AWS offers regulated customers tools, guidance and third-party audit reports to help meet compliance requirements. Regulated industry customers often require a service-by-service approval process when adopting cloud services to make sure that each adopted service aligns with their regulatory obligations and risk tolerance. How financial institutions can approve AWS services for highly confidential data walks through the key considerations that customers should focus on to help streamline the approval of cloud services. In this post we cover how regulated customers, especially FSI customers, can approach secrets management on Amazon Elastic Kubernetes Service (Amazon EKS) to help meet data protection and operational security requirements. Amazon EKS gives you the flexibility to start, run, and scale Kubernetes applications in the AWS Cloud or on-premises.
Applications often require sensitive information such as passwords, API keys, and tokens to connect to external services or systems. Kubernetes has secrets objects for managing these types of sensitive information. Additional tools and approaches have evolved to supplement the Kubernetes Secrets to help meet the compliance requirements of regulated organizations. One of the driving forces behind the evolution of these tools for regulated customers is that the native Kubernetes Secrets values aren’t encrypted but encoded as base64 strings; meaning that their values can be decoded by a threat actor with either API access or authorization to create a pod in a namespace containing the secret. There are options such as GoDaddy Kubernetes External Secrets, AWS Secrets and Configuration Provider (ASCP) for the Kubernetes Secrets Store CSI Driver, Hashicorp Vault, and Bitnami Sealed secrets that you can use to can help to improve the security, management, and audibility of your secrets usage.
Security and compliance is a shared responsibility between AWS and the customer. The AWS Shared Responsibility Model describes this as security of the cloud and security in the cloud:
AWS responsibility – Security of the cloud: AWS is responsible for protecting the infrastructure that runs the services offered in the AWS Cloud. For Amazon EKS, AWS is responsible for the Kubernetes control plane, which includes the control plane nodes and etcd database. Amazon EKS is certified by multiple compliance programs for regulated and sensitive applications. The effectiveness of the security controls are regularly tested and verified by third-party auditors as part of the AWS compliance programs.
Customer responsibility – Security in the cloud: Customers are responsible for the security and compliance of customer configured systems and services deployed on AWS. This includes responsibility for securely deploying, configuring and managing ESO within their Amazon EKS cluster. For Amazon EKS, the customer responsibility depends upon the worker nodes you pick to run your workloads and cluster configuration as shown in Figure 1. In the case of Amazon EKS deployment using Amazon Elastic Compute Cloud (Amazon EC2) hosts, the customer responsibility includes the following areas:
The security configuration of the data plane, including the configuration of the security groups that allow traffic to pass from the Amazon EKS control plane into the customer virtual private cloud (VPC).
The configuration of the nodes and the containers themselves.
The nodes’ operating system, including updates and security patches.
Other associated application software:
Setting up and managing network controls, such as firewall rules.
The sensitivity of your data, such as personally identifiable information (PII), keys, passwords, and tokens
Customers are responsible for enforcing access controls to protect their data and secrets.
Customers are responsible for monitoring and logging activities related to secrets management including auditing access, detecting anomalies and responding to security incidents.
Your company’s requirements, applicable laws and regulations
When using AWS Fargate, the operational overhead for customers is reduced in the following areas:
The customer is not responsible for updating or patching the host system.
Fargate manages the placement and scaling of containers.
Figure 1: AWS Shared Responsibility Model with Fargate and Amazon EC2 based workflows
As an example of the Shared Responsibility Model in action, consider a typical FSI workload accepting or processing payments cards and subject to PCI DSS requirements. PCI DSS v4.0 requirement 3 focuses on guidelines to secure cardholder data while at rest and in transit:
Control ID
Control description
3.6
Cryptographic keys used to protect stored account data are secured.
3.6.1.2
Store secret and private keys used to encrypt and decrypt cardholder data in one (or more) of the following forms:
Encrypted with a key-encrypting key that is at least as strong as the data-encrypting key, and that is stored separately from the data-encrypting key.
Stored within a secure cryptographic device (SCD), such as a hardware security module (HSM) or PTS-approved point-of-interaction device.
Has at least two full-length key components or key shares, in accordance with an industry-accepted method. Note: It is not required that public keys be stored in one of these forms.
3.6.1.3
Access to cleartext cryptographic key components is restricted to the fewest number of custodians necessary.
NIST frameworks and controls are also broadly adopted by FSI customers. NIST Cyber Security Framework (NIST CSF) and NIST SP 800-53 (Security and Privacy Controls for Information Systems and Organizations) include the following controls that apply to secrets:
Regulation or framework
Control ID
Control description
NIST CSF
PR.AC-1
Identities and credentials are issued, managed, verified, revoked, and audited for authorized devices, users and processes.
NIST CSF
PR.DS-1
Data-at-rest is protected.
NIST 800-53.r5
AC-2(1) AC-3(15)
Secrets should have automatic rotation enabled. Delete unused secrets.
Based on the preceding objectives, the management of secrets can be categorized into two broad areas:
Identity and access management ensures separation of duties and least privileged access.
Strong encryption, using a dedicated cryptographic device, introduces a secure boundary between the secrets data and keys, while maintaining appropriate management over the cryptographic keys.
Choosing your secrets management provider
To help choose a secrets management provider and apply compensating controls effectively, in this section we evaluate three different options based on the key objectives derived from the PCI DSS and NIST controls described above and other considerations such as operational overhead, high availability, resiliency, and developer or operator experience.
Architecture and workflow
The following architecture and component descriptions highlight the different architectural approaches and responsibilities of each solution’s components, ranging from controllers and operators, command-line interface (CLI) tools, custom resources, and CSI drivers working together to facilitate secure secrets management within Kubernetes environments.
External Secrets Operator (ESO) extends the Kubernetes API using a custom resource definition (CRD) for secret retrieval. ESO enables integration with external secrets management systems such as AWS Secrets Manager, HashiCorp Vault, Google Secrets Manager, Azure Key Vault, IBM Cloud Secrets Manager, and various other systems. ESO watches for changes to an external secret store and keeps Kubernetes secrets in sync. These services offer features that aren’t available with native Kubernetes Secrets, such as fine-grained access controls, strong encryption, and automatic rotation of secrets. By using these purpose-built tools outside of a Kubernetes cluster, you can better manage risk and benefit from central management of secrets across multiple Amazon EKS clusters. For more information, see the detailed walkthrough of using ESO to synchronize secrets from Secrets Manager to your Amazon EKS Fargate cluster.
ESO is comprised of a cluster-side controller that automatically reconciles the state within the Kubernetes cluster and updates the related secrets anytime the external API’s secret undergoes a change.
Figure 2: ESO workflow
Sealed Secrets is an open source project by Bitnami comprised of a Kubernetes controller coupled with a client-side CLI tool with the objective to store secrets in Git in a secure fashion. Sealed Secrets encrypts your Kubernetes secret into a SealedSecret, which can also be deployed to a Kubernetes cluster using kubectl. For more information, see the detailed walkthough of using tools from the Sealed Secrets open source project to manage secrets in your Amazon EKS clusters.
Sealed Secrets comprises of three main components: First, there is an operator or a controller which is deployed onto a Kubernetes cluster. The controller is responsible for decrypting your secrets. Second, you have a CLI tool called Kubeseal that takes your secret and encrypts it. Third, you have a CRD. Instead of creating regular secrets, you create SealedSecrets, which is a CRD defined within Kubernetes. That is how the operator knows when to perform the decryption process within your Kubernetes cluster.
Upon startup, the controller looks for a cluster-wide private-public key pair and generates a new 4096-bit RSA public-private key pair if one doesn’t exist. The private key is persisted in a secret object in the same namespace as the controller. The public key portion of this is made publicly available to anyone wanting to use Sealed Secrets with this cluster.
Figure 3: Sealed Secrets workflow
The AWS Secrets Manager and Config Provider (ASCP) for Secret Store CSI driver is an open source tool from AWS that allows secrets from Secrets Manager and Parameter Store, a capability of AWS Systems Manager, to be mounted as files inside Amazon EKS pods. It uses a CRD called SecretProviderClass to specify which secrets or parameters to mount. Upon a pod start or restart, the CSI driver retrieves the secrets or parameters from AWS and writes them to a tmpfs volume mounted in the pod. The volume is automatically cleaned up when the pod is deleted, making sure that secrets aren’t persisted. For more information, see the detailed walkthrough on how to set up and configure the ASCP to work with Amazon EKS.
ASCP comprises of a cluster-side controller acting as the provider, allowing secrets from Secrets Manager, and parameters from Parameter Store to appear as files mounted in Kubernetes pods. Secrets Store CSI Driver is a DaemonSet with three containers: node-driver-registrar, which registers the CSI driver with Kubelet; secrets-store, which implements the CSI Node service gRPC services for mounting and unmounting volumes during pod creation and deletion; and liveness-probe, which monitors the health of the CSI driver and reports to Kubernetes for automatic issue detection and pod restart.
Figure 4: AWS Secrets Manager and configuration provider
In the next section, we cover some of the key decisions involved in choosing whether to use ESO, Sealed Secrets, or ASCP for regulated customers to help meet their regulatory and compliance needs.
Comparing ESO, Sealed Secrets, and ASCP objectives
All three solutions address different aspects of secure secrets management and aim to help FSI customers meet their regulatory compliance requirements while upholding the protection of sensitive data in Kubernetes environments.
ESO synchronizes secrets from external APIs into Kubernetes, targeting the cluster operator and application developer personas. The cluster operator is responsible for setting up ESO and managing access policies. The application developer is responsible for defining external secrets and the application configuration.
Sealed Secrets encrypts your Kubernetes secrets before storing them in version control systems such as public Git repositories. This is the case if you decide to check in your Kubernetes manifest to a Git repository granting access to your sensitive secrets to anyone who has access to the Git repository. This is ultimately the reason why Sealed Secrets was created and the sealed secret can be decrypted only by the controller running in the target cluster.
Using ASCP, you can securely store and manage your secrets in Secrets Manager and retrieve them through your applications running on Kubernetes without having to write custom code. Secrets Manager provides features such as rotation, auditing, and access control that can help FSI customers meet regulatory compliance requirements and maintain a robust security posture.
Installation
The deployment and configuration details that follow highlight the different approaches and resources used by each solution to integrate with Kubernetes and external secret stores, catering to the specific requirements of secure secrets management in containerized environments.
ESO provides Helm charts for ease of operator deployment. External Secrets provides custom resources like SecretStore and ExternalSecret for configuring the required operator functionality to synchronize external secrets to your cluster. For instance, SecretStore can be used by the cluster operator to be able to connect to AWS Secrets Manager using appropriate credentials to pull in the secrets.
To install Sealed Secrets, you can deploy the Sealed Secrets Controller onto the Kubernetes cluster. You can deploy the manifest by itself or you can use a Helm chart to deploy the Sealed Secrets Controller for you. After the controller is installed, you use the Kubeseal client-side utility to encrypt secrets using asymmetric cryptography. If you don’t already have the Kubeseal CLI installed, see the installation instructions.
ASCP provides Helm charts to assist in operator deployment. The ASCP operator provides custom resources such as SecretProviderClass to provide provider-specific parameters to the CSI driver. During pod start and restart, the CSI driver will communicate with the provider using gRPC to retrieve the secret content from the external secret store you specified in the SecretProviderClass custom resource. Then the volume is mounted in the pod as tmpfs and the secret contents are written to the volume.
Encryption and key management
These solutions use robust encryption mechanisms and key management practices provided by external secret stores and AWS services such as AWS Key Management Service (AWS KMS) and Secrets Manager. However, additional considerations and configurations might be required to meet specific regulatory requirements, such as PCI DSS compliance for handling sensitive data.
ESO relies on encryption features within the external secrets management system. For instance, Secrets Manager supports envelope encryption with AWS KMS which is FIPS 140-2 Level 3 certified. Secrets Manager has several compliance certifications making it a great fit for regulated workloads. FIPS 140-2 Level 3 ensures only strong encryption algorithms approved by NIST can be used to protect data. It also defines security requirements for the cryptographic module, creating logical and physical boundaries.
Both AWS KMS and Secrets Manager help you to manage key lifecycle and to integrate with other AWS Services. In terms of key rotation, both provide automatic rotation of secrets that runs on a schedule (which you define), and abstract the complexity of managing different versions of keys. For AWS managed keys, the key rotation happens automatically once every year by default. With customer managed keys (CMKs), automatic key rotation is available but not enabled by default.
When using SealedSecrets, you use the Kubeseal tool to convert a standard Kubernetes Secret into a Sealed Secrets resource. The contents of the Sealed Secrets are encrypted with the public key served by the Sealed Secrets Controller as described in the Sealed Secrets project homepage.
In the absence of cloud native secrets management integration, you might have to add compensating controls to achieve the regulatory standards required by your organization. In cases where the underlying SealedSecrets data is sensitive in nature, such as cardholder PII, PCI requires that you store sensitive secrets in a cryptographic device such as a hardware security module (HSM). You can use Secrets Manager to store the master key generated to seal the secrets. However, this you will have to enable additional integration with Amazon EKS APIs to fetch the master key securely from the EKS cluster. You will also have to modify your deployment process to use a master key from Secrets Manager. The applications running in the EKS cluster must have permissions to fetch the SealedSecret and master key from Secrets Manager. This might involve configuring the application to interact with Amazon EKS APIs and Secrets Manager. For non-sensitive data, Kubeseal can be used directly within the EKS cluster to manage secrets and sealing keys.
For key rotation, you can store the controller generated private key in Parameter Store as a SecureString. You can use the advanced tier in Parameter Store if the file containing the private keys exceeds the Standard tier limit of up to 4,096 characters. In addition, if you want to add key rotation, you can use AWS KMS.
The ASCP relies on encryption features within the chosen secret store, such as Secrets Manager. Secrets Manager supports integration with AWS KMS for an additional layer of security by storing encryption keys separately. The Secrets Store CSI Driver facilitates secure interaction with the secret store, but doesn’t directly encrypt secrets. Encrypting mounted content can provide further protection, but introduces operational overhead related to key management.
ASCP relies on Secrets Manager and AWS KMS for encryption and decryption capabilities. As a recommendation, you can encrypt mounted content to further protect the secrets. However, this introduces the additional operational overhead of managing encryption keys and addressing key rotation.
Additional considerations
These solutions address various aspects of secure secrets management, ranging from centralized management, compliance, high availability, performance, developer experience, and integration with existing investments, catering to the specific needs of FSI customers in their Kubernetes environments.
ESO can be particularly useful when you need to manage an identical set of secrets across multiple Kubernetes clusters. Instead of configuring, managing, and rotating secrets at each cluster level individually, you can synchronize your secrets across your clusters. This simplifies secrets management by providing a single interface to manage secrets across multiple clusters and environments.
External secrets management systems typically offer advanced security features such as encryption at rest, access controls, audit logs, and integration with identity providers. This helps FSI customers ensure that sensitive information is stored and managed securely in accordance with regulatory requirements.
FSI customers usually have existing investments in their on-premises or cloud infrastructure, including secrets management solutions. ESO integrates seamlessly with existing secrets management systems and infrastructure, allowing FSI customers to use their investment in these systems without requiring significant changes to their workflow or tooling. This makes it easier for FSI customers to adopt and integrate ESO into their existing Kubernetes environments.
ESO provides capabilities for enforcing policies and governance controls around secrets management such as access control, rotation policies, and audit logging when using services like Secrets Manager. For FSI customers, audits and compliance are critical and ESO verifies that access to secrets is tracked and audit trails are maintained, thereby simplifying the process of demonstrating adherence to regulatory standards. For instance, secrets stored inside Secrets Manager can be audited for compliance with AWS Config and AWS Audit Manager. Additionally, ESO uses role-based access control (RBAC) to help prevent unauthorized access to Kubernetes secrets as documented in the ESO security best practices guide.
High availability and resilience are critical considerations for mission critical FSI applications such as online banking, payment processing, and trading services. By using external secrets management systems designed for high availability and disaster recovery, ESO helps FSI customers ensure secrets are available and accessible in the event of infrastructure failure or outages, thereby minimizing service disruption and downtime.
FSI workloads often experience spikes in transaction volumes, especially during peak days or hours. ESO is designed to efficiently managed a large volume of secrets by using external secrets management that’s optimized for performance and scalability.
In terms of monitoring, ESO provides Prometheus metrics to enable fine-grained monitoring of access to secrets. Amazon EKS pods offer diverse methods to grant access to secrets present on external secrets management solutions. For example, in non-production environments, access can be granted through IAM instance profiles assigned to the Amazon EKS worker nodes. For production, using IAM roles for service accounts (IRSA) is recommended. Furthermore, you can achieve namespace level fine-grained access control by using annotations.
ESO also provides options to configure operators to use a VPC endpoint to comply with FIPS requirements.
Additional developer productivity benefits provided by ESO include support for JSON objects (Secret key/value in the AWS Management console) or strings (Plaintext in the console). With JSON objects, developers can programmatically update multiple values atomically when rotating a client certificate and private key.
The benefit of Sealed Secrets, as discussed previously, is when you upload your manifest to a Git repository. The manifest will contain the encrypted SealedSecrets and not the regular secrets. This assures that no one has access to your sensitive secrets even when they have access to your Git repository. Sealed Secrets offer a few benefits to developers in terms of developer experience. Sealed Secrets gives you access to manage your secrets, making them more readily available to developers. Sealed Secrets offers VSCode extension to assist in integrating it into the software development lifecycle (SDLC). Using Sealed Secrets, you can store the encrypted secrets in the version control systems such as Gitlab and GitHub. Sealed Secrets can reduce operational overhead related to updating dependent objects because whenever a secret resource is updated, the same update is applied to the dependent objects.
ASCP integration with the Kubernetes Secrets Store CSI Driver on Amazon EKS offers enhanced security through seamless integration with Secrets Manager and Parameter Store, ensuring encryption, access control, and auditing. It centralizes management of sensitive data, simplifying operations and reducing the risk of exposure. The dynamic secrets injection capability facilitates secure retrieval and injection of secrets into Kubernetes pods, while automatic rotation provides up-to-date credentials without manual intervention. This combined solution streamlines deployment and management, providing a secure, scalable, and efficient approach to handling secrets and configuration settings in Kubernetes applications.
Consolidated threat model
We created a threat model based on the architecture of the three solution offerings. The threat model provides a comprehensive view of the potential threats and corresponding mitigations for each solution, allowing organizations to proactively address security risks and ensure the secure management of secrets in their Kubernetes environments.
X = Mitigations applicable to the solution
Threat
Mitigations
ESO
Sealed Secrets
ASCP
Unauthorized access or modification of secrets
Implement least privilege access principles
Rotate and manage credentials securely
Enable RBAC and auditing in Kubernetes
X
X
X
Insider threat (for example, a rogue administrator who has legitimate access)
Implement least privilege access principles
Enable auditing and monitoring
Enforce separation of duties and job rotation
X
X
Compromise of the deployment process
Secure and harden the deployment pipeline
Implement secure coding practices
Enable auditing and monitoring
X
Unauthorized access or tampering of secrets during transit
Enable encryption in transit using TLS
Implement mutual TLS authentication between components
Use private networking or VPN for secure communication
X
X
X
Compromise of the Kubernetes API server because of vulnerabilities or misconfiguration
Secure and harden the Kubernetes API server
Enable authentication and authorization mechanisms (for example, mutual TLS and RBAC)
Keep Kubernetes components up-to-date and patched
Enable Kubernetes audit logging and monitoring
X
Vulnerability in the external secrets controller leading to privilege escalation or data exposure
Keep the external secrets controller up-to-date and patched
Regularly monitor for and apply security updates
Implement least privilege access principles
Enable auditing and monitoring
X
Compromise of the Secrets Store CSI Driver, node-driver-registrar, Secrets Store CSI Provider, kubelet, or Pod could lead to unauthorized access or exposure of secrets
Implement least privilege principles and role-based access controls
Regularly patch and update the components
Monitor and audit the component activities
X
Unauthorized access or data breach in Secrets Manager could expose sensitive secrets
Implement strong access controls and access logging for Secrets Manager
Encrypt secrets at rest and in transit
Regularly rotate and update secrets
X
X
Shortcomings and limitations
The following limitations and drawbacks highlight the importance of carefully evaluating the specific requirements and constraints of your organization before adopting any of these solutions. You should consider factors such as team expertise, deployment environments, integration needs, and compliance requirements to promote a secure and efficient secrets management solution that aligns with your organization’s needs.
ESO doesn’t include a default way to restrict network traffic to and from ESO using network policies or similar network or firewall mechanisms. The application team is responsible for properly configuring network policies to improve the overall security posture of ESO within your Kubernetes cluster.
Any time an external secret associated with ESO is rotated, you must restart the deployment that uses that particular external secret. Given the inherent risks associated with integrating an external entity or third-party solution into your system, including ESO, it’s crucial to implement a comprehensive threat model similar to the Kubernetes Admission Control Threat Model.
Also, ESO set up is complicated and the controller must be installed on the Kubernetes cluster.
SealedSecrets cannot be reused across namespaces unless they’re re-encrypted or made cluster-wide, which makes it challenging to manage secrets across multiple namespaces consistently. The need to manually rotate and re-encrypt SealedSecrets with new keys can introduce operational overhead, especially in large-scale environments with numerous secrets. The old sealing keys pose a potential risk of misuse by unauthorized users, which increases the risk. To mitigate both risks (high overhead and old secrets), you should implement additional controls such as deleting older keys as part of the key rotation process or periodically rotate sealing keys and make sure that old sealed secret resources are re-encrypted with the new keys. Sealed Secrets doesn’t support external secret stores such as HashiCorp Vault, or cloud provider services such as Secrets Manager, Parameter Store, or Azure Key Vault. Sealed Secrets requires a Kubeseal client-side binary to encrypt secrets. This can be a concern in FSI environments where client-side tools are restricted by security policies.
While ASCP provides seamless integration with Secrets Manager and Parameter Store, teams unfamiliar with these AWS services might need to invest some additional effort to fully realize the benefits. This additional effort is justified by the long-term benefits of centralized secrets management and access control provided by these services. Additionally, relying primarily on AWS services for secrets management can potentially limit flexibility in deploying to alternative cloud providers or on-premises environments in the future. These factors should be carefully evaluated based on the specific needs and constraints of the application and deployment environment.
Conclusion
We have provided a summary of three options for managing secrets in Amazon EKS, ESO, Sealed Secrets, and AWS Secrets and Configuration Provider (ASCP), and the key considerations for FSI customers when choosing between them. The choice depends on several factors including existing investments in secrets management systems, specific security needs and compliance requirements, preference for a Kubernetes native solution or willingness to accept vendor lock-in.
The guidance provided here covers the strengths, limitations, and trade-offs of each option, allowing regulated institutions to make an informed decision based on their unique requirements and constraints. This guidance can be adapted and tailored to fit the specific needs of an organization, providing a secure and efficient secrets management solution for their Amazon EKS workloads, while aligning with the stringent security and compliance standards of the regulated institutions.
If you have feedback about this post, submit comments in the Comments section below. If you have questions about this post, contact AWS Support.
In today’s data-driven world, the ability to seamlessly integrate and utilize diverse data sources is critical for gaining actionable insights and driving innovation. As organizations increasingly rely on data stored across various platforms, such as Snowflake, Amazon Simple Storage Service (Amazon S3), and various software as a service (SaaS) applications, the challenge of bringing these disparate data sources together has never been more pressing.
AWS Glue is a robust data integration service that facilitates the consolidation of data from different origins, empowering businesses to use the full potential of their data assets. By using AWS Glue to integrate data from Snowflake, Amazon S3, and SaaS applications, organizations can unlock new opportunities in generative artificial intelligence (AI), machine learning (ML), business intelligence (BI), and self-service analytics or feed data to underlying applications.
In this post, we explore how AWS Glue can serve as the data integration service to bring the data from Snowflake for your data integration strategy, enabling you to harness the power of your data ecosystem and drive meaningful outcomes across various use cases.
Use case
Consider a large ecommerce company that relies heavily on data-driven insights to optimize its operations, marketing strategies, and customer experiences. The company stores vast amounts of transactional data, customer information, and product catalogs in Snowflake. However, they also generate and collect data from various other sources, such as web logs stored in Amazon S3, social media platforms, and third-party data providers. To gain a comprehensive understanding of their business and make informed decisions, the company needs to integrate and analyze data from all these sources seamlessly.
One crucial business requirement for the ecommerce company is to generate a Pricing Summary Report that provides a detailed analysis of pricing and discounting strategies. This report is essential for understanding revenue streams, identifying opportunities for optimization, and making data-driven decisions regarding pricing and promotions. After the Pricing Summary Report is generated and stored in Amazon S3, the company can use AWS analytics services to generate interactive BI dashboards and run one-time queries on the report. This allows business analysts and decision-makers to gain valuable insights, visualize key metrics, and explore the data in depth, enabling informed decision-making and strategic planning for pricing and promotional strategies.
Solution overview
The following architecture diagram illustrates a secure and efficient solution of integrating Snowflake data with Amazon S3, using the native Snowflake connector in AWS Glue. This setup uses AWS PrivateLink to provide secure connectivity between AWS services across different virtual private clouds (VPCs), eliminating the need to expose data to the public internet, which is a critical need for organizations.
The following are the key components and steps in the integration process:
Establish a secure, private connection between your AWS account and your Snowflake account using PrivateLink. This involves creating VPC endpoints in both the AWS and Snowflake VPCs, making sure data transfer remains within the AWS network.
Use Amazon Route 53 to create a private hosted zone that resolves the Snowflake endpoint within your VPC. This allows AWS Glue jobs to connect to Snowflake using a private DNS name, maintaining the security and integrity of the data transfer.
Create an AWS Glue job to handle the extract, transform, and load (ETL) process on data from Snowflake to Amazon S3. The AWS Glue job uses the secure connection established by the VPC endpoints to access Snowflake data. Snowflake credentials are securely stored in AWS Secrets Manager. The AWS Glue job retrieves these credentials at runtime to authenticate and connect to Snowflake, providing secure access management. A VPC endpoint enables you to securely communicate with this service without traversing the public internet, enhancing security and performance.
Store the extracted and transformed data in Amazon S3. Organize the data into appropriate structures, such as partitioned folders, to optimize query performance and data management. We use a VPC endpoint enabled to securely communicate with this service without traversing the public internet, enhancing security and performance. We also use Amazon S3 to store AWS Glue scripts, logs, and temporary data generated during the ETL process.
This approach offers the following benefits:
Enhanced security – By using PrivateLink and VPC endpoints, data transfer between Snowflake and Amazon S3 is secured within the AWS network, reducing exposure to potential security threats.
Efficient data integration – AWS Glue simplifies the ETL process, providing a scalable and flexible solution for data integration between Snowflake and Amazon S3.
Cost-effectiveness – Using Amazon S3 for data storage, combined with the AWS Glue pay-as-you-go pricing model, helps optimize costs associated with data management and integration.
Scalability and flexibility – The architecture supports scalable data transfers and can be extended to integrate additional data sources and destinations as needed.
By following this architecture and taking advantage of the capabilities of AWS Glue, PrivateLink, and associated AWS services, organizations can achieve a robust, secure, and efficient data integration solution, enabling them to harness the full potential of their Snowflake and Amazon S3 data for advanced analytics and BI.
Prerequisites
Complete the following prerequisites before setting up the solution:
Verify that you have access to AWS account with the necessary permissions to provision resources in services such as Route 53, Amazon S3, AWS Glue, Secrets Manager, and Amazon Virtual Private Cloud (Amazon VPC) using AWS CloudFormation, which lets you model, provision, and manage AWS and third-party resources by treating infrastructure as code.
Confirm that you have access to Snowflake hosted in AWS with required permissions to run the steps to configure PrivateLink. Refer to Enabling AWS PrivateLink in the Snowflake documentation to verify the steps, required access level, and service level to set the configurations. After you enable PrivateLink, save the value of the following parameters provided by Snowflake to use in the next step in this post:
privatelink-vpce-id
privatelink-account-url
privatelink_ocsp-url
regionless-snowsight-privatelink-url
Make sure you have a Snowflake user snowflakeUser and password snowflakePassword with required permissions to read from and write to Snowflake. The user and password are used in the AWS Glue connection to authenticate within Snowflake.
If your Snowflake user doesn’t have a default warehouse set, you will need a warehouse name. We use snowflakeWarehouse as a placeholder for the warehouse name; replace it with your actual warehouse name.
If you’re new to Snowflake, consider completing the Snowflake in 20 Minutes By the end of the tutorial, you should know how to create required Snowflake objects, including warehouses, databases, and tables for storing and querying data.
Create resources with AWS CloudFormation
This post includes a CloudFormation template for a quick setup of the base resources. You can review and customize it to suit your needs if needed. The CloudFormation template generates the following resources:
VPC (vpc-blog-glue-snowflake)
Subnets (one public subnet and three private subnets)
Route tables that are explicitly associated with the subnets
Security groups that are used to provision the endpoints for Secrets Manager, Amazon S3, and Snowflake, as well as used to provision the AWS Glue connection
Endpoints for Secrets Manager, Amazon S3, and Snowflake
To create your resources, complete the following steps:
Sign in to the AWS CloudFormation console.
Choose Launch Stack to launch the CloudFormation stack.
Provide the CloudFormation stack parameters:
For PrivateLinkAccountURL, enter the value of the parameter privatelink-account-url obtained in the prerequisites.
For PrivateLinkOcspURL, enter the value of the parameter privatelink_ocsp-url obtained in the prerequisites.
For PrivateLinkVpceId, enter the value of the parameter privatelink-vpce-id obtained in the prerequisites.
For PrivateSubnet1CIDR, enter the IP addresses for your private subnet 1.
For PrivateSubnet2CIDR, enter the IP addresses for your private subnet 2.
For PrivateSubnet3CIDR, enter the IP addresses for your private subnet 3.
For PublicSubnet1CIDR, enter the IP addresses for your public subnet 1.
For RegionlessSnowsightPrivateLinkURL, enter the value of the parameter regionless-snowsight-privatelink-url obtained in the prerequisites.
For VpcCIDR, enter the IP addresses for your VPC.
Choose Next.
Select I acknowledge that AWS CloudFormation might create IAM resources.
Choose Submit and wait for the stack creation step to complete.
After the CloudFormation stack is successfully created, you can see all the resources created on the Resources tab.
Navigate to the Outputs tab to see the outputs provided by CloudFormation stack. Save the value of the outputs GlueSecurityGroupId, VpcId, and PrivateSubnet1Id to use in the next step in this post.
Update the Secrets Manager secret with Snowflake credentials for the AWS Glue connection
To update the Secrets Manager secret with user snowflakeUser, password snowflakePassword, and warehouse snowflakeWarehouse that you will use in the AWS Glue connection to establish a connection to Snowflake, complete the following steps:
On the Secrets Manager console, choose Secrets in the navigation pane.
Open the secret blog-glue-snowflake-credentials.
Under Secret value, choose Retrieve secret value.
Choose Edit.
Enter the user snowflakeUser, password snowflakePassword, and warehouse snowflakeWarehouse for the keys sfUser, sfPassword, and sfWarehouse, respectively.
Choose Save.
Create the AWS Glue connection for Snowflake
An AWS Glue connection is an AWS Glue Data Catalog object that stores login credentials, URI strings, VPC information, and more for a particular data store. AWS Glue crawlers, jobs, and development endpoints use connections in order to access certain types of data stores. To create an AWS Glue connection to Snowflake, complete the following steps:
On the AWS Glue console, in the navigation pane, under Data catalog, choose Connections.
Choose Create connection.
For Data sources, search for and select Snowflake.
Choose Next.
For Snowflake URL, enter https://<privatelink-account-url>.
To obtain the Snowflake PrivateLink account URL, refer to parameters obtained in the prerequisites.
For AWS Secret, choose the secret blog-glue-snowflake-credentials.
For VPC, choose the VpcId value obtained from the CloudFormation stack output.
For Subnet, choose the PrivateSubnet1Id value obtained from the CloudFormation stack output.
For Security groups, choose the GlueSecurityGroupId value obtained from the CloudFormation stack output.
Choose Next.
In the Connection Properties section, for Name, enter glue-snowflake-connection.
Choose Next.
Choose Create connection.
Create an AWS Glue job
You’re now ready to define the AWS Glue job using the Snowflake connection. To create an AWS Glue job to read from Snowflake, complete the following steps:
On the AWS Glue console, under ETL jobs in the navigation pane, choose Visual ETL.
Choose the Job details tab.
For Name, enter a name, for example, Pricing Summary Report Job.
For Description, enter a meaningful description for the job.
For IAM Role, choose the role that has access to the target S3 location where the job is writing to and the source location from where it’s loading the Snowflake data and also to run the AWS Glue job. You can find this role in your CloudFormation stack output, named blog-glue-snowflake-GlueServiceRole-*.
Use the default options for Type, Glue version, Language, Worker type, Number of workers, Number of retries, and Job timeout.
For Job bookmark, choose Disable.
Choose Save to save the job.
On the Visual tab, choose Add nodes.
For Sources, choose Snowflake.
Choose Data source – Snowflake in the AWS Glue Studio canvas.
For Name, enter Snowflake_Pricing_Summary.
For Snowflake connection, choose glue-snowflake-connection.
For Snowflake source, select Enter a custom query.
For Database, enter snowflake_sample_data.
For Snowflake query, add the following Snowflake query:
SELECT l_returnflag
    , l_linestatus
    , Sum(l_quantity) AS sum_qty
    , Sum(l_extendedprice) AS sum_base_price
    , Sum(l_extendedprice * (1 - l_discount)) AS sum_disc_price
    , Sum(l_extendedprice * (1 - l_discount) * (1 + l_tax)) AS sum_charge
    , Avg(l_quantity) AS avg_qty
    , Avg(l_extendedprice) AS avg_price
    , Avg(l_discount) AS avg_disc
    , Count(*) AS count_order
FROM tpch_sf1.lineitem
WHERE l_shipdate <= Dateadd(day, - 90, To_date('1998-12-01'))
GROUP BY l_returnflag
    , l_linestatus
ORDER BY l_returnflag
    , l_linestatus;
The Pricing Summary Report provides a summary pricing report for all line items shipped as of a given date. The date is within 60–120 days of the greatest ship date contained in the database. The query lists totals for extended price, discounted extended price, discounted extended price plus tax, average quantity, average extended price, and average discount. These aggregates are grouped by RETURNFLAG and LINESTATUS, and listed in ascending order of RETURNFLAG and LINESTATUS. A count of the number of line items in each group is included.
For Custom Snowflake properties, specify Key as sfSchema and Value as tpch_sf1.
Choose Save.
Next, you add the destination as an S3 bucket.
On the Visual tab, choose Add nodes.
For Targets, choose Amazon S3.
Choose Data target – S3 bucket in the AWS Glue Studio canvas.
For Name, enter S3_Pricing_Summary.
For Node parents, select Snowflake_Pricing_Summary.
For Format, select Parquet.
For S3 Target Location, enter s3://<YourBucketName>/pricing_summary_report/ (use the name of your bucket).
For Data Catalog update options, select Create a table in the Data Catalog and on subsequent runs, update the schema and add new partitions.
For Database, choose db_blog_glue_snowflake.
For Table name, enter tb_pricing_summary.
Choose Save.
Choose Run to run the job, and monitor its status on the Runs tab.
You successfully completed the steps to create an AWS Glue job that reads data from Snowflake and loads the results into an S3 bucket using a secure connectivity pattern. Eventually, if you want to transform the data before loading it into Amazon S3, you can use AWS Glue transformations available in AWS Glue Studio. Using AWS Glue transformations is crucial when creating an AWS Glue job because they enable efficient data cleansing, enrichment, and restructuring, making sure the data is in the desired format and quality for downstream processes. Refer to Editing AWS Glue managed data transform nodes for more information.
Validate the results
After the job is complete, you can validate the output of the ETL job run in Athena, a serverless interactive analytics service. To validate the output, complete the following steps:
On the Athena console, choose Launch Query Editor.
For Workgroup, choose blog-workgroup.
If the message “All queries run in the Workgroup, blog-workgroup, will use the following settings:” is displayed, choose Acknowledge.
For Database, choose db_blog_glue_snowflake.
For Query, enter the following statement:
SELECT l_returnflag
    , l_linestatus
    , sum_qty
    , sum_base_price
FROM db_blog_glue_snowflake.tb_pricing_summary
Choose Run.
You have successfully validated your data for the AWS Glue job Pricing Summary Report Job.
Clean up
To clean up your resources, complete the following tasks:
Delete the AWS Glue job Pricing Summary Report Job.
Delete the AWS Glue connection glue-snowflake-connection.
Delete content from the S3 bucket blog-glue-snowflake-*.
Delete the CloudFormation stack blog-glue-snowflake.
Conclusion
Using the native Snowflake connector in AWS Glue provides an efficient and secure way to integrate data from Snowflake into your data pipelines on AWS. By following the steps outlined in this post, you can establish a private connectivity channel between AWS Glue and your Snowflake using PrivateLink, Amazon VPC, security groups, and Secrets Manager.
This architecture allows you to read data from and write data to Snowflake tables directly from AWS Glue jobs running on Spark. The secure connectivity pattern prevents data transfers over the public internet, enhancing data privacy and security.
Combining AWS data integration services like AWS Glue with data platforms like Snowflake allows you to build scalable, secure data lakes and pipelines to power analytics, BI, data science, and ML use cases.
In summary, the native Snowflake connector and private connectivity model outlined here provide a performant, secure way to include Snowflake data in AWS big data workflows. This unlocks scalable analytics while maintaining data governance, compliance, and access control. For more information on AWS Glue, visit AWS Glue.
About the Authors
Caio Sgaraboto Montovani is a Sr. Specialist Solutions Architect, Data Lake and AI/ML within AWS Professional Services, developing scalable solutions according customer needs. His vast experience has helped customers in different industries such as life sciences and healthcare, retail, banking, and aviation build solutions in data analytics, machine learning, and generative AI. He is passionate about rock and roll and cooking, and loves to spend time with his family.
Kartikay Khator is a Solutions Architect within Global Life Sciences at AWS, where he dedicates his efforts to developing innovative and scalable solutions that cater to the evolving needs of customers. His expertise lies in harnessing the capabilities of AWS analytics services. Extending beyond his professional pursuits, he finds joy and fulfillment in the world of running and hiking. Having already completed two marathons, he is currently preparing for his next marathon challenge.
Navnit Shukla, an AWS Specialist Solution Architect specializing in Analytics, is passionate about helping clients uncover valuable insights from their data. Leveraging his expertise, he develops inventive solutions that empower businesses to make informed, data-driven decisions. Notably, Navnit is the accomplished author of the book “Data Wrangling on AWS,” showcasing his expertise in the field.
Kamen Sharlandjiev is a Sr. Big Data and ETL Solutions Architect, Amazon MWAA and AWS Glue ETL expert. He’s on a mission to make life easier for customers who are facing complex data integration and orchestration challenges. His secret weapon? Fully managed AWS services that can get the job done with minimal effort. Follow Kamen on LinkedIn to keep up to date with the latest Amazon MWAA and AWS Glue features and news!
Bosco Albuquerque is a Sr. Partner Solutions Architect at AWS and has over 20 years of experience working with database and analytics products from enterprise database vendors and cloud providers. He has helped technology companies design and implement data analytics solutions and products.
Customers across diverse industries rely on Amazon OpenSearch Service for interactive log analytics, real-time application monitoring, website search, vector database, deriving meaningful insights from data, and visualizing these insights using OpenSearch Dashboards. Additionally, customers often seek out capabilities that enable effortless sharing of visual dashboards and seamless embedding of these dashboards within their applications, further enhancing user experience and streamlining workflows.
In this post, we show how to embed a live Amazon Opensearch dashboard in your application, allowing your end customers to access a consolidated, real-time view without ever leaving your website.
Solution overview
We demonstrate how to deploy a sample flight data dashboard using OpenSearch Dashboards and embed it into your application through an iFrame. The following diagram provides a high-level overview of the end-to-end solution.
The workflow includes the following steps:
The user requests for the embedded dashboard by opening the static web server’s endpoint in a browser.
The request reaches the NGINX endpoint. The NGINX endpoint routes the traffic to the self-managed OpenSearch Dashboards server. The OpenSearch Dashboards server acts as the UI layer that connects to the OpenSearch Service domain as the server.
The self-managed OpenSearch Dashboards server interacts with the Amazon managed OpenSearch Service domain to fetch the required data.
The requested data is sent to the OpenSearch Dashboards server.
The requested data is sent from the self-managed OpenSearch Dashboards server to the web server using the NGINX proxy.
The dashboard renders the visualization with the data and displays it on the website.
Prerequisites
You will launch a self-managed OpenSearch Dashboards server on an Amazon Elastic Compute Cloud (Amazon EC2) instance and link it to the managed OpenSearch Service domain to create your visualization. The self-managed OpenSearch Dashboards server acts as the UI layer that connects to the OpenSearch Service domain as the server. The post assumes the presence of a VPC with public as well as private subnets.
Create an OpenSearch Service domain
If you already have an OpenSearch Service domain set up, you can skip this step.
For instructions to create an OpenSearch Service domain, refer to Getting started with Amazon OpenSearch Service. The domain creation takes around 15–20 minutes. When the domain is in Active status, note the domain endpoint, which you will need to set up a proxy in subsequent steps.
Deploy an EC2 instance to act as the NGINX proxy to the OpenSearch Service domain and OpenSearch Dashboards
In this step, you launch an AWS CloudFormation stack that deploys the following resources:
A security group for the EC2 instance
An ingress rule for the security group attached to the OpenSearch Service domain that allows the traffic on port 443 from the proxy instance
An EC2 instance with the NGINX proxy and self-managed OpenSearch Dashboards set up
Complete the following steps to create the stack:
Choose Launch Stack to launch the CloudFormation stack with some preconfigured values in us-east-1. You can change the AWS Region as required.
Provide the parameters for your OpenSearch Service domain.
Choose Create stack. The process may take 3–4 minutes to complete as it sets up an EC2 instance and the required stack. Wait until the status of the stack changes to CREATE_COMPLETE.
On the Outputs tab of the stack, note the value for DashboardURL.
Access OpenSearch Dashboards using the NGINX proxy and set it up for embedding
In this step, you create a new dashboard in OpenSearch Dashboards, which will be used for embedding. Because you launched the OpenSearch Service domain within the VPC, you don’t have direct access to it. To establish a connection with the domain, you use the NGINX proxy setup that you configured in the previous steps.
Navigate to the link for DashboardURL (as demonstrated in the previous step) in your web browser.
Enter the user name and password you configured while creating the OpenSearch Service domain.
You will use a sample dataset for ease of demonstration, which has some preconfigured visualizations and dashboards.
Import the sample dataset by choosing Add data.
Choose the Sample flight data dataset and choose Add data.
To open the newly imported dashboard and get the iFrame code, choose Embed Code on the Share menu.
Under Generate the link as, select Snapshot and choose Copy iFrame code.
The iFrame code will look similar to the following code:
Copy the code to your preferred text editor, remove the /_dashboards part, and change the frame height and width from height="600" width="800" to height="800" width="100%".
Wrap the iFrame code with HTML code as shown in the following example and save it as an index.html file on your local system:
The next step is to host the index.html file. The index.html file can be served from any local laptop or desktop with Firefox or Chrome browser for a quick test.
There are different options available to host the web server, such as Amazon EC2 or Amazon S3. For instructions to host the web server on Amazon S3, refer to Tutorial: Configuring a static website on Amazon S3.
The following screenshot shows our embedded dashboard.
Clean up
If you no longer need the resources you created, delete the CloudFormation stack and the OpenSearch Service domain (if you created a new one) to prevent incurring additional charges.
Vibhu Pareek is a Sr. Solutions Architect at AWS. Since 2016, he has guided customers in cloud adoption using well-architected, repeatable patterns. With his specialization in databases, data analytics, and AI, he thrives on transforming complex challenges into innovative solutions. Outside work, he enjoys short treks and sports like badminton, football, and swimming.
Kamal Manchanda is a Senior Solutions Architect at AWS, specializing in building and designing data solutions with focus on lake house architectures, data governance, search platforms, log analytics solutions as well as generative AI solutions. In his spare time, Kamal loves to travel and spend time with family.
Adesh Jaiswal is a Cloud Support Engineer in the Support Engineering team at Amazon Web Services. He specializes in Amazon OpenSearch Service. He provides guidance and technical assistance to customers thus enabling them to build scalable, highly available, and secure solutions in the AWS Cloud. In his free time, he enjoys watching movies, TV series, and of course, football.
As the cloud landscape continues to evolve, organizations face the growing challenge of securing their cloud-native applications. We feel the 2024 Gartner Market Guide for Cloud-Native Application Protection Platforms (CNAPP) provides invaluable insights into the latest trends and technologies that are reshaping how companies protect their digital assets. Below, we highlight five key takeaways from the report to help you navigate the ever-changing cloud security ecosystem.
Key takeaway 1: The expanding attack surface
The attack surface of cloud-native applications is widening, with attackers increasingly targeting runtime environments, networks, compute, storage, identities, and permissions. Misconfigurations and vulnerabilities in APIs and the software supply chain are also primary targets for cybercriminals.
According to Gartner: “CNAPP offerings bring together multiple disparate security and protection capabilities into a single platform focused on identifying and prioritizing excessive risk of the entire cloud-native application and its associated infrastructure.”
This comprehensive approach allows organizations to tackle threats head-on and maintain a secure cloud environment.
Developers are taking on more responsibility for security as organizations embrace DevOps and shift left in their security practices. The need for advanced tools that address vulnerabilities and deploy infrastructure as code has become crucial.
The report highlights: “Proactively identifying and prioritizing risks during development, while providing developers with adequate context, is essential due to developers perceiving security as an obstacle.”
To support this shift, organizations should look for CNAPP solutions that integrate seamlessly with development processes, offering full life cycle visibility and protection.
Key takeaway 3: The importance of contextual risk analysis
Security teams must prioritize tasks and provide developers with the context needed to remediate issues quickly. Without this context, developers can become overwhelmed by alerts, leading to decreased productivity and potentially leaving vulnerabilities unaddressed.
The research suggests: “Security leaders should leverage CNAPP to strengthen defenses against attacks on network, compute, storage, identities, permissions, APIs, and the software supply chain, thereby mitigating potential risks and safeguarding critical assets.”
A strong CNAPP platform helps security teams understand the broader context of threats, making it easier to prioritize and address the most pressing issues.
Key takeaway 4: Integration and consolidation are key
The CNAPP market has experienced significant growth and consolidation, with a handful of vendors offering comprehensive platforms that integrate security across development and operations.
We believe the report emphasizes the benefits of consolidation: “CNAPP reduces operational complexity through consolidation of vendors, consoles, policies, and contracts, thereby reducing the chances of misconfiguration or mistakes.”
Organizations are moving toward unified solutions that offer consistent security policies across all application components, from code to containers to virtual machines. This integration not only simplifies management but also enhances security posture across cloud environments.
Understanding the relationships between various components of cloud-native applications is crucial for effective security. CNAPPs should leverage graph database technology to map these interconnected relationships, providing a visual representation of how resources, identities, and application components interact.
The report states: “A deep understanding of the relationships between an application’s elements (VMs, containers, service functions and storage), security posture, permissions, and connectivity, typically enabled by underlying graph database technology.”
This visualization is more than just a nice-to-have; it is becoming an expected feature. By using graph technology, CNAPP platforms can show potential paths for attackers to move laterally within an environment, enabling security teams to prioritize risks more effectively and understand the potential blast radius of a compromise. Rapid7’s latest Exposure Command, for example, incorporates this advanced graph visualization technology and attack path analysis, helping teams gain deeper insights into their security posture and enhance their threat mitigation strategies.
Conclusion: Navigating the cloud security landscape
Securing cloud-native applications requires a comprehensive and integrated approach that addresses risks throughout the development and production lifecycle. We feel the Gartner Market Guide for CNAPPs highlights the importance of selecting solutions that offer robust security features, seamless integration, and actionable insights to help organizations protect their digital assets effectively.
The FreeBSD Project is, for the second
time this year, engaging in a long-running discussion about the
possibility of including Rust in its base
system. The sequel to the first discussion included some work by
Alan Somers to show what it might look like to use Rust code in the
base tree. Support for Rust code does not appear much closer to being
included in FreeBSD’s base system, but the conversation has been
enlightening.
Today’s crop of new stable kernels consists of seven new versions: 6.10.6, 6.6.47, 6.1.106, 5.15.165, 5.10.224, 5.4.282, and 4.19.320. As usual, each contains important
fixes throughout the kernel tree.
When using cryptography to protect data, protocol designers often prefer symmetric keys and algorithms for their speed and efficiency. However, when data is exchanged across an untrusted network such as the internet, it becomes difficult to ensure that only the exchanging parties can know the same key. Asymmetric key pairs and algorithms help to solve this problem by allowing a public key to be shared over an untrusted network. And by using a key agreement scheme, two parties can use each other’s public key in combination with their own private key to each derive the same shared secret.
In this blog post we provide an overview of the new API action and explain how it can help you establish secure communications by exchanging only public keys to obtain a derived shared secret. We then show example commands to demonstrate how AWS KMS and OpenSSL can be used by two parties to derive a shared secret.
With this new DeriveSharedSecret API action, customers can take an external party’s public key and, in combination with a private key that resides within AWS KMS, derive a shared secret which can be used to derive a symmetric encryption key with a key derivation function (KDF). Customers can then use this symmetric encryption key to encrypt data locally within their application.
The same external party can combine their own related private key with the customer’s corresponding public key from AWS KMS to derive the same shared secret.
Now that both parties have the same shared secret, they can generate a symmetric encryption key that can be used to encrypt and decrypt the data they exchange.
DeriveSharedSecret offers a simple and secure way for customers to use their private key from within their application, enabling new asymmetric cryptography use cases for keys protected by AWS KMS, such as elliptic curve integrated encryption scheme (ECIES) or end-to-end encryption (E2EE) schemes.
AWS KMS DeriveSharedSecret overview
The AWS KMS API Reference documentation covers the DeriveSharedSecret API action in more detail than we include in this post. We broadly describe how to interact with the API action, using the following steps:
Create an elliptic curve (ECC) KMS key, selecting that the key be used for KEY_AGREEMENT and choosing one of the supported key specs. You will not be able to modify existing ECC keys to be used for key agreement.
Have another party create an elliptic curve key that matches the key spec you defined for your KMS key.
Retrieve the public key associated with your KMS key by using the existing GetPublicKey API action.
Exchange public keys through a trusted means of exchange with the other party. Note that DeriveSharedSecret expects a base64-encoded DER-formatted public key.
Use the other party’s public key as an input, along with your specified KEY_AGREEMENT key. The only key agreement algorithm supported by AWS KMS at launch is ECDH.
The other party should use the public key retrieved from AWS KMS and the private key associated with their generated ECC key pair to derive a shared secret.
The result of the preceding steps is that both parties have the same output without exchanging secret information. Only public keys were exchanged between the two parties. The output of DeriveSharedSecret is the raw shared secret. This shared secret is the multiplication of points on the elliptic curves and can result in many more bytes than are needed for an encryption key. We recommend that customers use a KDF, following the National Institute of Standards and Technology (NIST) SP800-56A Rev. 3 section 5.8 guidance, to derive encryption keys from this shared secret.
For the purposes of this post, we will demonstrate the steps by using the AWS CLI and OpenSSL command line. AWS has incorporated best practices for customers within the AWS Encryption SDK. You can find more details at AWS KMS ECDH keyrings.
Example use case
An example use case where you might wish to use ECDH key agreement is for end-to-end encryption. Although protocols exist that provide a secure framework for secure communications (for example, within AWS Wickr), we will highlight the simplified high-level steps behind some of these protocols. In our example use case, Alice and Bob are both part of a messaging network. This network is managed by a centralized service, and this service must not be able to access Alice or Bob’s unencrypted messages.
Figure 1: High-level architecture for the service described in the example use case
As shown in Figure 1, Alice and Bob each have an ECC key pair and participate in the secret derivation by using ECDH, through the following steps:
Alice registers her public key in the centralized key storage service. A detailed discussion of the key storage service is beyond the scope of this post.
Bob, an AWS KMS user, calls the AWS KMS GetPublicKey action to obtain the public key for the ECC KMS key pair.
Bob registers his public key in the same centralized key storage service.
Alice, who wants to exchange encrypted messages with Bob, retrieves Bob’s public key from the centralized key storage service.
Bob gets a notification that Alice wants to communicate with him, and he retrieves Alice’s public key from the centralized key storage service.
Using Bob’s public key and her private key, Alice derives a shared secret by using her cryptography provider.
Using Alice’s public key and his private key, Bob derives a shared secret by using DeriveSharedSecret.
Alice and Bob now have an identical shared secret. From this shared secret, she can create a symmetric encryption key by using a suitable KDF. The symmetric encryption key can be used to create ciphertext that can be sent to Bob.
Example use case walkthrough
You can use the following steps to create a KMS key for ECDH use and derive a shared secret by using AWS KMS. For our demonstration purposes, the user Alice (from our example use case) is using OpenSSL as the cryptography tool. We will show how the AWS KMS user Bob and OpenSSL user Alice can derive a shared secret by using each other’s public key.
General prerequisites
You must have the following prerequisites in place in order to implement the solution:
AWS CLI — The latest version is recommended. The example here uses aws-cli/2.15.40 and aws-cli/1.32.110.
Both parties (Alice and Bob, from our example use case) have an ECC key on the same curve. The steps in the next section, Key creation prerequisite, explain how these keys can be created.
Key creation prerequisite
Alice and Bob must use the same ECC curve during key creation. The DeriveSharedSecret API action supports curves ECC_NIST_P256, ECC_NIST_P384, and ECC_NIST_P521, which map to P-256, P-384, and P-521 respectively in OpenSSL. The curves that AWS KMS supports are the curves approved by the U.S. National Institute of Standards and Technology (NIST). Additionally, AWS KMS supports the SM2 key spec only in Amazon Web Services China Regions.
Bob creates an asymmetric KMS key for key agreement purposes
Bob creates a key pair in AWS KMS by using the CreateKey API action. In the following example, Bob creates an ECC key pair with ECC_NIST_P256 for the KeySpec parameter and KEY_AGREEMENT for the KeyUsage parameter.
You can follow the Creating asymmetric KMS keys documentation to see how to use the AWS Management Console to create a KMS key pair with the same properties as shown here. This example creates a KMS key with a default KMS key policy. You should review and configure your key policy according to the principle of least privilege, as appropriate for your environment.
Note: When a KMS key is created, it will be logged by AWS CloudTrail, a service that monitors and records activity within your account. API calls to the AWS KMS service are logged in CloudTrail, which you can use to audit access to KMS keys.
To allow your KMS key to be identified by a human-readable string rather than by the KeyId value, you can create an alias for the KMS key (replace the target-key-id value of a1b2c3d4-5678-90ab-cdef-EXAMPLE11111 with your KeyId value). This makes it easier to use and manage your KMS keys.
Bob creates an alias for his KMS key by using the CLI with the following command:
The following sections outline the steps that Alice and Bob will follow to share their public keys, retrieve one another’s public key, and then derive the same shared secret using AWS KMS and OpenSSL. The shared secrets derived by Alice and Bob respectively are then compared to show that they both derived the same shared secret.
Step 1: Alice generates and registers her OpenSSL public key with a central service
AWS KMS expects the public key in DER format. Therefore, in this example Alice creates a DER-format public key by using her ECC private key. Alice runs the following command to produce a DER-format file that contains her public key:
The file openssl_ecc_public_key.bin.der will have the public key in DER format, which Alice can store in the centralized key storage service (or send to anyone she would like to communicate with). Details about the centralized key storage service are beyond the scope of this post.
Step 2: Bob obtains the public key for his ECC KMS Key
To retrieve a copy of the public key for his ECC KMS key, Bob uses the GetPublicKey API action. Bob calls this API by using the AWS CLI command get-public-key, as follows:
The returned PublicKey value is a DER-encoded X.509 public key. Because the AWS CLI is being used, the public key output is base64-encoded for readability purposes. This base64-encoded value is decoded by using the base64 command, and the decoded value is stored in the output file. The file kms_ecdh_public_key.der contains the DER-encoded public key.
Note: If you call this API by using one of the AWS SDKs, such as Boto3, then the returned PublicKey value is not base64-encoded.
In our example use case, Alice is using OpenSSL, which expects the public key in PEM format. Bob converts his DER-format public key into PEM format by using the following command:
The file kms_ecdh_public_key.pem contains the public key in PEM format.
Step 3: Bob registers his public key with the centralized key storage service
Bob saves his public key in PEM format, obtained in Step 2, in the centralized key storage service.
Step 4: Alice retrieves Bob’s public key to derive a shared secret
To perform ECDH key agreement, the two parties involved (Alice and Bob, in our example use case) need to exchange their public key with each other. Alice, who wants to send encrypted messages to Bob, retrieves Bob’s public key from the centralized key storage service.
Bob’s public key, kms_ecdh_public_key.pem, is already in PEM format as expected by OpenSSL.
Step 5: Bob retrieves Alice’s public key to derive a shared secret
To perform ECDH key agreement, the two parties involved, Alice and Bob, need to exchange their public key with each other. Bob gets a notification that Alice wants to communicate with him, and he retrieves Alice’s public key from the centralized key storage service.
Alice’s public key, openssl_ecc_public_key.bin.der, is already in DER format as expected by AWS KMS.
Step 6: Alice uses OpenSSL to derive the shared secret
Alice, using her private key and Bob’s public key, can derive the shared secret by using OpenSSL. Alice derives the shared secret by using the OpenSSL pkeyutl command with the derive option, as follows:
The file openssl.ss will have the shared secret in binary format.
Step 7: Bob uses AWS KMS to derive the shared secret
Bob, using his private key (which remains securely within AWS KMS) and Alice’s public key, can derive the shared secret by using AWS KMS. The following example shows how Bob uses the DeriveSharedSecret API action with the AWS CLI command derive-shared-secret. At launch, the only supported key agreement algorithm is ECDH. Bob passes Alice’s public key for the PublicKey parameter.
Because the AWS CLI is being used, the returned SharedSecret value is base64-encoded for readability purposes. Using the base64 --decode command, the decoded binary format is stored to the file.
Note: If you call this API by using one of the AWS SDKs, such as Boto3, then the returned SharedSecret value is not base64-encoded.
The file kms.ss will have the shared secret in binary format.
Step 8: Using the shared secret and a suitable KDF, Alice derives an encryption key to encrypt her communication to Bob
You can use the following command to compare the two files containing the derived shared secrets that were obtained in Steps 6 and 7 and verify that they are identical:
diff -qs openssl.ss kms.ss
Because these files are identical, we can see that the same secret was derived using both AWS KMS and OpenSSL.
Using the shared secret, Alice should then derive a symmetric encryption key by using a suitable KDF. She can use this symmetric encryption key to encrypt data and send the ciphertext to Bob.
This blog post does not cover the steps to derive that symmetric encryption key, because that can be a complex topic depending on your use case. However, we note that you should not use the raw shared secret as an encryption key because it is not uniform. In other words, the shared secret has a lot of entropy, but the byte string itself is not random.
NIST recommends that you use a KDF function over the raw shared secret (value Z as described in section 5.8 of NIST SP800-56A Rev. 3). The KDFs that are recommended are described in more detail in NIST SP800-56C Rev. 2. One such example is OpenSSL Single Step KDF (SSKDF) EVP_KDF-SS, but using this KDF involves choosing the other values, such as FixedInfo, carefully.
To help customers make the right choice for the resulting KDF to use on the shared secret, the AWS Encryption SDK now includes AWS KMS ECDH keyrings. The keyring is a construct within the AWS Encryption SDK that you implement within your code. The keyring handles the management of encryption keys while applying best practices to protect your data. You can use the keyring to reference your KMS keys for key agreement, and then call a function to encrypt data. Data will be encrypted by using a derived shared wrapping key following NIST recommendations, and the Encryption SDK applies key commitment to the ciphertext.
Summary
In this blog post, we highlighted how you can use the recently launched DeriveSharedSecret API action to securely derive a shared secret. You’ve seen how ECDH can be used between two parties without having to share secret information across untrusted networks. We explained how you can audit your AWS KMS key usage through AWS CloudTrail logs. We highlighted that you would need to use a KDF to generate a symmetric encryption key from the shared secret. We strongly recommend that you use the AWS Encryption SDK to encrypt your data, which helps make sure that the recommended NIST key derivation functions are used for generating symmetric encryption keys.
If you have feedback about this post, submit comments in the Comments section below. If you have questions about this post, contact AWS Support.
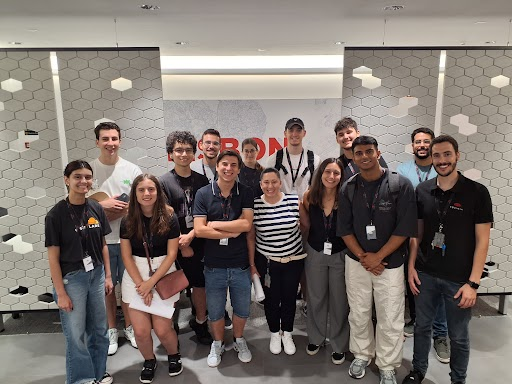
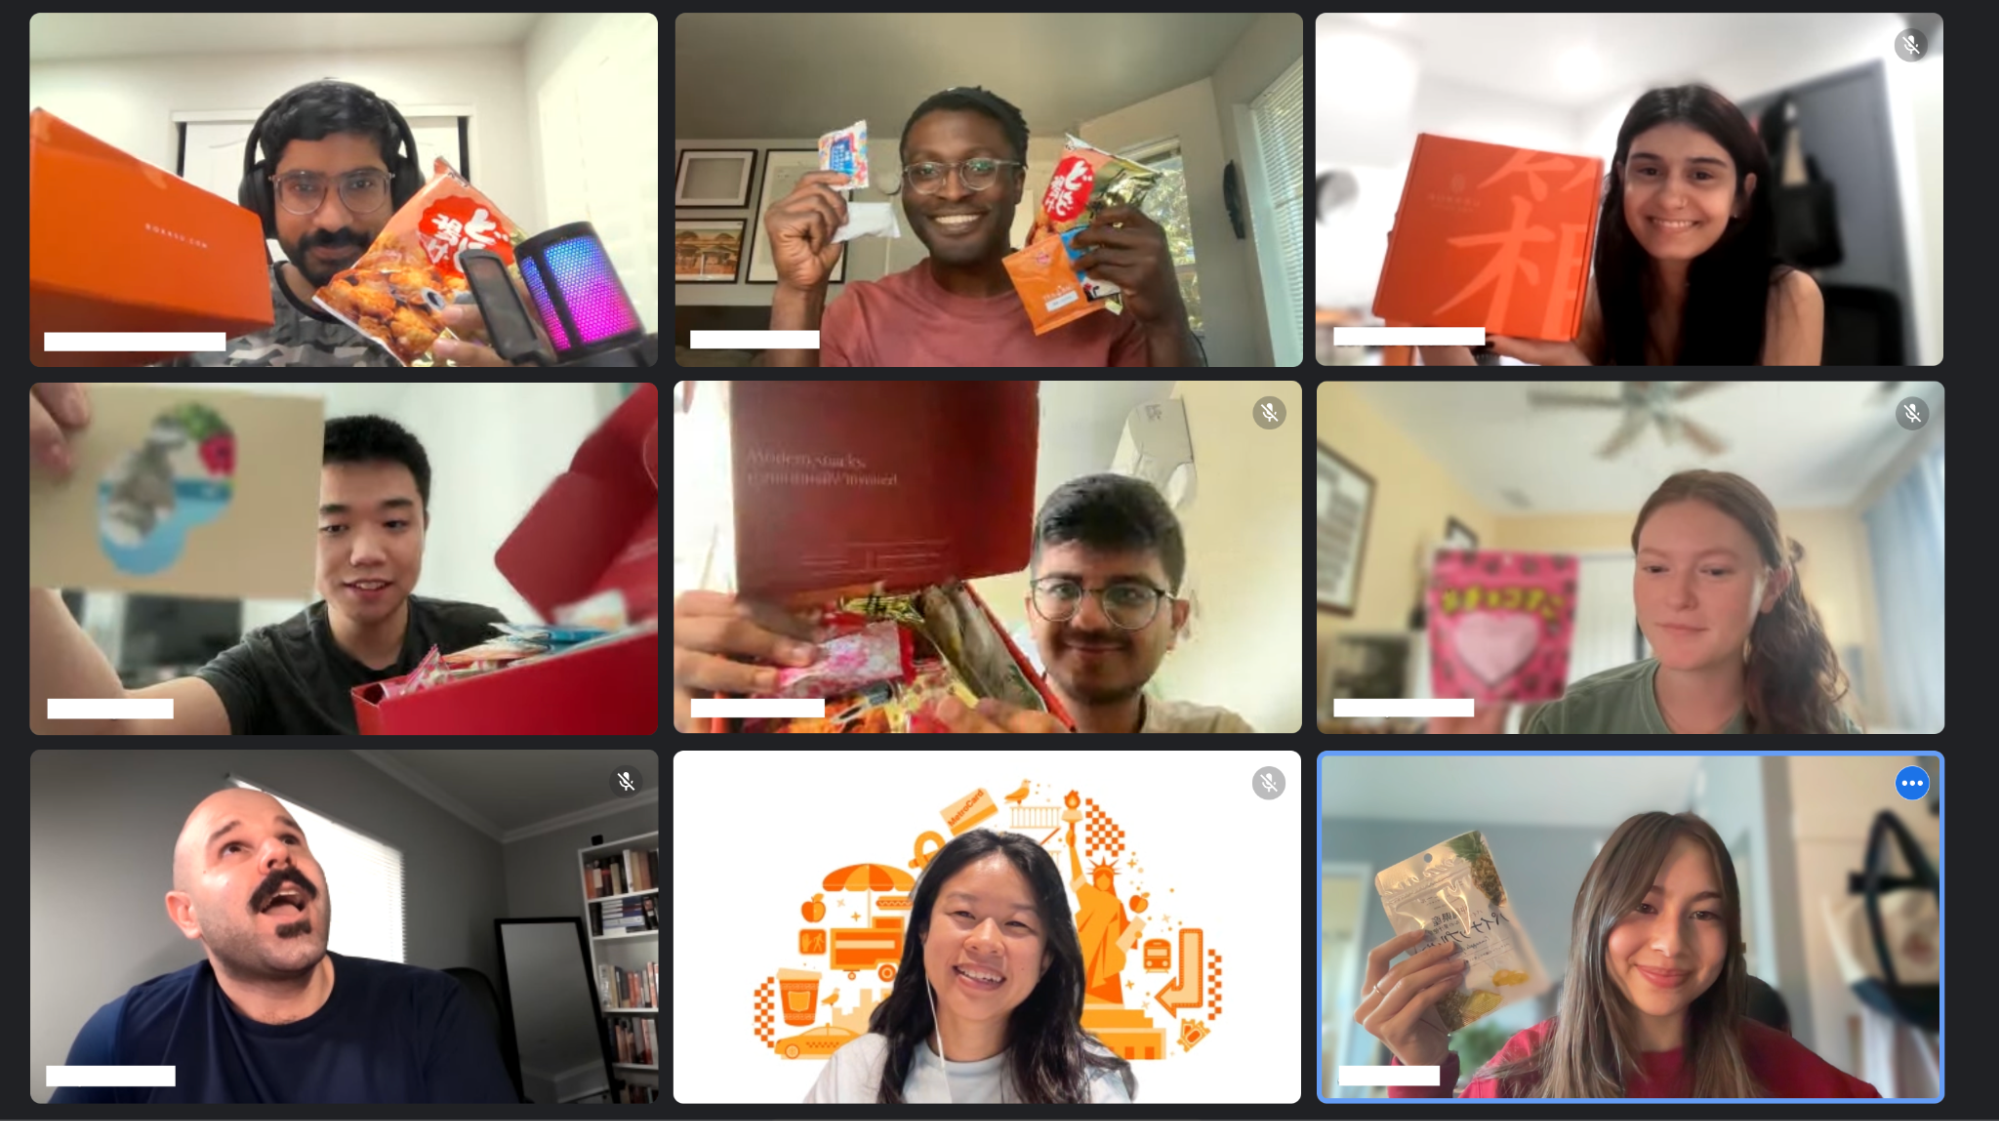
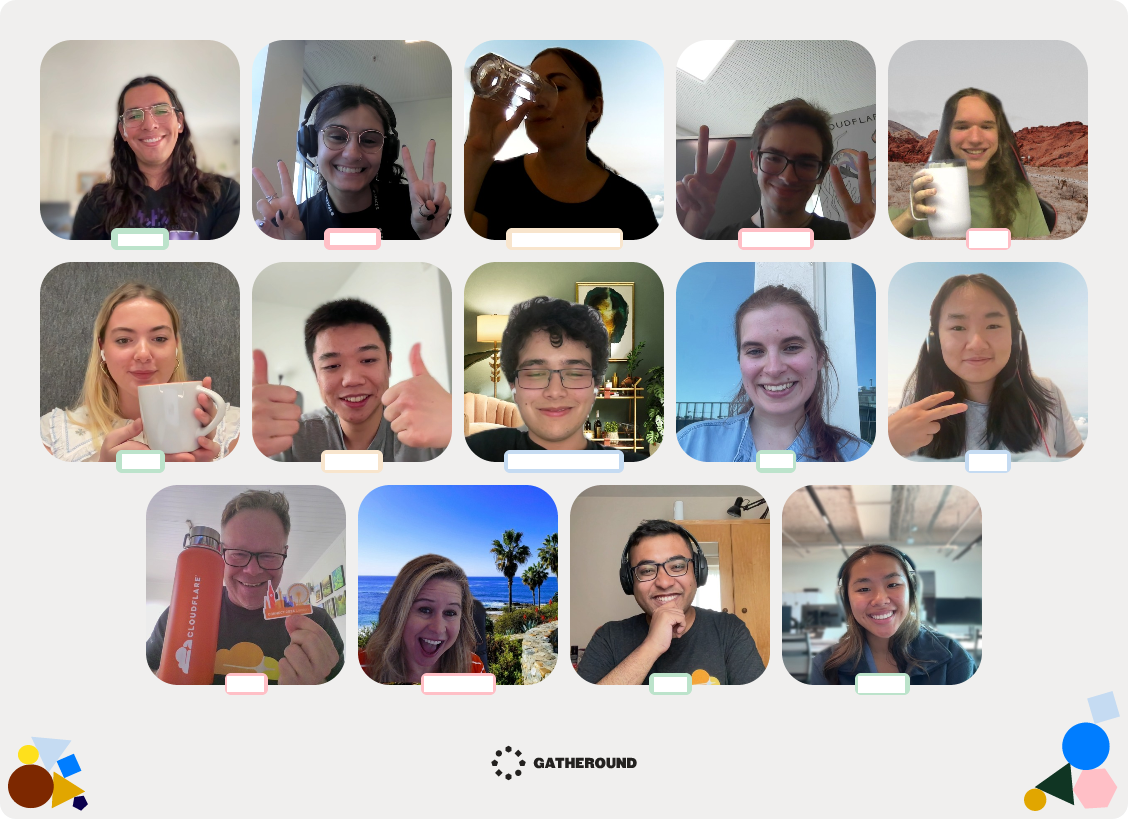
During the summer of 2024, Cloudflare welcomed approximately 60 Intern-ets from all around the globe on a mission to #HelpBuildABetterInternet. Over the course of their internships, our wonderful interns tackled real-world challenges from different teams all over the company and contributed to cutting-edge projects. As returning interns, we – Shaheen, Aaron, and Jada – would like to show off the great work our cohort has done and experiences we’ve had throughout our time here.
Austin Interns after volunteering at the Central Texas Food Bank.
Putting the SHIP in internSHIP
Cloudflare interns take pride in driving high-impact initiatives, playing a vital role in advancing Cloudflare’s mission. With our diverse roles and projects this summer, we’d love to highlight some of the exciting work we’ve been involved in:
Jessica, a Software Engineer intern, created a new threads api for the Workers AI team that automatically recalls past messages when running inference, helping developers to generate chat sessions when building personalized chatbots.
Anshika, an Internal Audit intern, worked on SOX & ISO testing for the first quarter of 2024, a data center audit, and is helping to roll out the automation of SOC 2 testing.
Jake, a Business Development Relations intern, led the creation and launch of an outbound BDR campaign that generated new pipeline for Cloudflare involving tailored messaging, account criteria, and enablement materials.
Utkarsh, a Software Engineer intern, built an internal tool for the Capacity Planning team to simulate unforeseen scenarios and changes within the Cloudflare network infrastructure, to help them provision new servers more efficiently.
Shaheen, a Product Management intern, and Anantharaman, a Software Engineer Intern, collaboratively enhanced Cloudflare D1 with improvements in billing observability, the dashboard, and Wrangler commands while also launching billing alerts and audit logs.
Jada, a Software Engineer intern, developed a Policy Tester feature for the Zero Trust Access Policies page to enable Cloudflare customers to view policy update statistics, using Cloudflare Durable Objects for the RESTful API.
Dhravya, a Software Engineer intern, helped launch function calling in Workers AI, a feature that enables LLMs to dynamically perform actions or retrieve data.
Prajjwal, a Research intern,focused on personalizing the WAF attack score and enhancing the overall user experience while experimenting with zero-shot learning techniques to detect new and evolving attacks.
Megan, a Security Analytics intern, ensured a smooth transition to an in-house security access tool by managing internal user access, aligning group rules, and addressing missing or duplicated groups/users during system migrations.
Intern events
In-person
For the first time since the pandemic, Cloudflare had over half of our interns in-person in our Austin, Lisbon and London offices. As the saying goes, everything is bigger in Texas and our new Austin office intern class shows it, with over 20 interns working in-person throughout the summer! Some of our favorite events were…
Intern ping-pong tournament After weeks of ping-pong classes, our interns got to put their skills to the test with a ping-pong tournament! The competition was fierce, with paddles flying and cheers echoing throughout the office as everyone battled for the title of Ping-Pong Champion. In the end, Josh, a PM intern on Workers, stole the show and was crowned as the 2024 Ping-Pong Champion.
Interns in the Austin office participating in the Ping-Pong tournament.
Food Bank Volunteering The Austin interns got the opportunity to give back to the community this summer at the Central Texas Food Bank. With the help of our full-timers the team got to work instantly, from packing food boxes to helping organize donations. Thanks to all the hard work, the team was able to feed a total of 9,000 people!
Austin Interns volunteering at the Central Texas Food Bank.
Austin Game Show The Austin interns had the exciting opportunity to participate in an exciting game show with their wonderful recruiters. This competitive showdown saw the “Winter-nets” face off against the “Return-ets” in a series of fun and challenging activities, including Family Feud and Wheel of Fortune. In the end, the Return-ets took the victory, with perhaps one too many pictures to prove it. Events like this are among the best, fostering bonding and friendly competition that bring everyone closer together.
“Return-ets” posing with the trophy they won.
Our Lisbon office also had 10 interns join Cloudflare and spend time doing some awesome things, including…
Visiting the Lisbon Data Center One of the most impressive parts of Cloudflare is its infrastructure, which spans hundreds of data centers worldwide. This summer, our interns were able to get up close and personal with our Lisbon data center where they ventured through Cloudflare’s state-of-the-art server rooms. They witnessed the security measures that are in place to ensure the safety of our data and the support systems that ensure that the facility is able to run nonstop.
Interns and Cloudflarians taking a photo in the Lisbon data center.
Remote
Our remote interns got to take on some virtual adventures throughout the summer,
building friendships and memories from all around the globe! Some of the highlights were…
Snack time
Interns all over the globe were shipped a box filled with an assortment of Japanese snacks and got to spend time together snacking on unique and new foods. This event not only satisfied our snack cravings but also strengthened our global connections with a fun, shared experience.
Remote interns showing their favorite snacks from the snack boxes we received.
Mingling meetups
Throughout the summer, interns got the chance to mingle with one another as well as the rest of the company. For a break from project work and a time to socialize, interns looked forward to Virtual Intern Game Days and Gatheround meetups. These designated online hangout blocks made for a more fun and inclusive experience for the remote interns. Along with that, remote interns near Cloudflare offices were welcome to join in-person events throughout the summer: from team lunches to arts & crafts and social mixers, visiting the office is always worth the trip!
Group photo of a Gatherround session with the interns and Cloudfriends.
Executive chats
Executive chats have been a key part of ensuring our interns get to truly know our top leaders and ask them questions 1-on-1. This summer was no exception, with interns hosting over eight executive chats filled with inspiring stories, valuable knowledge, and meaningful connections. Here’s what our interns had to say about it…
Alex enjoyed talking with Matthew Prince, Chief Executive Officer: “It was so heartfelt and emotional. I had heard the story of Lee Holloway before, but hearing it from Matthew himself was really impactful.”
Chantal loved the talk with Michele Yetman, Chief People Officer: “I enjoyed hearing about her job history and how she carefully adapted skill sets from her previous jobs to craft her career. Also, she was curious to hear our perspective and answered our questions in honest detail.”
Anantharaman liked the talk with Dane Knecht, SVP of Emerging Technology and Innovation: “Learning about the growth of ETI, the Austin office and the mission to move fast and break things within ETI to nurture a startup-y culture was very interesting.”
Matilde valued the talk with Nitin Rao, Interim Chief Product Officer: “I didn’t know much about him beforehand, but I found it fascinating to learn about his role at the company and the great impact of his contributions to Cloudflare’s current infrastructure.”
Company-wide intern presentations
Each summer, Cloudflare Intern-ets have the opportunity to showcase their work during the annual Intern Presentations series. Hundreds of Cloudflarians join in to support and celebrate the interns including Matthew Prince and Michelle Zatlyn. As Jake, a BDR Operations Intern, puts it, “The opportunity to present in front of the founders and the rest of the company speaks volumes about how much Cloudflare values its interns’ projects.”
Cloudfriends
Cloudfriends is a program specifically for interns to socialize with people throughout Cloudflare. Cloudflare employees from various departments signed up, and we were able to schedule meetings with all of them. These meetings let us get to know more people, share experiences, and keep in touch (even after our internships have ended). On a similar note, Cloudflare has a program for Random Employee Chats that interns can also take part in. These chats randomly pair you with another Cloudflare employee once a week and allow you to do even more socializing.
Unforgettable memories
Throughout our time here at Cloudflare, we formed numerous unforgettable memories that truly made our internship experience one of a kind.
The people
Cloudflare is filled with the most driven, passionate, and all around amazing people, so it’s no wonder that we all had a spectacular time interacting with everyone!
Ananya took networking to the next level by engaging with 49 people throughout her internship, forging valuable connections across the company. Meanwhile, Yomna wasted no time setting up 25 1:1s by the end of her second week, meeting a bunch of awesome people along the way.
Alex, Shaheen, Jack, Jake, Jaden,and Josh hit up a local Austin restaurant and spent SIX hours bonding over laughs, talks, and good vibes. From strangers to friends, this was a moment that will last well beyond their internships.
Carol and Jessica enjoyed their teams’ on-site events in the Austin office. They were able to meet all of their team members face-to-face and work and have fun together. The numerous on-site events that took place over the summer let the Austin Intern-ets connect with people from all over the company, including other Intern-ets that were remote or working out of another office.
Dhanush and Utkarsh gathered the interns to enjoy the Olympics in the Austin office. They all sat in the same area, talked with each other, and while watching the intense competition.
The activities
Aaron, Carol,and Tara enjoyed all the game nights the R2 team hosted. They played a variety of board and card games from For Sale to Brass: Birmingham that everyone enjoyed, and they even did some late-night karaoke. Anshika also enjoyed the games that the Internal Audit team played before their all-hands meetings, such as skribbl.io. These events let everyone on the team be more connected and overall just have fun.
The Austin interns filled their time with loads of different activities. From a dinner with Matthew, to visiting Barton Springs, to hosting a 4th of July barbecue party on top of a high-rise and overlooking Austin’s skyline, they certainly didn’t miss an opportunity to get out and have fun.
Meanwhile, in Europe, the London interns enjoyed their lunches on the beach. They were able to talk, swim, and get to know each other. The Lisbon office also hosted a bunch of team lunches that allowed everyone to work together and enjoy the sun.
Summer shenanigans
Dhravya’s caffeine fix: Dhravya drank around 250 cups of coffee over the course of his 12-week internship.
Matilde the bus marathoner: Every week, Matilde traveled 740 km from Braga to the Lisbon office by bus. By the end of her internship, she had accumulated 108 hours and 8880 km.
Anantharaman’s epic commute: Anantharaman chose to turn his daily commute into a marathon, walking over 100 miles during his 14-week internship.
Jack the Linux legend: Jack was the second most active Linux-based developer for dash.cloudflare.com.
Josh the Ping-Pong prodigy: Josh started his internship as a ping-pong newbie but after daily break-time practice, he smashed his way to win the intern ping-pong tournament.
Wing night warriors: The Austin interns PROUDLY placed 24th in the Pluckers Wing night trivia.
Byte-sized intern advice
Wondering how to get the most out of your time as an intern? We surveyed the Intern-ets for some insider hints…
Be curious and don’t be afraid to ask questions: An overwhelming number of Intern-ets and executives alike emphasized the importance of staying curious and keeping an open mind. Aside from that, asking questions can make a huge difference to get unstuck or even think ahead on problems; As Nikhil, a SWE Intern, points out, “Cloudflare is vast, and people are super friendly + eager to help.”
The importance of introductions: PM Intern Yomna notes how “cross-functional work…always works best when you are able to establish proper connections, a unified voice, and an open space that is dedicated to tackling the problem/situation at hand” and BDR Operations Intern Blaise recommends that interns “…make meetings with everyone on your team just to understand what each person is working on, and where you may be able to slot in”
Data on data: Marketing Analytics Intern Tanuj provides some insight, highlighting how “In analytics, it’s crucial to be data-informed rather than just data-driven. For instance, data might suggest cutting a high-spend marketing campaign due to low short-term ROI. However, understanding the business context – such as the campaign’s role in building brand loyalty can reveal its long-term value. Always consider the broader picture for more impactful insights.”
Want to become an Intern-et or Cloudflarian?
Sign uphereto be notified of new graduate and internship opportunities for 2025. Cloudflare is also hiring for full-time opportunities: check out open positions and apply today!
Palo Alto Networks published its semi-annual report on ransomware. From the Executive Summary:
Unit 42 monitors ransomware and extortion leak sites closely to keep tabs on threat activity. We reviewed compromise announcements from 53 dedicated leak sites in the first half of 2024 and found 1,762 new posts. This averages to approximately 294 posts a month and almost 68 posts a week. Of the 53 ransomware groups whose leak sites we monitored, six of the groups accounted for more than half of the compromises observed.
In February, we reported a 49% increase year-over-year in alleged victims posted on ransomware leak sites. So far, in 2024, comparing the first half of 2023 to the first half of 2024, we see an even further increase of 4.3%. The higher level of activity observed in 2023 was no fluke.
Activity from groups like Ambitious Scorpius (distributors of BlackCat) and Flighty Scorpius (distributors of LockBit) has largely fallen off due to law enforcement operations. However, other threat groups we track such as Spoiled Scorpius (distributors of RansomHub) and Slippery Scorpius (distributors of DragonForce) have joined the fray to fill the void.
But it all looks fairly normal. rc4 is bigger than either rc2 or
rc3 were, but not hugely so, and it’s actually a normal pattern,
where it takes a while before people find some issues. So nothing
feels all that odd.
To provide the best experiences, we use technologies like cookies to store and/or access device information. Consenting to these technologies will allow us to process data such as browsing behavior or unique IDs on this site. Not consenting or withdrawing consent, may adversely affect certain features and functions.
Functional
Always active
The technical storage or access is strictly necessary for the legitimate purpose of enabling the use of a specific service explicitly requested by the subscriber or user, or for the sole purpose of carrying out the transmission of a communication over an electronic communications network.
Preferences
The technical storage or access is necessary for the legitimate purpose of storing preferences that are not requested by the subscriber or user.
Statistics
The technical storage or access that is used exclusively for statistical purposes.The technical storage or access that is used exclusively for anonymous statistical purposes. Without a subpoena, voluntary compliance on the part of your Internet Service Provider, or additional records from a third party, information stored or retrieved for this purpose alone cannot usually be used to identify you.
Marketing
The technical storage or access is required to create user profiles to send advertising, or to track the user on a website or across several websites for similar marketing purposes.


 Kartikay Khator is a Solutions Architect within Global Life Sciences at AWS, where he dedicates his efforts to developing innovative and scalable solutions that cater to the evolving needs of customers. His expertise lies in harnessing the capabilities of AWS analytics services. Extending beyond his professional pursuits, he finds joy and fulfillment in the world of running and hiking. Having already completed two marathons, he is currently preparing for his next marathon challenge.
 Navnit Shukla, an AWS Specialist Solution Architect specializing in Analytics, is passionate about helping clients uncover valuable insights from their data. Leveraging his expertise, he develops inventive solutions that empower businesses to make informed, data-driven decisions. Notably, Navnit is the accomplished author of the book “Data Wrangling on AWS,” showcasing his expertise in the field.
 Kamen Sharlandjiev is a Sr. Big Data and ETL Solutions Architect, Amazon MWAA and AWS Glue ETL expert. He’s on a mission to make life easier for customers who are facing complex data integration and orchestration challenges. His secret weapon? Fully managed AWS services that can get the job done with minimal effort. Follow Kamen on
  Bosco Albuquerque is a Sr. Partner Solutions Architect at AWS and has over 20 years of experience working with database and analytics products from enterprise database vendors and cloud providers. He has helped technology companies design and implement data analytics solutions and products.


 Vibhu Pareek is a Sr. Solutions Architect at AWS. Since 2016, he has guided customers in cloud adoption using well-architected, repeatable patterns. With his specialization in databases, data analytics, and AI, he thrives on transforming complex challenges into innovative solutions. Outside work, he enjoys short treks and sports like badminton, football, and swimming.
 Kamal Manchanda is a Senior Solutions Architect at AWS, specializing in building and designing data solutions with focus on lake house architectures, data governance, search platforms, log analytics solutions as well as generative AI solutions. In his spare time, Kamal loves to travel and spend time with family.
 Adesh Jaiswal is a Cloud Support Engineer in the Support Engineering team at Amazon Web Services. He specializes in Amazon OpenSearch Service. He provides guidance and technical assistance to customers thus enabling them to build scalable, highly available, and secure solutions in the AWS Cloud. In his free time, he enjoys watching movies, TV series, and of course, football.