Tag Archives: launch

New: AWS Telco Network Builder – Deploy and Manage Telco Networks

Post Syndicated from Jeff Barr original https://aws.amazon.com/blogs/aws/new-aws-telco-network-builder-deploy-and-manage-telco-networks/

Over the course of more than one hundred years, the telecom industry has become standardized and regulated, and has developed methods, technologies, and an entire vocabulary (chock full of interesting acronyms) along the way. As an industry, they need to honor this tremendous legacy while also taking advantage of new technology, all in the name of delivering the best possible voice and data services to their customers.

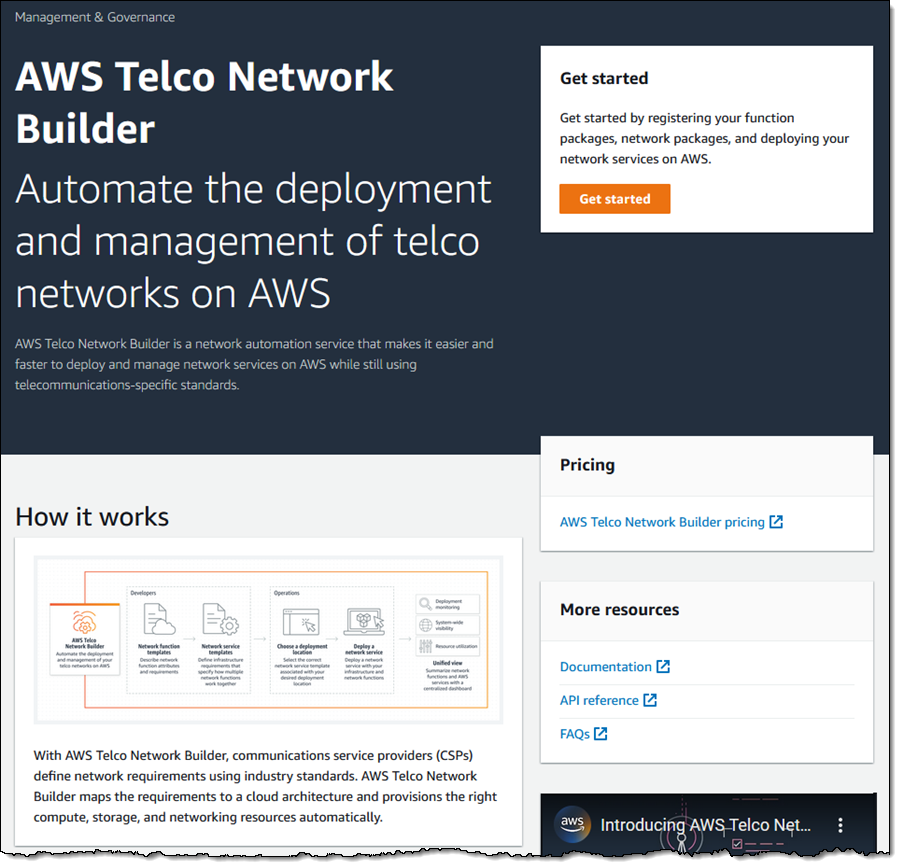
Today I would like to tell you about AWS Telco Network Builder (TNB). This new service is designed to help Communications Service Providers (CSPs) deploy and manage public and private telco networks on AWS. It uses existing standards, practices, and data formats, and makes it easier for CSPs to take advantage of the power, scale, and flexibility of AWS.

Today, CSPs often deploy their code to virtual machines. However, as they look to the future they are looking for additional flexibility and are increasingly making use of containers. AWS TNB is intended to be a part of this transition, and makes use of Kubernetes and Amazon Elastic Kubernetes Service (EKS) for packaging and deployment.

Concepts and Vocabulary
Before we dive in to the service, let’s take a look some concepts and vocabulary that are unique to this industry, and are relevant to AWS TNB:

European Telecommunications Standards Institute (ETSI) – A European organization that defines specifications suitable for global use. AWS TNB supports multiple ETSI specifications including ETSI SOL001 through ETSI SOL005, and ETSI SOL007.

Communications Service Provider (CSP) – An organization that offers telecommunications services.

Topology and Orchestration Specification for Cloud Applications (TOSCA) – A standardized grammar that is used to describe service templates for telecommunications applications.

Network Function (NF) – A software component that performs a specific core or value-added function within a telco network.

Virtual Network Function Descriptor (VNFD) – A specification of the metadata needed to onboard and manage a Network Function.

Cloud Service Archive (CSAR) – A ZIP file that contains a VNFD, references to container images that hold Network Functions, and any additional files needed to support and manage the Network Function.

Network Service Descriptor (NSD) – A specification of the compute, storage, networking, and location requirements for a set of Network Functions along with the information needed to assemble them to form a telco network.

Network Core – The heart of a network. It uses control plane and data plane operations to manage authentication, authorization, data, and policies.

Service Orchestrator (SO) – An external, high-level network management tool.

Radio Access Network (RAN) – The components (base stations, antennas, and so forth) that provide wireless coverage over a specific geographic area.

Using AWS Telco Network Builder (TNB)
I don’t happen to be a CSP, but I will do my best to walk you through the getting-started experience anyway! The primary steps are:

  1. Creating a function package for each Network Function by uploading a CSAR.
  2. Creating a network package for the network by uploading a Network Service Descriptor (NSD).
  3. Creating a network by selecting and instantiating an NSD.

To begin, I open the AWS TNB Console and click Get started:

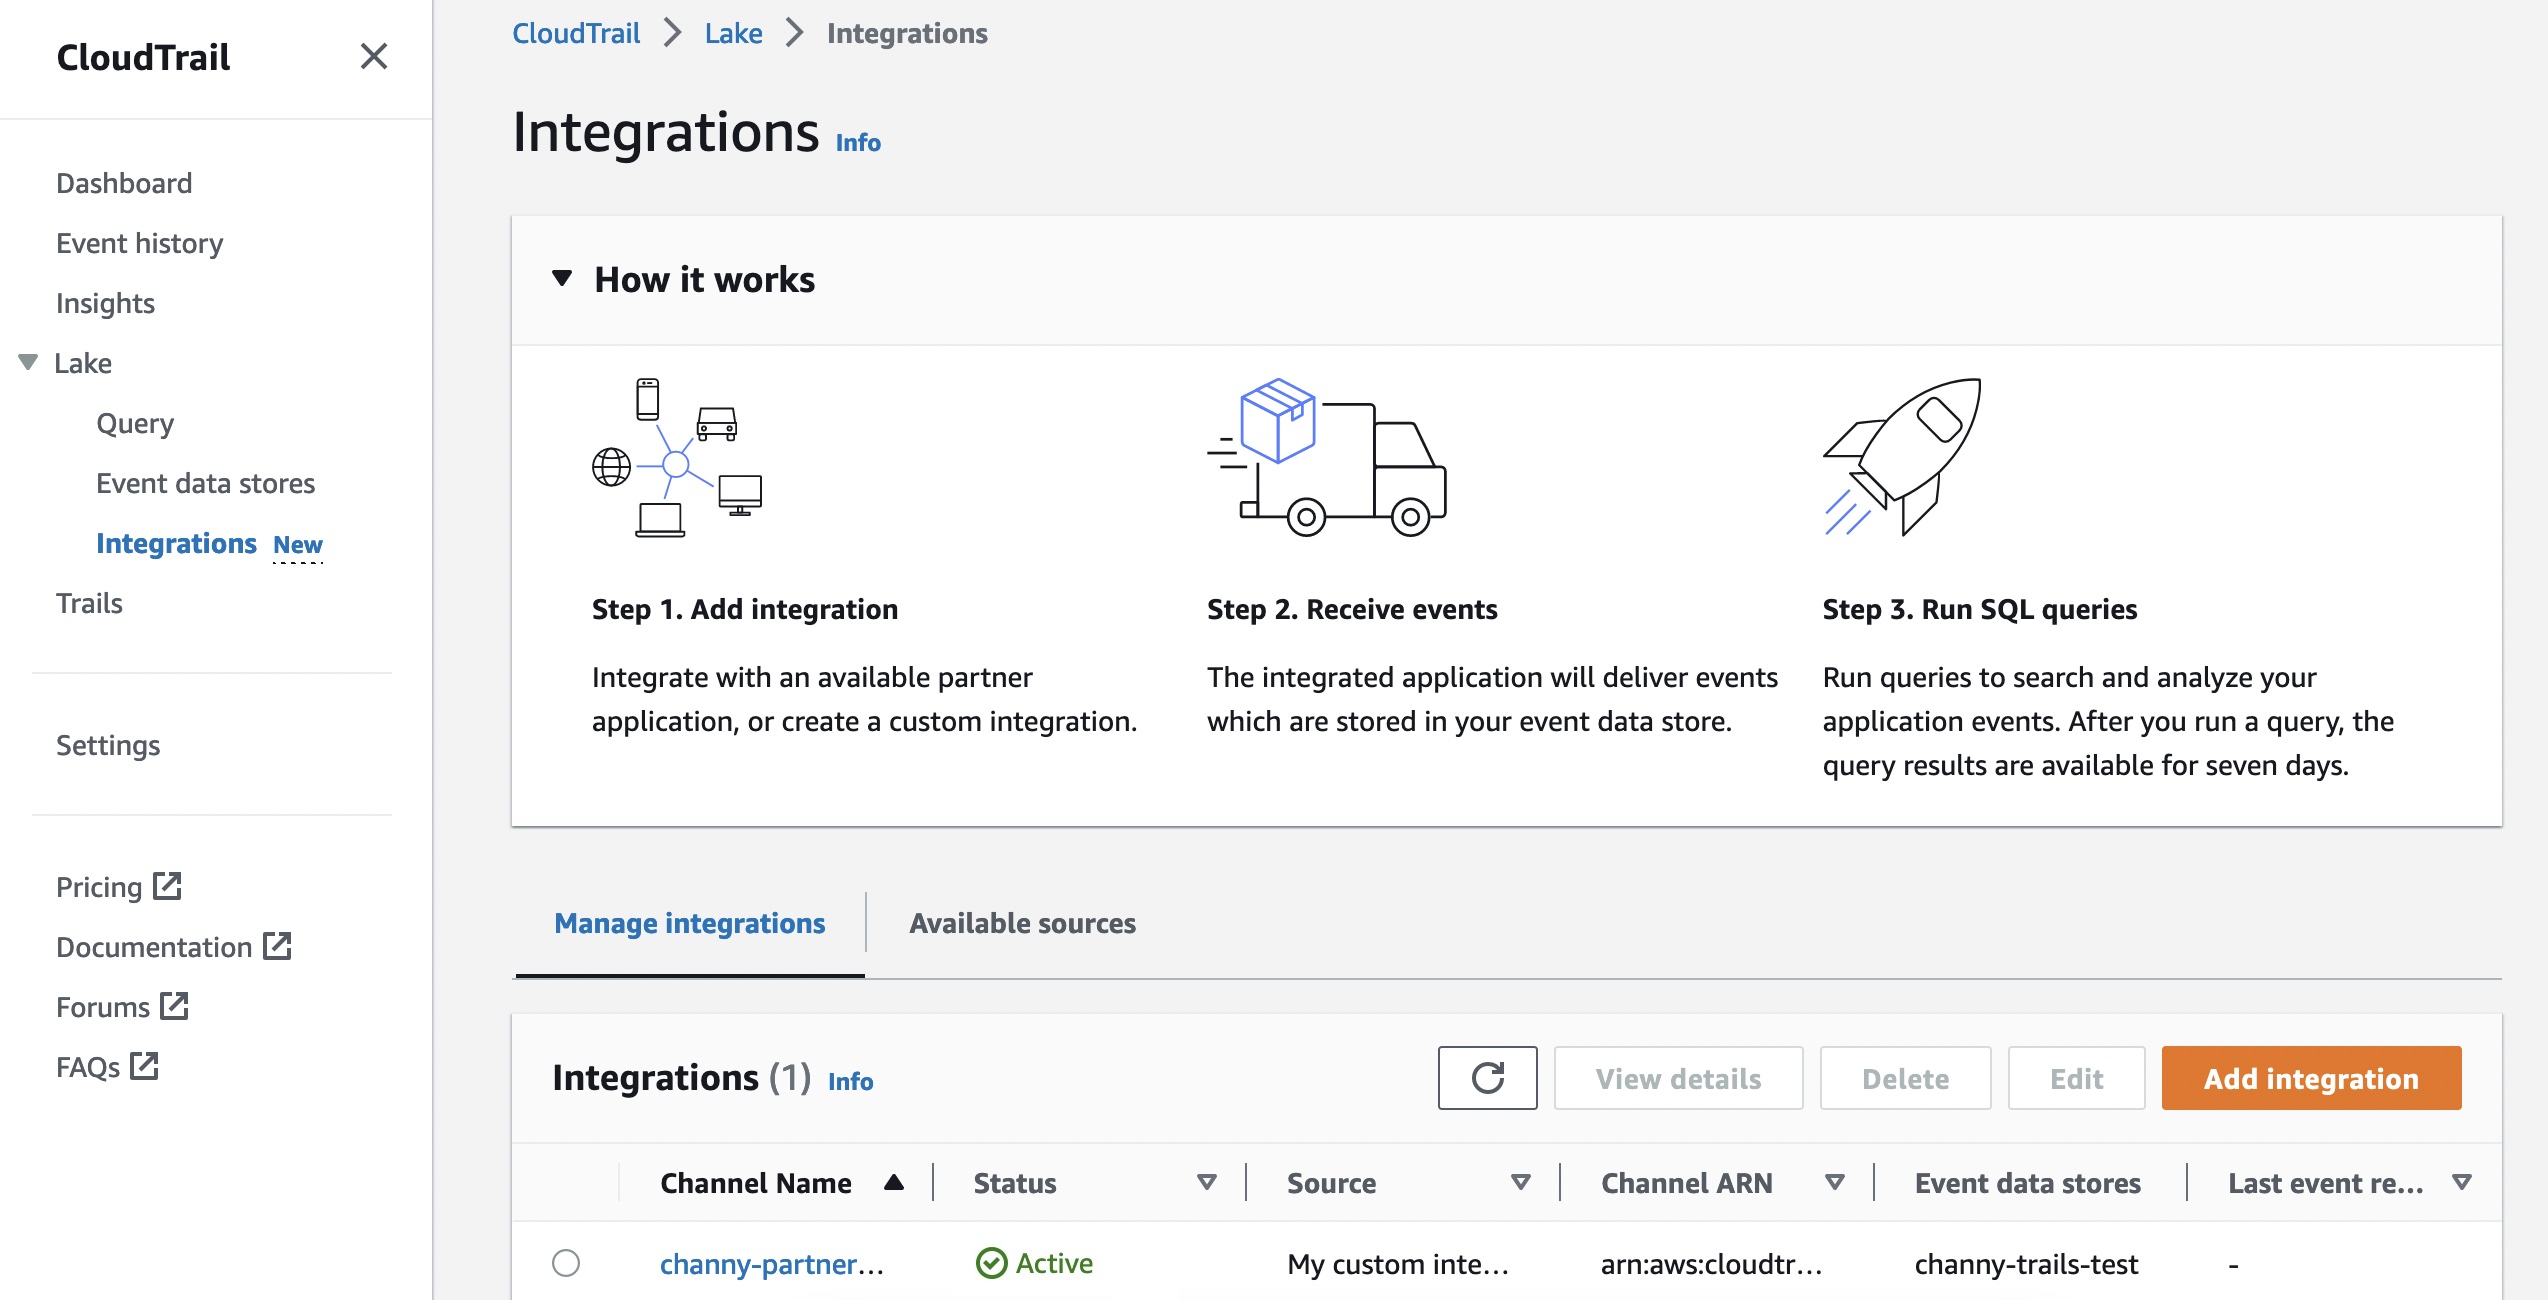
Initially, I have no networks, no function packages, and no network packages:

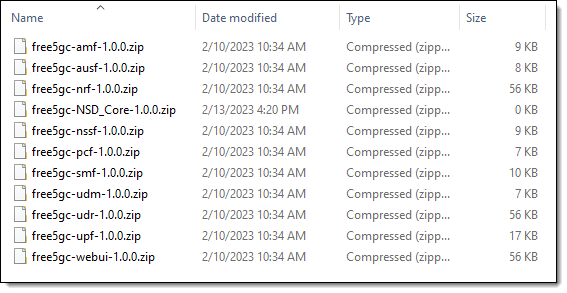
My colleagues supplied me with sample CSARs and an NSD for use in this blog post (the network functions are from Free 5G Core):

Each CSAR is a fairly simple ZIP file with a VNFD and other items inside. For example, the VNFD for the Free 5G Core Session Management Function (smf) looks like this:

tosca_definitions_version: tnb_simple_yaml_1_0

topology_template:

  node_templates:

    Free5gcSMF:
      type: tosca.nodes.AWS.VNF
      properties:
        descriptor_id: "4b2abab6-c82a-479d-ab87-4ccd516bf141"
        descriptor_version: "1.0.0"
        descriptor_name: "Free5gc SMF 1.0.0"
        provider: "Free5gc"
      requirements:
        helm: HelmImage

    HelmImage:
      type: tosca.nodes.AWS.Artifacts.Helm
      properties:
        implementation: "./free5gc-smf"

The final section (HelmImage) of the VNFD points to the Kubernetes Helm Chart that defines the implementation.

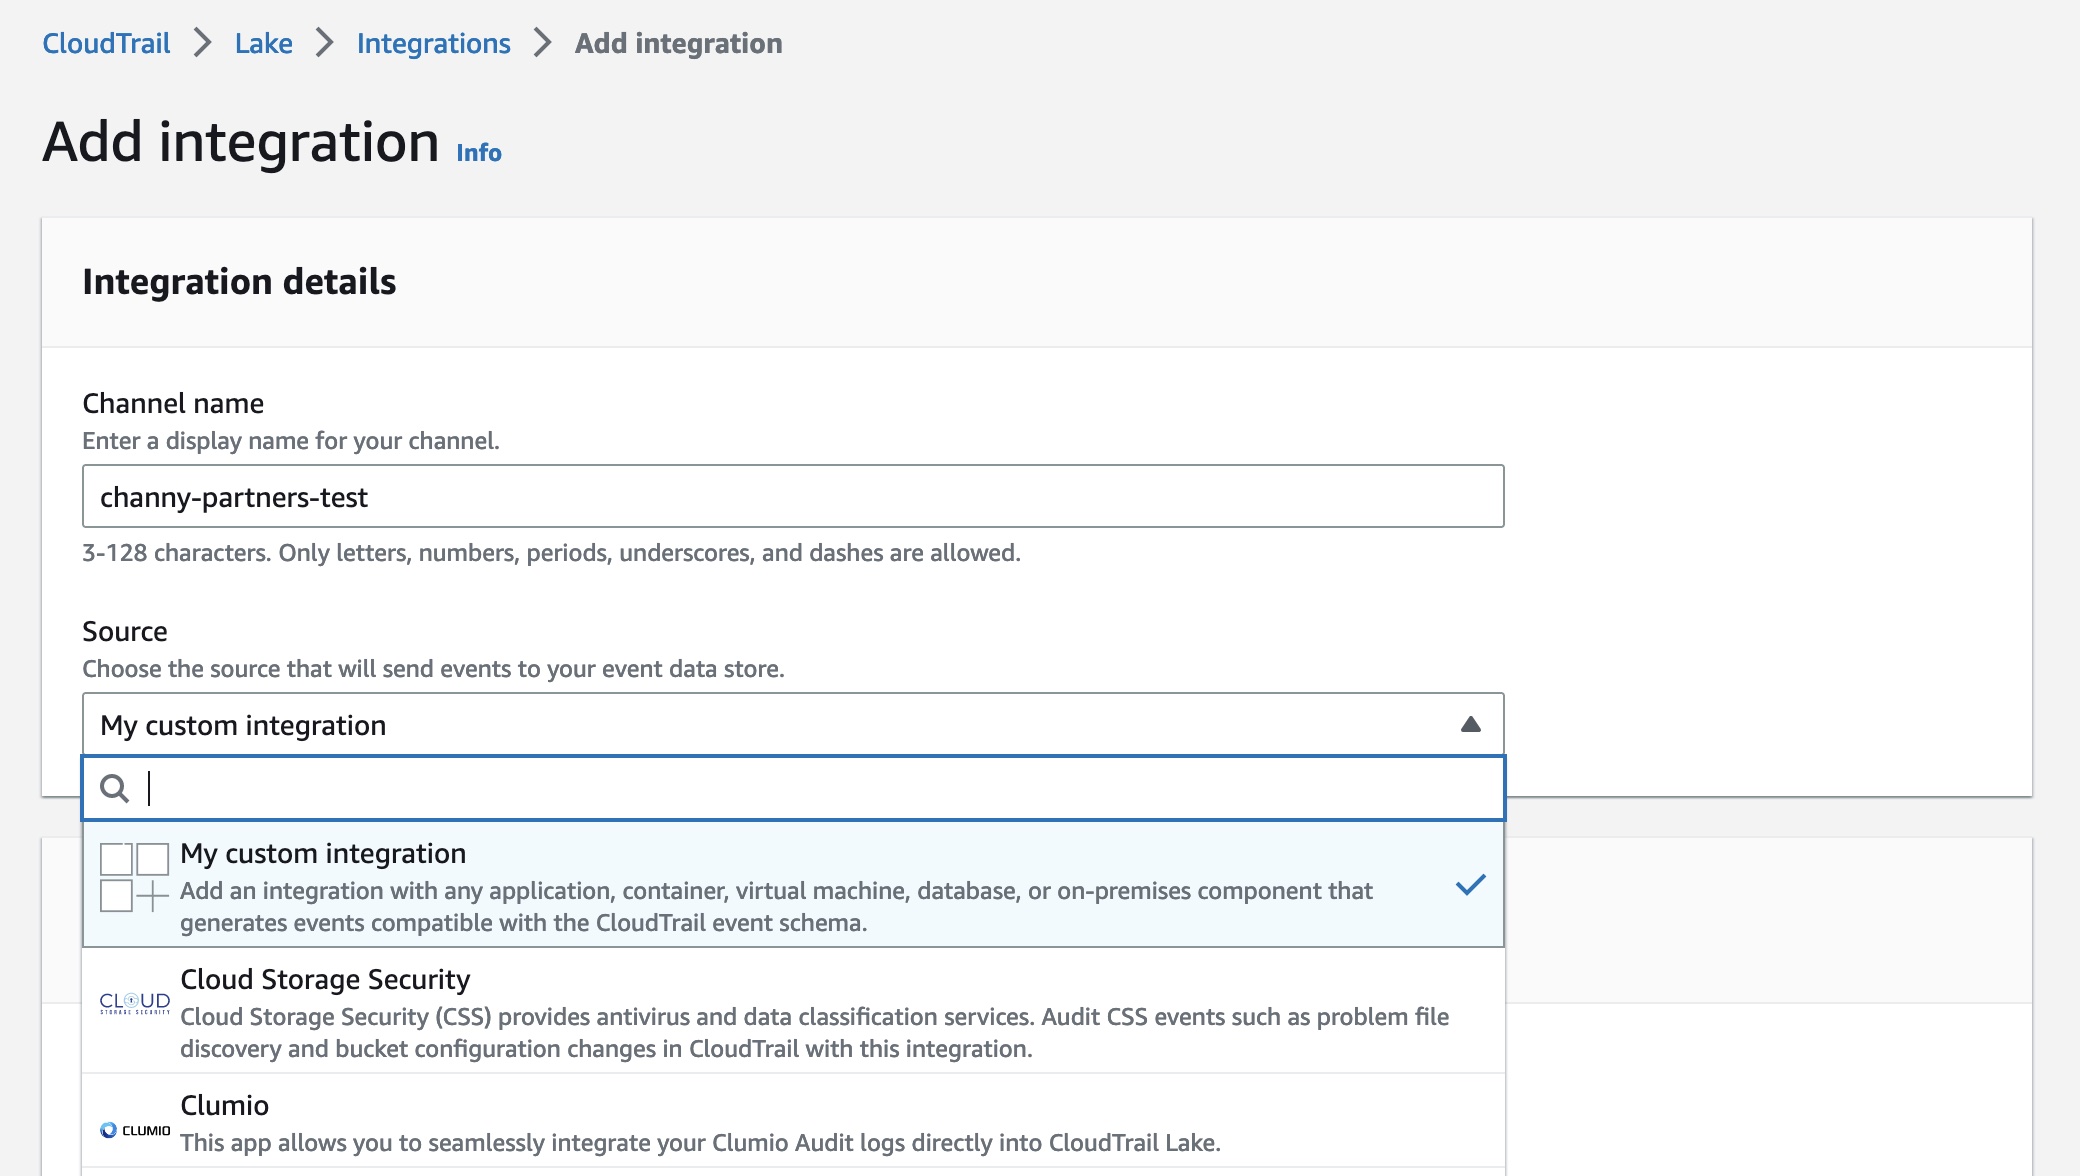
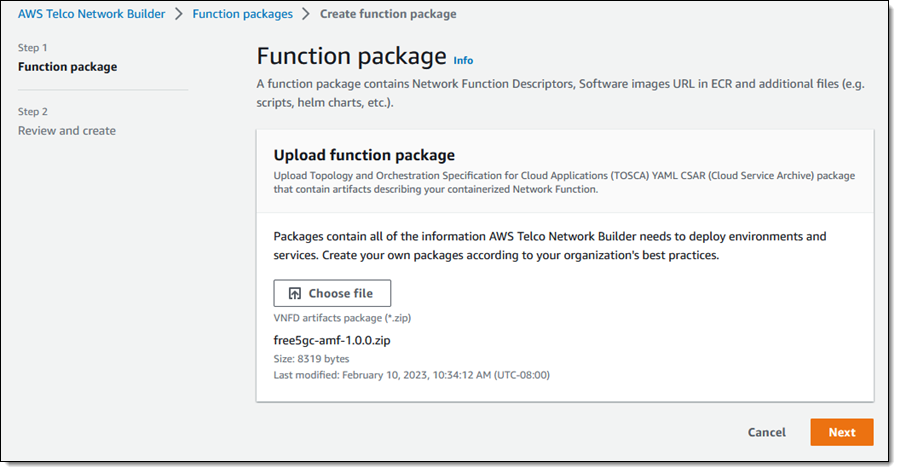
I click Function packages in the console, then click Create function package. Then I upload the first CSAR and click Next:

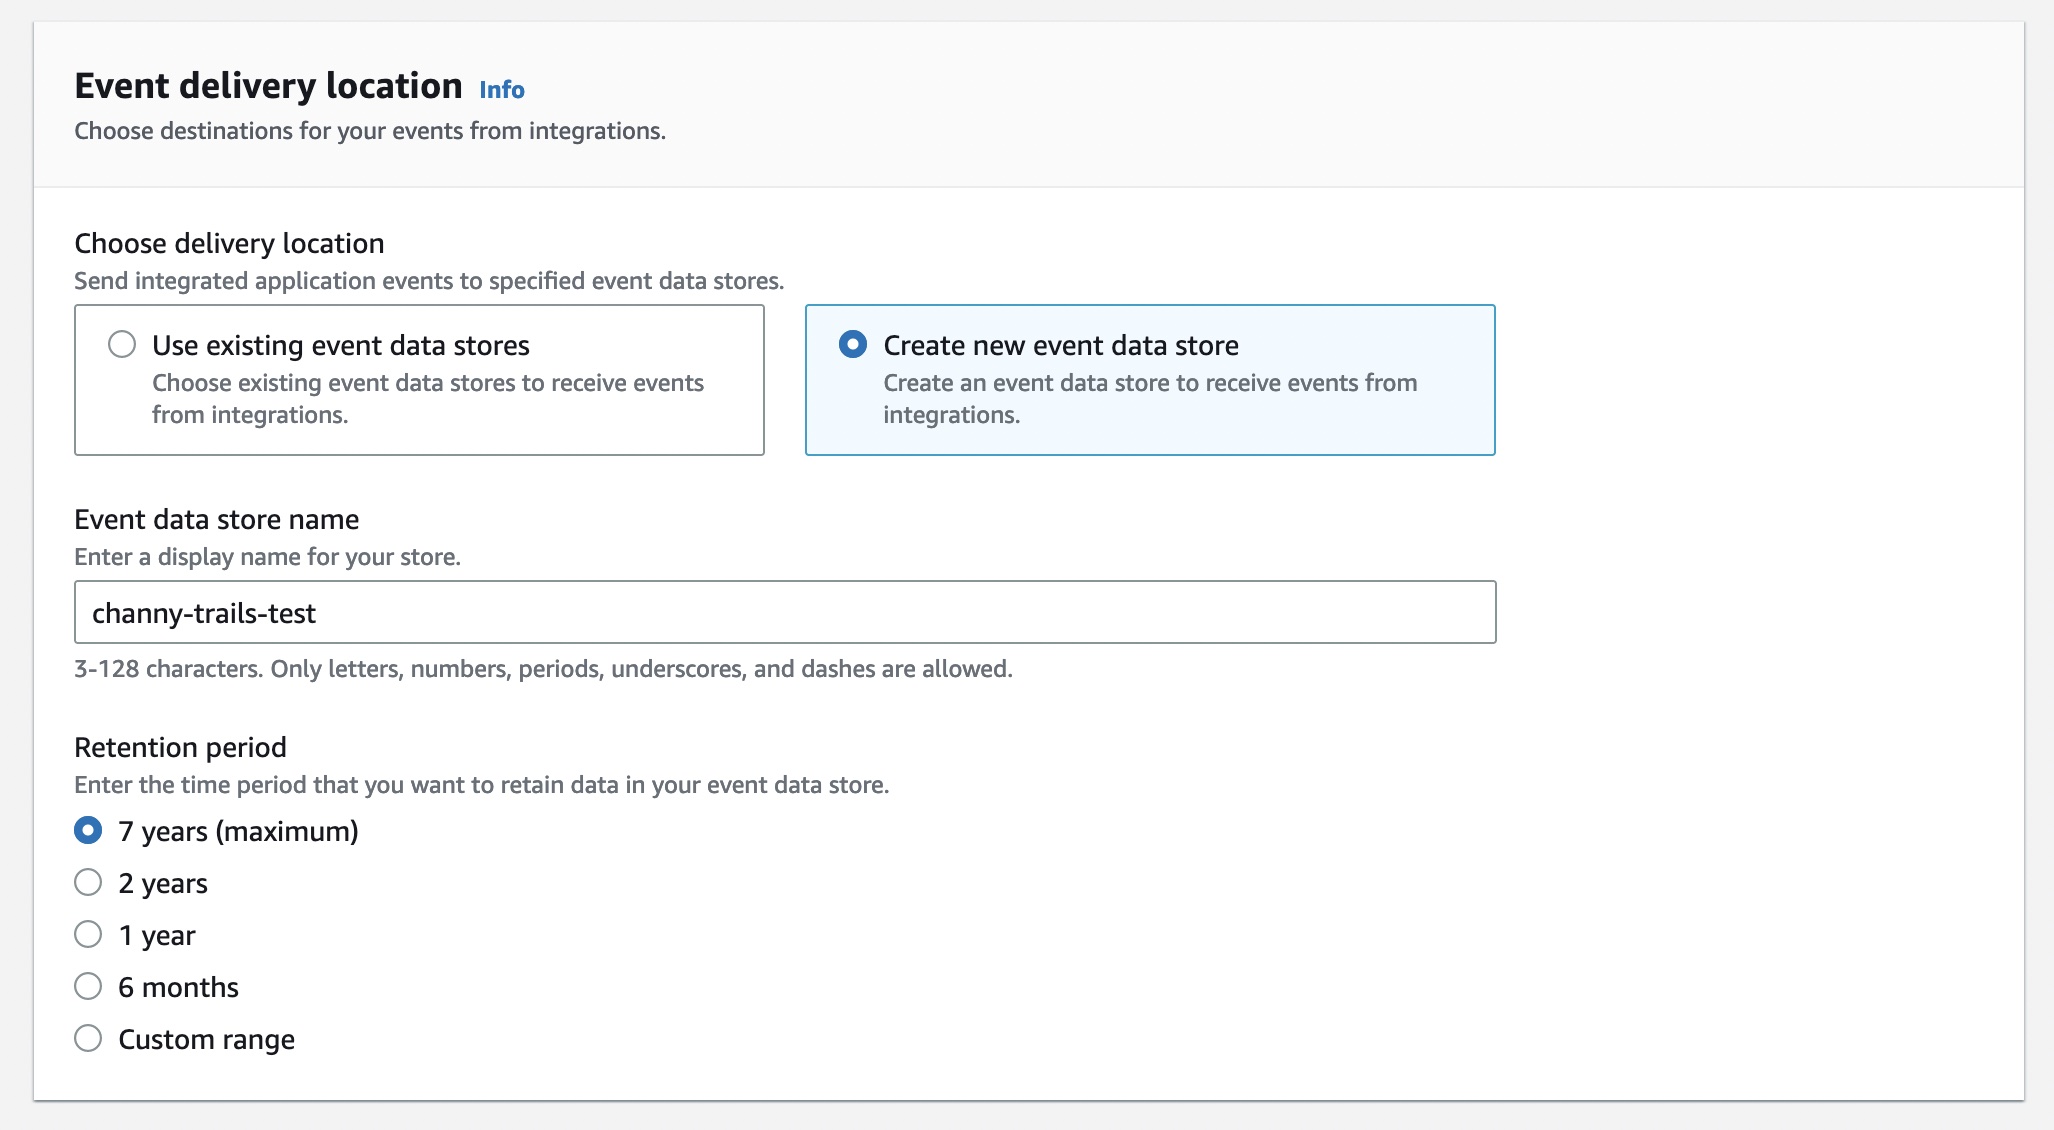
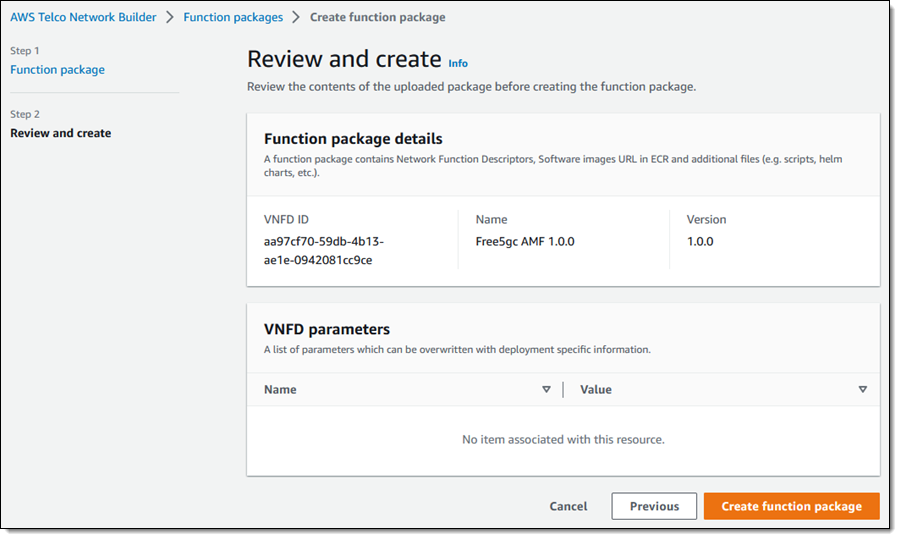
I review the details and click Create function package (each VNFD can include a set of parameters that have default values which can be overwritten with values that are specific to a particular deployment):

I repeat this process for the nine remaining CSARs, and all ten function packages are ready to use:

Now I am ready to create a Network Package. The Network Service Descriptor is also fairly simple, and I will show you several excerpts. First, the NSD establishes a mapping from descriptor_id to namespace for each Network Function so that the functions can be referenced by name:

vnfds:
  - descriptor_id: "aa97cf70-59db-4b13-ae1e-0942081cc9ce"
    namespace: "amf"
  - descriptor_id: "86bd1730-427f-480a-a718-8ae9dcf3f531"
    namespace: "ausf"
...

Then it defines the input variables, including default values (this reminds me of a AWS CloudFormation template):

  inputs:
    vpc_cidr_block:
      type: String
      description: "CIDR Block for Free5GCVPC"
      default: "10.100.0.0/16"

    eni_subnet_01_cidr_block:
      type: String
      description: "CIDR Block for Free5GCENISubnet01"
      default: "10.100.50.0/24"
...

Next, it uses the variables to create a mapping to the desired AWS resources (a VPC and a subnet in this case):

   Free5GCVPC:
      type: tosca.nodes.AWS.Networking.VPC
      properties:
        cidr_block: { get_input: vpc_cidr_block }
        dns_support: true

    Free5GCENISubnet01:
      type: tosca.nodes.AWS.Networking.Subnet
      properties:
        type: "PUBLIC"
        availability_zone: { get_input: subnet_01_az }
        cidr_block: { get_input: eni_subnet_01_cidr_block }
      requirements:
        route_table: Free5GCRouteTable
        vpc: Free5GCVPC

Then it defines an AWS Internet Gateway within the VPC:

    Free5GCIGW:
      type: tosca.nodes.AWS.Networking.InternetGateway
      capabilities:
        routing:
          properties:
            dest_cidr: { get_input: igw_dest_cidr }
      requirements:
        route_table: Free5GCRouteTable
        vpc: Free5GCVPC

Finally, it specifies deployment of the Network Functions to an EKS cluster; the functions are deployed in the specified order:

    Free5GCHelmDeploy:
      type: tosca.nodes.AWS.Deployment.VNFDeployment
      requirements:
        cluster: Free5GCEKS
        deployment: Free5GCNRFHelmDeploy
        vnfs:
          - amf.Free5gcAMF
          - ausf.Free5gcAUSF
          - nssf.Free5gcNSSF
          - pcf.Free5gcPCF
          - smf.Free5gcSMF
          - udm.Free5gcUDM
          - udr.Free5gcUDR
          - upf.Free5gcUPF
          - webui.Free5gcWEBUI
      interfaces:
        Hook:
          pre_create: Free5gcSimpleHook

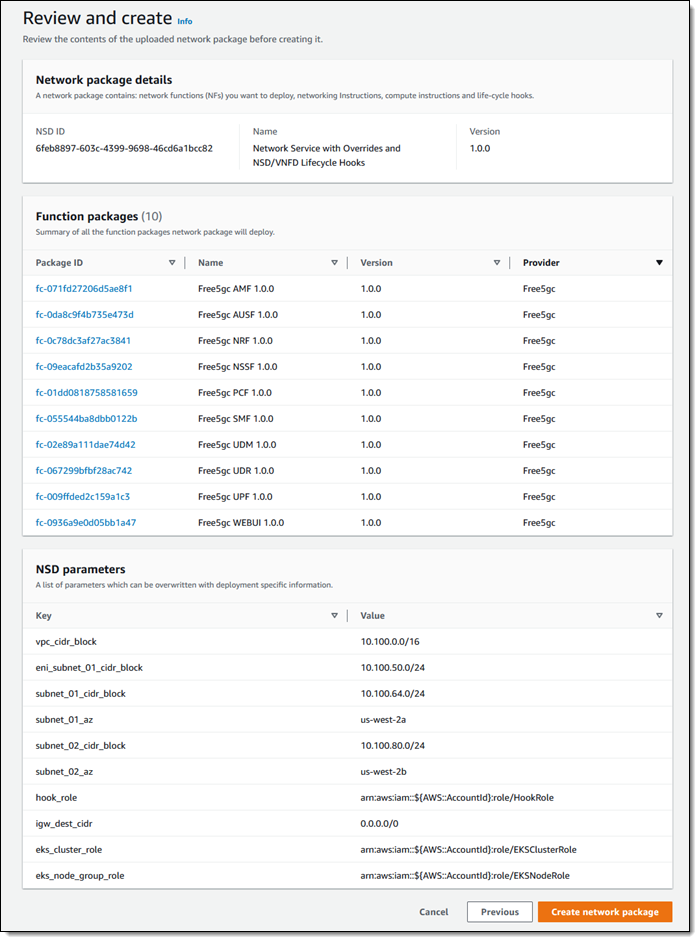
I click Create network package, select the NSD, and click Next to proceed. AWS TNB asks me to review the list of function packages and the NSD parameters. I do so, and click Create network package:

My network package is created and ready to use within seconds:

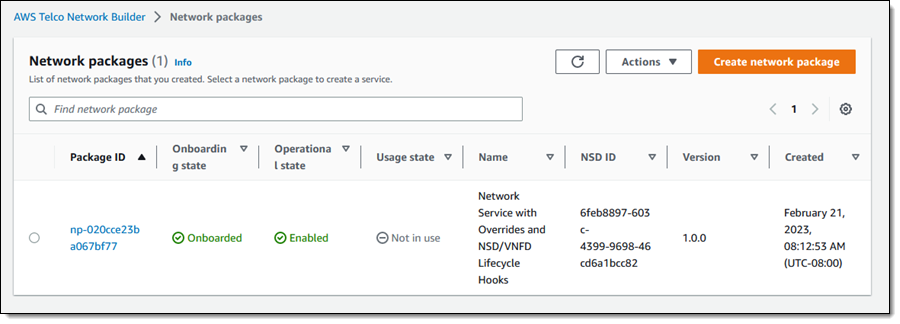
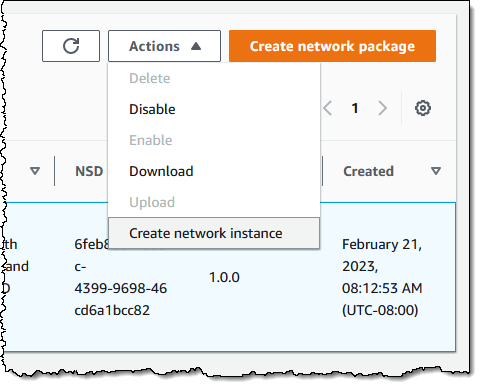
Now I am ready to create my network instance! I select the network package and choose Create network instance from the Actions menu:

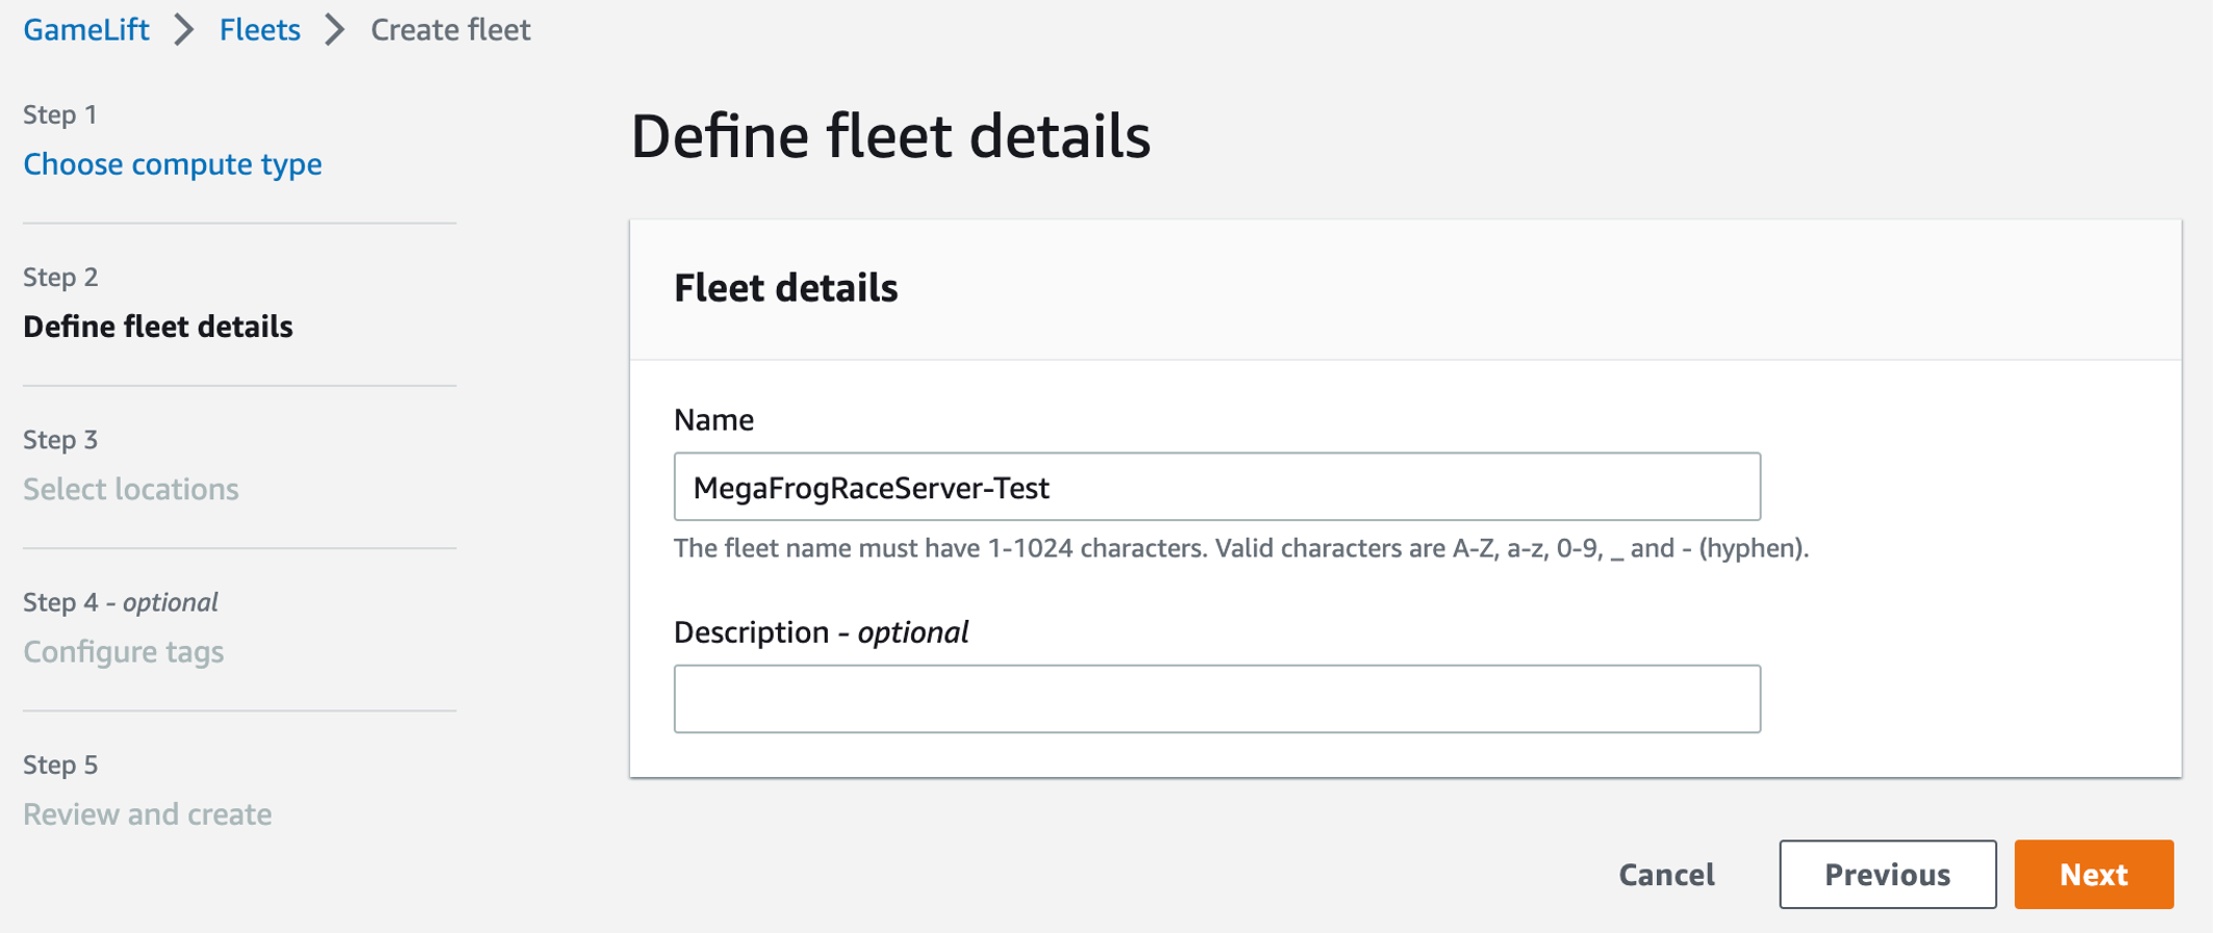
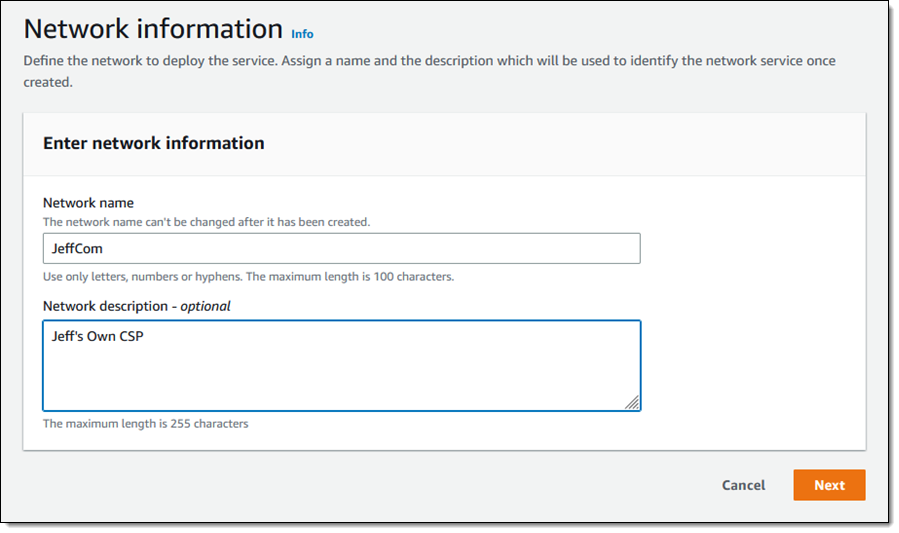
I give my network a name and a description, then click Next:

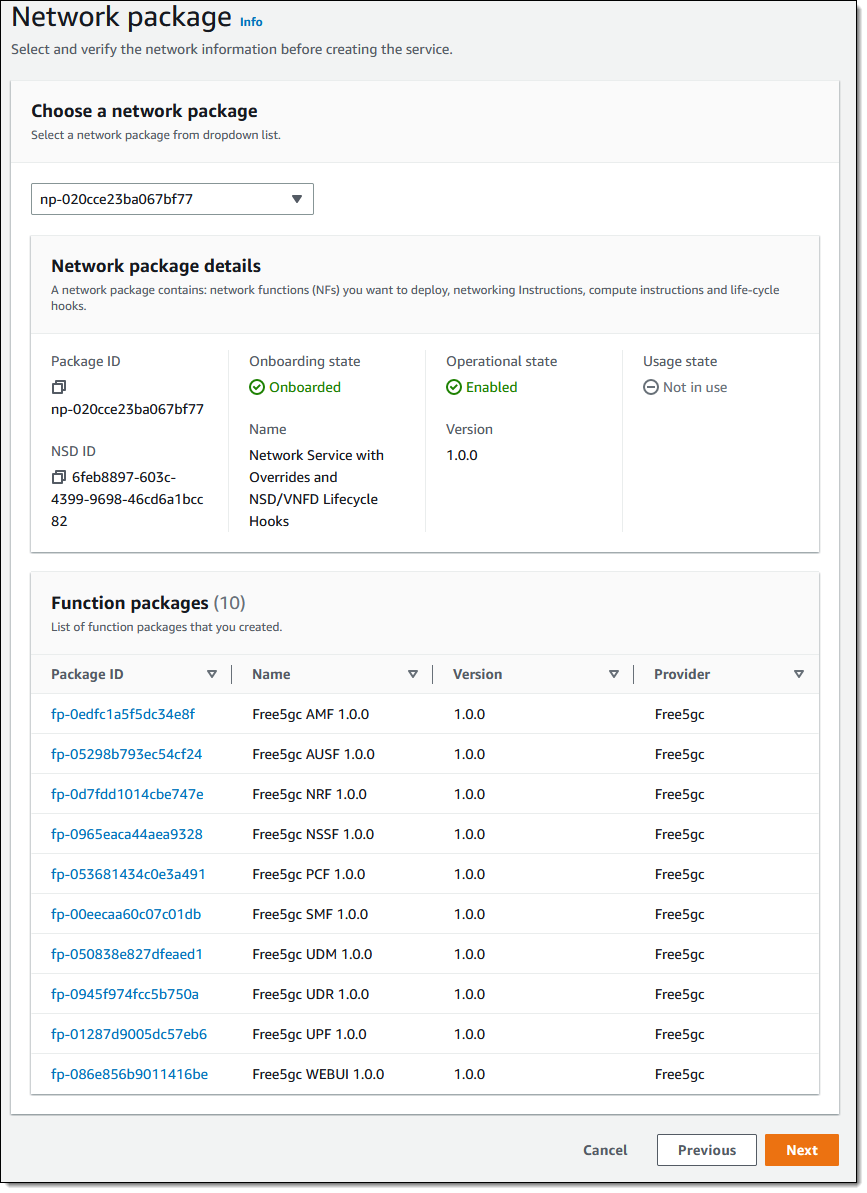
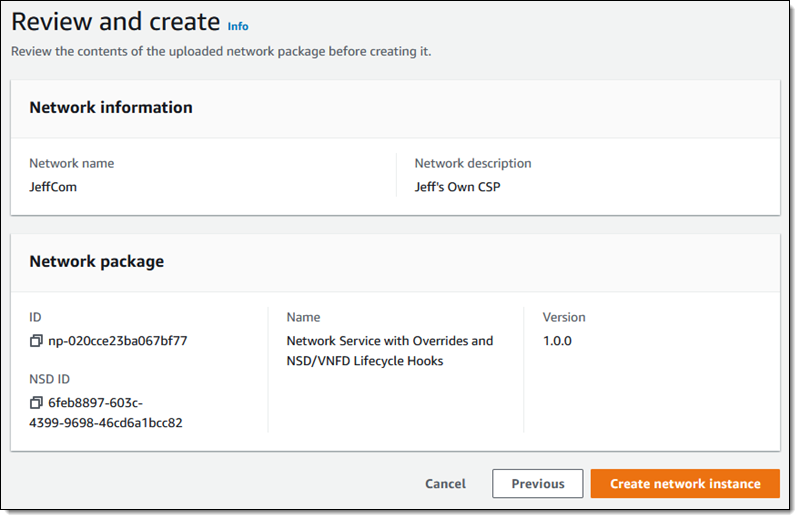
I make sure that I have selected the desired network package, review the list of functions packages that will be deployed, and click Next:

Then I do one final review, and click Create network instance:

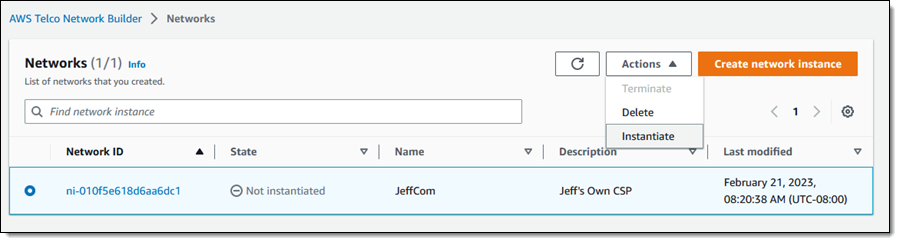
I select the new network instance and choose Instantiate from the Actions menu:

I review the parameters, and enter any desired overrides, then click Instantiate network:

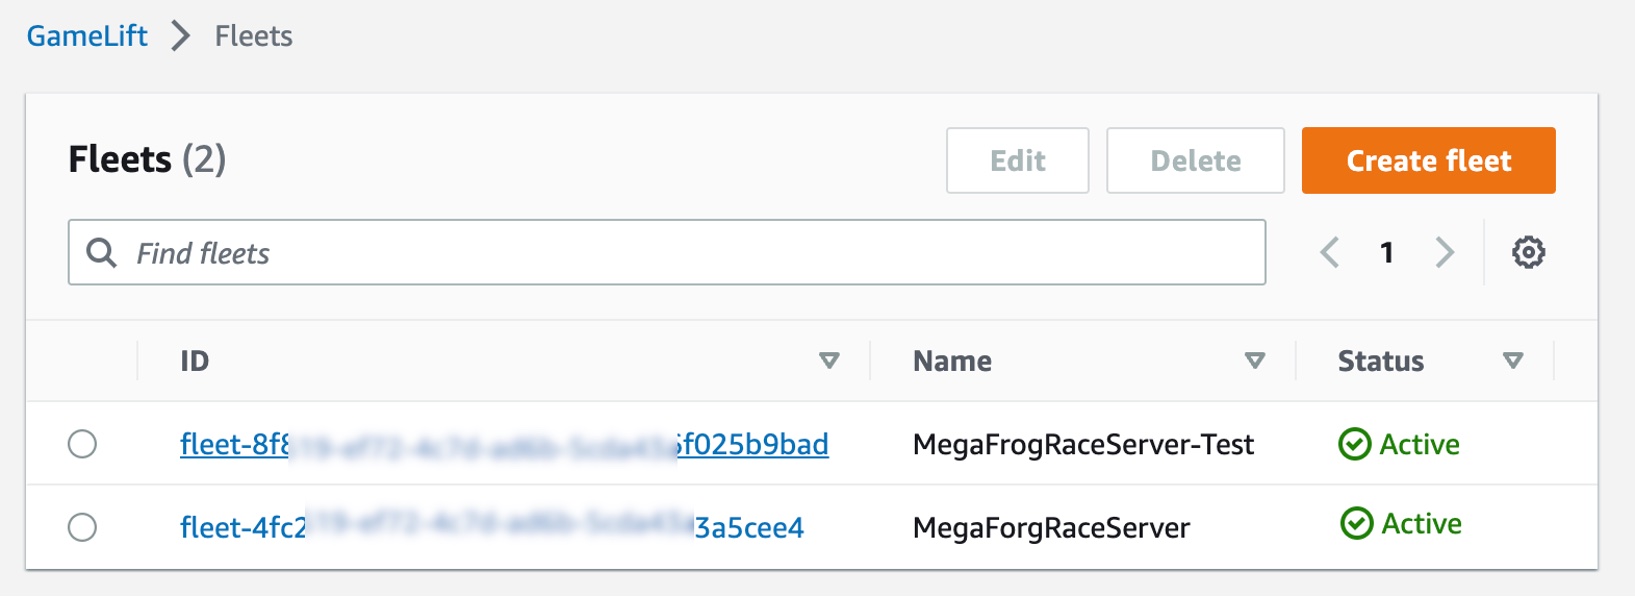
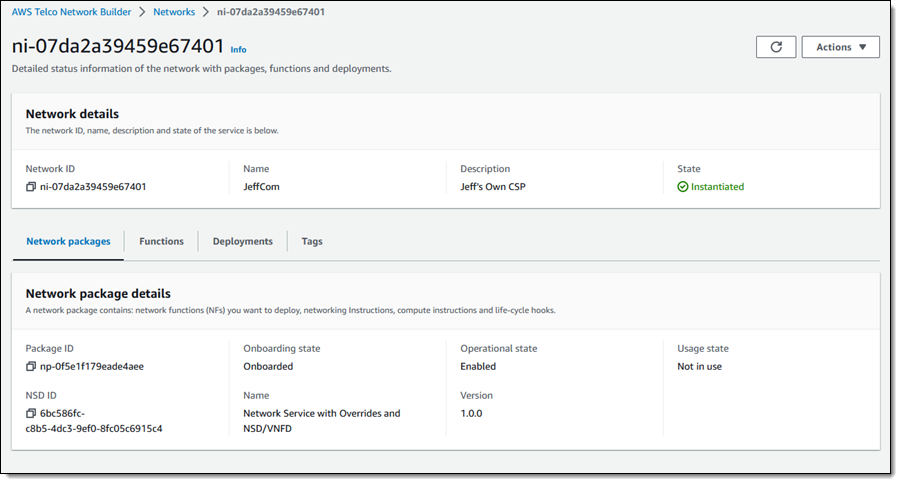
AWS Telco Network Builder (TNB) begins to instantiate my network (behind the scenes, the service creates a AWS CloudFormation template, uses the template to create a stack, and executes other tasks including Helm charts and custom scripts). When the instantiation step is complete, my network is ready to go. Instantiating a network creates a deployment, and the same network (perhaps with some parameters overridden) can be deployed more than once. I can see all of the deployments at a glance:

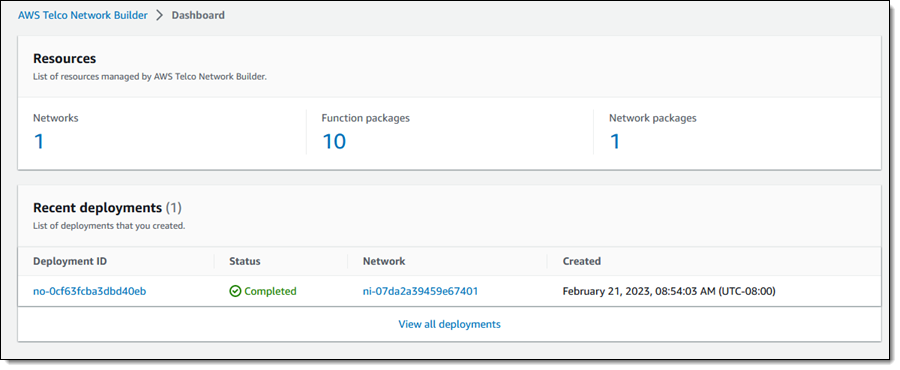
I can return to the dashboard to see my networks, function packages, network packages, and recent deployments:

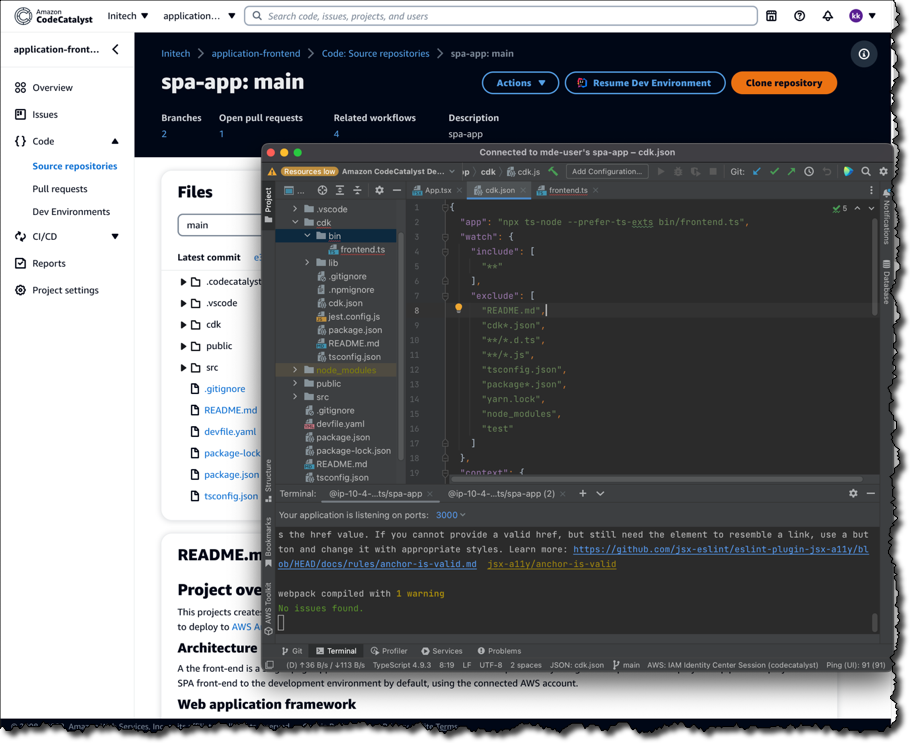
Inside an AWS TNB Deployment
Let’s take a quick look inside my deployment. Here’s what AWS TNB set up for me:

Network – An Amazon Virtual Private Cloud (Amazon VPC) with three subnets, a route table, a route, and an Internet Gateway.

Compute – An Amazon Elastic Kubernetes Service (EKS) cluster.

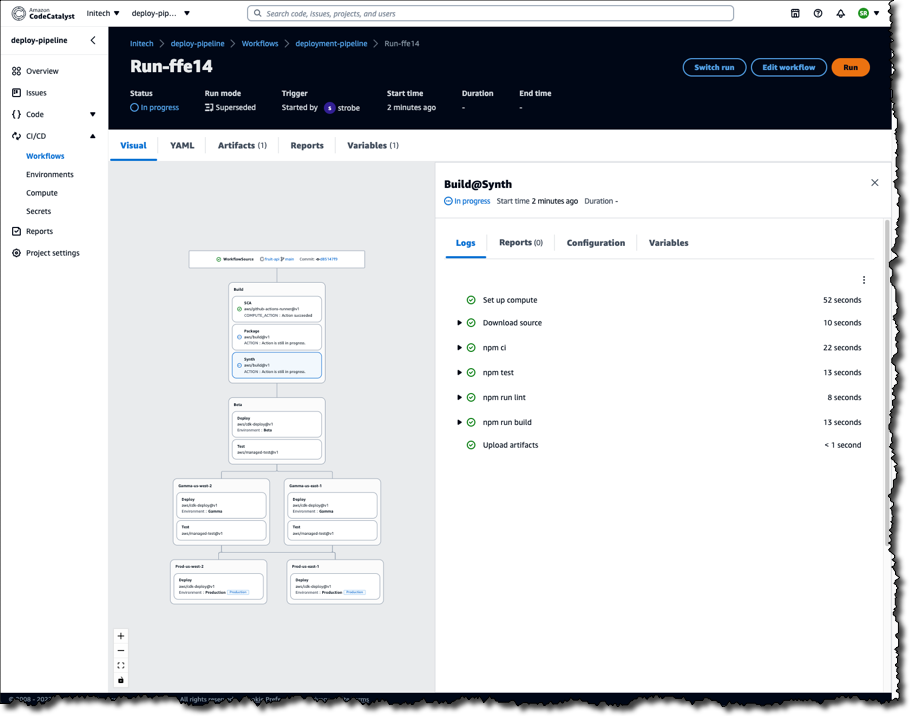
CI/CD – An AWS CodeBuild project that is triggered every time a node is added to the cluster.

Things to Know
Here are a couple of things to know about AWS Telco Network Builder (TNB):

Access – In addition to the console access that I showed you above, you can access AWS TNB from the AWS Command Line Interface (AWS CLI) and the AWS SDKs.

Deployment Options – We are launching with the ability to create a network that spans multiple Availability Zones in a single AWS Region. Over time we expect to add additional deployment options such as Local Zones and Outposts.

Pricing – Pricing is based on the number of Network Functions that are managed by AWS TNB and on calls to the AWS TNB APIs, but the first 45,000 API requests per month in each AWS Region are not charged. There are also additional charges for the AWS resources that are created as part of the deployment. To learn more, read the TNB Pricing page.

Getting Started
To learn more and to get started, visit the AWS Telco Network Builder (TNB) home page.

Jeff;

Behind the Scenes at AWS – DynamoDB UpdateTable Speedup

Post Syndicated from Jeff Barr original https://aws.amazon.com/blogs/aws/behind-the-scenes-at-aws-dynamodb-updatetable-speedup/

We often talk about the Pace of Innovation at AWS, and share the results in this blog, in the AWS What’s New page, and in our weekly AWS on Air streams. Today I would like to talk about a slightly different kind of innovation, the kind that happens behind the scenes.

Each AWS customer uses a different mix of services, and uses those services in unique ways. Every service is instrumented and monitored, and the team responsible for designing, building, running, scaling, and evolving the service pays continuous attention to all of the resulting metrics. The metrics provide insights into how the service is being used, how it performs under load, and in many cases highlights areas for optimization in pursuit of higher availability, better performance, and lower costs.

Once an area for improvement has been identified, a plan is put in to place, changes are made and tested in pre-production environments, then deployed to multiple AWS regions. This happens routinely, and (to date) without fanfare. Each part of AWS gets better and better, with no action on your part.

DynamoDB UpdateTable
In late 2021 we announced the Standard-Infrequent Access table class for Amazon DynamoDB. As Marcia noted in her post, using this class can reduce your storage costs by 60% compared to the existing (Standard) class. She also showed you how you could modify a table to use the new class. The modification operation calls the UpdateTable function, and that function is the topic of this post!

As is the case with just about every AWS launch, customers began to make use of the new table class right away. They created new tables and modified existing ones, benefiting from the lower pricing as soon as the modification was complete.

DynamoDB uses a highly distributed storage architecture. Each table is split into multiple partitions; operations such as changing the storage class are done in parallel across the partitions. After looking at a lot of metrics, the DynamoDB team found ways to increase parallelism and to reduce the amount of time spent managing the parallel operations.

This change had a dramatic effect for Amazon DynamoDB tables over 500 GB in size, reducing the time to update the table class by up to 97%.

Each time we make a change like this, we capture the “before” and “after” metrics, and share the results internally so that other teams can learn from the experience while they are in the process of making similar improvements of their own. Even better, each change that we make opens the door to other ones, creating a positive feedback loop that (once again) benefits everyone that uses a particular service or feature.

Every DynamoDB user can take advantage of this increased performance right away without the need for a version upgrade or downtime for maintenance (DynamoDB does not even have maintenance windows).

Incremental performance and operational improvements like this one are done routinely and without much fanfare. However it is always good to hear back from our customers when their own measurements indicate that some part of AWS became better or faster.

Leadership Principles
As I was thinking about this change while getting ready to write this post, several Amazon Leadership Principles came to mind. The DynamoDB team showed Customer Obsession by implementing a change that would benefit any DynamoDB user with tables over 500 GB in size. To do this they had to Invent and Simplify, coming up with a better way to implement the UpdateTable function.

While you, as an AWS customer, get the benefits with no action needed on your part, this does not mean that you have to wait until we decide to pay special attention to your particular use case. If you are pushing any aspect of AWS to the limit (or want to), I recommend that you make contact with the appropriate service team and let them know what’s going on. You might be running into a quota or other limit, or pushing bandwidth, memory, or other resources to extremes. Whatever the case, the team would love to hear from you!

Stay Tuned
I have a long list of other internal improvements that we have made, and will be working with the teams to share more of them throughout the year.

Jeff;

New Graviton3-Based General Purpose (m7g) and Memory-Optimized (r7g) Amazon EC2 Instances

Post Syndicated from Jeff Barr original https://aws.amazon.com/blogs/aws/new-graviton3-based-general-purpose-m7g-and-memory-optimized-r7g-amazon-ec2-instances/

We’ve come a long way since the launch of the m1.small instance in 2006, adding instances with additional memory, compute power, and your choice of Intel, AMD, or Graviton processors. The original general-purpose “one size fits all” instance has evolved into six families, each one optimized for specific uses cases, with over 600 generally available instances in all.

New M7g and R7g
Today I am happy to tell you about the newest Amazon EC2 instance types, the M7g and the R7g. Both types are powered by the latest generation AWS Graviton3 processors, and are designed to deliver up to 25% better performance than the equivalent sixth-generation (M6g and R6g) instances, making them the best performers in EC2.

The M7g instances are for general purpose workloads such as application servers, microservices, gaming servers, mid-sized data stores, and caching fleets. The R7g instances are a great fit for memory-intensive workloads such as open-source databases, in-memory caches, and real-time big data analytics.

Here are the specs for the M7g instances:

Instance Name vCPUs
Memory
Network Bandwidth
EBS Bandwidth
m7g.medium 1 4 GiB up to 12.5 Gbps up to 10 Gbps
m7g.large 2 8 GiB up to 12.5 Gbps up to 10 Gbps
m7g.xlarge 4 16 GiB up to 12.5 Gbps up to 10 Gbps
m7g.2xlarge 8 32 GiB up to 15 Gbps up to 10 Gbps
m7g.4xlarge 16 64 GiB up to 15 Gbps up to 10 Gbps
m7g.8xlarge 32 128 GiB 15 Gbps 10 Gbps
m7g.12xlarge 48 192 GiB 22.5 Gbps 15 Gbps
m7g.16xlarge 64 256 GiB 30 Gbps 20 Gbps
m7g.metal 64 256 GiB 30 Gbps 20 Gbps

And here are the specs for the R7g instances:

Instance Name vCPUs
Memory
Network Bandwidth
EBS Bandwidth
r7g.medium 1 8 GiB up to 12.5 Gbps up to 10 Gbps
r7g.large 2 16 GiB up to 12.5 Gbps up to 10 Gbps
r7g.xlarge 4 32 GiB up to 12.5 Gbps up to 10 Gbps
r7g.2xlarge 8 64 GiB up to 15 Gbps up to 10 Gbps
r7g.4xlarge 16 128 GiB up to 15 Gbps up to 10 Gbps
r7g.8xlarge 32 256 GiB 15 Gbps 10 Gbps
r7g.12xlarge 48 384 GiB 22.5 Gbps 15 Gbps
r7g.16xlarge 64 512 GiB 30 Gbps 20 Gbps
r7g.metal 64 512 GiB 30 Gbps 20 Gbps

Both types of instances are equipped with DDR5 memory, which provides up to 50% higher memory bandwidth than the DDR4 memory used in previous generations. Here’s an infographic that I created to highlight the principal performance and capacity improvements that we have made available with the new instances:

If you are not yet running your application on Graviton instances, be sure to take advantage of the AWS Graviton Ready Program. The partners in this program provide services and solutions that will help you to migrate your application and to take full advantage of all that the Graviton instances have to offer. Other helpful resources include the Porting Advisor for Graviton and the Graviton Fast Start program.

The instances are built on the AWS Nitro System, and benefit from multiple features that enhance security: always-on memory encryption, a dedicated cache for each vCPU, and support for pointer authentication. They also support encrypted EBS volumes, which protect data at rest on the volume, data moving between the instance and the volume, snapshots created from the volume, and volumes created from those snapshots. To learn more about these and other Nitro-powered security features, be sure to read The Security Design of the AWS Nitro System.

On the network side the instances are EBS-Optimized with dedicated networking between the instances and the EBS volumes, and also support Enhanced Networking (read How do I enable and configure enhanced networking on my EC2 instances? for more info). The 16xlarge and metal instances also support Elastic Fabric Adapter (EFA) for applications that need a high level of inter-node communication.

Pricing and Regions
M7g and R7g instances are available today in the US East (N. Virginia), US East (Ohio), US West (Oregon), and Europe (Ireland) AWS Regions in On-Demand, Spot, Reserved Instance, and Savings Plan form.

Jeff;

PS – Launch one today and let me know what you think!

New – Visualize Your VPC Resources from Amazon VPC Creation Experience

Post Syndicated from Channy Yun original https://aws.amazon.com/blogs/aws/new-visualize-your-vpc-resources-from-amazon-vpc-creation-experience/

Today we are announcing Amazon Virtual Private Cloud (Amazon VPC) resource map, a new feature that simplifies the VPC creation experience in the AWS Management Console. This feature displays your existing VPC resources and their routing visually on a single page, allowing you to quickly understand the architectural layout of the VPC.

A year ago, in March 2022, we launched a new VPC creation experience that streamlines the process of creating and connecting VPC resources. With just one click, even across multiple Availability Zones (AZs), you can create and connect VPC resources, eliminating more than 90 percent of the manual steps required in the past. The new creation experience is centered around an interactive diagram that displays a preview of the VPC architecture and updates as options are selected, providing a visual representation of the resources and their relationships within the VPC that you are about to create.

However, after the creation of the VPC, the diagram that was available during the creation experience that many of our customers loved was no longer available. Today we are changing that! With VPC resource map, you can quickly understand the architectural layout of the VPC, including the number of subnets, which subnets are associated with the public route table, and which route tables have routes to the NAT Gateway.

You can also get to the specific resource details by clicking on the resource. This eliminates the need for you to map out resource relationships mentally and hold the information in your head while working with your VPC, making the process much more efficient and less prone to mistakes.

Getting Started with VPC Resource Map
To get started, choose an existing VPC in the VPC console. In the details section, select the Resource map tab. Here, you can see the resources in your VPC and the relationships between those resources.

As you hover over a resource, you can see the related resources and the connected lines highlighted. If you click to select the resource, you can see a few lines of details and a link to see the details of the selected resource.

Getting Started with VPC Creation Experience
I want to explain how to use the VPC creation experience to improve your workflow to create a new VPC to make a high-availability three-tier VPC easily.

Choose Create VPC and select VPC and more in the VPC console. You can preview the VPC resources that you are about to create all on the same page.

In Name tag auto-generation, you can specify a prefix value for Name tags. This value is used to generate Name tags for all VPC resources in the preview. If I change the default value, which is project to channy, the Name tag in the preview changes to channy- something, such as channy-vpc. You can customize a Name tag per resource in the preview by clicking each resource and making changes.

You can easily change the default CIDR value (10.0.0.0/16) when you click the IPv4 CIDR block field to reveal the CIDR joystick. Use the left or right arrow to move to the previous (9.255.0.0/16) or next (10.0.1.0/16) CIDR block within the /16 network mask. You can also change the subnet mask to /17 by using the down arrow, or go back to /16 using the up arrow.

Choose the number of Availability Zones (AZs) up to 3. The number of public and private subnet types changes based on the number of AZs and shows the total number of each subnet type it will create.

I want a high-availability VPC in three AZs and select 6 for the number of private subnets. In the preview panel, you can see that there are 9 subnets. When I hover over channy-rtb-public, I can visually confirm that this route table is connected to three public subnets and also routed to the internet gateway (channy-igw). The dotted lines indicate routes to network node, and the solid lines indicate relationships such as implicit or explicit associations.

Adding NAT gateways and VPC endpoints is easy. You can simply change the number of NAT gateways in or per Availability Zone (AZ). Note that there is a charge for each NAT gateway. We always recommend having one NAT gateway per AZ and route traffic from subnets in an AZ to the NAT gateway in the same AZ for high availability and to avoid inter-AZ data charges.

To route traffic to Amazon Simple Storage Service (Amazon S3) buckets more securely, you can choose the S3 Gateway endpoint by default. The S3 Gateway endpoint is free of charge and does not use NAT gateways when moving data from private subnets.

You can create additional tags and assign them to all resources in the VPC in no time. I select Add new tag and enter environment for the Key and test for the Value. This key-value pair will be added to every resource here.

Choose Create VPC at the bottom of the page and see the resources and the IDs of those resources that are being created. Before creating, please validate resources from the preview.

Once all the resources are created, choose View VPC at the bottom. The button takes you directly to the VPC resource map, where you can see a visual representation of what you created.

Now Available
Amazon VPC resource map is now available in all AWS Regions where Amazon VPC is available, and you can start using it today.

The VPC resource map and creation experience now only displays VPC, subnets, route tables, internet gateway, NAT gateways, and Amazon S3 gateway. The Amazon VPC console teams and user experience teams will continue to improve the console experience using customer feedback.

To learn more, see the Amazon VPC User Guide, and please send feedback to AWS re:Post for Amazon VPC or through your usual AWS support contacts.

Channy

New – AWS CloudTrail Lake Supports Ingesting Activity Events From Non-AWS Sources

Post Syndicated from Channy Yun original https://aws.amazon.com/blogs/aws/new-aws-cloudtrail-lake-supports-ingesting-activity-events-from-non-aws-sources/

In November 2013, we announced AWS CloudTrail to track user activity and API usage. AWS CloudTrail enables auditing, security monitoring, and operational troubleshooting. CloudTrail records user activity and API calls across AWS services as events. CloudTrail events help you answer the questions of “who did what, where, and when?”.

Recently we have improved the ability for you to simplify your auditing and security analysis by using AWS CloudTrail Lake. CloudTrail Lake is a managed data lake for capturing, storing, accessing, and analyzing user and API activity on AWS for audit, security, and operational purposes. You can aggregate and immutably store your activity events, and run SQL-based queries for search and analysis.

We have heard your feedback that aggregating activity information from diverse applications across hybrid environments is complex and costly, but important for a comprehensive picture of your organization’s security and compliance posture.

Today we are announcing support of ingestion for activity events from non-AWS sources using CloudTrail Lake, making it a single location of immutable user and API activity events for auditing and security investigations. Now you can consolidate, immutably store, search, and analyze activity events from AWS and non-AWS sources, such as in-house or SaaS applications, in one place.

Using the new PutAuditEvents API in CloudTrail Lake, you can centralize user activity information from disparate sources into CloudTrail Lake, enabling you to analyze, troubleshoot and diagnose issues using this data. CloudTrail Lake records all events in standardized schema, making it easier for users to consume this information to comprehensively and quickly respond to security incidents or audit requests.

CloudTrail Lake is also integrated with selected AWS Partners, such as Cloud Storage Security, Clumio, CrowdStrike, CyberArk, GitHub, Kong Inc, LaunchDarkly, MontyCloud, Netskope, Nordcloud, Okta, One Identity, Shoreline.io, Snyk, and Wiz, allowing you to easily enable audit logging through the CloudTrail console.

Getting Started to Integrate External Sources
You can start to ingest activity events from your own data sources or partner applications by choosing Integrations under the Lake menu in the AWS CloudTrail console.

To create a new integration, choose Add integration and enter your channel name. You can choose the partner application source from which you want to get events. If you’re integrating with events from your own applications hosted on-premises or in the cloud, choose My custom integration.

For Event delivery location, you can choose destinations for your events from this integration. This allows your application or partners to deliver events to your event data store of CloudTrail Lake. An event data store can retain your activity events for a week to up to seven years. Then you can run queries on the event data store.

Choose either Use existing event data stores or Create new event data store—to receive events from integrations. To learn more about event data store, see Create an event data store in the AWS documentation.

You can also set up the permissions policy for the channel resource created with this integration. The information required for the policy is dependent on the integration type of each partner applications.

There are two types of integrations: direct and solution. With direct integrations, the partner calls the PutAuditEvents API to deliver events to the event data store for your AWS account. In this case, you need to provide External ID, the unique account identifier provided by the partner. You can see a link to partner website for the step-by-step guide. With solution integrations, the application runs in your AWS account and the application calls the PutAuditEvents API to deliver events to the event data store for your AWS account.

To find the Integration type for your partner, choose the Available sources tab from the integrations page.

After creating an integration, you will need to provide this Channel ARN to the source or partner application. Until these steps are finished, the status will remain as incomplete. Once CloudTrail Lake starts receiving events for the integrated partner or application, the status field will be updated to reflect the current state.

To ingest your application’s activity events into your integration, call the PutAuditEvents API to add the payload of events. Be sure that there is no sensitive or personally identifying information in the event payload before ingesting it into CloudTrail Lake.

You can make a JSON array of event objects, which includes a required user-generated ID from the event, the required payload of the event as the value of EventData, and an optional checksum to help validate the integrity of the event after ingestion into CloudTrail Lake.

{
  "AuditEvents": [
     {
      "Id": "event_ID",
      "EventData": "{event_payload}", "EventDataChecksum": "optional_checksum",
     },
   ... ]
}

The following example shows how to use the put-audit-events AWS CLI command.

$ aws cloudtrail-data put-audit-events \
--channel-arn $ChannelArn \
--external-id $UniqueExternalIDFromPartner \
--audit-events \
{
  "Id": "87f22433-0f1f-4a85-9664-d50a3545baef",
  "EventData":"{\"eventVersion\":\0.01\",\"eventSource\":\"MyCustomLog2\", ...\}",
},
{
  "Id": "7e5966e7-a999-486d-b241-b33a1671aa74",
  "EventData":"{\"eventVersion\":\0.02\",\"eventSource\":\"MyCustomLog1\", ...\}",
"EventDataChecksum":"848df986e7dd61f3eadb3ae278e61272xxxx",
}

On the Editor tab in the CloudTrail Lake, write your own queries for a new integrated event data store to check delivered events.

You can make your own integration query, like getting all principals across AWS and external resources that have made API calls after a particular date:

SELECT userIdentity.principalId FROM $AWS_EVENT_DATA_STORE_ID 
WHERE eventTime > '2022-09-24 00:00:00'
UNION ALL
SELECT eventData.userIdentity.principalId FROM $PARTNER_EVENT_DATA_STORE_ID
WHRERE eventData.eventTime > '2022-09-24 00:00:00'

To learn more, see CloudTrail Lake event schema and sample queries to help you get started.

Launch Partners
You can see the list of our launch partners to support a CloudTrail Lake integration option in the Available applications tab. Here are blog posts and announcements from our partners who collaborated on this launch (some will be added in the next few days).

  • Cloud Storage Security
  • Clumio
  • CrowdStrike
  • CyberArk
  • GitHub
  • Kong Inc
  • LaunchDarkly
  • MontyCloud
  • Netskope
  • Nordcloud
  • Okta
  • One Identity
  • Shoreline.io
  • Snyk
  • Wiz

Now Available
AWS CloudTrail Lake now supports ingesting activity events from external sources in all AWS Regions where CloudTrail Lake is available today. To learn more, see the AWS documentation and each partner’s getting started guides.

If you are interested in becoming an AWS CloudTrail Partner, you can contact your usual partner contacts.

Channy

AWS Week in Review – January 30, 2023

Post Syndicated from Steve Roberts original https://aws.amazon.com/blogs/aws/aws-week-in-review-january-30-2023/

This week’s review post comes to you from the road, having just wrapped up sponsorship of NDC London. While there we got to speak to many .NET developers, both new and experienced with AWS, and all eager to learn more. Thanks to everyone who stopped by our expo booth to chat or ask questions to the team!

.NET on AWS booth, NDC London 2023.NET on AWS booth, NDC London 2023

Last Week’s Launches
My team will be back on the road to our next events soon, but first, here are just some launches that caught my attention while I was at the expo booth last week:

General availability of Porting Advisor for Graviton: AWS Graviton2 processors are custom designed, Arm64, processors, that deliver increased price performance over comparable x86-64 processors. They’re suitable for a wide range of compute workloads on Amazon Elastic Compute Cloud (Amazon EC2) including application servers, microservices, high-performance computing (HPC), CPU-based ML inference, gaming, any many more. They’re also available in other AWS services such as AWS Lambda, AWS Fargate, to name just a few. The new Porting Advisor for Graviton is a freely available, open-source command line tool for analyzing compatibility of applications you want to run on Graviton-based compute environments. It provides a report that highlights missing or outdated libraries, and code, that you may need to update in order to port your application to run on Graviton processors.

Runtime management controls for AWS Lambda: Automated feature updates, performance improvements, and security patches to runtime environments for Lambda functions is popular with many customers. However, some customers have asked for increased visibility into when these updates occur, and control over when they’re applied. The new runtime management controls for Lambda provide optional capabilities for those customers that require more control over runtime changes. The new controls are optional; by default, all your Lambda functions will continue to receive automatic updates. But, if you wish, you can now apply a runtime management configuration with your functions that specifies how you want updates to be applied. You can find full details on the new runtime management controls in this blog post on the AWS Compute Blog.

General availability of Amazon OpenSearch Serverless: OpenSearch Serverless was one of the livestream segments in the recent AWS on Air re:Invent Recap of previews that were announced at the conference last December. OpenSearch Serverless is now generally available. As a serverless option for Amazon OpenSearch Service, it removes the need to configure, manage, or scale OpenSearch clusters, offering automatic provisioning and scaling of resources to enable fast ingestion and query responses.

Additional connectors for Amazon AppFlow: At AWS re:Invent 2023, I blogged about a release of new data connectors enabling data transfer from a variety of Software-as-a-Service (SaaS) applications to Amazon AppFlow. An additional set of 10 connectors, enabling connectivity from Asana, Google Calendar, JDBC, PayPal, and more, are also now available. Check out the full list of additional connectors launched this past week in this What’s New post.

AWS open-source news and updates: As usual, there’s a new edition of the weekly open-source newsletter highlighting new open-source projects, tools, and demos from the AWS Community. Read edition #143 here – LINK TBD.

For a full list of AWS announcements, be sure to keep an eye on the What’s New at AWS page.

Upcoming AWS Events
Check your calendars and sign up for these AWS events:

AWS Innovate Data and AI/ML edition: AWS Innovate is a free online event to learn the latest from AWS experts and get step-by-step guidance on using AI/ML to drive fast, efficient, and measurable results.

  • AWS Innovate Data and AI/ML edition for Asia Pacific and Japan is taking place on February 22, 2023. Register here.
  • Registrations for AWS Innovate EMEA (March 9, 2023) and the Americas (March 14, 2023) will open soon. Check the AWS Innovate page for updates.

You can find details on all upcoming events, in-person or virtual, here.

And finally, if you’re a .NET developer, my team will be at Swetugg, in Sweden, February 8-9, and DeveloperWeek, Oakland, California, February 15-17. If you’re in the vicinity at these events, be sure to stop by and say hello!

That’s all for this week. Check back next Monday for another Week in Review!

This post is part of our Week in Review series. Check back each week for a quick roundup of interesting news and announcements from AWS!

Now Open — AWS Asia Pacific (Melbourne) Region in Australia

Post Syndicated from Donnie Prakoso original https://aws.amazon.com/blogs/aws/now-open-aws-asia-pacific-melbourne-region-in-australia/

Following up on Jeff’s post on the announcement of the Melbourne Region, today I’m pleased to share the general availability of the AWS Asia Pacific (Melbourne) Region with three Availability Zones and API name ap-southeast-4.

The AWS Asia Pacific (Melbourne) Region is the second infrastructure Region in Australia, in addition to the Asia Pacific (Sydney) Region, and 12th the twelfth Region in Asia Pacific, joining existing Rregions in Singapore, Tokyo, Seoul, Mumbai, Hong Kong, Osaka, Jakarta, Hyderabad, Sydney, and Mainland China Beijing and Ningxia Regions.

Melbourne city historic building: Flinders Street Station built of yellow sandstone

AWS in Australia: Long-Standing History
In November 2012, AWS established a presence in Australia with the AWS Asia Pacific (Sydney) Region. Since then, AWS has provided continuous investments in infrastructure and technology to help drive digital transformations in Australia, to support hundreds of thousands of active customers each month.

Amazon CloudFront — Amazon CloudFront is a content delivery network (CDN) service built for high performance, security, and developer convenience that was first launched in Australia alongside Asia Pacific (Sydney) Region in 2012. To further accelerate the delivery of static and dynamic web content to end users in Australia, AWS announced additional CloudFront locations for Sydney and Melbourne in 2014. In addition, AWS also announced a Regional Edge Cache in 2016 and an additional CloudFront point of presence (PoP) in Perth in 2018. CloudFront points of presence ensure popular content can be served quickly to your viewers. Regional Edge Caches are positioned (network-wise) between the CloudFront locations and the origin and further help to improve content performance. AWS currently has seven edge locations and one Regional Edge Cache location in Australia.

AWS Direct Connect — As with CloudFront, the first AWS Direct Connect location was made available with Asia Pacific (Sydney) Region launch in 2012. To continue helping our customers in Australia improve application performance, secure data, and reduce networking costs, AWS announced the opening of additional Direct Connect locations in Sydney (2014), Melbourne (2016), Canberra (2017), Perth (2017), and an additional location in Sydney (2022), totaling six locations.

AWS Local Zones — To help customers run applications that require single-digit millisecond latency or local data processing, customers can use AWS Local Zones. They bring AWS infrastructure (compute, storage, database, and other select AWS services) closer to end users and business centers. AWS customers can run workloads with low latency requirements on the AWS Local Zones location in Perth while seamlessly connecting to the rest of their workloads running in AWS Regions.

Upskilling Local Developers, Students, and Future IT Leaders
Digital transformation will not happen on its own. AWS runs various programs and has trained more than 200,000 people across Australia with cloud skills since 2017. There is an additional goal to train more than 29 million people globally with free cloud skills by 2025. Here’s a brief description of related programs from AWS:

  • AWS re/Start is a digital skills training program that prepares unemployed, underemployed, and transitioning individuals for careers in cloud computing and connects students to potential employers.
  • AWS Academy provides higher education institutions with a free, ready-to-teach cloud computing curriculum that prepares students to pursue industry-recognized certifications and in-demand cloud jobs.
  • AWS Educate provides students with access to AWS services. AWS is also collaborating with governments, educators, and the industry to help individuals, both tech and nontech workers, build and deepen their digital skills to nurture a workforce that can harness the power of cloud computing and advanced technologies.
  • AWS Industry Quest is a game-based training initiative designed to help professionals and teams learn and build vital cloud skills and solutions. At re:Invent 2022, AWS announced the first iteration of the program for the financial services sector. National Australia Bank (NAB) is AWS Industry Quest: Financial Services’ first beta customer globally. Through AWS Industry Quest, NAB has trained thousands of colleagues in cloud skills since 2018, resulting in more than 4,500 industry-recognized certifications.

In addition to the above programs, AWS is also committed to supporting Victoria’s local tech community through digital upskilling, community initiatives, and partnerships. The Victorian Digital Skills is a new program from the Victorian Government that helps create a new pipeline of talent to meet the digital skills needs of Victorian employers. AWS has taken steps to help solve the retraining challenge by supporting the Victorian Digital Skills Program, which enables mid-career Victorians to reskill on technology and gain access to higher-paying jobs.

The Climate Pledge
Amazon is committed to investing and innovating across its businesses to help create a more sustainable future. With The Climate Pledge, Amazon is committed to reaching net-zero carbon across its business by 2040 and is on a path to powering its operations with 100 percent renewable energy by 2025.

As of May 2022, two projects in Australia are operational. Amazon Solar Farm Australia – Gunnedah and Amazon Solar Farm Australia – Suntop will aim to generate 392,000 MWh of renewable energy each year, equal to the annual electricity consumption of 63,000 Australian homes. Once Amazon Wind Farm Australia – Hawkesdale also becomes operational, it will boost the projects’ combined yearly renewable energy generation to 717,000 MWh, or enough for nearly 115,000 Australian homes.

AWS Customers in Australia
We have customers in Australia that are doing incredible things with AWS, for example:

National Australia Bank Limited (NAB)
NAB is one of Australia’s largest banks and Australia’s largest business bank. “We have been exploring the potential use cases with AWS since the announcement of the AWS Asia Pacific (Melbourne) Region,” said Steve Day, Chief Technology Officer at NAB.

Locating key banking applications and critical workloads geographically close to their compute platform and the bulk of their corporate workforce will provide lower latency benefits. Moreover, it will simplify their disaster recovery plans. With AWS Asia Pacific (Melbourne) Region, it will also accelerate their strategy to move 80 percent of applications to the cloud by 2025.

Littlepay
This Melbourne-based financial technology company works with more than 250 transport and mobility providers to enable contactless payments on local buses, city networks, and national public transport systems.

“Our mission is to create a universal payment experience around the world, which requires world-class global infrastructure that can grow with us,” said Amin Shayan, CEO at Littlepay. “To drive a seamless experience for our customers, we ingest and process over 1 million monthly transactions in real time using AWS, which enables us to generate insights that help us improve our services. We are excited about the launch of a second AWS Region in Australia, as it gives us access to advanced technologies, like machine learning and artificial intelligence, at a lower latency to help make commuting a simpler and more enjoyable experience.”

Royal Melbourne Institute of Technology (RMIT)
RMIT is a global university of technology, design, and enterprise with more than 91,000 students and 11,000 staff around the world.

“Today’s launch of the AWS Region in Melbourne will open up new ways for our researchers to drive computational engineering and maximize the scientific return,” said Professor Calum Drummond, Deputy Vice-Chancellor and Vice-President, Research and Innovation, and Interim DVC, STEM College, at RMIT.

“We recently launched RMIT University’s AWS Cloud Supercomputing facility (RACE) for RMIT researchers, who are now using it to power advances into battery technologies, photonics, and geospatial science. The low latency and high throughput delivered by the new AWS Region in Melbourne, combined with our 400 Gbps-capable private fiber network, will drive new ways of innovation and collaboration yet to be discovered. We fundamentally believe RACE will help truly democratize high-performance computing capabilities for researchers to run their datasets and make faster discoveries.”

Australian Bureau of Statistics (ABS)
ABS holds the Census of Population and Housing every five years. It is the most comprehensive snapshot of Australia, collecting data from around 10 million households and more than 25 million people.

“In this day and age, people expect a fast and simple online experience when using government services,” said Bindi Kindermann, program manager for 2021 Census Field Operations at ABS. “Using AWS, the ABS was able to scale and securely deliver services to people across the country, making it possible for them to quickly and easily participate in this nationwide event.”

With the success of the 2021 Census, the ABS is continuing to expand its use of AWS into broader areas of its business, making use of the security, reliability, and scalability of the cloud.

You can find more inspiring stories from our customers in Australia by visiting Customer Success Stories page.

Things to Know
AWS User Groups in Australia — Australia is also home to 9 AWS Heroes, 43 AWS Community Builders and community members of 17 AWS User Groups in various cities in Australia. Find an AWS User Group near you to meet and collaborate with fellow developers, participate in community activities and share your AWS knowledge.

AWS Global Footprint — With this launch, AWS now spans 99 Availability Zones within 31 geographic Regions around the world. We have also announced plans for 12 more Availability Zones and 4 more AWS Regions in Canada, Israel, New Zealand, and Thailand.

Available Now — The new Asia Pacific (Melbourne) Region is ready to support your business, and you can find a detailed list of the services available in this Region on the AWS Regional Services List.

To learn more, please visit the Global Infrastructure page, and start building on ap-southeast-4!

Happy building!

Donnie

AWS Week in Review – January 23, 2023

Post Syndicated from Jeff Barr original https://aws.amazon.com/blogs/aws/aws-week-in-review-january-23-2023/

Welcome to my first AWS Week in Review of 2023. As usual, it has been a busy week, so let’s dive right in:

Last Week’s Launches
Here are some launches that caught my eye last week:

Amazon Connect – You can now deliver long lasting, persistent chat experiences for your customers, with the ability to resume previous conversations including context, metadata, and transcripts. Learn more.

Amazon RDS for MariaDB – You can now enforce the use of encrypted (SSL/TLS) connections to your databases instances that are running Amazon RDS for MariaDB. Learn more.

Amazon CloudWatch – You can now use Metric Streams to send metrics across AWS accounts on a continuous, near real-time basis, within a single AWS Region. Learn more.

AWS Serverless Application Model – You can now run CloudFormation Linter from the SAM CLI to validate your SAM templates. The default rules check template size, Fn:GetAtt parameters, Fn:If syntax, and more. Learn more.

EC2 Auto Scaling – You can now see (and take advantage of) recommendations for activating a predictive scaling policy to optimize the capacity of your Auto Scaling groups. Recommendations can make use of up to 8 weeks of past date; learn more.

Service Limit Increases – Service limits for several AWS services were raised, and other services now have additional quotas that can be raised upon request:

X In Y – Existing AWS services became available in additional regions:

Other AWS News
Here are some other news items and blog posts that may be of interest to you:

AWS Open Source News and Updates – My colleague Ricardo Sueiras highlights the latest open source projects, tools, and demos from the open source community around AWS. Read edition #142 here.

AWS Fundamentals – This new book is designed to teach you about AWS in a real-world context. It covers the fundamental AWS services (compute, database, networking, and so forth), and helps you to make use of Infrastructure as Code using AWS CloudFormation, CDK, and Serverless Framework. As an add-on purchase you can also get access to a set of gorgeous, high-resolution infographics.

Upcoming AWS Events
Check your calendars and sign up for these AWS events:

AWS on Air – Every Friday at Noon PT we discuss the latest news and go in-depth on several of the most recent launches. Learn more.

#BuildOnLiveBuild On AWS Live events are a series of technical streams on twitch.tv/aws that focus on technology topics related to challenges hands-on practitioners face today:

  • Join the Build On Live Weekly show about the cloud, the community, the code, and everything in between, hosted by AWS Developer Advocates. The show streams every Thursday at 9:00 PT on twitch.tv/aws.
  • Join the new The Big Dev Theory show, co-hosted with AWS partners, discussing various topics such as data and AI, AIOps, integration, and security. The show streams every Tuesday at 8:00 PT on twitch.tv/aws.

Check the AWS Twitch schedule for all shows.

AWS Community DaysAWS Community Day events are community-led conferences that deliver a peer-to-peer learning experience, providing developers with a venue to acquire AWS knowledge in their preferred way: from one another.

AWS Innovate Data and AI/ML edition – AWS Innovate is a free online event to learn the latest from AWS experts and get step-by-step guidance on using AI/ML to drive fast, efficient, and measurable results.

  • AWS Innovate Data and AI/ML edition for Asia Pacific and Japan is taking place on February 22, 2023. Register here.
  • Registrations for AWS Innovate EMEA (March 9, 2023) and the Americas (March 14, 2023) will open soon. Check the AWS Innovate page for updates.

You can browse all upcoming in-person and virtual events.

And that’s all for this week!

Jeff;

New – Bring ML Models Built Anywhere into Amazon SageMaker Canvas and Generate Predictions

Post Syndicated from Antje Barth original https://aws.amazon.com/blogs/aws/new-bring-ml-models-built-anywhere-into-amazon-sagemaker-canvas-and-generate-predictions/

Amazon SageMaker Canvas provides business analysts with a visual interface to solve business problems using machine learning (ML) without writing a single line of code. Since we introduced SageMaker Canvas in 2021, many users have asked us for an enhanced, seamless collaboration experience that enables data scientists to share trained models with their business analysts with a few simple clicks.

Today, I’m excited to announce that you can now bring ML models built anywhere into SageMaker Canvas and generate predictions.

New – Bring Your Own Model into SageMaker Canvas
As a data scientist or ML practitioner, you can now seamlessly share models built anywhere, within or outside Amazon SageMaker, with your business teams. This removes the heavy lifting for your engineering teams to build a separate tool or user interface to share ML models and collaborate between the different parts of your organization. As a business analyst, you can now leverage ML models shared by your data scientists within minutes to generate predictions.

Let me show you how this works in practice!

In this example, I share an ML model that has been trained to identify customers that are potentially at risk of churning with my marketing analyst. First, I register the model in the SageMaker model registry. SageMaker model registry lets you catalog models and manage model versions. I create a model group called 2022-customer-churn-model-group and then select Create model version to register my model.

Amazon SageMaker Model Registry

To register your model, provide the location of the inference image in Amazon ECR, as well as the location of your model.tar.gz file in Amazon S3. You can also add model endpoint recommendations and additional model information. Once you’ve registered your model, select the model version and select Share.

Amazon SageMaker Studio - Share models from model registry with SageMaker Canvas users

You can now choose the SageMaker Canvas user profile(s) within the same SageMaker domain you want to share your model with. Then, provide additional model details, such as information about training and validation datasets, the ML problem type, and model output information. You can also add a note for the SageMaker Canvas users you share the model with.

Amazon SageMaker Studio - Share a model from Model Registry with SageMaker Canvas users

Similarly, you can now also share models trained in SageMaker Autopilot and models available in SageMaker JumpStart with SageMaker Canvas users.

The business analysts will receive an in-app notification in SageMaker Canvas that a model has been shared with them, along with any notes you added.

Amazon SageMaker Canvas - Received model from SageMaker Studio

My marketing analyst can now open, analyze, and start using the model to generate ML predictions in SageMaker Canvas.

Amazon SageMaker Canvas - Imported model from SageMaker Studio

Select Batch prediction to generate ML predictions for an entire dataset or Single prediction to create predictions for a single input. You can download the results in a .csv file.

Amazon SageMaker Canvas - Generate Predictions

New – Improved Model Sharing and Collaboration from SageMaker Canvas with SageMaker Studio Users
We also improved the sharing and collaboration capabilities from SageMaker Canvas with data science and ML teams. As a business analyst, you can now select which SageMaker Studio user profile(s) you want to share your standard-build models with.

Your data scientists or ML practitioners will receive a similar in-app notification in SageMaker Studio once a model has been shared with them, along with any notes from you. In addition to just reviewing the model, SageMaker Studio users can now also, if needed, update the data transformations in SageMaker Data Wrangler, retrain the model in SageMaker Autopilot, and share back the updated model. SageMaker Studio users can also recommend an alternate model from the list of models in SageMaker Autopilot.

Once SageMaker Studio users share back a model, you receive another notification in SageMaker Canvas that an updated model has been shared back with you. This collaboration between business analysts and data scientists will help democratize ML across organizations by bringing transparency to automated decisions, building trust, and accelerating ML deployments.

Now Available
The enhanced, seamless collaboration capabilities for Amazon SageMaker Canvas, including the ability to bring your ML models built anywhere, are available today in all AWS Regions where SageMaker Canvas is available with no changes to the existing SageMaker Canvas pricing.

Start collaborating and bring your ML model to Amazon SageMaker Canvas today!

— Antje

Heads-Up: Amazon S3 Security Changes Are Coming in April of 2023

Post Syndicated from Jeff Barr original https://aws.amazon.com/blogs/aws/heads-up-amazon-s3-security-changes-are-coming-in-april-of-2023/

Starting in April of 2023 we will be making two changes to Amazon Simple Storage Service (Amazon S3) to put our latest best practices for bucket security into effect automatically. The changes will begin to go into effect in April and will be rolled out to all AWS Regions within weeks.

Once the changes are in effect for a target Region, all newly created buckets in the Region will by default have S3 Block Public Access enabled and access control lists (ACLs) disabled. Both of these options are already console defaults and have long been recommended as best practices. The options will become the default for buckets that are created using the S3 API, S3 CLI, the AWS SDKs, or AWS CloudFormation templates.

As a bit of history, S3 buckets and objects have always been private by default. We added Block Public Access in 2018 and the ability to disable ACLs in 2021 in order to give you more control, and have long been recommending the use of AWS Identity and Access Management (IAM) policies as a modern and more flexible alternative.

In light of this change, we recommend a deliberate and thoughtful approach to the creation of new buckets that rely on public buckets or ACLs, and believe that most applications do not need either one. If your application turns out be one that does, then you will need to make the changes that I outline below (be sure to review your code, scripts, AWS CloudFormation templates, and any other automation).

What’s Changing
Let’s take a closer look at the changes that we are making:

S3 Block Public Access – All four of the bucket-level settings described in this post will be enabled for newly created buckets:

A subsequent attempt to set a bucket policy or an access point policy that grants public access will be rejected with a 403 Access Denied error. If you need public access for a new bucket you can create it as usual and then delete the public access block by calling DeletePublicAccessBlock (you will need s3:PutBucketPublicAccessBlock permission in order to call this function; read Block Public Access to learn more about the functions and the permissions).

ACLs Disabled – The Bucket owner enforced setting will be enabled for newly created buckets, making bucket ACLs and object ACLs ineffective, and ensuring that the bucket owner is the object owner no matter who uploads the object. If you want to enable ACLs for a bucket, you can set the ObjectOwnership parameter to ObjectWriter in your CreateBucket request or you can call DeleteBucketOwnershipControls after you create the bucket. You will need s3:PutBucketOwnershipControls permission in order to use the parameter or to call the function; read Controlling Ownership of Objects and Creating a Bucket to learn more.

Stay Tuned
We will publish an initial What’s New post when we start to deploy this change and another one when the deployment has reached all AWS Regions. You can also run your own tests to detect the change in behavior.

Jeff;

Introducing Amazon GameLift Anywhere – Run Your Game Servers on Your Own Infrastructure

Post Syndicated from Channy Yun original https://aws.amazon.com/blogs/aws/introducing-amazon-gamelift-anywhere-run-your-game-servers-on-your-own-infrastructure/

In 2016, we launched Amazon GameLift, a dedicated hosting solution that securely deploys and automatically scales fleets of session-based multiplayer game servers to meet worldwide player demand.

With Amazon GameLift, you can create and upload a game server build once, replicate, and then deploy across multiple AWS Regions and AWS Local Zones to reach your players with low-latency experiences across the world. GameLift also includes standalone features for low-cost game fleets with GameLift FleetIQ and player matchmaking with GameLift FlexMatch.

Game developers asked us to reduce the wait time to deploy a candidate server build to the cloud each time they needed to test and iterate their game during the development phase. In addition, our customers told us that they often have ongoing bare-metal contracts or on-premises game servers and want the flexibility to use their existing infrastructure with cloud servers.

Today we are announcing the general availability of Amazon GameLift Anywhere, which decouples game session management from the underlying compute resources. With this new release, you can now register and deploy any hardware, including your own local workstations, under a logical construct called an Anywhere Fleet.

Because your local hardware can now be a GameLift-managed server, you can iterate on the server build in your familiar local desktop environment, and any server error can materialize in seconds. You can also set breakpoints in your environment’s debugger, thereby eliminating trial and error and further speeding up the iteration process.

Here are the major benefits for game developers to use GameLift Anywhere.

  • Faster game development – Instantly test and iterate on your local workstation while still leveraging GameLift FlexMatch and Queue services.
  • Hybrid server management – Deploy, operate, and scale dedicated game servers hosted in the cloud or on-premises, all from a single location.
  • Streamline server operations – Reduce cost and operational complexity by unifying server infrastructure under a single game server orchestration layer.

During the beta period of GameLift Anywhere, lots of customers gave feedback. For example, Nitro Games has been an Amazon GameLift customer since 2020 and have used the service for player matchmaking and managing dedicated game servers in the cloud. Daniel Liljeqvist, Senior DevOps Engineer at Nitro Games said “With GameLift Anywhere we can easily debug a game server on our local machine, saving us time and making the feedback loop much shorter when we are developing new games and features.”

GameLift Anywhere resources such as locations, fleets, and compute are managed through the same highly secure AWS API endpoints as all AWS services. This also applies to generating the authentication tokens for game server processes that are only valid for a limited amount of time for additional security. You can leverage AWS Identity and Access Management (AWS IAM) roles and policies to fully manage access to all the GameLift Anywhere endpoints.

Getting Started with GameLift Anywhere
Before creating your GameLift fleet in your local hardware, you can create custom locations to run your game builds or scripts. Choose Locations in the left navigation pane of the GameLift console and select Create location.

You can create a custom location of your hardware that you can use with your GameLift Anywhere fleet to test your games.

Choose Fleets from the left navigation pane, then choose Create fleet to add your GameLift Anywhere fleet in the desired location.

Choose Anywhere on the Choose compute type step.

Define your fleet details, such as a fleet name and optional items. For more information on settings, see Create a new GameLift fleet in the AWS documentation.

On the Select locations step, select the custom location that you created. The home AWS Region is automatically selected as the Region you are creating the fleet in. You can use the home Region to access and use your resources.

After completing the fleet creation steps to create your Anywhere fleet, you can see active fleets in both the managed EC2 instances and the Anywhere location. You also can integrate remote on-premises hardware by adding more GameLift Anywhere locations, so you can manage your game sessions from one place. To learn more, see Create a new GameLift fleet in the AWS documentation.

You can register your laptop as a compute resource in the fleet that you created. Use the fleet-id created in the previous step and add a compute-name and your laptop’s ip-address.

$ aws gamelift register-compute \
    --compute-name ChannyDevLaptop \
    --fleet-id fleet-12345678-abcdefghi \
    --ip-address 10.1.2.3

Now, you can start a debug session of your game server by retrieving the authorization token for your laptop in the fleet that you created.

$ aws gamelift get-compute-auth-token \
    --fleet-id fleet-12345678-abcdefghi \
    --compute-name ChannyDevLaptop

To run a debug instance of your game server executable, your game server must call InitSDK(). After the process is ready to host a game session, the game server calls ProcessReady(). To learn more, see Integrating games with custom game servers and Testing your integration in the AWS documentation.

Now Available
Amazon GameLift Anywhere is available in all Regions where Amazon GameLift is available.  GameLift offers a step-by-step developer guide, API reference guide, and GameLift SDKs. You can also see for yourself how easy it is to test Amazon GameLift using our sample game to get started.

Give it a try, and please send feedback to AWS re:Post for Amazon GameLift or through your usual AWS support contacts.

Channy

Announcing Amazon CodeCatalyst (preview), a Unified Software Development Service

Post Syndicated from Steve Roberts original https://aws.amazon.com/blogs/aws/announcing-amazon-codecatalyst-preview-a-unified-software-development-service/

Today, we announced the preview release of Amazon CodeCatalyst. A unified software development and delivery service, Amazon CodeCatalyst enables software development teams to quickly and easily plan, develop, collaborate on, build, and deliver applications on AWS, reducing friction throughout the development lifecycle.

In my time as a developer the biggest excitement—besides shipping software to users—was the start of a new project, or being invited to join a project. Both came with the anticipation of building something cool, cutting new code—seeing an idea come to life. However, starting out was sometimes a slow process. My team or I would need to update our local development environments—or entirely new machines—with tools, libraries, and programming frameworks. We had to create source code repositories and set up other shared tools such as Jira, Confluence, or Jenkins, configure build pipelines and other automation workflows, create test environments, and so on. Day-to-day maintenance of development and build environments consumed valuable team cycles and energy. Collaboration between the team took effort, too, because tools to share information and have a single source of truth were not available. Context switching between projects and dealing with conflicting dependencies in those projects, e.g., Python 3.6 for project X and Python 2.7 for project Y—especially when we had only a single machine to work on—further increased the burden.

It doesn’t seem to have gotten any better! These days, when talking to developers about their experiences, I often hear them express that they feel modern development has become even more complicated. This is due to having to select and configure a wider collection of modern frameworks and libraries, tools, cloud services, continuous integration and delivery pipelines, and many other choices that all need to work together to deliver the application experience. What was once manageable by one developer on one machine is now a sprawling, dynamic, complex net of decisions and tradeoffs, made even more challenging by the need to coordinate all this across dispersed teams.

Enter Amazon CodeCatalyst
I’ve spent some time talking with the team behind Amazon CodeCatalyst about their sources of inspiration and goals. Taking feedback from both new and experienced developers and service teams here at AWS, they examined the challenges typically experienced by teams and individual developers when building software for the cloud. Having gathered and reviewed this feedback, they set about creating a unified tool that smooths out the rough edges that needlessly slow down software delivery, and they added features to make it easier for teams to work together and collaborate. Features in Amazon CodeCatalyst to address these challenges include:

  • Blueprints that set up the project’s resources—not just scaffolding for new projects, but also the resources needed to support software delivery and deployment.
  • On-demand cloud-based Dev Environments, to make it easy to replicate consistent development environments for you or your teams.
  • Issue management, enabling tracing of changes across commits, pull requests, and deployments.
  • Automated build and release (CI/CD) pipelines using flexible, managed build infrastructure.
  • Dashboards to surface a feed of project activities such as commits, pull requests, and test reporting.
  • The ability to invite others to collaborate on a project with just an email.
  • Unified search, making it easy to find what you’re looking for across users, issues, code and other project resources.

There’s a lot in Amazon CodeCatalyst that I don’t have space to cover in this post, so I’m going to briefly cover some specific features, like blueprints, Dev Environments, and project collaboration. Other upcoming posts will cover additional features.

Project Blueprints
When I first heard about blueprints, they sounded like a feature to scaffold some initial code for a project. However, they’re much more! Parameterized application blueprints enable you to set up shared project resources to support the application development lifecycle and team collaboration in minutes—not just initial starter code for an application. The resources that a blueprint creates for a project include a source code repository, complete with initial sample code and AWS service configuration for popular application patterns, which follow AWS best practices by default. If you prefer, an external Git repository such as GitHub may be used instead. The blueprint can also add an issue tracker, but external trackers such as Jira can also be used. Then, the blueprint adds a build and release pipeline for CI/CD, which I’ll come to shortly, as well as other integrated tooling.

The project resources and integrated tools set up using blueprints, including the CI/CD pipeline and the AWS resources to host your application, make it so that you can press “deploy” and get sample code running in a few minutes, enabling you to jump right in and start working on your specific business logic.

Project blueprints when starting a new project

At launch, customers can choose from blueprints with Typescript, Python, Java, .NET, Javascript for languages and React, Angular, and Vue frameworks, with more to come. And you don’t need to start with a blueprint. You can build projects with workflows that run on anything that works with Linux and Windows operating systems.

Cloud-Based Dev Environments
Development teams can often run into a problem of “environment drift” where one team member has a slightly different version of a toolchain or library compared to everyone else or the test environments. This can introduce subtle bugs that might go unnoticed for some time. Dev Environment specifications, and the other shared resources, that blueprints create help ensure there’s no unnecessary variance, and everyone on the team gets the same setup to provide a consistent, repeatable experience between developers.

Amazon CodeCatalyst uses a devfile to define the configuration of an on-demand, cloud-based Dev Environment, which currently supports four resizable instance size options with 2, 4, 8, or 16 vCPUs. The devfile defines and configures all of the resources needed to code, test, and debug for a given project, minimizing the time the development team members need to spend on creating and maintaining their local development environments. Devfiles, which are added to the source code repository by the selected blueprint can also be modified if required. With Dev Environments, context switching between projects incurs less overhead—with one click, you can simply switch to a different environment, and you’re ready to start working. This means you’re easily able to work concurrently on multiple codebases without reconfiguring. Being on-demand, Dev Environments can also be paused, restarted, or deleted as needed.

Below is an example of a devfile that bootstraps a Dev Environment.

schemaVersion: 2.0.0
metadata:
  name: aws-universal
  version: 1.0.1
  displayName: AWS Universal
  description: Stack with AWS Universal Tooling
  tags:
    - aws
    - a12
  projectType: aws
commands:
  - id: npm_install
    exec:
      component: aws-runtime
      commandLine: "npm install"
      workingDir: /projects/spa-app
events:
  postStart:
    - npm_install
components:
  - name: aws-runtime
    container:
      image: public.ecr.aws/aws-mde/universal-image:latest
      mountSources: true
      volumeMounts:
        - name: docker-store
          path: /var/lib/docker
  - name: docker-store
    volume:
      size: 16Gi

Developers working in cloud-based Dev Environments provisioned by Amazon CodeCatalyst can use AWS Cloud9 as their IDE. However, they can just as easily work with Amazon CodeCatalyst from other IDEs on their local machines, such as JetBrains IntelliJ IDEA Ultimate, PyCharm Pro, GoLand, and Visual Studio Code. Developers can also create Dev Environments from within their IDE, such as Visual Studio Code or for JetBrains using the JetBrains Gateway app. Below, JetBrains IntelliJ is being used.

Editing an application source file in JetBrains IntelliJ

Build and Release Pipelines
The build and release pipeline created by the blueprint run on flexible, managed infrastructure. The pipelines can use on-demand compute or preprovisioned builds, including a choice of machine sizes, and you can bring your own container environments. You can incorporate build actions that are built in or provided by partners (e.g., Mend, which provides a software composition analysis build action), and you can also incorporate GitHub Actions to compose fully automated pipelines. Pipelines are configurable using either a visual editor or YAML files.

Build and release pipelines enable deployment to popular AWS services, including Amazon Elastic Container Service (Amazon ECS), AWS Lambda, and Amazon Elastic Compute Cloud (Amazon EC2). Amazon CodeCatalyst makes it trivial to set up test and production environments and deploy using pipelines to one or many Regions or even multiple accounts for security.

Running automated workflow

Project Collaboration
As a unified software development service, Amazon CodeCatalyst not only makes it easier to get started building and delivering applications on AWS, it helps developers of all levels collaborate on projects through a single shared project space and source of truth. Developers can be invited to collaborate using just an email. On accepting the invitation, the developer sees the full project context and can begin work at once using the project’s Dev Environments—no need to spend time updating or reconfiguring their local machine with required tools, libraries, or other pre-requisites.

Existing members of an Amazon CodeCatalyst space, or new members using their email, can be invited to collaborate on a project:

Inviting new members to collaborate on a project

Each will receive an invitation email containing a link titled Accept Invitation, which when clicked, opens a browser tab to sign in. Once signed in, they can view all the projects in the Amazon CodeCatalyst space they’ve been invited to and can also quickly switch to other spaces in which they are the owner or to which they’ve been invited.

Projects I'm invited to collaborate on

From there, they can select a project and get an immediate overview of where things stand, for example, the status of recent workflows, any open pull requests, and available Dev Environments.

CodeCatalyst project summary

On the Issues board, team members can see which issues need to be worked on, select one, and get started.

Viewing issues

Being able to immediately see the context for the project, and have access to on-demand cloud-based Dev Environments, all help with being able to start contributing more quickly, eliminating setup delays.

Get Started with Amazon CodeCatalyst in the Free Tier Today!
Blueprints to scaffold not just application code but also shared project resources supporting the development and deployment of applications, issue tracking, invite-by-email collaboration, automated workflows, and more are all available today in the newly released preview of Amazon CodeCatalyst to help accelerate your cloud development and delivery efforts. Learn more in the Amazon CodeCatalyst User Guide. And, as I mentioned earlier, additional blogs posts and other supporting content are planned by the team to dive into the range of features in more detail, so be sure to look out for them!

Step Functions Distributed Map – A Serverless Solution for Large-Scale Parallel Data Processing

Post Syndicated from Sébastien Stormacq original https://aws.amazon.com/blogs/aws/step-functions-distributed-map-a-serverless-solution-for-large-scale-parallel-data-processing/

I am excited to announce the availability of a distributed map for AWS Step Functions. This flow extends support for orchestrating large-scale parallel workloads such as the on-demand processing of semi-structured data.

Step Function’s map state executes the same processing steps for multiple entries in a dataset. The existing map state is limited to 40 parallel iterations at a time. This limit makes it challenging to scale data processing workloads to process thousands of items (or even more) in parallel. In order to achieve higher parallel processing prior to today, you had to implement complex workarounds to the existing map state component.

The new distributed map state allows you to write Step Functions to coordinate large-scale parallel workloads within your serverless applications. You can now iterate over millions of objects such as logs, images, or .csv files stored in Amazon Simple Storage Service (Amazon S3). The new distributed map state can launch up to ten thousand parallel workflows to process data.

You can process data by composing any service API supported by Step Functions, but typically, you will invoke Lambda functions to process the data with code written in your favorite programming language.

Step Functions distributed map supports a maximum concurrency of up to 10,000 executions in parallel, which is well above the concurrency supported by many other AWS services. You can use the maximum concurrency feature of the distributed map to ensure that you do not exceed the concurrency of a downstream service. There are two factors to consider when working with other services. First, the maximum concurrency supported by the service for your account. Second, the burst and ramping rates, which determine how quickly you can achieve the maximum concurrency.

Let’s use Lambda as an example. Your functions’ concurrency is the number of instances that serve requests at a given time. The default maximum concurrency quota for Lambda is 1,000 per AWS Region. You can ask for an increase at any time. For an initial burst of traffic, your functions’ cumulative concurrency in a Region can reach an initial level of between 500 and 3000, which varies per Region. The burst concurrency quota applies to all your functions in the Region.

When using a distributed map, be sure to verify the quota on downstream services. Limit the distributed map maximum concurrency during your development, and plan for service quota increases accordingly.

To compare the new distributed map with the original map state flow, I created this table.

Original map state flow New distributed map flow
Sub workflows
  • Runs a sub-workflow for each item in an array. The array must be passed from the previous state.
  • Each iteration of the sub-workflow is called a map iteration, and its events are added to the state machine’s execution history.
  • Runs a sub-workflow for each item in an array or Amazon S3 dataset.
  • Each sub-workflow is run as a totally separate child execution, with its own event history.
Parallel branches Map iterations run in parallel, with an effective maximum concurrency of around 40 at a time. Can pass millions of items to multiple child executions, with concurrency of up to 10,000 executions at a time.
Input source Accepts only a JSON array as input. Accepts input as Amazon S3 object list, JSON arrays or files, csv files, or Amazon S3 inventory.
Payload 256 KB Each iteration receives a reference to a file (Amazon S3) or a single record from a file (state input). Actual file processing capability is limited by Lambda storage and memory.
Execution history 25,000 events Each iteration of the map state is a child execution, with up to 25,000 events each (express mode has no limit on execution history).

Sub-workflows within a distributed map work with both Standard workflows and the low-latency, short-duration Express Workflows.

This new capability is optimized to work with S3. I can configure the bucket and prefix where my data are stored directly from the distributed map configuration. The distributed map stops reading after 100 million items and supports JSON or csv files of up to 10GB.

When processing large files, think about downstream service capabilities. Let’s take Lambda again as an example. Each input—a file on S3, for example—must fit within the Lambda function execution environment in terms of temporary storage and memory. To make it easier to handle large files, Lambda Powertools for Python introduced a new streaming feature to fetch, transform, and process S3 objects with minimal memory footprint. This allows your Lambda functions to handle files larger than the size of their execution environment. To learn more about this new capability, check the Lambda Powertools documentation.

Let’s See It in Action
For this demo, I will create a workflow that processes one thousand dog images stored on S3. The images are already stored on S3.

➜  ~ aws s3 ls awsnewsblog-distributed-map/images/
2022-11-08 15:03:36      27034 n02085620_10074.jpg
2022-11-08 15:03:36      34458 n02085620_10131.jpg
2022-11-08 15:03:36      12883 n02085620_10621.jpg
2022-11-08 15:03:36      34910 n02085620_1073.jpg
...

➜  ~ aws s3 ls awsnewsblog-distributed-map/images/ | wc -l
    1000

The workflow and the S3 bucket must be in the same Region.

To get started, I navigate to the Step Functions page of the AWS Management Console and select Create state machine. On the next page, I choose to design my workflow using the visual editor. The distributed map works with Standard workflows, and I keep the default selection as-is. I select Next to enter the visual editor.

Distributed Map - create a workflowIn the visual editor, I search and select the Map component on the left-side pane, and I drag it to the workflow area. On the right side, I configure the component. I choose Distributed as Processing mode and Amazon S3 as Item Source.

Distributed maps are natively integrated with S3. I enter the name of the bucket (awsnewsblog-distributed-map) and the prefix (images) where my images are stored.

On the Runtime Settings section, I choose Express for Child workflow type. I also may decide to restrict the Concurrency limit. It helps to ensure we operate within the concurrency quotas of the downstream services (Lambda in this demo) for a particular account or Region.

By default, the output of my sub-workflows will be aggregated as state output, up to 256KB. To process larger outputs, I may choose to Export map state results to Amazon S3.

Distributed Map - add a Lambda invocation

Finally, I define what to do for each file. In this demo, I want to invoke a Lambda function for each file in the S3 bucket. The function exists already. I search for and select the Lambda invocation action on the left-side pane. I drag it to the distributed map component. Then, I use the right-side configuration panel to select the actual Lambda function to invoke: AWSNewsBlogDistributedMap in this example.

Distributed Map - add a Lambda invocation

When I am done, I select Next. I select Next again on the Review generated code page (not shown here).

On the Specify state machine settings page, I enter a Name for my state machine and the IAM Permissions to run. Then, I select Create state machine.

Create State Machine - Final ScreenNow I am ready to start the execution. On the State machine page, I select the new workflow and select Start execution. I can optionally enter a JSON document to pass to the workflow. In this demo, the workflow does not handle the input data. I leave it as-is, and I select Start execution.

Start workflow execution Start workflow execution - pass input data

During the execution of the workflow, I can monitor the progress. I observe the number of iterations, and the number of items successfully processed or in error.

I can drill down on one specific execution to see the details.

Distributed Map - monitor execution details

With just a few clicks, I created a large-scale and heavily parallel workflow able to handle a very large quantity of data.

Which AWS Service Should I Use
As often happens on AWS, you might observe an overlap between this new capability and existing services such as AWS Glue, Amazon EMR, or Amazon S3 Batch Operations. Let’s try to differentiate the use cases.

In my mental model, data scientists and data engineers use AWS Glue and EMR to process large amounts of data. On the other hand, application developers will use Step Functions to add serverless data processing into their applications. Step Functions is able to scale from zero quickly, which makes it a good fit for interactive workloads where customers may be waiting for the results. Finally, system administrators and IT operation teams are likely to use Amazon S3 Batch Operations for single-step IT automation operations such as copying, tagging, or changing permissions on billions of S3 objects.

Pricing and Availability
AWS Step Functions’ distributed map is generally available in the following ten AWS Regions: US East (Ohio, N. Virginia), US West (Oregon), Asia Pacific (Singapore, Sydney, Tokyo), Canada (Central), and Europe (Frankfurt, Ireland, Stockholm).

The pricing model for the existing inline map state does not change. For the new distributed map state, we charge one state transition per iteration. Pricing varies between Regions, and it starts at $0.025 per 1,000 state transitions. When you process your data using express workflows, you are also charged based on the number of requests for your workflow and its duration. Again, prices vary between Regions, but they start at $1.00 per 1 million requests and $0.06 per GB-hour (prorated to 100ms).

For the same amount of iterations, you will observe a cost reduction when using the combination of the distributed map and standard workflows compared to the existing inline map. When you use express workflows, expect the costs to stay the same for more value with the distributed map.

I am really excited to discover what you will build using this new capability and how it will unlock innovation. Go start to build highly parallel serverless data processing workflows today!

— seb

AWS Marketplace Vendor Insights – Simplify Third-Party Software Risk Assessments

Post Syndicated from Sébastien Stormacq original https://aws.amazon.com/blogs/aws/aws-marketplace-vendor-insights-simplify-third-party-software-risk-assessments/

AWS Marketplace Vendor Insights is a new capability of AWS Marketplace. It simplifies third-party software risk assessments when procuring solutions from the AWS Marketplace.

It helps you to ensure that the third-party software continuously meets your industry standards by compiling security and compliance information, such as data privacy and residency, application security, and access control, in one consolidated dashboard.

As a security engineer, you may now complete third-party software risk assessment in a few days instead of months. You can now:

  • Quickly discover products in AWS Marketplace that meet your security and certification standards by searching for and accessing Vendor Insights profiles.
  • Access and download current and validated information, with evidence gathered from the vendors’ security tools and audit reports. Reports are available for download on AWS Artifact third-party reports (now available in preview).
  • Monitor your software’s security posture post-procurement and receive notifications for security and compliance events.

As a software vendor, you can now reduce the operational burden of responding to buyer requests for risk assessment information. It gives your customers a self-service access experience. You can now:

  • Build your product’s security profile by uploading your ISO 27001 or SOC2 Type 2 report and completing a software risk assessment with AWS Audit Manager.
  • Store and share your compliance reports such as ISO 27001 and SOC2 Type 2, using AWS Artifact third-party reports (preview).
  • View and approve your buyer requests for viewing security controls and compliance artifacts stored in Vendor Insights.

Let’s See It in Action
I want to procure a solution on the AWS Marketplace. But before purchasing the product, as a security engineer, I want to review its compliance. I navigate to the AWS Marketplace page of the AWS Management Console. I use the faceted search on the left side to select vendors that are ISO 27001 compliant.

AWS MArketplace vendor insights - faceted searchI select a product. On the Product Overview page, I select View assessment data on the top right side (not shown on the screenshot). Then, I can see the overview page, which shows the Security certification received and the Expiration date.

AWS MArketplace vendor insights - certification receivedI select the Security and compliance tab and see that I need to request access to see the detailed security and compliance information. I select the Request access button on the top right side to ask the vendor for access to their compliance documents.

AWS MArketplace vendor insights - request access part 1

On the next page, I fill in the Your information form with my details, and I select Request access.

AWS MArketplace vendor insights - request access part 2The Next Steps section details what will happen next. The seller will contact me to sign a nondisclosure agreement (NDA). The seller will notify AWS Marketplace when the NDA is signed. Then, I will be granted access to Vendor Insights data.

The process can take a few days. For this demo, I switch to a fictional product—Everest—for which I have access to the compliance data. Here is the Security and compliance tab when my request for access is accepted.

The Summary section shows how many controls are available. It reports how many have been validated with evidence and how many have been self-reported by the seller. It also shows how many noncompliant controls are reported.

I can scroll down the page to see the details for multiple categories: Audit, compliance and security policy, Data security, Access management, Application security, Risk management and incident response, Business resiliency and continuity, End user device security, Infrastructure security, Human resources, and Security and configuration policy. The screenshot does not show all of them.

AWS Marketplace vendor insights - security and complianceI select the detail for Access control and see the list under Control name. For each of them, I can see the compliance for SOC2 Type 2, ISO 27001, and the Vendor self-assessment.

AWS Marketplace vendor insights - access controlI select the noncompliant one to get the details and the explanation the vendor provided.

AWS Marketplace vendor insights - non compliant details

If needed, I might also use AWS Artifact third-party reports (preview) to download the compliance reports.

For Software Vendors
As a software vendor, you can create a security profile for your SaaS products on AWS Marketplace and share this profile with your prospective and existing buyers. It helps you to reduce the manual work for engineering and security teams to respond to your customer questionnaires.

To create a security profile, you will need to complete a self-assessment using AWS Audit Manager on your marketplace management AWS account, share the current SOC2 Type II and ISO27001 compliance artifacts, if available, and turn on automated assessment using Audit Manager and AWS Config on your production AWS accounts.

Our team has created an AWS CloudFormation template to automate the onboarding steps. You can find the technical resources, such as the setup guide and the onboarding templates, on our GitHub repository. Once the profile is created, Vendor Insights will keep your security profile up to date by using automated evidence from Audit Manager and AWS Config. The updates to your profile are sent as notifications. Your security and compliance team can review the updates before they are shared with buyers.

With Vendor Insights, you manage access to your product’s security profile by approving the buyer’s subscription requests. When a buyer requests access, Vendor Insights shares their contact information over email to your compliance or deal-desk operations team. They can complete the NDA with the buyer and notify AWS Marketplace to grant the buyer access to your security profile. You can also request AWS Marketplace to revoke the buyer’s subscription on a later day if you don’t want to share your product’s security and compliance posture information with the buyer anymore.

The entire process is documented in the AWS Marketplace Vendor Insights seller guide.

Pricing and Availability
Vendor Insights is now available in all AWS Regions where AWS Marketplace is available.

The pricing model is very simple; there is no charge involved for using AWS Marketplace Vendor Insights.

For buyers, you can access and download assets during your procurement phase. You lose access to the Vendor Insights profile if you have not purchased the product after 60 days. When you purchase the product, you keep access to the product’s security profile for continuous monitoring of its compliance status.

For sellers, AWS Marketplace doesn’t charge to activate and use Vendor Insights. You will incur fees for using Audit Manager and AWS Config.

Go and start your risk assessments on the AWS Marketplace today.

— seb

New for Amazon SageMaker – Perform Shadow Tests to Compare Inference Performance Between ML Model Variants

Post Syndicated from Antje Barth original https://aws.amazon.com/blogs/aws/new-for-amazon-sagemaker-perform-shadow-tests-to-compare-inference-performance-between-ml-model-variants/

As you move your machine learning (ML) workloads into production, you need to continuously monitor your deployed models and iterate when you observe a deviation in your model performance. When you build a new model, you typically start validating the model offline using historical inference request data. But this data sometimes fails to account for current, real-world conditions. For example, new products might become trending that your product recommendation model hasn’t seen yet. Or, you experience a sudden spike in the volume of inference requests in production that you never exposed your model to before.

Today, I’m excited to announce Amazon SageMaker support for shadow testing!

Deploying a model in shadow mode lets you conduct a more holistic test by routing a copy of the live inference requests for a production model to the new (shadow) model. Yet, only the responses from the production model are returned to the calling application. Shadow testing helps you build further confidence in your model and catch potential configuration errors and performance issues before they impact end users. Once you complete a shadow test, you can use the deployment guardrails for SageMaker inference endpoints to safely update your model in production.

Get Started with Amazon SageMaker Shadow Testing
You can create shadow tests using the new SageMaker Inference Console and APIs. Shadow testing gives you a fully managed experience for setup, monitoring, viewing, and acting on the results of shadow tests. If you have existing workflows built around SageMaker endpoints, you can also deploy a model in shadow mode using the existing SageMaker Inference APIs.

On the SageMaker console, select Inference and Shadow tests to create, monitor, and deploy shadow tests.

Amazon SageMaker Shadow Tests

To create a shadow test, select an existing (or create a new) SageMaker endpoint and production variant you want to test against.

Amazon SageMaker - Create Shadow Test

Next, configure the proportion of traffic to send to the shadow variant, the comparison metrics you want to evaluate, and the duration of the test. You can also enable data capture for your production and shadow variant.

Amazon SagMaker - Create Shadow Test

That’s it. SageMaker now automatically deploys the new variant in shadow mode and routes a copy of the inference requests to it in real time, all within the same endpoint. The following diagram illustrates this workflow.

Amazon SageMaker - Shadow Testing

Note that only the responses of the production variant are returned to the calling application. You can choose to either discard or log the responses of the shadow variant for offline comparison.

You can also use shadow testing to validate changes you made to any component in your production variant, including the serving container or ML instance. This can be useful when you’re upgrading to a new framework version of your serving container, applying patches, or if you want to make sure that there is no impact to latency or error rate due to this change. Similarly, if you consider moving to another ML instance type, for example, Amazon EC2 C7g instances based on AWS Graviton processors, or EC2 G5 instances powered by NVIDIA A10G Tensor Core GPUs, you can use shadow testing to evaluate the performance on production traffic prior to rollout.

You can monitor the progress of the shadow test and performance metrics such as latency and error rate through a live dashboard. On the SageMaker console, select Inference and Shadow tests, then select the shadow test you want to monitor.

Amazon SageMaker - Monitor Shadow Test

Amazon SageMaker - Monitor Shadow Test

If you decide to promote the shadow model to production, select Deploy shadow variant and define the infrastructure configuration to deploy the shadow variant.

Amazon SageMaker - Deploy Shadow Variant

Amazon SageMaker - Deploy Shadow Variant

You can also use the SageMaker deployment guardrails if you want to add linear or canary traffic shifting modes and auto rollbacks to your update.

Availability and Pricing
SageMaker support for shadow testing is available today in all AWS Regions where SageMaker hosting is available except for the AWS GovCloud (US) Regions and AWS China Regions.

There is no additional charge for SageMaker shadow testing other than usage charges for the ML instances and ML storage provisioned to host the shadow variant. The pricing for ML instances and ML storage dimensions is the same as the real-time inference option. There is no additional charge for data processed in and out of shadow deployments. The SageMaker pricing page has all the details.

To learn more, visit Amazon SageMaker shadow testing.

Start validating your new ML models with SageMaker shadow tests today!

— Antje

New – Share ML Models and Notebooks More Easily Within Your Organization with Amazon SageMaker JumpStart

Post Syndicated from Antje Barth original https://aws.amazon.com/blogs/aws/new-share-ml-models-and-notebooks-more-easily-within-your-organization-with-amazon-sagemaker-jumpstart/

Amazon SageMaker JumpStart is a machine learning (ML) hub that can help you accelerate your ML journey. SageMaker JumpStart gives you access to built-in algorithms with pre-trained models from popular model hubs, pre-trained foundation models to help you perform tasks such as article summarization and image generation, and end-to-end solutions to solve common use cases.

Today, I’m happy to announce that you can now share ML artifacts, such as models and notebooks, more easily with other users that share your AWS account using SageMaker JumpStart.

Using SageMaker JumpStart to Share ML Artifacts
Machine learning is a team sport. You might want to share your models and notebooks with other data scientists in your team to collaborate and increase productivity. Or, you might want to share your models with operations teams to put your models into production. Let me show you how to share ML artifacts using SageMaker JumpStart.

In SageMaker Studio, select Models in the left navigation menu. Then, select Shared models and Shared by my organization. You can now discover and search ML artifacts that other users shared within your AWS account. Note that you can add and share ML artifacts developed with SageMaker as well as those developed outside of SageMaker.

To share a model or notebook, select Add. For models, provide basic information, such as title, description, data type, ML task, framework, and any additional metadata. This information helps other users to find the right models for their use cases. You can also enable training and deployment for your model. This allows users to fine-tune your shared model and deploy the model in just a few clicks through SageMaker JumpStart.

Amazon SageMaker Jumpstart - Add model to private ML hub

To enable model training, you can select an existing SageMaker training job that will autopopulate all relevant information. This information includes the container framework, training script location, model artifact location, instance type, default training and validation datasets, and target column. You can also provide custom model training information by selecting a prebuilt SageMaker Deep Learning Container or selecting a custom Docker container in Amazon ECR. You can also specify default hyperparameters and metrics for model training.

To enable model deployment, you also need to define the container image to use, the inference script and model artifact location, and the default instance type. Have a look at the SageMaker Developer Guide to learn more about model training and model deployment options.

Sharing a notebook works similarly. You need to provide basic information about your notebook and the Amazon S3 location of the notebook file.

Amazon SageMaker JumpStart - Add a notebook to private ML hub

Users that share your AWS account can now browse and select shared models to fine-tune, deploy endpoints, or run notebooks directly in SageMaker JumpStart.

In SageMaker Studio, select Quick start solutions in the left navigation menu, then select Solutions, models, example notebooks to access all shared ML artifacts, together with pre-trained models from popular model hubs and end-to-end solutions.

Amazon SageMaker JumpStart

Now Available
The new ML artifact-sharing capability within Amazon SageMaker JumpStart is available today in all AWS Regions where Amazon SageMaker JumpStart is available. To learn more, visit Amazon SageMaker JumpStart and the SageMaker JumpStart documentation.

Start sharing your models and notebooks with Amazon SageMaker JumpStart today!

— Antje

New for Amazon Redshift – Simplify Data Ingestion and Make Your Data Warehouse More Secure and Reliable

Post Syndicated from Danilo Poccia original https://aws.amazon.com/blogs/aws/new-for-amazon-redshift-simplify-data-ingestion-and-make-your-data-warehouse-more-secure-and-reliable/

When we talk with customers, we hear that they want to be able to harness insights from data in order to make timely, impactful, and actionable business decisions. A common pattern with data-driven organizations is that they have many different data sources they need to ingest into their analytics systems. This requires them to build manual data pipelines spanning across their operational databases, data lakes, streaming data, and data within their warehouse. As a consequence of this complex setup, it can take data engineers weeks or even months to build data ingestion pipelines. These data pipelines are costly, and the delays can lead to missed business opportunities. Additionally, data warehouses are increasingly becoming mission critical systems that require high availability, reliability, and security.

Amazon Redshift is a fully managed petabyte-scale data warehouse used by tens of thousands of customers to easily, quickly, securely, and cost-effectively analyze all their data at any scale. This year at re:Invent, Amazon Redshift has announced a number of features to help you simplify data ingestion and get to insights easily and quickly, within a secure, reliable environment.

In this blog, I introduce some of these new features that fit into two main categories:

  • Simplify data ingestion
    • Amazon Redshift now supports auto-copy from Amazon S3 (available in preview). With this new capability, Amazon Redshift automatically loads the files that arrive in an Amazon Simple Storage Service (Amazon S3) location that you specify into your data warehouse. The files can use any of the formats supported by the Amazon Redshift copy command, such as CSV, JSON, Parquet, and Avro. In this way, you don’t need to manually or repeatedly run copy procedures. Amazon Redshift automates file ingestion and takes care of data-loading steps under the hood.
    • With Amazon Aurora zero-ETL integration with Amazon Redshift, you can use Amazon Redshift for near real-time analytics and machine learning on petabytes of transactional data stored on Amazon Aurora MySQL databases (available in limited preview). With this capability, you can choose the Amazon Aurora databases containing the data you want to analyze with Amazon Redshift. Data is then replicated into your data warehouse within seconds after transactional data is written into Amazon Aurora, eliminating the need to build and maintain complex data pipelines. You can replicate data from multiple Amazon Aurora databases into the same Amazon Redshift instance to run analytics across multiple applications. With near real-time access to transactional data, you can leverage Amazon Redshift’s analytics and capabilities, such as built-in machine learning (ML), materialized views, data sharing, and federated access to multiple data stores and data lakes, to derive insights from transactional and other data.
    • With the general availability of Amazon Redshift Streaming Ingestion, you can now natively ingest hundreds of megabytes of data per second from Amazon Kinesis Data Streams and Amazon MSK into an Amazon Redshift materialized view and query it in seconds. Learn more in this post.
  • Make your data warehouse more secure and reliable
    • You can now improve the availability of your data warehouse by choosing multiple Availability Zone (AZ) deployments. Multi-AZ deployments for your Amazon Redshift clusters are available in preview and reduce recovery times to seconds through automatic recovery. In this way, you can build solutions that are more compliant with the recommendations of the Reliability Pillar of the AWS Well-Architected Framework.
    • With dynamic data masking (available in preview), you can protect sensitive information stored in your data warehouse and ensure that only the relevant data is accessible by users based on their roles. You can limit how much identifiable data is visible to users using multiple levels of policies so different users and groups can have different levels of data access without having to create multiple copies of data. Dynamic data masking complements other granular access control capabilities in Amazon Redshift including row-level and column-level security and role-based access controls. In this way, Dynamic Data Masking helps you meet requirements for GDPR, CCPA, and other privacy regulations.
    • Amazon Redshift now supports central access controls for data sharing with AWS Lake Formation (available in public preview). You can now use Lake Formation to simplify governance of data shared from Amazon Redshift and centrally manage granular access across all data-sharing consumers.

There have been other interesting news for Amazon Redshift at re:Invent you might have already heard about:

  • The general availability of Amazon Redshift integration for Apache Spark makes it easy to build and run Spark applications on Amazon Redshift and Redshift Serverless, opening up the data warehouse for a broader set of AWS analytics and machine learning solutions.
  • AWS Backup now supports Amazon Redshift. AWS Backup allows you to define a central backup policy to manage data protection of your applications and can also protect your Amazon Redshift clusters. In this way, you have a consistent experience when managing data protection across all supported services.

Availability and Pricing
Multi-AZ deployments, central access control for data sharing with AWS Lake Formation, auto-copy from Amazon S3, and dynamic data masking are available in preview in US East (Ohio), US East (N. Virginia), US West (Oregon), Asia Pacific (Tokyo), Europe (Ireland), and Europe (Stockholm).

There is no additional cost for using auto-copy from Amazon S3 and near real-time analytics on transactional data. There is no extra charge for dynamic data masking and central access control for data sharing. For more information, see Amazon Redshift pricing.

These new capabilities take you one step further in analyzing all your data across data sources with simple data ingestion capabilities, while improving the security and reliability of your data warehouse.

Danilo

Announcing Additional Data Connectors for Amazon AppFlow

Post Syndicated from Steve Roberts original https://aws.amazon.com/blogs/aws/announcing-additional-data-connectors-for-amazon-appflow/

Gathering insights from data is a more effective process if that data isn’t fragmented across multiple systems and data stores, whether on premises or in the cloud. Amazon AppFlow provides bidirectional data integration between on-premises systems and applications, SaaS applications, and AWS services. It helps customers break down data silos using a low- or no-code, cost-effective solution that’s easy to reconfigure in minutes as business needs change.

Today, we’re pleased to announce the addition of 22 new data connectors for Amazon AppFlow, including:

  • Marketing connectors (e.g., Facebook Ads, Google Ads, Instagram Ads, LinkedIn Ads).
  • Connectors for customer service and engagement (e.g., MailChimp, Sendgrid, Zendesk Sell or Chat, and more).
  • Business operations (Stripe, QuickBooks Online, and GitHub).

In total, Amazon AppFlow now supports over 50 integrations with various different SaaS applications and AWS services. This growing set of connectors can be combined to enable you to achieve 360 visibility across the data your organization generates. For instance, you could combine CRM (Salesforce), e-commerce (Stripe), and customer service (ServiceNow, Zendesk) data to build integrated analytics and predictive modeling that can guide your next best offer decisions and more. Using web (Google Analytics v4) and social surfaces (Facebook Ads, Instagram Ads) allows you to build comprehensive reporting for your marketing investments, helping you understand how customers are engaging with your brand. Or, sync ERP data (SAP S/4HANA) with custom order management applications running on AWS. For more information on the current range of connectors and integrations, visit the Amazon AppFlow integrations page.

Datasource connectors for Amazon AppFlow

Amazon AppFlow and AWS Glue Data Catalog
Amazon AppFlow has also recently announced integration with the AWS Glue Data Catalog to automate the preparation and registration of your SaaS data into the AWS Glue Data Catalog. Previously, customers using Amazon AppFlow to store data from supported SaaS applications into Amazon Simple Storage Service (Amazon S3) had to manually create and run AWS Glue Crawlers to make their data available to other AWS services such as Amazon Athena, Amazon SageMaker, or Amazon QuickSight. With this new integration, you can populate AWS Glue Data Catalog with a few clicks directly from the Amazon AppFlow configuration without the need to run any crawlers.

To simplify data preparation and improve query performance when using analytics engines such as Amazon Athena, Amazon AppFlow also now enables you to organize your data into partitioned folders in Amazon S3. Amazon AppFlow also automates the aggregation of records into files that are optimized to the size you specify. This increases performance by reducing processing overhead and improving parallelism.

You can find more information on the AWS Glue Data Catalog integration in the recent What’s New post.

Getting Started with Amazon AppFlow
Visit the Amazon AppFlow product page to learn more about the service and view all the available integrations. To help you get started, there’s also a variety of videos and demos available and some sample integrations available on GitHub. And finally, should you need a custom integration, try the Amazon AppFlow Connector SDK, detailed in the Amazon AppFlow documentation. The SDK enables you to build your own connectors to securely transfer data between your custom endpoint, application, or other cloud service to and from Amazon AppFlow‘s library of managed SaaS and AWS connectors.

— Steve

New ML Governance Tools for Amazon SageMaker – Simplify Access Control and Enhance Transparency Over Your ML Projects

Post Syndicated from Antje Barth original https://aws.amazon.com/blogs/aws/new-ml-governance-tools-for-amazon-sagemaker-simplify-access-control-and-enhance-transparency-over-your-ml-projects/

As companies increasingly adopt machine learning (ML) for their business applications, they are looking for ways to improve governance of their ML projects with simplified access control and enhanced visibility across the ML lifecycle. A common challenge in that effort is managing the right set of user permissions across different groups and ML activities. For example, a data scientist in your team that builds and trains models usually requires different permissions than an MLOps engineer that manages ML pipelines. Another challenge is improving visibility over ML projects. For example, model information, such as intended use, out-of-scope use cases, risk rating, and evaluation results, is often captured and shared via emails or documents. In addition, there is often no simple mechanism to monitor and report on your deployed model behavior.

That’s why I’m excited to announce a new set of ML governance tools for Amazon SageMaker.

As an ML system or platform administrator, you can now use Amazon SageMaker Role Manager to define custom permissions for SageMaker users in minutes, so you can onboard users faster. As an ML practitioner, business owner, or model risk and compliance officer, you can now use Amazon SageMaker Model Cards to document model information from conception to deployment and Amazon SageMaker Model Dashboard to monitor all your deployed models through a unified dashboard.

Let’s dive deeper into each tool, and I’ll show you how to get started.

Introducing Amazon SageMaker Role Manager
SageMaker Role Manager lets you define custom permissions for SageMaker users in minutes. It comes with a set of predefined policy templates for different personas and ML activities. Personas represent the different types of users that need permissions to perform ML activities in SageMaker, such as data scientists or MLOps engineers. ML activities are a set of permissions to accomplish a common ML task, such as running SageMaker Studio applications or managing experiments, models, or pipelines. You can also define additional personas, add ML activities, and your managed policies to match your specific needs. Once you have selected the persona type and the set of ML activities, SageMaker Role Manager automatically creates the required AWS Identity and Access Management (IAM) role and policies that you can assign to SageMaker users.

A Primer on SageMaker and IAM Roles
A role is an IAM identity that has permissions to perform actions with AWS services. Besides user roles that are assumed by a user via federation from an Identity Provider (IdP) or the AWS Console, Amazon SageMaker requires service roles (also known as execution roles) to perform actions on behalf of the user. SageMaker Role Manager helps you create these service roles:

  • SageMaker Compute Role – Gives SageMaker compute resources the ability to perform tasks such as training and inference, typically used via PassRole. You can select the SageMaker Compute Role persona in SageMaker Role Manager to create this role. Depending on the ML activities you select in your SageMaker service roles, you will need to create this compute role first.
  • SageMaker Service Role – Some AWS services, including SageMaker, require a service role to perform actions on your behalf. You can select the Data Scientist, MLOps, or Custom persona in SageMaker Role Manager to start creating service roles with custom permissions for your ML practitioners.

Now, let me show you how this works in practice.

There are two ways to get to SageMaker Role Manager, either through Getting started in the SageMaker console or when you select Add user in the SageMaker Studio Domain control panel.

I start in the SageMaker console. Under Configure role, select Create a role. This opens a workflow that guides you through all required steps.

Amazon SageMaker Admin Hub - Getting Started

Let’s assume I want to create a SageMaker service role with a specific set of permissions for my team of data scientists. In Step 1, I select the predefined policy template for the Data Scientist persona.

Amazon SageMaker Role Manager - Select persona

I can also define the network and encryption settings in this step by selecting Amazon Virtual Private Cloud (Amazon VPC) subnets, security groups, and encryption keys.

In Step 2, I select what ML activities data scientists in my team need to perform.

Amazon SageMaker Admin Hub - Configure ML activities

Some of the selected ML activities might require you to specify the Amazon Resource Name (ARN) of the SageMaker Compute Role so SageMaker compute resources have the ability to perform the tasks.

In Step 3, you can attach additional IAM policies and add tags to the role if needed. Tags help you identify and organize your AWS resources. You can use tags to add attributes such as project name, cost center, or location information to a role. After a final review of the settings in Step 4, select Submit, and the role is created.

In just a few minutes, I set up a SageMaker service role, and I’m now ready to onboard data scientists in SageMaker with custom permissions in place.

Introducing Amazon SageMaker Model Cards
SageMaker Model Cards helps you streamline model documentation throughout the ML lifecycle by creating a single source of truth for model information. For models trained on SageMaker, SageMaker Model Cards discovers and autopopulates details such as training jobs, training datasets, model artifacts, and inference environment. You can also record model details such as the model’s intended use, risk rating, and evaluation results. For compliance documentation and model evidence reporting, you can export your model cards to a PDF file and easily share them with your customers or regulators.

To start creating SageMaker Model Cards, go to the SageMaker console, select Governance in the left navigation menu, and select Model cards.

Amazon SageMaker Model Cards

Select Create model card to document your model information.

Amazon SageMaker Model Card

Amazon SageMaker Model Cards

Introducing Amazon SageMaker Model Dashboard
SageMaker Model Dashboard lets you monitor all your models in one place. With this bird’s-eye view, you can now see which models are used in production, view model cards, visualize model lineage, track resources, and monitor model behavior through an integration with SageMaker Model Monitor and SageMaker Clarify. The dashboard automatically alerts you when models are not being monitored or deviate from expected behavior. You can also drill deeper into individual models to troubleshoot issues.

To access SageMaker Model Dashboard, go to the SageMaker console, select Governance in the left navigation menu, and select Model dashboard.

Amazon SageMaker Model Dashboard

Note: The risk rating shown above is for illustrative purposes only and may vary based on input provided by you.

Now Available
Amazon SageMaker Role Manager, SageMaker Model Cards, and SageMaker Model Dashboard are available today at no additional charge in all the AWS Regions where Amazon SageMaker is available except for the AWS GovCloud and AWS China Regions.

To learn more, visit ML governance with Amazon SageMaker and check the developer guide.

Start building your ML projects with our new governance tools for Amazon SageMaker today

— Antje

Join the Preview – AWS Glue Data Quality

Post Syndicated from Jeff Barr original https://aws.amazon.com/blogs/aws/join-the-preview-aws-glue-data-quality/

Back in 1980, at my second professional programming job, I was working on a project that analyzed driver’s license data from a bunch of US states. At that time data of that type was generally stored in fixed-length records, with values carefully (or not) encoded into each field. Although we were given schemas for the data, we would invariably find that the developers had to resort to tricks in order to represent values that were not anticipated up front. For example, coding for someone with heterochromia, eyes of different colors. We ended up doing a full scan of the data ahead of our actual time-consuming and expensive analytics run in order to make sure that we were dealing with known data. This was my introduction to data quality, or the lack thereof.

AWS makes it easier for you to build data lakes and data warehouses at any scale. We want to make it easier than ever before for you to measure and maintain the desired quality level of the data that you ingest, process, and share.

Introducing AWS Glue Data Quality
Today I would like to tell you about AWS Glue Data Quality, a new set of features for AWS Glue that we are launching in preview form. It can analyze your tables and recommend a set of rules automatically based on what it finds. You can fine-tune those rules if necessary and you can also write your own rules. In this blog post I will show you a few highlights, and will save the details for a full post when these features progress from preview to generally available.

Each data quality rule references a Glue table or selected columns in a Glue table and checks for specific types of properties: timeliness, accuracy, integrity, and so forth. For example, a rule can indicate that a table must have the expected number of columns, that the column names match a desired pattern, and that a specific column is usable as a primary key.

Getting Started
I can open the new Data quality tab on one of my Glue tables to get started. From there I can create a ruleset manually, or I can click Recommend ruleset to get started:

Then I enter a name for my Ruleset (RS1), choose an IAM Role that has permission to access it, and click Recommend ruleset:

My click initiates a Glue Recommendation task (a specialized type of Glue job) that scans the data and makes recommendations. Once the task has run to completion I can examine the recommendations:

I click Evaluate ruleset to check on the quality of my data.

The data quality task runs and I can examine the results:

In addition to creating Rulesets that are attached to tables, I can use them as part of a Glue job. I create my job as usual and then add an Evaluate Data Quality node:

Then I use the Data Quality Definition Language (DDQL) builder to create my rules. I can choose between 20 different rule types:

For this blog post, I made these rules more strict than necessary so that I could show you what happens when the data quality evaluation fails.

I can set the job options, and choose the original data or the data quality results as the output of the transform. I can also write the data quality results to an S3 bucket:

After I have created my Ruleset, I set any other desired options for the job, save it, and then run it. After the job completes I can find the results in the Data quality tab. Because I made some overly strict rules, the evaluation correctly flagged my data with a 0% score:

There’s a lot more, but I will save that for the next blog post!

Things to Know
Preview Regions – This is an open preview and you can access it today the US East (Ohio, N. Virginia), US West (Oregon), Asia Pacific (Tokyo), and Europe (Ireland) AWS Regions.

Pricing – Evaluating data quality consumes Glue Data Processing Units (DPU) in the same manner and at the same per-DPU pricing as any other Glue job.

Jeff;