Post Syndicated from The History Guy: History Deserves to Be Remembered original https://www.youtube.com/watch?v=EA5W2H72VfM
Comic for 2023.04.21 – Yeast Infection
Post Syndicated from Explosm.net original https://explosm.net/comics/yeast-infection
New Cyanide and Happiness Comic
Правителство. Хубаво е, но не е готово
Post Syndicated from Емилия Милчева original https://www.toest.bg/pravitelstvo-hubavo-e-no-ne-e-gotovo/

Ако политиката се движеше по правилата на еволюцията, всяко парламентарно мнозинство би следвало да роди правителство. В 49-тия парламент се формира бинарно мнозинство от двете най-големи политически сили – ГЕРБ–СДС и ПП–ДБ, но едната иска да управлява сама в кабинет на малцинството.
Двете коалиции се споразумяха за законодателна програма, заедно избраха председател на парламента – Росен Желязков от ГЕРБ, и се договориха „джентълменски“ след три месеца да го смени Никола Минчев от ПП, сега един от заместник-председателите на Народното събрание. За да бъде удържана тази честна дума, Желязков следва да подаде оставка през юли, когато приключва лятната сесия, и депутатите да изберат Минчев. Разбира се, ако парламентът все още съществува, но също и мнозинството.
Мнозинството
Иначе, с 69-те мандата на ГЕРБ-СДС и с 64-те на ПП–ДБ двете коалиции нямат нужда от други „патерици“ в 49-тото НС, тъй като надхвърлят необходимите за надмощие 121 народни представители. Но въпреки демонстрирания досега бонтон е трудно за вярване, че той ще бъде запазен задълго от доскорошните съперници, разменили си не една и две яростни нападки. Протестната енергия на площада през 2020 г. и призивите за смяна на корупционния модел на управление на ГЕРБ сублимираха в „Продължаваме промяната“. А министри от ръководеното от ПП правителство разпоредиха ареста на лидера на ГЕРБ Бойко Борисов м.г.
Независимо от уверенията му, че е простил и е оставил възмездието на Бог, че непрекъснато говори за търпение, че стана депутат и за първи път от три години прекрачи прага на Президентството, не е изключено да помогне на „Началника“. Макар в публичните си изявления да твърди, че е оставил лошото назад, „иначе не бих се срещал, не бих си говорил и с Кирил, и с Асен, а ние си говорим“. (И така индиректно потвърди слуховете, че лидерските преговори вървят въпреки изявления и от двете страни, че не са започнали.)
Съюзът на ГЕРБ–СДС и ПП–ДБ предизвика напрежение сред останалите политически сили, почувствали се изолирани и отхвърлени. (Докато такъв център липсваше, всички те се усещаха значими, тъй като винаги съществуваше шанс да бъдат поканени за танц.) ДПС дипломатично се въздържаха от нападки, заявявайки, че са в опозиция на този съюз. И от „Има такъв народ“ не са предишните хъшлаци – критикуват бившите си партньори от ПП, но някак по-умерено и сдържано.
Лидерът на „Възраждане“ Костадин Костадинов обаче подгря с „Ако се коалират с ГЕРБ, ПП–ДБ ще зачеркнат смисъла от съществуването си“, а председателката на БСП Корнелия Нинова извади метафората за „eдноръките джентълмени“, припомняйки как депутати са се клели, че ще си отрежат едната ръка, вместо да гласуват за партийния враг. Всички те дават мило и драго двете формации да не се спогодят за кабинет, за да бъдат ухажвани.
Предизвикателство за новото мнозинство – освен напрежението с останалите политически партии и липсата на доверие между двете коалиции – са и сложните отношения вътре в ПП–ДБ. Откакто са започнали преговорите между ГЕРБ–СДС и ПП–ДБ, като че ли партията на Борисов преговаря с „Промяната“, но не и с „Демократична България“, чийто глас се изгуби. А председателят на ДСБ – част от ДБ, генерал Атанас Атанасов се дистанцира по bTV от подобен съюз с думите, че „на Борисов му трябва пералня и най-добрата пералня e нашата коалиция“, а също така, че няма никакво доверие на Бойко Борисов.
Правителството
В програмата, изготвена от ГЕРБ–СДС и ПП–ДБ, са предвидени 17 закона до края на лятната сесия. Сред тях липсват промени в Изборния кодекс, които да премахнат хартиената бюлетина, върната с гласовете на ГЕРБ, ДПС и БСП в предишния парламент.
До края на юли има само 3 месеца, а за някои законопроекти е записано, че трябва да се подготвят и внесат от Министерския съвет. Най-съществените са свързани с реализиране на реформите, предвидени в националния План за възстановяване и устойчивост (ПВУ). Предишният 48-ми парламент така и не успя да ги приеме. Несвършената работа е много – тук са промените в Наказателно-процесуалния кодекс и в Закона за съдебната власт, които се отнасят до механизма за разследване на главния прокурор и укрепването на Инспектората към ВСС, изискваните заради еврото изменения в Търговския закон, в Кодекса за застраховане и в Закона за мерките срещу изпирането на пари и др. Някои от тези законопроекти, внесени в предишния парламент от служебния кабинет, ще трябва да се внесат отново и в 49-тото НС, други – тепърва да бъдат разработени.
Ако няма редовно правителство, подкрепено от мнозинството, тези закони изчезват яко дим, а с тях и шансовете на България за по-тясна интеграция в ЕС и за трансформация на икономиката. За да бъдат приети, лидерът на ГЕРБ смята, че „най-доброто за България е коалиция между двете големи партии“, а другите варианти са „по-неработещи и по-слаби“. Няма да има друг вариант, докато не се изчерпят всички възможности за коалиция между двете големи партии, каза Борисов след консултациите при президента. От ПП–ДБ са все така категорични, че няма да участват в правителство с ГЕРБ, но ще предложат свой кабинет с втория мандат. „Националният съвет на ПП–ДБ каза ясно, че не можем да подкрепим първи мандат на ГЕРБ, но сме готови да направим правителство с втория мандат“, заяви съпредседателят на ПП Кирил Петков.
Вариантите на Борисов ще се изяснят следващата седмица. Не е изненада заявката му, че няма да е премиер – отдавна е разбрал, че историческото му време е свършило. Водачът на ГЕРБ не разкрива картите си, ако се провалят преговорите с ПП-ДБ, за което го попита и президентът Радев на консултациите:
Какви са вашите виждания за решаването на тези задачи и за фактора време? Колко време според вас е необходимо за водене на пълноценни преговори за съставяне на правителство, и то, както са вашите амбиции, с вашите доскорошни най-отявлени антагонисти? Ако това не стане, имате ли резервен план за правителство?
Борисов обаче успя да издейства от президента малко забавяне с връчването на първия мандат в името на същите тези преговори.
В случай че преговорите се провалят, пред ГЕРБ–СДС има два варианта – връщат празна папка на президента или подготвят кабинет, който в парламентарната зала може да получи подкрепа извън ПП–ДБ. А дали биха подкрепили правителство на малцинството с втория мандат на ПП–ДБ, на което се надяват Петков и Василев? Ако се случи, ПП–ДБ поемат твърде голям риск и опасност от извиване на ръце от страна на ГЕРБ, но пък и никой друг не би им оказал подкрепа.
Сметките
Със сигурност в очите на обществото Борисов прави всичко (не)възможно да осигури стабилност чрез редовно правителство, защото милее за държавата.
Сега, на който му е мила държавата, трябва да направи компромиси.
За ГЕРБ и Борисов подобен исторически компромис би бил триумф, за ПП–ДБ – обратното, но в действителност и двете коалиции направиха компромис със законодателната програма като първа заявка за общ път. В ГЕРБ смекчиха и позицията за бюджета – допреди дни твърдяха, че такъв може да предложи само редовно правителство, докато вече се сближават с идеята на ПП–ДБ да го внесе служебният кабинет поради липса на време.
Правителство, макар и за кратко, ще калкулира политически (а и не само) дивиденти в навечерието на местните избори от формацията, която ще успее да го състави. Според председателя на парламентарната група на ГЕРБ Десислава Атанасова до края на следващата седмица ще са готови парламентарните комисии, които приоритетно да се заемат със законопроектите за ПВУ, еврозоната, Шенген, както и с двата закона по ПВУ, които се отнасят до правосъдната система.
Тази амбициозна програма едва ли ще бъде изпълнена до края на лятната сесия, като се има предвид, че тук не са включени данъчните закони, държавният бюджет, както и тези на НЗОК и държавното обществено осигуряване, които трябва да се съгласуват и със социалните партньори. Освен това този парламент ще трябва да се произнесе и по подписката за референдум за запазване на българския лев, която „Възраждане“ внесе. Българският институт за правни инициативи сръчка депутатите, че трябва да изберат близо 70 членове на мястото на тези с изтекли мандати в 17 регулаторни и контролни органа.
Нищо не е готово. Просто две политически сили са се съгласили да работят за приемането на няколко закона. Дяволът е в компромисите.
Патриотична или националистична е българската диаспора?
Post Syndicated from Яна Хашъмова original https://www.toest.bg/patriotichna-ili-natsionalistichna-e-bulgarskata-diaspora/

Поредните български парламентарни избори и разностранният вот на българите в чужбина ме накараха отново да се замисля за учудващите политически предпочитания на сънародниците ми. Така се случи, че през последните две години пусках гласа си в три държави – САЩ, България и Испания. Вече пребивавам по-дълго в САЩ, отколкото съм живяла в България, но бъдещето ѝ продължава да ме вълнува. 33 години образование и работа в САЩ не заличиха акцента ми и почти всяка седмица в магазин или офис ми задават въпроса „Вие откъде сте?“, с което непрекъснато ми напомнят за националния ми произход. Иска ми се да запитам обратно: „А има ли значение?“ Като чуят отговора, виждам България като бяло петно на картата, отразено в очите им, но въпреки това значение има.
През тези години съм срещала всякакви сънародници, доста наподобяващи категориите, описани от Марина Лякова в статията ѝ „Електоралната енигма – защо българите в чужбина гласуват за „Възраждане“. Разликата между някои българи в Западна Европа и някои групи български емигранти в САЩ е тази, че обикновено в Съединените щати сънародниците ни пристигат с помощта на лотарията за зелени карти. Те са без особено образование или ако са били квалифицирани в България, в Щатите трудно намират работа по специалността. Това поражда редица предизвикателства и недоволства.
Българските неделни училища в чужбина
Въпреки че се бях откъснала от българската диаспора за дълъг период, покрай желанието ми моят син да подобри българския си и да придобие знания за историята и културата на нашата страна го записах в българско неделно училище. Изненада ме фактът, че нашето Министерство на образованието и науката издава специално написани учебници за неделните училища в чужбина и даже ги подпомага финансово. Другият учудващ за мен аспект на това образование беше наличието на силни патриотични, да не кажа националистически позиции, представени не толкова в учебниците, колкото лансирани от учителите.
По време на една родителска среща в американското училище на детето ми неговият учител ми разказа, че синът ми го е поправил, щом го чул да казва, че кирилицата е руска азбука. Коригирал го е с думите: „Руснаците са я откраднали от нас.“ Че кирилицата не е руска, това е правилно, но „открадването“ предполага, че азбуката ни принадлежи, което е и един от митовете на нашата национална идентичност.
Личното ми желание за ограмотяване на сина ми дойде повече от убеждението, че той ще има много когнитивни ползи от двуезичието си и от познанието на друга култура, а не толкова от амбиция да събудя патриотични чувства. Не отричам ползите от патриотично възпитание, но когато то преминава в национализъм, виждам повече проблеми. И това ме накара да проведа едно изследване сред български училища в чужбина.
Какво учат българските ученици в чужбина и защо?
Срещнах се и разговарях с директори и учители в САЩ, Англия, Нидерландия и Испания. Трябва да отбележа, че повечето учители в тези училища имат деца, които се обучават там, и в този смисъл учителите са и родители. На базата на 21 разговора и анализ на учебни материали моите изследвания показват следните резултати.
Първо, учители (и родители) приоритизират възпитанието в патриотична гордост и национално самосъзнание (и самоусещане), често базирано на националистични митове от нашата история вместо на факти. Когнитивното развитие на учениците не е цел на тези занятия. В отговорите присъстваха изрази като: „Запазил ни е като нация през хилядолетното ни съществуване“ или „Той е голяма сила и мощ, идваща от дедите ни и от корените“ (за езика ни), или пък „Ние не говорим за османско владичество, а за турско робство и наричаме нещата такива, каквито са“.
Второ, 18 от 21 интервюирани държат на българското образование на децата си, защото вярват или се надяват, че децата ще се завърнат в България. Няма да се впускам в подробности за „схизмите“ сред училищата, които открих, и как финансирането на тези занимания е довело в някои случаи до „крадене“ на списъци и създаването на две училища в един град с цел да се присвоят държавни средствата. В други случаи причини за разделянето се оказват националистическата идеология или по-засиленото религиозно обучение.
Политика и идентичност
Оказва се, че сред някаква част от българската диаспора пребиваването в чужбина или е повишило чувството за национална и религиозна принадлежност, или поне не го е потушило. Очевидно резултатите загатват за дисонанс в няколко насоки. Предлагам някои интерпретации, които могат да обяснят този дисонанс, пък и, на пръв поглед, учудващия вот на българите в чужбина.
Изследвайки различни аспекти на миграцията – от празнотата, създадена от загубата на роднини и приятели, през трудността на интегрирането в нова общност и култура, до възникването на много проблеми около развитието на нова културна идентичност, – Леон и Ребека Гринберг сравняват процеса на миграция с траур поради изгубените части от индивидуалната идентичност и трудната работа по възстановяване на загубите.
Резултатите от моето изследване в по-малка или по-голяма степен разкриват травмата и предизвикателствата на миграцията, както и чувствата, свързани с траура, носталгията и идеализирането на родината, тревогите, причинени от неспособността на емигрантите да намерят мястото си в новите общества. Изборът на учители и родители да приоритизират патриотичното образование и националната идентичност може да се обясни, от една страна, с идеaлизиране на родината, а от друга – с тревогите от неспособността да се постигнат задоволителни социални и икономически успехи в нова културна среда.
Страхът от другия, който в очите на българите застрашава или пречи на мястото им в новото общество, е съществена емоция, мотивираща поведението на много наши сънародници, живеещи в чужбина. Националната гордост, често преливаща в национализъм и породена от носталгия и страх, се проектира в образованието на децата им или пък в политически избор.
Лякова твърди, че българите в Западна Европа, гласуващи за „Възраждане“, режат клона, на който стоят. Това без съмнение е така, но те гласуват по този начин и от страх: в българските парламентарни избори – за „Възраждане“, а в президентските в САЩ – за Тръмп. В САЩ „Възраждане“ не е първа политическа сила, но гласовете ѝ са се увеличили в сравнение с предишните избори. „Възраждане“ според Костадинов иска да направи България отново велика – както Тръмп правеше в САЩ (като междувременно няма имигранти, бежанци и „господари“). Подобна политика си играе със страховете на маргинализирано население, което не успява да се пребори с различни икономически и социални предизвикателства и си намира лесно обяснение за това: вината е другаде и в другия.
Както българите в Испания и Италия, където „Възраждане“ събраха много гласове, така и тези в САЩ, които подкрепиха същата партия, се страхуват и ненавиждат други имигранти, обикновено от Африка, Близкия изток или Латинска Америка. Чувството за превъзходство над другите раси владее здраво някои наши сънародници и се проектира в образованието на децата им в чужбина.
Съмнявам се дали знаят, че в началото на ХХ век имигранти от Балканите (гърци и хървати) са наричани „полунегри“ от някои американци, както подробно обяснява Миглена Тодорова в статията си Imagining “In-between” Peoples across the Atlantic. А Хестър Дженкинс, професор в Американския девически колеж в Константинопол, в статия от 1915 г. за National Geographic описва български студентки като момичета с ориенталски черти, но по-малко ориенталски (least oriental) в сравнение с други от Близкия изток. Тези подробности противоречат на националното самосъзнание за превъзходство над други етноси и раси и очевидно убягват и на Костадинов, и на наши сънародници, които поддържат партията му.
Ще завърша с мечтата на Костадинов да направи в България това, което Тръмп правеше в САЩ. Тръмп не успя да постигне много от целите си благодарение на все още здравата демократична система. А тя, демокрацията, в България съвсем не е толкова здрава и това ме води до тъжни заключения. Дано прословутият здрав разум на българите надделее.
Helium Reserve
Post Syndicated from original https://xkcd.com/2766/
Create a CI/CD pipeline for .NET Lambda functions with AWS CDK Pipelines
Post Syndicated from Ankush Jain original https://aws.amazon.com/blogs/devops/create-a-ci-cd-pipeline-for-net-lambda-functions-with-aws-cdk-pipelines/
The AWS Cloud Development Kit (AWS CDK) is an open-source software development framework to define cloud infrastructure in familiar programming languages and provision it through AWS CloudFormation.
In this blog post, we will explore the process of creating a Continuous Integration/Continuous Deployment (CI/CD) pipeline for a .NET AWS Lambda function using the CDK Pipelines. We will cover all the necessary steps to automate the deployment of the .NET Lambda function, including setting up the development environment, creating the pipeline with AWS CDK, configuring the pipeline stages, and publishing the test reports. Additionally, we will show how to promote the deployment from a lower environment to a higher environment with manual approval.
Background
AWS CDK makes it easy to deploy a stack that provisions your infrastructure to AWS from your workstation by simply running cdk deploy. This is useful when you are doing initial development and testing. However, in most real-world scenarios, there are multiple environments, such as development, testing, staging, and production. It may not be the best approach to deploy your CDK application in all these environments using cdk deploy. Deployment to these environments should happen through more reliable, automated pipelines. CDK Pipelines makes it easy to set up a continuous deployment pipeline for your CDK applications, powered by AWS CodePipeline.
The AWS CDK Developer Guide’s Continuous integration and delivery (CI/CD) using CDK Pipelines page shows you how you can use CDK Pipelines to deploy a Node.js based Lambda function. However, .NET based Lambda functions are different from Node.js or Python based Lambda functions in that .NET code first needs to be compiled to create a deployment package. As a result, we decided to write this blog as a step-by-step guide to assist our .NET customers with deploying their Lambda functions utilizing CDK Pipelines.
In this post, we dive deeper into creating a real-world pipeline that runs build and unit tests, and deploys a .NET Lambda function to one or multiple environments.
Architecture
CDK Pipelines is a construct library that allows you to provision a CodePipeline pipeline. The pipeline created by CDK pipelines is self-mutating. This means, you need to run cdk deploy one time to get the pipeline started. After that, the pipeline automatically updates itself if you add new application stages or stacks in the source code.
The following diagram captures the architecture of the CI/CD pipeline created with CDK Pipelines. Let’s explore this architecture at a high level before diving deeper into the details.
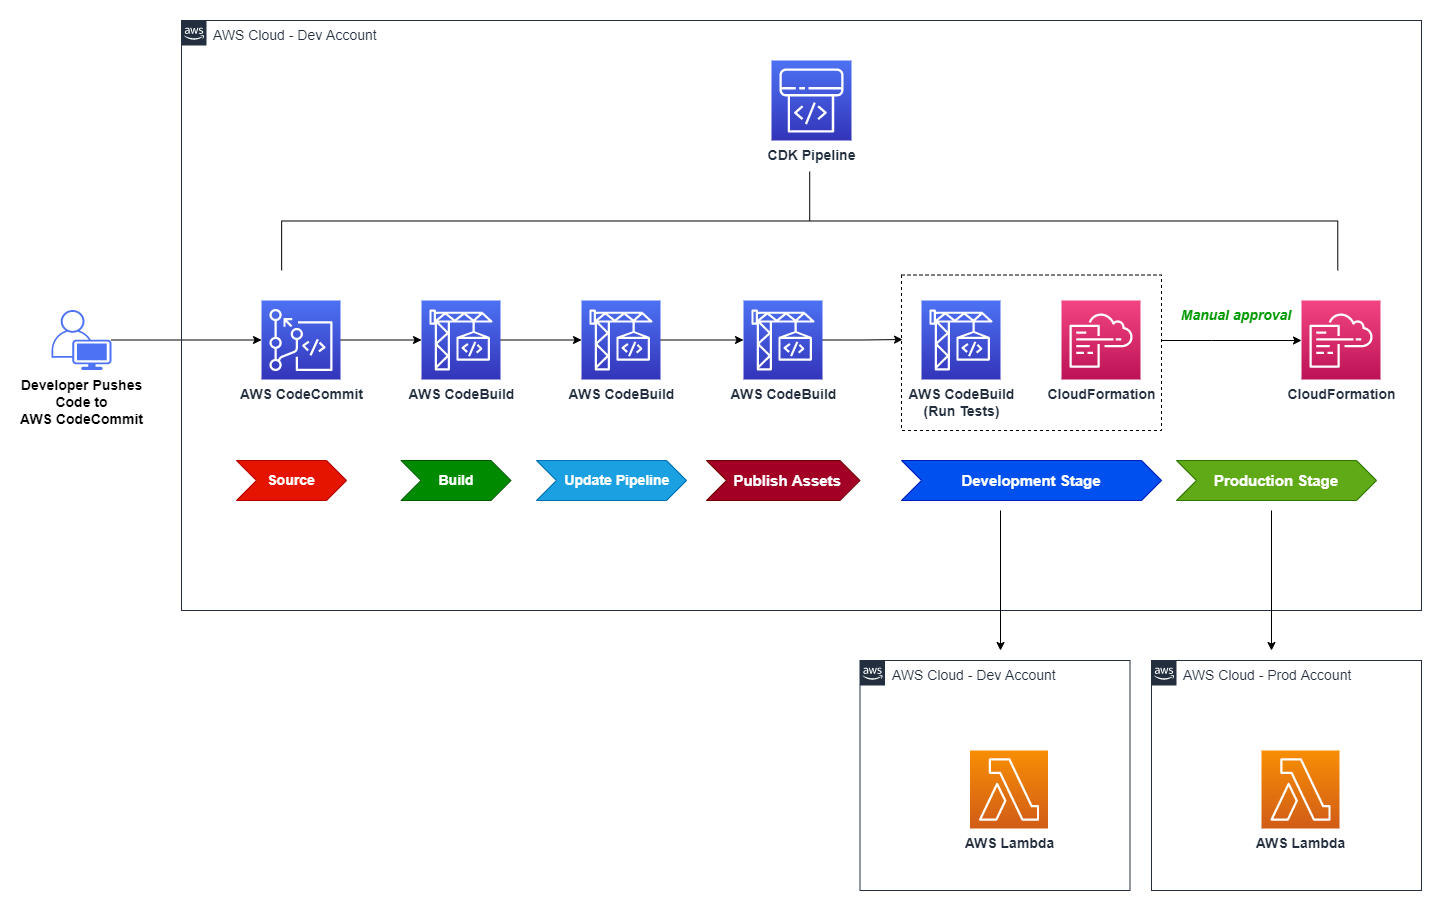
Figure 1: Reference architecture diagram
The solution creates a CodePipeline with a AWS CodeCommit repo as the source (CodePipeline Source Stage). When code is checked into CodeCommit, the pipeline is automatically triggered and retrieves the code from the CodeCommit repository branch to proceed to the Build stage.
- Build stage compiles the CDK application code and generates the cloud assembly.
- Update Pipeline stage updates the pipeline (if necessary).
- Publish Assets stage uploads the CDK assets to Amazon S3.
After Publish Assets is complete, the pipeline deploys the Lambda function to both the development and production environments. For added control, the architecture includes a manual approval step for releases that target the production environment.
Prerequisites
For this tutorial, you should have:
- An AWS account
- Visual Studio 2022
- AWS Toolkit for Visual Studio
- Node.js 18.x or later
- AWS CDK v2 (2.67.0 or later required)
- Git
Bootstrapping
Before you use AWS CDK to deploy CDK Pipelines, you must bootstrap the AWS environments where you want to deploy the Lambda function. An environment is the target AWS account and Region into which the stack is intended to be deployed.
In this post, you deploy the Lambda function into a development environment and, optionally, a production environment. This requires bootstrapping both environments. However, deployment to a production environment is optional; you can skip bootstrapping that environment for the time being, as we will cover that later.
This is one-time activity per environment for each environment to which you want to deploy CDK applications. To bootstrap the development environment, run the below command, substituting in the AWS account ID for your dev account, the region you will use for your dev environment, and the locally-configured AWS CLI profile you wish to use for that account. See the documentation for additional details.
cdk bootstrap aws://<DEV-ACCOUNT-ID>/<DEV-REGION> \
    --profile DEV-PROFILE \
    --cloudformation-execution-policies arn:aws:iam::aws:policy/AdministratorAccess
‐‐profile specifies the AWS CLI credential profile that will be used to bootstrap the environment. If not specified, default profile will be used. The profile should have sufficient permissions to provision the resources for the AWS CDK during bootstrap process.
‐‐cloudformation-execution-policies specifies the ARNs of managed policies that should be attached to the deployment role assumed by AWS CloudFormation during deployment of your stacks.
Note: By default, stacks are deployed with full administrator permissions using the
AdministratorAccesspolicy, but for real-world usage, you should define a more restrictive IAM policy and use that, refer customizing bootstrapping in AWS CDK documentation and Secure CDK deployments with IAM permission boundaries to see how to do that.
Create a Git repository in AWS CodeCommit
For this post, you will use CodeCommit to store your source code. First, create a git repository named dotnet-lambda-cdk-pipeline in CodeCommit by following these steps in the CodeCommit documentation.
After you have created the repository, generate git credentials to access the repository from your local machine if you don’t already have them. Follow the steps below to generate git credentials.
- Sign in to the AWS Management Console and open the IAM console.
- Create an IAM user (for example, git-user).
- Once user is created, attach AWSCodeCommitPowerUser policy to the user.
- Next. open the user details page, choose the Security Credentials tab, and in HTTPS Git credentials for AWS CodeCommit, choose Generate.
- Download credentials to download this information as a .CSV file.
Clone the recently created repository to your workstation, then cd into dotnet-lambda-cdk-pipeline directory.
git clone <CODECOMMIT-CLONE-URL>
cd dotnet-lambda-cdk-pipeline
Alternatively, you can use git-remote-codecommit to clone the repository with git clone codecommit::<REGION>://<PROFILE>@<REPOSITORY-NAME> command, replacing the placeholders with their original values. Using git-remote-codecommit does not require you to create additional IAM users to manage git credentials. To learn more, refer AWS CodeCommit with git-remote-codecommit documentation page.
Initialize the CDK project
From the command prompt, inside the dotnet-lambda-cdk-pipeline directory, initialize a AWS CDK project by running the following command.
cdk init app --language csharpOpen the generated C# solution in Visual Studio, right-click the DotnetLambdaCdkPipeline project and select Properties. Set the Target framework to .NET 6.
Create a CDK stack to provision the CodePipeline
Your CDK Pipelines application includes at least two stacks: one that represents the pipeline itself, and one or more stacks that represent the application(s) deployed via the pipeline. In this step, you create the first stack that deploys a CodePipeline pipeline in your AWS account.
From Visual Studio, open the solution by opening the .sln solution file (in the src/ folder). Once the solution has loaded, open the DotnetLambdaCdkPipelineStack.cs file, and replace its contents with the following code. Note that the filename, namespace and class name all assume you named your Git repository as shown earlier.
Note: be sure to replace “<CODECOMMIT-REPOSITORY-NAME>” in the code below with the name of your CodeCommit repository (in this blog post, we have used dotnet-lambda-cdk-pipeline).
using Amazon.CDK;
using Amazon.CDK.AWS.CodeBuild;
using Amazon.CDK.AWS.CodeCommit;
using Amazon.CDK.AWS.IAM;
using Amazon.CDK.Pipelines;
using Constructs;
using System.Collections.Generic;

namespace DotnetLambdaCdkPipeline
{
    public class DotnetLambdaCdkPipelineStack : Stack
    {
        internal DotnetLambdaCdkPipelineStack(Construct scope, string id, IStackProps props = null) : base(scope, id, props)
        {

            var repository = Repository.FromRepositoryName(this, "repository", "<CODECOMMIT-REPOSITORY-NAME>");

            // This construct creates a pipeline with 3 stages: Source, Build, and UpdatePipeline
            var pipeline = new CodePipeline(this, "pipeline", new CodePipelineProps
            {
                PipelineName = "LambdaPipeline",
                SelfMutation = true,

                // Synth represents a build step that produces the CDK Cloud Assembly.
                // The primary output of this step needs to be the cdk.out directory generated by the cdk synth command.
                Synth = new CodeBuildStep("Synth", new CodeBuildStepProps
                {
                    // The files downloaded from the repository will be placed in the working directory when the script is executed
                    Input = CodePipelineSource.CodeCommit(repository, "master"),

                    // Commands to run to generate CDK Cloud Assembly
                    Commands = new string[] { "npm install -g aws-cdk", "cdk synth" },

                    // Build environment configuration
                    BuildEnvironment = new BuildEnvironment
                    {
                        BuildImage = LinuxBuildImage.AMAZON_LINUX_2_4,
                        ComputeType = ComputeType.MEDIUM,

                        // Specify true to get a privileged container inside the build environment image
                        Privileged = true
                    }
                })
            });
        }
    }
}
In the preceding code, you use CodeBuildStep instead of ShellStep, since ShellStep doesn’t provide a property to specify BuildEnvironment. We need to specify the build environment in order to set privileged mode, which allows access to the Docker daemon in order to build container images in the build environment. This is necessary to use the CDK’s bundling feature, which is explained in later in this blog post.
Open the file src/DotnetLambdaCdkPipeline/Program.cs, and edit its contents to reflect the below. Be sure to replace the placeholders with your AWS account ID and region for your dev environment.
using Amazon.CDK;

namespace DotnetLambdaCdkPipeline
{
    sealed class Program
    {
        public static void Main(string[] args)
        {
            var app = new App();
            new DotnetLambdaCdkPipelineStack(app, "DotnetLambdaCdkPipelineStack", new StackProps
            {
                Env = new Amazon.CDK.Environment
                {
                    Account = "<DEV-ACCOUNT-ID>",
                    Region = "<DEV-REGION>"
                }
            });
            app.Synth();
        }
    }
}
Note: Instead of committing the account ID and region to source control, you can set environment variables on the CodeBuild agent and use them; see Environments in the AWS CDK documentation for more information. Because the CodeBuild agent is also configured in your CDK code, you can use the BuildEnvironmentVariableType property to store environment variables in AWS Systems Manager Parameter Store or AWS Secrets Manager.
After you make the code changes, build the solution to ensure there are no build issues. Next, commit and push all the changes you just made. Run the following commands (or alternatively use Visual Studio’s built-in Git functionality to commit and push your changes):
git add --all .
git commit -m 'Initial commit'
git push
Then navigate to the root directory of repository where your cdk.json file is present, and run the cdk deploy command to deploy the initial version of CodePipeline. Note that the deployment can take several minutes.
The pipeline created by CDK Pipelines is self-mutating. This means you only need to run cdk deploy one time to get the pipeline started. After that, the pipeline automatically updates itself if you add new CDK applications or stages in the source code.
After the deployment has finished, a CodePipeline is created and automatically runs. The pipeline includes three stages as shown below.
- Source – It fetches the source of your AWS CDK app from your CodeCommit repository and triggers the pipeline every time you push new commits to it.
- Build – This stage compiles your code (if necessary) and performs a
cdk synth. The output of that step is a cloud assembly. - UpdatePipeline – This stage runs
cdk deploycommand on the cloud assembly generated in previous stage. It modifies the pipeline if necessary. For example, if you update your code to add a new deployment stage to the pipeline to your application, the pipeline is automatically updated to reflect the changes you made.
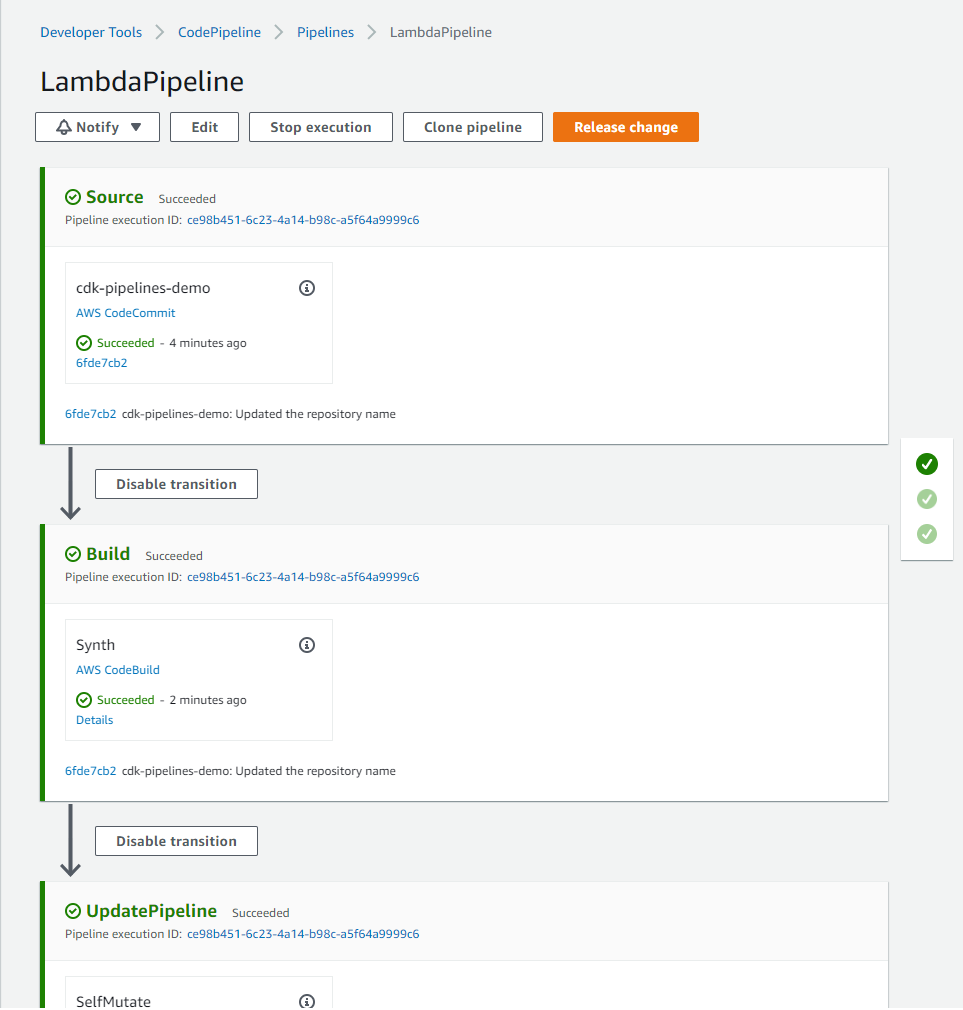
Figure 2: Initial CDK pipeline stages
Define a CodePipeline stage to deploy .NET Lambda function
In this step, you create a stack containing a simple Lambda function and place that stack in a stage. Then you add the stage to the pipeline so it can be deployed.
To create a Lambda project, do the following:
- In Visual Studio, right-click on the solution, choose Add, then choose New Project.
- In the New Project dialog box, choose the AWS Lambda Project (.NET Core – C#) template, and then choose OK or Next.
- For Project Name, enter
SampleLambda, and then choose Create. - From the Select Blueprint dialog, choose Empty Function, then choose Finish.
Next, create a new file in the CDK project at src/DotnetLambdaCdkPipeline/SampleLambdaStack.cs to define your application stack containing a Lambda function. Update the file with the following contents (adjust the namespace as necessary):
using Amazon.CDK;
using Amazon.CDK.AWS.Lambda;
using Constructs;
using AssetOptions = Amazon.CDK.AWS.S3.Assets.AssetOptions;

namespace DotnetLambdaCdkPipeline
{
    class SampleLambdaStack: Stack
    {
        public SampleLambdaStack(Construct scope, string id, StackProps props = null) : base(scope, id, props)
        {
            // Commands executed in a AWS CDK pipeline to build, package, and extract a .NET function.
            var buildCommands = new[]
            {
                "cd /asset-input",
                "export DOTNET_CLI_HOME=\"/tmp/DOTNET_CLI_HOME\"",
                "export PATH=\"$PATH:/tmp/DOTNET_CLI_HOME/.dotnet/tools\"",
                "dotnet build",
                "dotnet tool install -g Amazon.Lambda.Tools",
                "dotnet lambda package -o output.zip",
                "unzip -o -d /asset-output output.zip"
            };

            new Function(this, "LambdaFunction", new FunctionProps
            {
                Runtime = Runtime.DOTNET_6,
                Handler = "SampleLambda::SampleLambda.Function::FunctionHandler",

                // Asset path should point to the folder where .csproj file is present.
                // Also, this path should be relative to cdk.json file.
                Code = Code.FromAsset("./src/SampleLambda", new AssetOptions
                {
                    Bundling = new BundlingOptions
                    {
                        Image = Runtime.DOTNET_6.BundlingImage,
                        Command = new[]
                        {
                            "bash", "-c", string.Join(" && ", buildCommands)
                        }
                    }
                })
            });
        }
    }
}
Building inside a Docker container
The preceding code uses bundling feature to build the Lambda function inside a docker container. Bundling starts a new docker container, copies the Lambda source code inside /asset-input directory of the container, runs the specified commands that write the package files under /asset-output directory. The files in /asset-output are copied as assets to the stack’s cloud assembly directory. In a later stage, these files are zipped and uploaded to S3 as the CDK asset.
Building Lambda functions inside Docker containers is preferable than building them locally because it reduces the host machine’s dependencies, resulting in greater consistency and reliability in your build process.
Bundling requires the creation of a docker container on your build machine. For this purpose, the privileged: true setting on the build machine has already been configured.
Adding development stage
Create a new file in the CDK project at src/DotnetLambdaCdkPipeline/DotnetLambdaCdkPipelineStage.cs to hold your stage. This class will create the development stage for your pipeline.
using Amazon.CDK;
using Constructs;

namespace DotnetLambdaCdkPipeline
{
    public class DotnetLambdaCdkPipelineStage : Stage
    {
        internal DotnetLambdaCdkPipelineStage(Construct scope, string id, IStageProps props = null) : base(scope, id, props)
        {
            Stack lambdaStack = new SampleLambdaStack(this, "LambdaStack");
        }
    }
}
Edit src/DotnetLambdaCdkPipeline/DotnetLambdaCdkPipelineStack.cs to add the stage to your pipeline. Add the bolded line from the code below to your file.
using Amazon.CDK;
using Amazon.CDK.Pipelines;

namespace DotnetLambdaCdkPipeline
{
    public class DotnetLambdaCdkPipelineStack : Stack
    {
        internal DotnetLambdaCdkPipelineStack(Construct scope, string id, IStackProps props = null) : base(scope, id, props)
        {

            var repository = Repository.FromRepositoryName(this, "repository", "dotnet-lambda-cdk-application");

            // This construct creates a pipeline with 3 stages: Source, Build, and UpdatePipeline
            var pipeline = new CodePipeline(this, "pipeline", new CodePipelineProps
            {
                PipelineName = "LambdaPipeline",
                .
                .
                .
            });

            var devStage = pipeline.AddStage(new DotnetLambdaCdkPipelineStage(this, "Development"));
        }
    }
}
Next, build the solution, then commit and push the changes to the CodeCommit repo. This will trigger the CodePipeline to start.
When the pipeline runs, UpdatePipeline stage detects the changes and updates the pipeline based on the code it finds there. After the UpdatePipeline stage completes, pipeline is updated with additional stages.
Let’s observe the changes:
- An Assets stage has been added. This stage uploads all the assets you are using in your app to Amazon S3 (the S3 bucket created during bootstrapping) so that they could be used by other deployment stages later in the pipeline. For example, the CloudFormation template used by the development stage, includes reference to these assets, which is why assets are first moved to S3 and then referenced in later stages.
- A Development stage with two actions has been added. The first action is to create the change set, and the second is to execute it.
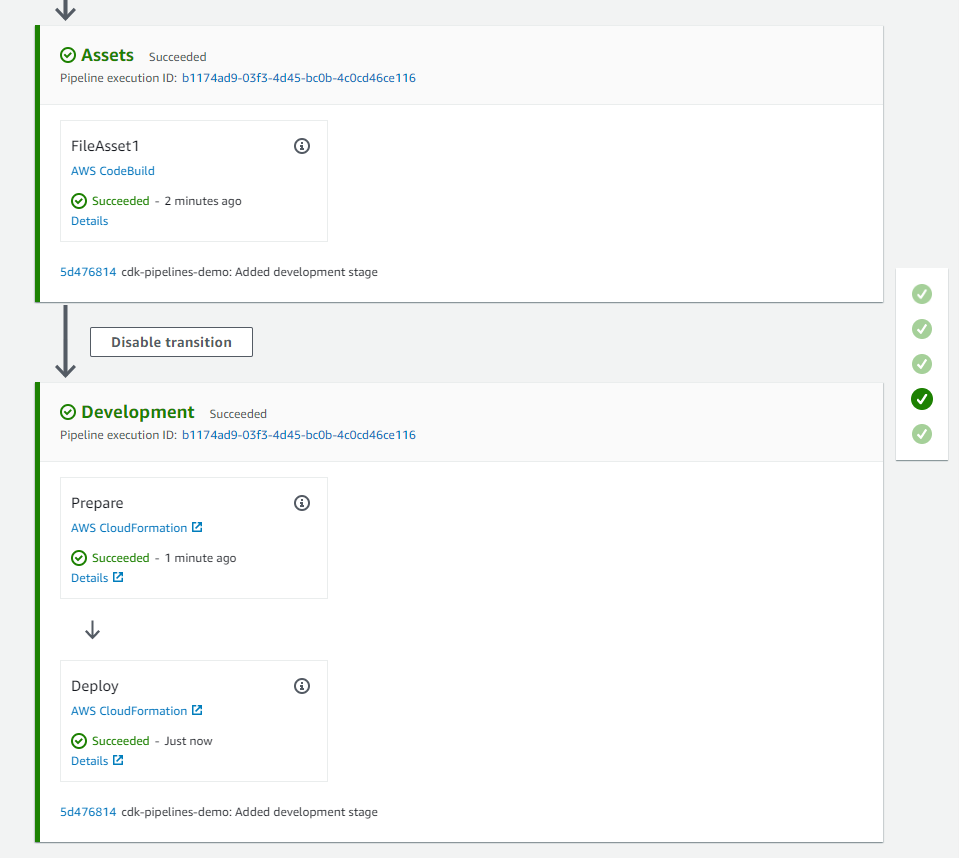
Figure 3: CDK pipeline with development stage to deploy .NET Lambda function
After the Deploy stage has completed, you can find the newly-deployed Lambda function by visiting the Lambda console, selecting “Functions” from the left menu, and filtering the functions list with “LambdaStack”. Note the runtime is .NET.
Running Unit Test cases in the CodePipeline
Next, you will add unit test cases to your Lambda function, and run them through the pipeline to generate a test report in CodeBuild.
To create a Unit Test project, do the following:
- Right click on the solution, choose Add, then choose New Project.
- In the New Project dialog box, choose the xUnit Test Project template, and then choose OK or Next.
- For Project Name, enter
SampleLambda.Tests, and then choose Create or Next.
Depending on your version of Visual Studio, you may be prompted to select the version of .NET to use. Choose .NET 6.0 (Long Term Support), then choose Create. - Right click on
SampleLambda.Testsproject, choose Add, then choose Project Reference. SelectSampleLambdaproject, and then choose OK.
Next, edit the src/SampleLambda.Tests/UnitTest1.cs file to add a unit test. You can use the code below, which verifies that the Lambda function returns the input string as upper case.
using Xunit;

namespace SampleLambda.Tests
{
    public class UnitTest1
    {
        [Fact]
        public void TestSuccess()
        {
            var lambda = new SampleLambda.Function();

            var result = lambda.FunctionHandler("test string", context: null);

            Assert.Equal("TEST STRING", result);
        }
    }
}
You can add pre-deployment or post-deployment actions to the stage by calling its AddPre() or AddPost() method. To execute above test cases, we will use a pre-deployment action.
To add a pre-deployment action, we will edit the src/DotnetLambdaCdkPipeline/DotnetLambdaCdkPipelineStack.cs file in the CDK project, after we add code to generate test reports.
To run the unit test(s) and publish the test report in CodeBuild, we will construct a BuildSpec for our CodeBuild project. We also provide IAM policy statements to be attached to the CodeBuild service role granting it permissions to run the tests and create reports. Update the file by adding the new code (starting with “// Add this code for test reports”) below the devStage declaration you added earlier:
using Amazon.CDK;
using Amazon.CDK.Pipelines;
...

namespace DotnetLambdaCdkPipeline
{
    public class DotnetLambdaCdkPipelineStack : Stack
    {
        internal DotnetLambdaCdkPipelineStack(Construct scope, string id, IStackProps props = null) : base(scope, id, props)
        {
            // ...
            // ...
            // ...
            var devStage = pipeline.AddStage(new DotnetLambdaCdkPipelineStage(this, "Development"));


            // Add this code for test reports
            var reportGroup = new ReportGroup(this, "TestReports", new ReportGroupProps
            {
                ReportGroupName = "TestReports"
            });

            // Policy statements for CodeBuild Project Role
            var policyProps = new PolicyStatementProps()
            {
                Actions = new string[] {
                    "codebuild:CreateReportGroup",
                    "codebuild:CreateReport",
                    "codebuild:UpdateReport",
                    "codebuild:BatchPutTestCases"
                },
                Effect = Effect.ALLOW,
                Resources = new string[] { reportGroup.ReportGroupArn }
            };

            // PartialBuildSpec in AWS CDK for C# can be created using Dictionary
            var reports = new Dictionary<string, object>()
            {
                {
                    "reports", new Dictionary<string, object>()
                    {
                        {
                            reportGroup.ReportGroupArn, new Dictionary<string,object>()
                            {
                                { "file-format", "VisualStudioTrx" },
                                { "files", "**/*" },
                                { "base-directory", "./testresults" }
                            }
                        }
                    }
                }
            };
            // End of new code block
        }
    }
}
Finally, add the CodeBuildStep as a pre-deployment action to the development stage with necessary CodeBuildStepProps to set up reports. Add this after the new code you added above.
devStage.AddPre(new Step[]
{
    new CodeBuildStep("Unit Test", new CodeBuildStepProps
    {
        Commands= new string[]
        {
            "dotnet test -c Release ./src/SampleLambda.Tests/SampleLambda.Tests.csproj --logger trx --results-directory ./testresults",
        },
        PrimaryOutputDirectory = "./testresults",
        PartialBuildSpec= BuildSpec.FromObject(reports),
        RolePolicyStatements = new PolicyStatement[] { new PolicyStatement(policyProps) },
        BuildEnvironment = new BuildEnvironment
        {
            BuildImage = LinuxBuildImage.AMAZON_LINUX_2_4,
            ComputeType = ComputeType.MEDIUM
        }
    })
});
Build the solution, then commit and push the changes to the repository. Pushing the changes triggers the pipeline, runs the test cases, and publishes the report to the CodeBuild console. To view the report, after the pipeline has completed, navigate to TestReports in CodeBuild’s Report Groups as shown below.
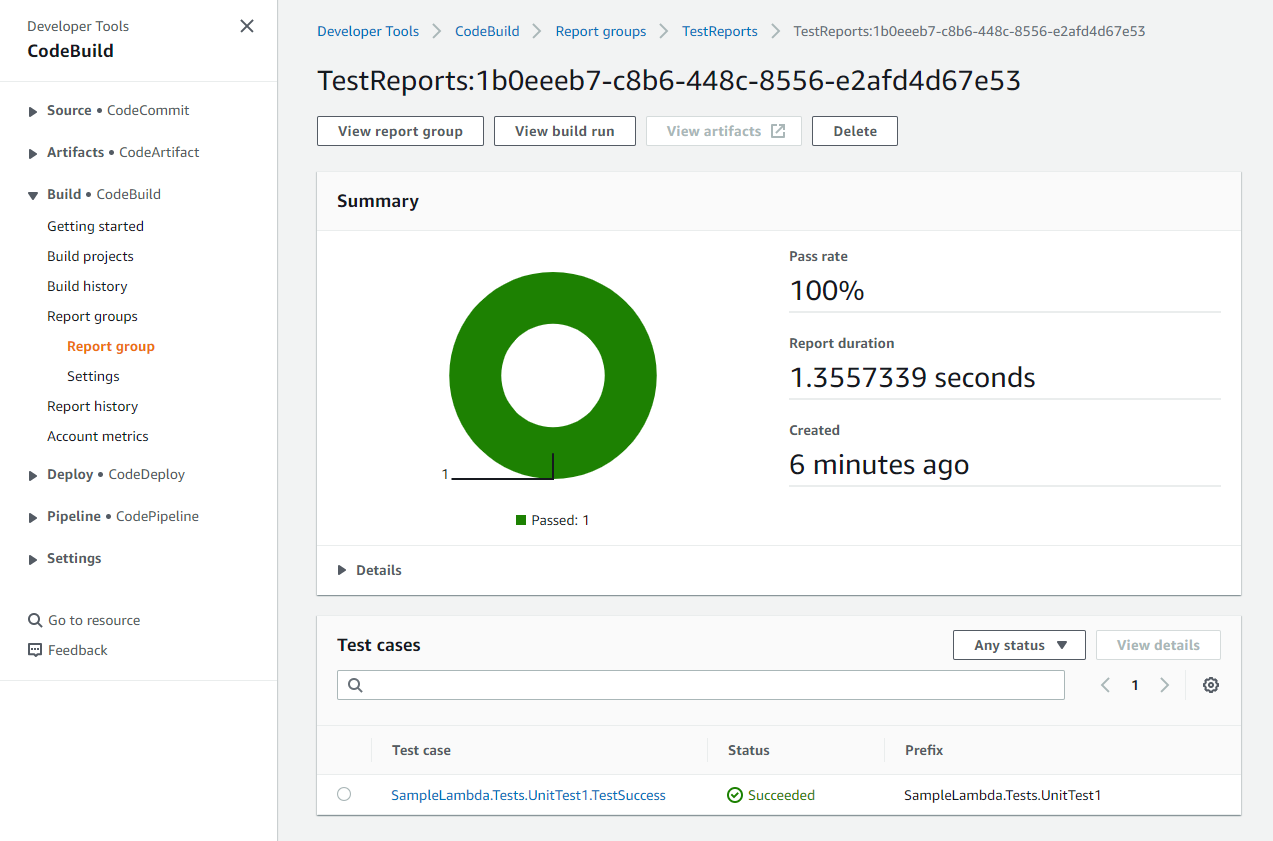
Figure 4: Test report in CodeBuild report group
Deploying to production environment with manual approval
CDK Pipelines makes it very easy to deploy additional stages with different accounts. You have to bootstrap the accounts and Regions you want to deploy to, and they must have a trust relationship added to the pipeline account.
To bootstrap an additional production environment into which AWS CDK applications will be deployed by the pipeline, run the below command, substituting in the AWS account ID for your production account, the region you will use for your production environment, the AWS CLI profile to use with the prod account, and the AWS account ID where the pipeline is already deployed (the account you bootstrapped at the start of this blog).
cdk bootstrap aws://<PROD-ACCOUNT-ID>/<PROD-REGION>
    --profile <PROD-PROFILE> \
    --cloudformation-execution-policies arn:aws:iam::aws:policy/AdministratorAccess \
    --trust <PIPELINE-ACCOUNT-ID>
The --trust option indicates which other account should have permissions to deploy AWS CDK applications into this environment. For this option, specify the pipeline’s AWS account ID.
Use below code to add a new stage for production deployment with manual approval. Add this code below the “devStage.AddPre(...)” code block you added in the previous section, and remember to replace the placeholders with your AWS account ID and region for your prod environment.
var prodStage = pipeline.AddStage(new DotnetLambdaCdkPipelineStage(this, "Production", new StageProps
{
    Env = new Environment
    {
        Account = "<PROD-ACCOUNT-ID>",
        Region = "<PROD-REGION>"
    }
}), new AddStageOpts
{
    Pre = new[] { new ManualApprovalStep("PromoteToProd") }
});
To support deploying CDK applications to another account, the artifact buckets must be encrypted, so add a CrossAccountKeys property to the CodePipeline near the top of the pipeline stack file, and set the value to true (see the line in bold in the code snippet below). This creates a KMS key for the artifact bucket, allowing cross-account deployments.
var pipeline = new CodePipeline(this, "pipeline", new CodePipelineProps
{
   PipelineName = "LambdaPipeline",
   SelfMutation = true,
   CrossAccountKeys = true,
   EnableKeyRotation = true, //Enable KMS key rotation for the generated KMS keys

   // ...
}
After you commit and push the changes to the repository, a new manual approval step called PromoteToProd is added to the Production stage of the pipeline. The pipeline pauses at this step and awaits manual approval as shown in the screenshot below.
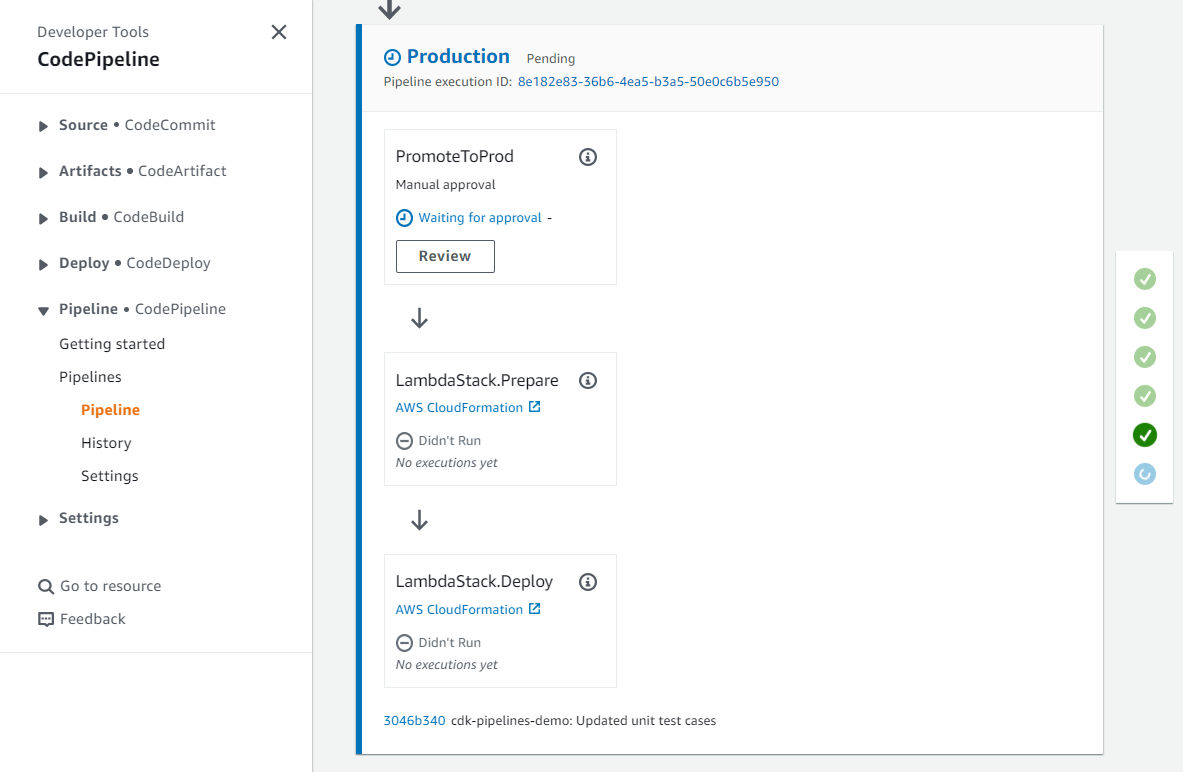
Figure 5: Pipeline waiting for manual review
When you click the Review button, you are presented with the following dialog. From here, you can choose to approve or reject and add comments if needed.
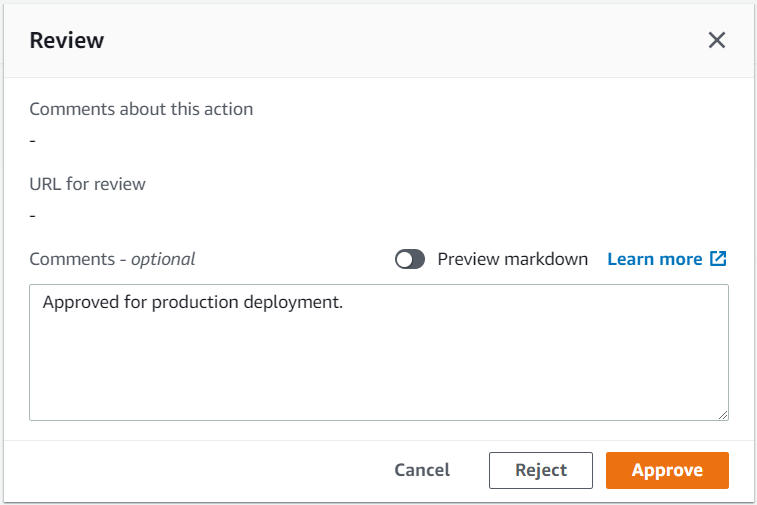
Figure 6: Manual review approval dialog
Once you approve, the pipeline resumes, executes the remaining steps and completes the deployment to production environment.
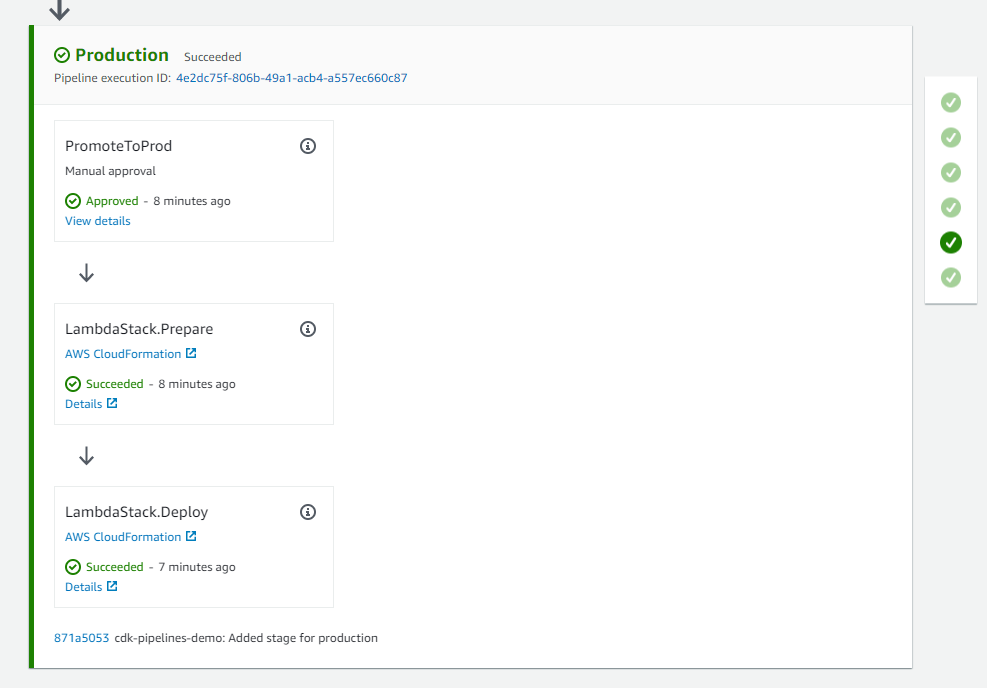
Figure 7: Successful deployment to production environment
Clean up
To avoid incurring future charges, log into the AWS console of the different accounts you used, go to the AWS CloudFormation console of the Region(s) where you chose to deploy, select and click Delete on the stacks created for this activity. Alternatively, you can delete the CloudFormation Stack(s) using cdk destroy command. It will not delete the CDKToolkit stack that the bootstrap command created. If you want to delete that as well, you can do it from the AWS Console.
Conclusion
In this post, you learned how to use CDK Pipelines for automating the deployment process of .NET Lambda functions. An intuitive and flexible architecture makes it easy to set up a CI/CD pipeline that covers the entire application lifecycle, from build and test to deployment. With CDK Pipelines, you can streamline your development workflow, reduce errors, and ensure consistent and reliable deployments.
For more information on CDK Pipelines and all the ways it can be used, see the CDK Pipelines reference documentation.
About the authors:
[$] GNOME releases version 44
Post Syndicated from original https://lwn.net/Articles/929220/
GNOME is, of course, a widely-used
desktop
environment for Linux
systems; on March 22, the project released GNOME 44,
codenamed “Kuala Lumpur”. This version features enhancements to the
settings panels, quick settings, the files application, and an updated file
chooser with a grid view, among others. The full list of changes can
be seen in the release
notes available on the GNOME website.
Understanding techniques to reduce AWS Lambda costs in serverless applications
Post Syndicated from James Beswick original https://aws.amazon.com/blogs/compute/understanding-techniques-to-reduce-aws-lambda-costs-in-serverless-applications/
This post is written by Josh Kahn, Tech Leader, and Chloe Jeon, Senior PMTes Lambda.
Serverless applications can lower the total cost of ownership (TCO) when compared to a server-based cloud execution model because it effectively shifts operational responsibilities such as managing servers to a cloud provider. Deloitte research on serverless TCO with Fortune 100 clients across industries show that serverless applications can offer up to 57% cost savings compared with server-based solutions.
Serverless applications can offer lower costs in:
- Initial development: Serverless enables builders to be more agile, deliver features more rapidly, and focus on differentiated business logic.
- Ongoing maintenance and infrastructure: Serverless shifts operational burden to AWS. Ongoing maintenance tasks, including patching and operating system updates.
This post focuses on options available to reduce direct AWS costs when building serverless applications. AWS Lambda is often the compute layer in these workloads and may comprise a meaningful portion of the overall cost.
To help optimize your Lambda-related costs, this post discusses some of the most commonly used cost optimization techniques with an emphasis on configuration changes over code updates. This post is intended for architects and developers new to building with serverless.
Building with serverless makes both experimentation and iterative improvement easier. All of the techniques described here can be applied before application development, or after you have deployed your application to production. The techniques are roughly by applicability: The first can apply to any workload; the last applies to a smaller number of workloads.
Right-sizing your Lambda functions
Lambda uses a pay-per-use cost model that is driven by three metrics:
- Memory configuration: allocated memory from 128MB to 10,240MB. CPU and other resources available to the function are allocated proportionally to memory.
- Function duration: time function runs, measures in milliseconds.
- Number of invocations: the number of times your function runs.
Over-provisioning memory is one of the primary drivers of increased Lambda cost. This is particularly acute among builders new to Lambda who are used to provisioning hosts running multiple processes. Lambda scales such that each execution environment of a function only handles one request at a time. Each execution environment has access to fixed resources (memory, CPU, storage) to complete work on the request.
By right-sizing the memory configuration, the function has the resources to complete its work and you are paying for only the needed resources. While you also have direct control of function duration, this is a less effective cost optimization to implement. The engineering costs to create a few milliseconds of savings may outweigh the cost savings. Depending on the workload, the number of times your function is invoked may be outside your control. The next section discusses a technique to reduce the number of invocations for some types of workloads.
Memory configuration is accessible via the AWS Management Console or your favorite infrastructure as code (IaC) option. The memory configuration setting defines allocated memory, not memory used by your function. Right-sizing memory is an adjustment that can reduce the cost (or increase performance) of your function. However, lowering the function-memory may not always result in cost savings. Lowering function memory means lowering available CPU for the Lambda function, which could increase the function duration, resulting in either no cost savings or higher cost. It is important to identify the optimal memory configuration for cost savings while preserving performance.
AWS offers two approaches to right-sizing memory allocation: AWS Lambda Power Tuning and AWS Compute Optimizer.
AWS Lambda Power Tuning is an open-source tool that can be used to empirically find the optimal memory configuration for your function by trading off cost against execution time. The tool runs multiple concurrent versions of your function against mock input data at different memory allocations. The result is a chart that can help you find the “sweet spot” between cost and duration/performance. Depending on the workload, you may prioritize one over the other. AWS Lambda Power Tuning is a good choice for new functions and can also help select between the two instruction set architectures offered by Lambda.

AWS Compute Optimizer uses machine learning to recommend an optimal memory configuration based on historical data. Compute Optimizer requires that your function be invoked at least 50 times over the trailing 14 days to provide a recommendation based on past utilization, so is most effective once your function is in production.
Both Lambda Power Tuning and Compute Optimizer help derive the right-sized memory allocation for your function. Use this value to update the configuration of your function using the AWS Management Console or IaC.
This post includes AWS Serverless Application Model (AWS SAM) sample code throughout to demonstrate how to implement optimizations. You can also use AWS Cloud Development Kit (AWS CDK), Terraform, Serverless Framework, and other IaC tools to implement the same changes.
MyFunction:
  Type: AWS::Serverless::Function
  Properties:
    Runtime: nodejs18.x
    Handler: app.handler
    MemorySize: 1024   # Set memory configuration to optimize for cost or performance
Setting a realistic function timeout
Lambda functions are configured with a maximum time that each invocation can run, up to 15 minutes. Setting an appropriate timeout can be beneficial in containing costs of your Lambda-based application. Unhandled exceptions, blocking actions (for example, opening a network connection), slow dependencies, and other conditions can lead to longer-running functions or functions that run until the configured timeout. Proper timeouts are the best protection against both slow and erroneous code. At some point, the work the function is performing and the per-millisecond cost of that work is wasted.
Our recommendation is to set a timeout of less than 29-seconds for all synchronous invocations, or those in which the caller is waiting for a response. Longer timeouts are appropriate for asynchronous invocations, but consider timeouts longer than 1-minute to be an exception that requires review and testing.
Using Graviton
Lambda offers two instruction set architectures in most AWS Regions: x86 and arm64.
Choosing Graviton can save money in two ways. First, your functions may run more efficiently due to the Graviton2 architecture. Second, you may pay less for the time that they run. Lambda functions powered by Graviton2 are designed to deliver up to 19 percent better performance at 20 percent lower cost. Consider starting with Graviton when developing new Lambda functions, particularly those that do not require natively compiled binaries.
If your function relies on native compiled binaries or is packaged as a container image, you must rebuild to move between arm64 and x86. Lambda layers may also include dependencies targeted for one architecture or the other. We encourage you to review dependencies and test your function before changing the architecture. The AWS Lambda Power Tuning tool also allows you to compare the price and performance of arm64 and x86 at different memory settings.
You can modify the architecture configuration of your function in the console or your IaC of choice. For example, in AWS SAM:
MyFunction:
  Type: AWS::Serverless::Function
  Properties:
    Architectures:
      - arm64. # Set architecture to use Graviton2
    Runtime: nodejs18.x
    Handler: app.handler
Filtering incoming events
Lambda is integrated with over 200 event sources, including Amazon SQS, Amazon Kinesis Data Streams, Amazon DynamoDB Streams, Amazon Managed Streaming for Apache Kafka, and Amazon MQ. The Lambda service integrates with these event sources to retrieve messages and invokes your function as needed to process those messages.
When working with one of these event sources, builders can configure filters to limit the events sent to your function. This technique can greatly reduce the number of times your function is invoked depending on the number of events and specificity of your filters. When not using event filtering, the function must be invoked to first determine if an event should be processed before performing the actual work. Event filtering alleviates the need to perform this upfront check while reducing the number of invocations.
For example, you may only want a function to run when orders of over $200 are found in a message on a Kinesis data stream. You can configure an event filtering pattern using the console or IaC in a manner similar to memory configuration.
To implement the Kinesis stream filter using AWS SAM:
MyFunction:
  Type: AWS::Serverless::Function
  Properties:
    Runtime: nodejs18.x
    Handler: app.handler
    Events:
      Type: Kinesis
      Properties:
        StartingPosition: LATEST
        Stream: "arn:aws:kinesis:us-east-1:0123456789012:stream/orders"
        FilterCriteria:
          Filters:
            - Pattern: '{ "data" : { "order" : { "value" : [{ "numeric": [">", 200] }] } } }'
If an event satisfies one of the event filters associated with the event source, Lambda sends the event to your function for processing. Otherwise, the event is discarded as processed successfully without invoking the function.
If you are building or running a Lambda function that is invoked by one of the previously mentioned event sources, it’s recommended that you review the filtering options available. This technique requires no code changes to your Lambda function – even if the function performs some preprocessing check, that check still completes successfully with filtering implemented.
To learn more, read Filtering event sources for AWS Lambda functions.
Avoiding recursion
You may be familiar with the programming concept of a recursive function or a function/routine that calls itself. Though rare, customers sometimes unintentionally build recursion in their architecture, so a Lambda function continuously calls itself.
The most common recursive pattern is between Lambda and Amazon S3. Actions in an S3 bucket can trigger a Lambda function, and recursion can occur when that Lambda function writes back to the same bucket.
Consider a use case in which a Lambda function is used to generate a thumbnail of user-submitted images. You configure the bucket to trigger the thumbnail generation function when a new object is put in the bucket. What happens if the Lambda function writes the thumbnail to the same bucket? The process starts anew and the Lambda function then runs on the thumbnail image itself. This is recursion and can lead to an infinite loop condition.
While there are multiple ways to prevent against this condition, it’s best practice to use a second S3 bucket to store thumbnails. This approach minimizes changes to the architecture as you do not need to change the notification settings nor the primary S3 bucket. To learn about other approaches, read Avoiding recursive invocation with Amazon S3 and AWS Lambda.
If you do encounter recursion in your architecture, set Lambda reserved concurrency to zero to stop the function from running. Allow minutes to hours before lifting the reserved concurrency cap. Since S3 events are asynchronous invocations that have automatic retries, you may continue to see recursion until you resolve the issue or all events have expired.
Conclusion
Lambda offers a number of techniques that you can use to minimize infrastructure costs whether you are just getting started with Lambda or have numerous functions already deployed in production. When combined with the lower costs of initial development and ongoing maintenance, serverless can offer a low total cost of ownership. Get hands-on with these techniques and more with the Serverless Optimization Workshop.
To learn more about serverless architectures, find reusable patterns, and keep up-to-date, visit Serverless Land.
Use IAM roles to connect GitHub Actions to actions in AWS
Post Syndicated from David Rowe original https://aws.amazon.com/blogs/security/use-iam-roles-to-connect-github-actions-to-actions-in-aws/
Have you ever wanted to initiate change in an Amazon Web Services (AWS) account after you update a GitHub repository, or deploy updates in an AWS application after you merge a commit, without the use of AWS Identity and Access Management (IAM) user access keys? If you configure an OpenID Connect (OIDC) identity provider (IdP) inside an AWS account, you can use IAM roles and short-term credentials, which removes the need for IAM user access keys.
In this blog post, we will walk you through the steps needed to configure a specific GitHub repo to assume an individual role in an AWS account to preform changes. You will learn how to create an OIDC-trusted connection that is scoped to an individual GitHub repository, and how to map the repository to an IAM role in your account. You will create the OIDC connection, IAM role, and trust relationship two ways: with the AWS Management Console and with the AWS Command Line Interface (AWS CLI).
This post focuses on creating an IAM OIDC identity provider for GitHub and demonstrates how to authorize access into an AWS account from a specific branch and repository. You can use OIDC IdPs for workflows that support the OpenID Connect standard, such as Google or Salesforce.
Prerequisites
To follow along with this blog post, you should have the following prerequisites in place:
- The ability to create a new GitHub Actions workflow file in the .github/workflows/ directory under a branch of a GitHub repository
- An AWS account
- Access to the following IAM permissions in the account:
- Must be able to create an OpenID Connect IdP
- Must be able to create an IAM role and attach a policy
Solution overview
GitHub is an external provider that is independent from AWS. To use GitHub as an OIDC IdP, you will need to complete four steps to access AWS resources from your GitHub repository. Then, for the fifth and final step, you will use AWS CloudTrail to audit the role that you created and used in steps 1–4.
- Create an OIDC provider in your AWS account. This is a trust relationship that allows GitHub to authenticate and be authorized to perform actions in your account.
- Create an IAM role in your account. You will then scope the IAM role’s trust relationship to the intended parts of your GitHub organization, repository, and branch for GitHub to assume and perform specific actions.
- Assign a minimum level of permissions to the role.
- Create a GitHub Actions workflow file in your repository that can invoke actions in your account.
- Audit the role’s use with Amazon CloudTrail logs.
Step 1: Create an OIDC provider in your account
The first step in this process is to create an OIDC provider which you will use in the trust policy for the IAM role used in this action.
To create an OIDC provider for GitHub (console):
- Open the IAM console.
- In the left navigation menu, choose Identity providers.
- In the Identity providers pane, choose Add provider.
- For Provider type, choose OpenID Connect.
- For Provider URL, enter the URL of the GitHub OIDC IdP for this solution: https://token.actions.GitHubusercontent.com.
- Choose Get thumbprint to verify the server certificate of your IdP. To learn more about OIDC thumbprints, see Obtaining the thumbprint for an OpenID Connect Identity Provider.
- For Audience, enter sts.amazonaws.com. This will allow the AWS Security Token Service (AWS STS) API to be called by this IdP.
- (Optional) For Add tags, you can add key–value pairs to help you identify and organize your IdPs. To learn more about tagging IAM OIDC IdPs, see Tagging OpenID Connect (OIDC) IdPs.
- Verify the information that you entered. Your console should match the screenshot in Figure 1. After verification, choose Add provider.
Note: Each provider is a one-to-one relationship to an external IdP. If you want to add more IdPs to your account, you can repeat this process.

Figure 1: Steps to configure the identity provider
- Once you are taken back to the Identity providers page, you will see your new IdP as shown in Figure 2. Select your provider to view its properties, and make note of the Amazon Resource Name (ARN). You will use the ARN later in this post. The ARN will look similar to the following:
arn:aws:iam::111122223333:oidc-provider/token.actions.GitHubusercontent.com
Figure 2: View your identity provider


To create an OIDC provider for GitHub (AWS CLI):
You can add GitHub as an IdP in your account with a single AWS CLI command. The following code will perform the previous steps outlined for the console, with the same results. For the value —thumbprint-list, you will use the GitHub OIDC thumbprint 938fd4d98bab03faadb97b34396831e3780aea1.
To learn more about the GitHub thumbprint, see GitHub Actions – Update on OIDC based deployments to AWS. At the time of publication, this thumbprint is correct.
Both of the preceding methods will add an IdP in your account. You can view the provider on the Identity providers page in the IAM console.
Step 2: Create an IAM role and scope the trust policy
You can create an IAM role with either the IAM console or the AWS CLI. If you choose to create the IAM role with the AWS CLI, you will scope the Trust Relationship Policy before you create the role.
The procedure to create the IAM role and to scope the trust policy come from the AWS Identity and Access Management User Guide. For detailed instructions on how to configure a role, see How to Configure a Role for GitHub OIDC Identity Provider.
To create the IAM role (IAM console):
- In the IAM console, on the Identity providers screen, choose the Assign role button for the newly created IdP.
Figure 3: Assign a role to the identity provider
- In the Assign role for box, choose Create a new role, and then choose Next, as shown in the following figure.
Figure 4: Create a role from the Identity provider page
- The Create role page presents you with a few options. Web identity is already selected as the trusted entity, and the Identity provider field is populated with your IdP. In the Audience list, select sts.amazonaws.com, and then choose Next.
- On the Permissions page, choose Next. For this demo, you won’t add permissions to the role.
If you’d like to test other actions, like AWS CodeBuild operations, you can add permissions as outlined by these blog posts: Complete CI/CD with AWS CodeCommit, AWS CodeBuild, AWS CodeDeploy, and AWS CodePipeline or Techniques for writing least privilege IAM policies.
- (Optional) On the Tags page, add tags to this new role, and then choose Next: Review.
- On the Create role page, add a role name. For this demo, enter GitHubAction-AssumeRoleWithAction. Optionally add a description.
- To create the role, choose Create role.


Next, you’ll scope the IAM role’s trust policy to a single GitHub organization, repository, and branch.
To scope the trust policy (IAM console)
- In the IAM console, open the newly created role and choose Edit trust relationship.
- On the Edit trust policy page, modify the trust policy to allow your unique GitHub organization, repository, and branch to assume the role. This example trusts the GitHub organization <aws-samples>, the repository named <EXAMPLEREPO>, and the branch named <ExampleBranch>. Update the Federated ARN with the GitHub IdP ARN that you copied previously.
To create a role (AWS CLI)
In the AWS CLI, use the example trust policy shown above for the console. This policy is designed to limit access to a defined GitHub organization, repository, and branch.
- Create and save a JSON file with the example policy to your local computer with the file name trustpolicyforGitHubOIDC.json.
- Run the following command to create the role.
For more details on how to create an OIDC role with the AWS CLI, see Creating a role for federated access (AWS CLI).
Step 3: Assign a minimum level of permissions to the role
For this example, you won’t add permissions to the IAM role, but will assume the role and call STS GetCallerIdentity to demonstrate a GitHub action that assumes the AWS role.
If you’re interested in performing additional actions in your account, you can add permissions to the role you created, GitHubAction-AssumeRoleWithAction. Common actions for workflows include calling AWS Lambda functions or pushing files to an Amazon Simple Storage Service (Amazon S3) bucket. For more information about using IAM to apply permissions, see Policies and permissions in IAM.
If you’d like to do a test, you can add permissions as outlined by these blog posts: Complete CI/CD with AWS CodeCommit, AWS CodeBuild, AWS CodeDeploy, and AWS CodePipeline or Techniques for writing least privilege IAM policies.
Step 4: Create a GitHub action to invoke the AWS CLI
GitHub actions are defined as methods that you can use to automate, customize, and run your software development workflows in GitHub. The GitHub action that you create will authenticate into your account as the role that was created in Step 2: Create the IAM role and scope the trust policy.
To create a GitHub action to invoke the AWS CLI:
- Create a basic workflow file, such as main.yml, in the .github/workflows directory of your repository. This sample workflow will assume the GitHubAction-AssumeRoleWithAction role, to perform the action aws sts get-caller-identity. Your repository can have multiple workflows, each performing different sets of tasks. After GitHub is authenticated to the role with the workflow, you can use AWS CLI commands in your account.
- Paste the following example workflow into the file.
- Modify the workflow to reflect your AWS account information:
- AWS_REGION: Enter the AWS Region for your AWS resources.
- role-to-assume: Replace the ARN with the ARN of the AWS GitHubAction role that you created previously.
In the example workflow, if there is a push or pull on the repository’s “main” branch, the action that you just created will be invoked.
Figure 5 shows the workflow steps in which GitHub does the following:
- Authenticates to the IAM role with the OIDC IdP in the Region that was defined in the workflow file in the step configure aws credentials.
- Calls aws sts get-caller-identity in the step Hello from AWS. WhoAmI… Run AWS CLI sts GetCallerIdentity.
Figure 5: Results of GitHub action

Step 5: Audit the role usage: Query CloudTrail logs
The final step is to view the AWS CloudTrail logs in your account to audit the use of this role.
To view the event logs for the GitHub action:
- In the AWS Management Console, open CloudTrail and choose Event History.
- In the Lookup attributes list, choose Event source.
- In the search bar, enter sts.amazonaws.com.
Figure 6: Find event history in CloudTrail
- You should see the GetCallerIdentity and AssumeRoleWithWebIdentity events, as shown in Figure 6. The GetCallerIdentity event is the Hello from AWS. step in the GitHub workflow file. This event shows the workflow as it calls aws sts get-caller-identity. The AssumeRoleWithWebIdentity event shows GitHub authenticating and assuming your IAM role GitHubAction-AssumeRoleWithAction.

You can also view one event at a time.
To view the AWS CLI GetCallerIdentity event:
- In the Lookup attributes list, choose User name.
- In the search bar, enter the role-session-name, defined in the workflow file in your repository. This is not the IAM role name, because this role-session-name is defined in line 30 of the workflow example. In the workflow example for this blog post, the role-session-name is GitHub_to_AWS_via_FederatedOIDC.
- You can now see the first event in the CloudTrail history.
Figure 7: View the get caller identity in CloudTrail

To view the AssumeRoleWithWebIdentity event
- In the Lookup attributes list, choose User name.
- In the search bar, enter the GitHub organization, repository, and branch that is defined in the IAM role’s trust policy. In the example outlined earlier, the user name is repo:aws-samples/EXAMPLE:ref:refs/heads/main.
- You can now see the individual event in the CloudTrail history.
Figure 8: View the assume role call in CloudTrail

Conclusion
When you use IAM roles with OIDC identity providers, you have a trusted way to provide access to your AWS resources. GitHub and other OIDC providers can generate temporary security credentials to update resources and infrastructure inside your accounts.
In this post, you learned how to use the federated access to assume a role inside AWS directly from a workflow action file in a GitHub repository. With this new IdP in place, you can begin to delete AWS access keys from your IAM users and use short-term credentials.
After you read this post, we recommend that you follow the AWS Well Architected Security Pillar IAM directive to use programmatic access to AWS services using temporary and limited-privilege credentials. If you deploy IAM federated roles instead of AWS user access keys, you follow this guideline and issue tokens by the AWS Security Token Service. If you have feedback on this post, leave a comment below and let us know how you would like to see OIDC workflows expanded to help your IAM needs.
If you have feedback about this post, submit comments in the Comments section below. If you have questions about this post, contact AWS Support.
Want more AWS Security news? Follow us on Twitter.
Multi-Architecture Container Builds with CodeCatalyst
Post Syndicated from original https://aws.amazon.com/blogs/devops/multi-architecture-container-builds-with-codecatalyst/
AWS Graviton Processors are designed by AWS to deliver the best price performance for your cloud workloads running in Amazon Elastic Compute Cloud (Amazon EC2). Amazon CodeCatalyst recently added support to run workflow actions using on-demand or pre-provisioned compute powered by AWS Graviton processors. Customers can now access high performance AWS Graviton processors to build artifacts for Arm, or improve their price performance. In this post I will show you how to create a multi-architecture docker image using CodeCatalyst that can run on both amd64 and arm64 processors.
Background
Container images only run on a system with the same CPU architecture for which they were targeted. For example, an amd64 image runs on Intel and AMD processors, while an arm64 image runs on AWS Graviton. Note that amd64 and x86_64 are often used interchangeable, and I have chosen to use amd64 in this post. Rather than maintaining multiple repositories for each image type, you can combine variants for multiple architectures in the same repository. In addition, you can create a manifest describing which image to use for each architecture. This is known as multi-architecture, or multi-platform images.
Let us look at an example to further understand multi-arch images. In this screenshot from Amazon Elastic Container Registry (Amazon ECR), I have created two images for a simple hello-world application. One image is tagged latest-amd64 for AMD architectures and one tagged latest-arm64 for ARM architectures.

In addition, I have created an Image Index tagged latest. The image index is a map describing which image to use for each architecture. This allows my users to simply pull hello-world:latest and the index will identify the correct image based on the target platform. The image index contains the following manifest.
{
  "schemaVersion": 2,
  "mediaType": "application/vnd.docker.distribution.manifest.list.v2+json",
  "manifests": [
    {
	  "mediaType": "application/vnd.docker.distribution.manifest.v2+json",
	  "size": 1573,
	  "digest": "sha256:eccb6dd2c2dbfc9...",
	  "platform": {
	    "architecture": "amd64",
		"os": "linux"
	  }
	},
	{
	  "mediaType": "application/vnd.docker.distribution.manifest.v2+json",
	  "size": 1573,
	  "digest": "sha256:c64812837fbd43...",
	  "platform": {
	    "architecture": "arm64",
		"os": "linux"
	  }
	}
  ]
}
Now that I have explained what a multi-arch image is, I will explain how to create one in a CodeCatalyst workflow. A CodeCatalyst workflow is an automated procedure that describes how to build, test, and deploy your code as part of a continuous integration and continuous delivery (CI/CD) system. A workflow defines a series of steps, or actions, to take during a workflow run. Let’s get started.
Prerequisites
If you would like to follow along with this walkthrough, you will need:
- A CodeCatalyst space and associated AWS account.
- An empty CodeCatalyst projectand source repository in the space.
- An Amazon ECR private repository in the associated AWS account.
- A CodeCatalyst environment connected to the associated AWS account.
Walkthrough
In this walkthrough I will create a simple application using an Apache HTTP Server serving a static hello world page. The workload is inconsequential. I will focus on the process of building the container image using a CodeCatalyst workflow. The Workflow will build two container images, one for amd64 and one for arm64. The two build tasks will run in parallel on different compute architectures. When both builds are complete, the workflow will build the docker manifest. At the end of this post, my workflow will look like this.

Note that docker also offers a plugin called buildx that will allow you to build a multi-architecture image with a single command. In a real-world application, the workflow would also build the source code, run unit tests, etc. on each architecture. The sample application used in this post is so simple that there is no need to build and test the source code. Let’s examine the sample application now.
Sample Application
Initially the empty repository will only have a README.md file. By the end of this post, my repository will look like this.

I’ll begin by creating the file named index.html. I used the Create file button in CodeCatalyst console shown previously. My index.html file has the following content:
<html>
    <head>
        <title>Hello World!</title>
    </head>
    <body>
        <h1>Hello World!</h1>
        <p>Hello from a multi-architecture container created in CodeCatalyst.</p>
    </body>
</html>
I’ll also create a Dockerfile that contains two commands. The first command instructs Docker to build a new image from the Apache HTTP Server Project image called httpd. It is important to note that the httpd image already supports multiple architectures including amd64 and arm64. When creating a multi-architecture image, the base image must also support these architectures. The second command simply copies the index.html file above into the new image. My Dockerfile file has the following content.
FROM httpd
COPY ./index.html /usr/local/apache2/htdocs/
With the source code for my sample application complete, I can turn my attention to the workflow.
CI/CD Workflow
To create a new workflow, select CI/CD from navigation on the left and then select Workflows (1). Then, select Create workflow (2), leave the default options, and select Create (3).

If the workflow editor opens in YAML mode, select Visual to open the visual designer. Now, I can start adding actions to the workflow.
Build Action for the AMD64 Variant
I’ll begin by adding a build action for the amd64 container. Select “+ Actions” to open the actions list. Find the Build action and click “+” to add a new build action to the workflow.
On the Inputs tab, create three variable named AWS_DEFAULT_REGION, IMAGE_REPO_NAME, and IMAGE_TAG. Set the first two values equal to the region and **** name of your Amazon ECR repository**.** Set the third to latest-amd64. For example:

Now select the Configuration tab and rename the action docker_build_amd64. Select the Environment, AWS account connection, and Role for the associated AWS account where you created the Amazon ECR repository. For example:

Then, copy and paste the following code into the Shell commands. This code will build the image using the Dockerfile you created previously. Then, it logs into Amazon ECR, and finally, pushes the new image to ECR.
- Run: AWS_ACCOUNT_ID=`aws sts get-caller-identity --query "Account" --output text`
- Run: docker build -t $AWS_ACCOUNT_ID.dkr.ecr.$AWS_DEFAULT_REGION.amazonaws.com/$IMAGE_REPO_NAME:$IMAGE_TAG .
- Run: aws ecr get-login-password | docker login --username AWS --password-stdin $AWS_ACCOUNT_ID.dkr.ecr.$AWS_DEFAULT_REGION.amazonaws.com
- Run: docker push $AWS_ACCOUNT_ID.dkr.ecr.$AWS_DEFAULT_REGION.amazonaws.com/$IMAGE_REPO_NAME:$IMAGE_TAG
If you switch back to the YAML view, you can see that the designer has added the following action to the workflow definition.
  docker_build_amd64:
    Identifier: aws/build@v1
    Compute:
      Type: EC2
    Inputs:
      Sources:
        - WorkflowSource
      Variables:
        - Name: AWS_DEFAULT_REGION
          Value: us-west-2
        - Name: IMAGE_REPO_NAME
          Value: hello-world
        - Name: IMAGE_TAG
          Value: latest-amd64
    Environment:
      Name: demo
      Connections:
        - Role: CodeCatalystPreviewDevelopmentAdministrator
          Name: development
    Configuration:
      Steps:
        - Run: AWS_ACCOUNT_ID=`aws sts get-caller-identity --query "Account" --output text`
        - Run: docker build -t $AWS_ACCOUNT_ID.dkr.ecr.$AWS_DEFAULT_REGION.amazonaws.com/$IMAGE_REPO_NAME:$IMAGE_TAG .
        - Run: aws ecr get-login-password | docker login --username AWS --password-stdin $AWS_ACCOUNT_ID.dkr.ecr.$AWS_DEFAULT_REGION.amazonaws.com
        - Run: docker push $AWS_ACCOUNT_ID.dkr.ecr.$AWS_DEFAULT_REGION.amazonaws.com/$IMAGE_REPO_NAME:$IMAGE_TAG
With the amd64 image complete, you can move on to the arm64 image.
Build Action for the ARM64 Variant
Add a second build action named docker_build_arm64 for the arm64 container. The configuration is nearly identical to the previous action with two minor changes. First, on the Inputs tab, I set the IMAGE_TAG to latest-arm64.

Second, on the Configuration tab, change the compute fleet to Linux.Arm64.Large. That is all you need to do to run your action on AWS Graviton. For example:

The Shell commands are identical to the arm64 build action. In addition, don’t forget to select the Environment, AWS account connection, and Role on the configuration tab. The complete configuration for the second action looks like this:
  docker_build_arm64:
    Identifier: aws/build@v1
    Compute:
      Type: EC2
      Fleet: Linux.Arm64.Large
    Inputs:
      Sources:
        - WorkflowSource
      Variables:
        - Name: AWS_DEFAULT_REGION
          Value: us-west-2
        - Name: IMAGE_REPO_NAME
          Value: hello-world
        - Name: IMAGE_TAG
          Value: latest-arm64
    Environment:
      Name: demo
      Connections:
        - Role: CodeCatalystPreviewDevelopmentAdministrator
          Name: development
    Configuration:
      Steps:
        - Run: AWS_ACCOUNT_ID=`aws sts get-caller-identity --query "Account" --output text`
        - Run: docker build -t $AWS_ACCOUNT_ID.dkr.ecr.$AWS_DEFAULT_REGION.amazonaws.com/$IMAGE_REPO_NAME:$IMAGE_TAG .
        - Run: aws ecr get-login-password | docker login --username AWS --password-stdin $AWS_ACCOUNT_ID.dkr.ecr.$AWS_DEFAULT_REGION.amazonaws.com
        - Run: docker push $AWS_ACCOUNT_ID.dkr.ecr.$AWS_DEFAULT_REGION.amazonaws.com/$IMAGE_REPO_NAME:$IMAGE_TAG
Now that you have a build action for the amd64 and arm64 images, you simply need to create a manifest file describing which image to use for each architecture.
Build Action for the Manifest
The final step in the workflow is to create the Docker manifest. Create a third build action named docker_manifest. You want this action to wait for the prior two actions to complete. Therefore, select the prior two actions from the Depends on drop down, like this:

Also configure four variables. AWS_DEFAULT_REGION and IMAGE_REPO_NAME are identical to the prior actions. In addition, IMAGE_TAG_AMD64 and IMAGE_TAG_ARM64 include the tags you created in the prior actions.

On the configuration tab, select the Environment, AWS account connection, and Role as you did in the prior actions. Then, copy and paste the following Shell commands.
- Run: AWS_ACCOUNT_ID=`aws sts get-caller-identity --query "Account" --output text`
- Run: aws ecr get-login-password | docker login --username AWS --password-stdin $AWS_ACCOUNT_ID.dkr.ecr.$AWS_DEFAULT_REGION.amazonaws.com
- Run: docker manifest create $AWS_ACCOUNT_ID.dkr.ecr.$AWS_DEFAULT_REGION.amazonaws.com/$IMAGE_REPO_NAME $AWS_ACCOUNT_ID.dkr.ecr.$AWS_DEFAULT_REGION.amazonaws.com/$IMAGE_REPO_NAME:$IMAGE_TAG_ARM64 $AWS_ACCOUNT_ID.dkr.ecr.$AWS_DEFAULT_REGION.amazonaws.com/$IMAGE_REPO_NAME:$IMAGE_TAG_AMD64
- Run: docker manifest annotate --arch amd64 $AWS_ACCOUNT_ID.dkr.ecr.$AWS_DEFAULT_REGION.amazonaws.com/$IMAGE_REPO_NAME $AWS_ACCOUNT_ID.dkr.ecr.$AWS_DEFAULT_REGION.amazonaws.com/$IMAGE_REPO_NAME:$IMAGE_TAG_AMD64
- Run: docker manifest annotate --arch arm64 $AWS_ACCOUNT_ID.dkr.ecr.$AWS_DEFAULT_REGION.amazonaws.com/$IMAGE_REPO_NAME $AWS_ACCOUNT_ID.dkr.ecr.$AWS_DEFAULT_REGION.amazonaws.com/$IMAGE_REPO_NAME:$IMAGE_TAG_ARM64
- Run: docker manifest push $AWS_ACCOUNT_ID.dkr.ecr.us-west-2.amazonaws.com/$IMAGE_REPO_NAME
The shell commands create a manifest and then annotate it with the correct image for both amd64 and arm64. The final action looks like this.
  docker_manifest:
    Identifier: aws/build@v1
    DependsOn:
      - docker_build_arm64
      - docker_build_amd64
    Compute:
      Type: EC2
    Inputs:
      Sources:
        - WorkflowSource
      Variables:
        - Name: AWS_DEFAULT_REGION
          Value: us-west-2
        - Name: IMAGE_REPO_NAME
          Value: hello-world
        - Name: IMAGE_TAG_AMD64
          Value: latest-amd64
        - Name: IMAGE_TAG_ARM64
          Value: latest-arm64
    Environment:
      Name: demo
      Connections:
        - Role: CodeCatalystPreviewDevelopmentAdministrator
          Name: development
    Configuration:
      Steps:
        - Run: AWS_ACCOUNT_ID=`aws sts get-caller-identity --query "Account" --output
            text`
        - Run: aws ecr get-login-password | docker login --username AWS
            --password-stdin $AWS_ACCOUNT_ID.dkr.ecr.$AWS_DEFAULT_REGION.amazonaws.com
        - Run: docker manifest create
            $AWS_ACCOUNT_ID.dkr.ecr.$AWS_DEFAULT_REGION.amazonaws.com/$IMAGE_REPO_NAME
            $AWS_ACCOUNT_ID.dkr.ecr.$AWS_DEFAULT_REGION.amazonaws.com/$IMAGE_REPO_NAME:$IMAGE_TAG_ARM64
            $AWS_ACCOUNT_ID.dkr.ecr.$AWS_DEFAULT_REGION.amazonaws.com/$IMAGE_REPO_NAME:$IMAGE_TAG_AMD64
        - Run: docker manifest annotate --arch amd64
            $AWS_ACCOUNT_ID.dkr.ecr.$AWS_DEFAULT_REGION.amazonaws.com/$IMAGE_REPO_NAME
            $AWS_ACCOUNT_ID.dkr.ecr.$AWS_DEFAULT_REGION.amazonaws.com/$IMAGE_REPO_NAME:$IMAGE_TAG_AMD64
        - Run: docker manifest annotate --arch arm64
            $AWS_ACCOUNT_ID.dkr.ecr.$AWS_DEFAULT_REGION.amazonaws.com/$IMAGE_REPO_NAME
            $AWS_ACCOUNT_ID.dkr.ecr.$AWS_DEFAULT_REGION.amazonaws.com/$IMAGE_REPO_NAME:$IMAGE_TAG_ARM64
        - Run: docker manifest push
            $AWS_ACCOUNT_ID.dkr.ecr.us-west-2.amazonaws.com/$IMAGE_REPO_NAME
I now have a complete CI/CD workflow that creates a container images for both amd64 and arm64. When I commit the changes, CodeCatalyst will execute my workflow, build the images, and push to ECR.
Cleanup
If you have been following along with this workflow, you should delete the resources you deployed so you do not continue to incur charges. First, delete the Amazon ECR repository using the AWS console. Second, delete the project from CodeCatalyst by navigating to Project settings and choosing Delete project.
Conclusion
AWS Graviton processors are custom-built by AWS to deliver the best price performance for cloud workloads. In this post I explained how to configure CodeCatalyst workflow actions to run on AWS Graviton. I used CodeCatalyst to create a workflow that builds a multi-architecture container image that can run on both amd64 and arm64 architectures. Get started building your multi-arch containers in Amazon CodeCatalyst today! You can read more about CodeCatalyst workflows in the documentation.
Amazon S3 Compatible Storage on AWS Snowball Edge Compute Optimized Devices Now Generally Available
Post Syndicated from Channy Yun original https://aws.amazon.com/blogs/aws/amazon-s3-compatible-storage-on-aws-snowball-edge-compute-optimized-devices-now-generally-available/
We have added a collection of purpose-built services to the AWS Snow Family for customers, such as Snowball Edge in 2016 and Snowcone in 2020. These services run compute intensive workloads and stores data in edge locations with denied, disrupted, intermittent, or limited network connectivity and for transferring large amounts of data from on-premises and rugged or mobile environments.
 Each new service is optimized for space- or weight-constrained environments, portability, and flexible networking options. For example, Snowball Edge devices have three options for device configurations. AWS Snowball Edge Compute Optimized provides a suitcase-sized, secure, and rugged device that customers can deploy in rugged and tactical edge locations to run their compute applications. Customers modernize their edge applications in the cloud use AWS compute services and storage services such as Amazon Simple Storage Service (Amazon S3), and then deploy these applications on Snow devices at the edge.
We heard from customers that they also needed access to local object store to run applications at the edge, such as 5G mobile core and real-time data analytics, to process end-user transactions, and they had limited storage infrastructure availability in these environments. Although the Amazon S3 Adapter for Snowball enables the basic storage and retrieval of objects on a Snow device, customers wanted access to a broader set of Amazon S3 APIs, including flexibility at scale, local bucket management, object tagging, and S3 event notifications.
Today, we’re announcing the general availability of Amazon S3 compatible storage on Snow for our Snowball Edge Compute Optimized devices. This makes it easy for you to store data and run applications with local S3 buckets that require low latency processing at the edge.
With Amazon S3 compatible storage on Snow, you can use an expanded set of Amazon S3 APIs to easily build applications on AWS and deploy them on Snowball Edge Compute Optimized devices. This eliminates the need to re-architect applications for each deployment. You can manage applications requiring Amazon S3 compatible storage across the cloud, on-premises, and at the edge in connected and disconnected environments with a consistent experience.
Moreover, you can use AWS OpsHub, a graphical user interface, to manage your Snow Family services and Amazon S3 compatible storage on the devices at the edge or remotely from a central location. You can also use Amazon S3 SDK or AWS Command Line Interface (AWS CLI) to create and manage S3 buckets, get S3 event notifications using MQTT, and local service notifications using SMTP, just as you do in AWS Regions.
With Amazon S3 compatible storage on Snow, we are now able to address various use cases in limited network environments, giving customers secure, durable local object storage. For example, customers in the intelligence community and in industrial IoT deploy applications such as video analytics in rugged and mobile edge locations.
Getting Started with S3 Compatible Storage on Snowball Edge Compute Optimized
To order new Amazon S3 enabled Snowball Edge devices, create a job in the AWS Snow Family console. You can replace an existing Snow device or cluster with new replacement devices that support S3 compatible storage.
In Step 1 – Job type, input your job name and choose Local compute and storage only. In Step 2 – Compute and storage, choose your preferred Snowball Edge Compute Optimized device.
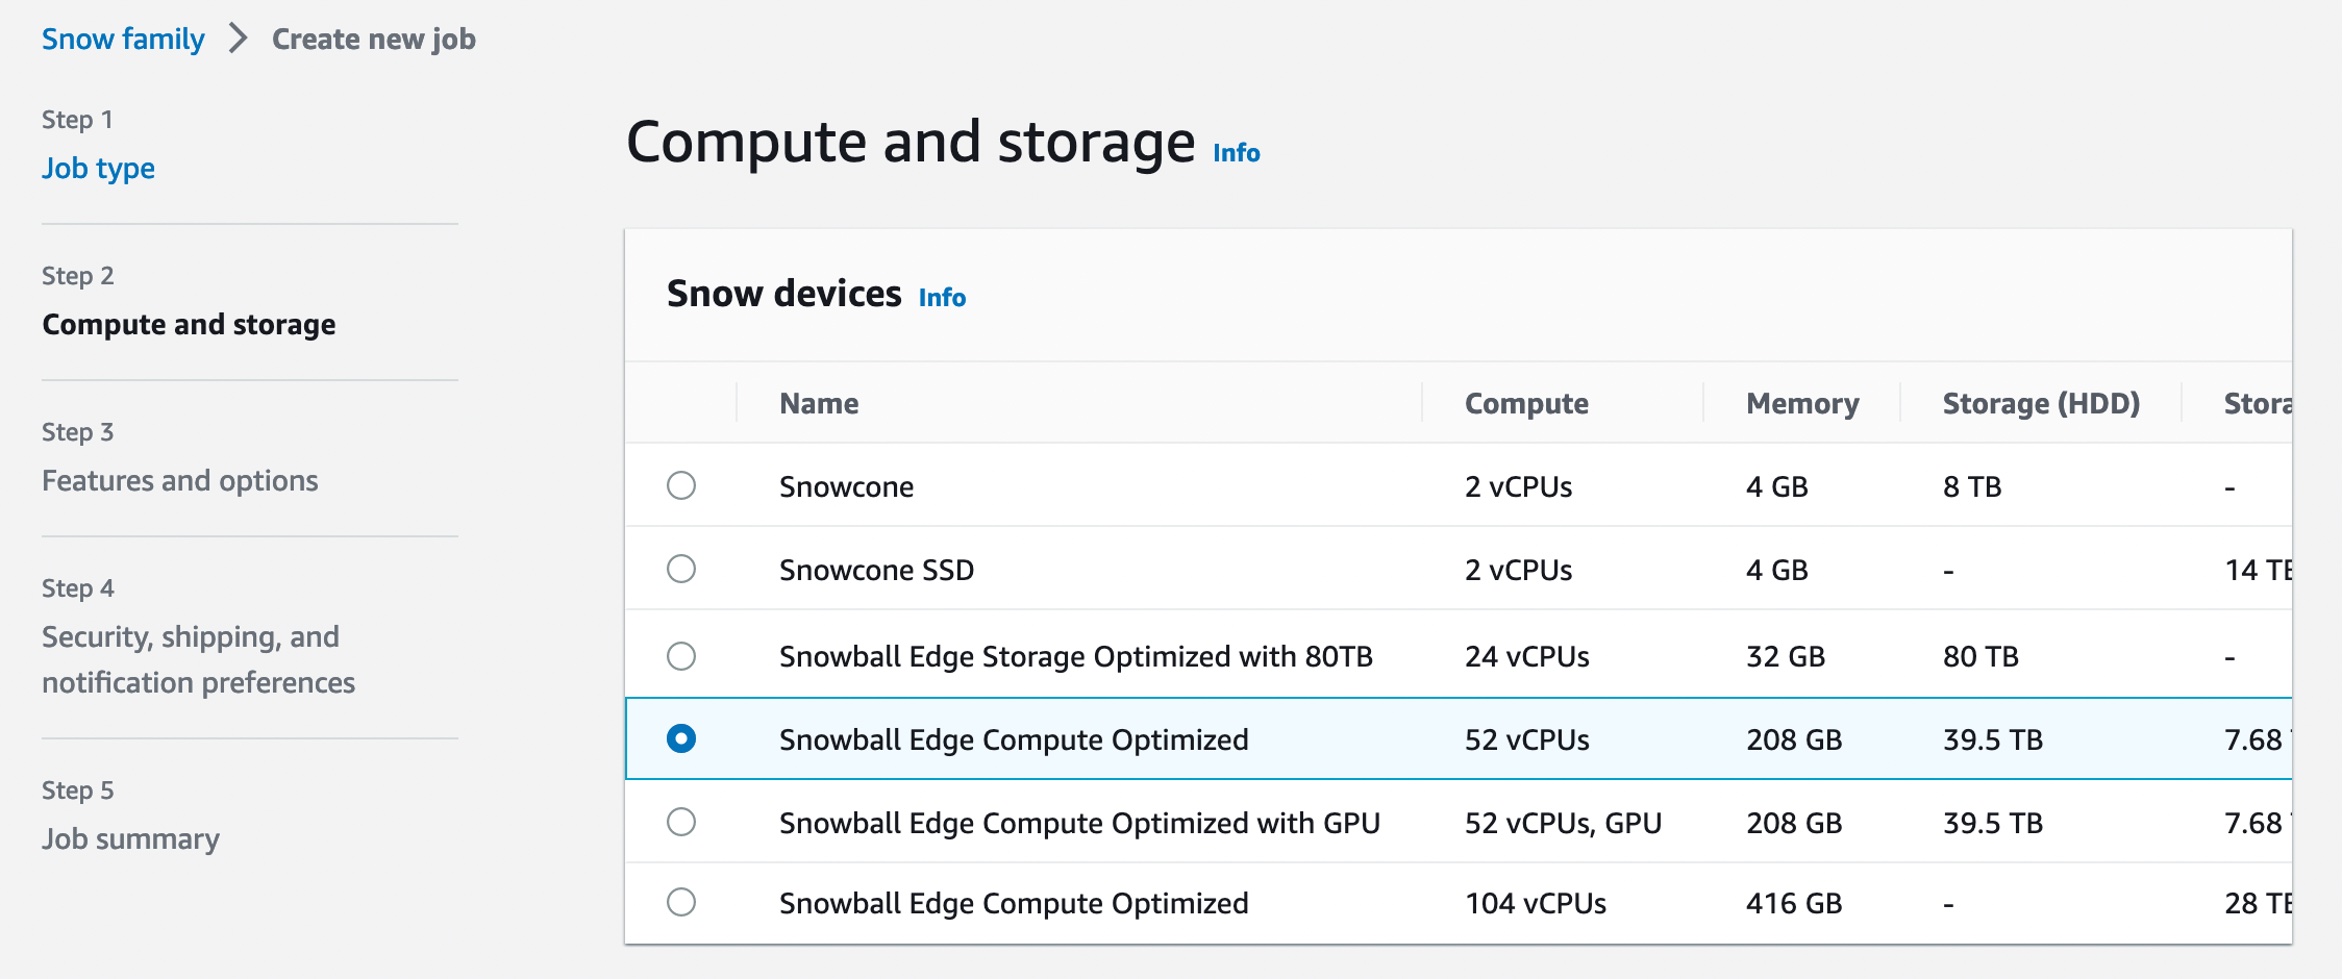
Select Amazon S3 compatible storage, a new option for S3 compatible storage. The current S3 Adapter solution is on deprecation path, and we recommend migrating workloads to use Amazon S3 compatible storage on Snow.

When you select Amazon S3 compatible storage, you can configure Amazon S3 compatible storage capacity for a single device or for a cluster. The Amazon S3 storage capacity depends on the quantity and type of Snowball Edge device.
- For single-device deployment, you can provision granular Amazon S3 capacity up to a maximum of 31 TB on a Snowball Edge Compute Optimized device.
- For a cluster setup, all storage capacity on a device is allocated to Amazon S3 compatible storage on Snow. You can provision a maximum of 500 TB on a 16 node cluster of Snowball Edge Compute Optimized devices.
When you provide all necessary job details and create your job, you can see the status of the delivery of your device in the job status section.
Manage S3 Compatible Storage on Snow with OpsHub
Once your device arrives at your site, power it on, and connect it to your network. To manage your device, download, install, and launch the OpsHub application in your laptop. After installation, you can unlock the device and start managing it and using supported AWS services locally.
OpsHub provides a dashboard that summarizes key metrics, such as storage capacity and active instances on your device. It also provides a selection of AWS services that are supported on the Snow Family devices.
Log in to OpsHub, then choose Manage Storage. This takes you to the Amazon S3 compatible storage on Snow landing page.
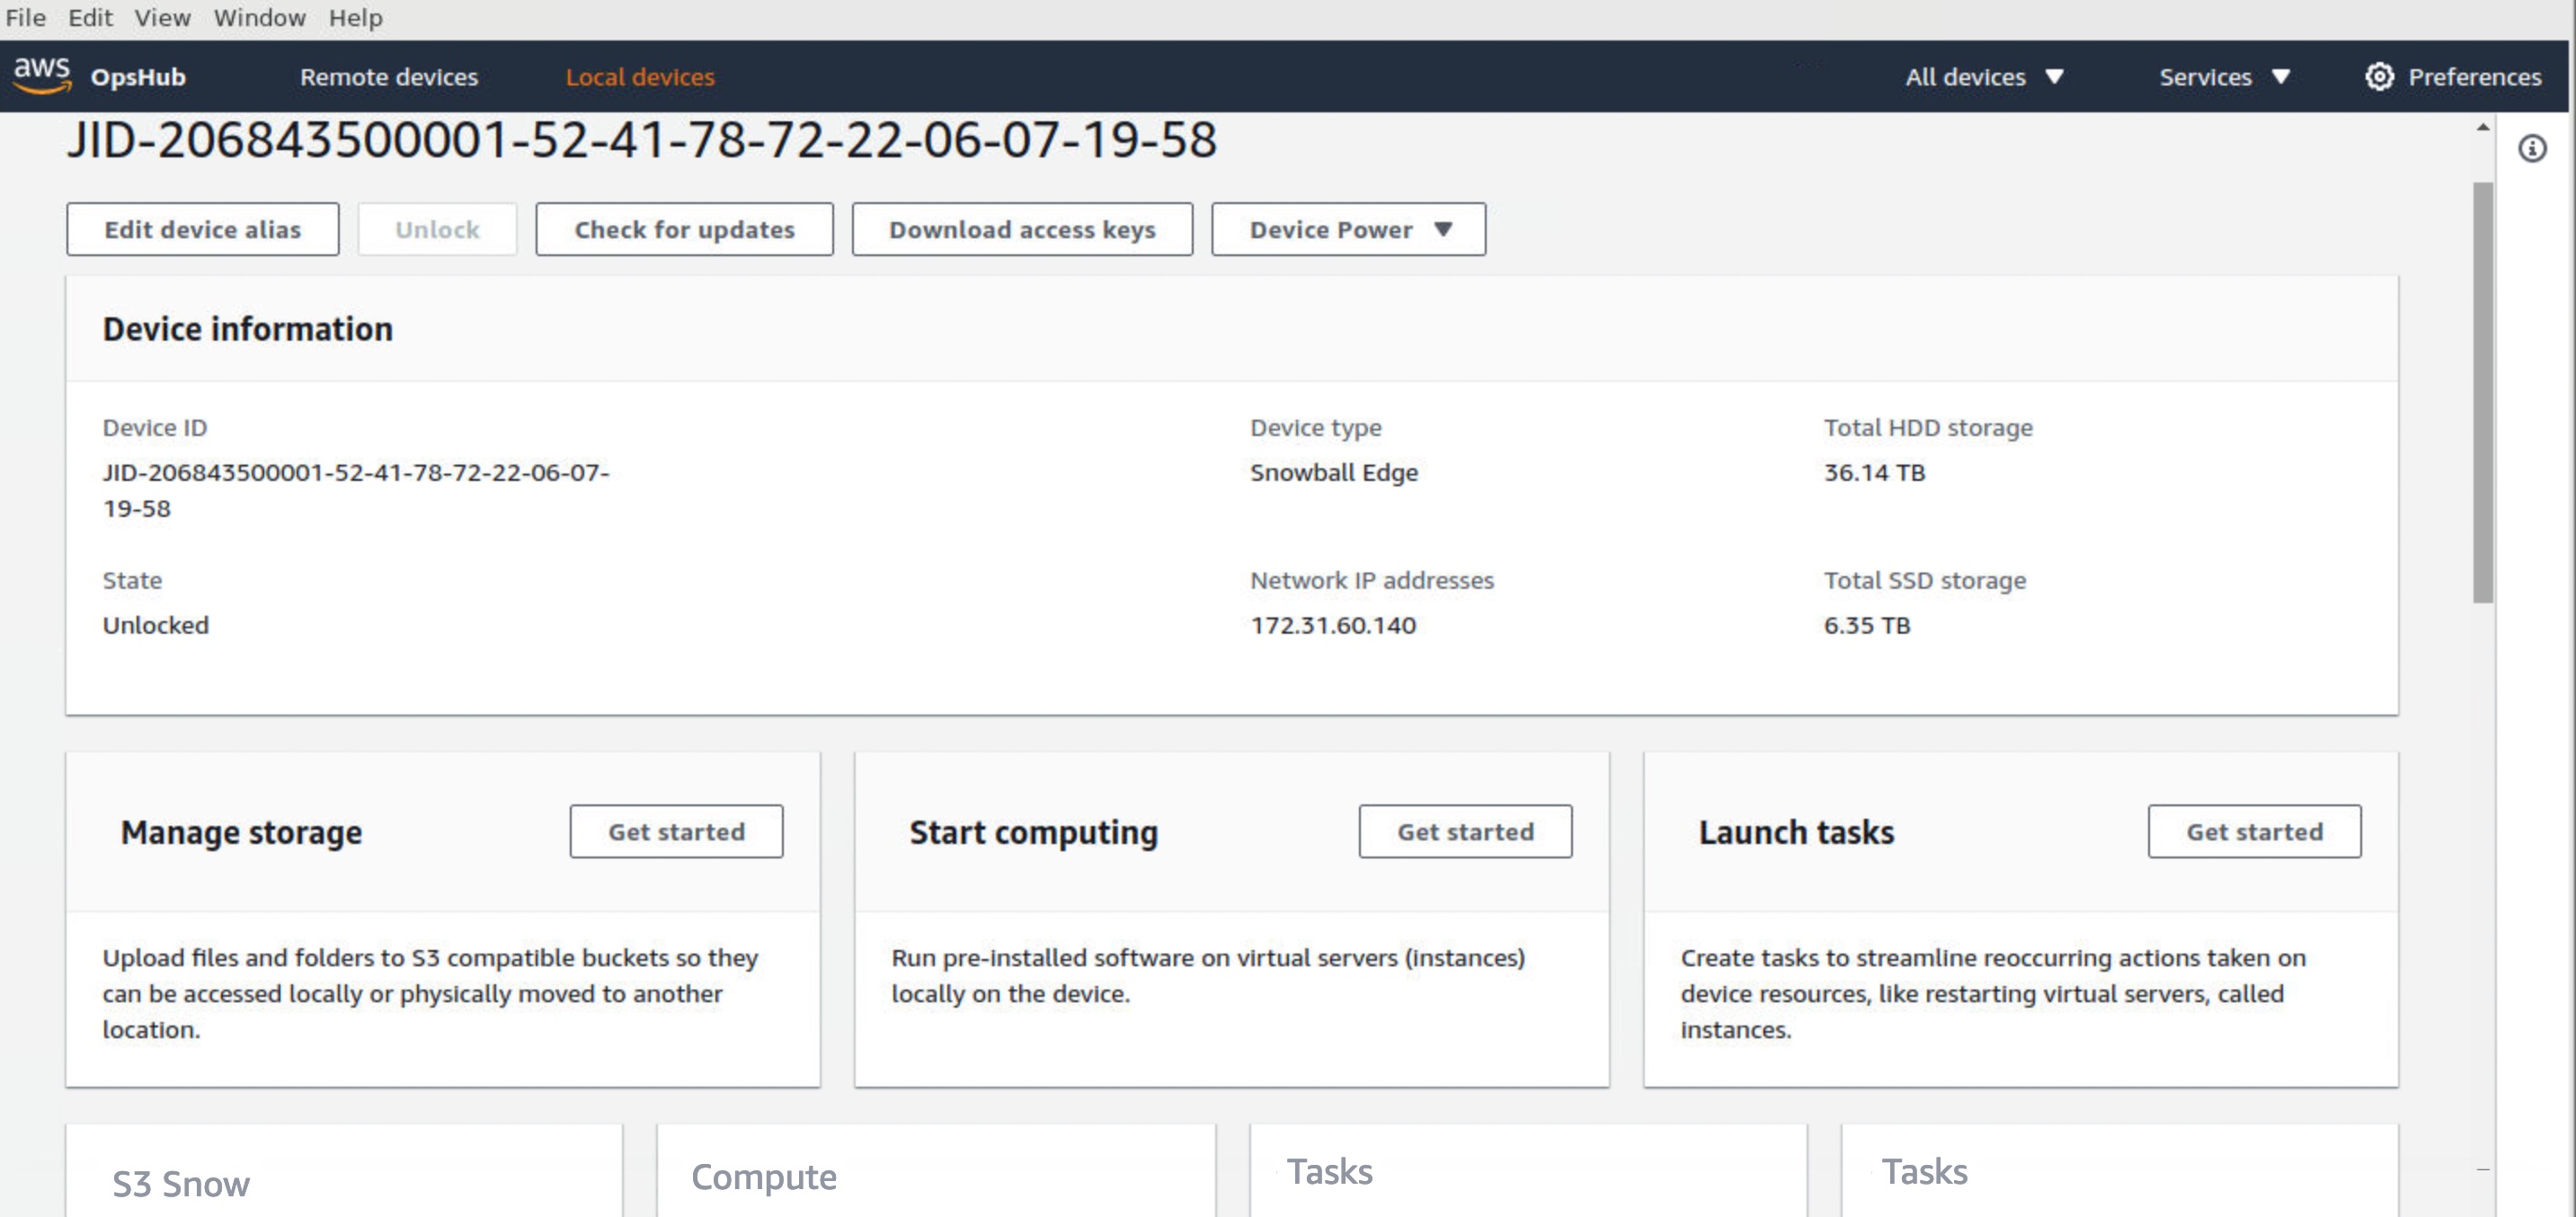
For Start service setup type, choose Simple if your network uses dynamic host configuration protocol (DHCP). With this option, the virtual network interface cards (VNICs) are created automatically on each device when you start the service. When your network uses static IP addresses, you need to create VNICs for each device manually, so choose the Advanced option.
Once the service starts, you’ll see its status is active with a list of endpoints. The following example shows the service activated in a single device:
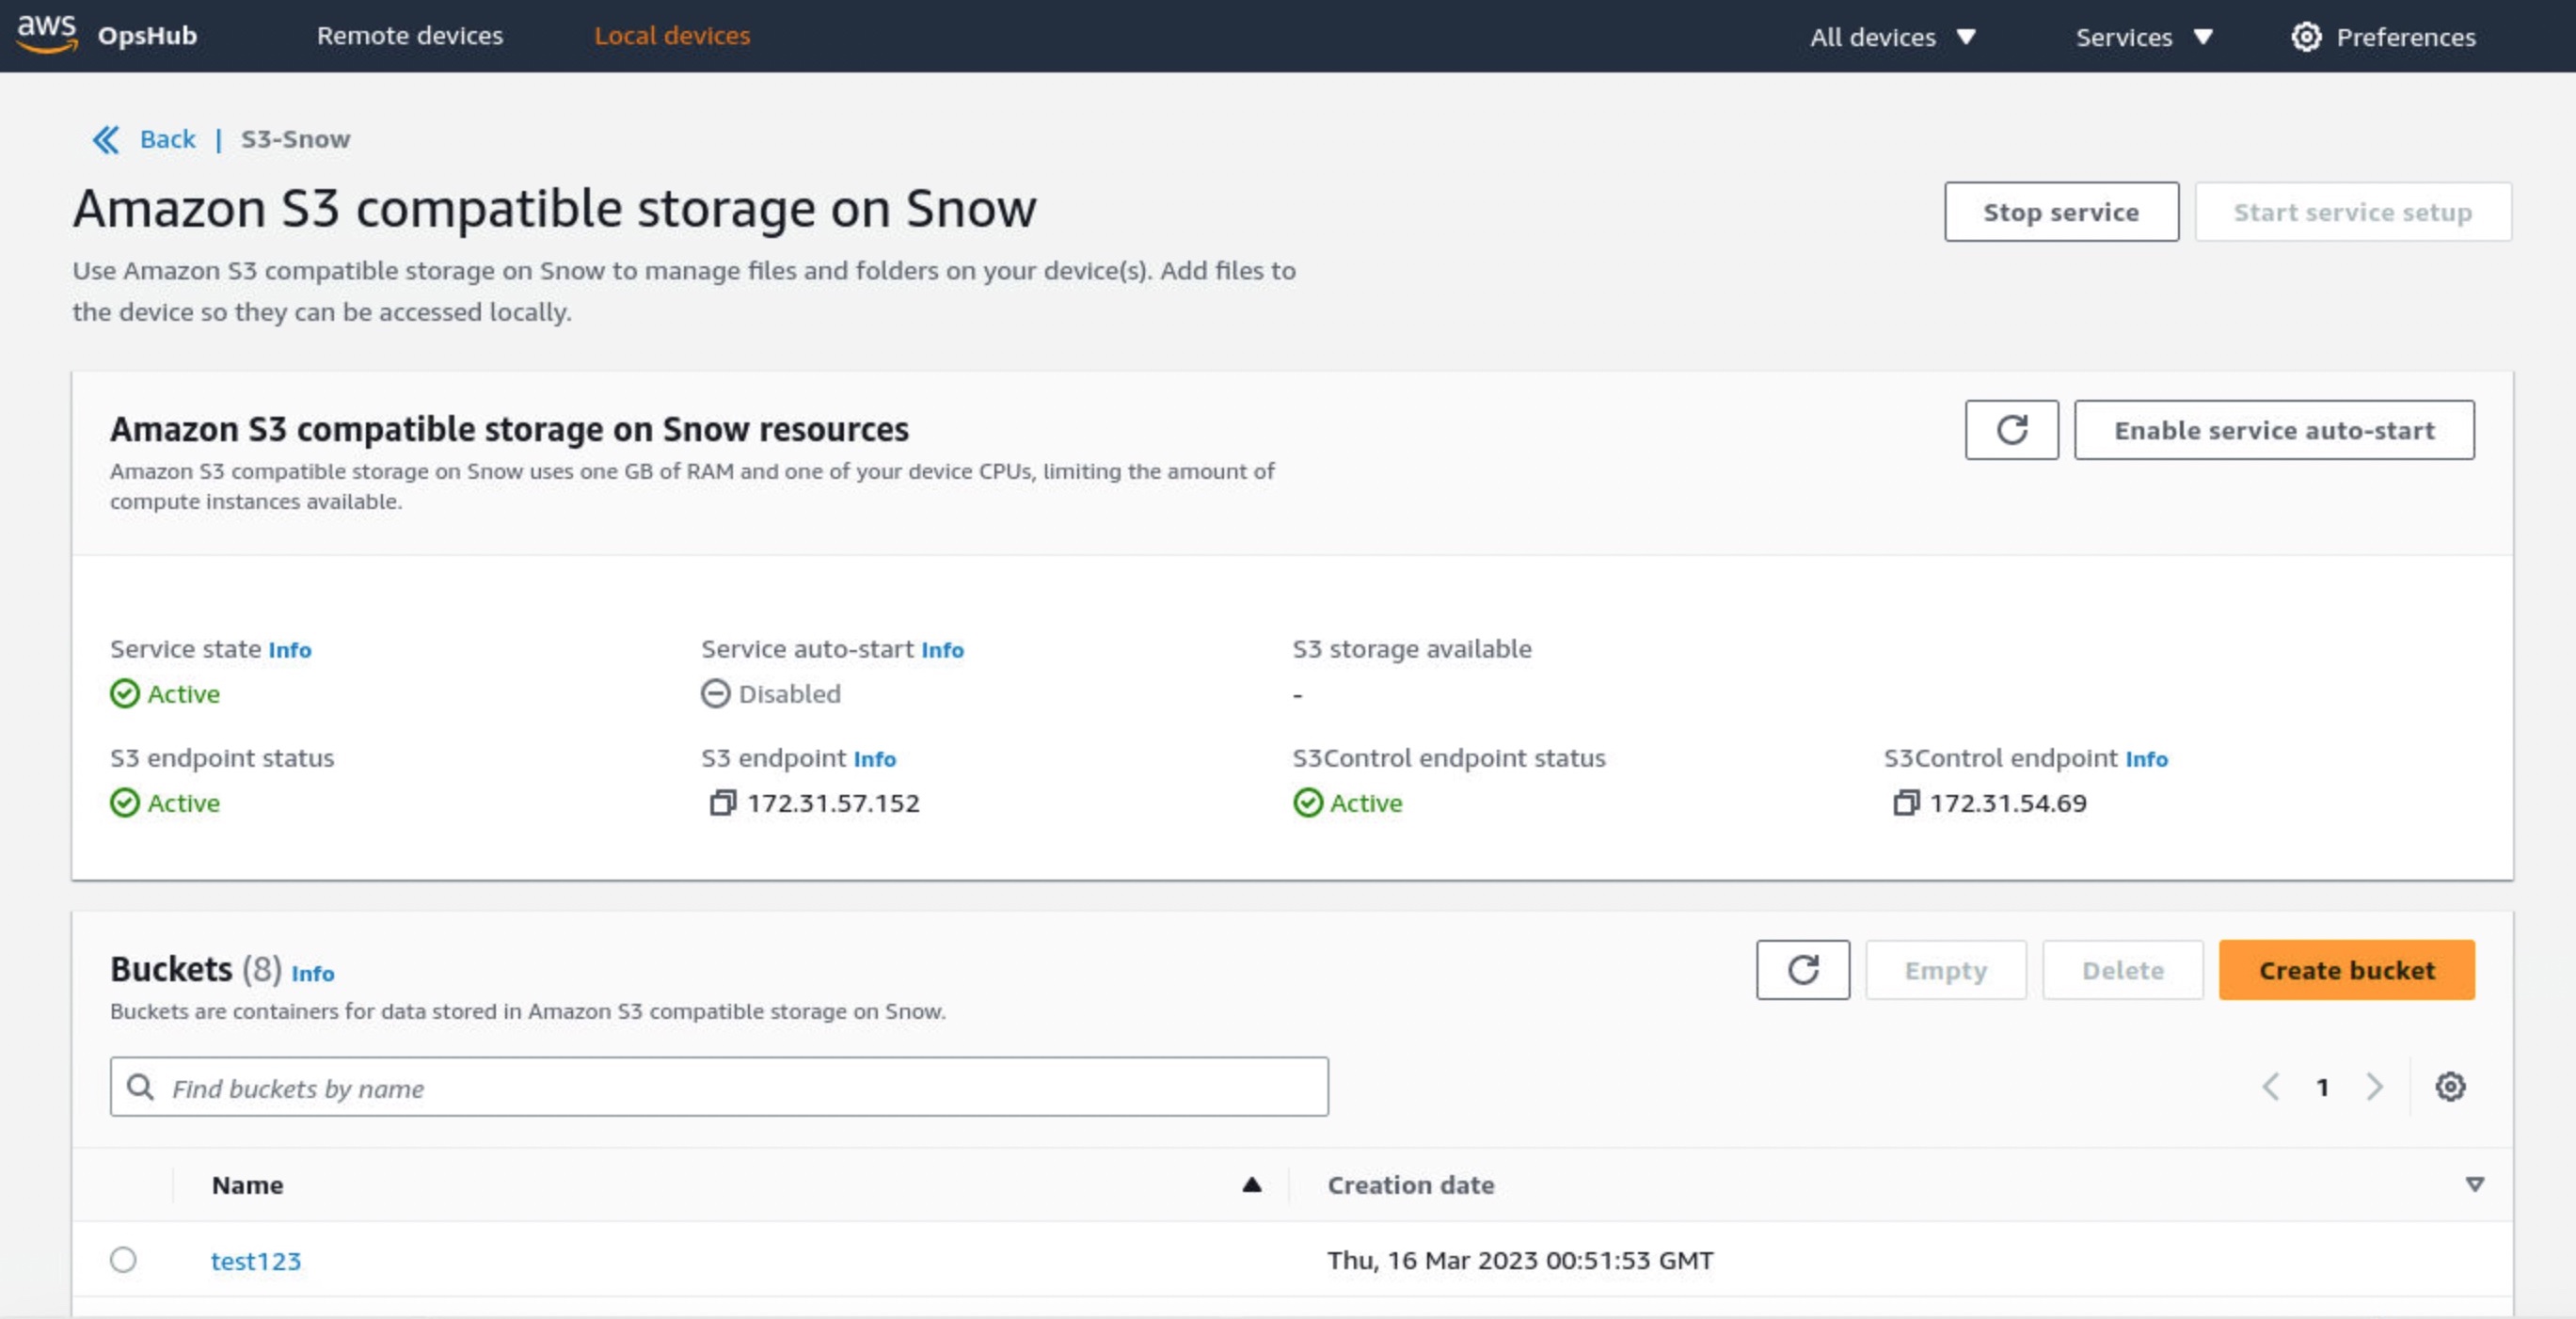
Choose Create bucket if you want the new S3 bucket in your device. Otherwise, you can upload files to your selected bucket. New uploaded objects have destination URLs such as s3-snow://test123/test_file with the unique bucket name in the device or cluster.
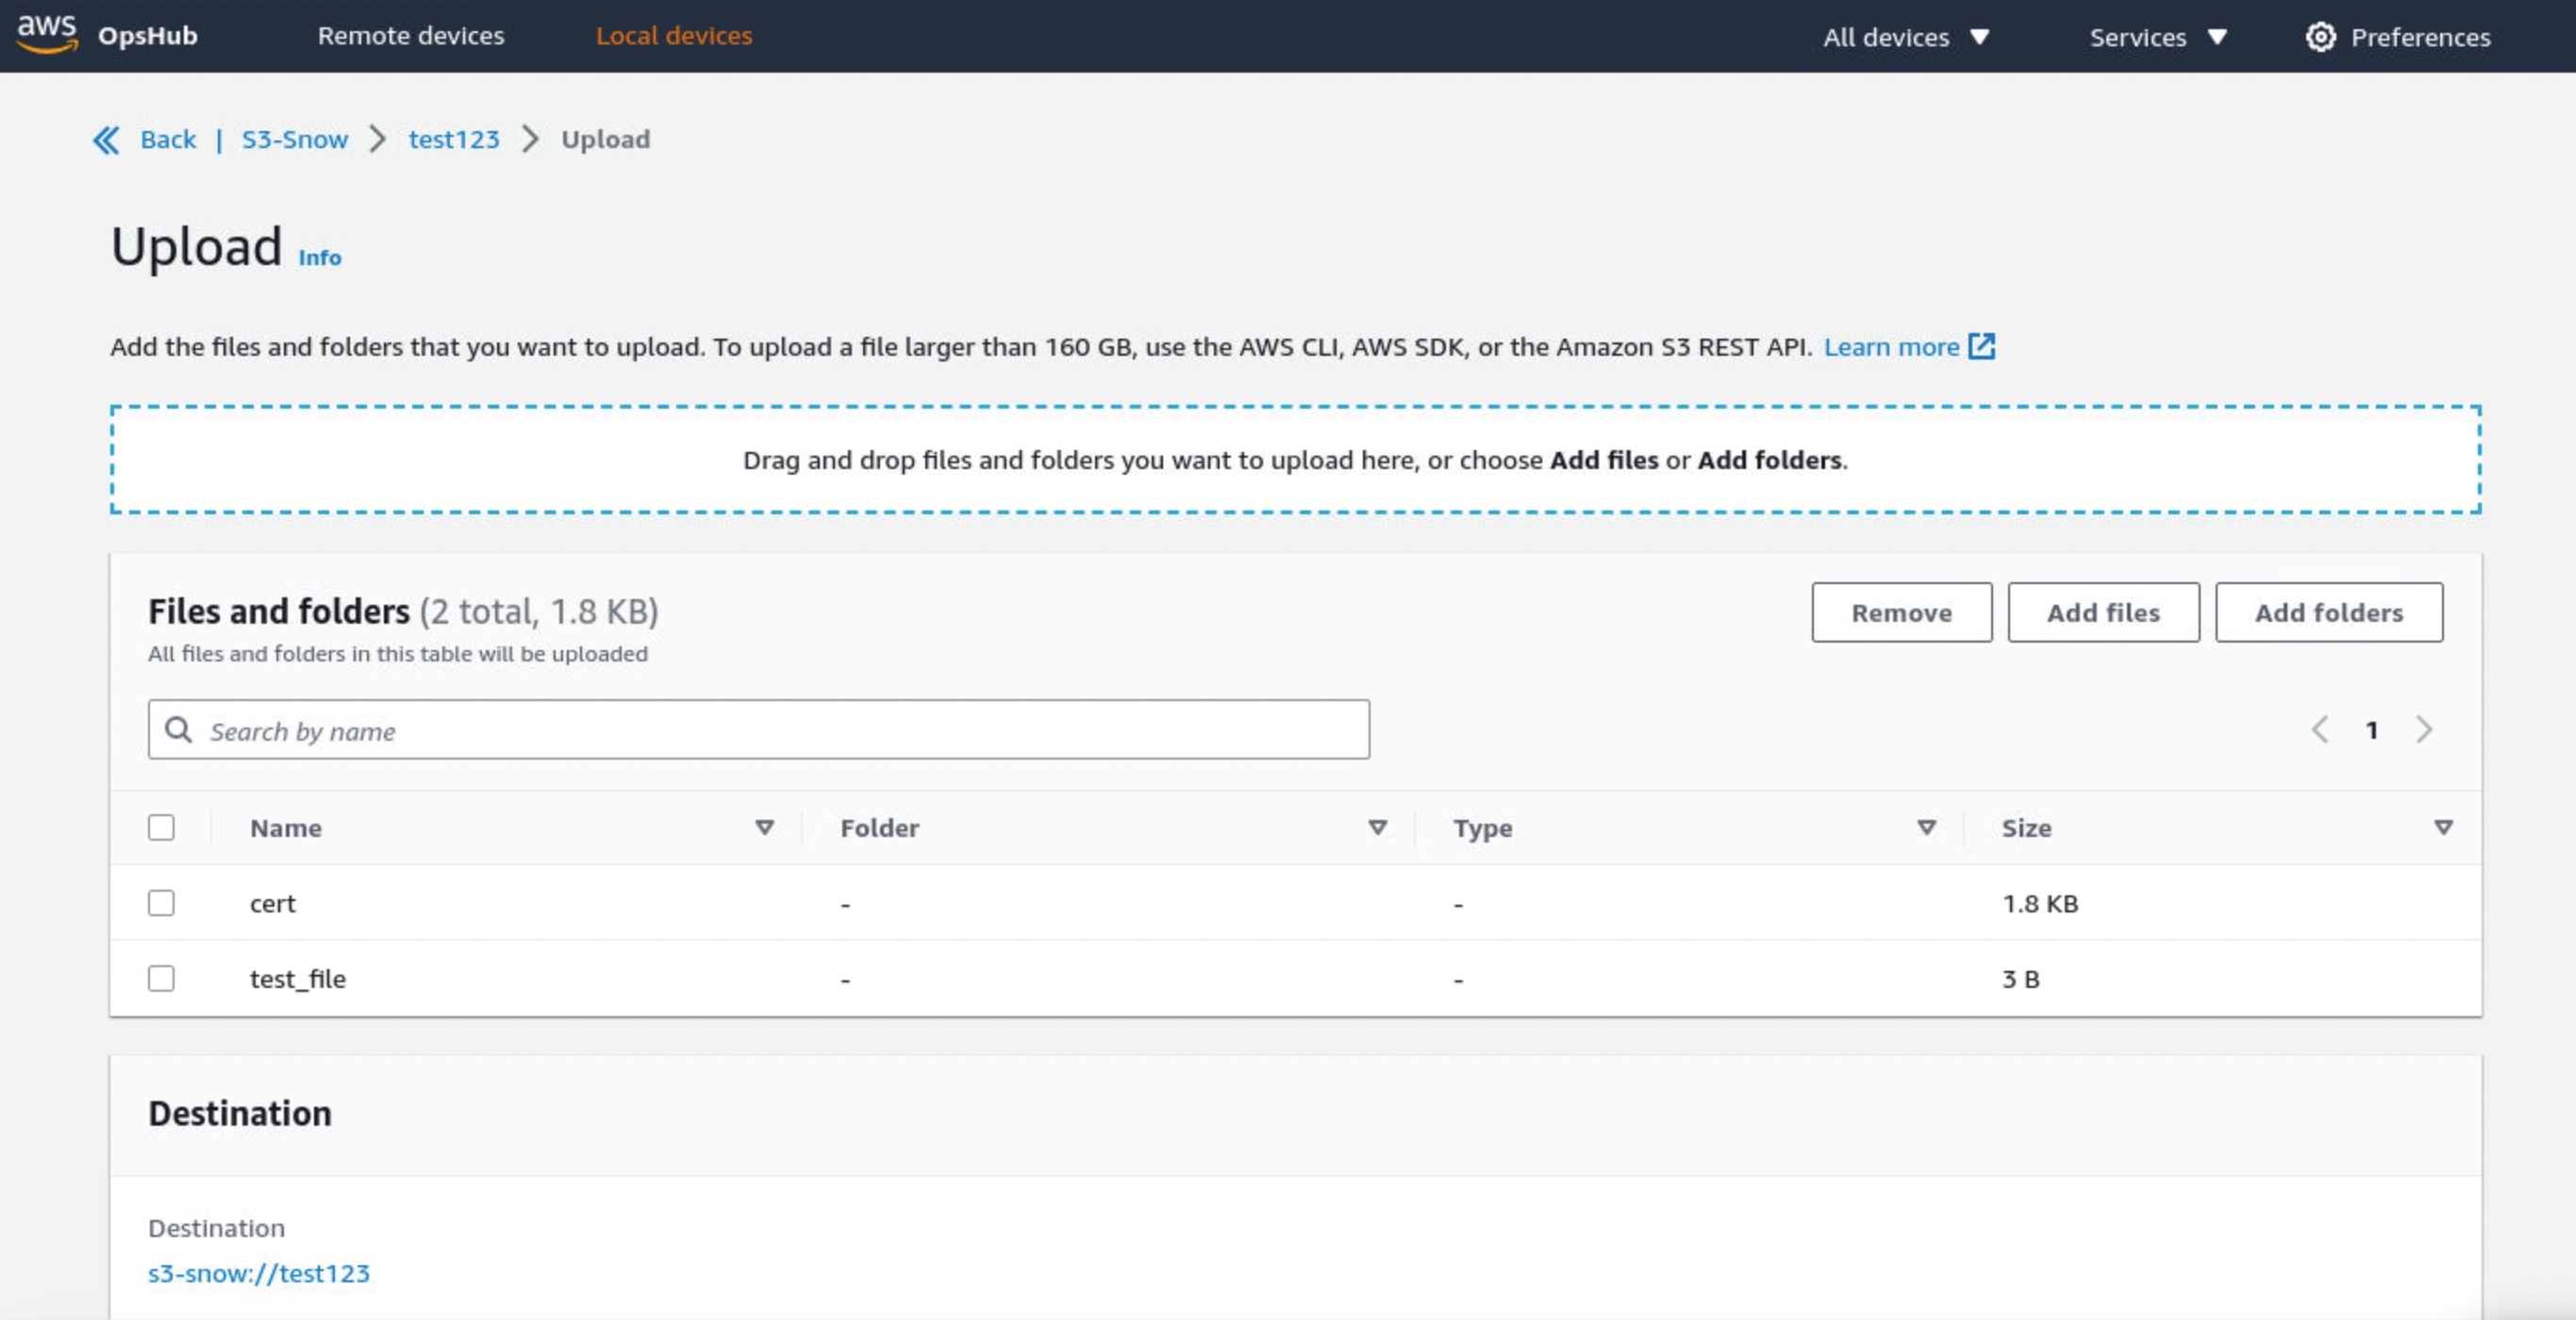
You can also use the bucket lifecycle rule to define when to trigger object deletion based on age or date. Choose Create lifecycle rule in the Management tab to add a new lifecycle rule.

You can select either Delete objects or Delete incomplete multipart uploads as a rule action. Configure the rule trigger that schedules deletion based on a specific date or object’s age. In this example, I set two days to delete objects after being uploaded.

You can also use the Amazon S3 SDK/CLI for all API operations supported by S3 for Snowball Edge. To learn more, see API Operations Supported on Amazon S3 for Snowball Edge in the AWS documentation.
Things to know
Keep these things in mind regarding additional features and considerations when you use Amazon S3 compatible storage on Snow:
- Capacity: If you fully utilize Amazon S3 capacity on your device or cluster, your write (
PUT) requests return an insufficient capacity error. Read (GET) operations continue to function normally. To monitor the available Amazon S3 capacity, you can use the OpsHub S3 on the Snow page or use thedescribe-serviceCLI command. Upon detecting insufficient capacity on the Snow device or cluster, you must free up space by deleting data or transferring data to an S3 bucket in the Region or another on-premises device. - Resiliency: Amazon S3 compatible storage on Snow stores data redundantly across multiple disks on each Snow device and multiple devices in your cluster, with built-in protection against correlated hardware failures. In the event of a disk or device failure within the quorum range, Amazon S3 compatible storage on Snow continues to operate until hardware is replaced. Additionally, Amazon S3 compatible storage on Snow continuously scrubs data on the device to make sure of data integrity and recover any corrupted data. For workloads that require local storage, the best practice is to back up your data to further protect your data stored on Snow devices.
- Notifications: Amazon S3 compatible storage on Snow continuously monitors the health status of the device or cluster. Background processes respond to data inconsistencies and temporary failures to heal and recover data to make sure of resiliency. In the case of nonrecoverable hardware failures, Amazon S3 compatible storage on Snow can continue operations and provides proactive notifications through emails, prompting you to work with AWS to replace failed devices. For connected devices, you have the option to enable the “Remote Monitoring” feature, which will allow AWS to monitor service health online and proactively notify you of any service issues.
- Security: Amazon S3 compatible storage on Snow supports encryption using server-side encryption with Amazon S3 managed encryption keys (SSE-S3) or customer-provided keys (SSE-C) and authentication and authorization using Snow IAM actions namespace (
s3:*) to provide you with distinct controls for data stored on your Snow devices. Amazon S3 compatible storage on Snow doesn’t support object-level access control list and bucket policies. Amazon S3 compatible storage on Snow defaults to Bucket Owner is Object Owner, making sure that the bucket owner has control over objects in the bucket.
Now Available
Amazon S3 compatible storage on Snow is now generally available for AWS Snowball Edge Compute Optimized devices in all AWS Commercial and GovCloud Regions where AWS Snow is available.
To learn more, see the AWS Snowball Edge Developer Guide and send feedback to AWS re:Post for AWS Snowball or through your usual AWS support contacts.
– Channy
Ubuntu 23.04 (Lunar Lobster) released
Post Syndicated from original https://lwn.net/Articles/929729/
The Ubuntu 23.04 release is out. Headline features include a new
installer, GNOME 44, Azure Active Directory authentication, and more.
The newest Edubuntu, Kubuntu, Lubuntu, Ubuntu Budgie, Ubuntu
Cinnamon, Ubuntu Kylin, Ubuntu MATE, Ubuntu Studio, Ubuntu Unity,
and Xubuntu are also being released today.
See the
release notes for more information.
Announcing General Availability of Amazon CodeCatalyst
Post Syndicated from Brad Bock original https://aws.amazon.com/blogs/devops/announcing-general-availability-of-amazon-codecatalyst/
We are pleased to announce that Amazon CodeCatalyst is now generally available. CodeCatalyst is a unified software development service that brings together everything teams need to get started planning, coding, building, testing, and deploying applications on AWS. CodeCatalyst was designed to make it easier for developers to spend more time developing application features and less time setting up project tools, creating and managing continuous integration and continuous delivery (CI/CD) pipelines, provisioning and configuring various development and deployment environments, and onboarding project collaborators. You can learn more and get started building in minutes on the AWS Free Tier at the CodeCatalyst website.
Launched in preview at AWS re:Invent in December 2022, CodeCatalyst provides an easy way for professional developers to build and deploy applications on AWS. We built CodeCatalyst based on feedback we received from customers looking for a more streamlined way to build using DevOps best practices. They want a complete software development service that lets them start new projects more quickly and gives them confidence that it will continue delivering a great long term experience throughout their application’s lifecycle.
Do more of what you love, and less of what you don’t
Starting a new project is an exciting time of imagining the possibilities: what can you build and how can you enable your end users to do something that wasn’t possible before? However, the joy of creating something new can also come with anxiety about all of the decisions to be made about tooling and integrations. Once your project is in production, managing tools and wrangling project collaborators can take your focus away from being creative and doing your best work. If you are spending too much time keeping brittle pipelines running and your teammates are constantly struggling with tooling, the day to day experience of building new features can start to feel less than joyful.
That is where CodeCatalyst comes in. It isn’t just about developer productivity – it is about helping developers and teams spend more time using the tools they are most comfortable with. Teams deliver better, more impactful outcomes to customers when they have more freedom to focus on their highest-value work and have to concern themselves less with activities that feel like roadblocks. Everything we do stems from that premise, and today’s launch marks a major milestone in helping to enable developers to have a better DevOps experience on AWS.
How CodeCatalyst delivers a great experience
There are four foundational elements of CodeCatalyst that are designed to help minimize distraction and maximize joy in the software development process: blueprints for quick project creation, actions-based CI/CD automation for managing day-to-day software lifecycle tasks, remote Dev Environments for a consistent build experience, and project and issue management for a more streamlined team collaboration.
Blueprints get you started quickly. CodeCatalyst blueprints set up an application code repository (complete with a working sample app), define cloud infrastructure, and run pre-configured CI/CD workflows for your project. Blueprints bring together the elements that are necessary both to begin a new project and deploy it into production. Blueprints can help to significantly reduce the time it takes to set up a new project. They are built by AWS for many use cases, and you can configure them with the programming languages and frameworks that you need both for your application and the underlying infrastructure-as-code. When it comes to incorporating existing tools like Jira or GitHub, CodeCatalyst has extensions that you can use to integrate them into your projects from the beginning without a lot of extra effort. Learn more about blueprints.
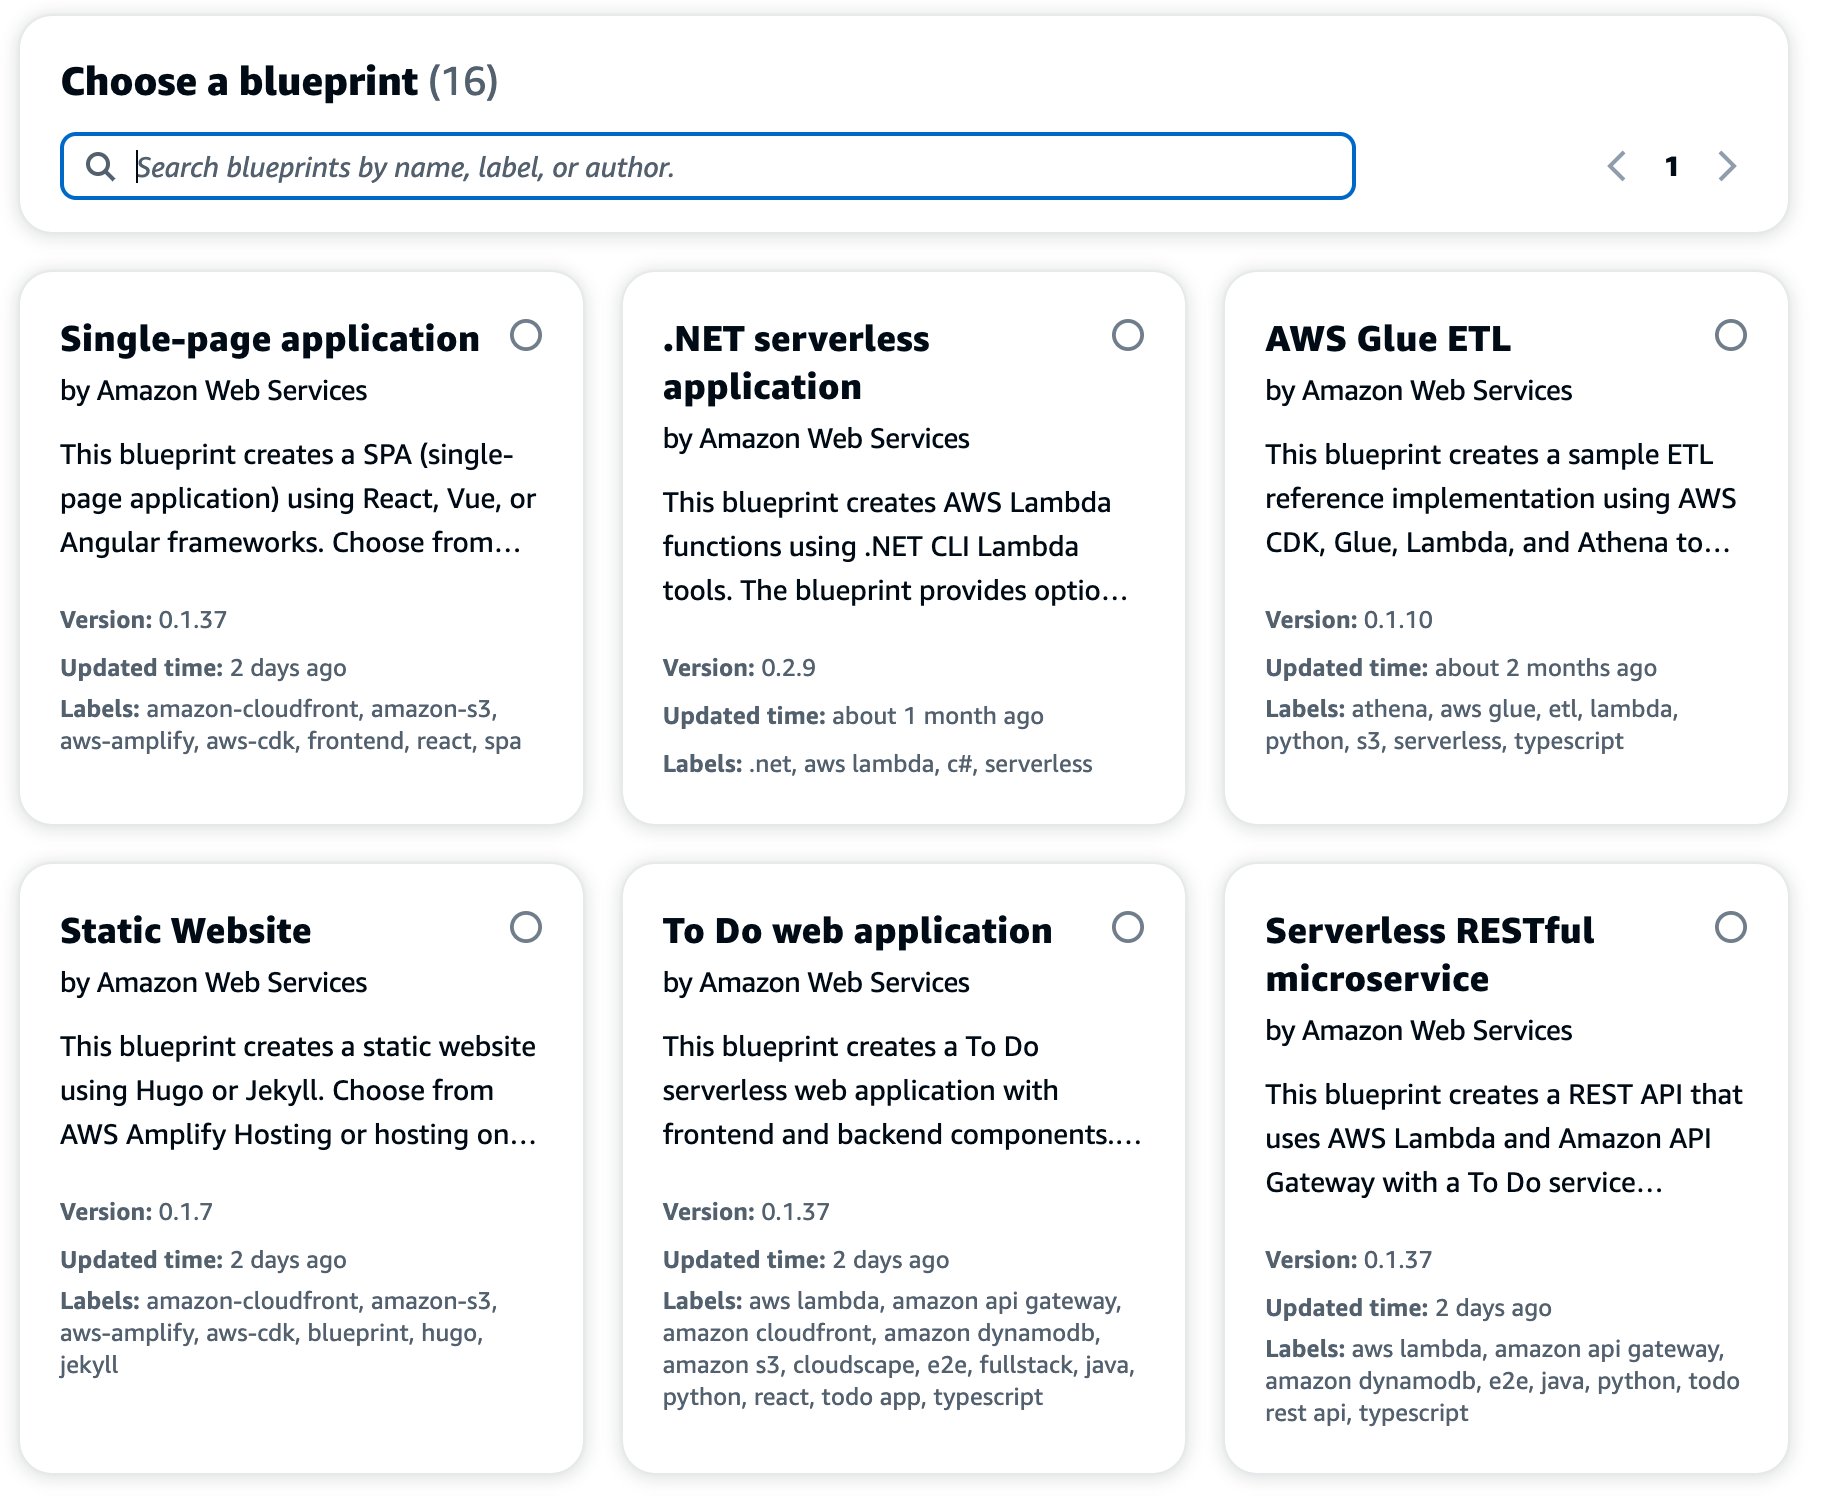
“CodeCatalyst helps us spend more time refining our customers’ build, test, and deploy workflows instead of implementing the underlying toolchains,” said Sean Bratcher, CEO of Buildstr. “The tight integration with AWS CDK means that definitions for infrastructure, environments, and configs live alongside the applications themselves as first-class code. This helps reduce friction when integrating with customers’ broader deployment approach.”
Actions-based CI/CD workflows take the pain out of pipeline management. CI/CD workflows in CodeCatalyst run on flexible, managed infrastructure. When you create a project with a blueprint, it comes with a complete CI/CD pipeline composed of actions from the included actions library. You can modify these pipelines with an action from the library or you can use any GitHub Action directly in the project to edit existing pipelines or build new ones from scratch. CodeCatalyst makes composing these actions into pipelines easier: you can switch back and forth between a text-based editor for declaring which actions you want to use through YAML and a visual drag-and-drop pipeline editor. Updating CI/CD workflows with new capabilities is a matter of incorporating new actions. Having CodeCatalyst create pipelines for you, based on your intent, means that you get the benefits of CI/CD automation without the ongoing pain of maintaining disparate tools.
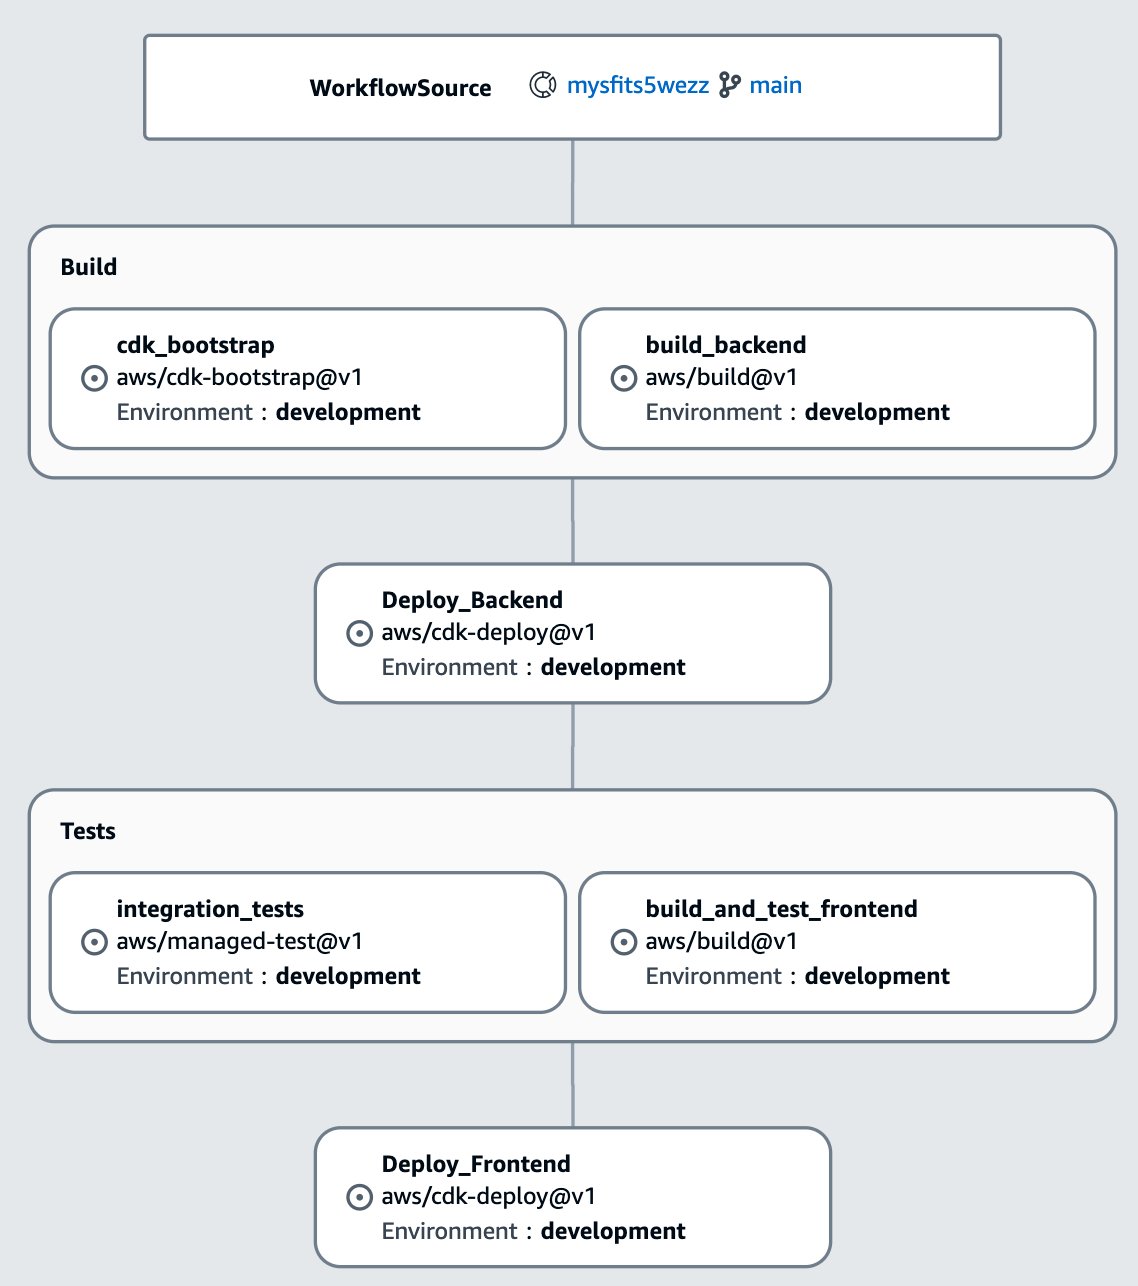
“We needed a streamlined way within AWS to rapidly iterate development of our Reading Partners Connects e-learning platform while maintaining the highest possible quality standards,” said Yaseer Khanani, Senior Product Manager at Reading Partners. “CodeCatalyst’s built-in CI/CD workflows make it easy to efficiently deploy code and conduct testing across a distributed team.”
Automated dev environments make consistency achievable A big friction point for developers collaborating on a software project is getting everyone on the same set of dependencies and settings in their local machines, and ensuring that all other environments from test to staging to production are also consistent. To help address this, CodeCatalyst has Dev Environments that are hosted in the cloud. Dev Environments are defined using the devfile standard, ensuring that everyone working on a project gets a consistent and repeatable experience. Dev Environments connect to popular IDEs like AWS Cloud9, VS Code, and multiple JetBrains IDEs, giving you a local IDE feel while running in the cloud.
“Working closely with customers in the software developer education space, we value the reproducible and pre-configured environments Amazon CodeCatalyst provides for improving learning outcomes for new developers. CodeCatalyst allows you to personalize student experiences while providing facilitators with control over the entire experience.” said Tia Dubuisson, President of Belle Fleur Technologies.
Issue management and simplified team onboarding streamline collaboration. CodeCatalyst is designed to help provide the benefits of building in a unified software development service by making it easier to onboard and collaborate with teammates. It starts with the process of inviting new collaborators: you can invite people to work together on your project with their email address, bypassing the need for everyone to have an individual AWS account. Once they have access, collaborators can see the history and context of the project and can start contributing by creating a Dev Environment.
CodeCatalyst also has built-in issue management that is tied to your code repo, so that you can assign tasks such as code reviews and pull requests to teammates and help track progress using agile methodologies right in the service. As with the rest of CodeCatalyst, collaboration comes without the distraction of managing separate services with separate logins and disparate commercial agreements. Once you give a new teammate access, they can quickly start contributing.
New to CodeCatalyst since the Preview launch
Along with the announcement of general availability, we are excited to share a few new CodeCatalyst features. First, you can now create a new project from an existing GitHub repository. In addition, CodeCatalyst Dev Environments now support GitHub repositories allowing you to work on code stored in GitHub.
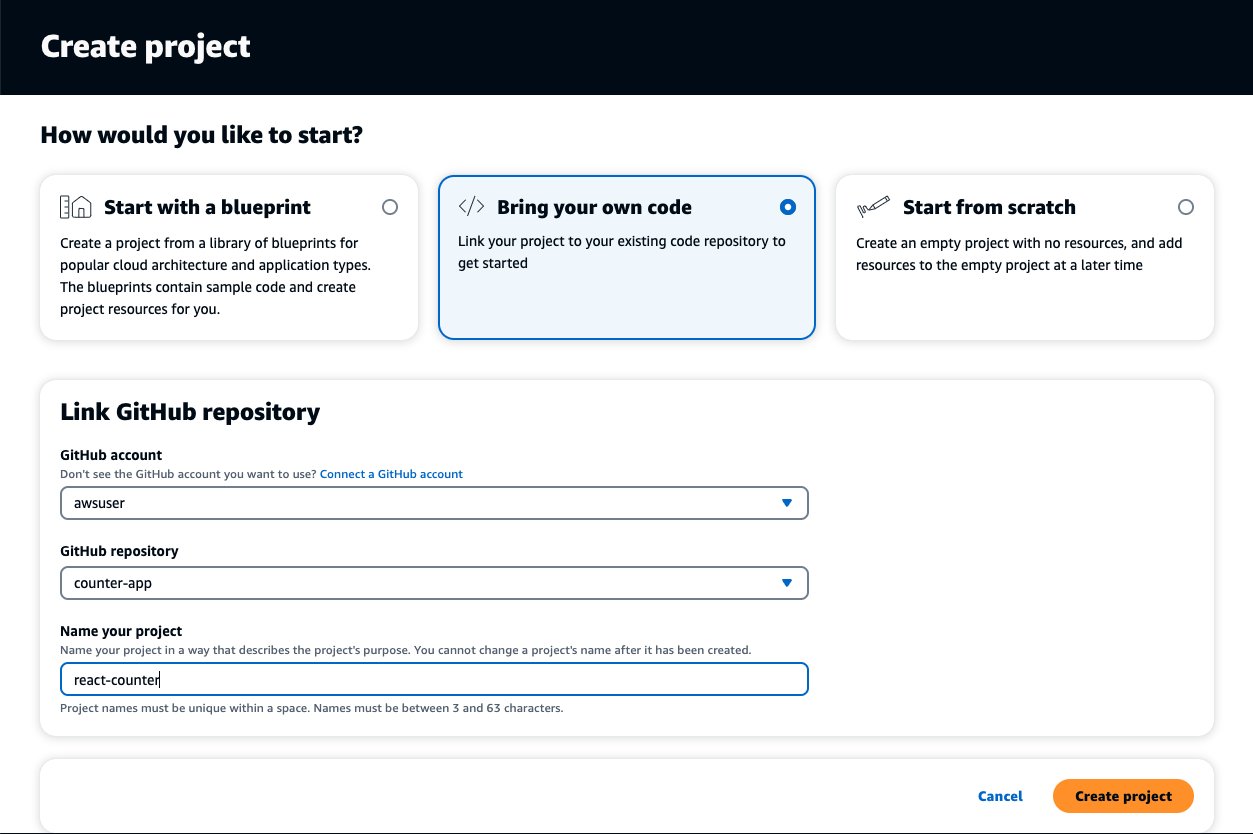
Second, CodeCatalyst Dev Environments now support Amazon CodeWhisperer. CodeWhisperer is an artificial intelligence (AI) coding companion that generates real-time code suggestions in your integrated development environment (IDE) to help you more quickly build software. CodeWhisperer is currently supported in CodeCatalyst Dev Environments using AWS Cloud 9 or Visual Studio Code.
Third, Amazon CodeCatalyst recently added support to run workflow actions using on-demand or pre-provisioned compute powered by AWS Graviton processors. AWS Graviton Processors are designed by AWS to deliver the best price performance for your cloud workloads running in Amazon Elastic Compute Cloud (Amazon EC2). Customers can use workflow actions running on AWS Graviton processors to build applications that target Arm architecture, create multi-architecture containers, and modernize legacy applications to help customers reduce costs.
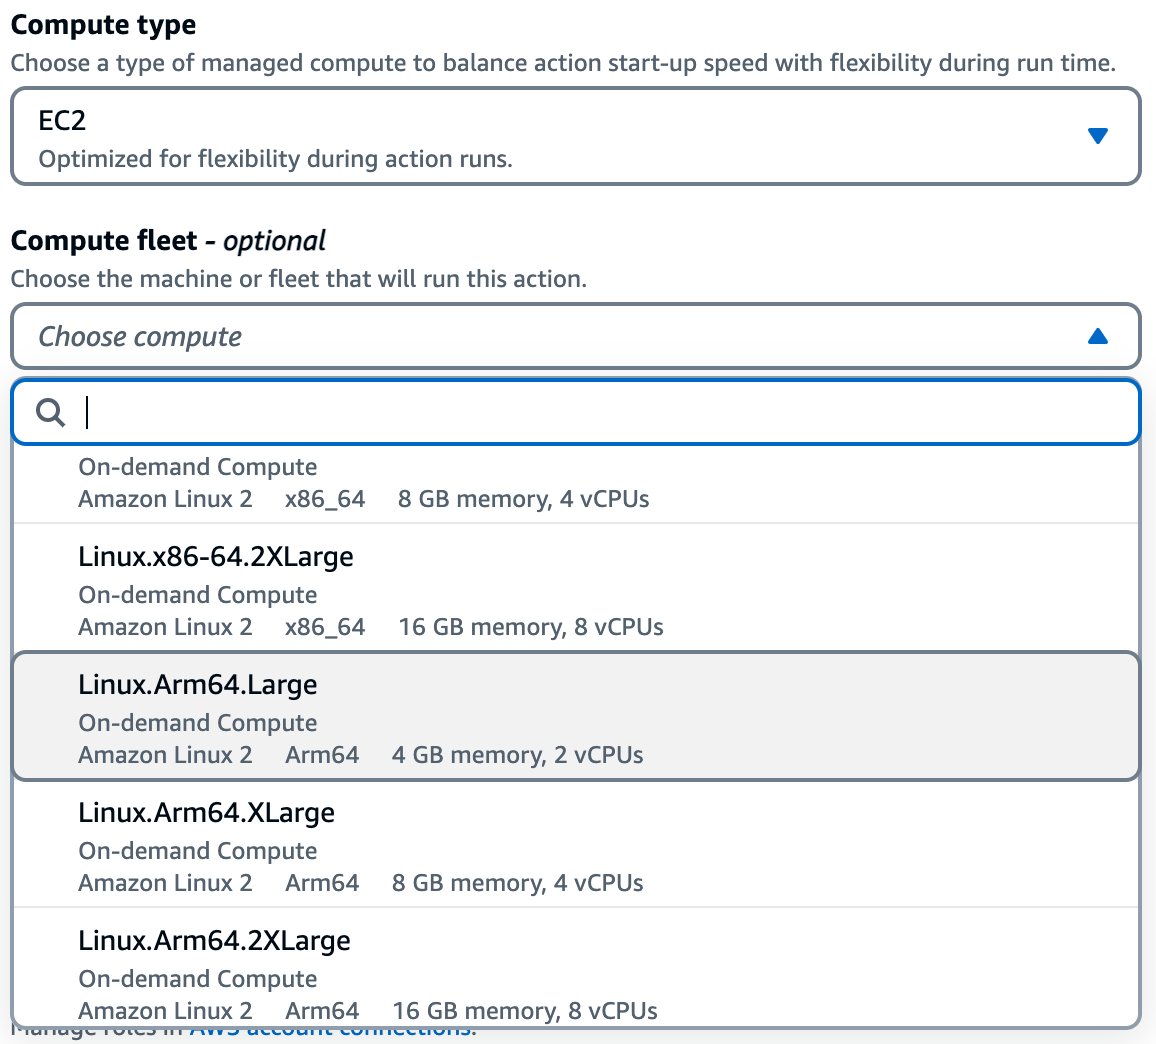
Finally, the library of CodeCatalyst blueprints is continuously growing. The CodeCatalyst preview release included blueprints for common workloads like single-page web applications, serverless applications, and many others. In addition, we have recently added blueprints for Static Websites with Hugo and Jekyll, as well as Intelligent Document Processing workflows.
Learn more about CodeCatalyst at Developer Innovation Day
Next Wednesday, April 26th, we are hosting Developer Innovation Day, a free 7-hour virtual event that is all about helping developers and teams learn to be productive, and collaborate, from discovery to delivery to running software and building applications. Developers can discover how the breadth and depth of AWS tools and the right practices can unlock your team’s ability to find success and take opportunities from ideas to impact.
CodeCatalyst plays a big part in Developer Innovation Day, with five sessions designed to help you see real examples of how you can spend more time doing the work you love best! Get an overview of the service, see how to deploy a working static website in minutes, collaborating effectively with teammates, and more.
Try CodeCatalyst
Ready to try CodeCatalyst? You can get started on the AWS Free Tier today and quickly deploy a blueprint with working sample code. If you would like to learn more, you can read through a collection of DevOps blogs about CodeCatalyst or read the documentation. We can’t wait to see how you innovate with CodeCatalyst!
Simplify and speed up Apache Spark applications on Amazon Redshift data with Amazon Redshift integration for Apache Spark
Post Syndicated from Gagan Brahmi original https://aws.amazon.com/blogs/big-data/simplify-and-speed-up-apache-spark-applications-on-amazon-redshift-data-with-amazon-redshift-integration-for-apache-spark/
Customers use Amazon Redshift to run their business-critical analytics on petabytes of structured and semi-structured data. Apache Spark is a popular framework that you can use to build applications for use cases such as ETL (extract, transform, and load), interactive analytics, and machine learning (ML). Apache Spark enables you to build applications in a variety of languages, such as Java, Scala, and Python, by accessing the data in your Amazon Redshift data warehouse.
Amazon Redshift integration for Apache Spark helps developers seamlessly build and run Apache Spark applications on Amazon Redshift data. Developers can use AWS analytics and ML services such as Amazon EMR, AWS Glue, and Amazon SageMaker to effortlessly build Apache Spark applications that read from and write to their Amazon Redshift data warehouse. You can do so without compromising on the performance of your applications or transactional consistency of your data.
In this post, we discuss why Amazon Redshift integration for Apache Spark is critical and efficient for analytics and ML. In addition, we discuss use cases that use Amazon Redshift integration with Apache Spark to drive business impact. Finally, we walk you through step-by-step examples of how to use this official AWS connector in an Apache Spark application.
Amazon Redshift integration for Apache Spark
The Amazon Redshift integration for Apache Spark minimizes the cumbersome and often manual process of setting up a spark-redshift connector (community version) and shortens the time needed to prepare for analytics and ML tasks. You only need to specify the connection to your data warehouse, and you can start working with Amazon Redshift data from your Apache Spark-based applications within minutes.
You can use several pushdown capabilities for operations such as sort, aggregate, limit, join, and scalar functions so that only the relevant data is moved from your Amazon Redshift data warehouse to the consuming Apache Spark application. This allows you to improve the performance of your applications. Amazon Redshift admins can easily identify the SQL generated from Spark-based applications. In this post, we show how you can find out the SQL generated by the Apache Spark job.
Moreover, Amazon Redshift integration for Apache Spark uses Parquet file format when staging the data in a temporary directory. Amazon Redshift uses the UNLOAD SQL statement to store this temporary data on Amazon Simple Storage Service (Amazon S3). The Apache Spark application retrieves the results from the temporary directory (stored in Parquet file format), which improves performance.
You can also help make your applications more secure by utilizing AWS Identity and Access Management (IAM) credentials to connect to Amazon Redshift.
Amazon Redshift integration for Apache Spark is built on top of the spark-redshift connector (community version) and enhances it for performance and security, helping you gain up to 10 times faster application performance.
Use cases for Amazon Redshift integration with Apache Spark
For our use case, the leadership of the product-based company wants to know the sales for each product across multiple markets. As sales for the company fluctuate dynamically, it has become a challenge for the leadership to track the sales across multiple markets. However, the overall sales are declining, and the company leadership wants to find out which markets aren’t performing so that they can target these markets for promotion campaigns.
For sales across multiple markets, the product sales data such as orders, transactions, and shipment data is available on Amazon S3 in the data lake. The data engineering team can use Apache Spark with Amazon EMR or AWS Glue to analyze this data in Amazon S3.
The inventory data is available in Amazon Redshift. Similarly, the data engineering team can analyze this data with Apache Spark using Amazon EMR or an AWS Glue job by using the Amazon Redshift integration for Apache Spark to perform aggregations and transformations. The aggregated and transformed dataset can be stored back into Amazon Redshift using the Amazon Redshift integration for Apache Spark.
Using a distributed framework like Apache Spark with the Amazon Redshift integration for Apache Spark can provide the visibility across the data lake and data warehouse to generate sales insights. These insights can be made available to the business stakeholders and line of business users in Amazon Redshift to make informed decisions to run targeted promotions for the low revenue market segments.
Additionally, we can use the Amazon Redshift integration with Apache Spark in the following use cases:
- An Amazon EMR or AWS Glue customer running Apache Spark jobs wants to transform data and write that into Amazon Redshift as a part of their ETL pipeline
- An ML customer uses Apache Spark with SageMaker for feature engineering for accessing and transforming data in Amazon Redshift
- An Amazon EMR, AWS Glue, or SageMaker customer uses Apache Spark for interactive data analysis with data on Amazon Redshift from notebooks
Examples for Amazon Redshift integration for Apache Spark in an Apache Spark application
In this post, we show the steps to connect Amazon Redshift from Amazon EMR on Amazon Elastic Compute Cloud (Amazon EC2), Amazon EMR Serverless, and AWS Glue using a common script. In the following sample code, we generate a report showing the quarterly sales for the year 2008. To do that, we join two Amazon Redshift tables using an Apache Spark DataFrame, run a predicate pushdown, aggregate and sort the data, and write the transformed data back to Amazon Redshift. The script uses PySpark
The script uses IAM-based authentication for Amazon Redshift. IAM roles used by Amazon EMR and AWS Glue should have the appropriate permissions to authenticate Amazon Redshift, and access to an S3 bucket for temporary data storage.
The following example policy allows the IAM role to call the GetClusterCredentials operations:
The following example policy allows access to an S3 bucket for temporary data storage:
The complete script is as follows:
If you plan to use the preceding script in your environment, make sure you replace the values for the following variables with the appropriate values for your environment: jdbc_iam_url, temp_dir, and aws_role.
In the next section, we walk through the steps to run this script to aggregate a sample dataset that is made available in Amazon Redshift.
Prerequisites
Before we begin, make sure the following prerequisites are met:
- You have an AWS account
- You have access to create AWS CloudFormation stack
Deploy resources using AWS CloudFormation
Complete the following steps to deploy the CloudFormation stack:
- Sign in to the AWS Management Console, then launch the CloudFormation stack:


You can also download the CloudFormation template to create the resources mentioned in this post through infrastructure as code (IaC). Use this template when launching a new CloudFormation stack.
- Scroll down to the bottom of the page to select I acknowledge that AWS CloudFormation might create IAM resources under Capabilities, then choose Create stack.


The stack creation process takes 15–20 minutes to complete. The CloudFormation template creates the following resources:
-
- An Amazon VPC with the needed subnets, route tables, and NAT gateway
- An S3 bucket with the name
redshift-spark-databucket-xxxxxxx(note that xxxxxxx is a random string to make the bucket name unique) - An Amazon Redshift cluster with sample data loaded inside the database
devand the primary userredshiftmasteruser. For the purpose of this blog post,redshiftmasteruserwith administrative permissions is used. However, it is recommended to use a user with fine grained access control in production environment. - An IAM role to be used for Amazon Redshift with the ability to request temporary credentials from the Amazon Redshift cluster’s dev database
- Amazon EMR Studio with the needed IAM roles
- Amazon EMR release version 6.9.0 on an EC2 cluster with the needed IAM roles
- An Amazon EMR Serverless application release version 6.9.0
- An AWS Glue connection and AWS Glue job version 4.0
- A Jupyter notebook to run using Amazon EMR Studio using Amazon EMR on an EC2 cluster
- A PySpark script to run using Amazon EMR Studio and Amazon EMR Serverless
- After the stack creation is complete, choose the stack name
redshift-sparkand navigate to the Outputs
We utilize these output values later in this post.

In the next sections, we show the steps for Amazon Redshift integration for Apache Spark from Amazon EMR on Amazon EC2, Amazon EMR Serverless, and AWS Glue.
Use Amazon Redshift integration with Apache Spark on Amazon EMR on EC2
Starting from Amazon EMR release version 6.9.0 and above, the connector using Amazon Redshift integration for Apache Spark and Amazon Redshift JDBC driver are available locally on Amazon EMR. These files are located under the /usr/share/aws/redshift/ directory. However, in the previous versions of Amazon EMR, the community version of the spark-redshift connector is available.
The following example shows how to connect Amazon Redshift using a PySpark kernel via an Amazon EMR Studio notebook. The CloudFormation stack created Amazon EMR Studio, Amazon EMR on an EC2 cluster, and a Jupyter notebook available to run. To go through this example, complete the following steps:
- Download the Jupyter notebook made available in the S3 bucket for you:
- In the CloudFormation stack outputs, look for the value for
EMRStudioNotebook, which should point to theredshift-spark-emr.ipynbnotebook available in the S3 bucket. - Choose the link or open the link in a new tab by copying the URL for the notebook.
- After you open the link, download the notebook by choosing Download, which will save the file locally on your computer.

- In the CloudFormation stack outputs, look for the value for

- Access Amazon EMR Studio by choosing or copying the link provided in the CloudFormation stack outputs for the key
EMRStudioURL. - In the navigation pane, choose Workspaces.

- Choose Create Workspace.

- Provide a name for the Workspace, for instance
redshift-spark. - Expand the Advanced configuration section and select Attach Workspace to an EMR cluster.
- Under Attach to an EMR cluster, choose the EMR cluster with the name
emrCluster-Redshift-Spark. - Choose Create Workspace.

- After the Amazon EMR Studio Workspace is created and in Attached status, you can access the Workspace by choosing the name of the Workspace.


This should open the Workspace in a new tab. Note that if you have a pop-up blocker, you may have to allow the Workspace to open or disable the pop-up blocker.

In the Amazon EMR Studio Workspace, we now upload the Jupyter notebook we downloaded earlier.
- Choose Upload to browse your local file system and upload the Jupyter notebook (
redshift-spark-emr.ipynb).

- Choose (double-click) the
redshift-spark-emr.ipynbnotebook within the Workspace to open the notebook.


The notebook provides the details of different tasks that it performs. Note that in the section Define the variables to connect to Amazon Redshift cluster, you don’t need to update the values for jdbc_iam_url, temp_dir, and aws_role because these are updated for you by AWS CloudFormation. AWS CloudFormation has also performed the steps mentioned in the Prerequisites section of the notebook.
You can now start running the notebook.
- Run the individual cells by selecting them and then choosing Play.
You can also use the key combination of Shift+Enter or Shift+Return. Alternatively, you can run all the cells by choosing Run All Cells on the Run menu.
- Find the predicate pushdown operation performed on the Amazon Redshift cluster by the Amazon Redshift integration for Apache Spark.
We can also see the temporary data stored on Amazon S3 in the optimized Parquet format. The output can be seen from running the cell in the section Get the last query executed on Amazon Redshift.

- To validate the table created by the job from Amazon EMR on Amazon EC2, navigate to the Amazon Redshift console and choose the cluster
redshift-spark-redshift-clusteron the Provisioned clusters dashboard page.

- In the cluster details, on the Query data menu, choose Query in query editor v2.

- Choose the cluster in the navigation pane and connect to the Amazon Redshift cluster when it requests for authentication.
- Select Temporary credentials.
- For Database, enter
dev. - For User name, enter
redshiftmasteruser. - Choose Save.

- In the navigation pane, expand the cluster
redshift-spark-redshift-cluster, expand the dev database, expandtickit, and expand Tables to list all the tables inside the schematickit.


You should find the table test_emr.

- Choose (right-click) the table
test_emr, then choose Select table to query the table.

- Choose Run to run the SQL statement.


Use Amazon Redshift integration with Apache Spark on Amazon EMR Serverless
The Amazon EMR release version 6.9.0 and above provides the Amazon Redshift integration for Apache Spark JARs (managed by Amazon Redshift) and Amazon Redshift JDBC JARs locally on Amazon EMR Serverless as well. These files are located under the /usr/share/aws/redshift/ directory. In the following example, we use the Python script made available in the S3 bucket by the CloudFormation stack we created earlier.
- In the CloudFormation stack outputs, make a note of the value for
EMRServerlessExecutionScript, which is the location of the Python script in the S3 bucket. - Also note the value for
EMRServerlessJobExecutionRole, which is the IAM role to be used with running the Amazon EMR Serverless job. - Access Amazon EMR Studio by choosing or copying the link provided in the CloudFormation stack outputs for the key
EMRStudioURL. - Choose Applications under Serverless in the navigation pane.


You will find an EMR application created by the CloudFormation stack with the name emr-spark-redshift.
- Choose the application name to submit a job.

- Choose Submit job.

- Under Job details, for Name, enter an identifiable name for the job.
- For Runtime role, choose the IAM role that you noted from the CloudFormation stack output earlier.
- For Script location, provide the path to the Python script you noted earlier from the CloudFormation stack output.
- Expand the section Spark properties and choose the Edit in text
- Enter the following value in the text box, which provides the path to the
redshift-connector, Amazon Redshift JDBC driver,spark-avroJAR, andminimal-jsonJAR files:
- Choose Submit job.
- Wait for the job to complete and the run status to show as Success.
- Navigate to the Amazon Redshift query editor to view if the table was created successfully.

- Check the pushdown queries run for Amazon Redshift query group
emr-serverless-redshift. You can run the following SQL statement against the databasedev:


You can see that the pushdown query and return results are stored in Parquet file format on Amazon S3.

Use Amazon Redshift integration with Apache Spark on AWS Glue
Starting with AWS Glue version 4.0 and above, the Apache Spark jobs connecting to Amazon Redshift can use the Amazon Redshift integration for Apache Spark and Amazon Redshift JDBC driver. Existing AWS Glue jobs that already use Amazon Redshift as source or target can be upgraded to AWS Glue 4.0 to take advantage of this new connector. The CloudFormation template provided with this post creates the following AWS Glue resources:
- AWS Glue connection for Amazon Redshift – The connection to establish connection from AWS Glue to Amazon Redshift using the Amazon Redshift integration for Apache Spark
- IAM role attached to the AWS Glue job – The IAM role to manage permissions to run the AWS Glue job
- AWS Glue job – The script for the AWS Glue job performing transformations and aggregations using the Amazon Redshift integration for Apache Spark
The following example uses the AWS Glue connection attached to the AWS Glue job with PySpark and includes the following steps:
- On the AWS Glue console, choose Connections in the navigation pane.

- Under Connections, choose the AWS Glue connection for Amazon Redshift created by the CloudFormation template.

- Verify the connection details.


You can now reuse this connection within a job or across multiple jobs.
- On the Connectors page, choose the AWS Glue job created by the CloudFormation stack under Your jobs, or access the AWS Glue job by using the URL provided for the key
GlueJobin the CloudFormation stack output.

- Access and verify the script for the AWS Glue job.

- On the Job details tab, make sure that Glue version is set to Glue 4.0.


This ensures that the job uses the latest redshift-spark connector.

- Expand Advanced properties and in the Connections section, verify that the connection created by the CloudFormation stack is attached.

- Verify the job parameters added for the AWS Glue job. These values are also available in the output for the CloudFormation stack.

- Choose Save and then Run.


You can view the status for the job run on the Run tab.

- After the job run completes successfully, you can verify the output of the table test-glue created by the AWS Glue job.

- We check the pushdown queries run for Amazon Redshift query group
glue-redshift. You can run the following SQL statement against the databasedev:


Best practices
Keep in mind the following best practices:
- Consider using the Amazon Redshift integration for Apache Spark from Amazon EMR instead of using the
redshift-sparkconnector (community version) for your new Apache Spark jobs. - If you have existing Apache Spark jobs using the
redshift-sparkconnector (community version), consider upgrading them to use the Amazon Redshift integration for Apache Spark - The Amazon Redshift integration for Apache Spark automatically applies predicate and query pushdown to optimize for performance. We recommend using supported functions (
autopushdown) in your query. The Amazon Redshift integration for Apache Spark will turn the function into a SQL query and run the query in Amazon Redshift. This optimization results in required data being retrieved, so Apache Spark can process less data and have better performance.- Consider using aggregate pushdown functions like
avg,count,max,min, andsumto retrieve filtered data for data processing. - Consider using Boolean pushdown operators like
in,isnull,isnotnull,contains,endswith, andstartswithto retrieve filtered data for data processing. - Consider using logical pushdown operators like
and,or, andnot(or!) to retrieve filtered data for data processing.
- Consider using aggregate pushdown functions like
- It’s recommended to pass an IAM role using the parameter
aws_iam_rolefor the Amazon Redshift authentication from your Apache Spark application on Amazon EMR or AWS Glue. The IAM role should have necessary permissions to retrieve temporary IAM credentials to authenticate to Amazon Redshift as shown in this blog’s “Examples for Amazon Redshift integration for Apache Spark in an Apache Spark application” section. - With this feature, you don’t have to maintain your Amazon Redshift user name and password in the secrets manager and Amazon Redshift database.
- Amazon Redshift uses the UNLOAD SQL statement to store this temporary data on Amazon S3. The Apache Spark application retrieves the results from the temporary directory (stored in Parquet file format). This temporary directory on Amazon S3 is not cleaned up automatically, and therefore could add additional cost. We recommend using Amazon S3 lifecycle policies to define the retention rules for the S3 bucket.
- It’s recommended to turn on Amazon Redshift audit logging to log the information about connections and user activities in your database.
- It’s recommended to turn on Amazon Redshift at-rest encryption to encrypt your data as Amazon Redshift writes it in its data centers and decrypt it for you when you access it.
- It’s recommended to upgrade to AWS Glue v4.0 and above to use the Amazon Redshift integration for Apache Spark, which is available out of the box. Upgrading to this version of AWS Glue will automatically make use of this feature.
- It’s recommended to upgrade to Amazon EMR v6.9.0 and above to use the Amazon Redshift integration for Apache Spark. You don’t have to manage any drivers or JAR files explicitly.
- Consider using Amazon EMR Studio notebooks to interact with your Amazon Redshift data in your Apache Spark application.
- Consider using AWS Glue Studio to create Apache Spark jobs using a visual interface. You can also switch to writing Apache Spark code in either Scala or PySpark within AWS Glue Studio.
Clean up
Complete the following steps to clean up the resources that are created as a part of the CloudFormation template to ensure that you’re not billed for the resources if you’ll no longer be using them:
- Stop the Amazon EMR Serverless application:
- Access Amazon EMR Studio by choosing or copying the link provided in the CloudFormation stack outputs for the key
EMRStudioURL. - Choose Applications under Serverless in the navigation pane.
- Access Amazon EMR Studio by choosing or copying the link provided in the CloudFormation stack outputs for the key

You will find an EMR application created by the CloudFormation stack with the name emr-spark-redshift.
-
- If the application status shows as Stopped, you can move to the next steps. However, if the application status is Started, choose the application name, then choose Stop application and Stop application again to confirm.
- Delete the Amazon EMR Studio Workspace:
- Access Amazon EMR Studio by choosing or copying the link provided in the CloudFormation stack outputs for the key
EMRStudioURL. - Choose Workspaces in the navigation pane.
- Select the Workspace that you created and choose Delete, then choose Delete again to confirm.

- Access Amazon EMR Studio by choosing or copying the link provided in the CloudFormation stack outputs for the key
- Delete the CloudFormation stack:

-
- On the AWS CloudFormation console, navigate to the stack you created earlier.
- Choose the stack name and then choose Delete to remove the stack and delete the resources created as a part of this post.
- On the confirmation screen, choose Delete stack.


Conclusion
In this post, we explained how you can use the Amazon Redshift integration for Apache Spark to build and deploy applications with Amazon EMR on Amazon EC2, Amazon EMR Serverless, and AWS Glue to automatically apply predicate and query pushdown to optimize the query performance for data in Amazon Redshift. It’s highly recommended to use Amazon Redshift integration for Apache Spark for seamless and secure connection to Amazon Redshift from your Amazon EMR or AWS Glue.
Here is what some of our customers have to say about the Amazon Redshift integration for Apache Spark:
“We empower our engineers to build their data pipelines and applications with Apache Spark using Python and Scala. We wanted a tailored solution that simplified operations and delivered faster and more efficiently for our clients, and that’s what we get with the new Amazon Redshift integration for Apache Spark.”
—Huron Consulting
“GE Aerospace uses AWS analytics and Amazon Redshift to enable critical business insights that drive important business decisions. With the support for auto-copy from Amazon S3, we can build simpler data pipelines to move data from Amazon S3 to Amazon Redshift. This accelerates our data product teams’ ability to access data and deliver insights to end-users. We spend more time adding value through data and less time on integrations.”
—GE Aerospace
“Our focus is on providing self-service access to data for all of our users at Goldman Sachs. Through Legend, our open-source data management and governance platform, we enable users to develop data-centric applications and derive data-driven insights as we collaborate across the financial services industry. With the Amazon Redshift integration for Apache Spark, our data platform team will be able to access Amazon Redshift data with minimal manual steps, allowing for zero-code ETL that will increase our ability to make it easier for engineers to focus on perfecting their workflow as they collect complete and timely information. We expect to see a performance improvement of applications and improved security as our users can now easily access the latest data in Amazon Redshift.”
—Goldman Sachs
About the Authors
 Gagan Brahmi is a Senior Specialist Solutions Architect focused on big data analytics and AI/ML platform at Amazon Web Services. Gagan has over 18 years of experience in information technology. He helps customers architect and build highly scalable, performant, and secure cloud-based solutions on AWS. In his spare time, he spends time with his family and explores new places.
 Vivek Gautam is a Data Architect with specialization in data lakes at AWS Professional Services. He works with enterprise customers building data products, analytics platforms, and solutions on AWS. When not building and designing data lakes, Vivek is a food enthusiast who also likes to explore new travel destinations and go on hikes.
 Naresh Gautam is a Data Analytics and AI/ML leader at AWS with 20 years of experience, who enjoys helping customers architect highly available, high-performance, and cost-effective data analytics and AI/ML solutions to empower customers with data-driven decision-making. In his free time, he enjoys meditation and cooking.
 Beaux Sharifi is a Software Development Engineer within the Amazon Redshift drivers’ team where he leads the development of the Amazon Redshift Integration with Apache Spark connector. He has over 20 years of experience building data-driven platforms across multiple industries. In his spare time, he enjoys spending time with his family and surfing.
Exploring new ETL and ELT capabilities for Amazon Redshift from the AWS Glue Studio visual editor
Post Syndicated from Aniket Jiddigoudar original https://aws.amazon.com/blogs/big-data/exploring-new-etl-and-elt-capabilities-for-amazon-redshift-from-the-aws-glue-studio-visual-editor/
In a modern data architecture, unified analytics enable you to access the data you need, whether it’s stored in a data lake or a data warehouse. In particular, we have observed an increasing number of customers who combine and integrate their data into an Amazon Redshift data warehouse to analyze huge data at scale and run complex queries to achieve their business goals.
One of the most common use cases for data preparation on Amazon Redshift is to ingest and transform data from different data stores into an Amazon Redshift data warehouse. This is commonly achieved via AWS Glue, which is a serverless, scalable data integration service that makes it easier to discover, prepare, move, and integrate data from multiple sources. AWS Glue provides an extensible architecture that enables users with different data processing use cases, and works well with Amazon Redshift. At AWS re:Invent 2022, we announced support for the new Amazon Redshift integration with Apache Spark available in AWS Glue 4.0, which provides enhanced ETL (extract, transform, and load) and ELT capabilities with improved performance.
Today, we are pleased to announce a new and enhanced visual job authoring capabilities for Amazon Redshift ETL and ELT workflows on the AWS Glue Studio visual editor. The new authoring experience gives you the ability to:
- Get started faster with Amazon Redshift by directly browsing Amazon Redshift schemas and tables from the AWS Glue Studio visual interface
- Flexible authoring through native Amazon Redshift SQL support as a source or custom preactions and postactions
- Simplify common data loading operations into Amazon Redshift through new support for INSERT, TRUNCATE, DROP, and MERGE commands
With these enhancements, you can use existing transforms and connectors in AWS Glue Studio to quickly create data pipelines for Amazon Redshift. No-code users can complete end-to-end tasks using only the visual interface, SQL users can reuse their existing Amazon Redshift SQL within AWS Glue, and all users can tune their logic with custom actions on the visual editor.
In this post, we explore the new streamlined user interface and dive deeper into how to use these capabilities. To demonstrate these new capabilities, we showcase the following:
- Passing a custom SQL JOIN statement to Amazon Redshift
- Using the results to apply an AWS Glue Studio visual transform
- Performing an APPEND on the results to load them into a destination table
Set up resources with AWS CloudFormation
To demonstrate the AWS Glue Studio visual editor experience with Amazon Redshift, we provide an AWS CloudFormation template for you to set up baseline resources quickly. The template creates the following resources for you:
- An Amazon VPC, subnets, route tables, an internet gateway, and NAT gateways
- An Amazon Redshift cluster
- An AWS Identity and Access Management (IAM) role associated with the Amazon Redshift cluster
- An IAM role for running the AWS Glue job
- An Amazon Simple Storage Service (Amazon S3) bucket to be used as a temporary location for Amazon Redshift ETL
- An AWS Secrets Manager secret that stores the user name and password for the Amazon Redshift cluster
Note that at the time of writing this post, Amazon Redshift MERGE is in preview, and the cluster created is a preview cluster.
To launch the CloudFormation stack, complete the following steps:
- On the AWS CloudFormation console, choose Create stack and then choose With new resources (standard).

- For Template source, select Upload a template file, and upload the provided template.
- Choose Next.
- Enter a name for the CloudFormation stack, then choose Next.

- Acknowledge that this stack might create IAM resources for you, then choose Submit.

- After the CloudFormation stack is successfully created, follow the steps mentioned at https://docs.aws.amazon.com/redshift/latest/gsg/rs-gsg-create-sample-db.html to load sample tickit data into the created Redshift Cluster


Exploring Amazon Redshift reads
In this section, we go over the new read functionality in the AWS Glue Studio visual editor and demonstrate how we can run a custom SQL statement via the new UI.
- On the AWS Glue console, choose ETL jobs in the navigation pane.

- Select the Visual with a blank canvas, because we’re authoring a job from scratch, then choose Create.

- In the blank canvas, choose the plus sign to add an Amazon Redshift node of type Source.


When you close the node selector, and you should see an Amazon Redshift source node on the canvas along with the data source properties.
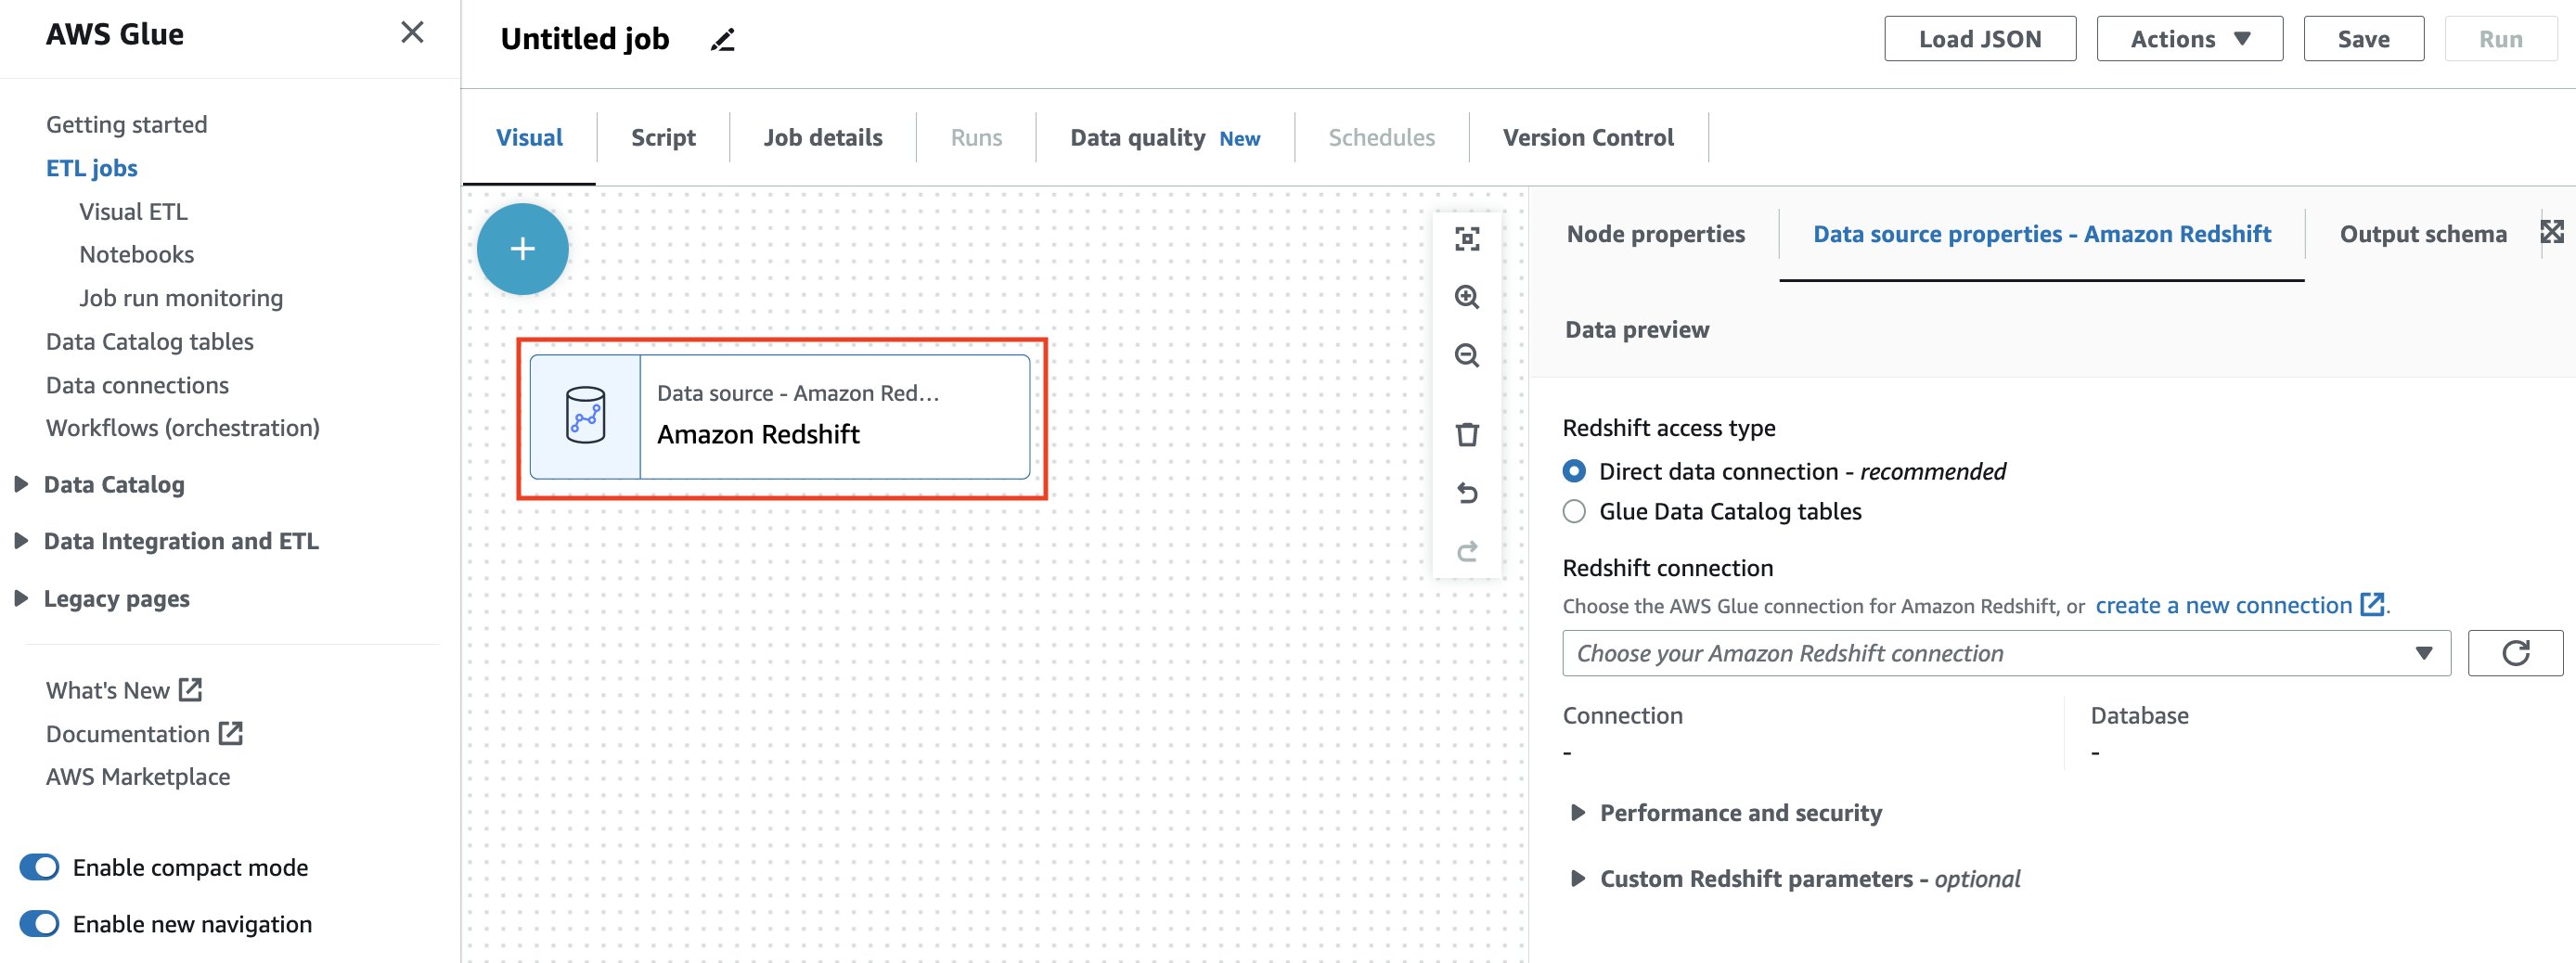
You can choose from two methods of accessing your Amazon Redshift data:
- Direct data connection – This new method allows you to establish a connection to your Amazon Redshift sources without the need to catalog them
- Glue Data Catalog tables – This method requires you to have already crawled or generated your Amazon Redshift tables in the AWS Glue Data Catalog
For this post, we use the Direct data connection option.
- For Redshift access type, select the Direct data connection.
- For Redshift connection, choose your AWS Glue Connection
redshift-demo-blog-connectioncreated in the CloudFormation stack.


Specifying the connection automatically configures all the network related details along with the name of the database you wish to connect to.
The UI then presents a choice on how you’d like to access the data from within your selected Amazon Redshift cluster’s database:
- Choose a single table – This option lets you select a single schema, and a single table from your database. You can browse through all of your available schemas and tables right from the AWS Glue Studio visual editor itself, which makes choosing your source table much easier.

- Enter a custom query – If you’re looking to perform your ETL on a subset of data from your Amazon Redshift tables, you can author an Amazon Redshift query from the AWS Glue Studio UI. This query will be passed to the connected Amazon Redshift cluster, and the returned query result will be available in downstream transformations on AWS Glue Studio.

For the purposes of this post, we write our own custom query that joins data from the preloaded event table and venue table.
- Select Enter a custom query and enter the following query into the query editor:
The intent of this query is to gather the venueid of locations that have had an event between 2008-01-01 14:00:00 and 2008-01-01 15:00:00 and have had venueseats = 0. If we run a similar query from the Amazon Redshift Query Editor, we can see that there are actually five such venues within that time frame. We wish to merge this data back into Amazon Redshift without including these rows.
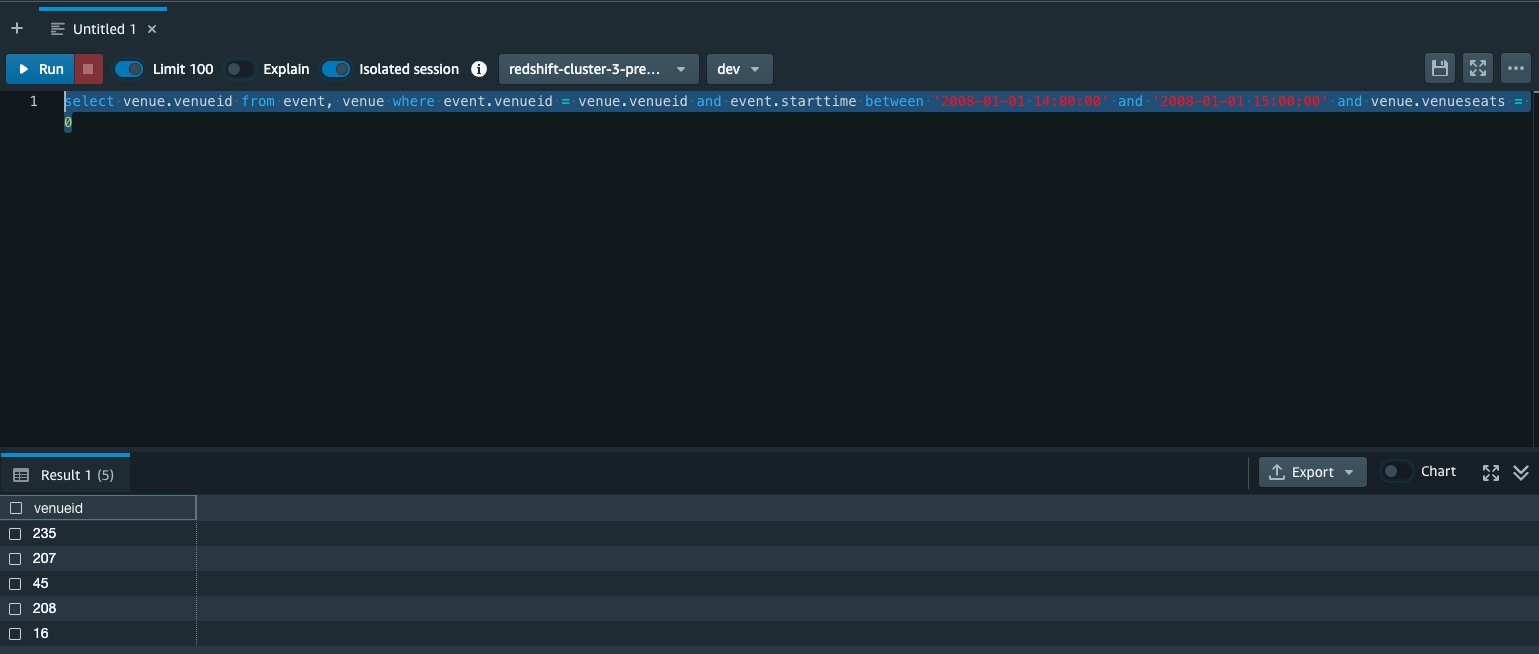
- Choose Infer schema, which allows the AWS Glue Studio visual editor to understand the schema from the returned columns from your query.


You can see the schema on the Output schema tab.
- Under Performance and security, for S3 staging directory, choose the S3 temporary directory location created by the CloudFormation stack ( RedshiftS3TempPath ).
- For IAM role, choose the IAM role specified by RedshiftIamRoleARN in the CloudFormation stack.


Now we’re going to add a transform to drop duplicate rows from our join result. This will ensure that the MERGE operation in the following steps won’t have conflicting keys when performing the operation.
- Choose the Drop Duplicates node to view the node properties.

- On the Transform tab, for Drop duplicates, select Match specific keys.
- For Keys to match rows, choose
venueid.


In this section, we defined the steps to read the output of a custom JOIN query. We then dropped the duplicate records from the returned value. In the next section, we explore the write path on the same job.
Exploring Amazon Redshift writes
Now we go over the enhancements for writing to Amazon Redshift as a destination. This section goes over all the simplified options for writing to Amazon Redshift, but highlights the new Amazon Redshift MERGE capabilities for the purposes of this post.
The MERGE operator offers great flexibility for conditionally merging rows from a source into a destination table. MERGE is powerful because it simplifies operations that traditionally were only achievable by using multiple insert, update, or delete statements separately. Within AWS Glue Studio, particularly with the custom MERGE option, you can define a more complex matching condition to handle finding the records to update.
- From the canvas page of the job used in the previous section, select Amazon Redshift to add an Amazon Redshift node of type Target.


When you close the selector, you should see your Amazon Redshift target node added on the Amazon Glue Studio canvas, along with possible options.
- For Redshift access type, select Direct data connection.
Similar to the Amazon Redshift source node, the Direct data connection method allows you to write directly to your Amazon Redshift tables without needing to have them cataloged within the AWS Glue Data Catalog.
- For Redshift connection, choose your AWS Glue connection
redshift-demo-blog-connectioncreated in the CloudFormation stack.

- For Schema, choose public.

- For Table, choose the venue table as the destination Amazon Redshift table where we will store the merged data.
- Choose MERGE data into target table.


This selection provides the user with two options:
- Choose keys and simple actions – This is a user-friendly version of the MERGE operation. You simply specify the matching keys, and choose what happens to the rows that match the key (update them or delete them) or don’t have any matches (insert them).
- Enter custom MERGE statement – This option provides the most flexibility. You can enter your own custom logic for MERGE.
For this post, we use the simple actions method for performing a MERGE operation.
- For Handling of data and target table, select MERGE data into target table, and then select Choose keys and simple actions.
- For Matching Keys, select
venueid.
This field will become our MERGE condition for checking keys
- For When matched, select the Delete record in the table
- For When not matched, select Insert source data as a new row into the table


With these selections, we’ve configured the AWS Glue job to run a MERGE statement on Amazon Redshift while inserting our data. Moreover, for performing this MERGE operation, we use the as the key (you can select multiple keys). If there is a key match with the destination table’s record, we delete that record. Otherwise, we insert the record into the destination table.
- Navigate to the Job details tab.
- For Name, enter a name for the job.
- For the IAM Role drop down, select the RedshiftIamRole role that was created via the CloudFormation template.
- Choose Save.

- Choose Run and wait for the job to finish.

You can track its progress on the Runs tab.
- After the run reaches a successful state, navigate back to the Amazon Redshift Query Editor.
- Run the same query again to discover that those rows have been deleted in accordance to our MERGE specifications.


In this section, we configured an Amazon Redshift target node to write a MERGE statement to conditionally update records in our destination Amazon Redshift table. We then saved and ran the AWS Glue job, and saw the effect of the MERGE statement on our destination Amazon Redshift table.
Other available write options
In addition to MERGE, the AWS Glue Studio visual editor’s Amazon Redshift destination node also supports a number of other common operations:
- APPEND – Appending to your target table performs an insert into the selected table without updating any of the existing records (if there are duplicates, both records will be retained). In cases where you want to update existing rows in addition to adding new rows (often referred to an UPSERT operation), you can select the Also update existing records in target table option. Note that both APPEND only and UPSERT (APPEND with UPDATE) are a simpler subset of the MERGE functionality discussed earlier.
- TRUNCATE – The TRUNCATE option clears all the data in the existing table but retains all the existing table schema, followed by an APPEND of all new data to the empty table. This option is often used when the full dataset needs to be refreshed and downstream services or tools depend on the table schema being consistent. For example, every night an Amazon Redshift table needs to be fully updated with the latest customer information that will be consumed by an Amazon QuickSight dashboard. In this case, the ETL developer would choose TRUNCATE to ensure the data is fully refreshed but the table schema is guaranteed not to change.
- DROP – This option is used when the full dataset needs to be refreshed and the downstream services or tools that depend on the schema or systems can handle possible schema changes without breaking.
How write operations are being handled on the backend
The Amazon Redshift connector supports two parameters called preactions and postactions. These parameters allow you to run SQL statements that will be passed on to the Amazon Redshift data warehouse before and after the actual write operation is carried out by Spark.
On the Script tab on the AWS Glue Studio page, we can see what SQL statements are being run.
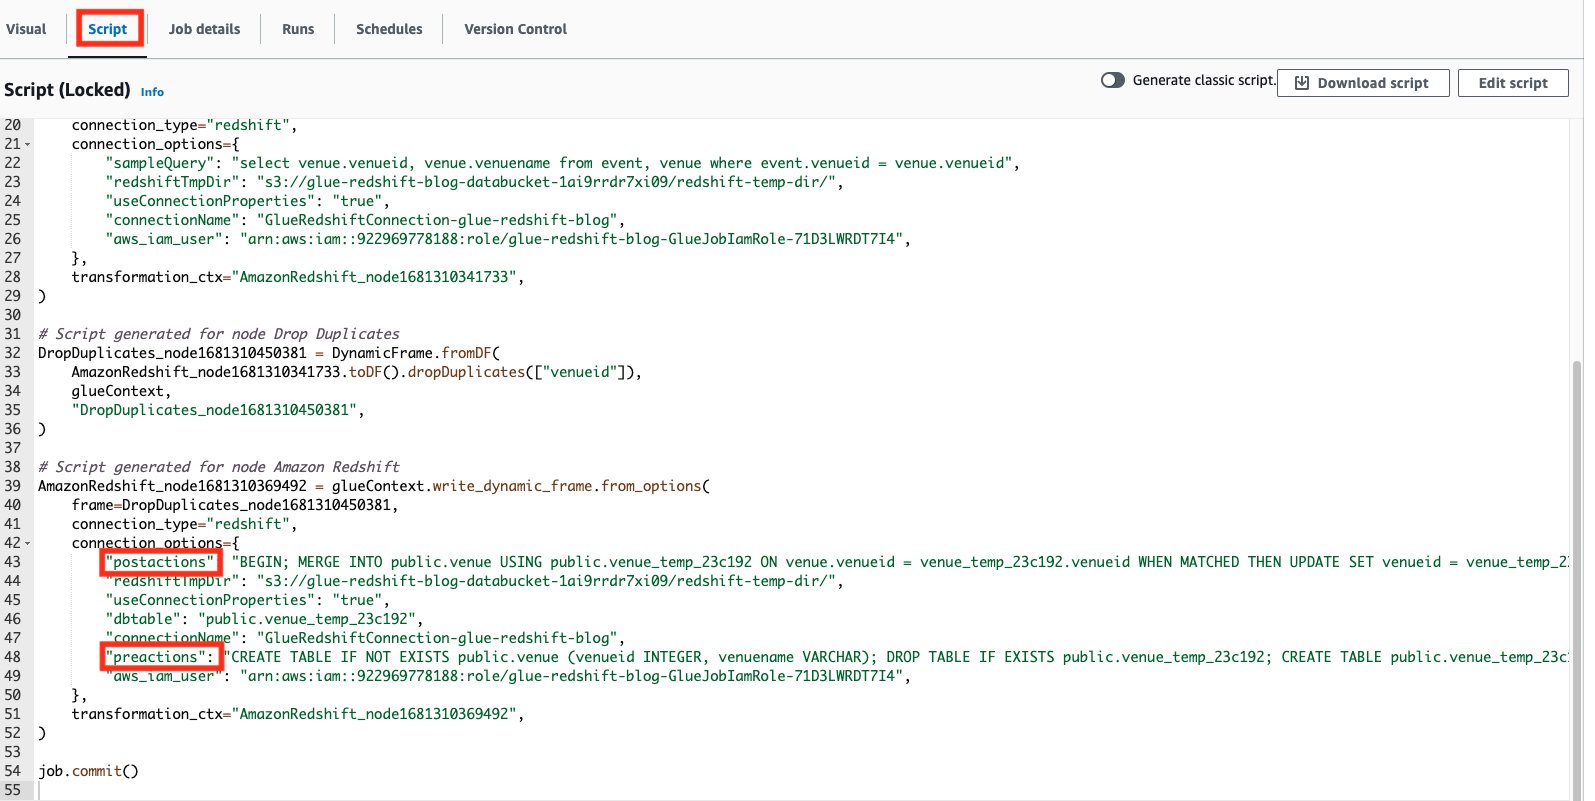
Use a custom implementation for writing data into Amazon Redshift
In the event that the provided presets require more customization, or your use case requires more advanced implementations for writing to Amazon Redshift, AWS Glue Studio also allows you to freely select which preactions and postactions can be run when writing to Amazon Redshift.
To show an example, we create an Amazon Redshift datashare as a preaction, then perform the cleaning up of the same datashare as a postaction via AWS Glue Studio.
NOTE: This section is not executed as part of the above blog and is provided as an example.
- Choose the Amazon Redshift data target node.
- On the Data target properties tab, expand the Custom Redshift parameters section.
- For the parameters, add the following:
- Parameter:
preactionswith ValueBEGIN; CREATE DATASHARE ds1; END - Parameter:
postactionswith ValueBEGIN; DROP DATASHARE ds1; END
- Parameter:
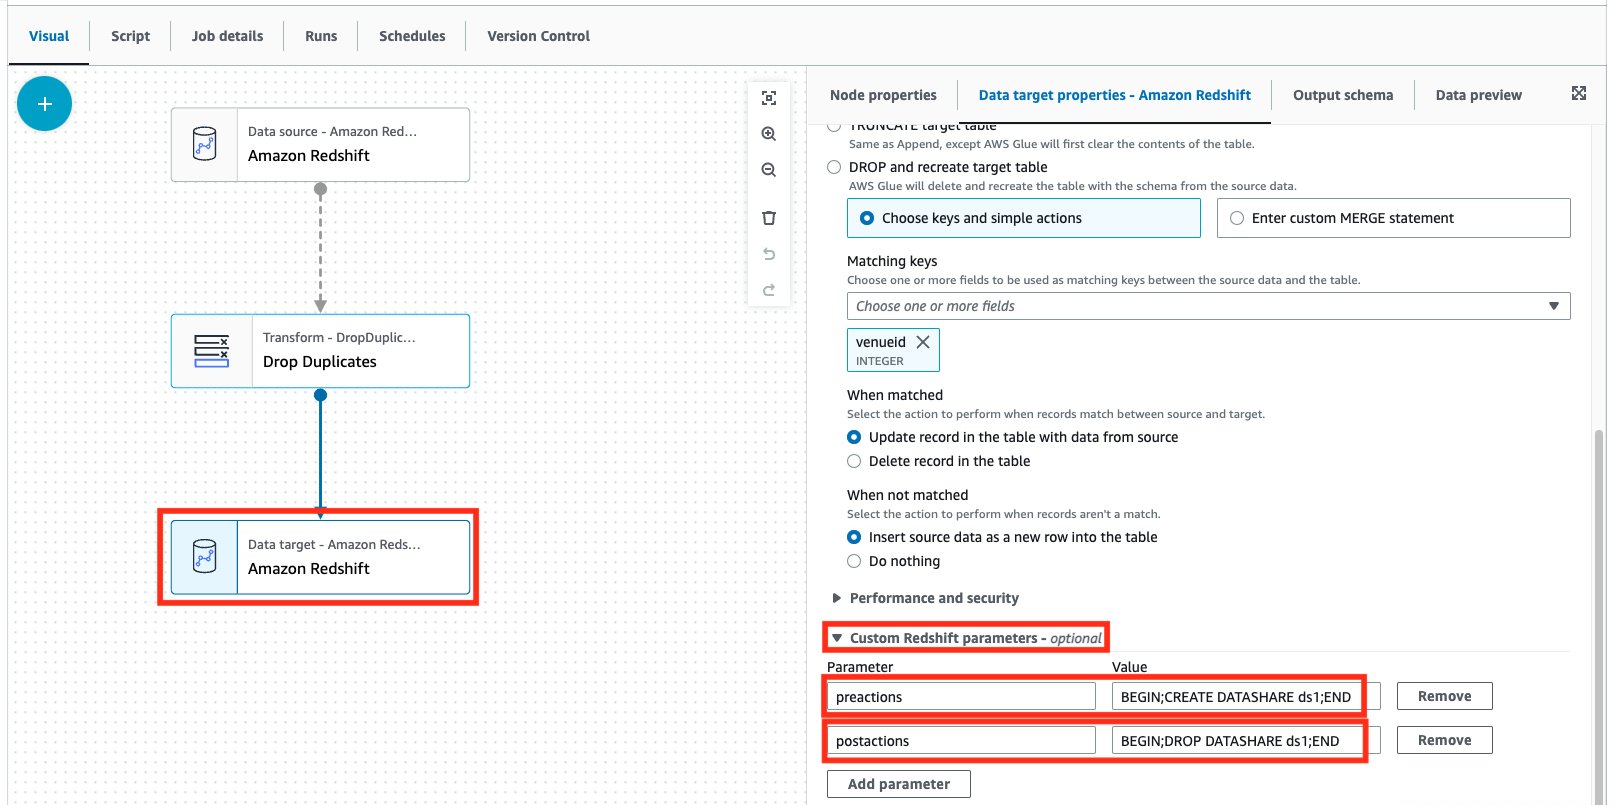
As you can see, we can specify multiple Amazon Redshift statements as a part of both the preactions and postactions parameters. Remember that these statements will override any existing preactions or postactions with your specified actions (as you can see in the following generated code).
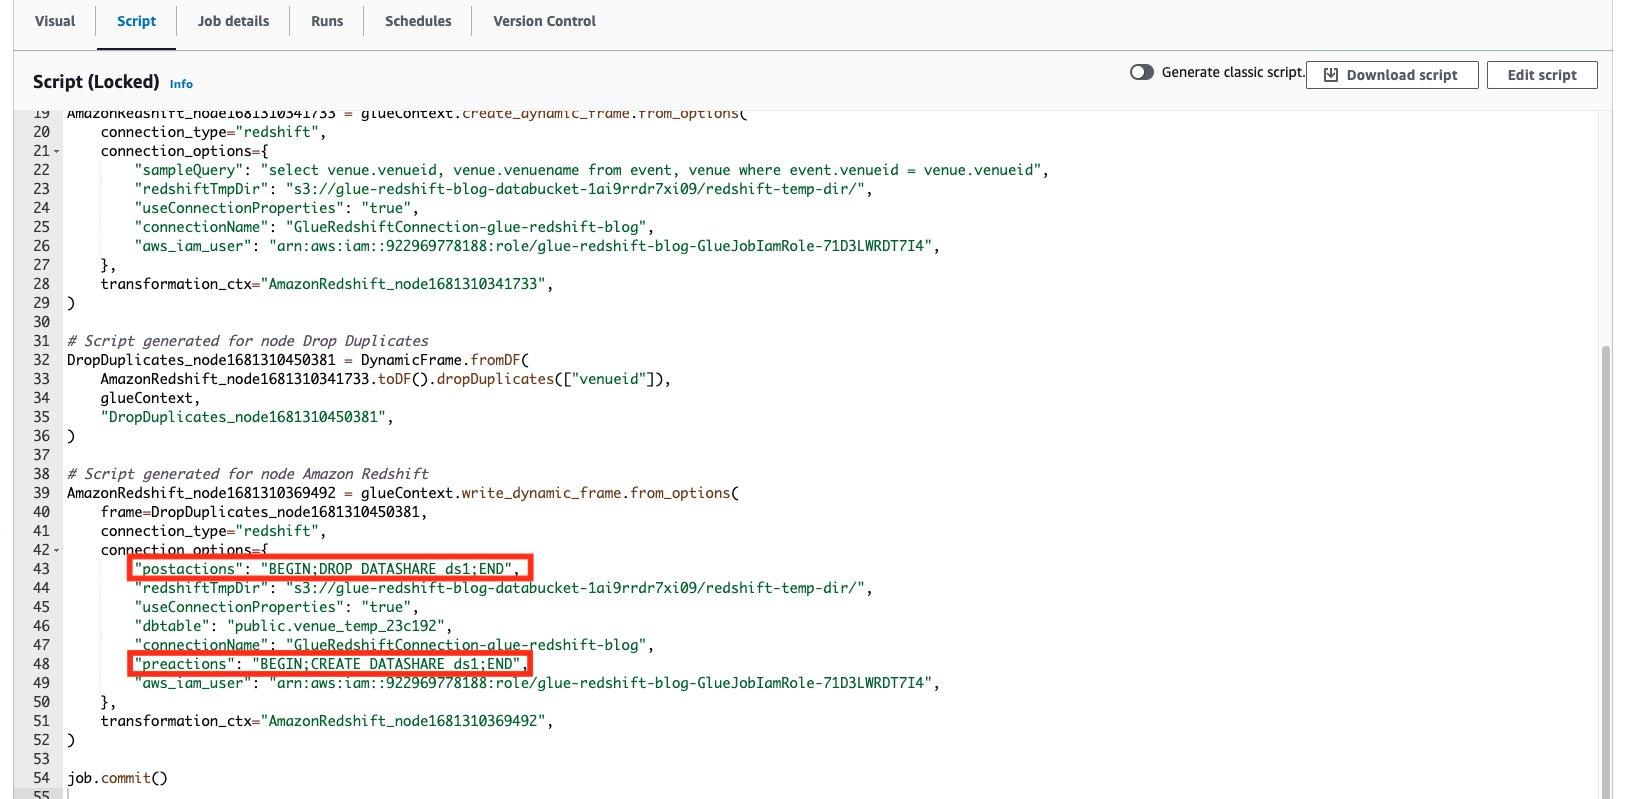
Cleanup
To avoid additional costs, make sure to delete any unnecessary resources and files:
- Empty and delete the contents from the S3 temporary bucket
- If you deployed the sample CloudFormation stack, delete the CloudFormation stack via the AWS CloudFormation console. Make sure to empty the S3 bucket before you delete the bucket.
Conclusion
In this post, we went over the new AWS Glue Studio visual options for performing reads and writes from Amazon Redshift. We also saw the simplicity with which you can browse your Amazon Redshift tables right from the AWS Glue Studio visual editor UI, and how to run your own custom SQL statements against your Amazon Redshift sources. We then explored how to perform simple ETL loading tasks against Amazon Redshift with just a few clicks, and showcased the new Amazon Redshift MERGE statement.
To dive deeper into the new Amazon Redshift integrations for the AWS Glue Studio visual editor, check out Connecting to Redshift in AWS Glue Studio.
About the Authors
 Aniket Jiddigoudar is a Big Data Architect on the AWS Glue team. He works with customers to help improve their big data workloads. In his spare time, he enjoys trying out new food, playing video games, and kickboxing.
 Sean Ma is a Principal Product Manager on the AWS Glue team. He has an 18+ year track record of innovating and delivering enterprise products that unlock the power of data for users. Outside of work, Sean enjoys scuba diving and college football.
FREE License Plate Reading, Face Recognition, and Object Detection for Blue Iris – Full Walkthrough
Post Syndicated from The Hook Up original https://www.youtube.com/watch?v=jqc1ukrkMmI
NVIDIA RTX 6000 Ada Graphics Card Review
Post Syndicated from William Harmon original https://www.servethehome.com/nvidia-rtx-6000-ada-graphics-card-review-pny/
In our NVIDIA RTX 6000 Ada review, we see how this 48GB (with ECC) GPU is the pinnacle of modern workstation GPUs
The post NVIDIA RTX 6000 Ada Graphics Card Review appeared first on ServeTheHome.
Backblaze Is 16!
Post Syndicated from Backblaze original https://www.backblaze.com/blog/backblaze-is-16/
Hey, we can drive! (Pun absolutely intended.) Some days it’s hard to believe that what started as a “crazy” dream in a one-bedroom apartment has evolved into what we’re celebrating today—16 years of blazing on (pun, ahem, also intended).
To mark the occasion, we thought we’d share some of our highlights from past years. If you want to hear co-founder and CEO Gleb Budman talking about our evolution (plus where he thinks cloud storage is going in the future), check out his recent appearance on The Cloudcast podcast.
And, here are some other great moments for your reading and viewing pleasure:
- Throwback to this article on our five-year anniversary—it has some great photos.
- Check out our very first viral moment, Petabytes on a Budget, and read more about our Storage Pods as they exist today.
- See how the Backblaze community came together to farm hard drives during the Thailand Drive Crisis.
- Read about how we were almost acquired; then later, our IPO announcement and thoughts on why more businesses should consider going public.
- Dig into the Drive Stats reports and data from the beginning (10 years ago!).
- View some of our technical content like our article on Reed-Solomon erasure coding, a history of the Python Gil, and load balancing while managing servers.
You already know there’s much, much more on the Backblaze blog, and we love chatting with folks in article comments and on socials. After all, we wouldn’t be here without all of you!
Thanks for supporting us over the years. If you feel like spreading the love, you can always refer a friend. (You’ll be prompted to log in so that you get credit for the referral.) Your friend will get a month free to try Backblaze, and when they sign up, you’ll get one too!
The post Backblaze Is 16! appeared first on Backblaze Blog | Cloud Storage & Cloud Backup.
SK hynix Introduces New 12-layer HBM3 Memory
Post Syndicated from Cliff Robinson original https://www.servethehome.com/sk-hynix-introduces-new-12-layer-hbm3-memory/
SK hynix has new 12-layer HBM3 memory increasing capacity from 8-layer 16GB stacks to 12-layer 24GB stacks
The post SK hynix Introduces New 12-layer HBM3 Memory appeared first on ServeTheHome.
How to prioritize IAM Access Analyzer findings
Post Syndicated from Swara Gandhi original https://aws.amazon.com/blogs/security/how-to-prioritize-iam-access-analyzer-findings/
AWS Identity and Access Management (IAM) Access Analyzer is an important tool in your journey towards least privilege access. You can use IAM Access Analyzer access previews to preview and validate public and cross-account access before deploying permissions changes in your environment.
For the permissions already in place, one of IAM Access Analyzer’s capabilities is that it helps you identify resources in your AWS Organizations organization and AWS accounts that are shared with an external entity.
For each external entity that has access to a resource in your account, IAM Access Analyzer generates a finding. Findings display information about the resource and the policy statement that generated the finding, with details such as the list of actions in the policy granting access, level of access, and conditions that allow the access. You can review the findings to determine if the access is intended or unintended.
As your use of AWS services grows and the number of accounts in your organization increases, the number of findings that you have might also increase. To help reduce noise and allow you to focus on unintended access findings, you can filter findings and create archive rules for intended access.
This blog post provides step-by-step guidance on how to get started with IAM Access Analyzer findings by using different filtering techniques that can help you filter approved use cases that result in access findings. For example, you might see a finding generated for an S3 bucket that hosts images for your website and thus allows public access, as approved by your organization, apply a filter so that you can concentrate on unintended access. IAM Access Analyzer offers a wide range of filters; for a complete list, see the IAM documentation.
In this post, we also share example archive rules for approved use cases that result in access findings. Archive rules automatically archive new findings that meet the criteria you define when you create the rule. You can also apply archive rules retroactively to archive existing findings that meet the archive rule criteria. Finally, we have included an example implementation of archive rules using an AWS CloudFormation template.
IAM Access Analyzer findings overview
To get started, create an analyzer for your entire organization or your account. The organization or account that you choose is known as the zone of trust for the analyzer. The zone of trust determines the type of access that IAM Access Analyzer considers to be trusted. IAM Access Analyzer continuously monitors to identify resource policies, access control lists, and other access controls that grant public or cross-account access from outside the zone of trust, and generates findings. For this blog post, we’ll demonstrate an organization as the zone of trust, showcasing findings from a large-scale, multi-account AWS deployment.
Prerequisites
This blog post assumes that you have the following in place:
- IAM Access Analyzer is enabled in your organization or account in the AWS Regions where you operate. For more details on how to enable IAM Access Analyzer, see Enabling IAM Access Analyzer.
- Access to the AWS Organizations management account or to a member account in the organization with delegated administrator access for creating and updating IAM Access Analyzer resources.
How to filter the findings
To start filtering your findings and create archive rules, you should complete the following steps:
- Review public access findings
- Filter by removing permissions errors
- Filter for known identity providers
- Filter cross-account access from trusted external accounts
We’ll walk you through each step.
1. Review public access findings
Some AWS resources allow public access on the resource by means of a resource-based policy—for example, an Amazon Simple Storage Service (Amazon S3) bucket policy that has the “Principal:*” permission added to its bucket policy. For resources such as Amazon Elastic Block Store (Amazon EBS) snapshots, you can share these by using a flag on the resource permission. IAM Access Analyzer looks for such sharing and reports it in the findings.
From the global report, you can generate a list of resources that allow public access by using the Public access: true query in the IAM console.
The following is an example of an AWS Command Line Interface (AWS CLI) command with public access as “true”. Replace <AccessAnalyzerARN> with the Amazon Resource Name (ARN) of your analyzer.
aws accessanalyzer list-findings --analyzer-arn <AccessAnalyzerARN> --filter isPublic={"eq"="true"}
Is the public access intended?
If the access is intended, you can archive the findings by creating an archive rule using the AWS Management Console, AWS CLI, or API. When you archive a security finding, IAM Access Analyzer removes it from the Active findings list and changes its status to Archived. For instructions on how to automatically archive expected findings, see How to automatically archive expected IAM Access Analyzer findings.
Example: Known S3 bucket that hosts public website images
If you have resources for which public access is expected, such as an S3 bucket that hosts images for your website, you can add an archive rule with Resource criteria equal to the bucket name, as shown in Figure 1.
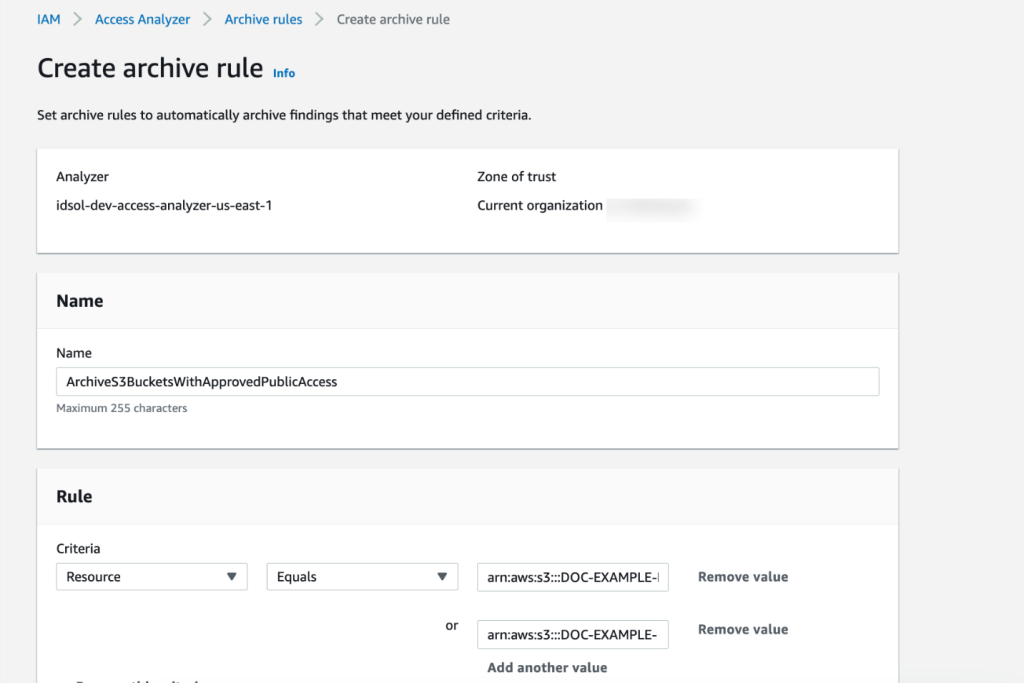
Figure 1: Create IAM Access Analyzer archive rule using the console
Is the public access unintended?
If the finding results from policies that were misconfigured to allow unintended public access, you can constrain the access by using AWS global condition context keys or a specific IAM principal ARN. The findings show the account and resource that contain the policy.
For example, if the finding shows a misconfigured S3 bucket, the following policy shows how you can modify the S3 bucket policy to only allow IAM principals from your organization to access the bucket by using the PrincipalOrgID condition key. Replace <DOC-EXAMPLE-BUCKET> with the name of your S3 bucket, and <ORGANIZATION_ID> with your organization ID.
2. Filter by removing permissions errors
Before you further investigate the IAM Access Analyzer findings, you should make sure that IAM Access Analyzer has enough permissions to access the resources in your accounts to be able to provide the analysis.
IAM Access Analyzer uses an AWS service-linked role to call other AWS services on your behalf. When IAM Access Analyzer analyzes a resource, it reads resource metadata, such as a resource-based policy, access control lists, and other access controls that grant public or cross-account access. If the policies don’t allow an IAM Access Analyzer role to read the resource metadata, it generates an Access Denied error finding, as shown in Figure 2.

Figure 2: IAM Access Analyzer access denied error example
To view these error findings from the IAM Access Analyzer console, filter the findings by using the Error: Access Denied property.
Resolution
To resolve the access issue, make sure that the IAM Access Analyzer service-linked role is not denied access. Review the resource-based policy attached to the resource that IAM Access Analyzer isn’t able to access. For a list of services that support resource-based policies, see the IAM documentation.
For example, if the analyzer can’t access an AWS Key Management Service (AWS KMS) key because of an explicit deny, add an exception for the IAM Access Analyzer service-linked role to the policy statement, similar to the following. Make sure that you change the <ACCOUNT_ID> to your account id.
| Before | After |
3. Filter for known identity providers
With SAML 2.0 or Open ID Connect (OIDC)—which are open federation standards that many identity providers (IdPs) use—users can log in to the console or call the AWS API operations without you having to create an IAM user for everyone in your organization.
To set up federation, you must perform a one-time configuration so that your organization’s IdP and your account trust each other. To configure this trust, you must register AWS as a service provider (SP) with the IdP of your organization and set up metadata and key exchange.
The role or roles that you create in IAM define what the federated users from your organization are allowed to use on AWS. When you create the trust policy for the role, you specify the SAML or OIDC provider as the Principal. To only allow users that match certain attributes to access the role, you can scope the trust policy with a Condition.
Example 1: Federation with Okta
Let’s walk through an example that uses Okta as the IdP. Although access to a trusted IdP is intended, IAM Access Analyzer creates a finding for an IAM role that has trust policy granting access to a SAML provider because the trust policy allows access outside of the known zone of trust for the analyzer. You will see findings created for the IAM role granting access to Okta using the IAM trust policy, as shown in Figure 3.
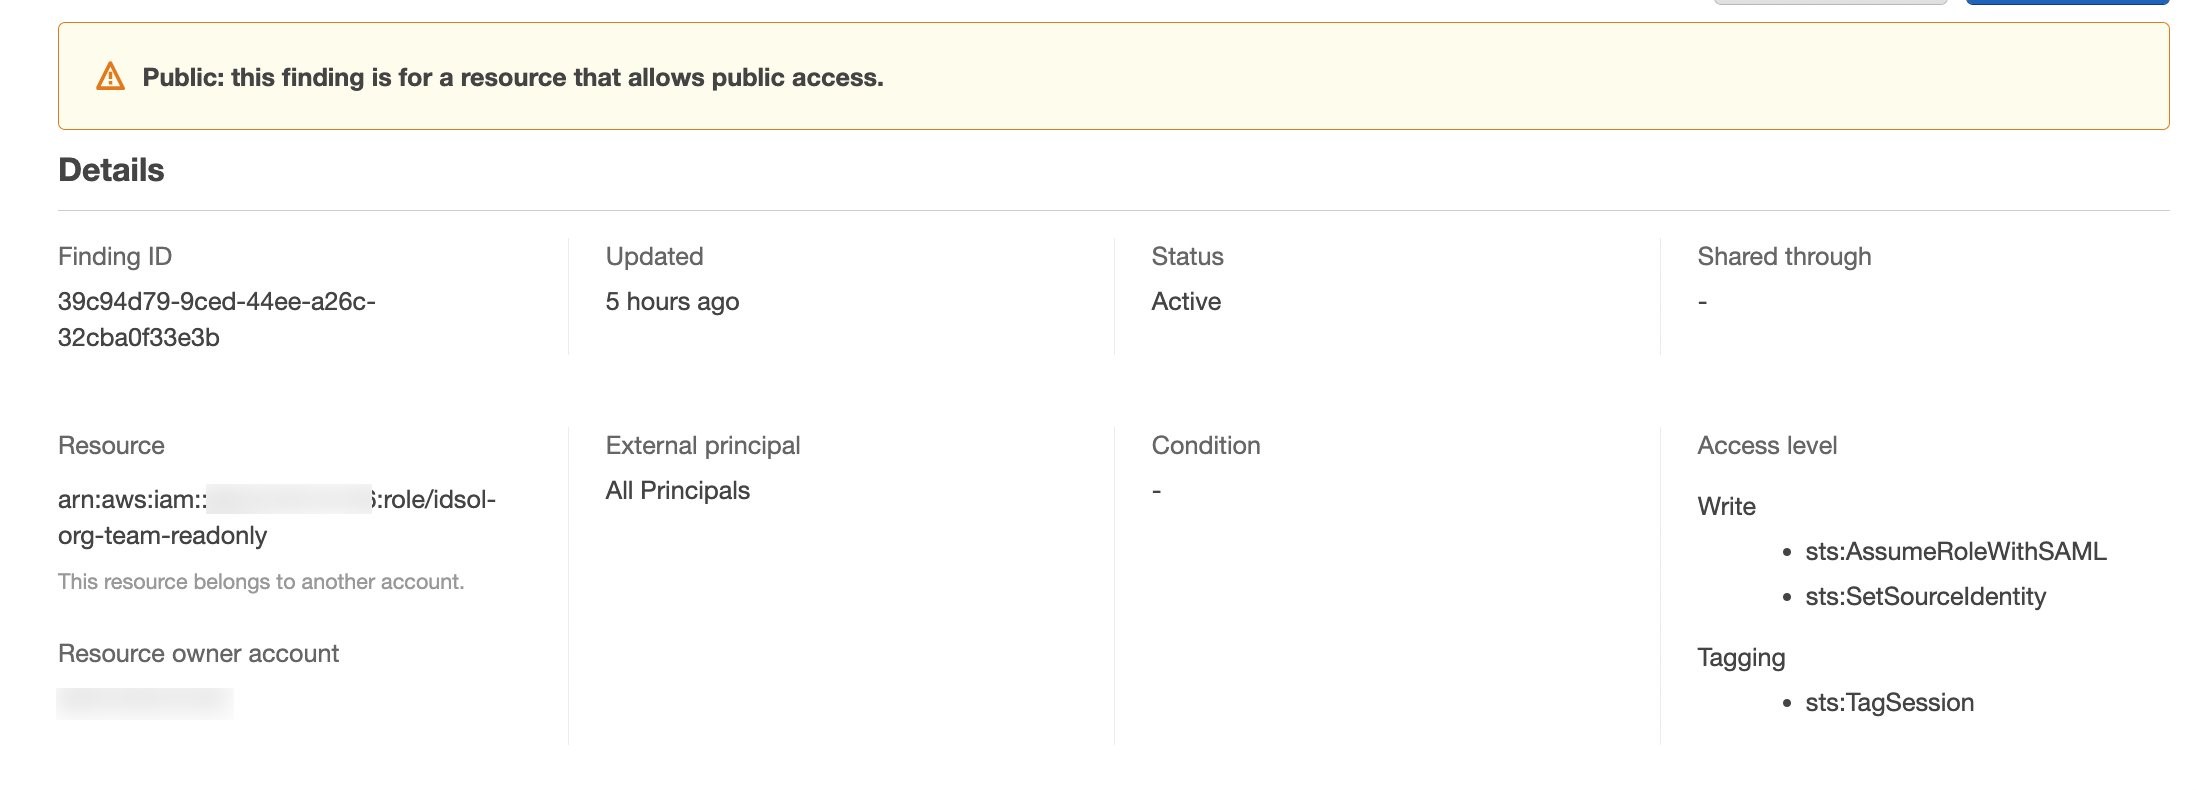
Figure 3: IAM Access Analyzer identity provider finding example
Resolution
Setting access through SAML providers is a privileged operation, so we recommend that you analyze each finding to decide if an exception is acceptable. If you approve of the SAML-provided access setup, you can implement an archive rule to archive such findings with conditions for federation used in combination with your SAML provider. The filter for the Federated User rule depends on the name that you gave to the SAML IdP in your federation setup. For example, if your SAML IdP name is Okta, the rule should have a filter for arn:aws:iam::<ACCOUNT_ID>:saml-provider/Okta, where <ACCOUNT_ID> is your account number, as shown in Figure 4.
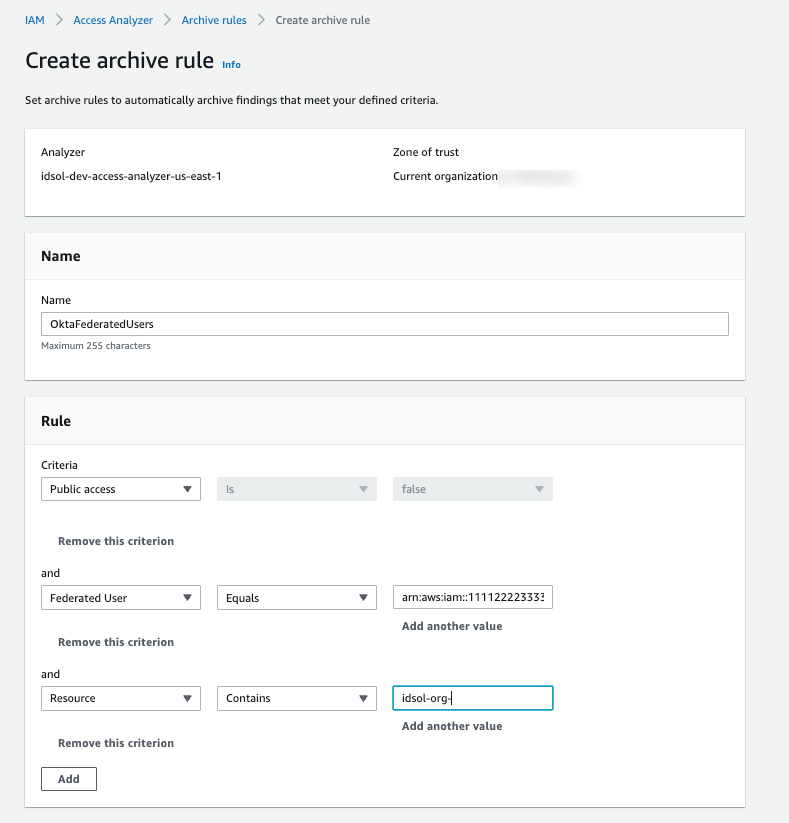
Figure 4: Archive rule example for using an IdP-related finding
Note: To include additional values for a multi-account setup, use the Add another value filter.
Example 2: IAM Identity Center
With AWS IAM Identity Center (successor to AWS Single Sign-On), you can manage sign-in security for your workforce. IAM Identity Center provides a central place to define your permission sets, assign them to your users and groups, and give your users a portal where they can access their assigned accounts.
With IAM Identity Center, you manage access to accounts by creating and assigning permission sets. These are IAM role templates that define (among other things) which policies to include in a role. When you create a permission set in IAM Identity Center and associate it to an account, IAM Identity Center creates a role in that account with a trust policy that allows a federated IdP as a principal — in this case, IAM Identity Center.
IAM Access Analyzer generates a finding for this setup because the allowed access is outside of the known zone of trust for the analyzer, as shown in Figure 5.
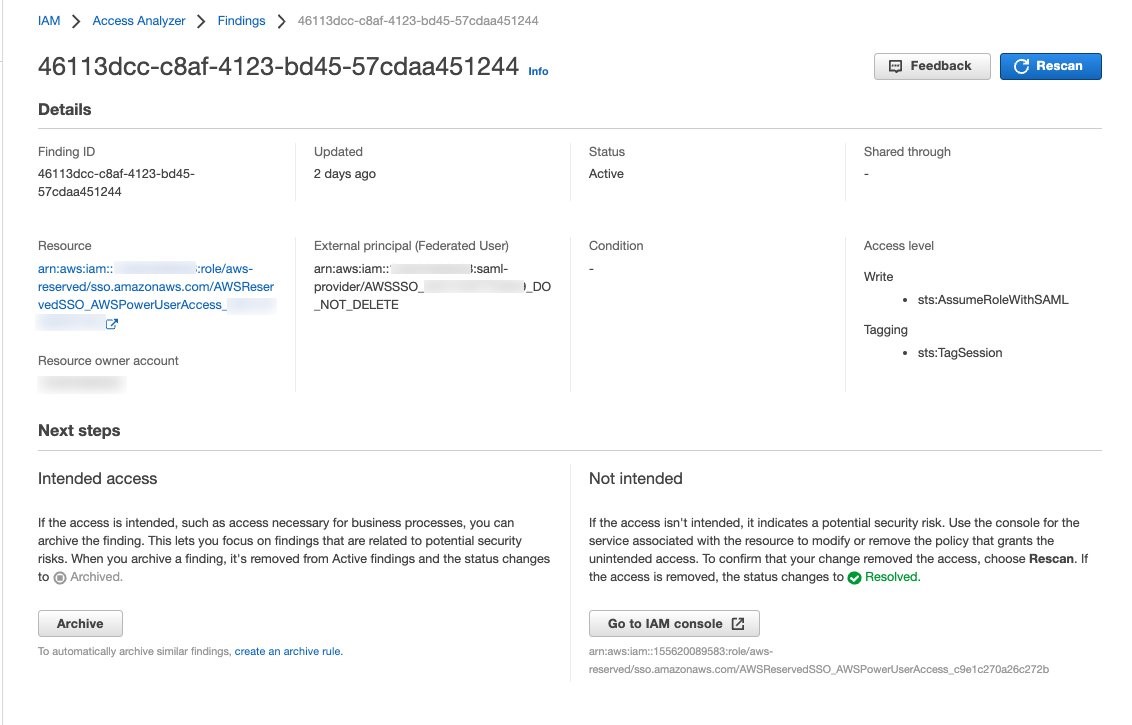
Figure 5: IAM Access Analyzer finding example for IAM Identity Center
To filter this finding, you need to implement an archive rule.
Resolution
You can implement an archive rule with conditions for federation used in combination with IAM Identity Center as the SAML provider. The roles created by IAM Identity Center in member accounts use a reserved path on AWS: arn:aws:iam::<ACCOUNT_ID>:role/aws-reserved/sso.amazonaws.com/. Hence, you can create an archive rule with a filter that contains :saml-provider/AWSSSO in the Federated User name and aws-reserved/sso.amazonaws.com/ in the Resource, as shown in Figure 6.
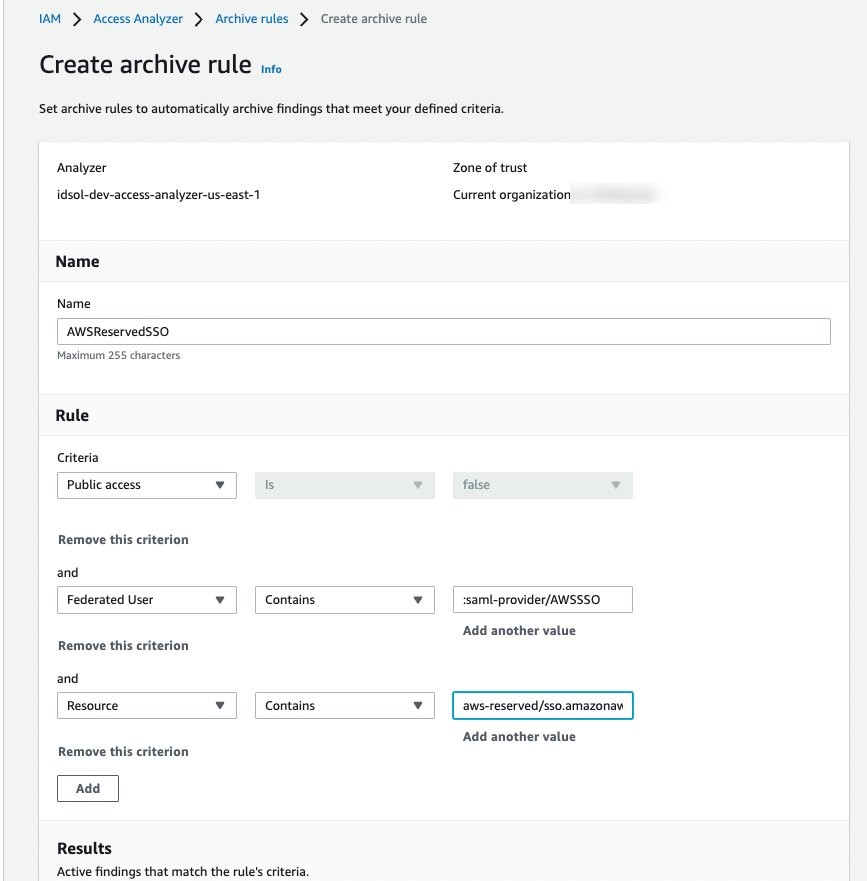
Figure 6: Archive rule example for IAM Identity Center generated findings
4. Filter cross-account access findings from trusted external accounts
We recommend that you identify and document accounts and principals that should be allowed access outside of the zone of trust for IAM Access Analyzer.
When a resource-based policy attached to a resource allows cross-account access from outside the zone of trust, IAM Access Analyzer generates cross-account access findings.
Is the cross-account access intended?
When you review cross-account access findings, you need to determine whether the access is intended or not. For example, you might have access provided to your auditor’s account or a partner account for visibility and monitoring of your AWS applications.
For trusted external accounts, you can create an archive rule that includes the AWS account in the criteria for the rule. Figure 7 shows an example of how to create the archive rule for a trusted external account (EXTERNAL_ACCOUNT_ID). In your own rule, replace EXTERNAL_ACCOUNT_ID with the trusted account id.
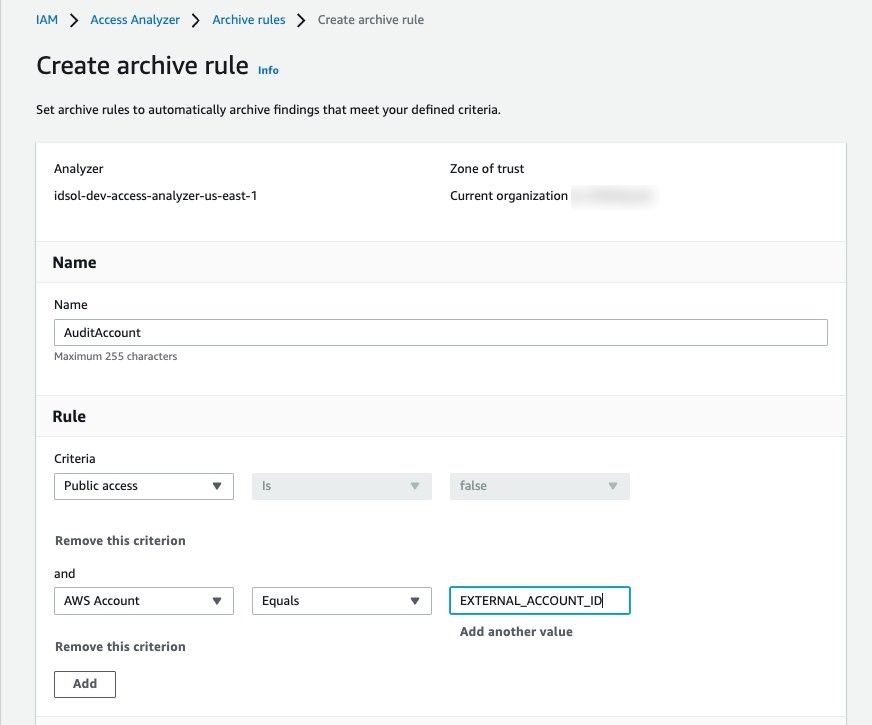
Figure 7: Archive rule example for trusted account findings
Is the cross-account access unintended?
After you have archived the intended access findings, you can start analyzing the findings initiated from unintended access. When you confirm that the findings show unintended access, you should take steps to remove the access by altering or deleting the policy or access control that granted access. You can expand the solution outlined in the blog post Automate resolution for IAM Access Analyzer cross-account access findings on IAM roles by adding an explicit deny statement.
You can also use AWS CloudTrail to track API calls that could have changed access configuration on your AWS resources.
Deploy IAM Access Analyzer and archive rules with a CloudFormation template
In this section, we demonstrate a sample CloudFormation template that creates an IAM access analyzer and archive rules for findings that are created for identified intended access to resources.
Important: When you create an archive rule using the AWS console, the existing findings and new findings that match criteria mentioned in the rules will be archived. However, archive rules created through CloudFormation or the AWS CLI will only archive the new findings that meet the criteria defined. You need to perform the access-analyzer:ApplyArchiveRule API after you create the archive rule to archive existing findings as well.
The sample CloudFormation template takes the following values as inputs and creates archive rules for findings that are created for identified intended access to resources shared outside of your zone of trust for the specified analyzer:
- Analyzer name
- Zone of trust
- Known public S3 buckets, if you have any (for example, a bucket that hosts public website images).
Note: We use S3 buckets as an example. You can edit the rule to include resource types that are supported by IAM Access Analyzer, if public access is intended.
- Trusted accounts — AWS accounts that don’t belong to your organization, but you trust them to have access to resources in your organization
- SAML provider — The SAML provider approved to have access to your resources
Note: If you don’t use federation, you can remove the rule SAMLFederatedUsers.
AWSTemplateFormatVersion: 2010-09-09
Description: >+
  Sample CloudFormation template creates archive rules for findings
  created for resources shared outside of your zone of trust for specified
  analyzer.

Metadata:
  AWS::CloudFormation::Interface:
    ParameterGroups:
      - Label:
          default: Define Configuration
        Parameters:
          - AccessAnalyzerName
          - ZoneOfTrust
          - KnownPublicS3Buckets
          - TrustedAccounts
          - SAMLProvider
Parameters:
  AccessAnalyzerName:
    Description: Provide name of the analyzer you would like to create archive rules for.
    Type: String
  ZoneOfTrust:
    Description: Select the zone of trust of AccessAnalyzer
    AllowedValues:
      - ACCOUNT
      - ORGANIZATION
    Type: String
  KnownPublicS3Buckets:
    Description: List of comma-separated known S3 bucket arns, that should allow
      public access Example -
      arn:aws:s3:::DOC-EXAMPLE-BUCKET,arn:aws:s3:::DOC-EXAMPLE-BUCKET2
    Type: CommaDelimitedList
  TrustedAccounts:
    Description: List of comma-separated account IDs, that do not belong to your
      organization but you trust them to have access to resources in your
      organization. [Example - Your auditor’s AWS account]
    Type: List<Number>
  TrustedFederationPrincipals:
    Description: List of comma-separated trusted federated principals that are able
      to assume roles in your accounts. [Example -
      arn:aws:iam::012345678901:saml-provider/Okta,
      arn:aws:iam::1111222233334444:saml-provider/Okta]
    Type: CommaDelimitedList
Resources:
  AccessAnalyzer:
    Type: AWS::AccessAnalyzer::Analyzer
    Properties:
      AnalyzerName: ${AccessAnalyzerName}-${AWS::Region}
      Type: ZoneOfTrust
      ArchiveRules:
        - RuleName: ArchivePublicS3BucketsAccess
          Filter:
            - Property: resource
              Eq: KnownPublicS3Buckets
        - RuleName: AccountAccessNecessaryForBusinessProcesses
          Filter:
            - Property: principal.AWS
              Eq: TrustedAccounts
            - Property: isPublic
              Eq:
                - "false"
        - RuleName: SAMLFederatedUsers
          Filter:
            - Property: principal.Federated
              Eq: TrustedFederationPrincipals
To download this sample template, download the file IAMAccessAnalyzer.yaml from Amazon S3.
Conclusion
In this blog post, you learned how to start with IAM Access Analyzer findings, filter them based on the level of access given outside of your zone of trust, and create archive rules for intended access findings. By using different filtering techniques to remediate intended access findings, you can concentrate on unintended access.
To take this solution further, we recommend that you consider automating the resolution of unintended cross-account IAM roles found by IAM Access Analyzer by adding a deny statement to the IAM role’s trust policy. You can also include capabilities like an approval workflow to resolve the finding to suit your organization’s process requirements.
Lastly, we suggest that you use IAM Access Analyzer access previews to preview and validate public and cross-account access before deploying permissions changes in your environment.
If you have feedback about this post, submit comments in the Comments section below. If you have questions about this post, contact AWS Support.
Want more AWS Security news? Follow us on Twitter.