Post Syndicated from Moheeb Zara original https://aws.amazon.com/blogs/compute/building-a-serverless-document-scanner-using-amazon-textract-and-aws-amplify/
This guide demonstrates creating and deploying a production ready document scanning application. It allows users to manage projects, upload images, and generate a PDF from detected text. The sample can be used as a template for building expense tracking applications, handling forms and legal documents, or for digitizing books and notes.
The frontend application is written in Vue.js and uses the Amplify Framework. The backend is built using AWS serverless technologies and consists of an Amazon API Gateway REST API that invokes AWS Lambda functions. Amazon Textract is used to analyze text from uploaded images to an Amazon S3 bucket. Detected text is stored in Amazon DynamoDB.
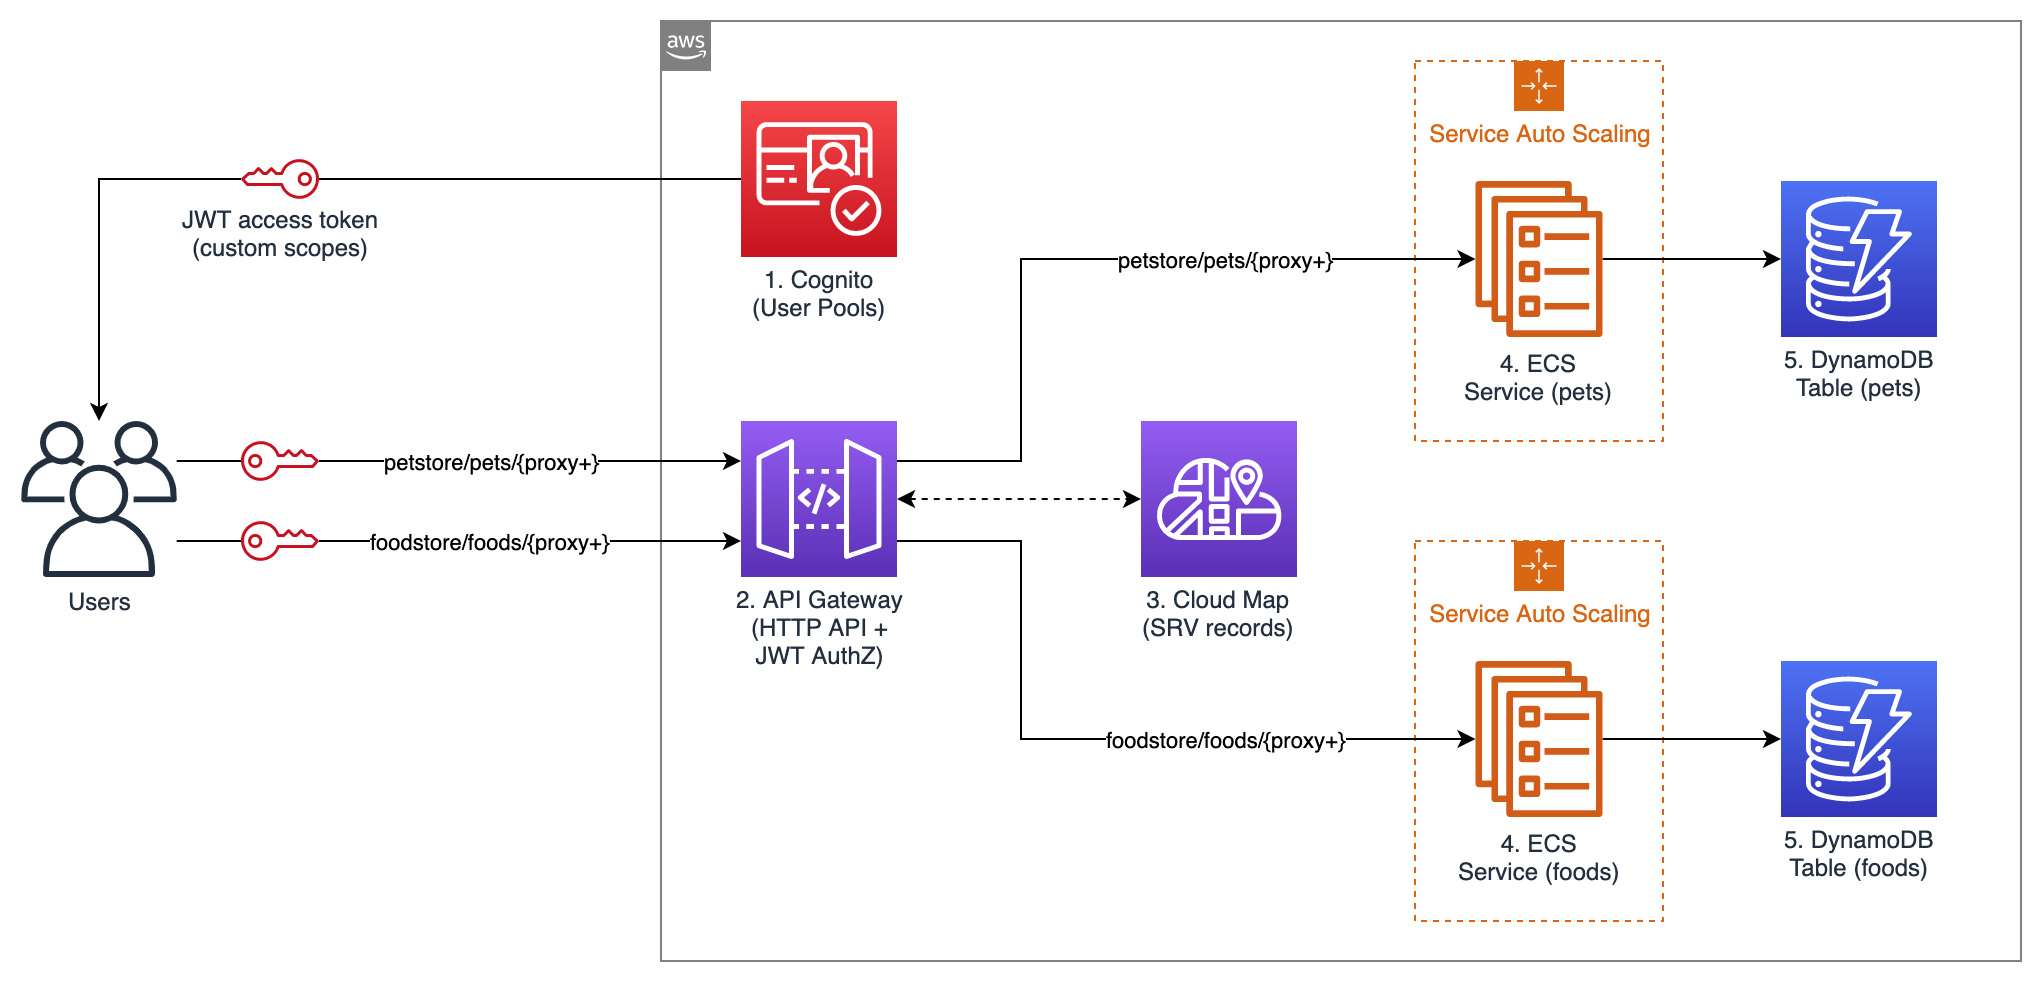
An architectural diagram of the application.
Prerequisites
You need the following to complete the project:
- Node.js and npm installed on a computer.
- An AWS account. This project can be completed using the AWS Free Tier.
Deploy the application

The solution consists of two parts, the frontend application and the serverless backend. The Amplify CLI deploys all the Amazon Cognito authentication, and hosting resources for the frontend. The backend requires the Amazon Cognito user pool identifier to configure an authorizer on the API. This enables an authorization workflow, as shown in the following image.
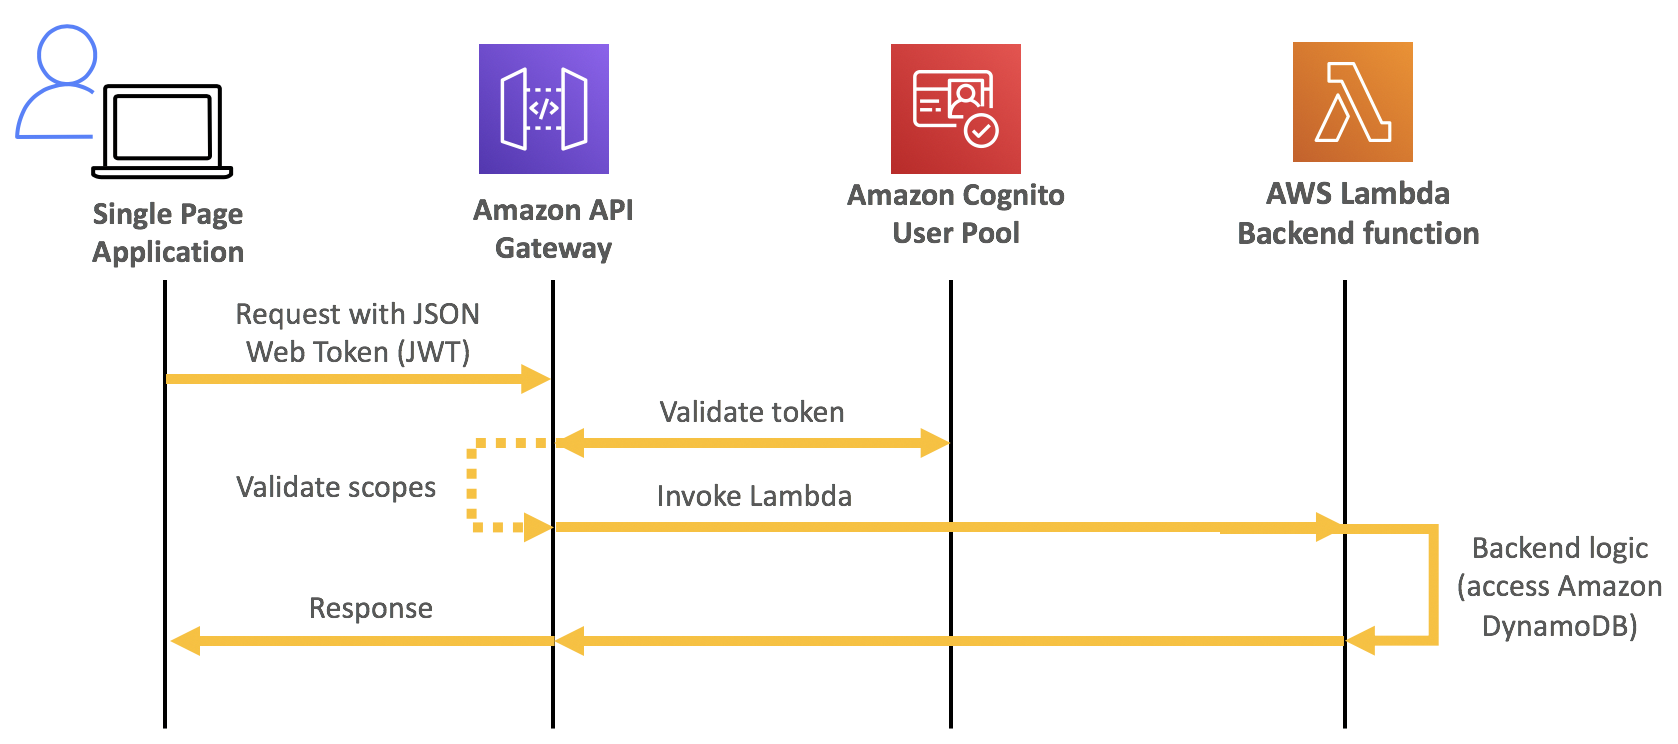
A diagram showing how an Amazon Cognito authorization workflow works
First, configure the frontend. Complete the following steps using a terminal running on a computer or by using the AWS Cloud9 IDE. If using AWS Cloud9, create an instance using the default options.
From the terminal:
- Install the Amplify CLI by running this command.
npm install -g @aws-amplify/cli - Configure the Amplify CLI using this command. Follow the guided process to completion.
amplify configure - Clone the project from GitHub.
git clone https://github.com/aws-samples/aws-serverless-document-scanner.git - Navigate to the amplify-frontend directory and initialize the project using the Amplify CLI command. Follow the guided process to completion.
cd aws-serverless-document-scanner/amplify-frontend amplify init - Deploy all the frontend resources to the AWS Cloud using the Amplify CLI command.
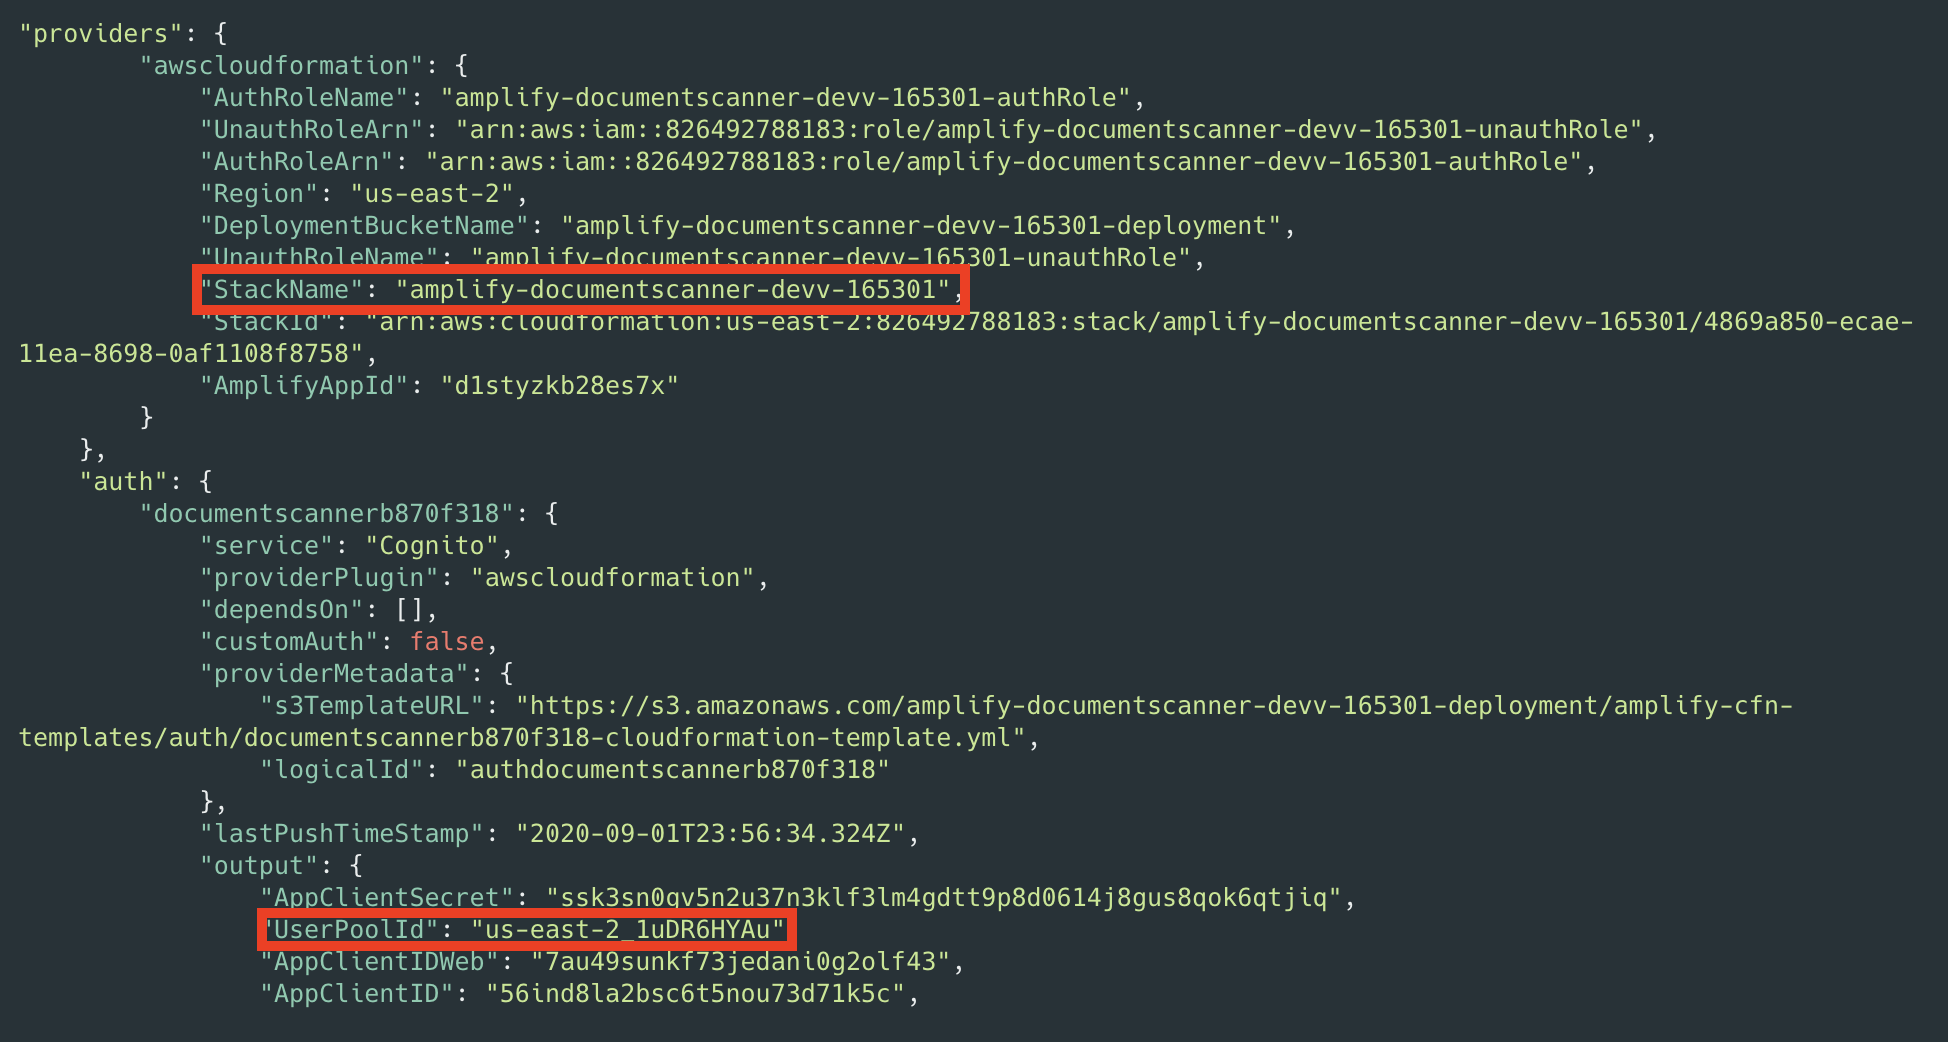
amplify push - After the resources have finishing deploying, make note of the StackName and UserPoolId properties in the amplify-frontend/amplify/backend/amplify-meta.json file. These are required when deploying the serverless backend.

Next, deploy the serverless backend. While it can be deployed using the AWS SAM CLI, you can also deploy from the AWS Management Console:
- Navigate to the document-scanner application in the AWS Serverless Application Repository.
- In Application settings, name the application and provide the StackName and UserPoolId from the frontend application for the UserPoolID and AmplifyStackName parameters. Provide a unique name for the BucketName parameter.

- Choose Deploy.
- Once complete, copy the API endpoint so that it can be configured on the frontend application in the next section.


Configure and run the frontend application
- Create a file, amplify-frontend/src/api-config.js, in the frontend application with the following content. Include the API endpoint and the unique BucketName from the previous step. The s3_region value must be the same as the Region where your serverless backend is deployed.
const apiConfig = { "endpoint": "<API ENDPOINT>", "s3_bucket_name": "<BucketName>", "s3_region": "<Bucket Region>" }; export default apiConfig; - In a terminal, navigate to the root directory of the frontend application and run it locally for testing.
cd aws-serverless-document-scanner/amplify-frontend

npm install

npm run serve
You should see an output like this:

- To publish the frontend application to cloud hosting, run the following command.
amplify publishOnce complete, a URL to the hosted application is provided.


Using the frontend application
Once the application is running locally or hosted in the cloud, navigating to it presents a user login interface with an option to register. The registration flow requires a code sent to the provided email for verification. Once verified you’re presented with the main application interface.

Once you create a project and choose it from the list, you are presented with an interface for uploading images by page number.

On mobile, it uses the device camera to capture images. On desktop, images are provided by the file system. You can replace an image and the page selector also lets you go back and change an image. The corresponding analyzed text is updated in DynamoDB as well.
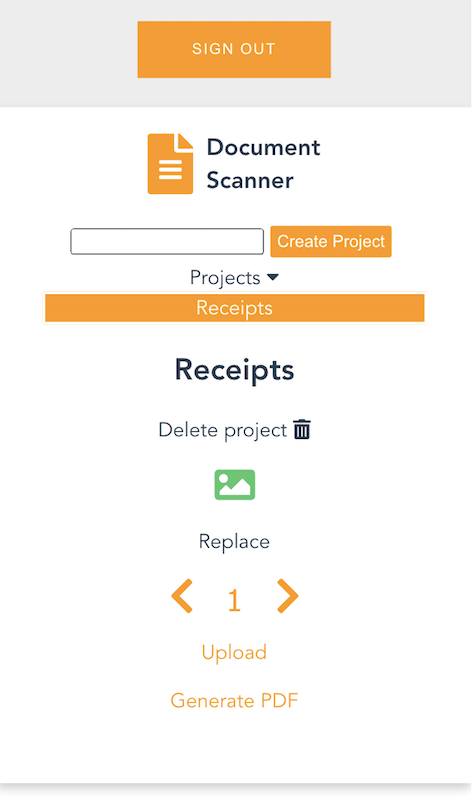
Each time you upload an image, the page is incremented. Choosing “Generate PDF” calls the endpoint for the GeneratePDF Lambda function and returns a PDF in base64 format. The download begins automatically.
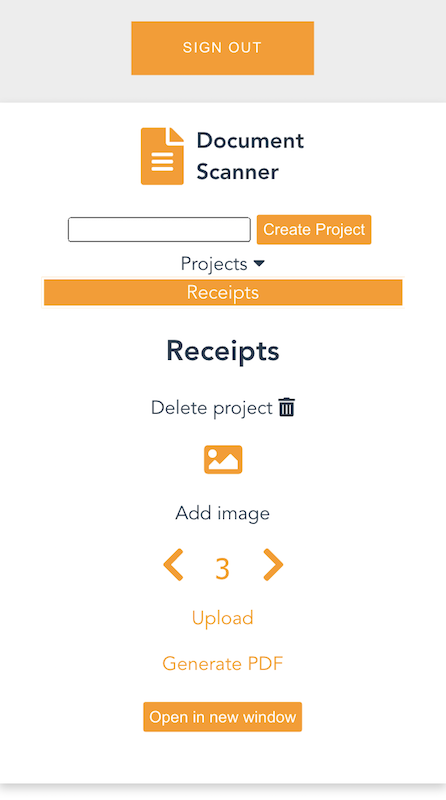
You can also open the PDF in another window, if viewing a preview in a desktop browser.

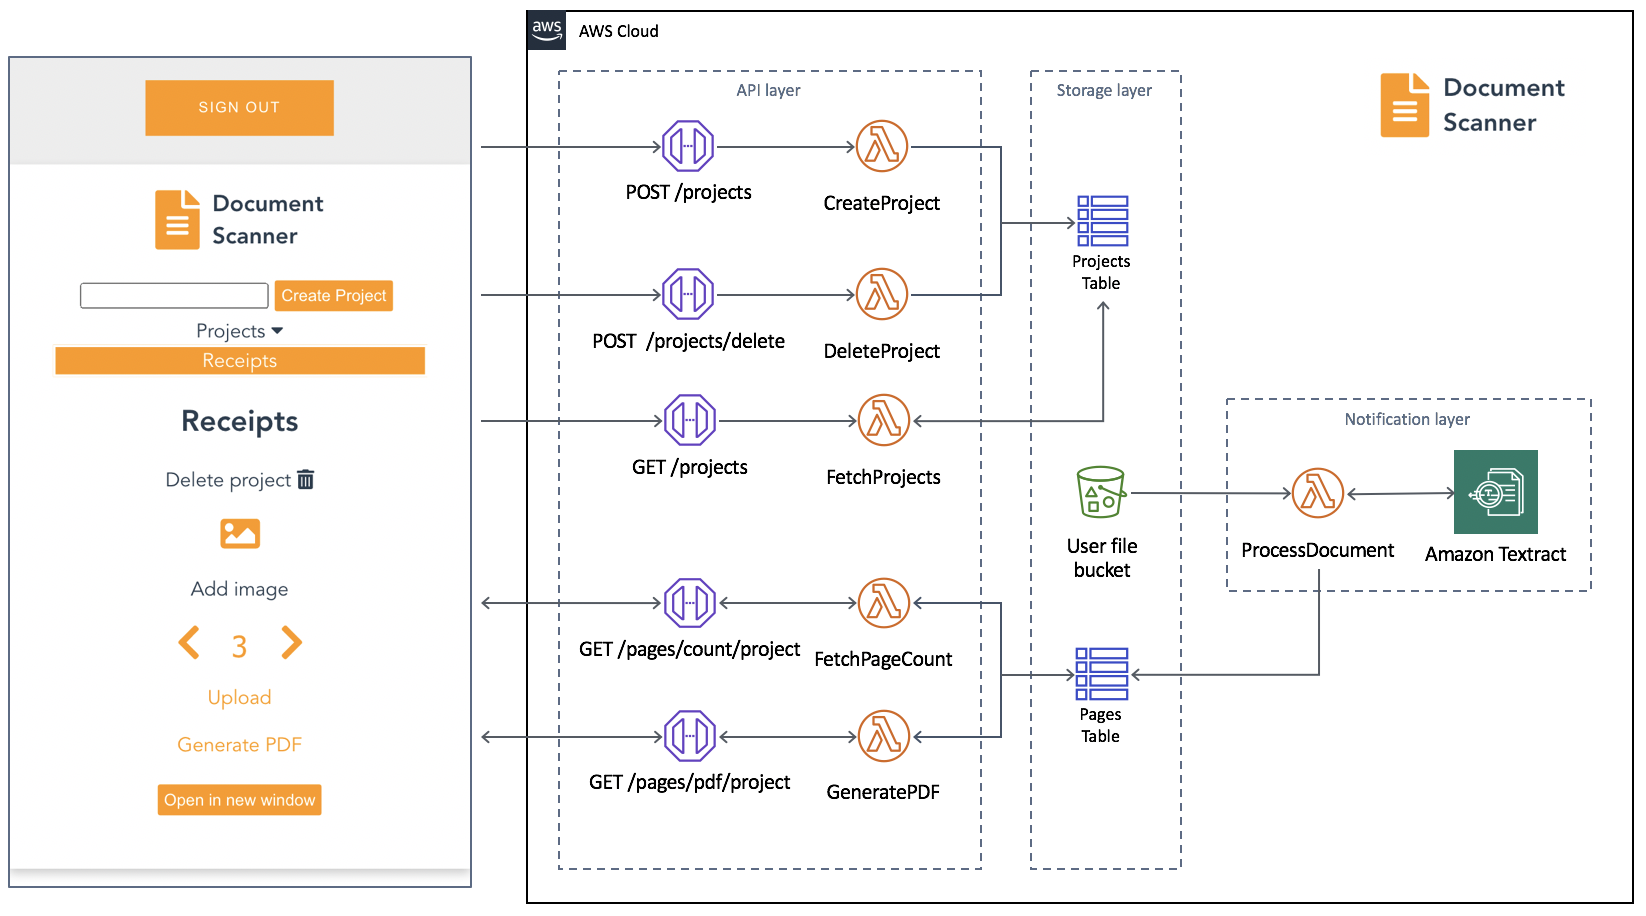
Understanding the serverless backend

An architecture diagram of the serverless backend.
In the GitHub project, the folder serverless-backend/ contains the AWS SAM template file and the Lambda functions. It creates an API Gateway endpoint, six Lambda functions, an S3 bucket, and two DynamoDB tables. The template also defines an Amazon Cognito authorizer for the API using the UserPoolID passed in as a parameter:
Parameters:
  UserPoolID:
    Type: String
    Description: (Required) The user pool ID created by the Amplify frontend.

  AmplifyStackName:
    Type: String
    Description: (Required) The stack name of the Amplify backend deployment.

  BucketName:
    Type: String
    Default: "ds-userfilebucket"
    Description: (Required) A unique name for the user file bucket. Must be all lowercase.


Globals:
  Api:
    Cors:
      AllowMethods: "'*'"
      AllowHeaders: "'*'"
      AllowOrigin: "'*'"

Resources:

  DocumentScannerAPI:
    Type: AWS::Serverless::Api
    Properties:
      StageName: Prod
      Auth:
        DefaultAuthorizer: CognitoAuthorizer
        Authorizers:
          CognitoAuthorizer:
            UserPoolArn: !Sub 'arn:aws:cognito-idp:${AWS::Region}:${AWS::AccountId}:userpool/${UserPoolID}'
            Identity:
              Header: Authorization
        AddDefaultAuthorizerToCorsPreflight: False
This only allows authenticated users of the frontend application to make requests with a JWT token containing their user name and email. The backend uses that information to fetch and store data in DynamoDB that corresponds to the user making the request.
Two DynamoDB tables are created. A Project table, which tracks all the project names by user, and a Pages table, which tracks pages by project and user. The DynamoDB tables are created by the AWS SAM template with the partition key and range key defined for each table. These are used by the Lambda functions to query and sort items. See the documentation to learn more about DynamoDB table key schema.
ProjectsTable:
    Type: AWS::DynamoDB::Table
    Properties:
      AttributeDefinitions:
        -
          AttributeName: "username"
          AttributeType: "S"
        -
          AttributeName: "project_name"
          AttributeType: "S"
      KeySchema:
        - AttributeName: username
          KeyType: HASH
        - AttributeName: project_name
          KeyType: RANGE
      ProvisionedThroughput:
        ReadCapacityUnits: "5"
        WriteCapacityUnits: "5"

  PagesTable:
    Type: AWS::DynamoDB::Table
    Properties:
      AttributeDefinitions:
        -
          AttributeName: "project"
          AttributeType: "S"
        -
          AttributeName: "page"
          AttributeType: "N"
      KeySchema:
        - AttributeName: project
          KeyType: HASH
        - AttributeName: page
          KeyType: RANGE
      ProvisionedThroughput:
        ReadCapacityUnits: "5"
        WriteCapacityUnits: "5"
When an API Gateway endpoint is called, it passes the user credentials in the request context to a Lambda function. This is used by the CreateProject Lambda function, which also receives a project name in the request body, to create an item in the Project Table and associate it with a user.
The endpoint for the FetchProjects Lambda function is called to retrieve the list of projects associated with a user. The DeleteProject Lambda function removes a specific project from the Project table and any associated pages in the Pages table. It also deletes the folder in the S3 bucket containing all images for the project.
When a user enters a Project, the API endpoint calls the FetchPageCount Lambda function. This returns the number of pages for a project to update the current page number in the upload selector. The project is retrieved from the path parameters, as defined in the AWS SAM template:
FetchPageCount:
    Type: AWS::Serverless::Function
    Properties:
      Handler: app.handler
      Runtime: python3.8
      CodeUri: lambda_functions/fetchPageCount/
      Policies:
        - DynamoDBCrudPolicy:
            TableName: !Ref PagesTable
      Environment:
        Variables:
          PAGES_TABLE_NAME: !Ref PagesTable
      Events:
        GetResource:
          Type: Api
          Properties:
            RestApiId: !Ref DocumentScannerAPI
            Path: /pages/count/{project+}
            Method: get
The template creates an S3 bucket and two AWS IAM managed policies. The policies are applied to the AuthRole and UnauthRole created by Amplify. This allows users to upload images directly to the S3 bucket. To understand how Amplify works with Storage, see the documentation.
The template also sets an S3 event notification on the bucket for all object create events with a “.png” suffix. Whenever the frontend uploads an image to S3, the object create event invokes the ProcessDocument Lambda function.

The function parses the object key to get the project name, user, and page number. Amazon Textract then analyzes the text of the image. The object returned by Amazon Textract contains the detected text and detailed information, such as the positioning of text in the image. Only the raw lines of text are stored in the Pages table.
import os
import json, decimal
import boto3
import urllib.parse
from boto3.dynamodb.conditions import Key, Attr

client = boto3.resource('dynamodb')
textract = boto3.client('textract')

tableName = os.environ.get('PAGES_TABLE_NAME')

def handler(event, context):

  table = client.Table(tableName)

  print(table.table_status)

  key = urllib.parse.unquote(event['Records'][0]['s3']['object']['key'])
  bucket = event['Records'][0]['s3']['bucket']['name']
  project = key.split('/')[3]
  page = key.split('/')[4].split('.')[0]
  user = key.split('/')[2]

  response = textract.detect_document_text(
    Document={
        'S3Object': {
            'Bucket': bucket,
            'Name': key
        }
    })

  fullText = ""

  for item in response["Blocks"]:
    if item["BlockType"] == "LINE":
        fullText = fullText + item["Text"] + '\n'

  print(fullText)

  table.put_item(Item= {
    'project': user + '/' + project,
    'page': int(page),
    'text': fullText
    })

  # print(response)
  return
The GeneratePDF Lambda function retrieves the detected text for each page in a project from the Pages table. It combines the text into a PDF and returns it as a base64-encoded string for download. This function can be modified if your document structure differs.
Understanding the frontend
In the GitHub repo, the folder amplify-frontend/src/ contains all the code for the frontend application. In main.js, the Amplify VueJS modules are configured to use the resources defined in aws-exports.js. It also configures the endpoint and S3 bucket of the serverless backend, defined in api-config.js.

In components/DocumentScanner.vue, the API module is imported and the API is defined.

API calls are defined as Vue methods that can be called by various other components and elements of the application.

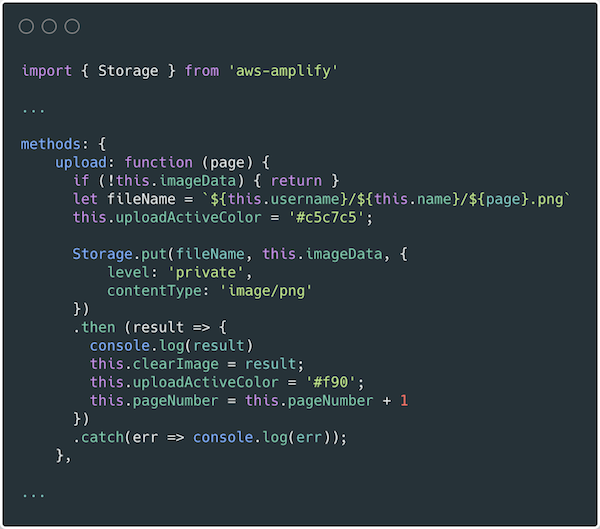
In components/Project.vue, the frontend uses the Storage module for Amplify to upload images. For more information on how to use S3 in an Amplify project see the documentation.
Conclusion
This blog post shows how to create a multiuser application that can analyze text from images and generate PDF documents. This guide demonstrates how to do so in a secure and scalable way using a serverless approach. The example also shows an event driven pattern for handling high volume image processing using S3, Lambda, and Amazon Textract.
The Amplify Framework simplifies the process of implementing authentication, storage, and backend integration. Explore the full solution on GitHub to modify it for your next project or startup idea.
To learn more about AWS serverless and keep up to date on the latest features, subscribe to the YouTube channel.
#ServerlessForEveryone