Post Syndicated from Nevi Shah original https://blog.cloudflare.com/cloudflare-pages-build-improvements/


Music is flowing through your headphones. Your hands are flying across the keyboard. You’re stringing together a masterpiece of code. The momentum is building up as you put on the finishing touches of your project. And at last, it’s ready for the world to see. Heart pounding with excitement and the feeling of victory, you push changes to the main branch…. only to end up waiting for the build to execute each step and spit out the build logs.
Starting afresh
Since the launch of Cloudflare Pages, there is no doubt that the build experience has been its biggest source of criticism. From the amount of waiting to inflexibility of CI workflow, Pages had a lot of opportunity for growth and improvement. With Pages, our North Star has always been designing a developer platform that fits right into your workflow and oozes simplicity. User pain points have been and always will be our priority, which is why today we are thrilled to share a list of exciting updates to our build times, logs and settings!
Over the last three quarters, we implemented a new build infrastructure that speeds up Pages builds, so you can iterate quickly and efficiently. In February, we soft released the Pages Fast Builds Beta, allowing you to opt in to this new infrastructure on a per-project basis. This not only allowed us to test our implementation, but also gave our community the opportunity to try it out and give us direct feedback in Discord. Today we are excited to announce the new build infrastructure is now generally available and automatically enabled for all existing and new projects!
Faster build times
As a developer, your time is extremely valuable, and we realize Pages builds were slow. It was obvious that creating an infrastructure that built projects faster and smarter was one of our top requirements.
Looking at a Pages build, there are four main steps: (1) initializing the build environment, (2) cloning your git repository, (3) building the application, and (4) deploying to Cloudflare’s global network. Each of these steps is a crucial part of the build process, and upon investigating areas suitable for optimization, we directed our efforts to cutting down on build initialization time.
In our old infrastructure, every time a build job was submitted, we created a new virtual machine to run that build, costing our users precious dev time. In our new infrastructure, we start jobs on machines that are ready and waiting to be used, taking a major chunk of time away from the build initialization step. This step previously ran for 2+ minutes, but with our new infrastructure update, projects are expected to see a build initialization time cut down to 2-3 SECONDS.
This means less time waiting and more time iterating on your code.
Fast and secure
In our old build infrastructure, because we spun up a new virtual machine (VM) for every build, it would take several minutes to boot up and initialize with the Pages build image needed to execute the build. Alternatively, one could reuse a collection of VMs, assigning a new build to the next available VM, but containers share a kernel with the host operating system, making them far less isolated, posing a huge security risk. This could allow a malicious actor to perform a “container escape” to break out of their sandbox. We wanted the best of both worlds: the speed of a container with the isolation of a virtual machine.
Enter gVisor, a container sandboxing technology that drastically limits the attack surface of a host. In the new infrastructure, each container running with gVisor is given its own independent application “kernel,” instead of directly sharing the kernel with its host. Then, to address the speed, we keep a cluster of virtual machines warm and ready to execute builds so that when a new Pages deployment is triggered, it takes just a few seconds for a new gVisor container to start up and begin executing meaningful work in a secure sandbox with near native performance.
Stream your build logs
After we solidified a fast and secure build, we wanted to enhance the user facing build experience. Because a build may not be successful every time, providing you with the tools you need to debug and access that information as fast as possible is crucial. While we have a long list of future improvements for a better logging experience, today we are starting by enabling you to stream your build logs.
Prior to today, with the aforementioned build steps required to complete a Pages build, you were required to wait until the build completed in order to view the resulting build logs. Easily addressable issues like incorrectly inputting the build command or specifying an environment variable would have required waiting for the entire build to finish before understanding the problem.
Today, we’re giving you the power to understand your build issues as soon as they happen. Spend less time waiting for your logs and start debugging the events of your builds within a second or less after they happen!
Control Branch Builds
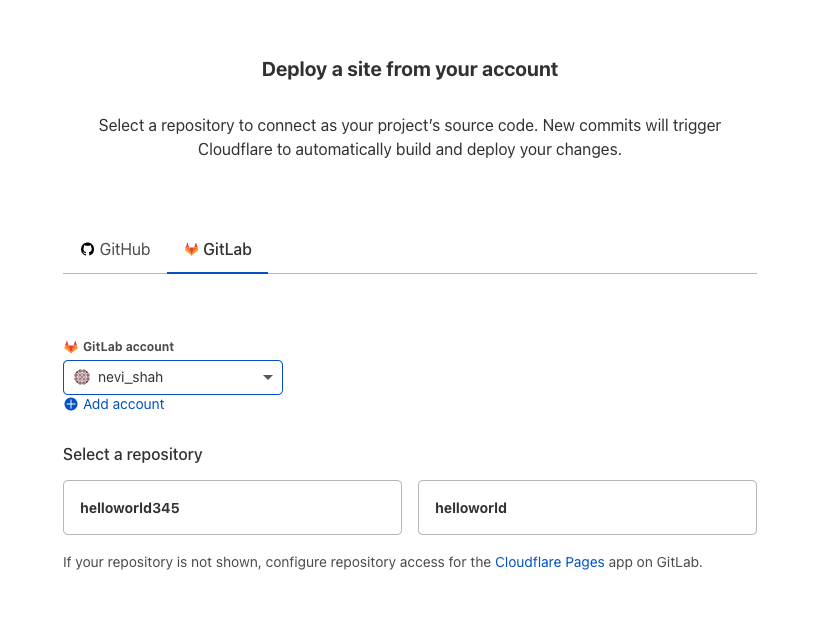
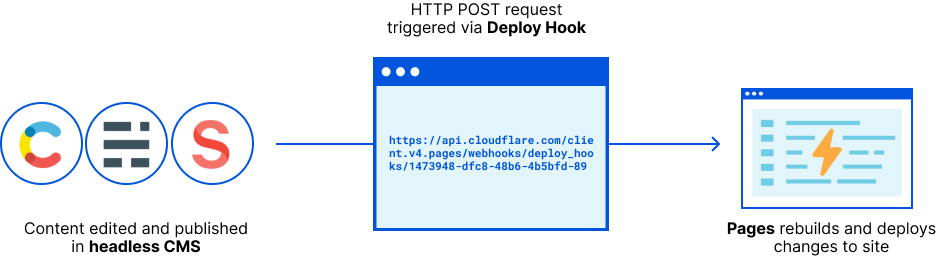
Finally, the build experience does not just include the events during execution but everything leading up to the trigger of a build. For our final trick, we’re enabling our users to have full control of the precise branches they’d like to include and exclude for automatic deployments.
Before today, Pages submitted builds for every commit in both production and preview environments, which led to queued builds and even more waiting if you exceeded your concurrent build limit. We wanted to provide even more flexibility to control your CI workflow. Now you can configure your build settings to specify branches to build, as well as skip ad hoc commits.
Specify branches to build
While “unlimited staging” is one of Pages’ greatest advantages, depending on your setup, sometimes automatic deployments to the preview environment can cause extra noise.
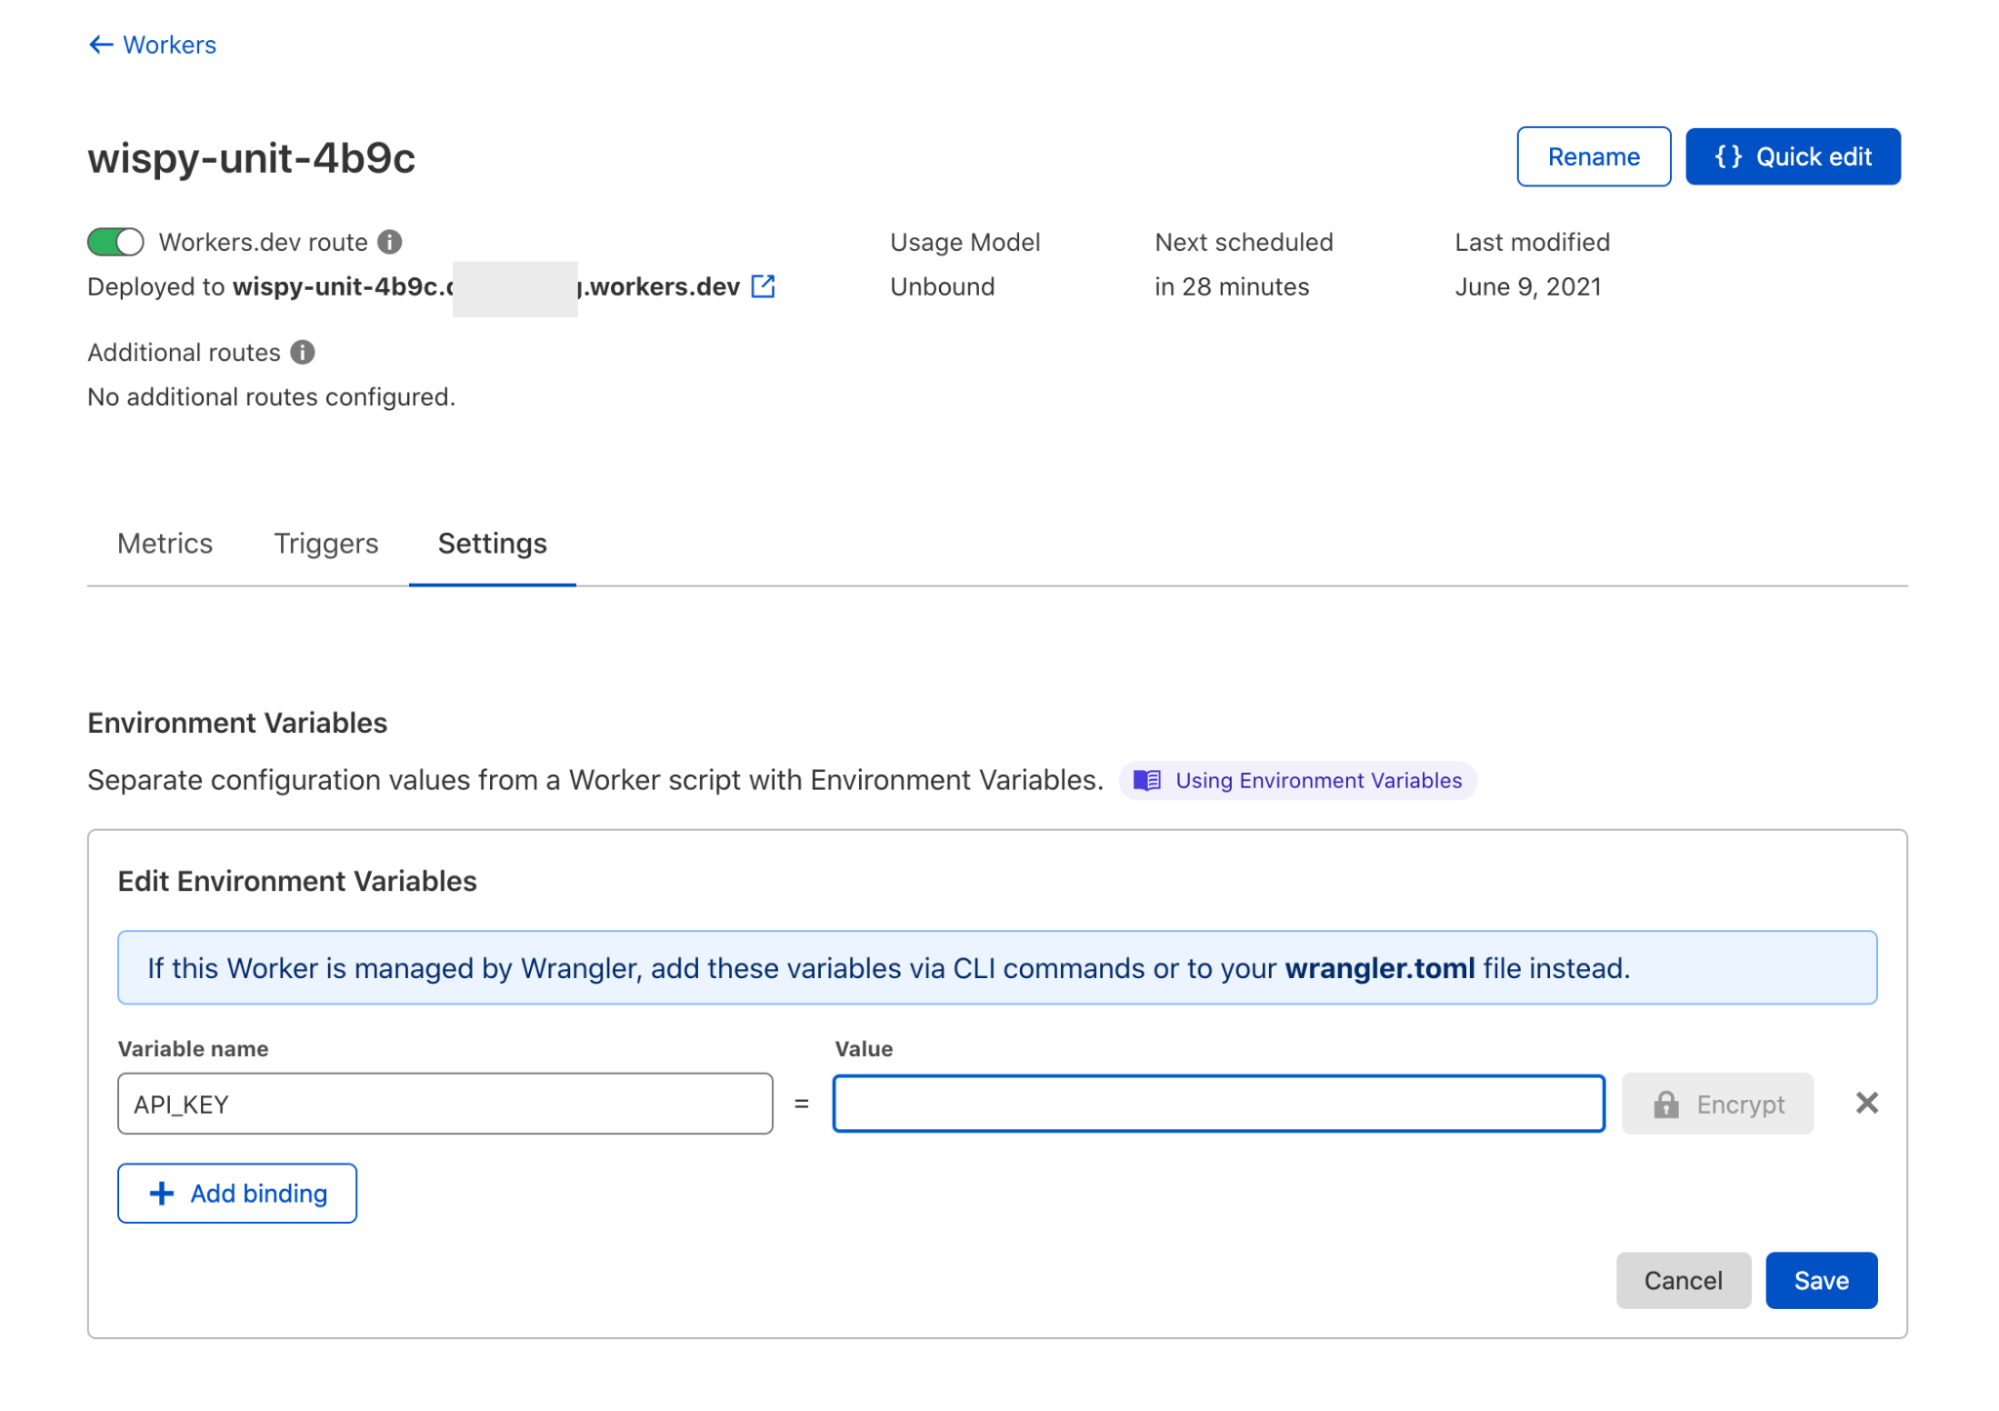
In the Pages build configuration setting, you can specify automatic deployments to be turned off for the production environment, the preview environment, or specific preview branches. In a more extreme case, you can even pause all deployments so that any commit sent to your git source will not trigger a new Pages build.
Additionally, in your project’s settings, you can now configure the specific Preview branches you would like to include and exclude for automatic deployments. To make this configuration an even more powerful tool, you can use wildcard syntax to set rules for existing branches as well as any newly created preview branches.
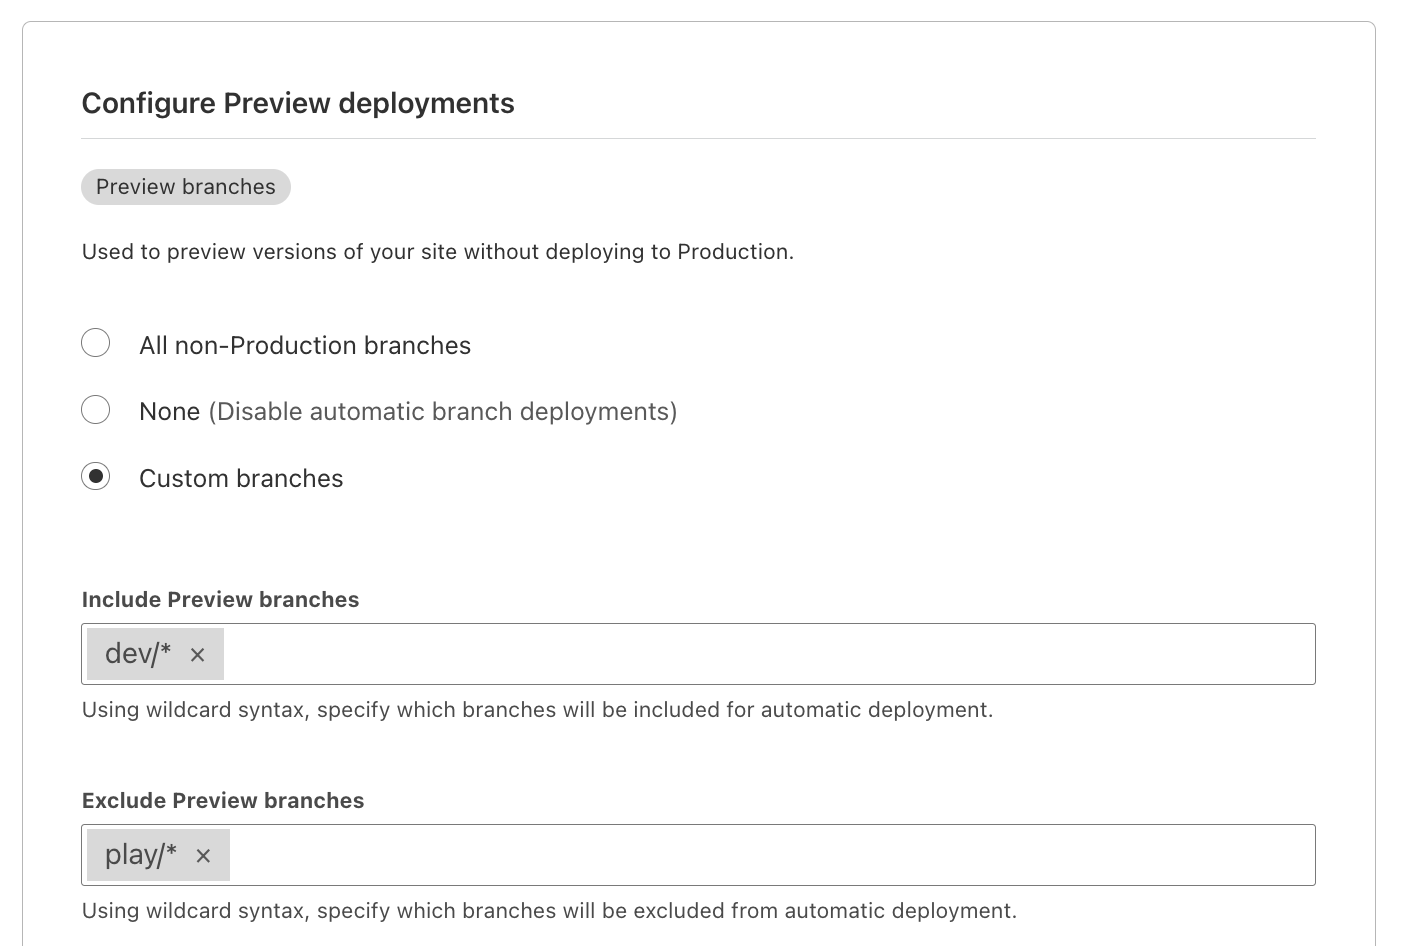
Read more in our Pages docs on how to get started with configuring automatic deployments with Wildcard Syntax.
Using CI Skip
Sometimes commits need to be skipped on an ad hoc basis. A small update to copy or a set of changes within a small timespan don’t always require an entire site rebuild. That’s why we also implemented a CI Skip command for your commit message, signaling to Pages that the update should be skipped by our builder.
With both CI Skip and configured build rules, you can keep track of your site changes in Pages’ deployment history.

Where we’re going
We’re extremely excited to bring these updates to you today, but of course, this is only the beginning of improving our build experience. Over the next few quarters, we will be bringing more to the build experience to create a seamless developer journey from site inception to launch.
Incremental builds and caching
From beta testing, we noticed that our new infrastructure can be less impactful on larger projects that use heavier frameworks such as Gatsby. We believe that every user on our developer platform, regardless of their use case, has the right to fast builds. Up next, we will be implementing incremental builds to help Pages identify only the deltas between commits and rebuild only files that were directly updated. We will also be implementing other caching strategies such as caching external dependencies to save time on subsequent builds.
Build image updates
Because we’ve been using the same build image we launched Pages with back in 2021, we are going to make some major updates. Languages release new versions all the time, and we want to make sure we update and maintain the latest versions. An updated build image will mean faster builds, more security and of course supporting all the latest versions of languages and tools we provide. With new build image versions being released, we will allow users to opt in to the updated builds in order to maintain compatibility with all existing projects.
Productive error messaging
Lastly, while streaming build logs helps you to identify those easily addressable issues, the infamous “Internal error occurred” is sometimes a little more cryptic to decipher depending on the failure. While we recently published a “Debugging Cloudflare Pages” guide, in the future we’d like to provide the error feedback in a more productive manner, so you can easily identify the issue.
Have feedback?
As always, your feedback defines our roadmap. With all the updates we’ve made to our build experience, it’s important we hear from you! You can get in touch with our team directly through Discord. Navigate to our Pages specific section and check out our various channels specific to different parts of the product!
Join us at Cloudflare Connect!
Interested in learning more about building with Cloudflare Pages? If you’re based in the New York City area, join us on Thursday, May 12th for a series of workshops on how to build a full stack application on Pages! Follow along with a fully hands-on lab, featuring Pages in conjunction with other products like Workers, Images and Cloudflare Gateway, and hear directly from our product managers. Register now!