Tag Archives: Developers

WebRTC live streaming to unlimited viewers, with sub-second latency

Post Syndicated from Kyle Boutette original https://blog.cloudflare.com/webrtc-whip-whep-cloudflare-stream/

WebRTC live streaming to unlimited viewers, with sub-second latency

WebRTC live streaming to unlimited viewers, with sub-second latency

Creators and broadcasters expect to be able to go live from anywhere, on any device. Viewers expect “live” to mean “real-time”. The protocols that power most live streams are unable to meet these growing expectations.

In talking to developers building live streaming into their apps and websites, we’ve heard near universal frustration with the limitations of existing live streaming technologies. Developers in 2022 rightly expect to be able to deliver low latency to viewers, broadcast reliably, and use web standards rather than old protocols that date back to the era of Flash.

Today, we’re excited to announce in open beta that Cloudflare Stream now supports live video streaming over WebRTC, with sub-second latency, to unlimited concurrent viewers. This is a new feature of Cloudflare Stream, and you can start using it right now in the Cloudflare Dashboard — read the docs to get started.

WebRTC with Cloudflare Stream leapfrogs existing tools and protocols, exclusively uses open standards with zero dependency on a specific SDK, and empowers any developer to build both low latency live streaming and playback into their website or app.

The status quo of streaming live video is broken

The status quo of streaming live video has high latency, depends on archaic protocols and is incompatible with the way developers build apps and websites. A reasonable person’s expectations of what the Internet should be able to deliver in 2022 are simply unmet by the dominant set of protocols carried over from past eras.

Viewers increasingly expect “live” to mean “real-time”. People want to place bets on sports broadcasts in real-time, interact and ask questions to presenters in real-time, and never feel behind their friends at a live event.

In practice, the HLS and DASH standards used to deliver video have 10+ seconds of latency. LL-HLS and LL-DASH bring this down to closer to 5 seconds, but only as a hack on top of the existing protocol that delivers segments of video in individual HTTP requests. Sending mini video clips over TCP simply cannot deliver video in real-time. HLS and DASH are here to stay, but aren’t the future of real-time live video.

Creators and broadcasters expect to be able to go live from anywhere, on any device.

In practice, people creating live content are stuck with a limited set of native apps, and can’t go live using RTMP from a web browser. Because it’s built on top of TCP, the RTMP broadcasting protocol struggles under even the slightest network disruption, making it a poor or often unworkable option when broadcasting from mobile networks. RTMP, originally built for use with Adobe Flash Player, was last updated in 2012, and while Stream supports the newer SRT protocol, creators need an option that works natively on the web and can more easily be integrated in native apps.

Developers expect to be able to build using standard APIs that are built into web browsers and native apps.

In practice, RTMP can’t be used from a web browser, and creating a native app that supports RTMP broadcasting typically requires diving into lower-level programming languages like C and Rust. Only those with expertise in both live video protocols and these languages have full access to the tools needed to create novel live streaming client applications.

We’re solving this by using new open WebRTC standards: WHIP and WHEP

WebRTC is the real-time communications protocol, supported across all web browsers, that powers video calling services like Zoom and Google Meet. Since inception it’s been designed for real-time, ultra low-latency communications.

While WebRTC is well established, for most of its history it’s lacked standards for:

  • Ingestion — how broadcasters should send media content (akin to RTMP today)
  • Egress — how viewers request and receive media content (akin to DASH or HLS today)

As a result, developers have had to implement this on their own, and client applications on both sides are often tightly coupled to provider-specific implementations. Developers we talk to often express frustration, having sunk months of engineering work into building around a specific vendor’s SDK, unable to switch without a significant rewrite of their client apps.

At Cloudflare, our mission is broader — we’re helping to build a better Internet. Today we’re launching not just a new feature of Cloudflare Stream, but a vote of confidence in new WebRTC standards for both ingestion and egress. We think you should be able to start using Stream without feeling locked into an SDK or implementation specific to Cloudflare, and we’re committed to using open standards whenever possible.

For ingestion, WHIP is an IETF draft on the Standards Track, with many applications already successfully using it in production. For delivery (egress), WHEP is an IETF draft with broad agreement. Combined, they provide a standardized end-to-end way to broadcast one-to-many over WebRTC at scale.

Cloudflare Stream is the first cloud service to let you both broadcast using WHIP and playback using WHEP — no vendor-specific SDK needed. Here’s how it works:

WebRTC live streaming to unlimited viewers, with sub-second latency

Cloudflare Stream is already built on top of the Cloudflare developer platform, using Workers and Durable Objects running on Cloudflare’s global network, within 50ms of 95% of the world’s Internet-connected population.

Our WebRTC implementation extends this to relay WebRTC video through our network. Broadcasters stream video using WHIP to the point of presence closest to their location, which tells the Durable Object where the live stream can be found. Viewers request streaming video from the point of presence closest to them, which asks the Durable Object where to find the stream, and video is routed through Cloudflare’s network, all with sub-second latency.

Using Durable Objects, we achieve this with zero centralized state. And just like the rest of Cloudflare Stream, you never have to think about regions, both in terms of pricing and product development.

While existing ultra low-latency streaming providers charge significantly more to stream over WebRTC, because Stream runs on Cloudflare’s global network, we’re able to offer WebRTC streaming at the same price as delivering video over HLS or DASH. We don’t think you should be penalized with higher pricing when choosing which technology to rely on to stream live video. Once generally available, WebRTC streaming will cost $1 per 1000 minutes of video delivered, just like the rest of Stream.

What does sub-second latency let you build?

Ultra low latency unlocks interactivity within your website or app, removing the time delay between creators, in-person attendees, and those watching remotely.

Developers we talk to are building everything from live sports betting, to live auctions, to live viewer Q&A and even real-time collaboration in video post-production. Even streams without in-app interactivity can benefit from real-time — no sports fan wants to get a text from their friend at the game that ruins the moment, before they’ve had a chance to watch the final play. Whether you’re bringing an existing app or have a new idea in mind, we’re excited to see what you build.

If you can write JavaScript, you can let your users go live from their browser

While hobbyist and professional creators might take the time to download and learn how to use an application like OBS Studio, most Internet users won’t get past this friction of new tools, and copying RTMP keys from one tool to another. To empower more people to go live, they need to be able to broadcast from within your website or app, just by enabling access to the camera and microphone.

Cloudflare Stream with WebRTC lets you build live streaming into your app as a front-end developer, without any special knowledge of video protocols. And our approach, using the WHIP and WHEP open standards, means you can do this with zero dependencies, with 100% your code that you control.

Go live from a web browser with just a few lines of code

You can go live right now, from your web browser, by creating a live input in the Cloudflare Stream dashboard, and pasting a URL into the example linked below.

Read the docs or run the example code below in your browser using Stackbltiz.

<video id="input-video" autoplay autoplay muted></video>

import WHIPClient from "./WHIPClient.js";

const url = "<WEBRTC_URL_FROM_YOUR_LIVE_INPUT>";
const videoElement = document.getElementById("input-video");
const client = new WHIPClient(url, videoElement);

This example uses an example WHIP client, written in just 100 lines of Javascript, using APIs that are native to web browsers, with zero dependencies. But because WHIP is an open standard, you can use any WHIP client you choose. Support for WHIP is growing across the video streaming industry — it has recently been added to Gstreamer, and one of the authors of the WHIP specification has written a Javascript client implementation. We intend to support the full WHIP specification, including supporting Trickle ICE for fast NAT traversal.

Play a live stream in a browser, with sub-second latency, no SDK required

Once you’ve started streaming, copy the playback URL from the live input you just created, and paste it into the example linked below.

Read the docs or run the example code below in your browser using Stackbltiz.

<video id="playback" controls autoplay muted></video>

import WHEPClient from './WHEPClient.js';
const url = "<WEBRTC_PLAYBACK_URL_FROM_YOUR_LIVE_INPUT>";
const videoElement = document.getElementById("playback");
const client = new WHEPClient(url, videoElement);

Just like the WHIP example before, this one uses an example WHEP client we’ve written that has zero dependencies. WHEP is an earlier IETF draft than WHIP, published in July of this year, but adoption is moving quickly. People in the community have already written open-source client implementations in both Javascript, C, with more to come.

Start experimenting with real-time live video, in open beta today

WebRTC streaming is in open beta today, ready for you to use as an integrated feature of Cloudflare Stream. Once Generally Available, WebRTC streaming will be priced like the rest of Cloudflare Stream, based on minutes of video delivered and minutes stored.

Read the docs to get started.

Build your next startup on Cloudflare with our comprehensive Startup Plan, v2.0

Post Syndicated from Jade Q. Wang original https://blog.cloudflare.com/startup-program-v2/

Build your next startup on Cloudflare with our comprehensive Startup Plan, v2.0

Build your next startup on Cloudflare with our comprehensive Startup Plan, v2.0

Starting a business is hard. And we know that the first few years of your business are crucial to your success.

Cloudflare’s Startup Plan is here to help.

Last year, we piloted a program to a select group of startups for free, with a selection of products that are very high leverage for young startups, early in their product development, like Workers, Stream, and Zero Trust.

Over the past year, startup founders repeatedly wrote into [email protected], and most of these emails followed one of 2 patterns:

  1. A startup would like to request additional products that are not a part of the startup plan, often Workers KV, Pages, Cloudflare for SaaS, R2, Argo, etc.
  2. A startup that is not a part of any accelerator program but would like to get on the startup plan.

Based on this feedback, we are thrilled to announce that today we will be increasing the scope of the program to also include popularly requested products! Beyond that, we’re also super excited to be broadening the eligibility criteria, so more startups can qualify for the plan.

What does the Cloudflare Startup Plan include?

There’s a lot of additional value that’s in the latest version of the plan. Here’s how things have evolved from v1.0:

Product Description v1.0 v2.0*
Content Delivery Network (CDN) Cloudflare’s CDN is a distributed network of servers that provides several advantages for a website. By caching website content, Cloudflare helps improve page load speeds, reduce bandwidth usage, and reduce CPU usage on the server.
Web Application Firewall (WAF) Cloudflare WAF protects a customer’s Internet properties from common vulnerabilities like SQL injection attacks, cross-site scripting, and cross-site forgery requests, with no changes to its existing infrastructure.
DNS Cloudflare DNS is an enterprise-grade authoritative DNS service that offers the fastest response time, unparalleled redundancy, and advanced security with built-in DDoS mitigation and DNSSEC.
Advanced DDoS Protection Cloudflare DDoS protection secures websites, applications, and entire networks while ensuring the performance of legitimate traffic is not compromised.
Page Rules Page Rules allows you to conditionally change zone settings such as security level or rocket loader settings. It is also how cache settings are configured for traffic passing through the zone.
Workers Cloudflare Workers allows developers to augment existing applications or create entirely new ones through a lightweight execution environment without configuring or maintaining infrastructure.
Stream Cloudflare Stream provides out-of-the-box video infrastructure that handles storage, encoding, and delivery. Using the Stream API, customers can build video functionality affordably and with minimal engineering effort.
Zero Trust Cloudflare Zero Trust replaces legacy security perimeters with our global edge, making the Internet faster and safer for teams around the world.
R2 Cloudflare R2 Storage allows developers to store large amounts of unstructured data without the costly egress bandwidth fees associated with typical cloud storage services.

Pages Cloudflare Pages allows frontend developers to quickly and easily build, collaborate on, and deploy websites.
Workers KV Workers KV is a global, low-latency, key-value data store. It supports high read volumes with low-latency, making it possible to build highly dynamic APIs and websites which respond as quickly as a cached static file would.
Workers Unbound Workers Unbound is a serverless platform for compute-intensive workloads, supporting up to 30s CPU time (GA), and 15 minute cron triggers (beta).
Cloudflare for SaaS Offers the benefits of Cloudflare’s SSL management to SaaS company’s customers. Allows SaaS customers to use their custom vanity domains while maintaining a branded customer experience, improved SEO rankings, and all the perks of dedicated certificates.

Advanced Certificate Manager (ACM) Advanced Certificate Manager is a flexible and customizable way to issue and manage certificates in Cloudflare. Customers use Advanced Certificate Manager when they want something more customizable than Universal SSL but still want the convenience of SSL certificate issuance and renewal.

Image Resizing Resize images for a variety of device types and connections from a single-source master image. Images can be manipulated by dimensions, compression ratios, and format (WebP conversion where supported). It is a feature of Speed→Optimization on the Dashboard.
Images Cloudflare Images lets you set up an image pipeline in minutes. Build a scalable image pipeline to store, resize, optimize and deliver images in a fast and secure manner.
Argo Smart Routing Argo Smart Routing improves Internet performance by intelligently routing end users through less congested and more reliable paths over the Internet using our network.
Spectrum DDoS protection, firewalling features and performance benefits for any TCP or UDP based application (such as gaming, FTP, email etc.)
Load Balancing Improve application performance and availability by steering traffic away from unhealthy origin servers and dynamically distributing it to the most available and responsive server pools.
Rate Limiting Protect your site or API from malicious traffic by blocking client IP addresses that hit a URL pattern and exceed a threshold you define.
Waiting Room Cloudflare Waiting Room allows organizations to route excess users to a custom-branded waiting room, helping preserve customer experience and protect origin servers from being overwhelmed with requests.
Area 1 Email Security Comprehensive email security solution to eliminate the risk from phishing, which is the root cause of damage in 95% of all cybersecurity incidents. Configuration with Google and Microsoft in 5 minutes.

*Product-specific usage limits apply

With the expanded product basket, the Startup Plan v2.0 provides four times the value of the original program. As an added bonus when new Cloudflare products are in beta, participants on the Startup Plan are welcome to share their use case and potentially receive early access.

How to join the Cloudflare Startup Program

Eligibility criteria for startups new to the program

To be eligible for the Startup Plan, your startup must be at an early stage (i.e. raised less than $3 million) and enrolled or recently graduated from a participating accelerator program.

If you are a founder in a participating accelerator program, navigate to the Cloudflare perk from your program’s vendor perk page and follow the instructions there. Those instructions will lead you to this plan page where you can select your program from the list.

If your accelerator program is not on the list, please email us at [email protected] and include the details of your perk manager. We’ll get in touch with them directly.

What if I’m already on the V1 Startup Plan? Can I get access to the products on the V2 plan?

Yes! Startups currently on the Startup Plan will automatically have the additional products added to your accounts in the coming weeks, no action required. This upgrade will apply for the remainder of the year that your company is on the Startup Plan.

If you have any questions about making the most of your plan, drop a line to [email protected] with any questions.

Special Eligibility: Referral Program, Alumni Program, Workers Launchpad

Over our years at Cloudflare, we have had the privilege of working with some remarkable technologists who have gone on to work on extraordinary projects after their time at Cloudflare. Moreover, there are startup founders who interface with teams at Cloudflare, whether through participation in the Cloudflare Community or because they were former coworkers elsewhere.

These startups are now also eligible:

  • Workers Launchpad funding program: If you are building on Cloudflare Workers, simultaneously apply for the Workers Launchpad funding program here, which will make you eligible for introductions to leading investors, additional mentorship opportunities, and other perks.
  • Referral Program: “Referred by (include details in comments)” is now an option in the Select Accelerator dropdown menu on the Startup Plan landing page. Please include the email address of your contact at Cloudflare in the comments field. Your account will be upgraded once your contact validates the referral.
  • Alumni Program: “Cloudflare Alumni” is now also an option in the Select Accelerator dropdown menu.

Questions about the program? Drop us a line at [email protected], and we’ll be in touch.

The easiest way to build a modern SaaS application

Post Syndicated from Tanushree Sharma original https://blog.cloudflare.com/workers-for-platforms-ga/

The easiest way to build a modern SaaS application

The easiest way to build a modern SaaS application

The Software as a Service (SaaS) model has changed the way we work – 80% of businesses use at least one SaaS application. Instead of investing in building proprietary software or installing and maintaining on-prem licensed software, SaaS vendors provide businesses with out-of-the-box solutions.

SaaS has many benefits over the traditional software model: cost savings, continuous updates and scalability, to name a few. However, any managed solution comes with trade-offs. As a business, one of the biggest challenges in adopting SaaS tooling is loss of customization. Not every business uses software in the same way and as you grow as a SaaS company it’s not long until you get customers saying “if only I could do X”.

Enter Workers for Platforms – Cloudflare’s serverless functions offering for SaaS businesses. With Workers for Platforms, your customers can build custom logic to meet their requirements right into your application.

We’re excited to announce that Workers for Platforms is now in GA for all Enterprise customers! If you’re an existing customer, reach out to your Customer Success Manager (CSM) to get access. For new customers, fill out our contact form to get started.

The conundrum of customization

As a SaaS business invested in capturing the widest market, you want to build a universal solution that can be used by customers of different sizes, in various industries and regions. However, every one of your customers has a unique set of tools and vendors and best practices. A generalized platform doesn’t always meet their needs.

For SaaS companies, once you get in the business of creating customizations yourself, it can be hard to keep up with seemingly never ending requests. You want your engineering teams to focus on building out your core business instead of building and maintaining custom solutions for each of your customer’s use cases.

With Workers for Platforms, you can give your customers the ability to write code that customizes your software. This gives your customers the flexibility to meet their exact use case while also freeing up internal engineering time  – it’s a win-win!

How is this different from Workers?

Workers is Cloudflare’s serverless execution environment that runs your code on Cloudflare’s global network. Workers is lightning fast and scalable; running at data centers in 275+ cities globally and serving requests from as close as possible to the end user. Workers for Platforms extends the power of Workers to our customer’s developers!

So, what’s new?

Dispatch Worker: As a platform customer, you want to have full control over how end developer code fits in with your APIs. A Dispatch Worker is written by our platform customers to run their own logic before dispatching (aka routing) to Workers written by end developers. In addition to routing, it can be used to run authentication, create boilerplate functions and sanitize responses.
User Workers: User Workers are written by end developers, that is, our customers’ developers. End developers can deploy User Workers to script automated actions, create integrations or modify response payload to return custom content. Unlike self-managed Function-as-a-Service (FaaS) options, with Workers for Platforms, end developers don’t need to worry about setting up and maintaining their code on any 3rd party platform. All they need to do is upload their code and you – or rather Cloudflare – takes care of the rest.

Unlimited Scripts: Yes, you read that correctly! With hundreds-plus end developers, the existing 100 script limit for Workers won’t cut it for Workers for Platforms customers. Some of our Workers for Platforms customers even deploy a new script each time their end developers make a change to their code in order to maintain version control and to easily revert to a previous state if a bug is deployed.

Dynamic Dispatch Namespaces: If you’ve used Workers before, you may be familiar with a feature we released earlier this year, Service Bindings. Service Bindings are a way for two Workers to communicate with each other. They allow developers to break up their applications into modules that can be chained together. Service Bindings explicitly link two Workers together, and they’re meant for use cases where you know exactly which Workers need to communicate with each other.

Service Bindings don’t work in the Workers for Platforms model because User Workers are uploaded ad hoc. Dynamic Dispatch Namespaces is our solution to this! A Dispatch Namespace is composed of a collection of User Workers. With Dispatch Namespaces, a Dispatch Worker can be used to call any User Worker in a namespace (similar to how Service Bindings work) but without needing to explicitly pre-define the relationship.

Read more about how to use these features below!

How to use Workers for Platforms

The easiest way to build a modern SaaS application

Dispatch Workers

Dispatch Workers are the entry point for requests to Workers in a Dispatch Namespace. The Dispatch Worker can be used to run any functions ahead of User Workers. They can make a request to any User Workers in the Dispatch Namespace, and they ultimately handle the routing to User Workers.

Dispatch Workers are created the same way as a regular Worker, except they need a Dispatch Namespace binding in the project’s wrangler.toml configuration file.

[[dispatch_namespaces]]
binding = "dispatcher"
namespace = "api-prod"

In the example below, this Dispatch Worker reads the subdomain from the path and calls the appropriate User Worker. Alternatively you can use KV, D1 or your data store of choice to map identifying parameters from an incoming request to a User Worker.

export default {
 async fetch(request, env) {
   try {
       // parse the URL, read the subdomain
       let worker_name = new URL(request.url).host.split('.')[0]
       let user_worker = env.dispatcher.get(worker_name)
       return user_worker.fetch(request)
   } catch (e) {
       if (e.message == 'Error: Worker not found.') {
           // we tried to get a worker that doesn't exist in our dispatch namespace
           return new Response('', {status: 404})
       }
       // this could be any other exception from `fetch()` *or* an exception
       // thrown by the called worker (e.g. if the dispatched worker has
       // `throw MyException()`, you could check for that here).
       return new Response(e.message, {status: 500})
   }
 }

}

Uploading User Workers

User Workers must be uploaded to a Dispatch Namespace through the Cloudflare API (wrangler support coming soon!). This code snippet below uses a simple HTML form to take in a script and customer id and then uploads it to the Dispatch Namespace.

export default {
 async fetch(request: Request) {
   try {
     // on form submit
     if (request.method === "POST"){
       const str = JSON.stringify(await request.json())
       const upload_obj = JSON.parse(str)
       await upload(upload_obj.customerID, upload_obj.script)
   }
   //render form
     return new Response (html, {
       headers: {
         "Content-Type": "text/html"
       }
     })
   } catch (e) {
       // form error
       return new Response(e.message, {status: 500})
   }
 }
}

async function upload(customerID:string, script:string){
 const scriptName = customerID;
 const scriptContent = script;
 const accountId = "<ACCOUNT_ID>";
 const dispatchNamespace = "api-prod";
 const url = `https://api.cloudflare.com/client/v4/accounts/${accountId}/workers/dispatch/namespaces/${dispatchNamespace}/scripts/${scriptName}`;
 // construct and send request
 const response = await fetch(url, {
   method: "PUT",
   body: scriptContent,
   headers: {
     "Content-Type": "application/javascript",
     "X-Auth-Email": "<EMAIL>",
     "X-Auth-Key": "<API_KEY>"
   }
 });

 const result = (await response.json());
 if (response.status != 200) {
   throw new Error(`Upload error`);
 }
}

It’s that simple. With Dispatch Namespaces and Dispatch Workers, we’re giving you the building blocks to customize your SaaS applications. Along with the Platforms APIs, we’re also releasing a Workers for Platforms UI on the Cloudflare dashboard where you can view your Dispatch Namespaces, search scripts and view analytics for User Workers.

The easiest way to build a modern SaaS application

To view an end to end example, check out our Workers for Platforms example application.

Get started today!

We’re releasing Workers for Platforms to all Cloudflare Enterprise customers. If you’re interested, reach out to your Customer Success Manager (CSM) to get access. To get started, take a look at our Workers for Platforms starter project and developer documentation.

We also have plans to release this down to the Workers Paid plan. Stay tuned on the Cloudflare Discord (channel name: workers-for-platforms-beta) for updates.

What’s next?

We’ve heard lots of great feature requests from our early Workers for Platforms customers. Here’s a preview of what’s coming next on the roadmap:

  • Fine-grained controls over User Workers: custom script limits, allowlist/blocklist for fetch requests
  • GraphQL and Logs: Metrics for User Workers by tag
  • Plug and play Platform Development Kit
  • Tighter integration with Cloudflare for SaaS custom domains

If you have specific feature requests in mind, please reach out to your CSM or get in touch through the Discord!

Stream Live is now Generally Available

Post Syndicated from Brendan Irvine-Broque original https://blog.cloudflare.com/stream-live-ga/

Stream Live is now Generally Available

Stream Live is now Generally Available

Today, we’re excited to announce that Stream Live is out of beta, available to everyone, and ready for production traffic at scale. Stream Live is a feature of Cloudflare Stream that allows developers to build live video features in websites and native apps.

Since its beta launch, developers have used Stream to broadcast live concerts from some of the world’s most popular artists directly to fans, build brand-new video creator platforms, operate a global 24/7 live OTT service, and more. While in beta, Stream has ingested millions of minutes of live video and delivered to viewers all over the world.

Bring your big live events, ambitious new video subscription service, or the next mobile video app with millions of users — we’re ready for it.

Streaming live video at scale is hard

Live video uses a massive amount of bandwidth. For example, a one-hour live stream at 1080p at 8Mbps is 3.6GB. At typical cloud provider egress prices, even a little egress can break the bank.

Live video must be encoded on-the-fly, in real-time. People expect to be able to watch live video on their phone, while connected to mobile networks with less bandwidth, higher latency and frequently interrupted connections. To support this, live video must be re-encoded in real-time into multiple resolutions, allowing someone’s phone to drop to a lower resolution and continue playback. This can be complex (Which bitrates? Which codecs? How many?) and costly: running a fleet of virtual machines doesn’t come cheap.

Ingest location matters — Live streaming protocols like RTMPS send video over TCP. If a single packet is dropped or lost, the entire connection is brought to a halt while the packet is found and re-transmitted. This is known as “head of line blocking”. The further away the broadcaster is from the ingest server, the more network hops, and the more likely packets will be dropped or lost, ultimately resulting in latency and buffering for viewers.

Delivery location matters — Live video must be cached and served from points of presence as close to viewers as possible. The longer the network round trips, the more likely videos will buffer or drop to a lower quality.

Broadcasting protocols are in flux — The most widely used protocol for streaming live video, RTMPS, has been abandoned since 2012, and dates back to the era of Flash video in the early 2000s. A new emerging standard, SRT, is not yet supported everywhere. And WebRTC has only recently evolved into an option for high definition one-to-many broadcasting at scale.

The old way to solve this has been to stitch together separate cloud services from different vendors. One vendor provides excellent content delivery, but no encoding. Another provides APIs or hardware to encode, but leaves you to fend for yourself and build your own storage layer. As a developer, you have to learn, manage and write a layer of glue code around the esoteric details of video streaming protocols, codecs, encoding settings and delivery pipelines.

Stream Live is now Generally Available

We built Stream Live to make streaming live video easy, like adding an <img> tag to a website. Live video is now a fundamental building block of Internet content, and we think any developer should have the tools to add it to their website or native app.

With Stream, you or your users stream live video directly to Cloudflare, and Cloudflare delivers video directly to your viewers. You never have to manage internal encoding, storage, or delivery systems — it’s just live video in and live video out.

Our network, our hardware = a solution only Cloudflare can provide

We’re not the only ones building APIs for live video — but we are the only ones with our own global network and hardware that we control and optimize for video. That lets us do things that others can’t, like sub-second glass-to-glass latency using RTMPS and SRT playback at scale.

Newer video codecs require specialized hardware encoders, and while others are beholden to the hardware limitations of public cloud providers, we’re already hard at work installing the latest encoding hardware in our own racks, so that you can deliver high resolution video with even less bandwidth. Our goal is to make what is otherwise only available to video giants available directly to you — stay tuned for some exciting updates on this next week.

Most providers limit how many destinations you can restream or simulcast to. Because we operate our own network, we’ve never even worried about this, and let you restream to as many destinations as you need.

Operating our own network lets us price Stream based on minutes of video delivered — unlike others, we don’t pay someone else for bandwidth and then pass along their costs to you at a markup. The status quo of charging for bandwidth or per-GB storage penalizes you for delivering or storing high resolution content. If you ask why a few times, most of the time you’ll discover that others are pushing their own cost structures on to you.

Encoding video is compute-intensive, delivering video is bandwidth intensive, and location matters when ingesting live video. When you use Stream, you don’t need to worry about optimizing performance, finding a CDN, and/or tweaking configuration endlessly. Stream takes care of this for you.

Free your live video from the business models of big platforms

Nearly every business uses live video, whether to engage with customers, broadcast events or monetize live content. But few have the specialized engineering resources to deliver live video at scale on their own, and wire together multiple low level cloud services. To date, many of the largest content creators have been forced to depend on a shortlist of social media apps and streaming services to deliver live content at scale.

Unlike the status quo, who force you to put your live video in their apps and services and fit their business models, Stream gives you full control of your live video, on your website or app, on any device, at scale, without pushing your users to someone else’s service.

Free encoding. Free ingestion. Free analytics. Simple per-minute pricing.

Others Stream
Encoding $ per minute Free
Ingestion $ per GB Free
Analytics Separate product Free
Live recordings Minutes or hours later Instant
Storage $ per GB per minute stored
Delivery $ per GB per minute delivered

Other platforms charge for ingestion and encoding. Many even force you to consider where you’re streaming to and from, the bitrate and frames per second of your video, and even which of their datacenters you’re using.

With Stream, encoding and ingestion are free. Other platforms charge for delivery based on bandwidth, penalizing you for delivering high quality video to your viewers. If you stream at a high resolution, you pay more.

With Stream, you don’t pay a penalty for delivering high resolution video. Stream’s pricing is simple — minutes of video delivered and stored. Because you pay per minute, not per gigabyte, you can stream at the ideal resolution for your viewers without worrying about bandwidth costs.

Other platforms charge separately for analytics, requiring you to buy another product to get metrics about your live streams.

With Stream, analytics are free. Stream provides an API and Dashboard for both server-side and client-side analytics, that can be queried on a per-video, per-creator, per-country basis, and more. You can use analytics to identify which creators in your app have the most viewed live streams, inform how much to bill your customers for their own usage, identify where content is going viral, and more.

Other platforms tack on live recordings or DVR mode as a separate add-on feature, and recordings only become available minutes or even hours after a live stream ends.

With Stream, live recordings are a built-in feature, made available instantly after a live stream ends. Once a live stream is available, it works just like any other video uploaded to Stream, letting you seamlessly use the same APIs for managing both pre-recorded and live content.

Build live video into your website or app in minutes

Stream Live is now Generally Available

Cloudflare Stream enables you or your users to go live using the same protocols and tools that broadcasters big and small use to go live to YouTube or Twitch, but gives you full control over access and presentation of live streams.

Step 1: Create a live input

Create a new live input from the Stream Dashboard or use use the Stream API:

Request

curl -X POST \
-H "Authorization: Bearer <YOUR_API_TOKEN>" \
-d "{"recording": { "mode": "automatic" } }" \
https://api.cloudflare.com/client/v4/accounts/<YOUR_CLOUDFLARE_ACCOUNT_ID>/stream/live_inputs

Response

{
"result": {
"uid": "<UID_OF_YOUR_LIVE_INPUT>",
"rtmps": {
"url": "rtmps://live.cloudflare.com:443/live/",
"streamKey": "<PRIVATE_RTMPS_STREAM_KEY>"
},
...
}
}

Step 2: Use the RTMPS key with any live broadcasting software, or in your own native app

Copy the RTMPS URL and key, and use them with your live streaming application. We recommend using Open Broadcaster Software (OBS) to get started, but any RTMPS or SRT compatible software should be able to interoperate with Stream Live.

Enter the Stream RTMPS URL and the Stream Key from Step 1:

Stream Live is now Generally Available

Step 3: Preview your live stream in the Cloudflare Dashboard

In the Stream Dashboard, within seconds of going live, you will see a preview of what your viewers will see, along with the real-time connection status of your live stream.

Stream Live is now Generally Available

Step 4: Add live video playback to your website or app

Stream your video using our Stream Player embed code, or use any video player that supports HLS or DASH — live streams can be played in both websites or native iOS and Android apps.

For example, on iOS, all you need to do is provide AVPlayer with the URL to the HLS manifest for your live input, which you can find via the API or in the Stream Dashboard.

import SwiftUI
import AVKit

struct MyView: View {
    // Change the url to the Cloudflare Stream HLS manifest URL
    private let player = AVPlayer(url: URL(string: "https://customer-9cbb9x7nxdw5hb57.cloudflarestream.com/8f92fe7d2c1c0983767649e065e691fc/manifest/video.m3u8")!)

    var body: some View {
        VideoPlayer(player: player)
            .onAppear() {
                player.play()
            }
    }
}

struct MyView_Previews: PreviewProvider {
    static var previews: some View {
        MyView()
    }
}

To run a complete example app in XCode, follow this guide in the Stream Developer docs.

Companies are building whole new video platforms on top of Stream

Developers want control, but most don’t have time to become video experts. And even video experts building innovative new platforms don’t want to manage live streaming infrastructure.

Switcher Studio’s whole business is live video — their iOS app allows creators and businesses to produce their own branded, multi camera live streams. Switcher uses Stream as an essential part of their live streaming infrastructure. In their own words:

“Since 2014, Switcher has helped creators connect to audiences with livestreams. Now, our users create over 100,000 streams per month. As we grew, we needed a scalable content delivery solution. Cloudflare offers secure, fast delivery, and even allowed us to offer new features, like multistreaming. Trusting Cloudflare Stream lets our team focus on the live production tools that make Switcher unique.”

While Stream Live has been in beta, we’ve worked with many customers like Switcher, where live video isn’t just one product feature, it is the core of their product. Even as experts in live video, they choose to use Stream, so that they can focus on the unique value they create for their customers, leaving the infrastructure of ingesting, encoding, recording and delivering live video to Cloudflare.

Start building live video into your website or app today

It takes just a few minutes to sign up and start your first live stream, using the Cloudflare Dashboard, with no code required to get started, but APIs for when you’re ready to start building your own live video features. Give it a try — we’re ready for you, no matter the size of your audience.

Using Cloudflare R2 as an apt/yum repository

Post Syndicated from Sudarsan Reddy original https://blog.cloudflare.com/using-cloudflare-r2-as-an-apt-yum-repository/

Using Cloudflare R2 as an apt/yum repository

Using Cloudflare R2 as an apt/yum repository

In this blog post, we’re going to talk about how we use Cloudflare R2 as an apt/yum repository to bring cloudflared (the Cloudflare Tunnel daemon) to your Debian/Ubuntu and CentOS/RHEL systems and how you can do it for your own distributable in a few easy steps!

I work on Cloudflare Tunnel, a product which enables customers to quickly connect their private networks and services through the Cloudflare global network without needing to expose any public IPs or ports through their firewall. Cloudflare Tunnel is managed for users by cloudflared, a tool that runs on the same network as the private services. It proxies traffic for these services via Cloudflare, and users can then access these services securely through the Cloudflare network.

Our connector, cloudflared, was designed to be lightweight and flexible enough to be effectively deployed on a Raspberry Pi, a router, your laptop, or a server running on a data center with applications ranging from IoT control to private networking. Naturally, this means cloudflared comes built for a myriad of operating systems, architectures and package distributions: You could download the appropriate package from our GitHub releases, brew install it or apt/yum install it (https://pkg.cloudflare.com).

In the rest of this blog post, I’ll use cloudflared as an example of how to create an apt/yum repository backed by Cloudflare’s object storage service R2. Note that this can be any binary/distributable. I simply use cloudflared as an example because this is something we recently did and actually use in production.

How apt-get works

Let’s see what happens when you run something like this on your terminal.

$ apt-get install cloudflared

Let’s also assume that apt sources were already added like so:

  $ echo 'deb [signed-by=/usr/share/keyrings/cloudflare-main.gpg] https://pkg.cloudflare.com/cloudflared buster main' | sudo tee /etc/apt/sources.list.d/cloudflared.list


$ apt-get update

From the source.list above, apt first looks up the Release file (or InRelease if it’s a signed package like cloudflared, but we will ignore this for the sake of simplicity).

A Release file contains a list of supported architectures and their md5, sha1 and sha256 checksums. It looks something like this:

$ curl https://pkg.cloudflare.com/cloudflared/dists/buster/Release
Origin: cloudflared
Label: cloudflared
Codename: buster
Date: Thu, 11 Aug 2022 08:40:18 UTC
Architectures: amd64 386 arm64 arm armhf
Components: main
Description: apt repository for cloudflared - buster
MD5Sum:
 c14a4a1cbe9437d6575ae788008a1ef4 549 main/binary-amd64/Packages
 6165bff172dd91fa658ca17a9556f3c8 374 main/binary-amd64/Packages.gz
 9cd622402eabed0b1b83f086976a8e01 128 main/binary-amd64/Release
 5d2929c46648ea8dbeb1c5f695d2ef6b 545 main/binary-386/Packages
 7419d40e4c22feb19937dce49b0b5a3d 371 main/binary-386/Packages.gz
 1770db5634dddaea0a5fedb4b078e7ef 126 main/binary-386/Release
 b0f5ccfe3c3acee38ba058d9d78a8f5f 549 main/binary-arm64/Packages
 48ba719b3b7127de21807f0dfc02cc19 376 main/binary-arm64/Packages.gz
 4f95fe1d9afd0124a32923ddb9187104 128 main/binary-arm64/Release
 8c50559a267962a7da631f000afc6e20 545 main/binary-arm/Packages
 4baed71e49ae3a5d895822837bead606 372 main/binary-arm/Packages.gz
 e472c3517a0091b30ab27926587c92f9 126 main/binary-arm/Release
 bb6d18be81e52e57bc3b729cbc80c1b5 549 main/binary-armhf/Packages
 31fd71fec8acc969a6128ac1489bd8ee 371 main/binary-armhf/Packages.gz
 8fbe2ff17eb40eacd64a82c46114d9e4 128 main/binary-armhf/Release
SHA1:
…
SHA256:
…

Depending on your system’s architecture, Debian picks the appropriate Packages location. A Packages file contains metadata about the binary apt wants to install, including location and its checksum. Let’s say it’s an amd64 machine. This means we’ll go here next:

$ curl https://pkg.cloudflare.com/cloudflared/dists/buster/main/binary-amd64/Packages
Package: cloudflared
Version: 2022.8.0
License: Apache License Version 2.0
Vendor: Cloudflare
Architecture: amd64
Maintainer: Cloudflare <[email protected]>
Installed-Size: 30736
Homepage: https://github.com/cloudflare/cloudflared
Priority: extra
Section: default
Filename: pool/main/c/cloudflared/cloudflared_2022.8.0_amd64.deb
Size: 15286808
SHA256: c47ca10a3c60ccbc34aa5750ad49f9207f855032eb1034a4de2d26916258ccc3
SHA1: 1655dd22fb069b8438b88b24cb2a80d03e31baea
MD5sum: 3aca53ccf2f9b2f584f066080557c01e
Description: Cloudflare Tunnel daemon

Notice the Filename field. This is where apt gets the deb from before running a dpkg command on it. What all of this means is the apt repository (and the yum repositories too) is basically a structured file system of mostly plaintext files and a deb.

The deb file is a Debian software package that contains two things: installable data (in our case, the cloudflared binary) and metadata about the installable.

Building our own apt repository

Now that we know what happens when an apt-get install runs, let’s work our way backwards to construct the repository.

Create a deb file out of the binary

Note: It is optional but recommended one signs the packages. See the section about how apt verifies packages here.

Debian files can be built by the dpkg-buildpackage tool in a linux or Debian environment. We use a handy command line tool called fpm (https://fpm.readthedocs.io/en/v1.13.1/) to do this because it works for both rpm and deb.

$ fpm -s <dir> -t deb -C /path/to/project -name <project_name> –version <version>

This yields a .deb file.

Create plaintext files needed by apt to lookup downloads

Again, these files can be built by hand, but there are multiple tools available to generate this:

We use reprepro.

Using it is as simple as

$ reprepro buster includedeb <path/to/the/deb>

reprepro neatly creates a bunch of folders in the structure we looked into above.

Upload them to Cloudflare R2

We use Cloudflare R2 to now be the host for this structured file system. R2 lets us upload and serve objects in this structured format. This means, we just need to upload the files in the same structure reprepro created them.

Here is a copyable example of how we do it for cloudflared.

Serve them from an R2 worker

For fine-grained control, we’ll write a very lightweight Cloudflare Worker to be the service we talk to and serve as the front-end API for apt to talk to. For an apt repository, we only need it to perform the GET function.

Here’s an example on how-to do this: https://developers.cloudflare.com/r2/examples/demo-worker/

Putting it all together

Here is a handy script we use to push cloudflared to R2 ready for apt/yum downloads and includes signing and publishing the pubkey.

And that’s it! You now have your own apt/yum repo without needing a server that needs to be maintained, there are no egress fees for downloads, and it is on the Cloudflare global network, protecting it against high request volumes. You can automate many of these steps to make it part of a release process.

Today, this is how cloudflared is distributed on the apt and yum repositories: https://pkg.cloudflare.com/

Announcing our Spring Developer Challenge

Post Syndicated from Albert Zhao original https://blog.cloudflare.com/announcing-our-spring-developer-challenge/

Announcing our Spring Developer Challenge

Announcing our Spring Developer Challenge

After many announcements from Platform Week, we’re thrilled to make one more: our Spring Developer Challenge!

The theme for this challenge is building real-time, collaborative applications — one of the most exciting use-cases emerging in the Cloudflare ecosystem. This is an opportunity for developers to merge their ideas with our newly released features, earn recognition on our blog, and take home our best swag yet.

Here’s a list of our tools that will get you started:

  • Workers can either be powerful middleware connecting your app to different APIs and an origin — or it can be the entire application itself. We recommend using Worktop, a popular framework for Workers, if you need TypeScript support, routing, and well-organized submodules. Worktop can also complement your existing app even if it already uses a framework,  such as Svelte.
  • Cloudflare Pages makes it incredibly easy to deploy sites, which you can make into truly dynamic apps by putting a Worker in front or using the Pages Functions (beta).
  • Durable Objects are great for collaborative apps because you can use websockets while coordinating state at the edge, seen in this chat demo. To help scale any load, we also recommend Durable Object Groups.
  • Workers KV provides a global key-value data store that securely stores and quickly serves data across Cloudflare’s network. R2 allows you to store enormous amounts of data without trapping you with costly egress services.

Last year, our Developer Spotlight series highlighted how developers around the world built entire applications on Cloudflare. Our Discord server maintained that momentum with users demonstrating that any type of application can be built. Need a way to organize thousands of lines of JSON? JSON Hero, built with Remix and deployed with Workers, provides an incredibly readable UI for your JSON files. Trying to deploy a GraphQL server for your app that scales? helix-flare deploys a GraphQL server easily through Workers and uses Durable Objects to coordinate data.

We hope developers continue to explore the boundaries of what they can build on Cloudflare as our platform evolves. During our Summer Developer Challenge in 2021, we received over 1,200 submissions that revealed you can build almost any app imaginable with Workers, Pages, and the rest of the developer ecosystem. We sent out hundreds of swag boxes to participants, to show our appreciation. The ensuing unboxing videos on Twitter and YouTube thrilled our team.

This year’s Spring Developer Challenge is all about making real-time, collaborative apps such as chat rooms, games, web-based editing tools, or anything else in your imagination! Here are the rules:

  • You must be at least 18 years old to participate
  • You can work in teams of up to 10 people per submission
  • The deadline to submit your repo is May 24

Enter the challenge by going to this site.

As you build your app, join our Discord if you or your team need any help. We will be enthusiastically reviewing submissions, promoting them on Twitter, and sending out swag boxes.

If you’re new to Cloudflare or have an exciting idea as a developer, this is your opportunity to see how far our platform has evolved and get rewarded for it!

Announcing the Cloudflare Images Sourcing Kit

Post Syndicated from Paulo Costa original https://blog.cloudflare.com/cloudflare-images-sourcing-kit/

Announcing the Cloudflare Images Sourcing Kit

Announcing the Cloudflare Images Sourcing Kit

When we announced Cloudflare Images to the world, we introduced a way to store images within the product and help customers move away from the egress fees met when using remote sources for their deliveries via Cloudflare.

To store the images in Cloudflare, customers can upload them via UI with a simple drag and drop, or via API for scenarios with a high number of objects for which scripting their way through the upload process makes more sense.

To create flexibility on how to import the images, we’ve recently also included the ability to upload via URL or define custom names and paths for your images to allow a simple mapping between customer repositories and the objects in Cloudflare. It’s also possible to serve from a custom hostname to create flexibility on how your end-users see the path, to improve the delivery performance by removing the need to do TLS negotiations or to improve your brand recognition through URL consistency.

Still, there was no simple way to tell our product: “Tens of millions of images are in this repository URL. Go and grab them all from me”.  

In some scenarios, our customers have buckets with millions of images to upload to Cloudflare Images. Their goal is to migrate all objects to Cloudflare through a one-time process, allowing you to drop the external storage altogether.

In another common scenario, different departments in larger companies use independent systems configured with varying storage repositories, all of which they feed at specific times with uneven upload volumes. And it would be best if they could reuse definitions to get all those new Images in Cloudflare to ensure the portfolio is up-to-date while not paying egregious egress fees by serving the public directly from those multiple storage providers.

These situations required the upload process to Cloudflare Images to include logistical coordination and scripting knowledge. Until now.

Announcing the Cloudflare Images Sourcing Kit

Today, we are happy to share with you our Sourcing Kit, where you can define one or more sources containing the objects you want to migrate to Cloudflare Images.

But, what exactly is Sourcing? In industries like manufacturing, it implies a number of operations, from selecting suppliers, to vetting raw materials and delivering reports to the process owners.

So, we borrowed that definition and translated it into a Cloudflare Images set of capabilities allowing you to:

  1. Define one or multiple repositories of images to bulk import;
  2. Reuse those sources and import only new images;
  3. Make sure that only actual usable images are imported and not other objects or file types that exist in that source;
  4. Define the target path and filename for imported images;
  5. Obtain Logs for the bulk operations;

The new kit does it all. So let’s go through it.

How the Cloudflare Images Sourcing Kit works

In the Cloudflare Dashboard, you will soon find the Sourcing Kit under Images.

In it, you will be able to create a new source definition, view existing ones, and view the status of the last operations.

Announcing the Cloudflare Images Sourcing Kit

Clicking on the create button will launch the wizard that will guide you through the first bulk import from your defined source:

Announcing the Cloudflare Images Sourcing Kit

First, you will need to input the Name of the Source and the URL for accessing it. You’ll be able to save the definitions and reuse the source whenever you wish.
After running the necessary validations, you’ll be able to define the rules for the import process.

The first option you have allows an Optional Prefix Path. Defining a prefix allows a unique identifier for the images uploaded from this particular source, differentiating the ones imported from this source.

Announcing the Cloudflare Images Sourcing Kit

The naming rule in place respects the source image name and path already, so let’s assume there’s a puppy image to be retrieved at:

https://my-bucket.s3.us-west-2.amazonaws.com/folderA/puppy.png

When imported without any Path Prefix, you’ll find the image at

https://imagedelivery.net/<AccountId>/folderA/puppy.png

Now, you might want to create an additional Path Prefix to identify the source, for example by mentioning that this bucket is from the Technical Writing department. In the puppy case, the result would be:

https://imagedelivery.net/<AccountId>/techwriting/folderA/puppy.png

Custom Path prefixes also provide a way to prevent name clashes coming from other sources.

Still, there will be times when customers don’t want to use them. And, when re-using the source to import images, a same path+filename destinations clash might occur.

By default, we don’t overwrite existing images, but we allow you to select that option and refresh your catalog present in the Cloudflare pipeline.

Announcing the Cloudflare Images Sourcing Kit

Once these inputs are defined, a click on the Create and start migration button at the bottom will trigger the upload process.

Announcing the Cloudflare Images Sourcing Kit

This action will show the final wizard screen, where the migration status is displayed. The progress log will report any errors obtained during the upload and is also available to download.

Announcing the Cloudflare Images Sourcing Kit

You can reuse, edit or delete source definitions when no operations are running, and at any point, from the home page of the kit, it’s possible to access the status and return to the ongoing or last migration report.

Announcing the Cloudflare Images Sourcing Kit

What’s next?

With the Beta version of the Cloudflare Images Sourcing Kit, we will allow you to define AWS S3 buckets as a source for the imports. In the following versions, we will enable definitions for other common repositories, such as the ones from Azure Storage Accounts or Google Cloud Storage.

And while we’re aiming for this to be a simple UI, we also plan to make everything available through CLI: from defining the repository URL to starting the upload process and retrieving a final report.

Apply for the Beta version

We will be releasing the Beta version of this kit in the following weeks, allowing you to source your images from third party repositories to Cloudflare.

If you want to be the first to use Sourcing Kit, request to join the waitlist on the Cloudflare Images dashboard.

Announcing the Cloudflare Images Sourcing Kit

Send email using Workers with MailChannels

Post Syndicated from Erwin van der Koogh original https://blog.cloudflare.com/sending-email-from-workers-with-mailchannels/

Send email using Workers with MailChannels

Send email using Workers with MailChannels

Here at Cloudflare we often talk about HTTP and related protocols as we work to help build a better Internet. However, the Simple Mail Transfer Protocol (SMTP) — used to send emails — is still a massive part of the Internet too.

Even though SMTP is turning 40 years old this year, most businesses still rely on email to validate user accounts, send notifications, announce new features, and more.

Sending an email is simple from a technical standpoint, but getting an email actually delivered to an inbox can be extremely tricky. Because of the enormous amount of spam that is sent every single day, all major email providers are very wary of things like new domains and IP addresses that start sending emails.

That is why we are delighted to announce a partnership with MailChannels. MailChannels has created an email sending service specifically for Cloudflare Workers that removes all the friction associated with sending emails. To use their service, you do not need to validate a domain or create a separate account. MailChannels filters spam before sending out an email, so you can feel safe putting user-submitted content in an email and be confident that it won’t ruin your domain reputation with email providers. But the absolute best part? Thanks to our friends at MailChannels, it is completely free to send email.

In the words of their CEO Ken Simpson: “Cloudflare Workers and Pages are changing the game when it comes to ease of use and removing friction to get started. So when we sat down to see what friction we could remove from sending out emails, it turns out that with our incredible anti-spam and anti-phishing, the answer is “everything”. We can’t wait to see what applications the community is going to build on top of this.”

The only constraint currently is that the integration only works when the request comes from a Cloudflare IP address. So it won’t work yet when you are developing on your local machine or running a test on your build server.

First let’s walk you through how to send out your first email using a Worker.

export default {
  async fetch(request) {
    send_request = new Request('https://api.mailchannels.net/tx/v1/send', {
      method: 'POST',
      headers: {
        'content-type': 'application/json',
      },
      body: JSON.stringify({
        personalizations: [
          {
            to: [{ email: '[email protected]', name: 'Test Recipient' }],
          },
        ],
        from: {
          email: '[email protected]',
          name: 'Workers - MailChannels integration',
        },
        subject: 'Look! No servers',
        content: [
          {
            type: 'text/plain',
            value: 'And no email service accounts and all for free too!',
          },
        ],
      }),
    })
  },
}

That is all there is to it. You can modify the example to make it send whatever email you want.

The MailChannels integration makes it easy to send emails to and from anywhere with Workers. However, we also wanted to make it easier to send emails to yourself from a form on your website. This is perfect for quickly and painlessly setting up pages such as “Contact Us” forms, landing pages, and sales inquiries.

The Pages Plugin Framework that we announced earlier this week allows other people to email you without exposing your email address.

The only thing you need to do is copy and paste the following code snippet in your /functions/_middleware.ts file. Now, every form that has the data-static-form-name attribute will automatically be emailed to you.

import mailchannelsPlugin from "@cloudflare/pages-plugin-mailchannels";

export const onRequest = mailchannelsPlugin({
  personalizations: [
    {
      to: [{ name: "ACME Support", email: "[email protected]" }],
    },
  ],
  from: { name: "Enquiry", email: "[email protected]" },
  respondWith: () =>
    new Response(null, {
      status: 302,
      headers: { Location: "/thank-you" },
    }),
});

Here is an example of what such a form would look like. You can make the form as complex as you like, the only thing it needs is the data-static-form-name attribute. You can give it any name you like to be able to distinguish between different forms.

<!DOCTYPE html>
<html>
  <body>
    <h1>Contact</h1>
    <form data-static-form-name="contact">
      <div>
        <label>Name<input type="text" name="name" /></label>
      </div>
      <div>
        <label>Email<input type="email" name="email" /></label>
      </div>
      <div>
        <label>Message<textarea name="message"></textarea></label>
      </div>
      <button type="submit">Send!</button>
    </form>
  </body>
</html>

So as you can see there is no barrier left when it comes to sending out emails. You can copy and paste the above Worker or Pages code into your projects and immediately start to send email for free.

If you have any questions about using MailChannels in your Workers, or want to learn more about Workers in general, please join our Cloudflare Developer Discord server.

Route to Workers, automate your email processing

Post Syndicated from Joao Sousa Botto original https://blog.cloudflare.com/announcing-route-to-workers/

Route to Workers, automate your email processing

Route to Workers, automate your email processing

Cloudflare Email Routing has quickly grown to a few hundred thousand users, and we’re incredibly excited with the number of feature requests that reach our product team every week. We hear you, we love the feedback, and we want to give you all that you’ve been asking for. What we don’t like is making you wait, or making you feel like your needs are too unique to be addressed.

That’s why we’re taking a different approach – we’re giving you the power tools that you need to implement any logic you can dream of to process your emails in the fastest, most scalable way possible.

Today we’re announcing Route to Workers, for which we’ll start a closed beta soon. You can join the waitlist today.

How this works

When using Route to Workers your Email Routing rules can have a Worker process the messages reaching any of your custom Email addresses.

Route to Workers, automate your email processing

Even if you haven’t used Cloudflare Workers before, we are making onboarding as easy as can be. You can start creating Workers straight from the Email Routing dashboard, with just one click.

Route to Workers, automate your email processing

After clicking Create, you will be able to choose a starter that allows you to get up and running with minimal effort. Starters are templates that pre-populate your Worker with the code you would write for popular use cases such as creating a blocklist or allowlist, content based filtering, tagging messages, pinging you on Slack for urgent emails, etc.

Route to Workers, automate your email processing

You can then use the code editor to make your new Worker process emails in exactly the way you want it to – the options are endless.

Route to Workers, automate your email processing

And for those of you that prefer to jump right into writing their own code, you can go straight to the editor without using a starter. You can write Workers with a language you likely already know. Cloudflare built Workers to execute JavaScript and WebAssembly and has continuously added support for new languages.

The Workers you’ll use for processing emails are just regular Workers that listen to incoming events, implement some logic, and reply accordingly. You can use all the features that a normal Worker would.

The main difference being that instead of:

export default {
  async fetch(request, env, ctx) {
    handleRequest(request);
  }
}

You’ll have:

export default {
  async email(message, env, ctx) {
    handleEmail(message);
  }
}

The new `email` event will provide you with the “from”, “to” fields, the full headers, and the raw body of the message. You can then use them in any way that fits your use case, including calling other APIs and orchestrating complex decision workflows. In the end, you can decide what action to take, including rejecting or forwarding the email to one of your Email Routing destination addresses.

With these capabilities you can easily create logic that, for example, only accepts messages coming from one specific address and, when one matches the criteria, forwards to one or more of your verified destination addresses while also immediately alerting you on Slack. Code for such feature could be as simple as this:

export default {
   async email(message, env, ctx) {
       switch (message.to) {
           case "[email protected]":
               await fetch("https://webhook.slack/notification", {
                   body: `Got a marketing email from ${ message.from }, subject: ${ message.headers.get("subject") }`,
               });
               sendEmail(message, [
                   "marketing@corp",
                   "sales@corp",
               ]);
               break;

           default:
               message.reject("Unknown address");
       }
   },
};

Route to Workers enables everyone to programmatically process their emails and use them as triggers for any other action. We think this is pretty powerful.

Process up to 100,000 emails/day for free

The first 100,000 Worker requests (or Email Triggers) each day are free, and paid plans start at just $5 per 10 million requests. You will be able to keep track of your Email Workers usage right from the Email Routing dashboard.

Route to Workers, automate your email processing

Join the Waitlist

You can join the waitlist today by going to the Email section of your dashboard, navigating to the Email Workers tab, and clicking the Join Waitlist button.

Route to Workers, automate your email processing

We are expecting to start the closed beta in just a few weeks, and can’t wait to hear about what you’ll build with it!

As usual, if you have any questions or feedback about Email Routing, please come see us in the Cloudflare Community and the Cloudflare Discord.

Announcing D1: our first SQL database

Post Syndicated from Rita Kozlov original https://blog.cloudflare.com/introducing-d1/

Announcing D1: our first SQL database

Announcing D1: our first SQL database

We announced Cloudflare Workers in 2017, giving developers access to compute on our network. We were excited about the possibilities this unlocked, but we quickly realized — most real world applications are stateful. Since then, we’ve delivered KV, Durable Objects, and R2, giving developers access to various types of storage.

Today, we’re excited to announce D1, our first SQL database.

While the wait on beta access shouldn’t be long — we’ll start letting folks in as early as June (sign up here), we’re excited to share some details of what’s to come.

Meet D1, the database designed for Cloudflare Workers

D1 is built on SQLite. Not only is SQLite the most ubiquitous database in the world, used by billions of devices a day, it’s also the first ever serverless database. Surprised? SQLite was so ahead of its time, it dubbed itself “serverless” before the term gained connotation with cloud services, and originally meant literally “not involving a server”.

Since Workers itself runs between the server and the client, and was inspired by technology built for the client, SQLite seemed like the perfect fit for our first entry into databases.

So what can you build with D1? The true answer is “almost anything!”, that might not be very helpful in triggering the imagination, so how about a live demo?

D1 Demo: Northwind Traders

You can check out an example of D1 in action by trying out our demo running here: northwind.d1sql.com.

If you’re wondering “Who are Northwind Traders?”, Northwind Traders is the “Hello, World!” of databases, if you will. A sample database that Microsoft would provide alongside Microsoft Access to use as their own tutorial. It first appeared 25 years ago in 1997, and you’ll find many examples of its use on the Internet.

It’s a typical business application, with a realistic schema, with many foreign keys, across many different tables — a truly timeless representation of data.

Announcing D1: our first SQL database

When was the recent order of Queso Cabrales shipped, and what ship was it on? You can quickly find out. Someone calling in about ordering some Chai? Good thing Exotic Liquids still has 39 units in stock, for just \$18 each.

Announcing D1: our first SQL database

We welcome you to play and poke around, and answer any questions you have about Northwind Trading’s business.

The Northwind Traders demo also features a dashboard where you can find details and metrics about the D1 SQL queries happening behind the scenes.

Announcing D1: our first SQL database

What can you build with D1?

Going back to our original question before the demo, however, what can you build with D1?

While you may not be running Northwind Traders yourself, you’re likely running a very similar piece of software somewhere. Even at the very core of Cloudflare’s service is a database. A SQL database filled with tables, materialized views and a plethora of stored procedures. Every time a customer interacts with our dashboard they end up changing state in that database.

The reality is that databases are everywhere. They are inside the web browser you’re reading this on, inside every app on your phone, and the storage for your bank transaction, travel reservations, business applications, and on and on. Our goal with D1 is to help you build anything from APIs to rich and powerful applications, including eCommerce sites, accounting software, SaaS solutions, and CRMs.

You can even combine D1 with Cloudflare Access and create internal dashboards and admin tools that are securely locked to only the people in your organization. The world, truly, is your oyster.

The D1 developer experience

We’ll talk about the capabilities, and upcoming features further down in the post, but at the core of it, the strength of D1 is the developer experience: allowing you to go from nothing to a full stack application in an instant. Think back to a tool you’ve used that made development feel magical — that’s exactly what we want developing with Workers and D1 to feel like.

To give you a sense of it, here’s what getting started with D1 will look like.

Creating your first D1 database

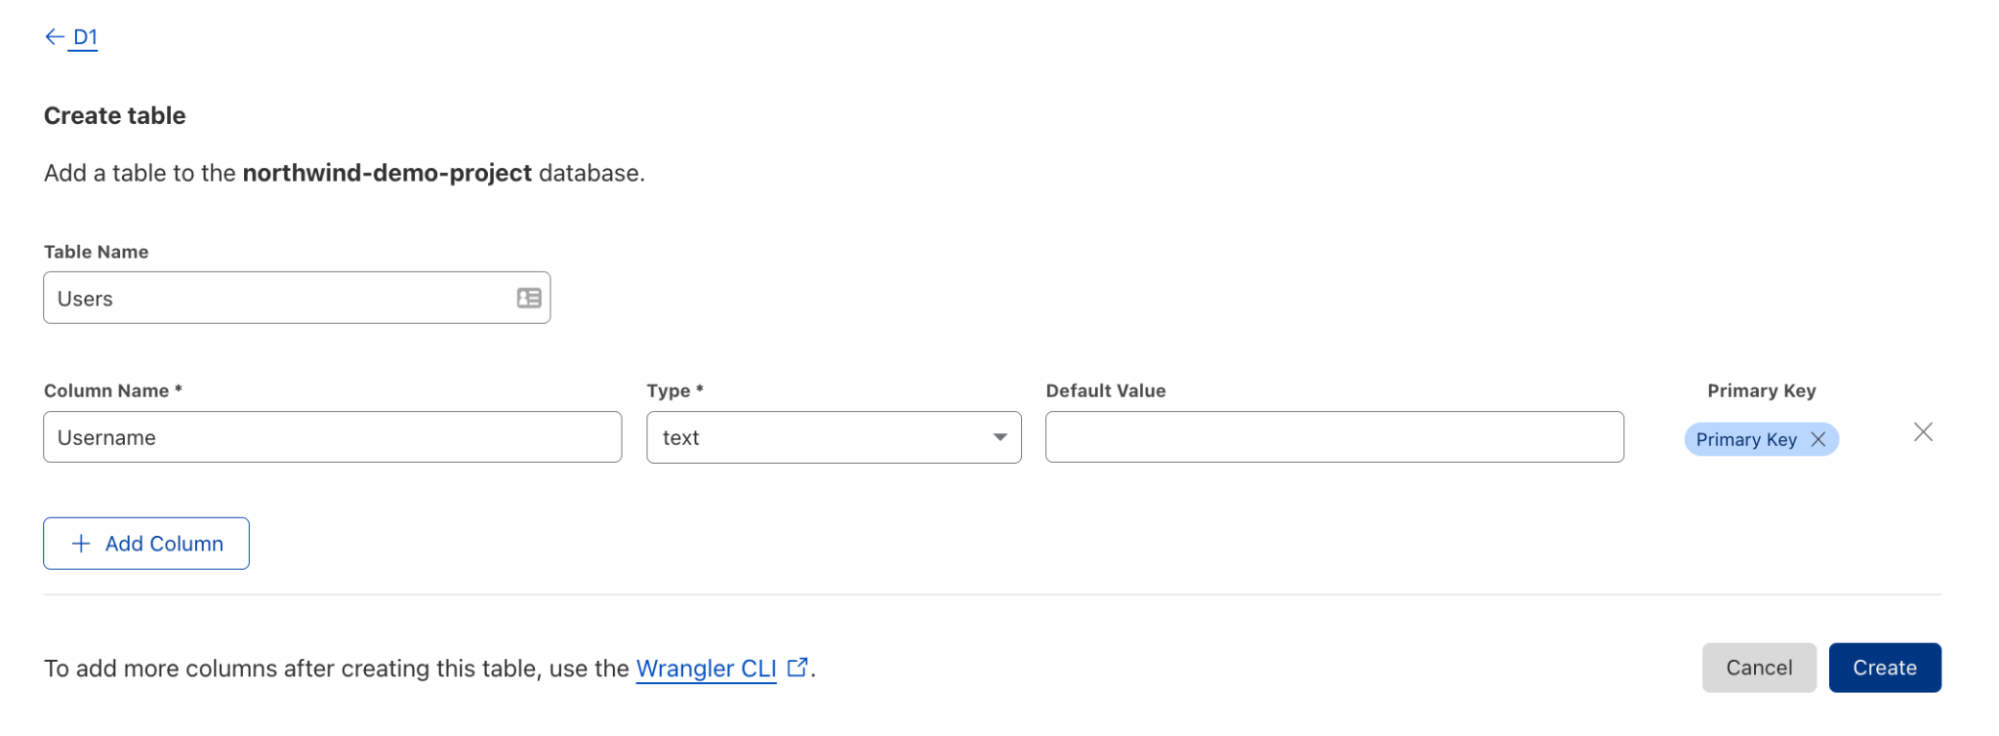
With D1, you will be able to create a database, in just a few clicks — define the tables, insert or upload some data, no need to memorize any commands unless you need to.

Announcing D1: our first SQL database

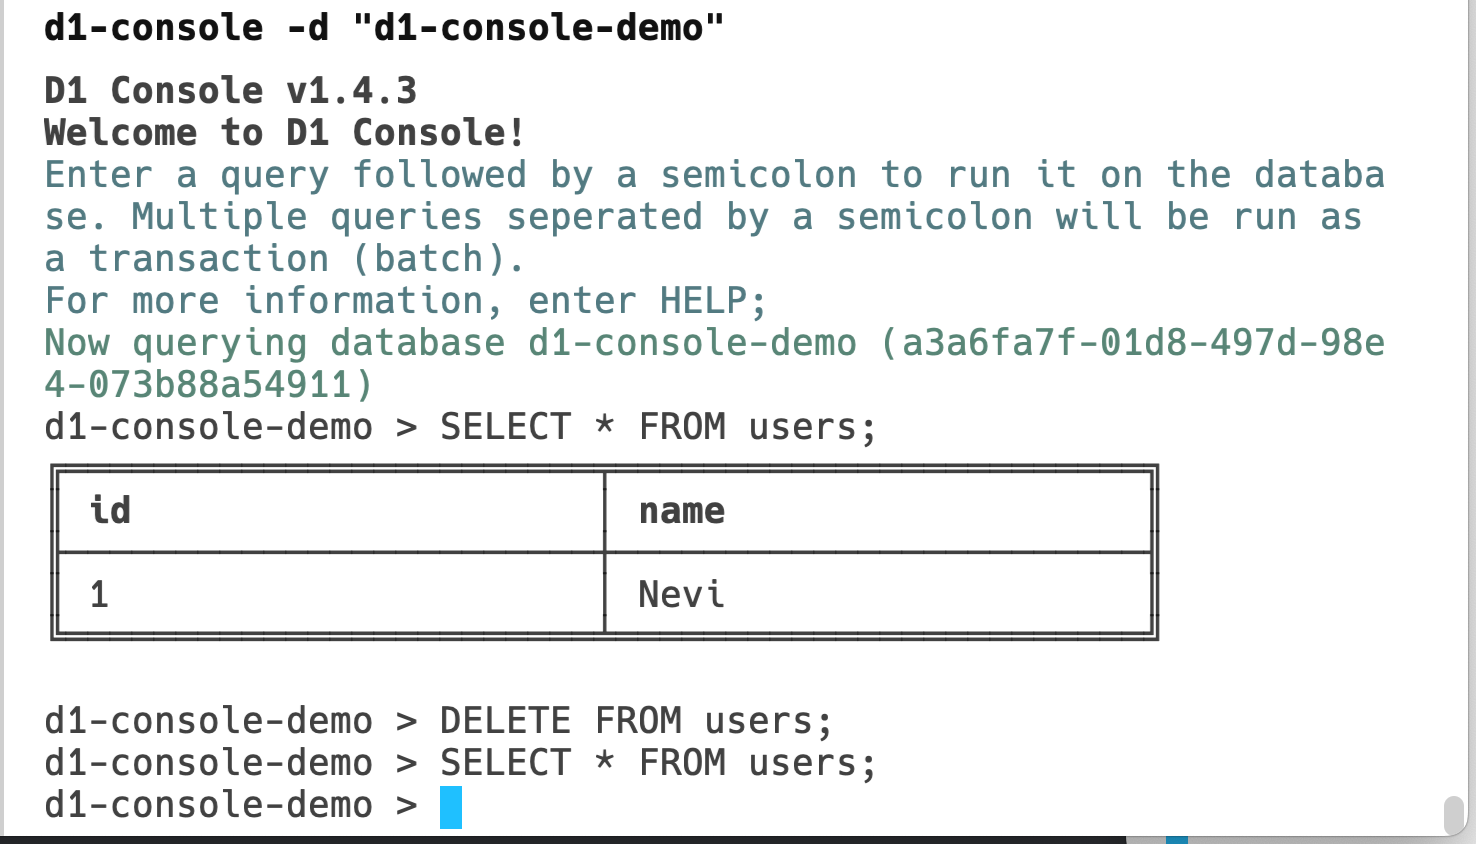
Of course, if the command-line is your jam, earlier this week, we announced the new and improved Wrangler 2, the best tool for wrangling and deploying your Workers, and soon also your tool for deploying D1. Wrangler will also come with native D1 support, so you can create & manage databases with a few simple commands:

Accessing D1 from your Worker

Attaching D1 to your Worker is as easy as creating a new binding. Each D1 database that you attach to your Worker gets attached with its own binding on the env parameter:

export default {
  async fetch(request, env, ctx) {
    const { pathname } = new URL(request.url)
    if (pathname === '/num-products') {
      const { result } = await env.DB.get(`SELECT count(*) AS num_products FROM Product;`)
      return new Response(`There are ${result.num_products} products in the D1 database!`)
    }
  }
}

Or, for a slightly more complex example, you can safely pass parameters from the URL to the database using a Router and parameterised queries:

import { Router } from 'itty-router';
const router = Router();

router.get('/product/:id', async ({ params }, env) => {
  const { result } = await env.DB.get(
    `SELECT * FROM Product WHERE ID = $id;`,
    { $id: params.id }
  )
  return new Response(JSON.stringify(result), {
    headers: {
      'content-type': 'application/json'
    }
  })
})

export default {
  fetch: router.handle,
}

So what can you expect from D1?

First and foremost, we want you to be able to develop with D1, without having to worry about cost.

At Cloudflare, we don’t believe in keeping your data hostage, so D1, like R2, will be free of egress charges. Our plan is to price D1 like we price our storage products by charging for the base storage plus database operations performed.

But, again, we don’t want our customers worrying about the cost or what happens if their business takes off, and they need more storage or have more activity. We want you to be able to build applications as simple or complex as you can dream up. We will ensure that D1 costs less and performs better than comparable centralized solutions. The promise of serverless and a global network like Cloudflare’s is performance and lower cost driven by our architecture.

Here’s a small preview of the features in D1.

Read replication

With D1, we want to make it easy to store your whole application’s state in the one place, so you can perform arbitrary queries across the full data set. That’s what makes relational databases so powerful.

However, we don’t think powerful should be synonymous with cumbersome. Most relational databases are huge, monolithic things and configuring replication isn’t trivial, so in general, most systems are designed so that all reads and writes flow back to a single instance. D1 takes a different approach.

With D1, we want to take configuration off your hands, and take advantage of Cloudflare’s global network. D1 will create read-only clones of your data, close to where your users are, and constantly keep them up-to-date with changes.

Batching

Many operations in an application don’t just generate a single query. If your logic is running in a Worker near your user, but each of these queries needs to execute on the database, then sending them across the wire one-by-one is extremely inefficient.

D1’s API includes batching: anywhere you can send a single SQL statement you can also provide an array of them, meaning you only need a single HTTP round-trip to perform multiple operations. This is perfect for transactions that need to execute and commit atomically:

async function recordPurchase(userId, productId, amount) { 
  const result = await env.DB.exec([
    [
      `UPDATE users SET balance = balance - $amount WHERE user_id = $user_id`,
      { $amount: amount, $user_id: userId },
    ],
    [
      'UPDATE product SET total_sales = total_sales + $amount WHERE product_id = $product_id',
      { $amount: amount, $product_id: productId },
    ],
  ])
  return result
}

Embedded compute

But we’re going further. With D1, it will be possible to define a chunk of your Worker code that runs directly next to the database, giving you total control and maximum performance—each request first hits your Worker near your users, but depending on the operation, can hand off to another Worker deployed alongside a replica or your primary D1 instance to complete its work.

Backups and redundancy

There are few things as critical as the data stored in your main application’s database, so D1 will automatically save snapshots of your database to Cloudflare’s cloud storage service, R2, at regular intervals, with a one-click restoration process. And, since we’re building on the redundant storage of Durable Objects, your database can physically move locations as needed, resulting in self-healing from even the most catastrophic problems in seconds.

Importing and exporting data

While D1 already supports the SQLite API, making it easy for you to write your queries, you might also need data to run them on. If you’re not creating a brand-new application, you may want to import an existing dataset from another source or database, which is why we’ll be working on allowing you to bring your own data to D1.

Likewise, one of SQLite’s advantages is its portability. If your application has a dedicated staging environment, say, you’ll be able to clone a snapshot of that data down to your local machine to develop against. And we’ll be adding more flexibility, such as the ability to create a new database with a set of test data for each new pull request on your Pages project.

What’s next?

This wouldn’t be a Cloudflare announcement if we didn’t conclude on “we’re just getting started!” — and it’s true! We are really excited about all the powerful possibilities our database on our global network opens up.

Are you already thinking about what you’re going to build with D1 and Workers? Same. Give us your details, and we’ll give you access as soon as we can — look out for a beta invite from us starting as early as June 2022!

A New Hope for Object Storage: R2 enters open beta

Post Syndicated from Greg McKeon original https://blog.cloudflare.com/r2-open-beta/

A New Hope for Object Storage: R2 enters open beta

A New Hope for Object Storage: R2 enters open beta

In September, we announced that we were building our own object storage solution: Cloudflare R2. R2 is our answer to egregious egress charges from incumbent cloud providers, letting developers store as much data as they want without worrying about the cost of accessing that data.

The response has been overwhelming.

  • Independent developers had bills too small for cloud providers to negotiate fair egress rates with them. Egress charges were the largest line-item on their cloud bills, strangling side projects and the new businesses they were building.
  • Large corporations had written off multi-cloud storage – and thus multi-cloud itself – as a pipe dream. They came to us with excitement, pitching new products that integrated data with partner companies.
  • Non-profit research organizations were paying massive egress fees just to share experiment data with one another. Egress fees were having a real impact on their ability to collaborate, driving silos between organizations and restricting the experiments and analyses they could run.

Cloudflare exists to help build a better Internet. Today, the Internet gets what it deserves: R2 is now in open beta.

Self-serve customers can enable R2 in the Cloudflare dashboard. Enterprise accounts can reach out to their CSM for onboarding.

Internal and external APIs

R2 has two APIs: an API accessible only from within Workers, which we call the In-Worker API, and an S3-compatible API, which exposes your bucket on a URL of the form bucket.account.r2storage.com. Before you can make requests to R2, you’ll need to be authenticated — R2 buckets are private by default.

In-Worker API

With the in-Worker API, a bucket is “bound” to a specific Worker, which can then perform PUT, GET, DELETE and LIST operations against the bucket.

S3-compatible API

For the S3-compatible API, authentication is done the same way as on S3: SigV4 against an R2 URL. SigV4 signs requests using a secret key to authenticate them to R2. This means public access to R2 over the Internet is only possible today by hosting a Worker, connecting it to R2, and routing requests through it.

The easiest way to test the S3-compatible API is to use an S3 client. One of the most popular S3 clients is the boto3 SDK.

In Python, copy the following script and fill in the account_id, access_key, and secret_access_key fields with your R2 account credentials.

#!/usr/bin/env python
import boto3
import pprint
from botocore.client import Config
 
account_id = ''
access_key_id = ''
secret_access_key = ''
endpoint = f'https://{account_id}.r2.cloudflarestorage.com'
 
cl = boto3.client(
    's3',
    aws_access_key_id=access_key_id,
    aws_secret_access_key=secret_access_key,
    endpoint_url=endpoint,
    config=Config(
        region_name = endpoints[endpoint_name].get('region', 'auto'),
        s3={'addressing_style': 'path'},
        retries=dict( max_attempts=0 ),
    ),
)
 
printer = pprint.PrettyPrinter().pprint
 
printer(cl.head_bucket(Bucket='some bucket'))
printer(cl.create_bucket(Bucket='some other bucket'))
printer(cl.put_object(Bucket='some bucket', Key='my object', Body='some payload'))

Features

R2 comes with support for all basic create/read/update/delete S3 features through both of its APIs.

During the open beta period, we’re targeting R2 to sustain 1,000 GET operations per second and 100 PUT operations per second, per bucket. R2 supports objects up to approximately 5 TB in size, with individual parts limited to 5 GB of data.

R2 provides strongly consistent access to data. Once a PUT is confirmed by R2, future GET operations will always reflect the new key/value pair. The only exception to this is when deleting a bucket. For a short period of time following deletion, the bucket may still exist and continue to allow reads/writes.

Pricing

When we initially announced R2, we included preliminary pricing numbers. One of our main goals with R2 has been to serve the developers who can’t negotiate large discounts with cloud vendors. To that end, we’re also announcing a forever-free tier that lets developers start building on R2 with no charges at all.

R2 charges depend on the total volume of data stored and the type of operation performed on the data:

  • Storage is priced at \$0.015 / GB, per month.
  • Class A operations (including writes and lists) cost \$4.50 / million.
  • Class B operations cost \$0.36 / million.

Class A operations tend to mutate state, such as creating a bucket, listing objects in a bucket, or writing an object. Class B operations tend to read existing state, for example reading an object from a bucket. You can find more information on pricing and a full list of operation types in the docs.

Of course, there is no charge for egress bandwidth from R2. You can access your bucket to your heart’s content.

R2’s forever-free tier includes:

  • 10 GB-months of stored data
  • 1,000,000 Class A operations, per month
  • 10,000,000 Class B operations, per month

Free usage resets each month. While in the open beta phase, R2 usage over the free tier will be billed.

Future plans

We’ve spent the past six months in closed beta with a number of design partners, building out our storage solution. Backed by Durable Objects, R2’s novel architecture delivers both high availability and consistent performance.

While we’ve made great progress on R2, we still have plenty left to build in the coming months.

Improving performance

Our first priority is to improve performance and reliability. While we’ve thrown internal usage and our design partner’s demands at R2, there’s no substitute for live production traffic.

During the open beta period, R2 can sustain a maximum of 1,000 GET operations per second and 100 PUT operations per second, per bucket. We’ll look to raise these limits as we get comfortable operating the system. If you have higher needs, reach out to us!

When you create a bucket, you won’t see a region selector. Our vision for R2 includes automatically globally distributed storage, where R2 seamlessly places each object into the storage region closest to where the request comes from. Today, R2 primarily stores data in North America, which can lead to higher latencies when accessing content from other regions. We’ll first look to address this by adding additional regions where objects can be created, before adding automatic migration of existing objects across regions. Similar to what we’ve built with jurisdictional restrictions for Durable Objects, we’ll also enable restricting where an R2 bucket places data to comply with privacy regulations.

Expanding R2’s feature set

We’ll then focus on expanding R2 capabilities beyond the basic S3 API. In the near term, we’re focused on delivering:

  • Support for TTLs, so data can automatically be deleted from buckets over time.
  • Public buckets, so a bucket can be exposed to the internet without writing a Worker
  • Pre-signed URL support, which delegates read and write access for a specific key to a token.
  • Integration with Cloudflare’s cache, to scale read requests and provide global distribution of data.

If you have additional feature requests that aren’t listed above, we want to hear from you! Reach out and let us know what you need to make R2 your new, zero-cost egress object store.

Announcing our Spring Developer Speaker Series

Post Syndicated from Kristian Freeman original https://blog.cloudflare.com/announcing-our-spring-developer-speaker-series/

Announcing our Spring Developer Speaker Series

Announcing our Spring Developer Speaker Series

We love developers.
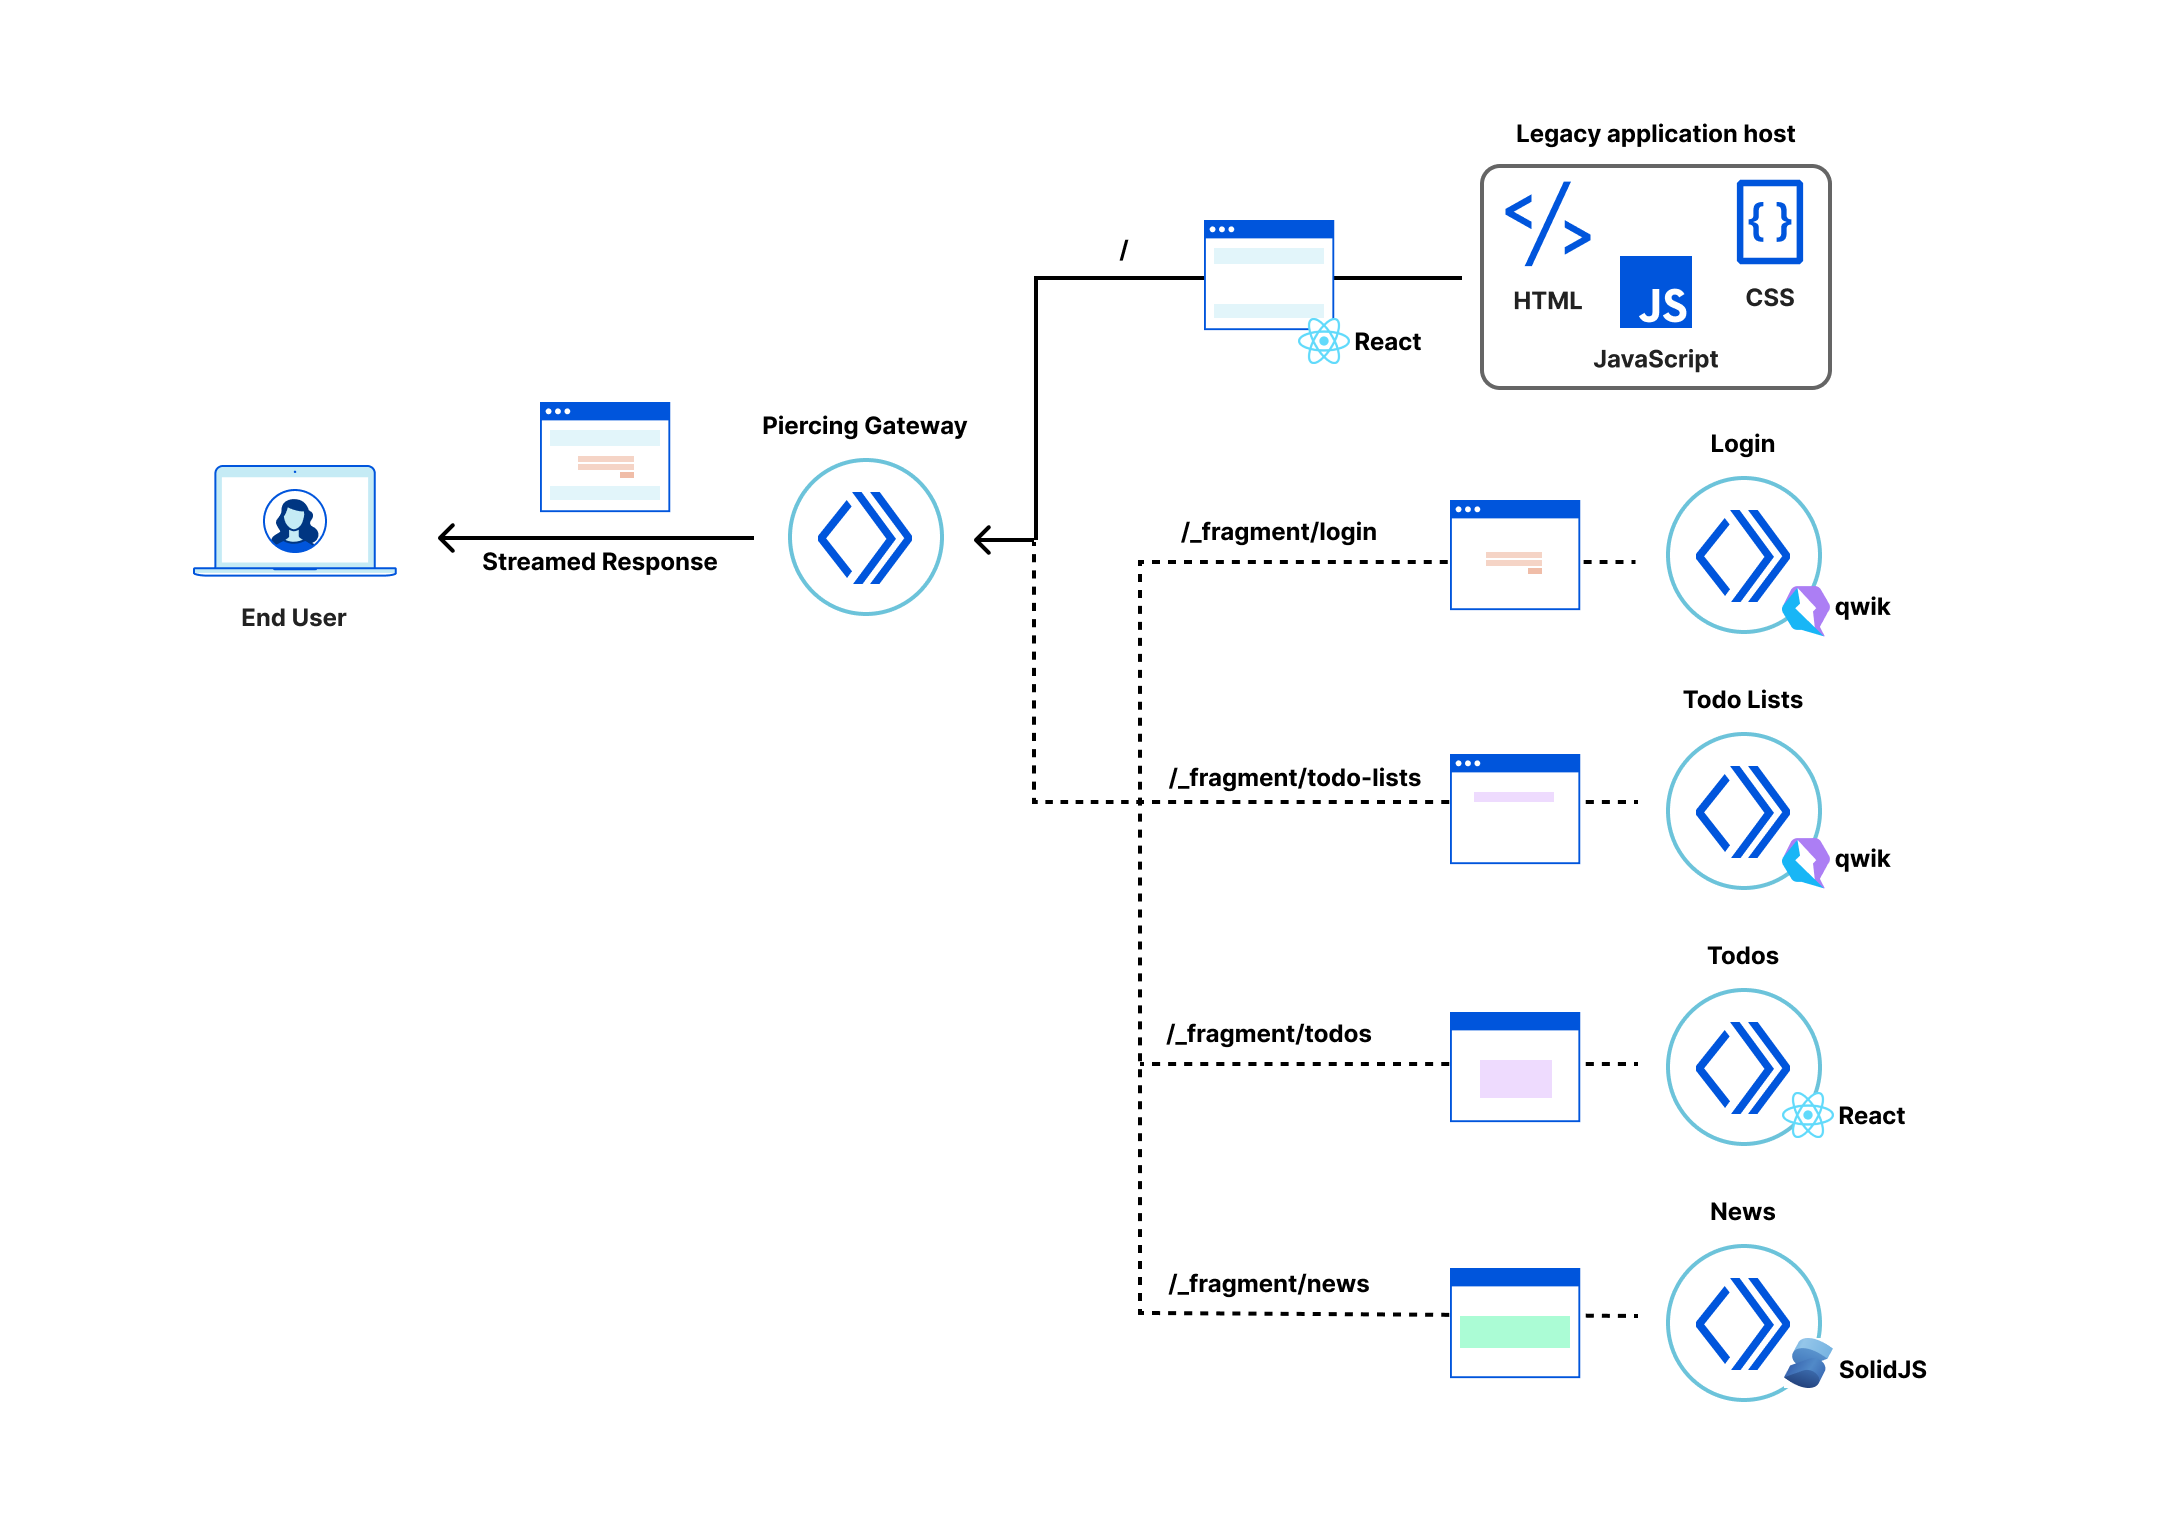
Late last year, we hosted Full Stack Week, with a focus on new products, features, and partnerships to continue growing Cloudflare’s developer platform. As part of Full Stack Week, we also hosted the Developer Speaker Series, bringing 12 speakers in the web dev community to our 24/7 online TV channel, Cloudflare TV. The talks covered topics across the web development ecosystem, which you can rewatch at any time.

We loved organizing the Developer Speaker Series last year. But as developers know far too well, our ecosystem changes rapidly: what may have been cutting edge back in November 2021 can be old news just a few months later in 2022. That’s what makes conferences and live speaking events so valuable: they serve as an up-to-date reference of best practices and future-facing developments in the industry. With that in mind, we’re excited to announce a new edition of our Developer Speaker Series for 2022!

Check out the eleven expert web dev speakers, developers, and educators that we’ve invited to speak live on Cloudflare TV! Here are the talks you’ll be able to watch, starting tomorrow morning (May 9 at 09:00 PT):

The Bootcampers Companion – Caitlyn Greffly
In her recent book, The Bootcamper’s Companion, Caitlyn dives into the specifics of how to build connections in the tech field, understand confusing tech jargon, and make yourself a stand-out candidate when looking for your first job. She’ll talk about some top tips and share a bit about her experience as well as what she has learned from navigating tech as a career changer.

Engaging Ecommerce with the Visual Web – Colby Fayock
Experiences on the web have grown increasingly visual, from displaying product images to interactive NFTs, but not paying attention to how media is delivered can impact Core Web Vitals, creating a bad UX with slow-loading pages, hurting your store’s conversion and potentially losing sales.

How can we effectively leverage media to showcase products creating engaging experiences for our store? We’ll talk about the media’s role in ecomm and how we can take advantage of it while optimizing delivery.

Testing Web Applications with Playwright – Debbie O’Brien
Testing is hard, testing takes time to learn and to write, and time is money. As developers, we want to test. We know we should, but we don’t have time. So how can we get more developers to do testing? We can create better tools.

Let me introduce you to Playwright, a reliable tool for end-to-end cross browser testing for modern web apps, by Microsoft and fully open source. Playwright’s codegen generates tests for you in JavaScript, TypeScript, Dot Net, Java or Python. Now you really have no excuses. It’s time to play your tests wright.

Building serverless APIs: how Fauna and Workers make it easy – Rob Sutter
Building APIs has always been tricky when it comes to setting up architecture. FaunaDB and Workers remove that burden by letting you write code and watch it run everywhere.

Business context is developer productivity – John Feminella
A major factor in developer productivity is whether they have the context to make decisions on their own, or if instead they can only execute someone else’s plan. But how do organizations give engineers the appropriate context to make those decisions when they weren’t there from the beginning?

On the edge of my server – Brian Rinaldi
Edge functions can be potentially game changing. You get the power of serverless functions but running at the CDN level – meaning the response is incredibly fast. With Cloudflare Workers, every worker is an edge function. In this talk, we’ll explore why edge functions can be powerful and explore examples of how to use them to do things a normal serverless function can’t do.

Ten things I love about Wrangler 2 – Sunil Pai
We spent the last six months rewriting wrangler, the CLI for building and deploying Cloudflare Workers. Almost every single feature has been upgraded to be more powerful and user-friendly, while still remaining backward compatible with the original version of wrangler. In this talk, we’ll go through some of the best parts about the rewrite, and how it provides the foundation for all the things we want to build in the future.

L is for Literacy – Henri Helvetica
It’s 2022, and web performance is now abundantly important, with an abundance of available metrics, used by — you guessed it — an abundance of developers, new and experienced. All quips aside, the complexities of the web has led to increased complexities in web performance. Understanding, or literacy in web performance is as important as the four basic language skills. ‘L is for Literacy’ is a lively look at performance lexicon, backed by enlightening data all will enjoy.

Cloudflare Pages Updates – Greg Brimble
Greg Brimble, a Systems Engineer working on Pages, will showcase some of this week’s announcements live on Cloudflare TV. Tune in to see what is now possible for your Cloudflare Pages projects. We’re excited to show you what the team has been working on!

Migrating to Cloudflare Pages: A look into git control, performance, and scalability – James Ross
James Ross, CTO of Nodecraft, will discuss how moving to Pages brought an improved experience for both users and his team building the future of game servers.

If you want to see the full schedule for the Developer Speaker Series, go to our landing page. It shows each talk, including speaker info and timing, as well as time zones for international viewers. When a talk goes live, tuning in is simple – just visit cloudflare.tv to start watching.

New this year, we’ve also prepared a Discord channel to follow the live conversation with other viewers! If you haven’t joined Cloudflare’s Discord server, get your invite.

Cloudflare Relay Worker

Post Syndicated from Matt Boyle original https://blog.cloudflare.com/cloudflare-relay-worker/

Cloudflare Relay Worker

Cloudflare Relay Worker

Our Notification Center offers first class support for a variety of popular services (a list of which are available here). However, even with such extensive support, you may use a tool that isn’t on that list. In that case, it is possible to leverage Cloudflare Workers in combination with a generic webhook to deliver notifications to any service that accepts webhooks.

Today, we are excited to announce that we are open sourcing a Cloudflare Worker that will make it as easy as possible for you to transform our generic webhook response into any format you require. Here’s how to do it.

For this example, we are going to write a Cloudflare Worker that takes a generic webhook response, transforms it into the correct format and delivers it to Rocket Chat, a popular customer service messaging platform.  When Cloudflare sends you a generic webhook, it will have the following schema, where “text” and “data” will vary depending on the alert that has fired:

{
   "name": "Your custom webhook",
   "text": "The alert text",
   "data": {
       "some": "further",
       "info": [
           "about",
           "your",
           "alert",
           "in"
       ],
       "json": "format"
   },
   "ts": 123456789
}

Whereas Rocket Chat is looking for this format:

{
   "text": "Example message",
   "attachments": [
       {
           "title": "Rocket Chat",
           "title_link": "https://rocket.chat",
           "text": "Rocket.Chat, the best open source chat",
           "image_url": "/images/integration-attachment-example.png",
           "color": "#764FA5"
       }
   ]
}

Getting Started

Firstly, you’ll need to ensure you are ready to develop on the Cloudflare Workers platform. You can find more information on how to do that here. For the purpose of this example, we will assume you have a Cloudflare account and Wrangler, the Workers CLI, setup.

Next, let us see the steps to extend the notifications system in detail.

Step 1
Clone the webhook relay worker GitHub repository: git clone [email protected]:cloudflare/cf-webhook-relay.git

Step 2
Check the webhook payload format required by your communication tool. In this specific case, it would look like the Rocket Chat example payload shared above.

Step 3
Sign up for Rocket Chat and add a webhook integration to accept incoming webhook notifications.

Cloudflare Relay Worker

Step 4
Configure an encrypted wrangler secret for request authentication and the Rocket Chat URL for sending requests in your Worker: Environment variables · Cloudflare Workers docs (for this example, the secret is not encrypted.)

Cloudflare Relay Worker

Step 5
Modify your worker to accept POST webhook requests with the secret configured as a query param for authentication.

if (headers.get("cf-webhook-auth") !== WEBHOOK_SECRET) {
    return new Response(":(", {
        headers: {'content-type': 'text/plain'},
            status: 401
    })
}

Step 6
Convert the incoming request payload from the notification system (like in the example shared above) to the Rocket Chat format in the worker.

let incReq = await request.json()
let msg = incReq.text
let webhookName = incReq.name
let rocketBody = {
    "text": webhookName,
    "attachments": [
        {
            "title": "Cloudflare Webhook",
            "text": msg,
            "title_link": "https://cloudflare.com",
            "color": "#764FA5"
        }
    ]
}

Step 7
Configure the Worker to send POST requests to the Rocket Chat webhook with the converted payload.

const rocketReq = {
    headers: {
        'content-type': 'application/json',
    },
    method: 'POST',
    body: JSON.stringify(rocketBody),
}
const response = await fetch(
    ROCKET_CHAT_URL,
    rocketReq,
)
const res = await response.json()
console.log(res)
return new Response(":)", {
    headers: {'content-type': 'text/plain'},
})

Step 8
Set up deployment configuration in your wrangler.toml file and publish your Worker. You can now see the Worker in the Cloudflare dashboard.

Cloudflare Relay Worker

Step 9
You can manage and monitor the Worker with a variety of available tools.

Cloudflare Relay Worker

Step 10
Add the Worker URL as a generic webhook to the notification destinations in the Cloudflare dashboard: Configure webhooks · Cloudflare Fundamentals docs.

Cloudflare Relay Worker

Step 11
Create a notification with the destination as the configured generic webhook: Create a Notification · Cloudflare Fundamentals docs.

Cloudflare Relay Worker

Step 12
Tada! With your Cloudflare Worker running, you can now receive all notifications to Rocket Chat. We can configure in the same way for any communication tool.

Cloudflare Relay Worker

We know that a notification system is essential to proactively monitor any issues that may arise within a project. We are excited with this announcement to make notifications available to any communication service without having to worry too much about the system’s compatibility to them. We have lots of updates planned, like adding more alertable events to choose from and extending our support to a wide range of webhook services to receive them.

If you’re interested in building scalable services and solving interesting technical problems, we are hiring engineers on our team in Austin & Lisbon.

The Cloudflare Developer Expert Program: apply today!

Post Syndicated from Albert Zhao original https://blog.cloudflare.com/developer-expert-program/

The Cloudflare Developer Expert Program: apply today!

The Cloudflare Developer Expert Program: apply today!

Today we’re launching the Cloudflare Developer Expert Program: an initiative to support and recognize our VIP users who build with Workers, Pages, and the entire Cloudflare developer ecosystem.

A Cloudflare Developer Expert is an early adopter of new releases, a frequent participant in feedback sessions, and an evangelist for Cloudflare products made for the larger developer community.

But first, what are the benefits of becoming a Cloudflare Developer Expert?

  • Early access to features (e.g., private betas)
  • Admission to a private community of power users
  • Routine calls with product managers, engineers, and developer advocates
  • Sponsorships for OSS work
  • Our best swag, of course

We have already sent invites to our first batch of power users, but if you’d like to join or want to nominate a developer, please fill out this form.

Why We Made This Program

We ship very quickly at Cloudflare.

This is because we want feedback early in development, allowing users to challenge our assumptions and validate what we’re building. In the Workers team, this strategy has been very successful.

For example, we began beta testing custom builds for Wrangler (our CLI tool) that allow you to run any JavaScript bundler you want. This was a huge release because it introduced the ES Modules syntax for the first time in Workers, significantly increasing the number of usable JavaScript packages and libraries. To get feedback before public release, we opened a private Discord channel and invited around 50 users for testing.

We were blown away by the feedback.

Our users quickly discovered edge cases that weren’t working, such as needing support for Workers Unbound. This made it easy for us to prioritize what to fix before GA. We also discovered actionable steps to improve documentation.

“The Workers team wanted our input early on for such a big release, and it really shows how seriously they’re taking developer experience,” said James Ross, CTO of Nodecraft.

After seeing the success of this small group of users, we figured it was time to make this a regular part of development.

We threw together a list of users, sent NDAs, and opened a private Discord channel for one of our biggest releases of the year: running functions directly on Cloudflare Pages.

We’re able to ship this feature more quickly and confidently because of feedback in our Discord,” said Nevi Shah, product manager for Cloudflare Pages. “Users let us know quickly what can be better and what features they need first.

Developers, Developers, Developers

Back in April, we launched our first Developer Week with a central focus: how to get developers to build more on Cloudflare. This included exciting releases like Cloudflare Pages and the Durable Objects open beta.

Since then, after receiving so much feedback in our Discord and other channels, we learned developers either expect their code to automatically run on Cloudflare’s infrastructure (Cloudflare Pages), or, if it’s a new technology (such as Durable Objects) they want as much direct guidance as possible to reliably get up and running. We realized involving users earlier in development allowed us to support more happy paths.

And since developers like doing things their own way, we aim to support as many happy paths as possible on our platform.

“I started developing with Cloudflare Workers shortly after it was announced. Over that time, Cloudflare has only increased its emphasis on developer experience,” said David Barratt, staff software engineer at Drizly. “The Cloudflare Developer Expert Program has been a fantastic way to have a quick feedback loop between the developers who have a lot of experience using the platform and the developers building that platform.”

Apply now!

If you are a developer who deploys with Workers, Pages, and our other tools, we want you to apply! We’re hoping to review applicants with experience deploying to production with our developer tools.

And again, Cloudflare Developer Experts get special, special care from our team.

To apply for the Cloudflare Developer Expert Program, fill out this form.

Developer Spotlight: Chris Coyier, CodePen

Post Syndicated from Kristian Freeman original https://blog.cloudflare.com/developer-spotlight-codepen/

Developer Spotlight: Chris Coyier, CodePen

Developer Spotlight: Chris Coyier, CodePen

Chris Coyier has been building on the web for over 15 years. Chris made his mark on the web development world with CSS-Tricks in 2007, one of the web’s leading publications for frontend and full-stack developers.
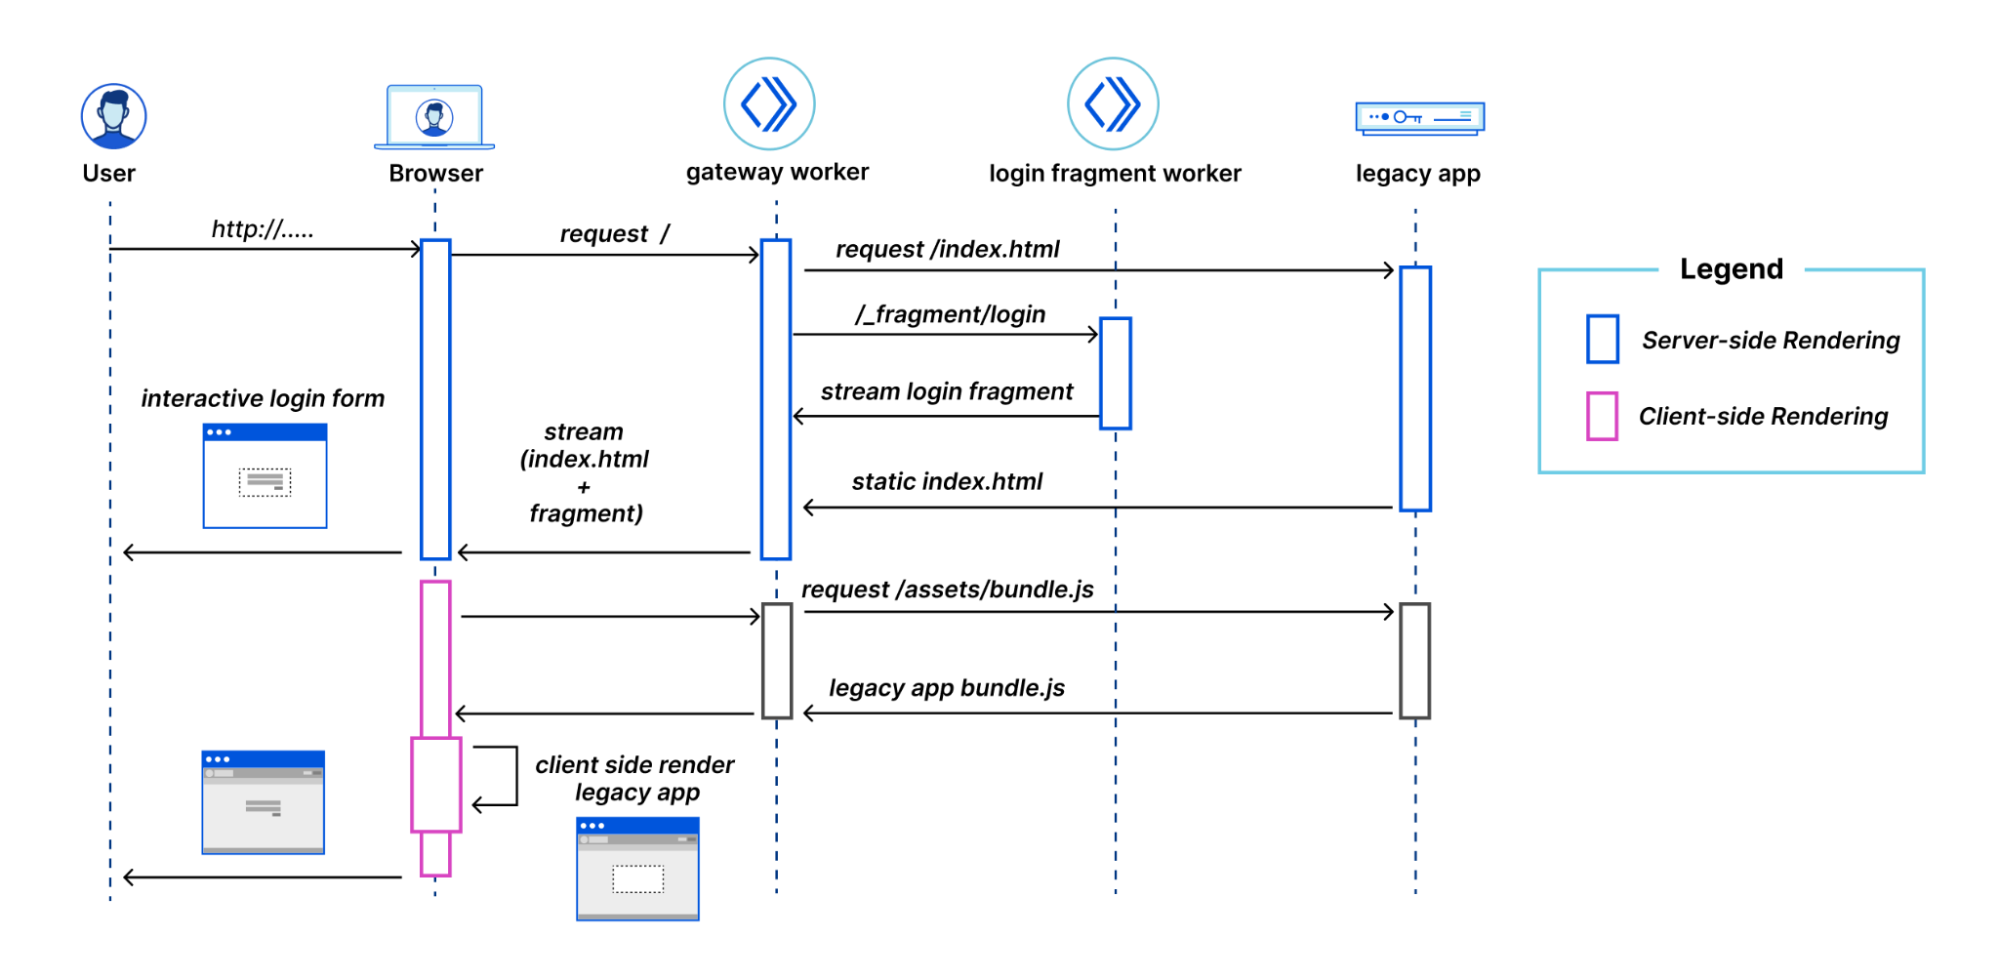
In 2012, Chris co-founded CodePen, which is an online code editor that lives in the browser and allows developers to collaborate and share code examples written in HTML, CSS, and JavaScript.

Due to the nature of CodePen — namely, hosting code and an incredibly popular embedding feature, allowing developers to share their CodePen “pens” around the world — any sort of optimization can have a massive impact on CodePen’s business. Increasingly, CodePen relies on the ability to both execute code and store data on Cloudflare’s network as a first stop for those optimizations. As Chris puts it, CodePen uses Cloudflare Workers for “so many things”:

“We pull content from an external CMS and use Workers to manipulate HTML before it arrives to the user’s browser. For example, we fetch the original page, fetch the content, then stitch them together for a full response.”

Workers allows you to work with responses directly using the native Request/Response classes and, with the addition of our streaming HTMLRewriter engine, you can modify, combine, and parse HTML without any loss in performance. Because Workers functions are deployed to Cloudflare’s network, CodePen has the ability to instantly deploy highly-intelligent middleware in-between their origin servers and their clients, without needing to spin up any additional infrastructure.

In a popular YouTube video on Chris Coyier’s YouTube channel, he sits down with a front-end engineer at CodePen, and covers how they use Cloudflare Workers to build crucial CodePen features. Here’s Chris:

“Cloudflare Workers are like serverless functions that always run at the edge, making them incredibly fast. Not only that, but the tooling around them is really nice. They can run at particular routes on your own website, removing any awkward CORS troubles, and helping you craft clean APIs. But they also have special superpowers, like access to KV storage (also at the edge), image manipulation and optimization, and HTML rewriting.”

CodePen also leverages Workers KV to store data. This allows them to avoid an immense amount of repetitive processing work by caching results and making them accessible on Cloudflare’s network, geographically near their users:

“We use Workers combined with the KV Store to run expensive jobs. For example, we check the KV Store to see if we need to do some processing work, or if that work has already been done. If we need to do the work, we do it and then update KV to know it’s been done and where the result of that work is.”

In a follow-up video on his YouTube channel, Chris dives into Workers KV and shows how you can build a simple serverless function — with storage — and deploy it to Cloudflare. With the addition of Workers KV, you can persist complex data structures side-by-side with your Workers function, without compromising on performance or scalability.

Chris and the CodePen team are invested in Workers and, most importantly, they enjoy developing with Cloudflare’s developer tooling. “The DX around them is suspiciously nice. Coming from other cloud functions services, there seems to be a just-right amount of tooling to do the things we need to do.”

CodePen is a great example of what’s possible when you integrate the Cloudflare Workers developer environment into your stack. Across all parts of the business, Workers, and tools like Workers KV and HTMLRewriter, allow CodePen to build highly-performant applications that look towards the future.

If you’d like to learn more about Cloudflare Workers, and deploy your own serverless functions to Cloudflare’s network, check out workers.cloudflare.com!

wrangler 2.0 — a new developer experience for Cloudflare Workers

Post Syndicated from Ashcon Partovi original https://blog.cloudflare.com/wrangler-v2-beta/

wrangler 2.0 — a new developer experience for Cloudflare Workers

wrangler 2.0 — a new developer experience for Cloudflare Workers

Much of a developer’s work is about making trade-offs: consistency versus availability, speed over correctness, you name it. While there will always be different technical trade-offs to consider, we believe there are some that you, as a developer, should never need to make.

One of those decisions is an easy-to-use development environment. Whether you’re onboarding a new developer to your team or you simply want to develop faster, it’s important that even the smallest of things are optimized for speed and simplicity.

That’s why we’re excited to announce the second-generation of our developer tooling for Cloudflare Workers. It’s a new developer experience that’s out-of-the-box, lightning fast, and can even run Workers on a local machine. (Yes!)
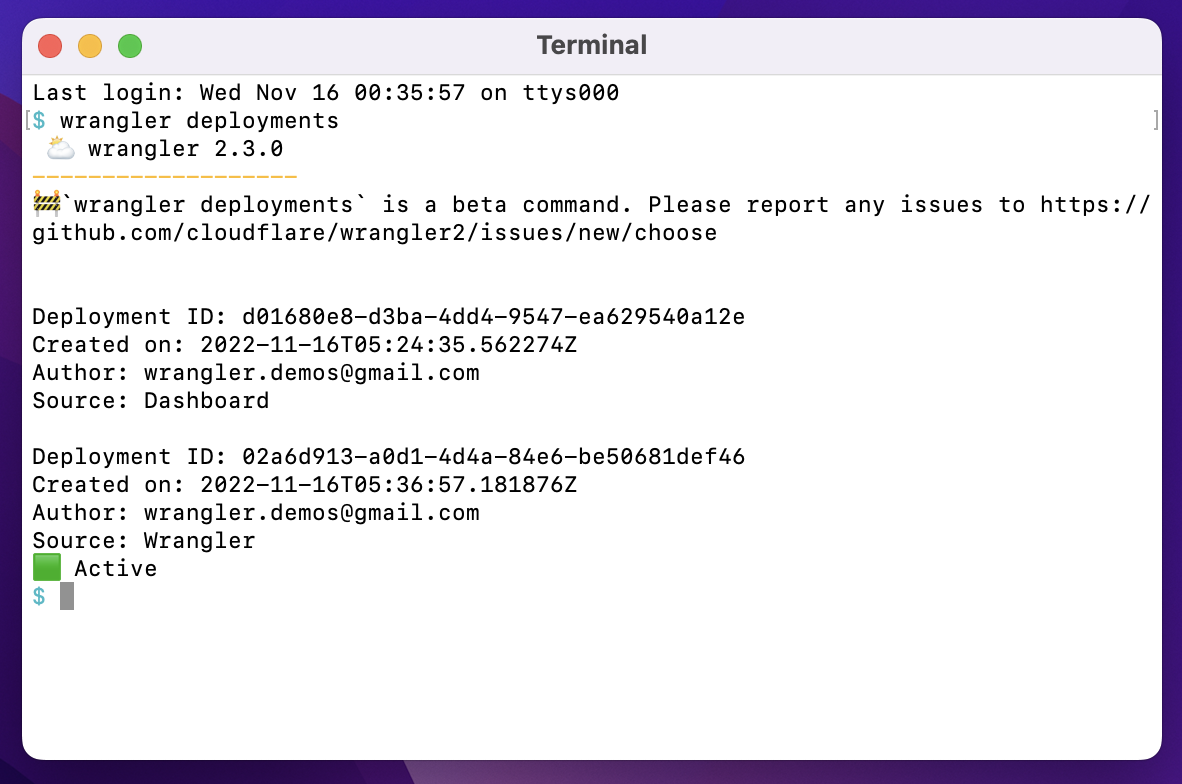
If you’re already familiar with our existing tools, we’re not just talking about the wrangler CLI, we’re talking about its next major release: wrangler 2.0. Stick around to get a sneak-peak at the new experience.

No config? No problem

We’ve made it much easier to get started with Cloudflare Workers. All you need is a single JavaScript file to run a Worker — no configuration needed. You don’t even need to decide on a name!
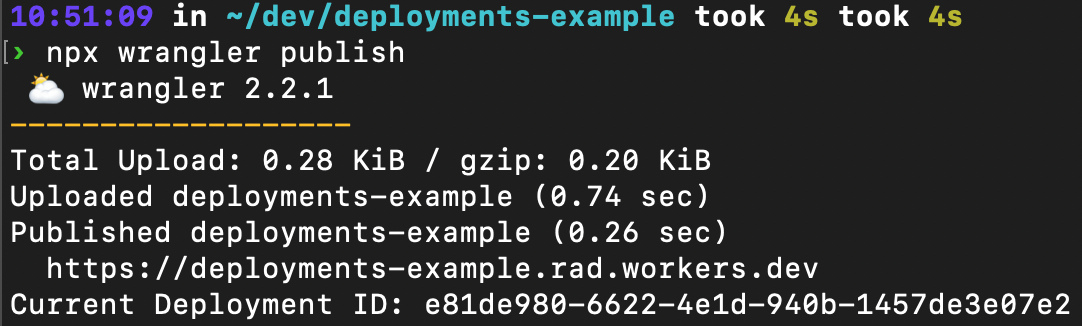
When you run wrangler dev <filename>, your code is automatically bundled and deployed to a development environment. Then, you can send HTTP requests to that environment using a localhost proxy. Here’s what that looks like in-action:

Live debugging, just like that

Now there’s a completely redesigned experience for debugging a Worker. With a simple command you get access to a remote debugger, the same used by Chrome when you click “Inspect,” which provides an interactive view of logs, exceptions, and requests. It feels like your Worker is running locally, yet it’s actually running on the Cloudflare network.
A debugger that “just works” and auto-detects your changes makes all the difference when you’re just trying to code. We’ve also made a number of improvements to make the debugging experience even easier:

  • Keybind shortcuts, to quickly toggle features or open a window.
  • Support for “–public <path>”, to automatically serve your static assets.
  • Faster and more reliable file-watching.

To start a debugging session, just run: wrangler dev <filename>, then hit the “D” keybind.

Local mode? Flip a switch

Another aspect of the new debugging experience is the ability to switch to “local mode,” which runs your Worker on your local machine. In fact, you can easily switch between “network” and “local” mode with just a keybind shortcut.

How does this work? Recently, we announced that Miniflare (created by Brendan Coll), a project to locally emulate Workers in Node.js, has joined the Cloudflare organization. Miniflare is great for unit testing and situations where you’d like to debug Workers without an Internet connection. Now we’ve integrated it directly into the local development experience, so you can enjoy the benefits of both the network and your localhost!

Let us know what you think!

Serverless should be simple. We’re really excited about these improvements to the developer experience for Workers, and we have a lot more planned.

While we’re still working on wrangler 2.0, you can try the beta release by running: npm install wrangler@beta or by visiting the repository to see what we’re working on. If you’re already using wrangler to deploy existing applications, we recommend continuing to use wrangler 1.0 until the 2.0 release is officially out. We will continue to develop and maintain wrangler 1.0 until we’re finished with backwards-compatibility for 2.0.

If you’re starting a project or want to try out the new experience, we’d love to hear your feedback! Let us know what we’re missing or what you’d like to see in wrangler 2.0. You can create a feature request or start a discussion in the repository. (we’ll merge them into the existing wrangler repository when 2.0 is out of beta).

Thank you to all of our developers out there, and we look forward to seeing what you build!

Automatically generating types for Cloudflare Workers

Post Syndicated from Brendan Coll original https://blog.cloudflare.com/automatically-generated-types/

Automatically generating types for Cloudflare Workers

Automatically generating types for Cloudflare Workers

Historically, keeping our Rust and TypeScript type repos up to date has been hard. They were manually generated, which means they ran the risk of being inaccurate or out of date. Until recently, the workers-types repository needed to be manually updated whenever the types changed. We also used to add type information for mostly complete browser APIs. This led to confusion when people would try to use browser APIs that aren’t supported by the Workers runtime they would compile but throw errors.

That all changed this summer when Brendan Coll, whilst he was interning with us, built an automated pipeline for generating them. It runs every time we build the Workers runtime, generating types for our TypeScript and Rust repositories. Now everything is up-to-date and accurate.

A quick overview

Every time the Workers runtime code is built, a script runs over the public APIs and generates the Rust and TypeScript types as well as a JSON file containing an intermediate representation of the static types. The types are sent to the appropriate repositories and the JSON file is uploaded as well in case people want to create their own types packages. More on that later.

This means the static types will always be accurate and up to date. It also allows projects running Workers in other, statically-typed languages to generate their own types from our intermediate representation. Here is an example PR from our Cloudflare bot. It’s detected a change in the runtime types and is updating the TypeScript files as well as the intermediate representation.

Automatically generating types for Cloudflare Workers

Using the auto-generated types

To get started, use wrangler to generate a new TypeScript project:

$ wrangler generate my-typescript-worker https://github.com/cloudflare/worker-typescript-template

If you already have a TypeScript project, you can install the latest version of workers-types with:

$ npm install --save-dev @cloudflare/workers-types

And then add @cloudflare/workers-types to your project’s tsconfig.json file.

{
"compilerOptions": {
"target": "ES2020",
"module": "CommonJS",
"lib": ["ES2020"],
"types": ["@cloudflare/workers-types"]
}
}

After that, you should get automatic type completion in your IDE of choice.

Automatically generating types for Cloudflare Workers

How it works

Here is some example code from the Workers runtime codebase.

class Blob: public js::Object {
public:
typedef kj::Array<kj::OneOf<kj::Array<const byte>, kj::String, js::Ref<Blob>>> Bits;
struct Options {
js::Optional<kj::String> type;
JS_STRUCT(type);
};
static js::Ref<Blob> constructor(js::Optional<Bits> bits, js::Optional<Options> options);
int getSize();
js::Ref<Blob> slice(js::Optional<int> start, js::Optional<int> end);
JS_RESOURCE_TYPE(Blob) {
JS_READONLY_PROPERTY(size, getSize);
JS_METHOD(slice);
}
};

A Python script runs over this code during each build and generates an Abstract Syntax Tree containing information about the function including an identifier, any argument types and any return types.

{
  "name": "Blob",
  "kind": "class",
  "members": [
    {
      "name": "size",
      "type": {
        "name": "integer"
      },
      "readonly": true
    },
    {
      "name": "slice",
      "type": {
        "params": [
          {
            "name": "start",
            "type": {
              "name": "integer",
              "optional": true
            }
          },
          {
            "name": "end",
            "type": {
              "name": "integer",
              "optional": true
            }
          }
        ],
        "returns": {
          "name": "Blob"
        }
      }
    }
  ]
}

Finally, the TypeScript types repositories are automatically sent PRs with the updated types.

declare type BlobBits = (ArrayBuffer | string | Blob)[];

interface BlobOptions {
  type?: string;
}

declare class Blob {
  constructor(bits?: BlobBits, options?: BlobOptions);
  readonly size: number;
  slice(start?: number, end?: number, type?: string): Blob;
}

Overrides

In some cases, TypeScript supports concepts that our C++ runtime does not. Namely, generics and function overloads. In these cases, we override the generated types with partial declarations. For example, DurableObjectStorage makes heavy use of generics for its getter and setter functions.

declare abstract class DurableObjectStorage {
	 get<T = unknown>(key: string, options?: DurableObjectStorageOperationsGetOptions): Promise<T | undefined>;
	 get<T = unknown>(keys: string[], options?: DurableObjectStorageOperationsGetOptions): Promise<Map<string, T>>;
	 
	 list<T = unknown>(options?: DurableObjectStorageOperationsListOptions): Promise<Map<string, T>>;
	 
	 put<T>(key: string, value: T, options?: DurableObjectStorageOperationsPutOptions): Promise<void>;
	 put<T>(entries: Record<string, T>, options?: DurableObjectStorageOperationsPutOptions): Promise<void>;
	 
	 delete(key: string, options?: DurableObjectStorageOperationsPutOptions): Promise<boolean>;
	 delete(keys: string[], options?: DurableObjectStorageOperationsPutOptions): Promise<number>;
	 
	 transaction<T>(closure: (txn: DurableObjectTransaction) => Promise<T>): Promise<T>;
	}

You can also write type overrides using Markdown. Here is an example of overriding types of KVNamespace.

Creating your own types

The JSON IR (intermediate representation) has been open sourced alongside the TypeScript types and can be found in this GitHub repository. We’ve also open sourced the type schema itself, which describes the format of the IR. If you’re interested in generating Workers types for your own language, you can take the IR, which describes the declaration in a “normalized” data structure, and generate types from it.

The declarations inside `workers.json` contain the elements to derive function signatures and other elements needed for code generation such as identifiers, argument types, return types and error management. A concrete use-case would be to generate external function declarations for a language that compiles to WebAssembly, to import precisely the set of available function calls available from the Workers runtime.

Conclusion

Cloudflare cares deeply about supporting the TypeScript and Rust ecosystems. Brendan created a tool which will ensure the type information for both languages is always up-to-date and accurate. We also are open-sourcing the type information itself in JSON format, so that anyone interested can create type data for any language they’d like!

JavaScript modules are now supported on Cloudflare Workers

Post Syndicated from Ashcon Partovi original https://blog.cloudflare.com/workers-javascript-modules/

JavaScript modules are now supported on Cloudflare Workers

JavaScript modules are now supported on Cloudflare Workers

We’re excited to announce that JavaScript modules are now supported on Cloudflare Workers. If you’ve ever taken look at an example Worker written in JavaScript, you might recognize the following code snippet that has been floating around the Internet the past few years:

addEventListener("fetch", (event) => {
  event.respondWith(new Response("Hello Worker!"));
}

The above syntax is known as the “Service Worker” API, and it was proposed to be standardized for use in web browsers. The idea is that you can attach a JavaScript file to a web page to modify its HTTP requests and responses, acting like a virtual endpoint. It was exactly what we needed for Workers, and it even integrated well with standard Web APIs like fetch() and caches.

Before introducing modules, we want to make it clear that we will continue to support the Service Worker API. No developer wants to get an email saying that you need to rewrite your code because an API or feature is being deprecated; and you won’t be getting one from us. If you’re interested in learning why we made this decision, you can read about our commitment to backwards-compatibility for Workers.

What are JavaScript modules?

JavaScript modules, also known as ECMAScript (abbreviated. “ES”) modules, is the standard API for importing and exporting code in JavaScript. It was introduced by the “ES6” language specification for JavaScript, and has been implemented by most Web browsers, Node.js, Deno, and now Cloudflare Workers. Here’s an example to demonstrate how it works:

// filename: ./src/util.js
export function getDate(time) {
  return new Date(time).toISOString().split("T")[0]; // "YYYY-MM-DD"
}

The “export” keyword indicates that the “getDate” function should be exported from the current module. Then, you can use “import” from another module to use that function.

// filename: ./src/index.js
import { getDate } from "./util.js"

console.log("Today’s date:", getDate());

Those are the basics, but there’s a lot more you can do with modules. It allows you to organize, maintain, and re-use your code in an elegant way that just works. While we can’t go over every aspect of modules here, if you’d like to learn more we’d encourage you to read the MDN guide on modules, or a more technical deep-dive by Lin Clark.

How can I use modules in Workers?

You can export a default module, which will represent your Worker. Instead of using “addEventListener,” each event handler is defined as a function on that module. Today, we support “fetch” for HTTP and WebSocket requests and “scheduled” for cron triggers.

export default {
  async fetch(request, environment, context) {
    return new Response("I’m a module!");
  },
  async scheduled(controller, environment, context) {
    // await doATask();
  }
}

You may also notice some other differences, such as the parameters on each event handler. Instead of a single “Event” object, the parameters that you need the most are spread out on their own. The first parameter is specific to the event type: for “fetch” it’s the Request object, and for “scheduled” it’s a controller that contains the cron schedule.

The second parameter is an object that contains your environment variables (also known as “bindings“). Previously, each variable was inserted into the global scope of the Worker. While a simple solution, it was confusing to have variables magically appear in your code. Now, with an environment object, you can control which modules and libraries get access to your environment variables. This mechanism is more secure, as it can prevent a compromised or nosy third-party library from enumerating all your variables or secrets.

The third parameter is a context object, which allows you to register background tasks using waitUntil(). This is useful for tasks like logging or error reporting that should not block the execution of the event.

When you put that all together, you can import and export multiple modules, as well as use the new event handler syntax.

// filename: ./src/error.js
export async function logError(url, error) {
  await fetch(url, {
     method: "POST",
     body: error.stack
  })
}

// filename: ./src/worker.js
import { logError } from "./error.js"

export default {
  async fetch(request, environment, context) {
    try {
       return await fetch(request);
    } catch (error) {
       context.waitUntil(logError(environment.ERROR_URL, error));
       return new Response("Oops!", { status: 500 });
    }
  }
}

Let’s not forget about Durable Objects, which became generally available earlier this week! You can also export classes, which is how you define a Durable Object class. Here’s another example with a “Counter” Durable Object, that responds with an incrementing value.

// filename: ./src/counter.js
export class Counter {
  value = 0;
  fetch() {
    this.value++;
    return new Response(this.value.toString());
  }
}

// filename: ./src/worker.js
// We need to re-export the Durable Object class in the Worker module.
export { Counter } from "./counter.js"

export default {
  async fetch(request, environment) {
    const clientId = request.headers.get("cf-connecting-ip");
    const counterId = environment.Counter.idFromName(clientId);
    // Each IP address gets its own Counter.
    const counter = environment.Counter.get(counterId);
    return counter.fetch("https://counter.object/increment");
  }
}

Are there non-JavaScript modules?

Yes! While modules are primarily for JavaScript, we also support other modules types, some of which are not yet standardized.

For instance, you can import WebAssembly as a module. Previously, with the Service Worker API, WebAssembly was included as a binding. We think that was a mistake, since WebAssembly should be represented as code and not an external resource. With modules, here’s the new way to import WebAssembly:

import module from "./lib/hello.wasm"

export default {
  async fetch(request) {
    const instance = await WebAssembly.instantiate(module);
    const result = instance.exports.hello();
    return new Response(result);
  }
}

While not supported today, we look forward to a future where WebAssembly and JavaScript modules can be more tightly integrated, as outlined in this proposal. The ergonomics improvement, demonstrated below, can go a long way to make WebAssembly more included in the JavaScript ecosystem.

import { hello } from "./lib/hello.wasm"

export default {
  async fetch(request) {
    return new Response(hello());
  }
}

We’ve also added support for text and binary modules, which allow you to import a String and ArrayBuffer, respectively. While not standardized, it allows you to easily import resources like an HTML file or an image.

<!-- filename: ./public/index.html -->
<!DOCTYPE html>
<html><body>
<p>Hello!</p>
</body></html>

import html from "../public/index.html"

export default {
  fetch(request) {
    if (request.url.endsWith("/index.html") {
       return new Response(html, {
          headers: { "Content-Type": "text/html" }
       });
    }
    return fetch(request);
  }
}

How can I get started?

There are many ways to get started with modules.

First, you can try out modules in your browser using our playground (which doesn’t require an account) or by using the dashboard quick editor. Your browser will automatically detect when you’re using modules to allow you to seamlessly switch from the Service Worker API. For now, you’ll only be able to create one JavaScript module in the browser, though supporting multiple modules is something we’ll be improving soon.

If you’re feeling adventurous and want to start a new project using modules, you can try out the beta release of wrangler 2.0, the next-generation of the command-line interface (CLI) for Workers.

For existing projects, we still recommend using wrangler 1.0 (release 1.17 or later). To enable modules, you can adapt your “wrangler.toml” configuration to the following example:

name = "my-worker"
type = "javascript"
workers_dev = true

[build.upload]
format = "modules"
dir = "./src"
main = "./worker.js" # becomes "./src/worker.js"

[[build.upload.rules]]
type = "ESModule"
globs = "**/*.js"

# Uncomment if you have a build script.
# [build]
# command = "npm run build"

We’ve updated our documentation to provide more details about modules, though some examples will still be using the Service Worker API as we transition to showing both formats. (and TypeScript as a bonus!)

If you experience an issue or notice something strange with modules, please let us know, and we’ll take a look. Happy coding, and we’re excited to see what you build with modules!

JavaScript modules are now supported on Cloudflare Workers

Introducing Services: Build Composable, Distributed Applications on Cloudflare Workers

Post Syndicated from Ashcon Partovi original https://blog.cloudflare.com/introducing-worker-services/

Introducing Services: Build Composable, Distributed Applications on Cloudflare Workers

Introducing Services: Build Composable, Distributed Applications on Cloudflare Workers

First, there was the Worker script. It was simple, yet elegant. With just a few lines of code, you could rewrite an HTTP request, append a header, or make a quick fix to your website.

Though, what if you wanted to build an entire application on Workers? You’d need a lot more tools in your developer toolbox. That’s why we’ve introduced extensions to Workers platform like KV, our distributed key-value store; Durable Objects, — a strongly consistent, object-oriented database; and soon R2, the no-egress object storage. While these tools allow you to build a more robust application, there’s still a gap when it comes to building a system architecture, composed of many applications or services.

Imagine you’ve built an authentication service that authorizes requests to your API. You’d want to re-use that logic among all your other services. Moreover, when you make changes to that authentication service, you’d want to test it in a controlled environment that doesn’t affect those other services in production. Well, you don’t need to imagine anymore.

Introducing Services

Services are the new building block for deploying applications on Cloudflare Workers. Unlike the script, a service is composable, which allows services to talk to each other. Services also support multiple environments, which allow you to test changes in a preview environment, then promote to production when you’re confident it worked.

To enable a seamless transition to services, we’ve automatically migrated every script to become a service with one “production” environment — no action needed.

Services have environments

Each service comes with a production environment and the ability to create or clone dozens of preview environments. Every aspect of an environment is overridable: the code, environment variables, and even resources like a KV namespace. You can create and switch between environments with just a few clicks in the dashboard.

Each environment is resolvable at a unique hostname, which is automatically generated when you create or rename the environment. There’s no waiting around after you deploy. Everything you need, like DNS records, SSL certificates, and more, is ready-to-go seconds later. If you’d like a more advanced setup, you can also add custom routes from your domain to an environment.

Once you’ve tested your changes in a preview environment, you’re ready to promote to production. We’ve made it really easy to promote code from one environment to another, without the need to rebuild or upload your code again. Environments also manage code separately from settings, so you don’t need to manually edit environment variables when you promote from staging to production.

Services are versioned

Every change to a service is versioned and audited. Mistakes do happen, but when they do, it’s important to be able to quickly roll back, then have the tools to answer the age-old question: “who changed what, when?”

Introducing Services: Build Composable, Distributed Applications on Cloudflare Workers

Each environment in a service has its own version history. Every time there is a code change or an environment variable is updated, the version number of that environment is incremented. You can also append additional metadata to each version, like a git commit or a deployment tag.

Services can talk to each other

Services are composable, allowing one service to talk to another service. To support this, we’re introducing a new API to facilitate service-to-service communication: service bindings.

Introducing Services: Build Composable, Distributed Applications on Cloudflare Workers

A service binding allows you to send HTTP requests to another service, without those requests going over the Internet. That means you can invoke other Workers directly from your code! Service bindings open up a new world of composability. In the example below, requests are validated by an authentication service.

export default {
  async fetch(request, environment) {
    const response = await environment.AUTH.fetch(request);
    if (response.status !== 200) {
      return response;
    }
    return new Response("Authenticated!");
  }
}

Introducing Services: Build Composable, Distributed Applications on Cloudflare Workers

Service bindings use the standard fetch API, so you can continue to use your existing utilities and libraries. You can also change the environment of a service binding, so you can test a new version of a service. In the next example, 1% of requests are routed to a “canary” deployment of a service. If a request to the canary fails, it’s sent to the production deployment for another chance.

export default {
  canRetry(request) {
    return request.method === "GET" || request.method === "HEAD";
  },
  async fetch(request, environment) {
    if (Math.random() < 0.01) {
      const response = await environment.CANARY.fetch(request.clone());
      if (response.status < 500 || !canRetry(request)) {
        return response;
      }
    }
    return environment.PRODUCTION.fetch(request);
  }
}

While the interface among services is HTTP, the networking is not. In fact, there is no networking! Unlike the typical “microservice architecture,” where services communicate over a network and can suffer from latency or interruption, service bindings are a zero-cost abstraction. When you deploy a service, we build a dependency graph of its service bindings, then package all of those services into a single deployment. When one service invokes another, there is no network delay; the request is executed immediately.

Introducing Services: Build Composable, Distributed Applications on Cloudflare Workers

This zero-cost model enables teams to share and reuse code within their organizations, without sacrificing latency or performance. Forget the days of convoluted YAML templates or exponential back off to orchestrate services — just write code, and we’ll stitch it all together.

Try out the future, today!

We’re excited to announce that you can start using Services today! If you’ve already used Workers, you’ll notice that each of your scripts have been upgraded to a service with one “production” environment. The dashboard and all the existing Cloudflare APIs will continue to “just work” with services.

You can also create and deploy code to multiple “preview” environments, as part of the open-beta launch. We’re still working on service bindings and versioning, and we’ll provide an update as soon as you can start using them.

For more information about Services, check out any of the resources below:

Introducing Services: Build Composable, Distributed Applications on Cloudflare Workers

How we build software at Cloudflare

Post Syndicated from Nick Wood original https://blog.cloudflare.com/building-software-at-cloudflare/

How we build software at Cloudflare

How we build software at Cloudflare

Cloudflare provides a broad range of products — ranging from security, to performance and serverless compute — which are used by millions of Internet properties worldwide. Often, these products are built by multiple teams in close collaboration and delivering them can be a complex task. So ever wondered how we do so consistently and safely at scale?

Software delivery consists of all the activities to get working software into the hands of customers. It’s usual to talk about software delivery with reference to a model, or framework. These provide the scaffolding for most modern software delivery models, although in order to minimise operational friction it’s usual for a company to tailor their approach to suit their business context and culture.

For example, a company that designs the autopilot systems for passenger aircraft will require very strict tolerances, as a failure could cost hundreds of lives. They would want a different process to a cutting edge tech startup, who may value time to market over system uptime or stability.

Before outlining the approach we use at Cloudflare it’s worth quickly running through a couple of commonly used delivery models.

The Waterfall Approach

Waterfall has its foundations (pun intended) in construction and manufacturing. It breaks a project up into phases and presumes that each phase is completed before the next begins. Each phase “cascades” into the next bit like a waterfall, hence the name.

How we build software at Cloudflare

The main criticism of waterfall approaches arises when flaws are discovered downstream, which may necessitate a return to earlier phases — though this can be managed through governance processes that allows for adjusting scope, budgets or timelines.

More recently there are a number of modified waterfall models which have been developed as a response to its perceived inflexibility. Some notable examples are the Rational Unified Process (RUP), which encourages iteration within phases, and Sashimi which provides partial overlap between phases.

Despite falling out of favour in recent years, waterfall still has a place in modern technology companies. It tends to be reserved for projects where the scope and requirements can be defined upfront and are unlikely to change. At Cloudflare, we use it for infrastructure rollouts, for example. It also has a place in very large projects with complex dependencies to manage.

Agile Approaches

Agile isn’t a single well-defined process, rather a family of approaches which share similar philosophies — those of the agile manifesto. Implementations vary, but most agile flavours tend to share a number of common traits:

  • Short release cycles, such that regular feedback (ideally from real users) can be incorporated.
  • Teams maintain a prioritized to-do list of upcoming work (often called a ‘backlog’), with the most valuable items are at the top.
  • Teams should be self-organizing, and work at a sustainable pace.
  • A philosophy of Continuous Improvement, where teams seek to improve their ways of working over time.

Continuous improvement is very much the heart of agile, meaning these approaches are less about nailing down “the correct process” and focus more on regular reflection and change. This means variances between any two teams is expected, and encouraged.

Agile approaches can be divided into two main branches — iterative and flow-based. Scrum is probably the most prevalent of the iterative agile methods. In Scrum a team aims to build shippable increments of code at regular intervals called sprints (or “iterations”). Flow-based approaches on the other hand (such as Kanban) instead pick up new items from their backlog on an ad hoc basis. They use a number of techniques to try and minimise work in progress across the team.

The main differences between the two branches can be typified by looking at two example teams:

  • The “Green” Team has a set of products they support and wants to update them regularly, production issues for them are rare and there is very little ad-hoc work. An iterative approach allows them to make long term plans whilst also being able to incorporate feedback from users with some regularity.
  • The “Blue” Team meanwhile is an operational team, where a big part of their role is to monitor production systems and investigate issues as they arise. For them, a flow based approach is much more appropriate, so they can update their plans on the fly as new items arise.

Which approach does Cloudflare follow?

Cloudflare comprises dozens of globally distributed engineering teams each with their own unique challenges and contexts. A team usually has an Engineering Manager, a Product Manager and less than 10 engineers, who all focus on a singular product or mission. The DDoS team for example is one such team.

A team that supports a newly released product will likely want to rapidly incorporate feedback from customers, whereas a team that manages shared internal platforms will prize platform stability over speed of innovation. There is a spectrum of different contexts within Cloudflare which makes it impossible to define a single software delivery method for all teams to follow.

Instead, we take a more nuanced approach where we allow teams to decide which methodology they wish to follow within the team, whilst also defining a number of high-level concepts and language that are common to all teams. In other words, we are more concerned with macro-management than micro-management.

“SHIP”s and “Epic”s

At the highest level, our unit of work is called a “SHIP”  — this is a change to a service or product which we intend to ship to customers, hence the name. All live SHIPs are published on our internal roadmap, called our “SHIP-board”. Transparency and collaboration are part of our DNA at Cloudflare, so for us, it’s important that anyone in Cloudflare can view the SHIP-board.

Individual SHIPs are sized such that they can be comfortably delivered within a month or two, though we have a strong preference towards shorter timescales. We’d much rather deliver three small feature sets monthly than one big launch every quarter.

A single SHIP might need work from multiple teams in order for customers to use it. We manage this by ensuring there is an EPIC within the SHIP for each team contributing. To prevent circular dependencies, a SHIP can’t contain another SHIP. SHIPs are owned by their Product Manager, and EPICs are usually owned by an Engineering Manager. We also allow for EPICs to be created that don’t deliver against SHIPs — this is where technical improvement initiatives are typically managed.

Below the level of EPICs we don’t enforce any strict delivery model on teams, though teams will usually link their contributory work to the EPIC for ease of tracking. Teams are free to use whichever delivery framework they wish.

Within the Product Engineering organisation, all Product Managers and Engineering managers meet weekly to discuss progress and blockers of their live SHIPs/EPICs. Due to the number of people involved, this is a very rapid fire meeting facilitated by our automated “SHIP-board”. This has a built-in linter to highlight potential issues, to be updated prior to the meeting. We run through each team one by one, starting with the team with the most outstanding lints.

There’s also a few icons which let us visualise the status of a SHIP or EPIC at a glance. For example, a monkey means the target date for an item moved in the last week. Bananas count the total number of times the date has “slipped”, i.e. changed. A typical fragment of the SHIP-board is shown below.

How we build software at Cloudflare

Planning

Planning takes place every quarter. This lets us deliver aggressively, without having to change plans too frequently. It also forces us to make conscious choices about what to include and exclude from a SHIP so that extraneous work is minimised.

About a month before quarter-end, product managers will begin to compile the SHIPs that would deliver the most value to customers. They’ll work with their engineering teams to understand how the work might be done, and what work is required of other teams (e.g. the UI team might need to build a frontend whilst another team builds the API).

The team will likely estimate the work at this stage (though the exact mechanism is left up to them). Where work is required of other teams we’ll also begin to reach out to them, so they can factor it into their work for the quarter, and estimate their effort too. It’s also important at this stage to understand what kind of dependency this is — do we need one piece to fully complete before the other, or can they be done in parallel and integrated towards the end? Usually the latter.

The final aspect of planned work are unlinked EPICs — these are things that don’t necessarily contribute meaningfully to a SHIP, but the team would still like to get them completed. Examples of this are performance improvements, or changes/fixes to backend tooling.

We deliver continuously through the quarter to avoid a scramble of deployment at once, and our target dates will reflect that. We also allow anything delivered in the first two weeks of the following quarter to still count as being on-time — stability of the network is more important than hitting arbitrary dates.

We also take a fairly pragmatic approach towards target dates. A natural part of software delivery is that as we begin to explore the solution space we may uncover additional complexity. As long as we can justify a change of date it’s perfectly acceptable to amend the dates of SHIPs/EPICs to reflect the latest information. The exception to this is where we’ve made an external commitment to deliver something, so changing the delivery dates is subject to greater scrutiny.

Keeping us safe

You might think that letting teams set their own process might lead to chaos, but in my experience the opposite is true. By allowing teams to define their own methods we are empowering them to make better decisions and understand their own context within Cloudflare. We explicitly define the interfaces we use between teams, and that allows teams the flexibility to do what works best for them.

We don’t go as far as to say “there are no rules”. Last quarter Cloudflare blocked an average of 87 billion cyber threats each day, and in July 2021 we blocked the largest DDoS attack ever recorded. If we have an outage, our customers feel it, and we feel it too. To manage this we have strict, though simple, rules governing how code reaches our data centers. For example, we mandate a minimum number of reviews for each piece of code, and our deployments are phased so that changes are tested on a subset of live traffic, so any issues can be localised.

The main takeaway is to find the right balance between freedom and rules, and appreciate that this may vary for different teams within the organisation. Enforcing an unnecessarily strict process can cause a lot of friction in teams, and that’s a shortcut to losing great people. Our ideal process is one that minimises red tape, such that our team can focus on the hard job of protecting our customers.

P.S. — we’re hiring!

Do you want to come and work on advanced technologies where every code push impacts millions of Internet properties? Join our team!