Post Syndicated from Matt Granger original https://www.youtube.com/watch?v=1Zu3J7sBx-g
Yearly Archives: 2024
Mozilla’s new branding strategy
Post Syndicated from corbet original https://lwn.net/Articles/1000880/
Mozilla would
appear to have concluded that the solution to its problems is an
extensive rebranding effort:
We teamed up with global branding powerhouse Jones Knowles Ritchie
(JKR) to revamp our brand and revitalize our intentions across our
entire ecosystem. At the heart of this transformation is making
sure people know Mozilla for its broader impact, as well as
Firefox. Our new brand strategy and expression embody our role as a
leader in digital rights and innovation, putting people over
profits through privacy-preserving products, open-source developer
tools, and community-building efforts.
Addressing the digital skills gap
Post Syndicated from Rachel Arthur original https://www.raspberrypi.org/blog/addressing-the-digital-skills-gap/
The digital skills gap is one of the biggest challenges for today’s workforce. It’s a growing concern for educators, employers, and anyone passionate about helping young people succeed.
Digital literacy is essential in today’s world, whether or not you’re aiming for a tech career — yet too many young people are entering adulthood without the skills to navigate it confidently and recent research shows that many young people finish school without formal digital qualifications.
Whilst this challenge is a global one, we’re exploring solutions in England where computing has been part of the national curriculum for a decade and the option of studying for a qualification (GCSE) in computer science is available to many 14-year-olds.
The SCARI report shows that GCSE computer science isn’t available in every school in England, and even where it is available, only a fraction of students opt to study it. Where GCSE computer science is offered, the focus is not on broader digital skills, but more on programming and theoretical knowledge which, while important, doesn’t support young people with the knowledge they need to succeed in the modern workplace.
How the Manchester Baccalaureate will help tackle the digital divide
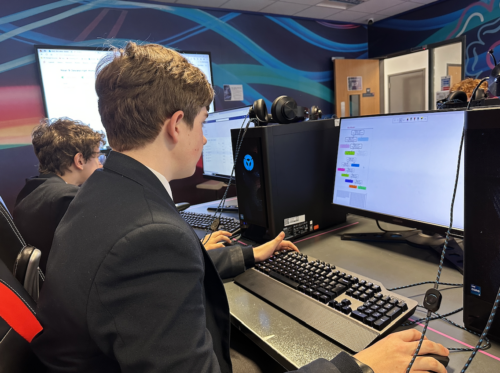
At the Raspberry Pi Foundation, we’re working with the Greater Manchester Combined Authority to tackle this challenge head-on. Together, as part of their Manchester Baccalaureate initiative, we’re developing a self-paced course and certification to tackle the digital skills gap directly.

The Raspberry Pi Foundation Certificate in Applied Computing is designed to be accessed by any pupil, anywhere. It includes a series of flexible modules that students can work through at their own pace. Targeted at young people ages 14 and up, the certificate covers three stages:
- Stage 1 – Students gain essential digital skills, preparing them for a wide range of careers
- Stages 2 and 3 – Students dive into specialisations in key tech areas, building expertise aligned with in-demand roles
What we’ve learnt in Manchester so far
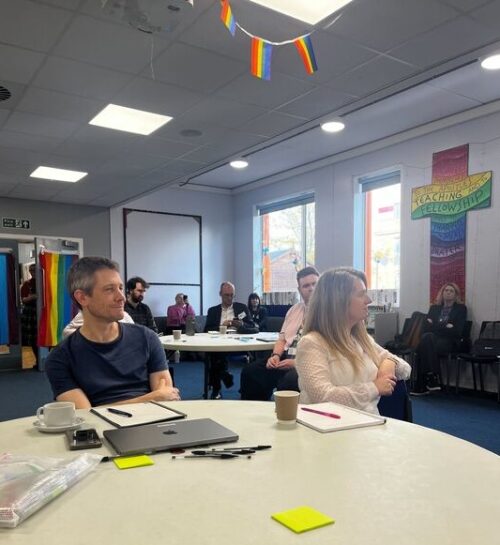
We recently visited Oasis Academy Media City to hold a workshop on digital skills and get input on the certificate. We welcomed educators and industry experts to share their insights, and their feedback has been invaluable.
Teachers pointed out a common challenge: while they see the importance of digital skills, they often lack the time and resources to add new material to an already packed curriculum. By offering the certification as bite-sized modules that focus on specific skills, it makes it easier to slot the content into the timetable, and helps students with limited access to school (due to illness, for example) engage with the course.
Educators were particularly excited about the opportunity for students to specialise in areas tied to in-demand roles that are currently being recruited for and our goal is to make the qualification engaging and relevant, helping students see how their learning applies in the real world.
Next steps
We’re thrilled to share that, in November, we’ll be piloting this qualification in schools throughout Manchester. We’ll gather invaluable feedback from young people as they embark on this learning experience, which will help us refine the course.
Our full qualification will launch in 2025, and we can’t wait to help students approach their futures with curiosity and confidence.
The post Addressing the digital skills gap appeared first on Raspberry Pi Foundation.
Stable kernels 6.12.2, 6.11.11, and 4.19.325
Post Syndicated from jake original https://lwn.net/Articles/1000871/
Greg Kroah-Hartman has released the 6.12.2, 6.11.11, and 4.19.325 stable kernels. Note that both
6.11.11 and 4.19.325 are the last kernels in those series, “please move
“. In the 4.19.325 release notice, he has
off to a newer kernel version
a rather longer-than-usual message, including:
As a “fun” proof that this one is finished (and that any company saying
they care about it really should have their statements validated with
facts), I looked at the “unfixed” CVEs from this kernel release.
Currently it is a list 983 CVEs long, too long to list here.You can verify it yourself by cloning the vulns.git repo at
git.kernel.org and running:./scripts/strak v4.19.325Note, this does NOT count the hardware CVEs which kernel.org does not
track, and many are sill unfixed in this kernel branch.
Security updates for Thursday
Post Syndicated from jake original https://lwn.net/Articles/1000870/
Security updates have been issued by Fedora (thunderbird, tuned, and webkitgtk), Mageia (python-aiohttp and qemu), Oracle (container-tools:ol8, firefox, java-1.8.0-openjdk, java-11-openjdk, kernel, kernel:4.18.0, krb5, pam, postgresql:16, python-tornado, python3:3.6.8, thunderbird, tigervnc, tuned, and webkit2gtk3), Red Hat (bzip2, postgresql, postgresql:13, postgresql:15, postgresql:16, python-tornado, and ruby:3.1), Slackware (python3), SUSE (postgresql, postgresql16, postgresql17, postgresql13, postgresql14, postgresql15, python-python-multipart, and python3), and Ubuntu (python-django and recutils).
How Fragile Is Our Vaccine Infrastructure?
Post Syndicated from The Atlantic original https://www.youtube.com/watch?v=8Z1W-9rr4Xk
За борбата на науката с ХИВ
Post Syndicated from original https://www.toest.bg/za-borbata-na-naukata-s-hiv/

Човешкият имунодефицитен вирус (ХИВ), който причинява синдрома на придобитата имунна недостатъчност (СПИН), е открит през 1984 г. Около 40 млн. души живеят с ХИВ към 2023 г., а над 40 млн. са починали от СПИН от началото на епидемията. ХИВ инфекцията може да увеличи риска от развитие на рак, сърдечносъдови и костни заболявания и др. Откакто е установен първият случай на болестта, не спират да се търсят подходи за прекратяване на разпространението на вируса и за иновативни терапии, както и да се правят опити за разработване на ваксини.
Началото
През 1981 г. в Центъра за контрол и превенция на заболяванията (Centre of Disease Control – CDC) в Атланта, Джорджия, специалистката по разработка на лекарства Санди Форд оставя бележка на ментора си за забелязани пет случая на пневмония с необичайно протичане, като предполагаем причинител са микроскопични гъби, подобни на дрожди. Такива микроорганизми до онзи момент са били наблюдавани само при имуносупресирани пациенти. По това време дерматолози в САЩ отчитат увеличение на пациентите с агресивния и рядко срещан вид рак на кожата – сарком на Капоши. Общото между пациентите отново е, че имунната им система е силно потисната.
Случаите стават стотици и започват да се откриват и в Европа, Южна Америка и Австралия. Най-често засегнати са хомосексуални мъже, хора, които употребяват наркотици, работници в секс индустрията (и техните партньори), както и пациенти с хемофилия. Открити са и други симптоми на заболяването освен пневмонията и саркома на Капоши, включващи гърчове, остра загуба на телесно тегло, висока температура и развитие на други видове рак. През следващата година CDC използва термина синдром на придобитата имунна недостатъчност (СПИН) и изказва предположението, че причинителят най-вероятно е все още неидентифициран инфекциозен агент.
През 1983 г. е изолиран вирус от лимфните съдове на пациенти със симптоми на СПИН. Той е класиран в семейството на ретровирусите. В този период учените откриват и начин как да размножат вируса в лабораторни условия, което служи и за разработването на патентован кръвен тест за наличие на ХИВ, който се използва и до днес. През 2008 г. Нобелова награда за медицина получават френските вирусолози Франсоаз Баре-Синуси и Люк Монтание за откриването на ХИВ.
Животът на ХИВ вируса
С откриването на ХИВ вируса се появяват и много въпроси, чакащи своя отговор. Какъв е произходът на този вирус? Защо причинява толкова разнообразни симптоми? Защо в немалка част от случаите симптомите се развиват много късно (месеци или години) след инфекция с вируса?
Съществуват два ХИВ вируса: ХИВ-1 и по-рядко срещаният ХИВ-2. Те произхождат от сходни ретровируси, които се срещат при примати в Африка. Хората са се заразили с тях от приматите (зооноза), най-вероятно чрез консумацията на заразено месо.
ХИВ вирусът е изграден от белтъчна обвивка, а в сърцевината му се крие нуклеиновата киселина РНК. Всъщност ХИВ вирусът прилича по структура на SARS-CoV2 – вируса, който предизвиква COVID-19. Въпреки че и двата са РНК вируси, жизненият им цикъл в заразената клетка е напълно различен.
ХИВ вирусът се предава чрез телесни течности – основно чрез кръвен контакт, чрез сексуален контакт без предпазни мерки или от бременна жена на плода. Вирусът се прикрепва към определен вид клетки на имунната система – CD4 Т-клетки. Те са задължителна и основна част от правилното функциониране на имунната система. Ролята им е да дават инструкции на другите клетки на имунната система, които получават сигнал и атакуват нахлуващите патогени и увредени клетки.
При закачането на ХИВ вируса за помощните Т- клетки той вкарва своите РНК и ензими в клетката. Най-важният ензим от жизнения цикъл на ХИВ е т.нар. обратна транскриптаза. Този ензим има уникалната възможност да произвежда ДНК от РНК (по правилата на централната догма ДНК се превръща в РНК, но не и обратното). Понякога вирусната ДНК остава скрита и не работи дълго време, което дава възможност на вируса да се запази дори и ако множество клетки на гостоприемника умрат.
В заразената Т-клетка вирусната ДНК се вгражда в ДНК на клетката. Това е и причината ХИВ-позитивните да остават завинаги такива, тъй като няма ефективен механизъм, чрез който да се унищожи напълно скритият внедрен в генома вирус.
Инжектираните РНК и ензими в помощните Т- клетки служат и за производството на нови вируси, които излизат от клетката и заразяват други клетки. Друго предимство на вируса е огромният брой грешки, които се допускат от ензими при превръщането на РНК в ДНК. Незасегнатите помощни Т-клетки получават сигнали, че заразената клетка е „развалена“, и когато се притекат на помощ, падат в същия капан. По този начин тялото унищожава множество помощни Т- клетки, което нарушава цялата имунна система и се стига до имунна недостатъчност. Ето защо пациентите са в пъти по-податливи на инфекции и рак, както и на резистентност към дадено лечение.
Терапевтични подходи
От началото на епидемията от ХИВ се правят опити за разработване на антиретровирусни лекарства. През 2016 г. са създадени над 40 медикамента, които в различни комбинации държат инфекцията под контрол. До 2021 г. Американската агенция по лекарства и храни е одобрила над 220 антиретровирусни медикамента за лечение на СПИН.
От края на 90-те години заболеваемостта и смъртността в резултат на заразяване с ХИВ вирус намаляват значително с помощта на антиретровирусната терапия (АРТ). Освен това АРТ удължава продължителността на живота на пациентите. Разработените терапии атакуват различни ензими, които са задължителна част от жизнения цикъл на ХИВ вируса, и успешно държат вирусния товар в ниски граници, тоест не позволяват на вируса да се размножава и да инфектира здрави помощни Т- клетки). През последните няколко години усилията са насочени към разработването на антитела, които да се използват като ваксина, но това е доста трудоемка задача предвид факта, че ХИВ вирусът мутира прекалено често.
Има и „имунизирани“ срещу ХИВ
За да инфектира една помощна Т-клетка, ХИВ вирусът се закачва за два рецептора едновременно – CD4 и CCR5. Някои хора носят мутация в гена, който кодира CCR5 рецептора. Мутиралата версия на рецептора води до невъзможност за експресиране на рецептора на повърхността на клетката – CCR5 при тези хора липсва. Голяма част от хората, носители на мутацията, са с европейски произход. Носителите на мутация и в двете копия на гена са напълно защитени от инфекция от ХИВ, а носителите само на едно копие развиват заболяването по-бавно. Това откритие насочва учените към мисълта за генни терапии на базата на CCR5 рецептора.
Трансплантация на стволови клетки и генни терапии
През 2007 г. е извършена първата трансплантация на стволови клетки на ХИВ-позитивен пациент от донор с мутация в CCR5 рецептора. Пациентът прекъсва АРТ след успешната трансплантация, а ХИВ инфекцията изчезва напълно. Към днешна дата излекуваните от ХИВ чрез трансплантация на стволови клетки са седем, но тази манипулация крие сериозни рискове, например реакция на присадката срещу гостоприемника. Тоест имплантираните от донора клетки разпознават като чуждо тялото на реципиента, което води до възпаление в различни органи и е животозастрашаващо. По тази причина засега трансплантацията не може да стане широко приложима практика.
През 2018 г. китайският генетик Хъ Дзиенкуей използва CRISPR-Cas технологията, за да модифицира два човешки ембриона. Раждат се две близначки, носителки на мутацията в гена, произвеждащ CCR5 рецептора. Ученият е осъден от китайската държава за своя експеримент поради упражняването на незаконни медицински практики. Твърди се, че Хъ е фалшифицирал документи от етичната комисия – практически сам е написал, че комисията одобрява и дава право да извърши тази манипулация. След това е излъгал лекарите, които, бивайки подведени, са имплантирали генномодофицираните ембриони в две пациентки при инвитро процедура. Едната от тях е родила близначките, а при другата процедурата е била неуспешна.
Обръщаме внимание на този експеримент, защото въпреки неетичния аспект случаят неоспоримо доказва, че напредъкът в генетичните техники открива възможности за нови подходи за превенция и лечение.
Какво предстои
Въпреки значителния прогрес в медицината през последните четири десетилетия, СПИН все още отнема живота на много хора по целия свят. Разработването на нови терапии за ХИВ инфекцията и кандидат-ваксините за превенция са надеждата за спирането на ХИВ/СПИН епидемията в глобален мащаб.
Заглавно изображение: ХИВ частици (в синьо), заобикалящи инфектирана Т-клетка (в червено), визуализирани с трансмисионен електронен микроскоп © National Institute of Allergy and Infectious Diseases за Unsplash
Next Generation CPL Filters
Post Syndicated from Matt Granger original https://www.youtube.com/watch?v=hmCco2Fet1s
The 1995 "Norwegian Rocket Incident."
Post Syndicated from The History Guy: History Deserves to Be Remembered original https://www.youtube.com/watch?v=3ud24B88sKU
[$] LWN.net Weekly Edition for December 5, 2024
Post Syndicated from corbet original https://lwn.net/Articles/998950/
The LWN.net Weekly Edition for December 5, 2024 is available.
Comic for 2024.12.05 – Invitation
Post Syndicated from Explosm.net original https://explosm.net/comics/invitation
New Cyanide and Happiness Comic
How we seamlessly migrated high volume real-time streaming traffic from one service to another with zero data loss and duplication
Post Syndicated from Grab Tech original https://engineering.grab.com/seamless-migration
At Grab, we continuously enhance our systems to improve scalability, reliability and cost-efficiency. Recently, we undertook a project to split the read and write functionalities of one of our backend services into separate services. This was motivated by the need to independently scale these operations based on their distinct scalability requirements.
In this post, we will dive deep into how we migrated the stream processing (write) functionality to a new service with zero data loss and duplication. This was accomplished while handling a high volume of real-time traffic averaging 20,000 reads per second from 16 source Kafka streams writing to other output streams and several DynamoDB tables.
Migration challenges and strategy
Migrating the stream processing to the new service while ensuring zero data loss and duplication posed some interesting challenges, especially given the high volume of real-time data. We needed a strategy that would enable us to:
- Migrate streams one by one gradually.
- Validate the new service’s processing in production before fully switching over.
- Perform the switchover with no downtime or data inconsistencies.
We considered various options for the switchover such as using feature flags via our unified config management and experimental rollout platform. However, these approaches had some limitations:
- There could be some data loss or duplication during the deployment time when toggling the flags, which can be up to a few minutes.
- There might be data inconsistencies as the flag value could be updated on the services (the existing and and the new one) at slightly different times.
Ultimately, we decided on a custom time-based switchover logic implemented in shared code between the two services leveraging our monorepo structure. In the following sections, we will walk you through the steps we took to achieve this seamless migration.
Step 1: Preparation
First, since both the existing and new services reside in our monorepo, we moved the stream processing code from the existing service to a shared /commons directory. This allowed both the old and new services to import and use the same code. We added logic in this commons package to selectively turn stream processing on or off based on the service processing them.
Next, we created temporary “sink” resources such as streams and DynamoDB tables for the new service to write the processed data. This allowed us to monitor and validate the new service’s behavior in production without impacting the main resources.

Step 2: Scheduling the switchover
In the shared /commons code, we added a map[string]time.Time to schedule the switchover for each stream.
map[string]time.Time{
  "streamA": time.Date(2024, 2, 28, 12, 0, 0, 0, time.UTC),
  "streamB": time.Date(2024, 3, 10, 12, 0, 0, 0, time.UTC),
  // ...
}
When a stream is added to this map, it means it is scheduled for switchover at the specified time. This logic is shared between both services, so the switchover happens simultaneously. The new service starts writing to the main resources while the old service stops, with no overlap or gap.
Step 3: Deployment and monitoring
To perform the switchover, we:
- Updated the switchover times for the streams.
- Deployed both services with enough buffer time before the scheduled switch.
- Closely monitored the process by creating dedicated monitors for the migration process using our observability tools.

The old service continued consuming the streams for a short monitoring period post-switchover, but without writing anywhere, ensuring no loss or duplication at the output sink resources. Then, the stream consumption was removed from the old service altogether, completing the entire migration process.
Results and learnings
Using this time-based approach, we were able to seamlessly migrate the high-volume stream processing to the new service with:
- Zero data loss or duplication.
- No downtime or production issues.
The whole migration, including the gradual stream-by-stream switchover, was completed in about three weeks.
One learning was that such custom time-based logic, while effective for our use case, has limitations. If a rollback was needed for any of the two services for some unexpected reasons, some data inconsistency would be unavoidable. Generally, such time-based logic should be used with caution as it can lead to unexpected scenarios if the systems fall out of sync. We went ahead with this approach as it was a temporary measure and we had thoroughly tested it before carrying out the switchover.
Join us
Grab is the leading superapp platform in Southeast Asia, providing everyday services that matter to consumers. More than just a ride-hailing and food delivery app, Grab offers a wide range of on-demand services in the region, including mobility, food, package and grocery delivery services, mobile payments, and financial services across 700 cities in eight countries.
Powered by technology and driven by heart, our mission is to drive Southeast Asia forward by creating economic empowerment for everyone. If this mission speaks to you, join our team today!
Ending OCSP Support in 2025
Post Syndicated from Let's Encrypt original https://letsencrypt.org/2024/12/05/ending-ocsp/
Earlier this year we announced our intent to provide certificate revocation information exclusively via Certificate Revocation Lists (CRLs), ending support for providing certificate revocation information via the Online Certificate Status Protocol (OCSP). Today we are providing a timeline for ending OCSP services:
- January 30, 2025
- OCSP Must-Staple requests will fail, unless the requesting account has previously issued a certificate containing the OCSP Must Staple extension
- May 7, 2025
- Prior to this date we will have added CRL URLs to certificates
- On this date we will drop OCSP URLs from certificates
- On this date all requests including the OCSP Must Staple extension will fail
- August 6, 2025
- On this date we will turn off our OCSP responders
Additionally, a very small percentage of our subscribers request certificates with the OCSP Must Staple Extension. If you have manually configured your ACME client to request that extension, action is required before May 7. See “Must Staple” below for details.
OCSP and CRLs are both mechanisms by which CAs can communicate certificate revocation information, but CRLs have significant advantages over OCSP. Let’s Encrypt has been providing an OCSP responder since our launch nearly ten years ago. We added support for CRLs in 2022.
Websites and people who visit them will not be affected by this change, but some non-browser software might be.
We plan to end support for OCSP primarily because it represents a considerable risk to privacy on the Internet. When someone visits a website using a browser or other software that checks for certificate revocation via OCSP, the Certificate Authority (CA) operating the OCSP responder immediately becomes aware of which website is being visited from that visitor’s particular IP address. Even when a CA intentionally does not retain this information, as is the case with Let’s Encrypt, CAs could be legally compelled to collect it. CRLs do not have this issue.
We are also taking this step because keeping our CA infrastructure as simple as possible is critical for the continuity of compliance, reliability, and efficiency at Let’s Encrypt. For every year that we have existed, operating OCSP services has taken up considerable resources that can soon be better spent on other aspects of our operations. Now that we support CRLs, our OCSP service has become unnecessary.
We recommend that anyone relying on OCSP services today start the process of ending that reliance as soon as possible. If you use Let’s Encrypt certificates to secure non-browser communications such as a VPN, you should ensure that your software operates correctly if certificates contain no OCSP URL.
Must Staple
Because of the privacy issues with OCSP, browsers and servers implement a feature called “OCSP Stapling”, where the web server sends a copy of the appropriate OCSP response during the TLS handshake, and the browser skips making a request to the CA, thus better preserving privacy.
In addition to OCSP Stapling (a TLS feature negotiated at handshake time), there’s an extension that can be added to certificates at issuance time, colloquially called “OCSP Must Staple.” This tells browsers that, if they see that extension in a certificate, they should never contact the CA about it and should instead expect to see a stapled copy in the handshake. Failing that, browsers should refuse to connect. This was designed to solve some security problems with revocation.
Let’s Encrypt has supported OCSP Must Staple for a long time, because of the potential to improve both privacy and security. However, Must Staple has failed to get wide browser support after many years. And popular web servers still implement OCSP Stapling in ways that create serious risks of downtime.
As part of removing OCSP, we’ll also be removing support for OCSP Must Staple. CRLs have wide browser support and can provide privacy benefits to all sites, without requiring special web server configuration. Thanks to all our subscribers who have helped with the OCSP Must Staple experiment.
If you are not certain whether you are using OCSP Must Staple, you can check this list of hostnames and certificate serials (11.1 MB, .zip).
As of January 30, 2025, issuance requests that include the OCSP Must Staple extension will fail, unless the requesting account has previously issued a certificate containing the OCSP Must Staple extension.
As of May 7, all issuance requests that include the OCSP Must Staple extension will fail, including renewals. Please change your ACME client configuration to not request the extension.
Introducing Buy with AWS: an accelerated procurement experience on AWS Partner sites, powered by AWS Marketplace
Post Syndicated from Prasad Rao original https://aws.amazon.com/blogs/aws/introducing-buy-with-aws-an-accelerated-procurement-experience-on-aws-partner-sites-powered-by-aws-marketplace/
Today, we are announcing Buy with AWS, a new way to discover and purchase solutions available in AWS Marketplace from AWS Partner sites. You can use Buy with AWS to accelerate and streamline your product procurement process on websites outside of Amazon Web Services (AWS). This feature provides you the ability to find, try, and buy solutions from Partner websites using your AWS account
AWS Marketplace is a curated digital store for you to find, buy, deploy, and manage cloud solutions from Partners. Buy with AWS is another step towards AWS Marketplace making it easy for you to find and procure the right Partner solutions, when and where you need them. You can conveniently find and procure solutions in AWS Marketplace, through integrated AWS service consoles, and now on Partner websites.
Accelerate cloud solution discovery and evaluation
You can now discover solutions from Partners available for purchase through AWS Marketplace as you explore solutions on the web beyond AWS.
Look for products that are “Available in AWS Marketplace” when browsing on Partner sites, then accelerate your evaluation process with fast access to free trials, demo requests, and inquiries for custom pricing.
For example, I want to evaluate Wiz to see how it can help with my cloud security requirements. While browsing the Wiz website, I come across a page where I see “Connect Wiz with Amazon Web Services (AWS)”.

I choose Try with AWS. It asks me to sign in to my AWS account if I’m not signed in already. I’m then presented with a Wiz and AWS co-branded page for me to sign up for the free trial.

The discovery experience that you see will vary depending on type of the Partner website you’re shopping from. Wiz is an example of how Buy with AWS can be implemented by an independent software vendor (ISV). Now, let’s look at an example of an AWS Marketplace Channel Partner, or reseller, who operates a storefront of their own.
I browse to the Bytes storefront with product listings from AWS Marketplace. I have the option to filter and search from the curated product listings, which are available in AWS Marketplace, on the Bytes site.

I choose View Details for Fortinet and see an option to Request Private Offer from AWS.

As you can tell, on a Channel Partner site, you can browse curated product listings available in AWS Marketplace, filter products, and request custom pricing using your AWS account directly from their website.
Streamline product procurement on AWS Partner sites
I had a seamless experience using Buy with AWS to access a free trial for Wiz and browse through the Bytes storefront to request a private offer.
Now I want to try Databricks for one of the applications I’m building. I sign up for a Databricks trial through their website.

I chose Upgrade and see Databricks is available in AWS Marketplace, which gives me the option to Buy with AWS.

I choose Buy with AWS, and after I sign in to my AWS account, I land on a Databricks and AWS Marketplace co-branded procurement page.

I complete the purchase on the co-branded procurement page and continue to set up my Databricks account.

As you can tell, I didn’t have to navigate the challenge of managing procurement processes for multiple vendors. I also didn’t have to speak with a sales representative or onboard a new vendor in my billing system, which would have required multiple approvals and delayed the overall process.
Access centralized billing and benefits through AWS Marketplace
Because Buy with AWS purchases are transacted through and managed in AWS Marketplace, you also benefit from the post-purchase experience of AWS Marketplace, including consolidated AWS billing, centralized subscription management, and access to cost optimization tools.
For example, through the AWS Billing and Cost Management console, I can centrally manage all my AWS purchases, including Buy with AWS purchases, from one dashboard. I can easily access and process invoices for all of my organization’s AWS purchases. I also need to have valid AWS Identity and Access Management (IAM) permissions to manage subscriptions and make a purchase through AWS Marketplace.

AWS Marketplace not only simplifies my billing but also helps in maintaining governance over spending by helping me manage purchasing authority and subscription access for my organization with centralized visibility and controls. I can manage my budget with pricing flexibility, cost transparency, and AWS cost management tools.
Buy with AWS for Partners
Buy with AWS enables Partners who sell or resell products in AWS Marketplace to create new solution discovery and buying experiences for customers on their own websites. By adding call to action (CTA) buttons to their websites such as “Buy with AWS”, “Try free with AWS”, “Request private offer”, and “Request demo”, Partners can help accelerate product evaluation and the path-to-purchase for customers.
By integrating AWS Marketplace APIs, Partners can display products from the AWS Marketplace catalog, allow customers to sort and filter products, and streamline private offers. Partners implementing Buy with AWS can access AWS Marketplace creative and messaging resources for guidance on building their own web experiences. Partners who implement Buy with AWS can access metrics for insights into engagement and conversion performance.
The Buy with AWS onboarding guide in the AWS Marketplace Management Portal details how Partners can get started.
Learn more
Visit the Buy with AWS page to learn more and explore Partner sites that offer Buy with AWS.
To learn more about selling or reselling products using Buy with AWS on your website, visit:
– Prasad
Simplify data access for your enterprise using Amazon SageMaker Lakehouse
Post Syndicated from Srividya Parthasarathy original https://aws.amazon.com/blogs/big-data/simplify-data-access-for-your-enterprise-using-amazon-sagemaker-lakehouse/
Organizations are increasingly using data to make decisions and drive innovation. However, building data-driven applications can be challenging. It often requires multiple teams working together and integrating various data sources, tools, and services. For example, creating a targeted marketing app involves data engineers, data scientists, and business analysts using different systems and tools. This complexity leads to several issues: it takes time to learn multiple systems, it’s difficult to manage data and code across different services, and controlling access for users across various systems is complicated. Currently, organizations often create custom solutions to connect these systems, but they want a more unified approach that them to choose the best tools while providing a streamlined experience for their data teams. The use of separate data warehouses and lakes has created data silos, leading to problems such as lack of interoperability, duplicate governance efforts, complex architectures, and slower time to value.
You can use Amazon SageMaker Lakehouse to achieve unified access to data in both data warehouses and data lakes. Through SageMaker Lakehouse, you can use preferred analytics, machine learning, and business intelligence engines through an open, Apache Iceberg REST API to help ensure secure access to data with consistent, fine-grained access controls.
Solution overview
Let’s consider Example Retail Corp, which is facing increasing customer churn. Its management wants to implement a data-driven approach to identify at-risk customers and develop targeted retention strategies. However, the customer data is scattered across different systems and services, making it challenging to perform comprehensive analyses. Today, Example Retail Corp manages sales data in its data warehouse and customer data in Apache Iceberg tables in Amazon Simple Storage Service (Amazon S3). It uses Amazon EMR Serverless for data processing and machine learning. For governance, it uses AWS Glue Data Catalog as the central technical catalog and AWS Lake Formation as the permission store for enforcing fine-grained access controls. Its main objective is to implement a unified data management system that now combines data from varied sources, enables secure access across enterprise, and allow disparate teams to use preferred tools to predict, analyze, and consume customer churn information.
Let’s examine how Example Retail Corp can use SageMaker Lakehouse to achieve its unified data management vision using this reference architecture diagram.

Personas
There are four personas used in this solution.
- The Data Lake Admin has an AWS Identity and Access Management (IAM) admin role and is a Lake Formation administrator responsible for managing user permissions to catalog objects using Lake Formation.
- The Data Warehouse Admin has an IAM admin role and manages databases in Amazon Redshift.
- The Data Engineer has an IAM ETL role and runs the extract, transform, and load (ETL) pipeline using Spark to populate the Lakehouse catalog on RMS.
- The Data Analyst has an IAM analyst role and performs churn analysis on SageMaker Lakehouse data using Amazon Athena and Amazon Redshift.
Dataset
The following table describes the elements of the dataset.
| Schema | Table | Data source |
public |
customer_churn |
Lakehouse catalog with storage on RMS |
customerdb |
customer |
Lakehouse catalog with storage on Amazon S3 |
sales |
store_sales |
Data warehouse |
Prerequisites
To follow along on the solution walkthrough, you need to have the following:
- Create a user defined IAM role following the instruction in Requirements for roles used to register locations. For this post, we will use IAM role
LakeFormationRegistrationRole. - An Amazon Virtual Private Cloud (Amazon VPC) with private and public subnets.
- Create an S3 bucket. For this post, we will use
customer_dataas the bucket name. - Create an Amazon Redshift serverless endpoint called
sales_dwwhich will hoststore_salesdataset. - Create an Amazon Redshift serverless endpoint called
sales_analysis_dwfor churn analysis by sales analysts. - Create an IAM role named
DataTransferRolefollowing the instructions in Prerequisites for managing Amazon Redshift namespaces in the AWS Glue Data Catalog. - Install or update the latest version of the AWS CLI. For instructions, see Installing or updating to the latest version of the AWS CLI.
- Create a data lake admin using the instructions in Create a data lake administrator. For this post, we will use an IAM role called Admin.
Configure Datalake administrators :
Sign in to the AWS Management Console as Admin and go to AWS Lake Formation. In the navigation pane, choose Administration roles and then choose Tasks under Administration. Under Data lake administrators, choose Add:
- In the Add administrators page, under Access type, choose Data lake administrator.
- Under IAM users and roles, select Admin. Choose Confirm.

- On the Add administrators page, for Access type select Read-only administrators. Under IAM users and roles, select AWSServiceRoleForRedshift and choose Conrm. This step enables Amazon Redshift to discover and access catalog objects in AWS Glue Data Catalog.


Solution walkthrough
Create a customer table in the Amazon S3 data lake in AWS Glue Data Catalog
- Create an AWS Glue database called
customerdbin the default catalog in your account by going to the AWS Lake Formation console and choosing Databases in the navigation pane. - Select the database that you just created and choose Edit.
- Clear the checkbox Use only IAM access control for new tables in this database.
- Sign in to the Athena console as Admin and select Workgroup that the role has access to. Run the following SQL:
- Register the S3 bucket with Lake Formation:
- Sign in to the Lake Formation console as Data Lake Admin.
- In the navigation pane, choose Administration, and then choose Data lake locations.
- Choose Register location.
- For the Amazon S3 path, enter
s3://customer_data/. - For the IAM role, choose LakeFormationRegistrationRole.
- For Permission mode, select Lake Formation.
- Choose Register location.
Create the salesdb database in Amazon Redshift
- Sign in to the Redshift endpoint
sales_dwas Admin user. Run following script to create a database namedsalesdb. - Connect to
salesdb. Run the following script to create schemasalesand thestore_salestable and populate it with data.
Create the churn_lakehouse RMS catalog in Glue Data Catalog
This catalog will contain the customer churn table with managed RMS storage, which will be populated using Amazon EMR.
We will manage the customer churn data in an AWS Glue managed catalog with managed RMS storage. This data is produced from an analysis conducted in EMR Serverless and is accessible in the presentation layer to serve to business intelligence (BI) applications.
Create Lakehouse (RMS) catalog
- Sign in to the Lake Formation console as Data Lake Admin.
- In the left navigation pane, choose Data Catalog, and then Catalogs New. Choose Create catalog.


- Provide the details for the catalog:
- Name: Enter
churn_lakehouse. - Type: Select Managed catalog.
- Storage: Select Redshift.
- Under Access from engines, make sure that Access this catalog from Iceberg compatible engines is selected.
- Choose Next.

- Name: Enter

-
- Under Principals, select IAM users and roles. Under IAM users and roles, select the Admin Under Catalog permissions, select Super user.

- Choose Add, and then choose Create catalog.
- Under Principals, select IAM users and roles. Under IAM users and roles, select the Admin Under Catalog permissions, select Super user.

Access churn_lakehouse RMS catalog from Amazon EMR Spark engine
- Set up an EMR Studio.
- Create an EMR Serverless application using CLI command.
Sign in to EMR Studio and use the EMR Studio Workspace
- Sign in to the EMR Studio console and choose Workspaces in the navigation pane, and then choose Create Workspace.
- Enter a name and a description for the Workspace.
- Choose Create Workspace. A new tab containing JupyterLab will open automatically when the Workspace is ready. Enable pop-ups in your browser if necessary.
- Choose the Compute icon in the navigation pane to attach the EMR Studio Workspace with a compute engine.
- Select EMR Serverless application for Compute type.
- Choose
Churn_Analysisfor EMR-S Application. - For Runtime role, choose Admin.
- Choose Attach.
Download the notebook, import it, choose PySpark kernel and execute the cells that will create the table.

Manage your users’ fine-grained access to catalog objects using AWS Lake Formation
Grant the following permissions to the Analyst role on the resources as shown in the following table.
| Catalog | Database | Table | Permission |
<account_id>:churn_lakehouse/dev |
public |
customer_churn |
Column permission: |
<account_id> |
customerdb |
customer |
Table permission |
<account_id>:sales_lakehouse/salesdb |
sales |
store_sales |
All table permission |
- Sign in to the Lake Formation console as Data Lake Admin. In the navigation pane, choose Data Lake Permissions, and then choose Grant.
- For IAM user and roles, choose Analyst IAM role. For resources choose as shown below and grant.

- For IAM user and roles, choose Analyst IAM Role. For resource choose as shown below and grant.

- For IAM user and roles, choose Analyst IAM Role. For resource choose as shown below and grant.


Perform churn analysis using multiple engines:
Using Athena
Sign in to the Athena console using the IAM Analyst role, select the workgroup that the role has access to. Run the following SQL combining data from the data warehouse and Lake House RMS catalog for churn analysis:
The following figure shows the results, which include customer IDs, names, and other information.

Using Amazon Redshift
Sign in to the Redshift Sale cluster QEV2 using the IAM Analyst role. Sign in using temporary credentials using your IAM identity and run the following SQL command:
The following figure shows the results, which include customer IDs, names, and other information.

Clean up
Complete the following steps to delete the resources you created to avoid unexpected costs:
- Deletethe Redshift Serverless workgroups.
- Deletethe Redshift Serverless associated namespace.
- Delete EMR Studio and Application created.
- Delete Glue resources and Lake Formation permissions.
- Empty the bucket and delete the bucket.
Conclusion
In this post, we showcased how you can use Amazon SageMaker Lakehouse to achieve unified access to data across your data warehouses and data lakes. With unified access, you can use preferred analytics, machine learning, and business intelligence engines through an open, Apache Iceberg REST API and secure access to data with consistent, fine-grained access controls. Try Amazon SageMaker Lakehouse in your environment and share your feedback with us.
About the Authors
 Srividya Parthasarathy is a Senior Big Data Architect on the AWS Lake Formation team. She works with product team and customer to build robust features and solutions for their analytical data platform. She enjoys building data mesh solutions and sharing them with the community.
 Harshida Patel is a Analytics Specialist Principal Solutions Architect, with AWS.
Supermicro SYS-222H-TN Review 2U Intel Xeon 6 Server
Post Syndicated from Patrick Kennedy original https://www.servethehome.com/supermicro-sys-222h-tn-review-2u-intel-xeon-6-server-daputstor/
In our Supermicro SYS-222H-TN review, we see how this 2U dual Intel Xeon 6 “Sierra Forest” server provides something unique
The post Supermicro SYS-222H-TN Review 2U Intel Xeon 6 Server appeared first on ServeTheHome.
Enforce fine-grained access control on data lake tables using AWS Glue 5.0 integrated with AWS Lake Formation
Post Syndicated from Sakti Mishra original https://aws.amazon.com/blogs/big-data/enforce-fine-grained-access-control-on-data-lake-tables-using-aws-glue-5-0-integrated-with-aws-lake-formation/
AWS Glue 5.0 supports fine-grained access control (FGAC) based on your policies defined in AWS Lake Formation. FGAC enables you to granularly control access to your data lake resources at the table, column, and row levels. This level of control is essential for organizations that need to comply with data governance and security regulations, or those that deal with sensitive data.
Lake Formation makes it straightforward to build, secure, and manage data lakes. It allows you to define fine-grained access controls through grant and revoke statements, similar to those used with relational database management systems (RDBMS), and automatically enforce those policies using compatible engines like Amazon Athena, Apache Spark on Amazon EMR, and Amazon Redshift Spectrum. With AWS Glue 5.0, the same Lake Formation rules that you set up for use with other services like Athena now apply to your AWS Glue Spark jobs and Interactive Sessions through built-in Spark SQL and Spark DataFrames. This simplifies security and governance of your data lakes.
This post demonstrates how to enforce FGAC on AWS Glue 5.0 through Lake Formation permissions.
How FGAC works on AWS Glue 5.0
Using AWS Glue 5.0 with Lake Formation lets you enforce a layer of permissions on each Spark job to apply Lake Formation permissions control when AWS Glue runs jobs. AWS Glue uses Spark resource profiles to create two profiles to effectively run jobs. The user profile runs user-supplied code, and the system profile enforces Lake Formation policies. For more information, see the AWS Lake Formation Developer Guide.
The following diagram demonstrates a high-level overview of how AWS Glue 5.0 gets access to data protected by Lake Formation permissions.

The workflow consists of the following steps:
- A user calls the
StartJobRunAPI on a Lake Formation enabled AWS Glue job. - AWS Glue sends the job to a user driver and runs the job in the user profile. The user driver runs a lean version of Spark that has no ability to launch tasks, request executors, or access Amazon Simple Storage Service (Amazon S3) or the AWS Glue Data Catalog. It builds a job plan.
- AWS Glue sets up a second driver called the system driver and runs it in the system profile (with a privileged identity). AWS Glue sets up an encrypted TLS channel between the two drivers for communication. The user driver uses the channel to send the job plans to the system driver. The system driver doesn’t run user-submitted code. It runs full Spark and communicates with Amazon S3 and the Data Catalog for data access. It requests executors and compiles the Job Plan into a sequence of execution stages.
- AWS Glue then runs the stages on executors with the user driver or system driver. The user code in any stage is run exclusively on user profile executors.
- Stages that read data from Data Catalog tables protected by Lake Formation or those that apply security filters are delegated to system executors.
Enable FGAC on AWS Glue 5.0
To enable Lake Formation FGAC for your AWS Glue 5.0 jobs on the AWS Glue console, complete the following steps:
- On the AWS Glue console, choose ETL jobs in the navigation pane.
- Choose your job.
- Choose the Job details
- For Glue version, choose Glue 5.0 – Supports spark 3.5, Scala 2, Python 3.
- For Job parameters, add following parameter:
- Key:
--enable-lakeformation-fine-grained-access - Value:
true
- Key:
- Choose Save.
To enable Lake Formation FGAC for your AWS Glue notebooks on the AWS Glue console, use %%configure magic:

Example use case
The following diagram represents the high-level architecture of the use case we demonstrate in this post. The objective of the use case is to showcase how can you enforce Lake Formation FGAC on both CSV and Iceberg tables and configure an AWS Glue PySpark job to read from them.
The implementation consists of the following steps:
- Create an S3 bucket and upload the input CSV dataset.
- Create a standard Data Catalog table and an Iceberg table by reading data from the input CSV table, using an Athena CTAS query.
- Use Lake Formation to enable FGAC on both CSV and Iceberg tables using row- and column-based filters.
- Run two sample AWS Glue jobs to showcase how you can run a sample PySpark script in AWS Glue that respects the Lake Formation FGAC permissions, and then write the output to Amazon S3.
To demonstrate the implementation steps, we use sample product inventory data that has the following attributes:
- op – The operation on the source record. This shows values
Ito represent insert operations,Uto represent updates, andDto represent deletes. - product_id – The primary key column in the source database’s products table.
- category – The product’s category, such as
ElectronicsorCosmetics. - product_name – The name of the product.
- quantity_available – The quantity available in the inventory for a product.
- last_update_time – The time when the product record was updated at the source database.
To implement this workflow, we create AWS resources such as an S3 bucket, define FGAC with Lake Formation, and build AWS Glue jobs to query those tables.
Prerequisites
Before you get started, make sure you have the following prerequisites:
- An AWS account with AWS Identity and Access Management (IAM) roles as needed.
- The required permissions to perform the following actions:
- Read or write to an S3 bucket.
- Create and run AWS Glue crawlers and jobs.
- Manage Data Catalog databases and tables.
- Manage Athena workgroups and run queries.
- Lake Formation already set up in the account and a Lake Formation administrator role or a similar role to follow along with the instructions in this post. To learn more about setting up permissions for a data lake administrator role, see Create a data lake administrator.
For this post, we use the eu-west-1 AWS Region, but you can integrate it in your preferred Region if the AWS services included in the architecture are available in that Region.
Next, let’s dive into the implementation steps.
Create an S3 bucket
To create an S3 bucket for the raw input datasets and Iceberg table, complete the following steps:
- On the Amazon S3 console, choose Buckets in the navigation pane.
- Choose Create bucket.
- Enter the bucket name (for example,
glue5-lf-demo-${AWS_ACCOUNT_ID}-${AWS_REGION_CODE}), and leave the remaining fields as default. - Choose Create bucket.
- On the bucket details page, choose Create folder.
- Create two subfolders:
raw-csv-inputandiceberg-datalake.

- Upload the LOAD00000001.csv file into the
raw-csv-inputfolder of the bucket.

Create tables
To create input and output tables in the Data Catalog, complete the following steps:
- On the Athena console, navigate to the query editor.
- Run the following queries in sequence (provide your S3 bucket name):
- Run the following query to validate the raw CSV input data:
The following screenshot shows the query result.

- Run the following query to validate the Iceberg table data:
The following screenshot shows the query result.

This step used DDL to create table definitions. Alternatively, you can use a Data Catalog API, the AWS Glue console, the Lake Formation console, or an AWS Glue crawler.
Next, let’s configure Lake Formation permissions on the raw_csv_input table and iceberg_datalake table.
Configure Lake Formation permissions
To validate the capability, let’s define FGAC permissions for the two Data Catalog tables we created.
For the raw_csv_input table, we enable permission for specific rows, for example allow read access only for the Furniture category. Similarly, for the iceberg_datalake table, we enable a data filter for the Electronics product category and limit read access to a few columns only.
To configure Lake Formation permissions for the two tables, complete the following steps:
- On the Lake Formation console, choose Data lake locations under Administration in the navigation pane.
- Choose Register location.
- For Amazon S3 path, enter the path of your S3 bucket to register the location.
- For IAM role, choose your Lake Formation data access IAM role, which is not a service linked role.
- For Permission mode, select Lake Formation.

- Choose Register location.

Grant table permissions on the standard table
The next step is to grant table permissions on the raw_csv_input table to the AWS Glue job role.
- On the Lake Formation console, choose Data lake permissions under Permissions in the navigation pane.
- Choose Grant.
- For Principals, choose IAM users and roles.
- For IAM users and roles, choose your IAM role that is going to be used on an AWS Glue job.
- For LF-Tags or catalog resources, choose Named Data Catalog resources.
- For Databases, choose
glue5_lf_demo. - For Tables, choose
raw_csv_input. - For Data filters, choose Create new.
- In the Create data filter dialog, provide the following information:
- For Data filter name, enter
product_furniture. - For Column-level access, select Access to all columns.
- Select Filter rows.
- For Row filter expression, enter
category='Furniture'. - Choose Create filter.

- For Data filter name, enter

- For Data filters, select the filter
product_furnitureyou created.

- For Data filter permissions, choose Select and Describe.
- Choose Grant.


Grant permissions on the Iceberg table
The next step is to grant table permissions on the iceberg_datalake table to the AWS Glue job role.
- On the Lake Formation console, choose Data lake permissions under Permissions in the navigation pane.
- Choose Grant.
- For Principals, choose IAM users and roles.
- For IAM users and roles, choose your IAM role that is going to be used on an AWS Glue job.
- For LF-Tags or catalog resources, choose Named Data Catalog resources.
- For Databases, choose
glue5_lf_demo. - For Tables, choose
iceberg_datalake. - For Data filters, choose Create new.
- In the Create data filter dialog, provide the following information:
- For Data filter name, enter
product_electronics. - For Column-level access, select Include columns.
- For Included columns, choose
category,last_update_time,op,product_name, andquantity_available. - Choose Filter rows.
- For Row filter expression, enter
category='Electronics'. - Choose Create filter.
- For Data filter name, enter
- For Data filters, select the filter
product_electronicsyou created. - For Data filter permissions, choose Select and Describe.
- Choose
Next, let’s create the AWS Glue PySpark job to process the input data.
Query the standard table through an AWS Glue 5.0 job
Complete the following steps to create an AWS Glue job to load data from the raw_csv_input table:
- On the AWS Glue console, choose ETL jobs in the navigation pane.
- For Create job, choose Script Editor.
- For Engine, choose Spark.
- For Options, choose Start fresh.
- Choose Create script.
- For Script, use the following code, providing your S3 output path. This example script writes the output in Parquet format; you can change this according to your use case.
- On the Job details tab, for Name, enter
glue5-lf-demo. - For IAM Role, assign an IAM role that has the required permissions to run an AWS Glue job and read and write to the S3 bucket.

- For Glue version, choose Glue 5.0 – Supports spark 3.5, Scala 2, Python 3.
- For Job parameters, add following parameter:
- Key:
--enable-lakeformation-fine-grained-access - Value:
true

- Key:


- Choose Save and then Run.
- When the job is complete, on the Run details tab at the bottom of job runs, choose Output logs.
You’re redirected to the Amazon CloudWatch console to validate the output.
The printed table is shown in the following screenshot. Only two records were returned because they are Furniture category products.

Query the Iceberg table through an AWS Glue 5.0 job
Next, complete the following steps to create an AWS Glue job to load data from the iceberg_datalake table:
- On the AWS Glue console, choose ETL jobs in the navigation pane.
- For Create job, choose Script Editor.
- For Engine, choose Spark.
- For Options, choose Start fresh.
- Choose Create script.
- For Script, replace the following parameters:
- Replace
aws_regionwith your Region. - Replace
aws_account_idwith your AWS account ID. - Replace
warehouse_pathwith your S3 warehouse path for the Iceberg table. - Replace
<s3_output_path>with your S3 output path.
- Replace
This example script writes the output in Parquet format; you can change it according to your use case.
- On the Job details tab, for Name, enter
glue5-lf-demo-iceberg. - For IAM Role, assign an IAM role that has the required permissions to run an AWS Glue job and read and write to the S3 bucket.
- For Glue version, choose Glue 5.0 – Supports spark 3.5, Scala 2, Python 3.
- For Job parameters, add following parameters:
- Key:
--enable-lakeformation-fine-grained-access - Value:
true - Key:
--datalake-formats - Value:
iceberg
- Key:
- Choose Save and then Run.
- When the job is complete, on the Run details tab, choose Output logs.
You’re redirected to the CloudWatch console to validate the output.
The printed table is shown in the following screenshot. Only two records were returned because they are Electronics category products, and the product_id column is excluded.

You are now able to verify that records of the table raw_csv_input and the table iceberg_datalake are successfully retrieved with configured Lake Formation data cell filters.
Clean up
Complete the following steps to clean up your resources:
- Delete the AWS Glue jobs
glue5-lf-demoandglue5-lf-demo-iceberg. - Delete the Lake Formation permissions.
- Delete the output files written to the S3 bucket.
- Delete the bucket you created for the input datasets, which might have a name similar to
glue5-lf-demo-${AWS_ACCOUNT_ID}-${AWS_REGION_CODE}.
Conclusion
This post explained how you can enable Lake Formation FGAC in AWS Glue jobs and notebooks that will enforce access control defined using Lake Formation grant commands. Previously, you needed to integrate AWS Glue DynamicFrames to enforce FGAC in AWS Glue jobs, but with this release, you can enforce FGAC through Spark DataFrame or Spark SQL. This capability also works not only with standard file formats like CSV, JSON, and Parquet but also with Apache Iceberg.
This feature can save you effort and encourage portability while migrating Spark scripts to different serverless environments such as AWS Glue and Amazon EMR.
About the Authors
 Sakti Mishra is a Principal Solutions Architect at AWS, where he helps customers modernize their data architecture and define end-to end-data strategies, including data security, accessibility, governance, and more. He is also the author of Simplify Big Data Analytics with Amazon EMR and AWS Certified Data Engineer Study Guide. Outside of work, Sakti enjoys learning new technologies, watching movies, and visiting places with family. He can be reached via LinkedIn.
 Noritaka Sekiyama is a Principal Big Data Architect on the AWS Glue team. He is also the author of the book Serverless ETL and Analytics with AWS Glue. He is responsible for building software artifacts to help customers. In his spare time, he enjoys cycling with his road bike.
 Matt Su is a Senior Product Manager on the AWS Glue team. He enjoys helping customers uncover insights and make better decisions using their data with AWS Analytics services. In his spare time, he enjoys skiing and gardening.
 Layth Yassin is a Software Development Engineer on the AWS Glue team. He’s passionate about tackling challenging problems at a large scale, and building products that push the limits of the field. Outside of work, he enjoys playing/watching basketball, and spending time with friends and family.
Use open table format libraries on AWS Glue 5.0 for Apache Spark
Post Syndicated from Sotaro Hikita original https://aws.amazon.com/blogs/big-data/use-open-table-format-libraries-on-aws-glue-5-0-for-apache-spark/
Open table formats are emerging in the rapidly evolving domain of big data management, fundamentally altering the landscape of data storage and analysis. These formats, exemplified by Apache Iceberg, Apache Hudi, and Delta Lake, addresses persistent challenges in traditional data lake structures by offering an advanced combination of flexibility, performance, and governance capabilities. By providing a standardized framework for data representation, open table formats break down data silos, enhance data quality, and accelerate analytics at scale.
As organizations grapple with exponential data growth and increasingly complex analytical requirements, these formats are transitioning from optional enhancements to essential components of competitive data strategies. Their ability to resolve critical issues such as data consistency, query efficiency, and governance renders them indispensable for data- driven organizations. The adoption of open table formats is a crucial consideration for organizations looking to optimize their data management practices and extract maximum value from their data.
In earlier posts, we discussed AWS Glue 5.0 for Apache Spark. In this post, we highlight notable updates on Iceberg, Hudi, and Delta Lake in AWS Glue 5.0.
Apache Iceberg highlights
AWS Glue 5.0 supports Iceberg 1.6.1. We highlight its notable updates in this section. For more details, refer to Iceberg Release 1.6.1.
Branching
Branches are independent lineage of snapshot history that point to the head of each lineage. These are useful for flexible data lifecycle management. An Iceberg table’s metadata stores a history of snapshots, which are updated with each transaction. Iceberg implements features such as table versioning and concurrency control through the lineage of these snapshots. To expand an Iceberg table’s lifecycle management, you can define branches that stem from other branches. Each branch has an independent snapshot lifecycle, allowing separate referencing and updating.
When an Iceberg table is created, it has only a main branch, which is created implicitly. All transactions are initially written to this branch. You can create additional branches, such as an audit branch, and configure engines to write to them. Changes on one branch can be fast-forwarded to another branch using Spark’s fast_forward procedure.
The following diagram illustrates this setup.

To create a new branch, use the following query:
After creating a branch, you can run queries on the data in the branch by specifying branch_<branch_name>. To write data to a specific branch, use the following query:
To query a specific branch, use the following query:
You can run the fast_forward procedure to publish the sample table data from the audit branch into the main branch using the following query:
Tagging
Tags are logical pointers to specific snapshot IDs, useful for managing important historical snapshots for business purposes. In Iceberg tables, new snapshots are created for each transaction, and you can query historical snapshots using time travel queries by specifying either a snapshot ID or timestamp. However, because snapshots are created for every transaction, it can be challenging to distinguish the important ones. Tags help address this by allowing you to point to specific snapshots with arbitrary names.
For example, you can set event tag for snapshot 2 with the following code:
You can query to the tagged snapshot by using the following code:

Lifecycle management with branching and tagging
Branching and tagging are useful for flexible table maintenance with the independent snapshot lifecycle management configuration. When data changes in an Iceberg table, each modification is preserved as a new snapshot. Over time, this creates multiple data files and metadata files as changes accumulate. Although these files are essential for Iceberg features like time travel queries, maintaining too many snapshots can increase storage costs. Additionally, they can impact query performance due to the overhead of handling large amounts of metadata. Therefore, organizations should plan regular deletion for snapshots no longer needed.
The AWS Glue Data Catalog addresses these challenges through its managed storage optimization feature. Its optimization job automatically deletes snapshots based on two configurable parameters: the number of snapshots to retain and the maximum days to keep snapshots. Importantly, you can set independent lifecycle policies for both branches and tagged snapshots.
For branches, you can control the maximum days to keep the snapshot and the minimum number of snapshots that must be retained, even if they’re older than the maximum age limit. This setting is independent for each branch.
For example, to keep snapshots 7 days and keep at least 10 snapshots, run the following query:
Tags act as permanent references to specific snapshots of your data. Without setting an expiration time, tagged snapshots persist indefinitely and prevent optimization jobs from cleaning up the associated data files. You can set a time limit for how long to keep a reference when you create it.
For example, to keep snapshots tagged with event for 360 days, run the following query:
This combination of branching and tagging capabilities enables flexible snapshot lifecycle management that can accommodate various business requirements and use cases. For more information about the Data Catalog’s automated storage optimization feature, refer to The AWS Glue Data Catalog now supports storage optimization of Apache Iceberg tables.
Change log view
The create_changelog_view Spark procedure helps track table modifications by generating a comprehensive change history view. It captures all data alterations, from insert to updates and deletions. This makes it simple to analyze how your data has evolved and audit changes over time.
The change log view created by the create_changelog_view procedure contains all the information about changes, including the modified record content, type of operation performed, order of changes, and the snapshot ID where the change was committed. In addition, it can show the original and modified versions of records by passing designated key columns. These selected columns typically serve as distinct identifiers or primary keys that uniquely identify each record. See the following code:

By running the procedure, the change log view test_changes is created. When you query the change log view using SELECT * FROM test_changes, you can obtain the following output, which includes the history of record changes in the Iceberg table.

The create_changelog_view procedure helps you monitor and understand data changes. This feature proves valuable for many use cases, including change data capture (CDC), monitoring audit records, and live analysis.
Storage partitioned join
Storage partitioned join is a join optimization technique provided by Iceberg, which enhances both read and write performance. This feature uses existing storage layout to eliminate expensive data shuffles, and significantly improves query performance when joining large datasets that share compatible partitioning schemes. It operates by taking advantage of the physical organization of data on disk. When both datasets are partitioned using a compatible layout, Spark can perform join operations locally by directly reading matching partitions, completely avoiding the need for data shuffling.
To enable and optimize storage partitioned joins, you need to set the following Spark config properties through SparkConf or an AWS Glue job parameter. The following code lists the properties for the Spark config:
To use an AWS Glue job parameter, set the following:
- Key:
--conf - Value:
spark.sql.sources.v2.bucketing.enabled=true --conf
spark.sql.sources.v2.bucketing.pushPartValues.enabled=true --conf
spark.sql.requireAllClusterKeysForCoPartition=false --conf
spark.sql.adaptive.enabled=false --conf
spark.sql.adaptive.autoBroadcastJoinThreshold=-1 --conf
spark.sql.iceberg.planning.preserve-data-grouping=true
The following examples compare sample physical plans obtained by the EXPLAIN query, with and without storage partitioned join. In these plans, both tables product_review and customer have the same bucketed partition keys, such as review_year and product_id. When storage partitioned join is enabled, Spark joins the two tables without a shuffle operation.
The following is a physical plan without storage partitioned join:
The following is a physical plan with storage partitioned join:
In this physical plan, we don’t see the Exchange operation that is present in physical plan without storage partitioned join. This indicates that no shuffle operation will be performed.
Delta Lake highlights
AWS Glue 5.0 supports Delta Lake 3.2.1. We highlight its notable updates in this section. For more details, refer to Delta Lake Release 3.2.1.
Deletion vectors
Deletion vectors are a feature in Delta Lake that implements a merge-on-read (MoR) paradigm, providing an alternative to the traditional copy-on-write (CoW) approach. This feature fundamentally changes how DELETE, UPDATE, and MERGE operations are processed in Delta Lake tables. In the CoW paradigm, modifying even a single row requires rewriting entire Parquet files. With deletion vectors, changes are recorded as soft deletes, allowing the original data files to remain untouched while maintaining logical consistency. This approach results in improved write performance.
When deletion vectors are enabled, changes are recorded as soft deletes in a compressed bitmap format during write operations. During read operations, these changes are merged with the base data. Additionally, changes recorded by deletion vectors can be physically applied by rewriting files to purge soft deleted data using the REORG command.
To enable deletion vectors, set the table parameter to delta.enableDeletionVectors = 'true'.
When deletion vector is enabled, you can confirm the deletion vector file is created. The file is highlighted in the following screenshot.

MoR with deletion vectors is especially useful in scenarios requiring efficient write operations to tables with frequent updates and data scattered across multiple files. However, you should consider the read overhead required to merge these files. For more information, refer to What are deletion vectors?
Optimized writes
Delta Lake’s optimized writes feature addresses the small file problem, a common performance challenge in data lakes. This issue typically occurs when numerous small files are created through distributed operations. When reading data, processing many small files creates substantial overhead due to extensive metadata management and file handling.
The optimized writes feature solves this by combining multiple small writes into larger, more efficient files before they are written to disk. The process redistributes data across executors before writing and colocates similar data within the same partition. You can control the target file size using the spark.databricks.delta.optimizeWrite.binSize parameter, which defaults to 512 MB. With optimized writes enabled, the traditional approach of using coalesce(n) or repartition(n) to control output file counts becomes unnecessary, because file size optimization is handled automatically.
To enable deletion vectors, set the table parameter to delta.autoOptimize.optimizeWrite = 'true'.
The optimized writes feature isn’t enabled by default, and you should be aware of potentially higher write latency due to data shuffling before files are written to the table. In some cases, combining this with auto compaction can effectively address small file issues. For more information, refer to Optimizations.
UniForm
Delta Lake Universal Format (UniForm) introduces an approach to data lake interoperability by enabling seamless access to Delta Lake tables through Iceberg and Hudi. Although these formats differ primarily in their metadata layer, Delta Lake UniForm bridges this gap by automatically generating compatible metadata for each format alongside Delta Lake, all referencing a single copy of the data. When you write to a Delta Lake table with UniForm enabled, UniForm automatically and asynchronously generates metadata for other formats.
Delta UniForm allows organizations to use the most suitable tool for each data workload while operating on a single delta lake-based data source. UniForm is read-only from an Iceberg and Hudi perspective, and some features of each format are not available. For more details about limitations, refer to Limitations. To learn more about how to use UniForm on AWS, visit Expand data access through Apache Iceberg using Delta Lake UniForm on AWS.
Apache Hudi highlights
AWS Glue 5.0 supports Hudi 0.15.0. We highlight its notable updates in this section. For more details, refer to Hudi Release 0.15.0.
Record Level Index
Hudi provides indexing mechanisms to map record keys to their corresponding file locations, enabling efficient data operations. To use these indexes, you first need to enable the metadata table using MoR by setting hoodie.metadata.enable=true in your table parameters. Hudi’s multi-modal indexing feature allows it to store various types of indexes. These indexes give you the flexibility to add different index types as your needs evolve.
Record Level Index enhances both write and read operations by maintaining precise mappings between record keys and their corresponding file locations. This mapping enables quick determination of record locations, reducing the number of files that need to be scanned during data retrieval.
During the write workflow, when new records arrive, Record Level Index tags each record with location information if it exists in any file group. This tagging process realizes efficient update operations by directly reducing write latency. For the read workflow, Record Level Index eliminates the need to scan through all files by enabling writers to quickly locate files containing specific data. By tracking which files contain which records, Record Level Index accelerates queries, particularly when performing exact matches on record key columns.
To enable Record Level Index, set the following table parameters:
When Record Level Index is enabled, the record_index partition is created on the metadata table storing indexes, as shown in the following screenshot.

For more information, refer to Record Level Index: Hudi’s blazing fast indexing for large-scale datasets on Hudi’s blog.
Auto generated keys
Traditionally, Hudi required explicit configuration of primary keys for every table. Users needed to specify the record key field using the hoodie.datasource.write.recordkey.field configuration. This requirement sometimes posed challenges for datasets lacking natural unique identifiers, such as in log ingestion scenarios.
With auto generated primary keys, Hudi now offers the flexibility to create tables without explicitly configuring primary keys. When you omit the hoodie.datasource.write.recordkey.field configuration, Hudi automatically generates efficient primary keys that optimize compute, storage, and read operations while maintaining uniqueness requirements. For more details, refer to Key Generation.
CDC queries
In some use cases like streaming ingestion, it’s important to track all changes for the records that belong to a single commit. Although Hudi has provided the incremental query that enables you to obtain a set of records that changed between a start and end commit time, it doesn’t contain before and after images of records. Instead, a CDC query in Hudi allows you to capture and process all mutating operations, including inserts, updates, and deletes, making it possible to track the complete evolution of data over time.
To enable CDC queries, set the table parameter to hoodie.table.cdc.enabled = 'true'.
To perform a CDC query, set the following query option:
The following screenshot shows a sample output from a CDC query. In the op column, we can see which operation was performed on each record. The output also displays the before and after images of the modified records.

This feature is currently available for CoW tables; MoR tables are not yet supported at the time of writing. For more information, refer to Change Data Capture Query.
Conclusion
In this post, we discussed the key upgrades on Iceberg, Delta Lake, and Hudi in AWS Glue 5.0. You can take advantage of the new version right away by creating new jobs and transferring your current ones to use the enhanced features.
About the Authors
 Sotaro Hikita is an Analytics Solutions Architect. He supports customers across a wide range of industries in building and operating analytics platforms more effectively. He is particularly passionate about big data technologies and open source software.
 Noritaka Sekiyama is a Principal Big Data Architect on the AWS Glue team. He works based in Tokyo, Japan. He is responsible for building software artifacts to help customers. In his spare time, he enjoys cycling with his road bike.
Introducing AWS Glue 5.0 for Apache Spark
Post Syndicated from Noritaka Sekiyama original https://aws.amazon.com/blogs/big-data/introducing-aws-glue-5-0-for-apache-spark/
AWS Glue is a serverless, scalable data integration service that makes it simple to discover, prepare, move, and integrate data from multiple sources. Today, we are launching AWS Glue 5.0, a new version of AWS Glue that accelerates data integration workloads in AWS. AWS Glue 5.0 upgrades the Spark engines to Apache Spark 3.5.2 and Python 3.11, giving you newer Spark and Python releases so you can develop, run, and scale your data integration workloads and get insights faster.
This post describes what’s new in AWS Glue 5.0, performance improvements, key highlights on Spark and related libraries, and how to get started on AWS Glue 5.0.
What’s new in AWS Glue 5.0
AWS Glue 5.0 upgrades the runtimes to Spark 3.5.2, Python 3.11, and Java 17 with new performance and security improvements from the open source. AWS Glue 5.0 also updates support for open table format libraries to Apache Hudi 0.15.0, Apache Iceberg 1.6.1, and Delta Lake 3.2.1 so you can solve advanced use cases around performance, cost, governance, and privacy in your data lakes. AWS Glue 5.0 adds support for Spark-native fine-grained access control with AWS Lake Formation so you can apply table- and column-level permissions on an Amazon Simple Storage Service (Amazon S3) data lake for write operations (such as INSERT INTO and INSERT OVERWRITE) with Spark jobs.
Key features include:
- Amazon SageMaker Unified Studio support
- Amazon SageMaker Lakehouse support
- Frameworks updated to Spark 3.5.2, Python 3.11, Scala 2.12.18, and Java 17
- Open Table Formats (OTF) updated to Hudi 0.15.0, Iceberg 1.6.1, and Delta Lake 3.2.1
- Spark-native fine-grained access control using Lake Formation
- Amazon S3 Access Grants support
requirements.txtsupport to install additional Python libraries- Data lineage support in Amazon DataZone
Amazon SageMaker Unified Studio support
Amazon SageMaker Unified Studio supports AWS Glue 5.0 for compute runtime of unified notebooks and visual ETL flow editor.
Amazon SageMaker Lakehouse support
Glue 5.0 supports native integration with Amazon SageMaker Lakehouse to enable unified access across Amazon Redshift data warehouses and S3 data lakes.
Frameworks updated to Spark 3.5.2, Python 3.11, Scala 2.12.18, and Java 17
AWS Glue 5.0 upgrades the runtimes to Spark 3.5.2, Python 3.11, Scala 2.12.18, and Java 17. Glue 5.0 uses AWS performance optimized Spark runtime, 3.9 times faster than open source Spark. Glue 5.0 is 32% faster than AWS Glue 4.0 and reduces costs by 22%.
For more details about updated library dependencies, see Dependent library upgrades section.
Open Table Formats (OTF) updated to Hudi 0.15.0, Iceberg 1.6.1, and Delta Lake 3.2.1
AWS Glue 5.0 upgrades the open table format libraries to Hudi 0.15.0, Iceberg 1.6.1, and Delta Lake 3.2.1.
Spark-native fine-grained access control using Lake Formation
AWS Glue supports AWS Lake Formation Fine Grained Access Control (FGAC) through native Spark DataFrames and Spark SQL.
S3 Access Grants support
S3 Access Grants provides a simplified model for defining access permissions to data in Amazon S3 by prefix, bucket, or object. AWS Glue 5.0 supports S3 Access Grants through EMR File System (EMRFS) using additional Spark configurations:
- Key:
--conf - Value:
hadoop.fs.s3.s3AccessGrants.enabled=true --conf spark.hadoop.fs.s3.s3AccessGrants.fallbackToIAM=false
To learn more, refer to documentation.
requirements.txt support to install additional Python libraries
In AWS Glue 5.0, you can provide the standard requirements.txt file to manage Python library dependencies. To do that, provide the following job parameters:
- Parameter 1:
- Key:
--python-modules-installer-option - Value:
-r
- Key:
- Parameter 2:
- Key:
--additional-python-modules - Value:
s3://path_to_requirements.txt
- Key:
AWS Glue 5.0 nodes initially load Python libraries specified in requirements.txt. The following code illustrates the sample requirements.txt:
Data lineage support in Amazon DataZone (preview)
AWS Glue 5.0 supports data lineage in Amazon DataZone in preview. You can configure AWS Glue to automatically collect lineage information during Spark job runs and send the lineage events to be visualized in Amazon DataZone.
To configure this on the AWS Glue console, enable Generate lineage events, and enter your Amazon DataZone domain ID on the Job details tab.

Alternatively, you can provide the following job parameter (provide your DataZone domain ID):
- Key:
--conf - Value:
extraListeners=io.openlineage.spark.agent.OpenLineageSparkListener —conf spark.openlineage.transport.type=amazon_datazone_api —conf spark.openlineage.transport.domainId=<Your-Domain-ID>
Learn more in Amazon DataZone introduces OpenLineage-compatible data lineage visualization in preview.
Improved performance
AWS Glue 5.0 improves the price-performance of your AWS Glue jobs. AWS Glue 5.0 is 32% faster than AWS Glue 4.0 and reduces costs by 22%. The following chart shows the total job runtime for all queries (in seconds) in the 3 TB query dataset between AWS Glue 4.0 and AWS Glue 5.0. The TPC-DS dataset is located in an S3 bucket in Parquet format, and we used 30 G.2X workers in AWS Glue. We observed that our AWS Glue 5.0 TPC-DS tests on Amazon S3 was 58% faster than that on AWS Glue 4.0 while reducing cost by 36%.
| . | AWS Glue 4.0 | AWS Glue 5.0 |
| Total Query Time (seconds) | 1896.1904 | 1197.78755 |
| Geometric Mean (seconds) | 10.09472 | 6.82208 |
| Estimated Cost ($) | 45.85533 | 29.20133 |
The following graphs illustrates the comparisons of performance and cost.

Dependent library upgrades
The following table lists dependency upgrades.
| Dependency | Version in AWS Glue 4.0 | Version in AWS Glue 5.0 |
| Spark | 3.3.0 | 3.5.2 |
| Hadoop | 3.3.3 | 3.4.0 |
| Scala | 2.12 | 2.12.18 |
| Hive | 2.3.9 | 2.3.9 |
| EMRFS | 2.54.0 | 2.66.0 |
| Arrow | 7.0.0 | 12.0.1 |
| Iceberg | 1.0.0 | 1.6.1 |
| Hudi | 0.12.1 | 0.15.0 |
| Delta Lake | 2.1.0 | 3.2.1 |
| Java | 8 | 17 |
| Python | 3.10 | 3.11 |
| boto3 | 1.26 | 1.34.131 |
| AWS SDK for Java | 1.12 | 2.28.8 |
| AWS Glue Data Catalog Client | 3.7.0 | 4.2.0 |
| EMR DynamoDB Connector | 4.16.0 | 5.6.0 |
The following table lists database connector (JDBC driver) upgrades.
| Driver | Connector Version in AWS Glue 4.0 | Connector Version in AWS Glue 5.0 |
| MySQL | 8.0.23 | 8.0.33 |
| Microsoft SQL Server | 9.4.0 | 10.2.0 |
| Oracle Databases | 21.7 | 23.3.0.23.09 |
| PostgreSQL | 42.3.6 | 42.7.3 |
| Amazon Redshift | redshift-jdbc42-2.1.0.16 | redshift-jdbc42-2.1.0.29 |
The following are Spark connector upgrades:
| Driver | Connector Version in AWS Glue 4.0 | Connector Version in AWS Glue 5.0 |
| Amazon Redshift | 6.1.3 | 6.3.0 |
| OpenSearch | 1.0.1 | 1.2.0 |
| MongoDB | 10.0.4 | 10.3.0 |
| Snowflake | 2.12.0 | 3.0.0 |
| BigQuery | 0.32.2 | 0.32.2 |
Apache Spark highlights
Spark 3.5.2 in AWS Glue 5.0 brings a number of valuable features, which we highlight in this section. To learn more about the highlights and enhancements of Spark 3.4 and 3.5, refer to Spark Release 3.4.0 and Spark Release 3.5.0.
Apache Arrow-optimized Python UDF
Python user-defined functions (UDFs) enable users to build custom code for data processing needs, providing flexibility and accessibility. However, performance suffers because UDFs require serialization between Python and JVM processes. Spark 3.5’s Apache Arrow-optimized UDFs solve this by keeping data in shared memory using Arrow’s high-performance columnar format, eliminating serialization overhead and making UDFs efficient for large-scale processing.
To use Arrow-optimized Python UDFs, set spark.sql.execution.pythonUDF.arrow.enabled to True.
Python user-defined table functions
A user-defined table function (UDTF) is a function that returns an entire output table instead of a single value. PySpark users can now write custom UDTFs with Python logic and use them in PySpark and SQL queries. Called in the FROM clause, UDTFs can accept zero or more arguments, either as scalar expressions or table arguments. The UDTF’s return type, defined as either a StructType (for example, StructType().add("c1", StringType())) or DDL string (for example, c1: string), determines the output table’s schema.
RocksDB state store enhancement
At Spark 3.2, RocksDB state store provider has been added as a built-in state store implementation.
Changelog checkpointing
A new checkpoint mechanism for the RocksDB state store provider called changelog checkpointing persists the changelog (updates) of the state. This reduces the commit latency, thereby reducing end-to-end latency significantly.
You can enable this by setting spark.sql.streaming.stateStore.rocksdb.changelogCheckpointing.enabled to True.
You can also enable this feature with existing checkpoints.
Memory management enhancements
Although the RocksDB state store provider is well-known to be useful to address memory issues on the state, there was no fine-grained memory management. Spark 3.5 introduces more fine-grained memory management, which enables users to cap the total memory usage across RocksDB instances in the same executor process, enabling users to configure the memory usage per executor process.
Enhanced Structured Streaming
Spark 3.4 and 3.5 have many enhancements related to Spark Structured Streaming.
This new API deduplicates rows based on certain events. Watermark-based processing allows for more precise control over late data handling:
- Deduplicate the same rows:
dropDuplicatesWithinWatermark() - Deduplicate values on ‘value’ columns:
dropDuplicatesWithinWatermark(['value']) - Deduplicate using the
guidcolumn with a watermark based on theeventTimecolumn:withWatermark("eventTime", "10 hours") .dropDuplicatesWithinWatermark(["guid"])
Get started with AWS Glue 5.0
You can start using AWS Glue 5.0 through AWS Glue Studio, the AWS Glue console, the latest AWS SDK, and the AWS Command Line Interface (AWS CLI).
To start using AWS Glue 5.0 jobs in AWS Glue Studio, open the AWS Glue job and on the Job Details tab, choose the version Glue 5.0 – Supports Spark 3.5, Scala 2, Python 3.

To start using AWS Glue 5.0 on an AWS Glue Studio notebook or an interactive session through a Jupyter notebook, set 5.0 in the %glue_version magic:
The following output shows that the session is set to use AWS Glue 5.0:
Conclusion
In this post, we discussed the key features and benefits of AWS Glue 5.0. You can create new AWS Glue jobs on AWS Glue 5.0 to get the benefit from the improvements, or migrate your existing AWS Glue jobs.
We would like to thank the support of numerous engineers and leaders who helped build Glue 5.0 that enables customers with a performance optimized Spark runtime and several new capabilities.
About the Authors
 Noritaka Sekiyama is a Principal Big Data Architect on the AWS Glue team. He is responsible for building software artifacts to help customers. In his spare time, he enjoys cycling with his road bike.
 Stuti Deshpande is a Big Data Specialist Solutions Architect at AWS. She works with customers around the globe, providing them strategic and architectural guidance on implementing analytics solutions using AWS. She has extensive experience in big data, ETL, and analytics. In her free time, Stuti likes to travel, learn new dance forms, and enjoy quality time with family and friends.
 Martin Ma is a Software Development Engineer on the AWS Glue team. He is passionate about improving the customer experience by applying problem-solving skills to invent new software solutions, as well as constantly searching for ways to simplify existing ones. In his spare time, he enjoys singing and playing the guitar.
 Anshul Sharma is a Software Development Engineer in AWS Glue Team.
 Rajendra Gujja is a Software Development Engineer on the AWS Glue team. He is passionate about distributed computing and everything and anything about data.
 Maheedhar Reddy Chappidi is a Sr. Software Development Engineer on the AWS Glue team. He is passionate about building fault tolerant and reliable distributed systems at scale. Outside of his work, Maheedhar is passionate about listening to podcasts and playing with his two-year-old kid.
Matt Su is a Senior Product Manager on the AWS Glue team. He enjoys helping customers uncover insights and make better decisions using their data with AWS Analytics services. In his spare time, he enjoys skiing and gardening.
 Savio Dsouza is a Software Development Manager on the AWS Glue team. His team works on generative AI applications for the Data Integration domain and distributed systems for efficiently managing data lakes on AWS and optimizing Apache Spark for performance and reliability.
 Kartik Panjabi is a Software Development Manager on the AWS Glue team. His team builds generative AI features for the Data Integration and distributed system for data integration.
 Mohit Saxena is a Senior Software Development Manager on the AWS Glue and Amazon EMR team. His team focuses on building distributed systems to enable customers with simple-to-use interfaces and AI-driven capabilities to efficiently transform petabytes of data across data lakes on Amazon S3, and databases and data warehouses on the cloud.
Read and write S3 Iceberg table using AWS Glue Iceberg Rest Catalog from Open Source Apache Spark
Post Syndicated from Raj Ramasubbu original https://aws.amazon.com/blogs/big-data/read-and-write-s3-iceberg-table-using-aws-glue-iceberg-rest-catalog-from-open-source-apache-spark/
In today’s data-driven world, organizations are constantly seeking efficient ways to process and analyze vast amounts of information across data lakes and warehouses.
Enter Amazon SageMaker Lakehouse, which you can use to unify all your data across Amazon Simple Storage Service (Amazon S3) data lakes and Amazon Redshift data warehouses, helping you build powerful analytics and AI and machine learning (AI/ML) applications on a single copy of data. SageMaker Lakehouse gives you the flexibility to access and query your data in-place with all Apache Iceberg compatible tools and engines. This opens up exciting possibilities for Open Source Apache Spark users who want to use SageMaker Lakehouse capabilities. Further you can secure your data in SageMaker Lakehouse by defining fine-grained permissions, which are enforced across all analytics and ML tools and engines.
In this post, we will explore how to harness the power of Open source Apache Spark and configure a third-party engine to work with AWS Glue Iceberg REST Catalog. The post will include details on how to perform read/write data operations against Amazon S3 tables with AWS Lake Formation managing metadata and underlying data access using temporary credential vending.
Solution overview
In this post, the customer uses Data Catalog to centrally manage technical metadata for structured and semi-structured datasets in their organization and wants to enable their data team to use Apache Spark for data processing. The customer will create an AWS Glue database and configure Apache Spark to interact with Glue Data Catalog using the Iceberg Rest API for writing/reading Iceberg data on Amazon S3 using Lake Formation permission control.
We will start by running an extract, transform, and load (ETL) script using Apache Spark to create an Iceberg table on Amazon S3 and access the table using the Glue Iceberg REST Catalog. The ETL script will add data to the Iceberg table and then read it back using Spark SQL. This post will showcase how this data can also be queried by other data teams using Amazon Athena .
Prerequisites
Access to an AWS Identity and Access Management (IAM) role that is a Lake Formation data lake administrator in the account that has the Data Catalog. For instructions, see Create a data lake administrator.
- Verify that you have Python version 3.7 or later installed. Check if pip3 version is 22.2.2 or higher is installed.
- Install or update the latest AWS Command Line Interface (AWS CLI). For instructions, see Installing or updating the latest version of the AWS CLI. Run aws configure using AWS CLI to point to your AWS account.
- Create an S3 bucket to store the customer Iceberg table. For this post, we will be using the us-east-2 AWS Region and will name the bucket:
ossblog-customer-datalake. - Create an IAM role that will be used in OSS Spark for data access using an AWS Glue Iceberg REST catalog endpoint. Make sure that the role has AWS Glue and Lake Formation policies as defined in Data engineer permissions. For this post, we will use an IAM role named
spark_role.
Enable Lake Formation permissions for third-party access
In this section, you will register the S3 bucket with Lake Formation. This step allows Lake Formation to act as a centralized permissions management system for metadata and data stored in Amazon S3, enabling more efficient and secure data governance in data lake environments.
- Create a user defined IAM role following the instructions in Requirements for roles used to register locations. For this post, we will use the IAM role:
LFRegisterRole. - Register the S3 bucket
ossblog-customer-datalakeusing the IAM roleLFRegisterRoleby running the following command:
Alternatively you can use the AWS Management Console for Lake Formation.
- Navigate to the Lake Formation console, choose Administration in the navigation pane, and then Data lake locations and provide the following values:
- For Amazon S3 path, select s3://ossblog-customer-datalake.
- For IAM role, select LFRegisterRole
- For Permission mode, choose Lake Formation.
- Choose Register location.


- In Lake Formation, enable full table access for external engines to access data.
- Sign in as an admin user, choose Administration in the navigation pane.
- Choose Application integration settings and select Allow external engines to access data in Amazon S3 locations with full table access.
- Choose Save.


Set up resource access for the OSS Spark role:
- Create an AWS Glue database called
ossblogdbin the default catalog by going to the Lake Formation console and choosing Databases in the navigation pane. - Select the database, choose Edit and clear the checkbox for Use only IAM access control for new tables in this database.


Grant resource permission to OSS Spark role:
To enable OSS Spark to create and populate the dataset in the ossblogdb database, you will use the IAM role (spark_role) for Apache Spark instance that you created in step 4 of the prerequisites section. Apache Spark will assume this role to create an Iceberg table, add records to it and read from it. To enable this functionality, grant full table access to spark_role and provide data location permission to the S3 bucket where the table data can be stored.
Grant create table permission to the spark_role:
Sign in as Datalake Admin and run the following command using AWS CLI:
Alternatively on the console:
- In the Lake Formation console navigation pane, choose Data lake permissions, and then choose Grant.
- In the Principals section, for IAM users and roles, select spark_role.
- In the LF-Tags or catalog resources section, select Named Data Catalog resources:
- Select <accountid> for Catalogs.
- Select ossblogdb for Databases.
- Select DESCRIBE and CREATE TABLE for Database permissions.
- Choose Grant.


Grant data location permission to the spark_role:
Sign in as Datalake Admin and run the following command using the AWS CLI:
Alternatively on the console:
- In the Lake Formation console navigation pane, choose Data Locations, and then choose Grant.
- For IAM users and roles, select spark_role.
- For Storage locations, select the bucket_name
- Choose Grant.


Set up a Spark script to use an AWS Glue Iceberg REST catalog endpoint:
Create a file named oss_spark_customer_etl.py in your environment with the following content:
Launch Pyspark locally and validate read/write to the Iceberg table on Amazon S3
Run pip install pyspark. Save the script locally and set the environment variables (AWS_ACCESS_KEY_ID, AWS_SECRET_ACCESS_KEY, and AWS_SESSION_TOKEN) with temporary credentials for the spark_role IAM role.
Run python /path/to/oss_spark_customer_etl.py

You can also use Athena to view the data in the Iceberg table:
To enable the other data team to view the content, provide read access to the data team IAM role using the Lake Formation console:
- In the Lake Formation console navigation pane, choose Data lake permissions, and then choose Grant.
- In the Principals section, for IAM users and roles choose <iam_role>.
- In the LF-Tags or catalog resources section, select Named Data Catalog resources:
- Select <accountid> for Catalogs.
- Select ossblogdb for Databases.
- Select customer for Tables.
- Select DESCRIBE and SELECT for Table permissions.
- Choose Grant.
Sign in as the IAM role and run the command:

Clean up
To clean up your resources, complete the following steps:
Conclusion
In this post, we’ve walked through the seamless integration between Apache Spark and an AWS Glue Iceberg Rest Catalog for accessing Iceberg tables in Amazon S3, demonstrating how to effectively perform read and write operations using Iceberg REST API. The beauty of this solution lies in its flexibility—whether you’re running Spark on bare metal servers in your data center, in a Kubernetes cluster, or any other environment, this architecture can be adapted to suit your needs.
About the Authors
 Raj Ramasubbu is a Sr. Analytics Specialist Solutions Architect focused on big data and analytics and AI/ML with Amazon Web Services. He helps customers architect and build highly scalable, performant, and secure cloud-based solutions on AWS. Raj provided technical expertise and leadership in building data engineering, big data analytics, business intelligence, and data science solutions for over 20 years prior to joining AWS. He helped customers in various industry verticals like healthcare, medical devices, life science, retail, asset management, car insurance, residential REIT, agriculture, title insurance, supply chain, document management, and real estate.
 Srividya Parthasarathy is a Senior Big Data Architect on the AWS Lake Formation team. She works with product team and customer to build robust features and solutions for their analytical data platform. She enjoys building data mesh solutions and sharing them with the community.
 Pratik Das is a Senior Product Manager with AWS Lake Formation. He is passionate about all things data and works with customers to understand their requirements and build delightful experiences. He has a background in building data-driven solutions and machine learning systems in production.