All posts by Antje Barth

Introducing Amazon SageMaker HyperPod, a purpose-built infrastructure for distributed training at scale

Post Syndicated from Antje Barth original https://aws.amazon.com/blogs/aws/introducing-amazon-sagemaker-hyperpod-a-purpose-built-infrastructure-for-distributed-training-at-scale/

Today, we are introducing Amazon SageMaker HyperPod, which helps reducing time to train foundation models (FMs) by providing a purpose-built infrastructure for distributed training at scale. You can now use SageMaker HyperPod to train FMs for weeks or even months while SageMaker actively monitors the cluster health and provides automated node and job resiliency by replacing faulty nodes and resuming model training from a checkpoint.

The clusters come preconfigured with SageMaker’s distributed training libraries that help you split your training data and model across all the nodes to process them in parallel and fully utilize the cluster’s compute and network infrastructure. You can further customize your training environment by installing additional frameworks, debugging tools, and optimization libraries.

Let me show you how to get started with SageMaker HyperPod. In the following demo, I create a SageMaker HyperPod and show you how to train a Llama 2 7B model using the example shared in the AWS ML Training Reference Architectures GitHub repository.

Create and manage clusters
As the SageMaker HyperPod admin, you can create and manage clusters using the AWS Management Console or AWS Command Line Interface (AWS CLI). In the console, navigate to Amazon SageMaker, select Cluster management under HyperPod Clusters in the left menu, then choose Create a cluster.

Amazon SageMaker HyperPod Clusters

In the setup that follows, provide a cluster name and configure instance groups with your instance types of choice and the number of instances to allocate to each instance group.

Amazon SageMaker HyperPod

You also need to prepare and upload one or more lifecycle scripts to your Amazon Simple Storage Service (Amazon S3) bucket to run in each instance group during cluster creation. With lifecycle scripts, you can customize your cluster environment and install required libraries and packages. You can find example lifecycle scripts for SageMaker HyperPod in the GitHub repo.

Using the AWS CLI
You can also use the AWS CLI to create and manage clusters. For my demo, I specify my cluster configuration in a JSON file. I choose to create two instance groups, one for the cluster controller node(s) that I call “controller-group,” and one for the cluster worker nodes that I call “worker-group.” For the worker nodes that will perform model training, I specify Amazon EC2 Trn1 instances powered by AWS Trainium chips.

// demo-cluster.json
{
   "InstanceGroups": [
        {
            "InstanceGroupName": "controller-group",
            "InstanceType": "ml.m5.xlarge",
            "InstanceCount": 1,
            "lifecycleConfig": {
                "SourceS3Uri": "s3://<your-s3-bucket>/<lifecycle-script-directory>/",
                "OnCreate": "on_create.sh"
            },
            "ExecutionRole": "arn:aws:iam::111122223333:role/my-role-for-cluster",
            "ThreadsPerCore": 1
        },
        {
            "InstanceGroupName": "worker-group",
            "InstanceType": "trn1.32xlarge",
            "InstanceCount": 4,
            "lifecycleConfig": {
                "SourceS3Uri": "s3://<your-s3-bucket>/<lifecycle-script-directory>/",
                "OnCreate": "on_create.sh"
            },
            "ExecutionRole": "arn:aws:iam::111122223333:role/my-role-for-cluster",
            "ThreadsPerCore": 1
        }
    ]
}

To create the cluster, I run the following AWS CLI command:

aws sagemaker create-cluster \
--cluster-name antje-demo-cluster \
--instance-groups file://demo-cluster.json

Upon creation, you can use aws sagemaker describe-cluster and aws sagemaker list-cluster-nodes to view your cluster and node details. Note down the cluster ID and instance ID of your controller node. You need that information to connect to your cluster.

You also have the option to attach a shared file system, such as Amazon FSx for Lustre. To use FSx for Lustre, you need to set up your cluster with an Amazon Virtual Private Cloud (Amazon VPC) configuration. Here’s an AWS CloudFormation template that shows how to create a SageMaker VPC and how to deploy FSx for Lustre.

Connect to your cluster
As a cluster user, you need to have access to the cluster provisioned by your cluster admin. With access permissions in place, you can connect to the cluster using SSH to schedule and run jobs. You can use the preinstalled AWS CLI plugin for AWS Systems Manager to connect to the controller node of your cluster.

For my demo, I run the following command specifying my cluster ID and instance ID of the control node as the target.

aws ssm start-session \
--target sagemaker-cluster:ntg44z9os8pn_i-05a854e0d4358b59c \
--region us-west-2

Schedule and run jobs on the cluster using Slurm
At launch, SageMaker HyperPod supports Slurm for workload orchestration. Slurm is a popular an open source cluster management and job scheduling system. You can install and set up Slurm through lifecycle scripts as part of the cluster creation. The example lifecycle scripts show how. Then, you can use the standard Slurm commands to schedule and launch jobs. Check out the Slurm Quick Start User Guide for architecture details and helpful commands.

For this demo, I’m using this example from the AWS ML Training Reference Architectures GitHub repo that shows how to train Llama 2 7B on Slurm with Trn1 instances. My cluster is already setup with Slurm, and I have an FSx for Lustre filesystem mounted.

Note
The Llama 2 model is governed by Meta. You can request access through the Meta request access page.

Set up the cluster environment
SageMaker HyperPod supports training in a range of environments, including Conda, venv, Docker, and enroot. Following the instructions in the README, I build my virtual environment aws_neuron_venv_pytorch and set up the torch_neuronx and neuronx-nemo-megatron libraries for training models on Trn1 instances.

Prepare model, tokenizer, and dataset
I follow the instructions to download the Llama 2 model and tokenizer and convert the model into the Hugging Face format. Then, I download and tokenize the RedPajama dataset. As a final preparation step, I pre-compile the Llama 2 model using ahead-of-time (AOT) compilation to speed up model training.

Launch jobs on the cluster
Now, I’m ready to start my model training job using the sbatch command.

sbatch --nodes 4 --auto-resume=1 run.slurm ./llama_7b.sh

You can use the squeue command to view the job queue. Once the training job is running, the SageMaker HyperPod resiliency features are automatically enabled. SageMaker HyperPod will automatically detect hardware failures, replace nodes as needed, and resume training from checkpoints if the auto-resume parameter is set, as shown in the preceding command.

You can view the output of the model training job in the following file:

tail -f slurm-run.slurm-<JOB_ID>.out

A sample output indicating that model training has started will look like this:

Epoch 0:  22%|██▏       | 4499/20101 [22:26:14<77:48:37, 17.95s/it, loss=2.43, v_num=5563, reduced_train_loss=2.470, gradient_norm=0.121, parameter_norm=1864.0, global_step=4512.0, consumed_samples=1.16e+6, iteration_time=16.40]
Epoch 0:  22%|██▏       | 4500/20101 [22:26:32<77:48:18, 17.95s/it, loss=2.43, v_num=5563, reduced_train_loss=2.470, gradient_norm=0.121, parameter_norm=1864.0, global_step=4512.0, consumed_samples=1.16e+6, iteration_time=16.40]
Epoch 0:  22%|██▏       | 4500/20101 [22:26:32<77:48:18, 17.95s/it, loss=2.44, v_num=5563, reduced_train_loss=2.450, gradient_norm=0.120, parameter_norm=1864.0, global_step=4512.0, consumed_samples=1.16e+6, iteration_time=16.50]

To further monitor and profile your model training jobs, you can use SageMaker hosted TensorBoard or any other tool of your choice.

Now available
SageMaker HyperPod is available today in AWS Regions US East (Ohio), US East (N. Virginia), US West (Oregon), Asia Pacific (Singapore), Asia Pacific (Sydney), Asia Pacific (Tokyo), Europe (Frankfurt), Europe (Ireland), and Europe (Stockholm).

Learn more:

— Antje

PS: Writing a blog post at AWS is always a team effort, even when you see only one name under the post title. In this case, I want to thank Brad Doran, Justin Pirtle, Ben Snyder, Pierre-Yves Aquilanti, Keita Watanabe, and Verdi March for their generous help with example code and sharing their expertise in managing large-scale model training infrastructures, Slurm, and SageMaker HyperPod.

Amazon Titan Image Generator, Multimodal Embeddings, and Text models are now available in Amazon Bedrock

Post Syndicated from Antje Barth original https://aws.amazon.com/blogs/aws/amazon-titan-image-generator-multimodal-embeddings-and-text-models-are-now-available-in-amazon-bedrock/

Today, we’re introducing two new Amazon Titan multimodal foundation models (FMs): Amazon Titan Image Generator (preview) and Amazon Titan Multimodal Embeddings. I’m also happy to share that Amazon Titan Text Lite and Amazon Titan Text Express are now generally available in Amazon Bedrock. You can now choose from three available Amazon Titan Text FMs, including Amazon Titan Text Embeddings.

Amazon Titan models incorporate 25 years of artificial intelligence (AI) and machine learning (ML) innovation at Amazon and offer a range of high-performing image, multimodal, and text model options through a fully managed API. AWS pre-trained these models on large datasets, making them powerful, general-purpose models built to support a variety of use cases while also supporting the responsible use of AI.

You can use the base models as is, or you can privately customize them with your own data. To enable access to Amazon Titan FMs, navigate to the Amazon Bedrock console and select Model access on the bottom left menu. On the model access overview page, choose Manage model access and enable access to the Amazon Titan FMs.

Amazon Titan Models

Let me give you a quick tour of the new models.

Amazon Titan Image Generator (preview)
As a content creator, you can now use Amazon Titan Image Generator to quickly create and refine images using English natural language prompts. This helps companies in advertising, e-commerce, and media and entertainment to create studio-quality, realistic images in large volumes and at low cost. The model makes it easy to iterate on image concepts by generating multiple image options based on the text descriptions. The model can understand complex prompts with multiple objects and generates relevant images. It is trained on high-quality, diverse data to create more accurate outputs, such as realistic images with inclusive attributes and limited distortions.

Titan Image Generator’s image editing features include the ability to automatically edit an image with a text prompt using a built-in segmentation model. The model supports inpainting with an image mask and outpainting to extend or change the background of an image. You can also configure image dimensions and specify the number of image variations you want the model to generate.

In addition, you can customize the model with proprietary data to generate images consistent with your brand guidelines or to generate images in a specific style, for example, by fine-tuning the model with images from a previous marketing campaign. Titan Image Generator also mitigates harmful content generation to support the responsible use of AI. All images generated by Amazon Titan contain an invisible watermark, by default, designed to help reduce the spread of misinformation by providing a discreet mechanism to identify AI-generated images.

Amazon Titan Image Generator in action
You can start using the model in the Amazon Bedrock console by submitting either an English natural language prompt to generate images or by uploading an image for editing. In the following example, I show you how to generate an image with Amazon Titan Image Generator using the AWS SDK for Python (Boto3).

First, let’s have a look at the configuration options for image generation that you can specify in the body of the inference request. For task type, I choose TEXT_IMAGE to create an image from a natural language prompt.

import boto3
import json

bedrock = boto3.client(service_name="bedrock")
bedrock_runtime = boto3.client(service_name="bedrock-runtime")

# ImageGenerationConfig Options:
#   numberOfImages: Number of images to be generated
#   quality: Quality of generated images, can be standard or premium
#   height: Height of output image(s)
#   width: Width of output image(s)
#   cfgScale: Scale for classifier-free guidance
#   seed: The seed to use for reproducibility  

body = json.dumps(
    {
        "taskType": "TEXT_IMAGE",
        "textToImageParams": {
            "text": "green iguana",   # Required
#           "negativeText": "<text>"  # Optional
        },
        "imageGenerationConfig": {
            "numberOfImages": 1,   # Range: 1 to 5 
            "quality": "premium",  # Options: standard or premium
            "height": 768,         # Supported height list in the docs 
            "width": 1280,         # Supported width list in the docs
            "cfgScale": 7.5,       # Range: 1.0 (exclusive) to 10.0
            "seed": 42             # Range: 0 to 214783647
        }
    }
)

Next, specify the model ID for Amazon Titan Image Generator and use the InvokeModel API to send the inference request.

response = bedrock_runtime.invoke_model(
    body=body, 
    modelId="amazon.titan-image-generator-v1" 
    accept="application/json", 
    contentType="application/json"
)

Then, parse the response and decode the base64-encoded image.

import base64
from PIL import Image
from io import BytesIO

response_body = json.loads(response.get("body").read())
images = [Image.open(BytesIO(base64.b64decode(base64_image))) for base64_image in response_body.get("images")]

for img in images:
    display(img)

Et voilà, here’s the green iguana (one of my favorite animals, actually):

Green iguana generated by Amazon Titan Image Generator

To learn more about all the Amazon Titan Image Generator features, visit the Amazon Titan product page. (You’ll see more of the iguana over there.)

Next, let’s use this image with the new Amazon Titan Multimodal Embeddings model.

Amazon Titan Multimodal Embeddings
Amazon Titan Multimodal Embeddings helps you build more accurate and contextually relevant multimodal search and recommendation experiences for end users. Multimodal refers to a system’s ability to process and generate information using distinct types of data (modalities). With Titan Multimodal Embeddings, you can submit text, image, or a combination of the two as input.

The model converts images and short English text up to 128 tokens into embeddings, which capture semantic meaning and relationships between your data. You can also fine-tune the model on image-caption pairs. For example, you can combine text and images to describe company-specific manufacturing parts to understand and identify parts more effectively.

By default, Titan Multimodal Embeddings generates vectors of 1,024 dimensions, which you can use to build search experiences that offer a high degree of accuracy and speed. You can also configure smaller vector dimensions to optimize for speed and price performance. The model provides an asynchronous batch API, and the Amazon OpenSearch Service will soon offer a connector that adds Titan Multimodal Embeddings support for neural search.

Amazon Titan Multimodal Embeddings in action
For this demo, I create a combined image and text embedding. First, I base64-encode my image, and then I specify either inputText, inputImage, or both in the body of the inference request.

# Maximum image size supported is 2048 x 2048 pixels
with open("iguana.png", "rb") as image_file:
    input_image = base64.b64encode(image_file.read()).decode('utf8')

# You can specify either text or image or both
body = json.dumps(
    {
        "inputText": "Green iguana on tree branch",
        "inputImage": input_image
    }
)

Next, specify the model ID for Amazon Titan Multimodal Embeddings and use the InvokeModel API to send the inference request.

response = bedrock_runtime.invoke_model(
	body=body, 
	modelId="amazon.titan-embed-image-v1", 
	accept="application/json", 
	contentType="application/json"
)

Let’s see the response.

response_body = json.loads(response.get("body").read())
print(response_body.get("embedding"))

[0.005087942, -0.004392853, -0.04764151, -0.024312444, 0.049922388, 0.0132532045, 0.014374298, 0.005523709, -0.015199458, 0.02182385, ...]

I redacted the output for brevity. The distance between multimodal embedding vectors, measured with metrics like cosine similarity or euclidean distance, shows how similar or different the represented information is across modalities. Smaller distances mean more similarity, while larger distances mean more dissimilarity.

As a next step, you could build an image database by storing and indexing the multimodal embeddings in a vector store or vector database. To implement text-to-image search, query the database with inputText. For image-to-image search, query the database with inputImage. For image+text-to-image search, query the database with both inputImage and inputText.

Amazon Titan Text
Amazon Titan Text Lite and Amazon Titan Text Express are large language models (LLMs) that support a wide range of text-related tasks, including summarization, translation, and conversational chatbot systems. They can also generate code and are optimized to support popular programming languages and text formats like JSON and CSV.

Titan Text Express – Titan Text Express has a maximum context length of 8,192 tokens and is ideal for a wide range of tasks, such as open-ended text generation and conversational chat, and support within Retrieval Augmented Generation (RAG) workflows.

Titan Text Lite – Titan Text Lite has a maximum context length of 4,096 tokens and is a price-performant version that is ideal for English-language tasks. The model is highly customizable and can be fine-tuned for tasks such as article summarization and copywriting.

Amazon Titan Text in action
For this demo, I ask Titan Text to write an email to my team members suggesting they organize a live stream: “Compose a short email from Antje, Principal Developer Advocate, encouraging colleagues in the developer relations team to organize a live stream to demo our new Amazon Titan V1 models.”

body = json.dumps({
    "inputText": prompt, 
    "textGenerationConfig":{  
        "maxTokenCount":512,
        "stopSequences":[],
        "temperature":0,
        "topP":0.9
    }
})

Titan Text FMs support temperature and topP inference parameters to control the randomness and diversity of the response, as well as maxTokenCount and stopSequences to control the length of the response.

Next, choose the model ID for one of the Titan Text models and use the InvokeModel API to send the inference request.

response = bedrock_runtime.invoke_model(
    body=body,
	# Choose modelID
	# Titan Text Express: "amazon.titan-text-express-v1"
	# Titan Text Lite: "amazon.titan-text-lite-v1"
	modelID="amazon.titan-text-express-v1"
    accept="application/json", 
    contentType="application/json"
)

Let’s have a look at the response.

response_body = json.loads(response.get('body').read())
outputText = response_body.get('results')[0].get('outputText')

text = outputText[outputText.index('\n')+1:]
email = text.strip()
print(email)

Subject: Demo our new Amazon Titan V1 models live!

Dear colleagues,

I hope this email finds you well. I am excited to announce that we have recently launched our new Amazon Titan V1 models, and I believe it would be a great opportunity for us to showcase their capabilities to the wider developer community.

I suggest that we organize a live stream to demo these models and discuss their features, benefits, and how they can help developers build innovative applications. This live stream could be hosted on our YouTube channel, Twitch, or any other platform that is suitable for our audience.

I believe that showcasing our new models will not only increase our visibility but also help us build stronger relationships with developers. It will also provide an opportunity for us to receive feedback and improve our products based on the developer’s needs.

If you are interested in organizing this live stream, please let me know. I am happy to provide any support or guidance you may need. Together, let’s make this live stream a success and showcase the power of Amazon Titan V1 models to the world!

Best regards,
Antje
Principal Developer Advocate

Nice. I could send this email right away!

Availability and pricing
Amazon Titan Text FMs are available today in AWS Regions US East (N. Virginia), US West (Oregon), Asia Pacific (Singapore, Tokyo), and Europe (Frankfurt). Amazon Titan Multimodal Embeddings is available today in the AWS Regions US East (N. Virginia) and US West (Oregon). Amazon Titan Image Generator is available in public preview in the AWS Regions US East (N. Virginia) and US West (Oregon). For pricing details, see the Amazon Bedrock Pricing page.

Learn more

Go to the AWS Management Console to start building generative AI applications with Amazon Titan FMs on Amazon Bedrock today!

— Antje

Introducing Amazon Q, a new generative AI-powered assistant (preview)

Post Syndicated from Antje Barth original https://aws.amazon.com/blogs/aws/introducing-amazon-q-a-new-generative-ai-powered-assistant-preview/

Today, we are announcing Amazon Q, a new generative artificial intelligence- (AI)-powered assistant designed for work that can be tailored to your business. You can use Amazon Q to have conversations, solve problems, generate content, gain insights, and take action by connecting to your company’s information repositories, code, data, and enterprise systems. Amazon Q provides immediate, relevant information and advice to employees to streamline tasks, accelerate decision-making and problem-solving, and help spark creativity and innovation at work.

Amazon Q offers user-based plans, so you get features, pricing, and options tailored to how you use the product. Amazon Q can adapt its interactions to each individual user based on the existing identities, roles, and permissions of your business. AWS never uses customers’ content from Amazon Q to train the underlying models. In other words, your company information remains secure and private.

In this post, I’ll give you a quick tour of how you can use Amazon Q for general business use. 

Amazon Q is your business expert
Let’s look at a few examples of how Amazon Q can help business users complete tasks using simple natural language prompts. As a marketing manager, you could ask Amazon Q to transform a press release into a blog post, create a summary of the press release, or create an email draft based on the provided release. Amazon Q searches through your company content, which can include internal style guides, for example, to provide a response appropriate to your company’s brand standards. Then, you could ask Amazon Q to generate tailored social media prompts to promote your story through each of your social media channels. Later, you can ask Amazon Q to analyze the results of your campaign and summarize them for leadership reviews.

Amazon Q

In the following example, I deployed Amazon Q with access to my AWS News Blog posts from 2023 and called the assistant “AWS Blog Expert.”

Amazon Q

Coming back to my previous example, let’s assume I’m a marketing manager and want Amazon Q to help me create social media posts for recent company blog posts.

I enter the following prompt: “Summarize the key insights from Antje’s recent AWS Weekly Roundup posts and craft a compelling social media post that not only highlights the most important points but also encourages engagement. Consider our target audience and aim for a tone that aligns with our brand identity. The social media post should be concise, informative, and enticing to encourage readers to click through and read the full articles. Please ensure the content is shareable and includes relevant hashtags for maximum visibility.”

Amazon Q

Behind the scenes, Amazon Q searches the documents in connected data sources and creates a relevant and detailed suggestion for a social media post based on my blog posts. Amazon Q also tells me which document was used to generate the answer. In this case, it is PDF file of the blog posts in question.

As an administrator, you can define the context for responses, restrict irrelevant topics, and configure whether to respond only using trusted company information or complement responses with knowledge from the underlying model. Restricting responses to trusted company information helps mitigate hallucinations, a common phenomenon where the underlying model generates responses that sound plausible but are based on misinterpreted or nonexistent data.

Amazon Q provides fine-grained access controls that restrict responses to only using data or acting based on the employee’s level of access and provides citations and references to the original sources for fact-checking and traceability. You can choose among 40+ built-in connectors for popular data sources and enterprise systems, including Amazon S3, Google Drive, Microsoft SharePoint, Salesforce, ServiceNow, and Slack.

How to tailor Amazon Q to your business
To tailor Amazon Q to your business, navigate to Amazon Q in the console, select Applications in the left menu, and choose Create application.

Amazon Q

This starts the following workflow.

Step 1. Create application. Provide an application name and create a new or select an existing AWS Identity and Access Management (IAM) service role that Amazon Q is allowed to assume. I call my application AWS-Blog-Expert. Then, choose Create.

Amazon Q

Step 2. Select retriever. A retriever pulls data from the index in real time during a conversation. You can choose between two options: use the Amazon Q native retriever or use an existing Amazon Kendra retriever. The native retriever can connect to the Amazon Q supported data sources. If you already use Amazon Kendra, you can select the existing Amazon Kendra retriever to connect the associated data sources to your Amazon Q application. I select the native retriever option. Then, choose Next.

Amazon Q

Step 3. Connect data sources. Amazon Q comes with built-in connectors for popular data sources and enterprise systems. For this demo, I choose Amazon S3 and configure the data source by pointing to my S3 bucket with the PDFs of my blog posts.

Amazon Q
Once the data source sync is successfully complete and the retriever shows the accurate document count, you can preview the web experience and start a conversation. Note that the data source sync can take from a few minutes to a few hours, depending on the amount and size of data to index.

You can also connect plugins that manage access to enterprise systems, including ServiceNow, Jira, Salesforce, and Zendesk. Plugins enable Amazon Q to perform user-requested tasks, such as creating support tickets or analyzing sales forecasts.

Amazon Q

Preview and deploy web experience
In the application overview, choose Preview web experience. This opens the web experience with the conversational interface to chat with the tailored Amazon Q AWS Blog Expert. In the final step, you deploy the Amazon Q web experience. You can integrate your SAML 2.0–compliant external identity provider (IdP) using IAM. Amazon Q can work with any IdP that’s compliant with SAML 2.0. Amazon Q uses service-initiated single sign-on (SSO) to authenticate users.

Join the preview
Amazon Q is available today in preview in AWS Regions US East (N. Virginia) and US West (Oregon). Visit the product page to learn how Amazon Q can become your expert in your business.

Also, check out the Amazon Q Slack Gateway GitHub repository that shows how to make Amazon Q available to users as a Slack Bot application.Amazon Q Slack Bot

Learn more

— Antje

Guardrails for Amazon Bedrock helps implement safeguards customized to your use cases and responsible AI policies (preview)

Post Syndicated from Antje Barth original https://aws.amazon.com/blogs/aws/guardrails-for-amazon-bedrock-helps-implement-safeguards-customized-to-your-use-cases-and-responsible-ai-policies-preview/

As part of your responsible artificial intelligence (AI) strategy, you can now use Guardrails for Amazon Bedrock (preview) to promote safe interactions between users and your generative AI applications by implementing safeguards customized to your use cases and responsible AI policies.

AWS is committed to developing generative AI in a responsible, people-centric way by focusing on education and science and helping developers to integrate responsible AI across the AI lifecycle. With Guardrails for Amazon Bedrock, you can consistently implement safeguards to deliver relevant and safe user experiences aligned with your company policies and principles. Guardrails help you define denied topics and content filters to remove undesirable and harmful content from interactions between users and your applications. This provides an additional level of control on top of any protections built into foundation models (FMs).

You can apply guardrails to all large language models (LLMs) in Amazon Bedrock, including fine-tuned models, and Agents for Amazon Bedrock. This drives consistency in how you deploy your preferences across applications so you can innovate safely while closely managing user experiences based on your requirements. By standardizing safety and privacy controls, Guardrails for Amazon Bedrock helps you build generative AI applications that align with your responsible AI goals.

Guardrails for Amazon Bedrock

Let me give you a quick tour of the key controls available in Guardrails for Amazon Bedrock.

Key controls
Using Guardrails for Amazon Bedrock, you can define the following set of policies to create safeguards in your applications.

Denied topics – You can define a set of topics that are undesirable in the context of your application using a short natural language description. For example, as a developer at a bank, you might want to set up an assistant for your online banking application to avoid providing investment advice.

I specify a denied topic with the name “Investment advice” and provide a natural language description, such as “Investment advice refers to inquiries, guidance, or recommendations regarding the management or allocation of funds or assets with the goal of generating returns or achieving specific financial objectives.”

Guardrails for Amazon Bedrock

Guardrails for Amazon Bedrock

Content filters – You can configure thresholds to filter harmful content across hate, insults, sexual, and violence categories. While many FMs already provide built-in protections to prevent the generation of undesirable and harmful responses, guardrails give you additional controls to filter such interactions to desired degrees based on your use cases and responsible AI policies. A higher filter strength corresponds to stricter filtering.

Guardrails for Amazon Bedrock

PII redaction (in the works) – You will be able to select a set of personally identifiable information (PII) such as name, e-mail address, and phone number, that can be redacted in FM-generated responses or block a user input if it contains PII.

Guardrails for Amazon Bedrock integrates with Amazon CloudWatch, so you can monitor and analyze user inputs and FM responses that violate policies defined in the guardrails.

Join the preview
Guardrails for Amazon Bedrock is available today in limited preview. Reach out through your usual AWS Support contacts if you’d like access to Guardrails for Amazon Bedrock.

During preview, guardrails can be applied to all large language models (LLMs) available in Amazon Bedrock, including Amazon Titan Text, Anthropic Claude, Meta Llama 2, AI21 Jurassic, and Cohere Command. You can also use guardrails with custom models as well as Agents for Amazon Bedrock.

To learn more, visit the Guardrails for Amazon Bedrock web page.

— Antje

Agents for Amazon Bedrock is now available with improved control of orchestration and visibility into reasoning

Post Syndicated from Antje Barth original https://aws.amazon.com/blogs/aws/agents-for-amazon-bedrock-is-now-available-with-improved-control-of-orchestration-and-visibility-into-reasoning/

Back in July, we introduced Agents for Amazon Bedrock in preview. Today, Agents for Amazon Bedrock is generally available.

Agents for Amazon Bedrock helps you accelerate generative artificial intelligence (AI) application development by orchestrating multistep tasks. Agents uses the reasoning capability of foundation models (FMs) to break down user-requested tasks into multiple steps. They use the developer-provided instruction to create an orchestration plan and then carry out the plan by invoking company APIs and accessing knowledge bases using Retrieval Augmented Generation (RAG) to provide a final response to the end user. If you’re curious how this works, check out my previous posts on agents that include a primer on advanced reasoning and a primer on RAG.

Starting today, Agents for Amazon Bedrock also comes with enhanced capabilities that include improved control of the orchestration and better visibility into the chain of thought reasoning.

Behind the scenes, Agents for Amazon Bedrock automates the prompt engineering and orchestration of user-requested tasks, such as managing retail orders or processing insurance claims. An agent automatically builds the orchestration prompt and, if connected to knowledge bases, augments it with your company-specific information and invokes APIs to provide responses to the user in natural language.

As a developer, you can use the new trace capability to follow the reasoning that’s used as the plan is carried out. You can view the intermediate steps in the orchestration process and use this information to troubleshoot issues.

You can also access and modify the prompt that the agent automatically creates so you can further enhance the end-user experience. You can update this automatically created prompt (or prompt template) to help the FM enhance the orchestration and responses, giving you more control over the orchestration.

Let me show you how to view the reasoning steps and how to modify the prompt.

View reasoning steps
Traces gives you visibility into the agent’s reasoning, known as the chain of thought (CoT). You can use the CoT trace to see how the agent performs tasks step by step. The CoT prompt is based on a reasoning technique called ReAct (synergizing reasoning and acting). Check out the primer on advanced reasoning in my previous blog post to learn more about ReAct and the specific prompt structure.

To get started, navigate to the Amazon Bedrock console and select the working draft of an existing agent. Then, select the Test button and enter a sample user request. In the agent’s response, select Show trace.

Agents for Amazon Bedrock

The CoT trace shows the agent’s reasoning step-by-step. Open each step to see the CoT details.

Agents for Amazon Bedrock

The enhanced visibility helps you understand the rationale used by the agent to complete the task. As a developer, you can use this information to refine the prompts, instructions, and action descriptions to adjust the agent’s actions and responses when iteratively testing and improving the user experience.

Modify agent-created prompts
The agent automatically creates a prompt template from the provided instructions. You can update the preprocessing of user inputs, the orchestration plan, and the postprocessing of the FM response.

To get started, navigate to the Amazon Bedrock console and select the working draft of an existing agent. Then, select the Edit button next to Advanced prompts.

Agents for Amazon Bedrock

Here, you have access to four different types of templates. Preprocessing templates define how an agent
contextualizes and categorizes user inputs. The orchestration template equips an agent with short-term memory, a list of available actions and knowledge bases along with their descriptions, as well as few-shot examples of how to break down the problem and use these actions and knowledge in different sequences or combinations. Knowledge base response generation templates define how knowledge bases will be used and summarized in the response. Postprocessing templates define how an agent will format and present a final response to the end user. You can either keep using the template defaults or edit and override the template defaults.

Things to know
Here are a few best practices and important things to know when you’re working with Agents for Amazon Bedrock.

Agents perform best when you allow them to focus on a specific task. The clearer the objective (instructions) and the more focused the available set of actions (APIs), the easier it will be for the FM to reason and identify the right steps. If you need agents to cover various tasks, consider creating separate, individual agents.

Here are a few additional guidelines:

  • Number of APIs – Use three to five APIs with a couple of input parameters in your agents.
  • API design – Follow general best practices for designing APIs, such as ensuring idempotency.
  • API call validations – Follow best practices of API design by employing exhaustive validation for all API calls. This is particularly important because large language models (LLMs) may generate hallucinated inputs and outputs, and these validations prove helpful during such occurrences.

Availability and pricing
Agents for Amazon Bedrock are available today in AWS Regions US East (N. Virginia) and US West (Oregon). You will be charged for the inference calls (InvokeModel API) made by agents. The InvokeAgent API is not charged separately. Amazon Bedrock Pricing has all the details.

Learn more

— Antje

Customize models in Amazon Bedrock with your own data using fine-tuning and continued pre-training

Post Syndicated from Antje Barth original https://aws.amazon.com/blogs/aws/customize-models-in-amazon-bedrock-with-your-own-data-using-fine-tuning-and-continued-pre-training/

Today, I’m excited to share that you can now privately and securely customize foundation models (FMs) with your own data in Amazon Bedrock to build applications that are specific to your domain, organization, and use case. With custom models, you can create unique user experiences that reflect your company’s style, voice, and services.

With fine-tuning, you can increase model accuracy by providing your own task-specific labeled training dataset and further specialize your FMs. With continued pre-training, you can train models using your own unlabeled data in a secure and managed environment with customer managed keys. Continued pre-training helps models become more domain-specific by accumulating more robust knowledge and adaptability—beyond their original training.

Let me give you a quick tour of both model customization options. You can create fine-tuning and continued pre-training jobs using the Amazon Bedrock console or APIs. In the console, navigate to Amazon Bedrock, then select Custom models.

Amazon Bedrock - Custom Models

Fine-tune Meta Llama 2, Cohere Command Light, and Amazon Titan FMs
Amazon Bedrock now supports fine-tuning for Meta Llama 2, Cohere Command Light, as well as Amazon Titan models. To create a fine-tuning job in the console, choose Customize model, then choose Create Fine-tuning job.

Amazon Bedrock - Custom Models

Here’s a quick demo using the AWS SDK for Python (Boto3). Let’s fine-tune Cohere Command Light to summarize dialogs. For demo purposes, I’m using the public dialogsum dataset, but this could be your own company-specific data.

To prepare for fine-tuning on Amazon Bedrock, I converted the dataset into JSON Lines format and uploaded it to Amazon S3. Each JSON line needs to have both a prompt and a completion field. You can specify up to 10,000 training data records, but you may already see model performance improvements with a few hundred examples.

{"completion": "Mr. Smith's getting a check-up, and Doctor Haw...", "prompt": Summarize the following conversation.\n\n#Pers..."}
{"completion": "Mrs Parker takes Ricky for his vaccines. Dr. P...", "prompt": "Summarize the following conversation.\n\n#Pers..."}
{"completion": "#Person1#'s looking for a set of keys and asks...", "prompt": "Summarize the following conversation.\n\n#Pers..."} 

I redacted the prompt and completion fields for brevity.

You can list available foundation models that support fine-tuning with the following command:

import boto3 
bedrock = boto3.client(service_name="bedrock")
bedrock_runtime = boto3.client(service_name="bedrock-runtime")

for model in bedrock.list_foundation_models(
    byCustomizationType="FINE_TUNING")["modelSummaries"]:
    for key, value in model.items():
        print(key, ":", value)
    print("-----\n")

Next, I create a model customization job. I specify the Cohere Command Light model ID that supports fine-tuning, set customization type to FINE_TUNING, and point to the Amazon S3 location of the training data. If needed, you can also adjust the hyperparameters for fine-tuning.

# Select the foundation model you want to customize
base_model_id = "cohere.command-light-text-v14:7:4k"

bedrock.create_model_customization_job(
    customizationType="FINE_TUNING",
    jobName=job_name,
    customModelName=model_name,
    roleArn=role,
    baseModelIdentifier=base_model_id,
    hyperParameters = {
        "epochCount": "1",
        "batchSize": "8",
        "learningRate": "0.00001",
    },
    trainingDataConfig={"s3Uri": "s3://path/to/train-summarization.jsonl"},
    outputDataConfig={"s3Uri": "s3://path/to/output"},
)

# Check for the job status
status = bedrock.get_model_customization_job(jobIdentifier=job_name)["status"]

Once the job is complete, you receive a unique model ID for your custom model. Your fine-tuned model is stored securely by Amazon Bedrock. To test and deploy your model, you need to purchase Provisioned Throughput.

Let’s see the results. I select one example from the dataset and ask the base model before fine-tuning, as well as the custom model after fine-tuning, to summarize the following dialog:

prompt = """Summarize the following conversation.\\n\\n
#Person1#: Hello. My name is John Sandals, and I've got a reservation.\\n
#Person2#: May I see some identification, sir, please?\\n
#Person1#: Sure. Here you are.\\n
#Person2#: Thank you so much. Have you got a credit card, Mr. Sandals?\\n
#Person1#: I sure do. How about American Express?\\n
#Person2#: Unfortunately, at the present time we take only MasterCard or VISA.\\n
#Person1#: No American Express? Okay, here's my VISA.\\n
#Person2#: Thank you, sir. You'll be in room 507, nonsmoking, with a queen-size bed. Do you approve, sir?\\n
#Person1#: Yeah, that'll be fine.\\n
#Person2#: That's great. This is your key, sir. If you need anything at all, anytime, just dial zero.\\n\\n
Summary: """

Use the Amazon Bedrock InvokeModel API to query the models.

body = {
    "prompt": prompt,
    "temperature": 0.5,
    "p": 0.9,
    "max_tokens": 512,
}

response = bedrock_runtime.invoke_model(
	# Use on-demand inference model ID for response before fine-tuning
    # modelId="cohere.command-light-text-v14",
	# Use ARN of your deployed custom model for response after fine-tuning
	modelId=provisioned_custom_model_arn,
    modelId=base_model_id, 
    body=json.dumps(body)
)

Here’s the base model response before fine-tuning:

#Person2# helps John Sandals with his reservation. John gives his credit card information and #Person2# confirms that they take only MasterCard and VISA. John will be in room 507 and #Person2# will be his host if he needs anything.

Here’s the response after fine-tuning, shorter and more to the point:

John Sandals has a reservation and checks in at a hotel. #Person2# takes his credit card and gives him a key.

Continued pre-training for Amazon Titan Text (preview)
Continued pre-training on Amazon Bedrock is available today in public preview for Amazon Titan Text models, including Titan Text Express and Titan Text Lite. To create a continued pre-training job in the console, choose Customize model, then choose Create Continued Pre-training job.

Amazon Bedrock - Custom Models

Here’s a quick demo again using boto3. Let’s assume you work at an investment company and want to continue pre-training the model with financial and analyst reports to make it more knowledgeable about financial industry terminology. For demo purposes, I selected a collection of Amazon shareholder letters as my training data.

To prepare for continued pre-training, I converted the dataset into JSON Lines format again and uploaded it to Amazon S3. Because I’m working with unlabeled data, each JSON line only needs to have the prompt field. You can specify up to 100,000 training data records and usually see positive effects after providing at least 1 billion tokens.

{"input": "Dear shareholders: As I sit down to..."}
{"input": "Over the last several months, we to..."}
{"input": "work came from optimizing the conne..."}
{"input": "of the Amazon shopping experience f..."}

I redacted the input fields for brevity.

Then, create a model customization job with customization type CONTINUED_PRE_TRAINING that points to the data. If needed, you can also adjust the hyperparameters for continued pre-training.

# Select the foundation model you want to customize
base_model_id = "amazon.titan-text-express-v1"

bedrock.create_model_customization_job(
    customizationType="CONTINUED_PRE_TRAINING",
    jobName=job_name,
    customModelName=model_name,
    roleArn=role,
    baseModelIdentifier=base_model_id,
    hyperParameters = {
        "epochCount": "10",
        "batchSize": "8",
        "learningRate": "0.00001",
    },
    trainingDataConfig={"s3Uri": "s3://path/to/train-continued-pretraining.jsonl"},
    outputDataConfig={"s3Uri": "s3://path/to/output"},
)

Once the job is complete, you receive another unique model ID. Your customized model is securely stored again by Amazon Bedrock. As with fine-tuning, you need to purchase Provisioned Throughput to test and deploy your model.

Things to know
Here are a couple of important things to know:

Data privacy and network security – With Amazon Bedrock, you are in control of your data, and all your inputs and customizations remain private to your AWS account. Your data, such as prompts, completions, custom models, and data used for fine-tuning or continued pre-training, is not used for service improvement and is never shared with third-party model providers. Your data remains in the AWS Region where the API call is processed. All data is encrypted in transit and at rest. You can use AWS PrivateLink to create a private connection between your VPC and Amazon Bedrock.

Billing – Amazon Bedrock charges for model customization, storage, and inference. Model customization is charged per tokens processed. This is the number of tokens in the training dataset multiplied by the number of training epochs. An epoch is one full pass through the training data during customization. Model storage is charged per month, per model. Inference is charged hourly per model unit using provisioned throughput. For detailed pricing information, see Amazon Bedrock Pricing.

Custom models and provisioned throughput – Amazon Bedrock allows you to run inference on custom models by purchasing provisioned throughput. This guarantees a consistent level of throughput in exchange for a term commitment. You specify the number of model units needed to meet your application’s performance needs. For evaluating custom models initially, you can purchase provisioned throughput hourly with no long-term commitment. With no commitment, a quota of one model unit is available per provisioned throughput. You can create up to two provisioned throughputs per account.

Availability
Fine-tuning support on Meta Llama 2, Cohere Command Light, and Amazon Titan Text FMs is available today in AWS Regions US East (N. Virginia) and US West (Oregon). Continued pre-training is available today in public preview in AWS Regions US East (N. Virginia) and US West (Oregon). To learn more, visit the Amazon Bedrock Developer Experience web page and check out the User Guide.

Customize FMs with Amazon Bedrock today!

— Antje

Knowledge Bases now delivers fully managed RAG experience in Amazon Bedrock

Post Syndicated from Antje Barth original https://aws.amazon.com/blogs/aws/knowledge-bases-now-delivers-fully-managed-rag-experience-in-amazon-bedrock/

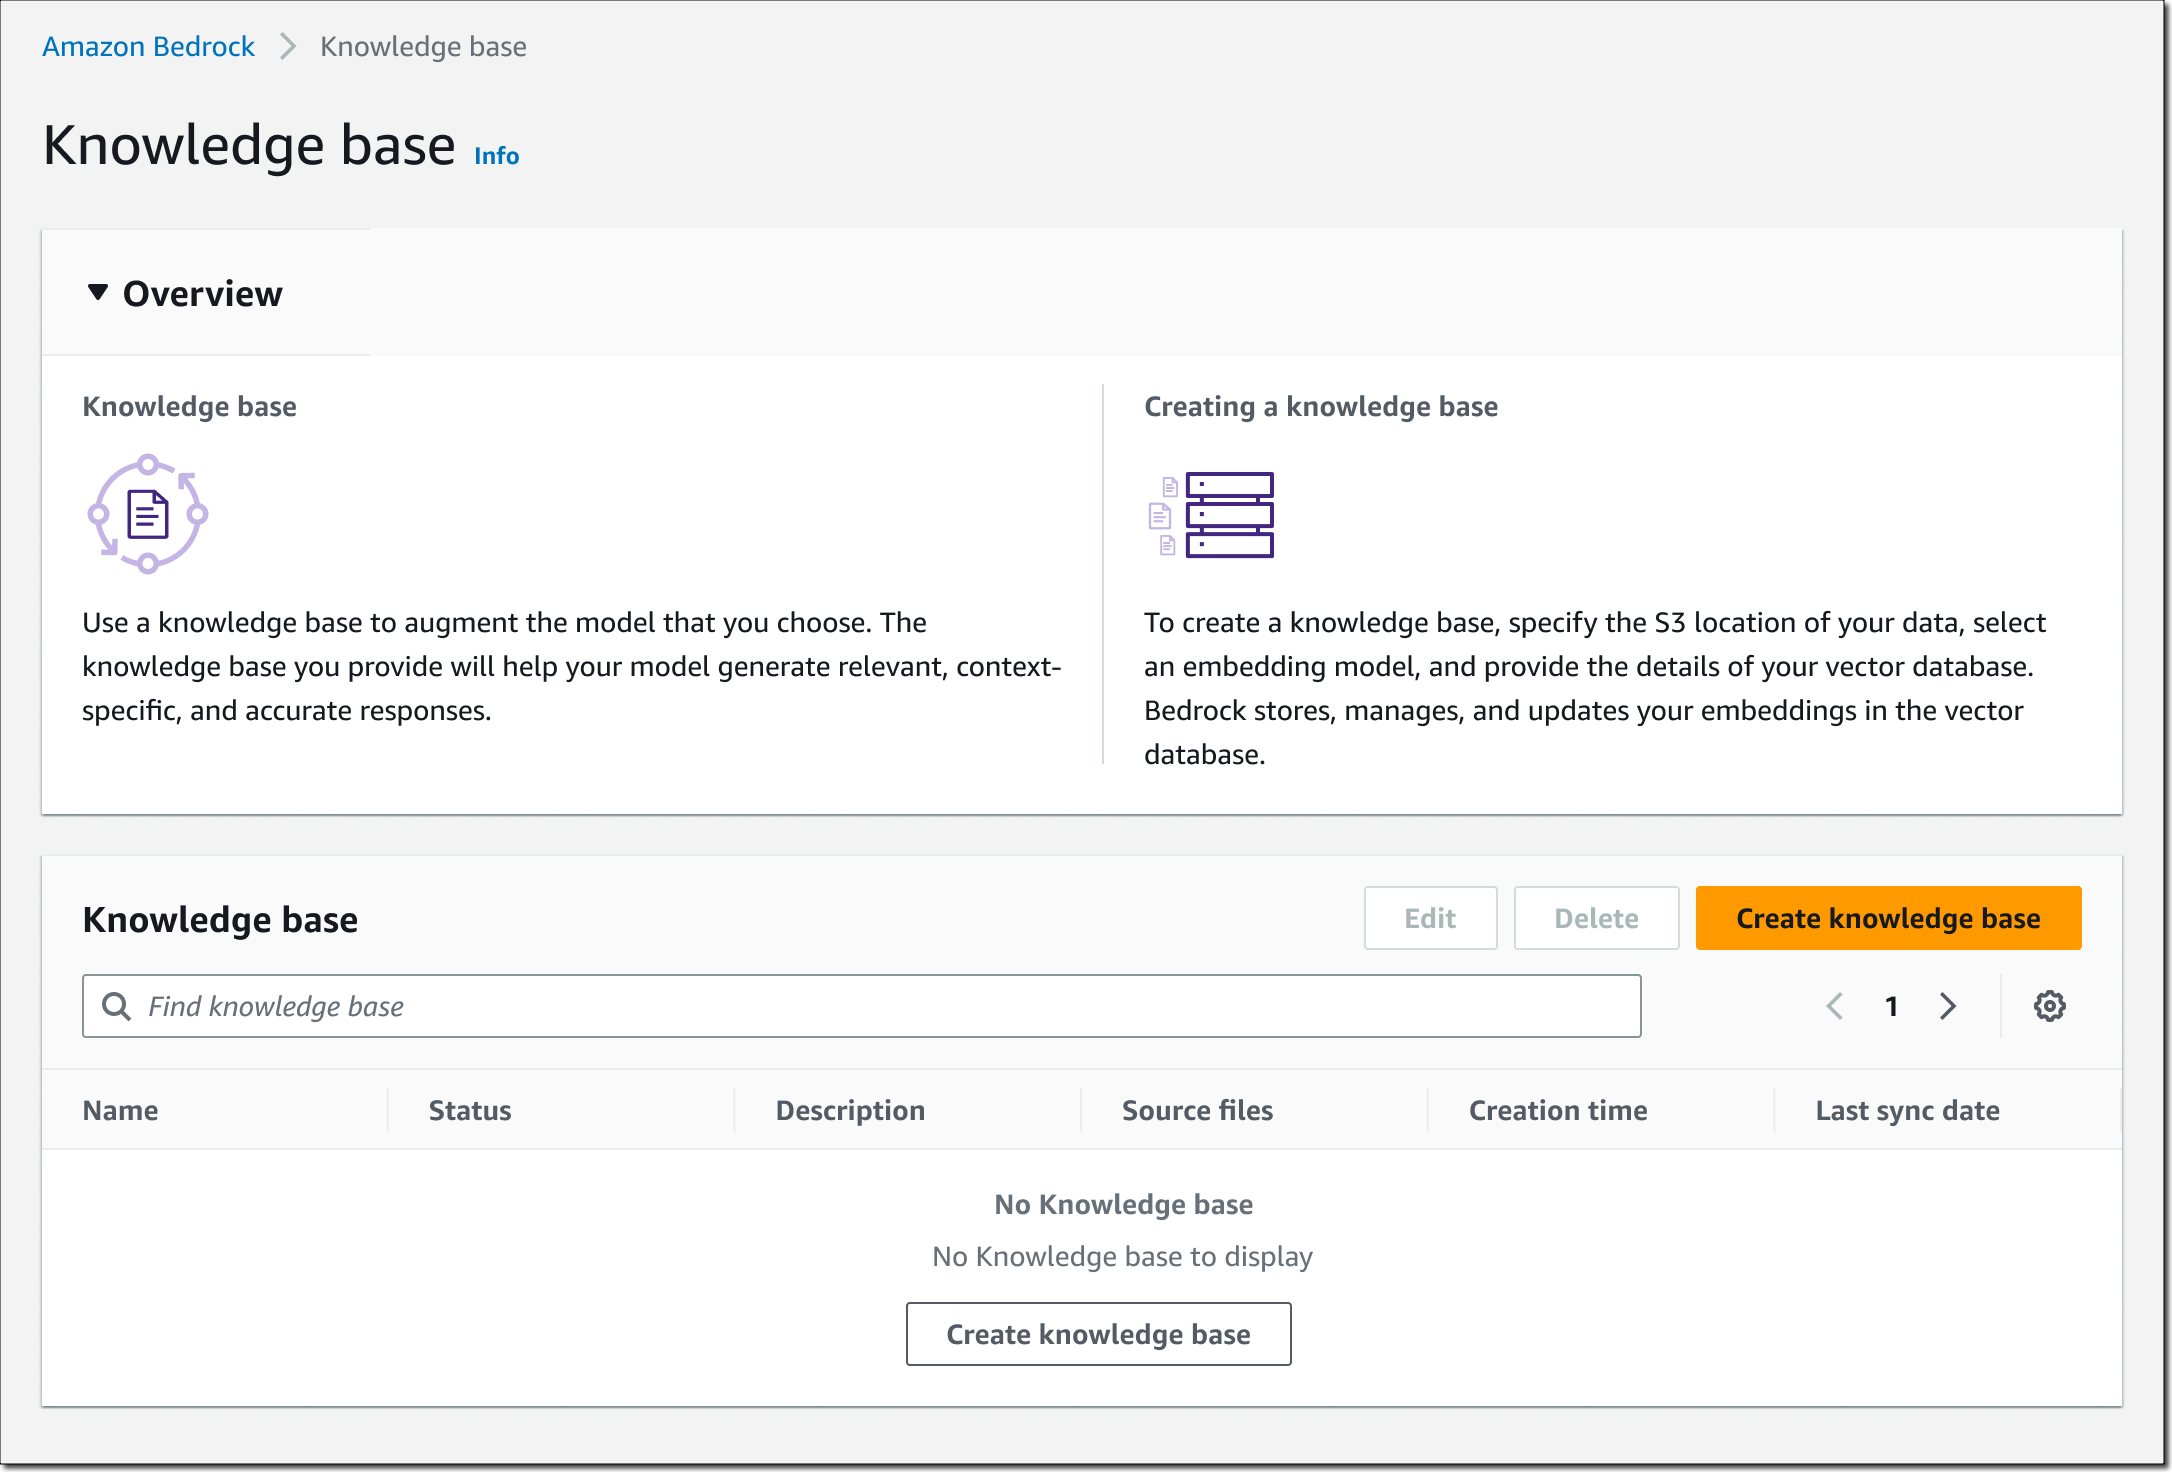
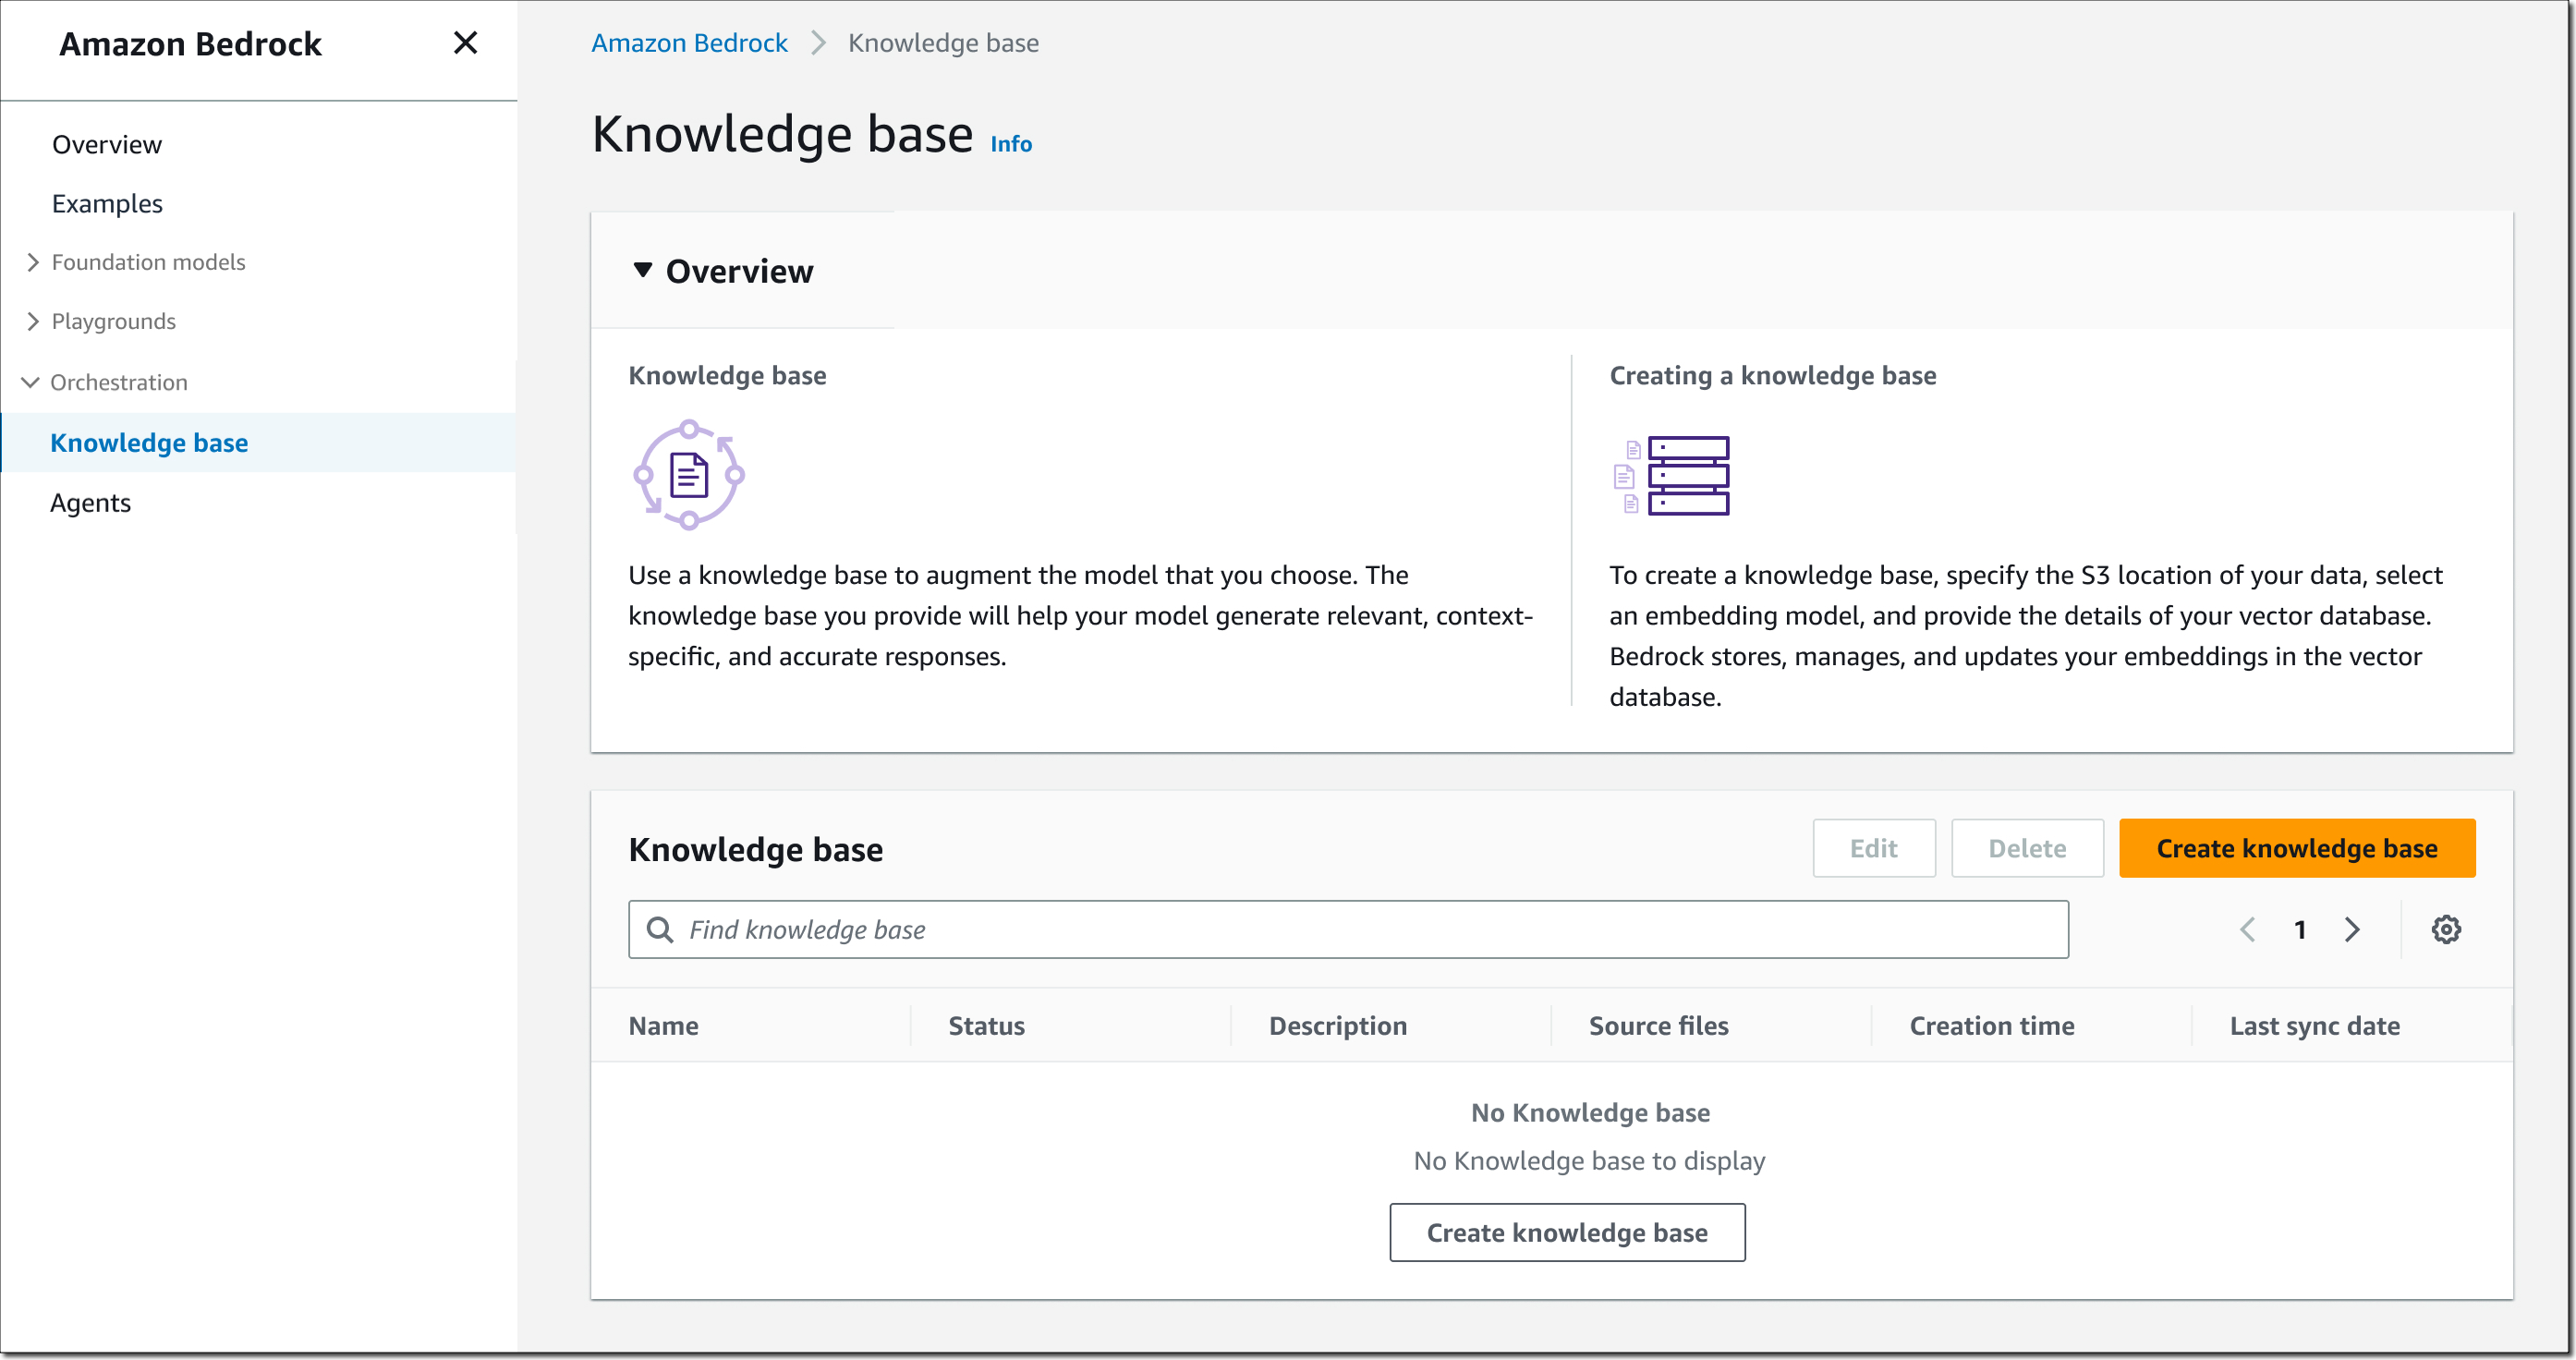
Back in September, we introduced Knowledge Bases for Amazon Bedrock in preview. Starting today, Knowledge Bases for Amazon Bedrock is generally available.

With a knowledge base, you can securely connect foundation models (FMs) in Amazon Bedrock to your company data for Retrieval Augmented Generation (RAG). Access to additional data helps the model generate more relevant, context-specific, and accurate responses without continuously retraining the FM. All information retrieved from knowledge bases comes with source attribution to improve transparency and minimize hallucinations. If you’re curious how this works, check out my previous post that includes a primer on RAG.

With today’s launch, Knowledge Bases gives you a fully managed RAG experience and the easiest way to get started with RAG in Amazon Bedrock. Knowledge Bases now manages the initial vector store setup, handles the embedding and querying, and provides source attribution and short-term memory needed for production RAG applications. If needed, you can also customize the RAG workflows to meet specific use case requirements or integrate RAG with other generative artificial intelligence (AI) tools and applications.

Fully managed RAG experience
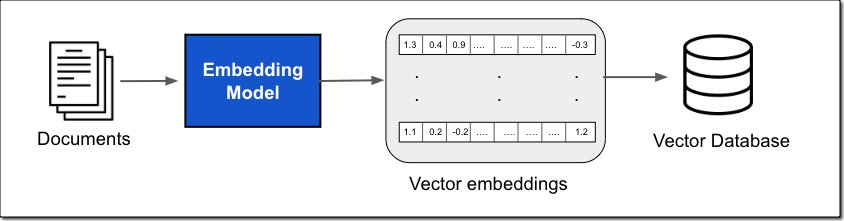
Knowledge Bases for Amazon Bedrock manages the end-to-end RAG workflow for you. You specify the location of your data, select an embedding model to convert the data into vector embeddings, and have Amazon Bedrock create a vector store in your account to store the vector data. When you select this option (available only in the console), Amazon Bedrock creates a vector index in Amazon OpenSearch Serverless in your account, removing the need to manage anything yourself.

Knowledge bases for Amazon Bedrock

Vector embeddings include the numeric representations of text data within your documents. Each embedding aims to capture the semantic or contextual meaning of the data. Amazon Bedrock takes care of creating, storing, managing, and updating your embeddings in the vector store, and it ensures your data is always in sync with your vector store.

Amazon Bedrock now also supports two new APIs for RAG that handle the embedding and querying and provide the source attribution and short-term memory needed for production RAG applications.

With the new RetrieveAndGenerate API, you can directly retrieve relevant information from your knowledge bases and have Amazon Bedrock generate a response from the results by specifying a FM in your API call. Let me show you how this works.

Use the RetrieveAndGenerate API
To give it a try, navigate to the Amazon Bedrock console, create and select a knowledge base, then select Test knowledge base. For this demo, I created a knowledge base that has access to a PDF of Generative AI on AWS. I choose Select Model to specify a FM.

Knowledge Bases for Amazon Bedrock

Then, I ask, “What is Amazon Bedrock?”

Knowledge Bases for Amazon Bedrock

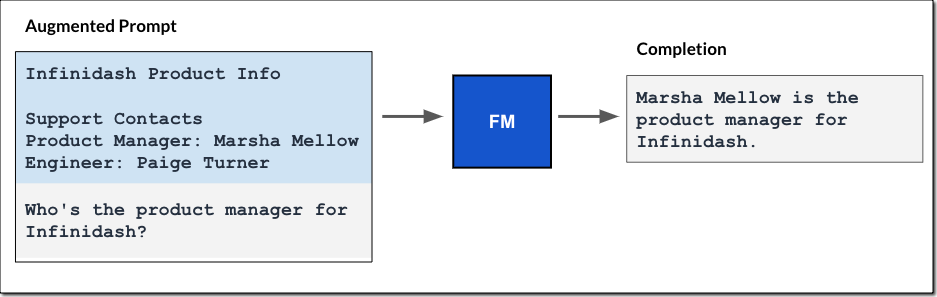
Behind the scenes, Amazon Bedrock converts the queries into embeddings, queries the knowledge base, and then augments the FM prompt with the search results as context information and returns the FM-generated response to my question. For multi-turn conversations, Knowledge Bases manages the short-term memory of the conversation to provide more contextual results.

Here’s a quick demo of how to use the APIs with the AWS SDK for Python (Boto3).

def retrieveAndGenerate(input, kbId):
    return bedrock_agent_runtime.retrieve_and_generate(
        input={
            'text': input
        },
        retrieveAndGenerateConfiguration={
            'type': 'KNOWLEDGE_BASE',
            'knowledgeBaseConfiguration': {
                'knowledgeBaseId': kbId,
                'modelArn': 'arn:aws:bedrock:us-east-1::foundation-model/anthropic.claude-instant-v1'
                }
            }
        )

response = retrieveAndGenerate("What is Amazon Bedrock?", "AES9P3MT9T")["output"]["text"]

The output of the RetrieveAndGenerate API includes the generated response, the source attribution, and the retrieved text chunks. In my demo, the API response looks like this (with some of the output redacted for brevity):


{ ... 
    'output': {'text': 'Amazon Bedrock is a managed service from AWS that ...'}, 
    'citations': 
        [{'generatedResponsePart': 
             {'textResponsePart': 
                 {'text': 'Amazon Bedrock is ...', 'span': {'start': 0, 'end': 241}}
             }, 
	      'retrievedReferences': 
			[{'content':
                 {'text': 'All AWS-managed service API activity...'}, 
				 'location': {'type': 'S3', 's3Location': {'uri': 's3://data-generative-ai-on-aws/gaia.pdf'}}}, 
		     {'content': 
			      {'text': 'Changing a portion of the image using ...'}, 
				  'location': {'type': 'S3', 's3Location': {'uri': 's3://data-generative-ai-on-aws/gaia.pdf'}}}, ...]
        ...}]
}

The generated response looks like this:

Amazon Bedrock is a managed service that offers a serverless experience for generative AI through a simple API. It provides access to foundation models from Amazon and third parties for tasks like text generation, image generation, and building conversational agents. Data processed through Amazon Bedrock remains private and encrypted.

Customize RAG workflows
If you want to process the retrieved text chunks further, see the relevance scores of the retrievals, or develop your own orchestration for text generation, you can use the new Retrieve API. This API converts user queries into embeddings, searches the knowledge base, and returns the relevant results, giving you more control to build custom workflows on top of the semantic search results.

Use the Retrieve API
In the Amazon Bedrock console, I toggle the switch to disable Generate responses.

Knowledge Bases for Amazon Bedrock

Then, I ask again, “What is Amazon Bedrock?” This time, the output shows me the retrieval results with links to the source documents where the text chunks came from.

Knowledge Bases for Amazon Bedrock

Here’s how to use the Retrieve API with boto3.

import boto3

bedrock_agent_runtime = boto3.client(
    service_name = "bedrock-agent-runtime"
)

def retrieve(query, kbId, numberOfResults=5):
    return bedrock_agent_runtime.retrieve(
        retrievalQuery= {
            'text': query
        },
        knowledgeBaseId=kbId,
        retrievalConfiguration= {
            'vectorSearchConfiguration': {
                'numberOfResults': numberOfResults
            }
        }
    )

response = retrieve("What is Amazon Bedrock?", "AES9P3MT9T")["retrievalResults"]

The output of the Retrieve API includes the retrieved text chunks, the location type and URI of the source data, and the scores of the retrievals. The score helps to determine chunks that match more closely with the query.

In my demo, the API response looks like this (with some of the output redacted for brevity):

[{'content': {'text': 'Changing a portion of the image using ...'},
  'location': {'type': 'S3',
   's3Location': {'uri': 's3://data-generative-ai-on-aws/gaia.pdf'}},
  'score': 0.7329834},
 {'content': {'text': 'back to the user in natural language. For ...'},
  'location': {'type': 'S3',
   's3Location': {'uri': 's3://data-generative-ai-on-aws/gaia.pdf'}},
  'score': 0.7331088},
...]
		 

To further customize your RAG workflows, you can define a custom chunking strategy and select a custom vector store.

Custom chunking strategy – To enable effective retrieval from your data, a common practice is to first split the documents into manageable chunks. This enhances the model’s capacity to comprehend and process information more effectively, leading to improved relevant retrievals and generation of coherent responses. Knowledge Bases for Amazon Bedrock manages the chunking of your documents.

When you configure the data source for your knowledge base, you can now define a chunking strategy. Default chunking splits data into chunks of up to 200 tokens and is optimized for question-answer tasks. Use default chunking when you are not sure of the optimal chunk size for your data.

You also have the option to specify a custom chunk size and overlap with fixed-size chunking. Use fixed-size chunking if you know the optimal chunk size and overlap for your data (based on file attributes, accuracy testing, and so on). An overlap between chunks in the recommended range of 0–20 percent can help improve accuracy. Higher overlap can lead to decreased relevancy scores.

If you select to create one embedding per document, Knowledge Bases keeps each file as a single chunk. Use this option if you don’t want Amazon Bedrock to chunk your data, for example, if you want to chunk your data offline using an algorithm that is specific to your use case. Common use cases include code documentation.

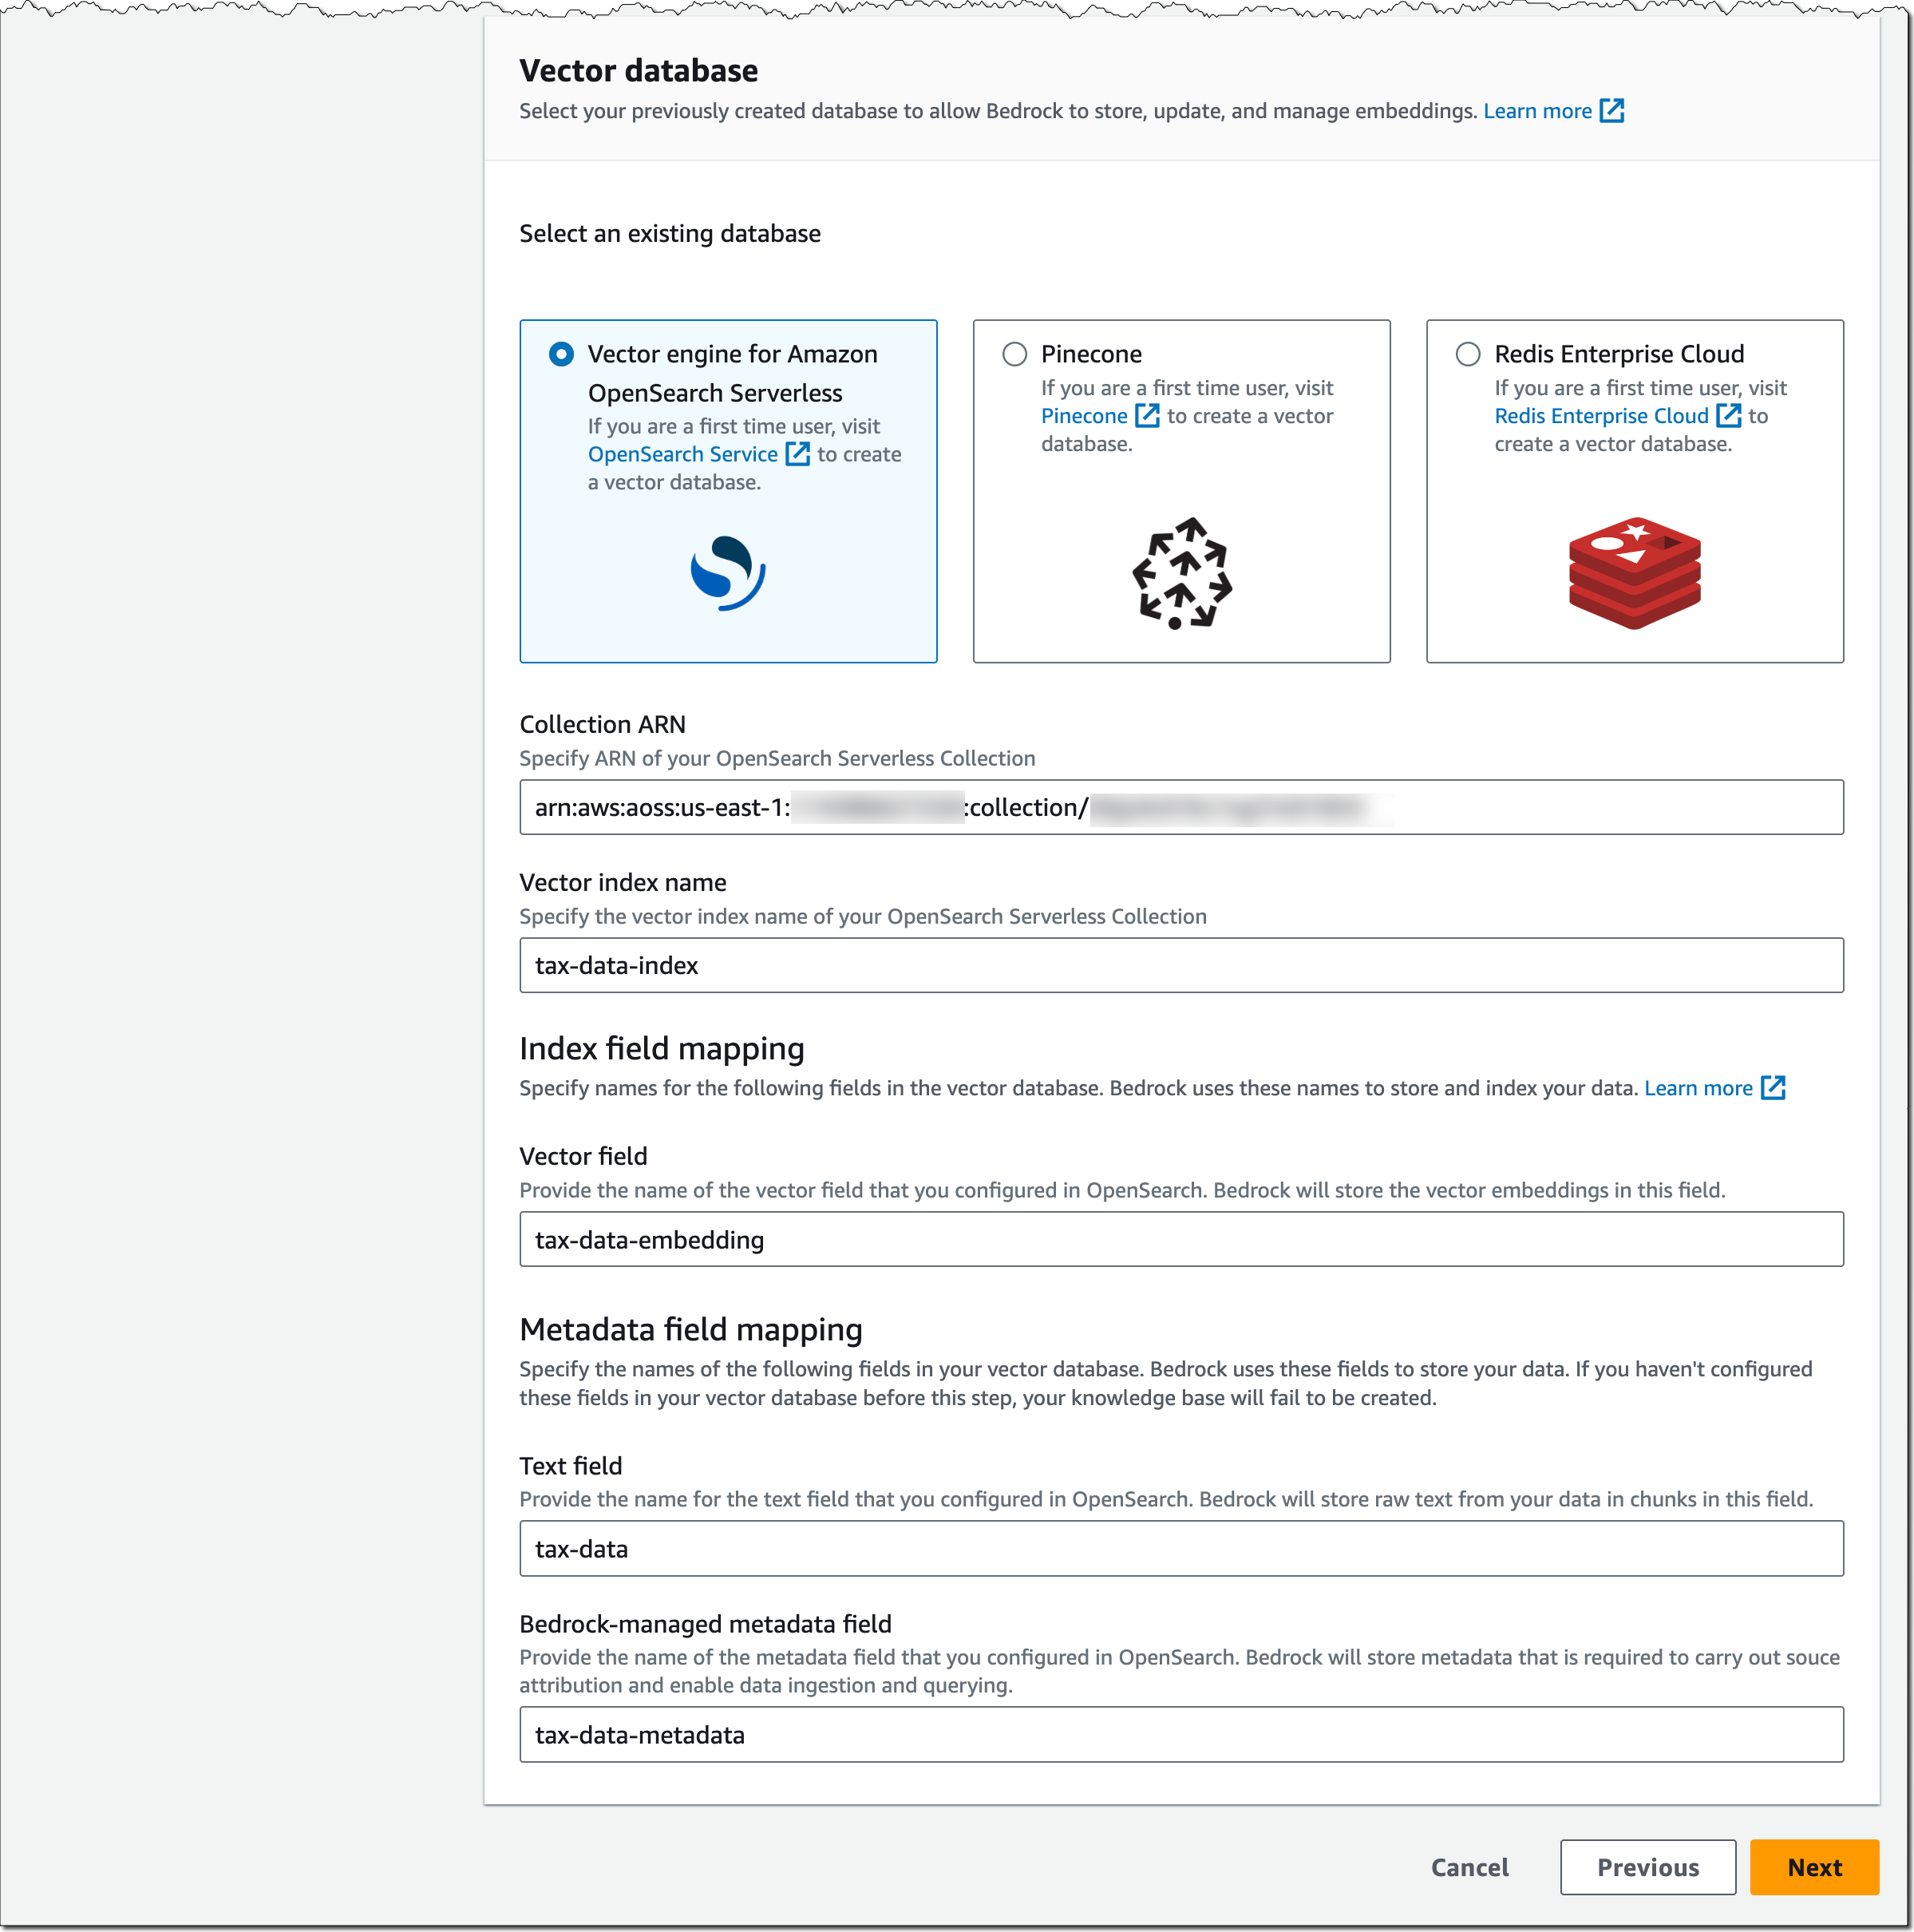
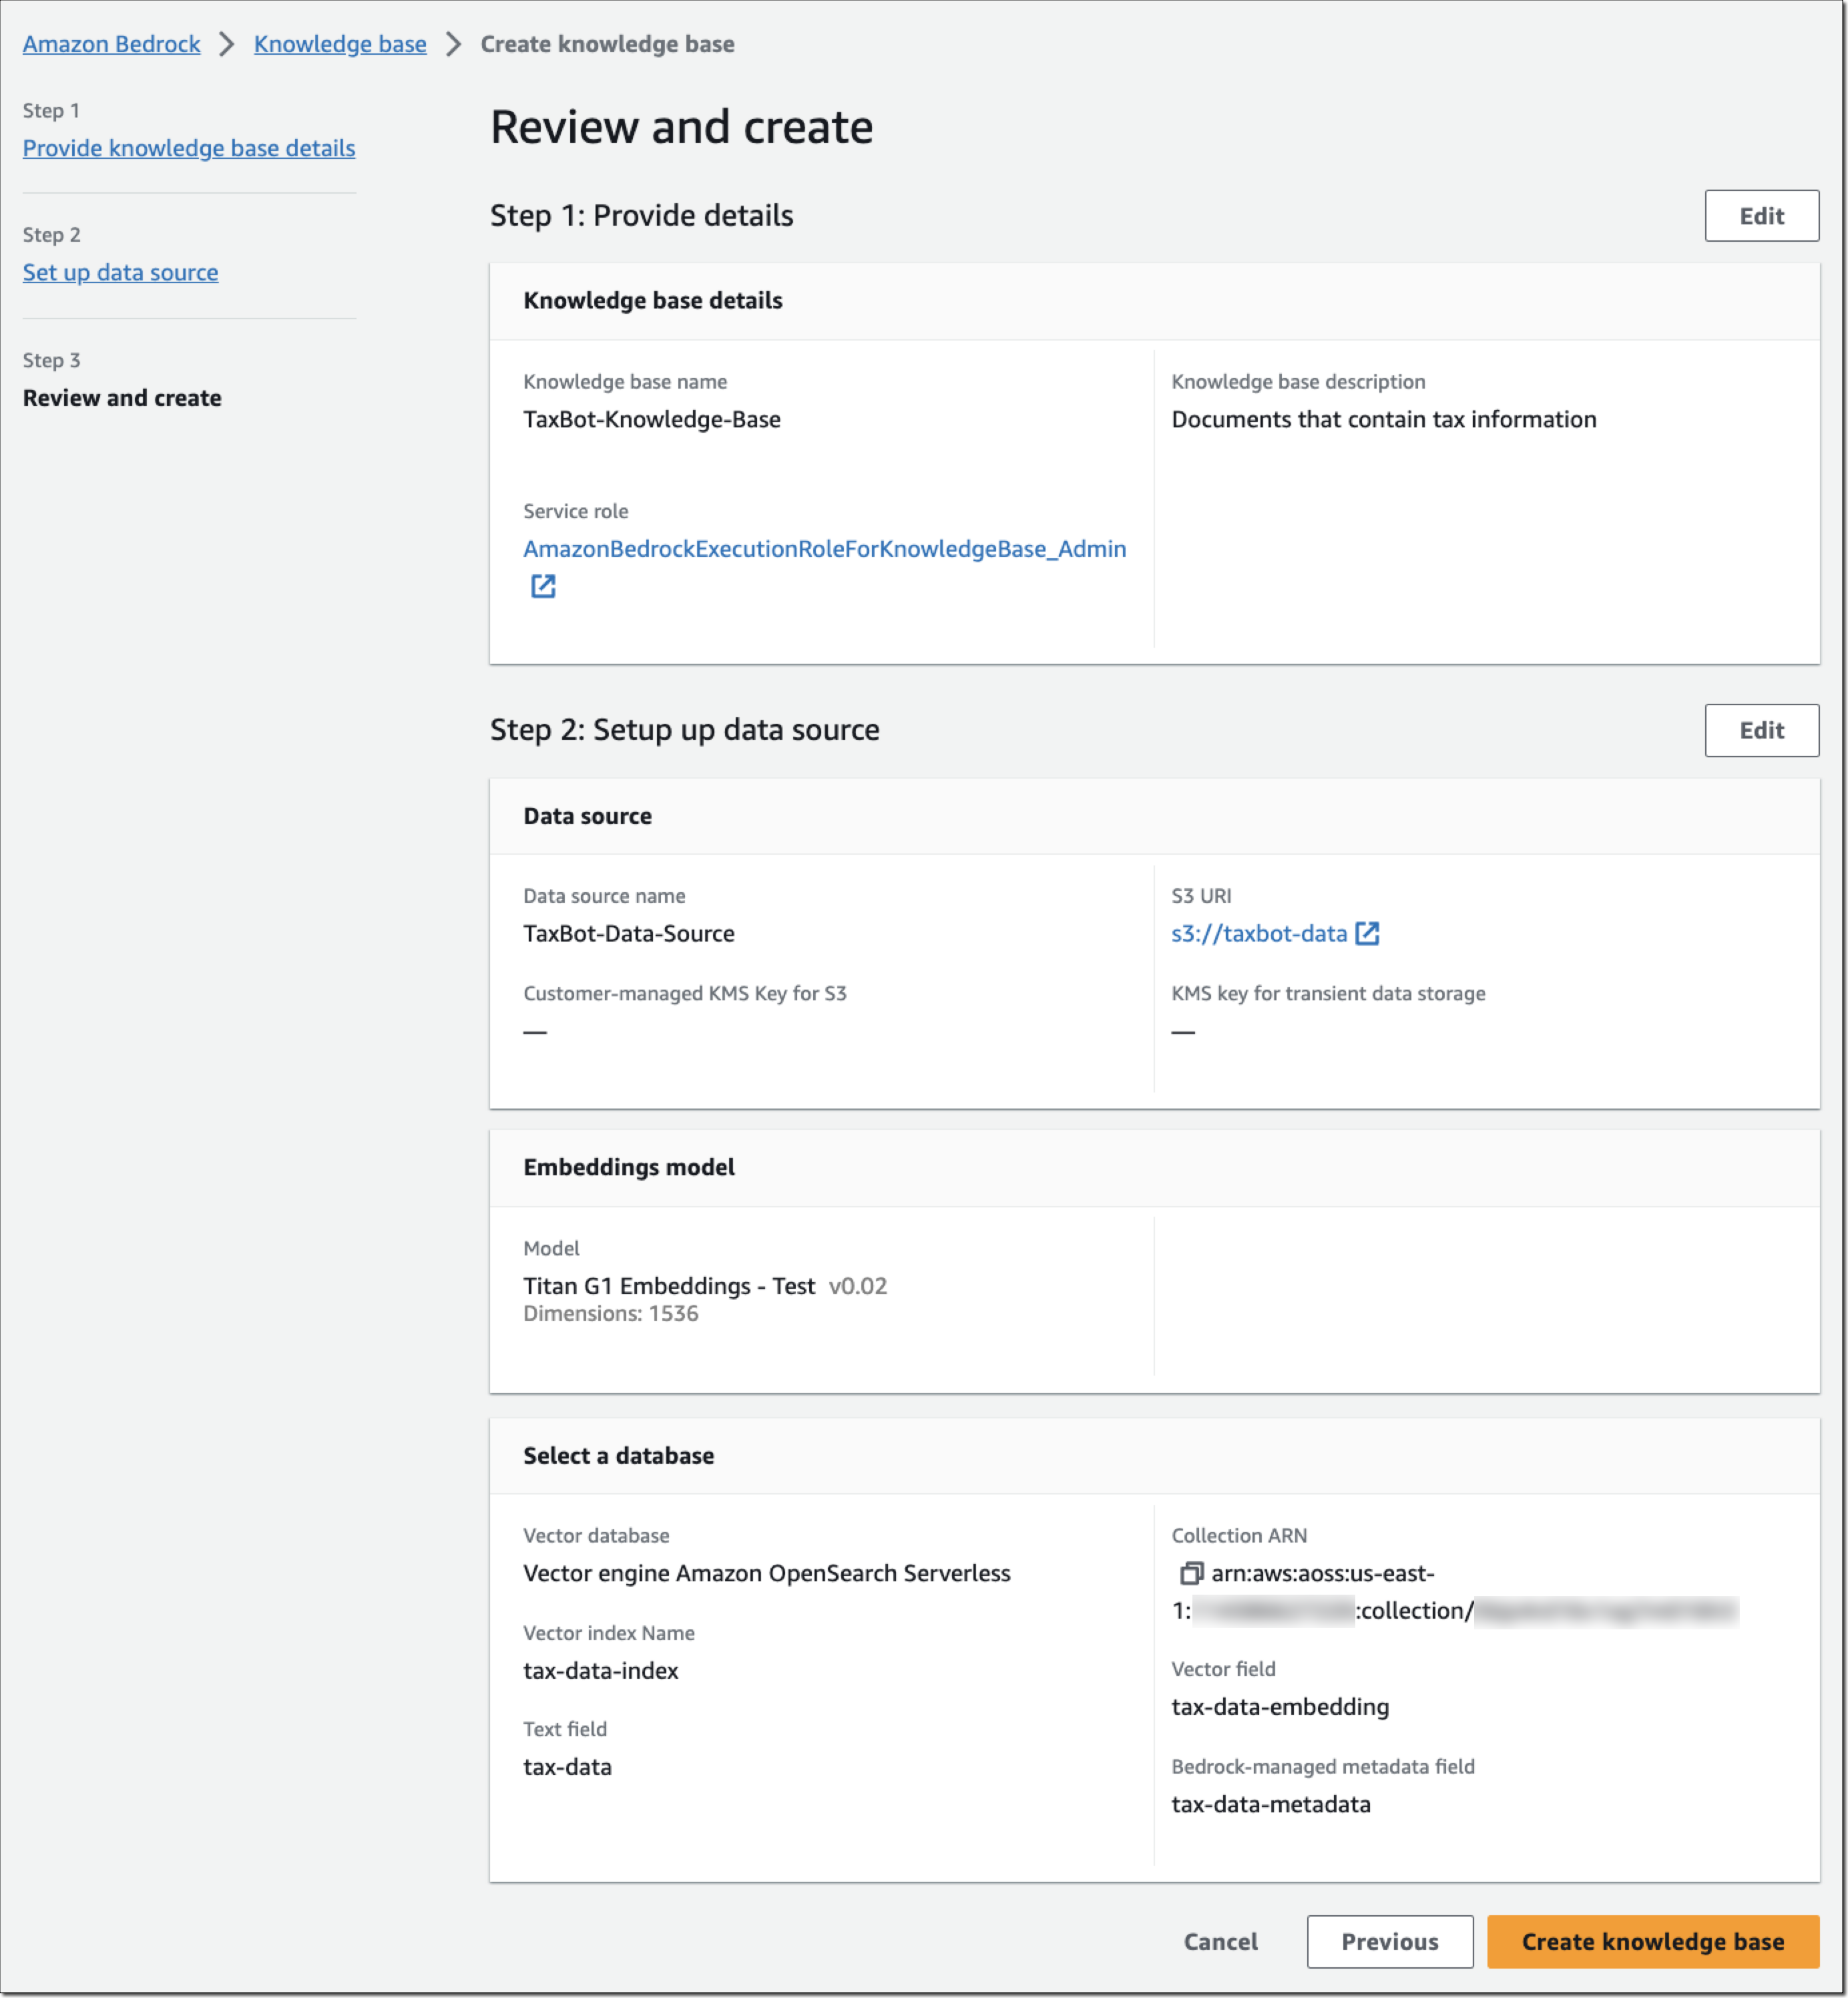
Custom vector store – You can also select a custom vector store. The available vector database options include vector engine for Amazon OpenSearch Serverless, Pinecone, and Redis Enterprise Cloud. To use a custom vector store, you must create a new, empty vector database from the list of supported options and provide the vector database index name as well as index field and metadata field mappings. This vector database will need to be for exclusive use with Amazon Bedrock.

Knowledge Bases for Amazon Bedrock

Integrate RAG with other generative AI tools and applications
If you want to build an AI assistant that can perform multistep tasks and access company data sources to generate more relevant and context-aware responses, you can integrate Knowledge Bases with Agents for Amazon Bedrock. You can also use the Knowledge Bases retrieval plugin for LangChain to integrate RAG workflows into your generative AI applications.

Availability
Knowledge bases for Amazon Bedrock is available today in AWS Regions US East (N. Virginia) and US West (Oregon).

Learn more

— Antje

AWS Weekly Roundup: AWS Control Tower, Amazon Bedrock, Amazon OpenSearch Service, and More (October 9, 2023)

Post Syndicated from Antje Barth original https://aws.amazon.com/blogs/aws/aws-weekly-roundup-aws-control-tower-amazon-bedrock-amazon-opensearch-service-and-more-october-9-2023/

Pumpkins

As the Northern Hemisphere enjoys early fall and pumpkins take over the local farmers markets and coffee flavors here in the United States, we’re also just 50 days away from re:Invent 2023! But before we officially enter pre:Invent sea­­son, let’s have a look at some of last week’s exciting news and announcements.

Last Week’s Launches
Here are some launches that got my attention:

AWS Control Tower – AWS Control Tower released 22 proactive controls and 10 AWS Security Hub detective controls to help you meet regulatory requirements and meet control objectives such as encrypting data in transit, encrypting data at rest, or using strong authentication. For more details and a list of controls, check out the AWS Control Tower user guide.

Amazon Bedrock – Just a week after Amazon Bedrock became available in AWS Regions US East (N. Virginia) and US West (Oregon), Amazon Bedrock is now also available in the Asia Pacific (Tokyo) AWS Region. To get started building and scaling generative AI applications with foundation models, check out the Amazon Bedrock documentation, explore the generative AI space at community.aws, and get hands-on with the Amazon Bedrock workshop.

Amazon OpenSearch Service – You can now run OpenSearch version 2.9 in Amazon OpenSearch Service with improvements to search, observability, security analytics, and machine learning (ML) capabilities. OpenSearch Service has expanded its geospatial aggregations support in version 2.9 to gather insights on high-level overview of trends and patterns and establish correlations within the data. OpenSearch Service 2.9 now also comes with OpenSearch Service Integrations to take advantage of new schema standards such as OpenTelemetry and supports managing and overlaying alerts and anomalies onto dashboard visualization line charts.

Amazon SageMakerSageMaker Feature Store now supports a fully managed, in-memory online store to help you retrieve features for model serving in real time for high throughput ML applications. The new online store is powered by ElastiCache for Redis, an in-memory data store built on open-source Redis. The SageMaker developer guide has all the details.

Also, SageMaker Model Registry added support for private model repositories. You can now register models that are stored in private Docker repositories and track all your models across multiple private AWS and non-AWS model repositories in one central service, simplifying ML operations (MLOps) and ML governance at scale. The SageMaker Developer Guide shows you how to get started.

Amazon SageMaker CanvasSageMaker Canvas expanded its support for ready-to-use models to include foundation models (FMs). You can now access FMs such as Claude 2, Amazon Titan, and Jurassic-2 (powered by Amazon Bedrock) as well as publicly available models such as Falcon and MPT (powered by SageMaker JumpStart) through a no-code chat interface. Check out the SageMaker Developer Guide for more details.

For a full list of AWS announcements, be sure to keep an eye on the What’s New at AWS page.

Other AWS News
Here are some additional blog posts and news items that you might find interesting:

Behind the scenes on AWS contributions to open-source databases – This post shares some of the more substantial open-source contributions AWS has made in the past two years to upstream databases, introduces some key contributors, and shares how AWS approaches upstream work in our database services.

Fast and cost-effective Llama 2 fine-tuning with AWS Trainium – This post shows you how to fine-tune the Llama 2 model from Meta on AWS Trainium, a purpose-built accelerator for LLM training, to reduce training times and costs.

Code Llama code generation models from Meta are now available via Amazon SageMaker JumpStart – You can now deploy Code Llama FMs, developed by Meta, with one click in SageMaker JumpStart. This post walks you through the details.

Upcoming AWS Events
Check your calendars and sign up for these AWS events:

Build On AWS - Generative AIBuild On Generative AI – Season 2 of this weekly Twitch show about all things generative AI is in full swing! Every Monday, 9:00 US PT, my colleagues Emily and Darko look at new technical and scientific patterns on AWS, invite guest speakers to demo their work, and show us how they built something new to improve the state of generative AI. In today’s episode, Emily and Darko discussed how to translate unstructured documents into structured data. Check out show notes and the full list of episodes on community.aws.

AWS Community Days – Join a community-led conference run by AWS user group leaders in your region: DMV (DC, Maryland, Virginia) (October 13), Italy (October 18), UAE (October 21), Jaipur (November 4), Vadodara (November 4), and Brasil (November 4).

AWS InnovateAWS Innovate: Every Application Edition – Join our free online conference to explore cutting-edge ways to enhance security and reliability, optimize performance on a budget, speed up application development, and revolutionize your applications with generative AI. Register for AWS Innovate Online Americas and EMEA on October 19 and AWS Innovate Online Asia Pacific & Japan on October 26.

AWS re:Invent 2023AWS re:Invent (November 27 – December 1) – Join us to hear the latest from AWS, learn from experts, and connect with the global cloud community. Browse the session catalog and attendee guides and check out the re:Invent highlights for generative AI.

You can browse all upcoming in-person and virtual events.

That’s all for this week. Check back next Monday for another Weekly Roundup!

— Antje

This post is part of our Weekly Roundup series. Check back each week for a quick roundup of interesting news and announcements from AWS!

Amazon Bedrock Is Now Generally Available – Build and Scale Generative AI Applications with Foundation Models

Post Syndicated from Antje Barth original https://aws.amazon.com/blogs/aws/amazon-bedrock-is-now-generally-available-build-and-scale-generative-ai-applications-with-foundation-models/

This April, we announced Amazon Bedrock as part of a set of new tools for building with generative AI on AWS. Amazon Bedrock is a fully managed service that offers a choice of high-performing foundation models (FMs) from leading AI companies, including AI21 Labs, Anthropic, Cohere, Stability AI, and Amazon, along with a broad set of capabilities to build generative AI applications, simplifying the development while maintaining privacy and security.

Today, I’m happy to announce that Amazon Bedrock is now generally available! I’m also excited to share that Meta’s Llama 2 13B and 70B parameter models will soon be available on Amazon Bedrock.

Amazon Bedrock

Amazon Bedrock’s comprehensive capabilities help you experiment with a variety of top FMs, customize them privately with your data using techniques such as fine-tuning and retrieval-augmented generation (RAG), and create managed agents that perform complex business tasks—all without writing any code. Check out my previous posts to learn more about agents for Amazon Bedrock and how to connect FMs to your company’s data sources.

Note that some capabilities, such as agents for Amazon Bedrock, including knowledge bases, continue to be available in preview. I’ll share more details on what capabilities continue to be available in preview towards the end of this blog post.

Since Amazon Bedrock is serverless, you don’t have to manage any infrastructure, and you can securely integrate and deploy generative AI capabilities into your applications using the AWS services you are already familiar with.

Amazon Bedrock is integrated with Amazon CloudWatch and AWS CloudTrail to support your monitoring and governance needs. You can use CloudWatch to track usage metrics and build customized dashboards for audit purposes. With CloudTrail, you can monitor API activity and troubleshoot issues as you integrate other systems into your generative AI applications. Amazon Bedrock also allows you to build applications that are in compliance with the GDPR and you can use Amazon Bedrock to run sensitive workloads regulated under the U.S. Health Insurance Portability and Accountability Act (HIPAA).

Get Started with Amazon Bedrock
You can access available FMs in Amazon Bedrock through the AWS Management Console, AWS SDKs, and open-source frameworks such as LangChain.

In the Amazon Bedrock console, you can browse FMs and explore and load example use cases and prompts for each model. First, you need to enable access to the models. In the console, select Model access in the left navigation pane and enable the models you would like to access. Once model access is enabled, you can try out different models and inference configuration settings to find a model that fits your use case.

For example, here’s a contract entity extraction use case example using Cohere’s Command model:

Amazon Bedrock

The example shows a prompt with a sample response, the inference configuration parameter settings for the example, and the API request that runs the example. If you select Open in Playground, you can explore the model and use case further in an interactive console experience.

Amazon Bedrock offers chat, text, and image model playgrounds. In the chat playground, you can experiment with various FMs using a conversational chat interface. The following example uses Anthropic’s Claude model:

Amazon Bedrock

As you evaluate different models, you should try various prompt engineering techniques and inference configuration parameters. Prompt engineering is a new and exciting skill focused on how to better understand and apply FMs to your tasks and use cases. Effective prompt engineering is about crafting the perfect query to get the most out of FMs and obtain proper and precise responses. In general, prompts should be simple, straightforward, and avoid ambiguity. You can also provide examples in the prompt or encourage the model to reason through more complex tasks.

Inference configuration parameters influence the response generated by the model. Parameters such as Temperature, Top P, and Top K give you control over the randomness and diversity, and Maximum Length or Max Tokens control the length of model responses. Note that each model exposes a different but often overlapping set of inference parameters. These parameters are either named the same between models or similar enough to reason through when you try out different models.

We discuss effective prompt engineering techniques and inference configuration parameters in more detail in week 1 of the Generative AI with Large Language Models on-demand course, developed by AWS in collaboration with DeepLearning.AI. You can also check the Amazon Bedrock documentation and the model provider’s respective documentation for additional tips.

Next, let’s see how you can interact with Amazon Bedrock via APIs.

Using the Amazon Bedrock API
Working with Amazon Bedrock is as simple as selecting an FM for your use case and then making a few API calls. In the following code examples, I’ll use the AWS SDK for Python (Boto3) to interact with Amazon Bedrock.

List Available Foundation Models
First, let’s set up the boto3 client and then use list_foundation_models() to see the most up-to-date list of available FMs:

import boto3
import json

bedrock = boto3.client(
    service_name='bedrock', 
    region='us-east-1'
)

bedrock.list_foundation_models()

Run Inference Using Amazon Bedrock’s InvokeModel API
Next, let’s perform an inference request using Amazon Bedrock’s InvokeModel API and boto3 runtime client. The runtime client manages the data plane APIs, including the InvokeModel API.

Amazon Bedrock

The InvokeModel API expects the following parameters:

{
    "modelId": <MODEL_ID>,
    "contentType": "application/json",
    "accept": "application/json",
    "body": <BODY>
}

The modelId parameter identifies the FM you want to use. The request body is a JSON string containing the prompt for your task, together with any inference configuration parameters. Note that the prompt format will vary based on the selected model provider and FM. The contentType and accept parameters define the MIME type of the data in the request body and response and default to application/json. For more information on the latest models, InvokeModel API parameters, and prompt formats, see the Amazon Bedrock documentation.

Example: Text Generation Using AI21 Lab’s Jurassic-2 Model
Here is a text generation example using AI21 Lab’s Jurassic-2 Ultra model. I’ll ask the model to tell me a knock-knock joke—my version of a Hello World.

bedrock_runtime = boto3.client(
    service_name='bedrock-runtime', 
    region='us-east-1'
)

modelId = 'ai21.j2-ultra-v1' 
accept = 'application/json'
contentType = 'application/json'

body = json.dumps(
    {"prompt": "Knock, knock!", 
     "maxTokens": 200,
     "temperature": 0.7,
     "topP": 1,
    }
)

response = bedrock_runtime.invoke_model(
    body=body, 
	modelId=modelId, 
	accept=accept, 
	contentType=contentType
)

response_body = json.loads(response.get('body').read())

Here’s the response:

outputText = response_body.get('completions')[0].get('data').get('text')
print(outputText)
Who's there? 
Boo! 
Boo who? 
Don't cry, it's just a joke!

You can also use the InvokeModel API to interact with embedding models.

Example: Create Text Embeddings Using Amazon’s Titan Embeddings Model
Text embedding models translate text inputs, such as words, phrases, or possibly large units of text, into numerical representations, known as embedding vectors. Embedding vectors capture the semantic meaning of the text in a high-dimension vector space and are useful for applications such as personalization or search. In the following example, I’m using the Amazon Titan Embeddings model to create an embedding vector.

prompt = "Knock-knock jokes are hilarious."

body = json.dumps({
    "inputText": prompt,
})

model_id = 'amazon.titan-embed-g1-text-02'
accept = 'application/json' 
content_type = 'application/json'

response = bedrock_runtime.invoke_model(
    body=body, 
    modelId=model_id, 
    accept=accept, 
    contentType=content_type
)

response_body = json.loads(response['body'].read())
embedding = response_body.get('embedding')

The embedding vector (shortened) will look similar to this:

[0.82421875, -0.6953125, -0.115722656, 0.87890625, 0.05883789, -0.020385742, 0.32421875, -0.00078201294, -0.40234375, 0.44140625, ...]

Note that Amazon Titan Embeddings is available today. The Amazon Titan Text family of models for text generation continues to be available in limited preview.

Run Inference Using Amazon Bedrock’s InvokeModelWithResponseStream API
The InvokeModel API request is synchronous and waits for the entire output to be generated by the model. For models that support streaming responses, Bedrock also offers an InvokeModelWithResponseStream API that lets you invoke the specified model to run inference using the provided input but streams the response as the model generates the output.

Amazon Bedrock

Streaming responses are particularly useful for responsive chat interfaces to keep the user engaged in an interactive application. Here is a Python code example using Amazon Bedrock’s InvokeModelWithResponseStream API:

response = bedrock_runtime.invoke_model_with_response_stream(
    modelId=modelId, 
    body=body)

stream = response.get('body')
if stream:
    for event in stream:
        chunk=event.get('chunk')
        if chunk:
            print(json.loads(chunk.get('bytes').decode))

Data Privacy and Network Security
With Amazon Bedrock, you are in control of your data, and all your inputs and customizations remain private to your AWS account. Your data, such as prompts, completions, and fine-tuned models, is not used for service improvement. Also, the data is never shared with third-party model providers.

Your data remains in the Region where the API call is processed. All data is encrypted in transit with a minimum of TLS 1.2 encryption. Data at rest is encrypted with AES-256 using AWS KMS managed data encryption keys. You can also use your own keys (customer managed keys) to encrypt the data.

You can configure your AWS account and virtual private cloud (VPC) to use Amazon VPC endpoints (built on AWS PrivateLink) to securely connect to Amazon Bedrock over the AWS network. This allows for secure and private connectivity between your applications running in a VPC and Amazon Bedrock.

Governance and Monitoring
Amazon Bedrock integrates with IAM to help you manage permissions for Amazon Bedrock. Such permissions include access to specific models, playground, or features within Amazon Bedrock. All AWS-managed service API activity, including Amazon Bedrock activity, is logged to CloudTrail within your account.

Amazon Bedrock emits data points to CloudWatch using the AWS/Bedrock namespace to track common metrics such as InputTokenCount, OutputTokenCount, InvocationLatency, and (number of) Invocations. You can filter results and get statistics for a specific model by specifying the model ID dimension when you search for metrics. This near real-time insight helps you track usage and cost (input and output token count) and troubleshoot performance issues (invocation latency and number of invocations) as you start building generative AI applications with Amazon Bedrock.

Billing and Pricing Models
Here are a couple of things around billing and pricing models to keep in mind when using Amazon Bedrock:

Billing – Text generation models are billed per processed input tokens and per generated output tokens. Text embedding models are billed per processed input tokens. Image generation models are billed per generated image.

Pricing Models – Amazon Bedrock offers two pricing models, on-demand and provisioned throughput. On-demand pricing allows you to use FMs on a pay-as-you-go basis without having to make any time-based term commitments. Provisioned throughput is primarily designed for large, consistent inference workloads that need guaranteed throughput in exchange for a term commitment. Here, you specify the number of model units of a particular FM to meet your application’s performance requirements as defined by the maximum number of input and output tokens processed per minute. For detailed pricing information, see Amazon Bedrock Pricing.

Now Available
Amazon Bedrock is available today in AWS Regions US East (N. Virginia) and US West (Oregon). To learn more, visit Amazon Bedrock, check the Amazon Bedrock documentation, explore the generative AI space at community.aws, and get hands-on with the Amazon Bedrock workshop. You can send feedback to AWS re:Post for Amazon Bedrock or through your usual AWS contacts.

(Available in Preview) The Amazon Titan Text family of text generation models, Stability AI’s Stable Diffusion XL image generation model, and agents for Amazon Bedrock, including knowledge bases, continue to be available in preview. Reach out through your usual AWS contacts if you’d like access.

(Coming Soon) The Llama 2 13B and 70B parameter models by Meta will soon be available via Amazon Bedrock’s fully managed API for inference and fine-tuning.

Start building generative AI applications with Amazon Bedrock, today!

— Antje

Preview – Connect Foundation Models to Your Company Data Sources with Agents for Amazon Bedrock

Post Syndicated from Antje Barth original https://aws.amazon.com/blogs/aws/preview-connect-foundation-models-to-your-company-data-sources-with-agents-for-amazon-bedrock/

In July, we announced the preview of agents for Amazon Bedrock, a new capability for developers to create generative AI applications that complete tasks. Today, I’m happy to introduce a new capability to securely connect foundation models (FMs) to your company data sources using agents.

With a knowledge base, you can use agents to give FMs in Bedrock access to additional data that helps the model generate more relevant, context-specific, and accurate responses without continuously retraining the FM. Based on user input, agents identify the appropriate knowledge base, retrieve the relevant information, and add the information to the input prompt, giving the model more context information to generate a completion.

Knowledge Base for Amazon Bedrock

Agents for Amazon Bedrock use a concept known as retrieval augmented generation (RAG) to achieve this. To create a knowledge base, specify the Amazon Simple Storage Service (Amazon S3) location of your data, select an embedding model, and provide the details of your vector database. Bedrock converts your data into embeddings and stores your embeddings in the vector database. Then, you can add the knowledge base to agents to enable RAG workflows.

For the vector database, you can choose between vector engine for Amazon OpenSearch Serverless, Pinecone, and Redis Enterprise Cloud. I’ll share more details on how to set up your vector database later in this post.

Primer on Retrieval Augmented Generation, Embeddings, and Vector Databases
RAG isn’t a specific set of technologies but a concept for providing FMs access to data they didn’t see during training. Using RAG, you can augment FMs with additional information, including company-specific data, without continuously retraining your model.

Continuously retraining your model is not only compute-intensive and expensive, but as soon as you’ve retrained the model, your company might have already generated new data, and your model has stale information. RAG addresses this issue by providing your model access to additional external data at runtime. Relevant data is then added to the prompt to help improve both the relevance and the accuracy of completions.

This data can come from a number of data sources, such as document stores or databases. A common implementation for document search is converting your documents, or chunks of the documents, into vector embeddings using an embedding model and then storing the vector embeddings in a vector database, as shown in the following figure.

Knowledge Base for Amazon Bedrock

The vector embedding includes the numeric representations of text data within your documents. Each embedding aims to capture the semantic or contextual meaning of the data. Each vector embedding is put into a vector database, often with additional metadata such as a reference to the original content the embedding was created from. The vector database then indexes the vectors, which can be done using a variety of approaches. This indexing enables quick retrieval of relevant data.

Compared to traditional keyword search, vector search can find relevant results without requiring an exact keyword match. For example, if you search for “What is the cost of product X?” and your documents say “The price of product X is […]”, then keyword search might not work because “price” and “cost” are two different words. With vector search, it will return the accurate result because “price” and “cost” are semantically similar; they have the same meaning. Vector similarity is calculated using distance metrics such as Euclidean distance, cosine similarity, or dot product similarity.

The vector database is then used within the prompt workflow to efficiently retrieve external information based on an input query, as shown in the figure below.

Knowledge Base for Amazon Bedrock

The workflow starts with a user input prompt. Using the same embedding model, you create a vector embedding representation of the input prompt. This embedding is then used to query the database for similar vector embeddings to return the most relevant text as the query result.

The query result is then added to the prompt, and the augmented prompt is passed to the FM. The model uses the additional context in the prompt to generate the completion, as shown in the following figure.

Knowledge Stores for Amazon Bedrock

Similar to the fully managed agents experience I described in the blog post on agents for Amazon Bedrock, the knowledge base for Amazon Bedrock manages the data ingestion workflow, and agents manage the RAG workflow for you.

Get Started with Knowledge Bases for Amazon Bedrock
You can add a knowledge base by specifying a data source, such as Amazon S3, select an embedding model, such as Amazon Titan Embeddings to convert the data into vector embeddings, and a destination vector database to store the vector data. Bedrock takes care of creating, storing, managing, and updating your embeddings in the vector database.

If you add knowledge bases to an agent, the agent will identify the appropriate knowledge base based on user input, retrieve the relevant information, and add the information to the input prompt, providing the model with more context information to generate a response, as shown in the figure below. All information retrieved from knowledge bases comes with source attribution to improve transparency and minimize hallucinations.

Knowledge Base for Amazon Bedrock

Let me walk you through those steps in more detail.

Create a Knowledge Base for Amazon Bedrock
Let’s assume you’re a developer at a tax consulting company and want to provide users with a generative AI application—a TaxBot—that can answer US tax filing questions. You first create a knowledge base that holds the relevant tax documents. Then, you configure an agent in Bedrock with access to this knowledge base and integrate the agent into your TaxBot application.

To get started, open the Bedrock console, select Knowledge base in the left navigation pane, then choose Create knowledge base.

Knowledge Base for Amazon Bedrock

Step 1 – Provide knowledge base details. Enter a name for the knowledge base and a description (optional). You also must select an AWS Identity and Access Management (IAM) runtime role with a trust policy for Amazon Bedrock, permissions to access the S3 bucket you want the knowledge base to use, and read/write permissions to your vector database. You can also assign tags as needed.

Knowledge Base for Amazon Bedrock

Step 2 – Set up data source. Enter a data source name and specify the Amazon S3 location for your data. Supported data formats include .txt, .md, .html, .doc and .docx, .csv, .xls and .xlsx, and .pdf files. You can also provide an AWS Key Management Service (AWS KMS) key to allow Bedrock to decrypt and encrypt your data and another AWS KMS key for transient data storage while Bedrock is converting your data into embeddings.

Choose the embedding model, such as Amazon Titan Embeddings – Text, and your vector database. For the vector database, as mentioned earlier, you can choose between vector engine for Amazon OpenSearch Serverless, Pinecone, or Redis Enterprise Cloud.

Knowledge Base for Amazon Bedrock

Important note on the vector database: Amazon Bedrock is not creating a vector database on your behalf. You must create a new, empty vector database from the list of supported options and provide the vector database index name as well as index field and metadata field mappings. This vector database will need to be for exclusive use with Amazon Bedrock.

Let me show you what the setup looks like for vector engine for Amazon OpenSearch Serverless. Assuming you’ve set up an OpenSearch Serverless collection as described in the Developer Guide and this AWS Big Data Blog post, provide the ARN of the OpenSearch Serverless collection, specify the vector index name, and the vector field and metadata field mapping.

Knowledge Base for Amazon Bedrock

The configuration for Pinecone and Redis Enterprise Cloud is similar. Check out this Pinecone blog post and this Redis Inc. blog post for more details on how to set up and prepare their vector database for Bedrock.

Step 3 – Review and create. Review your knowledge base configuration and choose Create knowledge base.

Knowledge Base for Amazon Bedrock

Back in the knowledge base details page, choose Sync for the newly created data source, and whenever you add new data to the data source, to start the ingestion workflow of converting your Amazon S3 data into vector embeddings and upserting the embeddings into the vector database. Depending on the amount of data, this whole workflow can take some time.

Knowledge Base for Amazon Bedrock

Next, I’ll show you how to add the knowledge base to an agent configuration.

Add a Knowledge Base to Agents for Amazon Bedrock
You can add a knowledge base when creating or updating an agent for Amazon Bedrock. Create an agent as described in this AWS News Blog post on agents for Amazon Bedrock.

For my tax bot example, I’ve created an agent called “TaxBot,” selected a foundation model, and provided these instructions for the agent in step 2: “You are a helpful and friendly agent that answers US tax filing questions for users.” In step 4, you can now select a previously created knowledge base and provide instructions for the agent describing when to use this knowledge base.

Knowledge Base for Amazon Bedrock

These instructions are very important as they help the agent decide whether or not a particular knowledge base should be used for retrieval. The agent will identify the appropriate knowledge base based on user input and available knowledge base instructions.

For my tax bot example, I added the knowledge base “TaxBot-Knowledge-Base” together with these instructions: “Use this knowledge base to answer tax filing questions.”

Once you’ve finished the agent configuration, you can test your agent and how it’s using the added knowledge base. Note how the agent provides a source attribution for information pulled from knowledge bases.

Knowledge Base for Amazon Bedrock

Generative AI with large language modelsLearn the Fundamentals of Generative AI
Generative AI with large language models (LLMs) is an on-demand, three-week course for data scientists and engineers who want to learn how to build generative AI applications with LLMs, including RAG. It’s the perfect foundation to start building with Amazon Bedrock. Enroll for generative AI with LLMs today.

Sign up to Learn More about Amazon Bedrock (Preview)
Amazon Bedrock is currently available in preview. Reach out through your usual AWS support contacts if you’d like access to knowledge bases for Amazon Bedrock as part of the preview. We’re regularly providing access to new customers. To learn more, visit the Amazon Bedrock Features page and sign up to learn more about Amazon Bedrock.

— Antje

AWS Weekly Roundup – Amazon MWAA, EMR Studio, Generative AI, and More – August 14, 2023

Post Syndicated from Antje Barth original https://aws.amazon.com/blogs/aws/aws-weekly-roundup-amazon-mwaa-emr-studio-generative-ai-and-more-august-14-2023/

While I enjoyed a few days off in California to get a dose of vitamin sea, a lot has happened in the AWS universe. Let’s take a look together!

Last Week’s Launches
Here are some launches that got my attention:

Amazon MWAA now supports Apache Airflow version 2.6Amazon Managed Workflows for Apache Airflow (Amazon MWAA) is a managed orchestration service for Apache Airflow that you can use to set up and operate end-to-end data pipelines in the cloud. Apache Airflow version 2.6 introduces important security updates and bug fixes that enhance the security and reliability of your workflows. If you’re currently running Apache Airflow version 2.x, you can now seamlessly upgrade to version 2.6.3. Check out this AWS Big Data Blog post to learn more.

Amazon EMR Studio adds support for AWS Lake Formation fine-grained access controlAmazon EMR Studio is a web-based integrated development environment (IDE) for fully managed Jupyter notebooks that run on Amazon EMR clusters. When you connect to EMR clusters from EMR Studio workspaces, you can now choose the AWS Identity and Access Management (IAM) role that you want to connect with. Apache Spark interactive notebooks will access only the data and resources permitted by policies attached to this runtime IAM role. When data is accessed from data lakes managed with AWS Lake Formation, you can enforce table and column-level access using policies attached to this runtime role. For more details, have a look at the Amazon EMR documentation.

AWS Security Hub launches 12 new security controls AWS Security Hub is a cloud security posture management (CSPM) service that performs security best practice checks, aggregates alerts, and enables automated remediation. With the newly released controls, Security Hub now supports three additional AWS services: Amazon Athena, Amazon DocumentDB (with MongoDB compatibility), and Amazon Neptune. Security Hub has also added an additional control against Amazon Relational Database Service (Amazon RDS). AWS Security Hub now offers 276 controls. You can find more information in the AWS Security Hub documentation.

Additional AWS services available in the AWS Israel (Tel Aviv) Region – The AWS Israel (Tel Aviv) Region opened on August 1, 2023. This past week, AWS Service Catalog, Amazon SageMaker, Amazon EFS, and Amazon Kinesis Data Analytics were added to the list of available services in the Israel (Tel Aviv) Region. Check the AWS Regional Services List for the most up-to-date availability information.

For a full list of AWS announcements, be sure to keep an eye on the What’s New at AWS page.

Other AWS News
Here are some additional blog posts and news items that you might find interesting:

AWS recognized as a Leader in 2023 Gartner Magic Quadrant for Contact Center as a Service with Amazon Connect – AWS was named a Leader for the first time since Amazon Connect, our flexible, AI-powered cloud contact center, was launched in 2017. Read the full story here. 

Generate creative advertising using generative AI –  This AWS Machine Learning Blog post shows how to generate captivating and innovative advertisements at scale using generative AI. It discusses the technique of inpainting and how to seamlessly create image backgrounds, visually stunning and engaging content, and reducing unwanted image artifacts.

AWS open-source news and updates – My colleague Ricardo writes this weekly open-source newsletter in which he highlights new open-source projects, tools, and demos from the AWS Community.

Upcoming AWS Events
Check your calendars and sign up for these AWS events:

Build On AWS - Generative AIBuild On Generative AI – Your favorite weekly Twitch show about all things generative AI is back for season 2 today! Every Monday, 9:00 US PT, my colleagues Emily and Darko look at new technical and scientific patterns on AWS, inviting guest speakers to demo their work and show us how they built something new to improve the state of generative AI.

In today’s episode, Emily and Darko discussed the latest models LlaMa-2 and Falcon, and explored them in retrieval-augmented generation design patterns. You can watch the video here. Check out show notes and the full list of episodes on community.aws.

AWS NLP Conference 2023 – Join this in-person event on September 13–14 in London to hear about the latest trends, ground-breaking research, and innovative applications that leverage natural language processing (NLP) capabilities on AWS. This year, the conference will primarily focus on large language models (LLMs), as they form the backbone of many generative AI applications and use cases. Register here.

AWS Global Summits – The 2023 AWS Summits season is almost coming to an end with the last two in-person events in Mexico City (August 30) and Johannesburg (September 26).

AWS Community Days – Join a community-led conference run by AWS user group leaders in your region: West Africa (August 19), Taiwan (August 26), Aotearoa (September 6), Lebanon (September 9), and Munich (September 14).

AWS re:Invent 2023AWS re:Invent (November 27 – December 1) – Join us to hear the latest from AWS, learn from experts, and connect with the global cloud community. Registration is now open.

You can browse all upcoming in-person and virtual events.

That’s all for this week. Check back next Monday for another Weekly Roundup!

— Antje

P.S. We’re focused on improving our content to provide a better customer experience, and we need your feedback to do so. Take this quick survey to share insights on your experience with the AWS Blog. Note that this survey is hosted by an external company, so the link doesn’t lead to our website. AWS handles your information as described in the AWS Privacy Notice.

Preview – Enable Foundation Models to Complete Tasks With Agents for Amazon Bedrock

Post Syndicated from Antje Barth original https://aws.amazon.com/blogs/aws/preview-enable-foundation-models-to-complete-tasks-with-agents-for-amazon-bedrock/

This April, Swami Sivasubramanian, Vice President of Data and Machine Learning at AWS, announced Amazon Bedrock and Amazon Titan models as part of new tools for building with generative AI on AWS. Amazon Bedrock, currently available in preview, is a fully managed service that makes foundation models (FMs) from Amazon and leading AI startups—such as AI21 Labs, Anthropic, Cohere, and Stability AI—available through an API.

Today, I’m excited to announce the preview of agents for Amazon Bedrock, a new capability for developers to create fully managed agents in a few clicks. Agents for Amazon Bedrock accelerate the delivery of generative AI applications that can manage and perform tasks by making API calls to your company systems. Agents extend FMs to understand user requests, break down complex tasks into multiple steps, carry on a conversation to collect additional information, and take actions to fulfill the request.

Agents for Amazon Bedrock

Using agents for Amazon Bedrock, you can automate tasks for your internal or external customers, such as managing retail orders or processing insurance claims. For example, an agent-powered generative AI e-commerce application can not only respond to the question, “Do you have this jacket in blue?” with a simple answer but can also help you with the task of updating your order or managing an exchange.

For this to work, you first need to give the agent access to external data sources and connect it to existing APIs of other applications. This allows the FM that powers the agent to interact with the broader world and extend its utility beyond just language processing tasks. Second, the FM needs to figure out what actions to take, what information to use, and in which sequence to perform these actions. This is possible thanks to an exciting emerging behavior of FMs—their ability to reason. You can show FMs how to handle such interactions and how to reason through tasks by building prompts that include definitions and instructions. The process of designing prompts to guide the model towards desired outputs is known as prompt engineering.

Introducing Agents for Amazon Bedrock
Agents for Amazon Bedrock automate the prompt engineering and orchestration of user-requested tasks. Once configured, an agent automatically builds the prompt and securely augments it with your company-specific information to provide responses back to the user in natural language. The agent is able to figure out the actions required to automatically process user-requested tasks. It breaks the task into multiple steps, orchestrates a sequence of API calls and data lookups, and maintains memory to complete the action for the user.

With fully managed agents, you don’t have to worry about provisioning or managing infrastructure. You’ll have seamless support for monitoring, encryption, user permissions, and API invocation management without writing custom code. As a developer, you can use the Bedrock console or SDK to upload the API schema. The agent then orchestrates the tasks with the help of FMs and performs API calls using AWS Lambda functions.

Primer on Advanced Reasoning and ReAct
You can help FMs to reason and figure out how to solve user-requested tasks with a reasoning technique called ReAct (synergizing reasoning and acting). Using ReAct, you can structure prompts to show an FM how to reason through a task and decide on actions that help find a solution. The structured prompts include a sequence of question-thought-action-observation examples.

The question is the user-requested task or problem to solve. The thought is a reasoning step that helps demonstrate to the FM how to tackle the problem and identify an action to take. The action is an API that the model can invoke from an allowed set of APIs. The observation is the result of carrying out the action. The actions that the FM is able to choose from are defined by a set of instructions that are prepended to the example prompt text. Here is an illustration of how you would build up a ReAct prompt:

Building up a ReAct prompt

The good news is that Bedrock performs the heavy lifting for you! Behind the scenes, agents for Amazon Bedrock build the prompts based on the information and actions you provide.

Now, let me show you how to get started with agents for Amazon Bedrock.

Create an Agent for Amazon Bedrock
Let’s assume you’re a developer at an insurance company and want to provide a generative AI application that helps the insurance agency owners automate repetitive tasks. You create an agent in Bedrock and integrate it into your application.

To get started with the agent, open the Bedrock console, select Agents in the left navigation panel, then choose Create Agent.

Agents for Amazon Bedrock

This starts the agent creation workflow.

  1. Provide agent details including agent name, description (optional), whether the agent is allowed to request additional user inputs, and the AWS Identity and Access Management (IAM) service role that gives your agent access to other required services, such as Amazon Simple Storage Service (Amazon S3) and AWS Lambda.Agents for Amazon Bedrock
  2. Select a foundation model from Bedrock that fits your use case. Here, you provide an instruction to your agent in natural language. The instruction tells the agent what task it’s supposed to perform and the persona it’s supposed to assume. For example, “You are an agent designed to help with processing insurance claims and managing pending paperwork.”Agents for Amazon Bedrock
  3. Add action groups. An action is a task that the agent can perform automatically by making API calls to your company systems. A set of actions is defined in an action group. Here, you provide an API schema that defines the APIs for all the actions in the group. You also must provide a Lambda function that represents the business logic for each API. For example, let’s define an action group called ClaimManagementActionGroup that manages insurance claims by pulling a list of open claims, identifying outstanding paperwork for each claim, and sending reminders to policy holders. Make sure to capture this information in the action group description. Agents for Amazon BedrockThe business logic for my action group is captured in the Lambda function InsuranceClaimsLambda. This AWS Lambda function implements methods for the following API calls: open-claims, identify-missing-documents, and send-reminders.Here’s a short extract from my OrderManagementLambda:
    import json
    import time
     
    def open_claims():
        ...
    
    def identify_missing_documents(parameters):
        ...
     
    def send_reminders():
        ...
     
    def lambda_handler(event, context):
        responses = []
     
        for prediction in event['actionGroups']:
            response_code = ...
            action = prediction['actionGroup']
            api_path = prediction['apiPath']
            
            if api_path == '/claims':
                body = open_claims() 
            elif api_path == '/claims/{claimId}/identify-missing-documents':
    			parameters = prediction['parameters']
                body = identify_missing_documents(parameters)
            elif api_path == '/send-reminders':
                body =  send_reminders()
            else:
                body = {"{}::{} is not a valid api, try another one.".format(action, api_path)}
     
            response_body = {
                'application/json': {
                    'body': str(body)
                }
            }
            
            action_response = {
                'actionGroup': prediction['actionGroup'],
                'apiPath': prediction['apiPath'],
                'httpMethod': prediction['httpMethod'],
                'httpStatusCode': response_code,
                'responseBody': response_body
            }
            
            responses.append(action_response)
     
        api_response = {'response': responses}
     
        return api_response

    Note that you also must provide an API schema in the OpenAPI schema JSON format. Here’s what my API schema file insurance_claim_schema.json looks like:

    {"openapi": "3.0.0",
        "info": {
            "title": "Insurance Claims Automation API",
            "version": "1.0.0",
            "description": "APIs for managing insurance claims by pulling a list of open claims, identifying outstanding paperwork for each claim, and sending reminders to policy holders."
        },
        "paths": {
            "/claims": {
                "get": {
                    "summary": "Get a list of all open claims",
                    "description": "Get the list of all open insurance claims. Return all the open claimIds.",
                    "operationId": "getAllOpenClaims",
                    "responses": {
                        "200": {
                            "description": "Gets the list of all open insurance claims for policy holders",
                            "content": {
                                "application/json": {
                                    "schema": {
                                        "type": "array",
                                        "items": {
                                            "type": "object",
                                            "properties": {
                                                "claimId": {
                                                    "type": "string",
                                                    "description": "Unique ID of the claim."
                                                },
                                                "policyHolderId": {
                                                    "type": "string",
                                                    "description": "Unique ID of the policy holder who has filed the claim."
                                                },
                                                "claimStatus": {
                                                    "type": "string",
                                                    "description": "The status of the claim. Claim can be in Open or Closed state"
                                                }
                                            }
                                        }
                                    }
                                }
                            }
                        }
                    }
                }
            },
            "/claims/{claimId}/identify-missing-documents": {
                "get": {
                    "summary": "Identify missing documents for a specific claim",
                    "description": "Get the list of pending documents that need to be uploaded by policy holder before the claim can be processed. The API takes in only one claim id and returns the list of documents that are pending to be uploaded by policy holder for that claim. This API should be called for each claim id",
                    "operationId": "identifyMissingDocuments",
                    "parameters": [{
                        "name": "claimId",
                        "in": "path",
                        "description": "Unique ID of the open insurance claim",
                        "required": true,
                        "schema": {
                            "type": "string"
                        }
                    }],
                    "responses": {
                        "200": {
                            "description": "List of documents that are pending to be uploaded by policy holder for insurance claim",
                            "content": {
                                "application/json": {
                                    "schema": {
                                        "type": "object",
                                        "properties": {
                                            "pendingDocuments": {
                                                "type": "string",
                                                "description": "The list of pending documents for the claim."
                                            }
                                        }
                                    }
                                }
                            }
    
                        }
                    }
                }
            },
            "/send-reminders": {
                "post": {
                    "summary": "API to send reminder to the customer about pending documents for open claim",
                    "description": "Send reminder to the customer about pending documents for open claim. The API takes in only one claim id and its pending documents at a time, sends the reminder and returns the tracking details for the reminder. This API should be called for each claim id you want to send reminders for.",
                    "operationId": "sendReminders",
                    "requestBody": {
                        "required": true,
                        "content": {
                            "application/json": {
                                "schema": {
                                    "type": "object",
                                    "properties": {
                                        "claimId": {
                                            "type": "string",
                                            "description": "Unique ID of open claims to send reminders for."
                                        },
                                        "pendingDocuments": {
                                            "type": "string",
                                            "description": "The list of pending documents for the claim."
                                        }
                                    },
                                    "required": [
                                        "claimId",
                                        "pendingDocuments"
                                    ]
                                }
                            }
                        }
                    },
                    "responses": {
                        "200": {
                            "description": "Reminders sent successfully",
                            "content": {
                                "application/json": {
                                    "schema": {
                                        "type": "object",
                                        "properties": {
                                            "sendReminderTrackingId": {
                                                "type": "string",
                                                "description": "Unique Id to track the status of the send reminder Call"
                                            },
                                            "sendReminderStatus": {
                                                "type": "string",
                                                "description": "Status of send reminder notifications"
                                            }
                                        }
                                    }
                                }
                            }
                        },
                        "400": {
                            "description": "Bad request. One or more required fields are missing or invalid."
                        }
                    }
                }
            }
        }
    }

    When a user asks your agent to complete a task, Bedrock will use the FM you configured for the agent to identify the sequence of actions and invoke the corresponding Lambda functions in the right order to solve the user-requested task.

  4. In the final step, review your agent configuration and choose Create Agent.Agents for Amazon Bedrock
  5. Congratulations, you’ve just created your first agent in Amazon Bedrock!Agents for Amazon Bedrock

Deploy an Agent for Amazon Bedrock
To deploy an agent in your application, you must create an alias. Bedrock then automatically creates a version for that alias.

  1. In the Bedrock console, select your agent, then select Deploy, and choose Create to create an alias.Agents for Amazon Bedrock
  2. Provide an alias name and description and choose whether to create a new version or use an existing version of your agent to associate with this alias.
    Agents for Amazon Bedrock
  3. This saves a snapshot of the agent code and configuration and associates an alias with this snapshot or version. You can use the alias to integrate the agent into your applications.
    Agents for Amazon Bedrock

Now, let’s test the insurance agent! You can do this right in the Bedrock console.

Let’s ask the agent to “Send reminder to all policy holders with open claims and pending paper work.” You can see how the FM-powered agent is able to understand the user request, break down the task into steps (collect the open insurance claims, lookup the claim IDs, send reminders), and perform the corresponding actions.

Agents for Amazon Bedrock

Agents for Amazon Bedrock can help you increase productivity, improve your customer service experience, or automate DevOps tasks. I’m excited to see what use cases you will implement!

Generative AI with large language modelsLearn the Fundamentals of Generative AI
If you’re interested in the fundamentals of generative AI and how to work with FMs, including advanced prompting techniques and agents, check out this this new hands-on course that I developed with AWS colleagues and industry experts in collaboration with DeepLearning.AI:

Generative AI with large language models (LLMs) is an on-demand, three-week course for data scientists and engineers who want to learn how to build generative AI applications with LLMs. It’s the perfect foundation to start building with Amazon Bedrock. Enroll for generative AI with LLMs today.

Sign up to Learn More about Amazon Bedrock (Preview)
Amazon Bedrock is currently available in preview. Reach out to us if you’d like access to agents for Amazon Bedrock as part of the preview. We’re regularly providing access to new customers. Visit the Amazon Bedrock Features page and sign up to learn more about Amazon Bedrock.

— Antje


P.S. We’re focused on improving our content to provide a better customer experience, and we need your feedback to do so. Please take this quick survey to share insights on your experience with the AWS Blog. Note that this survey is hosted by an external company, so the link does not lead to our website. AWS handles your information as described in the AWS Privacy Notice.

AWS Week in Review – AWS Glue Crawlers Now Supports Apache Iceberg, Amazon RDS Updates, and More – July 10, 2023

Post Syndicated from Antje Barth original https://aws.amazon.com/blogs/aws/aws-week-in-review-aws-glue-crawlers-now-supports-apache-iceberg-amazon-rds-updates-and-more-july-10-2023/

The US celebrated Independence Day last week on July 4 with fireworks and barbecues across the country. But fireworks weren’t the only thing that launched last week. Let’s have a look!

Last Week’s Launches
Here are some launches that got my attention:

AWS GlueAWS Glue Crawlers now supports Apache Iceberg tables. Apache Iceberg is an open-source table format for data stored in data lakes. You can now automatically register Apache Iceberg tables into AWS Glue Data Catalog by running the Glue Crawler. You can then query Glue Catalog Iceberg tables across various analytics engines and apply AWS Lake Formation fine-grained permissions when querying from Amazon Athena. Check out the AWS Glue Crawler documentation to learn more.

Amazon Relational Database Service (Amazon RDS) for PostgreSQL – PostgreSQL 16 Beta 2 is now available in the Amazon RDS Database Preview Environment. The PostgreSQL community released PostgreSQL 16 Beta 2 on June 29, 2023, which enables logical replication from standbys and includes numerous performance improvements. You can deploy PostgreSQL 16 Beta 2 in the preview environment and start evaluating the pre-release of PostgreSQL 16 on Amazon RDS for PostgreSQL.

In addition, Amazon RDS for PostgreSQL Multi-AZ Deployments with two readable standbys now supports logical replication. With logical replication, you can stream data changes from Amazon RDS for PostgreSQL to other databases for use cases such as data consolidation for analytical applications, change data capture (CDC), replicating select tables rather than the entire database, or for replicating data between different major versions of PostgreSQL. Check out the Amazon RDS User Guide for more details.

Amazon CloudWatch – Amazon CloudWatch now supports Service Quotas in cross-account observability. With this, you can track and visualize resource utilization and limits across various AWS services from multiple AWS accounts within a region using a central monitoring account. You no longer have to track the quotas by logging in to individual accounts, instead from a central monitoring account, you can create dashboards and alarms for the AWS service quota usage across all your source accounts from a central monitoring account. Setup CloudWatch cross-account observability to get started.

Amazon SageMaker – You can now associate a SageMaker Model Card with a specific model version in SageMaker Model Registry. This lets you establish a single source of truth for your registered model versions, with comprehensive, centralized, and standardized documentation across all stages of the model’s journey on SageMaker, facilitating discoverability and promoting governance, compliance, and accountability throughout the model lifecycle. Learn more about SageMaker Model Cards in the developer guide.

For a full list of AWS announcements, be sure to keep an eye on the What’s New at AWS page.

Other AWS News
Here are some additional blog posts and news items that you might find interesting:

Building generative AI applications for your startup – In this AWS Startups Blog post, Hrushikesh explains various approaches to build generative AI applications, and reviews their key component. Read the full post for the details.

Components of the generative AI landscape

Components of the generative AI landscape.

How Alexa learned to speak with an Irish accent – If you’re curious how Amazon researchers used voice conversation to generate Irish-accented training data in Alexa’s own voice, check out this Amazon Science Blog post. 

AWS open-source news and updates – My colleague Ricardo writes this weekly open-source newsletter in which he highlights new open-source projects, tools, and demos from the AWS Community.

Upcoming AWS Events
Check your calendars and sign up for these AWS events:

AWS Global Summits – Check your calendars and sign up for the AWS Summit close to where you live or work: Hong Kong (July 20), New York City (July 26), Taiwan (August 2-3), São Paulo (August 3), and Mexico City (August 30).

AWS Community Days – Join a community-led conference run by AWS user group leaders in your region: Malaysia (July 22), Philippines (July 29-30), Colombia (August 12), and West Africa (August 19).

AWS re:Invent 2023AWS re:Invent (November 27 – December 1) – Join us to hear the latest from AWS, learn from experts, and connect with the global cloud community. Registration is now open.

You can browse all upcoming in-person and virtual events.

That’s all for this week. Check back next Monday for another Week in Review!

— Antje

This post is part of our Week in Review series. Check back each week for a quick roundup of interesting news and announcements from AWS!

Generative AI with Large Language Models — New Hands-on Course by DeepLearning.AI and AWS

Post Syndicated from Antje Barth original https://aws.amazon.com/blogs/aws/generative-ai-with-large-language-models-new-hands-on-course-by-deeplearning-ai-and-aws/

Generative AI has taken the world by storm, and we’re starting to see the next wave of widespread adoption of AI with the potential for every customer experience and application to be reinvented with generative AI. Generative AI lets you to create new content and ideas including conversations, stories, images, videos, and music. Generative AI is powered by very large machine learning models that are pre-trained on vast amounts of data, commonly referred to as foundation models (FMs).

A subset of FMs called large language models (LLMs) are trained on trillions of words across many natural-language tasks. These LLMs can understand, learn, and generate text that’s nearly indistinguishable from text produced by humans. And not only that, LLMs can also engage in interactive conversations, answer questions, summarize dialogs and documents, and provide recommendations. They can power applications across many tasks and industries including creative writing for marketing, summarizing documents for legal, market research for financial, simulating clinical trials for healthcare, and code writing for software development.

Companies are moving rapidly to integrate generative AI into their products and services. This increases the demand for data scientists and engineers who understand generative AI and how to apply LLMs to solve business use cases.

This is why I’m excited to announce that DeepLearning.AI and AWS are jointly launching a new hands-on course Generative AI with large language models on Coursera’s education platform that prepares data scientists and engineers to become experts in selecting, training, fine-tuning, and deploying LLMs for real-world applications.

DeepLearning.AI was founded in 2017 by machine learning and education pioneer Andrew Ng with the mission to grow and connect the global AI community by delivering world-class AI education.

Generative AI with large language models

DeepLearning.AI teamed up with generative AI specialists from AWS including Chris Fregly, Shelbee Eigenbrode, Mike Chambers, and me to develop and deliver this course for data scientists and engineers who want to learn how to build generative AI applications with LLMs. We developed the content for this course under the guidance of Andrew Ng and with input from various industry experts and applied scientists at Amazon, AWS, and Hugging Face.

Course Highlights
This is the first comprehensive Coursera course focused on LLMs that details the typical generative AI project lifecycle, including scoping the problem, choosing an LLM, adapting the LLM to your domain, optimizing the model for deployment, and integrating into business applications. The course not only focuses on the practical aspects of generative AI but also highlights the science behind LLMs and why they’re effective.

The on-demand course is broken down into three weeks of content with approximately 16 hours of videos, quizzes, labs, and extra readings. The hands-on labs hosted by AWS Partner Vocareum let you apply the techniques directly in an AWS environment provided with the course and includes all resources needed to work with the LLMs and explore their effectiveness.

In just three weeks, the course prepares you to use generative AI for business and real-world applications. Let’s have a quick look at each week’s content.

Week 1 – Generative AI use cases, project lifecycle, and model pre-training
In week 1, you will examine the transformer architecture that powers many LLMs, see how these models are trained, and consider the compute resources required to develop them. You will also explore how to guide model output at inference time using prompt engineering and by specifying generative configuration settings.

In the first hands-on lab, you’ll construct and compare different prompts for a given generative task. In this case, you’ll summarize conversations between multiple people. For example, imagine summarizing support conversations between you and your customers. You’ll explore prompt engineering techniques, try different generative configuration parameters, and experiment with various sampling strategies to gain intuition on how to improve the generated model responses.

Week 2 – Fine-tuning, parameter-efficient fine-tuning (PEFT), and model evaluation
In week 2, you will explore options for adapting pre-trained models to specific tasks and datasets through a process called fine-tuning. A variant of fine-tuning, called parameter efficient fine-tuning (PEFT), lets you fine-tune very large models using much smaller resources—often a single GPU. You will also learn about the metrics used to evaluate and compare the performance of LLMs.

In the second lab, you’ll get hands-on with parameter-efficient fine-tuning (PEFT) and compare the results to prompt engineering from the first lab. This side-by-side comparison will help you gain intuition into the qualitative and quantitative impact of different techniques for adapting an LLM to your domain specific datasets and use cases.

Week 3 – Fine-tuning with reinforcement learning from human feedback (RLHF), retrieval-augmented generation (RAG), and LangChain
In week 3, you will make the LLM responses more humanlike and align them with human preferences using a technique called reinforcement learning from human feedback (RLHF). RLHF is key to improving the model’s honesty, harmlessness, and helpfulness. You will also explore techniques such as retrieval-augmented generation (RAG) and libraries such as LangChain that allow the LLM to integrate with custom data sources and APIs to improve the model’s response further.

In the final lab, you’ll get hands-on with RLHF. You’ll fine-tune the LLM using a reward model and a reinforcement-learning algorithm called proximal policy optimization (PPO) to increase the harmlessness of your model responses. Finally, you will evaluate the model’s harmlessness before and after the RLHF process to gain intuition into the impact of RLHF on aligning an LLM with human values and preferences.

Enroll Today
Generative AI with large language models is an on-demand, three-week course for data scientists and engineers who want to learn how to build generative AI applications with LLMs.

Enroll for generative AI with large language models today.

— Antje

AWS Week in Review: New Service for Generative AI and Amazon EC2 Trn1n, Inf2, and CodeWhisperer now GA – April 17, 2023

Post Syndicated from Antje Barth original https://aws.amazon.com/blogs/aws/aws-week-in-review-new-service-for-generative-ai-and-amazon-ec2-trn1n-inf2-and-codewhisperer-now-ga-april-17-2023/

I could almost title this blog post the “AWS AI/ML Week in Review.” This past week, we announced several new innovations and tools for building with generative AI on AWS. Let’s dive right into it.

Last Week’s Launches
Here are some launches that got my attention during the previous week:

Announcing Amazon Bedrock and Amazon Titan models Amazon Bedrock is a new service to accelerate your development of generative AI applications using foundation models through an API without managing infrastructure. You can choose from a wide range of foundation models built by leading AI startups and Amazon. The new Amazon Titan foundation models are pre-trained on large datasets, making them powerful, general-purpose models. You can use them as-is or privately to customize them with your own data for a particular task without annotating large volumes of data. Amazon Bedrock is currently in limited preview. Sign up here to learn more.

Building with Generative AI on AWS

Amazon EC2 Trn1n and Inf2 instances are now generally availableTrn1n instances, powered by AWS Trainium accelerators, double the network bandwidth (compared to Trn1 instances) to 1,600 Gbps of Elastic Fabric Adapter (EFAv2). The increased bandwidth delivers even higher performance for training network-intensive generative AI models such as large language models (LLMs) and mixture of experts (MoE). Inf2 instances, powered by AWS Inferentia2 accelerators, deliver high performance at the lowest cost in Amazon EC2 for generative AI models, including LLMs and vision transformers. They are the first inference-optimized instances in Amazon EC2 to support scale-out distributed inference with ultra-high-speed connectivity between accelerators. Compared to Inf1 instances, Inf2 instances deliver up to 4x higher throughput and up to 10x lower latency. Check out my blog posts on Trn1 instances and Inf2 instances for more details.

Amazon CodeWhisperer, free for individual use, is now generally availableAmazon CodeWhisperer is an AI coding companion that generates real-time single-line or full-function code suggestions in your IDE to help you build applications faster. With GA, we introduce two tiers: CodeWhisperer Individual and CodeWhisperer Professional. CodeWhisperer Individual is free to use for generating code. You can sign up with an AWS Builder ID based on your email address. The Individual Tier provides code recommendations, reference tracking, and security scans. CodeWhisperer Professional—priced at $19 per user, per month—offers additional enterprise administration capabilities. Steve’s blog post has all the details.

Amazon GameLift adds support for Unreal Engine 5Amazon GameLift is a fully managed solution that allows you to manage and scale dedicated game servers for session-based multiplayer games. The latest version of the Amazon GameLift Server SDK 5.0 lets you integrate your Unreal 5-based game servers with the Amazon GameLift service. In addition, the latest Amazon GameLift Server SDK with Unreal 5 plugin is built to work with Amazon GameLift Anywhere so that you can test and iterate Unreal game builds faster and manage game sessions across any server hosting infrastructure. Check out the release notes to learn more.

Amazon Rekognition launches Face Liveness to deter fraud in facial verification – Face Liveness verifies that only real users, not bad actors using spoofs, can access your services. Amazon Rekognition Face Liveness analyzes a short selfie video to detect spoofs presented to the camera, such as printed photos, digital photos, digital videos, or 3D masks, as well as spoofs that bypass the camera, such as pre-recorded or deepfake videos. This AWS Machine Learning Blog post walks you through the details and shows how you can add Face Liveness to your web and mobile applications.

For a full list of AWS announcements, be sure to keep an eye on the What’s New at AWS page.

Other AWS News
Here are some additional news items and blog posts that you may find interesting:

Updates to the AWS Well-Architected Framework – The most recent content updates and improvements focus on providing expanded guidance across the AWS service portfolio to help you make more informed decisions when developing implementation plans. Services that were added or expanded in coverage include AWS Elastic Disaster Recovery, AWS Trusted Advisor, AWS Resilience Hub, AWS Config, AWS Security Hub, Amazon GuardDuty, AWS Organizations, AWS Control Tower, AWS Compute Optimizer, AWS Budgets, Amazon CodeWhisperer, and Amazon CodeGuru. This AWS Architecture Blog post has all the details.

Amazon releases largest dataset for training “pick and place” robots – In an effort to improve the performance of robots that pick, sort, and pack products in warehouses, Amazon has publicly released the largest dataset of images captured in an industrial product-sorting setting. Where the largest previous dataset of industrial images featured on the order of 100 objects, the Amazon dataset, called ARMBench, features more than 190,000 objects. Check out this Amazon Science Blog post to learn more.

AWS open-source news and updates – My colleague Ricardo writes this weekly open-source newsletter in which he highlights new open-source projects, tools, and demos from the AWS Community. Read edition #153 here.

Upcoming AWS Events
Check your calendars and sign up for these AWS events:

Build On AWS - Generative AI#BuildOn Generative AI – Join our weekly live Build On Generative AI Twitch show. Every Monday morning, 9:00 US PT, my colleagues Emily and Darko take a look at aspects of generative AI. They host developers, scientists, startup founders, and AI leaders and discuss how to build generative AI applications on AWS.

In today’s episode, Emily walks us through the latest AWS generative AI announcements. You can watch the video here.

Dot Net Developer Day.NET Developer Day.NET Enterprise Developer Day EMEA 2023 (April 25) is a free, one-day virtual event providing enterprise developers with the most relevant information to swiftly and efficiently migrate and modernize their .NET applications and workloads on AWS.

AWS Developer Innovation DayAWS Developer Innovation DayAWS Developer Innovation Day (April 26) is a new, free, one-day virtual event designed to help developers and teams be productive and collaborate from discovery to delivery, to running software and building applications. Get a first look at exciting product updates, technical deep dives, and keynotes.

AWS Global Summits – Check your calendars and sign up for the AWS Summit close to where you live or work: Tokyo (April 20–21), Singapore (May 4), Stockholm (May 11), Hong Kong (May 23), Tel Aviv (May 31), Amsterdam (June 1), London (June 7), Washington, DC (June 7–8), Toronto (June 14), Madrid (June 15), and Milano (June 22).

You can browse all upcoming AWS-led in-person and virtual events and developer-focused events such as Community Days.

That’s all for this week. Check back next Monday for another Week in Review!

— Antje

This post is part of our Week in Review series. Check back each week for a quick roundup of interesting news and announcements from AWS!

Amazon EC2 Inf2 Instances for Low-Cost, High-Performance Generative AI Inference are Now Generally Available

Post Syndicated from Antje Barth original https://aws.amazon.com/blogs/aws/amazon-ec2-inf2-instances-for-low-cost-high-performance-generative-ai-inference-are-now-generally-available/

Innovations in deep learning (DL), especially the rapid growth of large language models (LLMs), have taken the industry by storm. DL models have grown from millions to billions of parameters and are demonstrating exciting new capabilities. They are fueling new applications such as generative AI or advanced research in healthcare and life sciences. AWS has been innovating across chips, servers, data center connectivity, and software to accelerate such DL workloads at scale.

At AWS re:Invent 2022, we announced the preview of Amazon EC2 Inf2 instances powered by AWS Inferentia2, the latest AWS-designed ML chip. Inf2 instances are designed to run high-performance DL inference applications at scale globally. They are the most cost-effective and energy-efficient option on Amazon EC2 for deploying the latest innovations in generative AI, such as GPT-J or Open Pre-trained Transformer (OPT) language models.

Today, I’m excited to announce that Amazon EC2 Inf2 instances are now generally available!

Inf2 instances are the first inference-optimized instances in Amazon EC2 to support scale-out distributed inference with ultra-high-speed connectivity between accelerators. You can now efficiently deploy models with hundreds of billions of parameters across multiple accelerators on Inf2 instances. Compared to Amazon EC2 Inf1 instances, Inf2 instances deliver up to 4x higher throughput and up to 10x lower latency. Here’s an infographic that highlights the key performance improvements that we have made available with the new Inf2 instances:

Performance improvements with Amazon EC2 Inf2

New Inf2 Instance Highlights
Inf2 instances are available today in four sizes and are powered by up to 12 AWS Inferentia2 chips with 192 vCPUs. They offer a combined compute power of 2.3 petaFLOPS at BF16 or FP16 data types and feature an ultra-high-speed NeuronLink interconnect between chips. NeuronLink scales large models across multiple Inferentia2 chips, avoids communication bottlenecks, and enables higher-performance inference.

Inf2 instances offer up to 384 GB of shared accelerator memory, with 32 GB high-bandwidth memory (HBM) in every Inferentia2 chip and 9.8 TB/s of total memory bandwidth. This type of bandwidth is particularly important to support inference for large language models that are memory bound.

Since the underlying AWS Inferentia2 chips are purpose-built for DL workloads, Inf2 instances offer up to 50 percent better performance per watt than other comparable Amazon EC2 instances. I’ll cover the AWS Inferentia2 silicon innovations in more detail later in this blog post.

The following table lists the sizes and specs of Inf2 instances in detail.

Instance Name
vCPUs AWS Inferentia2 Chips Accelerator Memory NeuronLink Instance Memory Instance Networking
inf2.xlarge 4 1 32 GB N/A 16 GB Up to 15 Gbps
inf2.8xlarge 32 1 32 GB N/A 128 GB Up to 25 Gbps
inf2.24xlarge 96 6 192 GB Yes 384 GB 50 Gbps
inf2.48xlarge 192 12 384 GB Yes 768 GB 100 Gbps

AWS Inferentia2 Innovation
Similar to AWS Trainium chips, each AWS Inferentia2 chip has two improved NeuronCore-v2 engines, HBM stacks, and dedicated collective compute engines to parallelize computation and communication operations when performing multi-accelerator inference.

Each NeuronCore-v2 has dedicated scalar, vector, and tensor engines that are purpose-built for DL algorithms. The tensor engine is optimized for matrix operations. The scalar engine is optimized for element-wise operations like ReLU (rectified linear unit) functions. The vector engine is optimized for non-element-wise vector operations, including batch normalization or pooling.

Here is a short summary of additional AWS Inferentia2 chip and server hardware innovations:

  • Data Types – AWS Inferentia2 supports a wide range of data types, including FP32, TF32, BF16, FP16, and UINT8, so you can choose the most suitable data type for your workloads. It also supports the new configurable FP8 (cFP8) data type, which is especially relevant for large models because it reduces the memory footprint and I/O requirements of the model. The following image compares the supported data types.AWS Inferentia2 Supported Data Types
  • Dynamic Execution, Dynamic Input Shapes – AWS Inferentia2 has embedded general-purpose digital signal processors (DSPs) that enable dynamic execution, so control flow operators don’t need to be unrolled or executed on the host. AWS Inferentia2 also supports dynamic input shapes that are key for models with unknown input tensor sizes, such as models processing text.
  • Custom Operators – AWS Inferentia2 supports custom operators written in C++. Neuron Custom C++ Operators enable you to write C++ custom operators that natively run on NeuronCores. You can use standard PyTorch custom operator programming interfaces to migrate CPU custom operators to Neuron and implement new experimental operators, all without any intimate knowledge of the NeuronCore hardware.
  • NeuronLink v2 – Inf2 instances are the first inference-optimized instance on Amazon EC2 to support distributed inference with direct ultra-high-speed connectivity—NeuronLink v2—between chips. NeuronLink v2 uses collective communications (CC) operators such as all-reduce to run high-performance inference pipelines across all chips.

The following Inf2 distributed inference benchmarks show throughput and cost improvements for OPT-30B and OPT-66B models over comparable inference-optimized Amazon EC2 instances.

Amazon EC2 Inf2 Benchmarks

Now, let me show you how to get started with Amazon EC2 Inf2 instances.

Get Started with Inf2 Instances
The AWS Neuron SDK integrates AWS Inferentia2 into popular machine learning (ML) frameworks like PyTorch. The Neuron SDK includes a compiler, runtime, and profiling tools and is constantly being updated with new features and performance optimizations.

In this example, I will compile and deploy a pre-trained BERT model from Hugging Face on an EC2 Inf2 instance using the available PyTorch Neuron packages. PyTorch Neuron is based on the PyTorch XLA software package and enables the conversion of PyTorch operations to AWS Inferentia2 instructions.

SSH into your Inf2 instance and activate a Python virtual environment that includes the PyTorch Neuron packages. If you’re using a Neuron-provided AMI, you can activate the preinstalled environment by running the following command:

source aws_neuron_venv_pytorch_p37/bin/activate

Now, with only a few changes to your code, you can compile your PyTorch model into an AWS Neuron-optimized TorchScript. Let’s start with importing torch, the PyTorch Neuron package torch_neuronx, and the Hugging Face transformers library.

import torch
import torch_neuronx from transformers import AutoTokenizer, AutoModelForSequenceClassification
import transformers
...

Next, let’s build the tokenizer and model.

name = "bert-base-cased-finetuned-mrpc"
tokenizer = AutoTokenizer.from_pretrained(name)
model = AutoModelForSequenceClassification.from_pretrained(name, torchscript=True)

We can test the model with example inputs. The model expects two sentences as input, and its output is whether or not those sentences are a paraphrase of each other.

def encode(tokenizer, *inputs, max_length=128, batch_size=1):
    tokens = tokenizer.encode_plus(
        *inputs,
        max_length=max_length,
        padding='max_length',
        truncation=True,
        return_tensors="pt"
    )
    return (
        torch.repeat_interleave(tokens['input_ids'], batch_size, 0),
        torch.repeat_interleave(tokens['attention_mask'], batch_size, 0),
        torch.repeat_interleave(tokens['token_type_ids'], batch_size, 0),
    )

# Example inputs
sequence_0 = "The company Hugging Face is based in New York City"
sequence_1 = "Apples are especially bad for your health"
sequence_2 = "Hugging Face's headquarters are situated in Manhattan"

paraphrase = encode(tokenizer, sequence_0, sequence_2)
not_paraphrase = encode(tokenizer, sequence_0, sequence_1)

# Run the original PyTorch model on examples
paraphrase_reference_logits = model(*paraphrase)[0]
not_paraphrase_reference_logits = model(*not_paraphrase)[0]

print('Paraphrase Reference Logits: ', paraphrase_reference_logits.detach().numpy())
print('Not-Paraphrase Reference Logits:', not_paraphrase_reference_logits.detach().numpy())

The output should look similar to this:

Paraphrase Reference Logits:     [[-0.34945598  1.9003887 ]]
Not-Paraphrase Reference Logits: [[ 0.5386365 -2.2197142]]

Now, the torch_neuronx.trace() method sends operations to the Neuron Compiler (neuron-cc) for compilation and embeds the compiled artifacts in a TorchScript graph. The method expects the model and a tuple of example inputs as arguments.

neuron_model = torch_neuronx.trace(model, paraphrase)

Let’s test the Neuron-compiled model with our example inputs:

paraphrase_neuron_logits = neuron_model(*paraphrase)[0]
not_paraphrase_neuron_logits = neuron_model(*not_paraphrase)[0]

print('Paraphrase Neuron Logits: ', paraphrase_neuron_logits.detach().numpy())
print('Not-Paraphrase Neuron Logits: ', not_paraphrase_neuron_logits.detach().numpy())

The output should look similar to this:

Paraphrase Neuron Logits: [[-0.34915772 1.8981738 ]]
Not-Paraphrase Neuron Logits: [[ 0.5374032 -2.2180378]]

That’s it. With just a few lines of code changes, we compiled and ran a PyTorch model on an Amazon EC2 Inf2 instance. To learn more about which DL model architectures are a good fit for AWS Inferentia2 and the current model support matrix, visit the AWS Neuron Documentation.

Available Now
You can launch Inf2 instances today in the AWS US East (Ohio) and US East (N. Virginia) Regions as On-Demand, Reserved, and Spot Instances or as part of a Savings Plan. As usual with Amazon EC2, you pay only for what you use. For more information, see Amazon EC2 pricing.

Inf2 instances can be deployed using AWS Deep Learning AMIs, and container images are available via managed services such as Amazon SageMaker, Amazon Elastic Kubernetes Service (Amazon EKS), Amazon Elastic Container Service (Amazon ECS), and AWS ParallelCluster.

To learn more, visit our Amazon EC2 Inf2 instances page, and please send feedback to AWS re:Post for EC2 or through your usual AWS Support contacts.

— Antje

AWS Week in Review – February 27, 2023

Post Syndicated from Antje Barth original https://aws.amazon.com/blogs/aws/aws-week-in-review-february-27-2023/

A couple days ago, I had the honor of doing a live stream on generative AI, discussing recent innovations and concepts behind the current generation of large language and vision models and how we got there. In today’s roundup of news and announcements, I will share some additional information—including an expanded partnership to make generative AI more accessible, a blog post about diffusion models, and our weekly Twitch show on Generative AI. Let’s dive right into it!

Last Week’s Launches
Here are some launches that got my attention during the previous week:

Integrated Private Wireless on AWS – The Integrated Private Wireless on AWS program is designed to provide enterprises with managed and validated private wireless offerings from leading communications service providers (CSPs). The offerings integrate CSPs’ private 5G and 4G LTE wireless networks with AWS services across AWS Regions, AWS Local Zones, AWS Outposts, and AWS Snow Family. For more details, read this Industries Blog post and check out this eBook. And, if you’re attending the Mobile World Congress Barcelona this week, stop by the AWS booth at the Upper Walkway, South Entrance, at the Fira Barcelona Gran Via, to learn more.

AWS Glue Crawlers – Now integrate with Lake Formation. AWS Glue Crawlers are used to discover datasets, extract schema information, and populate the AWS Glue Data Catalog. With this Glue Crawler and Lake Formation integration, you can configure a crawler to use Lake Formation permissions to access an S3 data store or a Data Catalog table with an underlying S3 location within the same AWS account or another AWS account. You can configure an existing Data Catalog table as a crawler’s target if the crawler and the Data Catalog table reside in the same account. To learn more, check out this Big Data Blog post.

AWS Glue Crawlers now support integration with AWS Lake Formation

Amazon SageMaker Model Monitor – You can now launch and configure Amazon SageMaker Model Monitor from the SageMaker Model Dashboard using a code-free point-and-click setup experience. SageMaker Model Dashboard gives you unified monitoring across all your models by providing insights into deviations from expected behavior, automated alerts, and troubleshooting to improve model performance. Model Monitor can detect drift in data quality, model quality, bias, and feature attribution and alert you to take remedial actions when such changes occur.

Amazon EKS – Now supports Kubernetes version 1.25. Kubernetes 1.25 introduced several new features and bug fixes, and you can now use Amazon EKS and Amazon EKS Distro to run Kubernetes version 1.25. You can create new 1.25 clusters or upgrade your existing clusters to 1.25 using the Amazon EKS console, the eksctl command line interface, or through an infrastructure-as-code tool. To learn more about this release named “Combiner,” check out this Containers Blog post.

Amazon Detective – New self-paced workshop available. You can now learn to use Amazon Detective with a new self-paced workshop in AWS Workshop Studio. AWS Workshop Studio is a collection of self-paced tutorials designed to teach practical skills and techniques to solve business problems. The Amazon Detective workshop is designed to teach you how to use the primary features of Detective through a series of interactive modules that cover topics such as security alert triage, security incident investigation, and threat hunting. Get started with the Amazon Detective Workshop.

For a full list of AWS announcements, be sure to keep an eye on the What’s New at AWS page.

Other AWS News
Here are some additional news items and blog posts that you may find interesting:

🤗❤☁ AWS and Hugging Face collaborate to make generative AI more accessible and cost-efficient – This previous week, we announced an expanded collaboration between AWS and Hugging Face to accelerate the training, fine-tuning, and deployment of large language and vision models used to create generative AI applications. Generative AI applications can perform a variety of tasks, including text summarization, answering questions, code generation, image creation, and writing essays and articles. For more details, read this Machine Learning Blog post.

If you are interested in generative AI, I also recommend reading this blog post on how to Fine-tune text-to-image Stable Diffusion models with Amazon SageMaker JumpStart. Stable Diffusion is a deep learning model that allows you to generate realistic, high-quality images and stunning art in just a few seconds. This blog post discusses how to make design choices, including dataset quality, size of training dataset, choice of hyperparameter values, and applicability to multiple datasets.

AWS open-source news and updates – My colleague Ricardo writes this weekly open-source newsletter in which he highlights new open-source projects, tools, and demos from the AWS Community. Read edition #146 here.

Upcoming AWS Events
Check your calendars and sign up for these AWS events:

Build On AWS - Generative AI#BuildOn Generative AI – Join our weekly live Build On Generative AI Twitch show. Every Monday morning, 9:00 US PT, my colleagues Emily and Darko take a look at aspects of generative AI. They host developers, scientists, startup founders, and AI leaders and discuss how to build generative AI applications on AWS.

In today’s episode, my colleague Chris walked us through an end-to-end ML pipeline from data ingestion to fine-tuning and deployment of generative AI models. You can watch the video here.

AWS Pi Day 2023 SmallAWS Pi Day – Join me on March 14 for the third annual AWS Pi Day live, virtual event hosted on the AWS On Air channel on Twitch as we celebrate the 17th birthday of Amazon S3 and the cloud.
We will discuss the latest innovations across AWS Data services, from storage to analytics and AI/ML. If you are curious about how AI can transform your business, register here and join my session.

AWS Innovate Data and AI/ML edition – AWS Innovate is a free online event to learn the latest from AWS experts and get step-by-step guidance on using AI/ML to drive fast, efficient, and measurable results. Register now for EMEA (March 9) and the Americas (March 14).

You can browse all upcoming AWS-led in-person, virtual events and developer focused events such as Community Days.

That’s all for this week. Check back next Monday for another Week in Review!

— Antje

This post is part of our Week in Review series. Check back each week for a quick roundup of interesting news and announcements from AWS!

AWS Week in Review – January 16, 2023

Post Syndicated from Antje Barth original https://aws.amazon.com/blogs/aws/aws-week-in-review-january-16-2023/

Today, we celebrate Martin Luther King Jr. Day in the US to honor the late civil rights leader’s life, legacy, and achievements. In this article, Amazon employees share what MLK Day means to them and how diversity makes us stronger.

Coming back to our AWS Week in Review—it’s been a busy week!

Last Week’s Launches
Here are some launches that got my attention during the previous week:

AWS Local Zones in Perth and Santiago now generally available – AWS Local Zones help you run latency-sensitive applications closer to end users. AWS now has a total of 29 Local Zones; 12 outside of the US (Bangkok, Buenos Aires, Copenhagen, Delhi, Hamburg, Helsinki, Kolkata, Muscat, Perth, Santiago, Taipei, and Warsaw) and 17 in the US. See the full list of available and announced AWS Local Zones and learn how to get started.

AWS Local Zones Locations

AWS Clean Rooms now available in preview – During AWS re:Invent this past November, we announced AWS Clean Rooms, a new analytics service that helps companies across industries easily and securely analyze and collaborate on their combined datasets—without sharing or revealing underlying data. You can now start using AWS Clean Rooms (Preview).

Amazon Kendra updates – Amazon Kendra is an intelligent search service powered by machine learning (ML) that helps you search across different content repositories with built-in connectors. With the new Amazon Kendra Intelligent Ranking for self-managed OpenSearch, you can now improve the quality of your OpenSearch search results using Amazon Kendra’s ML-powered semantic ranking technology.

Amazon Kendra also released an Amazon S3 connector with VPC support to index and search documents from Amazon S3 hosted in your VPC, a new Google Drive Connector to index and search documents from Google Drive, a Microsoft Teams Connector to enable Microsoft Teams messaging search, and a Microsoft Exchange Connector to enable email-messaging search.

Amazon Personalize updates – Amazon Personalize helps you improve customer engagement through personalized product and content recommendations. Using the new Trending-Now recipe, you can now generate recommendations for items that are rapidly becoming more popular with your users. Amazon Personalize now also supports tag-based resource authorization. Tags are labels in the form of key-value pairs that can be attached to individual Amazon Personalize resources to manage resources or allocate costs.

Amazon SageMaker Canvas now delivers up to 3x faster ML model training time – SageMaker Canvas is a visual interface that enables business analysts to generate accurate ML predictions on their own—without having to write a single line of code. The accelerated model training times help you prototype and experiment more rapidly, shortening the time to generate predictions and turn data into valuable insights.

For a full list of AWS announcements, be sure to keep an eye on the What’s New at AWS page.

Other AWS News
Here are some additional news items and blog posts that you may find interesting:

AWS open-source news and updates – My colleague Ricardo writes this weekly open-source newsletter in which he highlights new open-source projects, tools, and demos from the AWS Community. Read edition #141 here.

ML model hosting best practices in Amazon SageMaker – This seven-part blog series discusses best practices for ML model hosting in SageMaker to help you identify which hosting design pattern meets your needs best. The blog series also covers advanced concepts such as multi-model endpoints (MME), multi-container endpoints (MCE), serial inference pipelines, and model ensembles. Read part one here.

I would also like to recommend this really interesting Amazon Science article about differential privacy for end-to-end speech recognition. The data used to train AI models is protected by differential privacy (DP), which adds noise during training. In this article, Amazon researchers show how ensembles of teacher models can meet DP constraints while reducing error by more than 26 percent relative to standard DP methods.

Upcoming AWS Events
Check your calendars and sign up for these AWS events:

#BuildOnLiveBuild On AWS Live events are a series of technical streams on twitch.tv/aws that focus on technology topics related to challenges hands-on practitioners face today.

  • Join the Build On Live Weekly show about the cloud, the community, the code, and everything in between, hosted by AWS Developer Advocates. The show streams every Thursday at 09:00 US PT on twitch.tv/aws.
  • Join the new The Big Dev Theory show, co-hosted with AWS partners, discussing various topics such as data and AI, AIOps, integration, and security. The show streams every Tuesday at 08:00 US PT on twitch.tv/aws.

Check the AWS Twitch schedule for all shows.

AWS Community Days – AWS Community Day events are community-led conferences that deliver a peer-to-peer learning experience, providing developers with a venue to acquire AWS knowledge in their preferred way: from one another.

AWS Innovate Data and AI/ML edition – AWS Innovate is a free online event to learn the latest from AWS experts and get step-by-step guidance on using AI/ML to drive fast, efficient, and measurable results.

  • AWS Innovate Data and AI/ML edition for Asia Pacific and Japan is taking place on February 22, 2023. Register here.
  • Registrations for AWS Innovate EMEA (March 9, 2023) and the Americas (March 14, 2023) will open soon. Check the AWS Innovate page for updates.

You can browse all upcoming in-person and virtual events.

That’s all for this week. Check back next Monday for another Week in Review!

— Antje

This post is part of our Week in Review series. Check back each week for a quick roundup of interesting news and announcements from AWS!

New – Bring ML Models Built Anywhere into Amazon SageMaker Canvas and Generate Predictions

Post Syndicated from Antje Barth original https://aws.amazon.com/blogs/aws/new-bring-ml-models-built-anywhere-into-amazon-sagemaker-canvas-and-generate-predictions/

Amazon SageMaker Canvas provides business analysts with a visual interface to solve business problems using machine learning (ML) without writing a single line of code. Since we introduced SageMaker Canvas in 2021, many users have asked us for an enhanced, seamless collaboration experience that enables data scientists to share trained models with their business analysts with a few simple clicks.

Today, I’m excited to announce that you can now bring ML models built anywhere into SageMaker Canvas and generate predictions.

New – Bring Your Own Model into SageMaker Canvas
As a data scientist or ML practitioner, you can now seamlessly share models built anywhere, within or outside Amazon SageMaker, with your business teams. This removes the heavy lifting for your engineering teams to build a separate tool or user interface to share ML models and collaborate between the different parts of your organization. As a business analyst, you can now leverage ML models shared by your data scientists within minutes to generate predictions.

Let me show you how this works in practice!

In this example, I share an ML model that has been trained to identify customers that are potentially at risk of churning with my marketing analyst. First, I register the model in the SageMaker model registry. SageMaker model registry lets you catalog models and manage model versions. I create a model group called 2022-customer-churn-model-group and then select Create model version to register my model.

Amazon SageMaker Model Registry

To register your model, provide the location of the inference image in Amazon ECR, as well as the location of your model.tar.gz file in Amazon S3. You can also add model endpoint recommendations and additional model information. Once you’ve registered your model, select the model version and select Share.

Amazon SageMaker Studio - Share models from model registry with SageMaker Canvas users

You can now choose the SageMaker Canvas user profile(s) within the same SageMaker domain you want to share your model with. Then, provide additional model details, such as information about training and validation datasets, the ML problem type, and model output information. You can also add a note for the SageMaker Canvas users you share the model with.

Amazon SageMaker Studio - Share a model from Model Registry with SageMaker Canvas users

Similarly, you can now also share models trained in SageMaker Autopilot and models available in SageMaker JumpStart with SageMaker Canvas users.

The business analysts will receive an in-app notification in SageMaker Canvas that a model has been shared with them, along with any notes you added.

Amazon SageMaker Canvas - Received model from SageMaker Studio

My marketing analyst can now open, analyze, and start using the model to generate ML predictions in SageMaker Canvas.

Amazon SageMaker Canvas - Imported model from SageMaker Studio

Select Batch prediction to generate ML predictions for an entire dataset or Single prediction to create predictions for a single input. You can download the results in a .csv file.

Amazon SageMaker Canvas - Generate Predictions

New – Improved Model Sharing and Collaboration from SageMaker Canvas with SageMaker Studio Users
We also improved the sharing and collaboration capabilities from SageMaker Canvas with data science and ML teams. As a business analyst, you can now select which SageMaker Studio user profile(s) you want to share your standard-build models with.

Your data scientists or ML practitioners will receive a similar in-app notification in SageMaker Studio once a model has been shared with them, along with any notes from you. In addition to just reviewing the model, SageMaker Studio users can now also, if needed, update the data transformations in SageMaker Data Wrangler, retrain the model in SageMaker Autopilot, and share back the updated model. SageMaker Studio users can also recommend an alternate model from the list of models in SageMaker Autopilot.

Once SageMaker Studio users share back a model, you receive another notification in SageMaker Canvas that an updated model has been shared back with you. This collaboration between business analysts and data scientists will help democratize ML across organizations by bringing transparency to automated decisions, building trust, and accelerating ML deployments.

Now Available
The enhanced, seamless collaboration capabilities for Amazon SageMaker Canvas, including the ability to bring your ML models built anywhere, are available today in all AWS Regions where SageMaker Canvas is available with no changes to the existing SageMaker Canvas pricing.

Start collaborating and bring your ML model to Amazon SageMaker Canvas today!

— Antje

New for Amazon SageMaker – Perform Shadow Tests to Compare Inference Performance Between ML Model Variants

Post Syndicated from Antje Barth original https://aws.amazon.com/blogs/aws/new-for-amazon-sagemaker-perform-shadow-tests-to-compare-inference-performance-between-ml-model-variants/

As you move your machine learning (ML) workloads into production, you need to continuously monitor your deployed models and iterate when you observe a deviation in your model performance. When you build a new model, you typically start validating the model offline using historical inference request data. But this data sometimes fails to account for current, real-world conditions. For example, new products might become trending that your product recommendation model hasn’t seen yet. Or, you experience a sudden spike in the volume of inference requests in production that you never exposed your model to before.

Today, I’m excited to announce Amazon SageMaker support for shadow testing!

Deploying a model in shadow mode lets you conduct a more holistic test by routing a copy of the live inference requests for a production model to the new (shadow) model. Yet, only the responses from the production model are returned to the calling application. Shadow testing helps you build further confidence in your model and catch potential configuration errors and performance issues before they impact end users. Once you complete a shadow test, you can use the deployment guardrails for SageMaker inference endpoints to safely update your model in production.

Get Started with Amazon SageMaker Shadow Testing
You can create shadow tests using the new SageMaker Inference Console and APIs. Shadow testing gives you a fully managed experience for setup, monitoring, viewing, and acting on the results of shadow tests. If you have existing workflows built around SageMaker endpoints, you can also deploy a model in shadow mode using the existing SageMaker Inference APIs.

On the SageMaker console, select Inference and Shadow tests to create, monitor, and deploy shadow tests.

Amazon SageMaker Shadow Tests

To create a shadow test, select an existing (or create a new) SageMaker endpoint and production variant you want to test against.

Amazon SageMaker - Create Shadow Test

Next, configure the proportion of traffic to send to the shadow variant, the comparison metrics you want to evaluate, and the duration of the test. You can also enable data capture for your production and shadow variant.

Amazon SagMaker - Create Shadow Test

That’s it. SageMaker now automatically deploys the new variant in shadow mode and routes a copy of the inference requests to it in real time, all within the same endpoint. The following diagram illustrates this workflow.

Amazon SageMaker - Shadow Testing

Note that only the responses of the production variant are returned to the calling application. You can choose to either discard or log the responses of the shadow variant for offline comparison.

You can also use shadow testing to validate changes you made to any component in your production variant, including the serving container or ML instance. This can be useful when you’re upgrading to a new framework version of your serving container, applying patches, or if you want to make sure that there is no impact to latency or error rate due to this change. Similarly, if you consider moving to another ML instance type, for example, Amazon EC2 C7g instances based on AWS Graviton processors, or EC2 G5 instances powered by NVIDIA A10G Tensor Core GPUs, you can use shadow testing to evaluate the performance on production traffic prior to rollout.

You can monitor the progress of the shadow test and performance metrics such as latency and error rate through a live dashboard. On the SageMaker console, select Inference and Shadow tests, then select the shadow test you want to monitor.

Amazon SageMaker - Monitor Shadow Test

Amazon SageMaker - Monitor Shadow Test

If you decide to promote the shadow model to production, select Deploy shadow variant and define the infrastructure configuration to deploy the shadow variant.

Amazon SageMaker - Deploy Shadow Variant

Amazon SageMaker - Deploy Shadow Variant

You can also use the SageMaker deployment guardrails if you want to add linear or canary traffic shifting modes and auto rollbacks to your update.

Availability and Pricing
SageMaker support for shadow testing is available today in all AWS Regions where SageMaker hosting is available except for the AWS GovCloud (US) Regions and AWS China Regions.

There is no additional charge for SageMaker shadow testing other than usage charges for the ML instances and ML storage provisioned to host the shadow variant. The pricing for ML instances and ML storage dimensions is the same as the real-time inference option. There is no additional charge for data processed in and out of shadow deployments. The SageMaker pricing page has all the details.

To learn more, visit Amazon SageMaker shadow testing.

Start validating your new ML models with SageMaker shadow tests today!

— Antje