Post Syndicated from Anton Aleksandrov original https://aws.amazon.com/blogs/compute/building-multi-tenant-saas-applications-with-aws-lambdas-new-tenant-isolation-mode/
Today, AWS announced a new tenant isolation mode for AWS Lambda, that allows you to process function invocations in separate execution environments for each application end-user or tenant invoking your Lambda function. This capability simplifies building secure multi-tenant SaaS applications by managing tenant-level compute environment isolation and request routing for you. As a result, you can focus on your core business logic rather than implementing your own tenant-aware compute environment isolation.
Overview
Lambda runs your function code in secure execution environments that leverage Firecracker virtualization to provide isolation. These execution environments never share or reuse virtual resources (such as vCPU, disk, or memory) across functions, or even across different versions of the same function. However, Lambda can reuse execution environments for multiple invocations of the same function version, as these execution environments are fully set-up and can therefore deliver faster request processing for your functions.

Figure 1. Incoming invocations processed by a collection of execution environments that belong to a single function.
Multi-tenant SaaS applications that handle sensitive tenant-specific data or execute code supplied dynamically by tenants may need a higher degree of isolation—at the individual application tenant level rather than at the function level—for secure code execution and to reduce the risk of cross-tenant data access.
Prior to today’s launch, developers would implement custom solutions, such as SDKs or application logic to manage isolation within function code. This approach was bug-prone, required more work from application development teams, and didn’t ensure isolation at the compute environment level.
Alternatively, developers adopted the approach of creating separate functions per application tenant, replicating the same code across hundreds or thousands of tenants. This approach provided stronger compute environment isolation than sharing compute environments across multiple tenants of the same function, but increased implementation overhead and operational complexity as workloads grew to support a larger number of tenants over time.
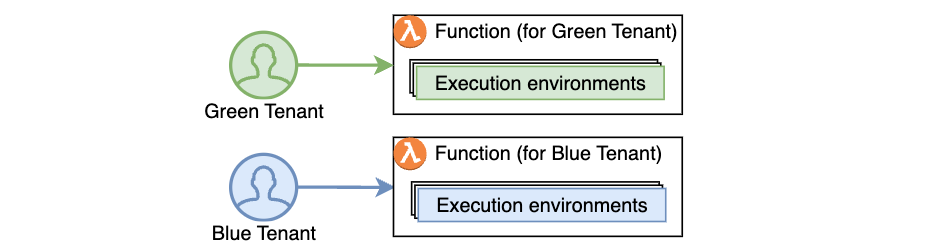
Figure 2. Using function-per-tenant model, each tenant’s requests are processed by a separate function.
Starting today, AWS Lambda offers a new tenant isolation mode that lets you isolate execution environments used across different tenants of your multi-tenant SaaS applications, even when all of the tenants invoke the same function. When you enable the new tenant isolation mode, you include a tenant identifier with each function invocation. Lambda uses this identifier to route the request to the correct execution environment. As a result, each execution environment is reused only for invocations from the same tenant. This means you still get the performance benefits of warm execution environments, while ensuring that each tenant’s workloads remain isolated.

Figure 3. With the new tenant isolation capability, Lambda creates separate execution environments per tenant for a single function.
For organizations handling sensitive tenant-specific data or running untrusted code supplied dynamically by end-users, Lambda’s new tenant isolation mode provides the security benefits of per-tenant compute environment separation without the operational complexity of managing individual functions or infrastructure for each tenant.
Example scenario
Consider building a multi-tenant serverless SaaS application. To optimize performance, your function handler can retrieve tenant-specific configuration and data, cache it in memory, and reuse it for subsequent invocations from the same tenant. For example, you might cache tenant-specific database location, feature flags, or business rules that are frequently accessed during request processing. You may store this information within the application runtime process as global variables or as files in the /tmp directory. However, if the underlying execution environment is used to serve multiple tenants, this approach can potentially expose data across tenants.
With tenant isolation mode you can address this risk with much simpler architecture and configuration. This built-in capability makes Lambda an excellent choice for multi-tenant SaaS applications needing isolated compute environments for individual tenants.
Getting Started with Lambda Tenant Isolation Mode
Use the new tenancy-config parameter to configure tenant isolation mode when you create your function. You can only apply this configuration at function creation time; it cannot be updated for existing functions. The following snippet creates a function with tenancy config using the AWS CLI.
After the function is created, you must provide the tenant ID parameter with each invocation. Lambda uses this identifier to ensure that the execution environment used for a particular tenant is never reused for other tenants. For subsequent invocations from the same tenant, Lambda may reuse the execution environment to optimize performance. Specify this tenant-id parameter as illustrated below:
The new tenant-id parameter is required for functions using the tenant isolation mode. Function invocations omitting this parameter will fail with an invocation error, as shown below:
Lambda makes the tenant ID parameter available through your function handler’s context object. This allows you to access tenant-specific information in your code, for example if you wish to implement custom logic based on the tenant identity, as shown below:
The following table outlines differences between Lambda functions with and without tenant isolation mode enabled:
| Feature | Without the new tenant isolation mode |
With the new tenant isolation mode |
| Execution environment isolation | Isolated per function version. | Isolated per end-user or tenant invoking a function version. |
| Execution environment reuse | Can be reused to process all invocations of a function version. | Can only be reused to process invocations from the same tenant invoking a function version. |
| Data stored on local disk and in-memory | Potentially accessible across all invocations of a function version. | Potentially accessible across invocations from the same tenant. Not accessible for invocations from other tenants. |
| Cold starts | Occur when there are no warm execution environments available to process incoming invocation. | Occur when there are no tenant-specific warm execution environments available to process incoming invocation. More cold starts expected due to tenant-specific execution environments. |
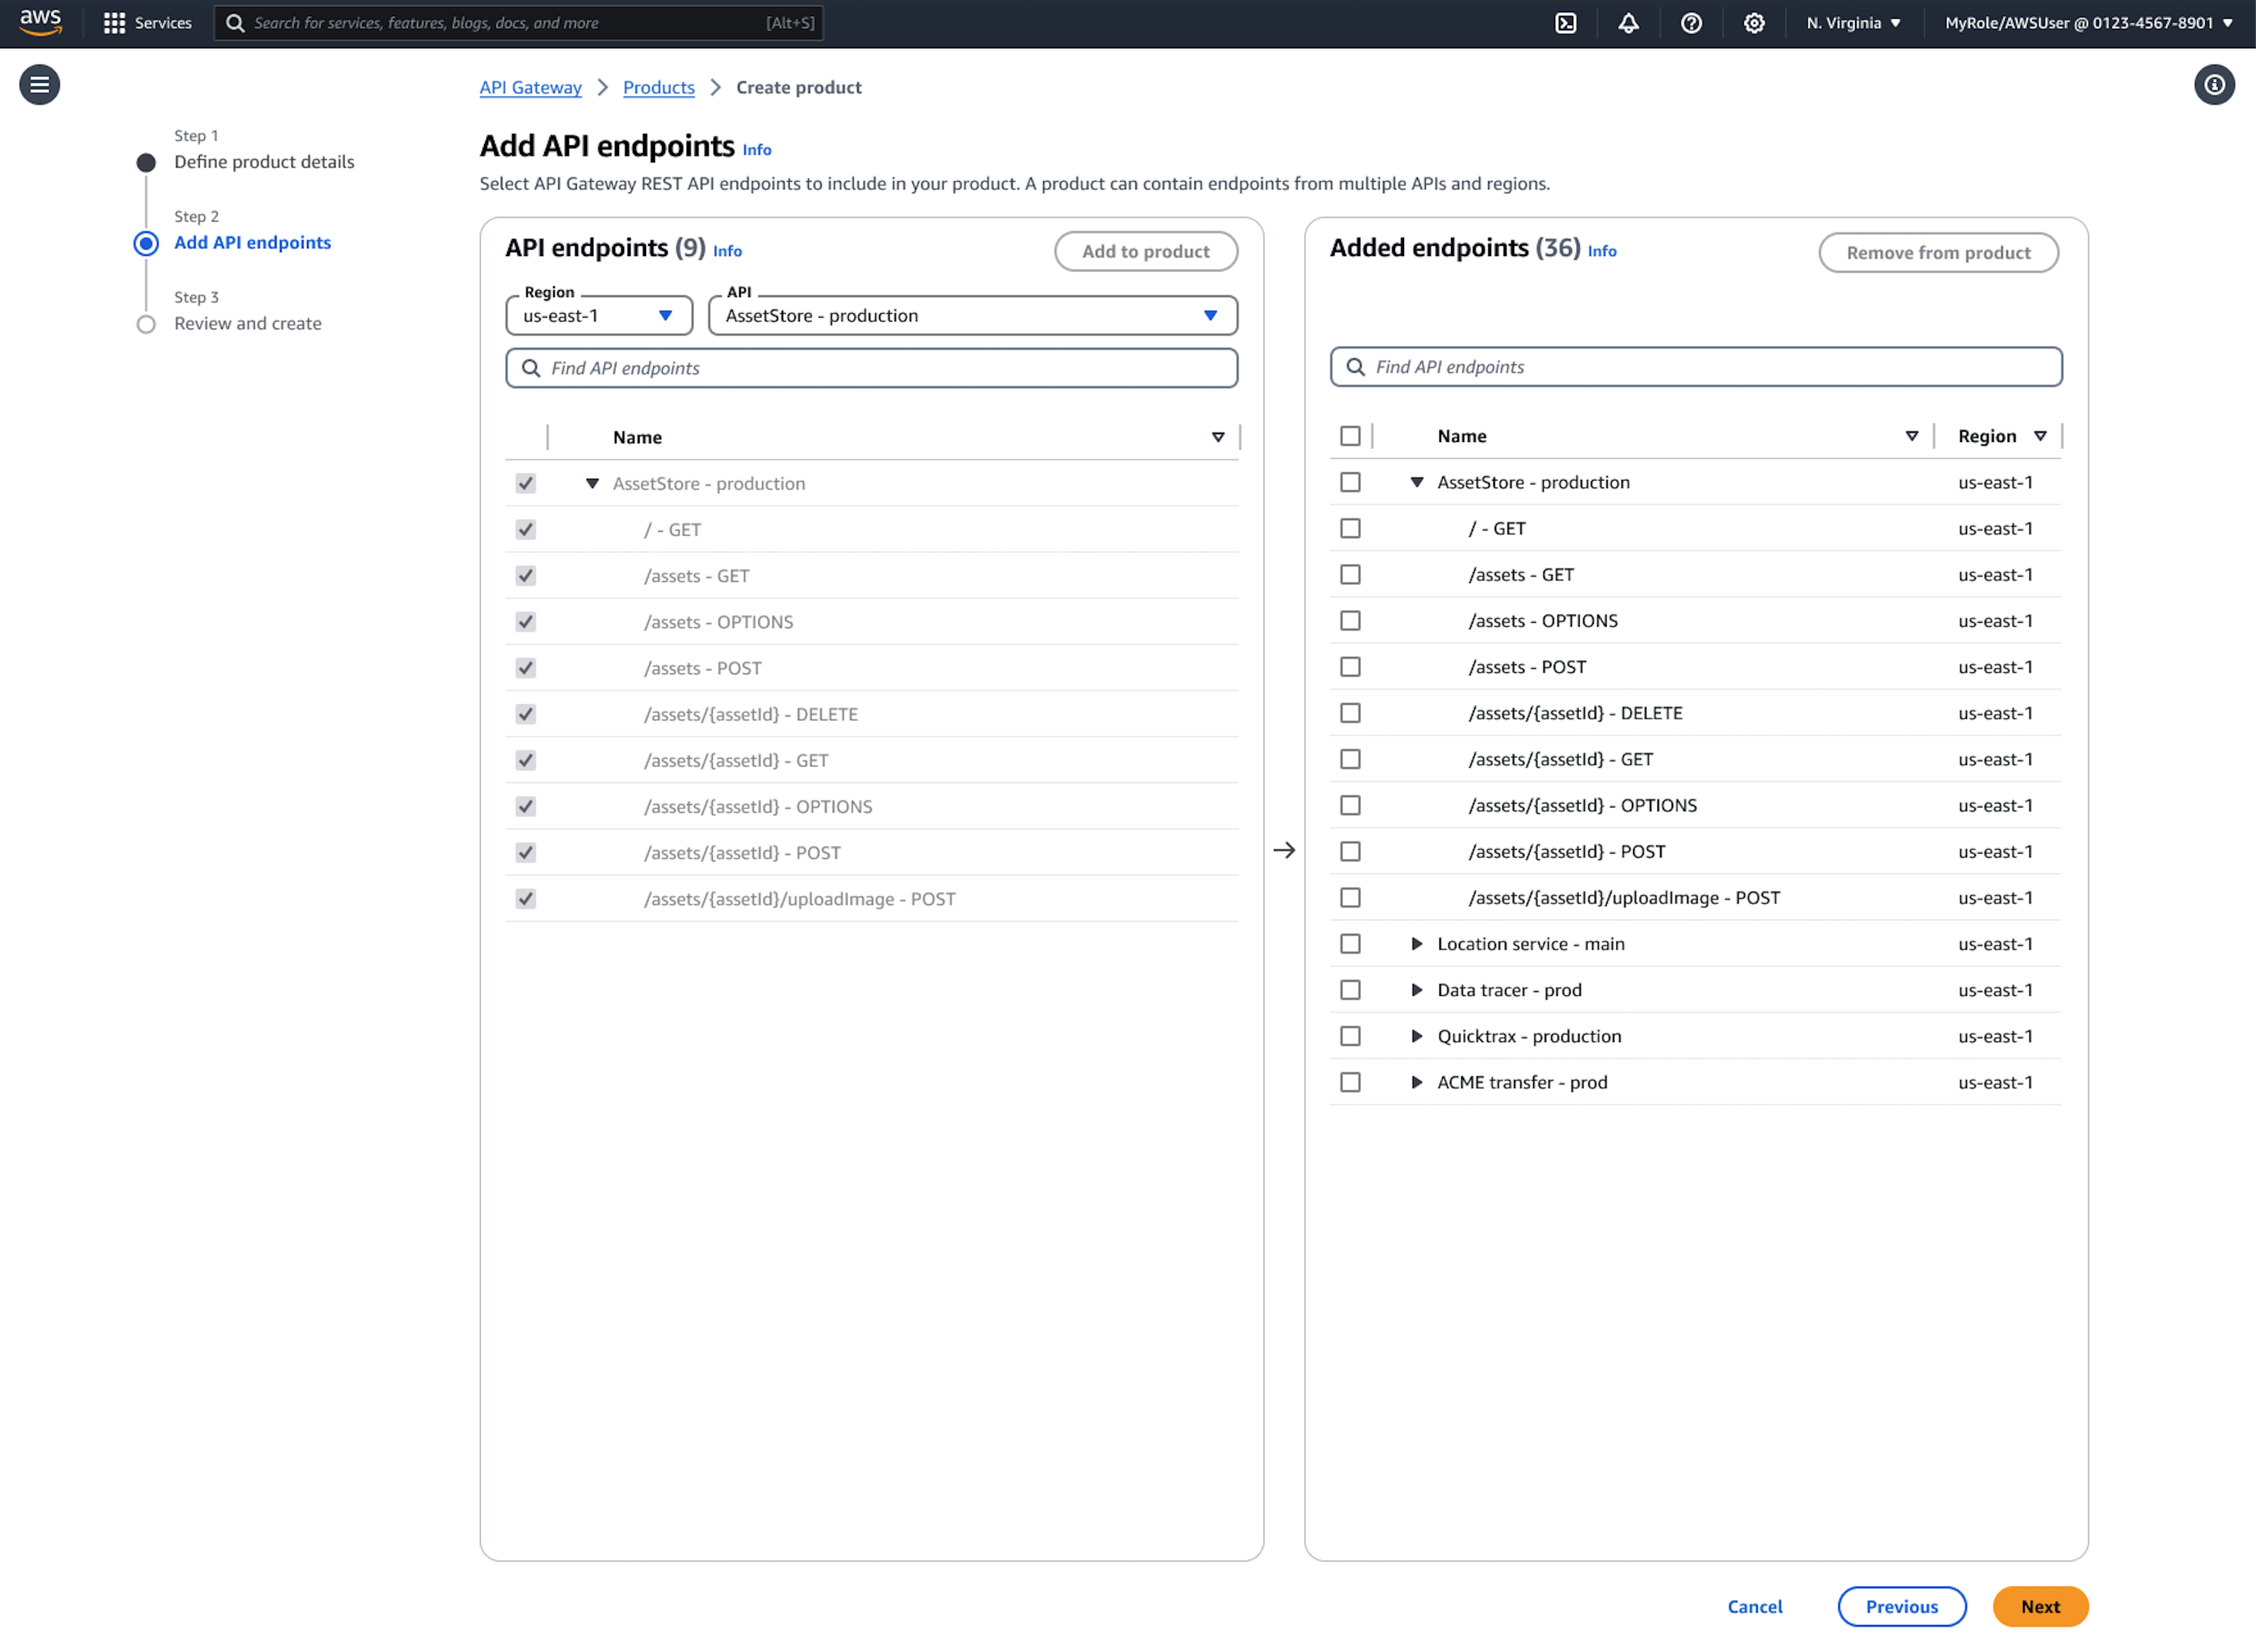
Integrating with Amazon API Gateway
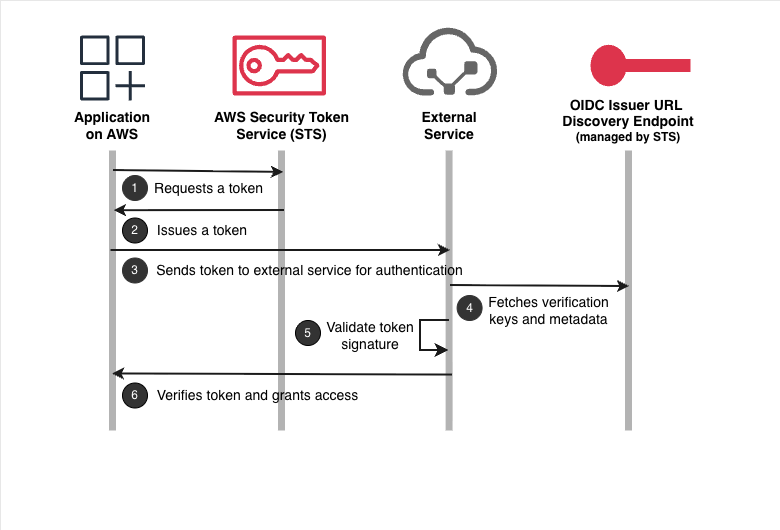
Amazon API Gateway uses Lambda’s Invoke API to invoke Lambda functions. When using the Invoke API, Lambda expects the tenant ID parameter to be passed using the X-Amz-Tenant-Id HTTP header. You can configure API Gateway to inject this HTTP header into the Lambda invocation request with a value obtained from client request properties such as HTTP header, query parameter, or path parameter. When using Lambda Authorizers, you can obtain the value from authorization context information returned by the authorizer, such as principal ID or JWT claim. See API Gateway documentation to learn how you can return authorization information from Lambda authorizers to be used for the X-Amz-Tenant-Id header value.
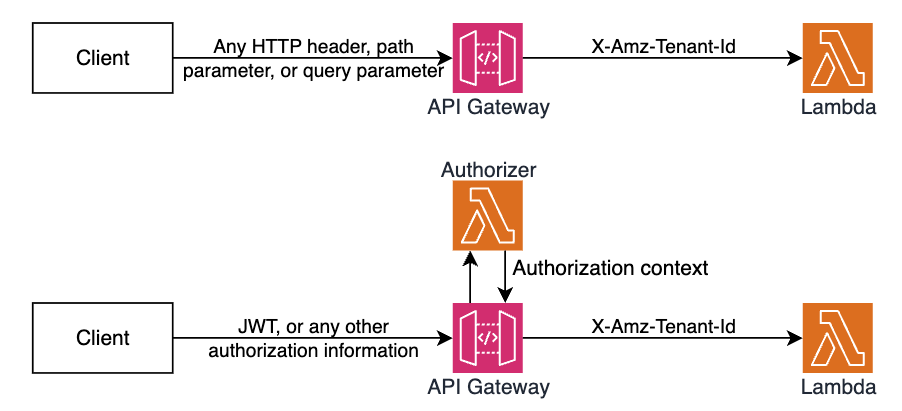
Figure 4. Obtaining X-Amz-Tenant-Id header value from authentication sources.
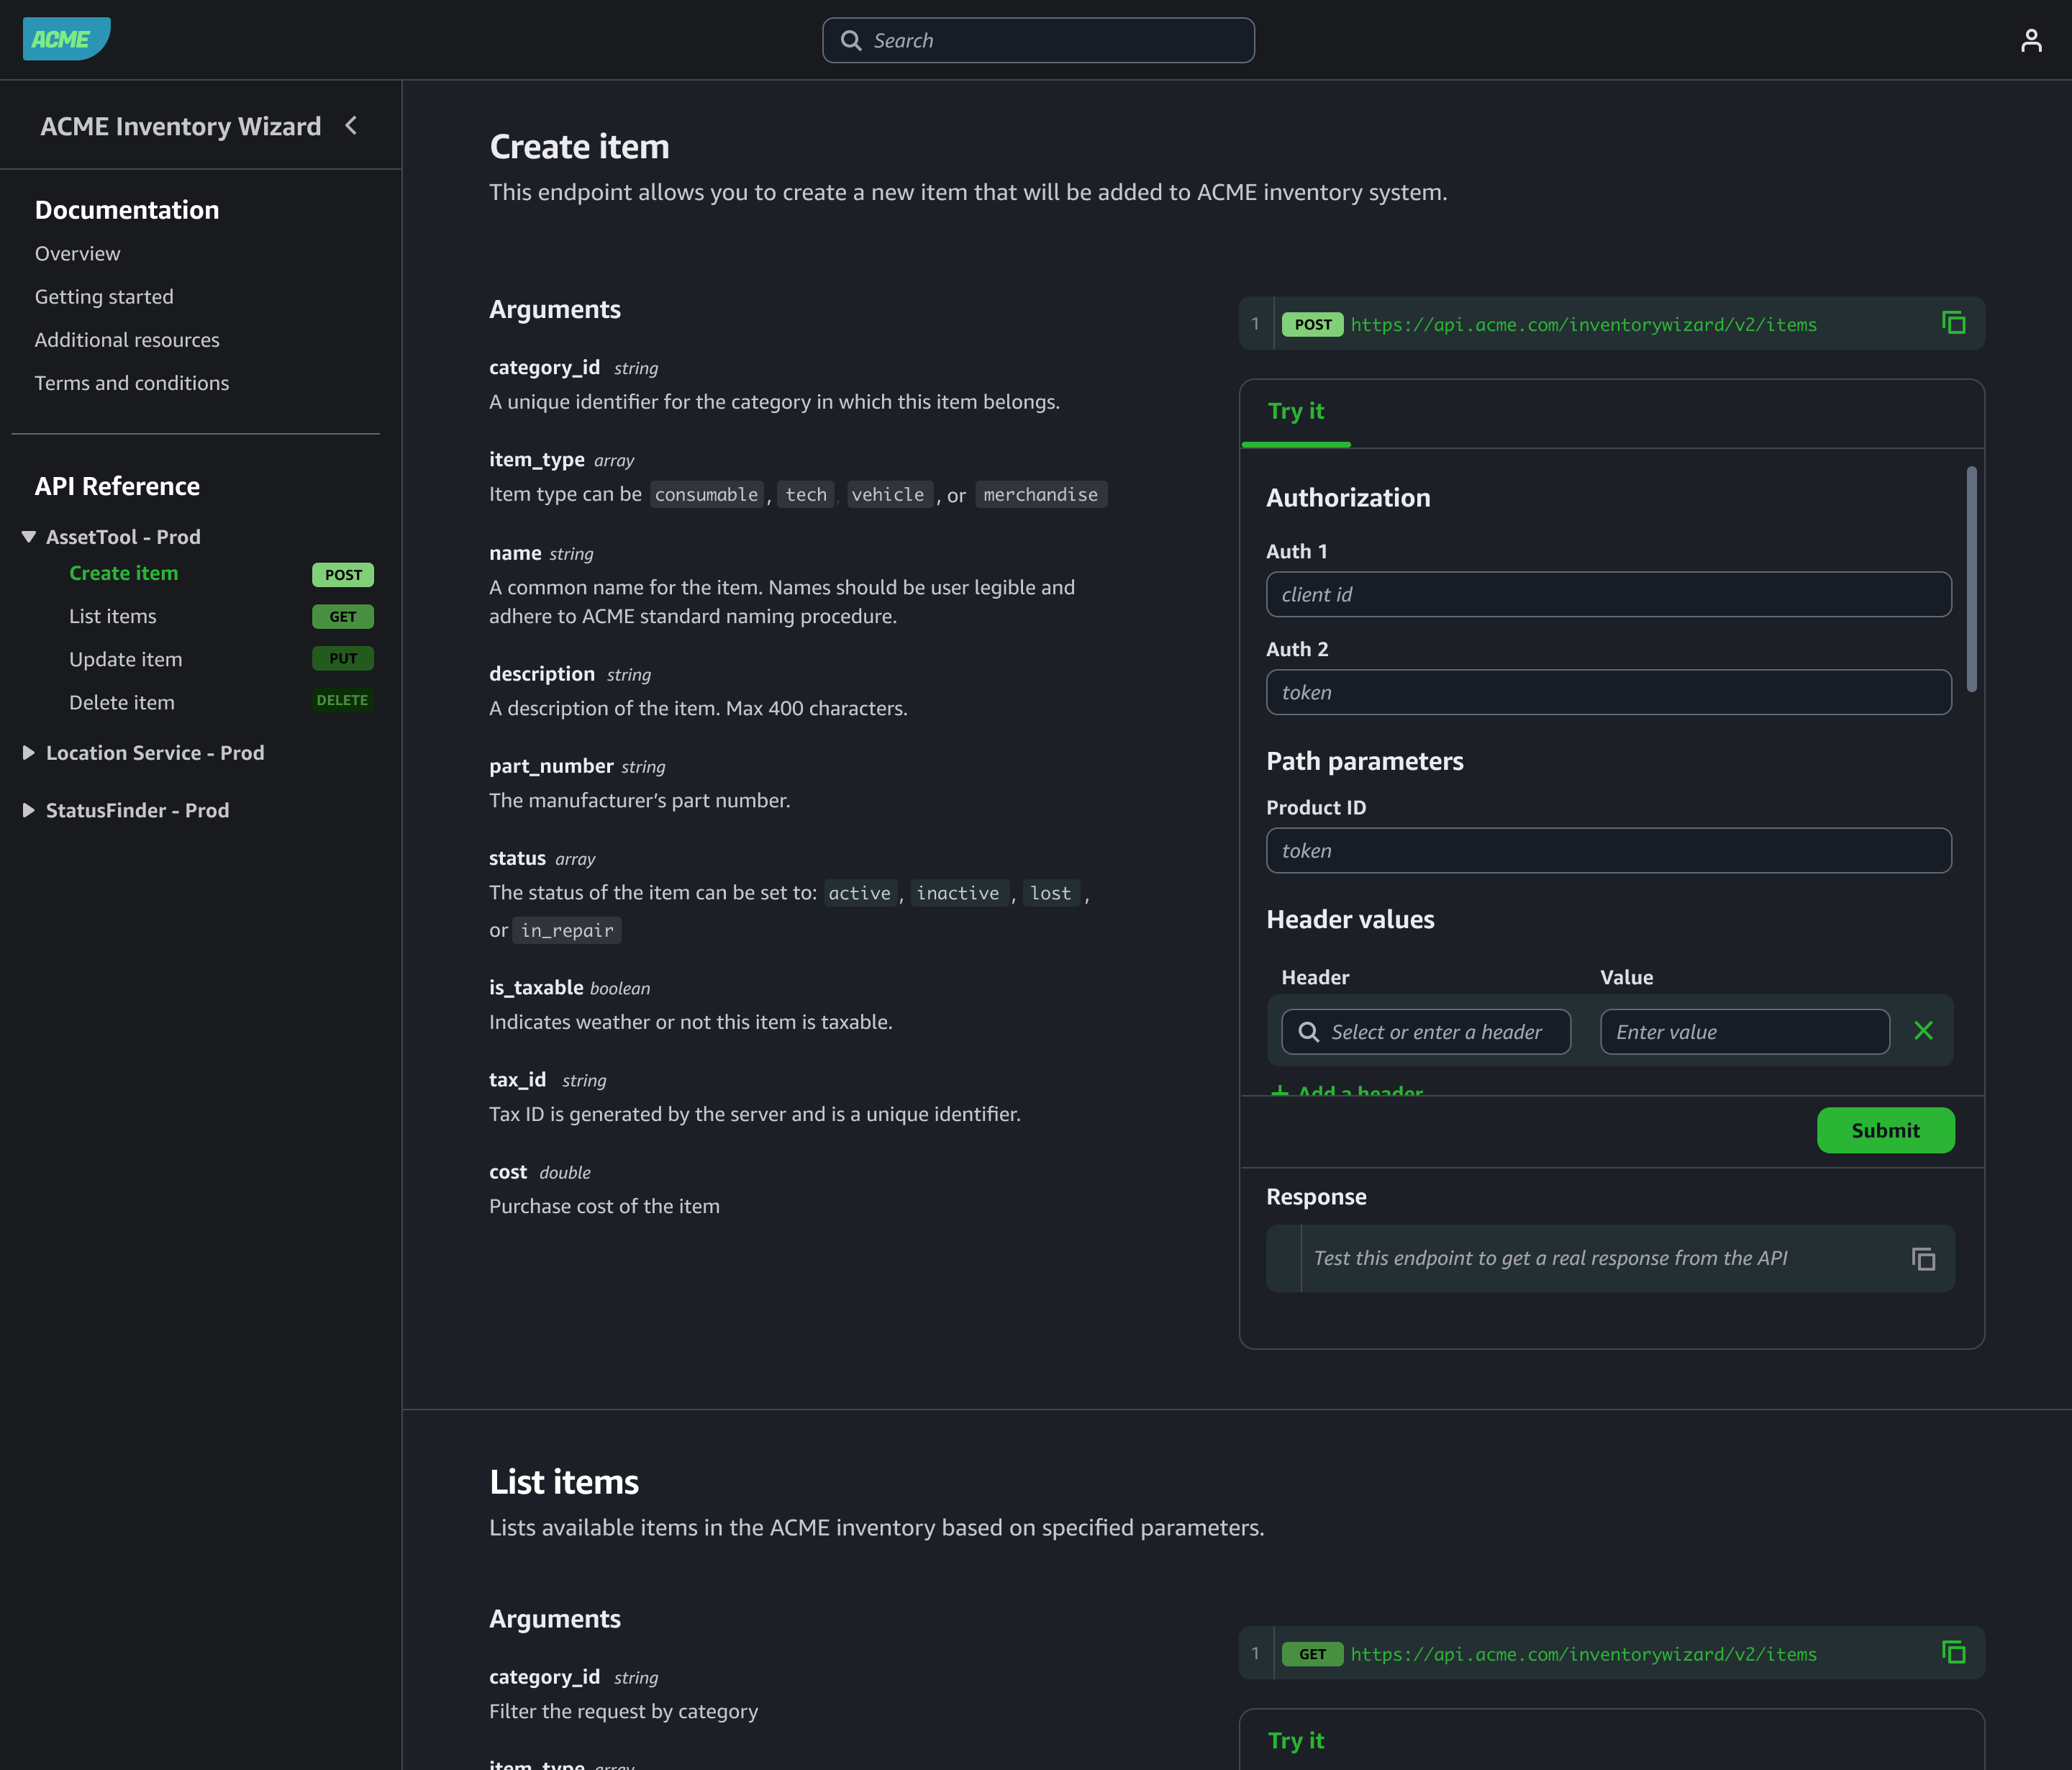
The following screenshot illustrates API Gateway Lambda integration configuration, where the incoming request to API Gateway includes an x-tenant-id header that is mapped to the X-Amz-Tenant-Id request header to invoke a Lambda function using tenant isolation mode.
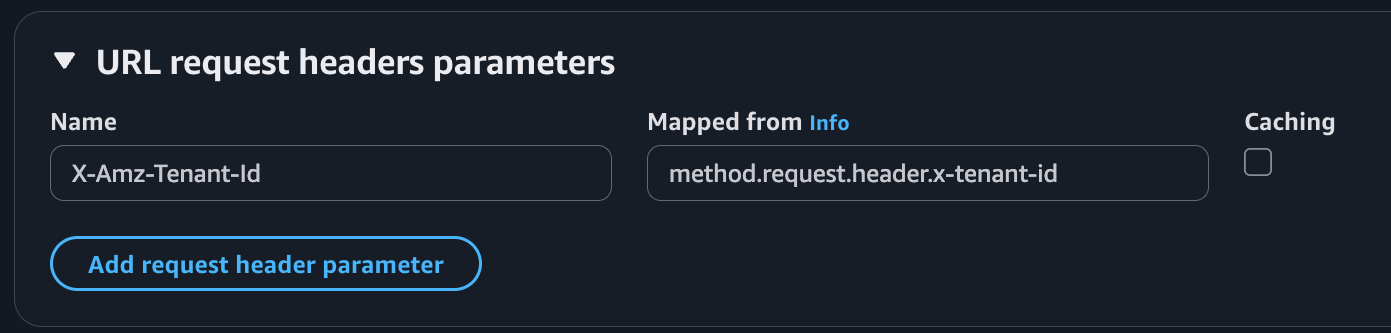
Figure 5. Mapping client request header to Lambda tenant-id header.
The following code snippet illustrates this configuration implemented with the AWS CDK.
Tenant-aware observability
For functions using tenant isolation, Lambda automatically includes the tenant ID in function logs when you have JSON logging enabled, making it easier to monitor and debug tenant-specific issues. Note that the tenantId property is available during function invocation, rather than during function initialization. The tenantId property is included for both platform events (like platform.start and platform.report) and custom logs you print in your function code, as shown in the following screenshot:
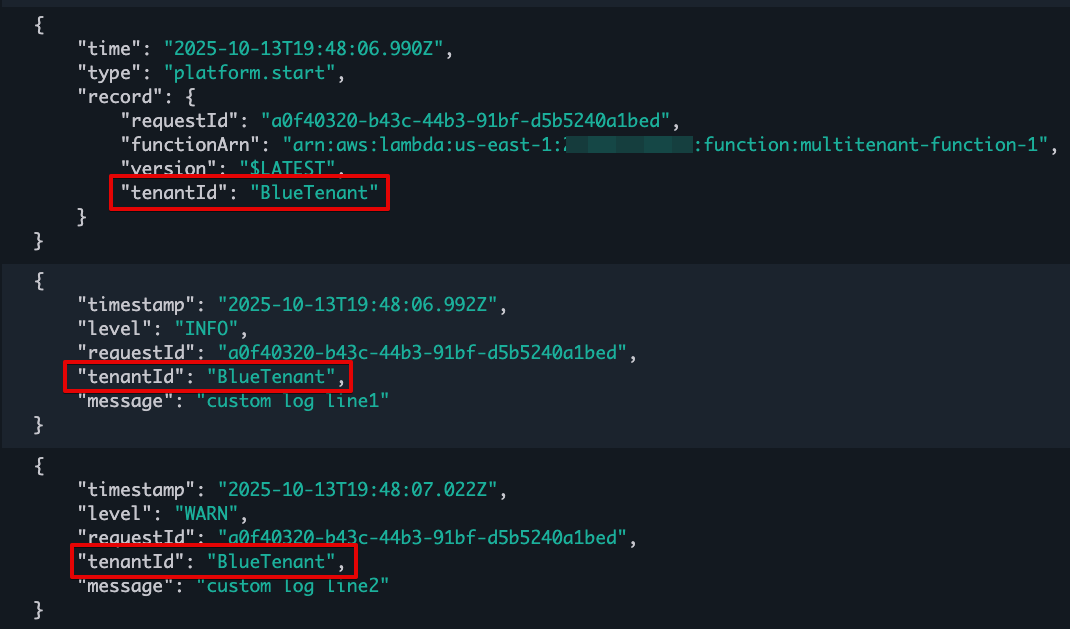
Figure 6. Lambda function logs with tenantId.
Lambda creates a separate CloudWatch log stream for each execution environment. You can use CloudWatch Log Insights to find log streams that belong to a particular tenant by filtering by tenant Id:
You can also retrieve tenant-specific logs across all log streams:
Each log stream starts with function initialization logs followed by the invocation logs. This structure helps you to debug tenant-specific issues and understand the lifecycle of each tenant’s execution environments.
Considerations
When using the new tenant isolation for Lambda functions, consider the following:
- Each tenant’s execution environments are isolated from other tenants so that tenant-specific data stored on disk or in memory remain separated from other tenants invoking the same Lambda function.
- All tenants share the function’s execution role. For more fine-grained permissions for individual tenants, consider propagating tenant-scoped credentials from the upstream application components invoking your Lambda function.
- Your application may experience higher percentage of cold starts, as Lambda processes requests in separate execution environments for each tenant invoking your functions.
- You pay a fee for each new tenant-specific execution environment created, depending on the memory configured for your function. See Lambda pricing page for details.
Best practices
When using the new tenant isolation mode for Lambda functions, AWS recommends the following best practices:
- Implement robust tenant ID validation at the application layer to prevent unauthorized access through tenant ID manipulation. Consider using a dedicated service or database to maintain valid tenant IDs.
- Monitor and audit tenant access patterns regularly to detect potential security anomalies or unauthorized cross-tenant access attempts.
- Be aware of Lambda concurrency quotas when building multi-tenant applications. You might need to request quota increases based on your tenant count and usage patterns.
Sample code
Follow the instructions in this GitHub repository to provision a sample project in your own account and see the new Lambda tenant isolation mode in action. The sample project illustrates how to integrate a function using the new tenant isolation mode with Amazon API Gateway and propagate tenant identity from client requests.
Conclusion
The new tenant isolation mode for Lambda simplifies building serverless multi-tenant SaaS applications on AWS. By automatically managing application tenant-level compute environment isolation, this capability eliminates the need for custom isolation logic or separate tenant functions, allowing you to focus on the core business logic while AWS handles the complexities of tenant-aware compute environment isolation.
Combined with the existing security features in Lambda, rapid scaling, and pay-per-use pricing, tenant isolation mode makes Lambda an even more compelling choice for modern SaaS applications, whether you’re building new solutions or enhancing existing ones.
To learn more, refer to the documentation for tenant isolation. For details on pricing, refer to Lambda’s pricing page.