Tag Archives: GitHub Actions

Integrating with GitHub Actions – CI/CD pipeline to deploy a Web App to Amazon EC2

Post Syndicated from Mahesh Biradar original https://aws.amazon.com/blogs/devops/integrating-with-github-actions-ci-cd-pipeline-to-deploy-a-web-app-to-amazon-ec2/

Many Organizations adopt DevOps Practices to innovate faster by automating and streamlining the software development and infrastructure management processes. Beyond cultural adoption, DevOps also suggests following certain best practices and Continuous Integration and Continuous Delivery (CI/CD) is among the important ones to start with. CI/CD practice reduces the time it takes to release new software updates by automating deployment activities. Many tools are available to implement this practice. Although AWS has a set of native tools to help achieve your CI/CD goals, it also offers flexibility and extensibility for integrating with numerous third party tools.

In this post, you will use GitHub Actions to create a CI/CD workflow and AWS CodeDeploy to deploy a sample Java SpringBoot application to Amazon Elastic Compute Cloud (Amazon EC2) instances in an Autoscaling group.

GitHub Actions is a feature on GitHub’s popular development platform that helps you automate your software development workflows in the same place that you store code and collaborate on pull requests and issues. You can write individual tasks called actions, and then combine them to create a custom workflow. Workflows are custom automated processes that you can set up in your repository to build, test, package, release, or deploy any code project on GitHub.

AWS CodeDeploy is a deployment service that automates application deployments to Amazon EC2 instances, on-premises instances, serverless AWS Lambda functions, or Amazon Elastic Container Service (Amazon ECS) services.

Solution Overview

The solution utilizes the following services:

  1. GitHub Actions – Workflow Orchestration tool that will host the Pipeline.
  2. AWS CodeDeploy – AWS service to manage deployment on Amazon EC2 Autoscaling Group.
  3. AWS Auto Scaling – AWS Service to help maintain application availability and elasticity by automatically adding or removing Amazon EC2 instances.
  4. Amazon EC2 – Destination Compute server for the application deployment.
  5. AWS CloudFormation – AWS infrastructure as code (IaC) service used to spin up the initial infrastructure on AWS side.
  6. IAM OIDC identity provider – Federated authentication service to establish trust between GitHub and AWS to allow GitHub Actions to deploy on AWS without maintaining AWS Secrets and credentials.
  7. Amazon Simple Storage Service (Amazon S3) – Amazon S3 to store the deployment artifacts.

The following diagram illustrates the architecture for the solution:
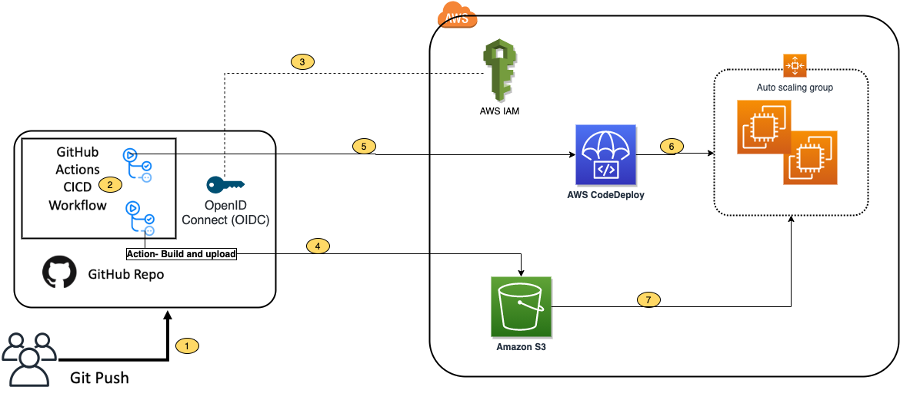
Architecture Diagram

  1. Developer commits code changes from their local repo to the GitHub repository. In this post, the GitHub action is triggered manually, but this can be automated.
  2. GitHub action triggers the build stage.
  3. GitHub’s Open ID Connector (OIDC) uses the tokens to authenticate to AWS and access resources.
  4. GitHub action uploads the deployment artifacts to Amazon S3.
  5. GitHub action invokes CodeDeploy.
  6. CodeDeploy triggers the deployment to Amazon EC2 instances in an Autoscaling group.
  7. CodeDeploy downloads the artifacts from Amazon S3 and deploys to Amazon EC2 instances.

Prerequisites

Before you begin, you must complete the following prerequisites:

  • An AWS account with permissions to create the necessary resources.
  • A GitHub account with permissions to configure GitHub repositories, create workflows, and configure GitHub secrets.
  • A Git client to clone the provided source code.

Steps

The following steps provide a high-level overview of the walkthrough:

  1. Clone the project from the AWS code samples repository.
  2. Deploy the AWS CloudFormation template to create the required services.
  3. Update the source code.
  4. Setup GitHub secrets.
  5. Integrate CodeDeploy with GitHub.
  6. Trigger the GitHub Action to build and deploy the code.
  7. Verify the deployment.

Download the source code

  1. Clone the source code repository aws-codedeploy-github-actions-deployment.

git clone https://github.com/aws-samples/aws-codedeploy-github-actions-deployment.git

  1. Create an empty repository in your personal GitHub account. To create a GitHub repository, see Create a repo. Clone this repo to your computer. Furthermore, ignore the warning about cloning an empty repository.

git clone https://github.com/<username>/<repoName>.git

Figure2: Github Clone

  1. Copy the code. We need contents from the hidden .github folder for the GitHub actions to work.

cp -r aws-codedeploy-github-actions-deployment/. <new repository>

e.g. GitActionsDeploytoAWS

  1. Now you should have the following folder structure in your local repository.

Figure3: Directory Structure

Repository folder structure

  • The .github folder contains actions defined in the YAML file.
  • The aws/scripts folder contains code to run at the different deployment lifecycle events.
  • The cloudformation folder contains the template.yaml file to create the required AWS resources.
  • Spring-boot-hello-world-example is a sample application used by GitHub actions to build and deploy.
  • Root of the repo contains appspec.yml. This file is required by CodeDeploy to perform deployment on Amazon EC2. Find more details here.

The following commands will help make sure that your remote repository points to your personal GitHub repository.

git remote remove origin

git remote add origin <your repository url>

git branch -M main

git push -u origin main

Deploy the CloudFormation template

To deploy the CloudFormation template, complete the following steps:

  1. Open AWS CloudFormation console. Enter your account ID, user name, and Password.
  2. Check your region, as this solution uses us-east-1.
  3. If this is a new AWS CloudFormation account, select Create New Stack. Otherwise, select Create Stack.
  4. Select Template is Ready
  5. Select Upload a template file
  6. Select Choose File. Navigate to template.yml file in your cloned repository at “aws-codedeploy-github-actions-deployment/cloudformation/template.yaml”.
  7. Select the template.yml file, and select next.
  8. In Specify Stack Details, add or modify the values as needed.
    • Stack name = CodeDeployStack.
    • VPC and Subnets = (these are pre-populated for you) you can change these values if you prefer to use your own Subnets)
    • GitHubThumbprintList = 6938fd4d98bab03faadb97b34396831e3780aea1
    • GitHubRepoName – Name of your GitHub personal repository which you created.

Figure4: CloudFormation Parameters

  1. On the Options page, select Next.
  2. Select the acknowledgement box to allow for the creation of IAM resources, and then select Create. It will take CloudFormation approximately 10 minutes to create all of the resources. This stack would create the following resources.
    • Two Amazon EC2 Linux instances with Tomcat server and CodeDeploy agent are installed
    • Autoscaling group with Internet Application load balancer
    • CodeDeploy application name and deployment group
    • Amazon S3 bucket to store build artifacts
    • Identity and Access Management (IAM) OIDC identity provider
    • Instance profile for Amazon EC2
    • Service role for CodeDeploy
    • Security groups for ALB and Amazon EC2

Update the source code

  1.  On the AWS CloudFormation console, select the Outputs tab. Note that the Amazon S3 bucket name and the ARM of the GitHub IAM Role. We will use this in the next step.

Figure5: CloudFormation Output

  1. Update the Amazon S3 bucket in the workflow file deploy.yml. Navigate to /.github/workflows/deploy.yml from your Project root directory.

Replace ##s3-bucket## with the name of the Amazon S3 bucket created previously.

Replace ##region## with your AWS Region.

Figure6: Actions YML

  1. Update the Amazon S3 bucket name in after-install.sh. Navigate to aws/scripts/after-install.sh. This script would copy the deployment artifact from the Amazon S3 bucket to the tomcat webapps folder.

Figure7: CodeDeploy Instruction

Remember to save all of the files and push the code to your GitHub repo.

  1. Verify that you’re in your git repository folder by running the following command:

git remote -V

You should see your remote branch address, which is similar to the following:

username@3c22fb075f8a GitActionsDeploytoAWS % git remote -v

origin [email protected]:<username>/GitActionsDeploytoAWS.git (fetch)

origin [email protected]:<username>/GitActionsDeploytoAWS.git (push)

  1. Now run the following commands to push your changes:

git add .

git commit -m “Initial commit”

git push

Setup GitHub Secrets

The GitHub Actions workflows must access resources in your AWS account. Here we are using IAM OpenID Connect identity provider and IAM role with IAM policies to access CodeDeploy and Amazon S3 bucket. OIDC lets your GitHub Actions workflows access resources in AWS without needing to store the AWS credentials as long-lived GitHub secrets.

These credentials are stored as GitHub secrets within your GitHub repository, under Settings > Secrets. For more information, see “GitHub Actions secrets”.

  • Navigate to your github repository. Select the Settings tab.
  • Select Secrets on the left menu bar.
  • Select New repository secret.
  • Select Actions under Secrets.
    • Enter the secret name as ‘IAMROLE_GITHUB’.
    • enter the value as ARN of GitHubIAMRole, which you copied from the CloudFormation output section.

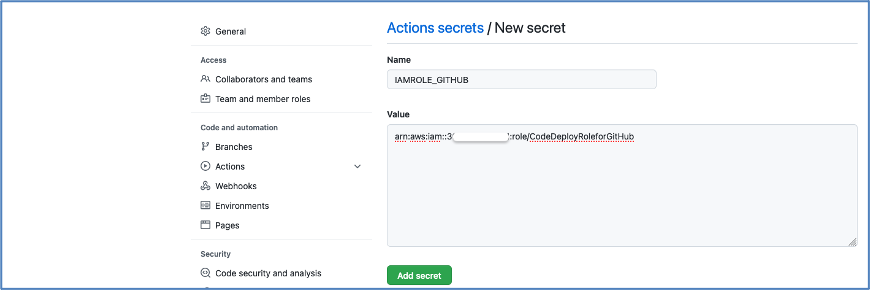
Figure8: Adding Github Secrets

Figure9: Adding New Secret

Integrate CodeDeploy with GitHub

For CodeDeploy to be able to perform deployment steps using scripts in your repository, it must be integrated with GitHub.

CodeDeploy application and deployment group are already created for you. Please use these applications in the next step:

CodeDeploy Application =CodeDeployAppNameWithASG

Deployment group = CodeDeployGroupName

To link a GitHub account to an application in CodeDeploy, follow until step 10 from the instructions on this page.

You can cancel the process after completing step 10. You don’t need to create Deployment.

Trigger the GitHub Actions Workflow

Now you have the required AWS resources and configured GitHub to build and deploy the code to Amazon EC2 instances.

The GitHub actions as defined in the GITHUBREPO/.github/workflows/deploy.yml would let us run the workflow. The workflow is currently setup to be manually run.

Follow the following steps to run it manually.

Go to your GitHub Repo and select Actions tab

Figure10: See Actions Tab

Select Build and Deploy link, and select Run workflow as shown in the following image.

Figure11: Running Workflow Manually

After a few seconds, the workflow will be displayed. Then, select Build and Deploy.

Figure12: Observing Workflow

You will see two stages:

  1. Build and Package.
  2. Deploy.

Build and Package

The Build and Package stage builds the sample SpringBoot application, generates the war file, and then uploads it to the Amazon S3 bucket.

Figure13: Completed Workflow

You should be able to see the war file in the Amazon S3 bucket.
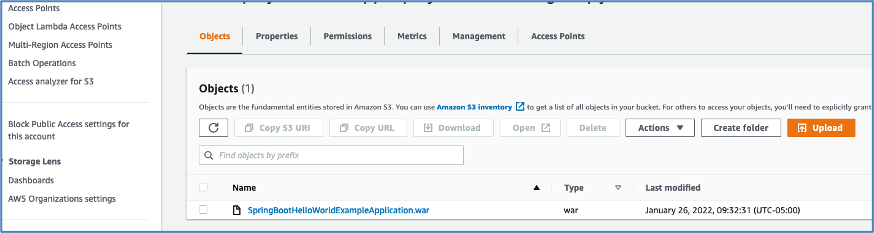
Figure14: Artifacts saved in S3

Deploy

In this stage, workflow would invoke the CodeDeploy service and trigger the deployment.
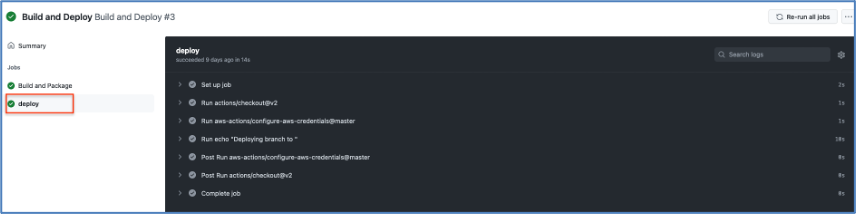
Figure15: Deploy With Actions

Verify the deployment

Log in to the AWS Console and navigate to the CodeDeploy console.

Select the Application name and deployment group. You will see the status as Succeeded if the deployment is successful.
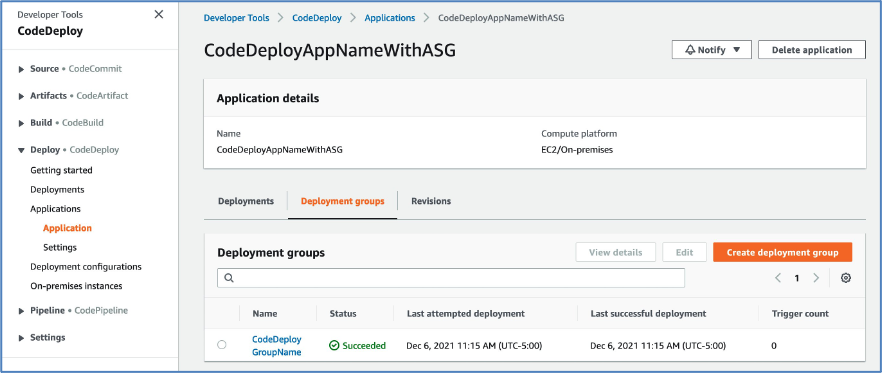
Figure16: Verifying Deployment

Point your browsers to the URL of the Application Load balancer.

Note: You can get the URL from the output section of the CloudFormation stack or Amazon EC2 console Load Balancers.

Figure17: Verifying Application

Optional – Automate the deployment on Git Push

Workflow can be automated by changing the following line of code in your .github/workflow/deploy.yml file.

From

workflow_dispatch: {}

To


  #workflow_dispatch: {}
  push:
    branches: [ main ]
  pull_request:

This will be interpreted by GitHub actions to automaticaly run the workflows on every push or pull requests done on the main branch.

After testing end-to-end flow manually, you can enable the automated deployment.

Clean up

To avoid incurring future changes, you should clean up the resources that you created.

  1. Empty the Amazon S3 bucket:
  2. Delete the CloudFormation stack (CodeDeployStack) from the AWS console.
  3. Delete the GitHub Secret (‘IAMROLE_GITHUB’)
    1. Go to the repository settings on GitHub Page.
    2. Select Secrets under Actions.
    3. Select IAMROLE_GITHUB, and delete it.

Conclusion

In this post, you saw how to leverage GitHub Actions and CodeDeploy to securely deploy Java SpringBoot application to Amazon EC2 instances behind AWS Autoscaling Group. You can further add other stages to your pipeline, such as Test and security scanning.

Additionally, this solution can be used for other programming languages.

About the Authors

Mahesh Biradar is a Solutions Architect at AWS. He is a DevOps enthusiast and enjoys helping customers implement cost-effective architectures that scale.
Suresh Moolya is a Cloud Application Architect with Amazon Web Services. He works with customers to architect, design, and automate business software at scale on AWS cloud.

5 DevOps tips to speed up your developer workflow

Post Syndicated from Damian Brady original https://github.blog/2021-11-30-5-devops-tips-to-speed-up-your-developer-workflow/

TL;DR: From learning YAML to scripting with Bash, here are a few simple tips for developers who want to speed up their workflows.

From CI/CD to containerization management and server provisioning, DevOps gets a lot of buzz in tech today. You could even say that it’s a buzz … word.

As a developer, you might be part of a DevOps team, but you’re focused on building great software, not necessarily provisioning servers and managing containers.

Even still, a lot of what developers, DevOps engineers, and IT teams handle in today’s software development life cycle is focused on tools, testing, automations, and server orchestration. And, that’s even more true if you’re a team of one or engaging in a big open source project.

Here are five DevOps tips for any developer looking to work smarter and faster.

Tip #1: A little YAML can make frontend work easier

Initially released in 2001, YAML has become one of the defacto languages for a lot of declarative automation—and it’s commonly used in DevOps and development work for an array of frontend configurations, automations, and more.

YAML, which stands for Yet Another Markup Language, is a superset of JSON and is notable for being a human readable language. That means it focuses less on characters, like brackets, braces, and quotes ({}, [], “).

Here’s why this matters: Learning YAML (or even stepping up your YAML skills) makes it easier to store configurations for your own applications, like your settings in an easy-to-write and easy-to-read language.

For this reason, you’re likely to come across YAML files anywhere from enterprise development workflows to open source projects—and yes, you’ll see plenty of YAML files on GitHub (it powers a product we’re pretty fond of: GitHub Actions, but more on this later).

Whether you can apply YAML directly to your day-to-day dev workflows or leverage different tools that use YAML, there are some pretty big benefits to getting started with this language—or stepping up your YAML skills.

Looking to learn more about YAML? Try the Learn YAML in Y Minutes guide.

Tip #2: A few DevOps tools to keep you moving fast

Let’s clear up one thing first: “DevOps tools” is an umbrella term that covers everything from cloud platforms, server orchestration tools, code management, version control, and dozens of other things.

So when we talk about “DevOps tools,” we’re really talking about technologies that make it easier to write, test, host, and release software, as well as reduce any worries around unexpected failures.

Here are three “DevOps tools” that can speed up your workflows and let you focus on building great software.

Git

You’re on the GitHub Blog, so we’re pretty sure you’re familiar with Git as a version control system and distributed source code management tool. It’s a mainstay of developers and a popular DevOps tool.

Here’s why: Git makes version control easy and gives teams a straightforward way to collaborate, experiment with different branches, and merge new features into the main software branch.

Learn how Git works >

Cloud-hosted integrated development environments (IDE)

I know, I know, saying cloud-hosted integrated development environments, or cloud IDEs, out loud is a bit of a mouthful (thank you, marketing). But these platforms are something you should start exploring immediately, if you haven’t already.

Here’s why: Cloud IDEs are fully hosted developer environments that let you write, run, and debug code—and they make spinning up new, preconfigured environments fast. Do you need proof? We launched our own cloud IDE called Codespaces earlier this year and started using it internally to build GitHub. It used to take us up to 45 minutes to spin up new developer environments—now it takes 10 seconds :mindblown:.

Cloud IDEs give you a super simple way to quickly spin up new, pre-configured development environments (and disposable development environments). Also, since they’re hosted in the cloud, you don’t need to worry about how powerful the computer you’re coding on is (friendly shout out here goes to the intrepid folks who have started coding on tablets).

Picture this: Your laptop fries itself (which has happened to me once or twice). You might have versions of npm, tools for connecting to your cloud provider, and any number of other configurations that you just lost. If you use a cloud IDE, you can spin up an environment in the cloud with all of your configurations, and that’s a magical thing to see.

Learn how cloud IDEs work >

Containers

If you don’t want to use a cloud IDE, dev containers are something you can use locally or in the cloud. Containers have exploded in popularity over the past decade for their utility in microservices architectures, CI/CD, and cloud-native application development, among other things. By nature, containers are lightweight and efficient making it easy to build, test, stage, and deploy software.

Learning the basics of containerization can be really handy—especially when it comes to testing your code in a lightweight environment that imitates your production environment. If you need to upgrade a library or try using an application on the next version of Node, you can do that really easily with containers before you hit production.

This can be especially useful for ”shifting left,” which is an important DevOps strategy. Catching issues or problems before you ever hit production can save a lot of headaches. If you can find those issues while you’re writing the code, that’s even better. Any problems will eventually mean more work, so the earlier you can catch them the better. After all, catching a problem before you get to the compiling stage can save you a headache or two.

Learn how containers work >

Tip #3: Automated testing and continuous integration (CI) to stay one step ahead

In any conversation around DevOps, you’ll probably hear about automated testing and continuous integration (CI). Yet while automated testing is typically part of a good CI development practice, it’s not strictly a requirement (but it should be … or at least part of your continuous delivery phase).

Most teams have some basic unit testing as part of their CI process, but stop short of testing for security vulnerabilities, automated UI testing, integration testing, etc.

Even still, these are two things that can help you step up your workflows by: (A) making sure your code works with the main branch; and (B) catching things like security vulnerabilities and other problems, so you can lessen your DevOps team’s workload.

Here’s how:

Using GitHub Actions to run automated tests

From ordering pizza to triggering an alarm, there’s a lot you can do with GitHub Actions. It all comes down to workflow automations.When it comes to setting up automated tests with GitHub Actions, you can either build your own action or leverage pre-built actions in the GitHub Marketplace.

[Learn how to build your own GitHub Actions workflow automations.]> Pro tip: Using Actions workflows that run on pull requests is a great way to check for security vulnerabilities, problems in your code, or anything else before you merge to the main branch. Doing this means you’re one step ahead and helps keep your main branch clean.

[Want to learn more about GitHub Actions? Check out our guide.]You can also configure your workflows to deploy to ephemeral testing environments. This means you can run your tests and deploy your changes to an environment where you can test your application. You can even configure your workflow to automatically tear these testing environments down after you’re finished.

All this means you’re testing things as much as possible before it’s time to go to production.

Using GitHub Actions to create CI pipelines

CI, or continuous integration, is the process of automatically integrating code from multiple people for a given project. A good CI practice means you can work faster, make sure your code compiles correctly, merge code changes more efficiently, and be sure your code plays nice with everyone else’s work.

The most powerful CI workflows are the ones that test all of the things you care about every single time you push your code to the server.

If you’re working on GitHub, GitHub Actions can do this for you, too. There are plenty of pre-built CI workflows in the GitHub Marketplace (and you can always build your own), but there are a few things to keep in mind when you start incorporating CI into your development flow. These include:

  • Run the necessary tests: Think about what build, integration, and testing automations you ideally need. You’ll want to consider things that may have gone wrong with releases in the past, and see if you can add a test for that in your CI.
  • Balance the time it takes to test your code with how fast you’re pushing new code: Let’s say you have teams pushing new code every five minutes (hypothetically), but the tests you’re running take 10 minutes to execute … that’s not great. It’s always best to balance what you’re checking and when with how long it takes, which might mean trimming your ideal list of tests down to a more realistic number, at least for your CI builds.

Get a tutorial on creating a CI pipeline with GitHub Actions >

Tip #4: Server orchestration tips for flexibility and speed

If you’re building a cloud-native application (or really even just using a few different servers, VMs, containers, or hosting services), you’re probably dealing with a few environments. Being able to make sure your application and infrastructure play well together means you can rely a little less on an operations team trying to get your software to run on existing infrastructure at the last minute.

That’s where server orchestration comes in. Server orchestration—or infrastructure orchestration—is often the job of IT and DevOps teams and includes configuring, managing, provisioning, and coordinating systems, applications, and core infrastructure needed to run software.

Pro tip: There’s a suite of tools that allow you to define and update the infrastructure you need to use.

A big advantage of infrastructure automation is improved scalability—and defined environments means it’s easier to tear down and rebuild an environment when something goes wrong (instead of starting from scratch, but we’ve all been there).

There’s another big advantage: If you want to test something, you don’t have to worry about asking the operations team to go and set up a server for you. You can instead do that as part of a workflow. You don’t have to worry about manually provisioning hardware or system requirements.

How to get started: Don’t try to replace everything in your environment with automated infrastructure automation. Instead, look for a part that might be easy to automate and start there—then the next piece and the next piece after that.

And definitely never start in production. Instead, begin with your testing environment. Once that works, move to your staging environment (and if that works, you can trust it’s good for production).

Tip #5: Repeatable tasks? Try scripting them with Bash or PowerShell

Picture this: You have a bunch of repeatable tasks that you’re executing on a local basis, and you’re spending way too much time working through them every week. There’s a better—and more efficient—way to handle this. How? Scripting with either Bash or PowerShell.

Bash has deep roots in the Unix world, and it’s a mainstay of IT and DevOps teams, and more than a few developers too. PowerShell is comparatively newer. Designed by Microsoft and launched in 2006, PowerShell replaced the command shell and earlier scripting languages for task automation and configuration management in Windows environments.

Today, both Bash and PowerShell are cross-platform (though most people with a Windows background will use PowerShell, and most people familiar with Linux or macOS will use Bash out of habit).

Pro tip: Bash and PowerShell have different ways of working. Where PowerShell works with objects, Bash passes information around as strings. Even still, whatever you choose is largely up to personal preference.

One of the more useful things I’ve done with Bash and PowerShell, for example, is building a script that pulls down the latest version of the code, creates a new branch, switches to that branch, pushes a draft pull request up to GitHub, and then opens VSCode (sub in your editor of choice here) in that branch.

It’s a series of small steps to make your life much easier. It’s something you might do once or twice a week, and if you can script that—it gives you more time to focus on what matters: writing great code.

The bottom line

There’s a big difference between an IT pro, a DevOps engineer, and a developer. But in today’s world of software development, a lot of core DevOps practices are becoming everyone’s job. Plus, any developer that can learn a few DevOps tricks can have an easier time working independently (and more efficiently at that), and continue to focus on what matters most: building great software. That’s something we can all get behind.

Additional resources

The best of Changelog • 2020 Edition

Post Syndicated from Michelle Mannering original https://github.blog/2021-01-21-changelog-2020-edition/

If you haven’t seen it, the GitHub Changelog helps you keep up-to-date with all the latest features and updates to GitHub. We shipped a tonne of changes last year, and it’s impossible to blog about every feature. In fact, we merged over 90,000 pull requests into the GitHub codebase in the past 12 months!

Here’s a quick recap of the top changes made to GitHub in 2020. We hope these changes are helping you build cooler things better and faster. Let us know what your favourite feature of the past year has been.

GitHub wherever you are

While we haven’t exactly been travelling a lot recently, one of the things we love is the flexibility to work wherever we want, however we want. Whether you want to work on your couch, in the terminal, or check your notifications on the go, we’ve shipped some updates for you.

GitHub CLI

Do you like to work in the command line? In September, we brought GitHub to your terminal. Having GitHub available in the command line reduces the need to switch between applications or various windows and helps simplify a bunch of automation scenarios.

The GitHub CLI allows you to run your entire GitHub workflow directly from the terminal. You can clone a repo, create, view and review PRs, open issues, assign tasks, and so much more. The CLI is available on Windows, iOS, and Linux. Best of all, the GitHub CLI is open source. Download the CLI today, check out the repo, and view the Docs for a full list of the CLI commands.

GitHub for Mobile

It doesn’t stop there. Now you can also have GitHub in your pocket with GitHub for Mobile!

This new native app makes it easy to create, view, and comment on issues, check your notifications, merge a pull request, explore, organise your tasks, and more. One of the most used features of GitHub for Mobile is push notification support. Mobile alerts means you’ll never miss a mention or review again and can help keep your team unblocked.

GitHub for Mobile is available on iOS and Android. Download it today if you’re not already carrying the world’s development platform in your pocket.

Oh and did you know, GitHub for Mobile isn’t just in English? It’s also available in Brazilian Portuguese, Japanese, Simplified Chinese, and Spanish.


GitHub Enterprise Server

With the release of GitHub Enterprise Server 2.21 in 2020, there was a host of amazing new features. There are new features for PRs, a new notification experience, and changes to issues. These are all designed to make it easier to connect, communicate, and collaborate within your organisation.

And now we’ve made Enterprise Server even better with GitHub Enterprise Server 3.0 RC. That means GitHub Actions, Packages, Code Scanning, Mobile Support, and Secret Scanning are now available in your Enterprise Server. This is the biggest release we’ve done of GitHub Enterprise Server in years, and you can install it now with full support.

Working better with automation

GitHub Actions was launched at the end of 2019 and is already the most popular CI/CD service on GitHub. Our team has continued adding features and improving ways for you to automate common tasks in your repository. GitHub Actions is so much more than simply CI/CD. Our community has really stepped up to help you automate all the things with over 6,500 open source Actions available in the GitHub Marketplace.

Some of the enhancements to GitHub Actions in 2020 include:

Workflow visualisation

We made it easy for you to see what’s happening with your Actions automation. With Workflow visualisation, you can now see a visual graph of your workflow.

This workflow visualisation allows you to easily view and understand your workflows no matter how complex they are. You can also track the progress of your workflow in real time and easily monitor what’s happening so you can access deployment targets.

On top of workflow visualisation, you can also create workflow templates. This makes it easier to promote best practices and consistency across your organisation. It also cuts down time when using the same or similar workflows. You can even define rules for these templates that work across your repo.

Self-hosted runners

Right at the end of 2019, we announced GitHub Actions supports self-hosted runner groups. It offered developers maximum flexibility and control over their workflows. Last year, we made updates to self-hosted runners, making self-hosted runners shareable across some or all of your GitHub organisations.

In addition, you can separate your runners into groups, and add custom labels to the runners in your groups. Read more about these Enterprise self-hosted runners and groups over on our GitHub Docs.

Environments & Environment Secrets

Last year we added environment protection rules and environment secrets across our CD capabilities in GitHub Actions. This new update ensures there is separation between the concerns of deployment and concerns surrounding development to meet compliance and security requirements.

Manual Approvals

With Environments, we also added the ability to pause a job that’s trying to deploy to the protected environment and request manual approval before that job continues. This unleashes a whole new raft of continuous deployment workflows, and we are very excited to see how you make use of these new features.

Other Actions Changes

Yes there’s all the big updates, and we’re committed to making small improvements too. Alongside other changes, we now have better support for whatever default branch name you choose. We updated all our starter workflows to use a new $default-branch macro.

We also added the ability to re-run all jobs after a successful run, as well as change the retention days for artifacts and logs. Speaking of logs, we updated how the logs are displayed. They are now much easier to read, have better searching, auto-scrolling, clickable URLs, support for more colours, and full screen mode. You can now disable or delete workflow runs in the Actions tab as well as manually trigger Actions runs with the workflow_dispatch trigger.

While having access to all 6,500+ actions in the marketplace helps integrate with different tools, some enterprises want to limit which actions you can invoke to a limited trusted sub-set. You can now fine-tune access to your external actions by limiting control to GitHub-verified authors, and even limit access to specific Actions.

There were so many amazing changes and updates to GitHub Actions that we couldn’t possibly include them all here. Check out the Changelog for all our GitHub Actions updates.

Working better with Security

Keeping your code safe and secure is one of the most important things for us at GitHub. That’s why we made a number of improvements to GitHub Advanced Security for 2020.

You can read all about these improvements in the special Security Highlights from 2020. There are new features such as code scanning, secret scanning, Dependabot updates, Dependency review, and NPM advisory information.

If you missed the talk at GitHub Universe on the state of security in the software industry, don’t forget to check it out. Justin Hutchings, the Staff Product Manager for Security, walks through the latest trends in security and all things DevSecOps. It’s definitely worth carving out some time over the weekend to watch this:

Working better with your communities

GitHub is about building code together. That’s why we’re always making improvements to the way you work with your team and your community.

Issues improvements

Issues are important for keeping track of your project, so we have been busy making issues work better and faster on GitHub.

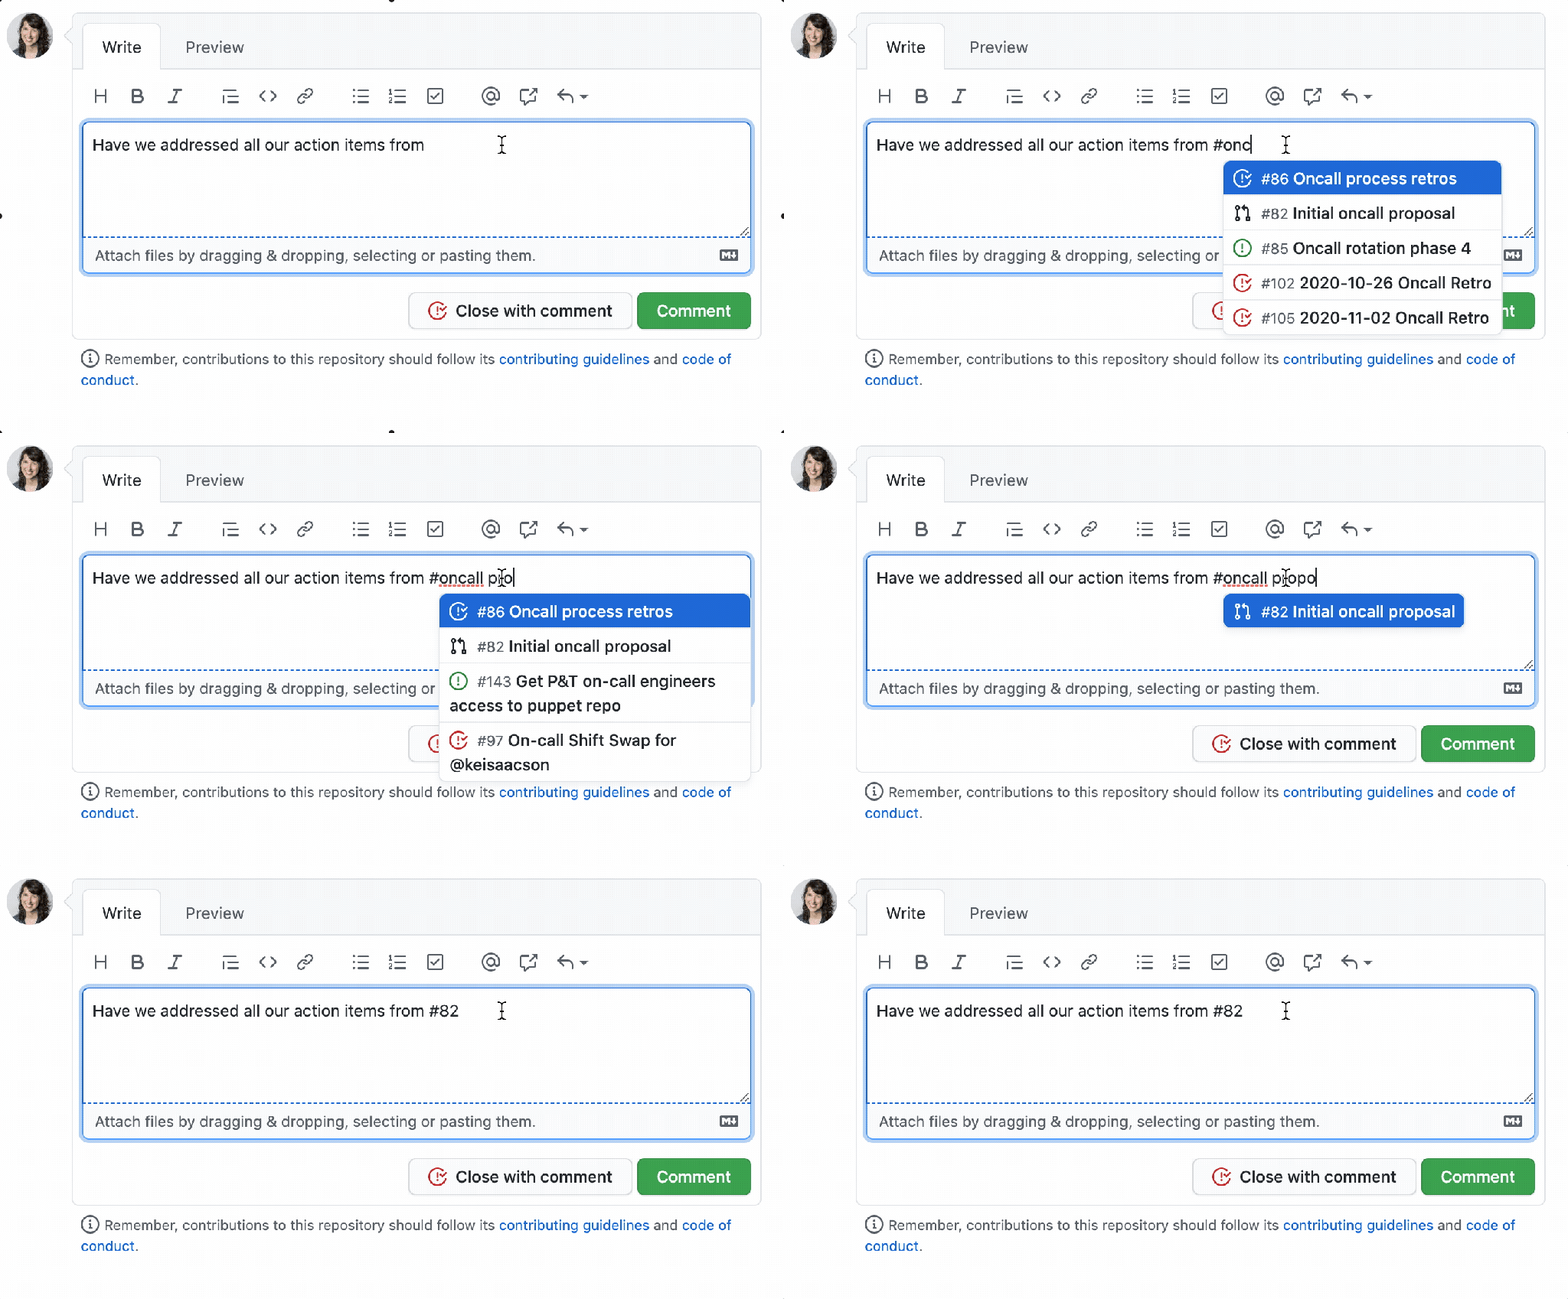
You can now also link issues and PRs via the sidebar, and issues now have list autocompletion. When you’re looking for an issue to reference, you can use multiple words to search for that issue inline.

Sometimes when creating an issue, you might like to add a GIF or short video to demo a bug or new feature. Now you can do it natively by adding an *.mp4 or *.mov into your issue.

GitHub Discussions

Issues are a great place to talk about feature updates and bug fixes, but what about when you want to have an open- ended conversation or have your community help answering common questions?

GitHub Discussions is a place for you and your community to come together and collaborate, chat, or discuss something in a separate space, away from your issues. Discussions allows you to have threaded conversations. You can even convert Issues to Discussions, mark questions as answered, categorise your topics, and pin your Discussions. These features help you provide a welcoming space to new people as well as quick access to the most common discussion points.

If you are an admin or maintainer of a public repo you can enable Discussions via repo settings today. Check out our Docs for more info.

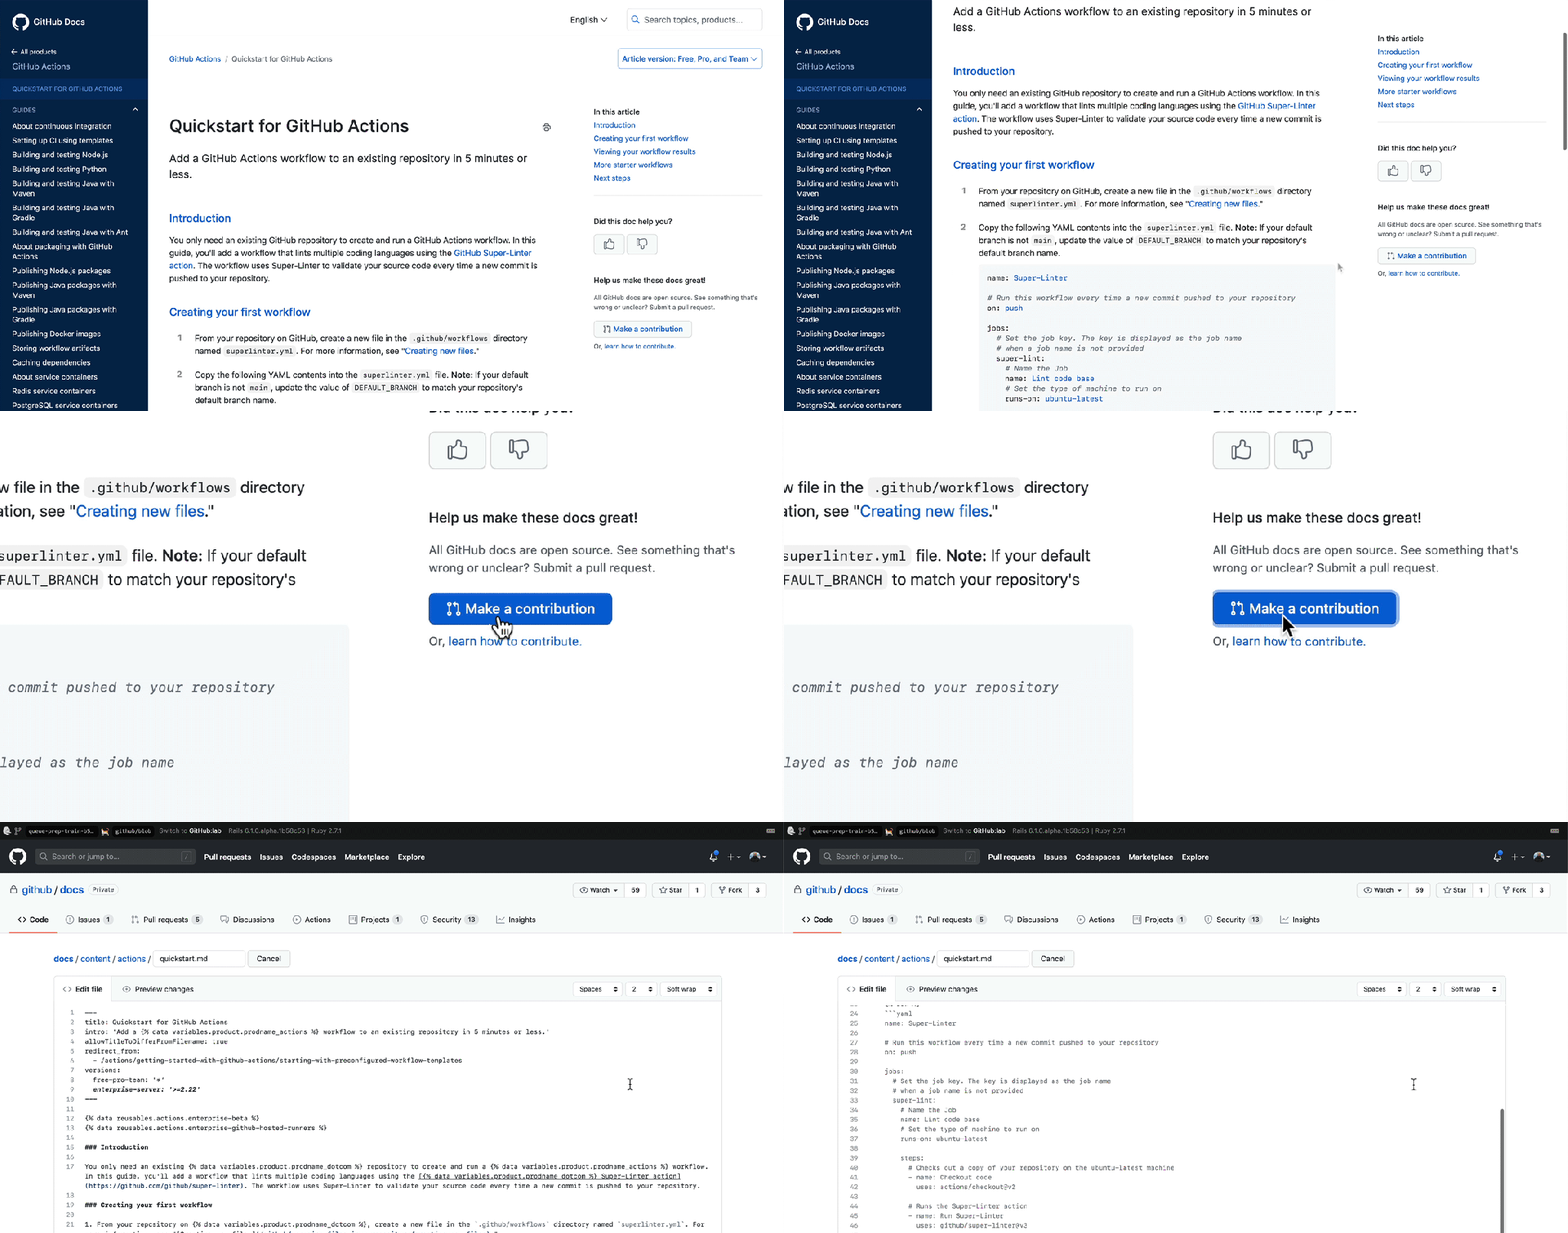
Speaking of Docs, did you know we recently published all our documentation as an open source project? Check it out and get involved today.

GitHub Sponsors

We launched GitHub Sponsors in 2019, and people have been loving this program. It’s a great way to contribute to open source projects. In 2020, we made GitHub Sponsors available in even more countries. Last year, GitHub Sponsors became available in Mexico, Czech Republic, Malta, and Cyprus.

We also added some other fancy features to GitHub Sponsors. This includes the ability to export a list of your sponsors. You can also set up webhooks for events in your sponsored account and easily keep track of everything that’s happening via your activity feed.

At GitHub Universe, we also announced Sponsors for Companies. This means organisations can now invest in open source projects via their billing arrangement with GitHub. Now is a great time to consider supporting your company’s most critical open source dependencies.

Working better with code

We’re always finding ways to help developers. As Nat said in his GitHub Universe keynote, the thing we care about the most is helping developers build amazing things. That’s why we’re always trying to make it quicker and easier to collaborate on code.

Convert pull requests to drafts

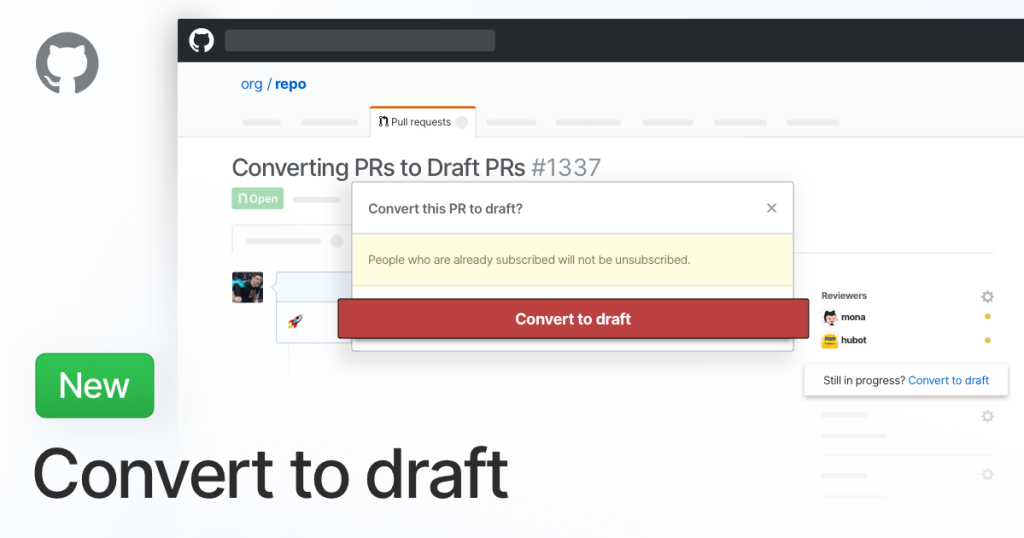
Draft pull requests are a great way to let your team know you are working on a feature. It helps start the conversation about how it should be built without worrying about someone thinking it’s ready to merge into main. We recently made it easy to convert an existing PR into a draft anytime.

Multi-line code suggestions

Not only can you do multi-line comments, you can now suggest a specific change to multiple lines of code when you’re reviewing a pull request. Simply click and drag and then edit text within the suggestion block.

Default branch naming

Alongside the entire Git community, we’ve been trying to make it easier for teams wanting to use more inclusive naming for their default branch. This also gives teams much more flexibility around branch naming. We’ve added first-tier support for renaming branches in the GitHub UI.

This helps take care of retargeting pull requests and updating branch protection rules. Furthermore, it provides instructions to people who have forked or cloned your repo to make it easier for them to update to your new branch names.

Re-directing to the new default branch

We provided re-directs so links to deleted branch names now point to the new default branch. In addition, we updated GitHub Pages to allow it to publish from any branch. We also added a preference so you can set the default branch name for your organization. If you need to stay with ‘master’ for compatibility with your existing tooling and automation, or if you prefer to use a different default branch, such as ‘development,’ you can now set this in a single place.

For new organizations to GitHub, we also updated the default to ‘main’ to reflect the new consensus among the Git community. Existing repos are also not affected by any of these changes. Hopefully we’ve helped make it easier for the people who do want to move away from the old ‘master’ terminology in Git.

Design updates for repos and GitHub UI

In mid 2020, we launched a fresh new look to the GitHub UI. The way repos are shown on the homepage and the overall look and feel of GitHub is super sleek. There’s responsive layout, improved UX in the mobile web experience, and more. We also made lots of small improvements. For example, the way your commits are shown in the pull request timeline has changed. PRs in the past were ordered by author date. Now they’ll show up according to their chronological order in the head branch.

If you’ve been following a lot of our socials, you’ll know we’ve also got a brand new look and feel to GitHub.com. Check out these changes, and we hope it gives you fresh vibes for the future.

Go to the Dark Side

Speaking of fresh vibes, you’ve asked for it, and now it’s here! No longer will you be blinded by the light. Now you can go to the dark side with dark mode for the web.

Changelog 2020

These are just some of the highlights for 2020. We’re all looking forward to bringing you more great updates in 2021.

Keep an eye on the Changelog to stay informed and ensure you don’t miss out on any cool updates. You can also follow our changes with @GHChangelog on Twitter and see what’s coming soon by checking out the GitHub Roadmap. Tweet us your favourite changes for 2020, and tell us what you’re most excited to see in 2021.

GitHub Availability Report: November 2020

Post Syndicated from Keith Ballinger original https://github.blog/2020-12-02-availability-report-november-2020/

Introduction

In November, we experienced two incidents resulting in significant impact and degraded state of availability for issues, pull requests, and GitHub Actions services.

November 2 12:00 UTC (lasting 32 minutes)

The SSL certificate for *.githubassets.com expired, impacting web requests for GitHub.com UI and services. There was an auto-generated issue indicating the certificate was within 30 days of expiration, but it was not addressed in time. Impact was reported, and the on-call engineer remediated it promptly.

We are using this occurrence to evaluate our current processes, as well as our tooling and automation, within this area to reduce the likelihood of such instances in the future.

November 27 16:04 UTC (lasting one hour and one minute)

Our service monitors detected abnormal levels of replication lag within one of our MySQL clusters affecting the GitHub Actions service.

Due to the recency of this incident, we are still investigating the contributing factors and will provide a more detailed update in next month’s report.

In summary

We place great importance in the reliability of our services along with the trust that our users place in us every day. We’ll continue to keep you updated on the progress we’re making to ensure this. To learn more about what we’re working on, visit the GitHub engineering blog.

How to get your organization started with containerized deployments

Post Syndicated from Sarah Khalife original https://github.blog/2020-10-15-how-to-get-your-organization-started-with-containerized-deployments/

This is our second post on cloud deployment with containers. Looking for more? Join our upcoming GitHub Actions webcast with Sarah, Solutions Engineer Pavan Ravipati, and Senior Product Manager Kayla Ngan on October 22.

In the past few years, businesses have moved towards cloud-native operating models to help streamline operations and move away from costly infrastructure. When running applications in dynamic environments with Docker, Kubernetes, and other tooling, a container becomes the tool of choice as a consistent, atomic unit of packaging, deployment, and application management. This sounds straightforward: build a new application, package it into containers, and scale elastically across the infrastructure of your choice. Then you can automatically update with new images as needed and focus more on solving problems for your end users and customers.

However, organizations don’t work in vacuums. They’re part of a larger ecosystem of customers, partners, and open source communities, with unique cultures, existing processes, applications, and tooling investments in place. This adds new challenges and complexity for adopting cloud native tools such as containers, Kubernetes, and other container schedulers.

Challenges for adopting container-based strategies in organizations

At GitHub, we’re fortunate to work with many customers on their container and DevOps strategy. When it comes to adopting containers, there are a few consistent challenges we see across organizations.

  • Containerizing and maintaining applications: Most organizations have existing applications and need to make the decision about whether to keep them as-is, or to place them in containers for an easier transition to the cloud. Even then, teams need to determine whether a single container for the application is appropriate (in a lift-and-shift motion to the cloud), or if more extensive work is needed to break it down into multiple services, delivered as a set of containers.
  • Efficiently configuring and managing permissions: Adopting containers often translates to better collaboration for everyone in your organization. DevOps is now more than just core developers and IT operators. It includes release and infosec engineers, data scientists, QA, project managers, and other roles. But collaborating across multiple teams introduces new needs for configuring and managing permissions for code, along with the automation to support it.
  • Standardizing best practices across the organization: Containers help teams scale and integrate quickly, but may also require updating your CI/CD practices to match. You have to validate they work well for existing applications, while incorporating the correct user and package permissions and policies.. The best practices you set have to be flexible for others too. Individual teams—who are transitioning to new ways of working—need to be able to optimize for their own goals.

Connecting teams and cloud-native tools with GitHub

Despite the few challenges of adopting containers and leveraging Kubernetes, more and more organizations continue to use them. Stepping over those hurdles allows enterprises to automate and streamline their operations, here with a few examples of how enterprises make it work successfully with support from package managers and CI/CD tools. At GitHub, we’ve introduced container support in GitHub Packages, CI/CD through GitHub Actions, and partnered within the ecosystem to simplify cloud-native workflows. Finding the right container tools should mean less work, not more—easily integrating alongside other tools, projects, and processes your organization already uses.

See container best practices in action

Want to simplify container deployments in your organization? Join me, Solutions Engineer Pavan Ravipati, and Senior Product Manager Kayla Ngan on October 22 to learn more about successfully adopting containers. We’ll walk through how to use them in the real world and demo best practices for deploying an application to Azure with GitHub Container Registry.

When
October 22, 2020
11:00 am PT / 2:00 pm ET

Watch the on-demand version of the webcast that previously aired..

Testing cloud apps with GitHub Actions and cloud-native open source tools

Post Syndicated from Sarah Khalife original https://github.blog/2020-10-09-devops-cloud-testing/

See this post in action during GitHub Demo Days on October 16.

What makes a project successful? For developers building cloud-native applications, successful projects thrive on transparent, consistent, and rigorous collaboration. That collaboration is one of the reasons that many open source projects, like Docker containers and Kubernetes, grow to become standards for how we build, deliver, and operate software. Our Open Source Guides and Introduction to innersourcing are great first steps to setting up and encouraging these best practices in your own projects.

However, a common challenge that application developers face is manually testing against inconsistent environments. Accurately testing Kubernetes applications can differ from one developer’s environment to another, and implementing a rigorous and consistent environment for end-to-end testing isn’t easy. It can also be very time consuming to spin up and down Kubernetes clusters. The inconsistencies between environments and the time required to spin up new Kubernetes clusters can negatively impact the speed and quality of cloud-native applications.

Building a transparent CI process

On GitHub, integration and testing becomes a little easier by combining GitHub Actions with open source tools. You can treat Actions as the native continuous integration and continuous delivery (CI/CD) tool for your project, and customize your Actions workflow to include automation and validation as next steps.

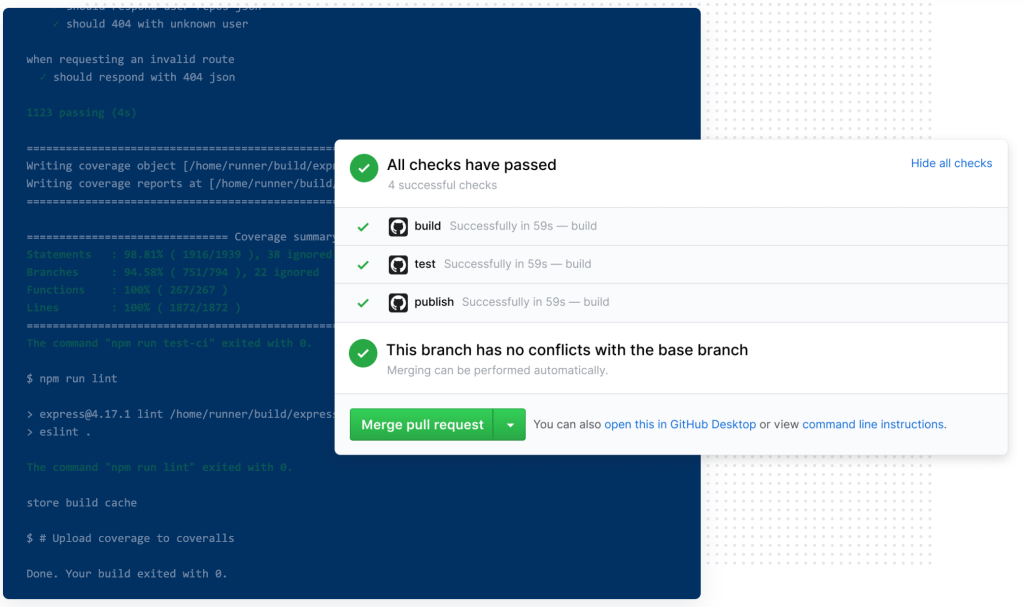
Since Actions can be triggered based on nearly any GitHub event, it’s also possible to build in accountability for updating tests and fixing bugs. For example, when a developer creates a pull request, Actions status checks can automatically block the merge if the test fails.

Here are a few more examples:

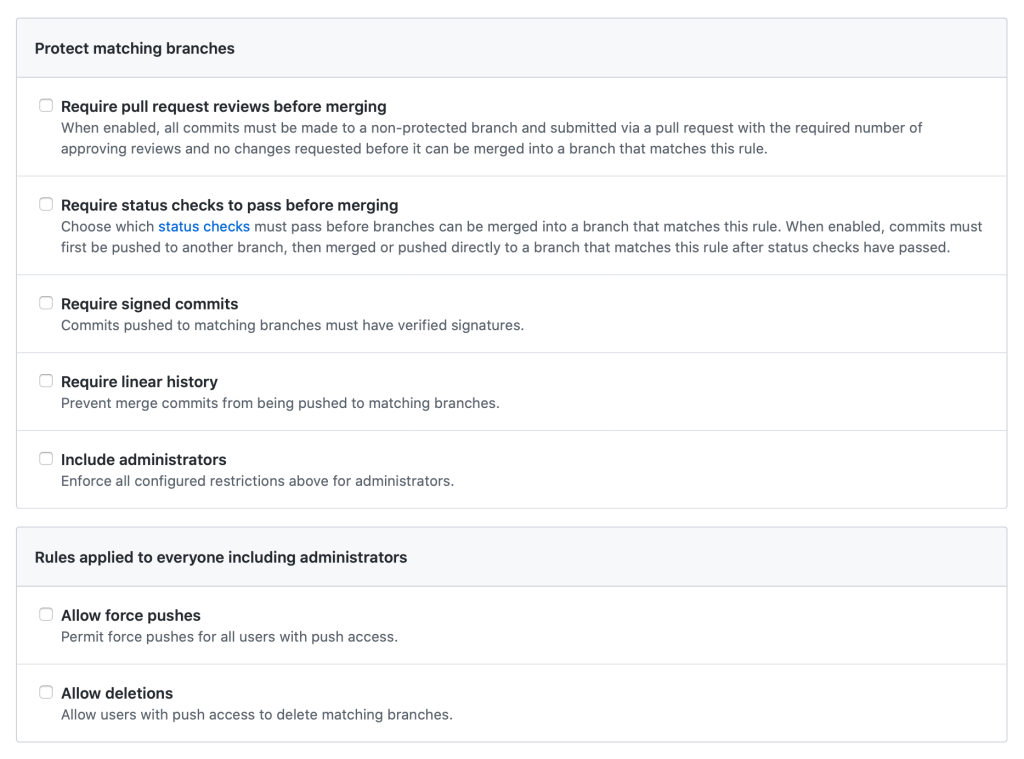
Branch protection rules in the repository help enforce certain workflows, such as requiring more than one pull request review or requiring certain status checks to pass before allowing a pull request to merge.

GitHub Actions are natively configured to act as status checks when they’re set up to trigger `on: [pull_request]`.

Continuous integration (CI) is extremely valuable as it allows you to run tests before each pull request is merged into production code. In turn, this will reduce the number of bugs that are pushed into production and increases confidence that newly introduced changes will not break existing functionality.

But transparency remains key: Requiring CI status checks on protected branches provides a clearly-defined, transparent way to let code reviewers know if the commits meet the conditions set for the repository—right in the pull request view.

Using community-powered workflows

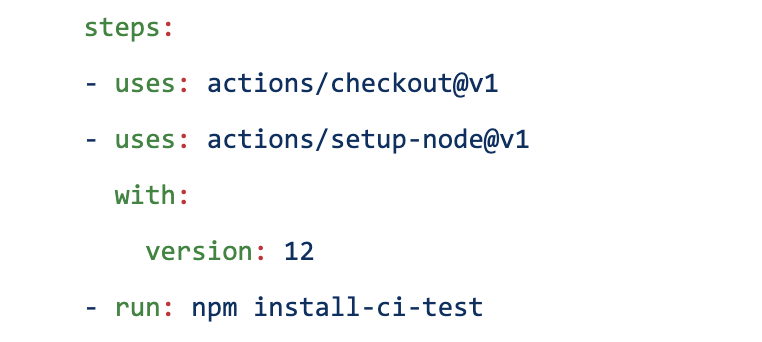
Now that we’ve thought through the simple CI policies, automated workflows are next. Think of an Actions workflow as a set of “plug and play” open sourced, automated steps contributed by the community. You can use them as they are, or customize and make them your own. Once you’ve found the right one, open sourced Actions can be plugged into your workflow with the`- uses: repo/action-name` field.

You might ask, “So how do I find available Actions that suit my needs?”

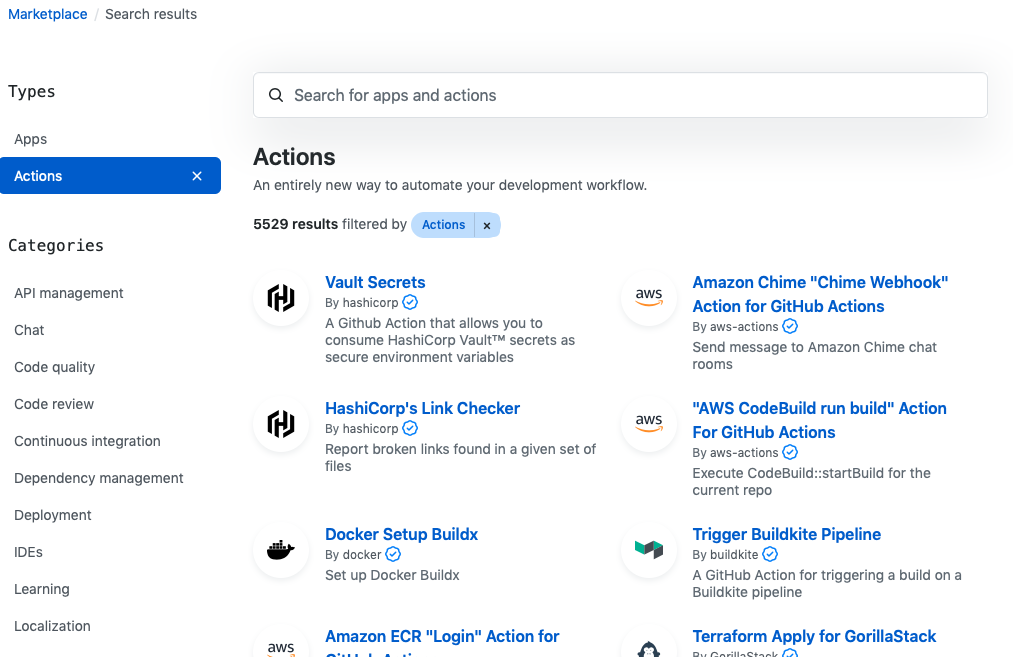
The GitHub Marketplace!

As you’re building automation and CI pipelines, take advantage of Marketplace to find pre-built Actions provided by the community. Examples of pre-built Actions span from a Docker publish and the kubectl CLI installation to container scans and cloud deployments. When it comes to cloud-native Actions, the list keeps growing as container-based development continues to expand.

Testing with kind

Testing is a critical part of any CI/CD pipeline, but running tests in Kubernetes can absorb the extra time that automation saves. Enter kind. kind stands for “Kubernetes in Docker.” It’s an open source project from the Kubernetes special interest group (SIGs) community, and a tool for running local Kubernetes clusters using Docker container “nodes.” Creating a kind cluster is a simple way to run Kubernetes cluster and application testing—without having to spin up a complete Kubernetes environment.

As the number of Kubernetes users pushing critical applications to production grows, so does the need for a repeatable, reliable, and rigorous testing process. This can be accomplished by combining the creation of a homogenous Kubernetes testing environment with kind, the community-powered Marketplace, and the native and transparent Actions CI process.

Bringing it all together with kind and Actions

Come see kind and Actions at work during our next GitHub Demo Day live stream on October 16, 2020 at 11am PT. I’ll walk you through how to easily set up automated and consistent tests per pull request, including how to use kind with Actions to automatically run end-to-end tests across a common Kubernetes environment.

Cross-account and cross-region deployment using GitHub actions and AWS CDK

Post Syndicated from DAMODAR SHENVI WAGLE original https://aws.amazon.com/blogs/devops/cross-account-and-cross-region-deployment-using-github-actions-and-aws-cdk/

GitHub Actions is a feature on GitHub’s popular development platform that helps you automate your software development workflows in the same place you store code and collaborate on pull requests and issues. You can write individual tasks called actions, and combine them to create a custom workflow. Workflows are custom automated processes that you can set up in your repository to build, test, package, release, or deploy any code project on GitHub.

A cross-account deployment strategy is a CI/CD pattern or model in AWS. In this pattern, you have a designated AWS account called tools, where all CI/CD pipelines reside. Deployment is carried out by these pipelines across other AWS accounts, which may correspond to dev, staging, or prod. For more information about a cross-account strategy in reference to CI/CD pipelines on AWS, see Building a Secure Cross-Account Continuous Delivery Pipeline.

In this post, we show you how to use GitHub Actions to deploy an AWS Lambda-based API to an AWS account and Region using the cross-account deployment strategy.

Using GitHub Actions may have associated costs in addition to the cost associated with the AWS resources you create. For more information, see About billing for GitHub Actions.

Prerequisites

Before proceeding any further, you need to identify and designate two AWS accounts required for the solution to work:

  • Tools – Where you create an AWS Identity and Access Management (IAM) user for GitHub Actions to use to carry out deployment.
  • Target – Where deployment occurs. You can call this as your dev/stage/prod environment.

You also need to create two AWS account profiles in ~/.aws/credentials for the tools and target accounts, if you don’t already have them. These profiles need to have sufficient permissions to run an AWS Cloud Development Kit (AWS CDK) stack. They should be your private profiles and only be used during the course of this use case. So, it should be fine if you want to use admin privileges. Don’t share the profile details, especially if it has admin privileges. I recommend removing the profile when you’re finished with this walkthrough. For more information about creating an AWS account profile, see Configuring the AWS CLI.

Solution overview

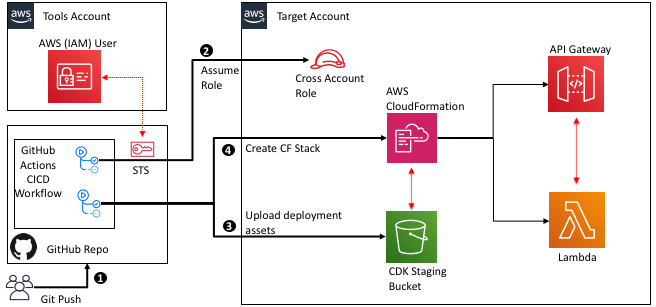
You start by building the necessary resources in the tools account (an IAM user with permissions to assume a specific IAM role from the target account to carry out deployment). For simplicity, we refer to this IAM role as the cross-account role, as specified in the architecture diagram.

You also create the cross-account role in the target account that trusts the IAM user in the tools account and provides the required permissions for AWS CDK to bootstrap and initiate creating an AWS CloudFormation deployment stack in the target account. GitHub Actions uses the tools account IAM user credentials to the assume the cross-account role to carry out deployment.

In addition, you create an AWS CloudFormation execution role in the target account, which AWS CloudFormation service assumes in the target account. This role has permissions to create your API resources, such as a Lambda function and Amazon API Gateway, in the target account. This role is passed to AWS CloudFormation service via AWS CDK.

You then configure your tools account IAM user credentials in your Git secrets and define the GitHub Actions workflow, which triggers upon pushing code to a specific branch of the repo. The workflow then assumes the cross-account role and initiates deployment.

The following diagram illustrates the solution architecture and shows AWS resources across the tools and target accounts.

Architecture diagram

Creating an IAM user

You start by creating an IAM user called git-action-deployment-user in the tools account. The user needs to have only programmatic access.

  1. Clone the GitHub repo aws-cross-account-cicd-git-actions-prereq and navigate to folder tools-account. Here you find the JSON parameter file src/cdk-stack-param.json, which contains the parameter CROSS_ACCOUNT_ROLE_ARN, which represents the ARN for the cross-account role we create in the next step in the target account. In the ARN, replace <target-account-id> with the actual account ID for your designated AWS target account.                                             Replace <target-account-id> with designated AWS account id
  2. Run deploy.sh by passing the name of the tools AWS account profile you created earlier. The script compiles the code, builds a package, and uses the AWS CDK CLI to bootstrap and deploy the stack. See the following code:
cd aws-cross-account-cicd-git-actions-prereq/tools-account/
./deploy.sh "<AWS-TOOLS-ACCOUNT-PROFILE-NAME>"

You should now see two stacks in the tools account: CDKToolkit and cf-GitActionDeploymentUserStack. AWS CDK creates the CDKToolkit stack when we bootstrap the AWS CDK app. This creates an Amazon Simple Storage Service (Amazon S3) bucket needed to hold deployment assets such as a CloudFormation template and Lambda code package. cf-GitActionDeploymentUserStack creates the IAM user with permission to assume git-action-cross-account-role (which you create in the next step). On the Outputs tab of the stack, you can find the user access key and the AWS Secrets Manager ARN that holds the user secret. To retrieve the secret, you need to go to Secrets Manager. Record the secret to use later.

Stack that creates IAM user with its secret stored in secrets manager

Creating a cross-account IAM role

In this step, you create two IAM roles in the target account: git-action-cross-account-role and git-action-cf-execution-role.

git-action-cross-account-role provides required deployment-specific permissions to the IAM user you created in the last step. The IAM user in the tools account can assume this role and perform the following tasks:

  • Upload deployment assets such as the CloudFormation template and Lambda code package to a designated S3 bucket via AWS CDK
  • Create a CloudFormation stack that deploys API Gateway and Lambda using AWS CDK

AWS CDK passes git-action-cf-execution-role to AWS CloudFormation to create, update, and delete the CloudFormation stack. It has permissions to create API Gateway and Lambda resources in the target account.

To deploy these two roles using AWS CDK, complete the following steps:

  1. In the already cloned repo from the previous step, navigate to the folder target-account. This folder contains the JSON parameter file cdk-stack-param.json, which contains the parameter TOOLS_ACCOUNT_USER_ARN, which represents the ARN for the IAM user you previously created in the tools account. In the ARN, replace <tools-account-id> with the actual account ID for your designated AWS tools account.                                             Replace <tools-account-id> with designated AWS account id
  2. Run deploy.sh by passing the name of the target AWS account profile you created earlier. The script compiles the code, builds the package, and uses the AWS CDK CLI to bootstrap and deploy the stack. See the following code:
cd ../target-account/
./deploy.sh "<AWS-TARGET-ACCOUNT-PROFILE-NAME>"

You should now see two stacks in your target account: CDKToolkit and cf-CrossAccountRolesStack. AWS CDK creates the CDKToolkit stack when we bootstrap the AWS CDK app. This creates an S3 bucket to hold deployment assets such as the CloudFormation template and Lambda code package. The cf-CrossAccountRolesStack creates the two IAM roles we discussed at the beginning of this step. The IAM role git-action-cross-account-role now has the IAM user added to its trust policy. On the Outputs tab of the stack, you can find these roles’ ARNs. Record these ARNs as you conclude this step.

Stack that creates IAM roles to carry out cross account deployment

Configuring secrets

One of the GitHub actions we use is aws-actions/configure-aws-credentials@v1. This action configures AWS credentials and Region environment variables for use in the GitHub Actions workflow. The AWS CDK CLI detects the environment variables to determine the credentials and Region to use for deployment.

For our cross-account deployment use case, aws-actions/configure-aws-credentials@v1 takes three pieces of sensitive information besides the Region: AWS_ACCESS_KEY_ID, AWS_ACCESS_KEY_SECRET, and CROSS_ACCOUNT_ROLE_TO_ASSUME. Secrets are recommended for storing sensitive pieces of information in the GitHub repo. It keeps the information in an encrypted format. For more information about referencing secrets in the workflow, see Creating and storing encrypted secrets.

Before we continue, you need your own empty GitHub repo to complete this step. Use an existing repo if you have one, or create a new repo. You configure secrets in this repo. In the next section, you check in the code provided by the post to deploy a Lambda-based API CDK stack into this repo.

  1. On the GitHub console, navigate to your repo settings and choose the Secrets tab.
  2. Add a new secret with name as TOOLS_ACCOUNT_ACCESS_KEY_ID.
  3. Copy the access key ID from the output OutGitActionDeploymentUserAccessKey of the stack GitActionDeploymentUserStack in tools account.
  4. Enter the ID in the Value field.                                                                                                                                                                Create secret
  5. Repeat this step to add two more secrets:
    • TOOLS_ACCOUNT_SECRET_ACCESS_KEY (value retrieved from the AWS Secrets Manager in tools account)
    • CROSS_ACCOUNT_ROLE (value copied from the output OutCrossAccountRoleArn of the stack cf-CrossAccountRolesStack in target account)

You should now have three secrets as shown below.

All required git secrets

Deploying with GitHub Actions

As the final step, first clone your empty repo where you set up your secrets. Download and copy the code from the GitHub repo into your empty repo. The folder structure of your repo should mimic the folder structure of source repo. See the following screenshot.

Folder structure of the Lambda API code

We can take a detailed look at the code base. First and foremost, we use Typescript to deploy our Lambda API, so we need an AWS CDK app and AWS CDK stack. The app is defined in app.ts under the repo root folder location. The stack definition is located under the stack-specific folder src/git-action-demo-api-stack. The Lambda code is located under the Lambda-specific folder src/git-action-demo-api-stack/lambda/ git-action-demo-lambda.

We also have a deployment script deploy.sh, which compiles the app and Lambda code, packages the Lambda code into a .zip file, bootstraps the app by copying the assets to an S3 bucket, and deploys the stack. To deploy the stack, AWS CDK has to pass CFN_EXECUTION_ROLE to AWS CloudFormation; this role is configured in src/params/cdk-stack-param.json. Replace <target-account-id> with your own designated AWS target account ID.

Update cdk-stack-param.json in git-actions-cross-account-cicd repo with TARGET account id

Finally, we define the Git Actions workflow under the .github/workflows/ folder per the specifications defined by GitHub Actions. GitHub Actions automatically identifies the workflow in this location and triggers it if conditions match. Our workflow .yml file is named in the format cicd-workflow-<region>.yml, where <region> in the file name identifies the deployment Region in the target account. In our use case, we use us-east-1 and us-west-2, which is also defined as an environment variable in the workflow.

The GitHub Actions workflow has a standard hierarchy. The workflow is a collection of jobs, which are collections of one or more steps. Each job runs on a virtual machine called a runner, which can either be GitHub-hosted or self-hosted. We use the GitHub-hosted runner ubuntu-latest because it works well for our use case. For more information about GitHub-hosted runners, see Virtual environments for GitHub-hosted runners. For more information about the software preinstalled on GitHub-hosted runners, see Software installed on GitHub-hosted runners.

The workflow also has a trigger condition specified at the top. You can schedule the trigger based on the cron settings or trigger it upon code pushed to a specific branch in the repo. See the following code:

name: Lambda API CICD Workflow
# This workflow is triggered on pushes to the repository branch master.
on:
  push:
    branches:
      - master

# Initializes environment variables for the workflow
env:
  REGION: us-east-1 # Deployment Region

jobs:
  deploy:
    name: Build And Deploy
    # This job runs on Linux
    runs-on: ubuntu-latest
    steps:
      # Checkout code from git repo branch configured above, under folder $GITHUB_WORKSPACE.
      - name: Checkout
        uses: actions/checkout@v2
      # Sets up AWS profile.
      - name: Configure AWS credentials
        uses: aws-actions/configure-aws-credentials@v1
        with:
          aws-access-key-id: ${{ secrets.TOOLS_ACCOUNT_ACCESS_KEY_ID }}
          aws-secret-access-key: ${{ secrets.TOOLS_ACCOUNT_SECRET_ACCESS_KEY }}
          aws-region: ${{ env.REGION }}
          role-to-assume: ${{ secrets.CROSS_ACCOUNT_ROLE }}
          role-duration-seconds: 1200
          role-session-name: GitActionDeploymentSession
      # Installs CDK and other prerequisites
      - name: Prerequisite Installation
        run: |
          sudo npm install -g [email protected]
          cdk --version
          aws s3 ls
      # Build and Deploy CDK application
      - name: Build & Deploy
        run: |
          cd $GITHUB_WORKSPACE
          ls -a
          chmod 700 deploy.sh
          ./deploy.sh

For more information about triggering workflows, see Triggering a workflow with events.

We have configured a single job workflow for our use case that runs on ubuntu-latest and is triggered upon a code push to the master branch. When you create an empty repo, master branch becomes the default branch. The workflow has four steps:

  1. Check out the code from the repo, for which we use a standard Git action actions/checkout@v2. The code is checked out into a folder defined by the variable $GITHUB_WORKSPACE, so it becomes the root location of our code.
  2. Configure AWS credentials using aws-actions/configure-aws-credentials@v1. This action is configured as explained in the previous section.
  3. Install your prerequisites. In our use case, the only prerequisite we need is AWS CDK. Upon installing AWS CDK, we can do a quick test using the AWS Command Line Interface (AWS CLI) command aws s3 ls. If cross-account access was successfully established in the previous step of the workflow, this command should return a list of buckets in the target account.
  4. Navigate to root location of the code $GITHUB_WORKSPACE and run the deploy.sh script.

You can check in the code into the master branch of your repo. This should trigger the workflow, which you can monitor on the Actions tab of your repo. The commit message you provide is displayed for the respective run of the workflow.

Workflow for region us-east-1 Workflow for region us-west-2

You can choose the workflow link and monitor the log for each individual step of the workflow.

Git action workflow steps

In the target account, you should now see the CloudFormation stack cf-GitActionDemoApiStack in us-east-1 and us-west-2.

Lambda API stack in us-east-1 Lambda API stack in us-west-2

The API resource URL DocUploadRestApiResourceUrl is located on the Outputs tab of the stack. You can invoke your API by choosing this URL on the browser.

API Invocation Output

Clean up

To remove all the resources from the target and tools accounts, complete the following steps in their given order:

  1. Delete the CloudFormation stack cf-GitActionDemoApiStack from the target account. This step removes the Lambda and API Gateway resources and their associated IAM roles.
  2. Delete the CloudFormation stack cf-CrossAccountRolesStack from the target account. This removes the cross-account role and CloudFormation execution role you created.
  3. Go to the CDKToolkit stack in the target account and note the BucketName on the Output tab. Empty that bucket and then delete the stack.
  4. Delete the CloudFormation stack cf-GitActionDeploymentUserStack from tools account. This removes cross-account-deploy-user IAM user.
  5. Go to the CDKToolkit stack in the tools account and note the BucketName on the Output tab. Empty that bucket and then delete the stack.

Security considerations

Cross-account IAM roles are very powerful and need to be handled carefully. For this post, we strictly limited the cross-account IAM role to specific Amazon S3 and CloudFormation permissions. This makes sure that the cross-account role can only do those things. The actual creation of Lambda, API Gateway, and Amazon DynamoDB resources happens via the AWS CloudFormation IAM role, which AWS  CloudFormation assumes in the target AWS account.

Make sure that you use secrets to store your sensitive workflow configurations, as specified in the section Configuring secrets.

Conclusion

In this post we showed how you can leverage GitHub’s popular software development platform to securely deploy to AWS accounts and Regions using GitHub actions and AWS CDK.

Build your own GitHub Actions CI/CD workflow as shown in this post.

About the author


Damodar Shenvi Wagle is a Cloud Application Architect at AWS Professional Services. His areas of expertise include architecting serverless solutions, ci/cd and automation.