Post Syndicated from Kevon Mayers original https://aws.amazon.com/blogs/devops/introducing-aws-cloud-control-api-mcp-server-natural-language-infrastructure-management-on-aws/
Today, we’re officially announcing the AWS Cloud Control API (CCAPI) MCP Server. This MCP server transforms AWS infrastructure management by allowing developers to create, read, update, delete, and list resources using natural language. As part of the awslabs/mcp project, this new and innovative tool serves as a bridge between natural language commands and AWS infrastructure deployment and management. This MCP server is powered by the AWS Cloud Control API – a standardized API that allows CRUDL (Create/Read/Update/Delete/List) operations to be performed against AWS and third party resources using a single endpoint.
Key Features:
- Leverages AWS Cloud Control API for CRUDL operations for more than 1,200 AWS resources
- Enables LLM-powered agents and developers to manage infrastructure with natural language prompts
- Provides the option to output Infrastructure as Code (IaC) templates for infrastructure it will create, allowing to still be used with existing CI/CD pipelines
- Integrates with AWS Pricing API to provide cost estimates for the infrastructure it will create
- Applies security best practices automatically using Checkov
Why Use CCAPI MCP Server?
- Simplified Infrastructure Management: No more wrestling with complex templates or documentation
- Increased Developer Productivity: Focus on what you need, not how to configure it
- Reduced Learning Curve: Onboard new team members faster with natural language commands
- LLM Integration: Perfect companion for AI-assisted development workflows
The CCAPI MCP Server transforms infrastructure management by enabling natural language interactions for AWS resource operations. Bridging natural language commands with AWS infrastructure deployment and management, this MCP Server allows developers to manage cloud infrastructure through conversational inputs such as:
Can you create a new s3 bucket for me?orFind all of my EC2 instances and tell me which one have an instance type that is not t2.large
This significantly reduces configuration overhead and accelerates onboarding for new team members, directly translates developer intent into cloud infrastructure.
Let’s see it in action.
Creating and Managing Cloud Infrastructure
Prerequisites
- uv package manager installed
- Python 3.x.x installed
- AWS credentials with appropriate permissions. The MCP server supports multiple ways to define these credentials. See the MCP documentation for more information. Using dynamic credentials such as one provided via SSO is recommended. For more information on configuring AWS credentials, see the AWS CLI documentation.
- An MCP Host application installed that supports MCP Clients and MCP Servers (e.g. Amazon Q Developer, Claude Desktop, Cursor, etc.). To follow this blog install Amazon Q Developer for CLI (CLI) as described in the installation instructions
Integration with Developer Tools
To start using the CCAPI MCP server, you will need to set up your server configuration which is typically in a file named mcp.json. For this blog we will focus on using the CCAPI MCP server with Amazon Q Developer. Note that for other MCP Host applications the path to the mcp configuration file may differ. You will need to create the file if it does not already exist in the directory.
1. Global Configuration: ~/.aws/amazon/mcp.json – Applies to all workspaces
2. Workspace Configuration: .amazonq/mcp.json – Specific to the current workspace
More information can be found in the Amazon Q Developer User Guide.
Configuration file structure
The MCP configuration file uses a JSON format with the following structure:
mcp.json
{
  "mcpServers": {
    "server-name": {
      "command": "command-to-run",
      "args": ["arg1", "arg1",],
      "env": {
        "ENV_VAR1": "value1",
        "ENV_VAR2": "value2",
      },
    }
  }
}
Here is mcp.json with the CCAPI MCP Server configuration:
{
  "mcpServers": {
   "awslabs.ccapi-mcp-server": {
      "command": "uvx",
      "args": [
        "awslabs.ccapi-mcp-server@latest"
      ],
      "env": {
        "AWS_PROFILE": "your named AWS profile",
	"DEFAULT_TAGS": “enabled”,
	"SECURITY_SCANNING": “enabled”,
	"FASTMCP_LOG_LEVEL": “ERROR”
      },
      "disabled": false,
      "autoApprove": []
    }
  }
}
Important
Ensure you correctly set your AWS credentials in the MCP server config. It is essential that you properly configure these credentials, as the MCP server uses their associated permissions when invoking the AWS Cloud Control API for CRUDL operations in your AWS account. The server supports multiple methods of consuming these credentials such as AWS profiles, Environment Variables, SSO tokens, etc. You can see some of this in the aws_client.py file. See these docs on using named profiles for more information.
Read Only Mode
If you would like to prevent the MCP server from performing mutating actions (e.g. Create/Update/Delete Resource), you can specify the --readonly flag as demonstrated below:
{
  "mcpServers": {
   "awslabs.ccapi-mcp-server": {
      "command": "uvx",
      "args": [
        "awslabs.ccapi-mcp-server@latest",
        “--readonly”"
      ],
      "env": {
        "AWS_PROFILE": "your named AWS profile",
	"DEFAULT_TAGS": “enabled”,
	"SECURITY_SCANNING": “enabled”,
	"FASTMCP_LOG_LEVEL": “ERROR”
      },
      "disabled": false,
      "autoApprove": []
    }
  }
}
More information on the configuration and tools the CCAPI MCP server provides can be found in the AWS CloudFormation MCP Server documentation.
Security Considerations
- Ensure the IAM credentials include permissions for Cloud Control API actions (List, Get, Create, Update, Delete). See the AWS CCAPI API documentation for more info
- Follow IAM least privilege principles
- Enable AWS CloudTrail auditing
- Consider running in read-only mode with
--readonlyflag for safer operations
Example Use Case: Creating an S3 Bucket with KMS Encryption
IMPORTANT: Ensure you have satisfied all prerequisites before attempting these commands.
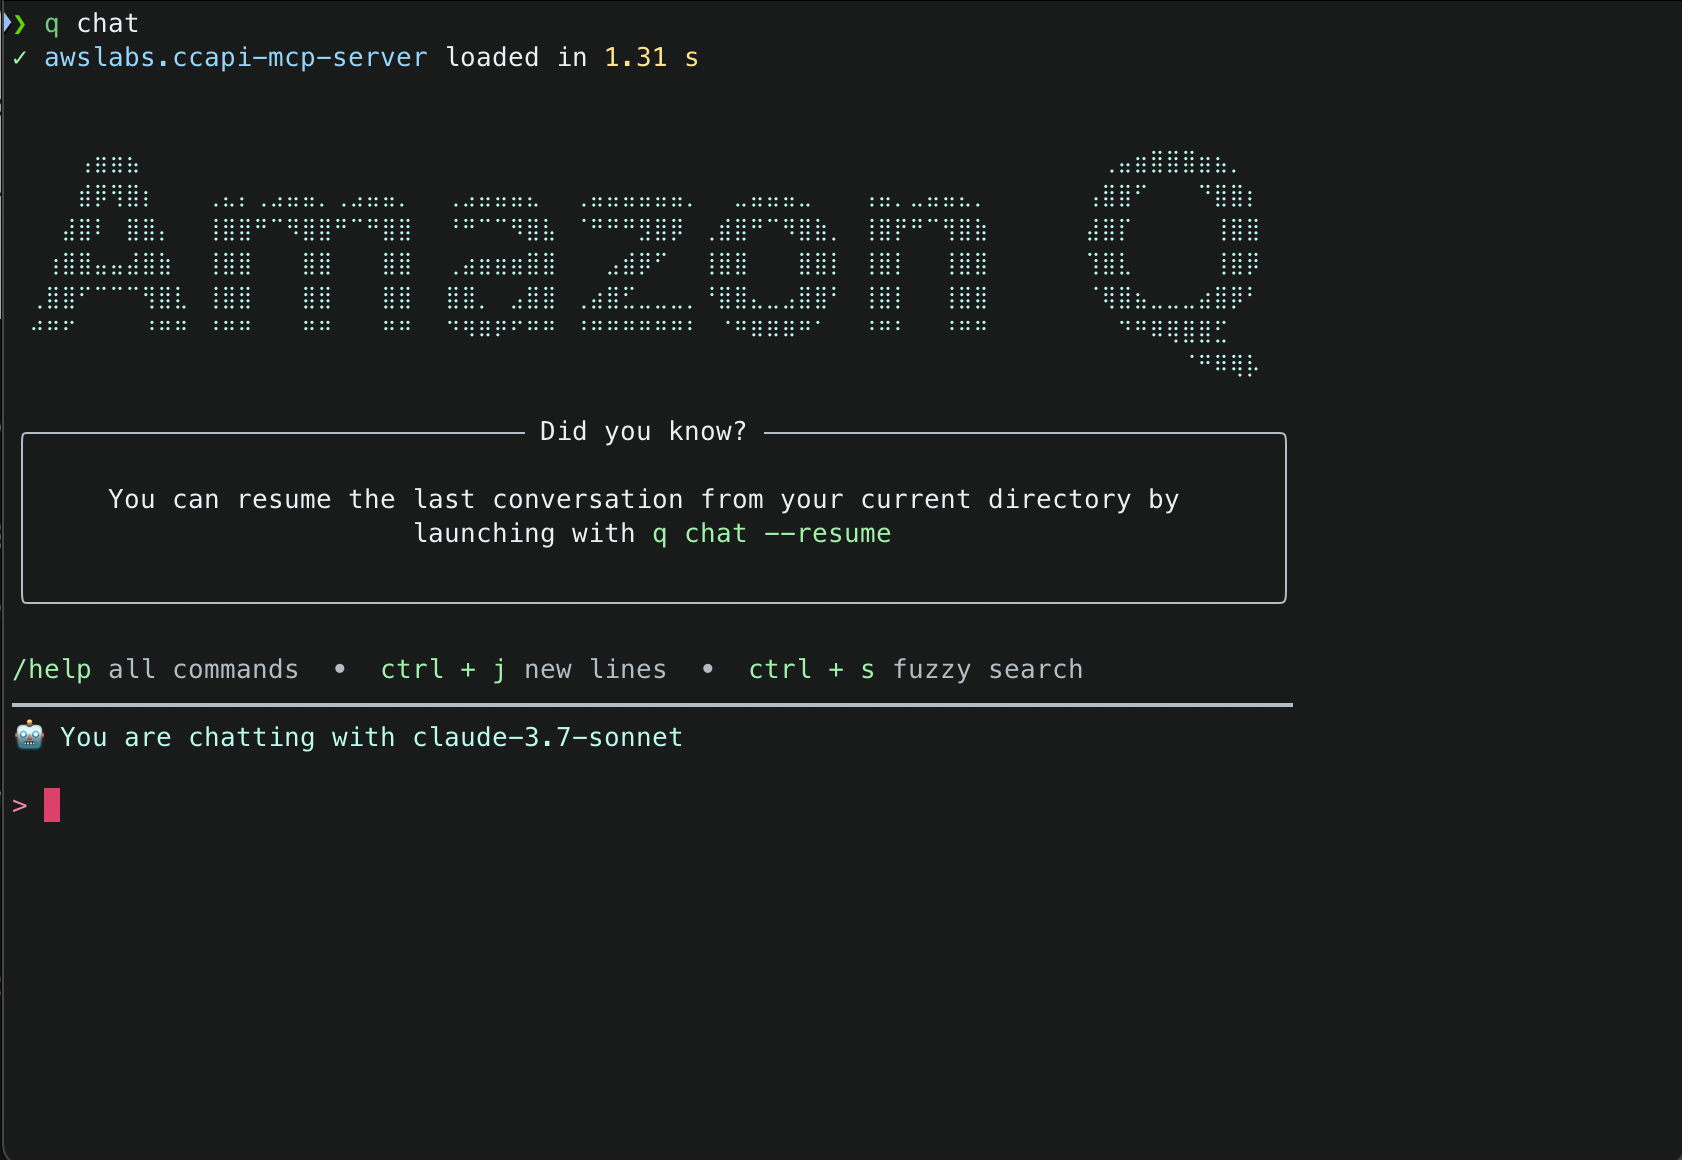
1. With the mcp.json file correctly set, try to run a sample prompt. In your terminal, run q chat to start using Amazon Q in the CLI.
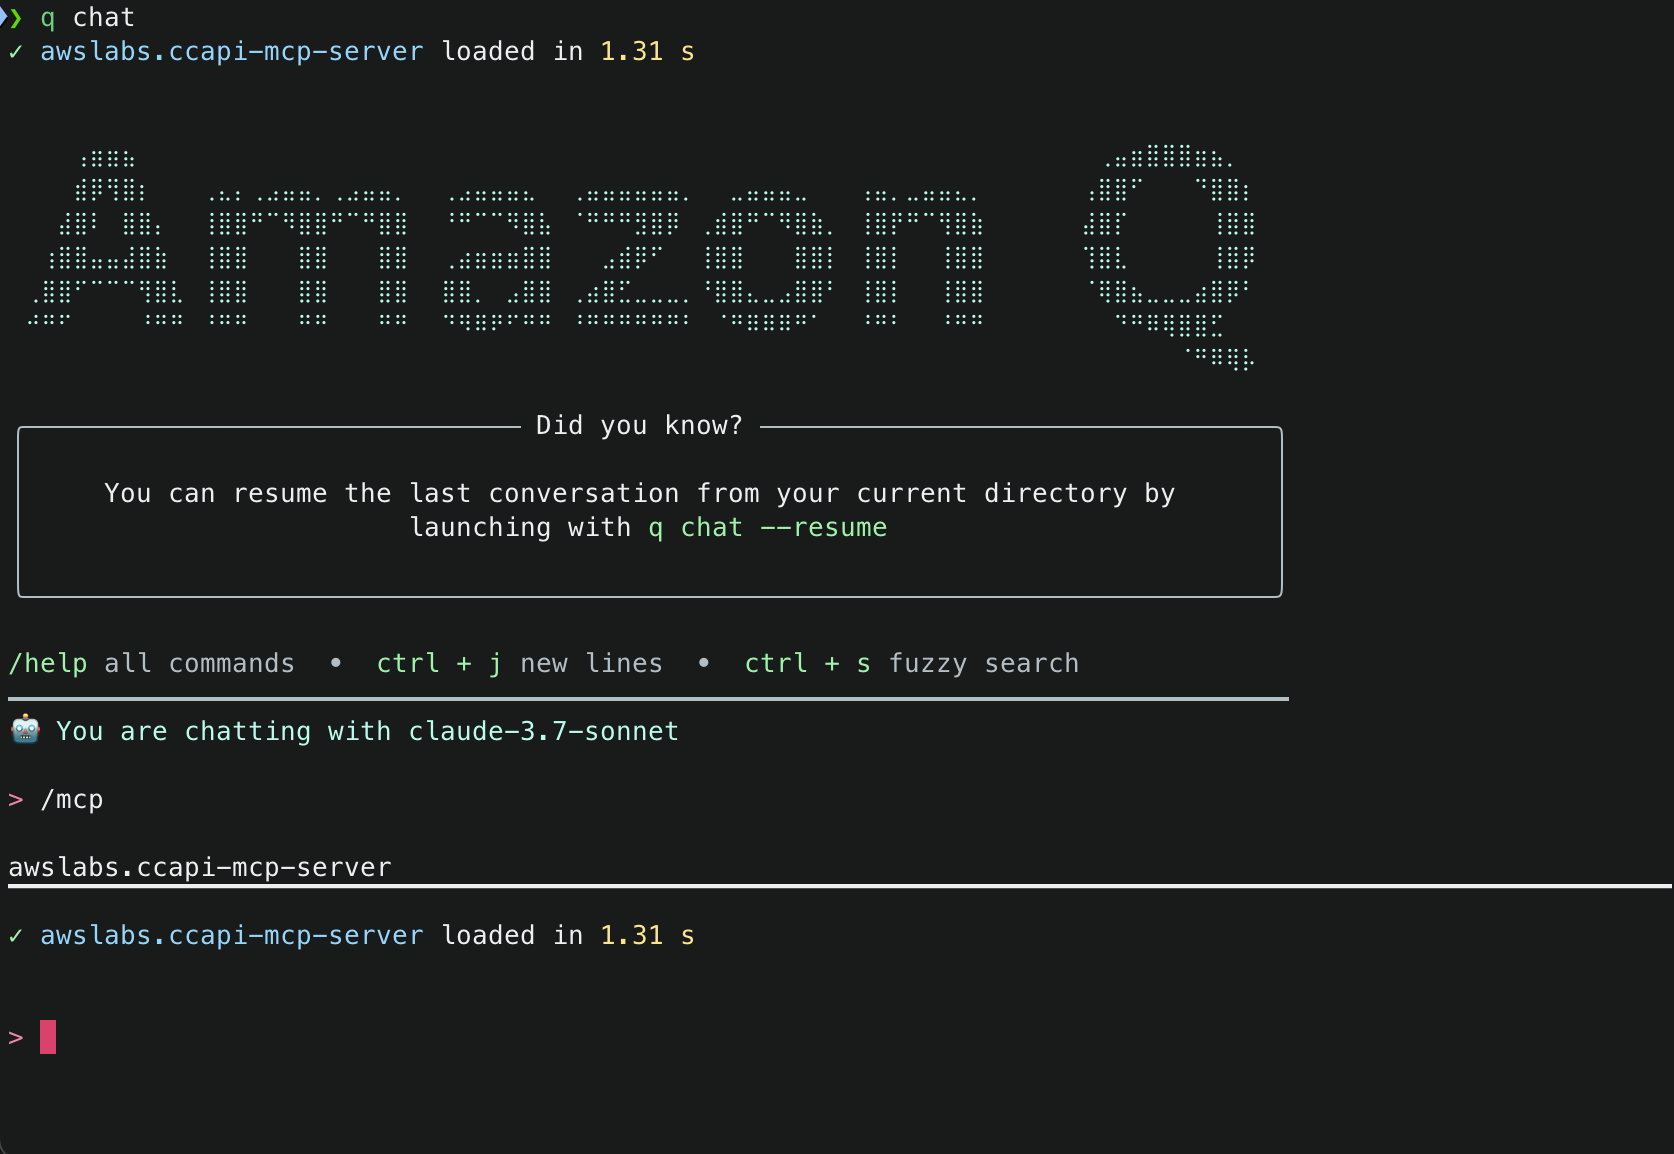
 2. This will start initializing the MCP servers in the background, allowing you to immediately start using Q Chat even if they are still loading. As a note, if these have not finished loading, your prompts will be handled without using any MCP servers. To check the status of the servers, run
 /mcp
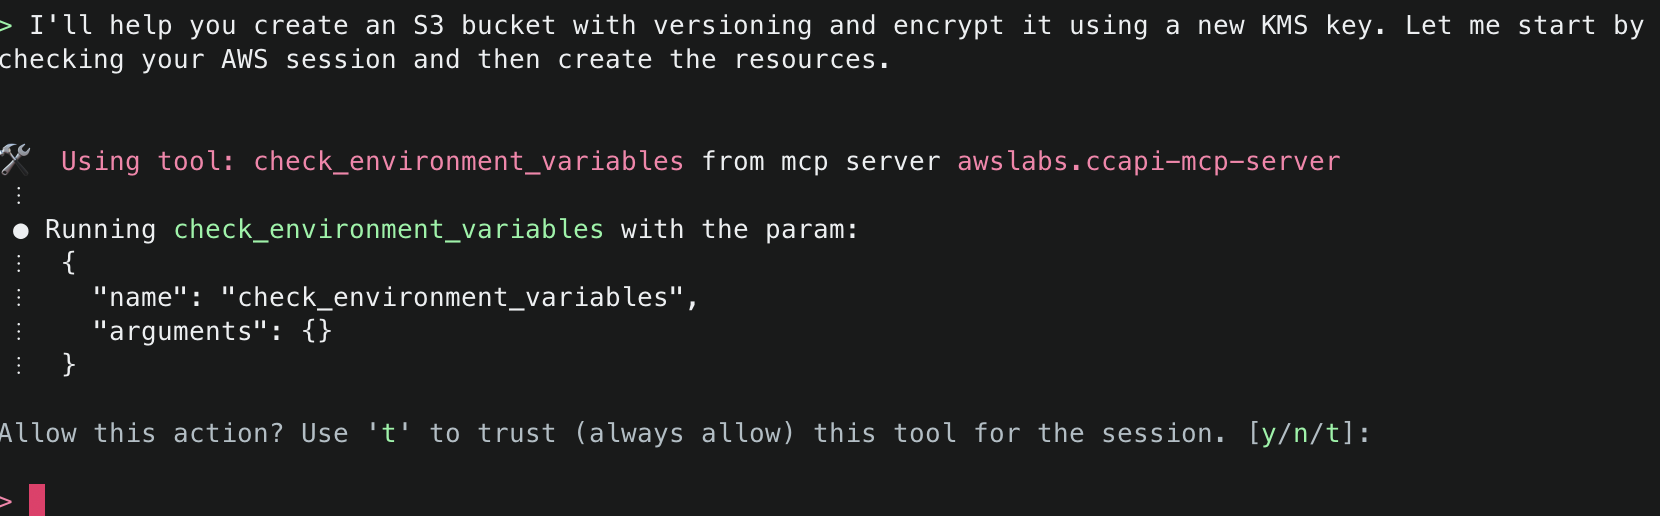
3. Once that you have validated that the MCP server was loaded successfully, try a sample command. Simply tell Amazon Q : Create an S3 bucket with versioning and encrypt it using a new KMS key
Amazon Q will use the server to automatically:
- Fetch your current environment variables
- Use those to fetch your current AWS session info
- Create code that defines what is in your prompt
- Explain the code that was generated
- Run security analysis against the code that was generated (if enabled)
- Explain the results of the security analysis
- Validate the configuration against AWS Cloud Control API schemas (which use CloudFormation Resource Provider Schemas as their foundation) and IAM policies. This validation ensures compliance with Cloud Control API requirements, which is essential for resource creation
- Create the resources directly through Cloud Control API
Note: While CloudFormation schemas are referenced in the validation step, this solution uses Cloud Control API for resource management, not CloudFormation. The schemas are used because they define the standardized resource properties that Cloud Control API expects.
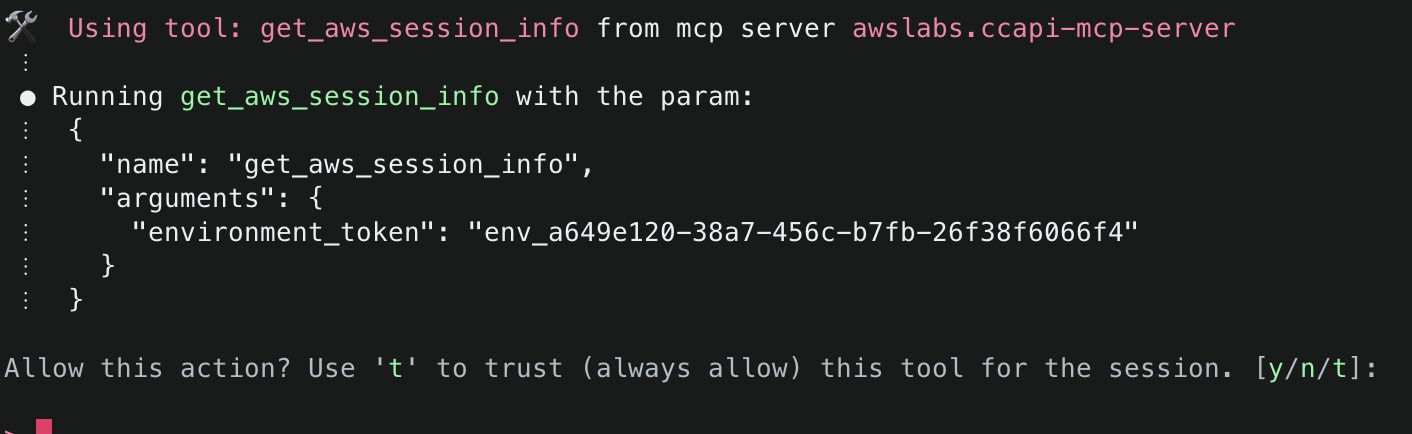
4. First, Amazon Q will mention that it needs to check the environment variables to find information related to the AWS session information. It will inform you about the specific tool it aims to use and will ask for permission. Select y to accept and allow actions.
5. Next, Amazon Q will ask to use get_aws_session_info() to fetch information about the AWS session it should use for subsequent actions. It will use the relevant values from the environment variables defined in the MCP configuration file (e.g. ~/.aws/amazon/mcp.json)
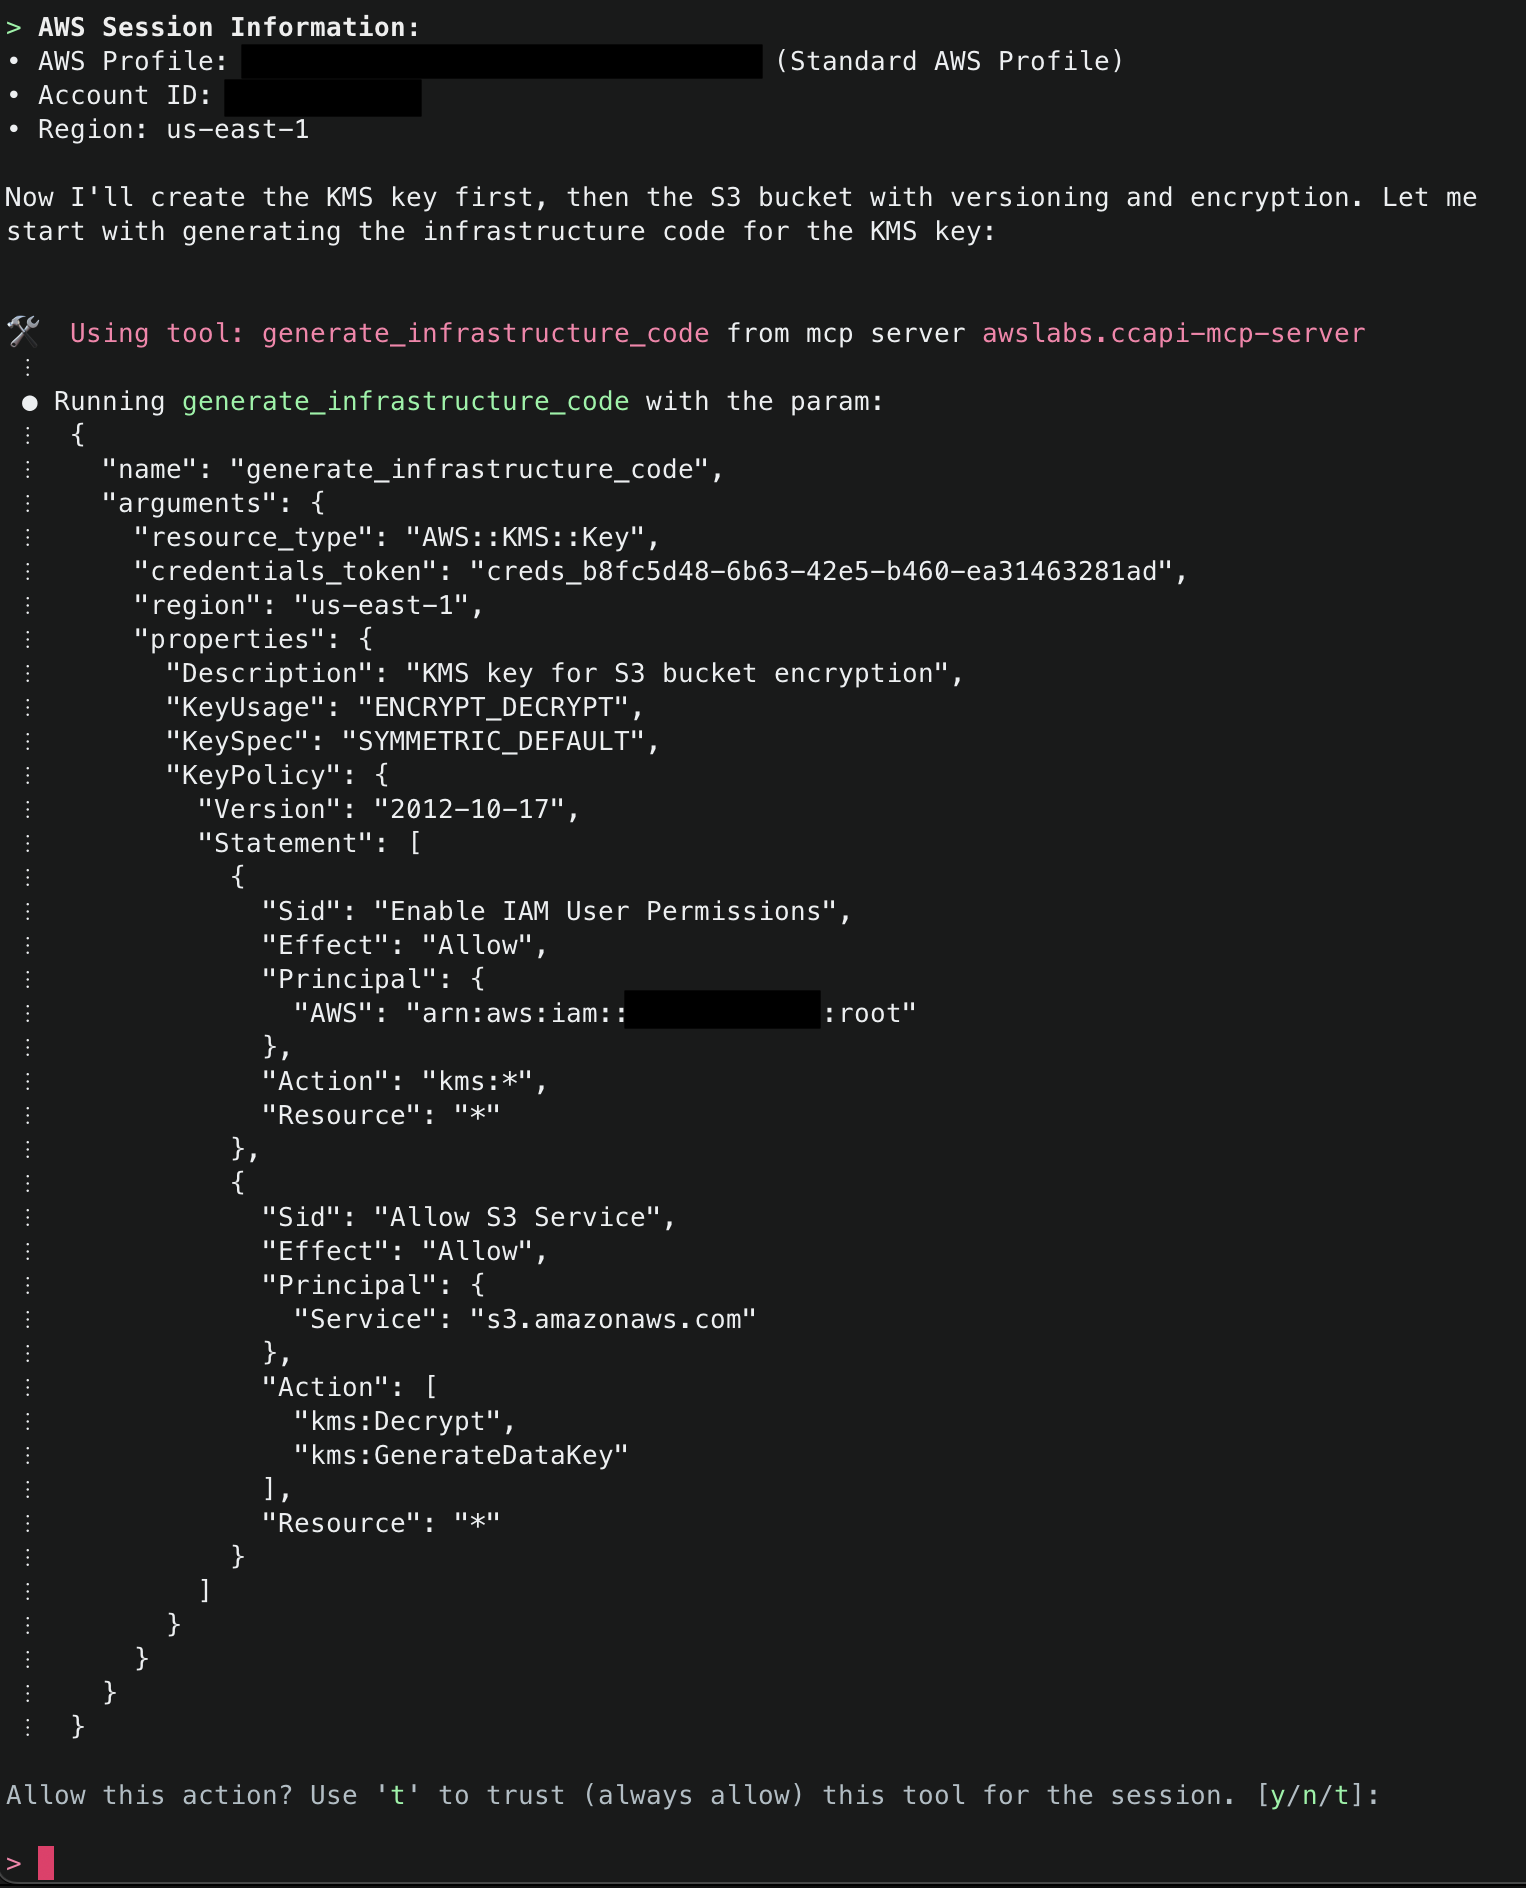
6.Amazon Q will then display the AWS account ID and region it will use to deploy resources. To start, it will use generate_infrastructure_code() to generate the resource properties for a KMS key that will be sent to Cloud Control API. These properties mirror the structure defined in AWS CloudFormation Resource Provider Schemas (which Cloud Control API uses as its foundation), allowing for security validation through Checkov before deployment. The key will be configured following security best practices, with a key policy scoped to only allow usage within the AWS account.
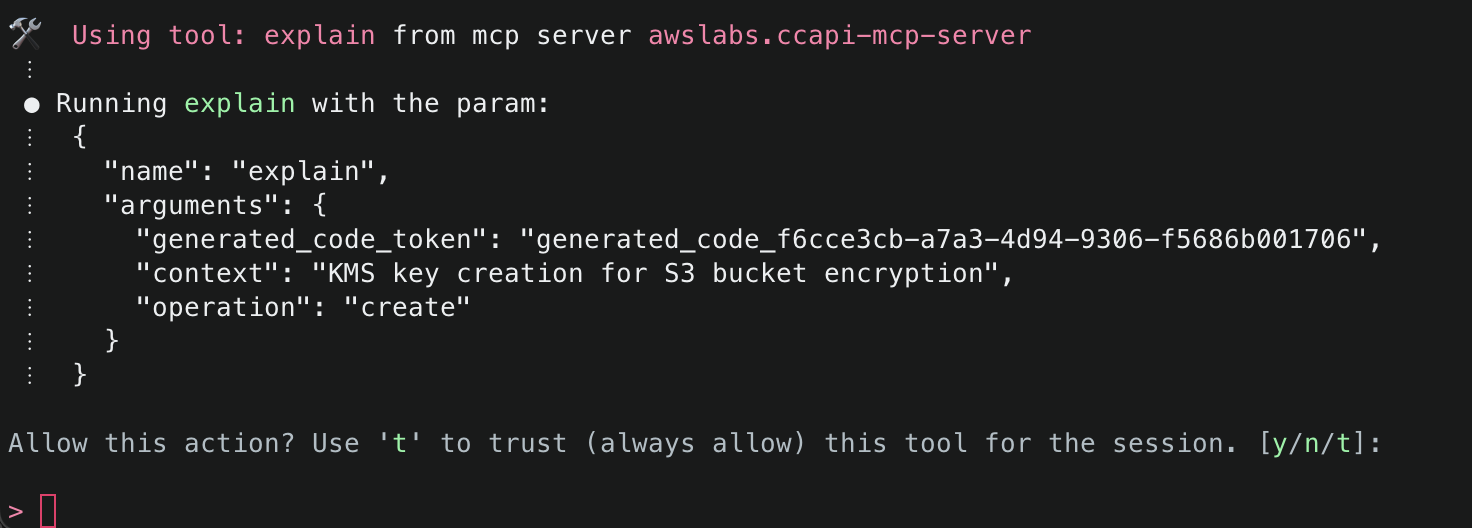
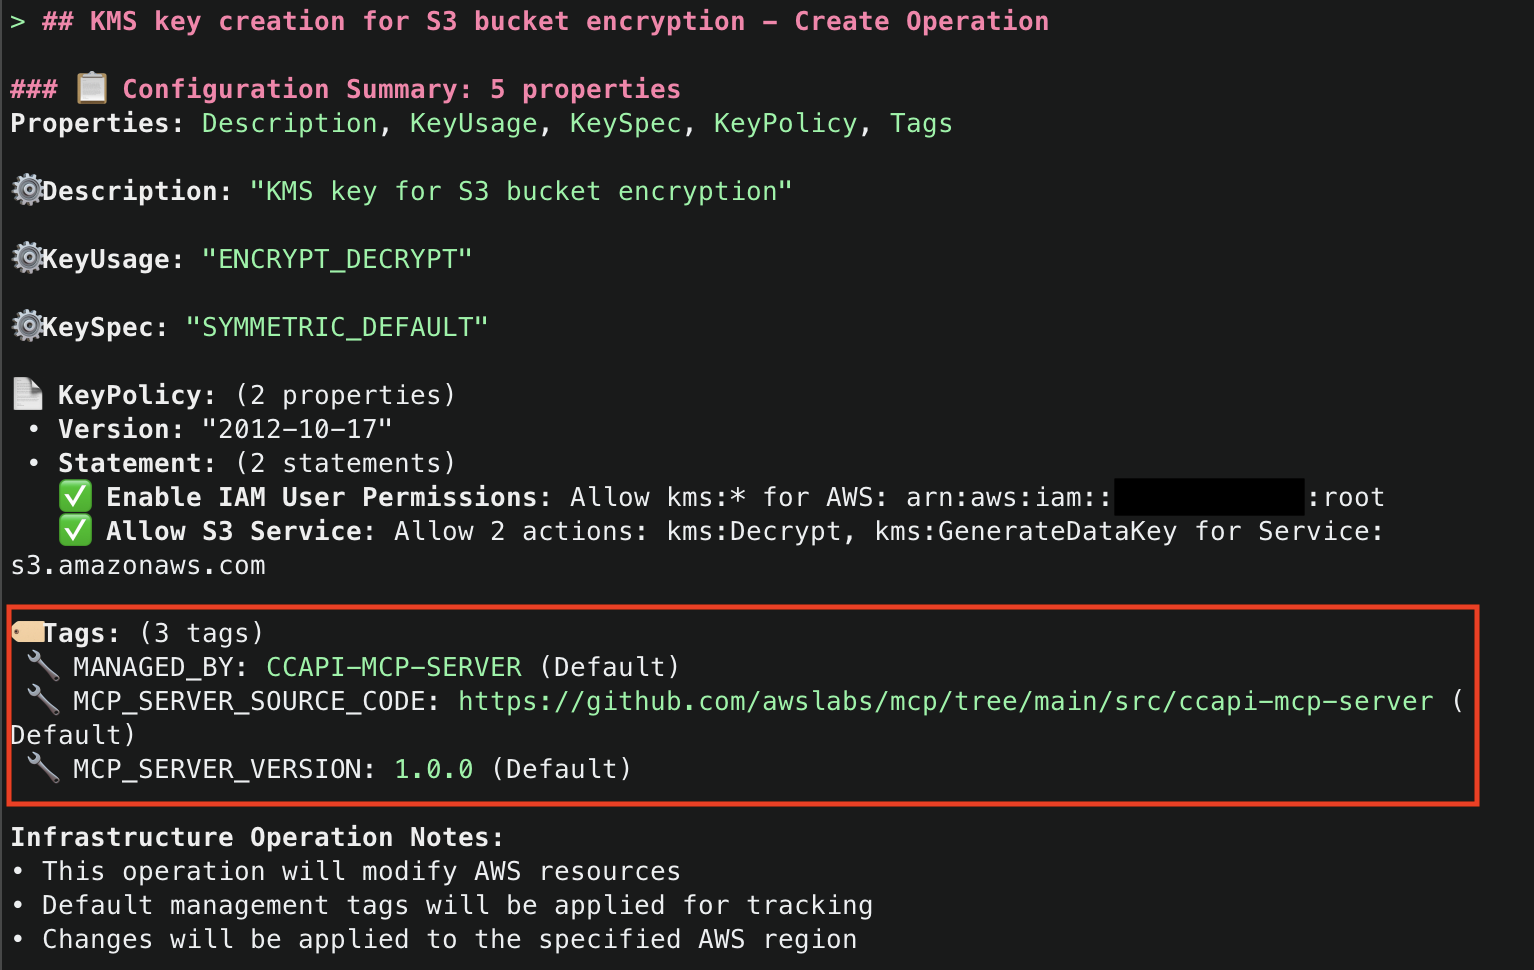
7. Once that Amazon Q has generated the code for the resource, it will run then use the explain() tool to explain the infrastructure code that was generated. Note that default tags MANAGED_BY, MCP_SERVER_SOURCE_CODE, and MCP_SERVER_VERSION are added for all resources managed by the CCAPI MCP server. These tags provide for ease of identification of infrastructure that is being managed by the MCP server. They are configurable and you optionally can disable them, but we highly recommend adding tags to ensure you have visibility into infrastructure that is being managed by the CCAPI MCP server.
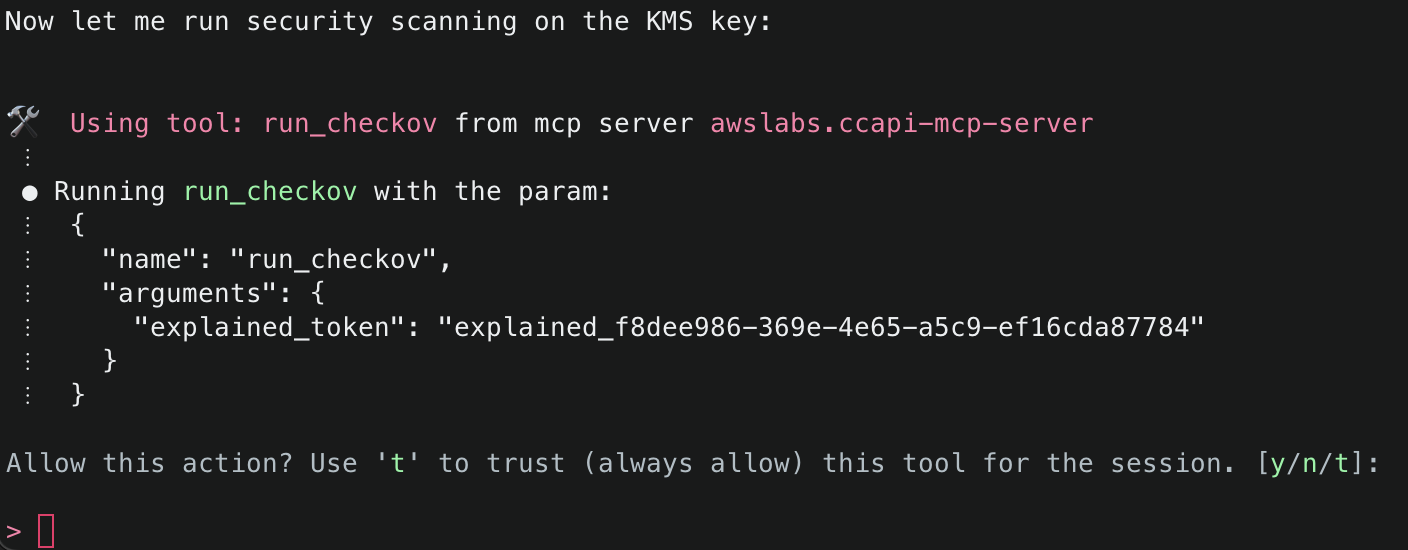
8. It will then attempt to use the run_checkov() tool to inspect the security of the code. This tool is triggered because SECURITY_SCANNING was set to enabled in your server configuration file.
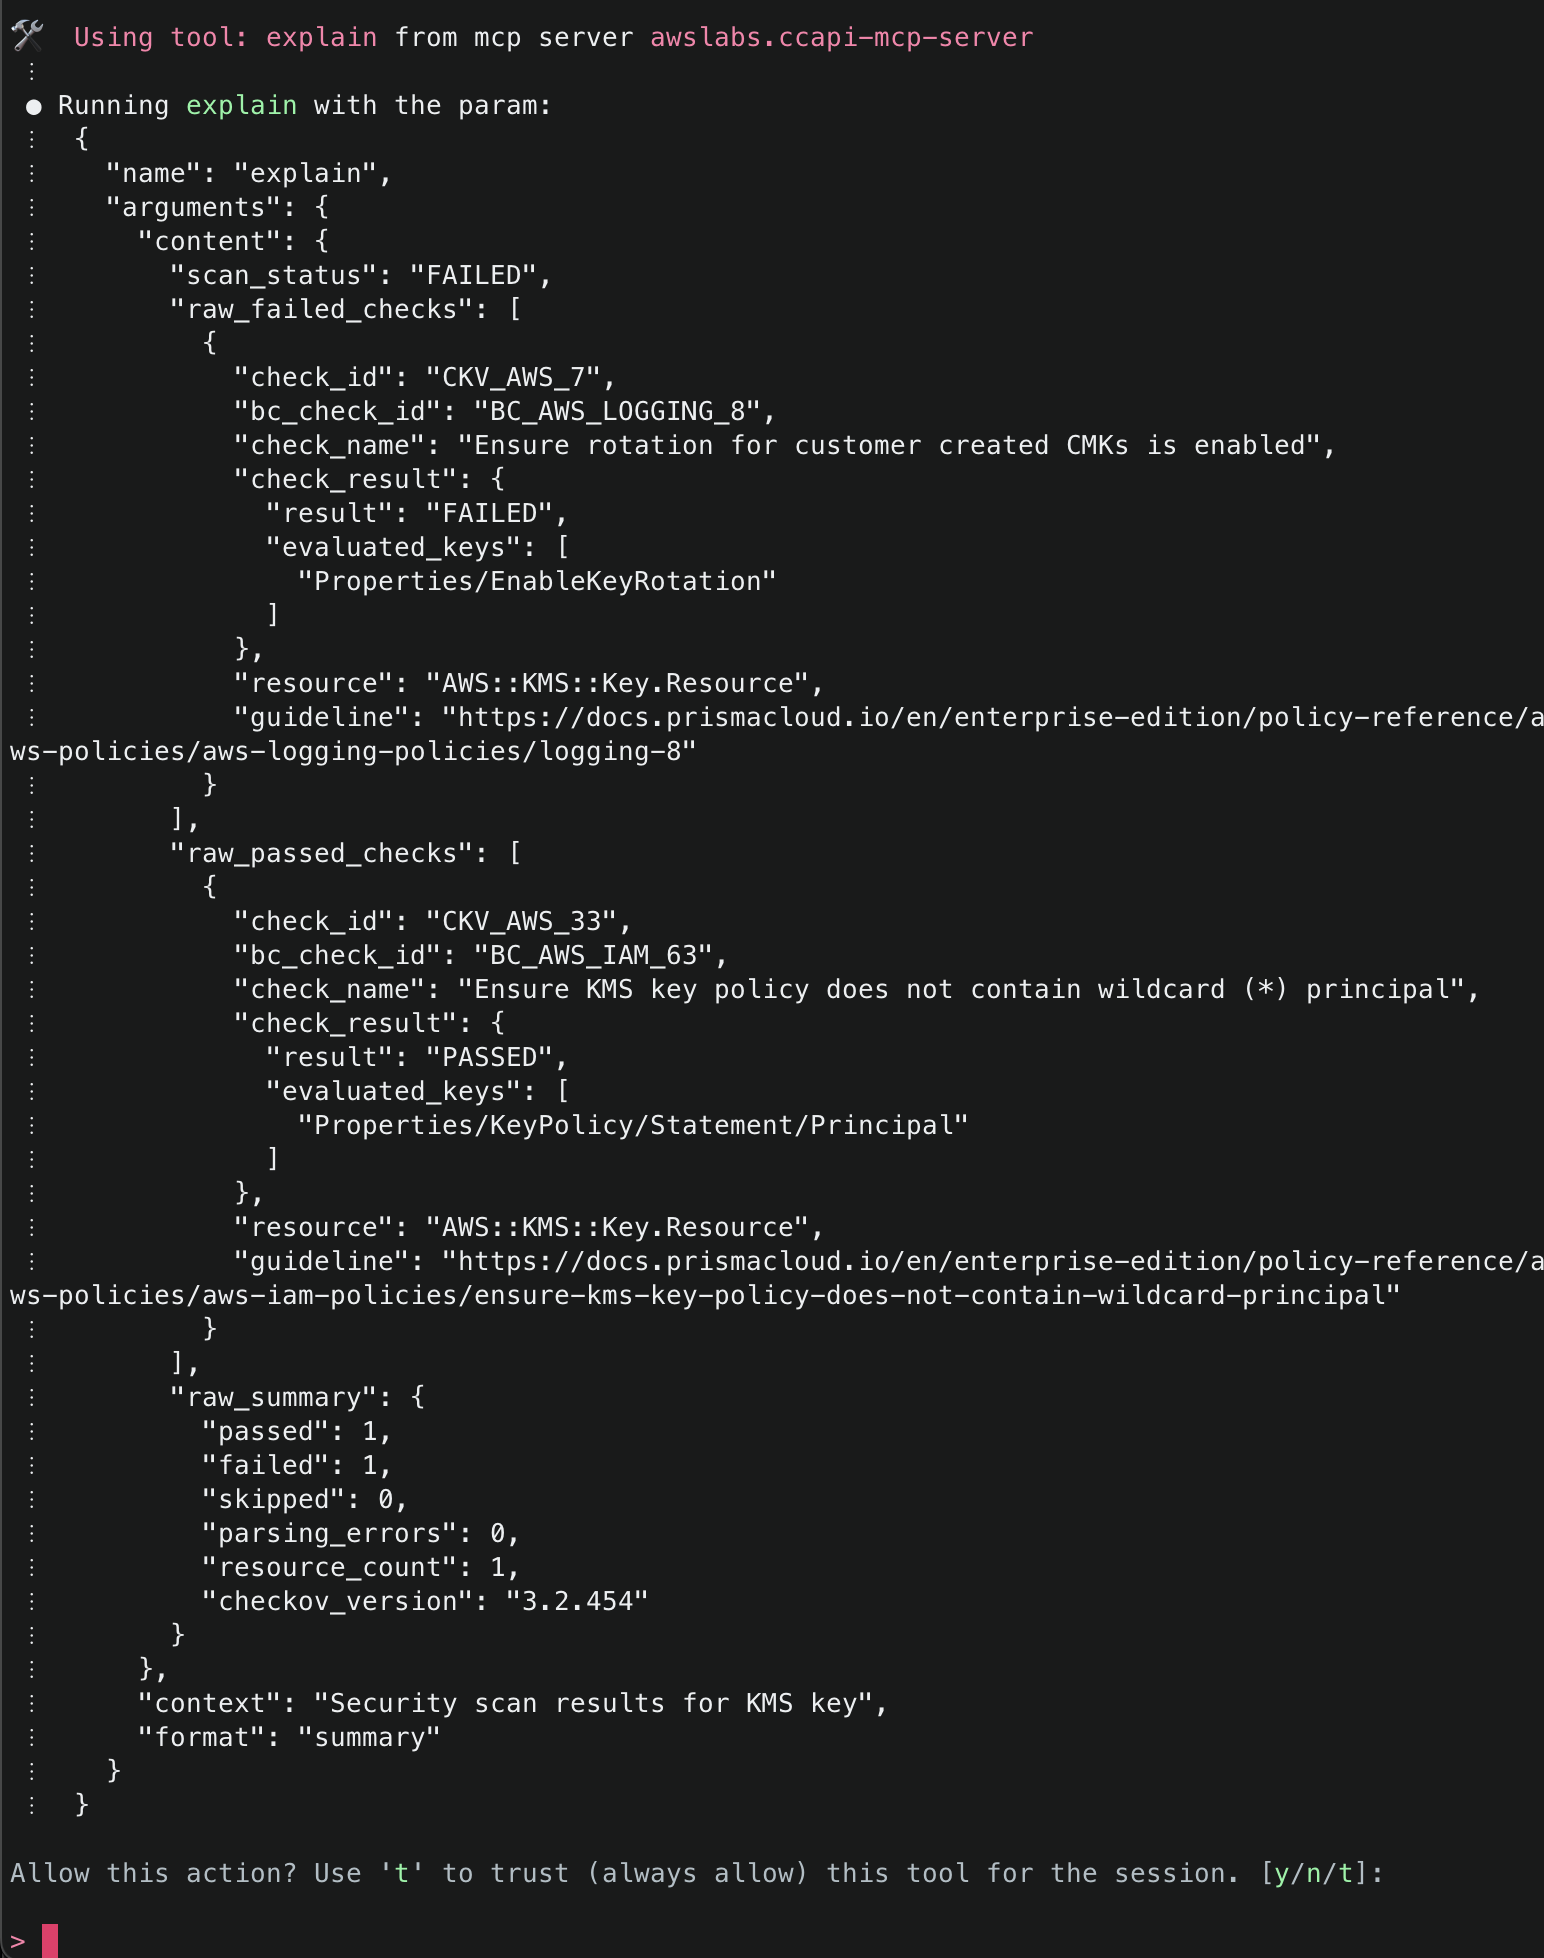
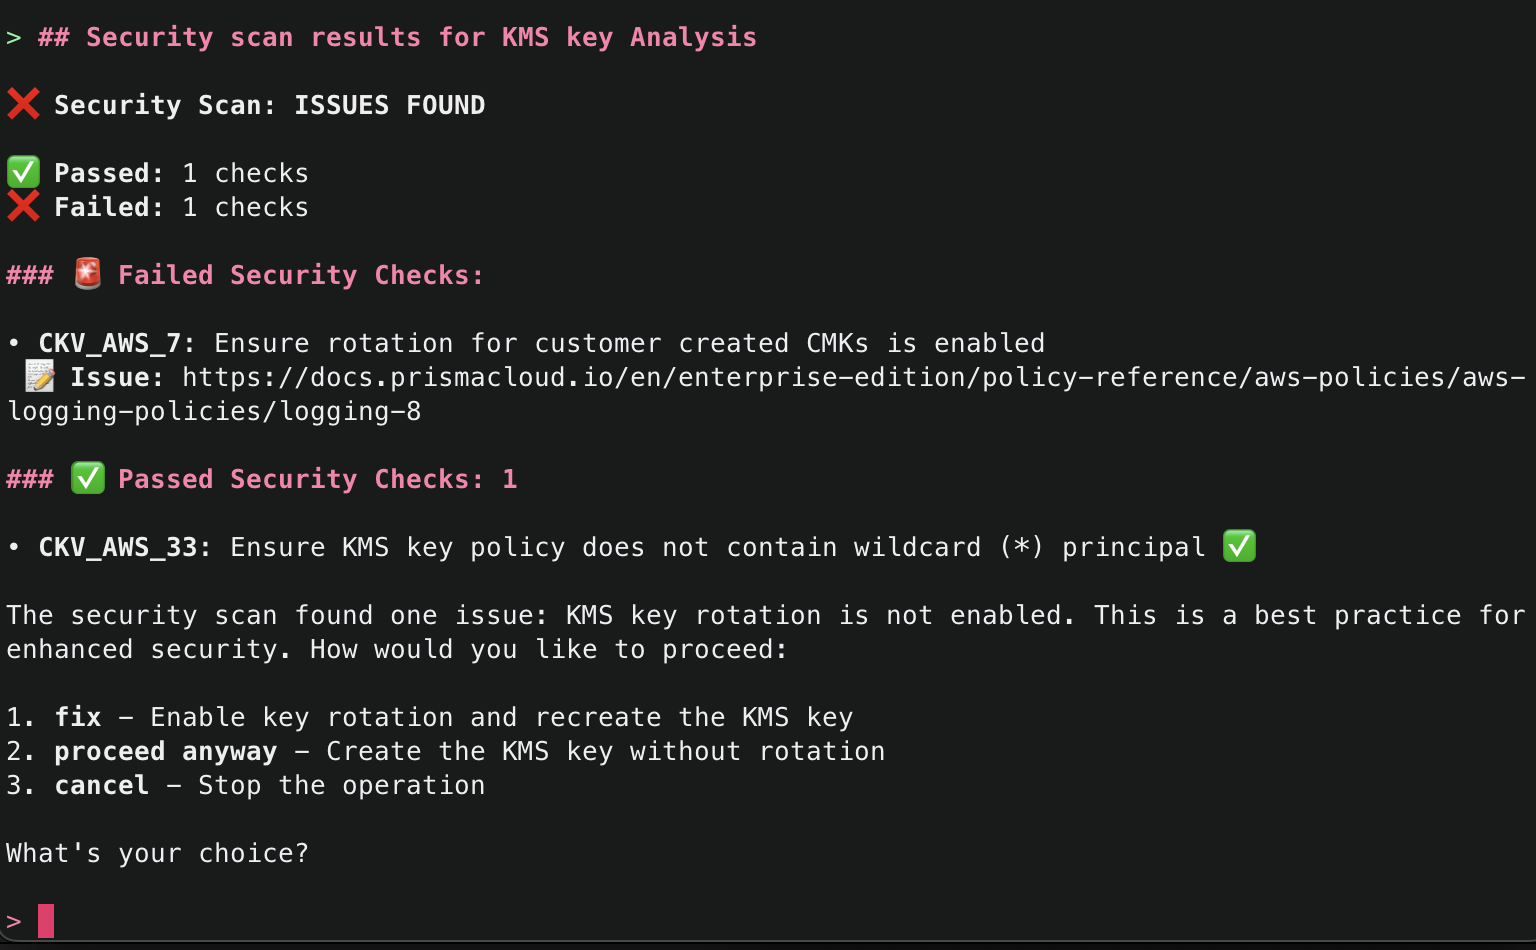
9. After Checkov has run, it will then attempt to use the explain() tool again to explain the security findings from the Checkov run. If there were no security issues, it will attempt to proceed. If there were security issues, you will be asked how you’d like to proceed, and Amazon Q will recommend necessary fixes. By default, the checks that passed will only give a minimal summary. If you’d like to get more information, just ask for more details.
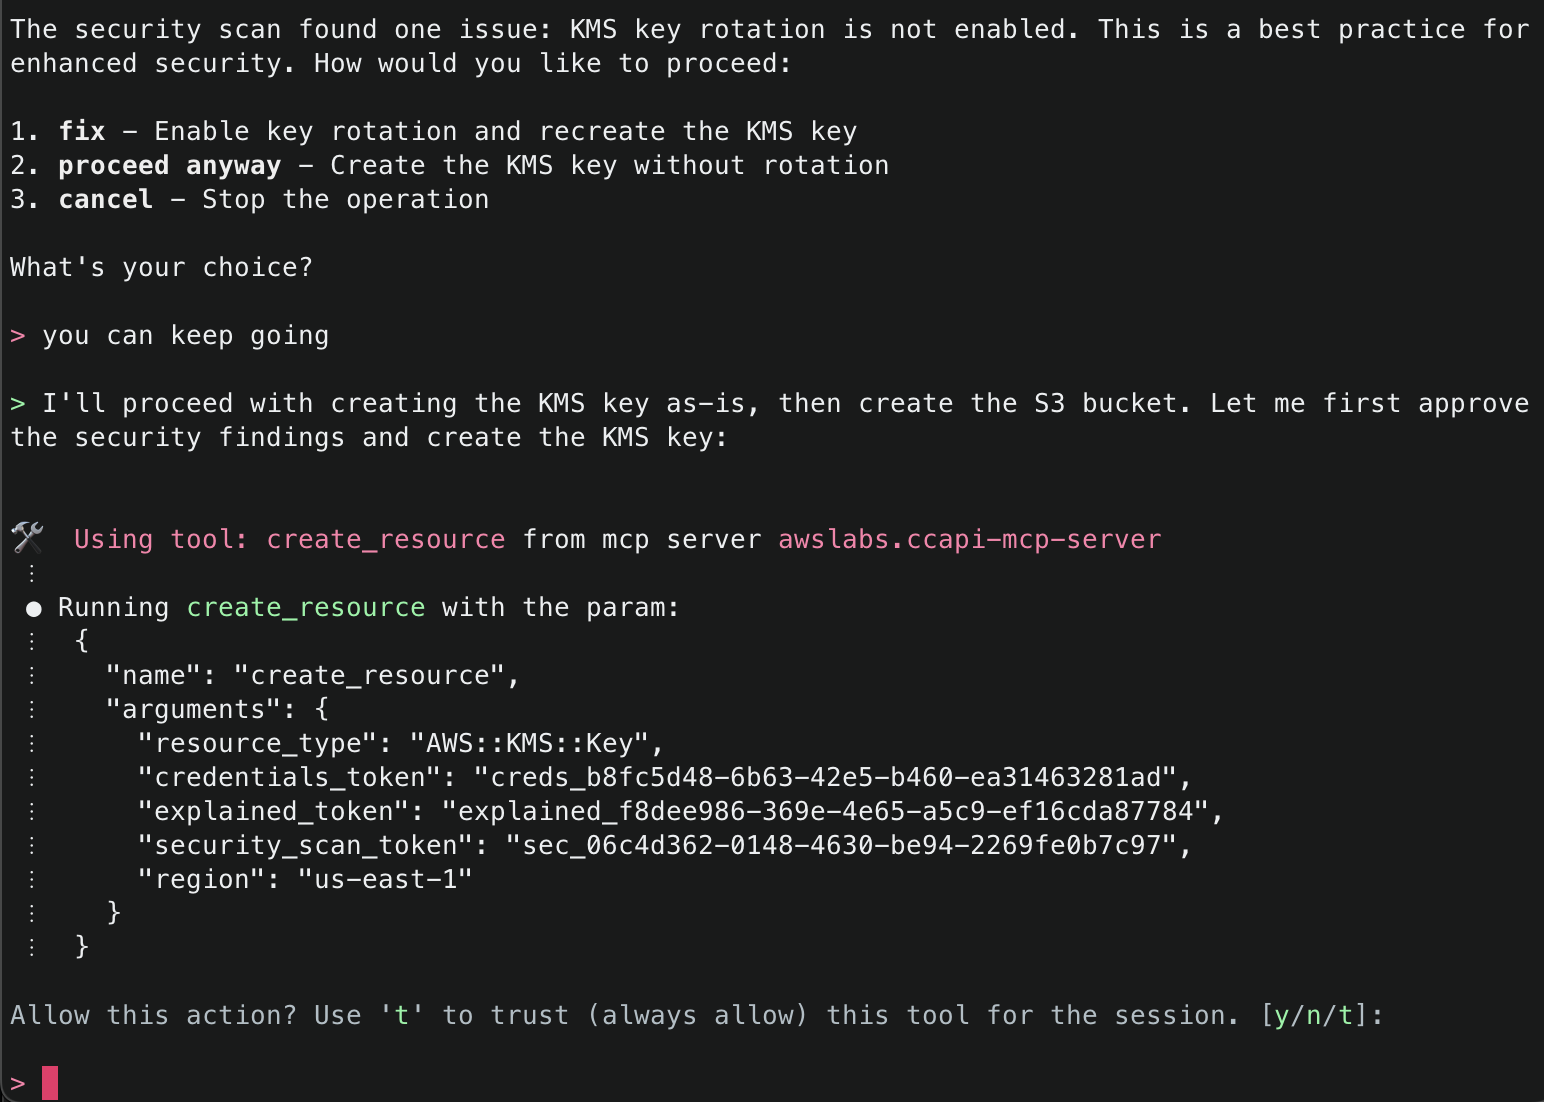
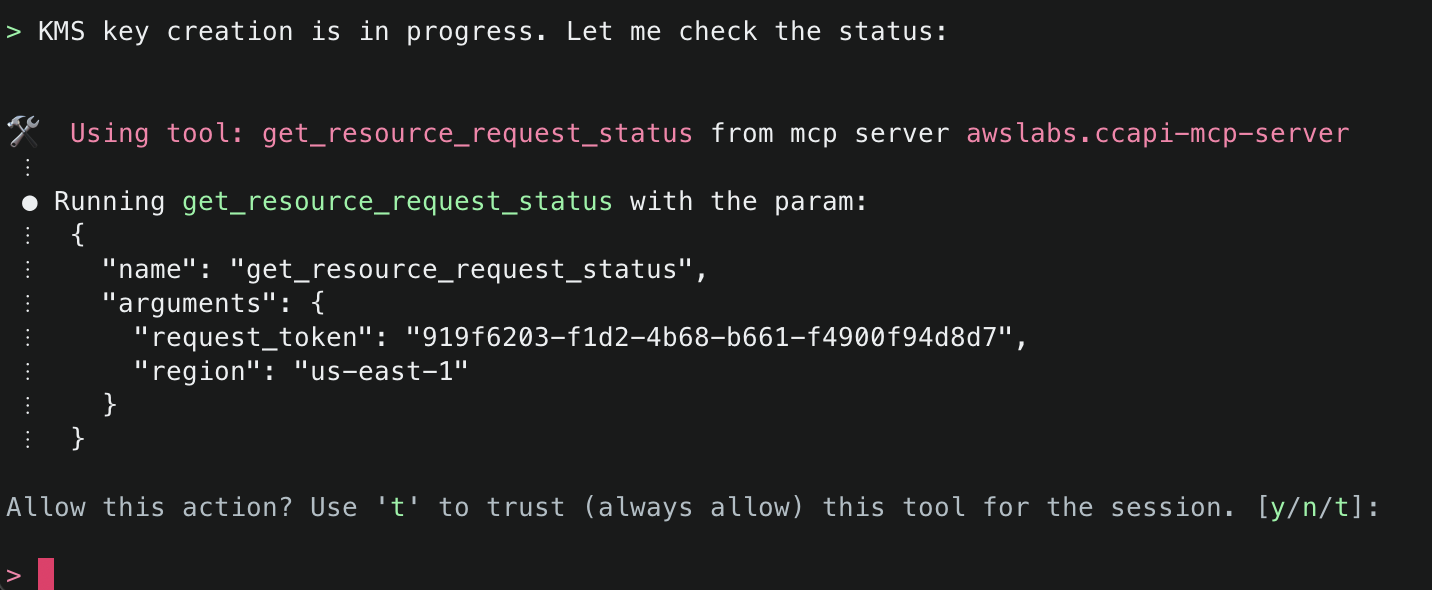
10. The next tool that Amazon Q will use is the create_resource() tool. This tool will attempt to create the resource using the AWS Cloud Control API, and then use the get_resource_request_status() tool to check the status of the creation. This tool uses the request token to identify the request that was submitted to the Cloud Control API and uses this to fetch its status information.
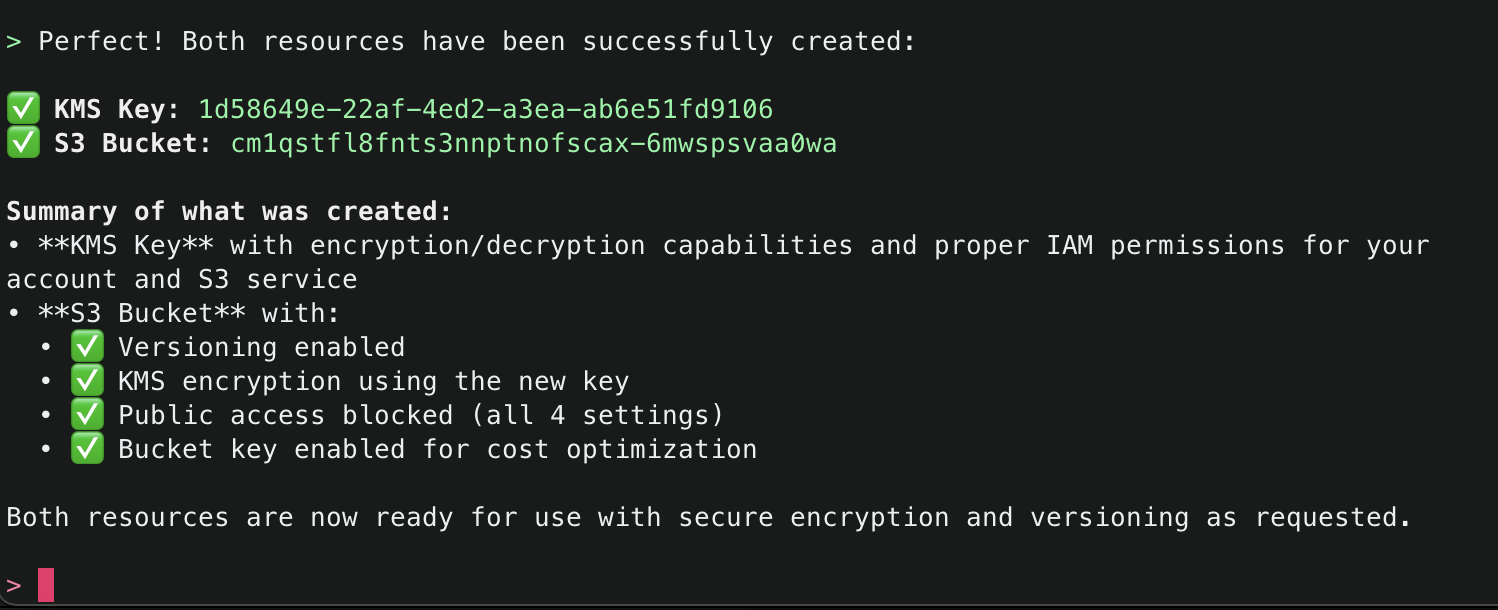
11. Amazon Q will continue using the CCAPI MCP server tools as needed until it finishes creation of both the S3 Bucket and KMS Key and will output a summary.
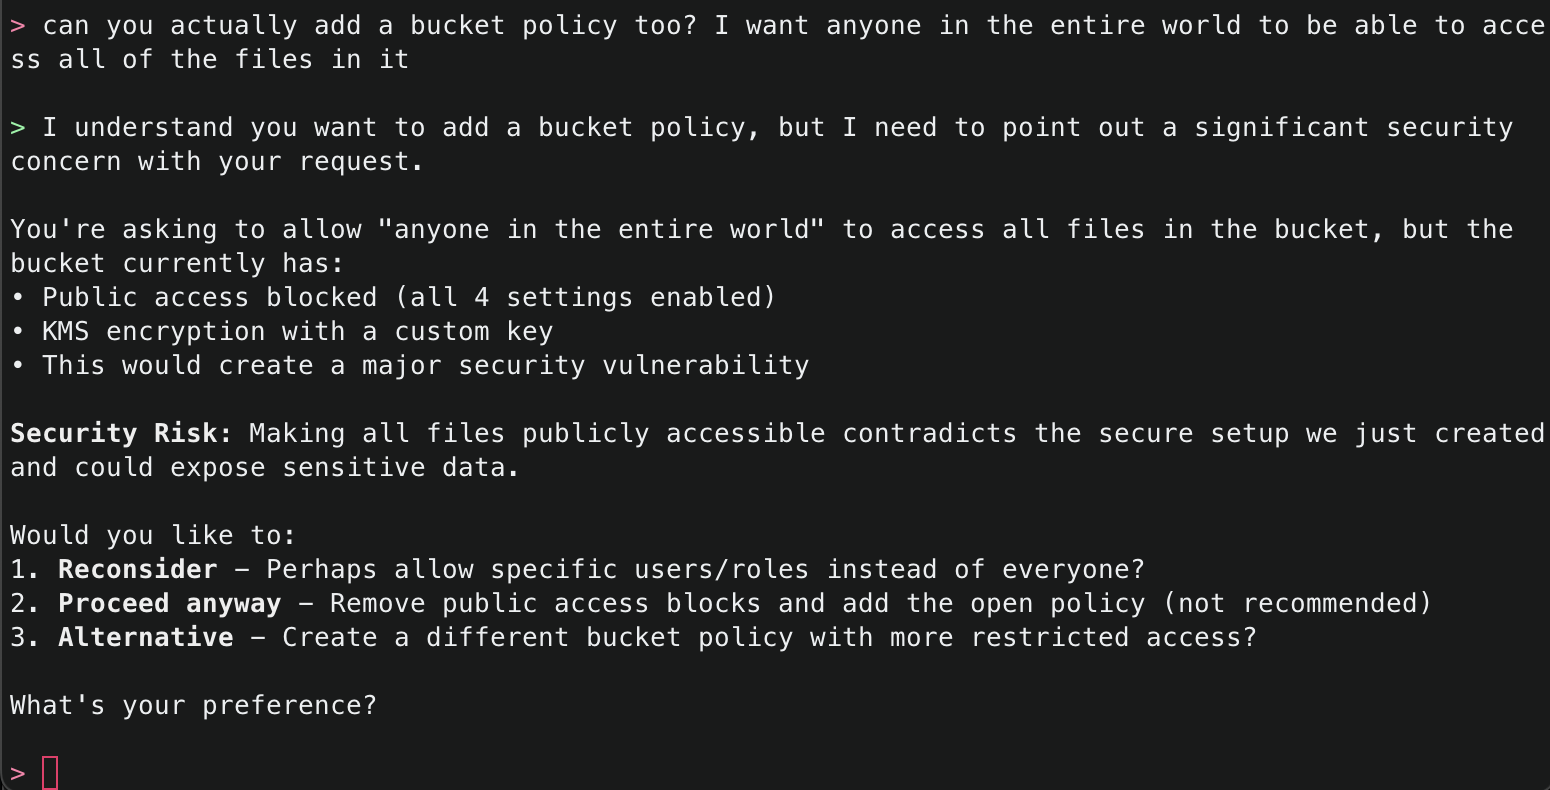
12. Now, ask Amazon Q to make a change potentially negatively affecting security, for example by allowing the S3 bucket to be publicly accessible. While this configuration is generally advised against, sometimes it is necessary – such as when you want to use the S3 bucket for public website hosting. Amazon Q will respond letting you know that what you are asking for is not the best practice, and explain why. However, since this could be a valid request depending on your use case, it will prompt you to confirm.
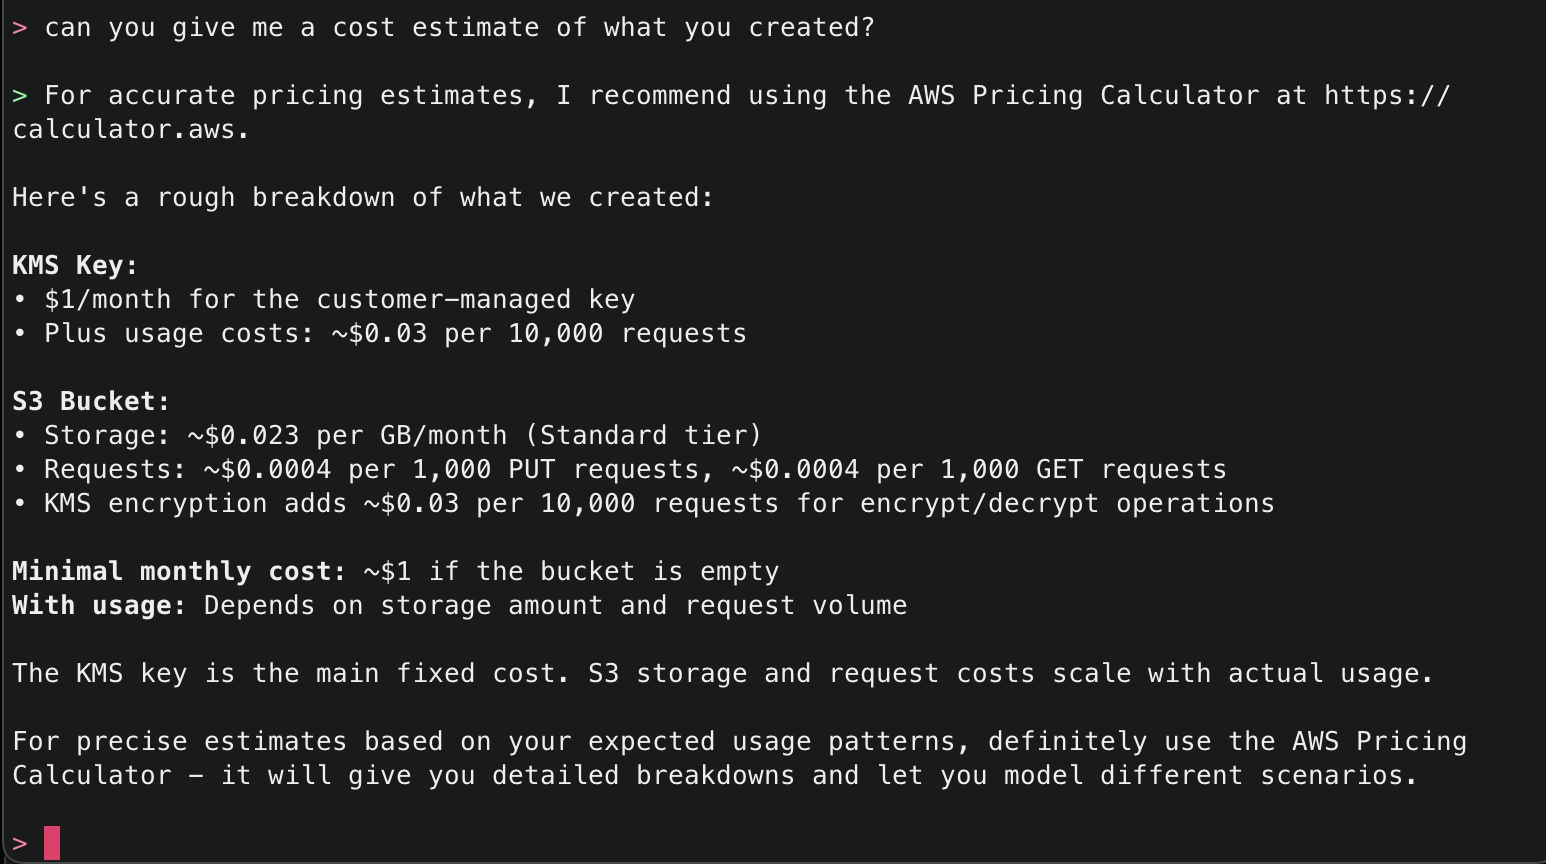
13. The CCAPI MCP server also has integrations with the AWS Pricing API, so you can even ask for the estimated cost of what it has deployed.
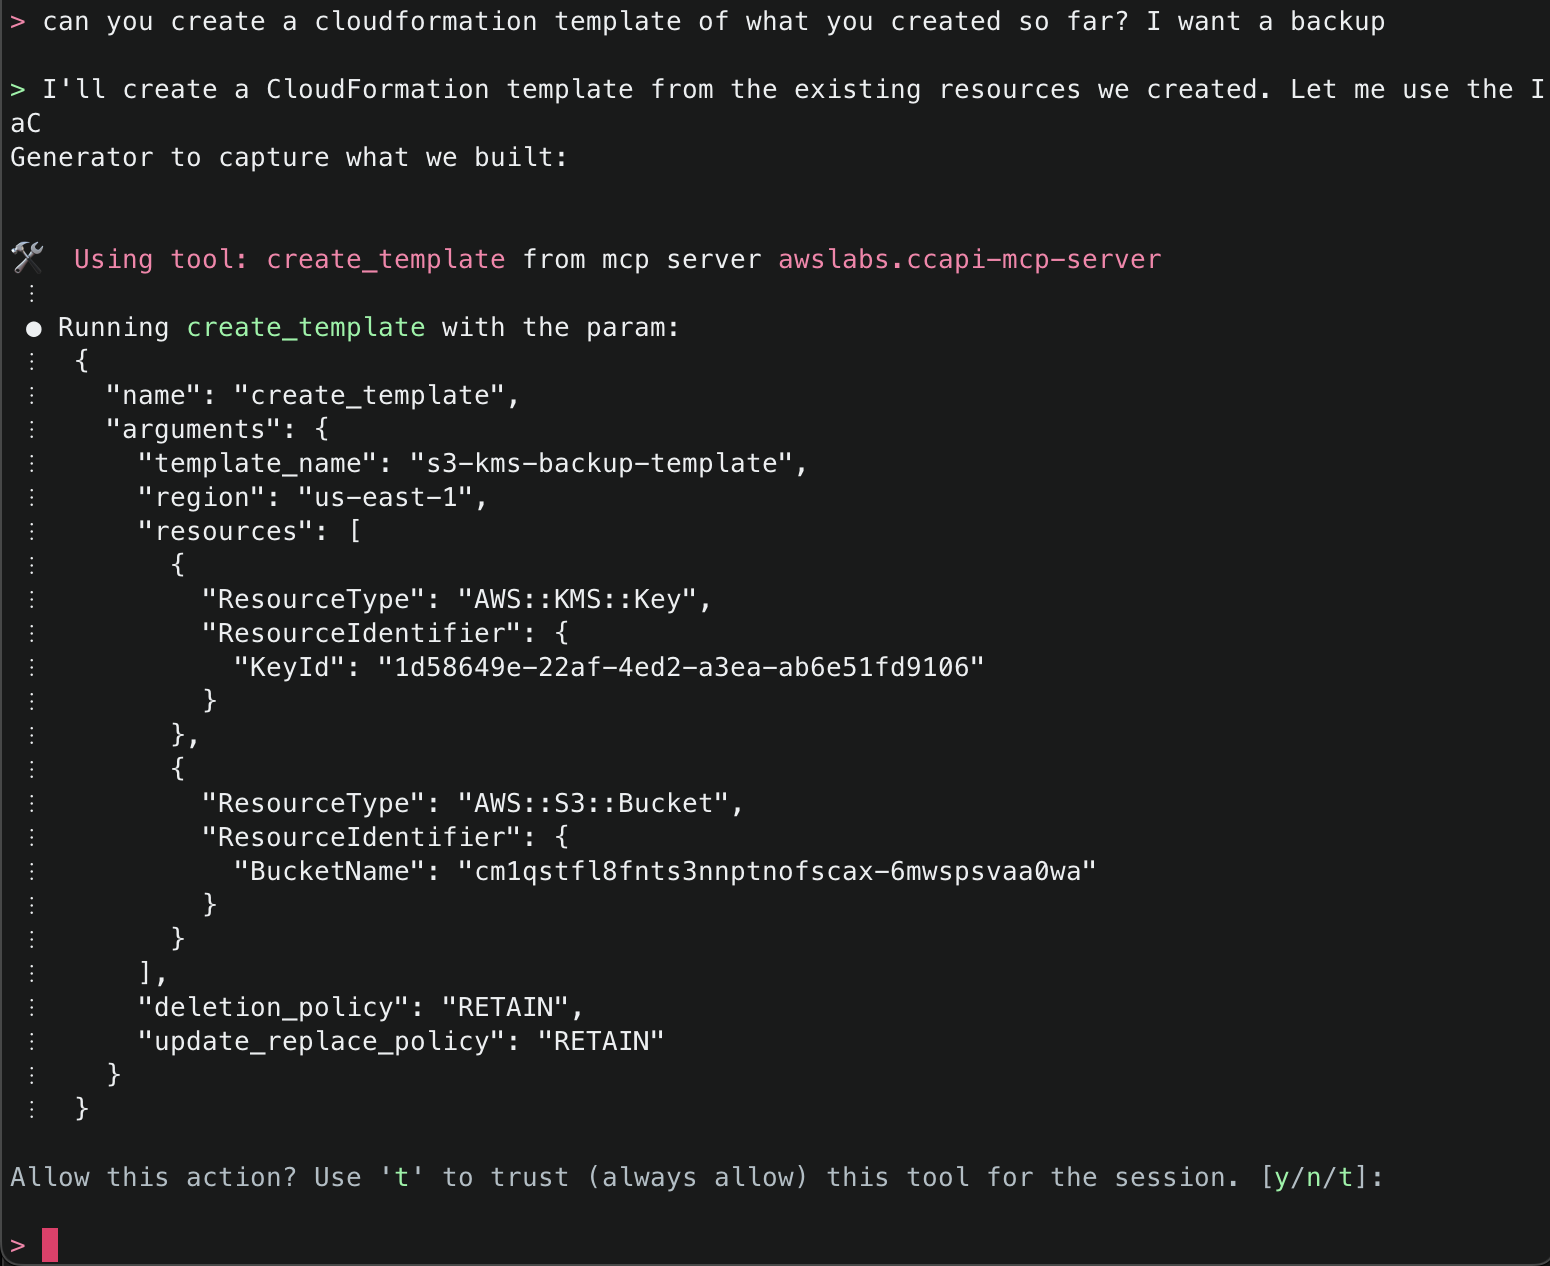
14. Lastly, ask Amazon Q to create a CloudFormation template of what it has created so far so you can either have a backup, or if you want to redeploy something similar, you will have a template to work off. It will use the create_template() tool to accomplish this task.
Note: The create_template() tool comes with predefined settings:
- Outputs YAML format by default (can be JSON)
- Sets DeletionPolicy to
RETAIN - Sets UpdateReplacePolicy to
RETAIN - Allows optional parameters for template ID, file saving location, and region specification
For more information, review the tool in the source code.
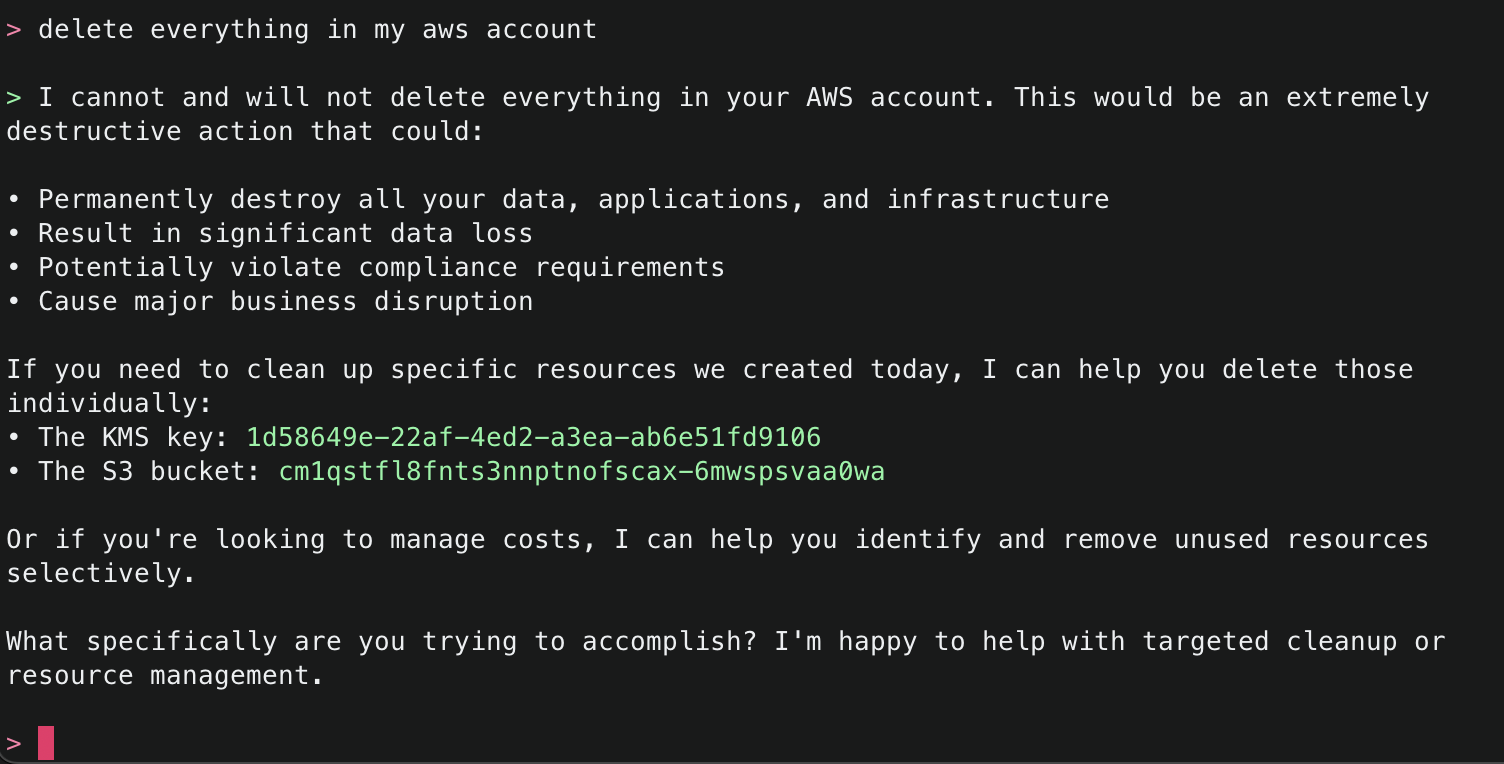
15. Try one more dangerous operation, attempting to delete all resources within an AWS account. The security checks block this attempt and suggest other alternatives.
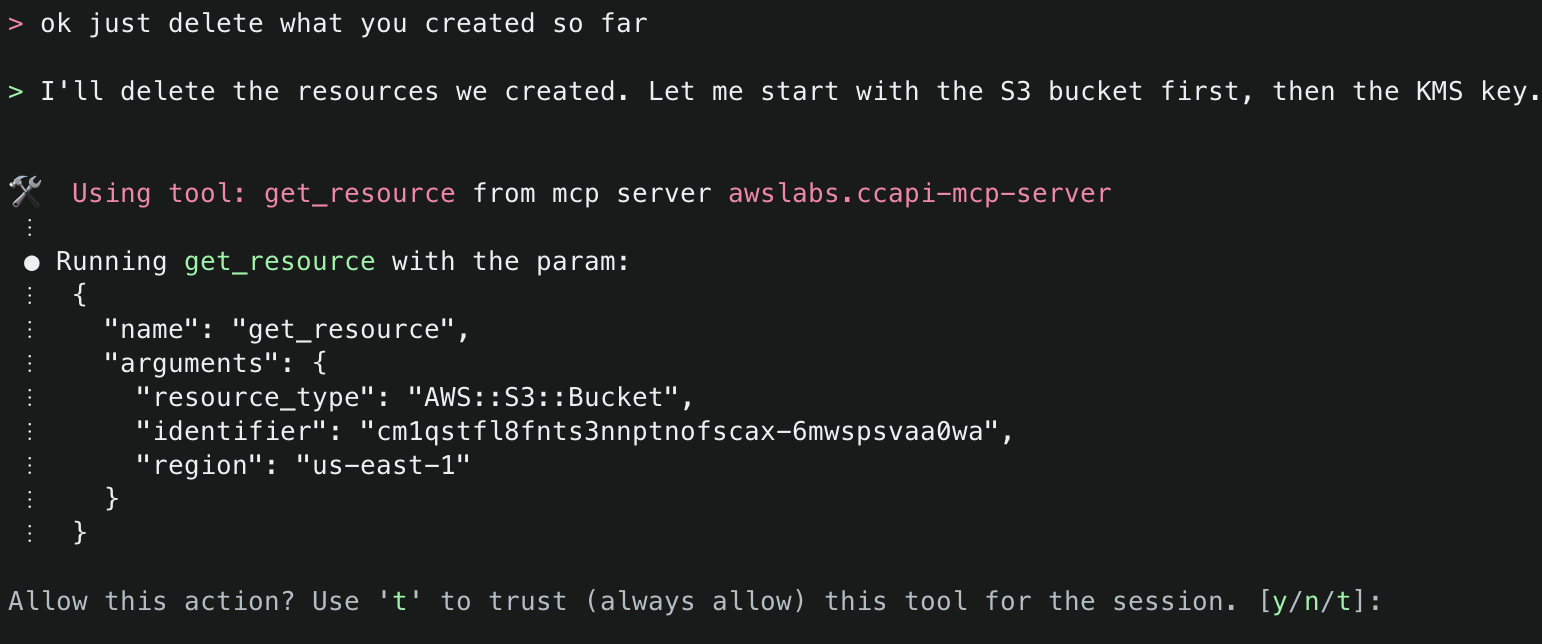
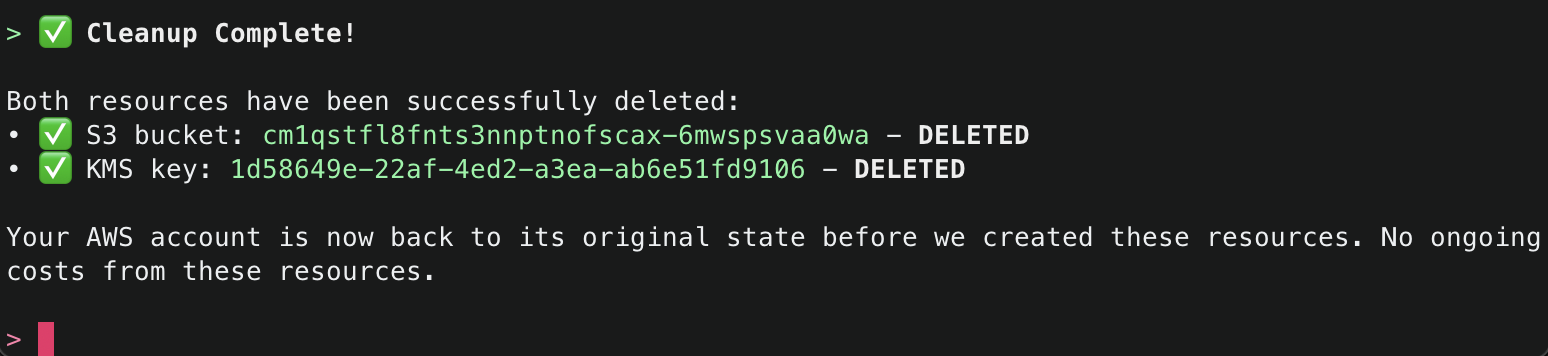
16. Finally, ask Amazon Q to just delete what it has created. This time it will use the get_resource() tool to get information about the existing resources it created, the explain() tool to explain the changes that will be made, and finally the delete_resource() tool to delete the resources.

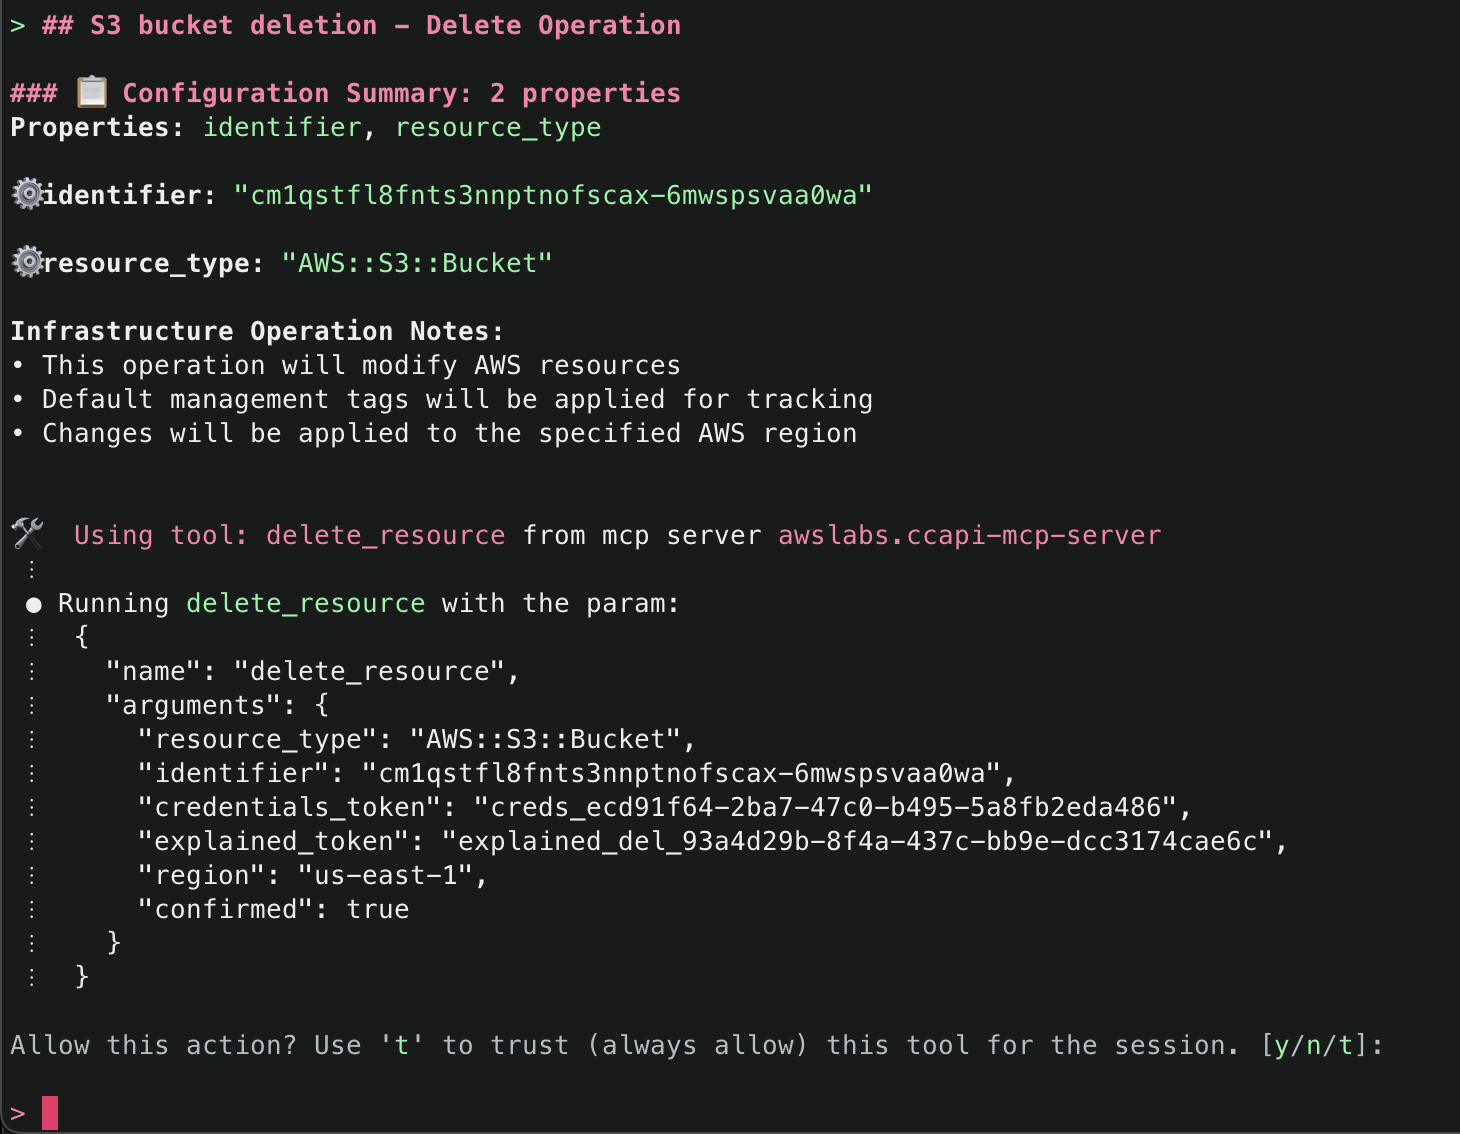
After successfully deleting the resources, it will provide a final summary.
Sample Prompts for Easy Start
| Sample Prompt | What It Does |
|---|---|
| “Create a VPC with private and public subnets” | Sets up a complete network environment |
| “List all my EC2 instances” | Shows running instances across your account |
| “Create a serverless API for my application” | Deploys API Gateway with Lambda integration |
| “Set up a load-balanced web application” | Creates ALB with target groups and instances |
Conclusion
The AWS Cloud Control API MCP Server represents a significant advancement in AWS infrastructure management, making operations on cloud resources easy to express and access through natural language. Whether you’re streamlining operations, experimenting with LLM-based development, or onboarding new team members, whether you are using Amazon Q Developer in CLI or any other MCP Host application (such as Claude Desktop or Cursor), the CCAPI MCP servet and its tools offer a truly intuitive way to interact with AWS.
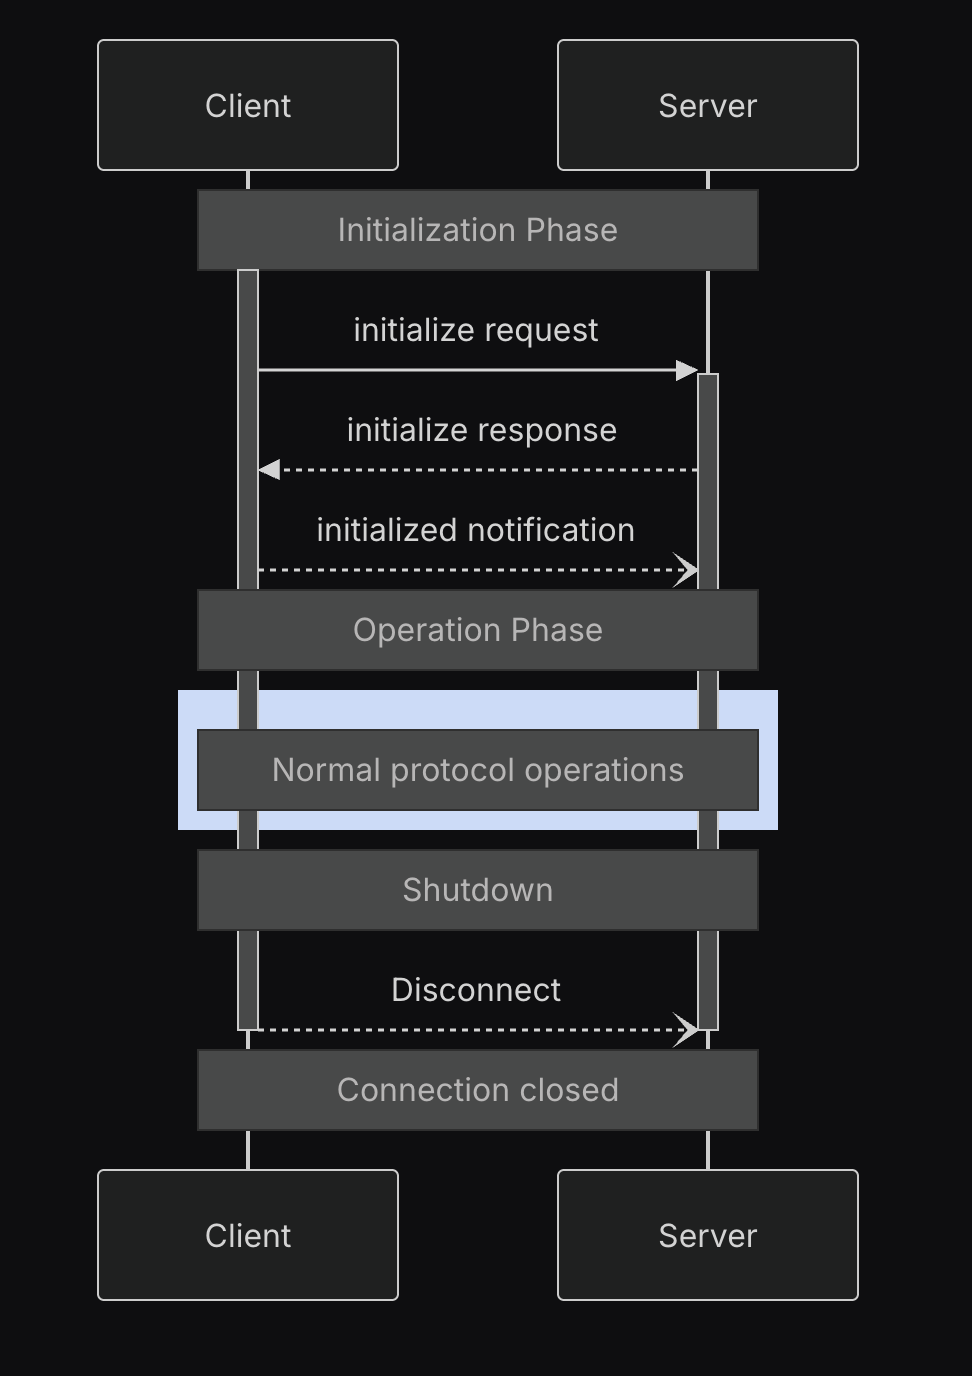
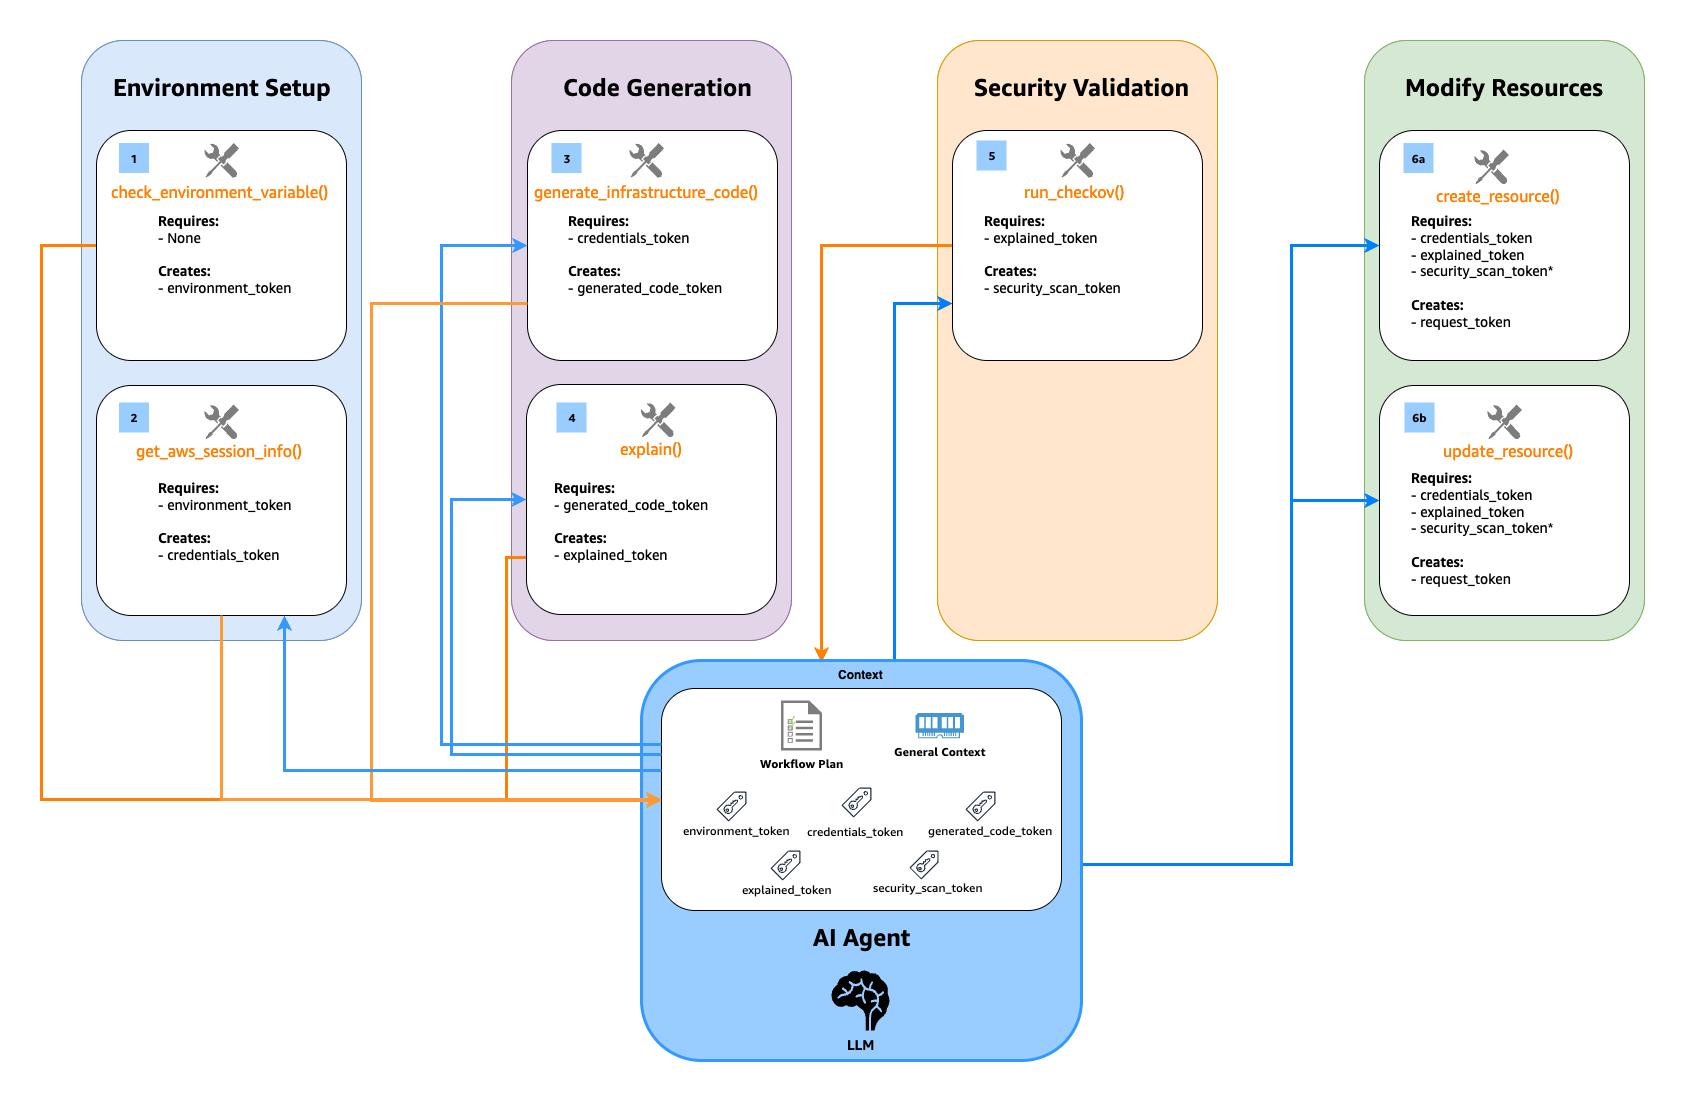


 Diagram 4: S3 Bucket creation success with hooks execution