Building Sustainable, Efficient, and Cost-Optimized Applications on AWS

Post Syndicated from Sheila Busser original https://aws.amazon.com/blogs/compute/building-sustainable-efficient-and-cost-optimized-applications-on-aws/

This blog post is written by Isha Dua Sr. Solutions Architect AWS, Ananth Kommuri Solutions Architect AWS, and Dr. Sam Mokhtari Sr. Sustainability Lead SA WA for AWS.

Today, more than ever, sustainability and cost-savings are top of mind for nearly every organization. Research has shown that AWS’ infrastructure is 3.6 times more energy efficient than the median of U.S. enterprise data centers and up to five times more energy efficient than the average in Europe. That said, simply migrating to AWS isn’t enough to meet the Environmental, Social, Governance (ESG) and Cloud Financial Management (CFM) goals that today’s customers are setting. In order to make conscious use of our planet’s resources, applications running on the cloud must be built with efficiency in mind.

That’s because cloud sustainability is a shared responsibility. At AWS, we’re responsible for optimizing the sustainability of the cloud – building efficient infrastructure, enough options to meet every customer’s needs, and the tools to manage it all effectively. As an AWS customer, you’re responsible for sustainability in the cloud – building workloads in a way that minimizes the total number of resource requirements and makes the most of what must be consumed.

Most AWS service charges are correlated with hardware usage, so reducing resource consumption also has the added benefit of reducing costs. In this blog post, we’ll highlight best practices for running efficient compute environments on AWS that maximize utilization and decrease waste, with both sustainability and cost-savings in mind.

First: Measure What Matters

Application optimization is a continuous process, but it has to start somewhere. The AWS Well Architected Framework Sustainability pillar includes an improvement process that helps customers map their journey and understand the impact of possible changes. There is a saying “you can’t improve what you don’t measure.”, which is why it’s important to define and regularly track metrics which are important to your business. Scope 2 Carbon emissions, such as those provided by the AWS Customer Carbon Footprint Tool, are one metric that many organizations use to benchmark their sustainability initiatives, but they shouldn’t be the only one.

Even after AWS meets our 2025 goal of powering our operations with 100% renewable energy, it’s still be important to maximize the utilization and minimize the consumption of the resources that you use. Just like installing solar panels on your house, it’s important to limit your total consumption to ensure you can be powered by that energy. That’s why many organizations use proxy metrics such as vCPU Hours, storage usage, and data transfer to evaluate their hardware consumption and measure improvements made to infrastructure over time.

In addition to these metrics, it’s helpful to baseline utilization against the value delivered to your end-users and customers. Tracking utilization alongside business metrics (orders shipped, page views, total API calls, etc) allows you to normalize resource consumption with the value delivered to your organization. It also provides a simple way to track progress towards your goals over time. For example, if the number of orders on your ecommerce site remained constant over the last month, but your AWS infrastructure usage decreased by 20%, you can attribute the efficiency gains to your optimization efforts, not changes in your customer behavior.

Utilize all of the available pricing models

Compute tasks are the foundation of many customers’ workloads, so it typically sees biggest benefit by optimization. Amazon EC2 provides resizable compute across a wide variety of compute instances, is well-suited to virtually every use case, is available via a number of highly flexible pricing options. One of the simplest changes you can make to decrease your costs on AWS is to review the purchase options for the compute and storage resources that you already use.

Amazon EC2 provides multiple purchasing options to enable you to optimize your costs based on your needs. Because every workload has different requirements, we recommend a combination of purchase options tailored for your specific workload needs. For steady-state workloads that can have a 1-3 year commitment, using Compute Savings Plans helps you save costs, move from one instance type to a newer, more energy-efficient alternative, or even between compute solutions (e.g., from EC2 instances to AWS Lambda functions, or AWS Fargate).

EC2 Spot instances are another great way to decrease cost and increase efficiency on AWS. Spot Instances make unused Amazon EC2 capacity available for customers at discounted prices. At AWS, one of our goals it to maximize utilization of our physical resources. By choosing EC2 Spot instances, you’re running on hardware that would otherwise be sitting idle in our datacenters. This increases the overall efficiency of the cloud, because more of our physical infrastructure is being used for meaningful work. Spot instances use market-based pricing that changes automatically based on supply and demand. This means that the hardware with the most spare capacity sees the highest discounts, sometimes up to XX% off on-demand prices, to encourage our customers to choose that configuration.

Savings Plans are ideal for predicable, steady-state work. On-demand is best suited for new, stateful, and spiky workloads which can’t be instance, location, or time flexible. Finally, Spot instances are a great way to supplement the other options for applications that are fault tolerant and flexible. AWS recommends using a mix of pricing models based on your workload needs and ability to be flexible.

By using these pricing models, you’re creating signals for your future compute needs, which helps AWS better forecast resource demands, manage capacity, and run our infrastructure in a more sustainable way.

Choose efficient, purpose-built processors whenever possible

Choosing the right processor for your application is as equally important consideration because under certain use cases a more powerful processor can allow for the same level of compute power with a smaller carbon footprint. AWS has the broadest choice of processors, such as Intel – Xeon scalable processors, AMD – AMD EPYC processors, GPU’s FPGAs, and Custom ASICs for Accelerated Computing.

AWS Graviton3, AWS’s latest and most power-efficient processor, delivers 3X better CPU performance per-watt than any other processor in AWS, provides up to 40% better price performance over comparable current generation x86-based instances for various workloads, and helps customers reduce their carbon footprint. Consider transitioning your workload to Graviton-based instances to improve the performance efficiency of your workload (see AWS Graviton Fast Start and AWS Graviton2 for ISVs). Note the considerations when transitioning workloads to AWS Graviton-based Amazon EC2 instances.

For machine learning (ML) workloads, use Amazon EC2 instances based on purpose-built Amazon Machine Learning (Amazon ML) chips, such as AWS TrainiumAWS Inferentia, and Amazon EC2 DL1.

Optimize for hardware utilization

The goal of efficient environments is to use only as many resources as required in order to meet your needs. Thankfully, this is made easier on the cloud because of the variety of instance choices, the ability to scale dynamically, and the wide array of tools to help track and optimize your cloud usage. At AWS, we offer a number of tools and services that can help you to optimize both the size of individual resources, as well as scale the total number of resources based on traffic and load.

Two of the most important tools to measure and track utilization are Amazon CloudWatch and the AWS Cost & Usage Report (CUR). With CloudWatch, you can get a unified view of your resource metrics and usage, then analyze the impact of user load on capacity utilization over time. The Cost & Usage Report (CUR) can help you understand which resources are contributing the most to your AWS usage, allowing you to fine-tune your efficiency and save on costs. CUR data is stored in S3, which allows you to query it with tools like Amazon Athena or generate custom reports in Amazon QuickSight or integrate with AWS Partner tools for better visibility and insights.

An example of a tool powered by CUR data is the AWS Cost Intelligence Dashboard. The Cost Intelligence Dashboard provides a detailed, granular, and recommendation-driven view of your AWS usage. With its prebuilt visualizations, it can help you identify which service and underlying resources are contributing the most towards your AWS usage, and see the potential savings you can realize by optimizing. It even provides right sizing recommendations and the appropriate EC2 instance family to help you optimize your resources.

Cost Intelligence Dashboard is also integrated with AWS Compute Optimizer, which makes instance type and size recommendations based on workload characteristics. For example, it can identify if the workload is CPU-intensive, if it exhibits a daily pattern, or if local storage is accessed frequently. Compute Optimizer then infers how the workload would have performed on various hardware platforms (for example, Amazon EC2 instance types) or using different configurations (for example, Amazon EBS volume IOPS settings, and AWS Lambda function memory sizes) to offer recommendations. For stable workloads, check AWS Compute Optimizer at regular intervals to identify right-sizing opportunities for instances. By right sizing with Compute Optimizer, you can increase resource utilization and reduce costs by up to 25%. Similarly, Lambda Power Tuning can help choose the memory allocated to Lambda functions is an optimization process that balances speed (duration) and cost while lowering your carbon emission in the process.

CloudWatch metrics are used to power EC2 Autoscaling, which can automatically choose the right instance to fit your needs with attribute-based instance selection and scale your entire instance fleet up and down based on demand in order to maintain high utilization. AWS Auto Scaling makes scaling simple with recommendations that let you optimize performance, costs, or balance between them. Configuring and testing workload elasticity will help save money, maintain performance benchmarks, and reduce the environmental impact of workloads. You can utilize the elasticity of the cloud to automatically increase the capacity during user load spikes, and then scale down when the load decreases. Amazon EC2 Auto Scaling allows your workload to automatically scale up and down based on demand. You can set up scheduled or dynamic scaling policies based on metrics such as average CPU utilization or average network in or out. Then, you can integrate AWS Instance Scheduler and Scheduled scaling for Amazon EC2 Auto Scaling to schedule shut downs and terminate resources that run only during business hours or on weekdays to further reduce your carbon footprint.

Design applications to minimize overhead and use fewer resources

Using the latest Amazon Machine Image (AMI) gives you updated operating systems, packages, libraries, and applications, which enable easier adoption as more efficient technologies become available. Up-to-date software includes features to measure the impact of your workload more accurately, as vendors deliver features to meet their own sustainability goals.

By reducing the amount of equipment that your company has on-premises and using managed services, you can help facilitate the move to a smaller, greener footprint. Instead of buying, storing, maintaining, disposing of, and replacing expensive equipment, businesses can purchase services as they need that are already optimized with a greener footprint. Managed services also shift responsibility for maintaining high average utilization and sustainability optimization of the deployed hardware to AWS. Using managed services will help distribute the sustainability impact of the service across all of the service tenants, thereby reducing your individual contribution. The following services help reduce your environmental impact because capacity management is automatically optimized.

 AWS  Managed Service   Recommendation for sustainability improvement

Amazon Aurora

You can use Amazon  Aurora Serverless to automatically start up, shut down, and scale capacity up or down based on your application’s needs.

Amazon Redshift

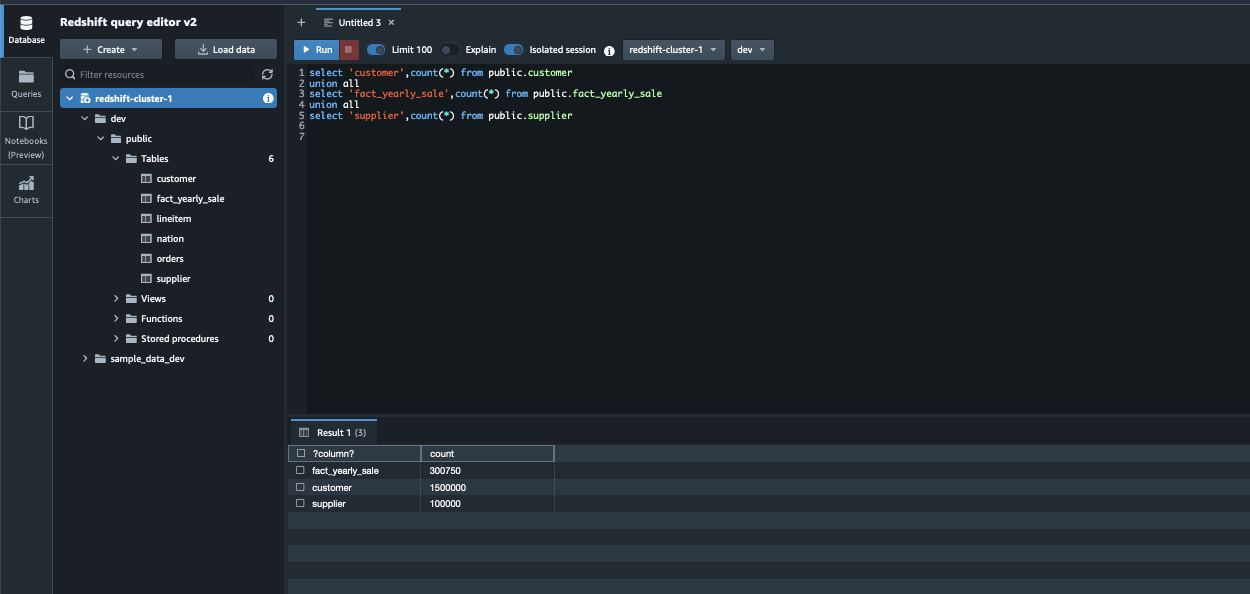
You can use Amazon Redshift Serverless to run and scale data warehouse capacity.

AWS Lambda

You can Migrate AWS Lambda functions to Arm-based AWS Graviton2 processors.

Amazon ECS

You can run Amazon ECS on AWS Fargate to avoid the undifferentiated heavy lifting by leveraging sustainability best practices AWS put in place for management of the control plane.

Amazon EMR

You can use EMR Serverless to avoid over- or under-provisioning resources for your data processing jobs.

AWS Glue

You can use Auto-scaling for AWS Glue to enable on-demand scaling up and scaling down of the computing resources.

 Centralized data centers consume a lot of energy, produce a lot of carbon emissions and cause significant electronic waste. While more data centers are moving towards green energy, an even more sustainable approach (alongside these so-called “green data centers”) is to actually cut unnecessary cloud traffic, central computation and storage as much as possible by shifting computation to the edge. Edge Computing stores and uses data locally, on or near the device it was created on. This reduces the amount of traffic sent to the cloud and, at scale, can limit the overall energy used and carbon emissions.

Use storage that best supports how your data is accessed and stored to minimize the resources provisioned while supporting your workload. Solid state devices (SSDs) are more energy intensive than magnetic drives and should be used only for active data use cases. You should look into using ephemeral storage whenever possible and categorize, centralize, deduplicate, and compress persistent storage.

AWS OutpostsAWS Local Zones and AWS Wavelength services deliver data processing, analysis, and storage close to your endpoints, allowing you to deploy APIs and tools to locations outside AWS data centers. Build high-performance applications that can process and store data close to where it’s generated, enabling ultra-low latency, intelligent, and real-time responsiveness. By processing data closer to the source, edge computing can reduce latency, which means that less energy is required to keep devices and applications running smoothly. Edge computing can help to reduce the carbon footprint of data centers by using renewable energy sources such as solar and wind power.

Conclusion

In this blog post, we discussed key methods and recommended actions you can take to optimize your AWS compute infrastructure for resource efficiency. Using the appropriate EC2 instance types with the right size, processor, instance storage and pricing model can enhance the sustainability of your applications. Use of AWS managed services, options for edge computing and continuously optimizing your resource usage can further improve the energy efficiency of your workloads. You can also analyze the changes in your emissions over time as you migrate workloads to AWS, re-architect applications, or deprecate unused resources using the Customer Carbon Footprint Tool.

Ready to get started? Check out the AWS Sustainability page to find out more about our commitment to sustainability and learn more about renewable energy usage, case studies on sustainability through the cloud, and more.

Accelerate orchestration of an ELT process using AWS Step Functions and Amazon Redshift Data API

Post Syndicated from Poulomi Dasgupta original https://aws.amazon.com/blogs/big-data/accelerate-orchestration-of-an-elt-process-using-aws-step-functions-and-amazon-redshift-data-api/

Extract, Load, and Transform (ELT) is a modern design strategy where raw data is first loaded into the data warehouse and then transformed with familiar Structured Query Language (SQL) semantics leveraging the power of massively parallel processing (MPP) architecture of the data warehouse. When you use an ELT pattern, you can also use your existing SQL workload while migrating from your on-premises data warehouse to Amazon Redshift. This eliminates the need to rewrite relational and complex SQL workloads into a new framework. With Amazon Redshift, you can load, transform, and enrich your data efficiently using familiar SQL with advanced and robust SQL support, simplicity, and seamless integration with your existing SQL tools. When you adopt an ELT pattern, a fully automated and highly scalable workflow orchestration mechanism will help to minimize the operational effort that you must invest in managing the pipelines. It also ensures the timely and accurate refresh of your data warehouse.

AWS Step Functions is a low-code, serverless, visual workflow service where you can orchestrate complex business workflows with an event-driven framework and easily develop repeatable and dependent processes. It can ensure that the long-running, multiple ELT jobs run in a specified order and complete successfully instead of manually orchestrating those jobs or maintaining a separate application.

Amazon DynamoDB is a fast, flexible NoSQL database service for single-digit millisecond performance at any scale.

This post explains how to use AWS Step Functions, Amazon DynamoDB, and Amazon Redshift Data API to orchestrate the different steps in your ELT workflow and process data within the Amazon Redshift data warehouse.

Solution overview

In this solution, we will orchestrate an ELT process using AWS Step Functions. As part of the ELT process, we will refresh the dimension and fact tables at regular intervals from staging tables, which ingest data from the source. We will maintain the current state of the ELT process (e.g., Running or Ready) in an audit table that will be maintained at Amazon DynamoDB. AWS Step Functions allows you to directly call the Data API from a state machine, reducing the complexity of running the ELT pipeline. For loading the dimensions and fact tables, we will be using Amazon Redshift Data API from AWS Lambda. We will use Amazon EventBridge for scheduling the state machine to run at a desired interval based on the customer’s SLA.

For a given ELT process, we will set up a JobID in a DynamoDB audit table and set the JobState as “Ready” before the state machine runs for the first time. The state machine performs the following steps:

  1. The first process in the Step Functions workflow is to pass the JobID as input to the process that is configured as JobID 101 in Step Functions and DynamoDB by default via the CloudFormation template.
  2. The next step is to fetch the current JobState for the given JobID by running a query against the DynamoDB audit table using Lambda Data API.
  3. If JobState is “Running,” then it indicates that the previous iteration is not completed yet, and the process should end.
  4. If the JobState is “Ready,” then it indicates that the previous iteration was completed successfully and the process is ready to start. So, the next step will be to update the DynamoDB audit table to change the JobState to “Running” and JobStart to the current time for the given JobID using DynamoDB Data API within a Lambda function.
  5. The next step will be to start the dimension table load from the staging table data within Amazon Redshift using Lambda Data API. In order to achieve that, we can either call a stored procedure using the Amazon Redshift Data API, or we can also run series of SQL statements synchronously using Amazon Redshift Data API within a Lambda function.
  6. In a typical data warehouse, multiple dimension tables are loaded in parallel at the same time before the fact table gets loaded. Using Parallel flow in Step Functions, we will load two dimension tables at the same time using Amazon Redshift Data API within a Lambda function.
  7. Once the load is completed for both the dimension tables, we will load the fact table as the next step using Amazon Redshift Data API within a Lambda function.
  8. As the load completes successfully, the last step would be to update the DynamoDB audit table to change the JobState to “Ready” and JobEnd to the current time for the given JobID, using DynamoDB Data API within a Lambda function.
    Solution Overview

Components and dependencies

The following architecture diagram highlights the end-to-end solution using AWS services:

Architecture Diagram

Before diving deeper into the code, let’s look at the components first:

  • AWS Step Functions – You can orchestrate a workflow by creating a State Machine to manage failures, retries, parallelization, and service integrations.
  • Amazon EventBridge – You can run your state machine on a daily schedule by creating a Rule in Amazon EventBridge.
  • AWS Lambda – You can trigger a Lambda function to run Data API either from Amazon Redshift or DynamoDB.
  • Amazon DynamoDB – Amazon DynamoDB is a fully managed, serverless, key-value NoSQL database designed to run high-performance applications at any scale. DynamoDB is extremely efficient in running updates, which improves the performance of metadata management for customers with strict SLAs.
  • Amazon Redshift – Amazon Redshift is a fully managed, scalable cloud data warehouse that accelerates your time to insights with fast, easy, and secure analytics at scale.
  • Amazon Redshift Data API – You can access your Amazon Redshift database using the built-in Amazon Redshift Data API. Using this API, you can access Amazon Redshift data with web services–based applications, including AWS Lambda.
  • DynamoDB API – You can access your Amazon DynamoDB tables from a Lambda function by importing boto3.

Prerequisites

To complete this walkthrough, you must have the following prerequisites:

  1. An AWS account.
  2. An Amazon Redshift cluster.
  3. An Amazon Redshift customizable IAM service role with the following policies:
    • AmazonS3ReadOnlyAccess
    • AmazonRedshiftFullAccess
  4. Above IAM role associated to the Amazon Redshift cluster.

Deploy the CloudFormation template

To set up the ETL orchestration demo, the steps are as follows:

  1. Sign in to the AWS Management Console.
  2. Click on Launch Stack.

    CreateStack-1
  3. Click Next.
  4. Enter a suitable name in Stack name.
  5. Provide the information for the Parameters as detailed in the following table.
CloudFormation template parameter Allowed values Description
RedshiftClusterIdentifier Amazon Redshift cluster identifier Enter the Amazon Redshift cluster identifier
DatabaseUserName Database user name in Amazon Redshift cluster Amazon Redshift database user name which has access to run SQL Script
DatabaseName Amazon Redshift database name Name of the Amazon Redshift primary database where SQL script would be run
RedshiftIAMRoleARN Valid IAM role ARN attached to Amazon Redshift cluster AWS IAM role ARN associated with the Amazon Redshift cluster

Create Stack 2

  1. Click Next and a new page appears. Accept the default values in the page and click Next. On the last page check the box to acknowledge resources might be created and click on Create stack.
    Create Stack 3
  2. Monitor the progress of the stack creation and wait until it is complete.
  3. The stack creation should complete approximately within 5 minutes.
  4. Navigate to Amazon Redshift console.
  5. Launch Amazon Redshift query editor v2 and connect to your cluster.
  6. Browse to the database name provided in the parameters while creating the cloudformation template e.g., dev, public schema and expand Tables. You should see the tables as shown below.
    Redshift Query Editor v2 1
  7. Validate the sample data by running the following SQL query and confirm the row count match above the screenshot.
select 'customer',count(*) from public.customer
union all
select 'fact_yearly_sale',count(*) from public.fact_yearly_sale
union all
select 'lineitem',count(*) from public.lineitem
union all
select 'nation',count(*) from public.nation
union all
select 'orders',count(*) from public.orders
union all
select 'supplier',count(*) from public.supplier

Run the ELT orchestration

  1. After you deploy the CloudFormation template, navigate to the stack detail page. On the Resources tab, choose the link for DynamoDBETLAuditTable to be redirected to the DynamoDB console.
  2. Navigate to Tables and click on table name beginning with <stackname>-DynamoDBETLAuditTable. In this demo, the stack name is DemoETLOrchestration, so the table name will begin with DemoETLOrchestration-DynamoDBETLAuditTable.
  3. It will expand the table. Click on Explore table items.
  4. Here you can see the current status of the job, which will be in Ready status.
    DynamoDB 1
  5. Navigate again to stack detail page on the CloudFormation console. On the Resources tab, choose the link for RedshiftETLStepFunction to be redirected to the Step Functions console.
    CFN Stack Resources
  6. Click Start Execution. When it successfully completes, all steps will be marked as green.
    Step Function Running
  7. While the job is running, navigate back to DemoETLOrchestration-DynamoDBETLAuditTable in the DynamoDB console screen. You will see JobState as Running with JobStart time.
    DynamoDB 2
  1. After Step Functions completes, JobState will be changed to Ready with JobStart and JobEnd time.
    DynamoDB 3

Handling failure

In the real world sometimes, the ELT process can fail due to unexpected data anomalies or object related issues. In that case, the step function execution will also fail with the failed step marked in red as shown in the screenshot below:
Step Function 2

Once you identify and fix the issue, please follow the below steps to restart the step function:

  1. Navigate to the DynamoDB table beginning with DemoETLOrchestration-DynamoDBETLAuditTable. Click on Explore table items and select the row with the specific JobID for the failed job.
  2. Go to Action and select Edit item to modify the JobState to Ready as shown below:
    DynamoDB 4
  3. Follow steps 5 and 6 under the “Run the ELT orchestration” section to restart execution of the step function.

Validate the ELT orchestration

The step function loads the dimension tables public.supplier and public.customer and the fact table public.fact_yearly_sale. To validate the orchestration, the process steps are as follows:

  1. Navigate to the Amazon Redshift console.
  2. Launch Amazon Redshift query editor v2 and connect to your cluster.
  3. Browse to the database name provided in the parameters while creating the cloud formation template e.g., dev, public schema.
  4. Validate the data loaded by Step Functions by running the following SQL query and confirm the row count to match as follows:
select 'customer',count(*) from public.customer
union all
select 'fact_yearly_sale',count(*) from public.fact_yearly_sale
union all
select 'supplier',count(*) from public.supplier

Redshift Query Editor v2 2

Schedule the ELT orchestration

The steps are as follows to schedule the Step Functions:

  1. Navigate to the Amazon EventBridge console and choose Create rule.
    Event Bridge 1
  1. Under Name, enter a meaningful name, for example, Trigger-Redshift-ELTStepFunction.
  2. Under Event bus, choose default.
  3. Under Rule Type, select Schedule.
  4. Click on Next.
    Event Bridge 2
  5. Under Schedule pattern, select A schedule that runs at a regular rate, such as every 10 minutes.
  6. Under Rate expression, enter Value as 5 and choose Unit as Minutes.
  7. Click on Next.
    Event Bridge 3
  8. Under Target types, choose AWS service.
  9. Under Select a Target, choose Step Functions state machine.
  10. Under State machine, choose the step function created by the CloudFormation template.
  11. Under Execution role, select Create a new role for this specific resource.
  12. Click on Next.
    Event Bridge 4
  13. Review the rule parameters and click on Create Rule.

After the rule has been created, it will automatically trigger the step function every 5 minutes to perform ELT processing in Amazon Redshift.

Clean up

Please note that deploying a CloudFormation template incurs cost. To avoid incurring future charges, delete the resources you created as part of the CloudFormation stack by navigating to the AWS CloudFormation console, selecting the stack, and choosing Delete.

Conclusion

In this post, we described how to easily implement a modern, serverless, highly scalable, and cost-effective ELT workflow orchestration process in Amazon Redshift using AWS Step Functions, Amazon DynamoDB and Amazon Redshift Data API. As an alternate solution, you can also use Amazon Redshift for metadata management instead of using Amazon DynamoDB. As part of this demo, we show how a single job entry in DynamoDB gets updated for each run, but you can also modify the solution to maintain a separate audit table with the history of each run for each job, which would help with debugging or historical tracking purposes. Step Functions manage failures, retries, parallelization, service integrations, and observability so your developers can focus on higher-value business logic. Step Functions can integrate with Amazon SNS to send notifications in case of failure or success of the workflow. Please follow this AWS Step Functions documentation to implement the notification mechanism.


About the Authors

Poulomi Dasgupta is a Senior Analytics Solutions Architect with AWS. She is passionate about helping customers build cloud-based analytics solutions to solve their business problems. Outside of work, she likes travelling and spending time with her family.

Raks KhareRaks Khare is an Analytics Specialist Solutions Architect at AWS based out of Pennsylvania. He helps customers architect data analytics solutions at scale on the AWS platform.

Tahir Aziz is an Analytics Solution Architect at AWS. He has worked with building data warehouses and big data solutions for over 13 years. He loves to help customers design end-to-end analytics solutions on AWS. Outside of work, he enjoys traveling
and cooking.

Add your own libraries and application dependencies to Spark and Hive on Amazon EMR Serverless with custom images

Post Syndicated from Veena Vasudevan original https://aws.amazon.com/blogs/big-data/add-your-own-libraries-and-application-dependencies-to-spark-and-hive-on-amazon-emr-serverless-with-custom-images/

Amazon EMR Serverless allows you to run open-source big data frameworks such as Apache Spark and Apache Hive without managing clusters and servers. Many customers who run Spark and Hive applications want to add their own libraries and dependencies to the application runtime. For example, you may want to add popular open-source extensions to Spark, or add a customized encryption-decryption module that is used by your application.

We are excited to announce a new capability that allows you to customize the runtime image used in EMR Serverless by adding custom libraries that your applications need to use. This feature enables you to do the following:

  • Maintain a set of version-controlled libraries that are reused and available for use in all your EMR Serverless jobs as part of the EMR Serverless runtime
  • Add popular extensions to open-source Spark and Hive frameworks such as pandas, NumPy, matplotlib, and more that you want your EMR serverless application to use
  • Use established CI/CD processes to build, test, and deploy your customized extension libraries to the EMR Serverless runtime
  • Apply established security processes, such as image scanning, to meet the compliance and governance requirements within your organization
  • Use a different version of a runtime component (for example the JDK runtime or the Python SDK runtime) than the version that is available by default with EMR Serverless

In this post, we demonstrate how to use this new feature.

Solution Overview

To use this capability, customize the EMR Serverless base image using Amazon Elastic Container Registry (Amazon ECR), which is a fully managed container registry that makes it easy for your developers to share and deploy container images. Amazon ECR eliminates the need to operate your own container repositories or worry about scaling the underlying infrastructure. After the custom image is pushed to the container registry, specify the custom image while creating your EMR Serverless applications.

The following diagram illustrates the steps involved in using custom images for your EMR Serverless applications.

In the following sections, we demonstrate using custom images with Amazon EMR Serverless to address three common use cases:

  • Add popular open-source Python libraries into the EMR Serverless runtime image
  • Use a different or newer version of the Java runtime for the EMR Serverless application
  • Install a Prometheus agent and customize the Spark runtime to push Spark JMX metrics to Amazon Managed Service for Prometheus, and visualize the metrics in a Grafana dashboard

General prerequisites

The following are the prerequisites to use custom images with EMR Serverless. Complete the following steps before proceeding with the subsequent steps:

  1. Create an AWS Identity and Access Management (IAM) role with IAM permissions for Amazon EMR Serverless applications, Amazon ECR permissions, and Amazon S3 permissions for the Amazon Simple Storage Service (Amazon S3) bucket aws-bigdata-blog and any S3 bucket in your account where you will store the application artifacts.
  2. Install or upgrade to the latest AWS Command Line Interface (AWS CLI) version and install the Docker service in an Amazon Linux 2 based Amazon Elastic Compute Cloud (Amazon EC2) instance. Attach the IAM role from the previous step for this EC2 instance.
  3. Select a base EMR Serverless image from the following public Amazon ECR repository. Run the following commands on the EC2 instance with Docker installed to verify that you are able to pull the base image from the public repository:
    # If docker is not started already, start the process
    $ sudo service docker start 
    
    # Check if you are able to pull the latest EMR 6.9.0 runtime base image 
    $ sudo docker pull public.ecr.aws/emr-serverless/spark/emr-6.9.0:latest

  4. Log in to Amazon ECR with the following commands and create a repository called emr-serverless-ci-examples, providing your AWS account ID and Region:
    $ sudo aws ecr get-login-password --region <region> | sudo docker login --username AWS --password-stdin <your AWS account ID>.dkr.ecr.<region>.amazonaws.com
    
    $ aws ecr create-repository --repository-name emr-serverless-ci-examples --region <region>

  5. Provide IAM permissions to the EMR Serverless service principal for the Amazon ECR repository:
    1. On the Amazon ECR console, choose Permissions under Repositories in the navigation pane.
    2. Choose Edit policy JSON.
    3. Enter the following JSON and save:
      {
        "Version": "2012-10-17",
        "Statement": [
          {
            "Sid": "Emr Serverless Custom Image Support",
            "Effect": "Allow",
            "Principal": {
              "Service": "emr-serverless.amazonaws.com"
            },
            "Action": [
              "ecr:BatchGetImage",
              "ecr:DescribeImages",
              "ecr:GetDownloadUrlForLayer"
            ]
          }
        ]
      }

Make sure that the policy is updated on the Amazon ECR console.

For production workloads, we recommend adding a condition in the Amazon ECR policy to ensure only allowed EMR Serverless applications can get, describe, and download images from this repository. For more information, refer to Allow EMR Serverless to access the custom image repository.

In the next steps, we create and use custom images in our EMR Serverless applications for the three different use cases.

Use case 1: Run data science applications

One of the common applications of Spark on Amazon EMR is the ability to run data science and machine learning (ML) applications at scale. For large datasets, Spark includes SparkML, which offers common ML algorithms that can be used to train models in a distributed fashion. However, you often need to run many iterations of simple classifiers to fit for hyperparameter tuning, ensembles, and multi-class solutions over small-to-medium-sized data (100,000 to 1 million records). Spark is a great engine to run multiple iterations of such classifiers in parallel. In this example, we demonstrate this use case, where we use Spark to run multiple iterations of an XGBoost model to select the best parameters. The ability to include Python dependencies in the EMR Serverless image should make it easy to make the various dependencies (xgboost, sk-dist, pandas, numpy, and so on) available for the application.

Prerequisites

The EMR Serverless job runtime IAM role should be given permissions to your S3 bucket where you will be storing your PySpark file and application logs:

{
    "Version": "2012-10-17",
    "Statement": [
        {
            "Sid": "AccessToS3Buckets",
            "Effect": "Allow",
            "Action": [
                "s3:PutObject",
                "s3:GetObject",
                "s3:ListBucket"
            ],
            "Resource": [
                "arn:aws:s3:::<YOUR-BUCKET>",
                "arn:aws:s3:::<YOUR-BUCKET>/*"
            ]
        }
    ]
}

Create an image to install ML dependencies

We create a custom image from the base EMR Serverless image to install dependencies required by the SparkML application. Create the following Dockerfile in your EC2 instance that runs the docker process inside a new directory named datascience:

FROM public.ecr.aws/emr-serverless/spark/emr-6.9.0:latest

USER root

# python packages
RUN pip3 install boto3 pandas numpy
RUN pip3 install -U scikit-learn==0.23.2 scipy 
RUN pip3 install sk-dist
RUN pip3 install xgboost
RUN sed -i 's|import Parallel, delayed|import Parallel, delayed, logger|g' /usr/local/lib/python3.7/site-packages/skdist/distribute/search.py

# EMRS will run the image as hadoop
USER hadoop:hadoop

Build and push the image to the Amazon ECR repository emr-serverless-ci-examples, providing your AWS account ID and Region:

# Build the image locally. This command will take a minute or so to complete
sudo docker build -t local/emr-serverless-ci-ml /home/ec2-user/datascience/ --no-cache --pull
# Create tag for the local image
sudo docker tag local/emr-serverless-ci-ml:latest <your AWS account ID>.dkr.ecr.<region>.amazonaws.com/emr-serverless-ci-examples:emr-serverless-ci-ml
# Push the image to Amazon ECR. This command will take a few seconds to complete
sudo docker push <your AWS account ID>.dkr.ecr.<region>.amazonaws.com/emr-serverless-ci-examples:emr-serverless-ci-ml

Submit your Spark application

Create an EMR Serverless application with the custom image created in the previous step:

aws --region <region>  emr-serverless create-application \
    --release-label emr-6.9.0 \
    --type "SPARK" \
    --name data-science-with-ci \
    --image-configuration '{ "imageUri": "<your AWS account ID>.dkr.ecr.<region>.amazonaws.com/emr-serverless-ci-examples:emr-serverless-ci-ml" }'

Make a note of the value of applicationId returned by the command.

After the application is created, we’re ready to submit our job. Copy the application file to your S3 bucket:

aws s3 cp s3://aws-bigdata-blog/artifacts/BDB-2771/code/emrserverless-xgboost-spark-example.py s3://<YOUR BUCKET>/<PREFIX>/emrserverless-xgboost-spark-example.py

Submit the Spark data science job. In the following command, provide the name of the S3 bucket and prefix where you stored your application file. Additionally, provide the applicationId value obtained from the create-application command and your EMR Serverless job runtime IAM role ARN.

aws emr-serverless start-job-run \
        --region <region> \
        --application-id <applicationId> \
        --execution-role-arn <jobRuntimeRole> \
        --job-driver '{
            "sparkSubmit": {
                "entryPoint": "s3://<YOUR BUCKET>/<PREFIX>/emrserverless-xgboost-spark-example.py"
            }
        }' \
        --configuration-overrides '{
              "monitoringConfiguration": {
                "s3MonitoringConfiguration": {
                  "logUri": "s3://<YOUR BUCKET>/emrserverless/logs"
                }
              }
            }'

After the Spark job succeeds, you can view the best model estimates from our application by viewing the Spark driver’s stdout logs. Navigate to Spark History Server, Executors, Driver, Logs, stdout.

Use case 2: Use a custom Java runtime environment

Another use case for custom images is the ability to use a custom Java version for your EMR Serverless applications. For example, if you’re using Java11 to compile and package your Java or Scala applications, and try to run them directly on EMR Serverless, it may lead to runtime errors because EMR Serverless uses Java 8 JRE by default. To make the runtime environments of your EMR Serverless applications compatible with your compile environment, you can use the custom images feature to install the Java version you are using to package your applications.

Prerequisites

An EMR Serverless job runtime IAM role should be given permissions to your S3 bucket where you will be storing your application JAR and logs:

{
    "Version": "2012-10-17",
    "Statement": [
        {
            "Sid": "AccessToS3Buckets",
            "Effect": "Allow",
            "Action": [
                "s3:PutObject",
                "s3:GetObject",
                "s3:ListBucket"
            ],
            "Resource": [
                "arn:aws:s3:::<YOUR-BUCKET>",
                "arn:aws:s3:::<YOUR-BUCKET>/*"
            ]
        }
    ]
}

Create an image to install a custom Java version

We first create an image that will install a Java 11 runtime environment. Create the following Dockerfile in your EC2 instance inside a new directory named customjre:

FROM public.ecr.aws/emr-serverless/spark/emr-6.9.0:latest

USER root

# Install JDK 11
RUN amazon-linux-extras install java-openjdk11

# EMRS will run the image as hadoop
USER hadoop:hadoop

Build and push the image to the Amazon ECR repository emr-serverless-ci-examples, providing your AWS account ID and Region:

sudo docker build -t local/emr-serverless-ci-java11 /home/ec2-user/customjre/ --no-cache --pull
sudo docker tag local/emr-serverless-ci-java11:latest <your AWS account ID>.dkr.ecr.<region>.amazonaws.com/emr-serverless-ci-examples:emr-serverless-ci-java11
sudo docker push <your AWS account ID>.dkr.ecr.<region>.amazonaws.com/emr-serverless-ci-examples:emr-serverless-ci-java11

Submit your Spark application

Create an EMR Serverless application with the custom image created in the previous step:

aws --region <region>  emr-serverless create-application \
    --release-label emr-6.9.0 \
    --type "SPARK" \
    --name custom-jre-with-ci \
    --image-configuration '{ "imageUri": "<your AWS account ID>.dkr.ecr.<region>.amazonaws.com/emr-serverless-ci-examples:emr-serverless-ci-java11" }'

Copy the application JAR to your S3 bucket:

aws s3 cp s3://aws-bigdata-blog/artifacts/BDB-2771/code/emrserverless-custom-images_2.12-1.0.jar s3://<YOUR BUCKET>/<PREFIX>/emrserverless-custom-images_2.12-1.0.jar

Submit a Spark Scala job that was compiled with Java11 JRE. This job also uses Java APIs that may produce different results for different versions of Java (for example: java.time.ZoneId). In the following command, provide the name of the S3 bucket and prefix where you stored your application JAR. Additionally, provide the applicationId value obtained from the create-application command and your EMR Serverless job runtime role ARN with IAM permissions mentioned in the prerequisites. Note that in the sparkSubmitParameters, we pass a custom Java version for our Spark driver and executor environments to instruct our job to use the Java11 runtime.

aws emr-serverless start-job-run \
        --region <region> \
        --application-id <applicationId> \
        --execution-role-arn <jobRuntimeRole> \
        --job-driver '{
            "sparkSubmit": {
                "entryPoint": "s3://<YOUR BUCKET>/<PREFIX>/emrserverless-custom-images_2.12-1.0.jar",
                "entryPointArguments": ["40000000"],
                "sparkSubmitParameters": "--conf spark.executorEnv.JAVA_HOME=/usr/lib/jvm/java-11-openjdk-11.0.16.0.8-1.amzn2.0.1.x86_64 --conf spark.emr-serverless.driverEnv.JAVA_HOME=/usr/lib/jvm/java-11-openjdk-11.0.16.0.8-1.amzn2.0.1.x86_64 --class emrserverless.customjre.SyntheticAnalysis"
            }
        }' \
        --configuration-overrides '{
              "monitoringConfiguration": {
                "s3MonitoringConfiguration": {
                  "logUri": "s3://<YOUR BUCKET>/emrserverless/logs"
                }
              }
            }'

You can also extend this use case to install and use a custom Python version for your PySpark applications.

Use case 3: Monitor Spark metrics in a single Grafana dashboard

Spark JMX telemetry provides a lot of fine-grained details about every stage of the Spark application, even at the JVM level. These insights can be used to tune and optimize the Spark applications to reduce job runtime and cost. Prometheus is a popular tool used for collecting, querying, and visualizing application and host metrics of several different processes. After the metrics are collected in Prometheus, we can query these metrics or use Grafana to build dashboards and visualize them. In this use case, we use Amazon Managed Prometheus to gather Spark driver and executor metrics from our EMR Serverless Spark application, and we use Grafana to visualize the collected metrics. The following screenshot is an example Grafana dashboard for an EMR Serverless Spark application.

Prerequisites

Complete the following prerequisite steps:

  1. Create a VPC, private subnet, and security group. The private subnet should have a NAT gateway or VPC S3 endpoint attached. The security group should allow outbound access to the HTTPS port 443 and should have a self-referencing inbound rule for all traffic.


    Both the private subnet and security group should be associated with the two Amazon Managed Prometheus VPC endpoint interfaces.
  2. On the Amazon Virtual Private Cloud (Amazon VPC) console, create two endpoints for Amazon Managed Prometheus and the Amazon Managed Prometheus workspace. Associate the endpoints to the VPC, private subnet, and security group to both endpoints. Optionally, provide a name tag for your endpoints and leave everything else as default.

  3. Create a new workspace on the Amazon Managed Prometheus console.
  4. Note the ARN and the values for Endpoint – remote write URL and Endpoint – query URL.
  5. Attach the following policy to your Amazon EMR Serverless job runtime IAM role to provide remote write access to your Prometheus workspace. Replace the ARN copied from the previous step in the Resource section of "Sid": "AccessToPrometheus". This role should also have permissions to your S3 bucket where you will be storing your application JAR and logs.
    {
        "Version": "2012-10-17",
        "Statement": [
            {
                "Sid": "AccessToPrometheus",
                "Effect": "Allow",
                "Action": [
                    "aps:RemoteWrite"
                ],
                "Resource": "arn:aws:aps:<region>:<your AWS account>:workspace/<Workspace_ID>"
            }, {
                "Sid": "AccessToS3Buckets",
                "Effect": "Allow",
                "Action": [
                    "s3:PutObject",
                    "s3:GetObject",
                    "s3:ListBucket"
                ],
                "Resource": [
                    "arn:aws:s3:::<YOUR-BUCKET>",
                    "arn:aws:s3:::<YOUR-BUCKET>/*"
                ]
            }
        ]
    }

  6. Create an IAM user or role with permissions to create and query the Amazon Managed Prometheus workspace.

We use the same IAM user or role to authenticate in Grafana or query the Prometheus workspace.

Create an image to install the Prometheus agent

We create a custom image from the base EMR Serverless image to do the following:

  • Update the Spark metrics configuration to use PrometheusServlet to publish driver and executor JMX metrics in Prometheus format
  • Download and install the Prometheus agent
  • Upload the configuration YAML file to instruct the Prometheus agent to send the metrics to the Amazon Managed Prometheus workspace

Create the Prometheus config YAML file to scrape the driver, executor, and application metrics. You can run the following example commands on the EC2 instance.

  1. Copy the prometheus.yaml file from our S3 path:
    aws s3 cp s3://aws-bigdata-blog/artifacts/BDB-2771/prometheus-config/prometheus.yaml .

  2. Modify prometheus.yaml to replace the Region and value of the remote_write URL with the remote write URL obtained from the prerequisites:
    ## Replace your AMP workspace remote write URL 
    endpoint_url="https://aps-workspaces.<region>.amazonaws.com/workspaces/<ws-xxxxxxx-xxxx-xxxx-xxxx-xxxxxx>/api/v1/remote_write"
    
    ## Replace the remote write URL and region. Following is example for us-west-2 region. Modify the command for your region. 
    sed -i "s|region:.*|region: us-west-2|g" prometheus.yaml
    sed -i "s|url:.*|url: ${endpoint_url}|g" prometheus.yaml

  3. Upload the file to your own S3 bucket:
    aws s3 cp prometheus.yaml s3://<YOUR BUCKET>/<PREFIX>/

  4. Create the following Dockerfile inside a new directory named prometheus on the same EC2 instance that runs the Docker service. Provide the S3 path where you uploaded the prometheus.yaml file.
    # Pull base image
    FROM public.ecr.aws/emr-serverless/spark/emr-6.9.0:latest
    
    USER root
    
    # Install Prometheus agent
    RUN yum install -y wget && \
        wget https://github.com/prometheus/prometheus/releases/download/v2.26.0/prometheus-2.26.0.linux-amd64.tar.gz && \
        tar -xvf prometheus-2.26.0.linux-amd64.tar.gz && \
        rm -rf prometheus-2.26.0.linux-amd64.tar.gz && \
        cp prometheus-2.26.0.linux-amd64/prometheus /usr/local/bin/
    
    # Change Spark metrics configuration file to use PrometheusServlet
    RUN cp /etc/spark/conf.dist/metrics.properties.template /etc/spark/conf/metrics.properties && \
        echo -e '\
     *.sink.prometheusServlet.class=org.apache.spark.metrics.sink.PrometheusServlet\n\
     *.sink.prometheusServlet.path=/metrics/prometheus\n\
     master.sink.prometheusServlet.path=/metrics/master/prometheus\n\
     applications.sink.prometheusServlet.path=/metrics/applications/prometheus\n\
     ' >> /etc/spark/conf/metrics.properties
    
     # Copy the prometheus.yaml file locally. Change the value of bucket and prefix to where you stored your prometheus.yaml file
    RUN aws s3 cp s3://<YOUR BUCKET>/<PREFIX>/prometheus.yaml .
    
     # Create a script to start the prometheus agent in the background
    RUN echo -e '#!/bin/bash\n\
     nohup /usr/local/bin/prometheus --config.file=/home/hadoop/prometheus.yaml </dev/null >/dev/null 2>&1 &\n\
     echo "Started Prometheus agent"\n\
     ' >> /home/hadoop/start-prometheus-agent.sh && \ 
        chmod +x /home/hadoop/start-prometheus-agent.sh
    
     # EMRS will run the image as hadoop
    USER hadoop:hadoop

  5. Build the Dockerfile and push to Amazon ECR, providing your AWS account ID and Region:
    sudo docker build -t local/emr-serverless-ci-prometheus /home/ec2-user/prometheus/ --no-cache --pull
    sudo docker tag local/emr-serverless-ci-prometheus <your AWS account ID>.dkr.ecr.<region>.amazonaws.com/emr-serverless-ci-examples:emr-serverless-ci-prometheus
    sudo docker push <your AWS account ID>.dkr.ecr.<region>.amazonaws.com/emr-serverless-ci-examples:emr-serverless-ci-prometheus
    

Submit the Spark application

After the Docker image has been pushed successfully, you can create the serverless Spark application with the custom image you created. We use the AWS CLI to submit Spark jobs with the custom image on EMR Serverless. Your AWS CLI has to be upgraded to the latest version to run the following commands.

  1. In the following AWS CLI command, provide your AWS account ID and Region. Additionally, provide the subnet and security group from the prerequisites in the network configuration. In order to successfully push metrics from EMR Serverless to Amazon Managed Prometheus, make sure that you are using the same VPC, subnet, and security group you created based on the prerequisites.
    aws emr-serverless create-application \
    --name monitor-spark-with-ci \
    --region <region> \
    --release-label emr-6.9.0 \
    --type SPARK \
    --network-configuration subnetIds=<subnet-xxxxxxx>,securityGroupIds=<sg-xxxxxxx> \
    --image-configuration '{ "imageUri": "<your AWS account ID>.dkr.ecr.<region>.amazonaws.com/emr-serverless-ci-examples:emr-serverless-ci-prometheus" }'

  2. Copy the application JAR to your S3 bucket:
    aws s3 cp s3://aws-bigdata-blog/artifacts/BDB-2771/code/emrserverless-custom-images_2.12-1.0.jar s3://<YOUR BUCKET>/<PREFIX>/emrserverless-custom-images_2.12-1.0.jar

  3. In the following command, provide the name of the S3 bucket and prefix where you stored your application JAR. Additionally, provide the applicationId value obtained from the create-application command and your EMR Serverless job runtime IAM role ARN from the prerequisites, with permissions to write to the Amazon Managed Prometheus workspace.
    aws emr-serverless start-job-run \
        --region <region> \
        --application-id <applicationId> \
        --execution-role-arn <jobRuntimeRole> \
        --job-driver '{
            "sparkSubmit": {
                "entryPoint": "s3://<YOUR BUCKET>/<PREFIX>/emrserverless-custom-images_2.12-1.0.jar",
                "entryPointArguments": ["40000000"],
                "sparkSubmitParameters": "--conf spark.ui.prometheus.enabled=true --conf spark.executor.processTreeMetrics.enabled=true --class emrserverless.prometheus.SyntheticAnalysis"
            }
        }' \
        --configuration-overrides '{
              "monitoringConfiguration": {
                "s3MonitoringConfiguration": {
                  "logUri": "s3://<YOUR BUCKET>/emrserverless/logs"
                }
              }
            }'
    

Inside this Spark application, we run the bash script in the image to start the Prometheus process. You will need to add the following lines to your Spark code after initiating the Spark session if you’re planning to use this image to monitor your own Spark application:

import scala.sys.process._
Seq("/home/hadoop/start-prometheus-agent.sh").!!

For PySpark applications, you can use the following code:

import os
os.system("/home/hadoop/start-prometheus-agent.sh")

Query Prometheus metrics and visualize in Grafana

About a minute after the job changes to Running status, you can query Prometheus metrics using awscurl.

  1. Replace the value of AMP_QUERY_ENDPOINT with the query URL you noted earlier, and provide the job run ID obtained after submitting the Spark job. Make sure that you’re using the credentials of an IAM user or role that has permissions to query the Prometheus workspace before running the commands.
    $ export AMP_QUERY_ENDPOINT="https://aps-workspaces.<region>.amazonaws.com/workspaces/<Workspace_ID>/api/v1/query"
    $ awscurl -X POST --region <region> \
                              --service aps "$AMP_QUERY_ENDPOINT?query=metrics_<jobRunId>_driver_ExecutorMetrics_TotalGCTime_Value{}"
    

    The following is example output from the query:

    {
        "status": "success",
        "data": {
            "resultType": "vector",
            "result": [{
                "metric": {
                    "__name__": "metrics_00f6bueadgb0lp09_driver_ExecutorMetrics_TotalGCTime_Value",
                    "instance": "localhost:4040",
                    "instance_type": "driver",
                    "job": "spark-driver",
                    "spark_cluster": "emrserverless",
                    "type": "gauges"
                },
                "value": [1671166922, "271"]
            }]
        }
    }

  2. Install Grafana on your local desktop and configure our AMP workspace as a data source.Grafana is a commonly used platform for visualizing Prometheus metrics.
  3. Before we start the Grafana server, enable AWS SIGv4 authentication in order to sign queries to AMP with IAM permissions.
    ## Enable SIGv4 auth 
    export AWS_SDK_LOAD_CONFIG=true 
    export GF_AUTH_SIGV4_AUTH_ENABLED=true

  4. In the same session, start the Grafana server. Note that the Grafana installation path may vary based on your OS configurations. Modify the command to start the Grafana server in case your installation path is different from /usr/local/. Also, make sure that you’re using the credentials of an IAM user or role that has permissions to query the Prometheus workspace before running the following commands
    ## Start Grafana server
    grafana-server --config=/usr/local/etc/grafana/grafana.ini \
      --homepath /usr/local/share/grafana \
      cfg:default.paths.logs=/usr/local/var/log/grafana \
      cfg:default.paths.data=/usr/local/var/lib/grafana \
      cfg:default.paths.plugins=/usr/local/var/lib/grafana/plugin

  5. Log in to Grafana and go on the data sources configuration page /datasources to add your AMP workspace as a data source.The URL should be without the /api/v1/query at the end. Enable SigV4 auth, then choose the appropriate Region and save.

When you explore the saved data source, you can see the metrics from the application we just submitted.

You can now visualize these metrics and create elaborate dashboards in Grafana.

Clean up

When you’re done running the examples, clean up the resources. You can use the following script to delete resources created in EMR Serverless, Amazon Managed Prometheus, and Amazon ECR. Pass the Region and optionally the Amazon Managed Prometheus workspace ID as arguments to the script. Note that this script will not remove EMR Serverless applications in Running status.

aws s3 cp s3://aws-bigdata-blog/artifacts/BDB-2771/cleanup/cleanup_resources.sh .
chmod +x cleanup_resources.sh
sh cleanup_resources.sh <region> <AMP Workspace ID> 

Conclusion

In this post, you learned how to use custom images with Amazon EMR Serverless to address some common use cases. For more information on how to build custom images or view sample Dockerfiles, see Customizing the EMR Serverless image and Custom Image Samples.


About the Author

Veena Vasudevan is a Senior Partner Solutions Architect and an Amazon EMR specialist at AWS focusing on Big Data and Analytics. She helps customers and partners build highly optimized, scalable, and secure solutions; modernize their architectures; and migrate their Big Data workloads to AWS.

Stable Diffusion and Backblaze: Create a Masterpiece from a Bucket of Your Own Images

Post Syndicated from Troy Liljedahl original https://www.backblaze.com/blog/stable-diffusion-and-backblaze-create-a-masterpiece-from-a-bucket-of-your-own-images/

AI is really having a moment. There’s DALL-E, Lensa, ChatGPT. Your social media feed is probably full of new avatars and AI-generated haiku. Naturally, we at Backblaze were intrigued by this brave new world of AI-generated content. The technology has been wildly popular, but is not without controversy, raising questions about intellectual property, copyright law, artist disenfranchisement, possible displacement of jobs, and general fear over the rise of the machines. On the other side of that coin, there’s definitely a place for AI in the future of work and life. So, I wanted to experiment with it.

Let’s start with Stable Diffusion.

Stable Diffusion is one of the new text-to-image technologies popping up all over the internet that allows users to input words and phrases and get back amazing pictures created by its deep learning model. What makes Stable Diffusion so interesting is that it has been open sourced to allow anyone to create their own models for text-to-image generation.

Today, I’ll walk through how you can do just that using Backblaze B2 Cloud Storage.

Kicking the Stable Diffusion Tires

After playing with an online instance of Stable Diffusion, I sought out content on some more ways to use the AI tool. I found several examples of how to use Stable Diffusion with your own images like this one and this one. The most common use case for this was taking advantage of AI to create art from a model based on your own face. Sounds cool, right? But what if I also had a bunch more pictures in Backblaze B2 Cloud Storage? Could I do the same thing to create art, graphics, branded images, and more, from my content in the cloud? The answer is a resounding YES.

Use Cases for Stable Diffusion

For me, this was a fun experiment, but we see a number of different ways this set up could be used both individually and for businesses. I started with about 20 images or so as fodder for Stable Diffusion’s algorithm. But, that’s just the beginning.

Let’s say you’re a marketing team at a small company. You could use Stable Diffusion’s paid version and get access to hundreds of thousands of random images from Google, but you really only care about analyzing and generating photos that are relevant to your business. So, you run Stable Diffusion in a cloud compute instance and have it analyze a Backblaze B2 Bucket where you store your own library of images, which you’ve probably been collecting for years. Set up that way, you have your own customized AI engine that analyzes and generates only images that are pertinent to your needs, rather than a bunch of images you don’t care about.

In this experiment, I used Google Colab, which worked well for my needs. But for a real implementation, you could use a Backblaze cloud compute partner like Vultr. Egress between Backblaze and Vultr is free, so the analysis won’t cost you anything beyond what it costs to use the two services.

This could be hugely useful for marketing teams, but we also see the value for individuals or businesses who want to keep their data private but still take advantage of AI technology. This way, you aren’t serving up images on public sites.

So, how does it all work? Let’s get into it.

Getting Started with Stable Diffusion and Backblaze B2

What you’ll need:

  • A Backblaze B2 account. You can sign up for free here.
  • A Google account.
  • A smartphone to take pictures if you don’t have 20 or so pictures of whatever subject you want to use lying around.
  • Whatever software tool you’d like to use to mount Backblaze B2 as a drive on your computer. I use Rclone in this example but any cloud drive software will work.

The first thing you’ll need to do is create an account at Hugging Face. Hugging Face is the home of the modern AI community and is where Stable Diffusion lives. In your Hugging Face account, navigate to your Account Settings and go to Access Tokens—we’ll need one of these to allow our environment to use the Stable Diffusion engines.

Now as to the environment, this can be on your own computer, in a virtual machine (VM), really wherever. My favorite (and free) method I found was a Google Colab notebook created by GitHub user TheLastBen that makes the process so incredibly simple that anyone can do this. The Colab notebook also takes advantage of DreamBooth, a Google Research project that provides for incredible detail on the art and images created by a diffusion model. In short, this is the easiest way to get really good looking AI art. You can get started with the Colab notebook here.

In the Colab notebook there are a ton of different options and a great step-by-step guide that explains them, but I’ll walk you through the basic settings to get going:

  1. First, hit the Play button next to Dependencies.
  2. Once that’s done, copy your User Access Token from your Hugging Face account.
  3. In the Model Download section, paste that User Access Token into the Huggingface_Token field.
  4. Click the Play button for Model Download.
  5. You’ll see the script run below all the fields here. You can proceed when you see “DONE!”
  6. Finally, in the Dreambooth section, provide a name in the Session_Name field. This will be the name of the session that gets saved in your Google Drive. That name can be reused later to skip these steps next time.

Training the Stable Diffusion Model

Now the pictures: You’ll want at least 20 pictures or so for your AI model to analyze in order to avoid creating a bunch of generic person art or nightmare fuel. So bust out your phone and take some selfies! If you have a friend to throw in two or three full body pictures this will help as well. A few optional tips:

  • Use different expressions and angles.
  • Use different backgrounds if you can.
  • Use a square or 1:1 ratio setting. By default, Stable Diffusion’s default image size is 512 x 512 pixels, so using square images makes your input more similar to your desired output.

If you’re an iPhone user, you will need to take one extra step here to save your files in JPEG format. You can find a guide for that in this article.

As you save your photos, make sure the file names include the name you’re going to use when generating your AI art. For example, my photos were all named troy (1).jpg, troy (2).jpg, troy (3).jpg, etc. This is important so that the AI understands what to call you (or your subject) when generating your images.

Once you have your photos, it’s time to upload them to a Bucket in Backblaze B2 Cloud Storage. You can easily do this in the Backblaze mobile app or on the Backblaze website.

With your selfies safely in Backblaze B2, make sure you make them accessible on your computer using a tool such as Rclone mount. If you don’t have an account yet, you can check out our guide on how to set up and configure Rclone mount.

You might be wondering why you should upload the photos to a Backblaze B2 Bucket and then mount the Bucket so that we can access it locally, rather than just saving the files to a local folder?

The answer is simple. In this example, we’re working with a few images representing a single subject, so you likely won’t have issues working from your local drive. As you further experiment with more subjects and more images of each subject, you’ll likely outgrow your local drive. Backblaze B2 Cloud Storage scales infinitely so you won’t have to worry about running out of space.

Now, back to the Colab notebook, hit the play button on Instance Images and click the button that shows up to Choose Files. In the pop up, choose your mounted instance of your B2 Bucket and select the photos.

Once they are uploaded, skip the Concept Images section and click the play button for Training. If you’ve done everything right, you should see some ASCII art like this:

Depending on how many photos you selected, this can take some time. So grab a coffee, go for a walk, listen to a podcast, or perhaps all three.

Creating Your Own AI-Generated Masterpieces

Once complete, click the Play button under Test the Trained Model. This will launch a temporary instance of Stable Diffusion with your new custom model in Gradio, which is an open-source Python library for running machine learning apps. Click the Gradio link generated and we’re ready to start making some AI art.

Again, there are a ton of options and configurations but all you really need to do at this point is enter some text into the Prompt box and click the big Generate button.

Creating prompts for AI art is quickly becoming its own art form. There are tons of resources out there to inspire you, but here are a few prompts I used along with the resulting art.

Pro Tip: You may need to click the Generate button a few times if something looks off. This is totally normal—your new AI friend is learning over time, and it does this by repeating the generation process.

Prompt: “Photo of troy digital painting”

Prompt: “Photo of troy person digital painting”

Prompt: “Photo of troy person digital painting asymmetrical headshot smiling”

And finally for something fun…

Prompt: ”photo of troy person hand-drawn cartoon”

It even has an artist signature! Although I’m not sure who fRny Y is?

So, there you have it. Your very own AI engine, customized to generate versions of your face (or your library of images).

Good luck to all the budding AI artists out there. If you give this a try, we’d love to see your images on social media. You can find us @backblaze on Twitter, Facebook, and LinkedIn. I look forward to seeing what you all create!

The post Stable Diffusion and Backblaze: Create a Masterpiece from a Bucket of Your Own Images appeared first on Backblaze Blog | Cloud Storage & Cloud Backup.

Secure CDK deployments with IAM permission boundaries

Post Syndicated from Brian Farnhill original https://aws.amazon.com/blogs/devops/secure-cdk-deployments-with-iam-permission-boundaries/

The AWS Cloud Development Kit (CDK) accelerates cloud development by allowing developers to use common programming languages when modelling their applications. To take advantage of this speed, developers need to operate in an environment where permissions and security controls don’t slow things down, and in a tightly controlled environment this is not always the case. Of particular concern is the scenario where a developer has permission to create AWS Identity and Access Management (IAM) entities (such as users or roles), as these could have permissions beyond that of the developer who created them, allowing for an escalation of privileges. This approach is typically controlled through the use of permission boundaries for IAM entities, and in this post you will learn how these boundaries can now be applied more effectively to CDK development – allowing developers to stay secure and move fast.

Time to read 10 minutes
Learning level Advanced (300)
Services used

AWS Cloud Development Kit (CDK)

AWS Identity and Access Management (IAM)

Applying custom permission boundaries to CDK deployments

When the CDK deploys a solution, it assumes a AWS CloudFormation execution role to perform operations on the user’s behalf. This role is created during the bootstrapping phase by the AWS CDK Command Line Interface (CLI). This role should be configured to represent the maximum set of actions that CloudFormation can perform on the developers behalf, while not compromising any compliance or security goals of the organisation. This can become complicated when developers need to create IAM entities (such as IAM users or roles) and assign permissions to them, as those permissions could be escalated beyond their existing access levels. Taking away the ability to create these entities is one way to solve the problem. However, doing this would be a significant impediment to developers, as they would have to ask an administrator to create them every time. This is made more challenging when you consider that security conscious practices will create individual IAM roles for every individual use case, such as each AWS Lambda Function in a stack. Rather than taking this approach, IAM permission boundaries can help in two ways – first, by ensuring that all actions are within the overlap of the users permissions and the boundary, and second by ensuring that any IAM entities that are created also have the same boundary applied. This blocks the path to privilege escalation without restricting the developer’s ability to create IAM identities. With the latest version of the AWS CLI these boundaries can be applied to the execution role automatically when running the bootstrap command, as well as being added to IAM entities that are created in a CDK stack.

To use a permission boundary in the CDK, first create an IAM policy that will act as the boundary. This should define the maximum set of actions that the CDK application will be able to perform on the developer’s behalf, both during deployment and operation. This step would usually be performed by an administrator who is responsible for the security of the account, ensuring that the appropriate boundaries and controls are enforced. Once created, the name of this policy is provided to the bootstrap command. In the example below, an IAM policy called “developer-policy” is used to demonstrate the command.
cdk bootstrap –custom-permissions-boundary developer-policy
Once this command runs, a new bootstrap stack will be created (or an existing stack will be updated) so that the execution role has this boundary applied to it. Next, you can ensure that any IAM entities that are created will have the same boundaries applied to them. This is done by either using a CDK context variable, or the permissionBoundary attribute on those resources. To explain this in some detail, let’s use a real world scenario and step through an example that shows how this feature can be used to restrict developers from using the AWS Config service.

Installing or upgrading the AWS CDK CLI

Before beginning, ensure that you have the latest version of the AWS CDK CLI tool installed. Follow the instructions in the documentation to complete this. You will need version 2.54.0 or higher to make use of this new feature. To check the version you have installed, run the following command.

cdk --version

Creating the policy

First, let’s begin by creating a new IAM policy. Below is a CloudFormation template that creates a permission policy for use in this example. In this case the AWS CLI can deploy it directly, but this could also be done at scale through a mechanism such as CloudFormation Stack Sets. This template has the following policy statements:

  1. Allow all actions by default – this allows you to deny the specific actions that you choose. You should carefully consider your approach to allow/deny actions when creating your own policies though.
  2. Deny the creation of users or roles unless the “developer-policy” permission boundary is used. Additionally limit the attachment of permissions boundaries on existing entities to only allow “developer-policy” to be used. This prevents the creation or change of an entity that can escalate outside of the policy.
  3. Deny the ability to change the policy itself so that a developer can’t modify the boundary they will operate within.
  4. Deny the ability to remove the boundary from any user or role
  5. Deny any actions against the AWS Config service

Here items 2, 3 and 4 all ensure that the permission boundary works correctly – they are controls that prevent the boundary being removed, tampered with, or bypassed. The real focus of this policy in terms of the example are items 1 and 5 – where you allow everything, except the specific actions that are denied (creating a deny list of actions, rather than an allow list approach).

Resources:
  PermissionsBoundary:
    Type: AWS::IAM::ManagedPolicy
    Properties:
      PolicyDocument:
        Statement:
          # ----- Begin base policy ---------------
          # If permission boundaries do not have an explicit allow
          # then the effect is deny
          - Sid: ExplicitAllowAll
            Action: "*"
            Effect: Allow
            Resource: "*"
          # Default permissions to prevent privilege escalation
          - Sid: DenyAccessIfRequiredPermBoundaryIsNotBeingApplied
            Action:
              - iam:CreateUser
              - iam:CreateRole
              - iam:PutRolePermissionsBoundary
              - iam:PutUserPermissionsBoundary
            Condition:
              StringNotEquals:
                iam:PermissionsBoundary:
                  Fn::Sub: arn:${AWS::Partition}:iam::${AWS::AccountId}:policy/developer-policy
            Effect: Deny
            Resource: "*"
          - Sid: DenyPermBoundaryIAMPolicyAlteration
            Action:
              - iam:CreatePolicyVersion
              - iam:DeletePolicy
              - iam:DeletePolicyVersion
              - iam:SetDefaultPolicyVersion
            Effect: Deny
            Resource:
              Fn::Sub: arn:${AWS::Partition}:iam::${AWS::AccountId}:policy/developer-policy
          - Sid: DenyRemovalOfPermBoundaryFromAnyUserOrRole
            Action: 
              - iam:DeleteUserPermissionsBoundary
              - iam:DeleteRolePermissionsBoundary
            Effect: Deny
            Resource: "*"
          # ----- End base policy ---------------
          # -- Begin Custom Organization Policy --
          - Sid: DenyModifyingOrgCloudTrails
            Effect: Deny
            Action: config:*
            Resource: "*"
          # -- End Custom Organization Policy --
        Version: "2012-10-17"
      Description: "Bootstrap Permission Boundary"
      ManagedPolicyName: developer-policy
      Path: /

Save the above locally as developer-policy.yaml and then you can deploy it with a CloudFormation command in the AWS CLI:

aws cloudformation create-stack --stack-name DeveloperPolicy \
        --template-body file://developer-policy.yaml \
        --capabilities CAPABILITY_NAMED_IAM

Creating a stack to test the policy

To begin, create a new CDK application that you will use to test and observe the behaviour of the permission boundary. Create a new directory with a TypeScript CDK application in it by executing these commands.

mkdir DevUsers && cd DevUsers
cdk init --language typescript

Once this is done, you should also make sure that your account has a CDK bootstrap stack deployed with the cdk bootstrap command – to start with, do not apply a permission boundary to it, you can add that later an observe how it changes the behaviour of your deployment. Because the bootstrap command is not using the --cloudformation-execution-policies argument, it will default to arn:aws:iam::aws:policy/AdministratorAccess which means that CloudFormation will have full access to the account until the boundary is applied.

cdk bootstrap

Once the command has run, create an AWS Config Rule in your application to be sure that this works without issue before the permission boundary is applied. Open the file lib/dev_users-stack.ts and edit its contents to reflect the sample below.


import * as cdk from 'aws-cdk-lib';
import { ManagedRule, ManagedRuleIdentifiers } from 'aws-cdk-lib/aws-config';
import { Construct } from "constructs";

export class DevUsersStack extends cdk.Stack {
  constructor(scope: Construct, id: string, props?: cdk.StackProps) {
    super(scope, id, props);

    new ManagedRule(this, 'AccessKeysRotated', {
      configRuleName: 'access-keys-policy',
      identifier: ManagedRuleIdentifiers.ACCESS_KEYS_ROTATED,
      inputParameters: {
        maxAccessKeyAge: 60, // default is 90 days
      },
    });
  }
}

Next you can deploy with the CDK CLI using the cdk deploy command, which will succeed (the output below has been truncated to show a summary of the important elements).

❯ cdk deploy
✨  Synthesis time: 3.05s
✅  DevUsersStack
✨  Deployment time: 23.17s

Stack ARN:
arn:aws:cloudformation:ap-southeast-2:123456789012:stack/DevUsersStack/704a7710-7c11-11ed-b606-06d79634f8d4

✨  Total time: 26.21s

Before you deploy the permission boundary, remove this stack again with the cdk destroy command.

❯ cdk destroy
Are you sure you want to delete: DevUsersStack (y/n)? y
DevUsersStack: destroying... [1/1]
✅ DevUsersStack: destroyed

Using a permission boundary with the CDK test application

Now apply the permission boundary that you created above and observe the impact it has on the same deployment. To update your booststrap with the permission boundary, re-run the cdk bootstrap command with the new custom-permissions-boundary parameter.

cdk bootstrap --custom-permissions-boundary developer-policy

After this command executes, the CloudFormation execution role will be updated to use that policy as a permission boundary, which based on the deny rule for config:* will cause this same application deployment to fail. Run cdk deploy again to confirm this and observe the error message.

❌ Deployment failed: Error: Stack Deployments Failed: Error: The stack
named DevUsersStack failed creation, it may need to be manually deleted 
from the AWS console: 
  ROLLBACK_COMPLETE: 
    User: arn:aws:sts::123456789012:assumed-role/cdk-hnb659fds-cfn-exec-role-123456789012-ap-southeast-2/AWSCloudFormation
    is not authorized to perform: config:PutConfigRule on resource: access-keys-policy with an explicit deny in a
    permissions boundary

This shows you that the action was denied specifically due to the use of a permissions boundary, which is what was expected.

Applying permission boundaries to IAM entities automatically

Next let’s explore how the permission boundary can be extended to IAM entities that are created by a CDK application. The concern here is that a developer who is creating a new IAM entity could assign it more permissions than they have themselves – the permission boundary manages this by ensuring that entities can only be created that also have the boundary attached. You can validate this by modifying the stack to deploy a Lambda function that uses a role that doesn’t include the boundary. Open the file lib/dev_users-stack.ts again and edit its contents to reflect the sample below.

import * as cdk from 'aws-cdk-lib';
import { PolicyStatement } from "aws-cdk-lib/aws-iam";
import {
  AwsCustomResource,
  AwsCustomResourcePolicy,
  PhysicalResourceId,
} from "aws-cdk-lib/custom-resources";
import { Construct } from "constructs";

export class DevUsersStack extends cdk.Stack {
  constructor(scope: Construct, id: string, props?: cdk.StackProps) {
    super(scope, id, props);

    new AwsCustomResource(this, "Resource", {
      onUpdate: {
        service: "ConfigService",
        action: "putConfigRule",
        parameters: {
          ConfigRule: {
            ConfigRuleName: "SampleRule",
            Source: {
              Owner: "AWS",
              SourceIdentifier: "ACCESS_KEYS_ROTATED",
            },
            InputParameters: '{"maxAccessKeyAge":"60"}',
          },
        },
        physicalResourceId: PhysicalResourceId.of("SampleConfigRule"),
      },
      policy: AwsCustomResourcePolicy.fromStatements([
        new PolicyStatement({
          actions: ["config:*"],
          resources: ["*"],
        }),
      ]),
    });
  }
}

Here the AwsCustomResource is used to provision a Lambda function that will attempt to create a new config rule. This is the same result as the previous stack but in this case the creation of the rule is done by a new IAM role that is created by the CDK construct for you. Attempting to deploy this will result in a failure – run cdk deploy to observe this.

❌ Deployment failed: Error: Stack Deployments Failed: Error: The stack named 
DevUsersStack failed creation, it may need to be manually deleted from the AWS 
console: 
  ROLLBACK_COMPLETE: 
    API: iam:CreateRole User: arn:aws:sts::123456789012:assumed-
role/cdk-hnb659fds-cfn-exec-role-123456789012-ap-southeast-2/AWSCloudFormation
    is not authorized to perform: iam:CreateRole on resource:
arn:aws:iam::123456789012:role/DevUsersStack-
AWS679f53fac002430cb0da5b7982bd2287S-1EAD7M62914OZ
    with an explicit deny in a permissions boundary

The error message here details that the stack was unable to deploy because the call to iam:CreateRole failed because the boundary wasn’t applied. The CDK now offers a straightforward way to set a default permission boundary on all IAM entities that are created, via the CDK context variable core:permissionsBoundary in the cdk.json file.

{
  "context": {
     "@aws-cdk/core:permissionsBoundary": {
       "name": "developer-policy"
     }
  }
}

This approach is useful because now you can import constructs that create IAM entities (such as those found on Construct Hub or out of the box constructs that create default IAM roles) and have the boundary apply to them as well. There are alternative ways to achieve this, such as setting a boundary on specific roles, which can be used in scenarios where this approach does not fit. Make the change to your cdk.json file and run the CDK deploy again. This time the custom resource will attempt to create the config rule using its IAM role instead of the CloudFormation execution role. It is expected that the boundary will also protect this Lambda function in the same way – run cdk deploy again to confirm this. Note that the deployment updates from CloudFormation show that this time the role creation succeeds this time, and a new error message is generated.

❌ Deployment failed: Error: Stack Deployments Failed: Error: The stack named
DevUsersStack failed creation, it may need to be manually deleted from the AWS 
console:
  ROLLBACK_COMPLETE: 
    Received response status [FAILED] from custom resource. Message returned: User:
    arn:aws:sts::123456789012:assumed-role/DevUsersStack-
AWS679f53fac002430cb0da5b7982bd2287S-84VFVA7OGC9N/DevUsersStack-
AWS679f53fac002430cb0da5b7982bd22872-MBnArBmaaLJp
    is not authorized to perform: config:PutConfigRule on resource: SampleRule with an explicit deny in a permissions boundary

In this error message you can see that the user it refers to is DevUsersStack-AWS679f53fac002430cb0da5b7982bd2287S-84VFVA7OGC9N rather than the CloudFormation execution role. This is the role being used by the custom Lambda function resource, and when it attempts to create the Config rule it is rejected because of the permissions boundary in the same way. Here you can see how the boundary is being applied consistently to all IAM entities that are created in your CDK app, which ensures the administrative controls can be applied consistently to everything a developer does with a minimal amount of overhead.

Cleanup

At this point you can either choose to remove the CDK bootstrap stack if you no longer require it, or remove the permission boundary from the stack. To remove it, delete the CDKToolkit stack from CloudFormation with this AWS CLI command.

aws cloudformation delete-stack --stack-name CDKToolkit

If you want to keep the bootstrap stack, you can remove the boundary by following these steps:

  1. Browse to the CloudFormation page in the AWS console, and select the CDKToolit stack.
  2. Select the ‘Update’ button. Choose “Use Current Template” and then press ‘Next’
  3. On the parameters page, find the value InputPermissionsBoundary which will have developer-policy as the value, and delete the text in this input to leave it blank. Press ‘Next’ and the on the following page, press ‘Next’ again
  4. On the final page, scroll to the bottom and check the box acknowledging that CloudFormation might create IAM resources with custom names, and choose ‘Submit’

With the permission boundary no longer being used, you can now remove the stack that created it as the final step.

aws cloudformation delete-stack --stack-name DeveloperPolicy

Conclusion

Now you can see how IAM permission boundaries can easily be integrated in to CDK development, helping ensure developers have the control they need while administrators can ensure that security is managed in a way that meets the needs of the organisation as well.

With this being understood, there are next steps you can take to further expand on the use of permission boundaries. The CDK Security and Safety Developer Guide document on GitHub outlines these approaches, as well as ways to think about your approach to permissions on deployment. It’s recommended that developers and administrators review this, and work to develop and appropriate approach to permission policies that suit your security goals.

Additionally, the permission boundary concept can be applied in a multi-account model where each Stage has a unique boundary name applied. This can allow for scenarios where a lower-level environment (such as a development or beta environment) has more relaxed permission boundaries that suit troubleshooting and other developer specific actions, but then the higher level environments (such as gamma or production) could have the more restricted permission boundaries to ensure that security risks are more appropriately managed. The mechanism for implement this is defined in the security and safety developer guide also.

About the authors:

Brian Farnhill

Brian Farnhill is a Software Development Engineer at AWS, helping public sector customers in APAC create impactful solutions running in the cloud. His background is in building solutions and helping customers improve DevOps tools and processes. When he isn’t working, you’ll find him either coding for fun or playing online games.

David Turnbull

David Turnbull is a Software Development Engineer at AWS, helping public sector customers in APAC create impactful solutions running in the cloud. He likes to comprehend new programming languages and has used this to stray out of his line. David writes computer simulations for fun.

PEP 703: Making the Python global interpreter lock optional

Post Syndicated from original https://lwn.net/Articles/919563/

In late 2021, LWN covered a plan to
eliminate the Python global interpreter lock (GIL), thus improving the
language’s thread-level concurrency. This plan has now been codified as PEP 703, which includes
an extensive discussion of the changes that would be made.

The global interpreter lock will remain the default for CPython
builds and python.org downloads. A new build configuration flag,
--without-gil will be added to the configure script that
will build CPython without the global interpreter lock.

The posting of a PEP is only one step in a long path toward integrating
this change into the CPython interpreter; expect some extended discussions
over the coming months.

What to expect from the Raspberry Pi Foundation in 2023

Post Syndicated from Philip Colligan original https://www.raspberrypi.org/blog/raspberry-pi-foundation-plans-2023/

Welcome to 2023.  I hope that you had a fantastic 2022 and that you’re looking forward to an even better year ahead. To help get the year off to a great start, I thought it might be fun to share a few of the things that we’ve got planned for 2023.

A teacher and learner at a laptop doing coding.

Whether you’re a teacher, a mentor, or a young person, if it’s computer science, coding, or digital skills that you’re looking for, we’ve got you covered. 

Your code in space 

Through our collaboration with the European Space Agency, theAstro Pi, young people can write computer programs that are guaranteed to run on the Raspberry Pi computers on the International Space Station (terms and conditions apply).

Two Astro Pi units on board the International Space Station.
The Raspberry Pi computers on board the ISS (Image: ESA/NASA)

Astro Pi Mission Zero is open to participants until 17 March 2023 and is a perfect introduction to programming in Python for beginners. It takes about an hour to complete and we provide step-by-step guides for teachers, mentors, and young people. 

Make a cool project and share it with the world 

Kids all over the world are already working on their entries to Coolest Projects Global 2023, our international online showcase that will see thousands of young people share their brilliant tech creations with the world. Registration opens on 6 February and it’s super simple to get involved. If you’re looking for inspiration, why not explore the judges’ favourite projects from 2022?

Five young coders show off their robotic garden tech project for Coolest Projects.

While we all love the Coolest Projects online showcase, I’m also looking forward to attending more in-person Coolest Projects events in 2023. The word on the street is that members of the Raspberry Pi team have been spotted scouting venues in Ireland… Watch this space. 

Experience AI 

I am sure I wasn’t alone in disappearing down a ChatGPT rabbit hole at the end of last year after OpenAI made their latest AI chatbot available for free. The internet exploded with both incredible examples of what the chatbot can do and furious debates about the limitations and ethics of AI systems.

A group of young people investigate computer hardware together.

With the rapid advances being made in AI technology, it’s increasingly important that young people are able to understand how AI is affecting their lives now and the role that it can play in their future. This year we’ll be building on our research into the future of AI and data science education and launching Experience AI in partnership with leading AI company DeepMind. The first wave of resources and learning experiences will be available in March. 

The big Code Club and CoderDojo meetup

With pandemic restrictions now almost completely unwound, we’ve seen a huge resurgence in Code Clubs and CoderDojos meeting all over the world. To build on this momentum, we are delighted to be welcoming Code Club and CoderDojo mentors and educators to a big Clubs Conference in Churchill College in Cambridge on 24 and 25 March.

Workshop attendees at a table.

This will be the first time we’re holding a community get-together since 2019 and a great opportunity to share learning and make new connections. 

Building partnerships in India, Kenya, and South Africa 

As part of our global mission to ensure that every young person is able to learn how to create with digital technologies, we have been focused on building partnerships in India, Kenya, and South Africa, and that work will be expanding in 2023.

Two Kenyan educators work on a physical computing project.

In India we will significantly scale up our work with established partners Mo School and Pratham Education Foundation, training 2000 more teachers in government schools in Odisha, and running 2200 Code Clubs across four states. We will also be launching new partnerships with community-based organisations in Kenya and South Africa, helping them set up networks of Code Clubs and co-designing learning experiences that help them bring computing education to their communities of young people. 

Exploring computing education for 5- to 11-year-olds 

Over the past few years, our research seminar series has covered computing education topics from diversity and inclusion, to AI and data science. This year, we’re focusing on current questions and research in primary computing education for 5- to 11-year-olds.

A teacher and a learner at a laptop doing coding.

As ever, we’re providing a platform for some of the world’s leading researchers to share their insights, and convening a community of educators, researchers, and policy makers to engage in the discussion. The first seminar takes place today (Tuesday 10 January) and it’s not too late to sign up.

And much, much more… 

That’s just a few of the super cool things that we’ve got planned for 2023. I haven’t even mentioned the new online projects we’re developing with our friends at Unity, the fun we’ve got planned with our very own online text editor, or what’s next for our curriculum and professional development offer for computing teachers.

You can sign up to our monthly newsletter to always stay up to date with what we’re working on.

The post What to expect from the Raspberry Pi Foundation in 2023 appeared first on Raspberry Pi.

Security updates for Tuesday

Post Syndicated from original https://lwn.net/Articles/919543/

Security updates have been issued by Debian (libtasn1-6), Fedora (nautilus), Oracle (kernel, kernel-container, nodejs:14, tigervnc, and xorg-x11-server), Red Hat (grub2, nodejs:14, tigervnc, and xorg-x11-server), Scientific Linux (tigervnc and xorg-x11-server), SUSE (systemd), and Ubuntu (firefox, linux-aws, linux-aws-5.15, linux-azure, linux-azure-5.15, linux-azure-fde, linux-azure, w3m, and webkit2gtk).

Announcing the Authorized Partner Service Delivery Track for Cloudflare One

Post Syndicated from Matthew Harrell original https://blog.cloudflare.com/cloudflare-one-authorized-services-delivery-partner-track/

Announcing the Authorized Partner Service Delivery Track for Cloudflare One

This post is also available in 简体中文, 日本語, Deutsch, Français, Español.

Announcing the Authorized Partner Service Delivery Track for Cloudflare One

In this Sunday’s Welcome to CIO Week blog, we talked about the value for CIOs in finding partners for long term digital transformation initiatives. As the adage goes, “If you want to go fast, go alone, if you want to go far, go together.”

As Cloudflare has expanded into new customer segments and emerging market categories like SASE and Zero Trust, we too have increasingly focused on expanding our relationship with go-to-market partners (e.g. service providers, implementation / consulting firms, system integrators, and more). Because security and network transformation can feel inherently daunting, customers often need strategic advice and practical support when implementing Cloudflare One – our SASE platform of Zero Trust security and networking services. These partners play a pivotal role in easing customer adoption by helping them assess, implement, and manage our services.

This blog is primarily intended for prospective and current Cloudflare go-to-market channel partners and highlights how we have grown our partnership program over the past year and will continue to, going forward.

Cloudflare One: fastest growing portfolio among Cloudflare partners

Over the past year, adoption of Cloudflare One services has been the fastest area of growth among our customer base. Investments we have made to our channel ecosystem have helped us capitalize on increased customer demand for SASE platforms, including Zero Trust security and cloud-delivered networking.

In the last year alone, we’ve seen a 3x increase in Cloudflare One partner bookings. At the same time, the number of transacting partners has increased 70% YoY.

Partners repeatedly cite the simplicity of our platform to deploy and manage, our pace of innovation to give them confidence in our roadmap, and our global network to ensure scale, speed, and resilience as key differentiators that are fueling strong customer demand for Cloudflare One services.

Migrating from legacy, on-premise appliance to a cloud-delivered SASE architecture is a journey. For most customers, partners help break that journey into two categories, broadly defined: network layer transformation and Zero Trust security modernization.

Transforming the network layer

Multi-cloud and hybrid cloud architecture are increasingly the norm. As enterprises embrace this approach, their networking infrastructure will likewise need to adapt to be able to easily connect to a variety of cloud environments.

Organizations that have traditionally relied on SD-WAN and MPLS based technologies will turn to cloud-based network-as-a-service (NaaS) offerings like Cloudflare’s Magic WAN (part of our Cloudflare One platform) to increase flexibility and reduce costs. This will also drive revenue opportunities for a new generation of cloud networking experts and advisors who have the skills to help organizations migrate from traditional on-premise hardware to a NaaS architecture.

For some organizations, transforming the network may in fact be a more attractive, initial entry point than beginning a Zero Trust security migration, as NaaS allows organizations to maintain their existing security tools while still providing a strategic path towards a full perimeter-less architecture with cloud-delivered protection in the future.

Implementing a Zero Trust architecture

For many organizations today, modernizing security for employees, devices, data, and offices with Zero Trust best practices is an equally critical priority. Trends towards hybrid and remote working have put additional pressure on IT and security teams to re-imagine how they secure access to corporate resources and move away from traditional ‘castle-and-moat’ architectures. Zero Trust promises enhanced visibility, more granular controls, and identity-aware protection across all traffic, regardless of origin or destination.

While the benefits of moving to a Zero Trust architecture are undeniable, implementing a full Zero Trust architecture is a journey that often requires the help of third parties. According to a recent report by iVanti, while 73% of companies plan to move to a cloud based architecture over the next 18 months, 46% of these companies IT security teams lack the confidence in their ability to apply a Zero Trust model on their own which is why 34% reportedly are relying on third party security providers to help them implement Zero Trust.1 This is where partners can help.

Announcing the Authorized Services Delivery Partner Track for Cloudflare One

Cloudflare is hyper focused on building the most compelling and easy-to-use SASE platform on the market to help accelerate how organizations can transform their network and security architectures. The scale and resiliency of our global network – which spans across 275+ cities in 100+ countries and has 172+ Tbps of network capacity – ensures that we can deliver our protections reliably and with high speed, regardless of where customers are around the world.

Just as our physical network of data centers continues to expand, so too does our strategic network of channel partners, who we rely on to deliver professional and managed services that customers may require as part of their Cloudflare One deployment. Cloudflare is actively working with partners worldwide to build advisory, migration, and managed services with the goal of wrapping partner services expertise around Cloudflare One engagements to ensure 100% customer adoption and satisfaction.

To help partners develop their Cloudflare One services expertise and distinguish themselves in the marketplace, today we are excited to announce the limited availability of a new specialization track for Authorized Services Delivery Partners (ASDP). This track is designed to authorize partners that meet Cloudflare’s high standards for professional services delivery around Cloudflare One.

To become an Authorized Partner, partners will need to go through a rigorous technical validation process and will be assessed on the merits of the security, performance, and reliability of their services delivery capabilities. Partners that achieve the Authorized Service Partner designation will receive a variety of benefits, such as:

  • Engagement in Cloudflare One sourced opportunities requiring services
  • Access to named Cloudflare One partner service delivery managers who can assist partners in the building of their services practices
  • Access to special partner incentive funds designed to ensure that authorized partner services are actively used in Cloudflare One customer engagements.
Announcing the Authorized Partner Service Delivery Track for Cloudflare One

To support this new partner track, we are also announcing advanced enablement and training paths that will be available in both instructor-led training and online formats via our partner portal, as well as advanced lab environments designed to help partners learn how to implement and support Cloudflare One deployments. Partners that successfully complete the ADSP requirements will also be given opportunities to shadow customer deployments to further their capabilities and expertise.

For current and prospective Cloudflare partners interested in this track, we are launching a new Cloudflare Authorized Service Delivery Partner Validation checklist, which includes details on the application process.

If you are an existing Cloudflare partner, you can also reach out to your named Channel Account Manager for additional information.

….
1iVanti 2021 Zero Trust Progress Report

Cloudflare protection for all your cardinal directions

Post Syndicated from Annika Garbers original https://blog.cloudflare.com/cardinal-directions-and-network-traffic/

Cloudflare protection for all your cardinal directions

Cloudflare protection for all your cardinal directions

As the Internet becomes the new corporate network, traditional definitions within corporate networking are becoming blurry. Concepts of the corporate WAN, “north/south” and “east/west” traffic, and private versus public application access dissolve and shift their meaning as applications shift outside corporate data center walls and users can access them from anywhere. And security requirements for all of this traffic have become more stringent as new attack vectors continue to emerge.

The good news: Cloudflare’s got you covered! In this post, we’ll recap how definitions of corporate network traffic have shifted and how Cloudflare One provides protection for all traffic flows, regardless of source or destination.

North, south, east, and west traffic

In the traditional perimeter security model, IT and network teams defined a “trusted” private network made up of the LANs at corporate locations, and the WAN connecting them. Network architects described traffic flowing between the trusted network and another, untrusted one as “north/south,” because those traffic flows are typically depicted spatially on network diagrams like the one below.

Connected north/south networks could be private, such as one belonging to a partner company, or public like the Internet. Security teams made sure all north/south traffic flowed through one or a few central locations where they could enforce controls across all the “untrusted” traffic, making sure no malicious actors could get in, and no sensitive data could get out.

Cloudflare protection for all your cardinal directions
Network diagram depicting traditional corporate network architecture

Traffic on a single LAN, such as requests from a desktop computer to a printer in an office, was referred to as “east/west” and generally was not subject to the same level of security control. The “east/west” definition also sometimes expanded to include traffic between LANs in a small geographic area, such as multiple buildings on a large office campus. As organizations became more distributed and the need to share information between geographically dispersed locations grew, “east/west” also often included WAN traffic transferred over trusted private connections like MPLS links.

As applications moved to the Internet and the cloud and users moved out of the office, clean definitions of north/south/east/west traffic started to dissolve. Traffic and data traditionally categorized as “private” and guarded within the boundaries of the corporate perimeter is now commonly transferred over the Internet, and organizations are shifting to cloud-first security models such as SASE which redefine where security controls are enforced across that traffic.

How Cloudflare keeps you protected

Cloudflare’s services can be used to secure and accelerate all of your traffic flows, regardless of whether your network architecture is fully cloud-based and Internet-native or more traditional and physically defined.

For “north/south” traffic from external users accessing your public applications, Cloudflare provides protection at all layers of the OSI stack and for a wide range of threats. Our application security portfolio, including DDoS protection, Web Application Firewall, API security, Bot Management, and more includes all the tools you need to keep public facing apps safe from malicious actors outside your network; our network services extend similar benefits to all your IP traffic. Cloudflare One has you covered for the growing amount of north/south traffic from internal users – Zero Trust Network Access provides access to corporate resources on the Internet without sacrificing security, and Secure Web Gateway filters outgoing traffic to keep your data safe from malware, ransomware, phishing, command and control, and other threats.

Cloudflare protection for all your cardinal directions
Cloudflare protection for all your traffic flows

As customers adopt SASE and multicloud architectures, the amount of east/west traffic within a single location continues to decrease. Cloudflare One enables customers to use Cloudflare’s network as an extension of theirs for east/west traffic between locations with a variety of secure on-ramp options including a device client, application and network-layer tunnels, and direct connections, and apply Zero Trust policies to all traffic regardless of where it’s headed. Some customers choose to use Cloudflare One for filtering local traffic as well, which involves a quick hop out to the closest Cloudflare location – less than 50ms from 95% of the world’s Internet-connected population – and enables security and IT teams to enforce consistent security policy across all traffic from a single control plane.

Because Cloudflare’s services are all delivered on every server in all locations across our network, customers can connect to us to get access to a full “service mesh” for any traffic. As we develop new capabilities, they can apply across any traffic flow regardless of source or destination. Watch out for some new product announcements coming later this week that enhance these integrations even further.

Get started today

As the Internet becomes the new corporate network, Cloudflare’s mission to help build a better Internet enables us to help you protect anything connected to it. Stay tuned for the rest of CIO Week for new capabilities to make all of your north, south, east, and west traffic faster, more secure, and more reliable, including updates on even more flexible application-layer capabilities for your private network traffic.

Why do CIOs choose Cloudflare One?

Post Syndicated from Sam Rhea original https://blog.cloudflare.com/why-cios-select-cloudflare-one/

Why do CIOs choose Cloudflare One?

Why do CIOs choose Cloudflare One?

Cloudflare’s first customers sought us out as the “Web Application Firewall vendor” or their DDoS-mitigating Content Delivery Network. We earned their trust by solving their problems in those categories and dozens of others. Today, over 100,000 customers now rely on Cloudflare to secure and deliver their Internet properties.

However, our conversations with CIOs evolved over the last few years. The discussions stopped centering around a specific product. CIOs, and CSOs too, approached us with the challenge of managing connectivity and security for their entire enterprise. Whether they described their goals as Zero Trust or Secure Access Service Edge (SASE), their existing appliances and point solutions could no longer keep up. So we built Cloudflare One to help them.

Today, over 10,000 organizations trust Cloudflare One to connect and secure their users, devices, applications, and data. As part of CIO Week, we spoke with the leaders of some of our largest customers to better understand why they selected Cloudflare.

The feedback centered around six themes:

  1. Cloudflare One delivers more complete security.
  2. Cloudflare One makes your team faster.
  3. Cloudflare One is easier to manage.
  4. Cloudflare One products work better together.
  5. Cloudflare One is the most cost-efficient comprehensive SASE offering.
  6. Cloudflare can be your single security vendor.

If you are new to Cloudflare, or more familiar with our Internet property products, we’re excited to share how other customers approached this journey and why they partnered with Cloudflare. Today’s post breaks down their feedback in serious detail. If you’d prefer to ask us directly, skip ahead to the bottom, and we’d be glad to find time to chat.

Cloudflare One delivers more complete security

The first SASE conversations we had with customers started when they asked us how we keep Cloudflare safe. Their Internet properties relied on us for security and availability – our own policies mattered to their decisions to trust us.

That’s fair. We are a popular target for attack. However, we could not find anything on the market that could keep us safe without slowing us down. Instead, we decided to use our own network to connect employees to internal resources and secure how those same team members connected to the rest of the Internet.

After learning what we built to replace our own private network, our customers started to ask if they could use it too. CIOs were on the same Zero Trust journey with us. They trusted our commitment to delivering the most comprehensive security on the market for their public-facing resources and started partnering with us to do the same thing for their entire enterprise.

We kept investing in Cloudflare One over the last several years based on feedback from our own internal teams and those CIOs. Our first priority was to replace our internal network with a model that applies Zero Trust controls by default. We created controls that could adapt to the demands of security teams without the need to modify applications. We added rules to force hard keys on certain applications, restrict access to specific countries, or require users to ask for approval from an administrator. The flexibility meant that every request, and every connection, could be scrutinized in a way that matched the sensitivity of internal tools.

We then turned that skepticism in the other direction. Customers on this journey with us asked “how could we have Zero Trust in the rest of the Internet?” To solve that, we turned Cloudflare’s network in the other direction. We built our DNS filtering product by combining the world’s fastest DNS resolver with our unique view into threat patterns on the Internet. We layered on a comprehensive Secure Web Gateway and network firewall. We sent potentially risky sites to Cloudflare’s isolated browser, a unique solution that pushes the industry forward in terms of usability.

More recently, we started to create tools that help control the data sitting in SaaS applications and to prevent sensitive data from leaving the enterprise. We’ve been delighted to watch customers adopt every stage in this progression with us, but we kept comparing notes with other CIOs and CSOs about the risk of something that most vendors do not consider part of the SASE stack: email.

We also spent so many hours monitoring email-based phishing attacks aimed at Cloudflare. To solve that challenge, we deployed Area 1 Email Security. The efficacy of Area 1 stunned our team to the point that we acquired the company, so we could offer the same security to our customers as part of Cloudflare One.

When CIOs describe the security challenges they need to solve, we can recommend a complete solution built on our experience addressing those same concerns. We cannot afford shortcuts in how we secure Cloudflare and know they cannot either in how they keep their enterprises safe.

Zero Trust security at a social media company

Like Cloudflare, social media services are a popular target for attack. When the security team at one of the world’s most prominent social media platforms began a project to overhaul their access controls, they ran a comprehensive evaluation of vendors who could keep their platform safe from phishing attacks and lateral movement. They selected Cloudflare One due to the granular access control our network provides and the layers of security policies that can be evaluated on any request or connection without slowing down end users.

Cloudflare One makes your team faster

Many of our customers start with our Application Services products, like our cache and smart routing, because they have a need for speed. The performance of their Internet properties directly impacts revenue. These customers hunt down opportunities to use Cloudflare to shave off milliseconds.

The CIOs who approach us to solve their SASE problems tend to rank performance lower than security and maintainability. In early conversations they describe their performance goals as “good enough that my users do not complain.”

Those complaints drive IT help desk tickets, but CIOs are used to sacrificing speed for security. We don’t believe they should have to compromise. CIOs select Cloudflare One because the performance of our network improves the experience of their end users and reduces overhead for their IT administrators.

We accelerate your users from the first moment they connect. When your team members visit a destination on the Internet, their experience starts with a DNS query to find the address of the website. Cloudflare runs the world’s fastest DNS resolver, 1.1.1.1, and the DNS filtering features of our SASE offering use the same technology.

Next, your users’ devices open a connection and send an HTTP request to their destination. The Cloudflare agent on their device does so by using a BoringTun, our Rust-based and open sourced WireGuard implementation. WireGuard allows us to provide a highly-performant on-ramp to the Internet through our network without compromising battery life or security. The same technology supports the millions of users who choose to use our WARP consumer offering. We take their feedback and optimize WARP constantly to improve how our enterprise users connect.

Finally, your users rely on our network to connect them to their destination and return the responses. Out of the 3,000 top networks in the world, measured by IPv4 addresses advertised, we rank the fastest in 1,310. Once connected, we apply our smart routing technology to route users through our network to find the fastest path to and from their destination.

We develop new technologies to improve the speed of Cloudflare One, but we cannot change the speed of light. Instead, we make the distance shorter by bringing websites closer to your users. Cloudflare is the reverse proxy for more than 20% of the HTTP Internet. We serve those websites from the same data centers where your employees connect to our Secure Web Gateway. In many cases, we can deliver content from a server centimeters away from where we apply Cloudflare One’s filtering, shaving off milliseconds and reducing the need for more hops.

Faster DNS filtering for the United States Federal Government

The Cybersecurity and Infrastructure Security Agency (CISA) works within the United States Department of Homeland Security as the “nation’s risk advisor.”1 Last year they launched a program to find a protective DNS resolver for the civilian government. These agencies and departments operate around the country, in large cities and rural areas, and they need a solution that would deliver fast DNS resolutions close to where those users sit. After a thorough evaluation, they selected Cloudflare, in partnership with Accenture Federal Services, as the country’s protective DNS resolver.

Performance at a Fortune 500 Energy Company

An American energy company attempted to deploy Zscaler, but became frustrated after spending eight months attempting to integrate and maintain systems that slowed down their users. This organization already observed Cloudflare’s ability to accelerate their traffic with our network-layer DDoS protection product and ran a pilot with Cloudflare One. Following an exhaustive test, the team observed significant performance improvements, particularly with Cloudflare’s isolated browser product, and decided to rip out Zscaler and consolidate around Cloudflare.

Cloudflare One products are easier to manage

The tools that a SASE solution like Cloudflare One replaces are cumbersome to manage. Hardware appliances or virtual equivalents require upfront deployment work and ongoing investment to maintain and upgrade them. Migrating to other cloud-based SASE vendors can reduce pain for some IT teams, but that is a low bar.

CIOs tell us that the ability to manage the solution is nearly as important as the security outcomes. If their selected vendor is difficult to deploy, the migration drags on and discourages adoption of more advanced features. If the solution is difficult to use or manage, team members find ways to avoid using it or IT administrators waste time.

We built Cloudflare One to make the most advanced SASE technologies available to teams of any size, including those that lack full IT departments. We invested in building a system that could be configured and deployed without operational overhead. Over 10,000 teams rely on Cloudflare One as a result. That same commitment to ease-of-use extends to the enterprise IT and Security teams who manage Cloudflare One deployments for some of the world’s largest organizations.

We also provide features tailored to the feedback we hear from CIOs and their teams about the unique challenges of managing larger deployments at global scale. In some cases, their teams need to update hundreds of policies or their global departments rely on dozens of administrators who need to coordinate changes. We provide API support for managing every Cloudflare One feature, and we also maintain a Terraform provider for teams that need the option for peer reviewed configuration-as-code management.

Ease-of-use at a Fortune 500 telecommunications provider

We make our free and pay-as-you-go plans available to anyone with a credit card in order to make these technologies accessible to teams of any size. Sometimes, the largest teams in the world start with those plans too. A European Fortune 500 telecommunications company began adopting our Zero Trust platform on a monthly subscription when their Developer Operations (DevOps) lost their patience with their existing VPN. Developers across their organization complained about how their legacy private network slowed down their access to the tools they needed to do their job.

Their DevOps administrators adopted Cloudflare One after being able to set it up in a matter of minutes without talking to a sales rep at Cloudflare. Their company now relies on Cloudflare One to secure their internal resources and their path to the Internet for over 100,000 employees.

Cloudflare One products work better together

CIOs who start their SASE evaluation often attempt to replace a collection of point solutions. The work to glue together those products demands more time from IT departments and the gaps between those tools present security blind spots.

However, many SASE vendors offer a platform that just cobbles together point solutions. There might be one invoice, but the same pain points remain around interoperability and security challenges. We talk to CIOs and CSOs who expand their vendor search radius after realizing that the cloud-based alternative from their existing hardware provider still includes those challenges.

When CIOs select Cloudflare One, they pick a single, comprehensive SASE solution. We don’t believe that any feature, or product, should be an island. The sum should be greater than the parts. Every capability that we build in Cloudflare One adds more value to what is already available without adding more maintenance overhead.

When an organization secures their applications behind our Zero Trust access control, they can enable Cloudflare’s Web Application Firewall (WAF) to run in-line with a single button. Users who click on an unknown link open that website in our isolated browser without any additional steps. Launching soon, the same Data Loss Prevention (DLP) rules that administrators build for data-in-transit filters will apply to data sitting at rest with our API-driven Cloud Access Security Broker (CASB).

Product integration at national residential services provider

Just a few months ago, a US-based national provider of residential services, like plumbing and climate control repair, selected Cloudflare One because they could consolidate their disparate stack of existing cloud-based security vendors into a single solution. After evaluating other vendors who stitch together point solutions under a single brand name, they found more value in deploying Cloudflare’s Zero Trust network access solution together with our outbound filtering products for thousands of employees.

Cloudflare One is the most cost-efficient comprehensive SASE offering

Some CIOs approach Cloudflare to replace their collection of hardware appliances that perform, or attempt to perform, Zero Trust functions. The decision to migrate to a cloud-based solution can deliver immediate cost savings by eliminating the cost to continue to license and maintain that hardware or by avoiding the need for new capital expenditure to purchase the latest generation of hardware that can better attempt to support SSE Goals.

We’re happy to help you throw out those band-aid boxes. We’ve spent the last decade helping over 100,000 organizations get rid of their hardware in favor of a faster, safer, and more cost-efficient solution. However, we have seen CIOs approach us in the last with a newer form of this problem: renewals. CIOs who first adopted a cloud-based SSE solution two or three years ago now describe extortionate price increases from their existing vendors.

Unlike Cloudflare, many of these vendors rely on dedicated appliances that struggle to scale with increased traffic. To meet that demand, they purchased more appliances and now need to find a way to bake that cost into the price they charge existing and new customers. Other vendors rely on public cloud providers to run their services. As those providers increase their costs, these vendors pass them on to their customers at a rate that scales with usage.

Cloudflare’s network provides a different model that allows Cloudflare One to deliver a comprehensive SASE offering that is more cost-efficient than anything in the market. Rather than deploying dedicated appliances, Cloudflare deploys commodity hardware on top of which any Cloudflare service can run allowing us to scale up and down for any use case from our Bot Management features to our Workers, including our SASE products. We also purchase server hardware from multiple vendors in the exact same configuration, providing us with supply chain flexibility and reducing the risk that any one component from a specific vendor drives up our hardware costs.

We obsess over the efficiency of the computing costs of that hardware because we have no choice – over 20% of the world’s HTTP Internet relies on it today. Since every service can run on every server, including Cloudflare One, that investment in computing efficiency also benefits Cloudflare One. We also avoid the need to buy more hardware specifically for Cloudflare One capacity. We built our network to scale with the demands of some of the world’s largest Internet properties. That model allows us to absorb the traffic spikes of any enterprise SASE deployment without noticing.

However, Cloudflare One, like all of our network-driven products, has another cost component: transit. We need to reliably deliver your employee’s traffic to its destination. While that destination is increasingly on our network already if it uses our reverse proxy, sometimes employees need other websites.

Thankfully we’ve spent the last decade reducing or eliminating the cost of transit. In many cases, our reverse proxy motivates exchanges and ISPs to waive transit fees for us. It is in their best interest to provide their users with the fastest, most reliable, path to the ever-increasing number of websites that use our network. When we turn our network in the other direction for our SASE customers we still benefit from the same savings.

Cost-savings at an African infrastructure company

Earlier this year, an infrastructure based in South Africa came to Cloudflare with this exact problem. Their existing cloud-based Secure Web Gateway vendor, Zscaler, insisted on a significant price increase for the same services and threatened to turn off the system if the customer did not agree. Instead, this infrastructure company already trusted our network for their Internet properties and decided to rip out their existing SASE vendor in favor of Cloudflare One’s more cost-efficient model without the loss of any functionality.

Cloudflare can be your single security and connectivity vendor

We hear from more and more CIOs who want to reduce the number of invoices they pay and vendors they manage. Hundreds of enterprises who have adopted our SASE platform started as customers of our Application Services and Application Security products.

We’ve seen this take two forms. In one form, CIOs describe the challenge of stitching together multiple security point solutions into a single SASE deployment. They choose our network for the reasons described above; the CIO’s team benefits from features that work better together, and they avoid the need to maintain multiple systems.

In the second form, the migration to more cloud-based services across use cases ranging from SASE to public cloud infrastructure led to vendor bloat. We hear from customers who struggle to inventory which vendors their team has purchased and which of those services they even use.

That proliferation of vendors introduces more cost in terms of dollars and time. In financial terms, each vendor’s contract model might introduce new fees, like fixed platform costs, that would be redundant when paying for a single vendor. In management terms, every new vendor adds one more account manager to go find during issues or one more vendor to involve when debugging an issue that could impact multiple systems.

Bundling Cloudflare One with our Application Services, and Application Security allows your organization to rely on a single vendor for every connection that you need to secure and accelerate. Your teams can rely on a single control plane for everything from customizing your website’s cache rules to reviewing potential gaps in your Zero Trust deployment. CIOs have one point of contact, a Cloudflare Customer Success Manager, they can reach out to if they need help escalating a request across what used to require dozens of potential vendors.

Vendor consolidation at a 10,000 person research publication company

A large American data analytics company chose Cloudflare One as part of that same journey. They first sought Cloudflare to help load-balance their applications and protect their sites from DDoS attacks. After becoming familiar with our platform, and learning how performance features they used for their public-facing applications could be delivered to their internal resources, they selected Cloudflare One over Zscaler and Cisco.

What’s next?

Not every CIO shares the same motivations. One of the reasons above might be more important to you based on your business, your industry, or your stage in a Zero Trust adoption journey.

That’s fine by us! We’d love to learn more about what drives your search and how we can help. We have a team dedicated to listening to organizations who are evaluating SASE options and helping them understand and experiment with Cloudflare One. If you’d like to get started, let us know here, and we’ll reach out.

Do you prefer to avoid talking to someone just yet? Nearly every feature in Cloudflare One is available at no cost for up to 50 users. Many of our largest enterprise customers start by exploring the products themselves on our free plan, and we invite you to do so by following the link here.

……
1https://www.cisa.gov/about-cisa

New ways to troubleshoot Cloudflare Access ‘blocked’ messages

Post Syndicated from Kenny Johnson original https://blog.cloudflare.com/403-logs-cloudflare-access/

New ways to troubleshoot Cloudflare Access 'blocked' messages

New ways to troubleshoot Cloudflare Access 'blocked' messages

Cloudflare Access is the industry’s easiest Zero Trust access control solution to deploy and maintain. Users can connect via Access to reach the resources and applications that power your team, all while Cloudflare’s network enforces least privilege rules and accelerates their connectivity.

Enforcing least privilege rules can lead to accidental blocks for legitimate users. Over the past year, we have focused on adding tools to make it easier for security administrators to troubleshoot why legitimate users are denied access. These block reasons were initially limited to users denied access due to information about their identity (e.g. wrong identity provider group, email address not in the Access policy, etc.)

Zero Trust access control extends beyond identity and device. Cloudflare Access allows for rules that enforce how a user connects. These rules can include their location, IP address, the presence of our Secure Web Gateway and other controls.

Starting today, you can investigate those allow or block decisions based on how a connection was made with the same level of ease that you can troubleshoot user identity. We’re excited to help more teams make the migration to a Zero Trust model as easy as possible and ensure the ongoing maintenance is a significant reduction compared to their previous private network.

Why was I blocked?

All Zero Trust deployments start and end with identity. In a Zero Trust model, you want your resources (and the network protecting them) to have zero trust by default of any incoming connection or request. Instead, every attempt should have to prove to the network that they should be allowed to connect.

Organizations provide users with a mechanism of proof by integrating their identity provider (IdP) like Azure Active Directory or Okta. With Cloudflare, teams can integrate multiple providers simultaneously to help users connect during activities like mergers or to allow contractors to reach specific resources. Users authenticate with their provider and Cloudflare Access uses that to determine if we should trust a given request or connection.

After integrating identity, most teams start to layer on new controls like device posture. In some cases, or in every case, the resources are so sensitive that you want to ensure only approved users connecting from managed, healthy devices are allowed to connect.

While that model significantly improves security, it can also create strain for IT teams managing remote or hybrid workforces. Troubleshooting “why” a user cannot reach a resource becomes a guessing game over chat. Earlier this year, we launched a new tool to tell you exactly why a user’s identity or device posture did not meet the rules that your administrators created.

New ways to troubleshoot Cloudflare Access 'blocked' messages

What about how they connected?

As organizations advance in their Zero Trust journey, they add rules that go beyond the identity of the user or the posture of the device. For example, some teams might have regulatory restrictions that prevent users from accessing sensitive data from certain countries. Other enterprises need to understand the network context before granting access.

These adaptive controls enforce decisions around how a user connects. The user (and their device) might otherwise be allowed, but their current context like location or network prohibits them from doing so. These checks can extend to automated services, too, like a trusted chatbot that uses a service token to connect to your internal ticketing system.

While user and device posture checks require at least one step of authentication, these contextual rules can consist of policies that make it simple for a bad actor to retry over and over again like an IP address check. While the user will still be denied, that kind of information can overwhelm and flood your logs while you attempt to investigate what should be a valid login attempt.

With today’s release, your team can now have the best of both worlds.

However, other checks are not based on a user’s identity, these include looking at a device’s properties, network context, location, presence of a certificate and more. Requests that fail these “non-identity” checks are immediately blocked. These requests are immediately blocked in order to prevent a malicious user from seeing which identity providers are used by a business.

New ways to troubleshoot Cloudflare Access 'blocked' messages

Additionally, these blocks were not logged in order to avoid overloading the Access request logs of an individual account. A malicious user attempting hundreds of requests or a misconfigured API making thousands of requests should not cloud a security admin’s ability to analyze legitimate user Access requests.

These logs would immediately become overloaded if every blocked request were logged. However, we heard from users that in some situations, especially during initial setup, it is helpful to see individual block requests even for non-identity checks.

We have released a GraphQL API that allows Access administrators to look up a specific blocked request by RayID, User or Application. The API response will return a full output of the properties of the associated request which makes it much easier to diagnose why a specific request was blocked.

New ways to troubleshoot Cloudflare Access 'blocked' messages

In addition to the GraphQL API, we also improved the user facing block page to include additional detail about a user’s session. This will make it faster for end users and administrators to diagnose why a legitimate user was not allowed access.

New ways to troubleshoot Cloudflare Access 'blocked' messages

How does it work?

Collecting blocked request logs for thousands of Access customers presented an interesting scale challenge. A single application in a single customer account could have millions of blocked requests in a day, multiple that out across all protected applications across all Access customers and the number of logs start to get large quickly.

We were able to leverage our existing analytics pipeline that was built to handle the scale of our global network which is far beyond the scale of Access. The analytics pipeline is configured to intelligently begin sampling data if an individual account begins generating too many requests. The majority of customers will have all non-identity block logs captured while accounts generating large traffic volumes will retain a significant portion to diagnose issues.

How can I get started?

We have built an example guide to use the GraphQL API to diagnose Access block reasons. These logs can be manually checked using an GraphQL API client or periodically ingested into a log storage database.

We know that achieving a Zero Trust Architecture is a journey and a significant part of that is troubleshooting and initial configuration. We are committed to making Cloudflare Zero Trust the easiest Zero Trust solution to troubleshoot and configure at scale. Keep an eye out for additional announcements in the coming months that make Cloudflare Zero Trust even easier to troubleshoot.

If you don’t already have Cloudflare Zero Trust set up, getting started is easy – see the platform yourself with 50 free seats by signing up here.

Or if you would like to talk with a Cloudflare representative about your overall Zero Trust strategy, reach out to us here for a consultation.

For those who already know and love Cloudflare Zero Trust, this feature is enabled for all accounts across all pricing tiers.

Network detection and settings profiles for the Cloudflare One agent

Post Syndicated from Kyle Krum original https://blog.cloudflare.com/location-aware-warp/

Network detection and settings profiles for the Cloudflare One agent

Network detection and settings profiles for the Cloudflare One agent

Teams can connect users, devices, and entire networks to Cloudflare One through several flexible on-ramps. Those on-ramps include traditional connectivity options like GRE or IPsec tunnels, our Cloudflare Tunnel technology, and our Cloudflare One device agent.

Each of these on-ramps send nearly all traffic to Cloudflare’s network where we can filter security threats with products like our Secure Web Gateway and Data Loss Prevention service. In other cases, the destination is an internal resource deployed in Cloudflare’s Zero Trust private network.

However, sometimes users want traffic to stay local. If a user is sitting within a few meters of their printer, they might prefer to connect through their local network instead of adding a hop through Cloudflare. They could configure Cloudflare to always ignore traffic bound for the printer, keeping it local, but when they leave the office they still need to use Cloudflare’s network to reach that printer remotely.

Solving this use case and others like it previously required manual changes from an administrator every time a user moved. An administrator would need to tell Cloudflare’s agent to include traffic sometimes and, in other situations, ignore it. This does not scale.

Starting today, any team using Cloudflare One has the flexibility to decide what traffic is sent to Cloudflare and what traffic stays local depending on the network of the user. End users do not need to change any settings when they enter or exit a managed network. Cloudflare One’s device agent will automatically detect and make the change for them.

Not everyone needs the same controls

Not every user in your enterprise needs the same network configuration. Sometimes you need to make exceptions for teams, certain members of staff, or speciality hardware/software based on business needs. Those exceptions can become a manual mess when you compound how locations and networks might also require different settings.

We’ve heard several examples from customers who run into that type of headache. Each case below describes a common theme: rigid network configuration breaks when it means real world usage.

In some cases, a user will work physically close to a server or another device that their device needs to reach. We talk to customers in manufacturing or lab environments who prefer to send all Internet-bound traffic to Cloudflare but want to continue to operate a private network inside their facility.

Today’s announcement allows teams to adapt to this type of model. When users operate inside the physical location in the trusted network, they can connect directly. When they leave, they can use Cloudflare’s network to reach back into the trusted network after they meet the conditions of the Zero Trust rules configured by an administrator.

In other situations, customers are in the process of phasing out legacy appliances in favor of Cloudflare One. However, the migration to a Zero Trust model sometimes needs to be stepwise and deliberate. In these cases, customers maintain some existing on-premise infrastructure while they deploy Cloudflare’s SASE solution.

As part of this release, teams can configure Cloudflare’s device agent to detect that a user sits inside a known location where those appliances still operate. The agent will automatically stop directing traffic to Cloudflare and instead send it to your existing appliances while you deprecate them over time.

Configuration Profiles and Managed Networks

Today’s release introduces the ability to create a profile, a defined set of configuration options. You can create rules that decide when and where profiles apply, changing settings without manual intervention.

For our network-aware work, administrators can define a profile that decides what traffic is sent to Cloudflare and what stays local. Next, that profile can apply when users are in specific networks and not when they are in other locations.

Beyond network detection, profiles can apply based on user group membership. Not every user in your workforce needs the same on-ramp configuration. Some developers might need certain traffic excluded due to local development work. As part of this launch, you can configure profiles to apply based on who the user is in addition to where the user sits.

Defining a secure way to detect a network you manage

Cloudflare needs to be able to decide what network a device is using in a way that can’t easily be spoofed by someone looking to skirt policy. To solve that challenge, today’s release introduces the ability to define a known TLS endpoint which Cloudflare’s agent can reach. In just a few minutes, an administrator can create a certificate-validated check to indicate a device is operating within a managed network.

First, an administrator can create a TLS certificate that Cloudflare will use and match based on the SHA-256 hash of the certificate. You can leverage existing infrastructure or create a new TLS endpoint via the following example:

1. Create a local certificate you can use

openssl req -x509 -newkey rsa:4096 -sha256 -days 3650 -nodes -keyout example.key -out example.pem -subj "/CN=example.com" -addext "subjectAltName=DNS:example.com"

2. Extract the sha256 thumbprint of that certificate

openssl x509 -noout -fingerprint -sha256 -inform pem -in example.pem | tr -d :

Which will output something like this:

SHA256 Fingerprint=DD4F4806C57A5BBAF1AA5B080F0541DA75DB468D0A1FE731310149500CCD8662

Next, the Cloudflare agent running on the device needs to be able to reach that certificate to validate that it is connected to a network you manage. We recommend running a simple HTTP server inside your network which the device can reach to validate the certificate.

3. Create a python3 script and save as myserver.py as part of setting up a simple HTTP server.

import ssl, http.server
server = http.server.HTTPServer(('0.0.0.0', 4443), http.server.SimpleHTTPRequestHandler)
sslcontext = ssl.create_default_context(ssl.Purpose.CLIENT_AUTH)
sslcontext.load_cert_chain(certfile='./example.pem', keyfile='./example.key')
server.socket = sslcontext.wrap_socket(server.socket, server_side=True)
server.serve_forever()

Run the server

python3 myserver.py

Configure the network location in Zero Trust dashboard

Once you’ve created the example TLS endpoint above, provide the fingerprint to Cloudflare to define a managed network.

  1. Login to your Zero Trust Dashboard and navigate to Settings → WARP Client
  2. Scroll down to Network Locations and click Add new and complete the form. Use the Fingerprint generated in the previous step as the TLS Cert SHA-256 and the IP address of the device running the python script
Network detection and settings profiles for the Cloudflare One agent

Configure a Device Profile

Once the network is defined, you can create profiles that apply based on whether the agent is operating in this network. To do so, follow the steps below.

  1. Login to your Zero Trust Dashboard and navigate to Settings → WARP Client
  2. Scroll down to Device Settings and create a new profile that includes Your newly created managed network as a location
Network detection and settings profiles for the Cloudflare One agent

Reconnect your Agent

Each time the device agent detects a network change event from the operating systems (ex. waking up the device, changing Wi-Fi networks, etc.) the agent will also attempt to reach that endpoint inside your network to prove that it is operating within a network you manage.

If an endpoint that matches the SHA-256 fingerprint you’ve defined is detected, the device will get the settings profile as configured above. You can quickly validate that the device agent received the required settings by using warp-cli settings or warp-cli get-alternate-network from your command line / terminal.

What’s next?

Managed network detection and settings profiles are both new and available for you to use today. While settings profiles will work with any modern version of the agent from this last year, network detection requires at least version 2022.12.

The WARP device client currently runs on all major operating systems and is easy to deploy with the device management tools your organization already uses. You can find the download links to all version of our agent by visiting Settings →Downloads

Network detection and settings profiles for the Cloudflare One agent

Starting a Zero Trust journey can be daunting. We’re spending this week, CIO Week, to share features like this to make it less of a hassle to begin. If you want to talk to us to learn more about how to take that first step, please reach out.

Preview any Cloudflare product today

Post Syndicated from Angie Kim original https://blog.cloudflare.com/preview-today/

Preview any Cloudflare product today

Preview any Cloudflare product today

With Cloudflare’s pace of innovation, customers want to be able to see how our products work and sooner to address their needs without having to contact someone. Now they can, without any commitments or limits on monetary value and usage caps.

Ready to get started? Here’s how it works.

For any product* that is currently not part of an enterprise contract, users with administrative access will have the ability to enable the product on the Cloudflare dashboard. With a single click of a button, they can start configuring any required features within seconds.

Preview any Cloudflare product today

You have access to resources that can help you get started as well as the ongoing support of your sales team. You will be otherwise left to enjoy the product and our team members will be in contact after about 2 weeks. We always look to collect feedback and can also discuss how to have it added to your contract. If more time is needed in the evaluation phase, no problem. If it is decided that it is not a right product fit, we will offboard the product without any penalties.

We are working on offering more and more self-service capabilities that traditionally have not been offered to our enterprise customers. We’ll also be enhancing this overall experience over the next few months to increase visibility and improve the self-guided journey.

Log into the dashboard to start exploring any products today!

*There are some products that will never be fully self-service, but we will look for opportunities to streamline the onboarding as much as possible. Examples include access to our China Network and Registrar. Support for the following products is still on the roadmap: R2, Cache Reserve, Image Resizing, CASB, DLP and BYOIP.

Announcing Custom DLP profiles

Post Syndicated from Adam Chalmers original https://blog.cloudflare.com/custom-dlp-profiles/

Announcing Custom DLP profiles

Introduction

Announcing Custom DLP profiles

Where does sensitive data live? Who has access to that data? How do I know if that data has been improperly shared or leaked? These questions keep many IT and security administrators up at night. The goal of data loss prevention (DLP) is to give administrators the desired visibility and control over their sensitive data.

We shipped the general availability of DLP in September 2022, offering Cloudflare One customers better protection of their sensitive data. With DLP, customers can identify sensitive data in their corporate traffic, evaluate the intended destination of the data, and then allow or block it accordingly — with details logged as permitted by your privacy and sovereignty requirements. We began by offering customers predefined detections for identifier numbers (e.g. Social Security #s) and financial information (e.g. credit card #s). Since then, nearly every customer has asked:

“When can I build my own detections?”

Most organizations care about credit card numbers, which use standard patterns that are easily detectable. But the data patterns of intellectual property or trade secrets vary widely between industries and companies, so customers need a way to detect the loss of their unique data. This can include internal project names, unreleased product names, or unannounced partner names.

As of today, your organization can build custom detections to identify these types of sensitive data using Cloudflare One. That’s right, today you are able to build Custom DLP Profile using the same regular expression approach that is used in policy building across our platform.

How to use it

Cloudflare’s DLP is embedded in our secure web gateway (SWG) product, Cloudflare Gateway, which routes your corporate traffic through Cloudflare for fast, safe Internet browsing. As your traffic passes through Cloudflare, you can inspect that HTTP traffic for sensitive data and apply DLP policies.

Building DLP custom profiles follows the same intuitive approach you’ve come to expect from Cloudflare.

First, once within the Zero Trust dashboard, navigate to the DLP Profiles tab under Gateway:

Announcing Custom DLP profiles

Here you will find any available DLP profiles, either predefined or custom:

Announcing Custom DLP profiles

Select to Create Profile to begin a new one.  After providing a name and description, select Add detection entry to add a custom regular expression. A regular expression, or regex, is a sequence of characters that specifies a search pattern in text, and is a standard way for administrators to achieve the flexibility and granularity they need in policy building.

Cloudflare Gateway currently supports regexes in HTTP policies using the Rust regex crate. For consistency, we used the same crate to offer custom DLP detections. For documentation on our regex support, see our documentation.

Regular expressions can be used to build custom PII detections of your choosing, such as email addresses, or to detect keywords for sensitive intellectual property.

Announcing Custom DLP profiles

Provide a name and a regex of your choosing. Every entry in a DLP profile is a new detection that you can scan for in your corporate traffic. Our documentation provides resources to help you create and test Rust regexes.

Below is an example of regex to detect a simple email address:

Announcing Custom DLP profiles

When you are done, you will see the entry in your profile.  You can turn entries on and off in the Status field for easier testing.

Announcing Custom DLP profiles

The custom profile can then be applied to traffic using an HTTP policy, just like a predefined profile. Here both a predefined and custom profile are used in the same policy, blocking sensitive traffic to dlptest.com:

Announcing Custom DLP profiles

Our DLP roadmap

This is just the start of our DLP journey, and we aim to grow the product exponentially in the coming quarters. In Q4 we delivered:

  • Expanded Predefined DLP Profiles
  • Custom DLP Profiles
  • PDF scanning support
  • Upgraded file name logging

Over the next quarters, we will add a number of features, including:

  • Data at rest scanning with Cloudflare CASB
  • Minimum DLP match counts
  • Microsoft Sensitivity Label support
  • Exact Data Match (EDM)
  • Context analysis
  • Optical Character Recognition (OCR)
  • Even more predefined DLP detections
  • DLP analytics
  • Many more!

Each of these features will offer you new data visibility and control solutions, and we are excited to bring these features to customers very soon.

How do I get started?

DLP is part of Cloudflare One, our Zero Trust network-as-a-service platform that connects users to enterprise resources. Our GA blog announcement provides more detail about using Cloudflare One to onboard traffic to DLP.

To get access to DLP via Cloudflare One, reach out for a consultation, or contact your account manager.

Announcing the Magic WAN Connector: the easiest on-ramp to your next generation network

Post Syndicated from Annika Garbers original https://blog.cloudflare.com/magic-wan-connector/

Announcing the Magic WAN Connector: the easiest on-ramp to your next generation network

Announcing the Magic WAN Connector: the easiest on-ramp to your next generation network

Cloudflare One enables organizations to modernize their corporate networks by connecting any traffic source or destination and layering Zero Trust security policies on top, saving cost and complexity for IT teams and delivering a better experience for users. Today, we’re excited to make it even easier for you to get connected with the Magic WAN Connector: a lightweight software package you can install in any physical or cloud network to automatically connect, steer, and shape any IP traffic.

You can install the Magic WAN Connector on physical or virtual hardware you already have, or purchase it pre-installed on a Cloudflare-certified device. It ensures the best possible connectivity to the closest Cloudflare network location, where we’ll apply security controls and send traffic on an optimized route to its destination. Embracing SASE has never been simpler.

Solving today’s problems and setting up for tomorrow

Over the past few years, we’ve had the opportunity to learn from IT teams about how their corporate networks have evolved and the challenges they’re facing today. Most organizations describe a starting point of private connectivity and “castle and moat” security controls: a corporate WAN composed of point-to-point and MPLS circuits and hardware appliances at the perimeter of physical networks. This architecture model worked well in a pre-cloud world, but as applications have shifted outside of the walls of the corporate data center and users can increasingly work from anywhere, the concept of the perimeter has crumbled.

In response to these shifts, traditional networking and security vendors have developed a wide array of point solutions to fill specific gaps: a virtual appliance to filter web traffic, a physical one to optimize bandwidth use across multiple circuits, a cloud-based tool to prevent data loss, and so on. IT teams now need to manage a broader-than-ever set of tools and contend with gaps in security, visibility, and control as a result.

Announcing the Magic WAN Connector: the easiest on-ramp to your next generation network
Today’s fragmented corporate network

We view this current state, with IT teams contending with a patchwork of tools and a never-ending ticket queue, as a transitional period to a world where the Internet forms the foundation of the corporate network. Cloudflare One is enabling organizations of all sizes to make the transition to SASE: connecting any traffic source and destination to a secure, fast, reliable global network where all security functions are enforced and traffic is optimized on the way to its destination, whether that’s within a private network or on the public Internet.

Announcing the Magic WAN Connector: the easiest on-ramp to your next generation network
Secure Access Service Edge architecture

Magic WAN Connector: the easiest way to connect your network to Cloudflare

The first step to adopting SASE is getting connected – establishing a secure path from your existing network to the closest location where Zero Trust security policies can be applied. Cloudflare offers a broad set of “on-ramps” to enable this connectivity, including client-based and clientless access options for roaming users, application-layer tunnels established by deploying a lightweight software daemon, network-layer connectivity with standard GRE or IPsec tunnels, and physical or virtual interconnection.

Today, to make this first step to SASE even easier, we’re introducing a new member to this family of on-ramps. The Magic WAN Connector can be deployed in any physical or cloud network to provide automatic connectivity to the closest Cloudflare network location, leveraging your existing last mile Internet connectivity and removing the requirement for IT teams to manually configure network gear to get connected.

Announcing the Magic WAN Connector: the easiest on-ramp to your next generation network
Magic WAN Connector provides easy connectivity to Cloudflare’s network

End-to-end traffic management

Hundreds of customer conversations over the past few years have helped us define a slim set of functionality that customers need within their on-premise and cloud networks. They’ve described this as “light branch, heavy cloud” architecture – minimizing the footprint at corporate network locations and shifting the majority of functions that used to be deployed in on-premise hardware to a globally distributed network.

The Magic WAN Connector includes a critical feature set to make the best possible use of available last mile connectivity. This includes traffic routing, load balancing, and failover; application-aware traffic steering and shaping; and automatic configuration and orchestration. These capabilities connect you automatically to the closest Cloudflare location, where traffic is optimized and routed to its destination. This approach allows you to use Cloudflare’s network – presence in 275 cities and 100 countries across the globe, 11,000+ interconnects and a growing fiber backbone – as an extension of your own.

Network function Magic WAN Connector Cloudflare Network
Branch routing (traffic shaping, failover, QoS) Application-aware routing and traffic steering between multiple last mile Internet circuits Application-aware routing and traffic steering across the middle mile to get traffic to its destination
Centralized device management Connector config controlled from unified Cloudflare dashboard Cloudflare unified dashboard portal, observability, Zero Trust services
Zero-touch configuration Automagic config; boots with smart defaults and sets up tunnels + routes Automagic config; Magic WAN Connector pulls down updates from central control plane
VPN + Firewall VPN termination + basic network segmentation included Full-featured SASE platform including ZTNA, FWaaS, DDoS, WAAP, and Email Security
Application-aware path selection Application-aware traffic shaping for last mile Application-aware Enhanced Internet for middle mile
Application auto discovery Works with Cloudflare network to perform application discovery and classification in real time 1+1=3: Cloudflare Zero Trust application classification tools reused in this context
Application performance visibility Acts as telemetry source for Cloudflare observability tools Cloudflare One Analytics platform & Digital Experience Monitoring
Software can be deployed in the cloud Software can be deployed as a public cloud VM All configuration controlled via unified Cloudflare dashboard

Fully integrated security from day 0

The Magic WAN Connector, like all of Cloudflare’s products, was developed from the ground up to natively integrate with the rest of the Cloudflare One portfolio. Connecting your network to Cloudflare’s with the Magic WAN Connector means automatic access to a full suite of SASE security capabilities, including our Firewall-as-a-Service, Zero Trust Network Access, Secure Web Gateway, Data Loss Prevention, Browser Isolation, Cloud Access Security Broker, Email Security, and more.

Optionally pre-packaged to make deployment easy

Cloudflare’s goal is to make it as easy as possible to on-ramp to our network, so there are flexible deployment options available for the Magic WAN Connector. You can install the software on physical or virtual Linux appliances that you manage, or purchase it pre-installed and configured on a hardware appliance for the lowest-friction path to SASE connectivity. Plug the device into your existing network and you’ll be automatically connected to and secured by the Cloudflare network within minutes.

And open source to make it even easier

We’re excited to make access to these capabilities available to all kinds of organizations, including those who want to DIY more aspects of their network deployments. To do this, we’ll be open sourcing the Magic WAN Connector software, so customers can even more easily connect to Cloudflare’s network from existing hardware.

Part of a growing family of on-ramps

In addition to introducing the Magic WAN Connector today, we’re continuing to grow the options for how customers can connect to us using existing hardware. We are excited to expand our Network On-Ramp partnerships to include leading networking companies Cisco, SonicWall, and Sophos, joining previous partners Aruba, VMWare, and Arista, to help you onboard traffic to Cloudflare smoothly.

Customers can connect to us from appliances offered by these vendors using either Anycast GRE or IPSec tunnels. Our partners have validated their solutions and tested that their networking hardware can connect to Cloudflare using these standards. To make setup easier for our mutual customers, detailed configuration instructions will be available soon at both the Cloudflare Developer Docs and partner websites.

If you are a networking solutions provider and are interested in becoming a Network On-Ramp partner, please reach out to us here.

Ready to start building the future of your corporate network?

We’re beyond excited to get the Magic WAN Connector into customer hands and help you jumpstart your transition to SASE. Learn more and sign up for early access here.

Real Life Business Service Monitoring

Post Syndicated from Alexander Petrov-Gavrilov original https://blog.zabbix.com/real-life-business-service-monitoring/24915/

Learn more about Zabbix business service monitoring features and check out our real-life use cases. The article is based on a Zabbix Summit 2022 speech by Aleksandrs Petrovs-Gavrilovs.

Business service monitoring with Zabbix

Hello everyone, my name is Alex and today I am going to write about Advanced business service and SLA monitoring and the related use cases.

Some of you may already be familiar with business services and the core idea behind them. In the vast majority of organizations, we have services that we provide to our customers or/and for internal use. The availability of those services is usually based either on hardware, software or people’s presence and availability. 

But no matter how well our monitoring is configured, there are times when we can miss how each specific device affects our business and that is where business service monitoring can help us.

With the help of business service monitoring it is possible to see what exactly is going on with your business depending on the state of every single part of your infrastructure. This allows us, the admins and service owners, to understand what it really means when a piece of hardware breaks or a device becomes unreachable. With business service monitoring, we see what exactly impacts our business and how severe the situation is, including calculating SLA (Service Level Agreement) and evaluating it against the defined SLO (Service Level Objective).

Business service hierarchy example

So let’s check out some examples of what business real-life business services may look like.

An average service tree example

In this example, we have a service tree that is based on support services. It has phones and phones are plugged into PBX, while PBX is plugged into the switch. And this is just one example, in reality, we could have a more complex infrastructure consisting of containers, CRM services and so on. And we of course monitor all of them, but what if we are interested in the business perspective as well?

To see the business perspective we need to go to the new service section in the main menu, where we can create and view the service tree itself. In addition, in the same section, we can configure the actions, which enable us to react in cases when something happens with one of the services.
We can also specify the SLO we strive to achieve and see SLA reports on the current situation.

Basic service overview

The service view also lets us see if we have problems affecting our services and track their root cause.

Service with active problems

Defining which service is affected by what problem is done by utilizing problem tags, which essentially link them together. Services can also have their own tags, which we use to group services and understand how one service relates to another. We can also use service tags to build an SLA report or execute actions in case a service is affected by a problem. Permissions too are based on service tags, allowing to creation of different views for different users.

But those are just the basics – what’s more interesting are the actual use cases. Let’s take a look at how Zabbix users actually use business service monitoring to their advantage based on real business examples. 

Business service tree for a financial institution

Real business service use cases can be helpful examples that can help you design your own Zabbix business service trees. Maybe you already have a similar business of your own and you need that starting point for everything to “click” – that starting point can be a real-life example.

Example service tree of a bank

The first example will seem a bit convoluted while actually being very straightforward. Here we can see an actual financial institution business service tree. You can see they have quite a lot of different interconnected services. First look at the service tree raw schema may be a bit confusing, but in Zabbix it’s pretty straightforward.

The internal service is connected to emails and emails are related to customer services at the same since we do need to communicate with the customers, not only internally! In addition, we also have to define services representing the underlying systems and applications which support our email services. That is easy to do with Zabbix services.

Easy to read e-mail service state

Imagine now, if you don’t have the services functionality at all, how fast can you check the status of the email service when all you have is only a list of problems for multiple devices? How can you check the service statistics for an entire year? That was the question that the service owners and administrators had in this use case and they solved it by defining Zabbix business service trees.

The “root” service

We start by defining the root business service – Financial institution. It is linked to 15 main services. The 15 services are grouped into internal or external ones. The lower-level services also contain the sub-services that the main services are based on. I.e., we have an Accounting service based on specific VM availability, where the accounting software resides on.

Detailed service tree

The services are divided into specific categories so the service owners can read the situation a lot easier without spending a lot of time figuring out which problem causes which situation. With a single click, the service owners can immediately see which components or child services each service is based on and the actual service SLA. This also gives the benefit of displaying the root cause problem and being able to quickly identify which child services are causing issues with a particular business service.

Parent-Child service relationship

Don’t forget, that the business service trees can be multi-level –  child services can have their own child services and services can also be interconnected with each other. For example – in the Parent-Child service relationship screenshot, we can see that we have an Accounting service. Accounting uses Microsoft services. Microsoft services are also used internally. So what happens when Microsoft services stop working? We will know that accounting will be affected, the internal services will be affected and we will see the exact chain of events – what and how exactly went wrong in the organization and which components need fixing.

Service state configuration

Services can have a varying impact on your business. Some services are more critical than others. Additional rules enable Zabbix to take the potential service impact into account. The first two additional rules analyze the percentage of affected child services and set the severity of the service problem accordingly.
But if the two most critical services are affected, that will immediately become a disaster. For example, online banking – you can imagine that any bank now has an online banking service and if it goes down – all the customers will be affected; it could even hit the news, not only monitoring. So of course they want to immediately know about that kind of a disaster, and with Zabbix services – they will. By defining additional rules and service weights, you can react to problems preemptively and fix the issues before they cause downtime for your end users.

SLA reporting

In Zabbix, we can choose for what periods SLA should be calculated – daily, weekly, monthly, yearly, or a mixed selection of those. Based on our selection, we can see real-time reports for services and as an example, by the end of the year or a day, understand what needs the most attention and review the service performance. Or to put in a closer-to-reality example – find out by accounting reports if the licenses were renewed in time so that the software which is used by accounting is always available.  We can also build a dashboard that will contain the reports, showing what is the current summary for the service so they can plan, buy new software, buy a new license and get new hardware and always be ahead again of whatever might happen.

Service state dashboard

Service permissions in user roles can be used to create different service views. This can be used to hide sensitive service information or simply display the services at the required level of detail. For example, a more detailed view can be provided for internal support users since they will need as much information as possible to fix any service-related issues. Separate views can be provided for Accounting and Management teams, showing only the relevant data to ensure a quick and reliable decision-making process. 

What if we want to make things even more simple for our Accounting and Management teams? We can use actions and scheduled report functionality to deliver the required information to the user’s mailbox without having them periodically log into Zabbix.

Service permissions

Business service tree for an MSP

Another example is an MSP (managed service provider) service tree. This use case is encountered pretty frequently and the tree is always easy to read even in the raw schema view as this:

Manager Service Provider service tree

We use a hosting company for our example. The company provides a particular set of services for its users. There are also some internal services that can also be used by the customers – for example, Zabbix itself.

Zabbix can be a great tool in MSP scenarios since it’s straightforward to provide customers with access to Zabbix and build a dashboard view with the latest statistics related to a particular user.
In this example, we can see the main service which is hosting, divided across customers, where each customer is a branch of that tree, using the hosting services the company provides. We also see that monitoring is a service itself because in this case customers also have the advantage of using Zabbix to get detailed information about the services they use and their current state. Seeing the current level of SLA for the servers they use and does it match the expectations.

Customer overview

The MSP, of course, retains the full view of the customers and all customers are equally important and deserve a proper quality of service so of course each customer will have an equal weight assigned to them. As soon as any customer has a problem, the related service will be marked with a high-level severity on the service tree. This way, the MSP will immediately see which customer is affected, making it possible to assist them as quickly as possible.

If you have a bigger environment – maybe you have hundreds of customers, you may opt out of defining service weights in your configuration since the number of services changes very rapidly. How can we react to global issues then?
We can use percentage rules instead of reacting to just the static weight number. This way, we can check is the problem related to a single customer or is it something global and everyone is now affected.

Root cause view in the services will allow you to start fixing everything immediately. Meanwhile, each customer can be informed individually using the service actions and conditions. This should be easy to do if we have properly named or tagged the services.

Customer service configuration

Don’t forget to define the permissions so that any customer, as Mooyani here, can have access to their Services immediately after login, ensuring that information not only remains private but also relevant for the current user.

Customer view

All information for Customers can be placed on their personal dashboards where they can see all the details whenever they need to. Monitoring the traffic going through their VMs, resource usage, application statuses and any other monitored entities. Don’t forget that service SLA reports can also be placed on Zabbix dashboards. This way your customers can see that the MSP meets the terms defined in the agreement and everything is performing as expected. 

To summarize – monitoring your infrastructure is great from any perspective, including business monitoring. it’s always a good idea to provide this view as an MSP to your customers, so they can see we meet the standards we define for ourselves and course promise for our users.

The collective thoughts of the interwebz