Use AWS service reference information to automate policy management workflows

Post Syndicated from Ramesh Rajan original https://aws.amazon.com/blogs/security/use-aws-service-reference-information-to-automate-policy-management-workflows/

Amazon Web Services (AWS) provides service reference information in JSON format to help you automate policy management workflows. With the service reference information, you can access available actions across AWS services from machine-readable files. The service reference information helps to address a key customer need: keeping up with the ever-growing list of services and actions in AWS. As new services launch and existing services expand their capabilities, you can now conveniently identify and incorporate available actions, resources, and condition keys for each AWS service into your policy authoring and validation workflows. As your business expands and your AWS footprint grows, you might decide to automate your policy management workflows. With the service authorization reference, you can build custom tools to make it easier to evaluate and use new actions, resources, and condition keys that AWS services introduce.

Getting started with service reference information

The service reference information is static information about the actions, resources, and condition keys available for each service in AWS. To obtain the list of AWS services for which reference information is available, go to the following URL:
https://servicereference.us-east-1.amazonaws.com/v1/service-list.json

This URL endpoint provides a JSON file that contains an up-to-date catalog of AWS services with available reference information. By querying this endpoint, you can retrieve the most current list of services supported by the AWS Service Reference Information feature.

To retrieve the list of actions, resources, and condition keys for a specific AWS service, go to the following URL:
https://servicereference.us-east-1.amazonaws.com/v1/<service-name>/<service-name>.json

Replace <service-name> with the name of the desired AWS service (for example, “s3” for Amazon Simple Storage service (Amazon S3) or “ec2” for Amazon Elastic Compute Cloud (Amazon EC2)). This URL endpoint provides a JSON file that contains the comprehensive list of actions, resources, and condition keys that are available for that particular service.

The following example shows the format of the output from the service-list.json file, which contains the service names and URLs for each service’s reference information:

[ 
    {
"service": "s3", 
        "url": "https://servicereference.us-east-1.amazonaws.com/v1/s3/s3.json" 
    }, 
    {
"service": "dynamodb", 
        "url": "https://servicereference.us-east-1.amazonaws.com/v1/dynamodb/dynamodb.json" 
    }, 
    …
]

You can navigate to the service information page by using the url field to view the list of permissions for the service. You can also download the JSON file to use in your policy authoring workflows. For example, you can download the permissions for Amazon S3 by following this URL:
https://servicereference.us-east-1.amazonaws.com/v1/s3/s3.json

The following example shows a partial output of the permissions for Amazon S3. The AWS Identity and Access Management (IAM) actions are available in JSON format, and each action is its own JSON object. The Name field for those objects provides the name of the IAM action, the ActionConditionKeys field provides the available condition keys for this action, and the Resources field provides the available resources for this action.

{
  "Name" : "s3",
  "Actions" : [ {
    "Name" : "AbortMultipartUpload",
    "ActionConditionKeys" : [ "s3:AccessGrantsInstanceArn", "s3:AccessPointNetworkOrigin", "s3:DataAccessPointAccount", "s3:DataAccessPointArn", "s3:ResourceAccount", "s3:TlsVersion", "s3:authType", "s3:signatureAge", "s3:signatureversion", "s3:x-amz-content-sha256" ],
    "Resources" : [ {
      "Name" : "object"
    } ]
  }, {
    "Name" : "AssociateAccessGrantsIdentityCenter",
    "ActionConditionKeys" : [ "aws:ResourceTag/${TagKey}", "s3:ResourceAccount", "s3:TlsVersion", "s3:authType", "s3:signatureAge", "s3:signatureversion", "s3:x-amz-content-sha256" ],
    "Resources" : [ {
      "Name" : "accessgrantsinstance"
    } ],
    "Version": "v1.1" 
}

What can you build with the service reference information?

Let’s explore how you can make use of the service reference information through practical examples. To help you get started, here are two custom tools that use the service reference information. You can find these tools in our GitHub repository, ready for you to use and adapt to your specific needs. You can download the source code for these tools by visiting the following links:

SCP pre-processor

The SCP pre-processor provides a convenient way to write SCPs. You run the SCP pre-processor as a command-line tool. The tool takes a single, monolithic JSON file and runs a series of transformations and optimizations, then outputs a collection of valid service control policies that fit within policy size quotas. The tool uses AWS service reference information data in order to optimize lists of IAM actions.

Notification tool for new or removed IAM actions

You might find yourself needing to update various policies throughout your AWS environment when new IAM actions or services are released. You can use this tool to notify you when new services or new actions are added or removed. It works by downloading the service reference information and comparing it to the previous version of the file when the tool last ran. You can use these notifications to perform actions like automatically updating IAM policies when new actions are added or manually reviewing the notifications for new, sensitive actions.

Visit the source code repositories for the SCP pre-processor and the daily notification tool to learn more.

Conclusion

The AWS service reference information makes it easier for you to create automation for policy authoring and validation. By providing the AWS service actions reference in JSON format, this feature enables you to create custom tools for policy authoring and management.

We’re excited to know what kind of policy authoring tools you can think up.

 
If you have feedback about this post, submit comments in the Comments section below. If you have questions about this post, contact AWS Support.

Ramesh Rajan
Ramesh Rajan

Ramesh is a Senior Solutions Architect based out of San Francisco. He holds a Bachelor of Science in Applied Sciences and a Master’s in Cyber Security and Information Assurance. He specializes in cloud migration, cloud security, compliance, and risk management.
Matt Luttrell
Matt Luttrell

Matt is a Principal Solutions Architect on the AWS Identity Solutions team. When he’s not spending time chasing his kids around, he enjoys skiing, cycling, and the occasional video game.

The 6.14 kernel is out

Post Syndicated from corbet original https://lwn.net/Articles/1015308/

Linus has released the 6.14 kernel, a bit
later than expected:

So it’s early Monday morning (well – early for me, I’m not really a
morning person), and I’d love to have some good excuse for why I
didn’t do the 6.14 release yesterday on my regular Sunday afternoon
release schedule.

I’d like to say that some important last-minute thing came up and
delayed things.

But no. It’s just pure incompetence.

See the LWN merge-window summaries (part 1, part 2) and the KernelNewbies 6.14 page
for details on what’s new in this release.

Using Amazon S3 Tables with Amazon Redshift to query Apache Iceberg tables

Post Syndicated from Jonathan Katz original https://aws.amazon.com/blogs/big-data/using-amazon-s3-tables-with-amazon-redshift-to-query-apache-iceberg-tables/

Amazon Redshift supports querying data stored using Apache Iceberg tables, an open table format that simplifies management of tabular data residing in data lakes on Amazon Simple Storage Service (Amazon S3). Amazon S3 Tables delivers the first cloud object store with built-in Iceberg support and streamlines storing tabular data at scale, including continual table optimizations that help improve query performance. Amazon SageMaker Lakehouse unifies your data across S3 data lakes, including S3 Tables, and Amazon Redshift data warehouses, helps you build powerful analytics and artificial intelligence and machine learning (AI/ML) applications on a single copy of data, querying data stored in S3 Tables without the need for complex extract, transform, and load (ETL) or data movement processes. You can take advantage of the scalability of S3 Tables to store and manage large volumes of data, optimize costs by avoiding additional data movement steps, and simplify data management through centralized fine-grained access control from SageMaker Lakehouse.

In this post, we demonstrate how to get started with S3 Tables and Amazon Redshift Serverless for querying data in Iceberg tables. We show how to set up S3 Tables, load data, register them in the unified data lake catalog, set up basic access controls in SageMaker Lakehouse through AWS Lake Formation, and query the data using Amazon Redshift.

Note – Amazon Redshift is just one option for querying data stored in S3 Tables. You can learn more about S3 Tables and additional ways to query and analyze data on the S3 Tables product page.

Solution overview

In this solution, we show how to query Iceberg tables managed in S3 Tables using Amazon Redshift. Specifically, we load a dataset into S3 Tables, link the data in S3 Tables to a Redshift Serverless workgroup with appropriate permissions, and finally run queries to analyze our dataset for trends and insights. The following diagram illustrates this workflow.

In this post, we will walk through the following steps:

  1. Create a table bucket in S3 Tables and integrate with other AWS analytics services.
  2. Set up permissions and create Iceberg tables with SageMaker Lakehouse using Lake Formation.
  3. Load data with Amazon Athena. There are different ways to ingest data into S3 Tables, but for this post, we show how we can quickly get started with Athena.
  4. Use Amazon Redshift to query your Iceberg tables stored in S3 Tables through the auto mounted catalog.

Prerequisites

The examples in this post require you to use the following AWS services and features:

Create a table bucket in S3 Tables

Before you can use Amazon Redshift to query the data in S3 Tables, you must first create a table bucket. Complete the following steps:

  1. In the Amazon S3 console, choose Table buckets on the left navigation pane.
  2. In the Integration with AWS analytics services section, choose Enable integration if you haven’t previously set this up.

This sets up the integration with AWS analytics services, including Amazon Redshift, Amazon EMR, and Athena.

After a few seconds, the status will change to Enabled.

  1. Choose Create table bucket.
  2. Enter a bucket name. For this example, we use the bucket name redshifticeberg.
  3. Choose Create table bucket.

After the S3 table bucket is created, you will be redirected to the table buckets list.

Now that your table bucket is created, the next step is to configure the unified catalog in SageMaker Lakehouse through the Lake Formation console. This will make the table bucket in S3 Tables available to Amazon Redshift for querying Iceberg tables.

Publishing Iceberg tables in S3 Tables to SageMaker Lakehouse

Before you can query Iceberg tables in S3 Tables with Amazon Redshift, you must first make the table bucket available in the unified catalog in SageMaker Lakehouse. You can do this through the Lake Formation console, which lets you publish catalogs and manage tables through the catalogs feature, and assign permissions to users. The following steps show you how to set up Lake Formation so you can use Amazon Redshift to query Iceberg tables in your table bucket:

  1. If you’ve never visited the Lake Formation console before, you must first do so as an AWS user with admin permissions to activate Lake Formation.

You will be redirected to the Catalogs page on the Lake Formation console. You will see that one of the catalogs available is the s3tablescatalog, which maintains a catalog of the table buckets you’ve created. The following steps will configure Lake Formation to make data in the s3tablescatalog catalog available to Amazon Redshift.

Next, you need to create a database in Lake Formation. The Lake Formation database maps to a Redshift schema.

  1. Choose Databases under Data Catalog in the navigation pane.
  2. On the Create menu, choose Database.

  1. Enter a name for this database. This example uses icebergsons3.
  2. For Catalog, choose the table bucket that you created. In this example, the name will have the format <ACCOUNT ID>:s3tablescatalog/redshifticeberg.
  3. Choose Create database.

You will be redirected on the Lake Formation console to a page with more information about your new database. Now you can create an Iceberg table in S3 Tables.

  1. On the database details page, on the View menu, choose Tables.

This will open up a new browser window with the table editor for this database.

  1. After the table view loads, choose Create table to start creating the table.

  1. In the editor, enter the name of the table. We call this table examples.
  2. Choose the catalog (<ACCOUNT ID>:s3tablescatalog/redshifticeberg) and database (icebergsons3).

Next, add columns to your table.

  1. In the Schema section, choose Add column, and add a column that represents an ID.

  1. Repeat this step and add columns for additional data:
    1. category_id (long)
    2. insert_date (date)
    3. data (string)

The final schema looks like the following screenshot.

  1. Choose Submit to create the table.

Next, you need to set up a read-only permission so you can query Iceberg data in S3 Tables using the Amazon Redshift Query Editor v2. For more information, see Prerequisites for managing Amazon Redshift namespaces in the AWS Glue Data Catalog.

  1. Under Administration in the navigation pane, choose Administrative roles and tasks.
  2. In the Data lake administrators section, choose Add.

  1. For Access type, select Read-only administrator.
  2. For IAM users and roles, enter AWSServiceRoleForRedshift.

AWSServiceRoleForRedshift is a service-linked role that’s managed by AWS.

  1. Choose Confirm.

You have now configured SageMaker Lakehouse using Lake Formation to allow Amazon Redshift to query Iceberg tables in S3 Tables. Next, you populate some data into the Iceberg table, and query it with Amazon Redshift.

Use SQL to query Iceberg data with Amazon Redshift

For this example, we use Athena to load data into our Iceberg table. This is one option for ingesting data into an Iceberg table; see Using Amazon S3 Tables with AWS analytics services for other options, including Amazon EMR with Spark, Amazon Data Firehose, and AWS Glue ETL.

  1. On the Athena console, navigate to the query editor.
  2. If this is your first time using Athena, you must first specify a query result location before executing your first query.
  3. In the query editor, under Data, choose your data source (AwsDataCatalog).
  4. For Catalog, choose the table bucket you created (s3tablescatalog/redshifticeberg).
  5. For Database, choose the database you created (icebergsons3).

  1. Let’s execute a query to generate data for the examples table. The following query generates over 1.5 million rows corresponding to 30 days of data. Enter the query and choose Run.
INSERT INTO icebergsons3.examples
SELECT
    b.id * (date_diff('day', CURRENT_DATE, a.insert_date) + 1),
    b.id % 1000, a.insert_date,
    CAST(random() AS varchar)
FROM
    unnest(
        sequence(CURRENT_DATE, CURRENT_DATE + INTERVAL '30' DAY, INTERVAL '1' DAY)
    ) AS a(insert_date),
    unnest(sequence(1, 50000)) AS b(id);

The following screenshot shows our query.

The query takes about 10 seconds to execute.

Now you can use Redshift Serverless to query the data.

  1. On the Redshift Serverless console, provision a Redshift Serverless workgroup if you haven’t already done so. For instructions, see Get started with Amazon Redshift Serverless data warehouses guide. In this example, we use a Redshift Serverless workgroup called iceberg.
  2. Make sure that your Amazon Redshift patch version is patch 188 or higher.

  1. Choose Query data to open the Amazon Redshift Query Editor v2.

  1. In the query editor, choose the workgroup you want to use.

A pop-up window will appear, prompting what user to use.

  1. Select Federated user, which will use your current account, and choose Create connection.

It will take a few seconds to start the connection. When you’re connected, you will see a list of available databases.

  1. Choose External databases.

You will see the table bucket from S3 Tables in the view (in this example, this is redshifticeberg@s3tablescatalog).

  1. If you continue clicking through the tree, you will see the examples table, which is the Iceberg table you previously created that’s stored in the table bucket.

You can now use Amazon Redshift to query the Iceberg table in S3 Tables.

Before you execute the query, review the Amazon Redshift syntax for querying catalogs registered in SageMaker Lakehouse. Amazon Redshift uses the following syntax to reference a table: [email protected] or database@namespace".schema.table.

In this example, we use the following syntax to query the examples table in the table bucket: r[email protected].

Learn more about this mapping in Using Amazon S3 Tables with AWS analytics services.

Let’s run some queries. First, let’s see how many rows are in the examples table.

  1. Run the following query in the query editor:
SELECT count(*)
FROM [email protected]; 

The query will take a few seconds to execute. You will see the following result.

Let’s try a slightly more complicated query. In this case, we want to find all the days that had example data starting with 0.2 and a category_id between 50–75 with at least 130 rows. We will order the results from most to least.

  1. Run the following query:
SELECT examples.insert_date, count(*)
FROM [email protected]
WHERE
    examples.data LIKE '0.2%' AND
    examples.category_id BETWEEN 50 AND 75
GROUP BY examples.insert_date
HAVING count(*) > 130
ORDER BY count DESC;

You might see different results than the following screenshot due the randomly generated source data.

Congratulations, you have set up and queried Iceberg data in S3 Tables from Amazon Redshift!

Clean up

If you implemented the example and want to remove the resources, complete the following steps:

  1. If you no longer need your Redshift Serverless workgroup, delete the workgroup.
  2. If you don’t need to access your SageMaker Lakehouse data from the Amazon Redshift Query Editor v2, remove the data lake administrator:
    1. On the Lake Formation console, choose Administrative roles and tasks in the navigation pane.
    2. Remove the read-only data lake administrator that has the AWSServiceRoleForRedshift privilege.
  3. If you want to permanently delete the data from this post, delete the database:
    1. On the Lake Formation console, choose Databases in the navigation pane.
    2. Delete the icebergsahead database.
  4. If you no longer need the table bucket, delete the table bucket.
  5. In you want to deactivate the integration between S3 Tables and AWS analytics services, see Migrating to the updated integration process.

Conclusion

In this post, we showed how to get started with Amazon Redshift to query Iceberg tables stored in S3 Tables. This is just the beginning for how you can use Amazon Redshift to analyze your Iceberg data that’s stored in S3 Tables—you can combine this with other Amazon Redshift features, including writing queries that join data from Iceberg tables stored in S3 Tables and Redshift Managed Storage (RMS), or implement data access controls that give you fine-granted access control rules for different users across the S3 Tables. Additionally, you can use features like Redshift Serverless to automatically select the amount of compute for analyzing your Iceberg tables, and use AI to intelligently scale on demand and optimize query performance characteristics for your analytical workload.

We invite you to leave feedback in the comments.


About the Authors

Jonathan Katz is a Principal Product Manager – Technical on the Amazon Redshift team and is based in New York. He is a Core Team member of the open source PostgreSQL project and an active open source contributor, including PostgreSQL and the pgvector project.

Satesh Sonti is a Sr. Analytics Specialist Solutions Architect based out of Atlanta, specialized in building enterprise data platforms, data warehousing, and analytics solutions. He has over 19 years of experience in building data assets and leading complex data platform programs for banking and insurance clients across the globe.

Security Week 2025: in review

Post Syndicated from Kim Blight original https://blog.cloudflare.com/security-week-2025-wrap-up/

Thank you for following along with another Security Week at Cloudflare. We’re extremely proud of the work our team does to make the Internet safer and to help meet the challenge of emerging threats. As our CISO Grant Bourzikas outlined in his kickoff post this week, security teams are facing a landscape of rapidly increasing complexity introduced by vendor sprawl, an “AI Boom”, and an ever-growing surface area to protect.

As we continuously work to meet new challenges, Innovation Weeks like Security Week give us an invaluable opportunity to share our point of view and engage with the wider Internet community. Cloudflare’s mission is to help build a better Internet. We want to help safeguard the Internet from the arrival of quantum supercomputers, help protect the livelihood of content creators from unauthorized AI scraping, help raise awareness of the latest Internet threats, and help find new ways to help reduce the reuse of compromised passwords. Solving these challenges will take a village. We’re grateful to everyone who has engaged with us on these issues via social media, contributed to our open source repositories, and reached out through our technology partner program to work with us on the issues most important to them. For us, that’s the best part.

Here’s a recap of this week’s announcements:

Helping make the Internet safer

Title

Excerpt

Conventional cryptography is under threat. Upgrade to post-quantum cryptography with Cloudflare Zero Trust

We’re thrilled to announce that organizations can now protect their sensitive corporate network traffic against quantum threats by tunneling it through Cloudflare’s Zero Trust platform.

How Cloudflare is using automation to tackle phishing head on

How Cloudflare is using threat intelligence and our Developer Platform products to automate phishing abuse reports.

Advancing account security as part of Cloudflare’s commitment to CISA’s Secure by Design pledge

Cloudflare has made significant progress in boosting multi-factor authentication (MFA) adoption. With the addition of Apple and Google social logins, we’ve made secure access easier for our users.

Email Security now available for free for political parties and campaigns through Cloudflare for Campaigns

We’re excited to announce that Cloudflare for Campaigns now includes Email Security, adding an extra layer of protection to email systems that power political campaigns.

Enhanced security and simplified controls with automated botnet protection, cipher suite selection, and URL Scanner updates

Enhanced security, simplified control! This Security Week, Cloudflare unveils automated botnet protection, flexible cipher suites, and an upgraded URL Scanner.

Password reuse is rampant: nearly half of user logins are compromised

Nearly half of login attempts across websites protected by Cloudflare involved leaked credentials. The pervasive issue of password reuse is enabling automated bot attacks on a massive scale.

Threat research from the network that sees the most threats 

Title

Excerpt

Unleashing improved context for threat actor activity with our Cloudforce One threat events platform

Gain real-time insights with our new threat events platform. This tool empowers your cybersecurity defense with actionable intelligence to stay ahead of attacks and protect your critical assets.

One platform to manage your company’s predictive security posture with Cloudflare

Cloudflare introduces a single platform for unified security posture management, helping protect SaaS and web applications deployed across various environments.

Cloudflare enables native monitoring and forensics with Log Explorer and custom dashboards

We are excited to announce support for Zero Trust datasets, and custom dashboards where customers can monitor critical metrics for suspicious or unusual activity

Introducing new Turnstile Analytics: Gain insight into your visitor traffic, bot behavior patterns, traffic anomalies, and attack attributes.

Introducing new Turnstile Analytics: gain insight into your visitor traffic, bot behavior patterns, traffic anomalies, and attack attributes.

Extending Cloudflare Radar’s security insights with new DDoS, leaked credentials, and bots datasets

For Security Week 2025, we are adding several new DDoS-focused graphs, new insights into leaked credential trends, and a new Bots page to Cloudflare Radar.

Securing models and guarding against AI threats 

Title

Excerpt

Cloudflare for AI: supporting AI adoption at scale with a security-first approach

With Cloudflare for AI, developers, security teams, and content creators can leverage Cloudflare’s network and portfolio of tools to secure, observe, and make AI applications resilient and safe to use.

How we train AI to uncover malicious JavaScript intent and make web surfing safer

Learn more about how Cloudflare developed an AI model to uncover malicious JavaScript intent using a Graph Neural Network, from pre-processing data to inferencing at scale.

An early look at cryptographic watermarks for AI-generated content

It’s hard to tell the difference between web content produced by humans and web content produced by AI. We’re taking a new approach to making AI content distinguishable without impacting performance.

How Cloudflare uses generative AI to slow down, confuse, and waste the resources of AI Crawlers and other bots that don’t respect “no crawl” directives.

How Cloudflare uses generative AI to slow down, confuse, and waste the resources of AI Crawlers and other bots that don’t respect “no crawl” directives.

Take control of public AI application security with Cloudflare’s Firewall for AI

Firewall for AI discovers and protects your public LLM-powered applications, and is seamlessly integrated with Cloudflare WAF. Join the beta now and take control of your generative AI security

Improved Bot Management flexibility and visibility with new high-precision heuristics

By building and integrating a new heuristics framework into the Cloudflare Ruleset Engine, we now have a more flexible system to write rules and deploy new releases rapidly

Simplifying security

Title

Excerpt

Introducing Cloudy, Cloudflare’s AI agent for simplifying complex configurations

Cloudflare’s first AI agent, Cloudy, helps make complicated configurations easy to understand for Cloudflare administrators.

Making Application Security simple with a new unified dashboard experience

We’re introducing a new Application Security experience in the Cloudflare dashboard, with a reworked UI organized by use cases, making it easier for customers to navigate and secure their accounts

Improved support for private applications and reusable access policies with Cloudflare Access

We are excited to introduce support for private hostname and IP address-defined applications as well as reusable access policies.

Simplify allowlist management and lock down origin access with Cloudflare Aegis

Cloudflare Aegis provides dedicated egress IPs for Zero Trust origin access strategies, now supporting BYOIP and customer-facing configurability, with observability of Aegis IP address utilization coming soon.

HTTPS-only for Cloudflare APIs: shutting the door on cleartext traffic

We are closing the cleartext HTTP ports entirely for Cloudflare API traffic. This prevents the risk of clients unintentionally leaking their secret API keys in cleartext during the initial request, before we can reject the connection at the server side.

Cloudflare named a leader in Web Application Firewall Solutions in 2025 Forrester report

Forrester Research has recognized Cloudflare as a Leader in its The Forrester Wave™: Web Application Firewall Solutions, Q1 2025 report.

Data security everywhere, all the time 

Title

Excerpt

Detecting sensitive data and misconfigurations in AWS and GCP with Cloudflare One

Using Cloudflare’s CASB, integrate, scan, and detect sensitive data and misconfigurations in your cloud storage accounts.

RDP without the risk: Cloudflare’s browser-based solution for secure third-party access

Cloudflare now provides clientless, browser-based support for the Remote Desktop Protocol (RDP). It natively enables secure, remote Windows server access without VPNs or RDP clients, to support third-party access and BYOD security.

Improving Data Loss Prevention accuracy with AI-powered context analysis

Cloudflare’s Data Loss Prevention is reducing false positives by using a self-improving AI-powered algorithm, built on Cloudflare’s Developer Platform, to improve detection accuracy through AI context analysis.

Enhance data protection in Microsoft Outlook with Cloudflare One’s new DLP Assist

Customers can now easily safeguard sensitive data in Microsoft Outlook with our new DLP Assist feature.

Prepping for post-quantum: a beginner’s guide to lattice cryptography

This post is a beginner’s guide to lattices, the math at the heart of the transition to post-quantum (PQ) cryptography. It explains how to do lattice-based encryption and authentication from scratch.

Cloudflare is now IRAP assessed at the PROTECTED level, furthering our commitment to the global public sector

Cloudflare is now assessed at the IRAP PROTECTED level, bringing our products and services to the Australian Public Sector.

Tune in to the latest on Cloudflare TV

For a deeper dive on many of the great announcements from Security Week, check out our CFTV segments where our team shares even more details on our latest updates. 

See you for our next Innovation Week

We appreciate everyone who’s taken the time to read Cloudflare’s Security Week blog posts or engage with us on these topics via social media. Our next innovation week, Developer Week, is right around the corner in April. We look forward to seeing you then!

New URLPattern API brings improved pattern matching to Node.js and Cloudflare Workers

Post Syndicated from Yagiz Nizipli original https://blog.cloudflare.com/improving-web-standards-urlpattern/

Today, we are excited to announce that we have contributed an implementation of the URLPattern API to Node.js, and it is available starting with the v23.8.0 update. We’ve done this by adding our URLPattern implementation to Ada URL, the high-performance URL parser that now powers URL handling in both Node.js and Cloudflare Workers. This marks an important step toward bringing this API to the broader JavaScript ecosystem.

Cloudflare Workers has, from the beginning, embraced a standards-based JavaScript programming model, and Cloudflare was one of the founding companies for what has evolved into ECMA’s 55th Technical Committee, focusing on interoperability between Web-interoperable runtimes like Workers, Node.js, Deno, and others. This contribution highlights and marks our commitment to this ongoing philosophy. Ensuring that all the JavaScript runtimes work consistently and offer at least a minimally consistent set of features is critical to ensuring the ongoing health of the ecosystem as a whole.

URLPattern API contribution is just one example of Cloudflare’s ongoing commitment to the open-source ecosystem. We actively contribute to numerous open-source projects including Node.js, V8, and Ada URL, while also maintaining our own open-source initiatives like workerd and wrangler. By upstreaming improvements to foundational technologies that power the web, we strengthen the entire developer ecosystem while ensuring consistent features across JavaScript runtimes. This collaborative approach reflects our belief that open standards and shared implementations benefit everyone – reducing fragmentation, improving developer experience and creating a better Internet. 

What is URLPattern?

URLPattern is a standard published by the WHATWG (Web Hypertext Application Technology Working Group) which provides a pattern-matching system for URLs. This specification is available at urlpattern.spec.whatwg.org. The API provides developers with an easy-to-use, regular expression (regex)-based approach to handling route matching, with built-in support for named parameters, wildcards, and more complex pattern matching that works uniformly across all URL components.

URLPattern is part of the WinterTC Minimum Common API, a soon-to-be standardized subset of web platform APIs designed to ensure interoperability across JavaScript runtimes, particularly for server-side and non-browser environments, and includes other APIs such as URL and URLSearchParams.

Cloudflare Workers has supported URLPattern for a number of years now, reflecting our commitment to enabling developers to use standard APIs across both browsers and server-side JavaScript runtimes. Contributing to Node.js and unifying the URLPattern implementation simplifies the ecosystem by reducing fragmentation, while at the same time improving our own implementation in Cloudflare Workers by making it faster and more specification compliant.

The following example demonstrates how URLPattern is used by creating a pattern that matches URLs with a “/blog/:year/:month/:slug” path structure, then tests if one specific URL string matches this pattern, and extracts the named parameters from a second URL using the exec method.

const pattern = new URLPattern({
  pathname: '/blog/:year/:month/:slug'
});

if (pattern.test('https://example.com/blog/2025/03/urlpattern-launch')) {
  console.log('Match found!');
}

const result = pattern.exec('https://example.com/blog/2025/03/urlpattern-launch');
console.log(result.pathname.groups.year); // "2025"
console.log(result.pathname.groups.month); // "03"
console.log(result.pathname.groups.slug); // "urlpattern-launch"

The URLPattern constructor accepts pattern strings or objects defining patterns for individual URL components. The test() method returns a boolean indicating if a URL simply matches the pattern. The exec() method provides detailed match results including captured groups. Behind this simple API, there’s sophisticated machinery working behind the scenes:

  1. When a URLPattern is used, it internally breaks down a URL, matching it against eight distinct components: protocol, username, password, hostname, port, pathname, search, and hash. This component-based approach gives the developer control over which parts of a URL to match.

  2. Upon creation of the instance, URLPattern parses your input patterns for each component and compiles them internally into eight specialized regular expressions (one for each component type). This compilation step happens just once when you create an URLPattern object, optimizing subsequent matching operations.

  3. During a match operation (whether using test() or exec()), these regular expressions are used to determine if the input matches the given properties. The test() method tells you if there’s a match, while exec() provides detailed information about what was matched, including any named capture groups from your pattern.

Fixing things along the way

While implementing URLPattern, we discovered some inconsistencies between the specification and the web-platform tests, a cross-browser test suite maintained by all major browsers to test conformance to web standard specifications. For instance, we found that URLs with non-special protocols (opaque-paths) and URLs with invalid characters in hostnames were not correctly defined and processed within the URLPattern specification. We worked actively with the Chromium and the Safari teams to address these issues.

URLPatterns constructed from hostname components that contain newline or tab characters were expected to fail in the corresponding web-platform tests. This was due to an inconsistency with the original URLPattern implementation and the URLPattern specification.

const pattern = new URL({ "hostname": "bad\nhostname" });
const matched = pattern.test({ "hostname": "badhostname" });
// This now returns true.

We opened several issues to document these inconsistencies and followed up with a pull-request to fix the specification, ensuring that all implementations will eventually converge on the same corrected behavior. This also resulted in fixing several inconsistencies in web-platform tests, particularly around handling certain types of white space (such as newline or tab characters) in hostnames. 

Getting started with URLPattern

If you’re interested in using URLPattern today, you can:

  • Use it natively in modern browsers by accessing the global URLPattern class

  • Try it in Cloudflare Workers (which has had URLPattern support for some time, now with improved spec compliance and performance)

  • Try it in Node.js, starting from v23.8.0

  • Try it in NativeScript on iOS and Android, starting from v8.9.0

  • Try it in Deno

Here is a more complex example showing how URLPattern can be used for routing in a Cloudflare Worker — a common use case when building API endpoints or web applications that need to handle different URL paths efficiently and differently. The following example shows a pattern for REST APIs that matches both “/users” and “/users/:userId”

const routes = [
  new URLPattern({ pathname: '/users{/:userId}?' }),
];

export default {
  async fetch(request, env, ctx): Promise<Response> {
    const url = new URL(request.url);
    for (const route of routes) {
      const match = route.exec(url);
      if (match) {
        const { userId } = match.pathname.groups;
        if (userId) {
          return new Response(`User ID: ${userId}`);
        }
        return new Response('List of users');
      }
    }
    // No matching route found
    return new Response('Not Found', { status: 404 });
  },
} satisfies ExportedHandler<Env>;

What does the future hold?

The contribution of URLPattern to Ada URL and Node.js is just the beginning. We’re excited about the possibilities this opens up for developers across different JavaScript environments.

In the future, we expect to contribute additional improvements to URLPattern’s performance, enabling more use cases for web application routing. Additionally, efforts to standardize the URLPatternList proposal will help deliver faster matching capabilities for server-side runtimes. We’re excited about these developments and encourage you to try URLPattern in your projects today.

Try it and let us know what you think by creating an issue on the workerd repository. Your feedback is invaluable as we work to further enhance URLPattern.

We hope to do our part to build a unified Javascript ecosystem, and encourage others to do the same. This may mean looking for opportunities, such as we have with URLPattern, to share API implementations across backend runtimes. It could mean using or contributing to web-platform-tests if you are working on a server-side runtime or web-standard APIs, or it might mean joining WinterTC to help define web-interoperable standards for server-side JavaScript.

2025-03-24 HackTues 11

Post Syndicated from Vasil Kolev original https://vasil.ludost.net/blog/?p=3502

Тази година StorPool бяхме спонсор на HackTues 11, и едно от нещата, които търсеха от нас, бяха ментори или членове на журито. Аз предпочетох да съм ментор, и се уговорих да си работя от там за двата дни на хакатона (четвъртък и петък).

Седмицата преди това бях в Тайланд за FOSSASIA, та бях изпуснал някакви неща (и ми се обаждаха да ми кажат да си попълня някакви документи). Та за някои неща нямах добра идея и ми ги разказваха в движение.

По правилата тази година, отборите си избираха менторите. Мен ме избра екип W-BT. Според тях основно заради python-а, който бях написал, че знам, според neter, понеже проектът им бил свързан със стари хора и им трябвал някакъв такъв.
(чак пък стар, само три пъти по-възрастен съм от тях)

Бяха (учудващо, поне за мен) добре организирани – бяха измислили какво точно ще правят още преди да се видя с тях, имаха сравнително добро разпределение на задачите, и дори за да избегнат забраната за всички под 9ти клас да стоят по цяла нощ/спят в залата, бяха си взели едно airbnb наблизо, от което да работят през нощта (което ми се видя като много добър hack).

Аз изкарах с тях двата дни и гледах да не им се меся много, и определено да не им решавам аз нещата (мисля, че се гледа криво на това менторът да ти напише кода), но debug-вах някакви неща, помагах с git и setup на работни среди, оправяне на текст и с измислянето на въпроси, които могат да очакват от журито.

(in other news, чудя се дали има смисъл да направя лекция “debug чрез print”, за нея имам страхотна история, която включва Алан Тюринг и Клод Шанън)

Не знам обаче как работеха всичките в тоя шум. В “Джон Атанасов” бяха наредени маси за всички отбори, бяха им докарали ток, и всички си работеха, но имаше много разговори и около 50-55db фонов шум (според калпавия измерващ app на телефона ми). Аз имах и някаква друга работа и определено ми пречеше, та по средата на хакатона се прежалих и си поръчах свестни слушалки (които ще дойдат съвсем навреме, следващата седмица…). Мисля си, че това беше основната причина да съм толкова уморен събота следобед и да не остана за финалната част, прибрах се и си легнах.

Та след като си направиха последните commit-и в 6:50 сутринта (при 6:59 краен срок), моите хора се явиха пред журито в 10:39. Това не беше най-лошия вариант де, имаше хора пред журито в 08:00, т.е. съвсем да не могат да поспят. Мисля, че бяха едни от най-добре справилите се с тази част, въпреки шума (част от полуфиналите бяха отстрани в “джобовете”, където на OpenFest-а слагаме детския кът и щандове, и нямаше начин да се ограничи шумът), ранния час и средно подлите въпроси от журито.

(Тая цялата работа със съня и денонощната работа ми докарва смесени чувства. Аз и като малък обичах да си доспивам, и въпреки, че съм правил разни неща за цяла нощ, като е трябвало да подкараме нещо счупено, също така спокойно мога да кажа, че почти всичкият код, писан в такова състояние е бил за триене после. Та, не знам това колко отговаря на реалния свят.
От друга страна, аз съм тръгнал от състезателното програмиране, което май още повече не отговаря на реалния свят, та вероятно нямам право да се оплаквам.
И ако моите деца някой ден поискат да ходят на такъв хакатон без спане, сигурно няма да съм много щастлив с идеята, ама ми се вижда малко вероятно да ги откажа…)

От нещата, които ми направиха неприятно впечатление (както и на колегите) беше начинът на използване на AI нещата и цялостното очакване, че те “знаят” какво правят. Имаше не само “дай chatgpt-то да ни изгенерира еди-какво-си”, но и в самите проекти имаше “и това го подаваме на OpenAI и то ни отговаря” (любимият ми пример беше при един проект, който анализираше извлечения от банкови сметки, как един член на журито пита “Добре, аз ей-сега му дадох един PDF от някакъв курсов проект, и то от него си измисли някакво голямо количество транзакции, това очаквано ли е?”). Мисля, че трябваше да има награда за не-използващи AI, или поне ползващи го по смислен начин.
(фирмената награда я дадохме на отбор, който това го беше направил както трябва)
Изобщо, тоя стохастичен папагал не е достатъчно добре разбран, и се струва магия на всички, както blockchain-а (който беше “тук нещо се случва и ставаш богат”). Чудя се дали мога да намеря някой да го обясни правилно.

Обаче най-важното беше, че всички бая се забавляваха, въпреки че подобно събитие по дефиниция си е напрегнато (и всичкият му график беше твърде оптимистичен, например почти без почивки между представянията за полуфиналите). Настроението се беше пренесло и върху журито – тяхната работа на практика е да се заяждат с участниците, но се усещаше един такъв тон на забавление в цялото нещо.
На финалите в журито имаше един член (който заслужава отделна награда), който изнамираше паролите, които хората бяха commit-нали и влизаше по админските и контролни системи на повечето проекти (един отбор си беше забравил AWS (или GCP?) token-ите в някакви commit-нати файлове и можеше да им се спре всичко). При един от отборите беше питал “Ама тук сте оставили админската парола на keycloak-а (през който минава всичката автентикация на приложението им) в един файл, то така не може ли всеки да влезе да вижда тия неща” и от отбора сравнително бързо успяха да отговорят “Ами то ние сме я сложили там, за да може да я види журито и по-добре да разгледа проекта”.
(5 минути смях в залата и ръкопляскания)

Ако мога да участвам догодина, едно от нещата, които бих направил/помогнал биха били някакви допълнителни workshop-и преди събитието, особено за по-младшите участници, за неща “как да работим по-ефективно” (сега е имало някакви, провеждани от предишни участници, но не мисля, че нещата, дето ми се иска са били засегнати). Това ми беше с доста участници наблюдението, че можеха да си спестят прилично време, ако ползваха alt-tab, разни други клавишни комбинации и като цяло някаква по-ясна организация на работното пространство. Мога даже да цитирам един разговор от при мен,
“Ползвай стрелката нагоре, защо се мъчиш да го пишеш наново”
“Уф, и баща ми все това ми казва”

[$] Lessons from open source in the Mexican government

Post Syndicated from jake original https://lwn.net/Articles/1013776/

The adoption of open-source software in governments has had its ups and
downs. While open source seems like a “no-brainer”, it turns out that
governments can be surprisingly resistant to using FOSS for a variety of
reasons. Federico González Waite spoke in the Open Government track at SCALE 22x in Pasadena,
California to recount his experiences
working with and for the Mexican government
. He led multiple projects
to switch away from proprietary, often predatory, software companies with
some success—and failure.

Security updates for Monday

Post Syndicated from jake original https://lwn.net/Articles/1015286/

Security updates have been issued by Debian (libxslt, mercurial, and webkit2gtk), Fedora (chromium, dotnet8.0, ffmpeg, jupyterlab, and kitty), Mageia (expat and libxslt), Red Hat (pcs), SUSE (apptainer, chromium, kernel, libarchive, mercurial, python311, radare2, xorg-x11-server, and zvbi), and Ubuntu (golang-github-cli-go-gh-v2 and nltk).

More Countries are Demanding Backdoors to Encrypted Apps

Post Syndicated from Bruce Schneier original https://www.schneier.com/blog/archives/2025/03/more-countries-are-demanding-back-doors-to-encrypted-apps.html

Last month, I wrote about the UK forcing Apple to break its Advanced Data Protection encryption in iCloud. More recently, both Sweden and France are contemplating mandating backdoors. Both initiatives are attempting to scare people into supporting backdoors, which are—of course—are terrible idea.

Also: “A Feminist Argument Against Weakening Encryption.”

За другите три кули при мол Парадайс и защо липсват

Post Syndicated from Боян Юруков original https://yurukov.net/blog/2025/drugite-tri-kuli/

Малко много станаха постовете конкретно за „оная“ карта, но покрай темите в последните дни ми се налага да ѝ обръщам повече внимание.

Когато я започнах средата на миналата година въвеждах сграда по сграда сравнявайки с това, което е построено или поне видимо на пространствените данни и това, което е отбелязано в портала на НАГ. До тук има над 24 хиляди полигона – говорих за това през януари. Описал съм подробно методологията и проблемите свързани с нея. В рамките на това въвеждане се допитвах редовно до различни групи и организации запознати с конкретни казуси и темата като цяло, особено когато имаше проблем с качеството на данните, на които разчитах.

Специално за пространството около Черни връх, което нашумя тези дни, първоначално дори не бях въвел въпросната 215 метрова кула и други три от по 180 метра, за които ще стане дума тук, защото реших, че е грешка в изписването на слой Застрояване. Нямаше да е за пръв път и в такива случаи търся да сравня с налични документи. За това място не открих. Тогава разпитах по описания горе начин и ми обясниха, че е наистина текуща тема, наистина това е ПУП-а и е приет с решение на СОС. Конкретно за 2025-метровата кула писах вчера с линкове към становища и фактология.

Днес, след като обявих нови функции към 3D картата за застрояването, Борис Бонев попита защо не съм отбелязал трите кули от по 180 метра на мола Парадайс. Виждат се на картата горе показваща прословутия слой застрояване и с какво всъщност работя, за да създам визуализацията. Спомням си, че бяхме обсъждали региона средата на миналата година заедно с доста хора и повечето смятаха тогава, че за разлика от нашумялата кула, тези трите по-скоро няма да видят бял свят. Затова не ги бях добавил, както и не бях отбелязал, че молът е разрешено да се строи до 50 метра, което е значително над сегашната височина.

На мястото на мола към този момент намирам над 50 различни документа, които може да разгледате на картата ми с документите. Повечето са разрешително за строеж, но за преустройство на магазини и складове. Някои са от времето на Диков, когато голяма част от тази и редица други каши са бетонирани та да се чудим как да ги разбиваме сега. Не се намира оригиналния ПУП, доклад или решения.

В духа на картата и как много подобни сгради всъщност са отбелязани – като онази огромната на бул. Цар Борис, например – следва наистина и тези кули да са също на картата. Затова ги добавих и вече може да ги намерите там. Отново напомням – няма известно движение по тях, няма решения, разрешения или каквото и да е поне в последните 10 години в посока тези кули. Не се съмнявам, че ще има опити да се спекулира с това – включително произвеждане на фалшиви новини, както и от хора, които знаят много добре всичко, което описвам. Тези се използват напоително не в интерес на града, а за политически цели, атаки срещу кметството и районните администрации, както и отклоняване на енергия и внимание от други теми, които са наистина важни. Добавям ги с ясното съзнание за този риск, защото все пак щом още по времето на Диков са влезли в ПУП, значи че както сега обсъжданите и много други, някой някога може да развее едни хартийки, да си напазарува експерти и анализи, да си плати или заплашва държавни служители и накрая когато събере заветната папка да върви при едни конкретни административни съдии да придвижва нещата.

Впрочем, промяната, която обявих по-рано днес, беше че вече може да натискате върху отбелязаните сгради на 3D картата и тя ще се опита да открие последните известни документи там, ако има въобще такива. Дава и линк към картата с документите, където с филтрите да търсите по-стари. Повечето документи вероятно няма да имат общо със самия строеж, а последвали промени като рекламни елементи, преустройство и прочие. Добра отправна точка е обаче и функцията с най-много запитвания.

The post За другите три кули при мол Парадайс и защо липсват first appeared on Блогът на Юруков.

2025-03-23 the “FOSDEM VideoBox” talk at FOSSASIA Summit 2025

Post Syndicated from Vasil Kolev original https://vasil.ludost.net/blog/?p=3499


This is a talk about the video-box that we used to run video on FOSDEM 2025, and that we’re testing, sorry, using, to do video at FOSSASIA 2025 🙂

(abstract)

Over the past years, the FOSDEM conference (a free and open-source developer event in Europe) has hacked together its own video recording and streaming setup. We stream 30 rooms with a video team that’s less than 30 people. The latest iteration of that was a lot of fun, and we’d like to share with everyone what it looks like, what it can do and how fun and hackable it is. We will explain our setup, and give a rundown of what’s in those weird boxes you might have seen.

The project is fully open source software and hardware, and everything is available in FOSDEM’s GitHub repos.

If you don’t want to listen to me, but want to see for yourself, everything – the hardware designs, assembly instructions, sources, ansible recipes – are in those two repos. Hack away 🙂
(there’s even a FOSSASIA branch for the things we had to change for this event)

The initial idea of this talk was to explain how useful this box is to any kind of event, for streaming, recording, etc, etc.. But there’s one more important point that I want to make, after talking to some people here.

THIS IS NOT HARD.

What you can see in this presentation and what we do is the product of a few slightly insane people. We didn’t know that some stuff was hard, and we didn’t care, we just tried to see what will happen. There were problems, there were wrong directions, but as you see, we have it working, and I do think that it’s possible for anyone here to do it.

This is one of the reasons we give the source for it – that people can learn from it, play with it, use it, etc.. It’s possible for people to create any such project – I have seen this again and again and again. I even have a favourite joke about it, I hope it translates well…

The mathematician Dantzig as a student was late for one lecture, came in the lecture room after everyone had left, and saw two mathematical problems written on the blackboard. He thought that those were homework, wrote them down, and went home. On the next day, he was a bit early, went to the professor and said:
“From the homework yesterday, I managed to solve the first one, but I’m having trouble with the second one”
“What homework?”
“The two problems that were written on the board”
“But… but… those were examples of unsolvable problems!”

So, seriously. When you look at the box, you shouldn’t think “wow, what great thing/product”. You should be thinking “I can make one better/I can make it better”.

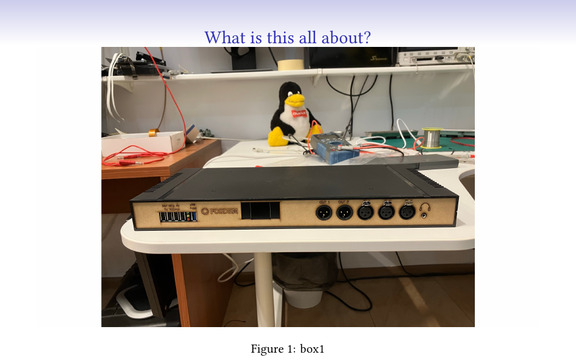
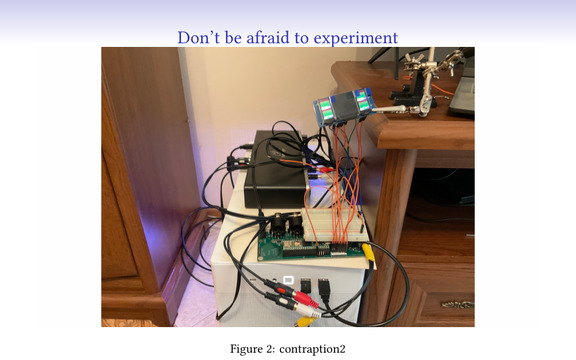
And to show what we’ve been through (because people see only the end result) – here is an example of a setup for part of the development. It loks scary, feels like it can catch fire if you touch anything, and is so far from what you see in the box.

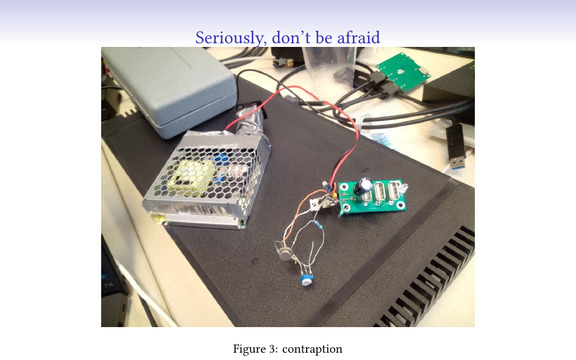
And this is a temporary version of the power board. I am not sure if you can see it very well, and I’m not sure you would want to see this horrible contraption. You should not be afraid to make things like this and experiment. Yes, it takes time, yes, it sometimes catches fire, but when that happens you just put out the fire and think of a new way forward. In the end it works!:)

Seriously. Experiment and do stupid things. This is how people learn.

(I’ve heard that there are some really smart people that learn from other people’s mistakes, but at least I need to make my own:) )

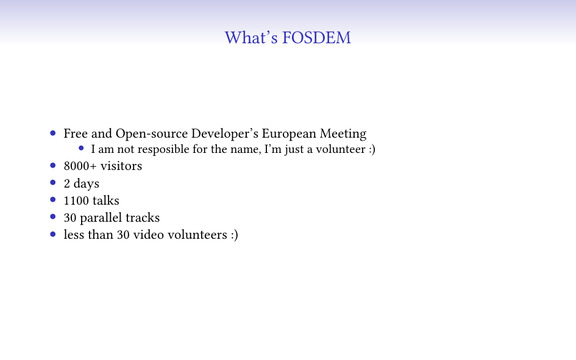
To explain where all this comes from, a few short words about FOSDEM – it’s the largest open-source event in Europe. It gathers some thousands of people in a cold, windy and rainy place with good beer to present and discuss all kinds of open-source projects. It’s a bit crazy, with 30 parallel tracks and more than a thousand talks.

And I’m really happy to be a part of it. It’s one of the things that I participate in that no other group does, and that’s mostly because nobody is crazy enough 🙂

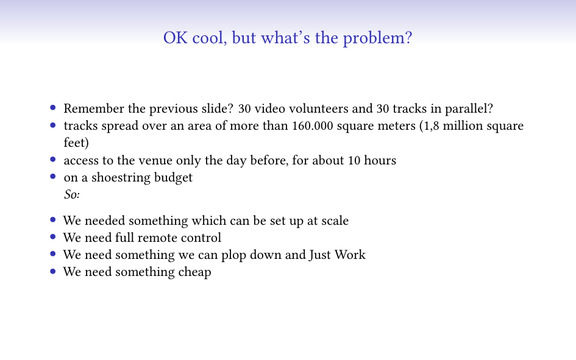
So, large event, large venue (multiple buildings), only half a day for the setup. We have next to no manpower and no time 🙂 . We want to have working video, because there are a lot of lazy people around the world that don’t feel like traveling to FOSDEM, and rooms are often so full that people sit outside and watch the streams.

And, FOSDEM is a completely open and free event, we can’t just throw money at the problem and have a setup that would cost a few million dollars.

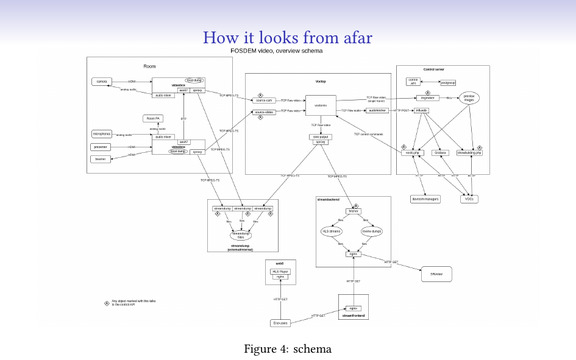
This is the overall architecture of the video at FOSDEM. We capture the camera and the presenter’s slides, they get sent to a video mixer, which mostly creates a picture-in-picture stream. That stream gets sent to the outside world to see, and gets recorded so it can be reviewed later.

A few things in this setup we didn’t finish for this year, like audio transport over the network (which would’ve saved us one long cable per room), but there’s always next year 🙂

This setup scales really well – we’ve done FOSDEM with between 20 and 30 rooms, and are pretty confident it would scale to a hundred or more. We manage to set the up in half day with 7-8 teams with 3 people each, and to tear it down after the event in three hours.

Not having too many people, we prioritize the ease of setup and operation. We’re also lazy 🙂

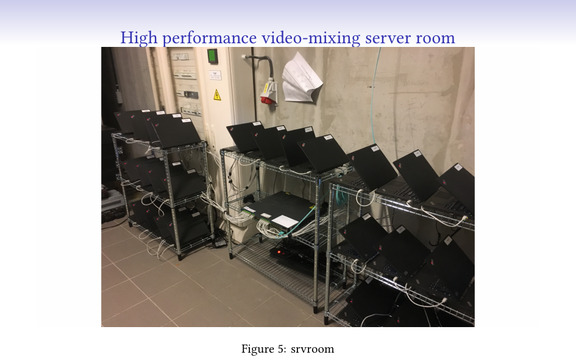
And such an event requires a tremendous amount of computing power to mix the video…

… just kidding. 10-year old laptops can deal with that without any issues 🙂 You can also see them here in the racks (Ikea wine racks). These machines run software called “voctomix”, developed in Python by c3voc and which does some magic with gstreamer.

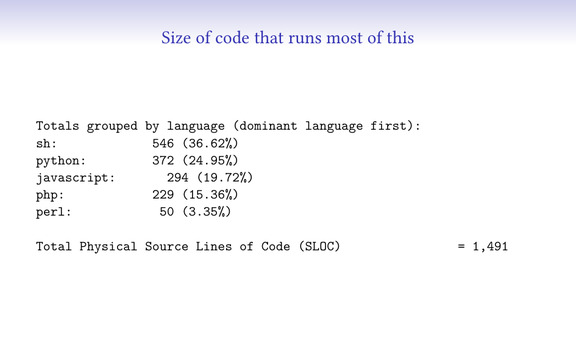
Remember the slide with “this is not hard”?

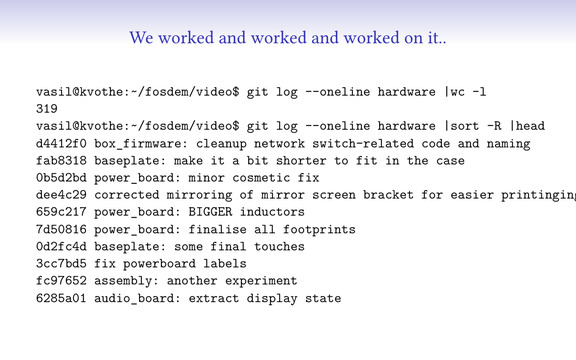
To show how much code we’ve written to run all that infrastructure above, I ran the tool that counts lines of code, and when I removed one external javascript library, this is what’s left. With 1500 lines of code you can run the video of one of the largest conferences there is.

There’s a bit more code in the firmware for the hardware and few other external things, but the above is enough for almost everything.

For 7-8 years we used this, but it was getting old (and some of the wood a bit moldy). It was a combination of a Banana PI, sata SSD, small switch, one BMD recorder (device that captures HDMI and gives it over USB), and for half of the boxes, a scaler – something that you can plug any laptop in and it’ll be able to change the signal to something that we can use.

The last part is always a problem, because laptops do weird things. Not to mention Macbooks.

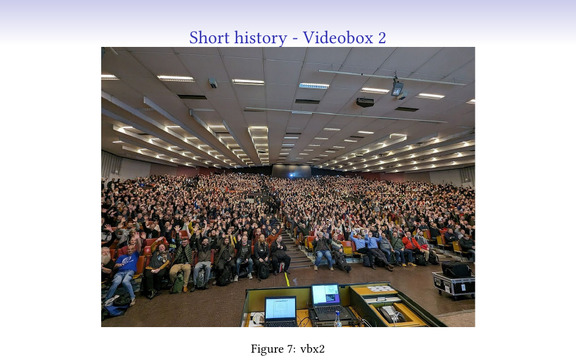
As the old boxes were breaking down, we made a stopgap measure – a laptop, and a capture card, in a transportable form-factor. This worked relatively well for 2024, but was larger than we liked, and the laptops we got for cheap had USB issues (which were fixed in a newer version of the laptop, but that did not have Ethernet ports).

You can see it on this picture in action – it’s the laptop with purple background and the box below it.

This worked pretty well, but was a bit unwieldy, and the box itself was almost empty. We couldn’t come up with a way to put the laptop in, so we started looking at options.

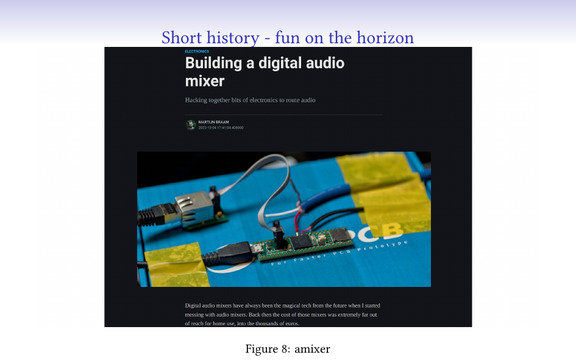
Then, Martijn Braam visited us during the 2024 event and metioned “you know, I’ve made a stand-alone open-source audio mixer, it’s a simple board and a chip”. We thought we can use it and get rid of the mixers we carry around, some cables, etc.

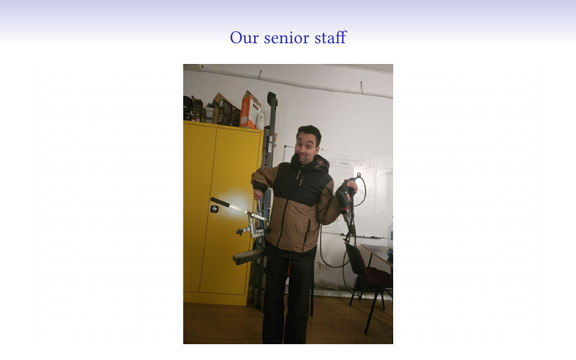
Here’s a picture of someone from our senior staff, responsible for the design of the power board and a lot of the low-level hardware and assembly. As you see, he has all the tools needed for the job. He was the other person really interested in designing hardware.

And if we have to say what were the driving words behind the project, it was this. We wanted something that doesn’t cost too much, that we can make in large amounts and that could do all the weird things we wanted.

The thing is, as soon as you start to make your own hardware, you start to get greedy and ask “what else can we do?”.There are so many interesting things you can add, to handle tasks that you were doing with extra hardware or software before.

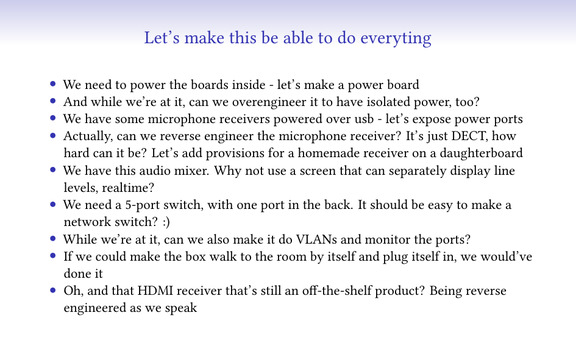
So the first is trivial, we need to power things inside, so you design your own power board.

Then, we have microphone receivers. They are battery-powered, but can also be powered via USB. So now we have 4 charging ports (and we can turn them off and on from software).

And for crazy ideas, why not design a radio INSIDE the box, that can just receive wireless microphones? Turns out that is pretty much possible, we didn’t have the time for it and there were some snags… But even to me this sounds crazy.

And well, in the end, how hard would it be to design a network switch? Turns out, not that hard. We needed just one revision to make it work, and a few days ago, just becase we can, we added initial support for VLANs in the switch – so that can actually do interesting network topologies.

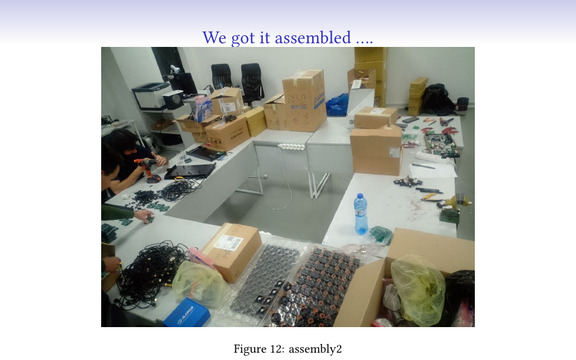
This is the part in movies where there’s montage with a music background. We worked on different pieces through the summer of 2024, a few months ago…

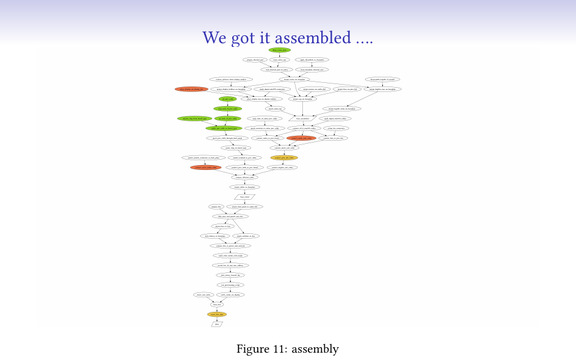
We started assembling it. This is a simple assembly flow chart 🙂 Might look daunting, but it actually took just two-three weekends and about 10 people to assemble, provision and test 70 boxes.

And because we were running late, this mostly happened in the weekend between Christmas and New Year. Not sure how to translate this to you, but let’s say we were the only people working in the country…

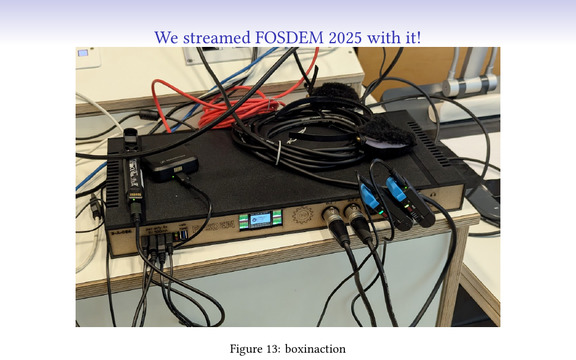
We got the boxes ready somewhere mid-January, and ran FOSDEM 2025 with them 2 weeks later.
And it worked. We still can’t believe it did. We even managed to do a talk there about the box itself 🙂
And yes, much like this very talk, we had the idea of actually having a talk, less than 24h before.

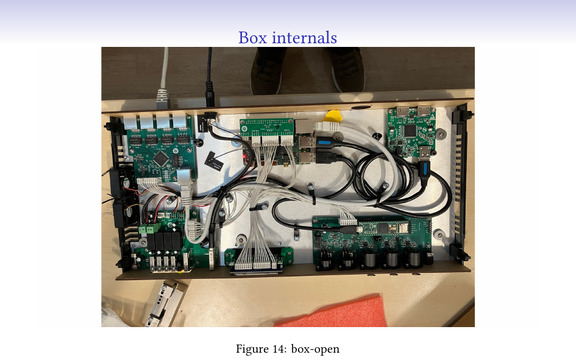
This is how the box looks on the inside. I’ve left a few of them open while running, so you can all see them.

There are two boards that we did not design: a Raxda X4 (an Intel-based single board computer) and a MS2131-based HDMI capture device with a loop out (but we’re working on that one).

The rest is:
An audio mixer with three inputs and two outputs. So you can have three microphones (enough for almost everything), one output to your camera and one to the room sound system. We needed a microcontroller with USB support, so we added an off-the-shelf Teensy on top of it.

An ethernet switch, so you can also connect other boxes and devices to the network (and build your own network). I’m actually afraid to show the topology we have right now in this venue 🙂

A power board powers the other boards, and provides the external charging ports. Plus it controls the fans, has a temperature sensor, controls the pass-through USB port to the radxa and more.

And a handful of breakout boards, to be able to cable things up neatly.

If you take a look in the training rooms, you’ll see an interesting modification of the setup. It uses an USB camera, has a single box, and can do all video and video mixing in that single box. So one box like this, one cheap camera, microphones, and you can record & stream a room pretty quicky.

This is still under development (I made a few fixes in the last few days, and there’ll be more). Its current interface is “SSH into it and run commands”, which is not easy for most people. But, this is also being worked on, so at some point there will be even an user-friendly box 🙂

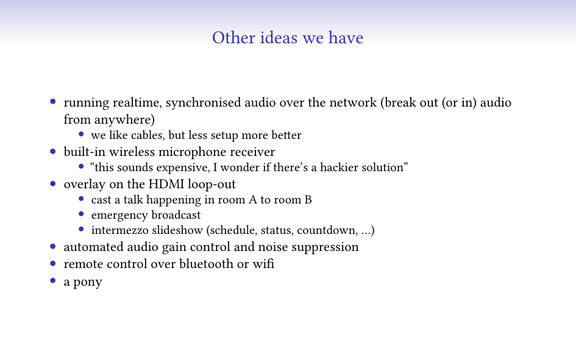
Of course, we are not even remotely close to what we want. There are so many ideas than those just listed here, and even some of these were thought up while we were writing this presentation, and I can’t wait to show it to the rest of the team.

I really hope they don’t lynch me.

These are two things from our TODO, as an example. As an open-source project, we welcome patches 🙂

We have tried to make sure this is useful not just to us. The boxes, the software around them, the overal ideas can be useful to everyone who does events or video for events, and should be possible to do video streaming and recording in an easy, stable way with a good quality. You won’t get the very nice features (like a multi-camera setup, drones taking photos from above, etc.), but you will have the sound, the presentation, the lecturer visible and recordings which would be usable to everyone that has not being able to attend.

FOSDEM lends this stuff, and we’re happy to explain how to use it. You can also build your own and we can help with the specifics if needed (but everything should be in the repo anyway).

And we can always use more contributors 🙂

Remember this slide? Do not be afraid to hack. Do not think this is something extremely complex and impossible to do to. You just need to start.

Please do 🙂

Assessment of DOGE and Musk’s Actions for Government Efficiency

Post Syndicated from Bozho original https://techblog.bozho.net/assessment-of-doge-and-musks-actions-for-government-efficiency/

The Trump administration began with a commitment to optimizing the efficiency of the government, introducing the so-called DOGE (Department of Government Efficiency) under Elon Musk. On the first day, I wrote that I would follow DOGE’s actions in optimizing the administration with interest. This is a task that we also face in my country, with electronic governance (of which I was the first minister a few years ago) being a tool for achieving it. On the very day of the executive order establishing DOGE, I wrote to colleagues that “the risky part is that every structure will have to provide them with all non-classified documents” and that they would likely be looking for “skeletons in the closet.”

This risk, stemming from the executive order, quickly materialized due to the actions of DOGE employees (or USDS, which is the U.S. government’s structure for IT services and administrative modernization, serving as DOGE’s main tool). The employees, who are 20-25-year-old IT specialists, gained access to the systems and databases of several key government agencies, even connecting external hard drives. This understandably sparked serious dissatisfaction.

I do not dispute the right of specialized units to access data and documents across the entire government structure. Nor do I deny the right to close down agencies or terminate funding — these are political decisions (subject to judicial oversight) that any administration has the authority to make (and anyone has the right to disagree and challenge them in court). Moreover, fraud and inefficiencies in spending certainly exist, and an external review of the data and systems can identify and eliminate them.

However, for the implementation of these political decisions to be legitimate, it must follow established rules. It appears that Musk and his team operate under the assumption that they are above the rules — that they can take over the information systems of key government agencies through “top-down orders.” These actions should be carried out properly, especially considering information security and data protection, which are at risk from such ad-hoc measures.

I will give a few examples from my time as a minister and earlier as an advisor, fully aware that the scale is different, but there are still direct parallels.

The first example is the SEBRA system (the Ministry of Finance’s budget payment system). Musk is essentially doing the same thing — extracting and potentially publishing all state payments. However, we did it properly — together with the Minister of Finance, we submitted a proposal to the Council of Ministers, designating payment data as a priority data set for publishing in compliance with the Access to Public Information Act. This decision mandated the Ministry of Finance to provide the data to the Ministry of e-Government in a specific format so that it could be processed, anonymized, and published. The Ministry of Finance assigned its contractor to extract the data and securely transfer it to the Ministry of e-Government, where the processing and anonymization code was published in an open-source repository. At the same time, a working group revised a regulation so that the system would automatically publish such data. If we had done it Musk’s way, I would have simply sent one of my advisors and told them, “Plug in your laptop and get access to the database.” And that would have been wrong.

In 2016, we opened up data from the Commercial Register and the Public Procurement Register. At the time, I was an advisor, but the data disclosure process involved official correspondence, and I never had direct access to the database — experts from the respective institutions wrote queries to the database, and I received a test database without real data to work on queries for extracting information. We also published the code for the anonymization tool used for the Commercial Register. This was all done based on formal communication and a valid legal basis under the Access to Public Information Act.

As a minister (after all, officially elected by parliament, not an unknown staffer), I requested to review systems, but someone else always had to show them to me while I only directed what should be extracted (even though I could have found it myself much faster). In these cases, the approach was always, “Sit here and show me,” or “Based on [legal grounds], please provide me with the following data,” rather than “Give me access to the database and leave.”

Yes, there is a risk of refusal or sabotage of these efforts, but there are other measures for that—those who sabotage can be reassigned or even dismissed if they do not comply with a lawful order. However, Musk is doing the opposite—his people (who have not been properly vetted) are acting unlawfully and are being stopped by the courts. In some places, internal teams correctly identified these actions as an “insider threat.” In principle, every access to databases should leave a trace, and access for usual personnel must be controlled because data misuse is not only a risk from external actors but also from internal ones.

The issue of access to institutional data is extremely serious and cannot be resolved with a blanket statement in a presidential executive order. It is serious because a modern state largely depends on its registers and databases. Their security and integrity are fundamental to many policies and their success or failure. “Seizing control” of registers and databases is a key instrument of power with significant negative potential.

Beyond this specific case, if DOGE had acted “properly,” it would have taken a few more months, but its actions would have had more legitimacy. However, in line with other actions and statements by the U.S. government, it seems that they are more interested in breaking things and disregarding the rules.

Government efficiency is important, and reducing unnecessary expenses is a valid political priority. But while it can be a legitimate goal, it can also serve as a cover for less honorable intentions. And although I come from the startup world, I do not agree with the approach that a government and administration can be run like a startup. In startups, the goal is to move fast, even at the risk of breaking things. In the public sector, it is more important not to break things, because lives and livelihoods depend on it, which is why processes take longer. And when you act by breaking the rules under the justification of political expediency, you do not build trust — you destroy it.

The post Assessment of DOGE and Musk’s Actions for Government Efficiency appeared first on Bozho's tech blog.

The collective thoughts of the interwebz