Post Syndicated from daroc original https://lwn.net/Articles/971093/
The LWN.net Weekly Edition for May 2, 2024 is available.
Post Syndicated from daroc original https://lwn.net/Articles/971093/
The LWN.net Weekly Edition for May 2, 2024 is available.
Post Syndicated from Tyler Holmes original https://aws.amazon.com/blogs/messaging-and-targeting/how-to-send-mms-using-amazon-pinpoint/
In our digital age, communication has evolved far beyond simple SMS, short for Simple Message Service. The rise of multimedia messaging has transformed the way we share information, express ourselves, and stay connected. MMS, short for Multimedia Messaging Service, is a technology that has become an integral part of our daily lives, enabling us to convey messages that go beyond the confines of plain text. MMS allows senders to transmit a variety of media, including images, videos, audio recordings, and even documents, alongside traditional text. This powerful combination has revolutionized the way we communicate, making it easier to share experiences, ideas, and emotions in a more engaging and visually compelling manner. In a world where visual content is becoming increasingly dominant, MMS has become a crucial tool for companies to communicate with their customers.
MMS is similar to SMS but has some very distinct differences that enable you to send and engage with your customers in different ways.
Here are some examples of how MMS messages can be used:
 Check out this exclusive sneak peek video.“
 Here’s a fun photo from our recent in-store event. Thanks for stopping by!”
 Explore our latest makeup collection with this handy lookbook.”
It’s important to note that you do not need to send all of your messages using one or the other. As an example you can use SMS for One Time Password (OTP) sends since they do not require media and generally should be a single message part in any language and use MMS to enable an eye catching marketing release with pictures or video.
You can use the AWS CLI or Amazon Pinpoint SMS and voice v2 API to send MMS messages to your customers. Use the send-media-message AWS CLI command to send an MMS message. There are two ways to send MMS depending on whether you are including media with your message.
The first step to sending MMS is to make sure that you have an Origination Identity (OID) that is enabled for MMS. Amazon Pinpoint supports sending MMS to the US and Canada. Eligible MMS numbers in the US include 10DLC, toll-free, and short codes. Canadian eligible MMS numbers include long codes and short codes.
NOTE: If you procured originators for the US and Canada prior to May 2024, in some cases, existing Pinpoint SMS US and Canadian phone will be automatically updated to begin supporting MMS. To determine if your existing Amazon Pinpoint number(s) are eligible, navigate to the Amazon Pinpoint console Phone Numbers page. If MMS is listed under the “capabilities” column, you can begin using that number for MMS immediately if your number is in an active state. For these existing eligible numbers, there is no additional registration requirement as long as your use case doesn’t change. If the capability listed only shows SMS, you will need to procure a new US or Canadian phone number which will automatically include MMS.

For all newly purchased(Post May 2024) Amazon Pinpoint US and Canadian phone numbers, both SMS and MMS services will automatically be added at time of purchase, simplifying the registration process and providing the flexibility to use either messaging formats upon approval.
You can get started by navigating to the Pinpoint SMS console phone number page and selecting Request Originator. From there, simply follow the self-guided steps for purchasing and registering the phone number If you need help determining what type of OID you need consult this tutorial. Information on registering for MMS enabled OIDs can be found here:
Sending MMS with media included requires you to create a bucket in Simple Storage Service (S3) that your media can be accessed from. The media files have to be stored in a publicly available S3 bucket. Information on creating a bucket and uploading media objects to it can be found here:
You will include the link to this bucket in your “sendMediaMessage” call using the “MediaUrls” attribute seen below. The supported media files formats can be found here.

The only required attributes are:
The CLI command below will send an MMS with the text of “Check out this Photo!” and will have a JPEG image included.
If Amazon Pinpoint SMS accepts the command you will receive the MessageID. This only means the command was successfully received and not that the destination device has received the message yet.

Sending an MMS with no media attached is nearly the same, you just don’t include a link to an S3 bucket in the “MediaUrls” attribute, it’s as easy as that. You might do this to reduce costs if you are sending a message with characters that are outside of the GSM 03.38 character or on a long message with more than 160 GSM 03.38 characters like the below.
The CLI command below will send the following message:
“This message will be broken up into more than 3 message parts if sent via SMS so we are going to use MMS instead to save costs. This is a great way to reduce your costs even if you are not sending any media such as a photo or video attached. Though a single MMS message costs more than a single SMS message there are times where you may want to use MMS simply because it is a cheaper way of communicating with your recipients. Since you can use SMS and MMS for different scenarios you may choose to send an OTP message with SMS and something like this message using MMS.”
In this post you learned about the differences between SMS and MMS and how each can be used to send different types of messages. MMS is an excellent channel to communicate with your recipients to send highly engaging content that in some scenarios can reduce your cost while improving your customers’ experience. If you are sending content outside of the GSM 03.38 character set, want to send images, videos, or attachments such as receipts then MMS is definitely something you should look into.
Post Syndicated from The History Guy: History Deserves to Be Remembered original https://www.youtube.com/watch?v=mfIhWXfn4fY
Post Syndicated from Cliff Robinson original https://www.servethehome.com/leaky-hpe-sgi-cheyenne-supercomputer-for-sale-at-perhaps-a-deal-intel-supermicro-mellanox/
A leaky HPE SGI Cheyenne Supercomputer is on auction for about the price of a single NVIDIA H100 GPU system
The post Leaky HPE SGI Cheyenne Supercomputer for Sale at Perhaps a Deal appeared first on ServeTheHome.
Post Syndicated from Vineeth Nair original https://aws.amazon.com/blogs/devops/automate-terraform-deployments-with-amazon-codecatalyst-and-terraform-community-action/
Amazon CodeCatalyst integrates continuous integration and deployment (CI/CD) by bringing key development tools together on one platform. With the entire application lifecycle managed in one tool, CodeCatalyst empowers rapid, dependable software delivery. CodeCatalyst offers a range of actions which is the main building block of a workflow, and defines a logical unit of work to perform during a workflow run. Typically, a workflow includes multiple actions that run sequentially or in parallel depending on how you’ve configured them.
Infrastructure as code (IaC) has become a best practice for managing IT infrastructure. IaC uses code to provision and manage your infrastructure in a consistent, programmatic way. Terraform by HashiCorp is one of most common tools for IaC.
With Terraform, you define the desired end state of your infrastructure resources in declarative configuration files. Terraform determines the necessary steps to reach the desired state and provisions the infrastructure automatically. This removes the need for manual processes while enabling version control, collaboration, and reproducibility across your infrastructure.
In this blog post, we will demonstrate using the “Terraform Community Edition” action in CodeCatalyst to create resources in an AWS account.

Figure 1: Amazon CodeCatalyst Action
To follow along with the post, you will need the following items:
In this walkthrough we create an Amazon S3 bucket using the Terraform Community Edition action in Amazon CodeCatalyst. The action will execute the Terraform commands needed to apply your configuration. You configure the action with a specified Terraform version. When the action runs it uses that Terraform version to deploy your Terraform templates, provisioning the defined infrastructure. This action will run terraform init to initialize the working directory, terraform plan to preview changes, and terraform apply to create the Amazon S3 bucket based on the Terraform configuration in a target AWS Account. At the end of the post your workflow will look like the following:

Figure 2: Amazon CodeCatalyst Workflow with Terraform Community Action
To begin, we create a workflow that will execute our Terraform code. In the CodeCatalyst project, click on CI/CD on left pane and select Workflows. In the Workflows pane, click on Create Workflow.

Figure 3: Creating Amazon CodeCatalyst Workflow
We have taken an existing repository my-sample-terraform-repository as a source repository.

Figure 4 : Creating Workflow from source repository
Once the source repository is selected, select Branch as main and click Create. You will have an empty workflow. You can edit the workflow from within the CodeCatalyst console. Click on the Commit button to create an initial commit:

Figure 5: Initial Workflow commit
On the Commit Workflow dialogue, add a commit message, and click on Commit. Ignore any validation errors at this stage:

Figure 6: Completing Initial Commit for Workflow
For this post, we will use an AWS Cloud9 Dev Environment to edit our workflow. Your first step is to connect to the dev environment. Select Code → Dev Environments.

Figure 7 : Navigate to CodeCatalyst Dev Environments
If you do not already have a Dev Environment you can create an instance by selecting the Create Dev Environment dropdown and selecting AWS Cloud9 (in browser). Leave the options as default and click on Create to provision a new Dev Environment.

Figure 8: Create CodeCatalyst Dev Environment
Once the Dev Environment has provisioned, you are redirected to a Cloud9 instance in browser. The Dev Environment automatically clones the existing repository for the Terraform project code. We at first create a main.tf file in root of the repository with the Terraform code for creating an Amazon S3 bucket. To do this, we right click on the repository folder in the tree-pane view on the left side of the Cloud9 Console window and select New File

Figure 9: Creating a new file in Cloud9
We are presented with a new file which we will name main.tf, this file will store the Terraform code. We then edit main.tf by right clicking on the file and selecting open. We insert the code below into main.tf. The code has a Terraform resource block to create an AWS S3 Bucket. The configuration also uses Terraform AWS datasources to obtain AWS region and AWS Account ID data which is used to form part of the bucket name. Finally, we use a backend block to configure Terraform to use an AWS S3 bucket to store Terraform state data. To save our changes we select File -> Save

Figure 10: Adding Terraform Code
Now let’s start creating Terraform Workflow using Amazon CodeCatalyst Terraform Community Action. Within your repository go to .codecatalyst/workflows directory and open the <workflowname.yaml> file.

Figure 11: Creating CodeCatalyst Workflow
The below code snippet is an example workflow definition with terraform plan and terraform apply. We will enter this into our workflow file, with the relevant configuration settings for our environment.
The workflow does the following:
Name: terraform-action-workflow
Compute:
  Type: EC2
  Fleet: Linux.x86-64.Large
SchemaVersion: "1.0"
Triggers:
  - Type: Push
    Branches:
      -  main
Actions:
  PlanTerraform:
    Identifier: codecatalyst-labs/provision-with-terraform-community@v1
    Environment:
      Name: dev
      Connections:
        - Name: codecatalyst
          Role: CodeCatalystWorkflowDevelopmentRole # The IAM role to be used
    Inputs:
      Sources:
        - WorkflowSource
    Outputs:
      Artifacts:
        - Name: tfplan # generates a tfplan output artifact
          Files:
            - tfplan.out
    Configuration:
      AWSRegion: eu-west-2
      StateBucket: tfstate-bucket # The Terraform state S3 Bucket
      StateKey: terraform.tfstate # The Terraform state file
      StateKeyPrefix: states/ # The path to the state file (optional)
      StateTable: tfstate-table # The Dynamo DB database
      TerraformVersion: ‘1.5.1’ # The Terraform version to be used
      TerraformOperationMode: plan # The Terraform operation- can be plan or apply
  ApplyTerraform:
    Identifier: codecatalyst-labs/provision-with-terraform-community@v1
    DependsOn:
      - PlanTerraform
    Environment:
      Name: dev
      Connections:
        - Name: codecatalyst
          Role: CodeCatalystWorkflowDevelopmentRole
    Inputs:
      Sources:
        - WorkflowSource
      Artifacts:
        - tfplan
    Configuration:
      AWSRegion: eu-west-2
      StateBucket: tfstate-bucket
      StateKey: terraform.tfstate
      StateKeyPrefix: states/
      StateTable: tfstate-table
      TerraformVersion: '1.5.1'
TerraformOperationMode: applyThe workflow now contains CodeCatalyst action for Terraform Plan and Terraform Apply.
To save our changes we select File -> Save, we can then commit these to our git repository by typing the following at the terminal:
git add . && git commit -m ‘adding terraform workflow and main.tf’ && git pushThe above command adds the workflow file and Terraform code to be tracked by git. It then commits the code and pushes the changes to CodeCatalyst git repository. As we have a branch trigger for main defined, this will trigger a run of the workflow. We can monitor the status of the workflow in the CodeCatalyst console by selecting CICD -> Workflows. Locate your workflow and click on Runs to view the status. You will be able to observe that the workflow has successfully completed and Amazon S3 bucket is created.

Figure 12: CodeCatalyst Workflow Status
If you have been following along with this workflow, you should delete the resources that you have deployed to avoid further charges. The walkthrough will create an Amazon S3 bucket named <your-aws-account-id>-<your-aws-region>-terraform-sample-bucket in your AWS account. In the AWS Console > S3, locate the bucket that was created, then select and click Delete to remove the bucket.
In this post, we explained how you can easily get started deploying IaC to your AWS accounts with Amazon CodeCatalyst. We outlined how the Terraform Community Edition action can streamline the process of planning and applying Terraform configurations and how to create a workflow that can leverage this action. Get started with Amazon CodeCatalyst today.
Post Syndicated from Talks at Google original https://www.youtube.com/watch?v=FABczqq-YDk
Post Syndicated from jzb original https://lwn.net/Articles/971980/
Version 8.0 of the terminal text editor GNU nano has been
released. This update includes several changes to keybindings to be
more newcomer-friendly, such as remapping Ctrl-F to forward-search and
adding an option for modern bindings:
Command-line option –modernbindings (-/) makes ^Q quit, ^X cut,
^C copy, ^V paste, ^Z undo, ^Y redo, ^O open a file, ^W write a
file, ^R replace, ^G find again, ^D find again backwards, ^A set
the mark, ^T jump to a line, ^P show the position, and ^E execute.
The release also provides access to 14 levels of gray scale in xterm (up
from four), as well as many bug fixes.
Post Syndicated from Satish Nandi original https://aws.amazon.com/blogs/big-data/analyze-more-demanding-as-well-as-larger-time-series-workloads-with-amazon-opensearch-serverless/
In today’s data-driven landscape, managing and analyzing vast amounts of data, especially logs, is crucial for organizations to derive insights and make informed decisions. However, handling this data efficiently presents a significant challenge, prompting organizations to seek scalable solutions without the complexity of infrastructure management.
Amazon OpenSearch Serverless lets you run OpenSearch in the AWS Cloud, without worrying about scaling infrastructure. With OpenSearch Serverless, you can ingest, analyze, and visualize your time-series data. Without the need for infrastructure provisioning, OpenSearch Serverless simplifies data management and enables you to derive actionable insights from extensive repositories.
We recently announced a new capacity level of 10TB for Time-series data per account per Region, which includes one or more indexes within a collection. With the support for larger datasets, you can unlock valuable operational insights and make data-driven decisions to troubleshoot application downtime, improve system performance, or identify fraudulent activities.
In this post, we discuss this new capability and how you can analyze larger time series datasets with OpenSearch Serverless.
The compute capacity for data ingestion and search or query in OpenSearch Serverless is measured in OpenSearch Compute Units (OCUs). These OCUs are shared among various collections, each containing one or more indexes within the account. To accommodate larger datasets, OpenSearch Serverless now supports up to 200 OCUs per account per AWS Region, each for indexing and search respectively, doubling from the previous limit of 100. You configure the maximum OCU limits on search and indexing independently to manage costs. You can also monitor real-time OCU usage with Amazon CloudWatch metrics to gain a better perspective on your workload’s resource consumption.
Dealing with larger data and analysis needs more memory and CPU. With 10TB data size support, OpenSearch Serverless is introducing vertical scaling up to eight times of 1-OCU systems. For example, the OpenSearch Serverless will deploy a larger system equivalent of eight 1-OCU systems. The system will use hybrid of horizontal and vertical scaling to address the needs of the workloads. There are improvements to shard reallocation algorithm to reduce the shard movement during heat remediation, vertical scaling, or routine deployment.
In our internal testing for 10TB Time-series data, we set the Max OCU to 48 for Search and 48 for Indexing. We set the data retention for 5 days using data lifecycle policies, and set the deployment type to “Enable redundancy” making sure the data is replicated across Availability Zones . This will lead to 12_24 hours of data in hot storage (OCU disk memory) and the rest in Amazon Simple Service (Amazon S3) storage. We observed the average ingestion achieved was 2.3 TiB per day with an average ingestion performance of 49.15 GiB per OCU per day, reaching a max of 52.47 GiB per OCU per day and a minimum of 32.69 Gib per OCU per day in our testing. The performance depends on several aspects, like document size, mapping, and other parameters, which may or may not have a variation for your workload.
You can start using our expanded capacity today by setting your OCU limits for indexing and search to 200. You can still set the limits to less than 200 to maintain a maximum cost during high traffic spikes. You only pay for the resources consumed, not for the max OCU configuration.
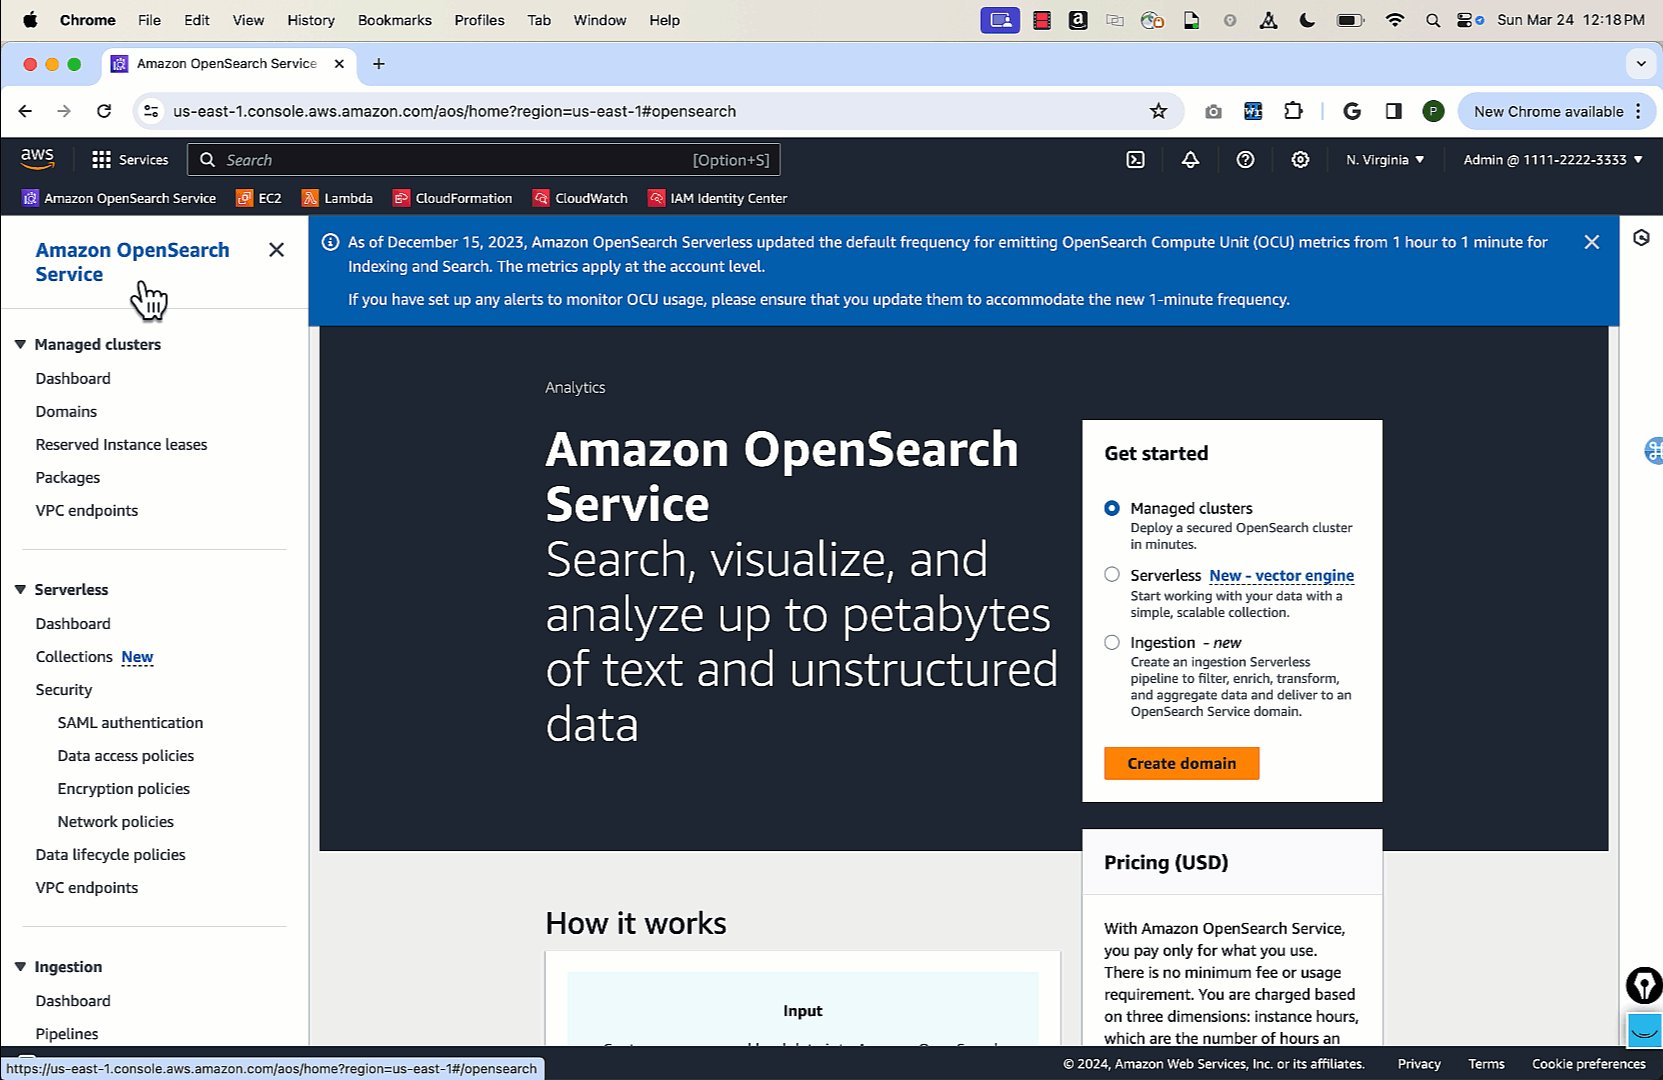
You can use the load generation scripts shared in the following workshop, or you can use your own application or data generator to create a load. You can run multiple instances of these scripts to generate a burst in indexing requests. As shown in the following screenshot, we tested with an index, sending approximately 10 TB of data. We used our load generator script to send the traffic to a single index, retaining data for 5 days, and used a data life cycle policy to delete data older than 5 days.

Before this release, OpenSearch Serverless auto-scaled by horizontally adding the same-size capacity to handle increases in traffic or load. With the new feature of vertical scaling to a larger size capacity, it can optimize the workload by providing a more powerful compute unit. The system will intelligently decide whether horizontal scaling or vertical scaling is more price-performance optimal. Vertical scaling also improves auto-scaling responsiveness, because vertical scaling helps to reach the optimal capacity faster compared to the incremental steps taken through horizontal scaling. Overall, vertical scaling has significantly improved the response time for auto_scaling.
We encourage you to take advantage of the 10TB index support and put it to the test! Migrate your data, explore the improved throughput, and take advantage of the enhanced scaling capabilities. Our goal is to deliver a seamless and efficient experience that aligns with your requirements.
To get started, refer to Log analytics the easy way with Amazon OpenSearch Serverless. To get hands-on experience with OpenSearch Serverless, follow the Getting started with Amazon OpenSearch Serverless workshop, which has a step-by-step guide for configuring and setting up an OpenSearch Serverless collection.
If you have feedback about this post, share it in the comments section. If you have questions about this post, start a new thread on the Amazon OpenSearch Service forum or contact AWS Support.
 Satish Nandi is a Senior Product Manager with Amazon OpenSearch Service. He is focused on OpenSearch Serverless and has years of experience in networking, security and ML/AI. He holds a Bachelor’s degree in Computer Science and an MBA in Entrepreneurship. In his free time, he likes to fly airplanes, hang gliders and ride his motorcycle.
 Michelle Xue is Sr. Software Development Manager working on Amazon OpenSearch Serverless. She works closely with customers to help them onboard OpenSearch Serverless and incorporates customer’s feedback into their Serverless roadmap. Outside of work, she enjoys hiking and playing tennis.
 Prashant Agrawal is a Sr. Search Specialist Solutions Architect with Amazon OpenSearch Service. He works closely with customers to help them migrate their workloads to the cloud and helps existing customers fine-tune their clusters to achieve better performance and save on cost. Before joining AWS, he helped various customers use OpenSearch and Elasticsearch for their search and log analytics use cases. When not working, you can find him traveling and exploring new places. In short, he likes doing Eat → Travel → Repeat.
Post Syndicated from jzb original https://lwn.net/Articles/971143/
Ubuntu 24.04 LTS, code-named “Noble Numbat”, was released on April 25. This release includes GNOME 46, installer updates,
security enhancements, a lot of updated packages, and a new App Center
that puts a heavy emphasis on using Snaps to install software. It is not an ambitious release, but it brings enough to the table that it’s a worthwhile update.
Post Syndicated from Carie Fisher original https://github.blog/engineering/engineering-principles/empowering-accessibility-githubs-journey-building-an-in-house-champions-program/
| For more on this topic, check out Alexis Lucio, Catherine McNally, and Lindsey Wild‘s axe-con 2024 talk, “Establishing a Scalable A11y Education Ecosystem,” which laid the foundation for this blog post. Free registration required. |
In today’s digital world, accessibility isn’t merely a checkbox—it’s the cornerstone of creating an inclusive experience for all users. At GitHub, we recognize this fundamental truth. That’s why we’ve embarked on a journey to empower developers, including those with disabilities, to participate fully and thrive on our platform. Our commitment to accessibility isn’t a one-time endeavor; it’s an ongoing effort fueled by the desire to remove barriers and make technology accessible to everyone.
As part of GitHub’s dedication to accessibility, we’ve been expanding our internal accessibility program and have scaled up our assessment process to help remove or lower barriers for users with disabilities. Naturally, as the number of assessments increased, so did the issues requiring attention, which strained our centralized accessibility team. Understanding the importance of decentralizing ownership of accessibility across the organization, we took decisive action by launching GitHub’s Accessibility Champions program. This strategic initiative empowers employees from various disciplines to drive accessibility efforts within their teams, fostering a culture where accessibility is deeply ingrained and valued.
The journey to establish GitHub’s Accessibility Champions program began with a comprehensive examination of our existing challenges and opportunities. We understood that for the program to thrive, we needed to consider various factors, including different time zones and work schedules, the expertise levels of our employees, and their ability to dedicate time to accessibility efforts due to competing priorities. By thoroughly assessing these considerations, we aimed to ensure that the program would be effective and adaptable to our team’s evolving needs.
To lay a solid foundation for the program’s success, we established clear goals and defined responsibilities for our champions upon completing their training. By setting measurable objectives and metrics to track the program’s impact on accessibility efforts both within the company and beyond, we provided our champions with a clear roadmap to follow. This proactive approach ensured we were all aligned in our efforts to make GitHub a more inclusive platform.
At the heart of the GitHub Accessibility Champions program’s success is the development of a comprehensive and dynamic curriculum. Understanding that people have different learning preferences, GitHub took a tailored approach by assembling different types of educational resources. These resources were carefully curated to cater to various learning styles and delivered asynchronously through videos, articles, and interactive exercises.
Participants in the program received training on digital accessibility fundamentals, including WCAG guidelines, inclusive design principles, testing techniques, and content/interface accessibility best practices. They learned to identify and address accessibility barriers, advocate for accessibility within their teams, and utilize assistive technologies. Participants gained practical experience creating inclusive digital experiences through hands-on exercises and interactive discussions.
The program began with a modest group of 17 engineering champions serving as pioneers in the initiative. This small-scale pilot allowed GitHub to fine-tune the curriculum, gather valuable feedback, and iterate on the program’s structure and content. As the program evolved and gained momentum, it gradually expanded to include 52 champions from a variety of backgrounds, spanning engineering, design, and content teams. Our plan for this year is to reach over 100 internal champions to help support our accessibility goals.
This phased approach to scaling the GitHub Accessibility Champions program has proved invaluable. By starting small and gradually growing the community of champions, we were able to refine the program iteratively, ensuring it met the evolving needs of participants. Moreover, this approach fostered a strong sense of camaraderie among champions, creating a network of advocates dedicated to advancing accessibility across the organization.
Feedback was instrumental in shaping the trajectory of the GitHub Accessibility Champions program, serving as a guiding force in its evolution. As participants engaged with the program, their voices were invaluable in driving improvements and enhancements to meet their needs.
One recurring theme in the feedback was the desire for more interactive experiences and community engagement. Participants expressed a hunger for opportunities to connect with fellow champions, share insights, and collaborate on addressing accessibility challenges. In response, we introduced monthly Champions Connect meetings, providing a platform for champions to come together, exchange ideas, and foster a sense of camaraderie. These gatherings facilitated knowledge sharing and motivated and inspired champions as they navigated their accessibility journeys.
“Being able to ask questions and get answers quickly on simple matters is important to my team’s success. Or, if the questions are too complex to get immediate answers, having a forum to take the time and unpack them to get the answers.”
Participants also emphasized the importance of hands-on experiences in honing their skills and understanding of accessibility principles. Recognizing this need, we organized bug bashes and collaborative events where teams worked together to identify and address accessibility issues in real-time. These sessions provided practical learning opportunities and fostered a culture of teamwork and collective problem-solving.
In addition to enhancing engagement within the champions community, we responded to the demand for more synchronous training sessions. We hosted live sessions tailored to the specific needs of engineers and product managers, providing a platform for interactive discussions, Q&A sessions, and technical deep dives. These sessions offered a valuable opportunity for participants to engage directly with experts, seek clarification on complex topics, and deepen their understanding of accessibility best practices.
“Getting a codespace to identify issues and identify remediations is an excellent way to move from using and understanding assistive technology to taking on the role of an auditor or engineer who is verifying fixes.”
Finally, we initiated roundtable discussions with customers with disabilities, recognizing the importance of incorporating diverse perspectives into the design and development process. These interactions provided invaluable insights into the experiences and needs of users with disabilities, highlighting the critical role of inclusive design practices. By engaging directly with end-users, every champion at GitHub gained a deeper understanding of accessibility challenges and priorities, informing the development of more user-centric and inclusive digital experiences.
“Communicating the value of why we should design and create accessible documentation is key to success on my team. Everyone wants to do the right thing and is willing to do more complex tasks if they understand how it helps people better use our product.”
Overall, feedback catalyzed continuous improvement and innovation within the GitHub Accessibility Champions program. By actively listening to participant input and responding with targeted initiatives, we demonstrate our commitment to fostering a culture of accessibility and inclusion. Through ongoing engagement, collaboration, and user-centered design, GitHub continues to advance accessibility efforts, empowering all users to access and interact with its platform seamlessly.
“I loved that the training was super detailed, to a point where someone with zero information on accessibility can get started with basic concepts all the way to acknowledging problems they didn’t know existed.”
While we are proud of our progress so far, the GitHub Accessibility Champions program isn’t just about addressing internal challenges and setting an example for the broader tech community. By sharing our experiences and best practices, we hope to inspire other organizations to prioritize accessibility and inclusion in their own initiatives.
As we reflect on the journey of GitHub’s Accessibility Champions program, there are several key takeaways and future directions that can provide valuable insights for other teams and organizations embarking on similar initiatives:
The GitHub Accessibility Champions program demonstrates our dedication to fostering a culture of accessibility and inclusion. By prioritizing feedback, collaboration, and responsiveness, we have created a supportive ecosystem where individuals can learn, grow, and acquire the tools to build more inclusive digital experiences. Our champions are truly a community of passionate accessibility advocates.
Looking ahead, we’re committed to enhancing the GitHub Accessibility Champions program, advancing accessibility efforts across the organization, and sharing our journey with the broader tech community—paving the way for a more inclusive digital future for all.
Please visit accessibility.github.com to learn more and to share feedback on our accessibility community discussion page.
The post Empowering accessibility: GitHub’s journey building an in-house Champions program appeared first on The GitHub Blog.
Post Syndicated from Salim Tutuncu original https://aws.amazon.com/blogs/big-data/detect-and-handle-data-skew-on-aws-glue/
AWS Glue is a fully managed, serverless data integration service provided by Amazon Web Services (AWS) that uses Apache Spark as one of its backend processing engines (as of this writing, you can use Python Shell, Spark, or Ray).
Data skew occurs when the data being processed is not evenly distributed across the Spark cluster, causing some tasks to take significantly longer to complete than others. This can lead to inefficient resource utilization, longer processing times, and ultimately, slower performance. Data skew can arise from various factors, including uneven data distribution, skewed join keys, or uneven data processing patterns. Even though the biggest issue is often having nodes running out of disk during shuffling, which leads to nodes falling like dominoes and job failures, it’s also important to mention that data skew is hidden. The stealthy nature of data skew means it can often go undetected because monitoring tools might not flag an uneven distribution as a critical issue, and logs don’t always make it evident. As a result, a developer may observe that their AWS Glue jobs are completing without apparent errors, yet the system could be operating far from its optimal efficiency. This hidden inefficiency not only increases operational costs due to longer runtimes but can also lead to unpredictable performance issues that are difficult to diagnose without a deep dive into the data distribution and task run patterns.
For example, in a dataset of customer transactions, if one customer has significantly more transactions than the others, it can cause a skew in the data distribution.
Identifying and handling data skew issues is key to having good performance on Apache Spark and therefore on AWS Glue jobs that use Spark as a backend. In this post, we show how you can identify data skew and discuss the different techniques to mitigate data skew.
When an AWS Glue job has issues with local disks (split disk issues), doesn’t scale with the number of workers, or has low CPU usage (you can enable Amazon CloudWatch metrics for your job to be able to see this), you may have a data skew issue. You can detect data skew with data analysis or by using the Spark UI. In this section, we discuss how to use the Spark UI.
The Spark UI provides a comprehensive view of Spark applications, including the number of tasks, stages, and their duration. To use it you need to enable Spark UI event logs for your job runs. It is enabled by default on Glue console and once enabled, Spark event log files will be created during the job run and stored in your S3 bucket. Then, those logs are parsed, and you can use the AWS Glue serverless Spark UI to visualize them. You can refer to this blogpost for more details. In those jobs where the AWS Glue serverless Spark UI does not work as it has a limit of 512 MB of logs, you can set up the Spark UI using an EC2 instance.
You can use the Spark UI to identify which tasks are taking longer to complete than others, and if the data distribution among partitions is balanced or not (remember that in Spark, one partition is mapped to one task). If there is data skew, you will see that some partitions have significantly more data than others. The following figure shows an example of this. We can see that one task is taking a lot more time than the others, which can indicate data skew.

Another thing that you can use is the summary metrics for each stage. The following screenshot shows another example of data skew.

These metrics represent the task-related metrics below which a certain percentage of tasks completed. For example, the 75th percentile task duration indicates that 75% of tasks completed in less time than this value. When the tasks are evenly distributed, you will see similar numbers in all the percentiles. When there is data skew, you will see very biased values in each percentile. In the preceding example, it didn’t write many shuffle files (less than 50 MiB) in Min, 25th percentile, Median, and 75th percentile. However, in Max, it wrote 460 MiB, 10 times the 75th percentile. It means there was at least one task (or up to 25% of tasks) that wrote much bigger shuffle files than the rest of the tasks. You can also see that the duration of the tax in Max is 46 seconds and the Median is 2 seconds. These are all indicators that your dataset may have data skew.
You can use interactive sessions to load your data from the AWS Glue Data Catalog or just use Spark methods to load the files such as Parquet or CSV that you want to analyze. You can use a similar script to the following to detect data skew from the partition size perspective; the more important issue is related to data skew while shuffling, and this script does not detect that kind of skew:
You can calculate the average and standard deviation of partition sizes using the agg() function and identify partitions with significantly different sizes using the filter() function, and you can print their indexes if any skewed partitions are detected. Otherwise, the output prints that no data skew is detected.
This code assumes that your data is structured, and you may need to modify it if your data is of a different type.
You can use different techniques in AWS Glue to handle data skew; there is no single universal solution. The first thing to do is confirm that you’re using latest AWS Glue version, for example AWS Glue 4.0 based on Spark 3.3 has enabled by default some configs like Adaptative Query Execution (AQE) that can help improve performance when data skew is present.
The following are some of the techniques that you can employ to handle data skew:
spark.sql.autoBroadcastJoinThreshold value (default is 10 MB), you have the option to either provide a hint to use broadcast join or adjust the threshold value to accommodate your dataset. This can be an effective strategy to optimize join operations and mitigate data skew issues resulting from shuffling large amounts of data across nodes.These are just a few techniques to handle data skew in PySpark; the best approach will depend on the characteristics of your data and the operations you are performing.
The following is an example of joining skewed data with the salting technique:
In this code, we first define a salt value, which can be a random integer or any other value. We then add a salt column to our DataFrame using the withColumn() function, where we set the value of the salt column to a random number using the rand() function with a fixed seed. The function replicate_salt_rows is defined to replicate each row in the non-skewed dataset (non_skewed_data) num_salts times. This ensures that each key in the non-skewed data has matching salted keys. Finally, a join operation is performed on the salted_key column between the skewed and non-skewed datasets. This join is more balanced compared to a direct join on the original key, because salting and replication have mitigated the data skew.
The rand() function used in this example generates a random number between 0–1 for each row, so it’s important to use a fixed seed to achieve consistent results across different runs of the code. You can choose any fixed integer value for the seed.
The following figures illustrate the data distribution before (left) and after (right) salting. Heavily skewed key2 identified and salted into key2_0, key2_1, and key2_2, balancing the data distribution and preventing any single node from being overloaded. After processing, the results can be aggregated back, so that that the final output is consistent with the unsalted key values.


When you’re performing skewed joins, you can use salting or broadcasting techniques, or divide your data into skewed and regular parts before joining the regular data and broadcasting the skewed data.
If you are using Spark 3, there are automatic optimizations for trying to optimize Data Skew issues on joins. Those can be tuned because they have dedicated configs on Apache Spark.
This post provided details on how to detect data skew in your data integration jobs using AWS Glue and different techniques for handling it. Having a good data distribution is key to achieving the best performance on distributed processing systems like Apache Spark.
Although this post focused on AWS Glue, the same concepts apply to jobs you may be running on Amazon EMR using Apache Spark or Amazon Athena for Apache Spark.
As always, AWS welcomes your feedback. Please leave your comments and questions in the comments section.
 Salim Tutuncu is a Sr. PSA Specialist on Data & AI, based from Amsterdam with a focus on the EMEA North and EMEA Central regions. With a rich background in the technology sector that spans roles as a Data Engineer, Data Scientist, and Machine Learning Engineer, Salim has built a formidable expertise in navigating the complex landscape of data and artificial intelligence. His current role involves working closely with partners to develop long-term, profitable businesses leveraging the AWS Platform, particularly in Data and AI use cases.
 Angel Conde Manjon is a Sr. PSA Specialist on Data & AI, based in Madrid, and focuses on EMEA South and Israel. He has previously worked on research related to Data Analytics and Artificial Intelligence in diverse European research projects. In his current role, Angel helps partners develop businesses centered on Data and AI.
Post Syndicated from Kanehito Miyake original https://aws.amazon.com/blogs/big-data/how-fujitsu-implemented-a-global-data-mesh-architecture-and-democratized-data/
This is a guest post co-authored with Kanehito Miyake, Engineer at Fujitsu Japan.
Fujitsu Limited was established in Japan in 1935. Currently, we have approximately 120,000 employees worldwide (as of March 2023), including group companies. We develop business in various regions around the world, starting with Japan, and provide digital services globally. To provide a variety of products, services, and solutions that are better suited to customers and society in each region, we have built business processes and systems that are optimized for each region and its market.
However, in recent years, the IT market environment has changed drastically, and it has become difficult for the entire group to respond flexibly to the individual market situation. Moreover, we are challenged not only to revisit individual products, services, and solutions, but also to reinvent entire business processes and operations.
To transform Fujitsu from an IT company to a digital transformation (DX) company, and to become a world-leading DX partner, Fujitsu has declared a shift to data-driven management. We built the OneFujitsu program, which standardizes business projects and systems throughout the company, including the domestic and overseas group companies, and tackles the major transformation of the entire company under the program.
To achieve data-driven management, we built OneData, a data utilization platform used in the four global AWS Regions, which started operation in April 2022. As of November 2023, more than 200 projects and 37,000 users were onboarded. The platform consists of approximately 370 dashboards, 360 tables registered in the data catalog, and 40 linked systems. The data size stored in Amazon Simple Storage Service (Amazon S3) exceeds 100 TB, including data processed for use in each project.
In this post, we introduce our OneData initiative. We explain how Fujitsu worked to solve the aforementioned issues and introduce an overview of the OneData design concept and its implementation. We hope this post will provide some guidance for architects and engineers.
Like many other companies struggling with data utilization, Fujitsu faced some challenges, which we discuss in this section.
In Fujitsu’s long history, we restructured organizations by merging affiliated companies into Fujitsu. Although organizational integration has progressed, there are still many systems and mechanisms customized for individual context. There are also many systems and mechanisms overlapping across different organizations. For this reason, it takes a lot of time and effort to discover, search, and integrate data when analyzing the entire company using a common standard. This situation makes it difficult for management to grasp business trends and make decisions in a timely manner.
Under these circumstances, the OneFujitsu program is designed have one system per one business globally. Core systems such as ERP and CRM are being integrated and unified in order to not have silos. It will make it easier for users to utilize data across different organizations for specific business areas.
However, to spread a culture of data-driven decision-making not only in management but also in every organization, it is necessary to have a mechanism that enables users to easily discover various types of data in organizations, and then analyze the data quickly and flexibly when needed.
Microsoft Excel is available on almost everyone’s PC in the company, and it helps lower the hurdles when starting to utilize data. However, Excel is mainly designed for spreadsheets; it’s not designed for large-scale data analytics and automation. Excel files tend to contain a mixture of data and procedures (functions, macros), and many users casually copy files for one-time use cases. It introduces complexity to keep both data and procedures up to date. Furthermore, it tends to require domain-specific knowledge to manage the Excel files for individual context.
For those reasons, it was extremely difficult for Fujitsu to manage and utilize data at scale with Excel.
OneData defines three personas:
Each role has sub-roles. For example, the consumer role has the following sub-roles with different responsibilities:
The following diagram describes how OneData platform works with those roles.

Let’s look at the key components of this architecture in more detail.
In the OneData platform, the publisher is per each data source system, and the consumer is defined per each data utilization project. OneData provides an AWS account for each.
This enables the publisher to cleanse data and the consumer to process and analyze data at scale. In addition, by properly separating data and processing, it becomes effortless for the teams and organizations to share, manage, and inherit processes that were traditionally confined to individual PCs.
When the teams don’t have a robust enough skillset, it can require more time to model and process data, and cause longer latency and lower data quality. It can also contribute to lower utilization by end-users. To address this, the foundation role provides an already processed dataset as a generic data model for data commonly use cases used by many consumers. This enables high-quality data available to each consumer. Here, the foundation role takes the lead in compiling the knowledge of domain experts and making data suitable for analysis. It is also an effective approach that eliminates duplicates for consumers. In addition, the foundation role monitors the state of the metadata, data quality indicators, data permissions, information classification labels, and so on. It is crucial in data governance and data management.
Individual consumers have a dedicated space in a BI tool. In the past, if users wanted to go beyond simple data visualization using Excel, they had to build and maintain their own BI tools, which caused silos. By unifying these BI tools, OneData lowers the difficulty for consumers to use BI tools, and centralizes operation and maintenance, achieving optimization on a company-wide scale.
Additionally, to keep portability between BI tools, OneData recommends users transform data within the consumer AWS account instead of transforming data in the BI tool. With this approach, BI tool loads data from AWS Glue Data Catalog tables through an Amazon Athena JDBC/ODBC driver without any further transformations.
To provide OneData as a common service for Fujitsu and group companies around the world, Regional OneData has been deployed in several locations. Regional OneData represents a unit of system configurations, and is designed to provide lower network latency for platform users, and be optimized for local languages, working hours for system operations and support, and region-specific legal restrictions, such as data residency and personal information protection.

The Regional Operations Unit (ROU), a virtual organization that brings together members from each region, is responsible for operating regional OneData in each of these regions. OneData HQ is responsible for supervising these ROUs, as well as planning and managing the entire OneData.
In addition, we have a specially positioned OneData called Global OneData, where global data utilization spans each region. Only the properly cleansed and sanitized data is transferred between each Regional OneData and Global OneData.
Systems such as ERP and CRM are accumulating data as a publisher for Global OneData, and the dashboards for executives in various regions to monitor business conditions with global metrics are also acting as a consumer for Global OneData.
In this section, we discuss some of the technical concepts of the solution.
We have adopted a multi-account strategy to provide AWS accounts for each project. Many publishers and consumers are already onboarded into OneData, and the number is expected to increase in the future. With this strategy, future usage expansion at scale can be achieved without affecting the users.
Also, this strategy allowed us to have clear boundaries in security, costs, and service quotas for each AWS service.
All the AWS accounts are deployed and managed through AWS Organizations and AWS Control Tower.
Although we provide independent AWS accounts for each publisher and consumer, both operational costs and resource costs would be enormous if we accommodated individual user requests, such as, “I want a virtual machine or RDBMS to run specific tools for data processing.” To avoid such continuous operational and resource costs, we have adopted AWS serverless services for all the computing resources necessary for our activities as a publisher and consumer.
We use AWS Glue to preprocess, cleanse, and enrich data. Optionally, AWS Lambda or Amazon Elastic Container Service (Amazon ECS) with AWS Fargate can also be used based on preferences. We allow users to set up AWS Step Functions for orchestration and Amazon CloudWatch for monitoring. In addition, we provide Amazon Aurora Serverless PostgreSQL as standard for consumers, to meet their needs for data processing with extract, load, and transform (ELT) jobs. With this approach, only the consumer who requires those services will incur charges based on usage. We are able to take advantage of lower operational and resource costs thanks to the unique benefit of serverless (or more accurately, pay-as-you-go) services.
AWS provides many serverless services, and OneData has integrated them to provide scalability that allows active users to quickly provide the required capability as needed, while minimizing the cost for non-frequent users.
In OneData, we have adopted a data mesh architecture where each publisher maintains ownership of data in a distributed and decentralized manner. When the consumer discovers the data they want to use, they request access from the publisher. The publisher accepts the request and grants permissions only when the request meets their own criteria. With the AWS Glue Data Catalog and AWS Lake Formation, there is no need to update S3 bucket policies or AWS Identity and Access Management (IAM) policies every time we allow access for individual data on an S3 data lake, and we can effortlessly grant the necessary permissions for the databases, tables, columns, and rows when needed.
Since the launch of OneData in April 2022, we have been persistently carrying out educational activities to expand the number of users and introducing success stories on our portal site. As a result, we have been promoting change management within the company and are actively utilizing data in each department. Regional OneData is being rolled out gradually, and we plan to further expand the scale of use in the future.
With its global expansion, the development of basic functions as a data utilization platform will reach a milestone. As we move forward, it will be important to make sure that OneData platform is used effectively throughout Fujitsu, while incorporating new technologies related to data analysis as appropriate. For example, we are preparing to provide more advanced machine learning functions using Amazon SageMaker Studio with OneData users and investigating the applicability of AWS Glue Data Quality to reduce the manual quality monitoring efforts. Furthermore, we are currently in the process of implementing Amazon DataZone through various initiatives and efforts, such as verifying its functionality and examining how it can operate while bridging the gap between OneData’s existing processes and to the ideal process we are aiming for ideals.
We have had the opportunity to discuss data utilization with various partners and customers and although individual challenges may differ in size and its context, the issues that we are currently trying to solve with OneData are common to many of them.
This post describes only a small portion of how Fujitsu tackled challenges using the AWS Cloud, but we hope the post will give you some inspiration to solve your own challenges.

Kanehito Miyake is an engineer at Fujitsu Japan and in charge of OneData’s solution and cloud architecture. He spearheaded the architectural study of the OneData project and contributed greatly to promoting data utilization at Fujitsu with his expertise. He loves rockfish fishing.
 Junpei Ozono is a Go-to-market Data & AI solutions architect at AWS in Japan. Junpei supports customers’ journeys on the AWS Cloud from Data & AI aspects and guides them to design and develop data-driven architectures powered by AWS services.
Post Syndicated from Jeimy Ruiz original https://github.blog/2024-05-01-5-tips-to-supercharge-your-developer-career-in-2024/
The world of software development is constantly evolving. That means whether you’re a seasoned developer or just starting out on your coding journey, there’s always something new to learn.
Below, we’ll explore five actionable tips to take your career to the next level. From mastering prompt engineering to harnessing the power of AI for code security, these tips will help you learn the skills and uncover the knowledge you need to excel in today’s competitive job market.
In the age of AI, you can use AI tools like GitHub Copilot to code up to 55% faster. But like any other tool or skill, our AI pair programmer has a learning curve, and there are certain techniques you can use that will make your work with AI even more effective. Enter prompt engineering. With prompt engineering, you provide GitHub Copilot with more context about your project—which yields better, more accurate results. Below are three best practices for crafting prompts for GitHub Copilot:
While you can begin using GitHub Copilot with a blank file, one easy way to introduce more context is to open related files in VS Code. Known as neighboring tabs, this technique enables Copilot to gain a deeper understanding of your code by processing all open files in your IDE.
This broader scope allows Copilot to identify matching code segments across your project, enhancing its suggestions and code completion capabilities.
Imagine being assigned a task with little to no context—that would make accomplishing it much more difficult, right? The same can be said for GitHub Copilot. When you add a brief, top-level comment in your code file, it helps Copilot understand the overarching objective before getting into the how.
Once you’ve broken down the ask and your goal, you can articulate the logic and steps required to achieve it. Then, allow Copilot to generate code incrementally, rather than all at once. This approach enhances Copilot’s understanding and improves the quality of the generated code.
Offer GitHub Copilot a snippet of code that closely resembles what you need. Even a brief example can further help Copilot craft suggestions tailored to your language and objectives!
GitHub is full of shortcuts and hacks that make your work life easier and help you stay in the flow. Gain momentum in your projects and increase your productivity with these popular shortcuts:
When you’re searching through repositories, type the letter “t” on your keyboard to activate the file finder and do away with hours of wasted time! See how in the video below:
Did you know that GitHub also has project management tools? One of them is a handy interlinking feature that allows you to link pull requests and Git commits to relevant issues in a project. This facilitates better organization, collaboration, and project management, not just for you, but for anyone looking for more context in your issue. Gone are the days of hunting down old issues every time you create a new pull request!
Creating custom actions on GitHub enables you to enhance code reuse, bypass repetition, and simplify maintenance across multiple workflows. All you have to do is outline the necessary steps for a particular task and package them into an action using any supported programming or scripting language, and you’re all set!
Ever wish there was an easier way to review code? Well, it’s possible! Add comments directly to the pull request, propose changes, and even accept and add those suggestions seamlessly to make code reviews easier than ever. You can also save your replies by heading over to the comment box in an open pull request and selecting “create new saved reply,” and then “add saved reply,” to make it official.
AI has introduced a host of hard skills that developers need to master in order to keep up with the latest tooling. Soft skills complement your new technical expertise and can contribute to your overall success by enhancing communication, collaboration, and problem-solving. Here are a few important ones to practice:
As you know, developer work rarely happens in a vacuum. Strong communication skills can facilitate clear understanding and efficient collaboration for both humans and AI tools, whether you’re collaborating with stakeholders, communicating complex technical concepts to non-technical audiences, or working on your prompt engineering.
Critical thinking enables developers to approach complex challenges creatively, break them down into manageable tasks, and find innovative solutions with the help of AI coding tools.
AI coding tools are evolving rapidly, with new technologies, methodologies, and tools emerging regularly. Being adaptable allows developers to stay current, learn new skills quickly, and stay nimble as things change. To cultivate resilience and embrace discomfort (in and outside of the workplace), engage in activities that challenge you to anticipate and respond to the unexpected.
Being aware of the ethical implications associated with these tools is essential. Developers should understand both the capabilities and limitations of AI coding tools and exercise critical thinking when interpreting responses from them. By remaining conscious of ethical considerations and actively working toward ethical practices, developers can ensure that these tools are used responsibly.
Empathy is crucial for understanding the needs, preferences, and challenges of end-users. Empathy also fosters better collaboration within teams by promoting understanding and respect for colleagues’ perspectives and experiences.
Developers can leverage AI to enhance code security in several ways. First, AI can help prevent vulnerabilities by providing context and secure code suggestions right from the start. Traditionally, “shift left” meant getting security feedback after coding (but before deployment). By utilizing AI as a pair programmer, developers can “shift left” by addressing security concerns right where they bring their ideas to code.
A common pain point for developers is sifting through lengthy pages of alerts, many of which turn out to be false positives—wasting valuable time and resources. With features like code scanning autofix, AI and automation can step in to provide AI-generated code fixes alongside vulnerability alerts, streamlining remediation directly into the developer workflow. Similarly, secret scanning alerts developers to potential secrets detected in the code.
AI also presents an opportunity to improve the modeling of a vast array of open-source frameworks and libraries. Traditionally, security teams manually model numerous packages and APIs. This is a challenging task given the volume and diversity of these components, along with frequent updates and replacements. By infusing AI in modeling efforts, developers can increase the detection of vulnerabilities.
Attending conferences is a valuable investment in a developer’s career, providing opportunities for learning, networking, skill development, and professional growth all at the same time. GitHub Universe is our flagship, global event that brings together developers, leaders, and companies for two days of exploring the latest technologies and industry trends with fun, food, and networking in between. Here are some of the highlights:
Learn about frameworks and best practices directly from 150+ experts in the field through keynotes, breakout sessions, product demos, and more.
Git official by signing up for an interactive workshop or getting GitHub certified in GitHub Actions, GitHub Advanced Security, GitHub Foundations, or GitHub Administration. It’ll certainly look great on your resume and LinkedIn. 😉
Sharing insights, presenting research findings, or showcasing projects can help developers establish themselves as thought leaders and experts in their field. The Universe call for sessions is open from now until May 10. Submit a session proposal today!
Show your commitment to your career and continuous learning by visiting the dedicated Career Corner for professional development.
Build your network and find opportunities for collaboration and mentorship by engaging with peers and participating in the Discussions Lounge.
Learn more about our content tracks and what we have in store for the 10th anniversary of our global developer event.
By implementing the strategies outlined above, you’ll be well-equipped to unlock your dream career in 2024 and beyond. And remember: you can take your skills to the next level, network with industry leaders, and learn how to use the latest AI tools at GitHub Universe 2024.
Eager to get involved? Act fast to save 30% on in-person tickets with our Super Early Bird discount from now until July 8, or get notified about our free virtual event!
The post 5 tips to supercharge your developer career in 2024 appeared first on The GitHub Blog.
Post Syndicated from Sébastien Stormacq original https://aws.amazon.com/blogs/aws/stop-the-cname-chain-struggle-simplified-management-with-route-53-resolver-dns-firewall/
Starting today, you can configure your DNS Firewall to automatically trust all domains in a resolution chain (such as aCNAME, DNAME, or Alias chain).
Let’s walk through this in nontechnical terms for those unfamiliar with DNS.
Why use DNS Firewall?
DNS Firewall provides protection for outbound DNS requests from your private network in the cloud (Amazon Virtual Private Cloud (Amazon VPC)). These requests route through Amazon Route 53 Resolver for domain name resolution. Firewall administrators can configure rules to filter and regulate the outbound DNS traffic.
DNS Firewall helps to protect against multiple security risks.
Let’s imagine a malicious actor managed to install and run some code on your Amazon Elastic Compute Cloud (Amazon EC2) instances or containers running inside one of your virtual private clouds (VPCs). The malicious code is likely to initiate outgoing network connections. It might do so to connect to a command server and receive commands to execute on your machine. Or it might initiate connections to a third-party service in a coordinated distributed denial of service (DDoS) attack. It might also try to exfiltrate data it managed to collect on your network.
Fortunately, your network and security groups are correctly configured. They block all outgoing traffic except the one to well-known API endpoints used by your app. So far so good—the malicious code cannot dial back home using regular TCP or UDP connections.
But what about DNS traffic? The malicious code may send DNS requests to an authoritative DNS server they control to either send control commands or encoded data, and it can receive data back in the response. I’ve illustrated the process in the following diagram.

To prevent these scenarios, you can use a DNS Firewall to monitor and control the domains that your applications can query. You can deny access to the domains that you know to be bad and allow all other queries to pass through. Alternately, you can deny access to all domains except those you explicitly trust.
What is the challenge with CNAME, DNAME, and Alias records?
Imagine you configured your DNS Firewall to allow DNS queries only to specific well-known domains and blocked all others. Your application communicates with alexa.amazon.com; therefore, you created a rule allowing DNS traffic to resolve that hostname.
However, the DNS system has multiple types of records. The ones of interest in this article are
A records that map a DNS name to an IP address,CNAME records that are synonyms for other DNS names, DNAME records that provide redirection from a part of the DNS name tree to another part of the DNS name tree, andAlias records that provide a Route 53 specific extension to DNS functionality. Alias records let you route traffic to selected AWS resources, such as Amazon CloudFront distributions and Amazon S3 bucketsWhen querying alexa.amazon.com, I see it’s actually a CNAME record that points to pitangui.amazon.com, which is another CNAME record that points to tp.5fd53c725-frontier.amazon.com, which, in turn, is a CNAME to d1wg1w6p5q8555.cloudfront.net. Only the last name (d1wg1w6p5q8555.cloudfront.net) has an A record associated with an IP address 3.162.42.28. The IP address is likely to be different for you. It points to the closest Amazon CloudFront edge location, likely the one from Paris (CDG52) for me.
A similar redirection mechanism happens when resolving DNAME or Alias records.

To allow the complete resolution of such a CNAME chain, you could be tempted to configure your DNS Firewall rule to allow all names under amazon.com (*.amazon.com), but that would fail to resolve the last CNAME that goes to cloudfront.net.
Worst, the DNS CNAME chain is controlled by the service your application connects to. The chain might change at any time, forcing you to manually maintain the list of rules and authorized domains inside your DNS Firewall rules.
Introducing DNS Firewall redirection chain authorization
Based on this explanation, you’re now equipped to understand the new capability we launch today. We added a parameter to the UpdateFirewallRule API (also available on the AWS Command Line Interface (AWS CLI) and AWS Management Console) to configure the DNS Firewall so that it follows and automatically trusts all the domains in a CNAME, DNAME, or Alias chain.
This parameter allows firewall administrators to only allow the domain your applications query. The firewall will automatically trust all intermediate domains in the chain until it reaches the A record with the IP address.
Let’s see it in action
I start with a DNS Firewall already configured with a domain list, a rule group, and a rule that ALLOW queries for the domain alexa.amazon.com. The rule group is attached to a VPC where I have an EC2 instance started.
When I connect to that EC2 instance and issue a DNS query to resolve alexa.amazon.com, it only returns the first name in the domain chain (pitangui.amazon.com) and stops there. This is expected because pitangui.amazon.com is not authorized to be resolved.

To solve this, I update the firewall rule to trust the entire redirection chain. I use the AWS CLI to call the update-firewall-rule API with a new parameter firewall-domain-redirection-action set to TRUST_REDIRECTION_DOMAIN.

The following diagram illustrates the setup at this stage.

Back to the EC2 instance, I try the DNS query again. This time, it works. It resolves the entire redirection chain, down to the IP address  .

Thanks to the trusted chain redirection, network administrators now have an easy way to implement a strategy to block all domains and authorize only known domains in their DNS Firewall without having to care about CNAME, DNAME, or Alias chains.
This capability is available at no additional cost in all AWS Regions. Try it out today!
Post Syndicated from daroc original https://lwn.net/Articles/971973/
The NixOS Foundation board
announced on April 30 that Eelco Dolstra is stepping down from the board
following the recent calls for his resignation.
Eelco is the principal author of Nix and undoubtedly a central figure in the
ecosystem that grew around it. We confirm that Eelco showed no intention to be
perceived as or act like the BDFL [Benevolent Dictator for Life]
of the Nix ecosystem, or the Nix code base. To
commit to that in a timely manner, he has decided to formally step down from the
board.
The board also announced its intent to set up new, explicit governance for the
project, answerable to the community:
We will appoint a constitutional assembly within the next 14 days.
Its task will be to set up a new governance structure, run by the
community, that is capable of serving the community’s needs. Once
established, we will delegate our power to institutions within that
new structure. This entire process will take place in a public space,
such that it’s traceable for anyone concerned. We are committed to
listening to everyone who may help with solving the problems the
community is facing.
Post Syndicated from jzb original https://lwn.net/Articles/972029/
Security updates have been issued by Debian (nghttp2 and qtbase-opensource-src), Mageia (cjson, freerdp, guava, krb5, libarchive, and mediawiki), Oracle (container-tools:4.0 and container-tools:ol8), Red Hat (bind, buildah, container-tools:3.0, container-tools:rhel8, expat, gnutls, golang, grafana, kernel, kernel-rt, libreswan, libvirt, linux-firmware, mod_http2, pcp, pcs, podman, python-jwcrypto, rhc-worker-script, shadow-utils, skopeo, sssd, tigervnc, unbound, and yajl), SUSE (kernel and python311), and Ubuntu (gerbv and node-json5).
Post Syndicated from Rapid7 original https://blog.rapid7.com/2024/05/01/the-business-of-cybersecurity-ownership/

Authored by Dan Bleakman
Many would say the answer is obvious. It’s the chief information security officer (CISO) and his or her team, of course. However, it’s not that simple. Sure, the CISO and their team are responsible for setting the strategy and executing on the cyber plan. But, with a multitude of security challenges thrown at them each day, it requires a proactive and informed approach that goes beyond the core cyber team.
Cyber ownership can often be overlooked or misunderstood within an organization. Responsibility and accountability should not rest solely on the CISO’s shoulders. And while the IT department will also have a role to play, security responsibilities must be ingrained in the culture of the entire organization. They should include each responsible asset owner, not forgetting that data is also an asset.
Cultivating a culture of cybersecurity ownership empowers security leaders, IT professionals, and decision-makers to navigate security challenges effectively. This approach not only strengthens your organisation’s security posture but also positions security as an enabler of innovation and digitalisation. The more eyes there are on security within your business, the greater the ability of your cyber teams to strive for increasing levels of maturity and a stronger overall security posture.
While cybersecurity teams or IT departments maintain control, everyone in the organisation plays a role. Executives and management must take charge and set the tone by prioritising cybersecurity as a business objective. They should work from the top-down to develop policies and frameworks, with the cyber teams or IT department responsible for implementing and enforcing them. By allocating resources, establishing policies, and promoting a security-conscious culture, leadership sends a powerful message that cybersecurity is not just an IT concern, but a shared responsibility.
Security responsibilities should also align with specific business functions and the potential impact of a breach. For instance, when assessing supply chain risks, consider factors such as data access and systems integration. This enables you to identify critical suppliers and prioritise efforts to enhance your security posture.
Security leaders are critical to ensuring cybersecurity is given the necessary focus and attention at all levels of your organisation. By involving experts in the overall risk conversation and decision-making forums, you can tap into valuable insights and expertise to effectively address evolving security challenges.
For example, many boards lack technical expertise and cybersecurity knowledge. This can hinder effective risk management and decision-making around cyber security challenges and strategy. Having a security leader at the board level will bridge this knowledge gap. It helps to facilitate communication, and ensure members grasp the importance of cybersecurity within the context of your organisation’s digital landscape.
Employee Awareness Training
Employees are a critical part of preventing and mitigating security risks. Despite this very common understanding, only 34% of organizations (PwC Digital Trust Insights) globally have an employee security awareness training program. Without proper awareness and education, employees may unknowingly engage in risky behaviors or fall victim to social engineering attacks. This can lead to potential data breaches and significant financial and reputational impacts on your organization.
It’s a good idea to prioritise regular training initiatives that provide employees with up-to-date knowledge and skills to identify and respond effectively to security threats. These training programs should cover a range of topics, such as identifying phishing attempts, securing personal devices, and understanding the importance of strong passwords and data protection. Additionally, training should be tailored to each business unit’s specific needs. It should also be delivered in a format that resonates, such as interactive modules, simulated phishing exercises, or workshops.
Consider providing additional training to individuals designated as security champions within your business. These champions will promote good security practices as well as encourage and help others, while also maintaining a security-conscious culture across the entire organization.
While everyone in the organisation can play a role in maintaining a good culture of cybersecurity, sometimes it helps to get a little additional outside support. Managed Threat Complete ensures your environment is monitored end-to-end, 24/7, by an elite SOC that works transparently with your in-house team, helping to further expand your resources.
Data privacy and security regulations have become increasingly stringent in recent years. As such, the consequences of non-compliance can be severe, ranging from financial penalties to reputational damage –even legal action against boards and directors.
Organisations are now obligated to protect the personal and sensitive data they collect and process. Familiarising your organisation with required data privacy laws enables you to establish appropriate safeguards and avoid hefty penalties. For instance, sectors such as telecommunications, banking, healthcare, energy, and transportation are subject to specialised regulations, such as critical infrastructure policies.
While legal obligations are an important aspect of cybersecurity, you must also strike a balance between compliance and business needs. Small businesses, in particular, may face challenges in meeting extensive legal requirements. However, by approaching compliance strategically and prioritising resources, small businesses can develop effective cybersecurity measures without compromising protection.
CISOs and their teams are responsible for setting the strategy, providing visibility and guidance on cyber risk, and working with the business to execute on the cyber plan. Embrace the opportunity to strengthen your cybersecurity posture by providing your workforce with the autonomy to be the guardians of your digital future. This in turn frees up the security team’s time to focus on advanced cyber measures that add even greater value to the business.
Post Syndicated from The History Guy: History Deserves to Be Remembered original https://www.youtube.com/watch?v=n-leHLHFAOw
Post Syndicated from The History Guy: History Deserves to Be Remembered original https://www.youtube.com/watch?v=Uwhi97pHnqc
Post Syndicated from Bruce Schneier original https://www.schneier.com/blog/archives/2024/05/ai-voice-scam.html
Scammers tricked a company into believing they were dealing with a BBC presenter. They faked her voice, and accepted money intended for her.