It’s been a few weeks since my last post about the Amazon Q Developer Command Line Interface (CLI), and I’m excited to share all the great new features and improvements the team has been working on. The CLI has been evolving rapidly with a focus on enhancing user experience, improving context management, and adding powerful new capabilities. In this post, I’ll walk you through the most significant changes that make the Amazon Q Developer CLI even more powerful and user-friendly.
Conversation Persistence
One of the most requested features has been the ability to persist conversations, and I’m thrilled to share that this is now available. With the new q chat --resume command, your conversations are now automatically saved by a working directory. This means you can pick up right where you left off when you return to a project, without having to rebuild context or repeat information.
Q Developer has also added two new commands to give you more control over your conversation state:
/save allows you to explicitly save the current conversation state
/load lets you restore a previously saved conversation
These commands make it easier to manage multiple conversation threads related to different aspects of your project. You can save a conversation about one feature, switch to working on something else, and then load the previous conversation when you’re ready to continue.
First, Q Developer has implemented background MCP server loading, which significantly improves startup time for q chat. Instead of waiting for all MCP servers to initialize before you can start interacting with Q Developer, the CLI now loads servers in the background while you begin your conversation. This means you can start working immediately, with tools becoming available as their servers finish loading.
The team has also added a new subcommand, q mcp, which provides a dedicated interface for updating and managing your MCP server configuration. This makes it easier to add, remove, or modify the MCP servers that extend your CLI’s capabilities.
For more granular control over which tools can be used, Q Developer has added the /tools command in q chat. This allows you to manage permissions for individual tools, giving you more control over what Q Developer can do in your environment. You can also reset permissions for a specific tool if you change your mind.
Improved Context Control
Context is crucial for getting the most out of Q Developer, and the team has made several improvements to how you can manage and view context:
The file selection in q chat‘s fuzzy finder is now git-aware, making it easier to include relevant files from your repository. This is particularly useful when working with large codebases, as it helps you focus on the files that matter for your current task.
Q Developer has added fuzzy search for slash commands with Ctrl + s, allowing you to quickly find and execute commands without remembering their exact syntax. This makes the CLI more accessible, especially for new users or those who don’t use certain commands frequently.
The /context show --expand command has been improved to provide more detailed information about the current context, helping you understand what Q Developer knows about your environment. The team has also enhanced the context file display in q chat to make it more informative and easier to read.
One of the most exciting additions is the new capability for dynamically adding context to messages with context hooks. This allows the CLI to automatically include relevant context based on your conversation, improving the quality of responses without requiring manual context management.
Image Support
I’m particularly excited to announce that q chat now supports images! This opens up a whole new dimension of interaction, allowing you to share screenshots, diagrams, or other visual information with Q Developer. This can be incredibly useful for debugging UI issues, discussing design concepts, or explaining complex ideas that are difficult to convey through text alone.
Editor for Long Prompts
For complex queries or detailed instructions, you may want multiple paragraphs. Q Developer supports Ctrl + j, allowing you to add a newline character to the prompt. In addition, the team has added the /editor command, which opens your configured text editor for composing prompts. This makes it much easier to craft detailed, multi-paragraph prompts or to edit and refine your questions before sending them to Q Developer.
Expanded Region Support
I’m happy to announce that Q Developer has expanded its regional availability. Professional tier users can now access Q Developer in the Frankfurt region (eu-central-1). This expansion is part of Q Developer’s ongoing effort to provide lower latency and better service to customers across the globe. By adding support for the Frankfurt region, Amazon Q Developer is more accessible to European customers, allowing them to benefit from reduced latency and improved performance.
The /issue command in q chat allows you to create new GitHub issues
The report_issue tool provides a programmatic way for Q Developer to help you create detailed issue reports
These features streamline the feedback process, making it easier for you to report bugs or request features, and for the team to improve the CLI based on your input.
Keeping Up with Future Changes
To help you stay informed about new features and improvements, Q Developer has added a --changelog flag to the q version command. This displays the change log directly from the CLI, making it easy to see what’s new without having to visit the GitHub repository or read blog posts like this one.
Conclusion
The Amazon Q Developer CLI continues to evolve rapidly, with new features and improvements that make it an even more powerful tool for developers. From conversation persistence to image support, these updates reflect Q Developer’s commitment to building a CLI that helps you be more productive and effective in your daily work. I encourage you to try out these new features by installing the Amazon Q Developer CLI. Thank you for your continued support and feedback, which helps make Amazon Q Developer better every day.
As organizations increasingly adopt AI-powered tools to enhance developer productivity, your ability to effectively communicate with these assistants becomes a valuable skill. This guide explores how you can craft prompts that deliver accurate, useful results when working with Amazon Q Developer.
Your success with Amazon Q Developer depends directly on how well you communicate with it. Through my work as a Principal Specialist Solutions Architect on the Next Generation Developer Experience team at AWS, I’ve observed that developers experience varying degrees of success based primarily on their approach to prompt construction. The difference between a vague request and a well-structured prompt can be the difference between wasted time and a productivity breakthrough.
Recent McKinsey research reveals that developers can complete tasks up to twice as fast with generative AI when using proper prompting techniques [1]. Even more impressive, developers tackling complex tasks are 25-30% more likely to complete them within given time-frames when using these tools effectively. These productivity gains aren’t automatic—they depend on mastering the art and science of prompt engineering.
Based on patterns observed across numerous customer interactions, this guide provides practical techniques to help you maximize the value of your AI-assisted development experience. You’ll learn how to transform your interactions to consistently produce helpful, relevant assistance that can dramatically improve your development workflow.
Key Takeaways
Structure your prompts with clear context, specific requirements, and desired output format
Include relevant technical details about your environment and constraints
Avoid vague requests and provide specific examples when possible
Use the provided prompt template to ensure consistent results
Getting Started with Amazon Q Developer
Already using Amazon Q Developer? Great! This guide will help you get more value from your interactions. If you haven’t set up Amazon Q Developer yet, check out the getting started guide.
Understanding the Impact of Good Prompts
The rapid adoption of AI technologies makes prompt engineering skills essential for today’s developers. McKinsey’s latest global survey reveals that 65% of organizations regularly use generative AI, nearly double from their previous survey. When developers master prompt engineering, they’re 25-30% more likely to complete complex tasks within given timeframes.
What Makes an Effective Prompt?
Specific Request: State exactly what you need
Clear Background: Describe your project, requirements, and constraints
Additional Context: Provide code, configuration, or other additional context
Expected Output: Specify how you want the information presented
Here’s how this works in practice:
Poor prompt:
How do I deploy a container on AWS?
Effective prompt:
I need to deploy a containerized Node.js e-commerce application that handles
50,000 daily users with peak loads during promotional events.
Requirements:
- High availability across multiple regions
- MongoDB for persistence
- Auto-scaling capabilities

Please provide:
1. AWS architecture diagram
2. List of required services with configurations
3. Security best practices
4. Operational monitoring recommendations
Common Patterns to Avoid
Short or Vague Requests:
Add Docs
Make this better
Check this
Not much to go on here. Amazon Q Developer will likely provide generic documentation.
Another vague prompt with a generic response.
Overly Broad Questions:
How do I use AWS?
What's the best practice?
Help with Lambda
The prompt is so vague that Amazon Q Developer responds by asking clarifying questions.
The more specific prompt allows Amazon Q Developer to provide a more precise response.
Remember: The quality of information you receive directly correlates with the quality of the information you provide.
Proven Techniques for Better Results
To help you apply these principles consistently, I’ve developed a template structure that incorporates all the key elements of an effective prompt. This framework can be adapted for various scenarios and serves as a starting point for your interactions with Amazon Q Developer. While Amazon Q Developer will fill in some parts of this context (see the next post in this series), you just need to make sure this information is available.
These are the principles demonstrated in the template:
Technical Context Requirements
Specify your technology stack and versions
Include environment details
Mention compliance requirements
Define scale expectations
Example Specifications
Include relevant code snippets
Paste error messages
Reference configuration files
Show current architecture
Output Format Guidelines
Request specific documentation formats
Ask for diagrams when needed
Specify code language preferences
Indicate level of detail needed
The specification of the output format ensure the response is what you expect.
Successfully working with Amazon Q Developer requires consistent application of proven practices. These guidelines, developed through extensive customer interactions, will help you maximize the value of your AI-assisted development experience.
Start with clear business objectives
Include relevant technical constraints
Specify performance requirements
Request specific output formats
Provide examples when possible
Through extensive customer interactions, we’ve found that following these practices consistently produces better results and reduces the need for follow-up clarification.
Take Action Now
Try the prompt template with your next Amazon Q Developer request
In the next part of this series, we’ll explore advanced context management in Amazon Q Developer and dive into the new prompt catalog features. You’ll learn how to:
Build and maintain context across multiple interactions
Use the prompt catalog effectively
Handle complex, multi-step development tasks
Optimize responses for your specific use cases
Stay tuned, and start applying these techniques today to transform how you build on AWS!
In this blog post, I explore Amazon Q Developer’s latest enhancements to the IDE chat experience including increased context control, chat history and other conversation management features. On March 11th, 2025, my colleague published Take control of your code with Amazon Q Developer’s new context features detailing several improvements to the chat experience within VS Code. These included increased context transparency, the ability to select specific files or folders as context, prompt libraries for reusing prompts across conversations and projects, and project rules to help enforce coding standards and best practices across your teams.
Since then, Amazon Q Developer released additional features in VS Code to help provide users with more control over their conversations and enhance their ability to maintain development context across longer periods. These new capabilities make your interactions with Amazon Q Developer not just more efficient, but also more contextual and persistent—helping you maintain your development flow, even when work spans hours or days. Now, let’s jump in and explore some of the new features available today.
Conversation persistence
We’ve all been there—you’re deep in conversation with Amazon Q Developer, maybe you’re debugging an authentication problem, optimizing a complex database query, or designing a new API structure. You and Amazon Q Developer have been going back and forth, uncovering insights and piecing together solutions.
Then reality intervenes. You close your IDE to focus on another task, step away for a meeting, or maybe update your computer. When you finally return to your IDE, ready to dive back in, you’re met with a blank chat window. All that context, all those valuable exchanges—gone. You find yourself trying to reconstruct your train of thought, wasting precious time and momentum.
Amazon Q Developer now preserves your conversations across your IDE sessions. Instead of starting from scratch each time you open the IDE, you can now come back to your conversation and pick up right where you left off.
Conversation History Search
It isn’t just after a closed IDE session or coming back to your computer after a long-weekend that you want Amazon Q Developer to remember what you have been working on. Sometimes you need to reference a previous solution — maybe Amazon Q Developer gave you some good advice on optimizing your database queries that you want to use elsewhere, or maybe you decided to work on some front-end components so you could have fresh eyes for the API performance issue you’ve been working at.
Now, you can access your previous conversations with Amazon Q Developer by clicking on the search icon in the top right corner of your chat window. You can quickly locate specific discussions by typing keywords into the search bar, then either review the previous exchange or continue the conversation where you left off.
Fig 1 – View chat history feature in the Amazon Q Developer VS Code chat interface.
Conversation Export
But what if you need to share these insights with a teammate or want to keep a local record for future reference? You can now easily export your chat sessions as markdown files, preserving all the valuable information for offline use or collaboration. To do this, click the export button located directly to the right of the chat history button. Alternatively, when browsing your chat history, you can export individual sessions by clicking the three dots on the right side of each conversation entry.
Fig 2 – Export chat feature in the Amazon Q Developer VS Code chat interface.
Increasing your control over context
Last July, we announced the ability to use @workspace in your chat session to provide comprehensive context across your entire application within the IDE. To provide more control over what Amazon Q Developer uses as context, earlier this year we released the ability to use the @ symbol in the chat to include specific folders or files as context for your conversation.
We are now taking your level of control one step further to allow you to use @ in your conversation to find and include classes, functions, and global variables into the input context. Rather than leaving it up to Amazon Q to determine the relevant files, folders, or functions for your request, you can continue to be more explicit with your request to receive the most relevant and accurate responses.
Fig 3 – Context selection in Amazon Q Developer chat, using “@” to show relevant folders, files, functions.
Conclusion
Amazon Q Developer is continuing to evolve its features that help put developers in control of their coding experience. By offering conversation persistence, history search, and export capabilities, Amazon Q Developer works to create continuity that allows developers to maintain their momentum across sessions and easily revisit past solutions. The expanded context control features empower developers to fine-tune their interactions with Amazon Q Developer, and receive more precise and relevant responses.
To get started with these features in VS Code, visit the Amazon Q Developer Getting Started guide and explore the full range of capabilities that can help you create impressive software more efficiently.
Automatically execute coding tasks to reduce development cycles using Amazon Q Developer in GitHub (in-preview), available for free, no AWS account required. Amazon Q Developer accelerates feature development within GitHub.com and GitHub Enterprise Cloud. Leverage the premium models that power Q Developer at no additional cost, to automatically implement new features, generate bug fixes, increase test coverage, generate documentation, run code reviews on all new pull requests and modernize legacy Java applications – all while using GitHub native issues and pull requests.
Background
Development teams face mounting challenges as they navigate multiple tools and contexts while collaborating to plan, write, and ship code. Critical time is consumed by routine tasks – fixing bugs, reviewing code, writing unit tests, and managing upgrades. As applications scale, these activities increasingly impact developer velocity and the ability to maintain security best practices.
Like many developers, you’re probably using GitHub for your DevOps workflows. That’s why we’re thrilled to announce Amazon Q Developer’s integration in GitHub. By bringing AI-powered assistance directly into your familiar GitHub environment, you can move faster, eliminate context switching, and focus on innovation while maintaining security and operational excellence. The future of development is here!
Getting started
Getting started with Amazon Q Developer in GitHub is straightforward. Organization administrators can quickly deploy the Amazon Q Developer application through the GitHub Marketplace, managing repository access and AI agent settings. Individual developers can start using the service immediately after organization setup – no AWS account set-up required.
Once configured, developers can engage Amazon Q Developer’s assistance by simply adding an “Amazon Q development agent” or “Amazon Q transform agent” label to GitHub issues. After the pull request is generated, developers can work with Amazon Q Developer to refine the generated code through natural language comments on Amazon Q Developer’s pull requests.
Amazon Q Developer for GitHub: How It Works
Feature Development agent
Amazon Q Developer simplifies feature development and bug fixes by generating production-ready code from natural language descriptions. To start, simply add the “Amazon Q development agent” label to any GitHub issue. Once labeled, Amazon Q Developer analyzes your requirements and existing codebase to understand the context. It then creates a new branch and generates code that follows your project’s established patterns and best practices.
Fig 1 – Issue created with Amazon Q development agent label
Fig 2- PR created by Amazon Q Developer with change description
As shown in Fig 1, when you create a GitHub issue with a title “Add an option to delete a task on the screen” and apply the “Amazon Q development agent” label, the agent begins processing. It analyzes the request and creates a pull request containing the proposed code changes, complete with detailed change descriptions and a security review, as shown in the Fig 2.
Transformation agent
Amazon Q Developer helps development teams modernize their applications and reduce technical debt through automated code upgrades. The agent currently supports upgrading Java applications from version 8 or 11 to Java 17, handling API changes and deprecations automatically. It intelligently updates your code to leverage new language features while maintaining your application’s existing functionality, reducing both the time and risk typically associated with major version upgrades.
Before starting code transformation, review the prerequisites and setup instructions in the documentation.
Fig 3 – Issue created with Amazon Q transform agent label
Fig 4 – PR created with code transformation summary
Fig 5 – Files updated for the pull request
As shown in Fig 3, when you create an issue titled “Migrate project from Java 8 to Java 17” and apply the “Amazon Q transform agent” label, Amazon Q Developer begins the upgrade process. The agent creates a detailed pull request documenting all changes and implementation steps, as demonstrated in Fig 4 and Fig 5.
Code Review agent
Amazon Q Developer streamlines the pull request review process by providing automated code analysis. This helps teams reduce review cycles and catch potential issues early in development. When a pull request is created, the agent automatically analyzes the code for:
Quality issues and potential bugs
Security vulnerabilities
Exposed secrets or sensitive information
Fig 6 – Automated Code review for the pull request
As shown in Fig 6, the agent performs a comprehensive security review and provides detailed, actionable feedback. In this example, it identified a hardcoded SECRET_KEY and offered a thorough remediation plan. The agent’s recommendations included:
Renaming the key for clarity
Moving sensitive data to environment variables
Adding documentation for future improvements
Suggesting best practices for secure key management
The agent explained how these changes would improve security by removing sensitive information from the source code, enabling easier key rotation, and improving code maintainability. It also recommended additional steps to enhance production security, such as using secure configuration files and implementing proper error handling.
By providing this level of detailed guidance, the code review agent is designed to help teams address immediate security concerns and assist developers in implementing AWS security best practices. This automated, in-depth review process can help reduce the time spent on manual code reviews while enhancing overall code quality and security.
Uninstall
To uninstall Amazon Q Developer from your GitHub organization, navigate to the app installation page and select “Configure”. Choose “Uninstall Amazon Q Developer” to permanently remove the integration from all previously selected repositories.
What’s Next
This preview release of Amazon Q Developer in GitHub aims to enhance enterprise software development. Amazon Q Developer brings AI-powered agent capabilities to GitHub, helping teams ship better code faster while maintaining high quality standards and reducing technical debt.
The integration uses standard GitHub workflows like issues, pull requests, and comments. Teams can benefit from Amazon Q Developer without disrupting their established development practices.
Ready to enhance your development workflow? Visit GitHub Marketplace to get started with Amazon Q Developer in GitHub today.
Back in March, I wrote about the new agentic coding experience within the Amazon Q Developer CLI. Recently, Amazon Q Developer announced that it has added a similar experience to the integrated development environement (IDE). Agentic coding in the IDE allows you to work with Amazon Q Developer to read and write files locally, run bash commands, build code, and more in near real-time through natural language conversations. The new experience redefines how you write, modify, and maintain code by leveraging natural language understanding to seamlessly execute complex workflows. The new agentic coding experience is now available in VS Code with support in other IDEs coming soon.
Background
Before I explain the new agentic coding experience, let’s take a minute to review the existing chat capabilities within the Amazon Q Developer IDE. As the name implies, the traditional chat allows me to have a conversation with Q Developer. This is a great option when I’m learning and planning. It provides a natural back-and-forth dialogue. Personally, I like the traditional chat during the planning phase of the Software Development Lifecycle (SDLC). I can chat with Q Developer to discuss my architecture and the various tradeoffs of different designs before I start working.
However, once I move into the build phase of the SDLC, I prefer the new agentic coding experience. In this new experience, Q Developer can do so much more than just have a conversation. It can directly interact with the development environment, reading and writing files, using various development tools, and even querying AWS resources. This allows for a far more dynamic, hands-on coding workflow compared to the traditional chat interface.
Rather than just discussing requirements, the agentic agent can take direct action to implement them. It can scaffold new projects, update existing code, and provide step-by-step summaries of its progress – all through a seamless, conversational interface right within the IDE. The great news is that I now have both options available to me. I can simply toggle between a traditional chat in the planning phase, and the new agentic coding in the build phase.
Walkthrough
Let’s walk through a simple example using the AWS Cloud Development Kit (CDK). I love CDK, and I use it all the time in my role. However, let’s assume that I don’t have a lot of experience, and want to learn more about CDK before I start using it. Since I just want to learn, I’ll start in the traditional chat experience, and ask Q Developer “How do I create an new CDK app?” As you can see in the following image, Q Developer starts to teach me about CDK. Along with the instructions, Q provides commands that I could copy and paste into my shell to get started.
While this is a great, I am already familiar with CDK. I don’t need to learn how to create a new application. I am ready to start building! Therefore, I will toggle from traditional chat to agentic coding by clicking on the angle bracket pair in the bottom left corner of the chat window. Then, I will ask Q Developer to “Create a new CDK app in this folder using TypeScript.” First, notice that I am not asking a question like I did previously, but I am giving a command. In the following image, you can see that Q Developer is acting on my command rather that teaching me what to do.
This is the power of the new agentic coding. It is not simply teaching me how to create a CDK app. Amazon Q Developer is creating the app for me. There are a few important things that I want to call out here. First, Amazon Q Developer can use tools when it is running agentic coding mode. In this example, Q is using a series of shell commands — mkdir, cd, npx, npm, etc. — to create the CDK app. I will discuss other tools later in this post. Second, Q Developer is asking my permission before it runs these commands. This allows me to retain control over the development process. I’ll click the Run button and allow Q to create the new application resulting in the following project structure.
It’s easy to overlook the power of allowing Q Developer to use tools. By using shell commands, it was able to generate the project using the latest template, and install dependencies for me. Running shell commands is just one of many changes with the agentic coding experience. Next, let’s look at how code generation works in agentic coding.
Code Generation
Amazon Q Developer has been generating code since it first launched in June of 2022. Since then, Amazon Q Developer has evolved, adding new features over time. Code generation began with inline suggestions, followed by chat, and the agent for software development. The new agentic coding, reinvents the code generation experience again. In the following example, I am going to add a Lambda function to the CDK stack that Q Developer created earlier. I ask Q Developer to “Add a new Lambda function that is triggered from the arrival of a file in an existing S3 bucket.”
Multiple important things happened in this example that I want to explain. First, notice that Q Developer edited the CDK Stack to add the new AWS Lambda function. Second, Q Developer used a shell command to create a new folder. Third, Q created a new file for the Lambda function. Forth, it updated the README file. Q took all four of these actions in response to a single prompt. In addition, note that Q Developer is providing a diff for each change, making it easy for me to review the changes. You can see an example of the changes it make to the README.md in the following image. Finally, note that I can undo any of the changes that Q Developer made along the way.
This is a big improvement over the traditional chat experience. Now let’s look at how Q Developer can describe my AWS resources.
Describing AWS resources
Remember that I am building an application that is triggered by the arrival of a file in an existing Amazon Simple Storage Service (Amazon S3) bucket. In the prior example, you can see that I need to pass the name of the bucket in the ExistingBucketName parameter when deploying the stack.
Let’s assume that I have forgotten the name of the bucket I want to use. The new agentic coding experience can help me with this too. In the following example, I ask Q to “List my S3 buckets in the ca-central-1 region?” Once again, Q Developer asks for permission to use the shell. After I accept, Q Developer uses the AWS CLI and lists the buckets I have available in Canada (ca-central-1).
With the name of the bucket, I am ready to deploy my stack. Of course, there still more work to do, but I’ll leave that for another post.
Conclusion
The new agentic coding experience within the Amazon Q Developer IDE represents a significant step forward in integrating powerful AI-driven capabilities directly into the developer’s workflow. By enabling the coding agent to read, write, and execute code locally, access tools, and interact with AWS resources, Q Developer promises to dramatically streamline and enhance the coding process. You can visit the Amazon Q Developer User Guide to install the IDE and start leveraging the new agent chat for free. Give it a try and let me know what you think!
As April 2025 comes to a close, I’m amazed by the innovations that Amazon Q Developer has launched in the past few weeks. Generative AI is evolving fast, enabling developer experiences that were just not possible a few months ago. Each new launch helps make Q Developer the most capable generative AI–powered assistant for software development. Let’s explore the announcements from April.
C# and C++ customization – April 1
Amazon Q Developer expanded its customization capabilities to include C# and C++ support, enabling developers to tailor AI suggestions based on their company’s proprietary codebase. This enhancement allows for more accurate inline suggestions and contextual code understanding across C# and C++ projects, while maintaining support for existing languages like Python, Java, JavaScript, and TypeScript. You can read more in Customizing C# and C++ with Amazon Q Developer
Amazon’s internal journey with Q Developer – April 2
In 2024, Amazon integrated its internal knowledge repository of millions of documents into Amazon Q Business, resulting in over 450,000 hours saved in technical query time. Using AI for software transformations integrated with internal development tools saved 4,500 developer years of effort and more than $260M. Perhaps most importantly, the technology is changing how developers approach problem-solving itself, enabling more creative and experimental development practices. You can read more in How generative AI is transforming developer workflows at Amazon.
Conversation persistence, search, and export – April 3rd
Amazon Q Developer now gives you more control over your conversation history. Your conversation is preserved between sessions, letting you pick up where you left off. In addition, you can search the conversation history and export the conversation as markdown. Conversation history features are now available in VS Code and will be added to other IDEs soon.
Context control enhancements – April 3rd
Back in March, I wrote a post about taking control of your code with Amazon Q Developer’s new context features. This allowed you to specify files and folders to add to the context. You can now include classes, functions, and global variables into the input context. In addition, the context size was increased to 100k characters in chat. These features are now available in VS Code and will be added to other IDEs soon.
Expanded language support – April 9
Amazon Q Developer now supports multiple languages across its IDE and CLI interfaces, enabling developers to discuss architecture, create documentation, and build applications in your preferred language. This enhancement creates a more inclusive and accessible development environment. You can read more in Speaking Your Language: Expanded language support in Amazon Q Developer.
Eclipse inline chat (preview) – April 10
The new inline chat feature in Eclipse allows developers to edit code in place using natural language commands. This powerful capability streamlines tasks like refactoring, optimization, and code maintenance without breaking development flow. You can read more in Announcing inline chat in Eclipse with Amazon Q Developer.
European region launch – April 14
Amazon Q Developer Pro Tier is now available in the Frankfurt (eu-central-1) region, addressing data residency requirements for European customers while improving performance through reduced latency. The launch includes cross-region inferencing optimization across Frankfurt, Ireland, Paris and Stockholm. You can read more in Announcing the European region for Amazon Q Developer.
GitLab Duo with Amazon Q (GA) – April 17
GitLab Duo with Amazon Q brings Amazon Q’s generative AI capabilities directly into GitLab’s DevSecOps platform and is now generally available. This integration enables AI-assisted development throughout your entire workflow—from idea conception to deployment—all within the familiar GitLab environment. You can read more in Announcing General Availability of GitLab Duo with Amazon Q.
Amazon has introduced SWE-PolyBench, a new industry benchmark to evaluate the performance of AI coding agents across multiple programming languages and real-world coding scenarios. Unlike previous benchmarks that focused mainly on Python and bug fixes, SWE-PolyBench contains over 2,000 curated coding tasks spanning Java, JavaScript, TypeScript, and Python, covering a variety of challenges including feature requests and refactoring. You can read more in Amazon introduces SWE-PolyBench, a multilingual benchmark for AI Coding Agents
Model context protocol support – April 30
The addition of model context protocol (MCP) support in the Amazon Q Developer CLI standardizes how applications provide context to Large Language Models, allowing developers to seamlessly integrate additional tools and data sources into their AI-assisted workflow. You can read more in Extend the Amazon Q Developer CLI with Model Context Protocol (MCP) for Richer Context.
Expanded support in customization – April 30
Less that one month after adding support for C# and C++, the Q Developer customizations team was hard at work adding support for: Dart, Go, Kotlin, PHP, Ruby, Rust, Scala, Bash, PowerShell, CloudFormation, and Terraform. This is, of course, in addition to the existing supported languages: Python, Java, JavaScript, TypeScript, Markdown, reStructuredText, and Text. Wow!
Conclusion
April 2025 has been a transformative month for Amazon Q Developer, with launches spanning global expansion, IDE enhancements, and deeper integrations. From bringing the service to European customers to enabling multilingual support and introducing powerful new capabilities like inline chat in Eclipse and GitLab integration, Amazon Q Developer significantly expanded how developers can leverage AI assistance in their daily workflows. These launches reflect a commitment to making AI-assisted development more accessible, powerful, and integrated into existing tools and processes. I encourage you to try these new features and share your feedback as we continue to enhance Amazon Q Developer.
Earlier today, Amazon Q Developer announced Model Context Protocol (MCP) support in the command line interface (CLI). Developers can connect external data sources to Amazon Q Developer CLI with MCP support for more context-aware responses. By integrating MCP tools and prompts into Q Developer CLI, you get access to an expansive list of pre-built integrations or any MCP Servers that support stdio. This extra context helps Q Developer write more accurate code, understand your data structures, generate appropriate unit tests, create database documentation, and execute precise queries, all without needing to develop custom integration code. By extending Q Developer with MCP tools and prompts, developers can execute development tasks faster, streamlining the developer experience. At AWS, we’re committed to supporting popular open source protocols for agents like Model Context Protocol (MCP) proposed by Anthropic. We’ll continue to support this effort by extending this functionality within the Amazon Q Developer IDE plugins in the coming weeks.
Introduction
I’m always on the lookout for tools and technologies that can streamline my workflow and unlock new capabilities. That’s why I was excited about the recent addition of Model Context Protocol (MCP) support in the Amazon Q Developer command line interface (CLI). MCP is an open protocol that standardizes how applications can seamlessly integrate with LLMs, providing a common way to share context, access data sources, and enable powerful AI-driven functionality. You can read more about MCP in this introduction.
Q Developer has had the ability to use tools for a while. I previously discussed the ability to run CLI commands and describe AWS resources. With the Q Developer CLI’s support for MCP tools and prompts, I now have the ability to add additional tools. For example, while I have had the ability to describe my AWS resources, I also need to describe database schemas, message formats, etc. to build an application. Let’s see how I can configure MCP to provide this additional context.
In this post, I will configure an MCP server to provide Q Developer with my database schema for a simple Learning Management System (LMS) that I am working on. While Q Developer is great at writing SQL, it does not know the schema of my database. The table structure and relationships are stored in the database and are not part of the source code of my project. Therefore, I am going to use an MCP server that can query the database schema. Specifically, I am using the official PostgreSQL reference implementation to connect to my Amazon Relational Database Service (RDS). Let’s get started.
Before Model Context Protocol
Prior to the introduction of MCP support, the Q Developer CLI provided a set of native tools, including the ability to execute bash commands, interact with files and the file system, and even make calls to AWS services. However, when it came to querying a database, the CLI was limited in its capabilities.
For example, prior to configuring the MCP server, I asked Q Developer to “Write a query that lists the students and the number of credits each student is taking.” In the following image you can see that Q Developer could only provide a generic SQL query, as it lacked the specific knowledge of the database schema for my LMS.
While this is a great start, I know that Q developer could do so much more if it knew the database schema.
Configuring Model Context Protocol
The introduction of MCP support in the Q Developer CLI allows me to easily configure MCP servers. I configure one or more MCP servers in a file called mcp.json. I can store the configuration in my home directory (e.g. ~/.aws/amazonq/mcp.json) and it is applied to all projects on my machine. Alternatively, I can store the configuration in the workspace root (e.g. .amazonq/mcp.json) so it is shared among project members. Here is an example of the configuration for the PostgreSQL MCP server.
With the MCP server configured, let’s see how Amazon Q Developer enhances my experience.
After Model Context Protocol
First, I start a new Q Developer session and immediately see the benefits. In addition to the existing tools, Q Developer now has access to PostgreSQL as shown in the following image. This means I can easily explore the schema of my database, understand the structure of the tables, and even execute complex SQL queries, all without having to write any additional integration code.
Let’s test the MCP server by asking Q Developer to “List the database tables.” As you can see in the following example, Q Developer now understands that I am asking about the PostgreSQL database, and uses the MCP server to list my three tables: students, courses, and enrollment.
Let’s go back to the example from earlier in this post. Now, when I ask Q Developer to “Write a query that lists the students and the number of credits each student is taking,” it no longer responds with a generic query. Instead, Q Developer first describes the relevant tables in my database, generates the appropriate SQL query, and then executes it, providing me with the desired results.
Of course, Q Developer can do a lot more than just write queries. Q Developer can use the MCP server to write Java code that accesses the database, create unit tests for the data layer, document the database, and much more. For example, I asked Q Developer to “Create an entity-relationship (ER) diagram using Mermaid syntax.” Q Developer was able to generate a visual representation of the database schema, helping me better understand the relationships between the various entities.
The integration of MCP into the Q Developer CLI has significantly streamlined my workflow by allowing me to add additional tools as needed.
Conclusion
The addition of MCP support in the Amazon Q Developer CLI provides a standardized way to share context and access data sources. In this post, I’ve demonstrated how I can use the Q Developer CLI’s MCP integration to quickly set up a connection to a PostgreSQL database, explore the schema, and generate complex SQL queries without having to write any additional integration code. Moving forward, I’m excited to see how you can leverage MCP to further enhance your development workflow. I encourage you to explore the MCP capabilities and the AWS MCP Servers repository on GitHub.
Developers today face a constant balancing act – building new features and functionality while also ensuring the security and reliability of their codebase. Two powerful tools, Snyk and Amazon Q Developer, can work in tandem to help developers navigate this challenge with greater efficiency and efficacy.
Snyk is a leading developer security platform that empowers developers to seamlessly secure their code, open-source dependencies, container images, and cloud infrastructure all from a single, unified platform. Amazon Q Developer is a generative AI-powered assistant designed to accelerate a variety of tasks across the software development lifecycle. By combining the security insights from Snyk with the assistive capabilities of Amazon Q Developer, developers can streamline their workflows and focus on delivery.
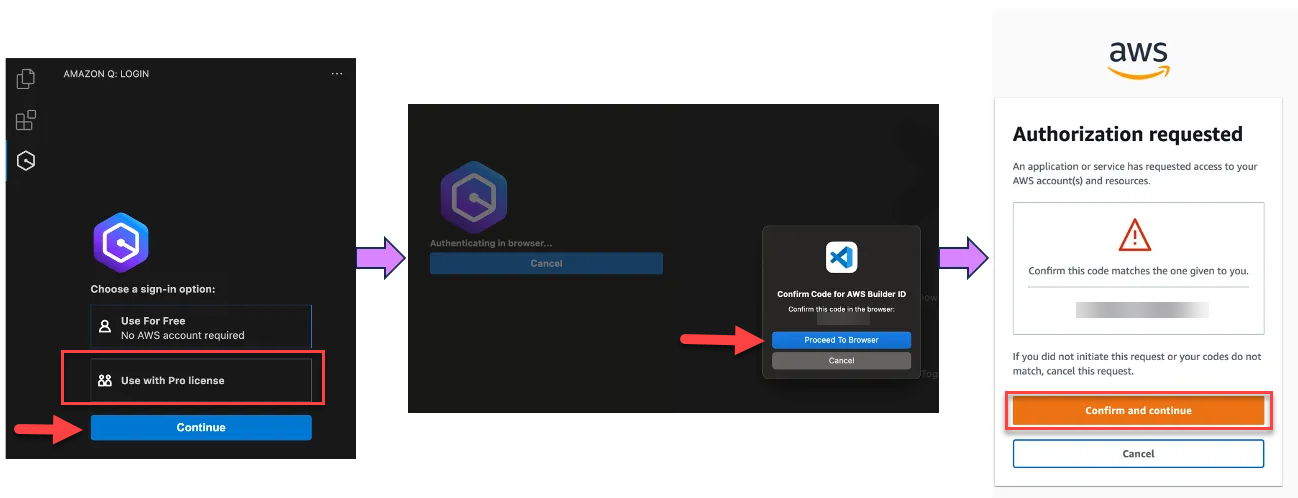
Getting started with Amazon Q Developer and Snyk IDE Plugins
To get started with Amazon Q Developer, you need to have an AWS Builder ID or be part of an organization with an AWS IAM Identity Center instance that allows you to use Amazon Q. To use Amazon Q Developer agents for software development in Visual Studio Code, start by installing the Amazon Q extension. Find the latest version of the extension on the Amazon Q Developer page. The extension is also available for JetBrains, Eclipse (Preview), and Visual Studio IDEs. For a detailed list of supported IDEs and the features available in each, refer to the Amazon Q Developer documentation.
To get started with Snyk, sign up for a free Snyk account or log in with your existing account. To use Snyk in your IDE to automatically find security issues, review the IDE documentation and install Snyk using your IDE extension marketplace. After Snyk is installed, navigate to the Snyk panel in your IDE and follow the on-screen instructions to authenticate with your Snyk account.
After authenticating, Snyk will automatically scan your entire codebase for security issues. Snyk will continue scanning periodically as you write code or generate code with Amazon Q Developer.
Walkthrough
Let’s explore how Snyk and Amazon Q Developer can be used together through a few examples. Imagine that you maintain an open-source project. As a new Snyk user, you would like to find and fix the security issues in the project. In this first and simple scenario, Snyk has identified many cases of security vulnerabilities in specific lines of code. Among the vulnerabilities, we’ll focus on the Information Exposure vulnerability.
Figure 1 – Snyk IDE Plugin displaying vulnerability analysis of an Information Exposure issue, showing severity, affected code, and prevention tips.
Rather than manually researching and implementing the fix, you can simply highlight the flagged line, invoke Amazon Q Developer’s inline chat by pressing ⌘+I (Mac) or Ctrl+I (Windows), and request assistance. Amazon Q Developer will analyze the issue, propose the necessary code changes, and provide you with an inline diff to review and accept. This allows for rapid remediation of security flaws saving time while improving the code.
Figure 2 – Activating Amazon Q Developer inline code generation to fix the detected information exposure vulnerability.
We are happy with the change Amazon Q Developer proposed, so we’ll simply hit enter to accept the suggestions. Of course, we could always hit escape to reject the suggestion if needed.
Figure 3 – Amazon Q Developer displaying an inline code generation to fix the detected information exposure vulnerability.
In addition to the inline chat, you can pass the vulnerability details directly from the Snyk plugin’s Problems view into the Amazon Q Developer /dev agentic capability.
In the chat interface of Q Developer, the /dev agentic capability allows longer conversation, broader workspace context, and handle changes within multiple files and topics. When this workflow is invoked, the Amazon Q Developer Agent will generate code based on the description and existing code in the workspace, provide a list of suggestions to review and add to the workspace, and if needed, iterate on the code based on feedback.
Figure 4 – Using Amazon Q’s /dev agent to implement project-wide fixes for Snyk-detected vulnerabilities across multiple files.
Not all issues are trivial as the prior example. In a more complex case, Snyk may surface a vulnerability that requires a deeper understanding of the code and the potential risk. Let’s look at another issue that Snyk identified in the project we have been discussing.
Figure 5 – Snyk Plugin highlighting a cross-site scripting (XSS) vulnerability, showing the affected code line and prevention recommendations.
Here, you can switch to Amazon Q Developer’s chat interface, provide the details of the issue, and ask for a more thorough explanation. Amazon Q Developer can then dive into the codebase, explain the problem in detail, and walk you through the appropriate fixes. This collaborative approach empowers developers to make informed decisions and gain broader knowledge, rather than simply implementing a suggestion.
Figure 6 – Amazon Q Developer’s chat interface explaining an XSS vulnerability and its security implications through natural language dialogue.
Note that Amazon Q Developer provides links to documentation and other sources for further reading. In addition, you can continue discussing the issue to learn more. For example, imagine that you want to understand real world breaches that have occurred as a result of the issues that Synk has identified. Q provides a few examples for me to learn more.
Figure 7 – Amazon Q Developer discussing notable real-world XSS breach examples and their security impacts.
Beyond fixing issues, Amazon Q Developer can also assist with other development tasks identified by Snyk, such as updating dependencies, refactoring code, or optimizing cloud infrastructure. By integrating these two tools, developers can streamline security scanning, issue investigation, and remediation, dramatically increasing their overall productivity.
Conclusion
In this blog, we took a look at how Snyk and Amazon Q Developer are a powerful duo in the modern developer’s toolkit. Integrating Snyk’s leading security insights with the generative AI capabilities of Amazon Q Developer empowers developers to more efficiently identify, comprehend, and address security vulnerabilities. This combination enables developers to upskill and enhance their own abilities as they work to resolve security issues. Get started with installing the Amazon Q Developer in the IDE and Snyk plugin.
Announcing General Availability of GitLab Duo with Amazon Q
Today, we’re excited to announce the general availability of GitLab Duo with Amazon Q. This new offering is an integrated product, bringing together GitLab’s DevSecOps platform with Amazon Q’s generative AI capabilities. Gitlab Duo with Amazon Q embeds Amazon Q agent capabilities directly in GitLab’s DevSecOps platform to accelerate complex, multi-step tasks across the entire software development lifecycle.
In today’s fast-paced software development environment, developers are constantly looking for ways to improve productivity while maintaining best practices for code quality, security, and deployment. The integration of GitLab Duo with Amazon Q addresses these needs by combining GitLab’s comprehensive DevSecOps platform with Amazon Q’s intelligent coding assistance.
This integration enables developers to leverage AI throughout their entire workflow—from idea conception to deployment—all within the familiar GitLab environment they already use. For new and existing Amazon Q Developer users, this integration also leverages the same Q Developer agents available in the IDE, providing a consistent experience across different interfaces.
Key Benefits and Features
The GitLab Duo with Amazon Q integration delivers significant value to development teams by creating a more efficient, secure, and collaborative workflow.
This integration eliminates the need to switch between different tools and environments, as developers can access powerful AI assistance directly within GitLab. GitLab helps automate building, testing, packaging, and deployment of secure code, streamlining the entire development lifecycle. What makes this particularly powerful is how the AI agents utilize the context throughout a GitLab project to keep the SLDC “loop” going. So whether you are troubleshooting a failed pipeline, investigating a vulnerability, or writing a new feature, Amazon Q agents can leverage the appropriate context to assist you with the task at hand.
Security and compliance are foundational elements of this integration. End-to-end security controls are built directly into the platform. The Amazon Q agents come with appropriate guardrails to help customers meet compliance without affecting development velocity, all while leveraging AWS’s cloud infrastructure to scale your AI-enhanced development workflows with confidence. You can ask Amazon Q agents to help remediate a finding in the project’s vulnerability reports or help troubleshoot a failed pipeline.
Throughout your development workflow, you’ll find collaborative AI agents ready to assist with various tasks. Whether you need to upgrade Java code from version 8 or 11 to 17, get AI-powered code review suggestions, automatically generate comprehensive test cases, or transform ideas into complete merge requests—Amazon Q is there to help at every step. These intelligent agents work alongside your team, enhancing productivity.
Use Cases and Examples
To demonstrate how GitLab and Amazon Q complement each other to accelerate development productivity and help organizations with application security, I’ll be using a Java application enjoyed by puzzle enthusiasts.
Idea to Merge Request
Whether you are looking to scale your developer teams or streamline the processes between feature requests and production, GitLab Duo with Amazon Q is now integrated into GitLab’s platform, so you can begin development simply by assigning a GitLab issue to Amazon Q Developer agents.
I start by creating a task in my GitLab project. I want to create a new feature to support multiple languages in the Q words game.
From here I assign the task directly to the Amazon Q agent by using GitLab’s quick action/q dev in the issue’s comment section.
The agent will automatically open up a merge request for me to review with suggested code changes. Here you can see changes the agent made across 11 files, accounting for front-end, API, and styling changes. In the past I would have opened my IDE, cloned the project, and coded these changes myself. Using GitLab Duo with Amazon Q, I just review and test the new code before I am ready to deploy.
Code Reviews
Code reviews play a critical function during the development life-cycle. They act as a quality gate to help maintain high quality security and coding standards. While important, code reviews add latency to software delivery, especially when reviewers are not available or when changes are complex.
The Amazon Q agent for Code Reviews in GitLab helps teams move faster through their code review. Using the quick action /q review in a merge request comment field sends the merge request to Amazon Q, where it will identify security and quality risks associated with code changes in the merge request.
I start by opening an open merge request. In this example, another developer had the task to add authentication to the Q words application.
I then invoke the agent with the /q review quick action.
The review is returned as inline code suggestions to the merge request. Here you can see an example of a finding from the review agent. Comments include a description of the findings as well as guidance and links to help improve the code.
I next use the Gitlab Duo with Amazon Q chat agent in the web interface to ask for a summary of the change and ask it to highlight any critical issues. GitLab Duo chat allows me to ask questions about the current resource in the URL. In this example it is the merge request, but it could also be a GitLab issue I want to explain or a summary of a code file in a repository.
Test Generation
Next, I ask GitLab Duo with Amazon Q to generate tests using the /q test quick action. Adding this action to the comment field will generate recommended tests when the MR lacks sufficient tests.
The summary I receive from GitLab Duo with Amazon Q helps me understand the scope of the changes and focuses my attention to the more important aspects of the change. Along with the tests that Q Developer agents recommended, I am able to approve the merge request in less time.
Java Transformation
Upgrading Java applications from older versions to Java 17 can be time-consuming and error-prone. With GitLab Duo and Amazon Q, I can leverage the transform agent to help me automate the migration from the current Java 8 code to Java 17 along with upgrading the project’s dependencies. I start by creating a new issue in my GitLab project that indicates the Java upgrade.
To begin the upgrade, I use the GitLab Q quick action /q transform to begin the upgrade process. The Amazon Q transformation agent asks me to update the gitlab-ci.yaml file to continue the process.
I can follow the agent’s progress by watching for updates in the Issue’s details. GitLab Duo with Amazon Q will also add a transformation plan to the issue so I can understand what types of changes will be involved to complete the upgrade.
When the transform is complete, a new merge request is opened for me to review. As you can see, my pom.xml file was updated to compile on Java 17 as well as additional changes to ensure the project compiles. It also includes a report detailing next steps to consider before merging and deploying the updated Java code.
Conclusion
In this post, I demonstrated how GitLab Duo with Amazon Q can help scale and improve application development. Using GitLab Duo with Amazon Q, I was able to quickly add additional features, review code changes, and upgrade my application to Java 17 all within GitLab’s collaborative interface. I now have a secure and modern java app that I can use to practice my Español.
The general availability of GitLab Duo with Amazon Q marks a significant milestone in AI-assisted software development. By combining GitLab’s comprehensive DevSecOps platform with Amazon Q ‘s generative AI capabilities, this integration empowers development teams to work more efficiently while maintaining high standards of security and compliance.
Organizations can now leverage this powerful integration to accelerate their software development lifecycle, reduce manual effort, and ship more secure code faster. The seamless developer experience, enterprise-grade security, and collaborative AI agents throughout the workflow make this integration a valuable addition to any development team’s toolkit. We’re excited to see how customers leverage this integration to transform their development processes and achieve new levels of productivity and innovation.
As I sat down to write this post, my daughter called from the top of the Eiffel Tower on a trip with her high school class. While she excitedly pointed her camera toward the Parisian skyline, I was struck by how technology has transformed our concept of distance. Her world, at eighteen, is infinitely more connected than the one I knew at her age. I couldn’t help but smile at the timing of this call, because today Amazon Q Developer is expanding to Europe.
The launch of Amazon Q Developer Pro Tier in the Frankfurt (eu-central-1) region marks a significant milestone for our European customers, addressing two critical needs: data residency and performance optimization. For organizations that need to meet EU data residency requirements, the ability to store customer content within EU boundaries can help provide the assurances they require. Beyond compliance, this regional presence brings performance benefits. European customers will experience reduced latency in their interactions with Amazon Q Developer, as requests are processed closer to home. This proximity not only improves response times but also enhances the overall development experience, making real-time interactions with Amazon Q Developer more fluid and natural.
Amazon Q Developer Pro tier users now have the choice of creating a profile in N. Virginia (us-east-1) or Frankfurt (eu-central-1). Associated data – including customizations – is stored in this region. While data is stored in Frankfurt, Amazon Q utilizes cross-region inferencing to optimize request processing. At launch, this includes Frankfurt, Ireland, Paris and Stockholm, as shown in the following image.
Finally, it is important to note that certain operations, such as querying AWS resources in other regions (e.g. “List my S3 buckets in Tokyo”), will naturally involve cross-region calls regardless of your Q Developer profile’s location.
The Frankfurt region includes all GA features except the command line and the ability to chat with Support. You can read more in the Amazon Q Developer User Guide. We invite you to experience these new capabilities by upgrading to the Pro tier and selecting Frankfurt as your region during profile creation. Get started with Amazon Q Developer, and share your feedback with us as we continue to expand our global presence.
In the fast-paced world of software development, maintaining comprehensive documentation often falls to the bottom of priority lists in favor of delivering functionality. Amazon Q Developer’s /doc agent changes this equation by automating README generation and updates. With this tool, the variable of time spent producing documentation is reduced to the point that it’s no longer a burden to the detriment of functionality.
The /doc agent leverages generative AI to analyze your codebase and generate comprehensive documentation. Additionally, the agent respects your .gitignore file and excludes files you don’t want to be included in documentation review.
Solution Overview: As an example, imagine a cloud infrastructure team at a technology consultancy had been working for weeks on their AWS DataSync project. The solution they built provided an elegant CDK implementation that automated data transfer between Amazon S3 buckets using AWS DataSync. The lead engineer had just finished implementing the final IAM role configurations when the product manager requested comprehensive documentation for the next day’s client handoff meeting. The team realized this would typically take hours of focused work. Instead, they decided to try Amazon Q Developer /doc agent.
Open your IDE with the Amazon Q extension installed
Click the Amazon Q icon to open the chat panel
Enter /doc to start the documentation process
Select your documentation task:
Create a new README
Update an existing README with recent code changes
Figure 1 – Entering /doc to start the documentation process.
Example: Creating a New README:
For projects without documentation, simply select: Create a README. It will confirm the project you are creating the README for.
Figure 2 – Select the Create a README option.
Once you verify the folder and select yes, the agent begins creating the README document for the folder. Here are the steps it works through: scanning the source files, summarizing the source files, and generating the documentation.
Figure 3 – Verify the folder and select yes.
When the document is created, you can preview the README file. The agent then presents you with the ability to either accept the changes or request modifications before implementation.
Figure 4 – Preview the created README file.
If you choose to accept, the README file is added to your project.
Figure 5 – Accept the changes so the README is added to your project folder.
Example: Updating Documentation with Code Changes
When your code evolves, you can keep the documentation synchronized by using /doc. The agent will review your recent code modifications and suggest appropriate documentation updates.
Figure 6 – Select Update an existing README to make changes to a README file.
Then you can describe the changes you want the agent to make to your README file.
Figure 7 – Describe changes to your README files.
For targeted documentation updates, you can provide specific instructions:
Figure 8 – Verify the folder and select yes.
Once you’ve made the changes, the agent asks you to verify them by selecting yes.
Figure 9 – Verify the changes and select yes.
Advanced Documentation Management
Multi-step Documentation Refinement:
Figure 10 – Multi-step Documentation Refinement.
Amazon Q Developer /doc agent allows for iterative improvement of your documentation through feedback loops. After generating initial documentation, you can:
Review the generated content for gaps or inaccuracies
Provide specific feedback to refine particular sections
Request additional sections on complex topics
Gradually build comprehensive documentation through multiple iterations
This iterative approach is particularly valuable for complex projects where documentation needs to evolve alongside the codebase.
Documentation for Specific Components
For modular projects, you can create targeted documentation at different levels:
Root-level README for project overview
Component-level READMEs for specific modules
Service-level documentation for microservices
API documentation for interfaces
By combining these documentation levels, you can maintain a hierarchical documentation structure that remains manageable and specific.
Handling Documentation Inheritance
Figure 11 – Handling Documentation Inheritance.
When working with derived or extended codebases:
Generate base documentation for the parent project
Create specialized documentation for extensions
Cross-reference related documentation to maintain consistency
Use the /doc agent to update specific sections when inheritance patterns change
Documentation Syncing Strategy
Figure 12 – Documentation Syncing Strategy.
For teams working on rapidly evolving projects:
Establish a documentation update schedule aligned with sprints
Assign documentation reviews as part of code review processes
Use /doc to generate change summaries after significant updates
Implement a verification process to ensure generated documentation accurately reflects code changes
Best Practices for /doc Agent
To improve results from documentation generation with Amazon Q Developer, follow these best practices:
Optimize repository size: Amazon Q Developer supports documentation generation across your codebase, accommodating projects up to the specified size limits. While documentation for larger repositories may require additional processing time and could provide more generalized results, you have the option to request documentation for specific subsets of code or individual files to receive more detailed insights.
Maintain high-quality code: The quality of documentation Amazon Q Developer generates improves significantly when your code is well-commented and organized, has meaningful naming conventions for programming entities, and follows standard coding conventions.
Be specific with change requests: When requesting specific README changes in natural language, choose to update an existing README and select the option to make a specific change. After initial documentation generation, you can request additional modifications by describing exactly what updates you want.
Craft effective change descriptions: When describing desired updates, include:
Specific sections you want to modify
Exact content you want to add or remove
Particular issues that need correcting
How project functionality should be reflected in the README
References to content available in your codebase.
Understand system limitations: Amazon Q Developer doesn’t have access to private or internal platforms and might lack knowledge of third-party tools, specialized software, or custom tooling in your code. Content requiring this knowledge won’t be documented automatically. In these cases, you’ll need to manually edit the README to include information Amazon Q Developer cannot generate.
Documentation Quotas and Limitations
When working with Amazon Q Developer /doc agent, be aware of these important constraints:
Document generations per task: There’s a limit to the number of feedback iterations allowed per documentation session. This quota resets each time you start a new documentation task.
File filtering: Amazon Q Developer filters out files or folders defined in your .gitignore file. This helps streamline the documentation process by focusing only on relevant code files.
Conclusion
Amazon Q Developer /doc agent transforms the documentation process from a tedious chore to an automated, efficient workflow. By generating and maintaining READMEs based on your actual code, it ensures documentation remains accurate and up-to-date without consuming precious development time.
As part of Amazon Q Developer’s free tier, the /doc agent is readily available to integrate into your development process. Start using it today to improve your project documentation and enhance team collaboration.
Earlier today Amazon Q Developer launched inline chat in the Eclipse IDE (in preview). In this post, I’ll walk you through how I’ve been using this powerful new capability to streamline my Java development workflow, from refactoring existing code to optimizing performance-critical methods. Whether you’re a seasoned Eclipse veteran or just getting started, you’ll see how Amazon Q Developer’s advanced AI-driven tools can supercharge your productivity across the entire software development lifecycle.
The chat interfacein Amazon Q Developer is where I turn when I’m not quite sure how to accomplish a particular task. I love being able to explain the problem I’m trying to solve, or the concept I’m trying to understand, and getting detailed, contextual responses that help point me in the right direction. The AI-generated code snippets and explanations are invaluable when I’m learning something new or tackling a complex challenge. However, when I know how to accomplish a task, I don’t need the explanation I just want the code.
On the other hand, when I’m workingon a well-understood task, I much prefer to use Amazon Q Developer’s inline suggestions. The way it analyzes my existing code and comments to provide relevant, customized completions is just incredible. It lets me work at faster, creating new functionality without having to constantly switch context or hunt for the right syntax. However, while inline suggestions are great for generating new code, I cannot use it to edit existing code.
Now, with the new inline chat feature in Eclipse (in preview), I can easily edit my code in place using Amazon Q Developer. Instead of having to copy/paste code from a separate chat window, I can describe the changes I want to make right in the editor, and Amazon Q Developer will seamlessly integrate the suggested updates into my code base as a diff. It’s great for for refactoring, bug fixing, and maintaining well-documented, easily-readable code. Let’s look at a couple of examples to see how inline chat works in Eclipse.
Refactoring
Imagine that I am the newest member of a development team, and I was tasked with adding unit tests to the OrderProcessor class. However, as I dug into the code base, I realized that the OrderProcessor was tightly coupled to the OrderRepository implementation. Notice the instantiation of the OrderRepository on line 2 in the following image. This made it difficult to write unit tests, as I couldn’t easily swap in a mock repository. I knew I needed to refactor the code to use dependency injection, but the thought of making all of those changes manually was daunting.
Fortunately, with Amazon Q Developer’s inline chat in my Eclipse IDE, I didn’t have to tackle this refactor alone. I selected the OrderProcessor class, invoked the inline chat using the keyboard shortcut (CMD + SHIFT + I for macOS, and CTRL + SHIFT + I for Windows). Then I described the change I want: “Refactor this class to use dependency injection so I can mock the OrderRepository in unit tests.” Note that I could have also asked Amazon Q Developer to leverage a specific DI framework, like Hibernate. However, I am going to keep this simple for the blog post.
Amazon Q Developer quickly analyzed the code and presented me with a suggested change shown in the following image. The change is presented as a diff so I can see what Amazon Q Developer is removing (in red) and adding (in green). After reviewing the changes, I was pleased to see that Amazon Q Developer had introduced a constructor that took an IOrderRepository interface, allowing me to pass in either the concrete implementation or a test double. This would make it a breeze to write comprehensive unit tests for the OrderProcessor. With a quick click to accept the changes, Amazon Q Developer updated my code, saving me valuable time and ensuring the new feature would be built on a solid, testable foundation.
In this example, I selected the entire class. However, I can also ask Q Developer to work on a specific portion of the code.
Optimization
While working on the Order class, I noticed that the containsItem method seemed to be running slowly, especially on orders with a large number of line items. I decided to profile the code and sure enough, that method was a hot spot, consuming a disproportionate amount of CPU cycles. I selected the containsItem method, brought up the inline chat, and asked Amazon Q Developer: “This code is running slow, please optimize it.”
Amazon Q Developer quickly analyzed the existing code, which was using a simple for loop to iterate through the list of items, and provided an improved implementation. As shown in the diff, Amazon Q Developer suggested replacing the for loop with a more efficient stream-based approach, using the anyMatch method to determine if the item is present in the order. This change has improved performance, especially for orders with a large number of line items. I reviewed the changes and accepted Amazon Q Developer’s suggestions.
Amazon Q Developer’s optimization not only improved the performance of the containsItem method, but also made the code more readable and maintainable going forward.
Conclusion
The integration of Amazon Q Developer into the Eclipse IDE (in-preview) has improved my Java development workflow. Whether I’m learning a new concept, generating boilerplate code, or optimizing a performance bottleneck, Amazon Q Developer’s suite of AI-powered tools has become an indispensable part of my development process. The addition of inline chat, in particular, has streamlined my ability to directly interact with the assistant, seamlessly updating my code base without breaking my concentration. If you’re an Eclipse user looking to supercharge your productivity, I highly recommend installing the Amazon Q Developer plugin today.
As the world of software development becomes increasingly global, the need for tools that support multiple languages has become paramount. Today, I am excited to announce expanded language support in Amazon Q Developer. In this post, I explore the recent expansion of language support in Amazon Q Developer, a powerful platform used by developers worldwide to discuss architecture, create documentation, design interfaces, and build applications.
While English remains the lingua franca of programming, the reality of modern software development extends far beyond code. Developers worldwide use Amazon Q Developer to discuss architecture decisions, create documentation, design user interfaces, and build applications that serve global audiences. By expanding language support, Amazon Q Developer now enables developers to have more natural, fluid conversations about complex technical concepts in their preferred language, whether they’re designing system architecture, generating documentation, or planning application localization strategies.
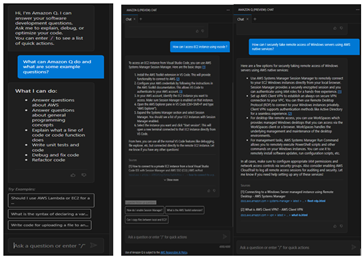
The power of this expanded language support is demonstrated in the following image, where I asked the same container hosting question in English, Chinese, Hindi, and Spanish. Not only does Amazon Q Developer now provide complete responses in these languages, but it also maintains technical accuracy while adapting to linguistic nuances. Furthermore, Q Developer now suggests follow-up questions and responses in the user’s chosen language, creating a more intuitive and seamless experience for developers worldwide. This natural flow of conversation in any language helps maintain the developer’s focus and flow, eliminating the mental overhead of constant translation.
Whether you’re a developer in Seoul writing documentation in Korean, a startup in Madrid brainstorming architecture in Spanish, or a team in Brazil collaborating in Portuguese, Amazon Q Developer is now ready to support your journey and your preferred language. Expanded language support is available to users of both the Free and Pro Tier starting today. Get started with Amazon Q Developer, and share your feedback. Together, we’re building a more inclusive and accessible future for software development.
In today’s rapidly evolving software landscape, maintaining and modernizing Java applications is a critical challenge for many organizations. As new Java versions are released and best practices evolve, the need for efficient code transformation becomes increasingly important. Amazon Q Developer transformation for Java using the Command Line Interface (CLI) presents a powerful alternative to integrated development environments (IDEs), offering unique advantages in scenarios requiring batch processing, CI/CD integration, headless environments, and custom automation workflows. By leveraging the CLI, development teams can perform consistent, scalable, and easily reproducible transformations across extensive codebases.
One key difference between CLI and IDE-based transformations lies in the standardization and customization capabilities. With CLI transformations, teams can define and enforce standardized transformation rules across the entire organization, ensuring consistency in code modernization efforts. This standardization is particularly valuable for large teams or distributed development environments. Additionally, the CLI approach allows for deeper customization of transformation rules, enabling teams to tailor the modernization process to their specific needs and coding standards. Whether updating deprecated APIs, migrating to newer Java versions, or enforcing coding standards, Amazon Q Developer’s CLI transformations provide a flexible and powerful solution.
This blog will explore how to use Amazon Q Developer’s CLI capabilities to create custom transformations for upgrading Java applications. We’ll dive into the process of defining transformation rules, executing them across your codebase, and demonstrate how to customize these transformations to meet specific requirements. By the end of this blog, you’ll have a clear understanding of how to leverage Amazon Q Developer’s CLI for Java transformations, enabling you to modernize your applications more efficiently and with greater control. You’ll be equipped to standardize your transformation processes across teams and projects while also customizing them to fit your unique requirements.
Pre-requisites
Before you begin a transformation, see the prerequisites for transformation on the command line with Amazon Q Developer.
Note: The Amazon Q Developer command line tool for transformation (qct cli) is distinct from the Amazon Q Developer CLI – while qct cli is specifically designed for code transformations, the Amazon Q Developer CLI provides features such as autocompletion, Amazon Q chat, inline ZShell completion, etc.
These pre-requisites ensure that you have all the necessary tools and permissions to use Amazon Q Developer’s CLI capabilities for custom transformations on your Java applications.
About the Application
This sample project will be used to demonstrate the Amazon Q Developer CLI code transformation feature in action. It’s a Java 1.8 based microservice application that displays a free list of movies for the month using configuration stored in AWS AppConfig service. Originally open sourced in 2020, it intentionally uses legacy versions of libraries (Spring Boot 2.x, Log4j 2.13.x, Mockito 1.x, Javax and Junit 4) to showcase the upgrade process. The application includes a dependency on another module built in both Java 1.8 and 17, specifically to demonstrate how post transformation steps can be used to modernize your application’s internal dependencies. You can download this sample project to experiment with the CLI upgrade feature in your own environment.
Configuring Amazon Q command line tool and authenticate
Configure the Amazon Q command line tool for transformation by running the qct configure command:
qct configure
This command will:
Prompt you to specify the JDK path for Java 8, 11, 17 and 21. You only need to specify the path to the JDK of the Java version you are upgrading.
Two options are available for authentication
Option 1 authenticates with IAM credentials stored in your AWS CLI profile. Refer Figure 2.
Figure 2: qct configure – Authenticate with IAM
Provide the AWS CLI profile to use for the IAM authentication. You can specify a specific profile name or press enter to use the default profile.
Provide a file path that will point to a CSV file which will be used to add tags for your transformation (optional). The CSV must have two columns, with headers titled key and value, where tag key-value pairs are listed.
Prompt you to provide the Start URL to authenticate to Amazon Q Developer Pro. The Start URL can be obtained from the console in the Q Developer > Settings.
Provide the AWS Region
If you’re upgrading your code’s Java version, you have the option to receive your code suggestions from Amazon Q in one commit or multiple commits. Amazon Q will split the upgraded code into multiple commits by default. If you want all your code changes to appear in one commit, enter the letter ‘O’ for one commit when prompted.
You can customize transformations by providing custom logic in the form of ast-grep rules that Amazon Q uses to make changes to your code.
To start with customization, create an Orchestrator file where you provide the paths to the custom transformation files. The Orchestrator file is a YAML file containing paths to custom pre-transformation and post-transformation files, which contain ast-grep rules that will run before and after transformation.
Here’s an example:
orchestrator_qct_cli.yaml
name: orchestrator_qct_cli
description: My collection of custom transformations to run before and after a transformation.

pre_qct_actions:
  ast-grep:
    rules:
      - custom-transformation-pre-qct.yaml

post_qct_actions:
  ast-grep:
    rules:
      - custom-transformation-post-qct.yaml
The pre-transformation rules file shown below is used to
Identify unused local variables declarations and remove them
Identify unused import declarations and remove them
This custom transformation cleans up unused local variable declarations and imports, helping in reducing the number of lines that will be considered for transformation as demonstrated in the following example:
custom-transformation-pre-qct.yaml
id: no-unused-vars
language: java
rule:
    kind: local_variable_declaration
    all:
        - has:
              has:
                  kind: identifier
                  pattern: $IDENT
        - not:
              precedes:
                  stopBy: end
                  has:
                      stopBy: end
                      any:
                          - { kind: identifier, pattern: $IDENT }
                          - { has: {kind: identifier, pattern: $IDENT, stopBy: end}}
fix: ''

--- # this is YAML doc separator to have multiple rules in one file

id: no-unused-imports
rule:
    kind: import_declaration
    all:
        - has:
            has:
                kind: identifier
                pattern: $IDENT
        - not:
            precedes:
                stopBy: end
                has:
                    stopBy: end
                    any:
                        - { kind: type_identifier, pattern: $IDENT }
                        - { has: {kind: type_identifier, pattern: $IDENT, stopBy: end}}
fix: ''
The post-transformation rules file serves multiple purposes and helps customers seamlessly upgrade their first-party (1P) dependencies after QCT transforms their application to Java 17 or 21:
When your project uses internal AWS dependencies that have been upgraded to Java 17 or 21, these rules automatically update your POM file to use the latest compatible versions. This eliminates manual dependency version updates and resolves build errors related to private dependencies.
After updating the POM file, the rules automatically modify your code to replace deprecated methods from internal dependencies with their latest supported versions, ensuring compatibility with the upgraded dependencies.
The rules identify System.out.println statements and replace them with a proper logger framework, improving application observability. This automated approach significantly simplifies the migration process by handling both the application transformation and internal dependency updates in one streamlined operation.
These rules help modernize your codebase and ensure compatibility with updated dependencies.
custom-transformation-post-qct.yaml
id: update-movie-service-util-java17
language: html
rule:
    pattern: |-
        <dependency>
            <groupId>org.amazonaws.samples</groupId>
            <artifactId>movie-service-utils</artifactId>
            <version>$VERSION</version>
        </dependency>
constraints:
    VERSION:
        regex: "^0\\.1\\.0"
fix: |-
    <dependency>
        <groupId>org.amazonaws.samples</groupId>
        <artifactId>movie-service-utils</artifactId>
        <version>0.2.0</version>
    </dependency>

--- # this is YAML doc separator to have multiple rules in one file
id: update-movie-service-util-method
language: java
rule:
    pattern: |-
        MovieUtils.isValidMovieName($MOVIE_NAME)
fix: |-
    MovieUtils.isValidMovie($MOVIE_NAME, movieId)

--- # this is YAML doc separator to have multiple rules in one file
id: sysout-to-logger
language: java
rule:
    pattern: System.out.println($MATCH)
fix: logger.info($MATCH)
Both pre- and post-transformation enhances logging capabilities, increases configurability, improves error handling, and makes the application more production-ready, while the use of transformation rules automates the process, saving time and reducing errors in large codebases.
Executing the transformation
Now, run the transformation using the Amazon Q Developer CLI:
–source_folder points to the path of the folder containing the Java application that needs to be transformed from version 8 to either 17 or 21.
–custom_transformation_file specifies the path to the orchestrator file (orchestrator_qct_cli.yaml).
–target_version refers to the target Java version to which the application will be transformed. It can be either JAVA_17 or JAVA_21.
If you have common requirements across all the applications you’re transforming, it’s better to store this file in a shared location and use an absolute path during transformation.
For applications with specific requirements, you can include the orchestrator file in the application’s codebase and use a relative path.
Once you execute the transform command if you choose to authenticate with IDC, it will prompt to authenticate providing a URL using the credentials set up in identity center that have access to Amazon Q Developer Pro: Figure 4: qct transform authentication with the IAM Identity provider
After logging in through the browser, verify if the code matches with the code in the CLI and approve access to Amazon Q Developer.
Once the request is approved – enter Y in the command line to proceed with transformation:
Before starting the transformation, the agent verifies if you have at least the minimum supported version of Maven for transformation
Figure 5: qct transform starts with pre-processing followed with transformation job
First ast-grep command is run using the pre-transformation template before transformation and once it’s successful, the Q Developer transformation job begins.
Figure 6: qct transform completed with the results committed to a new branch
After the transformation is complete the changes are saved to a local branch and the branch name can be obtained from CLI output.
After successful transformation ast-grep post-transformation step is executed and the branch is updated with the custom transformed code.
Reviewing and applying the changes
After the transformation is complete, review the changes in the new branch that’s in the CLI output. Use “git branch” to view the new branch created with the transformed files.
git branch
Figure 7: git branch – shows the new branch containing transformation result
Now compare the transformed branch with the source branch in our case its change-branch.
git diff change-branch
Figure 8: Spring boot upgraded to 3.3.8 from 2.0.5
Figure 9: Java upgraded from 8 to 17
You can see the application is upgraded to Java 17, Spring Boot upgraded to 3.3.0 form 2.0.5, and the internal dependency movie-service-utils upgraded to 0.2.0 version to support Java 17.
Figure 10: Unused variable removed also System.out.println replaced with Logging framework
Figure 11: Unused imports removed
Figure 12: MobieUtils.isValidMovie method updated to match the updated internal dependency
During pre-transformation
Unused local variables are identified and removed from the code.
Unused imports are identified and removed
During post-transformation
Using custom transformation, the sysout statements are replaced with logger framework.
The internal dependency MovieUtils.isValidMovieName method is updated with the required parameters that are required for the latest version using custom post transformation template.
Other changes of the Java 8 to 17 transformation are mentioned here.
Pre-transformation, transformation, and post-transformation changes are committed separately to help users compare differences and identify changes made in each step.
If you’re satisfied with the results, you can create a pull request from the branch which contains the transformed code to your corresponding release branch.
Troubleshooting
When working with Amazon Q Developer CLI transformations, you might encounter some common issues. Here’s how to address them:
Unstaged Git Commits
Before running a transformation, make sure to stash or commit any pending changes to your local branch. This ensures a clean working directory for the transformation process.
Clearing the Working Directory
If a transformation fails, clear the workspace located at ~/.aws/qcodetransform/transformation_projects/<your project name> before retrying the transformation. This step is only necessary for failed transformations.
Clean up
To clean up after the transformation:
Remove the user or group access to the Amazon Q Developer Pro application
Unsubscribe from Amazon Q Developer Pro
Call to Action
Ready to modernize your Java applications? Here’s how to get started:
Review the prerequisites for the command line transformation with Amazon Q Developer.
Download the sample project to practice transformations in a safe environment
Conclusion
Using Amazon Q Developer’s CLI capabilities for custom transformations provides a powerful and flexible way to upgrade Java applications. This approach allows you to automate the modernization process, saving time and reducing the risk of manual errors.
By leveraging custom rules, you can tailor the transformation to your specific needs, whether it’s updating deprecated methods, migrating to new APIs, or applying best practices across your codebase.
As you continue to work with Amazon Q Developer, explore more advanced transformation scenarios and integrate this process into your development workflow for ongoing modernization efforts.
As organizations modernize their database infrastructure, migrating from systems like Oracle to open source solutions such as PostgreSQL is becoming increasingly common. However, this transition presents a significant challenge: discovering and converting embedded SQL within existing Java applications to ensure compatibility with the new database system. Manual conversion of this code is time-consuming, error-prone, and can lead to extended downtime during migration. The process involves cautiously updating numerous SQL statements interwoven in Java code, which can take weeks depending on the application’s size and complexity. This manual approach is highly susceptible to errors, potentially introducing subtle bugs that are difficult to detect. It also requires deep expertise in both source and target database systems. Furthermore, ensuring consistency across the entire codebase during manual conversion is challenging. This can lead to inconsistencies in coding style, performance optimizations, and error handling. These factors combined make the SQL conversion process a significant bottleneck in database migration projects, often delaying modernization efforts and impacting business agility.
Solution
To address these challenges, AWS has introduced an innovative new capability: SQL code conversion using Amazon Q Developer in conjunction with AWS Database Migration Service (AWS DMS). This solution automates the process of transforming embedded SQL in Java applications, significantly reducing the time and effort required for database migrations. Amazon Q Developer, a generative AI–powered assistant for software development that integrates directly into your Integrated Development Environment (IDE), offers a range of features to enhance developer productivity, including code generation, refactoring, and transformations such as java version upgrades and now SQL code conversion. It analyzes Java code, identifies embedded SQL statements, and automates conversion from the source dialect (e.g. Oracle) to the target dialect (e.g. PostgreSQL). This automation dramatically accelerates the conversion process, potentially reducing weeks of tedious work to just hours of effort. The solution minimizes human error by leveraging AI algorithms trained on extensive SQL datasets, ensuring a level of consistency and accuracy difficult to achieve manually. It also allows developers to focus on higher-value tasks such as architecture optimization and performance tuning, rather than getting bogged down in the minutiae of SQL syntax differences. When combined with AWS Database Migration Service, which handles schema conversion and data replication, this solution creates a comprehensive migration workflow. It addresses not just code conversion but the entire database migration lifecycle, providing a streamlined path from legacy systems to modern database architectures. By automating SQL conversion, ensuring consistency across the codebase, and integrating with broader migration tools, this feature significantly simplifies the technical aspects of database migration. It aligns with organizational goals of improving efficiency, reducing costs, and maintaining competitiveness in an evolving technological landscape, making it a powerful tool for organizations undertaking database modernization projects.
Overview
To illustrate the power of this solution, let’s consider part of an application written in Java that manages shopping cart functionality for online retail operations using embedded Oracle SQL for database operations. The system allows customers to maintain their shopping carts, manage items, and handle basic e-commerce operations. In our sample application, we look at sections of code from a CartDAO.java class which has multiple Oracle-specific SQL queries. It demonstrates various Oracle-specific SQL features including regular expressions, XML handling, hierarchical queries, and analytical functions. These features make the code particularly optimized for Oracle databases. We’ll need to convert this SQL in order for it to be compatible PostgreSQL. Let’s explore each of these methods.
Method 1: createItem is a basic insertion method that uses Oracle’s SYSDATE function to automatically timestamp the record. This is Oracle’s built-in function for current date and time.
Method 2: getMfgCodes is a method which uses Oracle’s SUBSTR function to retrieve the first three characters of an item name.
public List<String> getMfgCodes() throws SQLException {
  Connection conn = getConnection();
  String sql = "SELECT DISTINCT(SUBSTR(name, 1, 3)) AS mfg_code FROM item";
  Statement stmt = conn.createStatement();
  ResultSet rs = stmt.executeQuery(sql);
  List<String> mfg_codes = new ArrayList<String>();
  while (rs.next()) {
    mfg_codes.add(rs.getString("mfg_code"));
  }
  return mfg_codes;
}
Method 3: findItemsByRegex leverages Oracle’s REGEXP_LIKE function, which provides pattern matching capabilities beyond standard SQL. This is used for complex string searching that would be difficult with simple LIKE clauses.
public List<String> findItemsByRegex(String pattern) throws SQLException {
  Connection conn = getConnection();
  String sql = "SELECT name FROM item WHERE REGEXP_LIKE(name, ?)";
  PreparedStatement pstmt = conn.prepareStatement(sql);
  pstmt.setString(1, pattern);
  ResultSet rs = pstmt.executeQuery();
  List<String> names = new ArrayList<String>();
  while (rs.next()) {
    names.add(rs.getString("name"));
  }
  return names;
}
Method 4: cleanItemDescriptions uses Oracle’s advanced regular expression capabilities through REGEXP_REPLACE. It specifically uses Oracle’s character class syntax [[:punct:]] to identify punctuation marks, which is an Oracle-specific implementation of POSIX regular expressions.
Method 5: This function retrieves the top 3 most expensive items for each premium category from the ‘item’ table using Oracle’s analytical RANK() function. It creates a formatted string for each item containing the premium category, item name, price, and its rank within its category. The results are stored in a List and returned.
public List<String> getTopItemsByCategory() throws SQLException {
  Connection conn = getConnection();
  String sql = "SELECT * FROM (SELECT name, premium, price,RANK() OVER (PARTITION BY premium"
               +" ORDER BY price DESC) as price_rank FROM item) WHERE price_rank <= 3";
  List<String> topItems = new ArrayList<>();
  try (Statement stmt = conn.createStatement();
    ResultSet rs = stmt.executeQuery(sql))
    while (rs.next()) {
      String result = String.format("Premium: %s, Item: %s, Price: %.2f, Rank: %d",
      rs.getString("premium"),
      rs.getString("name"),
      rs.getDouble("price"),
      rs.getInt("price_rank"));
      topItems.add(result);
    }
  }
  return topItems;
}
Method 6: The SQL query in the findItemsByPriceRange method performs a targeted search and ranking operation on the item table in the database. It begins by filtering items to only those within a specific price bracket.
public List<String> findItemsByPriceRange() throws SQLException {
  Connection conn = getConnection();
  String sql = "SELECT name, price, RANK() OVER (ORDER BY price) as price_rank FROM item"
               + "WHERE price BETWEEN ? AND ?";
  List<String> items = new ArrayList<>();
  try (PreparedStatement pstmt = conn.prepareStatement(sql)) {
    pstmt.setDouble(1, 50.0);
    pstmt.setDouble(2, 75.0);
    ResultSet rs = pstmt.executeQuery();
    while (rs.next()) {
      String result = String.format("Item: %s, Price: %.2f, Rank: %d",
      rs.getString("name"),
      rs.getDouble("price"),
      rs.getInt("price_rank"));
      items.add(result);
    }
  }
  return items;
}
Method 7: This function demonstrates Oracle’s ROWNUM pseudo-column, which is a specific Oracle database feature used to limit the number of rows returned by a query. The function retrieves the first N items from the ‘item’ table by using ROWNUM <= ? in the WHERE clause.
public List<String> getFirstNItems(int n) throws SQLException {
  Connection conn = getConnection();
  String sql = "SELECT name FROM item WHERE ROWNUM <= ?";
  List<String> items = new ArrayList<>();
  try (PreparedStatement pstmt = conn.prepareStatement(sql)) {
    pstmt.setInt(1, n);
    ResultSet rs = pstmt.executeQuery();
    while (rs.next()) {
      items.add(rs.getString("name"));
    }
  }
  return items;
}
Our goal is to convert these embedded Oracle specific queries to PostgreSQL queries.
Solution Walkthrough
Prerequisites
Before beginning the conversion process, ensure you have installed and configured Amazon Q in your IDE by following the setup guide. Your source codebase must be a Java application containing embedded Oracle SQL statements that you plan to migrate to PostgreSQL. The transformation specifically targets Oracle SQL syntax within Java code, so verify your application meets these requirements. Complete your database schema migration using AWS DMS Schema Conversion before starting the code transformation process. This crucial step creates the foundation for your PostgreSQL database structure.
Convert Embedded SQL
Open your Java application containing embedded SQL statements in your IDE where Amazon Q is installed. Access the Amazon Q chat panel by selecting the Amazon Q icon in your IDE interface. Start the transformation process by typing /transform in the chat panel. When prompted, specify ‘SQL conversion’ as your transformation type. Amazon Q validates your Java application’s eligibility for SQL conversion before proceeding.
Upload your schema metadata file when prompted by Amazon Q. The chat interface provides detailed instructions for retrieving this file from your previous DMS schema conversion process. Select your project containing embedded SQL and the corresponding database schema file from the dropdown menus in the chat panel. Amazon Q displays the detected database schema details for your confirmation. Take a moment to verify these details are accurate before proceeding with the conversion.
The SQL conversion process would begin, during which Amazon Q analyzes and transforms your Oracle SQL statements into PostgreSQL-compatible syntax.
For this application, Amazon Q was able to detect 7 Oracle specific queries in the code and was able to process them to the corresponding PostgreSQL queries. It generated a conversion summary of the embedded SQL statements processed, and shared recommended actions for 2 queries that needed further inspection. Amazon Q presented a comprehensive diff view showing all proposed changes to the embedded SQL. Review each modification in the diff view carefully. After your review, accept the changes to update your codebase. Amazon Q generates a detailed transformation summary documenting all modifications made during the conversion.
Let’s take a look at how each of SQL statements within each function got converted to be compatible with PostgreSQL.
Method 1: The key difference in this query involves the transition from Oracle’s SYSDATE function to PostgreSQL’s CLOCK_TIMESTAMP() with time zone handling. While SYSDATE in Oracle returns the current date and time of the database server, the PostgreSQL version uses CLOCK_TIMESTAMP() which provides the actual current time and explicitly handles timezone conversion through AT TIME ZONE.
public void createItem() throws SQLException {
    String sql = "INSERT INTO admin.item (name, description, updated_date) VALUES (?, ?,
                 (CLOCK_TIMESTAMP() AT TIME ZONE COALESCE(CURRENT_SETTING('aws_oracle_ext.tz',
                 TRUE), 'UTC'))::TIMESTAMP(0))";
    Connection conn = getConnection();
    PreparedStatement pstmt = conn.prepareStatement(sql);
    //pstmt.setInt(1, 1);
    pstmt.setString(1, "Sparkling Water");
    pstmt.setDouble(2, 5.0);
    pstmt.executeUpdate();
    System.out.println("Data inserted successfully");
}
Method 2: The key change in the next query involves using an extension pack added by the DMS Schema Conversion process which emulates source database functions. This is referenced using the fully qualified function name aws_oracle_ext.substr instead of the simple SUBSTR. The aws_oracle_ext schema contains Oracle-compatible functions to maintain compatibility with Oracle SQL syntax. Additionally, the table reference has been made more specific by including the schema name admin.item instead of just item, which helps avoid ambiguity in multi-schema environments.
public List<String> getMfgCodes() throws SQLException {
  Connection conn = getConnection();
  String sql = "SELECT DISTINCT (aws_oracle_ext.substr(name, 1, 3)) AS mfg_code FROM
                admin.item";
  Statement stmt = conn.createStatement();
  ResultSet rs = stmt.executeQuery(sql);
  List<String> mfg_codes = new ArrayList<String>();
  while (rs.next()) {
    mfg_codes.add(rs.getString("mfg_code"));
  }
  return mfg_codes;
}
Method 3: The next transformation demonstrates several important adaptations required for Oracle-compatible regular expression functionality in AWS. The key changes include: REGEXP_LIKE function has been replaced with its AWS Oracle extension equivalent aws_oracle_ext.regexp_like. Explicit type casting to TEXT has been added using the PostgreSQL-style cast operator:: TEXT for both the column name and the parameter. The schema qualifier admin has been added to the table name and extra parentheses have been added around the arguments for proper type handling. These modifications ensure that regular expression pattern matching works correctly in the AWS environment while maintaining Oracle-like functionality. The explicit TEXT type casting is particularly important as it ensures proper data type handling during the regular expression comparison operations.
public List<String> findItemsByRegex(String pattern) throws SQLException {
  Connection conn = getConnection();
  String sql = "SELECT name FROM admin.item WHERE aws_oracle_ext.regexp_like((name)::TEXT,
               (?::TEXT)::TEXT)";
  PreparedStatement pstmt = conn.prepareStatement(sql);
  pstmt.setString(1, pattern);
  ResultSet rs = pstmt.executeQuery();
  List<String> names = new ArrayList<String>();
  while (rs.next()) {
    names.add(rs.getString("name"));
  }
  return names;
}
Method 4: The next conversion shows several sophisticated adaptations required for Oracle-compatible regular expression functionality. The changes include the addition of the aws_oracle_ext schema prefix to both regexp_replace and regexp_like functions. The introduction of the E prefix before string literals containing escape sequences, which is PostgreSQL’s syntax for enabling escape sequence interpretation. Additional escaping of backslashes (from \s to \\s) has been added to properly handle whitespace matching in the AWS environment. Explicit type casting to TEXT using ::TEXT has been added for all arguments in both the regexp_replace and regexp_like functions. The schema qualifier admin has been added to the table name. Single quotes around the replacement space character have been wrapped with parentheses. These modifications ensure that the regular expression replacement and matching operations work correctly in the AWS environment while maintaining Oracle-like functionality. The pattern itself is designed to replace multiple consecutive punctuation marks or whitespace characters with a single space character.
public void cleanItemDescriptions() throws SQLException {
  Connection conn = getConnection();
  String sql = "UPDATE admin.item SET description =
                aws_oracle_ext.regexp_replace((description)::TEXT,
                (E'([[:punct:]]{2,}|\\\\s{2,})')::TEXT,
                ('')::TEXT) WHERE aws_oracle_ext.regexp_like((description)::TEXT,
                (E'([[:punct:]]{2,}|\\\\s{2,})')::TEXT)";
  try (Statement stmt = conn.createStatement()) {
    int rowsUpdated = stmt.executeUpdate(sql);
    System.out.println("Cleaned descriptions for " + rowsUpdated + " items");
  }
}
Method 5: The next transformation shows a few key modifications required for proper execution in PostgreSQL. The addition of an explicit alias AS var_sbq for the derived subquery, which is required in PostgreSQL systems to properly reference derived tables The schema qualifier admin has also been added to the table name item.
public List<String> getTopItemsByCategory() throws SQLException {
  Connection conn = getConnection();
  String sql = "SELECT * FROM (SELECT name, premium, price, RANK() OVER (PARTITION BY
                premium ORDER BY price DESC) AS price_rank FROM admin.item) AS var_sbq WHERE
                 price_rank <= 3";
  List<String> topItems = new ArrayList<>();
  try (Statement stmt = conn.createStatement();
    ResultSet rs = stmt.executeQuery(sql)) {
      while (rs.next()) {
        String result = String.format("Premium: %s, Item: %s, Price: %.2f, Rank: %d",
        rs.getString("premium"),
        rs.getString("name"),
        rs.getDouble("price"),
        rs.getInt("price_rank"));
        topItems.add(result);
      }
    }
  return topItems;
}
Method 6: The next transformation demonstrates a few important modifications for PostgreSQL compatibility: The addition of explicit type casting using ::NUMERIC for both parameters in the BETWEEN clause, which ensures proper numeric comparison and helps prevent type conversion issues The schema qualifier admin has been added to the table name item The window function RANK() syntax remains unchanged as it’s standard ANSI SQL.
public List<String> findItemsByPriceRange() throws SQLException {
  Connection conn = getConnection();
  String sql = "SELECT name, price, RANK() OVER (ORDER BY price) AS price_rank FROM
                admin.item WHERE price BETWEEN ?::NUMERIC AND ?::NUMERIC";
  List<String> items = new ArrayList<>();
  try (PreparedStatement pstmt = conn.prepareStatement(sql)) {
    pstmt.setDouble(1, 50.0);
    pstmt.setDouble(2, 75.0);
    ResultSet rs = pstmt.executeQuery();
    while (rs.next()) {
      String result = String.format("Item: %s, Price: %.2f, Rank: %d",
      rs.getString("name"),
      rs.getDouble("price"),
      rs.getInt("price_rank"));
      items.add(result);
    }
  }
  return items;
}
Method 7: The next transformation shows several significant changes for PostgreSQL compatibility. The Oracle-specific ROWNUM syntax has been replaced with the standard SQL LIMIT clause. A CASE expression has been added to handle input validation. TRUNC(?::NUMERIC) converts the input parameter to a numeric value and removes any decimal places. The CASE statement ensures that only positive numbers are accepted. If the input is less than or equal to 0, it returns 0 (effectively no rows). The schema qualifier admin has been added to the table name. The parameter is now used twice in the query (once for comparison and once for the actual limit). Type casting to NUMERIC has been added for safer numeric handling.
public List<String> getFirstNItems(int n) throws SQLException {
  Connection conn = getConnection();
  String sql = "SELECT name FROM admin.item LIMIT CASE WHEN TRUNC(?::NUMERIC) > 0 THEN
                 TRUNC(?::NUMERIC) ELSE 0 END";
  List<String> items = new ArrayList<>();
  try (PreparedStatement pstmt = conn.prepareStatement(sql)) {
    pstmt.setInt(1, n);
    ResultSet rs = pstmt.executeQuery();
    while (rs.next()) {
      items.add(rs.getString("name"));
    }
  }
  return items;
}
End-to-End Testing
After completing the SQL code conversion, update your application’s database connection settings to point to your new PostgreSQL database. This includes modifying connection strings, updating database credentials, and adjusting any database-specific configuration parameters. Execute your application’s comprehensive test suite to validate the converted SQL statements. The test suite should cover all database interactions, ensuring queries return expected results and maintain proper data integrity. Pay particular attention to complex queries, stored procedure calls, and transaction management scenarios. Conduct thorough testing of your application’s critical paths. Focus on core business workflows that heavily depend on database operations. Test edge cases and error conditions to verify proper exception handling with the new PostgreSQL database. As a best practice recommendation, implement detailed monitoring of your application logs during testing. Watch for any SQL-related errors, unexpected query behavior, or performance degradation.
Conclusion
The combination of Amazon Q Developer and AWS DMS represents a significant leap forward in database migration technology. By automating the conversion of embedded SQL, we’ve addressed one of the most time-consuming and error-prone aspects of moving from Oracle to PostgreSQL.
Key benefits of this approach include:
Reduced migration time: What once took weeks can now be accomplished in days or hours
Improved accuracy: AI-powered conversion minimizes human error
Cost savings: Less developer time spent on manual code updates shortening modernization and upgrade initiatives
Seamless integration: Works within your existing development environment
As organizations continue to modernize their database infrastructure, services like Amazon Q Developer will play a crucial role in ensuring smooth, efficient migrations. By leveraging the power of AI to handle complex code transformations, developers can focus on adding value to their applications rather than getting bogged down in the intricacies of SQL dialect differences. We encourage you to try Amazon Q Developer using the Amazon Q User Guide for your next database migration project and experience firsthand the benefits of automated SQL code conversion.
Software development is undergoing a seismic shift, driven by the transformative impact of generative AI. This powerful technology is redefining how developers work, what they build, and who can become a developer. At the AWS Developer Day 2025, we discussed how AWS is empowering developers to embrace this evolution through their generative AI developer tools. Developers got a first-hand look at exciting product launches, updates, and insights from AWS leaders on the future of software development. See the session list below.
This free, virtual event inspired developers of all backgrounds about the possibilities of generative AI for their work. Through use case demos, leadership insights, and community spotlights, attendees learned how AWS is making it faster and easier to build and scale quality software in the cloud.
If you could not attend AWS Developer Day 2025, you can still watch the recordings on YouTube:
Welcome to AWS Developer Day 2025 – Jeff Barr shares his thoughts on what this means for developers today, the skills needed to thrive in this changing environment, and how we sees it evolving in the future.
Fireside Chat with AWS and Redmonk – David Nalley (AWS), Rachel Stephens (Redmonk) discuss the evolution of the Developer Experience and future trends.
Go from idea to AI-powered app in minutes – Ali Spittel, Farrah Campbell and AM Grobelny show you how to add generative-AI capabilities like conversational chat and search to your web apps and how to securely provide LLMs access to your app’s data.
Acceleratee application modernization using generative AI – Eva Knight, Artur Rodrigues, Farrah Campbell and AM Grobelny show you how to automate and offload tedious manual tasks and port .NET Framework applications to cross-platform .NET faster and free up your time for innovation.
Gen AI disrupts SDLC. What does it mean for developers? The AWS approach – Alex Williams (The New Stack) and Srini Iragavarapu (AWS) discuss how generative AI is redefining software development, opening new frontiers for innovation, and democratizing access to coding for diverse creators shaping technology’s future.
Learning new skills with generative AI – Darko Mesaros, Cobus Bernard, Farrah Campbell and AM Grobelny teach you tips and tricks to succeed in this evolving developer landscape. We’ll cover best practices around agents, prompt engineering, and more.
Streamline operational troubleshooting with Amazon Q Developer – Nikhil Dewan, Farrah Campbell and AM Grobelny show you how Amazon Q Developer leverages insights from your cloud environments to accelerate root cause diagnosis and resolve operational issues in a fraction of the time.
Agents at work: plan – test – CR – deploy – repeat – Ryan Bachman, Farrah Campbell and AM Grobelny teach you how Amazon Q Developer’s embedded agents in the GItLab Duo platform help you complete your daily tasks with less manual overhead.
The AWS Developer Day 2025 showcased the transformative power of generative AI for software development. Developers learned how AWS is empowering them to embrace this evolution through their generative AI developer tools, making it faster and easier to build and scale quality software in the cloud. From boosting productivity across the SDLC to accelerating application modernization, the event highlighted the exciting possibilities that generative AI offers for the future of software development. As the industry continues to evolve, AWS is committed to equipping developers with the tools and insights they need to thrive in this changing landscape.
On February 14, Amazon Q Developer announced support for upgrades to Java 21. As a Java developer, I’m excited about this new capability, which will make it easier for me to keep my applications up-to-date and take advantage of the latest language features and performance improvements. In addition, the latest version of Amazon Q Developer includes improved summarization and recommendations that simplify the upgrade process and increase confidence in the results.
Amazon Q Developer is a generative AI-powered assistant that helps accelerate the modernization of enterprise applications. It can perform complex tasks like analyzing legacy code, mapping dependencies, and executing migration and modernization workflows. Amazon Q Developer frees up your team to focus on more strategic initiatives rather than getting bogged down in the undifferentiated heavy lifting of upgrading Java applications.
Staying current on Java versions is crucial, as each new release brings important security fixes, performance enhancements, and support for emerging frameworks and libraries. However, the effort required to manually migrate large Java codebases can be daunting. That’s where Amazon Q Developer has been invaluable. By offloading the tedious, labor-intensive parts of the upgrade process, your team can deliver important updates to users much faster while minimizing disruption.
The Benefits of Java 21
With the addition of Java 21 upgrade capabilities, Amazon Q Developer now supports upgrading applications from Java 8, 11, and 17 to Java 17 or 21. Some of the key benefits of Java 21 that I’m looking forward to include:
Virtual Threads:Virtual Threads are a new concurrency primitive introduced in Java 19 that reduce the effort of writing, maintaining, and debugging high-throughput concurrent applications. This unlocks significant performance improvements for your applications.
Better Memory Management: Enhancements to the Z Garbage Collector in Java 21 result in more predictable garbage collection pauses and reduced memory footprint, leading to more stable and responsive applications.
Upgrading your team’s Java applications to Java 21 with Amazon Q Developer is a game-changer. It saves countless hours of manual effort that would otherwise be required to migrate all of your Java components.
Simplifying the Upgrade Process with Amazon Q Developer
Upgrading Java applications to Java 21 with Amazon Q Developer is easy. After configuring your project and ensuring it meets the prerequisites, you can simply invoke the /transform command in the Amazon Q Developer chat window of your integrated development environment (IDE). The following screenshot is from VS Code; however, Q Developer also supports JetBrain’s IDEs including IntelliJ IDEA and the qct command line.
Amazon Q Developer will then analyze your codebase, determine the necessary changes to upgrade to Java 21, and provide a detailed diff so you can review and accept the transformations. This not only saves you time, but also helps ensure a consistent, high-quality upgrade across all of your Java applications.
In addition to adding support for upgrading to Java 21, the latest version of Amazon Q Developer also enhances the summarization and recommendations it provides after completing the transformation. Once the upgrade to Java 21 is complete, Q Developer generates a detailed summary of the changes made, such as deprecated APIs removed and code refactored to leverage new Java features. It also includes tailored recommendations to further improve the application, taking advantage of the capabilities introduced in Java 21. For example, Q Developer suggested upgrading the logging framework and implementing pattern matching to make the code more concise. These summary and recommendation capabilities help ensure a smooth and comprehensive upgrade process.
Finally, Q includes recommendations to further improve the application beyond the upgrade to Java 21. For example, Q provided the following recommendations.
The summary and recommendation capabilities help ensure a smooth and comprehensive upgrade experience. Developers can review the detailed changes, understand the rationale behind them, and then selectively apply the suggested optimizations to fully unlock the benefits of Java 21. This level of transparency and guidance from Q Developer greatly simplifies the upgrade process and increases confidence in the resulting codebase.
Conclusion
In summary, the new Amazon Q Developer transformation capabilities for upgrades to Java 21 offload the labor-intensive task of keeping your Java applications up-to-date. The detailed summaries and tailored recommendations provided by Q Developer ensure a smooth and comprehensive upgrade process, and significantly streamline the upgrade process. I’m excited to start rolling this out and freeing up the team’s time to focus on higher-value work. If you’re a fellow Java developer, I’d highly encourage you to try out Amazon Q Developer for yourself. To get started, visit the Amazon Q Developer getting started page.
Earlier today, Amazon Q Developer announced an enhanced CLI agent within the Amazon Q command line interface (CLI). With this announcement, Q Developer brings the latest agentic experience to the CLI that provide a more dynamic, interactive coding experience that works with you, and iteratively makes changes based on your feedback. Amazon Q Developer can now use the information in your CLI environment to help you read and write files locally, query AWS resources write code, or automatically debug issues.
Introduction
As a developer, I appreciate my Integrated Development Environment (IDE) along with the integrated linters and auto-completion features that help streamline my workflow. The addition of AI assistants, like Amazon Q Developer, have changed the way I work in profound ways. I can discuss best practices with Q Developer in chat, or ask it to refactor a complex method in seconds. I am increasingly using the Amazon Q Developer agents to develop new features, write documentation, generate unit tests, and automate code reviews. These powerful agent capabilities have further transformed how I approach my daily development tasks.
However, as a developer, I spend as much time at the command-line interface (CLI) as I do in the IDE, maybe even more. Tools like the Amazon Web Services (AWS) CLI, Git, package managers, and linters have revolutionized the way I manage infrastructure, automate repetitive tasks, and collaborate with my team. Tools like Docker and Kubernetes have transformed the way I develop and deploy my applications. Looking at the extensions tab in my IDE, I have extensions installed for Maven, Docker, and Vue, but I rarely use them, preferring the flexibility and power of the CLI.
Amazon Q Developer has been available in the CLI for over a year now, and it has become an indispensable part of my daily development routine. The assistant’s ability to provide intelligent command completions that can list my Git branches, Amazon S3 buckets, etc. has saved me countless hours. The chat feature allows me to engage in natural language conversations with Amazon Q Developer, asking it to help me learn how to accomplish specific tasks, while the translate capability seamlessly converts my plain-language prompts into the corresponding shell commands.
While Amazon Q Developer’s CLI capabilities are helpful, I miss the power of the agents I have access to in my IDE. Earlier today, Amazon Q Developer announced an enhanced CLI agent within the Amazon Q CLI. Amazon Q Developer, and the new agent is powered by Amazon Bedrock, as a result, the CLI has the power of Claude 3.7 Sonnet step-by-step reasoning. In addition, the new CLI agent can make use of tools installed on my system including compilers, package managers, and the AWS CLI. Finally, the enhanced CLI supports multi-turn conversations allowing dynamic, back-and-forth conversations with the agent. This enables me to get more work done, faster, without ever leaving the comfort of my preferred command-line environment.
Rather than being constrained by the features and workflows of an IDE, the CLI agent gives me direct access to the underlying tools and commands I need to get my work done. Let’s look at an example.
Walkthrough
To see how the CLI agent capabilities work, I’ll walk you through an example. I’m preparing for an internal developer community summit happening in April. I need an application to manage the call for content. The Call for Content application allows community members to propose topics for the summit. I’m going to use the Amazon Q Developer CLI to build the application.
I already have the CLI installed, so I’ll run q chat to begin a new conversation with the agent. Then I will ask Q Developer to “scaffold a new application named call-for-content using React and Vite, and then commit it to Git.” As you can see in the following video, the agent understands my intent, and carries out the work needed to build the application. In the past, the Q Developer CLI would provide instructions for me to execute. In this new enhanced version, the CLI agent uses the tools installed on my laptop to complete each step for me. I should note that I have disabled confirmations, but Q Developer can prompt me before each action so I can verify it.
The agent is working quickly in that video. So quickly that is hard to keep up. So I broke it down, step-by-step in the following image. The agent begins by calling npm create to create the new app, followed by npm install to add all the dependencies. It then runs a series of git commands to create a new repository, add my files, and commit the changes including a descriptive commit message.
Notice that agent is not simply generating files. It is running the same commands that I would have run on my own. However, the CLI agent is doing it much faster, and more accurately than I could have done. The enhanced Amazon Q Developer CLI can use tools, including other command line tools installed on my system, to complete its work. Once Q Developer is done, it provides me a summary of the work it has completed, and suggests next steps. In the following image, you can see that Q Developer is suggesting I run the development server to preview the changes. That is a great suggestion, so I ask Q Developer to start the server and confirm that everything is working.
With the application template running, I’m ready to start building the Call for Content application. The CLI agent supports multi-turn conversations, so I can pick up where we left off. I simply explain my requirements at the command line, and agent begins to generate code. This is what Amazon Q Developer does best. In this example, it needs to update the App.jsx and App.css files.
Notice that the agent can read and write files on my local system in addition to running commands as we saw in the prior example. So, as Q Developer generates code, the agent can put it in the correct place in my local file system. Once it is done, the agent starts the development server using npm run dev. I asked it to start the server last time, so it correctly guesses that I will want to check the progress. Just like last time, the agent provides another summary of the changes it made. Personally, I appreciate these periodic summaries. They help me build confidence in the work that Q Developer is doing. I’m not happy with the color of the title. I could ask Q Developer to update it, but I will simply update the file myself. Note that I can edit files on my own while using the CLI. the agent will read files before editing them to check if I have made any changes manually.
The application is looking great! However, it is currently writing it’s output to the console. I never told the agent what to do with the data. I would like the application to write to a DynamoDB table. In fact, I created one already. However, I cannot remember which region the table is in. In the following image, I ask the agent to figure it out for me. Let’s see how it responds.
As you can see in the prior image, the agent is able to think about my vague request, and figure out what to do. It starts by looking in us-east-1. When it can not find the table, it moves to us-west-2 and tries again. The table was in us-west-2, but if it were not, the agent would have continued searching. Q Developer understands how to list and describe AWS resources. Once the agent found the table, it uses npm to install the DynamoDB SDK, and then updates the application files. Note that the agent actually updated multiple files, but I kept the image simple.
With just a few simple prompts, I was able to use the enhanced CLI agent to collaborate with Q Developer throughout the entire development process. I’ll keep working on the application to add authentication, etc. However, I assume you have a good understanding of how the Q Developer CLI works and are eager to get started. So, let’s stop here.
Conclusion
Amazon Q Developer’s new CLI agent has completely transformed the way I approach software development. By bringing the power of an advanced AI assistant directly into my preferred command-line environment, I can now accomplish complex tasks faster than ever before. Q Developer’s natural language understanding and contextual awareness, combined with the CLI agent’s ability to reason and use a wide range of development tools, make it an indispensable part of my daily workflow. Finally, support for multi-turn conversations, enable me to collaborate with, and work along side the agent to get more work done, faster.
If you’re a developer who spends a significant amount of time in the CLI, I highly recommend trying out the Amazon Q Developer’s CLI agent. You can follow the Amazon Q Developer User Guide to install the CLI and start leveraging the new agent capabilities right away, for free. I’m confident it will change the way you work, just as it has for me. Give it a try and let me know what you think!
In this blog post, I’ll explain how to use a Microsoft Entra ID and Visual Studio Code editor to access Amazon Q developer service and speed up your development. Additionally, I’ll explain how to minimize the time spent on repetitive tasks and quickly integrate users from external identity sources so they can immediately use and explore Amazon Web Services (AWS).Generative AI on AWS holds great ability for businesses seeking to unlock new opportunities and drive innovation. AWS offers a robust suite of tools and capabilities that can revolutionize software development, generate valuable insights, and deliver enhanced customer value. AWS is committed to simplifying generative AI for businesses through services like Amazon Q, Amazon Bedrock, Amazon SageMaker, Data foundation & AI infrastructure.
Amazon Q Developer is a generative AI-powered assistant that helps developers and IT professionals with all of their tasks across the software development lifecycle. Amazon Q Developer assists with coding, testing, and upgrading to troubleshooting, performing security scanning and fixes, optimizing AWS resources, and creating data engineering pipelines.
A common request from Amazon Q Developer customers is to allow developer sign-ins using established identity providers (IdP) such as Entra ID. Amazon Q Developer offers authentication support through AWS Builder ID or AWS IAM Identity Center. AWS Builder ID is a personal profile for builders. IAM Identity Center is ideal for an enterprise developer working with Amazon Q and employed by organizations with an AWS account. When using the Amazon Q Developer Pro tier, the developer should authenticate with the IAM Identity Center. See the documentation, Understanding tiers of service for Amazon Q Developer for more information.
How it works
The flow for accessing Amazon Q Developer through the IAM Identity Center involves the authentication of Entra ID users using Security Assertion Markup Language (SAML) 2.0 authentication (Figure 1).
Figure 1 – Solution Overview
The flow for accessing Amazon Q Developer through the IAM Identity Center involves the authentication of Entra ID users using SAML 2.0 authentication. (Figure 1).
IAM Identity Center synchronizes users and groups information from Entra ID into IAM Identity Center using the System for Cross-domain Identity Management (SCIM) v2.0 protocol.
Developers with an Entra ID account connect to Amazon Q Developer through IAM Identity Center using the VS Code IDE.
If a developer isn’t already authenticated, they will be redirected to the Entra ID account login. The developer will sign in using their Entra ID credentials.
If the sign-in is successful, Entra ID processes the request and sends a SAML response containing the developer identity and authentication status to IAM Identity Center.
If the SAML response is valid and the developer is authenticated, IAM Identity Center grants access to Amazon Q Developer.
The developer can now securely access and use Amazon Q Developer.
Prerequisites
In order to perform the following procedure, make sure the following are in place.
Configure Entra ID and AWS IAM Identity Center integration
In this section, I will show how you can create a SAML base connection between Entra ID and AWS Identity Center so you can access AWS generative AI services using your Entra ID.
Note: You need to switch the console between Entra ID portal and AWS IAM Identity center. I recommend to open new browser tabs for each console.
Step 1 – Prepare your Microsoft tenant
Perform the below steps in the Entra identity provider section.
Navigate to Identity > Applications > Enterprise applications, and then choose New application.
On the Browse Microsoft Entra Gallery page, enter AWS IAM Identity Center in the search box.
Select AWS IAM Identity Center from the results area.
Choose Create.
Now you have created AWS IAM Identity Center application, set up single sign-on to enable users to sign into their applications using their Entra ID credentials. Select the Single sign-on tab from the left navigation plane and select Setup single sign on.
Step 2 – Collect required service provider metadata from IAM Identity Center
In this step, you will launch the Change identity source wizard from within the IAM Identity Center console and retrieve the metadata file and the AWS specific sign-in URL. You will need this to enter when configuring the connection with Entra ID in the next step.
IAM Identity Center.
You need to enable this in order to configure SSO.
Navigate to Services –> Security, Identity, & Compliance –> AWS IAM Identity Center.
Choose Enable (Figure 2).
Figure 2 – Get started with AWS IAM Identity Center
In the left navigation pane, choose Settings.
On the Settings page, find Identity source, select Actions pull-down menu, and select Change identity source.
On the Change identity source page, choose External identity provider (Figure 3).
Figure 3 – Select External identity provider
On the Configure external identity provider page, under Service provider metadata, select Download metadata file (XML file).
In the same section, locate the AWS access portal sign-in URL value and copy it. You will need to enter this value when prompted in the next step (Figure 4).
Figure 4 – Copy provider metadata URLs
Leave this page open, and move to the next step to configure the AWS IAM Identity Center enterprise application in Entra ID. Later, you will return to this page to complete the process.
Step 3 – Configure the AWS IAM Identity Center enterprise application in Entra ID
This procedure establishes one-half of the SAML connection on the Microsoft side using the values from the metadata file and Sign-On URL you obtained in the previous step.
In the Microsoft Entra admin center console, navigate to Identity > Applications > Enterprise applications and then choose AWS IAM Identity Center.
On the left, choose Single sign-on.
On the Set up Single sign on with SAML page, choose Upload metadata file, choose the folder icon, select the service provider metadata file that you downloaded in the previous step 2.6, and then choose Add.
On the Basic SAML Configuration page, verify that both the Identifier and Reply URL values now point to endpoints in AWS that start with https://<REGION>.signin.aws.amazon.com/platform/saml/.
Under Sign on URL (Optional), paste in the AWS access portal sign-in URL value you copied in the previous step (Step 2.7), choose Save, and then choose X to close the window.
If prompted to test single sign-on with AWS IAM Identity Center, choose No I’ll test later. You will do this verification in a later step.
On the Set up Single Sign-On with SAML page, in the SAML Certificates section, next to Federation Metadata XML, choose Download to save the metadata file to your system. You will need to upload this file when prompted in the next step.
Step 4 – Configure the Entra ID external IdP in AWS IAM Identity Center
Next you will return to the Change identity source wizard in the IAM Identity Center console to complete the second-half of the SAML connection in AWS.
Return to the browser session you left open in the IAM Identity Center console.
On the Configure external identity provider page, in the Identity provider metadata section, under IdP SAML metadata, choose the Choose file button, and select the identity provider metadata file that you downloaded from Microsoft Entra ID in the previous step, and then choose Open (Figure 5).
Figure 5 – AWS IAM Identity center metadata
Choose Next
After you read the disclaimer and are ready to proceed, enter ACCEPT
Choose Change identity source to apply your changes (Figure 6).
Figure 6 – AWS IAM Identity center metadata
Confirm the changes (Figure 7).
Figure 7 – AWS IAM Identity center metadata configuration changes progress console.
Step 5 – Configure and test your SCIM synchronization
In this step, you will set up automatic provisioning (synchronization) of user and group information from Microsoft Entra ID into IAM Identity Center using the SCIM v2.0 protocol. You configure this connection in Microsoft Entra ID using your SCIM endpoint for AWS IAM Identity Center and a bearer token that is created automatically by AWS IAM Identity Center.
To enable automatic provisioning of Entra ID users to IAM Identity Center, follow these steps using the IAM Identity Center application in Entra ID. For testing purposes, you can create a new user (TestUser) in Entra ID with details like First Name, Last Name, Email ID, Department, and more. Once you’ve configured SCIM synchronization, you can verify that this user and their relevant attributes were successfully synced to AWS IAM Identity Center.
In this procedure, you will use the IAM Identity Center console to enable automatic provisioning of users and groups coming from Entra ID into IAM Identity Center.
Open the IAM Identity Center console and Choose Setting in the left navigation pane.
On the Settings page, under the Identity source tab, notice that Provisioning method is set to Manual (Figure 8).
Figure 8 – AWS IAM Identity center console with provisioning method configuration details
Locate the Automatic provisioning information box, and then choose Enable. This immediately enables automatic provisioning in IAM Identity Center and displays the necessary SCIM endpoint and access token information.
In the Inbound automatic provisioning dialog box, copy each of the values for the following options. You will need to paste these in the next step when you configure provisioning in Entra ID.
SCIM endpoint – For example, https://scim.us-east-2.amazonaws.com/11111111111-2222-3333-4444-555555555555/scim/v2/
Access token – Choose Show token to copy the value (Figure 9).
Figure 9 – AWS IAM Identity center automatic provisioning info
Choose Close.
Under the Identity source tab, notice that Provisioning method is now set to SCIM.
Step 6 – Configure automatic provisioning in Entra ID
Now that you have your test user in place and have enabled SCIM in IAM Identity Center, you can proceed with configuring the SCIM synchronization settings in Entra ID.
In the Microsoft Entra admin center console, navigate to Identity > Applications > Enterprise applications and then choose AWS IAM Identity Center.
Choose Provisioning, under Manage, choose Provisioning
In Provisioning Mode select
For Admin Credentials, in Tenant URL paste in the SCIM endpoint URL value you copied earlier. In Secret Token, paste in the Access token value (Figure 10).
Figure 10 – Azure Enterprise AWS IAM Identity center application provisioning configuration tab
Choose Test Connection. You should see a message indicating that the tested credentials were successfully authorized to enable provisioning (Figure 11).
Figure 11 – Azure Enterprise AWS IAM Identity center application provisioning testing status
Choose Save.
Under Manage, choose Users and groups, and then choose Add user/group.
On the Add Assignment page, under Users, choose None Selected.
Select TestUser, and then choose Select.
On the Add Assignment page, choose
Choose Overview, and then choose Start provisioning (Figure 12).
Figure 12 – AWS IAM Identity center application Start provisioning tab
Note : The default provisioning interval is set to 40 minutes. Our users (Figure 13) are successfully provisioned and are now available in the AWS IAM Identity Center console.
In this section, you will verify that TestUser user was successfully provisioned and that all attributes are displayed in IAM Identity Center (Figure 13).
Figure 13 – AWS IAM Identity center application user console example
In the Identity source in IDC section, enable Identity-aware console sessions (Figure 14). This enables AWS IAM Identity Center user and session IDs to be included in users’ AWS console sessions when they sign in. For example, Amazon Q Developer Pro uses identity-aware console sessions to personalize the service experience.
I have completed Entra ID and AWS Identity Center configuration. You can see Entra ID identity synced successfully with AWS IAM identity center.
Step 7 – Set up AWS Toolkit with IAM Identity Center
To use Amazon Q Developer, you will now set up the AWS Toolkit within integrated development environments (IDE) to establish authentication with the IAM Identity Center.
AWS Toolkit for Visual Studio Code is an open-source plug-in for VS Code that makes it easier for developers by providing an integrated experience to create, debug, and deploy applications on AWS. Getting started with Amazon Q Developer in VS Code is simple.
Open the AWS Toolkit for Visual Studio Code extension in your VS Code IDE. Install AWS Toolkit for VS Code, which is available as a download from the VS Code Marketplace.
From the AWS Toolkit for Visual Studio Code extension in the VS Code Marketplace, choose Install to begin the installation process.
When prompted, choose to restart VS Code to complete the installation process.
Step 8 – Setup Amazon Q Developer service with VS Code using AWS IAM identity center.
After installing the Amazon Q extension or plugin, authenticate through IAM Identity Center or AWS Builder ID.
After your identity has been subscribed to Amazon Q Developer Pro, complete the following steps to authenticate.
Choose the Amazon Q icon from the sidebar in your IDE
Choose Use with Pro license and select Continue (Figure 15).
Figure 15 – Visual Studio code Amazon Q Developer extension
Enter the IAM Identity Center URL you previously copied into the Start URL
Set the appropriate region, example us-east-1, and select Continue
Click Copy Code and Proceed to copy the code from the resulting pop-up.
When prompted by the Do you want Code to open the external website? pop-up, select Open
Paste the code copied in Step 6 and select Next
Enter your Entra ID credentials and select Sign in
Select Allow Access toAWS IDE Extensions for VSCode to access Amazon Q Developer (Figure 16).
Figure 16 – Allow VS Code to access Amazon Q Developer
When the connection is complete, a notification indicates that it is safe to close your browser. Close the browser tab and return to your IDE.
You are now all set to use Amazon Q Developer from within IDE, authenticated with your Entra ID credentials.
Step 9 – Test configuration examples
Now you have configured IAM identity Center access with VS code now you can chat, get inline code suggestions, check for security vulnerabilities with Amazon Q Developer to learn about, build, and operate AWS applications. I have mentioned a few examples of Amazon Q Suggestions, Code suggestions, Security Vulnerabilities during development for your reference (Figures 17 ,18 ,19 ,20).
Figure 17 – Amazon Q suggestion examples
Example of developers get the recommendations using Amazon Q developer.
Figure 18 – Amazon Q Developer example
Figure 19 – Generate code, explain code, and get answers to questions about software development.
Example of integrating secure coding practices early in the software development lifecycle using Amazon Q developer.
Figure 20 – Analyze and fix security vulnerabilities in your project example
Cleanup
Configuring AWS and Azure services from this blog will provision resources which incur cost. It is a best practice to delete configurations and resources that you are no longer using so that you do not incur unintended charges.
Conclusion
In this blog post, you learned how to integrate AWS IAM Identity Center and Entra ID IdP for accessing Amazon Q Developer service using VS Code IDE, which speeds up development. Next, you set up the AWS Toolkit to establish a secure connection to AWS using Entra ID credentials, granting you access to the Amazon Q Developer Professional Tier. Using SCIM automatic provisioning for user provisioning and access assignment saves time and speeds up onboarding, allowing for immediate use of AWS services using you own identity. Using Amazon Q, developers get the recommendations and information within their working environment in the IDE, enabling them to integrate secure coding practices early in the software development lifecycle. Developers can proactively scan their existing code using Amazon Q and remediate the security vulnerabilities found in the code.
To provide the best experiences, we use technologies like cookies to store and/or access device information. Consenting to these technologies will allow us to process data such as browsing behavior or unique IDs on this site. Not consenting or withdrawing consent, may adversely affect certain features and functions.
Functional
Always active
The technical storage or access is strictly necessary for the legitimate purpose of enabling the use of a specific service explicitly requested by the subscriber or user, or for the sole purpose of carrying out the transmission of a communication over an electronic communications network.
Preferences
The technical storage or access is necessary for the legitimate purpose of storing preferences that are not requested by the subscriber or user.
Statistics
The technical storage or access that is used exclusively for statistical purposes.The technical storage or access that is used exclusively for anonymous statistical purposes. Without a subpoena, voluntary compliance on the part of your Internet Service Provider, or additional records from a third party, information stored or retrieved for this purpose alone cannot usually be used to identify you.
Marketing
The technical storage or access is required to create user profiles to send advertising, or to track the user on a website or across several websites for similar marketing purposes.


 Fig 1 – Issue created with Amazon Q development agent label
 Fig 2- PR created by Amazon Q Developer with change description

 Fig 5 – Files updated for the pull request