Marvell Custom HBM Compute Architecture for Custom Hyper-Scale XPUs

Post Syndicated from Patrick Kennedy original https://www.servethehome.com/marvell-custom-hbm-compute-architecture-for-custom-hyper-scale-xpus/

The Marvell Custom HBM Compute Architecture uses cHBM for higher performance and density while offering lower power for hyper-scale XPUs

The post Marvell Custom HBM Compute Architecture for Custom Hyper-Scale XPUs appeared first on ServeTheHome.

Federate to Amazon Redshift Query Editor v2 with Microsoft Entra ID

Post Syndicated from Koushik Konjeti original https://aws.amazon.com/blogs/big-data/federate-to-amazon-redshift-query-editor-v2-with-microsoft-entra-id/

Amazon Redshift is a fast, petabyte-scale, cloud data warehouse that tens of thousands of customers rely on to power their analytics workloads. With its massively parallel processing (MPP) architecture and columnar data storage, Amazon Redshift delivers high price-performance for complex analytical queries against large datasets.

To interact with and analyze data stored in Amazon Redshift, AWS provides the Amazon Redshift Query Editor V2, a web-based tool that allows you to explore, analyze, and share data using SQL. The Query Editor V2 offers a user-friendly interface for connecting to your Redshift clusters, executing queries, and visualizing results.

As organizations increasingly adopt cloud-based solutions and centralized identity management, the need for seamless and secure access to data warehouses like Amazon Redshift becomes crucial. Many customers have already implemented identity providers (IdPs) like Microsoft Entra ID (formerly Azure Active Directory) for single sign-on (SSO) access across their applications and services. For more information about using Microsoft Entra ID for federation to Amazon Redshift with SQL clients, see Federate Amazon Redshift access with Microsoft Azure AD single sign-on. This post focuses on setting up federation for accessing the Redshift Query Editor.

Through this federated setup, users can connect to the Redshift Query Editor using their existing Microsoft Entra ID credentials, allowing you to control permissions for database objects based on business groups defined in your Active Directory. This approach provides a seamless user experience while centralizing the governance of authentication and permissions for end-users, eliminating the need to manage separate credentials for data warehousing. Additionally, you can restrict access to specific datasets based on the user’s business group, so users only have access to the data they are authorized to view and manage.

In the following sections, we explore the process of federating into AWS using Microsoft Entra ID and AWS Identity and Access Management (IAM), and how to restrict access to datasets based on permissions linked to AD groups. Although the integration with AWS IAM Identity Center is the recommended approach, this post focuses on setups where IAM Identity Center might not be applicable due to compliance constraints, such as organizations requiring FedRAMP Moderate compliance, which IAM Identity Center doesn’t yet meet. We cover the prerequisites, guide you through the setup process, and demonstrate how to seamlessly connect to the Redshift Query Editor while making sure data access permissions are accurately enforced based on your Microsoft Entra ID groups.

Solution overview

The following diagram illustrates the authentication flow of Microsoft Entra ID with a Redshift cluster using federated IAM roles.

The configuration of federation between Microsoft Entra ID and IAM to enable seamless access to Amazon Redshift through a SQL client such as the Redshift Query Editor V2 involves the following main components:

  1. Users start by authenticating with their Microsoft Entra ID credentials by accessing the enterprise application’s user access URL.
  2. Upon successful authentication, the custom claims provider triggers the custom authentication extension’s token issuance start event listener.
  3. The custom authentication extension calls an Azure function (your REST API endpoint) with information about the event, user profile, session data, and other context.
  4. The Azure function makes a call to the Microsoft Graph API to retrieve the authenticated user’s group membership information.
  5. The Microsoft Graph API responds with the user’s group membership details.
  6. The Azure function takes the group information and transforms it into a colon-separated list, such as group1:group2:group3, and passes this colon-separated group information back to the custom authentication extension as a response payload.
  7. The custom authentication extension processes the response and augments the token with the user’s group information as SAML claims (principal tags). The token, now enriched with the group membership, is returned to the enterprise application.
  8. The enterprise application in Azure AD generates a SAML assertion with principal tags. It sends an HTTP POST to the user’s browser containing an HTML form. This form includes the SAML assertion and specifies the AWS sign-in SAML endpoint (https://signin.aws.amazon.com/saml) as the destination where the SAML assertion should be submitted.
  9. The browser automatically submits this SAML assertion, sending an HTTP POST to the AWS SAML endpoint. This endpoint validates and processes the SAML assertion. If multiple IAM roles are available, the user selects one. The AWS SAML endpoint then uses AWS Security Token Service (AWS STS) to generate temporary credentials for that specific role, creates a console sign-in URL, and redirects the user to the AWS Management Console. From there, the user can access the Redshift Query Editor V2. To learn more about this process, refer to Enabling SAML 2.0 federated users to access the AWS Management Console.
  10. Inside Redshift Query Editor V2, the user selects the option to authenticate using their IAM identity. This triggers the Redshift Query Editor V2 to call the GetClusterCredentialsWithIAM API, which checks the principal tags to determine the user’s database roles. If this is the user’s first login, the API automatically creates a database user and assigns the necessary database roles.
  11. The GetClusterCredentialsWithIAM API issues a temporary user name and password to the user. Using these credentials, the user logs in to the Redshift database. This login authorizes the user based on the Redshift database roles assigned earlier and allows them to run queries on the datasets.

Prerequisites

On the Microsoft Entra ID side, you need the following prerequisites to set up this solution:

  • A Microsoft Entra ID tenant – Required to set up and configure the Microsoft Entra ID service for managing and securing access to AWS resources through federation.
  • An Azure Subscription – Needed to access and use Azure services like Azure Functions.

Users should be members of specific Azure AD groups based on their access needs:

  • User A – Member of the "redshift_sales" group for access to sales datasets in Amazon Redshift, and the "AWS-<acctno>_dev-bdt-team" group for access to AWS services in the development environment. <acctno> is the AWS account where you have your Redshift cluster.
  • User B – Member of the "redshift_product" group for access to product datasets in Amazon Redshift, and the "AWS-<acctno>_dev-bdt-team" group for access to AWS services.
  • User C – Member of both "redshift_sales" and "redshift_product" groups for access to both datasets, and the "AWS-<acctno>_dev-bdt-team" group for access to AWS services.

The "AWS-<acctno>_dev-bdt-team" group in Azure AD is configured to allow users to assume an IAM role in AWS, providing the necessary permissions to access the AWS account. For a multi-account setup, create multiple groups for different environments or accounts and add users based on their access needs. For example, "AWS-<acctno>_prd-bdt-team" could be used for access to the production environment, where <acctno> reflects the account number for the production account.

On the Amazon Redshift side, you need the following resources:

  • Redshift cluster – A Redshift cluster should be available in the AWS account specified by <acctno> in the AWS-<acctno>_dev-bdt-team group. If not, follow the instructions to create a sample Redshift cluster.
  • Redshift database roles – Create database roles in Amazon Redshift that correspond to Microsoft Entra ID groups:
    • redshift_sales – For users with access to sales datasets.
    • redshift_product – For users with access to product datasets.
  • Redshift schemas – You need a Redshift schema named sales with the table sales_table, which can be accessed by users of the group redshift_sales. You also need a Redshift schema named product with the table product_table, which can be accessed by users of the group redshift_product in the dev database. You can use the following SQL statements on your Redshift cluster to create the groups and tables, inserting data into the created tables and granting access to the appropriate groups:
-- Create Redshift Roles
CREATE ROLE redshift_sales;
CREATE ROLE redshift_product;
-- Create sales schema and sales_table
CREATE SCHEMA sales;
CREATE TABLE sales.sales_table (
    id INT PRIMARY KEY,
    item VARCHAR(255),
    quantity INT,
    price DECIMAL(10,2)
);

-- Create product schema and product_table
CREATE SCHEMA product;
CREATE TABLE product.product_table (
    id INT PRIMARY KEY,
    name VARCHAR(255),
    category VARCHAR(255),
    price DECIMAL(10,2)
);
-- Insert data into sales_table
INSERT INTO sales.sales_table (id, item, quantity, price) VALUES
(1, 'Laptop', 10, 999.99),
(2, 'Smartphone', 20, 499.99),
(3, 'Headphones', 15, 199.99),
(4, 'Keyboard', 12, 89.99),
(5, 'Mouse', 30, 29.99);
-- Insert data into product_table
INSERT INTO product.product_table (id, name, category, price) VALUES
(1, 'Laptop', 'Electronics', 999.99),
(2, 'Smartphone', 'Electronics', 499.99),
(3, 'Blender', 'Home Appliances', 199.99),
(4, 'Mixer', 'Home Appliances', 89.99),
(5, 'Desk Lamp', 'Furniture', 29.99);
-- Grant usage on schema and select on all tables in the schema to redshift_sales
GRANT USAGE ON SCHEMA sales TO ROLE redshift_sales;
GRANT SELECT ON ALL TABLES IN SCHEMA sales TO ROLE redshift_sales;
-- Grant usage on schema and select on all tables in the schema to redshift_product
GRANT USAGE ON SCHEMA product TO ROLE redshift_product;
GRANT SELECT ON ALL TABLES IN SCHEMA product TO ROLE redshift_product;

Setup Azure Functions and custom authentication extensions

Complete the steps in this section to set up Azure Function and custom authentication extensions.

Create a new function app

Complete the following steps to create a new function app:

  • Open your web browser and navigate to the Azure Portal (portal.azure.com).
  • Log in with your Azure account credentials.
  • Choose Create a resource.
  • Choose Create under Function App.

  • Select the Consumption hosting plan and then choose Select.

  • On the Basics tab, for Subscription, provide the subscription you want to use. For this example, we use our default subscription, Azure subscription 1.
  • Choose or create a new resource group to organize your Azure resources. We name our resource group rg-redshift-federated-sso.

  • Under Instance Details, enter a globally unique name. For this post, we use the name fn-entra-id-transformer.
  • For Runtime stack, choose as Python.
  • For Version, choose 3.11.
  • For Region, choose East Us.
  • For Operating System, select Linux.
  • Choose Review + create to review the app configuration.

  • Choose Create to create the Azure Functions app.

  • Choose Go to resource in the notification message or deployment output window to navigate directly to your newly created app.

Create a function

Next, we create a HTTP trigger function in the newly created function app, called fn-entra-id-transformer.

  1. In the function app, choose Overview, then choose Create function in the Functions section.
  2. In the Create function pane, provide the following information:
    1. For Select a template, choose v2 Programming Model.
    2. For Programming Model, choose the HTTP trigger template.
    3. choose Next.
  3. In the Template details section, provide the following information:
    1. For Job type, choose Create new app.
    2. For Provide a function name, enter CustomAuthenticationFunction.
    3. Leave the Authorization level unchanged, which is set to Function by default.
    4. Choose Create.
  4. After the function is created, choose Get function URL and copy the value for default (Function key).
  5. Store the copied URL securely; you’ll need to use this URL later when setting up a custom authentication extension later in the section.

We will come back to this function later to update the code to retrieve group information.

Create a custom authentication extension

Next, we create a custom authentication extension. Complete the following steps:

  1. Navigate to Microsoft Entra ID, Enterprise applications, Custom authentication extensions.
  2. Choose Create a custom extension.
  3. In the Basics section, provide the following information:
    1. Leave Event type as TokenIssuanceStart (which is the default option).
    2. Select it and choose Next.
  4. In the Endpoint Configuration section, provide the following information:
    1. For Name, enter Retrieve_user_group_information.
    2. For Target URL, enter the function URL you stored earlier.
    3. Leave Timeout in milliseconds and Maximum Retries as the default values.
    4. Choose Next.
  5. In the Api Authentication section, provide the following information:
    1. Select Create new app registration for App registration type.
    2. For Name, enter Retrieve_user_group_information.
    3. Choose Next.
  6. In the Claims section, provide the following information:
    1. For Claim name, enter dbGroupsqueryeditor and dbGroupssqltools.
    2. Choose Next.

  7. In the Review section, review the configuration details, and if everything looks correct, choose Create.After the creation is completed, you will be redirected to the overview page of the newly created custom authentication extension.On the overview page, in the API Authentication section, you will see a message indicating that admin consent is required.
  8. Choose Grant admin consent to grant the required permissions.

After the admin consent is granted successfully, the API Authentication section will show the status as Configured.

Now you can proceed to create the enterprise application.

Set up the Azure enterprise application

Complete the steps in this section to configure the Azure enterprise application.

Create a new Azure enterprise application

Complete the following steps to create an Azure Enterprise application:

  1. Navigate to Microsoft Entra ID, Enterprise applications, New application.

  2. Under Cloud platforms, choose Amazon Web Services (AWS).
  3. For Name, enter AWS Single-Account Access.
  4. Choose Create.

When the create process is complete, you will be redirected to the newly created enterprise application.

Configure SSO

Complete the following steps to configure SSO for your application:

  1. On the enterprise application page, choose Get started under Set up single sign on.
  2. Choose SAML.

  3. In the Basic SAML Configuration section, choose Edit.
    1. For Identifier (Entity ID) and Reply URL, enter https://signin.aws.amazon.com/saml.
    2. Choose Save.
  4. In the Attributes & Claims section, choose Edit.
    1. In the Advanced settings section, choose Configure next to the custom claims provider setting.
    2. For Custom claims provider, choose Retrieve_user_group_information.
    3. Choose Save.

Configure a group claim

We use the group claim to transform the Azure AD group assignments into corresponding IAM roles. By applying a regular expression pattern, the group names are mapped to appropriate Amazon Resource Names (ARNs) for IAM roles and SAML providers. Complete the following steps to configure the group claim:

  1. On the Attributes & Claims page, delete claim name https://aws.amazon.com/SAML/Attributes/Role.
  2. Choose Add a group claim.
  3. Select Groups assigned to the application for the associated groups.
  4. For Source attribute, choose Cloud-only group display names.
  5. Under Advanced options, select Filter groups and provide the following information:
    1. For Attribute to match, choose Display name.
    2. For Match with, choose Prefix.
    3. For String, enter AWS-.
  6. Select Customize the name of group claim and provide the following information:
    1. For Name, choose Role.
    2. For Namespace, enter https://aws.amazon.com/SAML/Attributes.
    3. Select Apply regex replace to groups claim content.
    4. For Regex pattern, enter AWS-(?'accountid'[\d]{12})_(?'env'[a-z]+)-(?'app'[a-z]+)-(?'role'[a-z]+).
    5. For Regex replacement pattern, enter arn:aws:iam::{accountid}:saml-provider/AzureADDemo,arn:aws:iam::{accountid}:role/{env}-{app}-{role}
  7. Choose Save.

Add new claims

Complete the following steps to add new claims:

  1. On the Attributes & Claims page, choose Add new claim.
  2. Add claims with the following values:
    1. Choose Add a new claim, name the new claim https://aws.amazon.com/SAML/Attributes/PrincipalTag:RedshiftDbRoles, select Attribute for Source, enter customclaimsprovider.dbGroupsqueryeditor for Source attribute, and choose Save.

    2. Choose Add a new claim, name the new claim https://aws.amazon.com/SAML/Attributes/PrincipalTag:RedshiftDbUser, select Attribute for Source, enter user.userprincipalname for Source attribute, and choose Save.
    3. Choose Add a new claim, name the new claim https://redshift.amazon.com/SAML/Attributes/AutoCreate, select Attribute for Source, enter true for Source attribute, and choose Save.

The values of PrincipalTag:RedshiftDbUser and PrincipalTag:RedshiftDbGroups must be lowercase; begin with a letter; contain only alphanumeric characters, underscore (_), plus sign (+), dot (.), at (@), or hyphen (-); and be less than 128 characters.

When you complete adding all the claims, your Attributes & Claims page should look like the following screenshot.

Save the federation metadata XML file

You use the federation metadata file to configure the IAM IdP in a later step. Complete the following steps to download the file:

  1. Navigate back to your SAML-based sign-in page.
  2. In the Single sign-on section, under SAML Certificates, choose Download for Federation Metadata XML.
  3. Save this file locally.

The name of the file is often the same as the application name; for example, AWS Single-Account Access.xml.

Create a new client secret

Complete the following steps to create a new client secret:

  1. Return to the Azure directory overview and navigate to App registrations.
  2. Choose the application AWS Single-Account Access.
  3. If you don’t see your application in the list, choose the All applications tab and register it if it’s not registered.
  4. Record the values for Application (client) ID and Directory (tenant) ID.
  5. Under Certificates & secrets, choose New client secret.
  6. In the Add a client secret pane, provide the following information:
    1. For Description, enter AWSRedshiftFederationsecret.
    2. For Expires, choose select the Microsoft’s recommended value of 180 days.
    3. Choose Add.
  7. Copy the secret value and store it securely.

The secret expires after 180 days. Make sure there is a process in place to update with a new secret before the current secret expires in your environment.

Add permissions

Complete the following steps to add permissions:

  1. Navigate to API permissions for application AWS Single-Account Access.
  2. Choose Add a permission and provide the following information:
    1. For Select an API, choose Microsoft Graph.
    2. Select Delegated permissions for the type of permission your application requires.
    3. In Select permissions, choose User and then User.Read.

    4. Choose Application permissions for the type of permission your application requires.
    5. In Select permissions, choose Directory and then Directory.Read.All.

  3. Choose Add permissions.
    This allows the Redshift enterprise application to grant admin consent to read the user profile and group data associated with the user and perform the login using SSO.
  4. Under Configured permissions, choose Grant admin consent for added permissions.
  5. In the confirmation pane, choose Yes to grant consent for the requested permissions for all accounts to the enterprise application.
  6. Navigate to your enterprise applications and select AWS Single-Account Access and choose Users and groups.
  7. Choose Add user/group.
  8. Under Users and groups select the groups redshift_product, redshift_sales, and AWS-<acctno>_dev-bdt-team, which are created as part of the prerequisites, and choose Select.
  9. On the Add Assignment page, choose Assign.

Update Azure Function code

Complete the following steps to update the Azure Function code:

  1. Return to Home and navigate to fn-entra-id-transformer under Function App.
  2. Choose CustomAuthenticationFunction under Functions.
  3. On the Code + Test page, replace the sample code with the following code, which retrieves the user’s group membership, and choose Save.

In this code, replace the values of clientId, clientSecret, and tenantId with the values recorded previously. Also, in enterprise environments, use secret management service to store these secrets and use requirements file to install required packages such as requests.

import azure.functions as func
import logging
import json
import sys
import subprocess

def install(package):
    allowed_pattern = r'^[a-zA-Z0-9\-_\.]+$'
    if not re.match(allowed_pattern, package):
        raise ValueError("Invalid package name")

    subprocess.check_call([sys.executable, "-m", "pip", "install", package], shell=False)

# Ensure the requests package is installed
try:
    import requests
except ImportError:
    install("requests")
    import requests

app = func.FunctionApp(http_auth_level=func.AuthLevel.FUNCTION)

@app.route(route="custom-extension")
def custom_extension(req: func.HttpRequest) -> func.HttpResponse:
    logging.info("Azure AD Custom Extension function triggered")

    try:
        request_body = req.get_body().decode('utf-8')
        data = json.loads(request_body)
        user_id = data['data']['authenticationContext']['user']['id']

        # Fetch access token for Microsoft Graph API
        access_token = get_access_token()
        if not access_token:
            error_response = {"error": "Failed to obtain access token for Graph API"}
            return func.HttpResponse(body=json.dumps(error_response), status_code=200, headers={"Content-Type": "application/json"})

        # Fetch user groups
        user_groups = fetch_user_groups(user_id, access_token)
        if user_groups is None:
            error_response = {"error": "Failed to fetch user groups"}
            return func.HttpResponse(body=json.dumps(error_response), status_code=200, headers={"Content-Type": "application/json"})

        # Format groups as : seperated values as needed by redshift query editor
        groups_colon_separated = ":".join(user_groups)

        # Construct response as per the required JSON structure
        response_content = {
            "data": {
                "@odata.type": "microsoft.graph.onTokenIssuanceStartResponseData",
                "actions": [
                    {
                        "@odata.type": "microsoft.graph.tokenIssuanceStart.provideClaimsForToken",
                        "claims": {
                            "dbGroupsqueryeditor": groups_colon_separated,
                            "dbGroupssqltools": user_groups
                        }
                    }
                ]
            }
        }

        return func.HttpResponse(body=json.dumps(response_content), status_code=200, headers={"Content-Type": "application/json"})

    except Exception as e:
        logging.error(f"Error in function execution: {str(e)}")
        error_response = {"error": str(e)}
        return func.HttpResponse(body=json.dumps(error_response), status_code=200, headers={"Content-Type": "application/json"})

def get_access_token():
    # Hardcoded credentials for demonstration; replace with secure storage before production
    client_id = 'client_id'
    client_secret = 'client_secret' 
    tenant_id = 'tenant_id'
    token_url = f"https://login.microsoftonline.com/{tenant_id}/oauth2/v2.0/token"

    body = {
        "client_id": client_id,
        "scope": "https://graph.microsoft.com/.default",
        "client_secret": client_secret,
        "grant_type": "client_credentials"
    }

    try:
        response = requests.post(token_url, data=body, timeout=10)
        response.raise_for_status()
        return response.json()['access_token']
    except requests.RequestException as e:
        logging.error(f"Failed to retrieve access token: {str(e)}")
        return None

def fetch_user_groups(user_id, access_token):
    graph_url = f"https://graph.microsoft.com/v1.0/users/{user_id}/memberOf?$select=displayName"

    headers = {
        "Authorization": f"Bearer {access_token}"
    }

    try:
        response = requests.get(graph_url, headers=headers, timeout=10)
        response.raise_for_status()
        return [group['displayName'] for group in response.json().get('value', []) if group["@odata.type"] == "#microsoft.graph.group"]
    except requests.RequestException as e:
        logging.error(f"Failed to fetch user groups: {str(e)}")
        return None

Now you can create an IAM IdP and role.

In IAM, an IdP represents a trusted external authentication service like Microsoft Entra ID that supports SAML 2.0, allowing AWS to recognize user identities authenticated by that service. It’s crucial to name this IdP AzureADDemo to match the previously configured SAML claims for role creation.

Create your IAM SAML IdP

Complete the following steps to create your IAM SAML IdP:

  1. On the IAM console, choose Identity providers in the navigation pane.
  2. Choose Add provider.
  3. For Provider type, select SAML.
  4. For Provider name, enter a descriptive name, such as AzureADDemo.
  5. Upload the SAML metadata document, which you downloaded as Federation Metadata.xml and stored as AWS Single-Account Access.xml.
  6. Choose Add provider.

Create an IAM role

Next, you create an IAM role for SAML-based federation, which will be used to grant access to the Redshift Query Editor and Redshift cluster. Complete the following steps:

  1. On the IAM console, choose Roles in the navigation pane.
  2. Choose Create role.
  3. For Trusted identity type, select SAML 2.0 federation.
  4. For SAML 2.0-based provider, choose AzureADDemo.
  5. For Access to be allowed, select Allow programmatic and AWS Management Console access.
  6. Choose Next.
  7. Add the permissions AmazonRedshiftQueryEditorV2ReadSharing and ReadOnlyAccess, and choose Next.
  8. For Role name, enter a descriptive name, such as dev-bdt-team.
  9. Choose Create role.

Update trust policy

  1. On the IAM console, choose Roles in the navigation pane, and search for and choose the role dev-bdt-team.
  2. In the Trusted entities section, choose Edit trust policy.
  3. Add the action sts:TagSession by removing the Action line and adding the following code:"Action": [
    "sts:AssumeRoleWithSAML",
    "sts:TagSession"
    ],
  4. Choose Update policy.

Create an IAM policy

In the following steps, you create an IAM policy to allow the dev-bdt-team role to obtain temporary credentials for connecting to Amazon Redshift using IAM:

  1. On the IAM console, choose Policies in the navigation pane.
  2. Choose Create policy.
  3. On the JSON tab, enter the following policy document, replacing placeholders with appropriate values:
    {
        "Version": "2012-10-17",
        "Statement": [
                        {
                            "Sid": "VisualEditor0",
                            "Effect": "Allow",
                            "Action": "redshift:GetClusterCredentialsWithIAM",
                            "Resource": "arn:aws:redshift:<YOUR-REGION>:<AWS-ACCOUNT-NUMBER>:dbname::<YOUR-REDSHIFT-CLUSTER-NAME>/*"
                        }
                    ]
    }
    
  4. Review the policy details and provide a descriptive name for your policy, such as redshiftAccessPolicy.
  5. Review the policy summary and resolve any warnings or errors.
  6. Choose Create policy to finalize the policy creation process.
  7. On the Roles page, search for and open dev-bdt-team role.
  8. On the Add permissions menu, choose Attach policies.
  9. Attach redshiftAccessPolicy to the role.

Your permissions under the role dev-bdt-team should look like the following screenshot.

Test the SSO setup

You can now test the SSO setup. Complete the following steps:

  1. On the Azure Portal, for your AWS Single-Account Access application, choose Single sign-on.
  2. Choose Test this application.
  3. Choose Sign in as current user.

If the setup is correct, you’re redirected to the AWS Management Console (which might be in a new tab for some browsers).

Test with Redshift Query Editor

Complete the following steps:

  • Navigate to Microsoft Entra ID, Enterprise applications, AWS Single-Account Access.
  • Go to Properties and copy the user access URL.
  • Launch your preferred web browser and enter the user access URL to navigate to the Microsoft sign-in page.
  • Log in with user A credentials.
  • You will be directed to AWS console, and you will be logged in as dev-bdt-role.
  • Open the Amazon Redshift console and choose Provisioned clusters dashboard.
  • Choose the cluster examplecluster.
  • On the Query data menu, choose Query in query editor v2.
  • Select Temporary credentials using your IAM identity.
  • For Database, enter dev.
  • Choose Create connection.

After the connection is established, you should be able to see your dev database and schemas under it, as shown in the following screenshot.

Because user A is only part of group redshift_sales, they will be able to see only the sales schema.

  • Run a SQL statement to get data from sales_table.

Because user A has access to the table, you can see output like the following screenshot.

  • Log in as user C to test access for user C.

User C is able to see both the product and sales schemas because they’re part of both the redshift_product and redshift_sales groups.

  • Run a SQL statement to get data from both sales_table and product_table.

User C has access to both tables, as you can see in the following screenshot.

Clean up

To avoid incurring future charges, delete the resources you created, including the Redshift cluster, IAM role, IAM policy, Microsoft Entra ID application, and Azure Functions app.

Conclusion

In this post, we demonstrated how to use Microsoft Entra ID to federate into your AWS account and use the Redshift Query Editor V2 to connect to a Redshift cluster and access the schemas based on the AD groups associated with the user.


About the author

Koushik Konjeti is a Senior Solutions Architect at Amazon Web Services. He has a passion for aligning architectural guidance with customer goals, ensuring solutions are tailored to their unique requirements. Outside of work, he enjoys playing cricket and tennis.

A change of hats! (Fedora Magazine)

Post Syndicated from jzb original https://lwn.net/Articles/1001634/

Fedora Project Leader (FPL) Matthew Miller writes that he will soon be hanging up the FPL hat:

Stay tuned for a job posting from Red Hat, and details about all
that. I’m hoping we can hire someone awesome early in 2025, and make
the official handover on the release of auspiciously-numbered Fedora
Linux 42.

I’m not going to leave Fedora, though. As I said above, although it
might not always feel like it from the outside, Red Hat support for
Fedora is stronger than ever, and I plan on helping that grow even
more. I’m stepping into a full-time management role in the Community
Linux Engineering organization, so Fedora will still be part of my day
job, just in a different way.

[$] A Zephyr-based camera trap for seagrass monitoring

Post Syndicated from jake original https://lwn.net/Articles/998893/

In a session at
Open Source Summit Europe
(OSSEU) back in September, Alex Bucknall gave an overview of a camera “trap”—a
device to capture images in a non-intrusive way—that he helped develop
which is being used to monitor seagrass. He works for
the Arribada Initiative, which is a
non-profit organization
focused on creating open-source technology for studying wildlife and ecosystems.
The camera system uses the Zephyr
realtime operating system (RTOS) on an open platform that is designed to be
inexpensive and usable for multiple applications.

AWS-LC FIPS 3.0: First cryptographic library to include ML-KEM in FIPS 140-3 validation

Post Syndicated from Jake Massimo original https://aws.amazon.com/blogs/security/aws-lc-fips-3-0-first-cryptographic-library-to-include-ml-kem-in-fips-140-3-validation/

We’re excited to announce that AWS-LC FIPS 3.0 has been added to the National Institute of Standards and Technology (NIST) Cryptographic Module Validation Program (CMVP) modules in process list. This latest validation of AWS-LC introduces support for Module Lattice-Based Key Encapsulation Mechanisms (ML-KEM), the new FIPS standardized post-quantum cryptographic algorithm. This is a significant step towards enhancing the long-term confidentiality of our most sensitive customer workflows, including U.S. federal government communications.

This validation makes AWS LibCrypto (AWS-LC) the first open source cryptographic module to provide post-quantum algorithm support within the FIPS module. Organizations that require FIPS-validated cryptographic modules—such as those operating under FedRAMP, FISMA, HIPAA, and other federal compliance frameworks—can now use these algorithms within AWS-LC.

This announcement is part of the long-term promise made by AWS-LC of continuous validation to obtain new FIPS 140-3 certificates. AWS-LC obtained its first certificate in October 2023 for AWS-LC-FIPS 1.0. A subsequent version of the library, AWS-LC-FIPS 2.0, was certified in October 2024. In this post, we discuss our FIPS-validation of post-quantum cryptographic algorithm ML-KEM, the performance improvements of existing algorithms in AWS-LC FIPS 2.0 and 3.0, and the new algorithm support added for version 3.0. We also discuss how you can use the new algorithms to implement hybrid post-quantum cipher suites, along with configuration options that you can set up today to help protect against future threats.

FIPS post-quantum cryptography

Large-scale quantum computers pose a threat to the long-term confidentiality of the data that we protect under public-key cryptography today. In what’s known as a record-now, decrypt-later attack, an adversary records internet traffic today, capturing key exchanges and encrypted communication. Then, when a sufficiently powerful quantum computer is available, the adversary can retroactively recover shared secrets and encryption keys by solving the underlying hardness problem.

ML-KEM is one of the new key encapsulation mechanisms that’s being standardized by NIST in an effort to protect the uses of public key cryptography from quantum threats. Much like RSA, Diffie-Hellman (DH), or Elliptic-curve Diffie-Hellman (ECDH) key exchange, it works by establishing a shared secret between two parties. However, unlike RSA or DH, ML-KEM bases the key exchange on an underlying problem that is believed to be hard for quantum computers to solve.

Today, we don’t know how to build such a large-scale quantum computer. Significant scientific research is needed before such a computer can be built. However, you can mitigate the risk of record-now, decrypt-later attacks by introducing post-quantum algorithms such as ML-KEM into your key exchange protocols today. We recommend adopting a hybrid key exchange approach that combines a traditional key exchange method—such as ECDH—with ML-KEM to hedge against current and future adversaries. Later in this post, we show you how you can implement hybrid post-quantum cipher suites today to protect against future threats.

AWS-LC FIPS 3.0 includes the ML-KEM algorithm for all three provided parameter sets, ML-KEM-512, ML-KEM-768, and ML-KEM-1024. The three parameter sets provide differing levels of security strength as specified by NIST (see FIPS 203 [9, Sect. 5.6] or the post-quantum security evaluation criteria). ML-KEM-768 is recommended for general-purpose use cases, ML-KEM-1024 is designed for applications that require a higher security level or adherence to explicit directives such as the Commercial National Security Algorithm Suite (CNSA) 2.0 for National Security System owners and operators.

Algorithm NIST security category Public key (B) Private key (B) Ciphertext (B)
ML-KEM-512 1 800 1632 768
ML-KEM-768 3 1184 2400 1088
ML-KEM-1024 5 1568 3168 1568

Table 1. Security strength category, public key, private key, and ciphertext sizes in bytes for the three parameter sets of ML-KEM

Integration with s2n-tls

ML-KEM is now available in our open source TLS implementation, s2n-tls, through hybrid key exchange for TLS 1.3 (draft-ietf-tls-hybrid-design). We’ve also added support for hybrid ECDHE-ML-KEM key agreement for TLS 1.3 (draft-kwiatkowski-tls-ecdhe-mlkem), along with new key share identifiers for Curve x25519 and ML-KEM-768.

For hybrid key establishment in FIPS 140-approved mode, one component algorithm must be a NIST-approved mechanism (detailed in NIST post-quantum FAQs). With ML-KEM added to the list of NIST-approved algorithms, you can now include non-FIPS standardized algorithms like Curve x25519 in hybrid cipher suites. By configuring your TLS cipher suite to use ML-KEM-768 and x25519 (draft-kwiatkowski-tls-ecdhe-mlkem), you can use x25519 within a FIPS-validated cryptographic module for the first time. This can facilitate more efficient key exchange through the highly optimized and functionally verified Curve x25519 implementation provided by AWS-LC.

New algorithms and new implementations

Two integral parts of our commitment to continuous validation of AWS-LC FIPS are to include new algorithms as approved cryptographic services and new implementations of existing algorithms that provide performance improvements and functional correctness.

New algorithms

We’re committed to continually validating new algorithms so that builders can adopt FIPS-validated cryptography by including the latest revisions of approved cryptographic algorithms and supporting new primitives. Validating new algorithms in their latest standardized revision helps ensure that our cryptographic tool-kit is providing high-assurance implementations that achieve compliance with globally recognized standards.

In AWS-LC FIPS 3.0 we’ve added the latest member of the Secure Hash Algorithm standard SHA-3 to the module. The SHA-3 family is a cryptographic primitive used to support a variety of algorithms. In AWS-LC FIPS 3.0, we’ve integrated ECDSA and RSA signature generation and verification with SHA-3 and within the post-quantum algorithm ML-KEM. In AWS-LC, ML-KEM calls into our FIPS-validated SHA-3 functions, which provide optimized implementations of SHA-3 and SHAKE hashing procedures. This means that as we continually refine and optimize our AWS-LC SHA-3 implementation, we’ll continue to see performance increases across algorithms that use the primitive, such as ML-KEM.

EdDSA is a digital signature algorithm based on elliptic curves using the curve Ed25519. It was added to NIST’s updated Digital Signature Standard (DSS), FIPS 186-5. This signature algorithm is now offered as part of the AWS-LC 3.0 FIPS module. For key agreement, the Single-step Key Derivation Function (SSKDF) used to derive keys from a shared secret (SP 800-56Cr2) is available both in the digest-based and HMAC-based specifications. It can be used, for example, to derive a key from a shared secret produced by KMS when using ECDH. Further keys can be derived from that original key using a Key-based Key Derivation Function (KBKDF)—SP 800-108r1—which is available using a counter-mode based on HMAC.

Performance improvements

We focused on increasing the performance of public-key cryptography algorithms widely used in transport protocols such as the TLS protocol. For example, RSA signatures on Graviton2 are 81 percent faster for bit-length 2048, 33 percent for 3072, and 94 percent for 4096, with added formal verification of functional correctness of the main operation. Using Intel’s AVX512 Integer Fused Multiply Add (IFMA) instructions—available starting from 3rd Gen Intel Xeon—Intel developers contributed an RSA implementation that employs these instruction and the wide AVX512 registers, which are twice as fast as the existing implementation.

We increased throughput for EdDSA signing by an average of 108 percent and for verifying by 37 percent. This average is taken over three environments: Graviton2, Graviton3, and Intel Ice Lake (Intel Xeon Platinum 8375C CPU). This boost in performance is achieved by integrating assembly implementations of the core operation for each target from the s2n-bignum library. That, in addition to the careful constant-time implementation of the core operations, is how each one has been proven to be functionally correct.

In Figure 1 that follows, we highlight the percentage of performance improvements compared to AWS-LC FIPS 1.0 in versions 2.0 and 3.0. The improvements achieved in 2.0 are maintained in 3.0 and are not repeated in the graph. The graph also includes symmetric-key improvements. In AES-256-GCM, which is widely used in TLS to encrypt the communication after the session has been established, the increase is on average 115 percent across Intel Ice Lake and Graviton4 to encrypt a 16 KB message. In AES-256-XTS, which is used in disk storage, encrypting a 256 B input is 360 percent faster on Intel Ice Lake and 90 percent faster on Graviton4.

Figure 1: Graph of performance improvements in versions 2.0 and 3.0 of AWS-LC FIPS

Figure 1: Graph of performance improvements in versions 2.0 and 3.0 of AWS-LC FIPS

How to use ML-KEM today

You can configure both s2n-tls and AWS-LC TLS libraries to enable hybrid post-quantum security with ML-KEM today by enabling X25519MLKEM768 and SecP256r1MLKEM768 for key exchange. We’ve integrated support for both of these hybrid algorithms in AWS-LC libssl and s2n-tls using each library’s exisiting TLS configuration APIs. To negotiate a TLS connection, use one of the following commands:

# AWS-LC Client CLI Example
./aws-lc/build/tool/bssl s_client -curves X25519MLKEM768:SecP256r1MLKEM768:X25519 -connect <hostname>:<port>
# S2N-tls Client CLI Example
./s2n/build/bin/s2nc -c default_pq -i <hostname> <port>

Conclusion

In this post, we described the ongoing development, optimization, and validation of the cryptography that we provide to our customers and products through our open source cryptographic library, AWS-LC. We introduced the addition of FIPS-validated post-quantum algorithms and provided configuration options to begin using these algorithms today to protect against future threats.

AWS-LC-FIPS 3.0 is part of our commitment to continually validate new versions of AWS-LC as we add new algorithms within the FIPS boundary as they become specified, and as we raise the performance and formal verification bar on existing algorithms. Through this commitment, we continue to support the wider developer community of Rust, Java and Python developers by providing integrations into the AWS Libcrypto for Rust (aws-lc-rs) and ACCP 2.0 libraries. We facilitate integration into CPython so that you can build against AWS-LC and use it for all cryptography in the Python standard library. We enabled rustls to provide FIPS support.

 
If you have feedback about this post, submit comments in the Comments section below. If you have questions about this post, contact AWS Support.
 

Jake Massimo
Jake Massimo

Jake is an Applied Scientist on the AWS Cryptography team. His work interfaces Amazon with the global cryptographic community through participation in international conferences, academic literature, and standards organizations with a goal of influencing the adoption of post-quantum cloud-scale cryptographic technology. Recently, his focus has been developing the AWS cryptography library to support post-quantum migration.
Nevine Ebeid
Nevine Ebeid

Nevine is a Senior Applied Scientist at AWS Cryptography where she focuses on algorithms development, machine-level optimizations and FIPS 140-3 requirements for AWS-LC, the cryptographic library of AWS. Prior to joining AWS, Nevine worked in the research and development of various cryptographic libraries and protocols in automotive and mobile security applications.

GNU Shepherd 1.0.0 released

Post Syndicated from corbet original https://lwn.net/Articles/1001599/

Version
1.0.0
of the GNU Shepherd service manager has been released after a
mere 21 years of development.

This 1.0.0 release is published today because we think Shepherd has
become a solid tool, meeting user experience standards one has come
to expect since systemd changed the game of free init systems and
service managers alike. It’s also a major milestone for Guix, which
has been relying on the Shepherd from a time when doing so counted
as dogfooding.

Security updates for Tuesday

Post Syndicated from corbet original https://lwn.net/Articles/1001597/

Security updates have been issued by AlmaLinux (postgresql:15, postgresql:16, and ruby:3.1), Debian (jinja2), Fedora (python-multipart, python-python-multipart, python3.12, retsnoop, rust-rbspy, rust-rustls, and zabbix), Oracle (kernel, libsoup, postgresql:12, postgresql:13, postgresql:15, postgresql:16, redis:7, and ruby:3.1), SUSE (nodejs18, pam, qt6-webengine, and radare2), and Ubuntu (dogtag-pki, linux-intel-iotg, linux-intel-iotg-5.15, ofono, rabbitmq-server, and webkit2gtk).

Widespread exploitation of Cleo file transfer software (CVE-2024-50623)

Post Syndicated from Rapid7 original https://blog.rapid7.com/2024/12/10/etr-widespread-exploitation-of-cleo-file-transfer-software-cve-2024-50623/

Widespread exploitation of Cleo file transfer software (CVE-2024-50623)

On Monday, December 9, multiple security firms began privately circulating reports of in-the-wild exploitation targeting Cleo file transfer software. Late the evening of December 9, security firm Huntress published a blog on active exploitation of three different Cleo products (docs):

  • Cleo VLTrader, a server-side solution for “mid-enterprise organizations”
  • Cleo Harmony, which provides file transfer capabilities for “large enterprises”
  • Cleo LexiCom, a desktop-based client for communication with major trading networks  

Huntress’s blog says the exploitation they’re seeing across Cleo products results from an insufficient patch for CVE-2024-50623, a vulnerability disclosed in Cleo VLTrader, Cleo Harmony, and Cleo LexiCom in October 2024. Cleo indicated that the vulnerability was fixed in version 5.8.0.21 of all three solutions, but according to Huntress, 5.8.0.21 remains vulnerable to exploitation. CVE-2024-50623 is a cross-site scripting issue (CWE-79) that allows for unauthenticated remote code execution on target systems.

Update: Cleo evidently communicated with customers on December 10 acknowledging a “critical vulnerability in Cleo Harmony, VLTrader, and LexiCom that could allow an unauthenticated user to import and execute arbitrary bash or PowerShell commands on the host system by leveraging the default settings of the Autorun directory.”

As of December 10, Rapid7 MDR has confirmed successful exploitation of this issue in customer environments; similar to Huntress, our team has observed enumeration and post-exploitation activity and is investigating multiple incidents.

File transfer software continues to be a target for adversaries, and for financially motivated threat actors in particular. Rapid7 recommends taking emergency action to mitigate risk related to this threat.

Mitigation guidance

The following products and versions are vulnerable to CVE-2024-50623. The information below contradicts previous vendor guidance, which indicated that 5.8.0.21 resolved the issue. Cleo has updated their advisory as of December 10, 2024 to confirm 5.8.0.21 is still vulnerable.

  • Cleo Harmony before and including version 5.8.0.21
  • Cleo VLTrader before and including version 5.8.0.21
  • Cleo LexiCom before and including version 5.8.0.21

According to Huntress, “Cleo is preparing a new CVE designation and expects a new patch to be released mid-week.”

In the absence of an effective patch for CVE-2024-50623 (and any other CVEs that may be assigned to this exploit), Cleo customers should remove affected products from the public internet, ensuring they are behind a firewall. Per Huntress’s investigation, disabling Cleo’s Autorun Directory, which allows command files to be automatically processed, may also prevent the latter part of the attack chain from being executed.

Huntress’s blog has several descriptions of post-exploitation activity, including attack chain artifacts, commands run, and files dropped for persistence. Rapid7 recommends that affected customers review these indicators and investigate their environments for suspicious activity dating back to at least December 3, 2024.

Rapid7 customers

InsightVM and Nexpose customers will be able to assess their exposure to CVE-2024-50623 on Windows with an authenticated vulnerability check expected to be available in today’s (Tuesday, December 10) content release. Please note that content releases are typically available late in the evening ET on Patch Tuesday.

InsightIDR and Managed Detection and Response customers have existing detection coverage through Rapid7’s expansive library of detection rules. Rapid7 recommends installing the Insight Agent on all applicable hosts to ensure visibility into suspicious processes and proper detection coverage. Below is a non-exhaustive list of rules deployed and alerting on behavior related to this threat:

  • Suspicious Process – XORed Data in PowerShell
  • Suspicious Process – PowerShell System.Net.Sockets.TcpClient
  • Attacker Behavior – Possible Cleo MFT Exploitation 2024
  • Attacker Tool – PowerShell -noni -ep -nop Flags
  • Attacker Behavior – Obfuscated Powershell Script Containing -noni -ep -nop Flags
  • Suspicious Process – Powershell Invoke-WebRequest

Robotcop: enforcing your robots.txt policies and stopping bots before they reach your website

Post Syndicated from Celso Martinho original https://blog.cloudflare.com/ai-audit-enforcing-robots-txt

Cloudflare’s AI Audit dashboard allows you to easily understand how AI companies and services access your content. AI Audit gives a summary of request counts broken out by bot, detailed path summaries for more granular insights, and the ability to filter by categories like AI Search or AI Crawler.

Today, we’re going one step further. You can now quickly see which AI services are honoring your robots.txt policies, which aren’t, and then programmatically enforce these policies. 

What is robots.txt?

Robots.txt is a plain text file hosted on your domain that implements the Robots Exclusion Protocol, a standard that has been around since 1994. This file tells crawlers like Google, Bing, and many others which parts of your site, if any, they are allowed to access. 

There are many reasons why site owners would want to define which portions of their websites crawlers are allowed to access: they might not want certain content available on search engines or social networks, they might trust one platform more than another, or they might simply want to reduce automated traffic to their servers.

With the advent of generative AI, AI services have started crawling the Internet to collect training data for their models. These models are often proprietary and commercial and are used to generate new content. Many content creators and publishers that want to exercise control over how their content is used have started using robots.txt to declare policies that cover these AI bots, in addition to the traditional search engines.

Here’s an abbreviated real-world example of the robots.txt policy from a top online news site:

User-agent: GPTBot
Disallow: /

User-agent: ChatGPT-User
Disallow: /

User-agent: anthropic-ai
Disallow: /

User-agent: Google-Extended
Disallow: /

User-agent: Bytespider
Disallow: /

This policy declares that the news site doesn’t want ChatGPT, Anthropic AI, Google Gemini, or ByteDance’s Bytespider to crawl any of their content.

From voluntary compliance to enforcement

Compliance with the Robots Exclusion Protocol has historically been voluntary. 

That’s where our new feature comes in. We’ve extended AI Audit to give our customers both the visibility into how AI services providers honor their robots.txt policies and the ability to enforce those policies at the network level in your WAF

Your robots.txt file declares your policy, but now we can help you enforce it. You might even call it … your Robotcop.  

How it works

AI Audit takes the robots.txt files from your web properties, parses them, and then matches their rules against the AI bot traffic we see for the selected property. The summary table gives you an aggregated view of the number of requests and violations we see for every Bot across all paths. If you hover your mouse over the Robots.txt column, we will show you the defined policies for each Bot in the tooltip. You can also filter by violations from the top of the page. 


In the “Most popular paths” section, whenever a path in your site gets traffic that has violated your policy, we flag it for visibility. Ideally, you wouldn’t see violations in the Robots.txt column — if you do see them, someone’s not complying.


But that’s not all… More importantly, AI Audit allows you to enforce your robots.txt policy at the network level. By pressing the “Enforce robots.txt rules” button on the top of the summary table, we automatically translate the rules defined for AI Bots in your robots.txt into an advanced firewall rule, redirect you to the WAF configuration screen, and allow you to deploy the rule in our network.

This is how the robots.txt policy mentioned above looks after translation:


Once you deploy a WAF rule built from your robots.txt policies, you are no longer simply requesting that AI services respect your policy, you’re enforcing it.

Conclusion

With AI Audit, we are giving our customers even more visibility into how AI services access their content, helping them define their policies and then enforcing them at the network level.

This feature is live today for all Cloudflare customers. Simply log into the dashboard and navigate to your domain to begin auditing the bot traffic from AI services and enforcing your robots.txt directives.

Икономически аспект на случилото се в Сирия

Post Syndicated from VassilKendov original https://kendov.com/syria_now/

Икономически аспект на случилото се в Сирия

Малко се говори за икономическата страна на падането на режима на Асад в Сирия. Повечко се коментира военната страна на конфликта, а то такава реално нямаше. Армията бе разпусната и Асад призова за мирно предаване на властта. Нещо повече – разпуснатите войници дори не унищожиха военната си техника, а я оставиха в ръцете на „враговете си“ което е немислимо в един военен кофликт. Това ме наведе на мисълта, че случващото се няма нищо общо с военните действия и се зарових в икономическите предпоставки.

Информацията, която намерих и обобщих е на база информация от мрежата, понеже официална статистика е до 2020 година, а във военни времена не е ясно колко е меродавна тази статистика.

Моля използвайте приложената форма за записване на час за среща
[contact-form-7]

Твърди се в медиите, че от няколко месеца армията на Асад е получавала по 35 долара на месец като заплата на глава. Сами разбираме, че с тези пари не може да се поддържат военни действия и войниците да са мотивирани. Лично аз предполагам, че е такова положението или поне близко до това, понеже вторият по големина град – Алепо, което е и индустриалното сърце на Сирия, отдавна е под турски контрол. Твърди се, че там официална валута е турската лира. Също така за петролните кладенци в провинцията Идлиб има изписано доста, как Сирия предявява претенции към САЩ, после към Турция… Да не забравяме и санкциите от САЩ
Осен всичко това, плодородните земи също от дълго време са в ръцете на Турция и кюрдите. С две думи Сирия няма от какво да издържа армията и режима си.

ВЪПРОСЪТ Е КОЙ ПЛАЩАШЕ ДО СЕГА?

Финансови услуги за фирми и Физически лица

Моето мнение е, че това бяха руснаците. Те имаха най-голям интерес от този режим, но с войната в Украйна, явно вече им стана неизгодно да плащат за издръжка на режима, само и само да имат 2 бази в Сирия. Верно е, че са стратегически, но пък всичко е въпрос на средства. Ако е прекалено скъпо, то не може да е вечно.
Турция от своя страна приюти „демократичните ислямисти“ в лагери и ги обучава достатъчно дълго време, за да ги върне на терена. И докато повечето хора смятат, че големия печеливш е точно Турция, аз мисля, че не е така. Мисля че е Израел, защото на Турция и предстоят тежки времена с кюрдите, както и бъдещата издръжка на една цяла държава с население около 20 милиона. Казваме около, защото не знаем реално колко е към момента. Явно руснаците повече нма да плащат и оставят това право на Турция, което до момента само получаваше финансовите облаги от владеенето на териториите, но сега ще плаща за изграждане на държава, доколкото това е възможно изобщо. Предстои им и сбъсък с кюрдите, които пък са стратегически партньор на САЩ. А САЩ от своя страна е много малко вероятно да се включат финансово в издръжката на новата държава.

ЗАЩО Е ПЕЧЕЛИВШ ИЗРАЕЛ?

Защото въпреки, че декларира ненамеса в кофлита, това не им попречи да завземат южния военен пункт на сирийска територия, който имаше пряка видимост към Голанските възвишения, както и да нанесе въздушни удари по военни складове на сирийска територия за да не попаднат оржията в ръцете на джихадисти. Какви точно джихадисти, щом „демократичните ислямисти“ са взели властта – не се казва, но така или иначе оръжията са унищожени, а израелската войска е на сирийска територия.

КЪДЕ ЩЕ СЕ ДЕНЕ РУСИЯ?

Медиите твърдят, че транспортни самолети кацат в руските бази и изнасят оръжие и техника от там. Не е ясно каква е тази техника. Дали е от самите бази или от други по малки бази в страната. Твърди се също, че „демократичните ислямисти“ заобикалет руските воени бази.
При всички положения имаме освободена военна техника и предполагам не е сложно да предположим къде ще бъде разположена тя, ако базите бъдат закрити.
Казвам ако бъдат закрити, защото не знаем каква е договорката. А че има договорка е повече от ясно, предвид мирното предаване на властта.

ТРЯБВАТ ПАРИ ЗА ДА СЕ ТУШИРА НАПРЕЖЕНИЕТО

При всички положения новата власт ще се нуждае от пари, за да тушира напрежението. Ако ли не, в тази мултикултурна, раздирана от конфликт земя, където всеки е срещу всеки, ще продължи насилието на религиозна основа. Колкото и да се твърди, че новите „демократични ислямисти“ имат договорки с малцинствата и не ги закачат за момента, едно е ясно – когато ограничиш ресурса и няма достатъчно за всички, малцинствата страдат.
Моето мнение е, че точно това ще се случи на следващия етап. Няма начин след война да няма реваншизъм. Тоест има, но то се нарича НАРОДЕН СЪД. Нещо което много съвременни демократи не харесват, но това е единствения начин да се спре саморазправата в огромни мащаби след война. Прочетете как е било в Руанда, вижте как е било във войната между Етиопия и Еритрея и го наречете както искате, щом определението „Народен съд“ не ви харесва. Но съд ще трябва да има, ако не искаме саморазправи.

РЕСУРСИТЕ

Сирия е на пътя на доста ресурси. Петрол или газ имаме в Иран, Ирак, Кувейт, Саудитска Арабия, Катар, Бахрейн… Ако има има тръби, които да идват в Европа, но да заобикалят Турция, то те тряба да минат през Сирия. Но Турция не иска това. А Русия изобщо не иска да има тръби към Европа. Затова са и техните бази в Сирия, да охраняват маршрута и да гарантират, че няма да има тръби, които да доставят евтин петрол в Европа, който да ги заобикаля. Единствения начин в сегашната обстановка това да остане така е липсата на държава в Сирия, постоянни военни сблъсъци или руските бази да си останат под някаква форма.
Аз не знам каква е договорката и дали техните бази ще останат в сегашната обстановка, но ако се махнат от там, то най-логичното е Русия и Иран да започнат да поддържат и те някаква опозиция или фракция, което е безкрайно по-евтино от поддържането на режим или изграждането на държава.
Личното ми очакване е, че точно това ще се случи.

БЕЖАНЦИТЕ

Гледаме по телевизията колко щастливи са всички от новата власт, но за мен си съм убеден, че това не е така. Виждаме дори, че много сирийци се завръщали в Сирия от Турция. Виждайки как Ердоган търгуваше с Европа посредством бежанците, сега ще е безкрайно щаствлив да изпразни лагерите и да засели териториите граничещи с кюрдите точно с тези бежанци, които години наред хранеше в лагерите и от чиито среди възпита и обучи „демократичните ислямисти“. Да му мислят кюрдите, защото те също се биеха с армията на Асад, докато пък те се биеха с армията на „демократичните ислямисти“. Сега единствената им надежда е САЩ, но въпросът е дали Турция може да плаща и колко, за да държи нещата мирни, защото изобщо не ми се вярва САЩ да плащат и за този конфликт. Най-малко ще се окажат в положението на СССР през 89-та, когато издържаха неефективни режими и съвсем закономерно се разпаднаха.
Европа пък изобщо не я виждам като платец. Те и на Ливан отказаха  да плащат вече, а ги чака Украйна, и то в момент, когато германската икономика е в рецесия.
От друга страна Германия и Австрия обявиха официално, че вече няма да приемат бежанци от Сирия. Не ми се вярва и Ердоган да ги приема, защото те вече ще са от другите, а си има правитество в Сирия и тези хора ще са му нужни за а работят, да спират кюрдите и да плащат данъци за поддръжка на новото правителство.
В Европа обаче има маса сирийци и араби. А най-разумното нещо в момента за всеки нормален човек е да защити семейството си. Не мисля, че в следващите години това ще е възможно в Сирия. И дори Турция, Германия и Австрия да не искат повече бежанци от Сирия, саморазправата и насилието тепърва предстоят в онзи район. Както казахме почвата е идеална за Русия и Иран със сравнително малко пари да поддържат новата „демократична опозиция“, само и само да не минават тръби на техни конкуренти, като за всеки изхарчен долар, Турция или ЕС ще трябва да дава по 1000 за да се опита да задържи населението или да изгради държава. Не случайно Асад нареди разпускане на армията и не унищожиха оръжието. Имат да си връщат територията от Израел. Пък като не си я върнат, ще се съобазяват дългосрочно и ще служат на Израел под един или друг начин. Все пак Израел ще владее възвишенията. Ако не беше толкова важно и не им даваха контрол, изобщо нямаше да се опитват да влизат на сирийска територия.

На база всичко казано, аз си правя извода, че големият въпрос в случая е КОЙ ЩЕ ПЛАЩА ЗА СИРИЯ за да продължи да съществува? Не вярвам Турция да може дори и да иска, а Иран и целия останал арабски свят надали ще е много щастлив от разширението на Турция.

Само времето ще покаже какво ще се случи, но през това време доста човешки съдби ще получат нова посока.

Васил Кендов

The post Икономически аспект на случилото се в Сирия appeared first on Kendov.com.

Археология на утопията. Посткомунистическото във видеоигрите (продължение)

Post Syndicated from original https://www.toest.bg/arheologia-na-utopiyata-postkomunisticheskoto-vuv-videoigrite-produlzhenie/

<< Към първа част

Археология на утопията. Посткомунистическото във видеоигрите (продължение)

Северина Станкева: Предишният ни разговор завърши с темата за разпада, която ми се иска да продължим. Изглежда, че в посткомунистическите държави смъртта на утопията се възприема по особено подчертано автоимунен начин, което би могло да се обясни през статута и историческата съдба на утопичния проект в тях. Това е видимо и във видеоигрите.

В Диско Елизиум ахроматичният феномен на Сивотата създава двумилиметрови дупки в тъканта на света. Докато Сивотата е едновременно разделителна тъкан на материята и смесва всичко с всичко – физическите, епистемологическите и лингвистичните качества на нещата по границите ѝ образуват безбрежна ентропична супа, – дупките са предвестници на пълното унищожение. Тъкмо около тях спонтанно се формират духовни институции с апокалиптичен характер – църкви, философски нощни клубове и други.

В първата част на Фростпънк (полска игра, в която играчът приема ролята на лидер на последния град на света, разрушен от безкрайна вулканична зима) – независимо дали оцеляването е постигнато и дори границата на хуманността (буквално има такава) да не е премината – „най-добрият“ край все пак задава въпроса дали всичко си е заслужавало и дали тази граница не се намира всъщност другаде. Доколко това морализаторстване е оправдано, като имайме предвид, че играчът няма какво да направи, за да не премине и невидимата граница, освен може би да спре да играе играта, е друга тема. Във втората част е предприета доста различна, но също толкова съмнителна стратегия относно възможните финали. Имаме един утопичен – всички са щастливи, всичко е наред; друг, в който онези, които не искат мир, са обезвредени; и трети, в който играчът е очевиден диктатор, но мирът пак е постигнат. И в трите случая краят се приема за успешен, с разликата, че в първия и третия успехът изглежда по-голям. Съобщението е едно и също: „Противно на всички шансове, ти успя.“

Какво е отношението на утопията и разпада според вас и в кои игри могат да се открият следите му?

Миглена Николчина: С Еньо Стоянов вече сме обсъждали някои аспекти на тази тема1. Разминаването ни беше в съпоставката между поредиците Метро и Ядрена зима: моята позиция беше, че има принципна разлика между гигантските отломъци на една утопия, сред които се развива действието в Метро, и сантименталните руини на средната класа, сред които си проправяме път в Ядрена зима. Според Еньо по-скоро няма принципна разлика (ако съм го разбрала правилно). Неговата теза е поддържана – извън контекста на видеоигрите – например от Сюзън Бък-Морс в „Мечтани светове и катастрофа. Отмирането на масовата утопия на Изток и Запад“2. Според нея става дума за две аналогични утопии за благоденствие на масите – съветската и американската, – с които е дошло време да се простим. Аз обаче настоявам, отвъд амнезията и носталгиите, върху отгласите от специфичния политически и социален опит на бившите соцстрани. Мисля, че тези отгласи включват повишена чувствителност както към вакуума, който крахът на утопиите оставя след себе си, така и към узурпирането на утопичните проекти от една или друга поредна номенклатура.

Сивотата в Диско Елизиум може да бъде пример за това. Теорията за ерозията на реалността е изложена в играта от една хибридна фигура – ултралибералката (ре)Джойс. Тя е местна жена, зачеркнала някогашната си принадлежност и преминала в лагера на, така да се каже, светлоогъвателите: един от най-забавните персонажи в играта е мегабогаташът, който живее в контейнер, за да не го притесняват просители, и чието лицезрение огъва светлината по силата на „физически закон“, извлечен от романите на Емил Зола. Който е чел Зола, ще разбере. Джойс въплъщава припокриването между ултралибералното корпоративно богатство и морализма на „Моралинтерна“, днешната версия на Комунистическия интернационал. Доколкото ерозиралата реалност е стихията, през която новата номенклатура, Джойс и подобните на нея навигират, ерозията на реалността се оказва скритото опако на Моралинтерна. Тази ерозия е продукт не на старата, а на днешната утопия: продукт на старата утопия е остротата, с която в Диско Елизиум новият утопичен ерзац е съзнаван като вътрешно кух и неспособен да запълни вакуума от предишните сринати проекти.

Eньо Стоянов: Може би било удачно да спрем поглед и на рецептивната страна на въпроса, тъй като тя несъмнено дава и тон на производството в бившите социалистически страни. Първите игри от поредицата Ядрена зима и до днес получават неофициални продължения и модификации от играчи в Източна Европа десетилетия след като западноевропейските играчи са преместили фокуса си върху по-новите заглавия от нея и вероятно дори веднъж не са изигравали изходните заглавия.

Неслучайно този интерес на източноевропейците доведе до поява на заглавия като Атом RPG, който без преувеличение може да се определи като превод на света и системите на първите игри от Ядрена зима в постсъветски апокалиптичен контекст. Герои на мощ и магия 3, също заглавие от края на 90-те, продължава мощно да се играе онлайн днес, при това главно на украински сървъри (преди войната сървърите бяха предимно руски), където по лобитата могат да се открият и много български звучащи прозвища на играчи. И това е при положение, че споменатата поредица си има по-късни продължения (към момента е стигнала до номер 7). Нещо повече, интересът към тази игра се поддържа от времето на създаването ѝ до днес отново с неофициални допълнения, последното от които е от миналата година и е дело на руски разработчици аматьори – явно поне на терена на играенето в мрежа на Герои 3 руснаци и украинци съумяват някак да съжителстват.

Сред тази поредица от примери е уместно да споменем и един български принос – миналата година българското студио Haemimont Games издаде трета част на поредицата Нащърбен съюз. Предишната част също е от края на 90-те и се оказва с „култов“ статус именно в източноевропейски контекст.

Бегло очертаната тук фиксация на вниманието на играчите в бившите соцстрани около заглавия от края на 90-те е закономерна – в тях това е времето на интернет кафенетата, направили за първи път малко по-достъпни видеоигрите в периода на Прехода. Несъмнено всичко това говори за някаква особена носталгия, залозите на която са многоизмерни – от една страна, това е носталгия по обещанието, заложено в самата технология, овъзможностяваща видеоигрите и несъмнено вдъхновила този тласък към онова, за което говореше Северина в предишната част на разговора – т.нар. евровехтории от периода след 2000 г., заглъхнал почти напълно в настоящата ситуация на все по-окрупнена корпоративна форма на производство. Но вероятно тук можем да забележим и по-дълбок корен на тази носталгия – носталгия по утопичните обещания на самия преход в посткомунистическите страни, вещан символно и през самата поява на видеоигрите в тях.

Миглена Николчина: Това е страшно интересно и може да ни отведе към друга тема. За отбелязване е, че през 2008 г. полското студио CD Projekt RED, пожънало огромен международен успех с поредицата Вещерът, създава дъщерна фирма за разпространение, която се казва Good Old Games (GOG), тоест Добрите стари игри. Аз даже мислех, че GOG е създаден по-отдавна, но според Уикипедия годината е тази. По това време първият Вещер току-що е излязъл. Сякаш създателите му още тогава се загрижват за бъдещето на играта си като класика! GOG днес функционира като платформа без вградено управление на дигитални права (DRM) – знак за вярност към утопията за свободно споделяне, която споменаваш. Неотдавна GOG обяви свой нов проект, който са нарекли GOG Preservation Program (Програма за съхраняване на игрите). Един парадоксален ефект на новите технологии е, че продуктите, създадени с тях, се оказват ужасно нетрайни; старите игри бързо стават невъзпроизводими. Новата програма на Добрите стари игри, в духа на собственото си име, си поставя за задача да се бори с бързата смъртност на игрите. В момента има реставрирани над 100 заглавия. Очевидно много играчи ще се зарадват, както се вижда от наблюденията на Еньо, а за изследователите оцеляването на старите игри е абсолютно фундаментално условие. Не виждаме ли в примера с GOG обаче различно отношение не само към утопията, но и към историята?

Еньо Стоянов: Загрижеността около достъпността на стари игри несъмнено е реакция на ситуацията, установила се през последните петнайсетина години на софтуерния пазар. Тя е следствие на това, че дигиталните продукти всъщност вече не са стоки, които можеш да си купиш и да притежаваш (и при нужда, стига да имаш необходимите умения, да приспособиш към нови платформи, операционни системи и пр.), по-скоро корпоративният производител ти издава лиценз за ползване, който може да ти отнеме напълно (нещо, което се случва все по-често), щом сметне, че поддръжката на достъпност на софтуера е вече нерентабилна. Това е по-скоро ефект от липсващи законодателни рамки, които да защитават интересите на потребителите за достъп до софтуер, заплатен от тях.

В момента дори в ЕС се събират подписи за петиция, изискваща правни мерки, които да подсигурят производителите на игри с онлайн достъп да гарантират достъпността на продуктите си след приключване на официалната им поддръжка – в момента корпорациите просто погребват такива игри, за да си спестят разходи по поддръжка на сървърите. Подобни инициативи не са само въпрос на носталгия – тук се намесват въпроси за потребителски права, за интереси от академичен характер и т.н. Носталгичните склонности на посткомунистическите общности от играчи са, струва ми се, по-директно фиксирани около утопичния хоризонт, който самото съществуване на видеоигрите е предвещавало в даден момент и който днешната им индустриална ситуация почти напълно е похабила.

Северина Станкева: Описаното от Еньо показва не само как работи носталгията по добрите стари игри, но и самата добра стара носталгия. Да се каже, че тя е копнеж по миналото, е неточно. Зовът ѝ за завръщане е по-скоро насочен към едно минало бъдеще, т.е. възможността тук е с много по-висок статут от действителността. Реализирането на една или повече възможности неминуемо отдалечава от тази потентна точка на произхода, която предварително е осъдена да бъде пропусната, именно заради порива, който я задвижва. Изглежда, разработчиците на Вещерът се стремят да избегнат това, предпазвайки класическата си игра, преди тя да е станала такава.

Любопитно е, че що се отнася до носталгията по игрите от 90-те, ретротопичните общности от постсоциалистическите държави се оказват с доста голям възрастов диапазон и ако погледнем формално, включват няколко поколения, които, въпреки че донякъде споделят опит в дейността на играенето – компютърни клубове и носители със съмнителен произход, – изпитват носталгия по различни заглавия, макар и пуснати на пазара по същото време. Поколението играчи, което не е и чувало за Герои 3, също помни игри от 90-те, нищо че тогава тепърва се е раждало. Това може да се обясни с обстоятелството, че определени заглавия, най-вече конзолни, стават масово достъпни със закъснение в бившите соцдържави. И в паметта на това следващо поколение игрите на „Дисни“ от края на 90-те например са естествено свързвани с флашигрите или с игрите за браузър от средата на първото десетилетие на ХХI век, макар че, обективно погледнато, между тях има отстояние от около десет години. Херкулес например излиза в същата година като първата част на Ядрена зима, но едва ли ще се намерят много местни играчи, еднакво сантиментални и към двете, или въобще играли и двете. Разбира се, не е за пренебрегване и фактът, че тези игри са ориентирани към различни възрастови публики, но в паметта на западноевропейските общности те все пак могат да се открият една до друга.

Миглена Николчина: Аз пак ще дръпна разговора към съдържанието на игрите. Поредицата Вещерът, при все че действието се разиграва в измислени царства, обитавани от фантастични раси и чудовища, предлага ясни алегории на полската история. Играта е историческа по същността си, ако и да не е фактологически такава. Амбициозната историческа поредица Кредото на убиеца тръгва от словенски роман: тя се гради на фантастичното допускане, че е възможно да се изживее в плът (така, така – виртуална, де) миналото на предците. Поредицата Метро е дистопия, но в нея има исторически наслагвания, които днешните събития ни карат да преосмислим като исторически фатум. Историческа до степен да претендира за учебно помагало е Идното царство. За Диско Елизиум няма пак да говоря. Ако един от белезите на днешната епоха е, както често се твърди, залиняването на чувството за време и история, тези източноевропейски примери показват изненадващото оцеляване на това чувство във видеоигрите. Тук бих включила и стратегиите на българския разработчик Веселин Ханджиев. Искам да кажа накратко, че археологията на утопията – изненадващо или не – отваря хоризонтите на историята.

Северина Станкева: Миглена каза, че няма да говори повече за Диско Елизиум, но аз не мога да се въздържа от един последен пример, който прекрасно илюстрира връзката утопия–история. Когато играта те хване, че избираш реплики с ляв уклон, се появява Реторика, която ти подшушва, че изглежда, си готов да построиш комунизма отново. Нищо че не се е получавало преди – любовта също не ти се е получавала досега, но значи ли това, че трябва да се откажеш от нея? И въобще, продължава Реторика, провалът е в сърцето на комунизма, ти трябва да го построиш отново именно защото е невъзможно. Ти можеш да се превърнеш в Последния Комунист, който еднолично ще износи на раменете си работническата класа и ще осъществи мечтите ѝ. Ако играчът на това място избере буквално да запретне ръкави и да започне да строи комунизма, Реторика се провиква да влязат фургоните и отрядите за разстрел. Ако играчът каже, че не е искал нищо такова да се случи, отговорът е: вече е твърде късно. Не можеш да направиш омлет, без да счупиш няколко милиона яйца. 

Миглена Николчина: Трябва да оценим тази ирония на фона на многократните преки заявления на Курвиц, че е ленинец. Аз не съм стигала до яйцата и въобще не изкарах нито една от четирите политически линии докрай, винаги си правех миш-маш от четирите. Както и – друг проблем на прекалено неигровото ми играене – моето ченге и в трите ми превъртания домисляше мъчително дългата и с множество негативни снижения на способностите му „мисъл“ от мисловния шкаф, наречена „Пустата земя на реалността“ (Waste Land – препратка към Елиът?), накратко, ставаше заклет въздържател. Но не вярвам да има вариант, при който да избегнеш многопластовата ирония, включително политическа – иронията пропива всеки компонент на играта, предметите, дрехите на ченгето, имената, които може да си даде. Например обличането на възможно най-скучния на вид „междуостровен панталон“ (така, предполагам, трябва да се преведе interisolary trousers – светът на Диско Елизиум е островен архипелаг) повишава шанса ти да домислиш „Царството на съвестта“, което е линията на Моралинтерна, и е нужно за успеха на бизнес плана, който предлагаш на светлоогъващия мегабогаташ. Този панталон, така да се каже, олицетворява брака на морализма и монетизацията. Тъй като „междуостровна“ е наречена и валутата в играта, панталонът съответно придобива значение на валутна конвертируемост…

Иронията е съществен аспект и на поредицата Вещерът, но по отношение на днешните готови идеи тази ирония значително намалява с всяка следваща част. От друга страна, CD Projekt RED създават и този съвършено различен (и струва ми се, недостатъчно критически оценен) шедьовър – дистопията Киберпънк. Мегаполисът, където се развива действието, би могъл да бъде на много места, той е изграден с плътност, която засега е ненадмината, но при цялата му киберфутуристичност не си го представям в Полша или въобще в Европа. Този град е едно друго време, но той е и едно друго място, той е не-тук, другаде.

Ще припомня, че през 60-те години в България кипи голям дебат, свързан с литературата – дали голямата литература трябва да е национално или дори регионално локална („котловинна“ е тогавашният термин), или универсална. Цветан Стоянов се включва в този дебат с едно прекрасно кратко есе „По повод духа на мястото“, където в крайна сметка казва, че… ами зависи3. С Вещерът и Киберпънк CD Projekt RED показват, че могат да правят и едното, и другото – и двата пъти успешно достигайки до големи публики. Успехът обаче има цена и тепърва ще видим дали тази цена няма да струва уникалността на полското студио.

1 Вж. (Анти)утопично въображение и трансхуманизация във видеоигрите. – Във: Видеоигрите. Опасната Муза. София: Версус, 2023, с. 382–404.

2 Susan Buck-Morss. Dreamworld and Catastrophe: The Passing of Mass Utopia in East and West. Cambridge, Mass: MIT Press, 2000.

3 Цветан Стоянов. Културата като общение. Т. 1. София: Български писател, 1988, с. 188–193.


В рубриката „Игромислие“ публикуваме разговори, в които се срещат, съпоставят и противопоставят различни гледни точки към многоизмерния, многожанров феномен на видеоигрите – не толкова като електронен спорт, колкото като нов синтез на изкуствата и като ново поле на общуване и социалност. 

Build Write-Audit-Publish pattern with Apache Iceberg branching and AWS Glue Data Quality

Post Syndicated from Tomohiro Tanaka original https://aws.amazon.com/blogs/big-data/build-write-audit-publish-pattern-with-apache-iceberg-branching-and-aws-glue-data-quality/

Given the importance of data in the world today, organizations face the dual challenges of managing large-scale, continuously incoming data while vetting its quality and reliability. The importance of publishing only high-quality data can’t be overstated—it’s the foundation for accurate analytics, reliable machine learning (ML) models, and sound decision-making. Equally crucial is the ability to segregate and audit problematic data, not just for maintaining data integrity, but also for regulatory compliance, error analysis, and potential data recovery.

AWS Glue is a serverless data integration service that you can use to effectively monitor and manage data quality through AWS Glue Data Quality. Today, many customers build data quality validation pipelines using its Data Quality Definition Language (DQDL) because with static rules, dynamic rules, and anomaly detection capability, it’s fairly straightforward.

Apache Iceberg is an open table format that brings atomicity, consistency, isolation, and durability (ACID) transactions to data lakes, streamlining data management. One of its key features is the ability to manage data using branches. Each branch has its own lifecycle, allowing for flexible and efficient data management strategies.

This post explores robust strategies for maintaining data quality when ingesting data into Apache Iceberg tables using AWS Glue Data Quality and Iceberg branches. We discuss two common strategies to verify the quality of published data. We dive deep into the Write-Audit-Publish (WAP) pattern, demonstrating how it works with Apache Iceberg.

Strategy for managing data quality

When it comes to vetting data quality in streaming environments, two prominent strategies emerge: the dead-letter queue (DLQ) approach and the WAP pattern. Each strategy offers unique advantages and considerations.

  • The DLQ approach – Segregate problematic entries from high-quality data so that only clean data makes it into your primary dataset.
  • The WAP pattern – Using branches, segregate problematic entries from high-quality data so that only clean data is published in the main branch.

The DLQ approach

The DLQ strategy focuses on efficiently segregating high-quality data from problematic entries so that only clean data makes it into your primary dataset. Here’s how it works:

  1. As data streams in, it passes through a validation process
  2. Valid data is written directly to the table referred by downstream users
  3. Invalid or problematic data is redirected to a separate DLQ for later analysis and potential recovery

The following screenshot shows this flow.

bdb4341_0_1_dlq

Here are its advantages:

  • Simplicity – The DLQ approach is straightforward to implement, especially when there is only one writer
  • Low latency – Valid data is instantly available in the main branch for downstream consumers
  • Separate processing for invalid data – You can have dedicated jobs to process the DLQ for auditing and recovery purposes.

The DLQ strategy can present significant challenges in complex data environments. With multiple concurrent writers to the same Iceberg table, maintaining consistent DLQ implementation becomes difficult. This issue is compounded when different engines (for example, Spark, Trino, or Python) are used for writes because the DLQ logic may vary between them, making system maintenance more complex. Additionally, storing invalid data separately can lead to management overhead.

Additionally, for low-latency requirements, the processing validation step may introduce additional delays. This creates a challenge in balancing data quality with speed of delivery.

To solve those challenges in a reasonable way, we introduce the WAP pattern in the next section.

The WAP pattern

The WAP pattern implements a three-stage process:

  1. Write – Data is initially written to a staging branch
  2. Audit – Quality checks are performed on the staging branch
  3. Publish – Validated data is merged into the main branch for consumption

The following screenshot shows this flow.

bdb4341_0_2_wap

Here are its advantages:

  • Flexible data latency management – In the WAP pattern, the raw data is ingested to the staging branch without data validation, and then the high-quality data is ingested to the main branch with data validation. With this characteristic, there’s flexibility to achieve urgent, low-latency data handling on the staging branch and achieve high-quality data handling on the main branch.
  • Unified data quality management – The WAP pattern separates the audit and publish logic from the writer applications. It provides a unified approach to quality management, even with multiple writers or varying data sources. The audit phase can be customized and evolved without affecting the write or publish stages.

The primary challenge of the WAP pattern is the increased latency it introduces. The multistep process inevitably delays data availability for downstream consumers, which may be problematic for near real-time use cases. Furthermore, implementing this pattern requires more sophisticated orchestration compared to the DLQ approach, potentially increasing development time and complexity.

How the WAP pattern works with Iceberg

The following sections explore how the WAP pattern works with Iceberg.

Iceberg’s branching feature

Iceberg offers a branching feature for data lifecycle management, which is particularly useful for efficiently implementing the WAP pattern. The metadata of an Iceberg table stores a history of snapshots. These snapshots, created for each change to the table, are fundamental to concurrent access control and table versioning. Branches are independent histories of snapshots branched from another branch, and each branch can be referred to and updated separately.

When a table is created, it starts with only a main branch, and all transactions are initially written to it. You can create additional branches, such as an audit branch, and configure engines to write to them. Changes on one branch can be fast-forwarded to another branch using Spark’s fast_forward procedure, as shown in the following screenshot.

bdb4341_0_3_iceberg-branch

How to manage Iceberg branches

In this section, we cover the essential operations for managing Iceberg branches using SparkSQL. We’ll demonstrate how to use the branches, specifically, to create a new branch, write to and read from a specific branch, and set a default branch for a Spark session. These operations form the foundation for implementing the WAP pattern with Iceberg.

To create a branch, run the following SparkSQL query:

ALTER TABLE glue_catalog.db.tbl CREATE BRANCH audit

To specify a branch to be updated, use the glue_catalog.<database_name>.<table_name>.branch_<branch_name> syntax:

INSERT INTO glue_catalog.db.tbl.branch_audit VALUES (1, 'a'), (2, 'b');

To specify a branch to be queried, use the glue_catalog.<database_name>.<table_name>.branch_<branch_name> syntax:

SELECT * FROM glue_catalog.db.tbl.branch_audit;

To specify a branch for the entire Spark session scope, set the branch name to the Spark parameter spark.wap.branch. After this parameter is set, all queries will refer to the specified branch without explicit expression:

SET spark.wap.branch = audit

-- audit branch will be updated
INSERT INTO glue_catalog.db.tbl VALUES (3, 'c');

How to implement the WAP pattern with Iceberg branches

Using Iceberg’s branching feature, we can efficiently implement the WAP pattern with a single Iceberg table. Additionally, Iceberg characteristics such as ACID transactions and schema evolution are useful for handling multiple concurrent writers and varying data.

  1. Write – The data ingestion process switches branch from main and it commits updates to the audit branch, instead of the main branch. At this point, these updates aren’t accessible to downstream users who can only access the main branch.
  2. Audit – The audit process runs data quality checks on the data in the audit branch. It specifies which data is clean and ready to be provided.
  3. Publish – The audit process publishes validated data to the main branch with the Iceberg fast_forward procedure, making it available for downstream users.

This flow is shown in the following screenshot.

bdb4341_0_4_wap-w-iceberg-branch

By implementing the WAP pattern with Iceberg, we can obtain several advantages:

  • Simplicity – Iceberg branches can express multiple states of a table, such as audit and main, within one table. We can have unified data management even when handling multiple data contexts separately and uniformly.
  • Handling concurrent writers – Iceberg tables are ACID compliant, so consistent reads and writes are guaranteed even when multiple reader and writer processes run concurrently.
  • Schema evolution – If there are issues with the data being ingested, its schema may differ from the table definition. Spark supports dynamic schema merging for Iceberg tables. Iceberg tables can flexibly evolve their schema to write data with inconsistent schemas. By configuring the following parameters, when schema changes occur, new columns from the source are added to the target table with NULL values for existing rows. Columns present only in the target have their values set to NULL for new insertions or left unchanged during updates.
SET `spark.sql.iceberg.check-ordering` = false

ALTER TABLE glue_catalog.db.tbl SET TBLPROPERTIES (
    'write.spark.accept-any-schema'='true'
)
df.writeTo("glue_catalog.db.tbl").option("merge-schema","true").append()

As an intermediate wrap-up, the WAP pattern offers a robust approach to managing the balance between data quality and latency. With Iceberg branches, we can implement WAP pattern simply on single Iceberg table with handling concurrent writers and schema evolution.

Example use case

Suppose that a home monitoring system tracks room temperature and humidity. The system captures and sends the data to an Iceberg based data lake built on top of Amazon Simple Storage Service (Amazon S3). The data is visualized using matplotlib for interactive data analysis. For the system, issues such as device malfunctions or network problems can lead to partial or erroneous data being written, resulting in incorrect insights. In many cases, these issues are only detected after the data is sent to the data lake. Additionally, the correctness of such data is generally complicated.

To address these issues, the WAP pattern using Iceberg branches is applied for the system in this post. Through this approach, the incoming room data to the data lake is evaluated for quality before being visualized, and you make sure that only qualified room data is used for further data analysis. With the WAP pattern using the branches, you can achieve effective data management and promote data quality in downstream processes. The solution is demonstrated using AWS Glue Studio notebook, which is a managed Jupyter Notebook for interacting with Apache Spark.

Prerequisites

The following prerequisites are necessary for this use case:

Set up resources with AWS CloudFormation

First, you use a provided AWS CloudFormation template to set up resources to build Iceberg environments. The template creates the following resources:

  • An S3 bucket for metadata and data files of an Iceberg table
  • A database for the Iceberg table in AWS Glue Data Catalog
  • An AWS Identity and Access Management (IAM) role for an AWS Glue job

Complete the following steps to deploy the resources.

  1. Choose Launch stack.

Launch Button

  1. For the Parameters, IcebergDatabaseName is set by default. You can also change the default value. Then, choose Next.
  2. Choose Next.
  3. Choose I acknowledge that AWS CloudFormation might create IAM resources with custom names.
  4. Choose Submit.
  5. After the stack creation is complete, check the Outputs The resource values are used in the following sections.

Next, configure the Iceberg JAR files to the session to use the Iceberg branch feature. Complete the following steps:

  1. Select the following JAR files from the Iceberg releases page and download these JAR files on your local machine:
    1. 1.6.1 Spark 3.3_with Scala 2.12 runtime Jar
    2. 1.6.1 aws-bundle Jar
  2. Open the Amazon S3 console and select the S3 bucket you created through the CloudFormation stack. The S3 bucket name can be found on the CloudFormation Outputs tab.
  3. Choose Create folder and create the jars path in the S3 bucket.
  4. Upload the two downloaded JAR files to s3://<IcebergS3Bucket>/jars/ from the S3 console.

Upload a Jupyter Notebook on AWS Glue Studio

After launching the CloudFormation stack, you create an AWS Glue Studio notebook to use Iceberg with AWS Glue. Complete the following steps.

  1. Download wap.ipynb.
  2. Open AWS Glue Studio console.
  3. Under Create job, select Notebook.
  4. Select Upload Notebook, choose Choose file, and upload the notebook you downloaded.
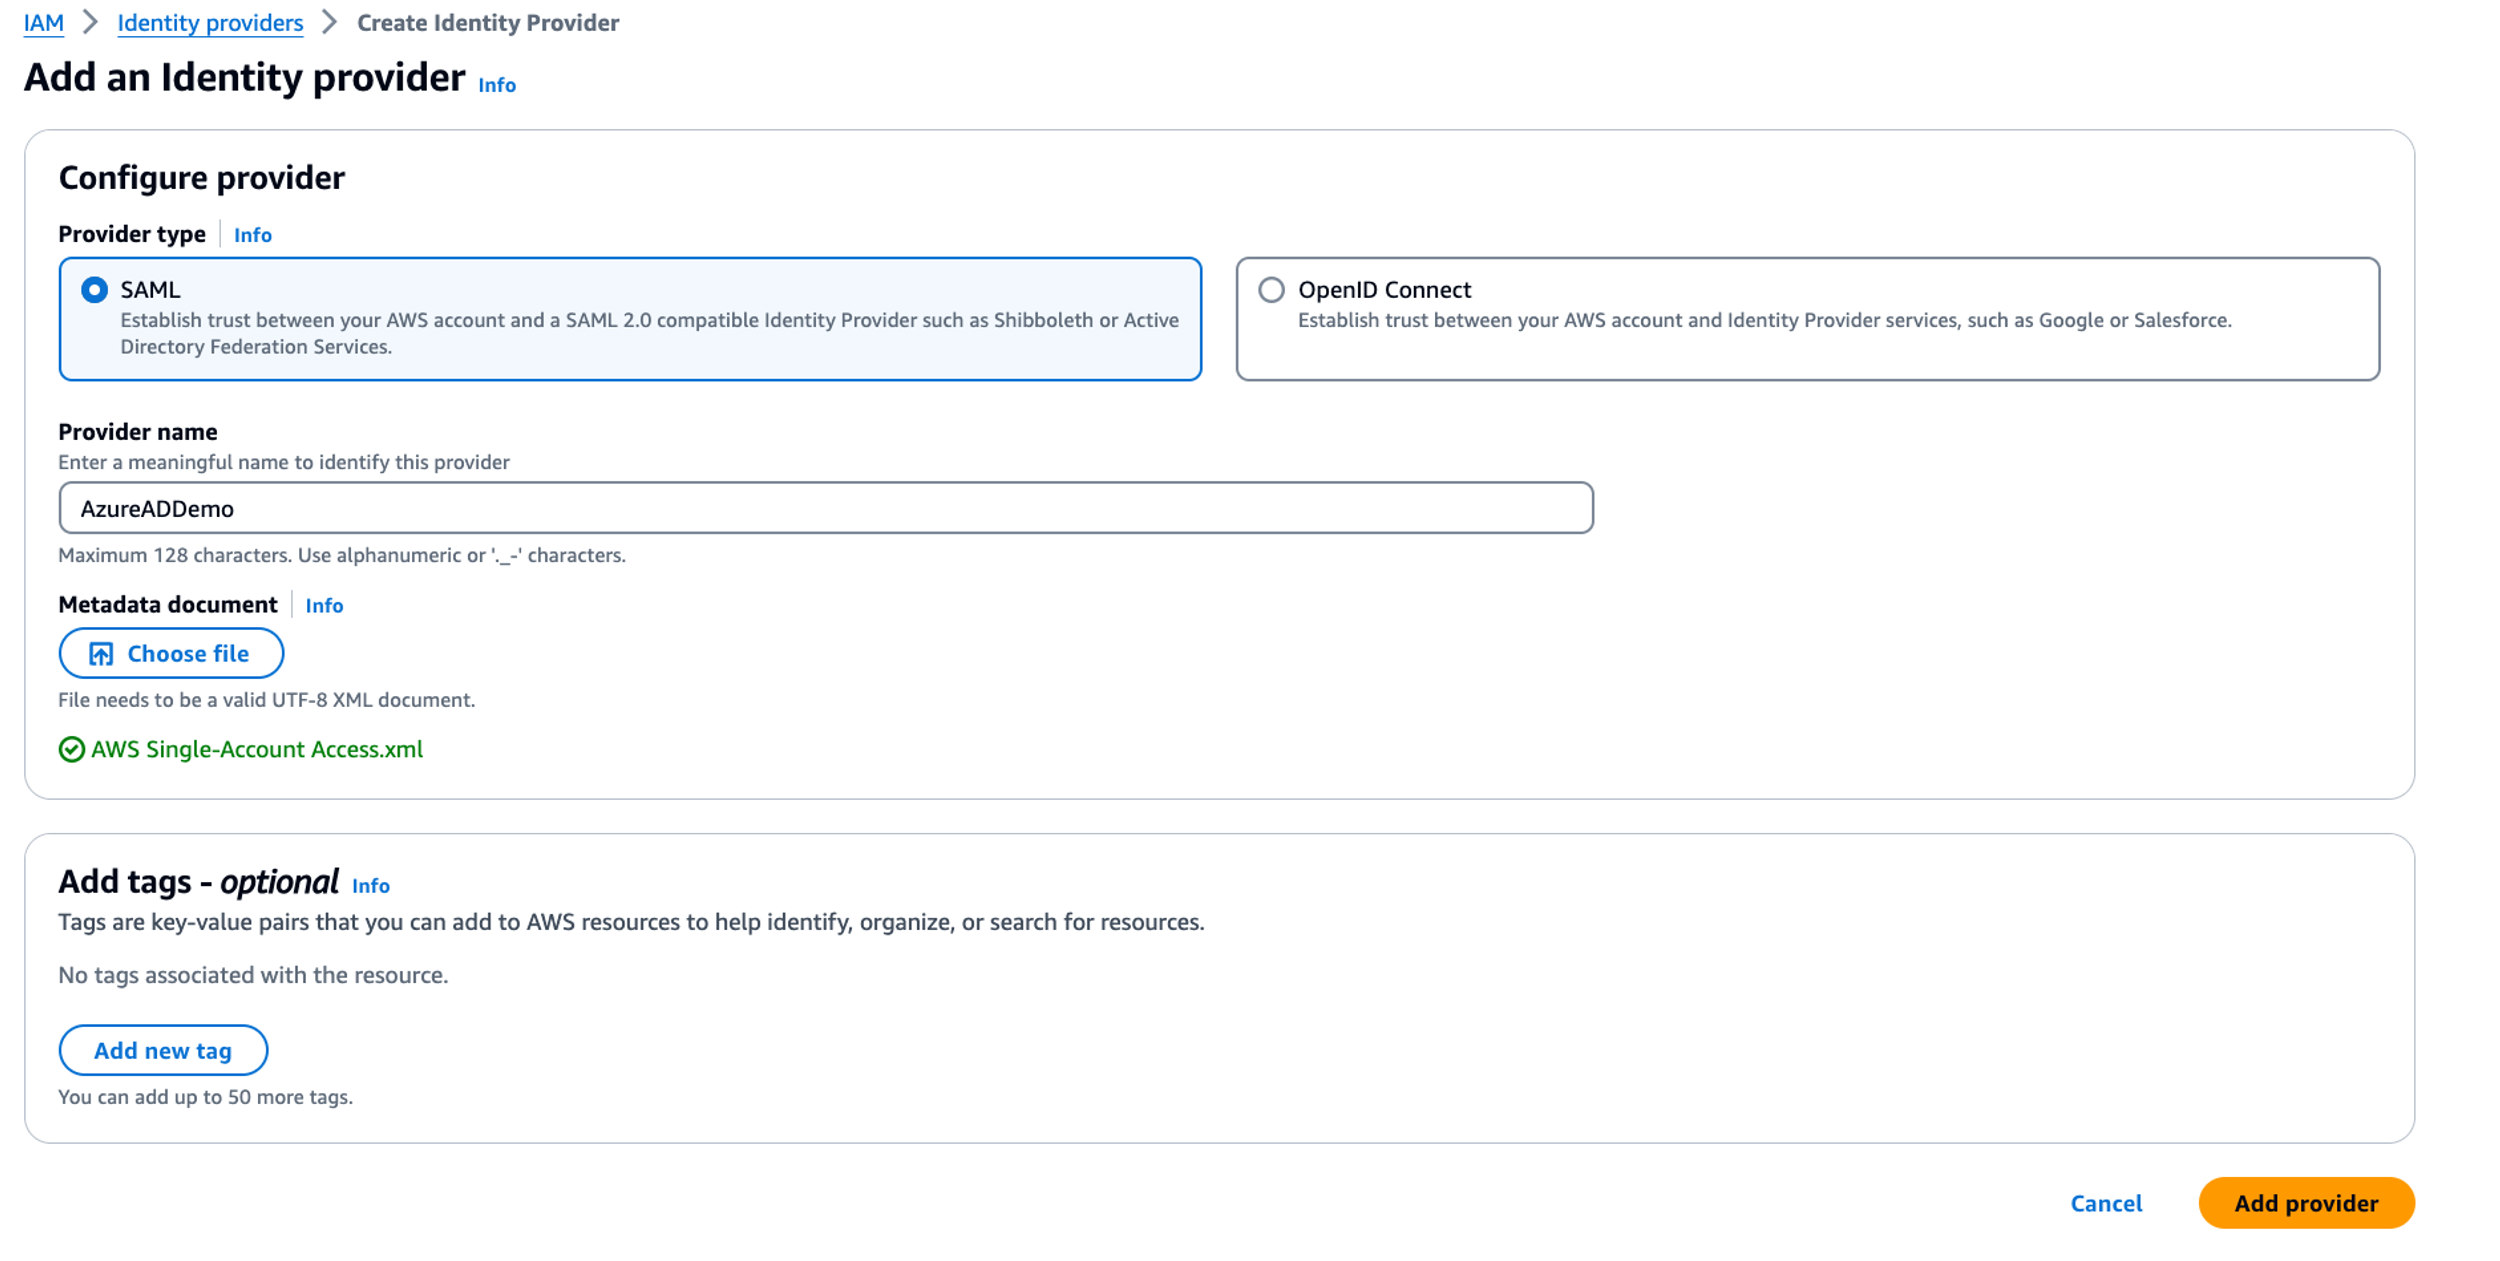
  5. Select the IAM role name, such as IcebergWAPGlueJobRole, that you created through the CloudFormation stack. Then, choose Create notebook.
  6. For Job name at the left top of the page, enter iceberg_wap.
  7. Choose Save.

Configure Iceberg branches

Start by creating an Iceberg table that contains a room temperature and humidity dataset. After creating the Iceberg table, create branches that are used for performing the WAP practice. Complete the following steps:

  1. On the Jupyter Notebook that you created in Upload a Jupyter Notebook on AWS Glue Studio, run the following cell to use Iceberg with Glue. %additional_python_modules pandas==2.2 is used to visualize the temperature and humidity data in the notebook with pandas. Before running the cell, replace <IcebergS3Bucket> with the S3 bucket name where you uploaded the Iceberg JAR files.

bdb4341_1_session-config

  1. Initialize the SparkSession by running the following cell. The first three settings, starting with spark.sql, are required to use Iceberg with Glue. The default catalog name is set to glue_catalog using spark.sql.defaultCatalog. The configuration spark.sql.execution.arrow.pyspark.enabled is set to true and is used for data visualization with pandas.

bdb4341_2_sparksession-init

  1. After the session is created (the notification Session <Session Id> has been created. will be displayed in the notebook), run the following commands to copy the temperature and humidity dataset to the S3 bucket you created through the CloudFormation stack. Before running the cell, replace <IcebergS3Bucket> with the name of the S3 bucket for Iceberg, which you can find on the CloudFormation Outputs tab.
!aws s3 cp s3://aws-blogs-artifacts-public/artifacts/BDB-4341/data/part-00000-fa08487a-43c2-4398-bae9-9cb912f8843c-c000.snappy.parquet s3://<IcebergS3Bucket>/src-data/current/ 
!aws s3 cp s3://aws-blogs-artifacts-public/artifacts/BDB-4341/data/new-part-00000-e8a06ab0-f33d-4b3b-bd0a-f04d366f067e-c000.snappy.parquet s3://<IcebergS3Bucket>/src-data/new/
  1. Configure the data source bucket name and path (DATA_SRC), Iceberg data warehouse path (ICEBERG_LOC), and database and table names for an Iceberg table (DB_TBL). Replace <IcebergS3Bucket> with the S3 bucket from the CloudFormation Outputs tab.
  2. Read the dataset and create the Iceberg table with the dataset using the Create Table As Select (CTAS) query.

bdb4341_3_ctas

  1. Run the following code to display the temperature and humidity data for each room in the Iceberg table. Pandas and matplotlib are used to visualize the data for each room. The data from 10:05 to 10:30 is displayed in the notebook, as shown in the following screenshot, with each room showing approximately 25°C for temperature (displayed as the blue line) and 52% for humidity (displayed as the orange line).
import matplotlib.pyplot as plt
import pandas as pd

CONF = [
    {'room_type': 'myroom', 'cols':['current_temperature', 'current_humidity']},
    {'room_type': 'living', 'cols':['current_temperature', 'current_humidity']},
    {'room_type': 'kitchen', 'cols':['current_temperature', 'current_humidity']}
]

fig, axes = plt.subplots(nrows=3, ncols=1, sharex=True, sharey=True)
for ax, conf in zip(axes.ravel(), CONF):
    df_room = spark.sql(f"""
        SELECT current_time, current_temperature, current_humidity, room_type
        FROM {DB_TBL} WHERE room_type = '{conf['room_type']}'
        ORDER BY current_time ASC
        """)
    pdf = df_room.toPandas()
    pdf.set_index(pdf['current_time'], inplace=True)
    plt.xlabel('time')
    plt.ylabel('temperature/humidity')
    plt.ylim(10, 60)
    plt.yticks([tick for tick in range(10, 60, 10)])
    pdf[conf['cols']].plot.line(ax=ax, grid=True, figsize=(8, 6), title=conf['room_type'], legend=False, marker=".", markersize=2, linewidth=0)

plt.legend(['temperature', 'humidity'], loc='center', bbox_to_anchor=(0, 1, 1, 5.5), ncol=2)

%matplot plt

bdb4341_4_vis-1

  1. You create Iceberg branches by running the following queries before writing data into the Iceberg table. You can create an Iceberg branch by the ALTER TABLE db.table CREATE BRANCH <branch_name> query.
ALTER TABLE iceberg_wap_db.room_data CREATE BRANCH stg
ALTER TABLE iceberg_wap_db.room_data CREATE BRANCH audit

Now, you’re ready to build the WAP pattern with Iceberg.

Build WAP pattern with Iceberg

Use the Iceberg branches created earlier to implement the WAP pattern. You start writing the newly incoming temperature and humidity data including erroneous values to the stg branch in the Iceberg table.

Write phase: Write incoming data into the Iceberg stg branch

To write the incoming data into the stg branch in the Iceberg table, complete the following steps:

  1. Run the following cell and write the data into Iceberg table.

bdb4341_5_write

  1. After the records are written, run the following code to visualize the current temperature and humidity data in the stg On the following screenshot, notice that new data was added after 10:30. The output shows incorrect readings, such as around 100°C for temperature between 10:35 and 10:52 in the living room.
fig, axes = plt.subplots(nrows=3, ncols=1, sharex=True, sharey=True)
for ax, conf in zip(axes.ravel(), CONF):
    df_room_stg = spark.sql(f"""
        SELECT current_time, current_temperature, current_humidity, room_type
        FROM {DB_TBL}.branch_stg WHERE room_type = '{conf['room_type']}'
        ORDER BY current_time ASC
        """)
    pdf = df_room_stg.toPandas()
    pdf.set_index(pdf['current_time'], inplace=True)
    plt.xlabel('time')
    plt.ylabel('temperature/humidity')
    plt.ylim(10, 110)
    plt.yticks([tick for tick in range(10, 110, 30)])
    pdf[conf['cols']].plot.line(ax=ax, grid=True, figsize=(8, 6), title=conf['room_type'], legend=False, marker=".", markersize=2, linewidth=0)

plt.legend(['temperature', 'humidity'], loc='center', bbox_to_anchor=(0, 1, 1, 5.5), ncol=2)

%matplot plt

bdb4341_6_vis-2

The new temperature data including erroneous records was written to the stg branch. This data isn’t visible to the downstream side because it hasn’t been published to the main branch. Next, you evaluate the data quality in the stg branch.

Audit phase: Evaluate the data quality in the stg branch

In this phase, you evaluate the quality of the temperature and humidity data in the stg branch using AWS Glue Data Quality. Then, the data that doesn’t meet the criteria is filtered out based on the data quality rules, and the qualified data is used to update the latest snapshot in the audit branch. Start with the data quality evaluation:

  1. Run the following code to evaluate the current data quality using AWS Glue Data Quality. The evaluation rule is defined in DQ_RULESET, where the normal temperature range is set between −10 and 50°C based on the device specifications. Any values out of this range are considered erroneous in this scenario.
from awsglue.context import GlueContext
from awsglue.transforms import SelectFromCollection
from awsglue.dynamicframe import DynamicFrame
from awsgluedq.transforms import EvaluateDataQuality
DQ_RULESET = """Rules = [ ColumnValues "current_temperature" between -10 and 50 ]"""


dyf = DynamicFrame.fromDF(
    dataframe=spark.sql(f"SELECT * FROM {DB_TBL}.branch_stg"),
    glue_ctx=GlueContext(spark.sparkContext),
    name='dyf')

dyfc_eval_dq = EvaluateDataQuality().process_rows(
    frame=dyf,
    ruleset=DQ_RULESET,
    publishing_options={
        "dataQualityEvaluationContext": "dyfc_eval_dq",
        "enableDataQualityCloudWatchMetrics": False,
        "enableDataQualityResultsPublishing": False,
    },
    additional_options={"performanceTuning.caching": "CACHE_NOTHING"},
)

# Show DQ results
dyfc_rule_outcomes = SelectFromCollection.apply(
    dfc=dyfc_eval_dq,
    key="ruleOutcomes")
dyfc_rule_outcomes.toDF().select('Outcome', 'FailureReason').show(truncate=False)
  1. The output shows the result of the evaluation. It displays Failed because some temperature data, such as 105°C, is out of the normal temperature range of −10 to 50°C.
+-------+------------------------------------------------------+
|Outcome|FailureReason                                         |
+-------+------------------------------------------------------+
|Failed |Value: 105.0 does not meet the constraint requirement!|
+-------+------------------------------------------------------+
  1. After the evaluation, filter out the incorrect temperature data in the stg branch, then update the latest snapshot in the audit branch with the valid temperature data.

bdb4341_7_write-to-audit

Through the data quality evaluation, the audit branch in the Iceberg table now contains the valid data, which is ready for downstream use.

Publish phase: Publish the valid data to the downstream side

To publish the valid data in the audit branch to main, complete the following steps:

  1. Run the fast_forward Iceberg procedure to publish the valid data in the audit branch to the downstream side.

bdb4341_8_publish

  1. After the procedure is complete, review the published data by querying the main branch in the Iceberg table to simulate the query from the downstream side.
fig, axes = plt.subplots(nrows=3, ncols=1, sharex=True, sharey=True)
for ax, conf in zip(axes.ravel(), CONF):
    df_room_main = spark.sql(f"""
        SELECT current_time, current_temperature, current_humidity, room_type
        FROM {DB_TBL} WHERE room_type = '{conf['room_type']}'
        ORDER BY current_time ASC
        """)
    pdf = df_room_main.toPandas()
    pdf.set_index(pdf['current_time'], inplace=True)
    plt.xlabel('time')
    plt.ylabel('temperature/humidity')
    plt.ylim(10, 60)
    plt.yticks([tick for tick in range(10, 60, 10)])
    pdf[conf['cols']].plot.line(ax=ax, grid=True, figsize=(8, 6), title=conf['room_type'], legend=False, marker=".", markersize=2, linewidth=0)

plt.legend(['temperature', 'humidity'], loc='center', bbox_to_anchor=(0, 1, 1, 5.5), ncol=2)

%matplot plt

The query result shows only the valid temperature and humidity data that has passed the data quality evaluation.

bdb4341_9_vis-3

In this scenario, you successfully managed data quality by applying the WAP pattern with Iceberg branches. The room temperature and humidity data, including any erroneous records, was first written to the staging branch for quality evaluation. This approach prevented erroneous data from being visualized and leading to incorrect insights. After the data was validated by AWS Glue Data Quality, only valid data was published to the main branch and visualized in the notebook. Using the WAP pattern with Iceberg branches, you can make sure that only validated data is passed to the downstream side for further analysis.

Clean up resources

To clean up the resources, complete the following steps:

  1. On the Amazon S3 console, select the S3 bucket aws-glue-assets-<ACCOUNT_ID>-<REGION> where the Notebook file (iceberg_wap.ipynb) is stored. Delete the Notebook file located in the notebook path.
  2. Select the S3 bucket you created through the CloudFormation template. You can obtain the bucket name from IcebergS3Bucket key on the CloudFormation Outputs tab. After selecting the bucket, choose Empty to delete all objects.
  3. After you confirm the bucket is empty, delete the CloudFormation stack iceberg-wap-baseline-resources.

Conclusion

In this post, we explored common strategies for maintaining data quality when ingesting data into Apache Iceberg tables. The step-by-step instructions demonstrated how to implement the WAP pattern with Iceberg branches. For use cases requiring data quality validation, the WAP pattern provides the flexibility to manage data latency even with concurrent writer applications without impacting downstream applications.


About the Authors

Tomohiro Tanaka is a Senior Cloud Support Engineer at Amazon Web Services. He’s passionate about helping customers use Apache Iceberg for their data lakes on AWS. In his free time, he enjoys a coffee break with his colleagues and making coffee at home.

Sotaro Hikita is a Solutions Architect. He supports customers in a wide range of industries, especially the financial industry, to build better solutions. He is particularly passionate about big data technologies and open source software.

Noritaka Sekiyama is a Principal Big Data Architect on the AWS Glue team. He works based in Tokyo, Japan. He is responsible for building software artifacts to help customers. In his spare time, he enjoys cycling with his road bike.

Implement historical record lookup and Slowly Changing Dimensions Type-2 using Apache Iceberg

Post Syndicated from Tomohiro Tanaka original https://aws.amazon.com/blogs/big-data/implement-historical-record-lookup-and-slowly-changing-dimensions-type-2-using-apache-iceberg/

In today’s data-driven world, tracking and analyzing changes over time has become essential. As organizations process vast amounts of data, maintaining an accurate historical record is crucial. History management in data systems is fundamental for compliance, business intelligence, data quality, and time-based analysis. It enables organizations to maintain audit trails, perform trend analysis, identify data quality issues, and conduct point-in-time reporting. When combined with Change Data Capture (CDC), which identifies and captures database changes, history management becomes even more potent.

Common use cases for historical record management in CDC scenarios span various domains. In customer relationship management, it tracks changes in customer information over time. Financial systems use it for maintaining accurate transaction and balance histories. Inventory management benefits from historical data for analyzing sales patterns and optimizing stock levels. HR systems use it to track employee information changes. In fraud detection, historical data helps identify anomalous patterns in transactions or user behaviors.

This post will explore how to implement these functionalities using Apache Iceberg, focusing on Slowly Changing Dimensions (SCD) Type-2. This method creates new records for each data change while preserving old ones, thus maintaining a full history. By the end, you’ll understand how to use Apache Iceberg to manage historical records effectively on a typical CDC architecture.

Historical record lookup

How can we retrieve the history of given records? This is a fundamental question in data management, especially when dealing with systems that need to track changes over time. Let’s explore this concept with a practical example.

Consider a product (Heater) in an ecommerce database:

product_id product_name price
00001 Heater 250

Now, let’s say we update the price of this product from 250 to 500. After some time, we want to retrieve the price history of this heater. In a traditional database setup, this task could be challenging, especially if we haven’t explicitly designed our system to track historical changes.

This is where the concept of historical record lookup becomes crucial. We need a system that not only stores the current state of our data but also maintains a log of all changes made to each record over time. This allows us to answer questions like:

  • What was the price of the heater at a specific point in time?
  • How many times has the price changed, and when did these changes occur?
  • What was the price trend of the heater over the past year?

Implementing such a system can be complex, requiring careful consideration of data storage, retrieval mechanisms, and query optimization. This is where Apache Iceberg comes into play, offering a feature known as the change log view.

The change log view in Apache Iceberg provides a view of all changes made to a table over time, making it straightforward to query and analyze the history of any record. With change log view, we can easily track insertions, updates, and deletions, giving us a complete picture of how our data has evolved.

For our heater example, Iceberg’s change log view would allow us to effortlessly retrieve a timeline of all price changes, complete with timestamps and other relevant metadata, as shown in the following table.

product_id product_name price _change_type
00001 Heater 250 INSERT
00001 Heater 250 UPDATE_BEFORE
00001 Heater 500 UPDATE_AFTER

This capability not only simplifies historical analysis but also opens possibilities for advanced time-based analytics, auditing, and data governance.

Historical table lookup with SCD Type-2

SCD Type-2 is a key concept in data warehousing and historical data management and is particularly relevant to Change Data Capture (CDC) scenarios. SCD Type-2 creates new rows for changed data instead of overwriting existing records, allowing for comprehensive tracking of changes over time.

SCD Type-2 requires additional fields such as effective_start_date, effective_end_date, and current_flag to manage historical records. This approach has been widely used in data warehouses to track changes in various dimensions such as customer information, product details, and employee data. In the example of the previous section, here’s what the SCD Type-2 looks like assuming the update operation is performed on December 11, 2024.

product_id product_name price effective_start_date effective_end_date current_flag
00001 Heater 250 2024-12-10 2024-12-11 FALSE
00001 Heater 500 2024-12-11 NULL TRUE

SCD Type-2 is particularly valuable in CDC use cases, where capturing all data changes over time is crucial. It enables point-in-time analysis, provides detailed audit trails, aids in data quality management, and helps meet compliance requirements by preserving historical data.

In traditional implementations on data warehouses, SCD Type-2 requires its specific handling in all INSERT, UPDATE, and DELETE operations that affect those additional columns. For example, to update the price of the product, you need to run the following query.

UPDATE product SET effective_end_date = '2024-12-11', current_flag = false
WHERE product_id = '00001' AND current_flag = true;

INSERT INTO product (product_id, product_name, price, effective_start_date, effective_end_date, current_flag)
VALUES ('00001', 'Heater', 500, '2024-12-11', NULL, true);

For modern data lakes, we propose a new approach to implement SCD Type-2. With Iceberg, you can create a dedicated view of SCD Type-2 on top of the change log view, eliminating the need to implement specific handling to make changes on SCD Type-2 tables. With this approach, you can keep managing Iceberg tables without complexity considering SCD Type-2 specification. Anytime when you need SCD Type-2 snapshot of your Iceberg table, you can create the corresponding representation. This approach combines the power of Iceberg’s efficient data management with the historical tracking capabilities of SCD Type-2. By using the change log view, Iceberg can dynamically generate the SCD Type-2 structure without the overhead of maintaining additional tables or manually managing effective dates and flags.

This streamlined method not only makes the implementation of SCD Type-2 more straightforward, but also offers improved performance and scalability for handling large volumes of historical data in CDC scenarios. It represents a significant advancement in historical data management, merging traditional data warehousing concepts with modern big data capabilities.

As we delve deeper into Iceberg’s features, we’ll explore how this approach can be implemented, showcasing the efficiency and flexibility it brings to historical data analysis and CDC processes.

Prerequisites

The following prerequisites are required for the use cases:

Set up resources with AWS CloudFormation

Use a provided AWS CloudFormation template to set up resources to build Iceberg environments. The template creates the following resources:

Complete the following steps to deploy the resources.

  1. Choose Launch stack

Launch Button

  1. For the parameters, IcebergDatabaseName is set by default. You can change the default value. Then, choose Next.
  2. Choose Next
  3. Choose I acknowledge that AWS CloudFormation might create IAM resources with custom names.
  4. Choose Submit.
  5. After the stack creation is complete, check the Outputs tab and make a note of the resource values, which are used in the following sections.

Next, configure the Iceberg JAR files to the session to use the Iceberg change log view feature. Complete the following steps.

  1. Select the following JAR files from the Iceberg releases page and download these JAR files on your local machine:
    1. 1.6.1 Spark 3.3_with Scala 2.12 runtime Jar.
    2. 1.6.1 aws-bundle Jar.
  2. Open the Amazon S3 console and select the S3 bucket you created using the CloudFormation stack. The S3 bucket name can be found on the CloudFormation Outputs tab.
  3. Choose Create folder and create the jars path in the S3 bucket.
  4. Upload the two downloaded JAR files on s3://<IcebergS3Bucket>/jars/ from the S3 console.

Upload a Jupyter Notebook on AWS Glue Studio

After launching the CloudFormation stack, create an AWS Glue Studio notebook to use Iceberg with AWS Glue.

  1. Download history.ipynb.
  2. Open AWS Glue Studio console.
  3. Under Create job, select Notebook.
  4. Select Upload Notebook, choose Choose file and upload the Notebook you downloaded.
  5. Select the IAM role name such as IcebergHistoryGlueJobRole that you created using the CloudFormation template. Then, choose Create notebook.

1_upload-notebook

  1. For Job name at the left top of the page, enter iceberg_history.
  2. Choose Save.

Create an Iceberg table

To create an Iceberg table using a product dataset, complete the following steps.

  1. On the Jupyter Notebook that you created in Upload a Jupyter Notebook on AWS Glue Studio, run the following cell to use Iceberg with AWS Glue. Before running the cell, replace <IcebergS3Bucket> with the S3 bucket name where you uploaded the Iceberg JAR files.

2_session-config

  1. Initialize the SparkSession with Iceberg settings.

3_ss-init

  1. Configure database and table names for an Iceberg table (DB_TBL) and data warehouse path (ICEBERG_LOC). Replace <IcebergS3Bucket> with the S3 bucket from the CloudFormation Outputs tab.
  2. Run the following code to create the Iceberg table using the Spark DataFrame based on the product dataset.
from pyspark.sql import Row
import time
ut = time.time()
product = [
    {'product_id': '00001', 'product_name': 'Heater', 'price': 250, 'category': 'Electronics', 'updated_at': ut},
    {'product_id': '00002', 'product_name': 'Thermostat', 'price': 400, 'category': 'Electronics', 'updated_at': ut},
    {'product_id': '00003', 'product_name': 'Television', 'price': 600, 'category': 'Electronics', 'updated_at': ut},
    {'product_id': '00004', 'product_name': 'Blender', 'price': 100, 'category': 'Electronics', 'updated_at': ut},
    {'product_id': '00005', 'product_name': 'USB charger', 'price': 50, 'category': 'Electronics', 'updated_at': ut}
]
df_products = spark.createDataFrame(Row(**x) for x in product)
df_products.createOrReplaceTempView('tmp')

spark.sql(f"""
CREATE TABLE {DB_TBL} USING iceberg LOCATION '{ICEBERG_LOC}'
AS SELECT * FROM tmp
""")
  1. After creating the Iceberg table, run SELECT * FROM iceberg_history_db.products ORDER BY product_id to show the product data in the Iceberg table. Currently the following five products are stored in the Iceberg table.
+----------+------------+-----+-----------+--------------------+
|product_id|product_name|price|   category|          updated_at|
+----------+------------+-----+-----------+--------------------+
|     00001|      Heater|  250|Electronics|1.7297845122056053E9|
|     00002|  Thermostat|  400|Electronics|1.7297845122056053E9|
|     00003|  Television|  600|Electronics|1.7297845122056053E9|
|     00004|     Blender|  100|Electronics|1.7297845122056053E9|
|     00005| USB charger|   50|Electronics|1.7297845122056053E9|
+----------+------------+-----+-----------+--------------------+

Next, look up the historical changes for a product using Iceberg’s change log view feature.

Implement historical record lookup with Iceberg’s change log view

Suppose that there’s a source table whose table records are replicated to the Iceberg table through a Change Data Capture (CDC) process. When the records in the source table are updated, these changes are then mirrored in the Iceberg table. In this section, you look up the history of a given record for such a system to capture the history of product updates. For example, the following updates occur in the source table. Through the CDC process, these changes are applied to the Iceberg table.

  • Upsert (update and insert) the two records:
    • The price of Heater (product_id: 00001) is updated from 250 to 500.
    • A new product Chair (product_id: 00006) is added.
  • Television (product_id: 00003) is deleted.

To simulate the CDC workflow, you manually apply these changes to the Iceberg table in the notebook.

  1. Use the MERGE INTO query to upsert records. If an input record in the Spark DataFrame has the same product_id as an existing record, the existing record is updated. If no matching product_id is found, the input record is inserted into the Iceberg table.

4-merge-into

  1. Delete Television from the Iceberg table by running the DELETE query.
DELETE FROM iceberg_history_db.products WHERE product_id = '00003'
  1. Then, run SELECT * FROM iceberg_history_db.products ORDER BY product_id to show the product data in the Iceberg table. You can confirm that the price of Heater is updated to 500, Chair is added and Television is deleted.
+----------+------------+-----+-----------+--------------------+
|product_id|product_name|price|   category|          updated_at|
+----------+------------+-----+-----------+--------------------+
|     00001|      Heater|  500|Electronics|    1.729790106579E9|
|     00002|  Thermostat|  400|Electronics|1.7297845122056053E9|
|     00004|     Blender|  100|Electronics|1.7297845122056053E9|
|     00005| USB charger|   50|Electronics|1.7297845122056053E9|
|     00006|       Chair|   50|  Furniture|    1.729790106579E9|
+----------+------------+-----+-----------+--------------------+

For the Iceberg table, where changes from the source table are replicated, you can track the record changes using Iceberg’s change log view. To start, you first create a change log view from the Iceberg table.

  1. Run the create_changelog_view Iceberg procedure to create a change log view.

5-clv

  1. Run the following query to retrieve the historical changes for Heater.
SELECT product_id, product_name, price, category, updated_at, _change_type
FROM products_clv WHERE product_id = '00001'
ORDER BY _change_ordinal, _change_type DESC
  1. The query result shows the historical changes to Heater. You can confirm that the price of Heater was updated from 250 to 500 from the output.
+----------+------------+-----+-----------+--------------------+-------------+
|product_id|product_name|price|   category|          updated_at| _change_type|
+----------+------------+-----+-----------+--------------------+-------------+
|     00001|      Heater|  250|Electronics|1.7297902833360643E9|       INSERT|
|     00001|      Heater|  250|Electronics|1.7297902833360643E9|UPDATE_BEFORE|
|     00001|      Heater|  500|Electronics|1.7297903836233025E9| UPDATE_AFTER|
+----------+------------+-----+-----------+--------------------+-------------+

Using Iceberg’s change log view, you can obtain the history of a given record directly from the Iceberg table’s history, without needing to create a separate table for managing record history. Next, you implement Slowly Changing Dimension (SCD) Type-2 using the change log view.

Implement SCD Type-2 with Iceberg’s change log view

The SCD Type-2 based table retains the full history of record changes and it can be used in multiple cases such as historical tracking, point-in-time analysis, regulatory compliance, and so on. In this section, you implement SCD Type-2 using the change log view (products_clv) that was created in the previous section. The change log view has a schema that’s similar to the schema defined in the SCD Type-2 specifications. For this change log view, you add effective_start, effective_end, and is_current columns. To add these columns and then implement SCD Type-2, complete the following steps.

  1. Run the following query to implement SCD Type-2. In the WITH AS (...) section of the query, the change log view is merged with the Iceberg table snapshots using the snapshot_id key to include the commit time for each record change. You can obtain the table snapshots by querying for db.table.snapshots. The other part in the query identifies both current and non-current entries by comparing the commit times for each product. It then sets the effective time for each product, and marks whether a product is current or not based on the effective time and the change type from the change log view.
WITH clv_snapshots AS (
    SELECT
        clv.*,
        s.snapshot_id,
        s.committed_at,
        s.committed_at as effective_start
    FROM products_clv clv
    JOIN iceberg_history_db.products.snapshots s
    ON clv._commit_snapshot_id = s.snapshot_id
) 
SELECT
    product_id, 
    product_name, 
    price, 
    category, 
    updated_at,
    effective_start,
    CASE
        WHEN effective_start != l_part_committed_at 
            OR _change_type = 'UPDATE_BEFORE' THEN l_part_committed_at
        ELSE CAST(null as timestamp)
    END as effective_end,
    CASE
        WHEN effective_start != l_part_committed_at
            OR _change_type = 'UPDATE_BEFORE' 
            OR _change_type = 'DELETE' THEN CAST(false as boolean)
        ELSE CAST(true as boolean)
    END as is_current
FROM (SELECT *, MAX(committed_at) OVER (PARTITION BY product_id, updated_at) as l_part_committed_at FROM clv_snapshots)
WHERE _change_type != 'UPDATE_BEFORE'
ORDER BY product_id,  _change_ordinal
  1. The query result shows the SCD Type-2 based schema and records.

7-output

After the query result is displayed, this SCD Type-2 based table is stored as scdt2 to allow access for further analysis.

SCD Type-2 is useful for many use cases. To explore how this SCD Type-2 implementation can be used to track the history of table records, run the following example queries.

  1. Run the following query to retrieve deleted or updated records in a specific period. This query captures which records were changed during that timeframe, allowing you to audit changes for further use-cases such as trend analysis, regulatory compliance checks, and so on. Before running the query, replace <START_DATETIME> and <END_DATETIME> with specific time ranges such as 2024-10-24 17:18:00 and 2024-10-24 17:20:00.
SELECT product_id, product_name, price, category, updated_at, effective_start, effective_end, is_current 
FROM scdt2 WHERE product_id IN ( SELECT product_id FROM scdt2 
WHERE (_change_type = 'DELETE' or _change_type = 'UPDATE_AFTER') 
AND effective_start BETWEEN '<START_DATETIME>' AND '<END_DATETIME>') 
ORDER BY product_id, effective_start
  1. The query result shows the deleted and updated records in the specified period. You can confirm that the price of Heater was updated and Television was deleted from the table.
+----------+------------+-----+-----------+--------------------+--------------------+--------------------+----------+
|product_id|product_name|price|   category|          updated_at|     effective_start|       effective_end|is_current|
+----------+------------+-----+-----------+--------------------+--------------------+--------------------+----------+
|     00001|      Heater|  250|Electronics|1.7297902833360643E9|2024-10-24 17:18:...|2024-10-24 17:19:...|     false|
|     00001|      Heater|  500|Electronics|1.7297903836233025E9|2024-10-24 17:19:...|                null|      true|
|     00003|  Television|  600|Electronics|1.7297902833360643E9|2024-10-24 17:18:...|2024-10-24 17:19:...|     false|
|     00003|  Television|  600|Electronics|1.7297902833360643E9|2024-10-24 17:19:...|                null|     false|
+----------+------------+-----+-----------+--------------------+--------------------+--------------------+----------+
  1. As another example, run the following query to retrieve the latest records at a specific point in time from the SCD Type-2 table by filtering with is_current = true for current data reporting.
SELECT product_id, product_name, price, category, updated_at
FROM scdt2 WHERE is_current = true ORDER BY product_id
  1. The query result shows the current table records, reflecting the updated price of Heater, the deletion of Television, and the addition of Chair after the initial records.
+----------+------------+-----+-----------+--------------------+
|product_id|product_name|price|   category|          updated_at|
+----------+------------+-----+-----------+--------------------+
|     00001|      Heater|  500|Electronics|1.7297903836233025E9|
|     00002|  Thermostat|  400|Electronics|1.7297902833360643E9|
|     00004|     Blender|  100|Electronics|1.7297902833360643E9|
|     00005| USB charger|   50|Electronics|1.7297902833360643E9|
|     00006|       Chair|   50|  Furniture|1.7297903836233025E9|
+----------+------------+-----+-----------+--------------------+

You have now successfully implemented SCD Type-2 using the change log view. This SCD Type-2 implementation allows you to track the history of table records. For example, you can use it to search for deleted or updated products such as Heater and Chair in a specific period. Additionally, you can retrieve the current table records by querying the SCD Type-2 table with is_current = true. Using Iceberg’s change log view enables you to implement SCD Type-2 without making any changes to the Iceberg table itself. It also eliminates the need for creating or managing an additional table for SCD Type-2.

Clean up

To clean up the resources used in this post, complete the following steps:

  1. Open the Amazon S3 console
  2. Select the S3 bucket aws-glue-assets-<ACCOUNT_ID>-<REGION> where the Notebook file (iceberg_history.ipynb) is stored. Delete the Notebook file that’s in the notebook path.
  3. Select the S3 bucket you created using the CloudFormation template. You can obtain the bucket name from IcebergS3Bucket key on the CloudFormation Outputs tab. After selecting the bucket, choose Empty to delete all objects
  4. After you confirm the bucket is empty, delete the CloudFormation stack iceberg-history-baseline-resources.

Considerations

Here are important considerations:

Conclusion

In this post, we have explored how to look up the history of records and tables using Apache Iceberg. The instruction demonstrated how to use change log view to look up the history of the records, and also the history of the tables with SCD Type-2. With this method, you can manage the history of records and tables without extra effort.


About the Authors

Tomohiro Tanaka is a Senior Cloud Support Engineer at Amazon Web Services. He’s passionate about helping customers use Apache Iceberg for their data lakes on AWS. In his free time, he enjoys a coffee break with his colleagues and making coffee at home.

Noritaka Sekiyama is a Principal Big Data Architect on the AWS Glue team. He works based in Tokyo, Japan. He is responsible for building software artifacts to help customers. In his spare time, he enjoys cycling with his road bike.

Fedora Steering Council election interviews

Post Syndicated from daroc original https://lwn.net/Articles/1001522/

When the Fedora Engineering Steering Council (FESCo) is up for election, the project posts
interviews of the candidates in order to help Fedora contributors make an informed choice. This
year, the candidates are

Zbigniew Jędrzejewski-Szmek
,

Tomáš Hrčka
,

Josh Stone
,

David Cantrell
,

Fabio Alessandro Locati
, and

Kevin Fenzi
.
All of them except for Locati are current members of the steering council.
Voting is open until December 20.