It’s “the intolerant person’s guide to keeping your computer computing.” If that sounds like you, we recommend you hop straight over to the Raspberry Pi Press online store and pick up a copy for just £10.
What’s it about?
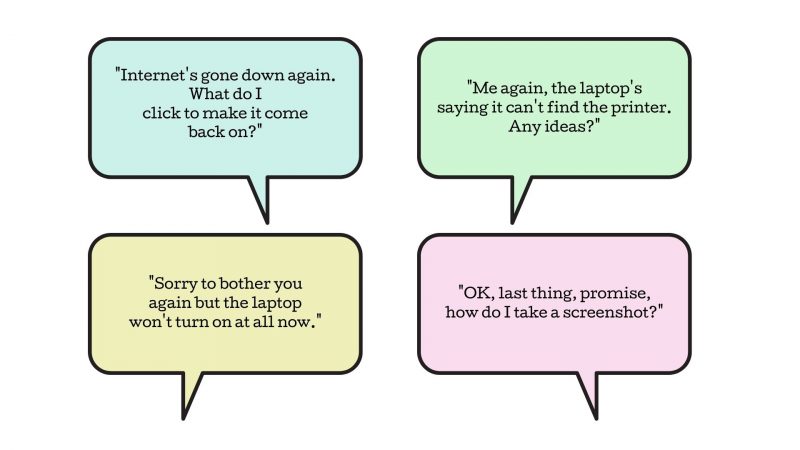
It also makes a good, only mildly passive-aggressive, gift. If the above text messages ring a bell, and you’re fed up with being the in-house tech support for your family, then Help! My computer is broken (How do I fix it?) can assist. It shows readers how to fix common computer problems, without having to wade through technical jargon or pester said tech support person.
Who wrote it?
We had the brilliant Barry Collins, who has been a technology journalist for more than 20 years, write it for you. He’s written for most of the UK’s leading tech publications, and he is a former editor of PC Pro as well as former assistant editor of the Sunday Times‘ technology section.
He’s now co-editor of The Big Tech Question, a site designed to answer people’s tech queries – in a similar vein to this book. Barry also makes regular appearances as a tech pundit on TV and radio.
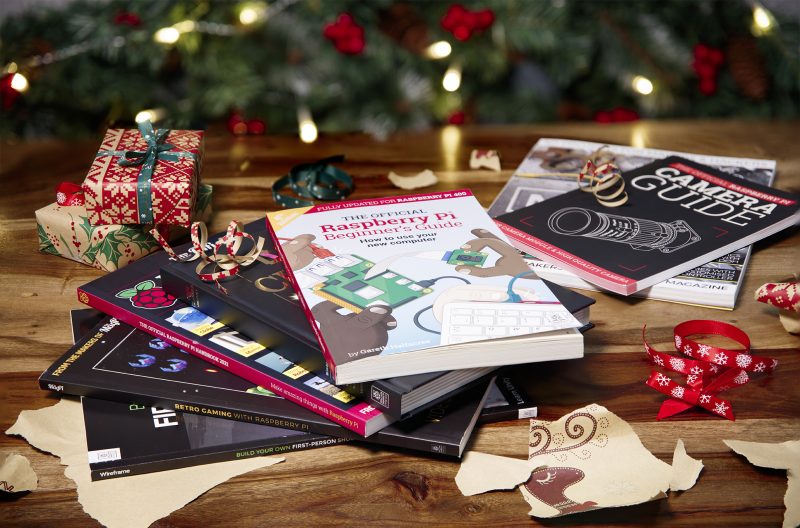
While you’re shopping at the Raspberry Pi Press online store, make sure you check out our Black Friday deal, which we’ve decided to keep rolling until Christmas Eve.
If you buy just one book from the Black Friday range (priced £7 – £10), you get two more completely FREE!
What if you could give the joy of opening a Raspberry Pi–themed gift every single month for a whole year? But what if the thought of wrapping 12 individual things fills you with Scrooge-level dread?
Snap up a magazine subscription for one of your nearest and/or dearest and we’ll take care of the packaging and delivery while you sit back and reap all the credit!
You could end up with a few extra gifts depending on what you sign up for so, read on and take your pick.
The MagPi magazine
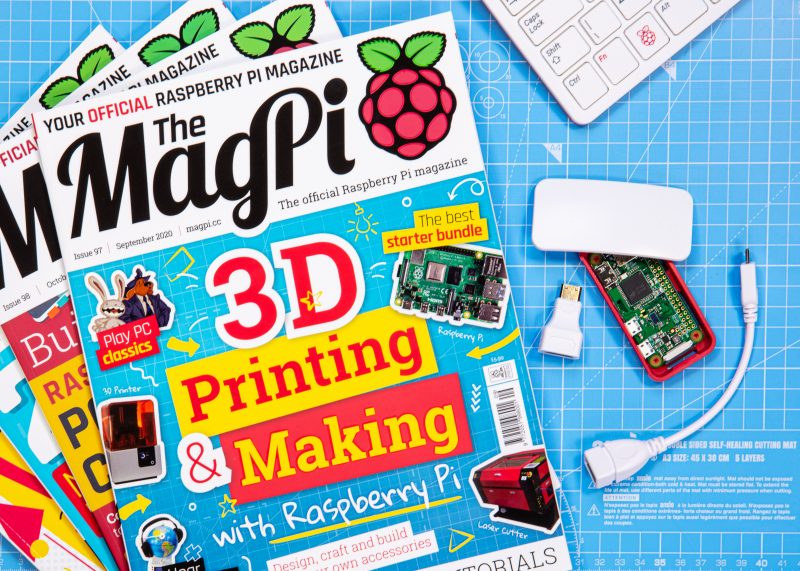
The official Raspberry Pi magazine comes with a free Raspberry Pi Zero W kit worth £20 when you sign up for a 12-month subscription. You can use our tiniest computer in tonnes of projects, meaning Raspberry Pi fans can never have enough. That’s a top gift-giving bonus for you right there.
Every issue of The MagPi is packed with computing and electronics tutorials, how-to guides, and the latest news and reviews. They also hit their 100th issue this month so, if someone on your list has been thinking about getting a subscription, now is a great time.
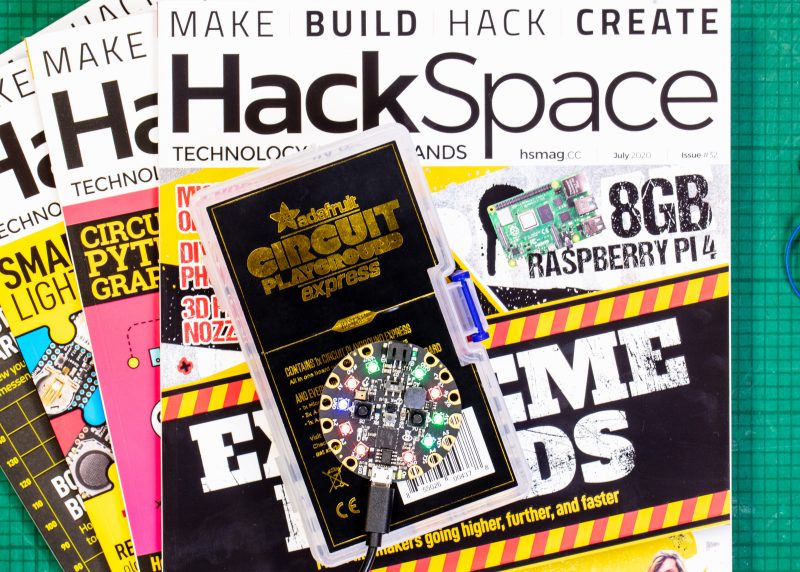
HackSpace magazine is the one to choose for fixers and tinkerers of all abilities. If you’re looking for a gift for someone who is always taking things apart and hacking everyday objects, HackSpace magazine will provide a year of inspiration for them.
12-month subscriptions come with a free Adafruit Circuit Playground Express, which has been specially developed to teach programming novices from scratch and is worth £25.
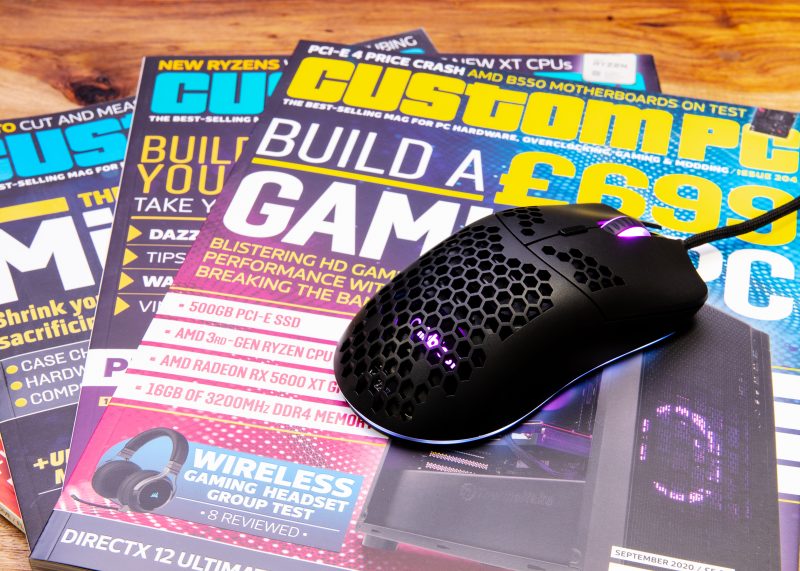
Custom PC is the magazine for people who are passionate about PC technology and hardware. And they’ve just launched a pretty cool new giveaway with every 12-month subscription: a free Chillblast Aero RGB Gaming mouse worth £40. Look, it lights up, it’s cool.
Wireframe magazine lifts the lid on video games. In every issue, you’ll find out how games are made, who makes them, and how you can code them to play for yourself using detailed guides.
The latest deal gets you three issues for just £10, plus your choice of one of our official books as a gift. By the way, that ‘three for £10 plus a free book’ is available across ALL our magazines. Did I not tell you that before? My bad. It’s good though, right?
And as an extra Christmas gift to you all, we’ve decided to keep our Black Friday deal rolling until Christmas Eve, so if you buy just one teeny tiny book from the Raspberry Pi Press store, you get two more completely FREE!
Better still, all of the books in the deal only cost £7 or £10 to start with, so makes for a good chunky batch of presents at a brilliantly affordable price.
The official Raspberry Pi magazine turned 100 this month! To celebrate, the greatest Raspberry Pi moments, achievements, and events that The MagPi magazine has ever featured came back for a special 100th issue.
100 Raspberry Pi Moments is a cracking bumper feature (starting on page 32 of issue 100, if you’d like to read the whole thing) highlighting some influential projects and educational achievements, as well as how our tiny computers have influenced pop culture. And since ’tis the season, we thought we’d share the How Raspberry Pi made a difference section to bring some extra cheer to your festive season.
Projects for good
The Raspberry Pi Foundation was originally launched to get more UK students into computing. Not only did it succeed at that, but the hardware and the Foundation have also managed to help people in other ways and all over the world. Here are just a few examples!
Computers for good
The Raspberry Pi Foundation provides free learning resources for everyone; however, not everyone has access to a computer to learn at home. Thanks to funding from the Bloomfield Trust and in collaboration with UK Youth and local charities, the Foundation has been able to supply hundreds of Raspberry Pi Desktop Kits to young people most in need. The computers have allowed these children, who wouldn’t have been able to otherwise, to learn from home and stay connected to their schools during lockdown. The Foundation’s work to distribute Raspberry Pi computers to young people in need is ongoing.
Elsewhere, a need for more medical equipment around the world resulted in many proposals and projects being considered for cheap, easy-to produce machines. Some included Raspberry Pi Zero, with 40,000 of these sold for ventilator designs.
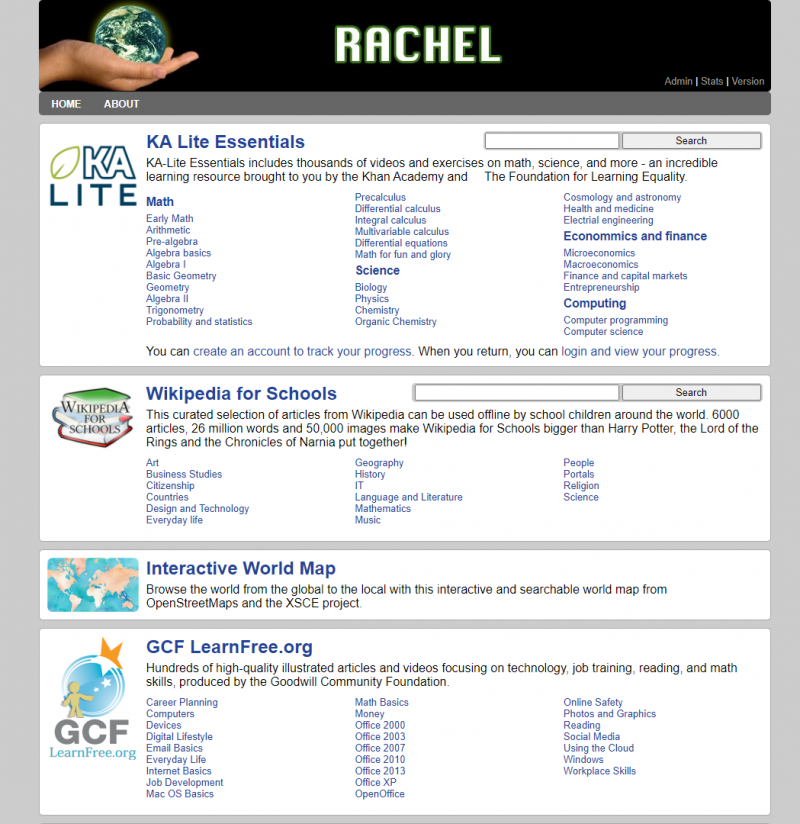
While there’s no global project or standard to say what an offline internet should contain, some educational projects have tried to condense down enough online content for specific people and load it all onto a Raspberry Pi. RACHEL-Pi is one such solution. The RACHEL-PI kit acts as a server, hosting a variety of different educational materials for all kinds of subjects, as well as an offline version of Wikipedia with 6000 articles. There’s even medical info for helping others, math lessons from Khan Acadamy, and much more.
The RACHEL sites are available in English, French, and Spanish
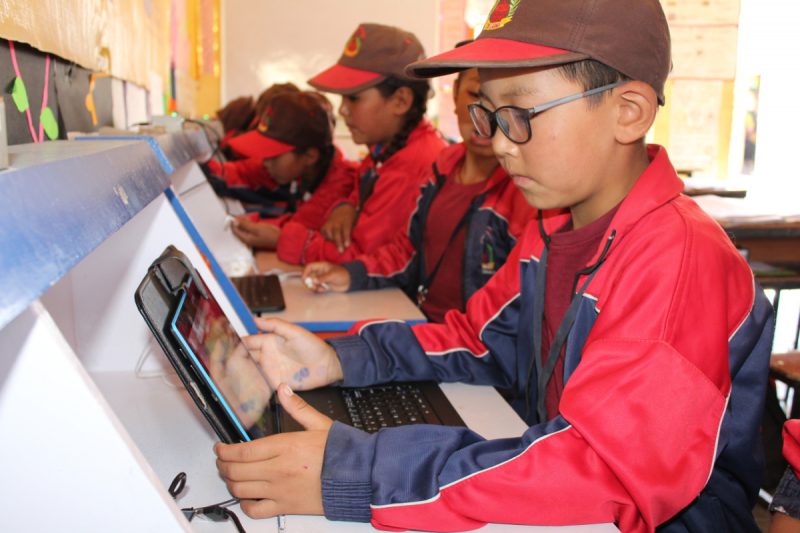
17,000 ft is another great project, which brings computing to schools high up in the Himalayas through a similar method in an attempt to help children stay in their local communities.
Ladakh is a desert-like region up a mountain that can easily shut down during the winter
Education in other countries
The free coding resources available on our projects site are great, and the Raspberry Pi Foundation works to make them accessible to people whose first language isn’t English: we have a dedicated translation team and, thanks to volunteers around the world, provide our free resources translated into up to 32 other languages. From French and Welsh to Korean and Arabic, there’s a ton of projects that learners from all over the world can access in their first language.
And through the Code Club and CoderDojo programmes, the Foundation supports volunteers around the world to run free coding clubs for young people.
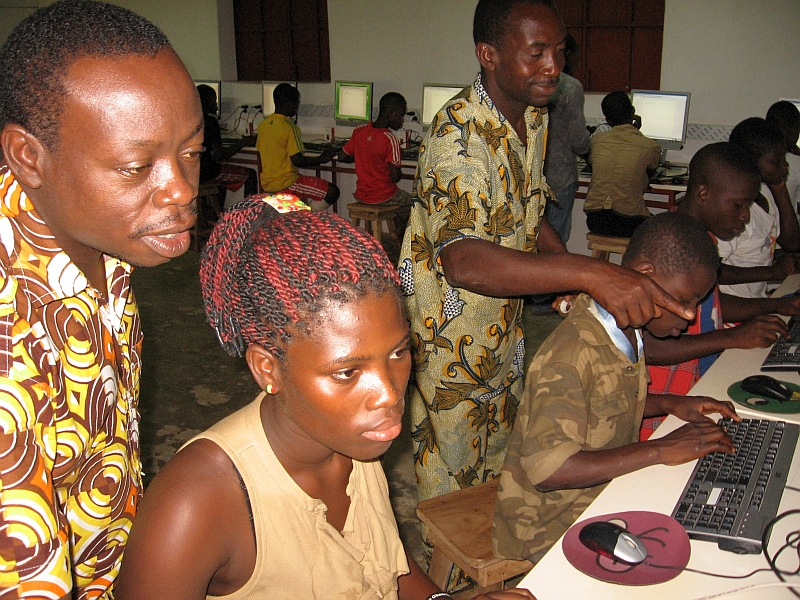
A Raspberry Pi lab in Kuma Adamé, Togo, that Dominique Laloux helped create and update
That’s not all: several charitable groups have set up Raspberry Pi classrooms to bring computing education to poorer parts of the world. People in African countries and parts of rural India have benefited from these programmes, and work is being done to widen access to ever more people and places.
Pocket FM
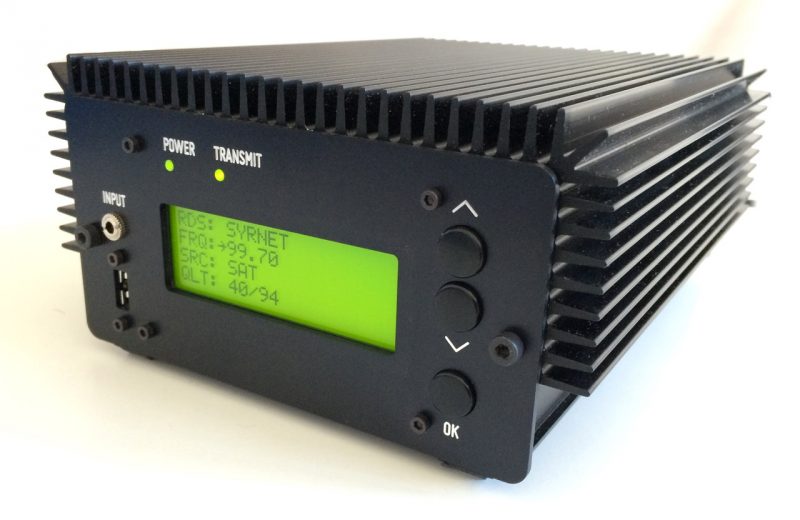
The Pocket FM is far smaller than traditional transmitters, and therefore easy to move into the country and set up
The HAM radio community loves Raspberry Pi for amateur radio projects; however, sometimes people need radio for more urgent purposes. In 2016, German group Media in Cooperation and Transition created the Pocket FM 96 , micro radio transmitters with 4–6km range. These radios allowed Syrians in the middle of a civil war to connect to free media on Syrnet for more reliable news.
There are a number of independent radio stations that transmit through Pocket FM
Raspberry Pi powered these transmitters, chosen because of how easy it is to upgrade and add components to. Each transmitter is powered by solar power, and Syrnet is still transmitting through them as the war continues into its tenth year.
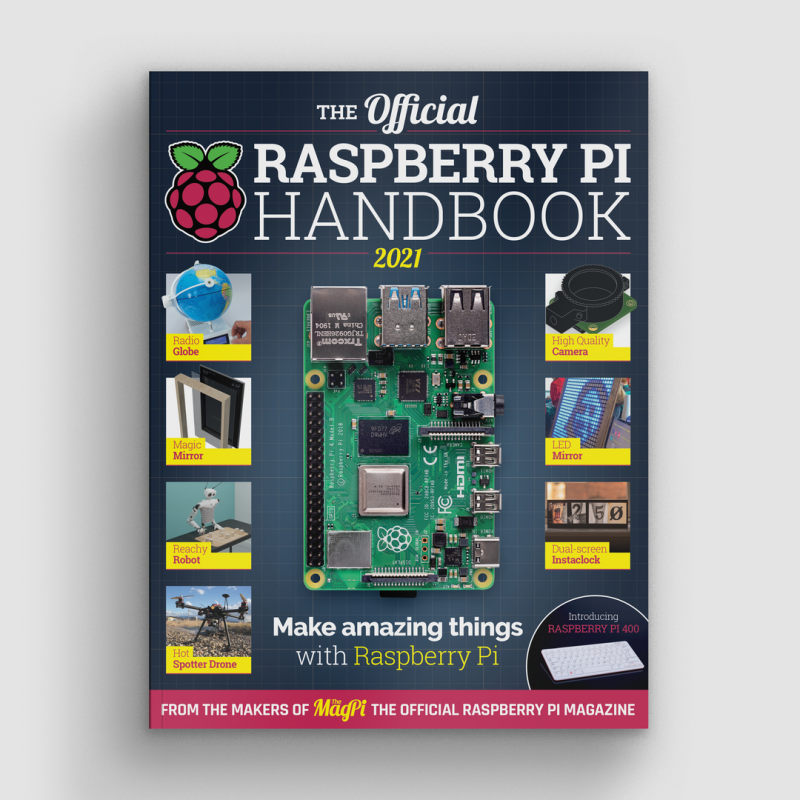
Hey everyone, come and see, come and see! Here’s a great new bookazine from the makers of the official Raspberry Pi magazine. We do love the folks at The MagPi. Clever, they are.
If, like us, you’re over 2020 already, dive into the pages of The Official Raspberry Pi Handbook 2021, and pretend it never happened. That will totally work.
To help you get the most of out of your Raspberry Pi computer, this official Handbook features 200 pages of essential information, inspiring projects, practical tutorials, and definitive reviews.
Beginner-friendly
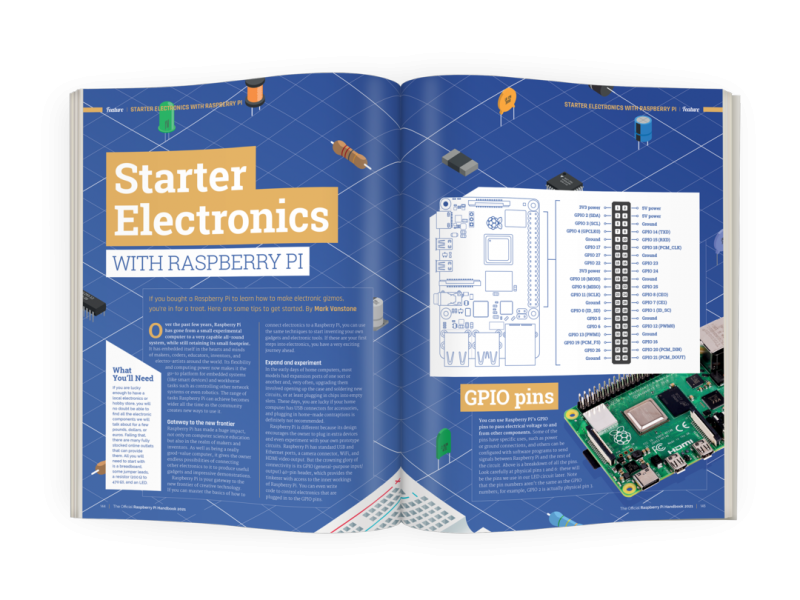
If you’re an absolute beginner, you can learn from the Handbook how to set up your Raspberry Pi and start using it. Then you can move on to the step-by-step tutorials that will teach you how to code and make with your Raspberry Pi.
Shiny new stuff
You’ll also (re)discover the new Raspberry Pi 400 and High Quality Camera, both released this year. And you’ll find out about the top kits and accessories for your projects.
Be inspired
And finally, we’ve also picked out some incredible Raspberry Pi projects made by people in the community to inspire you to get making and coding.
Personally, we prefer new book smell and the crackle of physical pages but, if you’re less picky and don’t mind on-screen reading, the lovely folks at The MagPi have a PDF version you can download for free.
Mike reports a “substantial difference in sound quality” compared to his previous setup (the aforementioned and reviled Bluetooth and RCA plug options).
This project lets you use a Raspberry Pi as a music player and control it from your mobile phone.
You can use an Ethernet cable, but Mike wanted to utilise Raspberry Pi 4’s wireless connectivity to boot the Volumio app. This way, the Raspberry Pi music player can be used anywhere in the house, as it’ll create its own wireless hotspot within your home network called ‘Volumio’.
Eew! No more direct audio connection to your phone to listen to music.
You’ll need a different version of the Volumio app depending on whether you have an Android phone or iPhone. Mike touts the app as “super easy, really robust”. You just select the music app you usually use from the ‘Plugins’ section of the Volumio app, and all your music, playlists, and cover art will be there ready for you once downloaded.
And that’s basically it. Just connect to the Volumio OS via the app and tell your Raspberry Pi what to play.
Amp it up
To get his new music player booming all around the house, Mike used a Starke Sound AD4, which you can watch him unbox and review.
What kind of amplification system have you got paired up with your Raspberry Pi–powered music player?
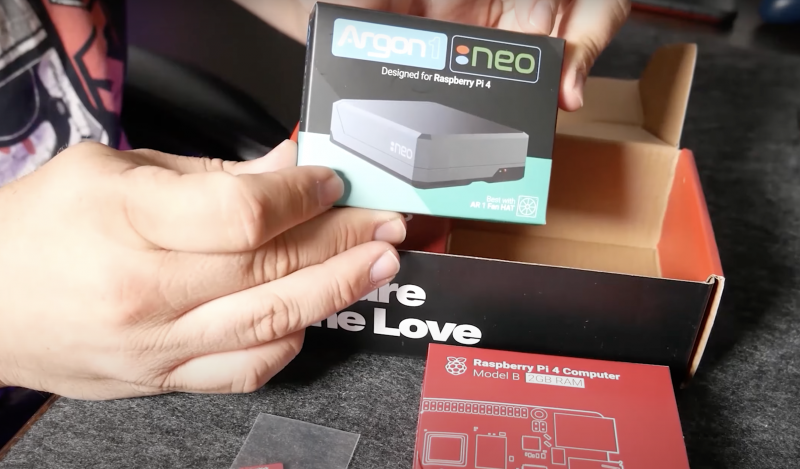
Maker Jen Fox took to hackster.io to share a Raspberry Pi–powered trash classifier that tells you whether the trash in your hand is recyclable, compostable, or just straight-up garbage.
Jen reckons this project is beginner-friendly, as you don’t need any code to train the machine learning model, just a little to load it on Raspberry Pi. It’s also a pretty affordable build, costing less than $70 including a Raspberry Pi 4.
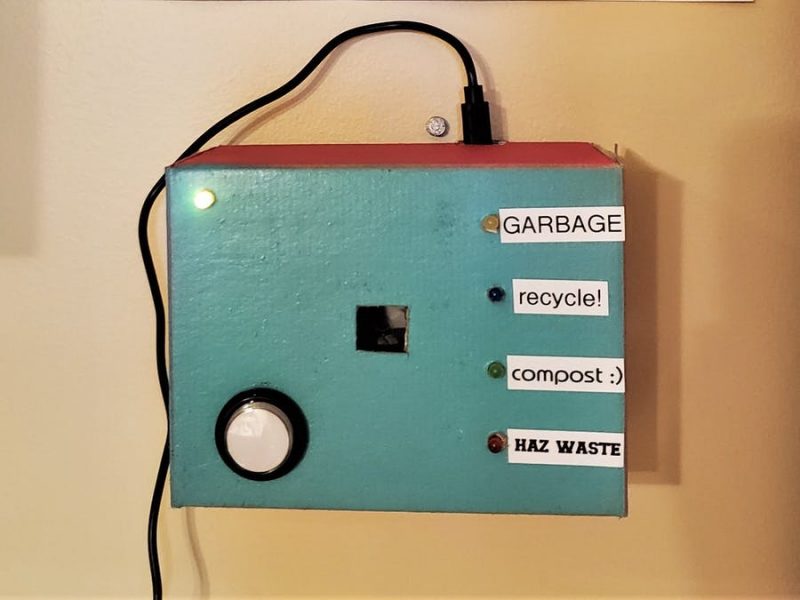
“Haz waste”?!
Hardware:
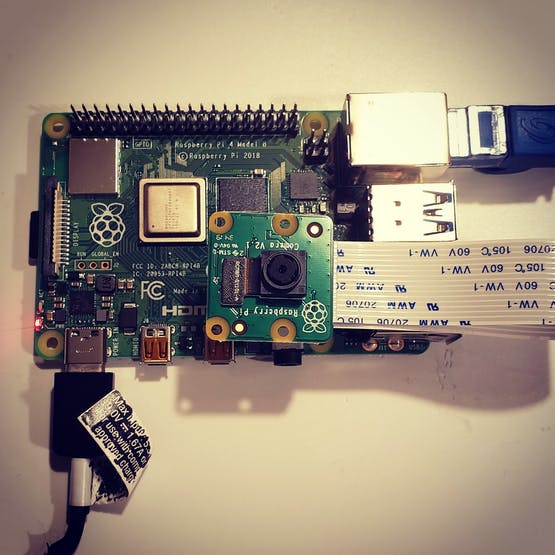
Raspberry Pi 4 Model B
Raspberry Pi Camera Module
Adafruit push button
Adafruit LEDs
Watch Jen giving a demo of her creation
Software
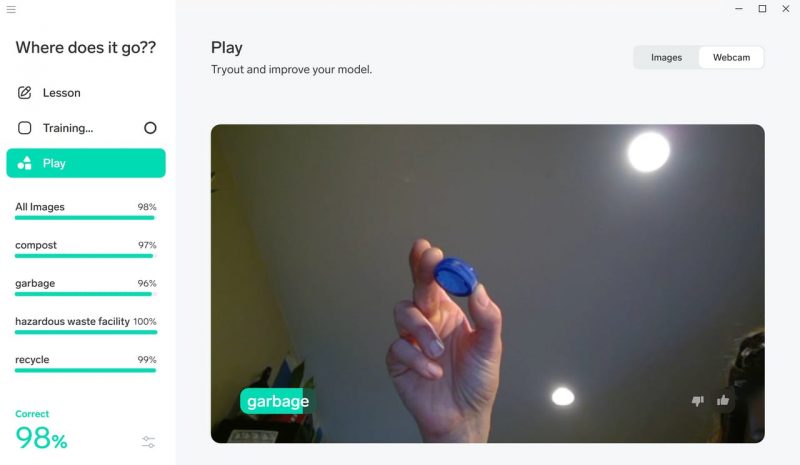
The code-free machine learning model is created using Lobe, a desktop tool that automatically trains a custom image classifier based on what objects you’ve shown it.
The image classifier correctly guessing it has been shown a bottle cap
Training the image classifier
Basically, you upload a tonne of photos and tell Lobe what object each of them shows. Jen told the empty classification model which photos were of compostable waste, which were of recyclable and items, and which were of garbage or bio-hazardous waste. Of course, as Jen says, “the more photos you have, the more accurate your model is.”
Loading up Raspberry Pi
The Raspberry Pi Camera Module attached to Raspberry Pi 4
As promised, you only need a little bit of code to load the image classifier onto your Raspberry Pi. The Raspberry Pi Camera Module acts as the image classifier’s “eyes” so Raspberry Pi can find out what kind of trash you hold up for it.
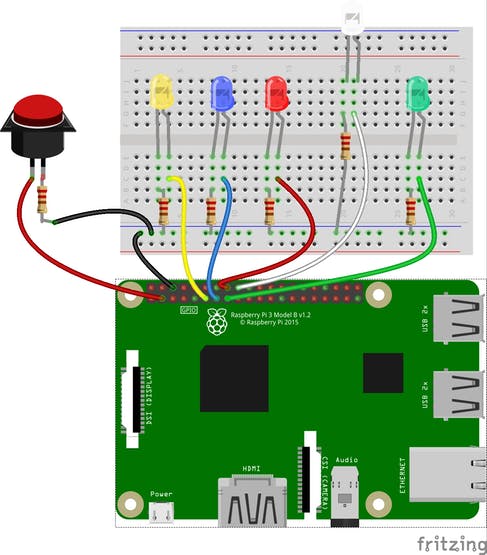
The push button and LEDs are wired up to the Raspberry Pi GPIO pins, and they work together with the camera and light up according to what the image classifier “sees”.
Here’s the fritzing diagram showing how to wire the push button and LEDS to the Raspberry Pi GPIO pins
You’ll want to create a snazzy case so your trash classifier looks good mounted on the wall. Kate cut holes in a cardboard box to make sure that the camera could “see” out, the user can see the LEDs, and the push button is accessible. Remember to leave room for Raspberry Pi’s power supply to plug in.
Jen’s hand-painted case mounted to the wall, having a look at a plastic bag
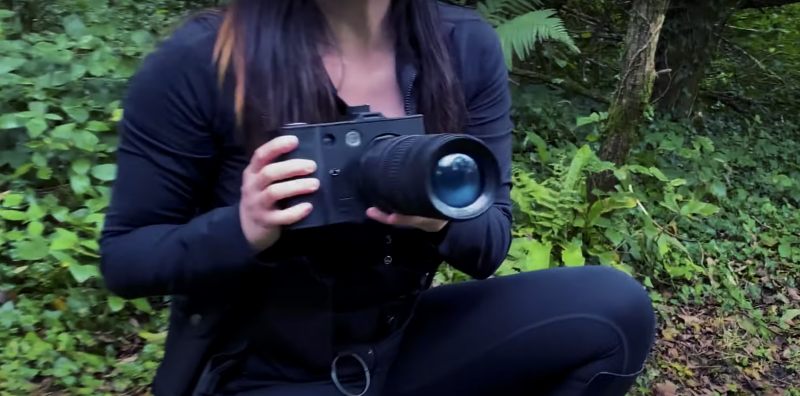
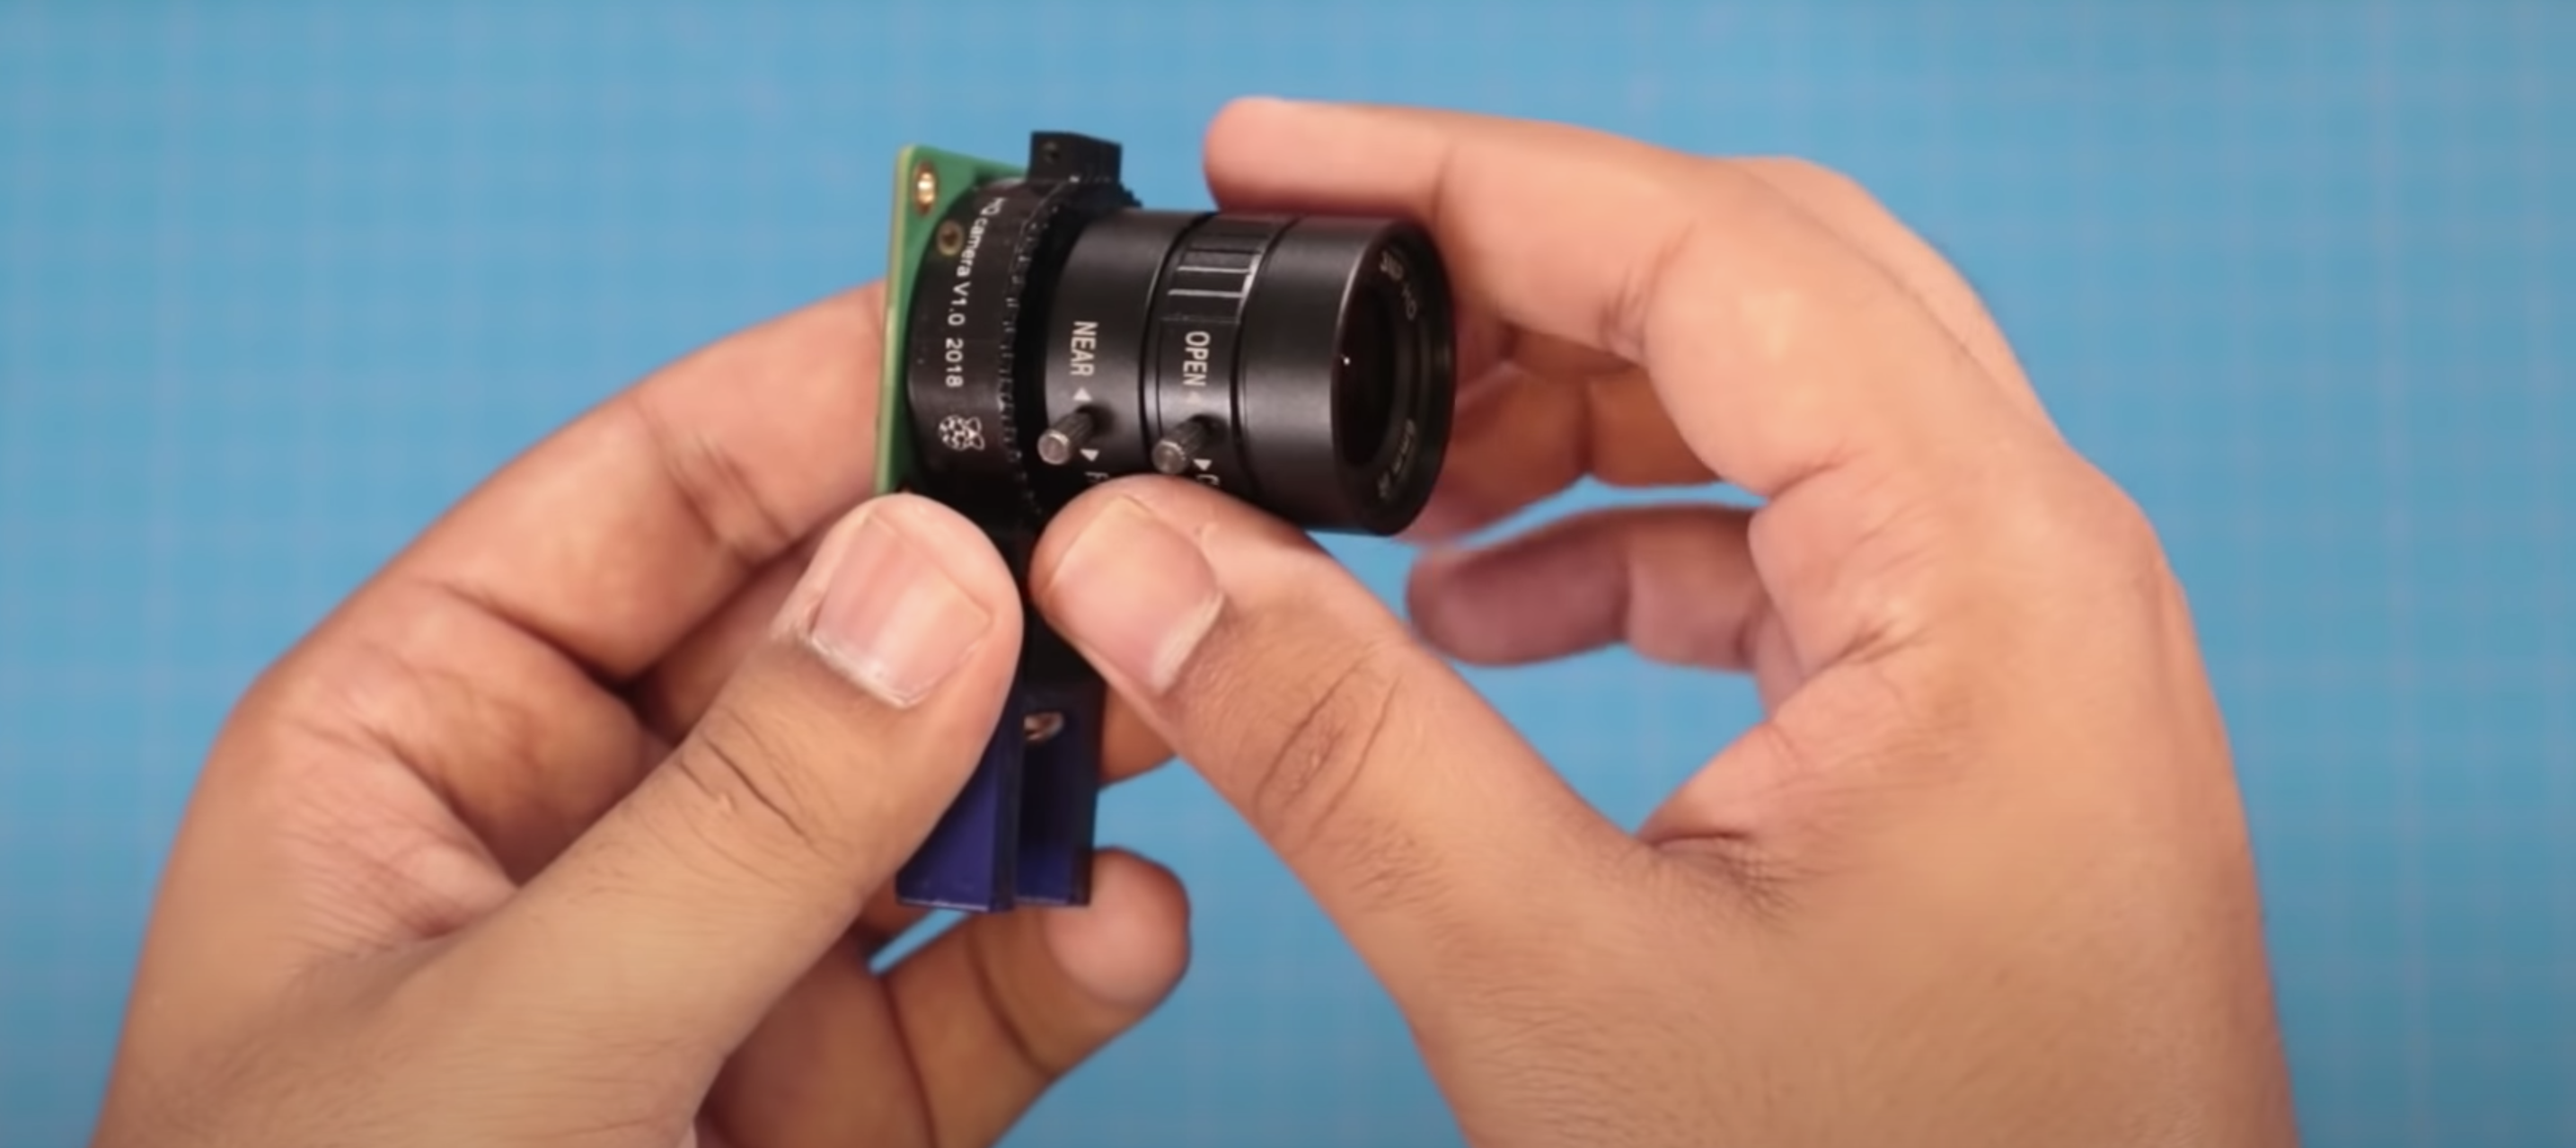
The trick with spy devices is to make sure they look as much like the object they’re hidden inside as possible. Where Raspberry Pi comes in is making sure the foam camera can be used as a real photo-taking camera too, to throw the baddies off the scent if they start fiddling with your spyware.
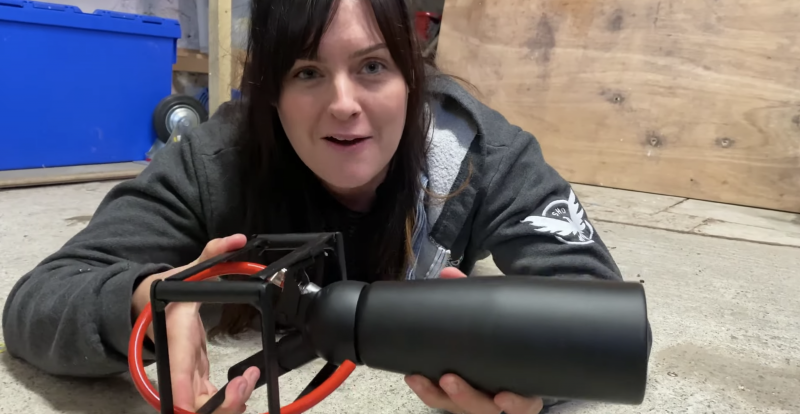
The foam-firing bit of Nathan’s invention was relatively simple to recreate – a modified chef’s squirty cream dispenser, hidden inside a camera-shaped box, gets the job done.
Squirty cream thing painted black and mounted onto camera-shaped frame
Ruth and Shawn drew a load of 3D-printed panels to mount on the box frame in the image above. One of those cool coffee cups that look like massive camera lenses hides the squirty cream dispenser and gives this build an authentic camera look.
THOSE cool camera lens-shaped coffee cups, see?
Techy bits from the build:
Raspberry Pi
Infrared LED
Camera module
Mini display screen
All the bits mentioned in the list above
The infrared LED is mounted next to the camera module and switches on when it gets dark, giving you night vision.
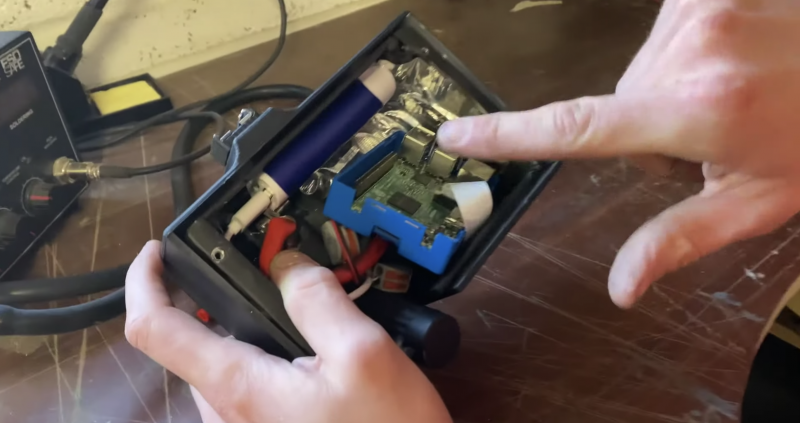
The mini display screen serves as a ‘lid’ to the blue case protecting the Raspberry Pi and mounts into the back panel of the ‘camera’
The Raspberry Pi computer and its power bank are crammed inside the box-shaped part, with the camera module and infrared LED mounted to peek out of custom-made holes in one of the 3D-printed panels on the front of the box frame.
The night vision mini display screen in action on the back of the camera
The foam-firing chef’s thingy is hidden inside the big fake lens, and it’s wedged inside so that when you lift the big fake lens, the lever on the chef’s squirty thing is depressed and foam fires out of a tube near to where the camera lens and infrared LED peek out on the front panel of the build.
Watch the #KidsInventStuff presenters test out Nathan’s invention
The most wonderful time of the year is approaching! “Most wonderful” meaning the time when you have to figure out what gift best expresses your level of affection for various individuals in your life. We’re here to take away some of that stress for you — provided your favourite individuals like Raspberry Pi, of course. Otherwise you’re on your own. Sorry.
We’ve got ideas for the gamers in your life, what to get for the Raspberry Pi “superfan” who has everything, and options that allow you to keep giving all year round.
Newest and hottest
If keeping up with the Joneses is your thing, why not treat your nearest Raspberry Pi fan to one of our newest products…
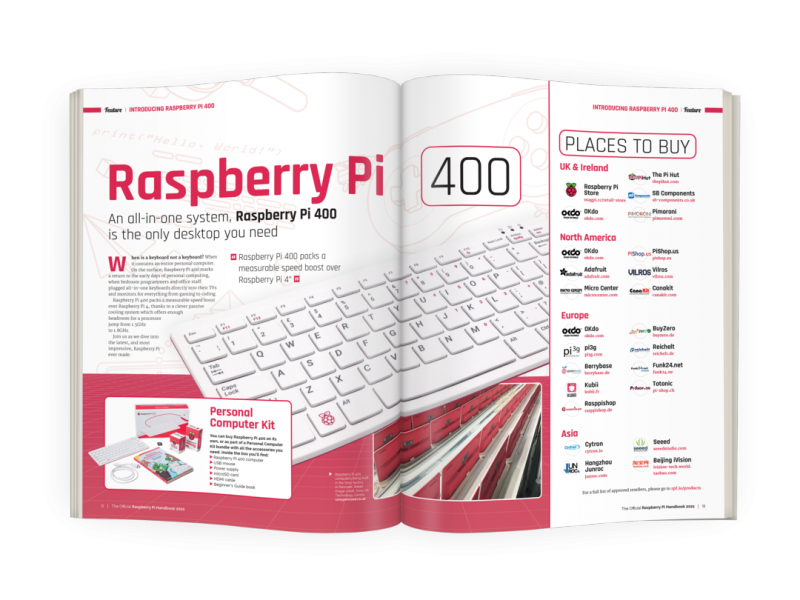
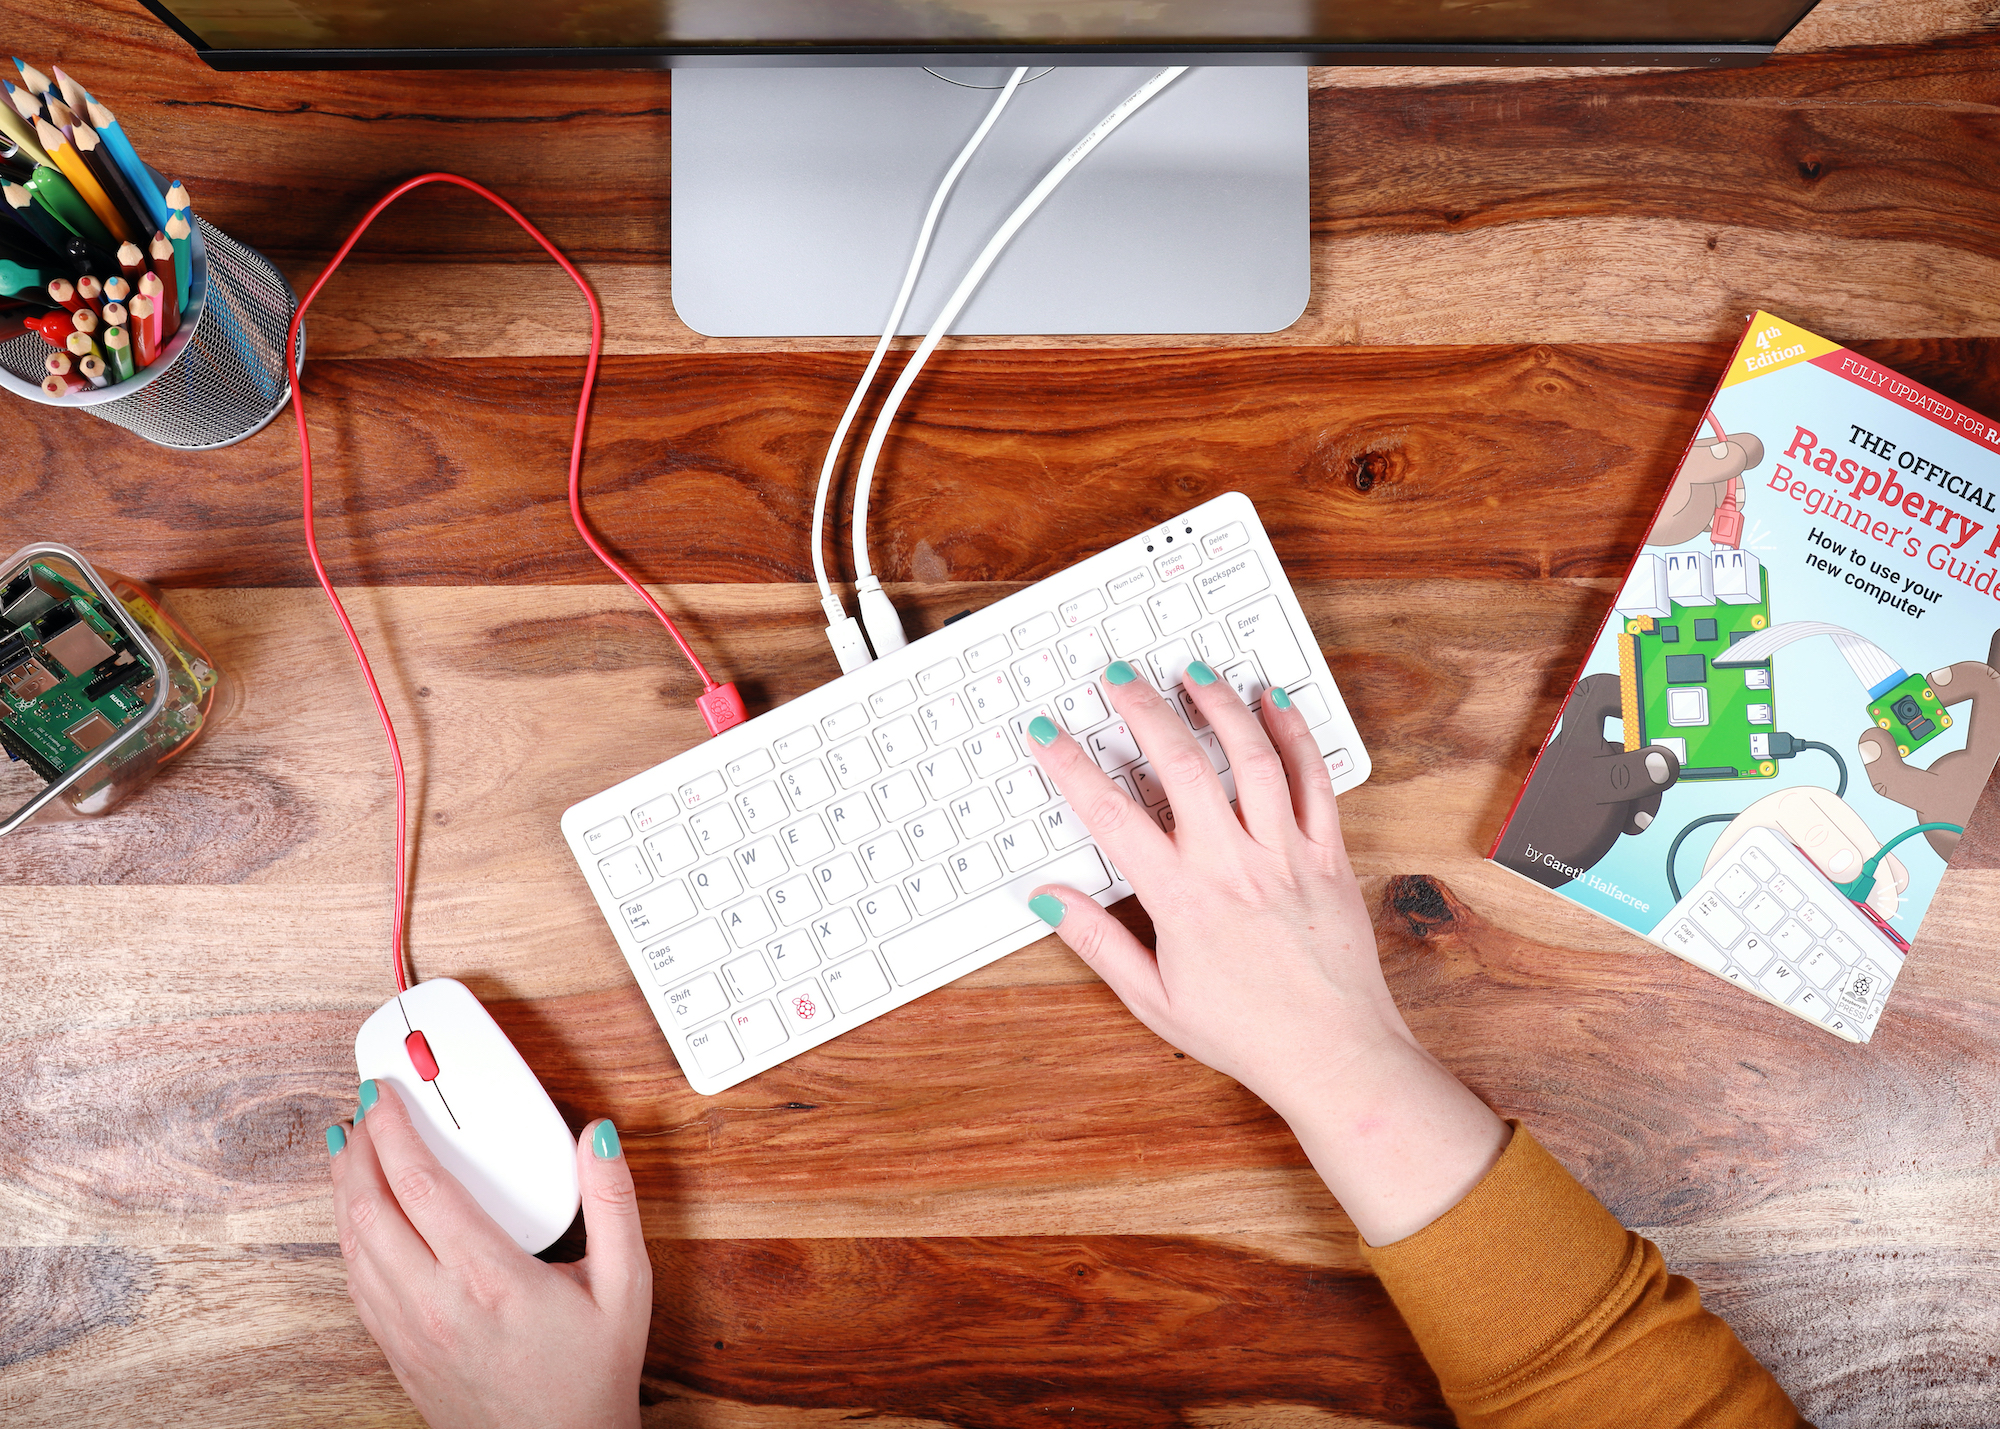
Raspberry Pi 400 | $70
This year, we released Raspberry Pi 400: a complete personal computer, built into a compact keyboard, costing just $70. Our community went wild about the possibilities that Raspberry Pi 400 opens up for home learners and for those who don’t have expensive tech options at their fingertips.
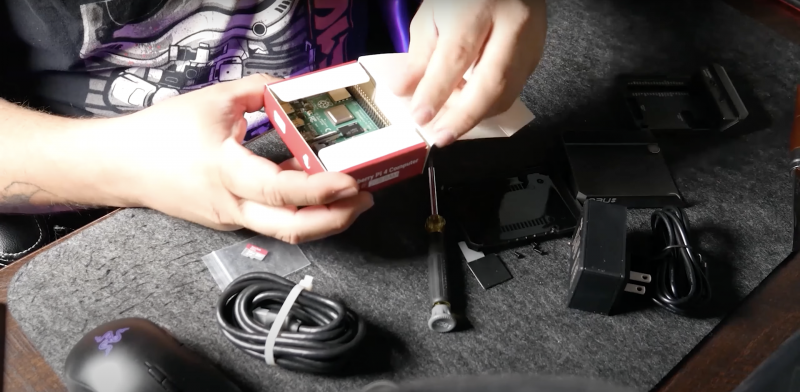
You just plug in a mouse, a monitor (any semi-modern TV screen should work), and go. The Raspberry Pi 400 Personal Computer kit costs $100 and comes with a few extras to help get you started. Or you can buy the Raspberry Pi 400 unit on its own.
Depending on where you are in the world, you may need to pre-order or join a waiting list, as Raspberry Pi 400 is in such high demand. But you could give a homemade ‘IOU’ voucher letting the recipient know that they will soon get their hands on one of our newest and most popular bits of kit.
Our latest book of coding coolness | £10
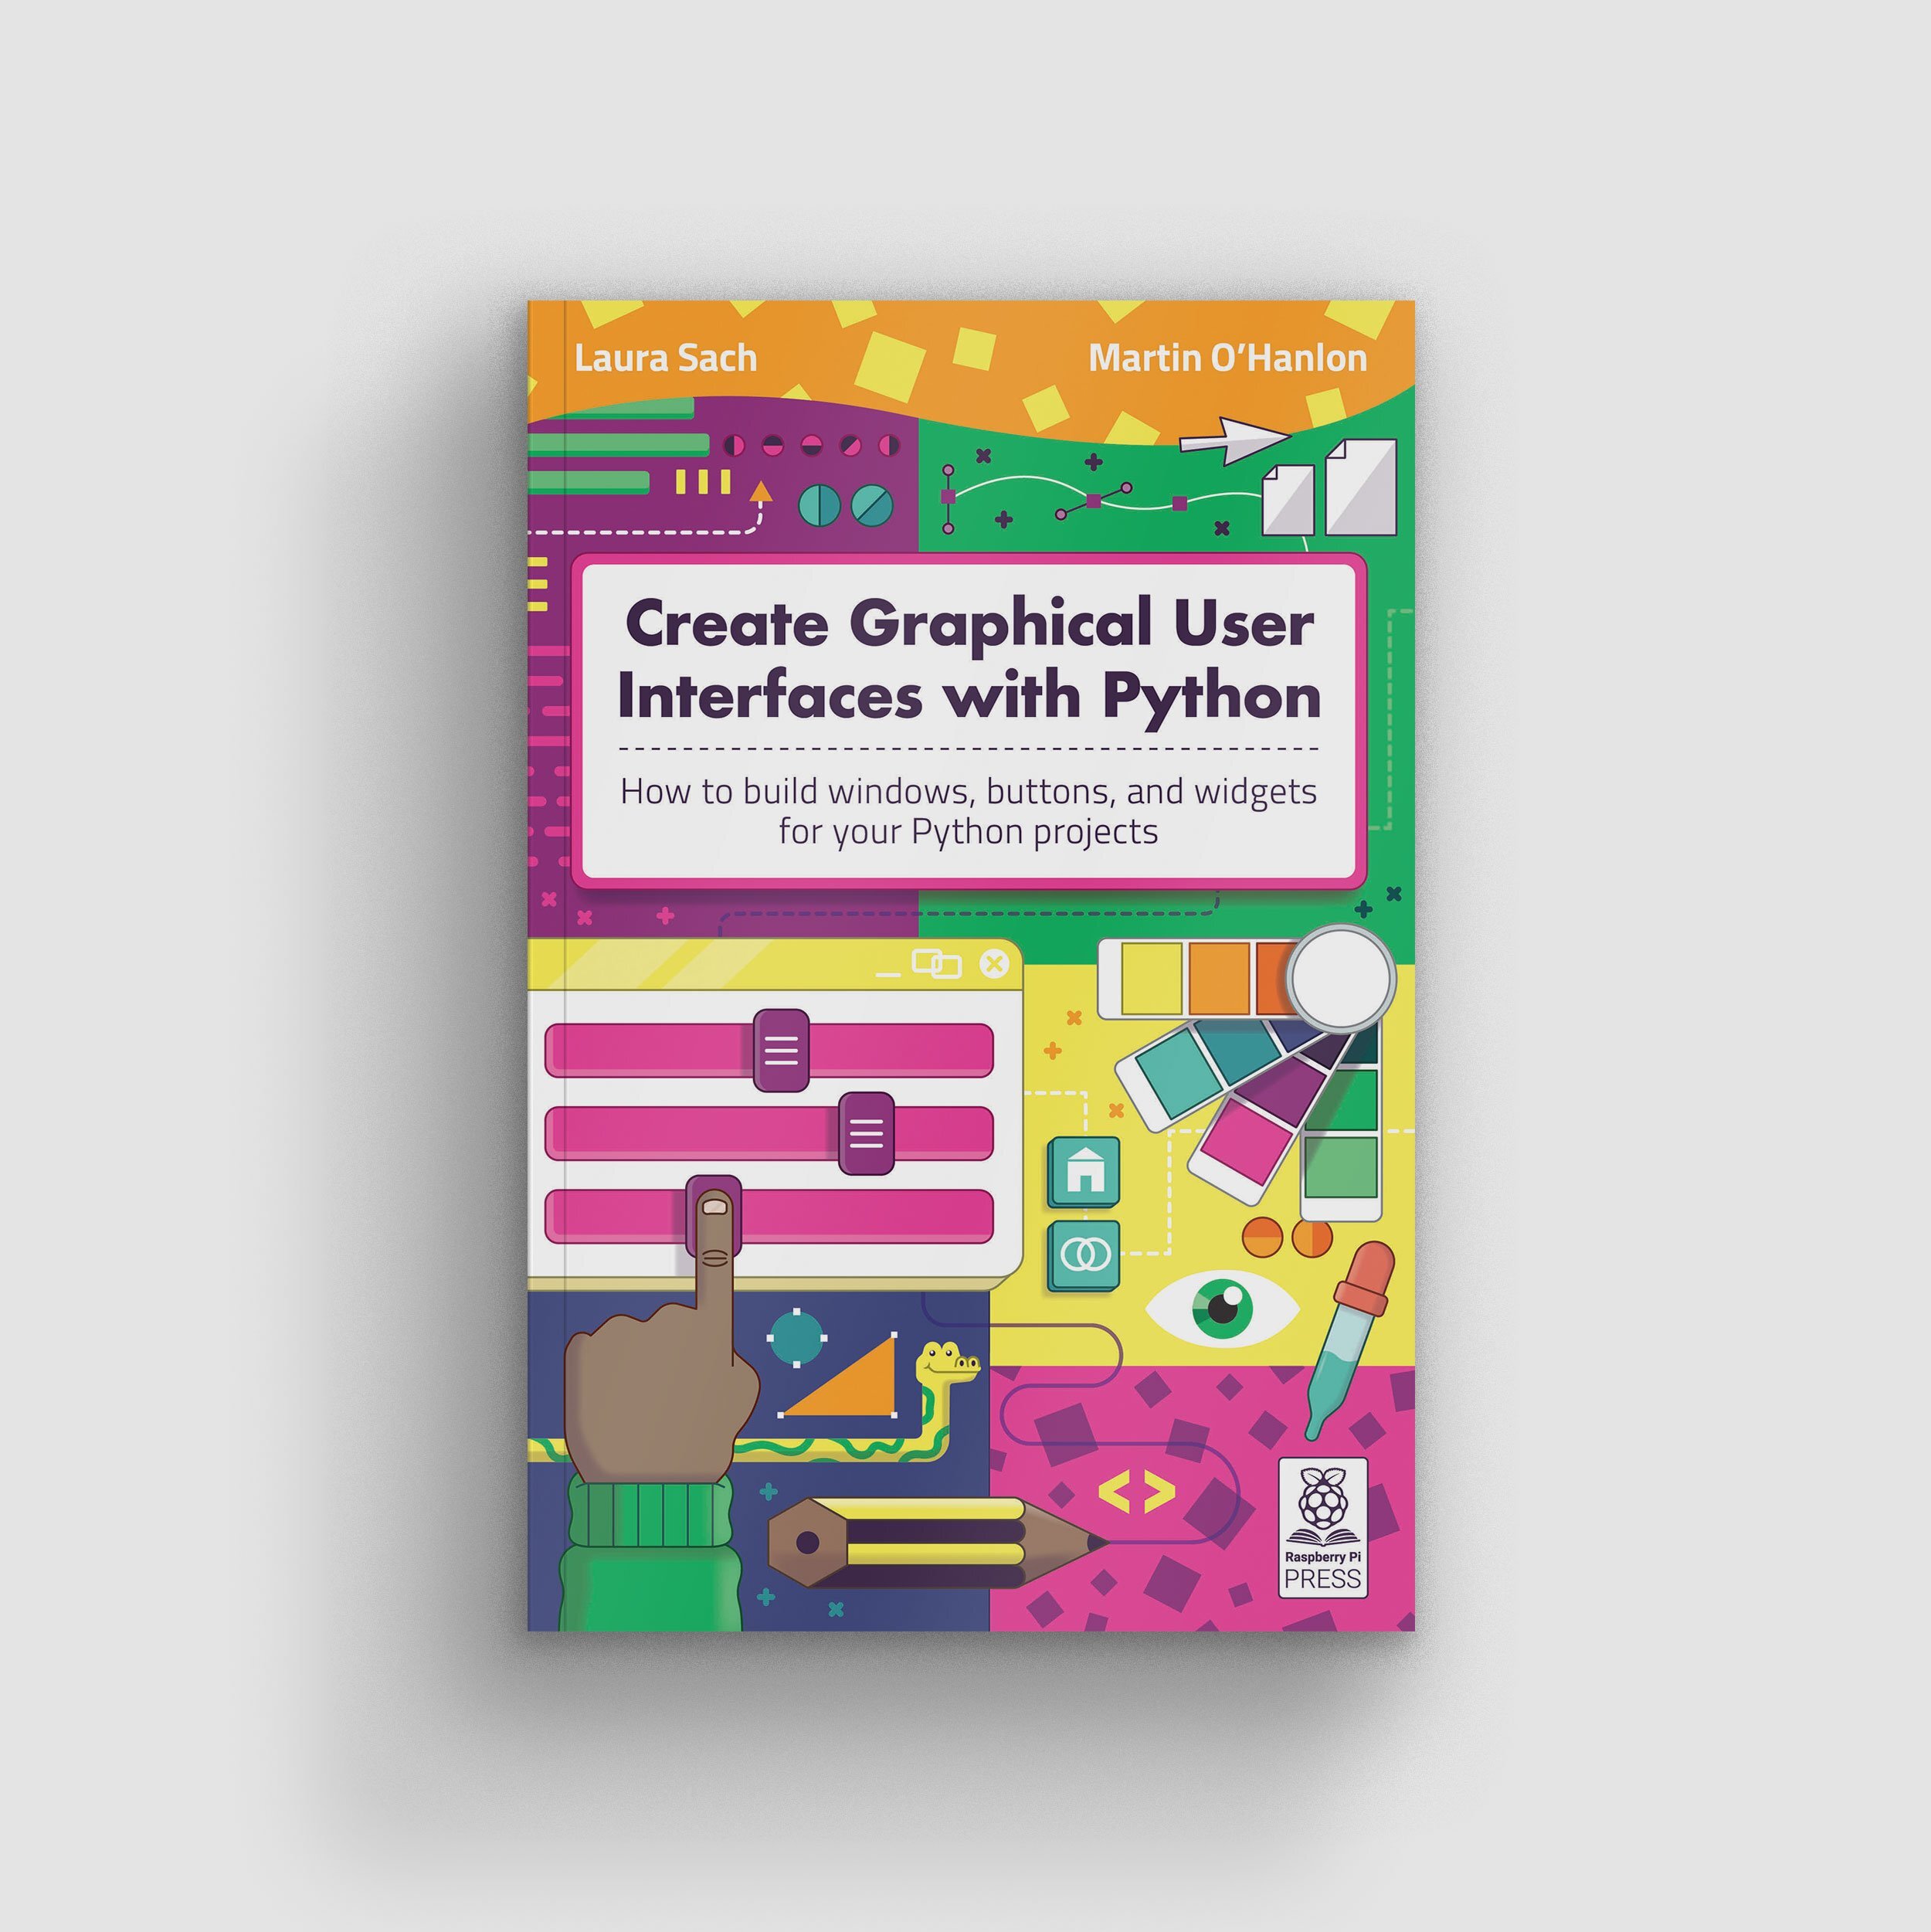
We publish some cool books around these parts. Laura Sach and Martin O’Hanlon, who are both Learning Managers at the Raspberry Pi Foundation, have written the very newest one, which is designed to help you to get more out of your Python projects.
In Create Graphical User Interfaces with Python, you’ll find ten fun Python projects to create, including a painting program, an emoji match game, and a stop-motion animation creator. All for just £10.
So, if you’ve a keen coder in your midst, this book is the best choice to stretch their skills and keep them entertained throughout 2021. Buy it online from the official Raspberry Pi Press store.
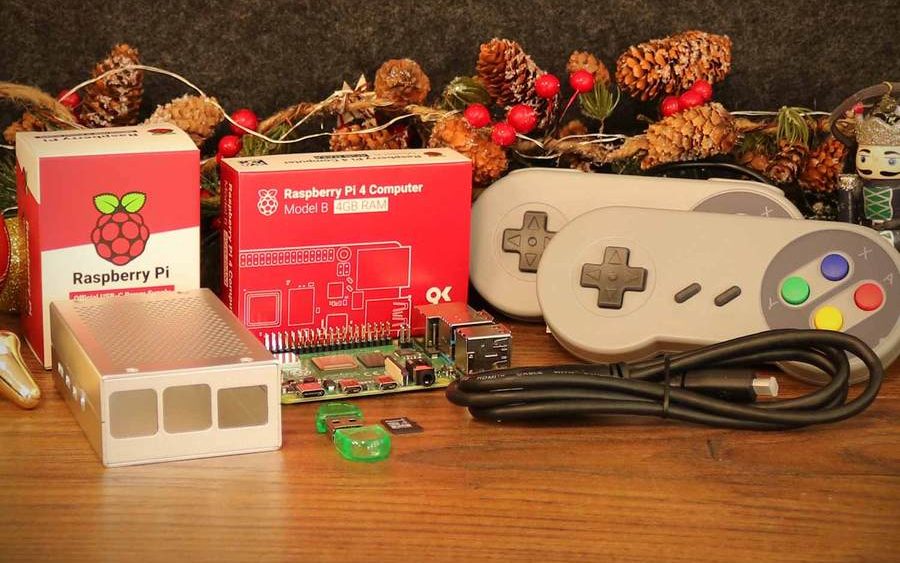
The Pi Hut’s Raspberry Pi 4 Retro Gaming Kit costs £88 and includes everything you need to create your very own retro gaming console. All your lucky kit recipient has to find is a screen to plug into, and a keyboard to set up their new Raspberry Pi, which comes as part of the kit along with a case for it. The Pi Hut has also thrown in a 16GB microSD card, plus a reader for it, as well as our official micro HDMI cable. Job done.
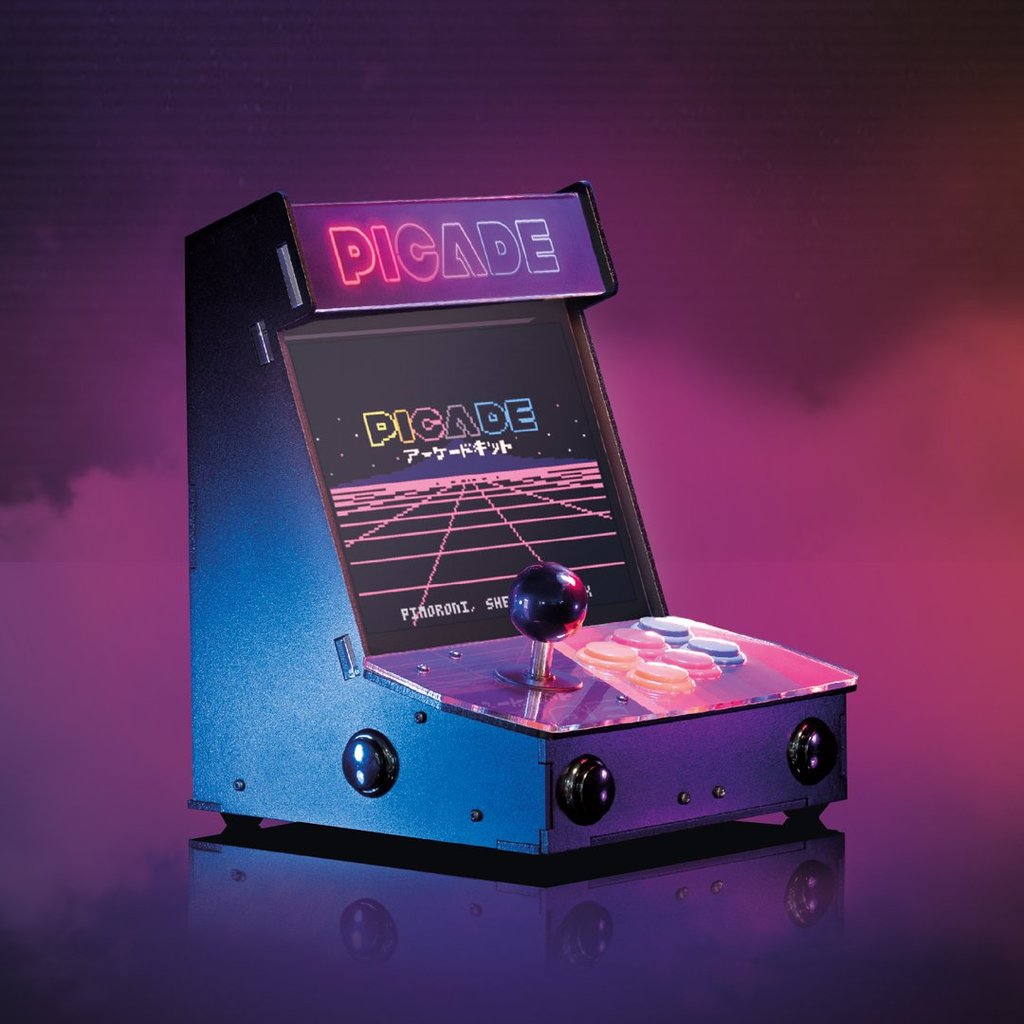
How cool does Picade look?! It’s sold by Pimoroni and you can buy an 8″ display set for £165,or a 10″ display version for £225. Show me a self-respecting gamer who doesn’t want a desktop retro arcade machine in their own home.
Picade is a Raspberry Pi–powered mini arcade that you build yourself. All you’ll need to add is your own Raspberry Pi, a power supply, and a micro SD card.
Code the Classics, Volume 1 | £12
And if the gamer on your gift list prefers to create their own retro video games, send them a copy of Code the Classics, Volume 1. It’s a stunning-looking hardback book packed with 224 pages telling the stories of some of the seminal video games of the 1970s and 1980s, and showing you how to create your own. Putting hours of projects in the hands of your favourite gamer will only set you back £12. Buy it online from the official Raspberry Pi Press store.
Raspberry Pi superfans
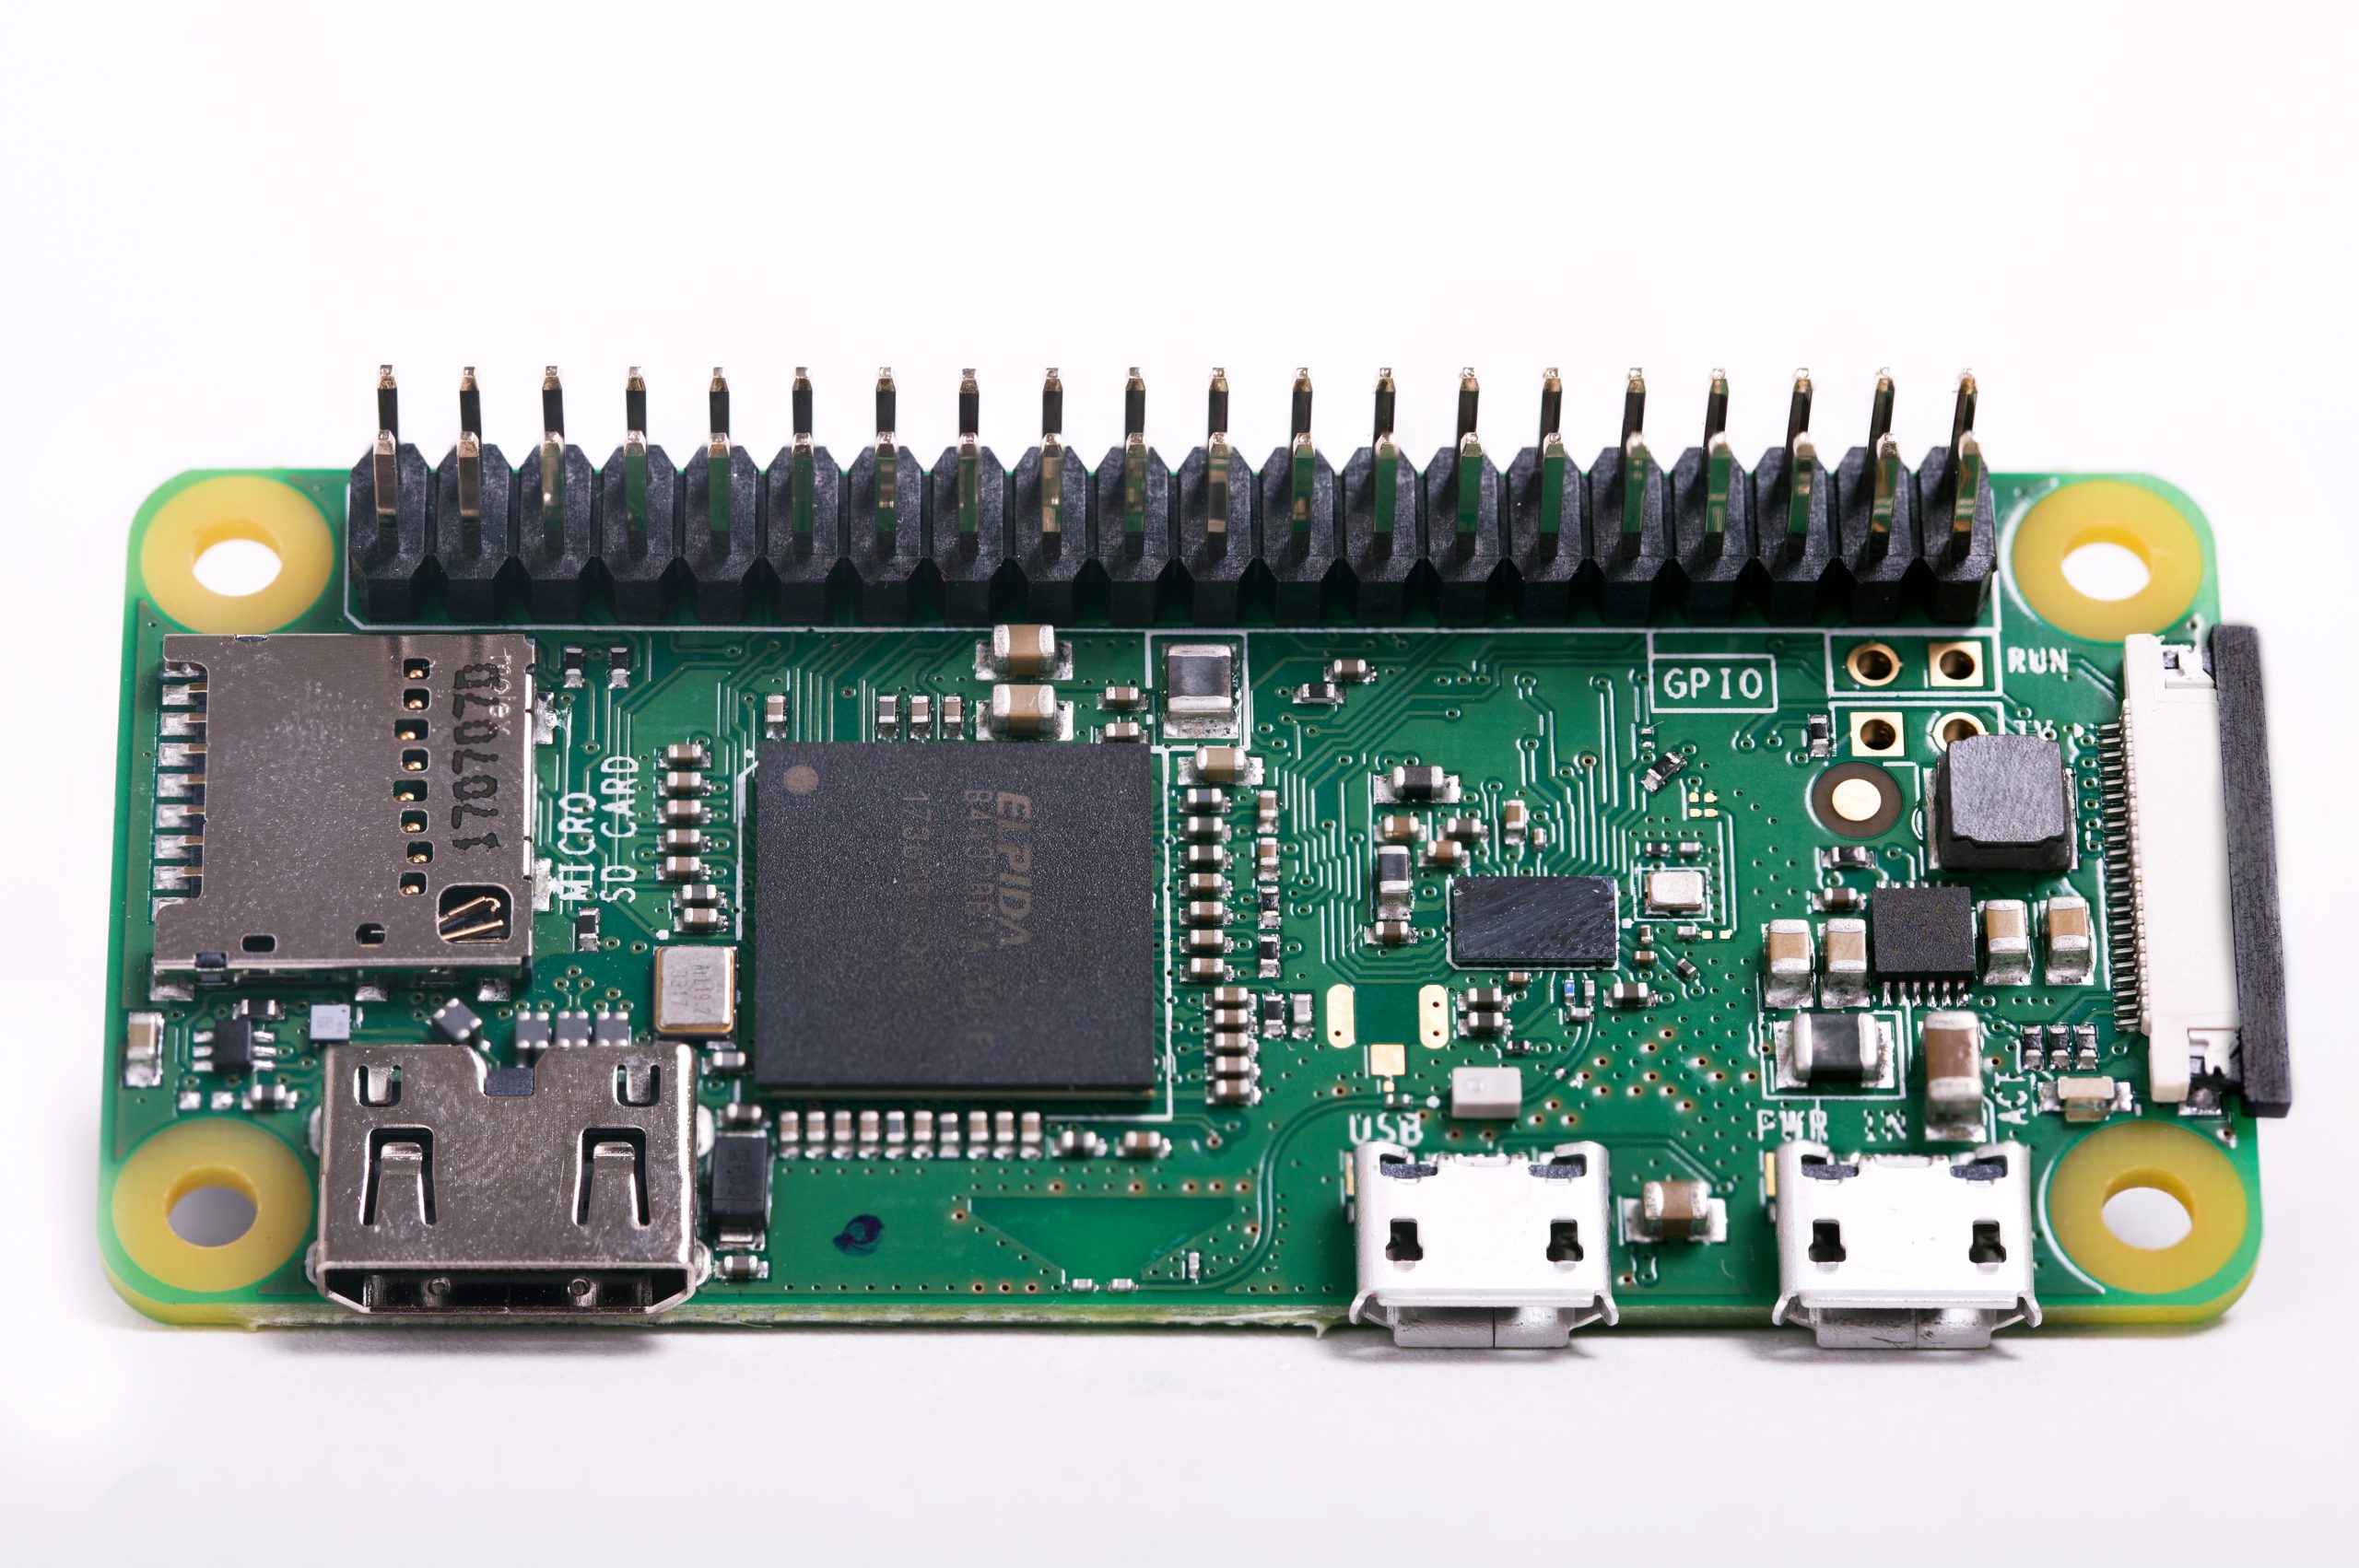
Raspberry Pi Zero W | $10
For just $10 apiece, you can drop a couple Raspberry Pi Zero W into any tinkerer’s stocking and they’ll be set for their next few projects. They will LOVE you for allowing them try a new, risky build without having to tear down something else they created to retrieve an old Raspberry Pi.
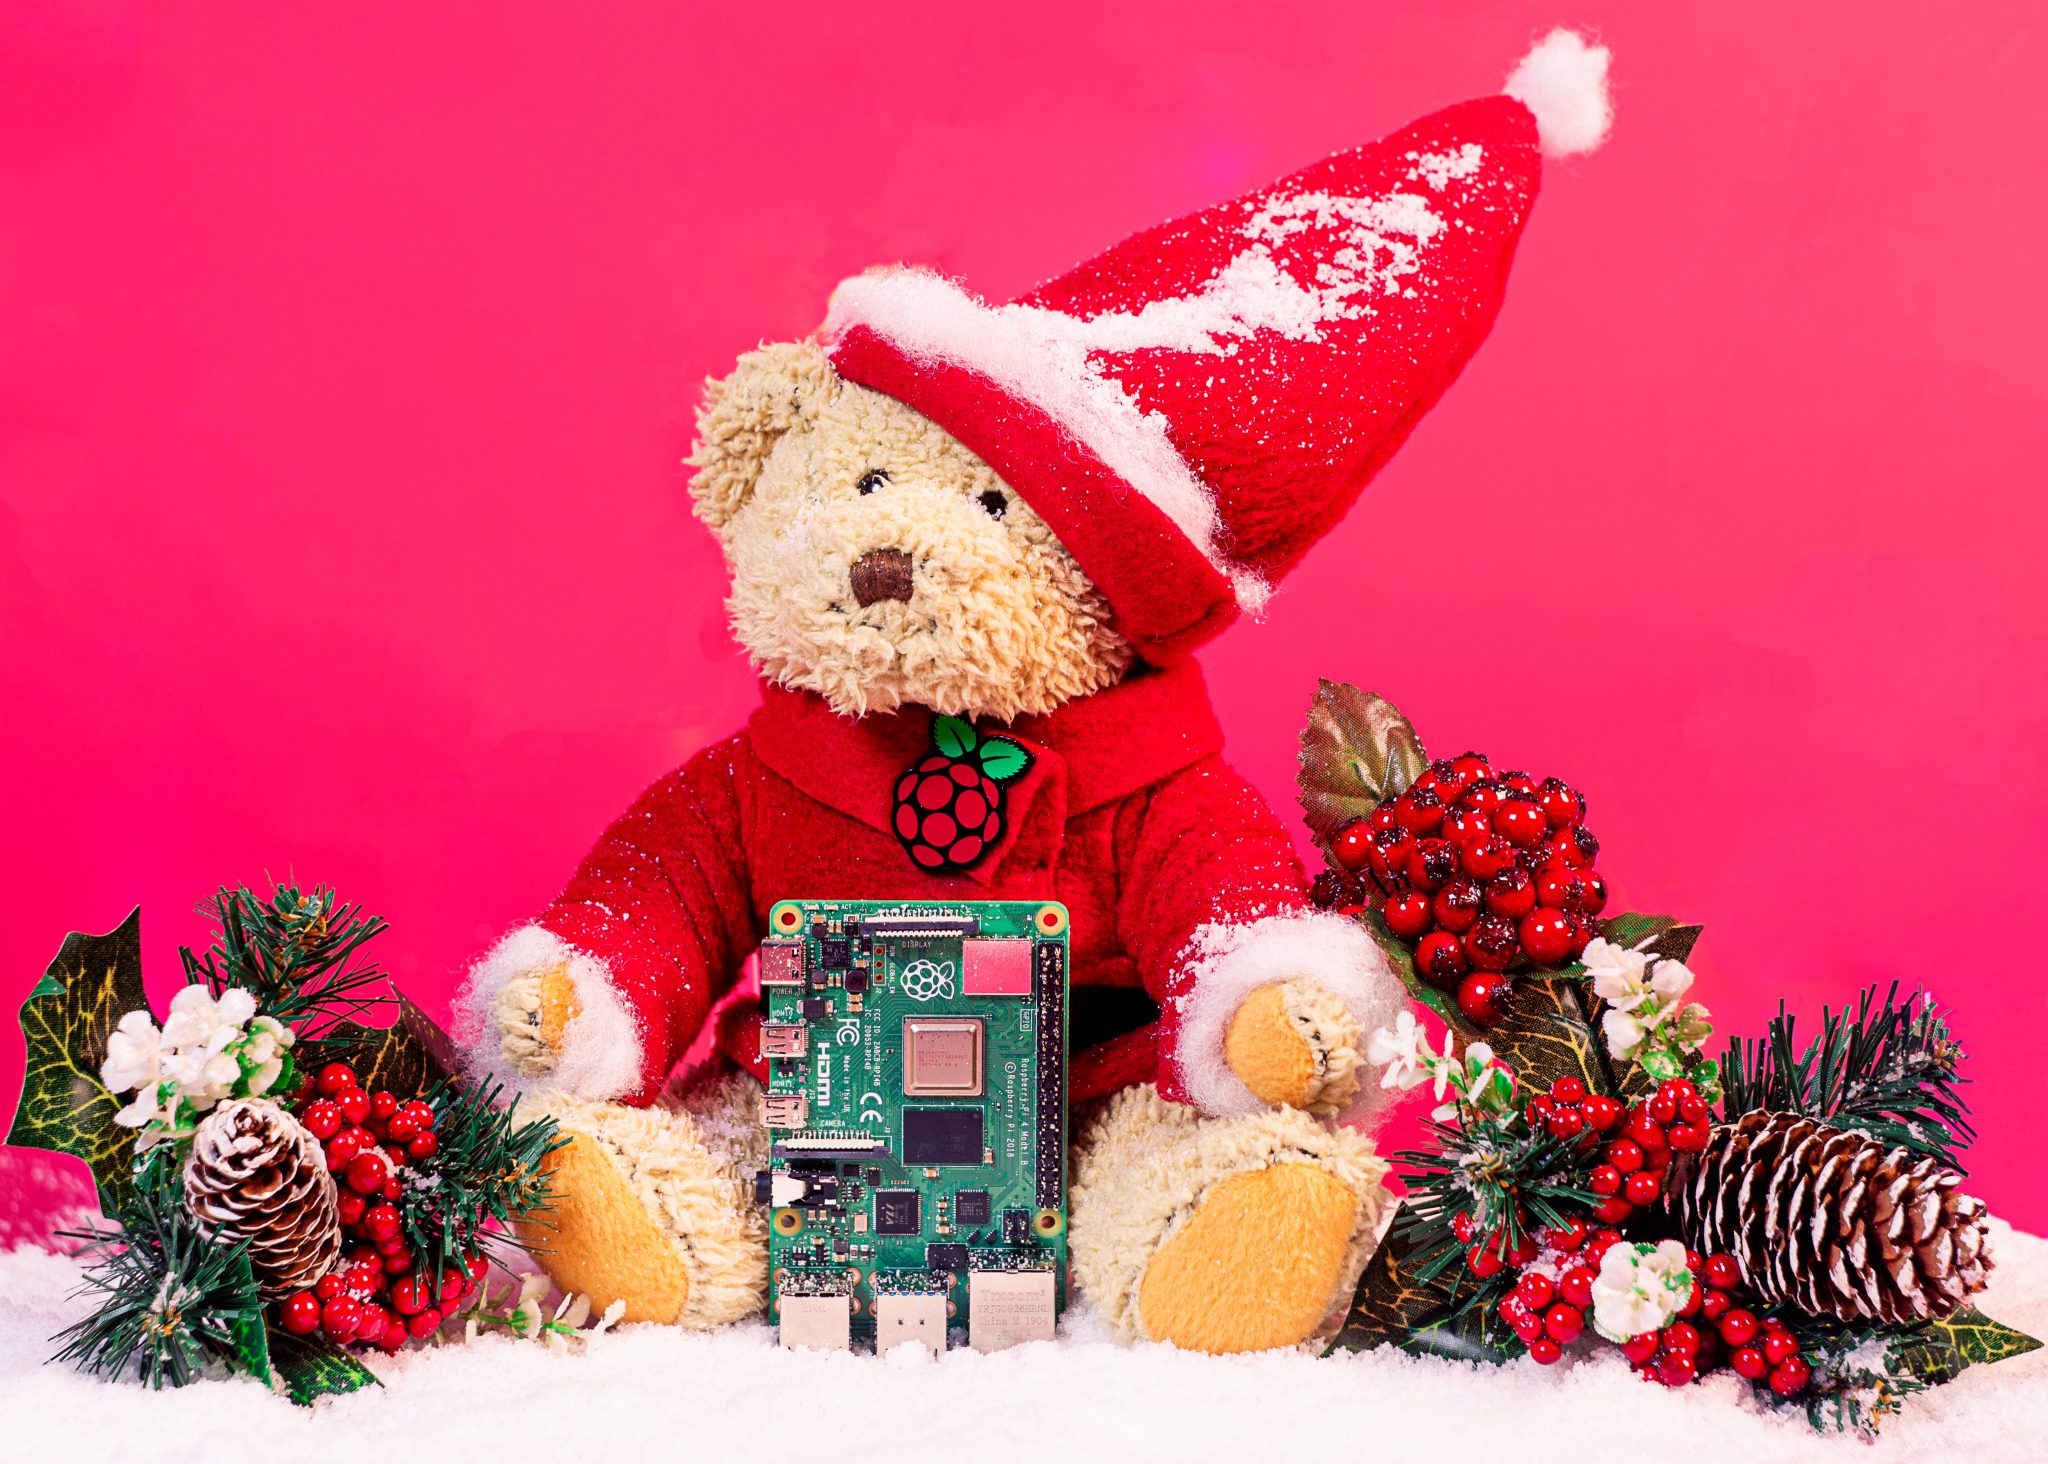
Babbage Bear | $9
What to get the superfan who already has a desk full of Raspberry Pi? An official Babbage Bear to oversee the proceedings! Babbage only costs £9 and will arrive wearing their own Raspberry Pi–branded T-shirt. A special Raspberry Pi Towers inhabitant made our Babbage this Christmassy outfit before we photographed them.
Official t-shirts | $12
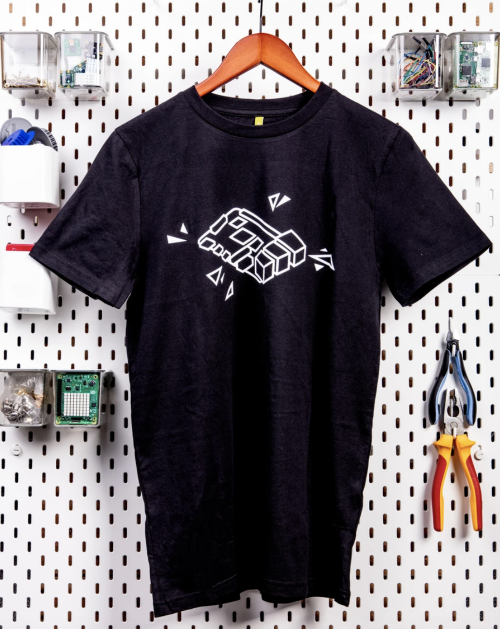
Raspberry Pi “Pi 4” T-shirt
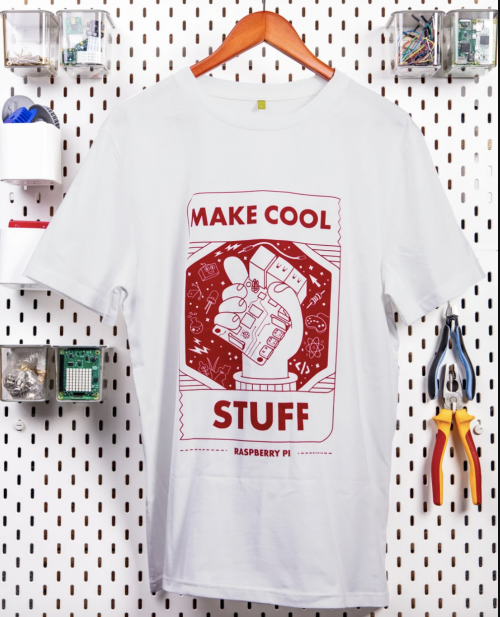
Raspberry Pi “Make Cool Stuff” T-shirt
If you’ve a superfan on your gift list, then it’s likely they already own a t-shirt with the Raspberry Pi logo on it — so why not get them one of these new designs?
Both costing just £12, the black Raspberry Pi “Pi 4” t-shirt was released to celebrate the launch of Raspberry Pi 4 and features an illustration of the powerful $35 computer. The white Raspberry Pi “Make Cool Stuff” option was created by Raspberry Pi’s own illustrator/animator extraordinaire Sam Alder. Drop that inside fact on the gift tag for extra superfan points.
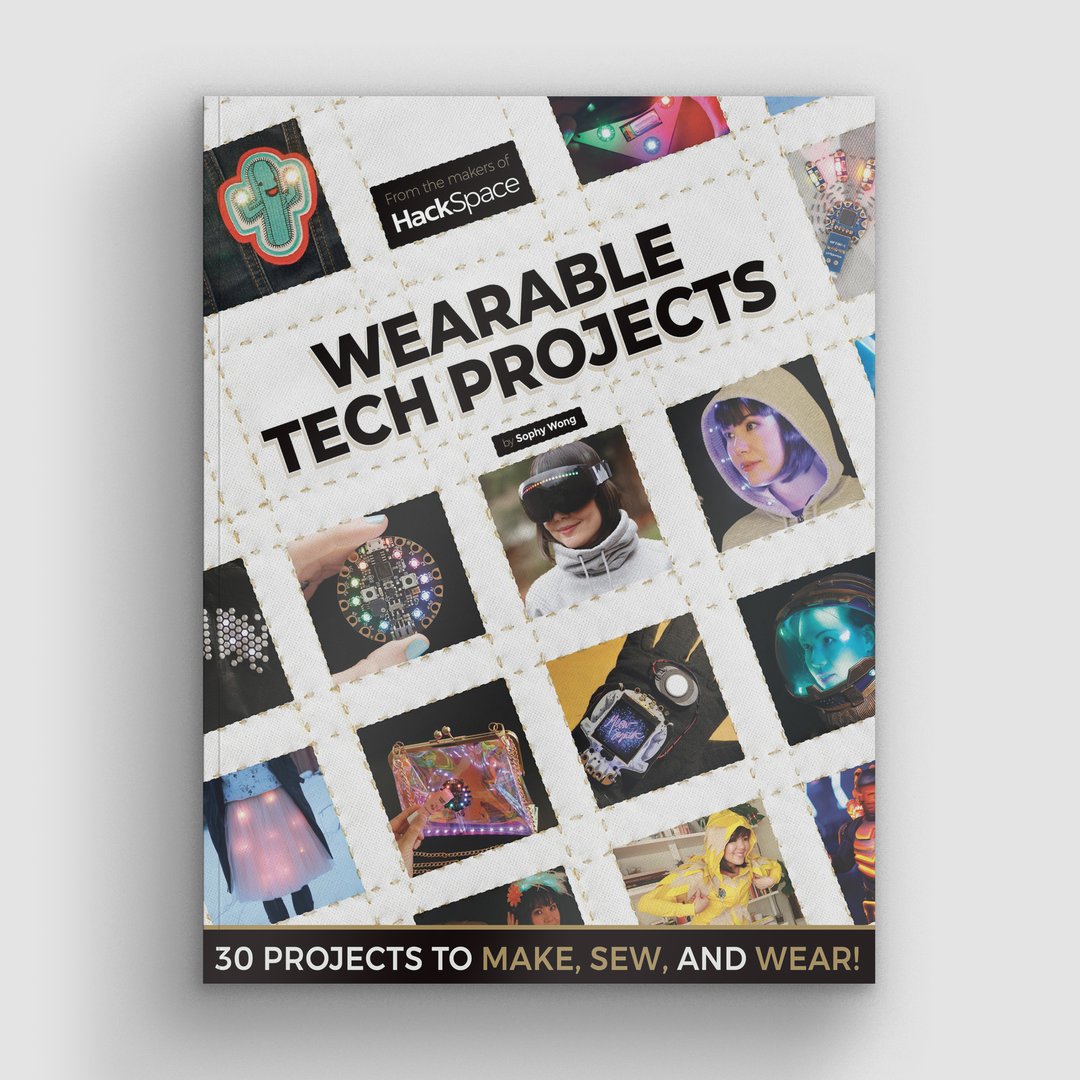
Wearable tech projects | £7
And if they’re the kind of superfan who would like to make their own Raspberry Pi-–themed clothing, gift them with our Wearable Tech Projects book. This 164-page book gathers up the best bits of wearable technology from HackSpace magazine, with tutorials such as adding lights to your favourite cosplay helmet, and creating a glowing LED skirt. It’s on sale for just £7 and you can buy it online from the official Raspberry Pi Press store.
Keep giving all year
What if you could give the joy of opening a Raspberry Pi–themed gift every single month for a whole year? Our magazine subscriptions let you do just that, AND they come with a few extra gifts when you sign up.
The MagPi magazine
The official Raspberry Pi magazine comes with a free Raspberry Pi Zero kit worth £20 when you sign up for a 12-month subscription. The magazine is packed with computing and electronics tutorials, how-to guides, and the latest news and reviews.
HackSpace magazine is packed with projects for fixers and tinkerers of all abilities. 12-month subscriptions comes with a free Adafruit Circuit Playground Express, which has been specially developed to teach programming novices from scratch and is worth £25.
Wireframe magazine lifts the lid on video games. In every issue, you’ll find out how games are made, who makes them, and how you can make your own using detailed guides. The latest deal gets you three issues for just £10, plus your choice of one of our official books as a gift.
Custom PC is the magazine for people who are passionate about PC technology and hardware. You can subscribe to receive three issues for just £10, and you’ll also receive a book as a gift.
That’s all folks. Have a holly jolly one. Drop a question in the comments box below if you’re after something Raspberry Pi–themed which isn’t mentioned here. I’m half elf and should be able to help.
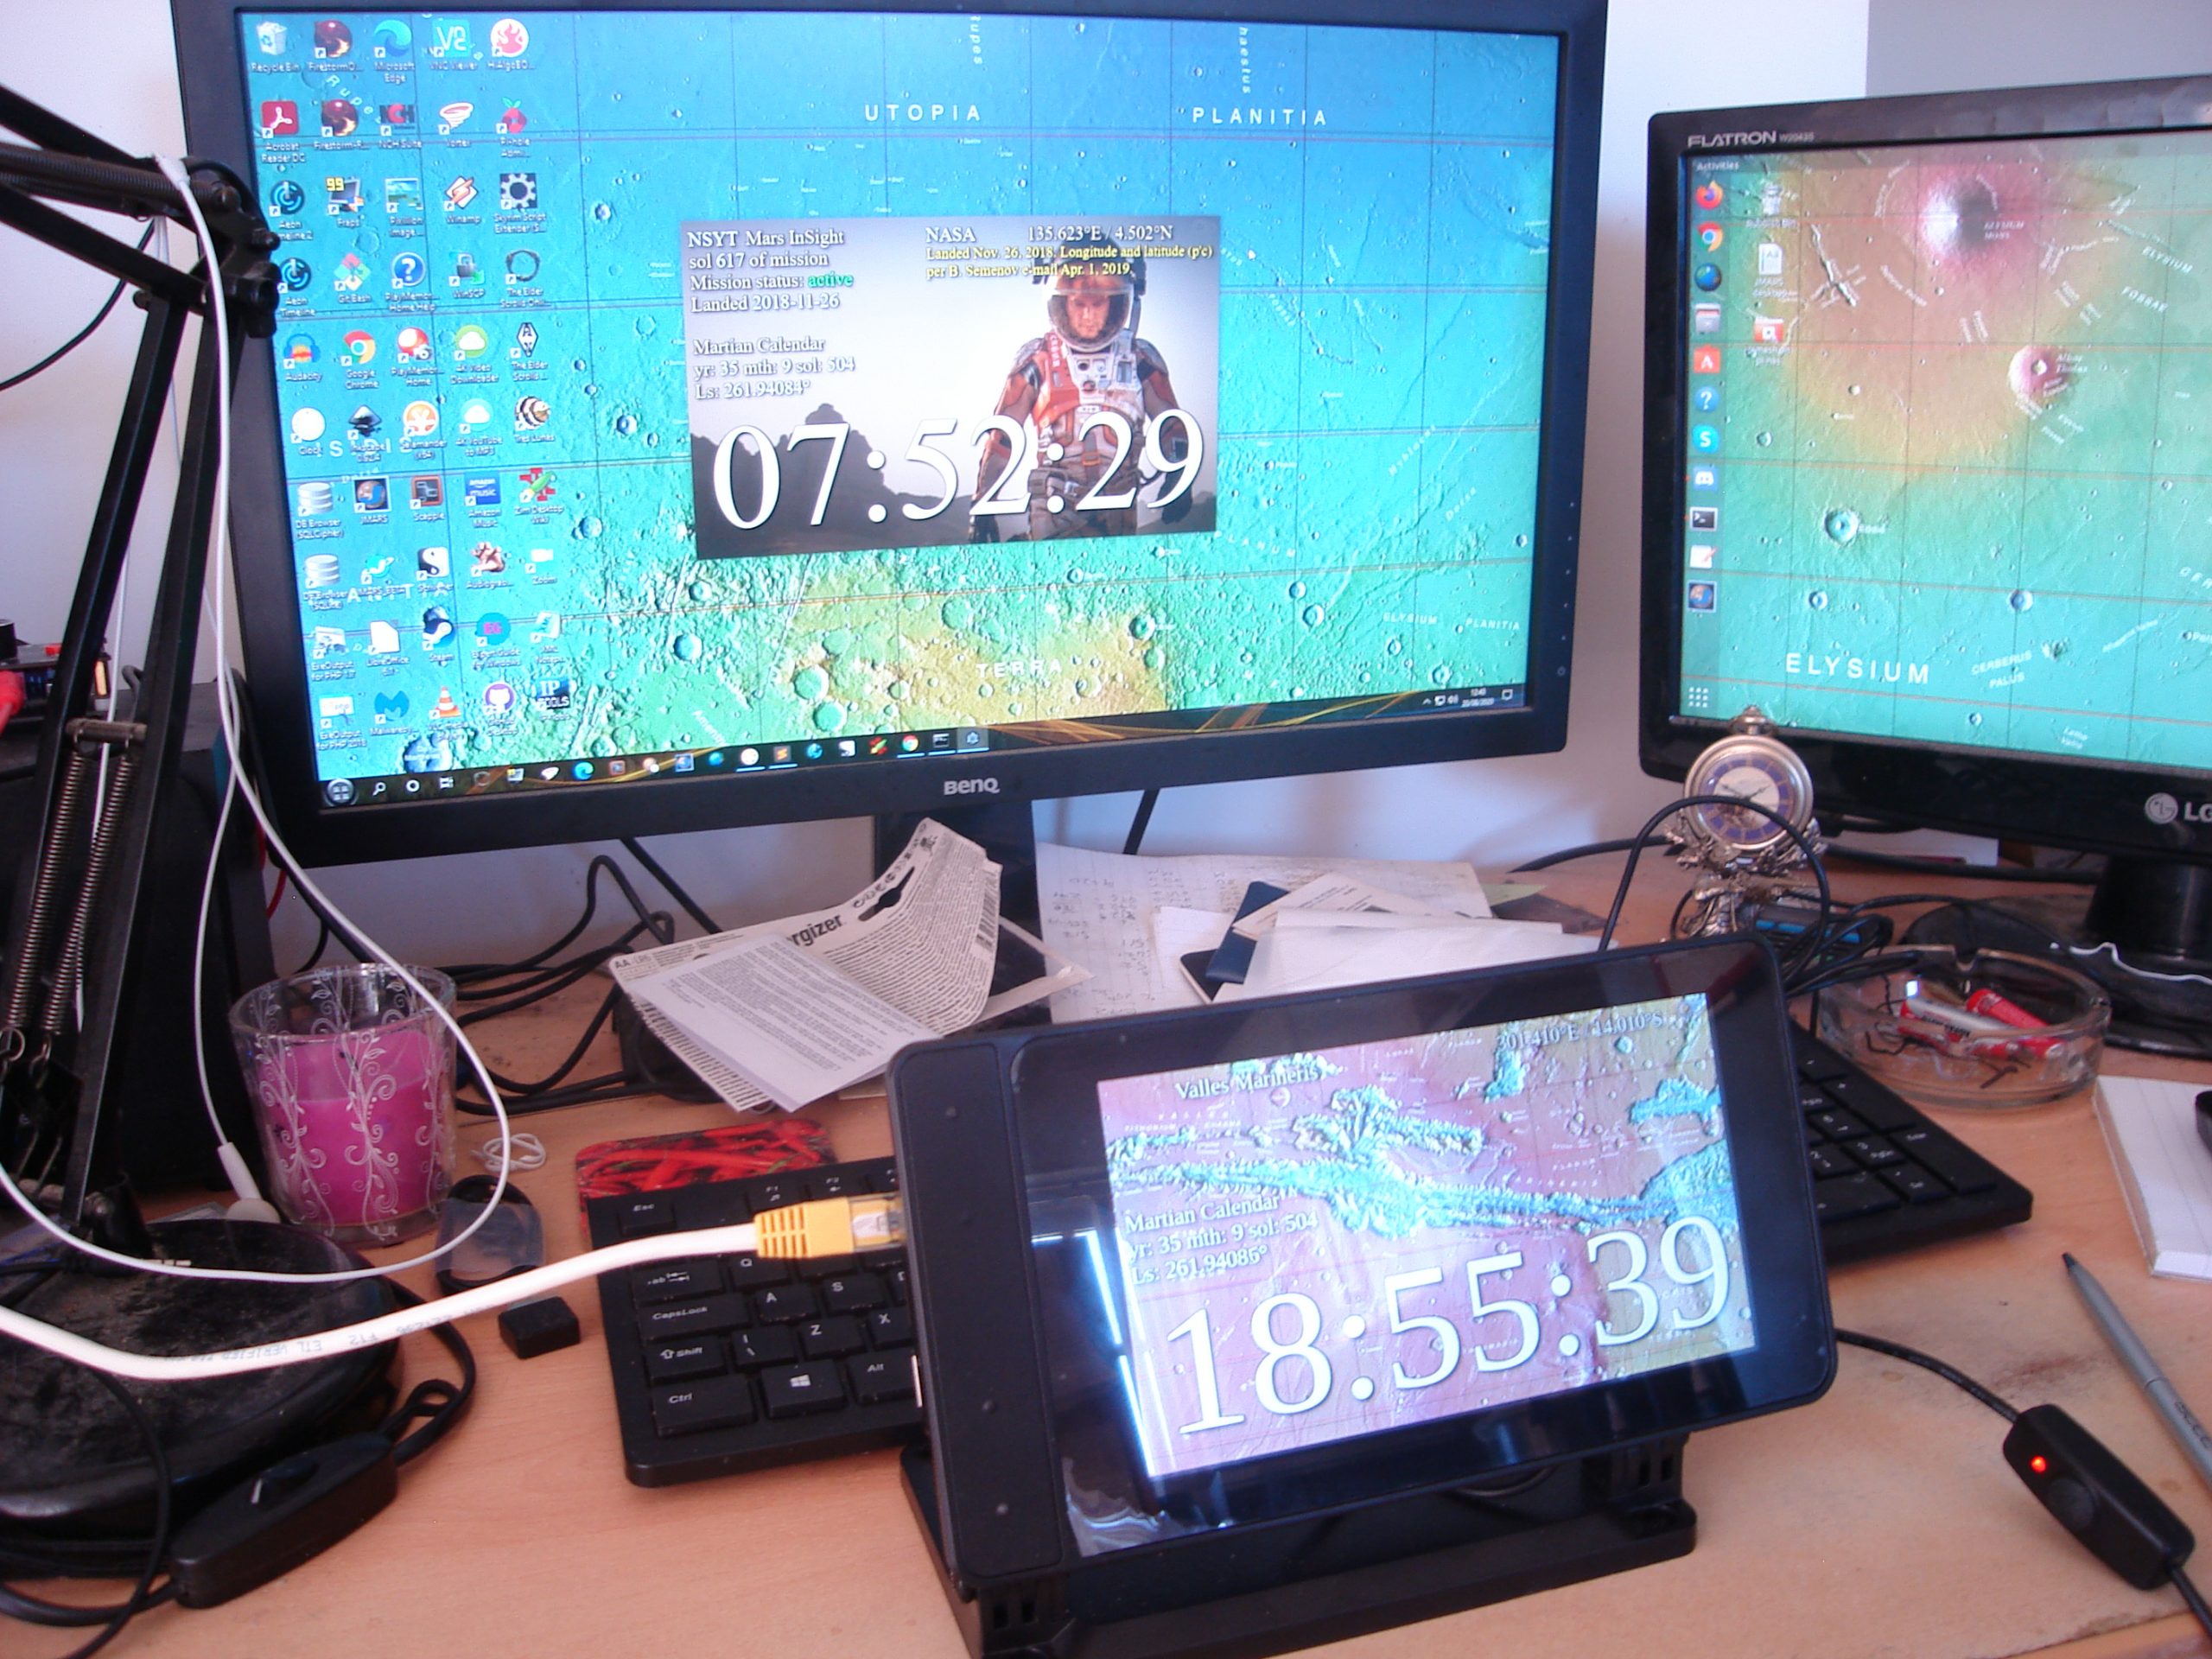
A sci-fi writer wanted to add some realism to his fiction. The result: a Raspberry Pi-based Martian timepiece. Rosie Hattersley clocks in from the latest issue of The MagPi Magazine.
The Mars Clock project is adapted from code Phil wrote in JavaScript and a Windows environment for Raspberry Pi
Ever since he first clapped eyes on Mars through the eyepiece of a telescope, Philip Ide has been obsessed with the Red Planet. He’s written several books based there and, many moons ago, set up a webpage showing the weather on Mars. This summer, Phil adapted his weather monitor and created a Raspberry Pi-powered Mars Clock.
Mission: Mars
After writing several clocks for his Mars Weather page, Phil wanted to make a physical clock: “something that could sit on my desk or such like, and tell the time on Mars.” It was to tell the time at any location on Mars, with presets for interesting locations “plus the sites of all the missions that made it to the surface – whether they pancaked or not.”
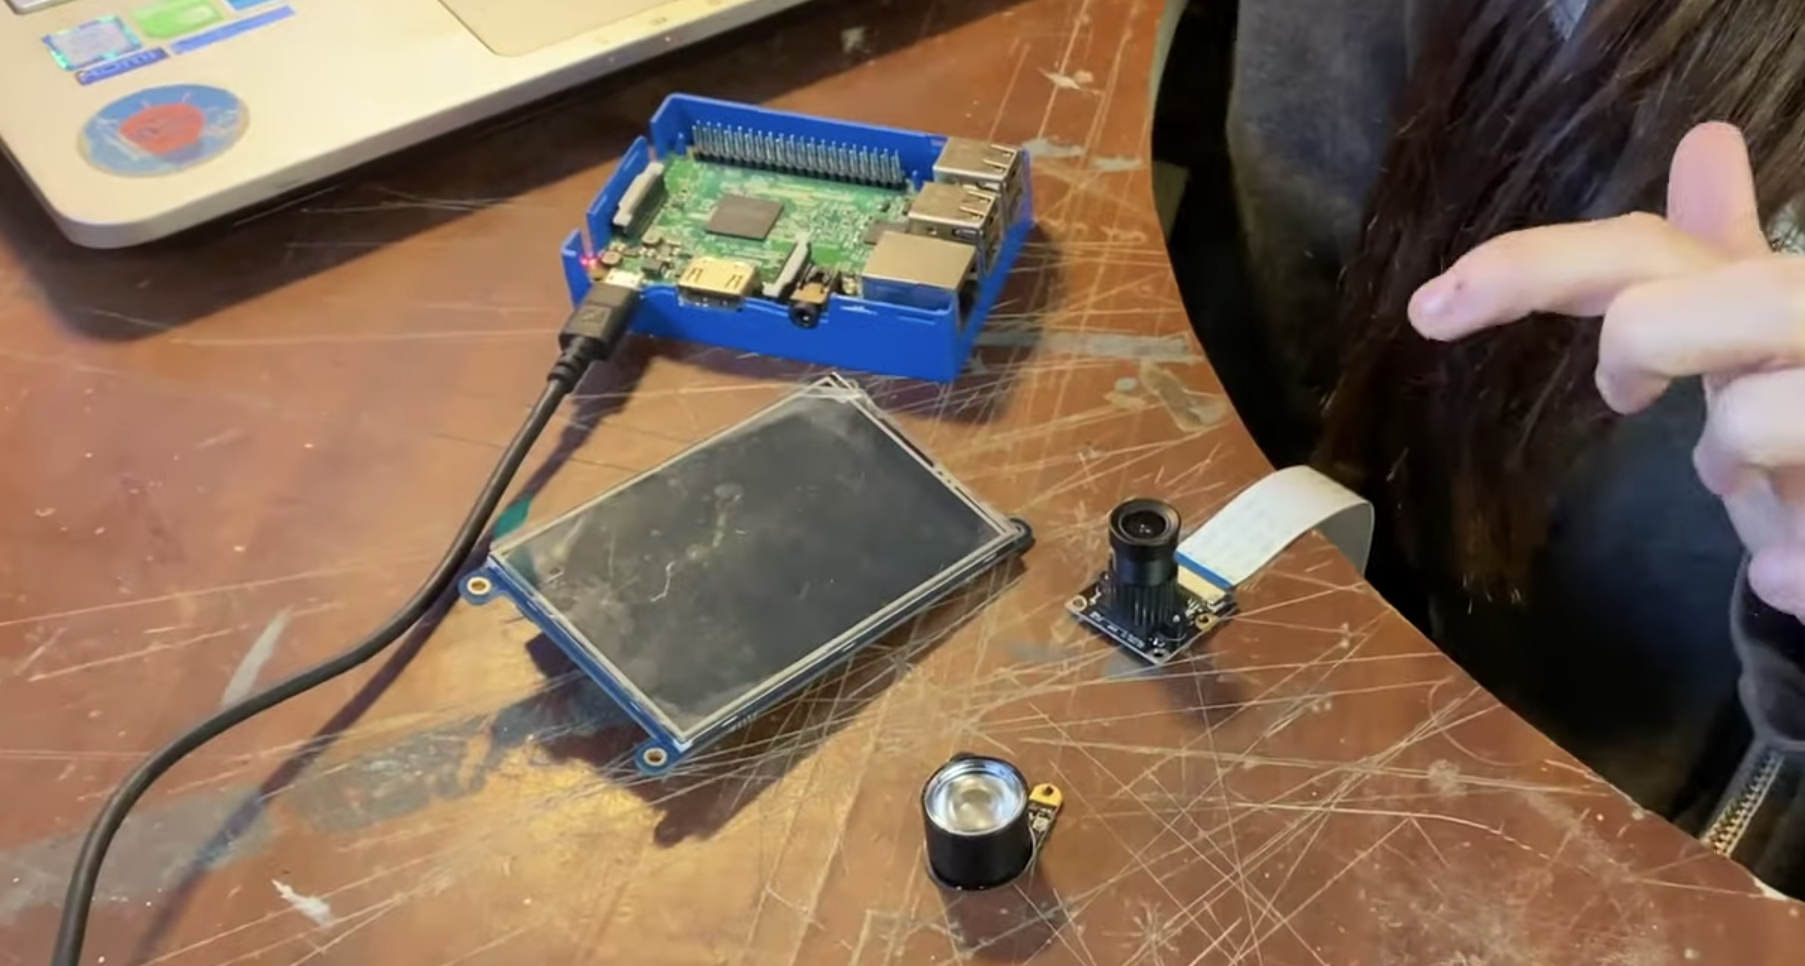
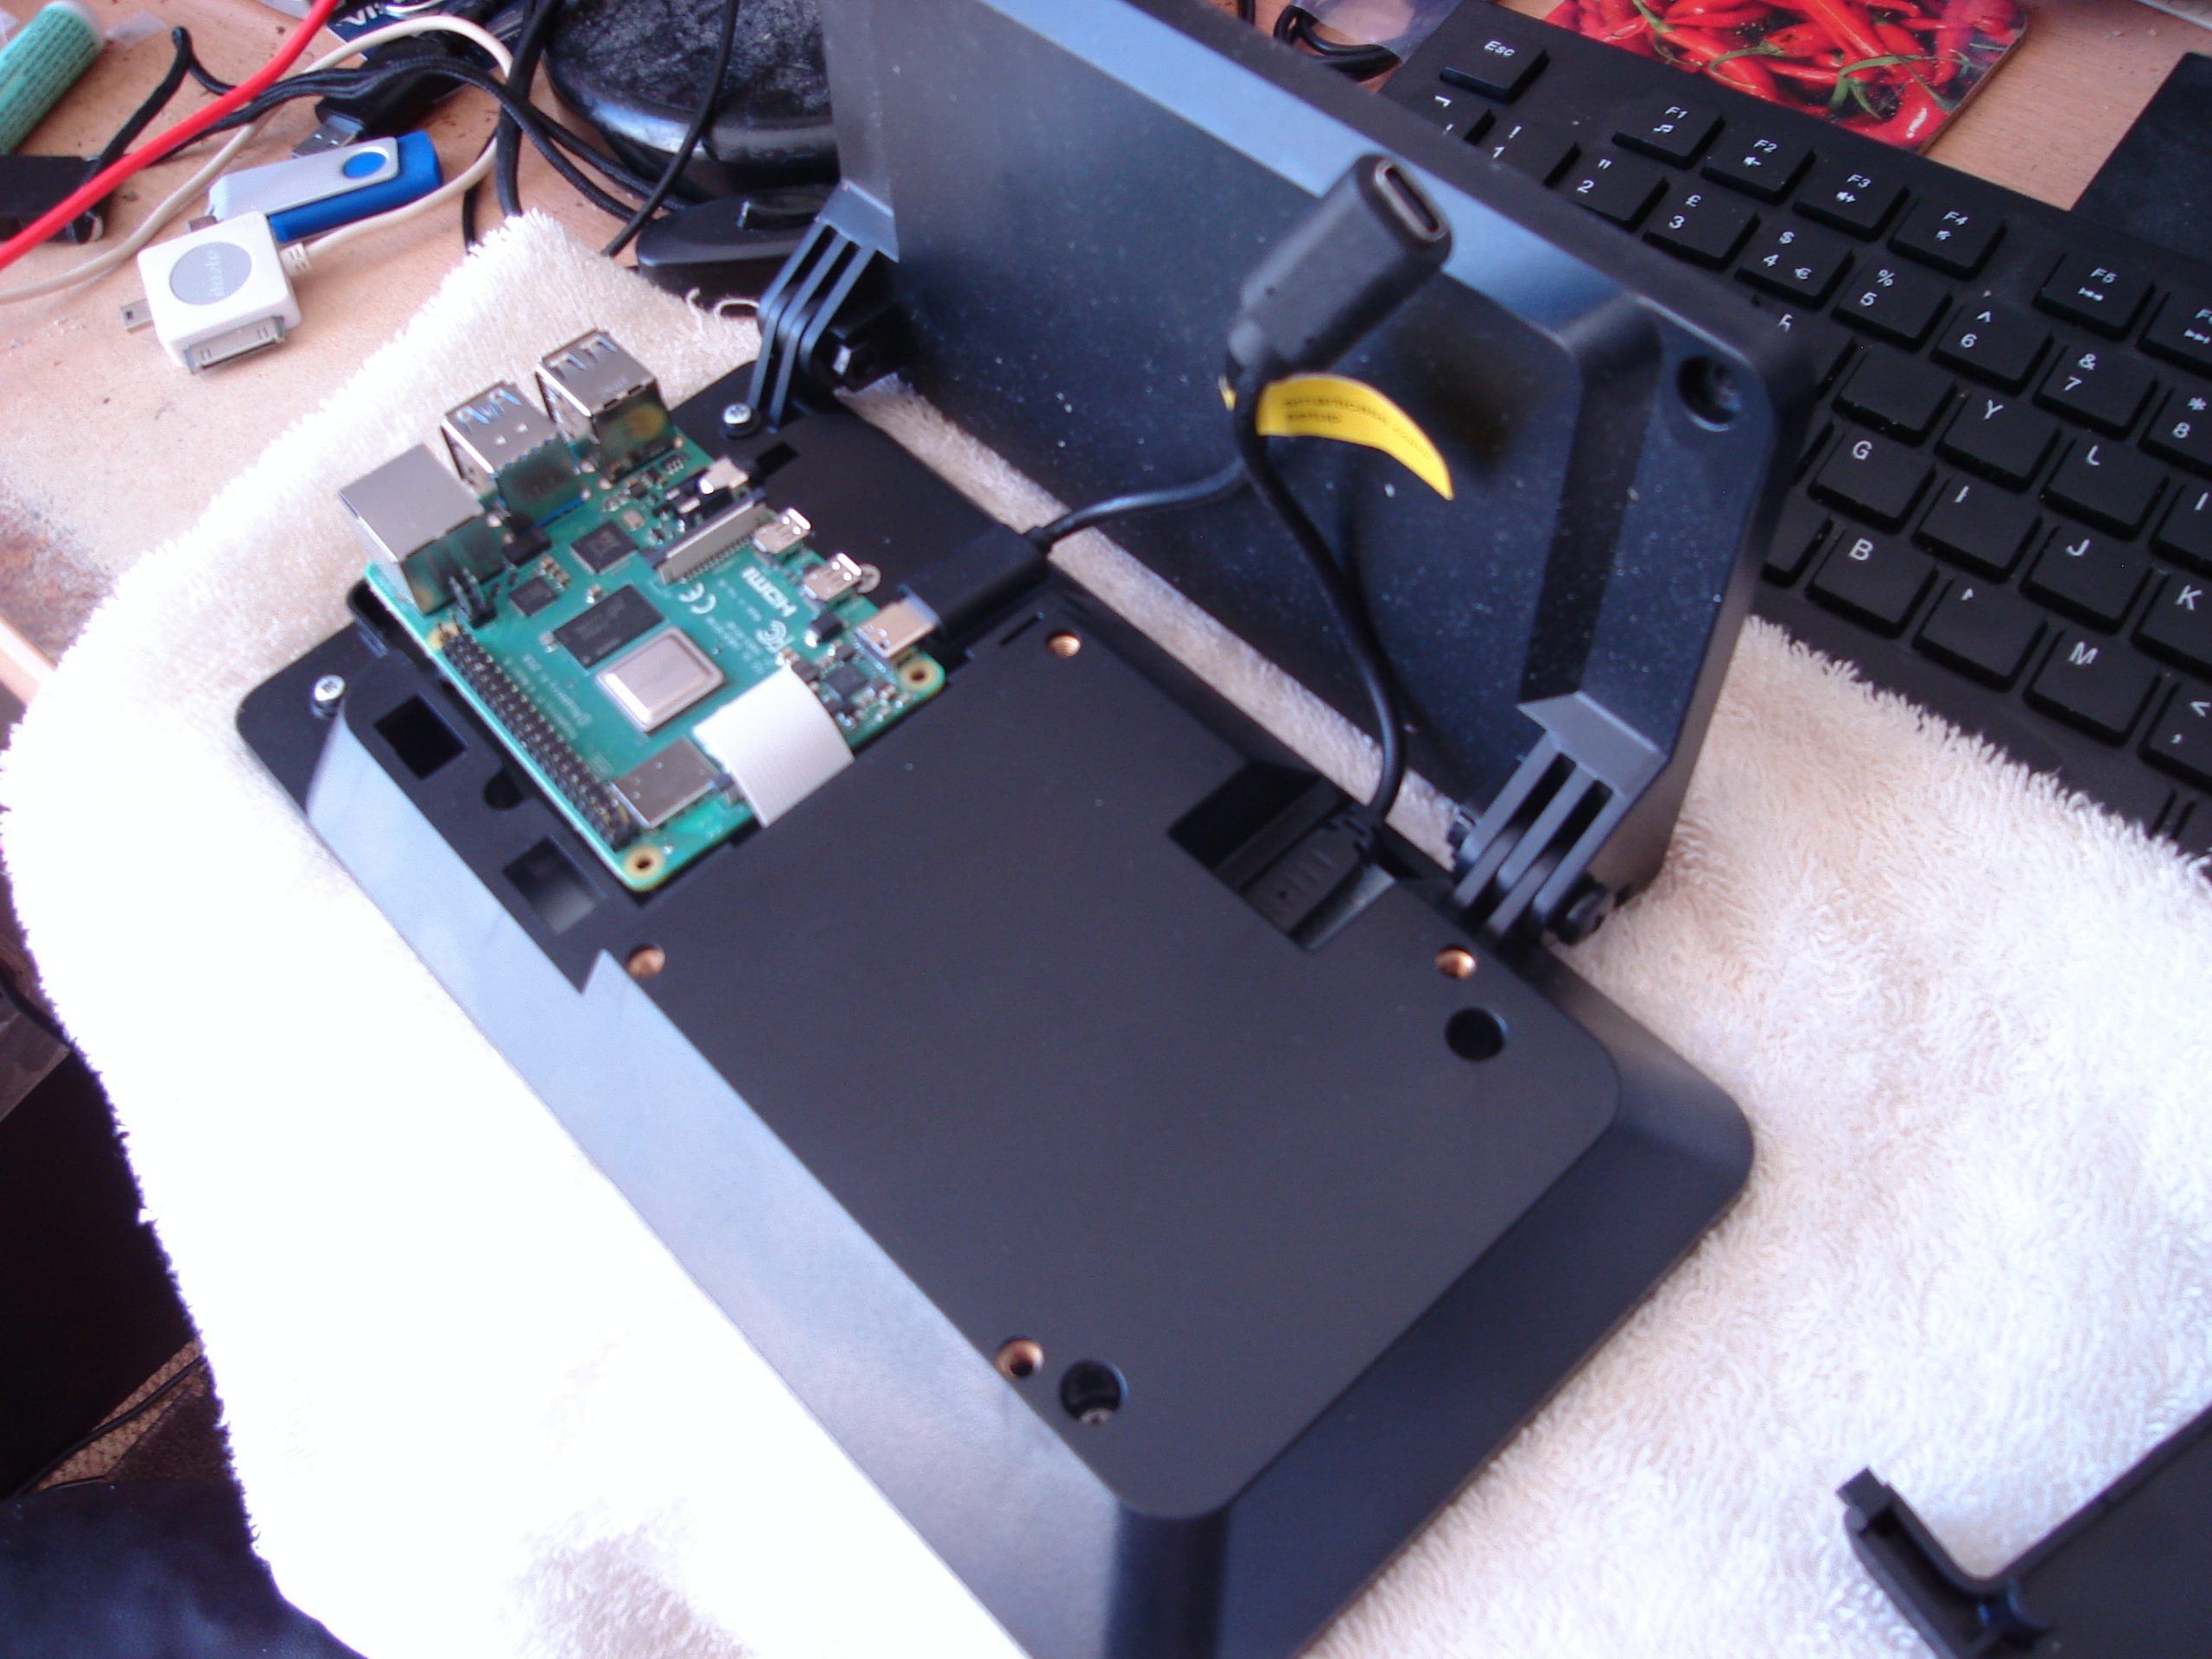
The projects runs on a 2GB Raspberry Pi 4 with official 7-inch touchscreen
Another prerequisite was that the clock had to check for new mission file updates and IERS bulletins to see if a new leap second had been factored into Universal Coordinated Time.
“Martian seconds are longer,” explains Phil, “so everything was pointing at software rather than a mechanical device. Raspberry Pi was a shoo-in for the job”. However, he’d never used one.
“I’d written some software for calculating orbits and one of the target platforms was Raspberry Pi. I’d never actually seen it run on a Raspberry Pi but I knew it worked, so the door was already open.” He was able to check his data against a benchmark NASA provided. Knowing that the clocks on his Mars Weather page were accurate meant that Phil could focus on getting to grips with his new single-board computer.
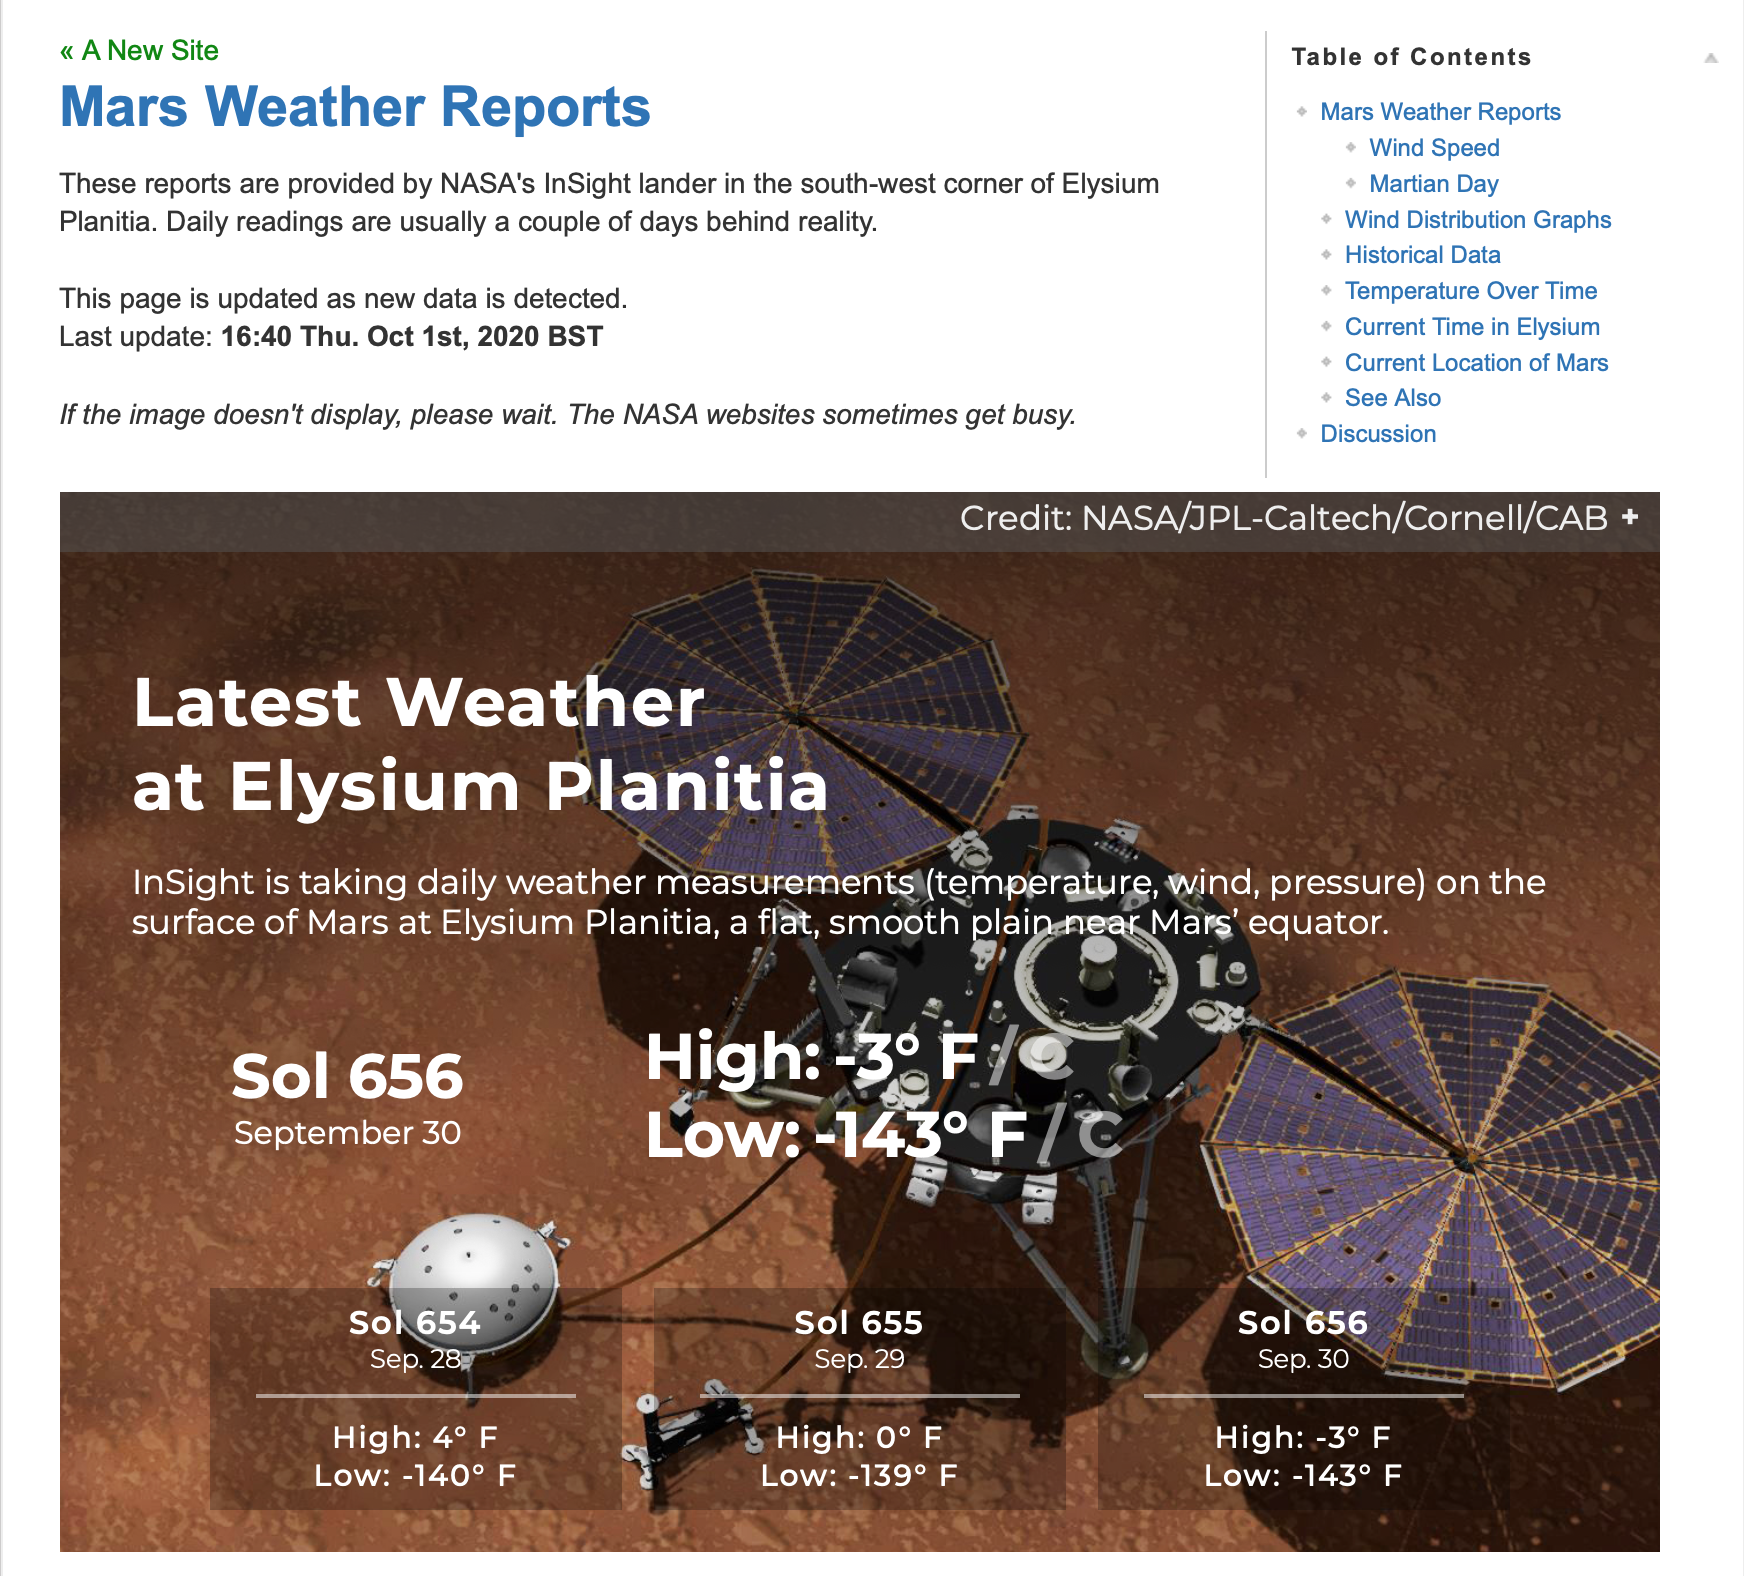
Phil’s Mars Weather page shows seasonal trends since March 2019.
He chose a 2GB Raspberry Pi 4 and official-inch touchscreen with a SmartiPi Touch 2 case. “Angles are everything,” he reasons. He also added a fan to lower the CPU temperature and extend the hardware’s life. Along with a power lead, the whole setup cost £130 from The Pi Hut.
Since his Mars Clock generates a lot of data, he made it skinnable so the user can choose which pieces of information to view at any one time. It can display two types of map – Viking or MOLA – depending on the co-ordinates for the clock. NASA provides a web map-tile service with many different data sets for Mars, so it should be possible to make the background an interactive map, allowing you to zoom in/out and scroll around. Getting these to work proved rather a headache as he hit incompatibilities with the libraries.
Learn through experience
Phil wrote most of the software himself, with the exception of libraries for the keyboard and FTP which he pulled from GitHub. Here’s all the code.
The Mars Clock’s various skins show details of missions to Mars, as well as the location’s time and date
He used JavaScript running on the Node.js/Electron framework. “This made for rapid development and is cross-platform, so I could write and test it on Windows and then move it to the Raspberry Pi,” he says. With the basic code written, Phil set about paring it back, reducing the number and duration of CPU time-slices the clock needed when running. “I like optimised software,” he explains.
His decades as a computer programmer meant other aspects were straightforward. The hardware is more than capable, he says of his first ever experience of Raspberry Pi, and the SmartiPi case makers had done a brilliant job. Everything fit together and in just a few minutes his Raspberry Pi was working.
The SmartiPi Touch 2 case houses Raspberry Pi 4 and a fan to cool its CPU
Since completing his Mars Clock Phil has added a pi-hole and a NAS to his Raspberry Pi setup and says his confidence using them is such that he’s now contemplating challenging himself to build an orrery (a mechanical model of the solar system). “I have decades of programming experience, but I was still learning new things as the project progressed,” he says. “The nerd factor of any given object increases exponentially if you make it yourself.”
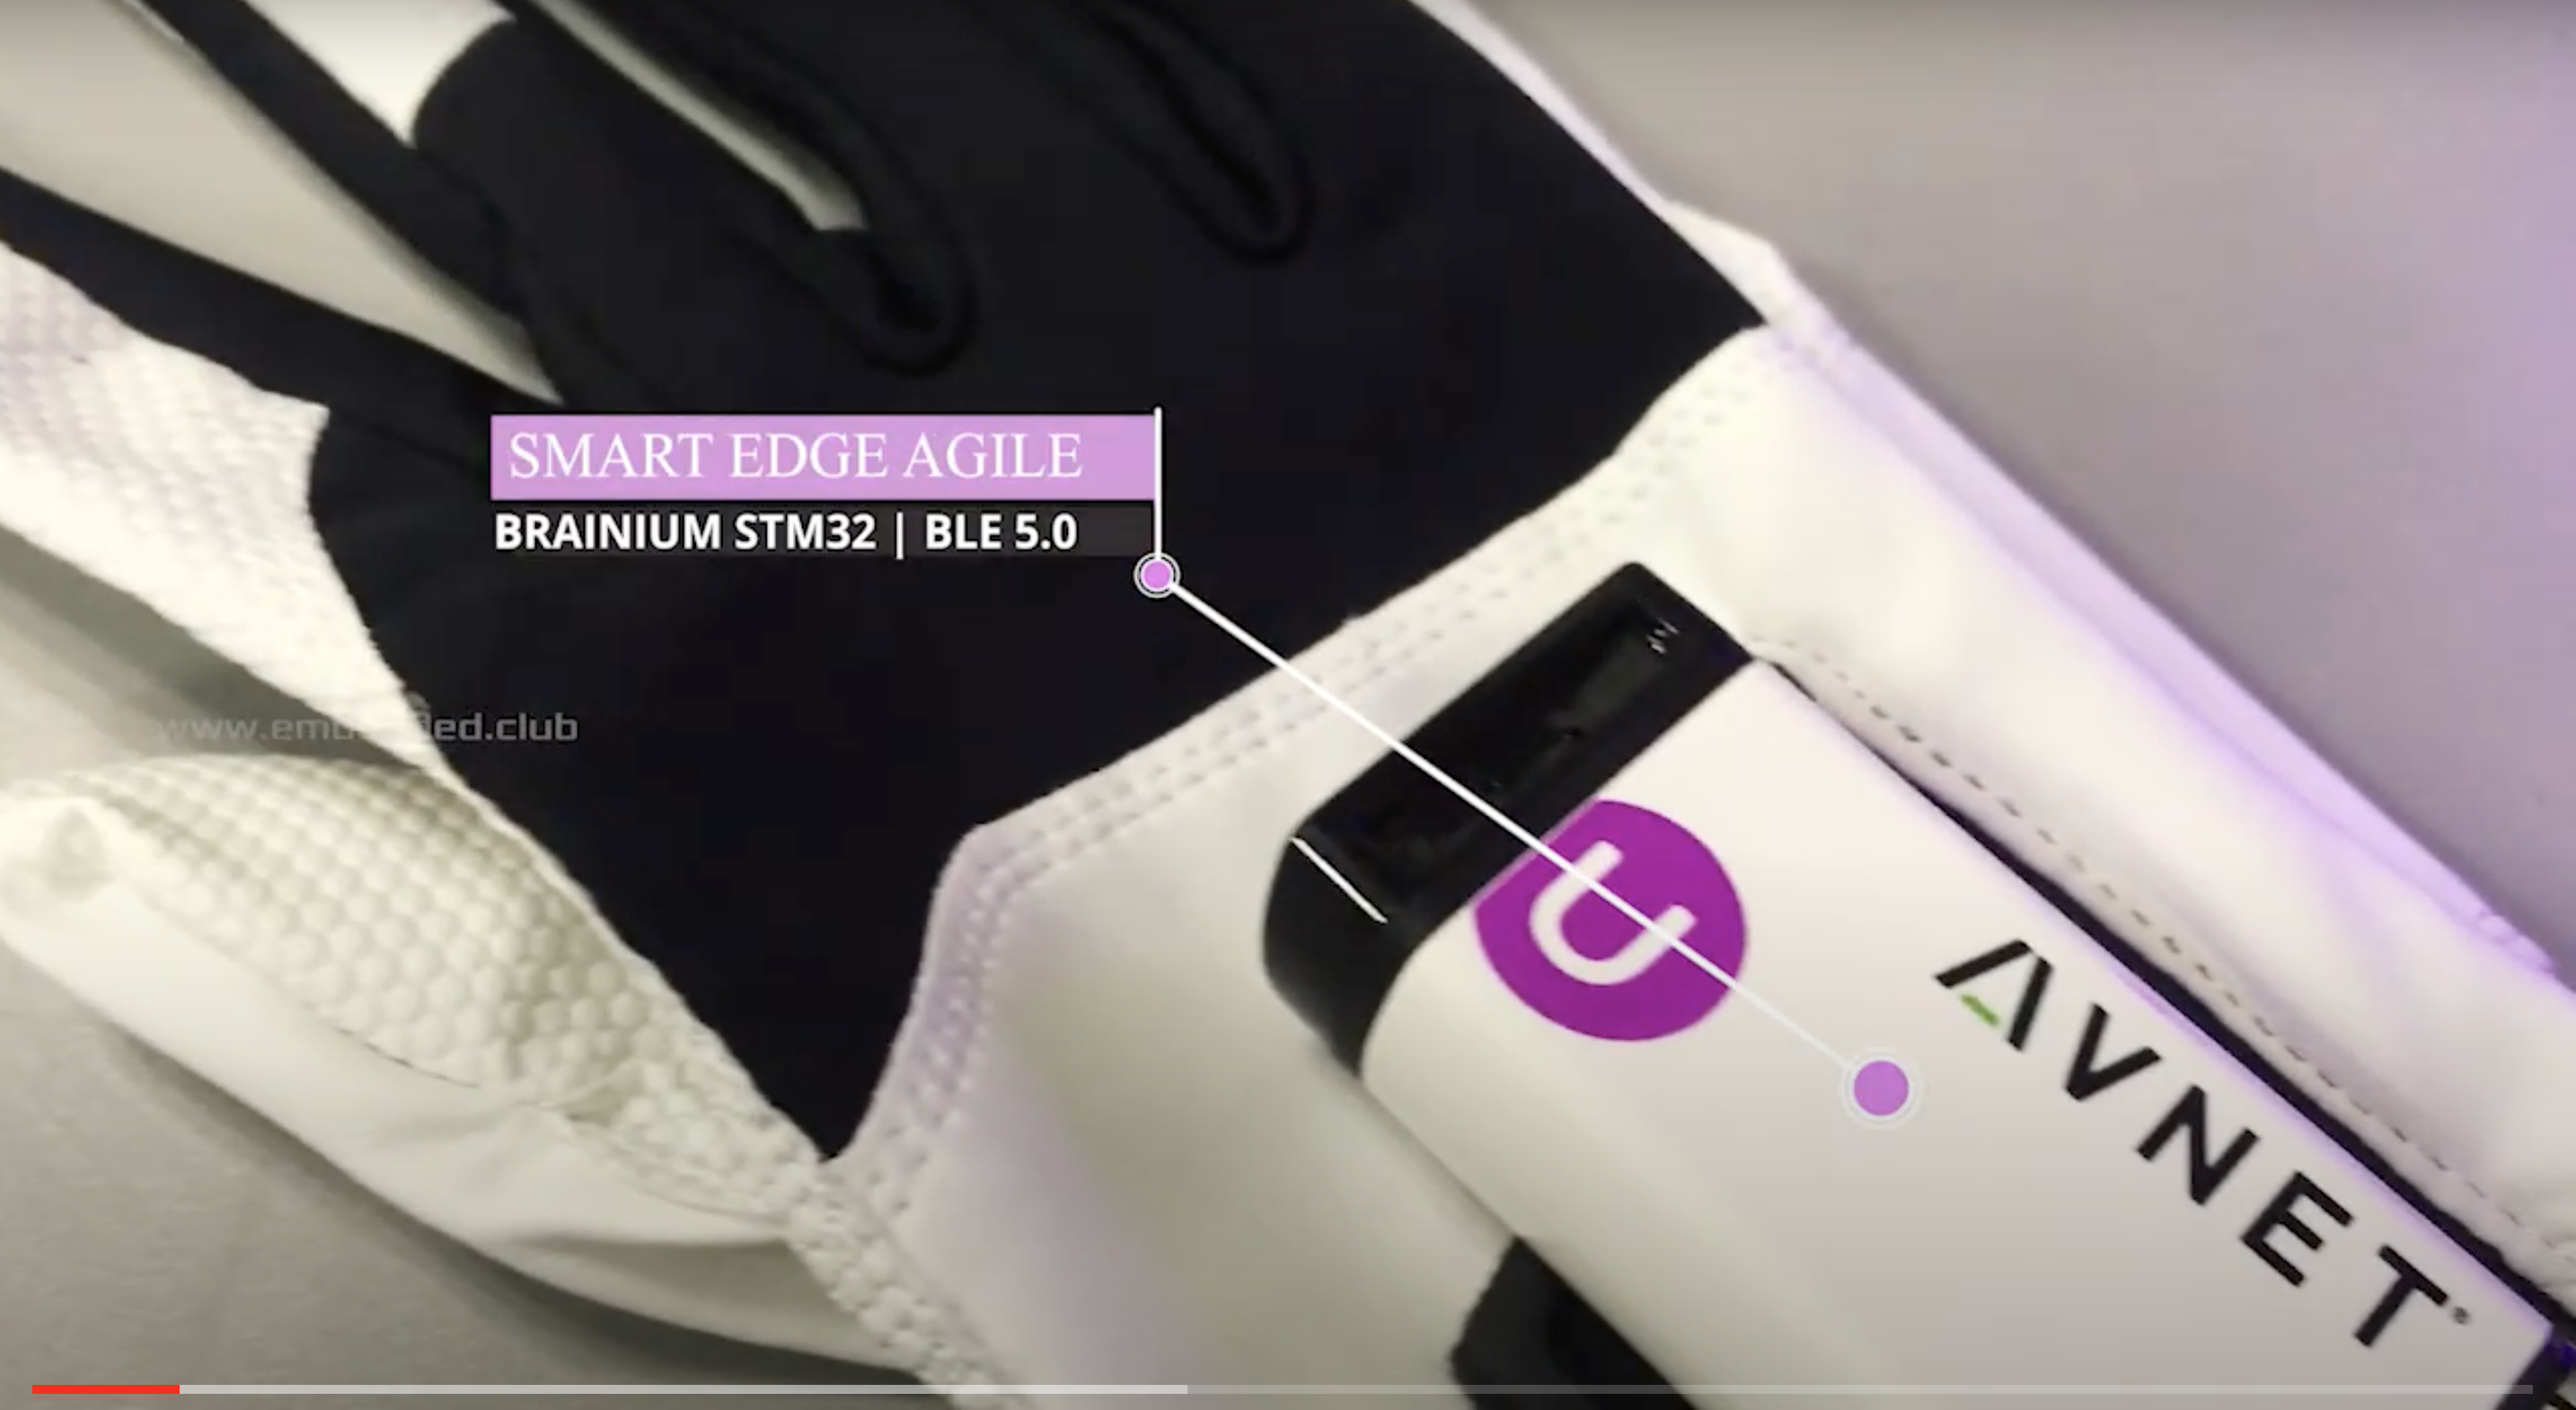
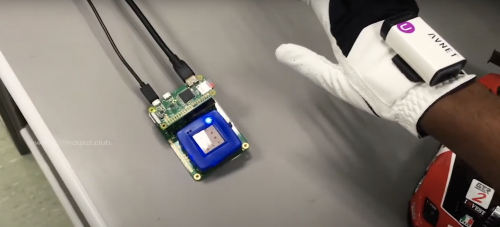
Animator/engineer Ashok Fair has put witch-level finger pointing powers in your hands by sticking a SmartEdge Agile, wirelessly controlled by Raspberry Pi Zero, to a golf glove. You could have really freaked the bejeezus out of Halloween party guests with this (if we were allowed to have Halloween parties that is).
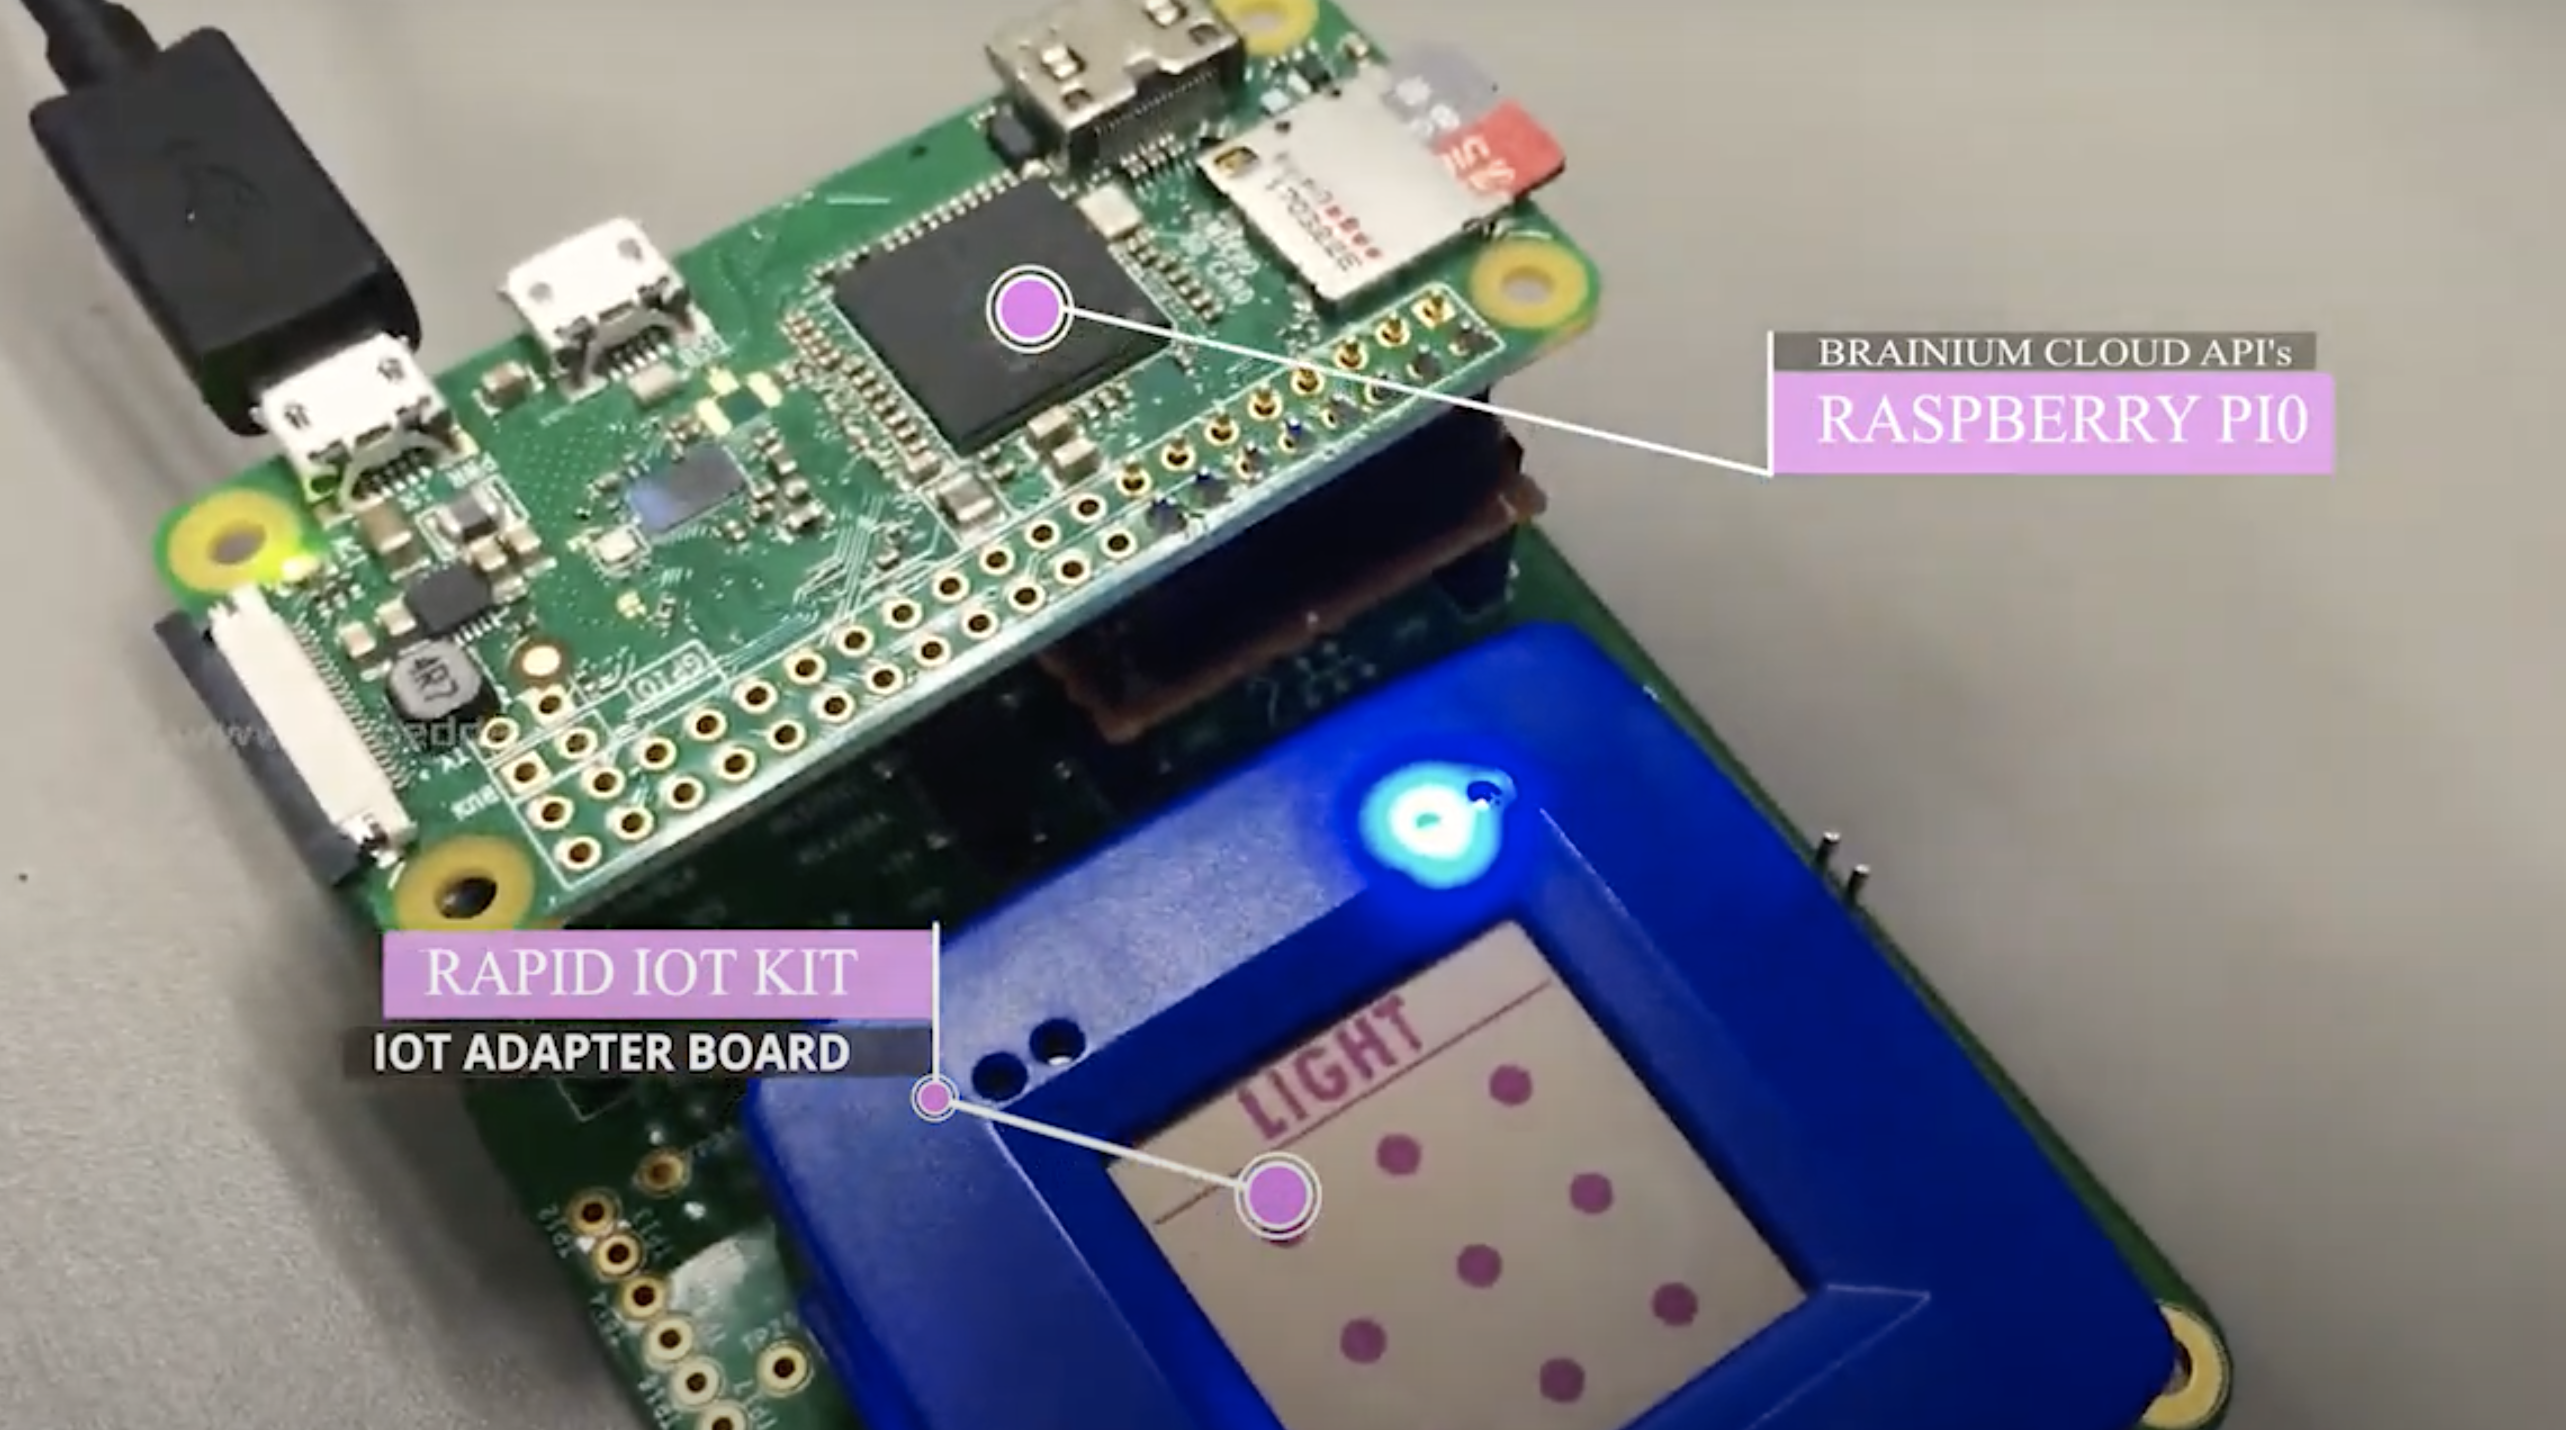
The build uses a Smart Edge Agile IoT device with Brainium, a cloud-based tool for performing machine learning tasks.
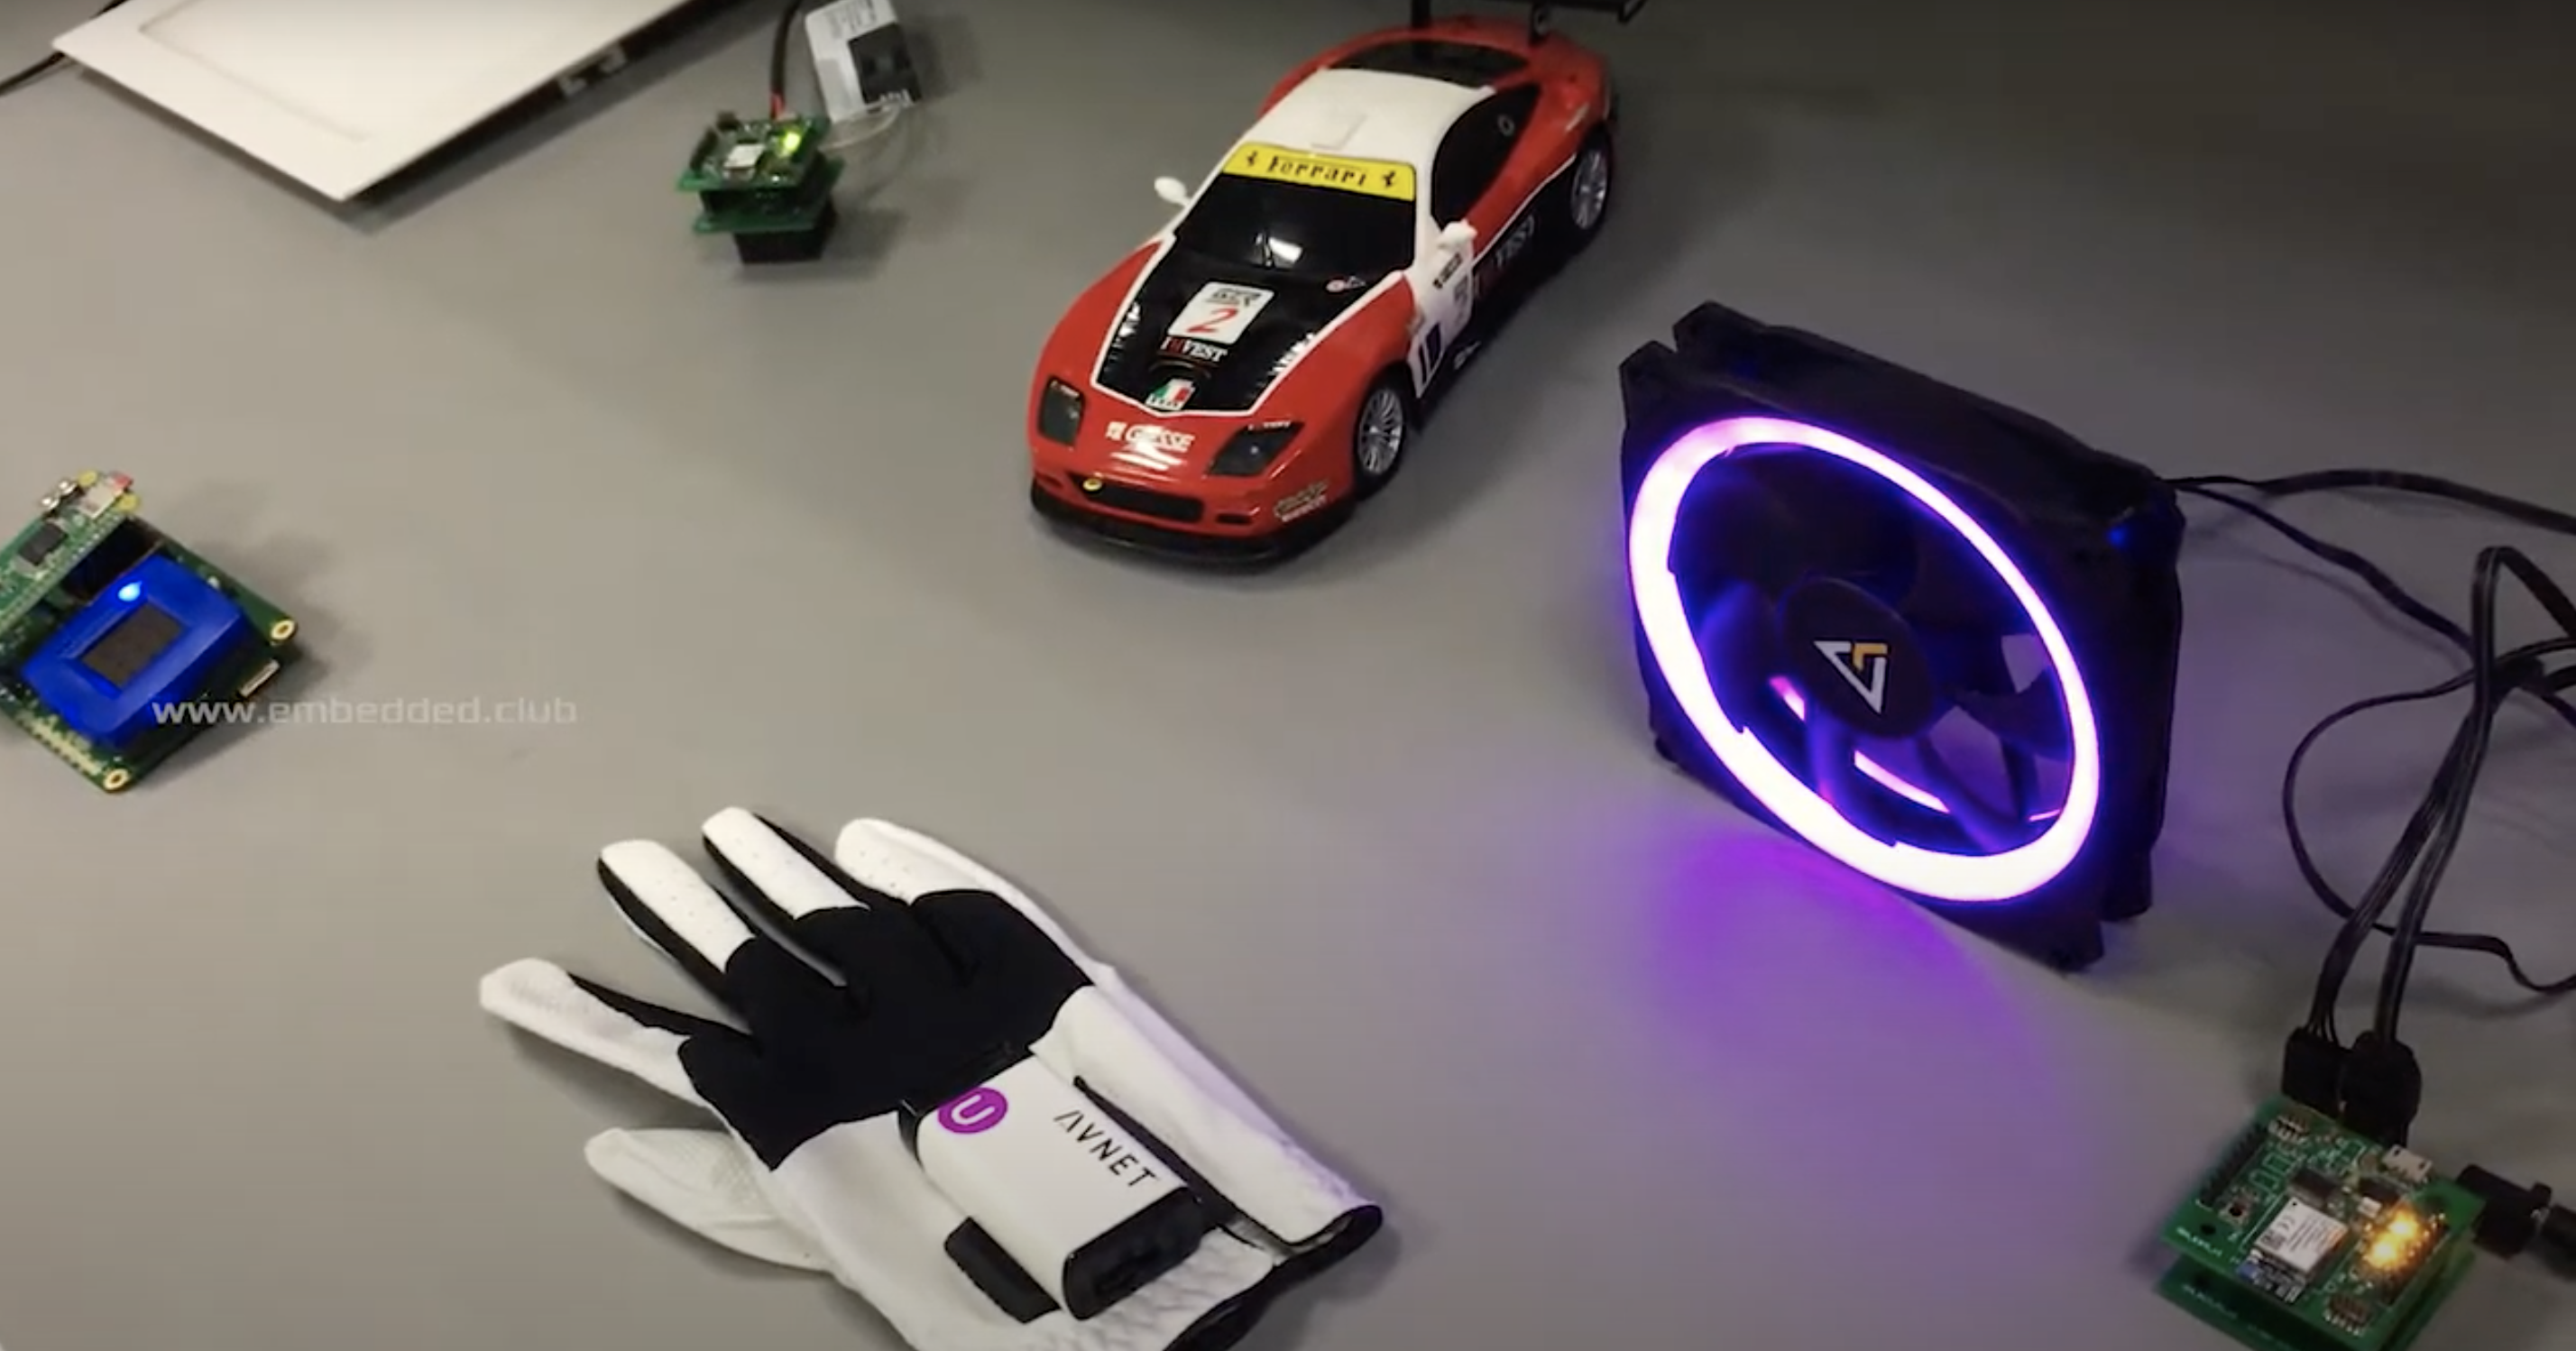
The Rapid IoT kit is interfaced with Raspberry Pi Zero and creates a thread network connecting to light, car, and fan controller nodes.
The Brainium app is installed on Raspberry Pi and bridges between the cloud and Smart Edge device. MQTT is running on Python and processes the Rapid IoT Kit’s data.
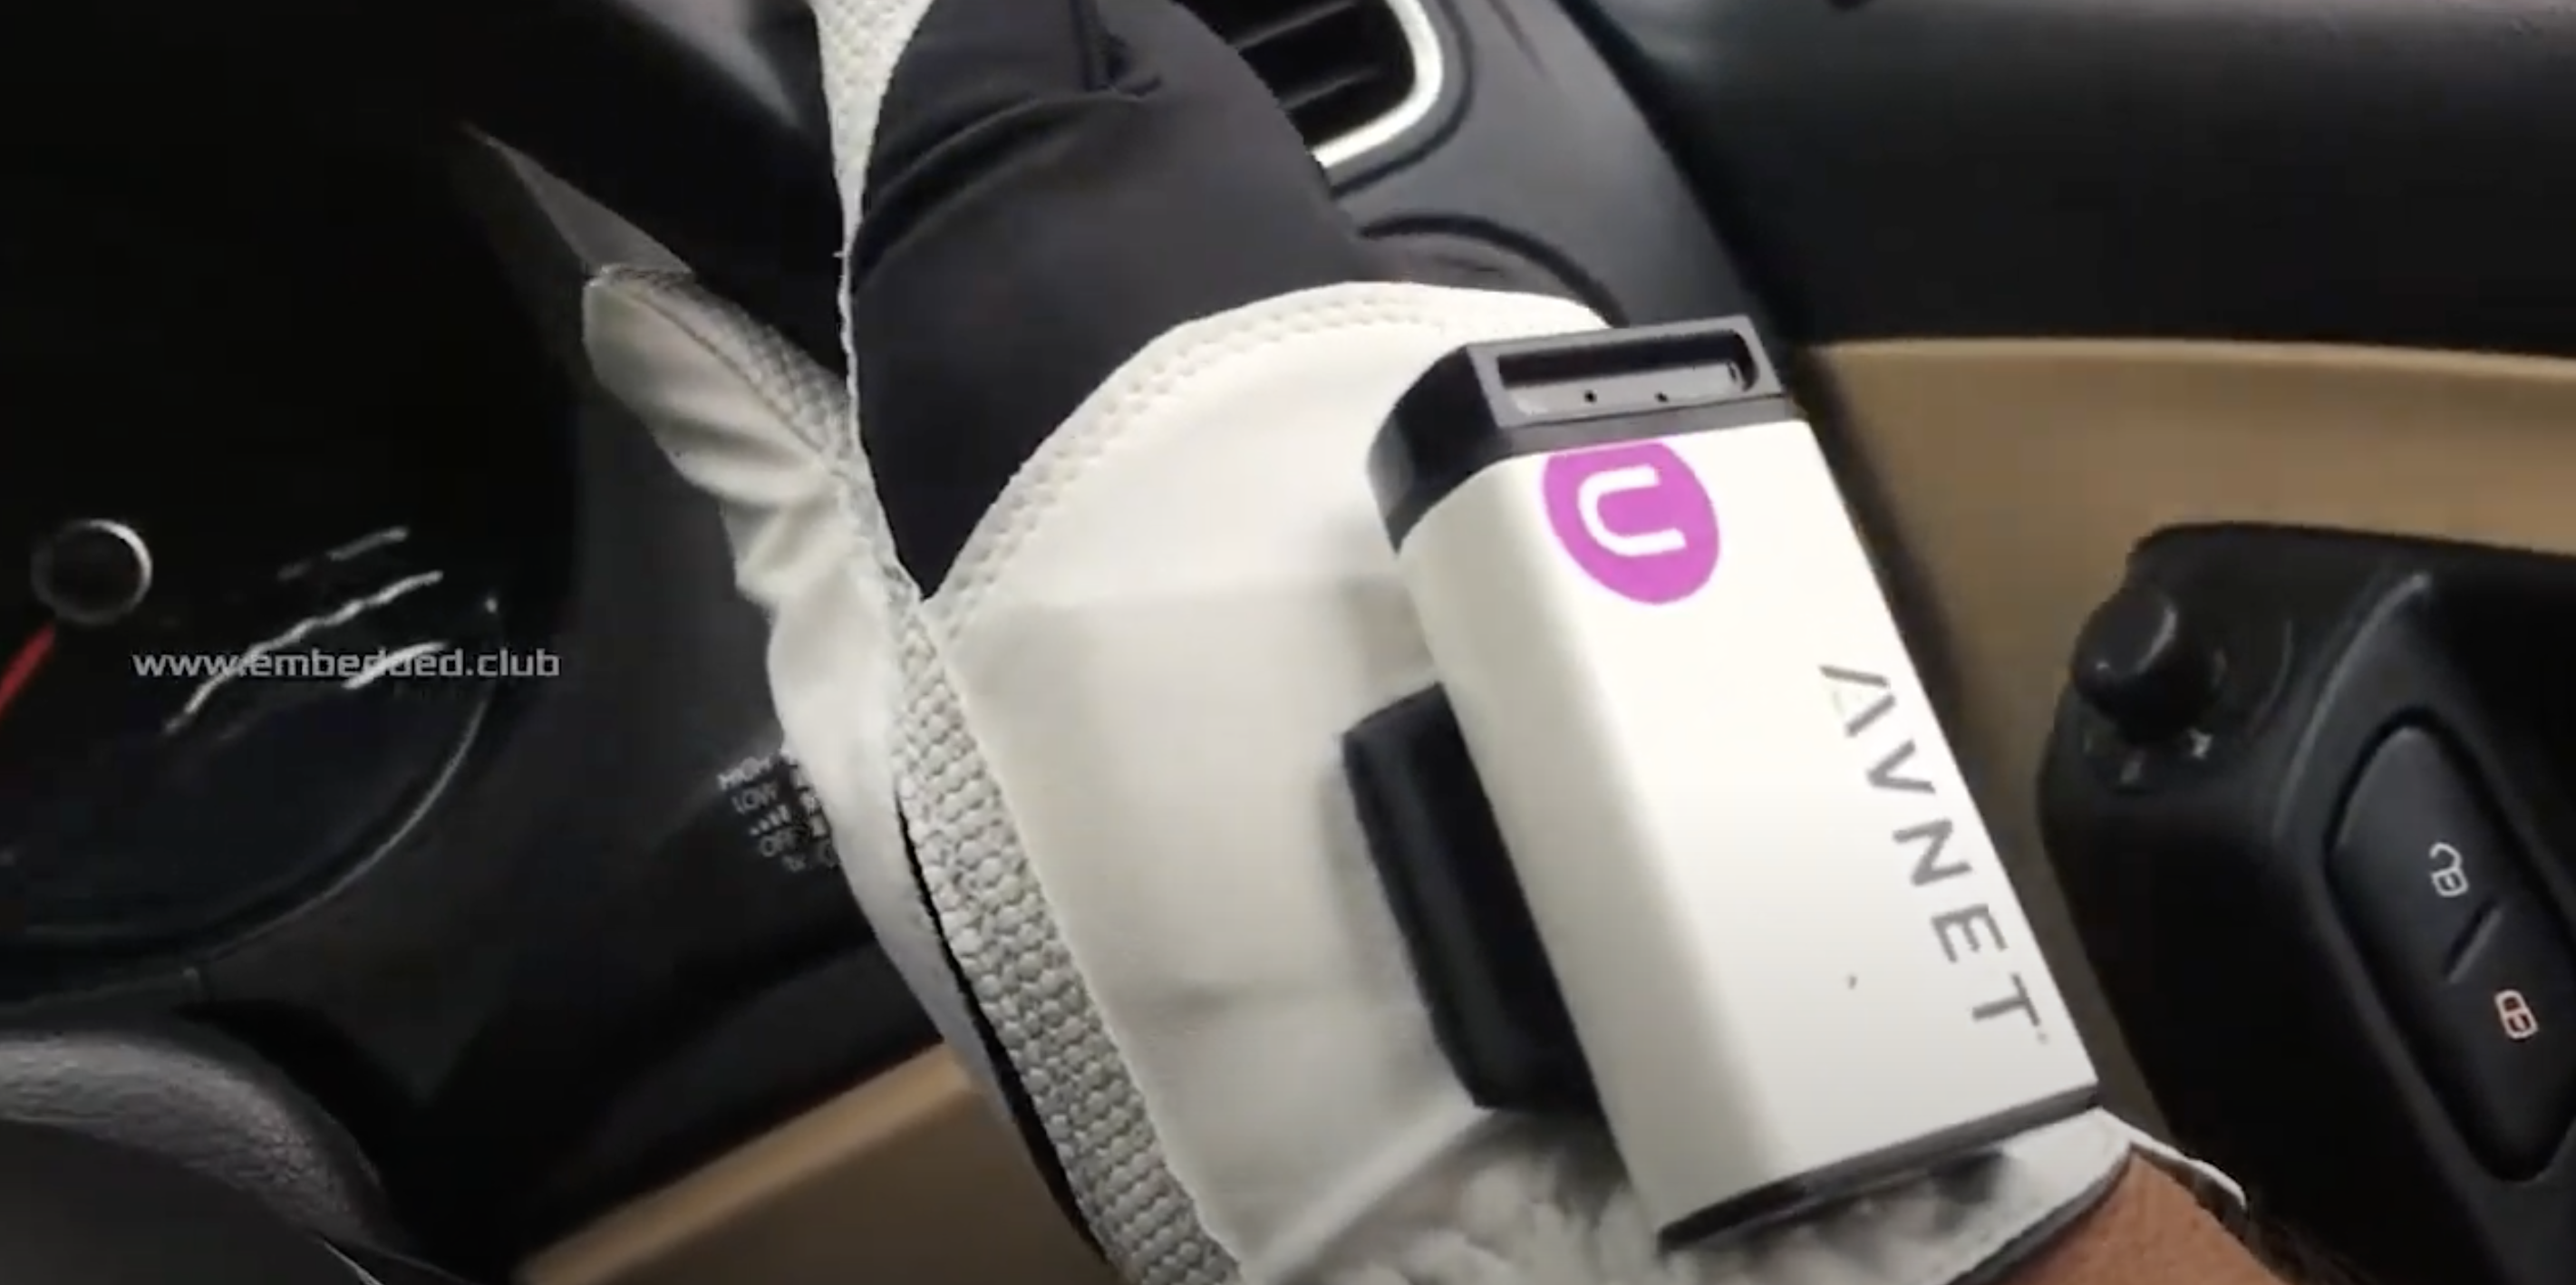
The device is mounted onto a golf glove, giving the wearer seemingly magical powers with the wave of a hand.
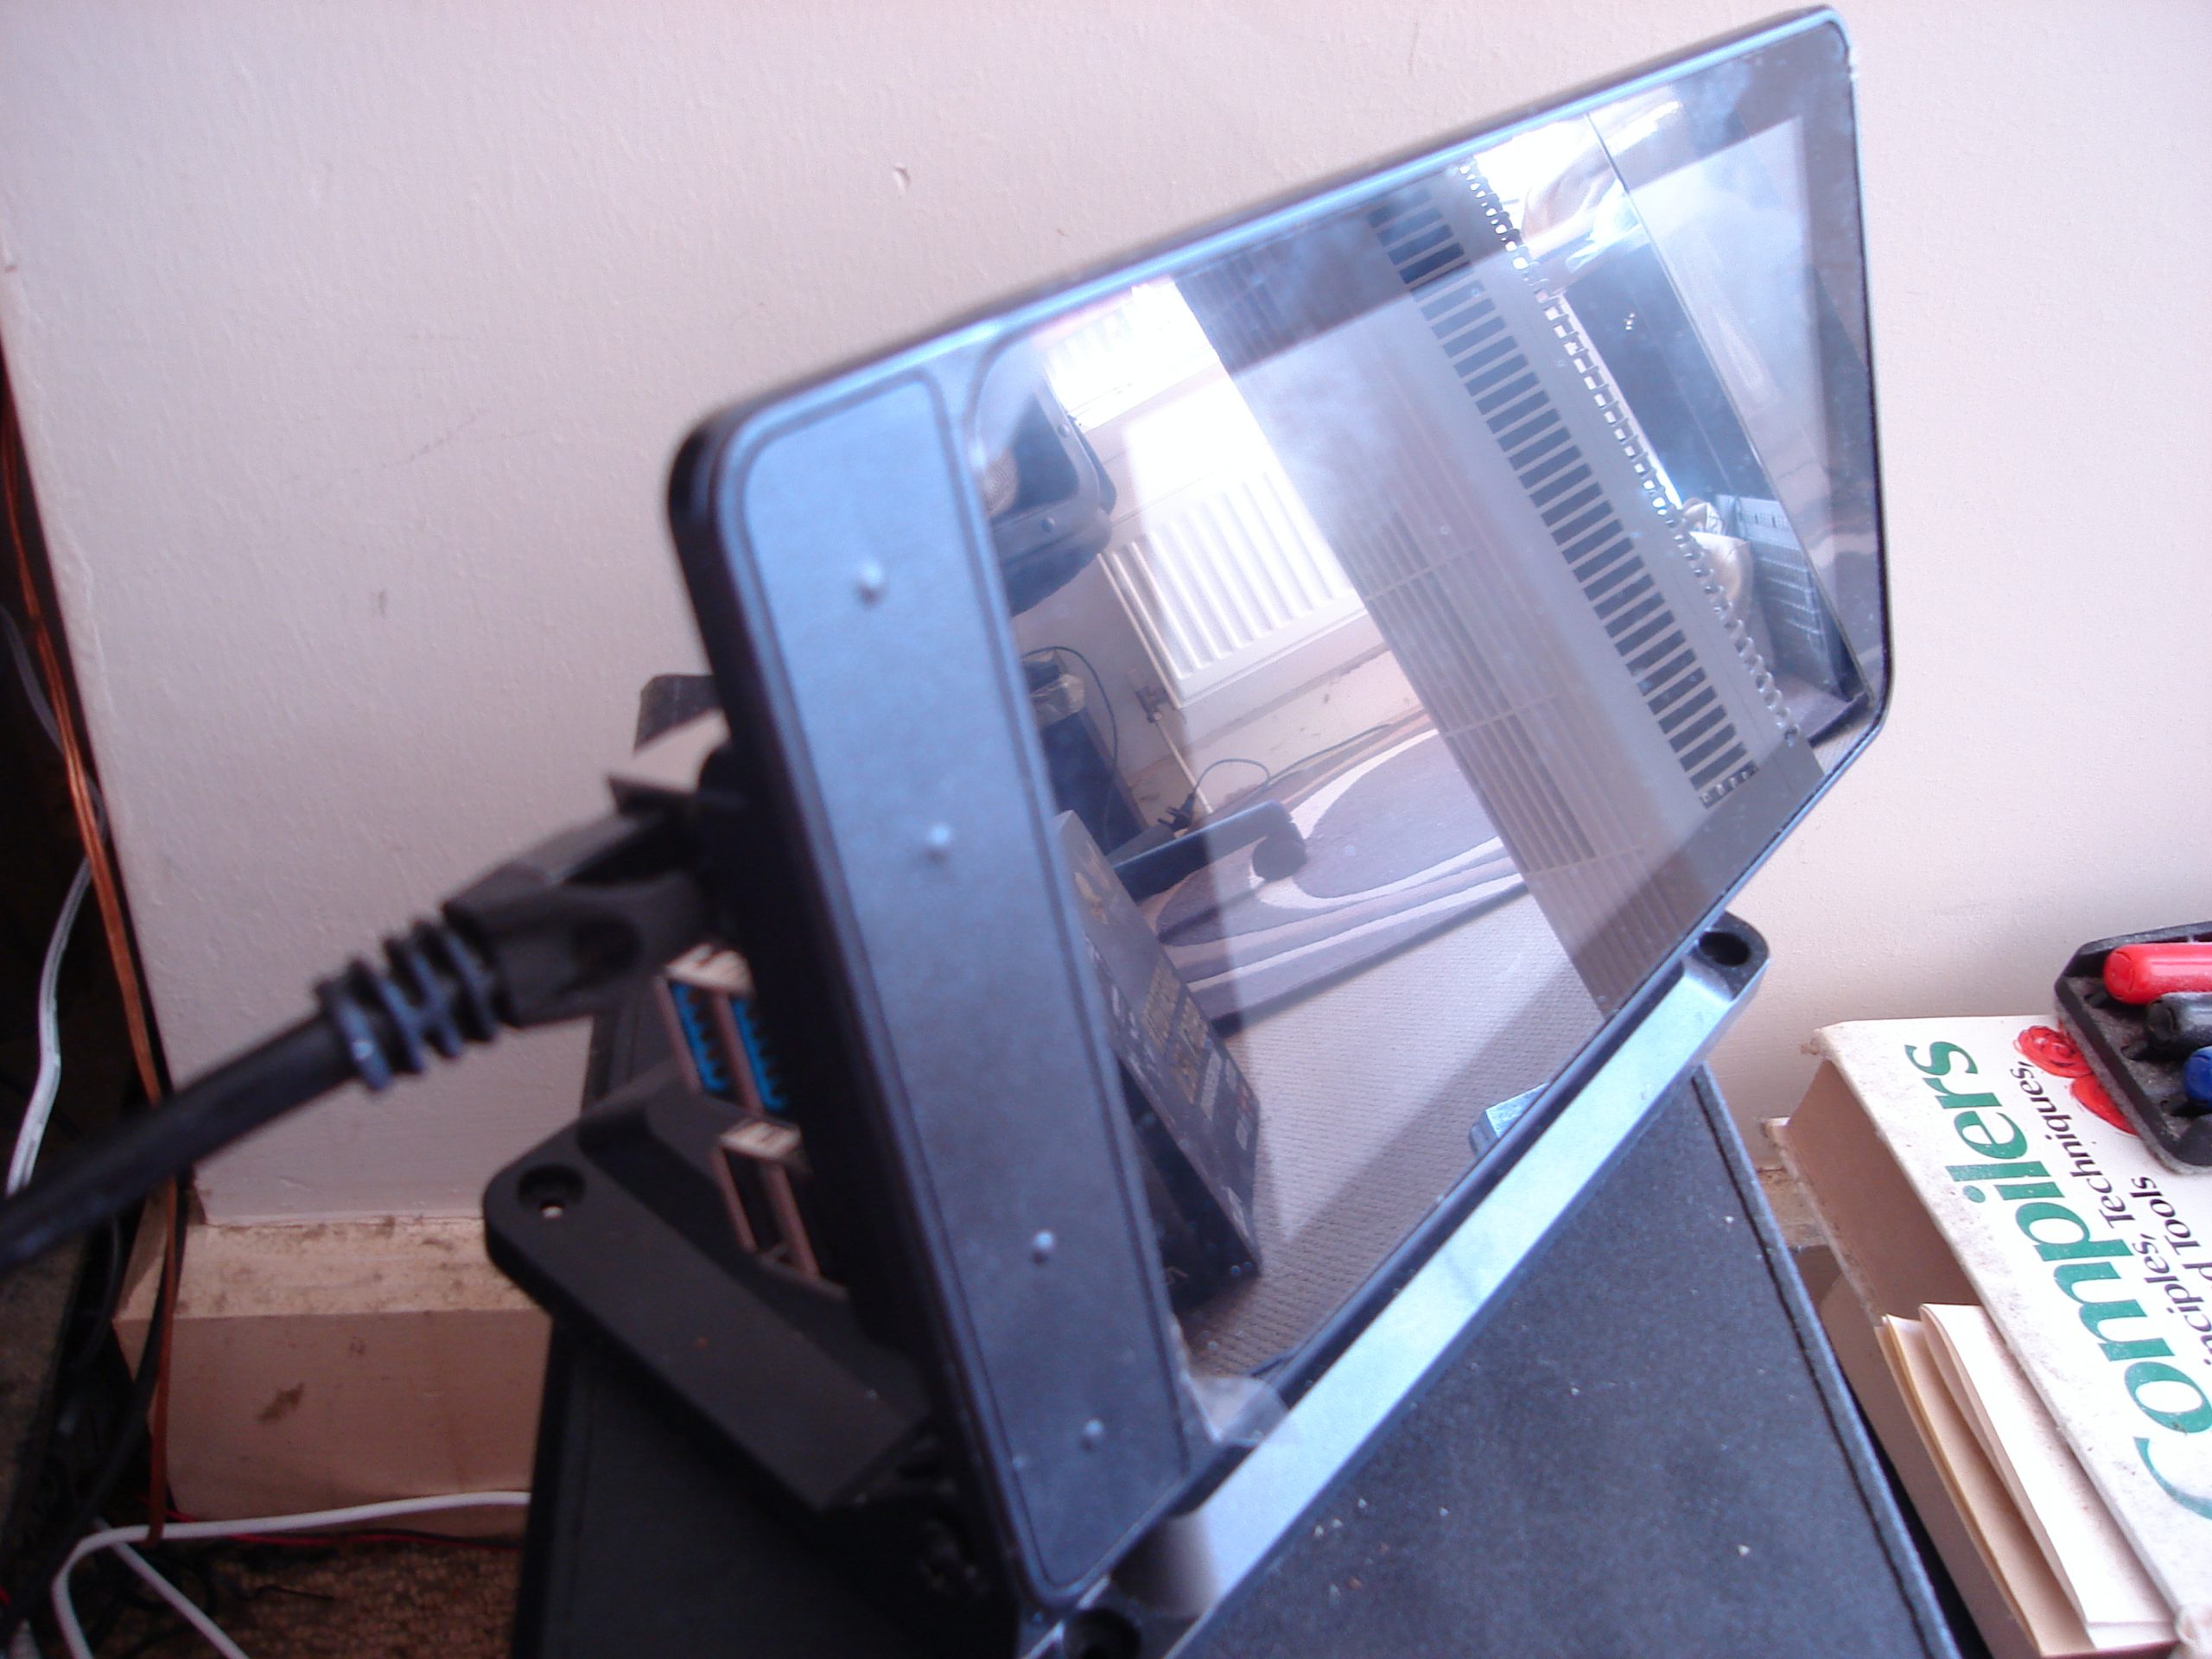
NXP Rapid IoT Prototyping Kit (the square blue screen stuck on the adaptor board with the Raspberry Pi Zero)
Brainium AI Studio app
Golf glove
Waking up the Rapid IoT screen
To get started, the glove wearer draws a pattern above the screen attached to the Raspberry Pi to unlock it and wake up all the controller nodes.
The light controller node is turned on by drawing a clockwise circle, and turned off with an counter-clockwise circle.
The full kit and caboodle
The fan is turned on and off in the same way, and you can increase the fan’s speed by moving your hand upwards and reduce the speed by moving your hand down. You know it’s working by the look of the fan’s LEDs: they blinker faster as the fan speeds up.
Make a pushing motion in the air above the car to make it move forward, and you can also make it turn and reverse.
“Driving glove”
If you wear the glove while driving, it collects data in real time and logs it on the Brainium cloud so you can review your driving style.
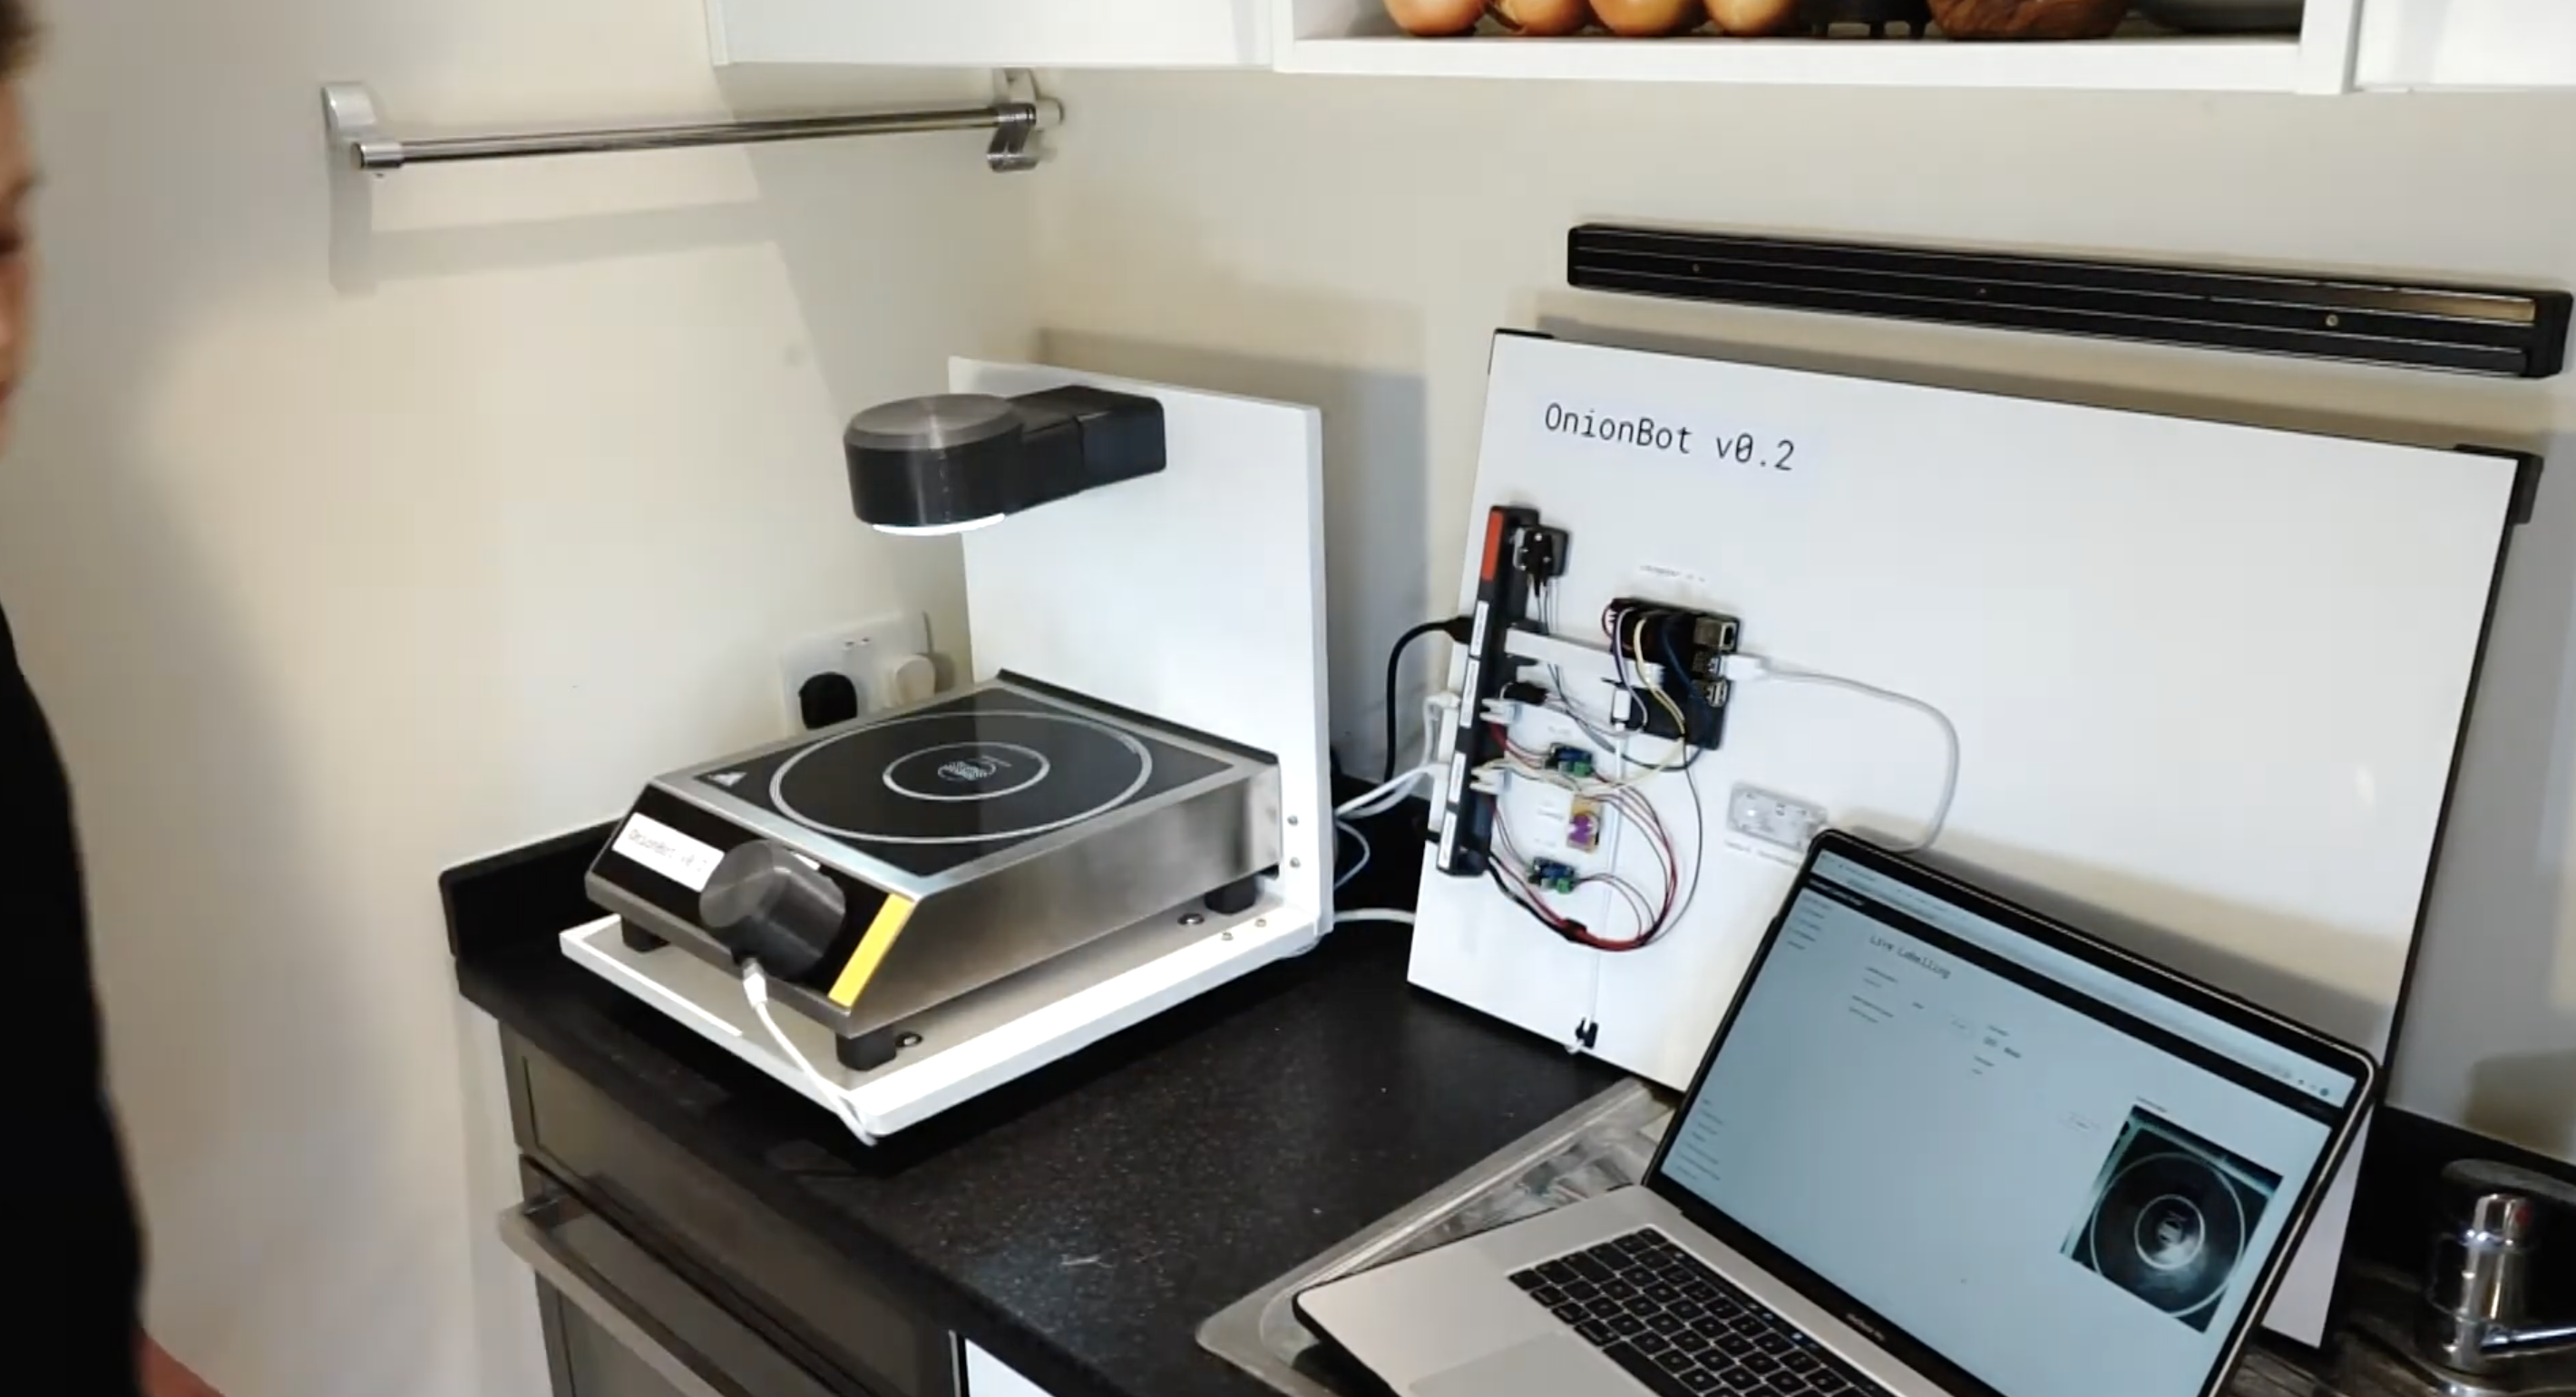
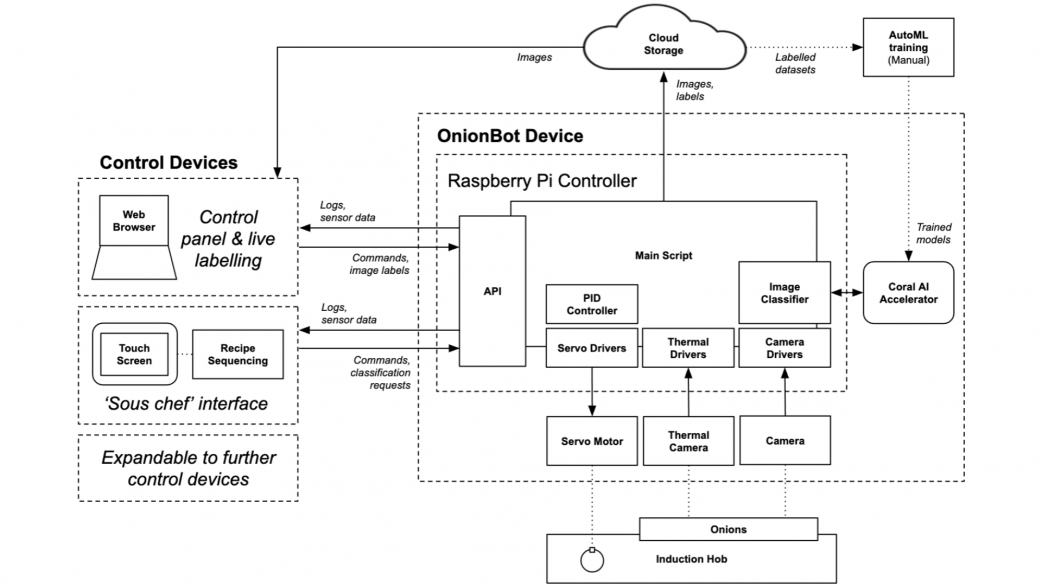
Design Engineering student Ben Cobley has created a Raspberry Pi–powered sous-chef that automates the easier pan-cooking tasks so the head chef can focus on culinary creativity.
Ben named his invention OnionBot, as the idea came to him when looking for an automated way to perfectly soften onions in a pan while he got on with the rest of his dish. I have yet to manage to retrieve onions from the pan before they blacken so… *need*.
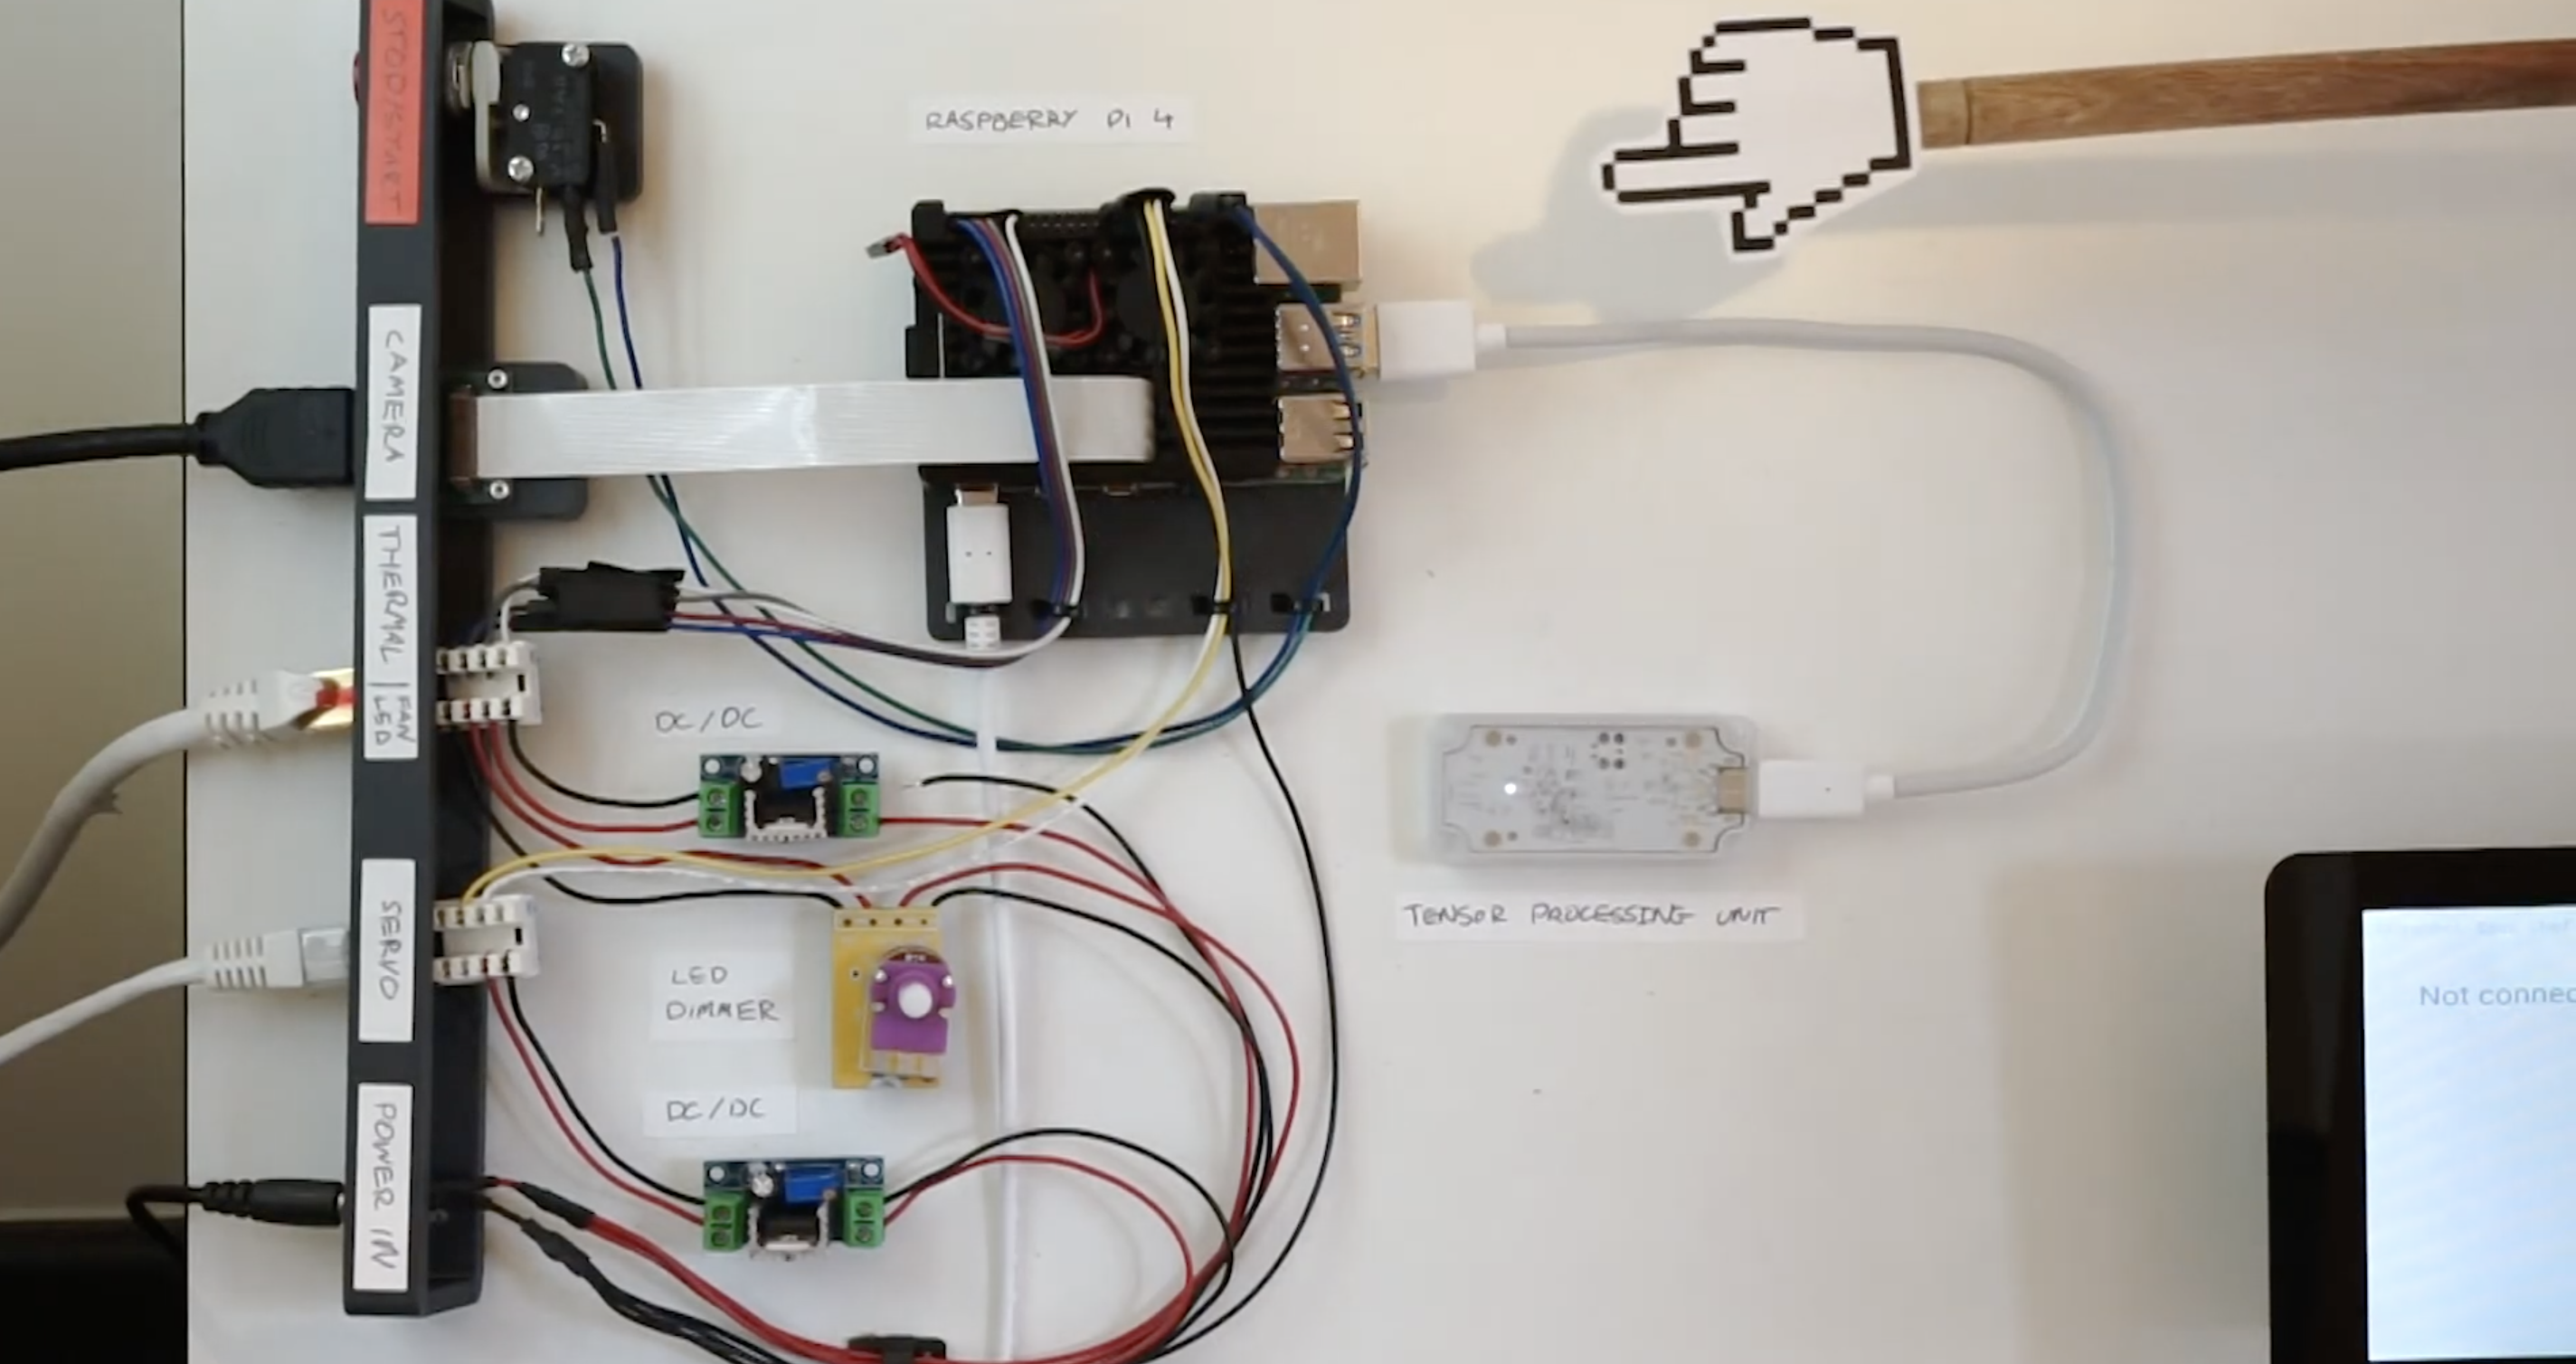
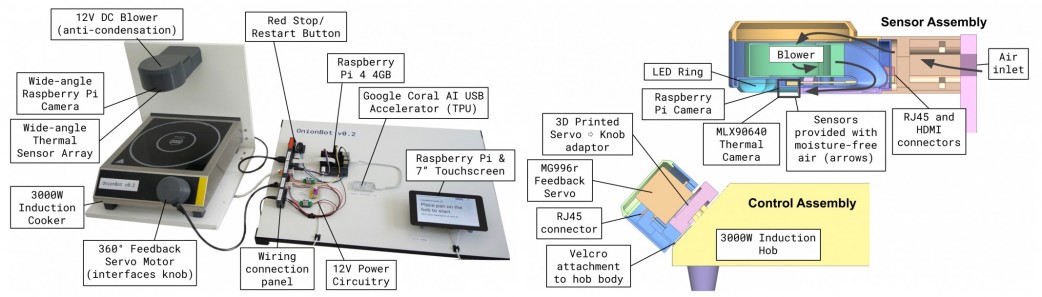
The full setup (you won’t need a laptop while you’re cooking, so you’ll have counter space)
Ben’s affordable solution is much better suited to home cooking than the big, expensive robotic arms used in industry. Using our tiny computer also allowed Ben to create something that fits on a kitchen counter.
What can OnionBot do?
Tells you on-screen when it is time to advance to the next stage of a recipe
Autonomously controls the pan temperature using PID feedback control
Detects when the pan is close to boiling over and automatically turns down the heat
Reminds you if you haven’t stirred the pan in a while
A thermal sensor array suspended above the stove detects the pan temperature, and the Raspberry Pi Camera Module helps track the cooking progress. A servo motor controls the dial on the induction stove.
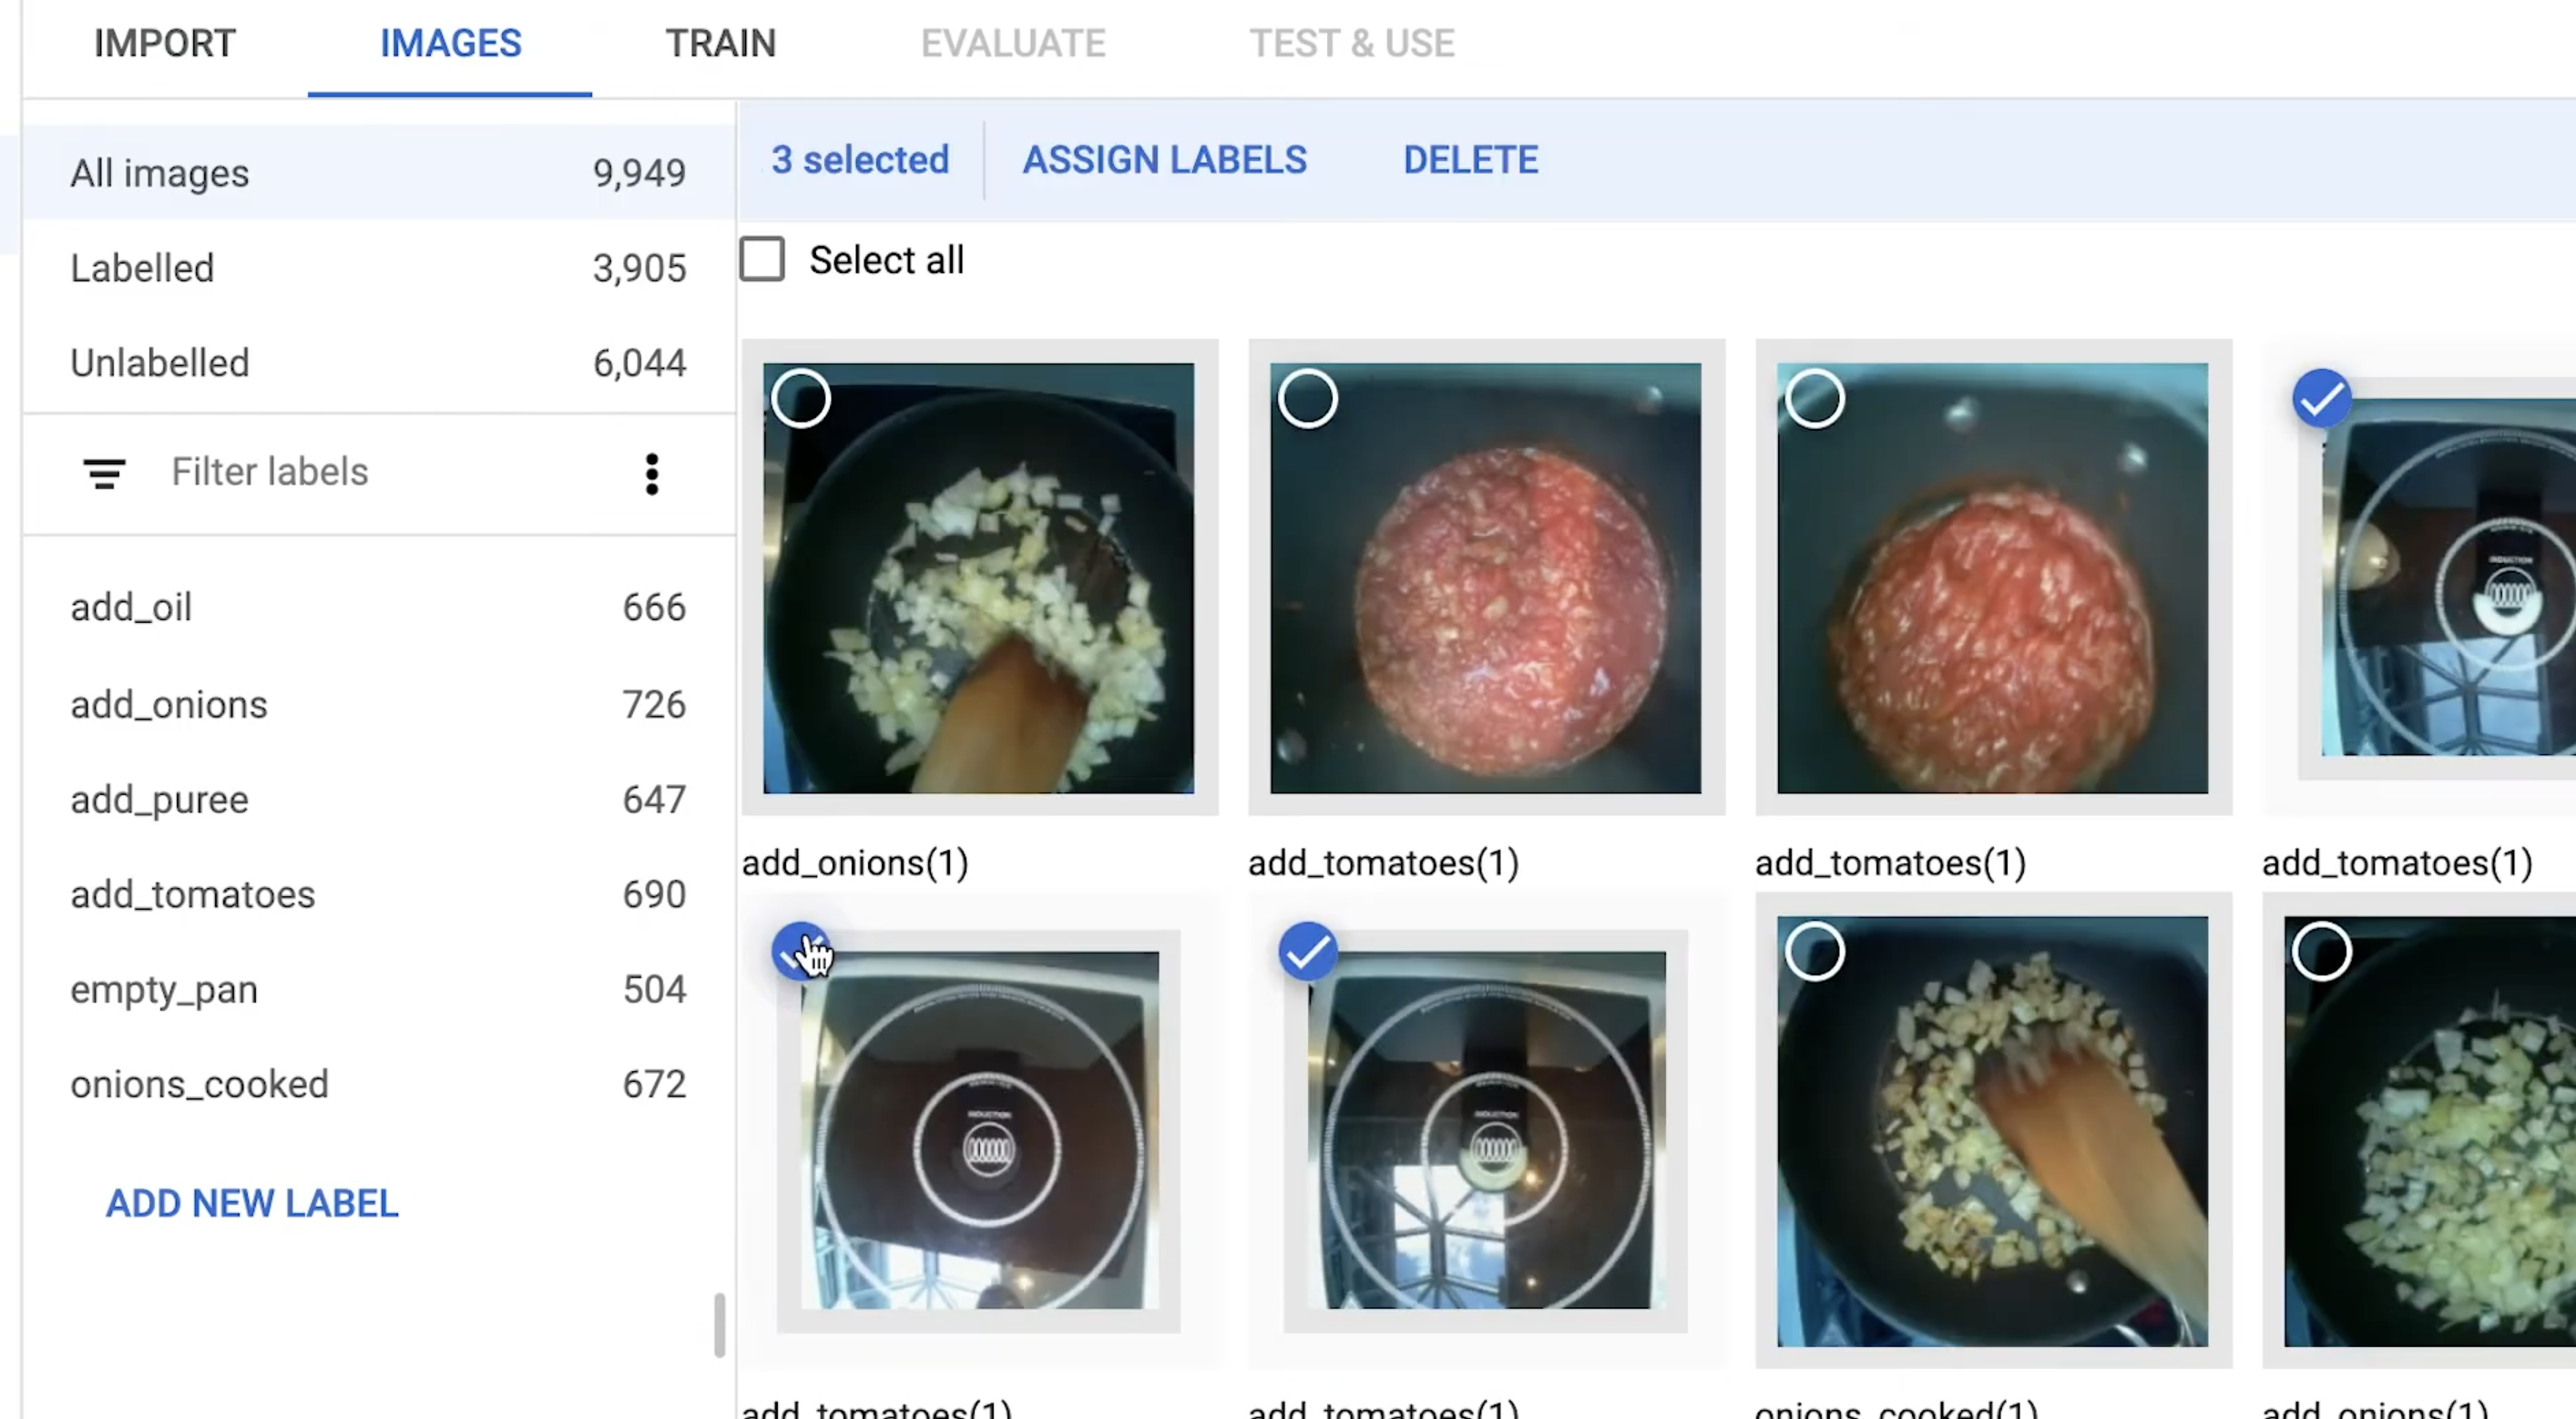
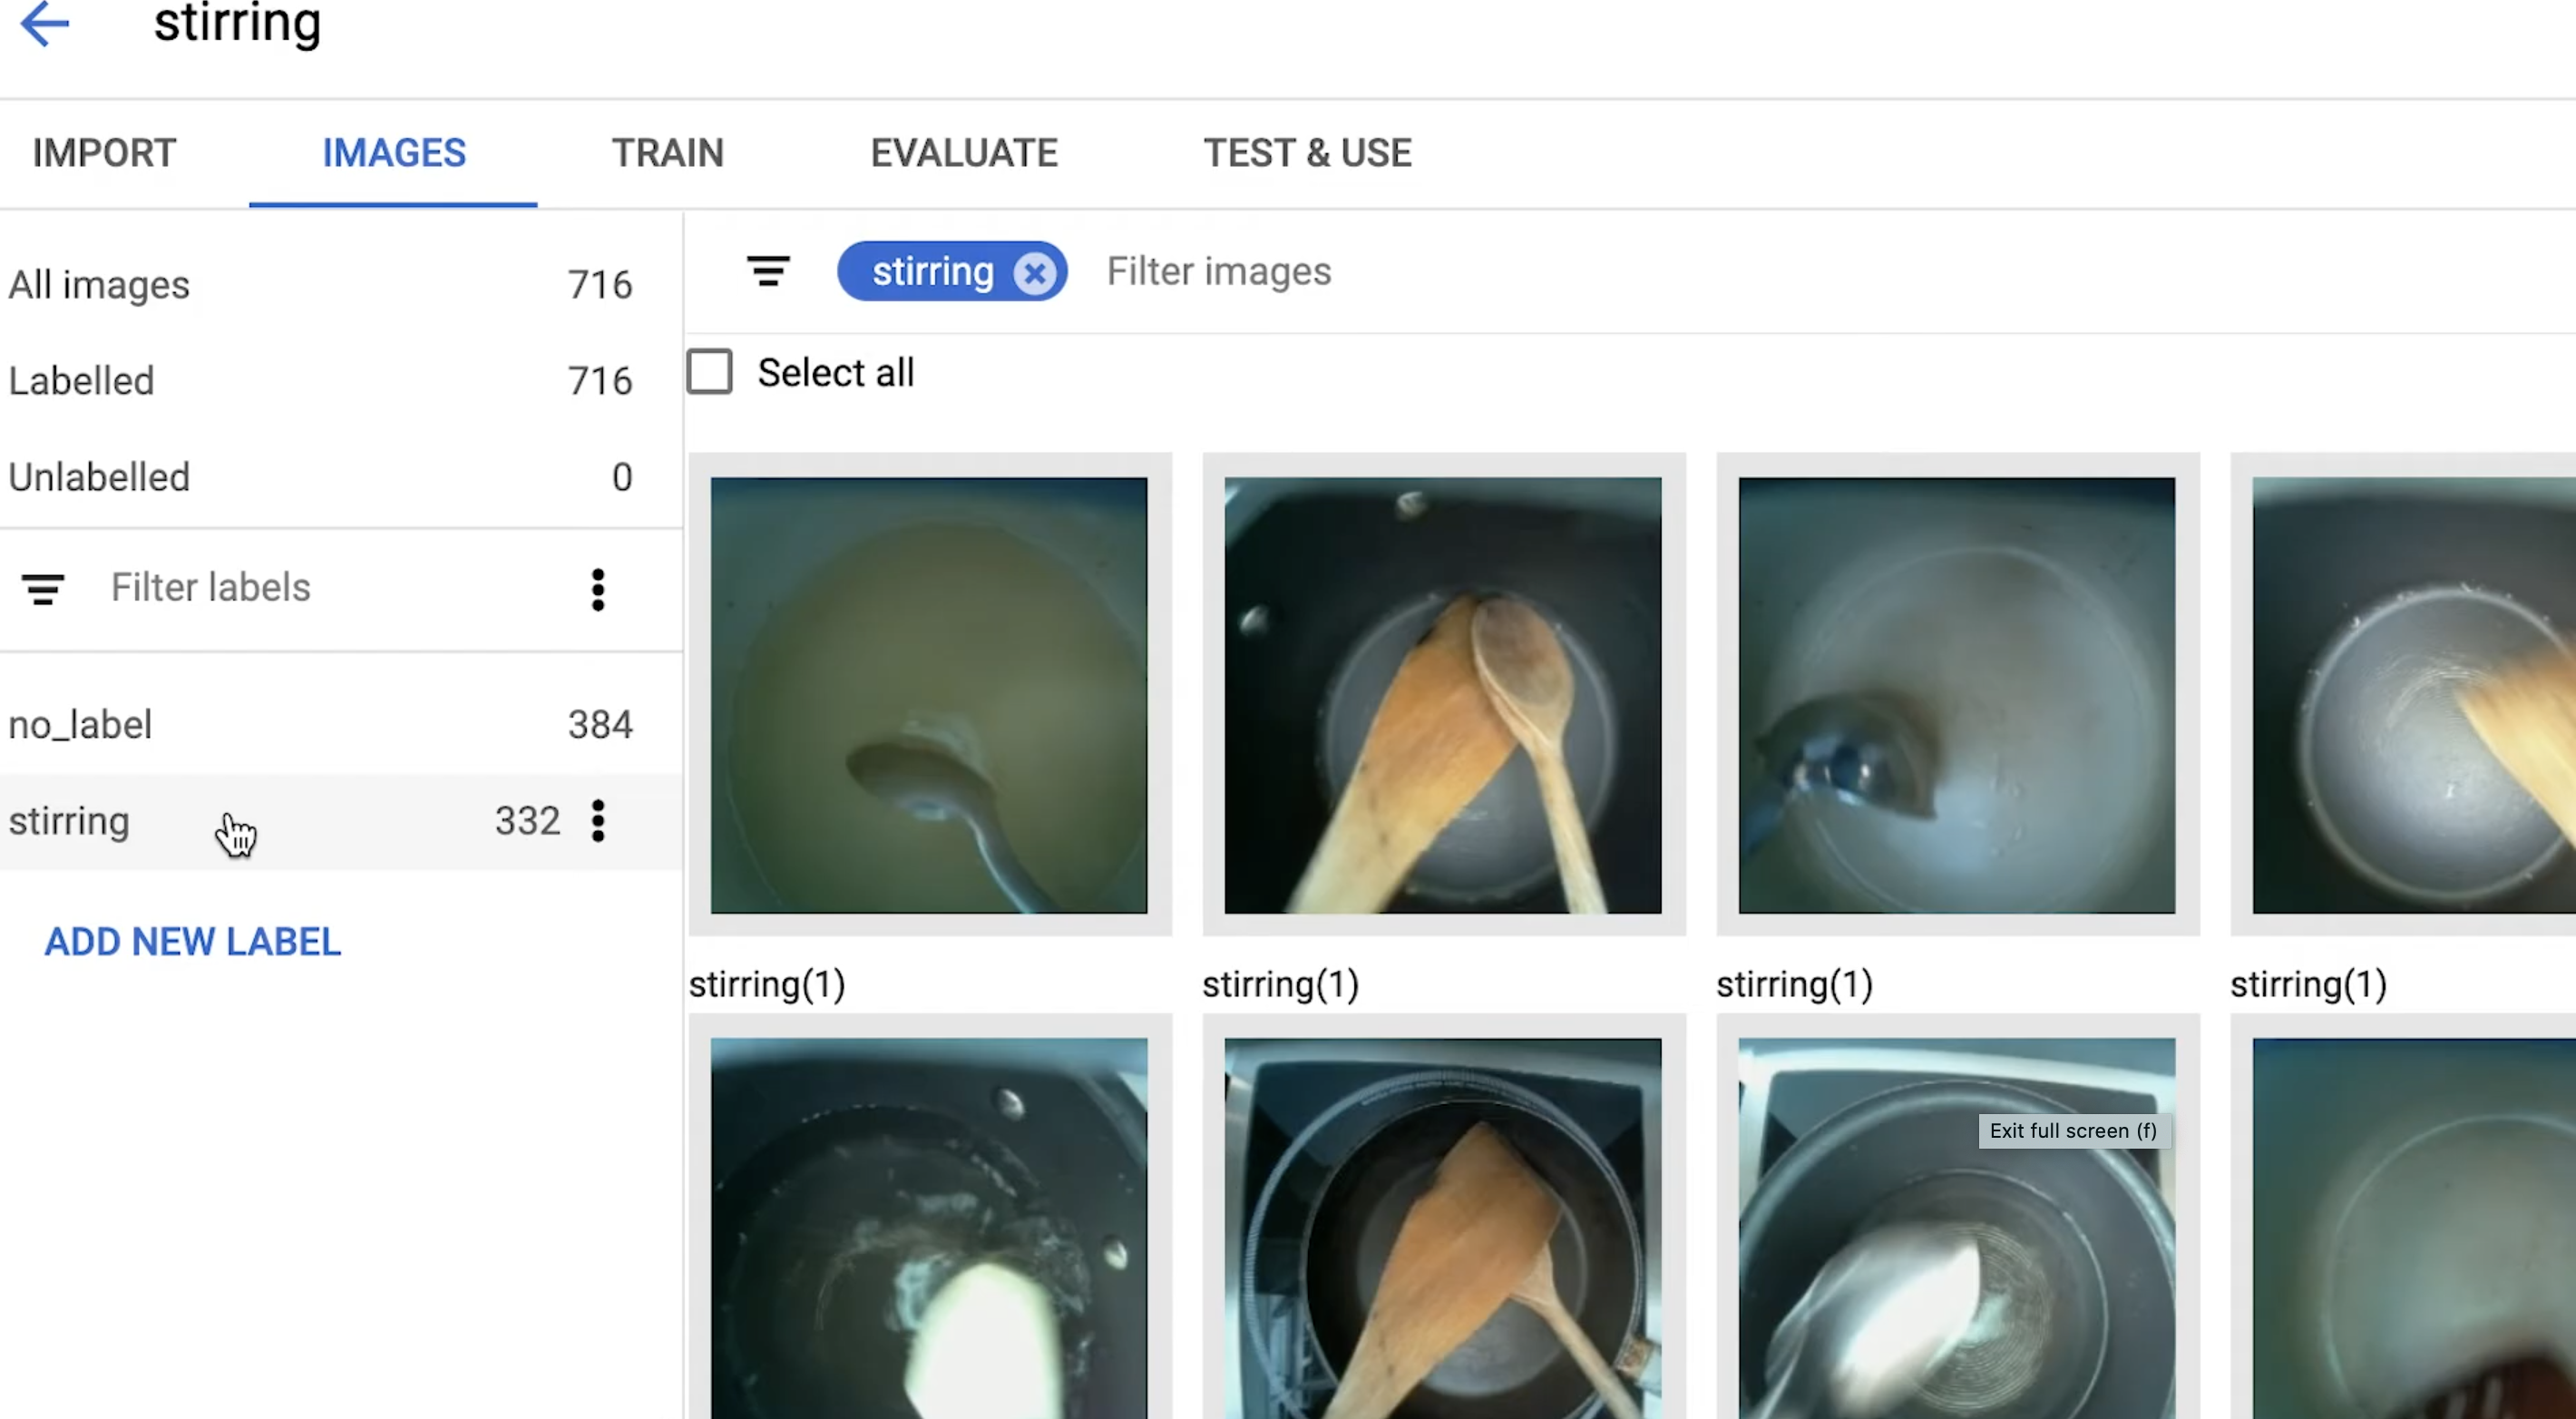
Labelling images to train the image classifier
No machine learning expertise was required to train an image classifier, running on Raspberry Pi, for Ben’s robotic creation; you’ll see in the video that the classifier is a really simple drag-and-drop affair.
Ben has only taught his sous-chef one pasta dish so far, and we admire his dedication to carbs.
Training the image classifier to know when you haven’t stirred the pot in a while
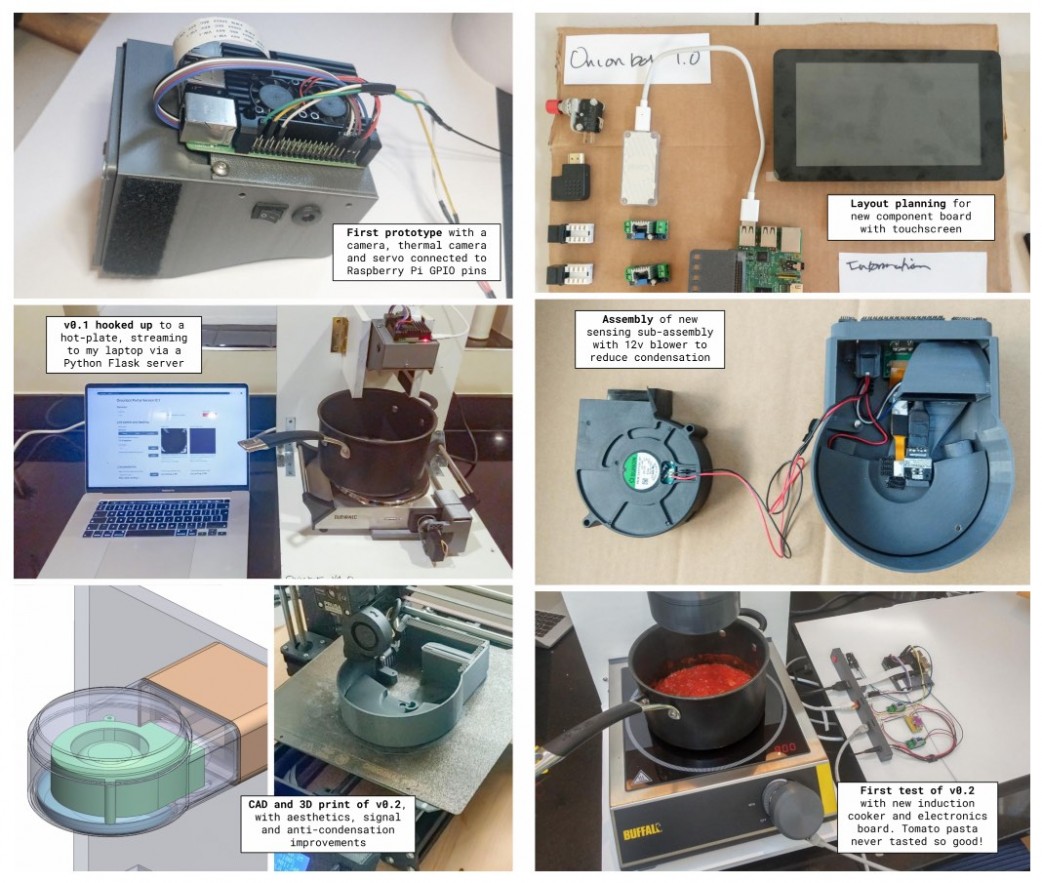
Ben built a control panel for labelling training images in real time and added labels at key recipe milestones while he cooked under the camera’s eye. This process required 500–1000 images per milestone, so Ben made a LOT of pasta while training his robotic sous-chef’s image classifier.
Ben open-sourced this project so you can collaborate to suggest improvements or teach your own robot sous-chef some more dishes. Here’s OnionBot on GitHub.
We love seeing how quickly our community of makers responds when we drop a new product, and one of the fastest off the starting block when we released the new Raspberry Pi Compute Module 4 on Monday was YouTuber Jeff Geerling.
Jeff Geerling
We made him keep it a secret until launch day after we snuck one to him early so we could see what one of YouTube’s chief advocates for our Compute Module line thought of our newest baby.
So how does our newest board compare to its predecessor, Compute Module 3+? In Jeff’s first video (above) he reviews some of Compute Module 4’s new features, and he has gone into tons more detail in this blog post.
Jeff also took to live stream for a Q&A (above) covering some of the most asked questions about Compute Module 4, and sharing some more features he missed in his initial review video.
His next video (above) is pretty cool. Jeff explains:
“Everyone knows you can overclock the Pi 4. But what happens when you overclock a Compute Module 4? The results surprised me!”
Jeff Geerling
And again, there’s tons more detail on temperature measurement, storage performance, and more on Jeff’s blog.
Top job, Jeff. We have our eyes on your channel for more videos on Compute Module 4, coming soon.
Laura Sach and Martin O’Hanlon, who are both Learning Managers at the Raspberry Pi Foundation, have written a brand-new book to help you to get more out of your Python projects.
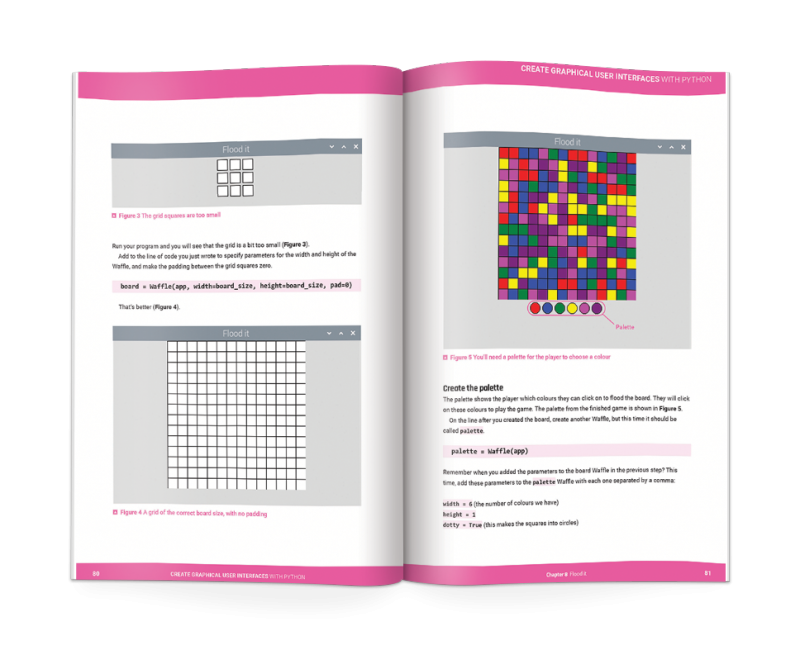
In Create Graphical User Interfaces with Python, Laura and Martin show you how to add buttons, boxes, pictures, colours, and more to your Python programs using the guizero library, which is easy to use and accessible for all, no matter your Python skills.
This new 156-page book is suitable for everyone — from beginners to experienced Python programmers — who wants to explore graphical user interfaces (GUIs).
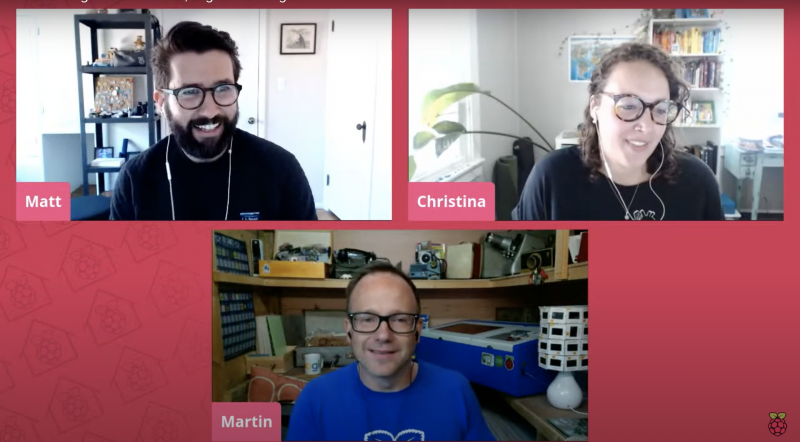
Meet the authors
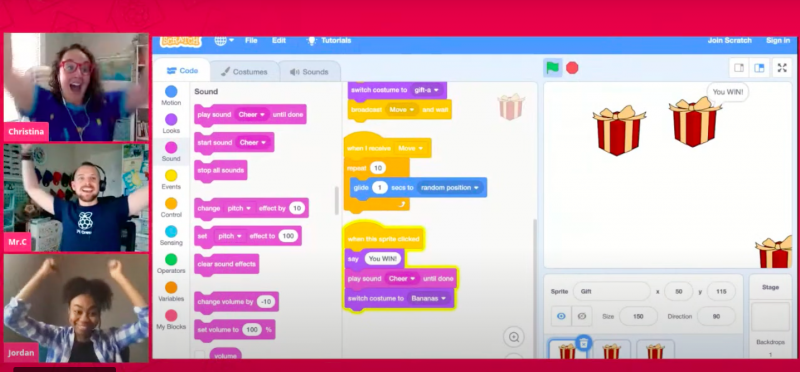
That’s Martin in the blue T-shirt with our Digital Making at Home live stream hosts Matt and Christina
Laura is also pretty cool! Here she is showing you how to solder your Raspberry Pi header pins:
Hi Laura!
Martin and Laura are also tonnes of fun on Twitter. You can find Martin as @martinohanlon, and Laura goes by @codeboom.
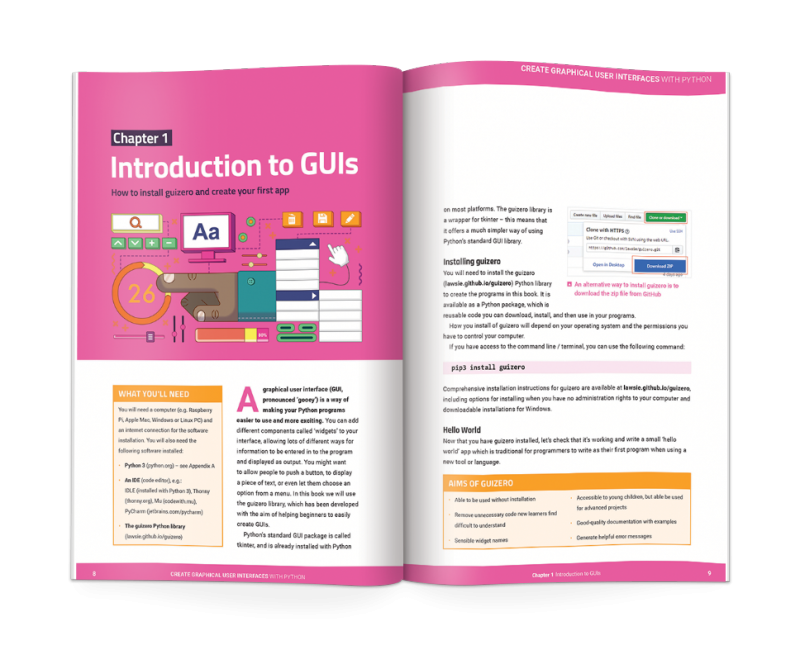
10 fun projects
In Create Graphical User Interfaces with Python, you’ll find ten fun Python projects to create with guizero, including a painting program, an emoji match game, and a stop-motion animation creator.
A peek inside Laura’s and Martin’s new book
You will also learn:
How to create fun Python games and programs
How to code your own graphical user interfaces using windows, text boxes, buttons, images, and more
And if you don’t need the lovely new book, with its new-book smell, in your hands in real life, you can download a PDF version for free, courtesy of The MagPi magazine.
Following on from Rob Zwetsloot’s Haunted House Hacks in the latest issue of The MagPi magazine, GitHub’s Martin Woodward has created a spooky pumpkin that warns you about the thing programmers find scariest of all — broken builds. Here’s his guest post describing the project:
“When you are browsing code looking for open source projects, seeing a nice green passing build badge in the ReadMe file lets you know everything is working with the latest version of that project. As a programmer you really don’t want to accidentally commit bad code, which is why we often set up continuous integration builds that constantly check the latest code in our project.”
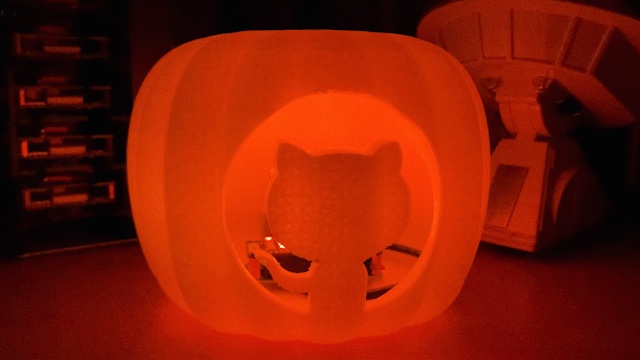
“I decided to create a 3D-printed pumpkin that would hold a Raspberry Pi Zero with an RGB LED pHat on top to show me the status of my build for Halloween. All the code is available on GitHub alongside the 3D printing models which are also available on Thingiverse.”
Components
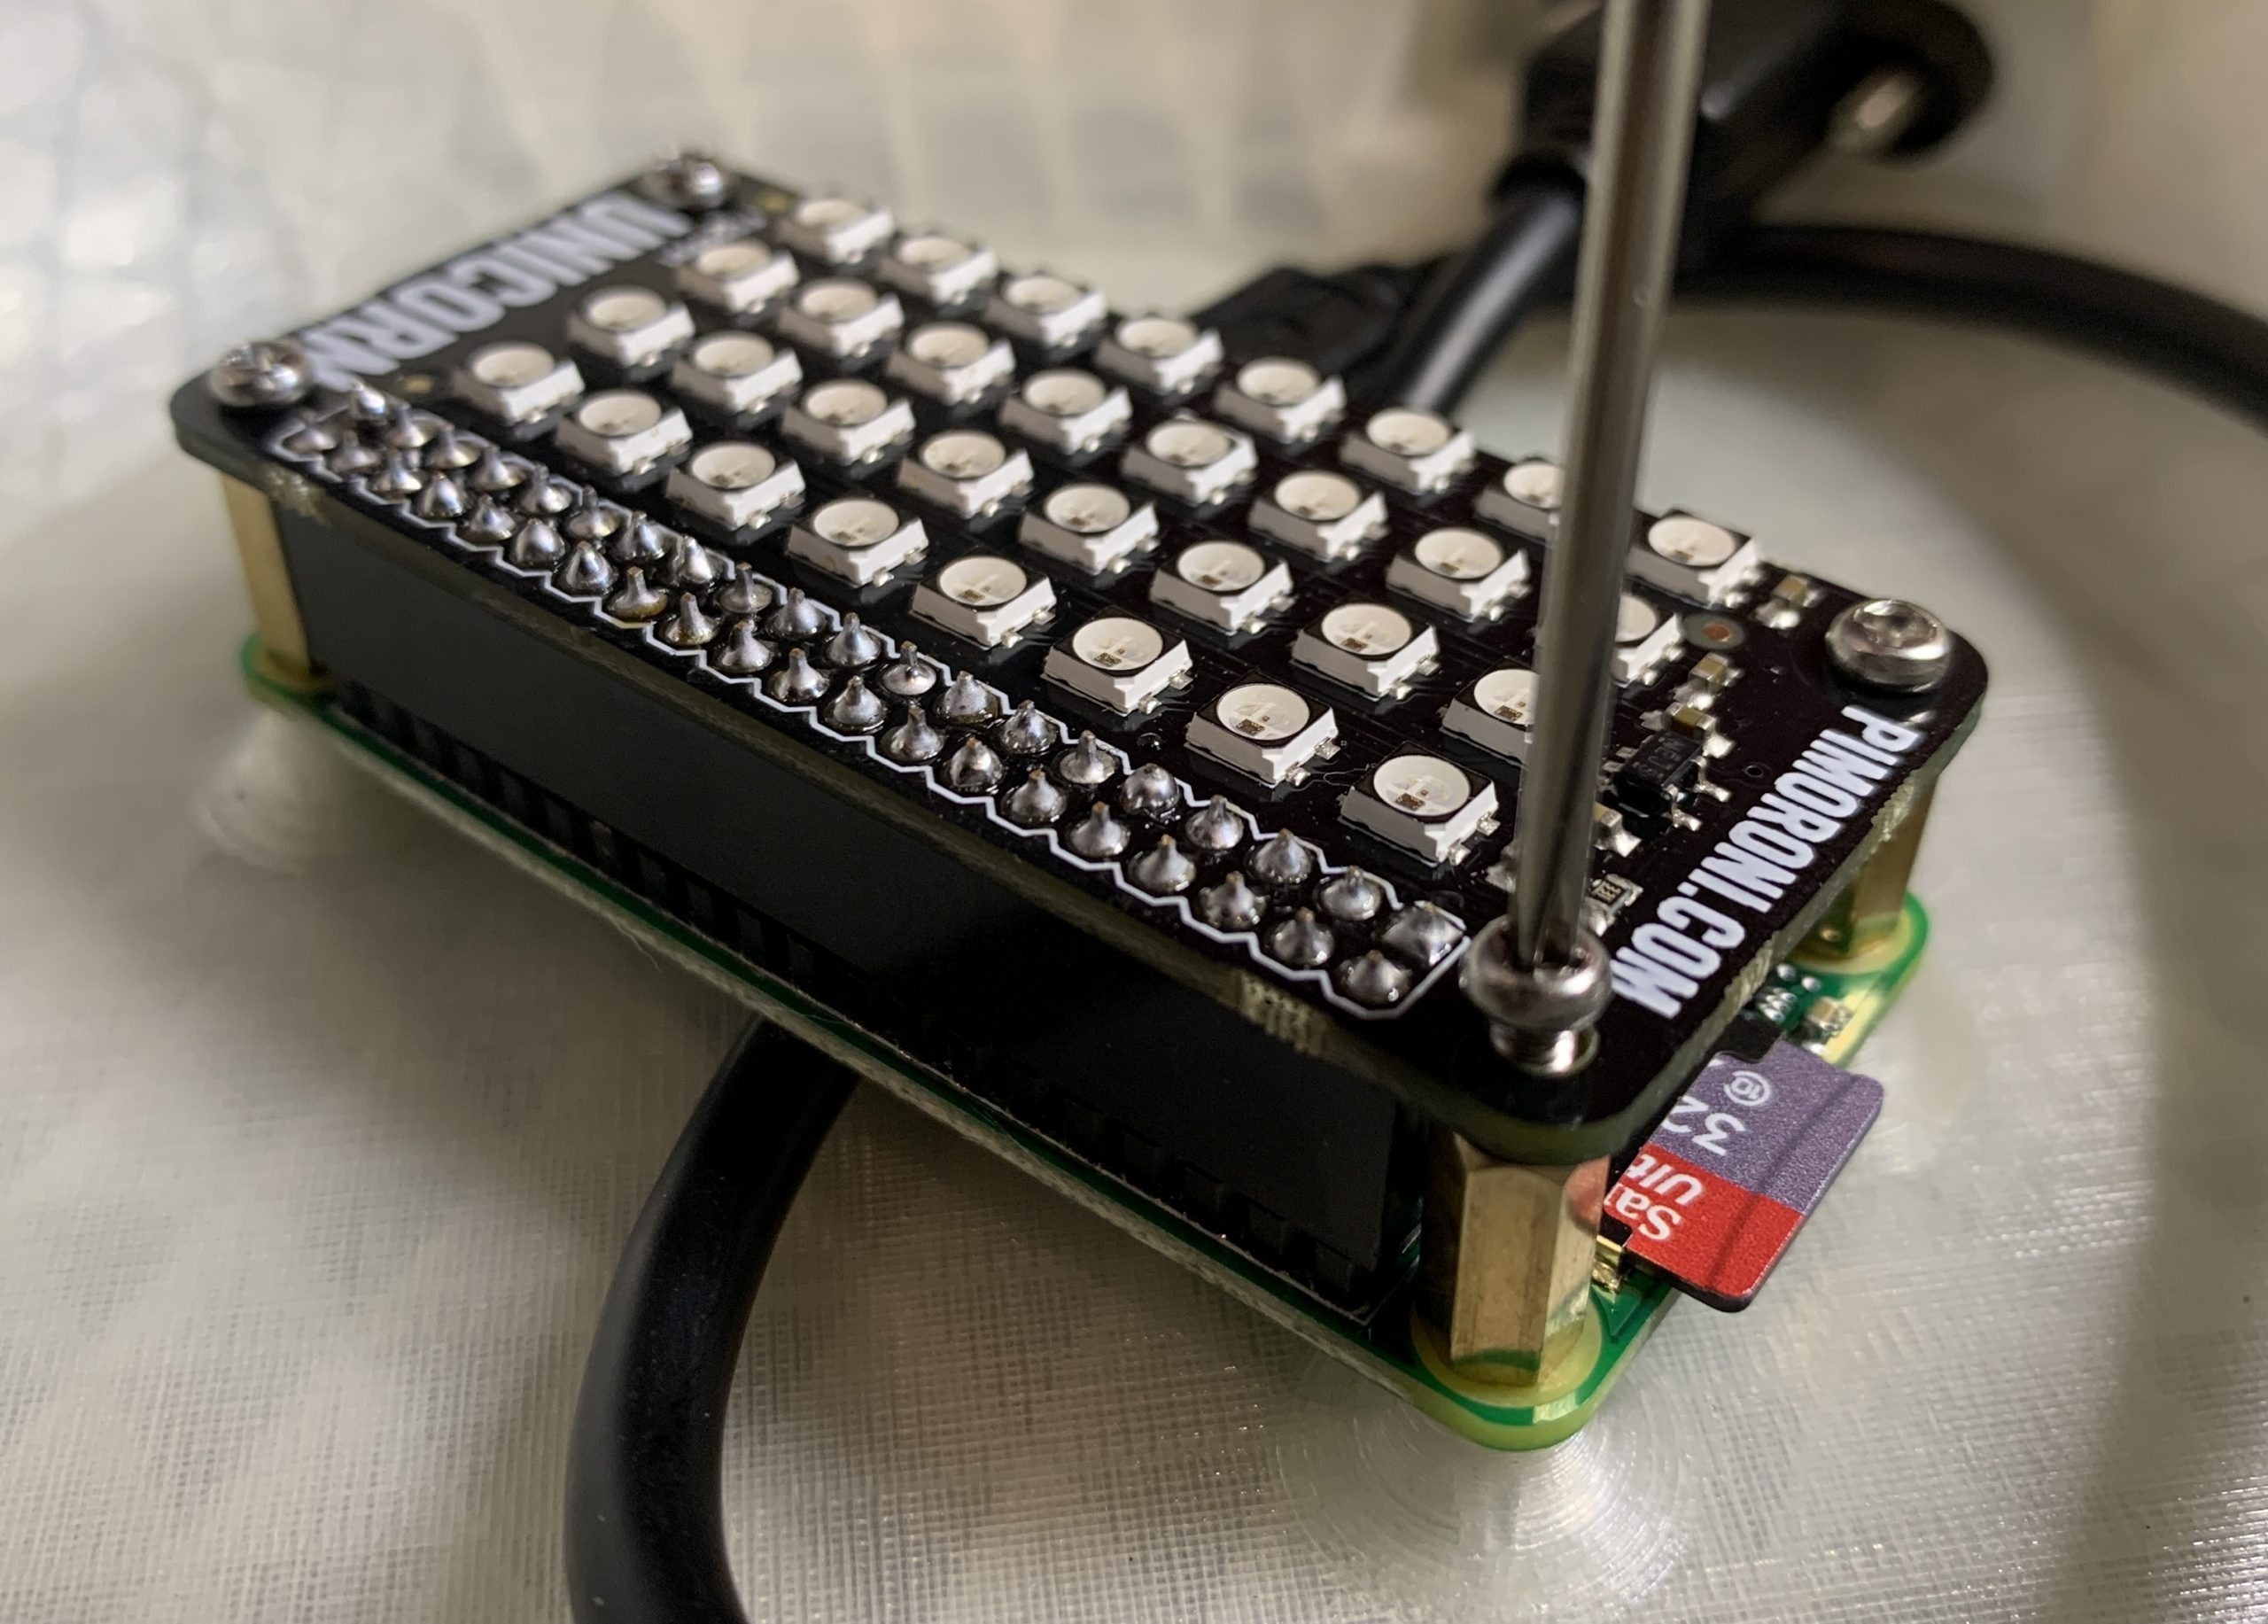
Raspberry Pi Zero (I went for the WH version to save me soldering on the header pins)
Unicorn pHat from Pimoroni
Panel mount micro-USB extension
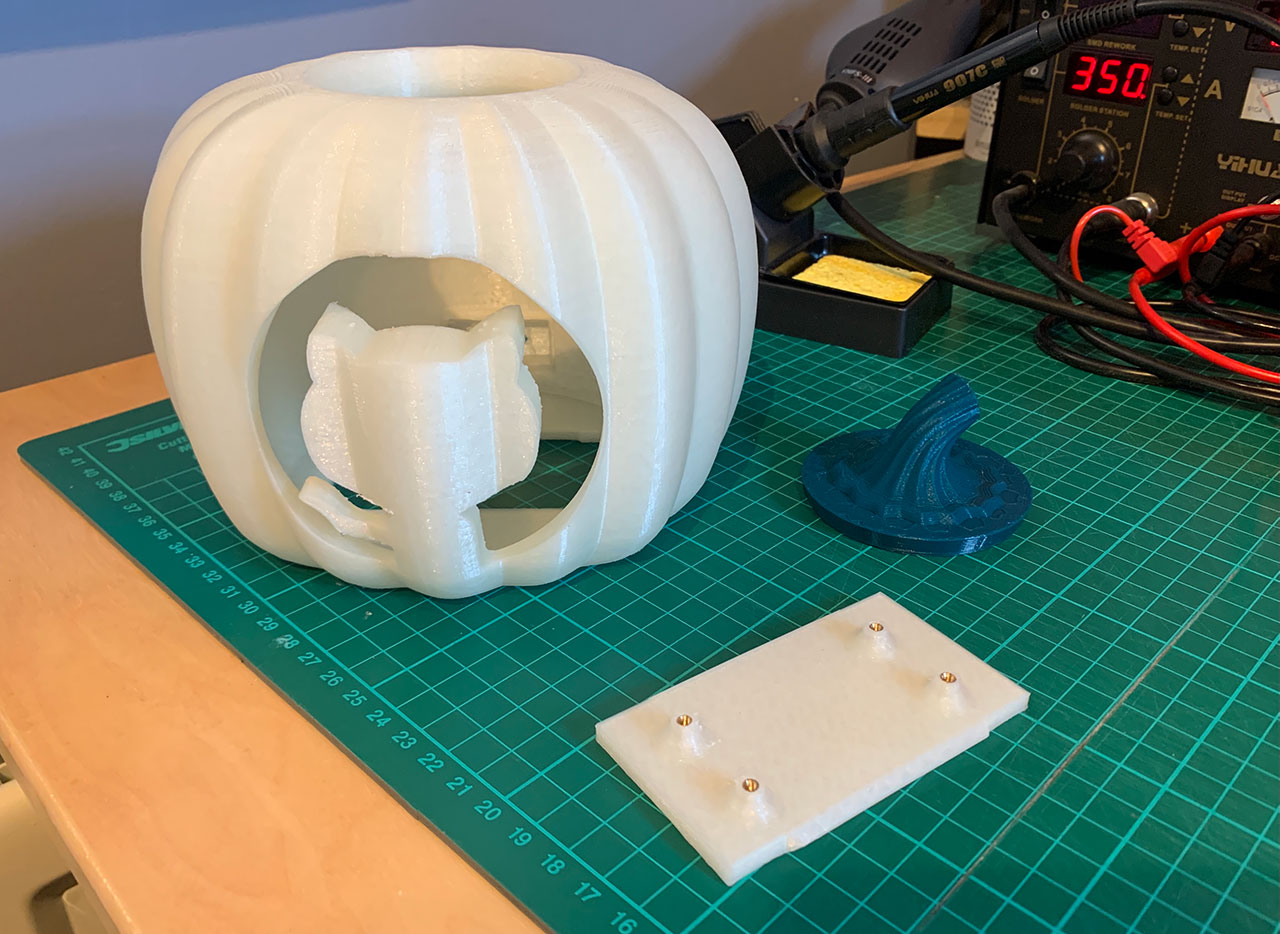
M2.5 hardware for mounting (screws, male PCB standoffs, and threaded inserts)
“For the 3D prints, I used a glow-in-the-dark PLA filament for the main body and Pi holder, along with a dark green PLA filament for the top plug.”
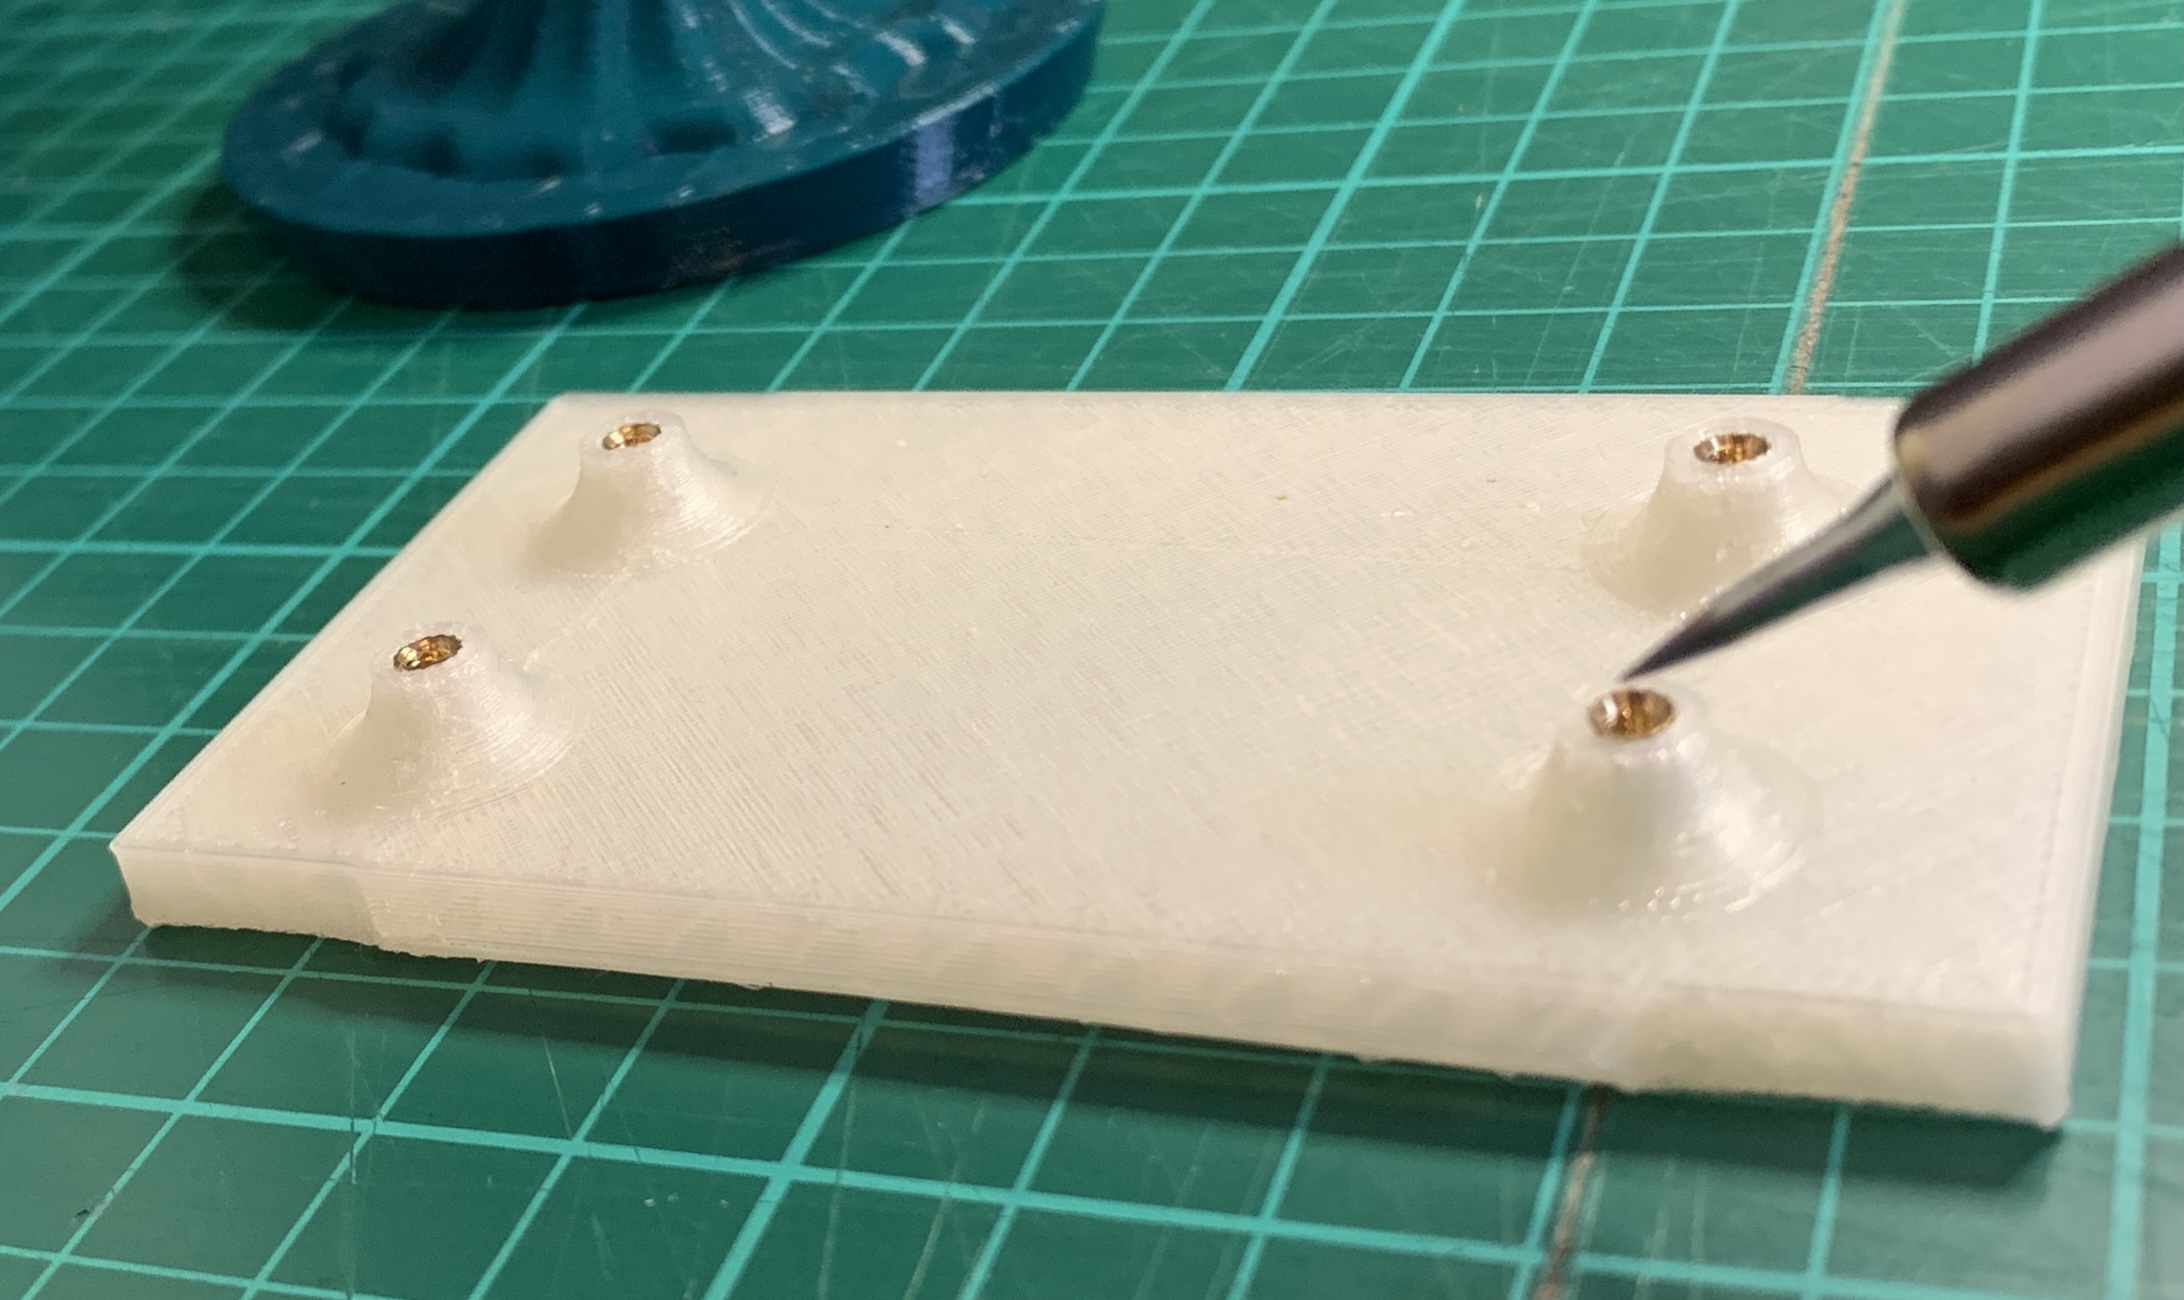
“I’ve been using M2.5 threaded inserts quite a bit when printing parts to fit a Raspberry Pi, as it allows you to simply design a small hole in your model and then you push the brass thread into the gap with your soldering iron to melt it securely into place ready for screwing in your device.”
Threaded insert
“Once the inserts are in, you can screw the Raspberry Pi Zero into place using some brass PCB stand-offs, place the Unicorn pHAT onto the GPIO ports, and then screw that down.”
pHAT install
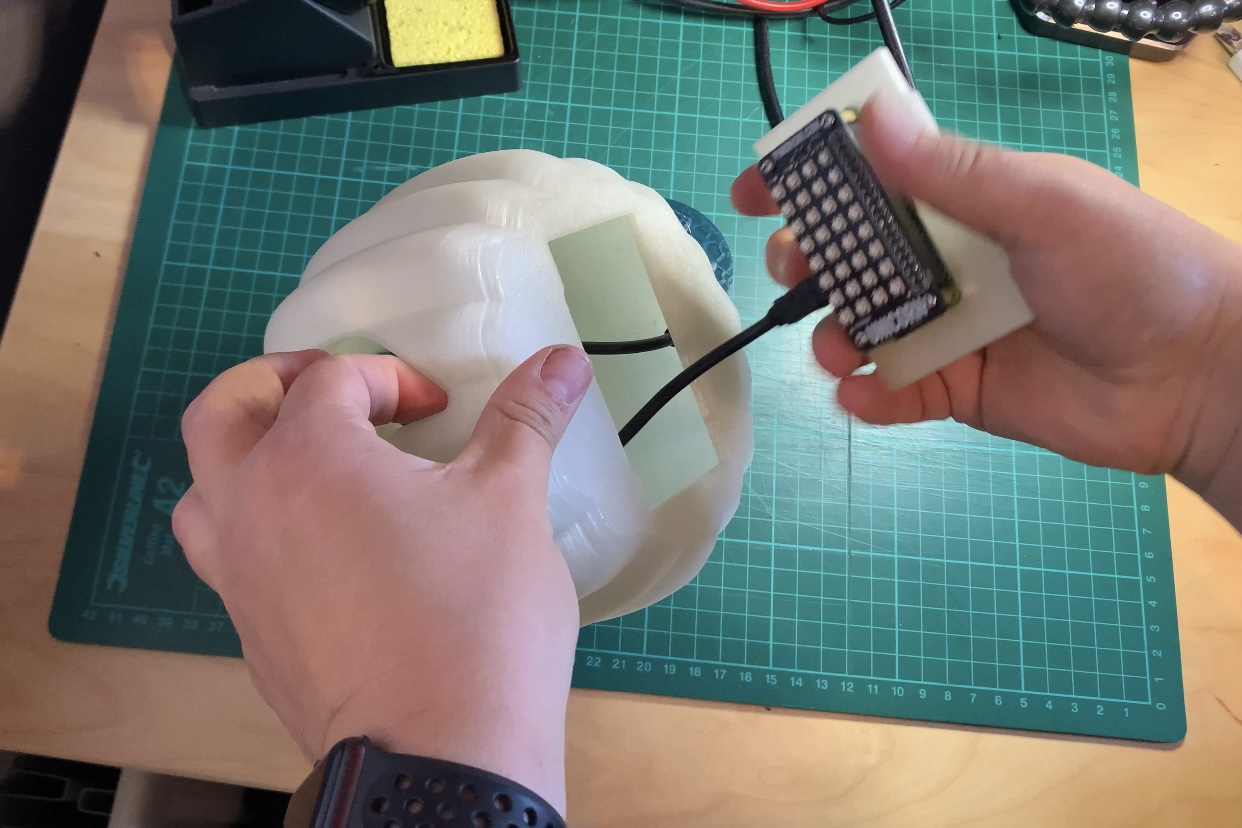
“Then you screw in the panel-mounted USB extension into the back of the pumpkin, connect it to the Raspberry Pi, and snap the Raspberry Pi holder into place in the bottom of your pumpkin.”
Inserting the base
Code along with Martin
“Now you are ready to install the software. You can get the latest version from my PumpkinPi project on GitHub. “
“Format the micro SD Card and install Raspberry Pi OS Lite. Rather than plugging in a keyboard and monitor, you probably want to do a headless install, configuring SSH and WiFi by dropping an ssh file and a wpa_supplicant.conf file onto the root of the SD card after copying over the Raspbian files.”
“You’ll need to install the Unicorn HAT software, but they have a cool one-line installer that takes care of all the dependencies including Python and Git.”
# How often to check (in seconds). Remember - be nice to the server. Once every 5 minutes is plenty.
REFRESH_INTERVAL = 300
“Finally you can run the script as root:”
sudo python ~/PumpkinPi/src/pumpkinpi.py &
“Once you are happy everything is running how you want, don’t forget you can run the script at boot time. The easiest way to do this is to use crontab. See this cool video from Estefannie to learn more. But basically you do sudo crontab -e then add the following:”
“Note that we are pausing for 10 seconds before running the Python script. This is to allow the WiFi network to connect before we check on the state of our build.”
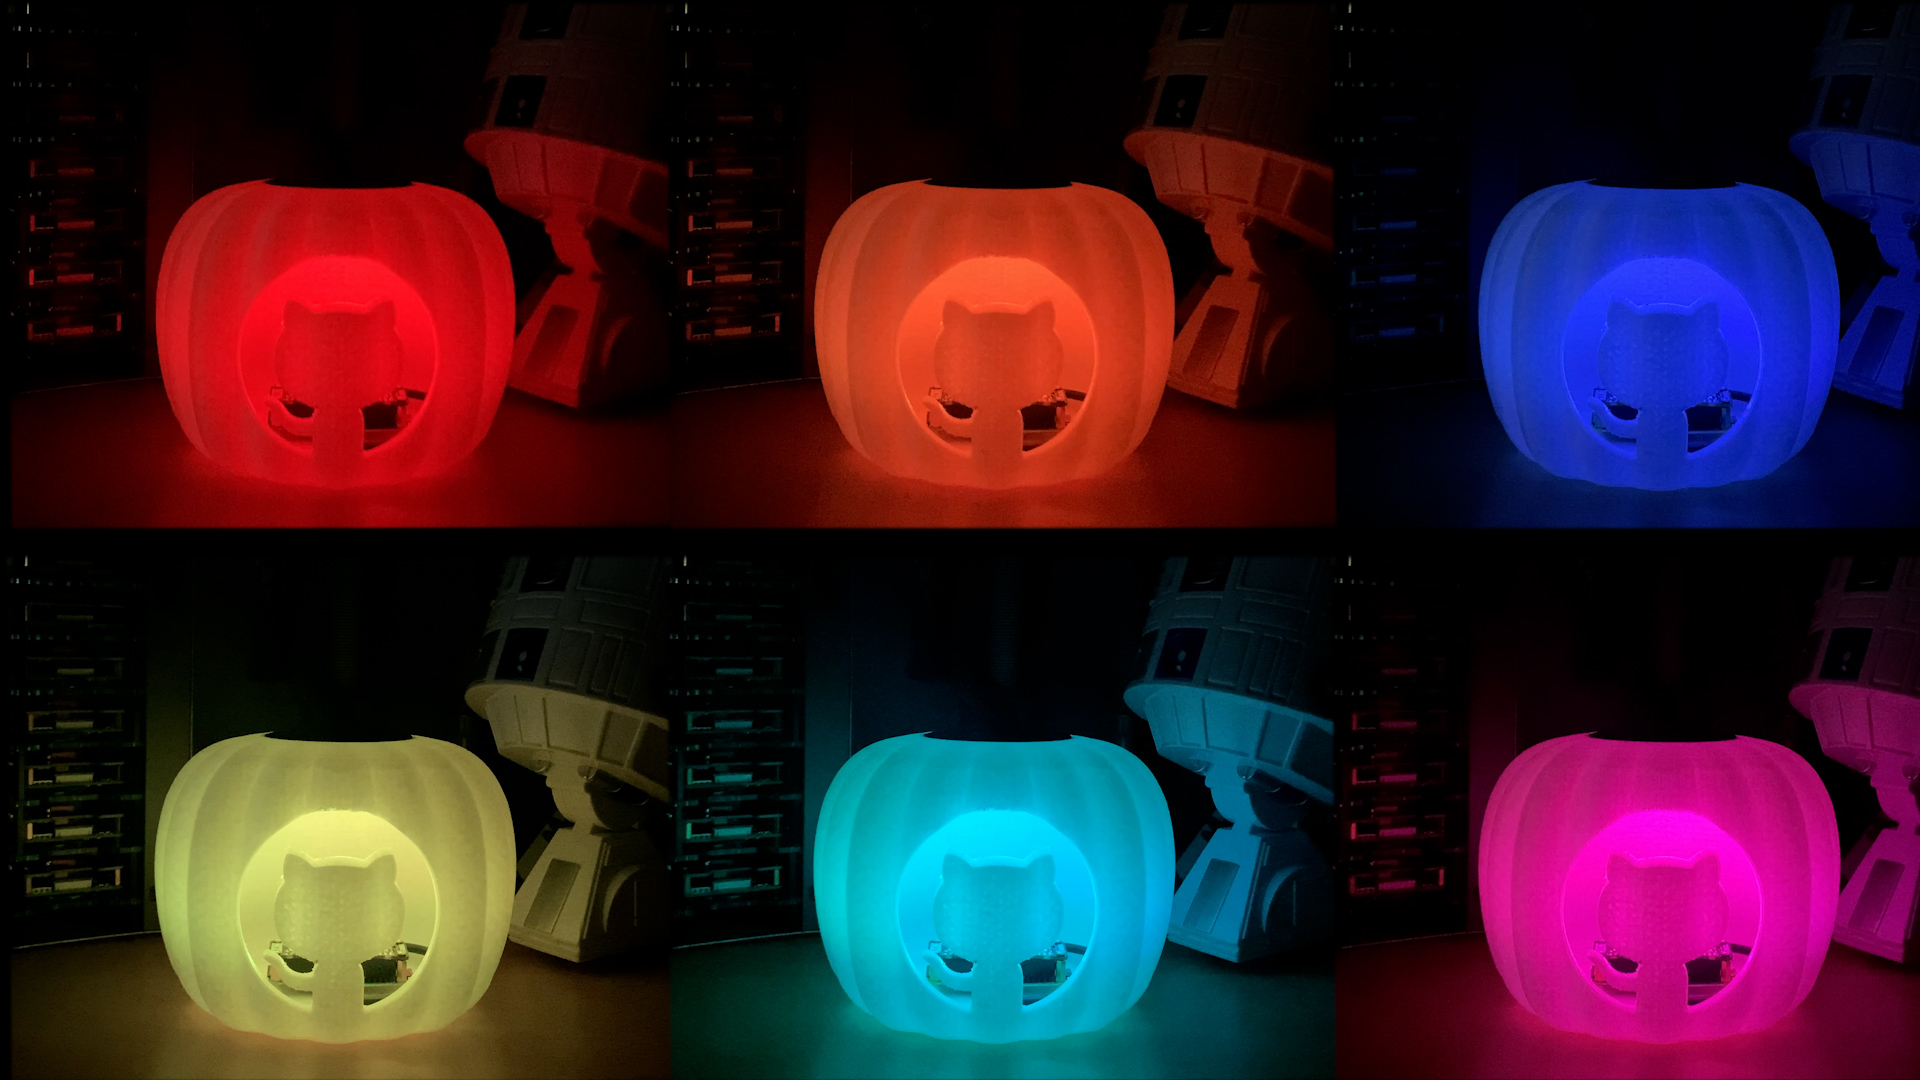
“The current version of the pumpkinpi script works with all the SVG files produced by the major hosted build providers, including GitHub Actions, which is free for open source projects. But if you want to improve the code in any way, I’m definitely accepting pull requests on it.”
“Using the same hardware you could monitor lots of different things, such as when someone posts on Twitter, what the weather will be tomorrow, or maybe just code your own unique multi-coloured display that you can leave flickering in your window.”
“If you build this project or create your own pumpkin display, I’d love to see pictures. You can find me on Twitter @martinwoodward and on GitHub.”
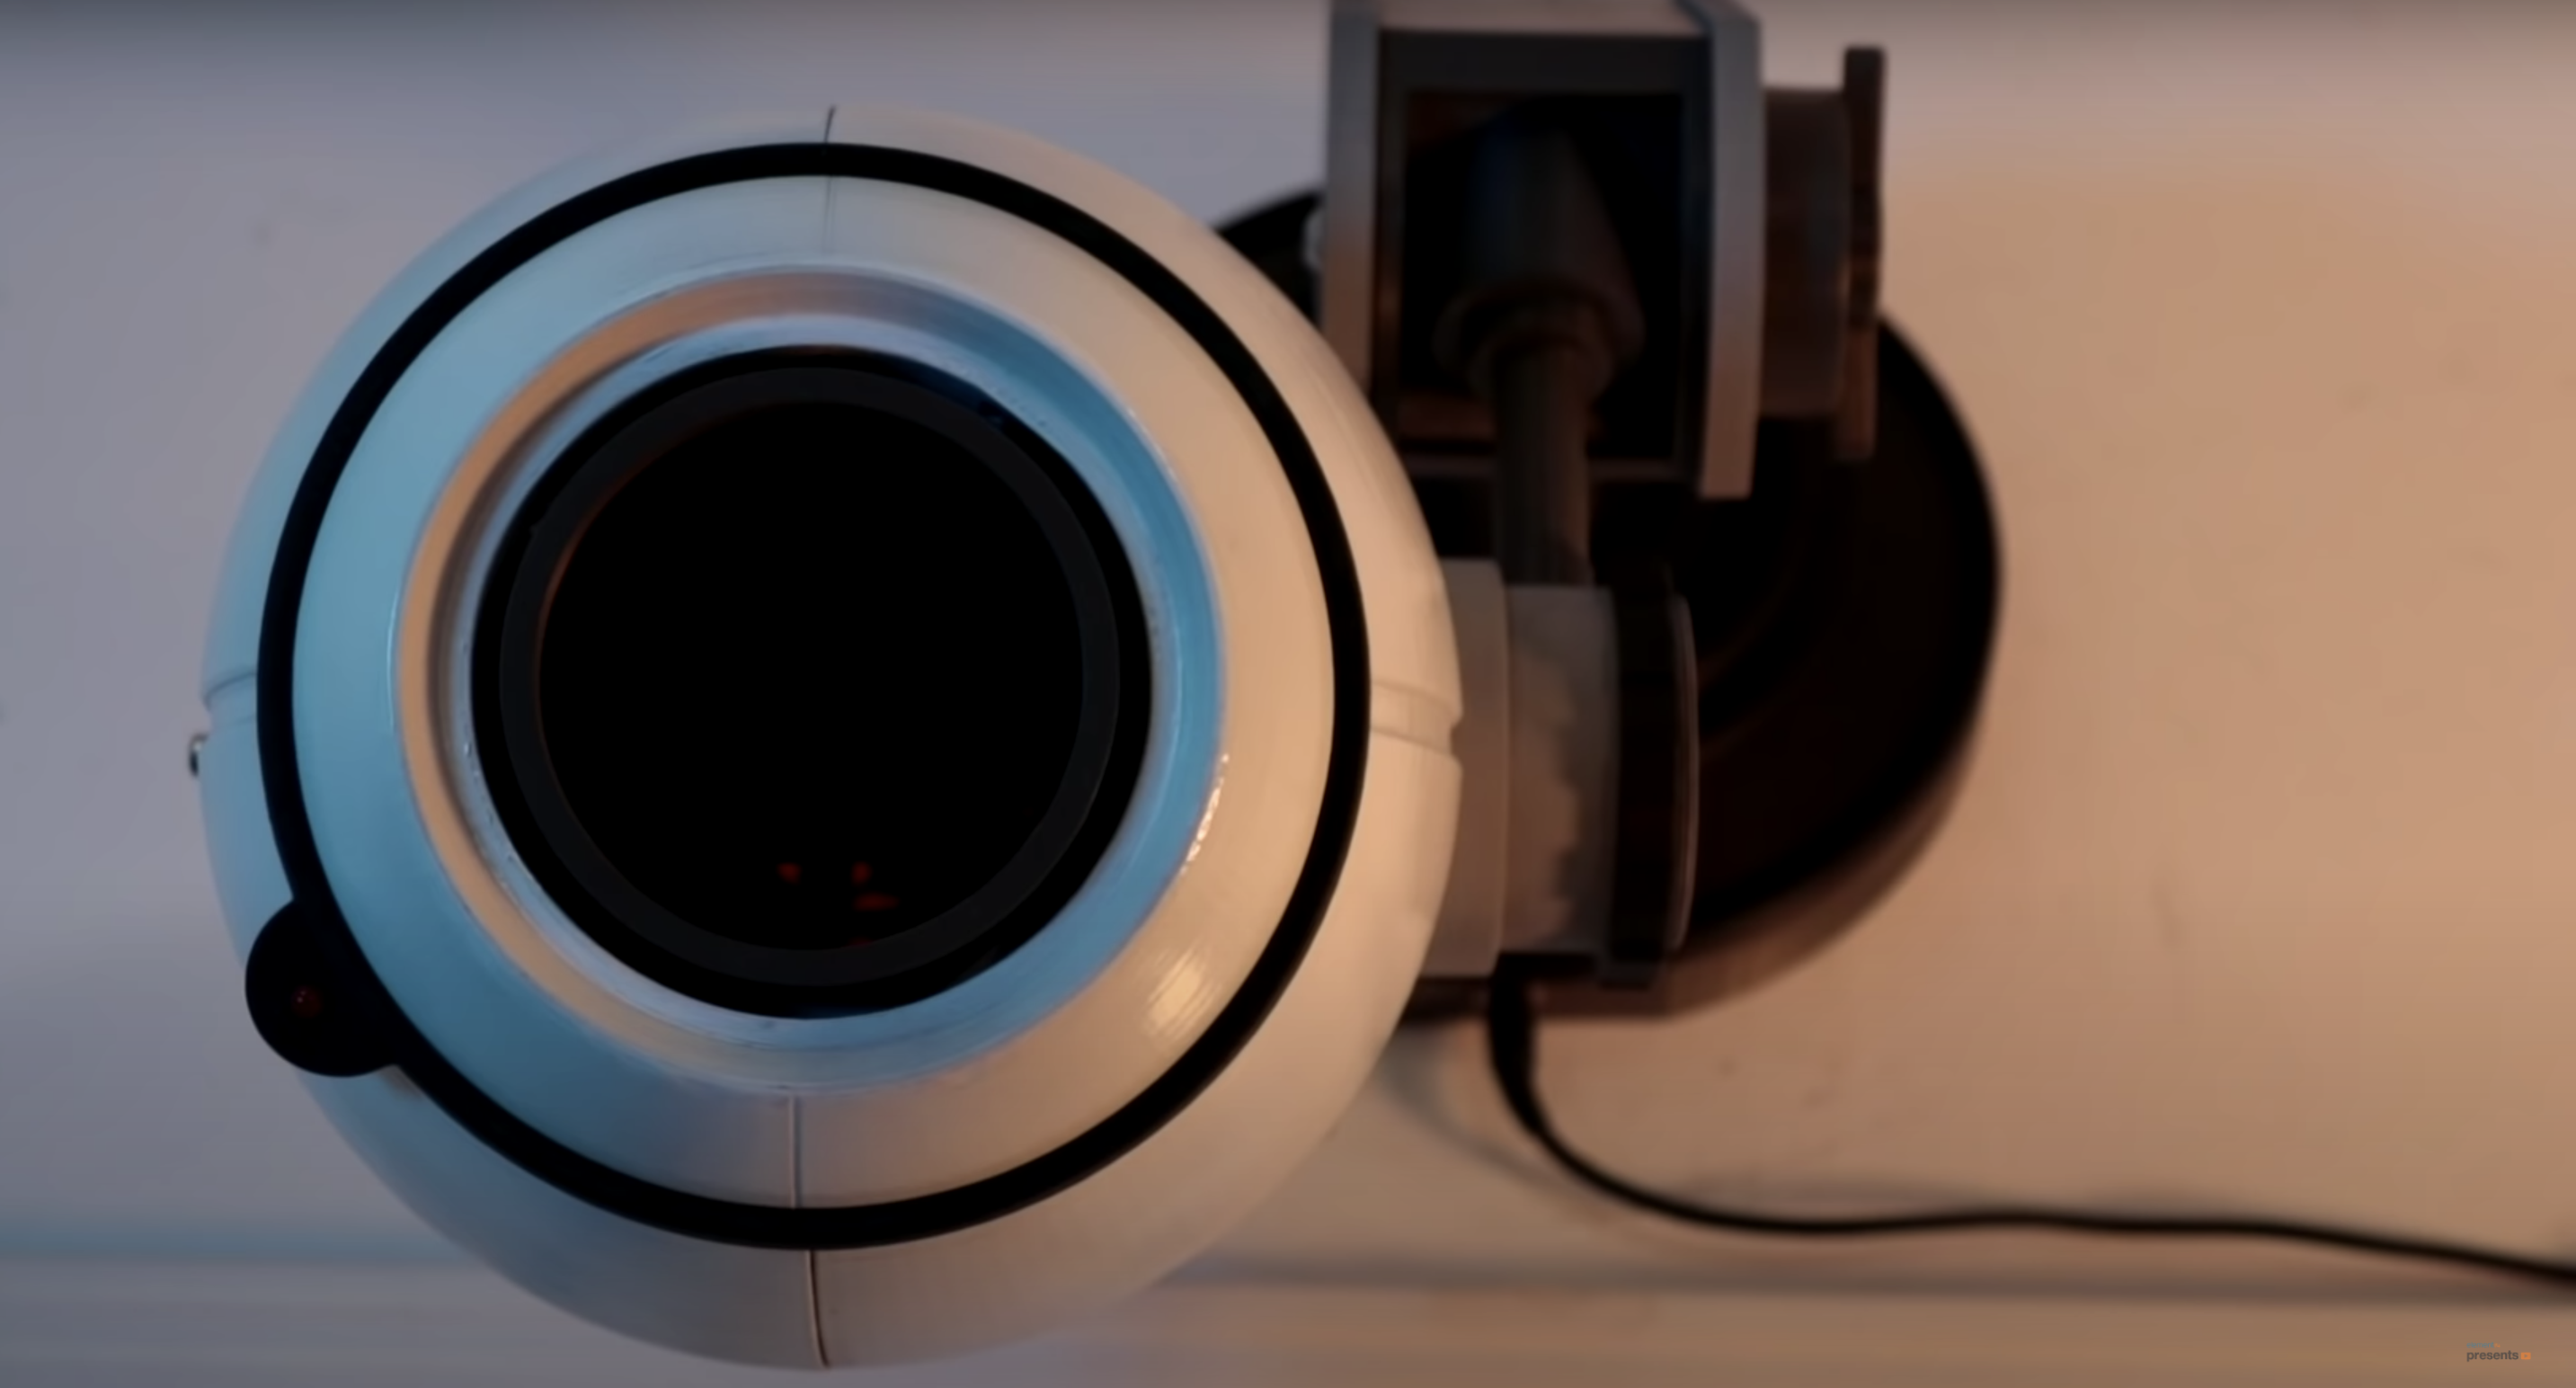
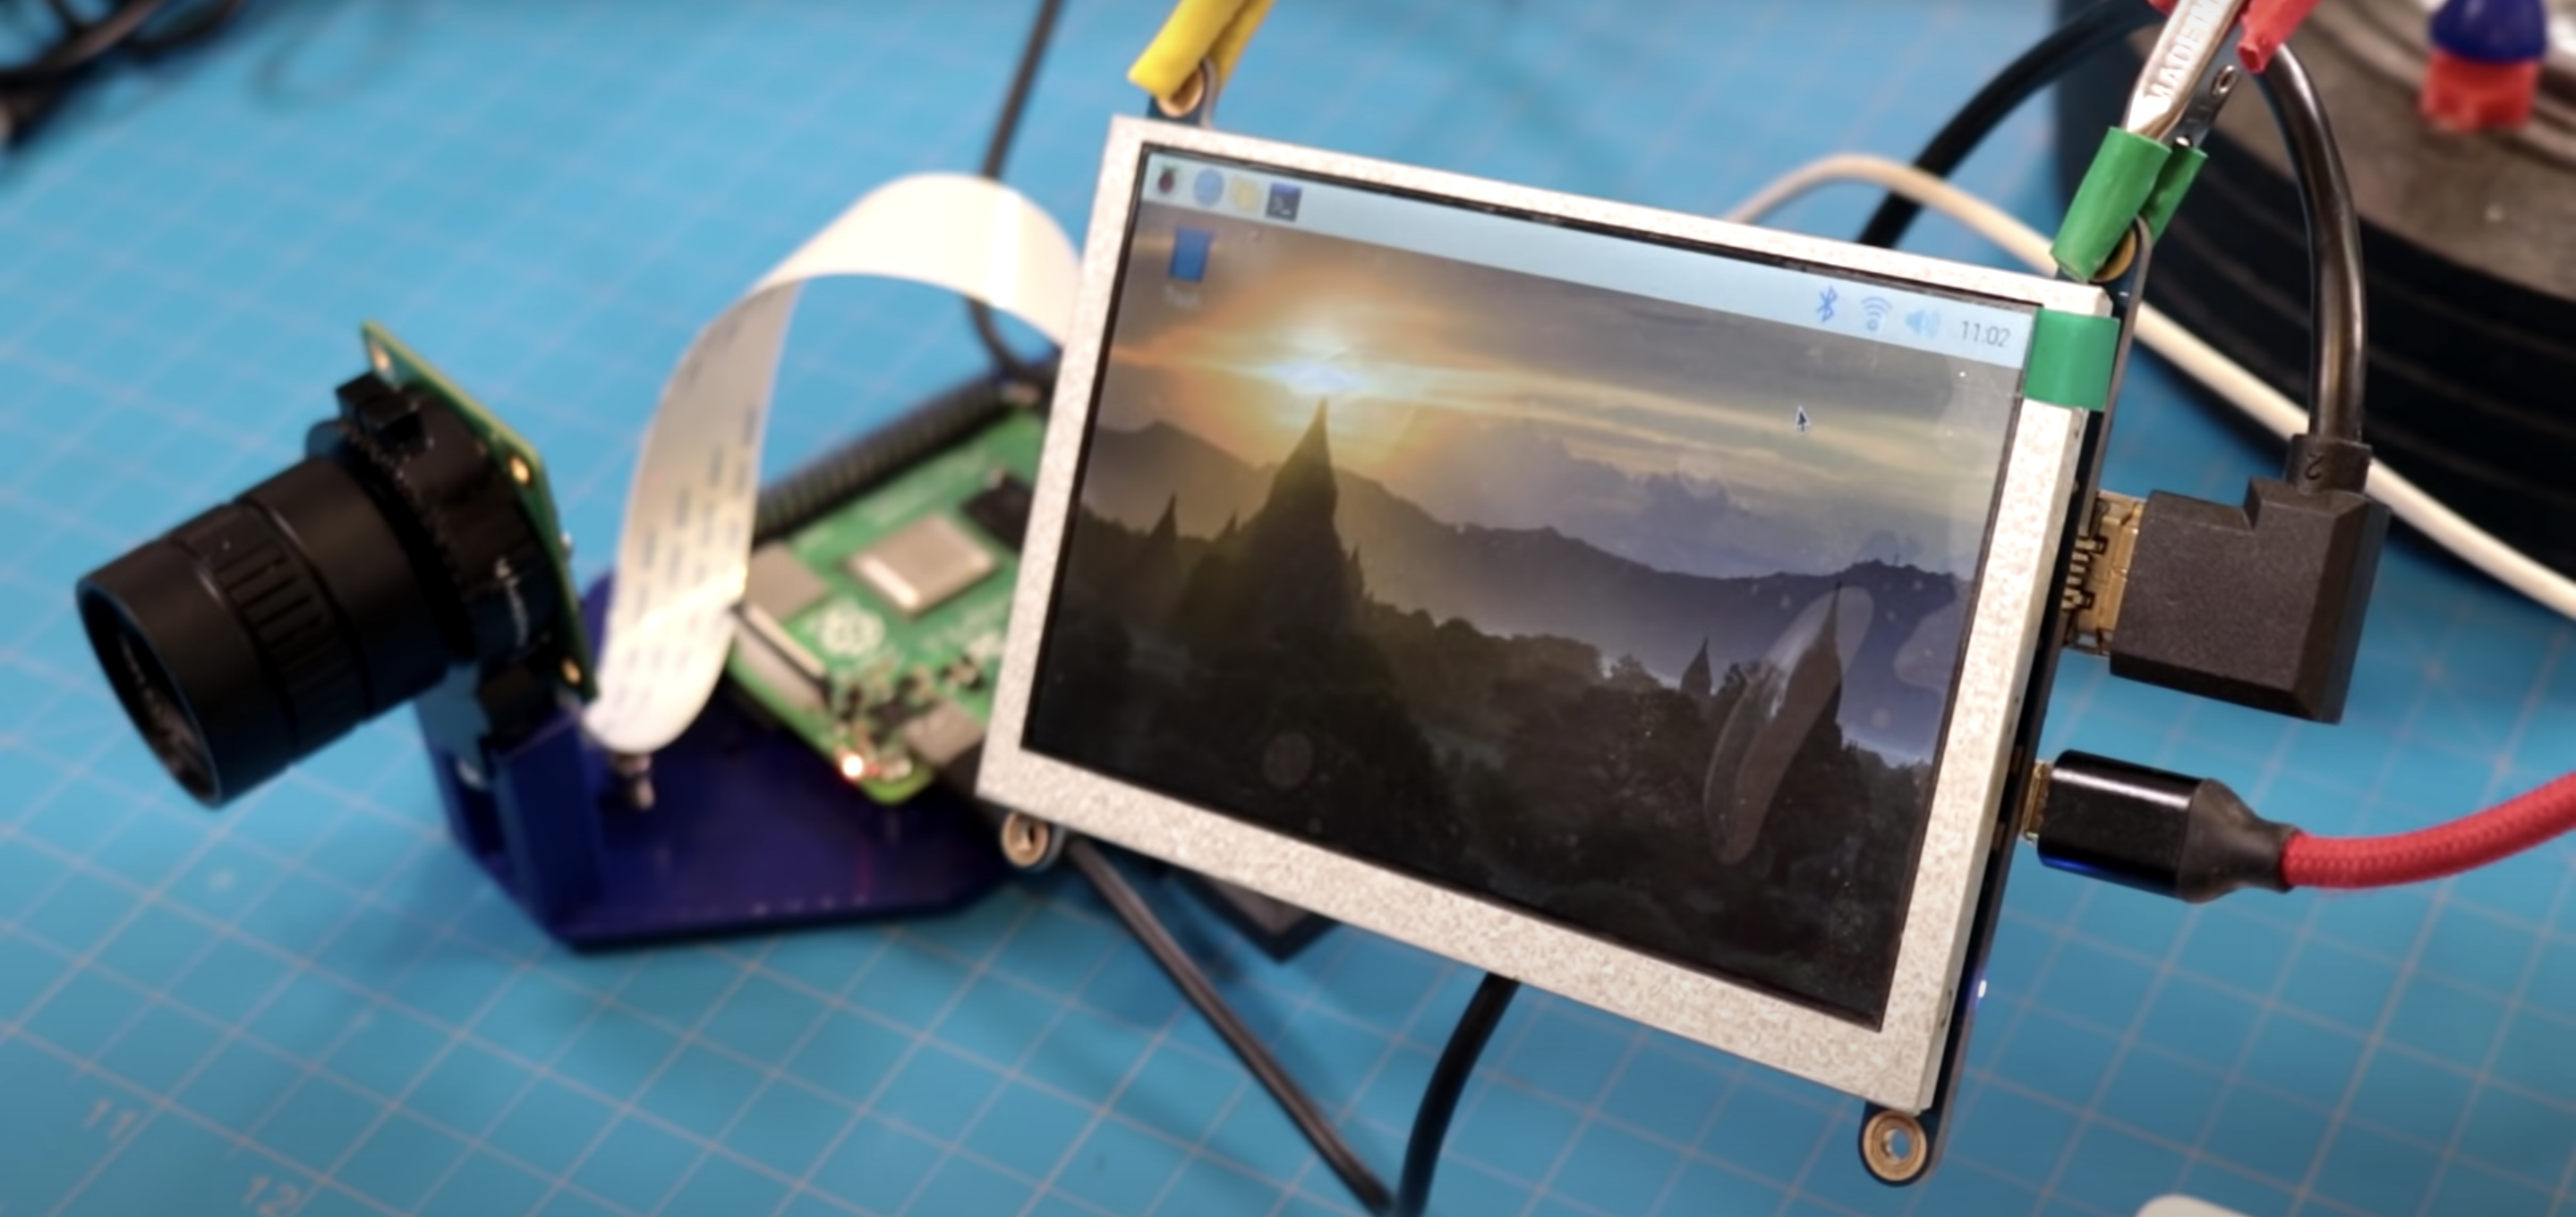
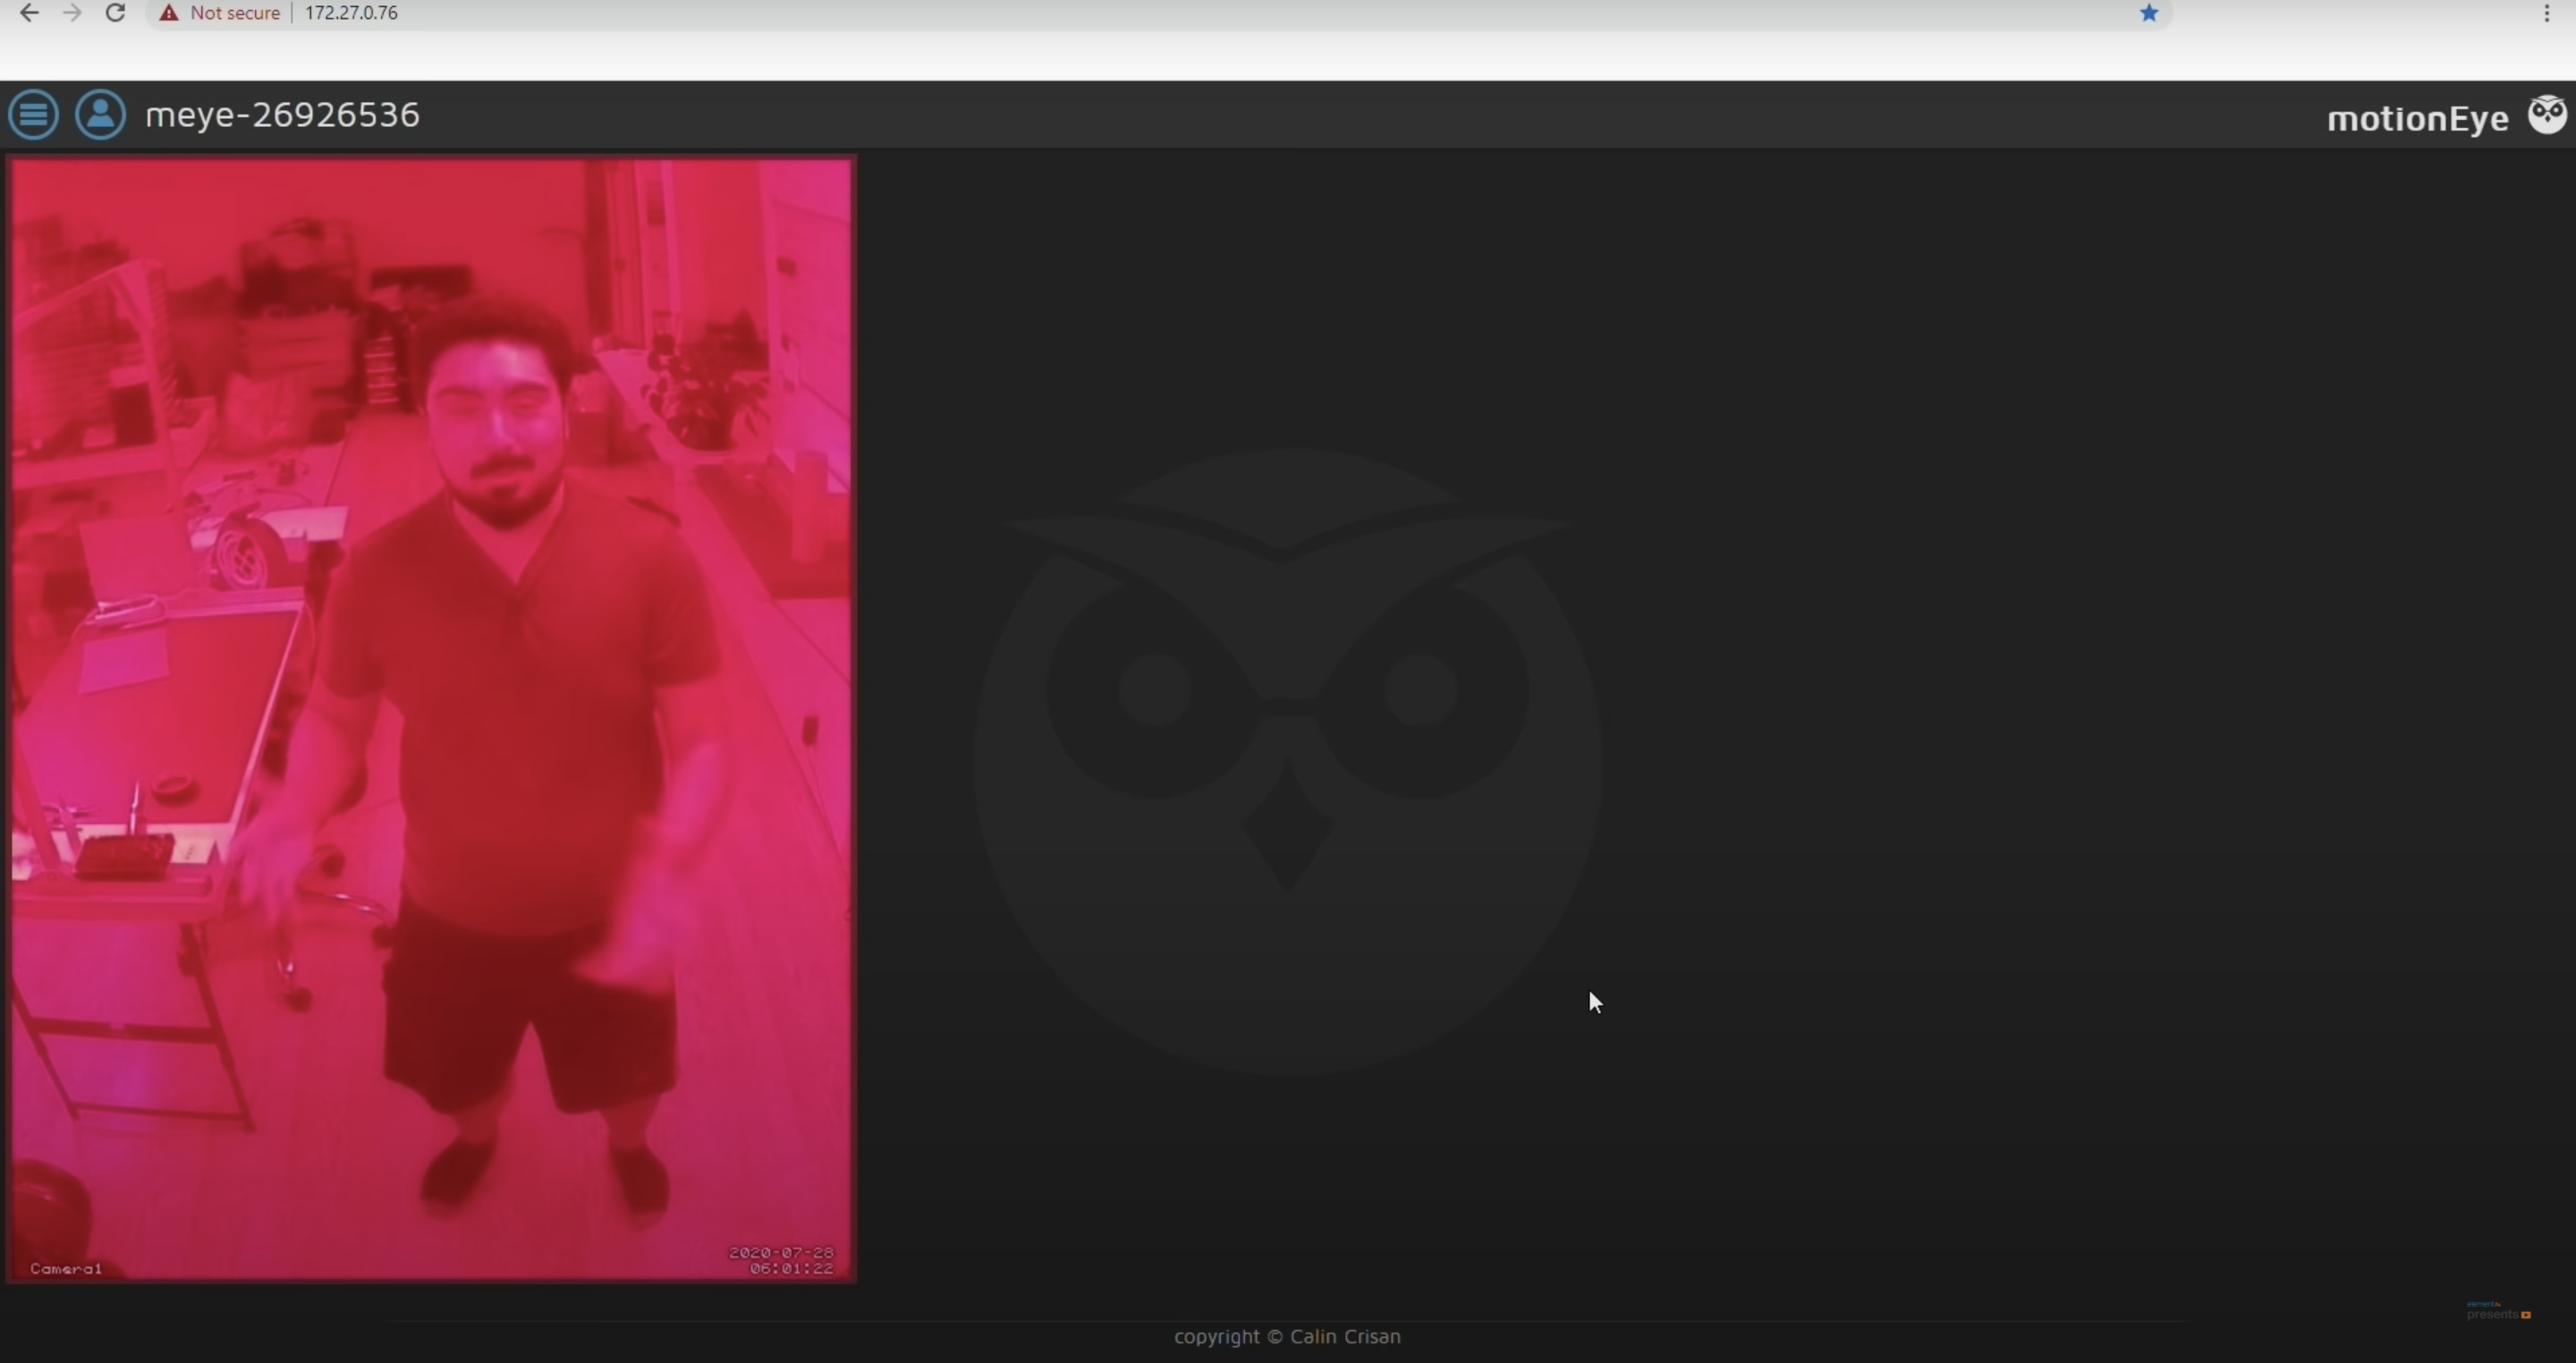
DJ from the element14 community shows you how to build a red-lensed security camera in the style of Portal 2 using the Raspberry Pi High Quality Camera.
The finished camera mounted on the wall
Portal 2 is a puzzle platform game developed by Valve — a “puzzle game masquerading as a first-person shooter”, according to Forbes.
DJ playing with the Raspberry Pi High Quality Camera
DJ was pleased to learn that you don’t need to write any code to make your own security camera, you can just use a package called motionEyeOS. All you have to do is download the motionEyeOS image, pop the flashed SD card into your Raspberry Pi, and you’re pretty much good to go.
Dj got everything set up on a 5″ screen attached to the Raspberry Pi
You’ll find that the default resolution is 640×480, so it will show up as a tiny window on your monitor of choice, but that can be amended.
Simplicity
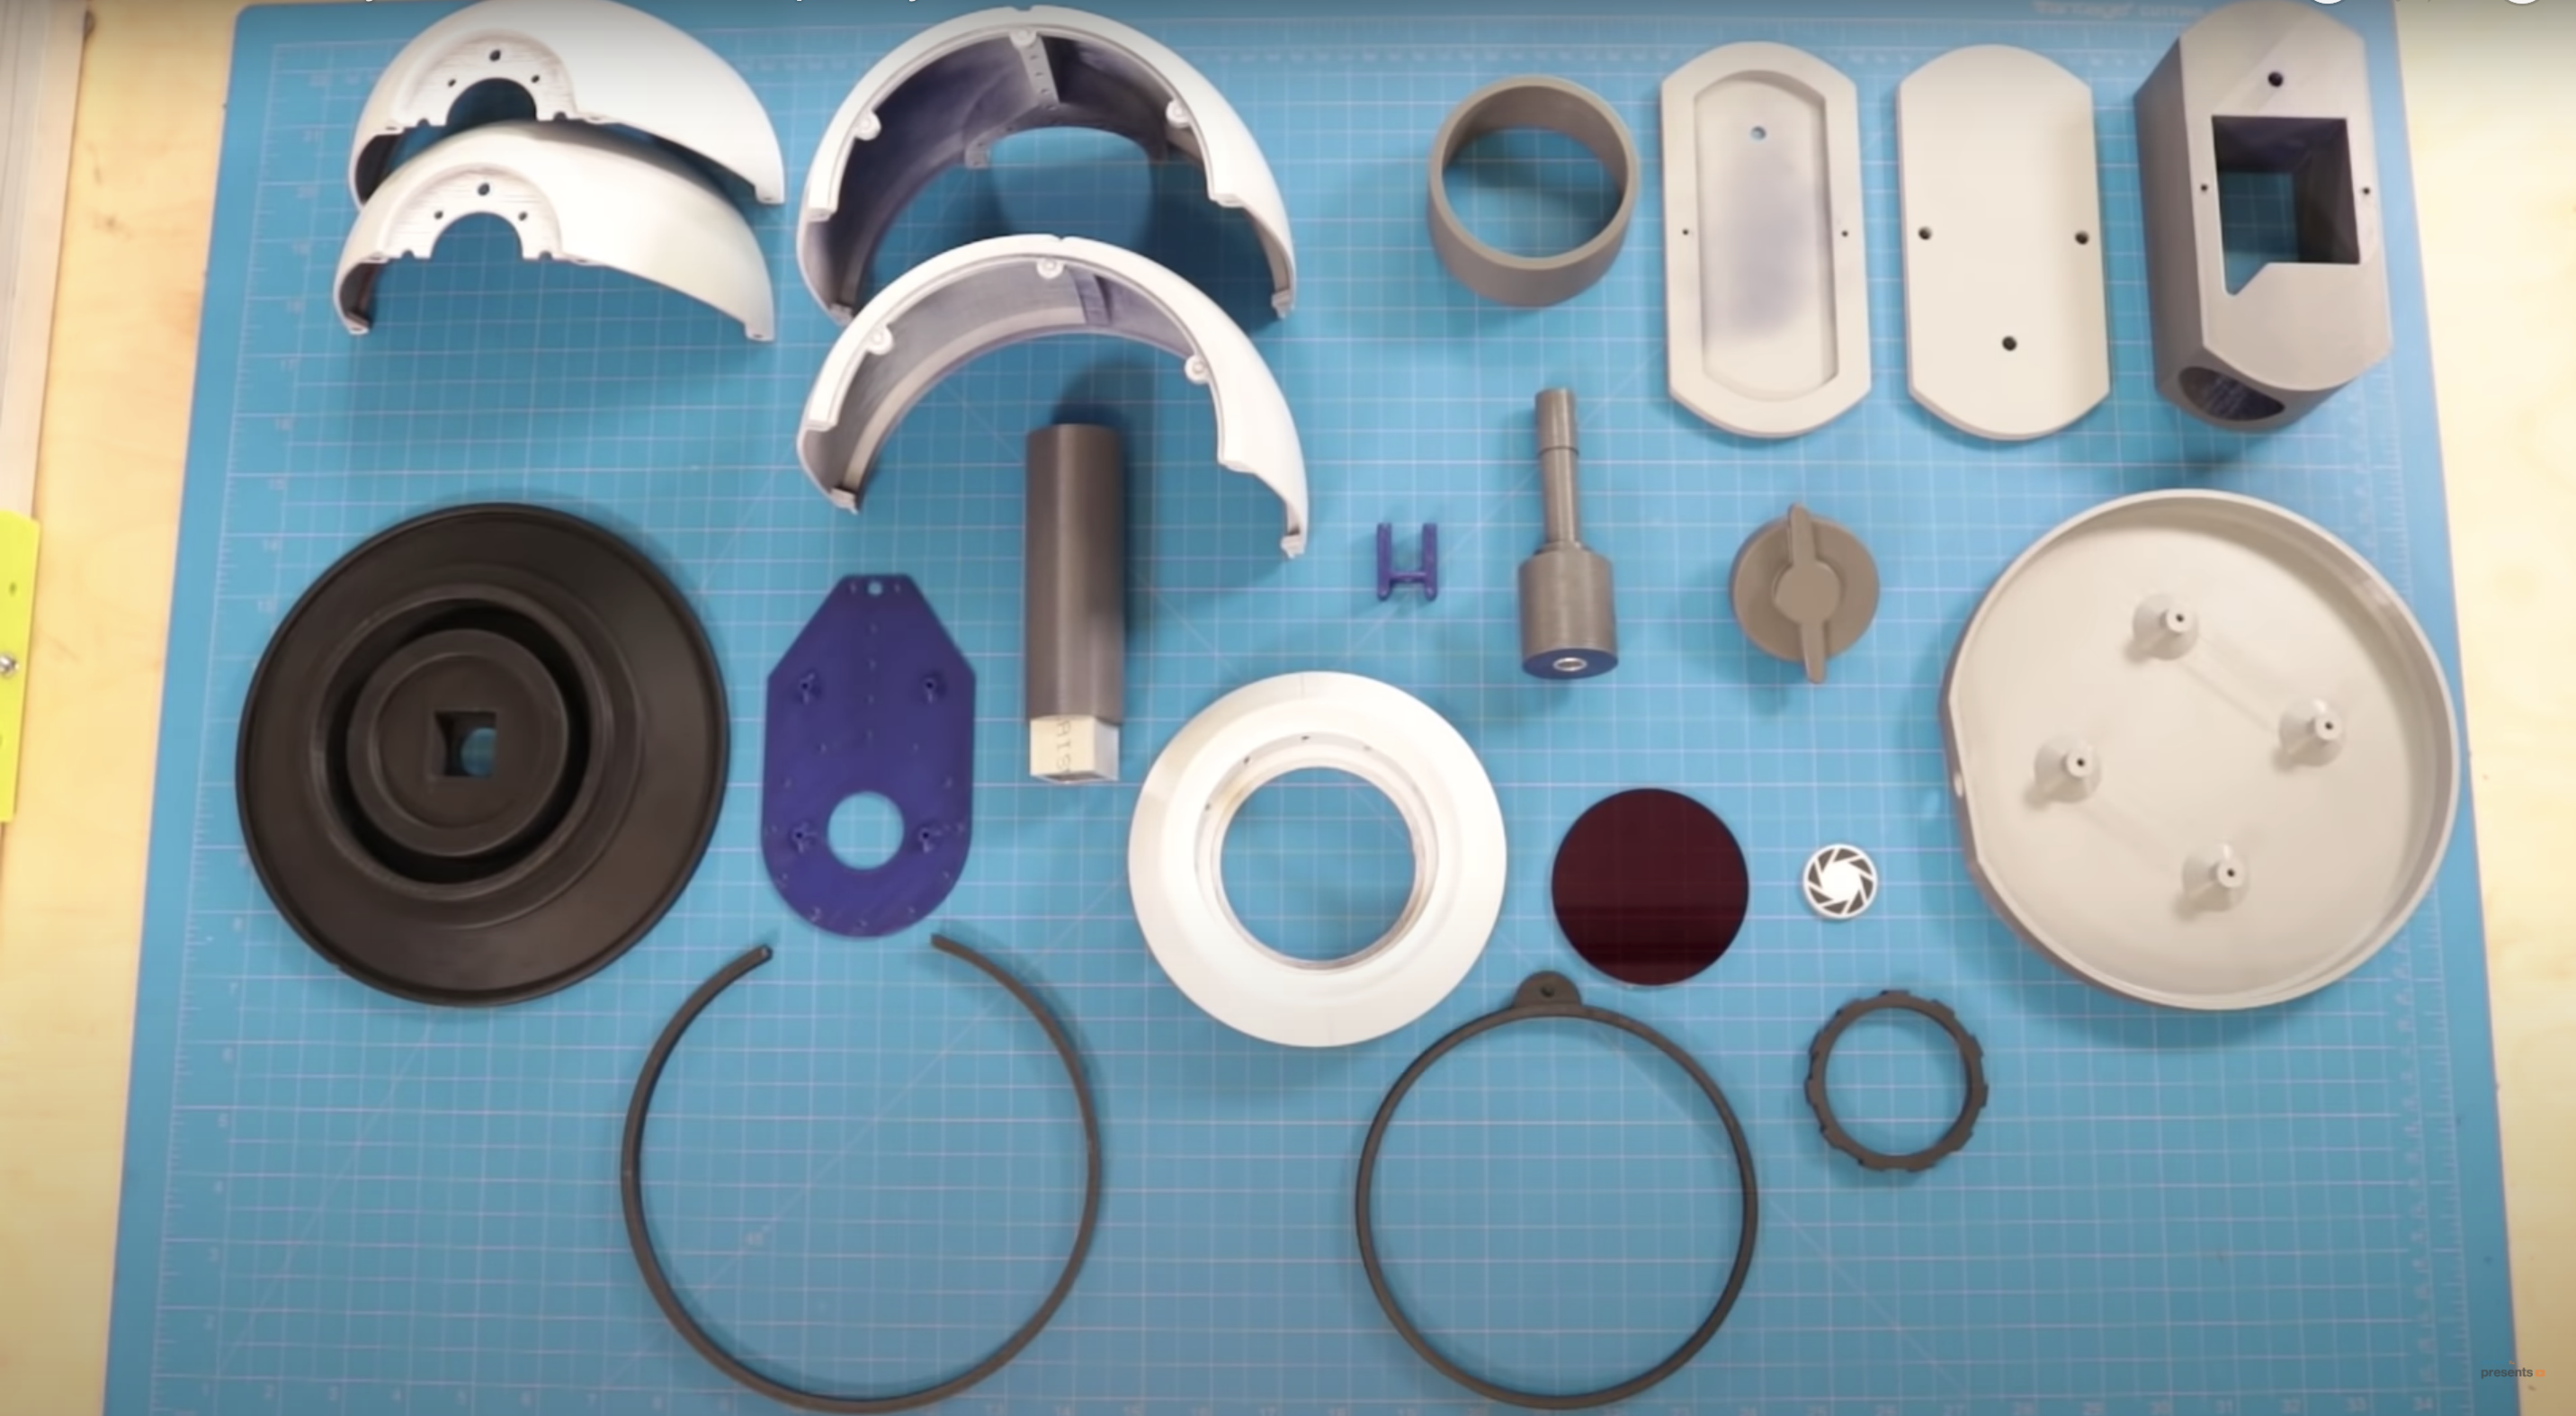
While this build is very simple electronically, the 20-part 3D-printed shell is beautiful. A Raspberry Pi is positioned on a purpose-built platform in the middle of the shell, connected to the Raspberry Pi High Quality Camera, which sits at the front of that shell, peeking out.
All the 3D printed parts ready to assemble
The 5V power supply is routed through the main shell into the base, which mounts the build to the wall. In order to keep the Raspberry Pi cool, DJ made some vent holes in the lens of the shell. The red LED is routed out of the side and sits on the outside body of the shell.
Magnetising
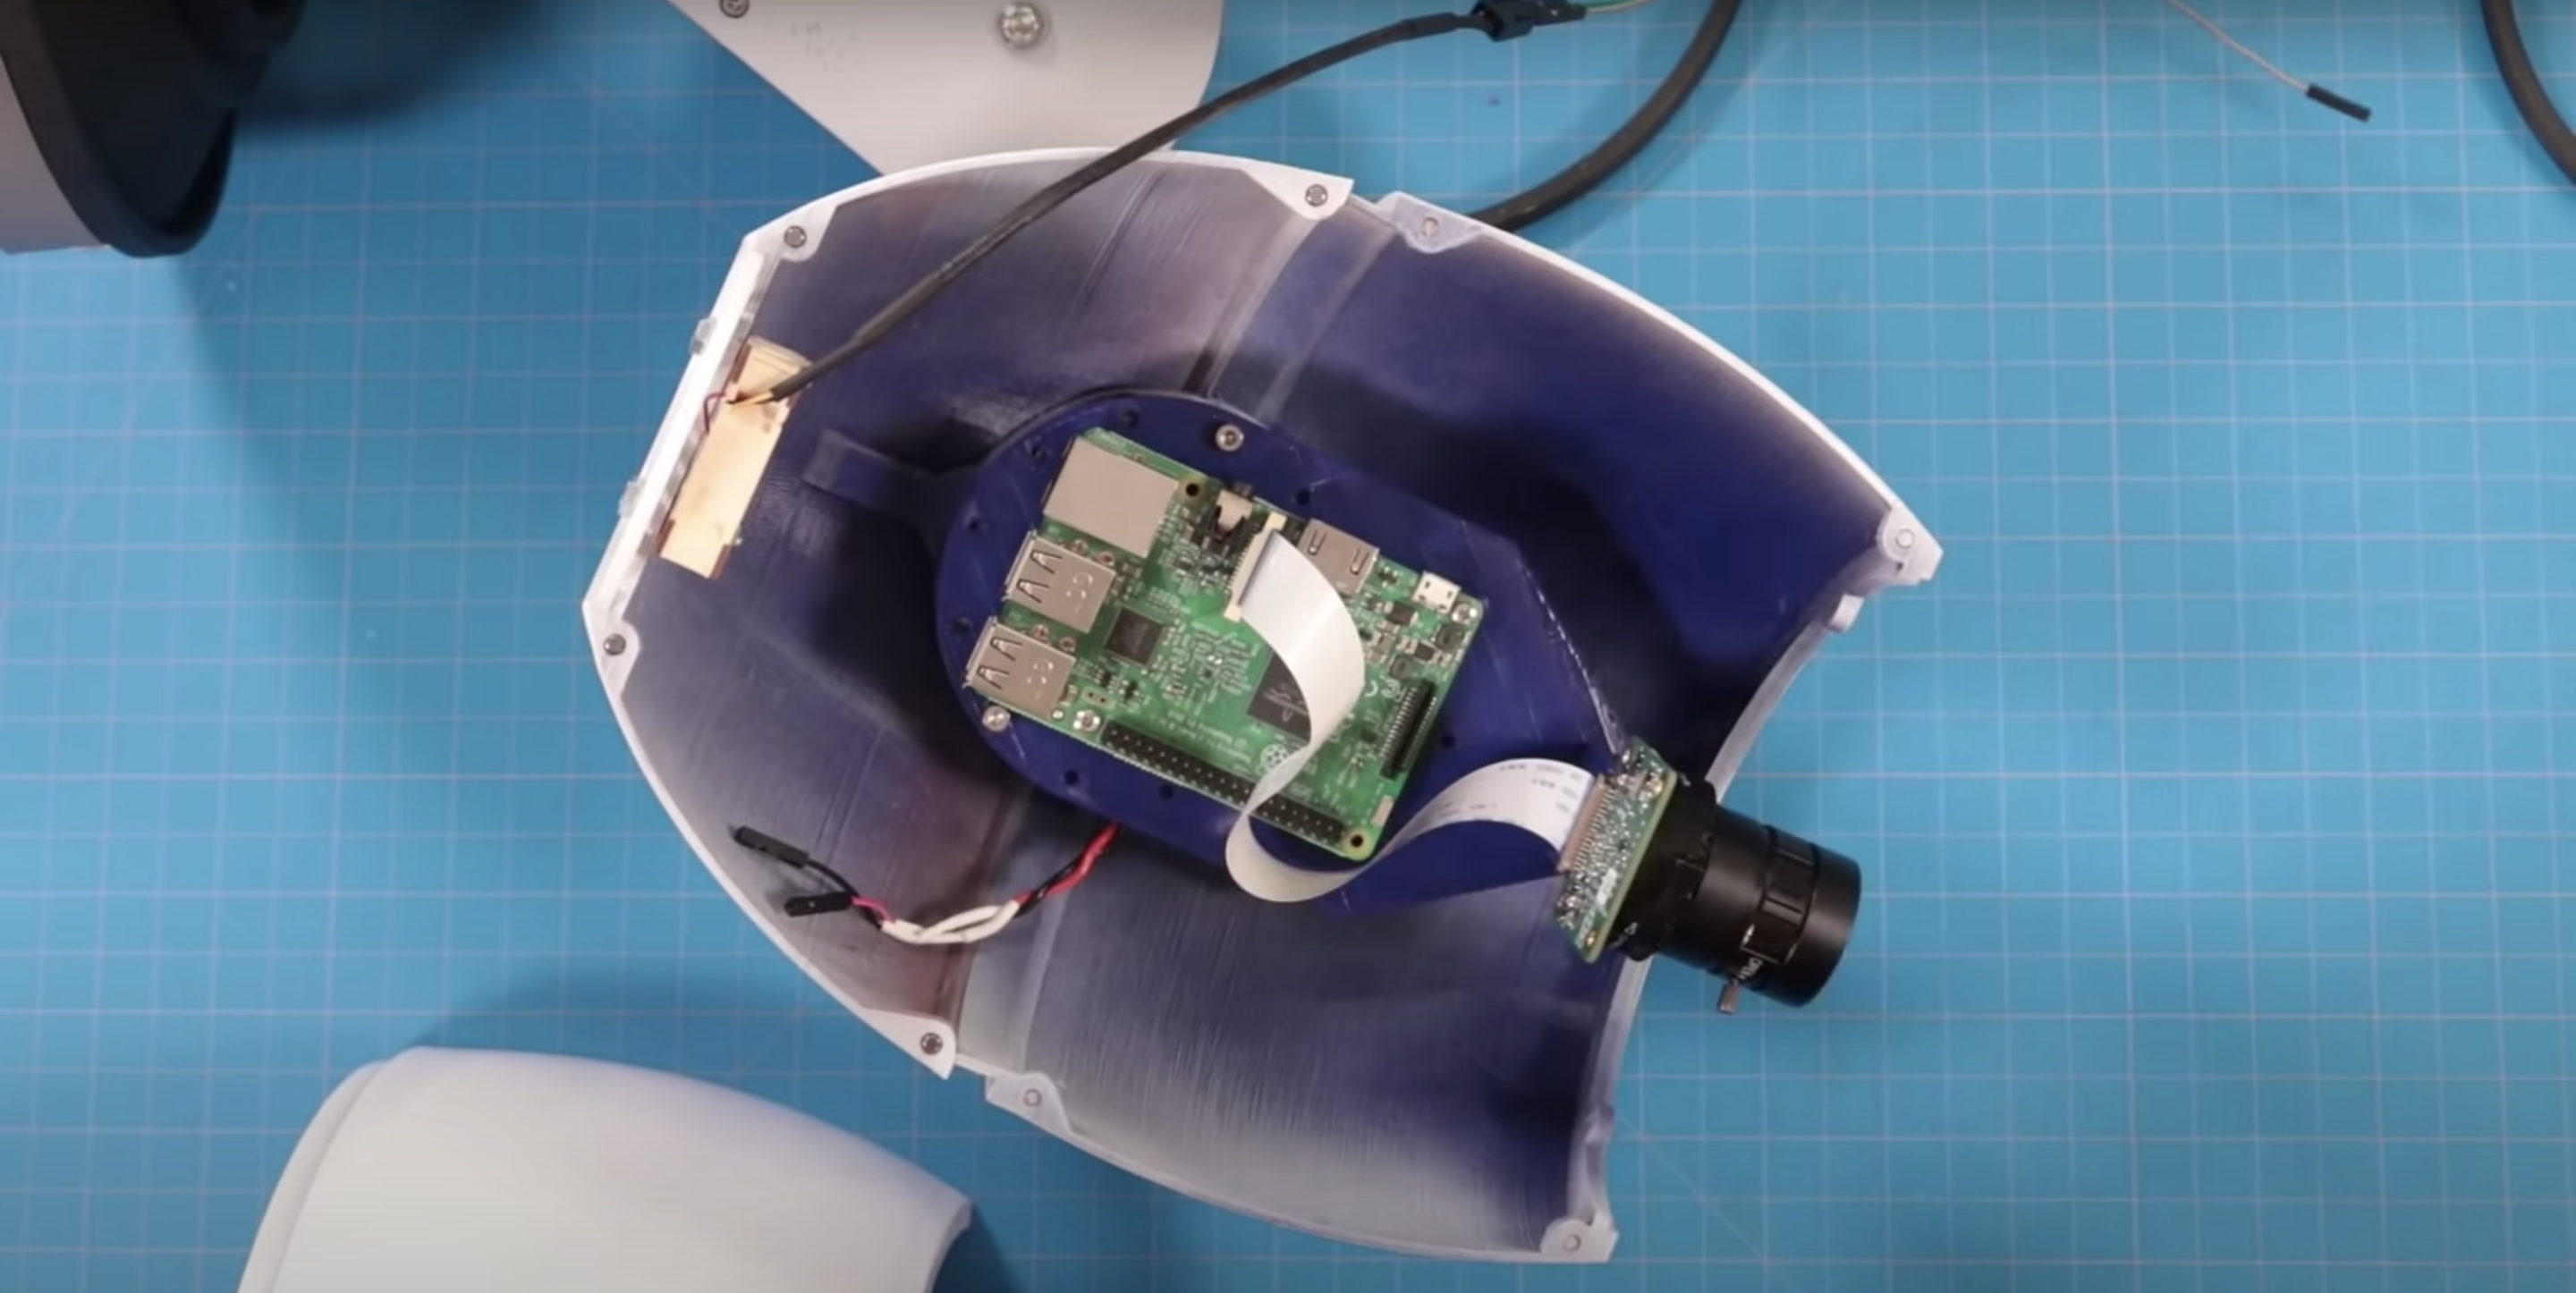
Raspberry Pi 4 (centre) and Raspberry Pi High Quality Camera (right) sat inside the 3D printed shell
This build is also screwless: the halves of the shell have what look like screw holes along the edges, but they are actually 3mm neodymium magnets, so assembly and repair is super easy as everything just pops on and off.
The final picture (that’s DJ!)
You can find all the files you need to recreate this build, or you can ask DJ a question, at element14.com/presents.
Have you perfected your particular combination of ‘eye widening then squinting’ to let people know you’re smiling at them behind your mask? Or do you need help expressing yourself from this text-scrolling creation by Caroline Dunn?
The mask running colourful sample code
What’s it made of?
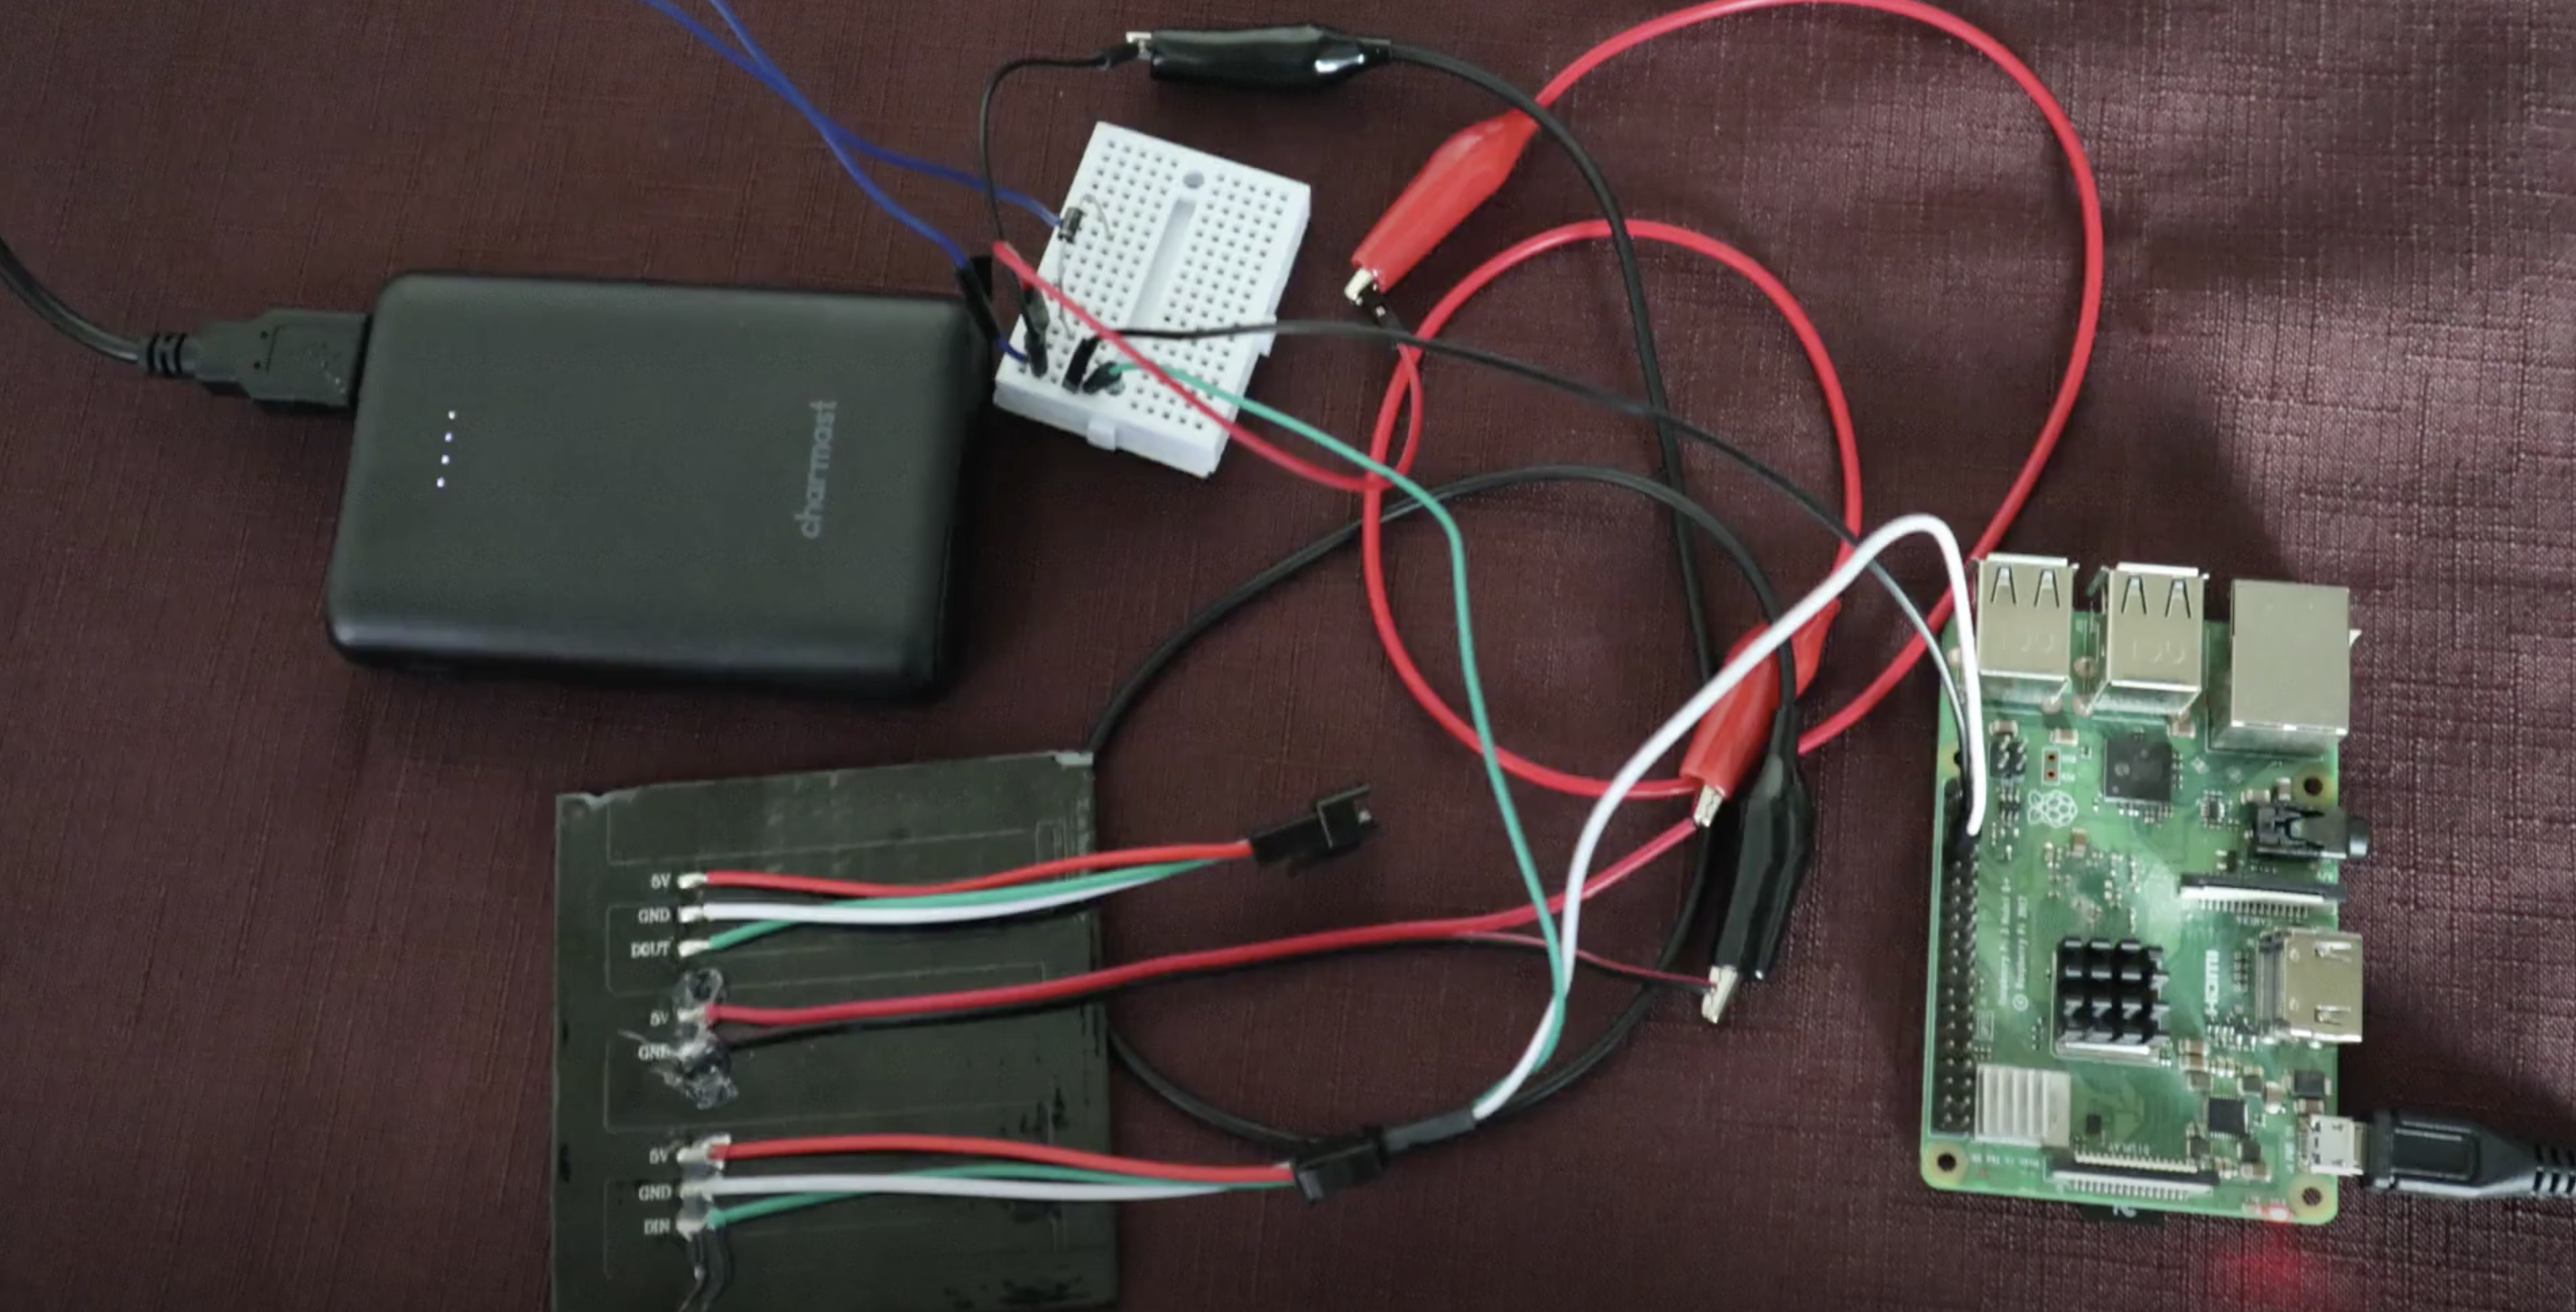
The main bits of hardware need are a Raspberry Pi 3 or Raspberry Pi 4 or Raspberry Pi Zero W (or a Zero WH with pre-soldered GPIO header if you don’t want to do soldering yourself), and an 8×8 Flexible NeoPixel Matrix with individually addressable LEDs. The latter is a two-dimensional grid of NeoPixels, all controlled via a single microcontroller pin.
Raspberry Pi and the NeoPixel Matrix (bottom left) getting wired up
The NeoPixel Matrix is attached to a cloth face that which has a second translucent fabric layer. The translucent layer is to sew your Raspberry Pi project to, the cloth layer underneath is a barrier for germs.
You’ll need a separate 5V power source for the NeoPixel Matrix. Caroline used a 5V power bank, which involved some extra fiddling with cutting up and stripping an old USB cable. You may want to go for a purpose-made traditional power supply for ease.
Running the text
To prototype, Caroline connected the Raspberry Pi computer to the NeoPixel Matrix via a breadboard and some jumper wires. At this stage of your own build, you check everything is working by running this sample code from Adafruit, which should get your NeoPixel Matrix lighting up like a rainbow.
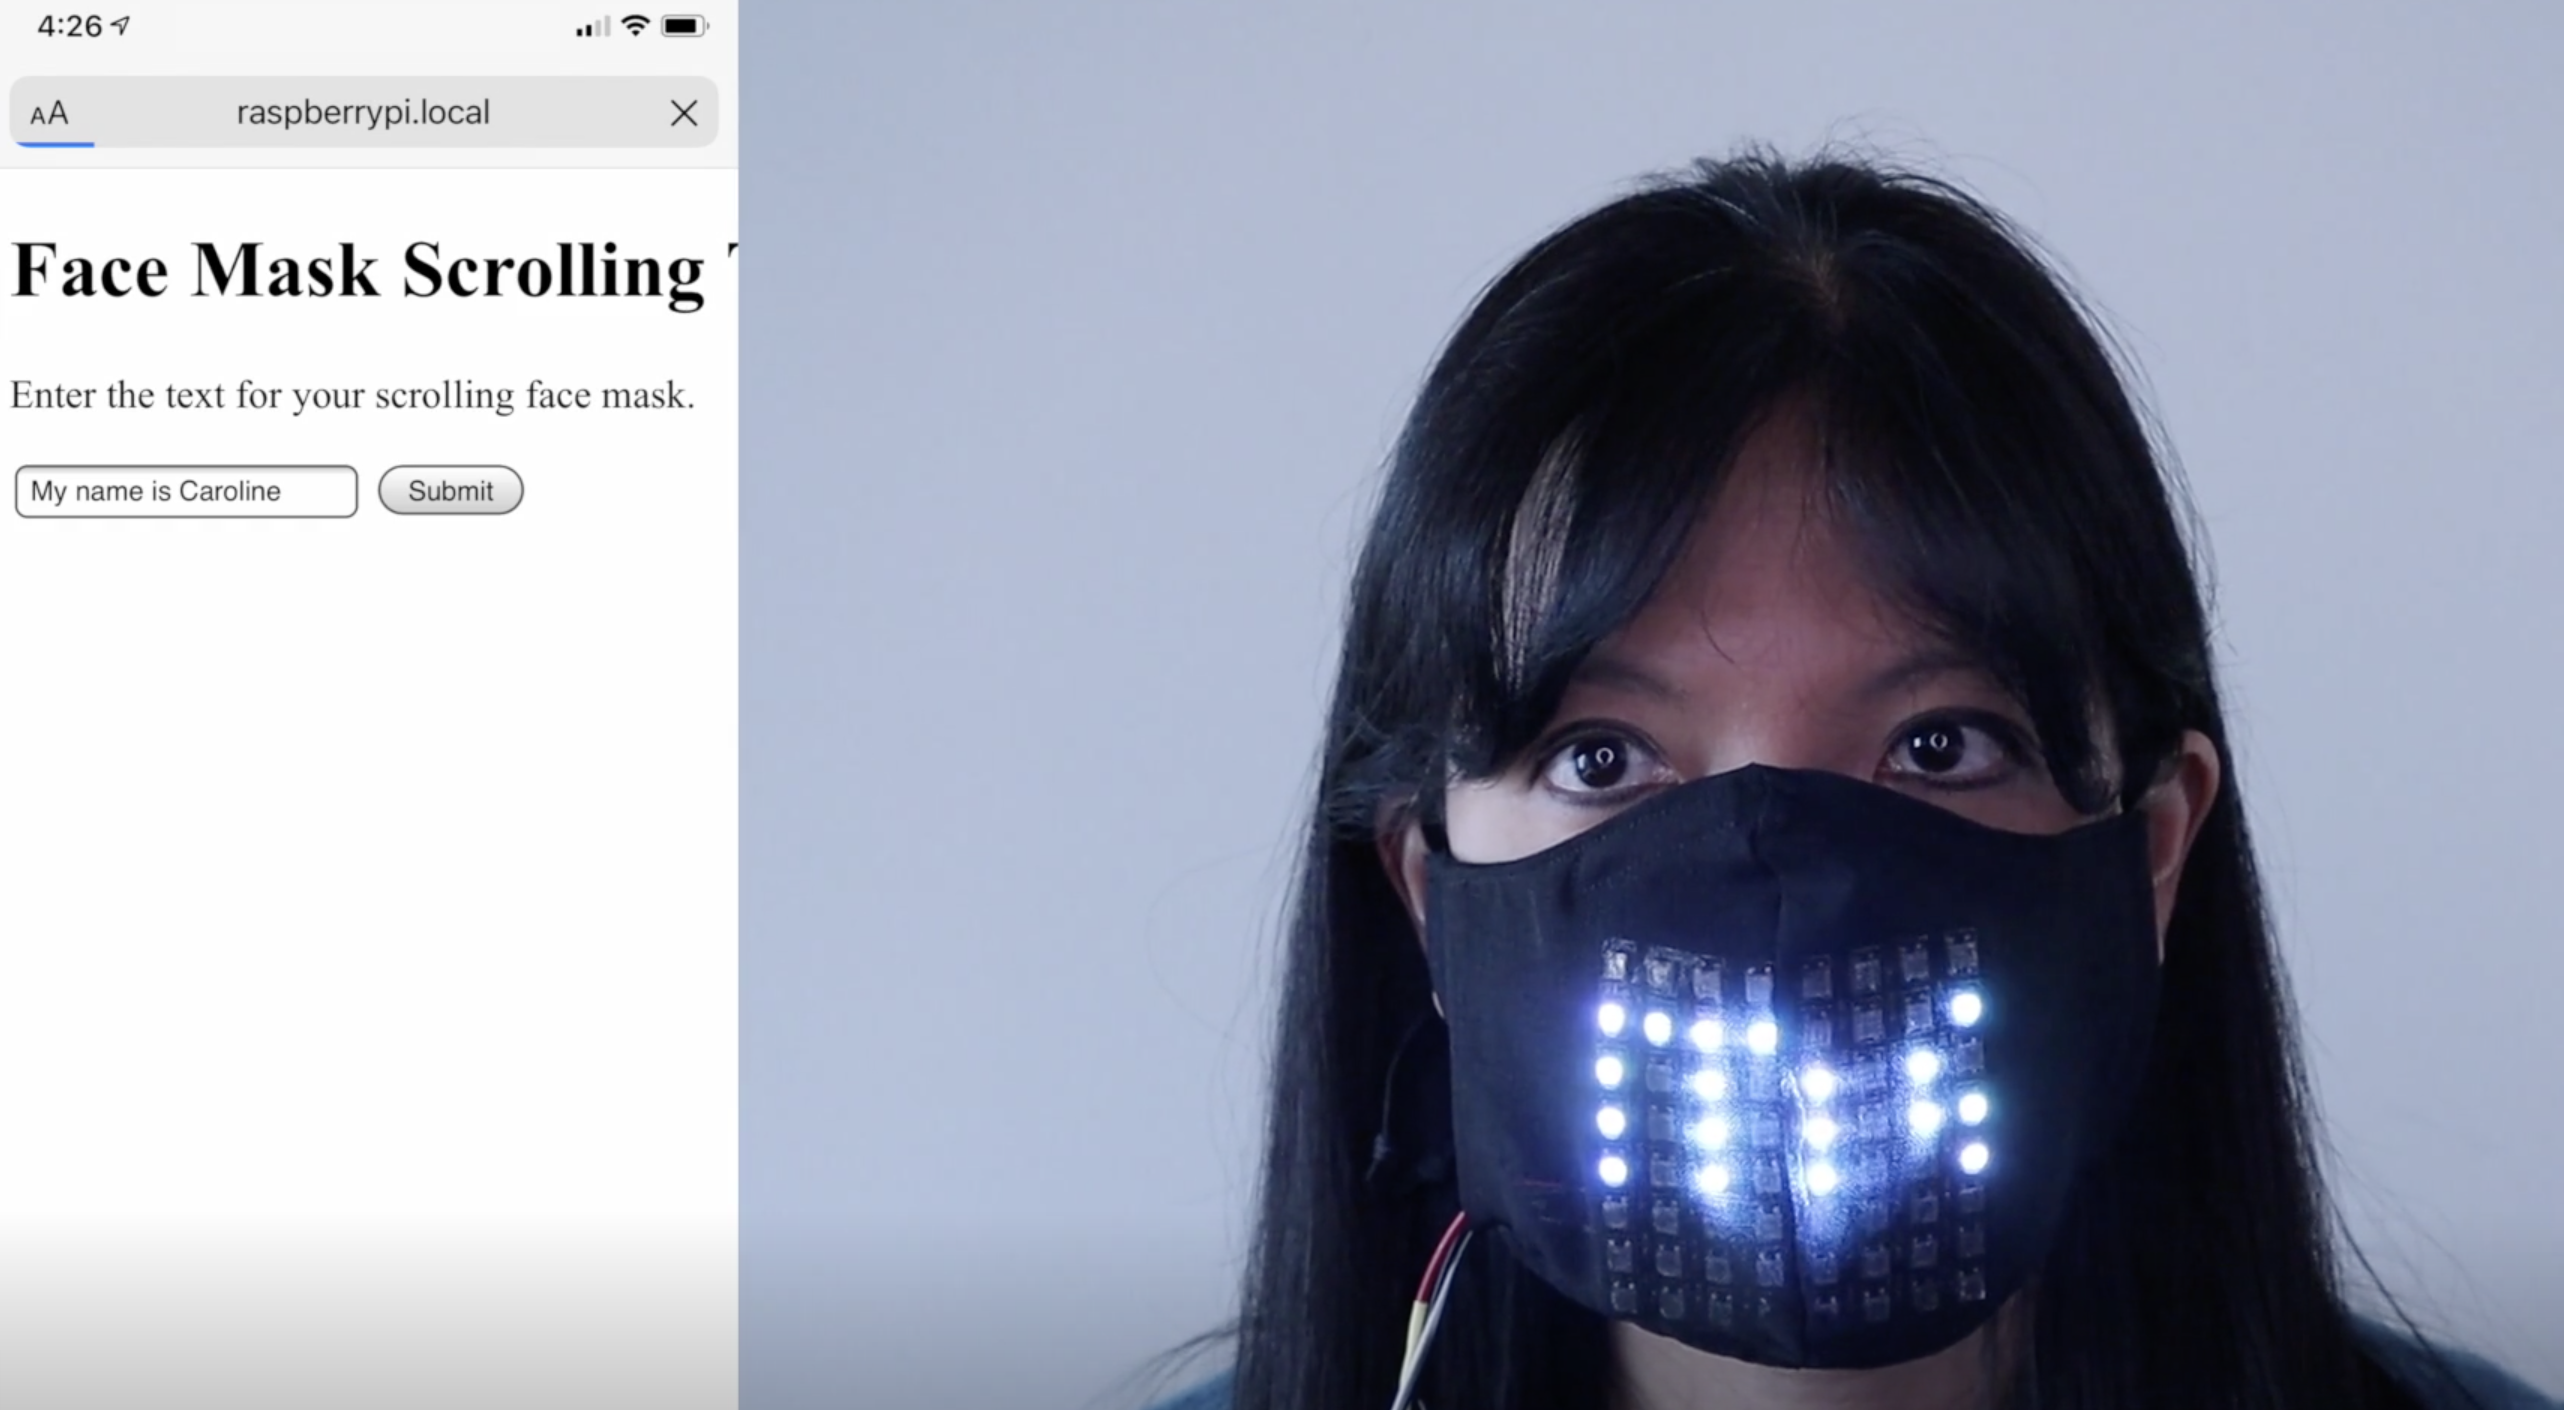
The internal website on the left
Once you’ve got your project up and running, you can ditch the breadboard and wires and set up the key script, app.py, to run on boot.
Going mobile
To change the text scrolling across your mask, you use the internal website that’s part of Caroline’s code.
And for a truly mobile solution, you can access the internal website via mobile phone by hooking up your Raspberry Pi using your phone’s hotspot functionality. Then you can alter the scrolling text while you’re out and about.
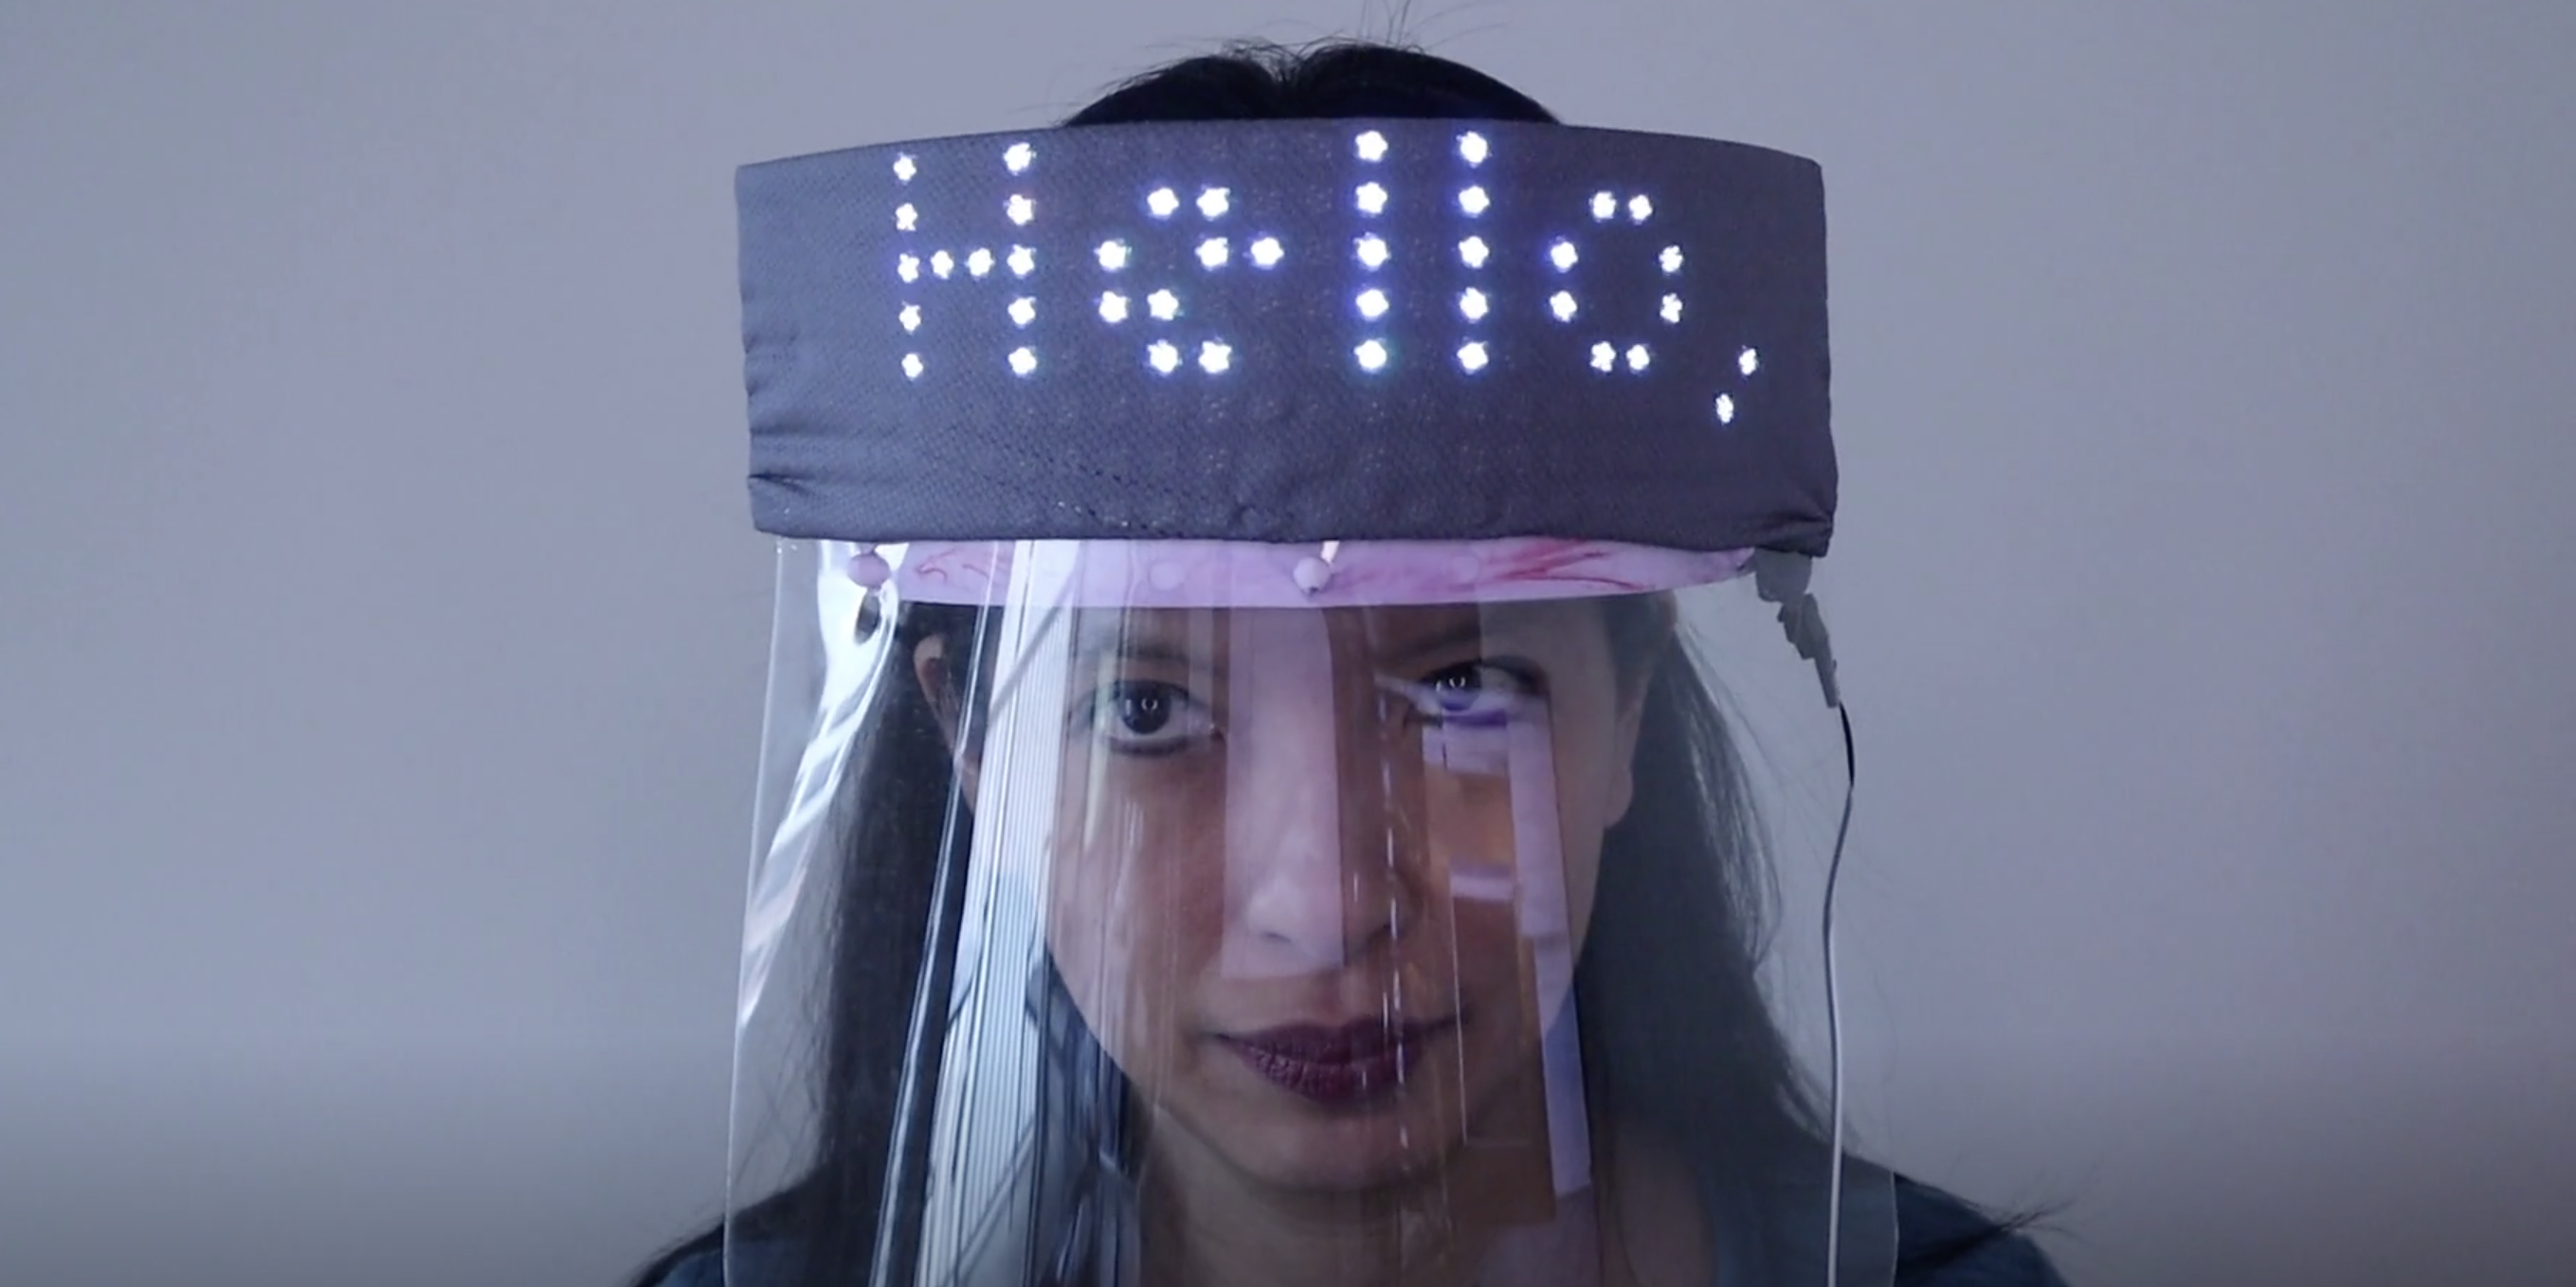
Caroline wearing the 32×8 version
Caroline also created a version of her project using a 32×8 Neopixel Matrix, which fits on the across the headband of larger plastic face visors.
If you want to make this build for yourself, you’d do well to start with the very nice in-depth walkthrough Caroline created. It’s only three parts; you’ll be fine.
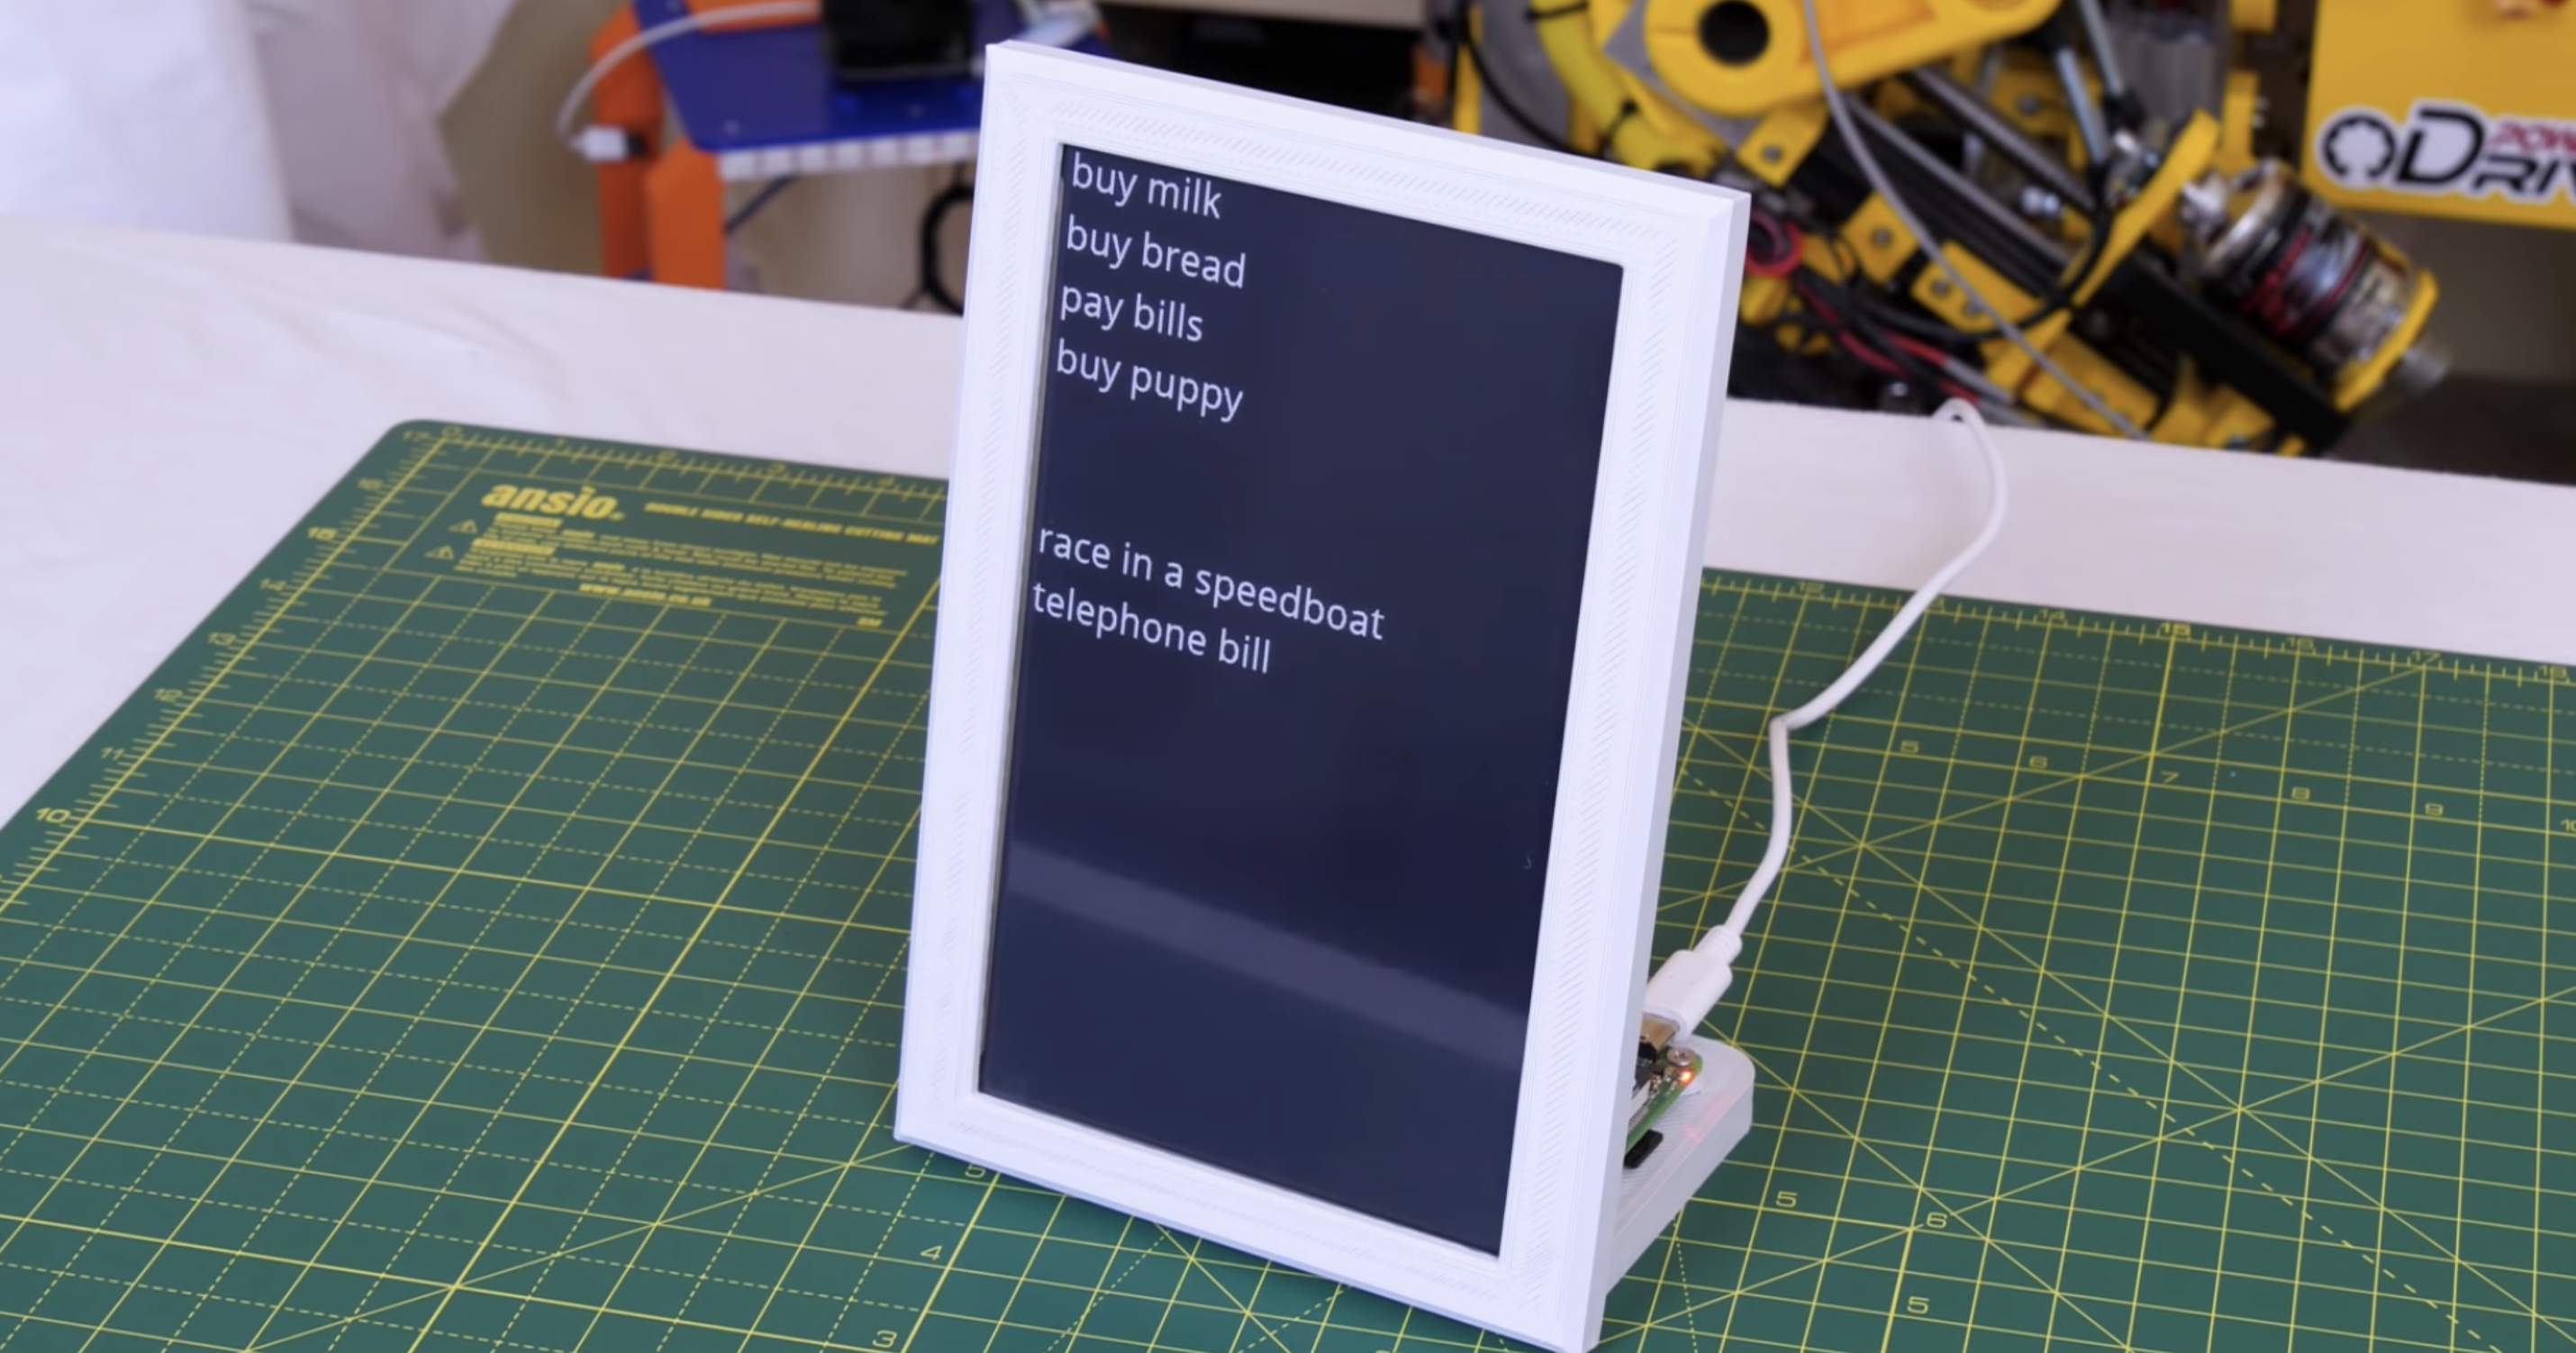
James Bruxton (or @xrobotosuk on Instagram) built an IoT-controlled e-paper message board using Raspberry Pi. Updating it is easy: just edit a Google sheet, and the message board will update with the new data.
Harnessing Google power
This smart message board uses e-paper, which has very low power consumption. Combining this with the Google Docs API (which allows you to write code to read and write to Google Docs) and Raspberry Pi makes it possible to build a message board that polls a Google Sheet and updates whenever there’s new data. This guide helped James write the Google Docs API code.
We’ll do #4 for you, James!
Why e-paper?
James’s original plan was to hook up his Raspberry Pi to a standard monitor and use Google Docs so people could update the display via mobile app. However, a standard monitor consumes a lot of power, due to its backlight, and if you set it to go into sleep mode, people would just walk past it and not see updates to the list unless they remember to wake the device up.
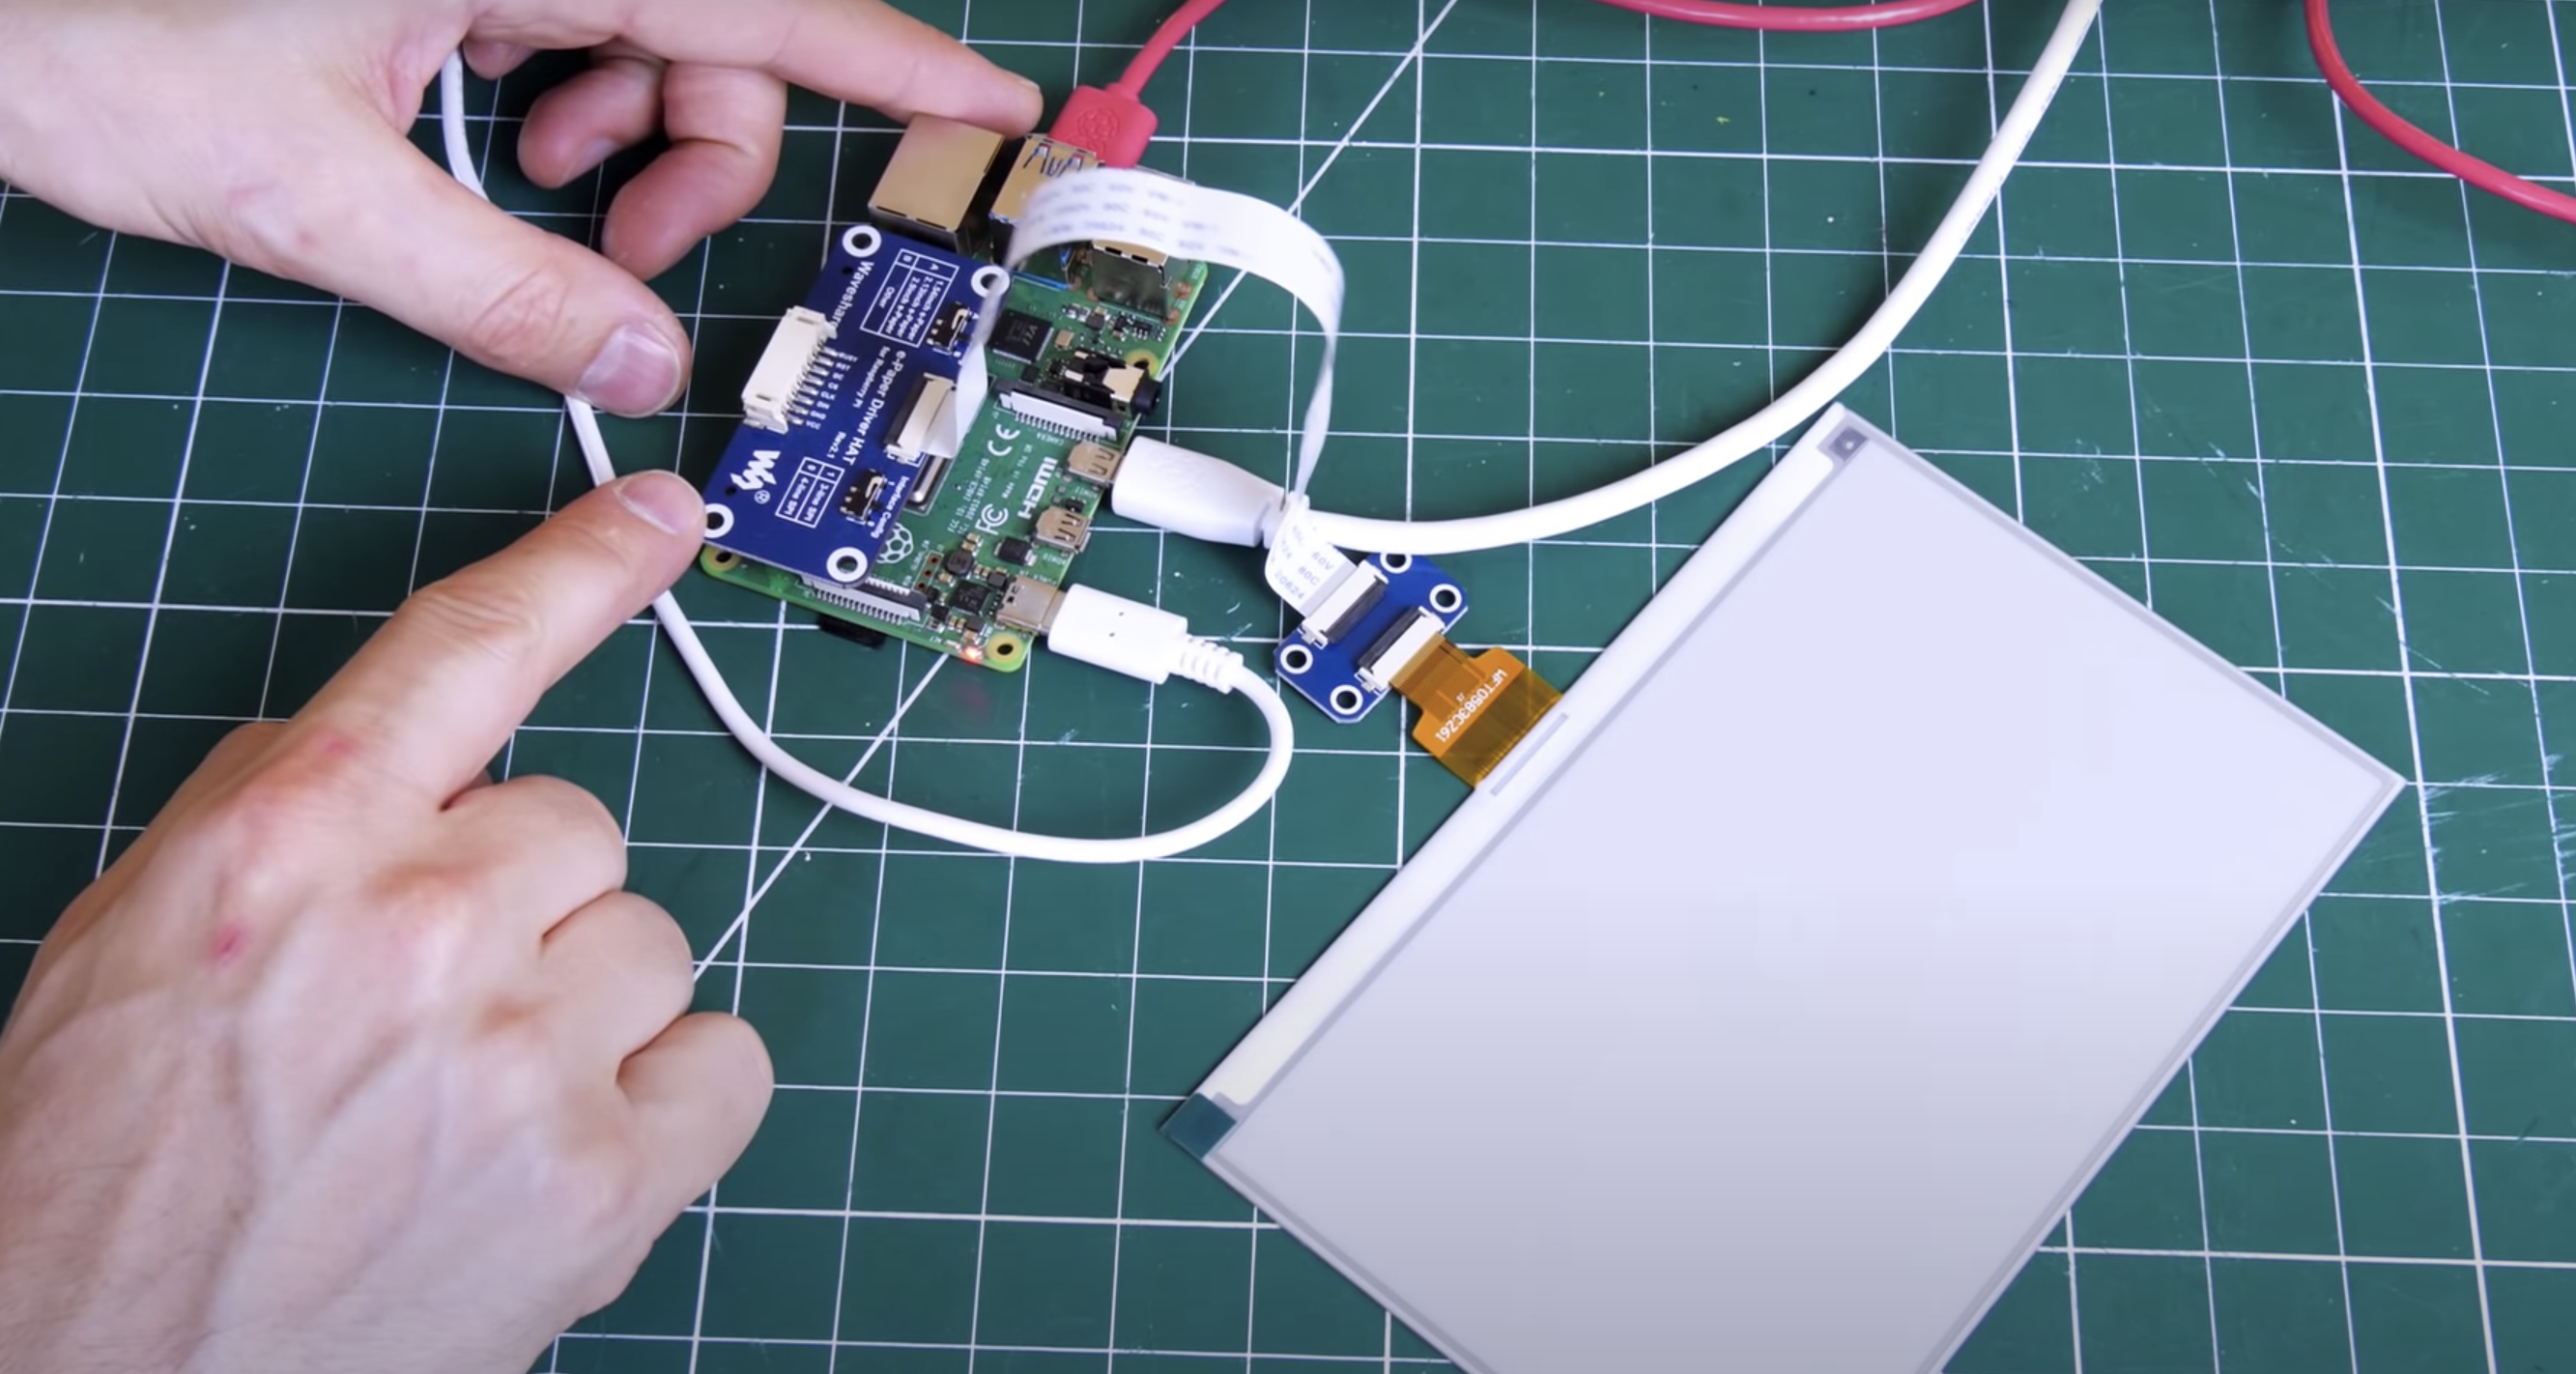
Raspberry Pi wearing its blue e-paper HAT on the left, which connects to the display on the right via a ribbon cable
Enter e-paper (the same stuff used for Kindle devices), which only consumes power when it’s updating. Once you’ve got the info you want on the e-paper, you can even disconnect it entirely from your power source and the screen will still display whatever the least update told it to. James’s top tip for your project: go for the smallest e-paper display possible, as those things are expensive. He went with this one, which comes with a HAT for Raspberry Pi and a ribbon cable to connect the two.
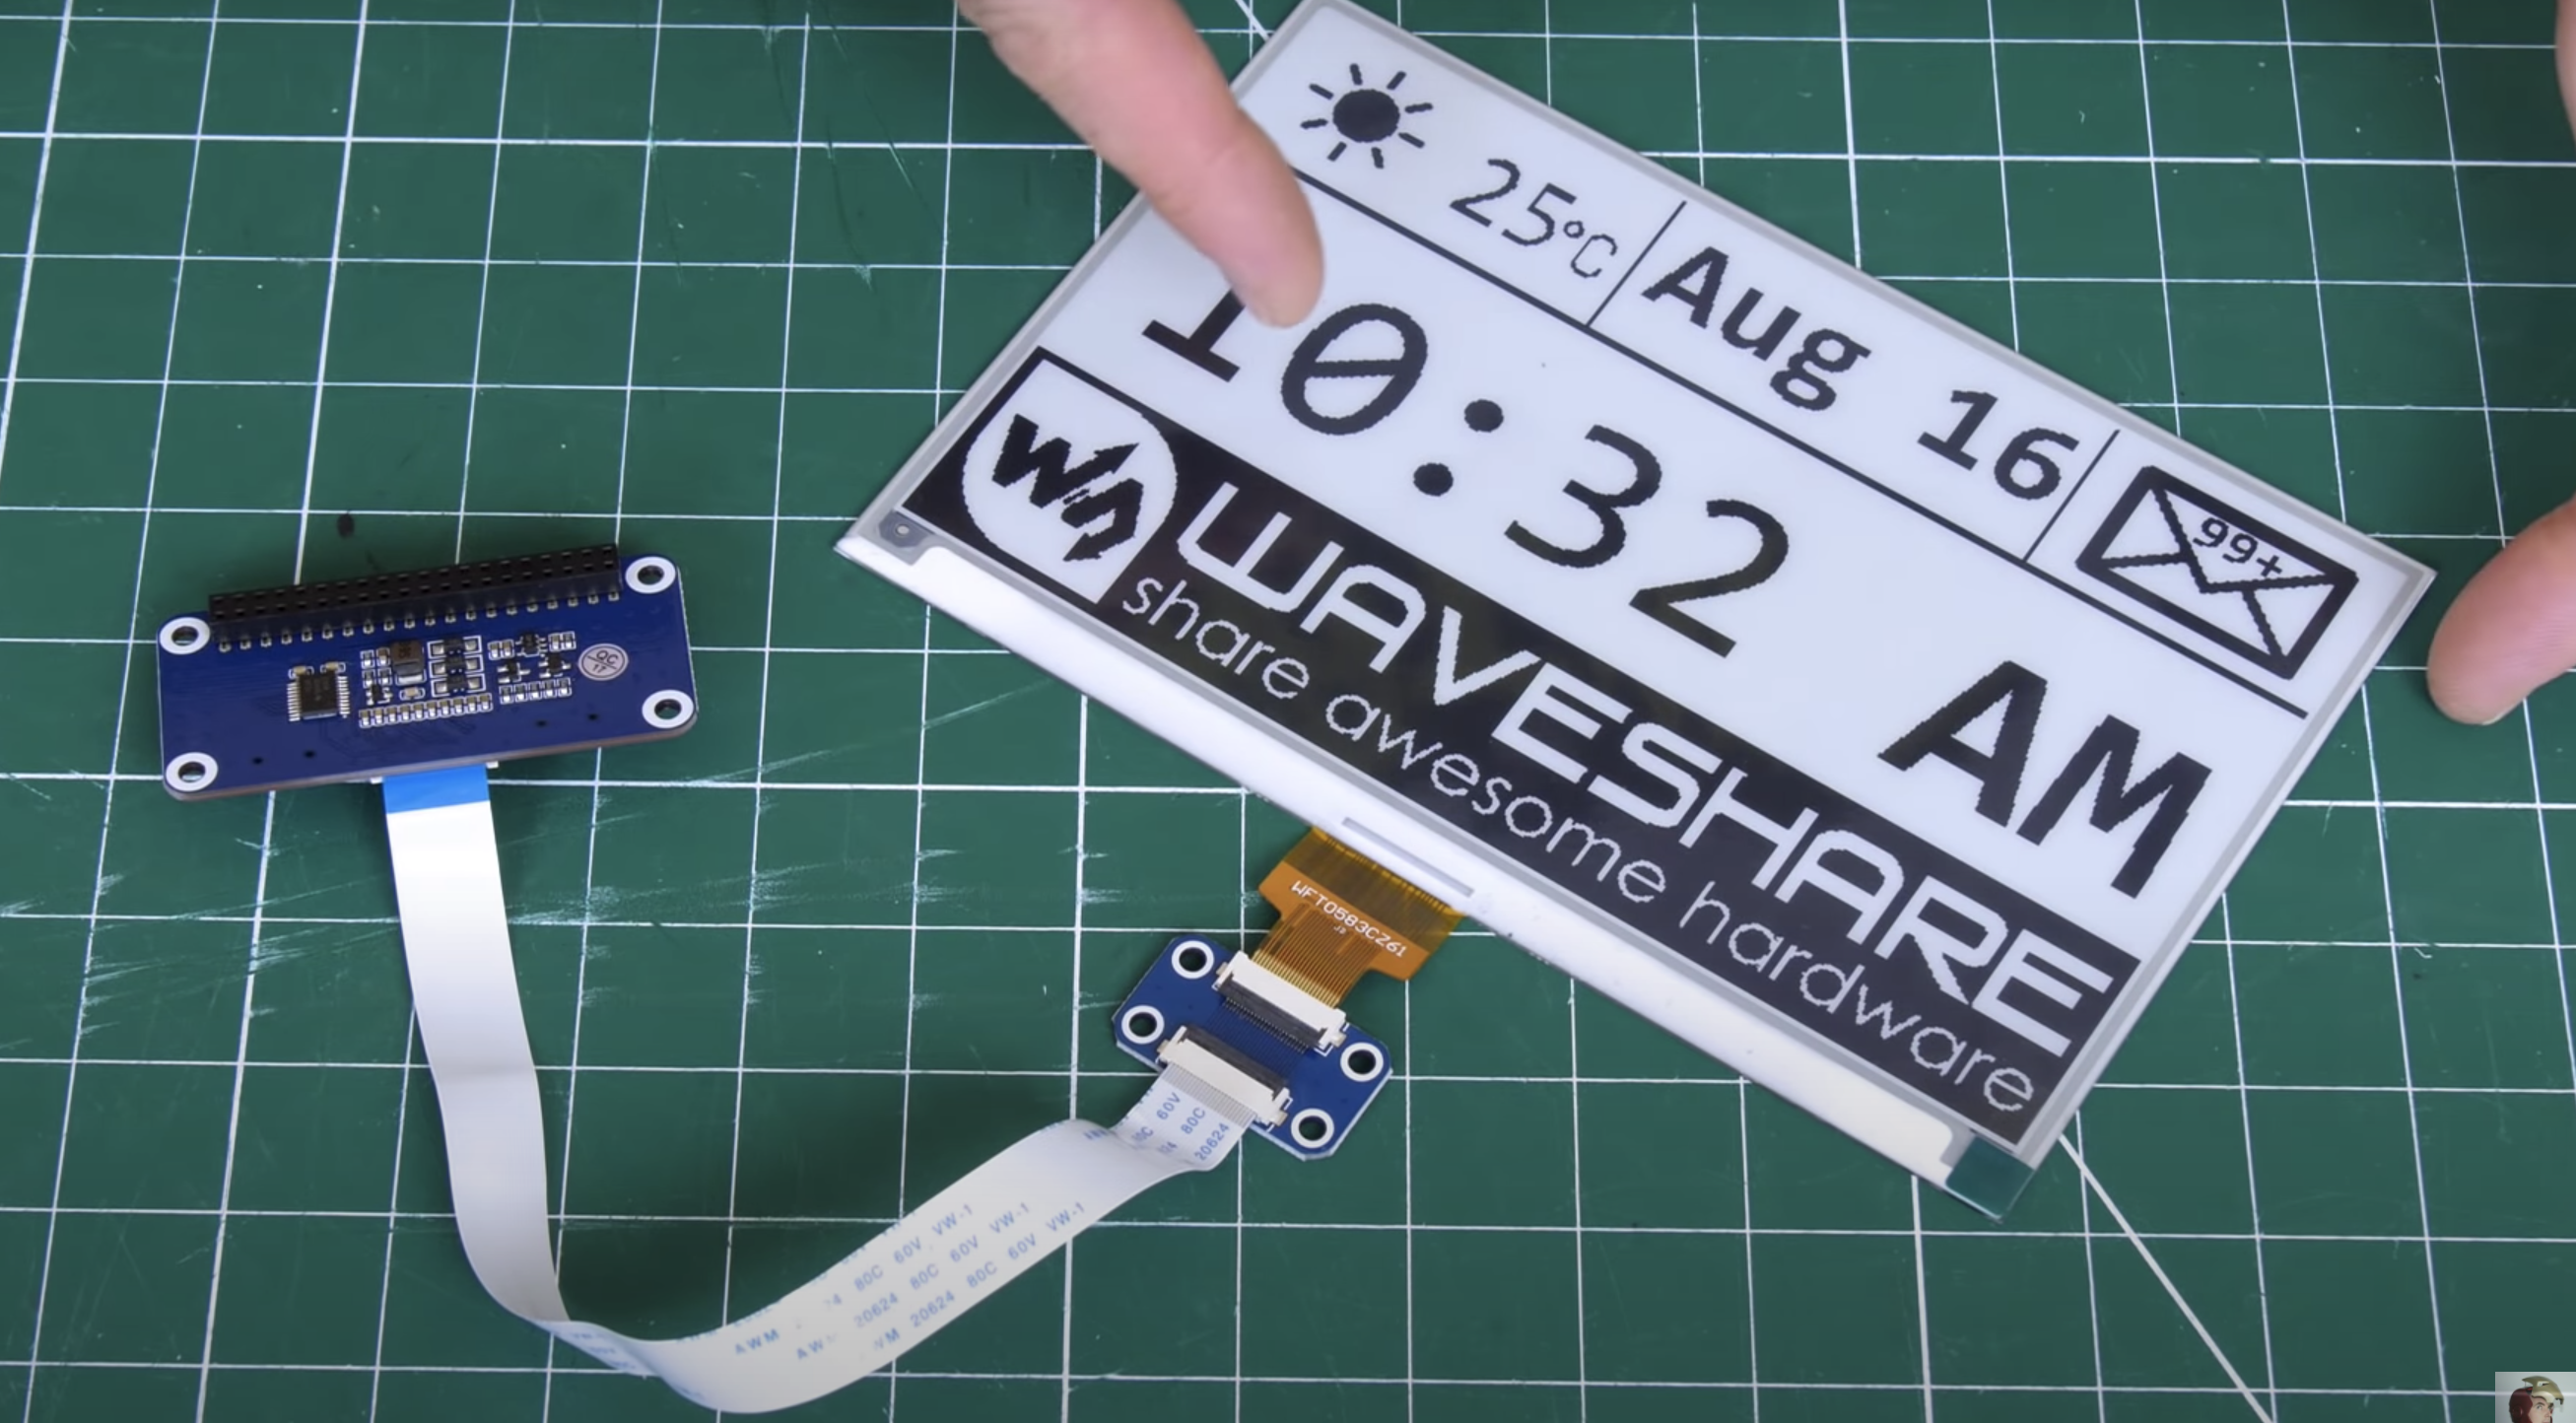
The display disconnected from any power and still clearly readable
The HAT has an adaptor for plugging into the Raspberry Pi GPIO pins, and a breakout header for the SPI pins. James found it’s not as simple as enabling the SPI on his Raspberry Pi and the e-paper display springing to life: you need a bit of code to enable the SPI display to act as the main display for the Raspberry Pi. Luckily, the code for this is on the wiki of Waveshare, the producer of HAT and display James used for this project.
Making it pretty
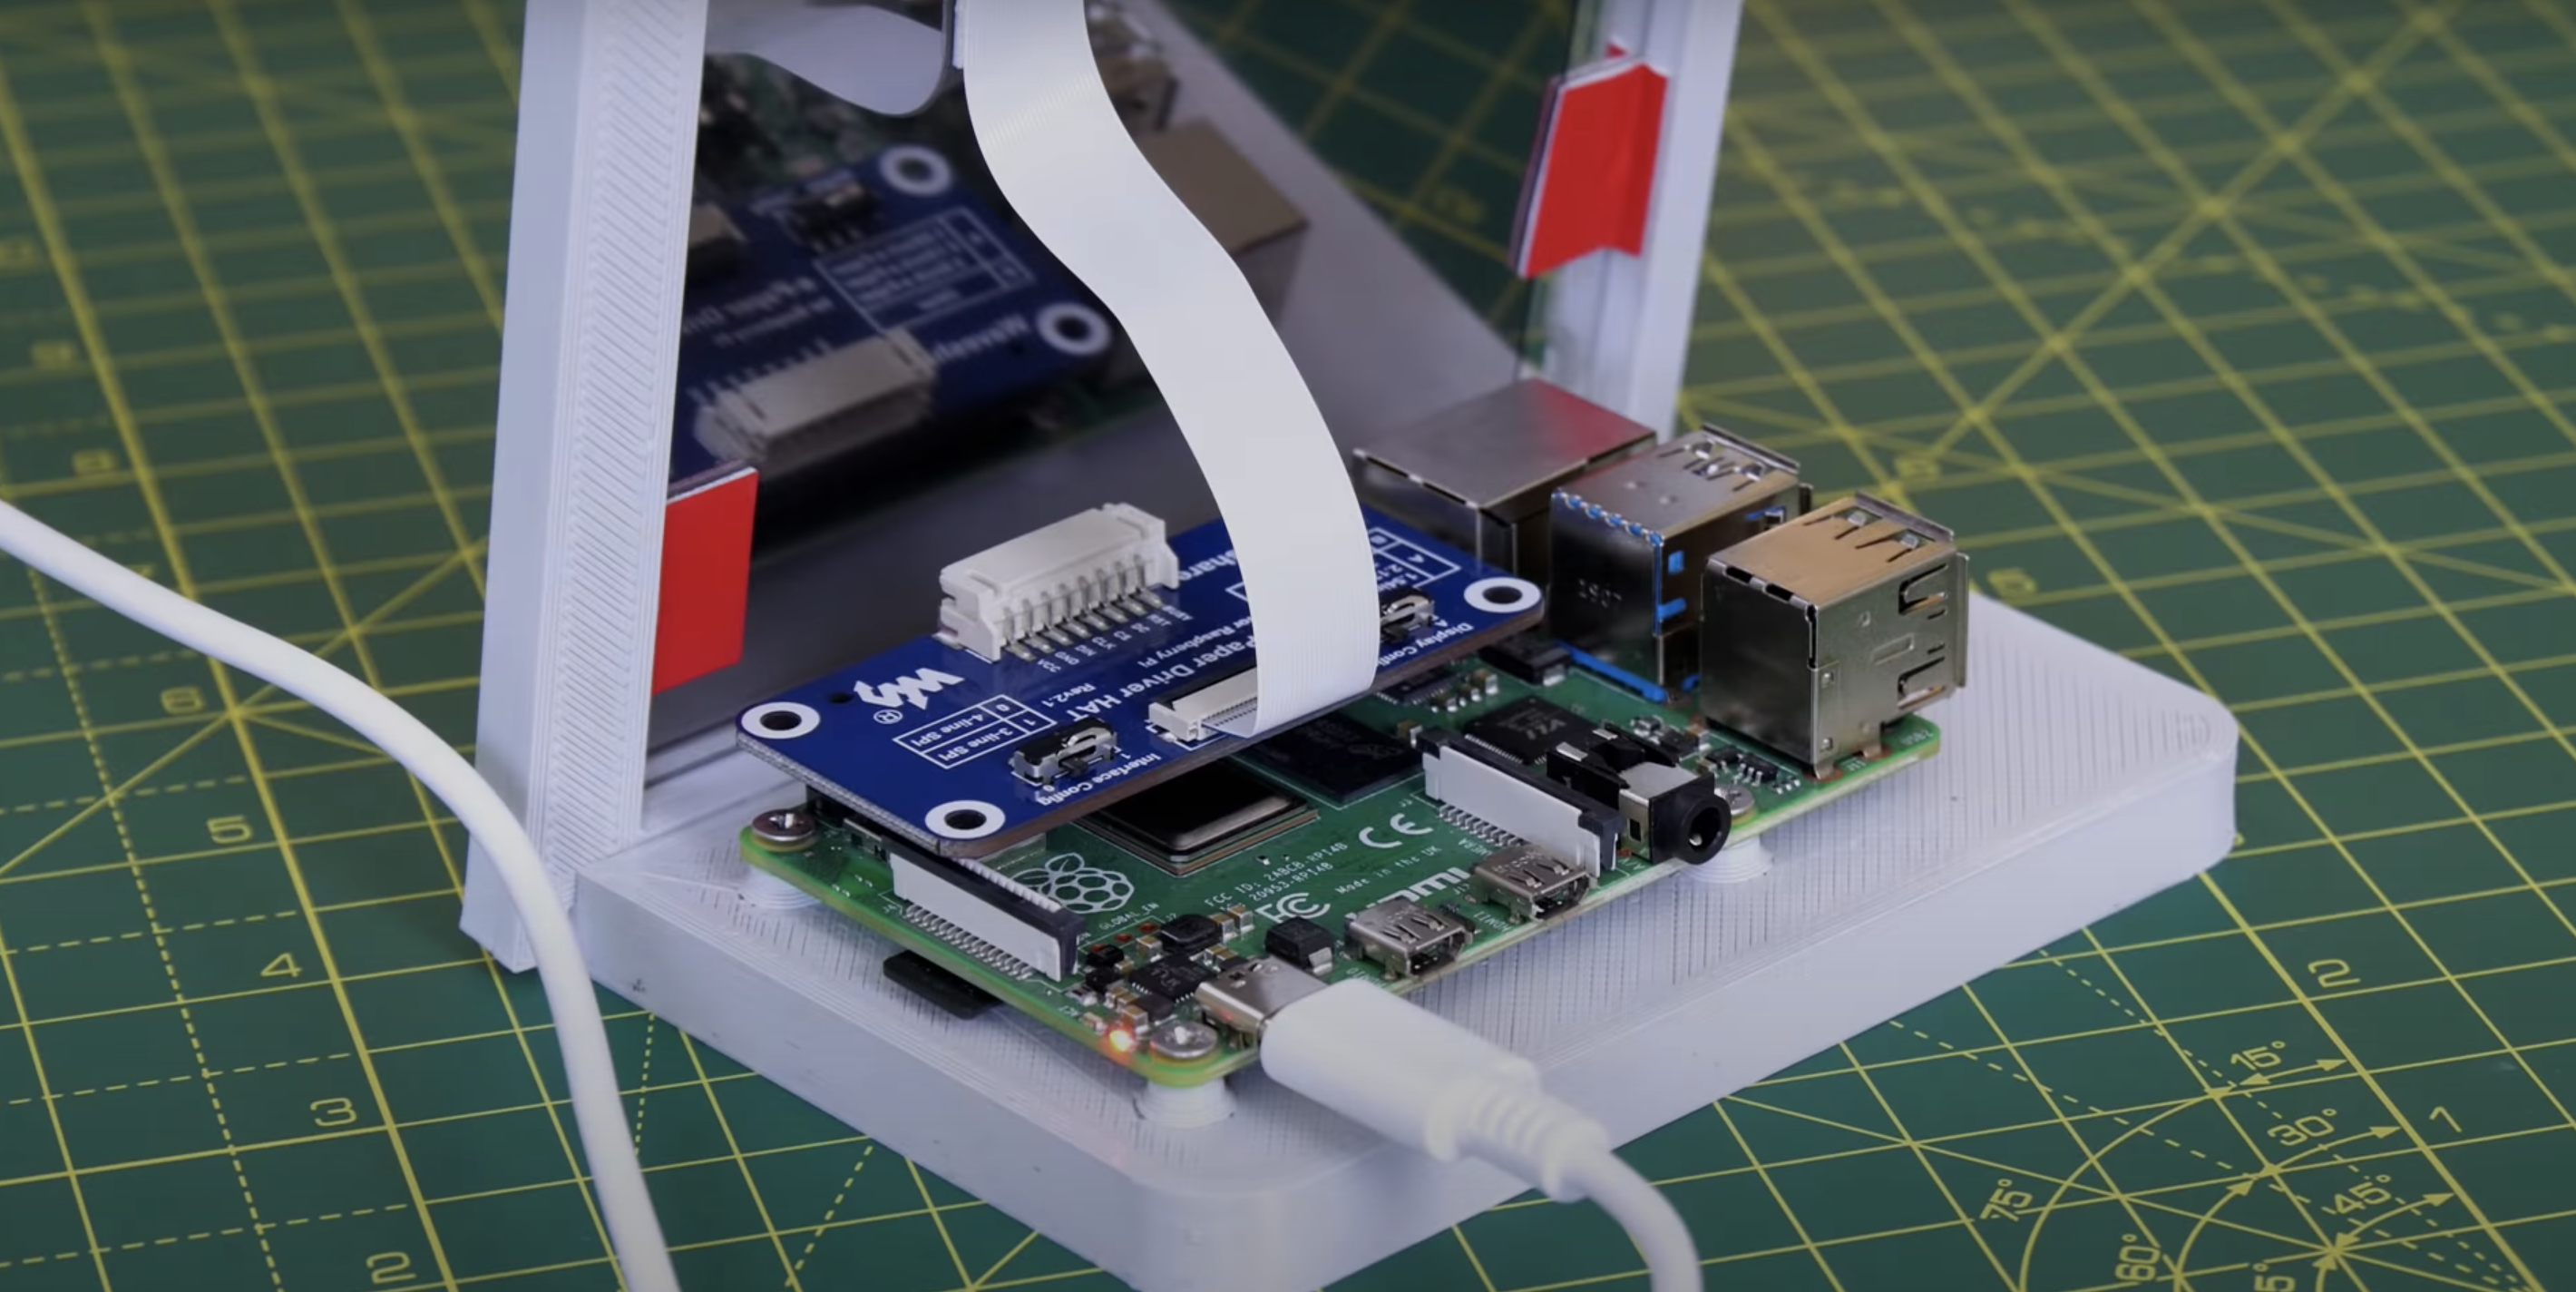
A 3D-printed case, which looks like a classic photo frame but with a hefty in-built stand to hold it up and provide enough space for the Raspberry Pi to sit on, is home to James’s finished smart to-do list. The e-paper is so light and thin it can just be sticky-taped into the frame.
The roomy frame stand
James’s creation is powered by Raspberry Pi 4, but you don’t need that much power, and he’s convinced you’ll be fine with any Raspberry Pi model that has 40 GPIO pins.
If you’re into e-paper stuff but are wedded to your handwritten to-do lists, then why not try building this super slow movie player instead? The blog squad went *nuts* for it when we posted it last month.
Welcome to October, the month in which spiderwebs become decor and anything vaguely gruesome is considered ‘seasonal’. Such as bats. Bats are in fact cute, furry creatures, but as they are part of the ‘Halloweeny animal’ canon, I have a perfect excuse to sing their praises.
SEE? Baby bats wrapped up cute like baby humans
Tegwyn Twmffat was tasked with doing a bat survey on a derelict building, and they took to DesignSpark to share their Raspberry Pi–powered solution.
UK law protects nesting birds and roosting bats, so before you go knocking buildings down, you need a professional to check that no critters will be harmed in the process.
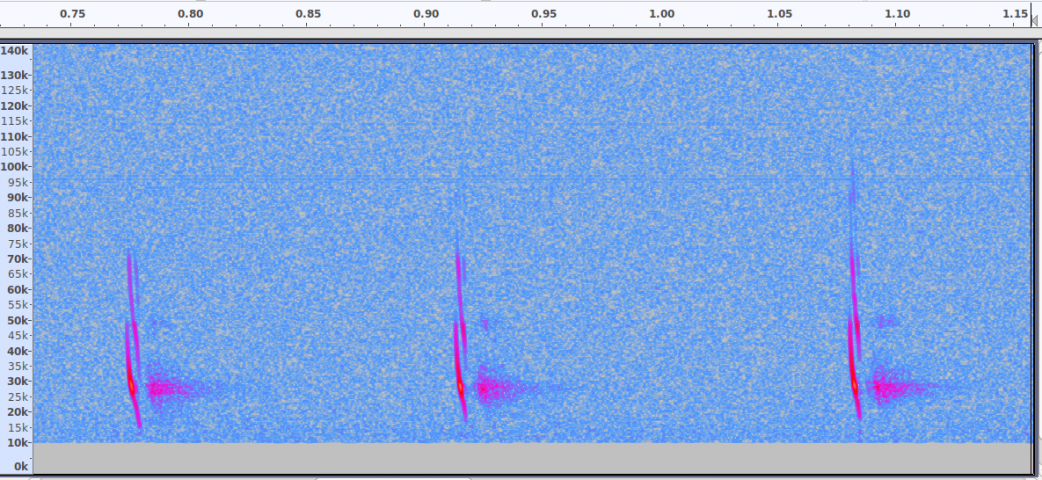
The acoustic signature of an echo-locating brown long-eared bat
The problem with bats, compared to birds, is they are much harder to spot and have a tendency to hang out in tiny wall cavities. Enter this big ultrasonic microphone.
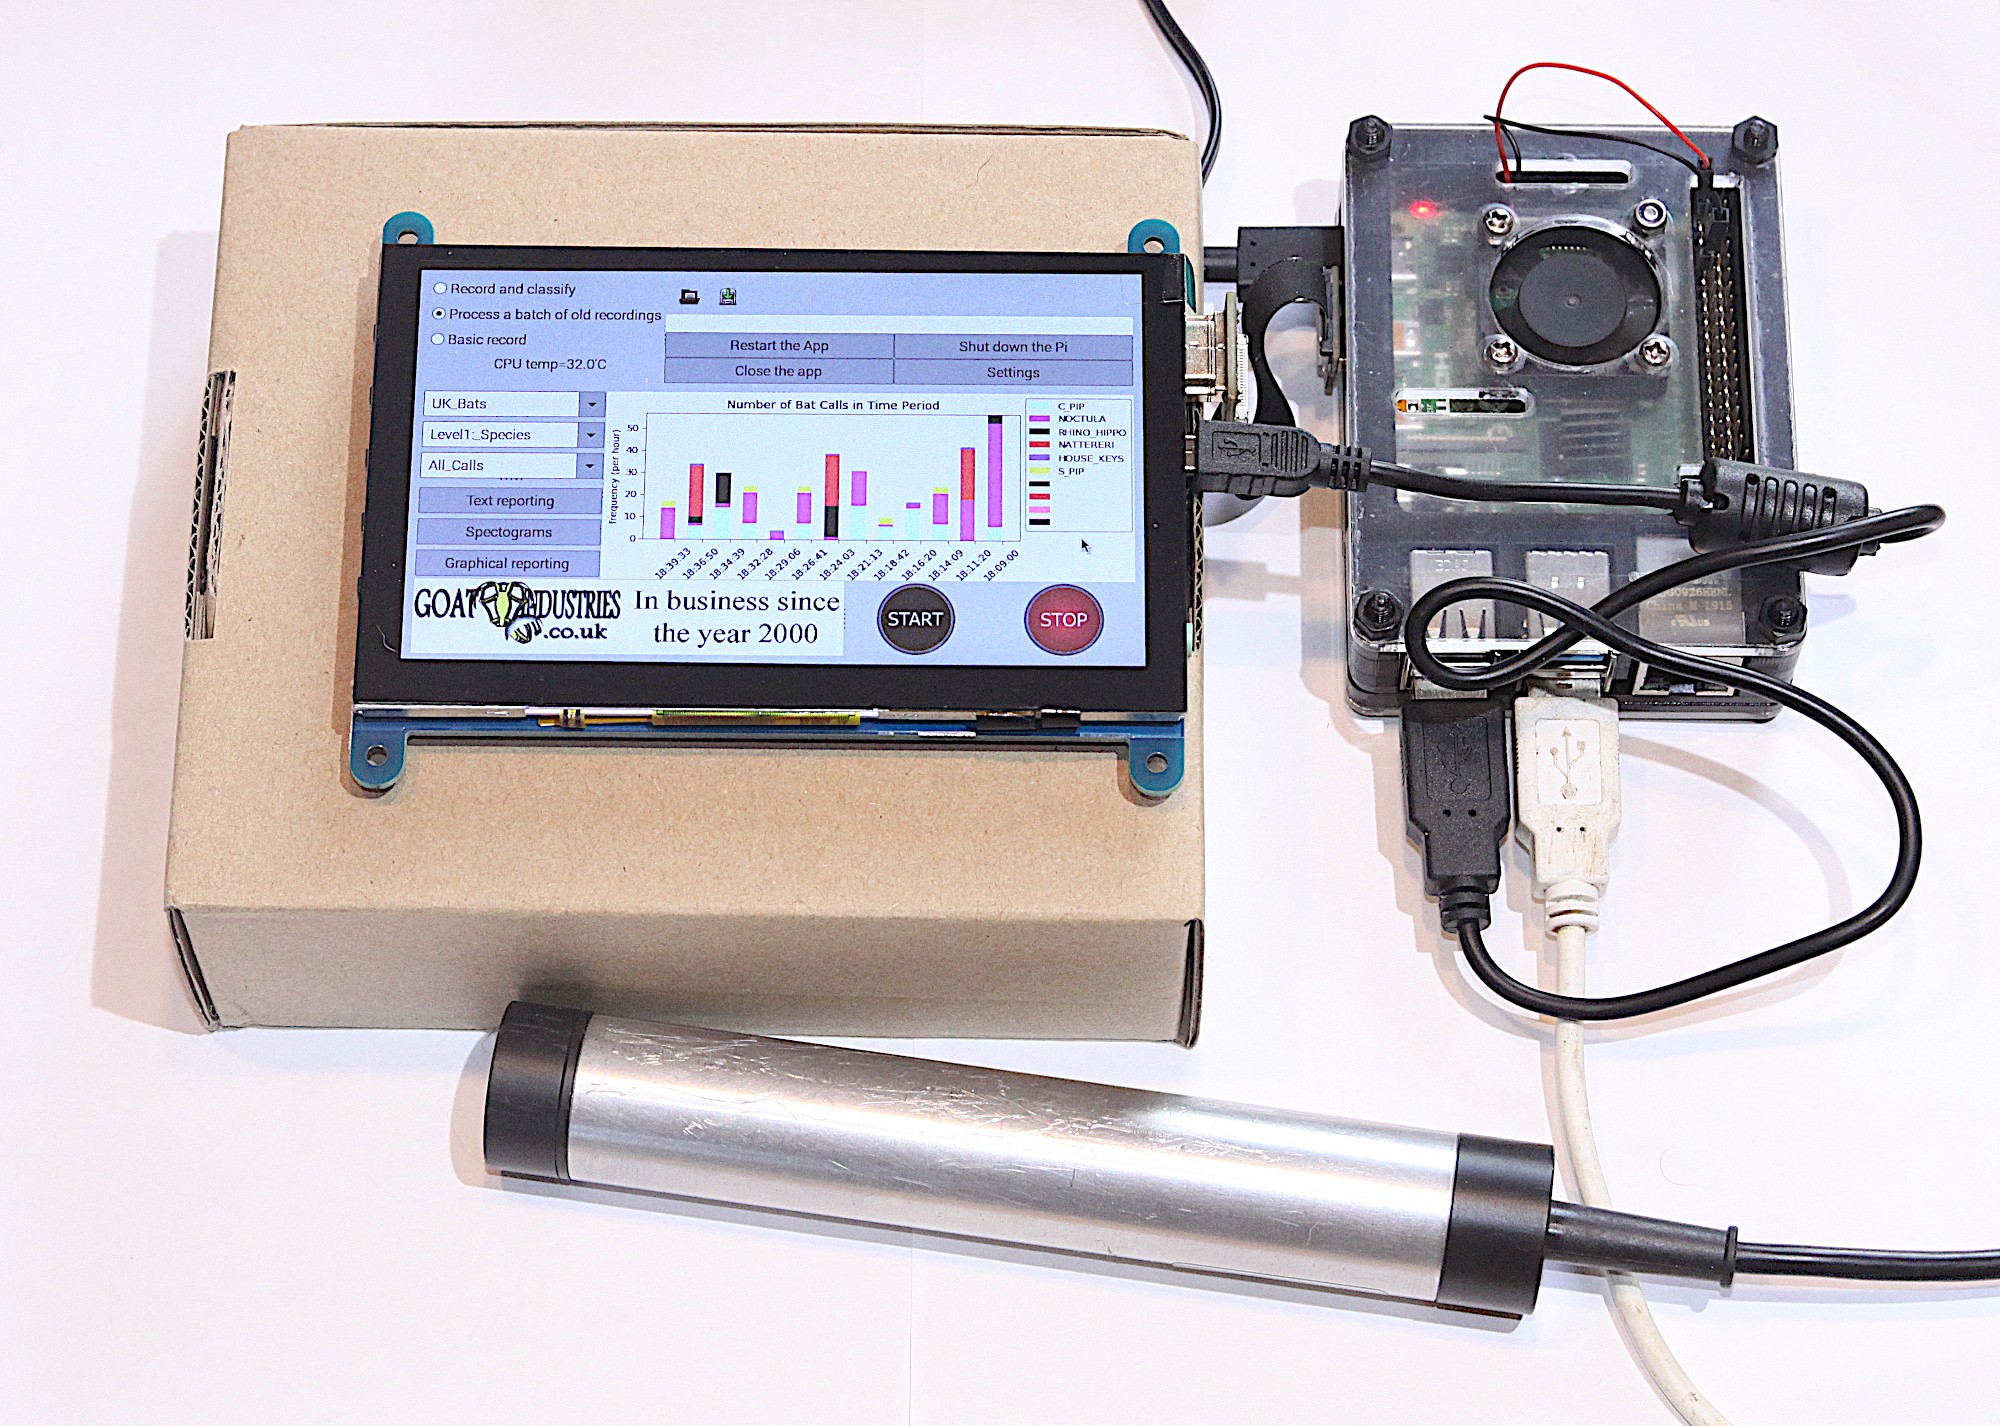
Raspberry Pi 4 Model B provided the RAM needed for this build
After the building was declared safely empty of bats, Tegwyn decided to keep hold of the expensive microphone (the metal tube in the image above) and have a crack at developing their own auto-classification system to detect which type of bats are about.
How does it work?
The ultrasonic mic picks up the audio data using an STM M0 processor and streams it to Raspberry Pi via USB. Raspberry Pi runs Alsa driver software and uses the bash language to receive the data.
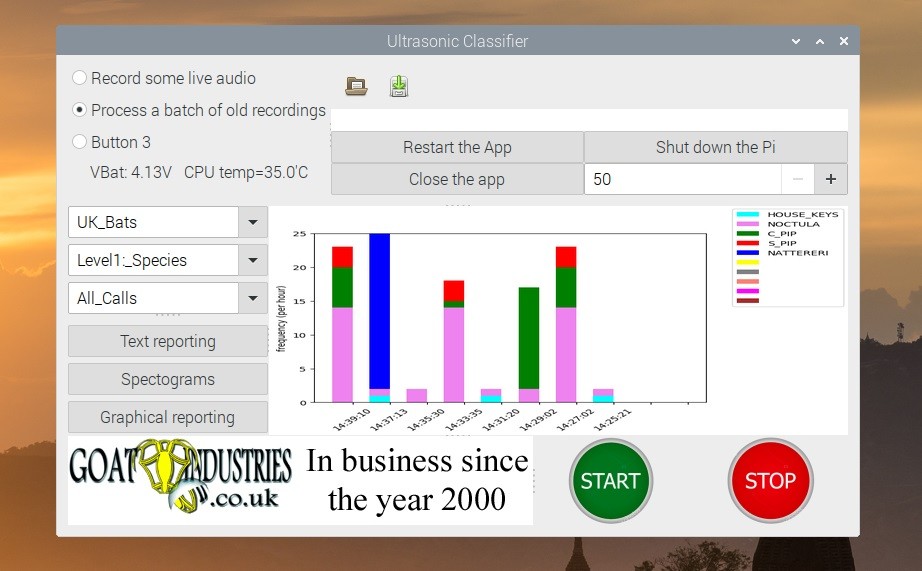
Tegwyn turned to the open-source GTK software to process the audio data
It turns out there are no publicly available audio records of bats, so Tegwyn took to their own back garden and found 6 species to record. And with the help of a few other bat enthusiasts, they cobbled together an audio dataset of 9 of the 17 bat species found in the UK!
More baby bats
Tegwyn’s original post about their project features a 12-step walkthrough, as well as all the code and commands you’ll need to build your own system. And here’s the GitHub repository, where you can check for updates.
We’ve been following the work of Dominique Laloux since he first got in touch with us in May 2013 ahead of leaving to spend a year in Togo. 75% of teachers in the region where he would be working had never used a computer before 2012, so he saw an opportunity to introduce Raspberry Pi and get some training set up.
We were so pleased to receive another update this year about Dominique and his Togolese team’s work. This has grown to become INITIC, a non-profit organisation that works to install low cost, low power consumption, low maintenance computer rooms in rural schools in Togo. The idea for the acronym came from the organisation’s focus on the INItiation of young people to ICT (TIC in French).
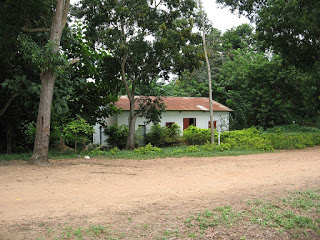
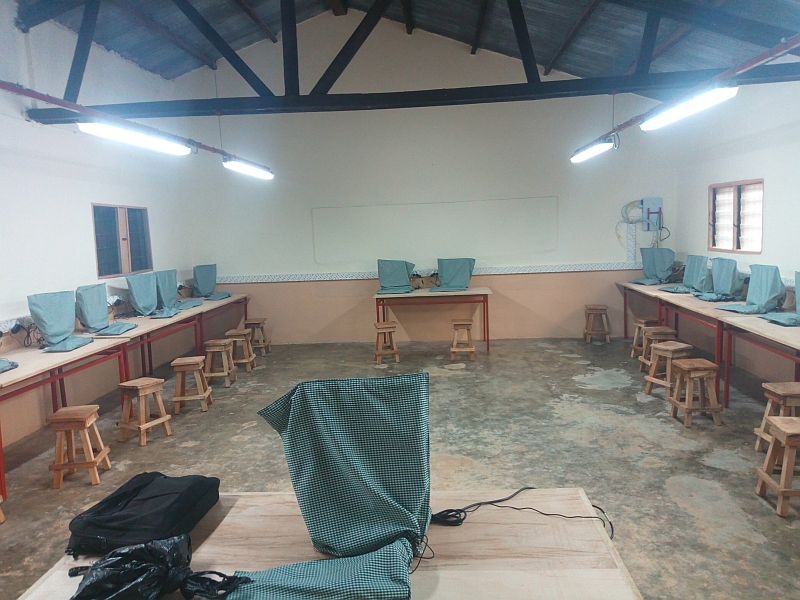
INITIC’s first computer room was installed in Tokpli, Togo, way back in 2012. It was a small room (see the photo on the left below) donated by an agricultural association and renovated by a team of villagers.
The first INTIC room
The new INTIC building
Fast forward to 2018, and INTIC had secured its own building (photo on the right above). It has a dedicated a Raspberry Pi Room, as well as a multipurpose room and another small technical room. Young people from local schools, as well as those in neighbouring villages, have access to the facilities.
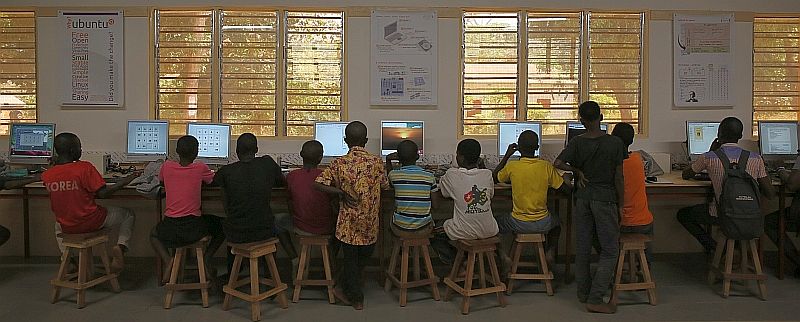
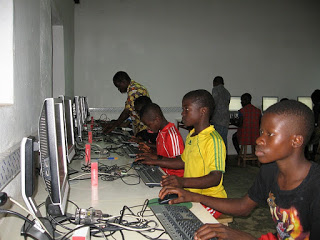
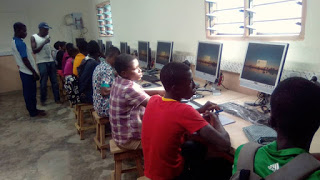
The first ever dedicated Raspberry Pi room at K. Adamé
The first dedicated Raspberry Pi Room in Togo was at the Collège (secondary school) in the town of Kuma Adamé. It was equipped with 21 first-generation Raspberry Pis, which stood up impressively against humid and dusty conditions.
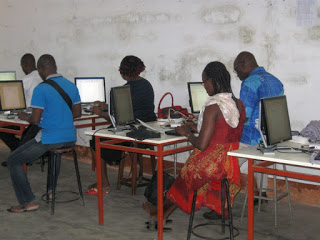
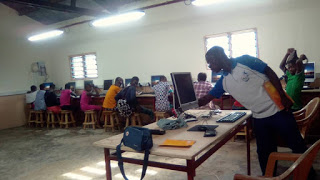
Kpodzi High School’s Raspberry Pi Room
In 2019, Kpodzi High School also got its own Raspberry Pi Room, equipped with 22 Raspberry Pi workstations. Once the projector, laser printer, and scanners are in place, the space will also be used for electronics, Arduino, and programming workshops.
What’s the latest?
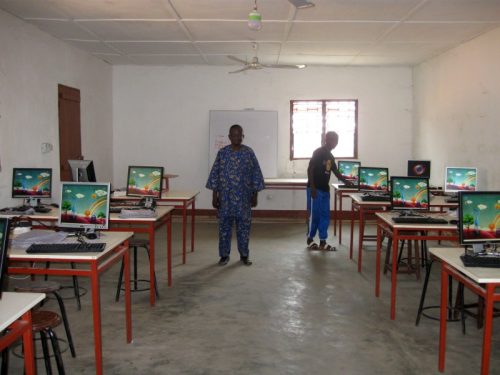
Ready for the unveiling…
Now we find ourselves in 2020 and INTIC is still growing. Young people in the bountiful, but inaccessible, village of Danyi Dzogbégan now have access to 20 Raspberry Pi workstations (plus one for the teacher). They have been using them for learning since January this year.
The first Raspberry Pi sessions in Danyi Dzogbégan
We can’t wait to see what Dominique and his team have up their sleeve next. You can help INTIC reach more young people in rural Togo by donating computer equipment, by helping teachers get lesson materials together, or through a volunteer stay at one of their facilities. Find out more here.
Adrian Hanft is our favourite kind of maker: weird. He’s also the guy who invented the Lego camera, 16 years ago. This time, he spent more than a year creating what he describes as “one of the strangest cameras you may ever hear about.”
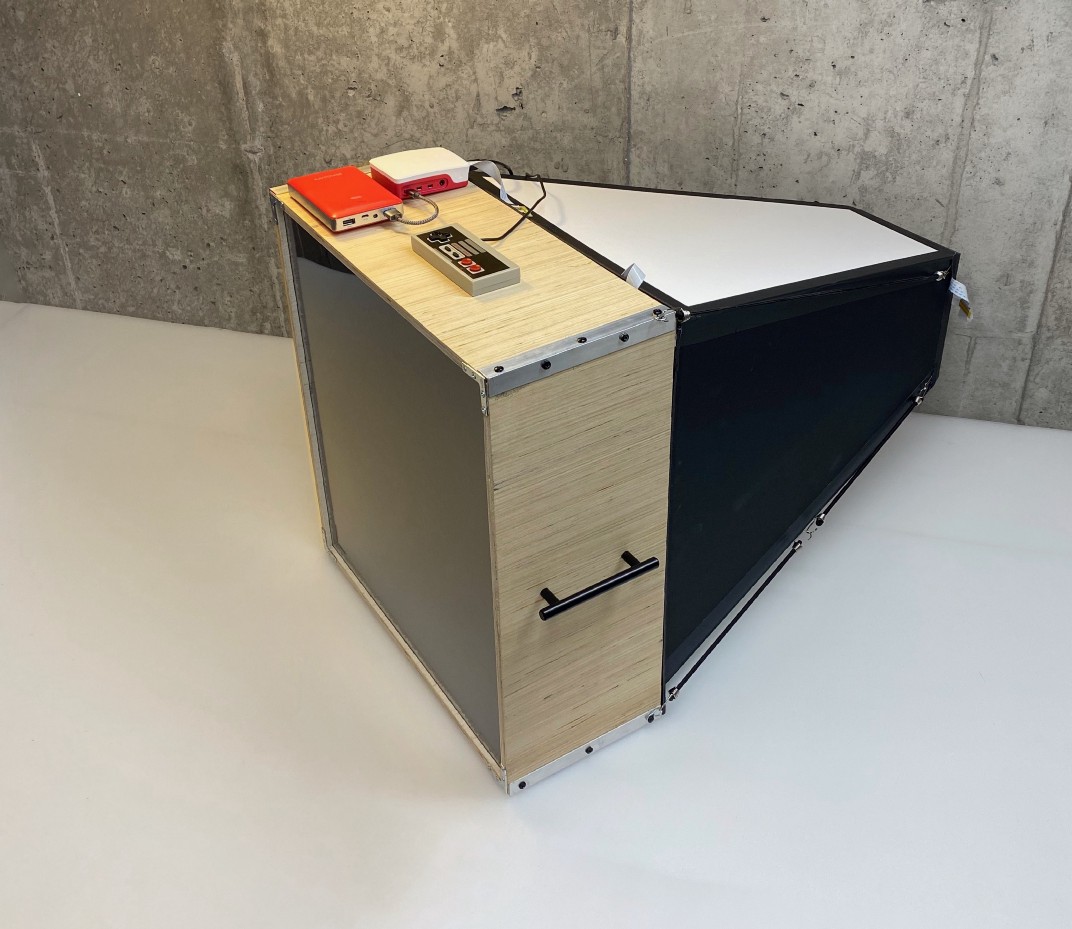
What? Looks normal from here. Massive, but normal
What’s with all the straws?
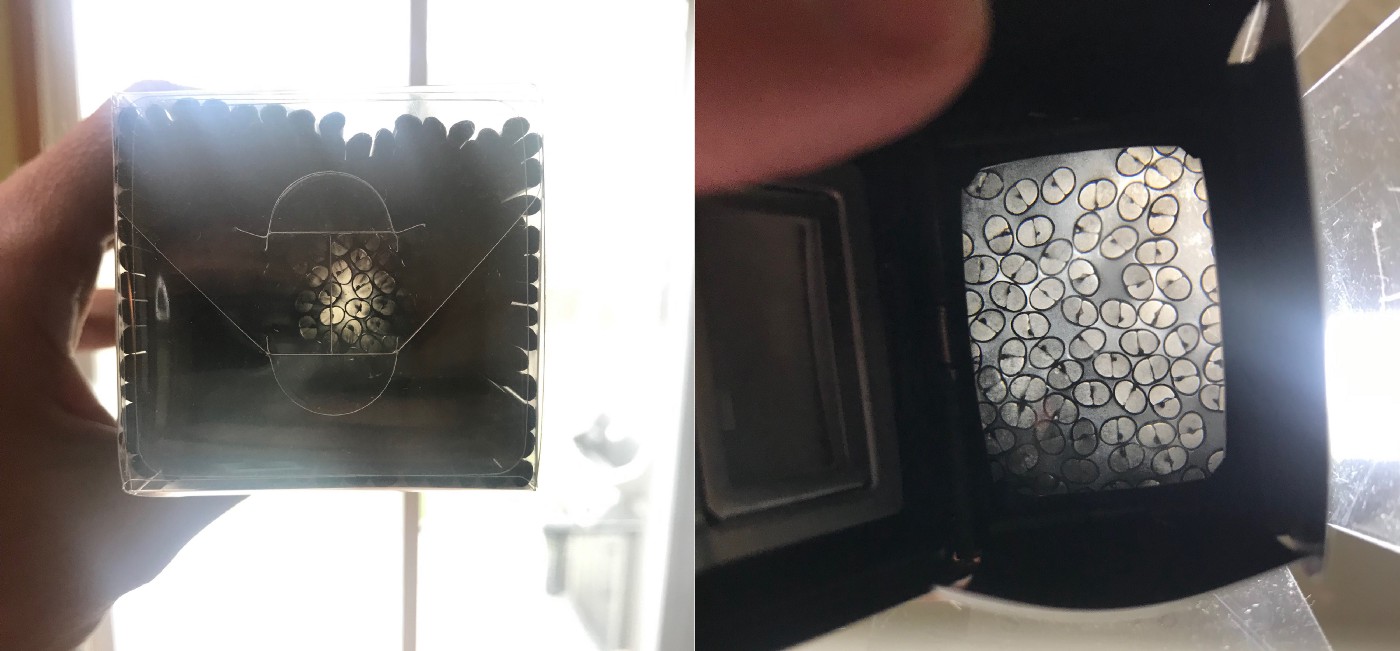
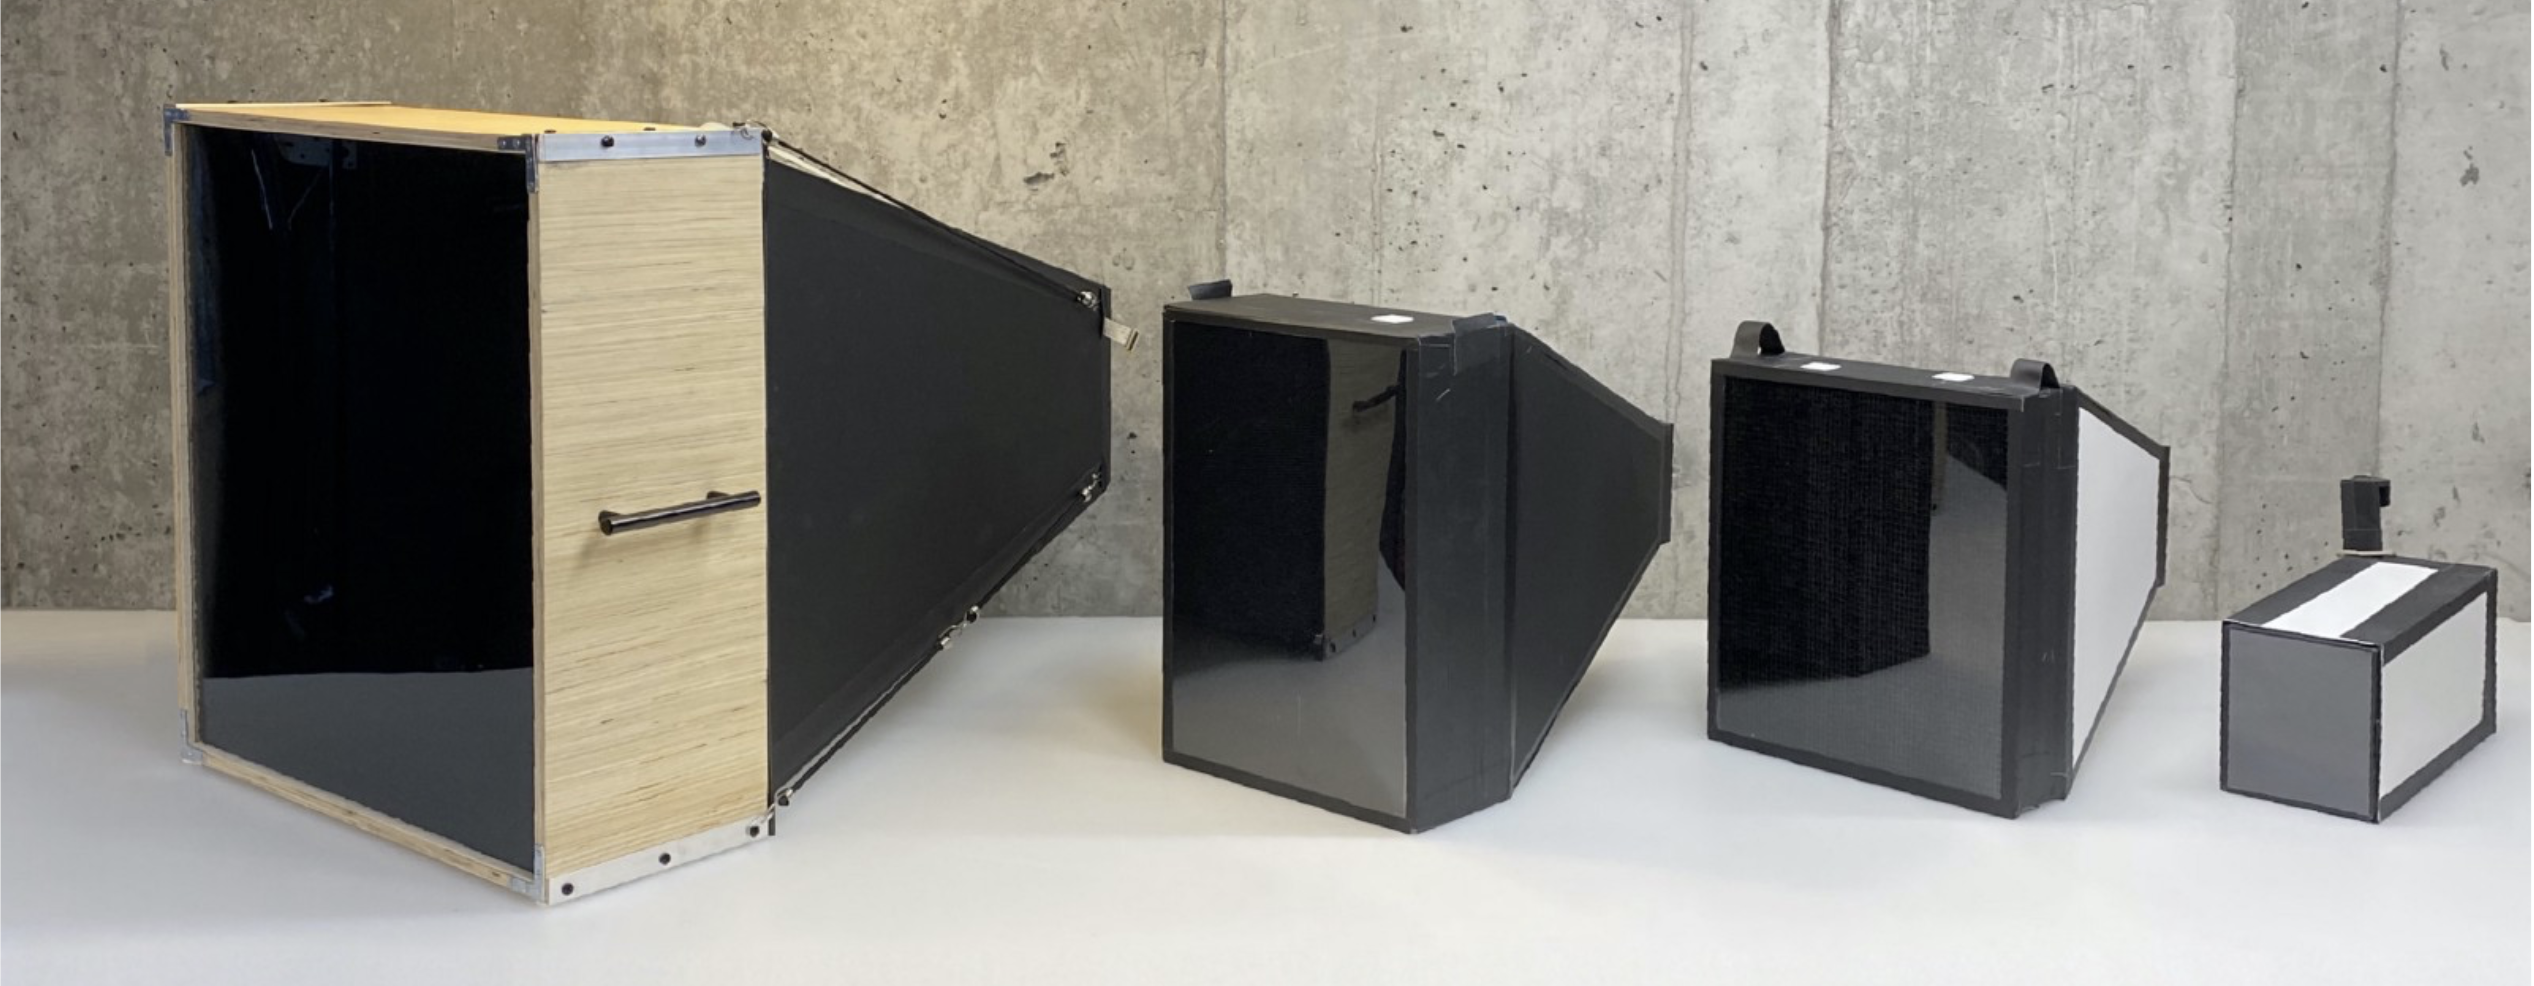
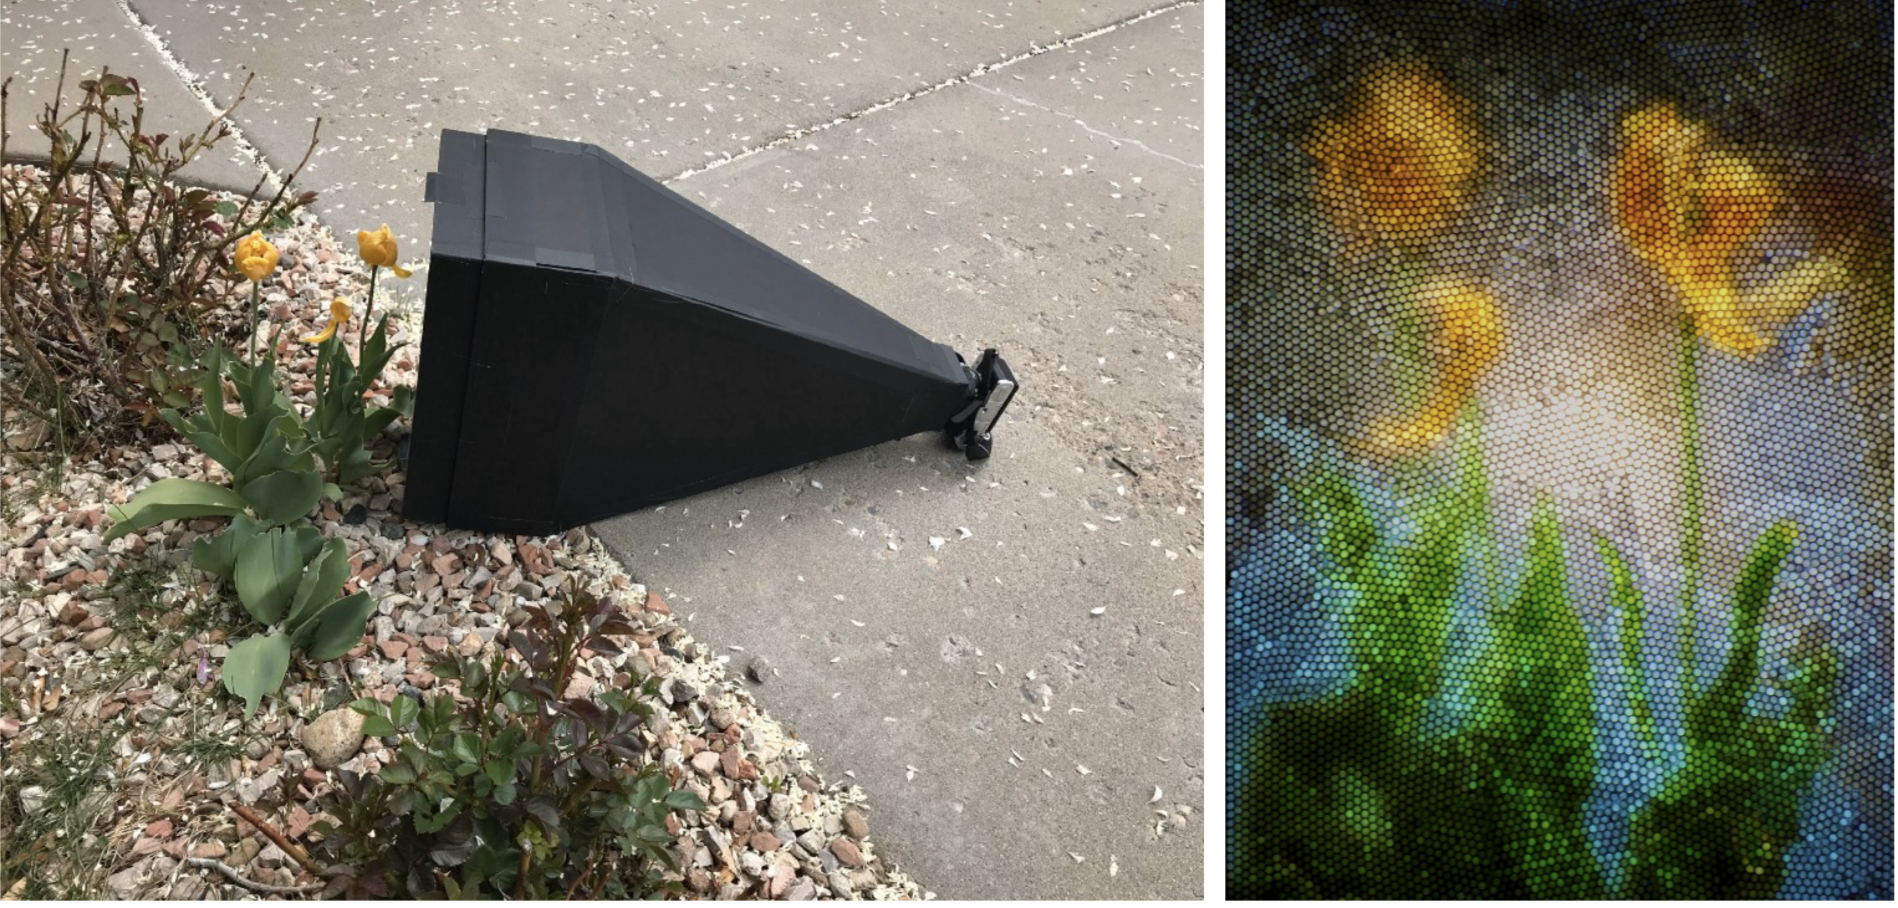
OK, here’s why it’s weird: it takes photos with a Raspberry Pi High Quality Camera through a ‘lens’ of tiny drinking straws packed together. 23,248 straws, to be exact, are inside the wooden box-shaped bit of the machine above. The camera itself sits at the slim end of the black and white part. The Raspberry Pi, power bank, and controller all sit on top of the wooden box full of straws.
Here’s what an image of Yoda looks like, photographed through that many straws:
Mosaic, but make it techy
Ground glass lenses
The concept isn’t as easy as it may look. As you can see from the images below, if you hold up a load of straws, you can only see the light through a few of them. Adrian turned to older technology for a solution, taking a viewfinder from an old camera which had ground glass (which ‘collects’ light) on the surface.
Left: looking through straws at light with the naked eye Right: the same straws viewed through a ground glass lens
Even though Adrian was completely new to both Raspberry Pi and Python, it only took him a week of evenings and weekends to code the software needed to control the Raspberry Pi High Quality Camera.
Long story short, on the left is the final camera, with all the prototypes queued up behind it
An original Nintendo controller runs the show and connects to the Raspberry Pi with a USB adapter. The buttons are mapped to the functions of Adrian’s software.
A super satisfying time-lapse of the straws being loaded
What does the Nintendo controller do?
In his original post, Adrian explains what all the buttons on the controller do in order to create images:
“The Start button launches a preview of what the camera is seeing. The A button takes a picture. The Up and Down buttons increase or decrease the exposure time by 1 second. The Select button launches a gallery of photos so I can see the last photo I took. The Right and Left buttons cycle between photos in the gallery. I am saving the B button for something else in the future. Maybe I will use it for uploading to Dropbox, I haven’t decided yet.”
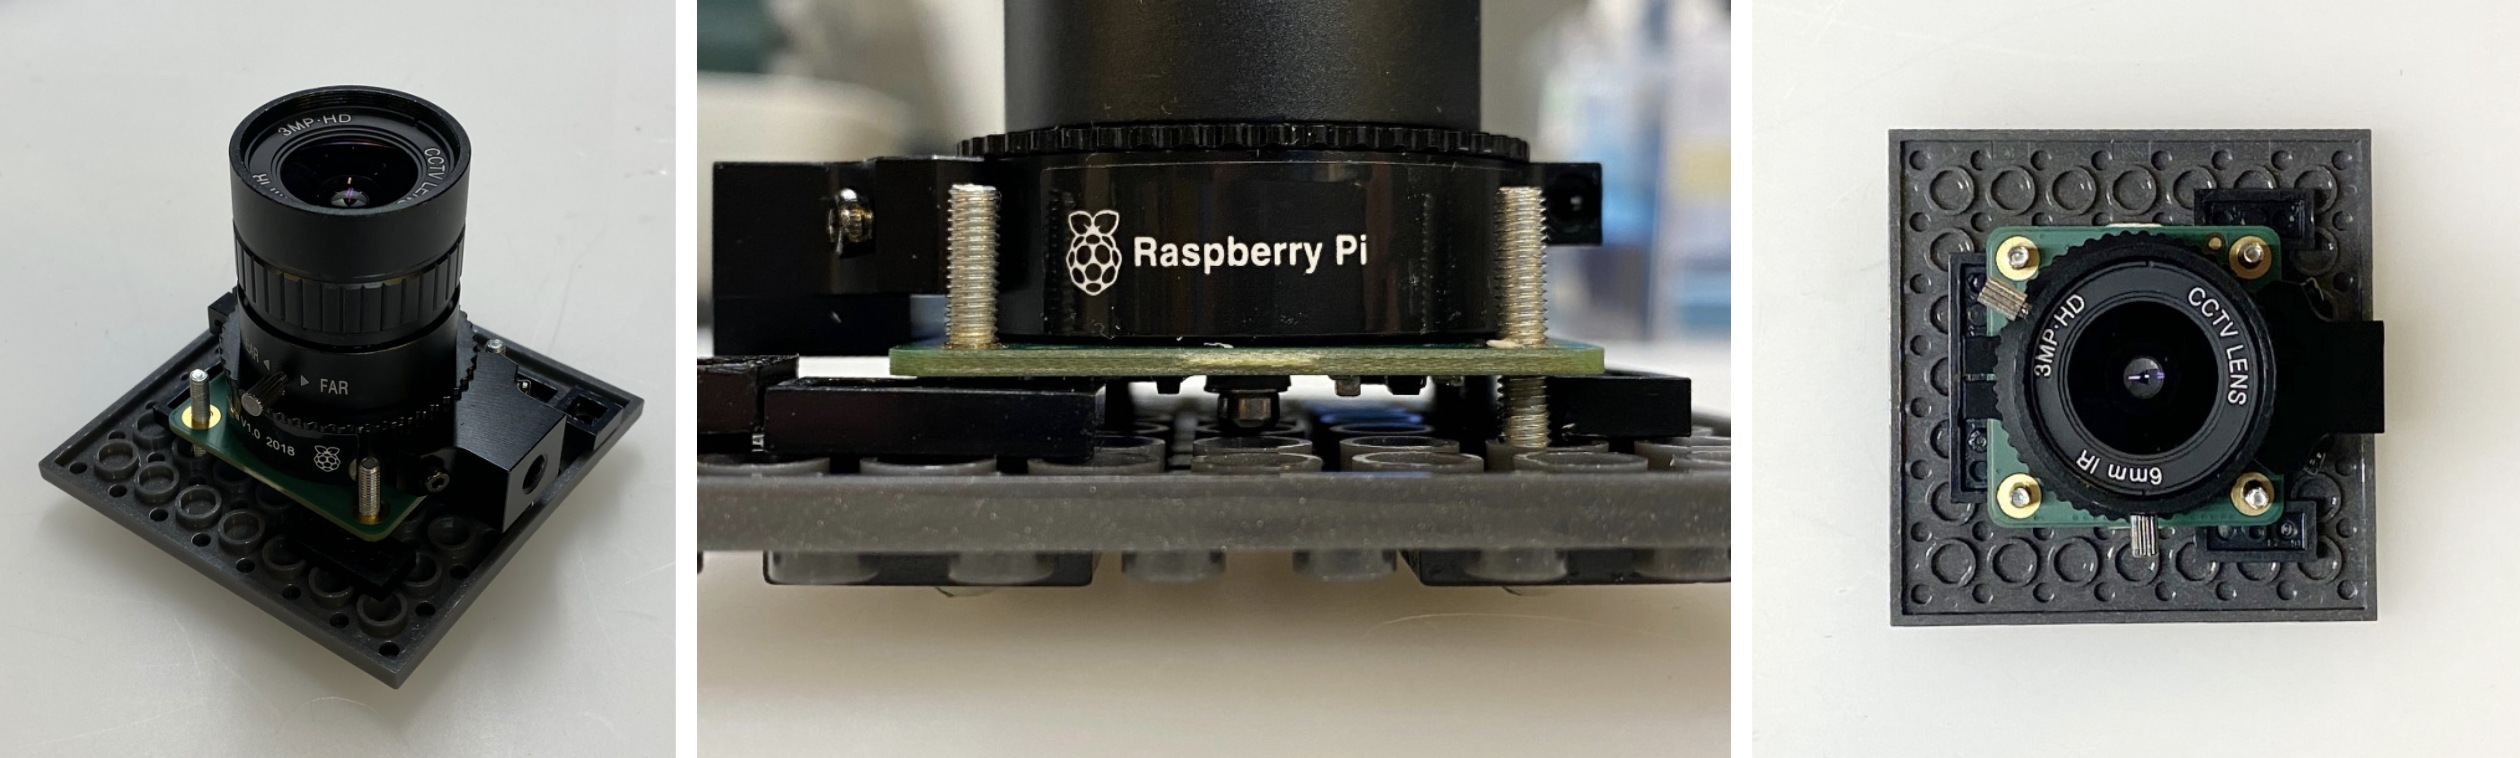
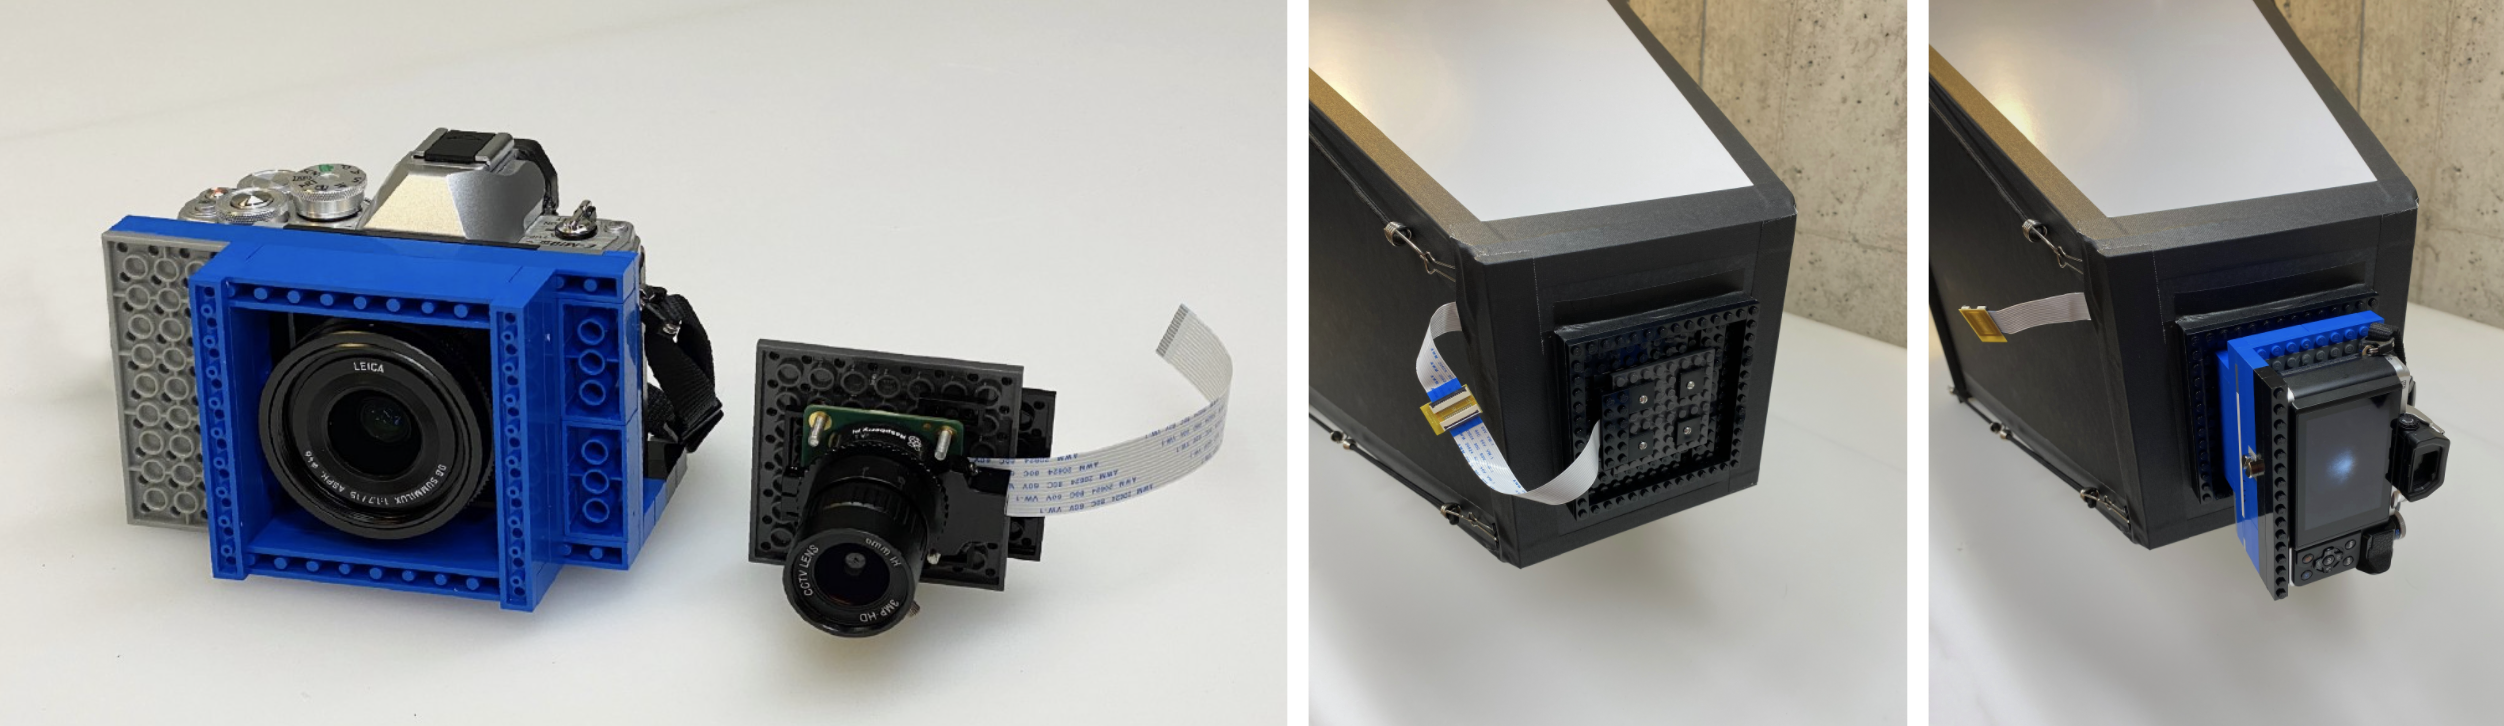
Adrian made a Lego mount for the Raspberry Pi camera
The Lego mount makes it easy to switch between cameras and lenses
A mobile phone serves as a wireless display so he can keep an eye on what’s going on. The phone communicates with the Raspberry Pi connected to the camera via a VPN app.
One of the prototypes in action
Follow Adrian on Instagram to keep up with all the photography captured using the final camera, as well as the prototypes that came before it.
To provide the best experiences, we use technologies like cookies to store and/or access device information. Consenting to these technologies will allow us to process data such as browsing behavior or unique IDs on this site. Not consenting or withdrawing consent, may adversely affect certain features and functions.
Functional
Always active
The technical storage or access is strictly necessary for the legitimate purpose of enabling the use of a specific service explicitly requested by the subscriber or user, or for the sole purpose of carrying out the transmission of a communication over an electronic communications network.
Preferences
The technical storage or access is necessary for the legitimate purpose of storing preferences that are not requested by the subscriber or user.
Statistics
The technical storage or access that is used exclusively for statistical purposes.The technical storage or access that is used exclusively for anonymous statistical purposes. Without a subpoena, voluntary compliance on the part of your Internet Service Provider, or additional records from a third party, information stored or retrieved for this purpose alone cannot usually be used to identify you.
Marketing
The technical storage or access is required to create user profiles to send advertising, or to track the user on a website or across several websites for similar marketing purposes.