Post Syndicated from aostan original https://aws.amazon.com/blogs/compute/faster-scaling-with-amazon-ec2-auto-scaling-target-tracking/
This post is written by Shahad Choudhury, Senior Cloud Support Engineer and Tiago Souza, Solutions Architect
Introduction
One of the key benefits of the AWS cloud is elasticity. It enables our users to provision and pay only for resources they need. To fully use the elasticity benefits, users needed a mechanism that is automated and can be widely operated with ease. Amazon EC2 Auto Scaling solves these challenges by helping our users automatically scale the number of Amazon Elastic Compute Cloud (Amazon EC2) instances to meet the changing workload demands, and it offers a wide suite of capabilities to manage the instance’s lifecycle.
To scale their Auto Scaling groups (ASG), users need to create scaling policies. Scaling policies provide ASGs with guidelines for adjusting Amazon EC2 capacity to match the workload demand. There are different types of scaling policies, with each having a different approach to manage capacity. One type of policy is Target Tracking, which offers a simpler yet effective way to scale automatically. To use it, users need to define a utilization metric and set a target value to maintain. For example, setting a 60% Average CPU Utilization policy causes the ASG to keep the metric as close to that value as possible across its fleet of EC2 instances.
In this post, we describe the recently released updates to Target Tracking. We also walk through the steps to create a Target Tracking policy that uses the new feature, and highlight the improvements and benefits users can expect from this new feature.
What’s new with Target Tracking policy
As users modernized their applications, we learned from them that a dynamic Auto Scaling solution must expand beyond our original implementation of the Target Tracking policy.
First, users found that the few minutes Target Tracking took to respond to a demand spike could lead to short-term performance degradation. We’ve seen many users mitigate this challenge by buffering their running capacity, leading to increased costs. Second, different workloads have different scaling requirements. This leads to users having to create tailored scaling policies for each workload, which is a time consuming, error prone, and operationally expensive activity for performance and cost optimizations.
To address these user challenges, we released an intelligent and highly responsive Target Tracking scaling policy. Target Tracking now automatically tunes its responsiveness to the unique usage patterns of individual applications and closely monitors application demand for faster scaling decisions. Automatic tuning allows users to enhance their application performance and maintain high usage for their Amazon EC2 resources to save costs without having to create tailored scaling policies for each workload. Users must specify a target utilization they want to maintain, and Target Tracking scales without any further input needed from users.
For faster auto scaling decisions, users can configure Target Tracking policies using high-resolution metrics in Amazon CloudWatch. This fine-grained monitoring allows Target Tracking to detect and respond to changing demand, not in minutes, but in seconds. This capability is ideal for applications that have volatile demand patterns, such as client-serving APIs, live streaming services, e-commerce websites, and on-demand data processing.
Getting started with the new Target Tracking policy
If you’re already using Target Tracking policies, then no action is necessary for you to upgrade to Target Tracking that automatically tunes itself. Target Tracking policies regularly analyze targeted metric history and determine the appropriate level of sensitivity to initiate scale-outs and scale-ins. Furthermore, it determines the amount of capacity that must be added or removed to optimize both availability and lower cost. These decisions depend on the unique characteristics of the application’s demand patterns, such as the range and frequency of demand changes, and whether spikes in usage are long or short-lived. Target Tracking continues to learn on an ongoing basis, and reevaluates itself to automatically adapt for your specific application and demand patterns.
Enabling faster scaling response from Target Tracking
Moreover, to enable the fastest response from Target Tracking policies, users can track metrics published at sub-minute granularity to CloudWatch (also known as high-resolution CloudWatch metrics). Users can update an existing Target Tracking policy or create a new one with a high-resolution metric as part of a CustomizedMetricSpecification. Users must describe the same metric namespace, metric name, and any dimension(s) and/or unit created when publishing the metric to CloudWatch. They must also define the metric period to indicate the metric granularity at which target tracking should evaluate the metric. The following steps walk you through how to get started on the AWS Management Console for ASG:
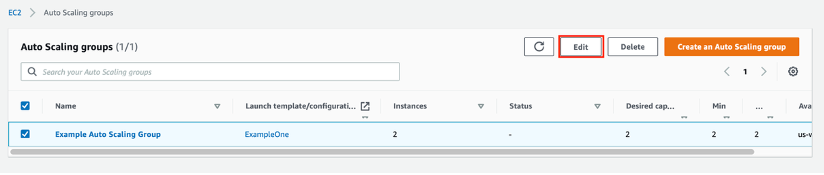
Step 1: Choose the ASG
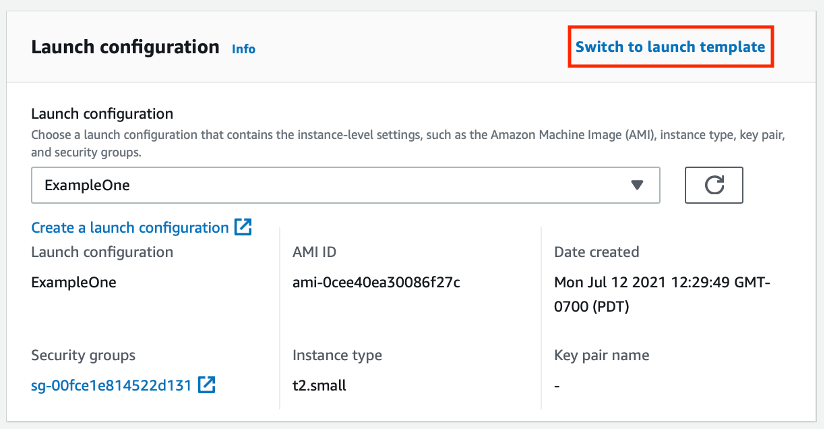
In the console, choose the name of the ASG. This takes you to the Details page, as shown in the following figure.

Figure 1: In the Amazon EC2 console, choose the ASG that you want to scale
Choose the Automatic scaling tab that gives you the option to Create a dynamic scaling policy, as shown in the following figure.

Step 2: Create dynamic scaling policy
Choose the target tracking policy as the policy type. For Metric Type, choose Custom CloudWatch metric. This shows a prefilled JSON snippet that you can edit to specify the metric name, namespace, and dimensions of the metric that you want to scale using the Target Tracking policy that you used to publish the CloudWatch metric, as shown in the following figure.

Figure 3: Updated CustomizedMetricSpecification section added to the Auto Scaling Console
The minimum Period supported is ten seconds. To use the ten second metric periods, your metric should be published at a ten second or higher resolution, for example at one second. However, publishing at one second intervals can substantially increase your CloudWatch cost. We discuss the cost considerations later in this post. Auto Scaling imposes a limit of 60 seconds to make sure that Target Tracking can observe and respond to usage spikes quickly.
These two steps allow you to enable target tracking to scale on a high resolution metric.
Enabling faster scaling impact:
The preceding steps allow the ASG to detect changes in your utilization faster, thus it can add more instances when demand spikes.
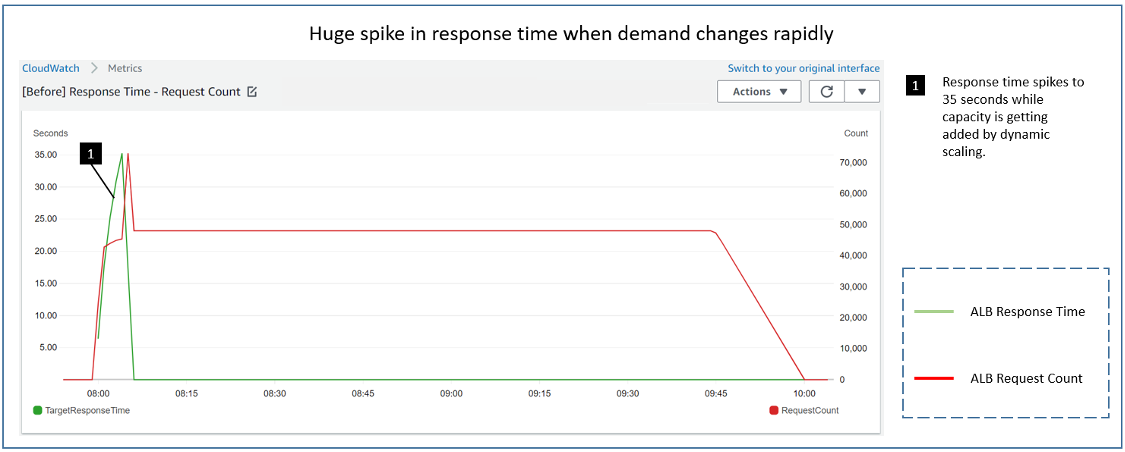
In the following diagram, we see the results of running identical load tests against an environment with a default target tracking policy of a 60 second period and a target tracking policy configured with a ten second period. Each policy has a target value of 60% CPU Utilization. The load test ramps up to 20 threads over three minutes each sending http requests to simulate a spike in demand. We can see that, in the 60 second period case (the left diagram) there were three minutes where the application was above the CPU Utilization target of 60% (blue line). The capacity (green line) increased only after the system had reached a peak of 100% CPU Utilization. This may lead to application performance issues and, to avoid that, users would have to aim for lower utilization level so that more capacity can be provisioned, which would increase their cost. However, with the ten second periods (the right diagram), scaling happened rapidly to avoid application impact. The capacity increased after one minute, during which CPU Utilization remained closer to 60% and didn’t hit the peak 100% level. This allows users to reach a higher utilization level, saving the cost without impacting the application performance.

Figure 4: Target tracking policy with 60 second periods as opposed to 10 seconds
Considerations
Before applying high resolution custom metrics, we recommend that you consider the following factors as they may impact your costs.
Metric types: Target Tracking assumes that metrics change proportionally to the number of instances in the ASG. Selecting the right metric is key for successful Target Tracking policies. Refer to the Target Tracking public documentation for more details.
Pricing: There is no further charge for EC2 Auto Scaling, including these new features. Users pay only for the AWS resources needed to run their applications and CloudWatch monitoring fees. However, you must understand the three CloudWatch billing items relevant to these features:
1) High-resolution alarms
2) API calls
3) Custom metrics
Target Tracking creates at least two alarms, one each to track high and low usage with a buffer in between their thresholds to reduce oscillation. If the metric period is less than sixty seconds, these alarms are billed as high-resolution alarms. As of this writing, the price for high-resolution alarm for the AWS US East (Ohio) Region is $0.30 per alarm metric as compared to $0.10 per alarm metric for standard resolution alarms.
If you’re using CloudWatch Agent, it sends API calls from each instance based on the metrics_collection_interval setting in the CloudWatch Agent config. Each instance sends an API call once per interval to CloudWatch. In CloudWatch, a metric is defined as a unique combination of a Namespace, MetricName, Dimension(s) (optional), and Unit (optional). Every unique combination of dimensions pushed from the CloudWatch Agent is billed as its custom metric.
The following is an example of expected monthly charges in USD using us-east-2 for an account that has passed the free tier, but is still in the first tier of paid usage (the price reduction for bulk usage). This example assumes an average of ten instances running over the month in an ASG with one target tracking policy where metrics and alarms are configured for ten second intervals.
1) High-resolution alarms:
2 alarms @ $0.30 each = $0.60/month
2) API calls:
10 instances * 30 days * 24 hours * 3600 seconds / 10 second_intervals = 2.592 million API calls
2.592 million API calls * $0.01 per 1,000 requests = $25.92/month
3) Custom metrics:
1 ASG aggregate metric @ $0.30/month = $0.30/month
Total estimate: $26.82/month for a 10 instance ASG
Multiple metrics can be pushed in a single PutMetricData API call. If you decide to configure the CloudWatch Agent to publish more than the single aggregate AutoScalingGroupName metric, then the API charges stay the same until the PutMetricData size limit is hit, and only the Custom metrics charge increases.
For example, if the ASG is running c8g.xlarge instances, then by running one fewer instance due to the higher utilization unlocked by these features, then the monthly cost saving in us-east-2 would be:
1 c8g.xlarge @ $0.15896/hour * 30 days * 24 hours = $114.45/month
Taking away the $26.82/month in estimated CloudWatch costs means a savings of $87.63/month per ASG. This is nearly 8% saving on the EC2 cost in this example.
Template to publish metrics and updating your scaling policies
To help you start publishing high resolution metrics, we have created a sample AWS CloudFormation template. The template provides the scaffolding to demonstrate the new faster scaling period for an existing ASG. It includes installing a CloudWatch agent and publishing the CPU Utilization of the ASG instances to CloudWatch at high resolution. The template also includes a Target Tracking policy, as described in this post.
Instructions on deployment and customization requirements can be found in the AWS Samples Repo for Faster Target Tracking. However, there are a few code snippets in the template that we want to highlight.
First, to install the CloudWatch agent, the template updates the UserData of the Launch Template used with the ASG.
This command refers to an AWS Systems Manager parameter holding the Cloudwatch Agent configuration.
The following snippet of the Systems Manager parameter reports the CPU Utilization metric at a 10 second interval to a custom namespace called FasterScalingDemo. The metric is also aggregated with the name of the ASG as a dimension so that you can easily refer to it in CloudWatch.
Second, the template also includes an updated AWS Identity and Access Management (IAM) Role and corresponding IAM Instance Profile with permissions to PutMetricData to CloudWatch, and to retrieve Systems Manager parameters that we created previously to configure the agent.
Finally, the following image depicts the architecture deployed by the CloudFormation template.

Figure 4: AWS resources created in the CloudFormation example
When the template is deployed with your chosen ASG, you should be ready to test Target Tracking set with high resolution metrics. You can perform a load test to see Target Tracking in action. The closer the load test mimics your application usage pattern, the more conclusive the test would be in determining the benefits of these features.
Conclusion
This post provides an overview of the updates we have made to the Target Tracking policy that deliver higher precision in matching your demand with Amazon EC2 capacity. Specifically, this post demonstrated the value of using high resolution CloudWatch metrics with Target Tracking to increase the Auto Scaling rate to match demand, improve availability, and open possibilities for better resource utilization. We encourage you to test the feature and apply the consideration factors outlined in this post before opting for high-resolution metric scaling. You can find more details about these new features in the Target Tracking documentation.