Tag Archives: Amazon EC2 Spot Instances

Selecting cost effective capacity reservations for your business-critical workloads on Amazon EC2

Post Syndicated from Sheila Busser original https://aws.amazon.com/blogs/compute/selecting-cost-effective-capacity-reservations-for-your-business-critical-workloads-on-amazon-ec2/

This blog post is written by Sarath Krishnan, Senior Solutions Architect and Navdeep Singh, Senior Customer Solutions Manager.

Amazon CTO Werner Vogels famously said, “everything fails all the time.” Designing your systems for failure is important for ensuring availability, scalability, fault tolerance and business continuity. Resilient systems scale with your business demand changes, prevent data loss, and allow for seamless recovery from failures. There are many strategies and architectural patterns to build resilient systems on AWS. Building resiliency often involves running duplicate workloads and maintaining backups and failover mechanisms. However, these additional resources may translate into higher costs. It is important to balance the cost of implementing resiliency measures against the potential cost of downtime and the associated risks to the organization.

In addition to the resilient architectural patterns, if your business-critical workloads are running on Amazon Elastic Compute Cloud (Amazon EC2) instances, it is imperative to understand different EC2 capacity reservation options available in AWS. Capacity reservations ensure that you always have access to Amazon EC2 capacity when you need it. For instance, Multi-AZ deployment is one of the architectural patterns to build highly resilient systems on AWS. In a Multi-AZ deployment, you spread your workload across multiple Availability Zones (AZs) with an Auto Scaling group. In an unlikely event of an AZ failure, the Auto Scaling group will try to bring up your instance in another AZ. In a rare scenario, the other AZ may not have the capacity at that time for your specific instance type, hence capacity reservations are important for your crucial workloads.

While implementing capacity reservations, it is important to understand how to control costs for your capacity reservations. In this post, we describe different EC2 capacity reservation and cost savings options available at AWS.

Amazon EC2 Purchase Options

Before we dive into the capacity reservation options, it is important to understand different EC2 instance purchase options available on AWS. EC2 On-Demand purchase option enables you to pay by the second for the instance you launch. Spot Instances purchase option allows you to request unused EC2 capacity for a steep discount. Savings Plans enable you to reduce cost through one- or three-year usage commitments.

Dedicated Hosts and Dedicated Instances allow you to run EC2 instances on single-tenant hardware. But only the On-Demand Capacity Reservations and zonal reservations can reserve capacity for your EC2 instances..

On-Demand Capacity Reservations Deep Dive

On-Demand Capacity Reservations enable you to reserve compute capacity for your Amazon EC2 instances in a specific AZ for any duration. On-Demand Capacity Reservations ensure On-Demand capacity allocation during capacity constraints without entering into a long-term commitment. With On-Demand Capacity Reservations, you pay on-demand price irrespective of your instance running or not. If your business needs capacity reservations only for a shorter duration, like a holiday season, or for a critical business event, such as large streaming event held once a quarter, On-Demand Capacity Reservations is the right fit for your needs. However, if you need capacity reservations for your business-critical workloads for a longer period consistently, we recommend combining On-Demand Capacity Reservations with Savings Plans to achieve capacity reservations and cost savings.

Savings Plans

Savings Plans is a flexible pricing model that can help you reduce your bill by up to 72% compared to On-Demand prices, in exchange for a one – or three-year hourly spend commitment. AWS offers three types of Savings Plans: Compute Savings Plans, EC2 Instance Savings Plans, and Amazon SageMaker Savings Plans.

With EC2 Instance Savings Plans, you can make an hourly spend commitment for instance family and region (e.g. M5 usage in N. Virginia) for one- or three-year terms. Savings are automatically applied to the instances launched in the selected instance family and region irrespective of size, tenancy and operating system. EC2 Instance Savings Plans also give you the flexibility to change your usage between instances within a family in that region. For example, you can move from c5.xlarge running Windows to c5.2xlarge running Linux and automatically benefit from the Savings Plans prices. EC2 Instance Savings Plans gets you the maximum discount of up to 72%.

Compute Savings Plans offer great flexibility as you can change the instance types, migrate workloads between regions, or move workloads to AWS Fargate or AWS Lambda and automatically continue to pay the discounted Savings Plans price. If you are an EC2 customer today, and planning to modernize your applications by leveraging AWS Fargate or AWS Lambda, evaluating Compute Savings Plans is recommended. This plan offers great flexibility so that your commercial agreements support your long-term changing architectural needs and offer cost savings of up to 66%. For example, with Compute Savings Plans, you can change from C4 to M5 instances, shift a workload from EU (Ireland) to EU (London), or move a workload from EC2 to Fargate or Lambda at any time and automatically continue to pay the Savings Plans price. Combining On-Demand Capacity Reservations with Compute Savings Plans give the capacity reservations, significant discounts and maximum flexibility.

We recommend utilizing Savings Plans for discounts due to its flexibility. However, some of the AWS customers might still have older Reserved Instances. If you have already purchased Reserved Instances and want to ensure capacity reservations, you can combine On-Demand Capacity Reservations with Reserved Instances to get the capacity reservations and the discounts. As your Reserved Instances expire, we recommend to sign up for Savings Plans as they offer the same savings as Reserved Instances, but with additional flexibility.

You may find Savings Plans pricing discount examples explained in the Savings Plans documentation.

Zonal Reservations

Zonal reservations offer reservation of capacity in a specific AZ. Zonal reservation requires one- or three- years commitment and reservation applies to a pre-defined instance family. Zonal reservation provides less flexibility as compared to Savings Plans. With zonal reservations, you do not have flexibility to change the instance family and its size. Zonal reservation also does not support queuing your purchase for a future date. We recommend to consider Savings Plans and On-Demand Capacity Reservations over zonal Reserved Instances so that you can get similar discounts and you get much better flexibility. If you are already on a zonal reservation, as your plan expires, we recommend you sign up for Savings Plans and On-Demand Capacity Reservations .

Working with Capacity Reservations and Savings Plans

You may provision capacity reservations using AWS console, Command Line Interface(CLI), and Application Programming Interface (API).

Work with capacity reservations documentation explains the steps to provision the On-Demand Capacity Reservations using AWS console and CLI in detail. You may find the steps to purchase the Savings Plans explained in the documentation.

Conclusion

In this post, we discussed different options for capacity reservations and cost control for your mission-critical workloads on EC2. For most flexibility and value, we recommend using On-Demand Capacity Reservations with Savings Plans. If you have a steady EC2 workloads which are not suitable candidates for modernization, EC2 Savings Plans is recommended. If you are looking for more flexibility of changing the instance types, migrate workloads between regions or planning to modernize your workloads leveraging AWS Fargate or AWS Lambda, consider Compute Savings Plans. Zonal reservations are not the preferred capacity reservation approach due to its lack of flexibility. If you need the capacity reservation for a short period of time, you may leverage the flexibility of On-Demand Capacity Reservations to book and cancel the reservations anytime.

You may refer to the blog to implement Reserving EC2 Capacity across Availability Zones by utilizing On Demand Capacity Reservations.

Best practices to optimize your Amazon EC2 Spot Instances usage

Post Syndicated from Sheila Busser original https://aws.amazon.com/blogs/compute/best-practices-to-optimize-your-amazon-ec2-spot-instances-usage/

This blog post is written by Pranaya Anshu, EC2 PMM, and Sid Ambatipudi, EC2 Compute GTM Specialist.

Amazon EC2 Spot Instances are a powerful tool that thousands of customers use to optimize their compute costs. The National Football League (NFL) is an example of customer using Spot Instances, leveraging 4000 EC2 Spot Instances across more than 20 instance types to build its season schedule. By using Spot Instances, it saves 2 million dollars every season! Virtually any organization – small or big – can benefit from using Spot Instances by following best practices.

Overview of Spot Instances

Spot Instances let you take advantage of unused EC2 capacity in the AWS cloud and are available at up to a 90% discount compared to On-Demand prices. Through Spot Instances, you can take advantage of the massive operating scale of AWS and run hyperscale workloads at a significant cost saving. In exchange for these discounts, AWS has the option to reclaim Spot Instances when EC2 requires the capacity. AWS provides a two-minute notification before reclaiming Spot Instances, allowing workloads running on those instances to be gracefully shut down.

In this blog post, we explore four best practices that can help you optimize your Spot Instances usage and minimize the impact of Spot Instances interruptions: diversifying your instances, considering attribute-based instance type selection, leveraging Spot placement scores, and using the price-capacity-optimized allocation strategy. By applying these best practices, you’ll be able to leverage Spot Instances for appropriate workloads and ultimately reduce your compute costs. Note for the purposes of this blog, we will focus on the integration of Spot Instances with Amazon EC2 Auto Scaling groups.

Pre-requisites

Spot Instances can be used for various stateless, fault-tolerant, or flexible applications such as big data, containerized workloads, CI/CD, web servers, high-performance computing (HPC), and AI/ML workloads. However, as previously mentioned, AWS can interrupt Spot Instances with a two-minute notification, so it is best not to use Spot Instances for workloads that cannot handle individual instance interruption — that is, workloads that are inflexible, stateful, fault-intolerant, or tightly coupled.

Best practices

  1. Diversify your instances

The fundamental best practice when using Spot Instances is to be flexible. A Spot capacity pool is a set of unused EC2 instances of the same instance type (for example, m6i.large) within the same AWS Region and Availability Zone (for example, us-east-1a). When you request Spot Instances, you are requesting instances from a specific Spot capacity pool. Since Spot Instances are spare EC2 capacity, you want to base your selection (request) on as many spare pools of capacity as possible in order to increase your likelihood of getting Spot Instances. You should diversify across instance sizes, generations, instance types, and Availability Zones to maximize your savings with Spot Instances. For example, if you are currently using c5a.large in us-east-1a, consider including c6a instances (newer generation of instances), c5a.xl (larger size), or us-east-1b (different Availability Zone) to increase your overall flexibility. Instance diversification is beneficial not only for selecting Spot Instances, but also for scaling, resilience, and cost optimization.

To get hands-on experience with Spot Instances and to practice instance diversification, check out Amazon EC2 Spot Instances workshops. And once you’ve diversified your instances, you can leverage AWS Fault Injection Simulator (AWS FIS) to test your applications’ resilience to Spot Instance interruptions to ensure that they can maintain target capacity while still benefiting from the cost savings offered by Spot Instances. To learn more about stress testing your applications, check out the Back to Basics: Chaos Engineering with AWS Fault Injection Simulator video and AWS FIS documentation.

  1. Consider attribute-based instance type selection

We have established that flexibility is key when it comes to getting the most out of Spot Instances. Similarly, we have said that in order to access your desired Spot Instances capacity, you should select multiple instance types. While building and maintaining instance type configurations in a flexible way may seem daunting or time-consuming, it doesn’t have to be if you use attribute-based instance type selection. With attribute-based instance type selection, you can specify instance attributes — for example, CPU, memory, and storage — and EC2 Auto Scaling will automatically identify and launch instances that meet your defined attributes. This removes the manual-lift of configuring and updating instance types. Moreover, this selection method enables you to automatically use newly released instance types as they become available so that you can continuously have access to an increasingly broad range of Spot Instance capacity. Attribute-based instance type selection is ideal for workloads and frameworks that are instance agnostic, such as HPC and big data workloads, and can help to reduce the work involved with selecting specific instance types to meet specific requirements.

For more information on how to configure attribute-based instance selection for your EC2 Auto Scaling group, refer to Create an Auto Scaling Group Using Attribute-Based Instance Type Selection documentation. To learn more about attribute-based instance type selection, read the Attribute-Based Instance Type Selection for EC2 Auto Scaling and EC2 Fleet news blog or check out the Using Attribute-Based Instance Type Selection and Mixed Instance Groups section of the Launching Spot Instances workshop.

  1. Leverage Spot placement scores

Now that we’ve stressed the importance of flexibility when it comes to Spot Instances and covered the best way to select instances, let’s dive into how to find preferred times and locations to launch Spot Instances. Because Spot Instances are unused EC2 capacity, Spot Instances capacity fluctuates. Correspondingly, it is possible that you won’t always get the exact capacity at a specific time that you need through Spot Instances. Spot placement scores are a feature of Spot Instances that indicates how likely it is that you will be able to get the Spot capacity that you require in a specific Region or Availability Zone. Your Spot placement score can help you reduce Spot Instance interruptions, acquire greater capacity, and identify optimal configurations to run workloads on Spot Instances. However, it is important to note that Spot placement scores serve only as point-in-time recommendations (scores can vary depending on current capacity) and do not provide any guarantees in terms of available capacity or risk of interruption.  To learn more about how Spot placement scores work and to get started with them, see the Identifying Optimal Locations for Flexible Workloads With Spot Placement Score blog and Spot placement scores documentation.

As a near real-time tool, Spot placement scores are often integrated into deployment automation. However, because of its logging and graphic capabilities, you may find it to be a valuable resource even before you launch a workload in the cloud. If you are looking to understand historical Spot placement scores for your workload, you should check out the Spot placement score tracker, a tool that automates the capture of Spot placement scores and stores Spot placement score metrics in Amazon CloudWatch. The tracker is available through AWS Labs, a GitHub repository hosting tools. Learn more about the tracker through the Optimizing Amazon EC2 Spot Instances with Spot Placement Scores blog.

When considering ideal times to launch Spot Instances and exploring different options via Spot placement scores, be sure to consider running Spot Instances at off-peak hours – or hours when there is less demand for EC2 Instances. As you may assume, there is less unused capacity – Spot Instances – available during typical business hours than after business hours. So, in order to leverage as much Spot capacity as you can, explore the possibility of running your workload at hours when there is reduced demand for EC2 instances and thus greater availability of Spot Instances. Similarly, consider running your Spot Instances in “off-peak Regions” – or Regions that are not experiencing business hours at that certain time.

On a related note, to maximize your usage of Spot Instances, you should consider using previous generation of instances if they meet your workload needs. This is because, as with off-peak vs peak hours, there is typically greater capacity available for previous generation instances than current generation instances, as most people tend to use current generation instances for their compute needs.

  1. Use the price-capacity-optimized allocation strategy

Once you’ve selected a diversified and flexible set of instances, you should select your allocation strategy. When launching instances, your Auto Scaling group uses the allocation strategy that you specify to pick the specific Spot pools from all your possible pools. Spot offers four allocation strategies: price-capacity-optimized, capacity-optimized, capacity-optimized-prioritized, and lowest-price. Each of these allocation strategies select Spot Instances in pools based on price, capacity, a prioritized list of instances, or a combination of these factors.

The price-capacity-optimized strategy launched in November 2022. This strategy makes Spot Instance allocation decisions based on the most capacity at the lowest price. It essentially enables Auto Scaling groups to identify the Spot pools with the highest capacity availability for the number of instances that are launching. In other words, if you select this allocation strategy, we will find the Spot capacity pools that we believe have the lowest chance of interruption in the near term. Your Auto Scaling groups then request Spot Instances from the lowest priced of these pools.

We recommend you leverage the price-capacity-optimized allocation strategy for the majority of your workloads that run on Spot Instances. To see how the price-capacity-optimized allocation strategy selects Spot Instances in comparison with lowest-price and capacity-optimized allocation strategies, read the Introducing the Price-Capacity-Optimized Allocation Strategy for EC2 Spot Instances blog post.

Clean-up

If you’ve explored the different Spot Instances workshops we recommended throughout this blog post and spun up resources, please remember to delete resources that you are no longer using to avoid incurring future costs.

Conclusion

Spot Instances can be leveraged to reduce costs across a wide-variety of use cases, including containers, big data, machine learning, HPC, and CI/CD workloads. In this blog, we discussed four Spot Instances best practices that can help you optimize your Spot Instance usage to maximize savings: diversifying your instances, considering attribute-based instance type selection, leveraging Spot placement scores, and using the price-capacity-optimized allocation strategy.

To learn more about Spot Instances, check out Spot Instances getting started resources. Or to learn of other ways of reducing costs and improving performance, including leveraging other flexible purchase models such as AWS Savings Plans, read the Increase Your Application Performance at Lower Costs eBook or watch the Seven Steps to Lower Costs While Improving Application Performance webinar.

Building diversified and cost-optimized EC2 server groups in Spinnaker

Post Syndicated from Sheila Busser original https://aws.amazon.com/blogs/compute/building-diversified-and-cost-optimized-ec2-server-groups-in-spinnaker/

This blog post is written by Sandeep Palavalasa, Sr. Specialist Containers SA, and Prathibha Datta-Kumar, Software Development Engineer

Spinnaker is an open source continuous delivery platform created by Netflix for releasing software changes rapidly and reliably. It enables teams to automate deployments into pipelines that are run whenever a new version is released with proven deployment strategies that are faster and more dependable with zero downtime. For many AWS customers, Spinnaker is a critical piece of technology that allows developers to deploy their applications safely and reliably across different AWS managed services.

Listening to customer requests on the Spinnaker open source project and in the Amazon EC2 Spot Instances integrations roadmap, we have further enhanced Spinnaker’s ability to deploy on Amazon Elastic Compute Cloud (Amazon EC2). The enhancements make it easier to combine Spot Instances with On-Demand, Reserved, and Savings Plans Instances to optimize workload costs with performance. You can improve workload availability when using Spot Instances with features such as allocation strategies and proactive Spot capacity rebalancing, when you are flexible about Instance types and Availability Zones. Combinations of these features offer the best possible experience when using Amazon EC2 with Spinnaker.

In this post, we detail the recent enhancements, along with a walkthrough of how you can use them following the best practices.

Amazon EC2 Spot Instances

EC2 Spot Instances are spare compute capacity in the AWS Cloud available at steep discounts of up to 90% when compared to On-Demand Instance prices. The primary difference between an On-Demand Instance and a Spot Instance is that a Spot Instance can be interrupted by Amazon EC2 with a two-minute notification when Amazon EC2 needs the capacity back. Amazon EC2 now sends rebalance recommendation notifications when Spot Instances are at an elevated risk of interruption. This signal can arrive sooner than the two-minute interruption notice. This lets you proactively replace your Spot Instances before it’s interrupted.

The best way to adhere to Spot best practices and instance fleet management is by using an Amazon EC2 Auto Scaling group When using Spot Instances in Auto Scaling group, enabling Capacity Rebalancing helps you maintain workload availability by proactively augmenting your fleet with a new Spot Instance before a running instance is interrupted by Amazon EC2.

Spinnaker concepts

Spinnaker uses three key concepts to describe your services, including applications, clusters, and server groups, and how your services are exposed to users is expressed as Load balancers and firewalls.

An application is a collection of clusters, a cluster is a collection of server groups, and a server group identifies the deployable artifact and basic configuration settings such as the number of instances, autoscaling policies, metadata, etc. This corresponds to an Auto Scaling group in AWS. We use Auto Scaling groups and server groups interchangeably in this post.

Spinnaker and Amazon EC2 Integration

In mid-2020, we started looking into customer requests and gaps in the Amazon EC2 feature set supported in Spinnaker. Around the same time, Spinnaker OSS added support for Amazon EC2 Launch Templates. Thanks to their effort, we could follow-up and expand the Amazon EC2 feature set supported in Spinnaker. Now that we understand the new features, let’s look at how to use some of them in the following tutorial spinnaker.io.

Here are some highlights of the features contributed recently:

Feature Why use it? (Example use cases)
  Multiple Instance Types   Tap into multiple capacity pools to achieve and maintain the desired scale using Spot Instances.
  Combining On-Demand and Spot Instances

  – Control the proportion of On-Demand and Spot Instances launched in your sever group.

– Combine Spot Instances with Amazon EC2 Reserved Instances or Savings Plans.

  Amazon EC2 Auto Scaling allocation strategies   Reduce overall Spot interruptions by launching from Spot pools that are optimally chosen based on the available Spot capacity, using capacity-optimized Spot allocation strategy.
  Capacity rebalancing   Improve your workload availability by proactively shifting your Spot capacity to optimal pools by enabling capacity rebalancing along with capacity-optimized allocation strategy.
  Improved support for burstable performance instance types with custom credit specification   Reduce costs by preventing wastage of CPU cycles.

We recommend using Spinnaker stable release 1.28.x for API users and 1.29.x for UI users. Here is the Git issue for related PRs and feature releases.

Now that we understand the new features, let’s look at how to use some of them in the following tutorial.

Example tutorial: Deploy a demo web application on an Auto Scaling group with On-Demand and Spot Instances

In this example tutorial, we setup Spinnaker to deploy to Amazon EC2, create an Application Load Balancer, and deploy a demo application on a server group diversified across multiple instance types and purchase options – this case On-Demand and Spot Instances.

We leverage Spinnaker’s API throughout the tutorial to create new resources, along with a quick guide on how to deploy the same using Spinnaker UI (Deck) and leverage UI to view them.

Prerequisites

As a prerequisite to complete this tutorial, you must have an AWS Account with an AWS Identity and Access Management (IAM) User that has the AdministratorAccess configured to use with AWS Command Line Interface (AWS CLI).

1. Spinnaker setup

We will use the AWS CloudFormation template setup-spinnaker-with-deployment-vpc.yml to setup Spinnaker and the required resources.

1.1 Create an Secure Shell(SSH) keypair used to connect to Spinnaker and EC2 instances launched by Spinnaker.

AWS_REGION=us-west-2 # Change the region where you want Spinnaker deployed
EC2_KEYPAIR_NAME=spinnaker-blog-${AWS_REGION}
aws ec2 create-key-pair --key-name ${EC2_KEYPAIR_NAME} --region ${AWS_REGION} --query KeyMaterial --output text > ~/${EC2_KEYPAIR_NAME}.pem
chmod 600 ~/${EC2_KEYPAIR_NAME}.pem

1.2 Deploy the Cloudformation stack.

STACK_NAME=spinnaker-blog
SPINNAKER_VERSION=1.29.1 # Change the version if newer versions are available
NUMBER_OF_AZS=3
AVAILABILITY_ZONES=${AWS_REGION}a,${AWS_REGION}b,${AWS_REGION}c
ACCOUNT_ID=$(aws sts get-caller-identity --query "Account" --output text)
S3_BUCKET_NAME=spin-persitent-store-${ACCOUNT_ID}

# Download template
curl -o setup-spinnaker-with-deployment-vpc.yml https://raw.githubusercontent.com/awslabs/ec2-spot-labs/master/ec2-spot-spinnaker/setup-spinnaker-with-deployment-vpc.yml

# deploy stack
aws cloudformation deploy --template-file setup-spinnaker-with-deployment-vpc.yml \
    --stack-name ${STACK_NAME} \
    --parameter-overrides NumberOfAZs=${NUMBER_OF_AZS} \
    AvailabilityZones=${AVAILABILITY_ZONES} \
    EC2KeyPairName=${EC2_KEYPAIR_NAME} \
    SpinnakerVersion=${SPINNAKER_VERSION} \
    SpinnakerS3BucketName=${S3_BUCKET_NAME} \
    --capabilities CAPABILITY_NAMED_IAM --region ${AWS_REGION}

1.3 Connecting to Spinnaker

1.3.1 Get the SSH command to port forwarding for Deck – the browser-based UI (9000) and Gate – the API Gateway (8084) to access the Spinnaker UI and API.

SPINNAKER_INSTANCE_DNS_NAME=$(aws cloudformation describe-stacks --stack-name ${STACK_NAME} --region ${AWS_REGION} --query "Stacks[].Outputs[?OutputKey=='SpinnakerInstance'].OutputValue" --output text)
echo 'ssh -A -L 9000:localhost:9000 -L 8084:localhost:8084 -L 8087:localhost:8087 -i ~/'${EC2_KEYPAIR_NAME}' ubuntu@$'{SPINNAKER_INSTANCE_DNS_NAME}''

1.3.2 Open a new terminal and use the SSH command (output from the previous command) to connect to the Spinnaker instance. After you successfully connect to the Spinnaker instance via SSH, access the Spinnaker UI here and API here.

2. Deploy a demo web application

Let’s make sure that we have the environment variables required in the shell before proceeding. If you’re using the same terminal window as before, then you might already have these variables.

STACK_NAME=spinnaker-blog
AWS_REGION=us-west-2 # use the same region as before
EC2_KEYPAIR_NAME=spinnaker-blog-${AWS_REGION}
VPC_ID=$(aws cloudformation describe-stacks --stack-name ${STACK_NAME} --region ${AWS_REGION} --query "Stacks[].Outputs[?OutputKey=='VPCID'].OutputValue" --output text)

2.1 Create a Spinnaker Application

We start by creating an application in Spinnaker, a placeholder for the service that we deploy.

curl 'http://localhost:8084/tasks' \
-H 'Content-Type: application/json;charset=utf-8' \
--data-raw \
'{
   "job":[
      {
         "type":"createApplication",
         "application":{
            "cloudProviders":"aws",
            "instancePort":80,
            "name":"demoapp",
            "email":"[email protected]",
            "providerSettings":{
               "aws":{
                  "useAmiBlockDeviceMappings":true
               }
            }
         }
      }
   ],
   "application":"demoapp",
   "description":"Create Application: demoapp"
}'

Spin Create Server Group

2.2 Create an Application Load Balancer

Let’s create an Application Load Balanacer and a target group for port 80, spanning the three availability zones in our public subnet. We use the Demo-ALB-SecurityGroup for Firewalls to allow public access to the ALB on port 80.

As Spot Instances are interrupted with a two minute warning, you must adjust the Target Group’s deregistration delay to a slightly lower time. Recommended values are 90 seconds or less. This allows time for in-flight requests to complete and gracefully close existing connections before the instance is interrupted.

curl 'http://localhost:8084/tasks' \
-H 'Content-Type: application/json;charset=utf-8' \
--data-binary \
'{
   "application":"demoapp",
   "description":"Create Load Balancer: demoapp",
   "job":[
      {
         "type":"upsertLoadBalancer",
         "name":"demoapp-lb",
         "loadBalancerType":"application",
         "cloudProvider":"aws",
         "credentials":"my-aws-account",
         "region":"'"${AWS_REGION}"'",
         "vpcId":"'"${VPC_ID}"'",
         "subnetType":"public-subnet",
         "idleTimeout":60,
         "targetGroups":[
            {
               "name":"demoapp-targetgroup",
               "protocol":"HTTP",
               "port":80,
               "targetType":"instance",
               "healthCheckProtocol":"HTTP",
               "healthCheckPort":"traffic-port",
               "healthCheckPath":"/",
               "attributes":{
                  "deregistrationDelay":90
               }
            }
         ],
         "regionZones":[
            "'"${AWS_REGION}"'a",
            "'"${AWS_REGION}"'b",
            "'"${AWS_REGION}"'c"
         ],
         "securityGroups":[
            "Demo-ALB-SecurityGroup"
         ],
         "listeners":[
            {
               "protocol":"HTTP",
               "port":80,
               "defaultActions":[
                  {
                     "type":"forward",
                     "targetGroupName":"demoapp-targetgroup"
                 }
               ]
            }
         ]
      }
   ]
}'

Spin Create ALB

2.3 Create a server group

Before creating a server group (Auto Scaling group), here is a brief overview of the features used in the example:

      • onDemandBaseCapacity (default 0): The minimum amount of your ASG’s capacity that must be fulfilled by On-Demand instances (can also be applied toward Reserved Instances or Savings Plans). The example uses an onDemandBaseCapacity of three.
      • onDemandPercentageAboveBaseCapacity (default 100): The percentages of On-Demand and Spot Instances for additional capacity beyond OnDemandBaseCapacity. The example uses onDemandPercentageAboveBaseCapacity of 10% (i.e. 90% Spot).
      • spotAllocationStrategy: This indicates how you want to allocate instances across Spot Instance pools in each Availability Zone. The example uses the recommended Capacity Optimized strategy. Instances are launched from optimal Spot pools that are chosen based on the available Spot capacity for the number of instances that are launching.
      • launchTemplateOverridesForInstanceType: The list of instance types that are acceptable for your workload. Specifying multiple instance types enables tapping into multiple instance pools in multiple Availability Zones, designed to enhance your service’s availability. You can use the ec2-instance-selector, an open source AWS Command Line Interface(CLI) tool to narrow down the instance types based on resource criteria like vcpus and memory.
      • capacityRebalance: When enabled, this feature proactively manages the EC2 Spot Instance lifecycle leveraging the new EC2 Instance rebalance recommendation. This increases the emphasis on availability by automatically attempting to replace Spot Instances in an ASG before they are interrupted by Amazon EC2. We enable this feature in this example.

Learn more on spinnaker.io: feature descriptions and use cases and sample API requests.

Let’s create a server group with a desired capacity of 12 instances diversified across current and previous generation instance types, attach the previously created ALB, use Demo-EC2-SecurityGroup for the Firewalls which allows http traffic only from the ALB, use the following bash script for UserData to install httpd, and add instance metadata into the index.html.

2.3.1 Save the userdata bash script into a file user-date.sh.

Note that Spinnaker only support base64 encoded userdata. We use base64 bash command to encode the file contents in the next step.

cat << "EOF" > user-data.sh
#!/bin/bash
yum update -y
yum install httpd -y
echo "<html>
    <head>
        <title>Demo Application</title>
        <style>body {margin-top: 40px; background-color: #Gray;} </style>
    </head>
    <body>
        <h2>You have reached a Demo Application running on</h2>
        <ul>
            <li>instance-id: <b> `curl http://169.254.169.254/latest/meta-data/instance-id` </b></li>
            <li>instance-type: <b> `curl http://169.254.169.254/latest/meta-data/instance-type` </b></li>
            <li>instance-life-cycle: <b> `curl http://169.254.169.254/latest/meta-data/instance-life-cycle` </b></li>
            <li>availability-zone: <b> `curl http://169.254.169.254/latest/meta-data/placement/availability-zone` </b></li>
        </ul>
    </body>
</html>" > /var/www/html/index.html
systemctl start httpd
systemctl enable httpd
EOF

2.3.2 Create the server group by running the following command. Note we use the KeyPairName that we created as part of the prerequisites.

curl 'http://localhost:8084/tasks' \
-H 'Content-Type: application/json;charset=utf-8' \
-d \
'{
   "job":[
      {
         "type":"createServerGroup",
         "cloudProvider":"aws",
         "account":"my-aws-account",
         "application":"demoapp",
         "stack":"",
         "credentials":"my-aws-account",
	"healthCheckType": "ELB",
	"healthCheckGracePeriod":600,
	"capacityRebalance": true,
         "onDemandBaseCapacity":3, 
         "onDemandPercentageAboveBaseCapacity":10,
         "spotAllocationStrategy":"capacity-optimized",
         "setLaunchTemplate":true,
         "launchTemplateOverridesForInstanceType":[
            {
               "instanceType":"m4.large"
            },
            {
               "instanceType":"m5.large"
            },
            {
               "instanceType":"m5a.large"
            },
            {
               "instanceType":"m5ad.large"
            },
            {
               "instanceType":"m5d.large"
            },
            {
               "instanceType":"m5dn.large"
            },
            {
               "instanceType":"m5n.large"
            }

         ],
         "capacity":{
            "min":6,
            "max":21,
            "desired":12
         },
         "subnetType":"private-subnet",
         "availabilityZones":{
            "'"${AWS_REGION}"'":[
               "'"${AWS_REGION}"'a",
               "'"${AWS_REGION}"'b",
               "'"${AWS_REGION}"'c"
            ]
         },
         "keyPair":"'"${EC2_KEYPAIR_NAME}"'",
         "securityGroups":[
            "Demo-EC2-SecurityGroup"
         ],
         "instanceType":"m5.large",
         "virtualizationType":"hvm",
         "amiName":"'"$(aws ec2 describe-images --owners amazon --filters "Name=name,Values=amzn2-ami-hvm-2*x86_64-gp2" --query 'reverse(sort_by(Images, &CreationDate))[0].Name' --region ${AWS_REGION} --output text)"'",
         "targetGroups":[
            "demoapp-targetgroup"
         ],
         "base64UserData":"'"$(base64 user-data.sh)"'",,
        "associatePublicIpAddress":false,
         "instanceMonitoring":false
      }
   ],
   "application":"demoapp",
   "description":"Create New server group in cluster demoapp"
}'

Spin Create ServerGroup

Spinnaker creates an Amazon EC2 Launch Template and an ASG with specified parameters and waits until the ALB health check passes before sending traffic to the EC2 Instances.

The server group and launch template that we just created will look like this in Spinnaker UI:

Spin View ServerGroup

The UI also displays capacity type, such as the purchase option for each instance type in the Instance Information section:

Spin View ServerGroup Purchase Options 1Spin View ServerGroup Purchase Options 2

3. Access the application

Copy the Application Load Balancer URL by selecting the tree icon in the right top corner of the server group, and access it in a browser. You can refresh multiple times to see that the requests are going to different instances every time.

Spin Access App

Congratulations! You successfully deployed the demo application on an Amazon EC2 server group diversified across multiple instance types and purchase options.

Moreover, you can clone, modify, disable, and destroy these server groups, as well as use them with Spinnaker pipelines to effectively release new versions of your application.

Cost savings

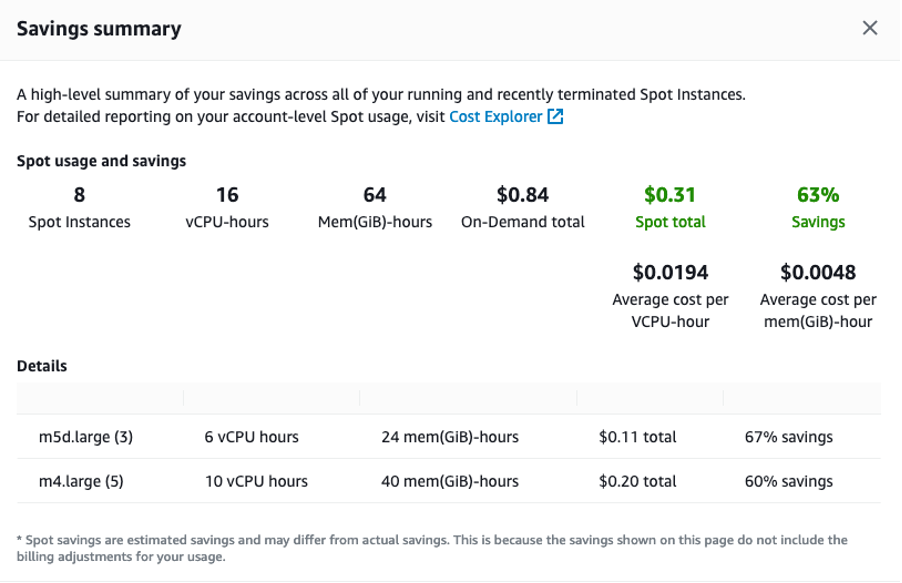
Check the savings you realized by deploying your demo application on EC2 Spot Instances by going to EC2 console > Spot Requests > Saving Summary.

Spin Spot Savings

Cleanup

To avoid incurring any additional charges, clean up the resources created in the tutorial.

Frist, delete the server group, application load balancer and application in Spinnaker.

curl 'http://localhost:8084/tasks' \
-H 'Content-Type: application/json;charset=utf-8' \
--data-raw \
'{
   "job":[
      {
         "reason":"Cleanup",
         "asgName":"demoapp-v000",
         "moniker":{
            "app":"demoapp",
            "cluster":"demoapp",
            "sequence":0
         },
         "serverGroupName":"demoapp-v000",
         "type":"destroyServerGroup",
         "region":"'"${AWS_REGION}"'",
         "credentials":"my-aws-account",
         "cloudProvider":"aws"
      },
      {
         "cloudProvider":"aws",
         "loadBalancerName":"demoapp-lb",
         "loadBalancerType":"application",
         "regions":[
            "'"${AWS_REGION}"'"
         ],
         "credentials":"my-aws-account",
         "vpcId":"'"${VPC_ID}"'",
         "type":"deleteLoadBalancer"
      },
      {
         "type":"deleteApplication",
         "application":{
            "name":"demoapp",
            "cloudProviders":"aws"
         }
      }
   ],
   "application":"demoapp",
   "description":"Deleting ServerGroup, ALB and Application: demoapp"
}'

Wait for Spinnaker to delete all of the resources before proceeding further. You can confirm this either on the Spinnaker UI or AWS Management Console.

Then delete the Spinnaker infrastructure by running the following command:

aws ec2 delete-key-pair --key-name ${EC2_KEYPAIR_NAME} --region ${AWS_REGION}
rm ~/${EC2_KEYPAIR_NAME}.pem
aws s3api delete-objects \
--bucket ${S3_BUCKET_NAME} \
--delete "$(aws s3api list-object-versions \
--bucket ${S3_BUCKET_NAME} \
--query='{Objects: Versions[].{Key:Key,VersionId:VersionId}}')" #If error occurs, there are no Versions and is OK
aws s3api delete-objects \
--bucket ${S3_BUCKET_NAME} \
--delete "$(aws s3api list-object-versions \
--bucket ${S3_BUCKET_NAME} \
--query='{Objects: DeleteMarkers[].{Key:Key,VersionId:VersionId}}')" #If error occurs, there are no DeleteMarkers and is OK
aws s3 rb s3://${S3_BUCKET_NAME} --force #Delete Bucket
aws cloudformation delete-stack --region ${AWS_REGION} --stack-name ${STACK_NAME}

Conclusion

In this post, we learned about the new Amazon EC2 features recently added to Spinnaker, and how to use them to build diversified and optimized Auto Scaling Groups. We also discussed recommended best practices for EC2 Spot and how they can improve your experience with it.

We would love to hear from you! Tell us about other Continuous Integration/Continuous Delivery (CI/CD) platforms that you want to use with EC2 Spot and/or Auto Scaling Groups by adding an issue on the Spot integrations roadmap.

Introducing the price-capacity-optimized allocation strategy for EC2 Spot Instances

Post Syndicated from Sheila Busser original https://aws.amazon.com/blogs/compute/introducing-price-capacity-optimized-allocation-strategy-for-ec2-spot-instances/

This blog post is written by Jagdeep Phoolkumar, Senior Specialist Solution Architect, Flexible Compute and Peter Manastyrny, Senior Product Manager Tech, EC2 Core.

Amazon EC2 Spot Instances are unused Amazon Elastic Compute Cloud (Amazon EC2) capacity in the AWS Cloud available at up to a 90% discount compared to On-Demand prices. One of the best practices for using EC2 Spot Instances is to be flexible across a wide range of instance types to increase the chances of getting the aggregate compute capacity. Amazon EC2 Auto Scaling and Amazon EC2 Fleet make it easy to configure a request with a flexible set of instance types, as well as use a Spot allocation strategy to determine how to fulfill Spot capacity from the Spot Instance pools that you provide in your request.

The existing allocation strategies available in Amazon EC2 Auto Scaling and Amazon EC2 Fleet are called “lowest-price” and “capacity-optimized”. The lowest-price allocation strategy allocates Spot Instance pools where the Spot price is currently the lowest. Customers told us that in some cases the lowest-price strategy picks the Spot Instance pools that are not optimized for capacity availability and results in more frequent Spot Instance interruptions. As an improvement over lowest-price allocation strategy, in August 2019 AWS launched the capacity-optimized allocation strategy for Spot Instances, which helps customers tap into the deepest Spot Instance pools by analyzing capacity metrics. Since then, customers have seen a significantly lower interruption rate with capacity-optimized strategy when compared to the lowest-price strategy. You can read more about these customer stories in the Capacity-Optimized Spot Instance Allocation in Action at Mobileye and Skyscanner blog post. The capacity-optimized allocation strategy strictly selects the deepest pools. Therefore, sometimes it can pick high-priced pools even when there are low-priced pools available with marginally less capacity. Customers have been telling us that, for an optimal experience, they would like an allocation strategy that balances the best trade-offs between lowest-price and capacity-optimized.

Today, we’re excited to share the new price-capacity-optimized allocation strategy that makes Spot Instance allocation decisions based on both the price and the capacity availability of Spot Instances. The price-capacity-optimized allocation strategy should be the first preference and the default allocation strategy for most Spot workloads.

This post illustrates how the price-capacity-optimized allocation strategy selects Spot Instances in comparison with lowest-price and capacity-optimized. Furthermore, it discusses some common use cases of the price-capacity-optimized allocation strategy.

Overview

The price-capacity-optimized allocation strategy makes Spot allocation decisions based on both capacity availability and Spot prices. In comparison to the lowest-price allocation strategy, the price-capacity-optimized strategy doesn’t always attempt to launch in the absolute lowest priced Spot Instance pool. Instead, price-capacity-optimized attempts to diversify as much as possible across the multiple low-priced pools with high capacity availability. As a result, the price-capacity-optimized strategy in most cases has a higher chance of getting Spot capacity and delivers lower interruption rates when compared to the lowest-price strategy. If you factor in the cost associated with retrying the interrupted requests, then the price-capacity-optimized strategy becomes even more attractive from a savings perspective over the lowest-price strategy.

We recommend the price-capacity-optimized allocation strategy for workloads that require optimization of cost savings, Spot capacity availability, and interruption rates. For existing workloads using lowest-price strategy, we recommend price-capacity-optimized strategy as a replacement. The capacity-optimized allocation strategy is still suitable for workloads that either use similarly priced instances, or ones where the cost of interruption is so significant that any cost saving is inadequate in comparison to a marginal increase in interruptions.

Walkthrough

In this section, we illustrate how the price-capacity-optimized allocation strategy deploys Spot capacity when compared to the other two allocation strategies. The following example configuration shows how Spot capacity could be allocated in an Auto Scaling group using the different allocation strategies:

{
    "AutoScalingGroupName": "myasg ",
    "MixedInstancesPolicy": {
        "LaunchTemplate": {
            "LaunchTemplateSpecification": {
                "LaunchTemplateId": "lt-abcde12345"
            },
            "Overrides": [
                {
                    "InstanceRequirements": {
                        "VCpuCount": {
                            "Min": 4,
                            "Max": 4
                        },
                        "MemoryMiB": {
                            "Min": 0,
                            "Max": 16384
                        },
                        "InstanceGenerations": [
                            "current"
                        ],
                        "BurstablePerformance": "excluded",
                        "AcceleratorCount": {
                            "Max": 0
                        }
                    }
                }
            ]
        },
        "InstancesDistribution": {
            "OnDemandPercentageAboveBaseCapacity": 0,
            "SpotAllocationStrategy": "spot-allocation-strategy"
        }
    },
    "MinSize": 10,
    "MaxSize": 100,
    "DesiredCapacity": 60,
    "VPCZoneIdentifier": "subnet-a12345a,subnet-b12345b,subnet-c12345c"
}

First, Amazon EC2 Auto Scaling attempts to balance capacity evenly across Availability Zones (AZ). Next, Amazon EC2 Auto Scaling applies the Spot allocation strategy using the 30+ instances selected by attribute-based instance type selection, in each Availability Zone. The results after testing different allocation strategies are as follows:

  • Price-capacity-optimized strategy diversifies over multiple low-priced Spot Instance pools that are optimized for capacity availability.
  • Capacity-optimize strategy identifies Spot Instance pools that are only optimized for capacity availability.
  • Lowest-price strategy by default allocates the two lowest priced Spot Instance pools that aren’t optimized for capacity availability

To find out how each allocation strategy fares regarding Spot savings and capacity, we compare ‘Cost of Auto Scaling group’ (number of instances x Spot price/hour for each type of instance) and ‘Spot interruptions rate’ (number of instances interrupted/number of instances launched) for each allocation strategy. We use fictional numbers for the purpose of this post. However, you can use the Cloud Intelligence Dashboards to find the actual Spot Saving, and the Amazon EC2 Spot interruption dashboard to log Spot Instance interruptions. The example results after a 30-day period are as follows:

Allocation strategy

Instance allocation

Cost of Auto Scaling group

Spot interruptions rate

price-capacity-optimized

40 c6i.xlarge

20 c5.xlarge

$4.80/hour 3%

capacity-optimized

60 c5.xlarge

$5.00/hour

2%

lowest-price

30 c5a.xlarge

30 m5n.xlarge

$4.75/hour

20%

As per the above table, with the price-capacity-optimized strategy, the cost of the Auto Scaling group is only 5 cents (1%) higher, whereas the rate of Spot interruptions is six times lower (3% vs 20%) than the lowest-price strategy. In summary, from this exercise you learn that the price-capacity-optimized strategy provides the optimal Spot experience that is the best of both the lowest-price and capacity-optimized allocation strategies.

Common use-cases of price-capacity-optimized allocation strategy

Earlier we mentioned that the price-capacity-optimized allocation strategy is recommended for most Spot workloads. To elaborate further, in this section we explore some of these common workloads.

Stateless and fault-tolerant workloads

Stateless workloads that can complete ongoing requests within two minutes of a Spot interruption notice, and the fault-tolerant workloads that have a low cost of retries, are the best fit for the price-capacity-optimized allocation strategy. This category has workloads such as stateless containerized applications, microservices, web applications, data and analytics jobs, and batch processing.

Workloads with a high cost of interruption

Workloads that have a high cost of interruption associated with an expensive cost of retries should implement checkpointing to lower the cost of interruptions. By using checkpointing, you make the price-capacity-optimized allocation strategy a good fit for these workloads, as it allocates capacity from the low-priced Spot Instance pools that offer a low Spot interruptions rate. This category has workloads such as long Continuous Integration (CI), image and media rendering, Deep Learning, and High Performance Compute (HPC) workloads.

Conclusion

We recommend that customers use the price-capacity-optimized allocation strategy as the default option. The price-capacity-optimized strategy helps Amazon EC2 Auto Scaling groups and Amazon EC2 Fleet provision target capacity with an optimal experience. Updating to the price-capacity-optimized allocation strategy is as simple as updating a single parameter in an Amazon EC2 Auto Scaling group and Amazon EC2 Fleet.

To learn more about allocation strategies for Spot Instances, visit the Spot allocation strategies documentation page.

Diving Deep into EC2 Spot Instance Cost and Operational Practices

Post Syndicated from Sheila Busser original https://aws.amazon.com/blogs/compute/diving-deep-into-ec2-spot-instance-cost-and-operational-practices/

This blog post is written by, Sudhi Bhat, Senior Specialist SA, Flexible Compute.

Amazon EC2 Spot Instances are one of the popular choices among customers looking to cost optimize their workload running on AWS. Spot Instances let you take advantage of unused Amazon Elastic Compute Cloud (Amazon EC2) capacity in the AWS cloud and are available at up to a 90% discount compared to On-Demand EC2 instance prices. The key difference between On-Demand Instances and Spot Instances is that Spot Instances can be interrupted by Amazon EC2, with two minutes of notification, when Amazon EC2 needs the capacity back. Spot Instances are recommended for various stateless, fault-tolerant, or flexible applications, such as big data, containerized workloads, continuous integration/continuous development (CI/CD), web servers, high-performance computing (HPC), and test and development workloads.

Customers asked us for fast and easy ways to track and optimize usage for different services. In this post, we’ll focus on tools and techniques that can provide useful insights into the usages and behavior of workloads using Spot Instances, as well as how we can leverage those techniques for troubleshooting and cost tracking purposes.

Operational tools

Instance selection

One of the best practices while using Spot Instances is to be flexible about instance types, Regions, and Availability Zones, as this gives Spot a better cross-section of compute pools to select and allocate your desired capacity. AWS makes it easier to diversify your instance selection in Auto Scaling groups and EC2 Fleet through features like Attribute-Based Instance Type Selection, where you can select the instance requirements as a set of attributes like vCPU, memory, storage, etc. These requirements are translated into matching instance types automatically.

Instance Selection using Attribute Based Instance Selection feature available during Auto Scaling Group creation

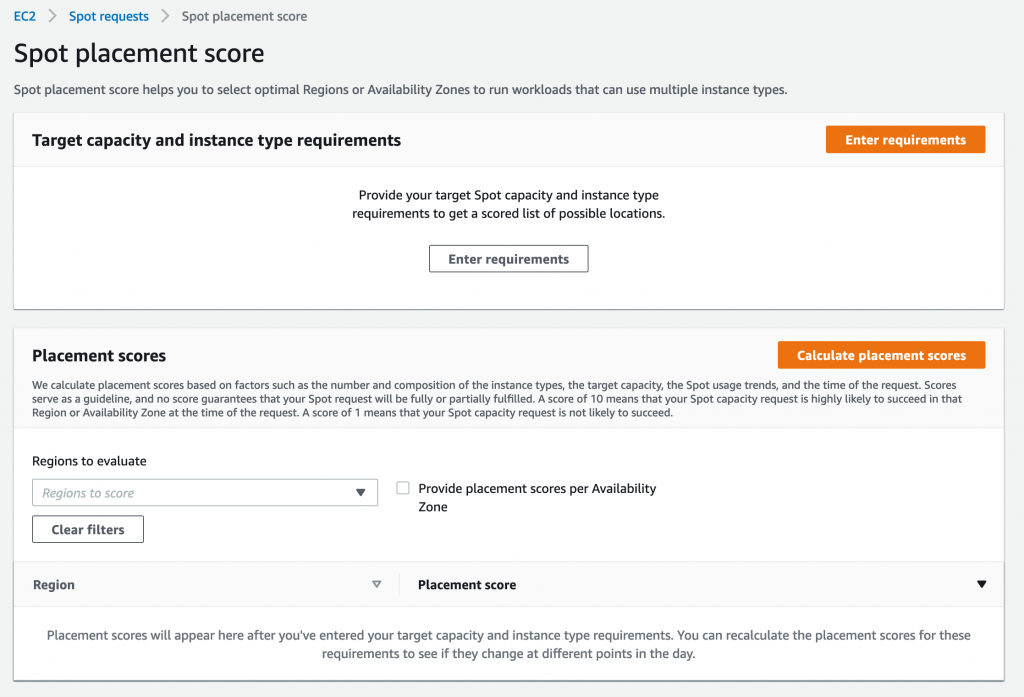
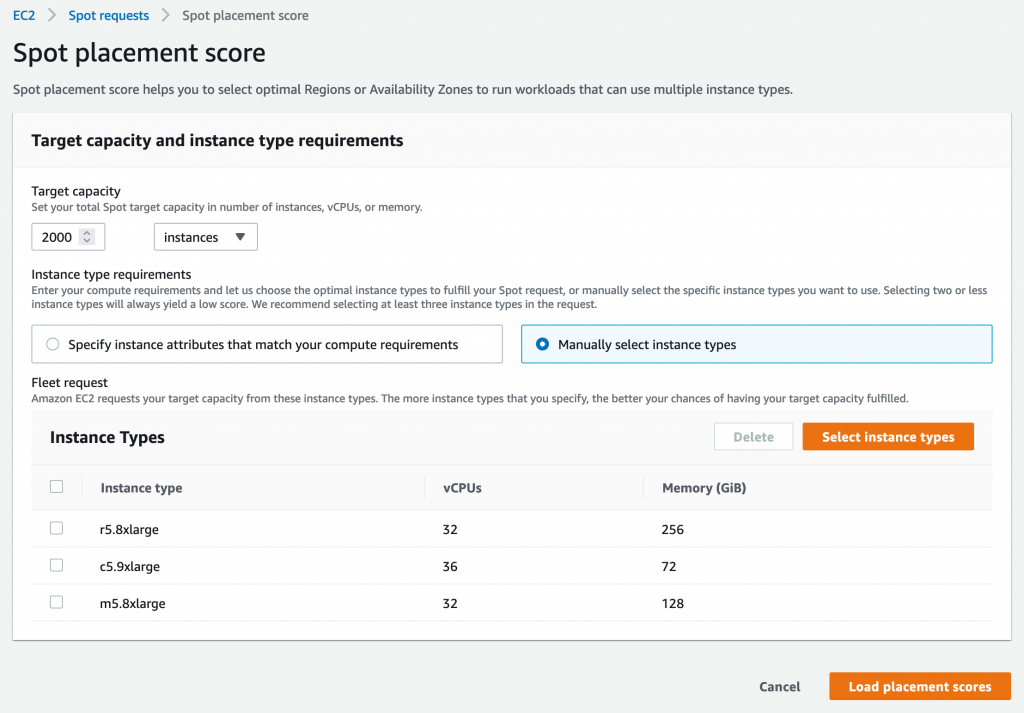
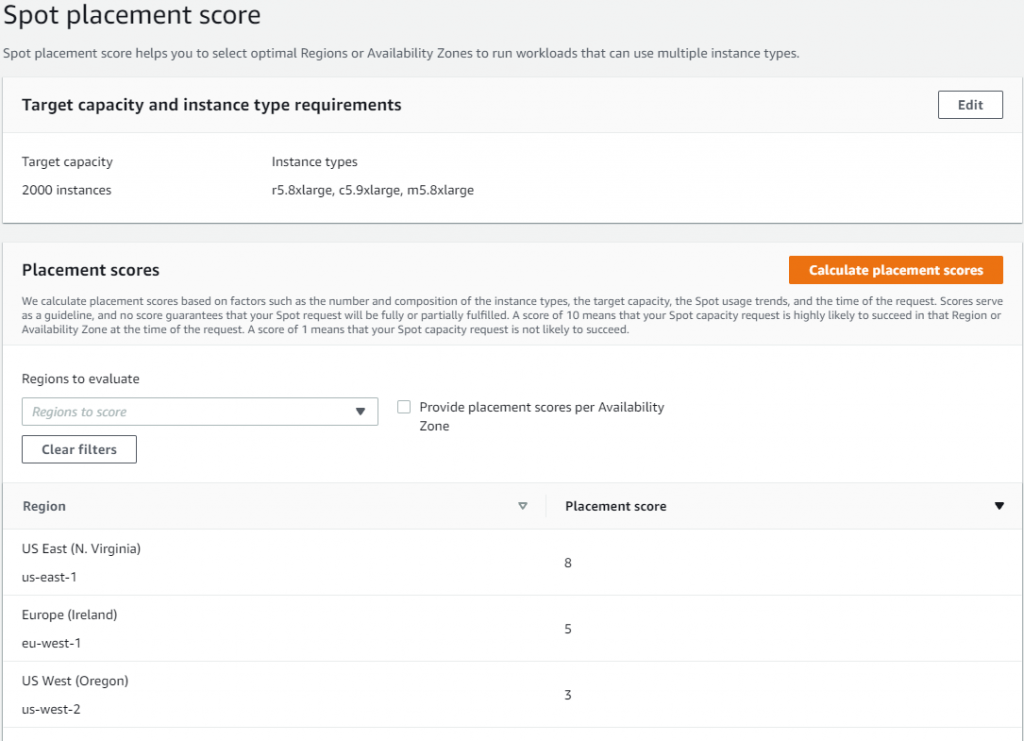
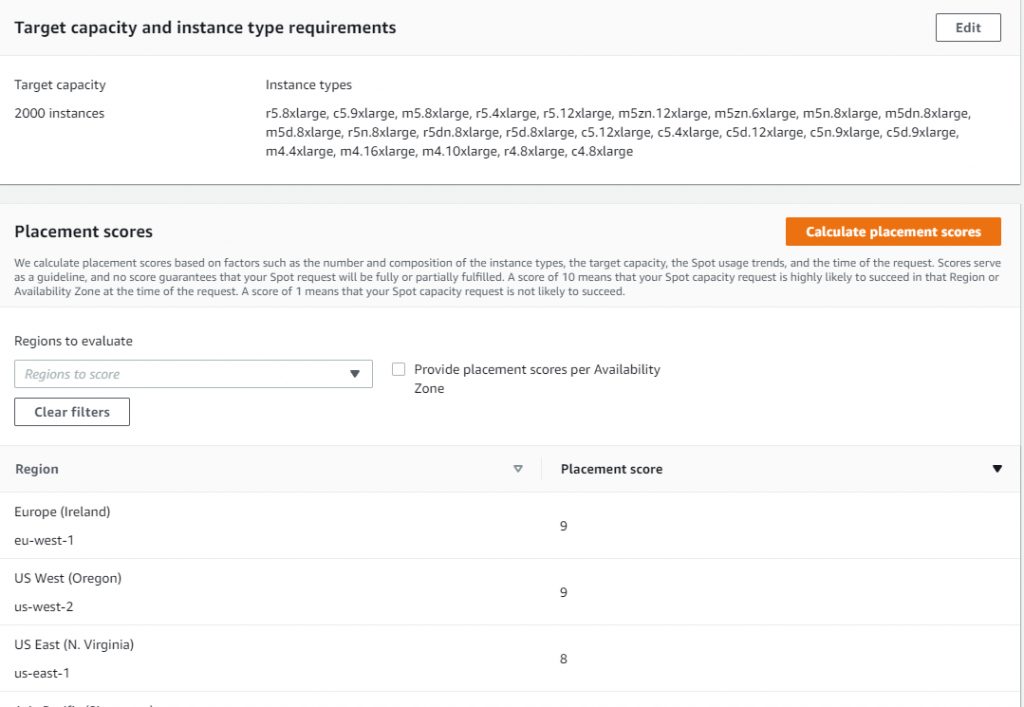
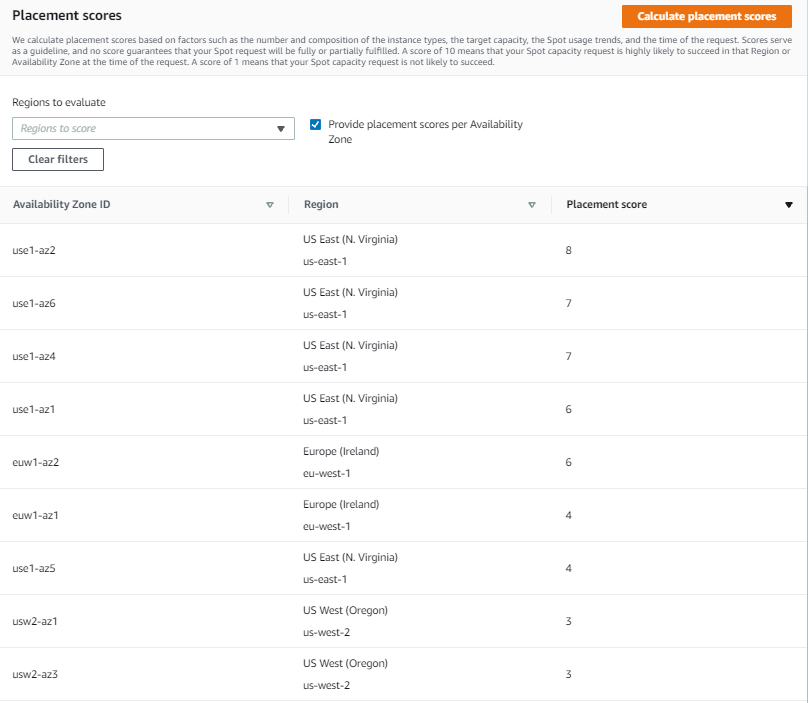
Considering that AWS Cloud spans across 25+ Regions and 80+ Availability Zones, finding the optimal location (either a Region or Availability Zone) to fulfil Spot capacity needs without launching a Spot can be very handy. This is especially true when AWS customers have the flexibility to run their workloads across multiple Regions or Availability Zones. This functionality can be achieved with one of the newer features called Amazon EC2 Spot placement score. Spot placement score provides a list of Regions or Availability Zones, each scored from 1 to 10, based on factors such as the requested instance types, target capacity, historical and current Spot usage trends, and the time of the request. The score reflects the likelihood of success when provisioning Spot capacity, with a 10 meaning that the request is highly likely to succeed.

Spot Placement Score feature is available in EC2 Dashboard

If you wish to specifically select and match your instances to your workloads to leverage them, then refer to Spot Instance Advisor to determine Spot Instances that meet your computing requirements with their relative discounts and associated interruption rates. Spot Instance Advisor populates the frequency of interruption and average savings over On-Demand instances based on the last 30 days of historical data. However, note that the past interruption behavior doesn’t predict the future availability of these instances. Therefore, as a part of instance diversity, try to leverage as many instances as possible regardless of whether or not an instance has a high level of interruptions.

Spot Instance pricing history

Understanding the price history for a specific Amazon EC2 Spot Instance can be useful during instance selection. However, tracking these pricing changes can be complex. Since November 2017, AWS launched a new pricing model that simplified the Spot purchasing experience. The new model gives AWS Customers predictable prices that adjust slowly over days and weeks, as Spot Instance prices are now determined based on long-term trends in supply and demand for Spot Instance capacity. The current Spot Instance prices can be viewed on AWS website, and the Spot Instance pricing history can be viewed on the Amazon EC2 console or accessed via AWS Command Line Interface (AWS CLI). Customers can continue to access the Spot price history for the last 90 days, filtering by instance type, operating system, and Availability Zone to understand how the Spot pricing has changed.

Spot Pricing History is available in EC2 DashboardAccessing Pricing history via AWS CLI using describe-spot-price-history or Get-EC2SpotPriceHistory (AWS Tools for Windows PowerShell).

aws ec2 describe-spot-price-history --start-time 2018-05-06T07:08:09 --end-time 2018-05-06T08:08:09 --instance-types c4.2xlarge --availability-zone eu-west-1a --product-description "Linux/UNIX (Amazon VPC)“
{
    "SpotPriceHistory": [
        {
            "Timestamp": "2018-05-06T06:30:30.000Z",
            "AvailabilityZone": "eu-west-1a",
            "InstanceType": "c4.2xlarge",
            "ProductDescription": "Linux/UNIX (Amazon VPC)",
            "SpotPrice": "0.122300"
        }
    ]
}

Spot Instance data feed

EC2 offers a mechanism to describe Spot Instance usage and pricing by providing a data feed that can be subscribed to. Therefore, the data feed is sent to an Amazon Simple Storage Service (Amazon S3) bucket on an hourly basis. Learn more about setting up the Spot Data feed and configuring the S3 bucket options in the documentation. A sample data feed would look like the following:

Sample Spot Instance data feed dataThe above example provides more information about Spot Instance in use, like m4.large Instance being used at the time as specified by Timestamp and MyBidID=sir-11wsgc6k representing the request that generated this instance usage, Charge=0.045 USD indicating the discounted price charged compared to the MyMaxPrice, which was set to On-Demand cost. This information can be useful during troubleshooting, as you can refer to the information about Spot Instances even if that specific instance has been terminated. Moreover, you could choose to extend the use of this data for simple querying and visualization/analytics purposes using Amazon Athena.

Amazon EC2 Spot Instance Interruption dashboard

Spot Instance interruptions are an inherent part of the Spot Instance lifecycle. For example, it’s always possible that your Spot Instance might be interrupted depending on how many unused EC2 instances are available. Therefore, you must make sure that your application is prepared for a Spot Instance interruption.

There are several best practices regarding handling Spot interruptions as described in the blog “Best practices for handling EC2 Spot Instance interruptions. Tracking Spot Instance interruptions can be useful in some scenarios, such as evaluating your workload for the tolerance for interruptions of a specific instance type, or to simply learn more about frequency of interruptions in your test environment so that you can fine-tune your instance selection. In these scenarios, you can use the EC2 Spot interruption dashboard, which is an opensource sample reference solution for logging Spot Instance interruptions. Spot Instance interruptions can fluctuate dynamically based on overall Spot Instance availability and demand for On-Demand Instances. However, it is important to note that tracking interruptions may not always represent the true Spot experience. Therefore, it’s recommended that this solution be used for those situations where Spot Instance interruptions inform a specific outcome, as it doesn’t accurately reflect system health or availability. It’s recommended to use this solution in dev/test environments to provide an educated view of how to use Spot Instances in production systems.

Open Source Solution available in github called Spot Interruption Dashboard for tracking Spot Interruption termination notices.

Cost management tools

AWS Pricing Calculator

AWS Pricing Calculator is a free tool that lets you create cost estimates for workloads that you run on AWS Services, including EC2 and Spot Instances. This calculator can greatly assist in calculating the cost of compute instances and estimating the future costs so that customers can compare the cost savings to be achieved before they even launch a Spot Instance as part of their solution. The AWS Pricing Calculator advanced estimate path offers six pricing strategies for Amazon EC2 instances. The pricing models include On-Demand, Reserved, Savings Plans, and Spot Instances. The estimates generated can also be exported to a CSV or PDF file format for quick sharing and additional analysis of the proposed architecture spend.

AWS Pricing Calculator support different types of workloadsFor Spot Instances, the calculator shows the historical average discount percentage for the instance chosen, and lets you enter a percentage discount for creating forecasts. We recommend choosing an instance type that best represents your target compute, memory, and network requirements for running your workload and generating an approximate estimate.

AWS Pricing Calculator Supports different type of EC2 Purchasing options, including EC2 Spot instances

AWS Cost Management

One of the popular reporting tools offered by AWS is AWS Cost Explorer, which has an easy-to-use interface that lets you visualize, understand, and manage your AWS costs and usage over time, including Spot Instances. You can view data up to the last 12 months, and forecast the next three months. You can use Cost Explorer filtered by “Purchase Options” to see patterns in how much you spend on Spot Instances over time, and see trends that you can use to understand your costs. Furthermore, you can specify time ranges for the data, and view time data by day or by month. Moreover, you can leverage the Amazon EC2 Instance Usage reports to gain insights into your instance usage and patterns, along with information that you need to optimize the overall EC2 use.

AWS Cost Explores shows cost incurred in multiple different compute purchasing options

AWS Billing and Cost Management offers a way to organize your resource costs on your cost allocation report by leveraging cost allocation tags, so that it’s easier to categorize and track your AWS costs using cost allocation reports, which includes all of your AWS costs for each billing period. The report includes both tagged and untagged resources, so that you can clearly organize the charges for resources. For example, if you tag resources with an application name that is deployed on Spot Instances, you can track the total cost of that single application that runs on those resources. The AWS generated tags “createdBy” is a tag that AWS defines and applies to supported AWS resources for cost allocation purposes and if opted, this tag is applied to “Spot-instance-request” resource type whenever the RequestSpotInstances API is invoked. This can be a great way to track the Spot Instance creation activities in your billing reports.

Cost and Usage Reports

AWS Customers have access to raw cost and usage data through the AWS Cost and Usage (AWS CUR) reports. These reports contain the most comprehensive information about your AWS usage and costs. Financial teams need this data so that they have an overview of their monthly, quarterly, and yearly AWS spend. But this data is equally valuable for technical teams who need detailed resource-level granularity to understand which resources are contributing to the spend, and what parts of the system to optimize. If you’re using Spot Instances for your compute needs, then AWS CUR populates the Amazon EC2 Spot usage pricing/* columns and the product/* columns. With this data, you can calculate the past savings achieved with Spot through the AWS CUR. Note that this feature was enabled in July 2021 and the AWS CUR data for Spot Usage is available only since then. The Cloud Intelligence Dashboards provide prebuilt visualizations that can help you get a detailed view of your AWS usage and costs. You can learn more about deploying Cloud Intelligence Dashboards by referring to the detailed blog “Visualize and gain insight into you AWS cost and usage with Cloud Intelligence Dashboard and CUDOS using Amazon QuickSite”Compute summary can be viewed in Cloud Intelligent Dashboards

Conclusion

It’s always recommended to follow Spot Instance best practices while using Amazon EC2 Spot Instances for suitable workloads, so that you can have the best experience. In this post, we explored a few tools and techniques that can further guide you toward much deeper insights into your workloads that are using Spot Instances. This can assist you with understanding cost savings and help you with troubleshooting so that you can use Spot Instances more easily.

Understanding the lifecycle of Amazon EC2 Dedicated Hosts

Post Syndicated from Sheila Busser original https://aws.amazon.com/blogs/compute/understanding-the-lifecycle-of-amazon-ec2-dedicated-hosts/

This post is written by Benjamin Meyer, Sr. Solutions Architect, and Pascal Vogel, Associate Solutions Architect.

Amazon Elastic Compute Cloud (Amazon EC2) Dedicated Hosts enable you to run software on dedicated physical servers. This lets you comply with corporate compliance requirements or per-socket, per-core, or per-VM licensing agreements by vendors, such as Microsoft, Oracle, and Red Hat. Dedicated Hosts are also required to run Amazon EC2 Mac Instances.

The lifecycles and states of Amazon EC2 Dedicated Hosts and Amazon EC2 instances are closely connected and dependent on each other. To operate Dedicated Hosts correctly and consistently, it is critical to understand the interplay between Dedicated Hosts and EC2 Instances. In this post, you’ll learn how EC2 instances are reliant on their (dedicated) hosts. We’ll also dive deep into their respective lifecycles, the connection points of these lifecycles, and the resulting considerations.

What is an EC2 instance?

An EC2 instance is a virtual server running on top of a physical Amazon EC2 host. EC2 instances are launched using a preconfigured template called Amazon Machine Image (AMI), which packages the information required to launch an instance. EC2 instances come in various CPU, memory, storage and GPU configurations, known as instance types, to enable you to choose the right instance for your workload. The process of finding the right instance size is known as right sizing. Amazon EC2 builds on the AWS Nitro System, which is a combination of dedicated hardware and the lightweight Nitro hypervisor. The EC2 instances that you launch in your AWS Management Console via Launch Instances are launched on AWS-controlled physical hosts.

What is an Amazon EC2 Bare Metal instance?

Bare Metal instances are instances that aren’t using the Nitro hypervisor. Bare Metal instances provide direct access to physical server hardware. Therefore, they let you run legacy workloads that don’t support a virtual environment, license-restricted business-critical applications, or even your own hypervisor. Workloads on Bare Metal instances continue to utilize AWS Cloud features, such as Amazon Elastic Block Store (Amazon EBS), Elastic Load Balancing (ELB), and Amazon Virtual Private Cloud (Amazon VPC).

What is an Amazon EC2 Dedicated Host?

An Amazon EC2 Dedicated Host is a physical server fully dedicated to a single customer. With visibility of sockets and physical cores of the Dedicated Host, you can address corporate compliance requirements, such as per-socket, per-core, or per-VM software licensing agreements.

You can launch EC2 instances onto a Dedicated Host. Instance families such as M5, C5, R5, M5n, C5n, and R5n allow for the launching of different instance sizes, such as4xlarge and 8xlarge, to the same host. Other instance families only support a homogenous launching of a single instance size. For more details, see Dedicated Host instance capacity.

As an example, let’s look at an M6i Dedicated Host. M6i Dedicated Hosts have 2 sockets and 64 physical cores. If you allocate a M6i Dedicated Host, then you can specify what instance type you’d like to support for allocation. In this case, possible instance sizes are:

  • large
  • xlarge
  • 2xlarge
  • 4xlarge
  • 8xlarge
  • 12xlarge
  • 16xlarge
  • 24xlarge
  • 32xlarge
  • metal

The number of instances that you can launch on a single M6i Dedicated Host depends on the selected instance size. For example:

  • In the case of xlarge (4 vCPUs), a maximum of 32 m6i.xlarge instances can be scheduled on this Dedicated Host.
  • In the case of 8xlarge (32 vCPUs), a maximum of 4 m6i.8xlarge instances can be scheduled on this Dedicated Host.
  • In the case of metal (128 vCPUs), a maximum of 1 m6i.metal instance can be scheduled on this Dedicated Host.

When launching an EC2 instance on a Dedicated Host, you’re billed for the Dedicated Host but not for the instance. The cost for Amazon EBS volumes is the same as in the case of regular EC2 instances.

Exemplary homogenious M6i Dedicated Host shown with 32 m6i.xlarge, four m6i.8xlarge and one m6i.metal each.

Exemplary M6i Dedicated Host instance selections: m6i.xlarge, m6i.8xlarge and m6i.metal

Understanding the EC2 instance lifecycle

Amazon EC2 instance lifecycle states and transitions

Throughout its lifecycle, an EC2 instance transitions through different states, starting with its launch and ending with its termination. Upon Launch, an EC2 instance enters the pending state. You can only launch EC2 instances on Dedicated Hosts in the available state. You aren’t billed for the time that the EC2 instance is in any state other than running. When launching an EC2 instance on a Dedicated Host, you’re billed for the Dedicated Host but not for the instance. Depending on the user action, the instance can transition into three different states from the running state:

  1. Via Reboot from the running state, the instance enters the rebooting state. Once the reboot is complete, it reenters the running state.
  2. In the case of an Amazon EBS-backed instance, a Stop or Stop-Hibernate transitions the running instance into the stopping state. After reaching the stopped state, it remains there until further action is taken. Via Start, the instance will reenter the pending and subsequently the running state. Via Terminate from the stopped state, the instance will enter the terminated state. As part of a Stop or Stop-Hibernate and subsequent Start, the EC2 instance may move to a different AWS-managed host. On Reboot, it remains on the same AWS-managed host.
  3. Via Terminate from the running state, the instance will enter the shutting-down state, and finally the terminated state. An instance can’t be started from the terminated state.

Understanding the Amazon EC2 Dedicated Host lifecycle

A diagram of the the Amazon EC2 Dedicated Host lifecycle states and transitions between them.

Amazon EC2 Dedicated Host lifecycle states and transitions

An Amazon EC2 Dedicated Host enters the available state as soon as you allocate it in your AWS account. Only if the Dedicated Host is in the available state, you can launch EC2 instances on it. You aren’t billed for the time that your Dedicated Host is in any state other than available. From the available state, the following states and state transitions can be reached:

  1. You can Release the Dedicated Host, transitioning it into the released state. Amazon EC2 Mac Instances Dedicated Hosts have a minimum allocation time of 24h. They can’t be released within the 24h. You can’t release a Dedicated Host that contains instances in one of the following states: pending, running, rebooting, stopping, or shutting down. Consequently, you must Stop or Terminate any EC2 instances on the Dedicated Host and wait until it’s in the available state before being able to release it. Once an instance is in the stopped state, you can move it to a different Dedicated Host by modifying its Instance placement configuration.
  2. The Dedicated Host may enter the pending state due to a number of reasons. In case of an EC2 Mac instance, stopping or terminating a Mac instance initiates a scrubbing workflow of the underlying Dedicated Host, during which it enters the pending state. This scrubbing workflow includes tasks such as erasing the internal SSD, resetting NVRAM, and more, and it can take up to 50 minutes to complete. Additionally, adding or removing a Dedicated Host to or from a Resource Group can cause the Dedicated Host to go into the pending state. From the pending state, the Dedicated Host will reenter the available state.
  3. The Dedicated Host may enter the under-assessment state if AWS is investigating a possible issue with the underlying infrastructure, such as a hardware defect or network connectivity event. While the host is in the under-assessment state, all of the EC2 instances running on it will have the impaired status. Depending on the nature of the underlying issue and if it’s configured, the Dedicated Host will initiate host auto recovery.

If Dedicated Host Auto Recovery is enabled for your host, then AWS attempts to restart the instances currently running on a defect Dedicated Host on an automatically allocated replacement Dedicated Host without requiring your manual intervention. When host recovery is initiated, the AWS account owner is notified by email and by an AWS Health Dashboard event. A second notification is sent after the host recovery has been successfully completed. Initially, the replacement Dedicated Host is in the pending state. EC2 instances running on the defect dedicated Host remain in the impaired status throughout this process. For more information, see the Host Recovery documentation.

Once all of the EC2 instances have been successfully relaunched on the replacement Dedicated Host, it enters the available state. Recovered instances reenter the running state. The original Dedicated Host enters the released-permanent-failure state. However, if the EC2 instances running on the Dedicated Host don’t support host recovery, then the original Dedicated Host enters the permanent-failure state instead.

Conclusion

In this post, we’ve explored the lifecycles of Amazon EC2 instances and Amazon EC2 Dedicated Hosts. We took a close look at the individual lifecycle states and how both lifecycles must be considered in unison to operate EC2 Instances on EC2 Dedicated Hosts correctly and consistently. To learn more about operating Amazon EC2 Dedicated Hosts, visit the EC2 Dedicated Hosts User Guide.

Amazon EC2 DL1 instances Deep Dive

Post Syndicated from Sheila Busser original https://aws.amazon.com/blogs/compute/amazon-ec2-dl1-instances-deep-dive/

This post is written by Amr Ragab, Principal Solutions Architect, Amazon EC2.

AWS is excited to announce that the new Amazon Elastic Compute Cloud (Amazon EC2) DL1 instances are now generally available in US-East (N. Virginia) and US-West (Oregon). DL1 provides up to 40% better price performance for training deep learning models as compared to current generation GPU-based EC2 instances. The dl1.24xlarge instance type features eight Intel-Habana Gaudi accelerators, which are custom-built to train deep learning models. Each Gaudi accelerator has 32 GB of high bandwidth memory (HBM2) and a peer-to-peer bidirectional bandwidth of 100 Gbps RoCE, for a total bidirectional interconnect bandwidth of 700 Gbps per card. Further instance specifications are as follows:

Instance Size vCPU Instance Memory (GiB) Gaudi Accelerators Network Bandwidth (Gbps) Total Accelerator Interconnect (Gbs) Local Instance Storage EBS Bandwidth (Gbps)
d1.24xlarge 96 768 8 4×100 Gbps 700 4x1TB NVMe 19

Instance Architecture

System architecture of the amazon ec2 dl1 instances.

As the preceding instance architecture indicates, pairs of Gaudi accelerators (e.g., Gaudi0 and Gaudi1) are attached directly through a PCIe Gen3x16 link. Additionally, peer-to-peer networking via 100 Gbps RoCEv2 links – with seven active links per card – provides a torus configuration with a total of 700 Gbps of interconnect bandwidth per card. This topology is a separate interconnect outside of the two NUMA domains. Furthermore, the instance supports four EFA ENIs and 4x1TB of local NVMe SSD storage. We will provide a peer-direct driver over EFA, which will let you utilize high throughput, low latency peer-direct networking between accelerators across multiple instances to efficiently scale multi-node distributed training workloads.

Quick Start

Quickly get started with DL1 and SynapseAI SDK through with the following options:

1) Habana Deep Learning AMIs provided by AWS.

2) AWS Marketplace AMIs provided by Habana.

3) Using Packer to build a custom Amazon Machine Images (AMI) provided by this GitHub repo. This repo also provides build scripts to create Amazon Elastic Container Service (Amazon ECS) and Amazon Elastic Kubernetes Service (Amazon EKS) AMIs.

After selecting an AMI, launch a dl1.24xlarge instance in either us-east-1 or us-west-2. To help identify in which availability zone(s) dl1.24xlarge is available, run the following command:

aws ec2 describe-instance-type-offerings \
--location-type availability-zone \
--filters Name=instance-type,Values=dl1.24xlarge \
--region us-west-2 \
--output table

Once launched, you can connect to the instance over SSH (with the correct security group attached).

Habana Collectives Communication Library (HCL/HCCL)

As part of the Habana SynapseAI SDK, Habana Gaudi’s use the HCCL library for handling the collectives between HPUs. Get more information on HCCL here. On DL1 through the HCL-tests, we can confirm close to 700 Gbps (689 Gbps) per card for the collectives tested as follows.

You can confirm these tests by cloning the github repo here.

Habana DL1 HCCL tests.

Amazon EKS Quick Start

Support for DL1 on Amazon EKS is available today with Amazon EKS versions > 1.19. The following is a quick start to get up and running quickly with DL1.

The following dependencies will be needed:

eksctl – You need version 0.70.0+ of eksctl.
kubectl – You use Kubernetes version 1.20 in this post.

Create EKS cluster:

eksctl create cluster --region us-east-1 --without-nodegroup \
--vpc-public-subnets subnet-037d8e430963c2d3e,subnet-0abe898359a7d43e9

Nodegroup configuration – save the following codeblock to a file called dl1-managed-ng.yaml. Replace the AMI ID in the code block with the AMI created earlier.

apiVersion: eksctl.io/v1alpha5
kind: ClusterConfig

metadata:
  name: fabulous-rainbow-1635807811
  region: us-west-2

vpc:
  id: vpc-34f1894c
  subnets:
    public:
      endpoint-one:
        id: subnet-4532e73d
      endpoint-two:
        id: subnet-8f8b7dc5

managedNodeGroups:
  - name: dl1-ng-1d
    instanceType: dl1.24xlarge
    volumeSize: 200
    instancePrefix: dl1-ng-1d-worker
    ami: ami-072c632cbbc2255b3
    iam:
      withAddonPolicies:
        imageBuilder: true
        autoScaler: true
        ebs: true
        fsx: true
        cloudWatch: true
    ssh:
      allow: true
      publicKeyName: amrragab-aws
    subnets:
    - endpoint-one
    minSize: 1
    desiredCapacity: 1
    maxSize: 4
    overrideBootstrapCommand: |
      #!/bin/bash
      /etc/eks/bootstrap.sh fabulous-rainbow-1635807811

Create the managed nodegroup with the following command:

eksctl create nodegroup -f dl1-managed-ng.yaml

Once the nodegroup has been completed, you must apply the habana-k8s-device-plugin

kubectl create -f https://vault.habana.ai/artifactory/docker-k8s-device-plugin/habana-k8s-device-plugin.yaml

Once completed, you should see the Gaudi devices as an allocatable resource in your EKS
cluster, presenting 8 Gaudi accelerators per DL1 node in the cluster.

Allocatable:

attachable-volumes-aws-ebs: 39
cpu:                        95690m
ephemeral-storage:          192188443124
habana.ai/gaudi:            8
hugepages-1Gi:              0
hugepages-2Mi:              30000Mi
memory:                     753055132Ki
pods:                       15

Example Distributed Machine Learning (ML) Workloads

The following tables are examples of Mixed Precision/FP32 training results comparing DL1 to the common GPU instances used for ML training.

Model: ResNet50
Framework: TensorFlow 2
Dataset: Imagenet2012
GitHub: https://github.com/HabanaAI/Model-
References/tree/master/TensorFlow/computer_vision/Resnets/resnet_keras

Instance Type Batch Size
Mixed Precision Training Throughput (images/sec)
8x Gaudi – 32 GB (dl1.24xlarge) 256 13036
8x A100 – 40 GB (p4d.24xlarge) 256 17921
8x V100 – 32 GB (p3dn.24xlarge) 256 9685
8x V100 – 16GB (p3.16xlarge) 256 8945

Model: Bert Large – Pretraining
Framework: Pytorch 1.9
Dataset: Wikipedia/BooksCorpus
GitHub: https://github.com/HabanaAI/Model-References/tree/master/PyTorch/nlp/bert

Instance Type Batch Size
@128 Sequence
Length
Mixed Precision Training Throughput (seq/sec)
8x Gaudi – 32 GB (dl1.24xlarge) 256 1318
8x A100 – 40 GB (p4d.24xlarge) 8192 2979
8x V100 – 32 GB (p3dn.24xlarge) 8192 1458
8x V100 – 16GB (p3.16xlarge) 8192 1013

You can find a more comprehensive list of ML models supported with performance data here. Support for containers with TensorFlow and Pytorch are also available. Furthermore, you can stay up-to-date with the operator support for TensorFlow and Pytorch.

CONCLUSION

We are excited to innovate on behalf of our customers and provide a diverse choice in ML accelerators with DL1 instances. The DL1 instances powered by Gaudi accelerators can provide up to 40% better price performance for training deep learning models as compared to current generation GPU-based EC2 instances. DL1 instances use the Habana SynapseAI SDK with framework support in Pytorch and TensorFlow. Additional future support for EFA with peer direct HPUs across nodes will also be supported. Now it’s time to go power up your ML workloads with Amazon EC2 DL1 instances.

Efficiently Scaling kOps clusters with Amazon EC2 Spot Instances

Post Syndicated from Pranaya Anshu original https://aws.amazon.com/blogs/compute/efficiently-scaling-kops-clusters-with-amazon-ec2-spot-instances/

This post is written by Carlos Manzanedo Rueda, WW SA Leader for EC2 Spot, and Brandon Wagner, Senior Software Development Engineer for EC2.

This post focuses on how you can leverage recently released tools to optimize your usage of Amazon EC2 Spot Instances on Kubernetes Operations (kOps) clusters. Spot Instances let you utilize unused capacity in the AWS cloud for up to 90% off compared to On-Demand prices, and they are a great fit for fault-tolerant, containerized applications. kOps is an open source project providing a cohesive toolset for provisioning, operating, and deleting Kubernetes clusters in the cloud.

Even with customers such as Snap Inc., Babylon Health, and Fidelity Investments telling us how Amazon Elastic Kubernetes Service (EKS) is essential for running their containerized workloads, we appreciate that there are scenarios where using Amazon EC2 instances and kOps are a viable alternative. At AWS, we understand “one size does not fit all.” While we encourage Kubernetes users to contribute their feedback to the AWS container roadmap so that we can improve our services, we also would like to reduce heavy lifting and simplify Spot best practices integration in kOps clusters.

To simplify the integration of Spot Instances in kOps clusters, in January of 2021 we introduced a new kops toolbox command: kops toolbox instance-selector. The utility is distributed as part of the standard kOps distribution. Moreover, it simplifies the creation of kOps Instance Groups by configuring them with full adherence to Spot Instances best practices.

Handling Spot interruption notifications in Kubernetes

Let’s quickly recap Spot best practices. Spot Instances perform exactly like any other EC2 Instances, except that in exchange for their discounted price, they can be interrupted with a two-minute warning when EC2 must reclaim capacity. Applications running on Spot can typically recover from transient interruptions by simply starting a new instance. Spot best practices involve measures such as diversifying into as many Spot capacity pools as possible, choosing the right Spot allocation strategy, and utilizing Spot integrated services. These handle the Spot Instances lifecycles for you. This blog post on handling Spot interruptions dives deeper into AWS’s EC2 Spot best practices.

In Kubernetes, to handle spot termination and rebalance recommendation events (both explained in this blog post on proactively managing Spot Instance lifecycle), we utilize the AWS open-source project AWS Node Termination Handler. We will be deploying the Node Termination Handler as a kOps managed addon, which simplifies its setup and configuration.

The Node Termination Handler ensures that the Kubernetes control plane responds appropriately to events that can make EC2 instances unavailable. It can be operated in two different modes: Instance Metadata Service (IMDS), deployed as a DaemonSet, or Queue Processor, deployed as a Deployment Controller. We recommend running it in Queue Processor mode. The Queue Processor controller continuously monitors an Amazon Simple Queue Service (SQS) queue for events received from Amazon EventBridge. This can lead to node termination in your cluster. When one of these events is received, the Node Termination Handler notifies the Kubernetes control plane to cordon and drain the node that is about to be interrupted. Then, the kubelet sends a SIGTERM signal to the Pods and containers running on the node. This lets your application proceed with a graceful termination – one of the recommended best practices of a Twelve-Factor App.

The kOps managed addon will let you configure the Node Termination Handler within your kOps cluster spec and, more importantly, manage provisioning the necessary infrastructure for you.

To deploy the AWS Node Termination Handler, we start by editing our cluster spec:

kops edit cluster --name ${KOPS_CLUSTER_NAME}

We append the nodeTerminationHandler configuration to the spec node:

spec:
  nodeTerminationHandler:
    enabled: true
    enableSQSTerminationDraining: true
    managedASGTag: "aws-node-termination-handler/managed"

Finally, we deploy the changes made to our cluster configuration:

kops update cluster --name ${KOPS_CLUSTER_NAME} –-state {KOPS_STATE_STORE} --yes --admin

${KOPS_CLUSTER_NAME} refers to the environment variable containing the cluster name, and ${KOPS_STATE_STORE} indicates the Amazon Simple Storage Service (S3) bucket – or kOps State Store – where kOps configuration is stored.

To check that your Node Termination Handler deployment was successful, you can execute:

kops get deployment aws-node-termination-handler -n kube-system

Instance Flexibility and Diversification

Diversification and selection of multiple instances types is essential to acquire and maintain Spot capacity, as well as to successfully replace interrupted instances with others from different pools. When running kOps on AWS, this is implemented by utilizing Amazon EC2 Auto Scaling. Amazon Auto Scaling group’s capacity-optimized allocation strategy ensures that Spot capacity is provisioned from the optimal pools, thereby reducing the chances of Spot terminations.

Simplifying adoption of Spot Best practices on kOps

Before the kops toolbox instance-selector, you would have to setup Spot best practices on kOps manually. This involved writing a stub file following the InstanceGroup specification and examples, and then implementing every best practice, including finding every pool that qualifies for our workload.

The new functionality in kops toolbox instance-selector simplifies InstanceGroup creation by moving the focus of kOps users and administrators from this manual configuration over to simply selecting the vCPUs and Memory requirements for their application (or a base instance type), and then letting kops toolbox instance-selector define the right configuration. Behind the scenes, it utilizes a library allowing it to plug into the feature-set of Amazon EC2 instance selector. At its core, ec2 instance selector helps you select compatible instance types for your application to run on. Utilize ec2 instance selector CLI or library when automating your configurations. In the case of kOps, the integration already comes in the kops toolbox.

For example, let’s say your cluster runs stateless, fault tolerant applications that are CPU/Memory bound and have a ratio of vCPU to Memory requiring at least 1vCPU : 4GB of RAM. You can run the following command in order to acquire cluster spot capacity:

kops toolbox instance-selector "spot-group-" \
  --usage-class spot --flexible --cluster-autoscaler \
  --vcpus-to-memory-ratio="1:4" \
  --ig-count 2

Let’s focus first on the command, and later cover its output. You can get a list of parameters and default values by running: kops toolbox instance-selector –help. A few default parameters weren’t passed in the command above, but they will be set to sane defaults, such as the maximum and minimum number of instances in the Instance Group. The parameter –flexible refers to our request to provide a group of flexible instance types spanning multiple generations.

Once you’ve defined the InstanceGroups, start them up by using the command:

kops update cluster \
–state=${KOPS_STATE_STORE} \
–name=${KOPS_CLUSTER_NAME} \
–yes –admin

The two commands above define and create a request for spot capacity from a flexible and diversified pool set, which meet the criteria to provide at least 4GB of RAM for each vCPU. The command creates not just one, but two node groups named “spot-group-1” and “spot-group-2” (–ig-count 2).

Now, let’s check the contents of the configuration file generated by kops toolbox instance-selector. To preview a configuration without making changes, add –dry-run –output yaml.

apiVersion: kops.k8s.io/v1alpha2
kind: InstanceGroup
metadata:
  creationTimestamp: "2020-08-11T10:22:16Z"
  labels:
    kops.k8s.io/cluster: spot-kops-cluster.k8s.local
  name: spot-group-1
spec:
  cloudLabels:
    k8s.io/cluster-autoscaler/enabled: "1"
    k8s.io/cluster-autoscaler/spot-kops-cluster.k8s.local: "1"
    kops.k8s.io/instance-selector: "1"
  image: 099720109477/ubuntu/images/hvm-ssd/ubuntu-focal-20.04-amd64-server-20200716
  machineType: m3.xlarge
  maxSize: 15
  minSize: 2
  mixedInstancesPolicy:
    instances:
    - m3.xlarge
    - m4.xlarge
    - m5.xlarge
    - m5a.xlarge
    - t2.xlarge
    - t3.xlarge
    onDemandAboveBase: 0
    onDemandBase: 0
    spotAllocationStrategy: capacity-optimized
  nodeLabels:
    kops.k8s.io/instancegroup: spot-group-1
  role: Node
  subnets:
  - eu-west-1a
  - eu-west-1b
  - eu-west-1c
...

The configuration above lists one of the groups created by kops toolbox instance-selector in the previous example. The second group will have a very similar make-up and format, except that it will refer to instances such as: r3.xlarge, r4.xlarge, r5.xlarge, and r5a.xlarge in the mixedInstancesPolicy section. By defining the parameter –usage-class to Spot, the configuration created by kops toolbox instance-selector will add the tags identifying this Auto Scaling group as a Spot group. When the nodes are initialized, kOps controller will identify the nodes as Spot and add the label node-role.kubernetes.io/spot-worker=true. Therefore, at a later stage, we can apply placement logic to our cluster by using nodeSelector and affinity. The configuration above adheres to the definition of kOps support for mixed Instance Groups in AWS, and adds all of the right cloudLabels in order to integrate and implement not only with Spot best practices, but also with Cluster Autoscaler Auto-Discovery configuration best practices.

Kubernetes Cluster Autoscaler is a Kubernetes controller that dynamically adjusts the cluster size. According to a 2020 survey by Cloud Native Computing Foundation (CNCF), 70% of Kubernetes workloads plan to autoscale their stateless applications. Dynamically scaling applications and clusters is also a great practice for optimizing your system costs in situations where capacity is unnecessary, as well as for scaling out accordingly in order to meet business demands. If there are Pods that can’t be scheduled due to insufficient resources, then Cluster Autoscaler will issue a Scale-out action. When there are nodes in the cluster that have been under-utilized for a configurable period of time, Cluster Autoscaler will Scale-in the cluster, and even down-scale to 0 instances when applications don’t need to be run.

On Scale-out operations, Cluster Autoscaler evaluates a set of node groups. When Cluster Autoscaler runs on AWS, node groups are implemented by using Auto Scaling groups (referring to the same instance group as a kOps Instance Group). Therefore, to calculate the number of nodes to scale-out, Cluster Autoscaler assumes that every instance in a node group has the same number of vCPUs and memory size.

By creating two node groups, you apply two diversification levels. You diversify within each node group by using an Auto Scaling group with Mixed Instance Policies and capacity-optimized allocation strategy. Then, to increase the pool range you can leverage, you add more than one node group, while still adhering to the best practices required by Cluster Autoscaler.

While we’ve been focusing on Spot Instances, the parameter –usage-class can be utilized to get OnDemand instances instead of Spot. In the next example, let’s say we would like to get On-Demand capacity in order to train complex deep learning models that will take hours to run. To train our models, we need instances that have at least one GPU with 16GB of RAM on instances that have at least 32GB Ram and 8 vCPUs.

kops toolbox instance-selector "ondemand-gpu-group" \
  --gpus-min 1 --gpu-memory-total-min 16gb --memory-min 32gb --vcpus 8\
  --node-count-max 4 --node-count-min 4 --cpu-architecture amd64

The command above, followed by kops update cluster –state=${KOPS_STATE_STORE} –name=${KOPS_CLUSTER_NAME} –yes can be utilized to produce a configuration and create a nodegroup with the right requirements. This could be created at the start of the training procedure, and then – once the training is done and the capacity is no longer needed – you could automate the nodegroup removal with the following command:

kops delete instancegroup ondemand-gpu-group --name ${KOPS_CLUSTER_NAME} –yes

Conclusions

We believe the best way to run Kubernetes on AWS is by using Amazon EKS. However, scenarios may exist where kOps is utilized in AWS. By using the kOps managed add-on to install aws-node-termination-handler and kops toolbox instance-selector, it is easier than ever to apply Spot best practices to Kubernetes workloads on kOps, and cost-optimize fault-tolerant, stateless applications. These tools let kOps workloads gracefully terminate applications, as well as proactively handle the replacement of instances that are at an elevated risk of termination. kops toolbox instance-selector leverages Amazon ec2-instance-selector in order to simplify the creation of Instance Group configurations adhering to Spot Instances best practices, implementing instance type flexibility, and utilizing capacity-optimized allocation strategy.

By adhering to these best practices to reduce the frequency of Spot interruptions, we will optimize not only the cost, but also our Spot Instances selection. This will enable us to acquire capacity at a massive scale if necessary.

To start using the tools we have described, follow along this step-by-step tutorial. Also, head over to the kops toolbox documentation to learn more about the ways in which you can use it.

Optimizing Apache Flink on Amazon EKS using Amazon EC2 Spot Instances

Post Syndicated from Emma White original https://aws.amazon.com/blogs/compute/optimizing-apache-flink-on-amazon-eks-using-amazon-ec2-spot-instances/

This post is written by Kinnar Sen, Senior EC2 Spot Specialist Solutions Architect

Apache Flink is a distributed data processing engine for stateful computations for both batch and stream data sources. Flink supports event time semantics for out-of-order events, exactly-once semantics, backpressure control, and optimized APIs. Flink has connectors for third-party data sources and AWS Services, such as Apache Kafka, Apache NiFi, Amazon Kinesis, and Amazon MSK. Flink can be used for Event Driven (Fraud Detection), Data Analytics (Ad-Hoc Analysis), and Data Pipeline (Continuous ETL) applications. Amazon Elastic Kubernetes Service (Amazon EKS) is the chosen deployment option for many AWS customers for Big Data frameworks such as Apache Spark and Apache Flink. Flink has native integration with Kubernetes allowing direct deployment and dynamic resource allocation.

In this post, I illustrate the deployment of scalable, highly available (HA), resilient, and cost optimized Flink application using Kubernetes via Amazon EKS and Amazon EC2 Spot Instances (Spot). Learn how to save money on big data streaming workloads by implementing this solution.

Overview

Amazon EC2 Spot Instances

Amazon EC2 Spot Instances let you take advantage of spare EC2 capacity in the AWS Cloud and are available at up to a 90% discount compared to On-Demand Instances. Spot Instances receive a two-minute warning when these instances are about to be reclaimed by Amazon EC2. There are many graceful ways to handle the interruption. Recently EC2 Instance rebalance recommendation has been added to send proactive notifications when a Spot Instance is at elevated risk of interruption. Spot Instances are a great way to scale up and increase throughput of Big Data workloads and has been adopted by many customers.

Apache Flink and Kubernetes

Apache Flink is an adaptable framework and it allows multiple deployment options and one of them being Kubernetes. Flink framework has a couple of key building blocks.

  • Job Client submits the job in form of a JobGraph to the Job Manager.
  • Job Manager plays the role of central work coordinator which distributes the job to the Task Managers.
  • Task Managers are the worker component, which runs the operators for source, transformations and sinks.
  • External components which are optional such as Resource Provider, HA Service Provider, Application Data Source, Sinks etc., and this varies with the deployment mode and options.

Image shows Flink application deployment architecture with Job Manager, Task Manager, Scheduler, Data Flow Graph, and client.

Flink supports different deployment (Resource Provider) modes when running on Kubernetes. In this blog we will use the Standalone Deployment mode, as we just want to showcase the functionality. We recommend first-time users however to deploy Flink on Kubernetes using the Native Kubernetes Deployment.

Flink can be run in different modes such as Session, Application, and Per-Job. The modes differ in cluster lifecycle, resource isolation and execution of the main() method. Flink can run jobs on Kubernetes via Application and Session Modes only.

  • Application Mode: This is a lightweight and scalable way to submit an application on Flink and is the preferred way to launch application as it supports better resource isolation. Resource isolation is achieved by running a cluster per job. Once the application shuts down all the Flink components are cleaned up.
  • Session Mode: This is a long running Kubernetes deployment of Flink. Multiple applications can be launched on a cluster and the applications competes for the resources. There may be multiple jobs running on a TaskManager in parallel. Its main advantage is that it saves time on spinning up a new Flink cluster for new jobs, however if one of the Task Managers fails it may impact all the jobs running on that.

Amazon EKS

Amazon EKS is a fully managed Kubernetes service. EKS supports creating and managing Spot Instances using Amazon EKS managed node groups following Spot best practices. This enables you to take advantage of the steep savings and scale that Spot Instances provide for interruptible workloads. EKS-managed node groups require less operational effort compared to using self-managed nodes. You can learn more in the blog “Amazon EKS now supports provisioning and managing EC2 Spot Instances in managed node groups.”

Apache Flink and Spot

Big Data frameworks like Spark and Flink are distributed to manage and process high volumes of data. Designed for failure, they can run on machines with different configurations, inherently resilient and flexible. Spot Instances can optimize runtimes by increasing throughput, while spending the same (or less). Flink can tolerate interruptions using restart and failover strategies.

Fault Tolerance

Fault tolerance is implemented in Flink with the help of check-pointing the state. Checkpoints allow Flink to recover state and positions in the streams. There are two per-requisites for check-pointing a persistent data source (Apache Kafka, Amazon Kinesis) which has the ability to replay data and a persistent distributed storage to store state (Amazon Simple Storage Service (Amazon S3), HDFS).

Cost Optimization

Job Manager and Task Manager are key building blocks of Flink. The Task Manager is the compute intensive part and Job Manager is the orchestrator. We would be running Task Manager on Spot Instances and Job Manager on On Demand Instances.

Scaling

Flink supports elastic scaling via Reactive Mode, Task Managers can be added/removed based on metrics monitored by an external service monitor like Horizontal Pod Autoscaling (HPA). When scaling up new pods would be added, if the cluster has resources they would be scheduled it not then they will go in pending state. Cluster Autoscaler (CA) detects pods in pending state and new nodes will be added by EC2 Auto Scaling. This is ideal with Spot Instances as it implements elastic scaling with higher throughput in a cost optimized way.

Tutorial: Running Flink applications in a cost optimized way

In this tutorial, I review steps, which help you launch cost optimized and resilient Flink workloads running on EKS via Application mode. The streaming application will read dummy Stock ticker prices send to an Amazon Kinesis Data Stream by Amazon Kinesis Data Generator, try to determine the highest price within a per-defined window, and output will be written onto Amazon S3 files.

Image shows Flink application pipeline with data flowing from Amazon Kinesis Data Generator to Kinesis Data Stream, processed in Apache Flink and output being written in Amazon S3

The configuration files can be found in this github location. To run the workload on Kubernetes, make sure you have eksctl and kubectl command line utilities installed on your computer or on an AWS Cloud9 environment. You can run this by using an AWS IAM user or role that has the Administrator Access policy attached to it, or check the minimum required permissions for using eksctl. The Spot node groups in the Amazon EKS cluster can be launched both in a managed or a self-managed way, in this post I use the EKS Managed node group for Spot Instances.

Steps

When we deploy Flink in Application Mode it runs as a single application. The cluster is exclusive for the job. We will be bundling the user code in the Flink image for that purpose and upload in Amazon Elastic Container Registry (Amazon ECR). Amazon ECR is a fully managed container registry that makes it easy to store, manage, share, and deploy your container images and artifacts anywhere.

1. Build the Amazon ECR Image

  • Login using the following cmd and don’t forget to replace the AWS_REGION and AWS_ACCOUNT_ID with your details.

aws ecr get-login-password --region ${AWS_REGION} | docker login --username AWS —password-stdin ${ACCOUNT_ID}.dkr.ecr.${AWS_REGION}.amazonaws.com

  • Create a repository

aws ecr create-repository --repository-name flink-demo --image-scanning-configuration scanOnPush=true —region ${AWS_REGION}

  • Build the Docker image:

Download the Docker file. I am using multistage docker build here. The sample code is from Github’s Amazon Kinesis Data Analytics Java examples. I modified the code to allow checkpointing and change the sliding window interval. Build and push the docker image using the following instructions.

docker build --tag flink-demo .

  • Tag and Push your image to Amazon ECR

docker tag flink-demo:latest ${ACCOUNT_ID}.dkr.ecr.${AWS_REGION}.amazonaws.com/flink-demo:latest
docker push ${ACCOUNT_ID}.dkr.ecr.${AWS_REGION}.
amazonaws.com/flink-demo:latest

2. Create Amazon S3/Amazon Kinesis Access Policy

First, I must create an access policy to allow the Flink application to read/write from Amazon fFS3 and read Kinesis data streams. Download the Amazon S3 policy file from here and modify the <<output folder>> to an Amazon S3 bucket which you have to create.

  • Run the following to create the policy. Note the ARN.

aws iam create-policy --policy-name flink-demo-policy --policy-document file://flink-demo-policy.json

3. Cluster and node groups deployment

  • Create an EKS cluster using the following command:

eksctl create cluster –name= flink-demo --node-private-networking --without-nodegroup --asg-access –region=<<AWS Region>>

The cluster takes approximately 15 minutes to launch.

  • Create the node group using the nodeGroup config file. I am using multiple nodeGroups of different sizes to adapt Spot best practice of diversification.  Replace the <<Policy ARN>> string using the ARN string from the previous step.

eksctl create nodegroup -f managedNodeGroups.yml

  • Download the Cluster Autoscaler and edit it to add the cluster-name (flink-demo)

curl -LO https://raw.githubusercontent.com/kubernetes/autoscaler/master/cluster-autoscaler/cloudprovider/aws/examples/cluster-autoscaler-autodiscover.yaml

4. Install the Cluster AutoScaler using the following command:

kubectl apply -f cluster-autoscaler-autodiscover.yaml

  • Using EKS Managed node groups requires significantly less operational effort compared to using self-managed node group and enables:
    • Auto enforcement of Spot best practices.
    • Spot Instance lifecycle management.
    • Auto labeling of Pods.
  • eksctl has integrated amazon-ec2-instance-selector to enable auto selection of instances based on the criteria passed. This has multiple benefits
    • ‘instance diversification’ is implemented by enabling multiple instance types selection in the node group which works well with CA
    • Reduces manual effort of selecting the instances.
  • We can create node group manifests using ‘dryrun’ and then create node groups using that.

eksctl create cluster --name flink-demo --instance-selector-vcpus=2 --instance-selector-memory=4 --dry-run

eksctl create node group -f managedNodeGroups.yml

5. Create service accounts for Flink

$ kubectl create serviceaccount flink-service-account
$ kubectl create clusterrolebinding flink-role-binding-flink --clusterrole=edit --serviceaccount=default:flink-service-account

6. Deploy Flink

This install folder here has all the YAML files required to deploy a standalone Flink cluster. Run the install.sh file. This will deploy the cluster with a JobManager, a pool of TaskManagers and a Service exposing JobManager’s ports.

  • This is a High-Availability(HA) deployment of Flink with the use of Kubernetes high availability service.
  • The JobManager runs on OnDemand and TaskManager on Spot. As the cluster is launched in Application Mode, if a node is interrupted only one job will be restarted.
  • Autoscaling is enabled by the use of ‘Reactive Mode’. Horizontal Pod Autoscaler is used to monitor the CPU load and scale accordingly.
  • Check-pointing is enabled which allows Flink to save state and be fault tolerant.

Image shows the Flink dashboard highlighting checkpoints for a job

7. Create Amazon Kinesis data stream and send dummy data      

Log in to AWS Management Console and create a Kinesis data stream name ‘ExampleInputStream’. Kinesis Data Generator is used to send data to the data stream. The template of the dummy data can be found here. Once this sends data the Flink application starts processing.

Image shows Amazon Kinesis Data Generator console sending data to Kinesis Data Strea

Observations

Spot Interruptions

If there is an interruption then the Flick application will be restarted using check-pointed data. The JobManager will restore the job as highlighted in the following log. The node will be replaced automatically by the Managed Node Group.

mage shows logs from a Flink job highlighting job restart using checkpoints.

One will be able to observe the graceful restart in the Flink UI.

Image shows the Flink dashboard highlighting job restart after failure.

AutoScaling

You can observe the elastic scaling using logs. The number of TaskManagers in the Flink UI will also reflect the scaling state.

Image shows kubectl output showing status of HPA during scale-out

Cleanup

If you are trying out the tutorial, run the following steps to make sure that you don’t encounter unwanted costs.

  • Run the delete.sh file.
  • Delete the EKS cluster and the node groups:
    • eksctl delete cluster --name flink-demo
  • Delete the Amazon S3 Access Policy:
    • aws iam delete-policy --policy-arn <<POLICY ARN>>
  • Delete the Amazon S3 Bucket:
    • aws s3 rb --force s3://<<S3_BUCKET>>
  • Delete the CloudFormation stack related to Kinesis Data Generator named ‘Kinesis-Data-Generator-Cognito-User’
  • Delete the Kinesis Data Stream.

Conclusion

In this blog, I demonstrated how you can run Flink workloads on a Kubernetes Cluster using Spot Instances, achieving scalability, resilience, and cost optimization. To cost optimize your Flink based big data workloads you should start thinking about using Amazon EKS and Spot Instances.

Implementing interruption tolerance in Amazon EC2 Spot with AWS Fault Injection Simulator

Post Syndicated from Pranaya Anshu original https://aws.amazon.com/blogs/compute/implementing-interruption-tolerance-in-amazon-ec2-spot-with-aws-fault-injection-simulator/

This post is written by Steve Cole, WW SA Leader for EC2 Spot, and David Bermeo, Senior Product Manager for EC2.

On October 20, 2021, AWS released new functionality to the Amazon Fault Injection Simulator that supports triggering the interruption of Amazon EC2 Spot Instances. This functionality lets you test the fault tolerance of your software by interrupting instances on command. The triggered interruption will be preceded with a Rebalance Recommendation (RBR) and Instance Termination Notification (ITN) so that you can fully test your applications as if an actual Spot interruption had occurred.

In this post, we’ll provide two examples of how easy it has now become to simulate Spot interruptions and validate the fault-tolerance of an application or service. We will demonstrate testing an application through the console and a service via CLI.

Engineering use-case (console)

Whether you are building a Spot-capable product or service from scratch or evaluating the Spot compatibility of existing software, the first step in testing is identifying whether or not the software is tolerant of being interrupted.

In the past, one way this was accomplished was with an AWS open-source tool called the Amazon EC2 Metadata Mock. This tool let customers simulate a Spot interruption as if it had been delivered through the Instance Metadata Service (IMDS), which then let customers test how their code responded to an RBR or an ITN. However, this model wasn’t a direct plug-and-play solution with how an actual Spot interruption would occur, since the signal wasn’t coming from AWS. In particular, the method didn’t provide the centralized notifications available through Amazon EventBridge or Amazon CloudWatch Events that enabled off-instance activities like launching AWS Lambda functions or other orchestration work when an RBR or ITN was received.

Now, Fault Injection Simulator has removed the need for custom logic, since it lets RBR and ITN signals be delivered via the standard IMDS and event services simultaneously.

Let’s walk through the process in the AWS Management Console. We’ll identify an instance that’s hosting a perpetually-running queue worker that checks the IMDS before pulling messages from Amazon Simple Queue Service (SQS). It will be part of a service stack that is scaled in and out based on the queue depth. Our goal is to make sure that the IMDS is being polled properly so that no new messages are pulled once an ITN is received. The typical processing time of a message with this example is 30 seconds, so we can wait for an ITN (which provides a two minute warning) and need not act on an RBR.

First, we go to the Fault Injection Simulator in the AWS Management Console to create an experiment.

AWS Fault Injection Simulator start screen in AWS Management console

At the experiment creation screen, we start by creating an optional name (recommended for console use) and a description, and then selecting an IAM Role. If this is the first time that you’ve used Fault Injection Simulator, then you’ll need to create an IAM Role per the directions in the FIS IAM permissions documentation. I’ve named the role that we created ‘FIS.’ After that, I’ll select an action (interrupt) and identify a target (the instance).

Experiment template screen in AWS Management console with description “interrupt queue worker,” name “interrupt queue worker,” and IAM role “FIS.”

First, I name the action. The Action type I want is to interrupt the Spot Instance: aws:ec2:send-spot-instance-interruptions. In the Action parameters, we are given the option to set the duration. The minimum value here is two minutes, below which you will receive an error since Spot Instances will always receive a two minute warning. The advantage here is that, by setting the durationBeforeInterruption to a value above two minutes, you will get the RBR (an optional point for you to respond) and ITN (the actual two minute warning) at different points in time, and this lets you respond to one or both.

New action form in the create experiment template screen with name, description, action type and durationBeforeInterruption fields filled.

The target instance that we launched is depicted in the following screenshot. It is a Spot Instance that was launched as a persistent request with its interruption action set to ‘stop’ instead of ‘terminate.’ The option to stop a Spot Instance, introduced in 2020, will let us restart the instance, log in and retrieve logs, update code, and perform other work necessary to implement Spot interruption handling.

Now that an action has been defined, we configure the target. We have the option of naming the target, which we’ve done here to match the Name tagged on the EC2 instance ‘qWorker’. The target method we want to use here is Resource ID, and then we can either type or select the desired instance from a drop-down list. Selection mode will be ‘all’, as there is only one instance. If we were using tags, which we will in the next example, then we’d be able to select a count of instances, up to five, instead of just one.

Edit target form in the create experiment template screen with name, resource type, and resource id fields filled. Name is “qWorker,” Resource type is “aws:ec2:spot-Instance,” Target method is “Resource IDs” Resource IDs is “i-019ea405f8f81742b” and Selection mode is “All.”

Once you’ve saved the Action, the Target, and the Experiment, then you’ll be able to begin the experiment by selecting the ‘Start from the Action’ menu at the top right of the screen.

Fault Injection Simulator Experiment template summary screen in the AWS Management console highlights experiment template ID, stop conditions, description, creation time, IAM role, and last update time.

After the experiment starts, you’ll be able to observe its state by refreshing the screen. Generally, the process will take just seconds, and you should be greeted by the Completed state, as seen in the following screenshot.

Fault Injection Simulator Experiment summary screen in the AWS Management console shows status as “Completed.”

In the following screenshot, having opened an interruption log group created in CloudWatch Event Logs, we can see the JSON of the RBR.

CloudWatch Event Logs screen in the AWS Management Console with information on the EC2 Rebalance Recommendation.

Two minutes later, we see the ITN in the same log group.

Cloudwatch Event Logs screen in the AWS Management console with information on the Instance Termination Notification.

Another two minutes after the ITN, we can see the EC2 instance is in the process of stopping (or terminating, if you elect).

EC2 Instance List screen in the AWS Management console with information on the instance that is stopping.

Shortly after the stop is issued by EC2, we can see the instance stopped. It would now be possible to restart the instance and view logs, make code changes, or do whatever you find necessary before testing again.

EC2 Instance List screen in the AWS Management console with information on the Instance that is stopped.

Now that our experiment succeeded in interrupting our Spot Instance, we can evaluate the performance of the code running on the instance. It should have completed the processing of any messages already retrieved at the ITN, and it should have not pulled any new messages afterward.

This experiment can be saved for later use, but it will require selecting the specific instance each time that it’s run. We can also re-use the experiment template by using tags instead of an instance ID, as we’ll show in the next example. This shouldn’t prove troublesome for infrequent experiments, and especially those run through the console. Or, as we did in our example, you can set the instance interruption behavior to stop (versus terminate) and re-use the experiment as long as that particular instance continues to exist. When the experiments get more frequent, it might be advantageous to automate the process, possibly as part of the test phase of a CI/CD pipeline. Doing this is programmatically possible through the AWS CLI or SDK.

Operations use-case (CLI)

Once the developers of our product validate the single-instance fault tolerance, indicating that the target workload is capable of running on Spot Instances, then the next logical step is to deploy the product as a service on multiple instances. This will allow for more comprehensive testing of the service as a whole, and it is a key process in collecting valuable information, such as performance data, response times, error rates, and other metrics to be used in the monitoring of the service. Once data has been collected on a non-interrupted deployment, it is then possible to use the Spot interruption action of the Fault Injection Simulator to observe how well the service can handle RBR and ITN while running, and to see how those events influence the metrics collected previously.

When testing a service, whether it is launched as instances in an Amazon EC2 Auto Scaling group, or it is part of one of the AWS container services, such as Amazon Elastic Container Service (Amazon ECS) or the Amazon Elastic Kubernetes Service (EKS), EC2 Fleet, Amazon EMR, or across any instances with descriptive tagging, you now have the ability to trigger Spot interruptions to as many as five instances in a single Fault Injection Simulator experiment.

We’ll use tags, as opposed to instance IDs, to identify candidates for interruption to interrupt multiple Spot Instances simultaneously. We can further refine the candidate targets with one or more filters in our experiment, for example targeting only running instances if you perform an action repeatedly.

In the following example, we will be interrupting three instances in an Auto Scaling group that is backing a self-managed EKS node group. We already know the software will behave as desired from our previous engineering tests. Our goal here is to see how quickly EKS can launch replacement tasks and identify how the service as a whole responds during the event. In our experiment, we will identify instances that contain the tag aws:autoscaling:groupName with a value of “spotEKS”.

The key benefit here is that we don’t need a list of instance IDs in our experiment. Therefore, this is a re-usable experiment that can be incorporated into test automation without needing to make specific selections from previous steps like collecting instance IDs from the target Auto Scaling group.

We start by creating a file that describes our experiment in JSON rather than through the console:

{
    "description": "interrupt multiple random instances in ASG",
    "targets": {
        "spotEKS": {
            "resourceType": "aws:ec2:spot-instance",
            "resourceTags": {
                "aws:autoscaling:groupName": "spotEKS"
            },
            "selectionMode": "COUNT(3)"
        }
    },
    "actions": {
        "interrupt": {
            "actionId": "aws:ec2:send-spot-instance-interruptions",
            "description": "interrupt multiple instances",
            "parameters": {
                "durationBeforeInterruption": "PT4M"
            },
            "targets": {
            "SpotInstances": "spotEKS"
            }
        }
    },
    "stopConditions": [
        {
            "source": "none"
        }
    ],
    "roleArn": "arn:aws:iam::xxxxxxxxxxxx:role/FIS",
    "tags": {
        "Name": "multi-instance"
    }
}

Then we upload the experiment template to Fault Injection Simulator from the command-line.

aws fis create-experiment-template --cli-input-json file://experiment.json

The response we receive returns our template along with an ID, which we’ll need to execute the experiment.

{
    "experimentTemplate": {
        "id": "EXT3SHtpk1N4qmsn",
        ...
    }
}

We then execute the experiment from the command-line using the ID that we were given at template creation.

aws fis start-experiment --experiment-template-id EXT3SHtpk1N4qmsn

We then receive confirmation that the experiment has started.

{
    "experiment": {
        "id": "EXPaFhEaX8GusfztyY",
        "experimentTemplateId": "EXT3SHtpk1N4qmsn",
        "state": {
            "status": "initiating",
            "reason": "Experiment is initiating."
        },
        ...
    }
}

To check the status of the experiment as it runs, which for interrupting Spot Instances is quite fast, we can query the experiment ID for success or failure messages as follows:

aws fis get-experiment --id EXPaFhEaX8GusfztyY

And finally, we can confirm the results of our experiment by listing our instances through EC2. Here we use the following command-line before and after execution to generate pre- and post-experiment output:

aws ec2 describe-instances --filters\
 Name='tag:aws:autoscaling:groupName',Values='spotEKS'\
 Name='instance-state-name',Values='running'\
 | jq .Reservations[].Instances[].InstanceId | sort

We can then compare this to identify which instances were interrupted and which were launched as replacements.

< "i-003c8d95c7b6e3c63"
< "i-03aa172262c16840a"
< "i-02572fa37a61dc319"
---
> "i-04a13406d11a38ca6"
> "i-02723d957dc243981"
> "i-05ced3f71736b5c95"

Summary

In the previous examples, we have demonstrated through the console and command-line how you can use the Spot interruption action in the Fault Injection Simulator to ascertain how your software and service will behave when encountering a Spot interruption. Simulating Spot interruptions will help assess the fault-tolerance of your software and can assess the impact of interruptions in a running service. The addition of events can enable more tooling, and being able to simulate both ITNs and RBRs, along with the Capacity Rebalance feature of Auto scaling groups, now matches the end-to-end experience of an actual AWS interruption. Get started on simulating Spot interruptions in the console.

Identifying optimal locations for flexible workloads with Spot placement score

Post Syndicated from Pranaya Anshu original https://aws.amazon.com/blogs/compute/identifying-optimal-locations-for-flexible-workloads-with-spot-placement-score/

This post is written by Jessie Xie, Solutions Architect for EC2 Spot, and Peter Manastyrny, Senior Product Manager for EC2 Auto Scaling and EC2 Fleet.

Amazon EC2 Spot Instances let you run flexible, fault-tolerant, or stateless applications in the AWS Cloud at up to a 90% discount from On-Demand prices. Since we introduced Spot Instances back in 2009, we have been building new features and integrations with a single goal – to make Spot easy and efficient to use for your flexible compute needs.

Spot Instances are spare EC2 compute capacity in the AWS Cloud available for steep discounts. In exchange for the discount, Spot Instances are interruptible and must be returned when EC2 needs the capacity back. The location and amount of spare capacity available at any given moment is dynamic and changes in real time. This is why Spot workloads should be flexible, meaning they can utilize a variety of different EC2 instance types and can be shifted in real time to where the spare capacity currently is. You can use Spot Instances with tools such as EC2 Fleet and Amazon EC2 Auto Scaling which make it easy to run workloads on multiple instance types.

The AWS Cloud spans 81 Availability Zones across 25 Regions with plans to launch 21 more Availability Zones and 7 more Regions. However, until now there was no way to find an optimal location (either a Region or Availability Zone) to fulfill your Spot capacity needs without trying to launch Spot Instances there first. Today, we are excited to announce Spot placement score, a new feature that helps you identify an optimal location to run your workloads on Spot Instances. Spot placement score recommends an optimal Region or Availability Zone based on the amount of Spot capacity you need and your instance type requirements.

Spot placement score is useful for workloads that could potentially run in a different Region. Additionally, because the score takes into account your instance type selection, it can help you determine if your request is sufficiently instance type flexible for your chosen Region or Availability Zone.

How Spot placement score works

To use Spot placement score you need to specify the amount of Spot capacity you need, what your instance type requirements are, and whether you would like a recommendation for a Region or a single Availability Zone. For instance type requirements, you can either provide a list of instance types, or the instance attributes, like the number of vCPUs and amount of memory. If you choose to use the instance attributes option, you can then use the same attribute configuration to request your Spot Instances in the recommended Region or Availability Zone with the new attribute-based instance type selection feature in EC2 Fleet or EC2 Auto Scaling.

Spot placement score provides a list of Regions or Availability Zones, each scored from 1 to 10, based on factors such as the requested instance types, target capacity, historical and current Spot usage trends, and time of the request. The score reflects the likelihood of success when provisioning Spot capacity, with a 10 meaning that the request is highly likely to succeed. Provided scores change based on the current Spot capacity situation, and the same request can yield different scores when ran at different times. It is important to note that the score serves as a guideline, and no score guarantees that your Spot request will be fully or partially fulfilled.

You can also filter your score by Regions or Availability Zones, which is useful for cases where you can use only a subset of AWS Regions, for example any Region in the United States.

Let’s see how Spot placement score works in practice through an example.

Using Spot placement score with AWS Management Console

To try Spot placement score, log into your AWS account, select EC2, Spot Requests, and click on Spot placement score to open the Spot placement score window.

Spot placement score screen in AWS Management Console.

Here, you need provide your target capacity and instance type requirements by clicking on Enter requirements. You can enter target capacity as a number of instances, vCPUs, or memory. vCPUs and memory options are useful for vertically scalable workloads that are sized for a total amount of compute resources and can utilize a wide range of instance sizes. Target capacity is limited and based on your recent Spot usage with accounting for potential usage growth. For accounts that do not have recent Spot usage, there is a default limit aligned with the Spot Instances limit.

For instance type requirements, there are two options. First option is to select Specify instance attributes that match your compute requirements tab and enter your compute requirements as a number of vCPUs, amount of memory, CPU architecture, and other optional attributes. Second option is to select Manually select instance types tab and select instance types from the list.

Please note that you need to select at least three different instance types (that is, different families, generations, or sizes). If you specify a smaller number of instance types, Spot placement score will always yield a low score. Spot placement score is designed to help you find an optimal location to request Spot capacity tailored to your specific workload needs, but it is not intended to be used for getting high-level Spot capacity information across all Regions and instance types.

Let’s try to find an optimal location to run a workload that can utilize r5.8xlarge, c5.9xlarge, and m5.8xlarge instance types and is sized at 2000 instances.

Spot placement score screen in AWS Management Console with selected target capacity at 2000 instances and selected r5.8xlarge, c5.9xlarge, and m5.8xlarge instance types..

Once you select 2000 instances under Target capacity, select r5.8xlarge, c5.9xlarge, and m5.8xlarge instances under Select instance types, and click Load placement score button, you will get a list of Regions sorted by score in a descending order. There is also an option to filter by specific Regions if needed.

The highest rated Region for your requirements turns out to be US East (N. Virginia) with a score of 8. The second closest contender is Europe (Ireland) with a score of 5. That tells you that right now the optimal Region for your Spot requirements is US East (N. Virginia).

Spot placement score screen in AWS Management Console with displayed scores on Region level scores.

Let’s now see if it is possible to get a higher score. Remember, the key best practice for Spot is to be flexible and utilize as many instance types as possible. To do that, press the Edit button on the Target capacity and instance type requirements tab. For the new request, keep the same target capacity at 2000, but expand the selection of instance types by adding similarly sized instance types from a variety of instance families and generations, i.e., r5.4xlarge, r5.12xlarge, m5zn.12xlarge, m5zn.6xlarge, m5n.8xlarge, m5dn.8xlarge, m5d.8xlarge, r5n.8xlarge, r5dn.8xlarge, r5d.8xlarge, c5.12xlarge, c5.4xlarge, c5d.12xlarge, c5n.9xlarge. c5d.9xlarge, m4.4xlarge, m4.16xlarge, m4.10xlarge, r4.8xlarge, c4.8xlarge.

After requesting the scores with updated requirements, you can see that even though the score in US East (N. Virginia) stays unchanged at 8, the scores for Europe (Ireland) and US West (Oregon) improved dramatically, both raising to 9. Now, you have a choice of three high-scored Regions to request your Spot Instances, each with a high likelihood to succeed.

To request Spot Instances based on the score, you can use EC2 Fleet or EC2 Auto Scaling. Please note, that the score implies that you use capacity-optimized Spot allocation strategy when requesting the capacity. If you use other allocation strategies, such as lowest-price, the result in the recommended Region or Availability Zone will not align with the score provided.

Spot placement score screen in AWS Management Console with selected target capacity at 2000 instances and selected r5.8xlarge, c5.9xlarge, m5.8xlarge, r5.4xlarge, r5.12xlarge, m5zn.12xlarge, m5zn.6xlarge, m5n.8xlarge, m5dn.8xlarge, m5d.8xlarge, r5n.8xlarge, r5dn.8xlarge, r5d.8xlarge, c5.12xlarge, c5.4xlarge, c5d.12xlarge, c5n.9xlarge. c5d.9xlarge, m4.4xlarge, m4.16xlarge, m4.10xlarge, r4.8xlarge, c4.8xlarge instance types.

You can also request the scores at the Availability Zone level. This is useful for running workloads that need to have all instances in the same Availability Zone, potentially to minimize inter-Availability Zone data transfer costs. Workloads such as Apache Spark, which involve transferring a high volume of data between instances, would be a good use case for this. To get scores per Availability Zone you can check the box Provide placement scores per Availability Zone.

When requesting instances based on Availability Zone recommendation, you need to make sure to configure EC2 Fleet or EC2 Auto Scaling request to only use that specific Availability Zone.

With Spot placement score, you can test different instance type combinations at different points in time, and find the most optimal Region or Availability Zone to run your workloads on Spot Instances.

Availability and pricing

You can use Spot placement score today in all public and AWS GovCloud Regions with the exception of those based in China, where we plan to release later. You can access Spot placement score using the AWS Command Line Interface (CLI), AWS SDKs, and Management Console. There is no additional charge for using Spot placement score, you will only pay EC2 standard rates if provisioning instances based on recommendation.

To learn more about using Spot placement score, visit the Spot placement score documentation page. To learn more about best practices for using Spot Instances, see Spot documentation.

Amazon EC2 Auto Scaling will no longer add support for new EC2 features to Launch Configurations

Post Syndicated from Pranaya Anshu original https://aws.amazon.com/blogs/compute/amazon-ec2-auto-scaling-will-no-longer-add-support-for-new-ec2-features-to-launch-configurations/

This post is written by Scott Horsfield, Principal Solutions Architect, EC2 Scalability and Surabhi Agarwal, Sr. Product Manager, EC2.

In 2010, AWS released launch configurations as a way to define the parameters of instances launched by EC2 Auto Scaling groups. In 2017, AWS released launch templates, the successor of launch configurations, as a way to streamline and simplify the launch process for Auto Scaling, Spot Fleet, Amazon EC2 Spot Instances, and On-Demand Instances. Launch templates define the steps required to create an instance, by capturing instance parameters in a resource that can be used across multiple services. Launch configurations have continued to live alongside launch templates but haven’t benefitted from all of the features we’ve added to launch templates.

Today, AWS is recommending that customers using launch configurations migrate to launch templates. We will continue to support and maintain launch configurations, but we will not be adding any new features to them. We will focus on adding new EC2 features to launch templates only. You can continue using launch configurations, and AWS is committed to supporting applications you have already built using them, but in order for you to take advantage of our most recent and upcoming releases, a migration to launch templates is recommended. Additionally, we plan to no longer support new instance types with launch configurations by the end of 2022. Our goal is to have all customers moved over to launch templates by then.

Moving to launch templates is simple to accomplish and can be done easily today. In this blog, we provide more details on how you can transition from launch configurations to launch templates. If you are unable to transition to launch templates due to lack of tooling or specific functions, or have any concerns, please contact AWS Support.

Launch templates vs. launch configurations

Launch configurations have been a part of Amazon EC2 Auto Scaling Groups since 2010. Customers use launch configurations to define Auto Scaling group configurations that include AMI and instance type definition. In 2017, AWS released launch templates, which reduce the number of steps required to create an instance by capturing all launch parameters within one resource that can be used across multiple services. Since then, AWS has released many new features such as Mixed Instance Policies with Auto Scaling groups, Targeted Capacity Reservations, and unlimited mode for burstable performance instances that only work with launch templates.

Launch templates provide several key benefits to customers, when compared to launch configurations, that can improve the availability and optimization of the workloads you host in Auto Scaling groups and allow you to access the full set of EC2 features when launching instances in an Auto Scaling group.

Some of the key benefits of launch templates when used with Auto Scaling groups include:

How to determine where you are using launch configurations

Use the Launch Configuration Inventory Script to find all of the launch configurations in your account. You can use this script to generate an inventory of launch configurations across all regions in a single account or all accounts in your AWS Organization.

The script can be run with a variety of options for different levels of account access. You can learn more about these options in this GitHub post. In its simplest form it will use the default credentials profile to inventory launch configurations across all regions in a single account.

Screenshot of Launch Configuration Inventory script

Once the script has completed, you can view the generated inventory.csv file to get a sense of how many launch configurations may need to be converted to launch templates or deleted.

Screenshot of script

How to transition to launch templates today

If you’re ready to move to launch templates now, making the transition is simple and mostly automated through the AWS Management Console. For customers who do not use the AWS Management Console, most popular Infrastructure as Code (IaC), such as CloudFormation and Terraform, already support launch templates, as do the AWS CLI and SDKs.

To perform this transition, you will need to ensure that your user has the required permissions.

Here are some examples to get you started.

AWS Management Console

  1. Open the EC2 Launch Configuration console. You must sign in if you are not already authenticated.
  2. From the Launch Configuration console, click on the Copy to launch template button and select Copy all.
    1. Alternatively, you can select individual launch configurations, and use the Copy selected option to selectively copy certain launch configurations.copy to launch template screenshot
  1. Review the list of templates and click on the Copy button when you’re ready to proceed.3. Review the list of templates and click on the Copy button when you’re ready to proceed.
  1. Once the copy process has completed, you can close the wizard.

4. Once the copy process has completed, you can close the wizard.

  1. Navigate to the EC2 Launch Template console to view your newly created launch templates.5. Navigate to the EC2 Launch Template console to view your newly created launch templates.
  1. Your launch templates are now ready to replace launch configurations in your Auto Scaling group configuration. Navigate to the Auto Scaling group console, select your Auto Scaling group, and click on the Edit.

. Navigate to the Auto Scaling group console, select your Auto Scaling group, and click on the Edit button.

  1. Next, scroll down to the Launch configuration section, and click Switch to launch template.7. Next, scroll down to the Launch configuration section, and click Switch to launch template.
  1. Select your newly created Launch template, review and confirm your configuration, and when ready scroll down to the bottom of the page and click the Update button.when ready scroll down to the bottom of the page and click the Update button.
  2. Now that you’ve migrated your launch configurations to launch templates you can prevent users from creating new launch configurations by updating their IAM permissions to deny the autoscaling:CreateLaunchConfiguration action.

Instances launched by this Auto Scaling group continue to run and are not automatically be replaced by making this change. Any instance launched after making this change uses the launch template for its configuration. As your Auto Scaling group scales up and down, the older instances are replaced. If you’d like to force an update, you can use Instance Refresh to ensure that all instances are running the same launch template and version.

CloudFormation and Terraform

If you use CloudFormation to create and manage your infrastructure, you should use the AWS::EC2::LaunchTemplate resource to create launch templates. After adding a launch template resource to your CloudFormation stack template file update your Auto Scaling group resource definition by adding a LaunchTemplate property and removing the existing LaunchConfigurationName property. We have several examples available to help you get started.

Using launch templates with Terraform is a similar process. Update your template file to include a aws_launch_template resource and then update your aws_autoscaling_group resources to reference the launch template.

In addition to making these changes, you may also want to consider adding a MixedInstancesPolicy to your Auto Scaling group. A MixedInstancesPolicy allows you to configure your Auto Scaling group with multiple instance types and purchase options. This helps improve the availability and optimization of your applications. Some examples of these benefits include using Spot Instances and On-Demand Instances within the same Auto Scaling group, combining CPU architectures such as Intel, AMD, and ARM (Graviton2), and having multiple instance types configured in case of a temporary capacity issue.

You can generate and configure example templates for CloudFormation and Terraform in the AWS Management Console.

AWS CLI

If you’re using the AWS CLI to create and manage your Auto Scaling groups, these examples will show you how to accomplish common tasks when using launch templates.

SDKs

AWS SDKs already include APIs for creating launch templates. If you’re using one of our SDKs to create and configure your Auto Scaling groups, you can find more information in the SDK documentation for your language of choice.

Next steps

We’re excited to help you take advantage of the latest EC2 features by making the transition to launch templates as seamless as possible. As we make this transition together, we’re here to help and will continue to communicate our plans and timelines for this transition. If you are unable to transition to launch templates due to lack of tooling or functionalities or have any concerns, please contact AWS Support. Also, stay tuned for more information on tools to help make this transition easier for you.

How IPONWEB Adopted Spot Instances to Run their Real-time Bidding Workloads

Post Syndicated from Roman Boiko original https://aws.amazon.com/blogs/architecture/how-iponweb-adopted-spot-instances-to-run-their-real-time-bidding-workloads/

IPONWEB is a global leader that builds programmatic, real-time advertising technology and infrastructure for some of the world’s biggest digital media buyers and sellers. The core of IPONWEB’s business is Real-time Bidding (RTB). IPONWEB’s platform processes, transmits, and auctions huge volumes of bid requests and bid responses in real time. They are then able to determine the optimal ad impression to be displayed to an end user.

IPONWEB processes over 1 trillion impression auctions per month. The volumes of impressions require significant compute power to make calculations and complete the entire bidding auction within 200 milliseconds. IPONWEB’s flagship RTB products, BidSwitch and BSWX, have been running on Amazon EC2 reserved and On-Demand Instances. The nature of the workload for this volume of compute for this short a time, has been notably spiky. IPONWEB maintained a core workload running 24/7 on EC2 instances covered by Reserved Instances and Savings Plans.

To optimize costs further, IPONWEB decided to use Amazon EC2 Spot Instances. Although this decision is also advantageous for workload efficiency, adopting Spot Instances did introduce a few challenges that needed to be addressed.

Some challenges in using Spot Instances for this use case

The Real-time Bidding (RTB) workload is critical to the business. Any interruption of bid processing has a negative impact on revenue. While the spikiness issue needed to be addressed, it was imperative to find a solution that could be implemented in a smooth and seamless fashion.

Efficient distribution over Availability Zones (AZs) within the AWS Region being used was imperative. RTB auctions process trillions of requests and consume large volumes of network traffic. Consequently, IPONWEB is continuously optimizing traffic costs along with compute costs. The architectural approach is to put as much workload as possible in one AZ to reduce inter-AZ traffic. For better performance, IPONWEB’s main MongoDB database and Spot Instances are running in the same AZ.

Under certain circumstances, using Spot Instances in other AZs can still be a good choice. AWS charges for traffic between AZs, so IPONWEB defined a break point. This occurs when usage of an EC2 Spot Instance in a different AZ became equal to usage of an EC2 On-Demand Instance in the same AZ.

This break point calculation led to the following best practices (in order of most value to least, for this use case):

  1. The most efficient practice was to run Spot Instances in the same AZ as the database
  2. Next effective was to run Spot Instances in the other AZs
  3. The third option was to run On-Demand Instances in the same AZ
  4. Least effective was to run On-Demand Instances in the other AZs

IPONWEB’s solution

IPONWEB evaluated Auto Scaling groups using both Spot and On-Demand Instances. They concluded that using Auto Scaling alone would not satisfy all the requirements, and it would be difficult to distribute workloads between AZs adequately. This is because an Auto Scaling group tries to distribute the instances across all the AZs evenly. However, IPONWEB needed to scale in one AZ initially, to avoid unnecessary cross AZ traffic. In addition, one Auto Scaling group can’t compensate for the sudden termination of a large number of Spot Instances. IPONWEB created a more flexible and reliable solution based on using four Auto Scaling groups.

  1. The first Auto Scaling group runs only on Spot Instances in the same AZ as the main database application.
  2. The second Auto Scaling group is running only Spot Instances in the other AZs.
  3. The third Auto Scaling group is running EC2 On-Demand Instances in the database AZ.
  4. The fourth Auto Scaling group is for EC2 On-Demand Instance on the other AZs.

The application workload running on the instances in these four Auto Scaling groups is evenly distributed. This is done using an Application Load Balancer (ALB), or IPONWEB’s purpose-built load balancer.

Figure 1. Spot and On-Demand scaling by different AZs

Figure 1. Spot and On-Demand Instances scaling by different AZs

IPONWEB then needed to create a proper scaling policy for each Auto Scaling group. They decided to implement a self-monitoring mechanism in the application. This monitored how much compute resources (CPU and memory) are still available at any given time. Using this information, the application determines if it is able to take the next processing request. If it’s unable to, a log entry is created, and an “empty” response is returned. IPONWEB created a composite metric based on the drop rate and CPU utilization of each host.

IPONWEB used that custom metric to create scaling policies for every Auto Scaling group. Each Auto Scaling group has a specific threshold. This provides granular control, such as when, and under what conditions the particular Auto Scaling group scales-out or scales-in. It will set a lower threshold for the first Auto Scaling group and higher thresholds for the next Auto Scaling groups.

For example, the group with Spot Instances in the same AZ starts scaling at 75% utilization. The group with Spot Instances in other AZs starts scaling at 80% utilization.

  • Because each instance in every group receives the same number of incoming requests to process, the first group will be scaling earlier than the others.
  • If some Spot Instances are shut down in the first group, then the total utilization will increase, and the second group will begin scaling.
  • If there is a shortage of Spot Instances in other AZs as well, then the group with EC2 On-Demand Instances will scale out.
  • When the Spot Instances are available and can be used again, the first group will use them. Then total utilization will decrease, causing the other groups to scale in.

Typically, the majority of this workload is done by the first group. The other groups are running with a bare minimum of two instances in each. After going live with this solution, IPONWEB observed that they can usually run the major portion of their workloads with the cheapest option. In this case, it was using Spot Instances in the same AZ as their database. There were several times when a large number of the Spot Instances were shut down. When this happened, the scaling diverted to On-Demand Instances. In general, the solution worked well and there was no degradation on the running services.

Conclusion

This solution helps IPONWEB utilize compute resources more efficiently using AWS, to place and process more bids. After the migration, IPONWEB increased infrastructure on AWS by ~15% without incurring additional costs. This solution can also be used for other workloads where you must have a granular control on the scaling while minimizing the costs.

Victor Gorelik, VP of Cloud Infrastructure at IPONWEB said:

“If you use cloud without optimizations, it is expensive. There are two ways to optimize the costs – use either Savings Plans or Spot Instances. But it feels like using Savings Plans is a step back to the traditional model where you buy hardware. On the other hand, using Spots is making you more Cloud native and is the way to move forward. I believe that in the future the majority of our workloads will be run on Spot.”

Read more here:

Running cost optimized Spark workloads on Kubernetes using EC2 Spot Instances

Post Syndicated from Emma White original https://aws.amazon.com/blogs/compute/running-cost-optimized-spark-workloads-on-kubernetes-using-ec2-spot-instances/

This post is written by Kinnar Sen, Senior Solutions Architect, EC2 Spot 

Apache Spark is an open-source, distributed processing system used for big data workloads. It provides API operations to perform multiple tasks such as streaming, extract transform load (ETL), query, machine learning (ML), and graph processing. Spark supports four different types of cluster managers (Spark standalone, Apache Mesos, Hadoop YARN, and Kubernetes), which are responsible for scheduling and allocation of resources in the cluster. Spark can run with native Kubernetes support since 2018 (Spark 2.3). AWS customers that have already chosen Kubernetes as their container orchestration tool can also choose to run Spark applications in Kubernetes, increasing the effectiveness of their operations and compute resources.

In this post, I illustrate the deployment of scalable, resilient, and cost optimized Spark application using Kubernetes via Amazon Elastic Kubernetes Service (Amazon EKS) and Amazon EC2 Spot Instances. Learn how to save money on big data workloads by implementing this solution.

Overview

Amazon EC2 Spot Instances

Amazon EC2 Spot Instances let you take advantage of unused EC2 capacity in the AWS Cloud. Spot Instances are available at up to a 90% discount compared to On-Demand Instance prices. Capacity pools are a group of EC2 instances that belong to particular instance family, size, and Availability Zone (AZ). If EC2 needs capacity back for On-Demand Instance usage, Spot Instances can be interrupted by EC2 with a two-minute notification. There are many graceful ways to handle the interruption to ensure that the application is well architected for resilience and fault tolerance. This can be automated via the application and/or infrastructure deployments. Spot Instances are ideal for stateless, fault tolerant, loosely coupled and flexible workloads that can handle interruptions.

Amazon Elastic Kubernetes Service

Amazon EKS is a fully managed Kubernetes service that makes it easy for you to run Kubernetes on AWS without needing to install, operate, and maintain your own Kubernetes control plane. It provides a highly available and scalable managed control plane. It also provides managed worker nodes, which let you create, update, or terminate shut down worker nodes for your cluster with a single command. It is a great choice for deploying flexible and fault tolerant containerized applications. Amazon EKS supports creating and managing Amazon EC2 Spot Instances using Amazon EKS-managed node groups following Spot best practices. This enables you to take advantage of the steep savings and scale that Spot Instances provide for interruptible workloads running in your Kubernetes cluster. Using EKS-managed node groups with Spot Instances requires less operational effort compared to using self-managed nodes. In addition to launching Spot Instances in managed node groups, it is possible to specify multiple instance types in EKS managed node groups. You can find more in this blog.

Apache Spark and Kubernetes

When a spark application is submitted to the Kubernetes cluster the following happens:

  • A Spark driver is created.
  • The driver and the run within pods.
  • The Spark driver then requests for executors, which are scheduled to run within pods. The executors are managed by the driver.
  • The application is launched and once it completes, the executor pods are cleaned up. The driver pod persists the logs and remains in a completed state until the pod is cleared by garbage collection or manually removed. The driver in a completed stage does not consume any memory or compute resources.

Spark Deployment on Kubernetes Cluster

When a spark application runs on clusters managed by Kubernetes, the native Kubernetes scheduler is used. It is possible to schedule the driver/executor pods on a subset of available nodes. The applications can be launched either by a vanilla ‘spark submit’, a workflow orchestrator like Apache Airflow or the spark operator. I use vanilla ‘spark submit’ in this blog. is also able to schedule Spark applications on EKS clusters as described in this launch blog, but Amazon EMR on EKS is out of scope for this post.

Cost optimization

For any organization running big data workloads there are three key requirements: scalability, performance, and low cost. As the size of data increases, there is demand for more compute capacity and the total cost of ownership increases. It is critical to optimize the cost of big data applications. Big Data frameworks (in this case, Spark) are distributed to manage and process high volumes of data. These frameworks are designed for failure, can run on machines with different configurations, and are inherently resilient and flexible.

If Spark deploys on Kubernetes, the executor pods can be scheduled on EC2 Spot Instances and driver pods on On-Demand Instances. This reduces the overall cost of deployment – Spot Instances can save up to 90% over On-Demand Instance prices. This also enables faster results by scaling out executors running on Spot Instances. Spot Instances, by design, can be interrupted when EC2 needs the capacity back. If a driver pod is running on a Spot Instance, which is interrupted then the application fails and the application must be re-submitted. To avoid this situation, the driver pod can be scheduled on On-Demand Instances only. This adds a layer of resiliency to the Spark application running on Kubernetes. To cost optimize the deployment, all the executor pods are scheduled on Spot Instances as that’s where the bulk of compute happens. Spark’s inherent resiliency has the driver launch new executors to replace the ones that fail due to Spot interruptions.

There are a couple of key points to note here.

  • The idea is to start with minimum number of nodes for both On-Demand and Spot Instances (one each) and then auto-scale usingCluster Autoscaler and EC2 Auto Scaling  Cluster Autoscaler for AWS provides integration with Auto Scaling groups. If there are not sufficient resources, the driver and executor pods go into pending state. The Cluster Autoscaler detects pods in pending state and scales worker nodes within the identified Auto Scaling group in the cluster using EC2 Auto Scaling.
  • The scaling for On-Demand and Spot nodes is exclusive of one another. So, if multiple applications are launched the driver and executor pods can be scheduled in different node groups independently per the resource requirements. This helps reduce job failures due to lack of resources for the driver, thus adding to the overall resiliency of the system.
  • Using EKS Managed node groups
    • This requires significantly less operational effort compared to using self-managed nodegroup and enables:
      • Auto enforcement of Spot best practices like Capacity Optimized allocation strategy, Capacity Rebalancing and use multiple instances types.
      • Proactive replacement of Spot nodes using rebalance notifications.
      • Managed draining of Spot nodes via re-balance recommendations.
    • The nodes are auto-labeled so that the pods can be scheduled with NodeAffinity.
      • eks.amazonaws.com/capacityType: SPOT
      • eks.amazonaws.com/capacityType: ON_DEMAND

Now that you understand the products and best practices of used in this tutorial, let’s get started.

Tutorial: running Spark in EKS managed node groups with Spot Instances

In this tutorial, I review steps, which help you launch cost optimized and resilient Spark jobs inside Kubernetes clusters running on EKS. I launch a word-count application counting the words from an Amazon Customer Review dataset and write the output to an Amazon S3 folder. To run the Spark workload on Kubernetes, make sure you have eksctl and kubectl installed on your computer or on an AWS Cloud9 environment. You can run this by using an AWS IAM user or role that has the AdministratorAccess policy attached to it, or check the minimum required permissions for using eksctl. The spot node groups in the Amazon EKS cluster can be launched both in a managed or a self-managed way, in this post I use the former. The config files for this tutorial can be found here. The job is finally launched in cluster mode.

Create Amazon S3 Access Policy

First, I must create an Amazon S3 access policy to allow the Spark application to read/write from Amazon S3. Amazon S3 Access is provisioned by attaching the policy by ARN to the node groups. This associates Amazon S3 access to the NodeInstanceRole and, hence, the node groups then have access to Amazon S3. Download the Amazon S3 policy file from here and modify the <<output folder>> to an Amazon S3 bucket you created. Run the following to create the policy. Note the ARN.

aws iam create-policy --policy-name spark-s3-policy --policy-document file://spark-s3.json

Cluster and node groups deployment

Create an EKS cluster using the following command:

eksctl create cluster –name= sparkonk8 --node-private-networking  --without-nodegroup --asg-access –region=<<AWS Region>>

The cluster takes approximately 15 minutes to launch.

Create the nodegroup using the nodeGroup config file. Replace the <<Policy ARN>> string using the ARN string from the previous step.

eksctl create nodegroup -f managedNodeGroups.yml

Scheduling driver/executor pods

The driver and executor pods can be assigned to nodes using affinity. PodTemplates can be used to configure the detail, which is not supported by Spark launch configuration by default. This feature is available from Spark 3.0.0, requiredDuringScheduling node affinity is used to schedule the driver and executor jobs. Sample podTemplates have been uploaded here.

Launching a Spark application

Create a service account. The spark driver pod uses the service account to create and watch executor pods using Kubernetes API server.

kubectl create serviceaccount spark
kubectl create clusterrolebinding spark-role --clusterrole='edit'  --serviceaccount=default:spark --namespace=default

Download the Cluster Autoscaler and edit it to add the cluster-name. 

curl -LO https://raw.githubusercontent.com/kubernetes/autoscaler/master/cluster-autoscaler/cloudprovider/aws/examples/cluster-autoscaler-autodiscover.yaml

Install the Cluster AutoScaler using the following command:

kubectl apply -f cluster-autoscaler-autodiscover.yaml

Get the details of Kubernetes master to get the head URL.

kubectl cluster-info 

command output

Use the following instructions to build the docker image.

Download the application file (script.py) from here and upload into the Amazon S3 bucket created.

Download the pod template files from here. Submit the application.

bin/spark-submit \
--master k8s://<<MASTER URL>> \
--deploy-mode cluster \
--name 'Job Name' \
--conf spark.eventLog.dir=s3a:// <<S3 BUCKET>>/logs \
--conf spark.eventLog.enabled=true \
--conf spark.history.fs.inProgressOptimization.enabled=true \
--conf spark.history.fs.update.interval=5s \
--conf spark.kubernetes.container.image=<<ECR Spark Docker Image>> \
--conf spark.kubernetes.container.image.pullPolicy=IfNotPresent \
--conf spark.kubernetes.driver.podTemplateFile='../driver_pod_template.yml' \
--conf spark.kubernetes.executor.podTemplateFile='../executor_pod_template.yml' \
--conf spark.kubernetes.authenticate.driver.serviceAccountName=spark \
--conf spark.dynamicAllocation.enabled=true \
--conf spark.dynamicAllocation.shuffleTracking.enabled=true \
--conf spark.dynamicAllocation.maxExecutors=100 \
--conf spark.dynamicAllocation.executorAllocationRatio=0.33 \
--conf spark.dynamicAllocation.sustainedSchedulerBacklogTimeout=30 \
--conf spark.dynamicAllocation.executorIdleTimeout=60s \
--conf spark.driver.memory=8g \
--conf spark.kubernetes.driver.request.cores=2 \
--conf spark.kubernetes.driver.limit.cores=4 \
--conf spark.executor.memory=8g \
--conf spark.kubernetes.executor.request.cores=2 \
--conf spark.kubernetes.executor.limit.cores=4 \
--conf spark.hadoop.fs.s3a.impl=org.apache.hadoop.fs.s3a.S3AFileSystem \
--conf spark.hadoop.fs.s3a.connection.ssl.enabled=false \
--conf spark.hadoop.fs.s3a.fast.upload=true \
s3a://<<S3 BUCKET>>/script.py \
s3a://<<S3 BUCKET>>/output 

A couple of key points to note here

  • podTemplateFile is used here, which enables scheduling of the driver pods to On-Demand Instances and executor pods to Spot Instances.
  • Spark provides a mechanism to allocate dynamically resources dynamically based on workloads. In the latest release of Spark (3.0.0), dynamicAllocation can be used with Kubernetes cluster manager. The executors that do not store, active, shuffled files can be removed to free up the resources. DynamicAllocation works well in tandem with Cluster Autoscaler for resource allocation and optimizes resource for jobs. We are using dynamicAllocation here to enable optimized resource sharing.
  • The application file and output are both in Amazon S3.

Output Files in S3

  • Spark Event logs are redirected to Amazon S3. Spark on Kubernetes creates local temporary files for logs and removes them once the application completes. The logs are redirected to Amazon S3 and Spark History Server can be used to analyze the logs. Note, you can create more instrumentation using tools like Prometheus and Grafana to monitor and manage the cluster.

Spark History Server + Dynamic Allocation

Observations

EC2 Spot Interruptions

The following diagram and log screenshot details from Spark History server showcases the behavior of a Spark application in case of an EC2 Spot interruption.

Four Spark applications launched in parallel in a cluster and one of the Spot nodes was interrupted. A couple of executor pods were terminated shut down in three of the four applications, but due to the resilient nature of Spark new executors were launched and the applications finished almost around the same time.
The Spark Driver identified the shut down executors, which handled the shuffle files and relaunched the tasks running on those executors.
Spark jobs

The Spark Driver identified the shut down executors, which handled the shuffle files and relaunched the tasks running on those executors.

Dynamic Allocation

Dynamic Allocation works with the caveat that it is an experimental feature.

dynamic allocation

Cost Optimization

Cost Optimization is achieved in several different ways from this tutorial.

  • Use of 100% Spot Instances for the Spark executors
  • Use of dynamicAllocation along with cluster autoscaler does make optimized use of resources and hence save cost
  • With the deployment of one driver and executor nodes to begin with and then scaling up on demand reduces the waste of a continuously running cluster

Cluster Autoscaling

Cluster Autoscaling is triggered as it is designed when there are pending (Spark executor) pods.

The Cluster Autoscaler logs can be fetched by:

kubectl logs -f deployment/cluster-autoscaler -n kube-system —tail=10  

Cluster Autoscaler Logs 

Cleanup

If you are trying out the tutorial, run the following steps to make sure that you don’t encounter unwanted costs.

Delete the EKS cluster and the nodegroups with the following command:

eksctl delete cluster --name sparkonk8

Delete the Amazon S3 Access Policy with the following command:

aws iam delete-policy --policy-arn <<POLICY ARN>>

Delete the Amazon S3 Output Bucket with the following command:

aws s3 rb --force s3://<<S3_BUCKET>>

Conclusion

In this blog, I demonstrated how you can run Spark workloads on a Kubernetes Cluster using Spot Instances, achieving scalability, resilience, and cost optimization. To cost optimize your Spark based big data workloads, consider running spark application using Kubernetes and EC2 Spot Instances.


Proactively manage the Spot Instance lifecycle using the new Capacity Rebalancing feature for EC2 Auto Scaling

Post Syndicated from Chad Schmutzer original https://aws.amazon.com/blogs/compute/proactively-manage-spot-instance-lifecycle-using-the-new-capacity-rebalancing-feature-for-ec2-auto-scaling/

By Deepthi Chelupati and Chad Schmutzer

AWS now offers Capacity Rebalancing for Amazon EC2 Auto Scaling, a new feature for proactively managing the Amazon EC2 Spot Instance lifecycle in an Auto Scaling group. Capacity Rebalancing complements the capacity optimized allocation strategy (designed to help find the most optimal spare capacity) and the mixed instances policy (designed to enhance availability by deploying across multiple instance types running in multiple Availability Zones). Capacity Rebalancing increases the emphasis on availability by automatically attempting to replace Spot Instances in an Auto Scaling group before they are interrupted by Amazon EC2.

In order to proactively replace Spot Instances, Capacity Rebalancing leverages the new EC2 Instance rebalance recommendation, a signal that is sent when a Spot Instance is at elevated risk of interruption. The rebalance recommendation signal can arrive sooner than the existing two-minute Spot Instance interruption notice, providing an opportunity to proactively rebalance a workload to new or existing Spot Instances that are not at elevated risk of interruption.

Capacity Rebalancing for EC2 Auto Scaling provides a seamless and automated experience for maintaining desired capacity through the Spot Instance lifecycle. This includes monitoring for rebalance recommendations, attempting to proactively launch replacement capacity for existing Spot Instances when they are at elevated risk of interruption, detaching from Elastic Load Balancing if necessary, and running lifecycle hooks as configured. This post provides an overview of using Capacity Rebalancing in EC2 Auto Scaling to manage your Spot Instance backed workloads, and dives into an example use case for taking advantage of Capacity Rebalancing in your environment.

EC2 Auto Scaling and Spot Instances – a classic love story

First, let’s review what Spot Instances are and why EC2 Auto scaling provides an optimal platform to manage your Spot Instance backed workloads. This will help illustrate how Capacity Rebalancing can benefit these workloads.

Spot Instances are spare EC2 compute capacity in the AWS Cloud available for steep discounts off On-Demand prices. In exchange for the discount, Spot Instances come with a simple rule – they are interruptible and must be returned when EC2 needs the capacity back. Where does this spare capacity come from? Since AWS builds capacity for unpredictable demand at any given time (think all 350+ instance types across 77 Availability Zones and 24 Regions), there is often excess capacity. Rather than let that spare capacity sit idle and unused, it is made available to be purchased as Spot Instances.

As you can imagine, the location and amount of spare capacity available at any given moment is dynamic and continually changes in real time. This is why it is extremely important for Spot customers to only run workloads that are truly interruption tolerant. Additionally, Spot workloads should be flexible, meaning they can be shifted in real time to where the spare capacity currently is (or otherwise be paused until spare capacity is available again). In practice, being flexible means qualifying a workload to run on multiple EC2 instance types (think big: multiple families, sizes, and generations), and in multiple Availability Zones, at any given time.

This is where EC2 Auto Scaling comes in. EC2 Auto Scaling is designed to help you maintain application availability. It also allows you to automatically add or remove EC2 instances according to conditions you define. We’ve continued to innovate on behalf of our customers by adding new features to EC2 Auto Scaling to natively support flexible configurations for EC2 workloads. One of these innovations is the mixed instances policy (launched in 2018), which supports multiple instance types and purchase options in a single Auto Scaling group. Another innovation is the capacity optimized allocation strategy (launched in 2019), an allocation strategy designed to locate optimal spare capacity for Spot Instances backed workloads. These features are aimed at supporting flexible workload best practices, and reacting to the dynamic shifts in capacity automatically.

The next level – moving from reactive to proactive Spot Capacity Rebalancing in EC2 Auto Scaling

The default behavior for EC2 Auto Scaling is to take a reactive approach to Spot Instance interruptions. This means that EC2 Auto Scaling attempts to replace an interrupted Spot Instance with another Spot Instance only after the instance has been shut down by EC2 and the health check fails. The reactive approach to interruptions works fine for many workloads. However, we have received feedback from customers requesting that EC2 Auto Scaling take a more proactive approach to handling Spot Instance interruptions.

Capacity Rebalancing in EC2 Auto Scaling is the answer to this request. Capacity Rebalancing is designed to take a proactive approach in handling the dynamic nature of EC2 capacity. It does this by monitoring for the EC2 Instance rebalance recommendation signal in addition to the “final” two-minute Spot Instance interruption notice. When a rebalance recommendation signal is detected, it automatically attempts to get a head start in replacing Spot Instances with new Spot Instances before they are shut down. In addition to attempting to maintain desired capacity through interruptions by launching replacement Spot Instances, Capacity Rebalancing gives customers the opportunity to gracefully remove Spot Instances from an Auto Scaling group by taking Spot Instances through the normal shut down process, such as deregistering from a load balancer and running terminating lifecycle hooks.

Capacity Rebalancing in EC2 Auto Scaling works best when combined with a few best practices. Let’s quickly review them:

  1. Be flexible. Capacity Rebalancing thrives on flexibility, and works best when using the EC2 Auto Scaling mixed instances policy and as many instance types and Availability Zones as possible. Remember to think big and qualify multiple families, sizes, and generations for your workload, and use all Availability Zones if possible.
  2. Use the capacity optimized allocation strategy. Capacity rebalance works optimally when combined with the capacity optimized allocation strategy and a flexible list of instance types and Availability Zones, because the goal is to find the optimal spare capacity to rebalance your workload on.
  3. Take advantage of termination lifecycle hooks (optional). Termination lifecycle hooks are powerful in case you need to perform any final tasks before shutdown.

Example tutorial – Web application workload

Now that you understand the best practices for taking advantage of Capacity Rebalancing in EC2 Auto Scaling, let’s dive into the example workload. In this scenario, we have a web application powered by 75% Spot Instances and 25% On-Demand Instances in an Auto Scaling group, running behind an Application Load Balancer. We’d like to maintain availability, and have the Auto Scaling group automatically handle Spot Instance interruptions and rebalancing of capacity.

The Auto Scaling group configuration looks like this (note the best practices of instance type and Availability Zone flexibility combined with the capacity optimized allocation strategy in the mixed instances policy):

{
   "AutoScalingGroupName": "myAutoScalingGroup",
   "CapacityRebalance": true,
   "DesiredCapacity": 12,
   "MaxSize": 15,
   "MinSize": 12,
   "MixedInstancesPolicy": {
      "InstancesDistribution": {
         "OnDemandBaseCapacity": 0,
         "OnDemandPercentageAboveBaseCapacity": 25,
         "SpotAllocationStrategy": "capacity-optimized"
      },
      "LaunchTemplate": {
         "LaunchTemplateSpecification": {
            "LaunchTemplateName": "myLaunchTemplate",
            "Version": "$Default"
         },
         "Overrides": [
            {
               "InstanceType": "c5.large"
            },
            {
               "InstanceType": "c5a.large"
            },
            {
               "InstanceType": "m5.large"
            },
            {
               "InstanceType": "m5a.large"
            },
            {
               "InstanceType": "c4.large"
            },
            {
               "InstanceType": "m4.large"
            },
            {
               "InstanceType": "c3.large"
            },
            {
               "InstanceType": "m3.large"
            }
         ]
      }
   },
   "TargetGroupARNs": [
      "arn:aws:elasticloadbalancing:us-west-2:123456789012:targetgroup/my-targets/a1b2c3d4e5f6g7h8"
   ],
   "VPCZoneIdentifier": "mySubnet1,mySubnet2,mySubnet3"
}

Next, create the Auto Scaling group as follows:

aws autoscaling create-auto-scaling-group \
  --cli-input-json file://myAutoScalingGroup.json

We also use a lifecycle hook to download logs before an instance is shut down:

aws autoscaling put-lifecycle-hook \
  --lifecycle-hook-name myTerminatingHook \
  --auto-scaling-group-name myAutoScalingGroup \
  --lifecycle-transition autoscaling:EC2_INSTANCE_TERMINATING \
  --heartbeat-timeout 300

In this example scenario, let’s say that the above config results in nine Spot Instances and three On-Demand instances being deployed in the Auto Scaling group, three Spot Instances, and one On-Demand instance in each Availability Zone. With Capacity Rebalancing enabled, if any of the nine Spot Instances receive the EC2 Instance rebalance recommendation signal, EC2 Auto Scaling will automatically request a replacement Spot Instance according to the allocation strategy (capacity optimized), resulting in 10 running Spot Instances. When the new Spot Instance passes EC2 health checks, it is joined to the load balancer and placed into service. Upon placing the new Spot Instance in service, EC2 Auto Scaling then proceeds with the shutdown process for the Spot Instance that has received the rebalance recommendation signal. It detaches the instance from the load balancer, drains connections, and then carries out the terminating lifecycle hook. Once the terminating lifecycle hook is complete, EC2 Auto Scaling shuts down the instance, bringing capacity back to nine Spot Instances.

Conclusion

Consider using the new Capacity Rebalancing feature for EC2 Auto Scaling in your environment to proactively manage Spot Instance lifecycle. Capacity Rebalancing attempts to maintain workload availability by automatically rebalancing capacity as necessary, providing a seamless and hands-off experience for managing Spot Instance interruptions. Capacity Rebalancing works best when combined with instance type flexibility and the capacity optimized allocation strategy, and may be especially useful for workloads that can easily rebalance across shifting capacity, including:

  • Containerized workloads
  • Big data and analytics
  • Image and media rendering
  • Batch processing
  • Web applications

To learn more about Capacity Rebalancing for EC2 Auto Scaling, please visit the documentation.

To learn more about the new EC2 Instance rebalance recommendation, please visit the documentation.