Post Syndicated from Garrett Galow original https://blog.cloudflare.com/zone-versioning-ga/


Today we are announcing the general availability of Zone Versioning for enterprise customers. Zone Versioning allows you to safely manage zone configuration by versioning changes and choosing how and when to deploy those changes to defined environments of traffic. Previously announced as HTTP Applications, we have redesigned the experience based on testing and feedback to provide a seamless experience for customers looking to safely rollout configuration changes.
Problems with making configuration changes
There are two problems we have heard from customers that Zone Versioning aims to solve:
- How do I test changes to my zone safely?
- If I do end up making a change that impacts my traffic negatively, how can I quickly revert that change?
Customers have worked out various ways of solving these problems. For problem #1, customers will create staging zones that live on a different hostname, often taking the form staging.example.com, that they make changes on first to ensure that those changes will work when deployed to their production zone. When making more than one change this can become troublesome as they now need to keep track of all the changes made to make the exact same set of changes on the production zone. Also, it is possible that something tested in staging never makes it to production, but yet is not rolled back, so now the two environments differ in configuration.
For problem #2, customers often keep track of what changes were made and when they were deployed in a ticketing system like JIRA, such that in case of an incident an on-call engineer can more easily find the changes they may need to roll back by manually modifying the configuration of the zone. This requires the on-call to be able to easily get to the list of what changes were made.
Altogether, this means customers are more reluctant to make changes to configuration or turn on new features that may benefit them because they do not feel confident in the ability to validate the changes safely.
How Zone Versioning solves those problems
Zone Versioning provides two new fundamental aspects to managing configuration that allow a customer to safely test, deploy and rollback configuration changes: Versions and Environments.
Versions are independent sets of zone configuration. They can be created anytime from a previous version or the initial configuration of the zone and changes to one version will not affect another version. Initially, a version affects none of a zone’s traffic, so any changes made are safe by definition. When first enabling zone versioning, we create Version 1 that is based on the current configuration of the zone (referred to as the baseline configuration).

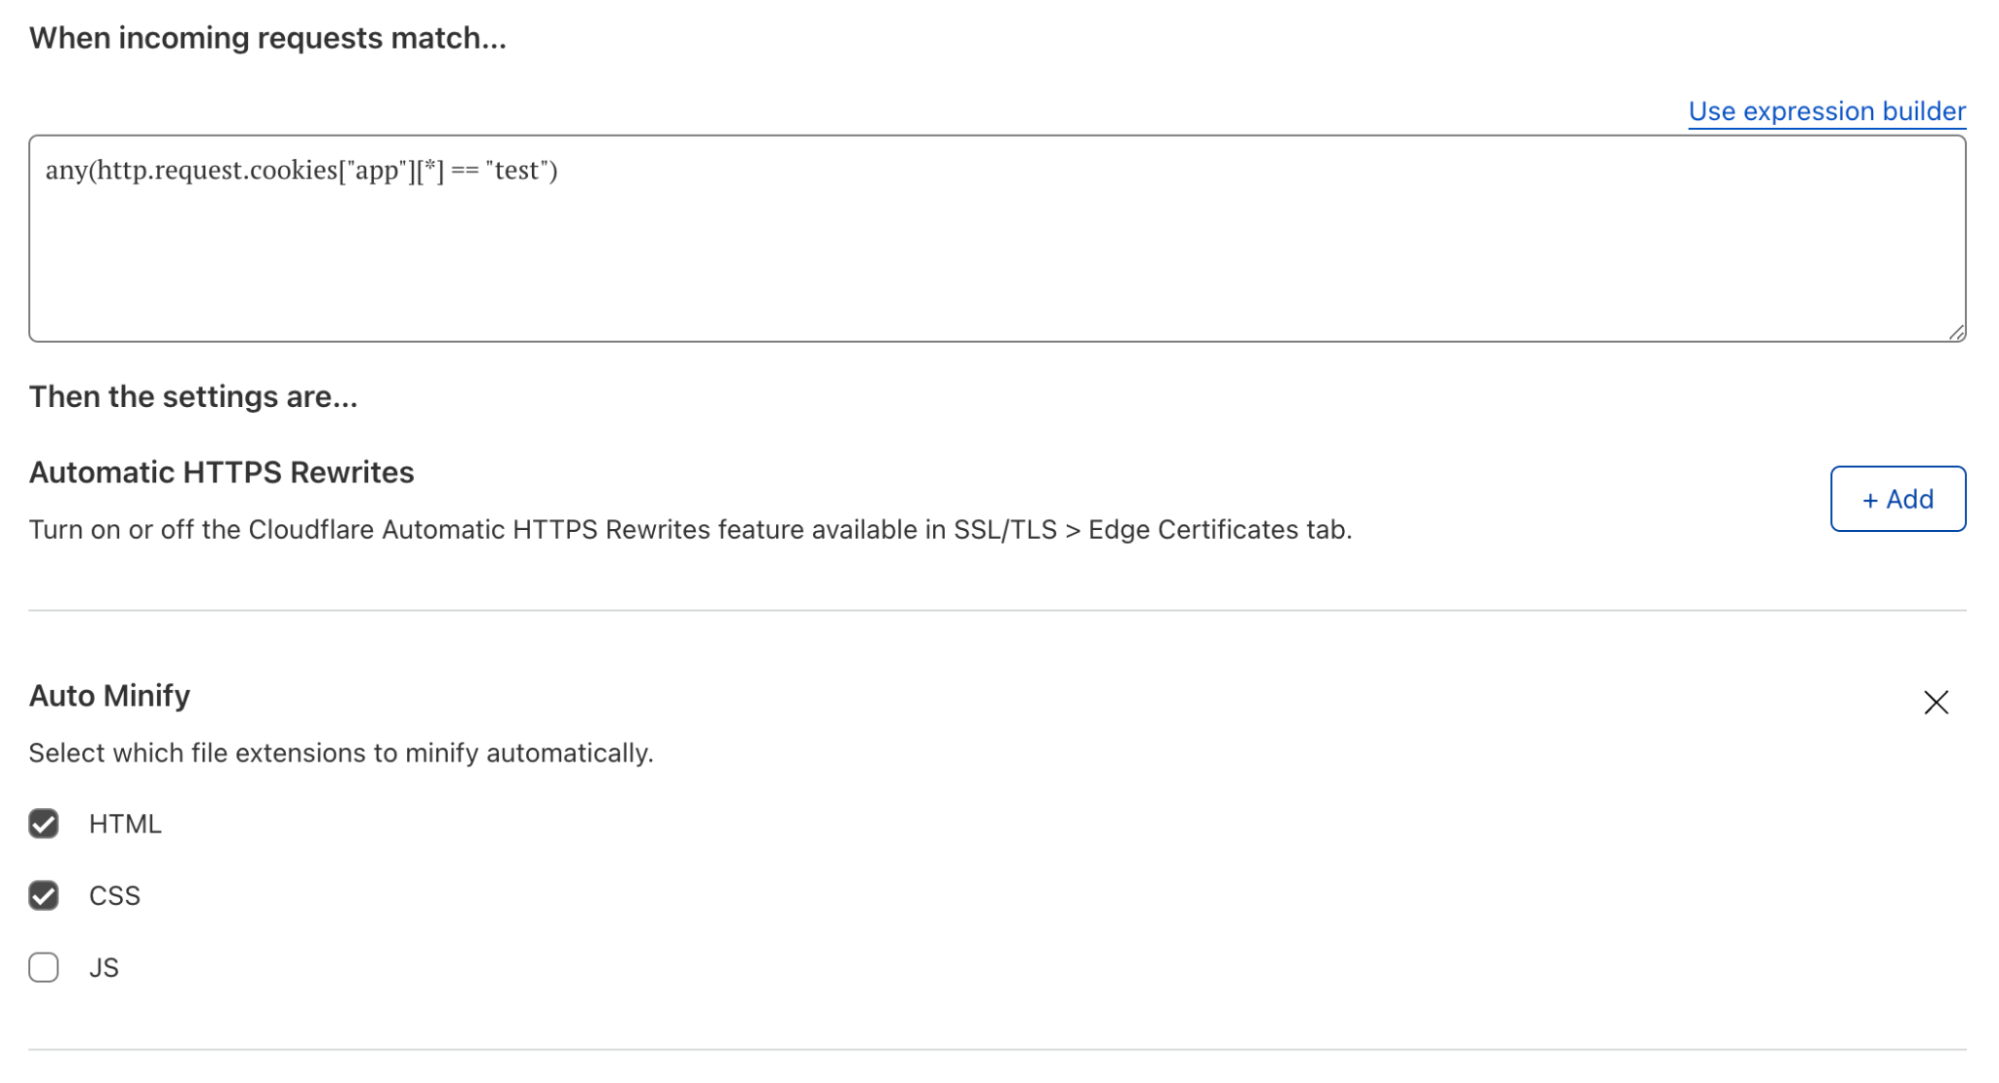
From there any changes that you make to Version 1 will be safely stored and propagated to our global network, but will not affect any traffic. Making changes to a version is no different from before, just select the version to edit and modify the configuration of that feature as normal. Once you have made the set of changes desired for a given version, to deploy that version on live traffic in your zone, you will need to deploy the version to an Environment.
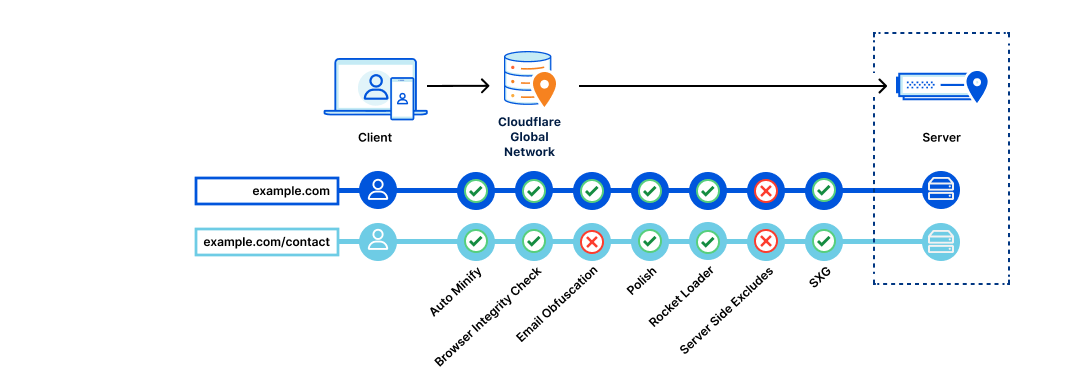
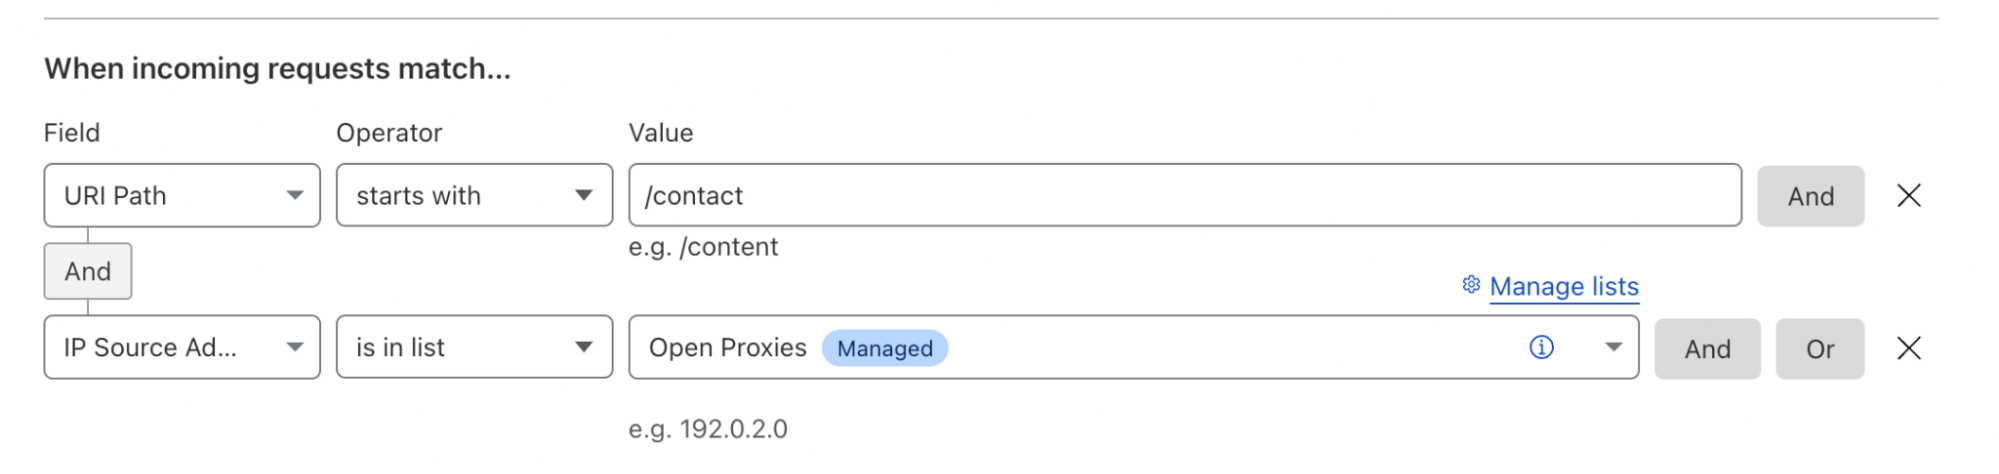
Environments are a way of mapping segments of your zone’s traffic to versions of configuration. Powered by our Ruleset Engine, that powers the likes of Custom WAF Rules and Cache Rules, Environments give you the ability to create filters based on a wide range of parameters such as hostname, client IP, location, or cookie. When a version is applied to an Environment, any traffic matching the filter will use that version’s configuration.
By default, we create three environments to get started with:
- Development – Applies to traffic sent with a specific cookie for development
- Staging – Applies to traffic sent to Cloudflare’s staging IPs
- Production – Applies to all traffic on the zone
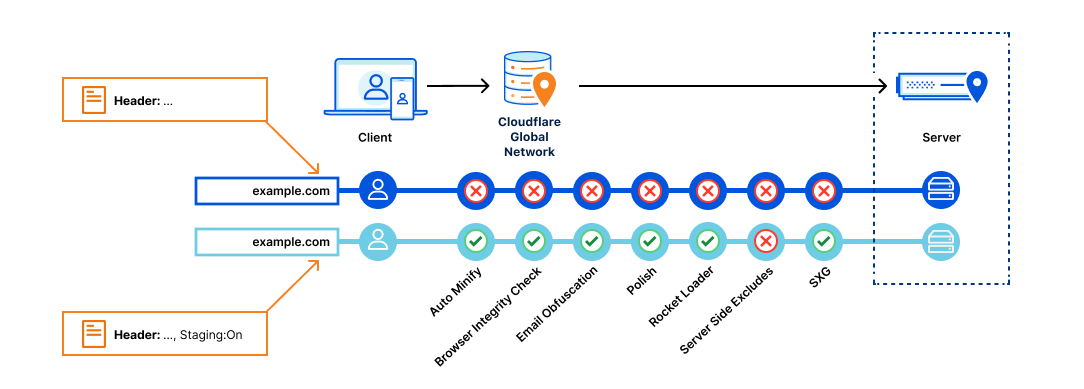
You can create additional environments or modify the pre-defined environments except for Production. Any newly created environment will begin in an unassigned state meaning traffic will fall back to the baseline configuration of the zone. In the above image, we have deployed Version 2 to both the Development and Staging environments. Once we have tested Version 2 in staging, then we can ‘Promote’ Version 2 to Production which means all traffic on the zone will receive the configuration in Version 2 except for Development and Staging traffic. If something goes wrong after deploying to Production, then we can use the ‘Rollback’ action to revert to the configuration of Version 1.
How promotion and rollbacks work
It is worth going into a bit more detail about how configuration changes, promotions, and rollbacks are realized in our global network. Whenever a configuration change is made to a version, we store that change in our system of record for the service and push that change to our global network so that it is available to be used at any time.
Importantly and unlike how changes to zones automatically take effect, that change will not be used until the version is deployed to an environment that is receiving traffic. The same is true for when a version is promoted or rolled back between environments. Because all the configuration we need for a given version is already available in our global network, we only need to push a single, atomic change to tell our network that traffic matching the filter for a given environment should now use the newly defined configuration version.
This means that promotions and more importantly rollbacks occur as quickly as you are used to with any configuration change in Cloudflare. No need to wait five or ten minutes for us to roll back a bad deployment, if something goes wrong you can return to a last known good configuration in seconds. Slow rollbacks can make ongoing incidents drag on leading to extended customer impact, so the ability to quickly execute a rollback was a critical capability.
Get started with Zone Versioning today
Enterprise Customers can get started with Zone Versioning today for their zones on the Cloudflare dashboard. Customers will need to be using the new Managed WAF rules in order to enable Zone Versioning. You can find more information about Zone Versioning in our Developer Docs.
Happy versioning!