Tag Archives: artificial intelligence

AIs as Computer Hackers

Post Syndicated from Bruce Schneier original https://www.schneier.com/blog/archives/2023/02/ais-as-computer-hackers.html

Hacker “Capture the Flag” has been a mainstay at hacker gatherings since the mid-1990s. It’s like the outdoor game, but played on computer networks. Teams of hackers defend their own computers while attacking other teams’. It’s a controlled setting for what computer hackers do in real life: finding and fixing vulnerabilities in their own systems and exploiting them in others’. It’s the software vulnerability lifecycle.

These days, dozens of teams from around the world compete in weekend-long marathon events held all over the world. People train for months. Winning is a big deal. If you’re into this sort of thing, it’s pretty much the most fun you can possibly have on the Internet without committing multiple felonies.

In 2016, DARPA ran a similarly styled event for artificial intelligence (AI). One hundred teams entered their systems into the Cyber Grand Challenge. After completing qualifying rounds, seven finalists competed at the DEFCON hacker convention in Las Vegas. The competition occurred in a specially designed test environment filled with custom software that had never been analyzed or tested. The AIs were given 10 hours to find vulnerabilities to exploit against the other AIs in the competition and to patch themselves against exploitation. A system called Mayhem, created by a team of Carnegie-Mellon computer security researchers, won. The researchers have since commercialized the technology, which is now busily defending networks for customers like the U.S. Department of Defense.

There was a traditional human–team capture-the-flag event at DEFCON that same year. Mayhem was invited to participate. It came in last overall, but it didn’t come in last in every category all of the time.

I figured it was only a matter of time. It would be the same story we’ve seen in so many other areas of AI: the games of chess and go, X-ray and disease diagnostics, writing fake news. AIs would improve every year because all of the core technologies are continually improving. Humans would largely stay the same because we remain humans even as our tools improve. Eventually, the AIs would routinely beat the humans. I guessed that it would take about a decade.

But now, five years later, I have no idea if that prediction is still on track. Inexplicably, DARPA never repeated the event. Research on the individual components of the software vulnerability lifecycle does continue. There’s an enormous amount of work being done on automatic vulnerability finding. Going through software code line by line is exactly the sort of tedious problem at which machine learning systems excel, if they can only be taught how to recognize a vulnerability. There is also work on automatic vulnerability exploitation and lots on automatic update and patching. Still, there is something uniquely powerful about a competition that puts all of the components together and tests them against others.

To see that in action, you have to go to China. Since 2017, China has held at least seven of these competitions—called Robot Hacking Games—many with multiple qualifying rounds. The first included one team each from the United States, Russia, and Ukraine. The rest have been Chinese only: teams from Chinese universities, teams from companies like Baidu and Tencent, teams from the military. Rules seem to vary. Sometimes human–AI hybrid teams compete.

Details of these events are few. They’re Chinese language only, which naturally limits what the West knows about them. I didn’t even know they existed until Dakota Cary, a research analyst at the Center for Security and Emerging Technology and a Chinese speaker, wrote a report about them a few months ago. And they’re increasingly hosted by the People’s Liberation Army, which presumably controls how much detail becomes public.

Some things we can infer. In 2016, none of the Cyber Grand Challenge teams used modern machine learning techniques. Certainly most of the Robot Hacking Games entrants are using them today. And the competitions encourage collaboration as well as competition between the teams. Presumably that accelerates advances in the field.

None of this is to say that real robot hackers are poised to attack us today, but I wish I could predict with some certainty when that day will come. In 2018, I wrote about how AI could change the attack/defense balance in cybersecurity. I said that it is impossible to know which side would benefit more but predicted that the technologies would benefit the defense more, at least in the short term. I wrote: “Defense is currently in a worse position than offense precisely because of the human components. Present-day attacks pit the relative advantages of computers and humans against the relative weaknesses of computers and humans. Computers moving into what are traditionally human areas will rebalance that equation.”

Unfortunately, it’s the People’s Liberation Army and not DARPA that will be the first to learn if I am right or wrong and how soon it matters.

This essay originally appeared in the January/February 2022 issue of IEEE Security & Privacy.

How SikSin improved customer engagement with AWS Data Lab and Amazon Personalize

Post Syndicated from Byungjun Choi original https://aws.amazon.com/blogs/big-data/how-siksin-improved-customer-engagement-with-aws-data-lab-and-amazon-personalize/

This post is co-written with Byungjun Choi and Sangha Yang from SikSin.

SikSin is a technology platform connecting customers with restaurant partners serving their multiple needs. Customers use the SikSin platform to search and discover restaurants, read and write reviews, and view photos. From the restaurateurs’ perspective, SikSin enables restaurant partners to engage and acquire customers in order to grow their business. SikSin has a partnership with 850 corporate companies and more than 50,000 restaurants. They issue restaurant e-vouchers to more than 220,000 members, including individuals as well as corporate members. The SikSin platform receives more than 3 million users in a month. SikSin was listed in the top 100 of the Financial Times’s Asia-Pacific region’s high-growth companies in 2022.

SikSin was looking to deliver improved customer experiences and increase customer engagement. SikSin confronted two business challenges:

  • Customer engagement – SikSin maintains data on more than 750,000 restaurants and has more than 4,000 restaurant articles (and growing). SikSin was looking for a personalized and customized approach to provide restaurant recommendations for their customers and get them engaged with the content, thereby providing a personalized customer experience.
  • Data analysis activities – The SikSin Food Service team experienced difficulties in regards to report generation due to scattered data across multiple systems. The team previously had to submit a request to the IT team and then wait for answers that might be outdated. For the IT team, they needed to manually pull data out of files, databases, and applications, and then combine them upon every request, which is a time-consuming activity. The SikSin Food Service team wanted to view web analytics log data by multiple dimensions, such as customer profiles and places. Examples include page view, conversion rate, and channels.

To overcome these two challenges, SikSin participated in the AWS Data Lab program to assist them in building a prototype solution. The AWS Data Lab offers accelerated, joint-engineering engagements between customers and AWS technical resources to create tangible deliverables that accelerate data and analytics modernization initiatives. The Build Lab is a 2–5-day intensive build with a technical customer team.

In this post, we share how SikSin built the basis for accelerating their data project with the help of the Data Lab and Amazon Personalize.

Use cases

The Data Lab team and SikSin team had three consecutive meetings to discuss business and technical requirements, and decided to work on two uses cases to resolve their two business challenges:

  • Build personalized recommendations – SikSin wanted to deploy a machine learning (ML) model to produce personalized content on the landing page of the platform, particularly restaurants and restaurant articles. The success criteria was to increase the number of page views per session and membership subscription, reduce their bounce rate, and ultimately engage more visitors and members in SikSin’s contents.
  • Establish self-service analytics – SikSin’s business users wanted to reduce time to insight by making data more accessible while removing the reliance on the IT team by giving business users the ability to query data. The key was to consolidate web logs from BigQuery and operational business data from Amazon Relational Data Service (Amazon RDS) into a single place and analyze data whenever they need.

Solution overview

The following architecture depicts what the SikSin team built in the 4-day Build Lab. There are two parts in the solution to address SikSin’s business and technical requirements. The first part (1–8) is for building personalized recommendations, and the second part (A–D) is for establishing self-service analytics.

SikSin Solution Architecture

SikSin deployed an ML model to produce personalized content recommendations by using the following AWS services:

  1. AWS Database Migration Service (AWS DMS) helps migrate databases to AWS quickly and securely with minimal downtime. The SikSin team used AWS DMS to perform full load to bring data from the database tables into Amazon Simple Storage Service (Amazon S3) as a target. Amazon S3 is an object storage service offering industry-leading scalability, data availability, security, and performance. An AWS Glue crawler populates the AWS Glue Data Catalog with the data schema definitions (in a landing folder).
  2. An AWS Lambda function checks if any previous files still exist in the landing folder and archives the files into a backup folder, if any.
  3. AWS Glue is a serverless data integration service that makes it easier to discover, prepare, move, and integrate data from multiple sources for analytics, ML, and application development. The SikSin team created AWS Glue Spark extract, transform, and load (ETL) jobs to prepare input datasets for ML models. These datasets are used to train ML models in bulk mode. There are a total of five datasets for training and two datasets for batch inference jobs.
  4. Amazon Personalize allows developers to quickly build and deploy curated recommendations and intelligent user segmentation at scale using ML. Because Amazon Personalize can be tailored to your individual needs, you can deliver the right customer experience at the right time and in the right place. Also, users will select existing ML models (also known as recipes), train models, and run batch inference to make recommendations.
  5. An Amazon Personalize job predicts for each line of input data (restaurants and restaurant articles) and produces ML-generated recommendations in the designated S3 output folder. The recommendation records are surfaced using interaction data, product data, and predictive models. An AWS Glue crawler populates the AWS Glue Data Catalog with the data schema definitions (in an output folder).
  6. The SikSin team applied business logics and filters in an AWS Glue job to prepare the final datasets for recommendations.
  7. AWS Step Functions enables you to build scalable, distributed applications using state machines. The SikSin team used AWS Step Functions Workflow Studio to visually create, run, and debug workflow runs. This workflow is triggered based on a schedule. The process includes data ingestion, cleansing, processing, and all steps defined in Amazon Personalize. This also involves managing run dependencies, scheduling, error-catching, and concurrency in accordance with the logical flow of the pipeline.
  8. Amazon Simple Notification Service (Amazon SNS) sends notifications. The SikSin team used Amazon SNS to send a notification via email and Google Hangouts with a Lambda function as a target.

To establish a self-service analytics environment to enable business users to perform data analysis, SikSin used the following services:

  1. The Google BigQuery Connector for AWS Glue simplifies the process of connecting AWS Glue jobs to extract data from BigQuery. The SikSin team used the connector to extract web analytics logs from BigQuery and load them to an S3 bucket.
  2. AWS Glue DataBrew is a visual data preparation tool that makes it easy for data analysts and data scientists to clean and normalize data to prepare it for analytics and ML. You can choose from over 250 pre-built transformations to automate data preparation tasks, all without the need to write any code. The SikSin Food Service team used it to visually inspect large datasets and shape the data for their data analysis activities. An S3 bucket (in the intermediate folder) contains business operational data such as customers, places, articles, and products, and reference data loaded from AWS DMS and web analytics logs and data by AWS Glue jobs.
  3. An AWS Glue Python shell runs a job to cleanse and join data, and apply business rules to prepare the data for queries. The SikSin team used AWS SDK Pandas, an AWS Professional Service open-source Python initiative, which extends the power of the Pandas library to AWS, connecting DataFrames and AWS data related services. The output files are stored in an Apache Parquet format in a single folder. An AWS Glue crawler populates the data schema definitions (in an output folder) into the AWS Glue Data Catalog.
  4. The SikSin Food Service team used Amazon Athena and Amazon Quicksight to query and visualize the data analysis. Athena is an interactive query service that makes it easy to analyze data in Amazon S3 using standard SQL. QuickSight is an ML-powered business intelligence service built for the cloud.

Business outcomes

The SikSin Food Service team is now able to access the available data for performing data analysis and manipulation operations efficiently, as well as for getting insights on their own. This immediately allows the team as well as other lines of business to understand how customers are interacting with SikSin’s contents and services on the platform and make decisions sooner. For example, with the data output, the Food Service team was able to provide insights and data points for their external stakeholder and customer to initiate a new business idea. Moreover, the team shared, “We anticipate the recommendations and personalized content will increase conversion rates and customer engagement.”

The AWS Data Lab enabled SikSin to review and assess thoroughly what data is actually usable and available. With SikSin’s objective to successfully build a data pipeline for data analytics purposes, the SikSin team came to realize the importance of data cleansing, categorization, and standardization. “Only fruitful analysis and recommendation are possible when data is intact and properly cleansed,” said Byungjun Choi (the Head of SikSin’s Food Service Team). After completing the Data Lab, SikSin completed and set up an internal process that can streamline the data cleansing pipeline.

SikSin was stuck in the research phase of looking for a solution to solve their personalization challenges. The AWS Data Lab enabled the SikSin IT Team to get hands-on with the technology and build a minimum viable product (MVP) to explore how Amazon Personalize would work in their environment with their data. They achieved this via the Data Lab by adopting AWS DMS, AWS Glue, Amazon Personalize, and Step Functions. “Though it is still the early stage of building a prototype, I am very confident with the right enablement provided from AWS that an effective recommendation system can be adopted on production level very soon,” commented Sangha Yang (the Head of SikSin IT Team).

Conclusion

As a result of the 4-day Build Lab, the SikSin team left with a working prototype that is custom fit to their needs, gaining a clear path forward for enabling end-users to gain valuable insights into its data. The Data Lab allowed the SikSin team to accelerate the architectural design and prototype build of this solution by months. Based on the lessons and learnings obtained from Data Lab, SikSin is planning to launch a Global News Content Platform equipped with a recommendation feature in FY23.

As demonstrated by SikSin’s achievements, Amazon Personalize allows developers to quickly build and deploy curated recommendations and intelligent user segmentation at scale using ML. Because Amazon Personalize can be tailored to your individual needs, you can deliver the right customer experience at the right time and in the right place. Whether you want to optimize recommendations, target customers more accurately, maximize your data’s value, or promote items using business rules.

To accelerate your digital transformation with ML, the Data Lab program is available to support you by providing prescriptive architectural guidance on a particular use case, sharing best practices, and removing technical roadblocks. You’ll leave the engagement with an architecture or working prototype that is custom fit to your needs, a path to production, and deeper knowledge of AWS services.

Please contact your AWS Account Manager or Solutions Architect to get started. If you don’t have an AWS Account Manager, please contact Sales.


About the Authors

bdb-2857-BJByungjun Choi is the Head of SikSin Food Service at SikSin.

bdb-2857-SHSangha Yang is the Head of IT team at SinSin.

bdb-2857-youngguYounggu Yun is a Senior Data Lab Architect at AWS. He works with customers around the APAC region to help them achieve business goals and solve technical problems by providing prescriptive architectural guidance, sharing best practices, and building innovative solutions together.

Junwoo Lee is an Account Manager at AWS. He provides technical and business support to help customer resolve their problems and enrich customer journey by introducing local and global programs for his customers.

bdb-2857-jinwooJinwoo Park is a Senior Solutions Architect at AWS. He provides technical support for AWS customers to succeed with their cloud journey. He helps customers build more secure, efficient, and cost-optimized architectures and solutions, and delivers best practices and workshops.

AI and Political Lobbying

Post Syndicated from Bruce Schneier original https://www.schneier.com/blog/archives/2023/01/ai-and-political-lobbying.html

Launched just weeks ago, ChatGPT is already threatening to upend how we draft everyday communications like emails, college essays and myriad other forms of writing.

Created by the company OpenAI, ChatGPT is a chatbot that can automatically respond to written prompts in a manner that is sometimes eerily close to human.

But for all the consternation over the potential for humans to be replaced by machines in formats like poetry and sitcom scripts, a far greater threat looms: artificial intelligence replacing humans in the democratic processes—not through voting, but through lobbying.

ChatGPT could automatically compose comments submitted in regulatory processes. It could write letters to the editor for publication in local newspapers. It could comment on news articles, blog entries and social media posts millions of times every day. It could mimic the work that the Russian Internet Research Agency did in its attempt to influence our 2016 elections, but without the agency’s reported multimillion-dollar budget and hundreds of employees.

Automatically generated comments aren’t a new problem. For some time, we have struggled with bots, machines that automatically post content. Five years ago, at least a million automatically drafted comments were believed to have been submitted to the Federal Communications Commission regarding proposed regulations on net neutrality. In 2019, a Harvard undergraduate, as a test, used a text-generation program to submit 1,001 comments in response to a government request for public input on a Medicaid issue. Back then, submitting comments was just a game of overwhelming numbers.

Platforms have gotten better at removing “coordinated inauthentic behavior.” Facebook, for example, has been removing over a billion fake accounts a year. But such messages are just the beginning. Rather than flooding legislators’ inboxes with supportive emails, or dominating the Capitol switchboard with synthetic voice calls, an AI system with the sophistication of ChatGPT but trained on relevant data could selectively target key legislators and influencers to identify the weakest points in the policymaking system and ruthlessly exploit them through direct communication, public relations campaigns, horse trading or other points of leverage.

When we humans do these things, we call it lobbying. Successful agents in this sphere pair precision message writing with smart targeting strategies. Right now, the only thing stopping a ChatGPT-equipped lobbyist from executing something resembling a rhetorical drone warfare campaign is a lack of precision targeting. AI could provide techniques for that as well.

A system that can understand political networks, if paired with the textual-generation capabilities of ChatGPT, could identify the member of Congress with the most leverage over a particular policy area—say, corporate taxation or military spending. Like human lobbyists, such a system could target undecided representatives sitting on committees controlling the policy of interest and then focus resources on members of the majority party when a bill moves toward a floor vote.

Once individuals and strategies are identified, an AI chatbot like ChatGPT could craft written messages to be used in letters, comments—anywhere text is useful. Human lobbyists could also target those individuals directly. It’s the combination that’s important: Editorial and social media comments only get you so far, and knowing which legislators to target isn’t itself enough.

This ability to understand and target actors within a network would create a tool for AI hacking, exploiting vulnerabilities in social, economic and political systems with incredible speed and scope. Legislative systems would be a particular target, because the motive for attacking policymaking systems is so strong, because the data for training such systems is so widely available and because the use of AI may be so hard to detect—particularly if it is being used strategically to guide human actors.

The data necessary to train such strategic targeting systems will only grow with time. Open societies generally make their democratic processes a matter of public record, and most legislators are eager—at least, performatively so—to accept and respond to messages that appear to be from their constituents.

Maybe an AI system could uncover which members of Congress have significant sway over leadership but still have low enough public profiles that there is only modest competition for their attention. It could then pinpoint the SuperPAC or public interest group with the greatest impact on that legislator’s public positions. Perhaps it could even calibrate the size of donation needed to influence that organization or direct targeted online advertisements carrying a strategic message to its members. For each policy end, the right audience; and for each audience, the right message at the right time.

What makes the threat of AI-powered lobbyists greater than the threat already posed by the high-priced lobbying firms on K Street is their potential for acceleration. Human lobbyists rely on decades of experience to find strategic solutions to achieve a policy outcome. That expertise is limited, and therefore expensive.

AI could, theoretically, do the same thing much more quickly and cheaply. Speed out of the gate is a huge advantage in an ecosystem in which public opinion and media narratives can become entrenched quickly, as is being nimble enough to shift rapidly in response to chaotic world events.

Moreover, the flexibility of AI could help achieve influence across many policies and jurisdictions simultaneously. Imagine an AI-assisted lobbying firm that can attempt to place legislation in every single bill moving in the US Congress, or even across all state legislatures. Lobbying firms tend to work within one state only, because there are such complex variations in law, procedure and political structure. With AI assistance in navigating these variations, it may become easier to exert power across political boundaries.

Just as teachers will have to change how they give students exams and essay assignments in light of ChatGPT, governments will have to change how they relate to lobbyists.

To be sure, there may also be benefits to this technology in the democracy space; the biggest one is accessibility. Not everyone can afford an experienced lobbyist, but a software interface to an AI system could be made available to anyone. If we’re lucky, maybe this kind of strategy-generating AI could revitalize the democratization of democracy by giving this kind of lobbying power to the powerless.

However, the biggest and most powerful institutions will likely use any AI lobbying techniques most successfully. After all, executing the best lobbying strategy still requires insiders—people who can walk the halls of the legislature—and money. Lobbying isn’t just about giving the right message to the right person at the right time; it’s also about giving money to the right person at the right time. And while an AI chatbot can identify who should be on the receiving end of those campaign contributions, humans will, for the foreseeable future, need to supply the cash. So while it’s impossible to predict what a future filled with AI lobbyists will look like, it will probably make the already influential and powerful even more so.

This essay was written with Nathan Sanders, and previously appeared in the New York Times.

Edited to Add: After writing this, we discovered that a research group is researching AI and lobbying:

We used autoregressive large language models (LLMs, the same type of model behind the now wildly popular ChatGPT) to systematically conduct the following steps. (The full code is available at this GitHub link: https://github.com/JohnNay/llm-lobbyist.)

  1. Summarize official U.S. Congressional bill summaries that are too long to fit into the context window of the LLM so the LLM can conduct steps 2 and 3.
  2. Using either the original official bill summary (if it was not too long), or the summarized version:
    1. Assess whether the bill may be relevant to a company based on a company’s description in its SEC 10K filing.
    2. Provide an explanation for why the bill is relevant or not.
    3. Provide a confidence level to the overall answer.
  3. If the bill is deemed relevant to the company by the LLM, draft a letter to the sponsor of the bill arguing for changes to the proposed legislation.

Here is the paper.

AWS Week in Review – January 16, 2023

Post Syndicated from Antje Barth original https://aws.amazon.com/blogs/aws/aws-week-in-review-january-16-2023/

Today, we celebrate Martin Luther King Jr. Day in the US to honor the late civil rights leader’s life, legacy, and achievements. In this article, Amazon employees share what MLK Day means to them and how diversity makes us stronger.

Coming back to our AWS Week in Review—it’s been a busy week!

Last Week’s Launches
Here are some launches that got my attention during the previous week:

AWS Local Zones in Perth and Santiago now generally available – AWS Local Zones help you run latency-sensitive applications closer to end users. AWS now has a total of 29 Local Zones; 12 outside of the US (Bangkok, Buenos Aires, Copenhagen, Delhi, Hamburg, Helsinki, Kolkata, Muscat, Perth, Santiago, Taipei, and Warsaw) and 17 in the US. See the full list of available and announced AWS Local Zones and learn how to get started.

AWS Local Zones Locations

AWS Clean Rooms now available in preview – During AWS re:Invent this past November, we announced AWS Clean Rooms, a new analytics service that helps companies across industries easily and securely analyze and collaborate on their combined datasets—without sharing or revealing underlying data. You can now start using AWS Clean Rooms (Preview).

Amazon Kendra updates – Amazon Kendra is an intelligent search service powered by machine learning (ML) that helps you search across different content repositories with built-in connectors. With the new Amazon Kendra Intelligent Ranking for self-managed OpenSearch, you can now improve the quality of your OpenSearch search results using Amazon Kendra’s ML-powered semantic ranking technology.

Amazon Kendra also released an Amazon S3 connector with VPC support to index and search documents from Amazon S3 hosted in your VPC, a new Google Drive Connector to index and search documents from Google Drive, a Microsoft Teams Connector to enable Microsoft Teams messaging search, and a Microsoft Exchange Connector to enable email-messaging search.

Amazon Personalize updates – Amazon Personalize helps you improve customer engagement through personalized product and content recommendations. Using the new Trending-Now recipe, you can now generate recommendations for items that are rapidly becoming more popular with your users. Amazon Personalize now also supports tag-based resource authorization. Tags are labels in the form of key-value pairs that can be attached to individual Amazon Personalize resources to manage resources or allocate costs.

Amazon SageMaker Canvas now delivers up to 3x faster ML model training time – SageMaker Canvas is a visual interface that enables business analysts to generate accurate ML predictions on their own—without having to write a single line of code. The accelerated model training times help you prototype and experiment more rapidly, shortening the time to generate predictions and turn data into valuable insights.

For a full list of AWS announcements, be sure to keep an eye on the What’s New at AWS page.

Other AWS News
Here are some additional news items and blog posts that you may find interesting:

AWS open-source news and updates – My colleague Ricardo writes this weekly open-source newsletter in which he highlights new open-source projects, tools, and demos from the AWS Community. Read edition #141 here.

ML model hosting best practices in Amazon SageMaker – This seven-part blog series discusses best practices for ML model hosting in SageMaker to help you identify which hosting design pattern meets your needs best. The blog series also covers advanced concepts such as multi-model endpoints (MME), multi-container endpoints (MCE), serial inference pipelines, and model ensembles. Read part one here.

I would also like to recommend this really interesting Amazon Science article about differential privacy for end-to-end speech recognition. The data used to train AI models is protected by differential privacy (DP), which adds noise during training. In this article, Amazon researchers show how ensembles of teacher models can meet DP constraints while reducing error by more than 26 percent relative to standard DP methods.

Upcoming AWS Events
Check your calendars and sign up for these AWS events:

#BuildOnLiveBuild On AWS Live events are a series of technical streams on twitch.tv/aws that focus on technology topics related to challenges hands-on practitioners face today.

  • Join the Build On Live Weekly show about the cloud, the community, the code, and everything in between, hosted by AWS Developer Advocates. The show streams every Thursday at 09:00 US PT on twitch.tv/aws.
  • Join the new The Big Dev Theory show, co-hosted with AWS partners, discussing various topics such as data and AI, AIOps, integration, and security. The show streams every Tuesday at 08:00 US PT on twitch.tv/aws.

Check the AWS Twitch schedule for all shows.

AWS Community Days – AWS Community Day events are community-led conferences that deliver a peer-to-peer learning experience, providing developers with a venue to acquire AWS knowledge in their preferred way: from one another.

AWS Innovate Data and AI/ML edition – AWS Innovate is a free online event to learn the latest from AWS experts and get step-by-step guidance on using AI/ML to drive fast, efficient, and measurable results.

  • AWS Innovate Data and AI/ML edition for Asia Pacific and Japan is taking place on February 22, 2023. Register here.
  • Registrations for AWS Innovate EMEA (March 9, 2023) and the Americas (March 14, 2023) will open soon. Check the AWS Innovate page for updates.

You can browse all upcoming in-person and virtual events.

That’s all for this week. Check back next Monday for another Week in Review!

— Antje

This post is part of our Week in Review series. Check back each week for a quick roundup of interesting news and announcements from AWS!

New – Bring ML Models Built Anywhere into Amazon SageMaker Canvas and Generate Predictions

Post Syndicated from Antje Barth original https://aws.amazon.com/blogs/aws/new-bring-ml-models-built-anywhere-into-amazon-sagemaker-canvas-and-generate-predictions/

Amazon SageMaker Canvas provides business analysts with a visual interface to solve business problems using machine learning (ML) without writing a single line of code. Since we introduced SageMaker Canvas in 2021, many users have asked us for an enhanced, seamless collaboration experience that enables data scientists to share trained models with their business analysts with a few simple clicks.

Today, I’m excited to announce that you can now bring ML models built anywhere into SageMaker Canvas and generate predictions.

New – Bring Your Own Model into SageMaker Canvas
As a data scientist or ML practitioner, you can now seamlessly share models built anywhere, within or outside Amazon SageMaker, with your business teams. This removes the heavy lifting for your engineering teams to build a separate tool or user interface to share ML models and collaborate between the different parts of your organization. As a business analyst, you can now leverage ML models shared by your data scientists within minutes to generate predictions.

Let me show you how this works in practice!

In this example, I share an ML model that has been trained to identify customers that are potentially at risk of churning with my marketing analyst. First, I register the model in the SageMaker model registry. SageMaker model registry lets you catalog models and manage model versions. I create a model group called 2022-customer-churn-model-group and then select Create model version to register my model.

Amazon SageMaker Model Registry

To register your model, provide the location of the inference image in Amazon ECR, as well as the location of your model.tar.gz file in Amazon S3. You can also add model endpoint recommendations and additional model information. Once you’ve registered your model, select the model version and select Share.

Amazon SageMaker Studio - Share models from model registry with SageMaker Canvas users

You can now choose the SageMaker Canvas user profile(s) within the same SageMaker domain you want to share your model with. Then, provide additional model details, such as information about training and validation datasets, the ML problem type, and model output information. You can also add a note for the SageMaker Canvas users you share the model with.

Amazon SageMaker Studio - Share a model from Model Registry with SageMaker Canvas users

Similarly, you can now also share models trained in SageMaker Autopilot and models available in SageMaker JumpStart with SageMaker Canvas users.

The business analysts will receive an in-app notification in SageMaker Canvas that a model has been shared with them, along with any notes you added.

Amazon SageMaker Canvas - Received model from SageMaker Studio

My marketing analyst can now open, analyze, and start using the model to generate ML predictions in SageMaker Canvas.

Amazon SageMaker Canvas - Imported model from SageMaker Studio

Select Batch prediction to generate ML predictions for an entire dataset or Single prediction to create predictions for a single input. You can download the results in a .csv file.

Amazon SageMaker Canvas - Generate Predictions

New – Improved Model Sharing and Collaboration from SageMaker Canvas with SageMaker Studio Users
We also improved the sharing and collaboration capabilities from SageMaker Canvas with data science and ML teams. As a business analyst, you can now select which SageMaker Studio user profile(s) you want to share your standard-build models with.

Your data scientists or ML practitioners will receive a similar in-app notification in SageMaker Studio once a model has been shared with them, along with any notes from you. In addition to just reviewing the model, SageMaker Studio users can now also, if needed, update the data transformations in SageMaker Data Wrangler, retrain the model in SageMaker Autopilot, and share back the updated model. SageMaker Studio users can also recommend an alternate model from the list of models in SageMaker Autopilot.

Once SageMaker Studio users share back a model, you receive another notification in SageMaker Canvas that an updated model has been shared back with you. This collaboration between business analysts and data scientists will help democratize ML across organizations by bringing transparency to automated decisions, building trust, and accelerating ML deployments.

Now Available
The enhanced, seamless collaboration capabilities for Amazon SageMaker Canvas, including the ability to bring your ML models built anywhere, are available today in all AWS Regions where SageMaker Canvas is available with no changes to the existing SageMaker Canvas pricing.

Start collaborating and bring your ML model to Amazon SageMaker Canvas today!

— Antje

Obligatory ChatGPT Post

Post Syndicated from Bruce Schneier original https://www.schneier.com/blog/archives/2022/12/obligatory-chatgpt-post.html

Seems like absolutely everyone everywhere is playing with Chat GPT.

So I did, too….

Write an essay in the style of Bruce Schneier on how ChatGPT will affect cybersecurity.

As with any new technology, the development and deployment of ChatGPT is likely to have a significant impact on the field of cybersecurity. In many ways, ChatGPT and other AI technologies hold great promise for improving the ability of organizations and individuals to defend against cyber threats. At the same time, however, the use of these technologies also raises important questions and concerns about the potential risks and challenges they may pose.

One of the key ways in which ChatGPT is likely to affect cybersecurity is by enabling organizations to more quickly and accurately identify potential security threats. With its ability to analyze vast amounts of data and identify patterns and trends that might be difficult for humans to spot, ChatGPT could be a valuable tool for detecting and responding to cyberattacks. This could be especially useful in the case of complex, coordinated attacks that might otherwise be difficult to identify and defend against.

Another potential benefit of ChatGPT in the realm of cybersecurity is its ability to improve communication and coordination among different organizations and agencies. By enabling these groups to more easily share information and work together to defend against cyber threats, ChatGPT could help to make the overall cybersecurity landscape more effective and efficient. This could be especially important in the case of large-scale attacks that require a coordinated response from multiple organizations.

Of course, as with any new technology, there are also potential risks and challenges associated with the use of ChatGPT in the field of cybersecurity. One key concern is the potential for ChatGPT to be used by malicious actors to conduct cyberattacks. By automating the process of planning and executing attacks, ChatGPT could make it easier for attackers to carry out sophisticated, coordinated attacks at a much faster pace than would be possible without AI. This could potentially make it more difficult for organizations and individuals to defend against such attacks.

Another potential risk is the possibility that ChatGPT could be used to create fake news or propaganda, which could be used to spread misinformation or confusion. In the context of cybersecurity, the spread of false information could potentially lead to confusion and panic, making it more difficult for organizations and individuals to respond effectively to cyber threats. Additionally, the use of ChatGPT to create fake news or propaganda could also undermine trust in information and communications systems, potentially undermining the overall security of these systems.

Overall, the development and deployment of ChatGPT is likely to have a significant impact on the field of cybersecurity. While ChatGPT and other AI technologies hold great promise for improving the ability of organizations and individuals to defend against cyber threats, it is important to carefully consider the potential risks and challenges they may pose, and to take appropriate measures to mitigate these risks. This may include implementing strict security protocols and safeguards to prevent unauthorized access to ChatGPT and other AI systems, as well as ongoing monitoring and evaluation to ensure that these technologies are being used in a safe and responsible manner.

Not bad. I don’t think I can retire, but I probably can go on vacation for a few days. And, of course, it’s going to get better…a lot better…and probably sooner than we expect. This is a big deal.

New – Process PDFs, Word Documents, and Images with Amazon Comprehend for IDP

Post Syndicated from Marcia Villalba original https://aws.amazon.com/blogs/aws/now-process-pdfs-word-documents-and-images-with-amazon-comprehend-for-idp/

Today we are announcing a new Amazon Comprehend feature for intelligent document processing (IDP). This feature allows you to classify and extract entities from PDF documents, Microsoft Word files, and images directly from Amazon Comprehend without you needing to extract the text first.

Many customers need to process documents that have a semi-structured format, like images of receipts that were scanned or tax statements in PDF format. Until today, those customers first needed to preprocess those documents using optical character recognition (OCR) tools to extract the text. Then they could use Amazon Comprehend to classify and extract entities from those preprocessed files.

Now with Amazon Comprehend for IDP, customers can process their semi-structured documents, such as PDFs, docx, PNG, JPG, or TIFF images, as well as plain-text documents, with a single API call. This new feature combines OCR and Amazon Comprehend’s existing natural language processing (NLP) capabilities to classify and extract entities from the documents. The custom document classification API allows you to organize documents into categories or classes, and the custom-named entity recognition API allows you to extract entities from documents like product codes or business-specific entities. For example, an insurance company can now process scanned customers’ claims with fewer API calls. Using the Amazon Comprehend entity recognition API, they can extract the customer number from the claims and use the custom classifier API to sort the claim into the different insurance categories—home, car, or personal.

Starting today, Amazon Comprehend for IDP APIs are available for real-time inferencing of files, as well as for asynchronous batch processing on large document sets. This feature simplifies the document processing pipeline and reduces development effort.

Getting Started
You can use Amazon Comprehend for IDP from the AWS Management Console, AWS SDKs, or AWS Command Line Interface (CLI).

In this demo, you will see how to asynchronously process a semi-structured file with a custom classifier. For extracting entities, the steps are different, and you can learn how to do it by checking the documentation.

In order to process a file with a classifier, you will first need to train a custom classifier. You can follow the steps in the Amazon Comprehend Developer Guide. You need to train this classifier with plain text data.

After you train your custom classifier, you can classify documents using either asynchronous or synchronous operations. For using the synchronous operation to analyze a single document, you need to create an endpoint to run real-time analysis using a custom model. You can find more information about real-time analysis in the documentation. For this demo, you are going to use the asynchronous operation, placing the documents to classify in an Amazon Simple Storage Service (Amazon S3) bucket and running an analysis batch job.

To get started classifying documents in batch from the console, on the Amazon Comprehend page, go to Analysis jobs and then Create job.

Create new job

Then you can configure the new analysis job. First, input a name and pick Custom classification and the custom classifier you created earlier.

Then you can configure the input data. First, select the S3 location for that data. In that location, you can place your PDFs, images, and Word Documents. Because you are processing semi-structured documents, you need to choose One document per file. If you want to override Amazon Comprehend settings for extracting and parsing the document, you can configure the Advanced document input options.

Input data for analysis job

After configuring the input data, you can select where the output of this analysis should be stored. Also, you need to give access permissions for this analysis job to read and write on the specified Amazon S3 locations, and then you are ready to create the job.

Configuring the classification job

The job takes a few minutes to run, depending on the size of the input. When the job is ready, you can check the output results. You can find the results in the Amazon S3 location you specified when you created the job.

In the results folder, you will find a .out file for each of the semi-structured files Amazon Comprehend classified. The .out file is a JSON, in which each line represents a page of the document. In the amazon-textract-output directory, you will find a folder for each classified file, and inside that folder, there is one file per page from the original file. Those page files contain the classification results. To learn more about the outputs of the classifications, check the documentation page.

Job output

Available Now
You can get started classifying and extracting entities from semi-structured files like PDFs, images, and Word Documents asynchronously and synchronously today from Amazon Comprehend in all the Regions where Amazon Comprehend is available. Learn more about this new launch in the Amazon Comprehend Developer Guide.

Marcia

Data: The genesis for modern invention

Post Syndicated from Swami Sivasubramanian original https://aws.amazon.com/blogs/big-data/data-the-genesis-for-modern-invention/

It only takes one groundbreaking invention—one iconic idea that solves a widespread pain point for customers—to create or transform an industry forever. From the invention of the telegraph, to the discovery of GPS, to the earliest cloud computing services, history is filled with examples of these “eureka” moments that continue to have long-lasting impacts on the way we do business today.

Cognitive scientists John Kounios and Mark Beeman demonstrated that great inventors don’t simply stumble upon their epiphanies; in reality, an idea is preceded by a collection of life experiences, educational knowledge, or even past failures the human brain processes and assimilates over time. Their ideas are preceded by a collection of data points.

When we apply this concept to organizations, and the vast amount of data being produced on a daily basis, we realize there’s an incredible opportunity to ingest, store, process, analyze, and visualize data to create the next big thing.

Today—more than ever before—data is the genesis for modern invention. But to produce new ideas with our data, we need to build dynamic, end-to-end data strategies that lead to new customer experiences as the final output. Some of the biggest brands in the world like Formula 1, Toyota, and Georgia-Pacific are already leveraging AWS to do just that.

This week at AWS re:Invent 2022, I shared several key learnings we’ve collected after working with these brands and more than 1.5 million customers who are using AWS to build their data strategies.

I also revealed several new services and innovations for our customers. Here are a few highlights.

You need a comprehensive set of services to get the job done

Creating a data lake to perform analytics and machine learning (ML) is not an end-to-end data strategy. Your needs will inevitably grow and change over time, which is why we believe every customer should have access to a wide variety of tools based on data types, personas, and their specific use cases.

And our data supports this, with 94% of the top 1,000 AWS customers using more than 10 of our databases and analytics services. A one-size-fits-all approach just doesn’t work in the long run.

You need a comprehensive set of services that enable you to store and query data in your databases, data lakes, and data warehouses; services that help you act on your data with analytics, business intelligence, and machine learning; and services that help you catalog and govern your data across your organization.

You should also have access to services that support a variety of data types for your future use cases, whether you’re working with financial data, clinical data, or retail data. Many of our customers are also using their data to create machine learning models, but some data types are still too cumbersome to work with and prepare for ML.

For example, geospatial data, which supports use cases like self-driving cars, urban planning, or even crop yield in agricultural farms, can be incredibly difficult to access, prepare, and visualize for ML. That’s why this week we announced new capabilities for Amazon SageMaker that make it easier for data scientists to work with geospatial data.

Performance and security are paramount

Performance and security continue to be critical components of our customers’ data strategies.

You’ll need to perform at scale across your data warehouses, databases, and data lakes, or when you want to quickly analyze and visualize your data. We’ve built our business on high-performing services like Amazon Aurora, Amazon DynamoDB, and Amazon Redshift, and this week, we announced several new capabilities to continue building on our performance innovations to date.

For our serverless, interactive query service, Amazon Athena, we announced a new integration with Apache Spark that enables you to spin up Spark workloads up to 75 times faster than other serverless Spark offerings. We also introduced a new feature called Elastic Clusters within our fully managed document database, Amazon DocumentDB, that enables customers to easily scale out or shard their data across multiple database instances.

To help our customers protect their data from potential compromises, we announced Amazon GuardDuty RDS Protection to intelligently detect potential threats for their data stored in Aurora, as well as a new open-source project that allows developers to safely use PostgreSQL extensions in their core databases without worrying about unintended security impacts.

Connecting data is critical for deeper insights

To get the most of your data, you need to combine data silos for deeper insights. However, connecting data across siloes typically requires complex extract, transform, and load (ETL) pipelines, which means creating a manual integration every time you want to ask a different question of your data or build a different ML model. This isn’t fast enough to keep up with the speed that businesses need to move today.

Zero ETL is the future. And we’ve been making strides in this zero-ETL future for several years by deepening integrations between our services. But this week, we’re getting closer to a zero-ETL future by announcing Aurora now supports zero-ETL integration with Amazon Redshift to bring transactional data in Aurora and the analytical capabilities in Amazon Redshift together.

We also announced a new auto-copy feature from Amazon Simple Storage Service (Amazon S3) to Amazon Redshift that removes the need for you to build and manage ETL pipelines whenever you want to use your data for analytics. And we’re not stopping here. With AWS, you can now connect to hundreds of data sources, from software as a service (SaaS) applications to on-premises data stores.

We’ll continue to build no zero-ETL capabilities into our services to help our customers easily analyze all their data, no matter where it resides.

Data governance unleashes innovation

Governance was historically used as a defensive measure, which meant locking down data in silos. But in reality, the right governance strategy helps you move and innovate faster with guardrails that give the right people access to your data, when and where they need it.

In addition to fine-grained access controls within AWS Lake Formation, this week we’re making it easier for customers to govern access and privileges within more of our data services with new capabilities announced in Amazon Redshift and Amazon SageMaker.

Our customers also told us they want an end-to-end strategy that enables them to govern their data across the entire data journey. That’s why this week we announced Amazon DataZone, a new data management service that helps you catalog, discover, analyze, share, and govern data across the organization.

When you properly manage secure access to your data, it can flow to the right places and connect the dots across siloed teams and departments.

Build with AWS

With the introduction of these new services and features this week, as well as our comprehensive set of data services, it’s important to remember that support is available as you build your end-to-end data strategy. In fact, we have an entire team at AWS, as well as an extensive network of partners to help our customers build data foundations that will meet their needs now—and well into the future.

For more information about re:Invent 2022, please visit our event page.


About the Author

Swami Sivasubramanian is the Vice President of AWS Data and Machine Learning.

New for Amazon SageMaker – Perform Shadow Tests to Compare Inference Performance Between ML Model Variants

Post Syndicated from Antje Barth original https://aws.amazon.com/blogs/aws/new-for-amazon-sagemaker-perform-shadow-tests-to-compare-inference-performance-between-ml-model-variants/

As you move your machine learning (ML) workloads into production, you need to continuously monitor your deployed models and iterate when you observe a deviation in your model performance. When you build a new model, you typically start validating the model offline using historical inference request data. But this data sometimes fails to account for current, real-world conditions. For example, new products might become trending that your product recommendation model hasn’t seen yet. Or, you experience a sudden spike in the volume of inference requests in production that you never exposed your model to before.

Today, I’m excited to announce Amazon SageMaker support for shadow testing!

Deploying a model in shadow mode lets you conduct a more holistic test by routing a copy of the live inference requests for a production model to the new (shadow) model. Yet, only the responses from the production model are returned to the calling application. Shadow testing helps you build further confidence in your model and catch potential configuration errors and performance issues before they impact end users. Once you complete a shadow test, you can use the deployment guardrails for SageMaker inference endpoints to safely update your model in production.

Get Started with Amazon SageMaker Shadow Testing
You can create shadow tests using the new SageMaker Inference Console and APIs. Shadow testing gives you a fully managed experience for setup, monitoring, viewing, and acting on the results of shadow tests. If you have existing workflows built around SageMaker endpoints, you can also deploy a model in shadow mode using the existing SageMaker Inference APIs.

On the SageMaker console, select Inference and Shadow tests to create, monitor, and deploy shadow tests.

Amazon SageMaker Shadow Tests

To create a shadow test, select an existing (or create a new) SageMaker endpoint and production variant you want to test against.

Amazon SageMaker - Create Shadow Test

Next, configure the proportion of traffic to send to the shadow variant, the comparison metrics you want to evaluate, and the duration of the test. You can also enable data capture for your production and shadow variant.

Amazon SagMaker - Create Shadow Test

That’s it. SageMaker now automatically deploys the new variant in shadow mode and routes a copy of the inference requests to it in real time, all within the same endpoint. The following diagram illustrates this workflow.

Amazon SageMaker - Shadow Testing

Note that only the responses of the production variant are returned to the calling application. You can choose to either discard or log the responses of the shadow variant for offline comparison.

You can also use shadow testing to validate changes you made to any component in your production variant, including the serving container or ML instance. This can be useful when you’re upgrading to a new framework version of your serving container, applying patches, or if you want to make sure that there is no impact to latency or error rate due to this change. Similarly, if you consider moving to another ML instance type, for example, Amazon EC2 C7g instances based on AWS Graviton processors, or EC2 G5 instances powered by NVIDIA A10G Tensor Core GPUs, you can use shadow testing to evaluate the performance on production traffic prior to rollout.

You can monitor the progress of the shadow test and performance metrics such as latency and error rate through a live dashboard. On the SageMaker console, select Inference and Shadow tests, then select the shadow test you want to monitor.

Amazon SageMaker - Monitor Shadow Test

Amazon SageMaker - Monitor Shadow Test

If you decide to promote the shadow model to production, select Deploy shadow variant and define the infrastructure configuration to deploy the shadow variant.

Amazon SageMaker - Deploy Shadow Variant

Amazon SageMaker - Deploy Shadow Variant

You can also use the SageMaker deployment guardrails if you want to add linear or canary traffic shifting modes and auto rollbacks to your update.

Availability and Pricing
SageMaker support for shadow testing is available today in all AWS Regions where SageMaker hosting is available except for the AWS GovCloud (US) Regions and AWS China Regions.

There is no additional charge for SageMaker shadow testing other than usage charges for the ML instances and ML storage provisioned to host the shadow variant. The pricing for ML instances and ML storage dimensions is the same as the real-time inference option. There is no additional charge for data processed in and out of shadow deployments. The SageMaker pricing page has all the details.

To learn more, visit Amazon SageMaker shadow testing.

Start validating your new ML models with SageMaker shadow tests today!

— Antje

Next Generation SageMaker Notebooks – Now with Built-in Data Preparation, Real-Time Collaboration, and Notebook Automation

Post Syndicated from Antje Barth original https://aws.amazon.com/blogs/aws/next-generation-sagemaker-notebooks-now-with-built-in-data-preparation-real-time-collaboration-and-notebook-automation/

In 2019, we introduced Amazon SageMaker Studio, the first fully integrated development environment (IDE) for data science and machine learning (ML). SageMaker Studio gives you access to fully managed Jupyter Notebooks that integrate with purpose-built tools to perform all ML steps, from preparing data to training and debugging models, tracking experiments, deploying and monitoring models, and managing pipelines.

Today, I’m excited to announce the next generation of Amazon SageMaker Notebooks to increase efficiency across the ML development workflow. You can now improve data quality in minutes with the built-in data preparation capability, edit the same notebooks with your teams in real time, and automatically convert notebook code to production-ready jobs.

Let me show you what’s new!

New Notebook Capability for Simplified Data Preparation
The new built-in data preparation capability is powered by Amazon SageMaker Data Wrangler and is available in SageMaker Studio notebooks.  SageMaker Studio notebooks automatically generate key visualizations on top of Pandas data frames to help you understand data distribution and identify data quality issues, like missing values, invalid data, and outliers. You can also select the target column for ML models and generate ML-specific insights such as imbalanced class or high correlation columns. You then receive recommendations for data transformations to resolve the issues. You can apply the data transformations right in the UI, and SageMaker Studio notebooks automatically generate the corresponding transformation code in the notebook cells that you can use to replay your data preparation pipeline.

Using the Built-in Data Preparation Capability
To get started, pip install and import sagemaker_datawrangler along with the pandas Python package. Then, download the dataset you want to analyze to the notebook working directory, and read the dataset with pandas.

import pandas as pd 
import sagemaker_datawrangler 

!aws s3 cp s3://<YOUR_S3_BUCKET>/data.csv . 

df = pd.read_csv("data.csv")

Now, when you display the data frame, it automatically shows key data visualizations at the top of each column, surfaces data insights, detects data quality issues, and suggests solutions to improve data quality. When you select a column as the target column for ML predictions, you get target-specific insights and warnings, such as mixed data types in target (for regression use cases) or too few instances per class (for classification use cases).

In this example, I’m using the Women’s E-Commerce Clothing Reviews dataset that contains customer reviews and ratings for women’s clothing. This dataset was obtained from Kaggle and has been modified by Amazon to add synthetic data quality issues.

Amazon SageMaker Studio notebooks with built-in data preparation

You can review the suggested data transformations to improve the data quality and apply them right in the UI. For a list of all supported data transformations, have a look at the documentation. Once you apply a data transformation, SageMaker Studio notebooks automatically generate the code to reproduce those data preparation steps in another notebook cell.

For my example, I select Rating as my target column. Target column insights tells me in a high-priority warning that this column has too few instances per class and with a medium-priority warning that classes are too imbalanced. Let’s follow the suggestions and drop rare target values and drop missing values. I will also follow the suggestions for some of the feature columns and drop missing values in the Review Text column and drop the Division Name column.

Once I apply the transformations, the notebook generates this code for me:

# Pandas code generated by sagemaker_datawrangler
output_df = df.copy(deep=True)


# Code to Drop rare target values for column: Rating to resolve warning: Too few instances per class 
rare_target_labels_to_drop = ['-100', '100']
output_df = output_df[~output_df['Rating'].isin(rare_target_labels_to_drop)]


# Code to Drop missing for column: Rating to resolve warning: Missing values 
output_df = output_df[output_df['Rating'].notnull()]


# Code to Drop missing for column: Review Text to resolve warning: Missing values 
output_df = output_df[output_df['Review Text'].notnull()]


# Code to Drop column for column: Division Name to resolve warning: Missing values 
output_df=output_df.drop(columns=['Division Name'])

I can now review and modify the code if needed or start integrating the data transformations as part of my ML development workflow.

Introducing Shared Spaces for Team-Based Sharing and Real-Time Collaboration
SageMaker Studio now offers shared spaces that give data science and ML teams a workspace where they can read, edit, and run notebooks together in real time to streamline collaboration and communication during the development process. Shared spaces provide a shared Amazon EFS directory that you can utilize to share files within a shared space. All taggable SageMaker resources that you create in a shared space are automatically tagged to help you organize and have a filtered view of your ML resources, such as training jobs, experiments, and models, that are relevant to the business problem you work on in the space. This also helps you monitor costs and plan budgets using tools such as AWS Budgets and AWS Cost Explorer.

And that’s not all. You can now also create multiple SageMaker domains within the same AWS account to scope access and isolate resources to different teams or business units in your organization. Now, let me show you how to create a shared space for users within a SageMaker domain.

Using Shared Spaces
You can use the SageMaker console or the AWS CLI to create shared spaces for a SageMaker domain. To get started in the SageMaker console, go to Domains, select or create a new domain, and select Space management on the Domain details page. Then, select Create and give the shared space a name.

Amazon SageMaker Spaces - Create Space

Users in this SageMaker domain can now launch and join the shared space through their SageMaker domain user profiles.

Amazon SageMaker Spaces - Launch Spaces

In a shared space, select the new Collaborators icon in the left navigation menu. You can now see who else is currently active in this space. The following screenshot shows user tom on the left, editing a notebook file. On the right, user antje sees the edits in real time, together with an annotation of the user name that currently edits that notebook cell.

Amazon SageMaker Spaces

New Notebook Capability to Automatically Convert Notebook Code to Production-Ready Jobs
You can now select a notebook and automate it as a job that can run in a production environment without the need to manage the underlying infrastructure. When you create a SageMaker Notebook Job, SageMaker Studio takes a snapshot of the entire notebook, packages its dependencies in a container, builds the infrastructure, runs the notebook as an automated job on a schedule you define, and deprovisions the infrastructure upon job completion. This notebook capability is now also available in SageMaker Studio Lab, our free ML development environment that provides the compute, storage, and security to learn and experiment with ML.

Using the Notebook Capability to Automate Notebooks
To get started, open a notebook file in SageMaker Studio. Then, right-click your notebook file and select Create Notebook Job or select the Create Notebook Job icon, as highlighted in the following screenshot.

Amazon SageMaker Studio - Automate your notebooks

Define a name for the Notebook Job, review the input file location, specify the compute type to use, and whether to run the job immediately or on a schedule. Then, select Create.

Amazon SageMaker Studio - Create Notebook Job

The Notebook Job has been created, and you can review all Notebook Job Definitions in the UI.

Amazon SageMaker Studio - Notebook Job Definitions

Now Available
The new Amazon SageMaker Studio notebook capabilities are now available in all AWS Regions where Amazon SageMaker Studio is available except for the AWS China Regions.

At launch, the built-in data preparation capability powered by SageMaker Data Wrangler is supported for SageMaker Studio notebooks and the following notebook kernel images:

  • Python 3 (Data Science) with Python 3.7
  • Python 3 (Data Science 2.0) with Python 3.8
  • Python 3 (Data Science 3.0) with Python 3.10
  • Spark Analytics 1.0 and 2.0

For more information, visit Amazon SageMaker Notebooks.

Start building your ML projects with the next generation of Amazon SageMaker Notebooks today!

— Antje

New – Share ML Models and Notebooks More Easily Within Your Organization with Amazon SageMaker JumpStart

Post Syndicated from Antje Barth original https://aws.amazon.com/blogs/aws/new-share-ml-models-and-notebooks-more-easily-within-your-organization-with-amazon-sagemaker-jumpstart/

Amazon SageMaker JumpStart is a machine learning (ML) hub that can help you accelerate your ML journey. SageMaker JumpStart gives you access to built-in algorithms with pre-trained models from popular model hubs, pre-trained foundation models to help you perform tasks such as article summarization and image generation, and end-to-end solutions to solve common use cases.

Today, I’m happy to announce that you can now share ML artifacts, such as models and notebooks, more easily with other users that share your AWS account using SageMaker JumpStart.

Using SageMaker JumpStart to Share ML Artifacts
Machine learning is a team sport. You might want to share your models and notebooks with other data scientists in your team to collaborate and increase productivity. Or, you might want to share your models with operations teams to put your models into production. Let me show you how to share ML artifacts using SageMaker JumpStart.

In SageMaker Studio, select Models in the left navigation menu. Then, select Shared models and Shared by my organization. You can now discover and search ML artifacts that other users shared within your AWS account. Note that you can add and share ML artifacts developed with SageMaker as well as those developed outside of SageMaker.

To share a model or notebook, select Add. For models, provide basic information, such as title, description, data type, ML task, framework, and any additional metadata. This information helps other users to find the right models for their use cases. You can also enable training and deployment for your model. This allows users to fine-tune your shared model and deploy the model in just a few clicks through SageMaker JumpStart.

Amazon SageMaker Jumpstart - Add model to private ML hub

To enable model training, you can select an existing SageMaker training job that will autopopulate all relevant information. This information includes the container framework, training script location, model artifact location, instance type, default training and validation datasets, and target column. You can also provide custom model training information by selecting a prebuilt SageMaker Deep Learning Container or selecting a custom Docker container in Amazon ECR. You can also specify default hyperparameters and metrics for model training.

To enable model deployment, you also need to define the container image to use, the inference script and model artifact location, and the default instance type. Have a look at the SageMaker Developer Guide to learn more about model training and model deployment options.

Sharing a notebook works similarly. You need to provide basic information about your notebook and the Amazon S3 location of the notebook file.

Amazon SageMaker JumpStart - Add a notebook to private ML hub

Users that share your AWS account can now browse and select shared models to fine-tune, deploy endpoints, or run notebooks directly in SageMaker JumpStart.

In SageMaker Studio, select Quick start solutions in the left navigation menu, then select Solutions, models, example notebooks to access all shared ML artifacts, together with pre-trained models from popular model hubs and end-to-end solutions.

Amazon SageMaker JumpStart

Now Available
The new ML artifact-sharing capability within Amazon SageMaker JumpStart is available today in all AWS Regions where Amazon SageMaker JumpStart is available. To learn more, visit Amazon SageMaker JumpStart and the SageMaker JumpStart documentation.

Start sharing your models and notebooks with Amazon SageMaker JumpStart today!

— Antje

AWS Machine Learning University New Educator Enablement Program to Build Diverse Talent for ML/AI Jobs

Post Syndicated from Marcia Villalba original https://aws.amazon.com/blogs/aws/aws-machine-learning-university-new-educator-enablement-program-to-build-diverse-talent-for-ml-ai-jobs/

AWS Machine Learning University is now providing a free educator enablement program. This program provides faculty at community colleges, minority-serving institutions (MSIs), and historically Black colleges and universities (HBCUs) with the skills and resources to teach data analytics, artificial intelligence (AI), and machine learning (ML) concepts to build a diverse pipeline for in-demand jobs of today and tomorrow.

According to the National Science Foundation, Black and Hispanic or Latino students earn bachelor’s degrees in Computer Science—the dominant pathway to AI/ML—at a much lower rate than their white peers, earning less than 11 percent of computer science degrees awarded. However, research shows that having diverse perspectives among skilled practitioners and across the AI/ML lifecycle contributes to the development of AI/ML systems that are safe, trustworthy, and have less bias. 

In 2018, we announced the Machine Learning University (MLU) to share with all developers the same courses that we used to train engineers at Amazon and AWS. This platform offers self-service, self-paced, AI/ML digital courses.

Machine Learning University home page

And today, we add this new program to our AI/ML training offering. Although anyone could access the MLU self-paced learning, it places the burden on the learner to source prerequisite work and solutions. This educator enablement program takes the concepts and lessons developed by MLU and makes them more accessible to educators. It offers a year-round educator enablement program with lesson planning, course playbooks, and access to free compute resources.

Program Details
Educators are onboarded in small-group cohorts into bootcamps where they will learn the material and deep dive into how to teach it via instructor-led lectures and hands-on projects. Educators who complete the bootcamp can take part in different year-round development opportunities, such as a dedicated Slack channel to share teaching best practices, education topic series and virtual study sessions moderated by MLU instructors, and regional events for continued professional development. Also, they will receive continuing education credits and AWS-provided stipends.

Faculty and students get access to instructional material through Amazon SageMaker Studio Lab. SageMaker Studio Lab was announced last year and is AWS’s free (no credit card required) ML development environment. It provides computing and storage for anybody that wants to learn and experiment with ML. Institutions can unlock additional resources to support their ML programs by registering for AWS Academy. AWS Academy unlocks all the AWS services for a complete AI/ML program.

Community colleges and universities can integrate this educator enablement program into their computer science, information technology, and business curricula to create an AI/ML course, certificate, or degree. We have worked with educators and education boards such as Houston Community College to create content that is vetted for credit-worthy and degree-earning curricula.

In August 2022, we launched our first educator bootcamp in partnership with The Coding School. The bootcamp was delivered over two weeks, offering lectures, case studies, and hands-on projects. 25 educators completed the Educator Machine Learning Bootcamp, representing 22 US community colleges and universities.

Learn More and Join The Program
During 2023, AWS Machine Learning University will run six educator-enablement cohorts starting in January. The program will give priority consideration to educators at community colleges, MSIs, and HBCUs, in alignment with this program mission to increase access to AI/ML technology to historically underserved and underrepresented students.

If you are a computer science educator or part of a board of educators interested in fostering more depth in your computer science coursework, you should sign up for the educator enablement program.

Marcia

New — Amazon SageMaker Data Wrangler Supports SaaS Applications as Data Sources

Post Syndicated from Donnie Prakoso original https://aws.amazon.com/blogs/aws/new-amazon-sagemaker-data-wrangler-supports-saas-applications-as-data-sources/

Data fuels machine learning. In machine learning, data preparation is the process of transforming raw data into a format that is suitable for further processing and analysis. The common process for data preparation starts with collecting data, then cleaning it, labeling it, and finally validating and visualizing it. Getting the data right with high quality can often be a complex and time-consuming process.

This is why customers who build machine learning (ML) workloads on AWS appreciate the ability of Amazon SageMaker Data Wrangler. With SageMaker Data Wrangler, customers can simplify the process of data preparation and complete the required processes of the data preparation workflow on a single visual interface. Amazon SageMaker Data Wrangler helps to reduce the time it takes to aggregate and prepare data for ML.

However, due to the proliferation of data, customers generally have data spread out into multiple systems, including external software-as-a-service (SaaS) applications like SAP OData for manufacturing data, Salesforce for customer pipeline, and Google Analytics for web application data. To solve business problems using ML, customers have to bring all of these data sources together. They currently have to build their own solution or use third-party solutions to ingest data into Amazon S3 or Amazon Redshift. These solutions can be complex to set up and not cost-effective.

Introducing Amazon SageMaker Data Wrangler Supports SaaS Applications as Data Sources
I’m happy to share that starting today, you can aggregate external SaaS application data for ML in Amazon SageMaker Data Wrangler to prepare data for ML. With this feature, you can use more than 40 SaaS applications as data sources via Amazon AppFlow and have these data available on Amazon SageMaker Data Wrangler. Once the data sources are registered in AWS Glue Data Catalog by AppFlow, you can browse tables and schemas from these data sources using Data Wrangler SQL explorer. This feature provides seamless data integration between SaaS applications and SageMaker Data Wrangler using Amazon AppFlow.

Here is a quick preview of this new feature:

This new feature of Amazon SageMaker Data Wrangler works by using integration with Amazon AppFlow, a fully managed integration service that enables you to securely exchange data between SaaS applications and AWS services. With Amazon AppFlow, you can establish bidirectional data integration between SaaS applications, such as Salesforce, SAP, and Amplitude and all supported services, into your Amazon S3 or Amazon Redshift.

Then, with Amazon AppFlow, you can catalog the data in AWS Glue Data Catalog. This is a new feature where with Amazon AppFlow, you can create an integration with AWS Glue Data Catalog for Amazon S3 destination connector. With this new integration, customers can catalog SaaS data applications into AWS Glue Data Catalog with a few clicks, directly from the Amazon AppFlow Flow configuration, without the need to run any crawlers.

Once you’ve established a flow and inserted it into the AWS Glue Data Catalog, you can use this data inside the Amazon SageMaker Data Wrangler. Then, you can do the data preparation as you usually do. You can write Amazon Athena queries to preview data, join data from multiple sources, or import data to prepare for ML model training.

With this feature, you need to do a few simple steps to perform seamless data integration between SaaS applications into Amazon SageMaker Data Wrangler via Amazon AppFlow. This integration supports more than 40 SaaS applications, and for a complete list of supported applications, please check the Supported source and destination applications documentation.

Get Started with Amazon SageMaker Data Wrangler Support for Amazon AppFlow
Let’s see how this feature works in detail. In my scenario, I need to get data from Salesforce, and do the data preparation using Amazon SageMaker Data Wrangler.

To start using this feature, the first thing I need to do is to create a flow in Amazon AppFlow that registers the data source into the AWS Glue Data Catalog. I already have an existing connection with my Salesforce account, and all I need now is to create a flow.

One important thing to note is that to make SaaS application data available in Amazon SageMaker Data Wrangler, I need to create a flow with Amazon S3 as the destination. Then, I need to enable Create a Data Catalog table in the AWS Glue Data Catalog settings. This option will automatically catalog my Salesforce data into AWS Glue Data Catalog.

On this page, I need to select a user role with the required AWS Glue Data Catalog permissions and define the database name and the table name prefix. In addition, in this section, I can define the data format preference, be it in JSON, CSV, or Apache Parquet formats, and filename preference if I want to add a timestamp into the file name section.

To learn more about how to register SaaS data in Amazon AppFlow and AWS Glue Data Catalog, you can read Cataloging the data output from an Amazon AppFlow flow documentation page.

Once I’ve finished registering SaaS data, I need to make sure the IAM role can view the data sources in Data Wrangler from AppFlow. Here is an example of a policy in the IAM role:

{
    "Version": "2012-10-17",
    "Statement": [
        {
            "Effect": "Allow",
            "Action": "glue:SearchTables",
            "Resource": [
                "arn:aws:glue:*:*:table/*/*",
                "arn:aws:glue:*:*:database/*",
                "arn:aws:glue:*:*:catalog"
            ]
        }
    ]
} 

By enabling data cataloging with AWS Glue Data Catalog, from this point on, Amazon SageMaker Data Wrangler will be able to automatically discover this new data source and I can browse tables and schema using the Data Wrangler SQL Explorer.

Now it’s time to switch to the Amazon SageMaker Data Wrangler dashboard then select Connect to data sources.

On the following page, I need to Create connection and select the data source I want to import. In this section, I can see all the available connections for me to use. Here I see the Salesforce connection is already available for me to use.

If I would like to add additional data sources, I can see a list of external SaaS applications that I can integrate into the Set up new data sources section. To learn how to recognize external SaaS applications as data sources, I can learn more with the select How to enable access.

Now I will import datasets and select the Salesforce connection.

On the next page, I can define connection settings and import data from Salesforce. When I’m done with this configuration, I select Connect.

On the following page, I see my Salesforce data that I already configured with Amazon AppFlow and AWS Glue Data Catalog called appflowdatasourcedb. I can also see a table preview and schema for me to review if this is the data I need.

Then, I start building my dataset using this data by performing SQL queries inside the SageMaker Data Wrangler SQL Explorer. Then, I select Import query.

Then, I define a name for my dataset.

At this point, I can start doing the data preparation process. I can navigate to the Analysis tab to run the data insight report. The analysis will provide me with a report on the data quality issues and what transform I need to use next to fix the issues based on the ML problem I want to predict. To learn more about how to use the data analysis feature, see Accelerate data preparation with data quality and insights in the Amazon SageMaker Data Wrangler blog post.

In my case, there are several columns I don’t need, and I need to drop these columns. I select Add step.

One feature I like is that Amazon SageMaker Data Wrangler provides numerous ML data transforms. It helps me to streamline the process of cleaning, transforming and feature engineering my data in one dashboard. For more about what SageMaker Data Wrangler provides for transformation data, please read this Transform Data documentation page.

In this list, I select Manage columns.

Then, in the Transform section, I select the Drop column option. Then, I select a few columns that I don’t need.

Once I’m done, the columns I don’t need are removed and the Drop column data preparation step I just created is listed in the Add step section.

I can also see the visual of my data flow inside the Amazon SageMaker Data Wrangler. In this example, my data flow is quite basic. But when my data preparation process becomes complex, this visual view makes it easy for me to see all the data preparation steps.

From this point on, I can do what I require with my Salesforce data. For example, I can export data directly to Amazon S3 by selecting Export to and choosing Amazon S3 from the Add destination menu. In my case, I specify Data Wrangler to store the data in Amazon S3 after it has processed it by selecting Add destination and then Amazon S3.

Amazon SageMaker Data Wrangler provides me flexibility to automate the same data preparation flow using scheduled jobs. I can also automate feature engineering with SageMaker Pipelines (via Jupyter Notebook) and SageMaker Feature Store (via Jupyter Notebook), and deploy to Inference end point with SageMaker Inference Pipeline (via Jupyter Notebook).

Things to Know
Related news – This feature will make it easy for you to do data aggregation and preparation with Amazon SageMaker Data Wrangler. As this feature is an integration with Amazon AppFlow and also AWS Glue Data Catalog, you might want to learn more on Amazon AppFlow now supports AWS Glue Data Catalog integration and provides enhanced data preparation page.

Availability – Amazon SageMaker Data Wrangler supports SaaS applications as data sources available in all the Regions currently supported by Amazon AppFlow.

Pricing – There is no additional cost to use SaaS applications supports in Amazon SageMaker Data Wrangler, but there is a cost to running Amazon AppFlow to get the data in Amazon SageMaker Data Wrangler.

Visit Import Data From Software as a Service (SaaS) Platforms documentation page to learn more about this feature, and follow the getting started guide to start data aggregating and preparing SaaS applications data with Amazon SageMaker Data Wrangler.

Happy building!
Donnie

New ML Governance Tools for Amazon SageMaker – Simplify Access Control and Enhance Transparency Over Your ML Projects

Post Syndicated from Antje Barth original https://aws.amazon.com/blogs/aws/new-ml-governance-tools-for-amazon-sagemaker-simplify-access-control-and-enhance-transparency-over-your-ml-projects/

As companies increasingly adopt machine learning (ML) for their business applications, they are looking for ways to improve governance of their ML projects with simplified access control and enhanced visibility across the ML lifecycle. A common challenge in that effort is managing the right set of user permissions across different groups and ML activities. For example, a data scientist in your team that builds and trains models usually requires different permissions than an MLOps engineer that manages ML pipelines. Another challenge is improving visibility over ML projects. For example, model information, such as intended use, out-of-scope use cases, risk rating, and evaluation results, is often captured and shared via emails or documents. In addition, there is often no simple mechanism to monitor and report on your deployed model behavior.

That’s why I’m excited to announce a new set of ML governance tools for Amazon SageMaker.

As an ML system or platform administrator, you can now use Amazon SageMaker Role Manager to define custom permissions for SageMaker users in minutes, so you can onboard users faster. As an ML practitioner, business owner, or model risk and compliance officer, you can now use Amazon SageMaker Model Cards to document model information from conception to deployment and Amazon SageMaker Model Dashboard to monitor all your deployed models through a unified dashboard.

Let’s dive deeper into each tool, and I’ll show you how to get started.

Introducing Amazon SageMaker Role Manager
SageMaker Role Manager lets you define custom permissions for SageMaker users in minutes. It comes with a set of predefined policy templates for different personas and ML activities. Personas represent the different types of users that need permissions to perform ML activities in SageMaker, such as data scientists or MLOps engineers. ML activities are a set of permissions to accomplish a common ML task, such as running SageMaker Studio applications or managing experiments, models, or pipelines. You can also define additional personas, add ML activities, and your managed policies to match your specific needs. Once you have selected the persona type and the set of ML activities, SageMaker Role Manager automatically creates the required AWS Identity and Access Management (IAM) role and policies that you can assign to SageMaker users.

A Primer on SageMaker and IAM Roles
A role is an IAM identity that has permissions to perform actions with AWS services. Besides user roles that are assumed by a user via federation from an Identity Provider (IdP) or the AWS Console, Amazon SageMaker requires service roles (also known as execution roles) to perform actions on behalf of the user. SageMaker Role Manager helps you create these service roles:

  • SageMaker Compute Role – Gives SageMaker compute resources the ability to perform tasks such as training and inference, typically used via PassRole. You can select the SageMaker Compute Role persona in SageMaker Role Manager to create this role. Depending on the ML activities you select in your SageMaker service roles, you will need to create this compute role first.
  • SageMaker Service Role – Some AWS services, including SageMaker, require a service role to perform actions on your behalf. You can select the Data Scientist, MLOps, or Custom persona in SageMaker Role Manager to start creating service roles with custom permissions for your ML practitioners.

Now, let me show you how this works in practice.

There are two ways to get to SageMaker Role Manager, either through Getting started in the SageMaker console or when you select Add user in the SageMaker Studio Domain control panel.

I start in the SageMaker console. Under Configure role, select Create a role. This opens a workflow that guides you through all required steps.

Amazon SageMaker Admin Hub - Getting Started

Let’s assume I want to create a SageMaker service role with a specific set of permissions for my team of data scientists. In Step 1, I select the predefined policy template for the Data Scientist persona.

Amazon SageMaker Role Manager - Select persona

I can also define the network and encryption settings in this step by selecting Amazon Virtual Private Cloud (Amazon VPC) subnets, security groups, and encryption keys.

In Step 2, I select what ML activities data scientists in my team need to perform.

Amazon SageMaker Admin Hub - Configure ML activities

Some of the selected ML activities might require you to specify the Amazon Resource Name (ARN) of the SageMaker Compute Role so SageMaker compute resources have the ability to perform the tasks.

In Step 3, you can attach additional IAM policies and add tags to the role if needed. Tags help you identify and organize your AWS resources. You can use tags to add attributes such as project name, cost center, or location information to a role. After a final review of the settings in Step 4, select Submit, and the role is created.

In just a few minutes, I set up a SageMaker service role, and I’m now ready to onboard data scientists in SageMaker with custom permissions in place.

Introducing Amazon SageMaker Model Cards
SageMaker Model Cards helps you streamline model documentation throughout the ML lifecycle by creating a single source of truth for model information. For models trained on SageMaker, SageMaker Model Cards discovers and autopopulates details such as training jobs, training datasets, model artifacts, and inference environment. You can also record model details such as the model’s intended use, risk rating, and evaluation results. For compliance documentation and model evidence reporting, you can export your model cards to a PDF file and easily share them with your customers or regulators.

To start creating SageMaker Model Cards, go to the SageMaker console, select Governance in the left navigation menu, and select Model cards.

Amazon SageMaker Model Cards

Select Create model card to document your model information.

Amazon SageMaker Model Card

Amazon SageMaker Model Cards

Introducing Amazon SageMaker Model Dashboard
SageMaker Model Dashboard lets you monitor all your models in one place. With this bird’s-eye view, you can now see which models are used in production, view model cards, visualize model lineage, track resources, and monitor model behavior through an integration with SageMaker Model Monitor and SageMaker Clarify. The dashboard automatically alerts you when models are not being monitored or deviate from expected behavior. You can also drill deeper into individual models to troubleshoot issues.

To access SageMaker Model Dashboard, go to the SageMaker console, select Governance in the left navigation menu, and select Model dashboard.

Amazon SageMaker Model Dashboard

Note: The risk rating shown above is for illustrative purposes only and may vary based on input provided by you.

Now Available
Amazon SageMaker Role Manager, SageMaker Model Cards, and SageMaker Model Dashboard are available today at no additional charge in all the AWS Regions where Amazon SageMaker is available except for the AWS GovCloud and AWS China Regions.

To learn more, visit ML governance with Amazon SageMaker and check the developer guide.

Start building your ML projects with our new governance tools for Amazon SageMaker today

— Antje

Preview: Use Amazon SageMaker to Build, Train, and Deploy ML Models Using Geospatial Data

Post Syndicated from Channy Yun original https://aws.amazon.com/blogs/aws/preview-use-amazon-sagemaker-to-build-train-and-deploy-ml-models-using-geospatial-data/

You use map apps every day to find your favorite restaurant or travel the fastest route using geospatial data. There are two types of geospatial data: vector data that uses two-dimensional geometries such as a building location (points), roads (lines), or land boundary (polygons), and raster data such as satellite and aerial images.

Last year, we introduced Amazon Location Service, which makes it easy for developers to add location functionality to their applications. With Amazon Location Service, you can visualize a map, search points of interest, optimize delivery routes, track assets, and use geofencing to detect entry and exit events in your defined geographical boundary.

However, if you want to make predictions from geospatial data using machine learning (ML), there are lots of challenges. When I studied geographic information systems (GIS) in graduate school, I was limited to a small data set that covered only a narrow area and had to contend with limited storage and only the computing power of my laptop at the time.

These challenges include 1) acquiring and accessing high-quality geospatial datasets is complex as it requires working with multiple data sources and vendors, 2) preparing massive geospatial data for training and inference can be time-consuming and expensive, and 3) specialized tools are needed to visualize geospatial data and integrate with ML operation infrastructure

Today I’m excited to announce the preview release of Amazon SageMaker‘s new geospatial capabilities that make it easy to build, train, and deploy ML models using geospatial data. This collection of features offers pre-trained deep neural network (DNN) models and geospatial operators that make it easy to access and prepare large geospatial datasets. All generated predictions can be visualized and explored on the map.

Also, you can use the new geospatial image to transform and visualize data inside geospatial notebooks using open-source libraries such as NumPy, GDAL, GeoPandas, and Rasterio, as well as SageMaker-specific libraries.

With a few clicks in the SageMaker Studio console, a fully integrated development environment (IDE) for ML, you can run an Earth Observation job, such as a land cover segmentation or launch notebooks. You can bring various geospatial data, for example, your own Planet Labs satellite data from Amazon S3, or US Geological Survey LANDSAT and Sentinel-2 images from Open Data on AWS, Amazon Location Service, or bring your own data, such as location data generated from GPS devices, connected vehicles or internet of things (IoT) sensors, retail store foot traffic, geo-marketing and census data.

The Amazon SageMaker geospatial capabilities support use cases across any industry. For example, insurance companies can use satellite images to analyze the damage impact from natural disasters on local economies, and agriculture companies can track the health of crops, predict harvest yield, and forecast regional demand for agricultural produce. Retailers can combine location and map data with competitive intelligence to optimize new store locations worldwide. These are just a few of the example use cases. You can turn your own ideas into reality!

Introducing Amazon SageMaker Geospatial Capabilities
In the preview, you can use SageMaker Studio initialized in the US West (Oregon) Region. Make sure to set the default Jupyter Lab 3 as the version when you create a new user in the Studio. To learn more about setting up SageMaker Studio, see Onboard to Amazon SageMaker Domain Using Quick setup in the AWS documentation.

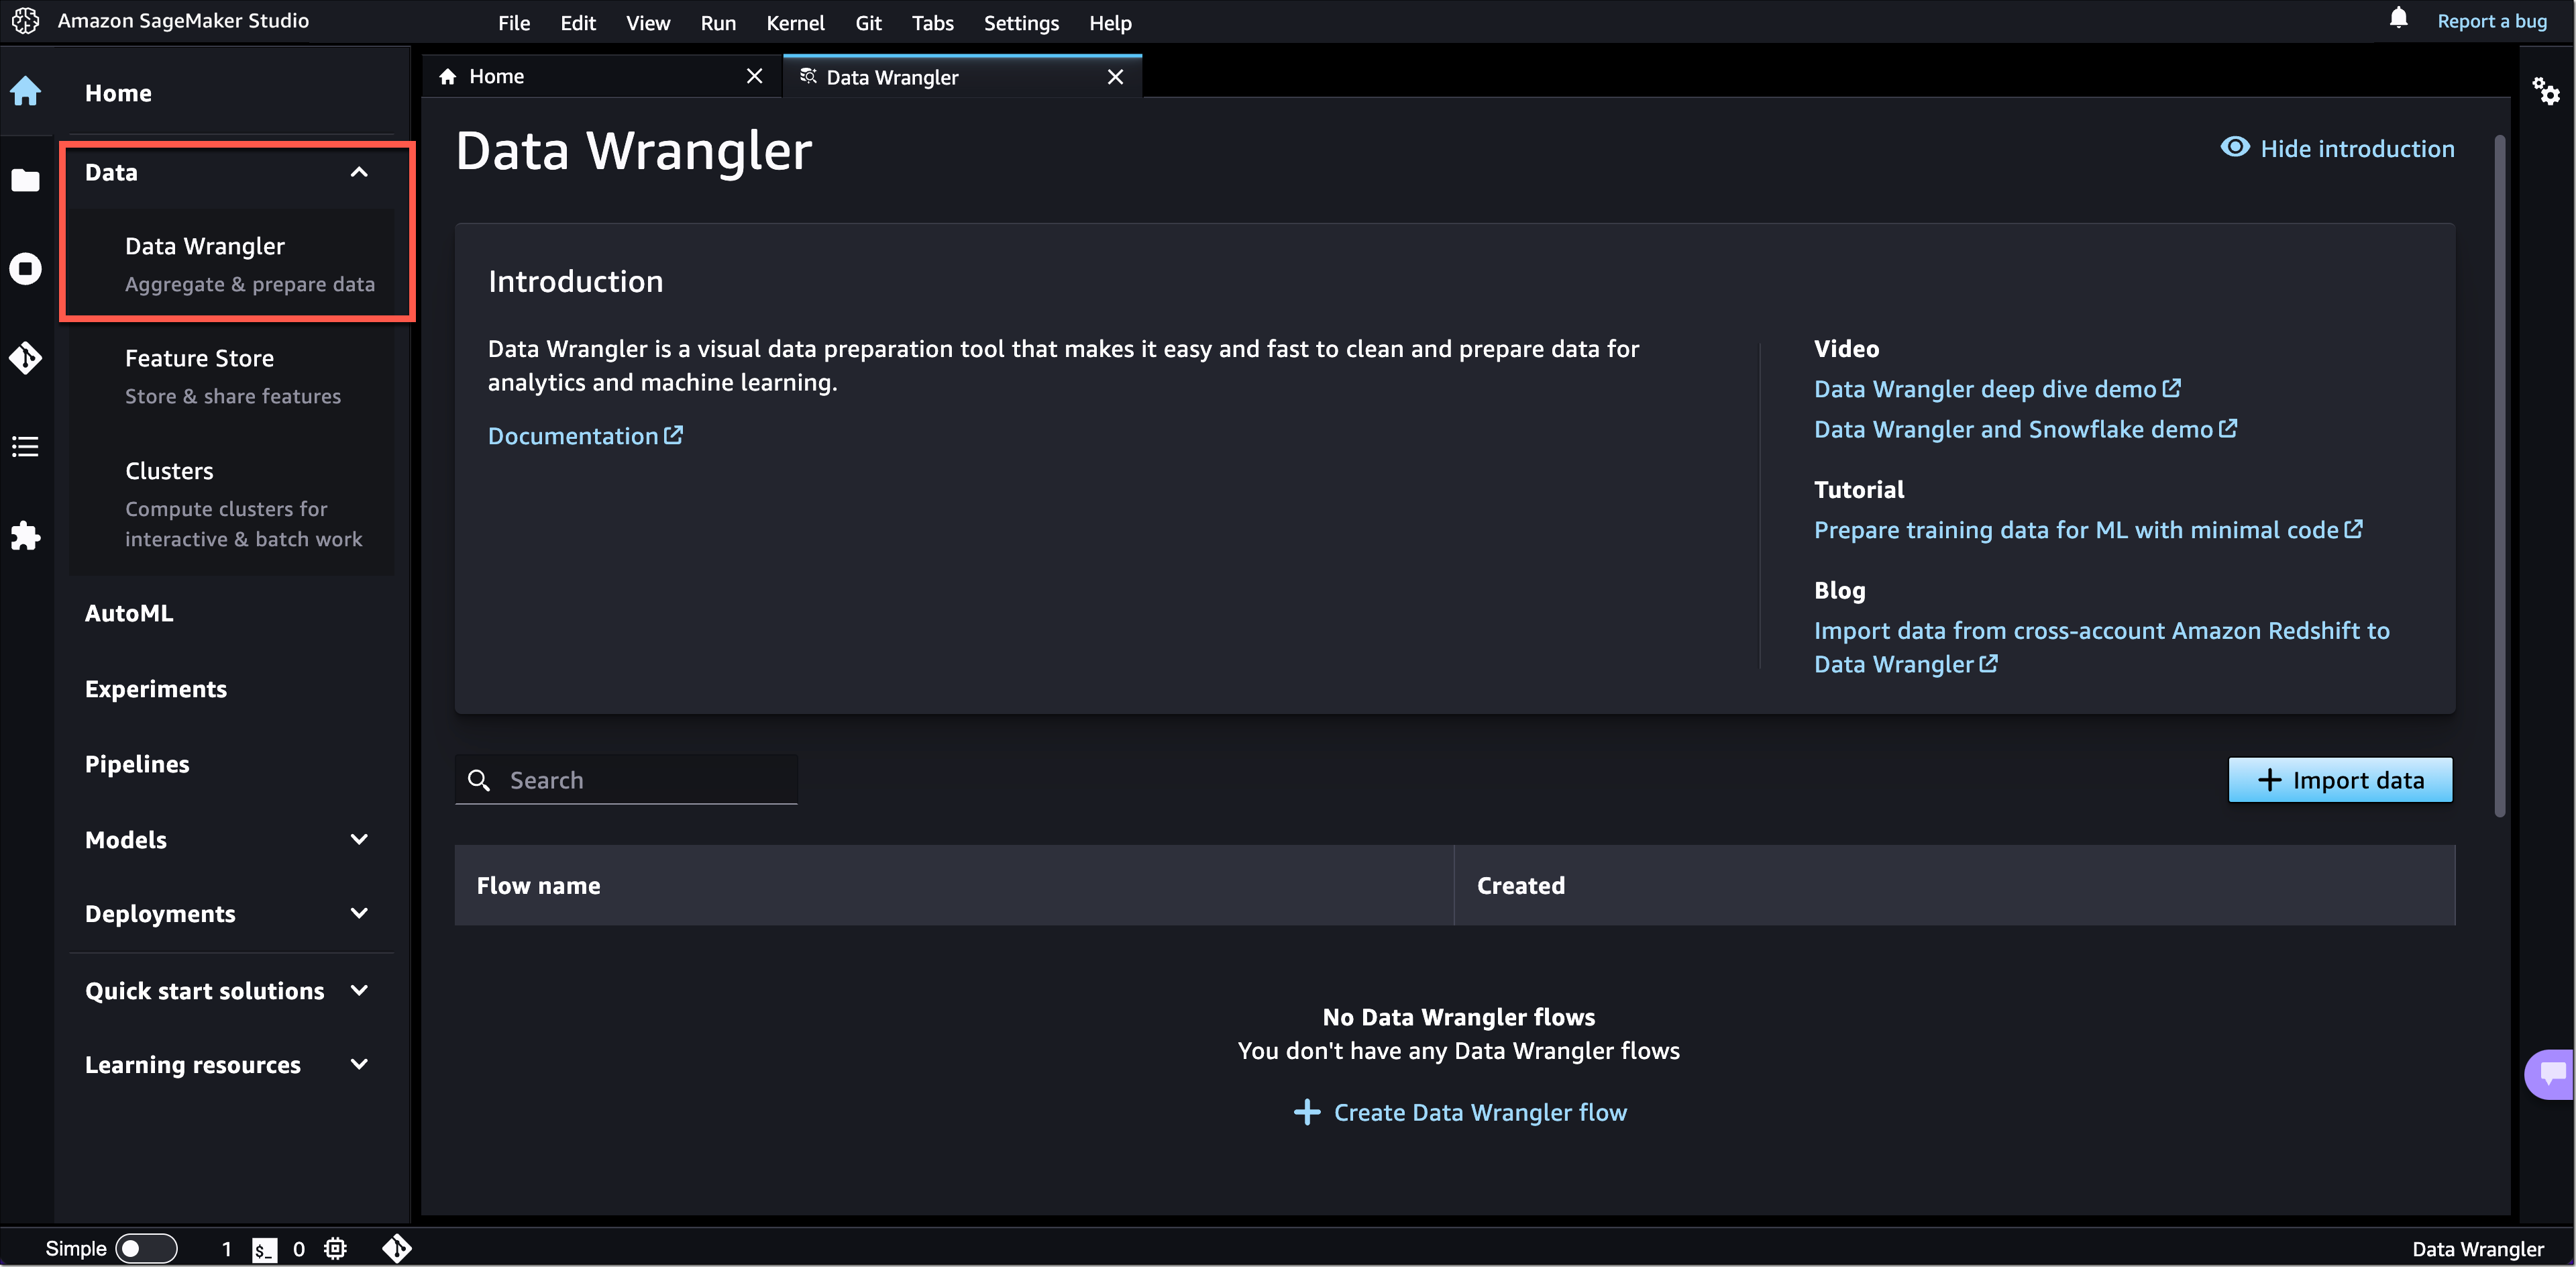
Now you can find the Geospatial section by navigating to the homepage and scrolling down in SageMaker Studio’s new Launcher tab.

Here is an overview of three key Amazon SageMaker geospatial capabilities:

  • Earth Observation jobs – Acquire, transform, and visualize satellite imagery data to make predictions and get useful insights.
  • Vector Enrichment jobs – Enrich your data with operations, such as converting geographical coordinates to readable addresses from CSV files.
  • Map Visualization – Visualize satellite images or map data uploaded from a CSV, JSON, or GeoJSON file.

Let’s dive deep into each component!

Get Started with an Earth Observation Job
To get started with Earth Observation jobs, select Create Earth Observation job on the front page.

You can select one of the geospatial operations or ML models based on your use case.

  • Spectral Index – Obtain a combination of spectral bands that indicate the abundance of features of interest.
  • Cloud Masking – Identify cloud and cloud-free pixels to get clear and accurate satellite imagery.
  • Land Cover Segmentation – Identify land cover types such as vegetation and water in satellite imagery.

The SageMaker provides a combination of geospatial functionalities that include built-in operations for data transformations along with pretrained ML models. You can use these models to understand the impact of environmental changes and human activities over time, identify cloud and cloud-free pixels, and perform semantic segmentation.

Define a Job name, choose a model to be used, and click the bottom-right Next button to move to the second configuration step.

Next, you can define an area of interest (AOI), the satellite image data set you want to use, and filters for your job. The left screen shows the Area of Interest map to visualize for your Earth Observation Job selection, and the right screen contains satellite images and filter options for your AOI.

You can choose the satellite image collection, either USGS LANDSAT or Sentinel-2 images, the date span for your Earth Observation job, and filters on properties of your images in the filter section.

I uploaded GeoJSON format to define my AOI as the Mountain Halla area in Jeju island, South Korea. I select all job properties and options and choose Create.

Once the Earth Observation job is successfully created, a flashbar will appear where I can view my job details by pressing the View job details button.

Once the job is finished, I can Visualize job output.

This image is a job output on rendering process to detect land usage from input satellite images. You can see either input images, output images, or the AOI from data layers in the left pane.

It shows automatic mapping results of land cover for natural resource management. For example, the yellow area is the sea, green is cloud, dark orange is forest, and orange is land.

You can also execute the same job with SageMaker notebook using the geospatial image with geospatial SDKs.

From the File and New, choose Notebook and select the Image dropdown menu in the Setup notebook environment and choose Geospatial 1.0. Let the other settings be set to the default values.

Let’s look at Python sample code! First, set up SageMaker geospatial libraries.

import boto3
import botocore
import sagemaker
import sagemaker_geospatial_map

region = boto3.Session().region_name
session = botocore.session.get_session()
execution_role = sagemaker.get_execution_role()

sg_client= session.create_client(
    service_name='sagemaker-geospatial',
    region_name=region
)

Start an Earth Observation Job to identify the land cover types in the area of Jeju island.

# Perform land cover segmentation on images returned from the sentinel dataset.
eoj_input_config = {
    "RasterDataCollectionQuery": {
        "RasterDataCollectionArn": <ArnDataCollection,
        "AreaOfInterest": {
            "AreaOfInterestGeometry": {
                "PolygonGeometry": {
                    "Coordinates": [
                        [[126.647226, 33.47014], [126.406116, 33.47014], [126.406116, 33.307529], [126.647226, 33.307529], [126.647226, 33.47014]]
                    ]
                }
            }
        },
        "TimeRangeFilter": {
            "StartTime": "2022-11-01T00:00:00Z",
            "EndTime": "2022-11-22T23:59:59Z"
        },
        "PropertyFilters": {
            "Properties": [
                {
                    "Property": {
                        "EoCloudCover": {
                            "LowerBound": 0,
                            "UpperBound": 20
                        }
                    }
                }
            ],
            "LogicalOperator": "AND"
        }
    }
}
eoj_config = {"LandCoverSegmentationConfig": {}}

response = sg_client.start_earth_observation_job(
    Name =  "jeju-island-landcover", 
    InputConfig = eoj_input_config,
    JobConfig = eoj_config, 
    ExecutionRoleArn = execution_role
)
# Monitor the EOJ status
sg_client.get_earth_observation_job(Arn = response['Arn'])

After your EOJ is created, the Arn is returned to you. You use the Arn to identify a job and perform further operations. After finishing the job, visualize Earth Observation inputs and outputs in the visualization tool.

# Creates an instance of the map to add EOJ input/ouput layer
map = sagemaker_geospatial_map.create_map({
    'is_raster': True
})
map.set_sagemaker_geospatial_client(sg_client)
# render the map
map.render()

# Visualize input, you can see EOJ is not be completed.
time_range_filter={
    "start_date": "2022-11-01T00:00:00Z",
    "end_date": "2022-11-22T23:59:59Z"
}
arn_to_visualize = response['Arn']
config = {
    'label': 'Jeju island'
}
input_layer=map.visualize_eoj_input(Arn=arn_to_visualize, config=config , time_range_filter=time_range_filter)

# Visualize output, EOJ needs to be in completed status
time_range_filter={
    "start_date": "2022-11-01T00:00:00Z",
    "snd_date": "2022-11-22T23:59:59Z"
}

config = {
   'preset': 'singleBand',
   'band_name': 'mask'
}
output_layer = map.visualize_eoj_output(Arn=arn_to_visualize, config=config, time_range_filter=time_range_filter)

You can also execute the StartEarthObservationJob API using the AWS Command Line Interface (AWS CLI).

When you create an Earth Observation Job in notebooks, you can use additional geospatial functionalities. Here is a list of some of the other geospatial operations that are supported by Amazon SageMaker:

  • Band Stacking – Combine multiple spectral properties to create a single image.
  • Cloud Removal – Remove pixels containing parts of a cloud from satellite imagery.
  • Geomosaic – Combine multiple images for greater fidelity.
  • Resampling – Scale images to different resolutions.
  • Temporal Statistics – Calculate statistics through time for multiple GeoTIFFs in the same area.
  • Zonal Statistics – Calculate statistics on user-defined regions.

To learn more, see Amazon SageMaker geospatial notebook SDK and Amazon SageMaker geospatial capability Service APIs in the AWS documentation and geospatial sample codes in the GitHub repository.

Perform a Vector Enrichment Job and Map Visualization
A Vector Enrichment Job (VEJ) performs operations on your vector data, such as reverse geocoding or map matching.

  • Reverse Geocoding – Convert map coordinates to human-readable addresses powered by Amazon Location Service.
  • Map Matching – Match GPS coordinates to road segments.

While you need to use an Amazon SageMaker Studio notebook to execute a VEJ, you can view all the jobs you create.

With the StartVectorEnrichmentJob API, you can create a VEJ for the supplied two job types.

{
  "Name":"vej-reverse", 
  "InputConfig":{
       "DocumentType":"csv", //
       "DataSourceConfig":{
       "S3Data":{
            "S3Uri":"s3://channy-geospatial/sample/vej.csv",
        } 
   }
  }, 
  "JobConfig": {
      "MapMatchingConfig": { 
          "YAttributeName":"string", // Latitude 
          "XAttributeName":"string", // Longitude 
          "TimestampAttributeName":"string", 
          "IdAttributeName":"string"
       }
   },
   "ExecutionRoleArn":"string" 
}

You can visualize the output of VEJ in the notebook or use the Map Visualization feature after you export VEJ jobs output to your S3 bucket. With the map visualization feature, you can easily show your geospatial data on the map.

This sample visualization includes Seattle City Council districts and public-school locations in GeoJSON format. Select Add data to upload data files or select S3 bucket.

{
  "type": "FeatureCollection",
  "crs": { "type": "name", "properties": { 
            "name":   "urn:ogc:def:crs:OGC:1.3:CRS84" } },
                                                                                
  "features": [
            { "type": "Feature", "id": 1, "properties": { "PROPERTY_L": "Jane Addams", "Status": "MS" }, "geometry": { "type": "Point", "coordinates": [ -122.293009024934037, 47.709944862769468 ] } },
            { "type": "Feature", "id": 2, "properties": { "PROPERTY_L": "Rainier View", "Status": "ELEM" }, "geometry": { "type": "Point", "coordinates": [ -122.263172064204767, 47.498863322205558 ] } },
            { "type": "Feature", "id": 3, "properties": { "PROPERTY_L": "Emerson", "Status": "ELEM" }, "geometry": { "type": "Point", "coordinates": [ -122.258636146463658, 47.514820466363943 ] } }
            ]
}

That’s all! For more information about each component, see Amazon SageMaker geospatial Developer Guide.

Join the Preview
The preview release of Amazon SageMaker geospatial capability is now available in the US West (Oregon) Region.

We want to hear more feedback during the preview. Give it a try, and please send feedback to AWS re:Post for Amazon SageMaker or through your usual AWS support contacts.

Channy

New – Redesigned UI for Amazon SageMaker Studio

Post Syndicated from Antje Barth original https://aws.amazon.com/blogs/aws/new-redesigned-ui-for-amazon-sagemaker-studio/

Today, I’m excited to announce a new, redesigned user interface (UI) for Amazon SageMaker Studio.

SageMaker Studio provides a single, web-based visual interface where you can perform all machine learning (ML) development steps with a comprehensive set of ML tools. For example, you can prepare data using SageMaker Data Wrangler, build ML models with fully managed Jupyter notebooks, and deploy models using SageMaker’s multi-model endpoints.

Introducing the Redesigned UI for Amazon SageMaker Studio
The redesigned UI makes it easier for you to discover and get started with the ML tools in SageMaker Studio. One highlight of the new UI includes a redesigned navigation menu with links to SageMaker capabilities that follow the typical ML development workflow from preparing data to building, training, and deploying ML models.

We also added new dynamic landing pages for each of the navigation menu items. These landing pages will refresh automatically to show the ML resources relevant for the tool, such as clusters, feature groups, experiments, and model endpoints, as you create or update them. On each of these pages, you can also find links to videos, tutorials, blogs, or additional documentation, to help you get started with the corresponding ML tool in SageMaker Studio.

The new SageMaker Studio Home page gives you one-click access to common tasks and workflows. From here, you can also open the redesigned Launcher with quick links to some of the most frequent tasks, such as creating a new notebook, opening a code console, or opening an image terminal.

Let me give you a whirlwind tour of the redesigned UI.

New Navigation Menu
The new left navigation menu in SageMaker Studio now helps you discover and navigate to the right tools for each step in your ML development workflow. The menu offers clear entry points to key ML tasks, such as data preparation, experimentation, model building, and deployments. The menu also provides shortcuts to quick start solutions and helpful content to accelerate your work in SageMaker Studio.

Amazon SageMaker Studio - New Navigation Menu

New Landing Pages for SageMaker Features and Capabilities
The new left navigation menu groups relevant tools together. For example, if you click on Data, you can now see the relevant SageMaker capabilities for your data preparation tasks. From here, you can prepare your data with SageMaker Data Wrangler, create and store ML features with SageMaker Feature Store, or manage Amazon EMR clusters for large-scale data processing.

If you click on Data Wrangler, the new landing page opens. These landing pages are designed to help you get started more easily. You can find a brief introduction to the tool and links to additional resources, such as videos, tutorials, or blogs.

Amazon SageMaker Studio - New Feature Landing Pages

Similar landing pages exist for the other navigation menu items. For example, with one click on AutoML, you can now see your existing SageMaker Autopilot experiments or get started by creating a new one.

Amazon SageMaker Studio - New AutoML Landing Page

New SageMaker Studio Home Page
We also added a new SageMaker Studio Home page with tooltips on key controls in the UI.

The Home page includes a list of Quick actions for common tasks, such as Open Launcher to create notebooks and other resources. Import & prepare data visually takes you to SageMaker Data Wrangler and helps you get started with your data preparation tasks. You can open the new Getting Started notebook or find additional resources, such as documentation and tutorials.

The Prebuilt and automated solutions help you get started quickly with prebuilt solutions, pretrained open-source models, and AutoML.

In Workflows and tasks, you find a list of relevant tasks for each step in your ML development workflow that take you to the right tool for the job. For example, Store, manage, and retrieve features takes you to SageMaker Feature Store and opens the feature catalog. Similarly, View all experiments takes you to SageMaker Experiments and opens the experiments list view.

In Quick start solutions, you can find pretrained vision, text, and tabular models, notebooks, and end-to-end solutions for common use cases.

Amazon SageMaker Studio - New Home Page

New Getting Started Notebook
SageMaker Studio now includes a new Getting Started notebook that walks you through the basics of how to use SageMaker Studio. If you are a first-time user of SageMaker Studio, this is the perfect starting place. The notebook covers everything from the fundamentals of JupyterLab to a practical walkthrough of training an ML model. The notebook also provides detailed insight into SageMaker-specific functionality, resources, and tools.

New SageMaker Studio Launcher
The Launcher is designed to help you invoke JupyterLab actions and has been optimized to give you quick access to the most frequent tasks, such as creating a notebook, opening a code console, or opening an image terminal. In the same step, you can also choose the image, kernel, instance type, or startup script as needed. 

Amazon SageMaker Studio - New Launcher

Now Available
The redesigned Amazon SageMaker Studio UI is now available in all AWS Regions where SageMaker Studio is available. The redesigned UI is supported by SageMaker Studio domains running on JupyterLab 3. For instructions on how to update the JupyterLab version, see View and update the JupyterLab version of an app from the console.

Give the new user experience a try, and let us know what you think through the purple Feedback widget in SageMaker Studio, or through your usual AWS support contacts.

Start building your ML projects with Amazon SageMaker Studio today!

— Antje

New for Amazon Transcribe – Real-Time Analytics During Live Calls

Post Syndicated from Danilo Poccia original https://aws.amazon.com/blogs/aws/new-for-amazon-transcribe-real-time-analytics-during-live-calls/

The experience customers have when interacting with a contact center can have a profound impact on them. For this reason, we launched Amazon Transcribe Call Analytics last year to help you analyze customer call recordings and get insights into issues and trends related to customer satisfaction and agent performance.

To assist agents in resolving live calls faster, we are introducing today real-time call analytics in Amazon Transcribe Call Analytics. Real-time call analytics provides APIs for developers to accurately transcribe live calls and at the same time identify customer experience issues and sentiment in real time. Transcribe Call Analytics uses state-of-the-art machine learning capabilities to automatically assess thousands of in-progress calls and detect customer experience issues, such as repeated requests to speak to a manager or cancel a subscription.

With a few clicks, supervisors and analysts can create categories in the AWS console to identify customer experience issues using criteria such as specific terms such as “not happy,” “poor quality,” and “cancel my subscription.” Transcribe Call Analytics analyzes in-progress calls in real time to detect when a category is met. Developers can use those signals, along with sentiment trends from the API, to build a proactive system that alerts supervisors about emerging issues or assists agents with relevant information to solve customer issues.

Transcribe Call Analytics also provides a real-time transcript of the live conversation that supervisors can use to quickly get up to speed on the customer interaction and assess the appropriate action. The in-call transcript also eliminates the need for customers to repeat themselves if the call is transferred to another agent. Agents can focus all their attention on the customer during the call instead of taking notes for entry in a CRM system because Transcribe Call Analytics includes an automated call summarization capability, which identifies the issue, outcome, and action item associated with a call.

Transcribe Call Analytics is a foundational API for AWS Contact Center Intelligence solutions such as post-call analytics and the updated real-time call analytics with agent assist solution using the new real-time capabilities.

Let’s see how this works in practice.

Exploring Real-Time Call Analytics in the Console
To see how this works visually, I use the Amazon Transcribe console. First, I create a category to be notified if some terms are used in the call that would require an escalation. I choose Category Management from the navigation pane and then Create category.

I enter Escalation as the name for the category. I select REAL_TIME in the Category type dropdown. Then, I choose Create from scratch.

Console screenshot.

I only need one rule for this category. In the Rule type dropdown, I select Transcript content match. In the next three options, I choose to trigger the rule when any of the words are mentioned during the entire call, and the speaker is either the customer or the agent. Now, I can enter the words or phrases to look for in the transcript. In this case, I enter cancel, canceled, cancelled, manager, and supervisor. In your case, you might be more specific depending on your business. For example, if subscriptions are your business, you can look for the phrase cancel my subscription.

Console screenshot.

Now that the category has been created, I use one of the sample calls in the console to test it. I choose Real-Time Analytics in the navigation pane. By choosing Configure advanced settings, I can configure the personally identifiable information (PII) identification and redaction settings. For example, I can choose to identify personal data such as email addresses or redact financial data like bank account numbers.

With no additional charge, I can enable Post-call Analytics so that, at the end of the call, I receive the output of the transcription job in an Amazon Simple Storage Service (Amazon S3) bucket. This output is in a similar format to what I’d receive if I were analyzing a call recording with Transcribe Call Analytics. In this way, I can use the post-call analytics output derived from the audio stream in any process I already have in place for output of analytics generated from call recordings, for example, to update dashboards or generate periodic reports.

With Insurance complaints in Step 1: Specify input audio selected, I choose Start streaming. In the Transcription output section of the console, I receive in real-time the transcription of the call. The words of the customer and agent appear as they are pronounced. Each sentence is flagged with its recognized sentiment (positive, neutral, or negative). The Escalation category that I just configured is found in two sentences, first, when the customer mentions that their insurance has been canceled, and then when the agent mentions their manager. Also, part of a sentence is underlined because an issue has been detected.

Console screenshot.

Using the Download dropdown, I download the full JSON transcript. If I am only interested in the transcription, I can download the text transcript. The JSON transcript contains an array where each item is similar to what I’d get in real time when using the real-time call analytics API.

Using the Live Call Analytics With Agent Assist (LCA) Solution
You can use the open-source real-time call analytics with agent assist solution for your contact center or as an inspiration of what Amazon Transcribe enables for developers. Let’s look at a couple of screenshots to understand how it works.

Here there is a list of on-going calls with the overall sentiment, the sentiment trend (is it improving or not?), and the categories found in real-time during the call that can be used for specific activities.

Screenshot from the real-time call analytics with agent assist solution.

When selecting a call from the list, you have access to more in-depth information, including the call transcript and the issues found during the on-going call. This allows to take action quickly to help resolve the call.

Screenshot from the real-time call analytics with agent assist solution.

Availability and Pricing
Amazon Transcribe Call Analytics with real-time capabilities is available today in US (N. Virginia, Oregon), Canada (Central), Europe (Frankfurt, London), and Asia Pacific (Seoul, Sydney, Tokyo) and supports US English, British English, Australian English, US Spanish, Canadian French, French, German, Italian, and Brazilian Portuguese.

With Amazon Transcribe Call Analytics, you pay as you go and are billed monthly based on tiered pricing. For more information, see Amazon Transcribe pricing.

As part of the AWS Free Tier, you can get started with Amazon Transcribe Call Analytics for free, including the new real-time call analytics API. You can analyze up to 60 minutes of call audio monthly for free for the first 12 months. For more information, see the AWS Free Tier page.

If you’re at re:Invent, you can learn more about this new capability in session AIM307 – JPMorganChase real-time agent assist for contact center productivity. I will update this post when the recording of the session is publicly available.

Start analyzing contact center conversations in real-time to improve your customers’ experience.

Danilo

Architecting near real-time personalized recommendations with Amazon Personalize

Post Syndicated from Raghavarao Sodabathina original https://aws.amazon.com/blogs/architecture/architecting-near-real-time-personalized-recommendations-with-amazon-personalize/

Delivering personalized customer experiences enables organizations to improve business outcomes such as acquiring and retaining customers, increasing engagement, driving efficiencies, and improving discoverability. Developing an in-house personalization solution can take a lot of time, which increases the time it takes for your business to launch new features and user experiences.

In this post, we show you how to architect near real-time personalized recommendations using Amazon Personalize and AWS purpose-built data services.  We also discuss key considerations and best practices while building near real-time personalized recommendations.

Building personalized recommendations with Amazon Personalize

Amazon Personalize makes it easy for developers to build applications capable of delivering a wide array of personalization experiences, including specific product recommendations, personalized product re-ranking, and customized direct marketing.

Amazon Personalize provisions the necessary infrastructure and manages the entire machine learning (ML) pipeline, including processing the data, identifying features, using the most appropriate algorithms, and training, optimizing, and hosting the models. You receive results through an Application Programming Interface (API) and pay only for what you use, with no minimum fees or upfront commitments.

Figure 1 illustrates the comparison of Amazon Personalize with the ML lifecycle.

Machine learning lifecycle vs. Amazon Personalize

Figure 1. Machine learning lifecycle vs. Amazon Personalize

First, provide the user and items data to Amazon Personalize. In general, there are three steps for building near real-time recommendations with Amazon Personalize:

  1. Data preparation: Preparing data is one of the prerequisites for building accurate ML models and analytics, and it is the most time-consuming part of an ML project. There are three types of data you use for modeling on Amazon Personalize:
    • An Interactions data set captures the activity of your users, also known as events. Examples include items your users click on, purchase, or watch. The events you choose to send are dependent on your business domain. This data set has the strongest signal for personalization, and is the only mandatory data set.
    • An Items data set includes details about your items, such as price point, category information, and other essential information from your catalog. This data set is optional, but very useful for scenarios such as recommending new items.
    • A Users data set includes details about the users, such as their location, age, and other details.
  2. Train the model with Amazon Personalize: Amazon Personalize provides recipes, based on common use cases for training models. A recipe is an Amazon Personalize algorithm prepared for a given use case. Refer to Amazon Personalize recipes for more details. The four types of recipes are:
    • USER_PERSONALIZATION: Recommends items for a user from a catalog. This is often included on a landing page.
    • RELATED_ITEM: Suggests items similar to a selected item on a detail page.
    • PERSONALZIED_RANKING: Re-ranks a list of items for a user within a category or in within search results.
    • USER_SEGMENTATION: Generates segments of users based on item input data. You can use this to create a targeted marketing campaign for particular products by brand.
  3. Get near real-time recommendations: Once your model is trained, a private personalization model is hosted for you. You can then provide recommendations for your users through a private API.

Figure 2 illustrates a high-level overview of Amazon Personalize:

Figure 2. Building recommendations with Amazon Personalize

Figure 2. Building recommendations with Amazon Personalize

Near real-time personalized recommendations reference architecture

Figure 3 illustrates how to architect near real-time personalized recommendations using Amazon Personalize and AWS purpose-built data services.

Reference architecture for near real-time recommendations

Figure 3. Near real-time recommendations reference architecture

Architecture flow:

  1. Data preparation: Start by creating a dataset group, schemas, and datasets representing your items, interactions, and user data.
  2. Train the model: After importing your data, select the recipe matching your use case, and then create a solution to train a model by creating a solution version.
    Once your solution version is ready, you can create a campaign for your solution version. You can create a campaign for every solution version that you want to use for near real-time recommendations.
    In this example architecture, we’re just showing a single solution version and campaign. If you were building out multiple personalization use cases with different recipes, you could create multiple solution versions and campaigns from the same datasets.
  3. Get near real-time recommendations: Once you have a campaign, you can integrate calls to the campaign in your application. This is where calls to the GetRecommendations or GetPersonalizedRanking APIs are made to request near real-time recommendations from Amazon Personalize.
    • The approach you take to integrate recommendations into your application varies based on your architecture but it typically involves encapsulating recommendations in a microservice or AWS Lambda function that is called by your website or mobile application through a RESTful or GraphQL API interface.
    • Near real-time recommendations support the ability to adapt to each user’s evolving interests. This is done by creating an event tracker in Amazon Personalize.
    • An event tracker provides an endpoint that allows you to stream interactions that occur in your application back to Amazon Personalize in near real-time. You do this by using the PutEvents API.
    • Again, the architectural details on how you integrate PutEvents into your application varies, but it typically involves collecting events using a JavaScript library in your website or a native library in your mobile apps, and making API calls to stream them to your backend. AWS provides the AWS Amplify framework that can be integrated into your web and mobile apps to handle this for you.
    • In this example architecture, you can build an event collection pipeline using  Amazon API Gateway, Amazon Kinesis Data Streams, and Lambda to receive and forward interactions to Amazon Personalize.
    • The Event Tracker performs two primary functions. First, it persists all streamed interactions so they will be incorporated into future retraining of your model. This also how Amazon Personalize cold starts new users. When a new user visits your site, Amazon Personalize will recommend popular items. After you stream in an event or two, Amazon Personalize immediately starts adjusting recommendations.

Key considerations and best practices

  1. For all use cases, your interactions data must have a minimum 1000 interaction records from users interacting with items in your catalog. These interactions can be from bulk imports, streamed events, or both, and a minimum 25 unique user IDs with at least two interactions for each.
  2. Metadata fields (user or item) can be used for training, filters, or both.
  3. Amazon Personalize supports the encryption of your imported data. You can specify a role allowing Amazon Personalize to use an AWS Key Management Service (AWS KMS) key to decrypt your data, or use the Amazon Simple Storage Service (Amazon S3) AES-256 server-side default encryption.
  4. You can re-train Amazon Personalize deployments based on how much interaction data you generate on a daily basis. A good rule is to re-train your models once every week or two as needed.
  5. You can apply business rules for personalized recommendations using filters. Refer to Filtering recommendations and user segments for more details.

Conclusion

In this post, we showed you how to build near real-time personalized recommendations using Amazon Personalize and AWS purpose-built data services. With the information in this post, you can now build your own personalized recommendations for your applications.

Read more and get started on building personalized recommendations on AWS:

New Research: Optimizing DAST Vulnerability Triage with Deep Learning

Post Syndicated from Tom Caiazza original https://blog.rapid7.com/2022/11/09/new-research-optimizing-dast-vulnerability-triage-with-deep-learning/

New Research: Optimizing DAST Vulnerability Triage with Deep Learning

On November 11th 2022, Rapid7 will for the first time publish and present state-of-the-art machine learning (ML) research at AISec, the leading venue for AI/ML cybersecurity innovations. Led by Dr. Stuart Millar, Senior Data Scientist, Rapid7’s multi-disciplinary ML group has designed a novel deep learning model to automatically prioritize application security vulnerabilities and reduce false positive friction. Partnering with The Centre for Secure Information Technologies (CSIT) at Queen’s University Belfast, this is the first deep learning system to optimize DAST vulnerability triage in application security. CSIT is the UK’s Innovation and Knowledge Centre for cybersecurity, recognised by GCHQ and EPSRC as a Centre of Excellence for cybersecurity research.

Security teams struggle tremendously with prioritizing risk and managing a high level of false positive alerts, while the rise of the cloud post-Covid means web application security is more crucial than ever. Web attacks continue to be the most common type of compromise; however, high levels of false positives generated by vulnerability scanners have become an industry-wide challenge. To combat this, Rapid7’s innovative ML architecture optimizes vulnerability triage by utilizing the structure of traffic exchanges between a DAST scanner and a given web application. Leveraging convolutional neural networks and natural language processing, we designed a deep learning system that encapsulates internal representations of request and response HTTP traffic before fusing them together to make a prediction of a verified vulnerability or a false positive. This system learns from historical triage carried out by our industry-leading SMEs in Rapid7’s Managed Services division.

Given the skillset, time, and cognitive effort required to review high volumes of DAST results by hand, the addition of this deep learning capability to a scanner creates a hybrid system that enables application security analysts to rank scan results, deprioritise false positives, and concentrate on likely real vulnerabilities. With the system able to make hundreds of predictions per second, productivity is improved and remediation time reduced, resulting in stronger customer security postures. A rigorous evaluation of this machine learning architecture across multiple customers shows that 96% of false positives on average can automatically be detected and filtered out.

Rapid7’s deep learning model uses convolutional neural networks and natural language processing to represent the structure of client-server web traffic. Neither the model nor the scanner require source code access — with this hybrid approach first finding potential vulnerabilities using a scan engine, followed by the model predicting those findings as real vulnerabilities or false positives. The resultant solution enables the augmentation of triage decisions by deprioritizing false positives. These time savings are essential to reduce exposure and harden security postures — considering the average time to detect a web breach can be several months, the sooner a vulnerability can be discovered, verified and remediated, the smaller the window of opportunity for an attacker.

Now recognized as state-of-the-art research after expert peer review, Rapid7 will introduce the work at AISec on Nov 11th 2022 at the Omni Los Angeles Hotel at California Plaza. Watch this space for further developments, and download a copy of the pre-print publication here.

AWS Week in Review – October 31, 2022

Post Syndicated from Antje Barth original https://aws.amazon.com/blogs/aws/aws-week-in-review-october-31-2022/

No tricks, just treats in this weekly roundup of news and announcements. Let’s switch our AWS Management Console into dark mode and dive right into it.

Last Week’s Launches
Here are some launches that got my attention during the previous week:

AWS Local Zones in Hamburg and Warsaw now generally available – AWS Local Zones help you run latency-sensitive applications closer to end users. The AWS Local Zones in Hamburg, Germany, and Warsaw, Poland, are the first Local Zones in Europe. AWS Local Zones are now generally available in 20 metro areas globally, with announced plans to launch 33 additional Local Zones in metro areas around the world. See the full list of available and announced AWS Local Zones, and learn how to get started.

Amazon SageMaker multi-model endpoint (MME) now supports GPU instances – MME is a managed capability of SageMaker Inference that lets you deploy thousands of models on a single endpoint. MMEs can now run multiple models on a GPU core, share GPU instances behind an endpoint across multiple models, and dynamically load and unload models based on the incoming traffic. This can help you reduce costs and achieve better price performance. Learn how to run multiple deep learning models on GPU with Amazon SageMaker multi-model endpoints.

Amazon EC2 now lets you replace the root Amazon EBS volume for a running instance – You can now use the Replace Root Volume for patching features in Amazon EC2 to replace your instance root volume using an updated AMI without needing to stop the instance. This makes patching of the guest operating system and applications easier, while retraining the instance store data, networking, and IAM configuration. Check out the documentation to learn more.

AWS Fault Injection Simulator now supports network connectivity disruption – AWS Fault Injection Simulator (FIS) is a managed service for running controlled fault injection experiments on AWS. AWS FIS now has a new action type to disrupt network connectivity and validate that your applications are resilient to a total or partial loss of connectivity. To learn more, visit Network Actions in the AWS FIS user guide.

Amazon SageMaker Automatic Model Tuning now supports Grid Search – SageMaker Automatic Model Tuning helps you find the hyperparameter values that result in the best-performing model for a chosen metric. Until now, you could choose between random, Bayesian, and hyperband search strategies. Grid search now lets you cover every combination of the specified hyperparameter values for use cases in which you need reproducible tuning results. Learn how Amazon SageMaker Automatic Model Tuning now supports grid search.

For a full list of AWS announcements, be sure to keep an eye on the What’s New at AWS page.

Other AWS News
Here are some additional news items that you may find interesting:

Celebrating over 20 years of AI/ML innovation – On October 25, we hosted the AWS AI/ML Innovation Day. Bratin Saha and other leaders in the field shared the great strides we have made in the past and discussed what’s next in the world of ML. You can watch the recording here.

AWS open-source news and updates – My colleague Ricardo Sueiras writes this weekly open-source newsletter in which he highlights new open-source projects, tools, and demos from the AWS Community. Read edition #133 here.

Upcoming AWS Events
Check your calendars and sign up for these AWS events:

AWS re:Invent is only 4 weeks away! Join us live in Las Vegas from November 28–December 2 for keynote announcements, training and certification opportunities, access to 1,500+ technical sessions, and much more. Seats are still available to reserve, and walk-ups are available onsite. You can also join us online to watch live keynotes and leadership sessions.

If you are into machine learning like me, check out the ML attendee guide. AWS Machine Learning Hero Vinicius Caridá put together recommended sessions and tips and tricks for building your agenda. We also have attendee guides on additional topics and industries.

On November 2, there is a virtual event for building modern .NET applications on AWS. You can register for free.

On November 11–12, AWS User Groups in India are hosting the AWS Community Day India 2022, with success stories, use cases, and much more from industry leaders. Sign up for free to join this virtual event.

That’s all for this week. Check back next Monday for another Week in Review!

— Antje

This post is part of our Week in Review series. Check back each week for a quick roundup of interesting news and announcements from AWS!