Tag Archives: AWS Toolkit for VS Code

Enhance the local testing experience for serverless applications with LocalStack

Post Syndicated from Patrick Galvin original https://aws.amazon.com/blogs/compute/enhance-the-local-testing-experience-for-serverless-applications-with-localstack/

Serverless applications often comprise multiple AWS services, such as AWS Lambda, Amazon Simple Queue Service (Amazon SQS), Amazon EventBridge, and Amazon DynamoDB. Although serverless architectures make it easy to build applications that are generally simple to operate and scale, testing them requires extra steps for developers. Recently, AWS brought you the capability to help developers remotely debug Lambda functions to accelerate the development process. Today, we’re excited to announce new capabilities that further simplify the local testing experience for Lambda functions and serverless applications through integration with LocalStack, an AWS Partner, in the AWS Toolkit for Visual Studio Code.

In this post, we will show you how you can enhance your local testing experience for serverless applications with LocalStack using AWS Toolkit.

Challenges with local serverless development

When building serverless applications with infrastructure as code (IaC) tools like the AWS Serverless Application Model (AWS SAM), developers often face challenges during local integration testing of applications that depend on interactions across multiple AWS services. These friction points slow down the critical code-test-debug cycle. Developers might encounter the following common roadblocks:

  • Cloud-based validation slows iteration – Developers previously needed to deploy AWS SAM templates to the cloud to test changes, introducing delays in feedback loops. AWS research shows that developers spend considerable time on deployment and testing, rather than writing code.
  • Tool context switching adds friction – Developers routinely shift between integrated development environments (IDEs), command line interfaces (CLIs), and resource emulators like LocalStack, leading to fragmented workflows.
  • Manual setup increases configuration complexity – Port mapping and code edits for local service integration tests can introduce inconsistencies between local and cloud environments.
  • Service integration debugging is limited – Troubleshooting Lambda functions in the context of AWS service integrations, such as DynamoDB, Amazon Simple Storage Service (Amazon S3), or Amazon SQS, requires manual configuration, extending the duration of troubleshooting efforts.

These challenges directly impact developer productivity and make local testing of integrated serverless applications complex.

Solution overview

Starting today, AWS helps simplify local serverless development by integrating LocalStack directly into the AWS Toolkit for VS Code. This integration helps developers test and debug serverless applications—defined using IaC tools like AWS SAM—entirely within their IDE. The enhanced local testing experience delivers four major improvements:

  • Integrated LocalStack experience – Connect to LocalStack directly within VS Code and manage local resources alongside cloud resources through a unified interface.
  • Emulated service interactions – Test Lambda functions with their interactions with other AWS services like Amazon SQS, DynamoDB, and EventBridge locally.
  • Simplified debugging – Start debugging sessions with LocalStack emulated environment, with a single click – no manual port configurations or code changes required, streamlining the debugging workflow.
  • Streamlined workflow – Deploy, test, and debug serverless applications without leaving the IDE, avoiding context switching between tools.

To set up LocalStack in VS Code (either the free version supporting over 30 core services like Lambda, Amazon S3, DynamoDB, Amazon SQS, and Amazon API Gateway, or the Ultimate version with over 110 services and advanced debugging features) you need essential development tools, including Docker, the AWS Command Line Interface (AWS CLI), AWS SAM CLI, and your preferred IDE such as VS Code. This combination enables full local integration testing of AWS services, including Lambda functions, messaging queues, databases, event-driven architectures, and serverless workflows, so you can develop and test your entire AWS application stack locally before deploying to the cloud.

Automated setup process

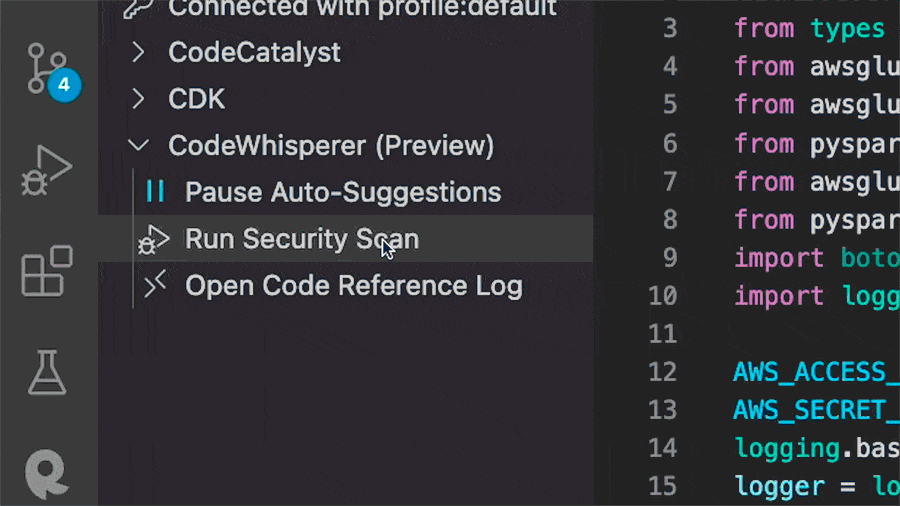
LocalStack is a cloud service emulator that you can use to run AWS applications locally for testing and development. To enhance your local testing capabilities, you can install the LocalStack VSCode Extension directly from AWS Walkthrough in AWS Toolkit, which offers a streamlined setup process through an intelligent wizard. After installation, the extension automatically detects whether LocalStack is configured on your system and prompts you to run the setup wizard through a notification. The entire process is quick and requires no manual configuration.

LocalStack extension has an integrated authentication wizard, that simplifies the process of connecting your development environment to LocalStack. During setup, the wizard opens a browser-based authentication flow and maintains an active connection until authentication completes. After it’s verified, it securely stores the authentication token in the ~/.localstack/auth.json file, enabling communication between your local environment and LocalStack services.

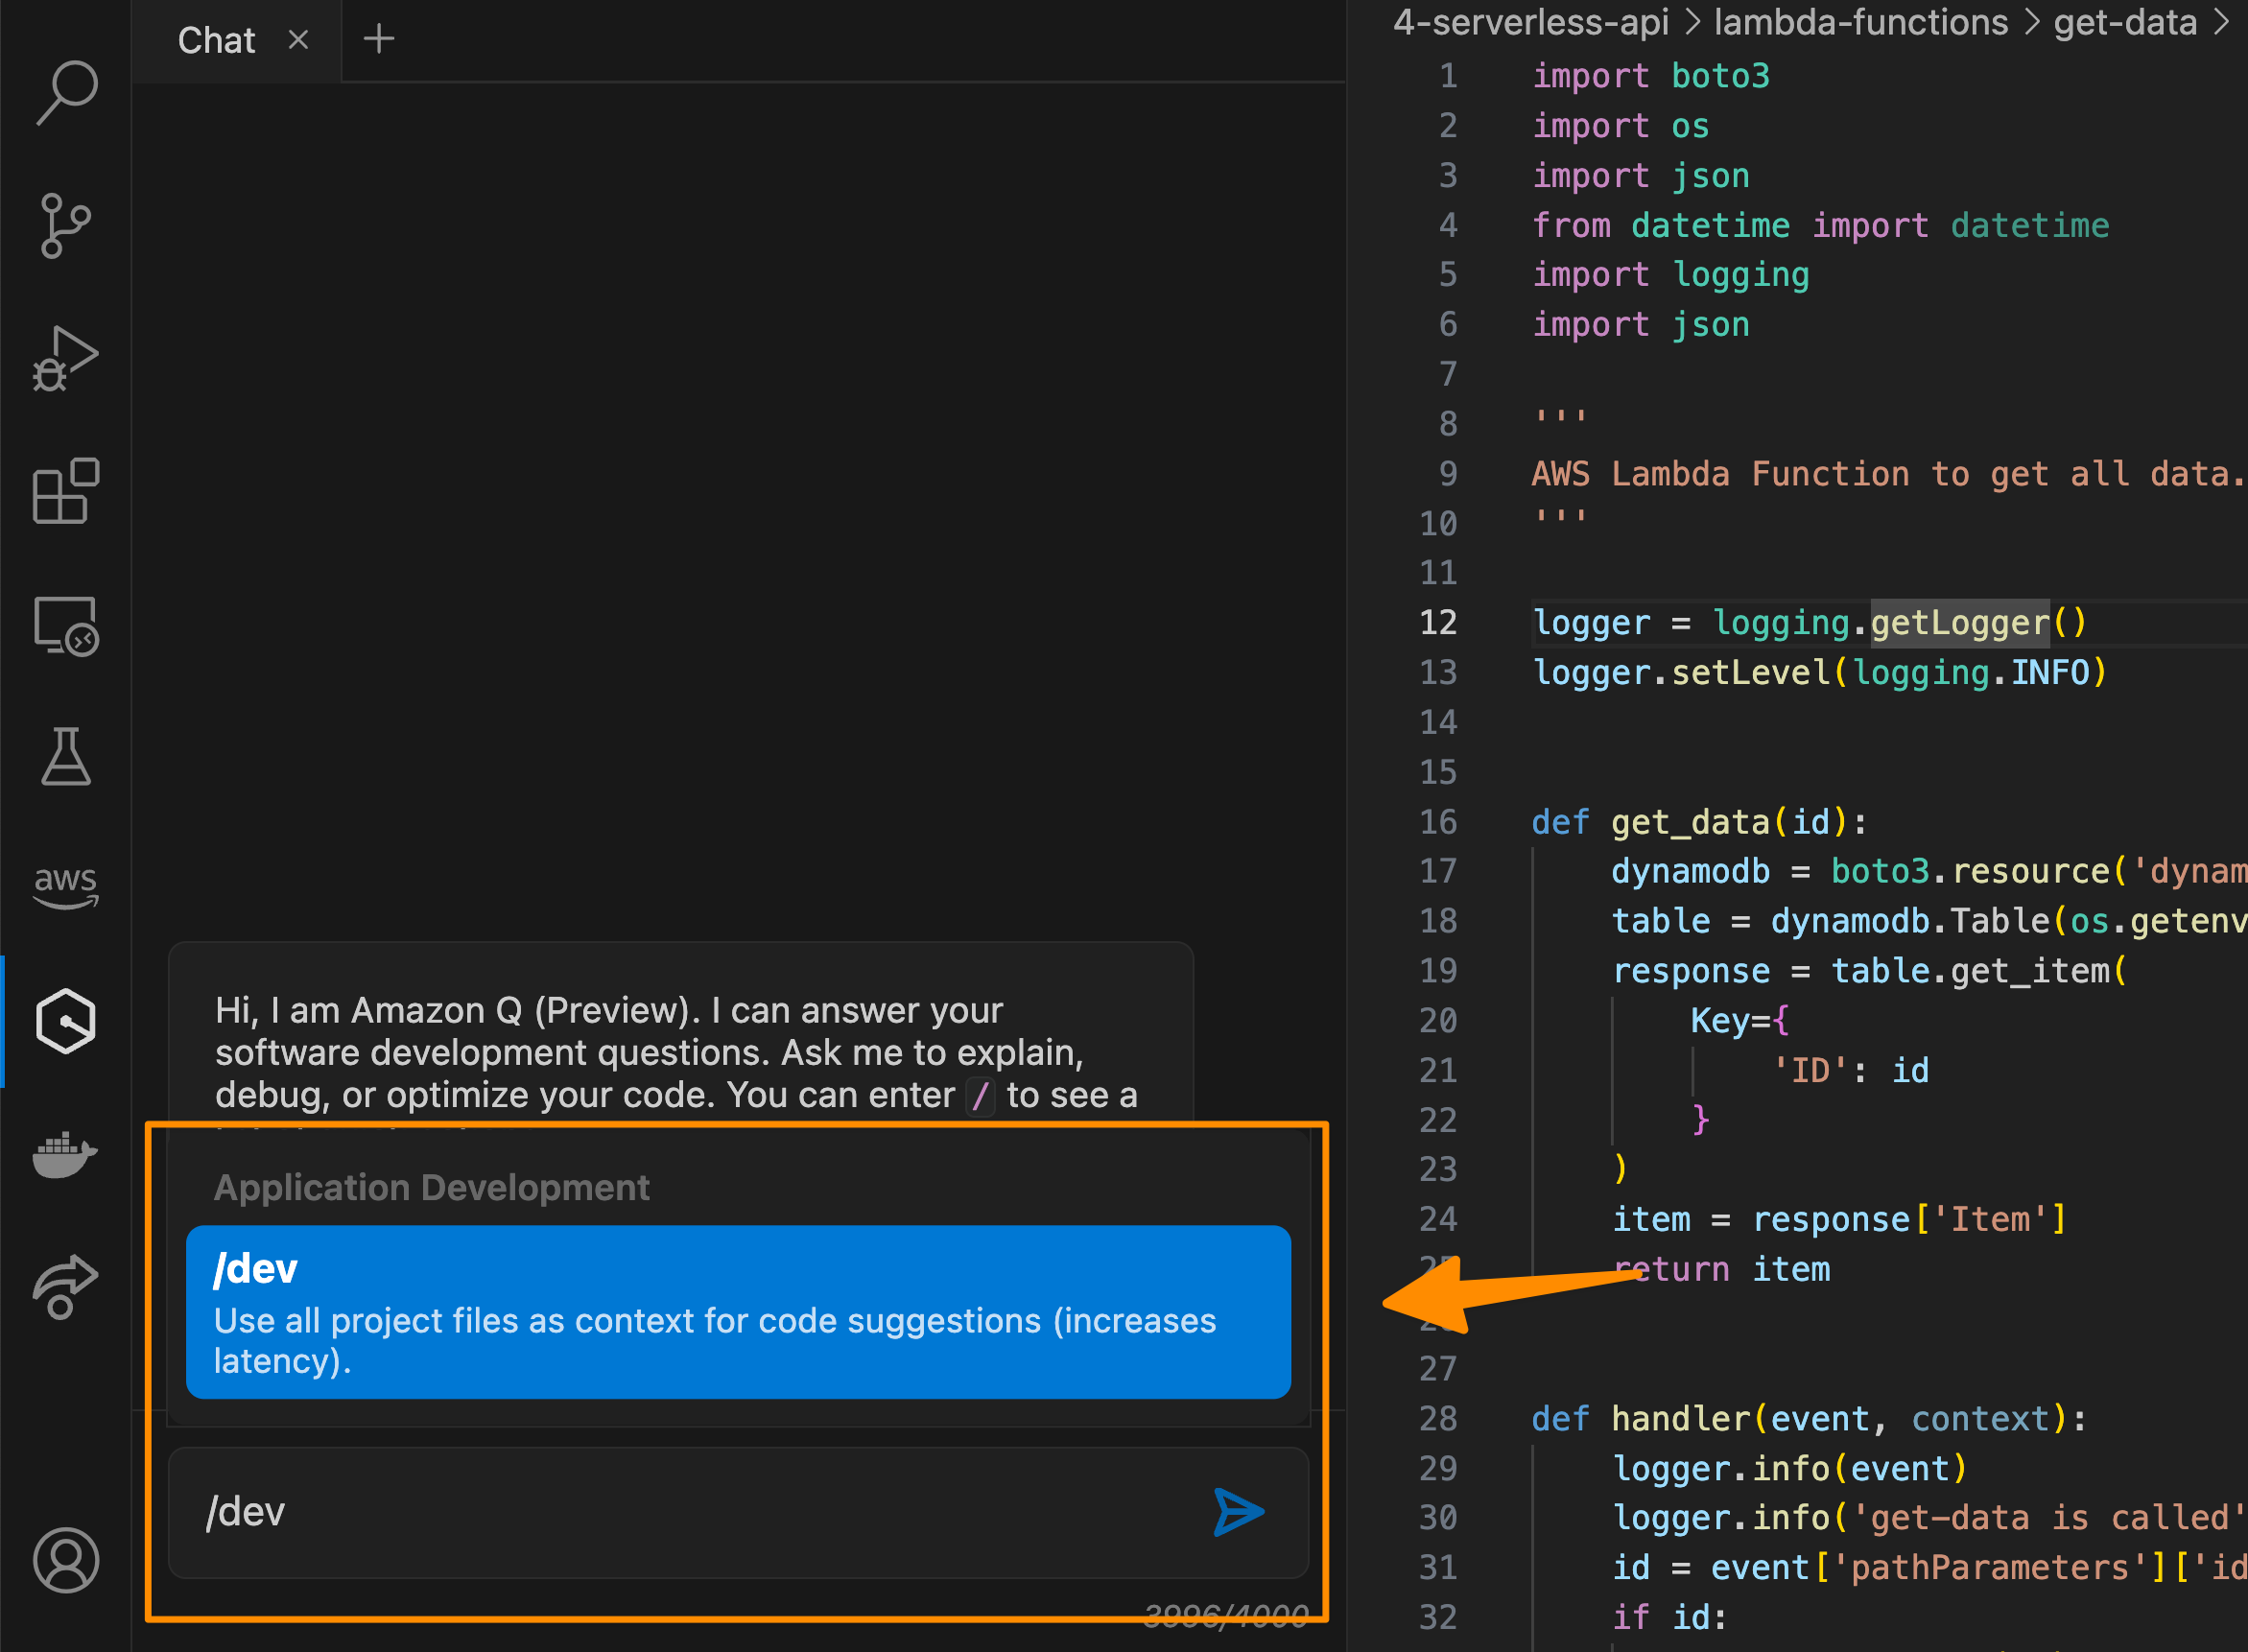
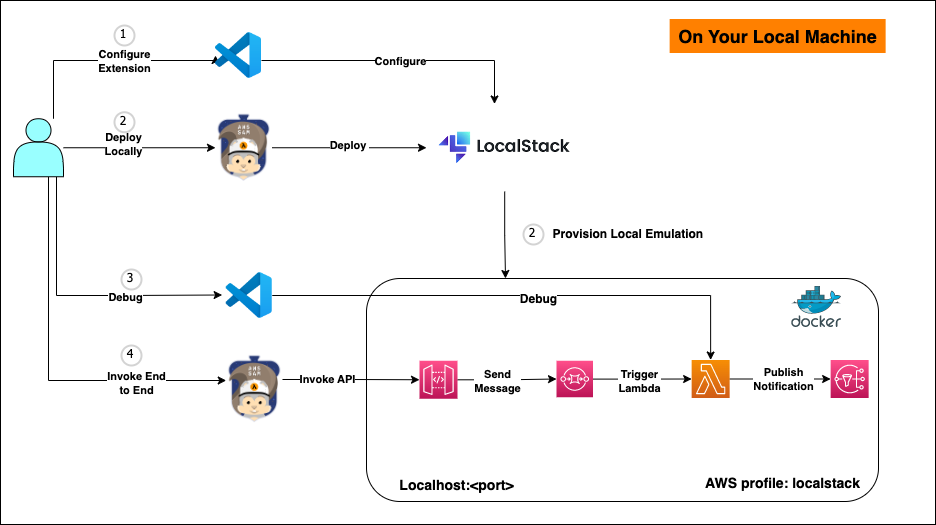
The wizard also checks if LocalStack AWS CLI profiles exist, and if not found, automatically creates them by updating the ~/.aws/config and ~/.aws/credentials files with LocalStack-specific endpoints and credentials. This seamless integration of AWS profiles enhances the development workflow by allowing developers to easily switch between different AWS environments, including the local LocalStack setup. By leveraging these profiles, developers can effortlessly point their AWS CLI or SDK to the appropriate endpoint, whether it’s a real AWS account or the LocalStack instance running on their machine. This configuration not only ensures a clear separation between local and cloud environments but also minimizes the risk of cross-environment interference. The automatic creation of these profiles streamlines the setup process, reducing manual configuration errors and saving valuable development time. Visual Studio Code (VS Code) provides real-time feedback throughout the setup. The status bar initially displays an error or warning indicator when LocalStack is not configured and then transitions to a normal or connected state once a successful connection is established. After setup completes, you’re ready to deploy, test, and debug serverless applications locally—without additional configuration. These settings persist across VS Code sessions, so the setup process is a one-time task.The following figure illustrates the process to start and verify LocalStack from VS Code.

To learn more, including installation steps, configuration examples, and troubleshooting guidance, visit the LocalStack Docs.

Test a serverless application

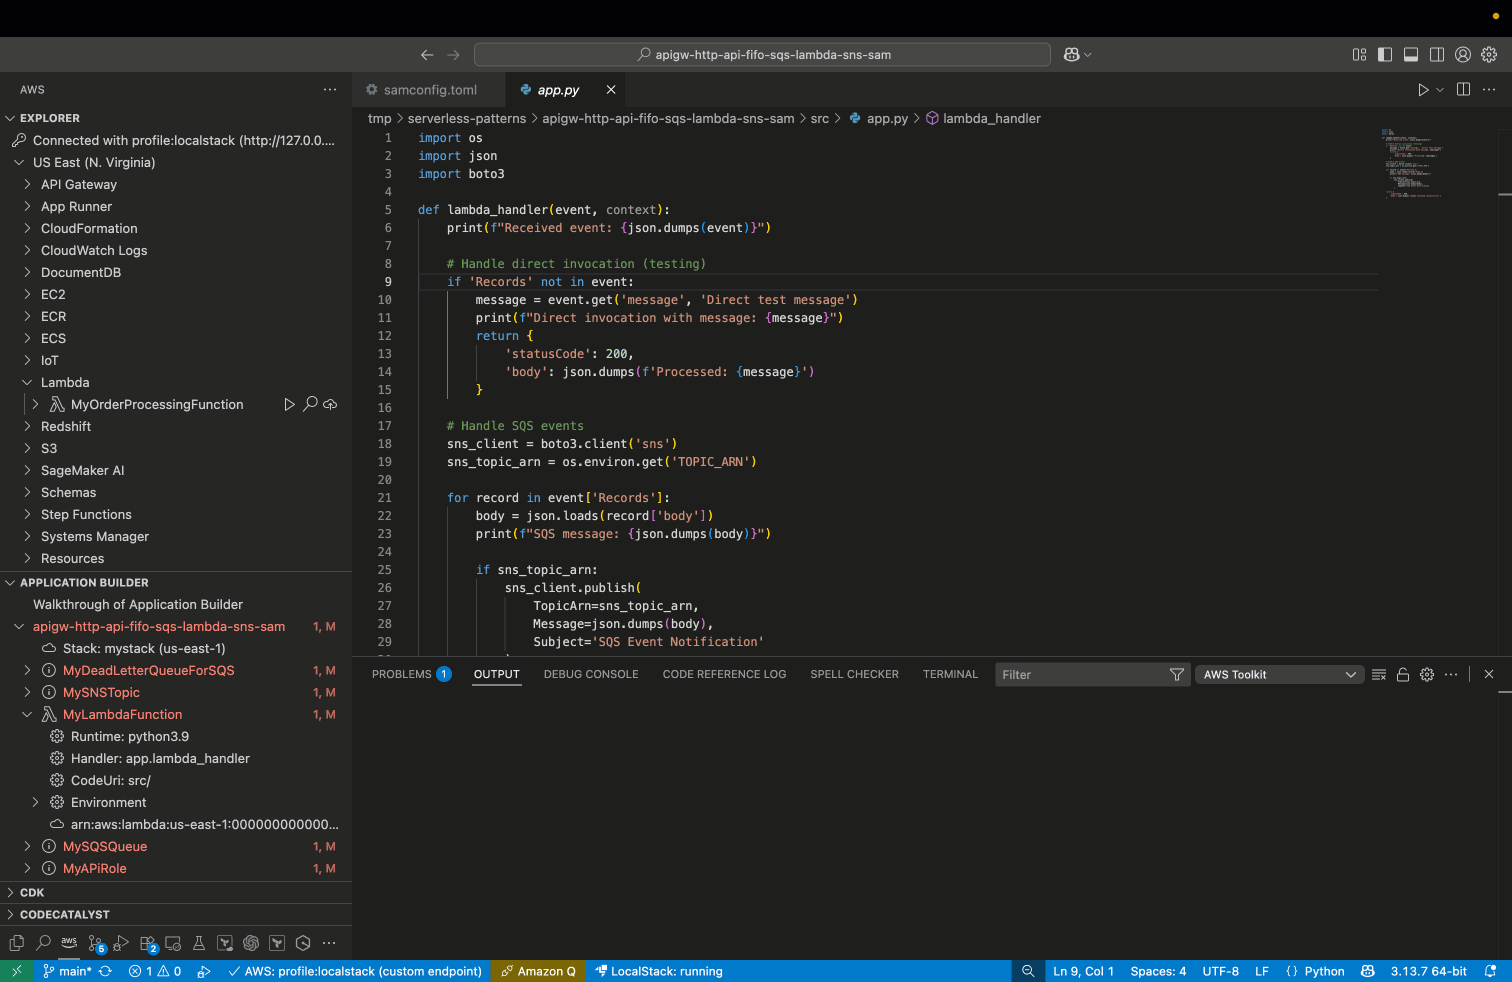
To demonstrate the enhanced local testing capabilities, let’s explore a practical serverless pattern: building and testing an event-driven order processing system that integrates Lambda with Amazon SQS, API Gateway, and Amazon Simple Notification Service (Amazon SNS). The application processes orders through an event-driven workflow: orders are submitted through API Gateway to an SQS queue and processed by a Lambda function, and the status is published to Amazon SNS to trigger customer email notifications.

Architechture digram depicting LocalStack emulation and user interaction with LocalStack emulated AWS Environment.

After you set up LocalStack in VS Code, you can test your entire serverless workflow without deploying to the cloud:

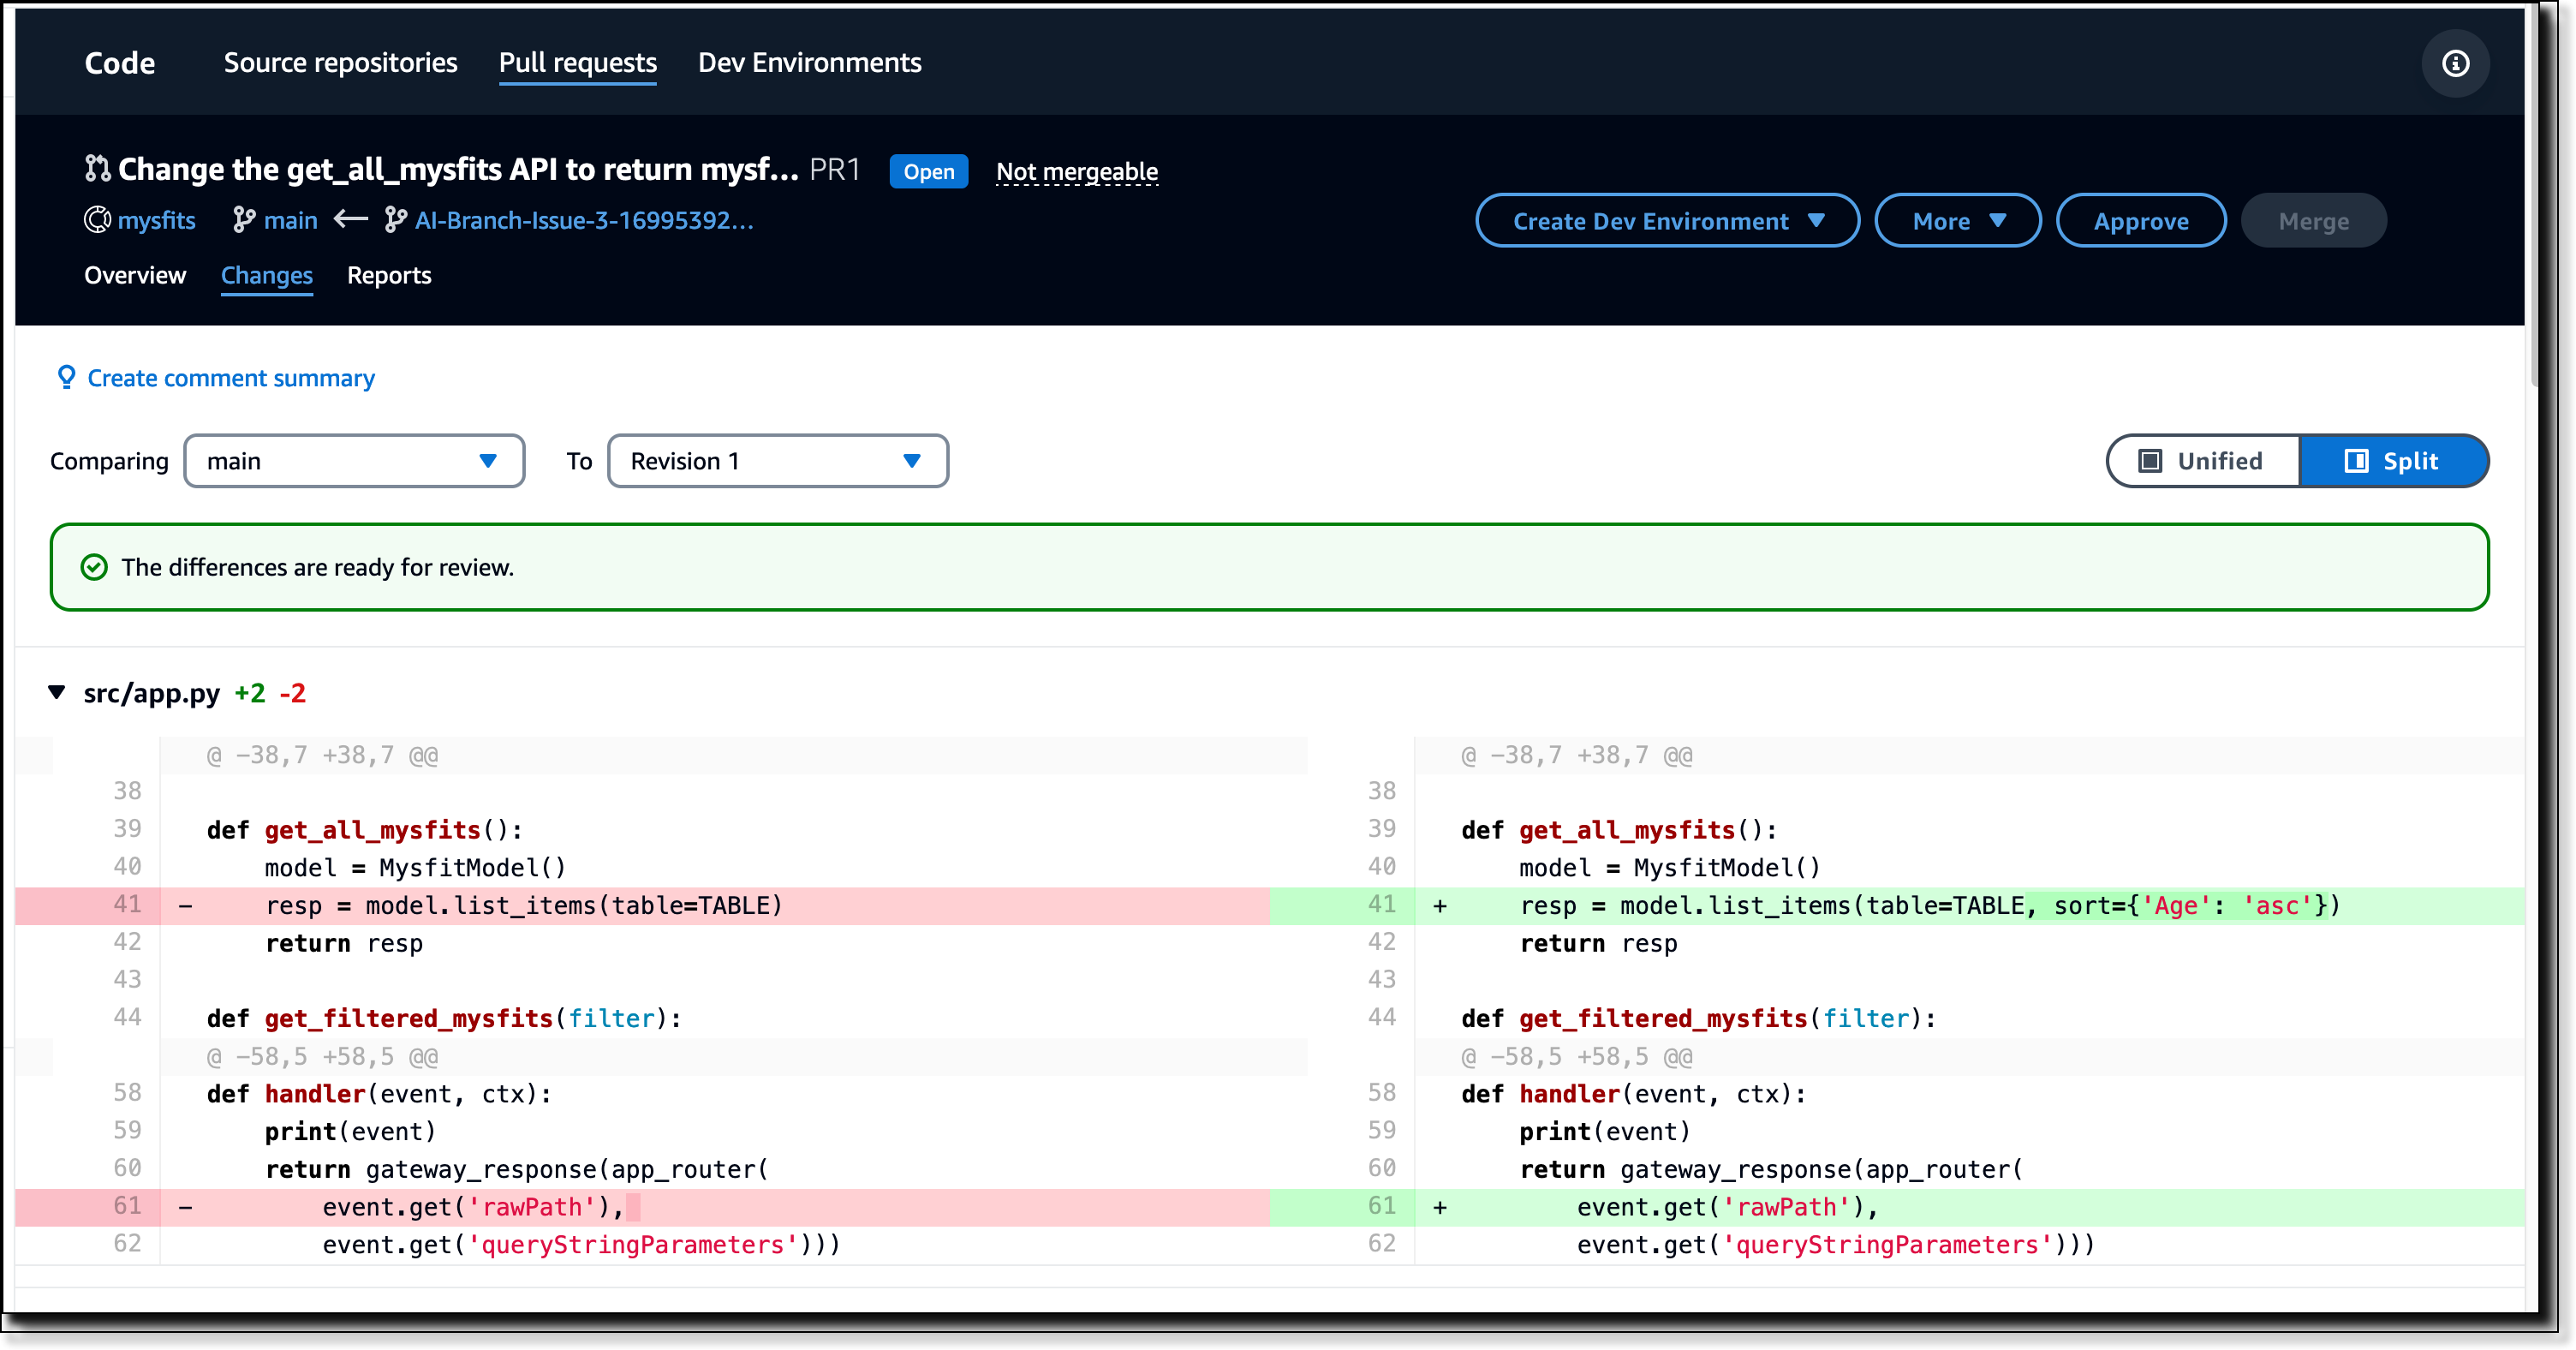
  • Deploy locally – Use the LocalStack AWS profile to deploy your AWS SAM application. The process mirrors cloud deployment but targets local endpoints. You can use the Application builder pane to initiate the deployment to LocalStack environment. The following figure illustrates the process of deploying a sample serverless application.

Picture depicting deploying a Serverless application on LocalStack and verifying the resources

  • Debug Lambda function deployed in LocalStack – Set breakpoints in your Lambda function and step through execution using VS Code’s integrated debugger. With the AWS Toolkit extension, you can invoke your Lambda with one click and inspect live interactions across services, all while running against a LocalStack container on your machine. This setup makes it possible to debug your AWS applications in a controlled, local environment that mimics the cloud infrastructure, without the need for deploying actual AWS services.

Picture depicting debugging a Lambda function using LocalStack and AWS VS Code Toolkit.

  • Validate end-to-end Flows – Test complete workflows from message ingestion through processing and notification, confirming all service integrations work correctly before cloud deployment.

For an in-depth technical demonstration of this LocalStack integration, refer to this youtube video.

Best practices for local Lambda function testing

In this section, we discuss various strategies and best practices for local Lambda function testing.

Optimizing your development workflow

Consider the following strategies to optimize your development workflow:

  • Start with a strong testing foundation – Use the AWS SAM CLI to perform unit tests that validate the core programmatic and business logic of your Lambda functions. Isolating function behavior early helps identify logic errors before introducing external dependencies.
  • Establish environment parity early in the development process – Many production issues stem from discrepancies between local and cloud environments. Use consistent service versions, configurations, and data structures across environments to confirm that what works locally behaves the same in production.
  • Adopt IaC from day one – Whether you choose AWS SAM, AWS CloudFormation, or another IaC framework, defining your application infrastructure as code reduces configuration drift and makes your deployments reproducible across teams and environments.
  • Apply a progressive testing strategy – Follow a structured testing pyramid that starts with fast, isolated unit tests and builds up to broader integration and system-level validation. This layered approach helps you catch issues earlier—when they’re easier and less expensive to fix—while still providing full application coverage.

A strategic approach to testing

Testing should be an integrated part of your serverless development workflow—not an afterthought. Successful teams implement layered testing strategies that use both local and cloud environments to strike a balance between speed and accuracy:

  1. Begin with unit tests that focus on isolated function logic. Use tools like the AWS SAM CLI, AWS Toolkit for VS Code and LocalStack extensions to run and debug functions locally.
  2. After validation, proceed to local integration testing using LocalStack to confirm how your Lambda functions interact with services such as Amazon SQS, DynamoDB, and Amazon SNS. These tests typically complete within minutes and catch most service integration issues before they reach production.
  3. After local testing, validate your application in the actual AWS environment. Cloud testing helps surface issues not present in local emulation, such as AWS Identity and Access Management (IAM) permission mismatches, Amazon Virtual Private Cloud (Amazon VPC) networking challenges, or service-specific nuances such as Lambda concurrency. For troubleshooting issues in the cloud environment, you can also remotely debug your Lambda functions using AWS Toolkit for VS Code.
  4. Lastly, conduct performance testing in AWS to assess how your application handles real-world traffic. These longer-running tests help validate scaling behavior and system resilience under load.

The result is higher-quality applications delivered faster, with fewer production surprises and more confident deployments.

Security considerations

When using LocalStack for local development, follow these security best practices:

  • Isolate the local environment – Use Docker networking to restrict LocalStack access and bind services to localhost to prevent external connections.
  • Use placeholder credentials – Use test credentials (for example, test/test) instead of real AWS credentials.
  • Protect your data – Use synthetic or anonymized datasets instead of production data and regularly purge local data stores to reduce risk.

When to use local versus cloud testing

Although local testing offers significant advantages, it’s important to understand when to use it versus testing in the cloud. The following table lists the potential use cases for each strategy.

Testing Scenario Local Testing Cloud Testing Reason
Function logic validation Fast feedback for core business logic
Service integration testing Quick validation of AWS service interactions
Rapid iteration during development Immediate feedback without deployment overhead
Cost-sensitive development environments Minimizes cloud resource costs during development
Offline development scenarios No internet connectivity required
Performance and scalability testing Requires actual AWS infrastructure for accurate results
IAM permission validation LocalStack doesn’t fully replicate IAM behavior
VPC networking scenarios Network configurations can’t be accurately emulated
Production-like load testing Real performance metrics only available in AWS
Final validation before deployment Supports compatibility with actual AWS environment

Conclusion

In this post, we discussed how to streamline local testing for AWS Serverless applications using LocalStack and the AWS Toolkit for VS Code. By running and debugging serverless applications directly in your IDE, you can reduce context switching, test complex integrations locally, and catch issues earlier—without deploying to the cloud.

We also showed how to apply progressive testing strategies that combine local emulation with cloud validation, optimize development costs, and build event-driven workflows with confidence.These enhancements lead to faster test cycles, lower development costs, and higher-quality deployments—all while staying fully in control of your development environment.

Have questions or feedback about this post? Connect with us on the AWS Compute Blog or join the AWS Developer community.

Serverless ICYMI 2025 Q1

Post Syndicated from Julian Wood original https://aws.amazon.com/blogs/compute/serverless-icymi-2025-q1/

Welcome to the 28th edition of the AWS Serverless ICYMI (in case you missed it) quarterly recap. At the end of a quarter, we share the most recent product launches, feature enhancements, blog posts, videos, live streams, and other interesting things that you might have missed!

In case you missed our last ICYMI, check out what happened in Q4 2024 here.

Serverless calendar Q1 2025

Serverless calendar Q1 2025

AWS Step Functions

The AWS Step Functions team continues to improve developer experience. Workflow Studio is now available within Visual Studio Code (VS Code) through the AWS Toolkit extension.

AWS Step Functions in IDE

AWS Step Functions in IDE

You can now design, test, and deploy your Step Functions workflows without leaving your IDE. The extension provides a drag-and-drop interface with all the familiar Workflow Studio capabilities, making it even easier to build state machines locally.

To get started, install the AWS Toolkit for Visual Studio Code and visit the user guide on Workflow Studio integration.

Step Functions private integrations now allows you to integrate applications seamlessly across private networks, on-premises infrastructure, and cloud platforms. Learn more in a blog post and explanation video.

AWS Step Functions private integrations video

AWS Step Functions private integrations video

Step Functions now integrates with 36 more AWS services that support user messaging capabilities. You can orchestrate notifications through Amazon SNS, Amazon SQS, Amazon EventBridge, Amazon Pinpoint, and more, all using the optimized integrations you’re familiar with.

Step Functions has increased the default quota for state machines and activities from 10,000 to 100,000 per AWS account. This tenfold increase means you can create more workflows to automate your business processes without worrying about hitting quota limits.

Distributed Map is expanding capabilities by adding support for JSON Lines (JSONL) format. JSONL, a highly efficient text-based format, stores structured data as individual JSON objects separated by newlines, making it particularly suitable for processing large datasets.

AWS Step Functions Distributed Map

AWS Step Functions Distributed Map

Distributed Map can also process data from a broader range of delimited file formats stored in Amazon S3 and offers new output transformations for greater control over result formatting.

Developer Tools

Serverless Land patterns are now available directly within VS Code.

You no longer need to switch between your IDE and external resources when building serverless architectures. Browse, search, and implement pre-built serverless patterns directly in VS Code.

Example Serverless Pattern

Example Serverless Pattern

AWS Lambda

Learn how AWS Lambda handles billions of invocations.

AWS Lambda asynchronous invocations

AWS Lambda asynchronous invocations

This blog post provides recommendations and insights for implementing highly distributed applications based on the Lambda service team’s experience building its robust asynchronous event processing system. It dives into challenges you might face, solution techniques, and best practices for handling noisy neighbors.

A new video walks through using the enhanced local IDE experience for Lambda developers.

AWS Lambda new IDE experience

AWS Lambda new IDE experience

The VS Code extension for Lambda now supports live tailing of CloudWatch Logs directly in your IDE following on from previous support for Live Tail in the Lambda console. Watch logs in real-time as your functions execute, making debugging and troubleshooting more efficient than ever.

You can now enable Application Performance Monitoring (APM) for Java and .NET runtimes using Amazon CloudWatch Application Signals.

Amazon CloudWatch Application Signals for Java and .NET AWS Lambda runtimes

Amazon CloudWatch Application Signals for Java and .NET AWS Lambda runtimes

This provides deep visibility into your function’s performance, including method-level tracing, memory profiling, and automated anomaly detection.

Amazon Bedrock features

Multi-agent collaboration is now available in Bedrock as a preview, enabling you to create systems where multiple AI agents work together to solve complex problems. Agents can specialize in different domains, share context, and coordinate their actions to achieve goals that would be difficult for a single agent.

RAG evaluation is now generally available. This provides metrics to assess and improve your retrieval augmented generation pipelines. GraphRAG for Bedrock Knowledge Bases is now generally available, allowing you to enhance retrievals with graph-based context.

Amazon Bedrock Flows now supports multi-turn conversations, allowing you to build dynamic AI applications that maintain context across multiple user interactions. Bedrock data automation is now generally available, streamlining the process of preparing, ingesting, and maintaining data for your GenAI applications. Bedrock now offers LLM-as-a-judge capability for model evaluation, providing automated assessment of model outputs without requiring human reviewers. Compare different models or prompt strategies against your specific criteria at scale.

Bedrock’s capabilities are now integrated into the Amazon SageMaker Unified Studio, creating a seamless experience for machine learning practitioners who want to incorporate foundation models into their workflows. Access Bedrock models, fine-tuning, and evaluation directly from SageMaker.

Amazon Nova is a new generation of state-of-the-art foundation models that deliver frontier intelligence and industry leading price-performance. Nova has expanded its tool use and converse API capabilities, making it easier for developers to build AI assistants that can use external tools to complete tasks.

Amazon Bedrock Guardrails image content filters are now generally available. Define and enforce boundaries for your AI applications with controls for both text and image content, ensuring outputs align with your organization’s policies.

Bedrock Knowledge Bases now supports using your existing OpenSearch clusters as the vector storage backend. This integration allows you to leverage your investments in OpenSearch while benefiting from the managed RAG capabilities of Bedrock.

New Amazon Bedrock models

  • Anthropic’s Claude 3.7 Sonnet hybrid reasoning allows you to toggle between standard and extended thinking modes. In standard mode, it functions as an upgraded version of Claude 3.5 Sonnet. While in extended thinking mode, it employs self-reflection to achieve improved results across a wide range of tasks.
  • DeepSeek R1, an advanced model specialized in research and scientific reasoning excels at complex problem-solving tasks and technical content generation.
  • Cohere Embed 3 models are now available in both multilingual and English-specific versions. These embedding models support text and images, providing more accurate representation for multimodal content and improving retrieval augmented generation (RAG) applications.
  • Ray2, Luma AI’s new visual AI model is capable of creating realistic visuals with fluid, natural movement. You can use it for image understanding, 3D scene reconstruction, and visual content generation, opening new possibilities for immersive and visual applications.
  • Bedrock now supports fine-tuning of Meta’s latest Llama 3.2 models. These upgraded models deliver improved performance across reasoning, coding, and multilingual tasks while being more efficient with computational resources.

Amazon Q Developer

Amazon Q Developer is now available as a CLI agent, bringing AI-assisted development to the command line. Get contextual recommendations, generate shell commands, and solve coding problems without leaving your terminal.

Amazon Q CLI

Amazon Q CLI

Amazon Q Developer transformation now supports upgrading Java applications using Maven to Java 21. It offers enhanced code suggestions, refactoring, and optimization recommendations for applications using the latest Java features, like virtual threads and pattern matching.

AWS AppSync

AWS AppSync Events now supports events publishing for WebSocket APIs, enabling real-time publish-subscribe functionality. This feature makes it easier to build applications requiring instant updates, like chat applications, collaborative tools, and real-time dashboards.

AWS AppSync Events

AWS AppSync Events

There are new AWS Cloud Development Kit (AWS CDK) L2 constructs for AppSync WebSocket APIs. These make it simpler to define and deploy real-time APIs using infrastructure as code. These high-level constructs handle the details of WebSocket connections, authorization, and messaging patterns.

Amazon SNS

Amazon SNS now supports high throughput mode for SNS FIFO topics, with default throughput matching SNS standard topics. When you enable high-throughput mode, SNS FIFO topics will maintain order within message group, while reducing the de-duplication scope to the message-group level.

Amazon EventBridge

Amazon EventBridge now supports direct delivery to targets across AWS accounts, simplifying multi-account architectures. This reduces latency and improves reliability when routing events between accounts in your organization.

Amazon EventBridge cross account

Amazon EventBridge cross account

The EventBridge console now features event source discovery, making it easier to find and visualize available event sources in your AWS environment. This tool helps you identify potential event producers and understand the event schemas they emit.

AWS Amplify

AWS Amplify now offers a TypeScript data client optimized for server-side Lambda functions, providing type-safe access to your data sources. This client reduces code complexity and improves reliability when working with databases and APIs in server environments.

Serverless compute blog posts

January

February

March

Serverless Office Hours weekly livestream

February

March

Still looking for more?

The Serverless landing page has more information. The Lambda resources page contains case studies, webinars, whitepapers, customer stories, reference architectures, and even more Getting Started tutorials.

You can also follow the Developer Advocacy team members who work on Serverless to see the latest news, follow conversations, and interact with the team.

And finally, visit the Serverless Land  for all your serverless needs.

Introducing an enhanced local IDE experience for AWS Lambda developers

Post Syndicated from Julian Wood original https://aws.amazon.com/blogs/compute/introducing-an-enhanced-local-ide-experience-for-aws-lambda-developers/

AWS Lambda is introducing an enhanced local IDE experience to simplify Lambda-based application development. The new features help developers to author, build, debug, test, and deploy Lambda applications more efficiently in their local IDE when using Visual Studio Code (VS Code).

Overview

The IDE experience is part of the AWS Toolkit for Visual Studio Code. A new guided walkthrough helps developers set up their local environment and install required tools. The toolkit includes a set of sample applications which show you how to iterate on your code locally and in the cloud. You can configure and save build settings to speed up application builds. Generate a configuration file to set up the debugging environment for VS Code to attach and launch the step-through debugger. Iterate faster by choosing to sync local application changes quickly to the cloud or perform a full application deploy. Test functions locally and in the cloud and create and share test events to speed up local and cloud testing. There are quick action buttons for build, deploy to cloud, and local or remote invoke. The toolkit integrates with AWS Infrastructure Composer, providing a visual application building experience directly from the IDE.

Using the new features

Installing the extension

To use the updated IDE experience, ensure you have the AWS Toolkit minimum version 3.31.0 installed as a VS Code Extension.

The AWS Toolkit now includes an additional section called Application Builder within the AWS extension side-bar. This allows you to view template resources and create, build, debug, and test serverless applications.

Using Application Builder for existing applications

You can open an existing local application template using Open Folder.

Lambda’s enhanced in-console editing experience allows you to download existing function code and an AWS Serverless Application Model (AWS SAM) template. This allows you to start in the console and more easily move to using infrastructure as code, which is a serverless best practice.

Using the guided walkthrough

The guided walkthrough helps you install dependencies, select an application template, and explains how to use Application Builder to iterate locally and deploy to the cloud.

  1. Choose Open Walkthrough which opens the walkthrough.
  2. Complete installation takes you through a wizard to install required dependencies and select application templates.
  3. The wizard provides download links to install the three dependencies:

    If you have installed the dependencies, selecting the links recognizes the installations.

  4. Select Choose your application template, which allows you to create example applications in VS Code.
  5. The Iterate locally tile provides guidance on how to use Application Builder to build and invoke the function, and how to view the results.
  6. Deploy to the cloud provides a link to Configure credentials and explains how to deploy your function to the cloud, remote invoke from your IDE, and view the results.

Creating an application from the samples

The following steps show how to create a function locally from an included template. You build the code artifact, locally test and debug, deploy, and remotely invoke and view results and logs, all without leaving your IDE.

  1. Navigate back to Choose your application template.
  2. New template with visual builder allows you to use Infrastructure Composer to create a new application using a visual canvas.
  3. See more application examples provides additional sample applications across a number of managed runtimes.

There are also two specific example applications to explore Lambda functionality.

  • Rest API: Learn how to build a synchronous Lambda function behind an API.
  • File processing.: Learn how to build an asynchronous Amazon S3 file processing application.

Building a synchronous Rest API application

  1. Select Rest API and chose Initialize your project.
  2. Select a language runtime. Select Python for this example.
  3. Open the file explorer, create a folder to download the example application and choose Create Project.
  4. Application Builder downloads the application. This includes the function code hello_world\app.py, with dependencies in requirements.txt, an AWS SAM template, template.yaml file, and an example event trigger, event.json. A README.md file explains the application structure and provides build and deploy instructions.

    The Application Builder section populates with the template resources.

  5. The icons provide shortcuts to view, build, and deploy the application.
  6. You can also use the Command Pallete to initiate the AWS SAM commands.
  7. Selecting the Open Template File icon opens the AWS SAM template in Infrastructure Composer.
  8. View the application resources and select Details to edit the template using the visual canvas.
  9. Navigate to the function resource and select Open Function Handler to show the function code.

Building the application

The build step helps you build artifacts from the files in your application project directory.

  1. Select the Build SAM template icon.
  2. Specify build flags allows you to configure AWS SAM builds settings.
  3. Select build settings particular to your configuration. Cached and parallel are useful to speed up future builds. Use container builds your function in a Lambda-like container. This allows you to build applications without having the language runtime and build tools installed locally.
  4. Save parameters adds the default build options in samconfig.toml.
  5. version = 0.1
    [default.build.parameters]
    template_file = "c:\\Code\\lambda-dx\\Rest-API\\template.yaml"
    cached = true
    parallel = true
    use_container = true

    AWS SAM builds the application. It downloads the build container image, installs the dependencies, and copies the function code.

  6. Press any key to close the additional terminal.

Iterate locally: invoke and debug

You can locally invoke and debug your serverless application before uploading it to the cloud. This helps you to test the logic of your function faster. Step-through debugging allows you to identify and fix issues in your application one instruction at a time in your local environment.

Local invoke

  1. In the Application Builder section, navigate to the function and select Local Invoke and Debug Configuration.
  2. Initiating Local Invoke and Debug Configuration

    Initiating Local Invoke and Debug Configuration

  3. This brings up another window which allows you to configure how to invoke the function locally and set up a debug configuration.
  4. Viewing Local Invoke and Debug Configuration Options

    Viewing Local Invoke and Debug Configuration Options

  5. You can create sample event payloads to test your function. Select an event provides a list of common trigger event payloads you can use and customize.
  6. Selecting an example event template

    Selecting an example event template

    This example application has an included sample event.

  7. Select Local file and choose the events\event.json file.
  8. Select the Invoke button.
  9. This builds the application and locally invokes the function within a Lambda emulation environment, using the event input file.

  10. View the function output within the IDE Output pane.
Viewing function output

Viewing function output

Local debugging

You can also debug the function locally using VS Code’s built-in debugger.

  1. Add a breakpoint to the function code.
  2. Adding a breakpoint to the function code

    Adding a breakpoint to the function code

  3. Select the Invoke button again.
  4. This locally invokes the function and attaches a debugger to the Lambda emulation environment.

  5. The debugger stops at the breakpoint and you can view the function variables and call stack.
  6. Viewing step through debugging

    Viewing step through debugging

  7. Use the VS Code debugger icons to step through the code.
  8. Using VS Code debugger icons to step through the code.

    Using VS Code debugger icons to step through the code.

  9. In the Local Invoke and Debug Configuration panel. Chose Save Debug Config.
  10. Choose Add Local Invoke and Debug Configuration.
  11. Saving debug configuration

    Saving debug configuration

  12. Enter a debug configuration name which creates a launch.json file and adds the debug configuration.
  13. Naming debug configuration

    Naming debug configuration

    You can create and save multiple debug configurations for different scenarios. See the AWS SAM documentation for more launch.json configuration options.

  14. Once you save the debug configuration, you can use VS Code’s Run and Debug panel and select which debug configuration to run.
Using the Run and Debug panel

Using the Run and Debug panel

Deploying the application

  1. Navigate to the Application Builder section and chose the Deploy SAM Application icon.
  2. Selecting Deploy SAM Application icon

    Selecting Deploy SAM Application icon

    AWS SAM provides two deployment options:

    • Sync uses AWS SAM sync to perform an initial CloudFormation deploy and then allows for quick syncing of your application code, which allows for rapid prototyping. Use this for development environments only, as it doesn’t do a full CloudFormation deploy on code changes.
    • Deploy does a full CloudFormation deploy, which is preferred for non-quick development environments.
    Viewing AWS SAM deployment options

    Viewing AWS SAM deployment options

  3. Select Sync.
  4. Select Specify required parameters and save as defaults.
  5. Specifying SAM sync parameters

    Specifying SAM sync parameters

  6. Select a Region to deploy the stack and enter a stack name. It is good practice to specify that this is a dev stack to avoid confusion when using the Deploy option.
  7. Entering dev stack name

    Entering dev stack name

  8. Select an existing S3 bucket to store the artifacts, or create a new one.
  9. Selecting S3 bucket

    Selecting S3 bucket

  10. Specify the Sync parameters. Ensure you select Watch as this automatically watches for code changes and quickly syncs code changes to the Lambda service
  11. Setting sync parameters

    Setting sync parameters

  12. AWS SAM sync does an initial CloudFormation deploy to build the resources and then waits for code changes.
  13. Make a change to the handler file code and save the file,
  14. Amending code

    Amending code

  15. This performs a quick sync which reduces the time to test in the cloud.
  16. Quickly syncing code

    Quickly syncing code

  17. You can use the Deploy option to deploy a non-quick sync test version, amending the stack name to differentiate it from the dev stack.
Naming test version stack

Naming test version stack

Remote invoke

You can invoke the function in the cloud from your IDE. This allows you to test functionality without having to mock security, external services, or other environment variables.

Once the application is deployed, Application Builder detects changes to samconfig.toml and template.yaml, it updates the resources list with the cloud resources.

Viewing cloud resources

Viewing cloud resources

  1. You can browse directly to the CloudFormation stack to view resources.
  2. Browsing to CloudFormation stack

    Browsing to CloudFormation stack

  3. Selecting the function provides quick link functionality, which includes function details and a link directly to the Lambda console for the function.
  4. Viewing function quick link options

    Viewing function quick link options

  5. Select Invoke in cloud.
  6. Select the same local event file for the local invoke.
  7. Selecting local file for remote invoke

    Selecting local file for remote invoke

  8. Choose Remote Invoke.
  9. The function invokes in the cloud using the local test event and displays the remote invoke results in the local IDE Output pane.

    Viewing remote invoke results

    Viewing remote invoke results

  10. Name and save the local event file as a remote event which becomes available in the Lambda console.
Saving remote test event

Saving remote test event

Viewing logs

You can fetch the Amazon CloudWatch Log streams generated by your Lambda function in the IDE.

  1. Select the Search Logs icon.
  2. Selecting Search Logs icon

    Selecting Search Logs icon

  3. You can optionally filter the results.
Optionally filtering log results

Optionally filtering log results

Conclusion

Lambda is introducing an enhanced local IDE experience to simplify the development of Lambda-based applications using the VS Code IDE and AWS Toolkit. This streamlines the code-test-deploy-debug cycle. A guided walkthrough helps set up your local development environment and provides sample applications to explore Lambda functionality. You can then build, debug, test, and deploy Lambda applications using icon shortcuts and the Command Pallette. This allows you to more easily iterate on your Lambda-based applications without switching between multiple interfaces.

For more serverless learning resources, visit Serverless Land.

Introducing an enhanced in-console editing experience for AWS Lambda

Post Syndicated from Julian Wood original https://aws.amazon.com/blogs/compute/introducing-an-enhanced-in-console-editing-experience-for-aws-lambda/

AWS Lambda is introducing a new code editing experience in the AWS console based on the popular Code-OSS, Visual Studio Code Open Source code editor. This brings the familiar Visual Studio Code interface and many of the features directly into the Lambda console, allowing developers to use their preferred coding environment and tools in the cloud. The Lambda Code Editor displays larger function package sizes and also integrates with Amazon Q Developer. This is an AI-powered coding assistant that provides real-time suggestions and insights to help you write, understand, and troubleshoot your Lambda functions more efficiently.

Overview

Visual Studio Code is the most popular IDE among developers according to the 2023 Stack Overflow Developer Survey. Integrating Code-OSS into the Lambda Console brings a familiar, accessible, and customizable interface to the in-browser code editing capabilities. This provides a coding experience that is substantially similar to working with function code locally. You can install selected extensions, apply preferred themes and settings, and use your familiar keyboard shortcuts and coding preferences.

The new editing experience is included as part of the standard Lambda service, at no extra cost.

Accessibility

The update also addresses important accessibility needs. With features like high color contrast, keyboard-only navigation, and screen reader support, the Code-OSS integration ensures an inclusive and accessible coding experience for all developers.

Differences from Visual Studio Code IDE

The Lambda console’s Code-OSS integration complements, rather than fully replaces, local development workflows. You can view and edit function code that uses an interpreted language, not compiled languages, which is consistent with the previous Lambda console. The terminal window is also unavailable in Code-OSS.

AWS Toolkit for Visual Studio Code extensions

Deeper integration with the AWS Toolkit for VS Code extension provides access to a subset of AWS specific functionality, including Q Developer. This ensures that the Lambda code editing experience benefits from additional developer tooling enhancements provided through the AWS Toolkit.

Larger package sizes

With Lambda, the total package size for ZIP-based functions, including code and libraries, cannot exceed 50 MB. Previously Lambda imposed a 3MB limit for editing code in the console. Now you are able to view function package sizes up to 50 MB in the console, however, there is still a single file limit of 3 MB. This allows you to view function code even when you have larger dependencies.

Using the new features

Viewing code

To experience the new Lambda Code Editor, log into the AWS Management Console and navigate to the Lambda service. Create a new function or edit an existing one. The new Lambda Code Editor is ready to use, with no additional setup required.

This example shows editing an existing function, viewing the function code in the familiar Code-OSS editor.

Viewing function code in the Lambda Code Editor

Viewing function code in the Lambda Code Editor

Previously, the code was not viewable as the code package size was greater than 3 MB. The update allows you to view larger files. The following image shows a package size of 13.3 MB and the Code-OSS editor allows editing of the function handler.

Viewing larger package size

Viewing larger package size

Environment variables

In the left pane, the environment variables are viewable for the function. Select the pencil icon to edit, add, and remove environment variables.

Viewing and editing environment variables

Viewing and editing environment variables

Creating test events

The new split-screen view allows you to test your function and see your code and test results side-by-side, simplifying test event configuration.

  1. Select Create test event to open the panel.
  2. Creating test event

    Creating test event

    You can create Private test events or Shareable test events for other builders to use with access to the account.

  3. Generate an event using an event template for the Amazon API Gateway HTTP API event trigger that the function uses. Save the test event.
  4. Creating API Gateway test event

    Creating API Gateway test event

    Invoke function

  5. Invoke the function by selecting the Invoke button

The function results appear in the Output panel, consistent with the local VS Code IDE experience.

Function invoke result

Function invoke result

The function logs appear below the output.

Viewing function logs

Viewing function logs

This view allows you to view and edit your code, generate and use test events, and invoke your function, all visible within the familiar Lambda Code Editor interface.

Live Tail Logs

Lambda now natively supports Amazon CloudWatch Logs Live Tail. This is an interactive log streaming and analytics capability, which allows you to view and analyze your Lambda function logs in real time.

  1. Select the Run and Debug icon in the Activity Bar on the left-hand side of the code editor in the Code tab.
  2. Select Open CloudWatch Live Tail. This opens the CloudWatch Logs Live Tail bottom drawer.
  3. Select Start to start a Live Tail session and view your Lambda function logs stream in real time.
  4. Alternatively, navigate to the Test tab and select CloudWatch Logs Live Tail to start a Live Tail session.
CloudWatch Logs Live Tail

CloudWatch Logs Live Tail

Keyboard shortcuts

In the left pane Extensions dialog, you can see the keyboard shortcuts are installed by default.

Viewing installed extensions

Viewing installed extensions

Select the Manage gear icon which shows which aspects are configurable.

Viewing configuration options

Viewing configuration options

The Keyboard shortcuts dialog allows you to view and change the shortcuts.

Amending keyboard shortcuts

Amending keyboard shortcuts

Command Palette

Viewing the Command Palette shows available commands.

Viewing Command Palette

Viewing Command Palette

Configuration settings

The Settings panel allows you to configure the Lambda Code Editor to match your local IDE environment if required.

Viewing Settings panel

Viewing Settings panel

Navigate to Themes | Color Themes to customize the theme, including dark mode.

Lambda Console Editor dark mode

Lambda Console Editor dark mode

Downloading function code and template

It is now easier to download the function code and an AWS Serverless Application Model (AWS SAM) template which represents the Cloudformation resources required to set up the function, policies, and triggers. This allows you to start in the console and more easily move to using infrastructure as code, which is a serverless best practice.

  1. Navigate to the Activity Bar Run and Debug section.
  2. Select Download code and SAM template.
  3. Extract the .zip file and open the folder in your local VS Code IDE.

You can continue to edit the function in your local IDE experience, which is consistent with the Lambda Console Editor.

Local VS Code IDE to continue working on function

Local VS Code IDE to continue working on function

Using your local IDE terminal or AWS Toolkit for VS Code, you can update the existing function. You can also use AWS SAM functionality to build and deploy the template as a Cloudformation stack to the cloud.

Using Amazon Q

The Amazon Q Developer AI assistant integrates directly into the code editor. This reduces the need to consult external documentation or tutorials, streamlining your development workflow.

Amazon Q provides inline suggestions or by using keyboard shortcuts for common actions you take, such as initiating Amazon Q or accepting a recommendation.

This example below adds more functionality to a new Lambda function to download an object from S3 with the help of Amazon Q. Enter a comment explaining the functionality you need.

Asking Amazon Q a question

Asking Amazon Q a question

Select tab to accept the suggestion.

Accepting an Amazon Q suggestion

Accepting an Amazon Q suggestion

You can continue to invoke Q manually to keep adding more code suggestions.

Continue adding functionality with Amazon Q

Continue adding functionality with Amazon Q

Conclusion

Lambda is introducing a new AWS console code editing experience based on the popular Code-OSS, Visual Studio Code Open Source code editor. This brings the familiar VS Code IDE interface and features directly into the Lambda console so you can use your preferred coding environment and tools in the cloud. Invoke your function using a new split-screen view to see your code and test results side-by-side, simplifying test event configuration.

The code editor displays larger function package sizes, makes environment variables more visible, and also integrates with Amazon Q Developer. This provides real-time suggestions and insights to help you write, understand, and troubleshoot your Lambda functions more efficiently.

For more serverless learning resources, visit Serverless Land.

Amazon Q brings generative AI-powered assistance to IT pros and developers (preview)

Post Syndicated from Donnie Prakoso original https://aws.amazon.com/blogs/aws/amazon-q-brings-generative-ai-powered-assistance-to-it-pros-and-developers-preview/

Today, we are announcing the preview of Amazon Q, a new type of generative artificial intelligence (AI) powered assistant that is specifically for work and can be tailored to a customer’s business.

Amazon Q brings a set of capabilities to support developers and IT professionals. Now you can use Amazon Q to get started building applications on AWS, research best practices, resolve errors, and get assistance in coding new features for your applications. For example, Amazon Q Code Transformation can perform Java application upgrades now, from version 8 and 11 to version 17.

Amazon Q is available in multiple areas of AWS to provide quick access to answers and ideas wherever you work. Here’s a quick look at Amazon Q, including in integrated development environment (IDE):

Building applications together with Amazon Q
Application development is a journey. It involves a continuous cycle of researching, developing, deploying, optimizing, and maintaining. At each stage, there are many questions—from figuring out the right AWS services to use, to troubleshooting issues in the application code.

Trained on 17 years of AWS knowledge and best practices, Amazon Q is designed to help you at each stage of development with a new experience for building applications on AWS. With Amazon Q, you minimize the time and effort you need to gain the knowledge required to answer AWS questions, explore new AWS capabilities, learn unfamiliar technologies, and architect solutions that fuel innovation.

Let us show you some capabilities of Amazon Q.

1. Conversational Q&A capability
You can interact with the Amazon Q conversational Q&A capability to get started, learn new things, research best practices, and iterate on how to build applications on AWS without needing to shift focus away from the AWS console.

To start using this feature, you can select the Amazon Q icon on the right-hand side of the AWS Management Console.

For example, you can ask, “What are AWS serverless services to build serverless APIs?” Amazon Q provides concise explanations along with references you can use to follow up on your questions and validate the guidance. You can also use Amazon Q to follow up on and iterate your questions. Amazon Q will show more deep-dive answers for you with references.

There are times when we have questions for a use case with fairly specific requirements. With Amazon Q, you can elaborate on your use cases in more detail to provide context.

For example, you can ask Amazon Q, “I’m planning to create serverless APIs with 100k requests/day. Each request needs to lookup into the database. What are the best services for this workload?” Amazon Q responds with a list of AWS services you can use and tries to limit the answer results to those that are accurately referenceable and verified with best practices.

Here is some additional information that you might want to note:

2. Optimize Amazon EC2 instance selection
Choosing the right Amazon Elastic Compute Cloud (Amazon EC2) instance type for your workload can be challenging with all the options available. Amazon Q aims to make this easier by providing personalized recommendations.

To use this feature, you can ask Amazon Q, “Which instance families should I use to deploy a Web App Server for hosting an application?” This feature is also available when you choose to launch an instance in the Amazon EC2 console. In Instance type, you can select Get advice on instance type selection. This will show a dialog to define your requirements.

Your requirements are automatically translated into a prompt on the Amazon Q chat panel. Amazon Q returns with a list of suggestions of EC2 instances that are suitable for your use cases. This capability helps you pick the right instance type and settings so your workloads will run smoothly and more cost-efficiently.

This capability to provide EC2 instance type recommendations based on your use case is available in preview in all commercial AWS Regions.

3. Troubleshoot and solve errors directly in the console
Amazon Q can also help you to solve errors for various AWS services directly in the console. With Amazon Q proposed solutions, you can avoid slow manual log checks or research.

Let’s say that you have an AWS Lambda function that tries to interact with an Amazon DynamoDB table. But, for an unknown reason (yet), it fails to run. Now, with Amazon Q, you can troubleshoot and resolve this issue faster by selecting Troubleshoot with Amazon Q.

Amazon Q provides concise analysis of the error which helps you to understand the root cause of the problem and the proposed resolution. With this information, you can follow the steps described by Amazon Q to fix the issue.

In just a few minutes, you will have the solution to solve your issues, saving significant time without disrupting your development workflow. The Amazon Q capability to help you troubleshoot errors in the console is available in preview in the US West (Oregon) for Amazon Elastic Compute Cloud (Amazon EC2), Amazon Simple Storage Service (Amazon S3), Amazon ECS, and AWS Lambda.

4. Network troubleshooting assistance
You can also ask Amazon Q to assist you in troubleshooting network connectivity issues caused by network misconfiguration in your current AWS account. For this capability, Amazon Q works with Amazon VPC Reachability Analyzer to check your connections and inspect your network configuration to identify potential issues.

This makes it easy to diagnose and resolve AWS networking problems, such as “Why can’t I SSH to my EC2 instance?” or “Why can’t I reach my web server from the Internet?” which you can ask Amazon Q.

Then, on the response text, you can select preview experience here, which will provide explanations to help you to troubleshoot network connectivity-related issues.

Here are a few things you need to know:

5. Integration and conversational capabilities within your IDEs
As we mentioned, Amazon Q is also available in supported IDEs. This allows you to ask questions and get help within your IDE by chatting with Amazon Q or invoking actions by typing / in the chat box.

To get started, you need to install or update the latest AWS Toolkit and sign in to Amazon CodeWhisperer. Once you’re signed in to Amazon CodeWhisperer, it will automatically activate the Amazon Q conversational capability in the IDE. With Amazon Q enabled, you can now start chatting to get coding assistance.

You can ask Amazon Q to describe your source code file.

From here, you can improve your application, for example, by integrating it with Amazon DynamoDB. You can ask Amazon Q, “Generate code to save data into DynamoDB table called save_data() accepting data parameter and return boolean status if the operation successfully runs.”

Once you’ve reviewed the generated code, you can do a manual copy and paste into the editor. You can also select Insert at cursor to place the generated code into the source code directly.

This feature makes it really easy to help you focus on building applications because you don’t have to leave your IDE to get answers and context-specific coding guidance. You can try the preview of this feature in Visual Studio Code and JetBrains IDEs.

6. Feature development capability
Another exciting feature that Amazon Q provides is guiding you interactively from idea to building new features within your IDE and Amazon CodeCatalyst. You can go from a natural language prompt to application features in minutes, with interactive step-by-step instructions and best practices, right from your IDE. With a prompt, Amazon Q will attempt to understand your application structure and break down your prompt into logical, atomic implementation steps.

To use this capability, you can start by invoking an action command /dev in Amazon Q and describe the task you need Amazon Q to process.

Then, from here, you can review, collaborate and guide Amazon Q in the chat for specific areas that need to be implemented.

Additional capabilities to help you ship features faster with complete pull requests are available if you’re using Amazon CodeCatalyst. In Amazon CodeCatalyst, you can assign a new or an existing issue to Amazon Q, and it will process an end-to-end development workflow for you. Amazon Q will review the existing code, propose a solution approach, seek feedback from you on the approach, generate merge-ready code, and publish a pull request for review. All you need to do after is to review the proposed solutions from Amazon Q.

The following screenshots show a pull request created by Amazon Q in Amazon CodeCatalyst.

Here are a couple of things that you should know:

  • Amazon Q feature development capability is currently in preview in Visual Studio Code and Amazon CodeCatalyst
  • To use this capability in IDE, you need to have the Amazon CodeWhisperer Professional tier. Learn more on the Amazon CodeWhisperer pricing page.

7. Upgrade applications with Amazon Q Code Transformation
With Amazon Q, you can now upgrade an entire application within a few hours by starting a guided code transformation. This capability, called Amazon Q Code Transformation, simplifies maintaining, migrating, and upgrading your existing applications.

To start, navigate to the CodeWhisperer section and then select Transform. Amazon Q Code Transformation automatically analyzes your existing codebase, generates a transformation plan, and completes the key transformation tasks suggested by the plan.

Some additional information about this feature:

  • Amazon Q Code Transformation is available in preview today in the AWS Toolkit for IntelliJ IDEA and the AWS Toolkit for Visual Studio Code.
  • To use this capability, you need to have the Amazon CodeWhisperer Professional tier during the preview.
  • During preview, you can can upgrade Java 8 and 11 applications to version 17, a Java Long-Term Support (LTS) release.

Get started with Amazon Q today
With Amazon Q, you have an AI expert by your side to answer questions, write code faster, troubleshoot issues, optimize workloads, and even help you code new features. These capabilities simplify every phase of building applications on AWS.

Amazon Q lets you engage with AWS Support agents directly from the Q interface if additional assistance is required, eliminating any dead ends in the customer’s self-service experience. The integration with AWS Support is available in the console and will honor the entitlements of your AWS Support plan.

Learn more

— Donnie & Channy

New Customization Capability in Amazon CodeWhisperer Generates Even Better Suggestions (Preview)

Post Syndicated from Donnie Prakoso original https://aws.amazon.com/blogs/aws/new-customization-capability-in-amazon-codewhisperer-generates-even-better-suggestions-preview/

An AI coding companion, such as Amazon CodeWhisperer, aims to improve developers’ productivity by helping them write code quickly and securely. However, in particular cases, developers need to have code recommendations based on their internal libraries and APIs they extensively use every day.

As most of the existing AI coding companion tools are trained only on open-source codes, they lack the capability to customize the code recommendations using private code repositories. This limitation presents a variety of challenges for developers. Developers have a difficulty learning how to use internal libraries correctly and avoid security problems. For large codebases, it requires hours of reading documentation to understand what code needs to be written to complete the task.

Now in Preview —  Amazon CodeWhisperer Customization Capability
Today, I’m excited to announce Amazon CodeWhisperer customization capability (in preview) that enables organizations to customize CodeWhisperer to generate specific code recommendations from private code repositories. With this feature, developers who are part of Amazon CodeWhisperer Professional tier can now receive real-time code recommendations that include their internal libraries, APIs, packages, classes, and methods.

Let’s say that you’re a developer working for a hypothetical food delivery company called AnyCompany. You’re given a task to process a list of unassigned food deliveries around the driver’s current location. Previously, with CodeWhisperer, it would not know the correct internal APIs to process unassigned food deliveries or getting driver’s current location as this isn’t publicly available information. 

Now, with customization capability, you can ask CodeWhisperer to provide recommendations that include specific code related to the company’s internal services. The following screenshot shows how CodeWhisperer generates codes based on the internal codebase just by writing a set of comments.

With the customization capability of utilizing your internal codebase, CodeWhisperer now understands the intent, determines which internal and public APIs are best suited to the task, and generates code recommendations.

How It Works
The explanation above described how you can use CodeWhisperer customization capability as a developer. Now, let me share how it works and how you can get started. 

To create a customization, you need to complete the following steps as a CodeWhisperer administrator. 

  1. Administer your end users as CodeWhisperer administrator.
  2. Connect to existing repositories. You can connect one or more code repositories in your GitHub, GitLab, or BitBucket account using AWS CodeStar Connections or manually upload all of your codes into an Amazon Simple Storage Service (Amazon S3) bucket.
  3. Create a customization. CodeWhisperer will customize its model based on your codebase.
  4. Activate the customization for your team members. Once the customization is created, you can review and manually activate the customization to make it available automatically in your team members’ IDEs.

This capability provides two main advantages: providing real-time customized code recommendations that are specific to organizations and ensuring the protection of valuable intellectual property. Organizations can now promote the use of code that meets their quality and security standards based on their codes in existing repositories.

Furthermore, CodeWhisperer helps to ensure the security of your codes by providing the option to encrypt your customization data using customer managed keys in AWS Key Management Service (AWS KMS). This customization data will be deleted once the customization job finishes. 

Let’s Get Started
Let me show you how you can use the Amazon CodeWhisperer customization capability.

To get started, I need to create a customization. I need to have administrator access to navigate to the Create customization page on the Amazon CodeWhisperer dashboard.

On the Create customization page, I can connect the desired private code repositories I want CodeWhisperer to train. Currently, CodeWhisperer customization capability supports connection to GitHub, GitLab, and Bitbucket via AWS CodeStar Connections. If I have codes that are not in any code repositories, I can also manually upload my codes into an S3 bucket and define the Amazon S3 URI.

The following screenshot shows that I have existing connections with my code repositories using AWS CodeStar Connections. I can also create a new connection by selecting Create new connection.

Then, I can select Create Customization so CodeWhisperer can start training the model based on the codes available in the connection. The duration to complete this process depends on the size of the code repositories.

When the customization is ready, CodeWhisperer will not activate it automatically. This gives me the flexibility to activate the customizations just when I need them. But before I demonstrate that, I’d like to explain the evaluation score.

In short, the evaluation score helps me to measure the customization’s accuracy in predicting and providing code recommendations based on the codes in my code repositories. It provides a score in one of three categories: 1) Very Good, with a score ranging from 7–10; 2) Fair, with a score ranging from 4–7; and 3) Poor, with a score ranging from 0–4. It’s recommended to activate the customization if the evaluation score is 6 or higher. If the evaluation score is less than desired, I need to make sure that I’m providing enough codes for customization and provide a new code dataset that extensively contains references to internal APIs.

Here, I can see the Evaluation score for my customization is 8, and I’m happy with this result. Then, I can select Activate to start using this customization.

Once I have activated the customizations, I can define the access to selected customizations by selecting Add users. Now, I can give access to the customizations for selected team members who have been added as users for Amazon CodeWhisperer Professional tier. To do that, I can follow the guide from the Administering end users page. 

Then, once my team members sign in via AWS Toolkit in their IDEs, they will see the available customizations and can start using them. 

With Amazon CodeWhisperer, I can create multiple customizations by providing different code repositories. This feature is useful if I want to build customizations for code recommendations for certain teams. 

As administrator, I can also monitor the performance of each of the customizations by navigating to the CodeWhisperer dashboard page. This page summarizes useful data such as user activity, how many lines of code were suggested by CodeWhisperer and accepted by my team members, and how many security scans have successfully been run from IDEs. 

Amazon CodeWhisperer customization capability also follows the supported IDEs as part of AWS Toolkit by Amazon CodeWhisperer, such as Visual Studio Code, IntelliJ JetBrains, Visual Studio, and AWS Cloud9. This feature also provides support for most popular programming languages, including Python, Java, JavaScript, TypeScript, and C#.

Join the Public Preview
By securely leveraging customer’s internal codebase, Amazon CodeWhisperer unlocks the full potential of generative AI-powered coding that is customized to your unique requirements.

Join the public preview now and learn more on how to get started on the Amazon CodeWhisperer Customization page.

Happy coding!
Donnie

Best Practices for Writing Step Functions Terraform Projects

Post Syndicated from Patrick Guha original https://aws.amazon.com/blogs/devops/best-practices-for-writing-step-functions-terraform-projects/

Terraform by HashiCorp is one of the most popular infrastructure-as-code (IaC) platforms. AWS Step Functions is a visual workflow service that helps developers use AWS services to build distributed applications, automate processes, orchestrate microservices, and create data and machine learning (ML) pipelines. In this blog, we showcase best practices for users leveraging Terraform to deploy workflows, also known as Step Functions state machines. We will create a state machine using Workflow Studio for AWS Step Functions, deploy the state machine with Terraform, and introduce best operating practices on topics such as project structure, modules, parameter substitution, and remote state.

We recommend that you have a working understanding of both Terraform and Step Functions before going through this blog. If you are brand new to Step Functions and/or Terraform, please visit the Introduction to Terraform on AWS Workshop and the Terraform option in the Managing State Machines with Infrastructure as Code section of The AWS Step Functions Workshop to learn more.

Step Functions and Terraform Project Structure

One of the most important parts of any software project is its structure. It must be clear and well-organized for yourself or any member of your team to pick up and start coding efficiently. A Step Functions project using Terraform can potentially have many moving parts and components, so it is especially important to modularize and label wherever possible. Let’s take a look at a project structure that will allow for modularization, re-usability, and extensibility:

mkdir sfn-tf-example
cd sfn-tf-example
mkdir -p -- statemachine modules functions/first-function/src
touch main.tf outputs.tf variables.tf .gitignore functions/first-function/src/lambda.py
tree

Before moving forward, let’s analyze the directory, subdirectories, and files created above:

  • /statemachine will hold our Amazon States Language (ASL) JSON code describing the Step Functions state machine definition. This is where the orchestration logic will reside, so it is prudent to keep it separated from the infrastructure code. If you are deploying multiple state machines in your project, each definition will have its own JSON file. If you prefer, you can specify separate folders for each state machine to further modularize and isolate the logic.
  • /functions subdirectory includes the actual code for AWS Lambda functions used in our state machine. Keeping this code here will be much easier to read than writing it inline in our main.tf file.
  • The last subdirectory we have is /modules. Terraform modules are higher level abstracts explaining new concepts in your architecture. However, do not fall into the trap of making a custom module for everything. Doing so will make your code harder to maintain, and AWS provider resources will often suffice. There are also very popular modules that you can use from the Terraform Registry, such as Terraform AWS modules. Whenever possible, one should re-use modules to avoid code duplication in your project.
  • The remaining files in the root of the project are common to all Terraform projects. There are going to be hidden files created by your Terraform project after running terraform init, so we will include a .gitignore. What you include in .gitignore is largely dependent on your codebase and what your tools silently create in the background. In a later section, we will explicitly call out *.tfstate files in our .gitignore, and go over best practices for managing Terraform state securely and remotely.

Initial Code and Project Setup

We are going to create a simple Step Functions state machine that will only execute a single Lambda function. However, we will need to create the Lambda function that the state machine will reference. We first need to create our Lambda function code and save it in the following the directory structure and file mentioned above: functions/first-function/src/lambda.py.

import boto3

def lambda_handler(event, context):
# Minimal function for demo purposes
	return True

In Terraform, the main configuration file is named main.tf. This is the file that the Terraform CLI will look for in the local directory. Although you can break down your template into multiple .tf files, main.tf must be one of them. In this file, we will define the required providers and their minimum version, along with the resource definition of our template. In the example below, we define the minimum resources needed for a simple state machine that only executes a Lambda function. We define the two AWS Identity and Access Management (IAM) roles that our Lambda function and state machine will use, respectively. We define a data resource that zips the Lambda function code, which is then used in the Lambda function definition. Also notice that we use the aws_iam_policy_document data source throughout. Using the official IAM policy document means both your integrated development environment (IDE) and Terraform can see if your policy is malformed before running terraform apply. Finally, we define an Amazon CloudWatch Log group that will be used by the Lambda function to store its execution logs.

Terraform {
  required_providers {
    aws = {
      source  = "hashicorp/aws"
      version = "~>4.0"
    }
  }
}

provider "aws" {}

provider "random" {}

data "aws_caller_identity" "current_account" {}

data "aws_region" "current_region" {}

resource "random_string" "random" {
  length  = 4
  special = false
}

data "aws_iam_policy_document" "lambda_assume_role_policy" {
  statement {
    effect = "Allow"

    principals {
      type        = "Service"
      identifiers = ["lambda.amazonaws.com"]
    }

    actions = [
      "sts:AssumeRole",
    ]
  }
}

resource "aws_iam_role" "function_role" {
  assume_role_policy  = data.aws_iam_policy_document.lambda_assume_role_policy.json
  managed_policy_arns = ["arn:aws:iam::aws:policy/service-role/AWSLambdaBasicExecutionRole"]
}

# Create the function
data "archive_file" "lambda" {
  type        = "zip"
  source_file = "functions/first-function/src/lambda.py"
  output_path = "functions/first-function/src/lambda.zip"
}

resource "aws_kms_key" "log_group_key" {}

resource "aws_kms_key_policy" "log_group_key_policy" {
  key_id = aws_kms_key.log_group_key.id
  policy = jsonencode({
    Id = "log_group_key_policy"
    Statement = [
      {
        Action = "kms:*"
        Effect = "Allow"
        Principal = {
          AWS = "arn:aws:iam::${data.aws_caller_identity.current_account.account_id}:root"
        }

        Resource = "*"
        Sid      = "Enable IAM User Permissions"
      },
      {
        Effect = "Allow",
        Principal = {
          Service : "logs.${data.aws_region.current_region.name}.amazonaws.com"
        },
        Action = [
          "kms:Encrypt*",
          "kms:Decrypt*",
          "kms:ReEncrypt*",
          "kms:GenerateDataKey*",
          "kms:Describe*"
        ],
        Resource = "*"
      }
    ]
    Version = "2012-10-17"
  })
}

resource "aws_lambda_function" "test_lambda" {
  function_name    = "HelloFunction-${random_string.random.id}"
  role             = aws_iam_role.function_role.arn
  handler          = "lambda.lambda_handler"
  runtime          = "python3.9"
  filename         = "functions/first-function/src/lambda.zip"
  source_code_hash = data.archive_file.lambda.output_base64sha256
}

# Explicitly create the function’s log group to set retention and allow auto-cleanup
resource "aws_cloudwatch_log_group" "lambda_function_log" {
  retention_in_days = 1
  name              = "/aws/lambda/${aws_lambda_function.test_lambda.function_name}"
  kms_key_id        = aws_kms_key.log_group_key.arn
}

# Create an IAM role for the Step Functions state machine
data "aws_iam_policy_document" "state_machine_assume_role_policy" {
  statement {
    effect = "Allow"

    principals {
      type        = "Service"
      identifiers = ["states.amazonaws.com"]
    }

    actions = [
      "sts:AssumeRole",
    ]
  }
}

resource "aws_iam_role" "StateMachineRole" {
  name               = "StepFunctions-Terraform-Role-${random_string.random.id}"
  assume_role_policy = data.aws_iam_policy_document.state_machine_assume_role_policy.json
}

data "aws_iam_policy_document" "state_machine_role_policy" {
  statement {
    effect = "Allow"

    actions = [
      "logs:CreateLogStream",
      "logs:PutLogEvents",
      "logs:DescribeLogGroups"
    ]

    resources = ["${aws_cloudwatch_log_group.MySFNLogGroup.arn}:*"]
  }

  statement {
    effect = "Allow"
    actions = [
      "cloudwatch:PutMetricData",
      "logs:CreateLogDelivery",
      "logs:GetLogDelivery",
      "logs:UpdateLogDelivery",
      "logs:DeleteLogDelivery",
      "logs:ListLogDeliveries",
      "logs:PutResourcePolicy",
      "logs:DescribeResourcePolicies",
    ]
    resources = ["*"]
  }

  statement {
    effect = "Allow"

    actions = [
      "lambda:InvokeFunction"
    ]

    resources = ["${aws_lambda_function.test_lambda.arn}"]
  }

}

# Create an IAM policy for the Step Functions state machine
resource "aws_iam_role_policy" "StateMachinePolicy" {
  role   = aws_iam_role.StateMachineRole.id
  policy = data.aws_iam_policy_document.state_machine_role_policy.json
}

# Create a Log group for the state machine
resource "aws_cloudwatch_log_group" "MySFNLogGroup" {
  name_prefix       = "/aws/vendedlogs/states/MyStateMachine-"
  retention_in_days = 1
  kms_key_id        = aws_kms_key.log_group_key.arn
}

Workflow Studio and Terraform Integration

It is important to understand the recommended steps given the different tools we have available for creating Step Functions state machines. You should use a combination of Workflow Studio and local development with Terraform. This workflow assumes you will define all resources for your application within the same Terraform project, and that you will be leveraging Terraform for managing your AWS resources.

Workflow for creating Step Functions state machine via Terraform

Figure 1 – Workflow for creating Step Functions state machine via Terraform

  1. You will write the Terraform definition for any resources you intend to call with your state machine, such as Lambda functions, Amazon Simple Storage Service (Amazon S3) buckets, or Amazon DynamoDB tables, and deploy them using the terraform apply command. Doing this prior to using Workflow Studio will be useful in designing the first version of the state machine. You can define additional resources after importing the state machine into your local Terraform project.
  2. You can use Workflow Studio to visually design the first version of the state machine. Given that you should have created the necessary resources already, you can drag and drop all of the actions and states, link them, and see how they look. Finally, you can execute the state machine for testing purposes.
  3. Once your initial design is ready, you will export the ASL file and save it in your Terraform project. You can use the Terraform resource type aws_sfn_state_machine and reference the saved ASL file in the definition field.
  4. You will then need to parametrize the ASL file given that Terraform will dynamically name the resources, and the Amazon Resource Name (ARN) may eventually change. You do not want to hardcode an ARN in your ASL file, as this will make updating and refactoring your code more difficult.
  5. Finally, you deploy the state machine via Terraform by running terraform apply.

Simple changes should be made directly in the parametrized ASL file in your Terraform project instead of going back to Workflow Studio. Having the ASL file versioned as part of your project ensures that no manual changes break the state machine. Even if there is a breaking change, you can easily roll back to a previous version. One caveat to this is if you are making major changes to the state machine. In this case, taking advantage of Workflow Studio in the console is preferable.

However, you will most likely want to continue seeing a visual representation of the state machine while developing locally. The good news is that you have another option directly integrated into Visual Studio Code (VS Code) that visually renders the state machine, similar to Workflow Studio. This functionality is part of the AWS Toolkit for VS Code. You can learn more about the state machine integration with the AWS Toolkit for VS Code here. Below is an example of a parametrized ASL file and its rendered visualization in VS Code.

Step Functions state machine displayed visually in VS Code

Figure 2 – Step Functions state machine displayed visually in VS Code

Parameter Substitution

In the Terraform template, when you define the Step Functions state machine, you can either include the definition in the template or in an external file. Leaving the definition in the template can cause the template to be less readable and difficult to manage. As a best practice, it is recommended to keep the definition of the state machine in a separate file. This raises the question of how to pass parameters to the state machine. In order to do this, you can use the templatefile function of Terraform. The templatefile function reads a file and renders its content with the supplied set of variables. As shown in the code snippet below, we will use the templatefile function to render the state machine definition file with the Lambda function ARN and any other parameters to pass to the state machine.

resource "aws_sfn_state_machine" "sfn_state_machine" {
  name     = "MyStateMachine-${random_string.random.id}"
  role_arn = aws_iam_role.StateMachineRole.arn
  definition = templatefile("${path.module}/statemachine/statemachine.asl.json", {
    ProcessingLambda = aws_lambda_function.test_lambda.arn
    }
  )
  logging_configuration {
    log_destination        = "${aws_cloudwatch_log_group.MySFNLogGroup.arn}:*"
    include_execution_data = true
    level                  = "ALL"
  }
}

Inside the state machine definition, you have to specify a string template using the interpolation sequences delimited with ${}. Similar to the code snippet below, you will define the state machine with the variable name that will be passed by the templatefile function.

"Lambda Invoke": {
    "Type": "Task",
    "Resource": "arn:aws:states:::lambda:invoke",
    "Parameters": {
        "Payload.$": "$",
        "FunctionName": "${ProcessingLambda}"
    },
    "End": true
}

After the templatefile function runs, it will replace the variable ${ProcessingLambda} with the actual Lambda function ARN generated when the template is deployed.

Remote Terraform State Management

Every time you run Terraform, it stores information about the managed infrastructure and configuration in a state file. By default, Terraform creates the state file called terraform.tfstate in the local directory. As mentioned earlier, you will want to include any .tfstate files in your .gitignore file. This will ensure you do not commit it to source control, which could potentially expose secrets and would most likely lead to errors in state. If you accidentally delete this local file, Terraform cannot track the infrastructure that was previously created. In that case, if you run terraform apply on an updated configuration, Terraform will create it from scratch, which will lead to conflicts. It is recommended that you store the Terraform state remotely in secure storage to enable versioning, encryption, and sharing. Terraform supports storing state in S3 buckets by using the backend configuration block. In order to configure Terraform to write the state file to an S3 bucket, you need to specify the bucket name, the region, and the key name.

It is also recommended that you enable versioning in the S3 bucket and MFA delete to protect the state file from accidental deletion. In addition, you need to make sure that Terraform has the right IAM permissions on the target S3 bucket. In case you have multiple developers working with the same infrastructure simultaneously, Terraform can also use state locking to prevent concurrent runs against the same state. You can use a DynamoDB table to control locking. The DynamoDB table you use must have a partition key named LockID with type String, and Terraform must have the right IAM permissions on the table.

terraform {
    backend "s3" {
        bucket         = "mybucket"
        key            = "path/to/state/file"
        region         = "us-east-1"
        attach_deny_insecure_transport_policy = true # only allow HTTPS connections 
        encrypt        = true
        dynamodb_table = "Table-Name"
    }
}

With this remote state configuration, you will maintain the state securely stored in S3. With every change you apply to your infrastructure, Terraform will automatically pull the latest state from the S3 bucket, lock it using the DynamoDB table, apply the changes, push the latest state again to the S3 bucket and then release the lock.

Cleanup

If you were following along and deployed resources such as the Lambda function, the Step Functions state machine, the S3 bucket for backend state storage, or any of the other associated resources by running terraform apply, to avoid incurring charges on your AWS account, please run terraform destroy to tear these resources down and clean up your environment.

Conclusion

In conclusion, this blog provides a comprehensive guide to leveraging Terraform for deploying AWS Step Functions state machines. We discussed the importance of a well-structured project, initial code setup, integration between Workflow Studio and Terraform, parameter substitution, and remote state management. By following these best practices, developers can create and manage their state machines more effectively while maintaining clean, modular, and reusable code. Embracing infrastructure-as-code and using the right tools, such as Workflow Studio, VS Code, and Terraform, will enable you to build scalable and maintainable distributed applications, automate processes, orchestrate microservices, and create data and ML pipelines with AWS Step Functions.

If you would like to learn more about using Step Functions with Terraform, please check out the following patterns and workflows on Serverless Land and view the Step Functions Developer Guide.

About the authors

Ahmad Aboushady

Ahmad Aboushady is a Senior Technical Account Manager at AWS based in UAE. He works with Enterprise Support customers across the region to help them optimize their workloads on AWS and make the best out of their cloud journey.

Patrick Guha

Patrick Guha is a Solutions Architect at AWS based in Austin, TX. He supports non-profit, research customers focused on genomics, healthcare, and high-performance compute workloads in the cloud. Patrick has a BS in Electrical and Computer Engineering, and is currently working towards an MS in Engineering Management.

Aryam Gutierrez

Aryam Gutierrez is a Senior Partner Solutions Architect at AWS based in Madrid. He supports strategic partners to either build highly-scalable solutions or navigate through the various partner programs to differentiate their business, with the ultimate goal of growing business with AWS.

Reimagine Software Development With CodeWhisperer as Your AI Coding Companion

Post Syndicated from Danilo Poccia original https://aws.amazon.com/blogs/aws/reimagine-software-development-with-codewhisperer-as-your-ai-coding-companion/

In the few months since Amazon CodeWhisperer became generally available, many customers have used it to simplify and streamline the way they develop software. CodeWhisperer uses generative AI powered by a foundational model to understand the semantics and context of your code and provide relevant and useful suggestions. It can help build applications faster and more securely, and it can help at different levels, from small suggestions to writing full functions and unit tests that help decompose a complex problem into simpler tasks.

Imagine you want to improve your code test coverage or implement a fine-grained authorization model for your application. As you begin writing your code, CodeWhisperer is there, working alongside you. It understands your comments and existing code, providing real-time suggestions that can range from snippets to entire functions or classes. This immediate assistance adapts to your flow, reducing the need for context-switching to search for solutions or syntax tips. Using a code companion can enhance focus and productivity during the development process.

When you encounter an unfamiliar API, CodeWhisperer accelerates your work by offering relevant code suggestions. In addition, CodeWhisperer offers a comprehensive code scanning feature that can detect elusive vulnerabilities and provide suggestions to rectify them. This aligns with best practices such as those outlined by the Open Worldwide Application Security Project (OWASP). This makes coding not just more efficient, but also more secure and with an increased assurance in the quality of your work.

CodeWhisperer can also flag code suggestions that resemble open-source training data, and flag and remove problematic code that might be considered biased or unfair. It provides you with the associated open-source project’s repository URL and license, making it easier for you to review them and add attribution where necessary.

Here are a few examples of CodeWhisperer in action that span different areas of software development, from prototyping and onboarding to data analytics and permissions management.

CodeWhisperer Speeds Up Prototyping and Onboarding
One customer using CodeWhisperer in an interesting way is BUILDSTR, a consultancy that provides cloud engineering services focused on platform development and modernization. They use Node.js and Python in the backend and mainly React in the frontend.

I talked with Kyle Hines, co-founder of BUILDSTR, who said, “leveraging CodeWhisperer across different types of development projects for different customers, we’ve seen a huge impact in prototyping. For example, we are impressed by how quickly we are able to create templates for AWS Lambda functions interacting with other AWS services such as Amazon DynamoDB.” Kyle said their prototyping now takes 40% less time, and they noticed a reduction of more than 50% in the number of vulnerabilities present in customer environments.

Screenshot of a code editor using CodeWhisperer to generate the handler of an AWS Lambda function.

Kyle added, “Because hiring and developing new talent is a perpetual process for consultancies, we leveraged CodeWhisperer for onboarding new developers and it helps BUILDSTR Academy reduce the time and complexity for onboarding by more than 20%.”

CodeWhisperer for Exploratory Data Analysis
Wendy Wong is a business performance analyst building data pipelines at Service NSW and agile projects in AI. For her contributions to the community, she’s also an AWS Data Hero. She says Amazon CodeWhisperer has significantly accelerated her exploratory data analysis process, when she is analyzing a dataset to get a summary of its main characteristics using statistics and visualization tools.

She finds CodeWhisperer to be a swift, user-friendly, and dependable coding companion that accurately infers her intent with each line of code she crafts, and ultimately aids in the enhancement of her code quality through its best practice suggestions.

“Using CodeWhisperer, building code feels so much easier when I don’t have to remember every detail as it will accurately autocomplete my code and comments,” she shared. “Earlier, it would take me 15 minutes to set up data preparation pre-processing tasks, but now I’m ready to go in 5 minutes.”

Screenshot of exploratory data analysis using Amazon CodeWhisperer in a Jupyter notebook.

Wendy says she has gained efficiency by delegating these repetitive tasks to CodeWhisperer, and she wrote a series of articles to explain how to use it to simplify exploratory data analysis.

Another tool used to explore data sets is SQL. Wendy is looking into how CodeWhisperer can help data engineers who are not SQL experts. For instance, she noticed they can just ask to “write multiple joins” or “write a subquery” to quickly get the correct syntax to use.

Asking Amazon CodeWhisperer to generate SQL syntax and code.

CodeWhisperer Accelerates Testing and Other Daily Tasks
I had the opportunity to spend some time with software engineers in the AWS Developer Relations Platform team. That’s the team that, among other things, builds and operates the community.aws website.

Screenshot of the community.aws website, built and operated by the AWS Developer Relations Platform team with some help from Amazon CodeWhisperer.

Nikitha Tejpal’s work primarily revolves around TypeScript, and CodeWhisperer aids her coding process by offering effective autocomplete suggestions that come up as she types. She said she specifically likes the way CodeWhisperer helps with unit tests.

“I can now focus on writing the positive tests, and then use a comment to have CodeWhisperer suggest negative tests for the same code,” she says. “In this way, I can write unit tests in 40% less time.”

Her colleague, Carlos Aller Estévez, relies on CodeWhisperer’s autocomplete feature to provide him with suggestions for a line or two to supplement his existing code, which he accepts or ignores based on his own discretion. Other times, he proactively leverages the predictive abilities of CodeWhisperer to write code for him. “If I want explicitly to get CodeWhisperer to code for me, I write a method signature with a comment describing what I want, and I wait for the autocomplete,” he explained.

For instance, when Carlos’s objective was to check if a user had permissions on a given path or any of its parent paths, CodeWhisperer provided a neat solution for part of the problem based on Carlos’s method signature and comment. The generated code checks the parent directories of a given resource, then creates a list of all possible parent paths. Carlos then implemented a simple permission check over each path to complete the implementation.

“CodeWhisperer helps with algorithms and implementation details so that I have more time to think about the big picture, such as business requirements, and create better solutions,” he added.

Code generated by CodeWhisperer based on method signature and comment.

CodeWhisperer is a Multilingual Team Player
CodeWhisperer is polyglot, supporting code generation for 15 programming languages: Python, Java, JavaScript, TypeScript, C#, Go, Rust, PHP, Ruby, Kotlin, C, C++, Shell scripting, SQL, and Scala.

CodeWhisperer is also a team player. In addition to Visual Studio (VS) Code and the JetBrains family of IDEs (including IntelliJ, PyCharm, GoLand, CLion, PhpStorm, RubyMine, Rider, WebStorm, and DataGrip), CodeWhisperer is also available for JupyterLab, in AWS Cloud9, in the AWS Lambda console, and in Amazon SageMaker Studio.

At AWS, we are committed to helping our customers transform responsible AI from theory into practice by investing to build new services to meet the needs of our customers and make it easier for them to identify and mitigate bias, improve explainability, and help keep data private and secure.

You can use Amazon CodeWhisperer for free in the Individual Tier. See CodeWhisperer pricing for more information. To get started, follow these steps.

Danilo

Amazon CodeWhisperer, Free for Individual Use, is Now Generally Available

Post Syndicated from Steve Roberts original https://aws.amazon.com/blogs/aws/amazon-codewhisperer-free-for-individual-use-is-now-generally-available/

Today, Amazon CodeWhisperer, a real-time AI coding companion, is generally available and also includes a CodeWhisperer Individual tier that’s free to use for all developers. Originally launched in preview last year, CodeWhisperer keeps developers in the zone and productive, helping them write code quickly and securely and without needing to break their flow by leaving their IDE to research something. Faced with creating code for complex and ever-changing environments, developers can improve their productivity and simplify their work by making use of CodeWhisperer inside their favorite IDEs, including Visual Studio Code, IntelliJ IDEA, and others. CodeWhisperer helps with creating code for routine or time-consuming, undifferentiated tasks, working with unfamiliar APIs or SDKs, making correct and effective use of AWS APIs, and other common coding scenarios such as reading and writing files, image processing, writing unit tests, and lots more.

Using just an email account, you can sign up and, in just a few minutes, become more productive writing code—and you don’t even need to be an AWS customer. For business users, CodeWhisperer offers a Professional tier that adds administrative features, like SSO and IAM Identity Center integration, policy control for referenced code suggestions, and higher limits on security scanning. And in addition to generating code suggestions for Python, Java, JavaScript, TypeScript, and C#, the generally available release also now supports Go, Rust, PHP, Ruby, Kotlin, C, C++, Shell scripting, SQL, and Scala. CodeWhisperer is available to developers working in Visual Studio Code, IntelliJ IDEA, CLion, GoLand, WebStorm, Rider, PhpStorm, PyCharm, RubyMine, and DataGrip IDEs (when the appropriate AWS extensions for those IDEs are installed), or natively in AWS Cloud9 or AWS Lambda console.

Helping to keep developers in their flow is increasingly important as, facing increasing time pressure to get their work done, developers are often forced to break that flow to turn to an internet search, sites such as StackOverflow, or their colleagues for help in completing tasks. While this can help them obtain the starter code they need, it’s disruptive as they’ve had to leave their IDE environment to search or ask questions in a forum or find and ask a colleague—further adding to the disruption. Instead, CodeWhisperer meets developers where they are most productive, providing recommendations in real time as they write code or comments in their IDE. During the preview we ran a productivity challenge, and participants who used CodeWhisperer were 27% more likely to complete tasks successfully and did so an average of 57% faster than those who didn’t use CodeWhisperer.

Code generation from a comment in CodeWhisperer
Code generation from a comment

The code developers eventually locate may, however, contain issues such as hidden security vulnerabilities, be biased or unfair, or fail to handle open source responsibly. These issues won’t improve the developer’s productivity when they later have to resolve them. CodeWhisperer is the best coding companion when it comes to coding securely and using AI responsibly. To help you code responsibly, CodeWhisperer filters out code suggestions that might be considered biased or unfair, and it’s the only coding companion that can filter or flag code suggestions that may resemble particular open-source training data. It provides additional data for suggestions—for example, the repository URL and license—when code similar to training data is generated, helping lower the risk of using the code and enabling developers to reuse it with confidence.

Reference tracking in CodeWhisperer
Open-source reference tracking

CodeWhisperer is also the only AI coding companion to have security scanning for finding and suggesting remediations for hard-to-detect vulnerabilities, scanning both generated and developer-written code looking for vulnerabilities such as those in the top ten listed in the Open Web Application Security Project (OWASP). If it finds a vulnerability, CodeWhisperer provides suggestions to help remediate the issue.

Scanning for vulnerabilities in CodeWhisperer
Scanning for vulnerabilities

Code suggestions provided by CodeWhisperer are not specific to working with AWS. However, CodeWhisperer is optimized for the most-used AWS APIs, for example AWS Lambda, or Amazon Simple Storage Service (Amazon S3), making it the best coding companion for those building applications on AWS. While CodeWhisperer provides suggestions for general-purpose use cases across a variety of languages, the tuning performed using additional data on AWS APIs means you can be confident it is the highest quality, most accurate code generation you can get for working with AWS.

Meet Your new AI Code Companion Today
Amazon CodeWhisperer is generally available today to all developers—not just those with an AWS account or working with AWS—writing code in Python, Java, JavaScript, TypeScript, C#, Go, Rust, PHP, Ruby, Kotlin, C, C++, Shell scripting, SQL, and Scala. You can sign up with just an email address, and, as I mentioned at the top of this post, CodeWhisperer offers an Individual tier that’s freely available to all developers. More information on the Individual tier, and pricing for the Professional tier, can be found at https://aws.amazon.com/codewhisperer/pricing

Now in Preview – Amazon CodeWhisperer- ML-Powered Coding Companion

Post Syndicated from Jeff Barr original https://aws.amazon.com/blogs/aws/now-in-preview-amazon-codewhisperer-ml-powered-coding-companion/

As I was getting ready to write this post I spent some time thinking about some of the coding tools that I have used over the course of my career. This includes the line-oriented editor that was an intrinsic part of the BASIC interpreter that I used in junior high school, the IBM keypunch that I used when I started college, various flavors of Emacs, and Visual Studio. The earliest editors were quite utilitarian, and grew in sophistication as CPU power become more plentiful. At first this increasing sophistication took the form of lexical assistance, such as dynamic completion of partially-entered variable and function names. Later editors were able to parse source code, and to offer assistance based on syntax and data types — Visual Studio‘s IntelliSense, for example. Each of these features broke new ground at the time, and each one had the same basic goal: to help developers to write better code while reducing routine and repetitive work.

Announcing CodeWhisperer
Today I would like to tell you about Amazon CodeWhisperer. Trained on billions of lines of code and powered by machine learning, CodeWhisperer has the same goal. Whether you are a student, a new developer, or an experienced professional, CodeWhisperer will help you to be more productive.

We are launching in preview form with support for multiple IDEs and languages. To get started, you simply install the proper AWS IDE Toolkit, enable the CodeWhisperer feature, enter your preview access code, and start typing:

CodeWhisperer will continually examine your code and your comments, and present you with syntactically correct recommendations. The recommendations are synthesized based on your coding style and variable names, and are not simply snippets.

CodeWhisperer uses multiple contextual clues to drive recommendations including the cursor location in the source code, code that precedes the cursor, comments, and code in other files in the same projects. You can use the recommendations as-is, or you can enhance and customize them as needed. As I mentioned earlier, we trained (and continue to train) CodeWhisperer on billions of lines of code drawn from open source repositories, internal Amazon repositories, API documentation, and forums.

CodeWhisperer in Action
I installed the CodeWhisperer preview in PyCharm and put it through its paces. Here are a few examples to show you what it can do. I want to build a list of prime numbers. I type # See if a number is pr. CodeWhisperer offers to complete this, and I press TAB (the actual key is specific to each IDE) to accept the recommendation:

On the next line, I press Alt-C (again, IDE-specific), and I can choose between a pair of function definitions. I accept the first one, and CodeWhisperer recommends the function body, and here’s what I have:

I write a for statement, and CodeWhisperer recommends the entire body of the loop:

CodeWhisperer can also help me to write code that accesses various AWS services. I start with # create S3 bucket and TAB-complete the rest:

I could show you many more cool examples, but you will learn more by simply joining the preview and taking CodeWhisperer for a spin.

Join the Preview
The preview supports code written in Python, Java, and JavaScript, using VS Code, IntelliJ IDEA, PyCharm, WebStorm, and AWS Cloud9. Support for the AWS Lambda Console is in the works and should be ready very soon.

Join the CodeWhisperer preview and let me know what you think!

Jeff;