Post Syndicated from Nigel Harris original https://aws.amazon.com/blogs/devops/agile-website-delivery-with-hugo-and-aws-amplify/
In this post, we show how you can rapidly configure and deploy a website using Hugo (an AWS Cloud9 integrated development environment (IDE) for content editing), AWS CodeCommit for source code control, and AWS Amplify to implement a source code-controlled, automated deployment process.
When hosting a website on AWS, you can choose from several options. One popular option is to use Amazon Simple Storage Service (Amazon S3) to host a static website. If you prefer full access to the infrastructure hosting your website, you can use the NGINX Quick Start to quickly deploy web server infrastructure using AWS CloudFormation.
Static website generators such as Hugo and MkDocs accelerate the website content generation process, and can be a valuable tool when trying to rapidly deliver technical documentation or similar content. Typically, the content creation process requires programming in HTML and CSS.
Hugo is written in Go and available under the Apache 2.0 license. It provides several themes (collections of layouts) that accelerate website creation by drastically reducing the need to focus on format. You can author content in Markdown and output in multiple languages and formats (including ebook formats). Excellent examples of public websites built using Hugo include Digital.gov and Kubernetes.io.
Solution overview
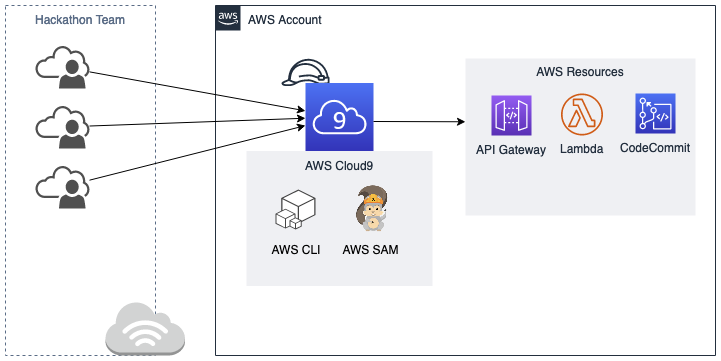
This solution illustrates how to provision a hosted, source code-controlled Hugo generated website using CodeCommit and Amplify Console. The provisioned website is configured with a custom subdomain and an SSL certificate. We use an AWS Cloud9 IDE to enable content creation in the cloud.
Setting up an AWS Cloud9 IDE
Start by provisioning an AWS Cloud9 IDE. AWS Cloud9 environments run using Amazon Elastic Compute Cloud (Amazon EC2). You need to provision your AWS Cloud9 environment into an existing public subnet in an Amazon Virtual Private Cloud (Amazon VPC) within your AWS account. You can complete this in the following steps:
1. Access your AWS account using with an identity with administrative privileges. If you don’t have an AWS account, you can create one.
2. Create a new AWS Cloud9 environment using the wizard on the AWS Cloud9 console.
3. Enter a name for your desktop and an optional description.
4. Choose Next step.

5. In the Environment settings section, for Environment type, select Create a new EC2 instance for environment (direct access).
6. For Instance type, select your preferred instance type (the default, t2.micro, works for this use case)
7. Under Network settings, for Network (VPC), choose a VPC that you wish to deploy your AWS Cloud9 instance into. You may wish to use your default VPC, which is suitable for the purpose of this tutorial.
8. Choose a public subnet from this VPC for deployment.

9. Leave all other settings unchanged and choose Next step.
10. Review your choices and choose Create environment.
Environment creation takes a few minutes to complete. When the environment is ready, you receive access to the AWS Cloud9 IDE in your browser. We return to it shortly to develop content for your Hugo website.

Configuring a source code repository to track content changes
Static website generators enable rapid changes to website content and layout. Source control management (SCM) systems provide a revision history for your code, and allow you to revert to previous versions of a project when unintended changes are introduced. SCM systems become increasingly important as the velocity of change and the number of team members introducing change increases.
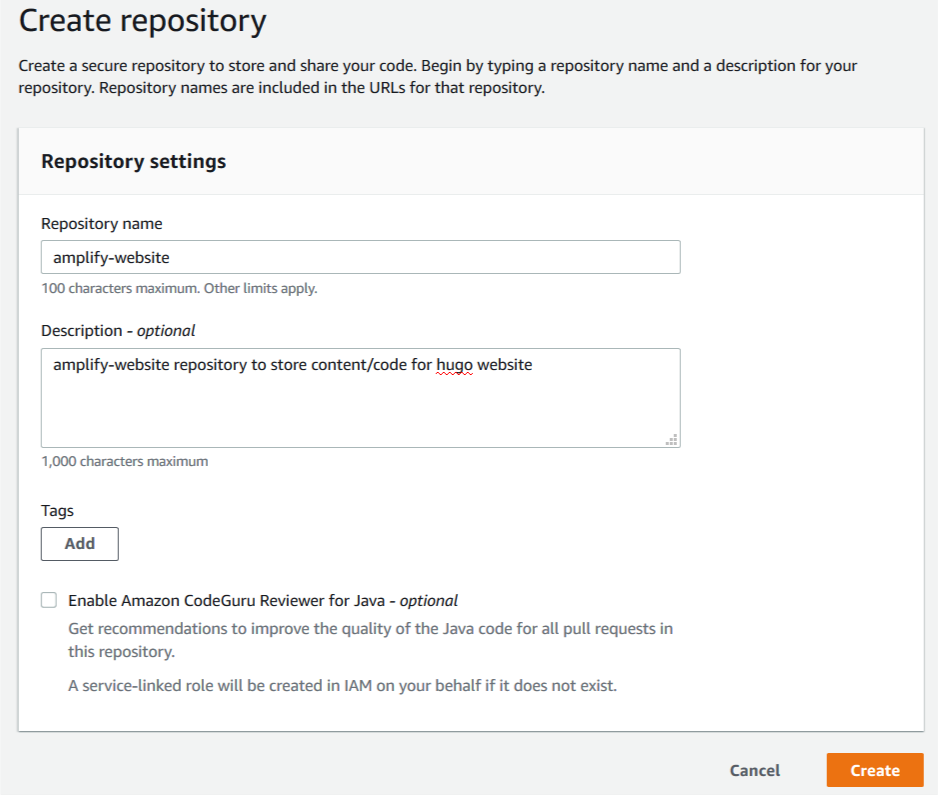
You now create a source code repository to track changes to your content. You use CodeCommit, a fully-managed source control service that hosts secure Git-based repositories.
1. In a new browser, sign in to the CodeCommit Console and create a new repository.
2. For Repository name, enter amplify-website.
3. For Description, enter an appropriate description.
4. Choose Create.

Repository creation takes just a few moments.
5. In the Connection steps section, choose the appropriate method to connect to your repository based on how you accessed your AWS account.
For this post, I signed in to my AWS account using federated access, so I choose the HTTPS Git Remote CodeCommit (HTTPS-GRC) tab. This is the recommended connection method for this sign-in type. You can also configure a connection to your repository using SSH or Git credentials over HTTPS. SSH and Git credentials over HTTPS are appropriate methods if you have signed in to your AWS account as an AWS Identity and Access Management (IAM) user. The Amazon CodeCommit console provides additional information regarding each of these connection types, including links to supporting documentation.

Configuring and deploying an example website
You’re now ready to configure and deploy your website.
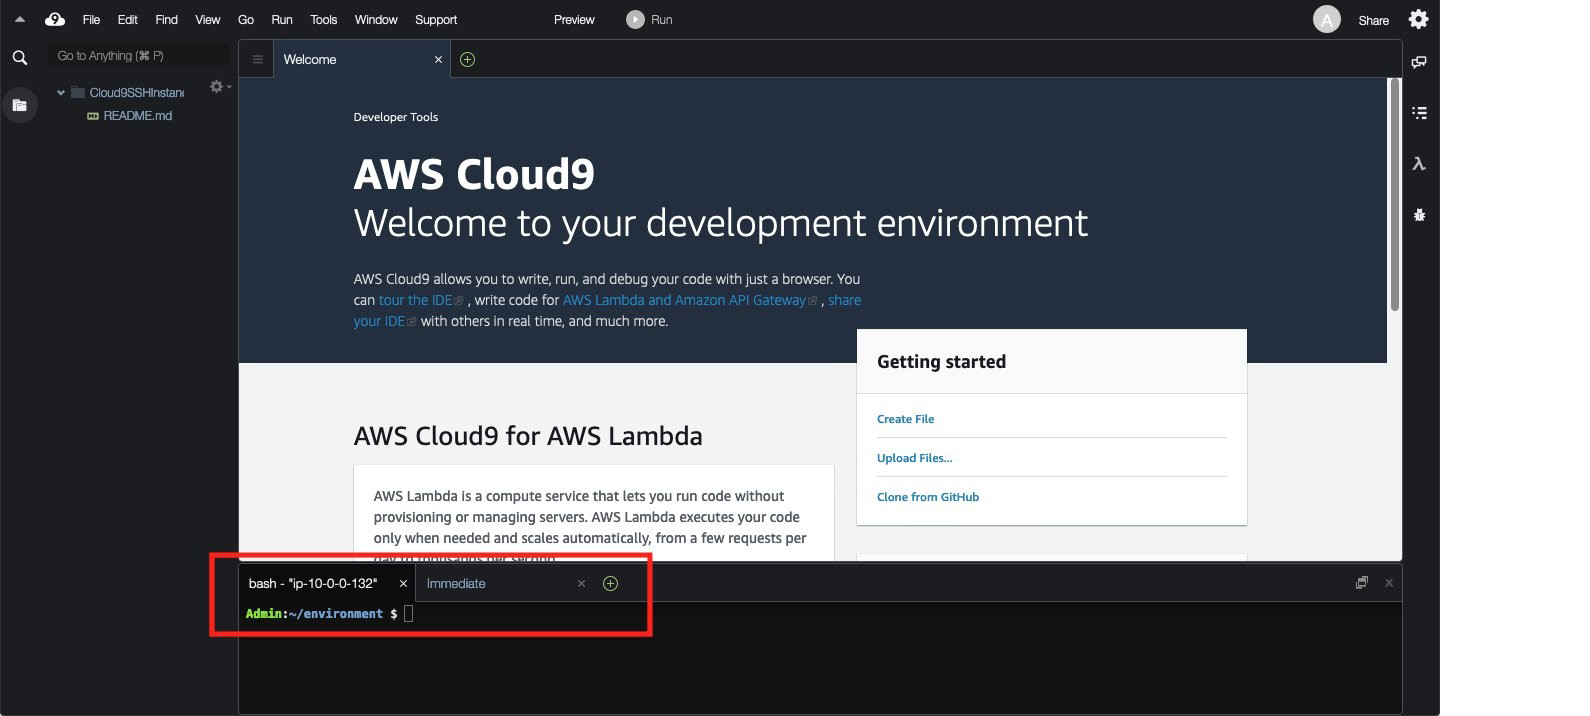
1. Return to the browser with your AWS Cloud9 IDE and place your cursor in the lower terminal pane of the IDE.
The terminal pane provides Bash shell access on the EC2 instance running AWS Cloud9.
You now create a Hugo website. The website design is based on Hugo-theme-learn. Themes are collections of Hugo layouts that take all the hassle out of building your website. Learn is a multilingual-ready theme authored by Mathieu Cornic, designed for building technical documentation websites.
Hugo provides a variety of themes on their website. Many of the themes include bundled example website content that you can easily adapt by following the accompanying theme documentation.
2. Enter the following code to download an existing example website stored as a .zip file, extract it, and commit the contents into CodeCommit from your AWS Cloud9 IDE:
cd ~/environment
aws s3 cp s3://ee-assets-prod-us-east-1/modules/3c5ba9cb6ff44465b96993d210f67147/v1/example-website.zip ~/environment/example-website.zip
unzip example-website.zip
rm example-website.zip
The following screenshot shows your output.

Next, we run commands to create a directory to host your website and copy files into place from the example website to get started. We then create a new default branch called main (formerly referred to as the master branch), local to our AWS Cloud9 instance. We then copy files into place from the example website. After adding and committing them locally, we push all our changes to the remote Amazon Codecommit repository.
3. Enter the following code:
mkdir ~/environment/amplify-website/
cd ~/environment/amplify-website/
git init
git remote add origin codecommit::us-east-1://amplify-website
git remote -v
git checkout -b main
cp -rp ~/environment/example-website/* ~/environment/amplify-website/
git add *
git commit -am "first commit"
git push -u origin main
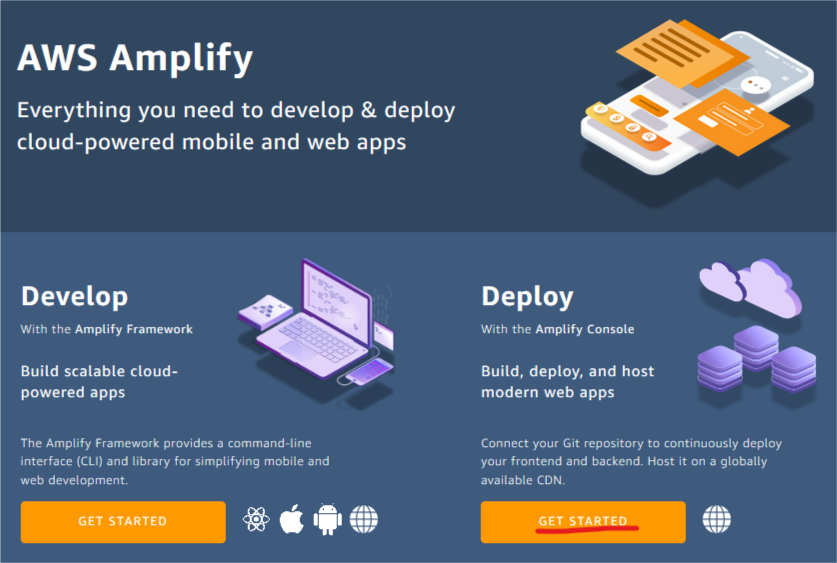
Deployment and hosting is achieved by using Amplify Console, a static web hosting service that accelerates your application release cycle by providing a simple CI/CD workflow for building and deploying static web applications.
4. On the Amplify console, under Deploy, choose Get Started.

5. On the Get started with the Amplify Console page, select AWS CodeCommit as your source code repository.
6. Choose Continue.

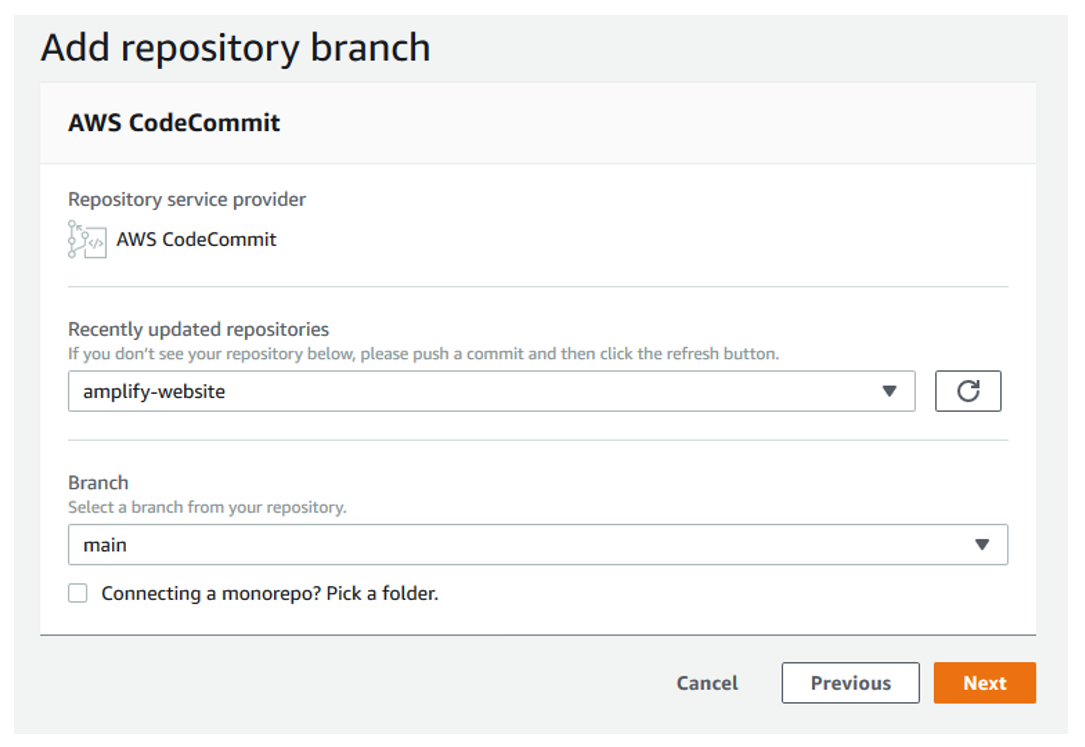
7. On the Add repository branch page, for Recently updated repositories, choose your repository.
8. For Branch, choose main.
9. Choose Next.

On the Configure build settings page, Amplify automatically uses the amplify.yml file for build settings for your deployment. You committed this into your source code repository in the previous step. The amplify.yml file is detected from the root of your website directory structure.
10. Choose Next.

11. On the review page, choose Save and deploy.
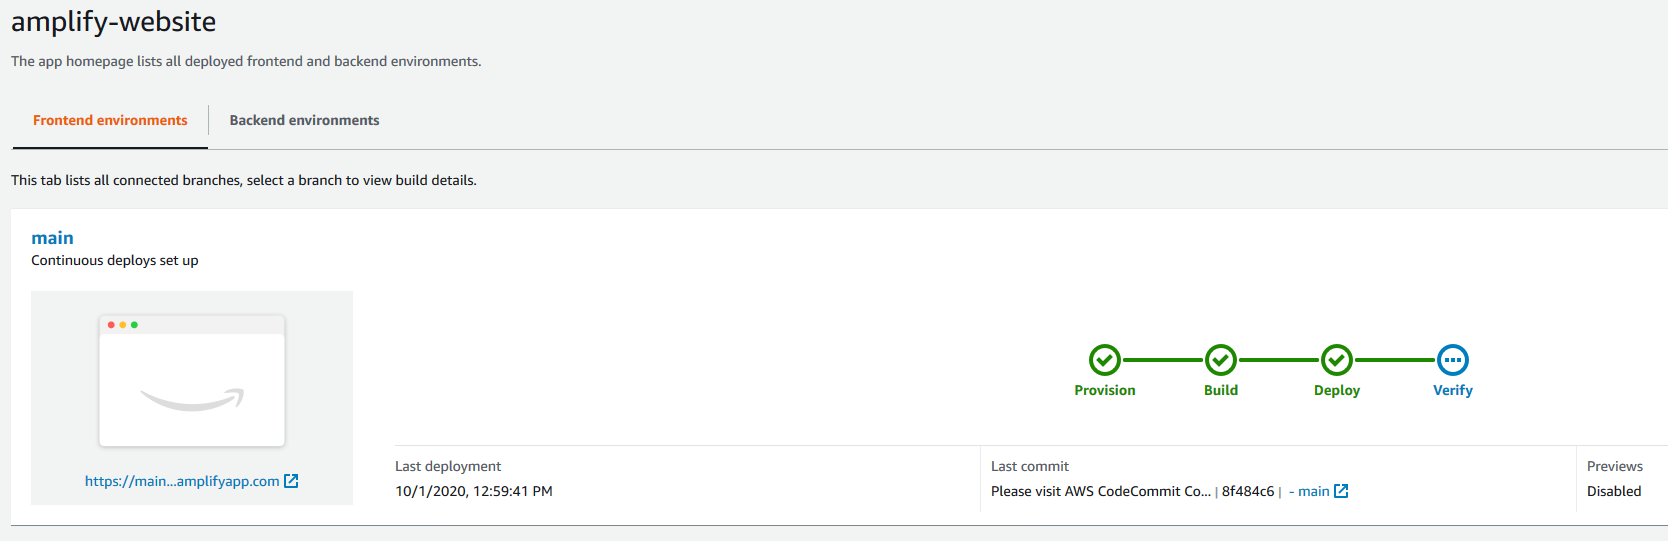
Amplify builds and deploys your Amplify website within minutes, and shows you its progress. When deployment is complete, you can access the website to see the sample content.

The following screenshot shows your example website.

Promoting changes to the website
We can now update the line of text in the home page and commit and publish this change.
1. Return to the browser with your AWS Cloud9 IDE and place your cursor in the lower terminal pane of the IDE.
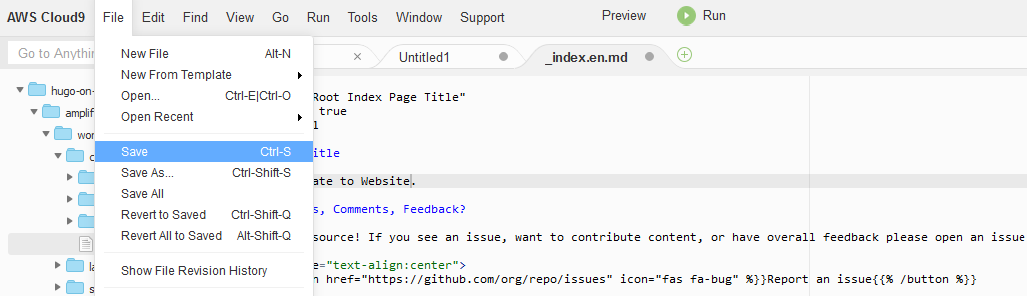
2. On the navigation pane, choose the file ~/environment/amplify-website/workshop/content/_index.en.md.
The contents of the file open under a new tab in the upper pane.
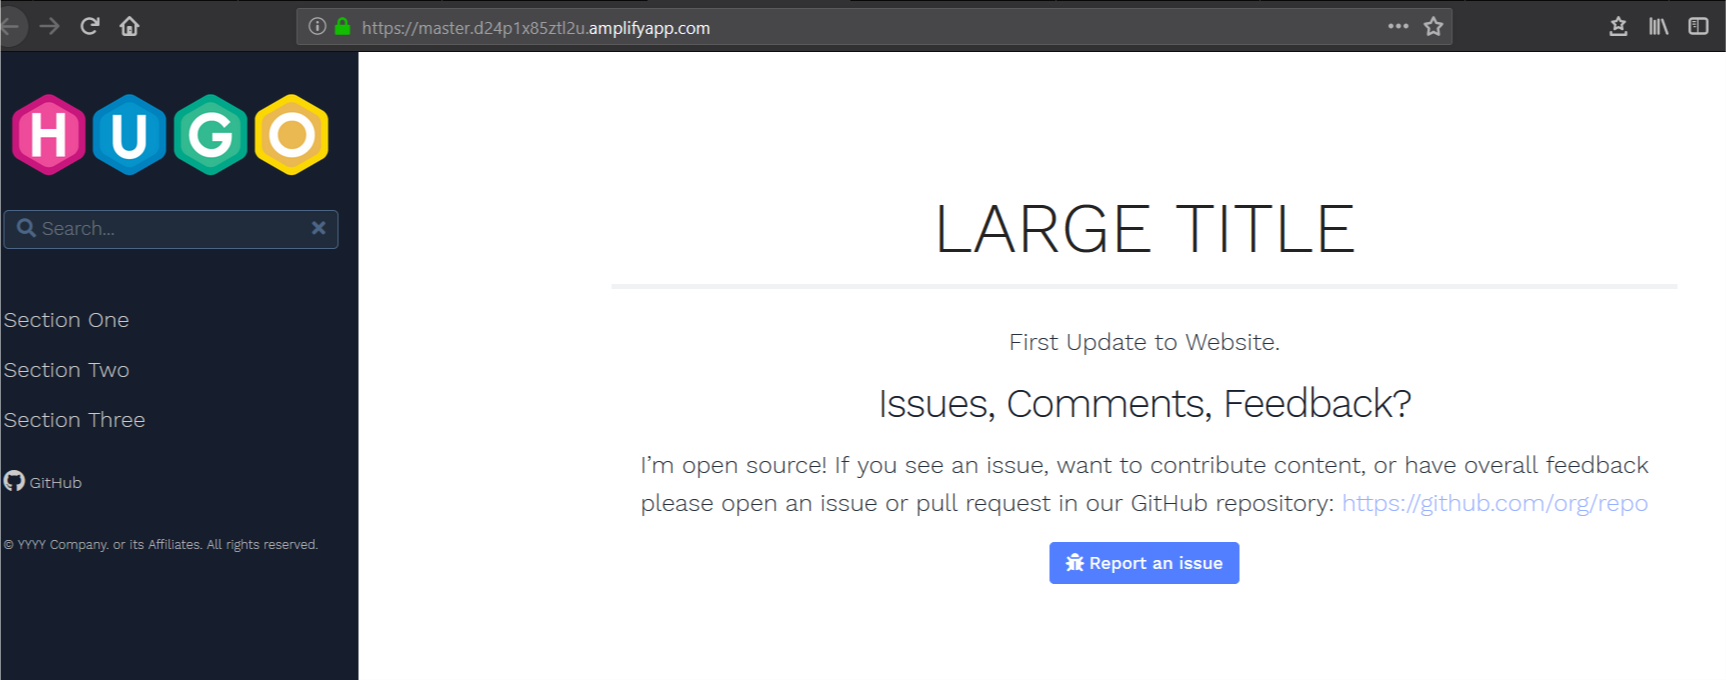
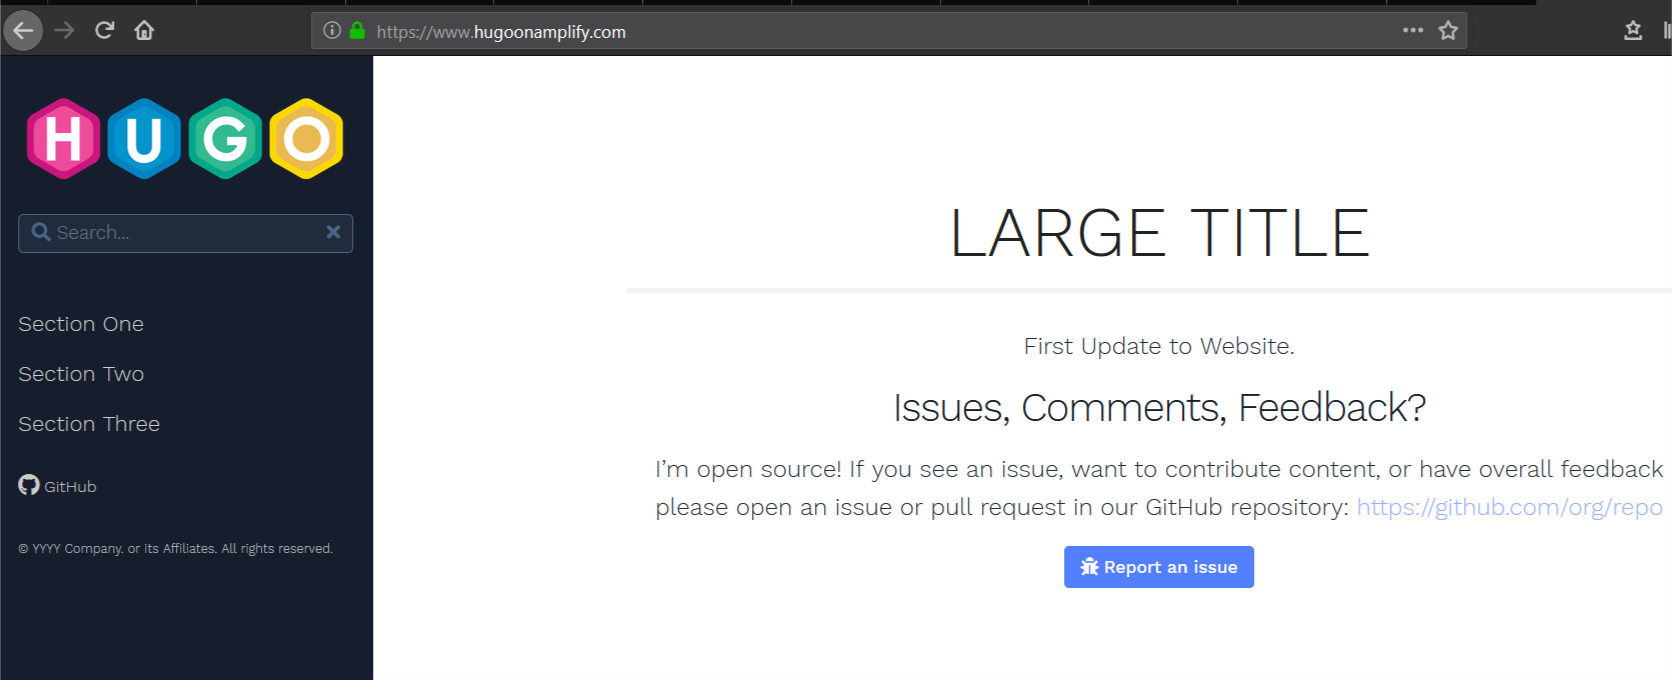
3. Change the string First Line of Text to First Update to Website.

4. From the File menu, choose Save to save the changes you have made to the _index.en.md file.

5. Commit the changes and push to CodeCommit by running the following command in the lower terminal pane in AWS Cloud9:
git add *; git commit -am "homepage update"; git push origin main
The output in your AWS Cloud9 terminal should appear similar to the following screenshot.

6. Return to the Amplify Console and observe how the committed change in CodeCommit is automatically detected. Amplify runs deployment steps to push your changes to the website.

7. Access the URL of your website after this update is complete to verify that the first line of text on your home page has changed.

You can repeat this process to make source-code controlled, automated changes to your website.
Adding a custom domain
Adding a custom domain to your Amplify configuration makes it easier for clients to access your content. You can register new domains using Amazon Route 53 or, if you have an existing domain registered outside of AWS, you can integrate it with Route 53 and Amplify. For our use case, the domain www.hugoonamplify.com is a registered a domain name using a third-party registrar (NameCheap). You can manage DNS configurations for domains registered outside of AWS using Route 53.
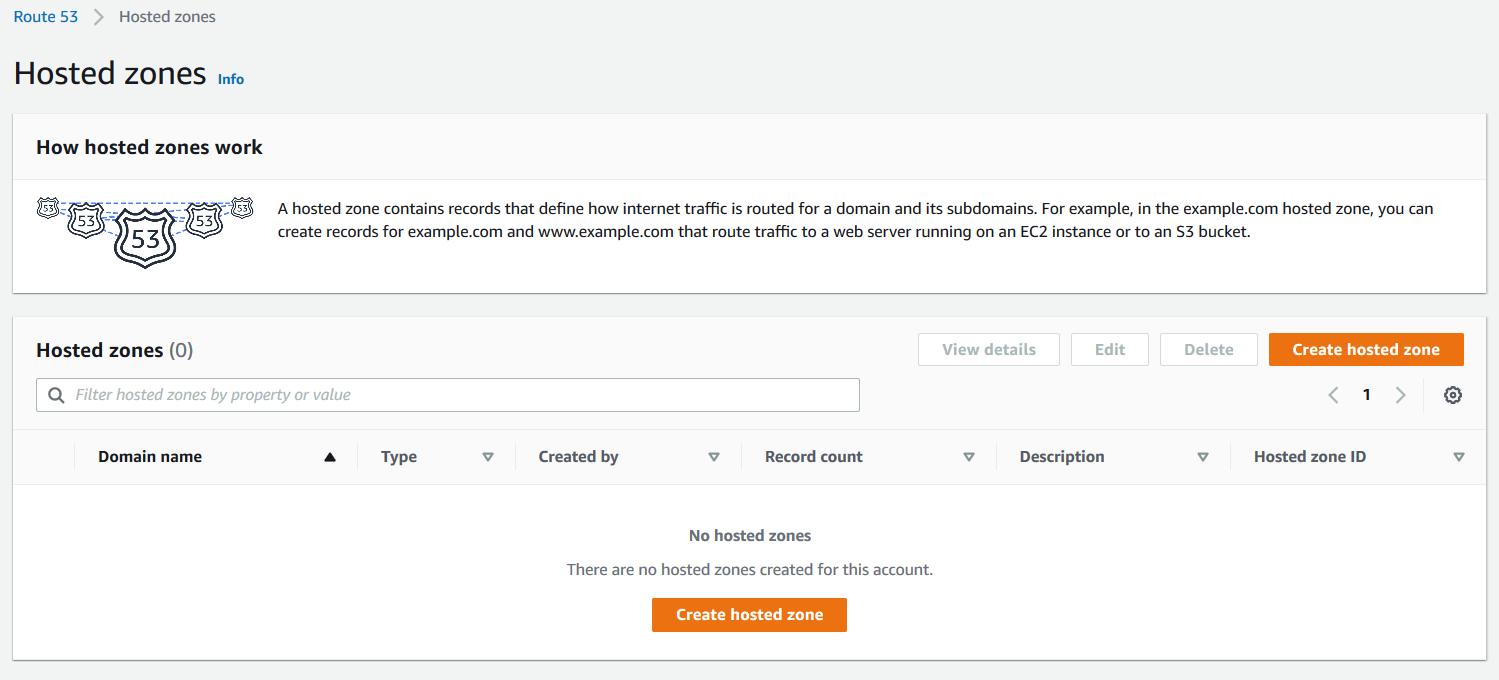
Start by configuring a public hosted zone in Route 53.
1. On the Route 53 console, choose Hosted zones.
2. Choose Create hosted zone.

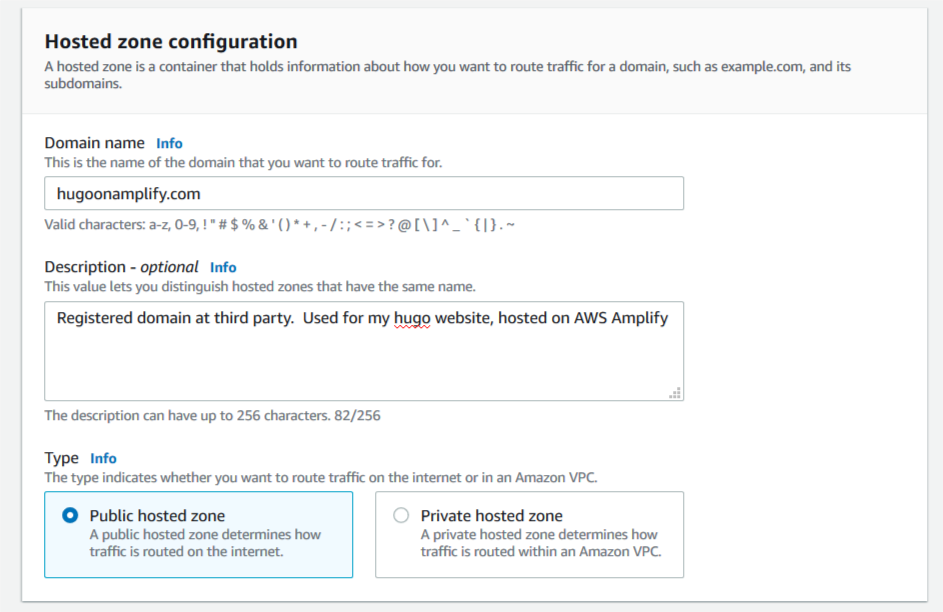
3. For Domain name, enter hugoonamplify.com.
4. For Description, enter an appropriate description.
5. For Type, select Public hosted zone.

6. Choose Create hosted zone.
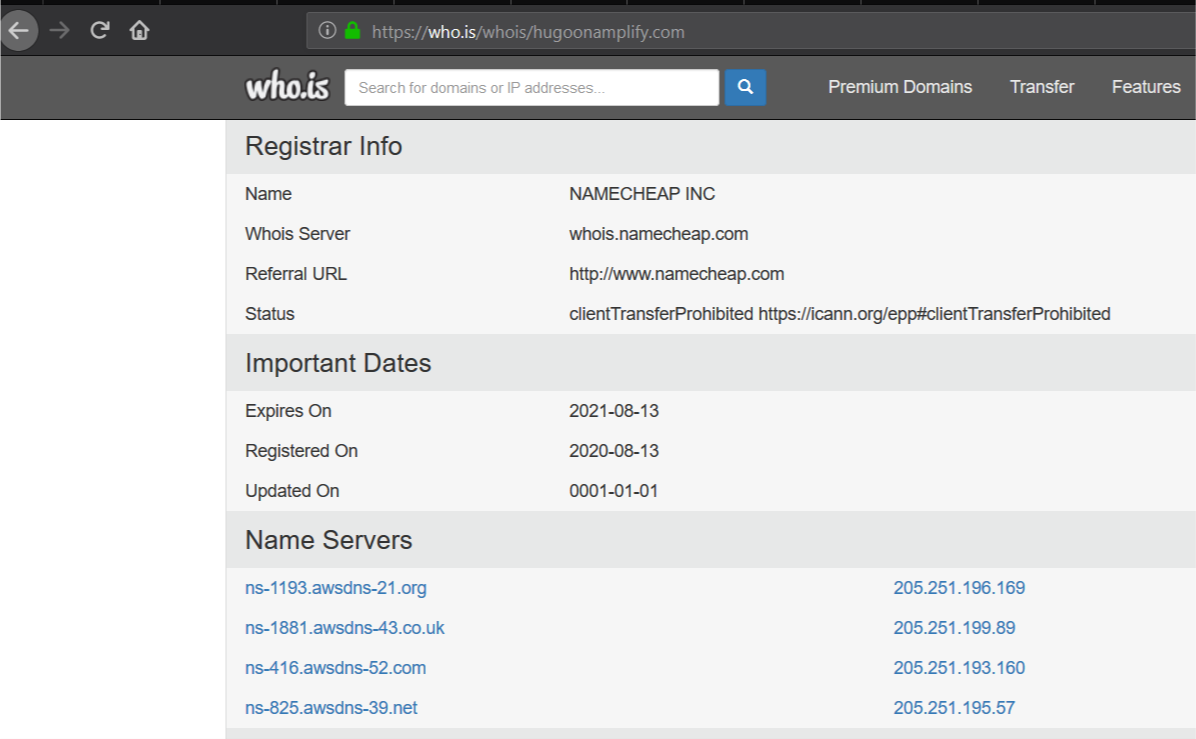
7. Save the addresses of the name servers that respond to client DNS lookup requests for the custom domain.

8. In a separate browser, access the console of your DNS registrar.
9. Configure a custom DNS name servers setting on the console of the third-party domain name registrar.
This configuration specifies the Route 53 assigned name servers as authoritative DNS for our custom domain. For this use case, propagation of this change may take up to 48 hours.

10. Use https://who.is to verify that the AWS name servers are listed correctly for your custom domain to internet clients.

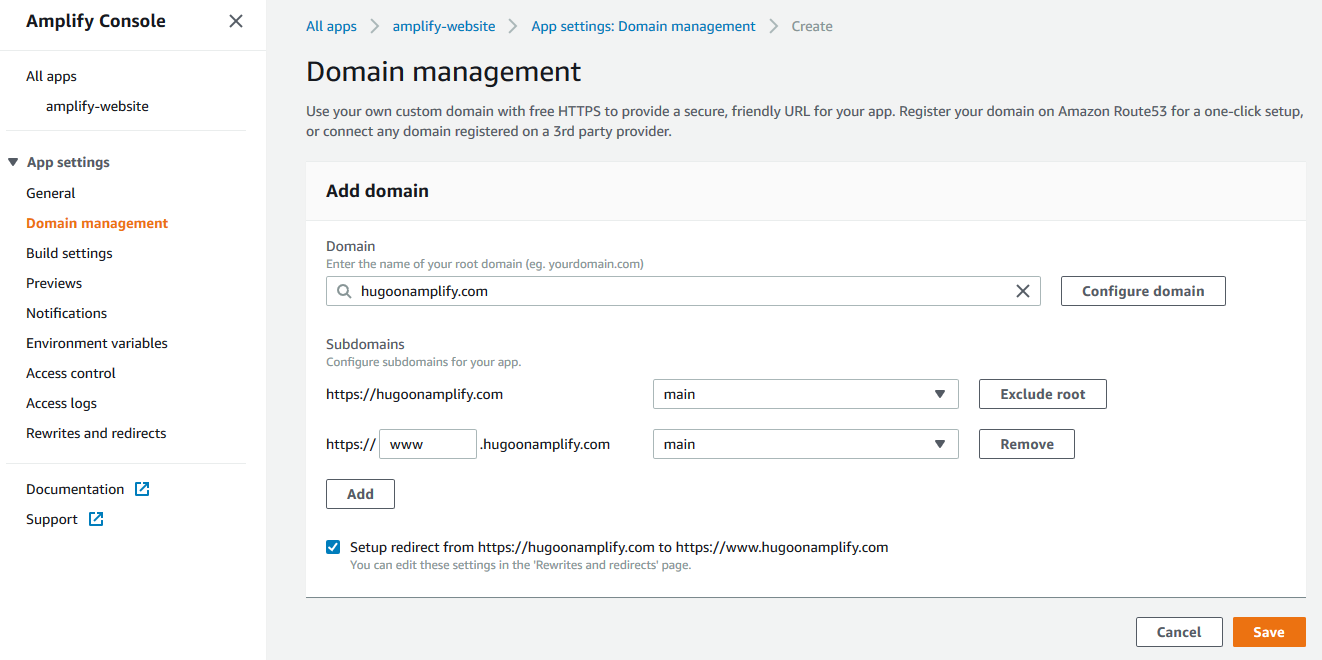
You can now set up your custom domain in Amplify. Amplify helps you configure DNS and set up SSL for your desired custom domain.

11. On the Amplify Console, under App settings, choose Domain management.
12. Choose Add domain.
13. For Domain, enter your custom domain name (hugoonamplify.com).
14. Choose Configure domain.
15. For Subdomain, I only want to set up www and choose to exclude the root of my custom domain.
16. Choose Save.
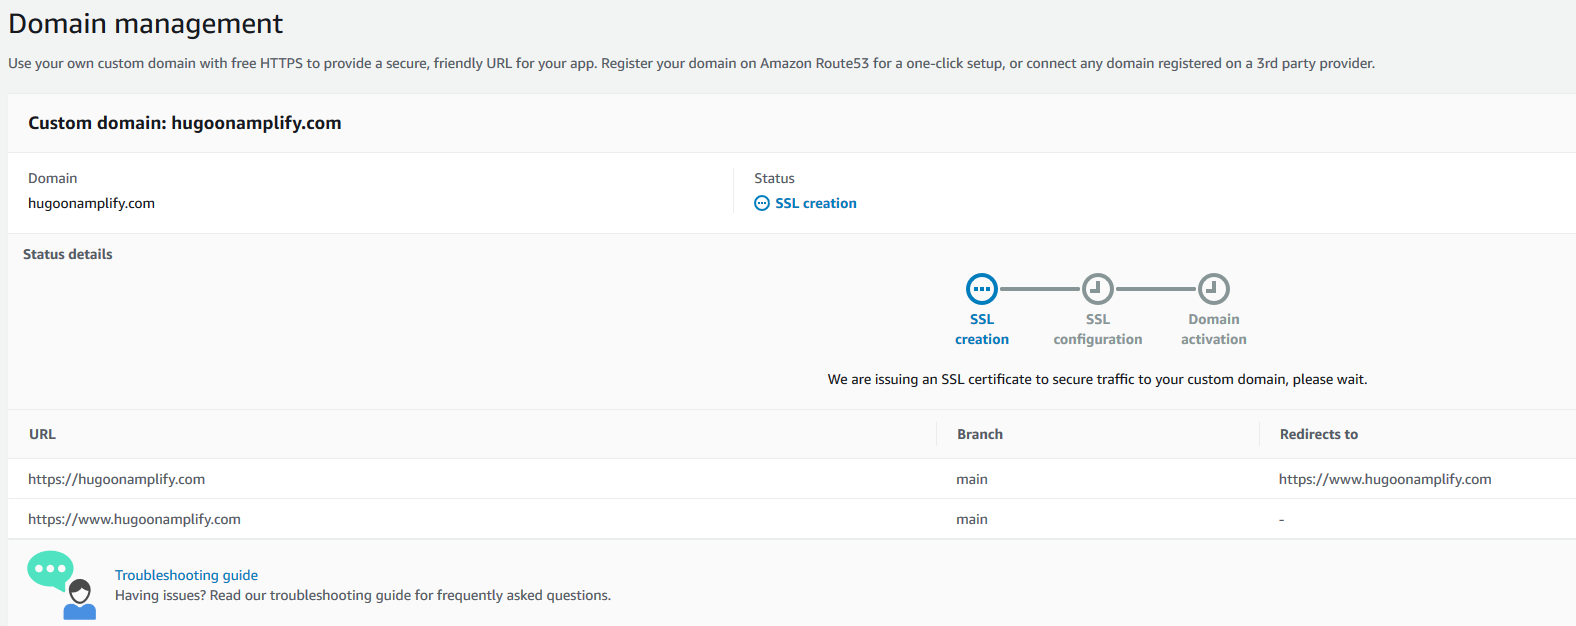
Amplify begins the process of creating the SSL certificates. Amplify sends a notification that it’s issuing an SSL certificate to secure traffic to the custom domain.

After a few moments, it proceeds to SSL configuration and indicates that ownership of domain is in progress.

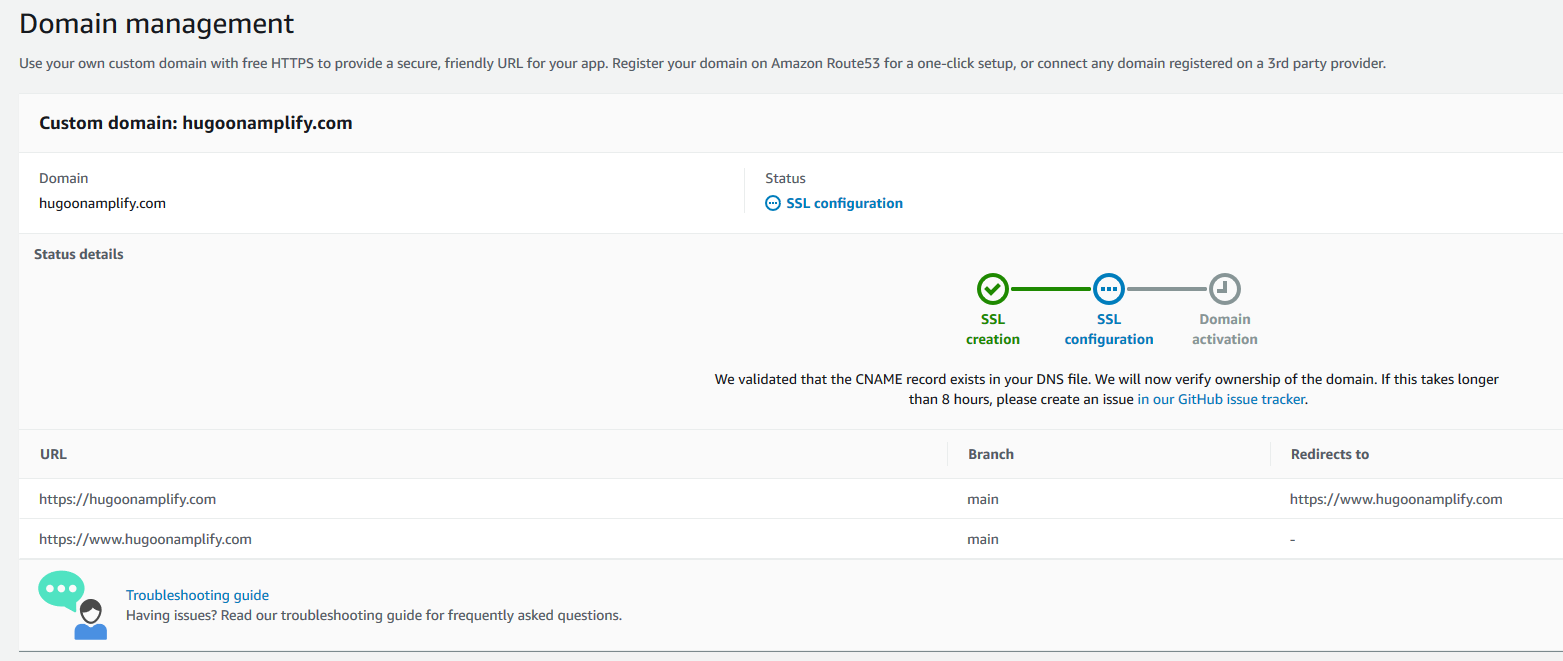
Amplify verifies domain ownership by creating a sample CNAME record in your hosted zone file. When ownership is verified, the domain is propagated onto an Amazon CloudFront distribution managed by the Amplify service, and domain activation is complete.

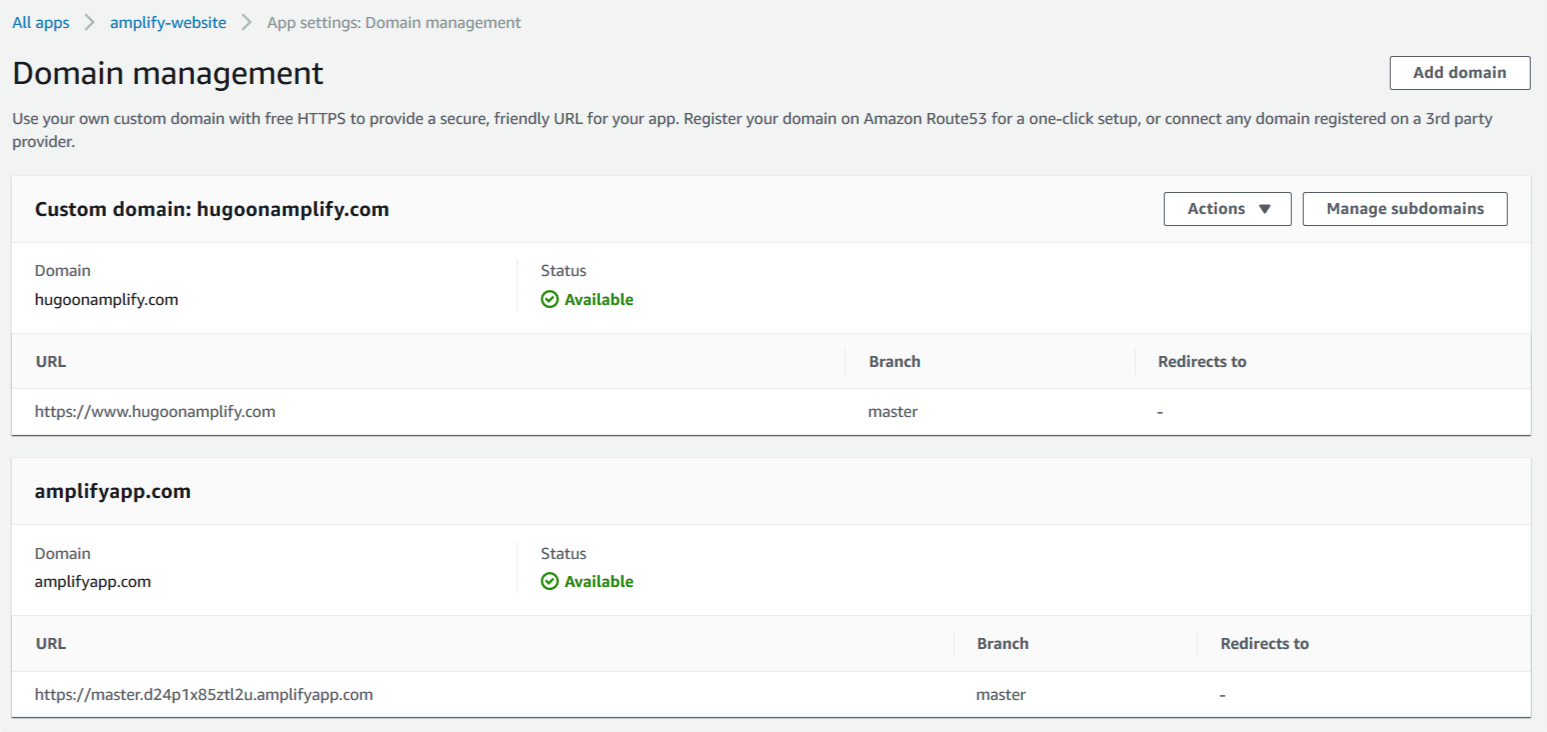
Clients can now access the website using the custom domain name www.hugoonaplify.com.

Establishing a subdomain for development
You can create a development website in Amplify that is aligned to a development code branch in CodeCommit that enables testing changes prior to production release.
1. Access the AWS Cloud9 IDE and use the terminal to enter the following commands to create a development branch and push changes to CodeCommit using the current content from the main branch with a single content change:
git checkout -b development
git branch
git remote -v
git add *; git commit -am "first development commit";
git push -u origin development
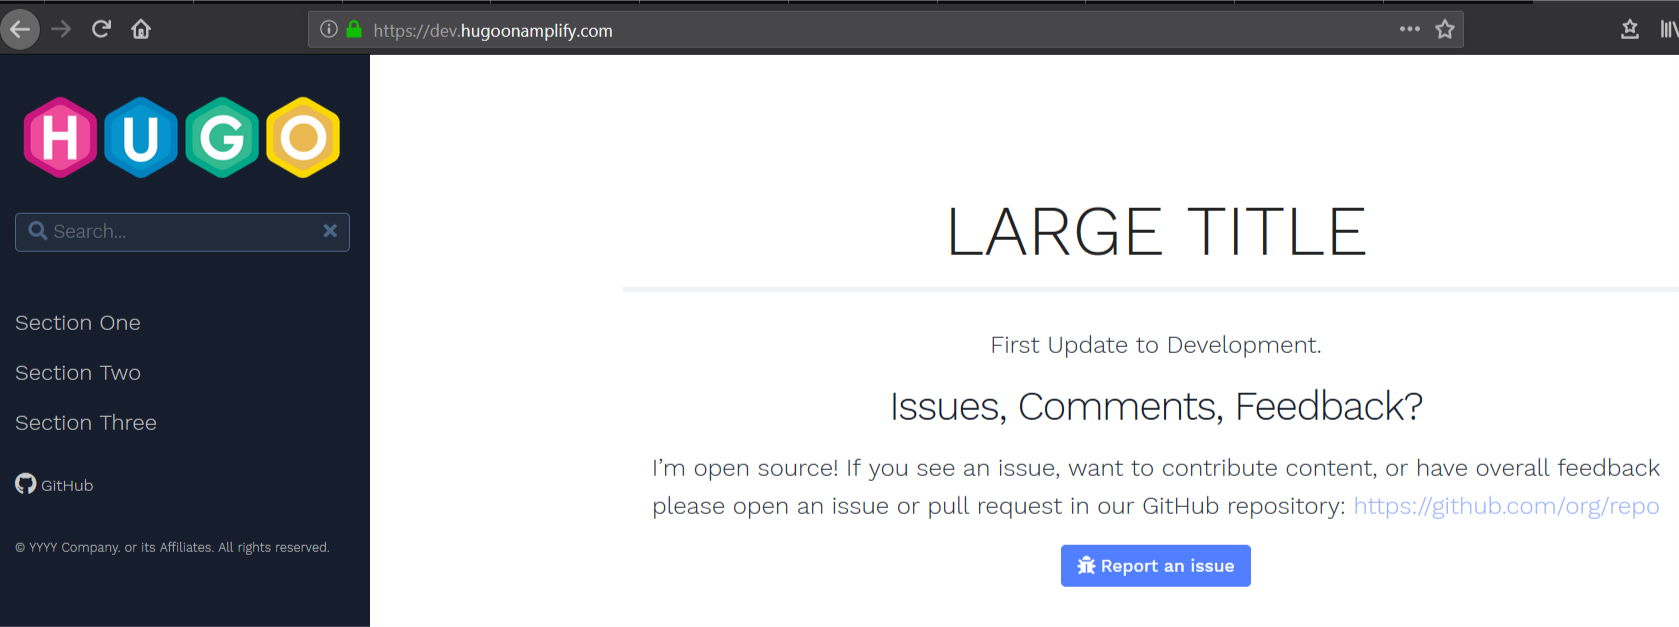
2. Open and edit the file ~/environment/amplify-website/workshop/content/_index.en.md and change the string Update to Website to something else.
Alternatively, run the following Unix sed command from the terminal in AWS Cloud9 to make that content change:
sed -i 's/Update to Website/Update to Development/g' ~/environment/amplify-website/workshop/content/_index.en.md
3. Commit and push your change with the following code:
git add *; git commit -am "second development commit"; git push -u origin development
You now configure a subdomain in Amplify to allow developers to review changes.
4. Return to the amplify-website app.
5. Choose Connect branch.

6. For Branch, choose the development branch you created and committed code into.
7. Choose Next.

Amplify builds a second website based on the contents of the development branch. You can see the instance of your website matched to the development code branch on Amplify Console.

8. Access the domain management menu item in your Amplify application to add a friendly subdomain.
9. Edit the domain and add a subdomain item with a name of your choice (for example, dev).
10. Associate it to the development branch containing the committed code and content changes.
11. Choose Add.

You can access the subdomain to verify the changes.

Controlling access to development
You may wish to restrict access to new content as it’s deployed into the development website.
1. On Amplify Console, choose your application.
2. Choose Access control.
3. Under Access control settings, choose your preferred settings.
You have the option to restrict access globally or on a branch-by-branch basis. For this use case, we create a simple password protection for a user named developer on the development branch and site.

Cleaning up
Unless you plan to keep the website you have constructed, you can quickly clean up provisioned assets and avoid any unnecessary costs.
1. On Amplify Console, select the app you created.
2. From the Actions drop-down menu, choose Delete app.
3. In the pop-up window, confirm the deletion.
4. On the CodeCommit dashboard, select the repository you created.
5. Choose Delete.
6. In the pop-up window, confirm the deletion.
7. On the AWS Cloud9 dashboard, select the IDE you created.
8. Choose Delete.
9. In the pop-up window, confirm the deletion.
Conclusion
Hugo is a powerful tool that enables accelerated delivery of content in a variety of formats including image portfolios, online resume presentation, blogging, and technical documentation. Amplify Console provides a convenient, easy-to-use, static web hosting service that can greatly accelerate delivery of static content.
When combining Hugo with Amplify Console, you can rapidly deploy websites in minutes with features such as friendly URLS, environments matched to code branches, and encryption (SSL). Visit gohugo.io to find out more about Hugo. For more information about how Amplify Console can help you rapidly deploy Hugo and other modern web applications, see the AWS Amplify Console User Guide.