Tag Archives: news

Optimize your storage costs for rarely-accessed files with Amazon EFS Archive

Post Syndicated from Danilo Poccia original https://aws.amazon.com/blogs/aws/optimize-your-storage-costs-for-rarely-accessed-files-with-amazon-efs-archive/

Today, we are introducing EFS Archive, a new storage class for Amazon Elastic File System (Amazon EFS) optimized for long-lived data that is rarely accessed.

With this launch, Amazon EFS supports three Regional storage classes:

  • EFS Standard – Powered by SSD storage and designed to deliver submillisecond latency for active data.
  • EFS Infrequent Access (EFS IA) – Cost-optimized for data accessed only a few times a quarter, and that doesn’t need the submillisecond latencies of EFS Standard.
  • EFS Archive – Cost-optimized for long-lived data accessed a few times a year or less and offering similar performance to EFS IA.

All Regional storage classes deliver gigabytes-per-second throughput and hundreds of thousands of IOPS performance and are designed for eleven nines of durability.

You don’t need to manually pick and choose a storage class for your file systems because EFS lifecycle management can automatically migrate files across storage classes based on their access patterns. This allows you to have a single shared file system that contains files processed in very different ways: from active latency-sensitive to cold rarely-accessed data.

Many datasets have subsets of data that are valuable for generating insights but aren’t often used. With EFS Archive, you can store rarely accessed data cost-effectively while keeping it in the same shared file system as other data. This simplified storage approach allows end users and applications to collaborate on large shared datasets in one place, making it easier and quicker to set up and scale analytics workloads.

Using EFS Archive, you can optimize costs for workloads with large file-based datasets that contain a mix of active and inactive data such as user shares, machine learning (ML) training datasets, SaaS applications, and data retained for regulatory compliance like financial transactions and medical records.

Let’s see how this works in practice.

Using EFS Archive storage
To use the new EFS Archive storage class, I need to configure lifecycle management for the file system. In the Amazon EFS console, I select one of my file systems and choose Edit. To use EFS Archive storage, the file system Throughput mode must be ElasticElastic Throughput is the recommended choice for most workloads because it is designed to provide applications with as much throughput as they need with pay-as-you-use pricing.

Console screenshot.

Now, I configure Lifecycle management to transition files into EFS IA or EFS Archive based on my workload’s access patterns.

Console screenshot.

My workloads rarely use files older than one month. Files older than a quarter are not used by normal activities but need to be kept for a longer time. Based on these considerations, I select to automatically transition files to EFS IA after 30 days and to EFS Archive after 90 days since the last access. These are the default settings for new file systems.

When one of my old files is accessed, it’s usually an indicator that is being used in a new analysis, so it’ll become active again for some period. For this reason, I use the option to transition files back to Standard storage on their first access in IA or Archive storage.

I save changes, and that’s it! This file system will now automatically use different storage classes based on how files are being processed by my applications.

Things to know
EFS Archive is available today in all AWS Regions where Amazon EFS is offered, excluding those based in China.

To offer a more cost-optimized experience for colder, rarely-accessed files, EFS Archive offers 50 percent lower storage cost than EFS IA with a three times higher request charge when data is accessed. For more information, see Amazon EFS pricing.

You can use EFS Archive with existing file systems by configuring the file system lifecycle policies. New file systems are created by default with a lifecycle policy that automatically transitions files to EFS IA after 30 days and to EFS Archive after 90 days since the last access.

Optimize your storage costs by configuring lifecycle management for your Amazon EFS file systems.

Danilo

New Amazon CloudWatch log class for infrequent access logs at a reduced price

Post Syndicated from Marcia Villalba original https://aws.amazon.com/blogs/aws/new-amazon-cloudwatch-log-class-for-infrequent-access-logs-at-a-reduced-price/

Amazon CloudWatch Logs announces today a new log class called Infrequent Access. This new log class offers a tailored set of capabilities at a lower cost for infrequently accessed logs, enabling customers to consolidate all their logs in one place in a cost-effective manner.

As customers’ applications continue to scale and grow, so does the volume of logs generated. To limit the increase of logging costs, many customers are forced to make hard trade-offs. For example, some customers limit the logs generated by their applications, which can hinder the visibility of the application, or choose a different solution for different log types, which adds complexity and inefficiencies in managing different logging solutions. For instance, customers may send logs needed for real-time analytics and alerting to CloudWatch Logs and send more detailed logs needed for debugging and troubleshooting to a lower-cost solution that doesn’t have as many features as CloudWatch. In the end, these workarounds can impact the observability of the application, because customers need to navigate across multiple solutions to see their logs.

The Infrequent Access log class allows you to build a holistic observability solution using CloudWatch by centralizing all your logs in one place to ingest, query, and store your logs in a cost-efficient way. Infrequent Access is 50 percent lower per GB ingestion price than Standard log class. It provides a tailored set of capabilities for customers that don’t need advanced features like Live Tail, metric extraction, alarming, or data protection that the Standard log class provides. With Infrequent Access, you can still get the benefits of fully managed ingestion, storage, and the ability to deep dive using CloudWatch Logs Insights.

The following table shows a side-by-side comparison of the features that the new Infrequent Access and the Standard log classes have.

Feature Infrequent Access log class Standard log class
Fully managed ingestion and storage Available Available
Cross-account Available Available
Encryption with KMS Available Available
Logs Insights Available Available
Subscription filters / Export to S3 Not available Available
GetLogEvents / FilterLogEvents Not available Available
Contributor, Container, and Lambda Insights Not available Available
Metric filter and alerting Not available Available
Data protection Not available Available
Embedded metric format (EMF) Not available Available
Live Tail Not available Available

When to use the new Infrequent Access log class
Use the Infrequent Access log class when you have a new workload that doesn’t require advanced features provided by the Standard log class. One important consideration is that when you create a log group with a specific log class, you cannot change that log group log class afterward.

The Infrequent Access log class is suitable for debug logs or web server logs because they are quite verbose and rarely require any of the advanced functionality that the Standard log class provides.

Another good workload for the Infrequent Access log class is an Internet of Things (IoT) fleet sending detailed logs that are only accessed for after the fact forensic analysis after the event. In addition, the Infrequent Access log class is a good choice for workloads where logs need to be stored for compliance because they will be queried infrequently.

Getting started
To get started using the new Infrequent Access log class, create a new log group in the CloudWatch Logs console and select the new Infrequent Access log class. You can create logs groups with the new Infrequent Access log class not only from the AWS Management Console but also from the AWS Command Line Interface (AWS CLI), AWS CloudFormation, AWS Cloud Development Kit (AWS CDK), and AWS SDKs.

Create log group

Once you have the new log group created, you can start using it in your workloads. For this example, I will configure a web application to send debug logs to this log group. After a while of the web application executes for a while, you can go back to the log group, where you see a new log stream.

View log group

When you select a log stream, you will be directed to CloudWatch Logs Insights.

Log insights

Using the same familiar CloudWatch Logs Insights experience you get with Standard Class, you can create queries and search those logs to find relevant information, and you can analyze all the logs quickly in one place.

Available now
The new Infrequent Access log class is now available in all AWS Regions except the China and GovCloud Regions. You can start using it and enjoy a more cost-effective way to collect, store, and analyze your logs in a fully managed experience.

To learn more about the new log class, you can check the CloudWatch Logs user guide dedicated page for the Infrequent Access log class.

Marcia

Introducing Amazon CloudFront KeyValueStore: A low-latency datastore for CloudFront Functions

Post Syndicated from Danilo Poccia original https://aws.amazon.com/blogs/aws/introducing-amazon-cloudfront-keyvaluestore-a-low-latency-datastore-for-cloudfront-functions/

Amazon CloudFront allows you to securely deliver static and dynamic content with low latency and high transfer speeds. With CloudFront Functions, you can perform latency-sensitive customizations for millions of requests per second. For example, you can use CloudFront Functions to modify headers, normalize cache keys, rewrite URLs, or authorize requests.

Today, we are introducing CloudFront KeyValueStore, a secure global low-latency key value datastore that allows read access from within CloudFront Functions, enabling advanced customizable logic at the CloudFront edge locations.

Previously, you had to embed configuration data inside the function code. For example, data for determining if a URL should be redirected and which URL to redirect the viewer to. When embedding configuration data with the function code, every small change in configuration requires a code change and a redeployment of the function code. Updating and deploying code for every new lookup addition introduces the risk of making inadvertent changes to code. Also, the maximum function size is 10 KB, making it difficult for many use cases to fit all the data within the code.

With CloudFront KeyValueStore, you can now update the data associated with a function and the function code independently from each other. This simplifies function code and makes it easy to update data without the need to deploy code changes.

Let’s see how this works in practice.

Creating a CloudFront key value store
In the CloudFront console, I choose Functions from the navigation pane. In the KeyValueStores tab, I choose Create KeyValueStore.

Here, I have the option to import key value pairs from a JSON file in an Amazon Simple Storage Service (Amazon S3) bucket. I am not doing that now because I want to start with no keys. I enter a name and description and complete the creation of the key value store.

Console screenshot.

When the key value store has been created, I choose Edit in the Key value pairs section and then Add pair. I type hello for the key and Hello World for the value and save the changes. I can add more keys and values, but one key is enough for now.

Console screenshot.

When I update a key value store, changes are propagated to all CloudFront edge locations in a few seconds so that it can be used with low latency by the functions that are associated with the key value store. Let’s see how that works.

Using CloudFront KeyValueStore from CloudFront Functions
In the CloudFront console, I choose Functions in the navigation pane and then Create function. I type a name for the function, select the cloudfront-js-2.0 runtime, and complete the creation of the function. Then, I use the new option to associate the key value store with this function.

Console screenshot.

I copy the key value store ID from the console to use it in the following function code:

import cf from 'cloudfront';

const kvsId = '<KEY_VALUE_STORE_ID>';

// This fails if the key value store is not associated with the function
const kvsHandle = cf.kvs(kvsId);

async function handler(event) {
    // Use the first part of the pathname as key, for example http(s)://domain/<key>/something/else
    const key = event.request.uri.split('/')[1]
    let value = "Not found" // Default value
    try {
        value = await kvsHandle.get(key);
    } catch (err) {
        console.log(`Kvs key lookup failed for ${key}: ${err}`);
    }
    var response = {
        statusCode: 200,
        statusDescription: 'OK',
        body: {
            encoding: 'text',
            data: `Key: ${key} Value: ${value}\n`
        }
    };
    return response;
}

This function uses the first part of the path of the request as key and responds with the name of the key and its value.

I save the changes and publish the function. In the Publish tab of the function, I associate the function with a CloudFront distribution that I created before. I use the Viewer Request event type and Default (*) cache behavior to intercept all requests to the distribution.

In the console, I go back to the list of functions and wait for the function to be deployed. Then, I use curl from the command line to download content from the distribution and test the result of the function.

First, I try with a couple of paths that invoke the function and look up the key I created before (hello):

curl https://distribution-domain.cloudfront.net/hello
Key: hello Value: Hello World

curl https://distribution-domain.cloudfront.net/hello/world
Key: hello Value: Hello World

It works! Then, I try with a different path to see that the default value I use in the code is returned when the key is not found.

curl https://distribution-domain.cloudfront.net/hi
Key: hi Value: Not found

Now that this first example works, let’s try something more advanced and useful.

Rewriting the URL using configuration data in CloudFront KeyValueStore
Let’s build a function that uses the content of the URL in the HTTP request to look up in a key value store the custom path that CloudFront should use to make the actual request. This function can help manage the multiple services that are part of a website.

For example, I want to update the blog platform I use for my website. The old blog has origin path /blog-v1 while the new blog has origin path /blog-v2.

Architectural diagram.

At first, I am still using the old blog. In the CloudFormation console, I add the blog key to the key value store with value blog-v1.

Then, I create the following function and associate it with the distribution using Viewer Request event and Default (*) cache behavior to intercept all requests to the distribution.

import cf from 'cloudfront';

const kvsId = "<KEY_VALUE_STORE_ID>";

// This fails if the key value store is not associated with the function
const kvsHandle = cf.kvs(kvsId);

async function handler(event) {
    const request = event.request;
    // Use the first segment of the pathname as key
    // For example http(s)://domain/<key>/something/else
    const pathSegments = request.uri.split('/')
    const key = pathSegments[1]
    try {
        // Replace the first path of the pathname with the value of the key
        // For example http(s)://domain/<value>/something/else
        pathSegments[1] = await kvsHandle.get(key);
        const newUri = pathSegments.join('/');
        console.log(`${request.uri} -> ${newUri}`)
        request.uri = newUri;
    } catch (err) {
        // No change to the pathname if the key is not found
        console.log(`${request.uri} | ${err}`);
    }
    return request;
}

Now, when I type blog at the beginning of the URL path, the request will actually go to the blog-v1 path. CloudFront will make the HTTP request to the old blog because blog-v1 is the origin path used by the old blog.

For example, if I type https://distribution-domain.cloudfront.net/blog/index.html in a browser, I see the old blog (V1).

Browser screenshot showing blog V1.

In the console, I update the blog key with value blog-v2. I access the same URL after a few seconds, and now I reach the new blog (V2).

Browser screenshot showing blog V2.

As you can see, the public URL is the same, but the content has changed. More generally, this function assumes that URLs do not change between the two blog versions.

I can now add more keys for the different services that are part of my website (blog, support, help, commerce, and so on) and set their values to use the correct URL path for each of them. When I add a new version for one of them (for example, I migrate to a new commerce platform), I can configure a new origin and update the corresponding key to use the new origin path.

This is just an example of the flexibility you get when you separate configuration data from code. If you are already using CloudFront Functions, you can simplify your code by using CloudFront KeyValueStore.

Things to know
CloudFront KeyValueStore is available today in all edge locations globally. With CloudFront KeyValueStore, you pay only for what you use based on the read/write operations from the public API and the read operations from within CloudFront Functions. For more information, see CloudFront pricing.

You can manage a key value store using the AWS Management Console, AWS Command Line Interface (AWS CLI), and AWS SDKs. AWS CloudFormation support is coming soon. The maximum size of a key value store is 5 MB, and you can associate a single key value store to each function. The maximum size of a key is 512 bytes. Values can be up to 1KB in size. When creating a key value store, you can import key/value data during creation using a source file on Amazon S3 with this JSON structure:

{
  "data":[
    {
      "key":"key1",
      "value":"val1"
    },
    {
      "key":"key2",
      "value":"val2"
    }
  ]
}

Importing key/value data at creation can help automate the setup of a new environment (such as test or dev) and easily replicate the configuration from one environment to another (such as preproduction to production).

Simplify the way you add custom logic at the edge using CloudFront KeyValueStore.

Danilo

AWS Weekly Roundup – EC2 DL2q instances, PartyRock, Amplify’s 6th birthday, and more – November 20, 2023

Post Syndicated from Channy Yun original https://aws.amazon.com/blogs/aws/aws-weekly-roundup-ec2-dl2q-instances-partyrock-amplifys-6th-birthday-and-more-november-20-2023/

Last week I saw an astonishing 160+ new service launches. There were so many updates that we decided to publish a weekly roundup again. This continues the same innovative pace of the previous week as we are getting closer to AWS re:Invent 2023.

Our News Blog team is also finalizing new blog posts for re:Invent to introduce awesome launches with service teams for your reading pleasure. Jeff Barr shared The Road to AWS re:Invent 2023 to explain our blogging journey and process. Please stay tuned in the next week!

Last week’s launches
Here are some of the launches that caught my attention last week:

Amazon EC2 DL2q instances – New DL2q instances are powered by Qualcomm AI 100 Standard accelerators and are the first to feature Qualcomm’s AI technology in the public cloud. With eight Qualcomm AI 100 Standard accelerators and 128 GiB of total accelerator memory, you can run popular generative artificial intelligence (AI) applications and extend to edge devices across smartphones, autonomous driving, personal compute, and extended reality headsets to develop and validate these AI workloads before deploying.

PartyRock for Amazon Bedrock – We introduced PartyRock, a fun and intuitive hands-on, generative AI app-building playground powered by Amazon Bedrock. You can experiment, learn all about prompt engineering, build mini-apps, and share them with your friends—all without writing any code or creating an AWS account.

You also can now access the Meta Llama 2 Chat 13B foundation model and Cohere Command Light, Embed English, and multilingual models for Amazon Bedrock.

AWS Amplify celebrates its sixth birthday – We announced six new launches; a new documentation site, support for Next.js 14 with our hosting and JavaScript library, added custom token providers and an automatic React Native social sign-in update to Amplify Auth, new ChangePassword and DeleteUser account settings components, and updated all Amplify UI packages to use new Amplify JavaScript v6. You can also use wildcard subdomains when using a custom domain with your Amplify application deployed to AWS Amplify Hosting.

Amplify docs site UI

Also check out other News Blog posts about major launches published in the past week:

Other AWS service launches
Here are some other bundled feature launches per AWS service:

Amazon Athena  – You can use a new cost-based optimizer (CBO) to enhance query performance based on table and column statistics, collected by AWS Glue Data Catalog and Athena JDBC 3.x driver, a new alternative that supports almost all authentication plugins. You can also use Amazon EMR Studio to develop and run interactive queries on Amazon Athena.

Amazon CloudWatch – You can use a new CloudWatch metric called EBS Stalled I/O Check to monitor the health of your Amazon EBS volumes, the regular expression for Amazon CloudWatch Logs Live Tail filter pattern syntax to search and match relevant log events, observability of SAP Sybase ASE database in CloudWatch Application Insights, and up to two stats commands in a Log Insights query to perform aggregations on the results.

Amazon CodeCatalyst – You can connect to a Amazon Virtual Private Cloud (Amazon VPC) from CodeCatalyst Workflows, provision infrastructure using Terraform within CodeCatalyst Workflows, access CodeCatalyst with your workforce identities configured in IAM Identity Center, and create teams made up of members of the CodeCatalyst space.

Amazon Connect – You can use a pre-built queue performance dashboard and Contact Lens conversational analytics dashboard to view and compare real-time and historical aggregated queue performance. You can use quick responses for chats, previously written formats such as typing in ‘/#greet’ to insert a personalized response, and scanning attachments to detect malware or other unwanted content.

AWS Glue – AWS Glue for Apache Spark added new six database connectors: Teradata, SAP HANA, Azure SQL, Azure Cosmos DB, Vertica, and MongoDB, as well as the native connectivity to Amazon OpenSearch Service.

AWS Lambda – You can see single pane view of metrics, logs, and traces in the AWS Lambda console and advanced logging controls to natively capture logs in JSON structured format. You can view the SAM template on the Lambda console and export the function’s configuration to AWS Application Composer. AWS Lambda also supports Java 21 and NodeJS 20 versions built on the new Amazon Linux 2023 runtime.

AWS Local Zones in Dallas – You can enable the new Local Zone in Dallas, Texas, us-east-1-dfw-2a, with Amazon EC2 C6i, M6i, R6i, C6gn, and M6g instances and Amazon EBS volume types gp2, gp3, io1, sc1, and st1. You can also access Amazon ECS, Amazon EKS, Application Load Balancer, and AWS Direct Connect in this new Local Zone to support a broad set of workloads at the edge.

Amazon Managed Streaming for Apache Kafka (Amazon MSK) – You can standardize access control to Kafka resources using AWS Identity and Access Management (IAM) and build Kafka clients for Amazon MSK Serverless written in all programming languages. These are open source client helper libraries and code samples for popular languages, including Java, Python, Go, and JavaScript. Also, Amazon MSK now supports an enhanced version of Apache Kafka 3.6.0 that offers generally available Tiered Storage and automatically sends you storage capacity alerts when you are at risk of exhausting your storage.

Amazon OpenSearch Service Ingestion – You can migrate your data from Elasticsearch version 7.x clusters to the latest versions of Amazon OpenSearch Service and use persistent buffering to protect the durability of incoming data.

Amazon RDS –Amazon RDS for MySQL now supports creating active-active clusters using the Group Replication plugin, upgrading MySQL 5.7 snapshots to MySQL 8.0, and Innovation Release version of MySQL 8.1.

Amazon RDS Custom for SQL Server extends point-in-time recovery support for up to 1,000 databases, supports Service Master Key Retention to use transparent data encryption (TDE), table- and column-level encryption, DBMail and linked servers, and use SQL Server Developer edition with the bring your own media (BYOM).

Additionally, Amazon RDS Multi-AZ deployments with two readable standbys now supports minor version upgrades and system maintenance updates with typically less than one second of downtime when using Amazon RDS Proxy.

AWS Partner Central – You can use an improved user experience in AWS Partner Central to build and promote your offerings and the new Investments tab in the Partner Analytics Dashboard to gain actionable insights. You can now link accounts and associated users between Partner Central and AWS Marketplace and use an enhanced co-sell experience with APN Customer Engagements (ACE) manager.

Amazon QuickSight – You can programmatically manage user access and custom permissions support for roles to restrict QuickSight functionality to the QuickSight account for IAM Identity Center and Active Directory using APIs. You can also use shared restricted folders, a Contributor role and support for data source asset types in folders and the Custom Week Start feature, an addition designed to enhance the data analysis experience for customers across diverse industries and social contexts.

AWS Trusted Advisor – You can use new APIs to programmatically access Trusted Advisor best practices checks, recommendations, and prioritized recommendations and 37 new Amazon RDS checks that provide best practices guidance by analyzing DB instance configuration, usage, and performance data.

There’s a lot more launch news that I haven’t covered. See AWS What’s New for more details.

See you virtually in AWS re:Invent
AWS re:Invent 2023Next week we’ll hear the latest from AWS, learn from experts, and connect with the global cloud community in Las Vegas. If you come, check out the agenda, session catalog, and attendee guides before your departure.

If you’re not able to attend re:Invent in person this year, we’re offering the option to livestream our Keynotes and Innovation Talks. With the registration for online pass, you will have access to on-demand keynote, Innovation Talks, and selected breakout sessions after the event.

Channy

New – Long-Form voices for Amazon Polly

Post Syndicated from Jeff Barr original https://aws.amazon.com/blogs/aws/new-long-form-voices-for-amazon-polly/

We are launching three new voices for Polly. Powered by a new long-form engine, the voices are natural and expressive, with appropriate pauses, emphasis, and tone.

New Voices
The new long-form voices are perfect for blog posts, news articles, training videos, and marketing content. The underlying Machine Learning model extracts meaning from the text, learning about speech segments, prosody (the pattern of rhythm and pauses), intonation, and other aspects of expressive speech, allowing the synthesized audio to express emotions, especially in dialogs. The new long-form engine uses a deep learning text-to-speech (TTS) model trained to acquire a contextual understanding of the text that allows it to express prosody in an appropriate way. This allows the intention of the story to drive the vocal performance and create the correct emphasis, pauses, and tones of a realistic human voice.

Here are the new voices:

Name Locale Gender Language Sample
Danielle en_US Female English (US)
Gregory en_US Male English (US)
Ruth en_US Female English (US)

Using the New Voices
You can access the new voices using the AWS Management Console, AWS Command Line Interface (AWS CLI), or the AWS SDKs. Using the CLI, I start by listing the voices that use the new long-form engine:

$ aws --region us-east-1 polly describe-voices --output json \
  | jq -r '.Voices[] | select(.SupportedEngines | index("long-form")) | .Name'
Danielle
Gregory
Ruth

I can pick one, or I can try all of them:

for v in `aws polly describe-voices --output json \
          | jq -r '.Voices[] | select(.SupportedEngines | index("long-form")) | .Name'`; do
    Text="Hello my name is $v and I can read blog posts, articles, \
and other long-form content for you. I am the best\!"
    aws polly synthesize-speech --output-format 'mp3' \
    --text "$Text" --voice-id $v $v.mp3 --engine long-form; \
    aws s3 cp $v.mp3 s3://jbarr-voices; \
done

My shell script had a small quoting bug, but the resulting audio was too funny not to include!

Programmatically, you can reproduce my example by writing code that calls the DescribeVoices and SynthesizeSpeech functions.

Things to Know
Here are some interesting things that you should know about the new voices:

Pricing – Long-form voices are priced at $100 per million characters or Speech Marks requests. Check out the Amazon Polly Pricing page to learn more.

Engines & Voices – Some of the voices that I listed above can be used with more than one engine. For example, the Danielle voice can be used with the new long-form engine and the existing neural engine.

Regions – The new engine and voices are available in the US East (N. Virginia) Region.

Check out the new voices, build something awesome, and let me know what you think!

Jeff;

Build AI apps with PartyRock and Amazon Bedrock

Post Syndicated from Jeff Barr original https://aws.amazon.com/blogs/aws/build-ai-apps-with-partyrock-and-amazon-bedrock/

If you are ready to learn more about Generative AI while having fun and building cool stuff, check out PartyRock.aws . You can experiment, learn all about prompt engineering, build mini-apps, and share them with your friends — all without writing any code or creating an AWS account. You can also start with an app that has been shared with you and remix it to further enhance and customize it.

Using PartyRock
To get started, I visit https://partyrock.aws/ , click Sign in, and log in using my Apple, Amazon, or Google account:

After authenticating, I am on the front page of PartyRock. I can review some sample apps, or I can click Build your own app to get started:

I can enter a description of the app that I want to build and use PartyRock’s Generative AI to get a running start, or I can built it myself on a widget-by-widget basis:

I am knee-deep in blog posts for AWS re:Invent right now. While most of my colleagues patiently wait for their draft to be ready, a few of them are impatient and keep asking me (this is the adult version of “Are we there yet?”). While I try to maintain a sense of humor about this, I sometimes get just a bit snarky with them. Let’s see if PartyRock can help. I enter my prompt and click Generate App:

My app (Snarky Patient Blogger) is ready within a few seconds, and I enter some input to see if the output has sufficient snark for my needs:

That looks great, so let’s take it apart and see how it works!

The application (Snarky Patient Blogger) has two widgets: User Input and Snarky Response. I click the Edit icon on the first widget, and see that it has a title, loading text, and a default value. The title allows widgets to reference each other by name:

This simple widget encapsulates a call to the Amazon Bedrock InvokeModel function. The widget specifies the use of the Claude v2 model, and a simple prompt, which references the User Input widget. I can experiment by changing either one, saving the change, and waiting a second or two for the result. For example, changing the model to Claude Instant gives me a slightly different response:

Now I want a visual representation of the reply. I’ll use a Text Generation widget to find the most important nouns in the response, and an Image Generation widget to visualize the results. I add the first widget and use a simple prompt:

I test it by clicking the Retry icon and the output looks perfect:

I add the Image Generation widget, and fiddle with the prompt a bit. After a minute or two I have what I want:

The finished app looks like this:

Once I am happy with the app, I can Make public and Share:

The finished app is at https://partyrock.aws/u/jeffbarr/E-FXPUkO7/Snarky-Patient-Blogger and you are welcome to play with it. You can also log in and click Remix to use it as the starting point for an even better app of your own.

But Wait, There’s More
As is usually the case with my blog posts, I did not have room to show you every last feature in detail. Here are a few that I skipped:

Empty App – I used the App Builder in my example, but I can also choose Start from an Empty App, select my widgets, and set them up as desired:

Remix – I can start with an existing app (mine or another public one) and Remix it to customize or enhance it:

Chatbot Widget – I can interact with my app using a prompt as a starting point:

@ Referencing – I can use the “@” to reference other widgets by name while I am building my app:

Advanced Settings – Some of the widgets offer advanced settings. For example, the Text Generation widget gives me the option to control the Temperature and Top P parameters to the model:

Backstage – The PartyRock Backstage lets me see my apps and my cumulative consumption of PartyRock credits:

Things to Know
Here are a couple of things that you should know about PartyRock:

Pricing – For a limited time, AWS offers new PartyRock users a free trial without the need to provide a credit card or sign up for an AWS account, so that you can begin learning fundamental skills without the worry of incurring costs. You can track your credit consumption in the Backstage, as shown above. Credit usage is calculated based on your input tokens, output tokens, and generated images; for full details read the Billing and Support section of the PartyRock FAQ.

Model Access – We plan to give you access to additional models over time.

In the Works – We are working on even more widgets and features, so stay tuned for more information.

Learning Resources – To learn more, check out these resources:

Party Time
The next step is up to you. Log in to PartyRock, create something cool, and share it with everyone you know. Let me know what you come up with!

Jeff;

New – Amazon EBS Snapshot Lock

Post Syndicated from Jeff Barr original https://aws.amazon.com/blogs/aws/new-amazon-ebs-snapshot-lock/

You can now lock individual Amazon Elastic Block Store (Amazon EBS) snapshots in order to enforce better compliance with your data retention policies. Locked snapshots cannot be deleted until the lock is expired or released, giving you the power to keep critical backups safe from accidental or malicious deletion, including ransomware attacks.

The Need for Locking
AWS customers use EBS snapshots for backups, disaster recovery, data migration, and compliance. Customers in financial services and health care often need to meet specific compliance requirements, with prescribed time frames for retention, and also need to ensure that the snapshots are truly Write Once Read Many (WORM). In order to meet these requirements, customers have implemented solutions that use multiple AWS accounts with one-way “air gaps” between them.

EBS Snapshot Lock
The new EBS Snapshot Lock feature helps you to meet your retention and compliance requirements without the need for custom solutions. You can lock new and existing EBS snapshots using a lock duration that can range from one day to about 100 years. The snapshot is locked for the specified duration and cannot be deleted.

There are two lock modes:

Governance – This mode protects snapshots from deletions by all users. However, with the proper IAM permissions, the lock duration can be extended or shortened, the lock can be deleted, and the mode can be changed from Governance mode to Compliance mode.

Compliance – This mode protects snapshots from actions by the root user and all IAM users. After a cooling-off period of up to 72 hours, neither the snapshot nor the lock can be deleted until the lock duration expires, and the mode cannot be changed. With the proper IAM permissions the lock duration can be extended, but it cannot be shortened.

Snapshots in either mode can still be shared or copied. They can be archived to the low-cost Amazon EBS Snapshots Archive tier, and locks can be applied to snapshots that have already been archived.

Using Snapshot Lock
From the EBS Console I select a snapshot (Snap-Monthly-2023-09) and choose Manage snapshot lock from Snapshot Settings in the Actions menu:

This is a monthly snapshot and I want to lock it for one year. I choose Governance mode and select the duration, then click Save lock settings:

I try to delete it, and the deletion fails, as it should:

Now I would like to lock one of my annual snapshots for 5 years, using Compliance mode this time:

I set my cooling-off period to 24 hours, just in case I change my mind. Perhaps I have to run some kind of audit or final date validation on the snapshot before committing to keeping it around for five years.

Programmatically, I can use new API functions to establish and control locks on my EBS snapshots:

LockSnapshot – Lock a snapshot in governance or compliance mode, or modify the settings of a snapshot that is already locked.

UnlockSnapshot – Unlock a snapshot that is is governance mode, or is in compliance mode but within the cooling-off period.

DescribeLockedSnapshots – Get information about the lock status of my snapshots, with optional filtering based on the state of the lock.

IAM users must have the appropriate permissions (ec2:lockSnapshot, ec2:UnlockSnapshot, and ec2:DescribeLockedSnapshots) in order to use these functions.

Things to Know
Here are a couple of things to keep in mind about this new feature:

AWS BackupAWS Backup independently manages retention for the snapshots that it creates. We do not recommend locking them.

Pricing – There is no extra charge for the use of this feature. You pay the usual rates for storage of snapshots and archived snapshots.

Regions – EBS Snapshot Locking is available in all commercial AWS Regions.

KMS Key Retention – If you are using customer-managed AWS Key Management Service (AWS KMS) keys to encrypt your EBS volumes and snapshots, you need to make sure that the key will remain valid for the lifetime of the snapshot.

Jeff;

New – Multi-account search in AWS Resource Explorer

Post Syndicated from Danilo Poccia original https://aws.amazon.com/blogs/aws/new-multi-account-search-in-aws-resource-explorer/

With AWS Resource Explorer, you can search for and discover your resources, such as Amazon Elastic Compute Cloud (Amazon EC2) instances, Amazon Kinesis data streams, and Amazon DynamoDB tables, across AWS Regions. Starting today, you can also search across accounts within your organization.

It takes just a few minutes to turn on and configure Resource Explorer for an entire organization or a specific organizational unit (OU) and use simple free-form text and filtered searches to find relevant AWS resources across accounts and Regions.

Multi-account search is available in the Resource Explorer console, anywhere in the AWS Management Console through the unified search bar (the search bar at the top of every AWS console page), using the AWS Command Line Interface (AWS CLI), AWS SDKs, or AWS Chatbot. In this way, you can locate a resource quickly, navigate to the appropriate account and service, and take action.

When operating in a well-architected manner, multiple AWS accounts are used to help isolate and manage business applications and data. You can now use Resource Explorer to simplify how you explore your resources across accounts and act on them at scale. For example, Resource Explorer can help you locate impacted resources across your entire organization when investigating increased operational costs, troubleshooting a performance issue, or remediating a security alert.

Let’s see how this works in practice.

Setting up multi-account search
You can set up multi-account search for your organization in four steps:

  1. Enable trusted access for AWS Account Management.
  2. Configure Resource Explorer in every account in the organization or in the OU you want to search through. You can do that in just a few clicks using AWS Systems Manager Quick Setup. Optionally, you can use AWS CloudFormation, or other management tools you are comfortable with.
  3. It is not mandatory, but we suggest creating a delegated admin account for AWS Account Management. Then, to centralize all the required permissions for multi-account creation, we recommend using the delegated admin account to create Resource Explorer multi-account views.
  4. Finally, you can create a multi-account view to start searching across the organization.

Create a multi-account view
I already implemented the first three steps in the previous list. Using the delegated admin account, I go to the Resource Explorer console. There, I choose Views in the Explore resources section and create a view.

I enter a name for the view and select Organization-wide resources visibility. In this way, I can allow visibility of resources located in accounts across my entire organization or in specific OUs. For this view, I select the whole organization.

Console screenshot.

For the Region, I select the one where I have the aggregator index. The aggregator index contains a replicated copy of the local index in every other Region where Resource Explorer has been turned on. Optionally, I can use a filter to limit which resources should be included in this view. I choose to include all resources and additional resource attributes such as tags.

Console screenshot.

Then, I complete the creation of the view. Now, by granting access to the view, I can control who can access what resource information in Resource Explorer.

Using multi-account search
To try the new multi-account view, I choose Resource search from the Explore resources section of the navigation pane. In my query, I want to see if there are Amazon ElastiCache resources for an old version of Redis. I type elasticache:* redis3.2 in the Query field.

Console screenshot.

In the results, I see the different AWS accounts and Regions where these resources are based. For resources in my account, there is a link in the first column that opens that resource in the console. For resources in other accounts, I can use the console with the appropriate account and service to get more information or take action.

Things to know
Multi-account search is available in the following AWS Regions: [[ Regions ]].

There is no additional charge for using AWS Resource Explorer, including for multi-account searches.

To share views with other accounts in an organization, we suggest you use the delegated admin account to create the view with the necessary visibility in terms of resources, Regions, and accounts within the organization and then use AWS Resource Access Manager to share access to the view. For example, you can create a view for a specific OU and then share the view with an account in that OU.

Search for and discover relevant resources across accounts in your organization and across Regions with AWS Resource Explorer.

Danilo

AWS Glue Data Catalog now supports automatic compaction of Apache Iceberg tables

Post Syndicated from Sébastien Stormacq original https://aws.amazon.com/blogs/aws/aws-glue-data-catalog-now-supports-automatic-compaction-of-apache-iceberg-tables/

Today, we’re making available a new capability of AWS Glue Data Catalog to allow automatic compaction of transactional tables in the Apache Iceberg format. This allows you to keep your transactional data lake tables always performant.

Data lakes were initially designed primarily for storing vast amounts of raw, unstructured, or semi structured data at a low cost, and they were commonly associated with big data and analytics use cases. Over time, the number of possible use cases for data lakes has evolved as organizations have recognized the potential to use data lakes for more than just reporting, requiring the inclusion of transactional capabilities to ensure data consistency.

Data lakes also play a pivotal role in data quality, governance, and compliance, particularly as data lakes store increasing volumes of critical business data, which often requires updates or deletion. Data-driven organizations also need to keep their back end analytics systems in near real-time sync with customer applications. This scenario requires transactional capabilities on your data lake to support concurrent writes and reads without data integrity compromise. Finally, data lakes now serve as integration points, necessitating transactions for safe and reliable data movement between various sources.

To support transactional semantics on data lake tables, organizations adopted an open table format (OTF), such as Apache Iceberg. Adopting OTF formats comes with its own set of challenges: transforming existing data lake tables from Parquet or Avro formats to an OTF format, managing a large number of small files as each transaction generates a new file on Amazon Simple Storage Service (Amazon S3), or managing object and meta-data versioning at scale, just to name a few. Organizations are typically building and managing their own data pipelines to address these challenges, leading to additional undifferentiated work on infrastructure. You need to write code, deploy Spark clusters to run your code, scale the cluster, manage errors, and so on.

When talking with our customers, we learned that the most challenging aspect is the compaction of individual small files produced by each transactional write on tables into a few large files. Large files are faster to read and scan, making your analytics jobs and queries faster to execute. Compaction optimizes the table storage with larger-sized files. It changes the storage for the table from a large number of small files to a small number of larger files. It reduces metadata overhead, lowers network round trips to S3, and improves performance. When you use engines that charge for the compute, the performance improvement is also beneficial to the cost of usage as the queries require less compute capacity to run.

But building custom pipelines to compact and optimize Iceberg tables is time-consuming and expensive. You have to manage the planning, provision infrastructure, and schedule and monitor the compaction jobs. This is why we launch automatic compaction today.

Let’s see how it works
To show you how to enable and monitor automatic compaction on Iceberg tables, I start from the AWS Lake Formation page or the AWS Glue page of the AWS Management Console. I have an existing database with tables in the Iceberg format. I execute transactions on this table over the course of a couple of days, and the table starts to fragment into small files on the underlying S3 bucket.

List of Iceberg table on Lake Formation console

I select the table on which I want to enable compaction, and then I select Enable compaction.

View details of a table in lake formation

An IAM role is required to pass permissions to the Lake Formation service to access my AWS Glue tables, S3 buckets, and CloudWatch log streams. Either I choose to create a new IAM role, or I select an existing one. Your existing role must have lakeformation:GetDataAccess and glue:UpdateTable permissions on the table. The role also needs logs:CreateLogGroup, logs:CreateLogStream, logs:PutLogEvents, to “arn:aws:logs:*:your_account_id:log-group:/aws-lakeformation-acceleration/compaction/logs:*“. The role trusted permission service name must be set to glue.amazonaws.com.

Then, I select Turn on compaction. Et voilà! Compaction is automatic; there is nothing to manage on your side.

The service starts to measure the table’s rate of change. As Iceberg tables can have multiple partitions, the service calculates this change rate for each partition and schedules managed jobs to compact the partitions where this rate of change breaches a threshold value.

When the table accumulates a high number of changes, you will be able to view the Compaction history under the Optimization tab in the console.

Lake formation compaction history in the console

You can also monitor the whole process either by observing the number of files on your S3 bucket (use the NumberOfObjects metric) or one of the two new Lake Formation metrics: numberOfBytesCompacted or numberOfFilesCompacted.

Iceberg table compaction metrics in the cloudwatch console

In addition to the AWS console, there are six new APIs that expose this new capability:CreateTableOptimizer, BatchGetTableOptimizer , UpdateTableOptimizer, DeleteTableOptimizer, GetTableOptimizer, and ListTableOptimizerRuns. These APIs are available in the AWS SDKs and AWS Command Line Interface (AWS CLI). As usual, don’t forget to update the SDK or the CLI to their latest versions to get access to these new APIs.

Things to know
As we launched this new capability today, there are a couple of additional points I’d like to share with you:

Availability
This new capability is available starting today in all AWS Regions where AWS Glue Data Catalog is available.

The pricing metric is the data processing unit (DPU), a relative measure of processing power that consists of 4 vCPUs of compute capacity and 16 GB of memory. There is a charge per DPU/hours metered by second, with a minimum of one minute.

Now it’s time to decommission your existing compaction data pipeline and switch to this new, entirely managed capability today.

— seb

Meet the final cohort of AWS Heroes this year – November 2023

Post Syndicated from Taylor Jacobsen original https://aws.amazon.com/blogs/aws/meet-the-final-cohort-of-aws-heroes-this-year-november-2023/

As 2023 comes to an end, we’re celebrating our final Heroes cohort launch of the year! These technical experts are passionate about helping their local communities build faster on AWS—they’re focused on sharing best practices, solving problems, and even more. We’re thrilled to have them join the AWS Heroes program, and recognizing them for their contributions to the greater AWS community.

Please meet our newest Heroes!

Emin Alemdar – Izmir, Turkey

Container Hero Emin Alemdar is a Solutions Architect at Spacelift where he produces solutions related to Kubernetes, Cloud technologies, and Cloud Native Transformation. In general, his work focuses on these services and technologies, and he shares best practices with the AWS community. Additionally, Emin is a CNCF Ambassador and is part of the HashiCorp Ambassador Program within the open source community.

Richard Fan – Hong Kong

Security Hero Richard Fan is a Security Engineer at ExpressVPN. He is dedicated to helping builders easily adopt AWS, and shares best practices around streamlines for cloud governance. Richard has also developed different tools to simplify the experience with AWS security services, such as his nitro-enclave-python-demo project, which helps builders get started on AWS Nitro Enclaves and has been adopted by some AWS workshops. Furthermore, Richard promotes the concept and use cases of enclave technology by partnering with multiple companies to review their AWS Nitro Enclaves offering.

Takuya Tachibana – Misawa, Japan

Community Hero Takuya Tachibana is the CEO of Heptagon inc. and Director of DigitalCube Co. Ltd. Since 2012, he has been contributing to the Japan AWS User Group (JAWS-UG), and he was the leader from 2016-2017 for all of the JAWS-UGs, representing and overseeing every chapter in Japan. Tachibana has been a speaker at over 100 community and cloud events throughout all of Japan, including AWS Summit Seoul, AWS Summit Beijing, and AWS Community Day APAC.

Learn More

To learn more about the AWS Heroes program or to connect with a Hero near you, please visit the AWS Heroes website.

Taylor

Amazon Bedrock now provides access to Meta’s Llama 2 Chat 13B model

Post Syndicated from Sébastien Stormacq original https://aws.amazon.com/blogs/aws/amazon-bedrock-now-provides-access-to-llama-2-chat-13b-model/

Today, we’re announcing the availability of Meta’s Llama 2 Chat 13B large language model (LLM) on Amazon Bedrock. With this launch, Amazon Bedrock becomes the first public cloud service to offer a fully managed API for Llama 2, Meta’s next-generation LLM. Now, organizations of all sizes can access Llama 2 Chat models on Amazon Bedrock without having to manage the underlying infrastructure. This is a step change in accessibility.

Amazon Bedrock is a fully managed service that offers a choice of high-performing foundation models (FMs) from leading AI companies, including AI21 Labs, Anthropic, Cohere, Stability AI, Amazon, and now Meta, along with a broad set of capabilities to build generative AI applications, simplifying the development while maintaining privacy and security. You can read more about Amazon Bedrock in Antje’s post here.

Llama 2 is a family of publicly available LLMs by Meta. The Llama 2 base model was pre-trained on 2 trillion tokens from online public data sources. According to Meta, the training of Llama 2 13B consumed 184,320 GPU/hour. That’s the equivalent of 21.04 years of a single GPU, not accounting for bissextile years.

Built on top of the base model, the Llama 2 Chat model is optimized for dialog use cases. It is fine-tuned with over 1 million human annotations (a technique known as reinforcement learning from human feedback or RLHF) and has undergone testing by Meta to identify performance gaps and mitigate potentially problematic responses in chat use cases, such as offensive or inappropriate responses.

To promote a responsible, collaborative AI innovation ecosystem, Meta established a range of resources for all who use Llama 2: individuals, creators, developers, researchers, academics, and businesses of any size. In particular, I like the Meta Responsible Use Guide, a resource for developers that provides best practices and considerations for building products powered by LLMs in a responsible manner, covering various stages of development from inception to deployment. This guide fits well in the set of AWS tools and resources to build AI responsibly.

You can now integrate the LLama 2 Chat model in your applications written in any programming language by calling the Amazon Bedrock API or using the AWS SDKs or the AWS Command Line Interface (AWS CLI).

Llama 2 Chat in action
Those of you who read the AWS News blog regularly know we like to show you the technologies we write about. So let’s write code to interact with Llama2.

I was lucky enough to talk at the AWS UG Perú Conf a few weeks ago. Jeff and Marcia were there too. Jeff opened the conference with an inspiring talk about generative AI, and he used a wall of generated images of llamas, the emblematic animal from Perú. So what better subject to talk about with Llama 2 Chat than llamas?

(And before writing code, I can’t resist sharing two photos of llamas I took during my visit to Machu Picchu)

A white llama at Machu Picchu A brown llama at Machu Picchu

To get started with a new model on Bedrock, I first navigate to Amazon Bedrock on the console. I select Model access on the bottom left pane, then select the Edit button on the top right side, and enable access to the Llama 2 Chat model.

Bedrock Llama2 Grant Access

In the left navigation bar, under Playgrounds, I select Chat to interact with the model without writing any code.

Bedrock chat playground for llama2

Now that I know I can access the model, I open a code editor on my laptop. I assume you have the AWS Command Line Interface (AWS CLI) configured, which will allow the AWS SDK to locate your AWS credentials. I use Python for this demo, but I want to show that Bedrock can be called from any language. I also share a public gist with the same code sample written in the Swift programming language.

Returning to Python, I first run the ListFoundationModels API call to discover the modelId for Llama 2 Chat 13B.

import boto3

bedrock = boto3.client(service_name='bedrock', region_name='us-east-1')
listModels = bedrock.list_foundation_models(byProvider='meta')
print("\n".join(list(map(lambda x: f"{x['modelName']} : { x['modelId'] }", listModels['modelSummaries']))))

Running this code produces the list:

Llama 2 Chat 13B : meta.llama2-13b-chat-v1

I select meta-llama2-chat-13b model ID and write the code to send a prompt to the LLama 2 Chat 13B model.

import boto3
import json

llamaModelId = 'meta.llama2-13b-chat-v1' 
prompt = "What is the difference between a llama and an alpaca?"

llamaPayload = json.dumps({ 
	'prompt': prompt,
    'max_gen_len': 512,
	'top_p': 0.9,
	'temperature': 0.2
})

bedrock_runtime = boto3.client(
    service_name='bedrock-runtime', 
    region_name='us-east-1'
)
response = bedrock_runtime.invoke_model(
    body=llamaPayload, 
    modelId=llamaModelId, 
    accept='application/json', 
    contentType='application/json'
)
body = response.get('body').read().decode('utf-8')
response_body = json.loads(body)
print(response_body['generation'].strip())

The response is printed:

Llamas and alpacas are both members of the camelid family, 
but they are different species with distinct physical and behavioral characteristics. 
Here are some of the main differences: (...)

I redacted the answer for brevity.

You can tune the different request parameters to see how they influence the response.

Optimizing your prompts
To get the best results out of the Llama 2 Chat model, you can experiment with a couple of prompt engineering techniques, such as using roles or chain-of-thought prompts.

Using roles, you tell the model how to behave by giving it a role and instructions before asking your question. For example:

Prompt: You are a teacher. You explain things for six-year old kids.
What is the difference between a llama and an alpaca?

Answer: Great question! Both llamas and alpacas are animals that live in South America, and they look a little bit similar. But there are some differences that we can talk about.
First, let's talk about their fur. Llamas have longer fur than alpacas. It's like they have a big, fluffy coat that helps them stay warm in the cold weather. Alpacas, on the other hand, have shorter fur that's a little bit smoother.
Another difference is their ears. Llamas have banana-shaped ears that are really big, while alpacas have small, triangular ears.
Finally, let's talk about their size. Llamas are generally bigger than alpacas. They can grow up to 6 feet tall and weigh a lot, while alpacas are usually smaller, only growing up to 3 feet tall.
So, those are some of the main differences between llamas and alpacas. They're both really cool animals, and it's fun to learn about them!

With chain-of-thought prompts, you ask the model to explain each step that led to the answer. For example:

Prompt: You are a a very intelligent bot with exceptional critical thinking.
I went to the market and bought 10 apples. I gave 2 apples to your friend and 2 to the helper. I then went and bought 5 more apples and ate 1. How many apples did I remain with?
Let's think step by step.

Answer:
1. You went to the market and bought 10 apples.
2. You gave 2 apples to your friend.
3. You gave 2 apples to the helper.
4. You went back to the market and bought 5 more apples.
5. You ate 1 apple.
Now, let's count how many apples you have:
10 apples (from the first trip to the market) - 2 apples (given to your friend) - 2 apples (given to the helper) = 6 apples
6 apples + 5 apples (from the second trip to the market) = 11 apples
11 apples - 1 apple (that you ate) = 10 apples
Therefore, you remain with 10 apples.
I hope this helps! Do you have any more questions or would you like to play again?

Meta shared more examples in section 4.2 of their getting to know Llama notebook.

Availability
The Llama 2 Chat model is available today for all AWS customers in two of the AWS Regions where Bedrock is available: US East (N. Virginia) and US West (Oregon).

You will be charged for model inference. You can choose to be charged on a pay-as-you-go basis, with no upfront or recurring fees; AWS charges per processed input and output tokens. Or you can provision sufficient throughput to meet your application’s performance requirements in exchange for a time-based term commitment. The Bedrock pricing page has the details.

With this information, you’re prepared to start using Amazon Bedrock and the Llama 2 Chat model in your applications.

Go build!

— seb

Amazon Bedrock now provides access to Cohere Command Light and Cohere Embed English and multilingual models

Post Syndicated from Sébastien Stormacq original https://aws.amazon.com/blogs/aws/amazon-bedrock-now-provides-access-to-cohere-command-light-and-cohere-embed-english-and-multilingual-models/

Cohere provides text generation and representation models powering business applications to generate text, summarize, search, cluster, classify, and utilize Retrieval Augmented Generation (RAG). Today, we’re announcing the availability of Cohere Command Light and Cohere Embed English and multilingual models on Amazon Bedrock. They’re joining the already available Cohere Command model.

Amazon Bedrock is a fully managed service that offers a choice of high-performing foundation models (FMs) from leading AI companies, including AI21 Labs, Anthropic, Cohere, Meta, Stability AI, and Amazon, along with a broad set of capabilities to build generative AI applications, simplifying the development while maintaining privacy and security. With this launch, Amazon Bedrock further expands the breadth of model choices to help you build and scale enterprise-ready generative AI. You can read more about Amazon Bedrock in Antje’s post here.

Command is Cohere’s flagship text generation model. It is trained to follow user commands and to be useful in business applications. Embed is a set of models trained to produce high-quality embeddings from text documents.

Embeddings are one of the most fascinating concepts in machine learning (ML). They are central to many applications that process natural language, recommendations, and search algorithms. Given any type of document, text, image, video, or sound, it is possible to transform it into a suite of numbers, known as a vector. Embeddings refer specifically to the technique of representing data as vectors in such a way that it captures meaningful information, semantic relationships, or contextual characteristics. In simple terms, embeddings are useful because the vectors representing similar documents are “close” to each other. In more formal terms, embeddings translate semantic similarity as perceived by humans to proximity in a vector space. Embeddings are typically generated through training algorithms or models.

Cohere Embed is a family of models trained to generate embeddings from text documents. Cohere Embed comes in two forms, an English language model and a multilingual model, both of which are now available in Amazon Bedrock.

There are three main use cases for text embeddings:

Semantic searches – Embeddings enable searching collections of documents by meaning, which leads to search systems that better incorporate context and user intent compared to existing keyword-matching systems.

Text Classification – Build systems that automatically categorize text and take action based on the type. For example, an email filtering system might decide to route one message to sales and escalate another message to tier-two support.

Retrieval Augmented Generation (RAG) – Improve the quality of a large language model (LLM) text generation by augmenting your prompts with data provided in context. The external data used to augment your prompts can come from multiple data sources, such as document repositories, databases, or APIs.

Imagine you have hundreds of documents describing your company policies. Due to the limited size of prompts accepted by LLMs, you have to select relevant parts of these documents to be included as context into prompts. The solution is to transform all your documents into embeddings and store them in a vector database, such as OpenSearch.

When a user wants to query this corpus of documents, you transform the user’s natural language query into a vector and perform a similarity search on the vector database to find the most relevant documents for this query. Then, you embed (pun intended) the original query from the user and the relevant documents surfaced by the vector database together in a prompt for the LLM. Including relevant documents in the context of the prompt helps the LLM generate more accurate and relevant answers.

You can now integrate Cohere Command Light and Embed models in your applications written in any programming language by calling the Bedrock API or using the AWS SDKs or the AWS Command Line Interface (AWS CLI).

Cohere Embed in action
Those of you who regularly read the AWS News Blog know we like to show you the technologies we write about.

We’re launching three distinct models today: Cohere Command Light, Cohere Embed English, and Cohere Embed multilingual. Writing code to invoke Cohere Command Light is no different than for Cohere Command, which is already part of Amazon Bedrock. So for this example, I decided to show you how to write code to interact with Cohere Embed and review how to use the embedding it generates.

To get started with a new model on Bedrock, I first navigate to the AWS Management Console and open the Bedrock page. Then, I select Model access on the bottom left pane. Then I select the Edit button on the top right side, and I enable access to the Cohere model.

Bedrock - model activation with Cohere models

Now that I know I can access the model, I open a code editor on my laptop. I assume you have the AWS Command Line Interface (AWS CLI) configured, which will allow the AWS SDK to locate your AWS credentials. I use Python for this demo, but I want to show that Bedrock can be called from any language. I also share a public gist with the same code sample written in the Swift programming language.

Back to Python, I first run the ListFoundationModels API call to discover the modelId for Cohere Embed.

import boto3
import json
import numpy

bedrock = boto3.client(service_name='bedrock', region_name='us-east-1')

listModels = bedrock.list_foundation_models(byProvider='cohere')
print("\n".join(list(map(lambda x: f"{x['modelName']} : { x['modelId'] }", listModels['modelSummaries']))))

Running this code produces the list:

Command : cohere.command-text-v14
Command Light : cohere.command-light-text-v14
Embed English : cohere.embed-english-v3
Embed Multilingual : cohere.embed-multilingual-v3

I select cohere.embed-english-v3 model ID and write the code to transform a text document into an embedding.

cohereModelId = 'cohere.embed-english-v3'

# For the list of parameters and their possible values, 
# check Cohere's API documentation at https://docs.cohere.com/reference/embed

coherePayload = json.dumps({
     'texts': ["This is a test document", "This is another document"],
     'input_type': 'search_document',
     'truncate': 'NONE'
})

bedrock_runtime = boto3.client(
    service_name='bedrock-runtime', 
    region_name='us-east-1'
)
print("\nInvoking Cohere Embed...")
response = bedrock_runtime.invoke_model(
    body=coherePayload, 
    modelId=cohereModelId, 
    accept='application/json', 
    contentType='application/json'
)

body = response.get('body').read().decode('utf-8')
response_body = json.loads(body)
print(np.array(response_body['embeddings']))

The response is printed

[ 1.234375 -0.63671875 -0.28515625 ... 0.38085938 -1.2265625 0.22363281]

Now that I have the embedding, the next step depends on my application. I can store this embedding in a vector store or use it to search similar documents in an existing store, and so on.

To learn more, I highly recommend following the hands-on instructions provided by this section of the Amazon Bedrock workshop. This is an end-to-end example of RAG. It demonstrates how to load documents, generate embeddings, store the embeddings in a vector store, perform a similarity search, and use relevant documents in a prompt sent to an LLM.

Availability
The Cohere Embed models are available today for all AWS customers in two of the AWS Regions where Amazon Bedrock is available: US East (N. Virginia) and US West (Oregon).

AWS charges for model inference. For Command Light, AWS charges per processed input or output token. For Embed models, AWS charges per input tokens. You can choose to be charged on a pay-as-you-go basis, with no upfront or recurring fees. You can also provision sufficient throughput to meet your application’s performance requirements in exchange for a time-based term commitment. The Amazon Bedrock pricing page has the details.

With this information, you’re ready to use text embeddings with Amazon Bedrock and the Cohere Embed models in your applications.

Go build!

— seb

AWS Weekly Roundup – CloudFront security dashboard, EBS snapshots improvements, and more – November 13, 2023

Post Syndicated from Danilo Poccia original https://aws.amazon.com/blogs/aws/aws-weekly-roundup-cloudfront-security-dashboard-ebs-snapshots-improvements-and-more-november-13-2023/

This week, it was really difficult to choose what to recap here because, as we’re getting closer to AWS re:Invent, service teams are delivering new capabilities at an incredible pace.

Last week’s launches
Here are some of the launches that caught my attention last week:

Amazon Aurora – Aurora MySQL zero-ETL integration with Amazon Redshift is now generally available. Get a walk-through in our AWS News Blog post. Here’s a recap of data integration innovations at AWS. Optimized reads for Aurora PostgreSQL provide up to 8x improved query latency and up to 30 percent cost savings for I/O-intensive applications. Here’s more of a deep dive from the AWS Database Blog.

Amazon EBS – You can now block public sharing of EBS snapshots. Read more about how that works in the launch post.

Amazon Data Lifecycle Manager – Support for pre- and post-script automation of EBS snapshots simplifies application-consistent snapshots. Here’s how to use it with Windows applications.

AWS Health – There’s now improved visibility into planned lifecycle events like end of standard support of a Kubernetes version in Amazon EKS, Amazon RDS certificate rotations, and end of support for other open source software. Here’s how it works.

Amazon CloudFront – Unified security dashboard to enable, monitor, and manage common security protections for your web applications directly from the CloudFront console. Read more at Introducing CloudFront Security Dashboard, a Unified CDN and Security Experience.

Amazon Connect – Reduced outbound telephony pricing across Europe and South America. It’s also easier now to deliver persistent chat experiences for end users.

AWS Lambda – Busy week for the Lambda team! There is now support for Amazon Linux 2023 as both a managed runtime and a container base image. More details in this Compute Blog post. There’s also enhanced auto scaling for Kafka event sources (the Compute Blog has a post with more details) and faster polling scale-up rate for Amazon SQS events when AWS Lambda functions are configured with SQS.

AWS CodeBuild – Now supports AWS Lambda compute to build and test software packages. Read about how it works in this post.

Amazon SQS – Now supports JSON protocol to reduce latency and client-side CPU usage. More in the launch post. There’s also a new integration for Amazon SQS in the Amazon EventBridge Pipes console (the week before that, Amazon Kinesis Data Streams was also integrated into the EventBridge Pipes console).

Amazon SNS –  FIFO topics now support 3,000 messages per second by default.

Amazon EventBridge – There are 22 additional Amazon CloudWatch metrics to help you monitor the performance of your event buses. More info in this post from the AWS Compute Blog.

Amazon OpenSearch ServiceNeural search makes it easier to create and manage semantic search applications.

Amazon Timestream – The UNLOAD statement simplifies exporting time-series data for additional insights.

Amazon Comprehend – New trust and safety features with toxicity detection and prompt safety classification. Read how to apply that to generative AI applications using LangChain.

AWS App Runner – Now available in London, Mumbai, and Paris AWS Regions.

AWS Application Migration Service – Support for AWS App2Container replatforming  of .NET and Java based applications.

Amazon FSx for OpenZFS – Now available in ten additional AWS Regions with support for additional deployment types in seven Regions.

AWS Global Accelerator – There’s now IPv6 support for Network Load Balancer (NLB) endpoints. It was already available for Application Load Balancers (ALBs) and Amazon Elastic Compute Cloud (Amazon EC2) instances.

Amazon GuardDuty – New machine learning (ML) capability enhances threat detection for Amazon EKS.

Other AWS news
Some other news and blog posts that you might have missed:

AWS Local Zones Credit Program – If you have low-latency or data residency requirements for your application, our Local Zones Credit Program can get you started. Fill out our form to receive $500 in AWS credits and apply it to a Local Zones workload.

Amazon CodeWhispererCustomizing coding companions for organizations and optimizing for sustainability.

Sharing what we have learned – Creating a correction of errors document to understand what went wrong and what would be done to prevent it from happening again.

Good tips for containers – Securing API endpoints using Amazon API Gateway and Amazon VPC Lattice.

Another post in this amazing series – Let’s Architect! Tools for developers.

A few highlights from Community.AWS:

Don’t miss the latest AWS open source newsletter by my colleague Ricardo.

Upcoming AWS events
Check your calendars and sign up for these AWS events:

AWS Community Days – Join a community-led conference run by AWS user group leaders in your region: Uruguay (November 14), Central Asia (Kazakhstan, Uzbekistan, Kyrgyzstan, and Mongolia on November 17–18), and Guatemala (November 18).

AWS re:Invent (November 27 – December 1) – Join us to hear the latest from AWS, learn from experts, and connect with the global cloud community. Browse the session catalog and attendee guides and check out the highlights for generative AI. In the AWS re:Invent Builder Hub you can find developer-focused sessions, events, competitions, and content.

Here you can browse all upcoming AWS-led in-person and virtual events and developer-focused events.

And that’s all from me for this week. We’re now taking a break. The next weekly roundup will be after re:Invent!

Danilo

This post is part of our Weekly Roundup series. Check back for a quick roundup of interesting news and announcements from AWS!

New for Amazon SQS – Update the AWS SDK to reduce latency

Post Syndicated from Danilo Poccia original https://aws.amazon.com/blogs/aws/new-for-amazon-sqs-update-the-aws-sdk-to-reduce-latency/

With Amazon SQS, you can send and receive messages between software components at any scale. It was one of the first AWS services I used and as a Solutions Architect, I helped many customers take advantage of asynchronous communications using message queues. In fact, Amazon SQS has been generally available since July 2006 and, under the hood, has always used the same wire protocol based on XML that we call AWS Query protocol.

Today, I am happy to announce that Amazon SQS now supports a JSON-based wire protocol for all APIs. The AWS JSON protocol avoids many of the shortcomings of AWS Query protocol.

AWS JSON is more efficient than the previous XML-based protocol and can reduce both latency and client-side CPU usage when sending and receiving SQS messages. For example, for a request that sends a simple “hello world” message, the response body size using the old AWS Query protocol is about 400 bytes. The content length of the same SendMessage response using the new AWS JSON protocol is less than 1/3 of the previous size.

Using the New JSON-Based Protocol with Amazon SQS
This is the nicest part of this launch! To benefit from the AWS JSON protocol, you just need to update the AWS SDK to the latest version. While building this new capability, the SQS team was careful so that no code changes are needed to use the new JSON-based wire protocol.

For example, we ran a benchmark using the AWS SDK for Java to compare the old and new wire protocols. We expect similar results from the other AWS SDKs. Based on AWS performance tests for a 5KB message payload, JSON protocol for Amazon SQS reduces end-to-end message processing latency by up to 23 percent and reduces application client side CPU and memory usage. These numbers depend on the actual implementation and can differ from what you’ll see for your own applications.

Availability and Pricing
Amazon SQS support for the new JSON protocol is available today in all AWS Regions where SQS is offered. All generally available AWS SDKs now support AWS JSON for SQS APIs. To get the benefits of this optimization, you just need to update the AWS SDK to the latest version available.

There is no change in pricing when using the AWS JSON protocol. For more information, see Amazon SQS pricing.

If you’re interested in more details on how AWS protocols work, you can have a look at Smithy, the language we use at AWS for defining services and SDKs.

After almost 17 years of being generally available, we’re improving and innovating around our oldest service. Just a few months back, we introduced server-side encryption with Amazon SQS-managed encryption keys (SSE-SQS) by default for newly created queues, increased the default quota for high throughput mode for FIFO queues, and announced support for attribute-based access control (ABAC) using queue tags. More recently, Amazon SQS added new APIs to manage dead-letter queue (DLQ) redrive programmatically. At AWS, it’s always day 1!

Update the AWS SDK to improve CPU and memory usage and reduce latency when using Amazon SQS.

Danilo

New for Amazon Comprehend – Toxicity Detection

Post Syndicated from Danilo Poccia original https://aws.amazon.com/blogs/aws/new-for-amazon-comprehend-toxicity-detection/

With Amazon Comprehend, you can extract insights from text without being a machine learning expert. Using its built-in models, Comprehend can analyze the syntax of your input documents and find entities, events, key phrases, personally identifiable information (PII), and the overall sentiment or sentiments associated with specific entities (such as brands or products).

Today, we are adding the capability to detect toxic content. This new capability helps you build safer environments for your end users. For example, you can use toxicity detection to improve the safety of applications open to external contributions such as comments. When using generative AI, toxicity detection can be used to check the input prompts and the output responses from large language models (LLMs).

You can use toxicity detection with the AWS Command Line Interface (AWS CLI) and AWS SDKs. Let’s see how this works in practice with a few examples using the AWS CLI, an AWS SDK, and to check the use of an LLM.

Using Amazon Comprehend Toxicity Detection with AWS CLI
The new detect-toxic-content subcommand in the AWS CLI detects toxicity in text. The output contains a list of labels, one for each text segment in input. For each text segment, a list is provided with the labels and a score (between 0 and 1).

Amazon Comprehend toxicity detection API

For example, this AWS CLI command analyzes one text segment and returns one Labels section and an overall Toxicity score for the segment between o and 1:

aws comprehend detect-toxic-content --language-code en --text-segments Text="'Good morning, it\'s a beautiful day.'"
{
    "ResultList": [
        {
            "Labels": [
                {
                    "Name": "PROFANITY",
                    "Score": 0.00039999998989515007
                },
                {
                    "Name": "HATE_SPEECH",
                    "Score": 0.01510000042617321
                },
                {
                    "Name": "INSULT",
                    "Score": 0.004699999932199717
                },
                {
                    "Name": "GRAPHIC",
                    "Score": 9.999999747378752e-05
                },
                {
                    "Name": "HARASSMENT_OR_ABUSE",
                    "Score": 0.0006000000284984708
                },
                {
                    "Name": "SEXUAL",
                    "Score": 0.03889999911189079
                },
                {
                    "Name": "VIOLENCE_OR_THREAT",
                    "Score": 0.016899999231100082
                }
            ],
            "Toxicity": 0.012299999594688416
        }
    ]
}

As expected, all scores are close to zero, and no toxicity was detected in this text.

To pass input as a file, I first use the AWS CLI --generate-cli-skeleton option to generate a skeleton of the JSON syntax used by the detect-toxic-content command:

aws comprehend detect-toxic-content --generate-cli-skeleton
{
    "TextSegments": [
        {
            "Text": ""
        }
    ],
    "LanguageCode": "en"
}

I write the output to a file and add three text segments (I will not show here the text used to show what happens with toxic content). This time, different levels of toxicity content has been found. Each Labels section is related to the corresponding input text segment.

aws comprehend detect-toxic-content --cli-input-json file://input.json
{
    "ResultList": [
        {
            "Labels": [
                {
                    "Name": "PROFANITY",
                    "Score": 0.03020000085234642
                },
                {
                    "Name": "HATE_SPEECH",
                    "Score": 0.12549999356269836
                },
                {
                    "Name": "INSULT",
                    "Score": 0.0738999992609024
                },
                {
                    "Name": "GRAPHIC",
                    "Score": 0.024399999529123306
                },
                {
                    "Name": "HARASSMENT_OR_ABUSE",
                    "Score": 0.09510000050067902
                },
                {
                    "Name": "SEXUAL",
                    "Score": 0.023900000378489494
                },
                {
                    "Name": "VIOLENCE_OR_THREAT",
                    "Score": 0.15549999475479126
                }
            ],
            "Toxicity": 0.06650000065565109
        },
        {
            "Labels": [
                {
                    "Name": "PROFANITY",
                    "Score": 0.03400000184774399
                },
                {
                    "Name": "HATE_SPEECH",
                    "Score": 0.2676999866962433
                },
                {
                    "Name": "INSULT",
                    "Score": 0.1981000006198883
                },
                {
                    "Name": "GRAPHIC",
                    "Score": 0.03139999881386757
                },
                {
                    "Name": "HARASSMENT_OR_ABUSE",
                    "Score": 0.1777999997138977
                },
                {
                    "Name": "SEXUAL",
                    "Score": 0.013000000268220901
                },
                {
                    "Name": "VIOLENCE_OR_THREAT",
                    "Score": 0.8395000100135803
                }
            ],
            "Toxicity": 0.41280001401901245
        },
        {
            "Labels": [
                {
                    "Name": "PROFANITY",
                    "Score": 0.9997000098228455
                },
                {
                    "Name": "HATE_SPEECH",
                    "Score": 0.39469999074935913
                },
                {
                    "Name": "INSULT",
                    "Score": 0.9265999794006348
                },
                {
                    "Name": "GRAPHIC",
                    "Score": 0.04650000110268593
                },
                {
                    "Name": "HARASSMENT_OR_ABUSE",
                    "Score": 0.4203999936580658
                },
                {
                    "Name": "SEXUAL",
                    "Score": 0.3353999853134155
                },
                {
                    "Name": "VIOLENCE_OR_THREAT",
                    "Score": 0.12409999966621399
                }
            ],
            "Toxicity": 0.8180999755859375
        }
    ]
}

Using Amazon Comprehend Toxicity Detection with AWS SDKs
Similar to what I did with the AWS CLI, I can use an AWS SDK to programmatically detect toxicity in my applications. The following Python script uses the AWS SDK for Python (Boto3) to detect toxicity in the text segments and print the labels if the score is greater than a specified threshold. In the code, I redacted the content of the second and third text segments and replaced it with ***.

import boto3

comprehend = boto3.client('comprehend')

THRESHOLD = 0.2
response = comprehend.detect_toxic_content(
    TextSegments=[
        {
            "Text": "You can go through the door go, he's waiting for you on the right."
        },
        {
            "Text": "***"
        },
        {
            "Text": "***"
        }
    ],
    LanguageCode='en'
)

result_list = response['ResultList']

for i, result in enumerate(result_list):
    labels = result['Labels']
    detected = [ l for l in labels if l['Score'] > THRESHOLD ]
    if len(detected) > 0:
        print("Text segment {}".format(i + 1))
        for d in detected:
            print("{} score {:.2f}".format(d['Name'], d['Score']))

I run the Python script. The output contains the labels and the scores detected in the second and third text segments. No toxicity is detected in the first text segment.

Text segment 2
HATE_SPEECH score 0.27
VIOLENCE_OR_THREAT score 0.84
Text segment 3
PROFANITY score 1.00
HATE_SPEECH score 0.39
INSULT score 0.93
HARASSMENT_OR_ABUSE score 0.42
SEXUAL score 0.34

Using Amazon Comprehend Toxicity Detection with LLMs
I deployed the Mistral 7B model using Amazon SageMaker JumpStart as described in this blog post.

To avoid toxicity in the responses of the model, I built a Python script with three functions:

  • query_endpoint invokes the Mistral 7B model using the endpoint deployed by SageMaker JumpStart.
  • check_toxicity uses Comprehend to detect toxicity in a text and return a list of the detected labels.
  • avoid_toxicity takes in input a list of the detected labels and returns a message describing what to do to avoid toxicity.

The query to the LLM goes through only if no toxicity is detected in the input prompt. Then, the response from the LLM is printed only if no toxicity is detected in output. In case toxicity is detected, the script provides suggestions on how to fix the input prompt.

Here’s the code of the Python script:

import json
import boto3

comprehend = boto3.client('comprehend')
sagemaker_runtime = boto3.client("runtime.sagemaker")

ENDPOINT_NAME = "<REPLACE_WITH_YOUR_SAGEMAKER_JUMPSTART_ENDPOINT>"
THRESHOLD = 0.2


def query_endpoint(prompt):
    payload = {
        "inputs": prompt,
        "parameters": {
            "max_new_tokens": 68,
            "no_repeat_ngram_size": 3,
        },
    }
    response = sagemaker_runtime.invoke_endpoint(
        EndpointName=ENDPOINT_NAME, ContentType="application/json", Body=json.dumps(payload).encode("utf-8")
    )
    model_predictions = json.loads(response["Body"].read())
    generated_text = model_predictions[0]["generated_text"]
    return generated_text


def check_toxicity(text):
    response = comprehend.detect_toxic_content(
        TextSegments=[
            {
                "Text":  text
            }
        ],
        LanguageCode='en'
    )

    labels = response['ResultList'][0]['Labels']
    detected = [ l['Name'] for l in labels if l['Score'] > THRESHOLD ]

    return detected


def avoid_toxicity(detected):
    formatted = [ d.lower().replace("_", " ") for d in detected ]
    message = (
        "Avoid content that is toxic and is " +
        ", ".join(formatted) + ".\n"
    )
    return message


prompt = "Building a website can be done in 10 simple steps:"

detected_labels = check_toxicity(prompt)

if len(detected_labels) > 0:
    # Toxicity detected in the input prompt
    print("Please fix the prompt.")
    print(avoid_toxicity(detected_labels))
else:
    response = query_endpoint(prompt)

    detected_labels = check_toxicity(response)

    if len(detected_labels) > 0:
        # Toxicity detected in the output response
        print("Here's an improved prompt:")
        prompt = avoid_toxicity(detected_labels) + prompt
        print(prompt)
    else:
        print(response)

You’ll not get a toxic response with the sample prompt in the script, but it’s safe to know that you can set up an automatic process to check and mitigate if that happens.

Availability and Pricing
Toxicity detection for Amazon Comprehend is available today in the following AWS Regions: US East (N. Virginia), US West (Oregon), Europe (Ireland), and Asia Pacific (Sydney).

When using toxicity detection, there are no long-term commitments, and you pay based on the number of input characters in units of 100 characters (1 unit = 100 characters), with a minimum charge of 3 units (300 character) per request. For more information, see Amazon Comprehend pricing.

Improve the safety of your online communities and simplify the adoption of LLMs in your applications with toxicity detection.

Danilo

Amazon Aurora MySQL zero-ETL integration with Amazon Redshift is now generally available

Post Syndicated from Donnie Prakoso original https://aws.amazon.com/blogs/aws/amazon-aurora-mysql-zero-etl-integration-with-amazon-redshift-is-now-generally-available/

Data is at the center of every application, process, and business decision,” wrote Swami Sivasubramanian, VP of Database, Analytics, and Machine Learning at AWS, and I couldn’t agree more. A common pattern customers use today is to build data pipelines to move data from Amazon Aurora to Amazon Redshift. These solutions help them gain insights to grow sales, reduce costs, and optimize their businesses.

To help you focus on creating value from data instead of preparing data for analysis, we announced Amazon Aurora zero-ETL integration with Amazon Redshift at AWS re:Invent 2022 and in public preview for Amazon Aurora MySQL-Compatible Edition in June 2023.

Now generally available: Amazon Aurora MySQL zero-ETL integration with Amazon Redshift
Today, we announced the general availability of Amazon Aurora MySQL zero-ETL integration with Amazon Redshift. With this fully managed solution, you no longer need to build and maintain complex data pipelines in order to derive time-sensitive insights from your transactional data to inform critical business decisions.

This zero-ETL integration between Amazon Aurora and Amazon Redshift unlocks opportunities for you to run near real-time analytics and machine learning (ML) on petabytes of transactional data in Amazon Redshift. As this data gets written into Aurora, it will be available in Amazon Redshift within seconds.

It also enables you to run consolidated analytics from multiple Aurora MySQL database clusters in Amazon Redshift to derive holistic insights across many applications or partitions. Amazon Aurora MySQL zero-ETL integration with Amazon Redshift processes over 1 million transactions per minute (an equivalent of 17.5 million insert/update/delete row operations per minute) from multiple Aurora databases and makes them available in Amazon Redshift in less than 15 seconds (p50 latency lag).

Furthermore, you can take advantage of the analytics and built-in ML capabilities of Amazon Redshift, such as materialized views, cross-Region data sharing, and federated access to multiple data stores and data lakes.

Let’s get started
In this article, I’ll highlight some steps along with information on how you can get started easily. I will use my existing Amazon Aurora MySQL serverless database and Amazon Redshift data warehouse.

To get started, I need to navigate to Amazon RDS and select Create zero-ETL integration on the Zero-ETL integrations page.

On the Create zero-ETL integration page, I need to follow a few steps to configure the integration for my Amazon Aurora database cluster and my Amazon Redshift data warehouse.

First, I define an identifier for my integration and select Next.

On the next page, I need to select the source database by selecting Browse RDS databases.

Here, I can select my existing database as the source.

The next step asks me the target Amazon Redshift data warehouse. Here, I have the flexibility to choose the Amazon Redshift Serverless or RA3 data warehouse in my account or in different account. I select Browse Redshift data warehouses.

Then, I choose the target data warehouse.

Because Amazon Aurora needs to replicate into the data warehouse, we need to add an additional resource policy and add the Aurora database as an authorized integration source in the Amazon Redshift data warehouse.

I can solve this by manually updating in the Amazon Redshift console or let Amazon RDS fix it for me. I tick the checkbox.

On the next page, it shows me the changes that Amazon RDS will perform for us. I select Continue.

On the next page, I can configure the tags and also the encryption. By default, zero-ETL integration encrypts your data using AWS Key Management Service (AWS KMS), and I have the option to use my own key.

Then, I need to review all the configurations and select Create zero-ETL integration to create the integration.

After a few minutes, my zero-ETL integration is sucessfully created. Then, I switch to Amazon Redshift, and on the Zero-ETL integrations page, I can see that I have my recently created zero-ETL integration.

Since the integration does not yet have a target database inside Amazon Redshift, I need to create one.

Now the integration configuration is complete. On this page, I can see the integration status is active, and there is one table that has been replicated.

For testing, I create a new table in my Amazon Aurora database and insert a record into this table.

Then I switched to the Redshift query editor v2 inside Amazon Redshift. Here I can make a connection to the database that I formed as part of the integration. By running a simple query, I can see that my data is already available inside Amazon Redshift.

I found this zero-ETL integration very convenient for two reasons. First, I could unify all data from multiple database clusters together and analyze it in aggregate. Second, within seconds of the transactional data being written into Amazon Aurora MySQL, this zero-ETL integration seamlessly made the data available in Amazon Redshift.

Things to know

Availability – Amazon Aurora zero-ETL integration with Amazon Redshift is available in US East (Ohio), US East (N. Virginia), US West (Oregon), Asia Pacific (Singapore), Asia Pacific (Sydney), Asia Pacific (Tokyo), Europe (Frankfurt), Europe (Ireland), and Europe (Stockholm).

Supported Database Engines – Amazon Aurora zero-ETL Integration with Amazon Redshift currently supports MySQL-compatible editions of Amazon Aurora. Support for Amazon Aurora PostgreSQL-Compatible Edition is a work in progress.

Pricing –  Amazon Aurora zero-ETL integration with Amazon Redshift is provided at no additional cost. You pay for existing Amazon Aurora and Amazon Redshift resources used to create and process the change data created as part of a zero-ETL integration.

We’re one step closer to helping you focus more on creating value from data instead of preparing it for analysis. To learn more on how to get started, please visit the Amazon Aurora MySQL zero-ETL integration with Amazon Redshift page.

Happy integrating!
— Donnie

New – Create application-consistent snapshots using Amazon Data Lifecycle Manager and custom scripts

Post Syndicated from Jeff Barr original https://aws.amazon.com/blogs/aws/new-create-application-consistent-snapshots-using-amazon-data-lifecycle-manager-and-custom-scripts/

Amazon Data Lifecycle Manager now supports the use of pre-snapshot and post-snapshot scripts embedded in AWS Systems Manager documents. You can use these scripts to ensure that Amazon Elastic Block Store (Amazon EBS) snapshots created by Data Lifecycle Manager are application-consistent. Scripts can pause and resume I/O operations, flush buffered data to EBS volumes, and so forth. As part of this launch we are also publishing a set of detailed blog posts that show you how to use this feature with self-managed relational databases and Windows Volume Shadow Copy Service (VSS).

Data Lifecycle Manager (DLM) Recap
As a quick recap, Data Lifecycle Manager helps you to automate the creation, retention, and deletion of Amazon EBS volume snapshots. Once you have completed the prerequisite steps such as onboarding your EC2 instance to AWS Systems Manager, setting up an IAM role for DLM, and tagging your SSM documents, you simply create a lifecycle policy and indicate (via tags) the applicable Amazon Elastic Compute Cloud (Amazon EC2) instances, set a retention model, and let DLM do the rest. The policies specify when they are to be run, what is to be backed up, and how long the snapshots must be retained. For a full walk-through of DLM, read my 2018 blog post, New – Lifecycle Management for Amazon EBS Snapshots.

Application Consistent Snapshots
EBS snapshots are crash-consistent, meaning that they represent the state of the associated EBS volume at the time that the snapshot was created. This is sufficient for many types of applications, including those that do not use snapshots to capture the state of an active relational database. To make a snapshot that is application-consistent, it is necessary to take pending transactions into account (either waiting for them to finish or causing them to fail), momentarily pause further write operations, take the snapshot, and then resume normal operations.

And that’s where today’s launch comes in. DLM now has the ability to tell the instance to prepare for an application-consistent backup. The pre-snapshot script can manage pending transactions, flush in-memory data to persistent storage, freeze the filesystem, or even bring the application or database to a stop. Then the post-snapshot script can bring the application or database back to life, reload in-memory caches from persistent storage, thaw the filesystem, and so forth.

In addition to the base-level support for custom scripts, you can also use this feature to automate the creation of VSS Backup snapshots:

Pre and Post Scripts
The new scripts apply to DLM policies for instances. Let’s assume that I have created a policy that references SSM documents with pre-snapshot and post-snapshot scripts, and that it applies to a single instance. Here’s what happens when the policy is run per its schedule:

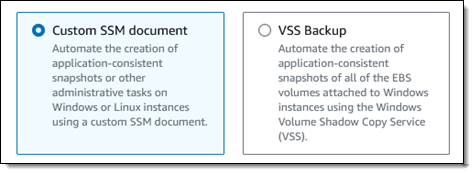
  1. The pre-snapshot script is started from the SSM document.
  2. Each command in the script is run and the script-level status (success or failure) is captured. If enabled in the policy, DLM will retry failed scripts.
  3. Multi-volume EBS snapshots are initiated for EBS volumes attached to the instance, with further control via the policy.
  4. The post-snapshot script is started from the SSM document,
  5. Each command in the script is run and and the script-level status (success or failure) is captured.

The policy contains options that give you control over the actions that are taken (retry, continue, or skip) when either of the scripts times out or fails. The status is logged, Amazon CloudWatch metrics are published, Amazon EventBridge events are emitted, and the status is also encoded in tags that are automatically assigned to each snapshot.

The pre-snapshot and post-snapshot scripts can perform any of the actions that are allowed in a command document: running shell scripts, running PowerShell scripts, and so forth. The actions must complete within the timeout specified in the policy, with an allowable range of 10 seconds to 120 seconds.

Getting Started
You will need to have a detailed understanding of your application or database in order to build a robust pair of scripts. In addition to handling the “happy path” when all goes well, your scripts need to plan for several failure scenarios. For example, a pre-snapshot script should fork a background task that will serve as a failsafe in case the post-snapshot script does not work as expected. Each script must return a shell-level status code, as detailed here.

Once I have written and tested my scripts and packaged them as SSM documents, I open the Data Lifecycle Manager page in the EC2 Console, select EBS snapshot policy, and click Next step:

I target all of my instances that are tagged with a Mode of Production, and use the default IAM role (if you use a different role, it must enable access to SSM), leave the rest of the values as-is, and proceed:

On the next page I scroll down to Pre and post scripts and expand the section. I click Enable pre and post scripts, choose Custom SSM document, and then select my SSM document from the menu. I also set the timeout and retry options, and choose to default to a crash-consistent backup if one of my scripts fails. I click Review policy, do one final check, and click Create policy on the following page:

My policy is created, and will take effect right away. After it has run at least once, I can inspect the CloudWatch metrics to check for starts, completions, and failures:

Additional Reading
Here are the first of the detailed blog posts that I promised you earlier:

We have more in the works for later this year and I will update the list above when they are published.

You can also read the documentation to learn more.

DLM Videos
While I’ve got your attention, I would like to share a couple of helpful videos with you:

This new feature is available now and you can start using it today!

Jeff;

Amazon EC2 Instance Metadata Service IMDSv2 by default

Post Syndicated from Jeff Barr original https://aws.amazon.com/blogs/aws/amazon-ec2-instance-metadata-service-imdsv2-by-default/

Effective mid-2024, newly released Amazon EC2 instance types will use only version 2 of the EC2 Instance Metadata Service (IMDSv2). We are also taking a series of steps to make IMDSv2 the default choice for AWS Management Console Quick Starts and other launch pathways.

Background
This service is accessible from within an EC2 instance at a fixed IP address (169.254.169.254 via IPv4 or fd00:ec2::254 via IPv6 on Nitro instances). It gives you (or the code running on the instance) access to a wealth of static and dynamic data including the ID of the AMI that was used to launch the instance, block device mappings, temporary IAM credentials for roles that are attached to the instance, network interface information, user data, and much more, as detailed in Instance Metadata Categories.

The v1 service uses a request/response access method and the v2 service uses a session-oriented method, as detailed in this blog post. Both services are fully secure, but v2 provides additional layers of protection for four types of vulnerabilities that could be used to try to access IMDS.

Many applications and instances are already using and benefiting from IMDSv2, but the full range of benefits become available only when IMDSv1 is disabled at the AWS account level.

Migration Plan
Here are the significant steps that we have taken, and those that plan to take, on the road to making IMDSv2 the default choice for new AWS infrastructure (allow a tiny bit of wiggle room on the 2023 and 2024 dates):

November 2019 – We launched IMDSv2 and showed you how to use it to add defense in depth.

February 2020 – We began to verify that all newly published products from AWS Marketplace sellers and AWS Partners support IMDSv2.

March 2023 – We launched Amazon Linux 2023, which uses IMDSv2 by default for all launches.

September 2023 – We published a blog post to show you how to Get the full benefits of IMDSv2 and disable IMDSv1 across your AWS infrastructure.

November 2023 – Starting today, all console Quick Start launches will use IMDSv2-only (all Amazon and Partner Quick Start AMIs support this). Here’s how this is specified in the EC2 Console within Advanced details when launching an instance:

February 2024 – We plan to introduce a new API function that will allow you to control the use of IMDSv1 as the default at the account level. You can already control IMDSv1 usage in an IAM policy (taking away and limiting existing permission), or as an SCP that is applied globally across an account, an organizational unit (OU), or an entire organization. For example IAM policies read Work with instance metadata.

Mid-2024 – Newly released Amazon EC2 instance types will use IMDSv2 only by default. For transition support, you will still be able to enable/turn on IMDSv1 at launch or after launch on an instance live without the need for a restart or stop/start.

What to Do
Now is the time to get started on your migration from IMDSv1 to IMDSv2 using the Get the full benefits.. blog post as a guide. You should also become familiar with the Tools for helping with the transition to IMDSv2, along with the recommended path on the same page. In addition to recommending tools, this page shows you how to set up an IAM policy that disables the use of IMDSv1 and shows you how to use the MetadataNoToken CloudWatch metric to detect any remaining usage:

Another helpful resource can be found on AWS re:Post: How can I use Systems Manager automation to enforce that only IMDSv2 is used to access instance metadata from my Amazon EC2 instance?

We want this transition to be as smooth as possible for you and for your customers. If you need any additional help, please contact AWS Support.

Jeff;