Post Syndicated from Talks at Google original https://www.youtube.com/watch?v=QsYtZaTk2Os
Use Snowflake with Amazon MWAA to orchestrate data pipelines
Post Syndicated from Payal Singh original https://aws.amazon.com/blogs/big-data/use-snowflake-with-amazon-mwaa-to-orchestrate-data-pipelines/
This blog post is co-written with James Sun from Snowflake.
Customers rely on data from different sources such as mobile applications, clickstream events from websites, historical data, and more to deduce meaningful patterns to optimize their products, services, and processes. With a data pipeline, which is a set of tasks used to automate the movement and transformation of data between different systems, you can reduce the time and effort needed to gain insights from the data. Apache Airflow and Snowflake have emerged as powerful technologies for data management and analysis.
Amazon Managed Workflows for Apache Airflow (Amazon MWAA) is a managed workflow orchestration service for Apache Airflow that you can use to set up and operate end-to-end data pipelines in the cloud at scale. The Snowflake Data Cloud provides a single source of truth for all your data needs and allows your organizations to store, analyze, and share large amounts of data. The Apache Airflow open-source community provides over 1,000 pre-built operators (plugins that simplify connections to services) for Apache Airflow to build data pipelines.
In this post, we provide an overview of orchestrating your data pipeline using Snowflake operators in your Amazon MWAA environment. We define the steps needed to set up the integration between Amazon MWAA and Snowflake. The solution provides an end-to-end automated workflow that includes data ingestion, transformation, analytics, and consumption.
Overview of solution
The following diagram illustrates our solution architecture.
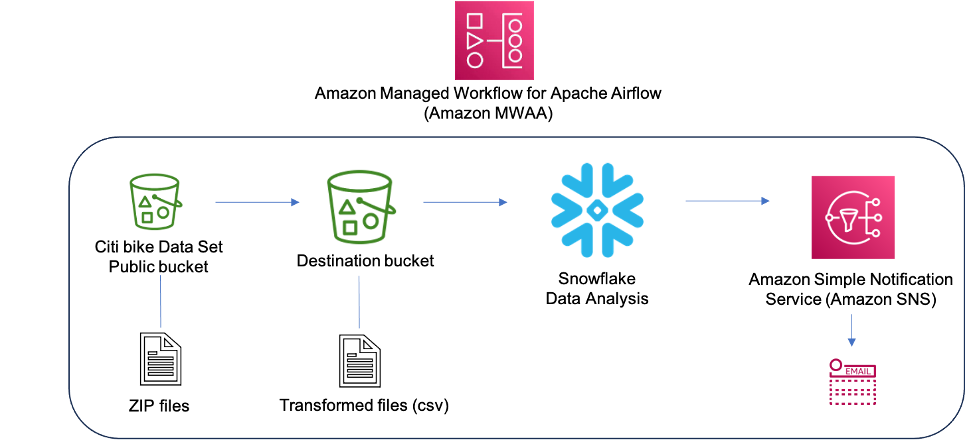
The data used for transformation and analysis is based on the publicly available New York Citi Bike dataset. The data (zipped files), which includes rider demographics and trip data, is copied from the public Citi Bike Amazon Simple Storage Service (Amazon S3) bucket in your AWS account. Data is decompressed and stored in a different S3 bucket (transformed data can be stored in the same S3 bucket where data was ingested, but for simplicity, we’re using two separate S3 buckets). The transformed data is then made accessible to Snowflake for data analysis. The output of the queried data is published to Amazon Simple Notification Service (Amazon SNS) for consumption.
Amazon MWAA uses a directed acyclic graph (DAG) to run the workflows. In this post, we run three DAGs:
- DAG1 sets up the Amazon MWAA connection to authenticate to Snowflake. The Snowflake connection string is stored in AWS Secrets Manager, which is referenced in the DAG file.
- DAG2 creates the required Snowflake objects (database, table, storage integration, and stage).
- DAG3 runs the data pipeline.
The following diagram illustrates this workflow.

See the GitHub repo for the DAGs and other files related to the post.
Note that in this post, we’re using a DAG to create a Snowflake connection, but you can also create the Snowflake connection using the Airflow UI or CLI.
Prerequisites
To deploy the solution, you should have a basic understanding of Snowflake and Amazon MWAA with the following prerequisites:
- An AWS account in an AWS Region where Amazon MWAA is supported.
- A Snowflake account with admin credentials. If you don’t have an account, sign up for a 30-day free trial. Select the Snowflake enterprise edition for the AWS Cloud platform.
- Access to Amazon MWAA, Secrets Manager, and Amazon SNS.
- In this post, we’re using two S3 buckets, called
airflow-blog-bucket-ACCOUNT_IDandcitibike-tripdata-destination-ACCOUNT_ID. Amazon S3 supports global buckets, which means that each bucket name must be unique across all AWS accounts in all the Regions within a partition. If the S3 bucket name is already taken, choose a different S3 bucket name. Create the S3 buckets in your AWS account. We upload content to the S3 bucket later in the post. ReplaceACCOUNT_IDwith your own AWS account ID or any other unique identifier. The bucket details are as follows:- airflow-blog-bucket-ACCOUNT_ID – The top-level bucket for Amazon MWAA-related files.
- airflow-blog-bucket-ACCOUNT_ID/requirements – The bucket used for storing the requirements.txt file needed to deploy Amazon MWAA.
- airflow-blog-bucket-ACCOUNT_ID/dags – The bucked used for storing the DAG files to run workflows in Amazon MWAA.
- airflow-blog-bucket-ACCOUNT_ID/dags/mwaa_snowflake_queries – The bucket used for storing the Snowflake SQL queries.
- citibike-tripdata-destination-ACCOUNT_ID – The bucket used for storing the transformed dataset.
When implementing the solution in this post, replace references to airflow-blog-bucket-ACCOUNT_ID and citibike-tripdata-destination-ACCOUNT_ID with the names of your own S3 buckets.
Set up the Amazon MWAA environment
First, you create an Amazon MWAA environment. Before deploying the environment, upload the requirements file to the airflow-blog-bucket-ACCOUNT_ID/requirements S3 bucket. The requirements file is based on Amazon MWAA version 2.6.3. If you’re testing on a different Amazon MWAA version, update the requirements file accordingly.
Complete the following steps to set up the environment:
- On the Amazon MWAA console, choose Create environment.
- Provide a name of your choice for the environment.
- Choose Airflow version 2.6.3.
- For the S3 bucket, enter the path of your bucket (
s3:// airflow-blog-bucket-ACCOUNT_ID). - For the DAGs folder, enter the DAGs folder path (
s3:// airflow-blog-bucket-ACCOUNT_ID/dags). - For the requirements file, enter the requirements file path (
s3:// airflow-blog-bucket-ACCOUNT_ID/ requirements/requirements.txt). - Choose Next.
- Under Networking, choose your existing VPC or choose Create MWAA VPC.
- Under Web server access, choose Public network.
- Under Security groups, leave Create new security group selected.
- For the Environment class, Encryption, and Monitoring sections, leave all values as default.
- In the Airflow configuration options section, choose Add custom configuration value and configure two values:
- Set Configuration option to
secrets.backendand Custom value toairflow.providers.amazon.aws.secrets.secrets_manager.SecretsManagerBackend. - Set Configuration option to
secrets.backend_kwargsand Custom value to{"connections_prefix" : "airflow/connections", "variables_prefix" : "airflow/variables"}.
- Set Configuration option to
- In the Permissions section, leave the default settings and choose Create a new role.
- Choose Next.
- When the Amazon MWAA environment us available, assign S3 bucket permissions to the AWS Identity and Access Management (IAM) execution role (created during the Amazon MWAA install).


This will direct you to the created execution role on the IAM console.
For testing purposes, you can choose Add permissions and add the managed AmazonS3FullAccess policy to the user instead of providing restricted access. For this post, we provide only the required access to the S3 buckets.
- On the drop-down menu, choose Create inline policy.
- For Select Service, choose S3.
- Under Access level, specify the following:
- Expand List level and select
ListBucket. - Expand Read level and select
GetObject. - Expand Write level and select
PutObject.
- Expand List level and select
- Under Resources, choose Add ARN.
- On the Text tab, provide the following ARNs for S3 bucket access:
arn:aws:s3:::airflow-blog-bucket-ACCOUNT_ID(use your own bucket).arn:aws:s3:::citibike-tripdata-destination-ACCOUNT_ID(use your own bucket).arn:aws:s3:::tripdata(this is the public S3 bucket where the Citi Bike dataset is stored; use the ARN as specified here).
- Under Resources, choose Add ARN.
- On the Text tab, provide the following ARNs for S3 bucket access:
arn:aws:s3:::airflow-blog-bucket-ACCOUNT_ID/*(make sure to include the asterisk).arn:aws:s3:::citibike-tripdata-destination-ACCOUNT_ID /*.arn:aws:s3:::tripdata/*(this is the public S3 bucket where the Citi Bike dataset is stored, use the ARN as specified here).
- Choose Next.
- For Policy name, enter
S3ReadWrite. - Choose Create policy.
- Lastly, provide Amazon MWAA with permission to access Secrets Manager secret keys.
This step provides the Amazon MWAA execution role for your Amazon MWAA environment read access to the secret key in Secrets Manager.
The execution role should have the policies MWAA-Execution-Policy*, S3ReadWrite, and SecretsManagerReadWrite attached to it.

When the Amazon MWAA environment is available, you can sign in to the Airflow UI from the Amazon MWAA console using link for Open Airflow UI.

Set up an SNS topic and subscription
Next, you create an SNS topic and add a subscription to the topic. Complete the following steps:
- On the Amazon SNS console, choose Topics from the navigation pane.
- Choose Create topic.
- For Topic type, choose Standard.
- For Name, enter
mwaa_snowflake. - Leave the rest as default.
- After you create the topic, navigate to the Subscriptions tab and choose Create subscription.

- For Topic ARN, choose
mwaa_snowflake. - Set the protocol to Email.
- For Endpoint, enter your email ID (you will get a notification in your email to accept the subscription).

By default, only the topic owner can publish and subscribe to the topic, so you need to modify the Amazon MWAA execution role access policy to allow Amazon SNS access.
- On the IAM console, navigate to the execution role you created earlier.
- On the drop-down menu, choose Create inline policy.

- For Select service, choose SNS.
- Under Actions, expand Write access level and select Publish.
- Under Resources, choose Add ARN.
- On the Text tab, specify the ARN
arn:aws:sns:<<region>>:<<our_account_ID>>:mwaa_snowflake. - Choose Next.
- For Policy name, enter
SNSPublishOnly. - Choose Create policy.

Configure a Secrets Manager secret
Next, we set up Secrets Manager, which is a supported alternative database for storing Snowflake connection information and credentials.
To create the connection string, the Snowflake host and account name is required. Log in to your Snowflake account, and under the Worksheets menu, choose the plus sign and select SQL worksheet. Using the worksheet, run the following SQL commands to find the host and account name.
Run the following query for the host name:
Run the following query for the account name:
Next, we configure the secret in Secrets Manager.
- On the Secrets Manager console, choose Store a new secret.
- For Secret type, choose Other type of secret.
- Under Key/Value pairs, choose the Plaintext tab.
- In the text field, enter the following code and modify the string to reflect your Snowflake account information:
{"host": "<<snowflake_host_name>>", "account":"<<snowflake_account_name>>","user":"<<snowflake_username>>","password":"<<snowflake_password>>","schema":"mwaa_schema","database":"mwaa_db","role":"accountadmin","warehouse":"dev_wh"}
For example:
{"host": "xxxxxx.snowflakecomputing.com", "account":"xxxxxx" ,"user":"xxxxx","password":"*****","schema":"mwaa_schema","database":"mwaa_db", "role":"accountadmin","warehouse":"dev_wh"}
The values for the database name, schema name, and role should be as mentioned earlier. The account, host, user, password, and warehouse can differ based on your setup.

Choose Next.
- For Secret name, enter
airflow/connections/snowflake_accountadmin. - Leave all other values as default and choose Next.
- Choose Store.
Take note of the Region in which the secret was created under Secret ARN. We later define it as a variable in the Airflow UI.
Configure Snowflake access permissions and IAM role
Next, log in to your Snowflake account. Ensure the account you are using has account administrator access. Create a SQL worksheet. Under the worksheet, create a warehouse named dev_wh.
The following is an example SQL command:
For Snowflake to read data from and write data to an S3 bucket referenced in an external (S3 bucket) stage, a storage integration is required. Follow the steps defined in Option 1: Configuring a Snowflake Storage Integration to Access Amazon S3(only perform Steps 1 and 2, as described in this section).
Configure access permissions for the S3 bucket
While creating the IAM policy, a sample policy document code is needed (see the following code), which provides Snowflake with the required permissions to load or unload data using a single bucket and folder path. The bucket name used in this post is citibike-tripdata-destination-ACCOUNT_ID. You should modify it to reflect your bucket name.
Create the IAM role
Next, you create the IAM role to grant privileges on the S3 bucket containing your data files. After creation, record the Role ARN value located on the role summary page.

Configure variables
Lastly, configure the variables that will be accessed by the DAGs in Airflow. Log in to the Airflow UI and on the Admin menu, choose Variables and the plus sign.

Add four variables with the following key/value pairs:
- Key
aws_role_arnwith value<<snowflake_aws_role_arn>>(the ARN for role mysnowflakerole noted earlier) - Key
destination_bucketwith value<<bucket_name>>(for this post, the bucket used in citibike-tripdata-destination-ACCOUNT_ID) - Key
target_sns_arnwith value<<sns_Arn>>(the SNS topic in your account) - Key
sec_key_regionwith value<<region_of_secret_deployment>>(the Region where the secret in Secrets Manager was created)
The following screenshot illustrates where to find the SNS topic ARN.

The Airflow UI will now have the variables defined, which will be referred to by the DAGs.

Congratulations, you have completed all the configuration steps.
Run the DAG
Let’s look at how to run the DAGs. To recap:
- DAG1 (create_snowflake_connection_blog.py) – Creates the Snowflake connection in Apache Airflow. This connection will be used to authenticate with Snowflake. The Snowflake connection string is stored in Secrets Manager, which is referenced in the DAG file.
- DAG2 (create-snowflake_initial-setup_blog.py) – Creates the database, schema, storage integration, and stage in Snowflake.
- DAG3 (run_mwaa_datapipeline_blog.py) – Runs the data pipeline, which will unzip files from the source public S3 bucket and copy them to the destination S3 bucket. The next task will create a table in Snowflake to store the data. Then the data from the destination S3 bucket will be copied into the table using a Snowflake stage. After the data is successfully copied, a view will be created in Snowflake, on top of which the SQL queries will be run.
To run the DAGs, complete the following steps:
- Upload the DAGs to the S3 bucket
airflow-blog-bucket-ACCOUNT_ID/dags. - Upload the SQL query files to the S3 bucket
airflow-blog-bucket-ACCOUNT_ID/dags/mwaa_snowflake_queries. - Log in to the Apache Airflow UI.
- Locate DAG1 (
create_snowflake_connection_blog), un-pause it, and choose the play icon to run it.
You can view the run state of the DAG using the Grid or Graph view in the Airflow UI.

After DAG1 runs, the Snowflake connection snowflake_conn_accountadmin is created on the Admin, Connections menu.
- Locate and run DAG2 (
create-snowflake_initial-setup_blog).

After DAG2 runs, the following objects are created in Snowflake:
- The database
mwaa_db - The schema
mwaa_schema - The storage integration
mwaa_citibike_storage_int - The stage
mwaa_citibike_stg
Before running the final DAG, the trust relationship for the IAM user needs to be updated.
- Log in to your Snowflake account using your admin account credentials.
- Open your SQL worksheet created earlier and run the following command:
mwaa_citibike_storage_int is the name of the integration created by the DAG2 in the previous step.
From the output, record the property value of the following two properties:
- STORAGE_AWS_IAM_USER_ARN – The IAM user created for your Snowflake account.
- STORAGE_AWS_EXTERNAL_ID – The external ID that is needed to establish a trust relationship.
Now we grant the Snowflake IAM user permissions to access bucket objects.
- On the IAM console, choose Roles in the navigation pane.
- Choose the role
mysnowflakerole. - On the Trust relationships tab, choose Edit trust relationship.
- Modify the policy document with the
DESC STORAGE INTEGRATIONoutput values you recorded. For example:
The AWS role ARN and ExternalId will be different for your environment based on the output of the DESC STORAGE INTEGRATION query

- Locate and run the final DAG (
run_mwaa_datapipeline_blog).
At the end of the DAG run, the data is ready for querying. In this example, the query (finding the top start and destination stations) is run as part of the DAG and the output can be viewed from the Airflow XCOMs UI.

In the DAG run, the output is also published to Amazon SNS and based on the subscription, an email notification is sent out with the query output.

Another method to visualize the results is directly from the Snowflake console using the Snowflake worksheet. The following is an example query:

There are different ways to visualize the output based on your use case.
As we observed, DAG1 and DAG2 need to be run only one time to set up the Amazon MWAA connection and Snowflake objects. DAG3 can be scheduled to run every week or month. With this solution, the user examining the data doesn’t have to log in to either Amazon MWAA or Snowflake. You can have an automated workflow triggered on a schedule that will ingest the latest data from the Citi Bike dataset and provide the top start and destination stations for the given dataset.
Clean up
To avoid incurring future charges, delete the AWS resources (IAM users and roles, Secrets Manager secrets, Amazon MWAA environment, SNS topics and subscription, S3 buckets) and Snowflake resources (database, stage, storage integration, view, tables) created as part of this post.
Conclusion
In this post, we demonstrated how to set up an Amazon MWAA connection for authenticating to Snowflake as well as to AWS using AWS user credentials. We used a DAG to automate creating the Snowflake objects such as database, tables, and stage using SQL queries. We also orchestrated the data pipeline using Amazon MWAA, which ran tasks related to data transformation as well as Snowflake queries. We used Secrets Manager to store Snowflake connection information and credentials and Amazon SNS to publish the data output for end consumption.
With this solution, you have an automated end-to-end orchestration of your data pipeline encompassing ingesting, transformation, analysis, and data consumption.
To learn more, refer to the following resources:
- Getting started with snowflake – Zero to Snowflake
- Amazon MWAA for Analytics Workshop
- Snowflake Airflow operators
About the authors
 Payal Singh is a Partner Solutions Architect at Amazon Web Services, focused on the Serverless platform. She is responsible for helping partner and customers modernize and migrate their applications to AWS.
 James Sun is a Senior Partner Solutions Architect at Snowflake. He actively collaborates with strategic cloud partners like AWS, supporting product and service integrations, as well as the development of joint solutions. He has held senior technical positions at tech companies such as EMC, AWS, and MapR Technologies. With over 20 years of experience in storage and data analytics, he also holds a PhD from Stanford University.
 Bosco Albuquerque is a Sr. Partner Solutions Architect at AWS and has over 20 years of experience working with database and analytics products from enterprise database vendors and cloud providers. He has helped technology companies design and implement data analytics solutions and products.
 Manuj Arora is a Sr. Solutions Architect for Strategic Accounts in AWS. He focuses on Migration and Modernization capabilities and offerings in AWS. Manuj has worked as a Partner Success Solutions Architect in AWS over the last 3 years and worked with partners like Snowflake to build solution blueprints that are leveraged by the customers. Outside of work, he enjoys traveling, playing tennis and exploring new places with family and friends.
Comic for 2023.10.31 – Does This Hurt
Post Syndicated from Explosm.net original https://explosm.net/comics/does-this-hurt
New Cyanide and Happiness Comic
Prepare your AWS workloads for the “Operational risks and resilience – banks” FINMA Circular
Post Syndicated from Margo Cronin original https://aws.amazon.com/blogs/security/prepare-your-aws-workloads-for-the-operational-risks-and-resilience-banks-finma-circular/
In December 2022, FINMA, the Swiss Financial Market Supervisory Authority, announced a fully revised circular called Operational risks and resilience – banks that will take effect on January 1, 2024. The circular will replace the Swiss Bankers Association’s Recommendations for Business Continuity Management (BCM), which is currently recognized as a minimum standard. The new circular also adopts the revised principles for managing operational risks, and the new principles on operational resilience, that the Basel Committee on Banking Supervision published in March 2021.
In this blog post, we share key considerations for AWS customers and regulated financial institutions to help them prepare for, and align to, the new circular.
AWS previously announced the publication of the AWS User Guide to Financial Services Regulations and Guidelines in Switzerland. The guide refers to certain rules applicable to financial institutions in Switzerland, including banks, insurance companies, stock exchanges, securities dealers, portfolio managers, trustees, and other financial entities that FINMA oversees (directly or indirectly).
FINMA has previously issued the following circulars to help regulated financial institutions understand approaches to due diligence, third party management, and key technical and organizational controls to be implemented in cloud outsourcing arrangements, particularly for material workloads:
- 2018/03 FINMA Circular Outsourcing – banks and insurers (31.10.2019)
- 2008/21 FINMA Circular Operational Risks – Banks (31.10.2019) – Principal 4 Technology Infrastructure
- 2008/21 FINMA Circular Operational Risks – Banks (31.10.2019) – Appendix 3 Handling of electronic Client Identifying Data
- 2013/03 Auditing (04.11.2020) – Information Technology (21.04.2020)
- BCM minimum standards proposed by the Swiss Insurance Association (01.06.2015) and Swiss Bankers Association (29.08.2013)
Operational risk management: Critical data
The circular defines critical data as follows:
“Critical data are data that, in view of the institution’s size, complexity, structure, risk profile and business model, are of such crucial significance that they require increased security measures. These are data that are crucial for the successful and sustainable provision of the institution’s services or for regulatory purposes. When assessing and determining the criticality of data, the confidentiality as well as the integrity and availability must be taken into account. Each of these three aspects can determine whether data is classified as critical.”
This definition is consistent with the AWS approach to privacy and security. We believe that for AWS to realize its full potential, customers must have control over their data. This includes the following commitments:
- Control over the location of your data
- Verifiable control over data access
- Ability to encrypt everything everywhere
- Resilience of AWS
These commitments further demonstrate our dedication to securing your data: it’s our highest priority. We implement rigorous contractual, technical, and organizational measures to help protect the confidentiality, integrity, and availability of your content regardless of which AWS Region you select. You have complete control over your content through powerful AWS services and tools that you can use to determine where to store your data, how to secure it, and who can access it.
You also have control over the location of your content on AWS. For example, in Europe, at the time of publication of this blog post, customers can deploy their data into any of eight Regions (for an up-to-date list of Regions, see AWS Global Infrastructure). One of these Regions is the Europe (Zurich) Region, also known by its API name ‘eu-central-2’, which customers can use to store data in Switzerland. Additionally, Swiss customers can rely on the terms of the AWS Swiss Addendum to the AWS Data Processing Addendum (DPA), which applies automatically when Swiss customers use AWS services to process personal data under the new Federal Act on Data Protection (nFADP).
AWS continually monitors the evolving privacy, regulatory, and legislative landscape to help identify changes and determine what tools our customers might need to meet their compliance requirements. Maintaining customer trust is an ongoing commitment. We strive to inform you of the privacy and security policies, practices, and technologies that we’ve put in place. Our commitments, as described in the Data Privacy FAQ, include the following:
- Access – As a customer, you maintain full control of your content that you upload to the AWS services under your AWS account, and responsibility for configuring access to AWS services and resources. We provide an advanced set of access, encryption, and logging features to help you do this effectively (for example, AWS Identity and Access Management, AWS Organizations, and AWS CloudTrail). We provide APIs that you can use to configure access control permissions for the services that you develop or deploy in an AWS environment. We never use your content or derive information from it for marketing or advertising purposes.
- Storage – You choose the AWS Regions in which your content is stored. You can replicate and back up your content in more than one Region. We will not move or replicate your content outside of your chosen AWS Regions except as agreed with you.
- Security – You choose how your content is secured. We offer you industry-leading encryption features to protect your content in transit and at rest, and we provide you with the option to manage your own encryption keys. These data protection features include:
- Data encryption capabilities available in over 100 AWS services.
- Flexible key management options using AWS Key Management Service (AWS KMS), so you can choose whether to have AWS manage your encryption keys or to keep complete control over your keys.
- Disclosure of customer content – We will not disclose customer content unless we’re required to do so to comply with the law or a binding order of a government body. If a governmental body sends AWS a demand for your customer content, we will attempt to redirect the governmental body to request that data directly from you. If compelled to disclose your customer content to a governmental body, we will give you reasonable notice of the demand to allow the customer to seek a protective order or other appropriate remedy, unless AWS is legally prohibited from doing so.
- Security assurance – We have developed a security assurance program that uses current recommendations for global privacy and data protection to help you operate securely on AWS, and to make the best use of our security control environment. These security protections and control processes are independently validated by multiple third-party independent assessments, including the FINMA International Standard on Assurance Engagements (ISAE) 3000 Type II attestation report.
Additionally, FINMA guidelines lay out requirements for the written agreement between a Swiss financial institution and its service provider, including access and audit rights. For Swiss financial institutions that run regulated workloads on AWS, we offer the Swiss Financial Services Addendum to address the contractual and audit requirements of the FINMA guidelines. We also provide these institutions the ability to comply with the audit requirements in the FINMA guidelines through the AWS Security & Audit Series, including participation in an Audit Symposium, to facilitate customer audits. To help align with regulatory requirements and expectations, our FINMA addendum and audit program incorporate feedback that we’ve received from a variety of financial supervisory authorities across EU member states. To learn more about the Swiss Financial Services addendum or about the audit engagements offered by AWS, reach out to your AWS account team.
Resilience
Customers need control over their workloads and high availability to help prepare for events such as supply chain disruptions, network interruptions, and natural disasters. Each AWS Region is composed of multiple Availability Zones (AZs). An Availability Zone is one or more discrete data centers with redundant power, networking, and connectivity in an AWS Region. To better isolate issues and achieve high availability, you can partition applications across multiple AZs in the same Region. If you are running workloads on premises or in intermittently connected or remote use cases, you can use our services that provide specific capabilities for offline data and remote compute and storage. We will continue to enhance our range of sovereign and resilient options, to help you sustain operations through disruption or disconnection.
FINMA incorporates the principles of operational resilience in the newest circular 2023/01. In line with the efforts of the European Commission’s proposal for the Digital Operational Resilience Act (DORA), FINMA outlines requirements for regulated institutions to identify critical functions and their tolerance for disruption. Continuity of service, especially for critical economic functions, is a key prerequisite for financial stability. AWS recognizes that financial institutions need to comply with sector-specific regulatory obligations and requirements regarding operational resilience. AWS has published the whitepaper Amazon Web Services’ Approach to Operational Resilience in the Financial Sector and Beyond, in which we discuss how AWS and customers build for resiliency on the AWS Cloud. AWS provides resilient infrastructure and services, which financial institution customers can rely on as they design their applications to align with FINMA regulatory and compliance obligations.
AWS previously announced the third issuance of the FINMA ISAE 3000 Type II attestation report. Customers can access the entire report in AWS Artifact. To learn more about the list of certified services and Regions, see the FINMA ISAE 3000 Type 2 Report and AWS Services in Scope for FINMA.
AWS is committed to adding new services into our future FINMA program scope based on your architectural and regulatory needs. If you have questions about the FINMA report, or how your workloads on AWS align to the FINMA obligations, contact your AWS account team. We will also help support customers as they look for new ways to experiment, remain competitive, meet consumer expectations, and develop new products and services on AWS that align with the new regulatory framework.
To learn more about our compliance, security programs and common privacy and data protection considerations, see AWS Compliance Programs and the dedicated AWS Compliance Center for Switzerland. As always, we value your feedback and questions; reach out to the AWS Compliance team through the Contact Us page.
If you have feedback about this post, submit comments in the Comments section below. If you have questions about this post, start a new thread on the Security, Identity, & Compliance re:Post or contact AWS Support.
Incus 0.2 released
Post Syndicated from corbet original https://lwn.net/Articles/949411/
Version
0.2 of Incus, an LXD fork, has been released. “This version
” Changes include NVME
incorporates most changes that went into LXD 5.19 as well as introduce a
few additional features and improvements.
storage support, support for migrating clustered environments from LXD, and
more.
Идва ли краят на атаките срещу медиите в България? Адвокатът на Биволъ представи съдебните дела срещу медията пред International Press Institute
Post Syndicated from Николай Марченко original https://bivol.bg/ipi_webinar_media.html
вторник 31 октомври 2023

Съдебните дела тип „Шамар“ (т.нар. SLAPP-ове*) срещу Сайта за разследващата журналистика „Биволъ“ и колегите от BIRD.bg, „Медиапул“ и „Капитал“ бяха представени по време на уебинара на International Press Institute (IPI)…
Security updates for Tuesday
Post Syndicated from corbet original https://lwn.net/Articles/949391/
Security updates have been issued by Debian (jetty9, node-browserify-sign, request-tracker4, and request-tracker5), Fedora (golang-github-altree-bigfloat, golang-github-seancfoley-bintree, golang-github-seancfoley-ipaddress, kitty, slurm, and thunderbird), Gentoo (ConnMan, libxslt, and Salt), Mageia (chromium-browser-stable), Red Hat (firefox, libguestfs-winsupport, and thunderbird), SUSE (clamav, gcc13, gstreamer-plugins-bad, icu73_2, java-17-openjdk, nodejs10, poppler, python-Werkzeug, redis, thunderbird, webkit2gtk3, xorg-x11-server, and xwayland), and Ubuntu (kernel, linux-aws, linux-azure, linux-gcp, linux-oracle, linux-raspi, linux-iot, linux-raspi, linux-raspi-5.4, and mysql-8.0).
Coding futures: Celebrating our educational partnership in Telangana
Post Syndicated from Mamta Manaktala original https://www.raspberrypi.org/blog/tswreis-coding-academy-computing-education-partnership-telangana/
On September 29 2023, amidst much excitement and enthusiasm, a significant event took place at a unique school in Moinabad, Telangana: the teams of the Raspberry Pi Foundation and Telangana Social Welfare Residential Educational Institutions Society (TSWREIS) gathered to celebrate our partnership on the esteemed Coding Academy of TSWREIS.

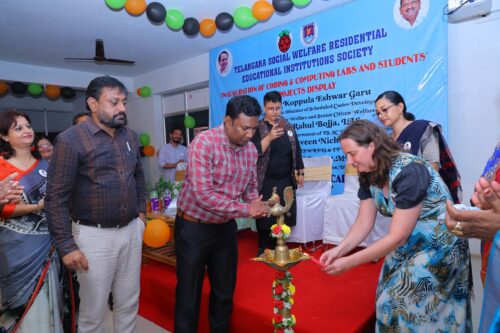
This event marked a special project for us where we are piloting a distinctive, progression-based computing curriculum in a government school and a degree college in India.

Partnering with TSWREIS to bring computing education to Telangana
At the Foundation, our goal is to work closely with schools, tailoring our offerings to their contexts. Our objective is to design and evaluate unique learning experiences by integrating content from our diverse range of high-quality educational products. Through these efforts, we aim to drive significant advancements in education and technology, benefiting both students and education systems across the world.
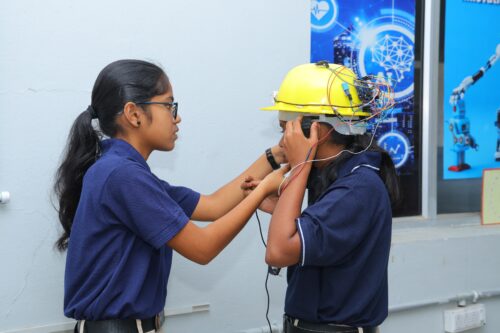
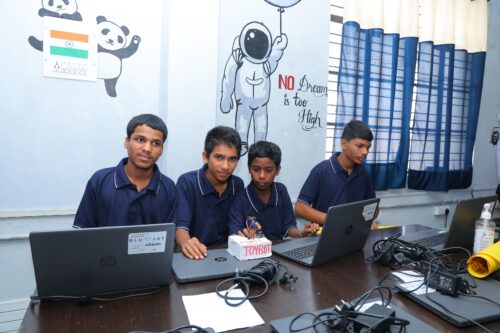
TSWREIS manages 268 residential educational institutions in Telangana, with a primary focus on delivering quality education to under-resourced young people, particularly children from scheduled castes and tribes in rural areas. Among these institutions is the Coding Academy school, located in Moinabad, which operates as a fully residential co-ed school for grades 6 to 12, accommodating around 800 students. Additionally, TSWREIS oversees another centre of excellence, the Coding Academy degree college in Shamirpet catering to 600 undergraduate female students.


We joined forces with TSWREIS to form a collaborative partnership with their Coding Academy units at both high school and college. We’re committed to sharing our expertise in computing and coding curriculum for students from Grade 6 to intermediate at the school, and across all courses at the college.
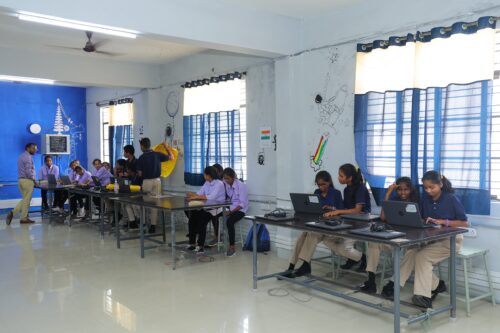
Our computing curriculum encompasses computer science, information technology, and digital literacy, and all its materials have been thoroughly researched and tested in the UK. Based on our 12 pedagogical principles, our curriculum ensures a project-based and holistic approach to learning. We also plan to provide national and international avenues for the Coding Academy students to showcase their learnings, for example through Coolest Projects, the world-leading, global technology showcase for young creators that we host every year.
The exciting model for our partnership with TSWREIS
We took on the challenge of directly delivering a comprehensive curriculum at the Coding Academy school and college through our own educators, exclusively hired and trained for this project. This is an exciting new approach for us, because up to this point, we have never directly delivered a curriculum anywhere in the world. However, we know we have created a world-class computing curriculum for educators in formal (and non-formal) settings, and we have many years’ experience of training teachers, so we are well-prepared to face this project and its potential challenges head-on and make it a success.
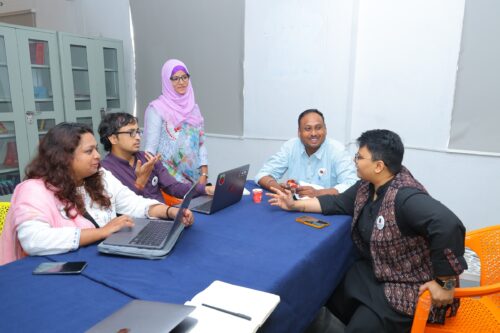
To begin the project, our team members based in India conducted a thorough study of the Coding Academy students’ interests and learning levels. Based on this, our Curriculum team in the UK and India customised and localised the content in our curriculum. We will be observing the curriculum’s delivery in classrooms and collecting students’ responses, and based on this data we’ll further refine the localised curriculum.
Throughout the project’s lifespan, we’ll measure the effectiveness of our curriculum and the impact of learning on the students. To do this, we’ll collect data from classroom observations, periodic assessments, and focused group discussions with students and educators.
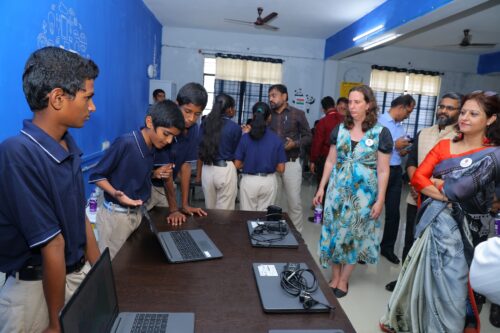
Starting from the second year of the project, we will build capacity within the system. In collaboration with TSWREIS, we’ll select teachers from within the organisation based on their interest and competence, and initiate their training. Our objective is that by the project’s fifth year, TSWREIS will have achieved self-sufficiency in delivering computing education to students at the Coding Academy as well as other institutions in its purview.
The promise of this project for our work in India
We began delivering lessons at the Coding Academy college and school in July, and it’s worth mentioning that it’s been a rollercoaster ride so far. We’ve been working closely with the TSWREIS team to equip both the academic units with the resources needed for seamless implementation of the project. Our India-based team has been able to ensure continuity in the project’s momentum and plug every gap, and is working tirelessly to make this big, challenging, and exciting project blossom and succeed. When it comes to the students’ energy, enthusiasm, and the sparkle in their eyes for their learning, it’s unmatched, and everyone feels proud of their achievements so far.

This work with TSWREIS holds immense importance for us, representing our dedication to shaping a brighter educational landscape especially for young people from under-resourced communities. We hope to replicate similar initiatives across various regions in India, enabling widespread access to quality education. We also aspire to take forward our initiatives in much larger dimensions for the entirety of India.

In addition to our partnership with TSWREIS, we are actively engaged in several other impactful projects in India, such as our partnership with Mo School Abhiyan in Odisha to serve the government’s schools across Odisha state, and our collaboration with Pratham Foundation, which is helping us reach under-resourced communities and furthering our commitment to enhancing educational experiences.
We look towards the future
In reflection, the voices at the launch event on September 29 echoed the anticipation and optimism that filled the air on that memorable day. Chief guests who graciously attended the event were Shri. E Naveen Nicholas, IAS, Secretary at TSWREIS & TTWREIS, and Rachel Bennett, our Managing Director at the Raspberry Pi Foundation. Heartfelt gratitude to them for their presence and blessings. We also extend our thanks to our funding partner in this work, Ezrah Charitable Trust, and our delivery partners for their invaluable support.

The energy felt on the event day continues to drive our determination to do the work that lies ahead. As we look forward to the future, our hope and the hope of both the Coding Academy team and students are aligned: hope for a brighter, technologically empowered future, where education becomes a beacon of opportunity for all.
The post Coding futures: Celebrating our educational partnership in Telangana appeared first on Raspberry Pi Foundation.
Introducing notifications for HTTP Traffic Anomalies
Post Syndicated from Cathy Chi original http://blog.cloudflare.com/introducing-http-traffic-anomalies-notifications/

When it comes to managing Internet properties, the difference between a small technical hiccup and major incident is often a matter of speed. Proactive alerting plays a crucial role, which is why we were excited when we released HTTP Error Rate notifications — giving administrators visibility into when end users are experiencing errors.
But what if there are issues that don’t show up as errors, like a sudden drop in traffic, or a spike?
Today, we’re excited to announce Traffic Anomalies notifications, available to enterprise customers. These notifications trigger when Cloudflare detects unexpected changes in traffic, giving another valuable perspective into the health of your systems.
Unexpected changes in traffic could be indicative of many things. If you run an ecommerce site and see a spike in traffic that could be great news — maybe customers are flocking to your sale, or you just had an ad run on a popular TV show. However, it could also mean that something is going wrong: maybe someone accidentally turned off a firewall rule, and now you’re seeing more malicious traffic. Either way, you might want to know that something has changed.
Similarly, a sudden drop in traffic could mean many things. Perhaps it’s Friday afternoon and all of your employees are signing off and no longer accessing your company website. Or maybe a link to your site is broken, and now potential customers aren’t able to access it. You could be losing potential revenue every minute that traffic is low, so you’d want to know as soon as possible to investigate.
How can we tell when to alert?
Calculating anomalies in time series datasets is difficult to do well. The simplest way to do it is to use basic thresholds. However, as we’ve previously blogged about, simple thresholds aren’t very accurate when trying to determine when things are actually going wrong. There are too many edge cases for them to work effectively.
Calculating anomalies in HTTP errors is relatively easy. We know that in general there should be a very low number of errors, so any spike is bad and therefore alertable. That’s why we use Service Level Objectives (SLOs) to calculate anomalies for our HTTP Error Rate notifications.
However, analyzing overall HTTP traffic behaves more similarly to Cloudflare Security Events: there’s some general baseline of events that is computed from historical trends. Any deviation from that baseline is alertable. Because of those similarities, we decided to use the same calculations for Traffic Anomalies notifications as we have previously used for Security Event notifications: z-scores. This involves comparing the current value to the average over a period of time. However, many standard deviations away from the average the current value is, is the z-score.
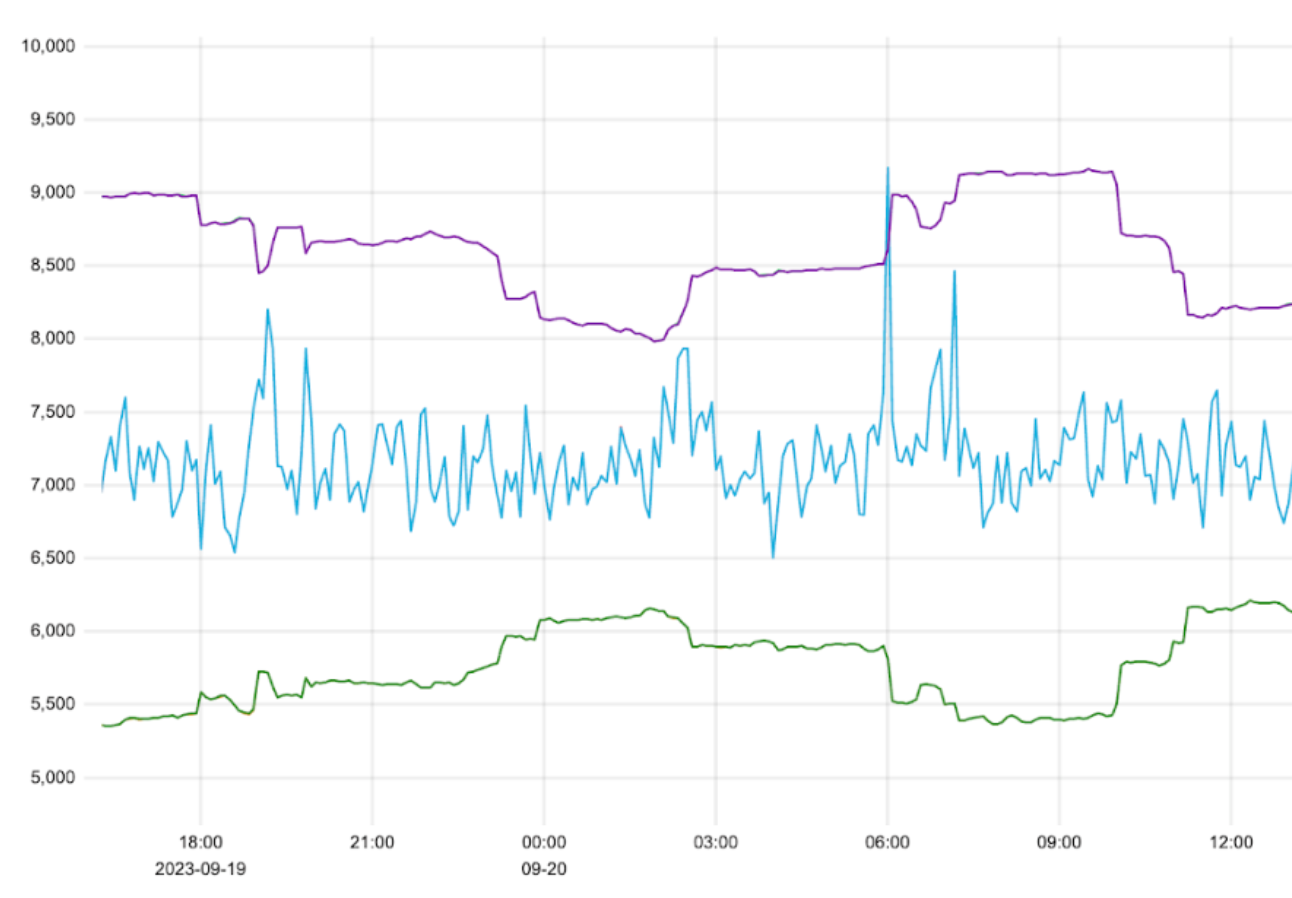
For Traffic Anomalies notifications, we’re comparing the traffic over the past 5 minutes (the short window) to the average of the traffic over the past 4 hours (the long window). Positive z-scores indicate a spike, and negative z-scores indicate a drop. If the current value is more than 3.5 standard deviations away from the average, we alert. We measure every 5 minutes, so we can alert on any traffic spike or drop in a timely fashion.

While our Security Event notifications only trigger when there is a spike in security events (a drop is almost always a good thing), in the case of Traffic Anomalies we send notifications for both spikes and drops. This is because a drop of HTTP traffic is likely indicative of a problem, and a surge could be good or bad.
As with Security Events, Traffic Anomalies notifications support minimum thresholds. This means that, even if we determine that an event is outside 3.5 standard deviations, if the number of events is insignificant, we don’t alert. A spike must be at least 200 requests, and a drop must fall by at least 200 requests. This makes the notifications less noisy, since we aren’t alerting on small spikes and drops.
Digging a little deeper
Cloudflare stores sampled statistics on requests that go through its network in Clickhouse. Every minute, we take HTTP traffic from Clickhouse and store it in an instance of VictoriaMetrics, a time-series data storage solution. VictoriaMetrics gives us out-of-the-box algorithmic functions for free, and it has been a good fit for our use case. We chose VictoriaMetrics for a few reasons.
Firstly, it’s easy to configure and operate. As a team, we want to optimize for low operational burden and VictoriaMetrics has been great thus far. Secondly, VictoriaMetrics has the ability to scale horizontally, meaning we can run it in a highly available mode. For a system such as this where we want something reliable to compute time sensitive information for our customers, the high availability requirement is essential. Finally, in our tests, we found that VictoriaMetrics used around ⅓ of the memory that Prometheus, a similar alternative product, did for the same use case.
Once we have data in VictoriaMetrics, we can run queries against it and determine whether we need to alert our customers or not, based on notification configurations they have created ahead of time. To do this we leverage our existing Alert Notification System, which we blogged about initially in 2019. We know we can count on our current notification system for the last mile to deliver these critical notifications to our customers.

Setting up the Notification
To configure this notification, navigate to the “Notifications” tab of the dashboard. Select Traffic Anomalies as your notification type. As with all Cloudflare notifications, you’re able to name and describe your notification, and choose how you want to be notified.
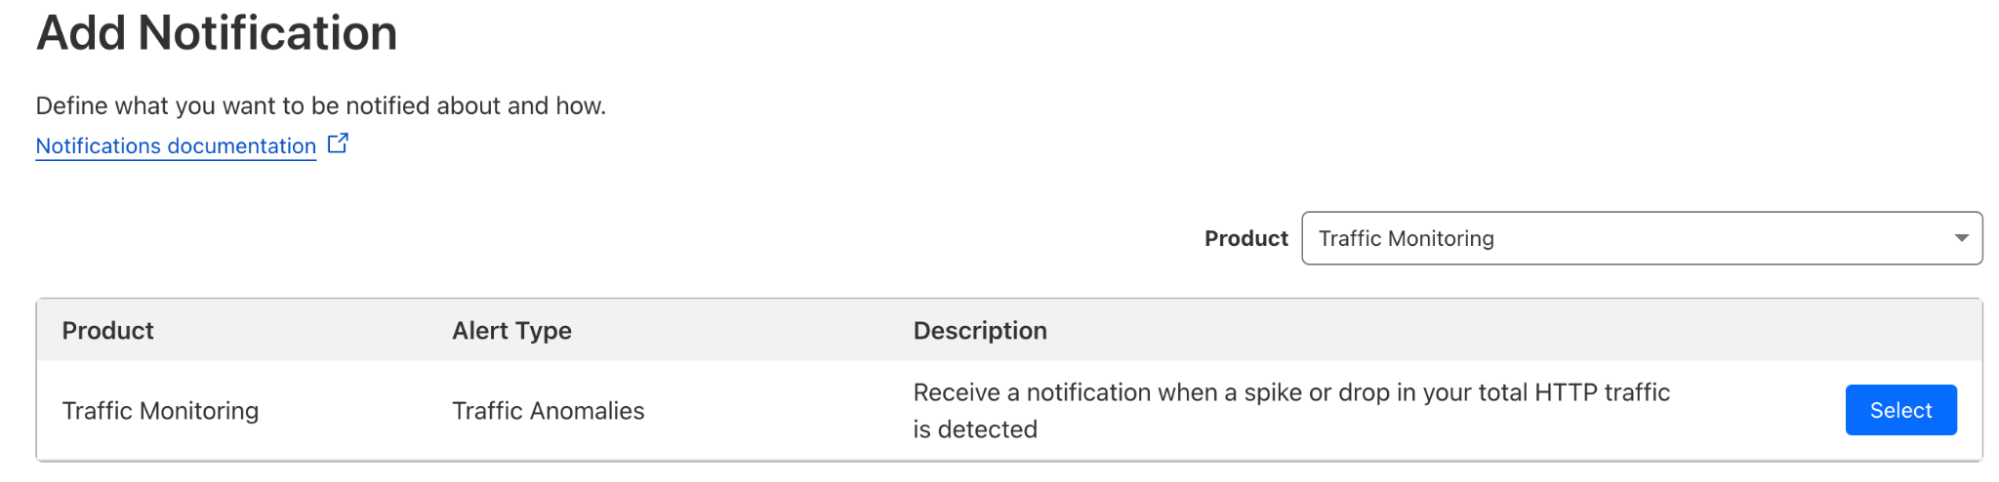
You can choose which domains you want monitored for Traffic Anomalies, whether you want to include traffic that’s already been mitigated by Cloudflare DoS or WAF products, and whether there are specific status codes you want included or excluded. You can also choose whether you want to be alerted on traffic spikes, drops, or both.
We’re excited to use this system to help serve our Enterprise customers with invaluable notifications regarding the overall health of their systems. Head over to the Notifications tab in the dash to check this new notification out now!
Терзиев vs. Григорова. Два свята, три извода
Post Syndicated from Емилия Милчева original https://www.toest.bg/terziev-vs-grigorova-dva-svyata-tri-izvoda/

През 1978 г. в София се раждат много деца, две от които, вече зрели хора, ще се изправят един срещу друг на балотажа за кмет на столицата на 5 ноември. 45-годишният Васил Терзиев, израснал в идеалния център на София, и 45-годишната Ваня Григорова, чието детство е преминало в населения с роми квартал „Христо Ботев“.
Първият – развивал се единствено в сферата на частния бизнес, добре образован и успешен инвеститор в софтуерната индустрия, без ярки политически изяви до издигането му за кандидат-кмет. Втората – с биография на човек, преминал през нископлатени работи, синдикалист, антиглобалист, ярък социален популист. И двамата са съзрявали като личности по време на Прехода, разполовил и даже разтроил България, живяла дотогава в привидностите на „равенството и братството“ и на номенклатурната клептокрация. Терзиев стартира с фамилия на високи позиции в системата на бившите тайни служби и като част от алумните на Американския университет в Благоевград. Стартът на Григорова е като на мнозинството обикновени българи, утежнен допълнително от произхода ѝ.
На 45 днес, и двамата слагат начало на политическа кариера – той за кмет (но така и не поведе листата с общински съветници) и може би за премиер след това, тя – за кмет, но и за нова левица. Пълни противоположности са – като южните и северните квартали на София. Терзиев е възпитан и сдържан, Григорова е твърде напориста и емоционална, също и жизнена.
Зададената като че ли по подразбиране прогноза от социолозите за първите двама в София – Васил Терзиев, кандидат на по-скоро либералната градска общност, срещу номинацията на десноцентристката и консервативна ГЕРБ Антон Хекимян – не се сбъдна. Срещу Терзиев се оказа кандидатът на обединената левица Ваня Григорова. А случващото се в София винаги е сигнализирало за промяна, макар и по-бавна, в останалата част на страната.
Избирателната активност в столицата, където гласоподавателите са 1,1 млн., е обидно ниска дори и сред разгневилите се заради активното мероприятие с машините софийски избиратели на ПП–ДБ, „Спаси София“ и „Екипът на София“. В навечерието на вота Държавна агенция „Национална сигурност“ с помощта на парламентарно представени партии – и партньорите, и противниците на ПП–ДБ – гръмна справка, с която пробва да уличи замeстник-министър на ПП–ДБ, ерго самата управляваща коалиция, в манипулация на машинния вот. В резултат на скандала ЦИК отмени гласуването с машини и в София излязоха на протест.
ДАНСwithme 2023 даде тласък за повече гласове, но въпреки това на предишните местни избори на първия тур за Йорданка Фандъкова гласуваха 161 909 души, а сега Терзиев е подкрепен от близо 119 000. Тогава съперничката на Фандъкова – Мая Манолова, обедини голяма част от анти-ГЕРБ вота и получи 123 714 гласа още на първи тур, а на втори надхвърли този резултат с близо 65 000 гласа.
По БНР социоложката от „Галъп интернешънъл болкан“ Яница Петкова коментира, че на 29 октомври са излезли да гласуват по-скоро представители на възрастовата група от 30 до 60 години и
хората с висше образование и по-висок социален статус са решили изборите в столицата.
За втория тур обаче ще е необходима много по-сериозна мобилизация. Големият въпрос е къде ще отидат гласовете на ГЕРБ и „Възраждане“, чийто кандидат – депутатът Деян Николов, е спечелил близо 29 000 гласа. Дори и лидерът на ГЕРБ Бойко Борисов да призове своите да подкрепят Терзиев, едва ли всички ще го направят, както не му се подчиниха и за Хекимян, чийто резултат се оказа по-нисък – неизненадващо, – отколкото на общинската листа на ГЕРБ–СДС.
Предстоящият сблъсък за София, изправил един срещу друг Терзиев и Григорова, налага някои изводи.
Автентичност
Притежават я и Терзиев, и Григорова – и като личности, и като политическо представителство. Автентичност липсваше на кандидата на ГЕРБ Антон Хекимян, който би могъл да изиграе кандидат на която и да е политическа сила, стига да му бъде поръчано, и до края изглеждаше като дубльор на истински кандидат. Нищо от биографията на журналиста не го свързва с десните консерватори на ГЕРБ – ако не броим репортажите за мъжкото хоро в Тунджа.
Васил Терзиев е автентичен представител на градските либерали, известни и като градска десница, от които всеки следващ избор отмива дясното. Социологическите данни показват, че митът за „синя София“ е заличен – кандидатът на „Възраждане“ Деян Николов е изпреварил кандидата на старата десница Вили Лилков. Едва 1,3% от гласувалите за ПП–ДБ, където са и десните консерватори от ДСБ, са пуснали бюлетина за Лилков.
Ваня Григорова също е автентичен ляв човек и нейната кандидатура, обединила БСП, „Левицата“, също „Атака“ и още леви формации, e попадение. Но и отглас от европейските тенденции, където се забелязва радикализиране на лявото в комбинация с национализъм и с „ортодоксален социализъм“ – определение, дадено преди пет години за германското движение „Изправи се“ и проруски настроената му лидерка Сара Вагенкнехт. Григорова, която беше от защитниците на преговори с „Газпром“ след спрените доставки на руски газ миналата година, в кампанията заглуши проруските теми и заложи на идеите си за повече община, срещу лошите частници и още от „късния социализъм“, както ги нарече „Сега“.
В действителност е все едно какво иска Григорова, защото структурата на СОС е ясна – най-голямата група в него е на ПП–ДБ, следвана от ГЕРБ–СДС, а тази на „БСП за България“ е трета благодарение на мажоритарния избор за Ваня Григорова.
Двата свята
През резултатите в София може да се чете и „няма ляво, няма дясно“, както при резултатите, които познаваме в цяла България. Изборът на Терзиев и слабият резултат за Вили Лилков показа, че СДС и неговите отломки остават в историята, в столицата има нова генерация избиратели, за които неизвършената лустрация и Държавна сигурност са скелети, които е най-добре да останат в гардероба. А за парите на задграничните дружества не са и чували.
В търсене на работа и по-добро заплащане към София се стекоха десетки хиляди от вътрешността на страната и социалната стратификация на столицата се промени. Кварталите „спални“ се разраснаха, а вълната от прииждащи в града, в който безработицата е изключително ниска, а средната заплата най-висока, наруши и идейния баланс. Старото дясно се характеризираше с идеологеми, а и нямаше как да бъде иначе, след като все още не беше изградило база, а само антикомунизъм и усилия за разграждане на тоталитарната държава. Новото обаче е бизнес ориентирано.
Изстрелването на Григорова към балотаж ще се отрази и на БСП. Наблюдателни журналисти забелязаха, че в изборната нощ триумфиращата лидерка на социалистите Корнелия Нинова така и не събра сили да назове името на същинската победителка. Дали пък Нинова няма да провали синдикалистката, която заплашва не шефския пост в партията, а съществуването на самата партия в настоящия ѝ вид. Вчера дойде новината за договорена подкрепа с „Има такъв народ“, спечелили близо 12 000 гласа с кандидата си Ивайло Вълчев. Но резервоарът на гласове все пак остават ГЕРБ и „Възраждане“, а партията на Костадин Костадинов се е колаборирала с БСП – подкрепи я за вота на недоверие например, а на няколко пъти вече координират действия.
Ваня Григорова на практика зашлеви Нинова и всичките досегашни подгласници на „Позитано“ 20, типични апаратчици от хайверената левица, за които лявото не е нищо повече от концесия до живот. Фактът обаче, че те стоят зад номинацията ѝ, показва, че вълкът иска да си смени кожата – нищо повече.
Идеалният кмет
Идеалният кмет на българския град-държава София би бил хибрид между технократа с рационален ум и сдържаност Терзиев и Григорова с нейната емпатия и социални умения. Но това е невъзможно, така че изборът на 5 ноември е неизбежен.
Страхове, власт и популизъм: САЩ, Полша, България
Post Syndicated from Яна Хашъмова original https://www.toest.bg/strahove-vlast-i-populizum-sasht-polsha-bulgaria/

На пръв поглед странни политически събития се случиха през последните седмици в САЩ и Полша. В американския Конгрес три седмици републиканците се бориха със себе си, докато успеят да изберат председател на Конгреса (Speaker of the House), а в Полша управляващата от осем години партия „Право и справедливост“ загуби изборите, въпреки че приложи всички позволени и непозволени методи по време на предизборната кампания, подкрепена от недемократичните закони, които сама си прокара.
На фона на тези събития състоянието на нашия политически живот направо изглежда нормално. Предварителните резултати от местните избори не донесоха особени изненади, с малки изключения, докато президентът и други политически сили и партии упорито и системно продължаваха да защитават и лансират руските икономически и политически интереси в България и да подронват демокрацията. А скандалите относно местните избори се въртяха около познатите вече теми: гласуването с машини, изборния туризъм и купуването на гласове.
И все пак има ли допирни точки между политическите явления в тези страни?
В САЩ Републиканската партия продължава да бъде манипулирана и контролирана от бившия президент Доналд Тръмп. Нейното крайнодясно крило, най-тясно свързано с Тръмп, но и най-малобройно, успя да свали бившия председател и да подкрепи и издигне новия – Майк Джонсън, не без помощта на Тръмп, който или отхвърляше, или подкрепяше кандидат след кандидат.
Бившият радиоводещ Джонсън се ръководи от радикалноконсервативни възгледи (социални и финансови), които повечето американци не споделят. Доказателство за това са не само обществените проучвания, но и предишните избори, в които немалко републикански кандидати за представители в Конгреса загубиха, след като гръмко поддържаха политика за цялостна забрана на абортите и също така гръмко бяха поддържани от Тръмп.
Разбира се, някои представители не се страхуват от избори, защото изкуствено начертаните изборни карти им гарантират успех, но все пак на доста места крайнодесните кандидати загубиха и очакваната червена вълна не се надигна изобщо. Състоянието на Републиканската партия е доста хаотично и нестабилно, но нейните политически представители продължават да са подвластни на стремежа си към власт и на крайни идеологически възгледи, които в момента се движат от страха и несигурността на хората. Тази несигурност, причинена от продължителното обедняване на работническата класа и подклаждана от реторика като „Америка първа“, се превръща в страх от променящия се начин на живот и в омраза към другия (обикновено имигранти, бежанци и ЛГБТИ+).
За това без съмнение допринесоха и проблемите на глобалната икономика, но големите корпорации продължават да печелят, а техният растеж се поддържа от същата тази консервативна идеология, която сега тръби „Америка първа“. Трудно е да се предсказват избори, когато резултатите често се определят от активни манипулации и ирационални чувства. В САЩ представителите в Конгреса (The House of Representatives) се избират на всеки две години на база на райони, чиито граници се определят от сената на всеки щат.
Всеки район избира представител и партията, която е на власт, обикновено чертае границите така, че да разводни гласовете на противниковата партия. Например населени места, за които се знае, че са демократично настроени, се делят на части, които след това се присъединяват към по-големи райони с население, гласуващо предимно за Републиканската партия. Така демократичните гласове се губят.
След като Върховният съд отхвърли преначертаването на изборните райони в Алабама като незаконно, понеже по този начин се отнемаха гласовете на афроамериканците там, в Северна Каролина съвсем наскоро се създадоха нови граници. Анализаторите твърдят, че при тези граници най-вероятно жителите ще изберат десет републиканци и четирима демократи в сравнение със седем републиканци и седем демократи при старите избирателни карти. Следващите избори ще покажат доколко подклажданият страх и предизборните манипулации ще надделеят или ще загубят в полза на по-здрава демокрация и по-категорично разпознаване на тези страхове.
Така се случи неочаквано в Полша.
Независимо от агресивната медийна кампания в услуга на управляващата партия и нейната фокусирана реторика, насочена срещу заплахата от имигранти и бежанци, поляците успяха да разпознаят манипулациите и не се изплашиха. Може би защото „Право и справедливост“ премина всякакви граници на балансираната предизборна кампания, в която все пак трябва да се чуе и гласът на опозицията. Силното ограничаване на правата на жените и опасността от напускане на Евросъюза при евентуално следващо управление на „Право и справедливост“ също вероятно допринесоха за загубата. Пътят на възстановяване на демократичните процеси обаче ще е труден заради изградената вече недемократична мрежа от институции и заради настоящия президент от „Право и справедливост“, който, като нашия, най-вероятно ще се опитва да възпрепятства възстановяването на демократичните институции и процеси в Полша.
Последните конфликти между нашия президент и управляващите се развиха по повод таксите на „Лукойл“ и ядрената енергетика. Реториката на Радев, доста празна, но може би затова и успешна, обикновено атакува или корупцията сред управляващите, или безхаберието им за благосъстоянието на хората. По отношение на развитието на ядрената енергетика президентът настоява за „устойчив, ефективен и ефикасен процес“, и още:
Трябва да се проучат, анализират и съпоставят всички възможни варианти по редица важни параметри – локация, лицензи, безопасност и най-вече време и средства за изграждане.
Въпреки че правителството се ангажира в точно такъв процес, подобна критика работи, защото е по-гръмко заявена и разпространена. Относно закона за енергетиката реториката е приблизително същата:
Националната сигурност изисква управлението да гледа отвъд постовете, отвъд своите интереси и мандати и да върне фокуса си върху проблемите на обществото.
Този път се използват сигурността и проблемите на обществото, като се атакуват безсъвестността и кариеризмът на политиците. Много общи приказки, както често казваме, но те успокояват хора, които са загубили вяра във функциите на държавата, страхуват се за ежедневието си и проектират страховете си върху неспособността на правителството да подобри живота им.
Няма да продължавам с други примери, в които политическите партии манипулират чувство за несигурност, лансирайки лозунги като „България за българите“, или градят изкуствено национално самочувствие, селективно представяйки историята на България и нейното величие и издигайки пилони и знамена. Може да прозвучи странно на читателите, но ще цитирам Чехов, който преди повече от 100 години неведнъж критично се е отнасял към собственото си общество:
Когато нещо не е наред в нас, ние търсим причини извън нас и скоро ги намираме. „Французинът, евреите, Вилхелм…“ – това са призраци, но затова пък те така облекчават нашето безпокойство.
А що се отнася до местните избори, анализаторите тепърва ще обобщават доколко манипулациите с купуване на гласове и изборен туризъм, пък и липсата на машинното гласуване са допринесли за резултатите. Но сега, когато довършвам тези мисли в края на изборния ден, е ясно, че гласоподавателите не повярваха на скандала с машинното гласуване и Васил Терзиев получи повече гласове от прогнозите. А междувременно Върховният административен съд отмени решението на Централната избирателна комисия и на втори кръг избирателите ще ползват машини. Интересно е да се види дали хартиените бюлетини са помогнали на партиите, които настояваха за тях. Притеснителна е ниската активност при такова голямо недоволство, но цинизмът и нихилизмът са силни фактори. От друга страна, слабото представяне на „Възраждане“ води до умерен оптимизъм.
В САЩ местните власти чертаят изборни граници, в Полша медиите се преработиха да обслужват интересите на „Право и справедливост“, а у нас се борим с машини, купуване на гласове и изборен туризъм. Кой с каквото може, а резултатите невинаги са пряко свързани с манипулации. Дано с по-сериозно образование, критично мислене и овладени страхове да постъпваме по-често като поляците.
The Future of Drone Warfare
Post Syndicated from Bruce Schneier original https://www.schneier.com/blog/archives/2023/10/the-future-of-drone-warfare.html
Ukraine is using $400 drones to destroy tanks:
Facing an enemy with superior numbers of troops and armor, the Ukrainian defenders are holding on with the help of tiny drones flown by operators like Firsov that, for a few hundred dollars, can deliver an explosive charge capable of destroying a Russian tank worth more than $2 million.
[…]
A typical FPV weighs up to one kilogram, has four small engines, a battery, a frame and a camera connected wirelessly to goggles worn by a pilot operating it remotely. It can carry up to 2.5 kilograms of explosives and strike a target at a speed of up to 150 kilometers per hour, explains Pavlo Tsybenko, acting director of the Dronarium military academy outside Kyiv.
“This drone costs up to $400 and can be made anywhere. We made ours using microchips imported from China and details we bought on AliExpress. We made the carbon frame ourselves. And, yeah, the batteries are from Tesla. One car has like 1,100 batteries that can be used to power these little guys,” Tsybenko told POLITICO on a recent visit, showing the custom-made FPV drones used by the academy to train future drone pilots.
“It is almost impossible to shoot it down,” he said. “Only a net can help. And I predict that soon we will have to put up such nets above our cities, or at least government buildings, all over Europe.”
Science fiction authors have been writing about drone swarms for decades. Now they are reality. Tanks today. Soon it will be ships (probably with more expensive drones). Feels like this will be a major change in warfare.
Apple M3 Family of CPUs Launched with Some Shaky Performance Claims
Post Syndicated from Patrick Kennedy original https://www.servethehome.com/apple-m3-family-of-arm-cpus-launched-with-some-shaky-performance-claims/
The Apple M3 family of chips launched with some advancements but also intentionally shaky performance claims that should warrant a look by consumer protection agencies
The post Apple M3 Family of CPUs Launched with Some Shaky Performance Claims appeared first on ServeTheHome.
Sending and receiving webhooks on AWS: Innovate with event notifications
Post Syndicated from James Beswick original https://aws.amazon.com/blogs/compute/sending-and-receiving-webhooks-on-aws-innovate-with-event-notifications/
This post is written by Daniel Wirjo, Solutions Architect, and Justin Plock, Principal Solutions Architect.
Commonly known as reverse APIs or push APIs, webhooks provide a way for applications to integrate to each other and communicate in near real-time. It enables integration for business and system events.
Whether you’re building a software as a service (SaaS) application integrating with your customer workflows, or transaction notifications from a vendor, webhooks play a critical role in unlocking innovation, enhancing user experience, and streamlining operations.
This post explains how to build with webhooks on AWS and covers two scenarios:
- Webhooks Provider: A SaaS application that sends webhooks to an external API.
- Webhooks Consumer: An API that receives webhooks with capacity to handle large payloads.
It includes high-level reference architectures with considerations, best practices and code sample to guide your implementation.
Sending webhooks
To send webhooks, you generate events, and deliver them to third-party APIs. These events facilitate updates, workflows, and actions in the third-party system. For example, a payments platform (provider) can send notifications for payment statuses, allowing ecommerce stores (consumers) to ship goods upon confirmation.
AWS reference architecture for a webhook provider
The architecture consists of two services:
- Webhook delivery: An application that delivers webhooks to an external endpoint specified by the consumer.
- Subscription management: A management API enabling the consumer to manage their configuration, including specifying endpoints for delivery, and which events for subscription.

Considerations and best practices for sending webhooks
When building an application to send webhooks, consider the following factors:
Event generation: Consider how you generate events. This example uses Amazon DynamoDB as the data source. Events are generated by change data capture for DynamoDB Streams and sent to Amazon EventBridge Pipes. You then simplify the DynamoDB response format by using an input transformer.
With EventBridge, you send events in near real time. If events are not time-sensitive, you can send multiple events in a batch. This can be done by polling for new events at a specified frequency using EventBridge Scheduler. To generate events from other data sources, consider similar approaches with Amazon Simple Storage Service (S3) Event Notifications or Amazon Kinesis.
Filtering: EventBridge Pipes support filtering by matching event patterns, before the event is routed to the target destination. For example, you can filter for events in relation to status update operations in the payments DynamoDB table to the relevant subscriber API endpoint.
Delivery: EventBridge API Destinations deliver events outside of AWS using REST API calls. To protect the external endpoint from surges in traffic, you set an invocation rate limit. In addition, retries with exponential backoff are handled automatically depending on the error. An Amazon Simple Queue Service (SQS) dead-letter queue retains messages that cannot be delivered. These can provide scalable and resilient delivery.
Payload Structure: Consider how consumers process event payloads. This example uses an input transformer to create a structured payload, aligned to the CloudEvents specification. CloudEvents provides an industry standard format and common payload structure, with developer tools and SDKs for consumers.
Payload Size: For fast and reliable delivery, keep payload size to a minimum. Consider delivering only necessary details, such as identifiers and status. For additional information, you can provide consumers with a separate API. Consumers can then separately call this API to retrieve the additional information.
Security and Authorization: To deliver events securely, you establish a connection using an authorization method such as OAuth. Under the hood, the connection stores the credentials in AWS Secrets Manager, which securely encrypts the credentials.
Subscription Management: Consider how consumers can manage their subscription, such as specifying HTTPS endpoints and event types to subscribe. DynamoDB stores this configuration. Amazon API Gateway, Amazon Cognito, and AWS Lambda provide a management API for operations.
Costs: In practice, sending webhooks incurs cost, which may become significant as you grow and generate more events. Consider implementing usage policies, quotas, and allowing consumers to subscribe only to the event types that they need.
Monetization: Consider billing consumers based on their usage volume or tier. For example, you can offer a free tier to provide a low-friction access to webhooks, but only up to a certain volume. For additional volume, you charge a usage fee that is aligned to the business value that your webhooks provide. At high volumes, you offer a premium tier where you provide dedicated infrastructure for certain consumers.
Monitoring and troubleshooting: Beyond the architecture, consider processes for day-to-day operations. As endpoints are managed by external parties, consider enabling self-service. For example, allow consumers to view statuses, replay events, and search for past webhook logs to diagnose issues.
Advanced Scenarios: This example is designed for popular use cases. For advanced scenarios, consider alternative application integration services noting their Service Quotas. For example, Amazon Simple Notification Service (SNS) for fan-out to a larger number of consumers, Lambda for flexibility to customize payloads and authentication, and AWS Step Functions for orchestrating a circuit breaker pattern to deactivate unreliable subscribers.
Receiving webhooks
To receive webhooks, you require an API to provide to the webhook provider. For example, an ecommerce store (consumer) may rely on notifications provided by their payment platform (provider) to ensure that goods are shipped in a timely manner. Webhooks present a unique scenario as the consumer must be scalable, resilient, and ensure that all requests are received.
AWS reference architecture for a webhook consumer
In this scenario, consider an advanced use case that can handle large payloads by using the claim-check pattern.

At a high-level, the architecture consists of:
- API: An API endpoint to receive webhooks. An event-driven system then authorizes and processes the received webhooks.
- Payload Store: S3 provides scalable storage for large payloads.
- Webhook Processing: EventBridge Pipes provide an extensible architecture for processing. It can batch, filter, enrich, and send events to a range of processing services as targets.
Considerations and best practices for receiving webhooks
When building an application to receive webhooks, consider the following factors:
Scalability: Providers typically send events as they occur. API Gateway provides a scalable managed endpoint to receive events. If unavailable or throttled, providers may retry the request, however, this is not guaranteed. Therefore, it is important to configure appropriate rate and burst limits. Throttling requests at the entry point mitigates impact on downstream services, where each service has its own quotas and limits. In many cases, providers are also aware of impact on downstream systems. As such, they send events at a threshold rate limit, typically up to 500 transactions per second (TPS).

In addition, API Gateway allows you to validate requests, monitor for any errors, and protect against distributed denial of service (DDoS). This includes Layer 7 and Layer 3 attacks, which are common threats to webhook consumers given public exposure.
Authorization and Verification: Providers can support different authorization methods. Consider a common scenario with Hash-based Message Authentication Code (HMAC), where a shared secret is established and stored in Secrets Manager. A Lambda function then verifies integrity of the message, processing a signature in the request header. Typically, the signature contains a timestamped nonce with an expiry to mitigate replay attacks, where events are sent multiple times by an attacker. Alternatively, if the provider supports OAuth, consider securing the API with Amazon Cognito.
Payload Size: Providers may send a variety of payload sizes. Events can be batched to a single larger request, or they may contain significant information. Consider payload size limits in your event-driven system. API Gateway and Lambda have limits of 10 Mb and 6 Mb. However, DynamoDB and SQS are limited to 400kb and 256kb (with extension for large messages) which can represent a bottleneck.
Instead of processing the entire payload, S3 stores the payload. It is then referenced in DynamoDB, via its bucket name and object key. This is known as the claim-check pattern. With this approach, the architecture supports payloads of up to 6mb, as per the Lambda invocation payload quota.

Idempotency: For reliability, many providers prioritize delivering at-least-once, even if it means not guaranteeing exactly once delivery. They can transmit the same request multiple times, resulting in duplicates. To handle this, a Lambda function checks against the event’s unique identifier against previous records in DynamoDB. If not already processed, you create a DynamoDB item.
Ordering: Consider processing requests in its intended order. As most providers prioritize at-least-once delivery, events can be out of order. To indicate order, events may include a timestamp or a sequence identifier in the payload. If not, ordering may be on a best-efforts basis based on when the webhook is received. To handle ordering reliably, select event-driven services that ensure ordering. This example uses DynamoDB Streams and EventBridge Pipes.
Flexible Processing: EventBridge Pipes provide integrations to a range of event-driven services as targets. You can route events to different targets based on filters. Different event types may require different processors. For example, you can use Step Functions for orchestrating complex workflows, Lambda for compute operations with less than 15-minute execution time, SQS to buffer requests, and Amazon Elastic Container Service (ECS) for long-running compute jobs. EventBridge Pipes provide transformation to ensure only necessary payloads are sent, and enrichment if additional information is required.
Costs: This example considers a use case that can handle large payloads. However, if you can ensure that providers send minimal payloads, consider a simpler architecture without the claim-check pattern to minimize cost.
Conclusion
Webhooks are a popular method for applications to communicate, and for businesses to collaborate and integrate with customers and partners.
This post shows how you can build applications to send and receive webhooks on AWS. It uses serverless services such as EventBridge and Lambda, which are well-suited for event-driven use cases. It covers high-level reference architectures, considerations, best practices and code sample to assist in building your solution.
For standards and best practices on webhooks, visit the open-source community resources Webhooks.fyi and CloudEvents.io.
For more serverless learning resources, visit Serverless Land.
ASRock Rack ALTRA-NAS Ampere Altra Arm NAS at OCP Summit 2023
Post Syndicated from Patrick Kennedy original https://www.servethehome.com/asrock-rack-altra-nas-ampere-altra-arm-nas-at-ocp-summit-2023/
We spotted the ASRock Rack ALTRA-NAS an Ampere Altra Max 128 Arm core NAS with PCIe Gen4, 10GbE, and IPMI, that will be a hit if launched
The post ASRock Rack ALTRA-NAS Ampere Altra Arm NAS at OCP Summit 2023 appeared first on ServeTheHome.
Spark on AWS Lambda: An Apache Spark runtime for AWS Lambda
Post Syndicated from John Cherian original https://aws.amazon.com/blogs/big-data/spark-on-aws-lambda-an-apache-spark-runtime-for-aws-lambda/
Spark on AWS Lambda (SoAL) is a framework that runs Apache Spark workloads on AWS Lambda. It’s designed for both batch and event-based workloads, handling data payload sizes from 10 KB to 400 MB. This framework is ideal for batch analytics workloads from Amazon Simple Storage Service (Amazon S3) and event-based streaming from Amazon Managed Streaming for Apache Kafka (Amazon MSK) and Amazon Kinesis. The framework seamlessly integrates data with platforms like Apache Iceberg, Apache Delta Lake, Apache HUDI, Amazon Redshift, and Snowflake, offering a low-cost and scalable data processing solution. SoAL provides a framework that enables you to run data-processing engines like Apache Spark and take advantage of the benefits of serverless architecture, like auto scaling and compute for analytics workloads.
This post highlights the SoAL architecture, provides infrastructure as code (IaC), offers step-by-step instructions for setting up the SoAL framework in your AWS account, and outlines SoAL architectural patterns for enterprises.
Solution overview
Apache Spark offers cluster mode and local mode deployments, with the former incurring latency due to the cluster initialization and warmup. Although Apache Spark’s cluster-based engines are commonly used for data processing, especially with ACID frameworks, they exhibit high resource overhead and slower performance for payloads under 50 MB compared to the more efficient Pandas framework for smaller datasets. When compared to Apache Spark cluster mode, local mode provides faster initialization and better performance for small analytics workloads. The Apache Spark local mode on the SoAL framework is optimized for small analytics workloads, and cluster mode is optimized for larger analytics workloads, making it a versatile framework for enterprises.
We provide an AWS Serverless Application Model (AWS SAM) template, available in the GitHub repo, to deploy the SoAL framework in an AWS account. The AWS SAM template builds the Docker image, pushes it to the Amazon Elastic Container Registry (Amazon ECR) repository, and then creates the Lambda function. The AWS SAM template expedites the setup and adoption of the SoAL framework for AWS customers.
SoAL architecture
The SoAL framework provides local mode and containerized Apache Spark running on Lambda. In the SoAL framework, Lambda runs in a Docker container with Apache Spark and AWS dependencies installed. On invocation, the SoAL framework’s Lambda handler fetches the PySpark script from an S3 folder and submits the Spark job on Lambda. The logs for the Spark jobs are recorded in Amazon CloudWatch.
For both streaming and batch tasks, the Lambda event is sent to the PySpark script as a named argument. Utilizing a container-based image cache along with the warm instance features of Lambda, it was found that the overall JVM warmup time reduced from approx. 70 seconds to under 30 seconds. It was observed that the framework performs well with batch payloads up to 400 MB and streaming data from Amazon MSK and Kinesis. The per-session costs for any given analytics workload depends on the number of requests, the run duration, and the memory configured for the Lambda functions.
The following diagram illustrates the SoAL architecture.

Enterprise architecture
The PySpark script is developed in standard Spark and is compatible with the SoAL framework, Amazon EMR, Amazon EMR Serverless, and AWS Glue. If needed, you can use the PySpark scripts in cluster mode on Amazon EMR, EMR Serverless, and AWS Glue. For analytics workloads with a size between a few KBs and 400 MB, you can use the SoAL framework on Lambda and in larger analytics workload scenarios over 400 MB, and run the same PySpark script on AWS cluster-based tools like Amazon EMR, EMR Serverless, and AWS Glue. The extensible script and architecture make SoAL a scalable framework for analytics workloads for enterprises. The following diagram illustrates this architecture.
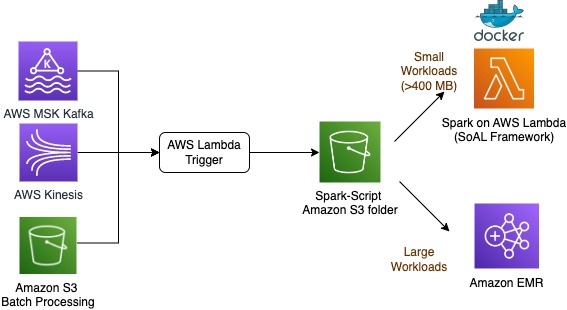
Prerequisites
To implement this solution, you need an AWS Identity and Access Management (IAM) role with permission to AWS CloudFormation, Amazon ECR, Lambda, and AWS CodeBuild.
Set up the solution
To set up the solution in an AWS account, complete the following steps:
- Clone the GitHub repository to local storage and change the directory within the cloned folder to the CloudFormation folder:
- Run the AWS SAM template
sam-imagebuilder.yamlusing the following command with the stack name and framework of your choice. In this example, the framework is Apache HUDI:
The command deploys a CloudFormation stack called spark-on-lambda-image-builder. The command runs a CodeBuild project that builds and pushes the Docker image with the latest tag to Amazon ECR. The command has a parameter called ParameterValue for each open-source framework (Apache Delta, Apache HUDI, and Apache Iceberg).
- After the stack has been successfully deployed, copy the ECR repository URI (spark-on-lambda-image-builder) that is displayed in the output of the stack.
- Run the AWS SAM Lambda package with the required Region and ECR repository:
This command creates the Lambda function with the container image from the ECR repository. An output file packaged-template.yaml is created in the local directory.
- Optionally, to publish the AWS SAM application to the AWS Serverless Application Repository, run the following command. This allows AWS SAM template sharing with the GUI interface using AWS Serverless Application Repository and other developers to use quick deployments in the future.
After you run this command, a Lambda function is created using the SoAL framework runtime.
- To test it, use PySpark scripts from the spark-scripts folder. Place the sample script and accomodations.csv dataset in an S3 folder and provide the location via the Lambda environment variables
SCRIPT_BUCKETandSCRIPT_LOCATION.
After Lambda is invoked, it uploads the PySpark script from the S3 folder to a container local storage and runs it on the SoAL framework container using SPARK-SUBMIT. The Lambda event is also passed to the PySpark script.
Clean up
Deploying an AWS SAM template incurs costs. Delete the Docker image from Amazon ECR, delete the Lambda function, and remove all the files or scripts from the S3 location. You can also use the following command to delete the stack:
Conclusion
The SoAL framework enables you to run Apache Spark serverless tasks on AWS Lambda efficiently and cost-effectively. Beyond cost savings, it ensures swift processing times for small to medium files. As a holistic enterprise vision, SoAL seamlessly bridges the gap between big and small data processing, using the power of the Apache Spark runtime across both Lambda and other cluster-based AWS resources.
Follow the steps in this post to use the SoAL framework in your AWS account, and leave a comment if you have any questions.
About the authors
 John Cherian is Senior Solutions Architect(SA) at Amazon Web Services helps customers with strategy and architecture for building solutions on AWS.
 Emerson Antony is Senior Cloud Architect at Amazon Web Services helps customers with implementing AWS solutions.
 Kiran Anand is Principal AWS Data Lab Architect at Amazon Web Services helps customers with Big data & Analytics architecture.
Scaling national identity schemes with itsme and Amazon Cognito
Post Syndicated from Guillaume Neau original https://aws.amazon.com/blogs/security/scaling-national-identity-schemes-with-itsme-and-amazon-cognito/
In this post, we demonstrate how you can use identity federation and integration between the identity provider itsme® and Amazon Cognito to quickly consume and build digital services for citizens on Amazon Web Services (AWS) using available national digital identities. We also provide code examples and integration proofs of concept to get you started quickly.
National digital identities refer to a system or framework that a government establishes to uniquely and securely identify its citizens or residents in the digital realm.
These national digital identities are built on a rigorous process of identity verification and enforce the use of high security standards when it comes to authentication mechanisms. Their adoption by both citizens and businesses helps to fight identity theft, most notably by removing the need to send printed copies of identity documents.
National certified secure digital identities are suitable for both businesses and public services and can improve the onboarding experience by reducing the need to create new credentials.
About itsme
itsme is a trusted identity provider (certified and notified for all 27 member states of EU at Level of Assurance HIGH of the eiDAS regulation) that can be used on over 800 government and company platforms to identify yourself online, log in, confirm transactions, or sign documents. It allows partners to use its verified identities for authentication and authorization on web, desktop, mobile web, and mobile applications.
As of this writing, itsme is accessible for all residents in Belgium, The Netherlands, and Luxembourg. However, since there are no limitations on the geographic usage of the identity and electronic signature APIs, itsme has the potential to expand to additional countries in the future. (Source: itsme, 2023)
Architecture overview
To demonstrate the integration, you’re going to build a minimalistic application made of the following components as shown in Figure 1 that follows:
- An Amazon Cognito user pool that supports OIDC federation with itsme for Belgium.
- A basic, frontend application that offers an authentication portal that will be served from a local development environment.
- An API built on top of Amazon API Gateway from which data are consumed.
- An API Gateway Amazon Cognito user pools authorizer that consumes tokens vended by Amazon Cognito to authorize API calls.
- An AWS Lambda function that reads and writes from an Amazon DynamoDB database.
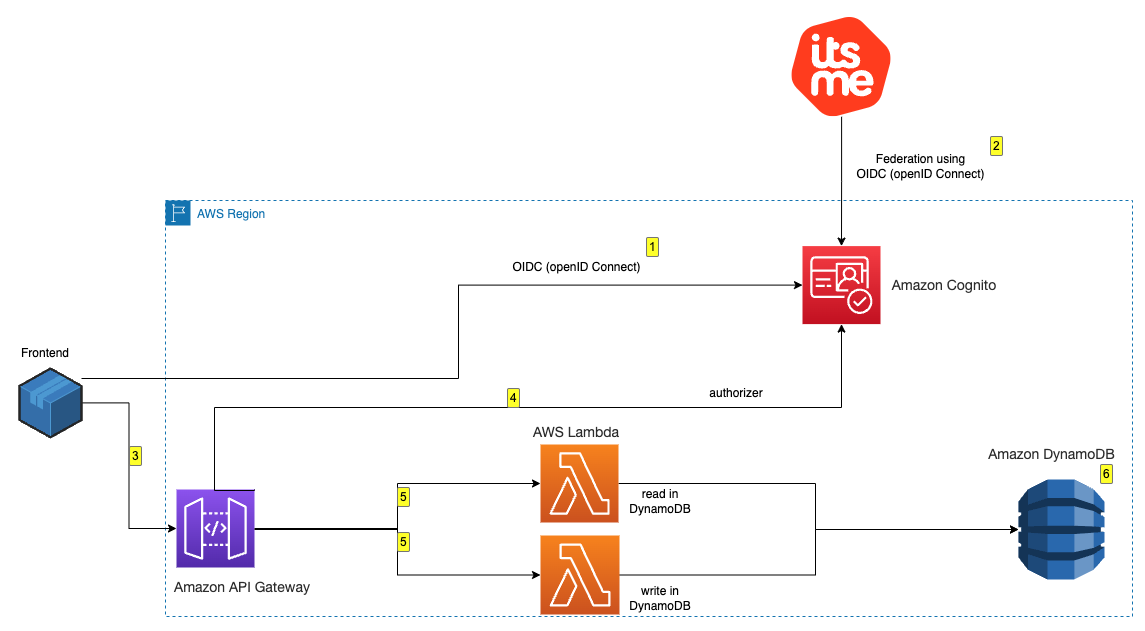
Figure 1: Architectural diagram
After deployment, you can log in and interact with the application:
- Visit the frontend deployed locally, and you’re presented the option to authenticate with itsme by using a blue colored button. Choose the button to proceed.
- After being redirected to itsme, you’re asked to either create a new account or to use an existing one for authentication. After you’re successfully authenticated with itsme, the associated Amazon Cognito user pool is populated with the requested data in the scope of the federation. Specifically in this example, the national registration number is made available.
- When authenticated, you’re redirected to the frontend, and you can read and write messages to and from the database behind an Amazon API Gateway.
- The Amazon API Gateway uses Amazon Cognito to check the validity of your authentication token.
- The Lambda function reads and writes messages to and from DynamoDB.
Prerequisites to deploy the identity federation with itsme
While setting up the Amazon Cognito user pool, you’re asked for the following information:
- An itsme client ID – itsmeClientId
- An itsme client secret – itsmeClientSecret
- An itsme service code – itsmeServiceCode
- An itsme issuer URL – itsmeIssuerUrl
To retrieve this information, you must be an itsme partner and to have your sandbox requested and available. The sandbox should be made available three business days after you submit the dedicated request form to itsme.
After the sandbox is provisioned, you must contact the itsme support desk and ask to switch the sandbox authentication to the client secret – itsmeClientSecret flow. Include the link to this post and specify that it’s for establishing a federation with Amazon Cognito.
Implement the proof of concept
To implement this proof of concept, you need to follow these steps:
- Create an Amazon Cognito user pool.
- Configure the Amazon Cognito user pool.
- Deploy a sample API.
- Configure your application.
To create and configure an Amazon Cognito user pool
- Sign in to the AWS Management Console and enter cognito in the search bar at the top. Select Cognito from the Services results.

Figure 2: Select Cognito service
- In the Amazon Cognito console, select User pools, and then choose Create user pool.

Figure 3: Cognito user pool creation
- To configure the sign-in experience section, select Federated identity providers as the authentication providers.
- In the Cognito user pool sign-in options area, select User name, Email, and Phone number.
- In the Federated sign-in options area, select OpenID Connect (OIDC).

Figure 4: Sign-in configuration
- Choose Next to continue to security requirements.


Note: In this post, account management and authentication are restricted to itsme. Because of this, the password length, multi-factor authentication, and recovery procedures are delegated to itsme. If you don’t restrict your Cognito user pool to itsme only, configure it according to your security requirements.
To configure the security requirements
- For Password policy, select Cognito defaults.
- Select Require MFA – Recommended in the Multi-factor authentication area, and select Authenticator apps
Note: Although the activation of multi-factor authentication is recommended, it’s important to understand that users of this pool will be created and authenticated through the federation with itsme. In the next procedure, you disable the Self service sign-up feature to prevent users from creating accounts. As itsme is compliant with the level of assurance substantial of the eIDAS regulation, itsme users must log in using a second factor of authentication.
- Clear Enable self-service account recovery in the User account recovery area.
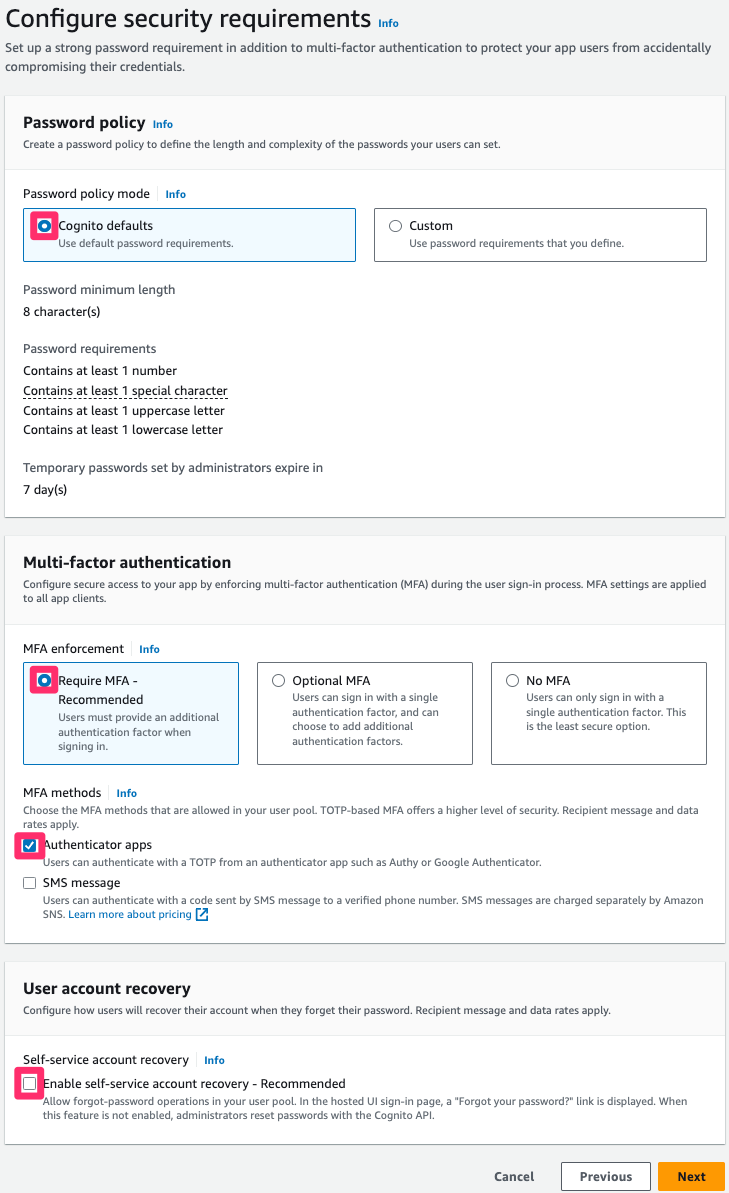
Figure 5: Security requirements configuration
To configure the sign-up experience
- Clear Enable self-registration.
- Clear Allow Cognito to automatically send messages to verify and confirm.

Figure 6: Sign-up configuration
- Skip the configuration of required attributes and configure custom attributes. Expand the drop-down menu and add the following custom attributes:
- Name: eid.
- Type: String.
- Leave Min and Max length blank.
- Mutable: Select.
This custom attribute is used to map and store the national registration number.
- Choose Next to configure message delivery.

Note: In this post, account management and authentication are going to be restricted to itsme. As a result, Amazon Cognito doesn’t send email or SMS, and the prescribed configuration is minimal. If you don’t limit your user pool to itsme, configure message delivery parameters according to your corporate policy.
To configure message delivery
- For Email, select Send email with Cognito and leave the other fields with their default configuration.
- To configure the SMS, select Create a new IAM Role if you don’t already have one provisioned.
- Choose Next to configure the federated identity provider.

Figure 7: Message delivery configuration
- Choose Next to configure identity provider.

To configure the federated identity provider
- For Provider name, enter itsme.
- For Client ID, enter the client ID provided by itsme.
- For Client secret, enter the client secret provided by itsme.
- For Authorized scopes, start with the mandatory service:itsmeServiceCode.
- With a space between each scope, enter openid profile eid email address.
- For Retrieve OIDC endpoints, enter the issuer URL provided by itsme.

Figure 8: OIDC federation configuration
The configuration of the mapping of the attributes can be done according to the documentation provided by itsme.
An example of mapping is provided in Figure 9 that follows. Some differences exist to be able to retrieve and map the eID and the unique username of itsme (sub).
More specifically, to retrieve the National Registration Number, the eid field needs to be set to http://itsme.services/v2/claim/BENationalNumber.

Figure 9: Attributes mapping
- Choose Next to configure an app client.


To configure an app client
- Configure both your user pool name and domain by opening the Amazon Cognito console.

Figure 10: User pool and domain name
- In the Initial app client area, select Public client.
- Enter your application client name.
- Select Don’t generate a client secret.
- Enter the application callback URL that’s used by itsme at the end of the authenticating flow. This URL is the one your end user is going to land on after authenticating.

Figure 11: Configuring app client


To finish the creation by reviewing and creating the user pool
When the user pool is created, send your Amazon Cognito domain name to itsme support for them to activate your authentication endpoints. That URL has the following composition:
https://<Your user pool domain>.auth.<your region>.amazoncognito.com/oauth2/idpresponse
When the user pool is created, you can retrieve your userPoolWebClientId, which is required to create a consuming application.
To retrieve your userPoolWebClientId
- From the Amazon Cognito Console, select User pools on the left menu.
- Select the user pool that you created.

Figure 12: User pool app integration

In the App integration area, your userPoolWebClientId is displayed at the bottom of the window.
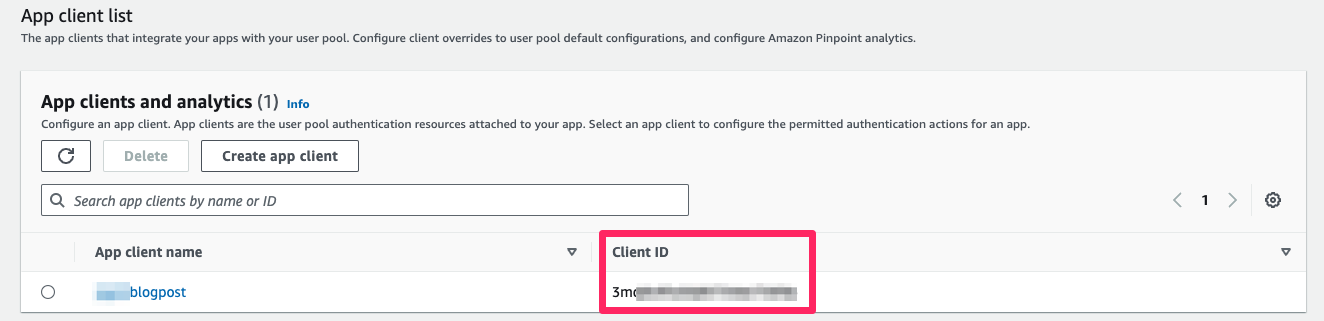
Figure 13: Client ID
To create a consuming application
When the setup of the user pool is done, you can integrate the authenticating flow in your application. The integration can be done using the AWS Amplify SDK and by calling the relevant API directly. Depending of the framework you used when building the application, you can find documentation about doing so in AWS Prescriptive Guidance Patterns.
You can use Amazon API Gateway to quickly build a secure API that uses the authentication made through Amazon Cognito and the federation to build services. We encourage you to review the Amazon API Gateway documentation to learn more. The next section provides you with examples that you can deploy to get an idea of the integration steps.
Additionally, you can use an Amazon Cognito identity pool to exchange Amazon Cognito issued tokens for AWS credentials (in other words, assuming AWS Identity and Access Management (IAM) roles) to access other AWS services. As an example, this could allow users to upload files to an Amazon Simple Storage Service (Amazon S3) bucket.
About the examples provided
The public GitHub repository that is provided contains code examples and associated documentation to help you automatically go through the setup steps detailed in this post. Specifically, the following are available:
- An AWS Cloudformation template that can help you provision a properly set-up user pool after you have the required information from itsme.
- An AWS Cloudformation template that deploys the backend for the test application.
- A React frontend that you can run locally to interact with the backend and to consume identities from itsme.
To deploy the provided examples
- Clone the repository on your local machine.
- Install the dependencies.
- If you haven’t created your user pool following the instructions in this post, you can use the CognitoItsmeStack provided as an example.
- Deploy the associated backend stack BackendItsmeStack.cfn.yaml.
- Rename the frontend/src/config.json.template file to frontend/src/config.json and replace the following:
- region with the AWS Region associated with your Amazon Cognito user pool.
- userPoolId with the assigned ID of the user pool that you created.
- userPoolWebClientId with the client ID that you retrieved.
- domain with your Amazon Cognito domain in the form of
<your user pool name>.auth.<your region>.amazoncognito.com

Figure 14: Frontend configuration file
- After modifications are done, start the application on your local machine with the provided command.

Following authentication, the results in the associated collected data are displayed, as shown in Figure 15 that follows.
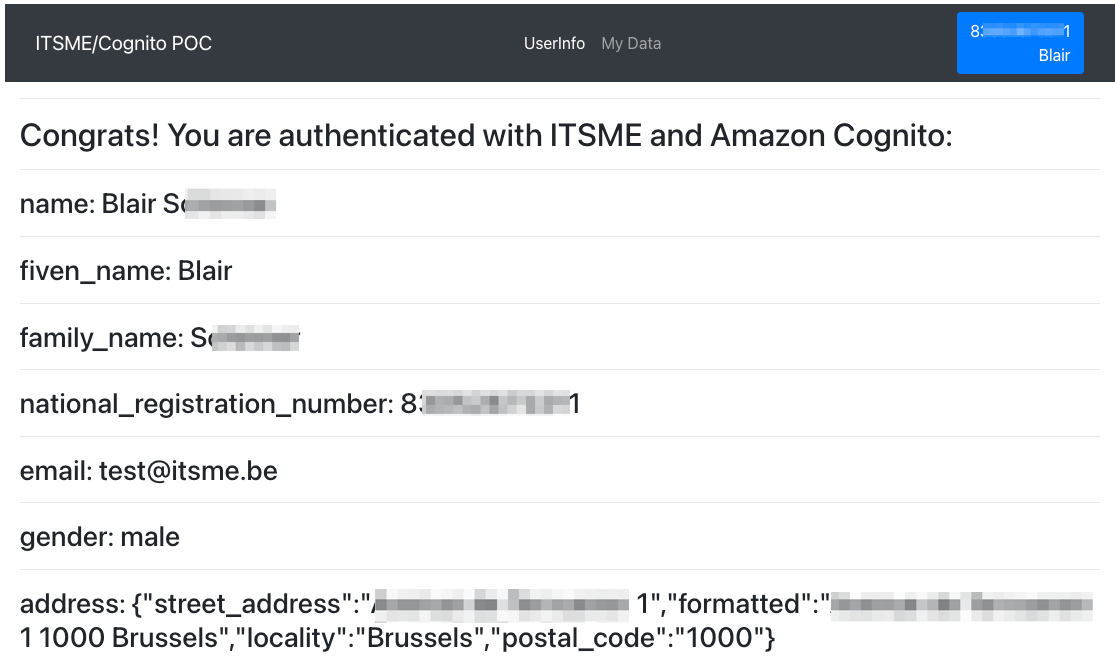
Figure 15: User information
In the My Data section, you can access a form to input a value (shown in Figure 16). Each time you go back to this page, the previous value entered is shown in the input box. This input is associated with your NRN (custom:eid), and only you can access it.
Figure 16: Database interaction
Conclusion
You can now consume digital identities through identity federation between Amazon Cognito and itsme. We hope that it helps you build secure digital services to improve the life of Benelux users.
If you have feedback about this post, submit comments in the Comments section below. If you have questions about this post, contact AWS Support.
Want more AWS Security how-to content, news, and feature announcements? Follow us on Twitter.
Bjarne Stroustrup’s Plan for Bringing Safety to C++ (The New Stack)
Post Syndicated from corbet original https://lwn.net/Articles/949269/
The New Stack covers
a conference talk by Bjarne Stroustrup on turning C++ into a safer
language.
Stroustrup has arrived at his solution: profiles. (That is, a set
of rules which, when followed, achieve specific safety guarantees.)
They’d be defined by the ISO C++ standard, addressing common safety
issues like pointers and array ranges. In response to a later
question from the audience about the difficulty of adding new
tooling, Stroustrup pointed out that the C++ compiler itself is now
a pretty sophisticated static analyzer, and could also be tasked
with meeting the profile’s requirements.
The architecture of today’s LLM applications
Post Syndicated from Nicole Choi original https://github.blog/2023-10-30-the-architecture-of-todays-llm-applications/
We want to empower you to experiment with LLM models, build your own applications, and discover untapped problem spaces. That’s why we sat down with GitHub’s Alireza Goudarzi, a senior machine learning researcher, and Albert Ziegler, a principal machine learning engineer, to discuss the emerging architecture of today’s LLMs.
In this post, we’ll cover five major steps to building your own LLM app, the emerging architecture of today’s LLM apps, and problem areas that you can start exploring today.
Five steps to building an LLM app
Building software with LLMs, or any machine learning (ML) model, is fundamentally different from building software without them. For one, rather than compiling source code into binary to run a series of commands, developers need to navigate datasets, embeddings, and parameter weights to generate consistent and accurate outputs. After all, LLM outputs are probabilistic and don’t produce the same predictable outcomes.
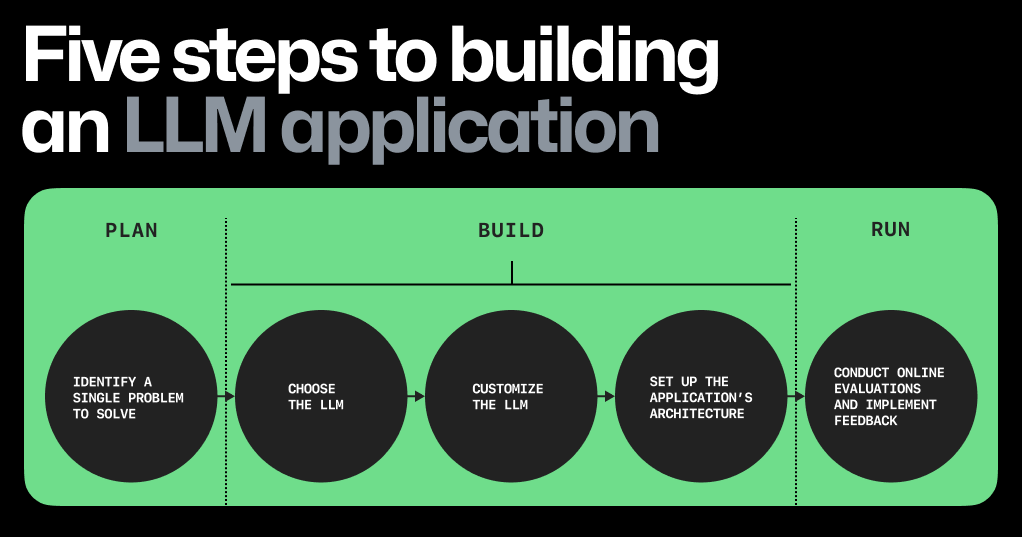
Let’s break down, at a high level, the steps to build an LLM app today.
1. Focus on a single problem, first. The key? Find a problem that’s the right size: one that’s focused enough so you can quickly iterate and make progress, but also big enough so that the right solution will wow users.
For instance, rather than trying to address all developer problems with AI, the GitHub Copilot team initially focused on one part of the software development lifecycle: coding functions in the IDE.
2. Choose the right LLM. You’re saving costs by building an LLM app with a pre-trained model, but how do you pick the right one? Here are some factors to consider:
- Licensing. If you hope to eventually sell your LLM app, you’ll need to use a model that has an API licensed for commercial use. To get you started on your search, here’s a community-sourced list of open LLMs that are licensed for commercial use.
- Model size. The size of LLMs can range from 7 to 175 billion parameters—and some, like Ada, are even as small as 350 million parameters. Most LLMs (at the time of writing this post) range in size from 7-13 billion parameters.
Conventional wisdom tells us that if a model has more parameters (variables that can be adjusted to improve a model’s output), the better the model is at learning new information and providing predictions. However, the improved performance of smaller models is challenging that belief. Smaller models are also usually faster and cheaper, so improvements to the quality of their predictions make them a viable contender compared to big-name models that might be out of scope for many apps.
- Model performance. Before you customize your LLM using techniques like fine-tuning and in-context learning (which we’ll cover below), evaluate how well and fast—and how consistently—the model generates your desired output. To measure model performance, you can use offline evaluations.
3. Customize the LLM. When you train an LLM, you’re building the scaffolding and neural networks to enable deep learning. When you customize a pre-trained LLM, you’re adapting the LLM to specific tasks, such as generating text around a specific topic or in a particular style. The section below will focus on techniques for the latter. To customize a pre-trained LLM to your specific needs, you can try in-context learning, reinforcement learning from human feedback (RLHF), or fine-tuning.
- In-context learning, sometimes referred to as prompt engineering by end users, is when you provide the model with specific instructions or examples at the time of inference—or the time you’re querying the model—and asking it to infer what you need and generate a contextually relevant output.
In-context learning can be done in a variety of ways, like providing examples, rephrasing your queries, and adding a sentence that states your goal at a high-level.
- RLHF comprises a reward model for the pre-trained LLM. The reward model is trained to predict if a user will accept or reject the output from the pre-trained LLM. The learnings from the reward model are passed to the pre-trained LLM, which will adjust its outputs based on user acceptance rate.
The benefit to RLHF is that it doesn’t require supervised learning and, consequently, expands the criteria for what’s an acceptable output. With enough human feedback, the LLM can learn that if there’s an 80% probability that a user will accept an output, then it’s fine to generate. Want to try it out? Check out these resources, including codebases, for RLHF.
- Fine-tuning is when the model’s generated output is evaluated against an intended or known output. For example, you know that the sentiment behind a statement like this is negative: “The soup is too salty.” To evaluate the LLM, you’d feed this sentence to the model and query it to label the sentiment as positive or negative. If the model labels it as positive, then you’d adjust the model’s parameters and try prompting it again to see if it can classify the sentiment as negative.
Fine-tuning can result in a highly customized LLM that excels at a specific task, but it uses supervised learning, which requires time-intensive labeling. In other words, each input sample requires an output that’s labeled with exactly the correct answer. That way, the actual output can be measured against the labeled one and adjustments can be made to the model’s parameters. The advantage of RLHF, as mentioned above, is that you don’t need an exact label.
4. Set up the app’s architecture. The different components you’ll need to set up your LLM app can be roughly grouped into three categories:
- User input which requires a UI, an LLM, and an app hosting platform.
- Input enrichment and prompt construction tools. This includes your data source, embedding model, a vector database, prompt construction and optimization tools, and a data filter.
-
Efficient and responsible AI tooling, which includes an LLM cache, LLM content classifier or filter, and a telemetry service to evaluate the output of your LLM app.
5. Conduct online evaluations of your app. These evaluations are considered “online” because they assess the LLM’s performance during user interaction. For example, online evaluations for GitHub Copilot are measured through acceptance rate (how often a developer accepts a completion shown to them), as well as the retention rate (how often and to what extent a developer edits an accepted completion).
The emerging architecture of LLM apps
Let’s get started on architecture. We’re going to revisit our friend Dave, whose Wi-Fi went out on the day of his World Cup watch party. Fortunately, Dave was able to get his Wi-Fi running in time for the game, thanks to an LLM-powered assistant.
We’ll use this example and the diagram above to walk through a user flow with an LLM app, and break down the kinds of tools you’d need to build it.
User input tools
When Dave’s Wi-Fi crashes, he calls his internet service provider (ISP) and is directed to an LLM-powered assistant. The assistant asks Dave to explain his emergency, and Dave responds, “My TV was connected to my Wi-Fi, but I bumped the counter, and the Wi-Fi box fell off! Now, we can’t watch the game.”
In order for Dave to interact with the LLM, we need four tools:
- LLM API and host: Is the LLM app running on a local machine or in the cloud? In an ISP’s case, it’s probably hosted in the cloud to handle the volume of calls like Dave’s. Vercel and early projects like jina-ai/rungpt aim to provide a cloud-native solution to deploy and scale LLM apps.
But if you want to build an LLM app to tinker, hosting the model on your machine might be more cost effective so that you’re not paying to spin up your cloud environment every time you want to experiment. You can find conversations on GitHub Discussions about hardware requirements for models like LLaMA‚ two of which can be found here and here.
- The UI: Dave’s keypad is essentially the UI, but in order for Dave to use his keypad to switch from the menu of options to the emergency line, the UI needs to include a router tool.
- Speech-to-text translation tool: Dave’s verbal query then needs to be fed through a speech-to-text translation tool that works in the background.
Input enrichment and prompt construction tools
Let’s go back to Dave. The LLM can analyze the sequence of words in Dave’s transcript, classify it as an IT complaint, and provide a contextually relevant response. (The LLM’s able to do this because it’s been trained on the internet’s entire corpus, which includes IT support documentation.)
Input enrichment tools aim to contextualize and package the user’s query in a way that will generate the most useful response from the LLM.
- A vector database is where you can store embeddings, or index high-dimensional vectors. It also increases the probability that the LLM’s response is helpful by providing additional information to further contextualize your user’s query.
Let’s say the LLM assistant has access to the company’s complaints search engine, and those complaints and solutions are stored as embeddings in a vector database. Now, the LLM assistant uses information not only from the internet’s IT support documentation, but also from documentation specific to customer problems with the ISP.
- But in order to retrieve information from the vector database that’s relevant to a user’s query, we need an embedding model to translate the query into an embedding. Because the embeddings in the vector database, as well as Dave’s query, are translated into high-dimensional vectors, the vectors will capture both the semantics and intention of the natural language, not just its syntax.
Here’s a list of open source text embedding models. OpenAI and Hugging Face also provide embedding models.
Dave’s contextualized query would then read like this:
// pay attention to the the following relevant information.
to the colors and blinking pattern.

// pay attention to the following relevant information.

// The following is an IT complaint from, Dave Anderson, IT support expert.
Answers to Dave's questions should serve as an example of the excellent support
provided by the ISP to its customers.

*Dave: Oh it's awful! This is the big game day. My TV was connected to my
Wi-Fi, but I bumped the counter and the Wi-Fi box fell off and broke! Now we
can't watch the game.
Not only do these series of prompts contextualize Dave’s issue as an IT complaint, they also pull in context from the company’s complaints search engine. That context includes common internet connectivity issues and solutions.
MongoDB released a public preview of Vector Atlas Search, which indexes high-dimensional vectors within MongoDB. Qdrant, Pinecone, and Milvus also provide free or open source vector databases.
- A data filter will ensure that the LLM isn’t processing unauthorized data, like personal identifiable information. Preliminary projects like amoffat/HeimdaLLM are working to ensure LLMs access only authorized data.
- A prompt optimization tool will then help to package the end user’s query with all this context. In other words, the tool will help to prioritize which context embeddings are most relevant, and in which order those embeddings should be organized in order for the LLM to produce the most contextually relevant response. This step is what ML researchers call prompt engineering, where a series of algorithms create a prompt. (A note that this is different from the prompt engineering that end users do, which is also known as in-context learning).
Prompt optimization tools like langchain-ai/langchain help you to compile prompts for your end users. Otherwise, you’ll need to DIY a series of algorithms that retrieve embeddings from the vector database, grab snippets of the relevant context, and order them. If you go this latter route, you could use GitHub Copilot Chat or ChatGPT to assist you.
| Learn how the GitHub Copilot team uses the Jaccard similarity to decide which pieces of context are most relevant to a user’s query > |
Efficient and responsible AI tooling
To ensure that Dave doesn’t become even more frustrated by waiting for the LLM assistant to generate a response, the LLM can quickly retrieve an output from a cache. And in the case that Dave does have an outburst, we can use a content classifier to make sure the LLM app doesn’t respond in kind. The telemetry service will also evaluate Dave’s interaction with the UI so that you, the developer, can improve the user experience based on Dave’s behavior.
- An LLM cache stores outputs. This means instead of generating new responses to the same query (because Dave isn’t the first person whose internet has gone down), the LLM can retrieve outputs from the cache that have been used for similar queries. Caching outputs can reduce latency, computational costs, and variability in suggestions.
You can experiment with a tool like zilliztech/GPTcache to cache your app’s responses.
- A content classifier or filter can prevent your automated assistant from responding with harmful or offensive suggestions (in the case that your end users take their frustration out on your LLM app).
Tools like derwiki/llm-prompt-injection-filtering and laiyer-ai/llm-guard are in their early stages but working toward preventing this problem.
- A telemetry service will allow you to evaluate how well your app is working with actual users. A service that responsibly and transparently monitors user activity (like how often they accept or change a suggestion) can share useful data to help improve your app and make it more useful.
OpenTelemetry, for example, is an open source framework that gives developers a standardized way to collect, process, and export telemetry data across development, testing, staging, and production environments.
Learn how GitHub uses OpenTelemetry to measure Git performance >
Woohoo! 🥳 Your LLM assistant has effectively answered Dave’s many queries. His router is up and working, and he’s ready for his World Cup watch party. Mission accomplished!
Real-world impact of LLMs
Looking for inspiration or a problem space to start exploring? Here’s a list of ongoing projects where LLM apps and models are making real-world impact.
- NASA and IBM recently open sourced the largest geospatial AI model to increase access to NASA earth science data. The hope is to accelerate discovery and understanding of climate effects.
- Read how the Johns Hopkins Applied Physics Laboratory is designing a conversational AI agent that provides, in plain English, medical guidance to untrained soldiers in the field based on established care procedures.
- Companies like Duolingo and Mercado Libre are using GitHub Copilot to help more people learn another language (for free) and democratize ecommerce in Latin America, respectively.
Further reading
- A developer’s guide to open source LLMs and generative AI
- Demystifying LLMs: How they can do things they weren’t trained to do
- A developer’s guide to prompt engineering and LLMs
- How to build an enterprise LLM application: Lessons from GitHub Copilot
The post The architecture of today’s LLM applications appeared first on The GitHub Blog.
[$] Some 6.6 development statistics
Post Syndicated from corbet original https://lwn.net/Articles/948970/
The 6.6 kernel was released,
right on schedule, on October 29. This development cycle saw the
addition of 14,069 non-merge changesets from 1,978 developers — fairly
typical numbers for recent releases. The time has come for LWN’s
traditional look at where the changes in this release came from, along with
a look at the longer development “supercycle” that (probably) ends with
6.6.