The world of education is loud with discussions about the uses and risks of generative AI — tools for outputting human-seeming media content such as text, images, audio, and video. In answer, there’s a new practical guide on using generative AI aimed at Computing teachers (and others), written by a group of classroom teachers and researchers at the Raspberry Pi Computing Education Research Centre and Faculty of Education at the University of Cambridge.
Their new guide is a really useful overview for everyone who wants to:
Understand the issues generative AI tools present in the context of education
Find out how to help their schools and students navigate them
Discover ideas on how to make use of generative AI tools in their teaching
Since generative AI tools have become publicly available, issues around data privacy and plagiarism are at the front of educators’ minds. At the same time, many educators are coming up with creative ways to use generative AI tools to enhance teaching and learning. The Research Centre’s guide describes the areas where generative AI touches on education, and lays out what schools and teachers can do to use the technology beneficially and help their learners do the same.
It’s widely accepted that AI tools can bring benefits but can also be used in unhelpful or harmful ways. Basic knowledge of how AI and machine learning works is key to being able to get the best from them. The Research Centre’s guide shares recommended educational resources for teaching learners about AI.
One of the recommendations is Experience AI, a set of free classroom resources we’re creating. It includes a set of 6 lessons for providing 11- to 14-year-olds with a foundational understanding of AI systems, as well as a standalone lesson specifically for teaching about large language model-based AI tools, such as ChatGPT and Google Gemini. These materials are for teachers of any specialism, not just for Computing teachers.
You’ll find that even a brief introduction to how large language models work is likely to make students’ ideas about using these tools to do all their homework much less appealing. The guide outlines creative ways you can help students see some of generative AI’s pitfalls, such as asking students to generate outputs and compare them, paying particular attention to inaccuracies in the outputs.
Generative AI tools and teaching computing
We’re still learning about what the best ways to teach programming to novice learners are. Generative AI has the potential to change how young people learn text-based programming, as AI functionality is now integrated into many of the major programming environments, generating example solutions or helping to spot errors.
The Research Centre’s guide acknowledges that there’s more work to be done to understand how and when to support learners with programming tasks through generative AI tools. (You can follow our ongoing seminar series on the topic.) In the meantime, you may choose to support established programming pedagogies with generative AI tools, such as prompting an AI chatbot to generate a PRIMM activity on a particular programming concept.
As ethics and the impact of technology play an important part in any good Computing curriculum, the guide also shares ways to use generative AI tools as a focus for your classroom discussions about topics such as bias and inequality.
Using generative AI tools to support teaching and learning
Teachers have been using generative AI applications as productivity tools to support their teaching, and the Research Centre’s guide gives several examples you can try out yourself. Examples include creating summaries of textual materials for students, and creating sets of questions on particular topics. As the guide points out, when you use generative AI tools like this, it’s important to always check the accuracy of the generated materials before you give any of them to your students.
Putting a school-wide policy in place
Importantly, the Research Centre’s guide highlights the need for a school-wide acceptable use policy (AUP) that informs teachers, other school staff, and students on how they may use generative AI tools. This section of the guide suggests websites that offer sample AUPs that can be used as a starting point for your school. Your AUP should aim to keep users safe, covering e-safety, privacy, and security issues as well as offering guidance on being transparent about the use of generative tools.
It’s not uncommon that schools look to specialist Computing teachers to act as the experts on questions around use of digital tools. However, for developing trust in how generative AI tools are used in the school, it’s important to encourage as wide a range of stakeholders as possible to be consulted in the process of creating an AUP.
A source of support for teachers and schools
As the Research Centre’s guide recognises, the landscape of AI and our thinking about it might change. In this uncertain context, the document offers a sensible and detailed overview of where we are now in understanding the current impact of generative AI on Computing as a subject, and on education more broadly. The example use cases and thought-provoking next steps on how this technology can be used and what its known risks and concerns are should be helpful for all interested educators and schools.
I recommend that all Computing teachers read this new guide, and I hope you feel inspired about the key role that you can play in shaping the future of education affected by AI.
We are working with two partner organisations in Odisha, India, to develop and roll out the IT & Coding Curriculum (Kaushali), a computing curriculum for government high schools. Last year we launched the first part of the curriculum and rolled out teacher training. Read on to find out what we have learned from this work.
Supporting government schools in Odisha to teach computing
Previously we shared an insight into how we established Code Clubs in Odisha to bring computing education to young people. Now we are partnering with two Indian civil society organisations to develop high school curriculum resources for computing and support teachers to deliver this content.
With our two partners, we trained 311 master teachers during July and August 2023. The master teachers, most often mathematics or science teachers, were in turn tasked with training teachers from around 8000 government schools. The aim of the training was to enable the 8000 teachers to deliver the curriculum to grades 9 and 10 in the June 2023 – April 2024 academic year.
At the Foundation, we have been responsible for providing ongoing support to 1898 teachers from 10 districts throughout the academic year, including through webinars and other online and in-person support.
To evaluate the impact our work in Odisha is having, we gathered data using a mixed-methods approach that included gathering feedback from teachers via surveys and interviews, visiting schools, capturing reflections from our trainers, and reviewing a sample of students’ projects.
Positive impact on teachers and students
In our teacher survey, respondents were generally positive about the curriculum resources:
87% of the 385 respondents agreed that the curriculum resources were both high quality and useful for their teaching
91% agreed that they felt more confident to teach students IT & Coding as a result of the curriculum resources
Teachers also tended to agree that the initial training had helped improve their understanding and confidence, and they appreciated our ongoing support webinars.
“The curriculum resources are very useful for students.” – Teacher in Odisha
“The webinar is very useful to acquire practical knowledge regarding the specific topics.” – Teacher in Odisha
Teachers who responded to our survey observed a positive impact on students:
93% agreed their students’ digital literacy skills had improved
90% agreed that their students’ coding knowledge had improved
On school visits, our team observed that the teachers adopted and implemented the practical elements of the initial training quite well. However, survey responses and interviews showed that often teachers were not yet using all the elements of the curriculum as intended.
In their feedback, many teachers expressed a need for further regular training and support, and some reported additional challenges, such as other demands on their time and access to equipment.
When we observed training sessions master teachers delivered to teachers, we saw that, in some cases, information was lost within the training cascade (from our trainers, to master teachers, to teachers), including details about the intended pedagogical approach. It can be difficult to introduce experienced teachers to new pedagogical methods within a short training session, and teachers’ lack of computing knowledge also presents a challenge.
We will use all this data to shape how we support teachers going forward. Some teachers didn’t share feedback, and so in our further evaluation work, we will focus on making sure we hear a broad and representative range of teachers’ views and experiences.
What’s new this year?
In the current academic year, we are rolling out more advanced curriculum content for grade 10 students, including AI literacy resources developed at the Foundation. We’re currently training master teachers on this content, and they will pass on their knowledge to other teachers in the coming months. Based on teachers’ feedback, the grade 10 curriculum and the training also include a recap of some key points from the grade 9 curriculum.
A State Resource Group (SRG) has also been set up, consisting of 30 teachers who will support us with planning and providing ongoing support to master teachers and other teachers in Odisha. We have already trained the SRG members on the new curriculum content to enable them to best support teachers across the state. In addition to this, our local team in Odisha plans to conduct more visits and reach out directly to teachers more often.
Our plans for the future
The long-term vision for our work in India is to enable any school in India to teach students about computing and creating with digital technologies. A critical part of achieving this vision is the development of a comprehensive computing curriculum for grade 6 to 12, specifically tailored for government schools in India. Thanks to our work in Odisha, we are in a better position to understand the unique challenges and limitations of government schools. We’re designing our curriculum to address these challenges and ensure that every Indian student has the opportunity to thrive in the 21st century. If you would like to know more about our work and impact in India, please reach out to us via [email protected].
We take evaluation of our work seriously and are always looking to understand how we can improve and increase the impact we have on the lives of young people. To find out more about our approach to impact, you can read about our recently updated theory of change, which supports how we evaluate what we do.
Generative artificial intelligence (AI) tools are becoming more easily accessible to learners and educators, and increasingly better at generating code solutions to programming tasks, code explanations, computing lesson plans, and other learning resources. This raises many questions for educators in terms of what and how we teach students about computing and AI, and AI’s impact on assessment, plagiarism, and learning objectives.
We were honoured to have Professor Brett Becker (University College Dublin) join us as part of our ‘Teaching programming (with or without AI)’ seminar series. He is uniquely placed to comment on teaching computing using AI tools, having been involved in many initiatives relevant to computing education at different levels, in Ireland and beyond.
Brett’s talk focused on what educators and education systems need to do to prepare all students — not just those studying Computing — so that they are equipped with sufficient knowledge about AI to make their way from primary school to secondary and beyond, whether it be university, technical qualifications, or work.
How do AI tools currently perform?
Brett began his talk by illustrating the increase in performance of large language models (LLMs) in solving first-year undergraduate programming exercises: he compared the findings from two recent studies he was involved in as part of an ITiCSE Working Group. In the first study — from 2021 — the results generated by GPT-3 were similar to those of students in the top quartile. By the second study in 2023, GPT-4’s performance matched that of a top student (Figure 1).
Figure 1: Student scores on Exam 1 and Exam 2, represented by circles. GPT-3’s 2021 score is represented by the blue ‘x’, and GPT-4’s 2023 score on the same questions is represented by the red ‘x’.
Brett also explained that the study found some models were capable of solving current undergraduate programming assessments almost error-free, and could solve the Irish Leaving Certificate and UK A level Computer Science exams.
What are challenges and opportunities for education?
This level of performance raises many questions for computing educators about what is taught and how to assess students’ learning. To address this, Brett referred to his 2023 paper, which included findings from a literature review and a survey on students’ and instructors’ attitudes towards using LLMs in computing education. This analysis has helped him identify several opportunities as well as the ethical challenges education systems face regarding generative AI.
The opportunities include:
The generation of unique content, lesson plans, programming tasks, or feedback to help educators with workload and productivity
More accessible content and tools generated by AI apps to make Computing more broadly accessible to more students
More engaging and meaningful student learning experiences, including using generative AI to enable creativity and using conversational agents to augment students’ learning
The impact on assessment practices, both in terms of automating the marking of current assessments as well as reconsidering what is assessed and how
Some of the challenges include:
The lack of reliability and accuracy of outputs from generative AI tools
The need to educate everyone about AI to create a baseline level of understanding
The legal and ethical implications of using AI in computing education and beyond
How to deal with questionable or even intentionally harmful uses of AI and mitigating the consequences of such uses
Programming as a basic skill for all subjects
Next, Brett talked about concrete actions that he thinks we need to take in response to these opportunities and challenges.
He also discussed the increased relevance of programming to all subjects, not only Computing, in a similar way to how reading and mathematics transcend the boundaries of their subjects, and the need he sees to adapt subjects and curricula to that effect.
As an example of how rapidly curricula may need to change with increasing AI use by students, Brett looked at the Irish Computer science specification for “senior cycle” (final two years of second-level, ages 16–18). This curriculum was developed in 2018 and remains a strong computing curriculum in Brett’s opinion. However, he pointed out that it only contains a single learning outcome on AI.
To help educators bridge this gap, in the book Brett wrote alongside Keith Quille to accompany the curriculum, they included two chapters dedicated to AI, machine learning, and ethics and computing. Brett believes these types of additional resources may be instrumental for teaching and learning about AI as resources are more adaptable and easier to update than curricula.
Generative AI in computing education
Taking the opportunity to use generative AI to reimagine new types of programming problems, Brett and colleagues have developed Promptly, a tool that allows students to practise prompting AI code generators. This tool provides a combined approach to learning about generative AI while learning programming with an AI tool.
Promptly is intended to help students learn how to write effective prompts. It encourages students to specify and decompose the programming problem they want to solve, read the code generated, compare it with test cases to discern why it is failing (if it is), and then update their prompt accordingly (Figure 2).
Figure 2: Example of a student’s use of Promptly.
Early undergraduate student feedback points to Promptly being a useful way to teach programming concepts and encourage metacognitive programming skills. The tool is further described in a paper, and whilst the initial evaluation was aimed at undergraduate students, Brett positioned it as a secondary school–level tool as well.
Brett hopes that by using generative AI tools like this, it will be possible to better equip a larger and more diverse pool of students to engage with computing.
Re-examining the concept of programming
Brett concluded his seminar by broadening the relevance of programming to all learners, while challenging us to expand our perspectives of what programming is. If we define programming as a way of prompting a machine to get an output, LLMs allow all of us to do so without the need for learning the syntax of traditional programming languages. Taking that view, Brett left us with a question to consider: “How do we prepare for this from an educational perspective?”
You can watch Brett’s presentation here:
Join our next seminar
The focus of our ongoing seminar series is on teaching programming with or without AI.
For our next seminar on Tuesday 11 June at 17:00 to 18:30 GMT, we’re joined by Veronica Cucuiat (Raspberry Pi Foundation), who will talk about whether LLMs could be employed to help understand programming error messages, which can present a significant obstacle to anyone new to coding, especially young people.
To take part in the seminar, click the button below to sign up, and we will send you information about how to join. We hope to see you there.
I’m excited to announce that we’re developing a new set of Code Editor features to help school teachers run text-based coding lessons with their students.
New Code Editor features for teaching
Last year we released our free Code Editor and made it available as an open source project. Right now we’re developing a new set of features to help schools use the Editor to run text-based coding lessons online and in-person.
The new features will enable educators to create coding activities in the Code Editor, share them with their students, and leave feedback directly on each student’s work. In a simple and easy-to-use interface, educators will be able to give students access, group them into classes within a school account, and quickly help with resetting forgotten passwords.
Example Code Editor feedback screen from an early prototype
We’re adding these teaching features to the Code Editor because one of the key problems we’ve seen educators face over the last few months has been the lack of an ideal tool to teach text-based coding in the classroom. There are some options available, but they can be cost-prohibitive for schools and educators. Our mission is to support young people to realise their full potential through the power of computing, and we believe that to tackle educational disadvantage, we need to offer high-quality tools and make them as accessible as possible. This is why we’ll offer the Code Editor and all its features to educators and students for free, forever.
Alongside the new classroom management features, we’re also working on improved Python library support for the Code Editor, so that you and your students can get more creative and use the Editor for more advanced topics. We continue to support HTML, CSS, and JavaScript in the Editor too, so you can set website development tasks in the classroom.
Educators have already been incredibly generous in their time and feedback to help us design these new Code Editor features, and they’ve told us they’re excited to see the upcoming developments. Pete Dring, Head of Computing at Fulford School, participated in our user research and said on LinkedIn: “The class management and feedback features they’re working on at the moment look really promising.” Lee Willis, Head of ICT and Computing at Newcastle High School for Girls, also commented on the Code Editor: “We have used it and love it, the fact that it is both for HTML/CSS and then Python is great as the students have a one-stop shop for IDEs.”
Our commitment to you
Free forever: We will always provide the Code Editor and all of its features to educators and students for free.
A safe environment: Accounts for education are designed to be safe for students aged 9 and up, with safeguarding front and centre.
Privacy first: Student data collection is minimised and all collected data is handled with the utmost care, in compliance with GDPR and the ICO Children’s Code.
Best-practice pedagogy: We’ll always build with education and learning in mind, backed by our leading computing education research.
Community-led: We value and seek out feedback from the computing education community so that we can continue working to make the Code Editor even better for teachers and students.
Get started
We’re working to have the Code Editor’s new teaching features ready later this year. We’ll launch the setup journey sooner, so that you can pre-register for your school account as we continue to work on these features.
Before then, you can complete this short form to keep up to date with progress on these new features or to get involved in user testing.
The Code Editor is already being used by thousands of people each month. If you’d like to try it, you can get started writing code right in your browser today, with zero setup.
We are pleased to announce that we are renewing our partnership with Oak National Academy in England to provide an updated high-quality Computing curriculum and lesson materials for Key Stages 1 to 4.
New curriculum and materials for the classroom
In 2021 we partnered with Oak National Academy to offer content for schools in England that supported young people to learn Computing at home while schools were closed as a result of the coronavirus pandemic.
In our renewed partnership, we will create new and updated materials for primary and secondary teachers to use in the classroom. These classroom units will be available for free on the Oak platform and will include everything a teacher needs to deliver engaging lessons, including slide decks, worksheets, quizzes, and accompanying videos for over 550 lessons. The units will cover both the general national Computing curriculum and the Computer Science GCSE, supporting teachers to provide a high-quality Computing offering to all students aged 5 to 16.
These new resources will update the very successful Computing Curriculum and will be rigorously tested by a Computing subject expert group.
“I am delighted that we are continuing our partnership with Oak National Academy to support all teachers in England with world-leading resources for teaching Computing and Computer Science. This means that all teachers in England will have access to free, rigorous and tested classroom resources that they can adapt to suit their context and students.” – Philip Colligan, CEO
All our materials on the Oak platform will be free and openly available, and can be accessed by educators worldwide.
Research-informed, time-saving, and adaptable resources
The materials will bring teachers the added benefit of saving valuable time, and schools can choose to adapt and use the resources in the way that works best for their students
Supporting schools in England and worldwide
We have already started work and will begin releasing units of lessons in autumn 2024. All units across Key Stages 1 to 4 will be available by autumn 2025.
We’re excited to continue our partnership with Oak National Academy to provide support to teachers and students in England.
Through the Hello World podcast, we help to connect computing educators around the world and share their experiences. In each episode, we expand on a topic from a recent Hello World magazine issue. After 5 seasons, and a break last year, we are back with season 6 today.
Episode 1: Do kids still need to learn how to code?
Joining my co-host Veronica and me are two computing educators: Pete Dring, Head of Computing at Fulford School in York, and Chris Coetzee, a computer science teacher for 24 years and currently a PhD student in Computer Science Education at Abertay Dundee. Given the recent developments in AI-based code generators, we talk about whether such tools will remove our learners’ need to learn to code or simply change what coding, and learning to code, looks like*.
What’s coming up in future episodes?
New episode of season 6 will come out every 2 weeks. In each episode we explore computing, coding, and digital making education by delving into an exciting topic together with our guests: experts, practitioners, and other members of the Hello World community.
Also in season 6, we’ll explore:
The role of computing communities
We discuss the value and importance of being connected to other computing educators through the many different teaching communities that exist around the world. What makes effective communities, and how do we build and sustain them?
Why is understanding cybersecurity so important?
From classroom lessons to challenges and competitions, there are lots of opportunities for learners to discover cybersecurity. There are also many pitfalls where learners’ online activities put them at risk of breaking the law. We discuss some of these pitfalls along with the many career opportunities in cybersecurity.
How to develop as a computing educator?
What is involved in becoming an effective computing educator? What knowledge, skills, and behaviours are needed, and how do we go about developing them? We sit down with teacher trainers and trainees to explore this topic.
What is the state of computing education and where is it heading?
Computing education has come a long way in the last decade in terms of practice and policy, as well as research. Together with our guests we discuss where computing education is today around the world, and we consider the lessons we can learn and the challenges ahead
What is the role of AI in your classroom?
AI continues to be a disruptive technology in many spaces, and the classroom is no exception. We hear examples of practices and approaches being explored by teachers in the classroom.
Listen and subscribe today
If you’ve not listened to the Hello World podcast yet, there are 5 whole seasons for you to discover. We talk about everything from ecology and quantum computing to philosophy, ethics, and inclusion, and our conversations always focus on the practicalities of teaching in the classroom.
Many of our podcast guests are Hello World authors, so if you’re an educator who wants to share your insights into how to teach young people about digital technology, please let us know. Your words could end up in the pages as well as on the airwaves of Hello World.
You’ll find the upcoming Hello World season and past episodes on your favourite podcast platform, including YouTube now, where you can also subscribe to never miss an episode. Alternatively, you can listen here via your browser.
You can now access classroom resources created by us for the T Level in Digital Production, Design and Development. T Levels are a type of vocational qualification young people in England can gain after leaving school, and we are pleased to be able to support T Level teachers and students.
With our new resources, we aim to empower more young people to develop their digital skills and confidence while studying, meaning they can access more jobs and opportunities for further study once they finish their T Levels.
We worked collaboratively with the Gatsby Charitable Foundation on this pilot project as part of their Technical Education Networks Programme, the first time that we have created classroom resources for post-16 vocational education.
Post-16 vocational training and T Levels
T Levels are Technical Levels, 2-year courses for 16- to 18-year-old school leavers. Launched in England in September 2020, T Levels cover a range of subjects and have been developed in collaboration with employers, education providers, and other organisations. The aim is for T Levels to specifically prepare young people for entry into skilled employment, an apprenticeship, or related technical study in further or higher education.
For us, this T Level pilot project follows on from work we did in 2022 to learn more about post-16 vocational training and identify gaps where we could make a difference.
Something interesting we found was the relatively low number of school-age young people who started apprenticeships in the UK in 2019/20. For example, a 2021 Worldskills UK report stated that only 18% of apprentices were young people aged 19 and under. 39% were aged 19-24, and the remaining 43% were people aged 25 and over.
To hear from young people about their thoughts directly, we spoke to a group of year 10 students (ages 14 to 15) at Gladesmore School in Tottenham. Two thirds of these students said that digital skills were ‘very important’ to them, and that they would consider applying for a digital apprenticeship or T Level. When we asked them why, one of the key reasons they gave was the opportunity to work and earn money, rather than moving into further study in higher education and paying tuition fees. One student’s answer was for example, “It’s a good way to learn new skills while getting paid, and also gives effective work experience.”
T Level curriculum materials and project brief
To support teachers in delivering the Digital Production, Design and Development T Level qualification, we created a new set of resources: curriculum materials as well a project brief with examples to support the Occupational Specialism component of the qualification.
The curriculum materials on the topic ‘Digital environments’ cover content related to computer systems including hardware, software, networks, and cloud environments. They are designed for teachers to use in the classroom and consist of a complete unit of work: lesson plans, slide decks, activities, a progression chart, and assessment materials. The materials are designed in line with our computing content framework and pedagogy principles, on which the whole of our Computing Curriculum is based.
The project brief is a real-world scenario related to our work and gives students the opportunity to problem-solve as though they are working in an industry job.
Our thanks to the Gatsby Foundation for collaborating with us on this work to empower more young people to fulfil their potential through the power of computing and digital technologies.
Everyone who has taught children before will know the excited gleam in their eyes when the lessons include something to interact with physically. Whether it’s printed and painstakingly laminated flashcards, laser-cut models, or robots, learners’ motivation to engage with the topic will increase along with the noise levels in the classroom.
However, these hands-on activities are often seen as merely a technique to raise interest, or a nice extra project for children to do before the ‘actual learning’ can begin. But what if this is the wrong way to think about this type of activity?
How do children learn?
In our 2023 online research seminar series, focused on computing education for primary-aged (K–5) learners, we delved into the most recent research aimed at enhancing learning experiences for students in the earliest stages of education. From a deep dive into teaching variables to exploring the integration of computational thinking, our series has looked at the most effective ways to engage young minds in the subject of computing.
It’s only fitting that in our final seminar in the series, Anaclara Gerosa from the University of Glasgow tackled one of the most fundamental questions in education: how do children actually learn? Beyond the conventional methods, emerging research has been shedding light on a fascinating approach — the concept of grounded cognition. This theory suggests that children don’t merely passively absorb knowledge; they physically interact with it, quite literally ‘grasping’ concepts in the process.
Grounded cognition, also known in variations as embodied and situated cognition, offers a new perspective on how we absorb and process information. At its core, this theory suggests that all cognitive processes, including language and thought, are rooted in the body’s dynamic interactions with the environment. This notion challenges the conventional view of learning as a purely cognitive activity and highlights the impact of action and simulation.
There is evidence from many studies in psychology and pedagogy that using hands-on activities can enhance comprehension and abstraction. For instance, finger counting has been found to be essential in understanding numerical systems and mathematical concepts. A recent study in this field has shown that children who are taught basic computing concepts with unplugged methods can grasp abstract ideas from as young as 3. There is therefore an urgent need to understand exactly how we could use grounded cognition methods to teach children computing — which is arguably one of the most abstract subjects in formal education.
A recent study in this field has shown that children who are taught basic computing concepts with unplugged methods can grasp abstract ideas from as young as 3.
A new framework for teaching computing
Anaclara is part of a group of researchers at the University of Glasgow who are currently developing a new approach to structuring computing education. Their EIFFEL (Enacted Instrumented Formal Framework for Early Learning in Computing) model suggests a progression from enacted to formal activities.
Following this model, in the early years of computing education, learners would primarily engage with activities that allow them to work with tangible 3D objects or manipulate intangible objects, for instance in Scratch. Increasingly, students will be able to perform actions in an instrumented or virtual environment which will require the knowledge of abstract symbols but will not yet require the knowledge of programming languages. Eventually, students will have developed the knowledge and skills to engage in fully formal environments, such as writing advanced code.
In a recent literature review, Anaclara and her colleagues looked at existing research into using grounded cognition theory in computing education. Although several studies report the use of grounded approaches, for instance by using block-based programming, robots, toys, or construction kits, the focus is generally on looking at how concrete objects can be used in unplugged activities due to specific contexts, such as a limited availability of computing devices.
The next steps in this area are looking at how activities that specifically follow the EIFFEL framework can enhance children’s learning.
Research into grounded cognition activities in computer science is ongoing, but we encourage you to try incorporating more hands-on activities when teaching younger learners and observing the effects yourself. Here are a few ideas on how to get started:
Explore the ‘Teach Data Literacy’ guide, developed by the Data Education in Schools team, which offers some practical activities to support young learners to develop their data literacy skills. You can find out more about the Data Education in Schools initiative in Kate Farrell and Judy Robertson’s seminar on teaching primary learners how to be data citizens from May 2023.
Check out Barefoot Computing, which offers a range of resources for early years education that involve physical manipulation and simulation.
Join us at our next seminar
In 2024, we are exploring different ways to teach and learn programming, with and without AI tools. In our next seminar, on 13 February at 17:00 GMT, Majeed Kazemi from the University of Toronto will be joining us to discuss whether AI-powered code generators can help K–12 students learn to program in Python. All of our online seminars are free and open to everyone. Sign up and we’ll send you the link to join on the day.
As the last school bell rings before winter break, one thing school districts should keep in mind is that during the winter break, schools can become particularly vulnerable to cyberattacks as the reduced staff presence and extended downtime create an environment conducive to security lapses. Criminal actors make their move when organizations are most vulnerable: on weekends and holiday breaks. With fewer personnel on-site, routine monitoring and response to potential threats may be delayed, providing cybercriminals with a window of opportunity. Schools store sensitive student and staff data, including personally identifiable information, financial records, and confidential academic information, and therefore consequences of a successful cyberattack can be severe. It is imperative that educational institutions implement robust cybersecurity measures to safeguard their digital infrastructure.
If you are a small public school district in the United States, Project Cybersafe Schools is here to help. Don’t let the Cyber Grinch ruin your winter break.
The response from school districts across the United States exceeded our expectations. We have had inquiries from over 200 school districts in over 30 states and Guam. Over the past few months, we have onboarded dozens of qualifying school districts into the program. As a result, over 60,000 students, teachers, and staff are protected by Cloudflare’s cloud email security to protect against a broad spectrum of threats including Business Email Compromise, multichannel phishing, credential harvesting, and other targeted attacks. These school districts are also receiving protection against Internet threats with DNS filtering by preventing users from reaching unwanted or harmful online content like ransomware or phishing sites. There are more than 9,000 small public school districts across the United States with fewer than 2,500 students. All of those school districts are eligible for Project Cybersafe Schools (for free, and with no time limit — see below for all the details), and we want to help as many as possible.
Since we launched the program, the White House has continued to amplify awareness around the risks for schools as well as the opportunities school districts have to protect themselves. Cloudflare hosted a series of live onboarding sessions at the start of the program and also created a Cybersafe School Resource Hub for school districts to learn more about the program and submit an inquiry.
What our participants are saying about the program
Here’s what a few Project Cybersafe Schools have to say about the impact of the program on small school districts.
“Project Cybersafe Schools has been incredibly helpful, especially for school districts with smaller enrollments, to provide resources, tools and information that otherwise might be out of grasp. Often, these smaller districts have individuals with many responsibilities and cybersecurity may not always be at the forefront. The tools Cloudflare offers as part of the White House focus to strengthen Cybersecurity across the K-12 spectrum allow us greater visibility into the threats experienced through E-Mail as well as protect our devices by layering DNS-based filtering on top of our existing environment to protect against threats that may come through via ransomware or phishing sites. Being able to leverage multiple layers of security helps us be more robust in protecting our student and teacher devices and ensure our learning environment is successful, safe and productive in the current digital landscape.” – Randy Saeks, Network Manager, Glencoe School District 35, Glencoe, Illinois
“Quitman School District was excited to add another layer of security for our staff and students with Cloudflare Project Cybersafe Schools. Living in a low income, rural community, we were grateful for the opportunity to add a world-class free service to our school’s network architecture. Partnering with Cloudflare allowed us to continue to modernize and strengthen our security measures and protect our staff and students from a wide variety of threats. This implementation was quick and easy, and we were ecstatic that there was no expiration date for this service. We were amazed to see that Cloudflare caught nearly 4,000 malicious emails in the first month of implementation! We are confident that Cloudflare will continue to keep our district and infrastructure safe from harmful threats.” – Matt Champion, Technology Coordinator, Quitman School District, Quitman, Mississippi
What Zero Trust services are available?
Eligible K-12 public school districts in the United States will have access to a package of enterprise-level Zero Trust cybersecurity services for free and with no time limit – there is no catch and no underlying obligations. Eligible organizations will benefit from:
Email Protection: Safeguards inboxes with cloud email security by protecting against a broad spectrum of threats including malware-less Business Email Compromise, multichannel phishing, credential harvesting, and other targeted attacks.
DNS Filtering: Protects against Internet threats with DNS filtering by preventing users from reaching unwanted or harmful online content like ransomware or phishing sites and can be deployed to comply with the Children’s Internet Protection Act (CIPA).
Who can apply?
To be eligible, Project Cybersafe Schools participants must be:
K-12 public school districts located in the United States
For schools or school districts that do not qualify for Project Cybersafe Schools, Cloudflare has other packages available with educational pricing. If you do not qualify for Project Cybersafe Schools, but are interested in our educational services, please contact us at [email protected].
Since launching our free online courses about computing on the edX platform back in August, we’ve been training course facilitators and analysing the needs of educators around the world. We want every course participant to have a great experience learning with us — read on to find out what we’re doing right now and into 2024 to ensure this.
Online courses for all adults who support young people
Educators of all kinds are key for supporting children and young people to engage with computing technology and develop digital skills. You might be a professional teacher, or a parent, volunteer, youth worker, librarian… there are so many roles in which people share knowledge with young learners.
That’s why our online courses are designed to support any kind of educator to:
Understand the full breadth of topics within computing
Discover how to introduce computing to young people in clear and exciting ways that are grounded in the latest research
We are constantly improving our online courses based on your feedback, the latest education research, and the insights our team members gain through supporting you on your course learning journeys. Three principles guide these improvements: accessibility, scalability, and sustainability.
Making our courses more relevant and accessible
Our online courses are used by people who live around the world and bring various knowledge and experiences. Some participants are classroom teachers, others have computing experience from their job and want to volunteer at a kids’ coding club, and some may be parents who want to support their children. It’s important to us that our courses are relevant and accessible to all kinds of adult learners.
We’re currently working to:
Simplify the English in the courses for participants who speak it as a second language
Adapt the course activities for specific settings where participants help young people learn so that e.g. teachers see how the activities work in the classroom, and volunteers who run coding clubs see how they work in club sessions
Ensure our course facilitators have experience in a range of different settings including coding clubs, and in a variety of different contexts around the world
Making our courses useful for more groups of people
When we think about the scalability of our courses, we think about how to best support as many educators around the world as possible. If we can make the jobs of all educators easier, whatever their setting is like, then we are making the right choices.
We’re currently working to:
Talk with the global network of educators we’re a part of to better understand what works for them so we can reflect that in the courses
Include a wider range of examples for settings beyond the classroom in the courses
Adapt our courses so they are relevant to participants with various needs while sustaining the high quality of the overall learning experience
Making the learning from our courses sustainable
The educators who take our courses work to achieve amazing things, and this means they are often busy. That they take the time to complete one of our courses to learn new things is a commitment we want to make sure is rewarded. The learning you get from participating in our online courses should continue to benefit you far beyond the time you spend completing it. This is what we mean by sustainability.
We’re currently working to:
Lay out clear learning pathways so you can build on the knowledge you gain in one course in the next course
Offer course resources that are easy to access after you’ve completed the course
Explore ways to build communities around our courses where you can share successes and learning outcomes with your fellow participants
Learn with us, and help us design better courses for you
Our work to improve the accessibility, scalability, and sustainability of our courses will continue into 2024, and these three principles will likely be part of our online training strategy for the following year too.
If you’d like to support young people in your life to learn about computing and digital technologies, take one of our free courses now and learn something new. We have twenty courses available right now and they are totally free.
We are also looking for adult testers for new course content. So if you’re any kind of educator and would like to test upcoming online course content and share your feedback and experiences, please send us a message with the subject ‘Educator training’.
On September 29 2023, amidst much excitement and enthusiasm, a significant event took place at a unique school in Moinabad, Telangana: the teams of the Raspberry Pi Foundation and Telangana Social Welfare Residential Educational Institutions Society (TSWREIS) gathered to celebrate our partnership on the esteemed Coding Academy of TSWREIS.
This event marked a special project for us where we are piloting a distinctive, progression-based computing curriculum in a government school and a degree college in India.
Partnering with TSWREIS to bring computing education to Telangana
At the Foundation, our goal is to work closely with schools, tailoring our offerings to their contexts. Our objective is to design and evaluate unique learning experiences by integrating content from our diverse range of high-quality educational products. Through these efforts, we aim to drive significant advancements in education and technology, benefiting both students and education systems across the world.
TSWREIS manages 268 residential educational institutions in Telangana, with a primary focus on delivering quality education to under-resourced young people, particularly children from scheduled castes and tribes in rural areas. Among these institutions is the Coding Academy school, located in Moinabad, which operates as a fully residential co-ed school for grades 6 to 12, accommodating around 800 students. Additionally, TSWREIS oversees another centre of excellence, the Coding Academy degree college in Shamirpet catering to 600 undergraduate female students.
We joined forces with TSWREIS to form a collaborative partnership with their Coding Academy units at both high school and college. We’re committed to sharing our expertise in computing and coding curriculum for students from Grade 6 to intermediate at the school, and across all courses at the college.
The exciting model for our partnership with TSWREIS
We took on the challenge of directly delivering a comprehensive curriculum at the Coding Academy school and college through our own educators, exclusively hired and trained for this project. This is an exciting new approach for us, because up to this point, we have never directly delivered a curriculum anywhere in the world. However, we know we have created a world-class computing curriculum for educators in formal (and non-formal) settings, and we have many years’ experience of training teachers, so we are well-prepared to face this project and its potential challenges head-on and make it a success.
To begin the project, our team members based in India conducted a thorough study of the Coding Academy students’ interests and learning levels. Based on this, our Curriculum team in the UK and India customised and localised the content in our curriculum. We will be observing the curriculum’s delivery in classrooms and collecting students’ responses, and based on this data we’ll further refine the localised curriculum.
Throughout the project’s lifespan, we’ll measure the effectiveness of our curriculum and the impact of learning on the students. To do this, we’ll collect data from classroom observations, periodic assessments, and focused group discussions with students and educators.
Starting from the second year of the project, we will build capacity within the system. In collaboration with TSWREIS, we’ll select teachers from within the organisation based on their interest and competence, and initiate their training. Our objective is that by the project’s fifth year, TSWREIS will have achieved self-sufficiency in delivering computing education to students at the Coding Academy as well as other institutions in its purview.
The promise of this project for our work in India
We began delivering lessons at the Coding Academy college and school in July, and it’s worth mentioning that it’s been a rollercoaster ride so far. We’ve been working closely with the TSWREIS team to equip both the academic units with the resources needed for seamless implementation of the project. Our India-based team has been able to ensure continuity in the project’s momentum and plug every gap, and is working tirelessly to make this big, challenging, and exciting project blossom and succeed. When it comes to the students’ energy, enthusiasm, and the sparkle in their eyes for their learning, it’s unmatched, and everyone feels proud of their achievements so far.
This work with TSWREIS holds immense importance for us, representing our dedication to shaping a brighter educational landscape especially for young people from under-resourced communities. We hope to replicate similar initiatives across various regions in India, enabling widespread access to quality education. We also aspire to take forward our initiatives in much larger dimensions for the entirety of India.
In addition to our partnership with TSWREIS, we are actively engaged in several other impactful projects in India, such as our partnership with Mo School Abhiyan in Odisha to serve the government’s schools across Odisha state, and our collaboration with Pratham Foundation, which is helping us reach under-resourced communities and furthering our commitment to enhancing educational experiences.
We look towards the future
In reflection, the voices at the launch event on September 29 echoed the anticipation and optimism that filled the air on that memorable day. Chief guests who graciously attended the event were Shri. E Naveen Nicholas, IAS, Secretary at TSWREIS & TTWREIS, and Rachel Bennett, our Managing Director at the Raspberry Pi Foundation. Heartfelt gratitude to them for their presence and blessings. We also extend our thanks to our funding partner in this work, Ezrah Charitable Trust, and our delivery partners for their invaluable support.
The energy felt on the event day continues to drive our determination to do the work that lies ahead. As we look forward to the future, our hope and the hope of both the Coding Academy team and students are aligned: hope for a brighter, technologically empowered future, where education becomes a beacon of opportunity for all.
It’s been less than a year since ChatGPT catapulted generative artificial intelligence (AI) into mainstream public consciousness, reigniting the debate about the role that these powerful new technologies will play in all of our futures.
‘Will AI save or destroy humanity?’ might seem like an extreme title for a podcast, particularly if you’ve played with these products and enjoyed some of their obvious limitations. The reality is that we are still at the foothills of what AI technology can achieve (think World Wide Web in the 1990s), and lots of credible people are predicting an astonishing pace of progress over the next few years, promising the radical transformation of almost every aspect of our lives. Comparisons with the Industrial Revolution abound.
At the same time, there are those saying it’s all moving too fast; that regulation isn’t keeping pace with innovation. One of the UK’s leading AI entrepreneurs, Mustafa Suleyman, said recently: “If you don’t start from a position of fear, you probably aren’t paying attention.”
What is AI literacy for young people?
What does all this mean for education, and particularly for computing education? Is there any point trying to teach children about AI when it is all changing so fast? Does anyone need to learn to code anymore? Will teachers be replaced by chatbots? Is assessment as we know it broken?
If we’re going to seriously engage with these questions, we need to understand that we’re talking about three different things:
AI literacy: What it is and how we teach it
Rethinking computer science (and possibly some other subjects)
Enhancing teaching and learning through AI-powered technologies
AI literacy: What it is and how we teach it
For young people to thrive in a world that is being transformed by AI systems, they need to understand these technologies and the role they could play in their lives.
Our SEAME model articulates the concepts, knowledge, and skills that are essential ingredients of any AI literacy curriculum.
The first problem is defining what AI literacy actually means. What are the concepts, knowledge, and skills that it would be useful for a young person to learn?
The reality is that — with a few notable exceptions — the vast majority of AI literacy resources available today are probably doing more harm than good.
In the past couple of years there has been a huge explosion in resources that claim to help young people develop AI literacy. Our research team mapped and categorised over 500 resources, and undertaken a systematic literature review to understand what research has been done on K–12 AI classroom interventions (spoiler: not much).
The reality is that — with a few notable exceptions — the vast majority of AI literacy resources available today are probably doing more harm than good. For example, in an attempt to be accessible and fun, many materials anthropomorphise AI systems, using human terms to describe them and their functions and thereby perpetuating misconceptions about what AI systems are and how they work.
What emerged from this work at the Raspberry Pi Foundation is the SEAME model, which articulates the concepts, knowledge, and skills that are essential ingredients of any AI literacy curriculum. It separates out the social and ethical, application, model, and engine levels of AI systems — all of which are important — and gets specific about age-appropriate learning outcomes for each.
This research has formed the basis of Experience AI (experience-ai.org), a suite of resources, lessons plans, videos, and interactive learning experiences created by the Raspberry Pi Foundation in partnership with Google DeepMind, which is already being used in thousands of classrooms.
If we’re serious about AI literacy for young people, we have to get serious about AI literacy for teachers.
Defining AI literacy and developing resources is part of the challenge, but that doesn’t solve the problem of how we get them into the hands and minds of every young person. This will require policy change. We need governments and education system leaders to grasp that a foundational understanding of AI technologies is essential for creating economic opportunity, ensuring that young people have the mindsets to engage positively with technological change, and avoiding a widening of the digital divide. We’ve messed this up before with digital skills. Let’s not do it again.
Teacher professional development is key to AI literacy for young people.
More than anything, we need to invest in teachers and their professional development. While there are some fantastic computing teachers with computer science qualifications, the reality is that most of the computing lessons taught anywhere on the planet are taught by a non-specialist teacher. That is even more so the case for anything related to AI. If we’re serious about AI literacy for young people, we have to get serious about AI literacy for teachers.
Rethinking computer science
Alongside introducing AI literacy, we also need to take a hard look at computer science. At the very least, we need to make sure that computer science curricula include machine learning models, explaining how they constitute a new paradigm for computing, and give more emphasis to the role that data will play in the future of computing. Adding anything new to an already packed computer science curriculum means tough choices about what to deprioritise to make space.
One of our Experience AI Lessons revolves around the us of AI technology to study the Serengeti ecosystem.
And, while we’re reviewing curricula, what about biology, geography, or any of the other subjects that are just as likely to be revolutionised by big data and AI? As part of Experience AI, we are launching some of the first lessons focusing on ecosystems and AI, which we think should be at the heart of any modern biology curriculum.
Some are saying young people don’t need to learn how to code. It’s an easy political soundbite, but it just doesn’t stand up to serious scrutiny.
There is already a lively debate about the extent to which the new generation of AI technologies will make programming as we know it obsolete. In January, the prestigious ACM journal ran an opinion piece from Matt Welsh, founder of an AI-powered programming start-up, in which he said: “I believe the conventional idea of ‘writing a program’ is headed for extinction, and indeed, for all but very specialised applications, most software, as we know it, will be replaced by AI systems that are trained rather than programmed.”
Writing computer programs is an essential part of learning how to analyse problems in computational terms.
With GitHub (now part of Microsoft) claiming that their pair programming technology, Copilot, is now writing 46 percent of developers’ code, it’s perhaps not surprising that some are saying young people don’t need to learn how to code. It’s an easy political soundbite, but it just doesn’t stand up to serious scrutiny.
Even if AI systems can improve to the point where they generate consistently reliable code, it seems to me that it is just as likely that this will increase the demand for more complex software, leading to greater demand for more programmers. There is historical precedent for this: the invention of abstract programming languages such as Python dramatically simplified the act of humans providing instructions to computers, leading to more complex software and a much greater demand for developers.
Learning to program will help young people understand how the world around them is being transformed by AI systems.
However these AI-powered tools develop, it will still be essential for young people to learn the fundamentals of programming and to get hands-on experience of writing code as part of any credible computer science course. Practical experience of writing computer programs is an essential part of learning how to analyse problems in computational terms; it brings the subject to life; it will help young people understand how the world around them is being transformed by AI systems; and it will ensure that they are able to shape that future, rather than it being something that is done to them.
Enhancing teaching and learning through AI-powered technologies
Technology has already transformed learning. YouTube is probably the most important educational innovation of the past 20 years, democratising both the creation and consumption of learning resources. Khan Academy, meanwhile, integrated video instruction into a learning experience that gamified formative assessment. Our own edtech platform, Ada Computer Science, combines comprehensive instructional materials, a huge bank of questions designed to help learning, and automated marking and feedback to make computer science easier to teach and learn. Brilliant though these are, none of them have even begun to harness the potential of AI systems like large language models (LLMs).
The challenge for all of us working in education is how we ensure that ethics and privacy are at the centre of the development of [AI-powered edtech].
One area where I think we’ll see huge progress is feedback. It’s well-established that good-quality feedback makes a huge difference to learning, but a teacher’s ability to provide feedback is limited by their time. No one is seriously claiming that chatbots will replace teachers, but — if we can get the quality right — LLM applications could provide every child with unlimited, on-demand feedback. AI-powered feedback — not giving students the answers, but coaching, suggesting, and encouraging in the way that great teachers already do — could be transformational.
The challenge for all of us working in education is how we ensure that ethics and privacy are at the centre of the development of AI-powered edtech.
We are already seeing edtech companies racing to bring new products and features to market that leverage LLMs, and my prediction is that the pace of that innovation is going to increase exponentially over the coming years. The challenge for all of us working in education is how we ensure that ethics and privacy are at the centre of the development of these technologies. That’s important for all applications of AI, but especially so in education, where these systems will be unleashed directly on young people. How much data from students will an AI system need to access? Can that data — aggregated from millions of students — be used to train new models? How can we communicate transparently the limitations of the information provided back to students?
Ultimately, we need to think about how parents, teachers, and education systems (the purchasers of edtech products) will be able to make informed choices about what to put in front of students. Standards will have an important role to play here, and I think we should be exploring ideas such as an AI kitemark for edtech products that communicate whether they meet a set of standards around bias, transparency, and privacy.
Realising potential in a brave new world
We may very well be entering an era in which AI systems dramatically enhance the creativity and productivity of humanity as a species. Whether the reality lives up to the hype or not, AI systems are undoubtedly going to be a big part of all of our futures, and we urgently need to figure out what that means for education, and what skills, knowledge, and mindsets young people need to develop in order to realise their full potential in that brave new world.
That’s the work we’re engaged in at the Raspberry Pi Foundation, working in partnership with individuals and organisations from across industry, government, education, and civil society.
If you have ideas and want to get involved in shaping the future of computing education, we’d love to hear from you.
This article will also appear in issue 22 of Hello World magazine, which focuses on teaching and AI. We are publishing this new issue on Monday 23 October. Sign up for a free digital subscription to get the PDF straight to your inbox on the day.
Block-based programming applications like Scratch and ScratchJr provide millions of children with an introduction to programming; they are a fun and accessible way for beginners to explore programming concepts and start making with code. ScratchJr, in particular, is designed specifically for children between the ages of 5 and 7, enabling them to create their own interactive stories and games. So it’s no surprise that they are popular tools for primary-level (K–5) computing teachers and learners. But how can teachers assess coding projects built in ScratchJr, where the possibilities are many and children are invited to follow their imagination?
Aim Unahalekhala
In the latest seminar of our series on computing education for primary-aged children, attendees heard about two research studies that explore the use of ScratchJr in K–2 education. The speaker, Apittha (Aim) Unahalekhala, is a graduate researcher at the DevTech Research Group at Tufts University. The two studies looked at assessing young children’s ScratchJr coding projects and understanding how they create projects. Both of the studies were part of the Coding as Another Language project, which sees computer science as a new literacy for the 21st century, and is developing a literacy-based coding curriculum for K–2.
How to evaluate children’s ScratchJr projects
ScratchJr offers children 28 blocks to choose from when creating a coding project. Some of these are simple, such as blocks that determine the look of a character or setting, while others are more complex, such as messaging blocks and loops. Children can combine the blocks in many different ways to create projects of different levels of complexity.
Selecting blocks for a ScratchJr project
At the start of her presentation, Aim described a rubric that she and her colleagues at DevTech have developed to assess three key aspects of a ScratchJr coding project. These aspects are coding concepts, project design, and purposefulness.
Coding concepts in ScratchJr are sequencing, repeats, events, parallelism, coordination, and the number parameter
Project design includes elaboration (number of settings and characters, use of speech bubbles) and originality (character and background customisation, animated looks, sounds)
The rubric lets educators or researchers:
Assess learners’ ability to use their coding knowledge to create purposeful and creative ScratchJr projects
Identify the level of mastery of each of the three key aspects demonstrated within the project
Identify where learners might need more guidance and support
The elements covered by the ScratchJr project evaluation rubric. Click to enlarge.
As part of the study, Aim and her colleagues collected coding projects from two schools at the start, middle, and end of a curriculum unit. They used the rubric to evaluate the coding projects and found that project scores increased over the course of the unit.
They also found that, overall, the scores for the project design elements were higher than those for coding concepts: many learners enjoyed spending lots of time designing their characters and settings, but made less use of other features. However, the two scores were correlated, meaning that learners who devoted a lot of time to the design of their project also got higher scores on coding concepts.
The rubric is a useful tool for any teachers using ScratchJr with their students. If you want to try it in your classroom, the validated rubric is free to download from the DevTech research group’s website.
How do young children create a project?
The rubric assesses the output created by a learner using ScratchJr. But learning is a process, not just an end outcome, and the final project might not always be an accurate reflection of a child’s understanding.
By understanding more about how young children create coding projects, we can improve teaching and curriculum design for early childhood computing education.
In the second study Aim presented, she set out to explore this question. She conducted a qualitative observation of children as they created coding projects at different stages of a curriculum unit, and used Google Analytics data to conduct a quantitative analysis of the steps the children took.
A project creation process involving iteration
Her findings highlighted the importance of encouraging young learners to explore the full variety of blocks available, both by guiding them in how to find and use different blocks, and by giving them the time and tools they need to explore on their own.
She also found that different teaching strategies are needed at different stages of the curriculum unit to support learners. This helps them to develop their understanding of both basic and advanced blocks, and to explore, customise, and iterate their projects.
Early-unit strategy:
Encourage free play to self-discover different functions, especially basic blocks
Mid-unit strategy:
Set plans on how long children will need on customising vs coding
More guidance on the advanced blocks, then let children explore
End-of-unit strategy:
Provide multiple sessions to work
Promote iteration by encouraging children to keep improving code and adding details
Teaching strategies for different stages of the curriculum
Join our next seminar on primary computing education
At our next seminar, we welcome Aman Yadav (Michigan State University), who will present research on computational thinking in primary school. The session will take place online on Tuesday 7 November at 17:00 UK time. Don’t miss out and sign up now:
Dr Sue Sentance, Director of our Raspberry Pi Computing Education Research Centre at the University of Cambridge, shares what she learned on a recent visit in Malaysia to understand more about the approach taken to computing education in the state of Sarawak.
Dr Sue Sentance
Computing education is a challenge around the world, and it is fascinating to see how different countries and education systems approach it. I recently had the opportunity to attend an event organised by the government of Sarawak, Malaysia, to see first-hand what learners and teachers are achieving thanks to the state’s recent policies.
Raspberry Pis and training for Sarawak’s primary schools
In Sarawak, the largest state of Malaysia, the local Ministry of Education, Innovation and Talent Development is funding an ambitious project through which all of Sarawak’s primary schools are receiving sets of Raspberry Pis. Learners use these as desktop computers and to develop computer science skills and knowledge, including the skills to create digital making projects.
Sarawak is the largest state of Malaysia, situated on the island of Borneo
Crucially, the ministry is combining this hardware distribution initiative with a three-year programme of professional development for primary school teachers. They receive training known as the Raspberry Pi Training Programme, which starts with Scratch programming and incorporates elements of physical computing with the Raspberry Pis and sensors.
To date the project has provided 9436 kits (including Raspberry Pi computer, case, monitor, mouse, and keyboard) to schools, and training for over 1200 teachers.
The STEM Trailblazers event
In order to showcase what has been achieved through the project so far, students and teachers were invited to use their schools’ Raspberry Pis to create projects to prototype solutions to real problems faced by their communities, and to showcase these projects at a special STEM Trailblazers event.
Geographically, Sarawak is Malaysia’s largest state, but it has a much smaller population than the west of the country. This means that towns and villages are very spread out and teachers and students had large distances to travel to attend the STEM Trailblazers event. To partially address this, the event was held in two locations simultaneously, Kuching and Miri, and talks were live-streamed between both venues.
STEM Trailblazers featured a host of talks from people involved in the initiative. I was very honoured to be invited as a guest speaker, representing both the University of Cambridge and the Raspberry Pi Foundation as the Director of the Raspberry Pi Computing Education Research Centre.
Solving real-world problems
The Raspberry Pi projects at STEM Trailblazers were entered into a competition, with prizes for students and teachers. Most projects had been created using Scratch to control the Raspberry Pi as well as a range of sensors.
The children and teachers who participated came from both rural and urban areas, and it was clear that the issues they had chosen to address were genuine problems in their communities.
Many of the projects I saw related to issues that schools faced around heat and hydration: a Smart Bottle project reminded children to drink regularly, a shade creator project created shade when the temperature got too high, a teachers’ project told students that they could no longer play outside when the temperature exceeded 35 degrees, and a water cooling system project set off sprinklers when the temperature rose. Other themes of the projects were keeping toilets clean, reminding children to eat healthily, and helping children to learn the alphabet. One project that especially intrigued me was an alert system for large and troublesome birds that were a problem for rural schools.
The creativity and quality of the projects on show was impressive given that all the students (and many of their teachers) had learned to program very recently, and also had to be quite innovative where they hadn’t been able to access all the hardware they needed to build their creations.
What we can learn from this initiative
Everyone involved in this project in Sarawak — including teachers, government representatives, university academics, and industry partners — is really committed to giving children the best opportunities to grow up with an understanding of digital technology. They know this is essential for their professional futures, and also fosters their creativity, independence, and problem-solving skills.
Over the last ten years, I’ve been fortunate enough to travel widely in my capacity as a computing education researcher, and I’ve seen first-hand a number of the approaches countries are taking to help their young people gain the skills and understanding of computing technologies that they need for their futures.
It’s good for us to look beyond our own context to understand how countries across the world are preparing their young people to engage with digital technology. No matter how many similarities there are between two places, we can all learn from each other’s initiatives and ideas. In 2021 the Brookings Institution published a global review of how countries are progressing with this endeavour. Organisations such as UNESCO and WEF regularly publish reports that emphasise the importance for countries to develop their citizens’ digital skills, and also advanced technological skills.
The Sarawak government’s initiative is grounded in the use of Raspberry Pis as desktop computers for schools, which run offline where schools have no access to the internet. That teachers are also trained to use the Raspberry Pis to support learners to develop hands-on digital making skills is a really important aspect of the project.
As for what the future holds for Sarawak’s computing education, at the opening ceremony of the STEM Trailblazers event, the Deputy Minister announced that the event will be an annual occasion. That means every year more students and teachers will be able to come together, share their learning, and get excited about using digital making to solve the problems that matter to them.
Like other under-resourced organizations, schools face cyber attacks from malicious actors that can impact their ability to safely perform their basic function: teach children. Schools face email, phishing, and ransomware attacks that slow access and threaten leaks of confidential student data. And these attacks have real effects. In a report issued at the end of 2022, the U.S. Government Accountability Office concluded that schools serving kindergarten through 12th grade (K-12) reported significant educational impact and monetary loss due to cybersecurity incidents, such as ransomware attacks. Recovery time can extend from 2 all the way up to 9 months — that’s almost an entire school year.
Cloudflare’s mission is to help build a better Internet, and we have always believed in helping protect those who might otherwise not have the resources to protect themselves from cyberattack.
It is against this backdrop that we’re very excited to introduce an initiative aimed at small K-12 public school districts: Project Cybersafe Schools. Announced as part of the Back to School Safely: K-12 Cybersecurity Summit at the White House on August 8, 2023, Project Cybersafe Schools will support eligible K-12 public school districts with a package of Zero Trust cybersecurity solutions — for free, and with no time limit. These tools will help eligible school districts minimize their exposure to common cyber threats.
Schools are prime targets for cyberattacks
In Q2 2023 alone, Cloudflare blocked an average of 70 million cyber threats each day targeting the U.S. education sector, and saw a 47% increase in DDoS attacks quarter-over-quarter. In September 2022, the Los Angeles Unified School District suffered a cyber attack, and the perpetrators later posted students’ private information on the dark web. Then, in January 2022, the public school system in Albuquerque, New Mexico was forced to close down for two days following a cyber attack that compromised student data. The list goes on. Between 2016 and 2022, there were 1,619 publicly reported cybersecurity-related incidents aimed at K-12 public schools and districts in the United States.
As an alliance member of the Joint Cyber Defense Collaborative, Cloudflare began conversations with officials from the Cybersecurity & Infrastructure Security Agency (CISA), the Department of Education, and the White House about how we could partner to protect K-12 schools in the United States from cyber threats. We think that we are particularly well-suited to help protect K-12 schools against cyber attacks. For almost a decade, Cloudflare has supported organizations that are particularly vulnerable to cyber threats and lack the resources to protect themselves through projects like Project Galileo, the Athenian Project, the Critical Infrastructure Defense Project, and Project Safekeeping.
Unlike many colleges, universities, and even some larger school districts, smaller school districts often lack the capacity to manage cyber threats. The lack of funding and staff make schools prime targets for hackers. These attacks prevent students from learning, put students’ personal information at risk, and cost school districts time and money in the aftermath of the attacks.
Project Cybersafe Schools: protecting the smallest K-12 public school districts
Project Cybersafe Schools will help support small K-12 public school districts by providing cloud email security to protect against a broad spectrum of threats including Business Email Compromise, multichannel phishing, credential harvesting, and other targeted attacks. Project Cybersafe Schools will also protect against Internet threats with DNS filtering by preventing users from reaching unwanted or harmful online content like ransomware or phishing sites. It can also be deployed to comply with the Children’s Internet Protection Act (CIPA), which Congress passed in 2000, to address concerns about children’s access to obscene or harmful content on the Internet.
We believe that Cloudflare can make a meaningful impact on the cybersecurity needs of our small school districts, which allows the schools to focus on what they do best: teaching students. Hopefully, this project will bring privacy, security, and peace of mind to school managers, staff, teachers, and students, allowing them to focus solely on teaching and learning fearlessly.
What Zero Trust services are available?
Eligible K-12 public school districts in the United States will have access to a package of enterprise-level Zero Trust cybersecurity services for free and with no time limit – there is no catch and no underlying obligations. Eligible organizations will benefit from:
Email Protection: Safeguards inboxes with cloud email security by protecting against a broad spectrum of threats including malware-less Business Email Compromise, multichannel phishing, credential harvesting, and other targeted attacks.
DNS Filtering: Protects against Internet threats with DNS filtering by preventing users from reaching unwanted or harmful online content like ransomware or phishing sites and can be deployed to comply with the Children’s Internet Protection Act (CIPA).
Who can apply?
To be eligible, Project Cybersafe Schools participants must be:
K-12 public school districts located in the United States
For schools or school districts that do not qualify for Project Cybersafe Schools, Cloudflare has other packages available with educational pricing. If you do not qualify for Project Cybersafe Schools, but are interested in our educational services, please contact us at [email protected].
From 27 to 29 September 2023, we and the University of Cambridge are hosting the WiPSCE International Workshop on Primary and Secondary Computing Education Research for educators and researchers. This year, this annual conference will take place at Robinson College in Cambridge. We’re inviting all UK-based teachers of computing subjects to apply for one of five ‘all expenses paid’ places at this well-regarded annual event.
You could attend WiPSCE with all expenses paid
WiPSCE is where teachers and researchers discuss research that’s relevant to teaching and learning in primary and secondary computing education, to teacher training, and to related topics. You can find more information about the conference, including the preliminary programme, at wipsce.org.
As a teacher at the conference, you will:
Engage with high-quality international research in the field where you teach
Learn ways to use that research to develop your own classroom practice
Find out how to become an advocate in your professional community for research-informed approaches to the teaching of computing.
We are delighted that, thanks to generous funding from a funder, we can offer five free places to UK computing teachers, covering:
The registration fee
Two nights’ accommodation at Robinson College
Up to £500 supply costs paid to your school to cover your teaching
You need to be a currently practising, UK-based teacher of Computing (England), Computing Science (Scotland), ICT or Digital Technologies (N. Ireland), or Computer Science (Wales)
Your headteacher needs to be able to provide written confirmation that they are happy for you to attend WiPSCE
You need to be available to attend the whole conference from Wednesday lunchtime to Friday afternoon
You need to be willing to share what you learn from the conference with your colleagues at school and with your broader teaching community, including through writing an article about your experience and its relevance to your teaching for this blog or Hello World magazine
The application form will ask your for:
Your name and contact details
Demographic and school information
Your teaching experience
A statement of up to 500 words on why you’re applying and how you think your teaching practice, your school and your colleagues will benefit from your attendance at WiPSCE (500 words is the maximum, feel free to be concise)
After the 19 July deadline, we’re aiming to inform you of the outcome of your application on Friday 21 July.
Use the information you share in your form, particularly in your statement
Select applicants from a mix of primary and secondary schools, with a mix of years of computing teaching experience, and from a mix of geographic areas
Join us in strengthening research-informed computing classroom practice
We’d be delighted to receive your application. Being able to facilitate teachers’ attendance at the conference is very much aligned with our approach to research. Both at the Foundation and the Raspberry Pi Computing Education Research Centre, we’re committed to conducting research that’s directly relevant to schools and teachers, and to working in close collaboration with teachers.
We hope you are interested in attending WiPSCE and becoming an advocate for research-informed computing education practice. If your application is unsuccessful, we hope you consider coming along anyway. We’re looking forward to meeting you there. In the meantime, you can keep up with WiPSCE news on Twitter.
We are delighted to announce that we’ve joined the partner network of edX, the global online learning platform. Through our free online courses we enable any educator to teach students about computing and how to create with digital technologies. Since 2017, over 250,000 people have taken our online courses, including 19,000 teachers in England alone. The move to edX builds on this success to help us bring high-quality training to many more teachers worldwide.
“I feel that this course was essential in my understanding of where I may take my students on their journey as coders. Extremely practical advice and exercises.” – Online course participant
Free training to support all educators to teach computing
Supporting teachers and educators is crucial for our mission to enable young people to realise their full potential through the power of computing and digital technologies. Through our online courses educators can learn the skills, knowledge, and confidence to teach computing in an engaging way. As a result, they empower young people to in turn develop the knowledge, skills, and confidence to use digital technologies effectively, and to be able to critically evaluate these technologies and confidently engage with technological change.
Twenty of our most popular online courses are now available for sign-up on the edX platform. They will start in two blocks of ten in August and September, respectively.
The courses are written with educators in mind, and are also useful to anyone with an interest in computing. The scope of topics is broad and includes programming in Python and Scratch, web development and design, cybersecurity, and machine learning and AI. Our aim is to support educators of all levels of experience to learn about computing, including teachers, club volunteers, youth workers, parents, and more. The courses also draw on content from our Computing Curriculum and provide support for teachers who want to engage their students with Experience AI, our pioneering education initiative about the field of AI.
“Our partnership with edX gives teachers everywhere a new way to engage with our free, expert-led computing education training. As people design and deploy new and powerful digital technologies, it’s important that no-one is left behind and we are all able to shape technology together.” – Sian Harris, Chief Education Officer at the Raspberry Pi Foundation
What are our courses like?
Designed, created, and facilitated by us, each of our courses is a cross-team project. When we put together a course we:
Use pedagogical best practice: we lead with concepts, model processes, and include activities that are ready for the classroom; add variety in terms of what content to present as text, images, or videos; and include opportunities to create projects
Use language carefully so that it is easy to follow for all participants, as are engaging with us online and may have English as an additional language
Put accessibility front and centre so that as many people as possible can learn with us
Offering our courses on the edX platform gives us flexibility in how we present the content, meaning we can better meet learner needs.
“Not only did the course present a thorough grounding in computing pedagogy, references were made to supporting research, and the structure and presentation was deceptively straightforward — despite dealing with some tricky concepts.” – Online course participant
We especially strive to exemplify the pedagogical approaches we recommend to teachers within the courses themselves. For example, semantic waves are woven throughout our learning resources and help learners to unpack new concepts, then repack them into more complex contexts to encourage knowledge acquisition. This teaching strategy, along with many others, is used widely in the courses and in all our teaching and learning resources.
How you can learn with us on edX
Taking our courses on edX you can:
Learn at your computer or on the edX mobile app
Join a course’s dedicated discussion are to discuss and collaborate with other participants
Ask our team questions — we’ll have experienced facilitators on hand
All the courses can be completed at your own pace, in your own time. Based on a commitment of between 1 to 2 hours per week, you can complete our courses in 2 to 4 weeks. You’re also welcome to work through them more quickly (or slowly) if you prefer.
What do we talk about when we talk about artificial intelligence (AI)? It’s becoming a cliche to point out that, because the term “AI” is used to describe so many different things nowadays, it’s difficult to know straight away what anyone means when they say “AI”. However, it’s true that without a shared understanding of what AI and related terms mean, we can’t talk about them, or educate young people about the field.
They ensure that we give learners and teachers a consistent and clear understanding of the key terms across all our Experience AI resources. Within the Experience AI Lessons for Key Stage 3 (age 11–14), these key terms are also correlated to the target concepts and learning objectives presented in the learning graph.
They help us talk about AI and AI education in our team. Thanks to sharing an understanding of what terms such as “AI”, “ML”, “model”, or “training” actually mean and how to best talk about AI, our conversations are much more productive.
As an example, here is our explanation of the term “artificial intelligence” for learners aged 11–14:
Artificial intelligence (AI) is the design and study of systems that appear to mimic intelligent behaviour. Some AI applications are based on rules. More often now, AI applications are built using machine learning that is said to ‘learn’ from examples in the form of data. For example, some AI applications are built to answer questions or help diagnose illnesses. Other AI applications could be built for harmful purposes, such as spreading fake news. AI applications do not think. AI applications are built to carry out tasks in a way that appears to be intelligent.
You can find 32 explanations in the glossary that is part of the Experience AI Lessons. Here’s an insight into how we arrived at the explanations.
Reliable sources
In order to ensure the explanations are as precise as possible, we first identified reliable sources. These included among many others:
Well-recognised AI courses, such as Andrew Ng’s AI for Everyone
Articles included in the AITopics publication of the AAAI
Explaining AI terms to Key Stage 3 learners: Some principles
Vocabulary is an important part of teaching and learning. When we use vocabulary correctly, we can support learners to develop their understanding. If we use it inconsistently, this can lead to alternate conceptions (misconceptions) that can interfere with learners’ understanding. You can read more about this in our Pedagogy Quick Read on alternate conceptions.
Some of our principles for writing explanations of AI terms were that the explanations need to:
Be accurate
Be grounded in education research best practice
Be suitable for our target audience (Key Stage 3 learners, i.e. 11- to 14-year-olds)
Be free of terms that have alternative meanings in computer science, such as “algorithm”
We engaged in an iterative process of writing explanations, gathering feedback from our team and our Experience AI project partners at Google DeepMind, and adapting the explanations. Then we went through the feedback and adaptation cycle until we all agreed that the explanations met our principles.
Image: Max Gruber / Better Images of AI / Ceci n’est pas une banane / CC-BY 4.0
An important part of what emerged as a result, aside from the explanations of AI terms themselves, was a blueprint for how not to talk about AI. One aspect of this is avoiding anthropomorphism, detailed by Ben Garside from our team here.
As part of designing the the Experience AI Lessons, creating the explanations helped us to:
Decide which technical details we needed to include when introducing AI concepts in the lessons
Figure out how to best present these technical details
Settle debates about where it would be appropriate, given our understanding and our learners’ age group, to abstract or leave out details
Using education research to explain AI terms
One of the ways education research informed the explanations was that we used semantic waves to structure each term’s explanation in three parts:
Top of the wave: The first one or two sentences are a high-level abstract explanation of the term, kept as short as possible, while introducing key words and concepts.
Bottom of the wave: The middle part of the explanation unpacks the meaning of the term using a common example, in a context that’s familiar to a young audience.
Top of the wave: The final one or two sentences repack what was explained in the example in a more abstract way again to reconnect with the term. The end part should be a repeat of the top of the wave at the beginning of the explanation. It should also add further information to lead to another concept.
Most explanations also contain ‘middle of the wave’ sentences, which add additional abstract content, bridging the ‘bottom of the wave’ concrete example to the ‘top of the wave’ abstract content.
Here’s the “artificial intelligence” explanation broken up into the parts of the semantic wave:
Artificial intelligence (AI) is the design and study of systems that appear to mimic intelligent behaviour. (top of the wave)
Some AI applications are based on rules. More often now, AI applications are built using machine learning that is said to ‘learn’ from examples in the form of data. (middle of the wave)
For example, some AI applications are built to answer questions or help diagnose illnesses. Other AI applications could be built for harmful purposes, such as spreading fake news (bottom of the wave)
AI applications do not think. (middle of the wave)
AI applications are built to carry out tasks in a way that appears to be intelligent. (top of the wave)
Our “artificial intelligence” explanation broken up into the parts of the semantic wave. Red = top of the wave; yellow = middle of the wave; green = bottom of the wave
Was it worth our time?
Some of the explanations went through 10 or more iterations before we agreed they were suitable for publication. After months of thinking about, writing, correcting, discussing, and justifying the explanations, it’s tempting to wonder whether I should have just prompted an AI chatbot to generate the explanations for me.
Rens Dimmendaal & Johann Siemens / Better Images of AI / Decision Tree reversed / CC-BY 4.0
I tested this idea by getting a chatbot to generate an explanation of “artificial intelligence” using the prompt “Explain what artificial intelligence is, using vocabulary suitable for KS3 students, avoiding anthropomorphism”. The result included quite a few inconsistencies with our principles, as well as a couple of technical inaccuracies. Perhaps I could have tweaked the prompt for the chatbot in order to get a better result. However, relying on a chatbot’s output would mean missing out on some of the value of doing the work of writing the explanations in collaboration with my team and our partners.
The visible result of that work is the explanations themselves. The invisible result is the knowledge we all gained, and the coherence we reached as a team, both of which enabled us to create high-quality resources for Experience AI. We wouldn’t have gotten to know what resources we wanted to write without writing the explanations ourselves and improving them over and over. So yes, it was worth our time.
What do you think about the explanations?
The process of creating and iterating the AI explanations highlights how opaque the field of AI still is, and how little we yet know about how best to teach and learn about it. At the Raspberry Pi Foundation, we now know just a bit more about that and are excited to share the results with teachers and young people.
You can access the Experience AI Lessons and the glossary with all our explanations at experience-ai.org. The glossary of AI explanations is just in its first published version: we will continue to improve it as we find out more about how to best support young people to learn about this field.
Let us know what you think about the explanations and whether they’re useful in your teaching. Onwards with the exciting work of establishing how to successfully engage young people in learning about and creating with AI technologies.
For the first time ever, I built a browser extension and did it with the help of GitHub Copilot. Here’s how.
I’ve built a rock, paper, scissors game with GitHub Copilot but never a browser extension. As a developer advocate at GitHub, I decided to put GitHub Copilot to the test, including its upcoming chat feature, and see if it could help me write an extension for Google Chrome to clear my cache.
I’m going to be honest: it wasn’t as straightforward as I expected it to be. I had a lot of questions throughout the build and had to learn new information.
But at the end of the day, I gained experience with learning an entirely new skill with a generative AI coding tool and pair programming with GitHub Copilot—and with other developers on Twitch .
I wanted to create steps that anyone—even those without developer experience—could easily replicate when building this extension, or any other extension. But I also wanted to share my new takeaways after a night of pair programming with GitHub Copilot and human developers.
1. Using the chat window, I asked GitHub Copilot, “How do I create a Chrome extension? What should the file structure look like?”
GitHub Copilot gave me general steps for creating an extension—from designing the folder structure to running the project locally in Chrome.
Then, it shared an example of a Chrome extension file structure.
To save you some time, here’s a chart that briefly defines the purpose of these files:
manifest.json
Metadata about your extension, like the name and version, and permissions. Manifest as a proper noun is the name of the Google Chrome API. The latest is V3.
popup.js
When users click on your extension icon in their Chrome toolbar, a pop-up window will appear. This file is what determines the behavior of that pop-up and contains code for handling user interactions with the pop-up window.
popup.html and style.css
These files make up the visual of your pop-up window. popup.html is the interface, including layout, structure, and content. style.css determines the way the HTML file should be displayed in the browser, including font, text color, background, etc.
2. Create the manifest.json
Inside a folder in my IDE, I created a file called manifest.json. In manifest.json,
I described my desired file:
Manifest for Chrome extension that clears browser cache.
manifest_version: 3
Permissions for the extension are: storage, tabs, browsingData
I pressed enter and invoked suggestions from GitHub Copilot by typing a curly brace.
Inside the curly brace, GitHub Copilot suggested the manifest. I deleted the lines describing my desired manifest.json, and the final file looked like this:
3. Create a service worker, which is a file called background.js
This wasn’t a file that was recommended from my chat with GitHub Copilot. I learned that it was a necessary file from a developer who tuned into my livestream . The background.js is what gives your extension the ability to run in the background, perform tasks, and respond to user events outside of the extension’s pop-up window (like network requests and data storage).
In my background.js file, I wrote a comment describing my desired service worker:
Service Worker for Google Chrome Extension
Handles when extension is installed
Handles when message is received
Then, I wrote a comment for the first function, which prompted a suggestion from GitHub Copilot, and then wrote another comment to describe the second function.
The final file looked like this:
/*
Service Worker for Google Chrome Extension
Handles when extension is installed
Handles when message is received
*/

// console.log when extension is installed
chrome.runtime.onInstalled.addListener(function() {
   console.log("Extension installed");
});

// send response when message is received and console.log when message is received
chrome.runtime.onMessage.addListener(function(request, sender, sendResponse) {
   console.log("Message received");
   sendResponse("Message received");
});
4. Create the popup.html file
In the popup.html file, I wrote a comment describing how I wanted my pop-up window to appear. This window is the one users will see when they click on the extension icon.
<!--
   HTML for Chrome extension that clears browser cache.
   Connect to javascript file called popup.js and CSS file called style.css
   Will render the following buttons with id's:
   - "All History"
   - "Past Month"
   - "Past Week"
   - "Past Day"
   - "Past Hour"
   - "Past Minute"


   Will render an empty paragraph with id "lastCleared"
-->
I decided to test the modifications before incorporating additional styles or interactivity. I prefer making incremental changes and conducting manual tests in between because it simplifies the debugging process.
Navigate to chrome://extensions/ in your Chrome browser. Turn on developer mode. Press “Load unpacked.” Upload the folder that holds your Chrome extension. Once loaded, you should be able to test your extension. Here’s what mine looked like:
6. Create a popup.js file to add interactivity
Inside this file, write a comment that will act as pseudocode for you but as a prompt for GitHub Copilot.
Pseudocode isn’t code, but a method of conceptualizing and communicating ideas to plan and design programs before writing the actual code. Programmers can concentrate on algorithmic logic without worrying about syntactic details of a particular programming language—and communicate ideas to other developers regardless of coding experience.
Here’s the pseudocode I used:
/*
This program is a Chrome Extension that clears browser cache.
Handle on button click:
- button with id "allHistory" that clears all cache history
- button with id "pastMonth" that clears cache history from the past month
- button with id "pastWeek" that clears cache history from the past week
- button with id "pastDay" that clears cache history from the past day
- button with id "pastHour" that clears cache history from the past hour
- button with id "pastMinute" that clears cache history from the past minute


Create function that
- converts dates and times into human-readable format
- adds "Successfully cleared cache" with date and time in a paragraph with id "lastCleared"
*/
Then, write the series of comments below, but write them one at a time to allow GitHub Copilot to generate a code suggestion after each one. The final popup.js looked like this:
/*
This program is a Chrome Extension that clears browser cache.
Handle on button click:
- button with id "allHistory" that clears all cache history
- button with id "pastMonth" that clears cache history from the past month
- button with id "pastWeek" that clears cache history from the past week
- button with id "pastDay" that clears cache history from the past day
- button with id "pastHour" that clears cache history from the past hour
- button with id "pastMinute" that clears cache history from the past minute

Create function that
- converts dates and times into human-readable format
- adds "Successfully cleared cache" with date and time in a paragraph with id "lastCleared"
*/

// convert date and time into human-readable format
function convertDate(date) {
   let date = new Date(date);
   var options = { weekday: 'long', year: 'numeric', month: 'long', day: 'numeric' };
   return date.toLocaleDateString("en-US", options);
}

// add successfully cleared cache into paragraph with id "lastCleared"
function addCleared() {
   var p = document.getElementById("lastCleared");
   let date = new Date();
   p.innerHTML = "Successfully cleared cache " + convertDate(date);
}

// clear all cache history
document.getElementById("allHistory").addEventListener("click", function() {
   chrome.browsingData.removeCache({ "since": 0 }, function() {
       addCleared();
   });
});

// clear cache history from the past month
document.getElementById("pastMonth").addEventListener("click", function() {
   let date = new Date();
   date.setMonth(date.getMonth() - 1);
   chrome.browsingData.removeCache({ "since": date.getTime() }, function() {
       addCleared();
   });
});

// clear cache history from the past week
document.getElementById("pastWeek").addEventListener("click", function() {
   let date = new Date();
   date.setDate(date.getDate() - 7);
   chrome.browsingData.removeCache({ "since": date.getTime() }, function() {
       addCleared();
   });
});

// clear cache history from the past day
document.getElementById("pastDay").addEventListener("click", function() {
   let date = new Date();
   date.setDate(date.getDate() - 1);
   chrome.browsingData.removeCache({ "since": date.getTime() }, function() {
       addCleared();
   });
});

// clear cache history from the past hour
document.getElementById("pastHour").addEventListener("click", function() {
  let date = new Date();
   date.setHours(date.getHours() - 1);
   chrome.browsingData.removeCache({ "since": date.getTime() }, function() {
       addCleared();
   });
});

// clear cache history from the past minute
document.getElementById("pastMinute").addEventListener("click", function() {
  let date = new Date();
   date.setMinutes(date.getMinutes() - 1);
   chrome.browsingData.removeCache({ "since": date.getTime() }, function() {
       addCleared();
   });
});
GitHub Copilot actually generated the var keyword, which is outdated. So I changed that keyword to let.
7. Create the last file in your folder: style.css
Write a comment that describes the style you want for your extension. Then, type “body” and continue tabbing until GitHub Copilot suggests all the styles.
My final style.css looked like this:
/* Style the Chrome extension's popup to be wider and taller
Use accessible friendly colors and fonts
Make h1 elements legible
Highlight when buttons are hovered over
Highlight when buttons are clicked
Align buttons in a column and center them but space them out evenly
Make paragraph bold and legible
*/

body {
   background-color: #f1f1f1;
   font-family: Arial, Helvetica, sans-serif;
   font-size: 16px;
   color: #333;
   width: 400px;
   height: 400px;
}

h1 {
   font-size: 24px;
   color: #333;
   text-align: center;
}

button {
   background-color: #4CAF50;
   color: white;
   padding: 15px 32px;
   text-align: center;
   text-decoration: none;
   display: inline-block;
   font-size: 16px;
   margin: 4px 2px;
   cursor: pointer;
   border-radius: 8px;
}

button:hover {
   background-color: #45a049;
}

button:active {
   background-color: #3e8e41;
}

p {
   font-weight: bold;
   font-size: 18px;
   color: #333;
}
Three important lessons about learning and pair programming in the age of AI
Generative AI reduces the fear of making mistakes. It can be daunting to learn a new language or framework, or start a new project. The fear of not knowing where to start—or making a mistake that could take hours to debug—can be a significant barrier to getting started. I’ve been a developer for over three years, but streaming while coding makes me nervous. I sometimes focus more on people watching me code and forget the actual logic. When I conversed with GitHub Copilot, I gained reassurance that I was going in the right direction and that helped me to stay motivated and confident during the stream.
Generative AI makes it easier to learn about new subjects, but it doesn’t replace the work of learning. GitHub Copilot didn’t magically write an entire Chrome extension for me. I had to experiment with different prompts, and ask questions to GitHub Copilot, ChatGPT, Google, and developers on my livestream. To put it in perspective, it took me about 1.5 hours to do steps 1 to 5 while streaming.
But if I hadn’t used GitHub Copilot, I would’ve had to write all this code by scratch or look it up in piecemeal searches. With the AI-generated code suggestions, I was able to jump right into review and troubleshooting, so a lot of my time and energy was focused on understanding how the code worked. I still had to put in the effort to learn an entirely new skill, but I was analyzing and evaluating code more often than I was trying to learn and then remember it.
Generative AI coding tools made it easier for me to collaborate with other developers. Developers who tuned into the livestream could understand my thought process because I had to tell GitHub Copilot what I wanted it to do. By clearly communicating my intentions with the AI pair programmer, I ended up communicating them more clearly with developers on my livestream, too. That made it easy for people tuning in to become my virtual pair programmers during my livestream.
Overall, working with GitHub Copilot made my thought process and workflow more transparent. Like I said earlier, it was actually a developer on my livestream who recommended a service worker file after noticing that GitHub Copilot didn’t include it in its suggested file structure. Once I confirmed in a chat conversation with GitHub Copilot and a Google search that I needed a service worker, I used GitHub Copilot to help me write one.
Take this with you
GitHub Copilot made me more confident with learning something new and collaborating with other developers. As I said before, live coding can be nerve-wracking. (I even get nervous even when I’m just pair programming with a coworker!) But GitHub Copilot’s real-time code suggestions and corrections created a safety net, allowing me to code more confidently—and quickly— in front of a live audience. Also, because I had to clearly communicate my intentions with the AI pair programmer, I was also communicating clearly with the developers who tuned into my livestream. This made it easy to virtually collaborate with them.
The real-time interaction with GitHub Copilot and the other developers helped with catching errors, learning coding suggestions, and reinforcing my own understanding and knowledge. The result was a high-quality codebase for a browser extension.
This project is a testament to the collaborative power of human-AI interaction. The experience underscored how GitHub Copilot can be a powerful tool in boosting confidence, facilitating learning, and fostering collaboration among developers.
We are working in partnership with Amala Education to pilot a vocational skills course for displaced learners aged 16 to 25 in Kakuma refugee camp, Kenya.
Kakuma camp was set up in Kenya in 1992, following a civil war in neighbouring South Sudan in East Africa. Today, 2 million people are living in the camp, and 61% are 18 and younger.
We’ve designed a 100-hour, 10-week course called Using online digital technologies to create change for the Amala learners in Kakuma camp. The course focused on digital skills including making media and websites, with its content we adapted from our Computing Curriculum. The course pilot was delivered alongside Amala’s High School Diploma programme, which is the first internationally accredited course programme enabling refugee and host community youth to complete their education through flexible study.
Our thanks go to the Ezrah Charitable Trust for generously funding our work in this partnership.
Sharing lessons we are learning
We are learning a lot during this pilot, so we are writing a set of three blogs to share these lessons with you.
Today’s blog is Amala Education‘s perspective on their learners in Kakuma Camp, the purpose of digital skills education, and the course design and facilitation. We will also share our approach to adapting learning resources for the context of the Amala learners and using data to assess the course, and what other support we’ve put in place to ensure this educational project is self-sustaining.
Want to make computing education meaningful? Make it connect to learners’ lived experience
By Polly Akhurst (Co-founder and Co-Executive Director, Amala Education), Louie Barnett (Education Lead, Amala Education) & Ajak Mayen Jok (Programme Coordinator, Amala Education)
Our learners wanted a course that develops not just their digital literacy, but one that aligns with Amala’s agency-based learning model, which gives young people the skills to improve their communities. Many of our learners have limited experience of using digital tools but a huge desire to develop these skills, which they see as essential to improving their lives and the lives of their community members.
So we knew we needed a course that not just builds learners’ technical knowledge and skills but can also enrich their lived experience.
How would we do it?
Enter the Raspberry Pi Foundation team. We combined Amala’s agency-based educational approach with the Raspberry Pi Foundation’s experience in pedagogy and teaching about technology and digital literacy to design a course that truly resonates with our learners.
Developing a relevant digital skills course
Before developing the course, the Raspberry Pi Foundation team held focus groups with facilitators and learners in Kakuma camp to understand their needs. This helped them to pitch the 100 hours of course materials at the right level for the learners.
We called the course Using online technologies to create change. It takes the learners on a journey, building their foundation elements of computing and digital literacy. Learners start by finding out how digital devices work using input, process, and output. Then they move on to understanding computer networks. The course includes hands-on activities related to creating media, like filming and reviewing content and creating and choosing sounds to use in a podcast. There is also some light-touch web development with HTML and JavaScript. At the end of the course, learners design and deliver a presentation that reflects the work they’ve completed.
“Before I joined the course, I really didn’t know much about how to operate technology, but through the learning and the process, now I am able to learn something that will be beneficial for me and the people in my community.” — Learner in Kakuma refugee camp
Throughout the course, learners use their newly gained skills and knowledge to make their own project aimed at creating positive change. One example project is this website developed by Shyaka Cedric and other learners, which shares how podcasts and remote learning helped their community stay safe and healthy during the pandemic. Another group of learners used their photography and design skills to develop ID cards to keep Amala students safe within the camp. Having an Amala student ID card protects learners because they can prove their identity to their community and the police.
Facilitators from the camp make the course relatable
One of the great things about this course is that the Amala facilitators who taught the learners look, speak, and sound like them. Amala facilitators are from within the camp, and that they are relatable is great for learners’ self-confidence.
Having the course facilitated by fellow refugees removes the stigmatisation that the learners are vulnerable and sets the precedent that they can do anything if they put their mind to it.
“It gave me power of… getting involved with new things…Any challenge that comes my way I am willing to take after the Raspberry Pi class now…” — Learner in Kakuma refugee camp
While the Raspberry Pi Foundation team worked to make the course content relevant for the learners, our facilitators further localised the content to ensure its relatability for learners. Local contextualisation helps students to understand what they are learning, and to identify with the content — it’s not something out of the blue for them. Localisation is also important because it helps implement one of Amala’s cornerstones: decolonising the African curriculum.
Digital literacy is an urgent need
Because the learners in Kakuma camp lead complex social lives and face high levels of precarity, we decided to make the pilot course optional through our existing Diploma programme. We anticipated a modest enrollment rate, but instead over 100 people within the Amala learner community expressed an interest in this 75-person course. This showed us that the value and urgency of digital literacy in refugee communities is more pertinent than ever.
“I want to study this course because the current world is a digital world and I would like to acquire the skills to boost my computer skills and be able to help myself by getting a job and transforming the community through the digital world.” — Learner in Kakuma refugee camp
So what’s happening next?
We have a blueprint of what works in Kakuma refugee camp, and we are also learning what doesn’t. Bringing these lessons together will help us offer the course to more learners in Kakuma, and adapt the content in other locations, like our site in Amman, Jordan.
Look out for our follow-up blogs about the support we put in place to enable learners in Kakuma camp to participate in the course, and how we worked to create course content that is suitable for them.
To provide the best experiences, we use technologies like cookies to store and/or access device information. Consenting to these technologies will allow us to process data such as browsing behavior or unique IDs on this site. Not consenting or withdrawing consent, may adversely affect certain features and functions.
Functional
Always active
The technical storage or access is strictly necessary for the legitimate purpose of enabling the use of a specific service explicitly requested by the subscriber or user, or for the sole purpose of carrying out the transmission of a communication over an electronic communications network.
Preferences
The technical storage or access is necessary for the legitimate purpose of storing preferences that are not requested by the subscriber or user.
Statistics
The technical storage or access that is used exclusively for statistical purposes.The technical storage or access that is used exclusively for anonymous statistical purposes. Without a subpoena, voluntary compliance on the part of your Internet Service Provider, or additional records from a third party, information stored or retrieved for this purpose alone cannot usually be used to identify you.
Marketing
The technical storage or access is required to create user profiles to send advertising, or to track the user on a website or across several websites for similar marketing purposes.

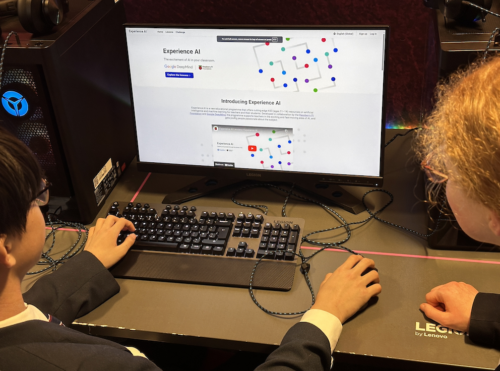
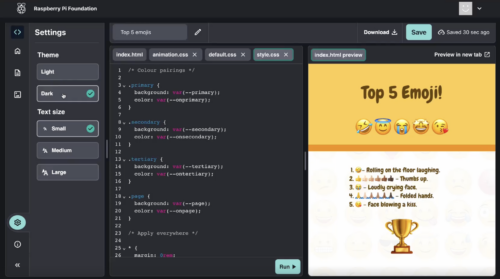

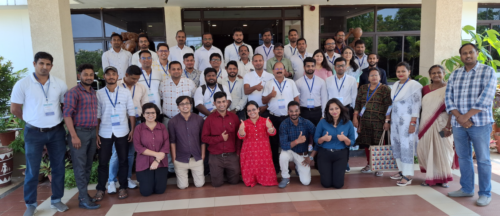
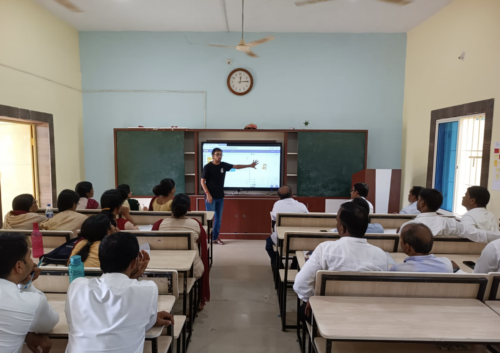
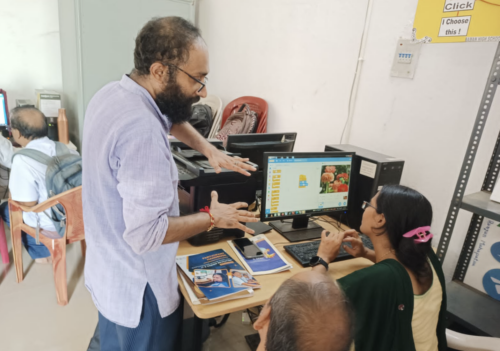
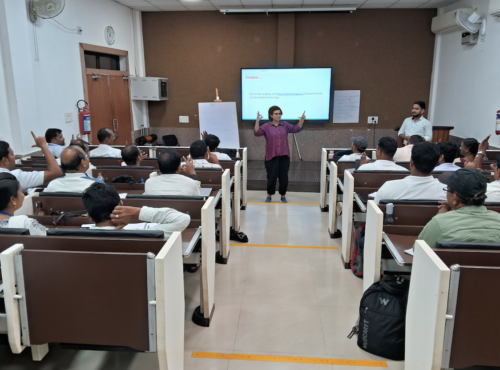
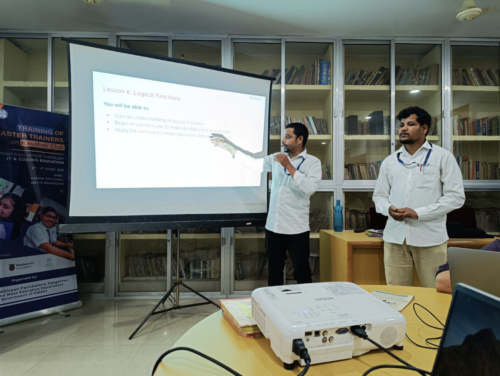


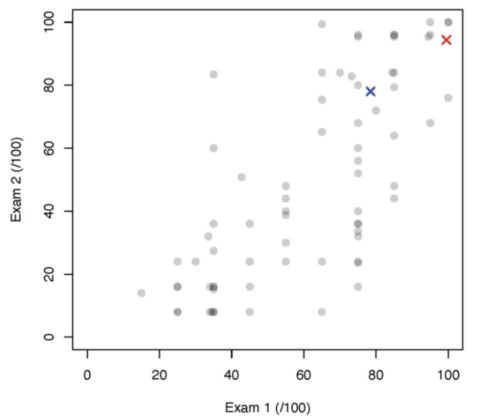

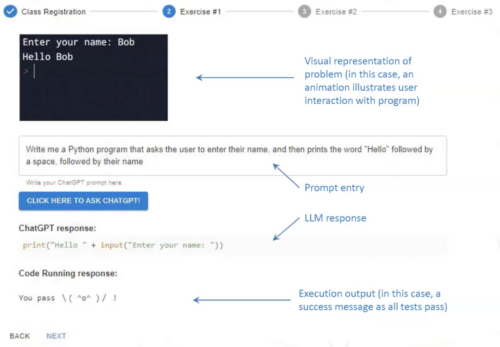
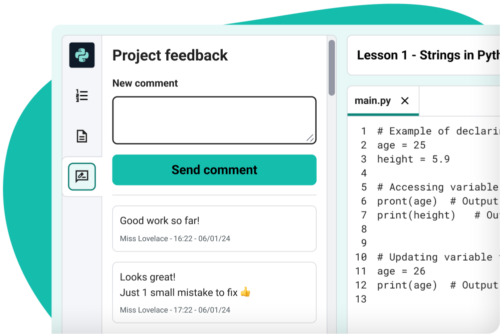
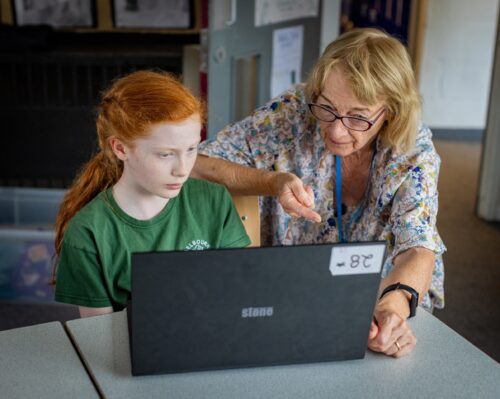



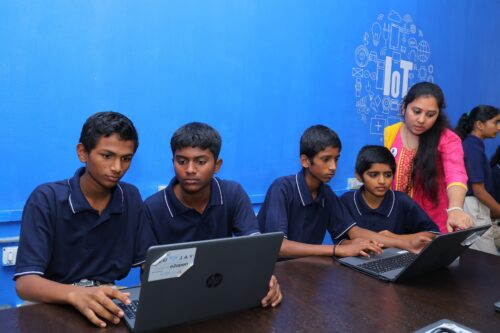
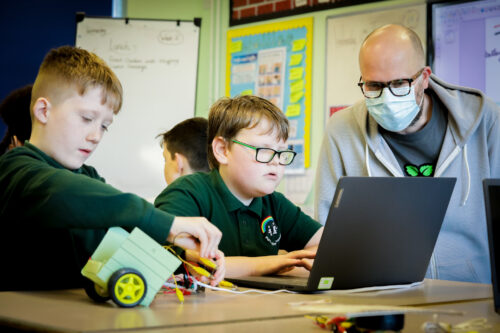



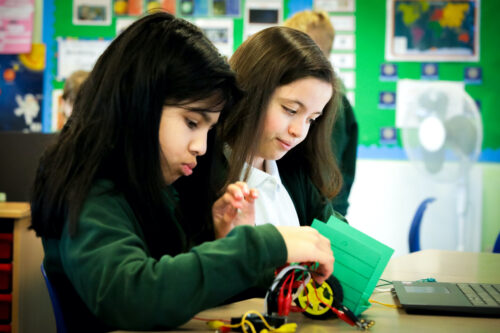

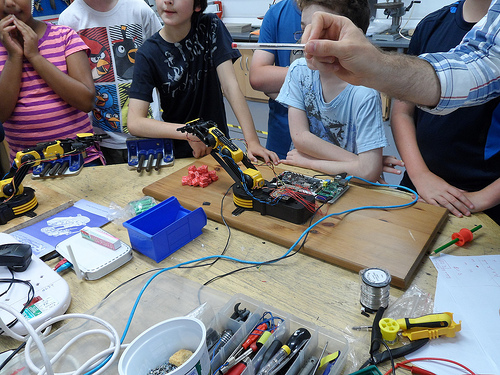
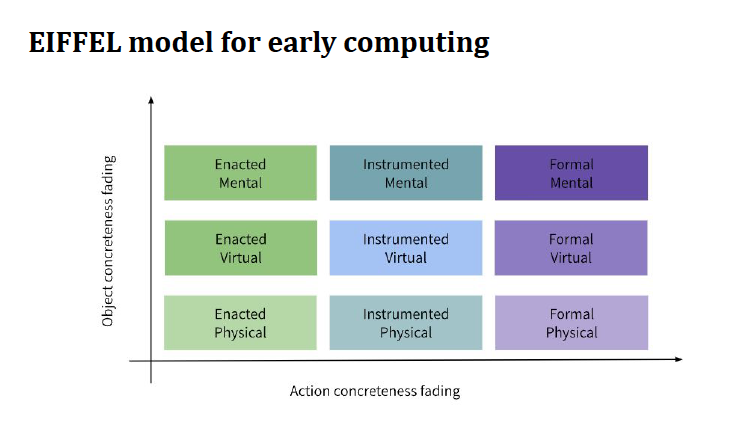




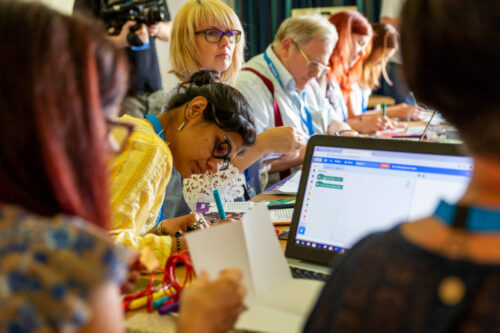


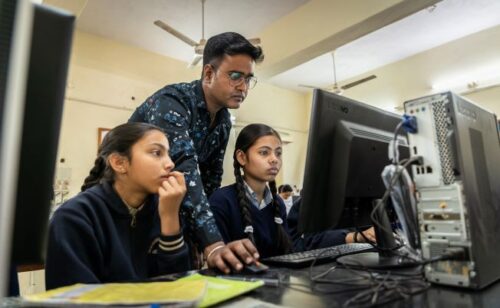
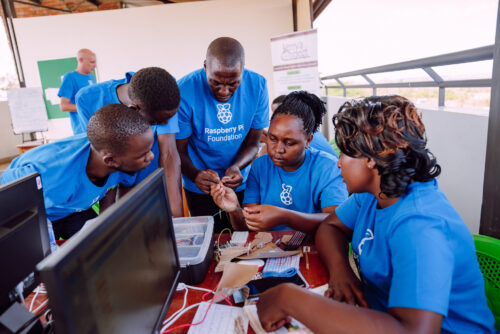
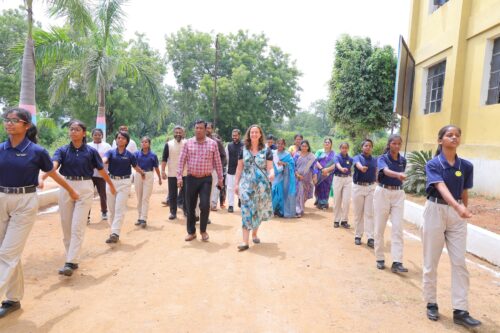

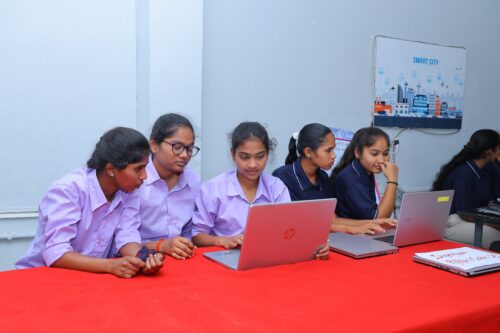
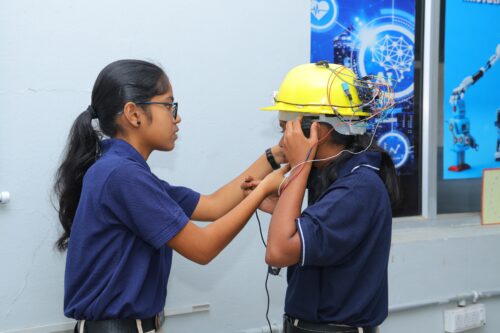
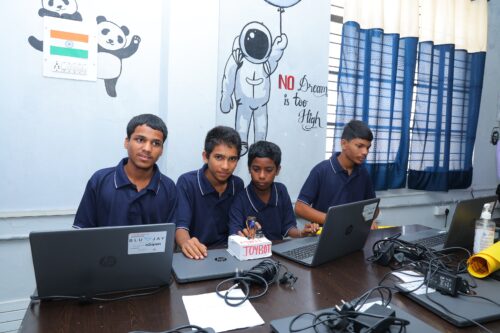
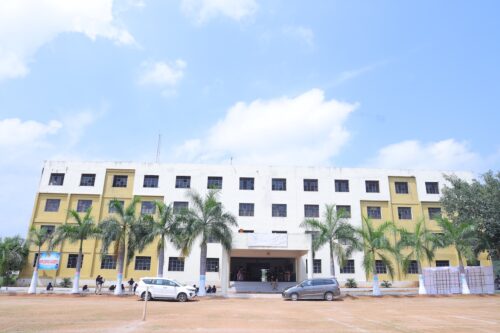
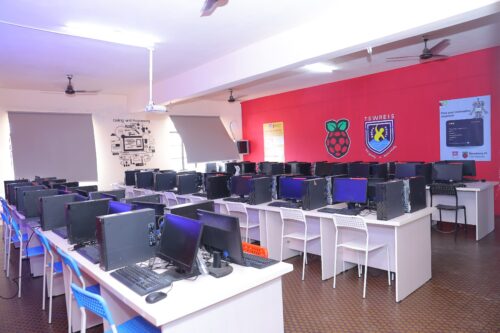
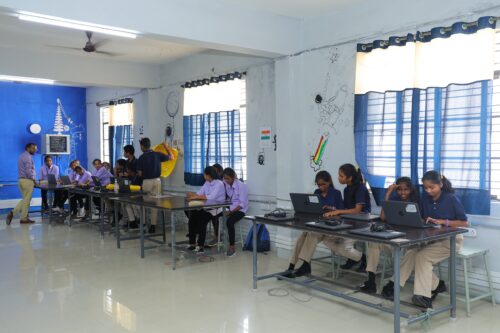
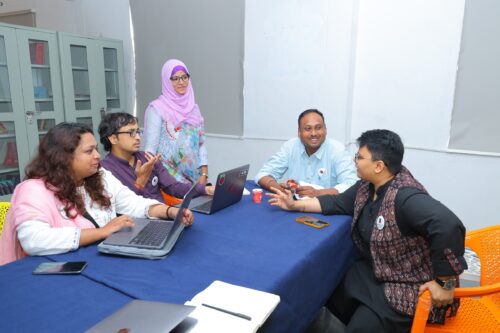
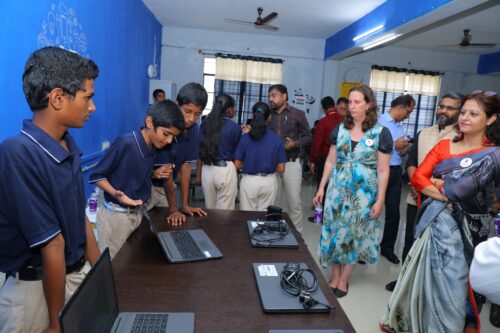
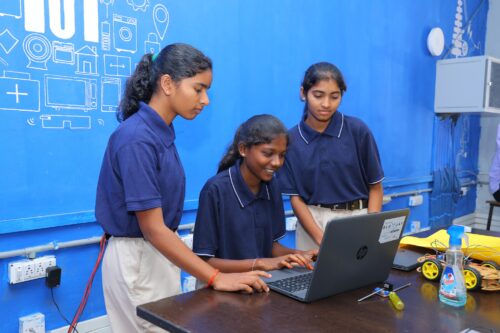








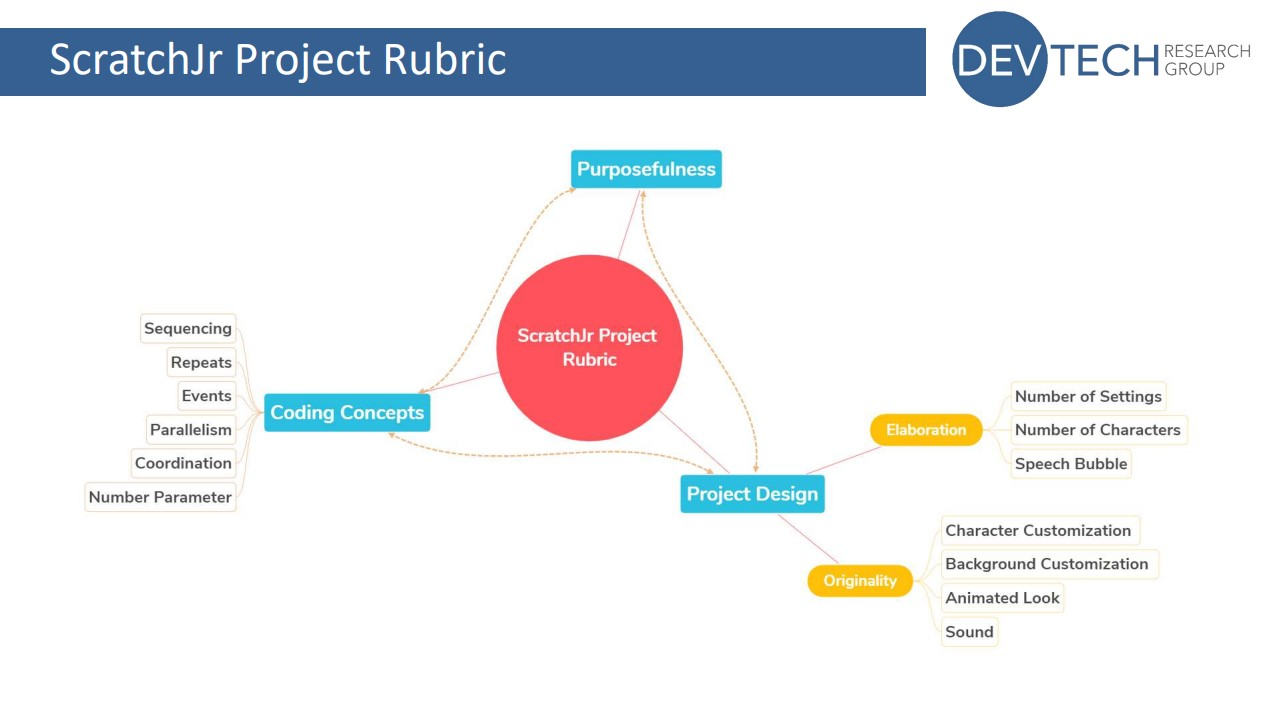
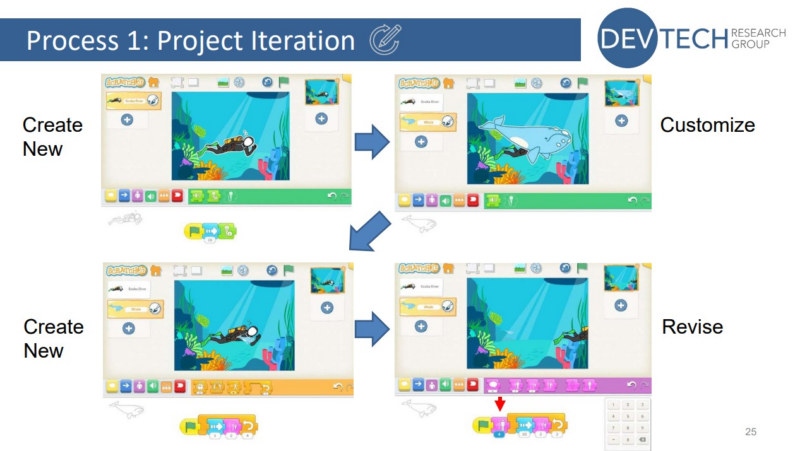
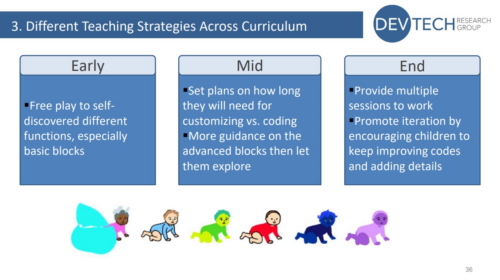


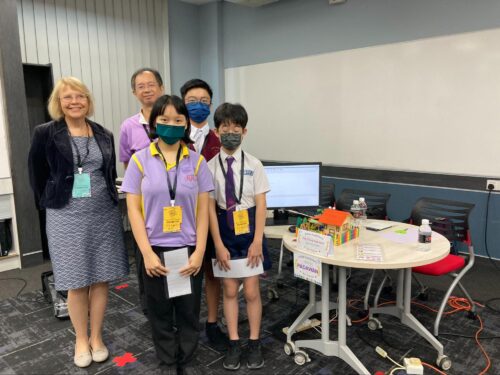
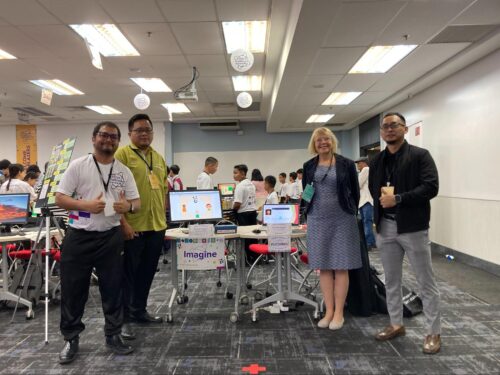
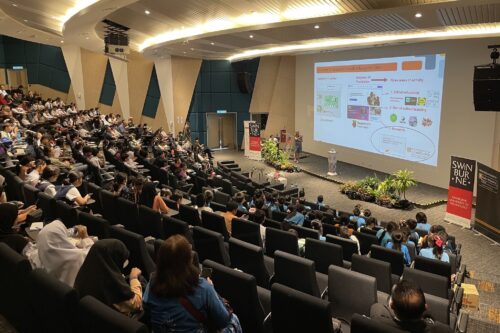
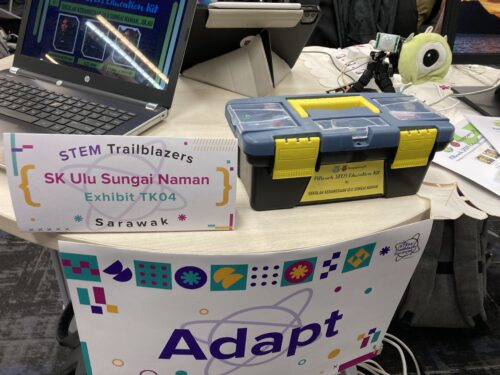
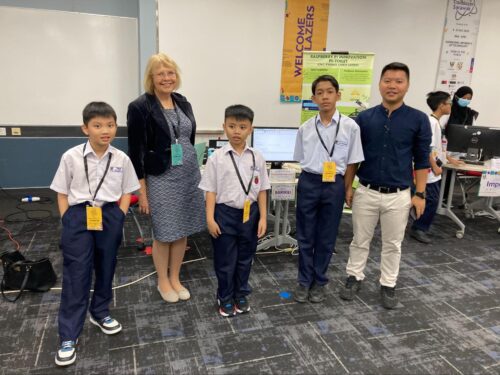
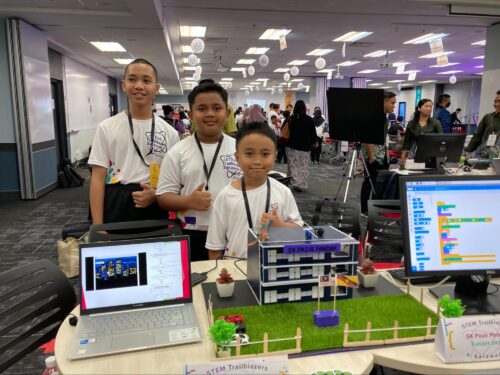
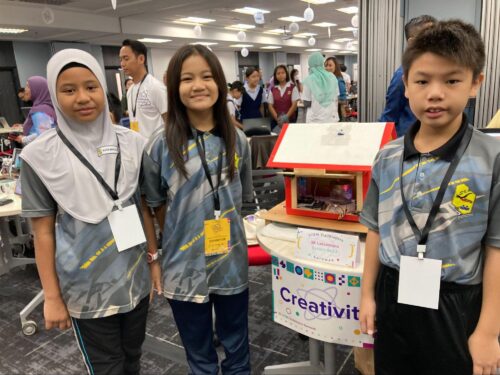





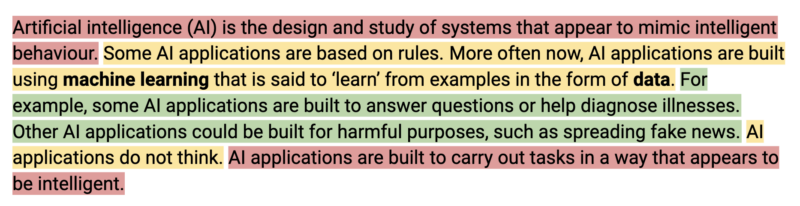

 .
.
 and the responses from GitHub Copilot
  .
.