Tag Archives: javascript

Micro-frontend Architectures on AWS

Post Syndicated from Bryant Bost original https://aws.amazon.com/blogs/architecture/micro-frontend-architectures-on-aws/

A microservice architecture is characterized by independent services that are focused on a specific business function and maintained by small, self-contained teams. Microservice architectures are used frequently for web applications developed on AWS, and for good reason. They offer many well-known benefits such as development agility, technological freedom, targeted deployments, and more. Despite the popularity of microservices, many frontend applications are still built in a monolithic style. For example, they have one large code base that interacts with all backend microservices, and is maintained by a large team of developers.

Monolith Frontend

Figure 1. Microservice backend with monolith frontend

What is a Micro-frontend?

The micro-frontend architecture introduces microservice development principles to frontend applications. In a micro-frontend architecture, development teams independently build and deploy “child” frontend applications. These applications are combined by a “parent” frontend application that acts as a container to retrieve, display, and integrate the various child applications. In this parent/child model, the user interacts with what appears to be a single application. In reality, they are interacting with several independent applications, published by different teams.

Micro Frontend

Figure 2. Microservice backend with micro-frontend

Micro-frontend Benefits

Compared to a monolith frontend, a micro-frontend offers the following benefits:

  • Independent artifacts: A core tenet of microservice development is that artifacts can be deployed independently, and this remains true for micro-frontends. In a micro-frontend architecture, teams should be able to independently deploy their frontend applications with minimal impact to other services. Those changes will be reflected by the parent application.
  • Autonomous teams: Each team is the expert in its own domain. For example, the billing service team members have specialized knowledge. This includes the data models, the business requirements, the API calls, and user interactions associated with the billing service. This knowledge allows the team to develop the billing frontend faster than a larger, less specialized team.
  • Flexible technology choices: Autonomy allows each team to make technology choices that are independent from other teams. For instance, the billing service team could develop their micro-frontend using Vue.js and the profile service team could develop their frontend using Angular.
  • Scalable development: Micro-frontend development teams are smaller and are able to operate without disrupting other teams. This allows us to quickly scale development by spinning up new teams to deliver additional frontend functionality via child applications.
  • Easier maintenance: Keeping frontend repositories small and specialized allows them to be more easily understood, and this simplifies long-term maintenance and testing. For instance, if you want to change an interaction on a monolith frontend, you must isolate the location and dependencies of the feature within the context of a large codebase. This type of operation is greatly simplified when dealing with the smaller codebases associated with micro-frontends.

Micro-frontend Challenges

Conversely, a micro-frontend presents the following challenges:

  • Parent/child integration: A micro-frontend introduces the task of ensuring the parent application displays the child application with the same consistency and performance expected from a monolith application. This point is discussed further in the next section.
  • Operational overhead: Instead of managing a single frontend application, a micro-frontend application involves creating and managing separate infrastructure for all teams.
  • Consistent user experience: In order to maintain a consistent user experience, the child applications must use the same UI components, CSS libraries, interactions, error handling, and more. Maintaining consistency in the user experience can be difficult for child applications that are at different stages in the development lifecycle.

Building Micro-frontends

The most difficult challenge with the micro-frontend architecture pattern is integrating child applications with the parent application. Prioritizing the user experience is critical for any frontend application. In the context of micro-frontends, this means ensuring a user can seamlessly navigate from one child application to another inside the parent application. We want to avoid disruptive behavior such as page refreshes or multiple logins. At its most basic definition, parent/child integration involves the parent application dynamically retrieving and rendering child applications when the parent app is loaded. Rendering the child application depends on how the child application was built, and this can be done in a number of ways. Two of the most popular methods of parent/child integration are:

  1. Building each child application as a web component.
  2. Importing each child application as an independent module. These modules either declares a function to render itself or is dynamically imported by the parent application (such as with module federation).

Registering child apps as web components:

<html>
    <head>
        <script src="https://shipping.example.com/shipping-service.js"></script>
        <script src="https://profile.example.com/profile-service.js"></script>
        <script src="https://billing.example.com/billing-service.js"></script>
        <title>Parent Application</title>
    </head>
    <body>
        <shipping-service />
        <profile-service />
        <billing-service />
    </body>
</html>

Registering child apps as modules:

<html>
    <head>
        <script src="https://shipping.example.com/shipping-service.js"></script>
        <script src="https://profile.example.com/profile-service.js"></script>
        <script src="https://billing.example.com/billing-service.js"></script>
     <title>Parent Application</title>
    </head>
    <body>
    </body>
    <script>
        // Load and render the child applications form their JS bundles.
    </script>
</html>

The following diagram shows an example micro-frontend architecture built on AWS.

AWS Micro Frontend

Figure 3. Micro-frontend architecture on AWS

In this example, each service team is running a separate, identical stack to build their application. They use the AWS Developer Tools and deploy the application to Amazon Simple Storage Service (S3) with Amazon CloudFront. The CI/CD pipelines use shared components such as CSS libraries, API wrappers, or custom modules stored in AWS CodeArtifact. This helps drive consistency across parent and child applications.

When you retrieve the parent application, it should prompt you to log in to an identity provider and retrieve JWTs. In this example, the identity provider is an Amazon Cognito User Pool. After a successful login, the parent application retrieves the child applications from CloudFront and renders them inside the parent application. Alternatively, the parent application can elect to render the child applications on demand, when you navigate to a specific route. The child applications should not require you to log in again to the Amazon Cognito user pool. They should be configured to use the JWT obtained by the parent app or silently retrieve a new JWT from Amazon Cognito.

Conclusion

Micro-frontend architectures introduce many of the familiar benefits of microservice development to frontend applications. A micro-frontend architecture also simplifies the process of building complex frontend applications by allowing you to manage small, independent components.

Save 2 clicks, test data preprocessing

Post Syndicated from Aigars Kadiķis original https://blog.zabbix.com/save-2-clicks-test-data-preprocessing/13249/

This topic is related to template development from scratch, bulk data input, and a lot of dependable items having different preprocessing steps each.

If these keywords resonate with you, keep reading.

Story stars back in a day when a “Test now” button was invented inside the item preprocessing section. In this way, we can simulate the entire preprocessing stack. A very cool feature to have.

Nevertheless, we tend to copy over and over again the data input:

While this is fine for small projects with simple preprocessing steps which match our knowledge league. It is not so OK in we have ambition to solve the impossible. Figure out a data preprocessing rule(s) which suit our needs.

For a template development process, the solution is to skip data input and inject a static value in the very first preprocessing step. Let me introduce the concept.

JavaScript preprocessing step 1:

return 'this is input text';

JavaScript preprocessing step 2:

return value.replace("text","data");

Now we have static input, no need to spend time to “click” the input data.

Sometimes the input is not just one line but multiple lines, and tabs, and spaces and double quotes and single quotes and special characters. To respect all these things, we must get our hands dirty with the base64 format.

To prepare input data as base64 string, on windows systems it can be easily done with Notepad++. Just select all text and select “Plugin commands” => “Base64 Encode” (functionality is not there with a lite version of Notepad++):

After that, we need to copy all content to clipboard:

Create the first JavasSript preprocessing with the content from the clipboard. Here is the same example:

return 'PD94bWwgdmVyc2lvbj0iMS4wIiBlbmNvZGluZz0iVVRGLTE2Ij8+DQo8am9ibG9nPg0KICA8am9iX2xvZ192ZXJzaW9uIHZlcnNpb249IjIuMCIvPg0KICA8aGVhZGVyPg0KICAgIDxzdGFydF90aW1lPkpvYiBzdGFydGVkOiBNb25kYXksIEF1Z3VzdCAxMCwgMjAyMCBhdCAxOjAwOjA1IFBNPC9zdGFydF90aW1lPg0KICA8L2hlYWRlcj4NCiAgPGZvb3Rlcj4NCiAgICA8ZW5kX3RpbWU+Sm9iIGVuZGVkOiBNb25kYXksIEF1Z3VzdCAxMCwgMjAyMCBhdCAzOjE3OjUwIFBNPC9lbmRfdGltZT4NCiAgICA8T3BlcmF0aW9uRXJyb3JzIFR5cGU9ImpvYmZ0cl9qb2Jjb21wbF9zaHV0ZG93biI+Sm9iIGNvbXBsZXRpb24gc3RhdHVzOiBDYW5jZWxlZCBieSBzZXJ2aWNlIHNodXRkb3duPC9PcGVyYXRpb25FcnJvcnM+DQogICAgPGNvbXBsZXRlU3RhdHVzPjE8L2NvbXBsZXRlU3RhdHVzPg0KICAgIDxhYm9ydFVzZXJOYW1lPlRoZSBqb2Igd2FzIGNhbmNlbGVkIGJlY2F1c2UgdGhlIHJlc3BvbnNlIHRvIGEgbWVkaWEgcmVxdWVzdCBhbGVydCB3YXMgQ2FuY2VsLCBvciBiZWNhdXNlIHRoZSBhbGVydCB3YXMgY29uZmlndXJlZCB0byBhdXRvbWF0aWNhbGx5IHJlc3BvbmQgd2l0aCBDYW5jZWwsIG9yIGJlY2F1c2UgdGhlIEJhY2t1cCBFeGVjIEpvYiBFbmdpbmUgc2VydmljZSB3YXMgc3RvcHBlZC48L2Fib3J0VXNlck5hbWU+DQogIDwvZm9vdGVyPg0KPC9qb2Jsb2c+DQo=';

In the next step, there must be decoding scheduled. Kindly copy the code 1:1. Configure it as a second preprocessing step:

var k = "ABCDEFGHIJKLMNOPQRSTUVWXYZabcdefghijklmnopqrstuvwxyz0123456789+/="
function d(e) {
    var t, n, o, r, a = "",
        i = "",
        c = "",
        l = 0;
    for (/[^A-Za-z0-9+/=]/g.exec(e) && alert("1"), e = e.replace(/[^A-Za-z0-9+/=]/g, ""); t = k.indexOf(e.charAt(l++)) << 2 | (o = k.indexOf(e.charAt(l++))) >> 4, n = (15 & o) << 4 | (r = k.indexOf(e.charAt(l++))) >> 2, i = (3 & r) << 6 | (c = k.indexOf(e.charAt(l++))), a += String.fromCharCode(t), 64 != r && (a += String.fromCharCode(n)), 64 != c && (a += String.fromCharCode(i)), t = n = i = "", o = r = c = "", l < e.length;);
    return unescape(a)
}
return d(value);

This is how it looks like:

Go to testing section and ensure the data in Zabbix is similar as it was in Notepad++:

Data has been successfully decoded. Multiple lines, quite original stuff. The tabs are not visible with a naked human eye but they are there, I promise!

Now we can “play” out the next preprocessing steps and try out different things:

When one preprocessing has been figured out, just clone the item and start to developing a next one. Sure, if we succeed the ambition, it will be required to spend 5 minutes to go through all items, remove first 2 steps and link the item to master key 😉

Ok. That is it for today. Bye.

By the way, on Linux system to have base64 string we only need:

  1. A command where the output entertains us
  2. Pipe it to ‘base64 -w0’
systemctl list-unit-files --type=service | base64 -w0

Publishing private npm packages with AWS CodeArtifact

Post Syndicated from Ryan Sonshine original https://aws.amazon.com/blogs/devops/publishing-private-npm-packages-aws-codeartifact/

This post demonstrates how to create, publish, and download private npm packages using AWS CodeArtifact, allowing you to share code across your organization without exposing your packages to the public.

The ability to control CodeArtifact repository access using AWS Identity and Access Management (IAM) removes the need to manage additional credentials for a private npm repository when developers already have IAM roles configured.

You can use private npm packages for a variety of use cases, such as:

  • Reducing code duplication
  • Configuration such as code linting and styling
  • CLI tools for internal processes

This post shows how to easily create a sample project in which we publish an npm package and install the package from CodeArtifact. For more information about pipeline integration, see AWS CodeArtifact and your package management flow – Best Practices for Integration.

Solution overview

The following diagram illustrates this solution.

Diagram showing npm package publish and install with CodeArtifact

In this post, you create a private scoped npm package containing a sample function that can be used across your organization. You create a second project to download the npm package. You also learn how to structure your npm package to make logging in to CodeArtifact automatic when you want to build or publish the package.

The code covered in this post is available on GitHub:

Prerequisites

Before you begin, you need to complete the following:

  1. Create an AWS account.
  2. Install the AWS Command Line Interface (AWS CLI). CodeArtifact is supported in these CLI versions:
    1. 18.83 or later: install the AWS CLI version 1
    2. 0.54 or later: install the AWS CLI version 2
  3. Create a CodeArtifact repository.
  4. Add required IAM permissions for CodeArtifact.

Creating your npm package

You can create your npm package in three easy steps: set up the project, create your npm script for authenticating with CodeArtifact, and publish the package.

Setting up your project

Create a directory for your new npm package. We name this directory my-package because it serves as the name of the package. We use an npm scope for this package, where @myorg represents the scope all of our organization’s packages are published under. This helps us distinguish our internal private package from external packages. See the following code:

npm init --scope=@myorg -y

{
  "name": "@myorg/my-package",
  "version": "1.0.0",
  "description": "A sample private scoped npm package",
  "main": "index.js",
  "scripts": {
    "test": "echo \"Error: no test specified\" && exit 1"
  }
}

The package.json file specifies that the main file of the package is called index.js. Next, we create that file and add our package function to it:

module.exports.helloWorld = function() {
  console.log('Hello world!');
}

Creating an npm script

To create your npm script, complete the following steps:

  1. On the CodeArtifact console, choose the repository you created as part of the prerequisites.

If you haven’t created a repository, create one before proceeding.

CodeArtifact repository details console

  1. Select your CodeArtifact repository and choose Details to view the additional details for your repository.

We use two items from this page:

  • Repository name (my-repo)
  • Domain (my-domain)
  1. Create a script named co:login in our package.json. The package.json contains the following code:
{
  "name": "@myorg/my-package",
  "version": "1.0.0",
  "description": "A sample private scoped npm package",
  "main": "index.js",
  "scripts": {
    "co:login": "aws codeartifact login --tool npm --repository my-repo --domain my-domain",
    "test": "echo \"Error: no test specified\" && exit 1"
  }
}

Running this script updates your npm configuration to use your CodeArtifact repository and sets your authentication token, which expires after 12 hours.

  1. To test our new script, enter the following command:

npm run co:login

The following code is the output:

> aws codeartifact login --tool npm --repository my-repo --domain my-domain
Successfully configured npm to use AWS CodeArtifact repository https://my-domain-<ACCOUNT ID>.d.codeartifact.us-east-1.amazonaws.com/npm/my-repo/
Login expires in 12 hours at 2020-09-04 02:16:17-04:00
  1. Add a prepare script to our package.json to run our login command:
{
  "name": "@myorg/my-package",
  "version": "1.0.0",
  "description": "A sample private scoped npm package",
  "main": "index.js",
  "scripts": {
    "prepare": "npm run co:login",
    "co:login": "aws codeartifact login --tool npm --repository my-repo --domain my-domain",
    "test": "echo \"Error: no test specified\" && exit 1"
  }
}

This configures our project to automatically authenticate and generate an access token anytime npm install or npm publish run on the project.

If you see an error containing Invalid choice, valid choices are:, you need to update the AWS CLI according to the versions listed in the perquisites of this post.

Publishing your package

To publish our new package for the first time, run npm publish.

The following screenshot shows the output.

Terminal showing npm publish output

If we navigate to our CodeArtifact repository on the CodeArtifact console, we now see our new private npm package ready to be downloaded.

CodeArtifact console showing published npm package

Installing your private npm package

To install your private npm package, you first set up the project and add the CodeArtifact configs. After you install your package, it’s ready to use.

Setting up your project

Create a directory for a new application and name it my-app. This is a sample project to download our private npm package published in the previous step. You can apply this pattern to all repositories you intend on installing your organization’s npm packages in.

npm init -y

{
  "name": "my-app",
  "version": "1.0.0",
  "description": "A sample application consuming a private scoped npm package",
  "main": "index.js",
  "scripts": {
    "test": "echo \"Error: no test specified\" && exit 1"
  }
}

Adding CodeArtifact configs

Copy the npm scripts prepare and co:login created earlier to your new project:

{
  "name": "my-app",
  "version": "1.0.0",
  "description": "A sample application consuming a private scoped npm package",
  "main": "index.js",
  "scripts": {
    "prepare": "npm run co:login",
    "co:login": "aws codeartifact login --tool npm --repository my-repo --domain my-domain",
    "test": "echo \"Error: no test specified\" && exit 1"
  }
}

Installing your new private npm package

Enter the following command:

npm install @myorg/my-package

Your package.json should now list @myorg/my-package in your dependencies:

{
  "name": "my-app",
  "version": "1.0.0",
  "description": "",
  "main": "index.js",
  "scripts": {
    "prepare": "npm run co:login",
    "co:login": "aws codeartifact login --tool npm --repository my-repo --domain my-domain",
    "test": "echo \"Error: no test specified\" && exit 1"
  },
  "dependencies": {
    "@myorg/my-package": "^1.0.0"
  }
}

Using your new npm package

In our my-app application, create a file named index.js to run code from our package containing the following:

const { helloWorld } = require('@myorg/my-package');

helloWorld();

Run node index.js in your terminal to see the console print the message from our @myorg/my-package helloWorld function.

Cleaning Up

If you created a CodeArtifact repository for the purposes of this post, use one of the following methods to delete the repository:

Remove the changes made to your user profile’s npm configuration by running npm config delete registry, this will remove the CodeArtifact repository from being set as your default npm registry.

Conclusion

In this post, you successfully published a private scoped npm package stored in CodeArtifact, which you can reuse across multiple teams and projects within your organization. You can use npm scripts to streamline the authentication process and apply this pattern to save time.

About the Author

Ryan Sonshine

Ryan Sonshine is a Cloud Application Architect at Amazon Web Services. He works with customers to drive digital transformations while helping them architect, automate, and re-engineer solutions to fully leverage the AWS Cloud.


Building, bundling, and deploying applications with the AWS CDK

Post Syndicated from Cory Hall original https://aws.amazon.com/blogs/devops/building-apps-with-aws-cdk/

The AWS Cloud Development Kit (AWS CDK) is an open-source software development framework to model and provision your cloud application resources using familiar programming languages.

The post CDK Pipelines: Continuous delivery for AWS CDK applications showed how you can use CDK Pipelines to deploy a TypeScript-based AWS Lambda function. In that post, you learned how to add additional build commands to the pipeline to compile the TypeScript code to JavaScript, which is needed to create the Lambda deployment package.

In this post, we dive deeper into how you can perform these build commands as part of your AWS CDK build process by using the native AWS CDK bundling functionality.

If you’re working with Python, TypeScript, or JavaScript-based Lambda functions, you may already be familiar with the PythonFunction and NodejsFunction constructs, which use the bundling functionality. This post describes how to write your own bundling logic for instances where a higher-level construct either doesn’t already exist or doesn’t meet your needs. To illustrate this, I walk through two different examples: a Lambda function written in Golang and a static site created with Nuxt.js.

Concepts

A typical CI/CD pipeline contains steps to build and compile your source code, bundle it into a deployable artifact, push it to artifact stores, and deploy to an environment. In this post, we focus on the building, compiling, and bundling stages of the pipeline.

The AWS CDK has the concept of bundling source code into a deployable artifact. As of this writing, this works for two main types of assets: Docker images published to Amazon Elastic Container Registry (Amazon ECR) and files published to Amazon Simple Storage Service (Amazon S3). For files published to Amazon S3, this can be as simple as pointing to a local file or directory, which the AWS CDK uploads to Amazon S3 for you.

When you build an AWS CDK application (by running cdk synth), a cloud assembly is produced. The cloud assembly consists of a set of files and directories that define your deployable AWS CDK application. In the context of the AWS CDK, it might include the following:

  • AWS CloudFormation templates and instructions on where to deploy them
  • Dockerfiles, corresponding application source code, and information about where to build and push the images to
  • File assets and information about which S3 buckets to upload the files to

Use case

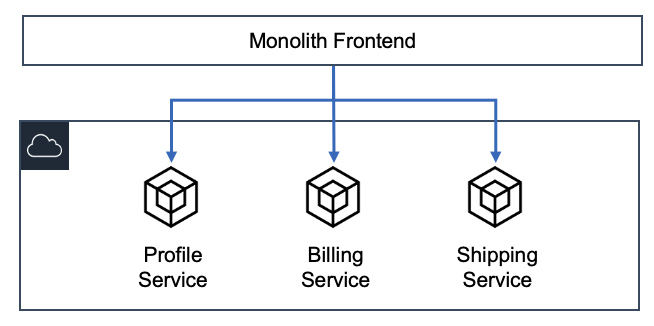
For this use case, our application consists of front-end and backend components. The example code is available in the GitHub repo. In the repository, I have split the example into two separate AWS CDK applications. The repo also contains the Golang Lambda example app and the Nuxt.js static site.

Golang Lambda function

To create a Golang-based Lambda function, you must first create a Lambda function deployment package. For Go, this consists of a .zip file containing a Go executable. Because we don’t commit the Go executable to our source repository, our CI/CD pipeline must perform the necessary steps to create it.

In the context of the AWS CDK, when we create a Lambda function, we have to tell the AWS CDK where to find the deployment package. See the following code:

new lambda.Function(this, 'MyGoFunction', {
  runtime: lambda.Runtime.GO_1_X,
  handler: 'main',
  code: lambda.Code.fromAsset(path.join(__dirname, 'folder-containing-go-executable')),
});

In the preceding code, the lambda.Code.fromAsset() method tells the AWS CDK where to find the Golang executable. When we run cdk synth, it stages this Go executable in the cloud assembly, which it zips and publishes to Amazon S3 as part of the PublishAssets stage.

If we’re running the AWS CDK as part of a CI/CD pipeline, this executable doesn’t exist yet, so how do we create it? One method is CDK bundling. The lambda.Code.fromAsset() method takes a second optional argument, AssetOptions, which contains the bundling parameter. With this bundling parameter, we can tell the AWS CDK to perform steps prior to staging the files in the cloud assembly.

Breaking down the BundlingOptions parameter further, we can perform the build inside a Docker container or locally.

Building inside a Docker container

For this to work, we need to make sure that we have Docker running on our build machine. In AWS CodeBuild, this means setting privileged: true. See the following code:

new lambda.Function(this, 'MyGoFunction', {
  code: lambda.Code.fromAsset(path.join(__dirname, 'folder-containing-source-code'), {
    bundling: {
      image: lambda.Runtime.GO_1_X.bundlingDockerImage,
      command: [
        'bash', '-c', [
          'go test -v',
          'GOOS=linux go build -o /asset-output/main',
      ].join(' && '),
    },
  })
  ...
});

We specify two parameters:

  • image (required) – The Docker image to perform the build commands in
  • command (optional) – The command to run within the container

The AWS CDK mounts the folder specified as the first argument to fromAsset at /asset-input inside the container, and mounts the asset output directory (where the cloud assembly is staged) at /asset-output inside the container.

After we perform the build commands, we need to make sure we copy the Golang executable to the /asset-output location (or specify it as the build output location like in the preceding example).

This is the equivalent of running something like the following code:

docker run \
  --rm \
  -v folder-containing-source-code:/asset-input \
  -v cdk.out/asset.1234a4b5/:/asset-output \
  lambci/lambda:build-go1.x \
  bash -c 'GOOS=linux go build -o /asset-output/main'

Building locally

To build locally (not in a Docker container), we have to provide the local parameter. See the following code:

new lambda.Function(this, 'MyGoFunction', {
  code: lambda.Code.fromAsset(path.join(__dirname, 'folder-containing-source-code'), {
    bundling: {
      image: lambda.Runtime.GO_1_X.bundlingDockerImage,
      command: [],
      local: {
        tryBundle(outputDir: string) {
          try {
            spawnSync('go version')
          } catch {
            return false
          }

          spawnSync(`GOOS=linux go build -o ${path.join(outputDir, 'main')}`);
          return true
        },
      },
    },
  })
  ...
});

The local parameter must implement the ILocalBundling interface. The tryBundle method is passed the asset output directory, and expects you to return a boolean (true or false). If you return true, the AWS CDK doesn’t try to perform Docker bundling. If you return false, it falls back to Docker bundling. Just like with Docker bundling, you must make sure that you place the Go executable in the outputDir.

Typically, you should perform some validation steps to ensure that you have the required dependencies installed locally to perform the build. This could be checking to see if you have go installed, or checking a specific version of go. This can be useful if you don’t have control over what type of build environment this might run in (for example, if you’re building a construct to be consumed by others).

If we run cdk synth on this, we see a new message telling us that the AWS CDK is bundling the asset. If we include additional commands like go test, we also see the output of those commands. This is especially useful if you wanted to fail a build if tests failed. See the following code:

$ cdk synth
Bundling asset GolangLambdaStack/MyGoFunction/Code/Stage...
✓  . (9ms)
✓  clients (5ms)

DONE 8 tests in 11.476s
✓  clients (5ms) (coverage: 84.6% of statements)
✓  . (6ms) (coverage: 78.4% of statements)

DONE 8 tests in 2.464s

Cloud Assembly

If we look at the cloud assembly that was generated (located at cdk.out), we see something like the following code:

$ cdk synth
Bundling asset GolangLambdaStack/MyGoFunction/Code/Stage...
✓  . (9ms)
✓  clients (5ms)

DONE 8 tests in 11.476s
✓  clients (5ms) (coverage: 84.6% of statements)
✓  . (6ms) (coverage: 78.4% of statements)

DONE 8 tests in 2.464s

It contains our GolangLambdaStack CloudFormation template that defines our Lambda function, as well as our Golang executable, bundled at asset.01cf34ff646d380829dc4f2f6fc93995b13277bde7db81c24ac8500a83a06952/main.

Let’s look at how the AWS CDK uses this information. The GolangLambdaStack.assets.json file contains all the information necessary for the AWS CDK to know where and how to publish our assets (in this use case, our Golang Lambda executable). See the following code:

{
  "version": "5.0.0",
  "files": {
    "01cf34ff646d380829dc4f2f6fc93995b13277bde7db81c24ac8500a83a06952": {
      "source": {
        "path": "asset.01cf34ff646d380829dc4f2f6fc93995b13277bde7db81c24ac8500a83a06952",
        "packaging": "zip"
      },
      "destinations": {
        "current_account-current_region": {
          "bucketName": "cdk-hnb659fds-assets-${AWS::AccountId}-${AWS::Region}",
          "objectKey": "01cf34ff646d380829dc4f2f6fc93995b13277bde7db81c24ac8500a83a06952.zip",
          "assumeRoleArn": "arn:${AWS::Partition}:iam::${AWS::AccountId}:role/cdk-hnb659fds-file-publishing-role-${AWS::AccountId}-${AWS::Region}"
        }
      }
    }
  }
}

The file contains information about where to find the source files (source.path) and what type of packaging (source.packaging). It also tells the AWS CDK where to publish this .zip file (bucketName and objectKey) and what AWS Identity and Access Management (IAM) role to use (assumeRoleArn). In this use case, we only deploy to a single account and Region, but if you have multiple accounts or Regions, you see multiple destinations in this file.

The GolangLambdaStack.template.json file that defines our Lambda resource looks something like the following code:

{
  "Resources": {
    "MyGoFunction0AB33E85": {
      "Type": "AWS::Lambda::Function",
      "Properties": {
        "Code": {
          "S3Bucket": {
            "Fn::Sub": "cdk-hnb659fds-assets-${AWS::AccountId}-${AWS::Region}"
          },
          "S3Key": "01cf34ff646d380829dc4f2f6fc93995b13277bde7db81c24ac8500a83a06952.zip"
        },
        "Handler": "main",
        ...
      }
    },
    ...
  }
}

The S3Bucket and S3Key match the bucketName and objectKey from the assets.json file. By default, the S3Key is generated by calculating a hash of the folder location that you pass to lambda.Code.fromAsset(), (for this post, folder-containing-source-code). This means that any time we update our source code, this calculated hash changes and a new Lambda function deployment is triggered.

Nuxt.js static site

In this section, I walk through building a static site using the Nuxt.js framework. You can apply the same logic to any static site framework that requires you to run a build step prior to deploying.

To deploy this static site, we use the BucketDeployment construct. This is a construct that allows you to populate an S3 bucket with the contents of .zip files from other S3 buckets or from a local disk.

Typically, we simply tell the BucketDeployment construct where to find the files that it needs to deploy to the S3 bucket. See the following code:

new s3_deployment.BucketDeployment(this, 'DeployMySite', {
  sources: [
    s3_deployment.Source.asset(path.join(__dirname, 'path-to-directory')),
  ],
  destinationBucket: myBucket
});

To deploy a static site built with a framework like Nuxt.js, we need to first run a build step to compile the site into something that can be deployed. For Nuxt.js, we run the following two commands:

  • yarn install – Installs all our dependencies
  • yarn generate – Builds the application and generates every route as an HTML file (used for static hosting)

This creates a dist directory, which you can deploy to Amazon S3.

Just like with the Golang Lambda example, we can perform these steps as part of the AWS CDK through either local or Docker bundling.

Building inside a Docker container

To build inside a Docker container, use the following code:

new s3_deployment.BucketDeployment(this, 'DeployMySite', {
  sources: [
    s3_deployment.Source.asset(path.join(__dirname, 'path-to-nuxtjs-project'), {
      bundling: {
        image: cdk.BundlingDockerImage.fromRegistry('node:lts'),
        command: [
          'bash', '-c', [
            'yarn install',
            'yarn generate',
            'cp -r /asset-input/dist/* /asset-output/',
          ].join(' && '),
        ],
      },
    }),
  ],
  ...
});

For this post, we build inside the publicly available node:lts image hosted on DockerHub. Inside the container, we run our build commands yarn install && yarn generate, and copy the generated dist directory to our output directory (the cloud assembly).

The parameters are the same as described in the Golang example we walked through earlier.

Building locally

To build locally, use the following code:

new s3_deployment.BucketDeployment(this, 'DeployMySite', {
  sources: [
    s3_deployment.Source.asset(path.join(__dirname, 'path-to-nuxtjs-project'), {
      bundling: {
        local: {
          tryBundle(outputDir: string) {
            try {
              spawnSync('yarn --version');
            } catch {
              return false
            }

            spawnSync('yarn install && yarn generate');

       fs.copySync(path.join(__dirname, ‘path-to-nuxtjs-project’, ‘dist’), outputDir);
            return true
          },
        },
        image: cdk.BundlingDockerImage.fromRegistry('node:lts'),
        command: [],
      },
    }),
  ],
  ...
});

Building locally works the same as the Golang example we walked through earlier, with one exception. We have one additional command to run that copies the generated dist folder to our output directory (cloud assembly).

Conclusion

This post showed how you can easily compile your backend and front-end applications using the AWS CDK. You can find the example code for this post in this GitHub repo. If you have any questions or comments, please comment on the GitHub repo. If you have any additional examples you want to add, we encourage you to create a Pull Request with your example!

Our code also contains examples of deploying the applications using CDK Pipelines, so if you’re interested in deploying the example yourself, check out the example repo.


About the author

Cory Hall

Cory is a Solutions Architect at Amazon Web Services with a passion for DevOps and is based in Charlotte, NC. Cory works with enterprise AWS customers to help them design, deploy, and scale applications to achieve their business goals.

How to add authentication to a single-page web application with Amazon Cognito OAuth2 implementation

Post Syndicated from George Conti original https://aws.amazon.com/blogs/security/how-to-add-authentication-single-page-web-application-with-amazon-cognito-oauth2-implementation/

In this post, I’ll be showing you how to configure Amazon Cognito as an OpenID provider (OP) with a single-page web application.

This use case describes using Amazon Cognito to integrate with an existing authorization system following the OpenID Connect (OIDC) specification. OIDC is an identity layer on top of the OAuth 2.0 protocol to enable clients to verify the identity of users. Amazon Cognito lets you add user sign-up, sign-in, and access control to your web and mobile apps quickly and easily. Some key reasons customers select Amazon Cognito include:

  • Simplicity of implementation: The console is very intuitive; it takes a short time to understand how to configure and use Amazon Cognito. Amazon Cognito also has key out-of-the-box functionality, including social sign-in, multi-factor authentication (MFA), forgotten password support, and infrastructure as code (AWS CloudFormation) support.
  • Ability to customize workflows: Amazon Cognito offers the option of a hosted UI where users can sign-in directly to Amazon Cognito or sign-in via social identity providers such as Amazon, Google, Apple, and Facebook. The Amazon Cognito hosted UI and workflows help save your team significant time and effort.
  • OIDC support: Amazon Cognito can securely pass user profile information to an existing authorization system following the ODIC authorization code flow. The authorization system uses the user profile information to secure access to the app.

Amazon Cognito overview

Amazon Cognito follows the OIDC specification to authenticate users of web and mobile apps. Users can sign in directly through the Amazon Cognito hosted UI or through a federated identity provider, such as Amazon, Facebook, Apple, or Google. The hosted UI workflows include sign-in and sign-up, password reset, and MFA. Since not all customer workflows are the same, you can customize Amazon Cognito workflows at key points with AWS Lambda functions, allowing you to run code without provisioning or managing servers. After a user authenticates, Amazon Cognito returns standard OIDC tokens. You can use the user profile information in the ID token to grant your users access to your own resources or you can use the tokens to grant access to APIs hosted by Amazon API Gateway. You can also exchange the tokens for temporary AWS credentials to access other AWS services.

Figure 1: Amazon Cognito sign-in flow

Figure 1: Amazon Cognito sign-in flow

OAuth 2.0 and OIDC

OAuth 2.0 is an open standard that allows a user to delegate access to their information to other websites or applications without handing over credentials. OIDC is an identity layer on top of OAuth 2.0 that uses OAuth 2.0 flows. OAuth 2.0 defines a number of flows to manage the interaction between the application, user, and authorization server. The right flow to use depends on the type of application.

The client credentials flow is used in machine-to-machine communications. You can use the client credentials flow to request an access token to access your own resources, which means you can use this flow when your app is requesting the token on its own behalf, not on behalf of a user. The authorization code grant flow is used to return an authorization code that is then exchanged for user pool tokens. Because the tokens are never exposed directly to the user, they are less likely to be shared broadly or accessed by an unauthorized party. However, a custom application is required on the back end to exchange the authorization code for user pool tokens. For security reasons, we recommend the Authorization Code Flow with Proof Key Code Exchange (PKCE) for public clients, such as single-page apps or native mobile apps.

The following table shows recommended flows per application type.

Application CFlow Description
Machine Client credentials Use this flow when your application is requesting the token on its own behalf, not on behalf of the user
Web app on a server Authorization code grant A regular web app on a web server
Single-page app Authorization code grant PKCE An app running in the browser, such as JavaScript
Mobile app Authorization code grant PKCE iOS or Android app

Securing the authorization code flow

Amazon Cognito can help you achieve compliance with regulatory frameworks and certifications, but it’s your responsibility to use the service in a way that remains compliant and secure. You need to determine the sensitivity of the user profile data in Amazon Cognito; adhere to your company’s security requirements, applicable laws and regulations; and configure your application and corresponding Amazon Cognito settings appropriately for your use case.

Note: You can learn more about regulatory frameworks and certifications at AWS Services in Scope by Compliance Program. You can download compliance reports from AWS Artifact.

We recommend that you use the authorization code flow with PKCE for single-page apps. Applications that use PKCE generate a random code verifier that’s created for every authorization request. Proof Key for Code Exchange by OAuth Public Clients has more information on use of a code verifier. In the following sections, I will show you how to set up the Amazon Cognito authorization endpoint for your app to support a code verifier.

The authorization code flow

In OpenID terms, the app is the relying party (RP) and Amazon Cognito is the OP. The flow for the authorization code flow with PKCE is as follows:

  1. The user enters the app home page URL in the browser and the browser fetches the app.
  2. The app generates the PKCE code challenge and redirects the request to the Amazon Cognito OAuth2 authorization endpoint (/oauth2/authorize).
  3. Amazon Cognito responds back to the user’s browser with the Amazon Cognito hosted sign-in page.
  4. The user signs in with their user name and password, signs up as a new user, or signs in with a federated sign-in. After a successful sign-in, Amazon Cognito returns the authorization code to the browser, which redirects the authorization code back to the app.
  5. The app sends a request to the Amazon Cognito OAuth2 token endpoint (/oauth2/token) with the authorization code, its client credentials, and the PKCE verifier.
  6. Amazon Cognito authenticates the app with the supplied credentials, validates the authorization code, validates the request with the code verifier, and returns the OpenID tokens, access token, ID token, and refresh token.
  7. The app validates the OpenID ID token and then uses the user profile information (claims) in the ID token to provide access to resources.(Optional) The app can use the access token to retrieve the user profile information from the Amazon Cognito user information endpoint (/userInfo).
  8. Amazon Cognito returns the user profile information (claims) about the authenticated user to the app. The app then uses the claims to provide access to resources.

The following diagram shows the authorization code flow with PKCE.

Figure 2: Authorization code flow

Figure 2: Authorization code flow

Implementing an app with Amazon Cognito authentication

Now that you’ve learned about Amazon Cognito OAuth implementation, let’s create a working example app that uses Amazon Cognito OAuth implementation. You’ll create an Amazon Cognito user pool along with an app client, the app, an Amazon Simple Storage Service (Amazon S3) bucket, and an Amazon CloudFront distribution for the app, and you’ll configure the app client.

Step 1. Create a user pool

Start by creating your user pool with the default configuration.

Create a user pool:

  1. Go to the Amazon Cognito console and select Manage User Pools. This takes you to the User Pools Directory.
  2. Select Create a user pool in the upper corner.
  3. Enter a Pool name, select Review defaults, and select Create pool.
  4. Copy the Pool ID, which will be used later to create your single-page app. It will be something like region_xxxxx. You will use it to replace the variable YOUR_USERPOOL_ID in a later step.(Optional) You can add additional features to the user pool, but this demonstration uses the default configuration. For more information see, the Amazon Cognito documentation.

The following figure shows you entering the user pool name.

Figure 3: Enter a name for the user pool

Figure 3: Enter a name for the user pool

The following figure shows the resulting user pool configuration.

Figure 4: Completed user pool configuration

Figure 4: Completed user pool configuration

Step 2. Create a domain name

The Amazon Cognito hosted UI lets you use your own domain name or you can add a prefix to the Amazon Cognito domain. This example uses an Amazon Cognito domain with a prefix.

Create a domain name:

  1. Sign in to the Amazon Cognito console, select Manage User Pools, and select your user pool.
  2. Under App integration, select Domain name.
  3. In the Amazon Cognito domain section, add your Domain prefix (for example, myblog).
  4. Select Check availability. If your domain isn’t available, change the domain prefix and try again.
  5. When your domain is confirmed as available, copy the Domain prefix to use when you create your single-page app. You will use it to replace the variable YOUR_COGNITO_DOMAIN_PREFIX in a later step.
  6. Choose Save changes.

The following figure shows creating an Amazon Cognito hosted domain.

Figure 5: Creating an Amazon Cognito hosted UI domain

Figure 5: Creating an Amazon Cognito hosted UI domain

Step 3. Create an app client

Now create the app client user pool. An app client is where you register your app with the user pool. Generally, you create an app client for each app platform. For example, you might create an app client for a single-page app and another app client for a mobile app. Each app client has its own ID, authentication flows, and permissions to access user attributes.

Create an app client:

  1. Sign in to the Amazon Cognito console, select Manage User Pools, and select your user pool.
  2. Under General settings, select App clients.
  3. Choose Add an app client.
  4. Enter a name for the app client in the App client name field.
  5. Uncheck Generate client secret and accept the remaining default configurations.

    Note: The client secret is used to authenticate the app client to the user pool. Generate client secret is unchecked because you don’t want to send the client secret on the URL using client-side JavaScript. The client secret is used by applications that have a server-side component that can secure the client secret.

  6. Choose Create app client as shown in the following figure.

    Figure 6: Create and configure an app client

    Figure 6: Create and configure an app client

  7. Copy the App client ID. You will use it to replace the variable YOUR_APPCLIENT_ID in a later step.

The following figure shows the App client ID which is automatically generated when the app client is created.

Figure 7: App client configuration

Figure 7: App client configuration

Step 4. Create an Amazon S3 website bucket

Amazon S3 is an object storage service that offers industry-leading scalability, data availability, security, and performance. We use Amazon S3 here to host a static website.

Create an Amazon S3 bucket with the following settings:

  1. Sign in to the AWS Management Console and open the Amazon S3 console.
  2. Choose Create bucket to start the Create bucket wizard.
  3. In Bucket name, enter a DNS-compliant name for your bucket. You will use this in a later step to replace the YOURS3BUCKETNAME variable.
  4. In Region, choose the AWS Region where you want the bucket to reside.

    Note: It’s recommended to create the Amazon S3 bucket in the same AWS Region as Amazon Cognito.

  5. Look up the region code from the region table (for example, US-East [N. Virginia] has a region code of us-east-1). You will use the region code to replace the variable YOUR_REGION in a later step.
  6. Choose Next.
  7. Select the Versioning checkbox.
  8. Choose Next.
  9. Choose Next.
  10. Choose Create bucket.
  11. Select the bucket you just created from the Amazon S3 bucket list.
  12. Select the Properties tab.
  13. Choose Static website hosting.
  14. Choose Use this bucket to host a website.
  15. For the index document, enter index.html and then choose Save.

Step 5. Create a CloudFront distribution

Amazon CloudFront is a fast content delivery network service that helps securely deliver data, videos, applications, and APIs to customers globally with low latency and high transfer speeds—all within a developer-friendly environment. In this step, we use CloudFront to set up an HTTPS-enabled domain for the static website hosted on Amazon S3.

Create a CloudFront distribution (web distribution) with the following modified default settings:

  1. Sign into the AWS Management Console and open the CloudFront console.
  2. Choose Create Distribution.
  3. On the first page of the Create Distribution Wizard, in the Web section, choose Get Started.
  4. Choose the Origin Domain Name from the dropdown list. It will be YOURS3BUCKETNAME.s3.amazonaws.com.
  5. For Restrict Bucket Access, select Yes.
  6. For Origin Access Identity, select Create a New Identity.
  7. For Grant Read Permission on Bucket, select Yes, Update Bucket Policy.
  8. For the Viewer Protocol Policy, select Redirect HTTP to HTTPS.
  9. For Cache Policy, select Managed-Caching Disabled.
  10. Set the Default Root Object to index.html.(Optional) Add a comment. Comments are a good place to describe the purpose of your distribution, for example, “Amazon Cognito SPA.”
  11. Select Create Distribution. The distribution will take a few minutes to create and update.
  12. Copy the Domain Name. This is the CloudFront distribution domain name, which you will use in a later step as the DOMAINNAME value in the YOUR_REDIRECT_URI variable.

Step 6. Create the app

Now that you’ve created the Amazon S3 bucket for static website hosting and the CloudFront distribution for the site, you’re ready to use the code that follows to create a sample app.

Use the following information from the previous steps:

  1. YOUR_COGNITO_DOMAIN_PREFIX is from Step 2.
  2. YOUR_REGION is the AWS region you used in Step 4 when you created your Amazon S3 bucket.
  3. YOUR_APPCLIENT_ID is the App client ID from Step 3.
  4. YOUR_USERPOOL_ID is the Pool ID from Step 1.
  5. YOUR_REDIRECT_URI, which is https://DOMAINNAME/index.html, where DOMAINNAME is your domain name from Step 5.

Create userprofile.js

Use the following text to create the userprofile.js file. Substitute the preceding pre-existing values for the variables in the text.

var myHeaders = new Headers();
myHeaders.set('Cache-Control', 'no-store');
var urlParams = new URLSearchParams(window.location.search);
var tokens;
var domain = "YOUR_COGNITO_DOMAIN_PREFIX";
var region = "YOUR_REGION";
var appClientId = "YOUR_APPCLIENT_ID";
var userPoolId = "YOUR_USERPOOL_ID";
var redirectURI = "YOUR_REDIRECT_URI";

//Convert Payload from Base64-URL to JSON
const decodePayload = payload => {
  const cleanedPayload = payload.replace(/-/g, '+').replace(/_/g, '/');
  const decodedPayload = atob(cleanedPayload)
  const uriEncodedPayload = Array.from(decodedPayload).reduce((acc, char) => {
    const uriEncodedChar = ('00' + char.charCodeAt(0).toString(16)).slice(-2)
    return `${acc}%${uriEncodedChar}`
  }, '')
  const jsonPayload = decodeURIComponent(uriEncodedPayload);

  return JSON.parse(jsonPayload)
}

//Parse JWT Payload
const parseJWTPayload = token => {
    const [header, payload, signature] = token.split('.');
    const jsonPayload = decodePayload(payload)

    return jsonPayload
};

//Parse JWT Header
const parseJWTHeader = token => {
    const [header, payload, signature] = token.split('.');
    const jsonHeader = decodePayload(header)

    return jsonHeader
};

//Generate a Random String
const getRandomString = () => {
    const randomItems = new Uint32Array(28);
    crypto.getRandomValues(randomItems);
    const binaryStringItems = randomItems.map(dec => `0${dec.toString(16).substr(-2)}`)
    return binaryStringItems.reduce((acc, item) => `${acc}${item}`, '');
}

//Encrypt a String with SHA256
const encryptStringWithSHA256 = async str => {
    const PROTOCOL = 'SHA-256'
    const textEncoder = new TextEncoder();
    const encodedData = textEncoder.encode(str);
    return crypto.subtle.digest(PROTOCOL, encodedData);
}

//Convert Hash to Base64-URL
const hashToBase64url = arrayBuffer => {
    const items = new Uint8Array(arrayBuffer)
    const stringifiedArrayHash = items.reduce((acc, i) => `${acc}${String.fromCharCode(i)}`, '')
    const decodedHash = btoa(stringifiedArrayHash)

    const base64URL = decodedHash.replace(/\+/g, '-').replace(/\//g, '_').replace(/=+$/, '');
    return base64URL
}

// Main Function
async function main() {
  var code = urlParams.get('code');

  //If code not present then request code else request tokens
  if (code == null){

    // Create random "state"
    var state = getRandomString();
    sessionStorage.setItem("pkce_state", state);

    // Create PKCE code verifier
    var code_verifier = getRandomString();
    sessionStorage.setItem("code_verifier", code_verifier);

    // Create code challenge
    var arrayHash = await encryptStringWithSHA256(code_verifier);
    var code_challenge = hashToBase64url(arrayHash);
    sessionStorage.setItem("code_challenge", code_challenge)

    // Redirtect user-agent to /authorize endpoint
    location.href = "https://"+domain+".auth."+region+".amazoncognito.com/oauth2/authorize?response_type=code&state="+state+"&client_id="+appClientId+"&redirect_uri="+redirectURI+"&scope=openid&code_challenge_method=S256&code_challenge="+code_challenge;
  } else {

    // Verify state matches
    state = urlParams.get('state');
    if(sessionStorage.getItem("pkce_state") != state) {
        alert("Invalid state");
    } else {

    // Fetch OAuth2 tokens from Cognito
    code_verifier = sessionStorage.getItem('code_verifier');
  await fetch("https://"+domain+".auth."+region+".amazoncognito.com/oauth2/token?grant_type=authorization_code&client_id="+appClientId+"&code_verifier="+code_verifier+"&redirect_uri="+redirectURI+"&code="+ code,{
  method: 'post',
  headers: {
    'Content-Type': 'application/x-www-form-urlencoded'
  }})
  .then((response) => {
    return response.json();
  })
  .then((data) => {

    // Verify id_token
    tokens=data;
    var idVerified = verifyToken (tokens.id_token);
    Promise.resolve(idVerified).then(function(value) {
      if (value.localeCompare("verified")){
        alert("Invalid ID Token - "+ value);
        return;
      }
      });
    // Display tokens
    document.getElementById("id_token").innerHTML = JSON.stringify(parseJWTPayload(tokens.id_token),null,'\t');
    document.getElementById("access_token").innerHTML = JSON.stringify(parseJWTPayload(tokens.access_token),null,'\t');
  });

    // Fetch from /user_info
    await fetch("https://"+domain+".auth."+region+".amazoncognito.com/oauth2/userInfo",{
      method: 'post',
      headers: {
        'authorization': 'Bearer ' + tokens.access_token
    }})
    .then((response) => {
      return response.json();
    })
    .then((data) => {
      // Display user information
      document.getElementById("userInfo").innerHTML = JSON.stringify(data, null,'\t');
    });
  }}}
  main();

Create the verifier.js file

Use the following text to create the verifier.js file.

var key_id;
var keys;
var key_index;

//verify token
async function verifyToken (token) {
//get Cognito keys
keys_url = 'https://cognito-idp.'+ region +'.amazonaws.com/' + userPoolId + '/.well-known/jwks.json';
await fetch(keys_url)
.then((response) => {
return response.json();
})
.then((data) => {
keys = data['keys'];
});

//Get the kid (key id)
var tokenHeader = parseJWTHeader(token);
key_id = tokenHeader.kid;

//search for the kid key id in the Cognito Keys
const key = keys.find(key =>key.kid===key_id)
if (key === undefined){
return "Public key not found in Cognito jwks.json";
}

//verify JWT Signature
var keyObj = KEYUTIL.getKey(key);
var isValid = KJUR.jws.JWS.verifyJWT(token, keyObj, {alg: ["RS256"]});
if (isValid){
} else {
return("Signature verification failed");
}

//verify token has not expired
var tokenPayload = parseJWTPayload(token);
if (Date.now() >= tokenPayload.exp * 1000) {
return("Token expired");
}

//verify app_client_id
var n = tokenPayload.aud.localeCompare(appClientId)
if (n != 0){
return("Token was not issued for this audience");
}
return("verified");
};

Create an index.html file

Use the following text to create the index.html file.

<!doctype html>

<html lang="en">
<head>
<meta charset="utf-8">

<title>MyApp</title>
<meta name="description" content="My Application">
<meta name="author" content="Your Name">
</head>

<body>
<h2>Cognito User</h2>

<p style="white-space:pre-line;" id="token_status"></p>

<p>Id Token</p>
<p style="white-space:pre-line;" id="id_token"></p>

<p>Access Token</p>
<p style="white-space:pre-line;" id="access_token"></p>

<p>User Profile</p>
<p style="white-space:pre-line;" id="userInfo"></p>
<script language="JavaScript" type="text/javascript"
src="https://kjur.github.io/jsrsasign/jsrsasign-latest-all-min.js">
</script>
<script src="js/verifier.js"></script>
<script src="js/userprofile.js"></script>
</body>
</html>

Upload the files into the Amazon S3 Bucket you created earlier

Upload the files you just created to the Amazon S3 bucket that you created in Step 4. If you’re using Chrome or Firefox browsers, you can choose the folders and files to upload and then drag and drop them into the destination bucket. Dragging and dropping is the only way that you can upload folders.

  1. Sign in to the AWS Management Console and open the Amazon S3 console.
  2. In the Bucket name list, choose the name of the bucket that you created earlier in Step 4.
  3. In a window other than the console window, select the index.html file to upload. Then drag and drop the file into the console window that lists the destination bucket.
  4. In the Upload dialog box, choose Upload.
  5. Choose Create Folder.
  6. Enter the name js and choose Save.
  7. Choose the js folder.
  8. In a window other than the console window, select the userprofile.js and verifier.js files to upload. Then drag and drop the files into the console window js folder.

    Note: The Amazon S3 bucket root will contain the index.html file and a js folder. The js folder will contain the userprofile.js and verifier.js files.

Step 7. Configure the app client settings

Use the Amazon Cognito console to configure the app client settings, including identity providers, OAuth flows, and OAuth scopes.

Configure the app client settings:

  1. Go to the Amazon Cognito console.
  2. Choose Manage your User Pools.
  3. Select your user pool.
  4. Select App integration, and then select App client settings.
  5. Under Enabled Identity Providers, select Cognito User Pool.(Optional) You can add federated identity providers. Adding User Pool Sign-in Through a Third-Party has more information about how to add federation providers.
  6. Enter the Callback URL(s) where the user is to be redirected after successfully signing in. The callback URL is the URL of your web app that will receive the authorization code. In our example, this will be the Domain Name for the CloudFront distribution you created earlier. It will look something like https://DOMAINNAME/index.html where DOMAINNAME is xxxxxxx.cloudfront.net.

    Note: HTTPS is required for the Callback URLs. For this example, I used CloudFront as a HTTPS endpoint for the app in Amazon S3.

  7. Next, select Authorization code grant from the Allowed OAuth Flows and OpenID from Allowed OAuth Scopes. The OpenID scope will return the ID token and grant access to all user attributes that are readable by the client.
  8. Choose Save changes.

Step 8. Show the app home page

Now that the Amazon Cognito user pool is configured and the sample app is built, you can test using Amazon Cognito as an OP from the sample JavaScript app you created in Step 6.

View the app’s home page:

  1. Open a web browser and enter the app’s home page URL using the CloudFront distribution to serve your index.html page created in Step 6 (https://DOMAINNAME/index.html) and the app will redirect the browser to the Amazon Cognito /authorize endpoint.
  2. The /authorize endpoint redirects the browser to the Amazon Cognito hosted UI, where the user can sign in or sign up. The following figure shows the user sign-in page.

    Figure 8: User sign-in page

    Figure 8: User sign-in page

Step 9. Create a user

You can use the Amazon Cognito user pool to manage your users or you can use a federated identity provider. Users can sign in or sign up from the Amazon Cognito hosted UI or from a federated identity provider. If you configured a federated identity provider, users will see a list of federated providers that they can choose from. When a user chooses a federated identity provider, they are redirected to the federated identity provider sign-in page. After signing in, the browser is directed back to Amazon Cognito. For this post, Amazon Cognito is the only identity provider, so you will use the Amazon Cognito hosted UI to create an Amazon Cognito user.

Create a new user using Amazon Cognito hosted UI:

  1. Create a new user by selecting Sign up and entering a username, password, and email address. Then select the Sign up button. The following figure shows the sign up screen.

    Figure 9: Sign up with a new account

    Figure 9: Sign up with a new account

  2. The Amazon Cognito sign up workflow will verify the email address by sending a verification code to that address. The following figure shows the prompt to enter the verification code.

    Figure 10: Enter the verification code

    Figure 10: Enter the verification code

  3. Enter the code from the verification email in the Verification Code text box.
  4. Select Confirm Account.

Step 10. Viewing the Amazon Cognito tokens and profile information

After authentication, the app displays the tokens and user information. The following figure shows the OAuth2 access token and OIDC ID token that are returned from the /token endpoint and the user profile returned from the /userInfo endpoint. Now that the user has been authenticated, the application can use the user’s email address to look up the user’s account information in an application data store. Based on the user’s account information, the application can grant/restrict access to paid content or show account information like order history.

Figure 11: Token and user profile information

Figure 11: Token and user profile information

Note: Many browsers will cache redirects. If your browser is repeatedly redirecting to the index.html page, clear the browser cache.

Summary

In this post, we’ve shown you how easy it is to add user authentication to your web and mobile apps with Amazon Cognito.

We created a Cognito User Pool as our user directory, assigned a domain name to the Amazon Cognito hosted UI, and created an application client for our application. Then we created an Amazon S3 bucket to host our website. Next, we created a CloudFront distribution for our Amazon S3 bucket. Then we created our application and uploaded it to our Amazon S3 website bucket. From there, we configured the client app settings with our identity provider, OAuth flows, and scopes. Then we accessed our application and used the Amazon Cognito sign-in flow to create a username and password. Finally, we logged into our application to see the OAuth and OIDC tokens.

Amazon Cognito saves you time and effort when implementing authentication with an intuitive UI, OAuth2 and OIDC support, and customizable workflows. You can now focus on building features that are important to your core business.

If you have feedback about this post, submit comments in the Comments section below. If you have questions about this post, start a new thread on the Amazon Cognito forum or contact AWS Support.

Want more AWS Security how-to content, news, and feature announcements? Follow us on Twitter.

Author

George Conti

George is a Solution Architect for the AWS Financial Services team. He is passonate about technology and helping Financial Services Companies build solutions with AWS Services.

Bullet Updates – Windowing, Apache Pulsar PubSub, Configuration-based Data Ingestion, and More

Post Syndicated from rosaliebeevm original https://yahooeng.tumblr.com/post/183315480351

yahoodevelopers:

By Akshay Sarma, Principal Engineer, Verizon Media & Brian Xiao, Software Engineer, Verizon Media

This is the first of an ongoing series of blog posts sharing releases and announcements for Bullet, an open-sourced lightweight, scalable, pluggable, multi-tenant query system.

Bullet allows you to query any data flowing through a streaming system without having to store it first through its UI or API. The queries are injected into the running system and have minimal overhead. Running hundreds of queries generally fit into the overhead of just reading the streaming data. Bullet requires running an instance of its backend on your data. This backend runs on common stream processing frameworks (Storm and Spark Streaming currently supported).

The data on which Bullet sits determines what it is used for. For example, our team runs an instance of Bullet on user engagement data (~1M events/sec) to let developers find their own events to validate their code that produces this data. We also use this instance to interactively explore data, throw up quick dashboards to monitor live releases, count unique users, debug issues, and more.

Since open sourcing Bullet in 2017, we’ve been hard at work adding many new features! We’ll highlight some of these here and continue sharing update posts for future releases.

Windowing

Bullet used to operate in a request-response fashion – you would submit a query and wait for the query to meet its termination conditions (usually duration) before receiving results. For short-lived queries, say, a few seconds, this was fine. But as we started fielding more interactive and iterative queries, waiting even a minute for results became too cumbersome.

Enter windowing! Bullet now supports time and record-based windowing. With time windowing, you can break up your query into chunks of time over its duration and retrieve results for each chunk.  For example, you can calculate the average of a field, and stream back results every second:

In the above example, the aggregation is operating on all the data since the beginning of the query, but you can also do aggregations on just the windows themselves. This is often called a Tumbling window:

image

With record windowing, you can get the intermediate aggregation for each record that matches your query (a Sliding window). Or you can do a Tumbling window on records rather than time. For example, you could get results back every three records:

image

Overlapping windows in other ways (Hopping windows) or windows that reset based on different criteria (Session windows, Cascading windows) are currently being worked on. Stay tuned!

image
image

Apache Pulsar support as a native PubSub

Bullet uses a PubSub (publish-subscribe) message queue to send queries and results between the Web Service and Backend. As with everything else in Bullet, the PubSub is pluggable. You can use your favorite pubsub by implementing a few interfaces if you don’t want to use the ones we provide. Until now, we’ve maintained and supported a REST-based PubSub and an Apache Kafka PubSub. Now we are excited to announce supporting Apache Pulsar as well! Bullet Pulsar will be useful to those users who want to use Pulsar as their underlying messaging service.

If you aren’t familiar with Pulsar, setting up a local standalone is very simple, and by default, any Pulsar topics written to will automatically be created. Setting up an instance of Bullet with Pulsar instead of REST or Kafka is just as easy. You can refer to our documentation for more details.

image

Plug your data into Bullet without code

While Bullet worked on any data source located in any persistence layer, you still had to implement an interface to connect your data source to the Backend and convert it into a record container format that Bullet understands. For instance, your data might be located in Kafka and be in the Avro format. If you were using Bullet on Storm, you would perhaps write a Storm Spout to read from Kafka, deserialize, and convert the Avro data into the Bullet record format. This was the only interface in Bullet that required our customers to write their own code. Not anymore! Bullet DSL is a text/configuration-based format for users to plug in their data to the Bullet Backend without having to write a single line of code.

Bullet DSL abstracts away the two major components for plugging data into the Bullet Backend. A Connector piece to read from arbitrary data-sources and a Converter piece to convert that read data into the Bullet record container. We currently support and maintain a few of these – Kafka and Pulsar for Connectors and Avro, Maps and arbitrary Java POJOs for Converters. The Converters understand typed data and can even do a bit of minor ETL (Extract, Transform and Load) if you need to change your data around before feeding it into Bullet. As always, the DSL components are pluggable and you can write your own (and contribute it back!) if you need one that we don’t support.

We appreciate your feedback and contributions! Explore Bullet on GitHub, use and help contribute to the project, and chat with us on Google Groups. To get started, try our Quickstarts on Spark or Storm to set up an instance of Bullet on some fake data and play around with it.

UNIFICli – a CLI tool to manage Ubiquiti’s Unifi Controller

Post Syndicated from Anonymous original http://deliantech.blogspot.com/2017/04/unificli-cli-tool-to-manage-ubiquitis.html

As mentioned earlier, I made a nodejs library interface to the Ubiquiti Unifi Controller’s REST API which is available here – https://github.com/delian/node-unifiapi
Now I am introducing a small, demo, CLI interface, which uses that same library to remotely connect and configure Ubiquiti Unifi Controller (or Ubiquiti UC-CK Cloud Key).
This software is available on GitHub here – https://github.com/delian/unificli and its main goal for me is to be able to test the node-unifiapi library. The calls and parameters are almost 1:1 with the library and this small code provides great example how such tools could be built.
This tool is able to connect to a controller either via direct HTTPS connection or via WebRTC trough Ubiquiti’s Unifi Clould network (they name it SDN). And also you have a command you could use to connect to wireless access point via SSH over WebRTC.
The tool is not completed, neither have any goal. Feel free to fix bugs, extend it with features or provide suggestions. Any help with the development will be appreciated.
Commands can be executed via the cli too:

npm start connectSSH 00:01:02:03:04:05 -l unifikeylocation

node-unifiapi – NodeJS API to access Ubiquiti Unifi Controller API

Post Syndicated from Anonymous original http://deliantech.blogspot.com/2017/03/node-unifiapi-nodejs-api-to-access.html

I have completed the initial rewrite of the PHP based UniFi-API-Browser to JavaScript for NodeJS.
The module and some auto generated documentation with some basic examples is available here:
The supported features includes all of the UniFi-API-Browser calls via the direct REST http calls or via WebRTC (using Ubiquiti Unifi Cloud) as well as SSH access to Unifi Access Points via WebRTC.

Private Properties with JavaScript (prototypes)

Post Syndicated from Anonymous original http://deliantech.blogspot.com/2017/01/private-properties-with-javascript.html

Some are saying that JavaScript does not have private properties with prototypes and it is not like TypeScript or Python.
However, that is not fully correct, especially with this comparison.
Python doesn’t have anything private. All the scopes are globally addressable and all the variables, properties and methods are accessible globally (as long as you know the scope path, which could be easily traced from within the software itself).
TypeScript is just a pre-processor. It will do extra semantic checks during compilation, but no enforcement of anything on runtime. 
However, it is generally untrue that you have no private properties available in JavaScript.
You do have scope inheritance and you don’t have global access to any scope from outside. Therefore you can make private properties easily.
For example, if you have:
function F1() {
  var XXX = 0;
  return function () {
     return XXX;
  }
}
F1()() will respond with the value of XXX but there is no way to access XXX from outside.
So what about prototyping?
You can do this there too.
function F1() {
  var XXX = ‘yyy’; // Private property
  function F1() {
     // You constructor is here
     this.YYY = ‘xxx’; // public property
  }
  F1.prototype.method1 = function() {
    return XXX + this.YYY;
  }
  return new F1();
}
Then if you do:
x = F1();
or
x = new F1();  // Both works the same way
and check:
console.log(x.YYY); // output ‘xxx’
console.log(x.XXX); // output Error
console.log(x.method1()); // output ‘yyyxxx’
So everything works! You have prototyping with private and public properties.
The same way you can do private and public methods.
The only thing that will not work with this method is instanceof
x instanceof F1 will respond with false, because x is not an instance of the upper F1, but the inner F1

The current ES6 standard have classes, but they are essentially a wrapper on top of prototype. So this technique still apply. Additionally with Object.defineProperty you could apply extra protection on top of a property.

There is another approach to the problem. Without prototypes.


function F1() {
  if (!this instanceof F1) return; // Protect against global scope polution
  var XXX = ‘yyy’; // Private property
  this.YYY = ‘xxx’; // Public property
  function PrivateMethod() {
    return XXX + this.YYY;
  }
  this.method1 = function() {
    return PrivateMethod();
  }
}

With the shown above approach you have both private and public methods and properties, with workable instanceof

Passport-http Digest Authentication and Express 4+ bug fix

Post Syndicated from Anonymous original http://deliantech.blogspot.com/2015/10/passport-http-digest-authentication-and.html

Passport is quite popular environment for implementing authentication under Node.JS and Express Framework.
Passport-http is a plug-in that provides Digest Authentication interfaces and is very popular for Passport.
However, since Express 4, the default approach to the Express routes is them to be relative.
Example – 
Express <=3 default application assumed that every file who extend Express with routes should specify the full path to the route in a similar to this approach:
app.js:
app.get(‘{fullpath}’,function)…
Or:
require(‘routes/users’)(app)
Where users.js do as well:
app.get(‘{fullpath’,function)…
The default app of Express 4+ uses relative routes, which is quite better as it allows full isolation between the modules of the application.
Example:
app.js:
app.use(‘/rest’,require(‘routes/rest’));
Where rest.js has:
router = require(‘express’).Router();
router.get(‘/data’, function)… // where data is relative url and the actual will be /rest/data
This simplifies the readability. Also it allows you to separate the authentication. You could have different authentication approach or configuration to each different module. And that works well with Passport.
For example:
app.js:
app.use(passport.initialize());
app.use(passport.session());
rest.js:
var DigestStrategy = require(‘passport-http’).DigestStrategy;
… here there should be a code for authentication function using Digest …
and then:
router.get(‘/data’,authentication,function) ….
This simplifies, makes it more readable and isolates very much the code necessary for authentication.
Personally, I write my own authentication functions in a separate module, then I include them in the express route module where I want to use them and it became even more simpler:
rest.js:
var auth = require(‘../libs/auth.js’);
Router.get(‘/data’, auth(‘admins’), function) …
I even could apply different permissions, roles like – if you have pre authenticated session, then the interface will not ask you for authentication (saved one RTT) but if you don’t it will ask you for digest authentication. Quite simple and quite readable.
However, all this does not work with Passport-http, because of a very small bug within.
The bug:
For security reasons, passport-http module verifies that the authentication URI from the customer request is the same as the URL requested authentication. However, the authentication URI (creds.uri) is always full path, but it is compared to req.url which is always relative path. The comparision has to be between creds.uri and req.baseUrl+req.url.
And this is my fix proposed to the author of passport-http, which I hope will be merged with the code.

EmbeddedJS – async reimplementation

Post Syndicated from Anonymous original http://deliantech.blogspot.com/2015/09/embeddedjs-async-reimplementation.html

I like using Embedded JS together with RequireJS in very small projects. It is very small, lighting fast and extremely simple, powerful and extensive.
However, there are hundreds of implementations, most of them out of date, and particularly the implementation I like is not supported anymore. But that I mean not only that the author is not supporting it, but also it works unpredictably in some browsers because it rely on Sync XMLHttpRequest which is not allowed in the main thread anymore.
So I decided to rewrite that EJS implementation myself, in a way I could use it in async mode.
So allow me to introduce the new Async Embedded JS implementation, which is here at https://github.com/delian/embeddedjs
It supports Node, AMD (requirejs) and globals (as the original) and detect them automatically.
A little documentation can be found here https://github.com/delian/embeddedjs/blob/master/README.md
The new code is written in ES5 and uses the new Function method from ES6. That makes it working only in modern browsers (IE10+). But it makes it really really fast. By current estimates about twice faster than the original.
It is still work in progress (no avoidance of cached URLs for example), but works perfectly fine for me.
If you use it and hit a bug, please report it at the Issues page at Github

JavaScript private methods and variables

Post Syndicated from Anonymous original http://deliantech.blogspot.com/2015/08/javascript-private-methods-and-variables.html

Often I am told that JavaScript has no real private methods and variables the same way as this is for Python or Perl.
Although, that is true for Python and Perl (all scopes and their content are publicly accessible and there is always a way to list and access the content) it is not true for JavaScript.
JavaScript have one of the most powerful scoping technique available for a main-stream programing language and provides you with the ability to hide and make private some content if needed.
Let me show you an example:
function MyClass() {
    var fullyPrivateVar = ‘xxxx’;
    this.notFullyPrivateVar = ‘yyyy’;

    function privateMethod() {
        return fullyPrivateVar;
    }

    this.publicMethodWithPrivateAccess = function() { return privateMethod() }
}

MyClass.prototype.publicMethodWithNoPrivateAccess = function() {
    return this.notFullyPrivateVar;
}

x = new MyClass();
console.log(x.publicMethodWithNoPrivateAccess());
yyyy
console.log(x.publicMethodWithPrivateAccess());
xxxx

I think the example is self explanatory, but let me say few words on it:
In JavaScript you can have hierarchy of scopes and you can define unlimited amount function in functions levels (and scope levels) in difference to other programming languages where you have limited / fixed scope levels.
So I have a privateMethod and fullyPrivateVar defined within MyClass. Because of it, only things defined in this scope will have access to them. Like publicMethodWithPrivateAccess that I assign with the constructor to the newly constructed object. However,  publicMethodWithNoPrivateAccess is defined outside of the scope and has no access to those values. But it has access to everything in the this scope. One could argue, that this approach takes more memory for the methods because I define a new method with every initialization of the class (the function assignment). But that is not true. The function in the function is having a static code (it is not part of eval+variable) and is compiled during the initial javascript processing of the JS virtual machine. So it will not take extra memory. Only during execution the function will be dynamically assigned with the private scope of the constructor, something you want anyway.

Node.JS module to access Cisco IOS XR XML interface

Post Syndicated from Anonymous original http://deliantech.blogspot.com/2015/03/nodejs-module-to-access-cisco-ios-xr.html

Hello to all,
This is the early version of my module for Node.JS that allows configuring routers and retrieving information over Cisco IOS XR’s XML interface.
The module is in its early phases – it still does not read IOS XR schema files and therefore decode the data (in JSON) in a little ugly way (too much arrays). I am planning to fix it, so there may be changes in the responses.
Please see bellow the first version of the documentation I’ve set in the github:

Module for Cisco XML API interface IOS XR

This is a small module that implements interface to Cisco IOS XR XML Interface.
This module open an maintain TCP session to the router, sends requests and receive responses.

Installation

To install the module do something like that:
npm install node-ciscoxml

Usage

It is very easy to use this module. See the methods bellow:

Load the module

To load and use the module, you have to use a code similar to this:
var cxml = require('node-ciscoxml');
var c = cxml( { ...connect options.. });

Module init and connect options

host (default 127.0.0.1) – the hostname of the router where we’ll connect
port (default 38751) – the port of the router where XML API is listening
username (default guest) – the username used for authentication, if username is requested by the remote side
password (default guest) – the password used for authentication, if password is requested by the remote side
connectErrCnt (default 3) – how many times it will retry to connect in case of an error
autoConnect (default true) – should it try to auto connect to the remote side if a request is dispatched and there is no open session already
autoDisconnect (default 60000) – how much milliseconds we will wait for another request before the tcp session to the remote side is closed. If the value is 0, it will wait forever (or until the remote side disconnects). Bear in mind autoConnect set to false does not assume autoDisconnect set to 0/false as well.
userPromptRegex (default (Username|Login)) – the rule used to identify that the remote side requests for a username
passPromptRegex (default Password) – the rule used to identify that the remote side requests for a password
xmlPromptRegex (default XML>) – the rule used to identify successful login/connection
noDelay (default true) – disables the Nagle algorithm (true)
keepAlive (default 30000) – enabled or disables (value of 0) TCP keepalive for the socket
ssl (default false) – if it is set to true or an object, then SSL session will be opened. Node.js TLS module is used for that so if the ssl points to an object, the tls options are taken from it. Be careful – enabling SSL does not change the default port from 38751 to 38752. You have to set it explicitly!
Example:
var cxml = require('node-ciscoxml');
var c = cxml( {
    host: '10.10.1.1',
    port: 5000,
    username: 'xmlapi',
    password: 'xmlpass'
});

connect method

This method forces explicitly a connection. It could accept any options of the above.
Example:
var cxml = require('node-ciscoxml');
var c = cxml();
c.connect( {
    host: '10.10.1.1',
    port: 5000,
    username: 'xmlapi',
    password: 'xmlpass'
});
The connect method is not necessary to be used. If autoConnect is enabled (default) the module will automatically open and close tcp connections when needed.
Connect supports callback. Example:
var cxml = require('node-ciscoxml');
cxml().connect( {
    host: '10.10.1.1',
    port: 5000,
    username: 'xmlapi',
    password: 'xmlpass'
}, function(err) {
    if (!err)
        console.log('Successful connection');
});
The callback may be the only parameter as well. Example:
var cxml = require('node-ciscoxml');
cxml({
    host: '10.10.1.1',
    port: 5000,
    username: 'xmlapi',
    password: 'xmlpass'
}).connect(function(err) {
    if (!err)
        console.log('Successful connection');
});
Example with SSL:
var cxml = require('node-ciscoxml');
var fs = require('fs');
cxml({
    host: '10.10.1.1',
    port: 38752,
    username: 'xmlapi',
    password: 'xmlpass',
    ssl: {
          // These are necessary only if using the client certificate authentication
          key: fs.readFileSync('client-key.pem'),
          cert: fs.readFileSync('client-cert.pem'),
          // This is necessary only if the server uses the self-signed certificate
          ca: [ fs.readFileSync('server-cert.pem') ]
    }
}).connect(function(err) {
    if (!err)
        console.log('Successful connection');
});

disconnect method

This method explicitly disconnects a connection.

sendRaw method

.sendRaw(data,callback)
Parameters:
data – a string containing valid Cisco XML request to be sent
callback – function that will be called when a valid Cisco XML response is received
Example:
var cxml = require('node-ciscoxml');
var c = cxml({
    host: '10.10.1.1',
    port: 5000,
    username: 'xmlapi',
    password: 'xmlpass'
});

c.sendRaw('<Request><GetDataSpaceInfo/></Request>',function(err,data) {
    console.log('Received',err,data);
});

sendRawObj method

.sendRawObj(data,callback)
Parameters:
data – a javascript object that will be converted to a Cisco XML request
callback – function that will be called with valid Cisco XML response converted to javascript object
Example:
var cxml = require('node-ciscoxml');
var c = cxml({
    host: '10.10.1.1',
    port: 5000,
    username: 'xmlapi',
    password: 'xmlpass'
});

c.sendRawObj({ GetDataSpaceInfo: '' },function(err,data) {
    console.log('Received',err,data);
});

rootGetDataSpaceInfo method

.rootGetDataSpaceInfo(callback)
Equivalent to .sendRawObj for GetDataSpaceInfo command

getNext

Sends getNext request with a specific id, so we can retrieve the rest of the previous operation if it has been truncated.
id – the ID callback – the callback with the data (in js object format)
Keep in mind next response may be truncated as well, so you have to check for IteratorID all the time.
Example:
var cxml = require('node-ciscoxml');
var c = cxml({
    host: '10.10.1.1',
    port: 5000,
    username: 'xmlapi',
    password: 'xmlpass'
});

c.sendRawObj({ Get: { Configuration: {} } },function(err,data) {
    console.log('Received',err,data);
    if ((!err) && data && data.Response.$.IteratorID) {
        return c.getNext(data.Response.$.IteratorID,function(err,nextData) {
            // .. code to merge data with nextData
        });
    }
    // .. code
});

sendRequest method

This method is equivalent to sendRawObj but it can automatically detect the need and resupply GetNext requests so the response is absolutley full. Therefore this method should be the preferred method for sending requests that expect very large replies.
Example:
var cxml = require('node-ciscoxml');
var c = cxml({
    host: '10.10.1.1',
    port: 5000,
    username: 'xmlapi',
    password: 'xmlpass'
});

c.sendRequest({ GetDataSpaceInfo: '' },function(err,data) {
    console.log('Received',err,data);
});

requestPath method

This is a method equivalent to sendRequest but instead of an object, the request may be formatted in a simple path string. This metod is not very useful for complex requests. But its value is in the ability to simplify very much the simple requests. The response is in JavaScript object
Example:
var cxml = require('node-ciscoxml');
var c = cxml({
    host: '10.10.1.1',
    port: 5000,
    username: 'xmlapi',
    password: 'xmlpass'
});

c.requestPath('Get.Configuration.Hostname',function(err,data) {
    console.log('Received',err,data);
});

reqPathPath method

This is the same method as requestPath, but the response is not an object, but a path array. The method supports optional filter, which has to be a RegExp object and all paths and values will be tested against it Only those returning true will be included in the response array.
Example:
var cxml = require('node-ciscoxml');
var c = cxml({
    host: '10.10.1.1',
    port: 5000,
    username: 'xmlapi',
    password: 'xmlpass'
});

c.reqPathPath('Get.Configuration.Hostname',/Hostname/,function(err,data) {
    console.log('Received',data[0]);
    // The output should be something like
    // [ 'Response("MajorVersion"="1","MinorVersion"="0").Get.Configuration.Hostname("MajorVersion"="1","MinorVersion"="0")',
           'asr9k-router' ] 
});
This method could be very useful for getting simple responses and configurations.

getConfig method

This method requests the whole configuration of the remote device and return it as object
Example:
c.getConfig(function(err,config) {
    console.log(err,config);
});

cliConfig method

This method is quite simple, it executes a command(s) in CLI Configuration mode and return the response in JS Object. You have to know that any configuration change in IOS XR is not effective unless it is committed!
Example:
c.cliConfig('username testuser\ngroup operator\n',function(err,data) {
    console.log(err,data);
    c.commit();
});

cliExec method

Executes a command(s) in CLI Exec mode and return the response in JS Object.
c.cliExec('show interfaces',function(err,data) {
    console.log(err,data?data.Response.CLI[0].Exec[0]);
});

commit method

Commit the current configuration.
Example:
c.commit(function(err,data) {
    console.log(err,data);
});

lock method

Locks the configuration mode.
Example:
c.lock(function(err,data) {
    console.log(err,data);
});

unlock method

Unlocks the configuration mode.
Example:
c.unlock(function(err,data) {
    console.log(err,data);
});

Configure Cisco IOS XR for XML agent

To configure IOS XR for remote XML configuration you have to:
Ensure you have *mgbl*** package installed and activated! Without it you will have no xml agentcommands!
Enable the XML agent with a similar configuration:
xml agent
  vrf default
    ipv4 access-list SECUREACCESS
  !
  ipv6 enable
  session timeout 10
  iteration on size 100000
!
You can enable tty and/or ssl agents as well!
(Keep in mind – full filtering of the XML access has to be done by the control-plane management-plane command! The XML interface does not use VTYs!)
You have to ensure you have correctly configured aaa as the xml agent uses default method for both authentication and authorization and that cannot be changed (last verified with IOS XR 5.3).
You have to have both aaa authentication and authorization. If authorization is not set (aaa authorization default local or none), you may not be able to log in. And you shall ensure that both the authentication and authorization share the same source (tacacs+ or local).
The default agent port is 38751 for the default agent and 38752 for SSL.

Debugging

The module uses “debug” module to log its outputs. You can enable the debugging by having in your code something like:
require('debug').enable('ciscoxml');
Or setting DEBUG environment to ciscoxml before starting the Node.JS

ExtJS short highlight of a gridrow in case of an update

Post Syndicated from Anonymous original http://deliantech.blogspot.com/2015/03/extjs-short-highlight-of-gridrow-in.html

In my ExtJS code I often update the values of records associated with Stores/Data Models associated with Grid Panel. 
Sometimes this an automated update received from the web server (an example you can see here) sometimes not.
However, as a user I like to be able to see if somewhere in the grid some data has been modified.
And to create a code, that highlight for a moment the row or a cell where a change happened is actually not so hard. 
Here is a small example how you can do that – you just have to bind to event ‘itemupdate‘ on a tableview. See the example bellow, that is supposed to be self explanatory:

Ext.ComponentQuery.query(‘#mytableview’).on(‘itemupdate’, function(record, index, node) {
    node.className = node.className + ‘ x-grid-item-alt’;
    setTimeout(function() {
        node.className = node.className.replace(/x-grid-item-alt/, ”);
    }, 500);
});

node.js module implementing EventEmitter interface using MongoDB tailable cursors as backend

Post Syndicated from Anonymous original http://deliantech.blogspot.com/2015/03/nodejs-module-implementing-eventemitter.html

I’ve published in the npm a new module, that I’ve used privately for a long time which implements EventEmitter interface using MongoDB tailable cursors as backend.
This module could be used as a messaging bus between processes or even between node.js modules as it allows implementing EventEmitter wihout need of sharing the object instance in advance.
Please see the first version of the README.md bellow:

Module for creating event bus interface based on MongoDB tailable cursors

The idea behind this module is to create EventEmitter like interface, which uses MongoDB capped collections and tailable cursors as an internal messaging bus. This model has a lot of advantages, especially if you already use MongoDB in your project.
The advantages are:
You don’t have to exchange the event emitter object between different pages or even different processes (forked, clustered, living on separate machines). As long as you use the same mongoUrl and capped collection name, you can exchange information. This way you can even create applications that runs on a different hardware and they may exchanging events and data as if they are the same application! Also your events are stored in a collection and could be used as a transaction log latley (mongodb’s own transaction log is implemented with capped collections).
It simplifies an application development very much.

Installation

To install the module run the following command:
npm install node-mongotailableevents

Short

It is easy to use that module. Look at the following example:
var ev = require('node-mongotailableevents');

var e = ev( { ...options ... }, callback );

e.on('event',callback);

e.emit('event',data);

Initialization and options

The following options can be used with the module
  • mongoUrl (default mongodb://127.0.0.1/test) – the URL to the mongo database
  • mongoOptions (default none) – Specific options to be used for the connection to the mongo database
  • name (default tailedEvents) – the name of the capped collection that will be created if it does not exists
  • size (default 1000000) – the maximum size of the capped collection (when reached, the oldest records will be automatically removed)
  • max (default 1000) – the maximum size in amount of records for the capped collection
You can call and create a new event emitter instance without options:
var ev = require('node-mongotailableevents');
var e = ev();
Or you can call and create a event emitter instance with options:
var ev = require('node-mongotailableevents');
var e = ev({
   mongoUrl: 'mongodb://127.0.0.1/mydb',
   name: 'myEventCollection'
});
Or you can call and create a event emitter instance with options and callback, which will be called when the collection is created successfuly:
var ev = require('node-mongotailableevents');
ev({
   mongoUrl: 'mongodb://127.0.0.1/mydb',
   name: 'myEventCollection'
}, function(err, e) {
    console.log('EventEmitter',e);
});
Or you can call and create event emitter with just callback (and default options):
ev(function(err, e) {
    console.log('EventEmitter',e);
});

Usage

This module inherits EventEmitter, so you can use all of the EventEmitter methods. Example:
ev(function(err, e) {
    if (err) throw err;

    e.on('myevent',function(data) {
        console.log('We have received',data);
    });

    e.emit('myevent','my data');
});
The best feature is that you can exchange events between different pages or processes, without the need of exchange in advance of the eventEmitter object instance or without any complex configuration, as long as both pages processes uses the same mongodb database (but it could be a different replica servers) and the same “name” (the name of the capped collection). This way you can create massive clusters and messaging bus distributed among multiple machines without a need of any separate messaging system and its configuration.
Do a simple example – start two separate node processes with the following code, and see what the results are:
var ev = require('node-mongotailableevents');
ev(function(err, e) {
    if (err) throw err;

    e.on('myevent',function(data) {
        console.log('We have received',data);
    });

    setInterval(function() {
        e.emit('myevent','my data'+parseInt(Math.random()*1000000));
    },5000);
});
You shall see on both of the outputs both of the messages received.

node-netflowv9 node.js module for processing of netflowv9 has been updated to 0.2.5

Post Syndicated from Anonymous original http://deliantech.blogspot.com/2015/03/node-netflowv9-nodejs-module-for.html

My node-netflowv9 library has been updated to version 0.2.5

There are few new things –

  • Almost all of the IETF netflow types are decoded now. Which means practically that we support IPFIX
  • Unknown NetFlow v9 type does not throw an error. It is decoded into property with name ‘unknown_type_XXX’ where XXX is the ID of the type
  • Unknown NetFlow v9 Option Template scope does not throw an error. It is decoded in ‘unknown_scope_XXX’ where XXX is the ID of the scope
  • The user can overwrite how different types of NetFlow are decoded and the user can define its own decoding for new types. The same for scopes. And this can happen “on fly” – at any time.
  • The library supports well multiple netflow collectors running at the same time
  • A lot of new options and models for using of the library has been introduced
Bellow is the updated README.md file, describing how to use the library:

Usage

The usage of the netflowv9 collector library is very very simple. You just have to do something like this:
var Collector = require('node-netflowv9');

Collector(function(flow) {
    console.log(flow);
}).listen(3000);
or you can use it as event provider:
Collector({port: 3000}).on('data',function(flow) {
    console.log(flow);
});
The flow will be presented in a format very similar to this:
{ header: 
  { version: 9,
     count: 25,
     uptime: 2452864139,
     seconds: 1401951592,
     sequence: 254138992,
     sourceId: 2081 },
  rinfo: 
  { address: '15.21.21.13',
     family: 'IPv4',
     port: 29471,
     size: 1452 },
  packet: Buffer <00 00 00 00 ....>
  flow: [
  { in_pkts: 3,
     in_bytes: 144,
     ipv4_src_addr: '15.23.23.37',
     ipv4_dst_addr: '16.16.19.165',
     input_snmp: 27,
     output_snmp: 16,
     last_switched: 2452753808,
     first_switched: 2452744429,
     l4_src_port: 61538,
     l4_dst_port: 62348,
     out_as: 0,
     in_as: 0,
     bgp_ipv4_next_hop: '16.16.1.1',
     src_mask: 32,
     dst_mask: 24,
     protocol: 17,
     tcp_flags: 0,
     src_tos: 0,
     direction: 1,
     fw_status: 64,
     flow_sampler_id: 2 } } ]
There will be one callback for each packet, which may contain more than one flow.
You can also access a NetFlow decode function directly. Do something like this:
var netflowPktDecoder = require('node-netflowv9').nfPktDecode;
....
console.log(netflowPktDecoder(buffer))
Currently we support netflow version 1, 5, 7 and 9.

Options

You can initialize the collector with either callback function only or a group of options within an object.
The following options are available during initialization:
port – defines the port where our collector will listen to.
Collector({ port: 5000, cb: function (flow) { console.log(flow) } })
If no port is provided, then the underlying socket will not be initialized (bind to a port) until you call listen method with a port as a parameter:
Collector(function (flow) { console.log(flow) }).listen(port)
cb – defines a callback function to be executed for every flow. If no call back function is provided, then the collector fires ‘data’ event for each received flow
Collector({ cb: function (flow) { console.log(flow) } }).listen(5000)
ipv4num – defines that we want to receive the IPv4 ip address as a number, instead of decoded in a readable dot format
Collector({ ipv4num: true, cb: function (flow) { console.log(flow) } }).listen(5000)
socketType – defines to what socket type we will bind to. Default is udp4. You can change it to udp6 is you like.
Collector({ socketType: 'udp6', cb: function (flow) { console.log(flow) } }).listen(5000)
nfTypes – defines your own decoders to NetFlow v9+ types
nfScope – defines your own decoders to NetFlow v9+ Option Template scopes

Define your own decoders for NetFlow v9+ types

NetFlow v9 could be extended with vendor specific types and many vendors define their own. There could be no netflow collector in the world that decodes all the specific vendor types. By default this library decodes in readable format all the types it recognises. All the unknown types are decoded as ‘unknown_type_XXX’ where XXX is the type ID. The data is provided as a HEX string. But you can extend the library yourself. You can even replace how current types are decoded. You can even do that on fly (you can dynamically change how the type is decoded in different periods of time).
To understand how to do that, you have to learn a bit about the internals of how this module works.
  • When a new flowset template is received from the NetFlow Agent, this netflow module generates and compile (with new Function()) a decoding function
  • When a netflow is received for a known flowset template (we have a compiled function for it) – the function is simply executed
This approach is quite simple and provides enormous performance. The function code is as small as possible and as well on first execution Node.JS compiles it with JIT and the result is really fast.
The function code is generated with templates that contains the javascript code to be add for each netflow type, identified by its ID.
Each template consist of an object of the following form:
{ name: 'property-name', compileRule: compileRuleObject }
compileRuleObject contains rules how that netflow type to be decoded, depending on its length. The reason for that is, that some of the netflow types are variable length. And you may have to execute different code to decode them depending on the length. The compileRuleObject format is simple:
{
   length: 'javascript code as a string that decode this value',
   ...
}
There is a special length property of 0. This code will be used, if there is no more specific decode defined for a length. For example:
{
   4: 'code used to decode this netflow type with length of 4',
   8: 'code used to decode this netflow type with length of 8',
   0: 'code used to decode ANY OTHER length'
}

decoding code

The decoding code must be a string that contains javascript code. This code will be concatenated to the function body before compilation. If that code contain errors or simply does not work as expected it could crash the collector. So be careful.
There are few variables you have to use:
$pos – this string is replaced with a number containing the current position of the netflow type within the binary buffer.
$len – this string is replaced with a number containing the length of the netflow type
$name – this string is replaced with a string containing the name property of the netflow type (defined by you above)
buf – is Node.JS Buffer object containing the Flow we want to decode
o – this is the object where the decoded flow is written to.
Everything else is pure javascript. It is good if you know the restrictions of the javascript and Node.JS capabilities of the Function() method, but not necessary to allow you to write simple decoding by yourself.
If you want to decode a string, of variable length, you could write a compileRuleObject of the form:
{
   0: 'o["$name"] = buf.toString("utf8",$pos,$pos+$len)'
}
The example above will say that for this netfow type, whatever length it has, we will decode the value as utf8 string.

Example

Lets assume you want to write you own code for decoding a NetFlow type, lets say 4444, which could be of variable length, and contains a integer number.
You can write a code like this:
Collector({
   port: 5000,
   nfTypes: {
      4444: {   // 4444 is the NetFlow Type ID which decoding we want to replace
         name: 'my_vendor_type4444', // This will be the property name, that will contain the decoded value, it will be also the value of the $name
         compileRule: {
             1: "o['$name']=buf.readUInt8($pos);", // This is how we decode type of length 1 to a number
             2: "o['$name']=buf.readUInt16BE($pos);", // This is how we decode type of length 2 to a number
             3: "o['$name']=buf.readUInt8($pos)*65536+buf.readUInt16BE($pos+1);", // This is how we decode type of length 3 to a number
             4: "o['$name']=buf.readUInt32BE($pos);", // This is how we decode type of length 4 to a number
             5: "o['$name']=buf.readUInt8($pos)*4294967296+buf.readUInt32BE($pos+1);", // This is how we decode type of length 5 to a number
             6: "o['$name']=buf.readUInt16BE($pos)*4294967296+buf.readUInt32BE($pos+2);", // This is how we decode type of length 6 to a number
             8: "o['$name']=buf.readUInt32BE($pos)*4294967296+buf.readUInt32BE($pos+4);", // This is how we decode type of length 8 to a number
             0: "o['$name']='Unsupported Length of $len'"
         }
      }
   },
   cb: function (flow) {
      console.log(flow)
   }
});
It looks to be a bit complex, but actually it is not. In most of the cases, you don’t have to define a compile rule for each different length. The following example defines a decoding for a netflow type 6789 that carry a string:
var colObj = Collector(function (flow) {
      console.log(flow)
});

colObj.listen(5000);

colObj.nfTypes[6789] = {
    name: 'vendor_string',
    compileRule: {
        0: 'o["$name"] = buf.toString("utf8",$pos,$pos+$len)'
    }
}
As you can see, we can also change the decoding on fly, by defining a property for that netflow type within the nfTypes property of the colObj (the Collector object). Next time when the NetFlow Agent send us a NetFlow Template definition containing this netflow type, the new rule will be used (the routers usually send temlpates from time to time, so even currently compiled templates are recompiled).
You could also overwrite the default property names where the decoded data is written. For example:
var colObj = Collector(function (flow) {
      console.log(flow)
});
colObj.listen(5000);

colObj.nfTypes[14].name = 'outputInterface';
colObj.nfTypes[10].name = 'inputInterface';

Logging / Debugging the module

You can use the debug module to turn on the logging, in order to debug how the library behave. The following example show you how:
require('debug').enable('NetFlowV9');
var Collector = require('node-netflowv9');
Collector(function(flow) {
    console.log(flow);
}).listen(5555);

Multiple collectors

The module allows you to define multiple collectors at the same time. For example:
var Collector = require('node-netflowv9');

Collector(function(flow) { // Collector 1 listening on port 5555
    console.log(flow);
}).listen(5555);

Collector(function(flow) { // Collector 2 listening on port 6666
    console.log(flow);
}).listen(6666);

NetFlowV9 Options Template

NetFlowV9 support Options template, where there could be an option Flow Set that contains data for a predefined fields within a certain scope. This module supports the Options Template and provides the output of it as it is any other flow. The only difference is that there is a property isOption set to true to remind to your code, that this data has come from an Option Template.
Currently the following nfScope are supported – system, interface, line_card, netflow_cache. You can overwrite the decoding of them, or add another the same way (and using absolutley the same format) as you overwrite nfTypes.

node-netflowv9 is updated to support netflow v1, v5, v7 and v9

Post Syndicated from Anonymous original http://deliantech.blogspot.com/2014/11/node-netflowv9-is-updated-to-support.html

My netflow module for Node.JS has been updated. Now it support more NetFlow versions – like NetFlow ver 1, ver 5, ver 7 and ver 9. Also it has been modified to be able to be used as Event Generator (instead of doing callbacks). Now you can do as well (the old model is still supported):
Collector({port: 3000}).on('data',function(flow) {
    console.log(flow);
});
Additionally, the module now supports and decode option templates and option data flows for NetFlow v9.

Sencha ExtJS grid update in real time from the back-end

Post Syndicated from Anonymous original http://deliantech.blogspot.com/2014/10/sencha-extjs-grid-update-in-real-time.html

Hello to all,
I love using Sencha ExtJS in some projects as it is the most complete JavaScript UI framework, even though it is kind of slow, not fast reacting and being cpu and memory expensive. ExtJS allows you to do very fast and lazy development of otherwise complex UI and especially if you use Sencha Architect you can minimize the UI development time focusing only on the important things of your code.
However, ExtJS has quite few draw backs – missing features or some things are over complex and hard to be kept in mind by inexperienced developer (like their Controller idea). 
Here I would like to show you a little example how you can implement a very simple real time update of Sencha Grids (tables) from the backend for an multi user application.
Why do you need this?
I often develop apps that has to be used by multiple persons at the same time and they share and modify the same data.
In such situation, a developer usually has to resolve all those conflicting cases where two users try to modify the same exact data. And Sencha ExtJS grids are not very helpful here. Sencha uses the concept of Store that interact with the data of the back-end (for example by using REST API) and then the Store is assigned to a visualization object like ComboBox or a Grid (Tables). If you modify a table (with the help of Cell Edit Plugin or Row Edit Plugin) that has autoSync property set to true, then any modification you do automatically generates a REST POST/PUT/DELETE query to inform the back end. It can never be easier for a developer, right? But all the data sent to the back end contains the whole modified row – all the properties. On a first sight, this is not an issue. But it is, if you have multiple users editing the same table at the same time. The problem happens because the Sencha Store caches the data. So if User1 modifies it – it is stored on the server. But if User2 modifies the same row but a different column, it will do that over the old data and can overwrite the User1 modification. The backend cannot know which property has been modified and which not and who of the two modifications has to be kept.
There are a lot of tricks a developer usually use to avoid this conflicts. Keeping a version of the modification with each data row in the server, which is received in GET by the UI clients. So when a modification happens, it is accepted only if the client sends the same version number as the one stored in the server, and then the version in the server increases. If another one modification is received with older cached data, it will not be accepted as it will have a different version number. Then the customer will receive an error, then the UI software may refresh its data and updates the versions and the content visualized to the user. 
This is quite popular model, but it is not very nice for the user. The problem is that with multiple users working with the application modifying the same data over the same time, the user will constantly be outdated and will constantly receive errors loosing all its modifications.
The only good solution for both users and the system in general is if in case of change we can update the data in real time in all UI applications. This does not avoid all the possibilities for conflict. But it is highly minimizing it, making the whole operation more pleasant for the end user.
This problem and the need of resolving it happens quite often. Google Spreadsheet and later Google Docs has introduced real time update between the UI data of all the users modifying the same document about 4 years ago.
Example
I like to show here that it is not really hard to update in real time the Stores of ExtJS applications.
It actually requires very little additional code.
Lets imaging we are using a UI developed in Sencha ExtJS with Stores communicating through REST with the backend. The backend for this example will be Node.JS and MongoDB.
Between the Node.JS and the Ext.JS UI there will be Socket.IO session that we will use to push the updates from the Node.JS to the ExtJS Store. I love Socket.IO because it provides a simple WebSockets interface with fallback to HTTP pooling model in case of WebSockets cannot be open (which happens a lot, if you are so unlucky to use a Microsoft security software for example – it blocks WebSockets). 
At the MongoDB we may use capped collections. I love capped collections – they are not only limited in size, but also they allow you to bind a triggers (make the collection tailable) that will receive any new insertion immediately when it happen.
So imagine your Node.JS express REST code looks something like this:
app.get(‘/rest/myrest’,restGetMyrest);
app.put(‘/rest/myrest/:id’,restPutMyrest);
app.post(‘/rest/myrest/:id’,restPostMyrest);
app.del(‘/rest/myrest/:id’,restDelMyrest);

function restGetMyrest(req,res) { // READ REST method
   db.collection(‘myrest’).find().toArray(function(err,q) { return res.send(200,q) })
}

function restPutMyrest(req,res) { // UPDATE REST method
  var id = ObjectID.createFromHexString(req.param(‘id’));
  db.collection(‘myrest’).findAndModify({ _id: id }, [[‘_id’:’asc’]], { $set: req.body }, { safe: true, ‘new’: true }, function(err,q) {
      if (err || (!q)) return res.send(500);
      db.collection(‘capDb’).insert({ method: ‘myrest’, op: ‘update’, data: q }, function() {});
      return res.send(200,q);
  })
}

function restPostMyrest(req,res) { // CREATE REST method
  var id = ObjectID.createFromHexString(req.param(‘id’));
  db.collection(‘myrest’).insert({ _id: id },req.body, { safe: true }, function(err,q) {
      if (err || (!q)) return res.send(500);
      setTimeout(function() {
         db.collection(‘capDb’).insert({ method: ‘myrest’, op: ‘create’, data: q[0] }, function() {});
      },250);
      return res.send(200,q);
  })
}

function restDelMyrest(req,res) { // DELETE REST method
  var id = ObjectID.createFromHexString(req.param(‘id’));
  db.collection(‘myrest’).remove({ _id: id }, { $set: req.body }, { safe: true }, function(err,q) {
      if (err || (!q)) return res.send(500);
      db.collection(‘capDb’).insert({ method: ‘myrest’, op: ‘delete’, data: { _id: id } }, function() {});
      return res.send(201,{});
  })
}
As you can see above – we have implemented a classical CRUD REST method named “myrest” retrieving and storing data in a mongodb collection named ‘myrest’. However, with all modification we also store that modification in a mongodb capped collection named “capDb”.
We use this capped collection (in bold) as an internal mechanism for communication within the NodeDB. You can use events instead, or you can directly send this message to the Socket.IO receiver. However, I like capped db, as they set a lot of advantages – there can be multiple Node.JS processes listening on a capped db and receiving the updates simultaneously. So it is easier to implement clusters that way, including notifying Node.JS processes distributed over different machines.
So now, may be in another file or anywhere else, you may have a simple Node.JS Socket.IO code looking like this:
var s = sIo.of(‘/updates’);
db.createCollection(“capDb”, { capped: true, size: 100000 }, function (err, col) {
   var stream = col.find({},{ tailable: true, awaitdata: true, numberOfRetries: -1 }).stream();
   stream.on(‘data’,function(doc) {
       s.emit(doc.op,doc);
   }
});
 
With this little code above we are basically broadcasting to everyone connected with Socket.IO to /updates the content of the last insertion in the tailable capDb. Also we are creating this collection, if it does not exists from before.
This is everything you need in Node.JS 🙂
Now we can get back to the Ext.JS code. Simply you need to have somewhere in your HTML application this code executed:
var socket = io.connect(‘/updates’);
socket.on(‘create’, function(msg) {
   var s = Ext.StoreMgr.get(msg.method);
   if ((!s)||(s.getCount()>s.pageSize||s.findRecord(‘id’,msg.data._id)) return;
   s.suspendAutoSync();
   s.add(msg.data);
   s.commitChanges();
   s.resumeAutoSync();
});
socket.on(‘update’, function(msg) {
   var s = Ext.StoreMgr.get(msg.method);
   var r;
   if ((!s)||(!(r=s.findRecord(‘id’,msg.data._id))) return;
   s.suspendAutoSync();
   for (var k in msg.data) if (r.get(k) != msg.data[k]) r.set(k,msg.data[k]);
   s.commitChanges();
   s.resumeAutoSync();
});
socket.on(‘delete’,function(msg) {
   var s = Ext.StoreMgr.get(msg.method);
   var r;
   if ((!s)||(!(r=s.findRecord(‘id’,msg.data._id))) return;
   s.suspendAutoSync();
   s.remove(r);
   s.commitChanges();
   s.resumeAutoSync();
});
This is all.
Basically what we do from end to end –
If the Node.JS receives any CRUD REST operation it updates the data in the MongoDB, but also for Create, Update, Delete it notify over Socket.IO all the listening web clients about this operation (in my example, I use tailable capped collection in MongoDB as a an internal messaging bus, but you can emit to the Socket.IO directly or use another messaging bus like EventEmitter).
Then the ExtJS receives the update over Socket.IO and assumes that the method property contains the name of the Store that has to be updated. Then we find the store, suspedAutoSync if it exists (otherwise we can get into update->autosync->rest->update loop), modify the content of the record (or the store) and resume AutoSync.
With this simple code you can broadcast all the modifications in your data between all the extjs users that are currently online, so they can see updates in real time in their grids.
A single REST method may be used by multiple stores. In such case, you have to modify your code with some association between the REST method name and all the related stores.
However, for this simple example, that is unnecessary.
Some other day, I may show you my “ExtJS WebSockets CRUD proxy” I made, where you have only one communication channel between the stores and the backend – Socket.IO. It is much faster and removes the need of having REST code at all in your server. 

Fun with JavaScript inheritance

Post Syndicated from Anonymous original http://deliantech.blogspot.com/2014/06/fun-with-javascript-inheritance.html

One could say that JavaScript does not support native inheritance for OOP and could not be so wrong. JavaScript happened to be having one of the most powerful OOP I have ever seen 🙂
Something more, JavaScript does the inheritance trough a prototype chaining, which actually provides even more power than you can imagine.
See the following simple chaining example, that shows a chained inheritance (not the typical one-step prototype->object inheritance everyone knows):
~$ node
> a={}
{}
> b = Object.create(a)
{}
> c = Object.create(b)
{}
> a.test = 1
1
> a
{ test: 1 }
> b
{}
> c
{}
> c.test
1
> b.text=2
2
> b
{ text: 2 }
> b.test
1
> c.test
1
> c.text
2
> c
{}
So now you can see above how can we do a very easy but powerful chain of objects. Something more, that works for ANY object, including chaining BOTH the methods and the prototypes of the objects, so you can modify either the objects directly, or their prototypes and everything is inherited with a two-shadow priority model.
~$ node
> a=[1,2,3,4]
[ 1, 2, 3, 4 ]
> b=Object.create(a)
{}
> b
{}
> b[1]
2
> b.length
4
> b
{}
So now you can see that b is still (an empty) object but has behavior and properties like an array 🙂

Operator overloading with JavaScript

Post Syndicated from Anonymous original http://deliantech.blogspot.com/2014/06/operator-overloading-with-javascript.html

JavaScript happens to have an extremely powerful OOP tool-set that is quite unknown. I am surprised every day by the power and flexibility of it.
One of the things I didn’t knew is possible at all with JavaScript was operator overloading.
And this is understandable – JavaScript doesn’t have strict variable types. Therefore any type of polymorphism is very hard to be implemented, as it is bound to the object/variable types.
However, you can easily do polymorphism with JavaScript and as it happens, you can easily do operator overloading too 🙂
How that works?
It is really easy – JavaScript retrieve the value of an Object using the valueOf method. And every object has valueOf with the exception of few primitive types (as in Java and C++). Therefore you can use that to do operator oveloading.
Let me show you an example:
~$ node
> a={}
{}
> a == 3
false
> a.valueOf = function() { return 3 }
[Function]
> a == 3
true
And the best is that you can do that to the prototype (or to the inherited object):
~$ node
> {} == 3
false
> Object.prototype.valueOf = function() { return 3 }
[Function]
> {} == 3
true