На второ четене: „Макгахански блусове и балади“

Post Syndicated from original https://www.toest.bg/na-vtoro-chetene-makgahanski-blusove-i-baladi/

„Макгахански блусове и балади“ от Юли Шумарев

На второ четене: „Макгахански блусове и балади“

ИК „Жанет 45“, 2022

Блусът се ражда като музика на бедните, разчитайки на „синята нота“ (blue note) и повторимостта на фразите, на ритмичното вдълбаване в суровите емоции, в тъгата и носталгията под далечния зноен дъх на спиричуъла. Тъкмо това прави и Юли Шумарев в „Макгахански блусове и балади“ –

сборник с разкази от етюден тип, който всъщност може да се чете и като поетичен роман за израстването.

Роман, изсвирен по грифа не на американската делта, а на спомена за една малка, вече напълно променена и джентрифицирана пловдивска уличка, затворена някога между стръмното на Стария град и началото на циганската махала.

„Макгахан“ е уличка на градската беднота, уличка на малките хора и съдби.

В тези автобиографични истории авторът разказвач пътува с така наречената от него „времевръщачка“ в детството си на ул. „Макгахан“ 10 – в присъствието на своите брат, баба и най-вече дядо, може би централния герой в тази книга. Той прави това по един типично прустовски, или по-скоро господиновски начин. Също като при Господинов, и тук миналото бива страстно инвентаризирано, опредметено, капсулирано преди всичко във вещи и предмети, както и в звуци, миризми и ритуали. Паметта се вкопчва в чисто сетивното, във физическото, в онова, което – като при неверния Тома – ни убеждава в съществуващото, в съществувалото.

Да, Юли Шумарев признава крехкостта и ненадеждността на тази памет – а следователно и нейното сродство с въображението, което идва да запълни празнините ѝ, но всъщност може би е самата нея.

Едва ли мога да си спомня тези неща. Сигурно си измислям. Аз съм лъжец.

Тази памет-въображение има нужда от патерица, от мадленка: стария дядов куфар, коланчето от роклята на баба, черницата на двора, запазеното билетче, запалката „Зипо“. Тя се рее над някогашните звуци и миризми: шляпането на гумените чехли, съскането на кибритената клечка, дъха на липовия цвят и риванола. Всичко това са не просто неща, а насъщна част от състояния и действия, които в детството (а може би чак в спомена за него?) придобиват смисъла на мистични, повтарящи се ритуали, съвсем буквално крепящи света.

Всяко нещо е важно и ненарушимо.

И така ритуалите по ежедневното курдисване на часовниците, боядисването напролет, запалването на печката, поправянето на повреденото се превръщат в част от донкихотовската битка на дядото на разказвача с ентропията и разпада. Същата обречена и неравна битка, която той води и със забравата, записвайки си на куп бели листчета имената на хора, места и предмети, започнали да му се изплъзват с напредването на деменцията.

Помнен, дори и само на хартия, светът ще остане цял.

Не е случайно, че едно от имената върху белите листчета е на кораба „Титаник“, който се споменава на много места из страниците. Старата къща на ул. „Макгахан“ 10, която разказвачът определя като „целия фундамент в живота ми“, е обречена пред айсберга на времето, който ще я разруши физически, слагайки край на детството. Тя е Шумаревият титаник, потънал насред океана на модернизиращия се град и порастването. Опитът на малкия Юли да излъже веднъж времето, размествайки стрелките на всички часовници у дома, така и не сработва.

И все пак машината на времето, за която мечтае авторът, вече е изобретена от самия него – чрез разказването.

Ще построя кораб срещу времето. Корпуса ще скова от дъските на дядовата ограда, ребрата ще направя от старите дворни плочи, килът ще е от вехтите греди, които подпират тавана. В сърцето му ще забия ръждивия цигански пирон, който крепи света ми. За мачти ще отсека любимите си макгахански дървета. Ще ги изправя да стърчат гордо, после ще ги превържа с такелаж, изплетен от бабината червена нишка. Ще връзвам здраво и няма да забравя парче за себе си.

И ето. Конецът от червеното кълбо се превръща в нишката на Ариадна, която не отвежда извън, а до самото сърце в лабиринта на детството. А потъващият „Титаник“ се издига в кораба на Ноевия ковчег. Така че може би финалната четвърта фраза на този макгахански блус се римува с възклицанието на разказвача, че „истинска загуба няма“. Най-малкото защото всяко изгубено от някого нещо е откритие за другиго, точно като изпадналите двайсет стотинки. Сума огромна впрочем…

… защото детството е лупата на живота.

Малката къщичка и дворчето на Юли са с размерите на „поле и катедрала“, хралупата на дървото е „светилище“, качването на тавана е равносилно на стъпването на Луната или поне на покоряването на Еверест. А куп пространства придобиват статута на убежища – такова само по себе си е детството, където криенето от света е част от преживяването му.

На второ четене: „Макгахански блусове и балади“

„Макгахански блусове и балади“ е не по-малко и книга за братството и връзката през поколенията. За сметка на бабите и дядовците, родителите почти липсват в наратива (те може би се нуждаят от собствена книга). В българското детство това е „изконна“ традиция, която максимално приближава детето до емоционалното преживяване на смъртта. Детството в крайна сметка е свикване с кръвта и смъртта. Включително тази на любимите домашни животни, заклани, за да бъдат изядени – както в дългата сцена с обезглавеното петле, спасително задигнато от котарака – страшилище на махалата.

Всъщност Юли Шумарев е преди всичко художник – от тези, израснали покрай Античния театър, учили се от платната на Слона, Кольо Карамфилов и други знакови артисти на града. Може би затова в дебютната си книга е способен да види небето в „цвят на изтъркани дънки“. Привидно семпъл, езикът на историите е силно образен и метафоричен, сетивен, поетично красив в носталгията си.

Фабулирането се случва и през езика, придавайки на всеки разказ почти библейски, епични измерения. На места историите звучат като притчи, в чиито архетипни образи поне няколко поколения ще разпознаят собственото си детство. Всичко там все още ще е преводимо в нещо друго – точно както всяка вещ от натуриите в бараката-убежище-светилище може да бъде употребявана за куп други неща, та да бъде светът самодостатъчен и самозакрепим. И в крайна сметка разказването е колкото сбогуване, толкова и отказът от него, както признава Юли Шумарев:

Не знам кога ще се сбогувам с миналото си. Не знам кога ще си простя. Не знам кога ще освободя баба и дядо от мислите си и ще ги оставя да се реят между звездите. Знам, че времето е жива материя. Мога да се върна по него, да видя старите места и липсващите любими хора.


Активните дарители на „Тоест“ получават постоянна отстъпка в размер на 20% от коричната цена на всички заглавия от каталога на „Жанет 45“, както и на няколко други български издателства в рамките на партньорската програма Читателски клуб „Тоест“. За повече информация прочетете на toest.bg/club.

Никой от нас не чете единствено най-новите книги. Тогава защо само за тях се пише? „На второ четене“ е рубрика, в която отваряме списъците с книги, публикувани преди поне година, четем ги и препоръчваме любимите си от тях. Рубриката е част от партньорската програма Читателски клуб „Тоест“. Изборът на заглавия обаче е единствено на авторите – Стефан Иванов и Севда Семер, които биха ви препоръчали тези книги и ако имаше как веднъж на две седмици да се разходите с тях в книжарницата.

Simplify data transfer: Google BigQuery to Amazon S3 using Amazon AppFlow

Post Syndicated from Kartikay Khator original https://aws.amazon.com/blogs/big-data/simplify-data-transfer-google-bigquery-to-amazon-s3-using-amazon-appflow/

In today’s data-driven world, the ability to effortlessly move and analyze data across diverse platforms is essential. Amazon AppFlow, a fully managed data integration service, has been at the forefront of streamlining data transfer between AWS services, software as a service (SaaS) applications, and now Google BigQuery. In this blog post, you explore the new Google BigQuery connector in Amazon AppFlow and discover how it simplifies the process of transferring data from Google’s data warehouse to Amazon Simple Storage Service (Amazon S3), providing significant benefits for data professionals and organizations, including the democratization of multi-cloud data access.

Overview of Amazon AppFlow

Amazon AppFlow is a fully managed integration service that you can use to securely transfer data between SaaS applications such as Google BigQuery, Salesforce, SAP, Hubspot, and ServiceNow, and AWS services such as Amazon S3 and Amazon Redshift, in just a few clicks. With Amazon AppFlow, you can run data flows at nearly any scale at the frequency you choose—on a schedule, in response to a business event, or on demand. You can configure data transformation capabilities such as filtering and validation to generate rich, ready-to-use data as part of the flow itself, without additional steps. Amazon AppFlow automatically encrypts data in motion, and allows you to restrict data from flowing over the public internet for SaaS applications that are integrated with AWS PrivateLink, reducing exposure to security threats.

Introducing the Google BigQuery connector

The new Google BigQuery connector in Amazon AppFlow unveils possibilities for organizations seeking to use the analytical capability of Google’s data warehouse, and to effortlessly integrate, analyze, store, or further process data from BigQuery, transforming it into actionable insights.

Architecture

Let’s review the architecture to transfer data from Google BigQuery to Amazon S3 using Amazon AppFlow.

architecture

  1. Select a data source: In Amazon AppFlow, select Google BigQuery as your data source. Specify the tables or datasets you want to extract data from.
  2. Field mapping and transformation: Configure the data transfer using the intuitive visual interface of Amazon AppFlow. You can map data fields and apply transformations as needed to align the data with your requirements.
  3. Transfer frequency: Decide how frequently you want to transfer data—such as daily, weekly, or monthly—supporting flexibility and automation.
  4. Destination: Specify an S3 bucket as the destination for your data. Amazon AppFlow will efficiently move the data, making it accessible in your Amazon S3 storage.
  5. Consumption: Use Amazon Athena to analyze the data in Amazon S3.

Prerequisites

The dataset used in this solution is generated by Synthea, a synthetic patient population simulator and opensource project under the Apache License 2.0. Load this data into Google BigQuery or use your existing dataset.

Connect Amazon AppFlow to your Google BigQuery account

For this post, you use a Google account, OAuth client with appropriate permissions, and Google BigQuery data. To enable Google BigQuery access from Amazon AppFlow, you must set up a new OAuth client in advance. For instructions, see Google BigQuery connector for Amazon AppFlow.

Set up Amazon S3

Every object in Amazon S3 is stored in a bucket. Before you can store data in Amazon S3, you must create an S3 bucket to store the results.

Create a new S3 bucket for Amazon AppFlow results

To create an S3 bucket, complete the following steps:

  1. On the AWS Management console for Amazon S3, choose Create bucket.
  2. Enter a globally unique name for your bucket; for example, appflow-bq-sample.
  3. Choose Create bucket.

Create a new S3 bucket for Amazon Athena results

To create an S3 bucket, complete the following steps:

  1. On the AWS Management console for Amazon S3, choose Create bucket.
  2. Enter a globally unique name for your bucket; for example, athena-results.
  3. Choose Create bucket.

User role (IAM role) for AWS Glue Data Catalog

To catalog the data that you transfer with your flow, you must have the appropriate user role in AWS Identity and Access Management (IAM). You provide this role to Amazon AppFlow to grant the permissions it needs to create an AWS Glue Data Catalog, tables, databases, and partitions.

For an example IAM policy that has the required permissions, see Identity-based policy examples for Amazon AppFlow.

Walkthrough of the design

Now, let’s walk through a practical use case to see how the Amazon AppFlow Google BigQuery to Amazon S3 connector works. For the use case, you will use Amazon AppFlow to archive historical data from Google BigQuery to Amazon S3 for long-term storage an analysis.

Set up Amazon AppFlow

Create a new Amazon AppFlow flow to transfer data from Google Analytics to Amazon S3.

  1. On the Amazon AppFlow console, choose Create flow.
  2. Enter a name for your flow; for example, my-bq-flow.
  3. Add necessary Tags; for example, for Key enter env and for Value enter dev.

appflow-flow-setup­­­­

  1. Choose Next.
  2. For Source name, choose Google BigQuery.
  3. Choose Create new connection.
  4. Enter your OAuth Client ID and Client Secret, then name your connection; for example, bq-connection.

­bq-connection

  1. In the pop-up window, choose to allow amazon.com access to the Google BigQuery API.

bq-authentication

  1. For Choose Google BigQuery object, choose Table.
  2. For Choose Google BigQuery subobject, choose BigQueryProjectName.
  3. For Choose Google BigQuery subobject, choose DatabaseName.
  4. For Choose Google BigQuery subobject, choose TableName.
  5. For Destination name, choose Amazon S3.
  6. For Bucket details, choose the Amazon S3 bucket you created for storing Amazon AppFlow results in the prerequisites.
  7. Enter raw as a prefix.

appflow-source-destination

  1. Next, provide AWS Glue Data Catalog settings to create a table for further analysis.
    1. Select the User role (IAM role) created in the prerequisites.
    2. Create new database for example, healthcare.
    3. Provide a table prefix setting for example, bq.

glue-crawler-config

  1. Select Run on demand.

appflow-trigger-setup

  1. Choose Next.
  2. Select Manually map fields.
  3. Select the following six fields for Source field name from the table Allergies:
    1. Start
    2. Patient
    3. Code
    4. Description
    5. Type
    6. Category
  4. Choose Map fields directly.

appflow-field-mapping

  1. Choose Next.
  2. In the Add filters section, choose Next.
  3. Choose Create flow.

Run the flow

After creating your new flow, you can run it on demand.

  1. On the Amazon AppFlow console, choose my-bq-flow.
  2. Choose Run flow.

sppflow-run--status

For this walkthrough, choose run the job on-demand for ease of understanding. In practice, you can choose a scheduled job and periodically extract only newly added data.

Query through Amazon Athena

When you select the optional AWS Glue Data Catalog settings, Data Catalog creates the catalog for the data, allowing Amazon Athena to perform queries.

If you’re prompted to configure a query results location, navigate to the Settings tab and choose Manage. Under Manage settings, choose the Athena results bucket created in prerequisites and choose Save.

  1. On the Amazon Athena console, select the Data Source as AWSDataCatalog.
  2. Next, select Database as healthcare.
  3. Now you can select the table created by the AWS Glue crawler and preview it.

athena-results

  1. You can also run a custom query to find the top 10 allergies as shown in the following query.

Note: In the below query, replace the table name, in this case bq_appflow_mybqflow_1693588670_latest, with the name of the table generated in your AWS account.

SELECT type,
category,
"description",
count(*) as number_of_cases
FROM "healthcare"."bq_appflow_mybqflow_1693588670_latest"
GROUP BY type,
category,
"description"
ORDER BY number_of_cases DESC
LIMIT 10;

  1. Choose Run query.

athena-custom-query-results

This result shows the top 10 allergies by number of cases.

Clean up

To avoid incurring charges, clean up the resources in your AWS account by completing the following steps:

  1. On the Amazon AppFlow console, choose Flows in the navigation pane.
  2. From the list of flows, select the flow my-bq-flow, and delete it.
  3. Enter delete to delete the flow.
  4. Choose Connections in the navigation pane.
  5. Choose Google BigQuery from the list of connectors, select bq-connector, and delete it.
  6. Enter delete to delete the connector.
  7. On the IAM console, choose Roles in the navigation page, then select the role you created for AWS Glue crawler and delete it.
  8. On the Amazon Athena console:
    1. Delete the tables created under the database healthcare using AWS Glue crawler.
    2. Drop the database healthcare
  9. On the Amazon S3 console, search for the Amazon AppFlow results bucket you created, choose Empty to delete the objects, then delete the bucket.
  10. On the Amazon S3 console, search for the Amazon Athena results bucket you created, choose Empty to delete the objects, then delete the bucket.
  11. Clean up resources in your Google account by deleting the project that contains the Google BigQuery resources. Follow the documentation to clean up the Google resources.

Conclusion

The Google BigQuery connector in Amazon AppFlow streamlines the process of transferring data from Google’s data warehouse to Amazon S3. This integration simplifies analytics and machine learning, archiving, and long-term storage, providing significant benefits for data professionals and organizations seeking to harness the analytical capabilities of both platforms.

With Amazon AppFlow, the complexities of data integration are eliminated, enabling you to focus on deriving actionable insights from your data. Whether you’re archiving historical data, performing complex analytics, or preparing data for machine learning, this connector simplifies the process, making it accessible to a broader range of data professionals.

If you’re interested to see how the data transfer from Google BigQuery to Amazon S3 using Amazon AppFlow, take a look at step-by-step video tutorial. In this tutorial, we walk through the entire process, from setting up the connection to running the data transfer flow. For more information on Amazon AppFlow, visit Amazon AppFlow.


About the authors

Kartikay Khator is a Solutions Architect on the Global Life Science at Amazon Web Services. He is passionate about helping customers on their cloud journey with focus on AWS analytics services. He is an avid runner and enjoys hiking.

Kamen SharlandjievKamen Sharlandjiev is a Sr. Big Data and ETL Solutions Architect and Amazon AppFlow expert. He’s on a mission to make life easier for customers who are facing complex data integration challenges. His secret weapon? Fully managed, low-code AWS services that can get the job done with minimal effort and no coding.

Ferrocene released as open source

Post Syndicated from corbet original https://lwn.net/Articles/946732/

Ferrous Systems has announced
that its Ferrocene Rust compiler will be released under the Apache-2.0 and
MIT licenses.

Ferrocene is the main Rust compiler – rustc – but quality managed
and qualified for use in automotive and industrial environments
(currently by ISO 26262 and IEC 61508) by Ferrous Systems. It
operates as a downstream to the Rust project, further increasing
its testing and quality on specific platforms.

The license is free, but this is not being run as an open-source project;
specifically, contributions from the “general public” are not accepted.

Enhancing Resource Isolation in AWS CDK with the App Staging Synthesizer

Post Syndicated from Jehu Gray original https://aws.amazon.com/blogs/devops/enhancing-resource-isolation-in-aws-cdk-with-the-app-staging-synthesizer/

AWS Cloud Development Kit (CDK) has become a powerful tool for defining and provisioning AWS cloud resources. While CDK simplifies the process of infrastructure as code, managing resources across different projects and environments can still present challenges. In this blog post, we’ll explore a new experimental library, the App Staging Synthesizer, that enhances resource isolation and provides finer control over staging resources in CDK applications.

Background: The CDK Bootstrapping Model

Let’s consider a scenario where a company has two projects in the same account, Project A and Project B. Both projects are developed using the AWS CDK and deploy various AWS resources. However, the company wants to ensure that resources used in Project A are not discoverable or accessible to Project B. Prior to the introduction of the App Staging Synthesizer library in CDK, the default bootstrapping process created shared staging resources, such as a single Amazon S3 bucket and Amazon ECR repository, which are used by all CDK applications deployed in the CDK environment. In AWS CDK, a combination of region and an account is considered to be an environment. The traditional CDK bootstrapping method offers simplicity and consistency by providing a standardized set of shared staging resources for all CDK applications in an environment, which can be cost-effective for multiple applications. This shared model makes it challenging to control access and visibility between the projects in the same account, particularly in scenarios where resource isolation is crucial between different projects. In such scenarios, AWS recommends a best practice of separating projects that need critical isolation into different AWS accounts. However, it is recognized that there might be organizational or practical reasons preventing the immediate adoption of this recommendation. In such cases, mechanisms like the App Staging Synthesizer can provide a valuable workaround.

Introducing the App Staging Synthesizer:

Today, a growing trend among customers is the consolidation of their cloud accounts driven by the desire to optimize costs, bolster security and enhance compliance control. However, while consolidation offers several advantages, it can sometimes limit the flexibility to align ownership and decision making with individual accounts. This can lead to dependencies and conflicts in how workloads across accounts are secured and managed. The App Staging Synthesizer which is an experimental library designed to provide a more flexible approach to resource management and staging in CDK applications was designed to address these challenges. The AppStagingSynthesizer enhances resource isolation and cleanup control by creating separate staging resources for each application, reducing the risk of conflicts between resources and providing more granular management. It also enables better asset lifecycle management and customization of roles and resource handling, offering CDK developers a flexible and organized approach to resource deployment. Let’s delve into some of the advantages and key features of this library.

Advantages and Outcomes:

  1. Isolation and Access Control: The resources created for Project A are now completely isolated from Project B. Project B doesn’t have visibility or access to the staging resources of Project A, and vice versa. This ensures a higher level of data and resource security.
  2. Easier Resource Cleanup: When cleaning up or deleting resources, the Staging Stack specific to each project can be removed independently. This allows for a more streamlined and controlled cleanup process, mitigating the risk of inadvertently affecting other projects.
  3. Lifecycle Management: With separate ECR repositories for each CDK application, the company can apply lifecycle rules independently for retention and cost management. For example, they can configure each ECR repository to retain only the most recent 5 images, effectively cutting down on storage costs.
  4. Reduced Bootstrapping Complexity: As the only shared resources required are global Roles, the company now only needs to bootstrap every account in one Region instead of bootstrapping every Region. This simplifies the bootstrapping process, making it easier to manage with CloudFormation StackSets.

Key Features of the App Staging Synthesizer:

  • IStagingResources Interface: The App Staging Synthesizer introduces the IStagingResources interface, offering a framework to manage app-level bootstrap stacks. These stacks handle file assets and Docker assets for CDK applications.
  • DefaultStagingStack: Included in the library, the DefaultStagingStack is a pre-built implementation of the IStagingResources It comes with default configurations for staging resources, making it easier to get started.
  • AppStagingSynthesizer: This is a new CDK synthesizer that orchestrates the creation of staging resources for each CDK application. It seamlessly integrates with the application deployment process.
  • Deployment Roles: In addition to creating staging resources, the CDK App Staging Synthesizer also manages deployment roles. These roles are crucial for secure and controlled resource deployment, ensuring that only authorized processes can modify or access the resources.

 Implementation:

Let’s explore practical examples of using the App Staging Synthesizer within a CDK application.

Prerequisite:

For this walkthrough, you should have the following prerequisites:

  • An AWS account
  • Install AWS CDK version 2.73.0 or later
  • A basic understanding of CDK. Please go through cdkworkshop.com to get hands-on learning about CDK and related concepts.
  • NOTE: To utilize the AppStagingSynthesizer, you should have an existing CDK application or should be working on a CDK application.

Using Default Staging Resources:

When configuring your CDK application to use deployment identities with the old bootstrap stack, it’s important to note that the existing staging resources, including the global S3 bucket and ECR repository, will still be created as part of the bootstrapping process. However, they will remain unused by this specific application, thanks to the App Staging Synthesizer.
While we won’t delve into the removal of these unused resources in this blogpost, it’s worth mentioning that for a more streamlined resource setup, you have the option to customize the bootstrap template to remove these resources if desired. This can help reduce clutter and ensure that only the necessary resources are retained within your CDK environment.

To get started, update your CDK App with the following code snippet:

const app = new App({
defaultStackSynthesizer: AppStagingSynthesizer.defaultResources({
appId: 'my-app-id',
// The following line is optional. By default, it is assumed you have bootstrapped in the same region(s) as the stack(s) you are deploying.
deploymentIdentities: DeploymentIdentities.defaultBootstrapRoles({ bootstrapRegion: 'us-east-1' }),
}),
});

This code snippet creates a DefaultStagingStack for a CDK App, allowing you to manage staging resources more effectively.

Customizing Roles:

You can customize roles for the synthesizer, which can be useful for several reasons such as:

  • Reuse of existing roles: In many AWS environments, organizations have existing IAM roles with specific permissions and policies that are aligned with their security and compliance requirements. Rather than creating new roles from scratch, you might want to leverage these existing roles to maintain consistency and adhere to established security practices.
  • Compatibility: In scenarios where you have pre-existing IAM roles that are being used across various AWS services or applications, customizing roles within the CDK App Staging Synthesizer allows you to seamlessly integrate CDK deployments into your existing IAM role management strategy.

Overall, customizing roles provides flexibility and control over resources used during CDK application deployments, enabling you to align CDK-based infrastructure with the organization’s policies. An example is:

const app = new App({
defaultStackSynthesizer: AppStagingSynthesizer.defaultResources({
appId: 'my-app-id',
deploymentIdentities: DeploymentIdentities.specifyRoles({
cloudFormationExecutionRole: BootstrapRole.fromRoleArn('arn:aws:iam::123456789012:role/Execute'),
deploymentRole: BootstrapRole.fromRoleArn('arn:aws:iam::123456789012:role/Deploy'),
}),
}),
});

This code snippet illustrates how you can specify custom roles for different stages of the deployment process.

Deploy Time S3 Assets:

Deploy-time S3 assets can be classified into two categories, each serving a distinct purpose:

  • Assets Used Only During Deployment: These assets are instrumental in handing off substantial data to other services for private copying during deployment. They play a vital role during initial deployment, and afterwards are retained solely for potential future rollbacks
  • Assets Accessed Throughout Application Lifespan: In contrast, some assets are accessed continuously throughout the runtime of your application. These could include script files utilized in CodeBuild projects, startup scripts for EC2 instances, or, in the case of CDK applications, ECR images that persist throughout the application’s life.

Marking Lambda Assets as Deploy-Time:

By default, Lambda assets are marked as deploy-time assets in the CDK App Staging Synthesizer. This means they fall into the first category mentioned above, serving as essential components during deployment. For instance, consider the following code snippet:

declare const stack: Stack;
new lambda.Function(stack, 'lambda', {
code: lambda.AssetCode.fromAsset(path.join(__dirname, 'assets')), // Lambda code bundle marked as deploy-time
handler: 'index.handler',
runtime: lambda.Runtime.PYTHON_3_9,
});

In this example, the Lambda code bundle is automatically identified as a deploy-time asset. This distinction ensures that it’s cleaned up after the configurable rollback window.

Creating Custom Deploy-Time Assets:

CDK offers the flexibility needed to create custom deploy-time assets. This can be achieved by utilizing the Asset construct from the AWS CDK library:

import { Asset } from 'aws-cdk-lib/aws-s3-assets';
declare const stack: Stack;
const asset = new Asset(stack, 'deploy-time-asset', {
deployTime: true, // Marking the asset as deploy-time
path: path.join(__dirname, './deploy-time-asset'),
});

By setting deployTime to true, the asset is explicitly marked as deploy-time. This allows you to maintain control over the lifecycle of these assets, ensuring they are retained for as long as needed. However, it is important to note that deploy-time assets eventually become eligible for cleanup.

Configuring Asset Lifecycles:
By default, the CDK retains deploy-time assets for a period of 30 days. However, there is flexibility to adjust this duration according to custom requirements. This can be achieved by specifying deployTimeFileAssetLifetime. The value set here determines how long you can roll back to a previous application version without the need for rebuilding and republishing assets:

const app = new App({
defaultStackSynthesizer: AppStagingSynthesizer.defaultResources({
appId: 'my-app-id',
deployTimeFileAssetLifetime: Duration.days(100), // Adjusting the asset retention period to 100 days
}),
});

By fine-tuning the lifecycle of deploy-time S3 assets, you gain more control over CDK deployments and ensure that CDK applications are equipped to handle rollbacks and updates with ease.

Optimizing ECR Repository Management with Lifecycle Rules:

The AWS CDK App Staging Synthesizer provides you with the capability to control the lifecycle of container images by leveraging lifecycle rules within ECR repositories. Let’s explore how this feature can help streamline your CDK workflows.

ECR repositories can accumulate numerous versions of Docker images over time. While retaining some historical versions is essential for rollback scenarios and reference, an unregulated growth of image versions can lead to increased storage costs and management complexity.

The AWS CDK App Staging Synthesizer offers a default configuration that stores a maximum of 3 revisions for a given Docker image asset. This ensures that you maintain access to previous image versions, facilitating seamless rollback operations. When more than 3 revisions of an asset exist in the ECR repository, the oldest one is purged.

Although by default, it’s set to 3, you can also adjust this value using the imageAssetVersionCount property:

const app = new App({
defaultStackSynthesizer: AppStagingSynthesizer.defaultResources({
appId: 'my-app-id',
imageAssetVersionCount: 10, // Customizing the image version count to retain up to 10 revisions
}),
});

By increasing or decreasing the imageAssetVersionCount, you can strike a balance between storage efficiency and the need to access historical image versions. This ensures that ECR repositories are optimized to the CDK application’s requirements.

Streamlining Cleanup: Auto Delete Staging Assets on Stack Deletion

Efficiently managing resources throughout the lifecycle of your CDK applications is essential, and this includes handling the cleanup of staging assets when stacks are deleted. The AWS CDK App Staging Synthesizer simplifies this process by providing an auto-delete feature for staging resources. In this section, we’ll explore how this feature works and how you can customize it according to your needs.

The Default Cleanup Behavior:
By default, the AWS CDK App Staging Synthesizer is designed to facilitate the cleanup of staging resources automatically when a stack is deleted. This means that associated resources, such as S3 buckets and ECR repositories, are configured with a RemovalPolicy.DESTROY and have autoDeleteObjects (for S3 buckets) or autoDeleteImages (for ECR repositories) turned on. Under the hood, custom resources are created to ensure a seamless cleanup process.

Customizing Cleanup Behavior:
While automatic cleanup is convenient for many scenarios, there may be situations where you want to retain staging resources even after stack deletion. This can be useful when you intend to reuse these resources or when you have specific cleanup processes outside of the default behavior. To retain staging assets and disable the auto-delete feature, you can specify autoDeleteStagingAssets: as false when configuring the AWS CDK App Staging Synthesizer:

const app = new App({
defaultStackSynthesizer: AppStagingSynthesizer.defaultResources({
appId: 'my-app-id',
autoDeleteStagingAssets: false, // Disabling auto-delete of staging assets
}),
});

By setting autoDeleteStagingAssets to false, you have full control over the cleanup of staging resources. This allows you to retain and manage these resources independently, giving you the flexibility to align CDK workflows with the organization’s specific practices.

Using an Existing Staging Stack:

While the AWS CDK App Staging Synthesizer offers powerful tools for managing staging resources, there may be scenarios where you already have a meticulously crafted staging stack in place. In such cases, you can seamlessly integrate the existing stack with the AppStagingSynthesizer using the customResources() method. Let’s explore how you can make the most of your pre-existing staging infrastructure.

The process is straightforward—supply your existing staging stack as a resource to the AppStagingSynthesizer using the customResources() method. It’s crucial to ensure that the custom stack adheres to the requirements of the IStagingResources interface for smooth integration.

Here’s an example:

// Create a new CDK App
const resourceApp = new App();

//Instantiate your custom staging stack (make sure it implements IstagingResources)
const resources = new CustomStagingStack(resourceApp, 'CustomStagingStack', {});

//Configure your CDK App to use the App Staging Synthesizer with your custom staging stack
const app = new App({
defaultStackSynthesizer: AppStagingSynthesizer.customResources({
resources,
}),
});

In this example, CustomStagingStack represents the pre-existing staging infrastructure. By providing it as a resource to the App Staging Synthesizer, you seamlessly integrate it into the CDK application’s deployment workflow.

Crafting Custom Staging Stacks for Environment Control:

For those seeking precise control over resource management in different environments, the AWS CDK App Staging Synthesizer offers a robust solution – custom staging stacks. This feature allows you to tailor resource configurations, permissions, and behaviors to meet the unique demands of each environment within the CDK application.

Subclassing DefaultStagingStack for a Quick Start:

If your customization requirements align with the available properties, you can start by subclassing DefaultStagingStack. This streamlined approach lets you inherit existing functionalities while tweaking specific behaviors as needed. Here’s how you can dive right in:

//Define custom staging stack
interface CustomStagingStackOptions extends DefaultStagingStackOptions {}

//Subclass DefaultStagingStack to create the custom stgaing stack
class CustomStagingStack extends DefaultStagingStack {
// Implement customizations here
}

Building Staging Resources from Scratch:

For more granular control, consider building the staging resources entirely from scratch. This approach allows you to define every aspect of the staging stack, from the ground up, by implementing the “IStagingResources” interface. Here’s an example:

// Define custom staging stack properties(if needed)
interface CustomStagingStackProps extends StackProps {}

//Create your custom staging stack that implements IStagingResources
class CustomStagingStack extends Stack implements IStagingResources {
constructor(scope: Construct, id: string, props: CustomStagingStackProps) {
super(scope, id, props);
}

// Implement methods to define your custom staging resources
public addFile(asset: FileAssetSource): FileStagingLocation {
return {
bucketName: 'myBucket',
assumeRoleArn: 'myArn',
dependencyStack: this,
};
}
public addDockerImage(asset: DockerImageAssetSource): ImageStagingLocation {
return {
repoName: 'myRepo',
assumeRoleArn: 'myArn',
dependencyStack: this,
};
}
}

Creating Custom Staging Resources:

Implementing custom staging resources also involves crafting a CustomFactory class to facilitate the creation of these resources in every environment where your CDK App is deployed. This approach offers a high level of customization while ensuring consistency across deployments. Here’s how it works:

// Define a custom factory for your staging resources
class CustomFactory implements IStagingResourcesFactory {
public obtainStagingResources(stack: Stack, context: ObtainStagingResourcesContext) {
const myApp = App.of(stack);

// Create a custom staging stack instance for the current environment
return new CustomStagingStack(myApp!, `CustomStagingStack-${context.environmentString}`, {});
}
}

//Incorporate your custom staging resources into the Application using the customer factory
const app = new App({
defaultStackSynthesizer: AppStagingSynthesizer.customFactory({
factory: new CustomFactory(),
oncePerEnv: true, // by default
}),
});

With this setup, you can create custom staging stacks for each environment, ensuring resource management tailored to your specific needs. Whether you choose to subclass DefaultStagingStack for a quick start or build resources from scratch, custom staging stacks empower you to achieve fine-grained control and consistency across CDK deployments.

Conclusion:

The App Staging Synthesizer introduces a powerful approach to managing staging resources in AWS CDK applications. With enhanced resource isolation and lifecycle control, it addresses the limitations of the default bootstrapping model. By integrating the App Staging Synthesizer into CDK applications, you can achieve better resource management, cleaner cleanup processes, and more control over cloud infrastructure.
Explore this experimental library and unleash the potential of fine-tuned resource management in CDK projects.

For more information and code examples, refer to the official documentation provided by AWS.

About the Authors:

Jehu Gray

Jehu Gray is an Enterprise Solutions Architect at Amazon Web Services where he helps customers design solutions that fits their needs. He enjoys exploring what’s possible with IaC.

Abiola Olanrewaju

Abiola Olanrewaju is an Enterprise Solutions Architect at Amazon Web Services where he helps customers design and implement scalable solutions that drive business outcomes. He has a keen interest in Data Analytics, Security and Automation.

Little Crumbs Can Lead To Giants

Post Syndicated from Christiaan Beek original https://blog.rapid7.com/2023/10/05/little-crumbs-can-lead-to-giants/

Little Crumbs Can Lead To Giants

This week is the Virus Bulletin Conference in London. Part of the conference is the Cyber Threat Alliance summit, where CTA members like Rapid7 showcase their research into all kinds of cyber threats and techniques.

Traditionally, when we investigate a campaign, the focus is mostly on the code of the file, the inner workings of the malware, and communications towards threat actor-controlled infrastructure. Having a background in forensics, and in particular data forensics, I’m always interested in new ways of looking at and investigating data. New techniques can help proactively track, detect, and hunt for artifacts.

In this blog, which highlights my presentation at the conference, I will dive into the world of Shell Link files (LNK) and Virtual Hard Disk files (VHD). As part of this research, Rapid7 is releasing a new feature in Velociraptor that can parse LNK files and will be released with the posting of this blog.

VHD files

VHD and its successor VHDX are formats representing a virtual hard disk. They can contain contents usually found on a physical hard drive, such as disk partitions and files. They are typically used as the hard disk of a virtual machine, are built into modern versions of Windows, and are the native file format for Microsoft’s hypervisor, Hyper-V. The format was created by Connectix for their Virtual PC, known as Microsoft Virtual since Microsoft acquired Connectix in 2003. As we will see later, the word “Connectix” is still part of the footer of a VHD file.

Why would threat actors use VHD files in their campaigns? Microsoft has a security technology that is called “Mark of the Web” (MOTW). When files are downloaded from the internet using Windows, they are marked with a secret Zone.Identifier NTFS Alternate Data Stream (ADS) with a particular value called the MOTW. MOTW-tagged files are restricted and unable to carry out specific operations. Windows Defender SmartScreen, which compares files with an allowlist of well-known executables, will process executables marked with the MOTW. SmartScreen will stop the execution of the file if it is unknown or untrusted and will alert the user not to run it. Since VHD files are a virtual hard-disk, they can contain files and folders. When files are inside a VHD container, they will not receive the MOTW and bypass the security restrictions.

Depending on the underlying operating system, the VHD file can be in FAT or NTFS. The great thing about that is that traditional file system forensics can be applied. Think about Master-File_Table analysis, Header/Footer analysis and data carving, to name a few.

Example case:

In the past we investigated a case where a threat-actor was using a VHD file as part of their campaign. The flow of the campaign demonstrates how this attack worked:

Little Crumbs Can Lead To Giants

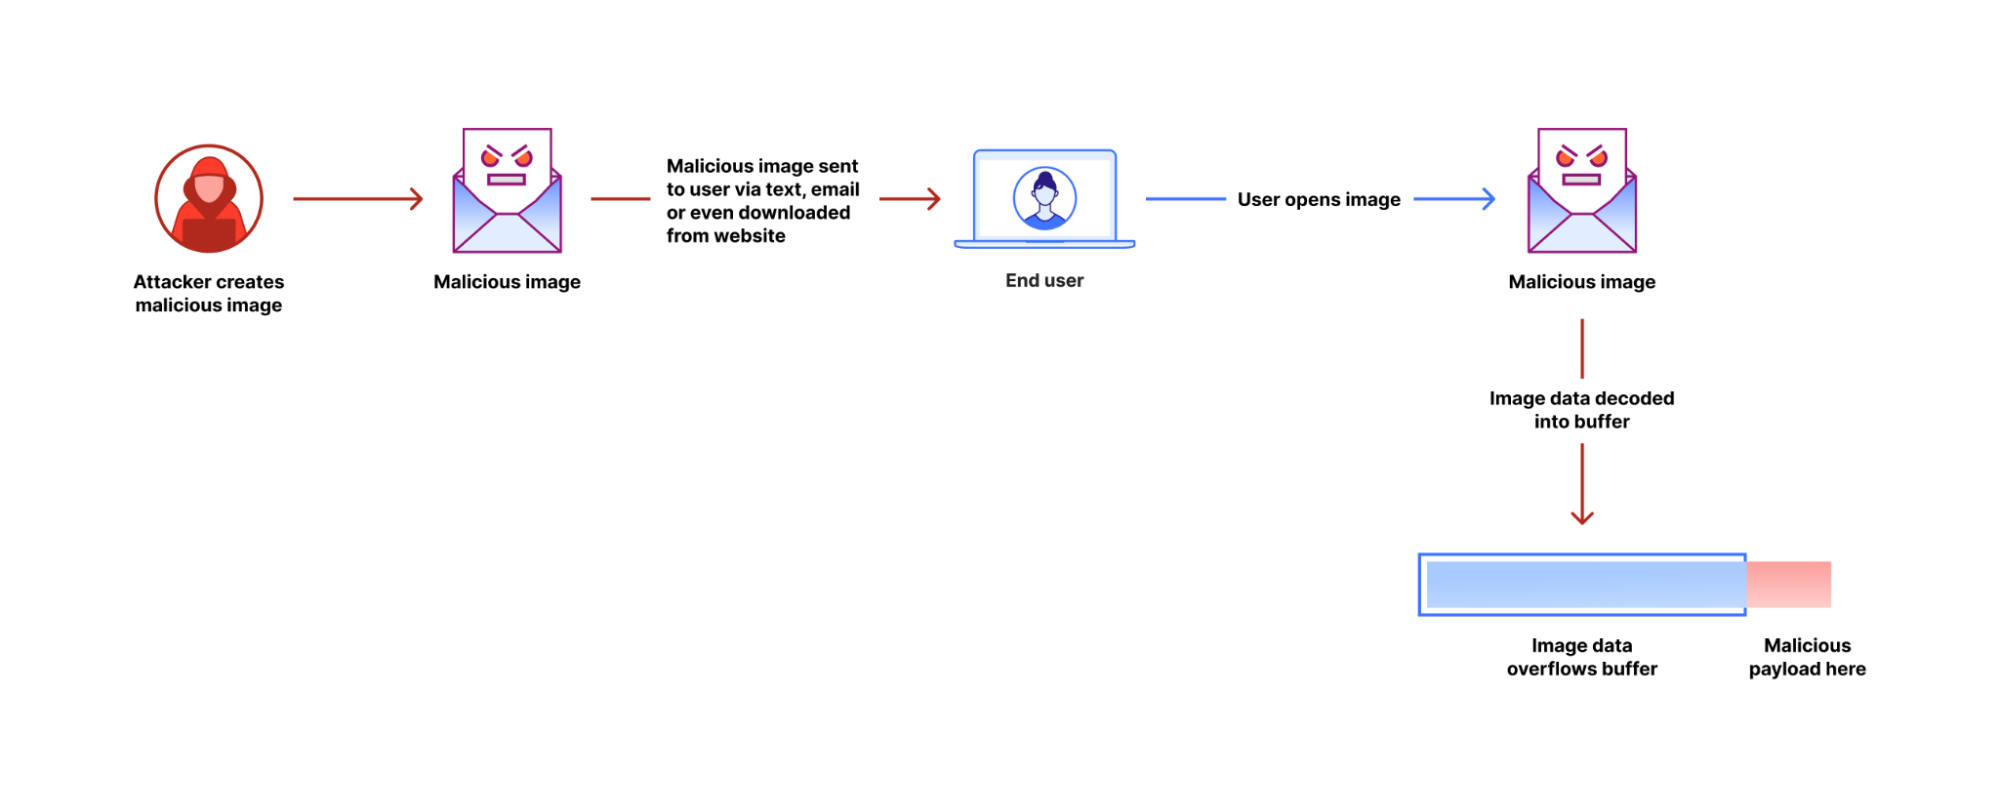
After sending a spear-phishing email with a VHD file, the victim would open up the VHD file that would auto-mount in Windows. Next, the MOTW is bypassed and a PDF file with backdoor is opened to download either the Sednit or Zebrocy malware. The backdoor would then establish a connection with the command-and-control (C2) server controlled by the threat actor.

After retrieving the VHD file, first it is mounted as ‘read-only’ so we cannot change anything about the digital evidence. Secondly, the Master-File-Table (MFT) is retrieved and analyzed:

Little Crumbs Can Lead To Giants

Besides the valuable information like creation and last modification times (always take into consideration that these can be altered on purpose), two of the files were copied from a system into the VHD file. Another interesting discovery here is that the VHD disk contained a RECYCLE.BIN file that contained deleted files. That’s great since depending on the filesize of the VHD (the bigger, the more chance that files are not overwritten), it is possible to retrieve these deleted files by using a technique called “data carving.”

Using Photorec as one of the data carving tools, again the VHD file is mounted read-only and the tool pointed towards this share to attempt to recover the deleted files.

Little Crumbs Can Lead To Giants

After running for a short bit, the deleted files could be retrieved and used as part of the investigation. Since this is not relevant for this blog, we continue with the footer analysis.

Footer analysis of a VHD file

The footer, which is often referred to as the trailer, is an addition to the original header that is appended to the end of a file. It is a data structure that resembles a header.

A footer is never located at a fixed offset from the beginning of an image file unless the image data is always the same size because by definition it comes after the image data, which is typically of variable length. It is often situated a certain distance from the end of a picture file. Similar to headers, footers often have a defined size. A rendering application can use a footer’s identification field or magic number, like a header’s, to distinguish it from other data structures in the file.

When we look at the footer of the VHD file, certain interesting fields can be observed:

Little Crumbs Can Lead To Giants

These values are some of the examples of the data structures that are specified for the footer of a VHD file, but there are also other values like “type of disk” that can be valuable during comparisons of multiple campaigns by an actor.

From the screenshot, we can see that “conectix” is the magic number value of the footer of a VHD file, you can compare it to a small fingerprint. From the other values, we can determine that the actor used a Windows operating system, and we can derive from the HEX value the creation time of the VHD file.

From a threat hunting or tracking perspective, these values can be very useful. In the below example, a Yara rule was written to identify the file as a VHD file and secondly the serial number of the hard drive used by the actor:

Little Crumbs Can Lead To Giants

Shell link files (LNK), aka Shortcut files

A Shell link, also known as a Shortcut, is a data object in this format that houses data that can be used to reach another data object. Windows files with the “LNK” extension are in a format known as the Shell Link Binary File Format. Shell links can also be used by programs that require the capacity to store a reference to a destination file. Shell links are frequently used to facilitate application launching and linking scenarios, such as Object Linking and Embedding (OLE).

LNK files are massively abused in multiple cybercrime campaigns to download next stage payloads or contain code hidden in certain data fields. The data structure specification of LNK files mentions that LNK files store various information, including “optional data” in the “extra data” sections. That is an interesting area to focus on.

Below is a summarized overview of the Extra Data structure:

Little Crumbs Can Lead To Giants

The ‘Header’ LinkInfo part contains interesting data on the type of drive used, but more importantly it contains the SerialNumber of the hard drive used by the actor when creating the LNK file:

Little Crumbs Can Lead To Giants

Other interesting information can be found; for example, around a value with regards to the icon used and in this file used, it contains an interesting string.

Little Crumbs Can Lead To Giants

Combining again that information, a simple Yara rule can be written for this particular LNK file which might have been used in multiple campaigns:

Little Crumbs Can Lead To Giants

One last example is to look for the ‘Droids’ values in the Extra Data sections. Droids stands for Digital Record Object Identification. There are two values present in the example file:

Little Crumbs Can Lead To Giants

The value in these fields translates to the MAC address of the attacker’s system… yes, you read this correctly and may close your open mouth now…

Little Crumbs Can Lead To Giants

Also this can be used to build upon the previous LNK Yara rule, where you could replace the “.\\3.jpg” part with the MAC address value to hunt for LNK files that were created on that particular device with that MAC address.

In a recent campaign called “Raspberry Robin”, LNK files were used to distribute the malware. Analyzing the LNK files and using the above investigation technique, the following Yara rule was created:

Little Crumbs Can Lead To Giants

Velociraptor LNK parser

Based on our research into LNK files, an updated LNK parser was developed by Matt Green from Rapid7 for Velociraptor, our advanced open-source endpoint monitoring, digital forensics, and cyber response platform.

With the parser, multiple LNK files can be processed and information can be extracted to use as an input for Yara rules that can be pushed back into the platform to hunt.

Little Crumbs Can Lead To Giants

Windows.Forensics.Lnk parses LNK shortcut files using Velociraptor’s built-in binary parser. The artifact outputs fields aligning to Microsoft’s ms-shllink protocol specification and some analysis hints to assist review or detection use cases. Users have the option to search for specific indicators in key fields with regex, or control the definitions for suspicious items to bubble up during parsing.

Some of the default targeted suspicious attributes include:

  • Large size
  • Startup path location for auto execution
  • Environment variable script — environment variable with a common script configured to execute
  • No target with an environment variable only execution
  • Suspicious argument size — large sized arguments over 250 characters as default
  • Arguments have ticks — ticks are common in malicious LNK files
  • Arguments have environment variables — environment variables are common in malicious LNKs
  • Arguments have rare characters — look for specific rare characters that may indicate obfuscation
  • Arguments that have leading space. Malicious LNK files may have many leading spaces to obfuscate some tools
  • Arguments that have http strings — LNKs are regularly used as a download cradle
  • Suspicious arguments — some common malicious arguments observed in field
  • Suspicious trackerdata hostname
  • Hostname mismatch with trackerdata hostname

Due to the use of Velociraptor’s binary parser, the artifact is significantly faster than other analysis tools. It can be deployed as part of analysis or at scale as a hunting function using the IOCRegex and/or SuspiciousOnly flag.

Summary

It is worth investigating the characteristics of file types we tend to skip in threat actor campaigns. In this blog I provided a few examples of how artifacts can be retrieved from VHD and LNK files and then used for the creation of hunting logic. As a result of this research, Rapid7 is happy to release a new LNK parser feature in Velociraptor and we welcome any feedback.

Define per-team resource limits for big data workloads using Amazon EMR Serverless

Post Syndicated from Gaurav Sharma original https://aws.amazon.com/blogs/big-data/define-per-team-resource-limits-for-big-data-workloads-using-amazon-emr-serverless/

Customers face a challenge when distributing cloud resources between different teams running workloads such as development, testing, or production. The resource distribution challenge also occurs when you have different line-of-business users. The objective is not only to ensure sufficient resources be consistently available to production workloads and critical teams, but also to prevent adhoc jobs from using all the resources and delaying other critical workloads due to mis-configured or non-optimized code. Cost controls and usage tracking across these teams is also a critical factor.

In the legacy big data and Hadoop clusters as well as Amazon EMR provisioned clusters, this problem was overcome by Yarn resource management and defining what were called Yarn queues for different workloads or teams. Another approach was to allocate independent clusters for different teams or different workloads.

Amazon EMR Serverless is a serverless option in Amazon EMR that makes it straightforward to run your big data workloads using open-source analytics frameworks such as Apache Spark and Hive without the need to configure, manage, or scale the clusters. With EMR Serverless, you don’t have to configure, optimize, secure, or operate clusters to run your workloads. You continue to get the benefits of Amazon EMR, such as open-source compatibility, concurrency, and optimized runtime performance for popular bigdata frameworks. EMR Serverless provides shorter job startup latency, automatic resource management and effective cost controls.

In this post, we show how to define per-team resource limits for big data workloads using EMR serverless.

Solution overview

EMR Serverless comes with a concept called an  EMR Serverless application, which is an isolated environment with the option to choose one of the open source analytics applications(Spark, Hive) to submit your workloads. You can include your own custom libraries, specify your EMR release version, and most importantly define the resource limits for the compute and memory resources. For instance, if your production Spark jobs run on Amazon EMR 6.9.0 and you need to test the same workload on Amazon EMR 6.10.0, you could use EMR Serverless to define EMR 6.10.0 as your version and test your workload using a predefined limit on resources.

The following diagram illustrates our solution architecture. We see that two different teams namely Prod team and Dev team are submitting their jobs independently to two different EMR Applications (namely ProdApp and DevApp respectively ) having dedicated resources.

EMR Serverless provides controls at the account, application and job level to limit the use of resources such as CPU, memory or disk. In the following sections, we discuss some of these controls.

Service quotas at account level

Amazon EMR Serverless has a default quota of 16 for maximum concurrent vCPUs per account. In other words, a new account can have a maximum of 16 vCPUs running at a given point in time in a particular Region across all EMR Serverless applications. However, this quota is auto-adjustable based on the usage patterns, which are monitored at the account and Region levels.

Resource limits and runtime configurations at the application level

In addition to quotas at the account levels, administrators can limit the use of resources at the application level using a feature known as “maximum capacity” which defines the maximum total vCPU, memory and disk capacity that can be consumed collectively by all the jobs running under this application.

You also have an option to specify common runtime and monitoring configurations at the application level which you would otherwise put in the specific job configurations. This helps create a standardized runtime environment for all the jobs running under an application. This can include settings like defining common connection setting your jobs need access to, log configurations that all your jobs will inherit by default, or Spark resource settings to help balance ad-hoc workloads. You can override these configurations at the job level, but defining them at the application can help reduce the configuration necessary for individual jobs.

For further details, refer to Declaring configurations at application level.

Runtime configurations at Job level

After you have set service, application quotas and runtime configurations at application level, you also have an option to override or add new configurations at the job level as well. For example, you can use different Spark job parameters to define how many maximum executors can be run by that specific job. One such parameter is spark.dynamicAllocation.maxExecutors which defines an upper bound for the number of executors in a job and therefore controls the number of workers in an EMR Serverless application because each executor runs within a single worker. This parameter is part of the dynamic allocation feature of Apache Spark, which allows you to dynamically scale the number of executors(workers) registered with the job up and down based on the workload. Dynamic allocation is enabled by default on EMR Serverless. For detailed steps, refer to Declaring configurations at application level.

With these configurations, you can control the resources used across accounts, applications, and jobs. For example, you can create applications with a predefined maximum capacity to constrain costs or configure jobs with resource limits in order to allow multiple ad hoc jobs to run simultaneously without consuming too many resources.

Best practices and considerations

Extending these usage scenarios further, EMR Serverless provides features and capabilities to implement the following design considerations and best practices based on your workload requirements:

  • To make sure that the users or teams submit their jobs only to their approved applications, you could use tag based AWS Identity and Access Management (IAM) policy conditions. For more details, refer to Using tags for access control.
  • You can use custom images as applications belonging to different teams that have distinct use-cases and software requirements. Using custom images is possible EMR 6.9.0 and onwards. Custom images allows you to package various application dependencies into a single container. Some of the important benefits of using custom images include the ability to use your own JDK and Python versions, apply your organization-specific security policies and integrate EMR Serverless into your build, test and deploy pipelines. For more information, refer to Customizing an EMR Serverless image.
  • If you need to estimate how much a Spark job would cost when run on EMR Serverless, you can use the open-source tool EMR Serverless Estimator. This tool analyzes Spark event logs to provide you with the cost estimate. For more details, refer to Amazon EMR Serverless cost estimator
  • We recommend that you determine your maximum capacity relative to the supported worker sizes by multiplying the number of workers by their size. For example, if you want to limit your application with 50 workers to 2 vCPUs, 16 GB of memory and 20 GB of disk, set the maximum capacity to 100 vCPU, 800 GB of memory, and 1000 GB of disk.
  • You can use tags when you create the EMR Serverless application to help search and filter your resources, or track the AWS costs using AWS Cost Explorer. You can also use tags for controlling who can submit jobs to a particular application or modify its configurations. Refer to Tagging your resources for more details.
  • You can configure the pre-initialized capacity at the time of application creation, which keeps the resources ready to be consumed by the time-sensitive jobs you submit.
  • The number of concurrent jobs you can run depends on important factors like maximum capacity limits, workers required for each job, and available IP address if using a VPC.
  • EMR Serverless will setup elastic network interfaces (ENIs) to securely communicate with resources in your VPC. Make sure you have enough IP addresses in your subnet for the job.
  • It’s a best practice to select multiple subnets from multiple Availability Zones. This is because the subnets you select determine the Availability Zones that are available to run the EMR Serverless application. Each worker uses an IP address in the subnet where it is launched. Make sure the configured subnets have enough IP addresses for the number of workers you plan to run.

Resource usage tracking

EMR Serverless not only allows cloud administrators to limit the resources for each application, it also enables them to monitor the applications and track the usage of resources across these applications. For more details, refer to  EMR Serverless usage metrics .

You can also deploy an AWS CloudFormation template to build a sample CloudWatch Dashboard for EMR Serverless which would help visualize various metrics for your applications and jobs. For more information, refer to EMR Serverless CloudWatch Dashboard.

Conclusion

In this post, we discussed how EMR Serverless empowers cloud and data platform administrators to efficiently distribute as well as restrict the cloud resources at different levels, for different organizational units, users and teams, as well as between critical and non-critical workloads. EMR Serverless resource limiting features make sure cloud cost is under control and resource usage is tracked effectively.

For more information on EMR Serverless applications and resource quotas, please refer to EMR Serverless User Guide and Configuring an application.


About the Authors

Gaurav Sharma is a Specialist Solutions Architect(Analytics) at Amazon Web Services (AWS), supporting US public sector customers on their cloud journey. Outside of work, Gaurav enjoys spending time with his family and reading books.

Damon Cortesi is a Principal Developer Advocate with Amazon Web Services. He builds tools and content to help make the lives of data engineers easier. When not hard at work, he still builds data pipelines and splits logs in his spare time.

Overload to Overhaul: How We Upgraded Drive Stats Data

Post Syndicated from David Winings original https://www.backblaze.com/blog/overload-to-overhaul-how-we-upgraded-drive-stats-data/

A decorative image showing the words "overload to overhaul: how we upgraded Drive Stats data."

This year, we’re celebrating 10 years of Drive Stats. Coincidentally, we also made some upgrades to how we run our Drive Stats reports. We reported on how an attempt to migrate triggered a weeks-long recalculation of the dataset, leading us to map the architecture of the Drive Stats data. 

This follow-up article focuses on the improvements we made after we fixed the existing bug (because hey, we were already in there), and then presents some of our ideas for future improvements. Remember that those are just ideas so far—they may not be live in a month (or ever?), but consider them good food for thought, and know that we’re paying attention so that we can pass this info along to the right people.

Now, onto the fun stuff. 

Quick Refresh: Drive Stats Data Architecture

The podstats generator runs on every Storage Pod, what we call any host that holds customer data, every few minutes. It’s a C++ program that collects SMART stats and a few other attributes, then converts them into an .xml file (“podstats”). Those are then pushed to a central host in each datacenter and bundled. Once the data leaves these central hosts, it has entered the domain of what we will call Drive Stats.  

Now let’s go into a little more detail: when you’re gathering stats about drives, you’re running a set of modules with dependencies to other modules, forming a data-dependency tree. Each time a module “runs”, it takes information, modifies it, and writes it to a disk. As you run each module, the data will be transformed sequentially. And, once a quarter, we run a special module that collects all the attributes for our Drive Stats reports, collecting data all the way down the tree. 

Here’s a truncated diagram of the whole system, to give you an idea of what the logic looks like:

A diagram of the mapped logic of the Drive Stats modules.
An abbreviated logic map of Drive Stats modules.

As you move down through the module layers, the logic gets more and more specialized. When you run a module, the first thing the module does is check in with the previous module to make sure the data exists and is current. It caches the data to disk at every step, and fills out the logic tree step by step. So for example, drive_stats, being a “per-day” module, will write out a file such as /data/drive_stats/2023-01-01.json.gz when it finishes processing. This lets future modules read that file to avoid repeating work.

This work deduplication process saves us a lot of time overall—but it also turned out to be the root cause of our weeks-long process when we were migrating Drive Stats to our new host. We fixed that by implementing versions to each module.  

While You’re There… Why Not Upgrade?

Once the dust from the bug fix had settled, we moved forward to try to modernize Drive Stats in general. Our daily report still ran quite slowly, on the order of several hours, and there was some low-hanging fruit to chase.

Waiting On You, failures_with_stats

First things first, we saved a log of a run of our daily reports in Jenkins. Then we wrote an analyzer to see which modules were taking a lot of time. failures_with_stats was our biggest offender, running for about two hours, while every other module took about 15 minutes.

An image showing runtimes for each module when running a Drive Stats report.
Not quite two hours.

Upon investigation, the time cost had to do with how the date_range module works. This takes us back to caching: our module checks if the file has been written already, and if it has, it uses the cached file. However, a date range is written to a single file. That is, Drive Stats will recognize “Monday to Wednesday” as distinct from “Monday to Thursday” and re-calculate the entire range. This is a problem for a workload that is essentially doing work for all of time, every day.  

On top of this, the raw Drive Stats data, which is a dependency for failures_with_stats, would be gzipped onto a disk. When each new query triggered a request to recalculate all-time data, each dependency would pick up the podstats file from disk, decompress it, read it into memory, and do that for every day of all time. We were picking up and processing our biggest files every day, and time continued to make that cost larger.

Our solution was what I called the “Date Range Accumulator.” It works as follows:

  • If we have a date range like “all of time as of yesterday” (or any partial range with the same start), consider it as a starting point.
  • Make sure that the version numbers don’t consider our starting point to be too old.
  • Do the processing of today’s data on top of our starting point to create “all of time as of today.”

To do this, we read the directory of the date range accumulator, find the “latest” valid one, and use that to determine the delta (change) to our current date. Basically, the module says: “The last time I ran this was on data from the beginning of time to Thursday. It’s now Friday. I need to run the process for Friday, and then add that to the compiled all-time.” And, before it does that, it double checks the version number to avoid errors. (As we noted in our previous article, if it doesn’t see the correct version number, instead of inefficiently running all data, it just tells you there is a version number discrepancy.) 

The code is also a bit finicky—there are lots of snags when it comes to things like defining exceptions, such as if we took a drive out of the fleet, but it wasn’t a true failure. The module also needed to be processable day by day to be usable with this technique.

Still, even with all the tweaks, it’s massively better from a runtime perspective for eligible candidates. Here’s our new failures_with_stats runtime: 

An output of module runtime after the Drive Stats improvements were made.
Ahh, sweet victory.

Note that in this example, we’re running that 60-day report. The daily report is quite a bit quicker. But, at least the 60-day report is a fixed amount of time (as compared with the all-time dataset, which is continually growing). 

Code Upgrade to Python 3

Next, we converted our code to Python 3. (Shout out to our intern, Anath, who did amazing work on this part of the project!) We didn’t make this improvement just to make it; no, we did this because I wanted faster JSON processors, and a lot of the more advanced ones did not work with Python 2. When we looked at the time each module took to process, most of that was spent serializing and deserializing JSON.

What Is JSON Parsing?

JSON is an open standard file format that uses human readable text to store and transmit data objects. Many modern programming languages include code to generate and parse JSON-format data. Here’s how you might describe a person named John, aged 30, from New York using JSON: 

{ 
“firstName”: “John”, 
“age”: 30,
“State”: “New York”
}

You can express those attributes into a single line of code and define them as a native object:

x = { 'name':'John', 'age':30, 'city':'New York'}

“Parsing” is the process by which you take the JSON data and make it into an object that you can plug into another programming language. You’d write your script (program) in Python, it would parse (interpret) the JSON data, and then give you an answer. This is what that would look like: 

import json

# some JSON:
x = '''
{ 
	"firstName": "John", 
	"age": 30,
	"State": "New York"
}
'''

# parse x:
y = json.loads(x)

# the result is a Python object:
print(y["name"])

If you run this script, you’ll get the output “John.” If you change print(y["name"]) to print(y["age"]), you’ll get the output “30.” Check out this website if you want to interact with the code for yourself. In practice, the JSON would be read from a database, or a web API, or a file on disk rather than defined as a “string” (or text) in the Python code. If you are converting a lot of this JSON, small improvements in efficiency can make a big difference in how a program performs.

And Implementing UltraJSON

Upgrading to Python 3 meant we could use UltraJSON. This was approximately 50% faster than the built-in Python JSON library we used previously. 

We also looked at the XML parsing for the podstats files, since XML parsing is often a slow process. In this case, we actually found our existing tool is pretty fast (and since we wrote it 10 years ago, that’s pretty cool). Off-the-shelf XML parsers take quite a bit longer because they care about a lot of things we don’t have to: our tool is customized for our Drive Stats needs. It’s a well known adage that you should not parse XML with regular expressions, but if your files are, well, very regular, it can save a lot of time.

What Does the Future Hold?

Now that we’re working with a significantly faster processing time for our Drive Stats dataset, we’ve got some ideas about upgrades in the future. Some of these are easier to achieve than others. Here’s a sneak peek of some potential additions and changes in the future.

Data on Data

In keeping with our data-nerd ways, I got curious about how much the Drive Stats dataset is growing and if the trend is linear. We made this graph, which shows the baseline rolling average, and has a trend line that attempts to predict linearly.

A graph showing the rate at which the Drive Stats dataset has grown over time.

I envision this graph living somewhere on the Drive Stats page and being fully interactive. It’s just one graph, but this and similar tools available on our website would be 1) fun and 2) lead to some interesting insights for those who don’t dig in line by line. 

What About Changing the Data Module?

The way our current module system works, everything gets processed in a tree approach, and they’re flat files. If we used something like SQLite or Parquet, we’d be able to process data in a more depth-first way, and that would mean that we could open a file for one module or data range, process everything, and not have to read the file again. 

And, since one of the first things that our Drive Stats expert, Andy Klein, does with our .xml data is to convert it to SQLite, outputting it in a queryable form would save a lot of time. 

We could also explore keeping the data as a less-smart filetype, but using something more compact than JSON, such as MessagePack.

Can We Improve Failure Tracking and Attribution?

One of the odd things about our Drive Stats datasets is that they don’t always and automatically agree with our internal data lake. Our Drive Stats outputs have some wonkiness that’s hard to replicate, and it’s mostly because of exceptions we build into the dataset. These exceptions aren’t when a drive fails, but rather when we’ve removed it from the fleet for some other reason, like if we were testing a drive or something along those lines. (You can see specific callouts in Drive Stats reports, if you’re interested.) It’s also where a lot of Andy’s manual work on Drive Stats data comes in each month: he’s often comparing the module’s output with data in our datacenter ticket tracker.

These tickets come from the awesome data techs working in our data centers. Each time a drive fails and they have to replace it, our techs add a reason for why it was removed from the fleet. While not all drive replacements are “failures”, adding a root cause to our Drive Stats dataset would give us more confidence in our failure reporting (and would save Andy comparing the two lists). 

The Result: Faster Drive Stats and Future Fun

These two improvements (the date range accumulator and upgrading to Python 3) resulted in hours, and maybe even days, of work saved. Even from a troubleshooting point of view, we often wouldn’t know if the process was stuck, or if this was the normal amount of time the module should take to run. Now, if it takes more than about 15 minutes to run a report, you’re sure there’s a problem. 

While the Drive Stats dataset can’t really be called “big data”, it provides a good, concrete example of scaling with your data. We’ve been collecting Drive Stats for just over 10 years now, and even though most of the code written way back when is inherently sound, small improvements that seem marginal become amplified as datasets grow. 

Now that we’ve got better documentation of how everything works, it’s going to be easier to keep Drive Stats up-to-date with the best tools and run with future improvements. Let us know in the comments what you’d be interested in seeing.

The post Overload to Overhaul: How We Upgraded Drive Stats Data appeared first on Backblaze Blog | Cloud Storage & Cloud Backup.

What’s New in Rapid7 Detection & Response: Q3 2023 in Review

Post Syndicated from Margaret Wei original https://blog.rapid7.com/2023/10/05/whats-new-in-rapid7-detection-response-q3-2023-in-review/

What’s New in Rapid7 Detection & Response: Q3 2023 in Review

This post takes a look at some of the investments we’ve made throughout Q3 2023 to our Detection and Response offerings to provide advanced DFIR capabilities with Velociraptor, more flexibility with custom detection rules, enhancements to our dashboard and log search features, and more.

Stop attacks before they happen with Next-Gen Antivirus in Managed Threat Complete

As endpoint attacks become more elusive and frequent, we know security teams need reliable coverage to keep their organizations safe. To provide teams with protection from both known and unknown threats, we’ve released multilayered prevention with Next-Gen Antivirus in Managed Threat Complete. Available through the Insight Agent, you’ll get immediate coverage with no additional configurations or deployments. With Managed Next-Gen Antivirus you’ll be able to:

  • Block known and unknown threats early in the kill chain
  • Halt malware that’s built to bypass existing security controls
  • Maximize your security stack and ROI with existing Insight Agent
  • Leverage the expertise of our MDR team to triage and investigate these alerts

To see more on our Managed Next-Gen Antivirus offering, including a demo walkthrough, visit our Endpoint Hub Page here.

Achieve faster DFIR outcomes with Velociraptor now integrated into the Insight Platform

As security teams are facing more and more persistent threats on their endpoints, it’s crucial to have proactive security measures that can identify attacks early in the kill chain, and the ability to access detailed evidence to drive complete remediation. We’re excited to announce that InsightIDR Ultimate customers can now recognize the value of Velociraptor, Rapid7’s open-source DFIR framework, faster than ever with its new integration into the Insight Platform.

With no additional deployment or configurations required, InsightIDR customers can deploy Velociraptor through their existing Insight Agents for daily threat monitoring and hunting, swift threat response, and expanded threat detection capabilities. For more details, check out our recent blog post here.

What’s New in Rapid7 Detection & Response: Q3 2023 in Review

A view of Velociraptor in InsightIDR

Tailor alerts to your unique needs with Custom Detection Rules

We know every organization has unique needs when it comes to detections and alerting on threats. While InsightIDR provides over 3,000 out-of-the-box detection rules to detect malicious behaviors, we’ve added additional capabilities with Custom Detection Rules to offer teams the ability to author rules tailored to their own individual needs. With Custom Detection Rules, you will be able to:

  • Build upon Rapid7’s library of expertly curated detection rules by creating rules that uniquely fit your organization’s security needs
  • Use LEQL to write rule logic against a variety of data sources
  • Add grouping and threshold conditions to refine your rule logic over specific periods of time to decrease unnecessary noise
  • Assess the rules activity before it starts to trigger alerts for downstream teams
  • Group alerts by specific keys such as by user or by asset within investigations to reduce triage time
  • Create exceptions and view modification history as you would with out-of-the-box ABA detection rules
  • Attach InsightConnect automation workflows to your custom rules to mitigate manual tasks such as containing assets and enriching data, or set up notifications when detections occur
What’s New in Rapid7 Detection & Response: Q3 2023 in Review

Creating a Custom Detection Rule in InsightIDR

Enhanced Attacker Behavior Analytics (ABA) alert details in Investigations

Easily view information about your ABA alerts that are a part of an investigation with our updated Evidence panel. With these updates, you’ll see more information on alerts, including their source event data and detection rule logic that generated them. Additionally, the Evidence button has also been renamed to Alert Details to more accurately reflect its function.

New alert details include:

  • A brief description of the alert and a recommendation for triage
  • The detection rule logic that generated the alert and the corresponding key-value payload from your environment
  • The process tree, which displays details about the process that occurred when the alert was generated and the processes that occurred before and after (only for MDR customers)

Dashboard Improvements: Revamped card builder and a new heat map visualization

Our recently released revamped card builder provides more functionality to make it faster and easier to build dashboard cards. For a look at what’s new, check out the demo below.

The new calendar heat map visualization allows you to more easily visualize trends in your data over time so you can quickly spot trends and anomalies. To see this new visualization in action, check out the demo below.

Export data locally with new Log Search option

You now have more flexibility when it comes to exporting your log search data, making it easier to gather evidence related to incidents for additional searching, sharing with others in your organization, or gathering evidence associated with incidents.

With this update you can now:

  • Use edit key selection to define what columns to export to csv
  • Export results from a grouby/calculate query to a csv file

New event sources

  • Microsoft Internet Information Services (IIS): A web server that is used to exchange web content with internet users. Read the documentation
  • Amazon Security Lake: A security data lake service that allows customers to aggregate & manage security-related logs. Read the documentation
  • Salesforce Threat Detection: Uses machine learning to detect threats within a Salesforce organization. Read the documentation

A growing library of actionable detections

In Q3 2023 we added 530 new ABA detection rules. See them in-product or visit the Detection Library for actionable descriptions and recommendations.

Stay tuned!

As always, we’re continuing to work on exciting product enhancements and releases throughout the year. Keep an eye on our blog and release notes as we continue to highlight the latest in detection and response at Rapid7.

Uncovering the Hidden WebP vulnerability: a tale of a CVE with much bigger implications than it originally seemed

Post Syndicated from Willi Geiger original http://blog.cloudflare.com/uncovering-the-hidden-webp-vulnerability-cve-2023-4863/

Uncovering the Hidden WebP vulnerability: a tale of a CVE with much bigger implications than it originally seemed

Uncovering the Hidden WebP vulnerability: a tale of a CVE with much bigger implications than it originally seemed

At Cloudflare, we're constantly vigilant when it comes to identifying vulnerabilities that could potentially affect the Internet ecosystem. Recently, on September 12, 2023, Google announced a security issue in Google Chrome, titled "Heap buffer overflow in WebP in Google Chrome," which caught our attention. Initially, it seemed like just another bug in the popular web browser. However, what we discovered was far more significant and had implications that extended well beyond Chrome.

Impact much wider than suggested

The vulnerability, tracked under CVE-2023-4863, was described as a heap buffer overflow in WebP within Google Chrome. While this description might lead one to believe that it's a problem confined solely to Chrome, the reality was quite different. It turned out to be a bug deeply rooted in the libwebp library, which is not only used by Chrome but by virtually every application that handles WebP images.

Digging deeper, this vulnerability was in fact first reported in an earlier CVE from Apple, CVE-2023-41064, although the connection was not immediately obvious. In early September, Citizen Lab, a research lab based out of the University of Toronto, reported on an apparent exploit that was being used to attempt to install spyware on the iPhone of "an individual employed by a Washington DC-based civil society organization." The advisory from Apple was also incomplete, stating that it was a “buffer overflow issue in ImageIO,” and that they were aware the issue may have been actively exploited. Only after Google released CVE-2023-4863 did it become clear that these two issues were linked, and there was a wider vulnerability in WebP.

The vulnerability allows an attacker to create a malformed WebP image file that makes libwebp write data beyond the buffer memory allocated to the image decoder. By writing past the legal bounds of the buffer, it is possible to modify sensitive data in memory, eventually leading to execution of the attacker's code.

WebP, introduced over a decade ago, has gained widespread adoption in various applications, ranging from web browsers to email clients, chat apps, graphics programs, and even operating systems. This ubiquity meant that this vulnerability had far-reaching consequences, affecting a vast array of software and virtually all users of the WebP format.

Uncovering the Hidden WebP vulnerability: a tale of a CVE with much bigger implications than it originally seemed
How the WebP vulnerability is exploited

Understanding the technical details

So what exactly was the issue, how could it be exploited, and how was it shut down? We can get our best clues by looking at the patch that was made to libwebp. This patch fixes a potential out-of-buffer (OOB) error in part of the image decoder – the Huffman tables – with two changes: additional validation of the input data, and a modified dynamic memory allocation model. A deeper dive into libwebp and the WebP image format built on top of it reveals what this means.

WebP is a combination of two different image formats: a lossy format similar to JPEG using VP8 codec, and a lossless format using WebP's custom lossless codec. The bug was in the lossless codec's handling of Huffman coding.

The fundamental idea behind Huffman coding is that using a constant number of bits for every basic unit of information in a dataset – like a pixel color – is not the most efficient representation. We can use a variable number of bits, and assign shortest sequences to the most frequently occurring values, and longer ones to the least common values. The sequences of ones and zeros can be represented as a binary tree, with the shorter, more common codes near the root, and longer, less common codes deeper in the tree. Looking up values in the tree bit by bit is relatively slow. Practical implementations build lookup tables that allow matching many bits at a time.

Image files contain compact information about the shape of the Huffman tree, which the decoder uses to reconstruct the tree, and build lookup tables for the codes. The bug in libwebp was in the code building the lookup tables. A specially crafted WebP file can contain a very unbalanced Huffman tree that contains codes much longer than any normal WebP file would have, and this made the function generating lookup tables write data beyond the buffer allocated for the lookup tables. Libwebp had checks for validity of the Huffman tree, but it would write the invalid lookup tables before the consistency check.

The buffer for lookup tables is allocated on the heap. Heap is an area of memory where most of the data of the application is stored. Code that writes data past its buffer allows attackers to modify and corrupt data that happens to be adjacent in memory to the buffer. This can be exploited to make the application misbehave, and eventually start executing code supplied by the attacker.

The fixed version of libwebp ensures that the input data will always create a valid internal structure, and if so, allocates more memory if necessary to ensure the buffer is always big enough.

Libwebp is a mature library, maintained by seasoned professionals. But it's written in the C language, which has very few safeguards against programming errors, especially memory use. Despite the care taken in the library's development, a single erroneous assumption led to a critical vulnerability.

Swift action

On the same day that Google's announcement caught our attention, we filed an internal security ticket, to document and address the vulnerability.

Google was initially perplexed about the true source of the problem. They did not release a patched version of libwebp before announcing the vulnerability. We discovered the yet-unreleased patch for libwebp in its repository, and used it to update libwebp in our services. libwebp officially released the patch a day later.

Our image processing services are written in Rust. We've submitted patches to Rust packages that contained a copy of libwebp and filed RustSec advisories for them (RUSTSEC-2023-0061 and RUSTSEC-2023-0062). This ensured that the broader Rust ecosystem was informed and could take appropriate action.

In an interesting turn of events, GitHub's vulnerability scanner was quick to recognize our RustSec reports as the first case of CVE-2023-4863, even before the issue gained widespread attention. This highlights the importance of having robust security reporting mechanisms in place and the vital role that platforms like GitHub play in keeping the open-source community secure.

These quick actions demonstrate how seriously Cloudflare takes this kind of threat. We have a belt-and-suspenders approach to security that limits the binaries we run at our edge to those signed by us, and ensures that all vulnerabilities are identified and remedied as soon as possible. In this case, we have scrutinized our logs, and found no evidence that any attackers attempted to leverage this vulnerability against Cloudflare. We believe this exploit targeted individuals rather than the infrastructure of a company like Cloudflare, but we never take chances with our customers’ data, and so fixed this vulnerability as quickly as possible, before it became well known.

Conclusion

Google has now widened its description of this issue, correctly calling out that all uses of WebP are potentially affected. This widened description was originally filed as yet another new CVE – CVE-2023-5129 – but then that was flagged as a duplicate of the original CVE-2023-4863, and the description of the earlier filing updated. This incident serves as a reminder of the complex and interconnected nature of the internet ecosystem. What initially seemed like a Chrome-specific problem revealed a much deeper issue that touched nearly every corner of the digital world. The incident also showcased the importance of swift collaboration and the critical role that responsible disclosure plays in mitigating security risks.

For each and every user, it demonstrates the need to keep all browsers, apps and operating systems up to date, and to install recommended security patches. All applications supporting WebP images need to be updated. We've updated our services.

At Cloudflare, we remain committed to enhancing the security of the internet, and incidents like these drive us to continually refine our processes and strengthen our partnerships within the global developer community. By working together, we can make the Internet a safer place for everyone.

[$] GCC features to help harden the kernel

Post Syndicated from corbet original https://lwn.net/Articles/946041/

Hardening the Linux kernel is an endless task, with work required on
multiple fronts. Sometimes, that work is not done in the kernel itself;
other tools, including compilers, can have a significant role to play.
At the 2023 GNU Tools
Cauldron
, Qing Zhao covered some of the work that has been done in the
GCC compiler to help with the hardening of the kernel — along with work
that still needs to be done.

Use AWS Secrets Manager to store and manage secrets in on-premises or multicloud workloads

Post Syndicated from Sreedar Radhakrishnan original https://aws.amazon.com/blogs/security/use-aws-secrets-manager-to-store-and-manage-secrets-in-on-premises-or-multicloud-workloads/

AWS Secrets Manager helps you manage, retrieve, and rotate database credentials, API keys, and other secrets throughout their lifecycles. You might already use Secrets Manager to store and manage secrets in your applications built on Amazon Web Services (AWS), but what about secrets for applications that are hosted in your on-premises data center, or hosted by another cloud service provider? You might even be in the process of moving applications out of your data center as part of a phased migration, where the application is partially in AWS, but other components still remain in your data center until the migration is complete. In this blog post, we’ll describe the potential benefits of using Secrets Manager for workloads outside AWS, outline some recommended practices for using Secrets Manager for hybrid workloads, and provide a basic sample application to highlight how to securely authenticate and retrieve secrets from Secrets Manager in a multicloud workload.

In order to make an API call to retrieve secrets from Secrets Manager, you need IAM credentials. While it is possible to use an AWS Identity and Access Management (IAM) user, AWS recommends using temporary, or short-lived, credentials wherever possible to reduce the scope of impact of an exposed credential. This means we will allow our hybrid application to assume an IAM role in this example. We’ll use IAM Roles Anywhere to provide a mechanism for our applications outside AWS to assume an IAM Role based on a trust configured with our Certificate Authority (CA).

IAM Roles Anywhere offers a solution for on-premises or multicloud applications to acquire temporary AWS credentials, helping to eliminate the necessity for creating and handling long-term AWS credentials. This removal of long-term credentials enhances security and streamlines the operational process by reducing the burden of managing and rotating the credentials.

In this post, we assume that you have a basic understanding of IAM. For more information on IAM roles, see the IAM documentation. We’ll start by examining some potential use cases at a high level, and then we’ll highlight recommended practices to securely fetch secrets from Secrets Manager from your on-premises or hybrid workload. Finally, we’ll walk you through a simple application example to demonstrate how to put these recommendations together in a workload.

Selected use cases for accessing secrets from outside AWS

Following are some example scenarios where it may be necessary to securely retrieve or manage secrets from outside AWS, such from applications hosted in your data center, or another cloud provider.

Centralize secrets management for applications in your data center and in AWS

It’s beneficial to offer your application teams a single, centralized environment for managing secrets. This can simplify managing secrets because application teams are only required to understand and use a single set of APIs to create, retrieve, and rotate secrets. It also provides consistent visibility into the secrets used across your organization because Secrets Manager is integrated with AWS CloudTrail to log API calls to the service, including calls to retrieve or modify a secret value.

In scenarios where your application is deployed either on-premises or in a multicloud environment, and your database resides in Amazon Relational Database Service (Amazon RDS), you have the opportunity to use both IAM Roles Anywhere and Secrets Manager to store and retrieve secrets by using short-term credentials. This approach allows central security teams to have confidence in the management of credentials and builder teams to have a well-defined pattern for credential management. Note that you can also choose to configure IAM database authentication with RDS, instead of storing database credentials in Secrets Manager, if this is supported by your database environment.

Hybrid or multicloud workloads

At AWS, we’ve generally seen that customers get the best experience, performance, and pricing when they choose a primary cloud provider. However, for a variety of reasons, some customers end up in a situation where they’re running IT operations in a multicloud environment. In these scenarios, you might have hybrid applications that run in multiple cloud environments, or you might have data stored in AWS that needs to be accessed from a different application or workload running in another cloud provider. You can use IAM Roles Anywhere to securely access or manage secrets in Secrets Manager for these use cases.

Phased application migrations to AWS

Consider a situation where you are migrating a monolithic application to AWS from your data center, but the migration is planned to take place in phases over a number of months. You might be migrating your compute into AWS well before your databases, or vice versa. In this scenario, you can use Secrets Manager to store your application secrets and access them from both on premises and in AWS. Because your secrets are accessible from both on premises and AWS through the same APIs, you won’t need to refactor your application to retrieve these secrets as the migration proceeds.

Recommended practices for retrieving secrets for hybrid and multicloud workloads

In this section, we’ll outline some recommended practices that will help you provide least-privilege access to your application secrets, wherever the access is coming from.

Client-side caching of secrets

Client-side caching of secrets stored in Secrets Manager can help you improve performance and decrease costs by reducing the number of API requests to Secrets Manager. After retrieving a secret from Secrets Manager, your application can get the secret value from its in-memory cache without making further API calls. The cached secret value is automatically refreshed after a configurable time interval, called the cache duration, to help ensure that the application is always using the latest secret value. AWS provides client-side caching libraries for .NET, Java, JDBC, Python, and Go to enable client-side caching. You can find more detailed information on client-side caching specific to Python libraries in this blog post.

Consider a hybrid application with an application server on premises, that needs to retrieve database credentials stored in Secrets Manager in order to query customer information from a database. Because the API calls to retrieve the secret are coming from outside AWS, they may incur increased latency simply based on the physical distance from the closest AWS data center. In this scenario, the performance gains from client-side caching become even more impactful.

Enforce least-privilege access to secrets through IAM policies

You can use a combination of IAM policy types to granularly restrict access to application secrets when you’re using IAM Roles Anywhere and Secrets Manager. You can use conditions in trust policies to control which systems can assume the role. In our example, this is based on the system’s certificate, meaning that you need to appropriately control access to these certificates. We use a policy condition to specify an IP address in our example, but you could also use a range of IP addresses. Other examples would be conditions that specify a time range for when resources can be accessed, conditions that allow or deny building resources in certain AWS Regions, and more. You can find example policies in the IAM documentation.

You should use identity policies to provide Secrets Manager with permissions to the IAM role being assumed, following the principle of least privilege. You can find IAM policy examples for Secrets Manager use cases in the Secrets Manager documentation.

By combining different policy types, like identity policies and trust policies, you can limit the scope of systems that can assume a role, and control what those systems can do after assuming a role. For example, in the trust policy for the IAM role with access to the secret in Secrets Manager, you can allow or deny access based on the common name of the certificate that’s being used to authenticate and retrieve temporary credentials in order to assume a role using IAM Roles Anywhere. You can then attach an identity policy to the role being assumed that provides only the necessary API actions for your application, such as the ability to retrieve a secret value—but not to a delete a secret. See this blogpost for more information on when to use different policy types.

Transform long-term secrets into short-term secrets

You may already be wondering, “why should I use short-lived credentials to access a long-term secret?” Frequently rotating your application secrets in Secrets Manager will reduce the impact radius of a compromised secret. Imagine that you rotate your application secret every day. If that secret is somehow publicly exposed, it will only be usable for a single day (or less). This can greatly reduce the risk of compromised credentials being used to get access to sensitive information. You can find more information about the value of using short-lived credentials in this AWS Well-Architected best practice.

Instead of using static database credentials that are rarely (or never) rotated, you can use Secrets Manager to automatically rotate secrets up to every four hours. This method better aligns the lifetime of your database secret with the lifetime of the short-lived credentials that are used to assume the IAM role by using IAM Roles Anywhere.

Sample workload: How to retrieve a secret to query an Amazon RDS database from a workload running in another cloud provider.

Now we’ll demonstrate examples of the recommended practices we outlined earlier, such as scoping permissions with IAM policies. We’ll also showcase a sample application that uses a virtual machine (VM) hosted in another cloud provider to access a secret in Secrets Manager.

The reference architecture in Figure 1 shows the basic sample application.

Figure 1: Application connecting to Secrets Manager by using IAM Roles Anywhere to retrieve RDS credentials

Figure 1: Application connecting to Secrets Manager by using IAM Roles Anywhere to retrieve RDS credentials

In the sample application, an application secret (for example, a database username and password) is being used to access an Amazon RDS database from an application server hosted in another cloud provider. The following process is used to connect to Secrets Manager in order to retrieve and use the secret:

  1. The application server makes a request to retrieve temporary credentials by using IAM Roles Anywhere.
  2. IAM validates the request against the relevant IAM policies and verifies that the certificate was issued by a CA configured as a trust anchor.
  3. If the request is valid, AWS Security Token Service (AWS STS) provides temporary credentials that the application can use to assume an IAM role.
  4. IAM Roles Anywhere returns temporary credentials to the application.
  5. The application assumes an IAM role with Secrets Manager permissions and makes a GetSecretValue API call to Secrets Manager.
  6. The application uses the returned database credentials from Secrets Manager to query the RDS database and retrieve the data it needs to process.

Configure IAM Roles Anywhere

Before you configure IAM Roles Anywhere, it’s essential to have an IAM role created with the required permission for Amazon RDS and Secrets Manager. If you’re following along on your own with these instructions, refer to this blog post and the IAM Roles Anywhere User Guide for the steps to configure IAM Roles Anywhere in your environment.

Obtain temporary security credentials

You have several options to obtain temporary security credentials using IAM Roles Anywhere:

  • Using the credential helper — The IAM Roles Anywhere credential helper is a tool that manages the process of signing the CreateSession API with the private key associated with an X.509 end-entity certificate and calls the endpoint to obtain temporary AWS credentials. It returns the credentials to the calling process in a standard JSON format. This approach is documented in the IAM Roles Anywhere User Guide.
  • Using the AWS SDKs

Use policy controls to appropriately scope access to secrets

In this section, we demonstrate the process of restricting access to temporary credentials by employing condition statements based on attributes extracted from the X.509 certificate. This additional step gives you granular control of the trust policy, so that you can effectively manage which resources can obtain credentials from IAM Roles Anywhere. For more information on establishing a robust data perimeter on AWS, refer to this blog post.

Prerequisites

  • IAM Roles Anywhere using AWS Private Certificate Authority or your own PKI as the trust anchor
  • IAM Roles Anywhere profile
  • An IAM role with Secrets Manager permissions

Restrict access to temporary credentials

You can restrict access to temporary credentials by using specific PKI conditions in your role’s trust policy, as follows:

  • Sessions issued by IAM Roles Anywhere have the source identity set to the common name (CN) of the subject you use in end-entity certificate authenticating to the target role.
  • IAM Roles Anywhere extracts values from the subject, issuer, and Subject Alternative Name (SAN) fields of the authenticating certificate and makes them available for policy evaluation through the sourceIdentity and principal tags.
  • To examine the contents of a certificate, use the following command:

    openssl x509 -text -noout -in certificate.pem

  • To establish a trust relationship for IAM Roles Anywhere, use the following steps:
    1. In the navigation pane of the IAM console, choose Roles.
    2. The console displays the roles for your account. Choose the name of the role that you want to modify, and then choose the Trust relationships tab on the details page.
    3. Choose Edit trust relationship.

Example: Restrict access to a role based on the common name of the certificate

The following example shows a trust policy that adds a condition based on the Subject Common Name (CN) of the certificate.

{
    "Version": "2012-10-17",
    "Statement": [
      {
        "Effect": "Allow",
        "Principal": {
          "Service": "rolesanywhere.amazonaws.com"
        },
        "Action": [
          "sts:AssumeRole",
          "sts:TagSession",
          "sts:SetSourceIdentity"
        ],
        "Condition": {
          "StringEquals": {
            "aws:PrincipalTag/x509Subject/CN": "workload-a.iamcr-test"
          },
          "ArnEquals": {
            "aws:SourceArn": [
              "arn:aws:rolesanywhere:region:account:trust-anchor/TA_ID"
            ]
          }
        }
      }
    ]
  }

If you try to access the temporary credentials using a different certificate which has a different CN, you will receive the error “Error when retrieving credentials from custom-process: 2023/07/0X 23:46:43 AccessDeniedException: Unable to assume role for arn:aws:iam::64687XXX207:role/RDS_SM_Role”.

Example: Restrict access to a role based on the issuer common name

The following example shows a trust policy that adds a condition based on the Issuer CN of the certificate.

 {
    "Version": "2012-10-17",
    "Statement": [
      {
        "Effect": "Allow",
        "Principal": {
          "Service": "rolesanywhere.amazonaws.com"
        },
        "Action": [
          "sts:AssumeRole",
          "sts:TagSession",
          "sts:SetSourceIdentity"
        ],
        "Condition": {
          "StringEquals": {
            "aws:PrincipalTag/x509Issuer/CN": "iamcr.test"
          },
          "ArnEquals": {
            "aws:SourceArn": [
              "arn:aws:rolesanywhere:region:account:trust-anchor/TA_ID"
            ]
          }
        }
      }
    ]
  }

Example: Restrict access to a role based on the subject alternative name (SAN)

The following example shows a trust policy that adds a condition based on the SAN fields of the certificate.

 {
  "Version": "2012-10-17",
  "Statement": [
    {
      "Effect": "Allow",
      "Principal": {
        "Service": "rolesanywhere.amazonaws.com"
      },
      "Action": [
        "sts:AssumeRole",
        "sts:TagSession",
        "sts:SetSourceIdentity"
      ],
      "Condition": {
        "StringEquals": {
          "aws:PrincipalTag/x509SAN/DNS": "workload-a.iamcr.test"
        },
        "ArnEquals": {
          "aws:SourceArn": [
            "arn:aws:rolesanywhere:region:account:trust-anchor/TA_ID"
          ]
        }
      }
    }
  ]
}

Session policies

Define session policies to further scope down the sessions delivered by IAM Roles Anywhere. Here, for demonstration purposes, we added an inline policy to only allow requests coming from the specified IP address by using the following steps.

  1. Navigate to the Roles Anywhere console.
  2. Under Profiles, choose Create a profile.
  3. On the Create a profile page, enter a name for the profile.
  4. For Roles, select the role that you created in the previous step, and select the Inline policy.

The following example shows how to allow only the requests from a specific IP address. You will need to replace <X.X.X.X/32> in the policy example with your own IP address.

{
  "Version": "2012-10-17",
  "Statement": [
    {
      "Effect": "Deny",
      "Action": "*",
      "Resource": "*",
      "Condition": {
        "NotIpAddress": {
          "aws:SourceIp": [
            "<X.X.X.X/32>"
          ]
        }
      }
    },
    {
      "Effect": "Allow",
      "Action": "*",
      "Resource": "*"
    }
  ]
}

Retrieve secrets securely from a workload running in another cloud environment

In this section, we’ll demonstrate the process of connecting virtual machines (VMs) running in another cloud provider to an Amazon RDS MySQL database, where the database credentials are securely stored in Secrets Manager.

Create a database and manage Amazon RDS master database credentials in Secrets Manager

In this section, you will create a database instance and use Secrets Manager to manage the master database credentials.

To create an Amazon RDS database and manage master database credentials in Secrets Manager

  1. Open the Amazon RDS console and choose Create database.
  2. Select your preferred database creation method. For this post, we chose Standard create.
  3. Under Engine options, for Engine type, choose your preferred database engine. In this post, we use MySQL.
  4. Under Settings, for Credentials Settings, select Manage master credentials in AWS Secrets Manager.
    Figure 2: Manage master credentials in Secrets Manager

    Figure 2: Manage master credentials in Secrets Manager

  5. You have the option to encrypt the managed master database credentials. In this example, we will use the default AWS KMS key.
  6. (Optional) Choose other settings to meet your requirements. For more information, see Settings for DB instances.
  7. Choose Create Database, and wait a few minutes for the database to be created.

Retrieve and use temporary credentials to access a secret in Secrets Manager

The next step is to use the AWS Roles Anywhere service to obtain temporary credentials for an IAM role. These temporary credentials are essential for accessing AWS resources securely. Earlier, we described the options available to you to retrieve temporary credentials by using IAM Roles Anywhere. In this section, we will assume you’re using the credential helper to retrieve temporary credentials and make an API call to Secrets Manager.

After you retrieve temporary credentials and assume an IAM role with permissions to access the secret in Secrets Manager, you can run a simple script on the VM to get the database username and password from Secrets Manager and update the database. The steps are summarized here:

  • Use the credential helper to assume your IAM role with permissions to access the secret in Secrets Manager. You can find instructions to obtain temporary credentials in the IAM Roles Anywhere User Guide.
  • Retrieve secrets from Secrets Manager. Using the obtained temporary credentials, you can create a boto3 session object and initialize a secrets_client from boto3.client(‘secretsmanager’). The secrets_client is responsible for interacting with the Secrets Manager service. You will retrieve the secret value from Secrets Manager, which contains the necessary credentials (for example, database username and password) for accessing an RDS database.
  • Establish a connection to the RDS database. The retrieved secret value is parsed, extracting the database connection information. You can then establish a connection to the RDS database using the extracted details, such as username and password.
  • Perform database operations. Once the database connection is established, the script performs the operation to update a record in the database.

The following is an example Python script to retrieve credentials from Secrets Manager and connect to the RDS for database operations.

import mysql.connector
import boto3
import json

#Create client

client = boto3.client('secretsmanager')
response = client.get_secret_value(
    SecretId='rds!db-fXXb-11ce-4f05-9XX2-d42XXcd'
)
secretDict = json.loads(response['SecretString'])

#Connect to DB

mydb = mysql.connector.connect(
    host="rdsmysql.cpl0ov.us-east-1.rds.amazonaws.com",
    user=secretDict['username'],
    password=secretDict['password'],
    database="rds_mysql"
)
mycursor = mydb.cursor()

#Update DB 

sql = "INSERT INTO employees (id, name) VALUES (%s, %s)"
val = (12, "AWPS")
mycursor.execute(sql, val)
mydb.commit()
print(mycursor.rowcount, "record inserted.")

And that’s it! You’ve retrieved temporary credentials using IAM Roles Anywhere, assumed a role with permissions to access the database username and password in Secrets Manager, and then retrieved and used the database credentials to update a database from your application running on another cloud provider. This is a simple example application for the purpose of the blog post, but the same concepts will apply in real-world use cases.

Conclusion

In this post, we’ve demonstrated how you can securely store, retrieve, and manage application secrets and database credentials for your hybrid and multicloud workloads using Secrets Manager. We also outlined some recommended practices for least-privilege access to your secrets when accessing Secrets Manager from outside AWS by using IAM Roles Anywhere. Lastly, we demonstrated a simple example of using IAM Roles Anywhere to assume a role, then retrieve and use database credentials from Secrets Manager in a multicloud workload. To get started managing secrets, open the Secrets Manager console. To learn more about Secrets Manager, refer to the Secrets Manager documentation.

 
If you have feedback about this post, submit comments in the Comments section below. If you have questions about this post, contact AWS Support.

Want more AWS Security news? Follow us on Twitter.

Sreedar Radhakrishnan

Sreedar Radhakrishnan

Sreedar is a Senior Solutions Architect at AWS, where he helps enterprise customers to design and build secure, scalable, and sustainable solutions on AWS. In his spare time, Sreedar enjoys playing badminton and spending time with his family.

Zach Miller

Zach Miller

Zach is a Senior Security Specialist Solutions Architect at AWS. His background is in data protection and security architecture, focused on a variety of security domains, including cryptography, secrets management, and data classification. Today, he is focused on helping enterprise AWS customers adopt and operationalize AWS security services to increase security effectiveness and reduce risk.

Akshay Aggarwal

Akshay Aggarwal

Akshay is a Senior Technical Product Manager on the AWS Secrets Manager team. As part of AWS Cryptography, Akshay drives technologies and defines best practices that help improve customer’s experience of building secure, reliable workloads in the AWS Cloud. Akshay is passionate about building technologies that are easy to use, secure, and scalable.

Security updates for Thursday

Post Syndicated from jake original https://lwn.net/Articles/946698/

Security updates have been issued by Debian (chromium, libx11, and libxpm), Fedora (ckeditor, drupal7, glibc, golang-github-cncf-xds, golang-github-envoyproxy-control-plane, golang-github-hashicorp-msgpack, golang-github-minio-highwayhash, golang-github-nats-io, golang-github-nats-io-jwt-2, golang-github-nats-io-nkeys, golang-github-nats-io-streaming-server, golang-github-protobuf, golang-google-protobuf, nats-server, and pgadmin4), Red Hat (firefox and thunderbird), SUSE (chromium, exim, ghostscript, kernel, poppler, python-gevent, and python-reportlab), and Ubuntu (binutils, exim4, jqueryui, linux, linux-aws, linux-aws-5.15, linux-azure, linux-azure-5.15,
linux-azure-fde, linux-azure-fde-5.15, linux-gcp, linux-gcp-5.15,
linux-gke, linux-gkeop, linux-gkeop-5.15, linux-ibm, linux-ibm-5.15,
linux-kvm, linux-lowlatency, linux-lowlatency-hwe-5.15, linux-nvidia,
linux-oracle, linux, linux-aws, linux-aws-5.4, linux-azure, linux-azure-5.4,
linux-bluefield, linux-gcp, linux-gcp-5.4, linux-gkeop, linux-hwe-5.4,
linux-ibm, linux-ibm-5.4, linux-iot, linux-kvm, linux-oracle,
linux-oracle-5.4, linux-raspi, linux-raspi-5.4, linux-xilinx-zynqmp, linux, linux-aws, linux-aws-6.2, linux-azure, linux-azure-6.2,
linux-azure-fde-6.2, linux-gcp, linux-gcp-6.2, linux-hwe-6.2, linux-kvm,
linux-lowlatency, linux-lowlatency-hwe-6.2, linux-oracle, linux-raspi,
linux-starfive, linux-kvm, linux-oem-6.1, nodejs, and python-django).

AWS ExecLeaders Data and Generative AI Day: Fueling Business Growth with Data and Generative AI

Post Syndicated from Irshad Buchh original https://aws.amazon.com/blogs/aws/aws-execleaders-data-and-generative-ai-day-fueling-business-growth-with-data-and-generative-ai/

Join us on Thursday, October 5, 2023, for a free-to-attend online event, Data and Generative AI Day. AWS will stream the event simultaneously across multiple platforms, including LinkedIn Live and YouTube.

In the realm of generative AI, the power and potential hidden within your organization’s data are more expansive than ever before. Generative AI has the capability to reshape customer interactions, elevate employee productivity, stimulate creative ideation, and drive groundbreaking innovation. However, as a forward-thinking leader, what steps are required to fully harness this data-driven potential and translate it into tangible outcomes?

During this half-day event, AWS experts, partners, customers, and leading startups will provide you insights into their efforts to propel innovation using data and generative AI within the ever-evolving landscape of today. You shall find practical guidance from industry leaders on how to navigate the diverse spectrum of opportunities and challenges presented by this transformative technology, all while gaining a glimpse into what the future holds in store.

Here are some of the highlights you can expect from this event.

Swami Sivasubramanian, VP, Database, Analytics, and ML at AWS, will kick off the event with a keynote session where he will share the blueprint to democratize data and AI for business leaders. Swami will share how leaders can usher in the right mindset, strategy, and tools to translate the promise of generative AI into real business value.

Tom Godden, Director of Enterprise Strategy at AWS, will explore practical strategies for leveraging generative AI to drive business outcomes. He will share the frameworks for identifying opportunities to pilot generative AI across your organization and provide business leaders with a timely understanding of how to employ these powerful emerging capabilities.

Gopinath Sankaran, Vice President, Strategic Cloud Ecosystems at Informatica, will share insights on the impact of generative AI on data management and explore how Informatica’s AI-powered Intelligent Data Management Cloud and AWS AI and Analytics services can power a new wave of insights and experiences.

Diego Saenz, Managing Director of Data & AI at Deloitte, and Jojy Matthew, Principal, Global Financial Services Industry (GFSI) Data, Analytics, & AI at Deloitte, will share what a well-crafted data strategy means to generative AI success. Diego will share practical advice on assessing if your data estate is ready for leveraging generative AI and driving business outcomes.

You will hear from AWS leaders and AWS customers FOX, Salesforce, and Booking.com, as they share their data and generative AI journeys and explain how you can leverage this transformational technology to re-imagine your customer and employee experiences.

Data & Generative AI Day

You can add an event reminder to your calendar by registering on the event page.

See you there.

— Irshad

Cloudflare’s a Top 100 Most Loved Workplace for the second consecutive year in 2023

Post Syndicated from Scott Tomtania original http://blog.cloudflare.com/cloudflares-a-top-100-most-loved-workplace-for-2023/

Cloudflare's a Top 100 Most Loved Workplace for the second consecutive year in 2023

Cloudflare's a Top 100 Most Loved Workplace for the second consecutive year in 2023

We have always strived to make Cloudflare somewhere where our entire team feels safe and empowered to bring their whole selves to work. It’s the best way to enable the many incredible people we have working here to be able to do their best work. With that as context, we are proud to share that Cloudflare has been certified and recognized as one of the Top 100 Most Loved Workplaces in 2023 by Newsweek and the Best Practice Institute (BPI) for the second consecutive year.

Cloudflare's a Top 100 Most Loved Workplace for the second consecutive year in 2023

Cloudflare’s ranking follows surveys of more than 2 million employees at companies with team sizes ranging from 50 to 10,000+, and includes US-based firms and international companies with a strong US presence. As part of the qualification for the certification, Cloudflare participated in a company-wide global employee survey — so this award isn’t a hypothetical, it’s driven by our employees’ sentiment and responses.

With this recognition, we wanted to reflect on what’s new, what’s remained the same, and what’s ahead for the team at Cloudflare. There are a few things that especially stand out:

It starts with our mission and people

Helping to build a better Internet.

If you speak to any member of the Cloudflare team about why they’re here, they’ll almost certainly talk about our mission. Whether it’s in our careers, or our lives more generally, so many of us have been positively impacted by the Internet. It is an incredible resource for humanity, and being able to contribute back to it is definitely a draw for many Cloudflarians. In an internal survey from September 2023, 92% of our team stated that they are inspired by Cloudflare’s mission to help build a better Internet — and 88% said that their work is important to the company.

Working on these kinds of problems, at the scale Cloudflare is at, requires constant innovation and figuring out solutions at the frontier of technology. At the same time, Cloudflare for years has been giving back to the community and society — through programs like Project Galileo, Athenian Project, and Project Cybersafe Schools — that make us especially proud of the work we do.

Cloudflarians get a real sense of our company culture, team, mission, and how we work, right when they start interviewing with us. Candidate feedback paints a picture of what this looks and feels like:

“The entire process is really different from anything I’ve experienced before — and I’m enjoying it very much. Also, the informal tone makes it much more human and everyone is so approachable.”  

“I’ve never met a group of people at a company that are all consistently excited about the work they are doing.”

Before anyone gets an offer, every candidate in the final stage connects with one of our executive leaders including our co-founders. This has been part of our interview process for many years, and is designed to ensure candidates truly understand what they’re signing up for in their role as part of joining the Cloudflare team, and to make our executive team accessible to everyone starting on day one. Transparency is one of our core values, and we want all employees to have a direct line to our leadership.

Transparency also serves as our guiding light when we engage with the public. We are quick to share detailed reports amid and after incidents, in the hopes that they will benefit the Internet-at-large. And we share regular impact reports detailing our progress around key environmental, social, and governance initiatives.

We have continued to receive unmatched interest with close to half a million applicants in the first half of 2023, which is nearly a 300% increase from 2022. Our offer acceptance rate remained equally as impressive at a rate of 90%. We are continuing to hire worldwide with hundreds of open positions across the organization ranging from Sales to Engineering.

Cloudflare's a Top 100 Most Loved Workplace for the second consecutive year in 2023

Supported & Flexible

We are committed to developing a globally distributed team with a flexible working approach. Individual teams opt into: hybrid, remote, or in-office, depending on what works best for the folks on the team, and the team more broadly. As an example, we've seen less tenured folks on certain teams wanting to go into the office more frequently to work together in-person. For reasons across the board, we give teams the ability to choose what works best for them. We’ve found that this approach gives teams the opportunity to establish their optimal working arrangements that fit with their objectives and enable collaboration.

Our paid time off policy is on a take-what-you-need basis. We encourage employees to find a comfortable work-life balance by taking as many days off as they need while still being able to perform their jobs satisfactorily.

Cloudflare's a Top 100 Most Loved Workplace for the second consecutive year in 2023

Benefits & Community

We want to empower and inspire our team members to do their best work every day — and this includes making sure they feel happy, healthy, and fulfilled both inside and outside of our workplace. Aside from comprehensive healthcare benefits, this also includes support for family planning like parental leave and Carrot Fertility, access to mental health and mindfulness programs through Ginger and Headspace apps, and three days of paid time off each year to volunteer in our respective communities.

Diversity, equity, and inclusion is a priority at Cloudflare to help ensure a sense of belonging and community for all of our employees and to best propel our business forward. Our 15+ Employee Resource Groups (ERGs) are employee-led and have designated executive sponsors of each group. These communities come together to support each other, celebrate their cultures, and help with initiatives to educate, support professional development, and more. We have a robust number of ERGs and this continues to grow as the diversity at Cloudflare expands.

Cloudflare's a Top 100 Most Loved Workplace for the second consecutive year in 2023

Consistently growing our team

Our employees believe that Cloudflare is a special place, with an especially meaningful mission. They believe there is no other place where a team so small is having such a large impact on the Internet. To keep up, it's critical that we have great people across the company to help us continue our mission. To learn more about the Cloudflare career opportunities, please check out Cloudflare Careers!

Може и да е по-лесно. Или как държавата да не пречи на бизнеса

Post Syndicated from Александър Нуцов original https://www.toest.bg/mozhe-i-da-e-po-lesno-ili-kak-durzhavata-da-ne-prechi-na-biznesa/

Може и да е по-лесно. Или как държавата да не пречи на бизнеса

Всекидневно чуваме обещания от институции и политици, че ей сега ще решат проблемите на хората и в частност – на бизнеса. Но какво означава „бизнес“? Вероятно в съзнанието на много от нас и днес изплуват картини от 90-те – мастити бизнесмени с луксозни черни автомобили, нагло поведение, тесни връзки с властта, монополно положение и фактическа непреодолимост в „борбата“ за обществени поръчки. Днес, за щастие, няма да си говорим за тях, защото имаме смелостта да смятаме, че са в миналото. Но ни се иска да започнем да говорим малко повече за съвременния български бизнес – какво става с него и защо.

В серия от материали ще опитаме да очертаем предизвикателствата пред модерните бизнеси, които развиват иновативни продукти с висока добавена стойност, разчитайки на собствените си конкурентни предимства, интелект и усилия. Ще поговорим за трудностите, създавани от самата среда и свързани най-вече с архаичното законодателство, твърде консервативните регулации и завладените институции.

Материалите от поредицата ще разделим в три направления, които синтезират най-значителните въпроси за предприемачите: административните бариери и нуждата да се улесни правенето на бизнес, достъпа до капитал и достъпа до подготвени кадри.

Днес ще се опитаме да влезем малко по-дълбоко в дебрите на административния лабиринт, пред чийто вход застава всеки достатъчно смел да започне и да поддържа бизнес в България. За да разберем в дълбочина проблемите на модерните предприемачи, се допитахме до екипа на BESCO – Българската предприемаческа асоциация. Нейна основна мисия е да повиши стандарта на живот в България, като трансформира икономическия модел към индустрии и иновации с висока добавена стойност и подобри предприемаческата среда и условията за правене на бизнес.

Според Недялко Дервенков, изпълнителен директор на асоциацията, въпросът, предхождащ проблемите на бизнеса, е свързан с това как реално се правят промените в България. И по-важно – защо стават толкова бавно? През призмата на дългогодишния си опит той може да посочи някои от недостатъците на държавната администрация: служителите не са добре платени, използват се за контролиран вот, администрацията се раздува като брой, вместо да се повиши качеството ѝ, а вътрешноведомствените назначения на старши експерти и директори, пряко въвлечени в практическото разработване на реформи, често са от политически характер. Това означава, че тяхната роля, функции и дневен ред са предопределени, което ги прави слепи за нуждите на предприемачите.

Царят дава, пъдарят не дава

От практиката си Дервенков съди, че хората на високо политическо ниво (например министри и депутати) са склонни да реагират на сигналите от бизнеса и да се ангажират с прокарването на конкретни политики за развитието на предприемаческата среда. Усложненията според него идват от увереността на съответните министри, че под тях се разработват реформи, без обаче да имат реален надзор над процесите и над директорите на дирекции и експертите, които трябва да ги осъществяват. Той описва тази разкъсаност като „голямата бездна на всяка една инициатива в България“.

Всички знаем, че администрацията не може да бъде съвършена. Въпреки това Недялко Дервенков вижда промяната в България като двупосочен процес – отвън навътре, когато гражданското общество и съвестните предприемачи и бизнеси изискват институциите да вършат качествено работата си, и отвътре навън – чрез преструктуриране на административния апарат. Едно от възможните решения е по-високи заплати за по-малко хора и дигитализация на оперативните процеси в администрацията.

Напоследък започнаха да се виждат промени, които биха могли да задвижат малко повече предприемаческото колело, и то не защото ще му дадат начална скорост, а защото ще премахнат част от препятствията по пътя, които му пречат да се засили. С други думи, истински конкурентоспособният бизнес няма нужда да го „бута“ държавата, а да не му пречи с цялата си административна тежест. Промените, които предстои да видим в действие съвсем скоро, са плод на дългогодишните усилия на бизнеса да насочи погледа на държавния апарат в правилната посока.

Какво се промени?

Под една или друга форма всички сме се сблъсквали с тромавата държавна администрация. Преди да стигнат до нея обаче, бизнесите срещат ограничения при самото си зачеване. Главната причина е, че двете най-разпространени юридически форми на сдружаване – ООД и АД, не отговарят на съвременните нужди на стартиращите предприемачи и техните служители в една изключително динамична и конкурентна среда, където качеството на кадрите е ключова ценност, а работодателите изпитват трудности да предложат достатъчно привлекателни стимули да ги задържат дългосрочно.

Освен по оста работодател – служител, трудности има и при договарянето на условия между съдружниците/акционерите, както и в отношенията между тях и инвеститорите. Например акционерното дружество много често е неприложимо за стартъпите поради изискването за минимален капитал от 50 000 лв., макар и да е по-удобно при дяловото разпределение. Дружеството с ограничена отговорност пък не позволява търгуването на финансови инструменти за набиране на средства и опции за стимулиране на служителите чрез предоставяне на дялове.

В опит да се справи с тези недостатъци през юли 2023 г. Народното събрание прие на второ четене една от най-дръзките промени в Търговския закон за последните десетилетия – създаването на чисто нова форма на сдружаване, наречена „дружество с променлив капитал“ (ДПК). Идеята зад ДПК е да улесни бизнесите в тяхната ранна форма на развитие, като съчетае положителните страни на ООД и АД.

Дружеството може да се регистрира дигитално, за отрицателно време и с капитал от няколко стотинки, който не трябва да бъде вписан в Търговския регистър. Откриването на първоначална набирателна сметка също няма да бъде необходимо. Същевременно ДПК предоставя много голяма гъвкавост на управление и свобода на договаряне между съдружниците, подобно на ООД, и лесно прехвърляне на дялове и боравене с финансови инструменти, подобно на АД.

Новото дружество улеснява издаването на опции/дялове на служителите – (например чрез сключване на вестинг договори¹), което до този момент не беше изрично регулирано от закона. Това е от значение за по-лесното и прозрачно стимулиране на ключови служители чрез предоставяне на дялове от компанията, в която работят. Идеята е да се чувстват пряко ангажирани с развитието на организацията и да припознават за свои целите и каузите ѝ, като се мотивират от факта, че успехът зависи от тях самите, а това ще им гарантира финансови стимули в бъдеще под формата на дялове или акции. С други думи, разпределянето на дялове към служителите ги кара да се абстрахират от мисълта да работят единствено за месечното си възнаграждение, което би могло да бъде предпоставка за некачествена работа и ниска производителност на труда.

Собствениците на компании и потенциалните инвеститори също са по-защитени чрез възможностите за сключване на конвертируем заем (кешово инвестиране с опция за изплащане на заема под формата на акции/дялове в бъдеще), tag-along – drag-along² клаузи, които регулират отношенията между мажоритарните и миноритарните собственици при продажба на дялове и т.н. (Повече подробности за ДПК ще откриете тук и тук.) Дали промените в Търговския закон ще се окажат успешни, предстои да разберем. Топката е в Агенцията по вписванията, която носи отговорност за надграждането на електронната система на Търговския регистър, за да позволи регистрацията на ДПК, което се очаква да стане най-рано през следващата година.

ДДС – данък добавен стрес

Друг дългогодишен проблем за малките предприятия и търговците е ниският праг за регистрация по ДДС. Той беше решен частично след вдигането му от 50 000 лв. на 100 000 лв. от началото на 2023 г. Макар че дава глътка въздух на малките предприятия, тази граница остава твърде ниска и продължава да затруднява засегнатите бизнеси.

От една страна, ниският праг създава административна тежест, свързана с нуждата от счетоводни услуги, издаване и съхранение на фактури, зависимост от институционални срокове и т.н. От друга, разходите за счетоводство и загубата на средства от разликата между внесеното и полученото обратно ДДС (в комбинация с регулярните фирмени разходи за наем, заплати, осигуровки и т.н.) често изяждат такава част от средната годишна печалба на компаниите с оборот около установения праг, че съществуването им губи икономически смисъл. Това пък логично ги принуждава да останат поне частично в сивия сектор, за да избегнат регистрация по ДДС, което означава и по-ниски нива на внесен данък печалба. Добро решение в случая би било вдигане на прага до максимално разрешения от Европейската комисия – 166 000 лв.

Една дума: ди-ги-та-ли-за-ци-я

Важен за облекчаване на тромавата администрация е и цялостният процес на дигитализация, в който България изостава значително от останалите европейски държави. Стъпка в тази насока беше направена в края на септември, когато депутатите приеха на второ четене промените в Кодекса на труда, с които хартиената трудова книжка остава в историята и се дигитализира под формата на единен електронен трудов запис към регистъра на НАП.

Промените гарантират правата на служителите, които изпитват трудности при пенсиониране заради изгубена или унищожена трудова книжка, и редуцират щетите при липса на подписи и печати. Други ползи включват улеснената обработка на данни, свързани с трудовия и осигурителния стаж на служители и работодатели, гарантиране на прозрачност и предпазване от злоупотреби. Работодателите са задължени да оформят и върнат трудовите книжки на своите служители до 1 юни 2026 г. Следваща голяма стъпка напред в тази посока би била дигитализацията на счетоводните архиви – проблем, с който всеки бизнес се сблъсква.

През май тази година пък правителството призна разработената от Evrotrust Technologies дигитална схема Evrotrust eID за национален електронен идентификатор. Тя стана валидна след одобрение от Европейската комисия съгласно съответния регламент, който задължава всяка държава членка да развие и информира Комисията за създаването на такава схема.

Ползите са и за гражданите, и за бизнеса, тъй като физически и юридически лица вече имат осигурен дигитален достъп до всякакъв вид обществени услуги в ЕС. Освен това българските предприемачи ще имат по-добра възможност да развият бизнеса си в чужбина, защото могат да предоставят на чуждестранните си клиенти електронни услуги, покриващи целия спектър на бизнес процесите, вкл. проверка на самоличност, сключване на договори и др.

Въпреки всичко процесите по дигитализация изостават, а много пречки пред бизнеса остават нерешени. За тях ще продължим да си говорим и в следващите материали.

От ключово значение за икономиката през идните години ще бъде скоростта, с която се провеждат реформите за подобряване на предприемаческата среда. А това в най-голяма степен зависи от преструктурирането на държавната администрация, нейното дигитализиране и компресиране – така че да заработи правилно и в полза на всички.

1 Вестинг договори – инструмент, чрез който служителите могат да придобият дял от компанията при изпълнение на определени условия след определен период (например ако се задържат на работа пет години и/или постигнат определени резултати). Идеята е работодателят да задържи и стимулира дългосрочно ключови служители, които да се чувстват лично въвлечени в развитието и успехите на фирмата.

2 Tag-along – защитава миноритарните акционери. Когато мажоритарният акционер реши да продаде своите дялове, миноритарният има право да се присъедини към сделката, включвайки своите дялове при същите условия по сделката. Drag-along – защитава мажоритарния акционер. Когато мажоритарният акционер реши да продава компанията, миноритарният е задължен да се присъедини към сделката със своите дялове при договорените по сделката условия. Tag-along правата дават опция на миноритарния акционер да продаде дяловете си, докато drag-along клаузите го задължават да го направи.

Political Disinformation and AI

Post Syndicated from Bruce Schneier original https://www.schneier.com/blog/archives/2023/10/political-disinformation-and-ai.html

Elections around the world are facing an evolving threat from foreign actors, one that involves artificial intelligence.

Countries trying to influence each other’s elections entered a new era in 2016, when the Russians launched a series of social media disinformation campaigns targeting the US presidential election. Over the next seven years, a number of countries—most prominently China and Iran—used social media to influence foreign elections, both in the US and elsewhere in the world. There’s no reason to expect 2023 and 2024 to be any different.

But there is a new element: generative AI and large language models. These have the ability to quickly and easily produce endless reams of text on any topic in any tone from any perspective. As a security expert, I believe it’s a tool uniquely suited to Internet-era propaganda.

This is all very new. ChatGPT was introduced in November 2022. The more powerful GPT-4 was released in March 2023. Other language and image production AIs are around the same age. It’s not clear how these technologies will change disinformation, how effective they will be or what effects they will have. But we are about to find out.

Election season will soon be in full swing in much of the democratic world. Seventy-one percent of people living in democracies will vote in a national election between now and the end of next year. Among them: Argentina and Poland in October, Taiwan in January, Indonesia in February, India in April, the European Union and Mexico in June, and the US in November. Nine African democracies, including South Africa, will have elections in 2024. Australia and the UK don’t have fixed dates, but elections are likely to occur in 2024.

Many of those elections matter a lot to the countries that have run social media influence operations in the past. China cares a great deal about Taiwan, Indonesia, India, and many African countries. Russia cares about the UK, Poland, Germany, and the EU in general. Everyone cares about the United States.

And that’s only considering the largest players. Every US national election from 2016 has brought with it an additional country attempting to influence the outcome. First it was just Russia, then Russia and China, and most recently those two plus Iran. As the financial cost of foreign influence decreases, more countries can get in on the action. Tools like ChatGPT significantly reduce the price of producing and distributing propaganda, bringing that capability within the budget of many more countries.

A couple of months ago, I attended a conference with representatives from all of the cybersecurity agencies in the US. They talked about their expectations regarding election interference in 2024. They expected the usual players—Russia, China, and Iran—and a significant new one: “domestic actors.” That is a direct result of this reduced cost.

Of course, there’s a lot more to running a disinformation campaign than generating content. The hard part is distribution. A propagandist needs a series of fake accounts on which to post, and others to boost it into the mainstream where it can go viral. Companies like Meta have gotten much better at identifying these accounts and taking them down. Just last month, Meta announced that it had removed 7,704 Facebook accounts, 954 Facebook pages, 15 Facebook groups, and 15 Instagram accounts associated with a Chinese influence campaign, and identified hundreds more accounts on TikTok, X (formerly Twitter), LiveJournal, and Blogspot. But that was a campaign that began four years ago, producing pre-AI disinformation.

Disinformation is an arms race. Both the attackers and defenders have improved, but also the world of social media is different. Four years ago, Twitter was a direct line to the media, and propaganda on that platform was a way to tilt the political narrative. A Columbia Journalism Review study found that most major news outlets used Russian tweets as sources for partisan opinion. That Twitter, with virtually every news editor reading it and everyone who was anyone posting there, is no more.

Many propaganda outlets moved from Facebook to messaging platforms such as Telegram and WhatsApp, which makes them harder to identify and remove. TikTok is a newer platform that is controlled by China and more suitable for short, provocative videos—ones that AI makes much easier to produce. And the current crop of generative AIs are being connected to tools that will make content distribution easier as well.

Generative AI tools also allow for new techniques of production and distribution, such as low-level propaganda at scale. Imagine a new AI-powered personal account on social media. For the most part, it behaves normally. It posts about its fake everyday life, joins interest groups and comments on others’ posts, and generally behaves like a normal user. And once in a while, not very often, it says—or amplifies—something political. These persona bots, as computer scientist Latanya Sweeney calls them, have negligible influence on their own. But replicated by the thousands or millions, they would have a lot more.

That’s just one scenario. The military officers in Russia, China, and elsewhere in charge of election interference are likely to have their best people thinking of others. And their tactics are likely to be much more sophisticated than they were in 2016.

Countries like Russia and China have a history of testing both cyberattacks and information operations on smaller countries before rolling them out at scale. When that happens, it’s important to be able to fingerprint these tactics. Countering new disinformation campaigns requires being able to recognize them, and recognizing them requires looking for and cataloging them now.

In the computer security world, researchers recognize that sharing methods of attack and their effectiveness is the only way to build strong defensive systems. The same kind of thinking also applies to these information campaigns: The more that researchers study what techniques are being employed in distant countries, the better they can defend their own countries.

Disinformation campaigns in the AI era are likely to be much more sophisticated than they were in 2016. I believe the US needs to have efforts in place to fingerprint and identify AI-produced propaganda in Taiwan, where a presidential candidate claims a deepfake audio recording has defamed him, and other places. Otherwise, we’re not going to see them when they arrive here. Unfortunately, researchers are instead being targeted and harassed.

Maybe this will all turn out okay. There have been some important democratic elections in the generative AI era with no significant disinformation issues: primaries in Argentina, first-round elections in Ecuador, and national elections in Thailand, Turkey, Spain, and Greece. But the sooner we know what to expect, the better we can deal with what comes.

This essay previously appeared in The Conversation.

„Битката за демонтажа на МОЧА е битка за България.“ Разговор с Валентина Маринова

Post Syndicated from original https://www.toest.bg/bitkata-za-demontazha-na-mocha-e-bitka-za-bulgariya-razgovor-s-valentina-marinova/

„Битката за демонтажа на МОЧА е битка за България.“ Разговор с Валентина Маринова

Защо най-големите паметници в основните градове на България прославят чужда армия? Армия, която с убийства и изнасилвания на цивилни е окупирала страната ни преди 79 години. В София, Пловдив, Бургас и Варна няма по-мащабни паметници от тези на Съветската армия. Идеите за техния демонтаж започват още в началото на 90-те, но до момента (с едно изключение) нямат успех.

През март 2023 г. Столичният общински съвет взе решение да демонтира Паметника на Съветската армия (ПСА) в центъра на София, известен и като Монумент на окупационната Червена армия (МОЧА). Гласуването беше съпътствано от протест на проруски партии. Няколко месеца по-късно партия „Левицата“ създаде палатков лагер пред паметника с намерението да спре наближаващия демонтаж. Тези действия на отделни политици в защита на спорния монумент бяха причината в спора да се намесят и футболни фенове, които настояваха ПСА да бъде демонтиран възможно най-скоро.

Към датата на интервюто паметникът е опасан с метална ограда и скеле. Специалисти вече обследват плочите и фигурите, за да се подготви преместването. Липсва яснота как и къде ще бъдат прехвърлени скулптурните композиции, а също и какво ще запълни опразненото място в сърцето на Княжеската градина. Що се отнася до срока, в който се планира демонтажът да бъде завършен, засега от Общината и от областната управа не се ангажират с конкретна дата. Областният управител на София Вяра Тодева обаче каза, че това няма да стане до края на годината.

Попитах Валентина Маринова, създателка на сдружение „Гражданска инициатива за демонтиране на паметника на съветската армия в София“, за реакциите на гражданското общество срещу монумента, за липсата на политическа воля той да бъде демонтиран, за връзката между историческите лъжи и войната на Русия в Украйна и за въпросите, на които трябва да си отговорим като суверенна нация.

„Битката за демонтажа на МОЧА е битка за България.“ Разговор с Валентина Маринова
Валентина Маринова е психолог и системен психотерапевт, доктор по педагогика

Защо трябва да се демонтира ПСА от центъра на София?

Демонтирането на това съоръжение, наречено „Паметник на Съветската армия“, дължим на жертвите на комунизма в България. Те са десетки хиляди. Някои от тях са ярки примери на достойни български граждани, представители на прогресивната част от обществото ни във всички сфери в продължение на десетилетия преди 1944 г. Голяма част от тях са се съпротивлявали срещу превръщането на страната ни в колония на съветската болшевишка империя.

Сред жертвите има и много обикновени хора, попаднали буквално случайно в мелето на кървавата вакханалия и саморазправа в първите месеци след 9 септември 1944 г. по села и градове. Тази саморазправа от назначените от Сталин главорези в България е продължила години наред. Има цели български семейства, чиито съдби са опустошени от насилие, унижения, безправие и произвол. Всички, които не оцеляха или оцеляха, но бяха смачкани, са хората, към които имаме дълг като народ. Дължим им този символичен жест на памет и справедливост. Дължим го и на себе си, ако искаме да ни има като свободни хора.

Какво е отношението на кандидат-кметовете по темата за демонтажа на ПСА?

Този демонтаж и настоящите процедури, които очакваме да бъдат придвижени съвсем скоро, нямат общо с предстоящите местни избори. Аз съм чувала само двама от кандидат-кметовете да коментират темата за демонтирането на МОЧА, макар че не следя тази кампания и може да съм пропуснала нещо. Всичко в момента е в ръцете на областния управител.

От колко време се занимавате с темата за демонтажа на ПСА и защо тази кауза е важна за Вас?

Тази гражданска инициатива започна през 2010 г. В началото бяхме шепа хора, като се занимавахме най-вече с това да направим инициативата видима и трайно присъстваща в общественото пространство. Бяхме ангажирани със събития, организиране и участие в дискусии, проучване на архиви, кореспонденция с различни институции. Дори водихме дело срещу кмета на Столичната община за неизпълнението на решението за демонтиране, взето от Столичния общински съвет през 1993 г.

Акцията с розовия барелеф през август 2013 г. – „България се извинява“, по случай престъпното смазване на Пражката пролет от войските на Варшавския договор беше наше дело. В един момент дойде време топката да бъде поета от политиците, за да се вземе политическо решение за премахването на този позор от центъра на София. През 2010 г. изглеждаше, че темата е потънала в забрава след предишните неуспешни опити да бъде доведена докрай. Защо е важна за мен? С две думи – заради справедливостта.

Създаването на сдружението успя ли да предизвика някаква политическа реакция през 2010 г.?

Бих казала, че в средите на онези партии, които се представят като антикомунистически, срещнахме доста големи симпатии. Разговаряли сме с политици и общински съветници, предимно от ДСБ, но и от по-малки партии. Отделни общински съветници от ГЕРБ, които изразяваха лични симпатии към идеята за демонтаж, не демонстрираха тези настроения в Общинския съвет. Знаете, че през всичките тези години мнозинството в Столичната община и Столичния общински съвет беше на ГЕРБ. Имаше знакови политици от онова време, които наричаха инициативата „моята тиха кауза“. Тоест разбиране и съпричастност към каузата имаше, но в началото бяха изразявани основно на четири очи и далеч от голямата политика.

Мога да кажа, че още в първите години се усети създаването на общност около тази инициатива. Просто от самото начало личеше, че има много сила в нея, много дълбок смисъл и тя бавно, бавно получаваше обществен резонанс.

Защо в периода, за който говорите, темата е оставала извън общественото внимание?

Не знам. Има неща, които не мога да си обясня или ми е трудно да приема все още. Имало е случаи, когато сме събирали пари за някакво събитие и разбира се, имаше възможност който ни подкрепя, да направи дарение в банковата сметка на сдружението. Срещала съм се с хора, които са ми давали пари кеш, защото не са искали от тяхната банкова сметка да има направен превод към сдружението. Имало е млади хора, които са ми изпращали снимки от някое събитие, за да се качат на сайта на инициативата, но изрично са ме предупреждавали да не им пишем името. Този монумент има подобна функция в обществото ни – да плаши, да мачка. Като някакво проклятие е.

Как е свързан демонтажът на МОЧА в София с цялостната декомунизация на българските градове? Ще дочакаме ли демонтаж на альошите в Пловдив и Бургас и на десетките други съветски монументи из страната?

Дали ще дочакаме демонтаж на всички останали съветски окупационни монументи, не знам. В голяма степен зависи от активността на гражданите. Ето, в Пловдив трябва просто да се внесе искане за демонтиране на „Альоша“, за да послужи това за причина местната администрация да изясни с какви документи разполага, какъв е статутът му, чия е собствеността и т.н. Трябва активност.

Всички подобни монументи трябва да бъдат премахнати, както наскоро каза в едно интервю проф. Евелина Келбечева. Това ще даде начало на истински преход на българското общество от мракобесен съветски болшевизъм към свободно и демократично развитие. Тук ще цитирам интервю с Валерия Новодворская от 2012 г.: „Намеренията на България [да се демонтира МОЧА – б.а.] са съвършено правилни. Пътят към процъфтяването минава през свалянето на паметниците от съветския период. А промени в Русия ще настъпят, когато видя, че са погребали Ленин и са свалили червената петолъчка над Кремъл.“

Пълномащабната руска агресия срещу Украйна ли катализира негативните настроения към монумента, за да вкара темата за неговото демонтиране отново в дневния ред на обществото?

Със сигурност войната промени контекста и направи централен въпроса за демонтажа на ПСА. В този смисъл много се промени и политическата конюнктура. Но имаше нужда и да мине време, да се извърви път, за да може тази маргинална през 2010 г. тема днес вече да е ако не централна, то поне невъзможна за подминаване с лекота и надменност. Сега много хора започнаха да говорят и да се интересуват и монументът в центъра на София започна да им боде очите.

От дистанцията на времето мога да кажа, че ни беше нужно това време, за да се осъзнае важността на акта на демонтиране, който е на практика освобождение от съветското робство. Бих искала да ни е нужно по-малко време и да сме решителни и категорични като общество, но не е така. Българското общество си беше затворило очите и беше ослепяло за престъпленията на комунизма, както и за факта, че без осмисляне на миналото ни няма да имаме бъдеще. Поне не бъдеще на достойна страна.

Споменахте, че темата с демонтажа на ПСА е била актуална и през 90-те. Градска легенда ли е, че тогава Руското посолство се намесва и оказва натиск върху кмета на София започналите работи по демонтажа да бъдат спрени?

Не мисля, че това е градска легенда. Има свидетелства на общински съветници, които са били ангажирани отблизо с процеса. Обаждането на руския посланик няма как да е документирано – това е станало по телефона. Но е още едно доказателство доколко България е загубила суверенитет, щом демонтажът е отменен по подобен начин. Защото реално е спрян с устно нареждане, без официално да е отменено по законен начин легитимното решение на Столичния общински съвет от 1993 г.

Това значи, че руският посланик е бил над волята на гражданите на София и техните представители в Столичния общински съвет. Устното спиране на демонтажа отменя смисъла на съществуването на легитимни институции и политическо представителство.

На какво се дължи сегашният обществен натиск за демонтаж на ПСА от Княжеската градина в София – на антикомунизъм или е по-скоро продиктуван от желанието на българите да се противопоставят на руската агресия в Украйна чрез този символичен акт?

Вероятно и двете неща играят роля за сегашната активност. Ние, хората от проевропейската част от обществото, които искаме да живеем в уредена, правова и просперираща държава, в момента сме истински изплашени и разтърсени. Първо, от това всестранно проникване на руската пропаганда у нас, което става все по-голямо и все по-опасно, особено с развитието на новите технологии. И второто, разбира се, е войната в Украйна.

Изплашени сме от това, което довчера мислехме за невъзможно – широкомащабна агресия на ядрена сила срещу независима и мирна страна, каквато е Украйна. Невинни жени и деца, включително етнически българи, биват убивани от руските бомби само на няколкостотин километра от България. Мнозинството българи разбрахме, че ако не дадем отпор на руската агресия сега, ще ни се наложи да воюваме истински. В момента има реална битка за избор на бъдещето на страната ни. Къде ще бъдем – в Европа или на страната на руските терористи? И ПСА се явява символична арена на тази битка.

След мача на „Левски“ срещу „Айнтрахт“ обаче цялото пространство около ПСА изглеждаше като бойно поле, пълно с тежковъоръжени полицаи и специални части на МВР. Имаше усещане, че нещата са на ръба и ще се стигне до сблъсъци. Смятате ли, че ще видим цивилизовано демонтиране, като се следват законите и решенията на Общината и държавата, или защитниците на руските интереси в България са готови да стигнат до по-сериозни ексцесии?

Дали ще може относително спокойно да се извърши демонтажът – цялата отговорност е на МВР и на органите, които се занимават с подобни високорискови събития. Те са длъжни да организират така нещата, че демонтирането да се извърши сравнително спокойно и без сериозни сблъсъци. Ние не можем да очакваме, че хората, които са проводници на руската пропаганда у нас, ще стоят мирно и кротко отстрани и ще приемат демонтажа. Виждате какво правят техните шефове в Москва, които са обвинени за геноцид и престъпления срещу човечеството.

Противопоставянето в обществото в момента е огромно и ще се използват всички средства за пропаганда и за реални физически сблъсъци. Важно е да се каже, че Общината и държавата в момента са длъжни да действат незабавно по отношение на демонтажа на ПСА. Защото ако позволим тази тема да потъне още веднъж в бюрократично безвремие, това би ни превърнало в блато и би бетонирало зоната около ПСА като една умъртвена територия в центъра на София, върху която държавата и народът ни нямат власт. Към премахването на този монумент трябва да се подходи така, сякаш няма да имаме утре и всичко трябва да се свърши днес. Това не е метафора – буквално днес.

След евентуален демонтаж какво трябва да има на това място?

Личното ми мнение е, че е най-добре да има градина, зеленина, пейки, чешми. Или друг вариант – парк за скейтборд. Това е, на което аз най-много бих се зарадвала. София има нужда от зеленина и от места, където може безопасно да се практикуват градски спортове и хобита.

Споменахте, че има основателен страх от руската агресия сред българите. Като психолог с дългогодишна практика бихте ли развила тази теза – защо всъщност е важен демонтажът на ПСА от обществена гледна точка?

Това би била една изключително здравословна крачка за нас като народ. Ще ни помогне да си отговорим на въпросите коя е България, къде е България. Битката за демонтажа на МОЧА е битка за България – това е самата истина. Страната ни в момента изглежда като държава, проядена от руско влияние в икономиката, в енергетиката, в медиите, в политиката.

Отговорът на въпросите „Кой съм аз?“ или „Кои сме ние?“ за всеки индивид, но и за всяко семейство и общество е сред най-важните и решаващи за психичното здраве, а оттам и за физическото здраве и оцеляване. Демонтирането на ПСА в най-скоро време би показало, че България е суверенна и независима държава и може да се справя сама със своите изпитания. Наивно е да се смята, че този демонтаж като с магическа пръчка би решил всички останали проблеми в страната, но той ще освободи пространство и енергия, за да можем да излезем най-после истински на пътя на развитието и да оставим назад сенките от миналото. Да тръгнем към истински реформи, които да ни поставят до другите европейски народи така, както са искали нашите възрожденци. Имаме нужда да се изправим и да очертаем наново границите си.

The collective thoughts of the interwebz