Logs on R2: slash your logging costs

Post Syndicated from Tanushree Sharma original https://blog.cloudflare.com/logs-r2/
Logs on R2: slash your logging costs

Logs on R2: slash your logging costs

Hot on the heels of the R2 open beta announcement, we’re excited that Cloudflare enterprise customers can now use Logpush to store logs on R2!

Raw logs from our products are used by our customers for debugging performance issues, to investigate security incidents, to keep up security standards for compliance and much more. You shouldn’t have to make tradeoffs between keeping logs that you need and managing tight budgets. With R2’s low costs, we’re making this decision easier for our customers!

Getting into the numbers

Cloudflare helps customers at different levels of scale — from a few requests per day, up to a million requests per second. Because of this, the cost of log storage also varies widely. For customers with higher-traffic websites, log storage costs can grow large, quickly.

As an example, imagine a website that gets 100,000 requests per second. This site would generate about 9.2 TB of HTTP request logs per day, or 850 GB/day after gzip compression. Over a month, you’ll be storing about 26 TB (compressed) of HTTP logs.

For a typical use case, imagine that you write and read the data exactly once – for example, you might write the data to object storage before ingesting it into an alerting system. Compare the costs of R2 and S3 (note that this excludes costs per operation to read/write data).

Provider Storage price Data transfer price Total cost assuming data is read once
R2 $0.015/GB $0 $390/month
S3 (Standard, US East $0.023/GB $0.09/GB for first 10 TB; then $0.085/GB $2,858/month

In this example, R2 leads to 86% savings! It’s worth noting that querying logs is where another hefty price tag comes in because Amazon Athena charges based on the amount of data scanned. If your team is looking back through historical data, each query can be hundreds of dollars.

Many of our customers have tens to hundreds of domains behind Cloudflare and the majority of our Enterprise customers also use multiple Cloudflare products. Imagine how costs will scale if you need to store HTTP, WAF and Spectrum logs for all of your Internet properties behind Cloudflare.

For SaaS customers that are building the next big thing on Cloudflare, logs are important to get visibility into customer usage and performance. Your customer’s developers may also want access to raw logs to understand errors during development and to troubleshoot production issues. Costs for storing logs multiply and add up quickly!

The flip side: log retrieval

When designing products, one of Cloudflare’s core principles is ease of use. We take on the complexity, so you don’t have to. Storing logs is only half the battle, you also need to be able to access relevant logs when you need them – in the heat of an incident or when doing an in depth analysis.

Our product, Logpull, offers seven days of log retention and an easy to use API to access. Our customers love that Logpull doesn’t need any setup on third parties since it’s completely managed by Cloudflare. However, Logpull is limited in the retention of logs, the type of logs that we store (only HTTP request logs) and the amount of data that can be queried at one time.

We’re building tools for log retrieval that make it super easy to get your data out of R2 from any of our datasets. Similar to Logpull, we’ll start by supporting lookups by time period and rayId. From there, we’ll tackle more complex functions like returning logs within time X and Y that have 500 errors or where WAF action = block.

We’re looking for customers to join a closed beta for our Log Retrieval API. If you’re interested in testing it out, giving feedback and ultimately helping us shape the product sign up here.

Logs on R2: How to get started

Enterprise customers first need to get R2 added to their contract. Reach out to your account team if this is something you’re interested in! Once enabled, create an R2 bucket for your logs and follow the Logpush setup flow to create your job.

Logs on R2: slash your logging costs

It’s that simple! If you have questions, our Logpush to R2 developer docs go into more detail.

More to come

We’re continuing to build out more advanced Logpush features with a focus on customization. Here’s a preview of what’s next on the roadmap:

  • New datasets: Network Analytics Logs, Workers Invocation Logs
  • Log filtering
  • Custom log formatting

We also have exciting plans to build out log analysis and forensics capabilities on top of R2. We want to make log storage tightly coupled to the Cloudflare dash so you can see high level analytics and drill down into individual log lines all in one view. Stay tuned to the blog for more!
Introducing Cache Reserve: massively extending Cloudflare’s cache

Post Syndicated from Alex Krivit original https://blog.cloudflare.com/introducing-cache-reserve/

Introducing Cache Reserve: massively extending Cloudflare’s cache

Introducing Cache Reserve: massively extending Cloudflare’s cache

One hundred percent. 100%. One-zero-zero. That’s the cache ratio we’re all chasing. Having a high cache ratio means that more of a website’s content is served from a Cloudflare data center close to where a visitor is requesting the website. Serving content from Cloudflare’s cache means it loads faster for visitors, saves website operators money on egress fees from origins, and provides multiple layers of resiliency and protection to make sure that content is always available to be served.

Today, I’m delighted to announce a massive extension of the benefits of caching with Cache Reserve: a new way to persistently serve all static content from Cloudflare’s global cache. By using Cache Reserve, customers can see higher cache hit ratios and lower egress bills.

Why is getting a 100% cache ratio difficult?

Every second, Cloudflare serves tens-of-millions of requests from our cache which equates to multiple terabytes-per-second of cached data being delivered to website visitors around the world. With this massive scale, we must ensure that the most requested content is cached in the areas where it is most popular. Otherwise, visitors might wait too long for content to be delivered from farther away and our network would be running inefficiently. If cache storage in a certain region is full, our network avoids imposing these inefficiencies on our customers by evicting less-popular content from the data center and replacing it with more-requested content.

This works well for the majority of use cases, but all customers have long tail content that is rarely requested and may be evicted from cache. This can be a cause of concern for customers, as this unpopular content can be a major cost driver if it is evicted repeatedly and needs to be served from an origin. This concern can be especially significant for customers with massive content libraries. So how can we make sure to keep this less popular content in cache to shield the customer from origin egress?

Cache Reserve removes customer content from this popularity contest and ensures that even if the specific content hasn’t been requested in months, it can still be served from Cloudflare’s cache – avoiding the need to pull it from the origin and saving the customer money on egress. Cache Reserve helps get customers closer to that 100% cache ratio and helps serve all of their content from our global CDN, forever.  

Why is cache eviction needed?

Most content served from our cache starts its journey from an origin server – where content is hosted. In order to be admitted to Cloudflare’s cache the content sent from the origin must meet certain eligibility criteria that ensures it can be reused to respond to other requests for a website (content that doesn’t change based on who is visiting the site).

After content is admitted to cache, the next question to consider is how long it should remain in cache. Since cache ratios are calculated by taking the number of requests for content and identifying the portion that are answered from a cache server instead of an origin server, ensuring content remains cached in an area it is highly requested is paramount to achieving a high cache ratio.

Introducing Cache Reserve: massively extending Cloudflare’s cache

Some CDNs use a pay-to-play model that allows customers to pay more money to ensure content is cached in certain areas for some length of time. At Cloudflare, we don’t charge customers based on where or for how long something is cached. This means that we have to use signals other than a customer’s willingness to pay to make sure that the right content is cached for the right amount of time and in the right areas.

Where to cache a piece of content is pretty straightforward (where it’s being requested), how long content should remain in cache can be highly variable.

Beyond headers like cache-control or cdn-cache-control, which help determine how long a customer wants something to be served from cache, the other element that CDNs must consider is whether they need to evict content early to optimize storage of more popular assets. We do eviction based on an algorithm called “least recently used” or LRU. This means that the least-requested content can be evicted from cache first to make space for more popular content when storage space is full.

This caching strategy requires keeping track of a lot of information about when requests come in and constantly updating the cache to make sure that the hottest content is kept in cache and the least popular content is evicted. This works well and is fair for the wide-array of customers our CDN supports.

However, if a customer has a large library of content that might go through cycles of popularity and which they’d like to serve from cache regardless, then LRU might mean additional origin egress as assets that are requested sparingly over a long time frame are pulled more from the origin.    

That’s where Cache Reserve comes in. Cache Reserve is not an alternative to our popularity-based cache but a complement to it. By backstopping all cacheable content in Cache Reserve customers don’t have to worry about cache eviction or ephemerality any longer.    

Cache Reserve

Cache Reserve is a large, persistent data store that is implemented on top of R2. By pushing a single button in the dashboard, all of your website’s cacheable content will be written to Cache Reserve. In the same way that Tiered Cache builds a hierarchy of caches between your visitors and your origin, Cache Reserve serves as the ultimate upper-tier cache that will reserve storage space for your assets for as long as you want. This ensures that your content is always served from cache, shielding your origin from unneeded egress fees, and improving response performance.

How Does Cache Reserve Work?

Introducing Cache Reserve: massively extending Cloudflare’s cache

Cache Reserve sits between our edge data centers and your origin and provides guaranteed SLAs for how long your content can remain in cache.

As content is pulled from the origin, it will be written to Cache Reserve, followed by upper-tier data centers, and lower-tier data centers until it reaches the client to fulfill the request. Subsequent requests for the same content will not need to go all the way back to the origin for the response and can, instead, be served from a cache closer to the visitor. Improving both performance and costs of serving the assets. As content gets evicted from lower-tiers and upper-tiers, it will be backstopped by Cache Reserve.

Cache Reserve voids the request-based eviction that’s implemented in LRU and ensures that assets will remain in cache as long as they are needed. Cache Reserve extends the benefits of Tiered Cache by reducing the number of times Cloudflare’s network needs to ask an origin for content we should have in cache, while simultaneously limiting the number of connections and requests that our data centers need to open to your origin to ask for missing content. Using Cache Reserve with tiered cache helps collapse the number of requests that result from multiple concurrent cache misses from lower-tiers for the same content.

As an example, let’s assume a cold request for example.com, something our network has never seen before. If a client request comes into the closest lower-tier data center and it is a miss, that lower-tier is mapped to an upper-tier data center. When the lower-tier asks the upper-tier for the content and it is also a miss, the upper-tier will ask Cache Reserve for the content. Now, being the ultimate upper-tier, it will be the only data center that can ask the origin for content if it is not stored on our network. This will help limit the origin resources you need to devote to serving this content as once it’s written to Cache Reserve, your origin doesn’t need to fan out the content to any other part of Cloudflare’s network.

When your content does need updating, Cache Reserve will respect cache-control headers and purge requests. This means that if you want to control how long something remains fresh in Cache Reserve, before Cloudflare goes back to your origin to revalidate the content, set it as a cache-control header and it will be respected without risk of early eviction. Or if you want to update content on the fly, you can send a purge request which will be respected in both Cloudflare’s cache and in Cache Reserve.

How do you use Cache Reserve?

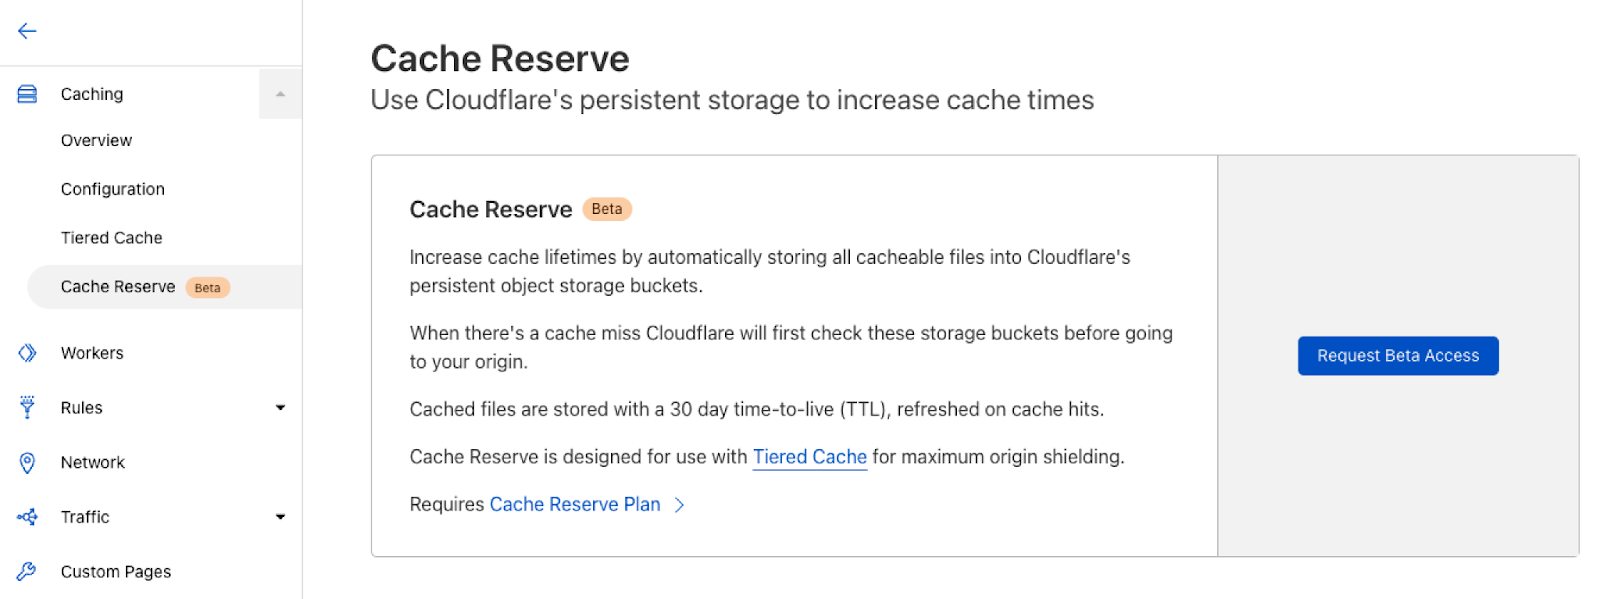
Currently, Cache Reserve is in closed beta, meaning that it’s available to anyone who wants to sign up but we will be slowly rolling it out to customers over the coming weeks to make sure that we are quickly triaging edge cases and making fundamental improvements before we make it generally available to everyone.

To sign up for the Cache Reserve beta:

  • Simply go to the Caching tile in the dashboard.
  • Navigate to the Cache Reserve page and push the sign up button.
Introducing Cache Reserve: massively extending Cloudflare’s cache

The Cache Reserve Plan will mimic the low cost of R2. Storage will be \$0.015 per GB per month and operations will be \$0.36 per million reads, and \$4.50 per million writes. For more information about pricing, please refer to the R2 page to get a general idea (Cache Reserve pricing page will be out soon).  

Try it out!

Cache Reserve holds tremendous promise to increase cache hit ratios — which will improve the economics of running any website while speeding up visitors’ experiences. We’re excited to begin letting people use Cache Reserve soon. Be sure to check out the beta and let us know what you think.

Durable Objects Alarms — a wake-up call for your applications

Post Syndicated from Matt Alonso original https://blog.cloudflare.com/durable-objects-alarms/

Durable Objects Alarms — a wake-up call for your applications

Durable Objects Alarms — a wake-up call for your applications

Since we launched Durable Objects, developers have leveraged them as a novel building block for distributed applications.

Durable Objects provide globally unique instances of a JavaScript class a developer writes, accessed via a unique ID. The Durable Object associated with each ID implements some fundamental component of an application — a banking application might have a Durable Object representing each bank account, for example. The bank account object would then expose methods for incrementing a balance, transferring money or any other actions that the application needs to do on the bank account.

Durable Objects work well as a stateful backend for applications — while Workers can instantiate a new instance of your code in any of Cloudflare’s data centers in response to a request, Durable Objects guarantee that all requests for a given Durable Object will reach the same instance on Cloudflare’s network.

Each Durable Object is single-threaded and has access to a stateful storage API, making it easy to build consistent and highly-available distributed applications on top of them.

This system makes distributed systems’ development easier — we’ve seen some impressive applications launched atop Durable Objects, from collaborative whiteboarding tools to conflict-free replicated data type (CRDT) systems for coordinating distributed state launch.

However, up until now, there’s been a piece missing — how do you invoke a Durable Object when a client Worker is not making requests to it?

As with any distributed system, Durable Objects can become unavailable and stop running. Perhaps the machine you were running on was unplugged, or the datacenter burned down and is never coming back, or an individual object exceeded its memory limit and was reset. Before today, a subsequent request would reinitialize the Durable Object on another machine, but there was no way to programmatically wake up an Object.

Durable Objects Alarms are here to change that, unlocking new use cases for Durable Objects like queues and deferred processing.

What is a Durable Object Alarm?

Durable Object Alarms allow you, from within your Durable Object, to schedule the object to be woken up at a time in the future. When the alarm’s scheduled time comes, the Durable Object’s alarm() handler will be called. If this handler throws an exception, the alarm will be automatically retried using exponential backoff until it succeeds — alarms have guaranteed at-least-once execution.

How are Alarms different from Workers Cron Triggers?

Alarms are more fine-grained than Cron Triggers. While a Workers service can have up to three Cron Triggers configured at once, it can have an unlimited amount of Durable Objects, each of which can have a single alarm active at a time.

Alarms are directly scheduled from and invoke a function within your Durable Object. Cron Triggers, on the other hand, are not programmatic — they execute based on their schedules, which have to be configured via the Cloudflare Dashboard or centralized configuration APIs.

How do I use Alarms?

First, you’ll need to add the durable_object_alarms compatibility flag to your wrangler.toml.

compatibility_flags = ["durable_object_alarms"]

Next, implement an alarm() handler in your Durable Object that will be called when the alarm executes. From anywhere else in your Durable Object, call state.storage.setAlarm() and pass in a time for the alarm to run at. You can use state.storage.getAlarm() to retrieve the currently set alarm time.

In this example, we implemented an alarm handler that wakes the Durable Object up once every 10 seconds to batch requests to a single Durable Object, deferring processing until there is enough work in the queue for it to be worthwhile to process them.

export default {
  async fetch(request, env) {
    let id = env.BATCHER.idFromName("foo");
    return await env.BATCHER.get(id).fetch(request);
  },
};

const SECONDS = 1000;

export class Batcher {
  constructor(state, env) {
    this.state = state;
    this.storage = state.storage;
    this.state.blockConcurrencyWhile(async () => {
      let vals = await this.storage.list({ reverse: true, limit: 1 });
      this.count = vals.size == 0 ? 0 : parseInt(vals.keys().next().value);
    });
  }
  async fetch(request) {
    this.count++;

    // If there is no alarm currently set, set one for 10 seconds from now
    // Any further POSTs in the next 10 seconds will be part of this kh.
    let currentAlarm = await this.storage.getAlarm();
    if (currentAlarm == null) {
      this.storage.setAlarm(Date.now() + 10 * SECONDS);
    }

    // Add the request to the batch.
    await this.storage.put(this.count, await request.text());
    return new Response(JSON.stringify({ queued: this.count }), {
      headers: {
        "content-type": "application/json;charset=UTF-8",
      },
    });
  }
  async alarm() {
    let vals = await this.storage.list();
    await fetch("http://example.com/some-upstream-service", {
      method: "POST",
      body: Array.from(vals.values()),
    });
    await this.storage.deleteAll();
    this.count = 0;
  }
}

Once every 10 seconds, the alarm() handler will be called. In the event an unexpected error terminates the Durable Object, it will be re-instantiated on another machine, following a short delay, after which it can continue processing.

Under the hood, Alarms are implemented by making reads and writes to the storage layer. This means Alarm get and set operations follow the same rules as any other storage operation – writes are coalesced with other writes, and reads have a defined ordering. See our blog post on the caching layer we implemented for Durable Objects for more information.

Durable Objects Alarms guarantee fault-tolerance

Alarms are designed to have no single point of failure and to run entirely on our edge – every Cloudflare data center running Durable Objects is capable of running alarms, including migrating Durable Objects from unhealthy data centers to healthy ones as necessary to ensure that their Alarm executes. Single failures should resolve in under 30 seconds, while multiple failures may take slightly longer.

We achieve this by storing alarms in the same distributed datastore that backs the Durable Object storage API. This allows alarm reads and writes to behave identically to storage reads and writes and to be performed atomically with them, and ensures that alarms are replicated across multiple datacenters.

Within each data center capable of running Durable Objects, there are multiple processes responsible for tracking upcoming alarms and triggering them, providing fault tolerance and scalability within the data center. A single elected leader in each data center is responsible for detecting failure of other data centers and assigning responsibility of those alarms to healthy local processes in its own data center. In the event of leader failure, another leader will be elected and become responsible for executing Alarms in the data center. This allows us to guarantee at-least-once execution for all Alarms.

How do I get started?

Alarms are a great way to build new distributed primitives, like queues, atop Durable Objects. They also provide a method for guaranteeing work within a Durable Object will complete, without relying on a client request to “kick” the Object.

You can get started with Alarms now by enabling Durable Objects in the Cloudflare dashboard. For more info, check the developer docs or jump in our Discord.

A New Hope for Object Storage: R2 enters open beta

Post Syndicated from Greg McKeon original https://blog.cloudflare.com/r2-open-beta/

A New Hope for Object Storage: R2 enters open beta

A New Hope for Object Storage: R2 enters open beta

In September, we announced that we were building our own object storage solution: Cloudflare R2. R2 is our answer to egregious egress charges from incumbent cloud providers, letting developers store as much data as they want without worrying about the cost of accessing that data.

The response has been overwhelming.

  • Independent developers had bills too small for cloud providers to negotiate fair egress rates with them. Egress charges were the largest line-item on their cloud bills, strangling side projects and the new businesses they were building.
  • Large corporations had written off multi-cloud storage – and thus multi-cloud itself – as a pipe dream. They came to us with excitement, pitching new products that integrated data with partner companies.
  • Non-profit research organizations were paying massive egress fees just to share experiment data with one another. Egress fees were having a real impact on their ability to collaborate, driving silos between organizations and restricting the experiments and analyses they could run.

Cloudflare exists to help build a better Internet. Today, the Internet gets what it deserves: R2 is now in open beta.

Self-serve customers can enable R2 in the Cloudflare dashboard. Enterprise accounts can reach out to their CSM for onboarding.

Internal and external APIs

R2 has two APIs: an API accessible only from within Workers, which we call the In-Worker API, and an S3-compatible API, which exposes your bucket on a URL of the form bucket.account.r2storage.com. Before you can make requests to R2, you’ll need to be authenticated — R2 buckets are private by default.

In-Worker API

With the in-Worker API, a bucket is “bound” to a specific Worker, which can then perform PUT, GET, DELETE and LIST operations against the bucket.

S3-compatible API

For the S3-compatible API, authentication is done the same way as on S3: SigV4 against an R2 URL. SigV4 signs requests using a secret key to authenticate them to R2. This means public access to R2 over the Internet is only possible today by hosting a Worker, connecting it to R2, and routing requests through it.

The easiest way to test the S3-compatible API is to use an S3 client. One of the most popular S3 clients is the boto3 SDK.

In Python, copy the following script and fill in the account_id, access_key, and secret_access_key fields with your R2 account credentials.

#!/usr/bin/env python
import boto3
import pprint
from botocore.client import Config
 
account_id = ''
access_key_id = ''
secret_access_key = ''
endpoint = f'https://{account_id}.r2.cloudflarestorage.com'
 
cl = boto3.client(
    's3',
    aws_access_key_id=access_key_id,
    aws_secret_access_key=secret_access_key,
    endpoint_url=endpoint,
    config=Config(
        region_name = endpoints[endpoint_name].get('region', 'auto'),
        s3={'addressing_style': 'path'},
        retries=dict( max_attempts=0 ),
    ),
)
 
printer = pprint.PrettyPrinter().pprint
 
printer(cl.head_bucket(Bucket='some bucket'))
printer(cl.create_bucket(Bucket='some other bucket'))
printer(cl.put_object(Bucket='some bucket', Key='my object', Body='some payload'))

Features

R2 comes with support for all basic create/read/update/delete S3 features through both of its APIs.

During the open beta period, we’re targeting R2 to sustain 1,000 GET operations per second and 100 PUT operations per second, per bucket. R2 supports objects up to approximately 5 TB in size, with individual parts limited to 5 GB of data.

R2 provides strongly consistent access to data. Once a PUT is confirmed by R2, future GET operations will always reflect the new key/value pair. The only exception to this is when deleting a bucket. For a short period of time following deletion, the bucket may still exist and continue to allow reads/writes.

Pricing

When we initially announced R2, we included preliminary pricing numbers. One of our main goals with R2 has been to serve the developers who can’t negotiate large discounts with cloud vendors. To that end, we’re also announcing a forever-free tier that lets developers start building on R2 with no charges at all.

R2 charges depend on the total volume of data stored and the type of operation performed on the data:

  • Storage is priced at \$0.015 / GB, per month.
  • Class A operations (including writes and lists) cost \$4.50 / million.
  • Class B operations cost \$0.36 / million.

Class A operations tend to mutate state, such as creating a bucket, listing objects in a bucket, or writing an object. Class B operations tend to read existing state, for example reading an object from a bucket. You can find more information on pricing and a full list of operation types in the docs.

Of course, there is no charge for egress bandwidth from R2. You can access your bucket to your heart’s content.

R2’s forever-free tier includes:

  • 10 GB-months of stored data
  • 1,000,000 Class A operations, per month
  • 10,000,000 Class B operations, per month

Free usage resets each month. While in the open beta phase, R2 usage over the free tier will be billed.

Future plans

We’ve spent the past six months in closed beta with a number of design partners, building out our storage solution. Backed by Durable Objects, R2’s novel architecture delivers both high availability and consistent performance.

While we’ve made great progress on R2, we still have plenty left to build in the coming months.

Improving performance

Our first priority is to improve performance and reliability. While we’ve thrown internal usage and our design partner’s demands at R2, there’s no substitute for live production traffic.

During the open beta period, R2 can sustain a maximum of 1,000 GET operations per second and 100 PUT operations per second, per bucket. We’ll look to raise these limits as we get comfortable operating the system. If you have higher needs, reach out to us!

When you create a bucket, you won’t see a region selector. Our vision for R2 includes automatically globally distributed storage, where R2 seamlessly places each object into the storage region closest to where the request comes from. Today, R2 primarily stores data in North America, which can lead to higher latencies when accessing content from other regions. We’ll first look to address this by adding additional regions where objects can be created, before adding automatic migration of existing objects across regions. Similar to what we’ve built with jurisdictional restrictions for Durable Objects, we’ll also enable restricting where an R2 bucket places data to comply with privacy regulations.

Expanding R2’s feature set

We’ll then focus on expanding R2 capabilities beyond the basic S3 API. In the near term, we’re focused on delivering:

  • Support for TTLs, so data can automatically be deleted from buckets over time.
  • Public buckets, so a bucket can be exposed to the internet without writing a Worker
  • Pre-signed URL support, which delegates read and write access for a specific key to a token.
  • Integration with Cloudflare’s cache, to scale read requests and provide global distribution of data.

If you have additional feature requests that aren’t listed above, we want to hear from you! Reach out and let us know what you need to make R2 your new, zero-cost egress object store.

So it’s been a while…

Post Syndicated from Adam Bradley original https://ibms360.co.uk/?p=902

Dear Reader,

Wow, it’s been a while since our last post here, almost 2 years! Time has totally flown by. I checked the traffic this morning and was pleasantly surprised to see that we’re still getting 2,000+ hits per month which is just incredible given that we haven’t published any updates.

So, I’m guessing you probably want to know whats going on and why we’re not posting here. Let me summarily answer your most important questions below:

  1. Are all of you okay? – Yes.
  2. Is the project dead? – No.
  3. Do you have any updates for us? – Unfortunately, not really.

So, the reason we haven’t been posting here is mainly because, well, nothing has changed. Chris & I have both been insanely busy with regular life, work is non-stop and personal commitments on top mean that currently we have little time to focus on the project. I’m additionally moving to Southampton for a new job which will put me further away from the project and will likely just add to the delay.

The small updates we do have for you are mainly administrative. Back in June 2020 Peter Vaughan purchased and donated some shelving units to the project to allow us to better store our parts, media, etc.

And in September of 2020 we had some members of the CCS (British Computer Conservation Society) visit us in a socially distanced fashion (remember that?!) to ask us some questions about the project following our application to join their projects register.

We have now successfully joined the CCS, and look forward to working with them in the future.

So, what of the project now? Well, for now we’ve basically decided to park the project for a while until one or both of us has more time to spend on it. It sucks because we really want to see the project move forward and succeed, but right now neither of us are particularly in a position to make that happen; and whilst we do have fantastic support from the rest of the team, realistically we need to be somewhat involved in order to be able to progress things in the direction we’d like them to go in.

So, basically we’re on pause for the moment. When will we be off pause? I don’t know. It depends on a lot of factors. Trust me though, if anything changes you will all be the first to hear about it!

All the best,

Adam

P.S. If you’ve sent us an email and we haven’t replied, I can only apologise. A lot of them seem to have disappeared into a black hole of our old email server, and so if you’d like to get in touch please send us another email and we’ll do our best to get back to you.

Get kids coding and learning electronics with Raspberry Pi Pico

Post Syndicated from Rebecca Franks original https://www.raspberrypi.org/blog/kids-coding-electronics-raspberry-pi-pico-free-learning-resource/

Since the release of the Raspberry Pi Pico microcontroller in 2021, we have seen people all over the world come up with creative Pico-based inventions.

Raspberry Pi Pico with its inbuilt LED blinking.
The Raspberry Pi Pico microcontroller.

Now, thanks to our brand-new and free ‘Introduction to Raspberry Pi Pico’ learning path, young coders can easily join in and make their own cool Pico projects! This free learning path has six guided projects to help kids to independently develop their coding skills, and their skills in physical computing and electronics.

A girl creates a physical computing project.
Physical computing is a great way to help young people get creative with coding.

In this post, I’ll tell you about Raspberry Pi Pico, what kids can make by following our free ‘Intro to Pico’ path, and what skills they will be learning.

Meet Raspberry Pi Pico

Raspberry Pi Pico is a physical computing device that is low-cost and easy to use. It’s much smaller than any Raspberry Pi computer, and it needs much less power. That’s because it’s not a full computer but instead a microcontroller. That means Pico is a device that you program by writing code on any computer, and then sending that code to Pico via a USB cable.

Raspberry Pi Pico has GPIO pins (like Raspberry Pi computers do). These pins mean it can interact with different types of physical computing components, such as buttons, buzzers, and LEDs.

In the ‘Intro to Raspberry Pi Pico’ path, we’ve designed new digital making projects specifically using Pico. By following the projects in the path, young people learn to make things with different electronic components. They’ll bring to life their own LED fireflies; they’ll make music with a sound machine and dial (a potentiometer); they’ll look after themselves and people around them by making a mood indicator and a heart rate visualiser. To find out more, visit the path, or scroll to the bottom of this post and click on ‘Details about the projects’.

The specially designed structure of our learning paths helps kids become confident and independent coders and digital makers. Through this project path, we want to show young people what is possible with Raspberry Pi Pico and inspire them to continue their digital making journey beyond the six projects. Seeing tech creations from our amazing community is super special to us, and we would love to hear about what your young coders have made with Pico. Kids can share their projects in the path gallery, or you can tag us on social media if you post photos!   

alt=""

Learning skills and independence with our project paths 

While young people make all these Raspberry Pi Pico projects, they will learn the skills and independence to make and code their very own, unique creations with a Pico. We have designed our new project paths to help kids become independent digital makers. As they progress through a path, kids gain new skills, practise what they have learnt, and finally write and follow their own project brief. 

Our learning paths help kids develop many of the skills that are important to all coders and digital makers, no matter how much experience they have: 

  • How to turn an idea on paper into a tech creation
  • How to debug a project
  • How to combine new information with what they already know about digital making 

The learning paths also encourage kids to make projects about the things that matter to them.  

Key questions answered

Who is this path for?

We have written the projects in this path with young people around the age of 9 to 13 in mind. 

Programs for Raspberry Pi Pico are written in a text-based language called MicroPython. That means a young person who wants to start the ‘Intro to Pico’ path needs to be familiar with typing on a keyboard.

A young person codes at a Raspberry Pi computer.

If your kid has never coded in a text-based language before, they could complete our free ‘Introduction to Python‘ project path first, but this is not a prerequisite.

What will young people learn?

To help with the programming aspects of the projects, the instructions in the path tell young people about:  

  • Displaying output
  • Arithmetic expressions
  • Importing from a library
  • While loops
  • Nested if statements
  • Defining and calling functions
  • Events
Raspberry Pi Pico attached with jumper wires to a purple LED.
We still get excited by a flashing LED.

One of the great things about this project path is that it helps young people explore physical computing and electronics. In the ‘Intro to Pico’ path, they’ll use:

  • Single-colour LEDs
  • Multi-colour LEDs (so-called RGB LEDs)
  • Buzzers
  • Switches (including switches the kids will make out of craft materials!)
  • Buttons
  • Potentiometers (dials)

How much time is needed to complete the path?

We’ve designed the path to be completed in around six one-hour sessions, with one hour per project. However, the project instructions encourage kids to upgrade their projects and go further if they wish. This means that they might want to spend a little more time getting their projects exactly as they imagine. 

What software is needed for the projects?

Young people need a web browser so they can follow the project instructions. The first two projects in the path provide detailed instructions for how to install the free software needed for the projects. 

alt=""
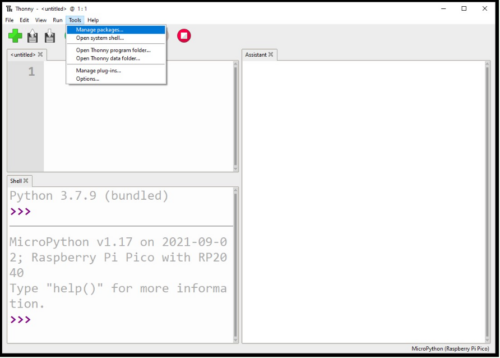
The projects in the path show you how to program Raspberry Pi Pico using MicroPython in the Thonny software.

What hardware is needed for these projects?

The first step of each project lists what components are needed to create the project. You can purchase a kit from Kitronik or from Pimoroni that includes all of the components used in the path:

‘Intro to Raspberry Pi Pico’ kit list (click here)

  • 1 × soldered Raspberry Pi Pico
  • 1 × USB cable
  • 1 × red LED
  • 1 × blue LED
  • 2 × yellow LEDs
  • 6 × single-colour LEDs (random)
  • 3 × RGB LEDs
  • 15 × 75 ohm resistors (max 220 ohm)
  • 2 × potentiometers
  • 8 × push buttons (optional, these can be made from crafting materials)
  • 15 × pin–socket jumper wires
  • 38 × socket–socket jumper wires
  • 4 × pin–pin jumper wires

What can young people do next?

Explore Python coding with us 

If your young coders enjoy MicroPython, they’ll also love our Python learning paths: ‘Introduction to Python‘ and More Python‘. Both are structured in the same way as our Pico path, and will help young people learn Python while creating their own visual designs.

A girl points happily at a project on the Raspberry Pi Foundation's projects site.
Details about the projects in ‘Intro to Raspberry Pi Pico’

The ‘Intro to Raspberry Pi Pico’ path is structured according to our Digital Making Framework, with three Explore projects, two Design projects, and a final Invent project. You can also check out our learning graph to see the progression of skills and knowledge throughout the path.

Explore project 1: LED firefly


The ‘LED firefly’ project introduces creators to Raspberry Pi Pico while they make their first project with a blinking LED. They program the LED with a blink pattern that is common to fireflies in the wild. To upgrade their projects, creators can place their LED firefly into a glass jar to create a twinkling effect.  

Explore project 2: Party popper


‘Party popper’ introduces creators to the RGB LED and a buzzer. To form the popper, they craft a pull switch out of kitchen foil and cardboard. When the popper is activated, the RGB LED flashes in their chosen colour, and a ‘tada’ sound plays on the buzzer. 

Explore project 3: Beating heart


‘Beating heart’ uses a potentiometer (dial) to control the pulsing speed of an LED. Creators craft their own hearts using red paper and origami before placing the pulsing LED inside. In this way, they create a model of a heart they can use to learn about medicine or to bring to life a favourite toy. 

Design project 1: Mood indicator


In the ‘Mood indicator’ project, kids use switches and an RGB LED to create a device that can communicate a need or a mood to another person. This Design project gives young creators lots of opportunities to use their new skills to create something personal to them.

Design project 2: Sound machine


‘Sound machine’ is a project for kids to work with the different tones that a buzzer can make. They can use the buzzer to create sound effects, or to recreate their favourite songs. Once they have decided on their sounds, they can think about how a user of their project might choose to play them. 

Invent project: Sensory gadget


This project gives creators that chance to pick their favourite elements of the path to create something totally unique to them. They could make all sorts of sensory gadgets, from a Picosaber to a candle that can be blown out. Creators are encouraged to showcase their creations in the path gallery to give other young makers inspiration. 

The post Get kids coding and learning electronics with Raspberry Pi Pico appeared first on Raspberry Pi.

[$] Page pinning and filesystems

Post Syndicated from original https://lwn.net/Articles/894390/

It would have been surprising indeed if the 2022 Linux Storage,
Filesystem, Memory-management and BPF Summit
(LSFMM) did not include a
session working toward solutions to the longstanding problems with
get_user_pages(), an internal function that locks user-space pages
in memory for access by the kernel. The issue has, after all, come up numerous times
over the years. This year’s event duly contained a session in the joint
filesystem and memory-management track, led by John Hubbard, with a focus
on page pinning and how it interacts with filesystems.

Establishing a data perimeter on AWS

Post Syndicated from Ilya Epshteyn original https://aws.amazon.com/blogs/security/establishing-a-data-perimeter-on-aws/

For your sensitive data on AWS, you should implement security controls, including identity and access management, infrastructure security, and data protection. Amazon Web Services (AWS) recommends that you set up multiple accounts as your workloads grow to isolate applications and data that have specific security requirements. AWS tools can help you establish a data perimeter between your multiple accounts, while blocking unintended access from outside of your organization. Data perimeters on AWS span many different features and capabilities. Based on your security requirements, you should decide which capabilities are appropriate for your organization. In this first blog post on data perimeters, I discuss which AWS Identity and Access Management (IAM) features and capabilities you can use to establish a data perimeter on AWS. Subsequent posts will provide implementation guidance and IAM policy examples for establishing your identity, resource, and network data perimeters.

A data perimeter is a set of preventive guardrails that help ensure that only your trusted identities are accessing trusted resources from expected networks. These terms are defined as follows:

  • Trusted identities – Principals (IAM roles or users) within your AWS accounts, or AWS services that are acting on your behalf
  • Trusted resources – Resources that are owned by your AWS accounts, or by AWS services that are acting on your behalf
  • Expected networks – Your on-premises data centers and virtual private clouds (VPCs), or networks of AWS services that are acting on your behalf

Data perimeter guardrails

You typically implement data perimeter guardrails as coarse-grained controls that apply across a broad set of AWS accounts and resources. When you implement a data perimeter, consider the following six primary control objectives.

Data perimeter Control objective
Identity Only trusted identities can access my resources.
Only trusted identities are allowed from my network.
Resource My identities can access only trusted resources.
Only trusted resources can be accessed from my network.
Network My identities can access resources only from expected networks.
My resources can only be accessed from expected networks.

Note that the controls in the preceding table are coarse in nature and are meant to serve as always-on boundaries. You can think of data perimeters as creating a firm boundary around your data to prevent unintended access patterns. Although data perimeters can prevent broad unintended access, you still need to make fine-grained access control decisions. Establishing a data perimeter does not diminish the need to continuously fine-tune permissions by using tools such as IAM Access Analyzer as part of your journey to least privilege.

To implement the preceding control objectives on AWS, use three primary capabilities:

Let’s expand the previous table to include the corresponding policies you would use to implement the controls for each of the control objectives.

Data perimeter Control objective Implemented by using
Identity Only trusted identities can access my resources. Resource-based policies
Only trusted identities are allowed from my network. VPC endpoint policies
Resource My identities can access only trusted resources. SCPs
Only trusted resources can be accessed from my network. VPC endpoint policies
Network My identities can access resources only from expected networks. SCPs
My resources can only be accessed from expected networks. Resource-based policies

As you can see in the preceding table, the correct policy for each control objective depends on which resource you are trying to secure. Resource-based policies, which are applied to resources such as Amazon S3 buckets, can be used to filter access based on the calling principal and the network from which they are making a call. VPC endpoint policies are used to inspect the principal that is making the API call and the resource they are trying to access. And SCPs are used to restrict your identities from accessing resources outside your control or from outside your network. Note that SCPs apply only to your principals within your AWS organization, whereas resource policies can be used to limit access to all principals.

The last components are the specific IAM controls or condition keys that enforce the control objective. For effective data perimeter controls, use the following primary IAM condition keys, including the new resource owner condition keys:

  • aws:PrincipalOrgID – Use this condition key to restrict access to trusted identities, your principals (roles or users) that belong to your organization. In the context of a data perimeter, you will use this condition key with your resource-based policies and VPC endpoint policies.
  • aws:ResourceOrgID – Use this condition key to restrict access to resources that belong to your AWS organization. To establish a data perimeter, you will use this condition key within SCPs and VPC endpoint policies.
  • aws:SourceIp, aws:SourceVpc, aws:SourceVpce – Use these condition keys to restrict access to expected network locations, such as your corporate network or your VPCs. In the context of a data perimeter, you will use these keys within identity and resource-based policies.

We can now complete the table that we’ve been developing throughout this post.

Data perimeter Control objective Implemented by using Primary IAM capability
Identity Only trusted identities can access my resources. Resource-based policies aws:PrincipalOrgID
aws:PrincipalIsAWSService
Only trusted identities are allowed from my network. VPC endpoint policies aws:PrincipalOrgID
Resource My identities can access only trusted resources. SCPs aws:ResourceOrgID
Only trusted resources can be accessed from my network. VPC endpoint policies aws:ResourceOrgID
Network My identities can access resources only from expected networks. SCPs aws:SourceIp
aws:SourceVpc
aws:SourceVpce
aws:ViaAWSService
My resources can only be accessed from expected networks. Resource-based policies aws:SourceIp
aws:SourceVpc
aws:SourceVpce
aws:ViaAWSService
aws:PrincipalIsAWSService

For the identity data perimeter, the primary condition key is aws:PrincipalOrgID, which you can use in resource-based policies and VPC endpoint policies so that only your identities are allowed access. Use aws:PrincipalIsAWSService to allow AWS services to access your resources by using their own identities—for example, AWS CloudTrail can use this access to write data to your bucket.

For the resource data perimeter, the primary condition key is aws:ResourceOrgID, which you can use in an SCP policy or VPC endpoint policy to allow your identities and network to access only the resources that belong to your AWS organization.

Last, for the network perimeter, use the aws:SourceIp, aws:SourceVpc, and aws:SourceVpce condition keys in SCPs and resource-based policies to make sure that your identities and resources are accessed only from your trusted network. Use the aws:PrincipalIsAWSService and aws:ViaAWSService condition keys to allow AWS services to access your resources from outside your network locations. For example, CloudTrail can use this access to write data to one of your S3 buckets, or Amazon Athena can query data in your S3 buckets. For more information about using these keys as part of your data perimeter strategy, see the blog post IAM makes it easier for you to manage permissions for AWS services accessing your resources.

Conclusion

In this blog post, you learned the foundational elements that are needed to implement an identity, resource, and network data perimeter on AWS, including the primary IAM capabilities that are used to implement each of the control objectives. Stay tuned to the follow-up posts in this series, which will provide prescriptive guidance on establishing your identity, resource, and network data perimeters.

Following are additional resources that will help you further explore the data perimeter topic, including a whitepaper and a hands-on-workshop. We have also curated several blog posts related to the key IAM capabilities discussed in this post.

If you have any questions, comments, or concerns, contact AWS Support or start a new thread on the IAM forum. If you have feedback about this post, submit comments in the Comments section below.

Want more AWS Security news? Follow us on Twitter.

Author

Ilya Epshteyn

Ilya is a Senior Manager of Identity Solutions in AWS Identity. He helps customers to innovate on AWS by building highly secure, available, and scalable architectures. He enjoys spending time outdoors and building Lego creations with his kids.

[$] Recent RCU changes

Post Syndicated from original https://lwn.net/Articles/894379/

In a combined filesystem and memory-management session at the 2022 Linux Storage,
Filesystem, Memory-management and BPF Summit
(LSFMM), Paul McKenney
gave an update on
the changes to the read-copy-update (RCU) subsystem that had been made over
the last several years. He started with a quick overview of what RCU is
and why it exists at all. He did not go into any
real depth, though, since many of the topics could take a 90-minute session of their
own, he said, but he did provide some descriptions of the work that has gone into
RCU recently.

Patch Tuesday – May 2022

Post Syndicated from Greg Wiseman original https://blog.rapid7.com/2022/05/10/patch-tuesday-may-2022/

Patch Tuesday - May 2022

This month is par for the course in terms of both number and severity of vulnerabilities being patched by Microsoft. That means there’s plenty of work to be done by system and network administrators, as usual.

There is one 0-day this month: CVE-2022-26925, a Spoofing vulnerability in the Windows Local Security Authority (LSA) subsystem, which allows attackers able to perform a man-in-the-middle attack to force domain controllers to authenticate to the attacker using NTLM authentication. This is very bad news when used in conjunction with an NTLM relay attack, potentially leading to remote code execution (RCE). This bug affects all supported versions of Windows, but Domain Controllers should be patched on a priority basis before updating other servers.

Two other CVEs were also publicly disclosed before today’s releases, though they have not yet been seen exploited in the wild. CVE-2022-22713 is a denial-of-service vulnerability that affects Hyper-V servers running relatively recent versions of Windows (20H2 and later). CVE-2022-29972 is a Critical RCE that affects the Amazon Redshift ODBC driver used by Microsoft’s Self-hosted Integration Runtime (a client agent that enables on-premises data sources to exchange data with cloud services such as Azure Data Factory and Azure Synapse Pipelines). This vulnerability also prompted Microsoft to publish their first guidance-based advisory of the year, ADV220001, indicating their plans to strengthen tenant isolation in their cloud services without actually providing any specific details or actions to be taken by customers.

All told, 74 CVEs were fixed this month, the vast majority of which affect functionality within the Windows operating system. Other notable vulnerabilities include CVE-2022-21972 and CVE-2022-23270, critical RCEs in the Point-to-Point Tunneling Protocol. Exploitation requires attackers to win a race condition, which increases the complexity, but if you have any RAS servers in your environment, patch sooner rather than later.

CVE-2022-26937 carries a CVSSv3 score of 9.8 and affects services using the Windows Network File System (NFS). This can be mitigated by disabling NFSV2 and NFSV3 on the server; however, this may cause compatibility issues, and upgrading is highly recommended.

CVE-2022-22017 is yet another client-side Remote Desktop Protocol (RDP) vulnerability. While not as worrisome as when an RCE affects RDP servers, if a user can be enticed to connect to a malicious RDP server via social engineering tactics, an attacker will gain RCE on their system.

Sharepoint Server administrators should be aware of CVE-2022-29108, a post-authentication RCE fixed today. Exchange admins have CVE-2022-21978 to worry about, which could allow an attacker with elevated privileges on an Exchange server to gain the rights of a Domain Administrator.

A host of Lightweight Directory Access Protocol (LDAP) vulnerabilities were also addressed this month, including CVE-2022-22012 and CVE-2022-29130 – both RCEs that, thankfully, are only exploitable if the MaxReceiveBuffer LDAP policy is set to a value higher than the default value.

Although there are no browser vulnerabilities this month, two RCEs affecting Excel (CVE-2022-29109 and CVE-2022-29110) and one Security Feature Bypass affecting Office (CVE-2022-29107) mean there is still some endpoint application patching to do.

Summary charts

Patch Tuesday - May 2022

Summary tables

Azure vulnerabilities

CVE Title Exploited? Publicly disclosed? CVSSv3 base score Has FAQ?
CVE-2022-29972 Insight Software: CVE-2022-29972 Magnitude Simba Amazon Redshift ODBC Driver No Yes N/A Yes

Developer Tools vulnerabilities

CVE Title Exploited? Publicly disclosed? CVSSv3 base score Has FAQ?
CVE-2022-29148 Visual Studio Remote Code Execution Vulnerability No No 7.8 Yes
CVE-2022-30129 Visual Studio Code Remote Code Execution Vulnerability No No 8.8 Yes
CVE-2022-23267 .NET and Visual Studio Denial of Service Vulnerability No No 7.5 No
CVE-2022-29117 .NET and Visual Studio Denial of Service Vulnerability No No 7.5 No
CVE-2022-29145 .NET and Visual Studio Denial of Service Vulnerability No No 7.5 No
CVE-2022-30130 .NET Framework Denial of Service Vulnerability No No 3.3 No

ESU Windows vulnerabilities

CVE Title Exploited? Publicly disclosed? CVSSv3 base score Has FAQ?
CVE-2022-26935 Windows WLAN AutoConfig Service Information Disclosure Vulnerability No No 6.5 Yes
CVE-2022-29121 Windows WLAN AutoConfig Service Denial of Service Vulnerability No No 6.5 Yes
CVE-2022-26936 Windows Server Service Information Disclosure Vulnerability No No 6.5 Yes
CVE-2022-22015 Windows Remote Desktop Protocol (RDP) Information Disclosure Vulnerability No No 6.5 Yes
CVE-2022-29103 Windows Remote Access Connection Manager Elevation of Privilege Vulnerability No No 7.8 No
CVE-2022-29132 Windows Print Spooler Elevation of Privilege Vulnerability No No 7.8 No
CVE-2022-26937 Windows Network File System Remote Code Execution Vulnerability No No 9.8 Yes
CVE-2022-26925 Windows LSA Spoofing Vulnerability Yes Yes 8.1 Yes
CVE-2022-22012 Windows LDAP Remote Code Execution Vulnerability No No 9.8 Yes
CVE-2022-29130 Windows LDAP Remote Code Execution Vulnerability No No 9.8 Yes
CVE-2022-22013 Windows LDAP Remote Code Execution Vulnerability No No 8.8 No
CVE-2022-22014 Windows LDAP Remote Code Execution Vulnerability No No 8.8 No
CVE-2022-29128 Windows LDAP Remote Code Execution Vulnerability No No 8.8 Yes
CVE-2022-29129 Windows LDAP Remote Code Execution Vulnerability No No 8.8 Yes
CVE-2022-29137 Windows LDAP Remote Code Execution Vulnerability No No 8.8 No
CVE-2022-29139 Windows LDAP Remote Code Execution Vulnerability No No 8.8 Yes
CVE-2022-29141 Windows LDAP Remote Code Execution Vulnerability No No 8.8 No
CVE-2022-26931 Windows Kerberos Elevation of Privilege Vulnerability No No 7.5 Yes
CVE-2022-26934 Windows Graphics Component Information Disclosure Vulnerability No No 6.5 Yes
CVE-2022-29112 Windows Graphics Component Information Disclosure Vulnerability No No 6.5 Yes
CVE-2022-22011 Windows Graphics Component Information Disclosure Vulnerability No No 5.5 Yes
CVE-2022-29115 Windows Fax Service Remote Code Execution Vulnerability No No 7.8 Yes
CVE-2022-26926 Windows Address Book Remote Code Execution Vulnerability No No 7.8 Yes
CVE-2022-22019 Remote Procedure Call Runtime Remote Code Execution Vulnerability No No 8.8 Yes
CVE-2022-21972 Point-to-Point Tunneling Protocol Remote Code Execution Vulnerability No No 8.1 Yes
CVE-2022-23270 Point-to-Point Tunneling Protocol Remote Code Execution Vulnerability No No 8.1 Yes
CVE-2022-29105 Microsoft Windows Media Foundation Remote Code Execution Vulnerability No No 7.8 No
CVE-2022-29127 BitLocker Security Feature Bypass Vulnerability No No 4.2 Yes

Exchange Server vulnerabilities

CVE Title Exploited? Publicly disclosed? CVSSv3 base score Has FAQ?
CVE-2022-21978 Microsoft Exchange Server Elevation of Privilege Vulnerability No No 8.2 Yes

Microsoft Office vulnerabilities

CVE Title Exploited? Publicly disclosed? CVSSv3 base score Has FAQ?
CVE-2022-29108 Microsoft SharePoint Server Remote Code Execution Vulnerability No No 8.8 Yes
CVE-2022-29107 Microsoft Office Security Feature Bypass Vulnerability No No 5.5 Yes
CVE-2022-29109 Microsoft Excel Remote Code Execution Vulnerability No No 7.8 Yes
CVE-2022-29110 Microsoft Excel Remote Code Execution Vulnerability No No 7.8 Yes

Windows vulnerabilities

CVE Title Exploited? Publicly disclosed? CVSSv3 base score Has FAQ?
CVE-2022-26930 Windows Remote Access Connection Manager Information Disclosure Vulnerability No No 5.5 Yes
CVE-2022-29125 Windows Push Notifications Apps Elevation of Privilege Vulnerability No No 7 Yes
CVE-2022-29114 Windows Print Spooler Information Disclosure Vulnerability No No 5.5 Yes
CVE-2022-29140 Windows Print Spooler Information Disclosure Vulnerability No No 5.5 Yes
CVE-2022-29104 Windows Print Spooler Elevation of Privilege Vulnerability No No 7.8 No
CVE-2022-22016 Windows PlayToManager Elevation of Privilege Vulnerability No No 7 Yes
CVE-2022-26933 Windows NTFS Information Disclosure Vulnerability No No 5.5 Yes
CVE-2022-29131 Windows LDAP Remote Code Execution Vulnerability No No 8.8 Yes
CVE-2022-29116 Windows Kernel Information Disclosure Vulnerability No No 4.7 Yes
CVE-2022-29133 Windows Kernel Elevation of Privilege Vulnerability No No 8.8 Yes
CVE-2022-29142 Windows Kernel Elevation of Privilege Vulnerability No No 7 Yes
CVE-2022-29106 Windows Hyper-V Shared Virtual Disk Elevation of Privilege Vulnerability No No 7 Yes
CVE-2022-24466 Windows Hyper-V Security Feature Bypass Vulnerability No No 4.1 Yes
CVE-2022-22713 Windows Hyper-V Denial of Service Vulnerability No Yes 5.6 Yes
CVE-2022-26927 Windows Graphics Component Remote Code Execution Vulnerability No No 8.8 Yes
CVE-2022-29102 Windows Failover Cluster Information Disclosure Vulnerability No No 5.5 Yes
CVE-2022-29113 Windows Digital Media Receiver Elevation of Privilege Vulnerability No No 7.8 Yes
CVE-2022-29134 Windows Clustered Shared Volume Information Disclosure Vulnerability No No 6.5 Yes
CVE-2022-29120 Windows Clustered Shared Volume Information Disclosure Vulnerability No No 6.5 Yes
CVE-2022-29122 Windows Clustered Shared Volume Information Disclosure Vulnerability No No 6.5 Yes
CVE-2022-29123 Windows Clustered Shared Volume Information Disclosure Vulnerability No No 6.5 Yes
CVE-2022-29138 Windows Clustered Shared Volume Elevation of Privilege Vulnerability No No 7 Yes
CVE-2022-29135 Windows Cluster Shared Volume (CSV) Elevation of Privilege Vulnerability No No 7 Yes
CVE-2022-29150 Windows Cluster Shared Volume (CSV) Elevation of Privilege Vulnerability No No 7 Yes
CVE-2022-29151 Windows Cluster Shared Volume (CSV) Elevation of Privilege Vulnerability No No 7 Yes
CVE-2022-26913 Windows Authentication Security Feature Bypass Vulnerability No No 7.4 Yes
CVE-2022-23279 Windows ALPC Elevation of Privilege Vulnerability No No 7 Yes
CVE-2022-29126 Tablet Windows User Interface Application Core Elevation of Privilege Vulnerability No No 7 Yes
CVE-2022-26932 Storage Spaces Direct Elevation of Privilege Vulnerability No No 8.2 Yes
CVE-2022-26938 Storage Spaces Direct Elevation of Privilege Vulnerability No No 7 Yes
CVE-2022-26939 Storage Spaces Direct Elevation of Privilege Vulnerability No No 7 Yes
CVE-2022-26940 Remote Desktop Protocol Client Information Disclosure Vulnerability No No 6.5 Yes
CVE-2022-22017 Remote Desktop Client Remote Code Execution Vulnerability No No 8.8 Yes
CVE-2022-26923 Active Directory Domain Services Elevation of Privilege Vulnerability No No 8.8 Yes

NEVER MISS A BLOG

Get the latest stories, expertise, and news about security today.

Analyze Amazon SES events at scale using Amazon Redshift

Post Syndicated from Manash Deb original https://aws.amazon.com/blogs/big-data/analyze-amazon-ses-events-at-scale-using-amazon-redshift/

Email is one of the most important methods for business communication across many organizations. It’s also one of the primary methods for many businesses to communicate with their customers. With the ever-increasing necessity to send emails at scale, monitoring and analysis has become a major challenge.

Amazon Simple Email Service (Amazon SES) is a cost-effective, flexible, and scalable email service that enables you to send and receive emails from your applications. You can use Amazon SES for several use cases, such as transactional, marketing, or mass email communications.

An important benefit of Amazon SES is its native integration with other AWS services, such as Amazon CloudWatch and Amazon Redshift, which allows you to monitor and analyze your emails sending at scale seamlessly. You can store your email events in Amazon Redshift, which is a widely used, fast, and fully managed cloud data warehouse. You can then analyze these events using SQL to gain business insights such as marketing campaign success, email bounces, complaints, and so on.

In this post, you will learn how to implement an end-to-end solution to automate this email analysis and monitoring process.

Solution overview

The following architecture diagram highlights the end-to-end solution, which you can provision automatically with an AWS CloudFormation template.

In this solution, you publish Amazon SES email events to an Amazon Kinesis Data Firehose delivery stream that publishes data to Amazon Redshift. You then connect to the Amazon Redshift database and use a SQL query tool to analyze Amazon SES email events that meet the given criteria. We use the Amazon Redshift SUPER data type to store the event (JSON data) in Amazon Redshift. The SUPER data type handles semi-structured data, which can have varying table attributes and types.

The alarm system uses Amazon CloudWatch logs that Kinesis Data Firehose generates when a data load to Amazon Redshift fails. We have set up a metric filter that pattern matches the CloudWatch log events to determine the error condition and triggers a CloudWatch alarm. This in turn sends out email notifications using Amazon Simple Notification Service (Amazon SNS).

Prerequisites

As a prerequisite for deploying the solution in this post, you need to set up Amazon SES in your account. For more information, see Getting Started with Amazon Simple Email Service.

Solution resources and features

The architecture built by AWS CloudFormation supports AWS best practices for high availability and security. The CloudFormation template takes care of the following key resources and features:

  • Amazon Redshift cluster – An Amazon Redshift cluster with encryption at rest enabled using an AWS Key Management Service (AWS KMS) customer managed key (CMK). This cluster acts as the destination for Kinesis Data Firehose and stores all the Amazon SES email sending events in the table ses, as shown in the following screenshot.
  • Kinesis Data Firehose configuration – A Kinesis Data Firehose delivery stream that acts as the event destination for all Amazon SES email sending metrics. The delivery stream is set up with Amazon Redshift as the destination. Server-side encryption is enabled using an AWS KMS CMK, and destination error logging has been enabled as per best practices.
  • Amazon SES configuration – A configuration set in Amazon SES that is used to map Kinesis Data Firehose as the event destination to publish email metrics.

To use the configuration set when sending emails, you can specify a default configuration set for your verified identity, or include a reference to the configuration set in the headers of the email.

  • Exploring and analyzing the data – We use Amazon Redshift query editor v2 for exploring and analyzing the data.
  • Alarms and notifications for ingestion failures – A data load error notification system using CloudWatch and Amazon SNS generates email-based notifications in the event of a failure during data load from Kinesis Data Firehose to Amazon Redshift. The setup creates a CloudWatch log metric filter, as shown in the following screenshot.

A CloudWatch alarm based on the metric filter triggers an SNS notification when in alarm state. For more information, see Using Amazon CloudWatch alarms.

Deploy the CloudFormation template

The provided CloudFormation template automatically creates all the required resources for this solution in your AWS account. For more information, see Getting started with AWS CloudFormation.

  1. Sign in to the AWS Management Console.
  2. Choose Launch Stack to launch AWS CloudFormation in your AWS account:
  3. For Stack name, enter a meaningful name for the stack, for example, ses_events.
  4. Provide the following values for the stack parameters:
    1. ClusterName – The name of the Amazon Redshift cluster.
    2. DatabaseName – The name of the first database to be created when the Amazon Redshift cluster is created.
    3. DeliveryStreamName – The name of the Firehose delivery stream.
    4. MasterUsername – The user name that is associated with the primary user account for the Amazon Redshift cluster.
    5. NodeType – The type of node to be provisioned. (Default dc2.large)
    6. NotificationEmailId – The email notification list that is used to configure an SNS topic for sending CloudWatch alarm and event notifications.
    7. NumberofNodes – The number of compute nodes in the Amazon Redshift cluster. For multi-node clusters, the NumberofNodes parameter must be greater than 1.
    8. OnPremisesCIDR – IP range (CIDR notation) for your existing infrastructure to access the target and replica Amazon Redshift clusters.
    9. SESConfigSetName – Name of the Amazon SES configuration set.
    10. SubnetId – Subnet ID where source Amazon Redshift cluster is created.
    11. Vpc – VPC in which Amazon Redshift cluster is launched.
  5. Choose Next.
  6. Review all the information and select I acknowledge that AWS CloudFormation might create IAM resources.
  7. Choose Create stack.

You can track the progress of the stack creation on the Events tab. Wait for the stack to complete and show the status CREATE_COMPLETE.

Test the solution

To send a test email, we use the Amazon SES mailbox simulator. Set the configuration-set header to the one created by the CloudFormation template.

We use the Amazon Redshift query editor V2 to query the Amazon Redshift table (created by the CloudFormation template) and see if the events have shown up.

If the data load of the event stream fails from Kinesis Data Firehose to Amazon Redshift, the failure notification system is triggered, and you receive an email notification via Amazon SNS.

Clean up

Some of the AWS resources deployed by the CloudFormation stacks in this post incur a cost as long as you continue to use them.

You can delete the CloudFormation stack to delete all AWS resources created by the stack. To clean up all your stacks, use the AWS CloudFormation console to remove the stacks that you created in reverse order.

  1. On the Stacks page on the AWS CloudFormation console, choose the stack to delete.
  2. In the stack details pane, choose Delete.
  3. Choose Delete stack when prompted.

After stack deletion begins, you can’t stop it. The stack proceeds to the DELETE_IN_PROGRESS state. When the stack deletion is complete, the stack changes to the DELETE_COMPLETE state. The AWS CloudFormation console doesn’t display stacks in the DELETE_COMPLETE state by default. To display deleted stacks, you must change the stack view filter. For more information, see Viewing deleted stacks on the AWS CloudFormation console.

If the delete fails, the stack enters the DELETE_FAILED state. For solutions, see Delete stack fails.

Conclusion

In this post, we walked through the process of setting up Amazon SES and Amazon Redshift to deploy an email reporting service that can scale to support millions of events. We used Amazon Redshift to store semi-structured messages using the SUPER data type in database tables to support varying message sizes and formats. With this solution, you can easily run analytics at scale and analyze your email event data for deliverability-related issues such as bounces or complaints.

Use the CloudFormation template provided to speed up provisioning of the cloud resources required for the solution (Amazon SES, Kinesis Data Firehose, and Amazon Redshift) in your account while following security best practices. Then you can analyze Amazon SES events at scale using Amazon Redshift.


About the Authors

Manash Deb is a Software Development Engineer in the AWS Directory Service team. He has worked on building end-to-end applications in different database and technologies for over 15 years. He loves to learn new technologies and solving, automating, and simplifying customer problems on AWS.

Arnab Ghosh is a Solutions Architect for AWS in North America helping enterprise customers build resilient and cost-efficient architectures. He has over 13 years of experience in architecting, designing, and developing enterprise applications solving complex business problems.

Sanjoy Thanneer is a Sr. Technical Account Manager with AWS based out of New York. He has over 20 years of experience working in Database and Analytics Domains.  He is passionate about helping enterprise customers build scalable , resilient and cost efficient Applications.

Justin Morris is a Email Deliverability Manager for the Simple Email Service team. With over 10 years of experience in the IT industry, he has developed a natural talent for diagnosing and resolving customer issues and continuously looks for growth opportunities to learn new technologies and services.

Watching Eurovision 2022 on Cloudflare Radar

Post Syndicated from João Tomé original https://blog.cloudflare.com/watching-eurovision-2022-on-cloudflare-radar/

Watching Eurovision 2022 on Cloudflare Radar

Watching Eurovision 2022 on Cloudflare Radar

The Eurovision Song Contest has a history that goes back to 1956, so it’s even older than the European Union and one of its highlights over the years was being the first global stage for the Swedish group ABBA — Waterloo won the 1974 edition). This year, for the 66th edition, we have a dedicated page for Eurovision fans, journalists or anyone interested in following Internet trends related to the event taking place in Turin, Italy.

The contest consists of two semi-finals and a final. The first semi-final is today, May 10, at 21:00 CEST, the second is Thursday, May 12, at 21:00 CEST. And the final is on Saturday, May 14, at 21:00 CEST. We are using Central European Summer Time and not our usual (on Radar) UTC because that’s the timezone of most of the 40 countries that will take part in the contest. There will be 17 countries in the first semi-final, 18 in the second, and 25 in the final (the full list is here).

From countries to fan sites.

First, you can see the Internet traffic aggregate in all the 40 countries that are participating in Eurovision 2022. There’s also a toggle to choose each of the 40 countries regarding Internet traffic. If you pass the mouse over the traffic line, the traffic level hour by hour is also highlighted.

Watching Eurovision 2022 on Cloudflare Radar

Then, we use DNS name resolution data to estimate traffic from the 40 participating countries to several types of websites. We have a video platforms chart as Eurovision has content on major video platforms. The baseline for the values we use is the average of the previous week, represented in the charts.

Watching Eurovision 2022 on Cloudflare Radar

We also show social media trends in the participating countries, by hour, to see if the Eurovision semi-finals and final cause a change.

The contest has a large base of fan websites (there’s even the OGAE, General Organisation of Eurovision Fans), and we also have a chart for Eurovision fan sites. In this chart, yesterday at 20:00 CEST, traffic was already at its highest since May 1, with 6.22x more than the average of the previous week (that’s the baseline here).

Watching Eurovision 2022 on Cloudflare Radar

Last, but not least, we also show the impact on national official broadcasters’ websites from the participating countries. For all the charts, there’s a download button to save the image file like this:

Watching Eurovision 2022 on Cloudflare Radar

For this evening’s first semi-final, Portugal is participating and since we’re writing this blog post from our Lisbon office, I asked everyone’s favorite songs for the 2022 Eurovision edition. Norway’s song from Subwoolfer, Give That Wolf A Banana, was one of the favorites, followed by Portugal’s song from MARO, Saudade, Saudade.

The UK’s song from Sam Ryder, SPACE MAN, is automatically in Saturday’s final and was also praised at the Lisbon office, the same with France’s song from Alvan & Ahez, called Fulenn, where the group sings in their native language, Breton (from the French region of Brittany).

Besides our dedicated Eurovision page, radar.cloudflare.com/eurovision-2022, we will also be checking this week for some trends on Cloudflare Radar’s Twitter account. Let the songs (and the Internet trends) begin.

[$] The state of memory-management development

Post Syndicated from original https://lwn.net/Articles/894378/

The 2022 Linux
Storage, Filesystem, Memory-management and BPF Summit
(LSFMM) was the
first chance for Linux memory-management developers to gather in three
years. In a session at the end of the first day led by maintainer Andrew
Morton, those developers discussed the memory-management development
process. While the overall governance will remain the same, there are
nonetheless some significant changes in store for this subsystem.

Data Protection x2: Explore What Cloud Replication Can Do

Post Syndicated from Jeremy Milk original https://www.backblaze.com/blog/data-protection-x2-explore-what-cloud-replication-can-do/

Anyone overwhelmed by their to-do list wishes they could be in two places at once. Backblaze’s newest feature—currently in beta—might not be able to grant that wish, but it will soon offer something similarly useful: The new Cloud Replication feature means data can be in two places at once, solving a whole suite of issues that keep IT teams up at night.

The Background: What Is Backblaze Cloud Replication?

Cloud Replication will enable Backblaze customers to store files in multiple regions, or create multiple copies of files in one region, across the Backblaze Storage Cloud. Simply set replication rules via web UI or API on a bucket. Once the rules are set, any data uploaded to that bucket will automatically be replicated into a destination bucket either in the same region or another region. If it sounds easy, that’s because it is—even the English majors in our Marketing department have mastered this one.

The Why: What Can Cloud Replication Do for You?

There are three key use cases for Cloud Replication:

  • Protecting data for security, compliance, and continuity purposes.
  • Bringing data closer to distant teams or customers for faster access.
  • Providing version protection for testing and staging in deployment environments.

Redundancy for Compliance and Continuity

This is the top use case for cloud replication, and will likely have value for almost any enterprise with advanced backup strategies.

Whether you are concerned about natural disasters, political instability, or complying with possible government, industry, or board regulations—replicating data to another geographic region can check a lot of boxes easily and efficiently. Especially as enterprises move completely into the cloud, data redundancy will increasingly be a requirement for:

  • Modern business continuity and disaster recovery plans.
  • Industry and board compliance efforts centered on concentration risk issues.
  • Data residency requirements stemming from regulations like GDPR.

The gold standard for backup strategies has long been a 3-2-1 approach. The core principles of 3-2-1, originally developed for an on-premises world, still hold true, and today they are being applied in even more robust ways to an increasingly cloud-based world. Cloud replication is a natural evolution for organizations that are storing much more or even all of their data in the cloud or plan to in the future. It enables you to implement the core principles of 3-2-1, including redundancy and geographic separation, all in the cloud.

Data Proximity

If you have teams, customers, or workflows spread around the world, bringing a copy of your data closer to where work gets done can minimize speed-of-light limitations. Especially for media-heavy teams in game development and postproduction, seconds can make the difference in keeping creative teams operating smoothly. And because you can automate replication and use metadata to track accuracy and process, you can remove some manual steps from the process where errors and data loss tend to crop up.

Testing and Staging

Version control and smoke testing are nothing new, but when you’re controlling versions of large applications or trying to keep track of what’s live and what’s in testing, you might need a tool with more horsepower and options for customization. Cloud Replication can serve these needs.

You can easily replicate objects between buckets dedicated for production, testing, or staging if you need to use the same data and maintain the same metadata. This allows you to observe best practices and automate replication between environments.

The Status: When Can I Get My Hands on Cloud Replication?

Cloud Replication kicked off in beta in early April and our team and early testers have been breaking in the feature since then.

Here’s how things are lined up:

  • April 18: Phase One (Underway)
    Phase one is a limited release that is currently underway. We’ve only unlocked new file replication in this release—meaning testers have to upload new data to test functionality.
  • May 24 (Projected): Phase Two
    We’ll be unlocking the “existing file” Cloud Replication functionality at this time. This means users will be able to set up replication rules on existing buckets to see how replication will work for their business data.
  • Early June (Projected): General Availability

    We’ll open the gates completely on June 7 with full functionality, yeehaw!

Want to Learn More About Cloud Replication?

Stay in the know about Cloud Replication availability—click here to get notified first.

If you want to dig into how this feature works via the CLI and API and learn about some of the edge cases, special circumstances, billing implications, and lookouts—our draft Cloud Replication documentation can be accessed here. We also have some help articles walking through how to create rules via the web application here.

Otherwise, we look forward to sharing more when this feature is fully baked and ready for consumption.

The post Data Protection x2: Explore What Cloud Replication Can Do appeared first on Backblaze Blog | Cloud Storage & Cloud Backup.

What’s Changed for Cybersecurity in Banking and Finance: New Study

Post Syndicated from Jesse Mack original https://blog.rapid7.com/2022/05/10/whats-changed-for-cybersecurity-in-banking-and-finance-new-study/

What's Changed for Cybersecurity in Banking and Finance: New Study

Cybersecurity in financial services is a complex picture. Not only has a range of new tech hit the industry in the last 5 years, but compliance requirements introduce another layer of difficulty to the lives of infosec teams in this sector. To add to this picture, the overall cybersecurity landscape has rapidly transformed, with ransomware attacks picking up speed and high-profile vulnerabilities hitting the headlines at an alarming pace.

VMware recently released the 5th annual installment of their Modern Bank Heists report, and the results show a changing landscape for cybersecurity in banking and finance. Here’s a closer look at what CISOs and security leaders in finance said about the security challenges they’re facing — and what they’re doing to solve them.

Destructive threats and ransomware attacks on banks are increasing

The stakes for cybersecurity are higher than ever at financial institutions, as threat actors are increasingly using more vicious tactics. Banks have seen an uptick in destructive cyberattacks — those that delete data, damage hard drives, disrupt network connections, or otherwise leave a trail of digital wreckage in their wake.

63% of financial institutions surveyed in the VMware report said they’ve seen an increase in these destructive attacks targeting their organization — that’s 17% more than said the same in last year’s version of the report.

At the same time, finance hasn’t been spared from the rise in ransomware attacks, which have also become increasingly disruptive. Nearly 3 out of 4 respondents to the survey said they’d been hit by at least one ransomware attack. What’s more, 63% of those ended up paying the ransom.

Supply chain security: No fun in the sun

Like ransomware, island hopping is also on the rise — and while that might sound like something to do on a beach vacation, that’s likely the last thing the phrase brings to mind for security pros at today’s financial institutions.

IT Pro describes island hopping attacks as “the process of undermining a company’s cyber defenses by going after its vulnerable partner network, rather than launching a direct attack.” The source points to the high-profile data breach that rocked big-box retailer Target in 2017. Hackers found an entry point to the company’s data not through its own servers, but those of Fazio Mechanical Services, a third-party vendor.

In the years since the Target breach, supply chain cybersecurity has become an even greater area of focus for security pros across industries, thanks to incidents like the SolarWinds breach and large-scale vulnerabilities like Log4Shell that reveal just how many interdependencies are out there. Now, threats in the software supply chain are becoming more apparent by the day.

VMware’s study found that 60% of security leaders in finance have seen an increase in island hopping attacks — 58% more than said the same last year. The uptick in threats originating from partners’ systems is clearly keeping security officers up at night: 87% said they’re concerned about the security posture of the service providers they rely on.

The proliferation of mobile and web applications associated with the rise of financial technology (fintech) may be exacerbating the problem. VMware notes API attacks are one of the primary methods of island hopping — and they found a whopping 94% of financial-industry security leaders have experienced an API attack through a fintech application, while 58% said they’ve seen an increase in application security incidents overall.

How financial institutions are improving cybersecurity

With attacks growing more dangerous and more frequent, security leaders in finance are doubling down on their efforts to protect their organizations. The majority of companies surveyed in VMware’s study said they planned a 20% to 30% boost to their cybersecurity budget in 2022. But what types of solutions are they investing in with that added cash?

The number 1 security investment for CISOs this year is extended detection and response (XDR), with 24% listing this as their top priority. Closely following were workload security at 22%, mobile security at 21%, threat intelligence at 15%, and managed detection and response (MDR) at 11%. In addition, 51% said they’re investing in threat hunting to help them stay ahead of the attackers.

Today’s threat landscape has grown difficult to navigate — especially when financial institutions are competing for candidates in a tight cybersecurity talent market. In the meantime, the financial industry has only grown more competitive, and the pace of innovation is at an all-time high. Having powerful, flexible tools that can streamline and automate security processes is essential to keep up with change. For banks and finance organizations to attain the level of visibility they need to innovate while keeping their systems protected, these tools are crucial.

Additional reading:

NEVER MISS A BLOG

Get the latest stories, expertise, and news about security today.

The collective thoughts of the interwebz

By continuing to use the site, you agree to the use of cookies. more information

The cookie settings on this website are set to "allow cookies" to give you the best browsing experience possible. If you continue to use this website without changing your cookie settings or you click "Accept" below then you are consenting to this.

Close