Post Syndicated from Rostislav Markov original https://aws.amazon.com/blogs/architecture/simplify-document-search-at-scale-with-intelligent-search-bot-on-aws/
Enterprise document management systems (EDMS) manage the lifecycle and distribution of documents. They often rely on keyword-based search functionality. However, it increasingly becomes hard to discover documents as such repositories grow to tens of thousands of items.
In this blog, we discuss how Amazon Web Services (AWS) built an intelligent search bot on top of the document repository of a global life sciences company. Before this enhancement, the native repository search function relied solely on keywords and document names, leading to a trial-and-error process. Now, scientists can effortlessly query the repository using natural language to locate the right document in a few seconds—even through voice commands while working with lab equipment.
Use case
In life sciences, documentation is critical for regulatory compliance with GxP. Scientists in life sciences use EDMS on a daily basis to retrieve standard operating procedures (SOPs). SOPs contain task-level instructions (for example, how to monitor lab equipment or use utilities such as steam generators and chilled water circulation pumps).
EDMS search capability is often limited to file names and metadata. In our use case, file names were numerical and metadata was typically a single-sentence description plus keywords.
Scientists wanted to query for a particular context and type of task they’re about to perform. However, this data was not extracted from document content and thus not readily available for search purposes. Scientists also wanted to be able to search by using a voice interface (for example, when they operate on lab equipment).
To address this, we designed a conversational bot interface. This bot locates the most relevant SOP based on pre-generated document extracts and returns a hyperlink to the most suitable document, as shown in Figure 1.

Figure 1. Example of document search prompt and chatbot response
Overview of the intelligent search bot solution
Our solution requirements for intelligent search were:
- Semantic search index and ranking based on full text
- Search capability through voice and text
- Out-of-the-box integration with web applications and mobile devices
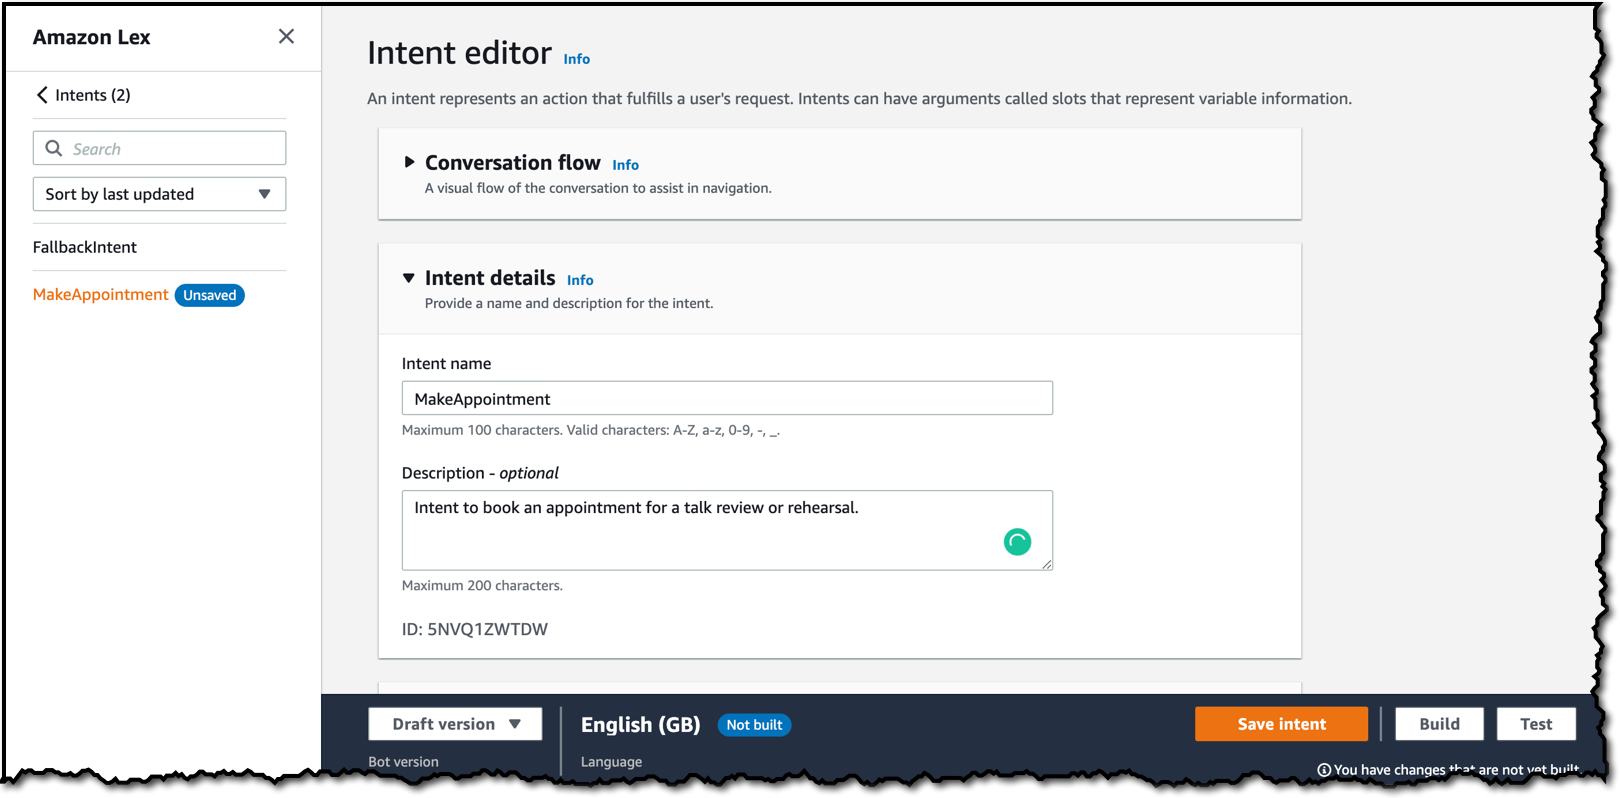
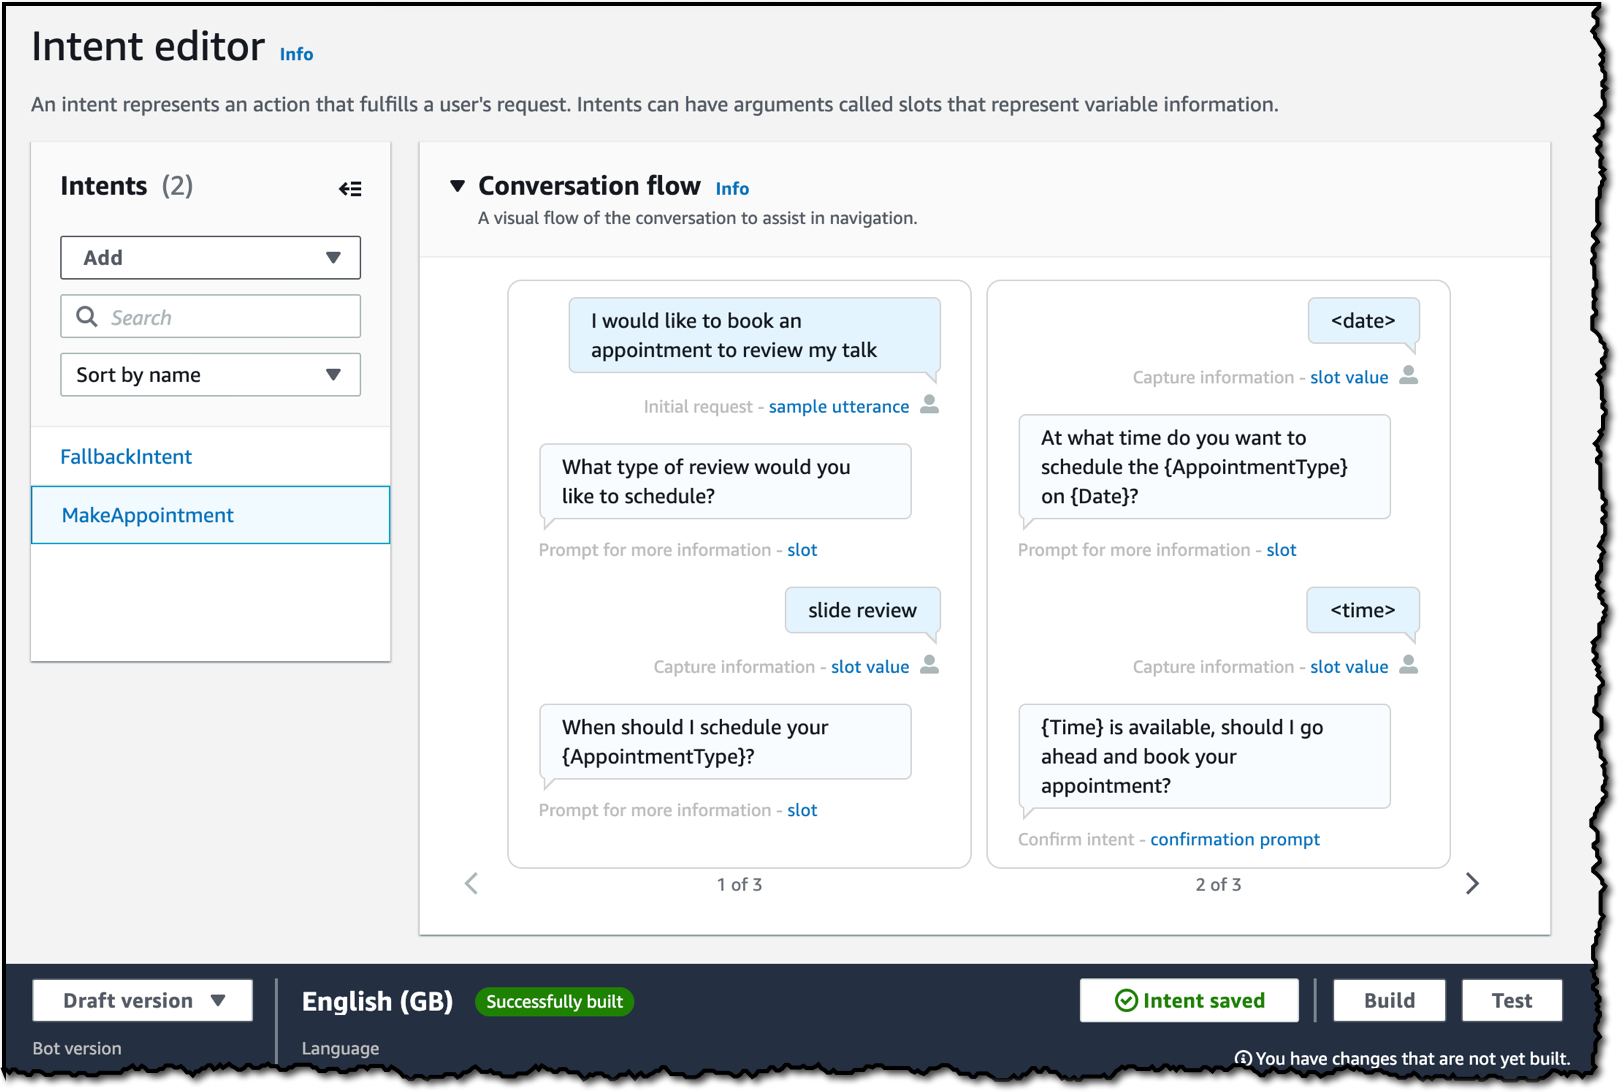
We choose Amazon Lex to provide the conversational interface using text or speech. Lex bots can be integrated with web and mobile applications using AWS Amplify Interactions. We used Amazon Kendra to create an intelligent search index on top of the data repository, which we hosted on Amazon Simple Storage Service (Amazon S3).
The advantage of using an Amazon Kendra index is its out-of-the-box semantic search and ranking capability based on document content. We use AWS Lambda to take care of Amazon S3 path mappings, and document attribute formatting for replicated documents, in order to make them retrievable by Amazon Kendra.

Figure 2. Intelligent search bot for enterprise document management systems
Benefits of integrating intelligent search bot with your EDMS
The benefits of extending EDMS with intelligent search bot include:
- Improved usability by adding text- and speech-based channels to match user situations (for example, scientists operating on lab equipment)
- Native, out-of-the-box integration with third-party systems (for example, Adobe Experience Manager, Alfresco, HubSpot, Marketo, Salesforce)
- Implementation timeboxed in a two-week agile sprint and requires no data science skills
Extensibility to large language models
The Amazon Kendra Retrieve API allows the extension to a document retrieval chain pattern using a large language model (LLM) from Amazon Bedrock or Amazon SageMaker Jumpstart. With this pattern, Amazon Kendra generated document summaries can be passed to the LLM for correlation, as shown in Figure 3. Consult the LangChain documentation to learn how to configure retrieval chains.

Figure 3. Extending the document search bot to large language model
In our use case, the effort for such extension went beyond the incremental optimizations and limited migration timeframe. Also, preference for a chain pattern should be given to complex correlations across documents.
This wasn’t the case here, as documents were functionally disjunct (for example, by device type, geographical site, and process task). Therefore, document retrieval with the Amazon Kendra API was sufficient and we deferred the extra effort associated with custom-built LLM prompt layers.
Implementation considerations
We started the EDMS migration to AWS by replicating the data repository to Amazon S3 by using AWS DataSync. We stored every document and corresponding metadata files as separate Amazon S3 objects.
For the Amazon Kendra index mappings to initialize properly:
- Metadata must be a JSON Amazon S3 object
- Follow the name convention <document>.<extension>.metadata.json
- Have reserved or common document attributes correctly formatted
The EDMS system did not adhere to this when generating metadata files so we offloaded the transformation to a Lambda function. The function fixed metadata attributes such as, changing version type (_version) from numeric to string and date (_created_at) from string to ISO8601. It also changed metadata names/Amazon S3 paths by enacting new objects (PutObject API) and deleting the original objects (DeleteObject API).
We configured Lambda invocation on Amazon S3 PutObject operations using Amazon S3 event notifications. We set the sync run schedule for the Amazon Kendra index to run on demand.
Alternatively, you can run it on a predefined schedule or as part of each Lambda invocation (using the update_index boto3 operation). Finally, we monitor for sync run fails associated with the Amazon Kendra index using Amazon CloudWatch.
Conclusion
This blog showed how you can enhance the keyword-based search of your EDMS. We embedded document search queries behind a chatbot to simplify user interaction.
You can build this solution quickly, with no machine learning skills, as part of your EDMS cloud migration. In more advanced use cases, including complete refactoring, consider extending this solution to use a large language model from Amazon Bedrock or Amazon SageMaker Jumpstart.