Post Syndicated from Hajer Bouafif original https://aws.amazon.com/blogs/big-data/amazon-opensearch-service-h1-2023-in-review/
Since its release in January 2021, the OpenSearch project has released 14 versions through June 2023. Amazon OpenSearch Service supports the latest versions of OpenSearch up to version 2.7.
OpenSearch Service provides two configuration options to deploy and operate OpenSearch at scale in the cloud. With OpenSearch Service managed domains, you specify a hardware configuration and OpenSearch Service provisions the required hardware and takes care of software patching, failure recovery, backups, and monitoring. With managed domains, you can use advanced capabilities at no extra cost such as cross-cluster search, cross-cluster replication, anomaly detection, semantic search, security analytics, and more. You don’t need a large team to maintain and operate your OpenSearch Service domain at scale. Your team should be familiar with sharding concepts and OpenSearch best practices to use the OpenSearch managed offering.
Amazon OpenSearch Serverless provides a straightforward and fully auto scaled deployment option. When you use OpenSearch Serverless, you create a collection (a set of indexes that work together on one workload) and use OpenSearch’s APIs, and OpenSearch Serverless does the rest. You don’t need to worry about sizing, capacity planning, or tuning your OpenSearch cluster.
In this post, we provide a review of all the exciting features releases in OpenSearch Service in the first half of 2023.
Build powerful search solutions
In this section, we discuss some of the features in OpenSearch Service that enable you to build powerful search solutions.
OpenSearch Serverless and the serverless vector engine
Earlier this year, we announced the general availability of OpenSearch Serverless. OpenSearch Serverless separates storage and compute components, and indexing and query compute, so they can be managed and scaled independently. It uses Amazon Simple Storage Service (Amazon S3) as the primary data storage for indexes, adding durability for your data. Collections are able to take advantage of the S3 storage layer to reduce the need for hot storage, and reduce cost, by bringing data into local store when it’s accessed.
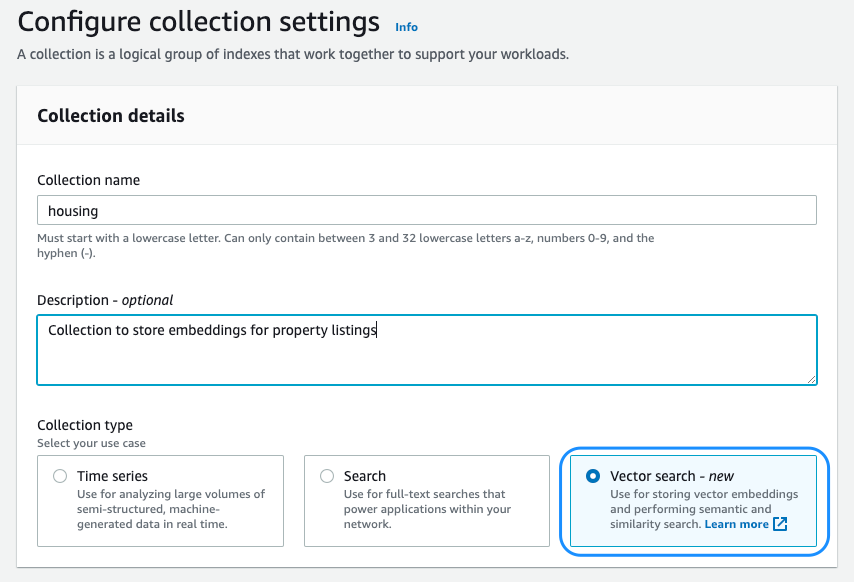
When you create a serverless collection, you set a collection type. OpenSearch Serverless optimizes resource use depending on the type you set. At release, you could create search and time series collections for full-text search and log analytics use cases, respectively. In July 2023, we previewed support for a third collection type: vector search. The vector engine for OpenSearch Serverless is a simple, scalable, and high-performing vector store and query engine that enables generative AI, semantic search, image search, and more. Built on OpenSearch Serverless, the vector engine inherits and benefits from its robust architecture. With the vector engine, you don’t have to worry about sizing, tuning, and scaling the backend infrastructure. The vector engine automatically adjusts resources by adapting to changing workload patterns and demand to provide consistently fast performance and scale. The vector engine uses approximate nearest neighbor (ANN) algorithms from the Non-Metric Space Library (NMSLIB) and FAISS libraries to power k-NN search.
You can start using the new vector engine capabilities by selecting Vector search when creating your collection on the OpenSearch Service console. Refer to Introducing the vector engine for Amazon OpenSearch Serverless, now in preview for more information about the new vector search option with OpenSearch Serverless.

Point in Time
Point in Time (PIT) search, released in version 2.4 of OpenSearch Project and supported in OpenSearch 2.5 in OpenSearch Service, provides consistency in search pagination even when new documents are ingested or deleted within a specific index. For example, let’s say your website user searched for “blue couch” and spent a few minutes looking at the results. During those few minutes, the application added some additional couches to the index, shifting the order of the first 20 documents. If the user then navigates from page 1 to page 2, they may see results that were already on page 1 but have shifted down in the result order. The pagination is not stable over the addition of new data to the index. If you use PIT search, the result order is guaranteed to remain the same across pages, regardless of changes to the index. To learn more about PIT capabilities, refer to Launch highlight: Paginate with Point in Time.
Search relevance plugin
Ever wondered what would happen if you adjusted your relevance function—would the results be better, or worse? With the search relevance plugin, you can now view a side-by-side comparison of results in OpenSearch Dashboards. A UI view makes it simple to see how the results have changed and dial in your relevance to perfection.
Additional field types
OpenSearch 2.7 (available in OpenSearch Service) supports the following new object mapping types:
- Cartesian field type – OpenSearch 2.7 in OpenSearch Service adds deeper support for GEO data. If you are building a virtual reality application, computer-aided design (CAD), or sporting venue mapping, you can benefit from the support of Cartesian field types xy point field and xy shape field.
- Flat object type – When you set your field’s mapping to flat_object, OpenSearch indexes any JSON objects in the field to let you search for leaf values, even if you don’t know the field name, and lets you search via dotted-path notation. Refer to Use flat object in OpenSearch to learn more about how the flat object mapping type simplifies index mappings and the search experience in OpenSearch.
Geographical analysis
Starting from OpenSearch 2.7 in OpenSearch Service, you can run GeoHex grid aggregation queries on datasets built with the Hexagonal Hierarchical Geospatial Indexing System (H3) open-source library. H3 provides precision down to the square meter or less, making it useful for cases that require a high degree of precision. Because high-precision requests are compute heavy, you should be sure to limit the geographic area using filters.
Take Observability to the next level
Observability in OpenSearch is a collection of plugins and features that let you explore, query and visualize telemetry data stored in OpenSearch. In this section, we discuss how OpenSearch Service enables you to take Observability to the next level.
Simple schema for observability
With version 2.6, the OpenSearch Project released a new unified schema for Observability named Simple Schema for Observability (SS4O) (supported in OpenSearch 2.7 in OpenSearch Service). SS4O is inspired by both OpenTelemetry and the Elastic Common Schema (ECS) and uses Amazon Elastic Container Service (Amazon ECS) event logs and OpenTelemetry (OTel) metadata. SS4O specifies the index structure (mapping), index naming conventions, an integration feature for adding preconfigured dashboards and visualizations, and a JSON schema for enforcing and validating the structure. SS4O complies with the OTEL schema for logs, traces, and metrics.
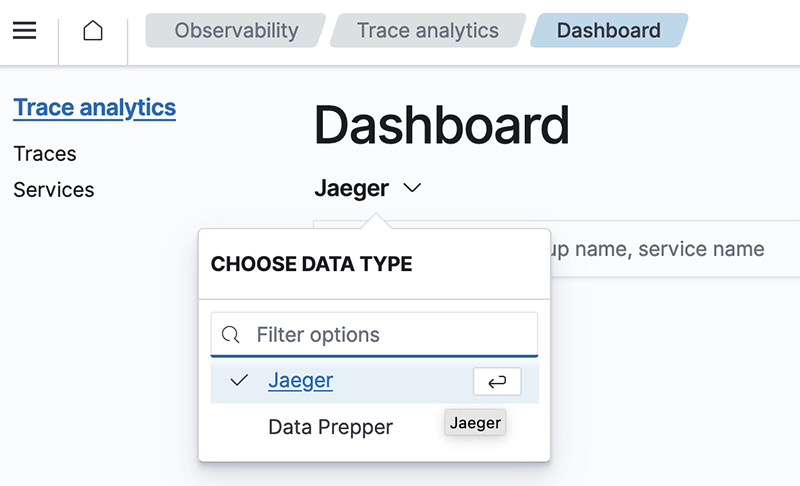
Jaeger traces support
With the release of OpenSearch 2.5, you can now integrate Jaeger trace data in OpenSearch and use the Observability plugin to analyze your trace data in Jaeger format.

Observability provides you with visibility on the health of your system and microservice applications. OpenSearch Dashboards comes with an Observability plugin, which provides a unified experience for collecting and monitoring metrics, logs, and traces from common data sources. With the Observability plugin, you can monitor and alert on your logs, metrics, and traces to ensure that your application is available, performant, and error-free.
In the first half of 2023, we added the capability to create Observability dashboards and standard dashboards from the OpenSearch Dashboards main menu. Before that, you needed to navigate to the Observability plugin to create event analytics visualizations using Piped Processing Language (PPL). With this release, we made this feature more accessible by integrating a new type of visualization named “PPL” within the list of visualization types on the Dashboards main menu. This helps you correlate both business insights and observability analytics in a single place.

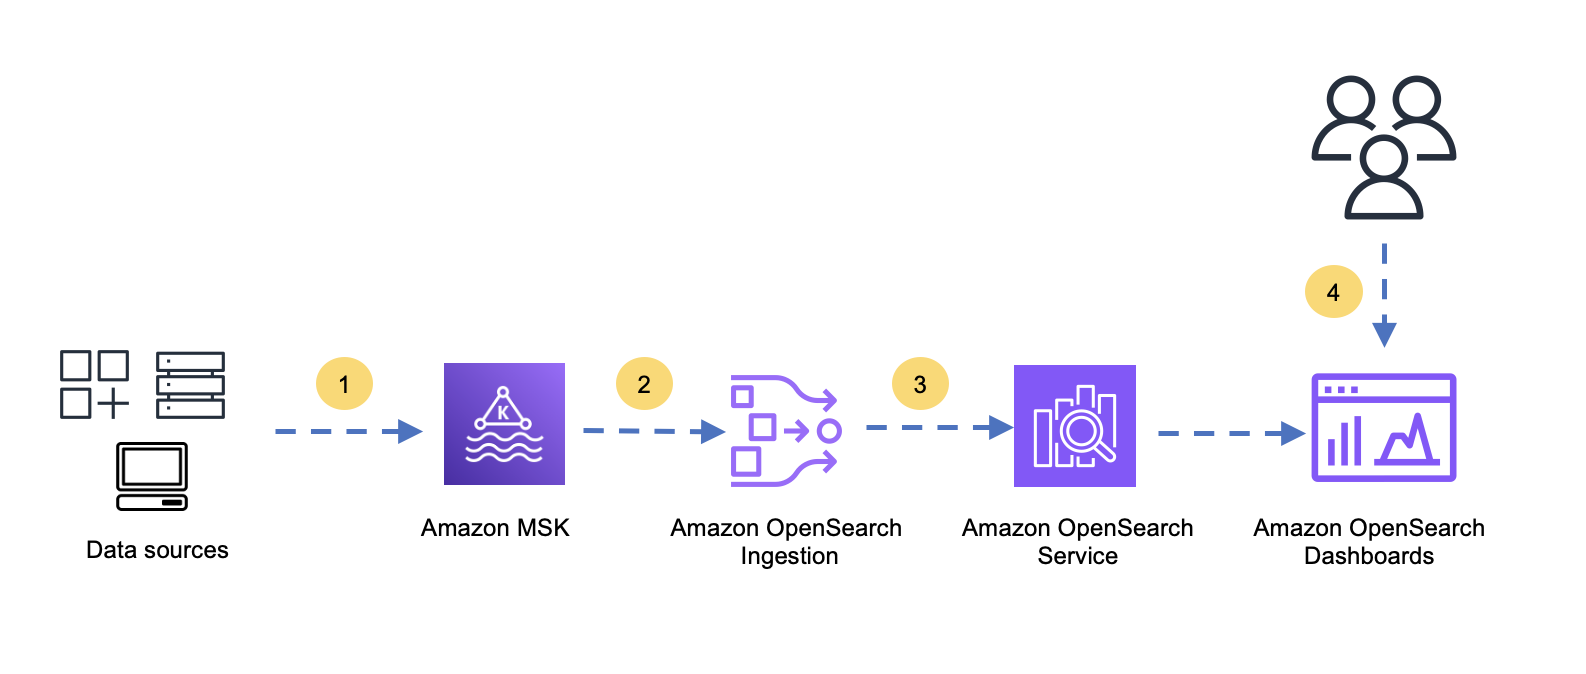
Build serverless ingestion pipelines
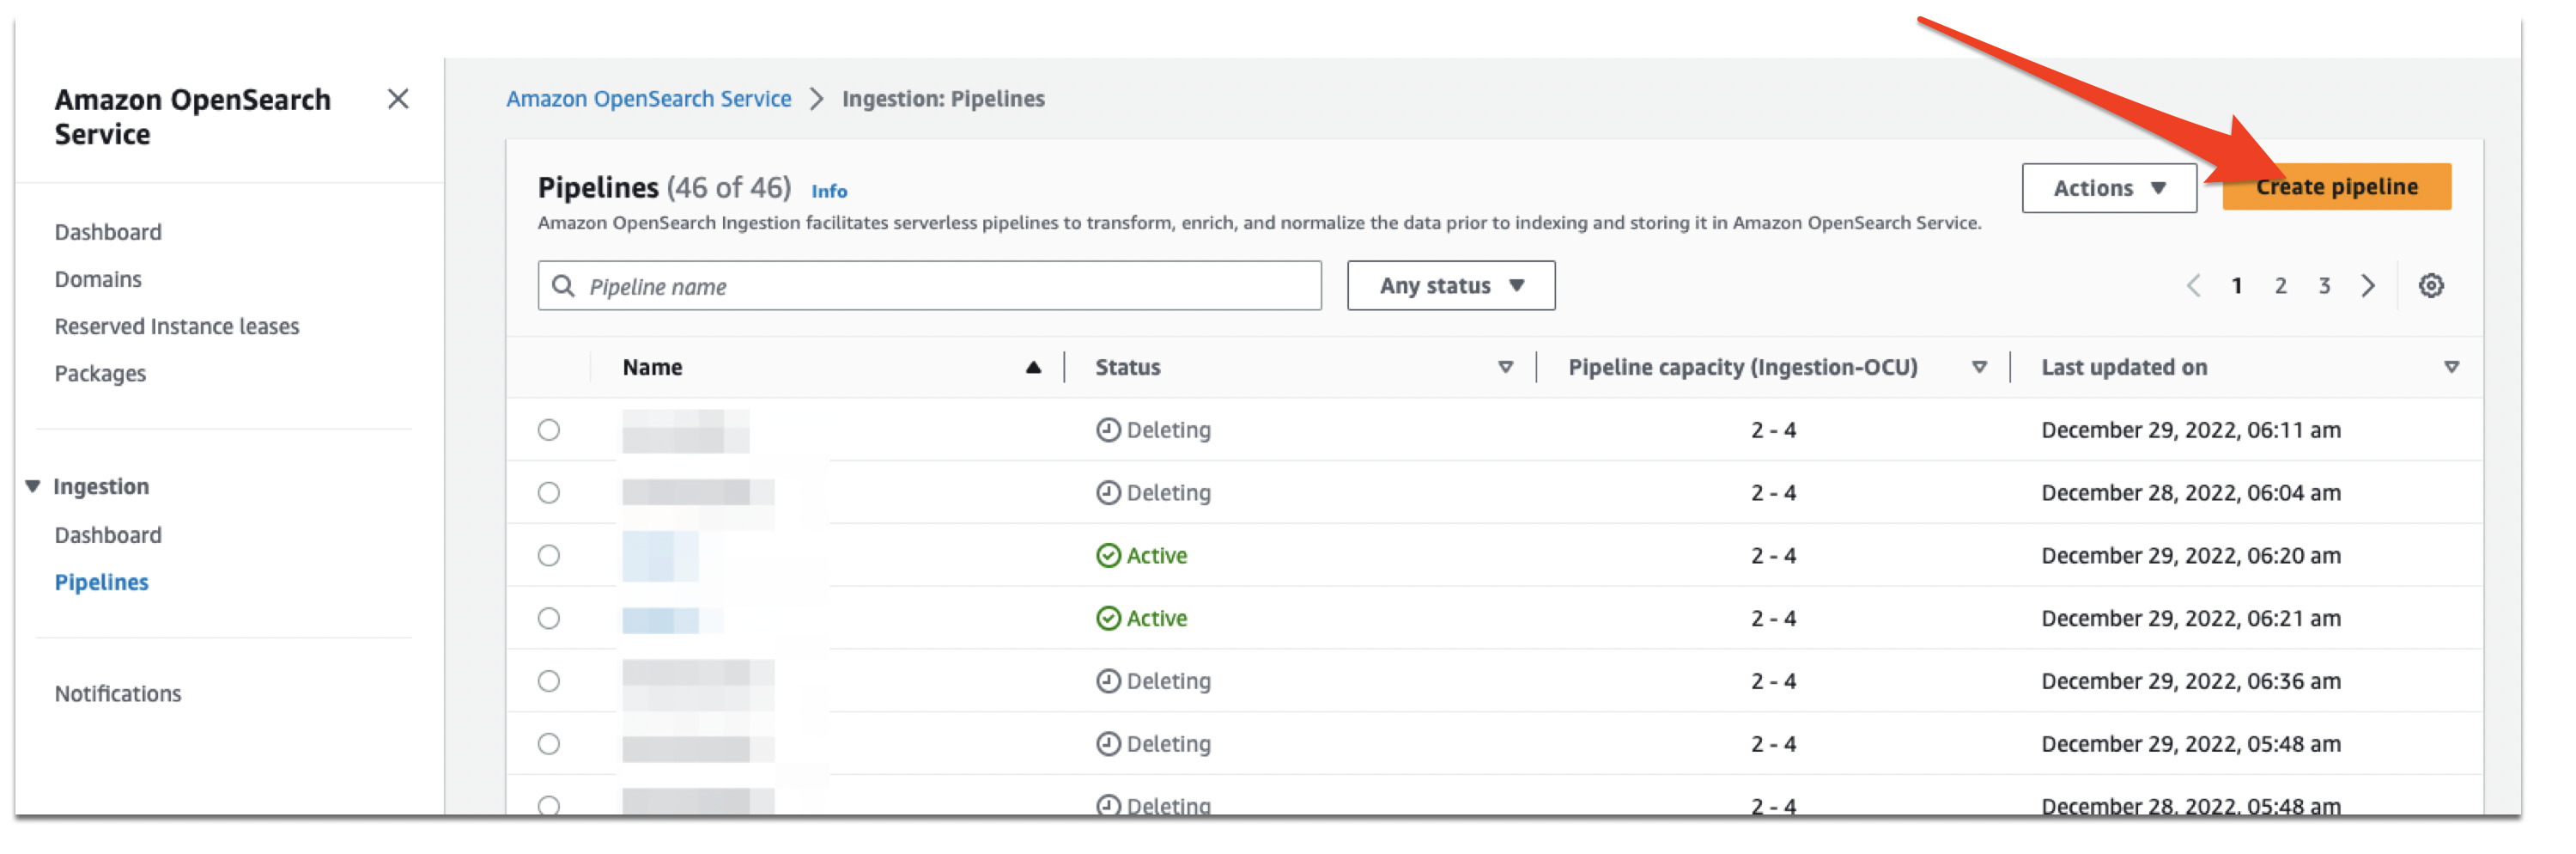
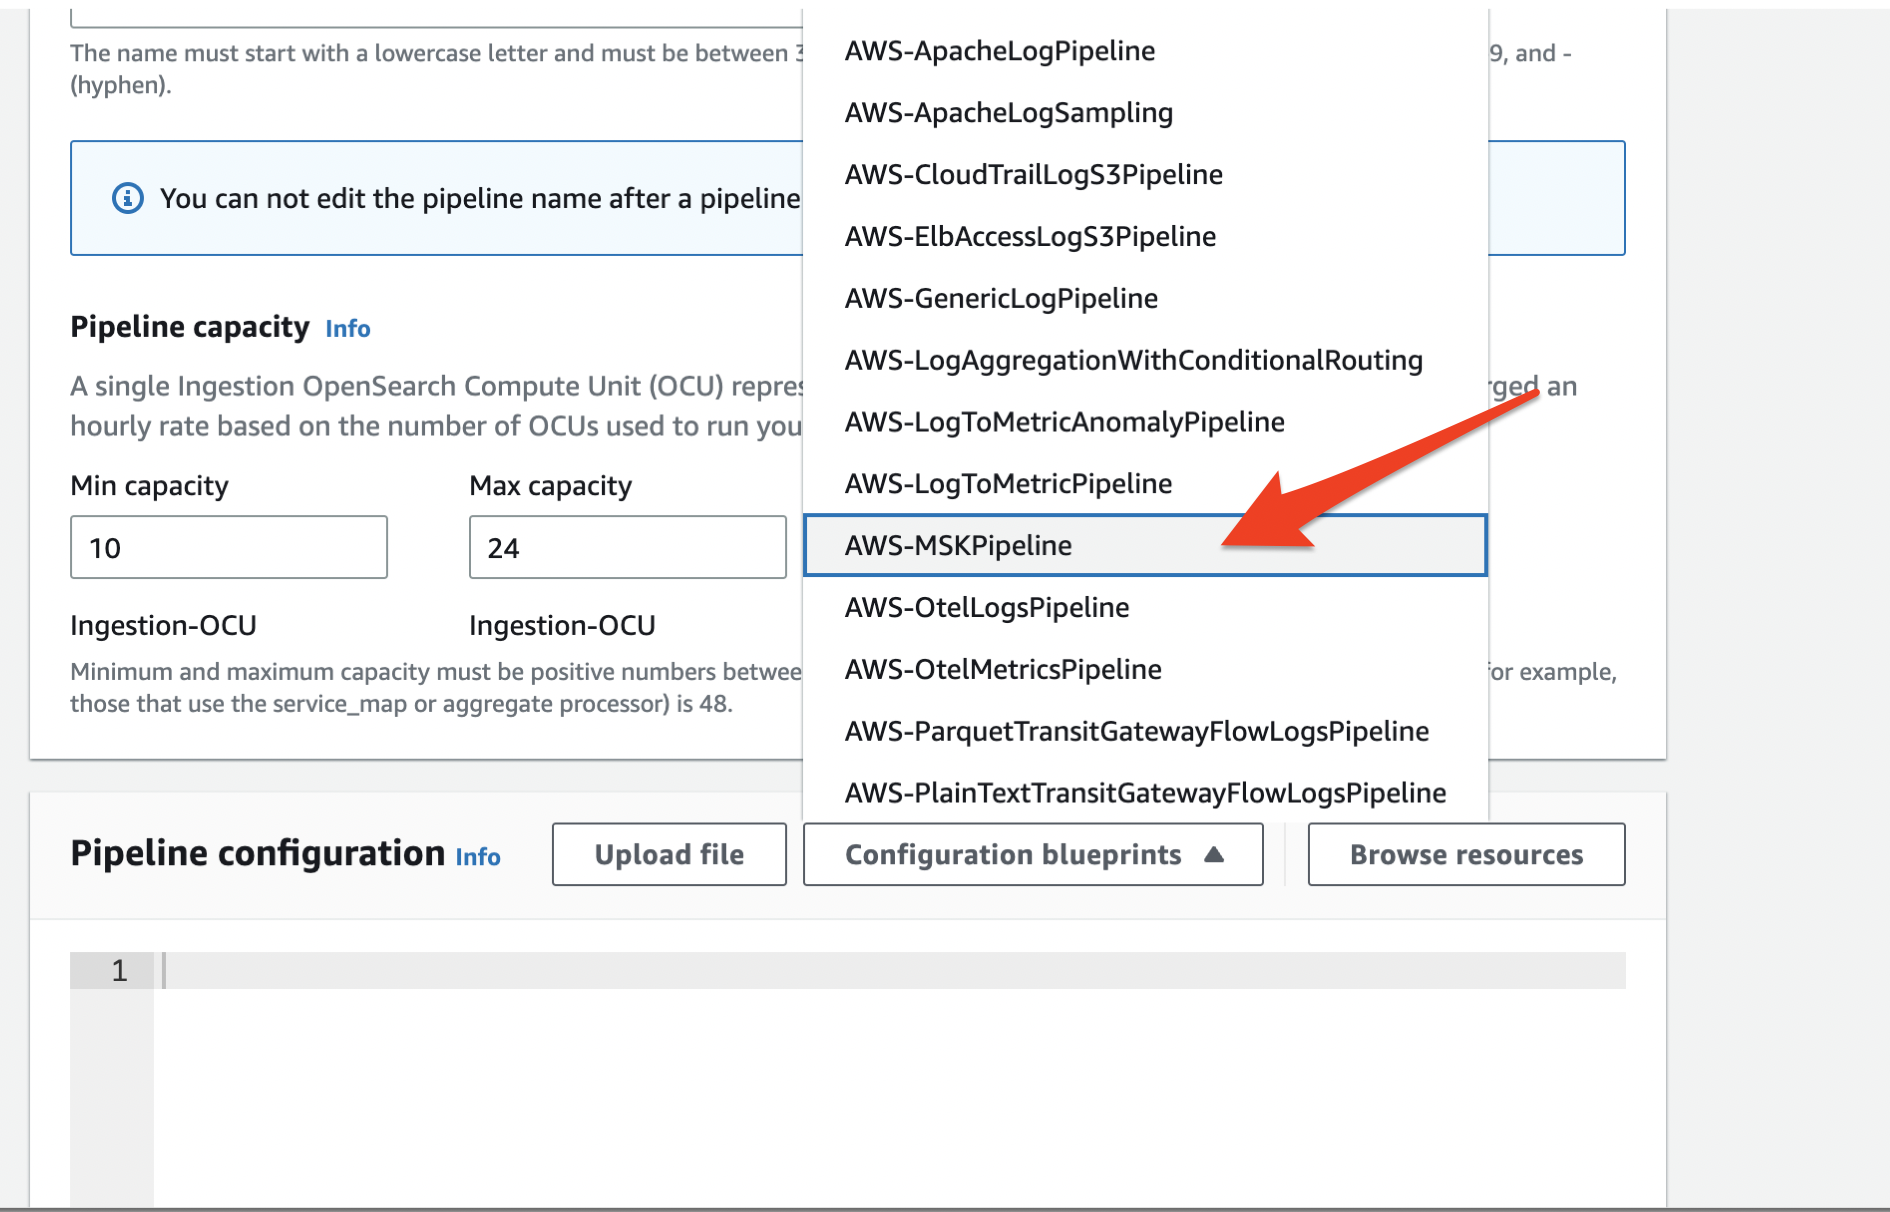
In April of 2023, OpenSearch Service released Amazon OpenSearch Ingestion, a fully managed and auto scaled ingestion pipeline for OpenSearch Service domains and OpenSearch Serverless collections. OpenSearch ingestion is powered by Data Prepper, with source and sink plugins to process, sample, filter, enrich, and deliver data for downstream analysis. Refer to Supported plugins and options for Amazon OpenSearch Ingestion pipelines to learn more.
The service automatically accommodates your workload demands by scaling up and down the OpenSearch Compute units (OCUs). Each OCU provides an estimated 8 GB per hour of throughput (your workload will determine the actual throughput) and is a combination of 8 GiB of memory and 2 vCPUs. You can scale up to 96 OCUs.
OpenSearch ingestion provides out-of-the-box pipeline blueprints that provide configuration templates for the most common ingestion pipelines. For more information, refer to Build a serverless log analytics pipeline using Amazon OpenSearch Ingestion with managed Amazon OpenSearch Service.

Enable your business with security features
In this section, we discuss how you can use OpenSearch Service to enable your business with security features.
Enable SAML during domain creation
SAML authentication for OpenSearch Dashboards was introduced in OpenSearch Service domains with Elasticsearch version 6.7 or higher and OpenSearch version 1.0 or higher, but you had to wait for the domain to be created to enable SAML. In February 2023, we enabled you to specify SAML support during domain creation. Support is available when you create domains on the AWS Management Console, AWS SDK, or AWS CloudFormation templates. SAML authentication for OpenSearch Dashboards enables you to integrate directly with identity providers (IdPs) such as Okta, Ping Identity, OneLogin, Auth0, Active Directory Federation Services (ADFS), and Azure Active Directory.
Security analytics with OpenSearch
OpenSearch 2.5 in OpenSearch Service launched support for OpenSearch’s security analytics plugin. In the past, identifying actionable security alerts and gaining valuable insights required significant expertise and familiarity with various security products. However, with security analytics, you can now benefit from simplified workflows that facilitate correlating multiple security logs and investigating security incidents, all within the OpenSearch environment, even without prior security experience. The security analytics plugin is bundled with an extensive collection of over 2,200 open-source Sigma security rules. These rules play a crucial role in detecting potential security threats in real time from your event logs. With the security analytics plugin, you can also design custom rules, tailor security alerts based on threat severity, and receive automated notifications at your preferred destination, such as email or a Slack channel. For more information about creating detectors and configuring rules, refer to Identify and remediate security threats to your business using security analytics with Amazon OpenSearch Service.

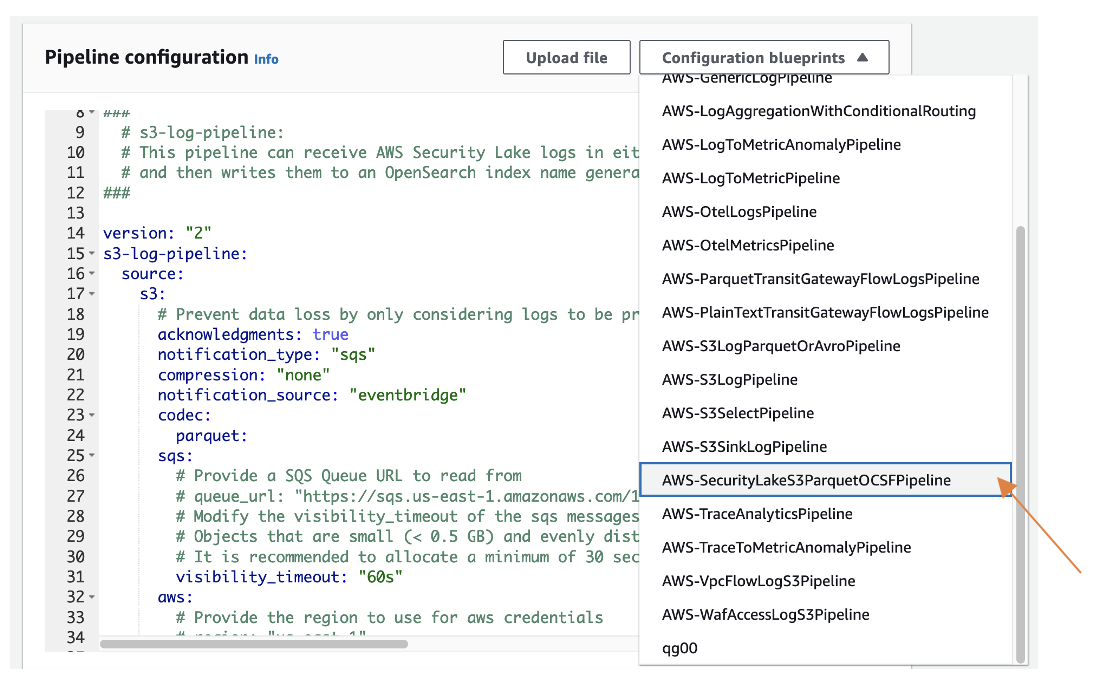
In June 2023, OpenSearch Ingestion added support for real-time ingestion of events from Amazon Security Lake, reducing indexing time for security data in OpenSearch Service. With Amazon Security Lake centralizing security data from various sources, you can take advantage of the extensive security analytics capabilities and rich dashboard visualizations of OpenSearch Service to gain valuable insights quickly. Using the Open Cybersecurity Schema Framework (OCSF), Amazon Security Lake normalizes and combines data from diverse enterprise security sources in Apache Parquet format. OpenSearch Ingestion now enables ingestion in Parquet format, with built-in processors to convert data into JSON documents before indexing. Additionally, there’s a specialized blueprint for ingesting data from Amazon Security Lake and support for Data Prepper 2.3.0, offering new features like S3 sink, Avro codec, obfuscation processor, event tagging, advanced expressions, and tail sampling.

Simplify cluster operations
In this section, we discuss how you can use OpenSearch Service to simplify cluster operations.
Enhanced dry run for configuration changes
OpenSearch Service has introduced an enhanced dry run option that allows you to validate configuration changes before applying them to your clusters. This feature ensures that any potential validation errors that might occur during the deployment of configuration changes are checked and summarized for your review. Additionally, the dry run will indicate whether a blue/green deployment is necessary to apply a change, enabling you to plan accordingly.
Ensure high availability and consistent performance
OpenSearch Service now offers 99.99% availability with Multi-AZ with Standby deployment. This new capability makes your business-critical workloads more resilient to potential infrastructure failures such as Availability Zone failure. Prior to this new launch, OpenSearch Service automatically recovered from Availability Zone outages by allocating more capacity in the impacted Availability Zone and automatically redistributing shards. However, this approach is a reactive approach to infrastructure and network failures, and usually led to high latency and increased resource utilization across the nodes. The Multi-AZ with Standby feature deploys infrastructure in three Availability Zones, while keeping two zones as active and one zone as standby. It requires a minimum of two replicas to maintain data redundancy across Availability Zones for a recovery time in less than a minute.

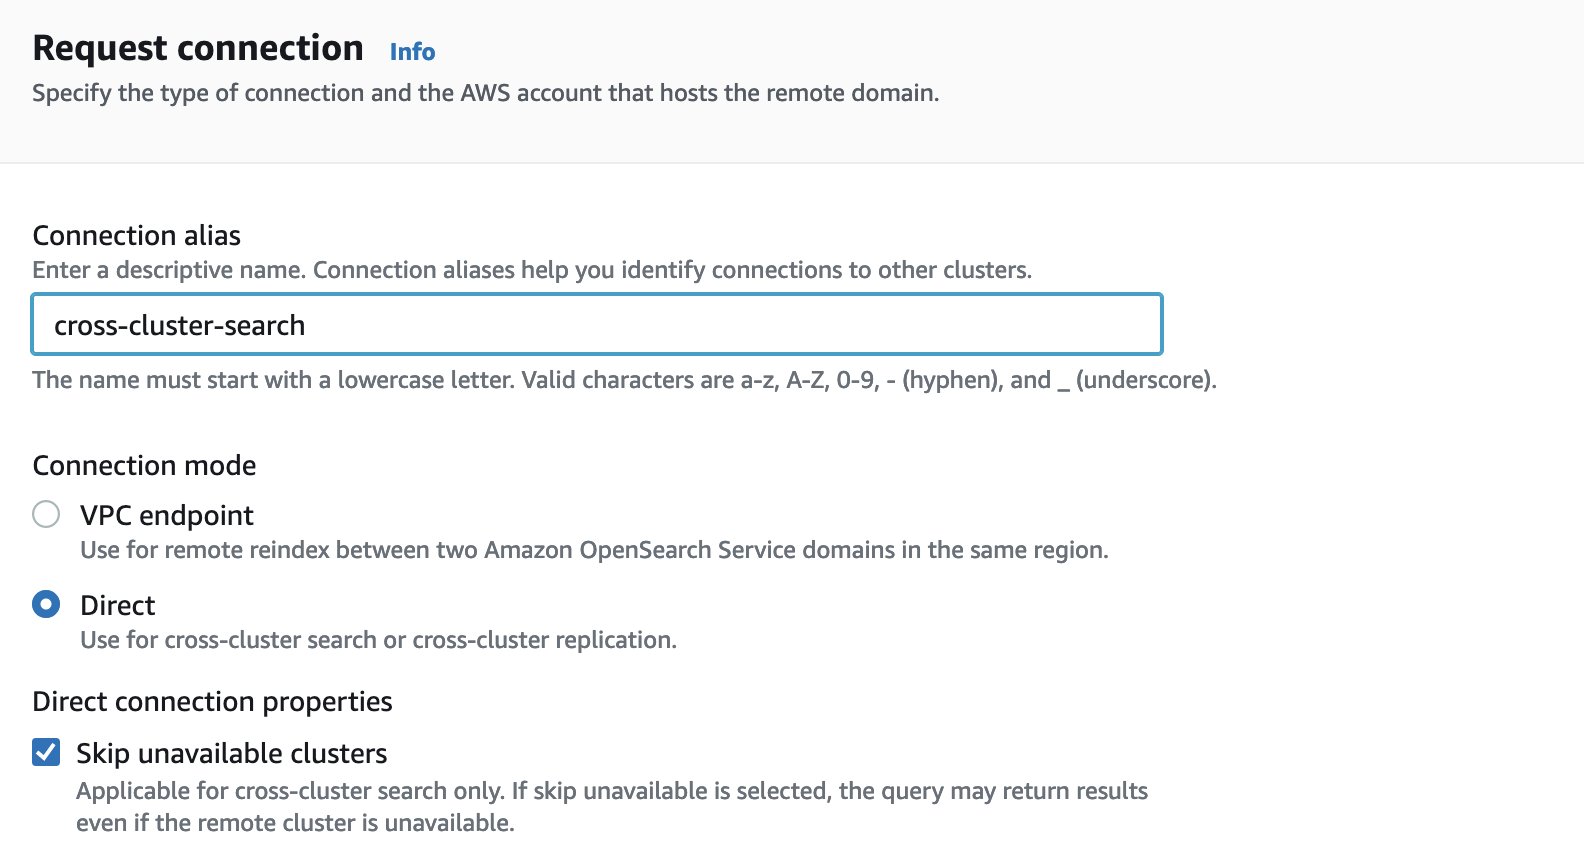
Skip unavailable clusters in cross-cluster search
With the release of the Skip unavailable clusters option for cross-cluster search in June 2023, your cross-cluster search queries will return results even if you have unavailable shards or indexes on one of the remote clusters. The feature is enabled by default when you request connection to a remote cluster on the OpenSearch Service console.

Enhance your experience with OpenSearch Dashboards
The release of OpenSearch 2.5 and OpenSearch 2.7 in OpenSearch Service has brought new features to manage data streams and indexes on the OpenSearch Dashboards UI.
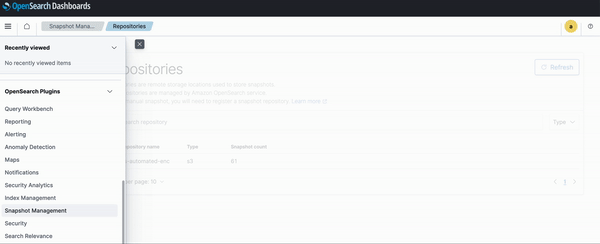
Snapshot management
By default, OpenSearch Service takes hourly snapshots of your data with a retention time of 14 days. The automatic snapshots are incremental in nature and help you recover from data loss or cluster failure. In addition to the default hourly snapshots, OpenSearch Service provides the capability to run manual snapshots and store them in an S3 bucket. You can use snapshot management to create manual snapshots, define a snapshot retention policy, and set up the frequency and timing of snapshot creation. Snapshot management is available under the index management plugin in OpenSearch Dashboards.

Index and data streams management
With the support of OpenSearch 2.5 and OpenSearch 2.7 in OpenSearch Service , you can now use the index management plugin in OpenSearch dashboards to manage data streams, index templates, and index aliases.
The index management UI provides expended capabilities to include running manual rollover and force merge actions for data streams. You can also visually manage multiple index templates and define index mappings, number of primary shards, number of replicas, and refresh internal for your indexes.

Conclusion
It’s been a busy first half of the year! OpenSearch Project and OpenSearch Service have launched OpenSearch Serverless to use OpenSearch without worrying about infrastructure, index, or shards; OpenSearch Ingestion to ingest your data; the vector engine for OpenSearch Serverless; security analytics to analyze data from Amazon Security Lake; operational improvements to bring 99.99% availability; and improvements to the Observability plugin. OpenSearch Service provides a full suite of capabilities, including a vector database, semantic search, and log analytics engine. We invite you to check out the features described in this post and we appreciate providing us your valuable feedback.
You can get started by having hands-on experience with the publicly available workshops for semantic search, microservice observability, and OpenSearch Serverless. You can also learn more about the service features and use cases by checking out more OpenSearch Service blog posts.
About the Authors
 Hajer Bouafif is an Analytics Specialist Solutions Architect at Amazon Web Services. She focuses on Amazon OpenSearch Service and helps customers design and build well-architected analytics workloads in diverse industries. Hajer enjoys spending time outdoors and discovering new cultures.

Aish Gunasekar is a Specialist Solutions Architect with a focus on Amazon OpenSearch Service. Her passion at AWS is to help customers design highly scalable architectures and help them in their cloud adoption journey. Outside of work, she enjoys hiking and baking.
 Jon Handler is a Senior Principal Solutions Architect at Amazon Web Services based in Palo Alto, CA. Jon works closely with OpenSearch and Amazon OpenSearch Service, providing help and guidance to a broad range of customers who have search and log analytics workloads that they want to move to the AWS Cloud. Prior to joining AWS, Jon’s career as a software developer included 4 years of coding a large-scale, ecommerce search engine. Jon holds a Bachelor of the Arts from the University of Pennsylvania, and a Master of Science and a PhD in Computer Science and Artificial Intelligence from Northwestern University.


 Muthu Pitchaimani is a Search Specialist with Amazon OpenSearch Service. He builds large-scale search applications and solutions. Muthu is interested in the topics of networking and security, and is based out of Austin, Texas.
 Arjun Nambiar is a Product Manager with Amazon OpenSearch Service. He focusses on ingestion technologies that enable ingesting data from a wide variety of sources into Amazon OpenSearch Service at scale. Arjun is interested in large scale distributed systems and cloud-native technologies and is based out of Seattle, Washington.
 Raj Sharma is a Sr. SDM with Amazon OpenSearch Service. He builds large-scale distributed applications and solutions. Raj is interested in the topics of Analytics, databases, networking and security, and is based out of Palo Alto, California.


 Hajer Bouafif is an Analytics Specialist Solutions Architect at Amazon Web Services. She focuses on Amazon OpenSearch Service and helps customers design and build well-architected analytics workloads in diverse industries. Hajer enjoys spending time outdoors and discovering new cultures.
 Jon Handler is a Senior Principal Solutions Architect at Amazon Web Services based in Palo Alto, CA. Jon works closely with OpenSearch and Amazon OpenSearch Service, providing help and guidance to a broad range of customers who have search and log analytics workloads that they want to move to the AWS Cloud. Prior to joining AWS, Jon’s career as a software developer included 4 years of coding a large-scale, ecommerce search engine. Jon holds a Bachelor of the Arts from the University of Pennsylvania, and a Master of Science and a PhD in Computer Science and Artificial Intelligence from Northwestern University.


 Prashant Agrawal is a Sr. Search Specialist Solutions Architect with Amazon OpenSearch Service. He works closely with customers to help them migrate their workloads to the cloud and helps existing customers fine-tune their clusters to achieve better performance and save on cost. Before joining AWS, he helped various customers use OpenSearch and Elasticsearch for their search and log analytics use cases. When not working, you can find him traveling and exploring new places. In short, he likes doing Eat → Travel → Repeat.
 AWS Global Summits – The 2023 AWS Summits season is almost coming to an end with the last two in-person events in


