All posts by Channy Yun (윤석찬)

Amazon EC2 C8id, M8id, and R8id instances with up to 22.8 TB local NVMe storage are generally available

Post Syndicated from Channy Yun (윤석찬) original https://aws.amazon.com/blogs/aws/amazon-ec2-c8id-m8id-and-r8id-instances-with-up-to-22-8-tb-local-nvme-storage-are-generally-available/

Last year, we launched the Amazon Elastic Compute Cloud (Amazon EC2) C8i instances, M8i instances, and R8i instances powered by custom Intel Xeon 6 processors available only on AWS with sustained all-core 3.9 GHz turbo frequency. They deliver the highest performance and fastest memory bandwidth among comparable Intel processors in the cloud.

Today we’re announcing new Amazon EC2 C8id, M8id, and R8id instances backed by up to 22.8TB of NVMe-based SSD block-level instance storage physically connected to the host server. These instances offer 3 times more vCPUs, memory and local storage compared to previous sixth-generation instances.

These instances deliver up to 43% higher compute performance and 3.3 times more memory bandwidth compared to previous sixth-generation instances. They also deliver up to 46% higher performance for I/O intensive database workloads, and up to 30% faster query results for I/O intensive real-time data analytics compared to previous sixth generation instances.

  • C8id instances are ideal for compute-intensive workloads, including those that need access to high-speed, low-latency local storage like video encoding, image manipulation, and other forms of media processing.
  • M8id instances are best for workloads that require a balance of compute and memory resources along with high-speed, low-latency local block storage, including data logging, media processing, and medium-sized data stores.
  • R8id instances are designed for memory-intensive workloads such as large-scale SQL and NoSQL databases, in-memory databases, large-scale data analytics, and AI inference.

C8id, M8id, and R8id instances now scale up to 96xlarge (versus 32xlarge sizes in the sixth generation) with up to 384 vCPUs, 3TiB of memory, and 22.8TB of local storage that make it easier to scale up applications and drive greater efficiencies. These instances also offer two bare metal sizes (metal-48xl and metal-96xl), allowing you to right size your instances and deploy your most performance sensitive workloads that benefit from direct access to physical resources.

The instances are available in 11 sizes per family, as well as two bare metal configurations each:

Instance Name vCPUs Memory (GiB) (C/M/R) Local NVMe storage (GB) Network bandwidth (Gbps) EBS bandwidth (Gbps)
large 2 4/8/16* 1 x 118 Up to 12.5 Up to 10
xlarge 4 8/16/32* 1 x 237 Up to 12.5 Up to 10
2xlarge 8 16/32/64* 1 x 474 Up to 15 Up to 10
4xlarge 16 32/64/128* 1 x 950 Up to 15 Up to 10
8xlarge 32 64/128/256* 1 x 1,900 15 10
12xlarge 48 96/192/384* 1 x 2,850 22.5 15
16xlarge 64 128/256/512* 1 x 3,800 30 20
24xlarge 96 192/384/768* 2 x 2,850 40 30
32xlarge 128 256/512/1024* 2 x 3,800 50 40
48xlarge 192 384/768/1536* 3 x 3,800 75 60
96xlarge 384 768/1536/3072* 6 x 3,800 100 80
metal-48xl 192 384/768/1536* 3 x 3,800 75 60
metal-96xl 384 768/1536/3072* 6 x 3,800 100 80

*Memory values are for C8id/M8id/R8id respectively.

These instances support the Instance Bandwidth Configuration (IBC) feature like other eighth-generation instance types, offering flexibility to allocate resources between network and Amazon Elastic Block Store (Amazon EBS) bandwidth. You can scale network or EBS bandwidth by 25%, allocating resources optimally for each workload. These instances also use sixth-generation AWS Nitro cards offloading CPU virtualization, storage, and networking functions to dedicated hardware and software, enhancing performance and security for your workloads.

You can use any Amazon Machine Images (AMIs) that include drivers for the Elastic Network Adapter (ENA) and NVMe to fully utilize the performance and capabilities. All current generation AWS Windows and Linux AMIs come with the AWS NVMe driver installed by default. If you use an AMI that does not have the AWS NVMe driver, you can manually install AWS NVMe drivers.

As I noted in my previous blog post, here are a couple of things to remind you about the local NVMe storage on these instances:

  • You don’t have to specify a block device mapping in your AMI or during the instance launch; the local storage will show up as one or more devices (/dev/nvme[0-26]n1 on Linux) after the guest operating system has booted.
  • Each local NVMe device is hardware encrypted using the XTS-AES-256 block cipher and a unique key. Each key is destroyed when the instance is stopped or terminated.
  • Local NVMe devices have the same lifetime as the instance they are attached to and do not persist after the instance has been stopped or terminated.

To learn more, visit Amazon EBS volumes and NVMe in the Amazon EBS User Guide.

Now available
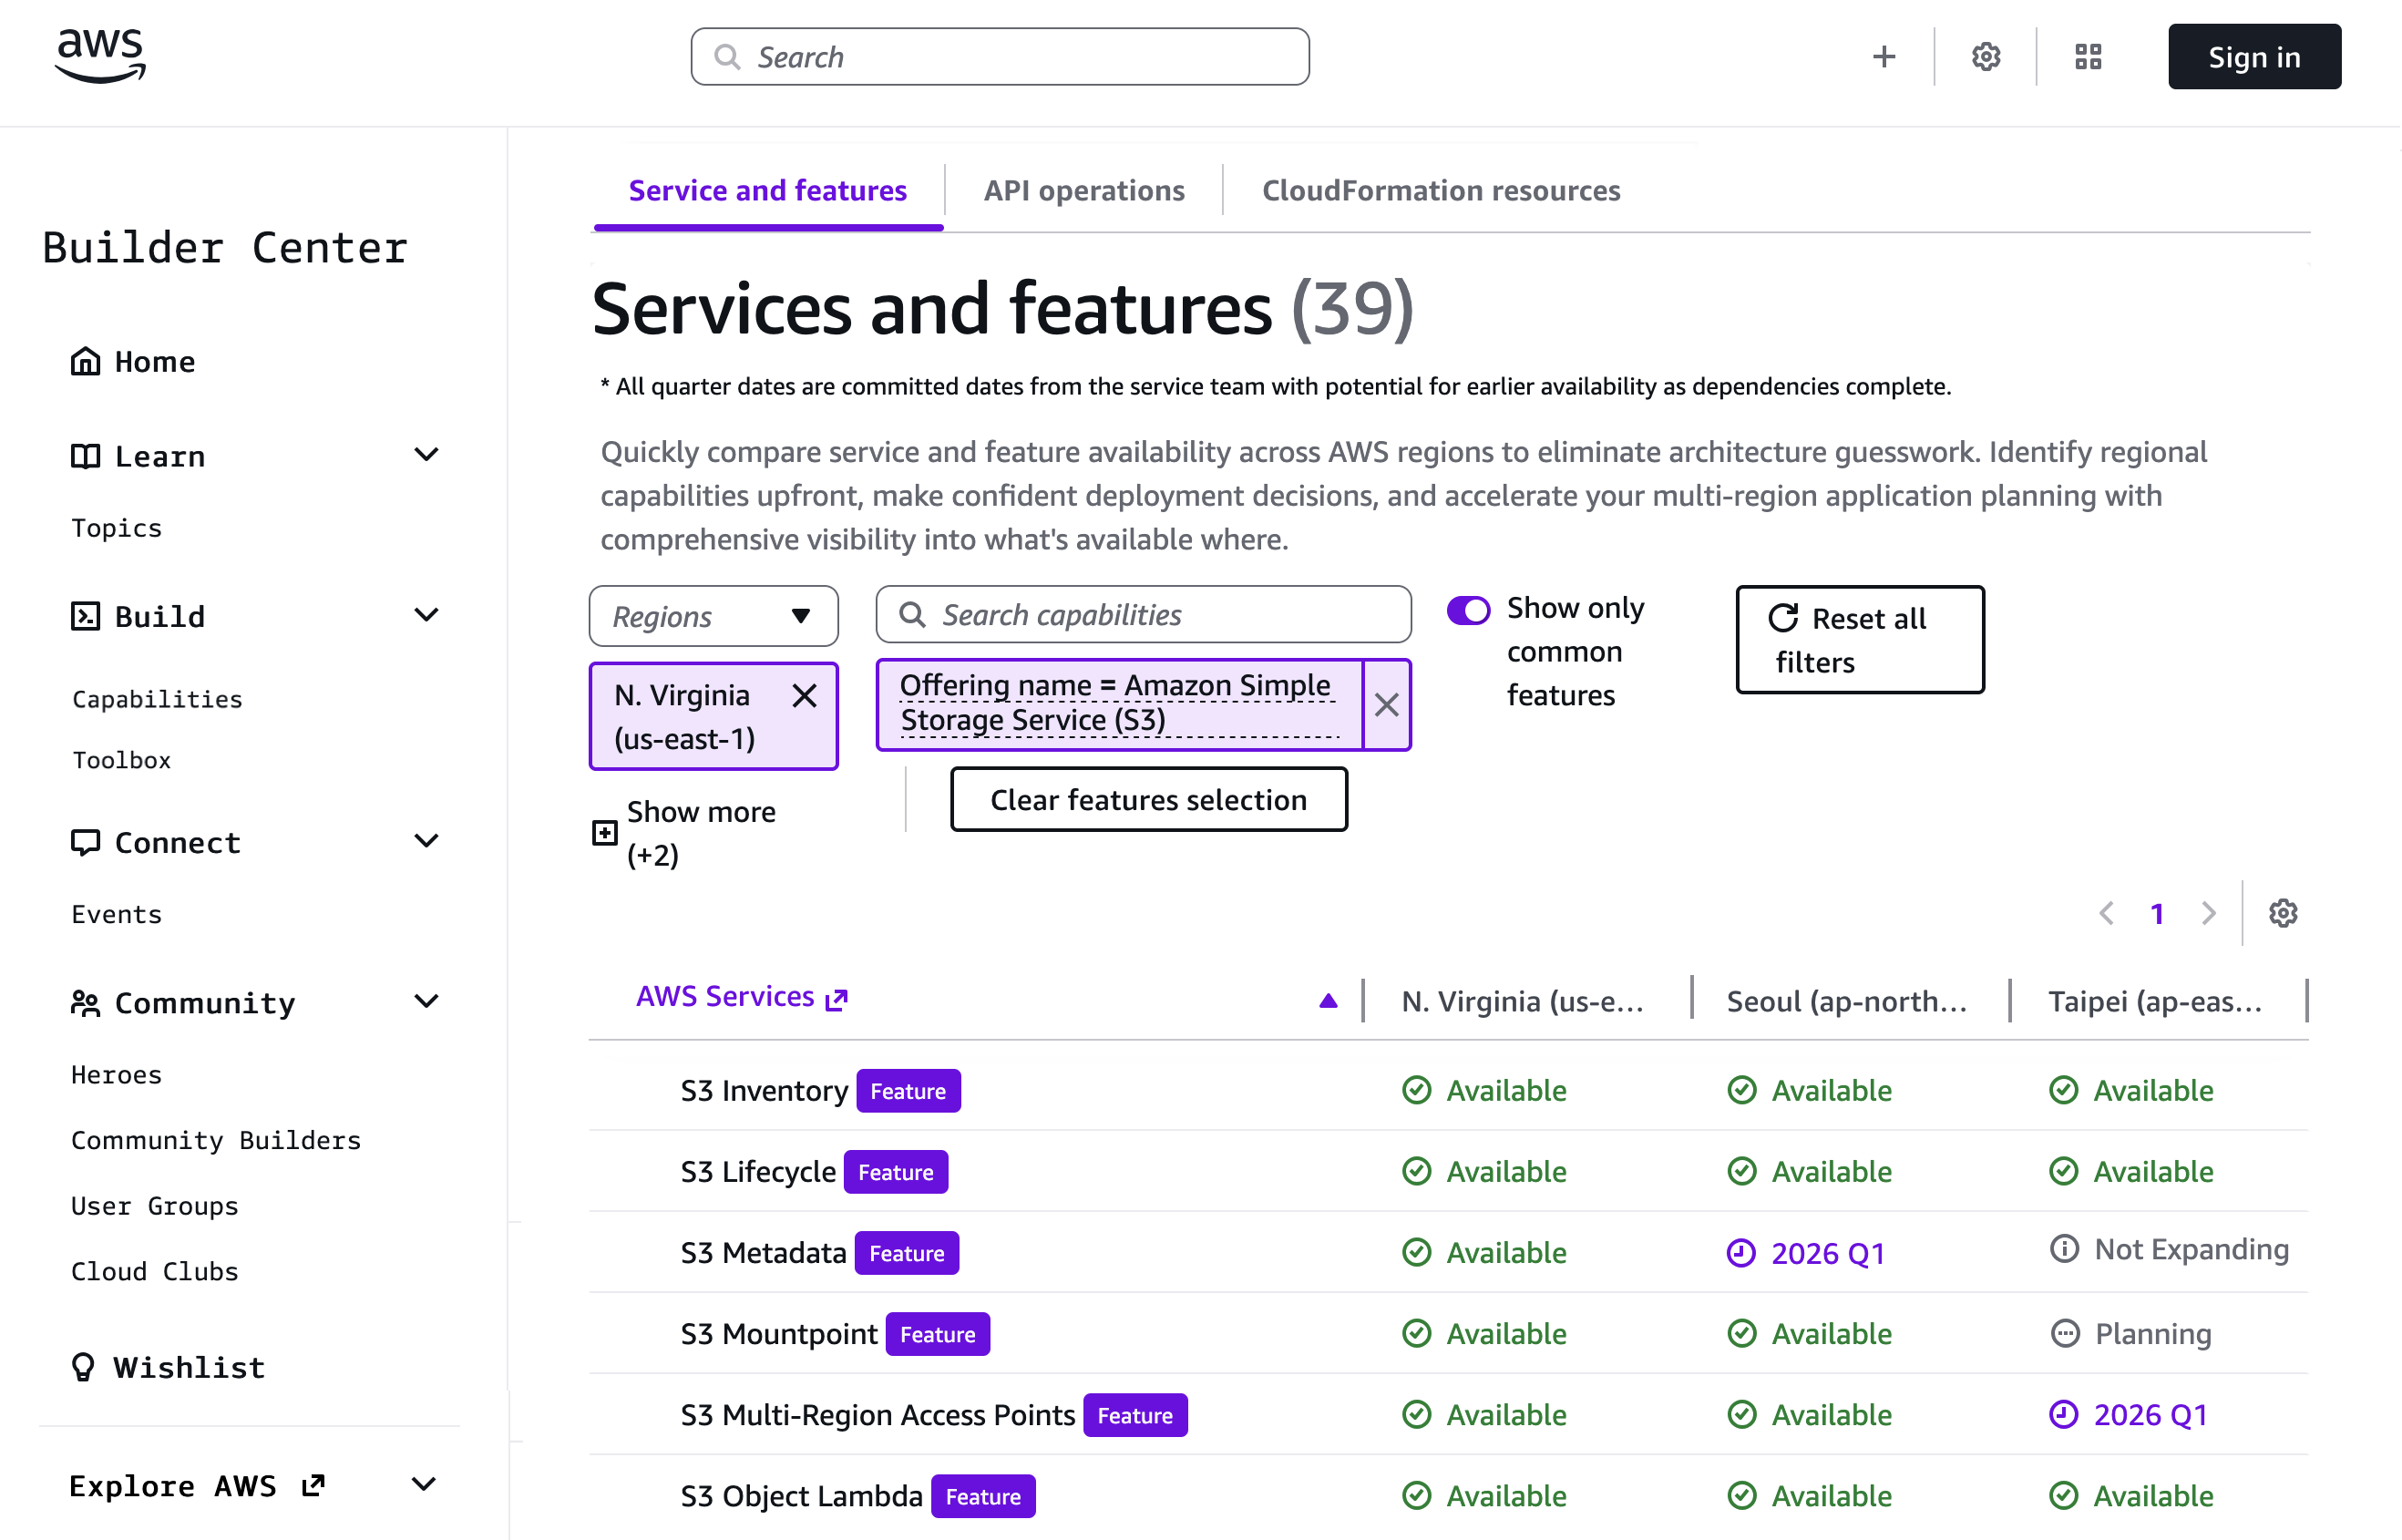
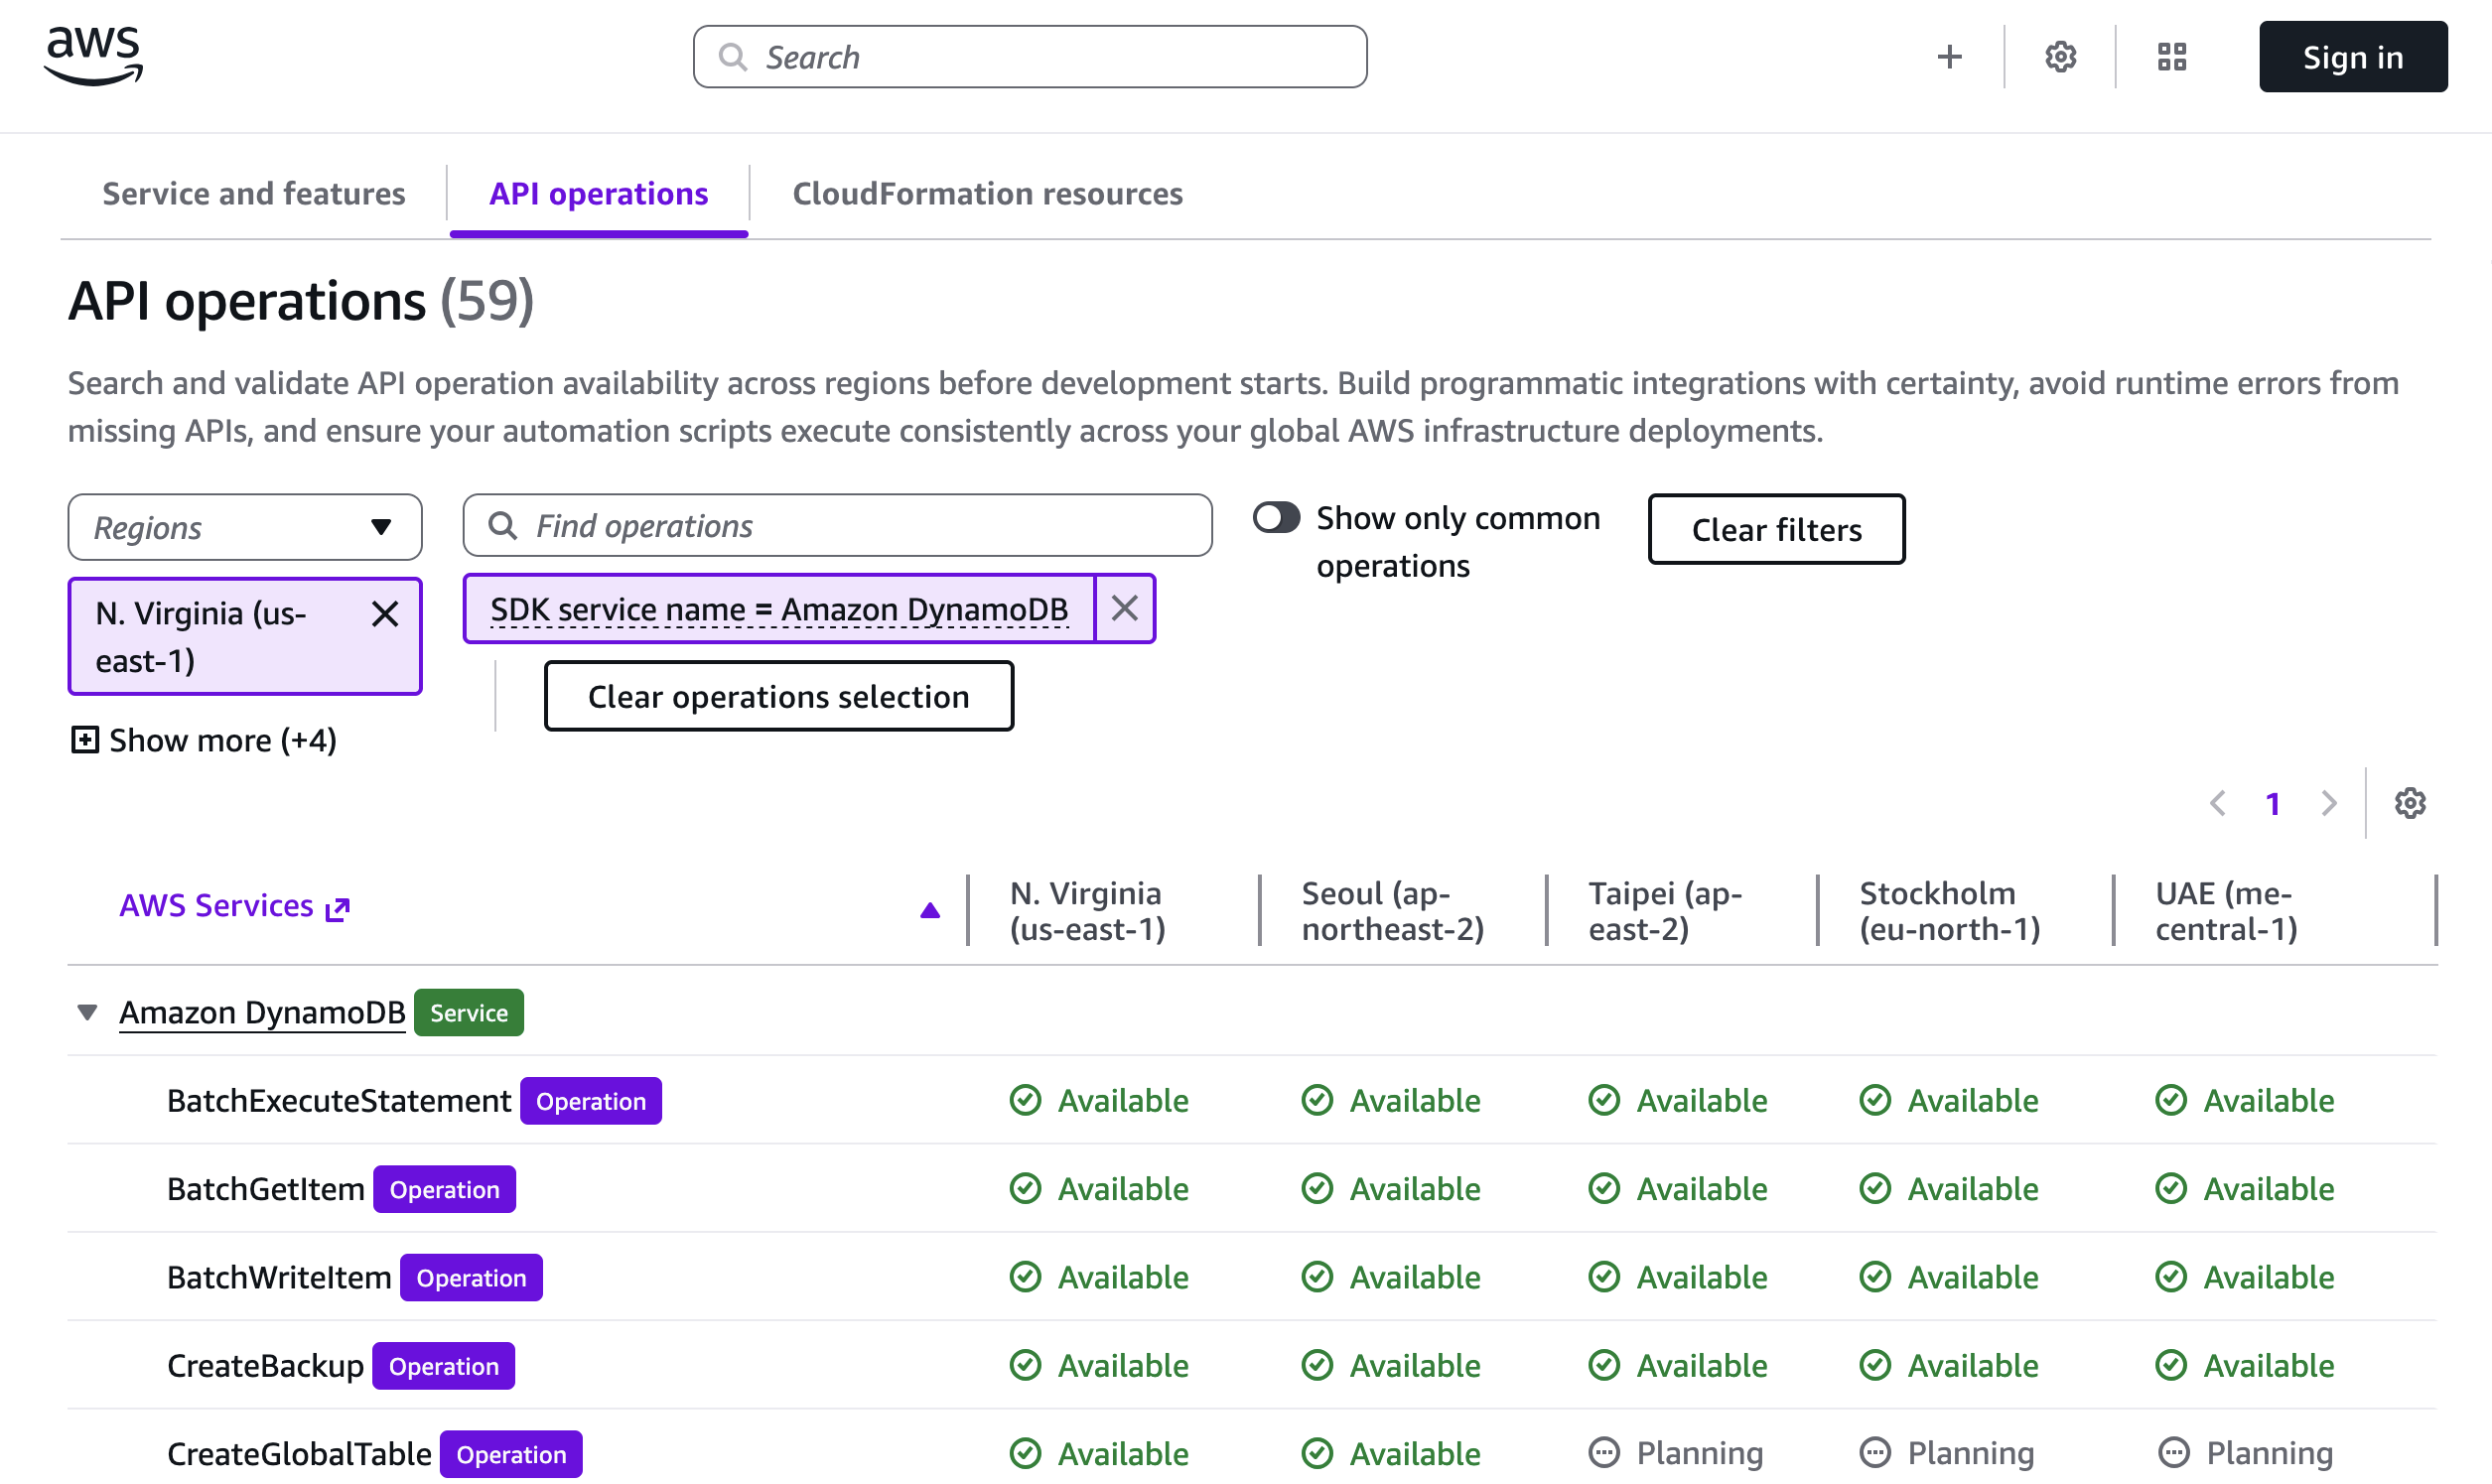
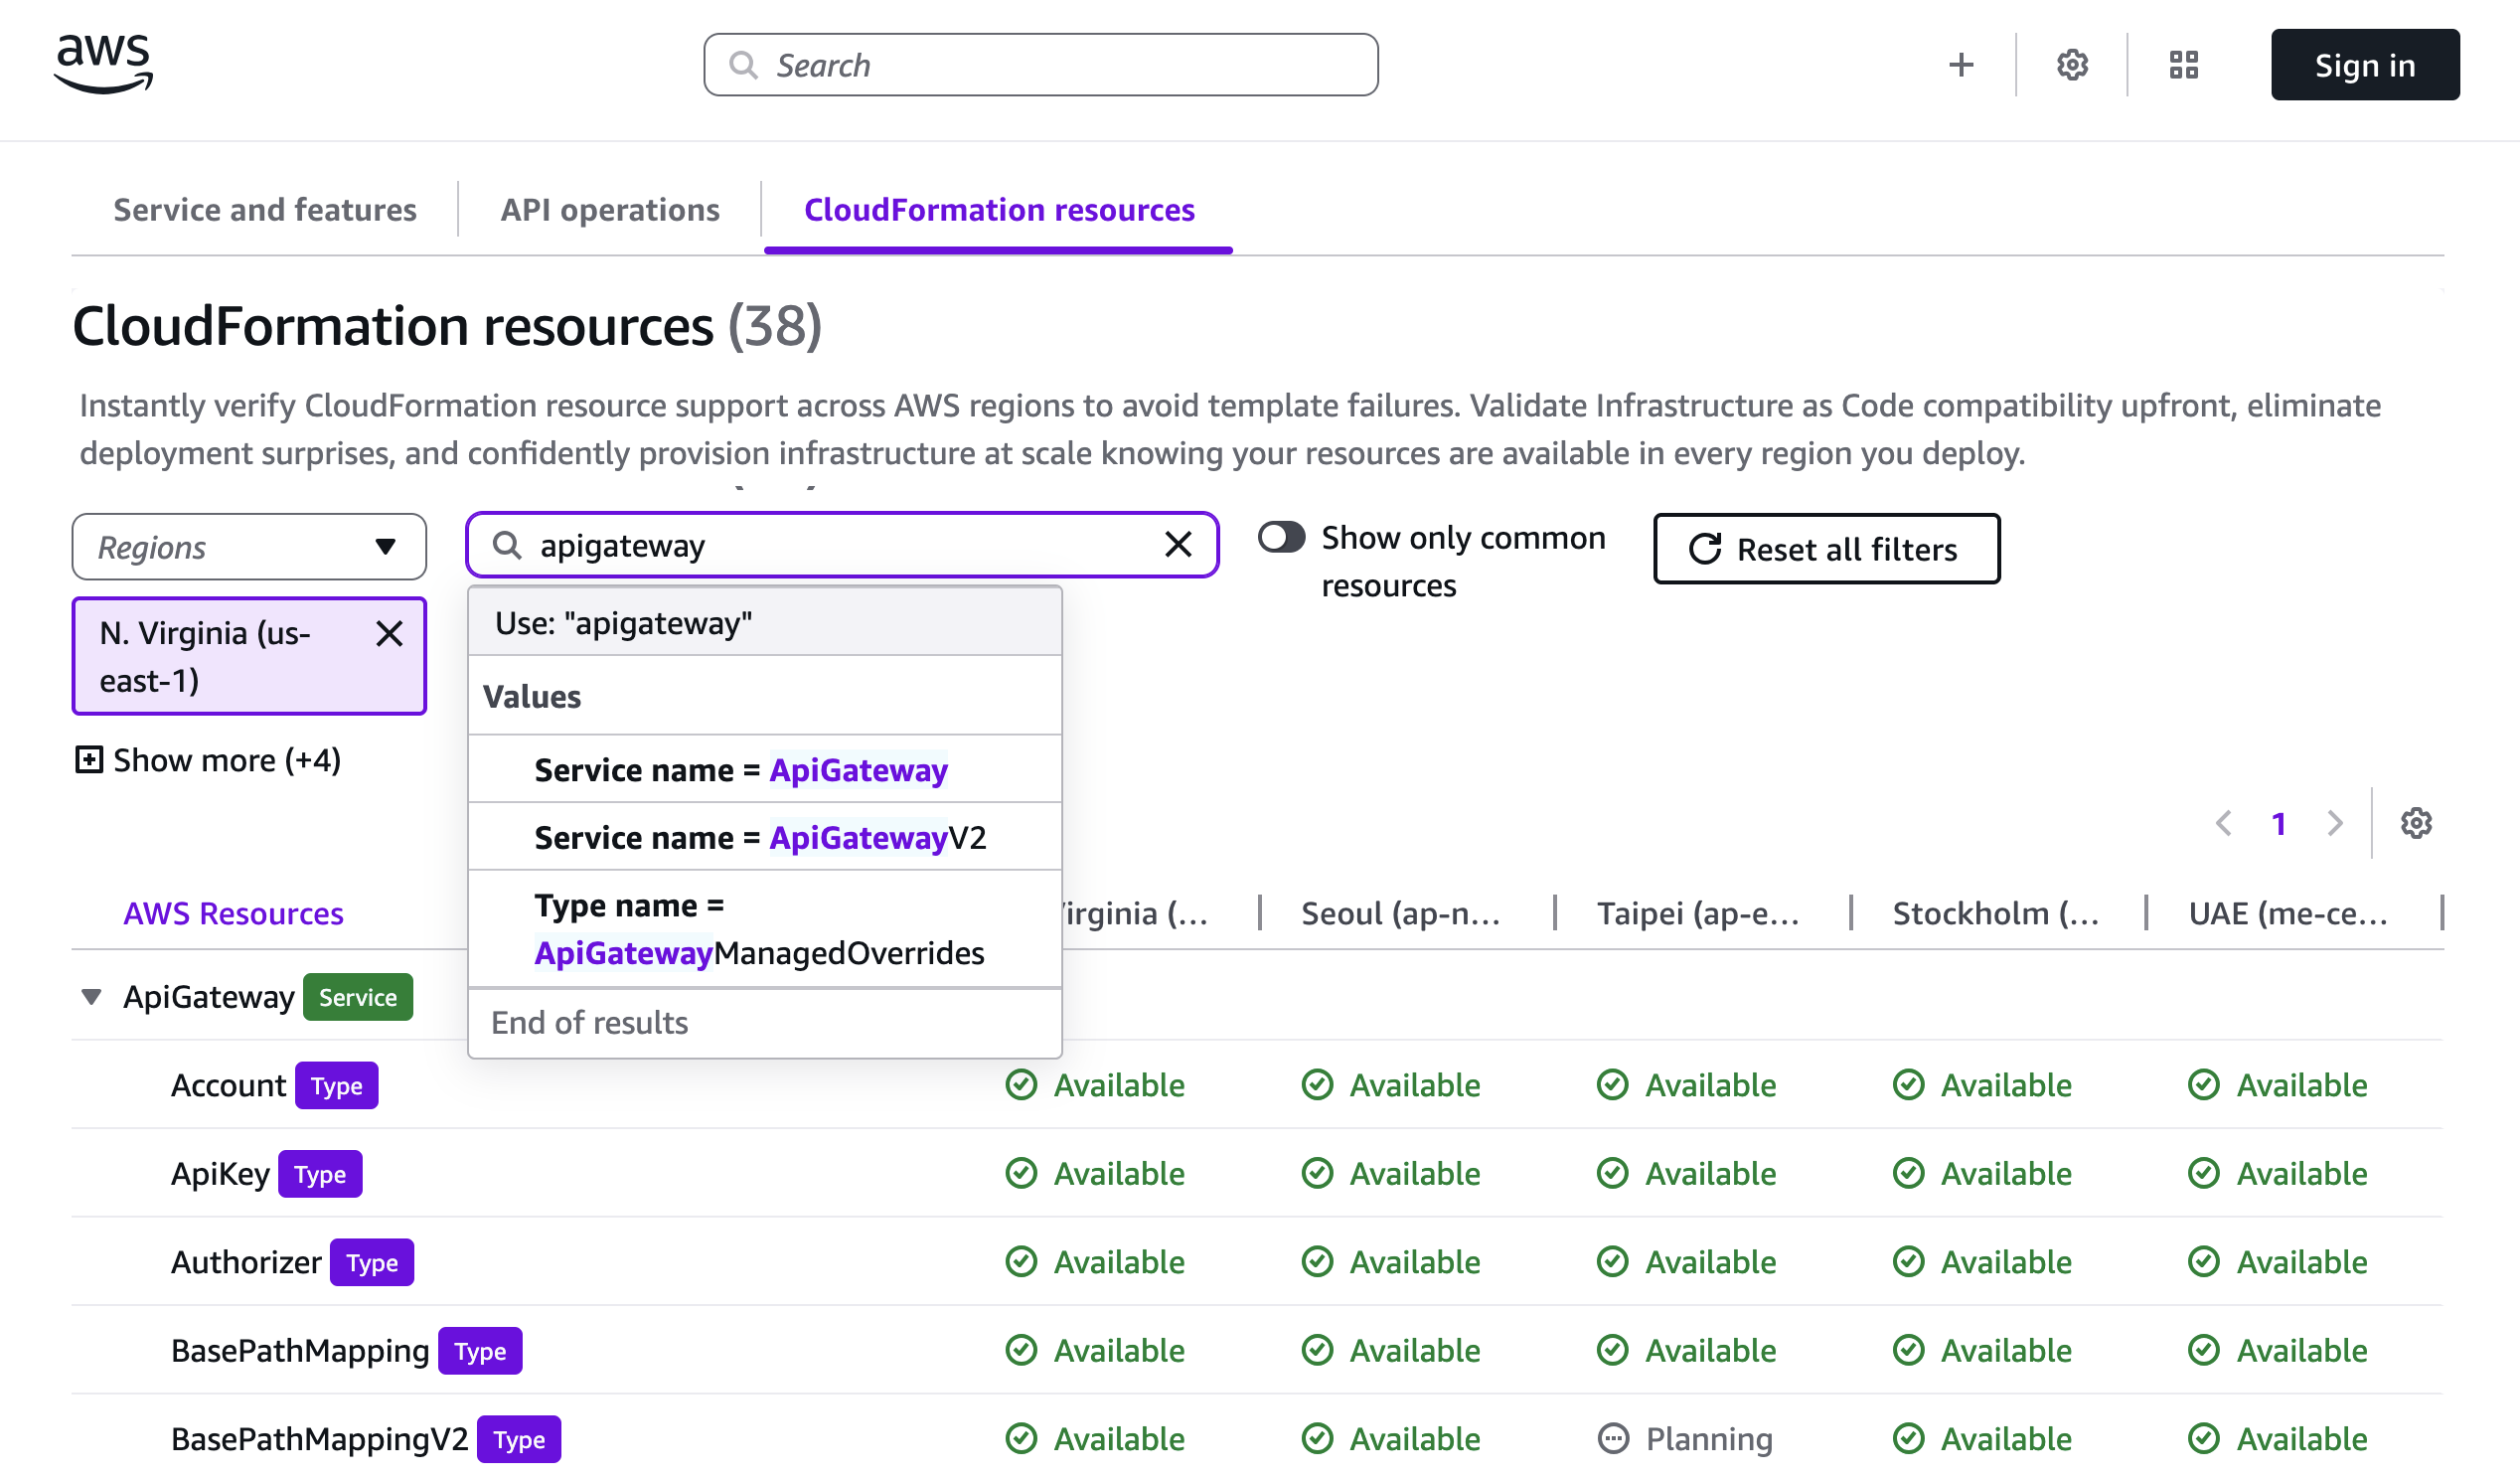
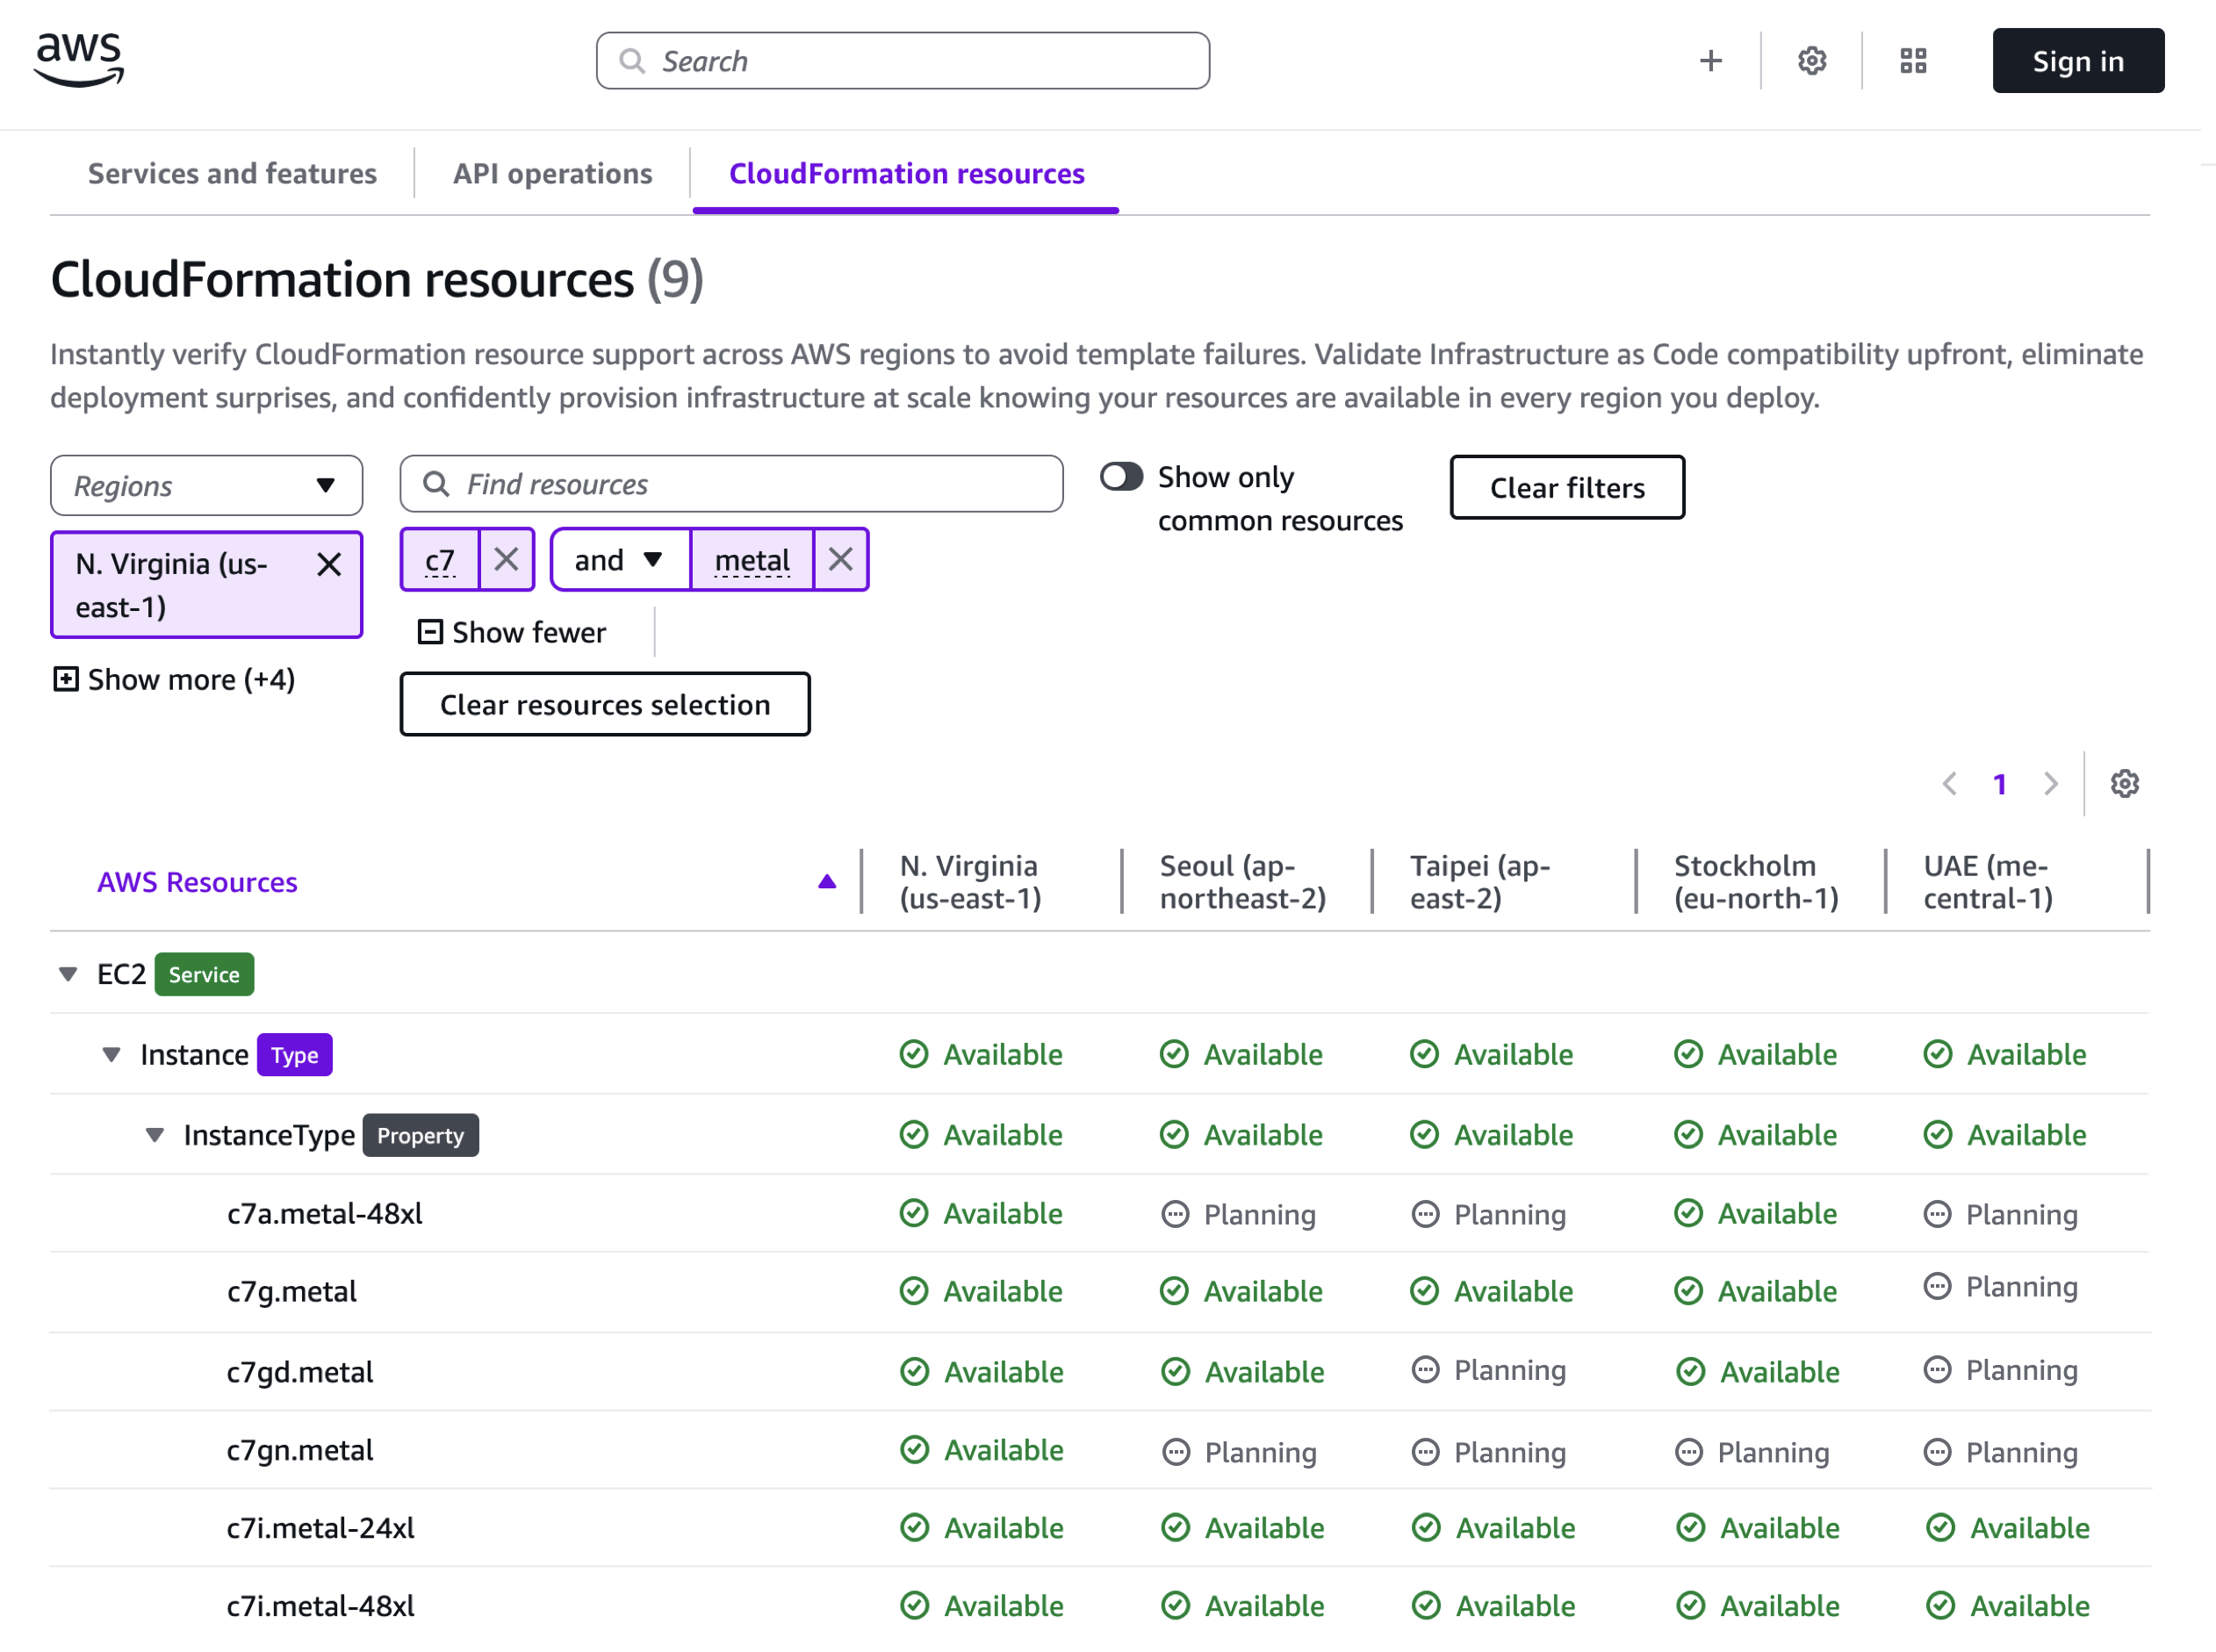
Amazon EC2 C8id, M8id and R8id instances are available in US East (N. Virginia), US East (Ohio), and US West (Oregon) AWS Regions. R8id instances are additionally available in Europe (Frankfurt) Region. For Regional availability and a future roadmap, search the instance type in the CloudFormation resources tab of AWS Capabilities by Region.

You can purchase these instances as On-Demand Instances, Savings Plans, and Spot Instances. These instances are also available as Dedicated Instances and Dedicated Hosts. To learn more, visit the Amazon EC2 Pricing page.

Give C8id, M8id, and R8id instances a try in the Amazon EC2 console. To learn more, visit the EC2 C8i instances, M8i instances, and R8i instances page and send feedback to AWS re:Post for EC2 or through your usual AWS Support contacts.

Channy

AWS IAM Identity Center now supports multi-Region replication for AWS account access and application use

Post Syndicated from Channy Yun (윤석찬) original https://aws.amazon.com/blogs/aws/aws-iam-identity-center-now-supports-multi-region-replication-for-aws-account-access-and-application-use/

Today, we’re announcing the general availability of AWS IAM Identity Center multi-Region support to enable AWS account access and managed application use in additional AWS Regions.

With this feature, you can replicate your workforce identities, permission sets, and other metadata in your organization instance of IAM Identity Center connected to an external identity provider (IdP), such as Microsoft Entra ID and Okta, from its current primary Region to additional Regions for improved resiliency of AWS account access.

You can also deploy AWS managed applications in your preferred Regions, close to application users and datasets for improved user experience or to meet data residency requirements. Your applications deployed in additional Regions access replicated workforce identities locally for optimal performance and reliability.

When you replicate your workforce identities to an additional Region, your workforce gets an active AWS access portal endpoint in that Region. This means that in the unlikely event of an IAM Identity Center service disruption in its primary Region, your workforce can still access their AWS accounts through the AWS access portal in an additional Region using already provisioned permissions. You can continue to manage IAM Identity Center configurations from the primary Region, maintaining centralized control.

Enable IAM Identity Center in multiple Regions
To get started, you should confirm that the AWS managed applications you’re currently using support customer managed AWS Key Management Service (AWS KMS) key enabled in AWS Identity Center. When we introduced this feature in October 2025, Seb recommended using multi-Region AWS KMS keys unless your company policies restrict you to single-Region keys. Multi-Region keys provide consistent key material across Regions while maintaining independent key infrastructure in each Region.

Before replicating IAM Identity Center to an additional Region, you must first replicate the customer managed AWS KMS key to that Region and configure the replica key with the permissions required for IAM Identity Center operations. For instructions on creating multi-Region replica keys, refer to Create multi-Region replica keys in the AWS KMS Developer Guide.

Go to the IAM Identity Center console in the primary Region, for example, US East (N. Virginia), choose Settings in the left-navigation pane, and select the Management tab. Confirm that your configured encryption key is a multi-Region customer managed AWS KMS key. To add more Regions, choose Add Region.

You can choose additional Regions to replicate the IAM Identity Center in a list of the available Regions. When choosing an additional Region, consider your intended use cases, for example, data compliance or user experience.

If you want to run AWS managed applications that access datasets limited to a specific Region for compliance reasons, choose the Region where the datasets reside. If you plan to use the additional Region to deploy AWS applications, verify that the required applications support your chosen Region and deployment in additional Regions.

Choose Add Region. This starts the initial replication whose duration depends on the size of your Identity Center instance.

After the replication is completed, your users can access their AWS accounts and applications in this new Region. When you choose View ACS URLs, you can view SAML information, such as an Assertion Consumer Service (ACS) URL, about the primary and additional Regions.

How your workforce can use an additional Region
AWS Identity Center supports SAML single sign-on with external IdPs, such as Microsoft Entra ID and Okta. Upon authentication in the IdP, the user is redirected to the AWS access portal. To enable the user to be redirected to the AWS access portal in the newly added Region, you need to add the additional Region’s ACS URL to the IdP configuration.

The following screenshots show you how to do this in the Okta admin console:

Then, you can create a bookmark application in your identity provider for users to discover the additional Region. This bookmark app functions like a browser bookmark and contains only the URL to the AWS access portal in the additional Region.

You can also deploy AWS managed applications in additional Regions using your existing deployment workflows. Your users can access applications or accounts using the existing access methods, such as the AWS access portal, an application link, or through the AWS Command Line Interface (AWS CLI).

To learn more about which AWS managed applications support deployment in additional Regions, visit the IAM Identity Center User Guide.

Things to know
Here are key considerations to know about this feature:

  • Consideration – To take advantage of this feature at launch, you must be using an organization instance of IAM Identity Center connected to an external IdP. Also, the primary and additional Regions must be enabled by default in an AWS account. Account instances of IAM Identity Center, and the other two identity sources (Microsoft Active Directory and IAM Identity Center directory) are presently not supported.
  • Operation – The primary Region remains the central place for managing workforce identities, account access permissions, external IdP, and other configurations. You can use the IAM Identity Center console in additional Regions with a limited feature set. Most operations are read-only, except for application management and user session revocation.
  • Monitoring – All workforce actions are emitted in AWS CloudTrail in the Region where the action was performed. This feature enhances account access continuity. You can set up break-glass access for privileged users to access AWS if the external IdP has a service disruption.

Now available
AWS IAM Identity Center multi-Region support is now available in the 17 enabled-by-default commercial AWS Regions. For Regional availability and a future roadmap, visit the AWS Capabilities by Region. You can use this feature at no additional cost. Standard AWS KMS charges apply for storing and using customer managed keys.

Give it a try in the AWS Identity Center console. To learn more, visit the IAM Identity Center User Guide and send feedback to AWS re:Post for Identity Center or through your usual AWS Support contacts.

Channy

Announcing Amazon EC2 G7e instances accelerated by NVIDIA RTX PRO 6000 Blackwell Server Edition GPUs

Post Syndicated from Channy Yun (윤석찬) original https://aws.amazon.com/blogs/aws/announcing-amazon-ec2-g7e-instances-accelerated-by-nvidia-rtx-pro-6000-blackwell-server-edition-gpus/

Today, we’re announcing the general availability of Amazon Elastic Compute Cloud (Amazon EC2) G7e instances that deliver cost-effective performance for generative AI inference workloads and the highest performance for graphics workloads.

G7e instances are accelerated by the NVIDIA RTX PRO 6000 Blackwell Server Edition GPUs and are well suited for a broad range of GPU-enabled workloads including spatial computing and scientific computing workloads. G7e instances deliver up to 2.3 times inference performance compared to G6e instances.

Improvements made compared to predecessors:

  • NVIDIA RTX PRO 6000 Blackwell GPUs — NVIDIA RTX PRO 6000 Blackwell Server Edition GPUs offer two times the GPU memory and 1.85 times the GPU memory bandwidth compared to G6e instances. By using the higher GPU memory offered by G7e instances, you can run medium-sized models of up to 70B parameters with FP8 precision on a single GPU.
  • NVIDIA GPUDirect P2P — For models that are too large to fit into the memory of a single GPU, you can split the model or computations across multiple GPUs. G7e instances reduce the latency of your multi-GPU workloads with support for NVIDIA GPUDirect P2P, which enables direct communication between GPUs over PCIe interconnect. These instances offer the lowest peer to peer latency for GPUs on the same PCIe switch. Additionally, G7e instances offer up to four times the inter-GPU bandwidth compared to L40s GPUs featured in G6e instances, boosting the performance of multi-GPU workloads. These improvements mean you can run inference for larger models across multiple GPUs offering up to 768 GB of GPU memory in a single node.
  • Networking — G7e instances offer four times the networking bandwidth compared to G6e instances, which means you can use the instance for small-scale multi-node workloads. Additionally, multi-GPU G7e instances support NVIDIA GPUDirect Remote Direct Memory Access (RDMA) with Elastic Fabric Adapter (EFA), which reduces the latency of remote GPU-to-GPU communication for multi-node workloads. These instance sizes also support NVIDIA GPUDirectStorage with Amazon FSx for Lustre, which increases throughput by up to 1.2 Tbps to the instances compared to G6e instances, which means you can quickly load your models.

EC2 G7e specifications
G7e instances feature up to 8 NVIDIA RTX PRO 6000 Blackwell Server Edition GPUs with up to 768 GB of total GPU memory (96 GB of memory per GPU) and Intel Emerald Rapids processors. They also support up to 192 vCPUs, up to 1,600 Gbps of network bandwidth, up to 2,048 GiB of system memory, and up to 15.2 TB of local NVMe SSD storage.

Here are the specs:

Instance name
 GPUs GPU memory (GB) vCPUs Memory (GiB) Storage (TB) EBS bandwidth (Gbps) Network bandwidth (Gbps)
g7e.2xlarge 1 96 8 64 1.9 x 1 Up to 5 50
g7e.4xlarge 1 96 16 128 1.9 x 1 8 50
g7e.8xlarge 1 96 32 256 1.9 x 1 16 100
g7e.12xlarge 2 192 48 512 3.8 x 1 25 400
g7e.24xlarge 4 384 96 1024 3.8 x 2 50 800
g7e.48xlarge 8 768 192 2048 3.8 x 4 100 1600

To get started with G7e instances, you can use the AWS Deep Learning AMIs (DLAMI) for your machine learning (ML) workloads. To run instances, you can use AWS Management Console, AWS Command Line Interface (AWS CLI) or AWS SDKs. For a managed experience, you can use G7e instances with Amazon Elastic Container Service (Amazon ECS), Amazon Elastic Kubernetes Service (Amazon EKS). Support for Amazon SageMaker AI is also coming soon.

Now available
Amazon EC2 G7e instances are available today in the US East (N. Virginia) and US East (Ohio) AWS Regions. For Regional availability and a future roadmap, search the instance type in the CloudFormation resources tab of AWS Capabilities by Region.

The instances can be purchased as On-Demand Instances, Savings Plan, and Spot Instances. G7e instances are also available in Dedicated Instances and Dedicated Hosts. To learn more, visit the Amazon EC2 Pricing page.

Give G7e instances a try in the Amazon EC2 console. To learn more, visit the Amazon EC2 G7e instances page and send feedback to AWS re:Post for EC2 or through your usual AWS Support contacts.

Channy

Amazon EC2 X8i instances powered by custom Intel Xeon 6 processors are generally available for memory-intensive workloads

Post Syndicated from Channy Yun (윤석찬) original https://aws.amazon.com/blogs/aws/amazon-ec2-x8i-instances-powered-by-custom-intel-xeon-6-processors-are-generally-available-for-memory-intensive-workloads/

Since a preview launch at AWS re:Invent 2025, we’re announcing the general availability of new memory-optimized Amazon Elastic Compute Cloud (Amazon EC2) X8i instances. These instances are powered by custom Intel Xeon 6 processors with a sustained all-core turbo frequency of 3.9 GHz, available only on AWS. These SAP certified instances deliver the highest performance and fastest memory bandwidth among comparable Intel processors in the cloud.

X8i instances are ideal for memory-intensive workloads including in-memory databases such as SAP HANA, traditional large-scale databases, data analytics, and electronic design automation (EDA), which require high compute performance and a large memory footprint.

These instances provide 1.5 times more memory capacity (up to 6 TB), and 3.4 times more memory bandwidth compared to previous generation X2i instances. These instances offer up to 43% higher performance compared to X2i instances, with higher gains on some of the real-world workloads. They deliver up to 50% higher SAP Application Performance Standard (SAPS) performance, up to 47% faster PostgreSQL performance, up to 88% faster Memcached performance, and up to 46% faster AI inference performance.

During the preview, customers like RISE with SAP utilized up to 6 TB of memory capacity with 50% higher compute performance compared to X2i instances. This enabled faster transaction processing and improved query response times for SAP HANA workloads. Orion reduced the number of active cores on X8i instances compared to X2idn instances while maintaining performance thresholds, cutting SQL Server licensing costs by 50%.

X8i instances
X8i instances are available in 14 sizes including three larger instance sizes (48xlarge, 64xlarge, and 96xlarge), so you can choose the right size for your application to scale up, and two bare metal sizes (metal-48xl and metal-96xl) to deploy workloads that benefit from direct access to physical resources. X8i instances feature up to 100 Gbps of network bandwidth with support for the Elastic Fabric Adapter (EFA) and up to 80 Gbps of throughput to Amazon Elastic Block Store (Amazon EBS).

Here are the specs for X8i instances:

Instance name vCPUs Memory
(GiB)
Network bandwidth (Gbps) EBS bandwidth (Gbps)
x8i.large 2 32 Up to 12.5 Up to 10
x8i.xlarge 4 64 Up to 12.5 Up to 10
x8i.2xlarge 8 128 Up to 15 Up to 10
x8i.4xlarge 16 256 Up to 15 Up to 10
x8i.8xlarge 32 512 15 10
x8i.12xlarge 48 768 22.5 15
x8i.16xlarge 64 1,024 30 20
x8i.24xlarge 96 1,536 40 30
x8i.32xlarge 128 2,048 50 40
x8i.48xlarge 192 3,072 75 60
x8i.64xlarge 256 4,096 80 70
x8i.96xlarge 384 6,144 100 80
x8i.metal-48xl 192 3,072 75 60
x8i.metal-96xl 384 6,144 100 80

X8i instances support the instance bandwidth configuration (IBC) feature like other eighth-generation instance types, offering flexibility to allocate resources between network and EBS bandwidth. You can scale network or EBS bandwidth by up to 25%, improving database performance, query processing speeds, and logging efficiency. These instances also use sixth-generation AWS Nitro cards, which offload CPU virtualization, storage, and networking functions to dedicated hardware and software, enhancing performance and security for your workloads.

Now available
Amazon EC2 X8i instances are now available in US East (N. Virginia), US East (Ohio), US West (Oregon), and Europe (Frankfurt) AWS Regions. For Regional availability and a future roadmap, search the instance type in the CloudFormation resources tab of AWS Capabilities by Region.

You can purchase these instances as On-Demand Instances, Savings Plan, and Spot Instances. To learn more, visit the Amazon EC2 Pricing page.

Give X8i instances a try in the Amazon EC2 console. To learn more, visit the Amazon EC2 X8i instances page and send feedback to AWS re:Post for EC2 or through your usual AWS Support contacts.

Channy

New serverless customization in Amazon SageMaker AI accelerates model fine-tuning

Post Syndicated from Channy Yun (윤석찬) original https://aws.amazon.com/blogs/aws/new-serverless-customization-in-amazon-sagemaker-ai-accelerates-model-fine-tuning/

Today, I’m happy to announce new serverless customization in Amazon SageMaker AI for popular AI models, such as Amazon Nova, DeepSeek, GPT-OSS, Llama, and Qwen. The new customization capability provides an easy-to-use interface for the latest fine-tuning techniques like reinforcement learning, so you can accelerate the AI model customization process from months to days.

With a few clicks, you can seamlessly select a model and customization technique, and handle model evaluation and deployment—all entirely serverless so you can focus on model tuning rather than managing infrastructure. When you choose serverless customization, SageMaker AI automatically selects and provisions the appropriate compute resources based on the model and data size.

Getting started with serverless model customization
You can get started customizing models in Amazon SageMaker Studio. Choose Models in the left navigation pane and check out your favorite AI models to be customized.

Customize with UI
You can customize AI models in a only few clicks. In the Customize model dropdown list for a specific model such as Meta Llama 3.1 8B Instruct, choose Customize with UI.

You can select a customization technique used to adapt the base model to your use case. SageMaker AI supports Supervised Fine-Tuning and the latest model customization techniques including Direct Preference Optimization, Reinforcement Learning from Verifiable Rewards (RLVR), and Reinforcement Learning from AI Feedback (RLAIF). Each technique optimizes models in different ways, with selection influenced by factors such as dataset size and quality, available computational resources, task at hand, desired accuracy levels, and deployment constraints.

Upload or select a training dataset to match the format required by the customization technique selected. Use the values of batch size, learning rate, and number of epochs recommended by the technique selected. You can configure advanced settings such as hyperparameters, a newly introduced serverless MLflow application for experiment tracking, and network and storage volume encryption. Choose Submit to get started on your model training job.

After your training job is complete, you can see the models you created in the My Models tab. Choose View details in one of your models.

By choosing Continue customization, you can continue to customize your model by adjusting hyperparameters or training with different techniques. By choosing Evaluate, you can evaluate your customized model to see how it performs compared to the base model.

When you complete both jobs, you can choose either the SageMaker or Bedrock in the Deploy dropdown list to deploy your model.

You can choose Amazon Bedrock for serverless inference. Choose Bedrock and the model name to deploy the model into Amazon Bedrock. To find your deployed models, choose Imported models in the Bedrock console.

You can also deploy your model to a SageMaker AI inference endpoint if you want to control your deployment resources such as an instance type and instance count. After the SageMaker AI deployment is In service, you can use this endpoint to perform inference. In the Playground tab, you can test your customized model with a single prompt or chat mode.

With the serverless MLflow capability, you can automatically log all critical experiment metrics without modifying code and access rich visualizations for further analysis.

Customize with code
When you choose customizing with code, you can see a sample notebook to fine-tune or deploy AI models. If you want to edit the sample notebook, open it in JupyterLab. Alternatively, you can deploy the model immediately by choosing Deploy.

You can choose the Amazon Bedrock or SageMaker AI endpoint by selecting the deployment resources either from Amazon SageMaker Inference or Amazon SageMaker Hyperpod.

When you choose Deploy on the bottom right of the page, it will be redirected back to the model detail page. After the SageMaker AI deployment is in service, you can use this endpoint to perform inference.

Okay, you’ve seen how to streamline the model customization in the SageMaker AI. You can now choose your favorite way. To learn more, visit the Amazon SageMaker AI Developer Guide.

Now available
New serverless AI model customization in Amazon SageMaker AI is now available in US East (N. Virginia), US West (Oregon), Asia Pacific (Tokyo), and Europe (Ireland) Regions. You only pay for the tokens processed during training and inference. To learn more details, visit Amazon SageMaker AI pricing page.

Give it a try in Amazon SageMaker Studio and send feedback to AWS re:Post for SageMaker or through your usual AWS Support contacts.

Channy

Introducing checkpointless and elastic training on Amazon SageMaker HyperPod

Post Syndicated from Channy Yun (윤석찬) original https://aws.amazon.com/blogs/aws/introducing-checkpointless-and-elastic-training-on-amazon-sagemaker-hyperpod/

Today, we’re announcing two new AI model training features within Amazon SageMaker HyperPod: checkpointless training, an approach that mitigates the need for traditional checkpoint-based recovery by enabling peer-to-peer state recovery, and elastic training, enabling AI workloads to automatically scale based on resource availability.

  • Checkpointless training – Checkpointless training eliminates disruptive checkpoint-restart cycles, maintaining forward training momentum despite failures, reducing recovery time from hours to minutes. Accelerate your AI model development, reclaim days from development timelines, and confidently scale training workflows to thousands of AI accelerators.
  • Elastic training  – Elastic training maximizes cluster utilization as training workloads automatically expand to use idle capacity as it becomes available, and contract to yield resources as higher-priority workloads like inference volumes peak. Save hours of engineering time per week spent reconfiguring training jobs based on compute availability.

Rather than spending time managing training infrastructure, these new training techniques mean that your team can concentrate entirely on enhancing model performance, ultimately getting your AI models to market faster. By eliminating the traditional checkpoint dependencies and fully utilizing available capacity, you can significantly reduce model training completion times.

Checkpointless training: How it works
Traditional checkpoint-based recovery has these sequential job stages: 1) job termination and restart, 2) process discovery and network setup, 3) checkpoint retrieval, 4) data loader initialization, and 5) training loop resumption. When failures occur, each stage can become a bottleneck and training recovery can take up to an hour on self-managed training clusters. The entire cluster must wait for every single stage to complete before training can resume. This can lead to the entire training cluster sitting idle during recovery operations, which increases costs and extends the time to market.

Checkpointless training removes this bottleneck entirely by maintaining continuous model state preservation across the training cluster. When failures occur, the system instantly recovers by using healthy peers, avoiding the need for a checkpoint-based recovery that requires restarting the entire job. As a result, checkpointless training enables fault recovery in minutes.

Checkpointless training is designed for incremental adoption and built on four core components that work together: 1) collective communications initialization optimizations, 2) memory-mapped data loading that enables caching, 3) in-process recovery, and 4) checkpointless peer-to-peer state replication. These components are orchestrated through the HyperPod training operator that is used to launch the job. Each component optimizes a specific step in the recovery process, and together they enable automatic detection and recovery of infrastructure faults in minutes with zero manual intervention, even with thousands of AI accelerators. You can progressively enable each of these features as your training scales.

The latest Amazon Nova models were trained using this technology on tens of thousands of accelerators. Additionally, based on internal studies on cluster sizes ranging between 16 GPUs to over 2,000 GPUs, checkpointless training showcased significant improvements in recovery times, reducing downtime by over 80% compared to traditional checkpoint-based recovery.

To learn more, visit HyperPod Checkpointless Training in the Amazon SageMaker AI Developer Guide.

Elastic training: How it works
On clusters that run different types of modern AI workloads, accelerator availability can change continuously throughout the day as short-duration training runs complete, inference spikes occur and subside, or resources free up from completed experiments. Despite this dynamic availability of AI accelerators, traditional training workloads remain locked into their initial compute allocation, unable to take advantage of idle accelerators without manual intervention. This rigidity leaves valuable GPU capacity unused and prevents organizations from maximizing their infrastructure investment.

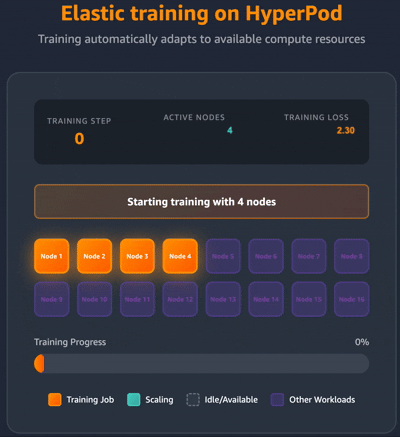
Elastic training transforms how training workloads interact with cluster resources. Training jobs can automatically scale up to utilize available accelerators and gracefully contract when resources are needed elsewhere, all while maintaining training quality.

Workload elasticity is enabled through the HyperPod training operator that orchestrates scaling decisions through integration with the Kubernetes control plane and resource scheduler. It continuously monitors cluster state through three primary channels: pod lifecycle events, node availability changes, and resource scheduler priority signals. This comprehensive monitoring enables near-instantaneous detection of scaling opportunities, whether from newly available resources or requests from higher-priority workloads.

The scaling mechanism relies on adding and removing data parallel replicas. When additional compute resources become available, new data parallel replicas join the training job, accelerating throughput. Conversely, during scale-down events (for example, when a higher-priority workload requests resources), the system scales down by removing replicas rather than terminating the entire job, allowing training to continue at reduced capacity.

Across different scales, the system preserves the global batch size and adapts learning rates, preventing model convergence from being adversely impacted. This enables workloads to dynamically scale up or down to utilize available AI accelerators without any manual intervention.

You can start elastic training through the HyperPod recipes for publicly available foundation models (FMs) including Llama and GPT-OSS. Additionally, you can modify your PyTorch training scripts to add elastic event handlers, which enable the job to dynamically scale.

To learn more, visit the HyperPod Elastic Training in the Amazon SageMaker AI Developer Guide. To get started, find the HyperPod recipes available in the AWS GitHub repository.

Now available
Both features are available in all the Regions in which Amazon SageMaker HyperPod is available. You can use these training techniques without additional cost. To learn more, visit the SageMaker HyperPod product page and SageMaker AI pricing page.

Give it a try and send feedback to AWS re:Post for SageMaker or through your usual AWS Support contacts.

Channy

Amazon CloudWatch introduces unified data management and analytics for operations, security, and compliance

Post Syndicated from Channy Yun (윤석찬) original https://aws.amazon.com/blogs/aws/amazon-cloudwatch-introduces-unified-data-management-and-analytics-for-operations-security-and-compliance/

Today we’re expanding Amazon CloudWatch capabilities to unify and manage log data across operational, security, and compliance use cases with flexible and powerful analytics in one place and with reduced data duplication and costs.

This enhancement means that CloudWatch can automatically normalize and process data to offer consistency across sources with built-in support for Open Cybersecurity Schema Framework (OCSF) and Open Telemetry (OTel) formats, so you can focus on analytics and insights. CloudWatch also introduces Apache Iceberg compatible access to your data through Amazon Simple Storage Service (Amazon S3) Tables, so that you can run analytics, not only locally but also using Amazon Athena, Amazon SageMaker Unified Studio, or any other Iceberg-compatible tool.

You can also correlate your operational data in CloudWatch with other business data from your preferred tools to correlate with other data. This unified approach streamlines management and provides comprehensive correlation across security, operational, and business use cases.

Here are the detailed enhancements:

  • Streamline data ingestion and normalization – CloudWatch automatically collects AWS vended logs across accounts and AWS Regions, integrating with AWS Organizations from AWS services including AWS CloudTrail, Amazon Virtual Private Cloud (Amazon VPC) Flow Logs, AWS WAF access logs, Amazon Route 53 resolver logs, and pre-built connectors for third-party sources such as endpoint (CrowdStrike, SentinelOne), identity (Okta, Entra ID), cloud security (Wiz), network security (Zscaler, Palo Alto Networks), productivity and collaboration (Microsoft Office 365, Windows Event Logs, and GitHub), along with IT service manager with ServiceNow CMBD. To normalize and process your data as they are being ingested, CloudWatch offers managed OCSF conversion for various AWS and third-party data sources and other processors such ad Grok for custom parsing, field-level operations, and string manipulations.
  • Reduce costly log data management – CloudWatch consolidates log management into a single service with built-in governance capabilities without storing and maintaining multiple copies of the same data across different tools and data stores. The unified data store of CloudWatch eliminates the need for complex ETL pipelines and reduces your operational costs and management overhead needed to maintain multiple separate data stores and tools.
  • Discover business insights from log data – You can run queries in CloudWatch using natural language queries and popular query languages such as LogsQL, PPL, and SQL through a single interface, or query your data using your preferred analytics tools through Apache Iceberg-compatible tables. The new Facets interface gives you intuitive filtering by source, application, account, region, and log type, which you can use to run queries across log groups of multiple AWS accounts and Regions with intelligent parameter inference.

In the next sections we explore the new log management and analytics features of the CloudWatch Logs!

1. Data discovery and management by data sources and types

You can see a high-level overview of logs and all data sources with a new Logs Management View in the CloudWatch console. To get started, go to the CloudWatch console and choose Log Management under the Logs menu in the left navigation pane. In the Summary tab, you can observe your logs data sources and types, insights into how your log groups are doing across ingestion, and anomalies.

Choose the Data sources tab to find and manage your log data by data sources, types, and fields. CloudWatch ingests and automatically categorizes data sources by AWS services, third-party, or custom sources such as application logs.

Choose the Data source actions to integrate S3 Tables to make future logs for selected data sources. You have the flexibility to analyze the logs through Athena and Amazon Redshift and other query engines such as Spark using Iceberg compatible access patterns. With this integration, logs from CloudWatch are available in a read-only aws-cloudwatch S3 Tables bucket.

When you choose a specific data source such as CloudTrail data, you can view the details of the data source that includes information regarding data format, pipeline, facets/field indexes, S3 Tables association, and the number of logs with that data source. You can observe all log groups included in this data source and type and edit a source/type field index policy using the new schema support.

To learn more about how to manage your data sources and index policy, visit Data sources in the Amazon CloudWatch Logs User Guide.

2. Ingestion and transformation using CloudWatch pipelines

You can create pipelines to streamline collecting, transforming, and routing telemetry and security data while standardizing data formats to optimize observability and security data management. The new pipeline feature of CloudWatch connects data from a catalogue of data sources, so that you can add and configure pipeline processors from a library to parse, enrich, and standardize data.

In the Pipeline tab, choose Add pipeline. It shows you the pipeline configuration wizard. This wizard guides you through five steps where you can choose the data source and other source details such as log source types, configure destination, configure up to 19 processors to perform an action on your data (such as filtering, transforming, or enriching), and finally review and deploy the pipeline.

You also have the option to create pipelines through the new Ingestion experience in CloudWatch. To learn more about how to set up and manage the pipelines, visit Pipelines in the Amazon CloudWatch Logs User Guide.

3. Enhanced analytics and querying based on data sources

You can enhance analytics with support for Facets and querying based on data sources. Facets enable interactive exploration and drill-down into logs and their values are automatically extracted based on the selected time period.

Choose the Facets tab in the Log Insights under the Logs menu in the left navigation pane. You can view available facets and values that appear in the panel. Choose one or more facets and values to interactively explore your data. I choose Facets regarding a VPC Flow Logs group and action, query to list the five most frequent patterns in my VPC Flow Logs through the AI query generator, and get the result patterns.

You can save your query with the selected Facets and values that you have specified. When you next choose your saved query, the logs to be queried have the pre-specified facets and values. To learn more about Facet management, visit Facets in the CloudWatch Logs User Guide.

As I previously noted, you can integrate data sources into S3 Tables and query together. For example, using a Query Editor in Athena, you can query correlates network traffic with AWS API activity from a specific IP range (174.163.137.*) by joining VPC Flow Logs with CloudTrail logs based on matching source IP addresses.

This type of integrated search is particularly valuable for security monitoring, incident investigation, and suspicious behavior detection. You can view if an IP that’s making network connections is also performing sensitive AWS operations such as creating users, modifying security groups, or accessing data.

To learn more, visit S3 Tables integration with CloudWatch in the CloudWatch Logs User Guide.

Now available
New log management features of Amazon CloudWatch are available today in all AWS Regions except the AWS GovCloud (US) Regions and China Regions. For Regional availability and future roadmap, visit the AWS Capabilities by Region. There are no upfront commitments or minimum fees, and you pay for the usage of existing CloudWatch Logs for data ingestion, storage, and queries. To learn more, visit the CloudWatch pricing page.

Give it a try in the CloudWatch console. To learn more, visit the CloudWatch product page and send feedback to AWS re:Post for CloudWatch Logs or through your usual AWS Support contacts.

Channy

Amazon OpenSearch Service improves vector database performance and cost with GPU acceleration and auto-optimization

Post Syndicated from Channy Yun (윤석찬) original https://aws.amazon.com/blogs/aws/amazon-opensearch-service-improves-vector-database-performance-and-cost-with-gpu-acceleration-and-auto-optimization/

Today we’re announcing serverless GPU acceleration and auto-optimization for vector index in Amazon OpenSearch Service that helps you build large-scale vector databases faster with lower costs and automatically optimize vector indexes for optimal trade-offs between search quality, speed, and cost.

Here are the new capabilities introduced today:

  • GPU acceleration – You can build vector databases up to 10 times faster at a quarter of the indexing cost when compared to non-GPU acceleration, and you can create billion-scale vector databases in under an hour. With significant gains in cost saving and speed, you get an advantage in time-to-market, innovation velocity, and adoption of vector search at scale.
  • Auto-optimization – You can find the best balance between search latency, quality, and memory requirements for your vector field without needing vector expertise. This optimization helps you achieve better cost-savings and recall rates when compared to default index configurations, while manual index tuning can take weeks to complete.

You can use these capabilities to build vector databases faster and more cost-effectively on OpenSearch Service. You can use them to power generative AI applications, search product catalogs and knowledge bases, and more. You can enable GPU acceleration and auto-optimization when you create a new OpenSearch domain or collection, as well as update an existing domain or collection.

Let’s go through how it works!

GPU acceleration for vector index
When you enable GPU acceleration on your OpenSearch Service domain or Serverless collection, OpenSearch Service automatically detects opportunities to accelerate your vector indexing workloads. This acceleration helps build the vector data structures in your OpenSearch Service domain or Serverless collection.

You don’t need to provision the GPU instances, manage their usage or pay for idle time. OpenSearch Service securely isolates your accelerated workloads to your domain’s or collection’s Amazon Virtual Private Cloud (Amazon VPC) within your account. You pay only for useful processing through the OpenSearch Compute Units (OCU) – Vector Acceleration pricing.

To enable GPU acceleration, go to the OpenSearch Service console and choose Enable GPU Acceleration in the Advanced features section when you create or update your OpenSearch Service domain or Serverless collection.

You can use the following AWS Command Line Interface (AWS CLI) command to enable GPU acceleration for an existing OpenSearch Service domain.

$ aws opensearch update-domain-config \
    --domain-name my-domain \
    --aiml-options '{"ServerlessVectorAcceleration": {"Enabled": true}}'

You can create a vector index optimized for GPU processing. This example index stores 768-dimensional vectors for text embeddings by enabling index.knn.remote_index_build.enabled.

PUT my-vector-index
{
    "settings": {
        "index.knn": true,
        "index.knn.remote_index_build.enabled": true
    },
    "mappings": {
        "properties": {
        "vector_field": {
        "type": "knn_vector",
        "dimension": 768,
      },
      "text": {
        "type": "text"
      }
    }
  }
}

Now you can add vector data and optimize your index using standard OpenSearch Service operations using the bulk API. The GPU acceleration is automatically applied to indexing and force-merge operations.

POST my-vector-index/_bulk
{"index": {"_id": "1"}}
{"vector_field": [0.1, 0.2, 0.3, ...], "text": "Sample document 1"}
{"index": {"_id": "2"}}
{"vector_field": [0.4, 0.5, 0.6, ...], "text": "Sample document 2"}

We ran index build benchmarks and observed speed gains from GPU acceleration ranging between 6.4 to 13.8 times. Stay tuned for more benchmarks and further details in upcoming posts.

To learn more, visit GPU acceleration for vector indexing in the Amazon OpenSearch Service Developer Guide.

Auto-optimizing vector databases
You can use the new vector ingestion feature to ingest documents from Amazon Simple Storage Service (Amazon S3), generate vector embeddings, optimize indexes automatically, and build large-scale vector indexes in minutes. During the ingestion, auto-optimization generates recommendations based on your vector fields and indexes of your OpenSearch Service domain or Serverless collection. You can choose one of these recommendations to quickly ingest and index your vector dataset instead of manually configuring these mappings.

To get started, choose Vector ingestion under the Ingestion menu in the left navigation pane of OpenSearch Service console.

You can create a new vector ingestion job with the following steps:

  • Prepare dataset – Prepare OpenSearch Service parquet documents in an S3 bucket and choose a domain or collection for your destination.
  • Configure index and automate optimizations – Auto-optimize your vector fields or manually configure them.
  • Ingest and accelerate indexing – Use OpenSearch ingestion pipelines to load data from Amazon S3 into OpenSearch Service. Build large vector indexes up to 10 times faster at a quarter of the cost.

In Step 2, configure your vector index with auto-optimize vector field. Auto-optimize is currently limited to one vector field. Further index mappings can be input after the auto-optimization job has completed.

Your vector field optimization settings depend on your use case. For example, if you need high search quality (recall rate) and don’t need faster responses, then choose Modest for the Latency requirements (p90) and more than or equal to 0.9 for the Acceptable search quality (recall). When you create a job, it starts to ingest vector data and auto-optimize vector index. The processing time depends on the vector dimensionality.

To learn more, visit Auto-optimize vector index in the OpenSearch Service Developer Guide.

Now available
GPU acceleration in Amazon OpenSearch Service is now available in the US East (N. Virginia), US West (Oregon), Asia Pacific (Sydney), Asia Pacific (Tokyo), and Europe (Ireland) Regions. Auto-optimization in OpenSearch Service is now available in the US East (Ohio), US East (N. Virginia), US West (Oregon), Asia Pacific (Mumbai), Asia Pacific (Singapore), Asia Pacific (Sydney), Asia Pacific (Tokyo), Europe (Frankfurt), and Europe (Ireland) Regions.

OpenSearch Service separately charges for used OCU – Vector Acceleration only to index your vector databases. For more information, visitOpenSearch Service pricing page.

Give it a try and send feedback to the AWS re:Post for Amazon OpenSearch Service or through your usual AWS Support contacts.

Channy

Amazon Bedrock adds 18 fully managed open weight models, including the new Mistral Large 3 and Ministral 3 models

Post Syndicated from Channy Yun (윤석찬) original https://aws.amazon.com/blogs/aws/amazon-bedrock-adds-fully-managed-open-weight-models/

Today, we’re announcing the general availability of an additional 18 fully managed open weight models in Amazon Bedrock from Google, Moonshot AI, MiniMax AI, Mistral AI, NVIDIA, OpenAI, and Qwen, including the new Mistral Large 3 and Ministral 3 3B, 8B, and 14B models.

With this launch, Amazon Bedrock now provides nearly 100 serverless models, offering a broad and deep range of models from leading AI companies, so customers can choose the precise capabilities that best serve their unique needs. By closely monitoring both customer needs and technological advancements, we regularly expand our curated selection of models based on customer needs and technological advancements to include promising new models alongside established industry favorites.

This ongoing expansion of high-performing and differentiated model offerings helps customers stay at the forefront of AI innovation. You can access these models on Amazon Bedrock through the unified API, evaluate, switch, and adopt new models without rewriting applications or changing infrastructure.

New Mistral AI models
These four Mistral AI models are now available first on Amazon Bedrock, each optimized for different performance and cost requirements:

  • Mistral Large 3 – This open weight model is optimized for long-context, multimodal, and instruction reliability. It excels in long document understanding, agentic and tool use workflows, enterprise knowledge work, coding assistance, advanced workloads such as math and coding tasks, multilingual analysis and processing, and multimodal reasoning with vision.
  • Ministral 3 3B – The smallest in the Ministral 3 family is edge-optimized for single GPU deployment with strong language and vision capabilities. It shows robust performance in image captioning, text classification, real-time translation, data extraction, short content generation, and lightweight real-time applications on edge or low-resource devices.
  • Ministral 3 8B – The best-in-class Ministral 3 model for text and vision is edge-optimized for single GPU deployment with high performance and minimal footprint. This model is ideal for chat interfaces in constrained environments, image and document description and understanding, specialized agentic use cases, and balanced performance for local or embedded systems.
  • Ministral 3 14B – The most capable Ministral 3 model delivers state-of the-art text and vision performance optimized for single GPU deployment. You can use advanced local agentic use cases and private AI deployments where advanced capabilities meet practical hardware constraints.

More open weight model options
You can use these open weight models for a wide range of use cases across industries:

Model provider Model name Description Use cases
Google Gemma 3 4B Efficient text and image model that runs locally on laptops. Multilingual support for on-device AI applications. On-device AI for mobile and edge applications, privacy-sensitive local inference, multilingual chat assistants, image captioning and description, and lightweight content generation.
Gemma 3 12B Balanced text and image model for workstations. Multi-language understanding with local deployment for privacy-sensitive applications. Workstation-based AI applications; local deployment for enterprises; multilingual document processing, image analysis and Q&A; and privacy-compliant AI assistants.
Gemma 3 27B Powerful text and image model for enterprise applications. Multi-language support with local deployment for privacy and control. Enterprise local deployment, high-performance multimodal applications, advanced image understanding, multilingual customer service, and data-sensitive AI workflows.
Moonshot AI Kimi K2 Thinking Deep reasoning model that thinks while using tools. Handles research, coding and complex workflows requiring hundreds of sequential actions. Complex coding projects requiring planning, multistep workflows, data analysis and computation, and long-form content creation with research.
MiniMax AI MiniMax M2 Built for coding agents and automation. Excels at multi-file edits, terminal operations and executing long tool-calling chains efficiently. Coding agents and integrated development environment (IDE) integration, multi-file code editing, terminal automation and DevOps, long-chain tool orchestration, and agentic software development.
Mistral AI Magistral Small 1.2 Excels at math, coding, multilingual tasks, and multimodal reasoning with vision capabilities for efficient local deployment. Math and coding tasks, multilingual analysis and processing, and multimodal reasoning with vision.
Voxtral Mini 1.0 Advanced audio understanding model with transcription, multilingual support, Q&A, summarization, and function-calling. Voice-controlled applications, fast speech-to-text conversion, and offline voice assistants.
Voxtral Small 1.0 Features state-of-the-art audio input with best-in-class text performance; excels at speech transcription, translation, and understanding. Enterprise speech transcription, multilingual customer service, and audio content summarization.
NVIDIA NVIDIA Nemotron Nano 2 9B High efficiency LLM with hybrid transformer Mamba design, excelling in reasoning and agentic tasks. Reasoning, tool calling, math, coding, and instruction following.
NVIDIA Nemotron Nano 2 VL 12B Advanced multimodal reasoning model for video understanding and document intelligence, powering Retrieval-Augmented Generation (RAG) and multimodal agentic applications. Multi-image and video understanding, visual Q&A, and summarization.
OpenAI gpt-oss-safeguard-20b Content safety model that applies your custom policies. Classifies harmful content with explanations for trust and safety workflows. Content moderation and safety classification, custom policy enforcement, user-generated content filtering, trust and safety workflows, and automated content triage.
gpt-oss-safeguard-120b Larger content safety model for complex moderation. Applies custom policies with detailed reasoning for enterprise trust and safety teams. Enterprise content moderation at scale, complex policy interpretation, multilayered safety classification, regulatory compliance checking, high-stakes content review.
Qwen Qwen3-Next-80B-A3B Fast inference with hybrid attention for ultra-long documents. Optimized for RAG pipelines, tool use & agentic workflows with quick responses. RAG pipelines with long documents, agentic workflows with tool calling, code generation and software development, multi-turn conversations with extended context, multilingual content generation.
Qwen3-VL-235B-A22B Understands images and video. Extracts text from documents, converts screenshots to working code, and automates clicking through interfaces. Extracting text from images and PDFs, converting UI designs or screenshots to working code, automating clicks and navigation in applications, video analysis and understanding, reading charts and diagrams.

When implementing publicly available models, give careful consideration to data privacy requirements in your production environments, check for bias in output, and monitor your results for data security, responsible AI, and model evaluation.

You can access the enterprise-grade security features of Amazon Bedrock and implement safeguards customized to your application requirements and responsible AI policies with Amazon Bedrock Guardrails. You can also evaluate and compare models to identify the optimal models for your use cases by using Amazon Bedrock model evaluation tools.

To get started, you can quickly test these models with a few prompts in the playground of the Amazon Bedrock console or use any AWS SDKs to include access to the Bedrock InvokeModel and Converse APIs. You can also use these models with any agentic framework that supports Amazon Bedrock and deploy the agents using Amazon Bedrock AgentCore and Strands Agents. To learn more, visit Code examples for Amazon Bedrock using AWS SDKs in the Amazon Bedrock User Guide.

Now available
Check the full Region list for availability and future updates of new models or search your model name in the AWS CloudFormation resources tab of AWS Capabilities by Region. To learn more, check out the Amazon Bedrock product page and the Amazon Bedrock pricing page.

Give these models a try in the Amazon Bedrock console today and send feedback to AWS re:Post for Amazon Bedrock or through your usual AWS Support contacts.

Channy

Introducing Amazon EC2 X8aedz instances powered by 5th Gen AMD EPYC processors for memory-intensive workloads

Post Syndicated from Channy Yun (윤석찬) original https://aws.amazon.com/blogs/aws/introducing-amazon-ec2-x8aedz-instances-powered-by-5th-gen-amd-epyc-processors-for-memory-intensive-workloads/

Today, we’re announcing the availability of new memory-optimized, high-frequency Amazon Elastic Compute Cloud (Amazon EC2) X8aedz instances powered by a 5th Gen AMD EPYC processor. These instances offer the highest CPU frequency, 5GHz in the cloud. They deliver up to two times higher compute performance and 31% price-performance compared to previous generation X2iezn instances.

X8aedz instances are ideal for electronic design automation (EDA) workloads, such as physical layout and physical verification jobs, and relational databases that benefit from high single-threaded processor performance and a large memory footprint. The combination of 5 GHz processors and local NVMe storage enables faster processing of memory-intensive backend EDA workloads such as floor planning, logic placement, clock tree synthesis (CTS), routing, and power/signal integrity analysis. The high memory-to-vCPU ratio of 32:1 makes these instances particularly effective for applications with vCPU-based licensing models.

Let me explain the instance type naming: The “a” suffix indicates an AMD processor, “e” denotes extended memory in the memory-optimized instance family, “d” represents local NVMe-based SSDs physically connected to the host server, and “z” indicates high-frequency processors.

X8aedz instances
X8aedz instances are available in eight sizes ranging from 2–96 vCPUs with 64–3,072 GiB of memory, including two bare metal sizes. X8aedz instances feature up to 75 Gbps of network bandwidth with support for the Elastic Fabric Adapter (EFA), up to 60 Gbps of throughput to the Amazon Elastic Block Store (Amazon EBS), and up to 8 TB of local NVMe SSD storage.

Here are the specs for X8aedz instances:

Instance name vCPUs Memory
(GiB)
NVMe SSD storage (GB) Network bandwidth (Gbps) EBS bandwidth (Gbps)
x8aedz.large 2 64 158 Up to 18.75 Up to 15
x8aedz.xlarge 4 128 316 Up to 18.75 Up to 15
x8aedz.3xlarge 12 384 950 Up to 18.75 Up to 15
x8aedz.6xlarge 24 768 1,900 18.75 15
x8aedz.12xlarge 48 1,536 3,800 37.5 30
x8aedz.24xlarge 96 3,072 7,600 75 60
x8aedz.metal-12xl 48 1,536 3,800 37.5 30
x8aedz.metal-24xl 96 3,072 7,600 75 60

With the 60 Gbps Amazon EBS bandwidth and up to 8 TB of local NVMe SSD storage, you can achieve faster database response times and reduced latency for EDA operations, ultimately accelerating time-to-market for chip designs. These instances also support the instance bandwidth configuration feature that offers flexibility in allocating resources between network and EBS bandwidth. You can scale network or EBS bandwidth by 25% and improve database (read and write) performance, query processing, and logging speeds.

X8aedz instances use sixth-generation AWS Nitro cards, which offload CPU virtualization, storage, and networking functions to dedicated hardware and software, enhancing performance and security for your workloads.

Now available
Amazon EC2 X8aedz instances are now available in US West (Oregon) and Asia Pacific (Tokyo) AWS Regions, and additional Regions will be coming soon. For Regional availability and future roadmap, search the instance type in the AWS CloudFormation resources tab of the AWS Capabilities by Region.

You can purchase these instances as On-Demand, Savings Plan, Spot Instances, and Dedicated Instances. To learn more, visit the Amazon EC2 Pricing page.

Give X8aedz instances a try in the Amazon EC2 console. To learn more, visit the Amazon EC2 X8aedz instances page and send feedback to AWS re:Post for EC2 or through your usual AWS Support contacts.

Channy

AWS Transform for mainframe introduces Reimagine capabilities and automated testing functionality

Post Syndicated from Channy Yun (윤석찬) original https://aws.amazon.com/blogs/aws/aws-transform-for-mainframe-introduces-reimagine-capabilities-and-automated-testing-functionality/

In May, 2025, we launched AWS Transform for mainframe, the first agentic AI service for modernizing mainframe workloads at scale. The AI-powered mainframe agent accelerates mainframe modernization by automating complex, resource-intensive tasks across every phase of modernization—from initial assessment to final deployment. You can streamline the migration of legacy mainframe applications, including COBOL, CICS, DB2, and VSAM to modern cloud environments—cutting modernization timelines from years to months.

Today, we’re announcing enhanced capabilities in AWS Transform for mainframe that include AI-powered analysis features, support for the Reimagine modernization pattern, and testing automation. These enhancements solve two critical challenges in mainframe modernization: the need to completely transform applications rather than merely move them to the cloud, and the extensive time and expertise required for testing.

  • Reimagining mainframe modernization – This is a new AI-driven approach that completely reimagines the customer’s application architecture using modern patterns or moving from batch process to real-time functions. By combining the enhanced business logic extraction with new data lineage analysis and automated data dictionary generation from the legacy source code through AWS Transform, customers transform monolithic mainframe applications written in languages like COBOL into more modern architectural styles, like microservices.
  • Automated testing – Customers can use new automated test plan generation, test data collection scripts, and test case automation scripts. AWS Transform for mainframe also provides functional testing tools for data migration, results validation, and terminal connectivity. These AI-powered capabilities work together to accelerate testing timelines and improve accuracy through automation.

Let’s learn more about reimagining mainframe modernization and automated testing capabilities.

How to reimagine mainframe modernization
We recognize that mainframe modernization is not a one-size-fits-all proposition. Whereas tactical approaches focus on augmentation and maintaining existing systems, strategic modernization offers distinct paths: Replatform, Refactor, Replace, or the new Reimagine.

In the Reimagine pattern, AWS Transform AI-powered analysis combines mainframe system analysis with organizational knowledge to create detailed business and technical documentation and architecture recommendations. This helps preserve critical business logic while enabling modern cloud-native capabilities.

AWS Transform provides new advanced data analysis capabilities that are essential for successful mainframe modernization, including data lineage analysis and automated data dictionary generation. These features work together to define the structure and meaning to accompany the usage and relationships of mainframe data. Customers gain complete visibility into their data landscape, enabling informed decision-making for modernization. Their technical teams can confidently redesign data architectures while preserving critical business logic and relationships.

The Reimagining strategy follows the principle of human in the loop validation, which means that AI-generated application specifications and code such as AWS Transform and Kiro are continuously validated by domain experts. This collaborative approach between AI capabilities and human judgment significantly reduces transformation risk while maintaining the speed advantages of AI-powered modernization.

The pathway has a three-phase methodology to transform legacy mainframe applications into cloud-native microservices:

  • Reverse engineering to extract business logic and rules from existing COBOL or job control language (JCL) code using AWS Transform for mainframe.
  • Forward engineering to generate microservice specification, modernized source code, infrastructure as code (IaC), and modernized database.
  • Deploy and test to deploy the generated microservices to Amazon Web Services (AWS) using IaC and to test the functionality of the modernized application.

Although microservices architecture offers significant benefits for mainframe modernization, it’s crucial to understand that it’s not the best solution for every scenario. The choice of architectural patterns should be driven by the specific requirements and constraints of the system. The key is to select an architecture that aligns with both current needs and future aspirations, recognizing that architectural decisions can evolve over time as organizations mature their cloud-native capabilities.

The flexible approach supports both do-it-yourself and partner-led development, so you can use your preferred tools while maintaining the integrity of your business processes. You get the benefits of modern cloud architecture while preserving decades of business logic and reducing project risk.

Automated testing in action
The new automated testing feature supports IBM z/OS mainframe batch application stack at launch, which helps organizations address a wider range of modernization scenarios while maintaining consistent processes and tooling.

Here are the new mainframe capabilities:

  • Plan test cases – Create test plans from mainframe code, business logic, and scheduler plans.
  • Generate test data collection scripts – Create JCL scripts for data collection from your mainframe to your test plan.
  • Generate test automation scripts – Generate execution scripts to automate testing of modernized applications running in the target AWS environment.

To get started with automated testing, you should set up a workspace, assign a specific role to each user, and invite them to onboard your workspace. To learn more, visit Getting started with AWS Transform in the AWS Transform User Guide.

Choose Create job in your workspace. You can see all types of supported transformation jobs. For this example, I select the Mainframe Modernization job to modernize mainframe applications.

After a new job is created, you can kick off modernization for tests generation. This workflow is sequential and it is a place for you to answer the AI agent’s questions, providing the necessary input. You can add your collaborators and specify resource location where the codebase or documentation is located in your Amazon Simple Storage Service (Amazon S3) bucket.

I use a sample application for a credit card management system as the mainframe banking case with the presentation (BMS screens), business logic (COBOL) and data (VSAM/DB2), including online transaction processing and batch jobs.

After finishing the steps of analyzing code, extracting business logic, decomposing code, planning migration wave, you can experience new automated testing capabilities such as planning test cases, generating test data collection scripts, and test automation scripts.

The new testing workflow creates a test plan for your modernization project and generates test data collection scripts. You will have three planning steps:

  • Configure test plan inputs – You can link your test plan to your other job files. The test plan is generated based on analyzing the mainframe application code and can provide more details optionally using the extracted business logic, the technical documentation, the decomposition, and using a scheduler plan.
  • Define test plan scope – You can define the entry point, the specific program where the application’s execution flow begins. For example, the JCL for a batch job. In the test plan, each functional test case is designed to start the execution from a specific entry point.
  • Refine test plan – A test plan is made up of sequential test cases. You can reorder them, add new ones, merge multiple cases, or split one into two on the test case detail page. Batch test cases are composed of a sequence of JCLs following the scheduler plan.

Generating test data collection scripts collects test data from mainframe applications for functional equivalence testing. This step actively generates JCL scripts that will help you gather test data from the sample application’s various data sources (such as VSAM files or DB2 databases) for use in testing the modernized application. The step is designed to create automated scripts that can extract test data from VSAM datasets, query DB2 tables for sample data, collect sequential data sets, and generate data collection workflows. After this step is completed, you’ll have comprehensive test data collection scripts ready to use.

To learn more about automated testing, visit Modernization of mainframe applications in the AWS Transform User Guide.

Now available
The new capabilities in AWS Transform for mainframe are available today in all AWS Regions where AWS Transform for mainframe is offered. For Regional availability and future roadmap, visit the AWS Capabilities by Region. Currently, we offer our core features—including assessment and transformation—at no cost to AWS customers. To learn more, visit AWS Transform Pricing page.

Give it a try in the AWS Transform console. To learn more, visit the AWS Transform for mainframe product page and send feedback to AWS re:Post for AWS Transform for mainframe or through your usual AWS Support contacts.

Channy

Announcing Amazon EKS Capabilities for workload orchestration and cloud resource management

Post Syndicated from Channy Yun (윤석찬) original https://aws.amazon.com/blogs/aws/announcing-amazon-eks-capabilities-for-workload-orchestration-and-cloud-resource-management/

Today, we’re announcing Amazon Elastic Kubernetes Service (Amazon EKS) Capabilities, an extensible set of Kubernetes-native solutions that streamline workload orchestration, Amazon Web Services (AWS) cloud resource management, and Kubernetes resource composition and orchestration. These fully managed, integrated platform capabilities include open source Kubernetes solutions that many customers are using today, such as Argo CD, AWS Controllers for Kubernetes, and Kube Resource Orchestrator.

With EKS Capabilities, you can build and scale Kubernetes applications without managing complex solution infrastructure. Unlike typical in-cluster installations, these capabilities actually run in EKS service-owned accounts that are fully abstracted from customers.

With AWS managing infrastructure scaling, patching, and updates of these cluster capabilities, you can use the enterprise reliability and security without needing to maintain and manage the underlying components.

Here are the capabilities available at launch:

  • Argo CD – This is a declarative GitOps tool for Kubernetes that provides continuous continuous deployment (CD) capabilities for Kubernetes. It’s broadly adopted, with more than 45% of Kubernetes end-users reporting production or planned production use in the 2024 Cloud Native Computing Foundation (CNCF) Survey.
  • AWS Controllers for Kubernetes (ACK) – ACK is highly popular with enterprise platform teams in production environments. ACK provides custom resources for Kubernetes that enable the management of AWS Cloud resources directly from within your clusters.
  • Kube Resource Orchestrator (KRO) – KRO provides a streamlined way to create and manage custom resources in Kubernetes. With KRO, platform teams can create reusable resource bundles that abstract away complexity while remaining natively to the Kubernetes ecosystem.

With these features, you can accelerate and scale your Kubernetes use with fully managed capabilities, using its opinionated but flexible features to build for scale right from the start. It is designed to offer a set of foundational cluster capabilities that layer seamlessly with each other, providing integrated features for continuous deployment, resource orchestration, and composition. You can focus on managing and shipping software without needing to spend time and resources building and managing these foundational platform components.

How it works
Platform engineers and cluster administrators can set up EKS Capabilities to offload building and managing custom solutions to provide common foundational services, meaning they can focus on more differentiated features that matter to your business.

Your application developers primarily work with EKS Capabilities as they do other Kubernetes features. They do this by applying declarative configuration to create Kubernetes resources using familiar tools, such as kubectl or through automation from git commit to running code.

Get started with EKS Capabilities
To enable EKS Capabilities, you can use the EKS console, AWS Command Line Interface (AWS CLI), eksctl, or other preferred tools. In the EKS console, choose Create capabilities in the Capabilities tab on your existing EKS cluster. EKS Capabilities are AWS resources, and they can be tagged, managed, and deleted.

You can select one or more capabilities to work together. I checked all three capabilities: ArgoCD, ACK, and KRO. However, these capabilities are completely independent and you can pick and choose which capabilities you want enabled on your clusters.

Now you can configure selected capabilities. You should create AWS Identity and Access Management (AWS IAM) roles to enable EKS to operate these capabilities within your cluster. Please note you cannot modify the capability name, namespace, authentication region, or AWS IAM Identity Center instance after creating the capability. Choose Next and review the settings and enable capabilities.

Now you can see and manage created capabilities. Select ArgoCD to update configuration of the capability.

You can see details of ArgoCD capability. Choose Edit to change configuration settings or Monitor ArgoCD to show the health status of the capability for the current EKS cluster.

Choose Go to Argo UI to visualize and monitor deployment status and application health.

To learn more about how to set up and use each capability in detail, visit Getting started with EKS Capabilities in the Amazon EKS User Guide.

Things to know
Here are key considerations to know about this feature:

  • Permissions – EKS Capabilities are cluster-scoped administrator resources, and resource permissions are configured through AWS IAM. For some capabilities, there is additional configuration for single sign-on. For example, Argo CD single sign-on configuration is enabled directly in EKS with a direct integration with IAM Identity Center.
  • Upgrades – EKS automatically updates cluster capabilities you enable and their related dependencies. It automatically analyzes for breaking changes, patches and updates components as needed, and informs you of conflicts or issues through the EKS cluster insights.
  • Adoptions – ACK provides resource adoption features that enable migration of existing AWS resources into ACK management. ACK also provides read-only resources which can help facilitate a step-wise migration from provisioned resources with Terraform, AWS CloudFormation into EKS Capabilities.

Now available
Amazon EKS Capabilities are now available in commercial AWS Regions. For Regional availability and future roadmap, visit the AWS Capabilities by Region. There are no upfront commitments or minimum fees, and you only pay for the EKS Capabilities and resources that you use. To learn more, visit the EKS pricing page.

Give it a try in the Amazon EKS console and send feedback to AWS re:Post for EKS or through your usual AWS Support contacts.

Channy

New one-click onboarding and notebooks with a built-in AI agent in Amazon SageMaker Unified Studio

Post Syndicated from Channy Yun (윤석찬) original https://aws.amazon.com/blogs/aws/new-one-click-onboarding-and-notebooks-with-ai-agent-in-amazon-sagemaker-unified-studio/

Today we’re announcing a faster way to get started with your existing AWS datasets in Amazon SageMaker Unified Studio. You can now start working with any data you have access to in a new serverless notebook with a built-in AI agent, using your existing AWS Identity and Access Management (IAM) roles and permissions.

New updates include:

  • One-click onboarding – Amazon SageMaker can now automatically create a project in Unified Studio with all your existing data permissions from AWS Glue Data Catalog, AWS Lake Formation, and Amazon Simple Storage Services (Amazon S3).
  • Direct integration – You can launch SageMaker Unified Studio directly from Amazon SageMaker, Amazon Athena, Amazon Redshift, and Amazon S3 Tables console pages, giving a fast path to analytics and AI workloads.
  • Notebooks with a built-in AI agent – You can use a new serverless notebook with a built-in AI agent, which supports SQL, Python, Spark, or natural language and gives data engineers, analysts, and data scientists one place to develop and run both SQL queries and code.

You also have access to other tools such as a Query Editor for SQL analysis, JupyterLab integrated developer environment (IDE), Visual ETL and workflows, and machine learning (ML) capabilities.

Try one-click onboarding and connect to Amazon SageMaker Unified Studio
To get started, go to the SageMaker console and choose the Get started button.

You will be prompted either to select an existing AWS Identity and Access Management (AWS IAM) role that has access to your data and compute, or to create a new role.

Choose Set up. It takes a few minutes to complete your environment. After this role is granted access, you’ll be taken to the SageMaker Unified Studio landing page where you will see the datasets that you have access to in AWS Glue Data Catalog as well as a variety of analytics and AI tools to work with.

This environment automatically creates the following serverless compute: Amazon Athena Spark, Amazon Athena SQL, AWS Glue Spark, and Amazon Managed Workflows for Apache Airflow (MWAA) serverless. This means you completely skip provisioning and can start working immediately with just-in-time compute resources, and it automatically scales back down when you finish, helping to save on costs.

You can also get started working on specific tables in Amazon Athena, Amazon Redshift, and Amazon S3 Tables. For example, you can select Query your data in Amazon SageMaker Unified Studio and then choose Get started in Amazon Athena console.

If you start from these consoles, you’ll connect directly to the Query Editor with the data that you were looking at already accessible, and your previous query context preserved. By using this context-aware routing, you can run queries immediately once inside the SageMaker Unified Studio without unnecessary navigation.

Getting started with notebooks with a built-in AI agent
Amazon SageMaker is introducing a new notebook experience that provides data and AI teams with a high-performance, serverless programming environment for analytics and ML jobs. The new notebook experience includes Amazon SageMaker Data Agent, a built-in AI agent that accelerates development by generating code and SQL statements from natural language prompts while guiding users through their tasks.

To start a new notebook, choose the Notebooks menu in the left navigation pane to run SQL queries, Python code, and natural language, and to discover, transform, analyze, visualize, and share insights on data. You can get started with sample data such as customer analytics and retail sales forecasting.

When you choose a sample project for customer usage analysis, you can open sample notebook to explore customer usage patterns and behaviors in a telecom dataset.

As I noted, the notebook includes a built-in AI agent that helps you interact with your data through natural language prompts. For example, you can start with data discovery using prompts like:

Show me some insights and visualizations on the customer churn dataset.

After you identify relevant tables, you can request specific analysis to generate Spark SQL. The AI agent creates step-by-step plans with initial code for data transformations and Python code for visualizations. If you see an error message while running the generated code, choose Fix with AI to get help resolving it. Here is a sample result:

For ML workflows, use specific prompts like:

Build an XGBoost classification model for churn prediction using the churn table, with purchase frequency, average transaction value, and days since last purchase as features.

This prompt receives structured responses including a step-by-step plan, data loading, feature engineering, and model training code using the SageMaker AI capabilities, and evaluation metrics. SageMaker Data Agent works best with specific prompts and is optimized for AWS data processing services including Athena for Apache Spark and SageMaker AI.

To learn more about new notebook experience, visit the Amazon SageMaker Unified Studio User Guide.

Now available
One-click onboarding and the new notebook experience in Amazon SageMaker Unified Studio are now available in US East (Ohio), US East (N. Virginia), US West (Oregon), Asia Pacific (Mumbai), Asia Pacific (Singapore), and Asia Pacific (Sydney), Asia Pacific (Tokyo), Europe (Frankfurt), Europe (Ireland) Regions. To learn more, visit the SageMaker Unified Studio product page.

Give it a try in the SageMaker console and send feedback to AWS re:Post for SageMaker Unified Studio or through your usual AWS Support contacts.

Channy

New business metadata features in Amazon SageMaker Catalog to improve discoverability across organizations

Post Syndicated from Channy Yun (윤석찬) original https://aws.amazon.com/blogs/aws/new-business-metadata-features-in-amazon-sagemaker-catalog-to-improve-discoverability-across-organizations/

Amazon SageMaker Catalog, which is now built in to Amazon SageMaker, can help you collect and organize your data with the accompanying business context people need to understand it. It automatically documents assets generated by AWS Glue and Amazon Redshift, and it connects directly with Amazon Quick Sight, Amazon Simple Storage Service (Amazon S3) buckets, Amazon S3 Tables, and AWS Glue Data Catalog (GDC).

With only a few clicks, you can curate data inventory assets with the required business metadata by adding or updating business names (asset and schema), descriptions (asset and schema), read me, glossary terms (asset and schema), and metadata forms. You can also create AI-generated suggestions, review and refine descriptions, and publish enriched asset metadata directly to the catalog. This helps reduce manual documentation effort, improves metadata consistency, and accelerates asset discoverability across organizations.

Starting today, you can use new capabilities in Amazon SageMaker Catalog metadata to improve business metadata and search:

  • Column-level metadata forms and rich descriptions – You can create custom metadata forms to capture business-specific information directly in individual columns. Columns also support markdown-enabled rich text descriptions for comprehensive data documentation and business context.
  • Enforce metadata rules for glossary terms for asset publishing – You can use metadata enforcement rules for glossary terms, meaning data producers must use approved business vocabulary when publishing assets. By standardizing metadata practices, your organization can improve compliance, enhance audit readiness, and streamline access workflows for greater efficiency and control.

These new SageMaker Catalog metadata capabilities help address consistent data classification and improve discoverability across your organizational catalogs. Let’s take a closer look at each capability.

Column-level metadata forms and rich descriptions
You can now use custom metadata forms and rich text descriptions at the column level, extending existing curation capabilities for business names, descriptions, and glossary term classifications. Custom metadata form field values and rich text content are indexed in real time and become immediately discoverable through search.

To edit column-level metadata, select the schema of your catalog asset used in your project and choose the View/Edit action for each column.

When you choose one of the columns as an asset owner, you can define custom key-value metadata forms and markdown descriptions to provide detailed column documentation.

Now data analysts in your organization can search using custom form field values and rich text content, alongside existing column names, descriptions, and glossary terms.

Enforce metadata rules for glossary terms for asset publishing
You can define mandatory glossary term requirements for data assets during the publishing workflow. Your data producers must now classify their assets with approved business terms from organizational glossaries before publication, promoting consistent metadata standards and improving data discoverability. The enforcement rules validate that required glossary terms are applied, preventing assets from being published without proper business context.

To enable a new metadata rule for glossary terms, choose Add in your domain units under the Domain Management section in the Govern menu.

Now you can select either Metadata forms or Glossary association as a type of requirement for the rule. When you select Glossary association, you can choose up to 5 required glossary terms per rule.

If you attempt to publish assets without adding the required glossary terms, the error message prompting you to enforce the glossary rule appears.

Standardizing metadata and aligning data schemas with business language enhances data governance and improves search relevance, helping your organization better understand and trust published data.

You can use AWS Command Line Interface (AWS CLI) and AWS SDKs to use these features. To learn more, visit the Amazon SageMaker Unified Studio data catalog in the Amazon SageMaker Unified Studio User Guide.

Now available
The new metadata capabilities are now available in AWS Regions where Amazon SageMaker Catalog is available.

Give it a try and send feedback to AWS re:Post for Amazon SageMaker Catalog or through your usual AWS Support contacts.

Channy

Introducing AWS IoT Core Device Location integration with Amazon Sidewalk

Post Syndicated from Channy Yun (윤석찬) original https://aws.amazon.com/blogs/aws/introducing-aws-iot-core-device-location-integration-with-amazon-sidewalk/

Today, I’m happy to announce a new capability to resolve location data for Amazon Sidewalk enabled devices with the AWS IoT Core Device Location service. This feature removes the requirement to install GPS modules in a Sidewalk device and also simplifies the developer experience of resolving location data. Devices powered by small coin cell batteries, such as smart home sensor trackers, use Sidewalk to connect. Supporting built-in GPS modules for products that move around is not only expensive, it can creates challenge in ensuring optimal battery life performance and longevity.

With this launch, Internet of Things (IoT) device manufacturers and solution developers can build asset tracking and location monitoring solutions using Sidewalk-enabled devices by sending Bluetooth Low Energy (BLE), Wi-Fi, or Global Navigation Satellite System (GNSS) information to AWS IoT for location resolution. They can then send the resolved location data to an MQTT topic or AWS IoT rule and route the data to other Amazon Web Services (AWS) services, thus using different capabilities of AWS Cloud through AWS IoT Core. This would simplify their software development and give them more options to choose the optimal location source, thereby improving their product performance.

This launch addresses previous challenges and architecture complexity. You don’t need location sensing on network-based devices when you use the Sidewalk network infrastructure itself to determine device location, which eliminates the need for power-hungry and costly GPS hardware on the device. And, this feature also allows devices to efficiently measure and report location data from GNSS and Wi-Fi, thus extending the product battery life. Therefore, you can build a more compelling solution for asset tracking and location-aware IoT applications with these enhancements.

For those unfamiliar with Amazon Sidewalk and the AWS IoT Core Device Location service, I’ll briefly explain their history and context. If you’re already familiar with them, you can skip to the section on how to get started.

AWS IoT Core integrations with Amazon Sidewalk
Amazon Sidewalk is a shared network that helps devices work better through improved connectivity options. It’s designed to support a wide range of customer devices with capabilities ranging from locating pets or valuables, to smart home security and lighting control and remote diagnostics for appliances and tools.

Amazon Sidewalk is a secure community network that uses Amazon Sidewalk Gateways (also called Sidewalk Bridges), such as compatible Amazon Echo and Ring devices, to provide cloud connectivity for IoT endpoint devices. Amazon Sidewalk enables low-bandwidth and long-range connectivity at home and beyond using BLE for short-distance communication and LoRa and frequency-shift keying (FSK) radio protocols at 900MHz frequencies to cover longer distances.

Sidewalk now provides coverage to more than 90% of the US population and supports long-range connected solutions for communities and enterprises. Users with Ring cameras or Alexa devices that act as a Sidewalk Bridge can choose to contribute a small portion of their internet bandwidth, which is pooled to create a shared network that benefits all Sidewalk-enabled devices in a community.

In March 2023, AWS IoT Core deepened its integration with Amazon Sidewalk to seamlessly provision, onboard, and monitor Sidewalk devices with qualified hardware development kits (HDKs), SDKs, and sample applications. As of this writing, AWS IoT Core is the only way for customers to connect the Sidewalk network.

In the AWS IoT Core console, you can add your Sidewalk device, provision and register your devices, and connect your Sidewalk endpoint to the cloud. To learn more about onboarding your Sidewalk devices, visit the Getting started with AWS IoT Core for Amazon Sidewalk in the AWS IoT Wireless Developer Guide.

In November 2022, we announced AWS IoT Core Device Location service, a new feature that you can use to get the geo-coordinates of their IoT devices even when the device doesn’t have a GPS module. You can use the Device Location service as a simple request and response HTTP API, or you can use it with IoT connectivity pathways like MQTT, LoRaWAN, and now with Amazon Sidewalk.

In the AWS IoT Core console, you can test the Device Location service to resolve the location of your device by importing device payload data. Resource location is reported as a GeoJSON payload. To learn more, visit the AWS IoT Core Device Location in the AWS IoT Core Developer Guide.

Customers across multiple industries like automotive, supply chain, and industrial tools have requested a simplified solution such as the Device Location service to extract location-data from Sidewalk products. This would streamline customer software development and give them more options to choose the optimal location source, thereby improving their product.

Get started with a Device Location integration with Amazon Sidewalk
To enable Device Location for Sidewalk devices, go to the AWS IoT Core for Amazon Sidewalk section under LPWAN devices in the AWS IoT Core console. Choose Provision device or your existing device to edit the setting and select Activate positioning in the Geolocation option when creating and updating your Sidewalk devices.

While activating position, you need to specify a destination where you want to send your location data. The destination can either be an AWS IoT rule or an MQTT topic.

Here is a sample AWS Command Line Interface (AWS CLI) command to enable position while provisioning a new Sidewalk device:

$ aws iotwireless createwireless device --type Sidewalk \
  --name "demo-1" --destination-name "New-1" \
  --positioning Enabled

After your Sidewalk device establishes a connection to the Amazon Sidewalk network, the device SDK will send the GNSS-, Wi-Fi- or BLE-based information to AWS IoT Core for Amazon Sidewalk. If the customer has enabled Positioning, then AWS IoT Core Device Location will resolve the location data and send the location data to the specified Destination. After your Sidewalk device transmits location measurement data, the resolved geographic coordinates and a map pin will also be displayed in the Position section for the selected device.

You will also get location information delivered to your destination in GeoJSON format, as shown in the following example:

{
    "coordinates": [
        13.376076698303223,
        52.51823043823242
    ],
    "type": "Point",
    "properties": {
        "verticalAccuracy": 45,
        "verticalConfidenceLevel": 0.68,
        "horizontalAccuracy": 303,
        "horizontalConfidenceLevel": 0.68,
        "country": "USA",
        "state": "CA",
        "city": "Sunnyvale",
        "postalCode": "91234",
        "timestamp": "2025-11-18T12:23:58.189Z"
    }
}

You can monitor the Device Location data between your Sidewalk devices and AWS Cloud by enabling Amazon CloudWatch Logs for AWS IoT Core. To learn more, visit the AWS IoT Core for Amazon Sidewalk in the AWS IoT Wireless Developer Guide.

Now available
AWS IoT Core Device Location integration with Amazon Sidewalk is now generally available in the US East (N. Virginia) Region. To learn more about use cases, documentation, sample codes, and partner devices, visit the AWS IoT Core for Amazon Sidewalk product page.

Give it a try in the AWS IoT Core console and send feedback to AWS re:Post for AWS IoT Core or through your usual AWS Support contacts.

Channy

Introducing AWS Capabilities by Region for easier Regional planning and faster global deployments

Post Syndicated from Channy Yun (윤석찬) original https://aws.amazon.com/blogs/aws/introducing-aws-capabilities-by-region-for-easier-regional-planning-and-faster-global-deployments/

At AWS, a common question we hear is: “Which AWS capabilities are available in different Regions?” It’s a critical question whether you’re planning Regional expansion, ensuring compliance with data residency requirements, or architecting for disaster recovery.

Today, I’m excited to introduce AWS Capabilities by Region, a new planning tool that helps you discover and compare AWS services, features, APIs, and AWS CloudFormation resources across Regions. You can explore service availability through an interactive interface, compare multiple Regions side-by-side, and view forward-looking roadmap information. This detailed visibility helps you make informed decisions about global deployments and avoid project delays and costly rework.

Getting started with Regional comparison
To get started, go to AWS Builder Center and choose AWS Capabilities and Start Exploring. When you select Services and features, you can choose the AWS Regions you’re most interested in from the dropdown list. You can use the search box to quickly find specific services or features. For example, I chose US (N. Virginia), Asia Pacific (Seoul), and Asia Pacific (Taipei) Regions to compare Amazon Simple Storage Service (Amazon S3) features.

Now I can view the availability of services and features in my chosen Regions and also see when they’re expected to be released. Select Show only common features to identify capabilities consistently available across all selected Regions, ensuring you design with services you can use everywhere.

The result will indicate availability using the following states: Available (live in the region); Planning (evaluating launch strategy); Not Expanding (will not launch in region); and 2026 Q1 (directional launch planning for the specified quarter).

In addition to exploring services and features, AWS Capabilities by Region also helps you explore available APIs and CloudFormation resources. As an example, to explore API operations, I added Europe (Stockholm) and Middle East (UAE) Regions to compare Amazon DynamoDB features across different geographies. The tool lets you view and search the availability of API operations in each Region.

The CloudFormation resources tab helps you verify Regional support for specific resource types before writing your templates. You can search by Service, Type, Property, and Config.For instance, when planning an Amazon API Gateway deployment, you can check the availability of resource types like AWS::ApiGateway::Account.

You can also search detailed resources such as Amazon Elastic Compute Cloud (Amazon EC2) instance type availability, including specialized instances such as Graviton-based, GPU-enabled, and memory-optimized variants. For example, I searched 7th generation compute-optimized metal instances and could find c7i.metal-24xl and c7i.metal-48xl instances are available across all targeted Regions.

Beyond the interactive interface, the AWS Capabilities by Region data is also accessible through the AWS Knowledge MCP Server. This allows you to automate Region expansion planning, generate AI-powered recommendations for Region and service selection, and integrate Regional capability checks directly into your development workflows and CI/CD pipelines.

Now available
You can begin exploring AWS Capabilities by Region in AWS Builder Center immediately. The Knowledge MCP server is also publicly accessible at no cost and does not require an AWS account. Usage is subject to rate limits. Follow the getting started guide for setup instructions.

We would love to hear your feedback, so please send us any suggestions through the Builder Support page.

Channy

Customer Carbon Footprint Tool Expands: Additional emissions categories including Scope 3 are now available

Post Syndicated from Channy Yun (윤석찬) original https://aws.amazon.com/blogs/aws/aws-customer-carbon-footprint-tool-now-includes-scope-3-emissions/

Since it launched in 2022, the Customer Carbon Footprint Tool (CCFT) has supported our customers’ sustainability journey to track, measure, and review their carbon emissions by providing the estimated carbon emissions associated with their usage of Amazon Web Services (AWS) services.

In April, we made major updates in the CCFT, including easier access to carbon emissions data, visibility into emissions by AWS Region, inclusion of location-based emissions (LBM), an updated, independently-verified methodology as well as moving to a dedicated page in the AWS Billing console.

The CCFT is informed by the Greenhouse Gas (GHG) Protocol’s classification of emissions, which classifies a company’s emissions. Today, we’re announcing the inclusion of Scope 3 emissions data and an update to Scope 1 emissions in the CCFT. The new emission categories complement the existing Scope 1 and 2 data, and they’ll give our customers a comprehensive look into their carbon emissions data.

In this updated methodology we incorporate new emissions categories. We’ve added Scope 1 refrigerants and natural gas, alongside the existing Scope 1 emissions from fuel combustion in emergency backup generators (diesel). Although Scope 1 emissions represent a small share of overall emissions, we provide our customers with a complete image of their carbon emissions.

To decide which categories of Scope 3 to include in our model we looked at how material each of them were to the overall carbon impact and confirmed the vast majority of emissions were represented. With that in mind, the methodology now includes:

  • Fuel- and energy-related activities (“FERA” under the GHG Protocol) – This includes upstream emissions from purchased fuels, upstream emissions of purchased electricity, and transmission and distribution (T&D) losses. AWS calculates these emissions using both LBM and the market-based method (MBM).

  • IT hardware – AWS uses a comprehensive cradle-to-gate approach that tracks emissions from raw material extraction through manufacturing and transportation to AWS data centers. We use four calculation pathways: process-based life cycle assessment (LCA) with engineering attributes, extrapolation, representative category average LCA, and economic input-output LCA. AWS prioritizes the most detailed and accurate methods for components that contribute significantly to overall emissions.

  • Buildings and equipment – AWS follows established whole building life cycle assessment (wbLCA) standards, considering emissions from construction, use, and end-of-life phases. The analysis covers data center shells, rooms, and long-lead equipment such as air handling units and generators. The methodology uses both process-based life cycle assessment models and economic input-output analysis to provide comprehensive coverage.

The Scope 3 emissions are then amortized over the assets’ service life (6 years for IT hardware, 50 years for buildings) to calculate monthly emissions that can be allocated to customers. This amortization means that we fairly distribute the total embodied carbon of each asset across its operational lifetime, accounting for scenarios such as early retirement or extended use.

All these updates are part of methodology version 3.0.0 and are explained in detail in our methodology document, which has been independently verified by a third party.

How to access the CCFT
To get started, go to the AWS Billing and Cost Management console and choose Customer Carbon Footprint Tool under Cost and Usage Analysis. You can access your carbon emissions data in the dashboard, download a csv file, or export all data using basic SQL and visualize your data by integrating with AWS Data Exports and Amazon Quick Sight.

To ensure you can make meaningful year-over-year comparisons, we’ve recalculated historical data back to January 2022 using version 3 of the methodology. All the data displayed in the CCFT now uses version 3. To see historical data using v3, choose Create custom data export. A new data export now includes new columns breaking down emissions by Scope 1, 2, and 3.

You can see estimated AWS emissions and estimated emissions savings. The tool shows emissions calculated using the MBM for 38 months of data by default. You can find your emissions calculated using the LBM by choosing LBM in the Calculation method filter on the dashboard. The unit of measurement for carbon emissions is metric tons of carbon dioxide equivalent (MTCO2e), an industry-standard measure.

In the Carbon emissions summary, it shows trends of your carbon emissions over time. You can also find emissions resulting from your usage of AWS services and across all AWS Regions. To learn more, visit Viewing your carbon footprint in the AWS documentation.

Voice of the customer
Some of our customers had early access to these updates. This is what they shared with us:

Sunya Norman, senior vice president, Impact at Salesforce shared “Effective decarbonization begins with visibility into our carbon footprint, especially in Scope 3 emissions. Industry averages are only a starting point. The granular carbon data we get from cloud providers like AWS are critical to helping us better understand the actual emissions associated with our cloud infrastructure and focus reductions where they matter most.”

Gerhard Loske, Head of Environmental Management at SAP said “The latest updates to the CCFT are a big step forward in helping us managing SAP’s sustainability goals. With new Region-specific data, we can now see better where emissions are coming from and take targeted action. The upcoming addition of Scope 3 emissions will give us a much fuller picture of our carbon footprint across AWS workloads. These improvements make it easier for us to turn data into meaningful climate action.”

Pinterest’s Global Sustainability Lead, Mia Ketterling highlighted the benefits of the Scope 3 emission data, saying, “By including Scope 3 emissions data in their CCFT, AWS empowers customers like Pinterest to more accurately measure and report the full carbon footprint of our digital operations. Enhanced transparency helps us drive meaningful climate action across our value chain.”

If you’re attending AWS re:Invent in person in December, join technical leaders from AWS, Adobe, and Salesforce as they reveal how the Customer Carbon Footprint Tool supports their environmental initiatives.

Now available
With Scope 1, 2, and 3 coverage in the CCFT, you can track your emissions over time to understand how you’re trending towards your sustainability goals and see the impact of any carbon reduction projects you’ve implemented. To learn more, visit the Customer Carbon Footprint Tool (CCFT) page.

Give these new features a try in the AWS Billing and Cost Management console and send feedback to AWS re:Post for the CCFT or through your usual AWS Support contacts.

Channy

Introducing new compute-optimized Amazon EC2 C8i and C8i-flex instances

Post Syndicated from Channy Yun (윤석찬) original https://aws.amazon.com/blogs/aws/introducing-new-compute-optimized-amazon-ec2-c8i-and-c8i-flex-instances/

After launching Amazon Elastic Compute Cloud (Amazon EC2) memory-optimized R8i and R8i-flex instances and general-purpose M8i and M8i-flex instances, I am happy to announce the general availability of compute-optimized C8i and C8i-flex instances powered by custom Intel Xeon 6 processors available only on AWS with sustained all-core 3.9 GHz turbo frequency and feature a 2:1 ratio of memory to vCPU. These instances deliver the highest performance and fastest memory bandwidth among comparable Intel processors in the cloud.

The C8i and C8i-flex instances offer up to 15 percent better price-performance, and 2.5 times more memory bandwidth compared to C7i and C7i-flex instances. The C8i and C8i-flex instances are up to 60 percent faster for NGINX web applications, up to 40 percent faster for AI deep learning recommendation models, and 35 percent faster for Memcached stores compared to C7i and C7i-flex instances.

C8i and C8i-flex instances are ideal for running compute-intensive workloads, such as web servers, caching, Apache.Kafka, ElasticSearch, batch processing, distributed analytics, high performance computing (HPC), ad serving, highly scalable multiplayer gaming, and video encoding.

As like other 8th generation instances, these instances use the new sixth generation AWS Nitro Cards, delivering up to two times more network and Amazon Elastic Block Storage (Amazon EBS) bandwidth compared to the previous generation instances. They also support bandwidth configuration with 25 percent allocation adjustments between network and Amazon EBS bandwidth, enabling better database performance, query processing, and logging speeds.

C8i instances
C8i instances provide up to 384 vCPUs and 768 TB memory including bare metal instances that provide dedicated access to the underlying physical hardware. These instances help you to run compute-intensive workloads, such as CPU-based inference, and video streaming that need the largest instance sizes or high CPU continuously.

Here are the specs for C8i instances:

Instance size vCPUs Memory (GiB) Network bandwidth (Gbps) EBS bandwidth (Gbps)
c8i.large 2 4 Up to 12.5 Up to 10
c8i.xlarge 4 8 Up to 12.5 Up to 10
c8i.2xlarge 8 16 Up to 15 Up to 10
c8i.4xlarge 16 32 Up to 15 Up to 10
c8i.8xlarge 32 64 15 10
c8i.12xlarge 48 96 22.5 15
c8i.16xlarge 64 128 30 20
c8i.24xlarge 96 192 40 30
c8i.32xlarge 128 256 50 40
c8i.48xlarge 192 384 75 60
c8i.96xlarge 384 768 100 80
c8i.metal-48xl 192 384 75 60
c8i.metal-96xl 384 768 100 80

C8i-flex instances
C8i-flex instances are a lower-cost variant of the C8i instances, with 5 percent better price performance at 5 percent lower prices. These instances are designed for workloads that benefit from the latest generation performance but don’t fully utilize all compute resources. These instances can reach up to the full CPU performance 95 percent of the time.

Here are the specs for the C8i-flex instances:

Instance size vCPUs Memory (GiB) Network bandwidth (Gbps) EBS bandwidth (Gbps)
c8i-flex.large 2 4 Up to 12.5 Up to 10
c8i-flex.xlarge 4 8 Up to 12.5 Up to 10
c8i-flex.2xlarge 8 16 Up to 15 Up to 10
c8i-flex.4xlarge 16 32 Up to 15 Up to 10
c8i-flex.8xlarge 32 64 Up to 15 Up to 10
c8i-flex.12xlarge 48 96 Up to 22.5 Up to 15
c8i-flex.16xlarge 64 128 Up to 30 Up to 20

If you’re currently using earlier generations of compute-optimized instances, you can adopt C8i-flex instances without having to make changes to your application or your workload.

Now available
Amazon EC2 C8i and C8i-flex instances are available today in the US East (N. Virginia), US East (Ohio), US West (Oregon), and Europe (Spain) AWS Regions. C8i and C8i-flex instances can be purchased as On-Demand, Savings Plan, and Spot instances. C8i instances are also available in Dedicated Instances and Dedicated Hosts. To learn more, visit the Amazon EC2 Pricing page.

Give C8i and C8i-flex instances a try in the Amazon EC2 console. To learn more, visit the Amazon EC2 C8i instances page and send feedback to AWS re:Post for EC2 or through your usual AWS Support contacts.

Channy