Tag Archives: Uncategorized

How to use customer managed policies in AWS IAM Identity Center for advanced use cases

Post Syndicated from Ron Cully original https://aws.amazon.com/blogs/security/how-to-use-customer-managed-policies-in-aws-single-sign-on-for-advanced-use-cases/

Are you looking for a simpler way to manage permissions across all your AWS accounts? Perhaps you federate your identity provider (IdP) to each account and divide permissions and authorization between cloud and identity teams, but want a simpler administrative model. Maybe you use AWS IAM Identity Center (successor to AWS Single Sign-On) but are running out of room in your permission set policies; or need a way to keep the role models you have while tailoring the policies in each account to reference their specific resources. Or perhaps you are considering IAM Identity Center as an alternative to per-account federation, but need a way to reuse the customer managed policies that you have already created. Great news! Now you can use customer managed policies (CMPs) and permissions boundaries (PBs) to help with these more advanced situations.

In this blog post, we explain how you can use CMPS and PBs with IAM Identity Center to address these considerations. We describe how IAM Identity Center works, how these types of policies work with IAM Identity Center, and how to best use CMPs and PBs with IAM Identity Center. We also show you how to configure and use CMPs in your IAM Identity Center deployment.

IAM Identity Center background

With IAM Identity Center, you can centrally manage access to multiple AWS accounts and business applications, while providing your workplace users a single sign-on experience with your choice of identity system. Rather than manage identity in each account individually, IAM Identity Center provides one place to connect an existing IdP, Microsoft Active Directory Domain Services (AD DS), or workforce users that you create directly in AWS. Because IAM Identity Center integrates with AWS Organizations, it also provides a central place to define your roles, assign them to your users and groups, and give your users a portal where they can access their assigned accounts.

With AWS Identity Center, you manage access to accounts by creating and assigning permission sets. These are AWS Identity and Access Management (IAM) role templates that define (among other things) which policies to include in a role. If you’re just getting started, you can attach AWS managed policies to the permission set. These policies, created by AWS service teams, enable you to get started without having to learn how to author IAM policies in JSON.

For more advanced cases, where you are unable to express policies sufficiently using inline policies, you can create a custom policy in the permission set. When you assign a permission set to users or groups in a specified account, IAM Identity Center creates a role from the template and then controls single sign-on access to the role. During role creation, IAM Identity Center attaches any specified AWS managed policies, and adds any custom policy to the role as an inline policy. These custom policies must be within the 10,240 character IAM quota of inline policies.

IAM provides two other types of custom policies that increase flexibility when managing access in AWS accounts. Customer managed policies (CMPs) are standalone policies that you create and can attach to roles in your AWS accounts to grant or deny access to AWS resources. Permissions boundaries (PBs) provide an advanced feature that specifies the maximum permissions that a role can have. For both CMPs and PBs, you create the custom policy in your account and then attach it to roles. IAM Identity Center now supports attaching both of these to permission sets so you can handle cases where AWS Managed Policies and inline policies may not be enough.

How CMPs and PBs work with IAM Identity Center

Although you can create IAM users to manage access to AWS accounts and resources, AWS recommends that you use roles instead of IAM users for this purpose. Roles act as an identity (sometimes called an IAM principal), and you assign permissions (identity-based policies) to the role. If you use the AWS Management Console or the AWS Command Line Interface to assume a role, you get the permissions of the role that you assumed. With its simpler way to maintain your users and groups in one AWS location and its ability to centrally manage and assign roles, AWS recommends that you use IAM Identity Center to manage access to your AWS accounts.

With this new IAM Identity Center release, you have the option to specify the names of CMPs and one PB in your permission set (role definition). Doing so modifies how IAM Identity Center provisions roles into accounts. When you assign a user or group to a permission set, IAM Identity Center checks the target account to verify that all specified CMPs and the PB are present. If they are all present, IAM Identity Center creates the role in the account and attaches the specified policies. If any of the specified CMPs or the PB are missing, IAM Identity Center fails the role creation.

This all sounds simple enough, but there are important implications to consider.

If you modify the permission set, IAM Identity Center updates the corresponding roles in all accounts to which you assigned the permission set. What is different when using CMPs and PBs is that IAM Identity Center is uninvolved in the creation or maintenance of the CMPs or PBs. It’s your responsibility to make sure that the CMPs and PBs are created and managed in all of the accounts to which you assign permission sets that use the CMPs and PBs. This means that you must be careful in how you name, create, and maintain these policies in your accounts, to avoid unintended consequences. For example, if you do not apply changes to CMPs consistently across all your accounts, the behavior of an IAM Identity Center created role will vary between accounts.

What CMPs do for you

By using CMPs with permission sets, you gain four main benefits:

  1. If you federate to your accounts directly and have CMPs already, you can reuse your CMPs with permission sets in IAM Identity Center. We describe exceptions later in this post.
  2. If you are running out of space in your permission set inline policies, you can add permission sets to increase the aggregate size of your policies.
  3. Policies often need to refer to account-specific resources by Amazon Resource Name (ARN). Designing an inline policy that does this correctly across all your accounts can be challenging and, in some cases, may not be possible. By specifying a CMP in a permission set, you can tailor the CMPs in each of your accounts to reference the resources of the account. When IAM Identity Center creates the role and attaches the CMPs of the account, the policies used by the IAM Identity Center–generated role are now specific to the account. We highlight this example later in this post.
  4. You get the benefit of a central location to define your roles, which gives you visibility of all the policies that are in use across the accounts where you assigned permission sets. This enables you to have a list of CMP and PB names that you should monitor for change across your accounts. This helps you ensure that you are maintaining your policies correctly.

Considerations and best practices

Start simple, avoid complex – If you’re just starting out, try using AWS managed policies first. With managed policies, you don’t need to know JSON policy to get started. If you need more advanced policies, start by creating identity-based inline custom policies in the permission set. These policies are provisioned as inline policies, and they will be identical in all your accounts. If you need larger policies or more advanced capabilities, use CMPs as your next option. In most cases, you can accomplish what you need with inline and customer managed policies. When you can’t achieve your objective using CMPs, use PBs. For information about intended use cases for PBs, see the blog post When and where to use IAM permissions boundaries.

Permissions boundaries don’t constrain IAM Identity Center admins who create permission sets – IAM Identity Center administrators (your staff) that you authorize to create permission sets can create inline policies and attach CMPs and PBs to permission sets, without restrictions. Permissions boundary policies set the maximum permissions of a role and the maximum permissions that the role can grant within an account through IAM only. For example, PBs can set the maximum permissions of a role that uses IAM to create other roles for use by code or services. However, a PB doesn’t set maximum permissions of the IAM Identity Center permission set creator. What does that mean? Suppose you created an IAM Identity Center Admin permission set that has a PB attached, and you assigned it to John Doe. John Doe can then sign in to IAM Identity Center and modify permission sets with any policy, regardless of what you put in the PB. The PB doesn’t restrict the policies that John Doe can put into a permission set.

In short, use PBs only for roles that need to create IAM roles for use by code or services. Don’t use PBs for permission sets that authorize IAM Identity Center admins who create permission sets.

Create and use a policy naming plan – IAM Identity Center doesn’t consider the content of a named policy that you attach to a permission set. If you assign a permission set in multiple accounts, make sure that all referenced policies have the same intent. Failure to do this will result in unexpected and inconsistent role behavior between different accounts. Imagine a CMP named “S3” that grants S3 read access in account A, and another CMP named “S3” that grants S3 administrative permissions over all S3 buckets in account B. A permission set that attaches the S3 policy and is assigned in accounts A and B will be confusing at best, because the level access is quite different in each of the accounts. It’s better to have more specific names, such as “S3Reader” and “S3Admin,” for your policies and ensure they are identical except for the account-specific resource ARNs.

Use automation to provision policies in accounts – Using tools such as AWS CloudFormation stacksets, or other infrastructure-as-code tools, can help ensure that naming and policies are consistent across your accounts. It also helps reduce the potential for administrators to modify policies in undesirable ways.

Policies must match the capabilities of IAM Identity Center – Although IAM Identity Center supports most IAM semantics, there are exceptions:

  1. If you use an identity provider as your identity source, IAM Identity Center passes only PrincipalTag attributes that come through SAML assertions to IAM. IAM Identity Center doesn’t process or forward other SAML assertions to IAM. If you have CMPs or PBs that rely on other information from SAML assertions, they won’t work. For example, IAM Identity Center doesn’t provide multi-factor authentication (MFA) context keys or SourceIdentity.
  2. Resource policies that reference role names or tags as part of trust policies don’t work with IAM Identity Center. You can use resource policies that use attribute-based access control (ABAC). IAM Identity Center role names are not static, and you can’t tag the roles that IAM Identity Center creates from its permission sets.

How to use CMPs with permission sets

Now that you understand permission sets and how they work with CMPs and PBs, let’s take a look at how you can configure a permission set to use CMPs.

In this example, we show you how to use one or more permission sets that attach a CMP that enables Amazon CloudWatch operations to the log group of specified accounts. Specifically, the AllowCloudWatch_permission set attaches a CMP named AllowCloudWatchForOperations. When we assign the permission set in two separate accounts, the assigned users can perform CloudWatch operations against the log groups of the assigned account only. Because the CloudWatch operations policies are in CMPs rather than inline policies, the log groups can be account specific, and you can reuse the CMPs in other permission sets if you want to have CloudWatch operations available through multiple permission sets.

Note: For this blog post, we demonstrate using CMPs by utilizing the IAM Management Console to create policies and assignments. We recommend that after you learn how to do this, you create your policies through automation for production environments. For example, use AWS CloudFormation. The intent of this example is to demonstrate how you can have a policy in two separate accounts that refer to different resources; something that is harder to accomplish using inline policies. The use case itself is not that advanced, but the use of CMPs to have different resources referenced in each account is a more advanced idea. We kept this simple to make it easier to focus on the feature than the use case.

Prerequisites

In this example, we assume that you know how to use the AWS Management Console, create accounts, navigate between accounts, and create customer managed policies. You also need administrative privileges to enable IAM Identity Center and to create policies in your accounts.

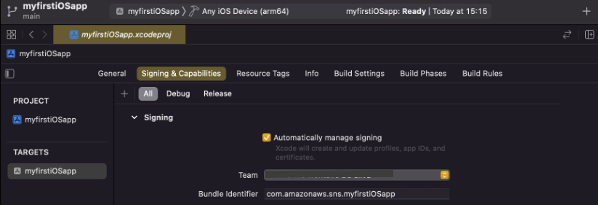
Before you begin, enable IAM Identity Center in your AWS Organizations management account in an AWS Region of your choice. You need to create at least two accounts within your AWS Organization. In this example, the account names are member-account and member-account-1. After you set up the accounts, you can optionally configure IAM Identity Center for administration in a delegated member account.

Configure an IAM Identity Center permission set to use a CMP

Follow these four procedures to use a CMP with a permission set:

  1. Create CMPs with consistent names in your target accounts
  2. Create a permission set that references the CMP that you created
  3. Assign groups or users to the permission set in accounts where you created CMPs
  4. Test your assignments

Step 1: Create CMPs with consistent names in your target accounts

In this step, you create a customer managed policy named AllowCloudWatchForOperations in two member accounts. The policy allows your cloud operations users to access a predefined CloudWatch log group in the account.

To create CMPs in your target accounts

  1. Sign into AWS.

    Note: You can sign in to IAM Identity Center if you have existing permission sets that enable you to create policies in member accounts. Alternatively, you can sign in using IAM federation or as an IAM user that has access to roles that enable you to navigate to other accounts where you can create policies. Your sign-in should also give you access to a role that can administer IAM Identity Center permission sets.

  2. Navigate to an AWS Organizations member account.

    Note: If you signed in through IAM Identity Center, use the user portal page to navigate to the account and role. If you signed in by using IAM federation or as an IAM user, choose your sign-in name that is displayed in the upper right corner of the AWS Management Console and then choose switch role, as shown in Figure 1.

    Figure 1: Switch role for IAM user or IAM federation

    Figure 1: Switch role for IAM user or IAM federation

  3. Open the IAM console.
  4. In the navigation pane, choose Policies.
  5. In the upper right of the page, choose Create policy.
  6. On the Create Policy page, choose the JSON tab.
  7. Paste the following policy into the JSON text box. Replace <account-id> with the ID of the account in which the policy is created.

    Tip: To copy your account number, choose your sign-in name that is displayed in the upper right corner of the AWS Management Console, and then choose the copy icon next to the account ID, as shown in Figure 2.

    Figure 2: Copy account number

    Figure 2: Copy account number

    {
        "Version": "2012-10-17",
        "Statement": [
            {
                "Action": [
                    "logs:CreateLogStream",
                    "logs:DescribeLogStreams",
                    "logs:PutLogEvents",
                    "logs:GetLogEvents"
                ],
                "Effect": "Allow",
                "Resource": "arn:aws:logs:us-east-1:<account-id>:log-group:OperationsLogGroup:*"
            },
            {
                "Action": [
                    "logs:DescribeLogGroups"
                ],
                "Effect": "Allow",
                "Resource": "arn:aws:logs:us-east-1:<account-id>:log-group::log-stream:*"
            }
        ]
    }

  8. Choose Next:Tags, and then choose Next:Review.
  9. On the Create Policy/Review Policy page, in the Name field, enter AllowCloudWatchForOperations. This is the name that you will use when you attach the CMP to the permission set in the next procedure (Step 2).
  10. Repeat steps 1 through 7 in at least one other member account. Be sure to replace the <account-id> element in the policy with the account ID of each account where you create the policy. The only difference between the policies in each account is the <account-id> in the policy.

Step 2: Create a permission set that references the CMP that you created

At this point, you have at least two member accounts containing the same policy with the same policy name. However, the ResourceARN in each policy refers to log groups that belong to the respective accounts. In this step, you create a permission set and attach the policy to the permission set. Importantly, you attach only the name of the policy to the permission set. The actual attachment of the policy to the role that IAM Identity Center creates, happens when you assign the permission set to a user or group in Step 3.

To create a permission set that references the CMP

  1. Sign in to the Organizations management account or the IAM Identity Center delegated administration account.
  2. Open the IAM Identity Center console.
  3. In the navigation pane, choose Permission Sets.
  4. On the Select Permission set type screen, select Custom permission Set and choose Next.
    Figure 3: Select custom permission set

    Figure 3: Select custom permission set

  5. On the Specify policies and permissions boundary page, expand the Customer managed policies option, and choose Attach policies.
    Figure 4: Specify policies and permissions boundary

    Figure 4: Specify policies and permissions boundary

  6. For Policy names, enter the name of the policy. This name must match the name of the policy that you created in Step 1. In our example, the name is AllowCloudWatchForOperations. Choose Next.
  7. On the Permission set details page, enter a name for your permission set. In this example, use AllowCloudWatch_PermissionSet. You can alspecify additional details for your permission sets, such as session duration and relay state (these are a link to a specific AWS Management Console page of your choice).
    Figure 5: Permission set details

    Figure 5: Permission set details

  8. Choose Next, and then choose Create.

Step 3: Assign groups or users to the permission set in accounts where you created your CMPs

In the preceding steps, you created a customer managed policy in two or more member accounts, and a permission set with the customer managed policy attached. In this step, you assign users to the permission set in your accounts.

To assign groups or users to the permission set

  1. Sign in to the Organizations management account or the IAM Identity Center delegated administration account.
  2. Open the IAM Identity Center console.
  3. In the navigation pane, choose AWS accounts.
    Figure 6: AWS account

    Figure 6: AWS account

  4. For testing purposes, in the AWS Organization section, select all the accounts where you created the customer managed policy. This means that any users or groups that you assign during the process will have access to the AllowCloudWatch_PermissionSet role in each account. Then, on the top right, choose Assign users or groups.
  5. Choose the Users or Groups tab and then select the users or groups that you want to assign to the permission set. You can select multiple users and multiple groups in this step. For this example, we recommend that you select a single user for which you have credentials, so that you can sign in as that user to test the setup later. After selecting the users or groups that you want to assign, choose Next.
    Figure 7: Assign users and groups to AWS accounts

    Figure 7: Assign users and groups to AWS accounts

  6. Select the permission set that you created in Step 2 and choose Next.
  7. Review the users and groups that you are assigning and choose Submit.
  8. You will see a message that IAM Identity Center is configuring the accounts. In this step, IAM Identity Center creates roles in each of the accounts that you selected. It does this for each account, so it looks in the account for the CMP that you specified in the permission set. If the name of the CMP that you specified in the permission set matches the name that you provided when creating the CMP, IAM Identity Center creates a role from the permission set. If the names don’t match or if the CMP isn’t present in the account to which you assigned the permission set, you see an error message associated with that account. After successful submission, you will see the following message: We reprovisioned your AWS accounts successfully and applied the updated permission set to the accounts.

Step 4: Test your assignments

Congratulations! You have successfully created CMPs in multiple AWS accounts, created a permission set and attached the CMPs by name, and assigned the permission set to users and groups in the accounts. Now it’s time to test the results.

To test your assignments

  1. Go to the IAM Identity Center console.
  2. Navigate to the Settings page.
  3. Copy the user portal URL, and then paste the user portal URL into your browser.
  4. At the sign-in prompt, sign in as one of the users that you assigned to the permission set.
  5. The IAM Identity Center user portal shows the accounts and roles that you can access. In the example shown in Figure 8, the user has access to the AllowCloudWatch_PermissionSet created in two accounts.
    Figure 8: User portal

    Figure 8: User portal

    If you choose AllowCloudWatch_PermissionSet in the member-account, you will have access to the CloudWatch log group in the member-account account. If you choose the role in member-account-1, you will have access to CloudWatch Log group in member-account-1.

  6. Test the access by choosing Management Console for the AllowCloudWatch_PermissionSet in the member-account.
  7. Open the CloudWatch console.
  8. In the navigation pane, choose Log groups. You should be able to access log groups, as shown in Figure 9.
    Figure 9: CloudWatch log groups

    Figure 9: CloudWatch log groups

  9. Open the IAM console. You shouldn’t have permissions to see the details on this console, as shown in figure 10. This is because AllowCloudWatch_PermissionSet only provided CloudWatch log access.
    Figure 10: Blocked access to the IAM console

    Figure 10: Blocked access to the IAM console

  10. Return to the IAM Identity Center user portal.
  11. Repeat steps 4 through 8 using member-account-1.

Answers to key questions

What happens if I delete a CMP or PB that is attached to a role that IAM Identity Center created?
IAM prevents you from deleting policies that are attached to IAM roles.

How can I delete a CMP or PB that is attached to a role that IAM Identity Center created?
Remove the CMP or PB reference from all your permission sets. Then re-provision the roles in your accounts. This detaches the CMP or PB from IAM Identity Center–created roles. If the policies are unused by other IAM roles in your account or by IAM users, you can delete the policy.

What happens if I modify a CMP or PB that is attached to an IAM Identity Center provisioned role?
The IAM Identity Center role picks up the policy change the next time that someone assumes the role.

Conclusion

In this post, you learned how IAM Identity Center works with customer managed policies and permissions boundaries that you create in your AWS accounts. You learned different ways that this capability can help you, and some of the key considerations and best practices to succeed in your deployments. That includes the principle of starting simple and avoiding unnecessarily complex configurations. Remember these four principles:

  1. In most cases, you can accomplish everything you need by starting with custom (inline) policies.
  2. Use customer managed policies for more advanced cases.
  3. Use permissions boundary policies only when necessary.
  4. Use CloudFormation to manage your customer managed policies and permissions boundaries rather than having administrators deploy them manually in accounts.

To learn more about this capability, see the IAM Identity Center User Guide. If you have feedback about this post, submit comments in the Comments section below. If you have questions about this post, start a new thread on the AWS IAM re:Post or contact AWS Support.

Want more AWS Security news? Follow us on Twitter.

Ron Cully

Ron s a Principal Product Manager at AWS where he leads feature and roadmap planning for workforce identity products at AWS. Ron has over 20 years of industry experience in product and program management of networking and directory related products. He is passionate about delivering secure, reliable solutions that help make it easier for customers to migrate directory aware applications and workloads to the cloud.

Nitin Kulkarni

Nitin Kulkarni

Nitin is a Solutions Architect on the AWS Identity Solutions team. He helps customers build secure and scalable solutions on the AWS platform. He also enjoys hiking, baseball and linguistics.

$23 Million YouTube Royalties Scam

Post Syndicated from Bruce Schneier original https://www.schneier.com/blog/archives/2022/08/23-million-youtube-royalties-scam.html

Scammers were able to convince YouTube that other peoples’ music was their own. They successfully stole $23 million before they were caught.

No one knows how common this scam is, and how much money total is being stolen in this way. Presumably this is not an uncommon fraud.

While the size of the heist and the breadth of the scheme may be very unique, it’s certainly a situation that many YouTube content creators have faced before. YouTube’s Content ID system, meant to help creators, has been weaponized by bad faith actors in order to make money off content that isn’t theirs. While some false claims are just mistakes caused by automated systems, the MediaMuv case is a perfect example of how fraudsters are also purposefully taking advantage of digital copyright rules.

YouTube attempts to be cautious with who it provides CMS and Content ID tool access because of how powerful these systems are. As a result, independent creators and artists cannot check for these false copyright claims nor do they have the power to directly act on them. They need to go through a digital rights management company that does have access. And it seems like thieves are doing the same, falsifying documents to gain access to these YouTube tools through these third parties that are “trusted” with these tools by YouTube.

Upcoming Speaking Engagements

Post Syndicated from Schneier.com Webmaster original https://www.schneier.com/blog/archives/2022/08/upcoming-speaking-engagements-22.html

This is a current list of where and when I am scheduled to speak:

The list is maintained on this page.

Friday Squid Blogging: SQUID Acronym for Making Conscious Choices

Post Syndicated from Bruce Schneier original https://www.schneier.com/blog/archives/2022/08/friday-squid-blogging-squid-acronym-for-making-conscious-choices.html

I think the U is forced:

SQUID consists of five steps: Stop, Question, Understand, Imagine, and Decide.

As usual, you can also use this squid post to talk about the security stories in the news that I haven’t covered.

Read my blog posting guidelines here.

Twitter Exposes Personal Information for 5.4 Million Accounts

Post Syndicated from Bruce Schneier original https://www.schneier.com/blog/archives/2022/08/twitter-exposes-personal-information-for-5-4-million-accounts.html

Twitter accidentally exposed the personal information—including phone numbers and email addresses—for 5.4 million accounts. And someone was trying to sell this information.

In January 2022, we received a report through our bug bounty program of a vulnerability in Twitter’s systems. As a result of the vulnerability, if someone submitted an email address or phone number to Twitter’s systems, Twitter’s systems would tell the person what Twitter account the submitted email addresses or phone number was associated with, if any. This bug resulted from an update to our code in June 2021. When we learned about this, we immediately investigated and fixed it. At that time, we had no evidence to suggest someone had taken advantage of the vulnerability.

In July 2022, we learned through a press report that someone had potentially leveraged this and was offering to sell the information they had compiled. After reviewing a sample of the available data for sale, we confirmed that a bad actor had taken advantage of the issue before it was addressed.

This includes anonymous accounts.

This comment has it right:

So after forcing users to enter a phone number to continue using twitter, despite twitter having no need to know the users phone number, they then leak the phone numbers and associated accounts. Great.

But it gets worse… After being told of the leak in January, rather than disclosing the fact millions of users data had been open for anyone who looked, they quietly fixed it and hoped nobody else had found it.

It was only when the press started to notice they finally disclosed the leak.

That isn’t just one bug causing a security leak—it’s a chain of bad decisions and bad security culture, and if anything should attract government fines for lax data security, this is it.

Twitter’s blog post unhelpfully goes on to say:

If you operate a pseudonymous Twitter account, we understand the risks an incident like this can introduce and deeply regret that this happened. To keep your identity as veiled as possible, we recommend not adding a publicly known phone number or email address to your Twitter account.

Three news articles.

A Taxonomy of Access Control

Post Syndicated from Bruce Schneier original https://www.schneier.com/blog/archives/2022/08/a-taxonomy-of-access-control.html

My personal definition of a brilliant idea is one that is immediately obvious once it’s explained, but no one has thought of it before. I can’t believe that no one has described this taxonomy of access control before Ittay Eyal laid it out in this paper. The paper is about cryptocurrency wallet design, but the ideas are more general. Ittay points out that a key—or an account, or anything similar—can be in one of four states:

safe Only the user has access,
loss No one has access,
leak Both the user and the adversary have access, or
theft Only the adversary has access.

Once you know these states, you can assign probabilities of transitioning from one state to another (someone hacks your account and locks you out, you forgot your own password, etc.) and then build optimal security and reliability to deal with it. It’s a truly elegant way of conceptualizing the problem.

How to prepare your application to scale reliably with Amazon EC2

Post Syndicated from Sheila Busser original https://aws.amazon.com/blogs/compute/how-to-prepare-your-application-to-scale-reliably-with-amazon-ec2/

This blog post is written by, Gabriele Postorino, Senior Technical Account Manager, and Giorgio Bonfiglio, Principal Technical Account Manager

In this post, we’ll discuss how you can prepare for planned and unplanned scaling events with

Most of the challenges related to horizontal scaling can be mitigated by optimizing the architectural implementation and applying improvements in operational processes.

In the following sections, we’ll explore this in depth. Recommendations can be applied partially or fully – they come with different complexities, and each one will help you reduce the risk of facing insufficient capacity errors or scaling delays, as well as deliver enhancements in areas such as fault tolerance, elasticity, and cost optimization.

Architectural best practices

Instance capacity can be regarded as being divided into “pools” defined by AZ (such as us-east-1a), instance type (for example m5.xlarge), and tenancy. Combining the following two guidelines will widen the capacity pools available to scale out your fleets of instances. This will help you reduce costs, transparently recover from failures, and increase your application scalability.

Instance flexibility

Whether you’re migrating a new workload to the cloud, or tuning an existing workload, you’ll likely evaluate which compute configuration options are available and determine the right configuration for your application.

If your workload is already running on EC2 instances, you might already be aware of the instance type that it runs best on. Let’s say that your application is RAM intensive, and you found that r6i.4xlarge instances are best suited for it.

However, relying on a single instance type might result in artificially limiting your ability to scale compute resources for your workload when needed. It’s always a good idea to explore how your workload behaves when running on other instance types: you might find that your application can serve double the number of requests served by one r6i.4xlarge instance when using one r6i.8xlarge instance or four r6i.2xlarge instances.

Furthermore, there’s no reason to limit your options to a single instance family, generation, or processor type. For example, m6a.8xlarge instances offer the same amount of RAM of r6i.4xlarge and might be used to run your application if needed.

Amazon EC2 Auto Scaling helps you make sure that you have the right number of EC2 instances available to handle the load for your application.

Auto Scaling groups can be configured to respond to scaling events by selecting the type of instance to launch among a list of instance types. You can statically populate the list in advance, as in the following screenshot,

The Instance type requirements section of the Auto Scaling Wizard instance launch options step is shown with the option “Manually add instance types” selected.

or dynamically define it by a set of instance attributes as shown in the subsequent screenshot:

The Instance type requirements section of the Auto Scaling Wizard instance launch options step is shown with the option “Specify instance attribute” selected.

For example, by setting the requirements to a minimum of 8 vCPUs, 64GiB of Memory, and a RAM/CPU ratio of 8 (just like r6i.2xlarge instances), up to 73 instance types can be included in the list of suitable instances. They will be selected for launch starting from the lowest priced instance types. If the request can’t be fulfilled in full by the lowest priced instance type, then additional instances will be launched from the second lowest instance type pool, and so on.

Instance distribution

Each AWS Region consists of multiple, isolated Availability Zones (AZ), interconnected with high-bandwidth, low-latency networking. Spreading a workload across AZs is a well-established resiliency best practice. It will make sure that your end users aren’t impacted in the case of a single AZ, data center, or rack failures, as each AZ has its own distinct instance capacity pools that you can leverage to scale your application fleets.

EC2 Auto Scaling can manage the optimal distribution of EC2 instances in a group across all AZs in a Region automatically, as well as deal with temporary failures transparently. To do so, it must be configured to use at least one subnet in each AZ. Then, it will attempt to distribute instances evenly across AZs and automatically cycle through AZs in case of temporary launch failures.

Diagram showing a VPC with subnets in 2 Availability Zones and an Autoscaling group managing groups of instances of different types

Operational best practices

The way that your workload is operated also impacts your ability to scale it when needed. Failure management and appropriate scaling techniques will help you maximize the availability of your environment.

Failure management

On-Demand capacity isn’t guaranteed to always be available. There might be short windows of time when AWS doesn’t have enough available On-Demand capacity to fulfill your specific request: as the availability of On-Demand capacity changes frequently, it’s important that your launch processes implement retry mechanisms.

Retries and fallbacks are managed automatically by EC2 Auto Scaling. But if you have a custom workflow to launch instances, it should be able to work with server error codes, in particular InsufficientInstanceCapacity or InternalError, by retrying the launch request. For a complete list of error codes for the EC2 API, please refer to our documentation.

Another option provided by EC2 is represented by EC2 Fleets. EC2 Fleet is a feature that helps to implement instance flexibility best practices. Instead of calling RunInstances with one instance type and retrying, EC2 Fleet in Instant mode considers all provided instance types, using a list of instances or Attribute Based Instance selection, and provisions capacity from the pools configured by the EC2 Fleet call where capacity was available.

Scaling technique

Launching EC2 instances as soon as you have an initial indication of increased load, in smaller batches and over a longer time span, helps increase your application performance and reliability while reducing costs and minimizing disruptions.

Two different scaling techniques that follow the increase in load are depicted. One scaling approach adds a large number of instances less frequently, while the second approach launches a smaller batch of instances more frequently. In the graph above, two different scaling techniques are depicted. Scaling approach #1 adds a large number of instances less frequently, while approach #2 launches a smaller batch of instances more frequently. Adopting the first approach risks your application not being able to sustain the increase in load in a timely manner. This will potentially cause an impact on end users and leave the operations team with little time to resolve.

Effective capacity planning

On-Demand Instances are best suited for applications with irregular, uninterruptible workloads. Interruptible workloads can avail of Spot Instances that pick from spare EC2 capacity. They cost less than On-Demand Instances but can be interrupted with a two-minute warning.

If your workload has a stable baseline utilization that hardly changes over time, then you can reserve capacity for your baseline usage of EC2 instances using open On-Demand Capacity Reservations and cover them with Savings Plans to get discounted rates with a one-year or three-year commitment, with the latter offering the bigger discounts.

Open On-Demand Capacity Reservations and Savings Plans aren’t tightly related to the EC2 instances that they cover at a certain point in time. Rather they shift to other usage, matching all of the parameters of the respective On-Demand Capacity Reservation or Savings Plan (e.g., Instance Type, Operating System, AZ, tenancy) in your account or across accounts for which you have sharing enabled. This lets you be dynamic even with your stable baseline. For example, during a rolling update or a blue/green deployment, On-Demand Capacity Reservations and Savings Plans will automatically cover any instances that match the respective criteria.

ODCR Fleets

There are times when you can’t apply all of the recommended mitigating actions in anticipation of a planned event. In those cases, you might want to use On-Demand Capacity Reservation Fleets to reserve capacity in advance for additional peace of mind. Capacity reservation fleets let you define capacity requests across multiple instance types, up to a target capacity that you specify. They can be created and managed using the AWS Command Line Interface (AWS CLI) and the AWS APIs.

Key concepts of Capacity Reservation Fleets are the total target capacity and the instance type weight. The instance type weight expresses the number of capacity units that each instance of a specific instance type counts toward the total target capacity.

Let’s say your workload is memory-bound, you expect to need 1,6TiB of RAM, and you want to use r6i instances. You can create a Capacity Reservation Fleet for r6i instances defining weights for each instance type in the family based on the relative amount of memory that they have in an instance type specification json file.

instanceTypeSpecification.json:
[
    {             
        "InstanceType": "r6i.2xlarge",                       
        "InstancePlatform":"Linux/UNIX",            
        "Weight": 1,
        "AvailabilityZone":"eu-west-1a",        
        "EbsOptimized": true,           
        "Priority" : 3
    },
    { 
        "InstanceType": "r6i.4xlarge",                        
        "InstancePlatform":"Linux/UNIX",            
        "Weight": 2,
        "AvailabilityZone":"eu-west-1a",        
        "EbsOptimized": true,            
        "Priority" : 2
    },
    {             
        "InstanceType": "r6i.8xlarge",                        
        "InstancePlatform":"Linux/UNIX",           
        "Weight": 4,
        "AvailabilityZone":"eu-west-1a",       
        "EbsOptimized": true,            
        "Priority" : 1
    }
]

Then, you want to use this specification to create a Capacity Reservation Fleet that takes care of the underlying Capacity Reservations needed to fulfill your request:

$ aws ec2 create-capacity-reservation-fleet \
--total-target-capacity 25 \
--allocation-strategy prioritized \
--instance-match-criteria open \
--tenancy default \
--end-date 2022-05-31T00:00:00.000Z \
--instance-type-specifications file://instanceTypeSpecification.json

In this example, I set the target capacity to 25, which is the number of r6i.2xlarge needed to get 1,6TiB of total memory across the fleet. As you might have noticed, Capacity Reservation Fleets can be created with an end date. They will automatically cancel themselves and the Capacity Reservations that they created when the end date is reached, so that you don’t need to.

AWS Infrastructure Event Management

Last but not least, our teams can offer the AWS Infrastructure Event Management (IEM) program. Part of select AWS Support offerings, the IEM program has been designed to help you with planning and executing events that impact your infrastructure on AWS. By requesting an IEM engagement, you will be supported by AWS experts during all of the phases of your event.Flow chart showing the steps and IEM is usually made of: 1. Event is planned 2. IEM is initiated 6-8 weeks in advance of the event 3. Infrastructure readiness is assessed and mitigations are applied 4. The event 5. Post-event reviewStarting from your business outcomes and success criteria, we’ll assess your infrastructure readiness for the event, evaluate risks, and recommend specific actions to mitigate them. The AWS experts will focus on your application architecture as a whole and dive deep into each of its components with your respective teams. They might also engage with other AWS teams to notify them of the upcoming event, and get specific prescriptive guidance when needed. During the event, AWS experts will have the context needed to help you resolve any issue that might arise as quickly as possible. The program is included in the Enterprise and Enterprise On-Ramp Support plans and is available to Business Support customers for an additional fee.

Conclusion

Whether you’re planning for a big future event, or you want to make sure that your application can withstand unexpected increases in traffic, it’s important that you consider what we discussed in this article:

  • Use as many instance types as you can, don’t limit your workload to use a single instance type when it could also use a lot more types
  • Distribute your EC2 instances across all AZs in the Region
  • Expect failures: manage retries and fallback options
  • Make use of EC2 Autoscaling and EC2 Fleet whenever possible
  • Avoid scaling spikes: start scaling earlier, in smaller chunks, and more frequently
  • Reserve capacity only when you really need to

For further study, we recommend the Well-Architected Framework Reliability and Operational Excellence pillars as starting points. Moreover, if you have an event coming up, talk to your Technical Account Manager, your Account Team, or contact us to find out how we can help!

NIST’s Post-Quantum Cryptography Standards

Post Syndicated from Schneier.com Webmaster original https://www.schneier.com/blog/archives/2022/08/nists-post-quantum-cryptography-standards.html

Quantum computing is a completely new paradigm for computers. A quantum computer uses quantum properties such as superposition, which allows a qubit (a quantum bit) to be neither 0 nor 1, but something much more complicated. In theory, such a computer can solve problems too complex for conventional computers.

Current quantum computers are still toy prototypes, and the engineering advances required to build a functionally useful quantum computer are somewhere between a few years away and impossible. Even so, we already know that that such a computer could potentially factor large numbers and compute discrete logs, and break the RSA and Diffie-Hellman public-key algorithms in all of the useful key sizes.

Cryptographers hate being rushed into things, which is why NIST began a competition to create a post-quantum cryptographic standard in 2016. The idea is to standardize on both a public-key encryption and digital signature algorithm that is resistant to quantum computing, well before anyone builds a useful quantum computer.

NIST is an old hand at this competitive process, having previously done this with symmetric algorithms (AES in 2001) and hash functions (SHA-3 in 2015). I participated in both of those competitions, and have likened them to demolition derbies. The idea is that participants put their algorithms into the ring, and then we all spend a few years beating on each other’s submissions. Then, with input from the cryptographic community, NIST crowns a winner. It’s a good process, mostly because NIST is both trusted and trustworthy.

In 2017, NIST received eighty-two post-quantum algorithm submissions from all over the world. Sixty-nine were considered complete enough to be Round 1 candidates. Twenty-six advanced to Round 2 in 2019, and seven (plus another eight alternates) were announced as Round 3 finalists in 2020. NIST was poised to make final algorithm selections in 2022, with a plan to have a draft standard available for public comment in 2023.

Cryptanalysis over the competition was brutal. Twenty-five of the Round 1 algorithms were attacked badly enough to remove them from the competition. Another eight were similarly attacked in Round 2. But here’s the real surprise: there were newly published cryptanalysis results against at least four of the Round 3 finalists just months ago—moments before NIST was to make its final decision.

One of the most popular algorithms, Rainbow, was found to be completely broken. Not that it could theoretically be broken with a quantum computer, but that it can be broken today—with an off-the-shelf laptop in just over two days. Three other finalists, Kyber, Saber, and Dilithium, were weakened with new techniques that will probably work against some of the other algorithms as well. (Fun fact: Those three algorithms were broken by the Center of Encryption and Information Security, part of the Israeli Defense Force. This represents the first time a national intelligence organization has published a cryptanalysis result in the open literature. And they had a lot of trouble publishing, as the authors wanted to remain anonymous.)

That was a close call, but it demonstrated that the process is working properly. Remember, this is a demolition derby. The goal is to surface these cryptanalytic results before standardization, which is exactly what happened. At this writing, NIST has chosen a single algorithm for general encryption and three digital-signature algorithms. It has not chosen a public-key encryption algorithm, and there are still four finalists. Check NIST’s webpage on the project for the latest information.

Ian Cassels, British mathematician and World War II cryptanalyst, once said that “cryptography is a mixture of mathematics and muddle, and without the muddle the mathematics can be used against you.” This mixture is particularly difficult to achieve with public-key algorithms, which rely on the mathematics for their security in a way that symmetric algorithms do not. We got lucky with RSA and related algorithms: their mathematics hinge on the problem of factoring, which turned out to be robustly difficult. Post-quantum algorithms rely on other mathematical disciplines and problems—code-based cryptography, hash-based cryptography, lattice-based cryptography, multivariate cryptography, and so on—whose mathematics are both more complicated and less well-understood. We’re seeing these breaks because those core mathematical problems aren’t nearly as well-studied as factoring is.

The moral is the need for cryptographic agility. It’s not enough to implement a single standard; it’s vital that our systems be able to easily swap in new algorithms when required. We’ve learned the hard way how algorithms can get so entrenched in systems that it can take many years to update them: in the transition from DES to AES, and the transition from MD4 and MD5 to SHA, SHA-1, and then SHA-3.

We need to do better. In the coming years we’ll be facing a double uncertainty. The first is quantum computing. When and if quantum computing becomes a practical reality, we will learn a lot about its strengths and limitations. It took a couple of decades to fully understand von Neumann computer architecture; expect the same learning curve with quantum computing. Our current understanding of quantum computing architecture will change, and that could easily result in new cryptanalytic techniques.

The second uncertainly is in the algorithms themselves. As the new cryptanalytic results demonstrate, we’re still learning a lot about how to turn hard mathematical problems into public-key cryptosystems. We have too much math and an inability to add more muddle, and that results in algorithms that are vulnerable to advances in mathematics. More cryptanalytic results are coming, and more algorithms are going to be broken.

We can’t stop the development of quantum computing. Maybe the engineering challenges will turn out to be impossible, but it’s not the way to bet. In the face of all that uncertainty, agility is the only way to maintain security.

This essay originally appeared in IEEE Security & Privacy.

EDITED TO ADD: One of the four public-key encryption algorithms selected for further research, SIKE, was just broken.

Friday Squid Blogging: New Squid Species

Post Syndicated from Bruce Schneier original https://www.schneier.com/blog/archives/2022/08/friday-squid-blogging-new-squid-species.html

Seems like they are being discovered all the time:

In the past, the DEEPEND crew has discovered three new species of Bathyteuthids, a type of squid that lives in depths between 700 and 2,000 meters. The findings were validated and published in 2020. Another new squid species description is currently in review at the Bulletin of Marine Science.

As usual, you can also use this squid post to talk about the security stories in the news that I haven’t covered.

Read my blog posting guidelines here.

Spring 2022 PCI DSS report available with seven services added to compliance scope

Post Syndicated from Michael Oyeniya original https://aws.amazon.com/blogs/security/spring-2022-pci-dss-report-available-with-seven-services-added-to-compliance-scope/

We’re continuing to expand the scope of our assurance programs at Amazon Web Services (AWS) and are pleased to announce that seven new services have been added to the scope of our Payment Card Industry Data Security Standard (PCI DSS) certification. This provides our customers with more options to process and store their payment card data and architect their cardholder data environment (CDE) securely in AWS.

You can see the full list of services on our Services in Scope by Compliance program page. The seven new services are:

We were evaluated by Coalfire, a third-party Qualified Security Assessor (QSA). Customers can access the Attestation of Compliance (AOC) report demonstrating AWS’ PCI compliance status through AWS Artifact.

To learn more about our PCI program and other compliance and security programs, see the AWS Compliance Programs page. As always, we value your feedback and questions; reach out to the AWS Compliance team through the Contact Us page.

 
If you have feedback about this post, submit comments in the Comments section below. If you have questions about this post, contact AWS Support.

Want more AWS Security news? Follow us on Twitter.

Author

Michael Oyeniya

Michael is a Compliance Program Manager at AWS on the Global Audits team, managing the PCI compliance program. He holds a Master’s degree in management and has over 18 years of experience in information technology security risk and control.

SIKE Broken

Post Syndicated from Bruce Schneier original https://www.schneier.com/blog/archives/2022/08/sike-broken.html

SIKE is one of the new algorithms that NIST recently added to the post-quantum cryptography competition.

It was just broken, really badly.

We present an efficient key recovery attack on the Supersingular Isogeny Diffie­-Hellman protocol (SIDH), based on a “glue-and-split” theorem due to Kani. Our attack exploits the existence of a small non-scalar endomorphism on the starting curve, and it also relies on the auxiliary torsion point information that Alice and Bob share during the protocol. Our Magma implementation breaks the instantiation SIKEp434, which aims at security level 1 of the Post-Quantum Cryptography standardization process currently ran by NIST, in about one hour on a single core.

News article.

Surveillance of Your Car

Post Syndicated from Bruce Schneier original https://www.schneier.com/blog/archives/2022/08/surveillance-of-your-car.html

TheMarkup has an extensive analysis of connected vehicle data and the companies that are collecting it.

The Markup has identified 37 companies that are part of the rapidly growing connected vehicle data industry that seeks to monetize such data in an environment with few regulations governing its sale or use.

While many of these companies stress they are using aggregated or anonymized data, the unique nature of location and movement data increases the potential for violations of user privacy.

Using certificate-based authentication for iOS applications with Amazon SNS

Post Syndicated from Sam Dengler original https://aws.amazon.com/blogs/compute/using-certificate-based-authentication-for-ios-applications-with-amazon-sns/

This blog post is written by Yashlin Naidoo, Arnav Thakur, Kim Read, Guilherme Silva.

Amazon SNS enables you to send notifications to a mobile push endpoint using a platform application endpoint by dispatching the notification on your application’s behalf. Push notifications for iOS apps are sent using Apple Push Notification Service (APNs).

To send push notifications using SNS for APNS certificate-based authentication, you must provide a set of credentials for connecting to the Apple Push Notification Service (see prerequisites for push). SNS supports using certificate-based authentication (.p12), in addition to the new token-based authentication (.p8).

Certificate-based authentication uses a provider certificate to establish a secure connection between your provider and APNs. These certificates are tied to a single application and are used to send notifications to this application. This approach can be useful when you haven’t migrated to the new token-based authentication.

For new applications, we recommend using token-based authentication as it provides improved security. It removes the need for yearly renewal of the certificates and can also be shared amongst multiple applications. To learn about how to use token-based authentication, visit Token-Based authentication for iOS applications with Amazon SNS in the AWS Compute Blog.

This blog shows step-by-step instructions on how to build an iOS application. You learn how to create a new certificate from your Apple developer account, and set up a platform application and endpoint in the SNS console. Next, you will learn how to test your application by sending a push notification via SNS to your device. Finally, you view the push notification delivered to your device.

Setting up your iOS application

This section will go over:

  • Creating an iOS application.
  • Creating a .p12 certificate to upload to SNS.

Prerequisites:

Creating an iOS application

  1. Create a new XCode project. Select iOS as the platform.

    New XCode project

    New XCode project

  2. Select your Apple Developer Account team and organization identifier.

    Select your Apple Developer Account team

    Select your Apple Developer Account team

  3. In your project, go to Signing & Capabilities. Under signing, ensure that “Automatically manage signing” is checked and your team is selected.

    Signing & Capabilities

    Signing & Capabilities

  4. To add the push notification capability to your application, select “+” and select Push Notifications.
    Add push notification capability

    Add push notification capability

    This step creates resources on your Apple Developer Account (the App ID and adds Push notification capability to it). You can also verify this in your Apple Developer Account.

  5. Add the following code to AppDelegate.swift:
        import UIKit
        import UserNotifications
    
        @main
        class AppDelegate: UIResponder, UIApplicationDelegate {
    
        func application(_ application: UIApplication, didFinishLaunchingWithOptions launchOptions: [UIApplication.LaunchOptionsKey: Any]?) -> Bool {
        // Override point for customization after application launch
    
        //Call to register for push notifications when launched
        registerForPushNotifications()
    
        return true
        }
    
        // MARK: UISceneSession Lifecycle
    
        func application(_ application: UIApplication, configurationForConnecting connectingSceneSession: UISceneSession, options: UIScene.ConnectionOptions) -> UISceneConfiguration {
        // Called when a new scene session is being created.
        // Use this method to select a configuration to create the new scene with.
        return UISceneConfiguration(name: "Default Configuration", sessionRole: connectingSceneSession.role)
        }
    
        func application(_ application: UIApplication, didDiscardSceneSessions sceneSessions: Set<UISceneSession>) {
        // Called when the user discards a scene session.
        // If any sessions were discarded while the application was not running, this will be called shortly after application:didFinishLaunchingWithOptions.
        // Use this method to release any resources that were specific to the discarded scenes, as they will not return.
        }
    
        func getNotificationSettings() {
        UNUserNotificationCenter.current().getNotificationSettings { settings in
        print("Notification settings: \(settings)")
    
        guard settings.authorizationStatus == .authorized else { return }
        DispatchQueue.main.async {
        UIApplication.shared.registerForRemoteNotifications()
        }
    
        }
        }
    
        func registerForPushNotifications() {
        //1 this handles all notification-related activities in the app including push notifications
        UNUserNotificationCenter.current()
    
        //2 this requests authorization to send the types of notifications specifies in the options
        .requestAuthorization(
        options: [.alert, .sound, .badge]) { [weak self] granted, _ in
        print("Permission granted: \(granted)")
        guard granted else { return }
        self?.getNotificationSettings()
        }
    
        }
    
        func application(
        _ application: UIApplication,
        didRegisterForRemoteNotificationsWithDeviceToken deviceToken: Data
        ) {
        let tokenParts = deviceToken.map { data in String(format: "%02.2hhx", data) }
        let token = tokenParts.joined()
        print("Device Token: \(token)")
        }
    
        func application(
        _ application: UIApplication,
        didFailToRegisterForRemoteNotificationsWithError error: Error
        ) {
        print("Failed to register: \(error)")
        }
    
        }
  6. Build and run the application on an iPhone. Note that the push notification feature does not work with a simulator.
  7. On your phone, select “Allow” when prompted to allow push notifications.

    Allow push notifications

    Allow push notifications

  8. The debugger prints “Permission granted: true” if successful and returns the Device Token.

    Device token

    Device token

You have now configured an iOS application that can receive push notifications. Next, use the application to test sending push notifications with SNS using certificate-based authentication.

Creating a .p12 certificate to upload to SNS

After completing the previous step, you need:

  • An app identifier
  • A certificate signing request (CSR)
  • An SSL certificate

Create an identifier

  1. Log in to your Apple Developer Account.
  2. Choose Certificates, Identifiers & Profiles.
  3. In the Identifiers section, choose the Add button (+).
  4. In the Register a new identifier section, choose App IDs and select Continue.
  5. In the Select a type section, choose App, and select Continue.
  6. For Description, type the application description.
  7. For Bundle ID, use the Bundle ID assigned to your application. You can find this ID under Signing & Capabilities of your application in XCode (see step 3 under “Creating an application”).
  8. Under Capabilities, choose Push Notifications.
  9. Select Continue. In the Confirm your App ID panel, check that all values were entered correctly. The identifier should match your app ID and bundle ID.
  10. Select Register to register the new app ID.

Create a certificate signing request (CSR)

  1. Open Keychain Access located in /Applications/Utilities or search for it on Finder.
  2. Once opened, choose the tab Keychain Access Tab (next to the Apple icon). Navigate to Certificate Assistant and choose Request a Certificate from a Certificate Authority.
  3. Enter the Username, Email Address, Common Name and leave CA Email Address empty.
  4. Choose Saved to disk and choose Continue.

Create a certificate

  1. Log in to your Apple Developer Account.
  2. Choose Certificates, Identifiers & Profiles.
  3. In the Certificate section, select Create new certificate.
  4. Under services, choose your certificate: Apple Push Notification service SSL (Sandbox)/Apple Push Notification service SSL (Sandbox & Production).
  5. Keep Platform as iOS and choose App ID (Identifier) created previously.
  6. Upload the Certificate Signing Request created in the previous step and Download your certificate.

Create .p12 certificate to upload to SNS

  1. Once your certificate.cer file is downloaded (for example, “aps_development.cer”), open it to show in keychain access. Find Apple Development iOS Push Services: (Your Identifier Name/App ID Name) and ensure that the file is placed in the “Login” folder.
  2. Right-click and choose Export as file format .p12 and choose Save. Optionally, set a password.

Creating a new platform application using APNs certificate-based authentication

Prerequisites

To implement APNs certificate-based authentication from SNS, you must have:

  • An Apple Developer Account
  • An iOS mobile application

For creating a new SNS Platform Application that is used to store Push Notification Platform credentials, configurations and related configurations:

  1. Navigate to the SNS Console. Expand the Mobile menu and choose Create platform application.
  2. For the Application name field, enter an application name such as “myfirstiOSapp”. For Push Notification Platform, select Apple iOS/ VoIP/ macOS.

    Create platform application

    Create platform application

  3. Under the Apple Credentials section:
    1. If your application is in development, select the radio button for Used for development in sandbox. If your application is in production, uncheck Used for development in sandbox.
    2. For Push service, choose iOS and for Authentication method, choose Certificate.
    3. Under Certificate, select Choose file to upload the .p12 certificate file.
    4. If you configured a password while creating the certificate, enter this in the Certificate Password field.
    5. Choose Load Credentials from File to extract the Certificate and private key components.
  4. Event Notifications, Delivery Status Logging – Optional: Refer to the guide for enabling Delivery Status logs and the guide to set up Mobile Event related Notifications. More on this step can also be found in the best practices guide.

    Enter Apple credentials

    Enter Apple credentials

  5. Choose Create Platform Application. This creates a certificate-based authentication APNs Platform Application for iOS.

    Create platform application

    Create platform application

Creating a new platform endpoint using APNs token-based authentication

To send Push Notifications using SNS, a platform endpoint resource is created to store the destination address of the corresponding iOS application that is associated with the SNS platform application.

A destination address of a user’s device with the iOS application installed is identified by an unique device token. It is obtained once the app has registered successfully with APNs to receive push notifications. The details of the device token captured in the Platform Endpoint resource along with the configurations in the SNS Platform application are used in conjunction by the service to deliver a push notification message.

In the following steps, you create a new platform endpoint for a destination device that has the iOS application installed and is capable of receiving push notifications.

  1. Open your Platform Application. Choose Create Application Endpoint.

    Application endpoints list

    Application endpoints list

  2. Locate the Device token in the application logs of the iOS app provisioned earlier. Enter it in the Device Token Field.
  3. To store any additional arbitrary data for the endpoint, you can include in the User data field and choose Create application endpoint.

    Create application endpoint

    Create application endpoint

  4. Choose Create application endpoint and the details are shown on the console.

    Application endpoint detail

    Application endpoint detail

Testing a push notification from your device

In this section, you test sending a push notification to your device.

  1. From the SNS console, navigate to your platform endpoint and choose Publish message.
  2. Enter a message to send. This example uses a custom payload that allows you to provide additional APNs headers.

    Publish message

    Publish message

  3. Choose Publish message.
  4. The push notification is delivered to your device.

    Notification

    Notification

Conclusion

Developers send mobile push notifications for APNs certificate-based authentication by using a .p12 certificate to authenticate an Apple device endpoint. Certificate-based authentication ensures a secure connection through TLS (Transport Layer Security). The provider (SNS) initiates the request to APNs and validation from the provider and APNS is required to complete the secure connection.

Certificates expire annually and must be renewed to ensure that SNS can continue to deliver to the endpoint. In this post, you learn how to create an iOS application for APNs certificate-based authentication and integrate it with SNS to send push notifications to your device using a .p12 certificate to authenticate your application with the mobile endpoint.

To learn more about APNs certificate-based authentication with Amazon SNS, visit the Amazon SNS Developer Guide.

For more serverless learning resources, visit Serverless Land.

Ring Gives Videos to Police without a Warrant or User Consent

Post Syndicated from Bruce Schneier original https://www.schneier.com/blog/archives/2022/08/ring-gives-videos-to-police-without-a-warrant-or-user-consent.html

Amazon has revealed that it gives police videos from its Ring doorbells without a warrant and without user consent.

Ring recently revealed how often the answer to that question has been yes. The Amazon company responded to an inquiry from US Senator Ed Markey (D-Mass.), confirming that there have been 11 cases in 2022 where Ring complied with police “emergency” requests. In each case, Ring handed over private recordings, including video and audio, without letting users know that police had access to—and potentially downloaded—their data. This raises many concerns about increased police reliance on private surveillance, a practice that has long gone unregulated.

EFF writes:

Police are not the customers for Ring; the people who buy the devices are the customers. But Amazon’s long-standing relationships with police blur that line. For example, in the past Amazon has given coaching to police to tell residents to install the Ring app and purchase cameras for their homes—­an arrangement that made salespeople out of the police force. The LAPD launched an investigation into how Ring provided free devices to officers when people used their discount codes to purchase cameras.

Ring, like other surveillance companies that sell directly to the general public, continues to provide free services to the police, even though they don’t have to. Ring could build a device, sold straight to residents, that ensures police come to the user’s door if they are interested in footage—­but Ring instead has decided it would rather continue making money from residents while providing services to police.

CNet has a good explainer.

Slashdot thread.

За странните неща

Post Syndicated from original http://www.gatchev.info/blog/?p=2477

Убиецът на клошари

Вие сте полицейски служител във Варна. Една вечер, докато сте на дежурство, при вас няколко души довеждат някого. Твърдят, че са го видели да кани на брега двама клошари в лодка, да я подкарва навътре в морето и след половин час да се връща с лодката сам. Подозират го, че ги е убил и изхвърлил в морето.

Разпитвате човека. Той заявява, че клошарите петнят прекрасния град и затова той ги разчиства по описания от свидетелите начин. Арестувате го и го предавате на следствието.

Следствието провежда свои разпити, на които човекът и арестувалите го казват същото. Казват го и в съда. На базата на тези показания съдът осъжда свидетеля за убийство.

Нещо странно? Е, странното започва тук. След произнасянето на присъдата осъденият и свидетелите заявяват, че те са екип психолози. Че всичко, което са разказали, е измислица – защото е опит. И че целта на опита – която той бил постигнал блестящо – е да докаже, че правосъдието е ненадеждна институция. Че то не може да различи истински престъпник от мним, и затова е самоволно и опасно и не трябва да съществува.

А психиатрията?

Дивотии на търкалета ли е тяхното „доказателство“? Естествено. Извън експеримента тази ситуация би била толкова надеждно доказателство за вината на осъдения, колкото каквото и да е може да е надеждно в реалния свят. Някой да се съмнява?

Но точно такова нещо, и с аналогични мотиви, твърди проф. Дейвид Розенхан за психиатрията.

През 1973 г. той публикува статия как той и още няколко доброволци са посещавали психиатрични болници и са твърдели, че изпитват усещания, характерни за определени психични болести. Всички те били приети за лечение и лекувани. Това според него означава, че психиатрията всъщност не може да разпознае болния, тоест тя е самоволна и опасна, и не бива да съществува.

Розенхан е само един от многото апологети на т.нар. антипсихиатрия. Доказателствата на всички тях са от същата категория. Като се замислите, всъщност са доказателства, че психиатрията е полезна и нужна.

Как работи науката

Е, попресилих малко. Работата на науката е именно да поставя под съмнение нещата, които приемаме за аксиоми. И го върши най-добре, когато сред учените има и такива като Розенхан. Или като оня британски лорд, който в продължение на месец всеки ден изнасял концерт на цветята в градината си, за да види ще има ли ефект. Няма ли в науката купища налудничави твърдения, тя не може да е наука.

Науката обаче и пресява налудничавите твърдения, за да открие кои от тях са верни. На края на месеца споменатият лорд записва в дневника си: „Експериментът беше успешен – доказа се, че цветята не се влияят от концерти.“ При по-трудни проблеми подробно описаната опитна постановка се повтаря многократно от други учени, проверява се за несъвършенства и проблеми, следи се дали дава същите резултати, и т.н. До практически консенсус се стига след дълго доуточняване на опитните условия, чистене на проблеми, сравняване на данни, анализ на резултатите и т.н. Затова обикновено този консенсус е верен.

(Поне според знанията ни към момента. Напълно е възможно по-нататък да научим неща, които опровергават старите позиции. Тогава науката проверява всичко и допълва знанието си. Но отново по тази бавна и внимателна процедура – не само по нечие твърдение, че той е Айнщайн. Науката знае, че на един Айнщайн или Галилей се падат по милиони луди с кауза.)

И най-вече науката прави разлика между експеримент (специална постановка, която може да греши и доста често греши) и факт (нещо, обективно доказано по строги критерии на базата на голям брой експерименти). Точно както и между хипотеза (умозрителна конструкция, която твърди нещо, без да разполага с достатъчни доказателства) и теория (умозрителна конструкция, която вече има зад себе си достатъчно сериозни доказателства). Например възгледът на Айнщайн, че много неща във физиката са относителни, отначало е бил хипотеза. С времето обаче са се натрупали достатъчно доказателства за верността му, за да е вече теория.

(Затова хора, които казват за нещо „Това е само теория“, всъщност казват „Аз съм идиот, който не знае разликата между хипотеза и теория“. Оттам нататък да ги слушате е така безсмислено, както ако казват за нещо със същата пренебрежителност „А, това е само факт“.

Важи още повече за хора, които казват „Всеки си има свои истини / факти / реалност“. Те имат нужда да ги биете, докато им обяснявате, че ги биете само в тяхната реалност, а във вашата не ги пипвате с пръст, така че няма как да спрете. Да не ви занимават с претенциите си, вие не сте виновни, проблемът им е в тяхната си реалност. И най-вече да не охкат и да не се съпротивляват, защото правят собствените си твърдения за смях пред околните…)

А ежедневието?

Ежедневието, дори това на учените, не е научен процес. В него нещо се възприема, когато вече се е доказало като факт. В него правосъдието може да не е абсолютно съвършено, но е необходимо и полезно. Психиатрията – също. Както впрочем и разбирането как работи науката.

А кое е в крайна сметка странното, и защо го има?

Добре, а защо тогава толкова хора наоколо не са наясно с тези неща? Защо непрекъснато ще видите хора, убедени че всеки си има своя истина, свои факти и своя реалност?

Простичко е. Тези хора не приемат истините и фактите от обективната реалност. Поради особено тежък идиотизъм, дебелоглавие и/или други вътрешни проблеми. И затова си съчиняват своя реалност и факти. Точно както някои деца си имат въображаеми приятели, които са им разхвърлили играчките, казали са им да не си ядат закуската или са разляли боя върху албума със снимките на баба и дядо.

Ето затова тези хора са странни и изобщо ги има. Както е казал мъдрият шоп, „улавинята оди по ората – я улаво дръво не съм видел“.

Само че децата обикновено надрастват с времето въображаемите си приятели. Докато възрастните, които си съчиняват реалности, обикновено с времето само затъват все по-дълбоко в тях.

Затова, ако имате такива около себе си, бъдете възрастни и отговорни хора – проявете грижа за тях. Помогнете им да намерят път към лечение – по-нататък то ще става все по-трудно и ще отнема все повече време и усилия.

Въпреки че могат да отричат и психиатрията. Това е доказателство не че я няма или не работи, а че те имат нужда от грижите ѝ.

И докато не са станали мнозинство. Станат ли, е време да се спасявате нанякъде, където за тях се грижат както им е нужно.

Иначе рискувате тук те да се погрижат за вас както смятат, че ви е нужно.

Microsoft Zero-Days Sold and then Used

Post Syndicated from Bruce Schneier original https://www.schneier.com/blog/archives/2022/07/microsoft-zero-days-sold-and-then-used.html

Yet another article about cyber-weapons arms manufacturers and their particular supply chain. This one is about Windows and Adobe Reader zero-day exploits sold by an Austrian company named DSIRF.

There’s an entire industry devoted to undermining all of our security. It needs to be stopped.

New UFEI Rootkit

Post Syndicated from Bruce Schneier original https://www.schneier.com/blog/archives/2022/07/new-ufei-rootkit.html

Kaspersky is reporting on a new UFEI rootkit that survives reinstalling the operating system and replacing the hard drive. From an article:

The firmware compromises the UEFI, the low-level and highly opaque chain of firmware required to boot up nearly every modern computer. As the software that bridges a PC’s device firmware with its operating system, the UEFI—short for Unified Extensible Firmware Interface—is an OS in its own right. It’s located in an SPI-connected flash storage chip soldered onto the computer motherboard, making it difficult to inspect or patch the code. Because it’s the first thing to run when a computer is turned on, it influences the OS, security apps, and all other software that follows.

Both links have lots of technical details; the second contains a list of previously discovered UFEI rootkits. Also relevant are the NSA’s capabilities—now a decade old—in this area.