Introducing Intra-VPC Communication Across Multiple Outposts with Direct VPC Routing

Post Syndicated from Macey Neff original https://aws.amazon.com/blogs/compute/introducing-intra-vpc-communication-across-multiple-outposts-with-direct-vpc-routing/

This blog post is written by Jared Thompson, Specialist Solutions Architect, Hybrid Edge.

Today, we announced AWS Outposts rack support for intra-VPC communication across multiple Outposts. You can now add routes in your Outposts rack subnet route table to forward traffic between subnets within the same VPC spanning across multiple Outposts using the Outpost local gateways (LGW). The LGW enables connectivity between your Outpost subnets and your on-premises network. With this enhancement, you can establish intra-VPC instance-to-instance IP communication across Outposts through your on-premise network, via direct VPC routing.

You can take advantage of this enhancement to architect for high availability for your on-premises applications and, at the same time, improve application performance by reducing the latency between application components that are in the same VPC but running on different Outposts.

This post shows you how you can use intra-VPC communication across multiple Outposts to build a Multi-AZ like architecture for your on-premises applications and services by leveraging direct VPC routing.

To clarify a few concepts before we go into the details: Outposts rack is the 42U form factor of the AWS Outposts Family of services. An Outpost is a pool of AWS compute and storage capacity deployed at a customer’s site. An Outpost may comprise of one or more racks connected together at the site.

Overview

Prior to today’s announcement, applications and services running on multiple Outposts were not able to communicate with each other if they were in the same VPC and if the Outpost was configured to use direct VPC routing. To overcome this limitation it was necessary to separate workloads into multiple VPCs and align each VPC with a separate Outpost, or to configure the Outpost local gateway route table to use Customer-owned IP (CoIP) mode. This limitation was because the traffic between two subnets that are in the same VPC but in disparate Outposts was not able to communicate each other through the service link, as it was blocked in the Region. (See the following diagram in Figure 1)

To show how this worked previously, as an example, let’s assume we have a VPC CIDR range of 10.77.0.0/16, and we want to route 10.77.11.0/24 using the local gateway:

When we attempted to apply this change, we would get the following error message:

The destination CIDR block 10.77.11.0/24 is equal or more specific than one of this VPC’s CIDR blocks. This route can target only an interface or an instance.

Because we were not able to specify a more specific route, we were not able to route between these subnets.

Prior to this feature, you could not send traffic to the local gateway, as you could not set a route that was more specific than the VPC's CIDR RangeFigure 1 – Prior to this feature, you could not send traffic to the local gateway, as you could not set a route that was more specific than the VPC’s CIDR Range

Using intra-VPC communication across multiple Outposts with direct VPC routing you can now define routes that are more specific than the local VPC CIDR range and has local gateway as target. This enables you to direct traffic from one subnet to another within the same VPC, using the Outpost’s local gateways (LGW). (See Figure 2)

Two Outpost racks in the same VPC can be configured to communicate over the Outpost local gateways

Figure 2 – Two Outpost racks in the same VPC can be configured to communicate over the Outpost local gateways

With this feature, you can design highly available architectures on the edge with multiple Outpost racks, eliminating the need to use multiple VPCs.

Let’s see it in action!

For this example, we will assume that we have a VPC CIDR of 10.77.0.0/16, Outpost A has a subnet CIDR of 10.77.7.0/24, and Outpost B has a subnet CIDR of 10.77.11.0/24.  By default, resources on these racks will not be able to communicate with each other since the default local route of each route table within the VPC is set to 10.77.0.0/16. If the traffic is on another Outpost, the traffic would be blocked because service link traffic cannot hairpin through the region. We are going to route this traffic across our on-premises infrastructure. (See Figure 3)

This is what our example environment looks like. Note, we have one VPC with two Outpost subnetsFigure 3 –This is what our example environment looks like. Note, we have one VPC with two Outpost subnets

For the purposes of this example, we are going to assume that the Customer WAN (See Figure 3) is already set up to route traffic between Outpost A and Outpost B subnets.  For more information, see Local gateway BGP connectivity in the AWS Outpost documentation.  Additionally, we will want to ensure that our local gateway routing tables are in direct VPC routing mode.

Let’s suppose that we want Instance A (10.77.7.88/24) to reach Instance B (10.77.11.119). We will try this with a ping:We can see that none of our pings worked. Since both of these subnets are on two different Outposts, we will need to configure our subnets to route traffic to each other by using intra-VPC communication across multiple Outposts with direct VPC routing.

To enable traffic between these two private subnets, we will configure the routing table to direct traffic towards the neighboring Outpost Subnet to use the Outpost local gateway, allowing traffic to flow between your on-premises network infrastructure. We do this by specifying a more specific route than the default VPC CIDR range.

1.To accomplish this, we will need to associate our VPC with the Outpost’s local gateway route table on each Outpost. From the console, navigate to AWS Outposts / Local gateway route tables. Find the local gateway route table that is associated with each Outpost, go to the VPC associations tab, and select Associate VPC.

Now that these VPC are associated to the local gateway routing table, we will be able to configure the route tables for these subnets to target the Outpost local gateway.

2. For our 10.77.7.0/24 subnet on Outpost Rack A, we will add a route to our other subnet, 10.77.11.0/24 in the subnet’s routing table. One of the target options is Outpost Local Gateway:

Selecting this option will bring up two options, for each of our local gateways. Be sure to select the correct local gateway ID for Outpost A’s local gateway, which is lgw-008e7656cf09c9c21 for my Outpost Rack A.

3. Do the same for our 10.77.11.0/24 subnet, this time setting a destination of 10.77.7.0/24 via the local gateway ID of Outpost Rack B:

Now that we have our routes updated, let’s try our ping again.

Success! We are now able to reach the other instance over the local gateways. This is because our route tables in the Outposts subnets are forwarding traffic over the local gateway, utilizing our on-premises network infrastructure for the communication backbone.

Availability

Intra-VPC communication across multiple Outposts with direct VPC routing is available in all AWS Regions where Outposts rack is available. Your existing Outposts racks may require an update to enable support for Intra-VPC communication across multiple Outposts. If this feature does not work for you, please contact AWS Support.

Conclusion

Utilizing intra-VPC communication across Outposts with direct VPC routing allows you to route traffic between subnets within the same VPC. This feature will allow traffic to route across different Outposts by utilizing Outposts local gateway and your on-premises network, without needing to divide your infrastructure into multiple VPCs. You can take advantage of this enhancement for your on-premises applications, while improving application performance by reducing latency between application components running on multiple Outposts.

[$] Mastering Emacs

Post Syndicated from jake original https://lwn.net/Articles/942962/

A series of rabbit holes, some of which led to unshaved
yaks
,
recently landed me on a book called Mastering Emacs.
Given that I have been using Emacs “professionally” for more than 16
years—and first looked into it a good ways into the previous century—I
should probably be pretty well-versed in that editor-cum-operating-system.
Sadly, for a variety of reasons, that is not really true, but the book and
some concerted effort have been helping me down a path toward Emacs-ian
enlightenment. Mastering Emacs may also help others who are
struggling in the frothy sea that makes up Emacs documentation.

Next-Gen Copper Cold Plates So Advanced They Need to Be 3D Printed from Fabric8Labs

Post Syndicated from Patrick Kennedy original https://www.servethehome.com/next-gen-copper-cold-plates-so-advanced-they-need-to-be-3d-printed-from-fabric8labs/

These liquid cooling cold plates are so advanced they need to be 3D printed. Fabric8Labs did a mic drop of a Hot Chips 2023 presentation

The post Next-Gen Copper Cold Plates So Advanced They Need to Be 3D Printed from Fabric8Labs appeared first on ServeTheHome.

161 AWS services achieve HITRUST certification

Post Syndicated from Mark Weech original https://aws.amazon.com/blogs/security/161-aws-services-achieve-hitrust-certification/

The Amazon Web Services (AWS) HITRUST Compliance Team is excited to announce that 161 AWS services have been certified for the HITRUST CSF version 11.0.1 for the 2023 cycle. The full list of AWS services, which were audited by a third-party assessor and certified under the HITRUST CSF, is now available on our Services in Scope by Compliance Program page. You can view and download our HITRUST CSF certification at any time on demand through AWS Artifact.

The HITRUST CSF has been widely adopted by leading organizations in a variety of industries in their approach to security and privacy. Visit the HITRUST website for more information. HITRUST certification allows you, as an AWS customer, to tailor your security control baselines specific to your architecture and assessment scope, and inherit certification for those controls so they don’t have to be tested as a component of your HITRUST assessment. Because cloud-based controls don’t have to be retested, AWS customers enjoy savings in both time and cost for their own HITRUST assessment certification needs.

AWS HITRUST CSF certification is available for customer inheritance with an updated Shared Responsibility Matrix version 1.4.1

As an added benefit to our customers, organizations no longer have to assess inherited controls for their HITRUST validated assessment, because AWS already has! Our customers can deploy business solutions into the AWS cloud environment and inherit our HITRUST CSF certification for those controls applicable to their cloud architecture for services that are in-scope of the AWS HITRUST assessment. A detailed listing of controls and corresponding inheritance values can be found on the HITRUST website.

The AWS HITRUST Inheritance Program supports the latest version of HITRUST controls (v11.1), and is excited to announce the availability of the latest Shared Responsibility Matrix (SRM) version 1.4.1. As an added benefit, the AWS HITRUST Inheritance Program also supports the control inheritance of AWS cloud-based workloads for new HITRUST e1 and i1 assessment types, as well as the validated r2-type assessments offered through HITRUST. The SRM is also backward-compatible to earlier versions of the HITRUST CSF from v9.1 through v11.

Additionally, through the AWS HITRUST Inheritance Program, AWS is a member of the Health 3rd Party Trust Initiative (Health3PT), a consortium of the largest US-based healthcare systems that is proactively committed to reducing third-party information security risk with more reliable and efficient assurances. You can find additional information at https://health3pt.org.

As always, we value your feedback and questions and are committed to helping you achieve and maintain the highest standard of security and compliance. Feel free to contact the team through AWS Compliance Contact Us.

Want more AWS Security how-to content, news, and feature announcements? Follow us on Twitter.

Mark Weech

Mark Weech

Mark is the AWS HITRUST Compliance Program Manager and has over 30 years of experience in compliance and cybersecurity roles pertaining to the healthcare, finance, and national defense industries. Mark holds several cybersecurity certifications and is a member of InfraGard’s Cyber Health Working Group—a partnership between the Federal Bureau of Investigation (FBI) and members of the private sector for the protection of US critical infrastructure (healthcare section).

Announcing Amazon Managed Service for Apache Flink Renamed from Amazon Kinesis Data Analytics

Post Syndicated from Channy Yun original https://aws.amazon.com/blogs/aws/announcing-amazon-managed-service-for-apache-flink-renamed-from-amazon-kinesis-data-analytics/

Today we are announcing the rename of Amazon Kinesis Data Analytics to Amazon Managed Service for Apache Flink, a fully managed and serverless service for you to build and run real-time streaming applications using Apache Flink.

We continue to deliver the same experience in your Flink applications without any impact on ongoing operations, developments, or business use cases. All your existing running applications in Kinesis Data Analytics will work as is without any changes.

Many customers use Apache Flink for data processing, including support for diverse use cases with a vibrant open-source community. While Apache Flink applications are robust and popular, they can be difficult to manage because they require scaling and coordination of parallel compute or container resources. With the explosion of data volumes, data types, and data sources, customers need an easier way to access, process, secure, and analyze their data to gain faster and deeper insights without compromising on performance and costs.

Using Amazon Managed Service for Apache Flink, you can set up and integrate data sources or destinations with minimal code, process data continuously with sub-second latencies from hundreds of data sources like Amazon Kinesis Data Streams and Amazon Managed Streaming for Apache Kafka (Amazon MSK), and respond to events in real-time. You can also analyze streaming data interactively with notebooks in just a few clicks with Amazon Managed Service for Apache Flink Studio with built-in visualizations powered by Apache Zeppelin.

With Amazon Managed Service for Apache Flink, you can deploy secure, compliant, and highly available applications. There are no servers and clusters to manage, no compute and storage infrastructure to set up, and you only pay for the resources your applications consume.

A History to Support Apache Flink
Since we launched Amazon Kinesis Data Analytics based on a proprietary SQL engine in 2016, we learned that SQL alone was not sufficient to provide the capabilities that customers needed for efficient stateful stream processing. So, we started investing in Apache Flink, a popular open-source framework and engine for processing real-time data streams.
In 2018, we provided support for Amazon Kinesis Data Analytics for Java as a programmable option for customers to build streaming applications using Apache Flink libraries and choose their own integrated development environment (IDE) to build their applications. In 2020, we repositioned Amazon Kinesis Data Analytics for Java to Amazon Kinesis Data Analytics for Apache Flink to emphasize our continued support for Apache Flink. In 2021, we launched Kinesis Data Analytics Studio (now, Amazon Managed Service for Apache Flink Studio) with a simple, familiar notebook interface for rapid development powered by Apache Zeppelin and using Apache Flink as the processing engine.

Since 2019, we have worked more closely with the Apache Flink community, increasing code contributions in the area of AWS connectors for Apache Flink such as those for Kinesis Data Streams and Kinesis Data Firehose, as well as sponsoring annual Flink Forward events. Recently, we contributed Async Sink to the Flink 1.15 release, which improved cloud interoperability and added more sink connectors and formats, among other updates.

Beyond connectors, we continue to work with the Flink community to contribute availability improvements and deployment options. To learn more, see Making it Easier to Build Connectors with Apache Flink: Introducing the Async Sink in the AWS Open Source Blog.

New Features in Amazon Managed Service for Apache Flink
As I mentioned, you can continue to run your existing Flink applications in Kinesis Data Analytics (now Amazon Managed Apache Flink) without making any changes. I want to let you know about a part of the service along with the console change and new feature,  a blueprint where you create an end-to-end data pipeline with just one click.

First, you can use the new console of Amazon Managed Service for Apache Flink directly under the Analytics section in AWS. To get started, you can easily create Streaming applications or Studio notebooks in the new console, with the same experience as before.

To create a streaming application in the new console, choose Create from scratch or Use a blueprint. With a new blueprint option, you can create and set up all the resources that you need to get started in a single step using AWS CloudFormation.

The blueprint is a curated collection of Apache Flink applications. The first of these has demo data being read from a Kinesis Data Stream and written to an Amazon Simple Storage Service (Amazon S3) bucket.

After creating the demo application, you can configure, run, and open the Apache Flink dashboard to monitor your Flink application’s health with the same experiences as before. You can change a code sample in the GitHub repository to perform different operations using the Flink libraries in your own local development environment.

Blueprints are designed to be extensible, and you can leverage them to create more complex applications to solve your business challenges based on Amazon Managed Service for Apache Flink. Learn more about how to use Apache Flink libraries in the AWS documentation.

You can also use a blueprint to create your Studio notebook using Apache Zeppelin as a new setup option. With this new blueprint option, you can also create and set up all the resources that you need to get started in a single step using AWS CloudFormation.

This blueprint includes Apache Flink applications with demo data being sent to an Amazon MSK topic and read in Managed Service for Apache Flink. With an Apache Zeppelin notebook, you can view, query, and analyze your streaming data. Deploying the blueprint and setting up the Studio notebook takes about ten minutes. Go get a cup of coffee while we set it up!

After creating the new Studio notebook, you can open an Apache Zeppelin notebook to run SQL queries in your note with the same experiences as before. You can view a code sample in the GitHub repository to learn more about how to use Apache Flink libraries.

You can run more SQL queries on this demo data such as user-defined functions, tumbling and hopping windows, Top-N queries, and delivering data to an S3 bucket for streaming.

You can also use Java, Python, or Scala to power up your SQL queries and deploy your note as a continuously running application, as shown in the blog posts, how to use the Studio notebook and query your Amazon MSK topics.

To learn more blueprint samples, see GitHub repositories such as reading from MSK Serverless and writing to Amazon S3, reading from MSK Serverless and writing to MSK Serverless, and reading from MSK Serverless and writing to Amazon S3.

Now Available
You can now use Amazon Managed Service for Apache Flink, renamed from Amazon Kinesis Data Analytics. All your existing running applications in Kinesis Data Analytics will work as is without any changes.

To learn more, visit the new product page and developer guide. You can send feedback to AWS re:Post for Amazon Managed Service for Apache Flink, or through your usual AWS Support contacts.

— Channy

Monitor Apache Spark applications on Amazon EMR with Amazon Cloudwatch

Post Syndicated from Le Clue Lubbe original https://aws.amazon.com/blogs/big-data/monitor-apache-spark-applications-on-amazon-emr-with-amazon-cloudwatch/

To improve a Spark application’s efficiency, it’s essential to monitor its performance and behavior. In this post, we demonstrate how to publish detailed Spark metrics from Amazon EMR to Amazon CloudWatch. This will give you the ability to identify bottlenecks while optimizing resource utilization.

CloudWatch provides a robust, scalable, and cost-effective monitoring solution for AWS resources and applications, with powerful customization options and seamless integration with other AWS services. By default, Amazon EMR sends basic metrics to CloudWatch to track the activity and health of a cluster. Spark’s configurable metrics system allows metrics to be collected in a variety of sinks, including HTTP, JMX, and CSV files, but additional configuration is required to enable Spark to publish metrics to CloudWatch.

Solution overview

This solution includes Spark configuration to send metrics to a custom sink. The custom sink collects only the metrics defined in a Metricfilter.json file. It utilizes the CloudWatch agent to publish the metrics to a custom Cloudwatch namespace. The bootstrap action script included is responsible for installing and configuring the CloudWatch agent and the metric library on the Amazon Elastic Compute Cloud (Amazon EC2) EMR instances. A CloudWatch dashboard can provide instant insight into the performance of an application.

The following diagram illustrates the solution architecture and workflow.

architectural diagram illustrating the solution overview

The workflow includes the following steps:

  1. Users start a Spark EMR job, creating a step on the EMR cluster. With Apache Spark, the workload is distributed across the different nodes of the EMR cluster.
  2. In each node (EC2 instance) of the cluster, a Spark library captures and pushes metric data to a CloudWatch agent, which aggregates the metric data before pushing them to CloudWatch every 30 seconds.
  3. Users can view the metrics accessing the custom namespace on the CloudWatch console.

We provide an AWS CloudFormation template in this post as a general guide. The template demonstrates how to configure a CloudWatch agent on Amazon EMR to push Spark metrics to CloudWatch. You can review and customize it as needed to include your Amazon EMR security configurations. As a best practice, we recommend including your Amazon EMR security configurations in the template to encrypt data in transit.

You should also be aware that some of the resources deployed by this stack incur costs when they remain in use. Additionally, EMR metrics don’t incur CloudWatch costs. However, custom metrics incur charges based on CloudWatch metrics pricing. For more information, see Amazon CloudWatch Pricing.

In the next sections, we go through the following steps:

  1. Create and upload the metrics library, installation script, and filter definition to an Amazon Simple Storage Service (Amazon S3) bucket.
  2. Use the CloudFormation template to create the following resources:
  3. Monitor the Spark metrics on the CloudWatch console.

Prerequisites

This post assumes that you have the following:

  • An AWS account.
  • An S3 bucket for storing the bootstrap script, library, and metric filter definition.
  • A VPC created in Amazon Virtual Private Cloud (Amazon VPC), where your EMR cluster will be launched.
  • Default IAM service roles for Amazon EMR permissions to AWS services and resources. You can create these roles with the aws emr create-default-roles command in the AWS Command Line Interface (AWS CLI).
  • An optional EC2 key pair, if you plan to connect to your cluster through SSH rather than Session Manager, a capability of AWS Systems Manager.

Define the required metrics

To avoid sending unnecessary data to CloudWatch, our solution implements a metric filter. Review the Spark documentation to get acquainted with the namespaces and their associated metrics. Determine which metrics are relevant to your specific application and performance goals. Different applications may require different metrics to monitor, depending on the workload, data processing requirements, and optimization objectives. The metric names you’d like to monitor should be defined in the Metricfilter.json file, along with their associated namespaces.

We have created an example Metricfilter.json definition, which includes capturing metrics related to data I/O, garbage collection, memory and CPU pressure, and Spark job, stage, and task metrics.

Note that certain metrics are not available in all Spark release versions (for example, appStatus was introduced in Spark 3.0).

Create and upload the required files to an S3 bucket

For more information, see Uploading objects and Installing and running the CloudWatch agent on your servers.

To create and the upload the bootstrap script, complete the following steps:

  1. On the Amazon S3 console, choose your S3 bucket.
  2. On the Objects tab, choose Upload.
  3. Choose Add files, then choose the Metricfilter.json, installer.sh, and examplejob.sh files.
  4. Additionally, upload the emr-custom-cw-sink-0.0.1.jar metrics library file that corresponds to the Amazon EMR release version you will be using:
    1. EMR-6.x.x
    2. EMR-5.x.x
  5. Choose Upload, and take note of the S3 URIs for the files.

Provision resources with the CloudFormation template

Choose Launch Stack to launch a CloudFormation stack in your account and deploy the template:

launch stack 1

This template creates an IAM role, IAM instance profile, EMR cluster, and CloudWatch dashboard. The cluster starts a basic Spark example application. You will be billed for the AWS resources used if you create a stack from this template.

The CloudFormation wizard will ask you to modify or provide these parameters:

  • InstanceType – The type of instance for all instance groups. The default is m5.2xlarge.
  • InstanceCountCore – The number of instances in the core instance group. The default is 4.
  • EMRReleaseLabel – The Amazon EMR release label you want to use. The default is emr-6.9.0.
  • BootstrapScriptPath – The S3 path of the installer.sh installation bootstrap script that you copied earlier.
  • MetricFilterPath – The S3 path of your Metricfilter.json definition that you copied earlier.
  • MetricsLibraryPath – The S3 path of your CloudWatch emr-custom-cw-sink-0.0.1.jar library that you copied earlier.
  • CloudWatchNamespace – The name of the custom CloudWatch namespace to be used.
  • SparkDemoApplicationPath – The S3 path of your examplejob.sh script that you copied earlier.
  • Subnet – The EC2 subnet where the cluster launches. You must provide this parameter.
  • EC2KeyPairName – An optional EC2 key pair for connecting to cluster nodes, as an alternative to Session Manager.

View the metrics

After the CloudFormation stack deploys successfully, the example job starts automatically and takes approximately 15 minutes to complete. On the CloudWatch console, choose Dashboards in the navigation pane. Then filter the list by the prefix SparkMonitoring.

The example dashboard includes information on the cluster and an overview of the Spark jobs, stages, and tasks. Metrics are also available under a custom namespace starting with EMRCustomSparkCloudWatchSink.

CloudWatch dashboard summary section

Memory, CPU, I/O, and additional task distribution metrics are also included.

CloudWatch dashboard executors

Finally, detailed Java garbage collection metrics are available per executor.

CloudWatch dashboard garbage-collection

Clean up

To avoid future charges in your account, delete the resources you created in this walkthrough. The EMR cluster will incur charges as long as the cluster is active, so stop it when you’re done. Complete the following steps:

  1. On the CloudFormation console, in the navigation pane, choose Stacks.
  2. Choose the stack you launched (EMR-CloudWatch-Demo), then choose Delete.
  3. Empty the S3 bucket you created.
  4. Delete the S3 bucket you created.

Conclusion

Now that you have completed the steps in this walkthrough, the CloudWatch agent is running on your cluster hosts and configured to push Spark metrics to CloudWatch. With this feature, you can effectively monitor the health and performance of your Spark jobs running on Amazon EMR, detecting critical issues in real time and identifying root causes quickly.

You can package and deploy this solution through a CloudFormation template like this example template, which creates the IAM instance profile role, CloudWatch dashboard, and EMR cluster. The source code for the library is available on GitHub for customization.

To take this further, consider using these metrics in CloudWatch alarms. You could collect them with other alarms into a composite alarm or configure alarm actions such as sending Amazon Simple Notification Service (Amazon SNS) notifications to trigger event-driven processes such as AWS Lambda functions.


About the Author

author portraitLe Clue Lubbe is a Principal Engineer at AWS. He works with our largest enterprise customers to solve some of their most complex technical problems. He drives broad solutions through innovation to impact and improve the life of our customers.

Spring 2023 SOC reports now available in Spanish

Post Syndicated from Andrew Najjar original https://aws.amazon.com/blogs/security/spring-2023-soc-reports-now-available-in-spanish/

Spanish version »

We continue to listen to our customers, regulators, and stakeholders to understand their needs regarding audit, assurance, certification, and attestation programs at Amazon Web Services (AWS). We’re pleased to announce that Spring 2023 System and Organization Controls (SOC) 1, SOC 2, and SOC 3 reports are now available in Spanish. These translated reports will help drive greater engagement and alignment with customer and regulatory requirements across Latin America and Spain.

The Spanish language version of the reports don’t contain the independent opinions issued by the auditors or the control test results, but you can find this information in the English language version. Stakeholders should use the English version as a complement to the Spanish version.

Spanish-translated SOC reports are available to customers through AWS Artifact. Spanish-translated SOC reports will be published twice a year, in alignment with the Fall and Spring reporting cycles.

We value your feedback and questions—feel free to reach out to our team or give feedback about this post through the Contact Us page.

If you have feedback about this post, submit comments in the Comments section below.

Want more AWS Security news? Follow us onTwitter.


Spanish version

Los informes SOC de Primavera de 2023 ahora están disponibles en español

Seguimos escuchando a nuestros clientes, reguladores y partes interesadas para comprender sus necesidades en relación con los programas de auditoría, garantía, certificación y atestación en Amazon Web Services (AWS). Nos complace anunciar que los informes SOC 1, SOC 2 y SOC 3 de AWS de Primavera de 2023 ya están disponibles en español. Estos informes traducidos ayudarán a impulsar un mayor compromiso y alineación con los requisitos regulatorios y de los clientes en las regiones de América Latina y España.

La versión en inglés de los informes debe tenerse en cuenta en relación con la opinión independiente emitida por los auditores y los resultados de las pruebas de controles, como complemento de las versiones en español.

Los informes SOC traducidos en español están disponibles en AWS Artifact. Los informes SOC traducidos en español se publicarán dos veces al año según los ciclos de informes de Otoño y Primavera.

Valoramos sus comentarios y preguntas; no dude en ponerse en contacto con nuestro equipo o enviarnos sus comentarios sobre esta publicación a través de nuestra página Contáctenos.

Si tienes comentarios sobre esta publicación, envíalos en la sección Comentarios a continuación.

¿Desea obtener más noticias sobre seguridad de AWS? Síguenos en Twitter.

Andrew Najjar

Andrew Najjar

Andrew is a Compliance Program Manager at Amazon Web Services. He leads multiple security and privacy initiatives within AWS, and has 8 years of experience in security assurance. Andrew holds a master’s degree in information systems and bachelor’s degree in accounting from Indiana University. He is a CPA and AWS Certified Solution Architect – Associate.

Nathan Samuel

Nathan Samuel

Nathan is a Compliance Program Manager at Amazon Web Services. He leads multiple security and privacy initiatives within AWS. Nathan has a Bachelors of Commerce degree from the University of the Witwatersrand, South Africa, and has 17 years’ experience in security assurance and holds the CISA, CRISC, CGEIT, CISM, CDPSE, and Certified Internal Auditor certifications.

ryan wilks

Ryan Wilks

Ryan is a Compliance Program Manager at Amazon Web Services. He leads multiple security and privacy initiatives within AWS. Ryan has 11 years of experience in information security and holds ITIL, CISM and CISA certifications.

Author

Rodrigo Fiuza

Rodrigo is a Security Audit Manager at AWS, based in São Paulo. He leads audits, attestations, certifications, and assessments across Latin America, Caribbean, and Europe. Rodrigo has previously worked in risk management, security assurance, and technology audits for the past 12 years.

Brownell Combs

Brownell Combs

Brownell is a Compliance Program Manager at AWS. He leads multiple security and privacy initiatives within AWS. Brownell holds a master’s degree in computer science from the University of Virginia, and a bachelor’s degree in computer science from Centre College. He has over 20 years of experience in information technology risk management and CISSP, CISA, and CRISC certifications.

Paul Hong

Paul Hong

Paul is a Compliance Program Manager at AWS. He leads multiple security, compliance, and training initiatives within AWS, and has nine years of experience in security assurance. Paul is a CISSP, CEH, and CPA, and holds a master’s degree in accounting information systems and a bachelor’s degree in business administration from James Madison University, Virginia.

AMD Versal Premium VP1902 Next-Gen Chiplet FPGA at Hot Chips 2023

Post Syndicated from Patrick Kennedy original https://www.servethehome.com/amd-versal-premium-vp1902-next-gen-chiplet-fpga-at-hot-chips-2023/

At Hot Chips 2023, we got to learn more about the massive VP1902 FPGA used to verify designs of large CPUs, GPUs, and AI accelerators

The post AMD Versal Premium VP1902 Next-Gen Chiplet FPGA at Hot Chips 2023 appeared first on ServeTheHome.

Migrating to a cloud ESP: How to onboard to Amazon SES

Post Syndicated from Vinay Ujjini original https://aws.amazon.com/blogs/messaging-and-targeting/migrating-to-amazon-ses-a-comprehensive-guide/

Amazon SES: Email remains a powerful tool for businesses, whether for marketing campaigns, transactional notifications, or other communications. Amazon Simple Email Service (Amazon SES) is a cloud email service provider that can integrate into any application for bulk email sending. Amazon SES is an email service that supports a variety of deployments like transactional emails, system alerts, marketing/promotional/bulk emails, streamlined internal communications, and emails triggered by CRM system as a few examples. When you use Amazon SES to send transactional emails, marketing emails, or newsletter emails, you only pay for what you use. Analytics on sender statistics along with managed services like Virtual Deliverability Manager help businesses make every email count with Amazon SES. You can get reliable, scalable email to communicate with customers at the best industry prices. If you are considering Amazon SES for its scalability, cost-effectiveness, and reliability, this guide will walk you through a systematic migration process.

Scenarios to consider:

When considering a migration to Amazon SES, let’s assess the specific scenarios to consider. These scenarios represent different contexts or situations that a business or individual find themselves in, and each scenario has its unique challenges and considerations. By identifying the appropriate scenario for your situation, you can tailor your migration strategy, anticipate potential challenges, and streamline the transition process. Few common scenarios:

  • Migrating from on-Prem to SES

    • Advantages:

      • Scalability: SES automatically scales with your needs, thus ensuring you don’t face downtimes or need to regularly upgrade your infrastructure.
      • Maintenance/overhead: Maintaining on-Prem email system can be complex and resource-intensive. Some of the tasks include hardware maintenance and scalability, back up or disaster recovery, security, and compliance (relevant to email storage and transmission).
      • Cost-Effectiveness: You only pay for what you send, eliminating overhead costs associated with maintaining and upgrading on-Prem email infrastructure.
      • Security: SES offers built-in security features like email encryption in transit and at rest, and DKIM authentication with automated key rotation, allowing for sending DMARC compliant email.
    • Considerations:

      • Email Sending Limits: SES has sending limits to protect customers from deliverability events resulting from unexpected sending volumes. Customers monitor when they have reached or are approaching their anticipated sending volumes, and may request the limits to be increased.
      • Migration Time: Depending on the volume and complexity migration has to be planned and executed to minimize downtime, maintain data & sending integrity, and maintain high deliverability. This blog goes in detail on the migration process.
      • Email authentication: Setting up email authentication records such as DKIM, SPF, DMARC and BIMI: Ensure you set up domain authentication to allow mailbox providers to build a trusted model based on the messages from your domain. Sending authenticated mail is the best path to deliverability. Additionally adding trust factors to your messages like BIMI (brand indicators for message identification) will help with brand recognition both by the mailbox provider and the end-recipient (ISPs & mailbox providers use DKIM as the authenticated identifier for the trust models to determine if to show the BIMI logo).
  • Migrating from another cloud solution to SES

    • Advantages:

      • Cost Savings: Amazon SES is cost-effective, especially at high volumes.
      • Integration with AWS Services: If you’re using other AWS services, integration is easier with Amazon SES.
      • Expert help: Amazon SES provides email expertise from architectural advise, help with the technical aspects of migrating from one service to another, in addition to email industry experts including deliverability focused specialists.
    • Considerations:

      • Transition Period/migration: Follow the migration path to mitigate transition risks.
      • Update Integrations: Any software or applications integrated with your previous cloud service will need to be reconfigured to work with Amazon SES (ex: SMTP, events, capturing feedback, metrics, etc.).
      • Avoid downtime: You can avoid downtime by ramping up sending gradually by moving each use case into configuration sets and applying warm-up patterns to each campaign as you shift traffic from existing service to Amazon SES.
  • Migrating portion of the load and running a hybrid solution

    • Advantages:

      • Flexibility: You can maintain operations on your existing platform while testing and transitioning to SES, ensuring there’s no disruption.
      • Risk Mitigation: You can monitor your migration progress in multiple steps rather than one single step.
      • Phased Implementation: You can migrate in stages, reducing the complexity of the move.
    • Considerations:

      • Complexity: Running two systems simultaneously will introduce operational & management complexities (For example, maintaining customer opt-out preferences and suppressed email addresses need to be synced into the source lists/database).
      • Cost Implications: While you’re transitioning, you will be paying for two services, which has a cost implication.
      • Consistent Branding: Ensure consistent branding and email design across both platforms to provide a uniform experience for recipients and leverage the same domain identities authenticated with DKIM so that their prior sending reputation is carried over.

Steps for migration:

1. Identify use cases: Before the technicalities, understand and breakdown the types of emails you plan on migrating:

    1. Marketing Campaign emails (e.g., cross-sell, up-sell, new product released)
    2. Transactional Emails (e.g., order confirmations, password resets)
    3. Regular business communications
    4. Inbox use cases
    5. Others (ex: OTP, acquisition, etc.)

2. Architect the flow by splitting marketing and transactional traffic: Differentiate between marketing and transactional emails, ensuring they are distinctly separated. This helps improve email management, deliverability monitoring, and ensures high-priority transactional emails aren’t delayed by large marketing campaigns. It is highly recommended is to split the transactional and marketing email traffic through separate subdomains. Choose whether to use your primary domain (example.com) or a sub-domain (mail.example.com) for sending emails. Using a sub-domain can help divide email traffic and manage domain reputations separately, like marketing.example.com and transactional.example.com. You can create configuration sets, which are sets of rules that are applied to the emails that you send. For example, you can use configuration sets to specify where notifications are sent when an email is delivered, when a recipient opens a message or clicks a link in it, when an email bounces, and when a recipient marks your email as spam. For more information, see Using configuration sets in Amazon SES.

3. Domain verification: Sending authorization policies act as the gatekeeper for authorizing use of a domain identity. Domain verification is a process for Amazon SES to verify the customer owns the domain and causes messages to be signed with a DKIM signature aligned to the domain in the “From” header address of outbound messages. It is a foundational step towards a secure, reputable, and efficient email-sending program. Here’s why domain verification is essential and how it benefits users:

Why is Domain Verification Needed?

  1. Ownership Assurance: Domain verification ensures that the customer is authorized to send emails from the specified domain. By confirming ownership, only customers who have verified a domain identity will have their messages authenticated with a DKIM signature belonging to the domain.
  2. Reduce Spam and Phishing: Ensuring that only verified domain owners can send emails contributes to a trustworthy email ecosystem. Using a verified domain identity ensures that the message is signed with a DKIM signature aligned to the domain in the from header, which means that the message will pass DMARC-style policy enforcement (describes how unauthenticated messages claiming to be from the domain).
  3. Maintain Domain Reputation: If anyone were able to send emails from any domain, it will damage the domain’s reputation that they are sending from, unless they are the owners of it. By sending from a verified domain, it ensures that your domain’s reputation remains intact and is not misused by others.
  4. Compliance with SES Policies: Amazon has set policies to maintain the integrity and reputation of its SES service. Domain verification is in line with these policies, ensuring that all users follow best email practices.

How does domain verification help you?

  1. Enhanced Deliverability: Emails from verified domains are more likely to reach the recipient’s inbox rather than being flagged as spam. Internet Service Providers (ISPs), mailbox providers and email clients trust emails that come from verified sources.
  2. Builds Trust with Recipients: The ability to verify a domain and send from it by proving domain ownership, where recipients trust the messages are actually coming from who they are purporting to be coming from.
  3. Enables Additional Features: In Amazon SES, once your domain is verified, you can also set up domain authentication mechanisms like Sender Policy Framework (SPF), DomainKeys Identified Mail (DKIM), Domain-based Message Authentication Reporting and Conformance (DMARC), and Brand Indicators for Message Identification (BIMI). These further enhance email deliverability and security.
  4. Monitoring and Reporting: By verifying your domain, you can access granular metrics specific to your domain in the SES dashboard. You can use VDM and its out of the box dashboards, which includes metrics specific to verified identities. This helps in monitoring and improving your email sending practices.

4. Testing in sandbox: Amazon SES starts users in a sandbox environment. Here, you can test sending to only verified email without affecting your production environment or domain reputation. Sandbox has a limit of number of emails you can send per day.

5. Request production access: Once ready, request access to production box by following the steps outlined here: https://docs.aws.amazon.com/ses/latest/dg/request-production-access.html

6. Configure domain authentication:  You can configure your domain to use authentication systems such as DKIM and SPF. This step is technically optional, but highly recommended. By setting up either DKIM or SPF (or both) for your domain, you can improve the deliverability of your emails, and increase the amount of trust that your customers have in you. Here are key resources:

7. IP management: When you create a new Amazon SES account, by default your emails are sent from IP addresses that are shared with other SES users. You can use dedicated IP addresses that are reserved for your exclusive use by leasing them for an additional cost. This gives you complete control over your sender reputation and enables you to isolate your reputation for different segments within email programs. Amazon SES 4 ways of IP Management outlined below:

  1. Shared: Emails are sent through shared IPs.
  2. Dedicated: Emails are sent through dedicated IPs.
  3. Managed dedicated: Emails are sent through dedicated IPs and Amazon SES will determine how many dedicated IPs you require based on your sending patterns. Amazon SES will create them for you, and then manage how they scale based on your sending requirements.
  4. BYOIP: Amazon SES includes a feature called Bring Your Own IP (BYOIP), which makes it possible to use your own IP addresses to send email through Amazon SES. If you already use a range of IP addresses to send email, you can request that we make your IP range (minimum range allowed is /24) available for sending email through Amazon SES.

Based on your use case and need, you can make a decision on how to proceed on IPs after reviewing the comparison matrix.

8. IP Warm up: IP warm-up is a crucial process when introducing a new IP address for sending emails. The goal is to progressively increase email volume sent through the new IP address, allowing mailbox providers to gradually recognize and trust this IP as a legitimate email sender. Sending reputation is built with a combination of sending domain and the IP addressed through which they are delivered.

  • Why is IP warm-up necessary? When an (or a set of) IP address is new (or has been dormant for a while), it lacks a reputation with mailbox providers. If you suddenly start sending large volumes of emails from this new IP, mailbox providers perceive this behavior as suspicious, potentially categorizing these emails as spam or even blocking them. Warming up the IP helps establish a positive sending reputation over time so that mailbox providers can build a positive profile for your sending which includes IP reputation.
  • IP warm-up process:
    • Start Small: Begin by sending a low volume of emails on the first day.
    • Gradually Increase Volume: Each subsequent day, increase the volume. A common strategy is to double the volume every other day, but this depends on your ultimate email volume needs.
    • Target Engaged Users First: In the initial stages, send emails to your top engaged users—those who are more likely to open, click, and not mark your emails as spam. Their positive engagement will bolster the IP’s reputation.
    • Monitor Deliverability Metrics: Keep a close eye on key metrics like delivery rates, open rates, bounce rates, and complaint rates. If you notice issues, you need to slow down the warm-up process.
    • Respond to Feedback: Some mailbox providers offer feedback loops where you can see if recipients marked your emails as spam. This feedback is invaluable during the warm-up phase to adjust your email practices.
    • Spread Sends Throughout the Day: Instead of sending all your emails at once, distribute them throughout the day. This creates a more consistent sending pattern that mailbox providers favor.
    • Continue Best Email Practices: While warming up your IP, it’s crucial to maintain best practices like segmenting your list, regularly cleaning your email list, and sending relevant content.
    • Understand your Mailbox Provider and domain distribution breakdown. For example if you send to 65% gmail.com users, you will want to focus heavily on the Gmail postmaster page and also setup tooling available for that specific Mailbox Provider. In the case of Gmail, it would be Google Postmaster Tools.
    • Identify and track any available reputation tooling for Mailbox Providers you send to. Example: Google Postmaster Tools, Hotmail SNDS, Yahoo Performance Feeds.
    • During warm-up, monitor these daily to track reputation progress.

9. Additional considerations:

  • If you are planning on using a dedicated IP, warming up is crucial. For dedicated or managed dedicated IPs, you need to either manually warm them up or you can leverage Amazon SES’s auto warm-up feature. Shared IP pools (used by ESPs for smaller senders) don’t require individual warm-ups since they have an established reputation.
  • The warm-up duration varies. For some, it might be a 3-4 weeks, while for others, it could stretch to a couple of months, depending on the final email volume you intend to reach.
  • Let’s use an example scenario:
    • Number of emails to be migrated – 10M emails/day.
    • Peak volume throughput – 2M/hour.
    • The below table shows a sample warm-up schedule.
Days Emails sent
Day 1 5000
Day 3 10,000
Day 5 20,000
Day 7 40,000
Day 9 80,000
Day 11 160,000
Day 13 320,000
Day 15 640,000
Day 17 1,280,000
Day 19 2,560,000

10. Generate SMTP credentials: If you plan to send email using an application that uses SMTP, you have to generate SMTP credentials. Your SMTP credentials are different from your regular AWS credentials. These credentials are also unique in each AWS Region. For more information on generating your SMTP credentials, see Obtaining Amazon SES SMTP credentials.

11. Connect to SMTP endpoint: If you use a message transfer agent such as postfix or sendmail, you have to update the configuration for that application to refer to an Amazon SES SMTP endpoint. For a complete list of SMTP endpoints, see Connecting to an Amazon SES SMTP endpoint. Note that the SMTP credentials that you created in the previous step are associated with a specific AWS Region. You have to connect to the SMTP endpoint in the region that you created the SMTP credentials in.

12. Monitor email send: When you send email through Amazon SES, it’s important to monitor the bounces and complaints for your account. You can do one or more of the below for monitoring your email send:

  1. Reputation metrics: Amazon SES includes a reputation metrics console page that you can use to keep track of the bounces and complaints for your account. For more information, see Using reputation metrics to track bounce and complaint rates.
  2. CloudWatch alarms: You can also create CloudWatch alarms that alert you when these rates get too high. For more information about creating CloudWatch alarms, see Creating reputation monitoring alarms using CloudWatch.
  3. Virtual Deliverability Manager (VDM): Deliverability, or ensuring your emails reach recipient inboxes instead of spam or junk folders, is a core element of a successful email strategy. Virtual Deliverability Manager is an out of the box Amazon SES feature that helps you enhance email deliverability. It can help in increasing inbox deliverability and email conversions, by providing insights into your sending and delivery data, and giving advice on how to fix the issues that are negatively affecting your delivery success rate and reputation. VDM has dashboards and advisor features that are built-in, Visit this VDM blog to see how you can improve your email deliverability using VDM.

13. Ramp-up ramp-down strategy: Sending email communication along with maintaining the domain and send reputation is key to any business. The ramp-up ramp-down strategy in the context of email migration, especially to a new email sending platform or a new IP address, is a best practice to ensure that your emails maintain a high deliverability rate and don’t end up being flagged as spam. Let’s delve deeper into what this strategy entails and why it’s crucial:

  1. Gradual volume increase: Start by sending a small number of emails (refer to table below in #12 – IP warm up) and then gradually increase this number over days or weeks. This slow increase allows mailbox providers to recognize and trust your new sending source. Ramp up gradually by moving each use case and applying warm-up pattern to each campaign as you shift traffic. Closely monitor deliverability metrics as you ramp-up. If the metrics show any signs of issue, freeze the warm-up to assess the root cause. Sending stable, predictable patters are the key, avoiding unexpected spikes.
  2. Prioritize engaged recipients: Begin your email sends by targeting recipients who are most likely to open and engage with your emails, like your top active subscribers or customers. Positive interactions, like email opens or link clicks, can boost your new IP’s reputation.
  3. Monitor Feedback loops: Utilize feedback loops offered by mailbox providers to understand if recipients are marking your emails as spam. This immediate feedback can help you tweak your sending practices.
  4. Maintain consistency: While you’re ramping up, maintain consistency in your sending patterns. Avoid erratic sending volumes, which can be red flags for mailbox providers.
  5. Maintain Domain/IP Reputation: Even if you’re sending fewer emails, ensure those emails still adhere to best practices to maintain your domain or IP reputation.

14. Final cut over: After rigorous testing, ramping up, and ensuring your emails are being delivered reliably, you can fully transition to Amazon SES. Monitor continuously, especially during the initial days, to catch and address any potential issues promptly.

Deliverability resources:

Conclusion:

Migrating to Amazon SES offers a host of benefits, but like all IT endeavors, it requires careful thought and execution. By following this comprehensive guide, you can pave a path for a smooth transition, allowing your business to leverage the power of Amazon SES effectively.

About the author:

Vinay Ujjini

Vinay Ujjini is an Amazon Pinpoint and Amazon Simple Email Service Worldwide Principal Specialist Solutions Architect at AWS. He has been solving customer’s omni-channel challenges for over 15 years. He is an avid sports enthusiast and in his spare time, enjoys playing tennis & cricket.

Why Rust is the most admired language among developers

Post Syndicated from Sara Verdi original https://github.blog/2023-08-30-why-rust-is-the-most-admired-language-among-developers/


For the eighth year in a row, Rust has topped the chart as “the most desired programming language” in Stack Overflow’s annual developer survey. And with more than 80% of developers reporting that they’d like to use the language again next year, you have to wonder how a language created less than 20 years ago has stolen the hearts of developers around the world.

In this article, we’ll look at the history of Rust, what it’s commonly used for, why developers love it so much, and some resources to help you start learning one of the top fastest growing languages on GitHub.

So, what is the Rust programming language?

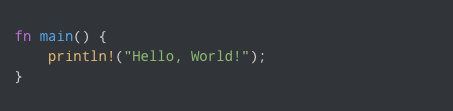
Rust’s print macro displaying the output “Hello, World!”

Originally intended to serve as a safer alternative to C and C++, Rust is a systems programming language that has gained significant popularity among developers thanks to its emphasis on safety, performance, and productivity. Rust is a statically typed language, so variable and expression types are determined and checked at compile time, which helps enhance memory safety and error detection, resulting in more reliable builds.

In 2006, the software developer, Graydon Hoare, started Rust as a personal project while he was working at Mozilla. According to an interview with MIT Technology Review, the inspiration for Rust came from a broken elevator in Hoare’s apartment building. The software for the lift operation system had crashed and Hoare understood that issues like this usually came from problems with how a program uses memory.

Quite often, the software for these types of devices is written in C or C++, but these languages require significant memory management, which can lead to errors that would cause the system to crash. So, Hoare set to work on figuring out how to create a programming language that could be both compact and memory bug-free.

He later showed the project to a manager—which led to Mozilla sponsoring it in 2009 as part of a longer-term effort to incorporate the language into the development of an experimental browser engine. In 2010, Mozilla Research officially announced the Rust project and released the source code to the public as an open-source project. After several years of development, Rust reached a stable and mature state—and in May 2015, Rust 1.0 was released. This milestone signaled that Rust was ready for production and provided a foundation for developers to build upon.

Since the 1.0 release, Rust has exploded in popularity and adoption, with top applications, such as Microsoft Windows, utilizing Rust to rewrite core libraries with its memory-safe code. Outside of the tech giants, Rust also has a vibrant community of developers, or “Rustaceans,” that are dedicated to making the Rust experience an active and collaborative one.

Ferris, an orange cartoon crustacean who is the unofficial mascot of Rust.

Meet Ferris, the unofficial mascot for Rust!

According to a recent survey by SlashData, there are roughly 2.8 million Rust developers worldwide in 2023, a number that has nearly tripled over the past two years. With plenty of active forums, documentation, and a supportive community for developers of all skill levels, it’s perhaps unsurprising that Rust keeps topping the most-desired language lists.

What makes Rust special?

So, what are some of Rust’s key features that make it so attractive to developers?

In simple terms, Rust solves some of developers’ most frustrating memory management problems commonly associated with C and C++, but that’s not its only shining capability. One of GitHub’s staff software engineers, Jason Orendorff, who co-authored a book on programming with Rust, said about the language:

“To me, what’s great about Rust is that it’s both fast AND reliable,” according to Orendorff. “It lets me write multi-headed programs that run on 16 cores and keep them readable, maintainable, and crash-free. It also lets me write very low-level algorithms requiring control over memory layout and pull in a crate that makes HTTPS requests super simple. It’s the combination of these features that makes Rust so unique.”

Building on that, here’s a few more of its well-loved characteristics and features:

  • Concurrency. Rust has built-in support for concurrent programming through its ownership system which enforces strict rules for data access, and its borrowing model, which prevents data races by allowing controlled, simultaneous access. This ensures that multiple threads can work on shared data without introducing memory-related issues.
  • No garbage collection. Unlike some programming languages, Rust does not employ garbage collection. Instead, its ownership and borrowing rules manage memory, which helps empower developers to have precise control over memory allocation and deallocation for efficient resource management.

  • Cargo Package Manager. Rust’s built-in package manager, Cargo, streamlines project management, dependency tracking, and building, which helps contribute to efficient and organized development workflows. But this doesn’t make it clear just how bonkers the Cargo ecosystem is. According to Orendorff, “My team takes advantage of high-quality open source packages for hashing, serialization, multithreading, data structures, compression, and a lot more. These are performance-critical libraries. Without some of these, our project to rethink code search on GitHub wouldn’t have been possible.” And here’s a fun fact: Rust was actually the first systems programming language to have a standard package manager, and, as a result, the Rust ecosystem is incredibly robust.

  • Zero-cost abstractions. This feature allows developers to write high-level code abstractions and features without introducing any runtime performance overhead.

  • Pattern matching. This powerful language feature enables developers to concisely and effectively match complex data structures against specific patterns to extract and handle different cases or scenarios in a clean and readable manner.

  • Type inference. This feature allows Rust’s compiler to automatically detect an expression based on context while you code. “Many programming languages have some type inference,” Orendorff said. “C# and C++ have some, Rust has a little more, and languages like Haskell, Scala, and ML have even more.”

fn main() {
    break rust;
}

Run this code for an inside joke among Rust developers 😆

What is Rust commonly used for?

Thanks to its direct access to both hardware and memory, Rust is well suited for embedded systems and bare-metal development. And since it’s a general purpose language, it can also be used for a variety of applications.

Let’s explore a few key use cases:

Using Rust to build performance-critical backend systems

Performance-critical backend systems are software components or services that handle tasks that require high-speed processing, low-latency responses, and efficient resource utilization—and Rust’s performance, thread safety, and error handling make it an excellent choice for developing these types of systems. In fact, we use Rust to build some of these systems at GitHub. For example, the backend of our code search feature is written in Rust (and you can read more about the development of GitHub’s newest code search with Rust, too).

Using Rust to develop operating systems

Rust was originally created to solve an operating system issue (remember the elevator problem?)—so, unsurprisingly, it’s often used to build operating systems, kernels, device drivers, or other low-level components where control over memory and performance is crucial. Redox, a Unix-like operating system, was written in Rust, which contributes to its most crucial feature: its security. “Fuchsia is another example that was built at Google,” Orendorff said. “If you have a Google Nest smart speaker, it’s likely running Fuchsia.”

Rust for operating system-adjacent code

Rust is also well-suited for writing code that performs tasks that closely interact with the operating system. For example, the Codespaces team at GitHub is leveraging Rust to enhance the speed of starting up the virtual disk within GitHub Codespaces and optimize the utilization of Azure storage. Coursera also employs Rust in its online grading system, as it operates within Docker and needs a language that compiles to machine code with minimal dependencies.

Using Rust for web development

Rust is increasingly being used for web development—especially on the server side. The async programming model and performance characteristics of Rust make it fitting for building high-performance web servers, APIs, and backend services. Plus, there’s been an influx of web frameworks for Rust, like Rocket, that can help folks get started with writing secure web applications. The emergence of these frameworks underscores Rust’s position as a mature language, and also helps increase the support for folks looking to use Rust in front or backend work.

Using Rust for crypto and blockchain development

Rust’s speed, memory management, and security all contribute to its involvement with cryptocurrency and blockchain technologies. For example, Polkadot, which is designed to enable the interoperability and interaction between multiple blockchains to share information and assets in a secure and decentralized manner, utilizes Rust to build its core infrastructure. Polkadot’s runtime logic, which governs the behavior and rules of the blockchain, is also written in Rust. Check out this repository, awesome-blockchain-rust, for some useful components for building your own blockchain applications with Rust.

Using Rust to build CLI tools

Rust’s compilation to efficient machine code and its expressive syntax make it a strong choice for building command line tools and applications. Plus, writing a command line app is a great way to learn and get comfortable with Rust. Take a look at this comprehensive guide on how to build your own CLI application with Rust in 15 minutes!

Learn how open source developers are making the command line more friendly—and more powerful.

Using Rust for embedded systems and IoT development

Rust’s minimal runtime and control over memory layout makes it incredibly useful for developing embedded systems and Internet of Things (IoT) devices. Its ability to prevent memory-related bugs, manage concurrency, and generate small, efficient binaries caters to IoT’s security, real-time, and efficiency needs.

Why developers love Rust

While its user base for Rust isn’t nearly as large as Java or Python, Rust continues to compete with the big hitters in most-admired lists across the internet. There’s even a full website composed of developer’s praises for Rust.

But why exactly is Rust so admired by developers? If you boil it down to just a handful of reasons why developers love Rust so much, they’d have to be the language’s speed, safety, and performance.

Moreover, Rust is continuing to evolve and grow with new frameworks, tools, and resources. You can keep tabs on contributions to the language in the awesome-rust repository, which hosts an impressive list of Rust code and resources.

The bottom line: Admiring Rust isn’t just about adopting a language—it’s embracing a mindset that prioritizes innovation without compromising on the core tenets of stability and security.

How to get started with Rust

We know, there’s plenty of resources to sharpen your Rust skills peppered throughout this article—but we have another pro tip for you: take Rust for a test drive with GitHub Copilot. As your AI-powered pair programmer, GitHub Copilot can help you learn and refine the basics of Rust as you go with tailored code suggestions.

Here’s a developer advocate at GitHub experimenting with Rust for the first time with GitHub Copilot. And to all of our seasoned Rustaceans out there, what do you think? Was the suggestion correct?

If you’re ready to begin your coding journey with Rust, GitHub Copilot can jumpstart your progress—all without the need to study documentation for hours at a time.

The post Why Rust is the most admired language among developers appeared first on The GitHub Blog.

When Apps Go Rogue

Post Syndicated from Bruce Schneier original https://www.schneier.com/blog/archives/2023/08/when-apps-go-rogue.html

Interesting story of an Apple Macintosh app that went rogue. Basically, it was a good app until one particular update…when it went bad.

With more official macOS features added in 2021 that enabled the “Night Shift” dark mode, the NightOwl app was left forlorn and forgotten on many older Macs. Few of those supposed tens of thousands of users likely noticed when the app they ran in the background of their older Macs was bought by another company, nor when earlier this year that company silently updated the dark mode app so that it hijacked their machines in order to send their IP data through a server network of affected computers, AKA a botnet.

This is not an unusual story. Sometimes the apps are sold. Sometimes they’re orphaned, and then taken over by someone else.

Let’s Architect! Cost-optimizing AWS workloads

Post Syndicated from Luca Mezzalira original https://aws.amazon.com/blogs/architecture/lets-architect-cost-optimizing-aws-workloads/

Every software component built by engineers and architects is designed with a purpose: to offer particular functionalities and, ultimately, contribute to the generation of business value. We should consider fundamental factors, such as the scalability of the software and the ease of evolution during times of business changes. However, performance and cost are important factors as well since they can impact the business profitability.

This edition of Let’s Architect! follows a similar series post from 2022, which discusses optimizing the cost of an architecture. Today, we focus on architectural patterns, services, and best practices to design cost-optimized cloud workloads. We also want to identify solutions, such as the use of Graviton processors, for increased performance at lower price. Cost optimization is a continuous process that requires the identification of the right tools for each job, as well as the adoption of efficient designs for your system.

AWS re:Invent 2022 – Manage and control your AWS costs

Govern cloud usage and avoid cost surprises without slowing down innovation within your organization. In this re:Invent 2022 session, you can learn how to set up guardrails and operationalize cost control within your organizations using services, such as AWS Budgets and AWS Cost Anomaly Detection, and explore the latest enhancements in the AWS cost control space. Additionally, Mercado Libre shares how they automate their cloud cost control through central management and automated algorithms.

Take me to this re:Invent 2022 video!

Work backwards from team needs to define/deploy cloud governance in AWS environments

Work backwards from team needs to define/deploy cloud governance in AWS environments

Compute optimization

When it comes to optimizing compute workloads, there are many tools available, such as AWS Compute Optimizer, Amazon EC2 Spot Instances, Amazon EC2 Reserved Instances, and Graviton instances. Modernizing your applications can also lead to cost savings, but you need to know how to use the right tools and techniques in an effective and efficient way.

For AWS Lambda functions, you can use the AWS Lambda Cost Optimization video to learn how to optimize your costs. The video covers topics, such as understanding and graphing performance versus cost, code optimization techniques, and avoiding idle wait time. If you are using Amazon Elastic Container Service (Amazon ECS) and AWS Fargate, you can watch a Twitch video on cost optimization using Amazon ECS and AWS Fargate to learn how to adjust your costs. The video covers topics like using spot instances, choosing the right instance type, and using Fargate Spot.

Finally, with Amazon Elastic Kubernetes Service (Amazon EKS), you can use Karpenter, an open-source Kubernetes cluster auto scaler to help optimize compute workloads. Karpenter can help you launch right-sized compute resources in response to changing application load, help you adopt spot and Graviton instances. To learn more about Karpenter, read the post How CoStar uses Karpenter to optimize their Amazon EKS Resources on the AWS Containers Blog.

Take me to Cost Optimization using Amazon ECS and AWS Fargate!
Take me to AWS Lambda Cost Optimization!
Take me to How CoStar uses Karpenter to optimize their Amazon EKS Resources!

Karpenter launches and terminates nodes to reduce infrastructure costs

Karpenter launches and terminates nodes to reduce infrastructure costs

AWS Lambda general guidance for cost optimization

AWS Lambda general guidance for cost optimization

AWS Graviton deep dive: The best price performance for AWS workloads

The choice of the hardware is a fundamental driver for performance, cost, as well as resource consumption of the systems we build. Graviton is a family of processors designed by AWS to support cloud-based workloads and give improvements in terms of performance and cost. This re:Invent 2022 presentation introduces Graviton and addresses the problems it can solve, how the underlying CPU architecture is designed, and how to get started with it. Furthermore, you can learn the journey to move different types of workloads to this architecture, such as containers, Java applications, and C applications.

Take me to this re:Invent 2022 video!

AWS Graviton processors are specifically designed by AWS for cloud workloads to deliver the best price performance

AWS Graviton processors are specifically designed by AWS for cloud workloads to deliver the best price performance

AWS Well-Architected Labs: Cost Optimization

The Cost Optimization section of the AWS Well Architected Workshop helps you learn how to optimize your AWS costs by using features, such as AWS Compute Optimizer, Spot Instances, and Reserved Instances. The workshop includes hands-on labs that walk you through the process of optimizing costs for different types of workloads and services, such as Amazon Elastic Compute Cloud, Amazon ECS, and Lambda.

Take me to this AWS Well-Architected lab!

Savings Plans is a flexible pricing model that can help reduce expenses compared with on-demand pricing

Savings Plans is a flexible pricing model that can help reduce expenses compared with on-demand pricing

See you next time!

Thanks for joining us to discuss cost optimization! In 2 weeks, we’ll talk about in-memory databases and caching systems.

To find all the blogs from this series, visit the Let’s Architect! list of content on the AWS Architecture Blog.

Security updates for Wednesday

Post Syndicated from corbet original https://lwn.net/Articles/943087/

Security updates have been issued by Debian (qpdf, ring, and tryton-server), Fedora (mingw-qt5-qtbase and moby-engine), Red Hat (cups, kernel, kernel-rt, kpatch-patch, librsvg2, and virt:rhel and virt-devel:rhel), and Ubuntu (amd64-microcode, firefox, linux, linux-aws, linux-aws-5.15, linux-gcp, linux-gke, linux-gkeop,
linux-hwe-5.15, linux-ibm, linux-kvm, linux-lowlatency,
linux-lowlatency-hwe-5.15, linux-nvidia, linux-oracle, linux-oracle-5.15, linux, linux-aws, linux-aws-5.4, linux-gcp, linux-hwe-5.4, linux-kvm,
linux-oracle, linux-xilinx-zynqmp, linux, linux-aws, linux-aws-6.2, linux-azure, linux-hwe-6.2, linux-ibm,
linux-kvm, linux-lowlatency, linux-lowlatency-hwe-6.2, linux-raspi, linux-bluefield, linux-ibm, linux-oem-6.1, and openjdk-lts, openjdk-17).

Validate IAM policies by using IAM Policy Validator for AWS CloudFormation and GitHub Actions

Post Syndicated from Mitch Beaumont original https://aws.amazon.com/blogs/security/validate-iam-policies-by-using-iam-policy-validator-for-aws-cloudformation-and-github-actions/

In this blog post, I’ll show you how to automate the validation of AWS Identity and Access Management (IAM) policies by using a combination of the IAM Policy Validator for AWS CloudFormation (cfn-policy-validator) and GitHub Actions. Policy validation is an approach that is designed to minimize the deployment of unwanted IAM identity-based and resource-based policies to your Amazon Web Services (AWS) environments.

With GitHub Actions, you can automate, customize, and run software development workflows directly within a repository. Workflows are defined using YAML and are stored alongside your code. I’ll discuss the specifics of how you can set up and use GitHub actions within a repository in the sections that follow.

The cfn-policy-validator tool is a command-line tool that takes an AWS CloudFormation template, finds and parses the IAM policies that are attached to IAM roles, users, groups, and resources, and then runs the policies through IAM Access Analyzer policy checks. Implementing IAM policy validation checks at the time of code check-in helps shift security to the left (closer to the developer) and shortens the time between when developers commit code and when they get feedback on their work.

Let’s walk through an example that checks the policies that are attached to an IAM role in a CloudFormation template. In this example, the cfn-policy-validator tool will find that the trust policy attached to the IAM role allows the role to be assumed by external principals. This configuration could lead to unintended access to your resources and data, which is a security risk.

Prerequisites

To complete this example, you will need the following:

  1. A GitHub account
  2. An AWS account, and an identity within that account that has permissions to create the IAM roles and resources used in this example

Step 1: Create a repository that will host the CloudFormation template to be validated

To begin with, you need to create a GitHub repository to host the CloudFormation template that is going to be validated by the cfn-policy-validator tool.

To create a repository:

  1. Open a browser and go to https://github.com.
  2. In the upper-right corner of the page, in the drop-down menu, choose New repository. For Repository name, enter a short, memorable name for your repository.
  3. (Optional) Add a description of your repository.
  4. Choose either the option Public (the repository is accessible to everyone on the internet) or Private (the repository is accessible only to people access is explicitly shared with).
  5. Choose Initialize this repository with: Add a README file.
  6. Choose Create repository. Make a note of the repository’s name.

Step 2: Clone the repository locally

Now that the repository has been created, clone it locally and add a CloudFormation template.

To clone the repository locally and add a CloudFormation template:

  1. Open the command-line tool of your choice.
  2. Use the following command to clone the new repository locally. Make sure to replace <GitHubOrg> and <RepositoryName> with your own values.
    git clone [email protected]:<GitHubOrg>/<RepositoryName>.git

  3. Change in to the directory that contains the locally-cloned repository.
    cd <RepositoryName>

    Now that the repository is locally cloned, populate the locally-cloned repository with the following sample CloudFormation template. This template creates a single IAM role that allows a principal to assume the role to perform the S3:GetObject action.

  4. Use the following command to create the sample CloudFormation template file.

    WARNING: This sample role and policy should not be used in production. Using a wildcard in the principal element of a role’s trust policy would allow any IAM principal in any account to assume the role.

    cat << EOF > sample-role.yaml
    
    AWSTemplateFormatVersion: "2010-09-09"
    Description: Base stack to create a simple role
    Resources:
      SampleIamRole:
        Type: AWS::IAM::Role
        Properties:
          AssumeRolePolicyDocument:
            Statement:
              - Effect: Allow
                Principal:
                  AWS: "*"
                Action: ["sts:AssumeRole"]
          Path: /      
          Policies:
            - PolicyName: root
              PolicyDocument:
                Version: 2012-10-17
                Statement:
                  - Resource: "*"
                    Effect: Allow
                    Action:
                      - s3:GetObject
    EOF

Notice that AssumeRolePolicyDocument refers to a trust policy that includes a wildcard value in the principal element. This means that the role could potentially be assumed by an external identity, and that’s a risk you want to know about.

Step 3: Vend temporary AWS credentials for GitHub Actions workflows

In order for the cfn-policy-validator tool that’s running in the GitHub Actions workflow to use the IAM Access Analyzer API, the GitHub Actions workflow needs a set of temporary AWS credentials. The AWS Credentials for GitHub Actions action helps address this requirement. This action implements the AWS SDK credential resolution chain and exports environment variables for other actions to use in a workflow. Environment variable exports are detected by the cfn-policy-validator tool.

AWS Credentials for GitHub Actions supports four methods for fetching credentials from AWS, but the recommended approach is to use GitHub’s OpenID Connect (OIDC) provider in conjunction with a configured IAM identity provider endpoint.

To configure an IAM identity provider endpoint for use in conjunction with GitHub’s OIDC provider:

  1. Open the AWS Management Console and navigate to IAM.
  2. In the left-hand menu, choose Identity providers, and then choose Add provider.
  3. For Provider type, choose OpenID Connect.
  4. For Provider URL, enter
    https://token.actions.githubusercontent.com
  5. Choose Get thumbprint.
  6. For Audiences, enter sts.amazonaws.com
  7. Choose Add provider to complete the setup.

At this point, make a note of the OIDC provider name. You’ll need this information in the next step.

After it’s configured, the IAM identity provider endpoint should look similar to the following:

Figure 1: IAM Identity provider details

Figure 1: IAM Identity provider details

Step 4: Create an IAM role with permissions to call the IAM Access Analyzer API

In this step, you will create an IAM role that can be assumed by the GitHub Actions workflow and that provides the necessary permissions to run the cfn-policy-validator tool.

To create the IAM role:

  1. In the IAM console, in the left-hand menu, choose Roles, and then choose Create role.
  2. For Trust entity type, choose Web identity.
  3. In the Provider list, choose the new GitHub OIDC provider that you created in the earlier step. For Audience, select sts.amazonaws.com from the list.
  4. Choose Next.
  5. On the Add permission page, choose Create policy.
  6. Choose JSON, and enter the following policy:
    
        "Version": "2012-10-17",
        "Statement": [
            {
                "Effect": "Allow",
                "Action": [
                  "iam:GetPolicy",
                  "iam:GetPolicyVersion",
                  "access-analyzer:ListAnalyzers",
                  "access-analyzer:ValidatePolicy",
                  "access-analyzer:CreateAccessPreview",
                  "access-analyzer:GetAccessPreview",
                  "access-analyzer:ListAccessPreviewFindings",
                  "access-analyzer:CreateAnalyzer",
                  "s3:ListAllMyBuckets",
                  "cloudformation:ListExports",
                  "ssm:GetParameter"
                ],
                "Resource": "*"
            },
            {
              "Effect": "Allow",
              "Action": "iam:CreateServiceLinkedRole",
              "Resource": "*",
              "Condition": {
                "StringEquals": {
                  "iam:AWSServiceName": "access-analyzer.amazonaws.com"
                }
              }
            } 
        ]
    }

  7. After you’ve attached the new policy, choose Next.

    Note: For a full explanation of each of these actions and a CloudFormation template example that you can use to create this role, see the IAM Policy Validator for AWS CloudFormation GitHub project.

  8. Give the role a name, and scroll down to look at Step 1: Select trusted entities.

    The default policy you just created allows GitHub Actions from organizations or repositories outside of your control to assume the role. To align with the IAM best practice of granting least privilege, let’s scope it down further to only allow a specific GitHub organization and the repository that you created earlier to assume it.

  9. Replace the policy to look like the following, but don’t forget to replace {AWSAccountID}, {GitHubOrg} and {RepositoryName} with your own values.
    {
        "Version": "2012-10-17",
        "Statement": [
            {
                "Effect": "Allow",
                "Principal": {
                    "Federated": "arn:aws:iam::{AWSAccountID}:oidc-provider/token.actions.githubusercontent.com"
                },
                "Action": "sts:AssumeRoleWithWebIdentity",
                "Condition": {
                    "StringEquals": {
                        "token.actions.githubusercontent.com:aud": "sts.amazonaws.com"
                    },
                    "StringLike": {
                        "token.actions.githubusercontent.com:sub": "repo:${GitHubOrg}/${RepositoryName}:*"
                    }
                }
            }
        ]
    }

For information on best practices for configuring a role for the GitHub OIDC provider, see Creating a role for web identity or OpenID Connect Federation (console).

Checkpoint

At this point, you’ve created and configured the following resources:

  • A GitHub repository that has been locally cloned and filled with a sample CloudFormation template.
  • An IAM identity provider endpoint for use in conjunction with GitHub’s OIDC provider.
  • A role that can be assumed by GitHub actions, and a set of associated permissions that allow the role to make requests to IAM Access Analyzer to validate policies.

Step 5: Create a definition for the GitHub Actions workflow

The workflow runs steps on hosted runners. For this example, we are going to use Ubuntu as the operating system for the hosted runners. The workflow runs the following steps on the runner:

  1. The workflow checks out the CloudFormation template by using the community actions/checkout action.
  2. The workflow then uses the aws-actions/configure-aws-credentials GitHub action to request a set of credentials through the IAM identity provider endpoint and the IAM role that you created earlier.
  3. The workflow installs the cfn-policy-validator tool by using the python package manager, PIP.
  4. The workflow runs a validation against the CloudFormation template by using the cfn-policy-validator tool.

The workflow is defined in a YAML document. In order for GitHub Actions to pick up the workflow, you need to place the definition file in a specific location within the repository: .github/workflows/main.yml. Note the “.” prefix in the directory name, indicating that this is a hidden directory.

To create the workflow:

  1. Use the following command to create the folder structure within the locally cloned repository:
    mkdir -p .github/workflows

  2. Create the sample workflow definition file in the .github/workflows directory. Make sure to replace <AWSAccountID> and <AWSRegion> with your own information.
    cat << EOF > .github/workflows/main.yml
    name: cfn-policy-validator-workflow
    
    on: push
    
    permissions:
      id-token: write
      contents: read
    
    jobs: 
      cfn-iam-policy-validation: 
        name: iam-policy-validation
        runs-on: ubuntu-latest
        steps:
          - name: Checkout code
            uses: actions/checkout@v3
    
          - name: Configure AWS Credentials
            uses: aws-actions/configure-aws-credentials@v2
            with:
              role-to-assume: arn:aws:iam::<AWSAccountID>:role/github-actions-access-analyzer-role
              aws-region: <AWSRegion>
              role-session-name: GitHubSessionName
            
          - name: Install cfn-policy-validator
            run: pip install cfn-policy-validator
    
          - name: Validate templates
            run: cfn-policy-validator validate --template-path ./sample-role-test.yaml --region <AWSRegion>
    EOF
    

Step 6: Test the setup

Now that everything has been set up and configured, it’s time to test.

To test the workflow and validate the IAM policy:

  1. Add and commit the changes to the local repository.
    git add .
    git commit -m ‘added sample cloudformation template and workflow definition’

  2. Push the local changes to the remote GitHub repository.
    git push

    After the changes are pushed to the remote repository, go back to https://github.com and open the repository that you created earlier. In the top-right corner of the repository window, there is a small orange indicator, as shown in Figure 2. This shows that your GitHub Actions workflow is running.

    Figure 2: GitHub repository window with the orange workflow indicator

    Figure 2: GitHub repository window with the orange workflow indicator

    Because the sample CloudFormation template used a wildcard value “*” in the principal element of the policy as described in the section Step 2: Clone the repository locally, the orange indicator turns to a red x (shown in Figure 3), which signals that something failed in the workflow.

    Figure 3: GitHub repository window with the red cross workflow indicator

    Figure 3: GitHub repository window with the red cross workflow indicator

  3. Choose the red x to see more information about the workflow’s status, as shown in Figure 4.
    Figure 4: Pop-up displayed after choosing the workflow indicator

    Figure 4: Pop-up displayed after choosing the workflow indicator

  4. Choose Details to review the workflow logs.

    In this example, the Validate templates step in the workflow has failed. A closer inspection shows that there is a blocking finding with the CloudFormation template. As shown in Figure 5, the finding is labelled as EXTERNAL_PRINCIPAL and has a description of Trust policy allows access from external principals.

    Figure 5: Details logs from the workflow showing the blocking finding

    Figure 5: Details logs from the workflow showing the blocking finding

    To remediate this blocking finding, you need to update the principal element of the trust policy to include a principal from your AWS account (considered a zone of trust). The resources and principals within your account comprises of the zone of trust for the cfn-policy-validator tool. In the initial version of sample-role.yaml, the IAM roles trust policy used a wildcard in the Principal element. This allowed principals outside of your control to assume the associated role, which caused the cfn-policy-validator tool to generate a blocking finding.

    In this case, the intent is that principals within the current AWS account (zone of trust) should be able to assume this role. To achieve this result, replace the wildcard value with the account principal by following the remaining steps.

  5. Open sample-role.yaml by using your preferred text editor, such as nano.
    nano sample-role.yaml

    Replace the wildcard value in the principal element with the account principal arn:aws:iam::<AccountID>:root. Make sure to replace <AWSAccountID> with your own AWS account ID.

    AWSTemplateFormatVersion: "2010-09-09"
    Description: Base stack to create a simple role
    Resources:
      SampleIamRole:
        Type: AWS::IAM::Role
        Properties:
          AssumeRolePolicyDocument:
            Statement:
              - Effect: Allow
                Principal:
                  AWS: "arn:aws:iam::<AccountID>:root"
                Action: ["sts:AssumeRole"]
          Path: /      
          Policies:
            - PolicyName: root
              PolicyDocument:
                Version: 2012-10-17
                Statement:
                  - Resource: "*"
                    Effect: Allow
                    Action:
                      - s3:GetObject

  6. Add the updated file, commit the changes, and push the updates to the remote GitHub repository.
    git add sample-role.yaml
    git commit -m ‘replacing wildcard principal with account principal’
    git push

After the changes have been pushed to the remote repository, go back to https://github.com and open the repository. The orange indicator in the top right of the window should change to a green tick (check mark), as shown in Figure 6.

Figure 6: GitHub repository window with the green tick workflow indicator

Figure 6: GitHub repository window with the green tick workflow indicator

This indicates that no blocking findings were identified, as shown in Figure 7.

Figure 7: Detailed logs from the workflow showing no more blocking findings

Figure 7: Detailed logs from the workflow showing no more blocking findings

Conclusion

In this post, I showed you how to automate IAM policy validation by using GitHub Actions and the IAM Policy Validator for CloudFormation. Although the example was a simple one, it demonstrates the benefits of automating security testing at the start of the development lifecycle. This is often referred to as shifting security left. Identifying misconfigurations early and automatically supports an iterative, fail-fast model of continuous development and testing. Ultimately, this enables teams to make security an inherent part of a system’s design and architecture and can speed up product development workflows.

In addition to the example I covered today, IAM Policy Validator for CloudFormation can validate IAM policies by using a range of IAM Access Analyzer policy checks. For more information about these policy checks, see Access Analyzer reference policy checks.

 
If you have feedback about this post, submit comments in the Comments section below. If you have questions about this post, contact AWS Support.

Want more AWS Security news? Follow us on Twitter.

Mitch Beaumont

Mitch Beaumont

Mitch is a Principal Solutions Architect for Amazon Web Services, based in Sydney, Australia. Mitch works with some of Australia’s largest financial services customers, helping them to continually raise the security bar for the products and features that they build and ship. Outside of work, Mitch enjoys spending time with his family, photography, and surfing.

The collective thoughts of the interwebz