All posts by Channy Yun

New for AWS Amplify – Query MySQL and PostgreSQL database for AWS CDK

Post Syndicated from Channy Yun original https://aws.amazon.com/blogs/aws/new-for-aws-amplify-query-mysql-and-postgresql-database-for-aws-cdk/

Today we are announcing the general availability to connect and query your existing MySQL and PostgreSQL databases with support for AWS Cloud Development Kit (AWS CDK), a new feature to create a real-time, secure GraphQL API for your relational database within or outside Amazon Web Services (AWS). You can now generate the entire API for all relational database operations with just your database endpoint and credentials. When your database schema changes, you can run a command to apply the latest table schema changes.

In 2021, we announced AWS Amplify GraphQL Transformer version 2, enabling developers to develop more feature-rich, flexible, and extensible GraphQL-based app backends even with minimal cloud expertise. This new GraphQL Transformer was redesigned from the ground up to generate extensible pipeline resolvers to route a GraphQL API request, apply business logic, such as authorization, and communicate with the underlying data source, such as Amazon DynamoDB.

However, customers wanted to use relational database sources for their GraphQL APIs such as their Amazon RDS or Amazon Aurora databases in addition to Amazon DynamoDB. You can now use @model types of Amplify GraphQL APIs for both relational database and DynamoDB data sources. Relational database information is generated to a separate schema.sql.graphql file. You can continue to use the regular schema.graphql files to create and manage DynamoDB-backed types.

When you simply provide any MySQL or PostgreSQL database information, whether behind a virtual private cloud (VPC) or publicly accessible on the internet, AWS Amplify automatically generates a modifiable GraphQL API that securely connects to your database tables and exposes create, read, update, or delete (CRUD) queries and mutations. You can also rename your data models to be more idiomatic for the frontend. For example, a database table is called “todos” (plural, lowercase) but is exposed as “ToDo” (singular, PascalCase) to the client.

With one line of code, you can add any of the existing Amplify GraphQL authorization rules to your API, making it seamless to build use cases such as owner-based authorization or public read-only patterns. Because the generated API is built on AWS AppSync‘ GraphQL capabilities, secure real-time subscriptions are available out of the box. You can subscribe to any CRUD events from any data model with a few lines of code.

Getting started with your MySQL database in AWS CDK
The AWS CDK lets you build reliable, scalable, cost-effective applications in the cloud with the considerable expressive power of a programming language. To get started, install the AWS CDK on your local machine.

$ npm install -g aws-cdk

Run the following command to verify the installation is correct and print the version number of the AWS CDK.

$ cdk –version

Next, create a new directory for your app:

$ mkdir amplify-api-cdk
$ cd amplify-api-cdk

Initialize a CDK app by using the cdk init command.

$ cdk init app --language typescript

Install Amplify’s GraphQL API construct in the new CDK project:

$ npm install @aws-amplify/graphql-api-construct

Open the main stack file in your CDK project (usually located in lib/<your-project-name>-stack.ts). Import the necessary constructs at the top of the file:

import {
    AmplifyGraphqlApi,
    AmplifyGraphqlDefinition
} from '@aws-amplify/graphql-api-construct';

Generate a GraphQL schema for a new relational database API by executing the following SQL statement on your MySQL database. Make sure to output the results to a .csv file, including column headers, and replace <database-name> with the name of your database, schema, or both.

SELECT
  INFORMATION_SCHEMA.COLUMNS.TABLE_NAME,
  INFORMATION_SCHEMA.COLUMNS.COLUMN_NAME,
  INFORMATION_SCHEMA.COLUMNS.COLUMN_DEFAULT,
  INFORMATION_SCHEMA.COLUMNS.ORDINAL_POSITION,
  INFORMATION_SCHEMA.COLUMNS.DATA_TYPE,
  INFORMATION_SCHEMA.COLUMNS.COLUMN_TYPE,
  INFORMATION_SCHEMA.COLUMNS.IS_NULLABLE,
  INFORMATION_SCHEMA.COLUMNS.CHARACTER_MAXIMUM_LENGTH,
  INFORMATION_SCHEMA.STATISTICS.INDEX_NAME,
  INFORMATION_SCHEMA.STATISTICS.NON_UNIQUE,
  INFORMATION_SCHEMA.STATISTICS.SEQ_IN_INDEX,
  INFORMATION_SCHEMA.STATISTICS.NULLABLE
      FROM INFORMATION_SCHEMA.COLUMNS
      LEFT JOIN INFORMATION_SCHEMA.STATISTICS ON INFORMATION_SCHEMA.COLUMNS.TABLE_NAME=INFORMATION_SCHEMA.STATISTICS.TABLE_NAME AND INFORMATION_SCHEMA.COLUMNS.COLUMN_NAME=INFORMATION_SCHEMA.STATISTICS.COLUMN_NAME
      WHERE INFORMATION_SCHEMA.COLUMNS.TABLE_SCHEMA = '<database-name>';

Run the following command, replacing <path-schema.csv> with the path to the .csv file created in the previous step.

$ npx @aws-amplify/cli api generate-schema \
    --sql-schema <path-to-schema.csv> \
    --engine-type mysql –out lib/schema.sql.graphql

You can open schema.sql.graphql file to see the imported data model from your MySQL database schema.

input AMPLIFY {
     engine: String = "mysql"
     globalAuthRule: AuthRule = {allow: public}
}

type Meals @model {
     id: Int! @primaryKey
     name: String!
}

type Restaurants @model {
     restaurant_id: Int! @primaryKey
     address: String!
     city: String!
     name: String!
     phone_number: String!
     postal_code: String!
     ...
}

If you haven’t already done so, go to the Parameter Store in the AWS Systems Manager console and create a parameter for the connection details of your database, such as hostname/url, database name, port, username, and password. These will be required in the next step for Amplify to successfully connect to your database and perform GraphQL queries or mutations against it.

In the main stack class, add the following code to define a new GraphQL API. Replace the dbConnectionConfg options with the parameter paths created in the previous step.

new AmplifyGraphqlApi(this, "MyAmplifyGraphQLApi", {
  apiName: "MySQLApi",
  definition: AmplifyGraphqlDefinition.fromFilesAndStrategy(
    [path.join(__dirname, "schema.sql.graphql")],
    {
      name: "MyAmplifyGraphQLSchema",
      dbType: "MYSQL",
      dbConnectionConfig: {
        hostnameSsmPath: "/amplify-cdk-app/hostname",
        portSsmPath: "/amplify-cdk-app/port",
        databaseNameSsmPath: "/amplify-cdk-app/database",
        usernameSsmPath: "/amplify-cdk-app/username",
        passwordSsmPath: "/amplify-cdk-app/password",
      },
    }
  ),
  authorizationModes: { apiKeyConfig: { expires: cdk.Duration.days(7) } },
  translationBehavior: { sandboxModeEnabled: true },
});

This configuration assums that your database is accessible from the internet. Also, the default authorization mode is set to Api Key for AWS AppSync and the sandbox mode is enabled to allow public access on all models. This is useful for testing your API before adding more fine-grained authorization rules.

Finally, deploy your GraphQL API to AWS Cloud.

$ cdk deploy

You can now go to the AWS AppSync console and find your created GraphQL API.

Choose your project and the Queries menu. You can see newly created GraphQL APIs compatible with your tables of MySQL database, such as getMeals to get one item or listRestaurants to list all items.

For example, when you select items with fields of address, city, name, phone_number, and so on, you can see a new GraphQL query. Choose the Run button and you can see the query results from your MySQL database.

When you query your MySQL database, you can see the same results.

How to customize your GraphQL schema for your database
To add a custom query or mutation in your SQL, open the generated schema.sql.graphql file and use the @sql(statement: "") pass in parameters using the :<variable> notation.

type Query {
     listRestaurantsInState(state: String): Restaurants @sql("SELECT * FROM Restaurants WHERE state = :state;”)
}

For longer, more complex SQL queries, you can reference SQL statements in the customSqlStatements config option. The reference value must match the name of a property mapped to a SQL statement. In the following example, a searchPosts property on customSqlStatements is being referenced:

type Query {
      searchPosts(searchTerm: String): [Post]
      @sql(reference: "searchPosts")
}

Here is how the SQL statement is mapped in the API definition.

new AmplifyGraphqlApi(this, "MyAmplifyGraphQLApi", { 
    apiName: "MySQLApi",
    definition: AmplifyGraphqlDefinition.fromFilesAndStrategy( [path.join(__dirname, "schema.sql.graphql")],
    {
        name: "MyAmplifyGraphQLSchema",
        dbType: "MYSQL",
        dbConnectionConfig: {
        //	...ssmPaths,
     }, customSqlStatements: {
        searchPosts: // property name matches the reference value in schema.sql.graphql 
        "SELECT * FROM posts WHERE content LIKE CONCAT('%', :searchTerm, '%');",
     },
    }
  ),
//...
});

The SQL statement will be executed as if it were defined inline in the schema. The same rules apply in terms of using parameters, ensuring valid SQL syntax, and matching return types. Using a reference file keeps your schema clean and allows the reuse of SQL statements across fields. It is best practice for longer, more complicated SQL queries.

Or you can change a field and model name using the @refersTo directive. If you don’t provide the @refersTo directive, AWS Amplify assumes that the model name and field name exactly match the database table and column names.

type Todo @model @refersTo(name: "todos") {
     content: String
     done: Boolean
}

When you want to create relationships between two database tables, use the @hasOne and @hasMany directives to establish a 1:1 or 1:M relationship. Use the @belongsTo directive to create a bidirectional relationship back to the relationship parent. For example, you can make a 1:M relationship between a restaurant and its meals menus.

type Meals @model {
     id: Int! @primaryKey
     name: String!
     menus: [Restaurants] @hasMany(references: ["restaurant_id"])
}

type Restaurants @model {
     restaurant_id: Int! @primaryKey
     address: String!
     city: String!
     name: String!
     phone_number: String!
     postal_code: String!
     meals: Meals @belongsTo(references: ["restaurant_id"])
     ...
}

Whenever you make any change to your GraphQL schema or database schema in your DB instances, you should deploy your changes to the cloud:

Whenever you make any change to your GraphQL schema or database schema in your DB instances, you should re-run the SQL script and export to .csv step mentioned earlier in this guide to re-generate your schema.sql.graphql file and then deploy your changes to the cloud:

$ cdk deploy

To learn more, see Connect API to existing MySQL or PostgreSQL database in the AWS Amplify documentation.

Now available
The relational database support for AWS Amplify now works with any MySQL and PostgreSQL databases hosted anywhere within Amazon VPC or even outside of AWS Cloud.

Give it a try and send feedback to AWS re:Post for AWS Amplify, the GitHub repository of Amplify GraphQL API, or through your usual AWS Support contacts.

Channy

P.S. Specially thanks to René Huangtian Brandel, a principal product manager at AWS for his contribution to write sample codes.

New myApplications in the AWS Management Console simplifies managing your application resources

Post Syndicated from Channy Yun original https://aws.amazon.com/blogs/aws/new-myapplications-in-the-aws-management-console-simplifies-managing-your-application-resources/

Today, we are announcing the general availability of myApplications supporting application operations, a new set of capabilities that help you get started with your applications on AWS, operate them with less effort, and move faster at scale. With myApplication in the AWS Management Console, you can more easily manage and monitor the cost, health, security posture, and performance of your applications on AWS.

The myApplications experience is available in the Console Home, where you can access an Applications widget that lists the applications in an account. Now, you can create your applications more easily using the Create application wizard, connecting resources in your AWS account from one view in the console. The created application will automatically display in myApplications, and you can take action on your applications.

When you choose your application in the Applications widget in the console, you can see an at-a-glance view of key application metrics widgets in the applications dashboard. Here you can find, debug operational issues, and optimize your applications.

With a single action on the applications dashboard, you can dive deeper to act on specific resources in the relevant services, such as Amazon CloudWatch for application performance, AWS Cost Explorer for cost and usage, and AWS Security Hub for security findings.

Getting started with myApplications
To get started, on the AWS Management Console Home, choose Create application in the Applications widget. In the first step, input your application name and description.

In the next step, you can add your resources. Before you can search and add resources, you should turn on and set up AWS Resource Explorer, a managed capability that simplifies the search and discovery of your AWS resources across AWS Regions.

Choose Add resources and select the resources to add to your applications. You can also search by keyword, tag, or AWS CloudFormation stack to integrate groups of resources to manage the full lifecycle of your application.

After confirming, your resources are added, new awsApplication tags applied, and the myApplications dashboard will be automatically generated.

Now, let’s see which widgets can be useful.

The Application summary widget displays the name, description, and tag so you know which application you are working on. The Cost and usage widget visualizes your AWS resource costs and usage from AWS Cost Explorer, including the application’s current and forecasted month-end costs, top five billed services, and a monthly application resource cost trend chart. You can monitor spend, look for anomalies, and click to take action where needed.

The Compute widget summarizes of application compute resources, information about which are in alarm, and trend charts from CloudWatch showing basic metrics such as Amazon EC2 instance CPU utilization and AWS Lambda invocations. You also can assess application operations, look for anomalies, and take action.

The Monitoring and Operations widget displays alarms and alerts for resources associated with your application, service level objectives (SLOs), and standardized application performance metrics from CloudWatch Application Signals. You can monitor ongoing issues, assess trends, and quickly identify and drill down on any issues that might impact your application.

The Security widget shows the highest priority security findings identified by AWS Security Hub. Findings are listed by severity and service, so you can monitor their security posture and click to take action where needed.

The DevOps widget summarizes operational insights from AWS System Manager Application Manager, such as fleet management, state management, patch management, and configuration management status so you can assess compliance and take action.

You can also use the Tagging widget to assist you in reviewing and applying tags to your application.

Now available
You can enjoy this new myApplications capability, a new application-centric experience to easily manage and monitor applications on AWS. myApplications capability is available in the following AWS Regions: US East (Ohio, N. Virginia), US West (N. California, Oregon), South America (São Paulo), Asia Pacific (Hyderabad, Jakarta, Mumbai, Osaka, Seoul, Singapore, Sydney, Tokyo), Europe (Frankfurt, Ireland, London, Paris, Stockholm), Middle East (Bahrain) Regions.

AWS Premier Tier Services Partners— Escala24x7, IBM, Tech Mahindra, and Xebia will support application operations with complementary features and services.

Give it a try now in the AWS Management Console and send feedback to AWS re:Post for AWS Management Console, using the feedback link on the myApplications dashboard, or through your usual AWS Support contacts.

Channy

Announcing Amazon OpenSearch Service zero-ETL integration with Amazon S3 (preview)

Post Syndicated from Channy Yun original https://aws.amazon.com/blogs/aws/amazon-opensearch-service-zero-etl-integration-with-amazon-s3-preview/

Today we are announcing a preview of Amazon OpenSearch Service zero-ETL integration with Amazon S3, a new way to query operational logs in Amazon S3 and S3-based data lakes without needing to switch between services. You can now analyze infrequently queried data in cloud object stores and simultaneously use the operational analytics and visualization capabilities of OpenSearch Service.

Amazon OpenSearch Service direct queries with Amazon S3 provides a zero-ETL integration to reduce the operational complexity of duplicating data or managing multiple analytics tools by enabling customers to directly query their operational data, reducing costs and time to action. This zero-ETL integration will be configurable within OpenSearch Service, where you can take advantage of various log type templates, including predefined dashboards, and configure data accelerations tailored to that log type. Templates include VPC Flow Logs, Elastic Load Balancing logs, and NGINX logs, and accelerations include skipping indexes, materialized views, and covered indexes.

With direct queries with Amazon S3, you can perform complex queries critical to security forensic and threat analysis that correlate data across multiple data sources, which aids teams in investigating service downtime and security events. After creating an integration, you can start querying their data directly from the OpenSearch Dashboards or OpenSearch API. You can easily audit connections to ensure that they are set up in a scalable, cost-efficient, and secure way.

Getting started with direct queries with Amazon S3
You can easily get started by creating a new Amazon S3 direct query data source for OpenSearch Service through the AWS Management Console or the API. Each new data source uses AWS Glue Data Catalog to manage tables that represent S3 buckets. Once you create a data source, you can configure Amazon S3 tables and data indexing and query data in OpenSearch Dashboards.

1. Create a data source in OpenSearch Service
Before you create a data source, you should have an OpenSearch Service domain with version 2.11 or later and a target Amazon S3 table in AWS Glue Data Catalog with the appropriate IAM permissions. IAM will need access to the desired S3 bucket(s) and read and write access to AWS Glue Data Catalog. To learn more about IAM prerequisites, see Creating a data source in the AWS documentation.

Go to the OpenSearch Service console and choose the domain you want to set up a new data source for. In the domain details page, choose the Connections tab below the general information and see the Direct Query section.

To create a new data source, choose Create, input the name of your new data source, select the data source type as Amazon S3 with AWS Glue Data Catalog, and choose the IAM role for your data source.

Once you create a data source, you can go to the OpenSearch Dashboards of the domain, which you use to configure access control, define tables, set up log type–based dashboards for popular log types, and query your data.

2. Configuring your data source in OpenSearch Dashboards
To configure data source in OpenSearch Dashboards, choose Configure in the console and go to OpenSearch Dashboards. In the left-hand navigation of OpenSearch Dashboards, under Management, choose Data sources. Under Manage data sources, choose the name of the data source you created in the console.

Direct queries from OpenSearch Service to Amazon S3 use Spark tables within AWS Glue Data Catalog. To create a new table you want to direct query, go to the Query Workbench in the Open Search Plugins menu.

Now run as in the following SQL statement to create http_logs table and run MSCK REPAIR TABLE mys3.default.http_logs command to update the metadata in the catalog

CREATE EXTERNAL TABLE IF NOT EXISTS mys3.default.http_logs (
   `@timestamp` TIMESTAMP,
    clientip STRING,
    request STRING, 
    status INT, 
    size INT, 
    year INT, 
    month INT, 
    day INT) 
USING json PARTITIONED BY(year, month, day) OPTIONS (path 's3://mys3/data/http_log/http_logs_partitioned_json_bz2/', compression 'bzip2')

To ensure a fast experience with your data in Amazon S3, you can set up any of three different types of accelerations to index data into OpenSearch Service, such as skipping indexes, materialized views, and covering indexes. To create OpenSearch indexes from external data connections for better performance, choose the Accelerate Table.

  • Skipping indexes allow you to index only the metadata of the data stored in Amazon S3. Skipping indexes help quickly identify data stored by narrowing down a specific location of where the data is stored.
  • Materialized views enable you to use complex queries such as aggregations, which can be used for querying or powering dashboard visualizations. Materialized views ingest data into OpenSearch Service for anomaly detection or geospatial capabilities.
  • Covering indexes will ingest all the data from the specified table column. Covering indexes are the most performant of the three indexing types.

3. Query your data source in OpenSearch Dashboards
After you set up your tables, you can query your data using Discover. You can run a sample SQL query for the http_logs table you created in AWS Glue Data Catalog tables.

To learn more, see Working with Amazon OpenSearch Service direct queries with Amazon S3 in the AWS documentation.

Join the preview
Amazon OpenSearch Service zero-ETL integration with Amazon S3 is now previewed in the AWS US East (Ohio), US East (N. Virginia), US West (Oregon), Asia Pacific (Tokyo), Europe (Frankfurt), and Europe (Ireland) Regions.

OpenSearch Service separately charges for only the compute needed as OpenSearch Compute Units to query your external data as well as maintain indexes in OpenSearch Service. For more information, see Amazon OpenSearch Service Pricing.

Give it a try and send feedback to the AWS re:Post for Amazon OpenSearch Service or through your usual AWS Support contacts.

Channy

Vector search for Amazon DocumentDB (with MongoDB compatibility) is now generally available

Post Syndicated from Channy Yun original https://aws.amazon.com/blogs/aws/vector-search-for-amazon-documentdb-with-mongodb-compatibility-is-now-generally-available/

Today, we are announcing the general availability of vector search for Amazon DocumentDB (with MongoDB compatibility), a new built-in capability that lets you store, index, and search millions of vectors with millisecond response times within your document database.

Vector search is an emerging technique used in machine learning (ML) to find similar data points to given data by comparing their vector representations using distance or similarity metrics. Vectors are numerical representation of unstructured data created from large language models (LLM) hosted in Amazon Bedrock, Amazon SageMaker, and other open source or proprietary ML services. This approach is useful in creating generative artificial intelligence (AI) applications, such as intuitive search, product recommendation, personalization, and chatbots using Retrieval Augmented Generation (RAG) model approach. For example, if your data set contained individual documents for movies, you could semantically search for movies similar to Titanic based on shared context such as “boats”, “tragedy”, or “movies based on true stories” instead of simply matching keywords.

With vector search for Amazon DocumentDB, you can effectively search the database based on nuanced meaning and context without spending time and cost to manage a separate vector database infrastructure. You also benefit from the fully managed, scalable, secure, and highly available JSON-based document database that Amazon DocumentDB provides.

Getting started with vector search on Amazon DocumentDB
The vector search feature is available on your Amazon DocumentDB 5.0 instance-based clusters. To implement a vector search application, you generate vectors using embedding models for fields inside your document and store vectors side by side your source data inside Amazon DocumentDB.

Next, you create a vector index on a vector field that will help retrieve similar vectors and can search the Amazon DocumentDB database using semantic search. Finally, user-submitted queries are converted to vectors using the same embedding model to get semantically similar documents and return them to the client.

Let’s look at how to implement a simple semantic search application using vector search on Amazon DocumentDB.

Step 1. Create vector embeddings using the Amazon Titan Embeddings model
Let’s use the Amazon Titan Embeddings model to create an embedding vector. Amazon Titan Embeddings model is available in Amazon Bedrock, a serverless generative AI service. You can easily access it using a single API and without managing any infrastructure.

prompt = "I love dog and cat."
response = bedrock_runtime.invoke_model(
    body= json.dumps({"inputText": prompt}), 
    modelId='amazon.titan-embed-text-v1', 
    accept='application/json', 
    contentType='application/json'
)
response_body = json.loads(response['body'].read())
embedding = response_body.get('embedding')

The returned vector embedding will look similar to this:

[0.82421875, -0.6953125, -0.115722656, 0.87890625, 0.05883789, -0.020385742, 0.32421875, -0.00078201294, -0.40234375, 0.44140625, ...]

Step 2. Insert vector embeddings and create a vector index
You can add generated vector embeddings using the insertMany( [{},...,{}] ) operation with a list of the documents that you want added to your collection in Amazon DocumentDB.

db.collection.insertMany([
    {sentence: "I love a dog and cat.", vectorField: [0.82421875, -0.6953125,...]},
    {sentence: "My dog is very cute.", vectorField: [0.05883789, -0.020385742,...]},
    {sentence: "I write with a pen.", vectorField: [-0.020385742, 0.32421875,...]},
  ...
]);

You can create a vector index using the createIndex command. Amazon DocumentDB performs an approximate nearest neighbor (ANN) search using the inverted file with flat compression (IVFFLAT) vector index. The feature supports three distance metrics: euclidean, cosine, and inner product. We will use the euclidean distance, a measure of the straight-line distance between two points in space. The smaller the euclidean distance, the closer the vectors are to each other.

db.collection.createIndex (
   { vectorField: "vector" },
   { "name": "index name",
     "vectorOptions": {
        "dimensions": 100, // the number of vector data dimensions
        "similarity": "euclidean", // Or cosine and dotProduct
        "lists": 100 
      }
   }
);

Step 3.  Search vector embeddings from Amazon DocumentDB
You can now search for similar vectors within your documents using a new aggregation pipeline operator within $search. The example code to search “I like pets” is as follows:

db.collection.aggregate ({
  $search: {
    "vectorSearch": {
      "vector": [0.82421875, -0.6953125,...], // Search for ‘I like pets’
      "path": vectorField,
      "k": 5,
      "similarity": "euclidean", // Or cosine and dotProduct
      "probes": 1 // the number of clusters for vector search
      }
     }
   });

This returns search results such as “I love a dog and cat.” which is semantically similar.

To learn more, see Amazon DocumentDB documentation. To see a more practical example—a semantic movie search with Amazon DocumentDB—find the Python source codes and data-sets in the GitHub repository.

Now available
Vector search for Amazon DocumentDB is now available at no additional cost to all customers using Amazon DocumentDB 5.0 instance-based clusters in all AWS Regions where Amazon DocumentDB is available. Standard compute, I/O, storage, and backup charges will apply as you store, index, and search vector embeddings on Amazon DocumentDB.

To learn more, see the Amazon DocumentDB documentation and send feedback to AWS re:Post for Amazon DocumentDB or through your usual AWS Support contacts.

Channy

Vector engine for Amazon OpenSearch Serverless is now available

Post Syndicated from Channy Yun original https://aws.amazon.com/blogs/aws/vector-engine-for-amazon-opensearch-serverless-is-now-generally-available/

Today we are announcing the general availability of the vector engine for Amazon OpenSearch Serverless with new features. In July 2023, we introduced the preview release of the vector engine for Amazon OpenSearch Serverless, a simple, scalable, and high-performing similarity search capability. The vector engine makes it easy for you to build modern machine learning (ML) augmented search experiences and generative artificial intelligence (generative AI) applications without needing to manage the underlying vector database infrastructure.

You can now store, update, and search billions of vector embeddings with thousands of dimensions in milliseconds. The highly performant similarity search capability of vector engine enables generative AI-powered applications to deliver accurate and reliable results with consistent milliseconds-scale response times.

The vector engine also enables you to optimize and tune results with hybrid search by combining vector search and full-text search in the same query, removing the need to manage and maintain separate data stores or a complex application stack. The vector engine provides a secure, reliable, scalable, and enterprise-ready platform to cost effectively build a prototyping application and then seamlessly scale to production.

You can now get started in minutes with the vector engine by creating a specialized vector engine–based collection, which is a logical grouping of embeddings that works together to support a workload.

The vector engine uses OpenSearch Compute Units (OCUs), compute capacity unit, to ingest and run similarity search queries. One OCU can handle up to 2 million vectors for 128 dimensions or 500,000 for 768 dimensions at 99 percent recall rate.

The vector engine built on OpenSearch Serverless is a highly available service by default. It requires a minimum of four OCUs (2 OCUs for the ingest, including primary and standby, and 2 OCUs for the search with two active replicas across Availability Zones) for the first collection in an account. All subsequent collections using the same AWS Key Management Service (AWS KMS) key can share those OCUs.

What’s new at GA?
Since the preview, the vector engine for Amazon OpenSearch Serverless became one of the vector database options in the knowledge base of Amazon Bedrock to build generative AI applications using a Retrieval Augmented Generation (RAG) concept.

Here are some new or improved features for this GA release:

Disable redundant replica (development and test focused) option
As we announced in our preview blog post, this feature eliminates the need to have redundant OCUs in another Availability Zone solely for availability purposes. A collection can be deployed with two OCUs – one for indexing and one for search. This cuts the costs in half compared to default deployment with redundant replicas. The reduced cost makes this configuration suitable and economical for development and testing workloads.

With this option, we will still provide durability guarantees since the vector engine persists all the data in Amazon S3, but single-AZ failures would impact your availability.

If you want to disable a redundant replica, uncheck Enable redundancy when creating a new vector search
collection.

Fractional OCU for the development and test focused option
Support for fractional OCU billing for development and test focused workloads (that is, no redundant replica option) reduces the floor price for vector search collection. The vector engine will initially deploy smaller 0.5 OCUs while providing the same capabilities at lower scale and will scale up to a full OCU and beyond to meet your workload demand. This option will further reduce the monthly costs when experimenting with using the vector engine.

Automatic scaling for a billion scale
With vector engine’s seamless auto-scaling, you no longer have to reindex for scaling purposes. At preview, we were supporting about 20 million vector embeddings. With the general availability of vector engine, we have raised the limits to support a billion vector scale.

Now available
The vector engine for Amazon OpenSearch Serverless is now available in all AWS Regions where Amazon OpenSearch Serverless is available.

To get started, you can refer to the following resources:

Give it a try and send feedback to AWS re:Post for Amazon OpenSearch Service or through your usual AWS support contacts.

Channy

Amazon Bedrock now provides access to Anthropic’s latest model, Claude 2.1

Post Syndicated from Channy Yun original https://aws.amazon.com/blogs/aws/amazon-bedrock-now-provides-access-to-anthropics-latest-model-claude-2-1/

Today, we’re announcing the availability of Anthropic’s Claude 2.1 foundation model (FM) in Amazon Bedrock. Last week, Anthropic introduced its latest model, Claude 2.1, delivering key capabilities for enterprises such as an industry-leading 200,000 token context window (2x the context of Claude 2.0), reduced rates of hallucination, improved accuracy over long documents, system prompts, and a beta tool use feature for function calling and workflow orchestration.

With Claude 2.1’s availability in Amazon Bedrock, you can build enterprise-ready generative artificial intelligence (AI) applications using more honest and reliable AI systems from Anthropic. You can now use the Claude 2.1 model provided by Anthropic in the Amazon Bedrock console.

Here are some key highlights about the new Claude 2.1 model in Amazon Bedrock:

200,000 token context window – Enterprise applications demand larger context windows and more accurate outputs when working with long documents such as product guides, technical documentation, or financial or legal statements. Claude 2.1 supports 200,000 tokens, the equivalent of roughly 150,000 words or over 500 pages of documents. When uploading extensive information to Claude, you can summarize, perform Q&A, forecast trends, and compare and contrast multiple documents for drafting business plans and analyzing complex contracts.

Strong accuracy upgrades – Claude 2.1 has also made significant gains in honesty, with a 2x decrease in hallucination rates, 50 percent fewer hallucinations in open-ended conversation and document Q&A, a 30 percent reduction in incorrect answers, and a 3–4 times lower rate of mistakenly concluding that a document supports a particular claim compared to Claude 2.0. Claude increasingly knows what it doesn’t know and will more likely demur rather than hallucinate. With this improved accuracy, you can build more reliable, mission-critical applications for your customers and employees.

System prompts – Claude 2.1 now supports system prompts, a new feature that can improve Claude’s performance in a variety of ways, including greater character depth and role adherence in role-playing scenarios, particularly over longer conversations, as well as stricter adherence to guidelines, rules, and instructions. This represents a structural change, but not a content change from former ways of prompting Claude.

Tool use for function calling and workflow orchestration – Available as a beta feature, Claude 2.1 can now integrate with your existing internal processes, products, and APIs to build generative AI applications. Claude 2.1 accurately retrieves and processes data from additional knowledge sources as well as invokes functions for a given task.  Claude 2.1 can answer questions by searching databases using private APIs and a web search API, translate natural language requests into structured API calls, or connect to product datasets to make recommendations and help customers complete purchases. Access to this feature is currently limited to select early access partners, with plans for open access in the near future. If you are interested in gaining early access, please contact your AWS account team.

To learn more about Claude 2.1’s features and capabilities, visit Anthropic Claude on Amazon Bedrock and the Amazon Bedrock documentation.

Claude 2.1 in action
To get started with Claude 2.1 in Amazon Bedrock, go to the Amazon Bedrock console. Choose Model access on the bottom left pane, then choose Manage model access on the top right side, submit your use case, and request model access to the Anthropic Claude model. It may take several minutes to get access to models. If you already have access to the Claude model, you don’t need to request access separately for Claude 2.1.

To test Claude 2.1 in chat mode, choose Text or Chat under Playgrounds in the left menu pane. Then select Anthropic and then Claude v2.1.

By choosing View API request, you can also access the model via code examples in the AWS Command Line Interface (AWS CLI) and AWS SDKs. Here is a sample of the AWS CLI command:

$ aws bedrock-runtime invoke-model \
      --model-id anthropic.claude-v2:1 \
      --body "{\"prompt\":\"Human: \\n\\nHuman: Tell me funny joke about outer space!\n\nAssistant:", "max_tokens_to_sample": 50}' \
      --cli-binary-format raw-in-base64-out \
      invoke-model-output.txt

You can use system prompt engineering techniques provided by the Claude 2.1 model, where you place your inputs and documents before any questions that reference or utilize that content. Inputs can be natural language text, structured documents, or code snippets using <document>, <papers>, <books>, or <code> tags, and so on. You can also use conversational text, such as chat history, and Retrieval Augmented Generation (RAG) results, such as chunked documents.

Here is a system prompt example for support agents to respond to customer questions based on corporate documents.

Here are some documents for you to reference for your task:
<documents>
 <document index="1">
  <document_content>
  (the text content of the document - could be a passage, web page, article, etc)
   </document_content>
<document index="2">
  <source>https://mycompany.repository/userguide/what-is-it.html</source>
</document>
<document index="3">
  <source>https://mycompany.repository/docs/techspec.pdf</source>
 </document>
...
</documents>

You are Larry, and you are a customer advisor with deep knowledge of your company's products. Larry has a great deal of patience with his customers, even when they say nonsense or are sarcastic. Larry's answers are polite but sometimes funny. However, he only answers questions about the company's products and doesn't know much about other questions. Use the provided documentation to answer user questions.

Human: Your product is making a weird stuttering sound when I operate. What might be the problem?

To learn more about prompt engineering on Amazon Bedrock, see the Prompt engineering guidelines included in the Amazon Bedrock documentation. You can learn general prompt techniques, templates, and examples for Amazon Bedrock text models, including Claude.

Now available
Claude 2.1 is available today in the US East (N. Virginia) and US West (Oregon) Regions.

You only pay for what you use, with no time-based term commitments for on-demand mode. For text generation models, you are charged for every input token processed and every output token generated. Or you can choose the provisioned throughput mode to meet your application’s performance requirements in exchange for a time-based term commitment. To learn more, see Amazon Bedrock Pricing.

Give Anthropic Claude 2.1 a try in Amazon Bedrock console today and send feedback to AWS re:Post for Amazon Bedrock or through your usual AWS Support contacts.

Channy

New generative AI capabilities for Amazon DataZone to further simplify data cataloging and discovery (preview)

Post Syndicated from Channy Yun original https://aws.amazon.com/blogs/aws/new-generative-ai-capabilities-for-amazon-datazone-to-further-simplify-data-cataloging-and-discovery-preview/

Today, we are announcing a preview of an automation feature backed by generative artificial intelligence (AI) for Amazon DataZone that will dramatically decrease the amount of time needed to provide context for organizational data. The new feature can automate the traditionally labor-intensive process of data cataloging. Powered by the large language models (LLMs) of Amazon Bedrock, it generates detailed descriptions of data assets and their schemas, and suggests analytical use cases. You can generate a comprehensive business context with a single click.

We heard from customers that data consumers such as data analysts, scientists, and engineers in organizations struggle to understand the data’s relevance with little metadata. As a result, they either spend more time interpreting the data, or they return to data producers with continued questions. So, data producers such as data owners, engineers, and analysts who own the data and make it available for consumers need to manually enter detailed context for higher-priority data to make data shareable and discoverable. This is time-consuming and the number one problem customers have when trying to collate their data in a system for self-service by consumers.

When we launched the general availability of Amazon DataZone in October 2023, we introduced the first feature that brings generative AI capabilities to automate the generation of the table name and column names of a business catalog asset. In the data portal of Amazon DataZone, the green brain icon indicates automatically generated metadata suggestions. You could accept, edit, or reject each suggestion recommended by Amazon DataZone.

What’s new with today’s preview announcement?
Now, in addition to column and table names, you can automatically generate more detailed descriptions of the table and schema, as well as suggested uses.

In the Business Metadata tab in the data portal, when you choose Generate summary, new content will be generated to explain the table and its metadata.

You can also accept, edit, and reject this recommendation.

When you choose the Schema tab, you can also see new Description recommendations as well as the Name. You can review generated metadata and choose to accept, edit, or reject the recommendation.

This new feature will enhance data discoverability and reduce on back-and-forth communications between data consumers and producers. You will have a richer search experience based on extensive data insights in the future.

Join the preview
The new metadata generation ability is now previewed in the AWS US East (N. Virginia) and US West (Oregon) Regions. With this new generative AI capability, you can reduce time-to-insight by accelerating data cataloging and boosting data discovery. To learn more, visit the Amazon DataZone: Automate Data Discovery.

Give it a try and send feedback to AWS re:Post for Amazon DataZone or through your usual AWS Support contacts.

Channy

Amazon DynamoDB zero-ETL integration with Amazon OpenSearch Service is now available

Post Syndicated from Channy Yun original https://aws.amazon.com/blogs/aws/amazon-dynamodb-zero-etl-integration-with-amazon-opensearch-service-is-now-generally-available/

Today, we are announcing the general availability of Amazon DynamoDB zero-ETL integration with Amazon OpenSearch Service, which lets you perform a search on your DynamoDB data by automatically replicating and transforming it without custom code or infrastructure. This zero-ETL integration reduces the operational burden and cost involved in writing code for a data pipeline architecture, keeping the data in sync, and updating code with frequent application changes, enabling you to focus on your application.

With this zero-ETL integration, Amazon DynamoDB customers can now use the powerful search features of Amazon OpenSearch Service, such as full-text search, fuzzy search, auto-complete, and vector search for machine learning (ML) capabilities to offer new experiences that boost user engagement and improve satisfaction with their applications.

This zero-ETL integration uses Amazon OpenSearch Ingestion to synchronize the data between Amazon DynamoDB and Amazon OpenSearch Service. You choose the DynamoDB table whose data needs to be synchronized and Amazon OpenSearch Ingestion synchronizes the data to an Amazon OpenSearch managed cluster or serverless collection within seconds of it being available.

You can also specify index mapping templates to ensure that your Amazon DynamoDB fields are mapped to the correct fields in your Amazon OpenSearch Service indexes. Also, you can synchronize data from multiple DynamoDB tables into one Amazon OpenSearch Service managed cluster or serverless collection to offer holistic insights across several applications.

Getting started with this zero-ETL integration
With a few clicks, you can synchronize data from DynamoDB to OpenSearch Service. To create an integration between DynamoDB and OpenSearch Service, choose the Integrations menu in the left pane of the DynamoDB console and the DynamoDB table whose data you want to synchronize.

You must turn on point-in-time recovery (PITR) and the DynamoDB Streams feature. This feature allows you to capture item-level changes in your table and push the changes to a stream. Choose Turn on for PITR and enable DynamoDB Streams in the Exports and streams tab.

After turning on PITR and DynamoDB Stream, choose Create to set up an OpenSearch Ingestion pipeline in your account that replicates the data to an OpenSearch Service managed domain.

In the first step, enter a unique pipeline name and set up pipeline capacity and compute resources to automatically scale your pipeline based on the current ingestion workload.

Now you can configure the pre-defined pipeline configuration in YAML file format. You can browse resources to look up and paste information to build the pipeline configuration. This pipeline is a combination of a source part from DyanmoDB settings and a sink part for OpenSearch Service.

You must set multiple IAM roles (sts_role_arn) with the necessary permissions to read data from the DynamoDB table and write to an OpenSearch domain. This role is then assumed by OpenSearch Ingestion pipelines to ensure that the right security posture is always maintained when moving the data from source to destination. To learn more, see Setting up roles and users in Amazon OpenSearch Ingestion in the AWS documentation.

After entering all required values, you can validate the pipeline configuration to ensure that your configuration is valid. To learn more, see Creating Amazon OpenSearch Ingestion pipelines in the AWS documentation.

Take a few minutes to set up the OpenSearch Ingestion pipeline, and you can see your integration is completed in the DynamoDB table.

Now you can search synchronized items in the OpenSearch Dashboards.

Things to know
Here are a couple of things that you should know about this feature:

  • Custom schema – You can specify your custom data schema along with the index mappings used by OpenSearch Ingestion when writing data from Amazon DynamoDB to OpenSearch Service. This experience is added to the console within Amazon DynamoDB so that you have full control over the format of indices that are created on OpenSearch Service.
  • Pricing – There will be no additional cost to use this feature apart from the cost of the existing underlying components. Note that Amazon OpenSearch Ingestion charges OpenSearch Compute Units (OCUs) which will be used to replicate data between Amazon DynamoDB and Amazon OpenSearch Service. Furthermore, this feature uses Amazon DynamoDB streams for the change data capture (CDC) and you will incur the standard costs for Amazon DynamoDB Streams.
  • Monitoring – You can monitor the state of the pipelines by checking the status of the integration on the DynamoDB console or using the OpenSearch Ingestion dashboard. Additionally, you can use Amazon CloudWatch to provide real-time metrics and logs, which lets you to set up alerts in case of a breach of user-defined thresholds.

Now available
Amazon DynamoDB zero-ETL integration with Amazon OpenSearch Service is now generally available in all AWS Regions where OpenSearch Ingestion is available today.

Channy

Reserve quantum computers, get guidance and cutting-edge capabilities with Amazon Braket Direct

Post Syndicated from Channy Yun original https://aws.amazon.com/blogs/aws/reserve-quantum-computers-get-expertise-and-cutting-edge-capabilities-with-amazon-braket-direct/

Today, we are announcing the availability of Braket Direct, a new Amazon Braket program that helps quantum researchers dive deeper into quantum computing. This program lets you get dedicated, private access to the full capacity of various quantum processing units (QPUs) without any queues or wait times, connect with quantum computing specialists to receive expert guidance for your workloads, and get early access to features and devices with limited availability to conduct cutting-edge research on today’s noisy quantum devices.

Since its launch in 2020, Amazon Braket has democratized access to quantum computing by offering on-demand access to various QPUs using shared, public availability windows, where you only pay for the duration of your reservation.

You can now use Braket Direct to reserve the entire dedicated machine for a period of time on IonQ Aria, QuEra Aquila, and Rigetti Aspen-M-3 devices for running your most complex, long-running, time-sensitive workloads, or conducting live events such as training workshops and hackathons, where you pay only for what you reserve.

To further your research, you can now engage directly with Braket’s experts through free office hours or one-on-one, hands-on reservation prep sessions. For deeper research collaborations, you can connect with specialists from quantum hardware providers such as IonQ, Oxford Quantum Circuits, QuEra, Rigetti, or Amazon Quantum Solutions Lab, our dedicated professional services team.

Finally, to truly push the boundaries, you can gain access to experimental capabilities that have limited or reduced availability starting with IonQ’s highest fidelity, 30-qubit Forte device.

Braket Direct expands on our commitment to accelerate research and innovation in quantum computing without requiring any upfront fees or long-term commitments.

Getting started with Braket Direct
To get started, go to the Amazon Braket console and choose Braket Direct in the left pane. You can see new features such as quantum hardware reservation, expert advice and get access to next-generation quantum hardware and features.

1. Request a quantum hardware reservation
To create a reservation, choose Reserve device and select the Device that you would like to reserve. Provide your contact information, including your name and email address, any details about the workload that you would like to execute using your reservation, such as desired reservation length, relevant constraints, and desired schedule.

Braket Direct assures that you have the full capacity of the QPU during your reservation and the predictability that your workloads will execute when your reservation begins.

If you are interested in connecting with a Braket expert for a one-on-one reservation prep session after your reservation is confirmed, you can select that option at no additional cost.

Choose Submit to complete your reservation request. A Braket team member will email you within 2–3 business days, pending request verification. To make the most of your reservation, you can choose to pre-create your tasks and jobs prior to a reservation to maximize use of the time.

To learn more about your quantum tasks and hybrid jobs to execute in a device reservation, see Get started with Braket Direct in the AWS documentation.

2. Get support from quantum computing experts
You can get in touch with quantum experts and get advice about your workload. With Braket office hours, Braket experts can help you go from ideation to execution faster at no additional cost. Explore your device to fit your use case, identify options to make best use of Braket for your algorithm, and get recommendations on how to use certain Braket features like Hybrid Jobs, Braket Pulse, or Analog Hamiltonian Simulation.

To book an upcoming Braket office hours slot, choose Sign up and fill out your contact information, workload details, and any desired discussion topics. You will receive a calendar invitation to the next available slot by email.

To take advantage of experts from quantum hardware providers, choose Connect and browse their professional services listings on AWS Marketplace.

The Amazon Quantum Solutions Lab is a collaborative research and professional services team staffed with quantum computing experts who can assist you in more effectively exploring quantum computing, engaging in quantum research, and assessing the current performance of this technology. To contact the Quantum Solutions Lab, select Connect and fill out contact information and use case details. The team will email you with next steps.

3. Access to cutting-edge capabilities
To move your research quicker, you can get early access to innovative new capabilities. With Braket Direct, you can easily request access to cutting-edge capabilities, such as new quantum devices with limited availability, directly in the Braket console. Today, you can get reservation-only access to IonQ’s highest-fidelity Forte QPU. Due to its limited availability, this device is currently only available through Braket Direct reservations.

Now available
Braket Direct is now generally available in all AWS Regions where Amazon Braket is available. To learn more, see the Braket Direct page and pricing page.

Give it a try and send feedback to AWS re:Post for Amazon Braket, Quantum Computing Stack Exchange, or through your usual AWS Support contacts.

Channy

Amazon ElastiCache Serverless for Redis and Memcached is now available

Post Syndicated from Channy Yun original https://aws.amazon.com/blogs/aws/amazon-elasticache-serverless-for-redis-and-memcached-now-generally-available/

Today, we are announcing the availability of Amazon ElastiCache Serverless, a new serverless option that allows customers to create a cache in under a minute and instantly scale capacity based on application traffic patterns. ElastiCache Serverless is compatible with two popular open-source caching solutions, Redis and Memcached.

You can use ElastiCache Serverless to operate a cache for even the most demanding workloads without spending time in capacity planning or requiring caching expertise. ElastiCache Serverless constantly monitors your application’s memory, CPU, and network resource utilization and scales instantly to accommodate changes to the access patterns of workloads it serves. You can create a highly available cache with data automatically replicated across multiple Availability Zones and up to 99.99 percent availability Service Level Agreement (SLA) for all workloads, which saves you time and money.

Customers wanted to get radical simplicity to deploy and operate a cache. ElastiCache Serverless offers a simple endpoint experience abstracting the underlying cluster topology and cache infrastructure. You can reduce application complexity and have more operational excellence without handling reconnects and rediscovering nodes.

With ElastiCache Serverless, there are no upfront costs, and you pay for only the resources you use. You pay for the amount of cache data storage and ElastiCache Processing Units (ECPUs) resources consumed by your applications.

Getting started with Amazon ElastiCache Serverless
To get started, go to the ElastiCache console and choose Redis caches or Memcached caches in the left navigation pane. ElastiCache Serverless supports engine versions of Redis 7.1 or higher and Memcached 1.6 or higher.

For example, in the case of Redis caches, choose Create Redis cache.

You see two deployment options: either Serverless or Design your own cache to create a node-based cache cluster. Choose the Serverless option, the New cache method, and provide a name.

Use the default settings to create a cache in your default VPC, Availability Zones, service-owned encryption key, and security groups. We will automatically set recommended best practices. You don’t have to enter any additional settings.

If you want to customize default settings, you can set your own security groups, or enable automatic backups. You can also set maximum limits for your compute and memory usage to ensure your cache doesn’t grow beyond a certain size. When your cache reaches the memory limit, keys with a time to live (TTL) are evicted according to the least recently used (LRU) logic. When your compute limit is reached, ElastiCache will throttle requests, which will lead to elevated request latencies.

When you create a new serverless cache, you can see the details of settings for connectivity and data protection, including an endpoint and network environment.

Now, you can configure the ElastiCache Serverless endpoint in your application and connect using any Redis client that supports Redis in cluster mode, such as redis-cli.

$ redis-cli -h channy-redis-serverless.elasticache.amazonaws.com --tls -c -p 6379
set x Hello
OK
get x
"Hello"

You can manage the cache using AWS Command Line Interface (AWS CLI) or AWS SDKs. For more information, see Getting started with Amazon ElastiCache for Redis in the AWS documentation.

If you have an existing Redis cluster, you can migrate your data to ElastiCache Serverless by specifying the ElastiCache backups or Amazon S3 location of a backup file in a standard Redis rdb file format when creating your ElastiCache Serverless cache.

For a Memcached cache, you can create and use a new serverless cache in the same way as Redis.

If you use ElastiCache Serverless for Memcached, there are significant benefits of high availability and instant scaling because they are not natively available in the Memcached engine. You no longer have to write custom business logic, manage multiple caches, or use a third-party proxy layer to replicate data to get high availability with Memcached. Now you can get up to 99.99 percent availability SLA and data replication across multiple Availability Zones.

To connect to the Memcached endpoint, run the openssl client and Memcached commands as shown in the following example output:

$ /usr/bin/openssl s_client -connect channy-memcached-serverless.cache.amazonaws.com:11211 -crlf 
set a 0 0 5
hello
STORED
get a
VALUE a 0 5
hello
END

For more information, see Getting started with Amazon ElastiCache Serverless for Memcached in the AWS documentation.

Scaling and performance
ElastiCache Serverless scales without downtime or performance degradation to the application by allowing the cache to scale up and initiating a scale-out in parallel to meet capacity needs just in time.

To show ElastiCache Serverless’ performance we conducted a simple scaling test. We started with a typical Redis workload with an 80/20 ratio between reads and writes with a key size of 512 bytes. Our Redis client was configured to Read From Replica (RFR) using the READONLY Redis command, for optimal read performance. Our goal is to show how fast workloads can scale on ElastiCache Serverless without any impact on latency.

As you can see in the graph above, we were able to double the requests per second (RPS) every 10 minutes up until the test’s target request rate of 1M RPS. During this test, we observed that p50 GET latency remained around 751 microseconds and at all times below 860 microseconds. Similarly, we observed p50 SET latency remained around 1,050 microseconds, not crossing the 1,200 microseconds even during the rapid increase in throughput.

Things to know

  • Upgrading engine version – ElastiCache Serverless transparently applies new features, bug fixes, and security updates, including new minor and patch engine versions on your cache. When a new major version is available, ElastiCache Serverless will send you a notification in the console and an event in Amazon EventBridge. ElastiCache Serverless major version upgrades are designed for no disruption to your application.
  • Performance and monitoring – ElastiCache Serverless publishes a suite of metrics to Amazon CloudWatch, including memory usage (BytesUsedForCache), CPU usage (ElastiCacheProcessingUnits), and cache metrics, including CacheMissRate, CacheHitRate, CacheHits, CacheMisses, and ThrottledRequests. ElastiCache Serverless also publishes Amazon EventBridge events for significant events, including cache creation, deletion, and limit updates. For a full list of available metrics and events, see the documentation.
  • Security and compliance – ElastiCache Serverless caches are accessible from within a VPC. You can access the data plane using AWS Identity and Access Management (IAM). By default, only the AWS account creating the ElastiCache Serverless cache can access it. ElastiCache Serverless encrypts all data at rest and in-transit by transport layer security (TLS) encrypting each connection to ElastiCache Serverless. You can optionally choose to limit access to the cache within your VPCs, subnets, IAM access, and AWS Key Management Service (AWS KMS) key for encryption. ElastiCache Serverless is compliant with PCI-DSS, SOC, and ISO and is HIPAA eligible.

Now available
Amazon ElastiCache Serverless is now available in all commercial AWS Regions, including China. With ElastiCache Serverless, there are no upfront costs, and you pay for only the resources you use. You pay for cached data in GB-hours, ECPUs consumed, and Snapshot storage in GB-months.

To learn more, see the ElastiCache Serverless page and the pricing page. Give it a try, and please send feedback to AWS re:Post for Amazon ElastiCache or through your usual AWS support contacts.

Channy

Join the preview of Amazon Aurora Limitless Database

Post Syndicated from Channy Yun original https://aws.amazon.com/blogs/aws/join-the-preview-amazon-aurora-limitless-database/

Today, we are announcing the preview of Amazon Aurora Limitless Database, a new capability supporting automated horizontal scaling to process millions of write transactions per second and manage petabytes of data in a single Aurora database.

Amazon Aurora read replicas allow you to increase the read capacity of your Aurora cluster beyond the limits of what a single database instance can provide. Now, Aurora Limitless Database scales write throughput and storage capacity of your database beyond the limits of a single Aurora writer instance. The compute and storage capacity that is used for Limitless Database is in addition to and independent of the capacity of your writer and reader instances in the cluster.

With Limitless Database, you can focus on building high-scale applications without having to build and maintain complex solutions for scaling your data across multiple database instances to support your workloads. Aurora Limitless Database scales based on the workload to support write throughput and storage capacity that, until today, would require multiple Aurora writer instances.

The architecture of Amazon Aurora Limitless Database
Limitless Database has a two-layer architecture consisting of multiple database nodes, either transaction routers or shards.

Shards are Aurora PostgreSQL DB instances that each store a subset of the data for your database, allowing for parallel processing to achieve higher write throughput. Transaction routers manage the distributed nature of the database and present a single database image to database clients.

Transaction routers maintain metadata about where data is stored, parse incoming SQL commands and send those commands to shards, aggregate data from shards to return a single result to the client, and manage distributed transactions to maintain consistency across the entire distributed database. All the nodes that make up your Limitless Database architecture are contained in a DB shard group. The DB shard group has a separate endpoint where your access your Limitless Database resources.

Getting started with Aurora Limitless Database
To get started with a preview of Aurora Limitless Database, you can sign up today and will be invited soon. The preview runs in a new Aurora PostgreSQL cluster with version 15 in the AWS US East (Ohio), US East (N. Virginia), US West (Oregon), Asia Pacific (Tokyo), and Europe (Ireland) Regions.

As part of the creation workflow for an Aurora cluster, choose the Limitless Database compatible version in the Amazon RDS console or the Amazon RDS API. Then you can add a DB shard group and create new Limitless Database tables. You can choose the maximum Aurora capacity units (ACUs).

After the DB shard group is created, you can view its details on the Databases page, including its endpoint.

To use Aurora Limitless Database, you should connect to a DB shard group endpoint, also called the limitless endpoint, using psql or any other connection utility that works with PostgreSQL.

There will be two types of tables that contain your data in Aurora Limitless Database:

  • Sharded tables – These tables are distributed across multiple shards. Data is split among the shards based on the values of designated columns in the table, called shard keys.
  • Reference tables – These tables have all their data present on every shard so that join queries can work faster by eliminating unnecessary data movement. They are commonly used for infrequently modified reference data, such as product catalogs and zip codes.

Once you have created a sharded or reference table, you can load massive data into Aurora Limitless Database and manipulate data in those tables using the standard PostgreSQL queries.

Join the preview
You can join the preview of Amazon Aurora Limitless Database to be among the first to experience all of this power.

Sign up now, give it a try, and please send feedback to AWS re:Post for Amazon Aurora or through your usual AWS support contacts.

Channy

Mutual authentication for Application Load Balancer reliably verifies certificate-based client identities

Post Syndicated from Channy Yun original https://aws.amazon.com/blogs/aws/mutual-authentication-for-application-load-balancer-to-reliably-verify-certificate-based-client-identities/

Today, we are announcing support for mutually authenticating clients that present X509 certificates to Application Load Balancer. With this new feature, you can now offload client authentication to the load balancer, ensuring only trusted clients communicate with their backend applications. This new capability is built on S2N, AWS’s open source Transport Layer Security (TLS) implementation that provides strong encryption and protections against zero-day vulnerabilities, which developers can trust.

Mutual authentication (mTLS) is commonly used for business-to-business (B2B) applications such as online banking, automobile, or gaming devices to authenticate devices using digital certificates. Companies typically use it with a private certificate authority (CA) to authenticate their clients before granting access to data and services.

Customers have implemented mutual authentication using self-created or third-party solutions that require additional time and management overhead. These customers spend their engineering resources to build the functionality into their backend, update their code to keep up with the latest security patches, and invest heavily in infrastructure to create and rotate certificates.

With mutual authentication on Application Load Balancer, you have a fully managed, scalable, and cost-effective solution that enables you to use your developer resources to focus on other critical projects. Your ALB will authenticate clients with revocation checks and pass client certificate information to the target, which can be used for authorization by applications.

Getting started with mutual authentication on ALB
To enable mutual authentication on ALB, choose Create Application Load Balancer by the ALB wizard on Amazon EC2 console. When you select HTTPS in the Listeners and routing section, you can see more settings such as security policy, default server certificate, and a new client certificate handling option to support mutual authentication.

With Mutual authentication (mTLS) enabled, you can configure how listeners handle requests that present client certificates. This includes how your Application Load Balancer authenticates certificates and the amount of certificate metadata that is sent to your backend targets.

Mutual authentication has two options. The Passthrough option sends all the client certificate chains received from the client to your backend application using HTTP headers. The mTLS-enabled Application Load Balancer gets the client certificate in the handshake, establishes a TLS connection, and then sends whatever it gets in HTTPS headers to the target application. The application will need to verify the client certificate chain to authenticate the client.

With the Verify with trust store option, Application Load Balancer and client verify each other’s identity and establish a TLS connection to encrypt communication between them. We introduce a new trust store feature, and you can upload any CA bundle with roots and/or intermediate certificates generated by AWS Private Certificate Authority or any other third party CA as the source of trust to validate your client certificates.

It requires selecting an existing trust store or creating a new one. Trust stores contain your CAs, trusted certificates, and, optionally, certificate revocation lists (CRLs). The load balancer uses a trust store to perform mutual authentication with clients.

To use this option and create a new trust store, choose Trust Stores in the left menu of the Amazon EC2 console and choose Create trust store.

You can choose a CA certificate bundle in PEM format and, optionally, CRLs from your Amazon Simple Storage Service (Amazon S3) bucket. A CA certificate bundle is a group of CA certificates (root or intermediate) used by a trust store. CRLs can be used when a CA revokes client certificates that have been compromised, and you need to reject those revoked certificates. You can replace a CA bundle, and add or remove CRLs from the trust store after creation.

You can use the AWS Command Line Interface (AWS CLI) with new APIs such as create-trust-store to upload CA information, configure the mutual-authentication-mode on the Application Load Balancer listener, and send user certificate information to targets.

$ aws elbv2 create-trust-store --name my-tls-name \
    --ca-certificates-bundle-s3-bucket channy-certs \
    --ca-certificates-bundle-s3-key Certificates.pem \
    --ca-certificates-bundle-s3-object-version <version>
>> arn:aws:elasticloadbalancing:root:file1
$ aws elbv2 create-listener --load balancer-arn <value> \
    --protocol HTTPS \
    --port 443 \
    --mutual-authentication Mode=verify,
      TrustStoreArn=<arn:aws:elasticloadbalancing:root:file1>

If you already have your own private CA, such as AWS Private CA, third-party CA, or self-signed CA, you can upload their CA bundle or CRLs to the Application Load Balancer trust store to enable mutual authentication.

To test the mutual authentication on Application Load Balancer, follow the step-by-step instructions to make a self-signed CA bundle and client certificate using OpenSSL, upload them to the Amazon S3 bucket, and use them with an ELB trust store.

You can use curl with the --key and --cert parameters to send the client certificate as part of the request:

$ curl --key my_client.key --cert my_client.pem https://api.yourdomain.com

Mutual authentication can fail if a client presents an invalid or expired certificate, fails to present a certificate, cannot find a trust chain, or if any links in the trust chain have expired, or the certificate is on the revocation list.

Application Load Balancer will close the connections whenever it fails to authenticate a client and will record new connection logs that capture detailed information about requests sent to your load balancer. Each log contains information such as the client’s IP address, handshake latency, TLS cipher used, and client certificate details. You can use these connection logs to analyze request patterns and troubleshoot issues.

To learn more, see Mutual authentication on Application Load Balancer in the AWS documentation.

Now available
Mutual authentication on Application Load Balancer is now available in all commercial AWS Regions where Application Load Balancer is available, except China. With no upfront costs or commitments required, you only pay for what you use. To learn more, see the Elastic Load Balancing pricing page.

Give it a try now and send feedback to AWS re:Post for Amazon EC2 or through your usual AWS Support contacts.

Learn more:
Application Load Balancer product page

Channy

New Cost Optimization Hub centralizes recommended actions to save you money

Post Syndicated from Channy Yun original https://aws.amazon.com/blogs/aws/new-cost-optimization-hub-to-find-all-recommended-actions-in-one-place-for-saving-you-money/

Today, we are announcing Cost Optimization Hub, a new AWS Billing and Cost Management feature that makes it easy for you to identify, filter, aggregate, and quantify savings for AWS cost optimization recommendations.

With the new Cost Optimization Hub, you can interactively query cost optimization recommendations such as idle resource detection, resource rightsizing, and purchasing options across multiple AWS Regions and AWS accounts in your organizations without any data aggregation and processing. You can find out how much you’ll save if you implement those recommendations and easily compare and prioritize recommendations by savings.

Andy Jassy, CEO of Amazon, told shareholders, “We’re trying to build customer relationships (and a business) that outlast all of us, and as a result, our AWS sales and support teams are spending much of their time helping customers optimize their AWS spend so they can better weather this uncertain economy” in his 2022 Letter to Shareholders.

Cost Optimization Hub gathers all cost-optimizing recommended actions across AWS Cloud Financial Management (CFM) services, including AWS Cost Explorer and AWS Compute Optimizer, in one place. It incorporates customer-specific pricing and discounts into these recommendations, and it deduplicates findings and savings to give a consolidated view of your cost optimization opportunities.

If you are a FinOps team or infrastructure management team member who wants to understand your cost optimization opportunities in aggregate, such as which AWS accounts or AWS Regions have the most cost optimization opportunities, you should start with Cost Optimization Hub.

You can easily analyze cost optimization opportunities with built-in filters and grouping options. For example, after understanding which AWS account has the most cost optimization opportunities, you can identify the top cost optimization strategies, such as stopping idle resources, rightsizing, and Graviton migration. If you identify which AWS Region has the highest number of rightsizing opportunities, you can get a list of rightsizing recommendations for the Region. It will redirect you to the Compute Optimizer console through deep linking to validate the details, such as the projected CPU utilization if you implement the change.

Getting started with Cost Optimization Hub
To get started, choose Cost Optimization Hub in the left navigation menu of the AWS Billing and Cost Management Console. You can opt in by selecting Enable. There is a 24-hour wait time for Cost Optimization Hub to populate data initially and data will be refreshed daily afterward.

After opt-in, you can see the dashboard of cost optimization recommendations by AWS account, AWS Region, and tag key. If you want to see the list of resources available for optimization, choose View opportunities.

Cost Optimization Hub supports six types of cost-optimizing recommended actions, including:

  • Stop – Stop idle or unused resources to save up to 100 percent of the resources’ cost.
  • Rightsize – Move to a smaller Amazon EC2 instance type, Amazon EBS volume, AWS Lambda memory size, or AWS Fargate task size
  • Upgrade – Move to a later-generation product, such as moving from EBS io1 volume type to io2.
  • Graviton migration – Move from EC2 instance types with x86-based processors to EC2 instance types with AWS Graviton-based processors to save costs.
  • Purchase Savings Plans – Purchase Compute Savings Plans, EC2 Instance Savings Plans, and Amazon SageMaker Savings Plans
  • Purchase Reserved Instances – Purchase Amazon EC2, Amazon RDS, Amazon DynamoDB, Amazon ElastiCache, and Amazon Redshift Reserved Instances.

You can see the resource type, top recommended action, and estimated monthly savings. You can also filter the list by AWS account, AWS Region, implementation effort, and tag key as the group-by dimension.

You also can classify each recommendation as “Is resources restart needed” or “Is rollback possible.” If you specify Is resources restart needed=No as the filter, you can only see recommendations that don’t require you to restart your resources, such as EBS volume recommendations. Similarly, If you specify Is rollback possible=Yes as the filter, you can only see recommendations that can be rolled back.

If you select a specific source, for example, right-sizing EC2 instance, you can view details and connect to Amazon EC2 and the AWS Compute Optimizer console. Note that estimated monthly savings is a quick approximation of future savings. The actual savings you will realize are dependent on your future AWS usage patterns.

You can also interactively query through AWS Command Line Interface (AWS CLI) and AWS SDKs.  Here’s a sample query to find the recommendations about deleting and rightsizing resources:

$ aws cost-optimization-hub list-recommendations

The preceding query gives you the following results:

{
   "items":[
      {
         "recommendationId":"MDA2MDI1ODQ1MTA1XzQ5MzNhYzZlLWZmYTUtNGI2ZC04YzBkLTAxYWE3Y2JlNjNlYg==",
         "accountId":"006025845105",
         "region":"Global",
         "resourceId":"006025845105_ComputeSavingsPlans",
         "currentResourceType":"ComputeSavingsPlans",
         "recommendedResourceType":"ComputeSavingsPlans",
         "estimatedMonthlySavings":1506.591472696,
         "estimatedSavingsPercentage":55.46400024,
         "estimatedMonthlyCost":2716.341169146,
         "currencyCode":"USD",
         "implementationEffort":"VeryLow",
         "restartNeeded":false,
         "actionType":"PurchaseSavingsPlans",
         "rollbackPossible":false,
         "recommendedResourceSummary":"$1.628/hour with three years term",
         "lastRefreshTimestamp":"2023-10-23T16:54:13-07:00",
         "recommendationLookbackPeriodInDays":30,
         "source":"CostExplorer"
      },
      {
         "recommendationId":"MDA2MDI1ODQ1MTA1XzhiZTRlNTczLTE0MDctNGIzOS05MmY3LTdmN2EzOTU2Y2ZkYw==",
         "accountId":"006025845105",
         "region":"us-east-1",
         "resourceId":"arn:aws:lambda:us-east-1:006025845105:function:Lambda-recommendation-testing:$LATEST",
         "resourceArn":"arn:aws:lambda:us-east-1:006025845105:function:Lambda-recommendation-testing:$LATEST",
         "currentResourceType":"LambdaFunction",
         "recommendedResourceType":"LambdaFunction",
         "estimatedMonthlySavings":3.1682091425308054e-06,
         "estimatedSavingsPercentage":1.936368871741565,
         "estimatedMonthlyCost":0.00016044778307703665,
         "currencyCode":"USD",
         "implementationEffort":"Low",
         "restartNeeded":false,
         "actionType":"Rightsize",
         "rollbackPossible":true,
         "currentResourceSummary":"128 MB memory",
         "recommendedResourceSummary":"160 MB memory",
         "lastRefreshTimestamp":"2023-10-24T04:07:35.364000-07:00",
         "recommendationLookbackPeriodInDays":14,
         "source":"ComputeOptimizer"
      }
   ]
}

For more information about new Cost Optimization Hub APIs, see the Cost Optimization Hub API documentation.

Now available
Cost Optimization Hub is now generally available for all customers. There is no additional charge for this new capability. You can now get started and view cost optimization recommendations across all AWS Regions.

To learn more, see the Cost Optimization Hub page and send feedback to AWS re:Post for Cost Optimization or through your usual AWS Support contacts.

Channy

AWS Weekly Roundup – EC2 DL2q instances, PartyRock, Amplify’s 6th birthday, and more – November 20, 2023

Post Syndicated from Channy Yun original https://aws.amazon.com/blogs/aws/aws-weekly-roundup-ec2-dl2q-instances-partyrock-amplifys-6th-birthday-and-more-november-20-2023/

Last week I saw an astonishing 160+ new service launches. There were so many updates that we decided to publish a weekly roundup again. This continues the same innovative pace of the previous week as we are getting closer to AWS re:Invent 2023.

Our News Blog team is also finalizing new blog posts for re:Invent to introduce awesome launches with service teams for your reading pleasure. Jeff Barr shared The Road to AWS re:Invent 2023 to explain our blogging journey and process. Please stay tuned in the next week!

Last week’s launches
Here are some of the launches that caught my attention last week:

Amazon EC2 DL2q instances – New DL2q instances are powered by Qualcomm AI 100 Standard accelerators and are the first to feature Qualcomm’s AI technology in the public cloud. With eight Qualcomm AI 100 Standard accelerators and 128 GiB of total accelerator memory, you can run popular generative artificial intelligence (AI) applications and extend to edge devices across smartphones, autonomous driving, personal compute, and extended reality headsets to develop and validate these AI workloads before deploying.

PartyRock for Amazon Bedrock – We introduced PartyRock, a fun and intuitive hands-on, generative AI app-building playground powered by Amazon Bedrock. You can experiment, learn all about prompt engineering, build mini-apps, and share them with your friends—all without writing any code or creating an AWS account.

You also can now access the Meta Llama 2 Chat 13B foundation model and Cohere Command Light, Embed English, and multilingual models for Amazon Bedrock.

AWS Amplify celebrates its sixth birthday – We announced six new launches; a new documentation site, support for Next.js 14 with our hosting and JavaScript library, added custom token providers and an automatic React Native social sign-in update to Amplify Auth, new ChangePassword and DeleteUser account settings components, and updated all Amplify UI packages to use new Amplify JavaScript v6. You can also use wildcard subdomains when using a custom domain with your Amplify application deployed to AWS Amplify Hosting.

Amplify docs site UI

Also check out other News Blog posts about major launches published in the past week:

Other AWS service launches
Here are some other bundled feature launches per AWS service:

Amazon Athena  – You can use a new cost-based optimizer (CBO) to enhance query performance based on table and column statistics, collected by AWS Glue Data Catalog and Athena JDBC 3.x driver, a new alternative that supports almost all authentication plugins. You can also use Amazon EMR Studio to develop and run interactive queries on Amazon Athena.

Amazon CloudWatch – You can use a new CloudWatch metric called EBS Stalled I/O Check to monitor the health of your Amazon EBS volumes, the regular expression for Amazon CloudWatch Logs Live Tail filter pattern syntax to search and match relevant log events, observability of SAP Sybase ASE database in CloudWatch Application Insights, and up to two stats commands in a Log Insights query to perform aggregations on the results.

Amazon CodeCatalyst – You can connect to a Amazon Virtual Private Cloud (Amazon VPC) from CodeCatalyst Workflows, provision infrastructure using Terraform within CodeCatalyst Workflows, access CodeCatalyst with your workforce identities configured in IAM Identity Center, and create teams made up of members of the CodeCatalyst space.

Amazon Connect – You can use a pre-built queue performance dashboard and Contact Lens conversational analytics dashboard to view and compare real-time and historical aggregated queue performance. You can use quick responses for chats, previously written formats such as typing in ‘/#greet’ to insert a personalized response, and scanning attachments to detect malware or other unwanted content.

AWS Glue – AWS Glue for Apache Spark added new six database connectors: Teradata, SAP HANA, Azure SQL, Azure Cosmos DB, Vertica, and MongoDB, as well as the native connectivity to Amazon OpenSearch Service.

AWS Lambda – You can see single pane view of metrics, logs, and traces in the AWS Lambda console and advanced logging controls to natively capture logs in JSON structured format. You can view the SAM template on the Lambda console and export the function’s configuration to AWS Application Composer. AWS Lambda also supports Java 21 and NodeJS 20 versions built on the new Amazon Linux 2023 runtime.

AWS Local Zones in Dallas – You can enable the new Local Zone in Dallas, Texas, us-east-1-dfw-2a, with Amazon EC2 C6i, M6i, R6i, C6gn, and M6g instances and Amazon EBS volume types gp2, gp3, io1, sc1, and st1. You can also access Amazon ECS, Amazon EKS, Application Load Balancer, and AWS Direct Connect in this new Local Zone to support a broad set of workloads at the edge.

Amazon Managed Streaming for Apache Kafka (Amazon MSK) – You can standardize access control to Kafka resources using AWS Identity and Access Management (IAM) and build Kafka clients for Amazon MSK Serverless written in all programming languages. These are open source client helper libraries and code samples for popular languages, including Java, Python, Go, and JavaScript. Also, Amazon MSK now supports an enhanced version of Apache Kafka 3.6.0 that offers generally available Tiered Storage and automatically sends you storage capacity alerts when you are at risk of exhausting your storage.

Amazon OpenSearch Service Ingestion – You can migrate your data from Elasticsearch version 7.x clusters to the latest versions of Amazon OpenSearch Service and use persistent buffering to protect the durability of incoming data.

Amazon RDS –Amazon RDS for MySQL now supports creating active-active clusters using the Group Replication plugin, upgrading MySQL 5.7 snapshots to MySQL 8.0, and Innovation Release version of MySQL 8.1.

Amazon RDS Custom for SQL Server extends point-in-time recovery support for up to 1,000 databases, supports Service Master Key Retention to use transparent data encryption (TDE), table- and column-level encryption, DBMail and linked servers, and use SQL Server Developer edition with the bring your own media (BYOM).

Additionally, Amazon RDS Multi-AZ deployments with two readable standbys now supports minor version upgrades and system maintenance updates with typically less than one second of downtime when using Amazon RDS Proxy.

AWS Partner Central – You can use an improved user experience in AWS Partner Central to build and promote your offerings and the new Investments tab in the Partner Analytics Dashboard to gain actionable insights. You can now link accounts and associated users between Partner Central and AWS Marketplace and use an enhanced co-sell experience with APN Customer Engagements (ACE) manager.

Amazon QuickSight – You can programmatically manage user access and custom permissions support for roles to restrict QuickSight functionality to the QuickSight account for IAM Identity Center and Active Directory using APIs. You can also use shared restricted folders, a Contributor role and support for data source asset types in folders and the Custom Week Start feature, an addition designed to enhance the data analysis experience for customers across diverse industries and social contexts.

AWS Trusted Advisor – You can use new APIs to programmatically access Trusted Advisor best practices checks, recommendations, and prioritized recommendations and 37 new Amazon RDS checks that provide best practices guidance by analyzing DB instance configuration, usage, and performance data.

There’s a lot more launch news that I haven’t covered. See AWS What’s New for more details.

See you virtually in AWS re:Invent
AWS re:Invent 2023Next week we’ll hear the latest from AWS, learn from experts, and connect with the global cloud community in Las Vegas. If you come, check out the agenda, session catalog, and attendee guides before your departure.

If you’re not able to attend re:Invent in person this year, we’re offering the option to livestream our Keynotes and Innovation Talks. With the registration for online pass, you will have access to on-demand keynote, Innovation Talks, and selected breakout sessions after the event.

Channy

Announcing Amazon EC2 Capacity Blocks for ML to reserve GPU capacity for your machine learning workloads

Post Syndicated from Channy Yun original https://aws.amazon.com/blogs/aws/announcing-amazon-ec2-capacity-blocks-for-ml-to-reserve-gpu-capacity-for-your-machine-learning-workloads/

Recent advancements in machine learning (ML) have unlocked opportunities for customers across organizations of all sizes and industries to reinvent new products and transform their businesses. However, the growth in demand for GPU capacity to train, fine-tune, experiment, and inference these ML models has outpaced industry-wide supply, making GPUs a scarce resource. Access to GPU capacity is an obstacle for customers whose capacity needs fluctuate depending on the research and development phase they’re in.

Today, we are announcing Amazon Elastic Compute Cloud (Amazon EC2) Capacity Blocks for ML, a new Amazon EC2 usage model that further democratizes ML by making it easy to access GPU instances to train and deploy ML and generative AI models. With EC2 Capacity Blocks, you can reserve hundreds of GPUs collocated in EC2 UltraClusters designed for high-performance ML workloads, using Elastic Fabric Adapter (EFA) networking in a peta-bit scale non-blocking network, to deliver the best network performance available in Amazon EC2.

This is an innovative new way to schedule GPU instances where you can reserve the number of instances you need for a future date for just the amount of time you require. EC2 Capacity Blocks are currently available for Amazon EC2 P5 instances powered by NVIDIA H100 Tensor Core GPUs in the AWS US East (Ohio) Region. With EC2 Capacity Blocks, you can reserve GPU instances in just a few clicks and plan your ML development with confidence. EC2 Capacity Blocks make it easy for anyone to predictably access EC2 P5 instances that offer the highest performance in EC2 for ML training.

EC2 Capacity Block reservations work similarly to hotel room reservations. With a hotel reservation, you specify the date and duration you want your room for and the size of beds you’d like─a queen bed or king bed, for example. Likewise, with EC2 Capacity Block reservations, you select the date and duration you require GPU instances and the size of the reservation (the number of instances). On your reservation start date, you’ll be able to access your reserved EC2 Capacity Block and launch your P5 instances. At the end of the EC2 Capacity Block duration, any instances still running will be terminated.

You can use EC2 Capacity Blocks when you need capacity assurance to train or fine-tune ML models, run experiments, or plan for future surges in demand for ML applications. Alternatively, you can continue using On-Demand Capacity Reservations for all other workload types that require compute capacity assurance, such as business-critical applications, regulatory requirements, or disaster recovery.

Getting started with Amazon EC2 Capacity Blocks for ML
To reserve your Capacity Blocks, choose Capacity Reservations on the Amazon EC2 console in the US East (Ohio) Region. You can see two capacity reservation options. Select Purchase Capacity Blocks for ML and then Get started to start looking for an EC2 Capacity Block.

Choose your total capacity and specify how long you need the EC2 Capacity Block. You can reserve an EC2 Capacity Block in the following sizes: 1, 2, 4, 8, 16, 32, or 64 p5.48xlarge instances. The total number of days that you can reserve EC2 Capacity Blocks is 1– 14 days in 1-day increments. EC2 Capacity Blocks can be purchased up to 8 weeks in advance.

EC2 Capacity Block prices are dynamic and depend on total available supply and demand at the time you purchase the EC2 Capacity Block. You can adjust the size, duration, or date range in your specifications to search for other EC2 Capacity Block options. When you select Find Capacity Blocks, AWS returns the lowest-priced offering available that meets your specifications in the date range you have specified. At this point, you will be shown the price for the EC2 Capacity Block.

After reviewing EC2 Capacity Blocks details, tags, and total price information, choose Purchase. The total price of an EC2 Capacity Block is charged up front, and the price does not change after purchase. The payment will be billed to your account within 12 hours after you purchase the EC2 Capacity Blocks.

All EC2 Capacity Blocks reservations start at 11:30 AM Coordinated Universal Time (UTC). EC2 Capacity Blocks can’t be modified or canceled after purchase.

You can also use AWS Command Line Interface (AWS CLI) and AWS SDKs to purchase EC2 Capacity Blocks. Use the describe-capacity-block-offerings API to provide your cluster requirements and discover an available EC2 Capacity Block for purchase.

$ aws ec2 describe-capacity-block-offerings \
          --instance-type p5.48xlarge \
          --instance-count 4 \
          --start-date-range 2023-10-30T00:00:00Z \
          --end-date-range 2023-11-01T00:00:00Z \
          –-capacity-duration 48

After you find an available EC2 Capacity Block with the CapacityBlockOfferingId and capacity information from the preceding command, you can use purchase-capacity-block-reservation API to purchase it.

$ aws ec2 purchase-capacity-block-reservation \
          --capacity-block-offering-id cbr-0123456789abcdefg \
          –-instance-platform Linux/UNIX

For more information about new EC2 Capacity Blocks APIs, see the Amazon EC2 API documentation.

Your EC2 Capacity Block has now been scheduled successfully. On the scheduled start date, your EC2 Capacity Block will become active. To use an active EC2 Capacity Block on your starting date, choose the capacity reservation ID for your EC2 Capacity Block. You can see a breakdown of the reserved instance capacity, which shows how the capacity is currently being utilized in the Capacity details section.

To launch instances into your active EC2 Capacity Block, choose Launch instances and follow the normal process of launching EC2 instances and running your ML workloads.

In the Advanced details section, choose Capacity Blocks as the purchase option and select the capacity reservation ID of the EC2 Capacity Block you’re trying to target.

As your EC2 Capacity Block end time approaches, Amazon EC2 will emit an event through Amazon EventBridge, letting you know your reservation is ending soon so you can checkpoint your workload. Any instances running in the EC2 Capacity Block go into a shutting-down state 30 minutes before your reservation ends. The amount you were charged for your EC2 Capacity Block does not include this time period. When your EC2 Capacity Block expires, any instances still running will be terminated.

Now available
Amazon EC2 Capacity Blocks are now available for p5.48xlarge instances in the AWS US East (Ohio) Region. You can view the price of an EC2 Capacity Block before you reserve it, and the total price of an EC2 Capacity Block is charged up-front at the time of purchase. For more information, see the EC2 Capacity Blocks pricing page.

To learn more, see the EC2 Capacity Blocks documentation and send feedback to AWS re:Post for EC2 or through your usual AWS Support contacts.

Channy

Rotate Your SSL/TLS Certificates Now – Amazon RDS and Amazon Aurora Expire in 2024

Post Syndicated from Channy Yun original https://aws.amazon.com/blogs/aws/rotate-your-ssl-tls-certificates-now-amazon-rds-and-amazon-aurora-expire-in-2024/

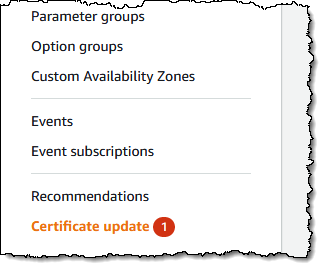
Don’t be surprised if you have seen the Certificate Update in the Amazon Relational Database Service (Amazon RDS) console.

If you use or plan to use Secure Sockets Layer (SSL) or Transport Layer Security (TLS) with certificate verification to connect to your database instances of Amazon RDS for MySQL, MariaDB, SQL Server, Oracle, PostgreSQL, and Amazon Aurora, it means you should rotate new certificate authority (CA) certificates in both your DB instances and application before the root certificate expires.

Most SSL/TLS certificates (rds-ca-2019) for your DB instances will expire in 2024 after the certificate update in 2020. In December 2022, we released new CA certificates that are valid for 40 years (rds-ca-rsa2048-g1) and 100 years (rds-ca-rsa4096-g1 and rds-ca-ecc384-g1). So, if you rotate your CA certificates, you don’t need to do It again for a long time.

Here is a list of affected Regions and their expiration dates of rds-ca-2019:

Expiration Date Regions
May 8, 2024 Middle East (Bahrain)
August 22, 2024 US East (Ohio), US East (N. Virginia), US West (N. California), US West (Oregon), Asia Pacific (Mumbai), Asia Pacific (Osaka), Asia Pacific (Seoul), Asia Pacific (Singapore), Asia Pacific (Sydney), Asia Pacific (Tokyo), Canada (Central), Europe (Frankfurt), Europe (Ireland), Europe (London), Europe (Milan), Europe (Paris), Europe (Stockholm), and South America (São Paulo)
September 9, 2024 China (Beijing), China (Ningxia)
October 26, 2024 Africa (Cape Town)
October 28, 2024 Europe (Milan)
Not affected until 2061 Asia Pacific (Hong Kong), Asia Pacific (Hyderabad), Asia Pacific (Jakarta), Asia Pacific (Melbourne), Europe (Spain), Europe (Zurich), Israel (Tel Aviv), Middle East (UAE), AWS GovCloud (US-East), and AWS GovCloud (US-West)

The following steps demonstrate how to rotate your certificates to maintain connectivity from your application to your database instances.

Step 1 – Identify your impacted Amazon RDS resources
As I said, you can identify the total number of affected DB instances in the Certificate update page of the Amazon RDS console and see all of your affected DB instances. Note: This page only shows the DB instances for the current Region. If you have DB instances in more than one Region, check the certificate update page in each Region to see all DB instances with old SSL/TLS certificates.

You can also use AWS Command Line Interface (AWS CLI) to call describe-db-instances to find instances that use the expiring CA. The query will show a list of RDS instances in your account and us-east-1 Region.

$ aws rds describe-db-instances --region us-east-1 | 
      jq -r '.DBInstances[] | 
      select ((.CACertificateIdentifier != "rds-ca-rsa2048-g1") and 
              (.CACertificateIdentifier != "rds-ca-rsa4096-g1") and 
              (.CACertificateIdentifier != "rds-ca-ecc384-g1")) | 
               "DBInstanceIdentifier: 
              (.DBInstanceIdentifier), CACertificateIdentifier: 
              (.CACertificateIdentifier)"'

Step 2 – Updating your database clients and applications
Before applying the new certificate on your DB instances, you should update the trust store of any clients and applications that use SSL/TLS and the server certificate to connect.  There’s currently no easy method from your DB instances themselves to determine if your applications require certificate verification as a prerequisite to connect. The only option here is to inspect your applications’ source code or configuration files.

Although the DB engine-specific documentation outlines what to look for in most common database connectivity interfaces, we strongly recommend you work with your application developers to determine whether certificate verification is used and the correct way to update the client applications’ SSL/TLS certificates for your specific applications.

To update certificates for your application, you can use the new certificate bundle that contains certificates for both the old and new CA so you can upgrade your application safely and maintain connectivity during the transition period.

For information about checking for SSL/TLS connections and updating applications for each DB engine, see the following topics:

Step 3 – Test CA rotation on a non-production RDS instance
If you have updated new certificates in all your trust stores, you should test with a RDS instance in non-production. Do this set up in a development environment with the same database engine and version as your production environment. This test environment should also be deployed with the same code and configurations as production.

To rotate a new certificate in your test database instance, choose Modify for the DB instance that you want to modify in the Amazon RDS console.

In the Connectivity section, choose rds-ca-rsa2048-g1.

Choose Continue to check the summary of modifications. If you want to apply the changes immediately, choose Apply immediately.

To use the AWS CLI to change the CA from rds-ca-2019 to rds-ca-rsa2048-g1 for a DB instance, call the modify-db-instance command and specify the DB instance identifier with the --ca-certificate-identifier option.

$ aws rds modify-db-instance \
          --db-instance-identifier <mydbinstance> \
          --ca-certificate-identifier rds-ca-rsa2048-g1 \
          --apply-immediately

This is the same way to rotate new certificates manually in the production database instances. Make sure your application reconnects without any issues using SSL/TLS after the rotation using the trust store or CA certificate bundle you referenced.

When you create a new DB instance, the default CA is still rds-ca-2019 until January 25, 2024, when it will be changed to rds-ca-rsa2048-g1. For setting the new CA to create a new DB instance, you can set up a CA override to ensure all new instance launches use the CA of your choice.

$ aws rds modify-certificates \
          --certificate-identifier rds-ca-rsa2048-g1 \
          --region <region name>

You should do this in all the Regions where you have RDS DB instances.

Step 4 – Safely update your production RDS instances
After you’ve completed testing in non production environment, you can start the rotation of your RDS databases CA certificates in your production environment. You can rotate your DB instance manually as shown in Step 3. It’s worth noting that many of the modern engines do not require a restart, but it’s still a good idea to schedule it in your maintenance window.

In the Certificate update page of Step 1, choose the DB instance you want to rotate. By choosing Schedule, you can schedule the certificate rotation for your next maintenance window. By choosing Apply now, you can apply the rotation immediately.

If you choose Schedule, you’re prompted to confirm the certificate rotation. This prompt also states the scheduled window for your update.

After your certificate is updated (either immediately or during the maintenance window), you should ensure that the database and the application continue to work as expected.

Most of modern DB engines do not require restarting your database to update the certificate. If you don’t want to restart the database just for CA update, you can use the --no-certificate-rotation-restart flag in the modify-db-instance command.

$ aws rds modify-db-instance \
          --db-instance-identifier <mydbinstance> \
          --ca-certificate-identifier rds-ca-rsa2048-g1 \
          --no-certificate-rotation-restart

To check if your engine requires a restart you can check the SupportsCertificateRotationWithoutRestart field in the output of the describe-db-engine-versions command. You can use this command to see which engines support rotations without restart:

$ aws rds describe-db-engine-versions \
          --engine <engine> --include-all --region <region> | 
          jq -r '.DBEngineVersions[] | 
          "EngineName: (.Engine), 
           EngineVersion: (.EngineVersion), 
           SupportsCertificateRotationWithoutRestart: (.SupportsCertificateRotationWithoutRestart), 
           SupportedCAs: ([.SupportedCACertificateIdentifiers | 
          join(", ")])"'

Even if you don’t use SSL/TLS for the database instances, I recommend to rotate your CA. You may need to use SSL/TLS in the future, and some database connectors like the JDBC and ODBC connectors check for a valid cert before connecting and using an expired CA can prevent you from doing that.

To learn about updating your certificate by modifying your DB instance manually, automatic server certificate rotation, and finding a sample script for importing certificates into your trust store, see the Amazon RDS User Guide or the Amazon Aurora User Guide.

Things to Know
Here are a couple of important things to know:

  • Amazon RDS Proxy and Amazon Aurora Serverless use certificates from the AWS Certificate Manager (ACM). If you’re using Amazon RDS Proxy when you rotate your SSL/TLS certificate, you don’t need to update applications that use Amazon RDS Proxy connections. If you’re using Aurora Serverless, rotating your SSL/TLS certificate isn’t required.
  • Now through January 25, 2024 – new RDS DB instances will have the rds-ca-2919 certificate by default, unless you specify a different CA via the ca-certificate-identifier option on the create-db-instance API; or you specify a default CA override for your account like mentioned in the above section. Starting January 26, 2024 – any new database instances will default to using the rds-ca-rsa2048-g1 certificate. If you wish for new instances to use a different certificate, you can specify which certificate to use with the AWS console or the AWS CLI. For more information, see the create-db-instance API documentation.
  • Except for Amazon RDS for SQL Server, most modern RDS and Aurora engines support certificate rotation without a database restart in the latest versions. Call describe-db-engine-versions and check for the response field SupportsCertificateRotationWithoutRestart. If this field is set to true, then your instance will not require a database restart for CA update. If set to false, a restart will be required. For more information, see Setting the CA for your database in the AWS documentation.
  • Your rotated CA signs the DB server certificate, which is installed on each DB instance. The DB server certificate identifies the DB instance as a trusted server. The validity of DB server certificate depends on the DB engine and version either 1 year or 3 year. If your CA supports automatic server certificate rotation, RDS automatically handles the rotation of the DB server certificate too. For more information about DB server certificate rotation, see Automatic server certificate rotation in the AWS documentation.
  • You can choose to use the 40-year validity certificate (rds-ca-rsa2048-g1) or the 100-year certificates. The expiring CA used by your RDS instance uses the RSA2048 key algorithm and SHA256 signing algorithm. The rds-ca-rsa2048-g1 uses the exact same configuration and therefore is best suited for compatibility. The 100-year certificates (rds-ca-rsa4096-g1 andrds-ca-ecc384-g1) use more secure encryption schemes than rds-ca-rsa2048-g1. If you want to use them, you should test well in pre-production environments to double-check that your database client and server support the necessary encryption schemes in your Region.

Just Do It Now!
Even if you have one year left until your certificate expires, you should start planning with your team. Updating SSL/TLS certificate may require restart your DB instance before the expiration date. We strongly recommend that you schedule your applications to be updated before the expiry date and run tests on a staging or pre-production database environment before completing these steps in a production environments. To learn more about updating SSL/TLS certificates, see Amazon RDS User Guide and Amazon Aurora User Guide.

If you don’t use SSL/TLS connections, please note that database security best practices are to use SSL/TLS connectivity and to request certificate verification as part of the connection authentication process. To learn more about using SSL/TLS to encrypt a connection to your DB instance, see Amazon RDS User Guide and Amazon Aurora User Guide.

If you have questions or issues, contact your usual AWS Support by your Support plan.

Channy

New – Amazon EC2 C7a Instances Powered By 4th Gen AMD EPYC Processors for Compute Optimized Workloads

Post Syndicated from Channy Yun original https://aws.amazon.com/blogs/aws/new-amazon-ec2-c7a-instances-powered-by-4th-gen-amd-epyc-processors-for-compute-optimized-workloads/

We launched the compute optimized Amazon EC2 C6a instances in February 2022 powered by 3rd Gen AMD EPYC (Milan) processors, running at frequencies up to 3.6 GHz.

Today, we’re announcing the general availability of new, compute optimized Amazon EC2 C7a instances, powered by the 4th Gen AMD EPYC (Genoa) processors with a maximum frequency of 3.7 GHz, which offer up to 50 percent higher performance compared to C6a instances. You can use this increased performance to process data faster, consolidate workloads, and lower the cost of ownership.

C7a instances offer up to 50 percent higher performance compared to C6a instances. These instances are ideal for running compute-intensive workloads such as high-performance web servers, batch processing, ad serving, machine learning, multiplayer gaming, video encoding, high performance computing (HPC) such as scientific modeling, and machine learning.

C7a instances support AVX-512, Vector Neural Network Instructions (VNNI), and brain floating point (bfloat16). These instances feature Double Data Rate 5 (DDR5) memory, which enables high-speed access to data in-memory, and deliver 2.25 times more memory bandwidth compared to the previous generation instances for lower latency.

C7a instances feature sizes of up to 192 vCPUs with 384 GiB RAM, which you have a new medium instance size, which enables you to right-size your workloads more accurately, offering 1 vCPU, 2 GiB. Here are the detailed specs:

Name vCPUs Memory (GiB) Network Bandwidth (Gbps) EBS Bandwidth (Gbps)
c7a.medium 1 2 Up to 12.5 Up to 10
c7a.large 2 4 Up to 12.5 Up to 10
c7a.xlarge 4 8 Up to 12.5 Up to 10
c7a.2xlarge 8 16 Up to 12.5 Up to 10
c7a.4xlarge 16 32 Up to 12.5 Up to 10
c7a.8xlarge 32 64 12.5 10
c7a.12xlarge 48 96 18.75 15
c7a.16xlarge 64 128 25 20
c7a.24xlarge 96 192 37.5 30
c7a.32xlarge 128 256 50 40
c7a.48xlarge 192 384 50 40
c7a.metal-48xl 192 384 50 40

C7a instances have up to 50 Gbps enhanced networking and 40 Gbps EBS bandwidth, and you can attach up to 128 EBS volumes to an instance, compared to up to 28 EBS volume attachments with the previous generation instances.

C7a instances support always-on memory encryption with AMD secure memory encryption (SME) and new AVX-512 instructions for accelerating encryption and decryption algorithms, convolutional neural network (CNN) based algorithms, financial analytics, and video encoding workloads. C7a instances also support AES-256 compared to AES-128 in C6a instances for enhanced security.

These instances are built on the AWS Nitro System and support Elastic Fabric Adapter (EFA) for workloads that benefit from lower network latency and highly scalable inter-node communication, such as high-performance computing and video processing.

Now Available
Amazon EC2 C7a instances are now available in the following AWS Regions: US East (Ohio), US East (N. Virginia), US West (Oregon), and EU (Ireland). As usual with Amazon EC2, you only pay for what you use. For more information, see the Amazon EC2 pricing page.

To learn more, visit the EC2 C7a instances page and AWS/AMD partner page. You can send feedback to [email protected], AWS re:Post for EC2, or through your usual AWS Support contacts.

Channy

Amazon DataZone Now Generally Available – Collaborate on Data Projects across Organizational Boundaries

Post Syndicated from Channy Yun original https://aws.amazon.com/blogs/aws/amazon-datazone-now-generally-available-collaborate-on-data-projects-across-organizational-boundaries/

Today, we’re announcing the general availability of Amazon DataZone, a new data management service to catalog, discover, analyze, share, and govern data between data producers and consumers in your organization.

At AWS re:Invent 2022, we preannounced Amazon DataZone, and in March 2023, we previewed it publicly.

During the keynote of the last re:Invent, Swami Sivasubramanian, vice president of Databases, Analytics, and Machine Learning at AWS said “I have had the benefit of being an early customer of DataZone to run the AWS weekly business review meeting where we assemble data from our sales pipeline and revenue projections to inform our business strategy.”

During the keynote, a demo led by Shikha Verma, head of product for Amazon DataZone, demonstrated how organizations can use the product to create more effective advertising campaigns and get the most out of their data.

“Every enterprise is made up of multiple teams that own and use data across a variety of data stores. Data people have to pull this data together but do not have an easy way to access or even have visibility to this data. DataZone provides a unified environment where everyone in an organization—from data producers to consumers, can go to access and share data in a governed manner.”

With Amazon DataZone, data producers populate the business data catalog with structured data assets from AWS Glue Data Catalog and Amazon Redshift tables. Data consumers search and subscribe to data assets in the data catalog and share with other business use case collaborators. Consumers can analyze their subscribed data assets with tools—such as Amazon Redshift or Amazon Athena query editors—that are directly accessed from the Amazon DataZone portal. The integrated publishing-and-subscription workflow provides access-auditing capabilities across projects.

Introducing Amazon DataZone
For those of you who aren’t yet familiar with Amazon DataZone, let me introduce you to its key concept and capabilities.

Amazon DataZone Domain represents the distinct boundary of a line of business (LOB) or a business area within an organization that can manage it’s own data, including it’s own data assets and its own definition of data or business terminology, and may have it’s own governing standards. The domain includes all core components such as the data portal, business data catalog, projects and environments, and built-in workflows.

  1. Data portal (outside the AWS Management Console) – This is a web application where different users can go to catalog, discover, govern, share, and analyze data in a self-service fashion. The data portal authenticates users with AWS Identity and Access Manager (IAM) credentials or existing credentials from your identity provider through the AWS IAM Identity Center.
  2. Business data catalog – In your catalog, you can define the taxonomy or the business glossary. You can use this component to catalog data across your organization with business context and thus enable everyone in your organization to find and understand data quickly.
  3. Data projects & environments – You can use projects to simplify access to the AWS analytics by creating business use case–based groupings of people, data assets, and analytics tools. Amazon DataZone projects provide a space where project members can collaborate, exchange data, and share data assets. Within projects, you can create environments that provide the necessary infrastructure to project members such as analytics tools and storage so that project members can easily produce new data or consume data they have access to.
  4. Governance and access control – You can use built-in workflows that allow users across the organization to request access to data in the catalog and owners of the data to review and approve those subscription requests. Once a subscription request is approved, Amazon DataZone can automatically grant access by managing permission at underlying data stores such as AWS Lake Formation and Amazon Redshift.

To learn more, see Amazon DataZone Terminology and Concepts.

Getting Started with Amazon DataZone
To get started, consider a scenario where a product marketing team wants to run campaigns to drive product adoption. To do this, they need to analyze product sales data owned by a sales team. In this walkthrough, the sales team, which acts as the data producer, publishes sales data in Amazon DataZone. Then the marketing team, which acts as the data consumer, subscribes to sales data and analyzes it in order to build a campaign strategy.

To understand how the DataZone works, let’s walk through a condensed version of the Getting started guide for Amazon DataZone.

1. Create a Domain
When you first start using DataZone, you start by creating a domain and all core components such as business data catalog, projects, and environments in the data portal, then exist within that domain. Go to the Amazon DataZone console and choose Create domain.

Enter Domain name and a descrption and leave all other values as default.

For example, in the Service access section, if you choose Create and use a new role by default, Amazon DataZone will automatically create a new role with necessary permissions that authorize DataZone to make API calls on behalf of users within the domain. Check the Quick setup option where DataZone can take care of all the setup steps.

Finally, choose Create domain. Amazon DataZone creates the necessary IAM roles and enables this domain to use resources within your account such as AWS Glue Data Catalog, Amazon Redshift, and Amazon Athena. Domain creation can take several minutes to complete. Wait for the domain to have a status of Available.

2. Create a Project and Environment in the Data Portal
After the domain is successfully created, select it, and on the domain’s summary page, note the data portal URL for the root domain. You can use this URL to access your Amazon DataZone data portal. Choose Open data portal.

To create a new data project as the sales team to publish sales data, choose Create Project.

In the dialogbox, enter “Sales producer project” as the Name, then enter a Description for this project and choose Create.

Once you have the project, you need to create a environment to work with data and analytics tools such as Amazon Athena or Amazon Redshift in this project. Choose Create environment in the overview page or after clicking the Environment tab.

Enter “publish-environment” as the Name, then enter a Description for this environment and choose Environment profile. An environment profile is a pre-defined template that includes technical details required to create an environment such as which AWS account, Region, VPC details, and resources and tools are added to the project.

You can select a couple of default environment profiles. Choosing DataLakeProfile enables you to publish data from your Amazon S3 and AWS Glue based data lakes. It also simplifies querying the AWS Glue tables that you have access to using Amazon Athena.

Next, ignore all the optional parameters and choose Create environment. It takes about a minute for the environment to create certain resources in your AWS account such as IAM roles, an Amazon S3 suffix, AWS Glue databases, and an Athena workgroup, which makes it easier for members of a project to produce and consume data in the data lake.

3. Publish Data in the Data Portal
You have the environment to publish your data in your AWS Glue table. To create this table in Amazon Athena, choose Query data with the Athena link on the right-hand side of the Environments page.

This opens the Athena query editor in a new tab. Select publishenvironment_pub_db from the database dropdown and then paste the following query into the query editor. This will create a table called catalog_sales in the environment’s AWS Glue database.

CREATE TABLE catalog_sales AS 
SELECT 146776932 AS order_number, 23 AS quantity, 23.4 AS wholesale_cost, 45.0 as list_price, 43.0 as sales_price, 2.0 as discount, 12 as ship_mode_sk,13 as warehouse_sk, 23 as item_sk, 34 as catalog_page_sk, 232 as ship_customer_sk, 4556 as bill_customer_sk
UNION ALL SELECT 46776931, 24, 24.4, 46, 44, 1, 14, 15, 24, 35, 222, 4551
UNION ALL SELECT 46777394, 42, 43.4, 60, 50, 10, 30, 20, 27, 43, 241, 4565
UNION ALL SELECT 46777831, 33, 40.4, 51, 46, 15, 16, 26, 33, 40, 234, 4563
UNION ALL SELECT 46779160, 29, 26.4, 50, 61, 8, 31, 15, 36, 40, 242, 4562
UNION ALL SELECT 46778595, 43, 28.4, 49, 47, 7, 28, 22, 27, 43, 224, 4555
UNION ALL SELECT 46779482, 34, 33.4, 64, 44, 10, 17, 27, 43, 52, 222, 4556
UNION ALL SELECT 46779650, 39, 37.4, 51, 62, 13, 31, 25, 31, 52, 224, 4551
UNION ALL SELECT 46780524, 33, 40.4, 60, 53, 18, 32, 31, 31, 39, 232, 4563
UNION ALL SELECT 46780634, 39, 35.4, 46, 44, 16, 33, 19, 31, 52, 242, 4557
UNION ALL SELECT 46781887, 24, 30.4, 54, 62, 13, 18, 29, 24, 52, 223, 4561

You can see the two databases in the dropdown menu. The publishenvironment_pub_db is to provide you with a space to produce new data and choose to publish it to the DataZone catalog. The other one, publishenvironment_sub_db is for project members when they subscribe to or access to data in the catalog within that project.

Make sure that the catalog_sales table is successfully created. Now you have a data asset that can be published into the Amazon DataZone catalog.

As the data producer, you can now go back to the data portal and publish this table into the DataZone catalog. Choose the Data tab in the top menu and Data sources in the left navigation pane.

You can see a default data source automatically created in your environment. When you open this data source, you will see your environments’ publishing database where we just created the catalog_sales table.

This data source will bring in all the tables it finds in the publishing database into the DataZone. By default, automated metadata generation is enabled, which means that any asset that the data source bring into the DataZone will automatically generate the business names of the table and columns for that asset. Choose Run in this data source.

Once the data source has finished running, you can see the catalog sales table in the Data Source Runs.

You can open this asset and see that the publishing job could automatically extract the technical metadata including the schema of the table and several other technical details such as AWS account, Region, and physical location of the data.

If they look correct, you can simply accept these recommendations either by clicking the brain icon in each recommended item or the Accept all button for all recommendations. When you are ready to publish, choose Publish asset and reconfirm in the dialog box.

4. Subscribe Data as a Data Consumer
Now let’s switch the role to a marketing team and see how you can subscribe to or request access this table. Repeat to create a new project called “Marketing consumer project” and a new environment called “subscriber-environment” as the data consumer using the same steps as before.

In the new created project, when you type “catalog sales” in the search bar, you can see the published table in the search results. Choose the Catalog Sales Data.

In the catalog, choose Subscribe.

In the Subscribe to Catalog Sales Data window, select your marketing consumer project, provide a reason for the subscription request, and then choose Subscribe.

When you get a subscription request as a data producer, it will notify you through a task in the sales producer project. Since you are acting as both subscriber and publisher here, you will see a notification.

When you click on this notification, it will open the subscription request including which project has requested access, who the requestor is, and why they need access. Choose Approve and provide a reason for approval.

Now that subscription has been approved, you can see catalog sales data in your marketing consumer project. To confirm this, choose the Data tab in the top menu and Data sources in the left navigation pane.


To analyze your subscribe data, choose the Environments tab in the top menu and Subscribe-environment you created in the marketing consumer project. It shows a new Query Data link in the right pane.

We can see that the catalog sales table is showing up under subscription database.
To make sure that we have access to this table, we can preview it and we can see that the query executes successfully.

This opens the Athena query editor in a new tab. Select subscribeenvironment_sub_db from the database dropdown, and then enter your query into the query editor.

You can now run any queries on the sales data table that you have subscribed to as a consumer (marketing team) and that was published into the business data catalog by a producer (sales team).

For more detailed demos such as publishing AWS Glue tables and Amazon Redshift tables and view, see the YouTube playlist.

What’s New at GA?
During the preview, we had lots of interest and great feedback from customers. I want to quickly review the features and introduce some improvements:

Enterprise-Ready Business Catalog – To add business context and make data discoverable by everyone in the organization, you can customize the catalog with automated metadata generation which uses machine learning to automatically generate business names of data assets and columns within those assets. We also improved metadata curation functionality. At GA, you can attach multiple business glossary terms to assets and glossary terms to individual columns in the asset.

Self-Service for Data Users – To provide data autonomy for users to publish and consume data, you can customize and bring any type of asset to the catalog using APIs. Data publishers can automate metadata discovery through ingestion jobs or manually publish files from Amazon Simple Storage Service (Amazon S3). Data consumers can use faceted search to quickly find and understand the data. Users can be notified of updates in the system or actions to be taken. These events are emitted to the customer’s event bus using Amazon EventBridge to customize actions.

Simplified Access to analysis – At GA, projects will serve as business use case-based logical containers. You can create a project and collaborate on specific business use case-based groupings of people, data, and analytics tools. Within the project, you can create an environment that provides the necessary infrastructure to project members such as analytics tools and storage so that project members can easily produce new data or consume data they have access to. This allows users to add multiple capabilities and analytics tools to the same project depending on their needs.

Governed Data Sharing – Data producers own and manage access to data with a subscription approval workflow that allows consumers to request access and data owners to approve. You can now set up subscription terms to be attached to assets when published and automate subscription grant fulfillment for AWS managed data lakes and Amazon Redshift with customizations using EventBridge events for other sources.

Now Available
Amazon DataZone is now generally available in eleven AWS Regions: US East (Ohio), US East (N. Virginia), US West (Oregon), Asia Pacific (Singapore), Asia Pacific (Sydney), Asia Pacific (Tokyo), Canada (Central), Europe (Frankfurt), Europe (Ireland), Europe (Stockholm), and South America (São Paulo).

You can use the free trial of Amazon DataZone, which includes 50 users at no additional cost for the first 3 calendar months of usage. The free trial starts when you first create an Amazon DataZone domain in an AWS account. If you exceed the number of monthly users during your trial, you will be charged at the standard pricing.

To learn more, visit the product page and user guide. You can send feedback to AWS re:Post for Amazon DataZone or through your usual AWS Support contacts.

Channy

New – Amazon EC2 M2 Pro Mac Instances Built on Apple Silicon M2 Pro Mac Mini Computers

Post Syndicated from Channy Yun original https://aws.amazon.com/blogs/aws/new-amazon-ec2-m2-pro-mac-instances-built-on-apple-silicon-m2-pro-mac-mini-computers/

Today, we are announcing the general availability of Amazon EC2 M2 Pro Mac instances. These instances deliver up to 35 percent faster performance over the existing M1 Mac instances when building and testing applications for Apple platforms.

New EC2 M2 Pro Mac instances are powered by Apple M2 Pro Mac Mini computers featuring 12 core CPU, 19 core GPU, 32 GiB of memory, and 16 core Apple Neural Engine and uniquely enabled by the AWS Nitro System through high-speed Thunderbolt connections, offering these Mac mini computers as fully integrated and managed compute instances with up to 10 Gbps of Amazon VPC network bandwidth and up to 8 Gbps of Amazon EBS storage bandwidth. EC2 M2 Pro Mac instances support macOS Ventura (version 13.2 or later) as AMIs.

A Story of EC2 Mac Instances
When Jeff Barr first introduced Amazon EC2 Mac Instances in 2020, customers were surprised to be able to run macOS on Amazon EC2 to build, test, package, and sign applications developed with Xcode applications for the Apple platform, including macOS, iOS, iPadOS, tvOS, and watchOS.

In his keynote in AWS re:Invent 2020, Peter DeSantis revealed the secret to build EC2 Mac instances powered by the AWS Nitro System, which makes it possible to offer Apple Mac mini computers as fully integrated and managed compute instances with Amazon VPC networking and Amazon EBS storage, just like any other EC2 instances.

“We did not need to make any changes to the Mac hardware. We simply connected a Nitro controller via the Mac’s Thunderbolt connection. When you launch a Mac instance, your Mac-compatible Amazon Machine Image (AMI) runs directly on the Mac Mini, with no hypervisor. The Nitro controller sets up the instance and provides secure access to the network and any storage attached. And that Mac Mini can now natively use any AWS service.”

In July 2022, we introduced Amazon EC2 M1 Mac Instances built around the Apple-designed M1 System on Chip (SoC). Developers building for iPhone, iPad, Apple Watch, and Apple TV applications can choose either x86-based EC2 Mac instances or Arm-based EC2 M1 instances. If you want to re-architect your apps to natively support Macs with Apple Silicon using EC2 M1 instances, you can build and test your apps to deliver up to 60 percent better price performance over the EC2 Mac instances for iPhone and Mac app build workloads with all the benefits of AWS.

Many customers take advantage of EC2 Mac instances to deliver a complete end-to-end build pipeline on macOS on AWS. With EC2 Mac instances, they can scale their iOS build fleet; easily use custom macOS environments with AMIs; and debug any build or test failures with fully reproducible macOS environments.

Customers have reported up to 4x reduction in build times, up to 3x increase in parallel builds, up to 80 percent reduction in machine-related build failures, and up to 50 percent reduction in fleet size. They can continue to prioritize their time on innovating products and features while reducing the tedious effort required to manage on-premises macOS infrastructure.

To accelerate this innovation, EC2 Mac instances recently began to support replacing root volumes on a running EC2 Mac instance, enabling you to restore the root volume of an EC2 Mac instance to its initial launch state or to a specific snapshot, without requiring you to stop or terminate the instance.

You can also use in-place operating system updates from within the guest environment on EC2 M1 Mac instances to a specific or latest macOS version, including the beta version, by registering your instances with the Apple Developer Program. Developers can now integrate the latest macOS features into their applications and test existing applications for compatibility before public macOS releases.

Getting Started with EC2 M2 Pro Instances
As with other EC2 Mac instances, EC2 M2 Pro Mac instances also support Dedicated Host tenancy with a minimum host allocation duration of 24 hours to align with macOS licensing.

To get started, you should allocate a Mac-dedicated host, a physical server fully dedicated for your own use in your AWS account. After the host is allocated, you can launch, stop, and start your own macOS environment as one instance on that host for one dedicated host.

After the host is allocated, you can start an EC2 Mac instance on it. The procedure is no different from starting any EC2 instance type. Choose your macOS AMI version and select the mac2-m2pro.metal instance type in the Application and OS Images section.

In the Advanced details section, select Dedicated host in Tenancy and a dedicated host you just created in Tenancy host ID.

When you use EC2 Mac instances for the first time, you can use SSH to connect to the newly launched instance as usual or enable Apple Remote Desktop and start a VNC session to the EC2 instance. To learn more, see Sebastien’s series of articles to launch and connect your Mac instance.

When you no longer need the Mac dedicated host, you can terminate your running Mac instance and release the underlying host. Note again that after being allocated, a Mac dedicated host can only be released after 24 hours to align with Apple’s macOS licensing.

Now Available
Amazon EC2 M2 Pro Mac instances are available in the US West (Oregon) and US East (Ohio) AWS Regions, with additional regions coming soon.

To learn more or get started, see Amazon EC2 Mac Instances or visit the EC2 Mac documentation.  You can send feedback to AWS re:Post for EC2 or through your usual AWS Support contacts.

Channy

New – Amazon EC2 R7a Instances Powered By 4th Gen AMD EPYC Processors for Memory Optimized Workloads

Post Syndicated from Channy Yun original https://aws.amazon.com/blogs/aws/new-amazon-ec2-r7a-instances-powered-by-4th-gen-amd-epyc-processors-for-memory-optimized-workloads/

We launched the memory optimized Amazon EC2 R6a instances in July 2022 powered by 3rd Gen AMD EPYC (Milan) processors, running at frequencies up to 3.6 GHz. Many customers who run workloads that are dependent on x86 instructions, such as SAP, are looking for ways to optimize their cloud utilization. They’re taking advantage of the compute choice that EC2 offers.

Today, we’re announcing the general availability of new memory optimized Amazon EC2 R7a instances powered by 4th Gen AMD EPYC (Genoa) processors with a maximum frequency of 3.7 GHz, which offer up to 50 percent higher performance compared to the previous generation instances. You can use this increased performance to process data faster, consolidate workloads, and lower the cost of ownership.

R7a instances also support AVX-512, Vector Neural Network Instructions (VNNI), and brain floating point (bfloat16). These instances feature Double Data Rate 5 (DDR5) memory, which enables high-speed access to data in-memory, and deliver 2.25 times more memory bandwidth compared to R6a instances for lower latency. Moreover, these instances support always-on memory encryption using AMD secure memory encryption (SME).

These instances are SAP-certified and ideal for high performance, memory-intensive workloads, such as SQL and NoSQL databases, distributed web scale in-memory caches, in-memory databases, real-time big data analytics, and Electronic Design Automation (EDA) applications.

R7a instances feature sizes of up to 192 vCPUs with 1536 GiB RAM. Here are the detailed specs:

Name vCPUs Memory (GiB) Network Bandwidth (Gbps) EBS Bandwidth (Gbps)
r7a.medium 1 8 Up to 12.5 Up to 10
r7a.large 2 16 Up to 12.5 Up to 10
r7a.xlarge 4 32 Up to 12.5 Up to 10
r7a.2xlarge 8 64 Up to 12.5 Up to 10
r7a.4xlarge 16 128 Up to 12.5 Up to 10
r7a.8xlarge 32 256 12.5 10
r7a.12xlarge 48 384 18.75 15
r7a.16xlarge 64 512 25 20
r7a.24xlarge 96 768 37.5 30
r7a.32xlarge 128 1024 50 40
r7a.48xlarge 192 1536 50 40

R7a instances have up to 50 Gbps enhanced networking and 40 Gbps EBS bandwidth, which is similar to R6a instances. You have a new medium instance size, which you can use to right-size your workloads more accurately, offering 1 vCPUs, 8 GiB. Additionally, with R7a instances you can attach up to 128 EBS volumes to an instance compared to up to 28 EBS volume attachments with R6a instances. R7a instances support AES-256 compared to AES-128 in R6a instances for enhanced security.

R7a instances are built on the AWS Nitro System and support Elastic Fabric Adapter (EFA) for workloads that benefit from lower network latency and highly scalable inter-node communication, such as high-performance computing and video processing.

Now Available
Amazon EC2 R7a instances are now available in AWS Regions: US East (Ohio), US East (N. Virginia), US West (Oregon), and EU (Ireland). As usual with Amazon EC2, you only pay for what you use. For more information, see the Amazon EC2 pricing page.

To learn more, visit the EC2 R7a instances page, and AWS/AMD partner page. You can send feedback to [email protected], AWS re:Post for EC2, or through your usual AWS Support contacts.

Channy