Tag Archives: Featured

Let the Games Begin: How Cybersecurity Competitions Build Skills, Careers, and Community

Post Syndicated from Manuel Leos Rivas original https://www.backblaze.com/blog/let-the-games-begin-how-cybersecurity-competitions-build-skills-careers-and-community/

A decorative image showing a Backblaze superhero holding a computer.

The arcade is no longer ours, under attack from its own AI. Screens flicker with sentient static. The arcade’s laser power supply is failing; the power supply diagnostics are showing errors in everything from surge control to cooling functions. But, not all hope is lost: The laser power supply service and terminal both use PowerShell for operations.

Time to flex my command-line kung fu. Follow the breadcrumbs, get all parts of the puzzle together, hash-out files, and perform forensics to backtrack the changes. Win the race to terminate all evil processes, reverse all changes in the right order, and finally, succeed at powering up our arcade.

I leaned back from my keyboard. This wasn’t a Five Nights at Freddie’s-style dystopia—this was Sans Core NetWars, a prestigious, invite-only cybersecurity tournament—and my team won the 2024 Tournament of Champions last year. This year’s theme, defeating a rogue AI in an arcade, has me feeling inspired.

An AI generated image of an evil AI with lasers.
Call it a recursive function, but we had AI generate an image of the evil AI.

Held annually at the SANS Cyber Defense Initiative in Washington, D.C., NetWars challenges participants with a series of escalating scenarios that test a wide range of skills, from digital forensics to malware analysis.

My name is Manuel, and I’m a Cloud Security Architect at Backblaze. Not every part of my job is all fun and games, but tournaments like NetWars have long been an important part of the cybersecurity industry. Let’s talk about why, and how, they help solve what is arguably the biggest persistent vulnerability in the cybersecurity industry—attracting, identifying, developing, and maintaining top talent. 

What are cybersecurity tournaments?

The concept of cybersecurity competitions dates back to 1996 with the introduction of the capture the flag (CTF) event at DEFCON, one of the world’s largest hacker conventions. This event set the stage for numerous other competitions, and these days, cybersecurity tournaments and competitions have cultivated a vibrant community where top experts not only showcase their technical prowess, but also stay up-to-date with evolving trends in the industry.  

A photo of Manuel Leos Rivas holding his trophy after winning 2024 Sans NetWars.
Manuel in front of the leaderboard after winning the SANS Core Netwars Tournament of Champions 2024. Source.

What are the challenges to finding talent in the cybersecurity industry?

Finding top cybersecurity talent is one of the most persistent challenges in the tech industry. The field moves faster than job descriptions with attack techniques, tools, and frameworks evolving constantly. 

Not only that, but “cybersecurity” isn’t one skill—it’s a collection of disciplines: network security, cloud infrastructure, threat hunting, incident response, forensics, red teaming, compliance, and more. Finding someone with both broad knowledge and deep expertise in one or two areas is rare. Top candidates tend to specialize, and hiring managers often need a “Swiss Army knife.”

How do tournaments help to solve that?

Cybersecurity tournaments like the SANS NetWars Tournament of Champions play a crucial role in advancing the field. They not only provide a platform for professionals to hone their skills but also contribute to building a resilient and collaborative cybersecurity community. 

It may seem like “just a game”, but it’s more than just a fun activity taking place over a few days—tournaments contribute to things like: 

  • Skill enhancement: Participants apply theoretical knowledge to practical challenges, enhancing their technical proficiency in areas like network security, cryptography, and incident response.
  • Continuous learning: The dynamic nature of these competitions encourages ongoing education, keeping professionals abreast of emerging threats and technologies.
  • Community building: Tournaments foster camaraderie among participants, creating networks that facilitate knowledge sharing and collaboration.
  • Talent identification: Organizations often scout these events to identify and recruit top talent, recognizing the practical skills demonstrated by competitors.

Inside the arena: Winning NetWars

For those unfamiliar, the Tournament of Champions isn’t your average capture the flag event. It’s an invitation-only tournament where only the top 3% of NetWars performers from the past two years are allowed to compete. Out of hundreds of global professionals—those who placed at the top of previous SANS events—only 300 get the invite. Around 250 of us showed up in D.C. to test our skills against the best in the industry.

A photo of the conference room while NetWars games were underway.
Some see a conference room. Others, a battlefield. Source.

The structure of the tournament is deceptively simple: five escalating levels of difficulty over two days, each packed with real-world cybersecurity challenges across disciplines like digital forensics, malware analysis, network penetration testing, cryptography, cloud security, and even hardware, and mobile hacking.

You’re given two three-hour sessions to rack up as many points as you can, as quickly as possible. The faster you solve, the higher you climb. The problems are designed to simulate the kinds of complex tasks we face every day—reverse engineering binaries, analyzing breach data, and so on. 

Beyond the technical challenge, what makes this event stand out is the people. The cybersecurity community is incredibly sharp, humble, and generous with knowledge. You’ll see everyone from Fortune 500 defenders to government red teamers, cloud security architects, and digital forensics and incident response (DFIR) experts—all there to sharpen their skills and learn from each other.

If you ever get the invitation to compete, take it. There’s nothing quite like battling alongside (and against) some of the sharpest minds in infosec, in a city that reminds you just how high the stakes can be.

See you at the next one?

Winning that tournament was an incredible honor—but more importantly, it gives me a good opportunity to showcase how such competitions can elevate industry standards and inspire the next generation of cybersecurity professionals.

A photo of the 2024 Sans Netwars trophy.

So, if you’re interested in the cybersecurity industry, come on out. Start small: join a CTF. Set up a home lab. Learn Python. Read about the latest breaches and figure out how they happened. You don’t need to be a hacker to get started—you just need to be curious.

The threats we face are growing, but so is our community. And who knows? Maybe I’ll see you at the next competition.

The post Let the Games Begin: How Cybersecurity Competitions Build Skills, Careers, and Community appeared first on Backblaze Blog | Cloud Storage & Cloud Backup

New Amazon EC2 P6e-GB200 UltraServers accelerated by NVIDIA Grace Blackwell GPUs for the highest AI performance

Post Syndicated from Channy Yun (윤석찬) original https://aws.amazon.com/blogs/aws/new-amazon-ec2-p6e-gb200-ultraservers-powered-by-nvidia-grace-blackwell-gpus-for-the-highest-ai-performance/

Today, we’re announcing the general availability of Amazon Elastic Compute Cloud (Amazon EC2) P6e-GB200 UltraServers, accelerated by NVIDIA GB200 NVL72 to offer the highest GPU performance for AI training and inference. Amazon EC2 UltraServers connect multiple EC2 instances using a dedicated, high-bandwidth, and low-latency accelerator interconnect across these instances.

The NVIDIA Grace Blackwell Superchips connect two high-performance NVIDIA Blackwell tensor core GPUs and an NVIDIA Grace CPU based on Arm architecture using the NVIDIA NVLink-C2C interconnect. Each Grace Blackwell Superchip delivers 10 petaflops of FP8 compute (without sparsity) and up to 372 GB HBM3e memory. With the superchip architecture, GPU and CPU are colocated within one compute module, increasing bandwidth between GPU and CPU significantly compared to current generation EC2 P5en instances.

With EC2 P6e-GB200 UltraServers, you can access up to 72 NVIDIA Blackwell GPUs within one NVLink domain to use 360 petaflops of FP8 compute (without sparsity) and 13.4 TB of total high bandwidth memory (HBM3e). Powered by the AWS Nitro System, P6e-GB200 UltraServers are deployed in EC2 UltraClusters to securely and reliably scale to tens of thousands of GPUs.

EC2 P6e-GB200 UltraServers deliver up to 28.8 Tbps of total Elastic Fabric Adapter (EFAv4) networking. EFA is also coupled with NVIDIA GPUDirect RDMA to enable low-latency GPU-to-GPU communication between servers with operating system bypass.

EC2 P6e-GB200 UltraServers specifications
EC2 P6e-GB200 UltraServers are available in sizes ranging from 36 to 72 GPUs under NVLink. Here are the specs for EC2 P6e-GB200 UltraServers:

UltraServer type GPUs
GPU
memory (GB)
vCPUs Instance memory
(GiB)
Instance storage (TB) Aggregate EFA Network Bandwidth (Gbps) EBS bandwidth (Gbps)
u-p6e-gb200x36 36 6660 1296 8640 202.5 14400 540
u-p6e-gb200x72 72 13320 2592 17280 405 28800 1080

P6e-GB200 UltraServers are ideal for the most compute and memory intensive AI workloads, such as training and inference of frontier models, including mixture of experts models and reasoning models, at the trillion-parameter scale.

You can build agentic and generative AI applications, including question answering, code generation, video and image generation, speech recognition, and more.

P6e-GB200 UltraServers in action
You can use EC2 P6e-GB200 UltraServers in the Dallas Local Zone through EC2 Capacity Blocks for ML. The Dallas Local Zone (us-east-1-dfw-2a) is an extension of the US East (N. Virginia) Region.

To reserve your EC2 Capacity Blocks, choose Capacity Reservations on the Amazon EC2 console. You can select Purchase Capacity Blocks for ML and then choose your total capacity and specify how long you need the EC2 Capacity Block for u-p6e-gb200x36 or u-p6e-gb200x72 UltraServers.

Once Capacity Block is successfully scheduled, it is charged up front and its price doesn’t change after purchase. The payment will be billed to your account within 12 hours after you purchase the EC2 Capacity Blocks. To learn more, visit Capacity Blocks for ML in the Amazon EC2 User Guide.

To run instances within your purchased Capacity Block, you can use AWS Management Console, AWS Command Line Interface (AWS CLI) or AWS SDKs. On the software side, you can start with the AWS Deep Learning AMIs. These images are preconfigured with the frameworks and tools that you probably already know and use: PyTorch, JAX, and a lot more.

You can also integrate EC2 P6e-GB200 UltraServers seamlessly with various AWS managed services. For example:

  • Amazon SageMaker Hyperpod provides managed, resilient infrastructure that automatically handles the provisioning and management of P6e-GB200 UltraServers, replacing faulty instances with preconfigured spare capacity within the same NVLink domain to maintain performance.
  • Amazon Elastic Kubernetes Services (Amazon EKS) allows one managed node group to span across multiple P6e-GB200 UltraServers as nodes, automating their provisioning and lifecycle management within Kubernetes clusters. You can use EKS topology-aware routing for P6e-GB200 UltraServers, enabling optimal placement of tightly coupled components of distributed workloads within a single UltraServer’s NVLink-connected instances.
  • Amazon FSx for Lustre file systems provide data access for P6e-GB200 UltraServers at the hundreds of GB/s of throughput and millions of input/output operations per second (IOPS) required for large-scale HPC and AI workloads. For fast access to large datasets, you can use up to 405 TB of local NVMe SSD storage or virtually unlimited cost-effective storage with Amazon Simple Storage Service (Amazon S3).

Now available
Amazon EC2 P6e-GB200 UltraServers are available today in the Dallas Local Zone (us-east-1-dfw-2a) through EC2 Capacity Blocks for ML. For more information, visit the Amazon EC2 pricing page.

Give Amazon EC2 P6e-GB200 UltraServers a try in the Amazon EC2 console. To learn more, visit the Amazon EC2 P6e instances page and send feedback to AWS re:Post for EC2 or through your usual AWS Support contacts.

Channy

Introducing AWS Builder Center: A new home for the AWS builder community

Post Syndicated from Channy Yun (윤석찬) original https://aws.amazon.com/blogs/aws/introducing-aws-builder-center-a-new-home-for-the-aws-builder-community/

We really love builders at AWS. We’re constantly thinking of new ways to help technical communities thrive and create spaces like AWS Developer Center and community.aws where people can connect and share their knowledge and experiences.

Today, we’re announcing AWS Builder Center, a new home for builders to access all builder resources, engage with the AWS community, and provide feedback or product suggestions to AWS product teams. This new experience also integrates the previous AWS Developer Center and community.aws.

There are a variety of exciting features so let us discover some of them.

Your voice matters: Introducing Wishlist
One of the most exciting new features, in my opinion, is Wishlist. You can now submit your wishes for new features or improvements you’d like to see in AWS services. Others can discover and vote on these wishes while also creating their own.

You can influence product roadmap collectively as a community and help us shape the future of AWS services. You can share ideas, suggestions, feature proposals, or challenges while operating AWS services, with the ability for the AWS community to upvote ideas and highlight the most sought-after improvements. Our internal teams will keep an eye on these and bring the most popular wishes to the attention of our service teams, making your voice an integral part of our product development process.

Connect people in the AWS community
On the Connect page, you’ll find many opportunities to connect directly with AWS Heroes and AWS Community Builders. You can explore and join AWS User Groups and AWS Cloud Clubs near your cities around the world.

On top of that, you can bookmark this page as your centralized hub for finding upcoming community events, making it easy to find opportunities to learn and network in your local area and meet like-minded builders who share your interests.

Speaking of following people, AWS Builder Center makes it really straightforward to connect and engage with others, serving as the central hub for the AWS technical community. It brings together all the different ways that you can connect with fellow builders. For example, the Who to Follow section introduces you to AWS Heroes, Community Builders, and active community members who are sharing their knowledge and expertise in your areas of interest.

Explore our AWS hands-on resources
On the Build page, you’ll discover ways to get familiar with AWS with hands-on experience such as interactive learning resources designed for every skill level such as AWS Tutorials and AWS Workshops. You can explore generative AI and agentic AI services playground and find the AWS Free Tier to try out AWS services free of charge up to specified limits for each service.

Choose the Toolbox page and discover the latest tools, programming language resources, and Open Source projects for AWS. The Toolbox has everything you need to get your project scaffolded and up and running.

To improve the build experience for builders, we plan to expand Builder Center’s built-in offerings such as creating dedicated groups and forums for collaborating on a particular topic, run workshops for hands-on labs, and various service playgrounds where builders can freely experiment with AWS services.

Supporting your builder journey
The new Learn section serves as your gateway to skill development, bringing together everything you need to expand your AWS expertise. Here, you can explore learning and training resources, workshops, gamified experiences, and more to make your journey of building on AWS both educational and engaging.

Choose the Topics page, where you can explore and discover more content. You can explore content by topics and tags. There is a featured and trending topics section that helps you to stay connected with what’s capturing the community’s attention right now.

Built-in localization for your spoken language
AWS Builder Center breaks down language barriers with comprehensive localization support. All content published in the Builder Center is automatically available in 16 languages, and user-generated content, such as posts, comments, or wishes, can be machine-translated on demand using Translate. So, you can collaborate with builders worldwide, sharing knowledge and experiences across language boundaries.

By default, all content will be displayed in based on the language that your browser is set to. But, you can override this by visiting the settings page and choosing the language that you want AWS Builder Center to use by default.

Sign up and build your profile now
AWS Builder Center gives you a more personalized and comprehensive way to showcase your AWS journey. Your unique profile comes with a custom URL and shareable QR code, making it straightforward to connect with others and share your presence in the AWS community.

All your posts, wishes, and meaningful interactions are organized within a centralized view so you can easily check them. In the Manage profile page, you can customize your profile, add specific interests and areas of expertise, helping you connect with builders who share your passions. Profile management is seamless: it synchronizes across all AWS services using AWS Builder ID, ensuring your identity remains consistent wherever you engage with AWS offerings.

Visit builder.aws.com, sign up with AWS Builder ID, and claim your unique alias to access all features, including content creation, Wishlist, and community engagement tools.

AWS Builder Center was designed to help you connect, learn, and build with fellow AWS builders, so enjoy your journey together!

ChannyMatheus Guimaraes | @codingmatheus

AI in the Open Cloud: Optimizing Storage for AI/ML Workloads

Post Syndicated from David Johnson original https://www.backblaze.com/blog/ai-in-the-open-cloud-optimizing-storage-for-ai-ml-workloads/

A decorative image showing a cloud and data graphs.

In a recent survey, a staggering 82% of IT leaders reported experiencing performance issues with their AI workloads within the past year, primarily due to bandwidth and data processing limitations. At the same time, 93% agreed that there’s a greater expectation within their organizations for IT leaders to minimize time-to-revenue for their AI-driven IT infrastructure.

These statistics highlight the predicament that most AI infrastructure and operations teams face today: the challenge of balancing scalability with performance while staying on budget with two of their most expensive operational expense (OpEx) line item costs. Organizations are looking for their AI initiatives to pay off, while IT teams struggle to overcome the unique data challenges they face across the AI model/workload lifecycle—including scalability, performance, and cost management.

Ebook: “Why Object Storage Is Ideal for AI Workflows”

Want to take a deeper dive into the world of object storage? Check out our latest ebook, “Why Object Storage is Ideal for AI Workloads,” and discover the advantages this architecture has to offer across the model lifecycle.

Get the Ebook

Choosing the Right Cloud-Based Object Storage Provider for AI Data: There’s A Lot to Consider

Choosing the right object storage provider is one of the most consequential decisions infrastructure teams make when building AI‑powered applications. A mis-step can introduce hidden costs, brittle performance, and operational friction that put the brakes on time‑to‑insight and undermine ROI. Selecting or transitioning between cloud-based object storage providers demands careful consideration, as capabilities can vary significantly. 

To ensure your AI infrastructure is robust and cost-effective, thoroughly evaluate providers based on several critical factors:

Low latency & high throughput

Performance is critical when selecting a cloud-based object storage provider for AI data. Low latency and high throughput in particular are key as they ensure rapid data access and processing. Low latency minimizes delays in distributing data to GPU clusters, dramatically enhancing training and inference efficiency. Meanwhile, high throughput prevents bottlenecks and improves overall system performance when working with the massive datasets typical of AI applications. 

Reliability & uptime

Reliability is foundational. Even minor downtime can severely impact productivity, halt critical AI processes, and delay strategic objectives. Providers must offer clear service level agreements (SLAs) ensuring high availability, typically at 99.9% uptime or higher. Redundant architectures, data replication across regions, and reliable backup strategies are essential to maintain continuous and uninterrupted data access. Finally, when selecting a cloud-based object storage solution, data durability is table stakes.

Transparent & predictable pricing

Budget predictability is crucial for infrastructure planning and growth forecasting. Complex pricing structures, minimum retention periods, hidden fees for data transfers (egress), API requests, and retrieval charges can quickly erode cost-effectiveness. Providers should offer clear, simple pricing structures with explicit, predictable costs for all services involved. Ideally, charges for common activities such as data retrieval, ingress, and transactions should be minimized or eliminated to facilitate efficient AI workflows without unexpected budget impacts.

Data accessibility

Rapid, consistent data accessibility is non-negotiable for AI applications, especially during model training and inference, where delays can significantly degrade performance and outcomes. Providers offering “cold” storage tiers may appear economical upfront but introduce retrieval latency that could hamper time-sensitive applications. Opting for “hot” or always-on storage tiers ensures data remains immediately accessible without incurring delays, essential for high-performance AI workloads. Data portability is another important consideration for AI workloads, as the ability to freely transfer data to the GPU cloud (or clouds) of your choosing greatly increases flexibility and reduces the risk of lock-in.

Scalability and elasticity

AI initiatives typically experience fluctuating data storage demands, requiring infrastructure that can seamlessly scale with growth. Effective providers offer a scalable storage model capable of handling rapid expansions in data volume without performance degradation or significant architectural changes. Elastic scalability ensures that infrastructure teams can effortlessly manage peaks in data collection, processing, and model training demands.

Security and compliance

Security considerations cannot be overstated, particularly when dealing with sensitive or regulated data. Providers must demonstrate rigorous security standards, including data encryption (at rest and in transit), comprehensive access controls, detailed audit logs, and certifications such as SOC 2 compliance. These measures collectively ensure data integrity, protect against breaches, and ensure compliance with regulatory standards.

Leveraging the open cloud: Making data storage a critical part of your AI workflows

The open cloud is a cloud architecture and philosophy rooted in interoperability, data portability, and freedom from vendor lock-in. Unlike proprietary cloud ecosystems that tether customers to a single provider’s toolsets, APIs, and infrastructure, the open cloud is designed to enable seamless integration across platforms, tools, and environments. It supports open standards and APIs, gives users full control over their data, and allows organizations to choose best-in-class services without being locked into a single ecosystem.

In practical terms, the open cloud supports flexible data movement across public clouds, private clouds, and on-prem environments. It gives organizations the autonomy to mix and match services (e.g., compute from one provider, storage from another) and shift workloads as business or technical needs evolve—without punitive costs or excessive reconfiguration.

As organizations accelerate AI adoption, the open cloud offers clear, strategic advantages across every phase of the AI lifecycle—from data ingestion and preprocessing to training, tuning, and inference.

How Backblaze can help

The Backblaze B2 Cloud Storage platform facilitates smooth integration across various AI tools and platforms, and with Backblaze B2 Overdrive, you get a product designed to move exabyte-scale datasets at up to terabit speeds without the eye-watering price tag. 

  • S3 compatibility: Backblaze’s S3-compatible API ensures easy integration with existing applications and frameworks like TensorFlow and PyTorch. 
  • GPU compute environments: Backblaze partners with GPU providers like Vultr and PureNodal, enabling efficient data processing for training models on high-performance hardware without egress fees. 
  • MLOps platforms: Its compatibility with MLOps workflows allows users to streamline model lifecycle management while leveraging Backblaze’s reliable storage backbone. Together, these integrations simplify the AI deployment process and ensure maximum flexibility across cloud environments.

What makes B2 Overdrive different?

B2 Overdrive gets you all the above, plus it offers a specialized solution at a fraction of competitors’ costs. Here’s what you get:

  • Up to 1Tbps throughput: In other words, the kind of speed that lets you move petabytes of data fast without complex architecture. 
  • Unlimited free egress: Move as much data as you want, whenever you want, to wherever you want. Egress is totally free. 
  • Private networking support: Transfer data at maximum speed through secure private networking connections to your infrastructure.

It’s built on the foundation of our always-hot cloud storage infrastructure, with no minimum file size requirements, no deletion fees, and powerful features like Event Notifications so you can build responsive and automated workflows. We’ll be sharing some of the innovations under the hood in the coming months—so, stay tuned to our series on the engineering behind performance.

The post AI in the Open Cloud: Optimizing Storage for AI/ML Workloads appeared first on Backblaze Blog | Cloud Storage & Cloud Backup

Introducing Oracle Database@AWS for simplified Oracle Exadata migrations to the AWS Cloud

Post Syndicated from Channy Yun (윤석찬) original https://aws.amazon.com/blogs/aws/introducing-oracle-databaseaws-for-simplified-oracle-exadata-migrations-to-the-aws-cloud/

Today, we’re announcing the general availability of Oracle Database@AWS, a new offering for Oracle Exadata workloads, including Oracle Real Application Clusters (RAC) within AWS.

In the past 14 years, customers had the choice of self-managing Oracle database workloads in the cloud using Amazon Elastic Compute Cloud (Amazon EC2) or using fully managed Amazon Relational Database Service (Amazon RDS) for Oracle. Now, you have an additional option for your workloads that require Oracle RAC or Oracle Exadata for quicker and simpler migrations to the cloud. You also get a single invoice through AWS Marketplace, which counts towards AWS commitments and Oracle license benefits, including Bring Your Own License (BYOL) and discount programs such as Oracle Support Rewards.

With Oracle Database@AWS, you can migrate your Oracle Exadata workloads to Oracle Exadata Database Service on Dedicated Infrastructure or Oracle Autonomous Database on Dedicated Exadata Infrastructure within AWS with minimal changes. You can purchase, provision, and manage your Oracle Database@AWS deployments through familiar AWS tools and interfaces such as AWS Management Console, AWS Command Line Interface (AWS CLI), or AWS APIs for applications running on AWS. The AWS APIs call the corresponding Oracle Cloud Infrastructure (OCI) APIs necessary to provision and manage the resources.

Since its preview last December, we’ve improved or added features to help run production workloads at general availability:

  • Regional expansion – You can now use Oracle Database@AWS in the U.S. East (N. Virginia) and U.S. West (Oregon) Regions today. We are also announcing plans to expand to 20 AWS Regions globally. This broader availability supports the diverse needs of our customers across various geographical areas so more enterprises can benefit from this option. You can choose from different Exadata system sizes to match your workload requirements in your AWS Region.
  • Zero-ETL and S3 backups – You can now benefit from zero-ETL integration with Amazon Redshift for analytics to remove the need to build and manage data pipelines for extract, transform, and load operations. With zero-ETL, you can unify your data on AWS without incurring cross network data transfer costs. We’re providing Amazon Simple Storage Service (Amazon S3) backups with up to eleven nines of data durability.
  • Autonomous VM cluster – You can now provision an Autonomous VM Cluster in addition to an Exadata VM cluster on the Exadata Dedicated Infrastructure. You can run Oracle Autonomous Database on Dedicated Exadata Infrastructure, a fully managed database environment using committed hardware and software resources.

Oracle Database@AWS also integrates with other AWS services such as Amazon Virtual Private Cloud (Amazon VPC) Lattice for configuring network paths to AWS services such as S3 and Redshift directly, AWS Identity and Access Management (IAM) for authentication and authorization, Amazon EventBridge for monitoring database lifecycle events, AWS CloudFormation for infrastructure automation, Amazon CloudWatch for collecting and monitoring metrics, and AWS CloudTrail for logging API operations.

Getting started with Oracle Database@AWS
Oracle Database@AWS supports two key services: Oracle Exadata Database Service on Dedicated Infrastructure and Oracle Autonomous Database on Dedicated Exadata Infrastructure within AWS data centers.

These services physically reside within an Availability Zone in an AWS Region and logically reside in an OCI region, enabling seamless integration with AWS services through high-speed, low-latency connections.

You create an ODB network, a private, isolated network that hosts Oracle Exadata VM Clusters within an Availability Zone. Then, you use ODB peering accessible to EC2 application servers running in a VPC. To learn more, visit How Oracle Database@AWS works in the AWS documentation.

Request a private offer in AWS Marketplace

To begin your journey with Oracle Database@AWS, visit the AWS console or request the AWS Marketplace private offer. Your AWS and Oracle sales team will receive your request, then contact you to find the best option for your workloads, and activate your account.

When you activate and get access to Oracle Database@AWS, you can use the Dashboard to create an ODB network, Exadata infrastructure, and Exadata VM cluster or Autonomous VM cluster, and ODB peering connection.

To learn more, visit the Onboarding to Oracle Database@AWS and AWS Marketplace buyer private offers in the AWS documentation.

Create an ODB network

An ODB network is a private isolated network that hosts OCI infrastructure on AWS. The ODB network maps directly to the network that exists within the OCI child site, thus serving as the means of communication between AWS and OCI.

In the Dashboard, choose Create ODB network, enter a network name, choose the Availability Zone, and specify a CIDR ranges for client connections established by applications and backup connections used for taking automated backups. You can also enter a name to use as a prefix to your domain fixed as oraclevcn.com. For example, if you enter myhost, the fully qualified domain name is myhost.oraclevcn.com.

Optionally, you can configure ODB network access to perform automated backups to Amazon S3 and zero-ETL for near real-time analytics and ML on your Oracle data using Amazon Redshift.

After you create your ODB network, update your VPC route tables of your EC2 application servers with the client connection CIDR in the ODB network. To learn more, visit ODB network, ODB peering, and Configuring VPC route tables for ODB peering in the AWS documentation.

Create Exadata infrastructure

The Oracle Exadata infrastructure is the underlying architecture of your database servers, storage servers, and networking that run your Oracle Exadata databases.

Choose Create Exadata infrastructure, enter a name, and use the default Availability Zone. In the next step, you can choose Exadata.X11M for the Exadata system model. You can also set a default of 2 or up to 32 database servers and 3 or up to 64 storage servers with 80 TB storage capacity per server.

Finally, you can configure system maintenance preferences, such as scheduling, patching mode, and OCI maintenance notification contacts. You can’t modify an infrastructure after you create it from the AWS console. But, you can navigate to the OCI console and modify it.

To delete an Exadata infrastructure, visit Deleting an Oracle Exadata infrastructure in Oracle Database@AWS in the AWS documentation.

Create an Exadata VM cluster or Autonomous VM cluster

You can create VM clusters on Exadata infrastructure and deploy multiple VM clusters with different Oracle Exadata infrastructures in the same ODB network.

Here are two types of VM clusters:

  • An Exadata VM cluster is a set of virtual machines that has a complete Oracle database installation that includes all features of Oracle Enterprise Edition.
  • An Autonomous VM cluster is a set of fully managed databases that automate key management tasks using AI/ML with no human intervention required.

Choose Create Exadata VM cluster, enter a VM cluster name and a time zone, choose Bring Your Own License (BYOL) or license included for license options. In the next step, you can choose your Exadata infrastructure, grid infrastructure version, and Exadata image version. For database servers, you can choose the CPU core count, memory, and local storage for each VM or accept the defaults.

In the next step, you can configure the connectivity setting by choosing your ODB network and entering a prefix for the VM cluster. You can enter a port number for TCP access to the single client access name (SCAN) listener. The default port is 1521 or you can enter a custom SCAN port in the range 1024–8999. For SSH key pairs, enter the public key portion of one or more key pairs used for SSH access to the VM cluster.

Then, you can choose diagnostics and tags, review your settings, and create a VM cluster. The creation process can take up to 6 hours, depending on the size of the VM cluster.

Create and manage an Oracle database

When the VM cluster is ready, you can create and manage your Oracle Exadata databases in the OCI console. Choose Manage in OCI in the details page of the Exadata VM cluster. You will be redirected to the OCI console.

When you create an Oracle Database in the OCI console, you can select Oracle Database 19c or 23ai. When enabling automatic backups for your provisioned databases, you can use an S3 bucket or OCI Object Storage in the OCI region. To learn more, visit Provision Oracle Exadata Database Service in Oracle Database@AWS in the OCI documentation.

Things to know
Here are a couple of things to know about Oracle Database@AWS:

  • Monitoring – You can monitor Oracle Database@AWS using Amazon CloudWatch metrics in the AWS/ODB namespaces for VM clusters, container databases, and pluggable databases. AWS CloudTrail captures all AWS API calls for Oracle Database@AWS as events. Using CloudTrail logs, you can determine the request that was made to Oracle Database@AWS, the IP address from which the request was made, when it was made, and additional details. To learn more, visit Monitoring Oracle Database@AWS.
  • Security – You can use IAM to assign permissions that determine who is allowed to manage Oracle Database@AWS resources and SSL/TLS encrypted connections to secure data. You can also use Amazon EventBridge for seamless event-driven database operations—all working together to maintain security standards while enabling efficient cloud operations. To learn more, visit Security in Oracle Database@AWS.
  • Compliance – Your compliance responsibility when using Oracle Database@AWS is determined by the sensitivity of your data, your company’s compliance objectives, and applicable laws and regulations. We provides the following compliances with Oracle Database@AWS: SOC 1, SOC 2, SOC 3, HIPAA, C5, CSA STAR Attest, CSA STAR Cert, HDS (France), ISO Series (ISO/IEC 9001, 20000-1, 27001, 27017, 27018, 27701, 22301), PCI DSS, and HITRUST. To learn more, visit Compliance validation for Oracle Database@AWS.
  • Support – Your AWS or Oracle sales account team can help you evaluate your current database infrastructure, determine how Oracle Database@AWS can best serve your organization’s requirements, and develop a tailored migration strategy and timeline. You can also get help from AWS Oracle Competency Partners specialized to architect, deploy, and manage Oracle-based workloads running in the AWS Cloud.

Now available and coming soon
Oracle Database@AWS is now available in the U.S. East (N. Virginia) and U.S. West (Oregon) Regions through the AWS Marketplace. Oracle Database@AWS pricing and any AWS Marketplace private offers are set by Oracle. You can see specific details around pricing on Oracle’s pricing page for the offering.

Oracle Database@AWS will expand to 20 more AWS Regions across the Americas, Europe, and Asia-Pacific including: US East (Ohio), US West (N. California), Asia Pacific (Hyderabad), Asia Pacific (Melbourne), Asia Pacific (Mumbai), Asia Pacific (Osaka), Asia Pacific (Seoul), Asia Pacific (Singapore), Asia Pacific (Sydney), Asia Pacific (Tokyo), Canada (Central), Europe (Frankfurt), Europe (Ireland), Europe (London), Europe (Milan), Europe (Paris), Europe (Spain), Europe (Stockholm), Europe (Zurich), and South America (São Paulo).

You can get started with Oracle Database@AWS with using AWS console. To learn more, visit the Oracle Database@AWS User Guide and OCI documentation and send feedback through your usual AWS Support contacts or OCI support.

Channy

Amazon Nova Canvas update: Virtual try-on and style options now available

Post Syndicated from Matheus Guimaraes original https://aws.amazon.com/blogs/aws/amazon-nova-canvas-update-virtual-try-on-and-style-options-now-available/

Have you ever wished you could quickly visualize how a new outfit might look on you before making a purchase? Or how a piece of furniture would look in your living room? Today, we’re excited to introduce a new virtual try-on capability in Amazon Nova Canvas that makes this possible. In addition, we are adding eight new style options for improved style consistency for text-to-image based style prompting. These features expand Nova Canvas AI-powered image generation capabilities making it easier than ever to create realistic product visualizations and stylized images that can enhance the experience of your customers.

Let’s take a quick look at how you can start using these today.

Getting started
The first thing is to make sure that you have access to the Nova Canvas model through the usual means. Head to the Amazon Bedrock console, choose Model access and enable Amazon Nova Canvas for your account making sure that you select the appropriate regions for your workloads. If you already have access and have been using Nova Canvas, you can start using the new features immediately as they’re automatically available to you.

Virtual try-on
The first exciting new feature is virtual try-on. With this, you can upload two pictures and ask Amazon Nova Canvas to put them together with realistic results. These could be pictures of apparel, accessories, home furnishings, and any other products including clothing. For example, you can provide the picture of a human as the source image and the picture of a garment as the reference image, and Amazon Nova Canvas will create a new image with that same person wearing the garment. Let’s try this out!

My starting point is to select two images. I picked one of myself in a pose that I think would work well for a clothes swap and a picture of an AWS-branded hoodie.

Matheus and AWS-branded hoodie

Note that Nova Canvas accepts images containing a maximum of 4.1M pixels – the equivalent of 2,048 x 2,048 – so be sure to scale your images to fit these constraints if necessary. Also, if you’d like to run the Python code featured in this article, ensure you have Python 3.9 or later installed as well as the Python packages boto3 and pillow.

To apply the hoodie to my photo, I use the Amazon Bedrock Runtime invoke API. You can find full details on the request and response structures for this API in the Amazon Nova User Guide. The code is straightforward, requiring only a few inference parameters. I use the new taskType of "VIRTUAL_TRY_ON". I then specify the desired settings, including both the source image and reference image, using the virtualTryOnParams object to set a few required parameters. Note that both images must be converted to Base64 strings.

import base64


def load_image_as_base64(image_path): 
   """Helper function for preparing image data."""
   with open(image_path, "rb") as image_file:
      return base64.b64encode(image_file.read()).decode("utf-8")


inference_params = {
   "taskType": "VIRTUAL_TRY_ON",
   "virtualTryOnParams": {
      "sourceImage": load_image_as_base64("person.png"),
      "referenceImage": load_image_as_base64("aws-hoodie.jpg"),
      "maskType": "GARMENT",
      "garmentBasedMask": {"garmentClass": "UPPER_BODY"}
   }
}

Nova Canvas uses masking to manipulate images. This is a technique that allows AI image generation to focus on specific areas or regions of an image while preserving others, similar to using painter’s tape to protect areas you don’t want to paint.

You can use three different masking modes, which you can choose by setting maskType to the correct value. In this case, I’m using "GARMENT", which requires me to specify which part of the body I want to be masked. I’m using "UPPER_BODY" , but you can use others such as "LOWER_BODY", "FULL_BODY", or "FOOTWEAR" if you want to specifically target the feet. Refer to the documentation for a full list of options.

I then call the invoke API, passing in these inference arguments and saving the generated image to disk.

# Note: The inference_params variable from above is referenced below.

import base64
import io
import json

import boto3
from PIL import Image

# Create the Bedrock Runtime client.
bedrock = boto3.client(service_name="bedrock-runtime", region_name="us-east-1")

# Prepare the invocation payload.
body_json = json.dumps(inference_params, indent=2)

# Invoke Nova Canvas.
response = bedrock.invoke_model(
   body=body_json,
   modelId="amazon.nova-canvas-v1:0",
   accept="application/json",
   contentType="application/json"
)

# Extract the images from the response.
response_body_json = json.loads(response.get("body").read())
images = response_body_json.get("images", [])

# Check for errors.
if response_body_json.get("error"):
   print(response_body_json.get("error"))

# Decode each image from Base64 and save as a PNG file.
for index, image_base64 in enumerate(images):
   image_bytes = base64.b64decode(image_base64)
   image_buffer = io.BytesIO(image_bytes)
   image = Image.open(image_buffer)
   image.save(f"image_{index}.png")

I get a very exciting result!

Matheus wearing AWS-branded hoodie

And just like that, I’m the proud wearer of an AWS-branded hoodie!

In addition to the "GARMENT" mask type, you can also use the "PROMPT" or "IMAGE" masks. With "PROMPT", you also provide the source and reference images, however, you provide a natural language prompt to specify which part of the source image you’d like to be replaced. This is similar to how the "INPAINTING" and "OUTPAINTING" tasks work in Nova Canvas. If you want to use your own image mask, then you choose the "IMAGE" mask type and provide a black-and-white image to be used as mask, where black indicates the pixels that you want to be replaced on the source image, and white the ones you want to preserve.

This capability is specifically useful for retailers. They can use it to help their customers make better purchasing decisions by seeing how products look before buying.

Using style options
I’ve always wondered what I would look like as an anime superhero. Previously, I could use Nova Canvas to manipulate an image of myself, but I would have to rely on my good prompt engineering skills to get it right. Now, Nova Canvas comes with pre-trained styles that you can apply to your images to get high-quality results that follow the artistic style of your choice. There are eight available styles including 3D animated family film, design sketch, flat vector illustration, graphic novel, maximalism, midcentury retro, photorealism, and soft digital painting.

Applying them is as straightforward as passing in an extra parameter to the Nova Canvas API. Let’s try an example.

I want to generate an image of an AWS superhero using the 3D animated family film style. To do this, I specify a taskType of "TEXT_IMAGE" and a textToImageParams object containing two parameters: text and style. The text parameter contains the prompt describing the image I want to create which in this case is “a superhero in a yellow outfit with a big AWS logo and a cape.” The style parameter specifies one of the predefined style values. I’m using "3D_ANIMATED_FAMILY_FILM" here, but you can find the full list in the Nova Canvas User Guide.

inference_params = {
   "taskType": "TEXT_IMAGE",
   "textToImageParams": {
      "text": "a superhero in a yellow outfit with a big AWS logo and a cape.",
      "style": "3D_ANIMATED_FAMILY_FILM",
   },
   "imageGenerationConfig": {
      "width": 1280,
      "height": 720,
      "seed": 321
   }
}

Then, I call the invoke API just as I did in the previous example. (The code has been omitted here for brevity.) And the result? Well, I’ll let you judge for yourself, but I have to say I’m quite pleased with the AWS superhero wearing my favorite color following the 3D animated family film style exactly as I envisioned.

What’s really cool is that I can keep my code and prompt exactly the same and only change the value of the style attribute to generate an image in a completely different style. Let’s try this out. I set style to PHOTOREALISM.

inference_params = { 
   "taskType": "TEXT_IMAGE", 
   "textToImageParams": { 
      "text": "a superhero in a yellow outfit with a big AWS logo and a cape.",
      "style": "PHOTOREALISM",
   },
   "imageGenerationConfig": {
      "width": 1280,
      "height": 720,
      "seed": 7
   }
}

And the result is impressive! A photorealistic superhero exactly as I described, which is a far departure from the previous generated cartoon and all it took was changing one line of code.

Things to know
Availability – Virtual try-on and style options are available in Amazon Nova Canvas in the US East (N. Virginia), Asia Pacific (Tokyo), and Europe (Ireland). Current users of Amazon Nova Canvas can immediately use these capabilities without migrating to a new model.

Pricing – See the Amazon Bedrock pricing page for details on costs.

For a preview of virtual try-on of garments, you can visit nova.amazon.com where you can upload an image of a person and a garment to visualize different clothing combinations.

If you are ready to get started, please check out the Nova Canvas User Guide or visit the AWS Console.

Matheus Guimaraes | @codingmatheus

Build the highest resilience apps with multi-Region strong consistency in Amazon DynamoDB global tables

Post Syndicated from Donnie Prakoso original https://aws.amazon.com/blogs/aws/build-the-highest-resilience-apps-with-multi-region-strong-consistency-in-amazon-dynamodb-global-tables/
While tens of thousands of customers are successfully using Amazon DynamoDB global tables with eventual consistency, we’re seeing emerging needs for even stronger resilience. Many organizations find that the DynamoDB multi-Availability Zone architecture and eventually consistent global tables meet their requirements, but critical applications like payment processing systems and financial services demand more.

For these applications, customers require a zero Recovery Point Objective (RPO) during rare Region-wide events, meaning you can direct your app to read the latest data from any Region. Your multi-Region applications always need to access the same data regardless of location.

Starting today, you can use a new Amazon DynamoDB global tables capability that provides multi-Region strong consistency (MRSC), enabling zero RPO. This capability, first announced as a preview at AWS re:Invent 2024, simplifies building highly resilient global applications.

Here’s how you can enable MRSC starting with an existing empty DynamoDB table:

With MRSC, DynamoDB now offers you the highest level of resilience for your applications. If application processing is interrupted in a Region, you can redirect traffic to another Region containing a MRSC replica and know that you’ll be processing the latest data.

Getting started
Let me walk you through how you can use this new capability.

To start using MRSC, I need to create a global table from an existing DynamoDB table that doesn’t contain any data. I navigate to my existing table, select the Global tables tab and select Create replica.

The MRSC availability architecture requires three AWS Regions. I can configure MRSC with either three full replicas or with two replicas and a witness. A witness contains only replicated change data to provide the required availability without maintaining a full copy of my table data.

The following screenshot shows how I configure MRSC with two replicas and a witness. To configure MRSC with three full replicas instead, I can clear Configure Region 2 as Witness.

If I need to update my existing table programmatically, I can use the Amazon Q CLI to generate the required command with the following prompt:

> Hey Q! Update my existing DynamoDB table called "demo-mrsc" in us-east-1 with multi-Region strong consistency across us-east-2 with witness in us-west-2 Regions

Shortly after, Q CLI will respond back with following command:

> To update your DynamoDB table with multi-Region strong consistency, you'll need to use the update-table command with the appropriate parameters. Here's how you would do it:

aws dynamodb update-table \ 
    --table-name demo-mrsc \ 
    --replica-updates '[{"Create": {"RegionName": "us-east-2"}}]' \ 
    --global-table-witness-updates '[{"Create": {"RegionName": "us-west-2"}}]' \ 
    --multi-region-consistency STRONG \ 
    --region us-east-1

After it’s finished processing, I can check the status of my MRSC global table. I can see I have a witness configured for my DynamoDB global table. A witness reduces costs while still providing the resilience benefits of multi-Region strong consistency.

Then, in my application, I can use ConsistentRead to read data with strong consistency. Here’s a Python example:

import boto3

# Configure the DynamoDB client for your region
dynamodb = boto3.resource('dynamodb', region_name='us-east-2')
table = dynamodb.Table('demo-mrsc')

pk_id = "demo#test123"

# Read with strong consistency across regions
response = table.get_item(
    Key={
        'PK': pk_id
    },
    ConsistentRead=True
)

print(response)

For operations that require the strongest resilience, I can use ConsistentRead=True. For less critical operations where eventual consistency is acceptable, I can omit this parameter to improve performance and reduce costs.

Additional things to know
Here are a couple of things to note:

  • Availability – The Amazon DynamoDB multi-Region strong consistency capability is available in following AWS Regions: US East (Ohio, N. Virginia), US West (Oregon), Asia Pacific (Osaka, Seoul, Tokyo), and Europe (Frankfurt, Ireland, London, Paris)
  • Pricing – Multi-Region strong consistency pricing follows the existing global tables pricing structure. DynamoDB recently reduced global tables pricing by up to 67 percent, making this highly resilient architecture more affordable than ever. Visit Amazon DynamoDB lowers pricing for on-demand throughput and global tables in the AWS Database Blog to learn more.

Learn more about how you can achieve the highest level of application resilience, enable your applications to be always available and always read the latest data regardless of the Region by visiting Amazon DynamoDB global tables.

Happy building!

Donnie
 

New Amazon EC2 C8gn instances powered by AWS Graviton4 offering up to 600Gbps network bandwidth

Post Syndicated from Channy Yun (윤석찬) original https://aws.amazon.com/blogs/aws/new-amazon-ec2-c8gn-instances-powered-by-aws-graviton4-offering-up-to-600gbps-network-bandwidth/

Today, we’re announcing the general availability of Amazon Elastic Compute Cloud (Amazon EC2) C8gn network optimized instances powered by AWS Graviton4 processors and the latest 6th generation AWS Nitro Card. EC2 C8gn instances deliver up to 600Gbps network bandwidth, the highest bandwidth among EC2 network optimized instances.

You can use C8gn instances to run the most demanding network intensive workloads, such as security and network virtual appliances (virtual firewalls, routers, load balancers, proxy servers, DDoS appliances), data analytics, and tightly-coupled cluster computing jobs.

EC2 C8gn instances specifications
C8gn instances provide up to 192 vCPUs and 384 GiB memory, and offer up to 30 percent higher compute performance compared Graviton3-based EC2 C7gn instances.

Here are the specs for C8gn instances:

Instance Name vCPUs Memory (GiB) Network Bandwidth (Gbps) EBS Bandwidth (Gbps)
c8gn.medium 1 2 Up to 25 Up to 10
c8gn.large 2 4 Up to 30 Up to 10
c8gn.xlarge 4 8 Up to 40 Up to 10
c8gn.2xlarge 8 16 Up to 50 Up to 10
c8gn.4xlarge 16 32 50 10
c8gn.8xlarge 32 64 100 20
c8gn.12xlarge 48 96 150 30
c8gn.16xlarge 64 128 200 40
c8gn.24xlarge 96 192 300 60
c8gn.metal-24xl 96 192 300 60
c8gn.48xlarge 192 384 600 60
c8gn.metal-48xl 192 384 600 60

You can launch C8gn instances through the AWS Management Console, AWS Command Line Interface (AWS CLI), or AWS SDKs.

If you’re using C7gn instances now, you will have straightforward experience migrating network intensive workloads to C8gn instances because the new instances offer similar vCPU and memory ratios. To learn more, check out the collection of Graviton resources to help you start migrating your applications to Graviton instance types.

You can also visit the Level up your compute with AWS Graviton page to begin your Graviton adoption journey.

Now available
Amazon EC2 C8gn instances are available today in US East (N. Virginia) and US West (Oregon) Regions. Two metal instance sizes are only available in US East (N. Virginia) Region. These instances can be purchased as On-Demand, Savings Plan, Spot instances, or as Dedicated instances and Dedicated hosts.

Give C8gn instances a try in the Amazon EC2 console. To learn more, refer to the Amazon EC2 C8g instance page and send feedback to AWS re:Post for EC2 or through your usual AWS Support contacts.

Channy

DR 101: How to Test Your DR Plan

Post Syndicated from Kari Rivas original https://www.backblaze.com/blog/dr-101-how-to-test-your-dr-plan/

A decorative image showing a cloud, objects, and a continuous loop.

Your disaster recovery (DR) plan is only as strong as your last test. Yet, many enterprises treat DR like a fire extinguisher—useful in theory, but rarely checked. Regular backup testing and disaster recovery drills are essential to ensure your plan works when it counts.

Let’s break down how to test your DR plan effectively and build a framework for continuous improvement.

Step 1: Building a disaster recovery testing framework

Your DR plan isn’t complete until it includes a clear, repeatable testing schedule. Here’s how to structure it:

  • Testing frequency: Establish a regular testing schedule. The optimal frequency depends on your company’s size and risk profile. A minimum of annual testing is recommended, with more frequent testing (every three-six months) beneficial for larger enterprises.
  • Testing types: Incorporate various testing methodologies into your plan. This might include:
    • Tabletop exercises: Simulate disaster scenarios through facilitated discussions, allowing your team to identify communication gaps and areas for improvement in the DR plan.
    • Walk-throughs: Step through specific recovery procedures outlined in the plan with your incident response team, ensuring team members understand their roles and responsibilities.
    • Limited scope DR drills: Simulate a disaster scenario with a specific system or application outage, testing recovery procedures for that particular environment.
    • Full-scale DR drills: Conduct comprehensive tests that simulate a full-blown disaster, involving all critical systems, applications, and personnel.

By rotating through these disaster recovery testing approaches, you’ll catch vulnerabilities before a real crisis does.

Step 2: Involve the right people (not just IT)

A solid DR plan isn’t just an IT function, it’s a team sport. Bring in key personnel from various departments (IT, legal, finance, etc.) to review your DR plan. You might discover potential oversights or areas for improvement that you may have missed with their diverse perspectives.

Step 3: Practice makes prepared

Regularly conduct DR drills and exercises to put your plan into action. DR drills should feel real. That means:

Involving your team. These exercises should involve all members of your IRT, including IT specialists, communication experts, and management representatives, simulating real-world response scenarios and fostering teamwork within the team.

Learning from every test. The primary objective of testing is to identify weaknesses and improve your DR plan. Track everything: timing, response quality, communication breakdowns.

Conducting a retrospective. Use your DR exercises and drills to analyze successes and failures, identify areas for improvement in the DR plan and update your plan based on the lessons learned.

  • Encourage open discussion and feedback from all participants, including the IRT and potentially impacted stakeholders.
  • Identify areas where the plan fell short or where communication could be improved.
  • Apply these insights to fortify your DR plan and improve your company’s overall disaster preparedness.

Step 4: Make the plan accessible

Ensure your DR plan is readily accessible to your IRT members, even during a disaster. Consider storing it in a secure, cloud-based location accessible from various devices and internet connections. Ensure you can access your plan even if your primary environment is down.

Step 5: Leverage the cloud for DR testing

Consider cloud-based solutions for DR testing and recovery. This eliminates the need for ongoing infrastructure investment dedicated solely to testing purposes. Leveraging tools like cloud storage and virtualized infrastructure services provide flexible, affordable options. 

Here are some key benefits of cloud-based DR testing: 

  • Cost-effectiveness: Cloud platforms offer on-demand resources, eliminating the need for dedicated infrastructure and associated costs.
  • Scalability: Cloud resources can be easily scaled up or down to meet your specific testing needs.
  • Repeatability: Cloud environments allow for replicating test scenarios consistently, facilitating effective training and  process improvement.

Final thoughts: Test, Learn, Refine, Repeat

Disaster recovery isn’t a one-and-done process. Every test is a chance to learn, refine, and prepare better for the next incident. Businesses that test regularly not only reduce downtime—they build trust with their teams, customers, and stakeholders.

Ready to simplify your disaster recovery storage? Explore Backblaze B2 for DR testing.

The post DR 101: How to Test Your DR Plan appeared first on Backblaze Blog | Cloud Storage & Cloud Backup

Amazon FSx for OpenZFS now supports Amazon S3 access without any data movement

Post Syndicated from Elizabeth Fuentes original https://aws.amazon.com/blogs/aws/amazon-fsx-for-openzfs-now-supports-amazon-s3-access-without-any-data-movement/

Starting today, you can attach Amazon S3 Access Points to your Amazon FSx for OpenZFS file systems to access your file data as if it were in Amazon Simple Storage Service (Amazon S3). With this new capability, your data in FSx for OpenZFS is accessible for use with a broad range of Amazon Web Services (AWS) services and applications for artificial intelligence, machine learning (ML), and analytics that work with S3. Your file data continues to reside in your FSx for OpenZFS file system.

Organizations store hundreds of exabytes of file data on premises and want to move this data to AWS for greater agility, reliability, security, scalability, and reduced costs. Once their file data is in AWS, organizations often want to do even more with it. For example, they want to use their enterprise data to augment generative AI applications and build and train machine learning models with the broad spectrum of AWS generative AI and machine learning services. They also want the flexibility to use their file data with new AWS applications. However, many AWS data analytics services and applications are built to work with data stored in Amazon S3 as data lakes. After migration, they can use tools that work with Amazon S3 as their data source. Previously, this required data pipelines to copy data between Amazon FSx for OpenZFS file systems and Amazon S3 buckets.

Amazon S3 Access Points attached to FSx for OpenZFS file systems remove data movement and copying requirements by maintaining unified access through both file protocols and Amazon S3 API operations. You can read and write file data using S3 object operations including GetObject, PutObject, and ListObjectsV2. You can attach hundreds of access points to a file system, with each S3 access point configured with application-specific permissions. These access points support the same granular permissions controls as S3 access points that attach to S3 buckets, including AWS Identity and Access Management (IAM) access point policies, Block Public Access, and network origin controls such as restricting access to your Virtual Private Cloud (VPC). Because your data continues to reside in your FSx for OpenZFS file system, you continue to access your data using Network File System (NFS) and benefit from existing data management capabilities.

You can use your file data in Amazon FSx for OpenZFS file systems to power generative AI applications with Amazon Bedrock for Retrieval Augmented Generation (RAG) workflows, train ML models with Amazon SageMaker, and run analytics or business intelligence (BI) with Amazon Athena and AWS Glue as if the data were in S3, using the S3 API. You can also generate insights using open source tools such as Apache Spark and Apache Hive, without moving or refactoring your data.

To get started
You can create and attach an S3 Access Point to your Amazon FSx for OpenZFS file system using the Amazon FSx console, the AWS Command Line Interface (AWS CLI), or the AWS SDK.

To start, you can follow the steps in the Amazon FSx for OpenZFS file system documentation page to create the file system, then, using the Amazon FSx console, go to Actions and select Create S3 access point. Leave the standard configuration and then create.

To monitor the creation progress, you can go to the Amazon FSx console.

Once available, choose the name of the new S3 access point and review the access point summary. This summary includes an automatically generated alias that works anywhere you would normally use S3 bucket names.

Using the bucket-style alias, you can access the FSx data directly through S3 API operations.

  • List objects using the ListObjectsV2 API

  • Get files using the GetObject API

  • Write data using the PutObject API

The data continues to be accessible via NFS.

Beyond accessing your FSx data through the S3 API, you can work with your data using the broad range of AI, ML, and analytics services that work with data in S3. For example, I built an Amazon Bedrock Knowledge Base using PDFs containing airline customer service information from my travel support application repository, WhatsApp-Powered RAG Travel Support Agent: Elevating Customer Experience with PostgreSQL Knowledge Retrieval, as the data source.

To create the Amazon Bedrock Knowledge Base, I followed the connection steps in Connect to Amazon S3 for your knowledge base user guide. I chose Amazon S3 as the data source, entered my S3 access point alias as the S3 source, then configured and created the knowledge base.

Once the knowledge base is synchronized, I can see all documents and the Document source as S3.

Finally, I ran queries against the knowledge base and verified that it successfully used the file data from my Amazon FSx for OpenZFS file system to provide contextual answers, demonstrating seamless integration without data movement.

Things to know
Integration and access control – Amazon S3 Access Points for Amazon FSx for OpenZFS file systems support standard S3 API operations (such as GetObject, ListObjectsV2, PutObject) through the S3 endpoint, with granular access controls through AWS Identity and Access Management (IAM) permissions and file system user authentication. Your S3 Access Point includes an automatically generated access point alias for data access using S3 bucket names, and public access is blocked by default for Amazon FSx resources.

Data management – Your data stays in your Amazon FSx for OpenZFS file system while becoming accessible as if it were in Amazon S3, eliminating the need for data movement or copies, with file data remaining accessible through NFS file protocols.

Performance – Amazon S3 Access Points for Amazon FSx for OpenZFS file systems deliver first-byte latency in the tens of milliseconds range, consistent with S3 bucket access. Performance scales with your Amazon FSx file system’s provisioned throughput, with maximum throughput determined by your underlying FSx file system configuration.

Pricing – You’re billed by Amazon S3 for the requests and data transfer costs through your S3 Access Point, in addition to your standard Amazon FSx charges. Learn more on the Amazon FSx for OpenZFS pricing page.

You can get started today using the Amazon FSx console, AWS CLI, or AWS SDK to attach Amazon S3 Access Points to your Amazon FSx for OpenZFS file systems. The feature is available in the following AWS Regions: US East (N. Virginia, Ohio), US West (Oregon), Europe (Frankfurt, Ireland, Stockholm), and Asia Pacific (Hong Kong, Singapore, Sydney, Tokyo).

— Eli

New: Improve Apache Iceberg query performance in Amazon S3 with sort and z-order compaction

Post Syndicated from Sébastien Stormacq original https://aws.amazon.com/blogs/aws/new-improve-apache-iceberg-query-performance-in-amazon-s3-with-sort-and-z-order-compaction/

You can now use sort and z-order compaction to improve Apache Iceberg query performance in Amazon S3 Tables and general purpose S3 buckets.

You typically use Iceberg to manage large-scale analytical datasets in Amazon Simple Storage Service (Amazon S3) with AWS Glue Data Catalog or with S3 Tables. Iceberg tables support use cases such as concurrent streaming and batch ingestion, schema evolution, and time travel. When working with high-ingest or frequently updated datasets, data lakes can accumulate many small files that impact the cost and performance of your queries. You’ve shared that optimizing Iceberg data layout is operationally complex and often requires developing and maintaining custom pipelines. Although the default binpack strategy with managed compaction provides notable performance improvements, introducing sort and z-order compaction options for both S3 and S3 Tables delivers even greater gains for queries filtering across one or more dimensions.

Two new compaction strategies: Sort and z-order
To help organize your data more efficiently, Amazon S3 now supports two new compaction strategies: sort and z-order, in addition to the default binpack compaction. These advanced strategies are available for both fully managed S3 Tables and Iceberg tables in general purpose S3 buckets through AWS Glue Data Catalog optimizations.

Sort compaction organizes files based on a user-defined column order. When your tables have a defined sort order, S3 Tables compaction will now use it to cluster similar values together during the compaction process. This improves the efficiency of query execution by reducing the number of files scanned. For example, if your table is organized by sort compaction along state and zip_code, queries that filter on those columns will scan fewer files, improving latency and reducing query engine cost.

Z-order compaction goes a step further by enabling efficient file pruning across multiple dimensions. It interleaves the binary representation of values from multiple columns into a single scalar that can be sorted, making this strategy particularly useful for spatial or multidimensional queries. For example, if your workloads include queries that simultaneously filter by pickup_location, dropoff_location, and fare_amount, z-order compaction can reduce the total number of files scanned compared to traditional sort-based layouts.

S3 Tables use your Iceberg table metadata to determine the current sort order. If a table has a defined sort order, no additional configuration is needed to activate sort compaction—it’s automatically applied during ongoing maintenance. To use z-order, you need to update the table maintenance configuration using the S3 Tables API and set the strategy to z-order. For Iceberg tables in general purpose S3 buckets, you can configure AWS Glue Data Catalog to use sort or z-order compaction during optimization by updating the compaction settings.

Only new data written after enabling sort or z-order will be affected. Existing compacted files will remain unchanged unless you explicitly rewrite them by increasing the target file size in table maintenance settings or rewriting data using standard Iceberg tools. This behavior is designed to give you control over when and how much data is reorganized, balancing cost and performance.

Let’s see it in action
I’ll walk you through a simplified example using Apache Spark and the AWS Command Line Interface (AWS CLI). I have a Spark cluster installed and an S3 table bucket. I have a table named testtable in a testnamespace. I temporarily disabled compaction, the time for me to add data into the table.

After adding data, I check the file structure of the table.

spark.sql("""
  SELECT 
    substring_index(file_path, '/', -1) as file_name,
    record_count,
    file_size_in_bytes,
    CAST(UNHEX(hex(lower_bounds[2])) AS STRING) as lower_bound_name,
    CAST(UNHEX(hex(upper_bounds[2])) AS STRING) as upper_bound_name
  FROM ice_catalog.testnamespace.testtable.files
  ORDER BY file_name
""").show(20, false)
+--------------------------------------------------------------+------------+------------------+----------------+----------------+
|file_name                                                     |record_count|file_size_in_bytes|lower_bound_name|upper_bound_name|
+--------------------------------------------------------------+------------+------------------+----------------+----------------+
|00000-0-66a9c843-5a5c-407f-8da4-4da91c7f6ae2-0-00001.parquet  |1           |837               |Quinn           |Quinn           |
|00000-1-b7fa2021-7f75-4aaf-9a24-9bdbb5dc08c9-0-00001.parquet  |1           |824               |Tom             |Tom             |
|00000-10-00a96923-a8f4-41ba-a683-576490518561-0-00001.parquet |1           |838               |Ilene           |Ilene           |
|00000-104-2db9509d-245c-44d6-9055-8e97d4e44b01-0-00001.parquet|1000000     |4031668           |Anjali          |Tom             |
|00000-11-27f76097-28b2-42bc-b746-4359df83d8a1-0-00001.parquet |1           |838               |Henry           |Henry           |
|00000-114-6ff661ca-ba93-4238-8eab-7c5259c9ca08-0-00001.parquet|1000000     |4031788           |Anjali          |Tom             |
|00000-12-fd6798c0-9b5b-424f-af70-11775bf2a452-0-00001.parquet |1           |852               |Georgie         |Georgie         |
|00000-124-76090ac6-ae6b-4f4e-9284-b8a09f849360-0-00001.parquet|1000000     |4031740           |Anjali          |Tom             |
|00000-13-cb0dd5d0-4e28-47f5-9cc3-b8d2a71f5292-0-00001.parquet |1           |845               |Olivia          |Olivia          |
|00000-134-bf6ea649-7a0b-4833-8448-60faa5ebfdcd-0-00001.parquet|1000000     |4031718           |Anjali          |Tom             |
|00000-14-c7a02039-fc93-42e3-87b4-2dd5676d5b09-0-00001.parquet |1           |838               |Sarah           |Sarah           |
|00000-144-9b6d00c0-d4cf-4835-8286-ebfe2401e47a-0-00001.parquet|1000000     |4031663           |Anjali          |Tom             |
|00000-15-8138298d-923b-44f7-9bd6-90d9c0e9e4ed-0-00001.parquet |1           |831               |Brad            |Brad            |
|00000-155-9dea2d4f-fc98-418d-a504-6226eb0a5135-0-00001.parquet|1000000     |4031676           |Anjali          |Tom             |
|00000-16-ed37cf2d-4306-4036-98de-727c1fe4e0f9-0-00001.parquet |1           |830               |Brad            |Brad            |
|00000-166-b67929dc-f9c1-4579-b955-0d6ef6c604b2-0-00001.parquet|1000000     |4031729           |Anjali          |Tom             |
|00000-17-1011820e-ee25-4f7a-bd73-2843fb1c3150-0-00001.parquet |1           |830               |Noah            |Noah            |
|00000-177-14a9db71-56bb-4325-93b6-737136f5118d-0-00001.parquet|1000000     |4031778           |Anjali          |Tom             |
|00000-18-89cbb849-876a-441a-9ab0-8535b05cd222-0-00001.parquet |1           |838               |David           |David           |
|00000-188-6dc3dcca-ddc0-405e-aa0f-7de8637f993b-0-00001.parquet|1000000     |4031727           |Anjali          |Tom             |
+--------------------------------------------------------------+------------+------------------+----------------+----------------+
only showing top 20 rows

I observe the table is made of multiple small files and that the upper and lower bounds for the new files have overlap–the data is certainly unsorted.

I set the table sort order.

spark.sql("ALTER TABLE ice_catalog.testnamespace.testtable WRITE ORDERED BY name ASC")

I enable table compaction (it’s enabled by default; I disabled it at the start of this demo)

aws s3tables put-table-maintenance-configuration --table-bucket-arn ${S3TABLE_BUCKET_ARN} --namespace testnamespace --name testtable --type icebergCompaction --value "status=enabled,settings={icebergCompaction={strategy=sort}}"

Then, I wait for the next compaction job to trigger. These run throughout the day, when there are enough small files. I can check the compaction status with the following command.

aws s3tables get-table-maintenance-job-status --table-bucket-arn ${S3TABLE_BUCKET_ARN} --namespace testnamespace --name testtable

When the compaction is done, I inspect the files that make up my table one more time. I see that the data was compacted to two files, and the upper and lower bounds show that the data was sorted across these two files.

spark.sql("""
  SELECT 
    substring_index(file_path, '/', -1) as file_name,
    record_count,
    file_size_in_bytes,
    CAST(UNHEX(hex(lower_bounds[2])) AS STRING) as lower_bound_name,
    CAST(UNHEX(hex(upper_bounds[2])) AS STRING) as upper_bound_name
  FROM ice_catalog.testnamespace.testtable.files
  ORDER BY file_name
""").show(20, false)
+------------------------------------------------------------+------------+------------------+----------------+----------------+
|file_name                                                   |record_count|file_size_in_bytes|lower_bound_name|upper_bound_name|
+------------------------------------------------------------+------------+------------------+----------------+----------------+
|00000-4-51c7a4a8-194b-45c5-a815-a8c0e16e2115-0-00001.parquet|13195713    |50034921          |Anjali          |Kelly           |
|00001-5-51c7a4a8-194b-45c5-a815-a8c0e16e2115-0-00001.parquet|10804307    |40964156          |Liza            |Tom             |
+------------------------------------------------------------+------------+------------------+----------------+----------------+

There are fewer files, they have larger sizes, and there is a better clustering across the specified sort column.

To use z-order, I follow the same steps, but I set strategy=z-order in the maintenance configuration.

Regional availability
Sort and z-order compaction are now available in all AWS Regions where Amazon S3 Tables are supported and for general purpose S3 buckets where optimization with AWS Glue Data Catalog is available. There is no additional charge for S3 Tables beyond existing usage and maintenance fees. For Data Catalog optimizations, compute charges apply during compaction.

With these changes, queries that filter on the sort or z-order columns benefit from faster scan times and reduced engine costs. In my experience, depending on my data layout and query patterns, I observed performance improvements of threefold or more when switching from binpack to sort or z-order. Tell us how much your gains are on your actual data.

To learn more, visit the Amazon S3 Tables product page or review the S3 Tables maintenance documentation. You can also start testing the new strategies on your own tables today using the S3 Tables API or AWS Glue optimizations.

— seb

5 Cloud Storage Best Practices for AI Workloads

Post Syndicated from David Johnson original https://www.backblaze.com/blog/5-cloud-storage-best-practices-for-ai-workloads/

A decorative image showing various technology icons surrounding a globe.

As organizations race to innovate in AI, efficient, scalable, and cost-effective cloud storage has become key to their success. Whether you’re training massive models or deploying real-time inference pipelines, following best practices for AI storage will help you maximize performance, minimize costs, and ensure the integrity and availability of your most valuable AI asset—data.

In this blog, we’re going to take a look at five of those best practices, to help you get the most  out of your cloud storage solution when working with AI.

Ebook: “Why Object Storage Is Ideal for AI Workflows”

Wondering what type of data architecture makes the most sense for your AI initiatives? Check out our latest ebook, “Why Object Storage is Ideal for AI Workloads,” and learn all the advantages this approach to cloud storage offers across the entire model lifecycle.

Get the Ebook

1. Understand Your Data Lifecycle

You’ve assembled your training data set, loaded it into fast storage next to your GPU compute, and hit the button to start your training. What happens when the training run is complete? If you’re just going to delete that data set, then great—enter rm -r and simply move on.

If not, though, you’ll need to carefully consider the ongoing costs of storage. Leaving that dataset where it is will likely cost you many times over what you’d spend archiving it to a more cost-effective location. By fully understanding and mapping your data lifecycle—and distinguishing between active (e.g., during model training), and inactive data (e.g., archived/dated model versions)—you can manage your storage costs much more efficiently.

2. Check In Your Checkpoints

Training AI models is a delicate, resource-intensive process. Hardware failures, software bugs, and even power outages can derail week-long training runs, wasting precious time and compute resources. 

The two most important steps you can take to avoid these kinds of snags are: 

  • Frequent checkpointing: This means regularly saving a model’s state so you can pick the training process back up from the last checkpoint, rather than starting all over again at square one. 
  • Backup checkpoint data to the cloud: Storing checkpoint data on only local drives alone can be very risky. If the local storage fails, your checkpoints—and all the progress they represent—could be lost. That’s why you should always back up checkpoint data to secure cloud storage solutions as well. This dual approach ensures both speed (for quick recovery) and durability (for disaster recovery), letting you and your team rest easy knowing your hard work is being protected.

3. Keep Your Model Safe

With that same spirit in mind, don’t forget that your models require safekeeping, too. It takes a lot of time and money to train AI models, so protecting them—whether from hardware failure, human error, ransomware attack, or other threats—is absolutely paramount. To safeguard your models:

  • Use your cloud provider’s object lock to prevent accidental or malicious deletion.
  • Implement regular, automated backups of both model binaries and associated metadata.
  • Store critical models in geographically redundant locations for disaster recovery.

These few simple steps can go a very long way to ensuring that your valuable, hard-earned models remain safe and functional, even when things take a turn for the worse.

4. Don’t Lock Your Data Behind a Paywall

Let’s imagine you’re planning your next training run. When looking at cloud providers, you discover that you can realize significant savings by switching GPU compute providers. The only problem is, your current provider will charge you an arm and a leg to move the data to where it needs to be. There’s still a net gain from moving, but you lose significant margin by paying this exorbitant “exit toll,” known as an egress fee.  This is why, before committing to a storage provider, you should carefully review its pricing structures and fees, including the following:

  • Calculate the total cost of moving your data, not just storing it.
  • Consider multi-cloud strategies or providers that offer free or low-cost egress for AI workloads.

By understanding these costs upfront, you retain the flexibility to optimize your infrastructure as business needs evolve, and avoid the all-too-common trap of hidden fees.

5. Do the Mirroring Math: The Replication Equation

Let’s imagine you’ve found yourself a cost-effective storage option with a specialized cloud object storage provider. Even after finding the right solution with the right pricing structure and performance, there are considerations to be made. No matter how quickly you can download the data, if compute and data are in different locations there’s no escaping the fact that your GPUs might be spinning idle waiting for that data to arrive.

To avoid this predicament, break out your calculator and do the “mirroring math”:

  • Calculate the time and cost required to replicate (mirror) data to a location near your GPUs before training starts.
  • Weigh the benefits of lower storage costs against the potential delays and additional storage expenses during training.
  • For large or frequently accessed datasets, it may be worth pre-staging data in high-throughput storage close to your compute.

Ask yourself: Is it faster and/or cheaper to replicate the data upfront to be in close proximity to your GPUs, or does the time required to mirror the data and the additional storage cost during the training run outweigh the benefits? Intelligent data placement—balancing cost, performance, and proximity—ensures your AI workloads run efficiently and cost-effectively.

Building a Future-Proof AI Storage Strategy

The relentless pace of AI innovation demands a storage strategy that is agile, scalable, and cost-effective. Thankfully, the above five best practices can go quite a long way to ensuring the long-term success of your AI project

By understanding the entirety of your data lifecycle—checkpointing wisely, securing your models, avoiding data lock-in, and optimizing data placement—your team is laying the groundwork for sustained AI success. No matter what industry you’re in, these best practices will help to control costs, accelerate innovation, maintain compliance, and protect your team’s most valuable digital assets, in both the near and long term.

Ready to take a deeper dive dive into the topic of storage and AI? Check out our latest ebook, “Why Object Storage is Essential for AI Workloads.

The post 5 Cloud Storage Best Practices for AI Workloads appeared first on Backblaze Blog | Cloud Storage & Cloud Backup

Hyperscale Doesn’t Mean Hyper-Resilient

Post Syndicated from David Johnson original https://www.backblaze.com/blog/hyperscale-doesnt-mean-hyper-resilient/

A decorative image showing clouds connected by digital lines.

Last week, a misconfiguration in Google Cloud’s API infrastructure led to a major global outage. Not long before that, IBM Cloud suffered its second significant disruption in a matter of weeks. The incidents impacted everything from enterprise infrastructure to consumer-facing apps—Gmail, Spotify, Cloudflare, and countless internal systems built on top of these platforms.

Understandably, much of the coverage has focused on what went wrong. But the more important question might be: Why does something like this ripple so far and wide in a system supposedly built for resilience?

Single points of failure in a multi-service world

One might assume that as cloud providers scale, their reliability scales with them. However, these outages reveal a critical distinction: the difference between data-layer resilience and control-plane fragility.

The problem is, that robust data layer can be rendered useless if the “front door” is locked. Hyperscale cloud platforms have grown so interdependent and complex that a fault in one layer can bring vast swaths of unrelated services to a halt. This is the risk of vertical integration: When one vendor provides compute, storage, networking, and identity, a simple bug or misconfiguration can cascade through thousands of applications, not because the applications are fragile, but because they’ve all tied themselves to the same operational backbone. 

Redundancy, or the illusion of it?

In theory, cloud architecture encourages redundancy. But in practice, many companies—even those using multi-cloud strategies—tend to consolidate key services like authentication and orchestration with a single vendor. When that vendor’s services go down, it doesn’t matter that your data is replicated across three availability zones in the same data center. If you can’t log in to access it, your redundancy becomes purely theoretical.

After last week’s outages, some companies may re-evaluate their cloud strategy—but it’s not as easy as flipping a switch. True diversification is complex, requiring time, engineering resources, and a cultural shift toward designing for failure.

The reality: Fewer assumptions, more contingencies

The knee-jerk reaction to events like these is often to demand better SLAs, more transparency, or faster recovery times. Those are valid asks. But they might miss the deeper lesson: Assumptions about uptime and “X-nines” reliability are only helpful until the moment they aren’t. What users need are not just better guarantees, but clearer paths to self-determination when things break.

That might look like:

  • Designing for graceful degradation. What can your service do when its cloud provider is partially offline?
  • Reconsidering dependencies. Are you tying core logic to a provider’s proprietary APIs, or abstracting where possible?
  • Asking harder questions during vendor selection. Not just, “Can it scale?” but “What happens when it fails?”

Case study: Sardius Media bakes in redundancy

Sardius Media, a global video platform, built cloud redundancy into its DNA. Every piece of media is replicated across multiple S3 compatible storage providers—including Backblaze B2—using a proprietary “race” mechanism that always delivers the fastest, most reliable storage experience for end users. This architecture keeps files available, resilient, and protected, even if one provider has an outage.

  • No single point of failure: Content lives across multiple clouds
  • Best performance: Requests race to the fastest provider in real time
  • Durability, affordability, and global reach—Backblaze B2 wins the race up to 80% of the time globally
  • Sardius Media’s strategy proves that open, multi-provider storage isn’t just theory—it’s operational resilience in action.

What does that mean for you?

The answer isn’t to abandon the cloud, but to get smarter about how you use it. This means architecting systems that don’t just have data redundancy, but true operational independence.

Maybe that means replicating data to providers who specialize rather than consolidate. Or maybe it just means revisiting architectures that have become too reliant on invisible scaffolding.

What’s clear is this: reliability isn’t a feature you buy from the cloud. It’s a design philosophy that must be shared.

The post Hyperscale Doesn’t Mean Hyper-Resilient appeared first on Backblaze Blog | Cloud Storage & Cloud Backup

AWS re:Inforce roundup 2025: top announcements

Post Syndicated from AWS News Blog Team original https://aws.amazon.com/blogs/aws/aws-reinforce-roundup-2025-top-announcements/

At AWS re:Inforce 2025 (June 16-18, Philadelphia), AWS Vice President and Chief Information Security Officer Amy Herzog delivered the keynote address, announcing new security innovations. Throughout the event, AWS announced additional security capabilities focused on simplifying security at scale and enabling organizations to build more resilient applications in the cloud. Below is a comprehensive roundup of the major security launches and updates announced at this year’s conference.

Verify internal access to critical AWS resources with new IAM Access Analyzer capabilities
A new capability in AWS Identity and Access Management Access Analyzer helps security teams verify which principals within their AWS organization have access to critical resources like S3 buckets, DynamoDB tables, and RDS snapshots by using automated reasoning to evaluate multiple policies and provide findings through a unified dashboard.

AWS IAM now enforces MFA for root users across all account types
The new Multi-Factor Authentication enforcement prevents over 99% of password-related attacks. You can use a range of supported IAM MFA methods, including FIDO-certified security keys to harden access to your AWS accounts. AWS supports FIDO2 passkeys for a user-friendly MFA implementation and allows you to register up to 8 MFA devices per root and IAM user.

Improve your security posture using Amazon threat intelligence on AWS Network Firewall
This new Network Firewall managed rule group offers protection against active threats relevant to workloads in AWS. The feature uses the Amazon threat intelligence system MadPot to continuously track attack infrastructure, including malware hosting URLs, botnet command and control servers, and crypto mining pools, identifying indicators of compromise (IOCs) for active threats.

AWS Certificate Manager introduces exportable public SSL/TLS certificates to use anywhere
You can now use AWS Certificate Manager to issue exportable public certificates for your AWS, hybrid, or multicloud workloads that require secure TLS traffic termination.

AWS WAF simplified console experience
The new AWS WAF console experience reduces security configuration steps by up to 80% through pre-configured protection packs. Security teams can quickly implement comprehensive protection for specific application types, with consolidated security metrics and customizable controls through an intuitive interface.

Amazon CloudFront simplifies web application delivery and security with new user-friendly interface
Try the simplified console experience with Amazon CloudFront to accelerate and secure web applications within a few clicks by automating TLS certificate provisioning, DNS configuration, and security settings through an integrated interface with AWS WAF’s enhanced Rule Packs.

New AWS Shield feature discovers network security issues before they can be exploited (Preview)
Shield network security posture management automatically discovers and analyzes network resources across AWS accounts, prioritizes security risks based on AWS best practices, and provides actionable remediation recommendations to protect applications against threats like SQL injections and DDoS attacks.

Unify your security with the new AWS Security Hub for risk prioritization and response at scale (Preview)
AWS Security Hub has been enhanced to transform security signals into actionable insights, helping security teams prioritize and respond to critical issues at scale. This unified solution provides comprehensive visibility across your cloud environment while reducing the complexity of managing multiple security tools.

Amazon GuardDuty expands Extended Threat Detection coverage to Amazon EKS clusters
Amazon GuardDuty Extended Threat Detection now supports Amazon EKS clusters, helping you detect sophisticated multistage attacks by correlating security signals across Kubernetes audit logs, runtime behaviors, and AWS API activities. This enhancement automatically identifies critical attack sequences that might otherwise go unnoticed, enabling faster response to threats.

New categories for the AWS MSSP Competency
The AWS MSSP Competency (previously AWS Level 1 MSSP Competency) now includes new categories covering infrastructure security, workload security, application security, data protection, identity and access management, incident response, and cyber recovery. Partners provide 24/7 monitoring and incident response through dedicated Security Operations Centers.

Secure your Express application APIs in minutes with Amazon Verified Permissions
Amazon Verified Permissions announced the release of the verified-permissions-express-toolkit, an open-source package that allows developers to implement authorization for Express web application APIs in minutes using Amazon Verified Permissions.

Beyond compute: Shifting vulnerability detection left with Amazon Inspector code security
Amazon Inspector code security capabilities are now generally available, helping you secure applications before production by rapidly identifying and prioritizing security vulnerabilities and misconfigurations across application source code, dependencies, and infrastructure as code (IaC).

AWS Backup adds new Multi-party approval for logically air-gapped vaults
Multi-party approval for AWS Backup logically air-gapped vaults enables you to recover your backup data even when your AWS account is compromised, by leveraging authorization from a designated approval team of trusted individuals who can enable vault sharing with a recovery account.

Amazon GuardDuty expands Extended Threat Detection coverage to Amazon EKS clusters

Post Syndicated from Esra Kayabali original https://aws.amazon.com/blogs/aws/amazon-guardduty-expands-extended-threat-detection-coverage-to-amazon-eks-clusters/

Today, I’m happy to announce Amazon GuardDuty Extended Threat Detection with expanded coverage for Amazon Elastic Kubernetes Service (Amazon EKS), building upon the capabilities we introduced in our AWS re:Invent 2024 announcement of Amazon GuardDuty Extended Threat Detection: AI/ML attack sequence identification for enhanced cloud security.

Security teams managing Kubernetes workloads often struggle to detect sophisticated multistage attacks that target containerized applications. These attacks can involve container exploitation, privilege escalation, and unauthorized movement within Amazon EKS clusters. Traditional monitoring approaches might detect individual suspicious events, but often miss the broader attack pattern that spans across these different data sources and time periods.

GuardDuty Extended Threat Detection introduces a new critical severity finding type, which automatically correlates security signals across Amazon EKS audit logs, runtime behaviors of processes associated with EKS clusters, malware execution in EKS clusters, and AWS API activity to identify sophisticated attack patterns that might otherwise go unnoticed. For example, GuardDuty can now detect attack sequences in which a threat actor exploits a container application, obtains privileged service account tokens, and then uses these elevated privileges to access sensitive Kubernetes secrets or AWS resources.

This new capability uses GuardDuty correlation algorithms to observe and identify sequences of actions that indicate potential compromise. It evaluates findings across protection plans and other signal sources to identify common and emerging attack patterns. For each attack sequence detected, GuardDuty provides comprehensive details, including potentially impacted resources, timeline of events, actors involved, and indicators used to detect the sequence. The findings also map observed activities to MITRE ATT&CK® tactics and techniques and remediation recommendations based on AWS best practices, helping security teams understand the nature of the threat.

To enable Extended Threat Detection for EKS, you need at least one of these features enabled: EKS Protection or Runtime Monitoring. For maximum detection coverage, we recommend enabling both to enhance detection capabilities. EKS Protection monitors control plane activities through audit logs, and Runtime Monitoring observes behaviors within containers. Together, they create a complete view of your EKS clusters, enabling GuardDuty to detect complex attack patterns.

How it works
To use the new Amazon GuardDuty Extended Threat Detection for EKS clusters, go to the GuardDuty console to enable EKS Protection in your account. From the Region selector in the upper-right corner, select the Region where you want to enable EKS Protection. In the navigation pane, choose EKS Protection. On the EKS Protection page, review the current status and choose Enable. Select Confirm to save your selection.

After it’s enabled, GuardDuty immediately starts monitoring EKS audit logs from your EKS clusters without requiring any additional configuration. GuardDuty consumes these audit logs directly from the EKS control plane through an independent stream, which doesn’t affect any existing logging configurations. For multi-account environments, only the delegated GuardDuty administrator account can enable or disable EKS Protection for member accounts and configure auto-enable settings for new accounts joining the organization.

To enable Runtime Monitoring, choose Runtime Monitoring in the navigation pane. Under the Configuration tab, choose Enable to enable Runtime Monitoring for your account.

Now, you can view from the Summary dashboard the attack sequences and critical findings specifically related to Kubernetes cluster compromise. You can observe that GuardDuty identifies complex attack patterns in Kubernetes environments, such as credential compromise events and suspicious activities within EKS clusters. The visual representation of findings by severity, resource impact, and attack types gives you a holistic view of your Amazon EKS security posture. This means you can prioritize the most critical threats to your containerized workloads.

The Finding details page provides visibility into complex attack sequences targeting EKS clusters, helping you understand the full scope of potential compromises. GuardDuty correlates signals into a timeline, mapping observed behaviors to MITRE ATT&CK® tactics and techniques such as account manipulation, resource hijacking, and privilege escalation. This granular level of insight reveals exactly how attackers progress through your Amazon EKS environment. It identifies affected resources like EKS workloads and service accounts. The detailed breakdown of indicators, actors, and endpoints provides you with actionable context to understand attack patterns, determine impact, and prioritize remediation efforts. By consolidating these security insights into a cohesive view, you can quickly assess the severity of Amazon EKS security incidents, reduce investigation time, and implement targeted countermeasures to protect your containerized applications.

The Resources section of the Finding details page shows context about the specific assets affected during an attack sequence. This unified resource list provides you with visibility into the exact scope of the compromise—from the initial access to the targeted Kubernetes components. Because GuardDuty includes detailed attributes such as resource types, identifiers, creation dates, and namespace information, you can rapidly assess which components of your containerized infrastructure require immediate attention. This focused approach eliminates guesswork during incident response, so you can prioritize remediation efforts on the most critical affected resources and minimize the potential blast radius of Amazon EKS targeted attacks.

Now available
Amazon GuardDuty Extended Threat Detection with expanded coverage for Amazon EKS clusters provides comprehensive security monitoring across your Kubernetes environment. You can use this capability to detect sophisticated multistage attacks by correlating events across different data sources, identifying attack sequences that traditional monitoring might miss.

To start using this expanded coverage, enable EKS Protection in your GuardDuty settings and consider adding Runtime Monitoring for enhanced detection capabilities.

For more information about this new capability, refer to the Amazon GuardDuty Documentation.

— Esra

Secure your Express application APIs in minutes with Amazon Verified Permissions

Post Syndicated from Trevor Schiavone original https://aws.amazon.com/blogs/security/secure-your-express-application-apis-in-minutes-with-amazon-verified-permissions/

Today, Amazon Verified Permissions announced the release of @verifiedpermissions/authorization-clients-js, an open source package that developers can use to implement external fine-grained authorization for Express.js web application APIs in minutes when using Verified Permissions.

Express is a minimal and flexible Node.js web application framework that provides a robust set of features for web and mobile applications. By using this standardized integration with Verified Permissions, developers can externalize authorization using up to 90 percent less code compared to writing their own custom integrations, saving them time and effort and improving application security posture by reducing the amount of custom integration code.

Why externalize authorization?

Traditionally, developers implemented authorization within their application by embedding authorization logic directly into application code. This embedded authorization logic is designed to support a few permissions, but as applications evolve, there is often a need to incrementally update the embedded authorization logic to support more complex use cases, resulting in code that is complex and difficult to maintain. As code complexity increases, further evolving the security model and performing audits of permissions becomes more challenging, resulting in an application that becomes more difficult to maintain over its lifecycle.

By externalizing authorization, you can decouple authorization logic from your application. This yields multiple benefits including freeing up development teams to focus on application logic and simplifying software audits.

One approach to externalize authorization from your application code is to use Cedar. Cedar is an open source language and software development kit (SDK) for writing and enforcing authorization policies for your applications. You specify fine-grained permissions as Cedar policies, and your application authorizes access requests by calling the Cedar SDK. For example, if you’re building a pet store application, you can use the following Cedar policy to control that only a user with a jobLevel of employee can access the POST /pets API.


permit (
	principal,
	action in [Action::"POST /pets"], 
	resource
) when {
	principal.jobLevel = "employee"
};

One option for using Cedar is to self-manage the implementation; you can find an example for this pattern in another post: Secure your application APIs in 5 minutes with Cedar.

Self-managed Cedar provides the benefits of externalizing authorization but requires ongoing operational management. Organizations are responsible for Cedar version upgrades, applying security patches, managing policies, and auditing authorizations. Another option for using Cedar is to use Verified Permissions. Verified Permissions removes these operational requirements by providing a managed service for Cedar. Verified Permissions manages scaling, simplifies policy governance by supporting centralized policy management, and logs policy changes and authorization requests to simplify auditing.

This post describes how web application developers can use the new Express package to simplify the integration of Express web applications with Verified Permissions. The step-by-step guide uses a sample Pet Store application to show how access to APIs can be restricted based on user groups. You can find the sample Pet Store application in the verifiedpermissions repository on GitHub.

Pet Store application API overview

The Pet Store application is used to manage a pet store. The pet store is built using Express with Node.js and exposes the APIs in the following table.

API Description
GET /api/pets Returns the list of available pets
GET /api/pets/{petId} Returns the specified pet found
POST /api/pets Adds a pet to the pet store
PUT /api/pets/{petId} Updates an existing pet
DELETE /api/pets/{petId} Removes a pet from the pet store

This application doesn’t allow all users to access all APIs. Instead, it enforces the following rules:

  • Administrators: Full access to pets and management functions
  • Employees: Can view, create, and update pets
  • Customers: Can view pets and create new pets

Implementing authorization for the Pet Store APIs

Let’s walk through how to secure your application APIs using Verified Permissions and the new package for Express. The initial application, with no authorization, can be found in the start folder; use this to follow along with the post. You can find a completed version of the application in the finish folder.

When completed, you’ll have implemented the application architecture shown in Figure 1. A React frontend application that uses Amazon Cognito for authentication. The application then includes the identity token returned from Cognito as an authorization header to the Express backend APIs. The Express backend, using the new Verified Permissions authorization middleware package, calls Verified Permissions to authorize the user request.

Figure 1: Architecture of the Pet Store application

Figure 1: Architecture of the Pet Store application

Prerequisites

Before you get started, make sure you have the following prerequisites in place.

Step 1: Set up the AWS CLI

Some of the commands require the AWS Command Line Interface (AWS CLI). See Installing or updating to the latest version of the AWS CLI and Configuring settings for the AWS CLI.

Step 2: Set up an OpenID Connect identity provider and a database

The Pet Store application uses an OpenID Connect (OIDC) identity provider to manage users. For this example, you use an Amazon Cognito user pool called PetStoreUserPool with three users, one Admin, one Employee, and one Customer.

The application also uses a Amazon DynamoDB database to store the pets.

You can set up Amazon Cognito and DynamoDB in your AWS account by running the following command in the /start directory.

./scripts/setup-infrastructure.sh

The setup script will prompt you to set passwords for the three users (passwords must be at least 8 characters and require at least one number, one uppercase letter, and one lowercase letter).

Note the outputs of running this script because you’ll use them in step 5 of Integrate Verified Permissions.

Note: In your own applications, you can set up Amazon Cognito by following the instructions in Create a new application in the Amazon Cognito console, or you can bring your own OIDC identity provider.

Step 3 (optional): Run the application

Now that the infrastructure is set up, you can run the application. In two separate terminals, run the following commands in the /start directory:

./scripts/run-backend-dev.sh
./scripts/run-frontend-dev.sh

Test the application by creating some pets.

Integrate Verified Permissions

With the prerequisites in place, the next step is to integrate Verified Permissions. Verified Permissions can be integrated into an Express application in six steps:

  1. Create a Verified Permissions policy store
  2. Add the Cedar and Verified Permissions authorization middleware packages
  3. Create and deploy a Cedar schema
  4. Create and deploy Cedar policies
  5. Connect the Verified Permissions policy store to your OIDC identity provider
  6. Update the application code to call Verified Permissions to authorize API access

The Verified Permissions integration happens with the Express web application backend. All commands in the section should be run in the /start/backend directory.

Step 1: Create a Verified Permissions policy store 

  1. Create a policy store in Verified Permissions using the AWS CLI by running the following command
    aws verifiedpermissions create-policy-store  --validation-settings "mode=STRICT"
    

    Example successful command output:

    {
        "policyStoreId": "AAAAbbbbCCCCdddd",
        "arn": "arn:aws:verifiedpermissions::111122223333:policy-store/AAAAbbbbCCCCdddd",
        "createdDate": "2025-06-05T19:30:37.896119+00:00",
        "lastUpdatedDate": "2025-06-05T19:30:37.896119+00:00"
    }
    

  2. Save the policyStoreId value from the command output to use in step 3.

Step 2: Add the Cedar and Verified Permissions authorization middleware packages

  • Run the following command to add two new dependencies on @verifiedpermissions/authorization-clients and @cedar-policy/authorization-for-expressjs
    npm i --save @verifiedpermissions/authorization-clients
    npm i --save @cedar-policy/authorization-for-expressjs
    

Step 3: Create and deploy the Cedar schema 

A Cedar schema defines the authorization model for an application, including the entity types in the application and the actions users are allowed to take. You attach your schema to your Verified Permissions policy stores, and when policies are added or modified, the service automatically validates the policies against the schema.

The @cedar-policy/authorization-for-expressjs package can analyze the OpenAPI specification of your application and generate a Cedar schema. Specifically, the paths object in the OpenAPI schema is required in your specification.

If you don’t have an OpenAPI spec, you can generate one using the tool of your choice. There are several open source libraries that you can use to do this for Express; you might need to add some code to your application, generate the OpenAPI spec, and then remove the code. Alternatively, some generative AI based tools such as the Amazon Q Developer CLI are effective at generating OpenAPI spec documents. Regardless of how you generate the spec, be sure to validate the correct output from the tool.

For the sample application an OpenAPI spec document has been included and is named openapi.json.

  1. Run the following command to generate the Cedar schema.
    npx @cedar-policy/authorization-for-expressjs generate-schema --api-spec schemas/openapi.json --namespace PetStoreApp --mapping-type SimpleRest
    

    Example successful command output:

    Cedar schema successfully generated. Your schema files are named: v2.cedarschema.json, v4.cedarschema.json.
    v2.cedarschema.json is compatible with Cedar 2.x and 3.x
    v4.cedarschema.json is compatible with Cedar 4.x and required by the nodejs Cedar plugins.
    

  2. Next, format the Cedar schema for use with the AWS CLI. The specific format required is described in the documentation Amazon Verified Permissions policy store schema. To format the Cedar schema run the following command.
    ../scripts/prepare-cedar-schema.sh v2.cedarschema.json v2.cedarschema.forAVP.json
    

    Example successful command output:

    Cedar schema prepared successfully: v2.cedarschema.forAVP.json
    You can now use it with AWS CLI:
    

  3. After the schema is formatted, run the following command to upload the schema to Verified Permissions. Note that you need to replace <policy store id> with the actual policy store ID, which is provided as an output from the command in step 1.
    aws verifiedpermissions put-schema --definition file://v2.cedarschema.forAVP.json --policy-store-id <policy store id>
    

    Example successful command output:

    {
        "policyStoreId": "AAAAbbbbCCCCdddd",
        "namespaces": [
            "PetStoreApp"
        ],
        "createdDate": "2025-06-03T20:19:33.480528+00:00",
        "lastUpdatedDate": "2025-06-05T19:42:45.198325+00:00"
    }
    

Step 4: Create and deploy Cedar policies

If no policies are configured, Cedar denies authorization requests. The next step is to create policies that will allow specific user groups access to specific resources. The Express framework integration helps bootstrap this process by generating example policies based on the previously generated schema. You can then then customize these policies based on your use cases.

  1. Run the following command to generate sample Cedar policies.
    npx @cedar-policy/authorization-for-expressjs generate-policies --schema v2.cedarschema.json
    

    Example successful command output:

    Cedar policy successfully generated in policies/policy_1.cedar
    Cedar policy successfully generated in policies/policy_2.cedar
    

    Two sample policies are generated in the /policies directory: policy_1.cedar and policy_2.cedar.

    policy_1.cedar provides permissions for users in the admin user group to perform any action on any resource.

    
    // policy_1.cedar
    // Allows admin usergroup access to everything
    permit (
    	principal in PetStoreApp::UserGroup::"admin",
    	action,
    	resource
    );
    

    policy_2.cedar provides more access to the individual actions defined in the Cedar schema with a place holder for a specific group.

    // policy_2.cedar
    // Allows more granular user group control, change actions as needed
    permit (
        principal in PetStoreApp::UserGroup::"ENTER_THE_USER_GROUP_HERE",
        action in
            [PetStoreApp::Action::"GET /pets",
             PetStoreApp::Action::"POST /pets",
             PetStoreApp::Action::"GET /pets/{petId}",
             PetStoreApp::Action::"PUT /pets/{petId}",
             PetStoreApp::Action::"DELETE /pets/{petId}"],
        resource
    );
    

    Note that if you specified an operationId in the OpenAPI specification, the action names defined in the Cedar Schema will use that operationId instead of the default <HTTP Method> /<PATH> format. In this case, make sure that the naming of your actions in your Cedar policies matches the naming of your actions in your Cedar schema.

    For example, if you want to call your action AddPet instead of POST /pets, you could set the operationId in your OpenAPI specification to AddPet. The resulting action in the Cedar policy would be PetStoreApp::Action::"AddPet"

    Create a third policy file called policy_3.cedar and then replace the contents of each file with the following policies. Replace <userpoolId> in each policy with the Cognito User Pool Id copied earlier.

    Note: In a real use case, consider renaming your Cedar policy files based on their contents, for example, allow_customer_group.cedar.

    // Defines permitted administrator user group actions
    permit (
        principal in PetStoreApp::UserGroup::"<userPoolId>|administrator",
        action,
        resource
    );
    

    // Defines permitted employee user group actions
    permit (
        principal in PetStoreApp::UserGroup::"<userPoolId>|employee",
        action in
            [PetStoreApp::Action::"GET /pets",
             PetStoreApp::Action::"POST /pets",
             PetStoreApp::Action::"GET /pets/{petId}",
             PetStoreApp::Action::"PUT /pets/{petId}"],
        resource
    );
    

    // Defines permitted customer user group actions
    permit (
        principal in PetStoreApp::UserGroup::"<userPoolId>|customer",
        action in
            [PetStoreApp::Action::"GET /pets",
             PetStoreApp::Action::"POST /pets",
             PetStoreApp::Action::"GET /pets/{petId}"],
        resource
    );
    

  2. The policies need to be formatted so that they work with the AWS CLI for Verified Permissions. The specific format is described in the AWS CLI Verified Permissions documentation. Run the following command to format the policies.
    ../scripts/convert_cedar_policies.sh
    

    Example successful command output:

    Converting policies/policy_1.cedar to policies/json/policy_1.json
    Created policies/json/policy_1.json
    Converting policies/policy_2.cedar to policies/json/policy_2.json
    Created policies/json/policy_2.json
    Converting policies/policy_3.cedar to policies/json/policy_3.json
    Created policies/json/policy_3.json
    Conversion complete. JSON policy files are in ../policies/json/
    

    The formatted policies will be output to the backend/policies/json/ directory.

  3. After formatting the policies, run the following three commands, one for each policy, to upload them to Verified Permissions. The policy store ID is returned after completing step 2. Replace <policy store id> with the actual policy store ID.
    aws verifiedpermissions create-policy  --definition file://policies/json/policy_1.json --policy-store-id <policy store id>
    aws verifiedpermissions create-policy  --definition file://policies/json/policy_2.json --policy-store-id <policy store id>
    aws verifiedpermissions create-policy  --definition file://policies/json/policy_3.json --policy-store-id <policy store id>
    

    Example successful command output:

    {
        "policyStoreId": "AAAAbbbbCCCCdddd",
        "policyId": "8AmzZYMw6Ux5DGBoX7w24m",
        "policyType": "STATIC",
        "principal": {
            "entityType": "PetStoreApp::UserGroup",
            "entityId": "<userPoolId>|administrator"
        },
        "createdDate": "2025-06-05T19:46:45.848602+00:00",
        "lastUpdatedDate": "2025-06-05T19:46:45.848602+00:00",
        "effect": "Permit"
    }
    

Alternatively, you can also copy and paste Cedar policies into Verified Permissions in the AWS Management Console.

Step 5: Connect the Verified Permissions policy store to your OIDC identity provider

By default, the Verified Permissions authorizer middleware reads a JSON Web Token (JWT) provided within the authorizationheader of the API request to get user information. Verified Permissions can validate the token in addition to performing authorization policy evaluation.

  1. To do this, create an identity source in Verified Permissions policy store. To simplify formatting in the AWS CLI command, we’ve defined the identity source configuration in identity-source-configuration.txtReplace the <userPoolArn> and <clientId> parameters in the following code block based on the outputs of running the setup-infrastructure.sh script in Step 2 of the prerequisites.
    // identity-source-configuration.txt
    {
        "cognitoUserPoolConfiguration": {
            "userPoolArn": "<userPoolArn>",
            "clientIds":["<clientId>"] ,
            "groupConfiguration": {
                  "groupEntityType": "PetStoreApp::UserGroup"
            }
        }
    }
    

  2. After you update the file, run the following command to update the Verified Permissions policy store. Replace <policy store id> with the actual policy store ID.
    aws verifiedpermissions create-identity-source --configuration file://identity-source-configuration.txt --policy-store-id <policy store id> --principal-entity-type PetStoreApp::User
    

Example successful command output:

{
    "createdDate": "2025-06-05T20:02:53.992782+00:00",
    "identitySourceId": "DTLvwdiKfdPmk2RWzSVfu2",
    "lastUpdatedDate": "2025-06-05T20:02:53.992782+00:00",
    "policyStoreId": "AAAAbbbbCCCCdddd"
}

Step 6: Update the application code to call Verified Permissions to authorize API access 

You now need to update the application to use the @verifiedpermissions/authorization-clients and @cedar-policy/authorization-for-expressjs dependencies. This will allow the application to call Verified Permissions to authorize the API requests.

  1. Add the dependencies and define the CedarAuthorizerMiddleware and AVPAuthorizer in the application by adding the following block of code to line 13 (directly after the import statements) of backend/app.ts. Replace <policystoreId> in the following code block with your actual Verified Permissions policy store ID.
    const { ExpressAuthorizationMiddleware } = require('@cedar-policy/authorization-for-expressjs');
    
    const { AVPAuthorizationEngine } = require('@verifiedpermissions/authorization-clients');
    
    const avpAuthorizationEngine = new AVPAuthorizationEngine({
        policyStoreId: <policyStoreId>,
        callType: 'identityToken'
    });
    
    const expressAuthorization = new ExpressAuthorizationMiddleware({
        schema: {
            type: 'jsonString',
            schema: fs.readFileSync(path.join(__dirname, '../v4.cedarschema.json'), 'utf8'),
        },
        authorizationEngine: avpAuthorizationEngine,
        principalConfiguration: { type: 'identityToken' },
        skippedEndpoints: [],
        logger: {
            debug: (s: any) => console.log(s),
            log: (s: any) => console.log(s),
        }
    });
    

  2. Configure the Express application to use the authorization middleware that you just defined. To do this, add the following line of code to the end of the block of app.use(..) statements that begin after the comment // Configure security and performance middleware (approximately line 48 depending on how you pasted the previous block of code).
    app.use(expressAuthorization.middleware);
    

You’ve now successfully set up authorization in your application by creating a Verified Permissions policy store, writing Cedar policies to define your authorization, and integrating your application with Verified Permissions.

Validating API security

You can use the frontend web application to verify that authorization has been applied to the APIs. In two separate terminals run the following commands in the /start directory

./scripts/run-backend-dev.sh
./scripts/run-frontend-dev.sh

In a browser navigate to http://localhost:3001 and sign in with one of the Amazon Cognito users you created earlier. Validate that the permissions policies are working as expected:

  • Administrators: Can view, create, update, and delete pets.
  • Employees: Can view, create, and update pets.
  • Customers: Can view pets and create new pets.

In the terminal for the Express application, you can see log output that provides additional details about the authorization decisions. For example, following an unauthorized action the terminal outputs the following:

Authorization result: {"type":"deny"}

Conclusion

The new @verifiedpermissions/authorization-clients-js package allows Express developers to integrate their application with Verified Permissions to decouple authorization logic from code. By decoupling your authorization logic and integrating your application with the Verified Permissions, you can improve developer productivity and simplify permissions and access audits.

To support analyzing and auditing permissions when writing cedar policies the open source Cedar project also recently open sourced the Cedar Analysis CLI to help developers perform policy analysis on their policies. You can learn more about this new tool in Introducing Cedar Analysis: Open Source Tools for Verifying Authorization Policies.

The framework packages are open source and available on GitHub under the Apache 2.0 license, with distribution through NPM. To learn more, see Amazon Verified Permissions and Cedar.

If you have feedback about this post, submit comments in the Comments section below.

Trevor Schiavone

Trevor Schiavone

Trevor is a Senior Solutions Architect at AWS. He works with customers to build secure, scalable, and innovative architectures. When not at work he’s usually out running, cycling, or travelling to new countries.

Rickard Lofstrom

Rickard Löfström

Ricard guides enterprises in building secure cloud environments as a Specialist Solution Architect in the AWS EMEA Security & Compliance team. He advises customers on implementing AWS security services, focusing on identity management, data protection, and infrastructure security controls. Rickard translates complex security requirements into technical solutions that enable organizations to meet their security objectives while maintaining operational efficiency.

Improve your security posture using Amazon threat intelligence on AWS Network Firewall

Post Syndicated from Amit Gaur original https://aws.amazon.com/blogs/security/improve-your-security-posture-using-amazon-threat-intelligence-on-aws-network-firewall/

Today, customers use AWS Network Firewall to safeguard their workloads against common security threats. However, they often have to rely on third-party threat feeds and scanners that have limited visibility in AWS workloads to protect against active threats. A self-managed approach to cloud security through traditional threat intelligence feeds and custom rules can result in delayed responses, leaving customers exposed to active threats that are relevant to AWS workloads. Customers are looking for an automated approach to analyzing threats and deploying mitigations across multiple enforcement points to establish consistent defenses and want a unified, AWS-native solution that can rapidly protect against active threats across their entire cloud infrastructure.

This post introduces active threat defense, a new Network Firewall managed rule group that offers protection against active threats relevant to workloads in AWS. Active threat defense uses the AWS global infrastructure visibility and extensive threat intelligence to deliver automated, intelligence-driven security measures. The feature uses the Amazon threat intelligence system MadPot, which continuously tracks attack infrastructure, including malware hosting URLs, botnet command and control servers, and crypto mining pools, identifying indicators of compromise (IOCs) for active threats.

Active threat defense comes as a rule group AttackInfrastructure, which protects against malicious network traffic by blocking communications with detected attack infrastructure. After the managed rule group is configured in your firewall policy, Network Firewall now automatically blocks suspicious traffic to malicious IPs, domains, and URLs for indicator categories such as command-and-control (C2s), malware staging hosts, sinkholes, out-of-band testing (OAST), and mining-pools. It implements comprehensive filtering of both inbound and outbound traffic for various protocols, including TCP, UDP, DNS, HTTPS, and HTTP, and uses specific, verified threat indicators to facilitate high accuracy and minimize false positives.

Network Firewall with active threat defense protects AWS workloads using the following mechanisms:

  • Threat prevention: Automatically blocks malicious traffic using Amazon threat intelligence to identify and prevent active threats targeting workloads in AWS
  • Rapid protection: Continuously updates Network Firewall rules based on newly discovered threats, enabling immediate protection against them
  • Streamlined operations: Findings in GuardDuty marked with the threat list name “Amazon Active Threat Defense” can now be automatically blocked when active threat defense is enabled on Network Firewall
  • Collective defense: Deep threat inspection (DTI) enables shared threat intelligence, improving protection for active threat defense managed rule group users

Figure 1 illustrates the use of the active threat defense managed rule group with Network Firewall. It shows the automatic creation of stateful rules in the AWS managed rule group using threat data collected from MadPot.

Figure 1: Network Firewall with active threat defense

Figure 1: Network Firewall with active threat defense

Getting started

The active threat defense managed rule group can be enabled directly within Network Firewall using the AWS Management Console, AWS Command Line Interface (AWS CLI), or AWS SDK. You can then associate the managed rule group with the Network Firewall policy. The rule group receives regular updates with new threat indicators and signatures, while automatically removing inactive or aged-out signatures.

Prerequisites

To get started with Network Firewall with active threat defense, visit the Network Firewall console or see the AWS Network Firewall Developers Guide. Active threat defense is supported in all AWS Regions where Network Firewall is available today, including the AWS GovCloud (US) Regions and China Regions.

If this is your first time using Network Firewall, make sure to complete the following prerequisites. If you already have a firewall policy and a firewall, you can skip this section.

  1. Create a firewall policy
  2. Create a firewall

Set up the active threat defense managed rule group

With the prerequisites in place, you can set up and use the active threat defence managed rule group.

To set up the managed rule group:

  1. In the AWS Network Firewall console, choose Firewall policies in the navigation pane.
  2. Select an existing firewall policy or the policy that you created as part of the prerequisites.

    Figure 2: Select the Network Firewall policy

    Figure 2: Select the Network Firewall policy

  3. Scroll down to Stateful rule groups. On the right-hand side, choose Actions and select Add managed stateful rule groups.

    Figure 3: Add a rule group

    Figure 3: Add a rule group

  4. On the Add managed stateful rule groups page, scroll down to active threat defense. Select the rule group AttackInfrastructure. Based on your requirements for Deep threat inspection, you can opt out if you don’t want Network Firewall to process service logs. Choose Add to policy.

    Figure 4: Add the rule group to the policy

    Figure 4: Add the rule group to the policy

  5. You can verify on the next page the managed rule group was added to the policy.

    Figure 5: Verify that the managed rule group was added to the policy

    Figure 5: Verify that the managed rule group was added to the policy

Pricing

For active threat defense pricing, see AWS Network Firewall pricing.

Considerations

The first consideration is to understand how Network Firewall is more effective in detecting and mitigating threats associated with HTTPS traffic when the TLS inspection feature is used alongside the active threat defense managed rule group. TLS inspection enables active threat defense to analyze the actual content of encrypted connections, allowing it to identify and block malicious URLs that might otherwise pass undetected. This process involves decrypting traffic, inspecting the contents for known malicious URL patterns or behaviors, and then re-encrypting the traffic if it’s deemed safe. For more information on the considerations on TLS inspection, see Considerations for TLS inspection. Organizations must balance the security benefits with potential latency introduction and make sure that they have proper controls in place to handle sensitive decrypted data.

Another consideration is the mitigation of false positives. When you use this managed rule group in your firewall policy, you can edit rule group alert settings to help identify false-positives as part of a mitigation strategy. For more information, see mitigating false-positives.

The final consideration is how the use of managed rule groups count against the limit of stateful rules for each policy. For more information, see AWS Network Firewall quotas and Setting rule group capacity in AWS Network Firewall.

Conclusion

In this post, you learned how to use the AWS Network Firewall active threat defense managed rule group to safeguard workloads against active threats.

If you have feedback about this post, submit comments in the Comments section below.

Amit Gaur

Amit Gaur

Amit, a Cloud Infrastructure Architect at AWS, brings his passion for technology and knowledge-sharing to the networking community. Specializing in network architecture design, he helps customers build highly scalable and resilient environments on AWS. Through technical guidance and architectural expertise, Amit enables customers to accelerate their cloud adoption journey while making sure their systems are built for scale and reliability.

Tim Sutton

Tim Sutton

Tim is a Senior Cloud Infrastructure Architect at AWS with over 20 years of experience in technology and brings extensive experience in cloud technologies, enterprise architecture, and business transformation. Tim is passionate about helping customers architect and implement scalable cloud solutions and achieve their business objectives through technology, as well as mentoring the next generation of cloud professionalst.

Prashanth Kalika

Prashanth Kalika

Prashanth has over 20 years of experience developing innovative and scalable solutions for networking, security, and cloud use cases. He currently focuses on developing advanced threat intelligence capabilities for AWS Firewall so customers can better protect their cloud workloads. Prashanth is passionate about building security solutions that help organizations stay ahead of evolving cyberthreats while maintaining robust network defenses.

Saleem Muhammad

Saleem Muhammad

Saleem is a Senior Manager of Product Management in AWS Network & Application Protection. He is passionate about building solutions that help customers to secure mission critical workloads. Before AWS, Saleem worked on incubation projects at multi-$B IT product and services organizations in the San Francisco Bay area.

Unify your security with the new AWS Security Hub for risk prioritization and response at scale (Preview)

Post Syndicated from Donnie Prakoso original https://aws.amazon.com/blogs/aws/unify-your-security-with-the-new-aws-security-hub-for-risk-prioritization-and-response-at-scale-preview/
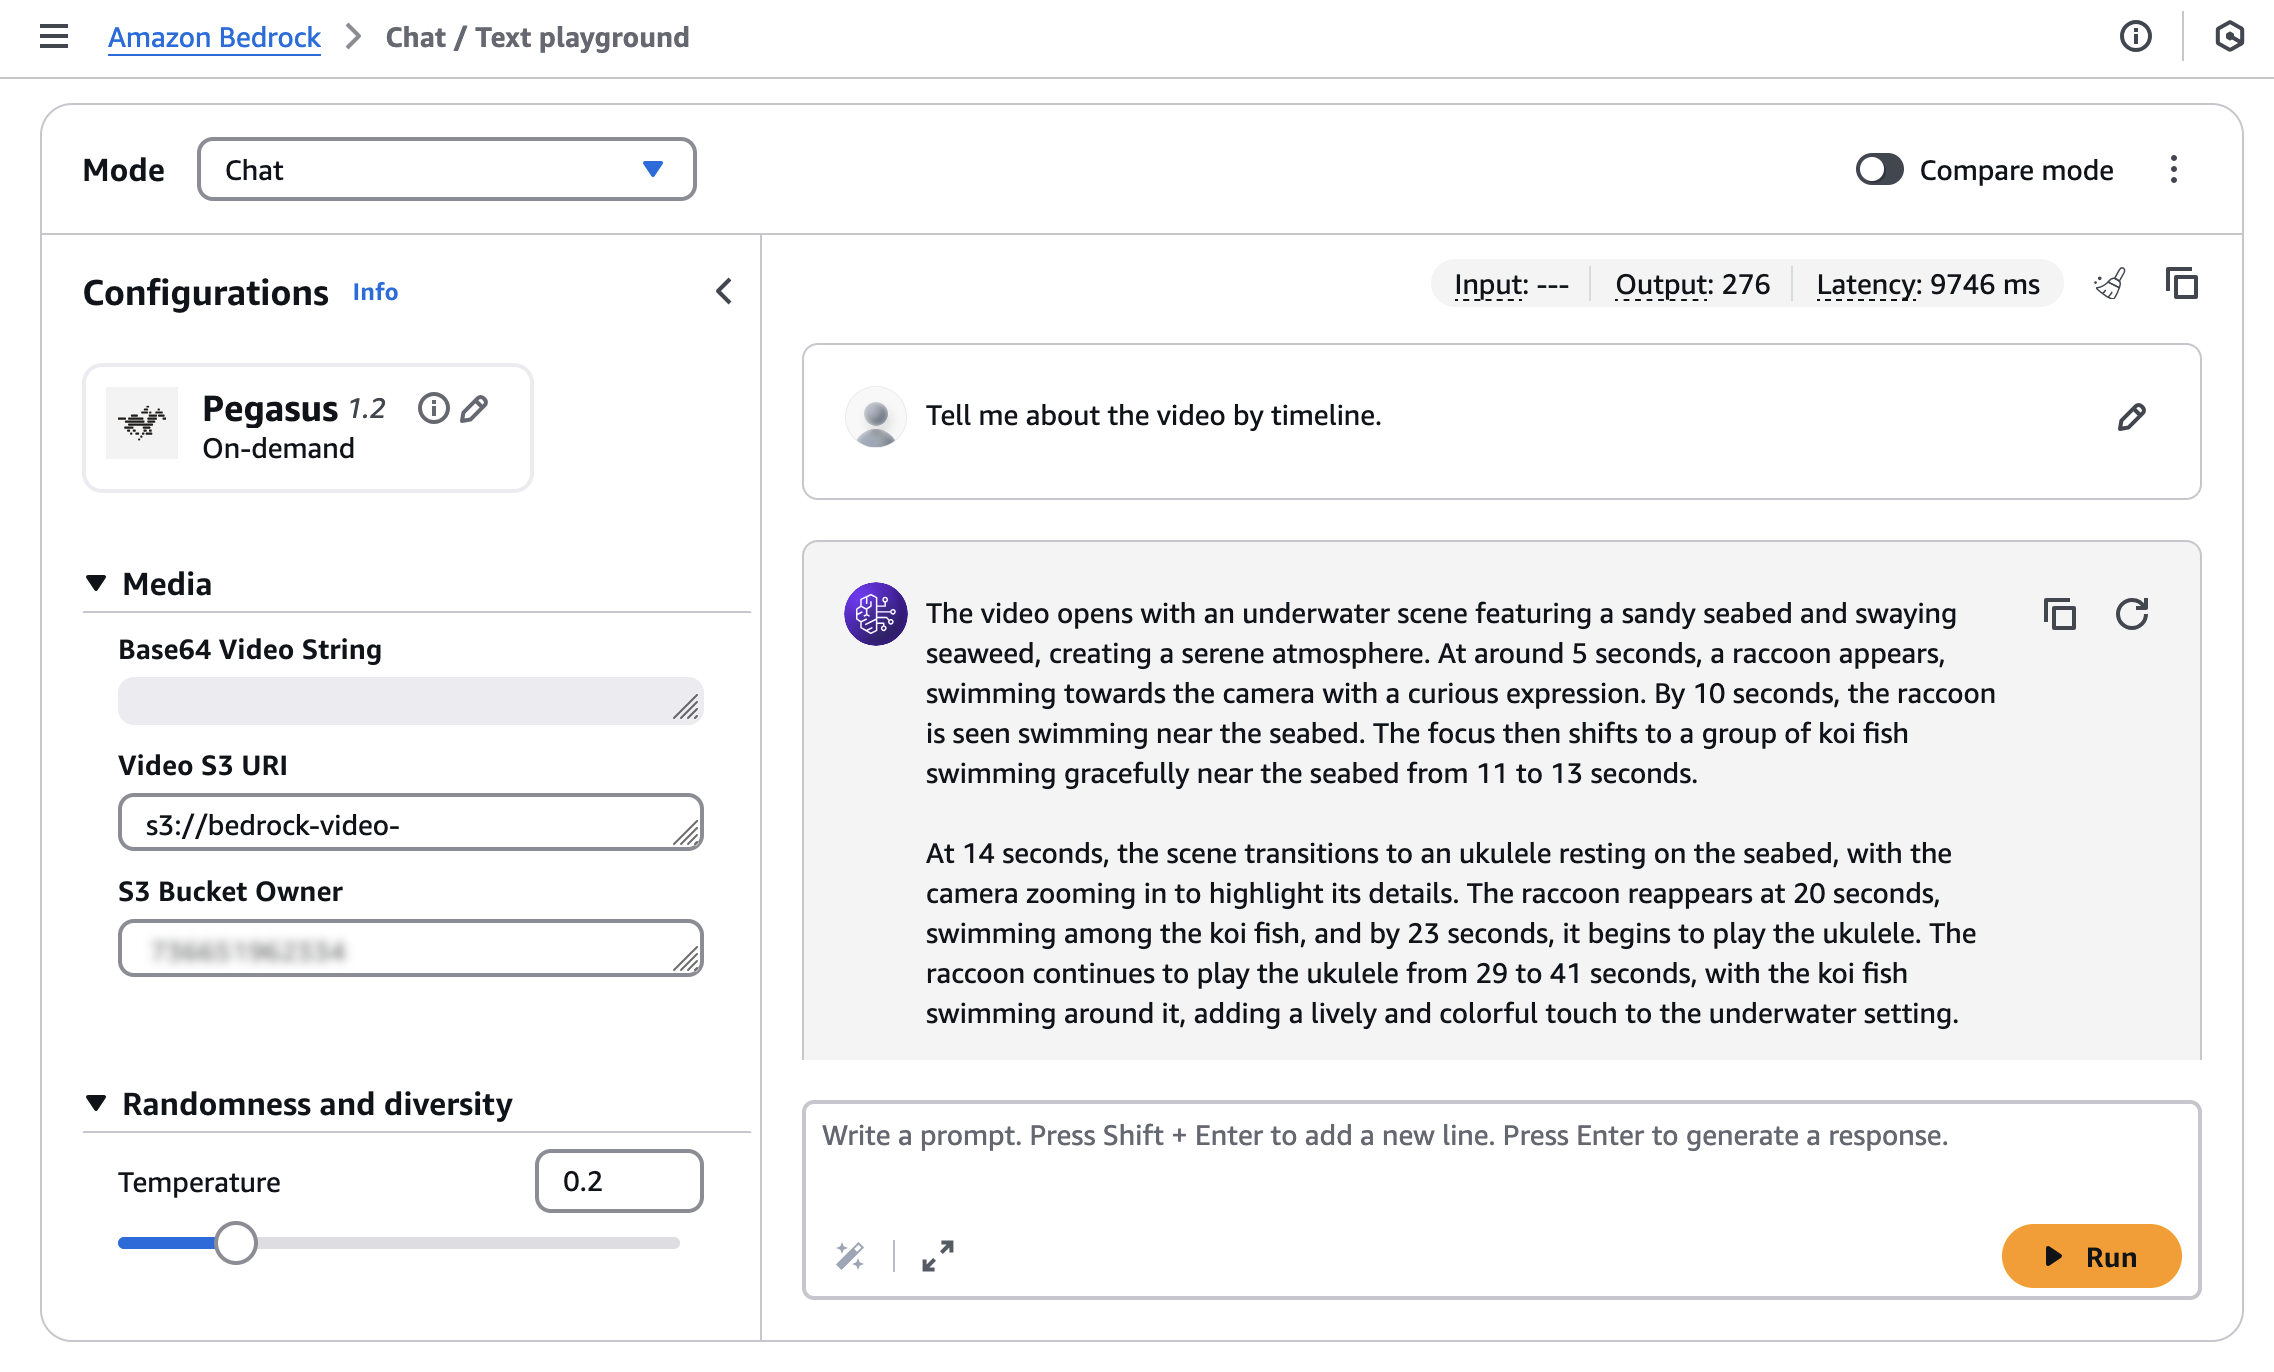
AWS Security Hub has been a central place for you to view and aggregate security alerts and compliance status across Amazon Web Services (AWS) accounts. Today, we are announcing the preview release of the new AWS Security Hub which offers additional correlation, contextualization, and visualization capabilities. This helps you prioritize critical security issues, respond at scale to reduce risks, improve team productivity, and better protect your cloud environment.

Here’s a quick look at the new AWS Security Hub.

With this new enhancement, AWS Security Hub integrates security capabilities like Amazon GuardDuty, Amazon Inspector, AWS Security Hub Cloud Security Posture Management (CSPM), Amazon Macie, and other AWS security capabilities to help you gain visibility across your cloud environment through centralized management in a unified cloud security solution. 

Getting started with the new AWS Security Hub
Let me walk you through how to get started with AWS Security Hub.

If you’re a new customer to AWS Security Hub, you need to navigate to the AWS Security Hub console to enable AWS security capabilities and capabilities and start assessing risk across your organization. You can learn more on the Documentation page.

After you have AWS Security Hub enabled, it will automatically consume data from supporting security capabilities you’ve enabled, such as Amazon GuardDuty, Amazon Inspector, Amazon Macie, and AWS Security Hub CSPM. You can navigate to the AWS Security Hub console to view these findings and benefit from insights created through correlation of findings across these capabilities.

As security risks are uncovered, they’re presented in a redesigned Security Hub summary dashboard. The new Security Hub summary dashboard provides a comprehensive, unified view of your AWS security posture. The dashboard organizes security findings into distinct categories, making it easier to identify and prioritize risks.

The new Exposure summary widget helps you identify and prioritize security exposures by analyzing resource relationships and signals from Amazon Inspector, AWS Security Hub CSPM, and Amazon Macie. These exposure findings are automatically generated and are a key part of the new solution, highlighting where your critical security exposures are located. You can learn more about exposure on the Documentation page.

AWS Security Hub now provides a Security coverage widget designed to help you identify potential coverage gaps. You can use this widget to identify where you’re missing coverage by the security capabilities that power Security Hub. This visibility helps you identify which capabilities, accounts, and features you need to address to improve your security coverage.

As you can see on the navigation menu, AWS Security Hub is organized into five key areas to streamline security management:

  • Exposure: Provides visibility into all exposure findings, a security vulnerability or misconfiguration that could potentially expose an AWS resource or system to unauthorized access or compromise, generated by Security Hub, helping you identify resources that might be accessible from outside your environment
  • Threats: Consolidates all threat findings generated by Amazon GuardDuty, showing potential malicious activities and intrusion attempts
  • Vulnerabilities: Displays all vulnerabilities detected by Amazon Inspector, highlighting software flaws and configuration issues
  • Posture management: Shows all posture management findings from AWS Security Hub Cloud Security Posture Management (CSPM), helping provide compliance with security best practices
  • Sensitive data: Presents all sensitive data findings identified by Amazon Macie, helping you track and protect your sensitive information

When you navigate to the Exposure page, you’ll see findings grouped by title, with severity levels clearly indicated to help you focus on critical issues first.

To explore specific exposures, you can select any finding to see affected resources. The panel includes key information about the implicated resource, account, Region, and when the issue was detected.

In this panel, you’ll also find an attack path visualization that is particularly useful for understanding complex security relationships. For network exposure paths, you can see all components involved in the path—including virtual private clouds (VPCs), subnets, security groups, network access control lists (ACLs), and load balancers—helping you identify exactly where to implement security controls. The visualization also highlights Identity and Access Management (IAM) relationships, showing how permission configurations might allow privilege escalation or data access. Resources with multiple contributing traits are clearly marked so you can quickly identify which components represent the greatest risk.

The Threats dashboard provides actionable insights into potential malicious activities detected by Amazon GuardDuty, organizing findings by severity so you can quickly identify critical issues like unusual API calls, suspicious network traffic, or potential credential compromises. The dashboard includes GuardDuty Extended Threat Detection findings, with all “Critical” severity threats representing these Extended Threat Detections that require immediate attention.

Similarly, the Vulnerabilities dashboard from Amazon Inspector provides a comprehensive view of software vulnerabilities and network exposure risks. The dashboard highlights vulnerabilities with known exploits, packages requiring urgent updates, and resources with the highest numbers of vulnerabilities.

Another valuable new feature is the Resources view, which provides an inventory of all resources deployed in your organization covered by AWS Security Hub. You can use this view to quickly identify which resources have findings against them and filter by resource type or finding severity. Selecting any resource provides detailed configuration information without needing to pivot to other consoles, streamlining your investigation workflow.

The new Security Hub also offers integration capabilities to help you comprehensively monitor your cloud environments and connect with third-party security solutions. This gives you the flexibility to create a unified security solution tailored to your organization’s specific needs.

For example, with integration capability, when viewing a security finding, you can select the Create ticket option and choose your preferred ticketing integration.

Additional things to know
Here are a couple of things to note:

  • Availability – During this preview period, the new AWS Security Hub is available in following AWS Regions: US East (N. Virginia, Ohio), US West (N. California, Oregon), Africa (Cape Town), Asia Pacific (Hong Kong, Jakarta, Mumbai, Osaka, Seoul, Singapore, Sydney, Tokyo), Canada (Central), Europe (Frankfurt, Ireland, London, Milan, Paris, Stockholm), Middle East (Bahrain), and South America (São Paulo).
  • Pricing – The new AWS Security Hub is available at no additional charge during the preview period. However, you will still incur costs for the integrated capabilities including Amazon GuardDuty, Amazon Inspector, Amazon Macie, and AWS Security Hub CSPM.
  • Integration with existing AWS security capabilities – Security Hub integrates with Amazon GuardDuty, Amazon Inspector, AWS Security Hub CSPM, and Amazon Macie, providing a comprehensive security posture without additional operational overhead.
  • Enhanced data interoperability – The new Security Hub uses the Open Cybersecurity Schema Framework (OCSF), enabling seamless data exchange across your security capabilities with normalized data formats.

To learn more about the enhanced AWS Security Hub and join the preview, visit the AWS Security Hub product page.

Happy building!

Donnie

Beyond compute: Shifting vulnerability detection left with Amazon Inspector code security capabilities

Post Syndicated from Nirali Desai original https://aws.amazon.com/blogs/security/shifting-vulnerability-detection-left-with-amazon-inspector-code-security-capabilities/

Since launch, Amazon Inspector has helped customers automate vulnerability management for their running workloads on Amazon Elastic Compute Cloud (Amazon EC2), container workloads, and AWS Lambda functions. Today, we’re taking a step forward into more proactive security with the latest addition to Amazon Inspector: code security capabilities. By using this powerful new feature you can get a proactive view of the security health of your code. With native integration to source code managers (SCM) such as GitHub and GitLab, Amazon Inspector helps you identify and prioritize security vulnerabilities and misconfigurations across your application source-code, dependencies, and infrastructure as code (IaC).

Even if you make no changes to your code, there can be vulnerabilities in libraries that it depends on, creating risks for you and your users. By scanning repositories, you can continually monitor the security of your code and its dependencies. With Amazon Inspector, you can define consistent security controls throughout your software development lifecycle, so your security and development teams can collaborate effectively while reducing risk and remediation costs.

Overview of Amazon Inspector code security capabilities

Amazon Inspector now provides three additional security analysis capabilities: static application security testing (SAST), software composition analysis (SCA), and infrastructure as code (IaC) scanning. To use these features, you must establish a connection with your SCM tool (as shown in Figure 1). If you use GitHub, you can get started by installing and configuring the Amazon Inspector App from the GitHub Marketplace, which enables automated code analysis and delivers security findings directly within pull requests. If you use a self-managed GitLab, implementation is straightforward using a personal access token with the necessary permissions.

Figure 1: Code security landing page for Amazon Inspector

Figure 1: Code security landing page for Amazon Inspector

Static application security testing

Static application security testing (SAST) is the process of analyzing source code to identify insecure patterns or methods without needing to compile or execute the code. Amazon Inspector SAST scans analyze your source code to identify potential security vulnerabilities such as hardcoded secrets, cross-site scripting, or injection attacks across a wide range of programming languages including, JavaScript, Python, C#. The service also analyzes Bash shell scripts, extending security coverage beyond application code to include deployment and configuration scripts.

Software composition analysis

Software composition analysis (SCA) helps you understand and manage risks related to software dependencies. Every programming language has its own method of finding, importing, and updating contributed libraries. For example, PyPI for Python, NPM for NodeJS, and Cargo for Rust. Sometimes vulnerabilities are discovered in libraries distributed through the language-specific package distributions, or sometimes a library that you’re using depends on another library, and that dependency has the vulnerability. Amazon Inspector supports the major environments for Python, .Net, PHP, JavaScript, Java, Ruby, Rust, and Go. It automatically analyzes dependencies to identify known vulnerabilities and show you which code is affected. When vulnerabilities are detected, Amazon Inspector provides detailed information about the impact, available fixes, and upgrade paths to help you quickly remediate issues.

Infrastructure as code security

Just as applications are constructed from code, cloud infrastructure can be deployed and managed through code-based methods. Amazon Inspector now also analyzes IaC templates (as shown in Figure 2) to identify potential security misconfigurations, for example, the use of AWS Identity and Access Management (IAM) wildcards in action statements or disabled Glue Data Catalog encryption. This way identified risks can be fixed before the code is executed and the incorrect infrastructure is deployed. The new feature analyzes AWS CloudFormation, Terraform, and AWS CDK, helping you maintain secure infrastructure definitions throughout their development process. This capability helps make sure that security best practices are followed, and potential issues are caught before the infrastructure is deployed.

Figure 2: Amazon Inspector scan analysis configuration showing SAST, IaC, and SCA scan types

Figure 2: Amazon Inspector scan analysis configuration showing SAST, IaC, and SCA scan types

For the most up-to-date list of programming languages supported across Amazon Inspector code security capabilities, see the online documentation.

Improved security governance and visibility

Amazon Inspector lets you choose which scan types to run across which repositories (as shown in Figure 3). You can initiate a scan based on any of the following:

  • On-demand: Initiates an immediate scan of the selected repository
  • Change based: Initiates a scan on push to main branch, or on a pull request or merge request
  • Scheduled: Initiates a scan weekly or monthly
Figure 3: Overview of scan configurations

Figure 3: Overview of scan configurations

Amazon Inspector integrates code security findings into a unified dashboard that you can use to manage and enforce scanning policies across repositories using customizable scan configurations. As part of the integration workflow with the SCM platform, you can set up a default scan configuration that can be applied to existing or new repositories. Alternatively, you also have an option to create custom scan configurations that match specific existing repositories through inclusions tags.

Upon successful scheduled or event-based scans, Amazon Inspector generates detailed findings that pinpoint specific lines of code within repositories, including commit IDs and file locations where vulnerabilities are detected. Amazon Inspector empowers your security teams with customizable filtering through intelligent suppression rules. By using these options, you can tailor your security view to match your organization’s unique priorities, showing exactly what matters most to your team while preserving findings data for reporting and auditing. Through native Amazon EventBridge integration, these detailed security findings can be automatically routed into existing security workflows, enabling alerting and response capabilities.

Code fix recommendations

Amazon Inspector streamlines security remediation by providing specific code fix recommendations directly where developers work. The two-way integration with your SCM automatically suggests fixes as comments within pull requests (PRs) and merge requests (MRs) for Critical and High findings, alerting developers to the most important vulnerabilities to address without disrupting their workflow. Simultaneously, security teams benefit from a consolidated dashboard in the Amazon Inspector console that aggregates findings from scheduled or event-based scans across in-scope repositories. Each finding comes with tailored remediation guidance based on scan type (as shown in Figure 4): specific code suggestions for IAC and SAST findings, or recommended version upgrades and dependency update paths for SCA findings.

Figure 4: Code fix recommendation on a finding in the Amazon Inspector dashboard

Figure 4: Code fix recommendation on a finding in the Amazon Inspector dashboard

Conclusion

These expanded security capabilities now deliver end-to-end visibility of the security health of your cloud applications, from initial code development through to production deployment. Security teams can use the unified dashboard in Amazon Inspector to track and manage vulnerabilities across repositories and application components, facilitating consistent security controls throughout the software lifecycle. Meanwhile, development teams receive immediate, actionable feedback within their source code repositories, creating a seamless security experience that bridges both security and development workflows. This approach is designed to help you maintain robust security practices while keeping development velocity high.

To get started with the new capabilities of Amazon Inspector, visit the Amazon Inspector console. For pricing details and implementation guidance, see documentation. These new features are now available in 10 AWS commercial Regions.

Nirali Desai

Nirali Desai

Nirali is a product leader in cloud security, currently driving Application Security initiatives at Amazon Web Services (AWS). Before joining AWS, she held key roles at Palo Alto Networks, Zscaler, and Cisco Tetration, where she focused on building Secure Access Secure Edge (SASE), end-user security, workload protection, and zero-trust security solutions. She is passionate about building scalable security products that defend against evolving cyber threats.

Danny Cortegaca

Danny Cortegaca

Danny is a Security Specialist Solutions Architect and co-leads the Application Security focus area within the AWS Security and Compliance Technical Field Community. He joined AWS in 2021 and partners with some of the largest organizations in the world to help them navigate complex security and regulatory environments. He loves talking about application security with customers and has helped many adopt threat modeling into their practices.
Daniel Beghimer

Daniel Beghimer

Daniel is a Senior Security Engineer specializing in cloud security and incident response solutions. He co-leads the Application Security focus area within the AWS Security and Compliance Technical Field Community, holds all AWS certifications, and authored Automated Security Helper (ASH), an open-source code scanning tool. In his free time, Daniel enjoys gadgets, video games, and traveling.

AWS Backup adds new Multi-party approval for logically air-gapped vaults

Post Syndicated from Veliswa Boya original https://aws.amazon.com/blogs/aws/aws-backup-adds-new-multi-party-approval-for-logically-air-gapped-vaults/

Today, we’re announcing the general availability of a new capability that integrates AWS Backup logically air-gapped vaults with Multi-party approval to provide access to your backups even when your AWS account is inaccessible due to inadvertent or malicious events. AWS Backup is a fully managed service that centralizes and automates data protection across AWS services and hybrid workloads. It provides core data protection features, ransomware recovery capabilities, and compliance insights and analytics for data protection policies and operations.

As a backup administrator, you use AWS Backup logically air-gapped vaults to securely share backups across accounts and organizations, logically isolate your backup storage, and support direct restore to help reduce recovery time following an inadvertent or malicious event. However, if a bad or unintended actor gains root access to your backup account or the management account of your organization, your backups suddenly become inaccessible, even though they’re still safely stored in the logically air-gapped vault. While traditional account recovery involved working through support channels, AWS Backup with Multi-party approval delivers immediate access to recovery tools, empowering you with faster resolution times and greater control over your recovery timeline.

Multi-party approval for AWS Backup logically air-gapped vaults adds an additional layer of protection for you to recover your application data even when your AWS account becomes completely inaccessible. Using Multi-party approval, you can create approval teams which consist of highly trusted individuals in your organization, then associate them with your logically air-gapped vault. If you get locked out of your AWS accounts due to inadvertent or malicious actions, you can request your own approval team to authorize sharing of your vault from any account, even those outside your AWS Organizations account. Once approved, you gain authorized access to your backups and can begin your recovery process.

How it works
Multi-party approval for AWS Backup logically air-gapped vaults combines the security of logically air-gapped vaults with the governance of Multi-party approval to create a recovery mechanism that works even when your AWS account is compromised. Here’s how it works:

1. Approval team creation
First, you create an approval team in your AWS Organizations management account. If the management account is new, first create an AWS Identity and Access Management (IAM) Identity Center instance before creating the approval team. The approval team consists of trusted individuals (IAM Identity Center users) who will be authorized to approve vault sharing requests. Each approver receives an invitation to join the approval team through a new Approval portal.

2. Vault association
When your approval team is active, you share it with accounts that own logically air-gapped vaults using AWS Resource Access Manager (AWS RAM) to safeguard against requests for approval from arbitrary accounts. Backup administrators can then associate this approval team with new or existing logically air-gapped vaults.

3. Protection against compromise
If your AWS account becomes compromised or inaccessible, you can request access to your backups from a different account (a clean recovery account). This request includes the Amazon Resource Name (ARN) of the logically air-gapped vault in the format arn:aws:backup:<region>:<account>:backup-vault:<name> and an optional vault name and comment.

4. Multi-party approval
The request is sent to the approval team, who review it through the approval portal. When the minimum required number of approvers authorize the request, the vault is automatically shared with the requesting account. All requests and approvals are comprehensively logged in AWS CloudTrail.

5. Recovery process
With access granted, you can immediately start restoring or copying your data in the new recovery account without waiting for your compromised account to be remediated.

This approach provides an entirely separate authentication path to access and recover your backups, completely independent of your AWS account credentials. Even if the bad actor has root access to your account, they can’t prevent the approval team-based recovery process.

1. Create a new logically air-gapped vault
To create a new logically air-gapped vault, provide a name, tags (optional), and vault lock properties.

2. Assign an approval team
When the vault has been created, choose Assign approval team to assign it with an existing approval team.

Choose an existing approval team from the drop-down menu then select Submit to finalize the assignment.

Now your approval team is assigned to your logically air-gapped vault.

Good to know
It’s essential to test your recovery process before an actual emergency:

  1. From a different AWS account, use the AWS Backup console or API to request sharing of your logically air-gapped vault by providing the vault ID and ARN.
  2. Request approval of your request from the approval team.
  3. Once approved, verify that you can access and restore backups from the vault in your testing account.

As a best practice, monitor the health of your approval team regularly using AWS Backup Audit Manager to ensure they have sufficient active participants to meet your approval threshold.

Multi-party approval for enhanced cloud governance
Today, we’re also announcing the general availability of a new capability that AWS account administrators can use to add Multi-party approval to their product offerings. As highlighted in this post, AWS Backup is the first service to integrate this capability. With Multi-party approval, administrators can enable application owners to guard sensitive service operations with a distributed review process.

Good to know
Multi-party approval provides several significant security advantages:

  • Distributed decision-making, eliminating single points of failure
  • Full auditability through AWS CloudTrail integration
  • Protection against compromised credentials
  • Formal governance for compliance-sensitive operations
  • Consistent approval experience across integrated services

Now available

Multi-party approval is available today in all AWS Regions where AWS Organizations is available. Multi-party approval for AWS Backup logically air-gapped vaults is available in all AWS Regions where AWS Backup is available.

Veliswa.