As I often told my audiences in the early days, I wanted them to think big thoughts and dream big dreams! Looking back, I think it is safe to say that the launch of S3 empowered them to do just that, and initiated a wave of innovation that continues to this day.
Bigger, Busier, and more Cost-Effective Our customers count on Amazon S3 to provide them with reliable and highly durable object storage that scales to meet their needs, while growing more and more cost-effective over time. We’ve met those needs and many others; here are some new metrics that prove my point:
Object Storage – Amazon S3 now holds more than 200 trillion (2 x 10¹⁴) objects. That’s almost 29,000 objects for each resident of planet Earth. Counting at one object per second, it would take 6.342 million years to reach this number! According to Ethan Siegel, there are about 2 trillion galaxies in the visible Universe, so that’s 100 objects per galaxy! Shortly after the 2006 launch of S3, I was happy to announce the then-impressive metric of 800 million stored objects, so the object count has grown by a factor of 250,000 in less than 16 years.
Request Rate – Amazon S3 now averages over 100 million requests per second.
Cost Effective – Over time we have added multiple storage classes to S3 in order to optimize cost and performance for many different workloads. For example, AWS customers are making great use of Amazon S3 Intelligent Tiering (the only cloud storage class that delivers automatic storage cost savings when data access patterns change), and have saved more than $250 million in storage costs as compared to Amazon S3 Standard. When I first wrote about this storage class in 2018, I said:
In order to make it easier for you to take advantage of S3 without having to develop a deep understanding of your access patterns, we are launching a new storage class, S3 Intelligent-Tiering.
Customer Innovation As you can see from the metrics above, our customers use S3 to store and protect vast amounts of data in support of an equally vast number of use cases and applications. Here are just a few of the ways that our customers are innovating:
NASCAR – After spending 15 years collecting video, image, and audio assets representing over 70 years of motor sports history, NASCAR built a media library that encompassed over 8,600 LTO 6 tapes and a few thousand LTO 4 tapes, with a growth rate of between 1.5 PB and 2 PB per year. Over the course of 18 months they migrated all of this content (a total of 15 PB) to AWS, making use of the Amazon S3 Standard, Amazon S3 Glacier Flexible Retrieval, and Amazon S3 Glacier Deep Archive storage classes. To learn more about how they migrated this massive and invaluable archive, read Modernizing NASCAR’s multi-PB media archive at speed with AWS Storage.
Electronic Arts – This game maker’s core telemetry systems handle tens of petabytes of data, tens of thousands of tables, and over 2 billion objects. As their games became more popular and the volume of data grew, they were facing challenges around data growth, cost management, retention, and data usage. In a series of updates, they moved archival data to Amazon S3 Glacier Deep Archive, implemented tag-driven retention management, and implemented Amazon S3 Intelligent-Tiering. They have reduced their costs and made their data assets more accessible; read Electronic Arts optimizes storage costs and operations using Amazon S3 Intelligent-Tiering and S3 Glacier to learn more.
NRGene / CRISPR-IL – This team came together to build a best-in-class gene-editing prediction platform. CRISPR ( A Crack In Creation is a great introduction) is a very new and very precise way to edit genes and effect changes to an organism’s genetic makeup. The CRISPR-IL consortium is built around an iterative learning process that allows researchers to send results to a predictive engine that helps to shape the next round of experiments. As described in A gene-editing prediction engine with iterative learning cycles built on AWS, the team identified five key challenges and then used AWS to build GoGenome, a web service that performs predictions and delivers the results to users. GoGenome stores over 20 terabytes of raw sequencing data, and hundreds of millions of feature vectors, making use of Amazon S3 and other AWS storage services as the foundation of their data lake.
Designed for system administrators, engineers, developers, and architects, our sessions will bring you the latest and greatest information on security, backup, archiving, certification, and more. Join us at 9:30 AM PT on Twitch for Kevin Miller’s kickoff keynote, and stick around for the entire day to learn a lot more about how you can put Amazon S3 to use in your applications. See you there!
The world of the cloud never stops moving — so neither can cloud security. In the face of rapidly evolving technology and a constantly changing threat landscape, keeping up with all the latest developments, trends, and best practices in this emerging practice is more vital than ever.
Enter Rapid7’s third annual Cloud Security Summit, which we’ll be hosting this year on Tuesday, March 29. This one-day virtual event is dedicated to cloud security best practices and will feature industry experts from Rapid7, as well as Amazon Web Services (AWS), Snyk, and more.
While the event is fully virtual and free, we know that the time commitment can be the most challenging part of attending a multi-hour event during the workday. With that in mind, we’ve compiled a short list of the top reasons you’ll definitely want to register, clear your calendar, and attend this event.
Reason 1: Get a sneak peak at some original cloud security research
During the opening session of this year’s summit, two members of Rapid7’s award-winning security research team will be presenting some never-before-published research on the current state of cloud security operations, the most common misconfigurations in 2021, Log4j, and more.
Along with being genuinely interesting data, this research will also give you some insights and benchmarks that will help you evaluate your own cloud security program, and prioritize the most commonly exploited risks in your organization’s environment.
Reason 2: Learn from industry experts, and get CPE credits
Along with a handful of team member’s from Rapid7’s own cloud security practice, this year’s summit includes a host of subject matter experts from across the industry. You can look forward to hearing from Merritt Baer, Principal in the Office of the CISO at Amazon Web Services; Anthony Seto, Field Director for Cloud Native Application Security at Snyk; Keith Hoodlet, Code Security Architect at GitHub; and more. And that doesn’t even include the InsightCloudSec customers who will be joining to share their expert perspectives as well.
While learning and knowledge gain are clearly the most important aspects here, it’s always great to have something extra to show for the time you devoted to an event like this. To help make the case to your management that this event is more than worth the time you’ll put in, we’ve arranged for all attendees to earn 3.5 continuing professional education (CPE) credits to go toward maintaining or upgrading security certifications, such as CISSP, CISM, and more.
Reason 3: Be the first to hear exciting Rapid7 announcements
Last but not least, while the event is primarily focused on cloud security research, strategies, and thought leadership, we are also planning to pepper in some exciting news related to InsightCloudSec, Rapid7’s cloud-native security platform.
We’ll end the day with a demonstration of the product, so you can see some of our newest capabilities in action. Whether you’re already an InsightCloudSec customer, or considering a new solution for uncovering misconfigurations, automating cloud security workflows, shifting left, and more, this is the best way to get a live look at one of the top solutions available in the market today.
So what are you waiting for? Come join us, and let’s dive into the latest and greatest in cloud security together.
Ten years ago, Raspberry Pi started shipping its first computers in order to inspire young people to reimagine the role of technology in their lives. What started with a low-cost, high-performance computer has grown into a movement of millions of people of all ages and backgrounds.
Today, Raspberry Pi is the UK’s best-selling computer, and the Raspberry Pi Foundation is one of the world’s leading educational non-profits. Raspberry Pi computers make technology accessible to people and businesses all over the world. They are used everywhere from homes and schools to factories, offices, and shops.
Visit the history of Raspberry Pi
To help celebrate this 10-year milestone, we’ve partnered with The National Museum of Computing, located at the historic Bletchley Park, to open a new temporary exhibit dedicated to telling the story of the Raspberry Pi computer, the Raspberry Pi Foundation, and the global community of innovators, learners, and educators we’re a part of.
In the exhibit, you’ll be able to get hands-on with Raspberry Pi computers, hear the story of how Raspberry Pi came to be, and see a few of the many ways that Raspberry Pi has made an impact on the world.
Join us for the exhibition opening
We know that not everyone will be able to experience the exhibit in person, and so we’ll live-stream the grand opening this Saturday 5 March 2022 at 11:15am GMT. Keep an eye on our social media channels for the link to watch the video feed. If you’re able to make it to the National Museum of Computing on Saturday, tickets are available to purchase.
During the last 10 years, hundreds of thousands of customers have adopted DynamoDB. It regularly reaches new peaks of performance and scalability. For example, during the last Prime Day sales in June 2021, it handled trillions of requests over 66 hours while maintaining single-digit millisecond performance and peaked at 89.2 million requests per second. Disney+ uses DynamoDB to ingest content, metadata, and billions of viewers actions each day. Even during unprecedented demands caused by the pandemic, DynamoDB was able to help customers as many across the world had to change their way of working, needing to meet and conduct business virtually. For example, Zoom was able to scale from 10 million to 300 million daily meeting participants when we all started to make video calls in early 2020.
On this special anniversary, join us for an unique online event on Twitch on March 1st. I’ll tell you more about this at the end of this post. But before talking about this event, let’s take this opportunity to reflect back on the genesis of this service and the main capabilities we added since the original launch 10 years ago.
The History Behind DynamoDB The story of DynamoDB started long before the launch 10 years ago. It started with a series of outages on Amazon’s e-commerce platform during the holiday shopping season in 2004. At that time, Amazon was transitioning from a monolithic architecture to microservices. The design principle was (and still is) that each stateful microservice uses its own data store, and other services are required to access a microservice’s data through a publicly exposed API. Direct database access was not an option anymore. At that time, most microservices were using a relational database provided by a third-party vendor. Given the volume of traffic during the holiday season in 2004, the database system experienced some hard-to-debug and hard-to-reproduce deadlocks. The e-commerce platform was pushing the relational databases to their limits, despite the fact that we were using simple usage patterns, such as query by primary keys only. These usage patterns do not require the complexity of a relational database.
At Amazon and AWS, after an outage happens, we start a process called Correction of Error (COE) to document the root cause of the issue, to describe how we fixed it, and to detail the changes we’re making to avoid recurrence. During the COE for this database issue, a young, naïve, 20-year-old intern named Swaminathan (Swami) Sivasubramanian (now VP of the database, analytics, and ML organization at AWS) asked the question, “Why are we using a relational database for this? These workloads don’t need the SQL level of complexity and transactional guarantees.”
This led Amazon to rethink the architecture of its data stores and to build the original Dynamo database. The objective was to address the demanding scalability and reliability requirements of the Amazon e-commerce platform. This non-relational, key-value database was initially targeted at use cases that were the core of the Amazon e-commerce operations, such as the shopping basket and the session service.
AWS published the Dynamo paper in 2007, three years later, to describe our design principles and provide the lessons learned from running this database to support Amazon’s core e-commerce operations. Over the years, we saw several Dynamo clones appear, proving other companies were searching for scalable solutions, just like Amazon.
After a couple of years, Dynamo was adopted by several core service teams at Amazon. Their engineers were very satisfied with the performance and scalability. However, we started to interview engineers to understand why it was not more broadly adopted within Amazon. We learned Dynamo was giving teams the reliability, performance, and scalability they needed, but it did not simplify the operational complexity of running the system. Teams were still needed to install, configure, and operate the system in Amazon’s data centers.
At the time, AWS was proposing Amazon SimpleDB as a NoSQL service. Many teams preferred the operational simplicity of SimpleDB despite the difficulties to scale a domain beyond 10 GB, its non-predictable latency (it was affected by the size of the database and its indexes), and its eventual consistency model.
We concluded the ideal solution would combine the strengths of Dynamo—the scalability and the predictable low latency to retrieve data—with the operational simplicity of SimpleDB—just having a table to declare and let the system handle the low-level complexity transparently.
DynamoDB was born.
DynamoDB frees developers from the complexity of managing hardware and software. It handles all the complexity of scaling partitions and re-partitions your data to meet your throughput requirements. It scales seamlessly without the need to manually re-partition tables, and it provides predictable low latency access to your data (single-digit milliseconds).
At AWS, the moment we launch a new service is not the end of the project. It is actually the beginning. Over the last 10 years, we have continuously listened to your feedback, and we have brought new capabilities to DynamoDB. In addition to hundreds of incremental improvements, we added:
The ability to create global tables and replicate your data across AWS Regions (November 2017). This allowed you to create active-active applications hosted in multiple Regions. A DynamoDB global table consists of multiple replicas in multiple Regions. When an application writes data to a replica table in one Region, DynamoDB propagates the write to the other replica tables in the other Regions automatically.
Point-In-Time Recovery (PITR). It allows you to backup your table with the ability to restore at any second in time with a fully consistent version of the data (March 2018)
Lastly, during the last AWS re:Invent conference, we announced Amazon DynamoDB Standard-Infrequent Access (DynamoDB Standard-IA). This new DynamoDB table class allows you to lower the cost of data storage for infrequently accessed data by 60%. The ideal use case is for data that you need to keep for the long term and that your application needs to occasionally access, without compromising on access latency. In the past, to lower storage costs for such data, you were writing code to move infrequently accessed data to lower-cost storage alternatives, such as Amazon Simple Storage Service (Amazon S3). Now you can switch to the DynamoDB Standard-IA table class to store infrequently accessed data while preserving the high availability and performance of DynamoDB.
Customers now leverage DynamoDB across virtually any industry vertical, geographic area, and company size. You are continually surprising us with how you innovate on DynamoDB, and you are continually pushing us to continue to evolve DynamoDB to make it easier to build the next generation of applications. We are going to continue to work backwards from your feedback to meet your ever evolving needs and to enable you to innovate and scale for decades to come.
A Decade of Innovation with DynamoDB – A Virtual Event As I mentioned at the beginning, we also would love to celebrate this anniversary with you. We prepared a live Twitch event for you to learn best practices, see technical demos, and attend a live Q&A. You will hear stories from two of our long-time customers : SmugMug CEO Don MacAskill, and engineering leaders from Dropbox. In addition, you’ll get a chance to ask your questions to and chat with AWS’ blog legend and Chief Evangelist Jeff Barr, and DynamoDB‘s product managers and engineers. Finally, AWS heroes Alex DeBrie and Jeremy Daly will host two deep dive technical sessions. Have a look at the full agenda here.
This will be live on Twitch on March 1st, you can register today. The first 1,000 registrants from US will receive a free digital copy of the DynamoDB book (this has a $79 retail value).
The first thing I noticed about CES this year was COVID’s impact on the event, which was more than just attendance size. A large amount of the technology focused on sanitation, everything from using light to sanitize surfaces on point-of-sale systems to hand-washing stations.
When I attend events such as this, which are not 100% security-related, I still approach them with a very strong security mindset and take the opportunity to talk to many of the vendors about the subject of security within their products. This often has mixed results, with many of those working the booths at CES having more focused knowledge on product functionality and capabilities, not technical questions related to product security. This year was no different, but I still had fun talking about security with many of those working their product booth, and as usual, I had some great conversations.
For example, I love when I see a product that typically wouldn’t be considered smart technology, but then see that it has been retrofitted with some level of smart tech to expand its usefulness, like a toothbrush. This year, I headed right to those booths and started asking security questions, and I was surprised at the responses I got, even though security was not their area of expertise as, say, an oral hygienist. They were still interested in talking about security and made every effort to either answer my question or find the answer. They also were quick to start asking me questions around what they should be concerned with and how would products like theirs be properly tested.
A healthy curiosity
Moving on from there, as usual, I encountered wearable smart technology, which has always been a big item at CES. Going beyond the typical devices to track your steps, smartwatches continue to be improved with a focus on monitoring key health stats including blood pressure, oxygen levels, heart rate, EKG, and even blood sugar levels for diabetics.
At Abbott’s booth, which had several products including the Libre Freestyle for monitoring blood glucose level, which is a product I use. Abbott is releasing a new sensor for this product that has a much smaller profile, and I’m looking forward to that. Since they had no live demos of their currently marketed Libre FreeStyle product, I volunteered to demo my unit for another CES attendee.
One of the Abbott booth employees asked me why I still use their handheld unit and haven’t switched to their mobile application, which was perfect timing for me to start talking security. During the conversation, I told them that I hadn’t personally tested their mobile application and regularly avoid placing apps on my phone that I haven’t security-tested. They all chimed in and recommended that I test their mobile application and let them know if it has any issues that they need to fix. So, I guess I need to add that to my to-do list.
Facing the future
Next, I encountered the typical facial recognition systems we regularly see at CES — but now, they all appear to be able to measure body temperatures and identify you despite wearing a mask. Of course, they also now support contract tracing to help identify if you’ve encountered someone who is COVID-positive. Also, many companies have made their devices more friendly by enabling them to automatically greet you at the door.
Personally, I always have reservations when it comes to facial recognition systems. Don’t get me wrong: I get the value they can bring. But sadly, in the long haul, I expect the data gathered will end up being misused, just like data gathered using other methods. Someone will find a way to commoditize this data if they aren’t already.
Charged up
Another area I expected to see at CES was electric-vehicle (EV) technology, and I wasn’t disappointed. Some may think I’m weird, but my focus wasn’t necessarily on the expensive cars and flying vehicles, although they’re very interesting — it was the charging stations.
With US plans to deploy charging stations across the nation, there’s a large marketplace to support public and home charging systems, and there were many solutions of this kind on display at CES. Several of the vendors indicated they were looking to snap up some of that market share and were actively working to have their products certified in the US.
With EV chargers most likely all being connected or potentially having the ability to impact the electric grid in various ways, I think security should play a big role in their design and deployment, and I took the opportunity to have some security discussions with several vendors. One vendor specifically designed and produced only EV charging hardware, not the software, and had staff at the event who could engage comfortably on the subject of security. Even though this organization hadn’t yet conducted any independent security testing on their product, they understood the value of doing so and asked a number of questions, including details on the processes and methodologies.
Robots: Convenient or creepy?
What would CES be if we didn’t take a quick look at robot technology?
Like many, I’m intrigued and freaked out by robots at the same time. The first ones to look at were the service robots, which are less creepy than others and could be very useful in activities like delivering parts on a shop floor or serving up refreshments at a party.
The convenience of using robots for these tasks is great, and I look forward to seeing this play out some day at a party I am attending. Although, with the typical crowds I run with, I expect everyone will be trying to hack on it and paying very little attention to the food it’s serving.
Finally, I looked at the creepier side of robots. The UK pavilion had a robot that was able to have lifelike facial and hand gestures. I found these features to be very impressive. If this tech could be built to be mobile and handle human interactions, I would say we have advanced to a new level, but I expect this is only mimicking these features, and we still have further to go before we will be living the Jetsons.
Also, Boston Dynamics and Hyundai were at CES. Their advanced robotics work always impresses and also scares me a little, and I’m not alone. My only disappointment was that I couldn’t get into the live demo of the technology. I waited in line, but the interest in the live show was high, and space was limited.
With advancements in robotics like these, we must all give this some deep consideration and answer the questions: What will this tech be used for? And how can we properly secure it? Because if it’s misused or not properly secured, it can lead to issues we never want to deal with. With that said, this robot tech is amazing, and I expect it can be a real game-changer in a number of positive areas.
NEVER MISS A BLOG
Get the latest stories, expertise, and news about security today.
In this post, we will walk through using Amazon Pinpoint and Amazon Quicksight to create customizable messaging campaign reports. Amazon Pinpoint is a flexible and scalable outbound and inbound marketing communications service that allows customers to connect with users over channels like email, SMS, push, or voice. Amazon QuickSight is a scalable, serverless, embeddable, machine learning-powered business intelligence (BI) service built for the cloud. This solution allows event and user data from Amazon Pinpoint to flow into Amazon Quicksight. Once in Quicksight, customers can build their own reports that shows campaign performance on a more granular level.
Engagement Event Dashboard
Customers want to view the results of their messaging campaigns in ever increasing levels of granularity and ensure their users see value from the email, SMS or push notifications they receive. Customers also want to analyze how different user segments respond to different messages, and how to optimize subsequent user communication. Previously, customers could only view this data in Amazon Pinpoint analytics, which offers robust reporting on: events, funnels, and campaigns. However, does not allow analysis across these different parameters and the building of custom reports. For example, show campaign revenue across different user segments, or show what events were generated after a user viewed a campaign in a funnel analysis. Customers would need to extract this data themselves and do the analysis in excel.
Customers should be prepared to purchase Amazon Quicksight because it has its own set of costs which is not covered within Amazon Pinpoint cost.
Solution Overview
This Solution uses the Athena tables created by Digital user engagement events database solution. The AWS CloudFormation template given in this post automatically sets up the different architecture components, to capture detailed notifications about Amazon Pinpoint engagement events and log those in Amazon Athena in the form of Athena views. You still need to manually configure Amazon Quicksight dashboards to link to these newly generated Athena views. Please follow the steps below in order for further information.
Use case(s)
Event dashboard solutions have following use cases: –
Deep dive into engagement insights. (eg: SMS events, Email events, Campaign events, Journey events)
The ability to view engagement events at the individual user level.
Data/process mining turn raw event data into useful marking insights.
User engagement benchmarking and end user event funneling.
Compute campaign conversions (post campaign user analysis to show campaign effectiveness)
Build funnels that shows user progression.
Getting started with solution deployment
Prerequisite tasks to be completed before deploying the logging solution
Step 1 – Create AWS account, Pinpoint Project, Implement Event-Database-Solution. As part of this step customers need to implement DUE Event database solution as the current solution (DUE event dashboard) is an extension of DUE event database solution. The basic assumption here is that the customer has already configured Amazon Pinpoint project or Amazon SES within the required AWS region before implementing this step.
The steps required to implement an event dashboard solution are as follows.
a/Follow the steps mentioned in Event database solution to implement the complete stack. Prior installing the complete stack copy and save the name Athena events database name as shown in the diagram. For my case it is due_eventdb. Database name is required as an input parameter for the current Event Dashboard solution.
b/Once the solution is deployed, navigate to the output page of the cloud formation stack, and copy, and save the following information, which will be required as input parameters in step 2 of the current Event Dashboard solution.
Step 2 – Deploy Cloud formation template for Event dashboard solution This step generates a number of new Amazon Athena views that will serve as a data source for Amazon Quicksight. Continue with the following actions.
Navigate to Cloud formation page in AWS console, click up right on “Create stack” and select the option “With new resources (standard)”
Leave the “Prerequisite – Prepare template” to “Template is ready” and for the “Specify template” option, select “Upload a template file”. On the same page, click on “Choose file”, browse to find the file “Event-dashboard.yaml” file and select it. Once the file is uploaded, click “Next” and deploy the stack.
Enter following information under the section “Specify stack details”:
EventAthenaDatabaseName – As mentioned in Step 1-a.
S3DataLogBucket- As mentioned in Step 1-b
This solution will create additional 5 Athena views which are
All_email_events
All_SMS_events
All_custom_events (Custom events can be Mobile app/WebApp/Push Events)
All_campaign_events
All_journey_events
Step 3 – Create Amazon Quicksight engagement Dashboard This step walks you through the process of creating an Amazon Quicksight dashboard for Amazon Pinpoint engagement events using the Athena views you created in step-2
To Setup Amazon Quicksight for the 1st time please follow this link (this process is not needed if you have already setup Amazon Quicksight). Please make sure you are an Amazon Quicksight Administrator.
Go/search Amazon Quicksight on AWS console.
Create New Analysis and then select “New dataset”
Select Athena as data source
As a next step, you need to select what all analysis you need for respective events. This solution provides option to create 5 different set of analysis as mentioned in Step 2. They are a/All email events, b/All SMS Events, c/All Custom Events (Mobile/Web App, web push etc), d/ All Campaign events, e/All Journey events. Dashboard can be created from Quicksight analysis and same can be shared among the organization stake holders. Following are the steps to create analysis and dashboards for different type of events.
Email Events –
For all email events, name the analysis “All-emails-events” (this can be any kind of customer preferred nomenclature), select Athena workgroup as primary, and then create a data source.
Once you create the data source Quicksight lists all the views and tables available under the specified database (in our case it is:- due_eventdb). Select the email_all_events view as data source.
Select the event data location for analysis. There are mainly two options available which are a/ Import to Spice quicker analysis b/ Directly query your data. Please select the preferred options and then click on “visualize the data”.
Import to Spice quicker analysis – SPICE is the Amazon QuickSight Super-fast, Parallel, In-memory Calculation Engine. It’s engineered to rapidly perform advanced calculations and serve data. In Enterprise edition, data stored in SPICE is encrypted at rest. (1 GB of storage is available for free for extra storage customer need to pay extra, please refer cost section in this document )
Directly query your data – This process enables Quicksight to query directly to the Athena or source database (In the current case it is Athena) and Quicksight will not store any data.
Now that you have selected a data source, you will be taken to a blank quick sight canvas (Blank analysis page) as shown in the following Image, please drag and drop what visualization type you need to visualize onto the auto-graph pane. Please note that Amazon QuickSight is a Busines intelligence platform, so customers are free to choose the desired visualization types to observe the individual engagement events.
As part of this blog, we have displayed how to create some simple analysis graphs to visualize the engagement events.
As an initial step please Select tabular Visualization as shown in the Image.
Select all the event dimensions that you want to put it as part of the Table in X axis. Amazon Quicksight table can be extended to show as many as tables columns, this completely depends upon the business requirement how much data marketers want to visualize.
Further filtering on the table can be done using Quicksight filters, you can apply the filter on specific granular values to enable further filtering. For Eg – If you want to apply filtering on the destination email Id then 1/Select the filter from left hand menu 2/Add destination field as the filtering criterion 3/ Tick on the destination field you are trying to filter or search for the Destination email ID that 4/ All the result in the table gets further filtered as per the filter criterion
As a next step please add another visual from top left corner “Add -> Add Visual”, then select the Donut Chart from Visual types pane. Donut charts are always used for displaying aggregation.
Then select the “event_type” as the Group to visualize the aggregated events, this helps marketers/business users to figure out how many email events occurred and what are the aggregated success ratio, click ratio, complain ratio or bounce ratio etc for the emails/Campaign that’s sent to end users.
To create a Quicksight dashboards from the Quicksight analysis click Share menu option at the top right corner then select publish dashboard”. Provide required dashboard name while publishing the dashboard”. Same dashboard can be shared with multiple audiences in the Organization.
Following is the final version of the dashboard. As mentioned above Quicksight dashboards can be shared with other stakeholders and also complete dashboard can be exported as excel sheet.
SMS Events-
As shown above SMS events can be analyzed using Quicksight and dash boards can be created out of the analysis. Please repeat all of the sub-steps listed in step 6. Following is a sample SMS dashboard.
Custom Events-
After you integrate your application (app) with Amazon Pinpoint, Amazon Pinpoint can stream event data about user activity, different type custom events, and message deliveries for the app. Eg :- Session.start, Product_page_view, _session.stop etc. Do repeat all of the sub-steps listed in step 6 create a custom event dashboards.
Campaign events
As shown before campaign also can be included in the same dashboard or you can create new dashboard only for campaign events.
Cost for Event dashboard solution You are responsible for the cost of the AWS services used while running this solution. As of the date of publication, the cost for running this solution with default settings in the US West (Oregon) Region is approximately $65 a month. The cost estimate includes the cost of AWS Lambda, Amazon Athena, Amazon Quicksight. The estimate assumes querying 1TB of data in a month, and two authors managing Amazon Quicksight every month, four Amazon Quicksight readers witnessing the events dashboard unlimited times in a month, and a Quicksight spice capacity is 50 GB per month. Prices are subject to change. For full details, see the pricing webpage for each AWS service you will be using in this solution.
Clean up
When you’re done with this exercise, complete the following steps to delete your resources and stop incurring costs:
On the CloudFormation console, select your stack and choose Delete. This cleans up all the resources created by the stack,
Delete the Amazon Quicksight Dashboards and data sets that you have created.
Conclusion
In this blog post, I have demonstrated how marketers, business users, and business analysts can utilize Amazon Quicksight dashboards to evaluate and exploit user engagement data from Amazon SES and Pinpoint event streams. Customers can also utilize this solution to understand how Amazon Pinpoint campaigns lead to business conversions, in addition to analyzing multi-channel communication metrics at the individual user level.
Next steps
The personas for this blog are both the tech team and the marketing analyst team, as it involves a code deployment to create very simple Athena views, as well as the steps to create an Amazon Quicksight dashboard to analyse Amazon SES and Amazon Pinpoint engagement events at the individual user level. Customers may then create their own Amazon Quicksight dashboards to illustrate the conversion ratio and propensity trends in real time by integrating campaign events with app-level events such as purchase conversions, order placement, and so on.
Extending the solution
You can download the AWS Cloudformation templates, code for this solution from our public GitHub repository and modify it to fit your needs.
About the Author
Satyasovan Tripathy works at Amazon Web Services as a Senior Specialist Solution Architect. He is based in Bengaluru, India, and specialises on the AWS Digital User Engagement product portfolio. He likes reading and travelling outside of work.
We are launching AWS Direct Connect SiteLink, a new capability of AWS Direct Connect that lets you create connections between your on-premises networks through the AWS global network backbone.
Until today, when you needed direct connectivity between your data centers or branch offices, you had to rely on public internet or expensive and hard-to-deploy fixed networks. These are geographically constrained and can be tied to long-term contracts. This rigidity becomes a pain point as you expand your businesses globally. In turn, you’re required to create custom workarounds to interconnect networks from different providers, which increases your operating costs.
Starting today, you may connect your sites through Direct Connect locations, without sending your traffic through an AWS Region. We have 108 Direct Connect locations available in 32 countries as I am writing this post, located across Africa, Americas, Asia-Pacific, Europe, and the Middle East. Traffic flows from one Direct Connect location to another following the shortest possible path. You no longer need to connect through the closest AWS Region and manage and configure an AWS Transit Gateway for site-to-site network connectivity.
You can take advantage of Direct Connect’s reliability and global footprint to build a network that grows with your business, with no long-term contracts, flexible pay-as-you-go pricing, and a wide range of port-speeds, from 50 Mbps to 100 Gbps. SiteLink also integrates with other AWS services, letting you reach your VPCs, other AWS services, and your on-premises networks from your Direct Connect connections.
When talking about network topology, a small diagram is always more descriptive than long phrases.
The following diagram shows the way that you use Direct Connect today. Direct Connect is currently optimized to let you reach your AWS Resources running in any Region as quickly as possible. Sending data from one Direct Connect location to another is not possible.
Once you connect your locations (NY1, AM3, Paris, and TY2 in the diagram) to a Direct Connect gateway, those connections can reach any AWS Region (except the two AWS China Regions). No peering between Regions is necessary, because Direct Connect gateways are global resources.
The following diagram shows how you connect multiple sites using SiteLink. The data flows between Direct Connect locations without going through an AWS Region.
How to Get Started? Configuring these connections is very similar to what you do today. The first step is to connect my network to Direct Connect locations. After that, SiteLink can be enabled or disabled in minutes.
Using the AWS Management Console, I navigate to the Direct Connect section, and I select Create virtual interface to create a virtual interface. Under the Additional Settings section, I make sure the SiteLink switch is turned on. Obviously, I repeat this on another virtual interface, once per site, to connect.
I have access to similar monitoring dashboards and metrics published to CloudWatch. I select my virtual interface, and then navigate to the Monitoring tab (hopefully your ViF will have more data available than mine that was created just for this post).
Availability and Pricing You can connect your on-premises networks or branch offices to any of our Direct Connect locations available today, except in China.
Pricing is pay-as-you-go, with no commitment or recurring fees. In addition to existing Direct Connect charges, your monthly bill will include a price-per-hour for SiteLink virtual interfaces, as well as the cost of SiteLink data transfer. Check the pricing page to get the details.
Today we are announcing Amazon DynamoDB Standard-Infrequent Access (DynamoDB Standard-IA). A new table class for DynamoDB that reduces storage costs by 60 percent compared to existing DynamoDB Standard tables, and that delivers the same performance, durability, and scaling.
Nowadays, many customers are moving their infrequently accessed data between DynamoDB and Amazon Simple Storage Service (Amazon S3). This means that customers are developing a process to migrate the data and build complex applications that must support two different APIs—one for DynamoDB and another for Amazon S3.
DynamoDB Standard-IA table class is designed for customers who want a cost-optimized solution for storing infrequently accessed data in DynamoDB without changing any application code. Using this new table class, you get the single-digit millisecond read and write performance from DynamoDB and use all of the same APIs.
When you use DynamoDB Standard-IA table class, you will save up to 60 percent in storage costs as compared to using the DynamoDB Standard table class. However, DynamoDB reads and writes for this new table class are priced higher than the Standard tables. Therefore, it is important to understand your use cases before applying this new table class to your tables.
DynamoDB Standard-IA is a great solution if you must store terabytes of data for several years where the data must be highly available, but it is not frequently accessed. An example is social media applications where end users rarely access their old posts. However, these posts remain stored, because if someone scrolls on a profile to see an old photo from 2009, they should be able to retrieve it as fast as if it was a newer post.
E-commerce sites are another good use case. These sites might have a lot of products that are not frequently accessed, but administrators of the site still want to have them available in their store just in case someone wants to buy them. Furthermore, this is a good solution for storing a customer’s previous orders. DynamoDB Standard-IA table offers the ability to retain historical orders at a lower cost.
Get started using DynamoDB Standard-IA Get started using DynamoDB Standard-IA by evaluating the best class for your existing tables.
Go to the table page and select Update the table class in the Actions dropdown to change the table class. Then, choose the new table class and save the changes. You can change the table class for an existing table to be Standard-IA or Standard twice every 30-days with no impact on performance or availability. All of the features of DynamoDB are available when using a table in the Standard-IA table class.
Moreover, you can also create a new table with the DynamoDB Standard-IA table class.
Availability and Pricing DynamoDB Standard-IA is available in all of the AWS Regions, except the China Regions and AWS GovCloud.
For example, DynamoDB Standard-IA storage pricing in US East (N. Virginia) is now $0.10 per GB (60 percent less than DynamoDB Standard), while reads and writes are 25 percent higher.
Hundreds of thousands of customers nowadays are using Amazon Aurora because it is highly available, scalable, and durable. But as applications grow in size and complexity, it becomes more challenging for these customers to detect and resolve operational and performance issues quickly.
During last year’s re:Invent, we announced DevOps Guru, a service that uses machine learning (ML) to automatically detect and alert customers of application issues, including database problems. Today we are announcing DevOps Guru for RDS to help developers using Amazon Aurora databases to detect, diagnose, and resolve database performance issues fast and at scale. Now developers will have enough information to determine the exact cause for a database performance issue. This launch will save developers and engineers many hours of work trying to uncover and remediate the performance-related database issues.
DevOps Guru for RDS uses ML to automatically identify and analyze a wide range of performance-related database issues, such as over-utilization of host resources, database bottlenecks, or misbehavior of SQL queries. It also recommends solutions to remediate the issues it finds. To use this capability, you don’t need to be a database or ML expert.
When an issue is detected, DevOps Guru for RDS displays the finding in the DevOps Guru console and sends notifications using Amazon EventBridge or Amazon Simple Notification Service (SNS). This allows developers to automatically manage and take real-time action on the issues.
How DevOps Guru for RDS Works DevOps Guru for RDS uses anomaly detection on the database load (DB load) performance metric to detect issues. DB load is measured in units of Average Active Sessions (AAS). DB load measures the level of activity in your database, making it a great metric to understand the health of your database. If the DB load is high, this can result in performance issues. This metric can be compared to the number of virtual CPUs (vCPUs), and if the DB load is higher than that number, issues can arise.
The most useful dimensions for this metric are the wait events and the top SQL. The wait event describes what the system conditions that are currently running SQLs are waiting on. The most common reasons why a statement is waiting is that it is waiting for the CPU, waiting for a read or write, or waiting for a locked resource. The top SQL dimension shows which queries are contributing the most to DB load.
The following image is an example of a finding that DevOps Guru for RDS reported. The graph shows that from the AAS, most of them were waiting for access to a table or for CPU.
If you continue scrolling on the DevOps Guru for RDS analysis page, you can discover the cause for the problem and some recommendations to fix it. In this particular example, two problems were detected: high-load wait events and CPU capacity exceeded.
DevOps Guru for RDS looks more in-depth into these problems. First, it looks at the high-load wait events, where there were 27 AAS for the IO and CPU wait types, which is 99 percent of the total DB load.
Second, it tells us that the running tasks exceeded six processes. This database only has two vCPUs, and the recommended number of running processes should be a maximum of four (2x vCPUs). DevOps Guru for RDS also makes recommendations to fix these issues.
In another anomaly, the graph shows that there was a high load of wait events, and one SQL query was found to require further investigation. You can even see the exact SQL query if you click on the SQL digest IDs. The insight’s analysis and recommendation section is full of information on how to investigate further and fix the issue. You can get a lot of detailed information by clicking on the wait event, for example, on the wait event wait/io/table/sql/handler or in the View troubleshooting doc link.
Get started with DevOps Guru for RDS To get started with this new capability of DevOps Guru, make sure that Performance Insights is enabled for your Amazon Aurora DB instances. It supports Amazon Aurora with MySQL- and PostgreSQL-compatibility. For instructions on how to enable Performance Insights, see Enabling and disabling Performance Insights.
The next step is to enable DevOps Guru to start monitoring your AWS resources. You can specify the resources you want to be covered by DevOps Guru.
If you are already using DevOps Guru, whenever there is a new insight for an Amazon Aurora database resource, you will see it in the console.
To see the detailed database analysis, navigate to the Insight page and select the new View analysis button under the DB load aggregated metric. That button will take you to the detailed analysis by DevOps Guru for RDS.
DevOps Guru for RDS is available in all Regions where DevOps Guru is available, US East (Ohio), US East (N. Virginia), US West (Oregon), Asia Pacific (Singapore), Asia Pacific (Sydney), Asia Pacific (Tokyo), Europe (Frankfurt), Europe (Ireland), and Europe (Stockholm).
Learn more about DevOps Guru for RDS and check out the talk at AWS re:Invent “Automatically detect and resolve performance issues with Amazon DevOps Guru for RDS” (Session Id 15877).
Today, we are announcing two additional capabilities of Amazon FSx for Lustre. First, a full bi-directional synchronization of your file systems with Amazon Simple Storage Service (Amazon S3), including deleted files and objects. Second, the ability to synchronize your file systems with multiple S3 buckets or prefixes.
Lustre is a large scale, distributed parallel file system powering the workloads of most of the largest supercomputers. It is popular among AWS customers for high-performance computing workloads, such as meteorology, life-science, and engineering simulations. It is also used in media and entertainment, as well as the financial services industry.
I had my first hands-on Lustre file systems when I was working for Sun Microsystems. I was a pre-sales engineer and worked on some deals to sell multimillion-dollar compute and storage infrastructure to financial services companies. Back then, having access to a Lustre file system was a luxury. It required expensive compute, storage, and network hardware. We had to wait weeks for delivery. Furthermore, it required days to install and configure a cluster.
Fast forward to 2021, I may create a petabyte-scale Lustre cluster and attach the file system to compute resources running in the AWS cloud, on-demand, and only pay for what I use. There is no need to know about Storage Area Networks (SAN), Fiber Channel (FC) fabric, and other underlying technologies.
Modern applications use different storage options for different workloads. It is common to use S3 object storage for data transformation, preparation, or import/export tasks. Other workloads may require POSIX file-systems to access the data. FSx for Lustre lets you synchronize objects stored on S3 with the Lustre file system to meet these requirements.
When you link your S3 bucket to your file system, FSx for Lustre transparently presents S3 objects as files and lets you to write results back to S3.
Full Bi-Directional Synchronization with Multiple S3 Buckets If your workloads require a fast, POSIX-compliant file system access to your S3 buckets, then you can use FSx for Lustre to link your S3 buckets to a file system and keep data synchronized between the file system and S3 in both directions. However, until today, there were a couple limitations. First, you had to manually configure a task to export data back from FSx for Lustre to S3. Second, deleted files on S3 were not automatically deleted from the file system. And third, an FSx for Lustre file system was synchronized with one S3 bucket only. We are addressing these three challenges with this launch.
Starting today, when you configure an automatic export policy for your data repository association, files on your FSx for Lustre file system are automatically exported to your data repository on S3. Next, deleted objects on S3 are now deleted from the FSx for Lustre file system. The opposite is also available: deleting files on FSx for Lustre triggers the deletion of corresponding objects on S3. Finally, you may now synchronize your FSx for Lustre file system with multiple S3 buckets. Each bucket has a different path at the root of your Lustre file system. For example your S3 bucket logs may be mapped to /fsx/logs and your other financial_data bucket may be mapped to /fsx/finance.
These new capabilities are useful when you must concurrently process data in S3 buckets using both a file-based and an object-based workflow, as well as share results in near real time between these workflows. For example, an application that accesses file data can do so by using an FSx for Lustre file system linked to your S3 bucket, while another application running on Amazon EMR may process the same files from S3.
Moreover, you may link multiple S3 buckets or prefixes to a single FSx for Lustre file system, thereby enabling a unified view across multiple datasets. Now you can create a single FSx for Lustre file system and easily link multiple S3 data repositories (S3 buckets or prefixes). This is convenient when you use multiple S3 buckets or prefixes to organize and manage access to your data lake, access files from a public S3 bucket (such as these hundreds of public datasets) and write job outputs to a different S3 bucket, or when you want to use a larger FSx for Lustre file system linked to multiple S3 datasets to achieve greater scale-out performance.
How It Works Let’s create an FSx for Lustre file system and attach it to an Amazon Elastic Compute Cloud (Amazon EC2) instance. I make sure that the file system and instance are in the same VPC subnet to minimize data transfer costs. The file system security group must authorize access from the instance.
It takes a few minutes to create the file system. Once the status is Available, I navigate to the Data repository tab, and then select Create data repository association.
I choose a Data Repository path (my source S3 bucket) and a file system path (where in the file system that bucket will be imported).
Then, I choose the Import policy and Export policy. I may synchronize the creation of file/objects, their updates, and when they are deleted. I select Create.
When I use automatic import, I also make sure to provide an S3 bucket in the same AWS Region as the FSx for Lustre cluster. FSx for Lustre supports linking to an S3 bucket in a different AWS Region for automatic export and all other capabilities.
Using the console, I see the list of Data repository associations. I wait for the import task status to become Succeeded. If I link the file system to an S3 bucket with a large number of objects, then I may choose to skip Importing metadata from repository while creating the data repository association, and then load metadata from selected prefixes in my S3 buckets that are required for my workload using an Import task.
I create an EC2 instance in the same VPC subnet. Furthermore, I make sure that the FSx for Lustre cluster security group authorizes ingress traffic from the EC2 instance. I use SSH to connect to the instance, and then type the following commands (commands are prefixed with the $ sign that is part of my shell prompt).
# check kernel version, minimum version 4.14.104-95.84 is required
$ uname -r
4.14.252-195.483.amzn2.aarch64

# install lustre client
$ sudo amazon-linux-extras install -y lustre2.10
Installing lustre-client
...
Installed:
  lustre-client.aarch64 0:2.10.8-5.amzn2

Complete!

# create a mount point
$ sudo mkdir /fsx

# mount the file system
$ sudo mount -t lustre -o noatime,flock fs-00...9d.fsx.us-east-1.amazonaws.com@tcp:/ny345bmv /fsx

# verify mount succeeded
$ mount
...
172.0.0.0@tcp:/ny345bmv on /fsx type lustre (rw,noatime,flock,lazystatfs)
Then, I verify that the file system contains the S3 objects, and I create a new file using the touch command.
I switch to the AWS Console, under S3 and then my bucket name, and I verify that the file has been synchronized.
Using the console, I delete the file from S3. And, unsurprisingly, after a few seconds, the file is also deleted from the FSx file system.
Pricing and Availability These new capabilities are available at no additional cost on Amazon FSx for Lustre file systems. Automatic export and multiple repositories are only available on Persistent 2 file systems in US East (N. Virginia), US East (Ohio), US West (Oregon), Canada (Central), Asia Pacific (Tokyo), Europe (Frankfurt), and Europe (Ireland). Automatic import with support for deleted and moved objects in S3 is available on file systems created after July 23, 2020 in all regions where FSx for Lustre is available.
One More Thing One more thing while you are reading. Today, we also launched the next generation of FSx for Lustre file systems. FSx for Lustre next-gen file systems are built on AWS Graviton processors. They are designed to provide you with up to 5x higher throughput per terabyte (up to 1 GB/s per terabyte) and reduce your cost of throughput by up to 60% as compared to previous generation file systems. Give it a try today!
Modern workloads and systems are leveraging different storage options for different functionalities. In the 21st century, it is normal to build applications relying on non-relational and relational databases, shared file storage, and object storage, just to name of few. When operating and managing these applications, you told us that you wanted centralized protection and provable compliance for application data stored in S3 alongside other AWS services for storage, compute, and databases.
First, it lets you centrally manage your applications backups: AWS Backup provides an automated solution to centrally configure backup policies, thereby helping you simplify backup lifecycle management. This also makes it easy to ensure that your application data across AWS services (including S3) is centrally backed up.
Second, it lets you easily restore your data: AWS Backup provides a single-click-restore experience for your S3 data. This lets you perform point-in-time restores of your S3 buckets and objects to a new or existing S3 bucket.
Finally, it improves backup compliance: AWS Backup provides built-in dashboards that let you to track backup and restore operations for S3.
AWS Backup for S3 (Preview) lets you create continuous point-in-time backups along with periodic backups of S3 buckets, including object data, object tags, access control lists (ACLs), and user-defined metadata. The first backup is a full snapshot, while subsequent backups are incremental. If there is a data disruption event, then you choose a backup from the backup vault, and restore an S3 bucket (or individual S3 objects) to a new or existing S3 bucket. AWS Backup is integrated with AWS Organizations, which let you use a single policy across AWS accounts (within your Organizations) to automate backup creation and backup access management.
Furthermore, you can turn on AWS Backup Vault Lock to enable delete protection of the data that you protect with AWS Backup, and thereby improving protection of your immutable backups from accidental deletion or malicious re-encryption.
I must enable S3 in AWS Backup Settings when I use this feature for the first time. Using the AWS Management Console, I navigate to AWS Backup, then select Settings and Configure resources. I enable S3, and select Confirm. This is a one-time operation.
For this demo, I already have an existing backup plan, and I want to add an S3 bucket to this plan. If you want to create a new backup plan, then you can refer to AWS Backup‘s technical documentation.
To start including my S3 objects in my backup plan, I open the AWS Management Console, navigate to Backup plans, and select Assign resources.
I give a name to my Resource assignment. I select Include specific resources types, then I select S3 as Resource type and one or several S3 Bucket names. When I am done, I select Assign resources.
Alternatively, I may use tags or resource IDs to assign S3 resources.
If you have thousands of S3 buckets, I recommend using tags to assign the S3 buckets to a backup plan. AWS Backup matches the tags in S3 buckets to the ones assigned to the backup plan, and it centrally backs up the S3 resources along with other AWS services that your application uses.
The Bucket names list in the previous screenshot only shows the S3 buckets in the same Region.
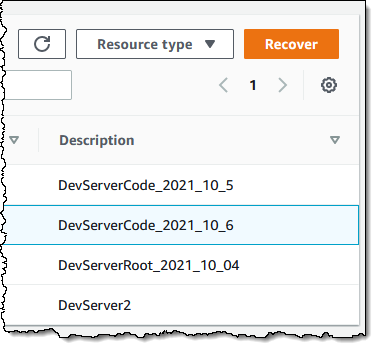
Alternatively, I may also create on-demand backups. I navigate to the Protected resources section, and select Create on-demand backup.
I select S3 as the Resource type, and select the Bucket name. As per usual, I choose a Backup Window, a Retention period, a Backup vault, and an IAM role. Then, I select Create on-demand backup.
After a while, depending on the size of my bucket, the backup is Completed.
All of the backups are encrypted and stored securely in a backup vault that I selected in the backup plan.
A backup vault (or backup storage vault) is an encrypted logical construct in my AWS account that stores and organizes my backups (recovery points). I may create new backup vaults in every AWS Region where AWS Backup is available. I may enable AWS Backup Vault Lock (delete-protection capability) on the backup vault to avoid accidental deletions and prevent malicious actors from re-encrypting my data. AWS Backup stores my continuous backups and periodic snapshots in the backup vault of my preference, and it lets me browse and restore as per my requirements.
How to Restore Objects Let’s try to restore this backup.
The restore operation is very flexible. I may restore entire S3 buckets or individual S3 objects. I may restore the backups to the source S3 bucket, or to another existing bucket. Furthermore, I may create a new S3 bucket during restore. The S3 buckets must have Versioning enabled. Also, I may change the encryption key during restore.
I navigate to Backup vaults to restore the S3 bucket I just backed up. In the Backups section, I select the Recovery point ID that I want to restore, and I select Restore from the Actions menu.
Before starting the restore, I may select a few options:
The Restore time: I may restore my continuous backup to a point-in-time in the last 35 days, while I can restore my periodic backups to their original state.
The Restore type: I may choose to restore the entire bucket or a subset of objects within it.
The Restore destination: I may choose to restore on the same bucket, on another one, or create a new bucket during restore.
The Restored object encryption: this lets me select the key I want to use to encrypt the restored objects in the bucket.
I select Restore backup to start the restore.
I can monitor the progress in the Jobs section, under the Restore jobs tab.
When the status turns green to Completed, my objects are ready to use!
Generally, the most comprehensive data-protection strategies include regular testing and validation of your restore procedures before you need them. Testing your restores also helps to prepare and maintain recovery runbooks. In turn, that ensures operational readiness during a disaster recovery exercise, or an actual data loss scenario.
Availability and Pricing The preview is available in the US West (Oregon) Region only.
During the preview, there are no charges for creating and storing backups. You will pay the AWS charges for underlying resources, such as S3 storage, API usage, and versioning.
Send us an email at [email protected] including your AWS account ID to register for the preview.
Today we are announcing the Amazon S3 Glacier Instant Retrieval storage class. This new archive storage class delivers the lowest cost storage for long-lived data that is rarely accessed and requires millisecond retrieval.
We are also excited to announce that S3 Intelligent-Tiering now automatically optimizes storage costs for rarely accessed data that needs immediate retrieval with the new Archive Instant Access tier, which is ideal for data with unknown or changing access patterns. For existing customers, this will provide an immediate savings of 68 percent for data that hasn’t been accessed for more than 90 days, with no action needed. The Frequent, Infrequent, and now Archive Instant Access tiers are designed for the same milliseconds access time and high-throughput performance.
In addition, we are announcing the new name for the existing Amazon S3 Glacier storage class and several price reductions.
Amazon S3 Glacier Instant Retrieval The Amazon S3 Glacier storage classes are extremely low-cost and built for data archiving. They are secure and durable, and they are designed to provide the lowest cost for data that does not require immediate access, with retrieval options from minutes to hours.
Many customers need to store rarely accessed data for several years. However the data must be highly available and immediately accessible. Today, these customers use the S3 Standard-Infrequent Access (S3 Standard-IA) storage class. This storage class offers low cost for storage and allows customers to retrieve their data instantly.
S3 Glacier Instant Retrieval is a new storage class that delivers the fastest access to archive storage, with the same low latency and high-throughput performance as the S3 Standard and S3 Standard-IA storage classes. You can save up to 68 percent on storage costs as compared with using the S3 Standard-IA storage class when you use the S3 Glacier Instant Retrieval storage class and pay a low price to retrieve data. For example, in the US East (N. Virginia) Region, S3 Glacier Instant Retrieval storage pricing is $0.004 per GB-month and data retrieval is $0.03 per GB. Learn more about pricing for your Region.
Media archives, medical images, or user-generated content are just a few examples of ideal use cases for S3 Glacier Instant Retrieval. Once created, this content is rarely accessed, but when it is needed it must be available in milliseconds.
To get started using the new storage class from the Amazon S3 console, upload an object as you would normally, and select the S3 Glacier Instant Retrieval storage class.
In my opinion, the easiest way to store data in S3 Glacier Instant Retrieval is to use the S3 PUT API using the CLI. When using this API, set the storage class to GLACIER_IR.
When the object is uploaded to Amazon S3, verify the storage class in the list of objects or on the object details page.
For data that already exists in Amazon S3, you can use S3 Lifecycle to transition data from the S3 Standard and S3 Standard-IA storage classes into S3 Glacier Instant Retrieval.
New Archive Instant Access Tier in S3 Intelligent-Tiering S3 Intelligent-Tiering is a storage class that automatically moves objects between access tiers to optimize costs. This is the recommended storage class for data with unpredictable or changing access patterns, such as in data lakes, analytics, or user-generated content.
Until today, there were two low latency access tiers optimized for frequent and infrequent access, and two optional archive access tiers designed for asynchronous access optimized for rare access at a low cost.
Beginning today, the Archive Instant Access tier is added as a new access tier in the S3 Intelligent-Tiering storage class. You will start seeing automatic costs savings for your storage in S3 Intelligent-Tiering for rarely accessed objects.
The Archive Instant Access tier joins the group of low latency access tiers. This new tier is optimized for data that is not accessed for months at a time but, when it is needed, is available within milliseconds.
S3 Intelligent-Tiering automatically stores objects in three access tiers that deliver the same performance as the S3 Standard storage class:
Frequent Access tier
Infrequent Access tier
Archive Instant Access (new)
For a small monitoring and automation charge, S3 Intelligent-Tiering monitors access patterns and moves objects between the different access tiers. Objects that have not been accessed for 30 consecutive days are moved from the Frequent Access tier to the Infrequent Access tier for savings of 40 percent. When an object hasn’t been accessed for 90 consecutive days, S3 Intelligent-Tiering will move the object from the Infrequent Access tier to the Archive Instant Access tier, with a savings of 68 percent. If the data is accessed later, it is automatically moved back to the Frequent Access tier. No tiering charges apply when objects are moved between access tiers within the S3 Intelligent-Tiering storage class.
To get started with this new access tier, select Intelligent-Tiering as the storage class for an object when uploading an object using the S3 console. After 90 days of inactivity (30 days in Frequent Access tier and 60 days in Infrequent Access tier), S3 Intelligent-Tiering will automatically move the object to the Archive Instant Access tier. The introduction of the new Archive Instant Access tier has no impact on performance when you retrieve objects.
New name for the Amazon S3 Glacier storage class – S3 Glacier Flexible Retrieval The existing Amazon S3 Glacier storage class is now named S3 Glacier Flexible Retrieval. This storage class now has free bulk retrievals in 5 to 12 hours, and the storage price has been reduced by 10 percent in all Regions, effective December 1, 2021. S3 Glacier Flexible Retrieval is now even more cost-effective, and the free bulk retrievals make it ideal for retrieving large data volumes.
These are the Amazon S3 archive storage classes:
S3 Glacier Instant Retrieval: The newest storage class is optimized for long-lived data that is rarely accessed (typically once per quarter). However when data is needed, it is available within milliseconds. For example, medical images and news media assets are perfect for this storage class.
S3 Glacier Flexible Retrieval: This newly renamed storage class is optimized for archiving data that can be retrieved in minutes or with free bulk retrievals in 5 to 12 hours. This storage class is ideal for backups and disaster recovery use cases, where you have large amounts of long-term, rarely accessed data, and you don’t want to worry about retrieval costs when you need the data.
S3 Glacier Deep Archive: This storage class is the lowest-cost storage in the cloud and is optimized for archiving data that can be restored in at least 12 hours. It’s great for storing your compliance archives or for digital media preservation.
Amazon S3 has reduced storage prices! We are excited to announce that Amazon S3 has reduced storage prices of up to 31 percent in the S3 Standard-IA and S3 One Zone-IA storage classes across 9 AWS Regions: US West (N. California), Asia Pacific (Hong Kong), Asia Pacific (Mumbai), Asia Pacific (Osaka), Asia Pacific (Seoul), Asia Pacific (Singapore), Asia Pacific (Sydney), Asia Pacific (Tokyo), and South America (São Paulo). These price reductions are effective December 1, 2021.
Available Now The new storage class, S3 Glacier Instant Retrieval, and the new Archive Instant Access tier in S3 Intelligent-Tiering are available today (November 30, 2021) in all AWS Regions.
The price cut for S3 Glacier and free bulk retrievals in all AWS Regions, and the S3 Standard-Infrequent Access/One Zone-Infrequent storage class in nine Regions will be effective on December 1, 2021.
At AWS our mission is to make machine learning (ML) accessible to data scientists, developers, and business users. To help businesses easily leverage the power of ML, we create purpose-built solutions that embed ML and deep learning technologies directly into a business process to address real customer needs, rather than leaving companies to sort it out on their own.
One place where we have seen ML have an impact is within the contact center—the place you receive and respond to customer inquiries and issues. Because of the growing role of customer experience (CX) and the increase in contact less commerce via phone or email, contact centers are essentials to maintaining the human connections that businesses depend on. However, analog or outdated methods make it difficult to address every customer need in an effective way that delivers timely resolutions, delivers great experiences, and fosters customer loyalty.
Embedding AWS ML technologies into a cloud contact center solution helps decrease the friction of calls, chats, and other engagements. It also makes it possible to automate outdated processes.
Amazon Connect is an easy-to-use, cloud-based, ML-powered contact center service that helps companies of any size deliver superior customer service at a lower cost.
Let me take three examples with Voice ID, Wisdom, and Contact Lens.
Amazon Connect Voice ID ML capabilities might help streamline customer experience for authentication. Instead of asking customers to repeat their email address and their mother’s maiden name several times, ML-powered voice identification can establish a digital voice print associated with each customer’s unique voice. Then, it can recognize it at the beginning of each subsequent call. Voice identification provides a confidence score that may be used to automate authentication workflows.
Amazon Connect Wisdom ML might also help search the vast documentation and knowledge base to find the most relevant answers to the questions raised by the customer. ML helps resolve customer issues faster and better.
Contact Lens for Amazon Connect ML technologies also shine at analyzing the tone and content of a conversation, capturing customer sentiment in the moment, and learning from it. ML can help transcribe calls, track customer sentiment, detect common issues and customer trends, or even pinpoint discrepancies.
Contact Lens Adds Call Summarization But we didn’t stop there. Today, I am pleased to announce the addition of a new capability that helps you improve customer experience and agent and supervisor productivity by automatically summarizing the important aspects of each customer call.
You told us that keeping notes of customer conversations is time consuming, especially, for agents that must take notes during the call and import them manually in your CRM tool afterward. In the end, this is more time for us, the customers, waiting in queue for an agent to become available. Likewise, using automatically generated call transcripts doesn’t save time for supervisors. It is time consuming for supervisors to read these full call transcripts to understand what happened during customer conversations.
How it Works Starting today, Contact Lens has added a summary of the key moments in a conversation. It is enabled by default, and there is no additional configuration step. You may toggle the Show transcript summary button to show or hide the summary when you don’t need it.
Once a call is analyzed, the summary is available on the contact detail page.
Contact Lens identifies and summarizes the sections corresponding to Issue (e.g., lost package), Outcome (e.g., customer refund), and Action item (e.g., send a follow-up mail confirming the refund was processed). A manager can quickly see where there’s an action to send a customer a follow-up email and take action to ensure it happens.
... redacted for brevity ...

"IssuesDetected": [
{
   "CharacterOffsets": {
      "BeginOffsetChar": 31,
      "EndOffsetChar": 73
   },
   "Text": "I would like to cancel my subscription"
}
]
...
"ActionItemsDetected": [
 {
   "CharacterOffsets": {
      "BeginOffsetChar": 32,
      "EndOffsetChar": 116
   },
   "Text": "I will send you an email with details"
 }
 ]
Availability and Pricing Call summarization by Contact Lens is available in all AWS Regions where Contact Lens is available today. We support post-call analytics in the US West (Oregon), US East (N. Virginia), Canada (Central), Europe (London), Europe (Frankfurt), Asia Pacific (Singapore), Asia Pacific (Seoul), Asia Pacific (Tokyo), and Asia Pacific (Sydney) regions. We support real-time analytics in the US West (Oregon), US East (N. Virginia), Canada (Central), Europe (London), Europe (Frankfurt), Asia Pacific (Seoul), Asia Pacific (Tokyo), and Asia Pacific (Sydney) regions.
Call summary comes at no additional cost on top of the usual charges for Contact Lens. This is why we choose to enable it by default. Contact Lens is charged $0.015 per minute of voice conversation analyzed. Most of our Contact Lens customers analyze millions of conversation minutes per month. The price is $0.0125 per minute when you analyze more than 5 millions minutes per month.
AWS Outposts gives you on-premises compute and storage that is monitored and managed by AWS, and controlled by the same, familiar AWS APIs. You may already know about the AWS Outposts rack, which occupies a full 42U rack.
Last year I told you that we were working on new sizes of Outposts suitable for locations such as branch offices, factories, retail stores, health clinics, hospitals, and cell sites that are space-constrained and need access to low-latency compute capacity. Today we are launching three AWS Outposts servers, all powered by AWS Nitro System and with your choice of x86 or Arm/Graviton2 processors. Here’s an overview:
You can create VPC subnets on each Outpost, and you can launch Amazon Elastic Compute Cloud (Amazon EC2) instances from EBS-backed AMIs in the parent region. The c6gd.16xlarge model supports six instance sizes, as follows:
Instance Name
vCPUs
Memory
Local Storage
c6gd.large
2
4 GiB
118 GB
c6gd.xlarge
4
8 GiB
237 GB
c6gd.2xlarge
8
16 GiB
474 GB
c6gd.4xlarge
16
32 GiB
950 GB
c6gd.8xlarge
32
64 GiB
1.9 TB
c6gd.16xlarge
64
128 GiB
3.8 TB
The c6id.16xlarge model supports all but the largest of the following instance sizes, and the c6id.32xlarge supports all of them:
Instance Name
vCPUs
Memory
Local Storage
c6id.large
2
4 GiB
118 GB
c6id.xlarge
4
8 GiB
237 GB
c6id.2xlarge
8
16 GiB
474 GB
c6id.4xlarge
16
32 GiB
950 GB
c6id.8xlarge
32
64 GiB
1.9 TB
c6id.16xlarge
64
128 GiB
3.8 TB
c6id.32xlarge
128
256 GiB
7.6 TB
Within each of your Outposts servers, you can launch any desired mix of instance sizes as long as you remain within the overall processing and storage available. You can create Amazon Elastic Container Service (Amazon ECS) clusters (Amazon Elastic Kubernetes Service (EKS) is coming soon) , and the code you run on-premises can make use of the entire lineup of services in the AWS Cloud.
Each Outposts server connects to the cloud via the public Internet or across a private AWS Direct Connect line. Additionally, each Outpost server supports a Local Network Interface (LNI) that provides a Level 2 presence on your local network for AWS service endpoints.
Outposts servers incorporate many powerful Nitro features including high speed networking and enhanced security. The security model is locked-down and prevents administrative access, preventing tampering or human error. Additionally, data at rest is protected by a NIST-compliant physical security key.
While I was writing this post, I stopped in to say hello to the design and development team, and met with my colleague Bianca Nagy to learn more about the Outposts server:
Ordering Outposts Servers Let’s walk through the process of ordering an Outposts server from the AWS Management Console. I visit the AWS Outposts Console, make sure that I am in the desired AWS Region, and click Place order to get started:
I click Servers, and then choose the desired configuration. I pick the c6gd.16xlarge, and click Next to proceed:
Then I create a new Outpost:
And a new Site:
Then I review my payment options and select my shipping address:
On the next page I review all of my options, click Place order, and await delivery:
In general, we expect to be able to deliver Outposts servers in two to six weeks, starting in the first quarter of 2022. After you receive yours, you or a member of your IT team can mount it in a 19″ rack or position it on a flat surface, cable it to power and networking, and power the device on. You then use a set of temporary AWS credentials to confirm the identity of the device, and to verify that the device is able to use DHCP to obtain an IP address. Once the device has established connectivity to the designated AWS parent region, we will finalize the provisioning of EC2 instance capacity and make it available to you.
After that, you are ready to launch instances and to deploy your on-premises applications.
We will monitor hardware performance and will contact you if your device is in need of maintenance. We will ship a replacement device for arrival within 2 business days. You can migrate your workloads to a redundant device, and use tracking information & notifications to track delivery status. When the replacement arrives, you install it and then destroy the physical security key in the old one before shipping it back to AWS.
Outposts API Update We are also enhancing the Outposts API as part of this launch. Here are some of the new functions:
ListCatalogItem – Get a list of items in the Outposts catalog, with optional filtering by EC2 family or supported storage options.
GetCatalogItem – Get full information about a single item in the Outposts catalog.
GetSiteAddress – Get the physical address of a site where an Outposts rack or server is installed.
You can use the information returned by GetCatalogItem to place an order that contains the desired quantity of one or more catalog items.
Things to Know Here are a couple of important things to know about Outposts servers:
Availability – Outposts servers are available for order to most locations where Outposts racks are available (currently 23 regions and 49 countries), with more to follow in 2022.
Ordering at Scale – I showed you the console-based ordering process above, and also gave you a glimpse at the Outposts API. If you need hundreds or thousands of devices, get in touch and we will give you a template that you can fill in and then upload.
re:Invent 2021 Outposts Server Selfie Challenge If you attend AWS re:Invent, be sure to visit the AWS Hybrid kiosk in the AWS Booth (#1719) to see the new Outposts Servers up close and personal. While you are there, take a fun & creative selfie, tag it with #AWSOutposts & #AWSPromotion, and share it on Twitter. I will post my three favorites at the end of the show!
Today we are launching Amazon Kinesis Data Streams On-demand, a new capacity mode. This capacity mode eliminates capacity provisioning and management for streaming workloads.
Kinesis Data Streams is a fully-managed, serverless service for real-time processing of streamed data at a massive scale. Kinesis Data Streams can take any amount of data, from any number of sources, and scale up and down as needed. Creating a new data stream is easy, since we announced Kinesis Data Streams in November 2013. To get started, you only need to specify the number of shards with which you must provision your stream.
Shards are the way to define capacity in Kinesis Data Streams. Each shard can ingest 1 MB/s and 1,000 records/second and egress up to 2 MB/s. You can add or remove shards of the stream using Kinesis Data Streams APIs to adjust the stream capacity according to the throughout needs of their workloads. This lets you make sure that producer and consumer applications don’t experience any throttling.
As customers adopt data streaming broadly, workloads with data traffic that can increase by millions of events in a few minutes are becoming more common. For these volatile traffic patterns, customers carefully plan capacity, monitor throughput, and in some cases develop processes that automatically change the Kinesis Data Streams stream capacity.
Kinesis Data Streams On-Demand Mode That is why today we are announcing Kinesis Data Streams On-demand. This new capacity mode eliminates the need for provisioning and managing the capacity for streaming data. Using Kinesis Data Streams On-demand automatically scales the capacity in response to varying data traffic. Customers are charged per gigabyte of data written, read, and stored in the stream, in a pay-per-throughput fashion.
Data streams in the on-demand mode have the same high durability, high availability, low latency, security, and deep AWS integrations that Kinesis Data Streams already provides. Moreover, there are no new APIs to write or read data. All existing Kinesis Data Streams integrations work in the on-demand mode.
Kinesis Data Streams uses the partition key to distribute data across shards. That is why when using Kinesis Data Streams On-demand, you still must specify a partition key for each record to write data into a data stream, as you do today in Kinesis Data Streams using the provisioned mode. In Kinesis Data Streams On-demand, the data stream automatically adapts to handle uneven data distribution patterns. But you must be careful that no partition key exceeds a shard’s limits. If this happens, then you will receive write throttles, and then you can retry these requests.
When a new data stream is created using Kinesis Data Streams On-demand, it gets created with the default capacity of 4 MB/s and 4,000 records per second for writes. Kinesis Data Streams On-demand can automatically scale up to 200 MB/s and 200,000 records per second for writes.
Kinesis Data Streams On-demand accommodates up to double its previous peak write throughput observed in the last 30 days. As your data stream’s write throughput hits a new peak, Kinesis Data Streams automatically scales the stream’s capacity.
For example, if your data stream has a write throughput that varies between 10 MB/s and 40 MB/s, Kinesis Data Streams will make sure that you can easily burst to double the peak—80 MB/s. And, if later on that same data stream reaches a new peak of 50 MB/s, then Kinesis Data Streams will make sure that there is enough capacity to ingest 100 MB/s. However, write throttling can occur if your traffic grows more than double the previous peak in less than 15 minutes.
When to Use Kinesis Data Streams On-demand On-demand mode is great for customers that have an unknown or variable workload, or who simply don’t want to deal with capacity management. On-demand mode works best for workloads that have even partition key distribution. For example, you run a mobile game that has variable traffic through the week or day, as customers play mostly on nights or weekends. Or, you run a streaming platform that hosts live shows, and you see a sudden increase in demand depending on the guests you have.
In addition, you can switch between on-demand and provision mode twice a day. For example, you run an e-commerce site with predictable traffic. But, starting next month, there will be many marketing campaigns launched globally. You don’t know the impact that those will have on the site traffic. Switch your Kinesis Data Streams to on-demand mode, and now you can enjoy the automated capacity planning and management for your data streams.
To create one from the console, visit the Kinesis console and Create data stream. When selecting the capacity mode, select On-demand.
At the end of the page, all of the settings for the new data stream are presented. These settings can be changed after the data stream has been created.
Let’s See This in Action! For this demo, I want to show you how the new Kinesis Data Streams capability works. This situation is best described if you at look at the following Amazon CloudWatch graphs. The green line represents the bytes ingested successfully into the stream, and the red line shows the percentage of traffic that is throttled.
First, we will start with a stream provisioned with five shards. For the first three minutes, we are sending a load of 4 MB/s. You can see that the stream can handle the load.
At the time stamp 21:19, we increase the load to 12 MB/s. Now the stream cannot handle the load, and the throttles start (the red line starts climbing up to 60 percent of request being throttled).
At the time stamp 21:23, we change the stream capacity from provisioned to on-demand. You can do that on-the-fly without affecting the stream. See that it takes a very short time for the stream to handle the load when converting from one capacity mode to the other.
In a few minutes (time stamp 21:24) the throttles start to drop as the stream starts scaling up. The stream capacity doubles to 10 shards first (time stamp 21:26), and the stream keeps scaling up until each shard has a load of less than 0.5 MB/s. In this way, if the stream suddenly receives double the amount of load, then it has the capacity ready to handle it.
At the time stamp 21:26, the load in the stream is increased to 18 MB/s. You can see the green line climbing to 350,000 records – there are no throttles, and the stream ends this demo with 40 open shards. This means that if suddenly the stream receives a load of 40 MB/s, then it could handle it with no problem.
I am pleased to announce the availability of Amazon EBS Snapshots Archive, a new storage tier for the long-term retention of Amazon Elastic Block Store (EBS) snapshots of your EBS volumes.
In a nutshell, EBS is an easy-to-use high-performance block storage service for your Amazon Elastic Compute Cloud (Amazon EC2) instances. An EBS volume mounted to your EC2 instances lets you boot an operating system and store data for your most performance-demanding workloads. You may use EBS snapshots to create point-in-time copies of your volume data. The first snapshot of a volume contains all of the data written into that volume. Subsequent snapshots are incremental. Snapshots are stored on Amazon Simple Storage Service (Amazon S3), and they may be shared between AWS accounts and AWS Regions.
The ability to take frequent snapshots and easily restore volumes makes EBS snapshots an obvious choice for your data management strategy, alongside other backup options. The incremental nature of snapshots makes them cost-effective for daily and weekly backups that need immediate restores. However, you were telling us that business compliance and regulatory needs have meant that you needed to retain EBS snapshots for longer periods of time (months or years). For example, snapshots taken at the end of a project, or snapshots for test and development preserved for future project releases. The vast majority of these snapshots are taken and never read. For these snapshots, you are looking to lower your storage costs. Today, to benefit from lower storage costs, you may have written complex scripts involving temporary EC2 instances to restore snapshots, mount the corresponding volumes, and transfer the data to lower-cost storage tiers, such as Amazon Glacier.
EBS Snapshots Archive provides a low-cost storage tier to archive full, point-in-time copies of EBS Snapshots that you must retain for 90 days or more for regulatory and compliance reasons, or for future project releases. Now, you can easily archive and manage EBS Snapshots, thereby eliminating the need for custom scripts and third-party tools to manage these snapshots. This lets you move your rarely accessed snapshots to EBS Snapshots Archive to achieve up to 75% lower storage costs, and avoid licensing costs for third-party tools. Furthermore, you can retrieve an archived snapshot within 24-72 hours, and, once restored, use the snapshot to recover an EBS volume.
As per usual, let me show you how it works.
How to Get Started I have a snapshot available in the US East (N. Virginia) Region, and I want to archive this snapshot for compliance reasons. I open the AWS Management Console, navigate to EC2, then to Snapshots. I select the snapshot I want to archive, and select the Actions menu. I select the Archive snapshot menu option.
I carefully read the confirmation message :-), and I select Archive snapshot.
I may monitor the progress of the archive operation with the new Storage Tier tab at the bottom of the screen. After some time, depending on the size of the snapshot, the Tiering status becomes Archival completed.
Archived snapshots stay visible in the console. The new Storage tier column indicates the tier used for storage (Standard or Archive).
How do I Restore a Volume? Restoring a volume from EBS Snapshots Archive is a two-step process. First, I retrieve the snapshot from EBS Snapshots Archive to its original snapshot ID, using RestoreSnapshotTier API call or the management console. It takes between 24-72 hours to retrieve the snapshot from the archive, depending on the snapshot size. Once retrieved, the snapshot appears as a regular snapshot on my account. At this stage, I hydrate the retrieved snapshot into an EBS volume using the default snapshot restore or Fast Snapshot Restore (FSR) for expedited restores, just like usual.
A CloudWatch event is generated when the snapshot is restored. You may listen to this event to avoid pulling the status with the API.
A CreateVolume API call on an archived snapshot will fail. You must restore a snapshot from archive before you use it to create a volume.
Using the AWS Management Console, I select the snapshot that I want to restore, I select the Actions menu, and then I select the Restore snapshot from archive menu option.
I have the choice to restore the snapshot permanently, or just temporarily. At the end of the temporary duration, the standard tier snapshot is deleted, and only the archive is preserved.
After a while, depending on the snapshot size, the archive is restored to standard storage and may be used to recreate a volume, just like usual. I may monitor the progress of the retrieval and the lifetime for temporarily restored archives in the new Storage tier tab in the bottom half of the screen. Temporary restored snapshots may be kept for up to 180 days.
Pricing and Availability EBS Snapshots Archive is available for you today in 17 AWS Regions. At the time of launch, it is not available in the two Regions in China, Asia Pacific (Seoul), Asia Pacific (Osaka), Canada (Central), and South America (São Paulo).
As per usual, you pay as-you-go, with no minimum or fixed fees. There are two metrics that influence EBS Snapshots Archive billing: data storage and data retrieval. We charge you $0.0125 per GB-month of stored data and $0.03 per GB retrieved. You are charged for a 90-day period at minimum. This means that if you delete a snapshot archive or permanently restore it less than 90 days after creation, then we charge for the full 90-day period. The EBS pricing page has the details.
It is easy to create EBS Snapshots, and just as easy to either delete them manually or to use the Data Lifecycle Manager to delete them automatically in accord with your organization’s retention model. Sometimes, as it turns out, it is a bit too easy to delete snapshots, and a well-intended cleanup effort or a wayward script can sometimes go a bit overboard!
New Recycle Bin In order to give you more control over the deletion process, we are launching a Recycle Bin for EBS Snapshots. As you will see in a moment, you can now set up rules to retain deleted snapshots so that you can recover them after an accidental deletion. You can think of this as a two-level model, where individual AWS users are responsible for the initial deletion, and then a designated “Recycle Bin Administrator” (as specified by an IAM role) manages retention and recovery.
Rules can apply to all snapshots, or to snapshots that include a specified set of tag/value pairs. Each rule specifies a retention period (between one day and one year), after which the snapshot is permanently deleted.
Let’s Recycle! I open the Recycle Bin Console, select the region of interest, and click Create retention rule to begin:
I call my first rule KeepAll, and set it to retain all deleted EBS snapshots for 4 days:
I add a tag (User) to the rule, and click Create retention rule:
Because Apply to all resources is checked, this is a general rule that applies when there are no applicable rules that specify one or more tags.
Then I create a second rule (KeepDev) that retains snapshots tagged with a Mode of Dev for just one day:
If two different tag-based rules match the same resource, then the one with the longer retention period applies.
Here are my retention rules:
Here are my EBS snapshots. As you can see, the first three are tagged with a Mode of Dev:
In an effort to save several cents per month, I impulsively delete them all:
And they are gone:
Later in the day, a member of my developer team messages me in a panic and lets me know that they desperately need the latest snapshot of the development server’s code. I open the Recycle Bin and I locate the snapshot (DevServer_2021_10_6):
I select the snapshot and click Recover:
Then I confirm my intent:
And the snapshot is available once again:
As has always been the case, Fast Snapshot Restore is disabled when a snapshot is deleted. With this launch, it will remain disabled when a snapshot is restored.
All of this functionality (creating rules, listing resources in the Recycle Bin, and restoring them) is also available from the CLI and via the Recycle Bin APIs.
Things to Know Here are a couple of things to know about the new Recycle Bin:
IAM Support – As I mentioned earlier, you can use AWS Identity and Access Management (IAM) to grant access to this feature, and should consider creating an empowered user known as the Recycle Bin Administrator.
Rule Changes – You can make changes to your retention rules at any time, but be aware that the rules are evaluated (and the retention period is set) when you delete a snapshot. Changing a rule after an item has been deleted will not alter the retention period for the item.
Pricing – Resources that are in the Recycle Bin are charged the usual price, but be aware that creating rules with long retention periods could increase your AWS bill. On a related note, be sure that keeping deleted snapshots around does not violate your organization’s data retention policies. There is no charge for deleting or recovering a resource.
In the Bin – Resources in the Recycle Bin are immutable. If a resource is recovered, all of its existing metadata (tags and so forth) is also recovered intact.
Recycling – We will do our best to recycle all of the zeroes and all of the ones once when a resource in your Recycle Bin reaches the end of its retention period!
Organizations, development teams, and individual developers who have chosen to use containers to host their applications may prefer, or perhaps are required, to source all images from Amazon Elastic Container Registry to take advantage of its high availability and security. To satisfy those requirements, customers have needed to take on the burden of manually pulling images from public registries into their private Amazon Elastic Container Registry repositories, and then keeping them in sync. This adds operational complexity and maintenance costs, thereby impacting developer productivity. Additionally, some registries may have limitations or restrictions on how frequently images can be downloaded. When reached, those limitations then begin impacting developers and the release velocity of their business, due to build errors when image pulls are throttled, or even rejected.
Today, we have announced pull through cache repository support in Amazon Elastic Container Registry, for publicly accessible registries that do not require authentication. Pull through cache repositories offer developers the improved performance, security, and availability of Amazon Elastic Container Registry for container images that they source from public registries. Images in pull through cache repositories are automatically kept in sync with the upstream public registries, thereby eliminating the manual work of pulling images and periodically updating.
Pull through cache repositories provide the benefits of the built-in security capabilities in Amazon Elastic Container Registry, such as AWS PrivateLink enabling you to keep all of the network traffic private, image scanning to detect vulnerabilities, encryption with AWS Key Management Service (KMS) keys, cross-region replication, and lifecycle policies. When enabled, cross-region replication is designed to automatically distribute updated images to additional Regions. All you need to do is update the pull URL so that the image is downloaded from the relevant Region.
When consuming images from pull through cache repositories, download throttling is also no longer a problem for developers, as well as the build and deployment infrastructure that supports their applications. While Amazon Elastic Container Registry is designed to automatically keep the cache repository in sync, you can also manually sync a repository at any time. And, if you wish, the automatic sync can be turned off.
Getting Started with Amazon Elastic Container Registry Pull Through Cache Repositories Setting up pull through cache repositories is a simple process. For the following example, I’m using Amazon Elastic Container Registry Public in the South America (São Paulo) Region as my upstream registry.
First, I must modify my private registry’s settings to add a rule that references the upstream, publicly accessible registry (multiple rules can be set if I need additional upstream registries). In the Amazon Elastic Container Registry console, I begin by selecting Private registry, and then select Edit in the Pull through cache panel to change settings. This takes me to the Pull through cache configuration page, where I select Add rule.
On the Create pull through cache rule page, I choose the upstream registry, which is ECR Public in this example. I also must set a namespace that I’ll use when referring to images in my pull commands. For this example, I’ll accept the suggested namespace, ecr-public.
Selecting Save takes me back to the Pull through cache configuration page where my newly configured rule is listed. Now, I’m ready to utilize the cache repository when pulling images.
To reference an image, I must specify the namespace that I chose in the pull URL, using the URL format <accountId>.dkr.ecr.<region>.amazonaws.com/<namespace>/<sourcerepo>:<tag>. When images are pulled, the cache repository associated with the namespace is checked for the image. In my case, the cache repository doesn’t exist yet, but I don’t have to create it myself. The image is fetched from the upstream repository in the public registry associated with the namespace, and then stored in a new cache repository that is created for me automatically.
In the command prompt session below, I first authenticate with my registry, and then pull an Amazon Linux 2 image from Amazon Elastic Container Registry Public into the cache:
In my Amazon Elastic Container Registry console, a check of the Repositories page shows that a new private repository has been created containing the image I pulled, together with an indication that a pull through cache is active.
Working with images and the pull through cache repository is just as straightforward in Dockerfiles. All I need do is reference the image I need using the namespace in the pull URL. If the image is not in the cache repository, then it will be pulled and stored there for me. Cached images are checked once per 24 hours to verify if the cached image is the latest version, with the timer based off the last pull time of the cached image.
Start using Pull through Cache Repositories Today Pull through cache repositories for Amazon Elastic Container Registry are available for you to take advantage of today in all commercial AWS Regions. There is no charge for using pull through cache repositories, only standard Amazon Elastic Container Registry pricing for storage and data transfer charges applies. You can find more details on pricing at the Amazon Elastic Container Registry pricing page. Learn more about pull through cache repositories in the Amazon Elastic Container Registry User Guide, and get started today.
In 2018, we launched AWS RoboMaker, a cloud-based simulation service that enables robotics developers to run, scale, and automate simulation without managing any infrastructure. As we worked with robot developers and operators, we have repeatedly heard that they face challenges in operating different robot types in their automation efforts, including autonomous guided vehicles (AGV), autonomous mobile vehicles (AMR), and robotic manipulators.
Many customers choose different types of robots – often from different vendors in a single facility. Robot operator want to access the unified data required to build applications that work across a fleet of robots. However, when a new robot is added to an autonomous operation, complex and time-consuming software integration work is required to connect the robot control software to work management systems.
Today, we are launching a public preview of AWS IoT RoboRunner, a new robotics service that makes it easier for enterprises to build and deploy applications that help fleets of robots work seamlessly together. AWS IoT RoboRunner lets you connect your robots and work management systems, thereby enabling you to orchestrate work across your operation through a single system view.
This new service builds on the same technology used in Amazon fulfillment centers, and now we are excited to make it available to all developers to build advanced robotics applications for their businesses.
AWS IoT RoboRunner in Action You can create a single facility (e.g., site name and location) in the AWS Management Console to get started with AWS IoT RoboRunner. Behind the scenes, AWS IoT RoboRunner automatically creates centralized repositories for storing facility, robot, destination, and task data. Then, the robots working on this site are setup as a “Fleet”, and each individual robot is setup in AWS IoT RoboRunner as a “Robot” within a fleet.
You can download the Fleet Gateway Library to develop integration codes for connecting your robots and WMS systems with AWS IoT RoboRunner to send and receive data from individual robot fleets. You can also develop the first robotics management application using the Task Manager Library and deploy Task Manager codes as an AWS Lambda function and Fleet Gateway codes on-premises as an AWS IoT Greengrass component.
To enable a single-system view of the robots, status of the systems, and progress of tasks on the same interface, AWS IoT RoboRunner provides APIs that let you build a user application. AWS IoT RoboRunner provides sample applications for allocating tasks to robot fleets so that you can get started quickly. You can customize the task allocation code with business requirements that align to your use case.
Learn more by reading Getting started with AWS IoT RoboRunner in the AWS IoT RoboRunner Developer Guide. Watch a quick introductory video about AWS IoT RoboRunner for more information.
Try Public Preview Now AWS IoT RoboRunner is now available in public preview, and you can start using them today in the US East (N. Virginia) and Europe (Frankfrut) Regions. There will be no additional cost to use this feature during the preview period.
Opening night of Web Summit 2021, at the Altice Arena in Lisbon, Portugal. Photo by Sam Barnes/Web Summit
Global in-person events were back in a big way at the start of November (1-4) in Lisbon, Portugal, with Web Summit 2021 gathering more than 42,000 attendees from 128 countries. I was there to discover Internet trends and meet interesting people. What I saw was the contagious excitement of people from all corners of the world coming together for what seemed like a type of normality in a time when the Internet “is almost as important as having water”, according to Sonia Jorge from the World Wide Web Foundation.
Here’s some of what I heard in the halls.
With a lot happening on a screen, the lockdowns throughout the pandemic showed us a glimpse of what the metaverse could be, just without VR or AR headsets. Think about the way many were able to use virtual tools to work all day, learn, collaborate, order food, supplies, and communicate with friends and family — all from their homes.
While many had this experience, many others were unable to, with some talks at the event focusing on the digital divide and how “Internet access is a basic human right”, according to the grandson of Nelson Mandela — we interviewed him, and you can watch the conversation below.
The future already has some paths laid out, and many were discussed at the event.
The pandemic helped to accelerate most of them, especially by bringing more people (in some countries) to the digital world.
The CPO of Meta, Chris Cox, shared how the company previously known as Facebook has some ideas about the future of augmented reality, and how they want to see those ideas play out in the next five to 10 years. “We want to get the conversation going,” he said.
Also present at the event was Jon Vlassopulos, Global Head of Music, Roblox. He explained how virtual concerts on the video game platform could be the future of music performances, and even bring free tickets to fans of famous music stars like Adele. Stars like Zara Larsson, KSI and Ava Max have already performed on Roblox and “they’re making big money from selling digital merchandise”.
On the other hand, Paddy Cosgrave, CEO of Web Summit, says that there’s something magical about in-person big events that can’t be replicated in full online events. However, the real and virtual world can complement each other — it was announced that CES 2022 will use a combination of Web Summit online and offline software.
Web3 was another big part of the discussion, sometimes in clear sight, other times embedded in the many conversations about blockchain, NFTs and cryptocurrencies, and as a vision for a decentralized web (we’re actually working on that).
Speakers also focused on data privacy and security, ethics in AI and data protection. Ownership to the user and sovereignty were topics discussed and emphasized by Sir Tim Berners-Lee on the last day of the event.
The workplace was also a popular topic, as well as the changes it underwent in the past couple of years. We heard about the importance of diversity in the workplace, as well as the future of work — is it going to be flexible, hybrid, full remote or something in between? Speakers also mentioned The Great Resignation and the reset of people’s and organizations’ mindsets.
Using AI to hire and motivate people was also in the air, as well as big topics like the digitalization of healthcare, mental health, behaviour changes in humans (young and adult) who are more and more on the Internet and even the decentralization of financial services.
And here are some examples of the different speakers at the event we talked to:
Vice-Admiral Gouveia e Melo: Vaccination, misinformation and leadership
Portuguese Navy officer and coordinator of the Task Force for the Portugal COVID-19 vaccination plan
Portugal has achieved an 86% vaccination rate on the vice-admiral’s watch. He brought a sense of mission to a task that involved organization, focus and the use of both digital and communication tools.
The country started the vaccination process late but is now one of the countries with a higher vaccination rate in the world. We talked with the vice-admiral about how the Internet helped, but also how it created problems related to disinformation and misinformation, and we asked about the dangers of controlling speech online. Finally, we asked for bits of leadership advice.
Sonia Jorge: The need for Internet — affordable, fast and for everyone
Executive Director World Wide Web Foundation (Alliance for Affordable Internet)
“The Internet is now an essential public good that everybody needs at this time just like we need to drink water or to have electricity and shelter. We should do more to bring everyone into the digital society.”
In some countries around the world Internet access is very limited. In some places people have to go to a particular plaza to have access to the Internet — five years ago John Graham-Cumming saw something similar in Cuba. Sonia Jorge knows that very well. She is trying to bring affordable Internet to everyone and that challenge is more difficult than it appears.
She explains that the world is far behind in the UN’s goals for Internet access — today only about half of the earth’s population has any Internet access at all. But many of those who have access to the World Wide Web have limited possibilities to be online: “some have access once a month, for example.” So the digital divide is real, and it “should worry everyone”.
The pandemic caused health and economic difficulties that didn’t help the mission of bringing good, fast and reliable Internet to everyone. Nevertheless, Sonia — who is Portuguese and moved to the US to study when she was 17 — saw that many African countries like Nigeria began to realize that the Internet is really important for knowledge and also for the possibilities it opens in terms of cultural, financial and societal growth.
Sonia also highlights that there is a big disparity in the world between men and women in terms of Internet access.
David Kiron: The future of work and how AI (and philosophy) can help
Editorial director of MIT Sloan Management Review
Technology will play a significant role in the future of work. In a way, that “future” is already here, but isn’t evenly distributed — and researchers are just beginning to study it. David Kiron goes on to explain the challenge for some people to be “really seen by their leadership when you’re not in the office.”
The former senior researcher at Harvard Business School tells us how companies started valuing employees even more through the pandemic. There’s also an opportunity for different ways of work interaction through digital tools — “Zoom calls aren’t it.” He’s also worried that the pandemic caused a great reset that is driving many out of the workforce entirely: “There’s a trend of working moms opting out,” for example.
About the metaverse and a universe of universes:“If tech leaders spent more time reading philosophy they might have a better sense of where the world is going (…) more and more leaders of companies are taking on the philosopher’s role.”
And how can AI help? “Once you get AI going in a company we saw in our new study that there’s a big bump in morale, collaboration, learning and people’s sense on what they should be doing”. AI can also help better identify talent and match candidates to skills that are already represented in a company, but he also highlights that “humans play a role in all the stages of the hiring and working process.”
David Kiron explains that “if you’re not asking the right questions to your AI teams you’re going to be behind other companies that are doing better questions”. He adds that AI can help with performance, but it also helps “redefine what performance means in your organization by finding other metrics to look at.”
Ana Maiques: neuroscience & women in tech
Co-founder and CEO of neuroscience-based medical device company Neuroelectrics
We talked to Ana about the future of the Internet. She thinks moving forward there will be more fluid interfaces — not only limited to computers and smartphones, but we will have different devices that go beyond VR headsets and that will lead to new types of interactions. In the neuroscience field, she has big hopes in the technology that Neuroelectrics, her company, is developing in Barcelona, Spain. They work with devices that use non-invasive transcranial electrical stimulation to treat the brain in diseases like epilepsy, depression and Alzheimer.
Neuroelectricsis also developing a process called digital copy (for better personalized treatments) that could be useful in the future if someone develops one of these problems. But she says humankind is still very far from the dangers of something like a mind-reading device or the possibility of reading and downloading thoughts and dreams: “it’s fun to think of science fiction possibilities, but we need to act now on things and problems that are affecting us today.”
She also talks about the difficulties of being a woman in the tech business and raising money. “But little by little I see more women and that’s why it’s important to get out there and explain to women that they can do it.”
Siyabulela Mandela: The Internet is a human right
Director for Africa Journalists for Human Rights
The grandson of Nelson Mandela is on a mission to help journalists in Africa to be free to publish human rights stories. He explains how the Internet is critical for this mission and “a human rights issue”. Not only does the Internet give communities access to trustworthy information, but it also helps them become aware of their rights, gives access to financial tools and allows them to grow in our era.
He also highlights how the Internet can be misused, for example when it becomes a vehicle for misinformation, or when governments shut down Internet access to control communities — in Sudan the Internet has been cut off since October 25, 2021 (you can track that information on Cloudflare Radar).
Carlos Moedas: The light (and innovation) in Lisbon
Newly elected Mayor of Lisbon; previous European Commissioner for Research, Science and Innovation
Why is Lisbon attracting so many tech companies and talent? Carlos Moedas welcomes Cloudflare to his city — we’re growing fast in the city, and we have more than 80 job openings in the country. He also talks about why Portugal’s capital is so special and should be considered by company leaders who want to grow innovative companies. Paddy Cosgrave, from the Web Summit, told us something similar four weeks ago.
The ambition? “Make Lisbon the capital of innovation of the world” or, at least, of Europe. The new mayor also has a project called Unicorn Factory to achieve just that.
Sudarsan Reddy: Why is Cloudflare Tunnel relevant?
Cloudflare engineer from the Tunnel Team
Also, at the event was our very own engineer Sudarsan Reddy (based in Lisbon). We asked him some questions about Cloudflare Tunnel, our tunneling software that lets you quickly secure and encrypt application traffic to any type of infrastructure, so you can hide your server IP addresses, block direct attacks, and get back to delivering great applications.
Sudarsan focuses on what Tunnel is, why it is relevant, how it works and examples of situations where it can make a difference.
Yusuf Sherwani: Addiction treated online
Co-founder & CEO, Quit Genius
Yusuf graduated as a doctor from Imperial College School of Medicine, in London, but joined two passions, healthcare and technology, when he co-founded Quit Genius. He explains how in just 18 months the pandemic accelerated the adoption of digital health by 10 years, and there’s no going back. “The Internet enables people to unlock improvements to their lives, and digital healthcare went from being convenient to a necessity”.
We dig into the benefits of digital healthcare, but also the scrutiny that is needed in technology, now that it is more powerful than ever and cemented in people’s lives. Yusuf also gives examples of how his digital clinic is helping people in treating tobacco, vaping, alcohol, and opioid addictions.
Yusuf has co-authored 12 peer-reviewed studies on behavioural health and substance addictions. He was featured on the Forbes 30 Under 30 List of 2018 and in Fast Company’s 100 Most Creative People in Business.
David Shrier: From sharing economy to blockchain
American futurist and Professor of Practice, AI & Innovation with Imperial College Business School in London
David sums up how the pandemic has affected people’s relationship with technology: “Everyone is tired of Zoom calls, but the convenience opened people’s minds”.
We also talk about the digital divide, about human-centered ways of working with AI, and we also address the potential in VR and AR and how nobody saw the sharing economy coming 20 years ago and, now, “it’s incredible to see how people embraced blockchain and the digitalization of financial services”.
Dame Til Wykes: The mental health discussion went viral
Professor of Clinical Psychology and Rehabilitation at King’s College London, Director of the NIHR Clinical Research Network: Mental Health
As someone with experience in the psychology field for more than 50 years, Dame Til Wykes still had to learn new ways of engaging with patients throughout the pandemic — and even learn which buttons to push on a computer to make Zoom calls. COVID-19 and the hardships of the pandemic made people more aware and ready to talk about their mental health issues, like anxiety or depression. But the pandemic wasn’t the same for everyone and Dame Til Wykes is worried about some of the effects, “most of them remain to be seen”.
Remote consultations were a big help, but she reminds us that in her field it is important to see the whole person and not just the face — for example, “if someone is tapping a foot nervously while giving us a smile, that tells us something that we cannot see in a Zoom call”. She also mentions the adoption of meditation apps bringing a form of help to some was another positive trend in this difficult period, as well as the reset button the pandemic brought to some people’s lives.
The collective thoughts of the interwebz
Manage Consent
To provide the best experiences, we use technologies like cookies to store and/or access device information. Consenting to these technologies will allow us to process data such as browsing behavior or unique IDs on this site. Not consenting or withdrawing consent, may adversely affect certain features and functions.
Functional
Always active
The technical storage or access is strictly necessary for the legitimate purpose of enabling the use of a specific service explicitly requested by the subscriber or user, or for the sole purpose of carrying out the transmission of a communication over an electronic communications network.
Preferences
The technical storage or access is necessary for the legitimate purpose of storing preferences that are not requested by the subscriber or user.
Statistics
The technical storage or access that is used exclusively for statistical purposes.The technical storage or access that is used exclusively for anonymous statistical purposes. Without a subpoena, voluntary compliance on the part of your Internet Service Provider, or additional records from a third party, information stored or retrieved for this purpose alone cannot usually be used to identify you.
Marketing
The technical storage or access is required to create user profiles to send advertising, or to track the user on a website or across several websites for similar marketing purposes.
 We launched Amazon Simple Storage Service (Amazon S3) sixteen years ago today!
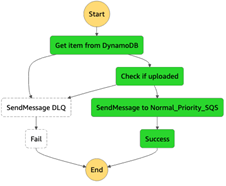 After spending 15 years collecting video, image, and audio assets representing over 70 years of motor sports history, NASCAR built a media library that encompassed over 8,600 LTO 6 tapes and a few thousand LTO 4 tapes, with a growth rate of between 1.5 PB and 2 PB per year. Over the course of 18 months they migrated all of this content (a total of 15 PB) to AWS, making use of the Amazon S3 Standard, Amazon S3 Glacier Flexible Retrieval, and Amazon S3 Glacier Deep Archive storage classes. To learn more about how they migrated this massive and invaluable archive, read Modernizing NASCAR’s multi-PB media archive at speed with AWS Storage.
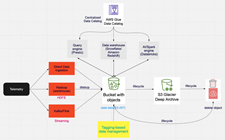 This game maker’s core telemetry systems handle tens of petabytes of data, tens of thousands of tables, and over 2 billion objects. As their games became more popular and the volume of data grew, they were facing challenges around data growth, cost management, retention, and data usage. In a series of updates, they moved archival data to Amazon S3 Glacier Deep Archive, implemented tag-driven retention management, and implemented Amazon S3 Intelligent-Tiering. They have reduced their costs and made their data assets more accessible; read
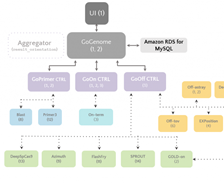 This team came together to build a best-in-class gene-editing prediction platform. CRISPR (




 .
.
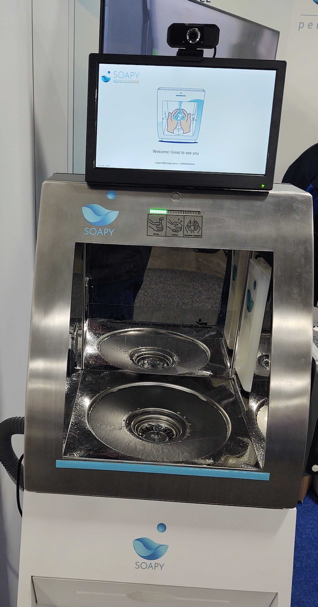
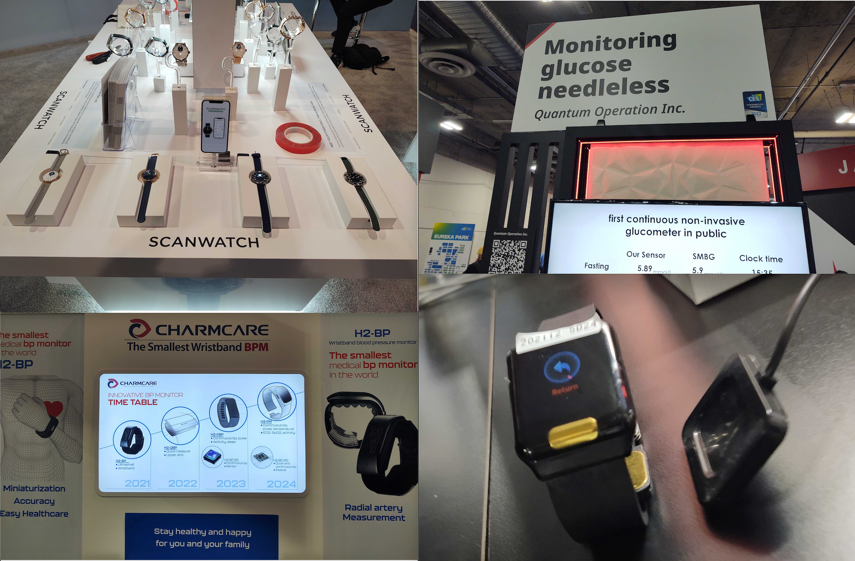

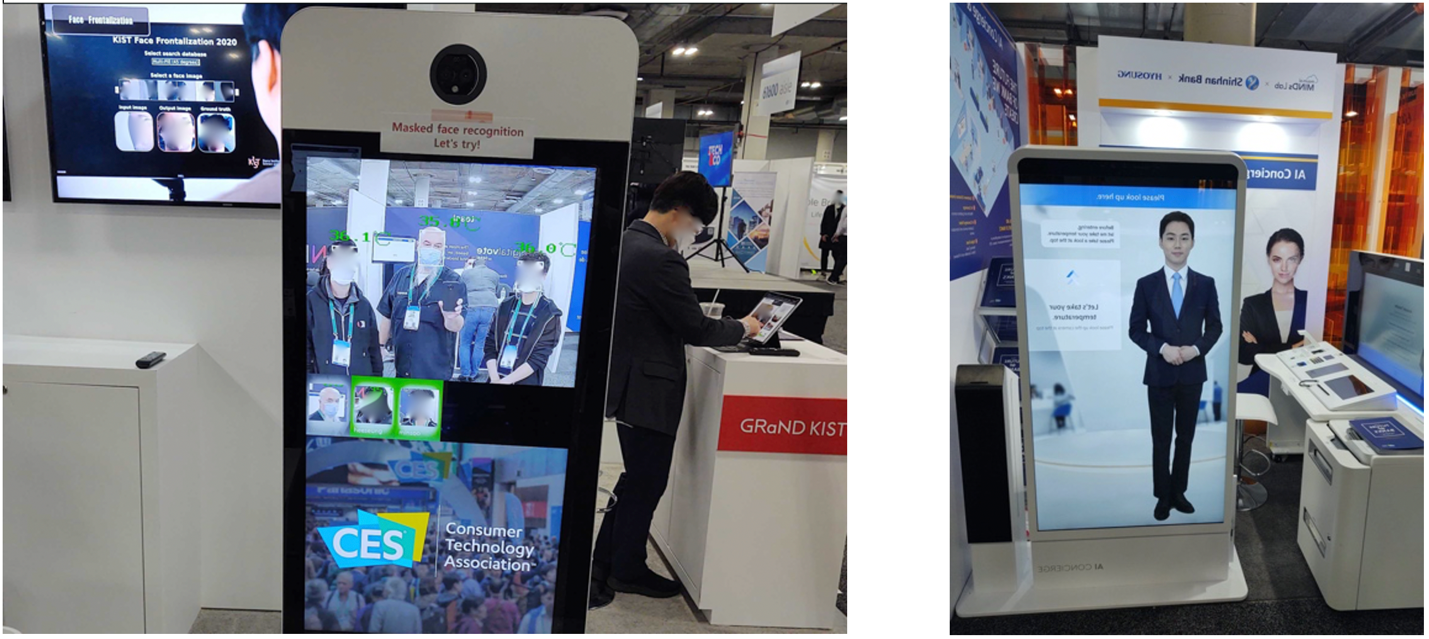

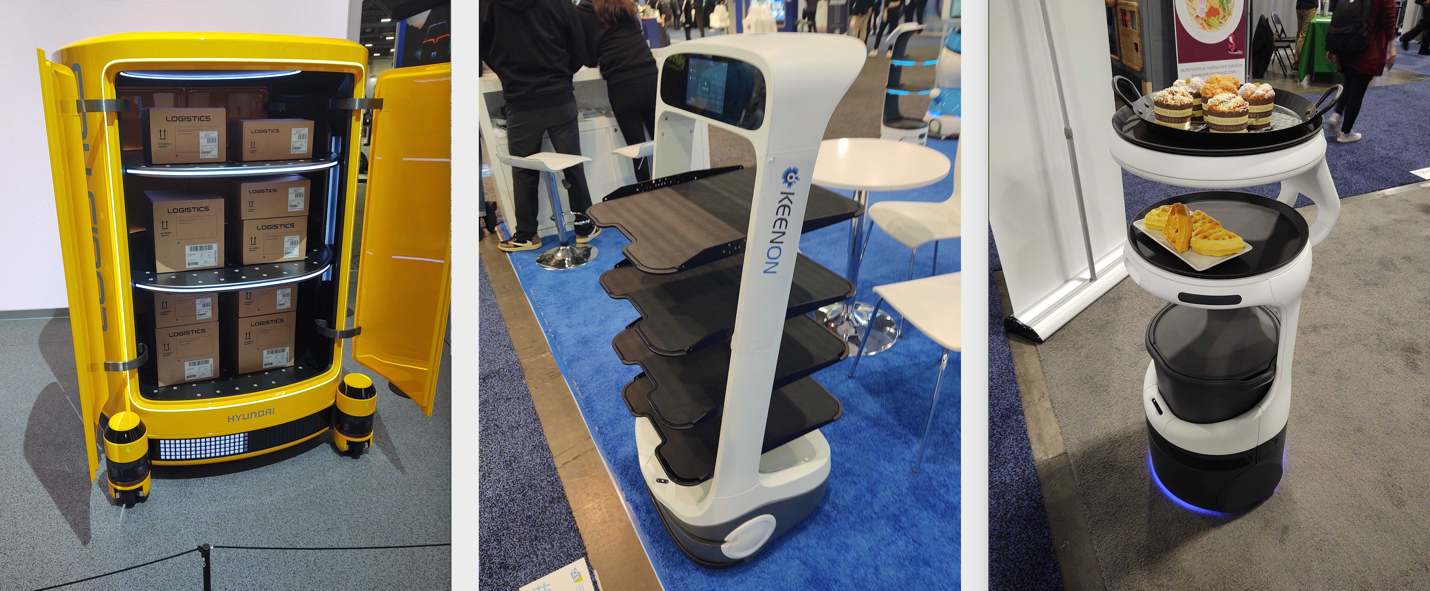

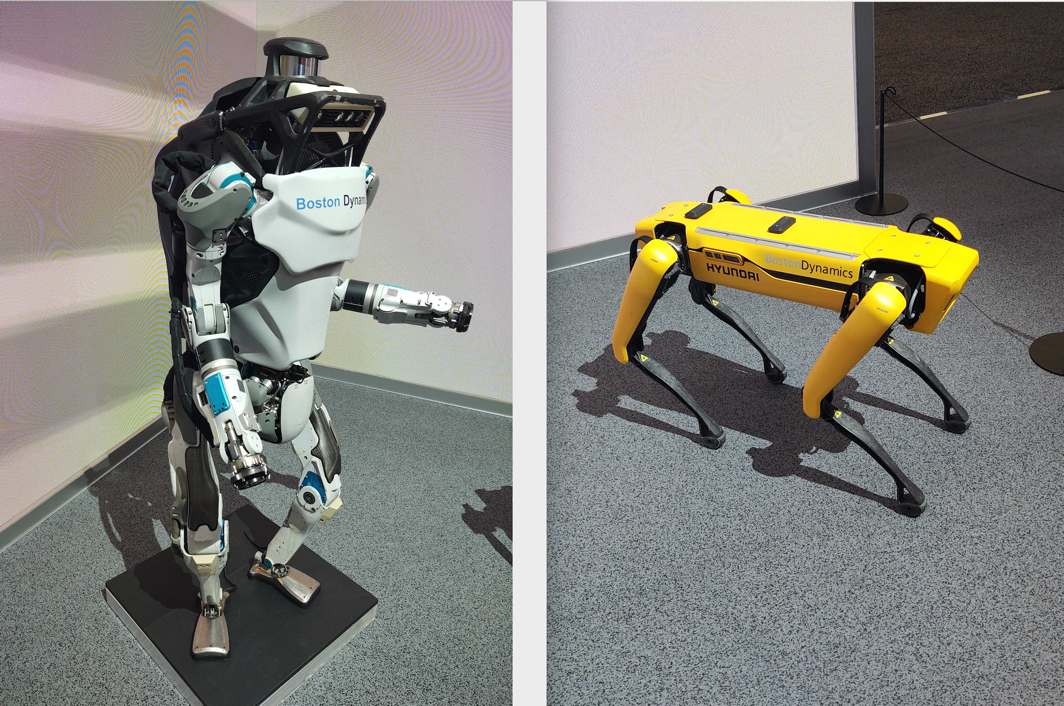


 Once you create the data source Quicksight lists all the views and tables available under the specified database (in our case it is:- due_eventdb). Select the email_all_events view as data source.
 Select the event data location for analysis. There are mainly two options available which are a/ Import to Spice quicker analysis b/ Directly query your data. Please select the preferred options and then click on “visualize the data”.
 Now that you have selected a data source, you will be taken to a blank quick sight canvas (Blank analysis page) as shown in the following Image, please drag and drop what
  As part of this blog, we have displayed how to create some simple analysis graphs to visualize the engagement events.
 Select all the event dimensions that you want to put it as part of the Table in X axis. Amazon Quicksight table can be extended to show as many as tables columns, this completely depends upon the business requirement how much data marketers want to visualize.
 To create a Quicksight dashboards from the Quicksight analysis click Share menu option at the top right corner then select publish dashboard”. Provide required dashboard name while publishing the dashboard”. Same dashboard can be shared with multiple audiences in the Organization.
 Following is the final version of the dashboard. As mentioned above Quicksight dashboards can be shared with other stakeholders and also complete dashboard can be exported as excel sheet.


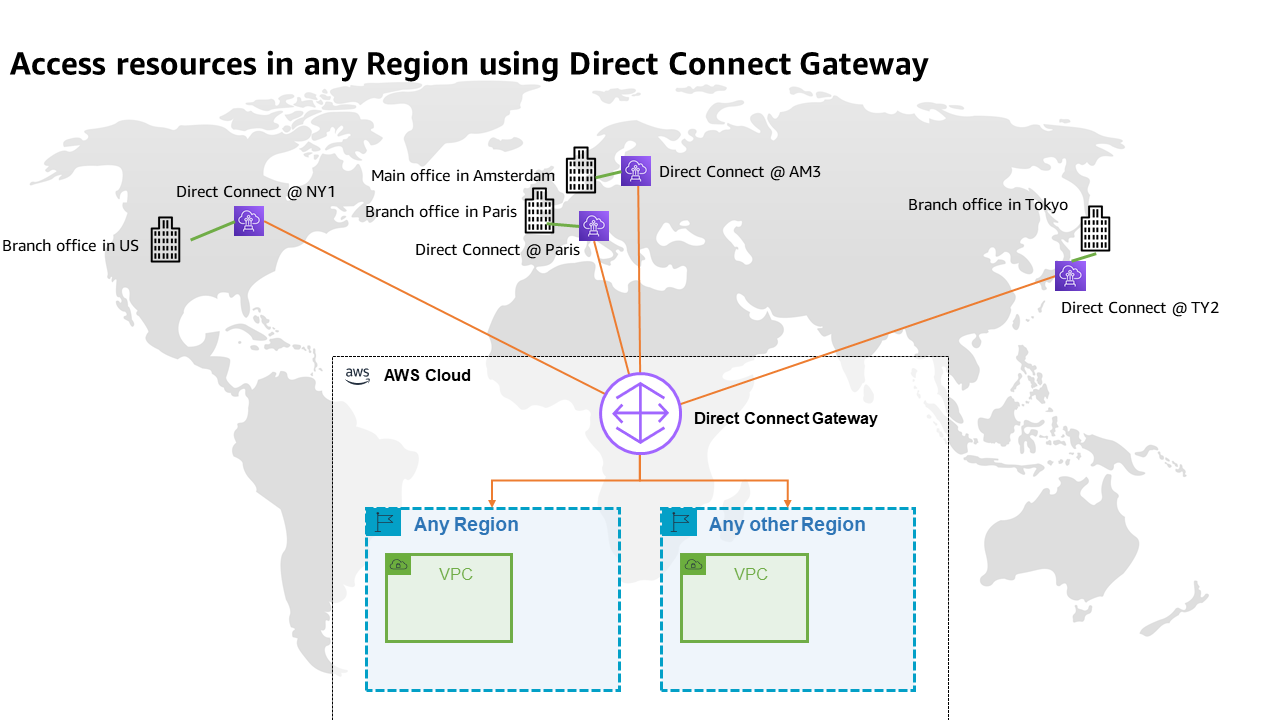


 Available, I navigate to the Data repository tab, and then select Create data repository association.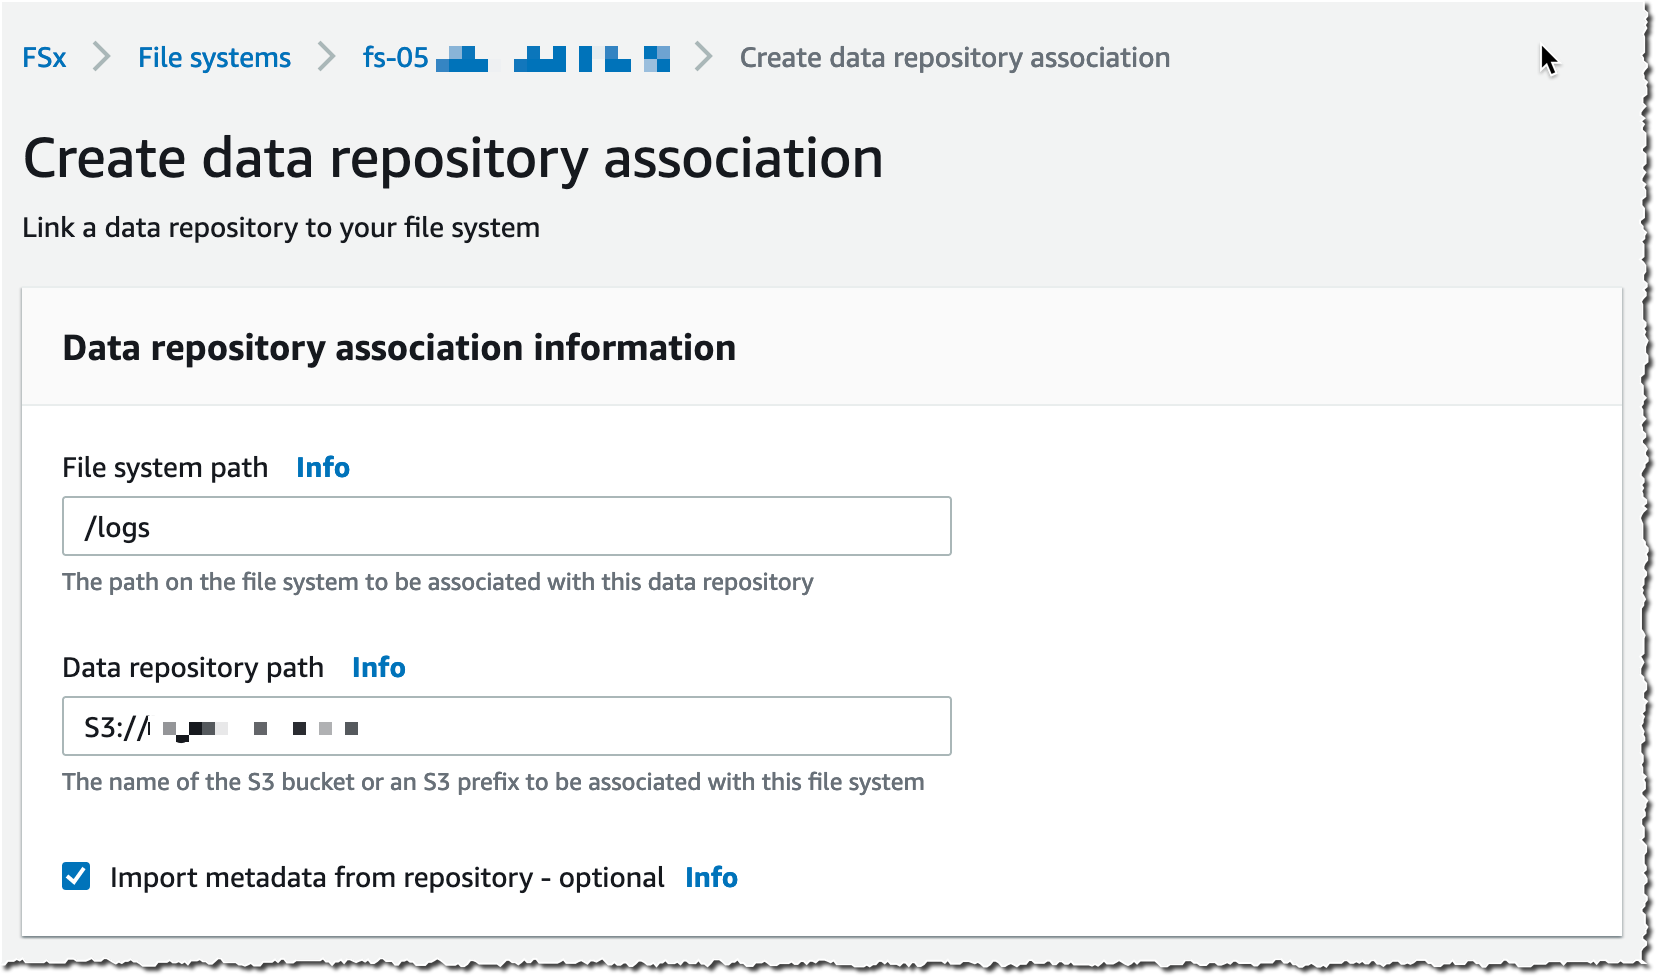

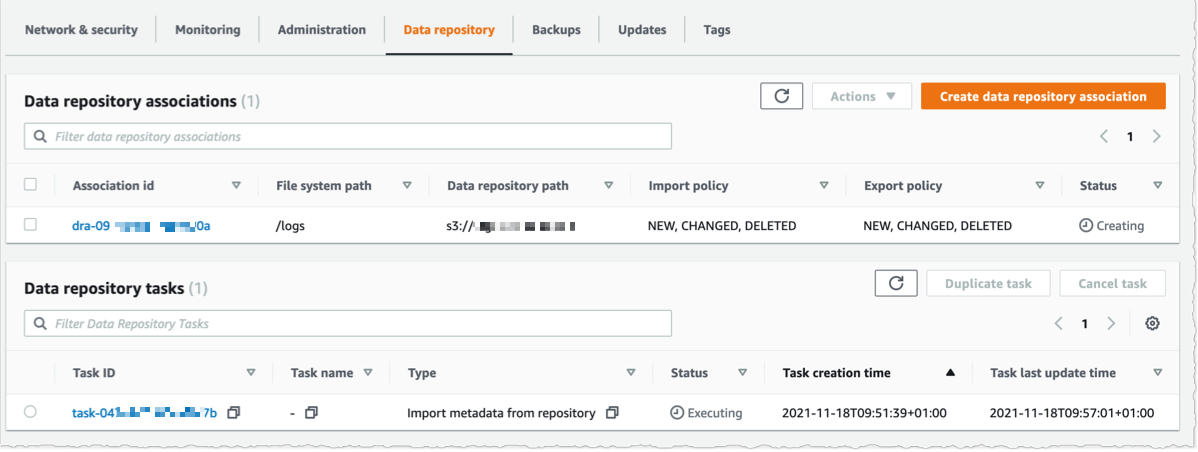


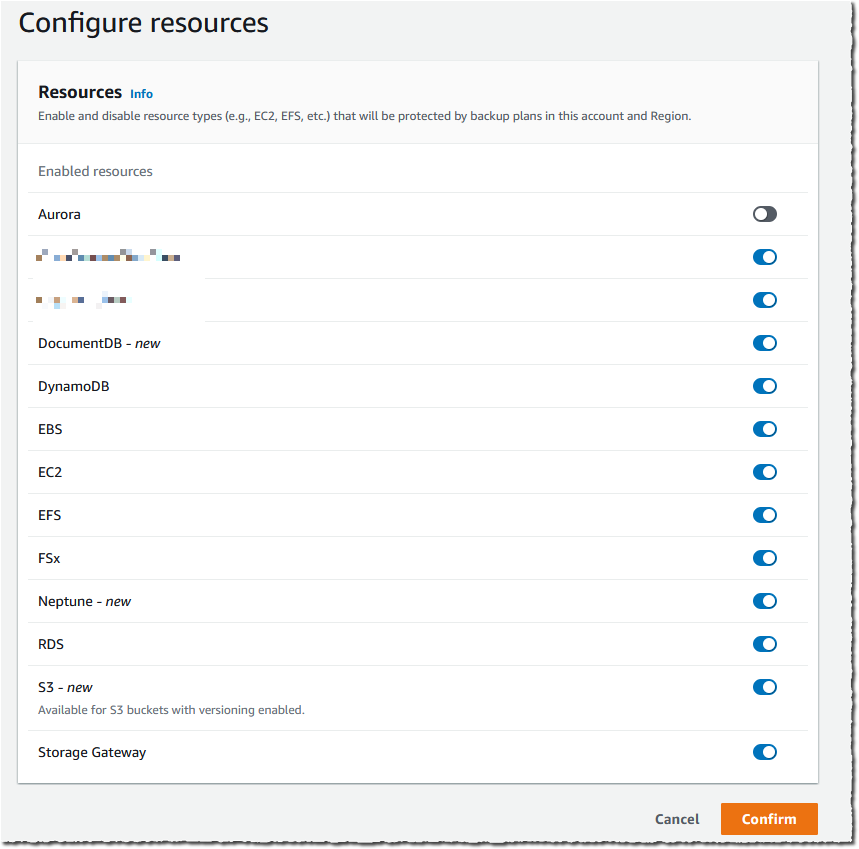
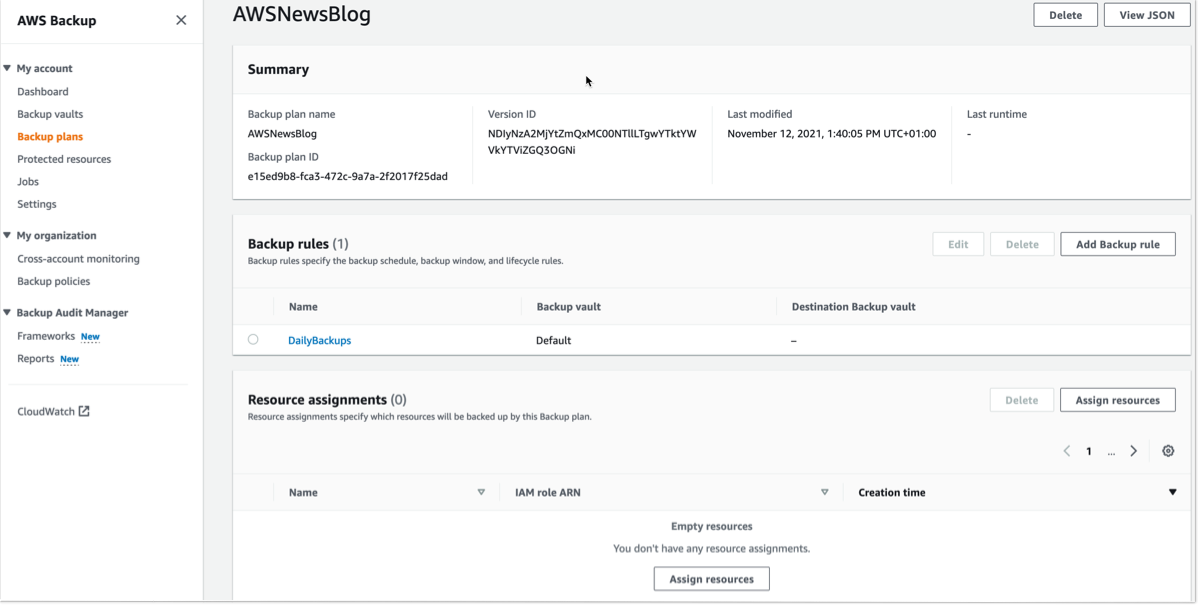
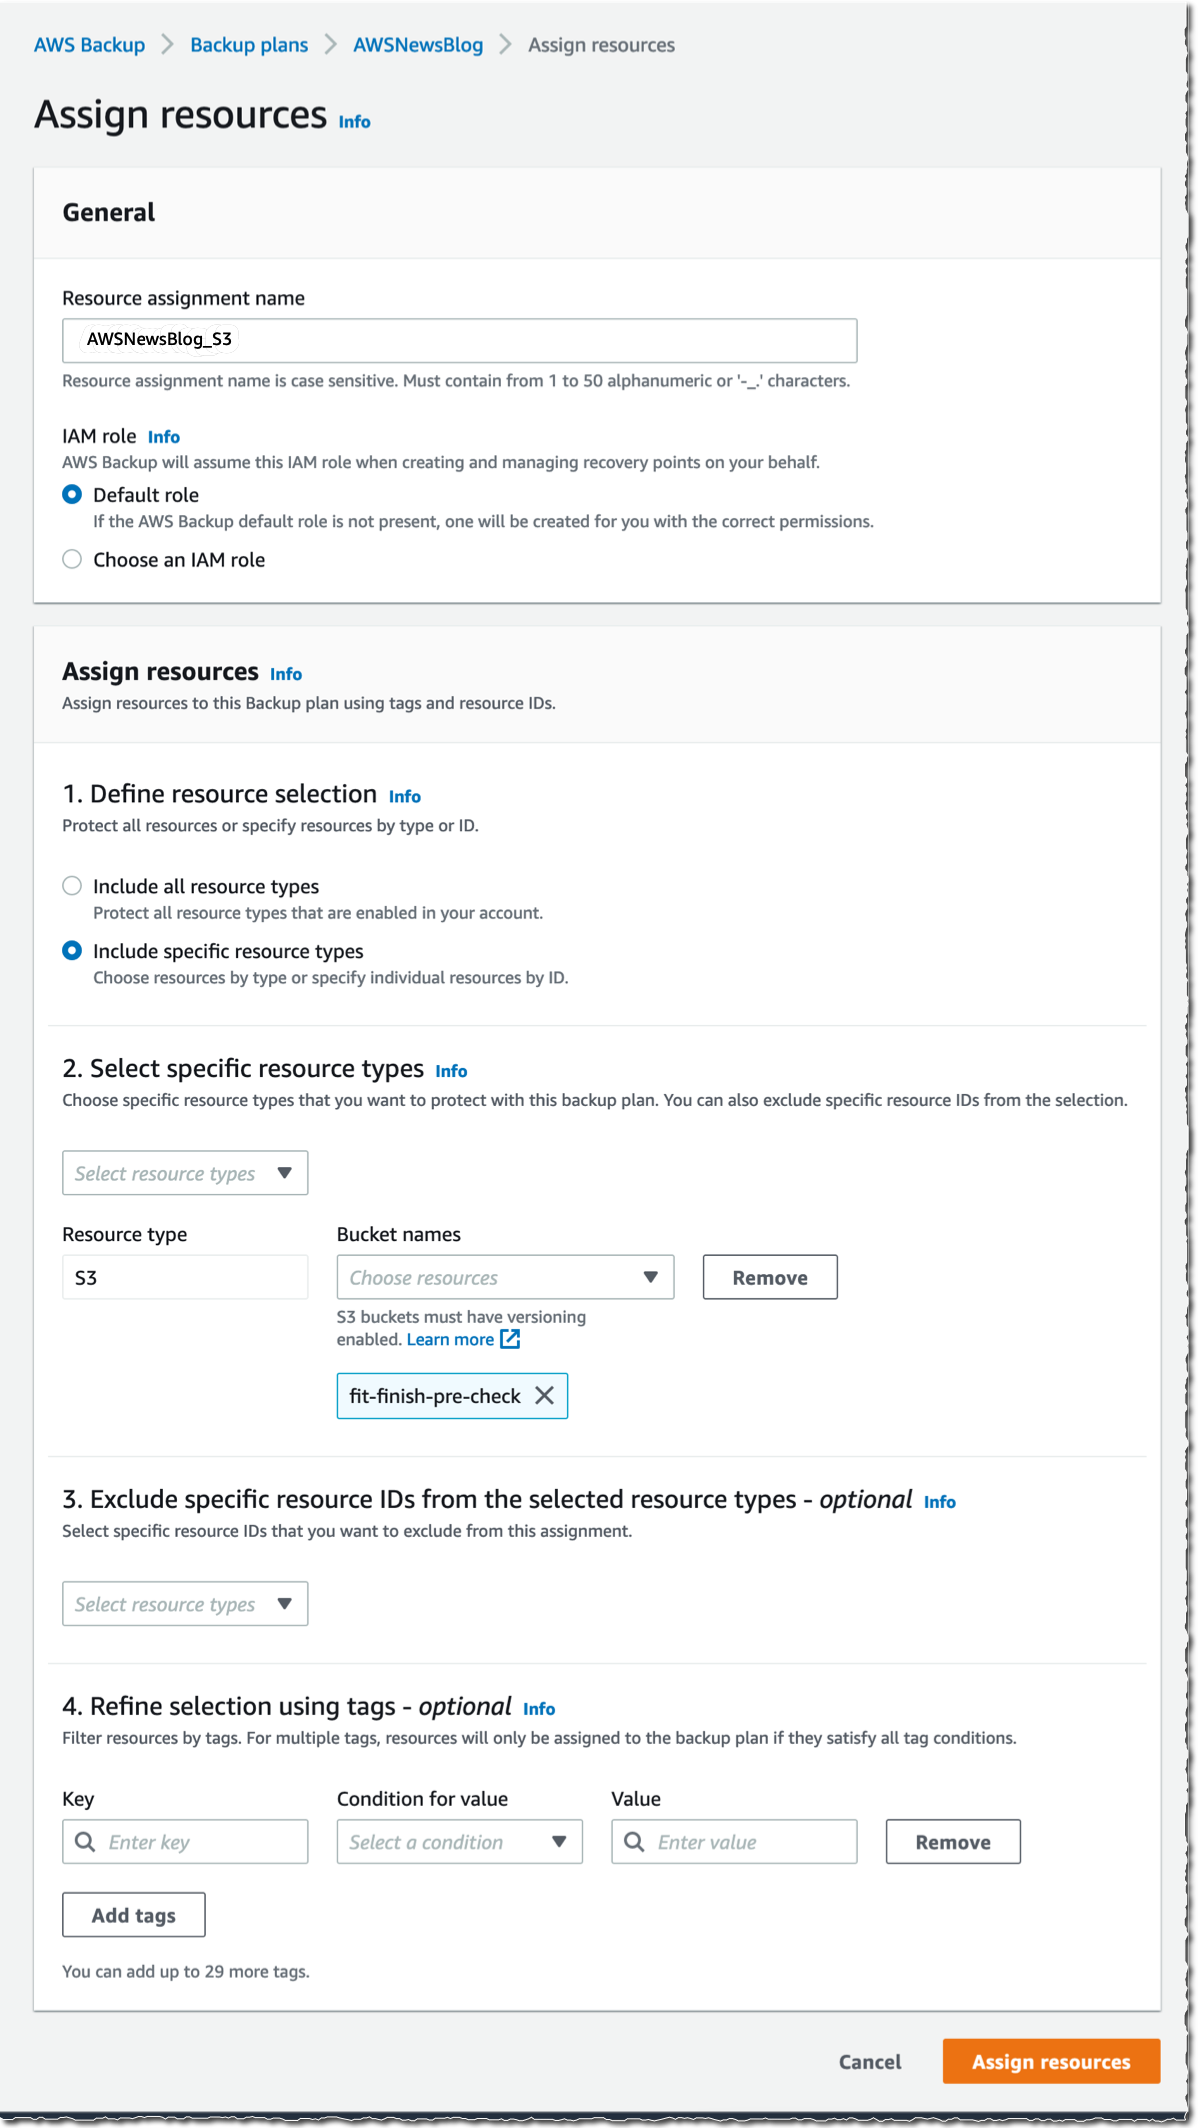

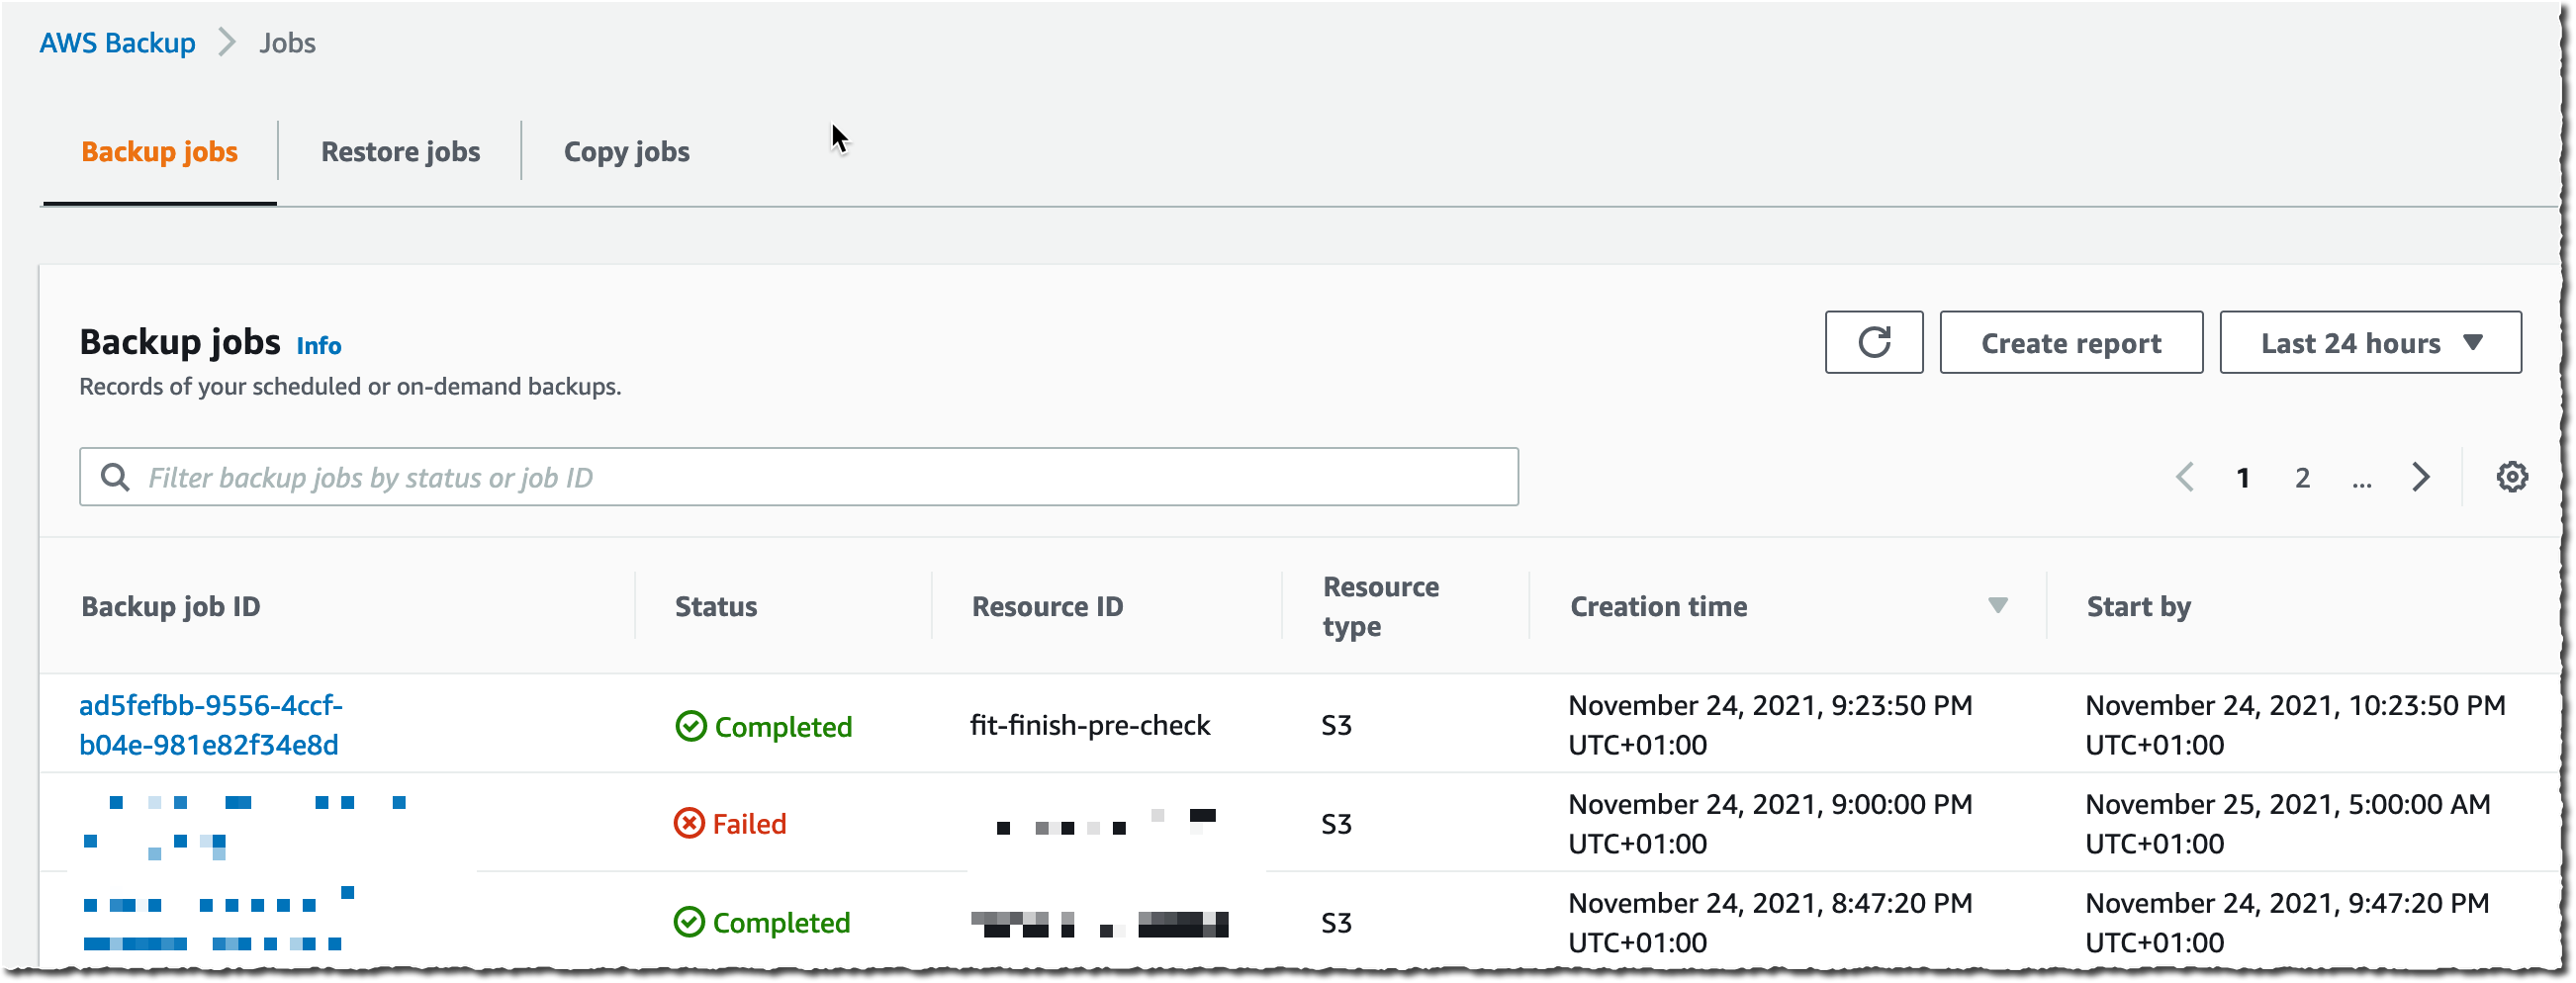


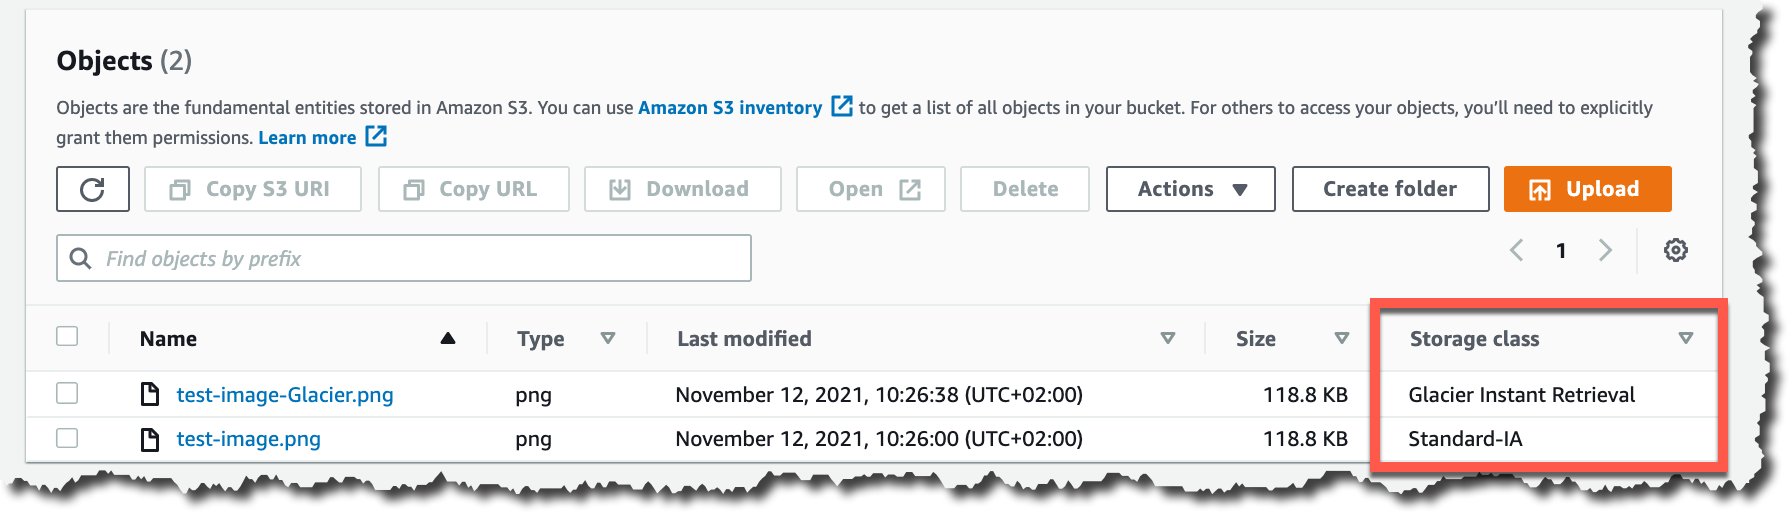


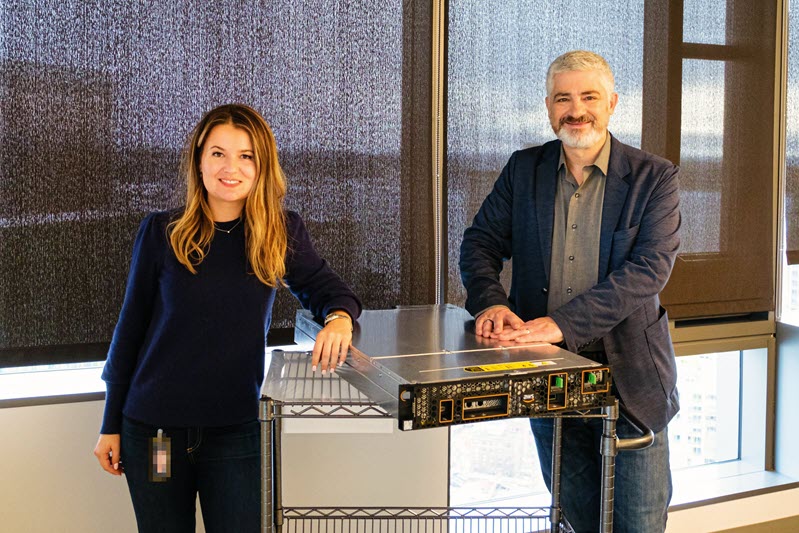
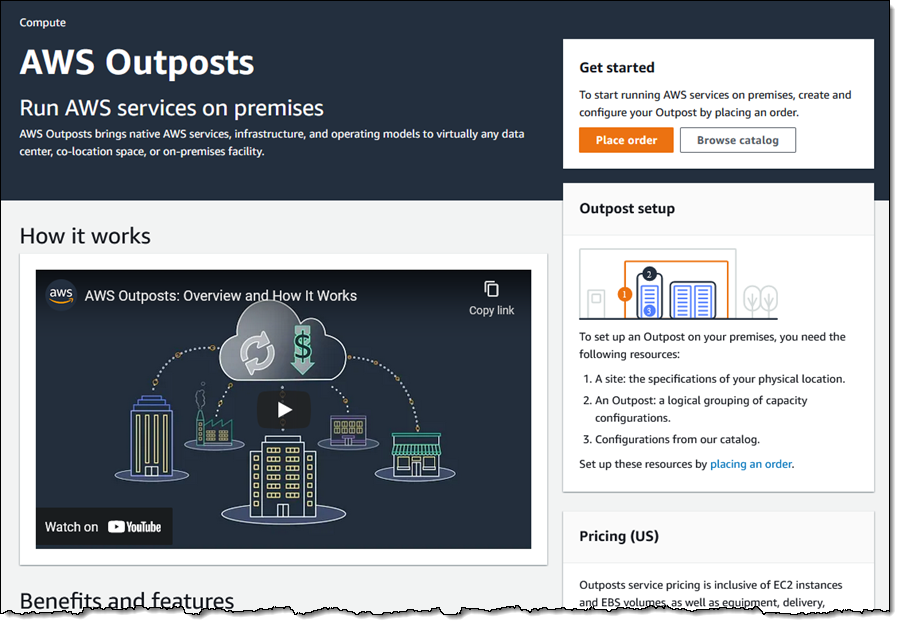
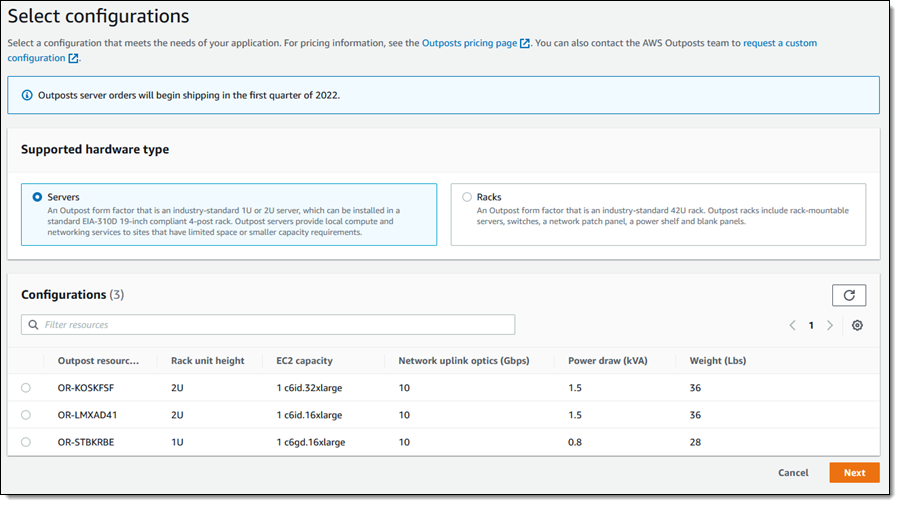
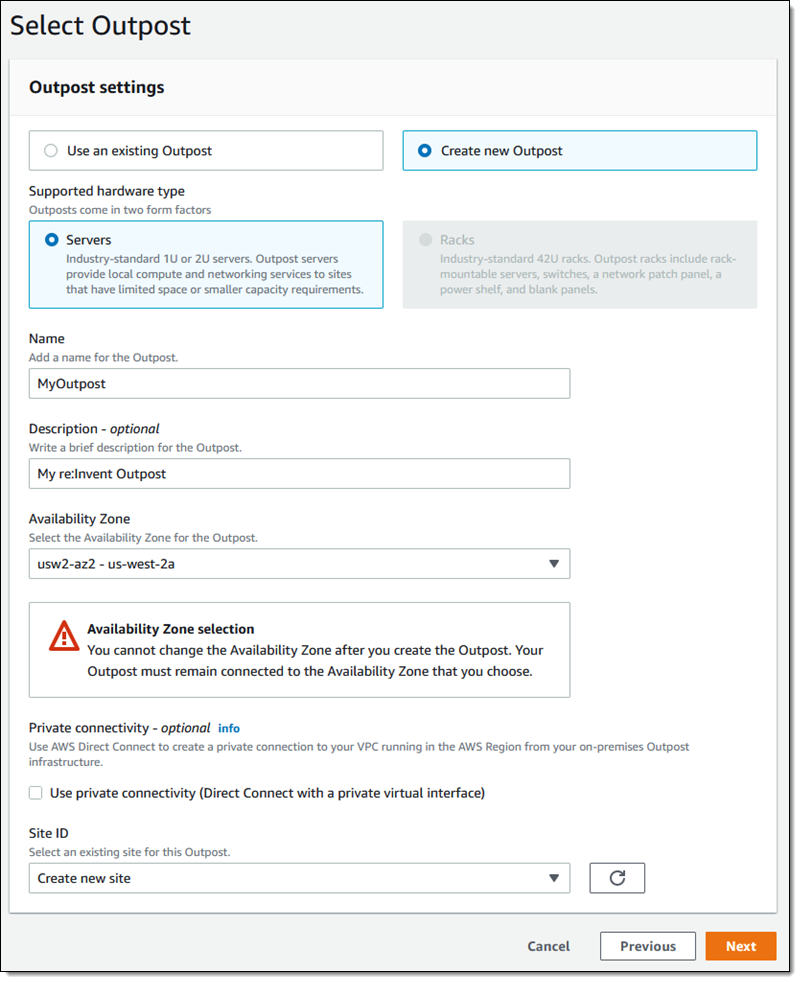

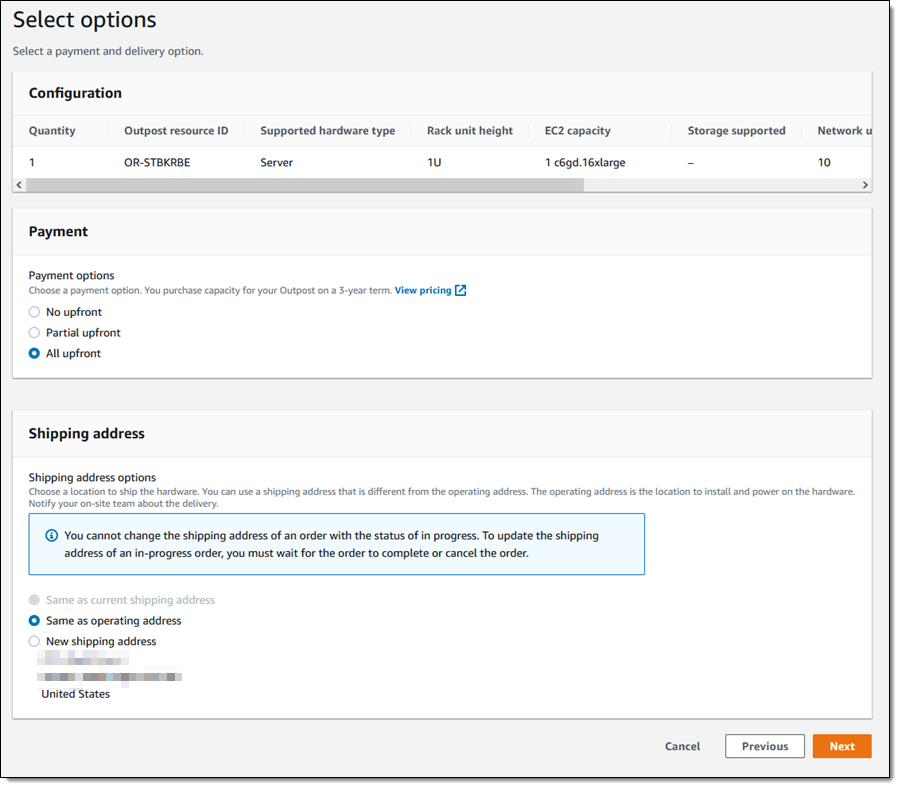
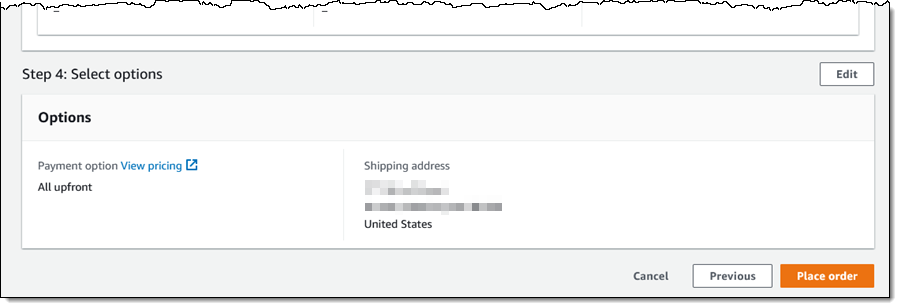

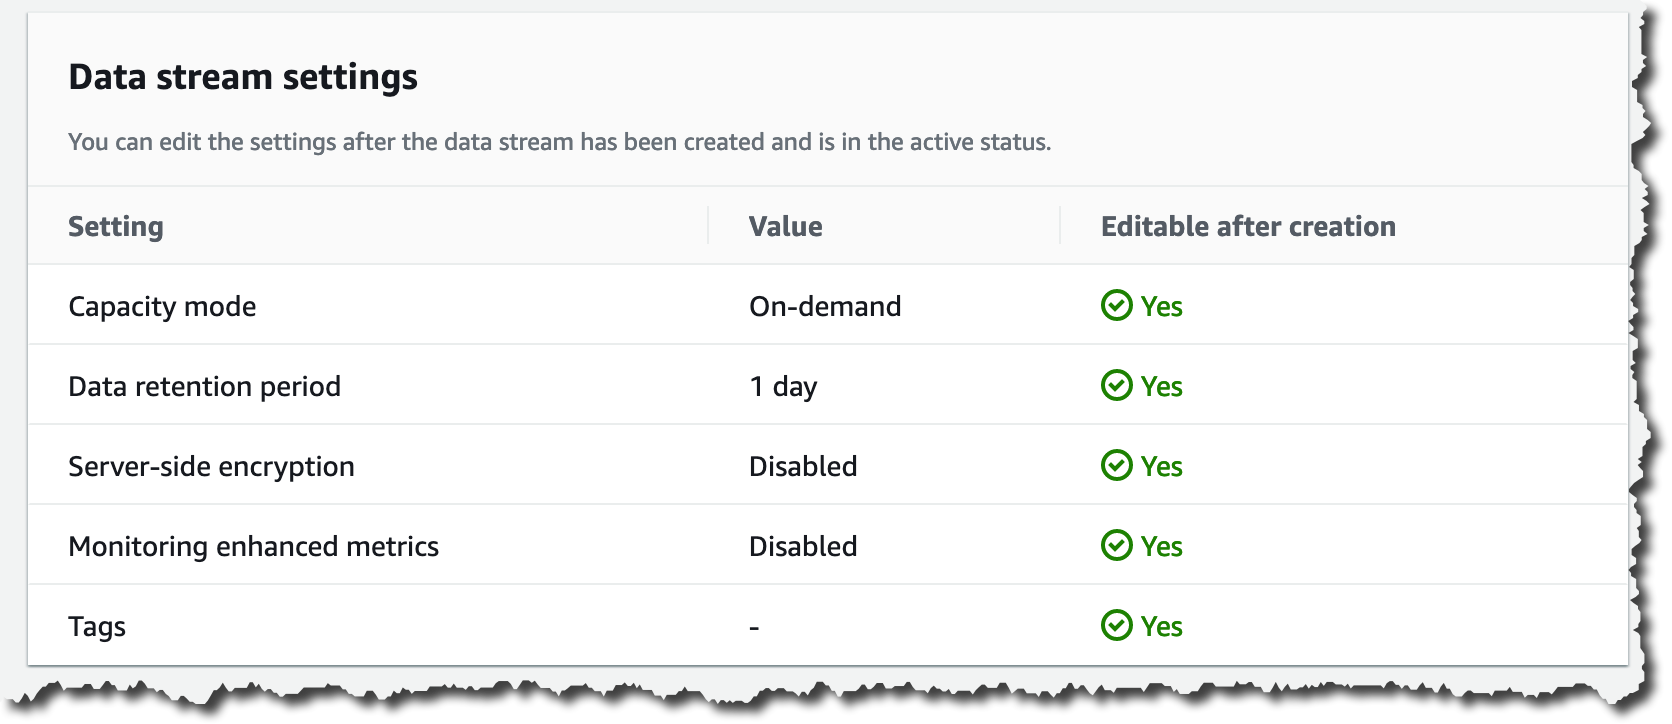
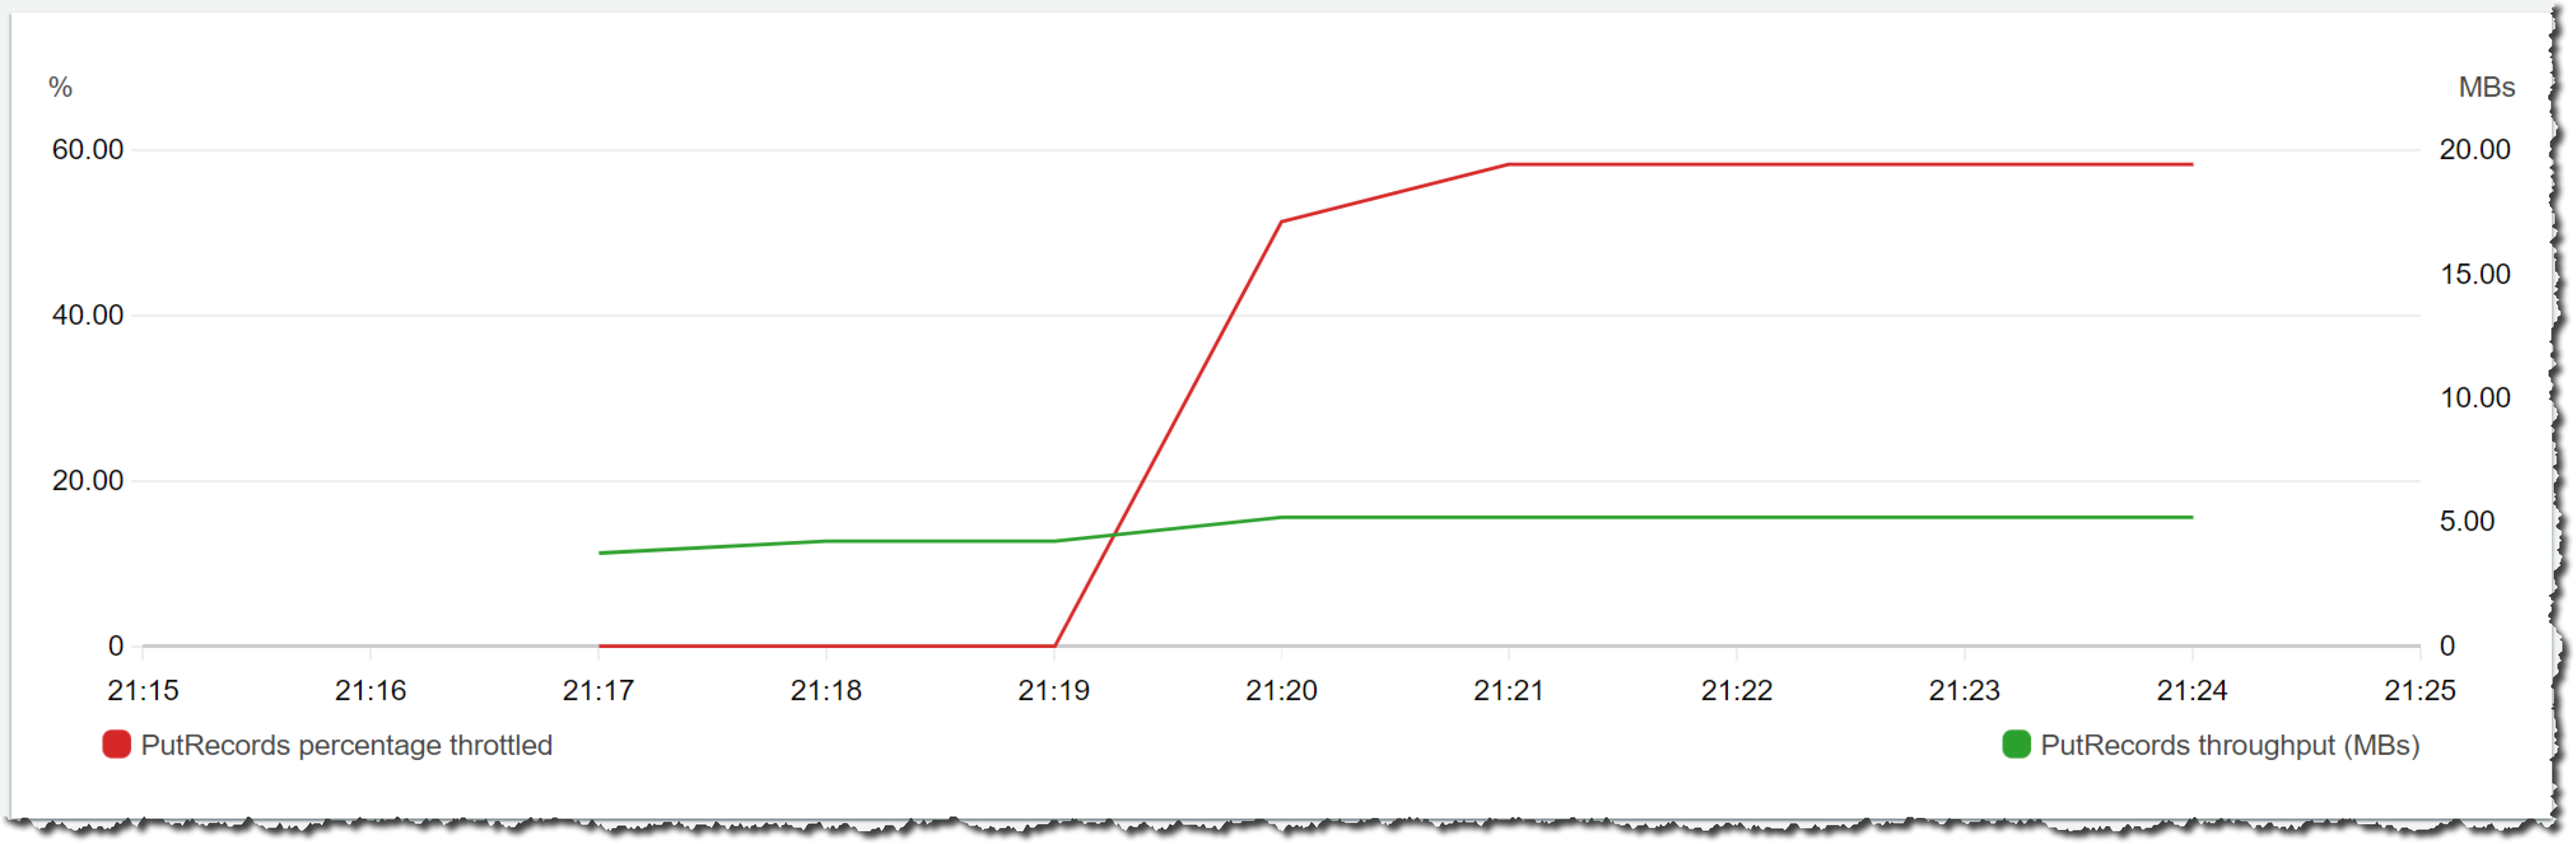


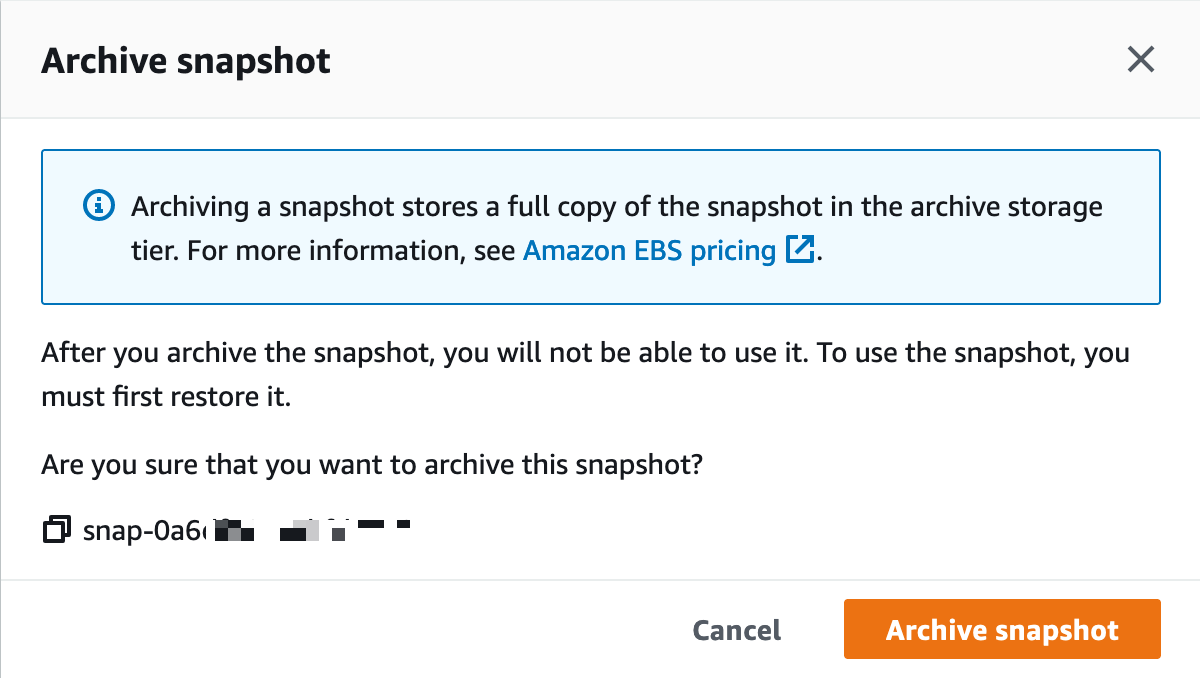
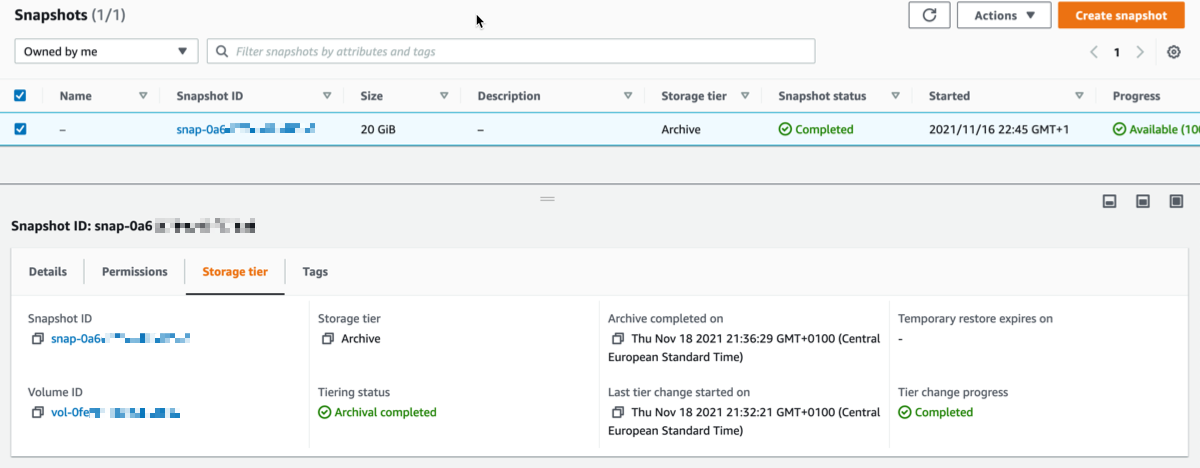

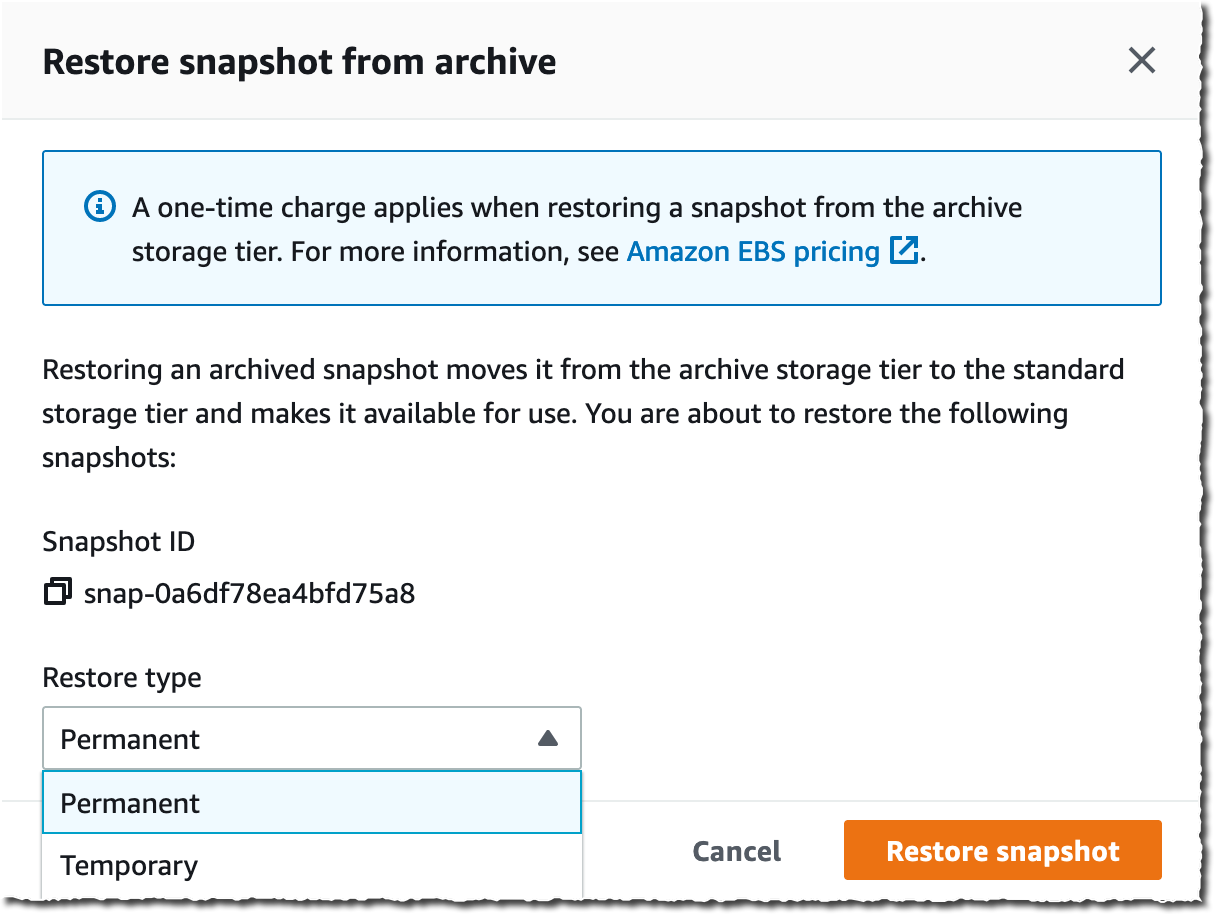
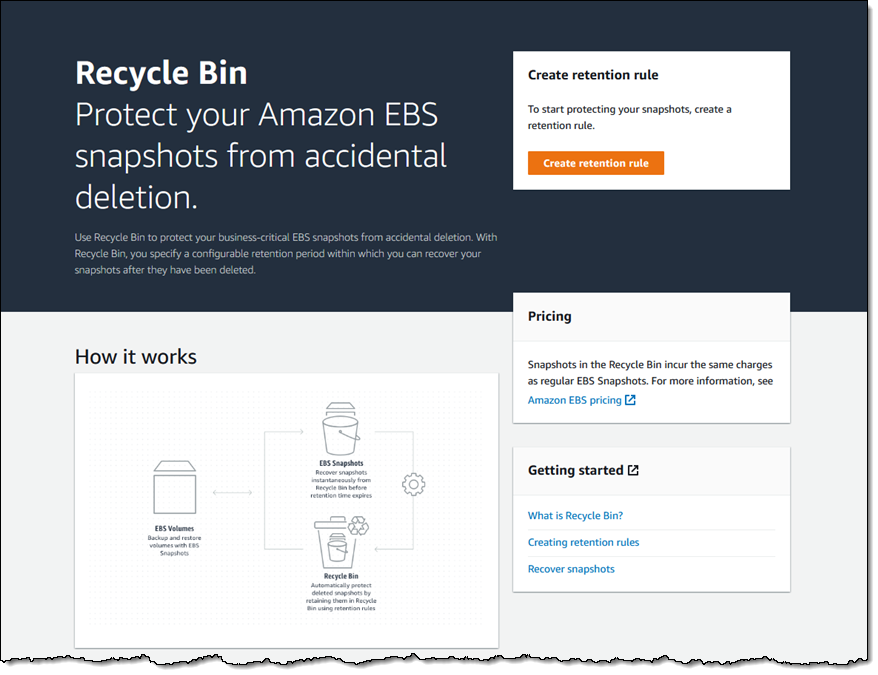
 I add a tag (User) to the rule, and click Create retention rule: