Tag Archives: Featured

AI 101: Classification vs. Predictive vs. Generative AI

Post Syndicated from Stephanie Doyle original https://www.backblaze.com/blog/ai-101-classification-vs-predictive-vs-generative-ai/

A decorative image showing several buildings with digital lines flowing upward into a cloud.

It may seem like generative AI is the only game in town, or at least the only AI model worth paying attention to. But folks have been using AI models to do all kinds of things for years before ChatGPT, Claude, and Gemini came on the scene. 

Today, I’m talking about the three different broadly defined categories of AI—classification, predictive, and generative—and what they’re good for.

Classification vs. Predictive vs. Generative AI Models: What’s the Diff?

Classification and predictive models have been foundational to AI for decades, powering applications like spam filters, cyber security tools, big data analysis, and demand forecasting. However, with recent advances, generative models like GPT and DALL-E have taken the spotlight, bringing up interesting existential (and legal) questions about the nature of creativity and creative work going forward. Understanding the distinctions and history of these models is key to grasping how AI continues to shape industries and innovation today.

Let’s see which category best applies to your particular problem.

AI classification models

A classification model is built to recognize, understand, and group data into preset categories. The model is fully trained using the training data and then evaluated using test data before being used to respond to unseen data. In general, such models infer answers for the current moment in time, for example, deciding whether an email is spam or phishing. In that case, the decision is based on comparing the incoming email to a model trained on previously classified email messages, both ones that the user has set or ones that the platform has. (The two are related, of course, as the platform’s filters often update to include aggregate user data.) 

In business, classification models drive applications like spam detection, customer segmentation, and fraud detection. Healthcare uses classification models to diagnose diseases based on medical images or patient data. In finance, they help identify high-risk transactions. Social media platforms rely on these models to filter content, detect hate speech, and recommend posts. Overall, classification models are key to organizing large datasets efficiently and making decisions based on patterns, helping automate and optimize numerous industry processes.

AI prediction models

Predictive AI models utilize historical data, patterns, and trends to train the model, so they can be used to make informed decisions about future events or outcomes. Using Drive Stats as an example, we could theoretically build a model that, when given data about a particular drive model and failure rates, predicts the chance that a given hard drive will fail in the next 90 days. Predictive AI models typically require large amounts of data to be trained and are computationally expensive to generate.

Predicting Hard Drive Failure Rates with AI

Okay, we were being coy when we said “example.” Check out Andy Klein’s Tech Day 2024 presentation, “Predicting Hard Drive Failure Rates with AI” to see how this kind of predictive model works.

AI prediction models help predict customer behavior, sales trends, and demand, aiding in decision making and resource planning. In finance, these models are crucial for stock price forecasting, risk assessment, and credit scoring. Healthcare utilizes prediction models for patient outcome predictions, disease progression, and treatment effectiveness. They are also applied in weather forecasting, supply chain optimization, and energy usage management. By analyzing past data, prediction models provide insights that help organizations anticipate trends, make proactive decisions, and optimize performance across various industries.

Generative AI models

You know this one. Generative AI is about creating (sort of) new content. It uses neural networking, deep learning, and other techniques to infer and generate content that is based on patterns it observes in existing content all while mimicking the style and structure as requested. Image generators such as DALL-E and Stable Diffusion, and large language models like ChatGPT, Claude, and Gemini are easily accessible AI applications which have brought AI into the public eye.

Generative AI is at turns the thing that will revolutionize everything, a scary specter with near-sentience that will steal your job, or a big hallucinating fluke that tells you to put glue on pizza. There are some pretty cool use cases—for one, researchers are using generative AI for new drug discovery. But you’re most likely to run into generative AI in the following use cases: customer service chatbots, coding assistants, marketing support, and general business assistants that generate transcripts and summaries.

Unlocking the power of AI

Even with all the current hype around generative AI we are still in the early stages of development when it comes to AI systems given they are most useful in responding to queries based on the subject matter with which they were trained. 

For example, an AI model trained to play chess might find playing checkers to be difficult. While the board, and number of players are the same, can a chess-playing AI model infer the allowed checker moves based on its understanding of chess? Even generative AI models like ChatGPT which are trained on a wide variety of subjects are still lacking a key ingredient to be truly useful to your organization: your data.

An AI chatbot, for example, isn’t going to perform the way you want it to without being powered by your organization’s data. And, how do you build an AI powered tool while keeping your private data private? We started to explore that very question in a recent webinar, “Leveraging your Cloud Storage Data in AI/ML Apps and Services.”

Tune in to learn more about the various ways AI/ML applications use and store data and get insights from our customers who leverage Backblaze B2 Cloud Object Storage for their AI/ML needs.

The post AI 101: Classification vs. Predictive vs. Generative AI appeared first on Backblaze Blog | Cloud Storage & Cloud Backup

Introducing Scalable Application Keys for Enhanced Security and Performance

Post Syndicated from Bala Krishna Gangisetty original https://www.backblaze.com/blog/introducing-scalable-application-keys-for-enhanced-security-and-performance/

A decorative image showing keys erupting from a server.

If you work in an industry with high performance and security demands like video surveillance, internet of things (IoT), and mobile applications, a new Backblaze capability could help your cloud workflows—Scalable Application Keys. This new capability enables you to generate application keys for your Backblaze B2 Cloud Storage Buckets at 150 times the current scale. When you need high volume, short-lived application keys to upload your data to cloud storage, you can’t tolerate bottlenecks—the Scalable Application Keys feature removes them.

Today, I’m digging into the challenges solved by Scalable Application Keys, the use cases where it has the most impact, and the benefits of the feature.

Jump to the docs

Check out our documentation for more information on Scalable Application Keys and how to work with them.

The challenges

Managing large volumes of data under strict security requirements sometimes requires using application keys programmatically to interact with cloud storage buckets. In the video surveillance industry, for example, you might upload massive amounts of video footage directly from security cameras to Backblaze B2, and you need to regularly refresh the application keys used by each of those cameras to maintain a robust security posture. However, this practice has a few unique requirements:

  • You can’t be hampered by rate limitations to generate the volume of application keys you need.
  • You need high key limits sufficient for the total volume of keys.
  • Throughput needs to be high to generate hundreds or thousands of new application keys simultaneously.

The irregular timing of key refreshes and the scale of operations can further amplify the problem, especially when hundreds or thousands of devices request new keys at the same time. 

The solution: Scalable Application Keys

With the introduction of Scalable Application Keys, Backblaze B2 customers can generate and refresh keys at significantly higher volumes and throughput—without hitting hard limits on the number of keys. This feature is designed to accommodate the unique requirements of customers who need:

  • High key throughput: Create keys at scale, even when thousands of devices need new keys simultaneously. You can create up to 10,000 keys per minute.
  • Unlimited key generation: Scale without interruption—there’s no hard cap on the number of application keys that can be generated.
  • Short-lived keys: Easily generate keys with very short lifespans, enhancing security without compromising functionality.
  • S3 compatibility: Maintain support for the Backblaze S3 compatible API, allowing you to avoid costly firmware upgrades on your devices.

Real-world applications

This feature is particularly beneficial for customers with many endpoints that all upload to Backblaze B2 cloud individually through the S3 Compatible API. For example:

Video surveillance: Companies with large networks of security cameras can now easily refresh keys for each device frequently. When you operate tens of thousands of cameras that record sensitive footage, you need to be able to refresh application keys regularly to maintain security. With Scalable Application Keys, you can handle refreshes efficiently and continue scaling the number of cameras in operation without worry. 

Mobile applications: Developers of mobile apps that store data in B2 Cloud Storage can generate unique keys for each user’s device. This is especially useful for apps that rely on user-generated and user-uploaded content, where each end device needs its own application key. 

IoT devices: Businesses managing large fleets of IoT devices, where each device needs a unique and regularly refreshed application key, can ensure secure, individualized access to cloud storage.

Benefits of Scalable Application Keys

  1. Enhanced security:
    • Frequent key rotation becomes feasible at scale, significantly reducing the risk of unauthorized access.
    • Short-lived keys minimize the window of vulnerability if a key is compromised.
    • Customers can implement best practices for key management without extraneous components that could cause performance penalties.
  2. Operational flexibility:
    • Easily manage key generation for large numbers of devices, from thousands to millions.
    • Accommodate sudden spikes in key requests, such as during system-wide updates or resets.
    • Adapt to varying usage patterns throughout the day without hitting rate limits.
  3. Cost effectiveness:
    • Avoid expensive firmware upgrades by continuing to use the S3 Compatible API.
    • Eliminate the need for complex workarounds or additional infrastructure to handle key management.

Scalable Application Keys not only solves existing limitations but also future-proofs your workflows by providing the flexibility and performance needed to scale without restriction.This feature allows you to securely manage access to B2 Cloud Storage, no matter the scale of your operations.

Ready to get started?

This feature is available upon request. If you’re an existing Backblaze B2 customer and want to get access to this capability, please contact our Support team to request access.

New to Backblaze? Contact our Sales team to learn more about how Scalable Application Keys can benefit your business and how to get started.

Once this feature is enabled, you can generate application keys at scale. Check out the documentation for more on how to use the feature.

What next? 

Are you leveraging Scalable Application Keys to build more efficient and performant workflows? Share how it’s working for you so other organizations and developers can benefit from what you find. If you have any questions or feedback, please don’t hesitate to reach out to us.

The post Introducing Scalable Application Keys for Enhanced Security and Performance appeared first on Backblaze Blog | Cloud Storage & Cloud Backup

Is AI Right for Your Business? 4 Questions to Ask

Post Syndicated from Stephanie Doyle original https://www.backblaze.com/blog/is-ai-right-for-your-business-4-questions-to-ask/

A decorative image showing several layers of computer screen folding into the cloud.

AI is everywhere—powering chatbots, generating images, even deciding what you binge watch next. It’s no wonder businesses of all sizes are feeling compelled to jump on the AI bandwagon. But before you get swept up in the AI hype, here’s the question you need to ask: Is AI right for your business and the problem you’re trying to solve?

Where AI truly becomes a change agent is when it is powered by your organization’s data to deliver relevant, insightful, and actionable observations to you in a timely manner. The reality is, while AI is really cool, without your unique data it provides your organization few competitive advantages. Of course, releasing proprietary, or even sensitive, information to a robot connected to the internet can be risky—and you want to make sure your (and your clients’) information doesn’t end up in surprising places

But just because everyone’s talking about AI doesn’t mean it’s the magic bullet for every problem. Like any strategic investment, it takes careful consideration. So, before you hand over your data to a machine, let’s explore whether AI is really what your business needs—or if it’s just another shiny object in the tech landscape.

Where do I start?

Today, many organizations are somewhere along the AI/ML path. Most are experimenting with AI, some are actively building applications, and a handful have successfully deployed a solution. Like any other project, before you start trying to use AI in your organization, the first thing you should do is define the problem you are trying to solve. Only then can you determine if you really need AI as a part of the solution. 

Ask yourself the following questions about the project. If you answer yes to all four items, the project is AI-worthy:

1. Do you want AI to replace tedious, repetitive tasks?

Start by identifying the business problem in specific, measurable terms. Determine the scope of the problem, its frequency, and the impact it has on your business. Is it recurring and time consuming? If the problem is complex, repetitive, or data-intensive, it might be suitable for AI.

2. Do you want to use AI because you can’t consistently apply a set of logical rules to answer the questions at hand?

If the problem involves large amounts of data that is difficult to process manually where the answer is derived by combining and weighing multiple factors, it may be a candidate for an AI-based solution. On the other hand, just because it can be automated doesn’t mean you need an AI solution—AI is expensive in terms of power and processing resources. If you’re running a simple routine task over and over, you might be just as well off using traditional programming methods. But, when you’re solving a complex task, you need a structure that is not a strict binary, and that’s when you might want to use AI.

3. Will you use AI for problems that humans can solve, but AI can solve much faster?

AI should help your organization solve problems it finds extremely difficult or nearly impossible to solve otherwise. AI excels at tackling complex problems that overwhelm traditional methods, such as processing vast amounts of data, recognizing intricate patterns, or making real-time predictions. If your business is facing challenges that manual processes or standard software can’t handle effectively, AI can step in to provide powerful, scalable solutions that would otherwise be out of reach.

But remember, AI should work with you, not against you. Understand how AI will integrate into your workflow and whether it aligns with your overall business strategy to avoid creating unnecessary complications or disrupting ongoing operations.

4. Do you intend for AI to increase productivity of a function or group?

Most AI projects are productivity based, even those that seem otherwise. Even AI projects aimed at improving customer experiences, like personalized recommendations, ultimately enhance productivity by streamlining interactions and reducing manual effort. At their core, most AI implementations are designed to automate tasks, optimize processes, or extract actionable insights, all of which drive greater efficiency and cost savings. And, that means you need to analyze the potential return on investment (ROI). 

AI integration requires an investment in technology, data management, and often specialized personnel. Weigh the cost of implementing AI against the potential benefits it could bring. Will it save time or reduce costs? By how much? If the financial or productivity benefits outweigh the costs, AI may be a worthwhile investment.

Where to next?

Clearly defining the problem and deciding if it’s suitable for an AI-based solution is really just the first step. Once the problem is defined, you open up another set of questions around whether and how to implement it. Do you have the right data, resources, and expertise to support an AI solution? How will it integrate with your systems? How will you measure success? The answers to all of these questions should absolutely inform your decision-making, but understanding if you’re applying AI to the right problem is your starting point. Without that, you’re using a sledgehammer to crack a nut, so to speak. 

The post Is AI Right for Your Business? 4 Questions to Ask appeared first on Backblaze Blog | Cloud Storage & Cloud Backup

Accelerate Serverless Streamlit App Deployment with Terraform

Post Syndicated from Kevon Mayers original https://aws.amazon.com/blogs/devops/accelerate-serverless-streamlit-app-deployment-with-terraform/

Image depicting the HashiCorp Terraform and Amazon Web Services (AWS) logos. Underneath the AWS logo are AWS service logos for Amazon Elastic Container Service (ECS), AWS CodePipeline, AWS CodeBuild, and Amazon CloudFront

Graphic created by Kevon Mayers.

Introduction

As customers increasingly seek to harness the power of generative AI (GenAI) and machine learning to deliver cutting-edge applications, the need for a flexible, intuitive, and scalable development platform has never been greater. In this landscape, Streamlit has emerged as a standout tool, making it easy for developers to prototype, build, and deploy GenAI-powered apps with minimal friction. It is an open-source Python framework designed to simplify the development of custom web applications for data science, machine learning, and GenAI projects. With Streamlit, developers can quickly transform Python scripts into interactive dashboards, LLM-powered chatbots, and web apps, using just a few lines of code. Its unique combination of simplicity, interactivity, and speed is the perfect complement to the rapid advancements in AI.

When deploying Streamlit applications, customers often face the challenge of ensuring their applications are highly available and can scale to meet a variable amount of demand. To achieve these goals, customers are looking at serverless approaches to deploying their Streamlit apps. With a serverless application, you only pay for the resources required and do not want have to worry about managing servers or capacity planning.

In this post, we will walk you through deploying containerized, serverless Streamlit applications automatically via HashiCorp Terraform, an Infrastructure as Code (IaC) tool that enables users to define and provision infrastructure across cloud platforms.

Solution Overview

For this solution, we have the Streamlit app running on an Amazon Elastic Container Service (ECS) cluster across multiple availability zones (AZs), using AWS Fargate to manage the compute. Fargate is a serverless, pay-as-you-go compute engine that lets you focus on building apps without managing servers. Using Fargate helps reduce the undifferentiated heavy lifting that can come with building and maintaining web applications. It is also often desirable to use a Content Delivery Network (CDN) to ensure low latency for users globally by caching the content at edge locations closer to where the users are geographically located.

Let’s zoom in on the two architectures – the Streamlit App hosting architecture, and the Streamlit App deployment pipeline.

Streamlit app hosting

Image depicting the AWS data flow architecture for the solution. The architecture shows an Amazon Elastic Container Service (ECS) cluster that spans across two availability zones. Within each availability zone are a public and private subnet. A NAT gateway is within the public subnet, and an ECS Cluster with AWS Fargate deployment type is in the private subnet. An Internet Gateway (IGW) is used to allow traffic to flow through the NAT Gateway out to the internet.An Application Load Balancer (ALB) is used to distribute the load to the ECS cluster. Amazon CloudFront is used as the content delivery network (CDN).

In the above architecture, the following flow applies:

  1. Users access the Streamlit App using the public DNS endpoint for an Amazon CloudFront distribution.
  2. Using an Internet Gateway (IGW), user requests are routed to a public-facing Application Load Balancer (ALB).
  3. This ALB has target groups which map to ECS task nodes that are part of an ECS cluster running in two AZs (us-east-1a and us-east-1b in this example).
  4. Fargate will automatically scale the underlying compute nodes in the ECS cluster based on the demand.

Streamlit app deployment pipeline

Image depicting the Streamlit app deployment pipeline architecture. Within it, a developer uploads a .zip file called streamlit-app-assets.zip to an Amazon S3 Bucket. This upload event is processed by Amazon EventBridge, which in turn invokes an AWS CodePipeline to run. Related artifacts are stored in a connected CodePipeline S3 bucket. CodePipeline orchestrates an AWS CodeBuild project that creates a new Docker image using the .zip file that was uploaded, and stores in an Amazon Elastic Container Registry (ECR) repository. This image upload triggers a new Amazon Elastic Container Service (ECS) deployment. Terraform then creates a Amazon CloudFront invalidation to serve the new version of the application to customers.

In the above architecture, the following flow applies:

  1. User develops a local Streamlit App and defines the path of these assets in the module configuration, then runs terraform apply to generate a local .zip file comprised of the Streamlit App directory, and upload this to an Amazon S3 bucket (Streamlit Assets) with versioning enabled, which is configured to trigger the Streamlit CI/CD pipeline to run.
  2. AWS CodePipeline (Streamlit CI/CD pipeline) begins running. The pipeline copies the .zip file from the Streamlit Assets S3 Bucket, stores the contents in a connected CodePipeline Artifacts S3 bucket, and passes the asset to the AWS CodeBuild project that is also part of the pipeline.
  3. CodeBuild (Streamlit CodeBuild Project) configures a compute/build environment and fetches a Python Docker Image from a public Amazon ECR repository. CodeBuild uses Docker to build a new Streamlit App image based on what is defined in the Dockerfile within the .zip file, and pushes the new image to a private ECR repository. It tags the image with latest, an app_version (user-defined in Terraform), as well as the S3 Version ID of the .zip file and pushes the image to ECR.
  4. ECS has a task definition that references the image in ECR based on the S3 Version ID tag which will always be a unique value, as it is generated whenever a new version of the file is created. This also serves as data lineage so versions of the Streamlit App .zip files in S3 can be linked to versions of the image stored in ECR. Once a new image is pushed to ECR (with a unique image tag), the task definition is updated and the ECS service begins a new deployment using the new version of the Streamlit App.
  5. When a new image is pushed to ECR, the Terraform Module is configured to use the local-exec provisioner to run an AWS CLI command that creates a CloudFront invalidation. This enables users of the Streamlit app to use the new version without waiting for the time-to-live (TTL) of the cached file to expire on the edge locations (default is 24 hours).
    Both of these pipelines are built and packaged into a Terraform module that can be reused efficiently with only a few lines of code.

Both of these pipelines are built and packaged into a Terraform module that can be reused efficiently with only a few lines of code.

Prerequisites

This solution requires the following prerequisites:

  • An AWS account. If you don’t have an account, you can sign up for one.
  • Terraform v1.0.0 or newer installed.
  • python v3.8 or newer installed.
  • A Streamlit app. If you don’t have a Streamlit project already, you can download this app directory as a sample Streamlit app for this post and save it to a local folder.

Your folder structure will look something like this:

terraform_streamlit_folder
├── README.md
└── app                 # Streamlit app directory
    ├── home.py         # Streamlit app entry point
    ├── Dockerfile      # Dockerfile
     └── pages/          # Streamlit pages

Create and initialize a Terraform project

In the same folder where you have the your Streamlit app saved, in the above example in the terraform_streamlit_folder, you will create and initialize a new Terraform project.

  1.  In your preferred terminal, create a new file named main.tf by running the following command on Unix/Linux machines, or an equivalent command on Windows machines:
    touch main.tf
  2. Open up the main.tf file and add the following code to it:
    module "serverless-streamlit-app" {
      source          = "aws-ia/serverless-streamlit-app/aws"
      app_name        = "streamlit-app"
      app_version     = "v1.1.0" 
      path_to_app_dir = "./app" # Replace with path to your app
    }

    This code utilizes a module block with a source pointing to the Terraform module, and the appropriate input variables passed in. When Terraform encounters a module block, it loads and processes that module’s configuration files using the source. The Serverless Streamlit App Terraform module has many optional input variables. If you have existing resources, such as an existing VPC, subnets, and security groups that you’d like to reuse instead of deploying new ones, you can use the module’s input variables to reference your existing resources. However, in this post, we’re deploying all of the resources in the above architecture from scratch. Here, we simply define the source that references the module hosted in the Terraform Registry, provide an app_name that will be used as a prefix for naming your resources, the app_version that is used for tracking changes to your app, and the path_to_app_dir which is the path to the local directory where the assets for your Streamlit app are stored.

  3. Save the file.
  4. To initialize the Terraform working directory, run the following command in your terminal:
    terraform init

    The output will contain a successful message like the following:

    "Terraform has been successfully initialized"

Output the CloudFront URL

To be able to easily access the Cloudfront URL of the deployed Streamlit application, you can add the URL as a Terraform output.

  1. In your terminal, create a new file named outputs.tf by running the following command on Unix/Linux machines, or an equivalent command on Windows machines:
    touch outputs.tf
  2. Open up the outputs.tf file and add the following code to it:
    output "streamlit_cloudfront_distribution_url" {
      value = module.serverless-streamlit-app.streamlit_cloudfront_distribution_url
    }
  3. Save the file.
    Now, your folder structure will look like:

    terraform_streamlit_folder
    ├── README.md
    ├── app                 # Streamlit app directory
    │   ├── home.py         # Streamlit app entry point
    │   ├── Dockerfile      # Dockerfile
    │   └── pages/          # Streamlit pages
    │     
    ├── main.tf             # Terraform Code (where you call the module) 
    └── outputs.tf          # Outputs definition

Deploy the solution

Now you can use Terraform to deploy the resources defined in your main.tf file.

  1. In your terminal, run the following command to apply to deploy the infrastructure. This includes the hosting for your Streamlit application using ECS and CloudFront, as well as the pipeline that is used to push updates.
    terraform apply

    When the apply command finishes running, you’ll see the Terraform outputs displayed in the terminal.

  2. Navigate to the streamlit_cloudfront_distribution_url to see your Streamlit application that is hosted on AWS.
  3. When you make changes to your Streamlit codebase, you can go ahead and re-run terraform apply to push your new changes to your cloud environment.

When updating the Streamlit codebase, the CodePipeline and CodeBuild processes kick off to automatically update your new changes, which get reflected on your Streamlit application. CodePipeline automates the entire software release process, managing stages like source retrieval, building, testing, and deployment. It integrates with AWS services and third-party tools (such as GitHub and Jenkins) to enhance automation, speed, and security. CodeBuild focuses on automating code compilation, testing, and packaging, supporting multiple languages and custom Docker environments, while integrating with CodePipeline for scalable, secure builds. With this CI/CD pipeline, when you make changes to your code, all you need to run is terraform apply to update your cloud environment. For an example buildspec, see the example in the repo.

You can find full examples of deploying the infrastructure with and without existing resources in the GitHub repository.

Clean up

When you no longer need the resources deployed in this post, you can clean up the resources by using the Terraform destroy command. Simply run terraform destroy . This will remove all of the resources you have deployed in this post with Terraform.

Conclusion

Building serverless Streamlit applications with Terraform on AWS offers a powerful combination of scalability, efficiency, and automation. As you continue to build and refine your Streamlit applications, Terraform’s flexibility ensures that your infrastructure can evolve seamlessly, supporting rapid innovation and agile development. With Streamlit and Terraform, you have the tools to create dynamic, serverless applications that scale effortlessly and operate reliably in the cloud.

Authors

Image depicting Kevon Mayers, a Solutions Architect at AWS

Kevon Mayers

Kevon Mayers is a Solutions Architect at AWS. Kevon is a Terraform Contributor and has led multiple Terraform initiatives within AWS. Prior to joining AWS he was working as a DevOps Engineer and Developer, and before that was working with the GRAMMYs/The Recording Academy as a Studio Manager, Music Producer, and Audio Engineer. He also owns a professional production company, MM Productions.

Image depicting Alexa Perlov, a Prototyping Architect at AWS

Alexa Perlov

Alexa Perlov is a Prototyping Architect with the Prototyping Acceleration team at AWS. She helps customers build with emerging technologies by open sourcing repeatable projects. She is currently based out of Pittsburgh, PA.

Image depicting Shravani Malipeddi, a Solutions Architect at AWS

Shravani Malipeddi

Shravani Malipeddi is a Solutions Architect at AWS who came out of the TechU Program. She currently supports strategic accounts and is based out of San Francisco, CA. .

The Fine Print: How Minimum Data Retention Fees Affect Cloud Costs

Post Syndicated from Kari Rivas original https://www.backblaze.com/blog/the-fine-print-how-minimum-data-retention-fees-affect-cloud-costs/

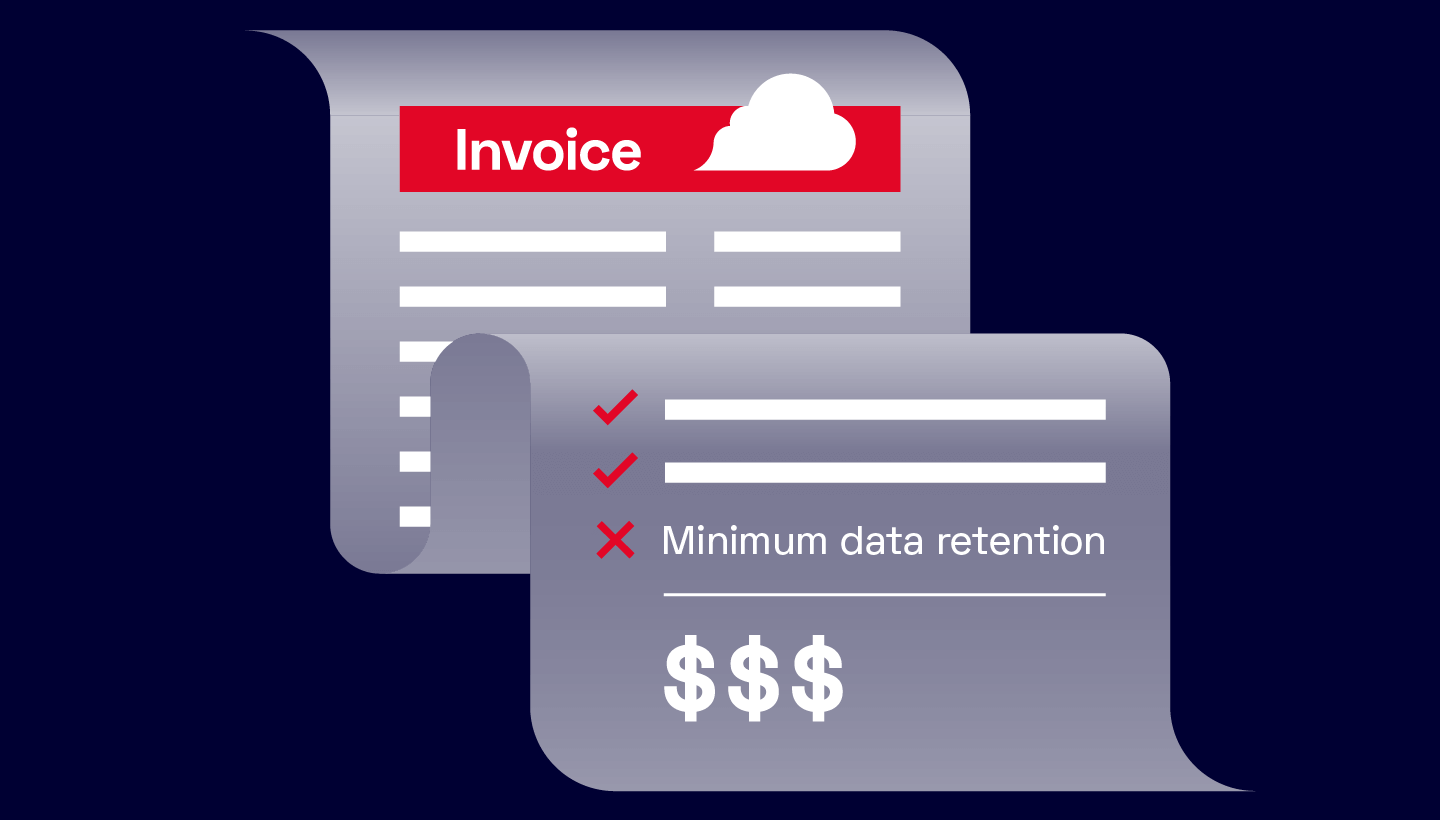
A decorative image showing a stylize image of an invoice with the phrase "minimum retention fees," as a line item.

You probably won’t notice a little asterisked footnote tucked at the bottom of the page the first time you read through a cloud storage vendor’s pricing tables. You probably won’t notice it the second or third time either. But you’ll definitely notice it when your bill comes in with charges for data you thought you deleted weeks ago. 

That footnote explains an often overlooked challenge to your budget: minimum data retention periods. These policies, used by cloud providers like AWS, Azure, Google Cloud, and Wasabi, can lead to unexpected cost increases and complicated data management strategies. 

Today, I’m breaking down cloud storage retention minimums and common scenarios where they directly impact storage budgets and data management policies. 

What are minimum data retention periods?

Retention minimums specify the minimum amount of time that data must be stored before it can be deleted, overwritten, or moved to a different storage tier without incurring additional charges. 

Cloud storage providers with multiple tiers like AWS or Google Cloud use minimum retention policies to ensure that customers cannot frequently move data between storage tiers to exploit lower-cost storage classes for short-term storage. For cloud providers that have a single class of storage, these policies allow providers to stabilize their resource usage and maintain predictable pricing structures.

Minimum retention periods can vary significantly between providers, and even between different storage tiers offered by the same provider. For example, AWS S3 Standard has no minimum retention period, but S3 Standard-IA has a 30 day minimum, Glacier has a 90 day minimum, and Deep Archive has a 180 day minimum.

Despite their significance, information about these retention periods is often buried in the fine print of service agreements or technical documentation. 

What are delete fees?

Delete fees are a direct consequence of deleting or moving files before the retention minimum is met. Cloud providers charge these fees to ensure that the infrastructure allocated for the data is compensated for the resources it would have otherwise used during the retention period. This fee is typically prorated, representing the remaining days in the retention period that the data was meant to occupy in a storage class. 

The terms “delete fees,” “minimum storage duration,” and “minimum retention fees” all refer to a similar policy.

How are delete fees incurred?

Early deletion fees can be triggered by various actions, not just the obvious deletion of files. Some examples include:

  • Moving data from a higher-cost tier to a lower-cost tier before the minimum retention period has been met: This scenario often catches organizations off guard when they attempt to optimize costs by transferring infrequently accessed data to a cheaper storage class.
  • Overwriting existing files: When a file is overwritten, the cloud provider typically treats this as a delete operation followed by a new write operation. If the original file hasn’t met its minimum retention period, the organization may be charged for the remaining time, even though they’re still using the same amount of storage space.
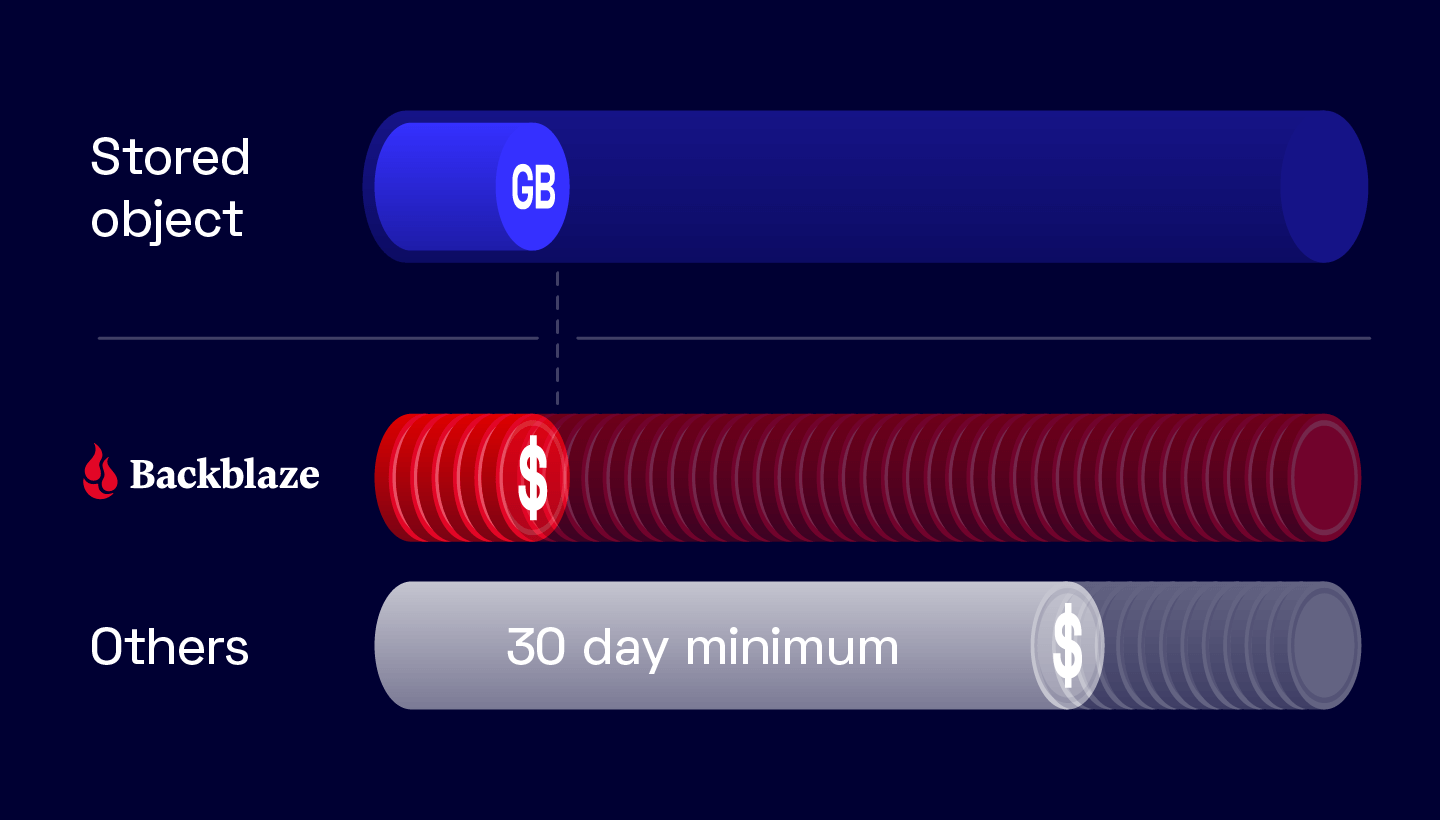
A decorative image showing three bars, one that represents the stored object, and two that represent what duration of days you might be charged for.
  • Implementation of automated lifecycle policies: Many organizations set up rules to automatically move or delete data based on its age or access patterns. However, if these policies don’t account for minimum retention periods, they can inadvertently trigger early delete fees on a large scale.
  • Renaming files or folders: Even seemingly benign actions like renaming files or folders can sometimes be interpreted as delete-and-rewrite operations by certain cloud storage systems, potentially triggering these fees. 

Additionally, in multi-user or multi-team environments, lack of communication about retention policies can lead to unexpected charges. One team might delete or move data without realizing the financial implications for the entire organization. 

The financial impact of minimum data retention periods

Minimum data retention periods, particularly in cold storage tiers, can have significant impacts on IT budgets. What may have seemed like a cost-saving storage tier can actually increase expenses when operations require frequent deletions or movements of data before the minimum retention period is over. But even in hot storage, these policies can unexpectedly inflate overall costs.

To illustrate the real-world impact of retention minimums, let’s examine a few common scenarios:

1. Backup strategy

Let’s say you have a 30 day backup strategy for your critical infrastructure, and you opt for Wasabi object storage to save costs vs. AWS. You plan to keep a month’s worth of backups in the cloud and will then replace them with the newer backups.

Wasabi’s minimum retention policy is 90 days for its Pay as You Go storage (and 30 days for its Reserved Capacity Storage). 

You store an initial 50TB of backups in Wasabi on Day 1. On Day 31, the older backup is deleted and replaced with the newer backup. So, you incur costs for 30 days of Timed Active Storage (50TB) and 60 days of Timed Deleted Storage (50TB). These charges are incurred every time the backup is replaced.

With Wasabi’s Pay as You Go storage, your monthly bill will look like this:

50TB x $6.99/TB/month x 3 = $1048.50

We multiply by 3 because the 90 day minimum retention policy equals three months’ time. One of those you’ve actually stored for, and the other two are because you’ve replaced your backups with the new ones.  

Compare this to Backblaze B2 Cloud Storage, which has no minimum retention policy and costs $6 per TB/month for its Pay as You Go storage:

50TB x $6/TB/month = $300

The minimum retention policy effectively triples the anticipated storage expenses. When scaled across multiple backup sets or extended periods, the impact on the IT budget can be substantial.

Delete fees in the real world: California university switches to Backblaze to eliminate surprise bills from Wasabi

Cal Poly Humboldt thought they understood cloud storage provider Wasabi’s pricing, but each month brought unexpected charges for deleted data due to Wasabi’s minimum storage retention policies. This, in turn, caused a chain reaction of calls from the procurement office, buying extra capacity, and then modifying the system to try to avoid further bills. To silence the monthly fire alarms, they switched to Backblaze.

With no retention minimums, Cal Poly Humboldt now knows exactly what their Backblaze costs will be up front. The move was so smooth that they migrated another 100TB from Google’s no-longer-free tier for educational institutions and plan to scale their storage to over a petabyte to back up and safeguard research data.

2. Application storage

In application storage use cases, retention minimums can impact cloud spend significantly when the data has a short lifecycle. Applications with high transaction volumes—such as e-commerce, user-generated content applications, or surveillance platforms—frequently upload and delete as part of their daily operations. 

For example, most video surveillance platforms may only need 30 days of history for footage that’s been uploaded and processed, so something like a 90-day retention period doesn’t make financial or operational sense. E-commerce customers can also be affected; these businesses have users that frequently upload and delete content to manage storefronts, creating unpredictable data usage patterns. In these cases, you are at the mercy of your end users—if users churn through files quickly you will pay the retention penalties.

3. Video production

Retention minimums also affect video production workflows particularly when you need to make revisions once a project has been archived in cold storage—a common workflow many studios and broadcasting agencies use to get more affordable storage rates for seldom-accessed data. 

Whether due to last minute changes in branding, edits to visuals, or adjustments to sound, the project needs to be pulled from storage for further modification. Because the files were moved to colder storage under a 90 day retention policy, accessing and modifying them before that period ends can trigger significant early delete fees.

If you routinely archive files immediately after a project completes anticipating that no further changes will be required, these early delete fees can add up quickly.

The hidden complexities of minimum data retention periods

Retention minimums can significantly impact your bottom line. These policies, often buried in the fine print, can lead to unexpected costs and complicate data management strategies across various industries.

Understanding the nuances of minimum data retention periods and their associated costs is crucial for developing an effective and economically sound cloud storage strategy. It enables organizations to make more informed decisions, avoid unexpected expenses, and better align their storage choices with their specific data management needs and budget constraints.

The post The Fine Print: How Minimum Data Retention Fees Affect Cloud Costs appeared first on Backblaze Blog | Cloud Storage & Cloud Backup

Backblaze B2 Event Notifications Now Generally Available

Post Syndicated from Bala Krishna Gangisetty original https://www.backblaze.com/blog/using-b2-event-notifications/

A decorative image showing a cloud, gears, and an alarm notification.

No one likes being left out in the cold, least of all your data. With Backblaze B2 Event Notifications—now generally available—you can receive real-time notifications about object changes. That means that you can build more responsive and automated workflows across best-of-breed cloud platforms, saving time and money and improving your end users’ experiences. And, you can be alerted to changes in your data that may speed time to action.

Here’s how it works: With Backblaze B2 Event Notifications, any data changes within B2 Cloud Storage—like uploads, updates, or deletions—can automatically trigger actions in a workflow, including transcoding video files, spooling up data analytics, delivering finished assets to end users, and many others. Importantly, unlike many other solutions currently available, Backblaze’s service doesn’t lock you into one platform or require you to use legacy tools from AWS.

So, to businesses that want to create an automated workflow that combines different compute, content delivery networks (CDN), data analytics, and whatever other cloud service: Now you can, with the bonus of cloud storage at a fifth of the rates of other solutions and free egress.

Key capabilities

  • Flexible implementation: Event Notifications are sent as HTTP POST requests to the desired service or endpoint within your infrastructure or any other cloud service. This flexibility ensures seamless integration with your existing workflows. For instance, your endpoint could be Fastly Compute, AWS Lambda, Azure Functions, or Google Cloud Functions, etc.
  • Event categories: Specify the types of events you want to be notified about, such as when files are uploaded and deleted. This allows you to receive notifications tailored to your specific needs. For instance, you have the flexibility to specify different methods of object creation, such as copying, uploading, or multipart replication, to trigger event notifications. You can also manage Event Notification rules through UI or API.
  • Filter by prefix: Define prefixes to filter events, enabling you to narrow down notifications to specific sets of objects or directories within your storage on Backblaze B2. For instance, if your bucket contains audio, video, and text files organized into separate prefixes, you can specify the prefix for audio files in order to receive Event Notifications exclusively for audio files.
  • Custom headers: Include personalized HTTP headers in your Event Notifications to provide additional authentication or contextual information when communicating with your target endpoint. For example, you can use these headers to add necessary authentication tokens or API keys for your target endpoint, or include any extra metadata related to the payload to offer contextual information to your webhook endpoint, and more.
  • Signed notification messages: You can configure outgoing messages to be signed by the Event Notifications service, allowing you to validate signatures and verify that each message was generated by Backblaze B2 and not tampered with in transit.
  • Test rule functionality: Validate the functionality of your target endpoint by testing Event Notifications before deploying them into production. This allows you to ensure that your integration with your target endpoint is set up correctly and functioning as expected.
  • Retries: Event Notifications are automatically re-sent if the initial delivery attempt fails. This feature increases the reliability of Event Notifications by ensuring that temporary issues do not result in missed events, thus maintaining the integrity of your event-driven workflows.
  • Delivery: Event Notifications are designed for the at-least-once delivery guarantee to ensure Event Notifications are delivered reliably, even in the presence of network or system failures.

Versatile use cases

This past April, we announced Event Notifications in preview, and folks have put Event Notifications to work in some incredible ways. Today, we’re sharing some of the key use cases that came out of the preview to simplify your own workflows so you can focus on extracting insights from your data, rather than managing the logistics of data processing.

A diagram describing how Event Notifications work.

Automated media processing

Video transcoding: Many customers use Event Notifications to automate their video transcoding workflows. When a new video is uploaded to a Backblaze B2 Bucket, an Event Notification can trigger a transcoding process to generate all videos in the desired format. 

Image processing: Similarly, customers also use Event Notifications to set up automated image processing pipelines, such as generating thumbnails or applying filters when new images are added to a Backblaze B2 Bucket.

Media processing is not limited to video transcoding or image processing. It can be extended to any other media processing workflow, minimizing the number of steps in the workflow.

Backup monitoring

Customers can receive notifications when backups are successfully uploaded to a Backblaze B2 Bucket with Event Notifications, providing peace of mind and ensuring data protection. Whether you want to track your nightly or monthly backups, you can get a notification when they are completed.

Presigned URL monitoring

Using a presigned URL is a standard way to share a file without giving the full access to your Backblaze B2 Bucket. Customers are using Event Notifications to know when their clients upload files via presigned URLs to Backblaze B2. They can get a callback to confirm that the upload is complete.

Security and access control

Unauthorized access detection: Customers are using Event Notifications to track access to highly confidential video files and report back to their clients as needed. Event Notifications help them detect any unauthorized access and take immediate action.

Audit trails: Some customers are using Event Notifications to create a detailed audit log of supported bucket activities through Event Notifications, which is useful for their compliance and security purposes.

Anomaly/malware detection: Event Notifications can strengthen security by detecting unusual access patterns, like malware that deletes or overwrites backups, by getting notifications of changes to Backblaze B2 Buckets.

Integration with external systems

Database synchronization: Customers use Event Notifications to keep databases in sync with the state of their Backblaze B2 Buckets. It’s critical to ensure data consistency across systems as their applications run on the databases.

Document management system: Some customers use Event Notifications with a workflow system to track document revisions, uploads, and deletes, or to notify team members when specific documents are uploaded or deleted.

Analytics and reporting

Performance analytics: Some customers use Event Notifications to monitor their backup performance and completion times, helping to optimize their data management strategies.

Usage tracking: Event Notifications can help track storage consumption by individual users or projects, facilitating better resource management and cost allocation.

These are just a few of the use cases our preview customers shared with us, and the sky is truly the limit for ways Event Notifications can empower you to simplify and streamline your workflows. 

Ready to get started?

For existing customers working with a Backblaze account manager, Event Notifications is enabled for you today. If you need assistance, your account manager is happy to help.

For existing customers who are not currently working with an account manager, please contact our Support team to request access.

New to Backblaze? Contact our Sales team to learn more about how Event Notifications can benefit your business and how to get started.

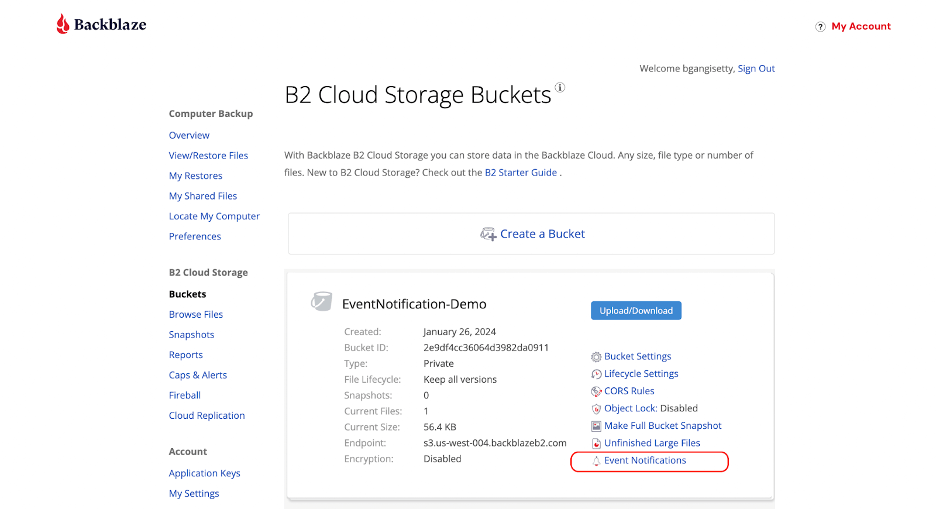
A screenshot of the Backblaze account screen where you can enable Event Notifications.

Once Event Notifications is enabled on your account, log in to your Backblaze B2 account, navigate to the Buckets page, and click on the Event Notifications section. From there, you can set up notification rules for the events you want to track or configure notifications through our API. 

For detailed instructions and best practices, check out the Event Notifications documentation.

What’s next?

Please do share how you’re leveraging Event Notifications to build more efficient, automated, and responsive workflows so that other organizations and developers can benefit from what you find. If you have any questions or feedback, please don’t hesitate to reach out to us.

The post Backblaze B2 Event Notifications Now Generally Available appeared first on Backblaze Blog | Cloud Storage & Cloud Backup

The Cloud Storage Playbook: 4 Best Practices for Sports Teams

Post Syndicated from Laquie Campbell original https://www.backblaze.com/blog/the-cloud-storage-playbook-4-best-practices-for-sports-teams/

A decorative image showing a cloud icon surrounded by media icons.

Video and data are the lifeblood of sports teams and leagues, fueling everything from fan engagement to game analysis. 

To keep operations running smoothly, sports teams need to ensure that assets are stored securely, managed cost effectively, and kept ready for quick access. Cloud storage is increasingly part of sports teams’ data management playbooks, integrating with existing workflows and media tools so that teams can stay sharp and keep fans engaged. 

Let’s break down what’s driving data growth in the sports market, use cases for cloud storage, and four best practices you can use to adopt cloud storage in a hybrid approach.

What’s driving data growth for sports teams?

During a given game, teams typically capture multiple camera angles, including sideline and aerial views, along with player-specific footage. Inside the stadium, teams use video and data to create an immersive fan experience, with big-screen displays and other screens showing player profiles, replays, real-time stats, and more. The action doesn’t stop there. Live feeds and exclusive content delivered on mobile devices add interactivity, bringing the game closer to the audience. 

Sports teams generate a massive amount of video and image data during a game. As an example, a given professional sports game may involve around 10–12 cameras, and each can generate several terabytes of high-definition (high-def) footage over the course of the game.

High-def video files can range from 1–3GB per minute of footage, meaning a two to three hour game with multiple cameras might produce dozens of terabytes. On top of that, teams use high speed cameras for slow motion analysis, which further increases the data volume. When considering still images from different angles and high-resolution (hi-res) formats, the overall image and video data generated per game can easily reach 10–20TB or more, depending on the resolution and frame rates used.

How sports organizations take advantage of cloud storage: Key use cases

Given the massive data growth in sports organizations, many teams rely on cloud storage to help them store, manage, and use that data effectively. Here’s how they do it.

Replacing aging on-premises systems

Professional sports teams have long relied on on-premises storage like LTO tape systems or servers to keep their game footage, player performance data, and other critical content safe. But as time goes on, these systems become harder to maintain, prone to breakdowns, and outmatched by the growing volume of data. As media and data continue to pile up, teams need storage that can scale fast without requiring a major investment in new infrastructure.

By using cloud storage—typically through a hybrid infrastructure that utilizes both cloud and on-premises systems—sports organizations can off-load some of the hassle of maintaining and upgrading aging physical systems. Cloud storage eliminates the need for constant hardware replacements, freeing up IT teams to focus on more strategic plays.

Eagles retire LTO, drafting up an active cloud archive

With multiple championships behind them, the Philadelphia Eagles had decades of incredible content to mine and protect, but they needed to draft and train up some new technical assets to stay in contention. They retired their LTO-6 system and shifted hundreds of terabytes off of their storage area network (SAN) to a true cloud archive in Backblaze B2 Cloud Storage. Check out their game plan for protecting data and improving media workflows in the cloud.

Enhancing video management and distribution

By implementing cloud storage for hot archives, a league or team can store all video content in a centralized repository that offers instant access from anywhere, especially when paired with cloud-friendly media asset management (MAM) tools. 

Cloud storage simplifies the process of sharing large video files with players, broadcasters, and media outlets, boosting an organization’s ability to monetize its content. 

Backblaze B2 Live Read changes the game

Advanced services like Live Read give teams the ability to access, edit, and transform media as it’s uploaded. This speeds up content retrieval for analysis, editing, and distribution, making it especially useful on game days, when quick access to video and analytics can influence real-time decisions and help create up-to-the-minute content.

Business continuity and disaster recovery

Keeping sensitive data and high value media safe is nonnegotiable for sports organizations. A natural disaster, cyberattack, data breach, or other threat to stored data and media can cause days or weeks of downtime, making critical assets inaccessible and leading to significant operational disruptions. 

Teams are using cloud storage to create geographic redundancy that ensures that data stays secure and recoverable even in the event of a local disaster. Tools like Object Lock add an extra layer of protection, making sure that data can’t be tampered with or deleted.

Integrating AI capabilities

AI is employed by sports teams to automate video analysis and content tagging, create highlight reels almost instantly, and scale personalization efforts. 

Using the cloud to implement AI for sports media makes sense thanks to its scalability, processing power, and accessibility. Cloud platforms can handle vast amounts of video data and provide the computational resources necessary for AI-driven tasks like real-time analysis, high-speed editing, and video rendering. The cloud also enables collaboration across multiple locations, allowing teams, coaches, and analysts to access and process data seamlessly. Cloud-based AI is cost efficient, as teams only pay for the resources they use, avoiding the high costs of maintaining dedicated on-premises AI infrastructure.

Leverage video understanding with Twelve Labs

Twelve Labs’ video understanding platform allows you to build AI functionality into your workflows, giving you the ability to automate metadata tagging and search video archives with natural language. Check out how it integrates with cloud storage in Backblaze B2.

Optimizing costs

As traditional storage systems scale up, they can become prohibitively expensive—not only in direct costs, but also in ongoing maintenance and management. Cloud storage is inherently scalable, capable of handling growing volumes of content and data without breaking the bank. 

Cloud storage helps sports teams optimize data storage costs by offering scalable, flexible pricing models that align with their data needs. Depending on their needs, teams can choose to pay for the exact amount of storage they use or to leverage capacity-based storage plans, but in either case, they’ll avoid the need for expensive on-premises hardware that often requires over-provisioning. 

With cloud storage, teams can dynamically scale storage up or down based on their requirements—like during the season when video data surges—though it’s essential to consider things like egress fees in cost calculations. Backblaze, for example, includes 3x free egress, which can reduce costs significantly

Hybrid cloud storage for sports teams

Many organizations take a phased approach in embracing cloud storage, or choose to continue leveraging on-premises storage infrastructure along with new cloud storage resources in a hybrid model. As with any deployment of new technology, this process is best undertaken with a thoughtful game plan.

Four best practices for adopting hybrid cloud storage

1. Assess your current infrastructure

Begin by auditing the on-premises storage systems you currently rely on to maintain team footage and data. Knowing where your storage infrastructure falls short, you can set clear objectives for a hybrid solution, such as increased accessibility or more cost-effective scaling options, and then map out your shift to the cloud. Evaluate capacity, performance, and scalability limits to help identify pain points (e.g., slow access to media files, high costs) and inform prioritization of the data or content that should move to the cloud. 

2. Prioritize media for migration

Depending on your goals, you’ll prioritize different media for a cloud migration. For example, if your goal is to modernize your archive and make it more accessible for monetization, it makes sense to move archives off LTO to an active cloud archive. On the other hand, if your goal is streamlining remote workflows, your production data is likely first up for a cloud migration while you can maintain on-premises solutions for your archives as long as they’re serving your needs. 

3. Leverage hybrid storage as a transition stage

With a cloud storage platform that integrates smoothly with existing on-prem storage and applications, you are well positioned to implement a hybrid cloud solution. A hybrid storage model allows you to shift operations to the cloud gradually, without the need for an abrupt overhaul. As you navigate this transition, your team can begin to take advantage of cloud scalability and flexibility without abandoning familiar workflows or compromising performance.

4. Establish clear data management policies

Structured data management helps prevent inefficiencies, such as duplicated or misplaced files, and ensures that storage solutions align with operational needs. Create clear policies for where media and data are stored (on-prem or cloud), when and how each should be moved, and which users have access (and at what level).

Preparing for the future

As sports organizations continue to generate and rely on massive amounts of video and data, cloud storage is increasingly becoming a strategic necessity. By embracing cloud storage, teams and leagues can increase their efficiency, improve fan engagement, enhance performance analysis, and ensure operational continuity—all while optimizing costs and future-proofing their infrastructure. The result? More streamlined, secure, and scalable storage that supports long-term success on and off the field.

The post The Cloud Storage Playbook: 4 Best Practices for Sports Teams appeared first on Backblaze Blog | Cloud Storage & Cloud Backup

Is Your Data Really Safe? How to Test Your Backups

Post Syndicated from David Johnson original https://www.backblaze.com/blog/is-your-data-really-safe-how-to-test-your-backups/

A decorative image showing icons related to backing up and restoring data.

Ransomware is now a billion dollar industry, and one of the best things any business can do to protect its bottom line is to back up. But, it’s important to remember that backups are only the first step in the process—when you are affected by a ransomware attack, natural disaster, or even human error, you’ll then need to restore. 

As your business scales and becomes more complex, so does your backup and restore process. You’ll have more types of data to restore, on more networks and devices, with more people involved at every step of the way. 

The best way to make sure your backups are effective? Test them regularly. Let’s talk about why and how. 

Good reasons to test your backups

By regularly testing your backups, you can improve your chances of a successful recovery and minimize the impact of data loss. Here are several reasons why regular backup testing is crucial:

  1. Data integrity verification: Testing ensures that your backups are accurate and complete. A failed test might reveal corrupted files or missing data that could lead to significant losses.
  2. Recovery process validation: By simulating the recovery process, you can identify potential bottlenecks or issues in your restoration procedures. This ensures that you can quickly and effectively recover your data in case of a disaster.
  3. Disaster readiness assessment: Regular testing helps you assess your overall disaster recovery plan. It reveals any weaknesses or gaps that need to be addressed to ensure business continuity and to meet recovery time objectives.
  4. Compliance adherence: Many industries have strict data retention and backup requirements. Testing helps you demonstrate compliance with these regulations. 
  5. Cyber insurance standards: Cyber insurance adoption is increasingly important for businesses, and many cyber insurance providers focus both on helping their clients prepare for ransomware attacks and recovery after the fact. As a result, many require regular backup verification testing and reporting. 
  6. Peace of mind: Knowing that your backups are reliable and tested can provide peace of mind and reduce stress during a crisis.
  7. Early detection of issues: Testing can uncover problems with your backup software, hardware, or processes early on, allowing you to address them before they lead to more significant consequences.

In short, regular backup testing not only confirms that your data is properly backed up, but also ensures that you’re meeting recovery point objectives (RPO), have key features like immutability configured properly, and supports overall business objectives.

Ransomware and backups

In addition to the above reasons, it’s important to note the growing trend for ransomware bad actors to specifically target backups. Veeam’s 2024 Ransomware Trends Report shows that 96% of attacks focus on backup repositories with the bad actors successfully affecting the backups in 76% of cases. Elsewhere, Sophos reports in instances where backups were compromised, ransomware demands doubled, and recovery costs were eight times higher. 

How to test your backups

Testing device backups is crucial to ensure data integrity and recoverability in case of loss or damage. Here are some effective methods:

1. Manual restoration tests

  • Regularly restore files: Select random files from your backup and restore them to a different location. Verify that the restored files are identical to the original files.
  • Test system restore: If your backup includes system images, periodically restore them to a separate partition or virtual machine to ensure they function correctly.

2. Automated testing tools

  • Backup software features: Many backup solutions offer built-in testing features. These tools can automatically verify the integrity of your backups and alert you to any issues. Restore services like Cloud Instant Backup Recovery can also provide valuable insight and support before, during, and after ransomware events. 
  • Third-party verification tools: Consider using specialized tools designed for backup verification. These tools can provide more in-depth analysis and reporting.

3. Simulated disaster scenarios 

  • Create a test environment: Set up a simulated disaster environment, such as a corrupted hard drive or a system failure.
  • Attempt recovery: Try to restore your data from the backup to the simulated environment. This will help you assess the effectiveness of your backup and recovery procedures.

4. Cloud-based backup testing for different recovery scenarios

  • Restore workstations: If you use cloud backup for your workstations, test restoring your files to a new device. This will show the functionality of the cloud backup service and ensure that your data can be accessed and restored successfully.
  • Restore server or network data: In addition to endpoints, you’ll also want to restore your servers or networks to different business locations. This lets you pressure test the cost of restores to account for things like hidden fees, and to ensure functions like immutability are properly configured.   

5. Regular backup verification

  • Check file integrity: Regularly verify the integrity of your backup files using checksums or hash functions. This will help detect any corruption or damage that may have occurred.
  • Review backup logs: Monitor your backup logs for any errors or warnings that might indicate issues with the backup process.

By following these methods, you can ensure that your device backups are reliable and that you can recover your data effectively in case of a disaster.

The human element

Don’t forget that this includes things like establishing where and how you’ll communicate if, for instance, company email is offline. It’s also important to designate incident managers to streamline decision making and ensure that essential personnel have the access and permissions they need. 

How cloud storage can help

Store your backup data in readily accessible, hot storage. This minimizes retrieval times during a disaster, enabling faster recovery of critical applications and data. 

By implementing a robust backup strategy that incorporates the 3-2-1 backup rule (or, the more robust, and increasingly enterprise standard 3-2-1-1-0 method), immutability, version control, and cloud storage, you can ensure the protection of your critical data against various threats. And, by testing frequently, you can rely on the fact that those backups—and your team—are ready to get your business back online as soon as possible.

The post Is Your Data Really Safe? How to Test Your Backups appeared first on Backblaze Blog | Cloud Storage & Cloud Backup

Introducing Llama 3.2 models from Meta in Amazon Bedrock: A new generation of multimodal vision and lightweight models

Post Syndicated from Danilo Poccia original https://aws.amazon.com/blogs/aws/introducing-llama-3-2-models-from-meta-in-amazon-bedrock-a-new-generation-of-multimodal-vision-and-lightweight-models/

In July, we announced the availability of Llama 3.1 models in Amazon Bedrock. Generative AI technology is improving at incredible speed and today, we are excited to introduce the new Llama 3.2 models from Meta in Amazon Bedrock.

Llama 3.2 offers multimodal vision and lightweight models representing Meta’s latest advancement in large language models (LLMs) and providing enhanced capabilities and broader applicability across various use cases. With a focus on responsible innovation and system-level safety, these new models demonstrate state-of-the-art performance on a wide range of industry benchmarks and introduce features that help you build a new generation of AI experiences.

These models are designed to inspire builders with image reasoning and are more accessible for edge applications, unlocking more possibilities with AI.

The Llama 3.2 collection of models are offered in various sizes, from lightweight text-only 1B and 3B parameter models suitable for edge devices to small and medium-sized 11B and 90B parameter models capable of sophisticated reasoning tasks including multimodal support for high resolution images. Llama 3.2 11B and 90B are the first Llama models to support vision tasks, with a new model architecture that integrates image encoder representations into the language model. The new models are designed to be more efficient for AI workloads, with reduced latency and improved performance, making them suitable for a wide range of applications.

All Llama 3.2 models support a 128K context length, maintaining the expanded token capacity introduced in Llama 3.1. Additionally, the models offer improved multilingual support for eight languages including English, German, French, Italian, Portuguese, Hindi, Spanish, and Thai.

In addition to the existing text capable Llama 3.1 8B, 70B, and 405B models, Llama 3.2 supports multimodal use cases. You can now use four new Llama 3.2 models — 90B, 11B, 3B, and 1B — from Meta in Amazon Bedrock to build, experiment, and scale your creative ideas:

Llama 3.2 90B Vision (text + image input) – Meta’s most advanced model, ideal for enterprise-level applications. This model excels at general knowledge, long-form text generation, multilingual translation, coding, math, and advanced reasoning. It also introduces image reasoning capabilities, allowing for image understanding and visual reasoning tasks. This model is ideal for the following use cases: image captioning, image-text retrieval, visual grounding, visual question answering and visual reasoning, and document visual question answering.

Llama 3.2 11B Vision (text + image input) – Well-suited for content creation, conversational AI, language understanding, and enterprise applications requiring visual reasoning. The model demonstrates strong performance in text summarization, sentiment analysis, code generation, and following instructions, with the added ability to reason about images. This model use cases are similar to the 90B version: image captioning, image-text-retrieval, visual grounding, visual question answering and visual reasoning, and document visual question answering.

Llama 3.2 3B (text input) – Designed for applications requiring low-latency inferencing and limited computational resources. It excels at text summarization, classification, and language translation tasks. This model is ideal for the following use cases: mobile AI-powered writing assistants and customer service applications.

Llama 3.2 1B (text input) – The most lightweight model in the Llama 3.2 collection of models, perfect for retrieval and summarization for edge devices and mobile applications. This model is ideal for the following use cases: personal information management and multilingual knowledge retrieval.

In addition, Llama 3.2 is built on top of the Llama Stack, a standardized interface for building canonical toolchain components and agentic applications, making building and deploying easier than ever. Llama Stack API adapters and distributions are designed to most effectively leverage the Llama model capabilities and it gives customers the ability to benchmark Llama models across different vendors.

Meta has tested Llama 3.2 on over 150 benchmark datasets spanning multiple languages and conducted extensive human evaluations, demonstrating competitive performance with other leading foundation models. Let’s see how these models work in practice.

Using Llama 3.2 models in Amazon Bedrock
To get started with Llama 3.2 models, I navigate to the Amazon Bedrock console and choose Model access on the navigation pane. There, I request access for the new Llama 3.2 models: Llama 3.2 1B, 3B, 11B Vision, and 90B Vision.

To test the new vision capability, I open another browser tab and download from the Our World in Data website the Share of electricity generated by renewables chart in PNG format. The chart is very high resolution and I resize it to be 1024 pixel wide.

Back in the Amazon Bedrock console, I choose Chat under Playgrounds in the navigation pane, select Meta as the category, and choose the Llama 3.2 90B Vision model.

I use Choose files to select the resized chart image and use this prompt:

Based on this chart, which countries in Europe have the highest share?

I choose Run and the model analyzes the image and returns its results:

Using Meta Llama 3.2 models in the Amazon Bedrock console

I can also access the models programmatically using the AWS Command Line Interface (AWS CLI) and AWS SDKs. Compared to using the Llama 3.1 models, I only need to update the model IDs as described in the documentation. I can also use the new cross-region inference endpoint for the US and the EU Regions. These endpoints work for any Region within the US and the EU respectively. For example, the cross-region inference endpoints for the Llama 3.2 90B Vision model are:

  • us.meta.llama3-2-90b-instruct-v1:0
  • eu.meta.llama3-2-90b-instruct-v1:0

Here’s a sample AWS CLI command using the Amazon Bedrock Converse API. I use the --query parameter of the CLI to filter the result and only show the text content of the output message:

aws bedrock-runtime converse --messages '[{ "role": "user", "content": [ { "text": "Tell me the three largest cities in Italy." } ] }]' --model-id us.meta.llama3-2-90b-instruct-v1:0 --query 'output.message.content[*].text' --output text

In output, I get the response message from the "assistant".

The three largest cities in Italy are:

1. Rome (Roma) - population: approximately 2.8 million
2. Milan (Milano) - population: approximately 1.4 million
3. Naples (Napoli) - population: approximately 970,000

It’s not much different if you use one of the AWS SDKs. For example, here’s how you can use Python with the AWS SDK for Python (Boto3) to analyze the same image as in the console example:

import boto3

MODEL_ID = "us.meta.llama3-2-90b-instruct-v1:0"
# MODEL_ID = "eu.meta.llama3-2-90b-instruct-v1:0"

IMAGE_NAME = "share-electricity-renewable-small.png"

bedrock_runtime = boto3.client("bedrock-runtime")

with open(IMAGE_NAME, "rb") as f:
    image = f.read()

user_message = "Based on this chart, which countries in Europe have the highest share?"

messages = [
    {
        "role": "user",
        "content": [
            {"image": {"format": "png", "source": {"bytes": image}}},
            {"text": user_message},
        ],
    }
]

response = bedrock_runtime.converse(
    modelId=MODEL_ID,
    messages=messages,
)
response_text = response["output"]["message"]["content"][0]["text"]
print(response_text)

Llama 3.2 models are also available in Amazon SageMaker JumpStart, a machine learning (ML) hub that makes it easy to deploy pre-trained models using the console or programmatically through the SageMaker Python SDK. From SageMaker JumpStart, you can also access and deploy new safeguard models that can help classify the safety level of model inputs (prompts) and outputs (responses), including Llama Guard 3 11B Vision, which are designed to support responsible innovation and system-level safety.

In addition, you can easily fine-tune Llama 3.2 1B and 3B models with SageMaker JumpStart today. Fine-tuned models can then be imported as custom models into Amazon Bedrock. Fine-tuning for the full collection of Llama 3.2 models in Amazon Bedrock and Amazon SageMaker JumpStart is coming soon.

The publicly available weights of Llama 3.2 models make it easier to deliver tailored solutions for custom needs. For example, you can fine-tune a Llama 3.2 model for a specific use case and bring it into Amazon Bedrock as a custom model, potentially outperforming other models in domain-specific tasks. Whether you’re fine-tuning for enhanced performance in areas like content creation, language understanding, or visual reasoning, Llama 3.2’s availability in Amazon Bedrock and SageMaker empowers you to create unique, high-performing AI capabilities that can set your solutions apart.

More on Llama 3.2 model architecture
Llama 3.2 builds upon the success of its predecessors with an advanced architecture designed for optimal performance and versatility:

Auto-regressive language model – At its core, Llama 3.2 uses an optimized transformer architecture, allowing it to generate text by predicting the next token based on the previous context.

Fine-tuning techniques – The instruction-tuned versions of Llama 3.2 employ two key techniques:

  • Supervised fine-tuning (SFT) – This process adapts the model to follow specific instructions and generate more relevant responses.
  • Reinforcement learning with human feedback (RLHF) – This advanced technique aligns the model’s outputs with human preferences, enhancing helpfulness and safety.

Multimodal capabilities – For the 11B and 90B Vision models, Llama 3.2 introduces a novel approach to image understanding:

  • Separately trained image reasoning adaptor weights are integrated with the core LLM weights.
  • These adaptors are connected to the main model through cross-attention mechanisms. Cross-attention allows one section of the model to focus on relevant parts of another component’s output, enabling information flow between different sections of the model.
  • When an image is input, the model treats the image reasoning process as a “tool use” operation, allowing for sophisticated visual analysis alongside text processing. In this context, tool use is the generic term used when a model uses external resources or functions to augment its capabilities and complete tasks more effectively.

Optimized inference – All models support grouped-query attention (GQA), which enhances inference speed and efficiency, particularly beneficial for the larger 90B model.

This architecture enables Llama 3.2 to handle a wide range of tasks, from text generation and understanding to complex reasoning and image analysis, all while maintaining high performance and adaptability across different model sizes.

Things to know
Llama 3.2 models from Meta are now generally available in Amazon Bedrock in the following AWS Regions:

  • Llama 3.2 1B and 3B models are available in the US West (Oregon) and Europe (Frankfurt) Regions, and are available in the US East (Ohio, N. Virginia) and Europe (Ireland, Paris) Regions via cross-region inference.
  • Llama 3.2 11B Vision and 90B Vision models are available in the US West (Oregon) Region, and are available in the US East (Ohio, N. Virginia) Regions via cross-region inference.

Check the full AWS Region list for future updates. To estimate your costs, visit the Amazon Bedrock pricing page.

To learn more about Llama 3.2 features and capabilities, visit the Llama models section of the Amazon Bedrock documentation. Give Llama 3.2 a try in the Amazon Bedrock console today, and send feedback to AWS re:Post for Amazon Bedrock.

You can find deep-dive technical content and discover how our Builder communities are using Amazon Bedrock at community.aws. Let us know what you build with Llama 3.2 in Amazon Bedrock!

Danilo

Mastering Mac MDM: Best Practices for Managing Your macOS Fleet

Post Syndicated from Natasha Rabinov original https://www.backblaze.com/blog/mastering-mac-mdm-best-practices-for-managing-your-macos-fleet/

Mac usage has steadily increased in recent years, particularly in business. In the fourth quarter of 2023, Apple shipped 16.1 percent of all personal computer units in the United States, per Gartner. Moreover, IDC anticipates the number of Macs sold to business users worldwide will increase by 20% between 2023 and 2024. IDC also reports that 76% of IT decision makers believe Macs are more secure than other computers.

With this surge of Macs in the workplace and increased focus on security, IT administrators increasingly require mobile device management (MDM) to protect, secure, and manage these remote devices.

Today, we’re digging into all things Mac MDM, including best practices for implementing MDM in your enterprise and why it’s so important to seek out Mac-native tools to do so.

What is mobile device management (MDM)?

MDM enables you to securely manage and control Apple devices—such as iPhones, iPads, Macs, and Apple TVs—remotely. With MDM, IT administrators can configure devices, deploy apps, enforce security policies, manage updates, and track device inventory all from a centralized platform. For IT teams, the main purpose of MDM is to improve their management and control over their fleet of devices, especially devices that aren’t on-premises like those for remote workers.

How MDM works in practice

  1. Device enrollment: A device is enrolled via automated device enrollment (ADE), a third-party MDM tool like Jamf, Kandji, or Munki, manual setup, QR code, or a URL.
  2. Device configuration: MDM pushes settings (Wi-Fi, VPN, email), security policies (passcode, encryption), and apps to the device.
  3. Ongoing management: MDM continuously monitors the device’s compliance with organizational policies and can enforce restrictions or trigger actions (like updating software, changing user permissions, etc.) when needed.
  4. Device retirement: When a device is retired or a user leaves, the MDM can deprovision the device, sometimes wiping or restoring it to factory settings.

MDM solutions provide a centralized, scalable, and secure way to manage devices in an enterprise setting. This ensures consistency, enhances security, and simplifies IT administration.

What are some advantages of MDM for Macs?

Using MDM for Macs in an enterprise environment offers several advantages, particularly in terms of security, efficiency, and scalability. Here are some key benefits:

  1. Enhanced security: Mac MDM tools frequently make use of the built-in Apple management framework, and one of the most significant benefits of MDMs are their robust security features. With features such as location tracking, remote data wiping, encryption enforcement, and strong authentication methods, MDM solutions protect businesses from cyber threats and unauthorized access. They allow you to enforce security settings like passcodes, encryption (FileVault), and password complexity requirements across all Macs. They also allow you to implement web security policies, blocking access to harmful sites, restricting app installations, controlling software updates, and preventing malicious downloads.
  2. Centralized device management: You can automate enrollment and configure devices remotely, setting up Wi-Fi, VPN, email, and other necessary system preferences without user intervention. This functionality enables touchless deployment, allowing you to ship laptops directly to employees and enroll them remotely, without your IT team ever having to touch the machine. Mac admins can also assign custom configuration profiles to different user groups (e.g., for different departments), allowing flexible yet consistent policy enforcement.
  3. Self-service: As you scale, it becomes increasingly important to limit rights on employee machines, depending on the department and the level of access they need. With MDM, you can populate a self-service portal where employees can access the software they need to do their jobs, including licensed and paid apps. 
  4. Streamlined app deployment and management: You can easily deploy apps from the Mac App Store or distribute custom internal apps, and then centralize automatic updates for those applications.
  5. Efficient patch and update management: MDMs can schedule and enforce macOS updates, reducing vulnerabilities by ensuring all devices are running the latest versions. Automated and remote updates reduce the need for manual interventions and device downtime.
  6. Bring Your Own Device (BYOD) support: MDM supports BYOD environments by providing a separation between personal and work data on the same machine, making it flexible for both company-owned and personal devices.

Challenges with Mac MDM

One of the challenges of managing Apple devices at scale is keeping the Mac operating system (macOS) updated across your fleet of machines. Apple has made changes to how that works over the years. As a Mac admin in a corporate environment, you have to balance conflicting demands—you need to make sure your fleet of machines is up to date and in compliance, but you also need to do so in a way that isn’t disruptive to end users, minimizes downtime, and avoids sudden unexpected reboots. 

To answer this challenge, the open-source community has come together with solutions. Third-party, open source scripting can be leveraged within your MDM to allow you more flexibility and control over macOS updates, allowing you to expand user options for updates while at the same time setting deadlines for those updates to happen.

Another challenge of using MDM solutions is navigating the increasingly restrictive permissions introduced by Apple. Starting with macOS 10.14 and in updates since then, Apple added security to parts of the computer it considers sensitive or critical. While these restrictions enhance user privacy and security, they can limit IT administrators’ control over devices. Applications that require sensitive access to these parts of the system, like backup clients or anti-virus software, now require additional permissions. 

Silently installing these types of apps now requires an additional component, a custom policy configuration that grants full disk access. This will be different depending on the MDM you’re using, but Jamf, for example, offers the Privacy Preferences Policy Control (PPPC) Utility to help you create configuration profiles. 

Best practices for Mac MDM

Managing Macs in an enterprise environment can be a complex task that can have a big impact. One of the biggest benefits of MDM is reducing IT workload. Centralized and automated management reduces the time and effort needed to configure and manage each Mac manually, allowing you to focus on more strategic tasks. 

But, effective MDM requires some other building blocks to be in place before you can realize all of those advantages. Here are some best practices for Mac MDM:

  1. Choose the right MDM solution
  • Find the right partner: Integrate with an MDM solution like Jamf, Kandji, or Munki for streamlined device enrollment and management.
  • Update processes: Ensure that the MDM solution supports both Apple’s Device Enrollment Program (DEP) and Volume Purchase Program (VPP) to automate setup and app deployment, and ensure all devices are enrolled in the MDM system as soon as they are set up.
  1. Enforce security policies
  • Passcode and encryption: Ensure all devices require strong passcodes and are encrypted with FileVault (for Mac) and native iOS encryption.
  • Multi-factor authentication (MFA): Enforce MFA for accessing corporate services and apps.
  • Remote lock/wipe: Enable the ability to lock or wipe devices remotely in case of theft or loss.
  1. App management
  • Volume purchasing: Use Apple’s VPP to distribute apps and content centrally.
  • App whitelisting and blacklisting: Control which apps users can install on their devices, blocking potentially harmful or non-compliant apps.
  • App updates: Automate app updates to ensure security patches and features are deployed quickly.
  1. User and group profiles
  • User profiles: Use custom profiles to set different policies for various roles within the organization (e.g., executives, developers, sales).
  • Configuration profiles: Set up policies for Wi-Fi, VPN, email, and other settings automatically based on user or group membership.
  1. Data protection
  • Content filtering: Implement web content filtering and secure browsing rules.
  • Data loss prevention (DLP): Apply DLP policies to prevent sensitive corporate data from being shared through unapproved channels.
  • Backup solutions: Ensure regular, automated backups using a true backup solution like Backblaze Computer Backup versus a sync service.
  1. Patch management
  • Automatic updates: Automate macOS updates and ensure compliance with the latest patches and versions.
  • Version control: Use MDM to control which versions of macOS and iOS are allowed in the organization to prevent untested or unsupported versions from being installed.
  1. Monitor device compliance
  • Compliance uniformity: Set compliance rules for security (e.g., passcode policies, encryption) and regularly monitor devices for adherence.
  • Compliance monitoring: Use reporting and analytics tools built into your MDM solution to track compliance, app usage, and device health.

By following these best practices, you can efficiently manage and secure Mac devices within your organization while minimizing risks and ensuring a seamless experience for employees.

The importance of Mac-native apps

Mac-native apps provide a seamless and optimized experience that takes full advantage of the macOS ecosystem. Native apps are specifically designed to integrate with macOS, ensuring smoother performance, faster responsiveness, and a more intuitive user experience compared to non-native or cross-platform applications. 

This integration often means that the apps are more efficient, utilize fewer system resources, and can easily interface with built-in macOS features such as Spotlight, Siri, and Notification Center. For IT administrators managing multiple Macs, the consistency of Mac-native apps helps minimize compatibility issues and ensures a uniform experience across all devices.

In addition, Mac-native apps typically offer better security and reliability, which is crucial for IT administrators overseeing corporate environments. Apple has a strict set of guidelines for app development, especially for apps available through the App Store. These guidelines emphasize security practices such as sandboxing, code-signing, and integration with macOS security features like Gatekeeper and XProtect. 

This gives IT administrators confidence that Mac-native apps are less likely to pose security risks, reducing the chances of malware or vulnerabilities being introduced into the organization’s systems. Moreover, since native apps are built to work within Apple’s framework, they are generally more stable, reducing the risk of crashes or bugs that could disrupt workflows.

Furthermore, Mac-native apps support better integration with management and automation tools that are vital for IT administrators. These apps can be more easily deployed, managed, and updated through Apple MDMs. 

Finally, native apps can often integrate with Apple’s scripting languages and automation tools like AppleScript and Automator, providing IT teams with more powerful options for customizing workflows, optimizing processes, and enhancing productivity across the organization. This level of control is essential for IT administrators looking to streamline their management tasks and ensure a high level of efficiency.

Having MDMs built native for Macs is critical for the success of IT management. That holds true for all software running on Macs, including backup software like Backblaze Computer Backup—you have to update permissions less frequently, you have access to more robust build possibilities, and it runs seamlessly in the background.

Are you using a Mac MDM tool?

Do you have a favorite MDM tool? Let us know in the comments. We love to hear how they’re working for you.

The post Mastering Mac MDM: Best Practices for Managing Your macOS Fleet appeared first on Backblaze Blog | Cloud Storage & Cloud Backup

AWS named as a Leader in the 2024 Gartner Magic Quadrant for Desktop as a Service (DaaS)

Post Syndicated from Jeff Barr original https://aws.amazon.com/blogs/aws/aws-named-as-a-leader-in-the-2024-gartner-magic-quadrant-for-desktop-as-a-service-daas/

The 2024 Gartner Magic Quadrant for DaaS (Desktop as a Service) positions AWS as a Leader for the first time. Last year we were recognized as a Challenger. We believe this is a result of our commitment to meet a wide range of customer needs by delivering a diverse portfolio of virtual desktop services with license portability (including Microsoft 365 Apps for Enterprise), our geographic strategy, and operational capabilities focused on cost optimization and automation. Also, our focus on easy-to-use interfaces for managing each aspect of our virtual desktop services means that our customers rarely need to make use of third-party tools.

You can access the complete 2024 Gartner Magic Quadrant for Desktop as a Service (DaaS) to learn more.

2024-Gartner-MQ-for-DaaS-Graph

AWS DaaS Offerings
Let’s take a quick look at our lineup of DaaS offerings (part of our End User Computing portfolio):

Amazon WorkSpaces Family – Originally launched in early 2014 and enhanced frequently ever since, Amazon WorkSpaces gives you a desktop computing environment running Microsoft Windows, Ubuntu, Amazon Linux, or Red Hat Enterprise Linux in the cloud. Designed to support remote & hybrid workers, knowledge workers, developer workstations, and learning environments, WorkSpaces is available in sixteen AWS Regions, in your choice of six bundle sizes, including the GPU-equipped Graphics G4dn bundle. WorkSpaces Personal gives each user a persistent desktop — perfect for developers, knowledge workers, and others who need to install apps and save files or data. If your users do not need persistent desktops (often the case for contact centers, training, virtual learning, and back office access) you can use WorkSpaces Pools to simplify management and reduce costs. WorkSpaces Core provides managed virtual desktop infrastructure that is designed to work with third-party VDI solutions such as those from Citrix, Leostream, Omnissa, and Workspot.

Amazon WorkSpaces clients are available for desktops and tablets, with web access (Amazon WorkSpaces Secure Browser) and the Amazon WorkSpaces Thin Client providing even more choices. If you have the appropriate Windows 10 or 11 desktop license from Microsoft, you can bring your own license to the cloud (also known as BYOL), where it will run on hardware that is dedicated to you.

You can read about the Amazon WorkSpaces Family and review the WorkSpaces Features to learn more about what WorkSpaces has to offer.

Amazon AppStream 2.0 – Launched in late 2016, Amazon AppStream gives you instant, streamed access to SaaS applications and desktop applications without writing code or refactoring the application. You can easily scale applications and make them available to users across the globe without the need to manage any infrastructure. A wide range of compute, memory, storage, GPU, and operating system options let you empower remote workers, while also taking advantage of auto-scaling to avoid overprovisioning. Amazon AppStream offers three fleet types: Always on (instant connections), On-Demand (2 minutes to launch), and Elastic (for unpredictable demand). Pricing varies by type, with per second and per hour granularity for Windows and Linux; read Amazon AppStream 2.0 Pricing to learn more.

Jeff;

Gartner does not endorse any vendor, product or service depicted in its research publications and does not advise technology users to select only those vendors with the highest ratings or other designation. Gartner research publications consist of the opinions of Gartner’s research organization and should not be construed as statements of fact. Gartner disclaims all warranties, expressed or implied, with respect to this research, including any warranties of merchantability or fitness for a particular purpose.

GARTNER is a registered trademark and service mark of Gartner and Magic Quadrant is a registered trademark of Gartner, Inc. and/or its affiliates in the U.S. and internationally and are used herein with permission. All rights reserved.

This graphic was published by Gartner, Inc. as part of a larger research document and should be evaluated in the context of the entire document. The Gartner document is available upon request from AWS.

Do More with Backblaze B2: A Tour of the Backblaze GitHub Repositories

Post Syndicated from Pat Patterson original https://www.backblaze.com/blog/do-more-with-backblaze-b2-a-tour-of-the-backblaze-github-repositories/

A decorative image showing a computer with the GitHub logo and the Backblaze logo superimposed on files.

If you work with Backblaze B2, you’re probably already aware of resources such as the Backblaze B2 Python SDK and the Backblaze B2 Command Line Tool, but did you know that there is also a Terraform Provider for Backblaze B2, an SDK for Java, and a whole slew of open source samples showing how to integrate with Backblaze B2 from web browsers, serverless platforms, and more? Today, I’ll take you on a quick tour of our open source SDKs, tools, and sample code, pointing out some interesting sights along the way.

Why open source?

We’ve long been believers in open source code here at Backblaze, open sourcing our implementation of Reed-Solomon erasure coding back in 2015, and, even before then, sharing our Storage Pod designs and, of course, Drive Stats, the statistics and insights based on our observations of the hard drives we operate in our data centers, including the raw metrics we collect from many thousands of hard drives, every day.

While the Storage Pod designs and Drive Stats live here on the Backblaze website, we make our open source code available via two GitHub organizations:

Let’s take a closer look.

Official Backblaze SDKs and tools

You can use any of AWS’ range of SDKs, plus the AWS Command Line Interface (CLI), to access Backblaze B2 via its S3 Compatible API; just remember to configure the endpoint URL as well as the access key ID and secret access key.

Not every Backblaze B2 operation is accessible via the S3 Compatible API—for example, application key management—so we also support a range of open source SDKs for accessing Backblaze B2’s Native API from a variety of programming languages:

  • The Backblaze B2 Python SDK: This SDK provides access to the basic operations of the Native API, such as list_buckets() and download_file_by_id(), as well as a powerful Synchronizer class that implements high performance, multi-threaded file copying between Backblaze B2 and local file storage.
  • The Backblaze B2 Java SDK: Although it doesn’t include anything quite as sophisticated as the Python Synchronizer, the Java SDK does implement high-level functionality such as uploadLargeFile(), which encapsulates all of the mechanics of a multi-threaded file upload in a single method call. We also use it internally at Backblaze in our production environment. 
  • blazer, an open source Backblaze B2 SDK for Go (aka golang): We adopted blazer from its original author, Toby Burress, when he was no longer able to maintain it. We’ve made a few improvements since taking it on, and we’re looking at doing more with it.

The Backblaze GitHub organization also contains a pair of tools built on the Python SDK:

The remaining repositories contain utilities and other code that we have published over the years, including our open source Reed-Solomon erasure coding implementation and a utility we wrote to support migrating a live Cassandra cluster from one data center to another.

Backblaze sample and demo code

Our https://github.com/backblaze-b2-samples organization contains, at the time of writing, 34 repositories, demonstrating how to use Backblaze B2 in a wide variety of situations. We’ve covered a few of them in past blog posts:

As you explore the https://github.com/backblaze-b2-samples organization, you’ll also find repositories that have not yet been covered here on the Backblaze blog:

  • B2listen allows you to forward Backblaze B2 Event Notifications to a service listening on a local URL. B2listen uses Cloudflare’s free Quick Tunnels feature to proxy traffic from an internet-accessible URL to a local endpoint.
  • B2 Browser Upload shows you how to upload files directly to Backblaze B2 from JavaScript code running in the browser, with sample code for both the Backblaze B2 Native and S3-compatible APIs.
  • The Backblaze B2 Zip Files Example implements a simple Python web app, using the Flask web application framework and the flask-executor task queue, that can compress a set of files located in Backblaze B2 into an archive, also stored in Backblaze B2, without using any local storage.

We’ll write more about these, and other, as yet unreleased, open source projects, over the coming weeks and months, but, if you’d like us to prioritize any of the above three repositories, or any of our other projects, let us know in the comments!

The post Do More with Backblaze B2: A Tour of the Backblaze GitHub Repositories appeared first on Backblaze Blog | Cloud Storage & Cloud Backup

Three Surprising Factors that Affect Cloud Performance

Post Syndicated from Kari Rivas original https://www.backblaze.com/blog/three-surprising-factors-that-affect-cloud-performance/

A decorative image showing a cloud and data graphs.

When you think about cloud performance, metrics like latency and throughput are probably the first things that come to mind. We covered those metrics pretty extensively here and here. So, today, I’m walking through some factors that affect cloud performance that may not get talked about as often, including:

  • The size of your files.
  • The number of parts you upload or download.
  • Block (part) size.

These factors may not be “surprising” per se especially if you remember the pain of trying to download The Matrix over dial up. But they are all things that you should consider (and that you have more control over) when thinking about cloud performance overall. 

Let’s dig in.

1. The size of your files

This one is pretty obvious. Larger files take longer because they require more data to be transferred. If you have a 10Mbps upload connection, a 1GB file will take approximately 800 seconds (13 minutes and 20 seconds) to upload, whereas a 100MB file will take about 80 seconds (a minute and 20 seconds). Most enterprise-grade internet connections offer higher upload speeds, but 10Mbps makes the math approachable for the sake of argument.  

Small files—that is, those less than 5GB—can be uploaded in a single API call. (Note: this can vary based on cloud storage provider and configuration.) Larger files up to 10TB can be uploaded as “parts” in multiple API calls. Each part has to be a minimum of 5MB and a maximum of 5GB. 

You’ll notice that there is quite an overlap here! For uploading files between 5MB and 5GB, is it better to upload them in a single API call, or split them into parts? What is the optimum part size? For backup applications, which typically split all data into equally sized blocks, storing each block as a file, what is the optimum block size? As with many questions, the answer is: it depends.

2. The number of parts you upload or download

Each API call incurs a more-or-less fixed overhead due to latency. For a 1GB file, assuming a single thread of execution, uploading all 1GB in a single API call will be faster than 10 API calls each uploading a 100MB part, since those additional nine API calls each incur some latency overhead. So, bigger is better, right?

3. Block (part) size

Not necessarily, and that brings us to part size. Multi-threading, as mentioned above, affords us the opportunity to upload multiple parts simultaneously, which improves performance—but there are trade-offs. Typically, each part must be stored in memory as it is uploaded, so more threads means more memory consumption. If the number of threads multiplied by the part size exceeds available memory, then either the application will fail with an out of memory error, or data will be swapped to disk, reducing performance.

Downloading data offers even more flexibility, since applications can specify any portion of the file to download in each API call. Whether uploading or downloading, there is a maximum number of threads that will drive throughput to consume all of the available bandwidth. Exceeding this maximum will consume more memory, but provide no performance benefit. 

So, what to do to get the best performance possible for your use case? 

Simple: Customize your settings

Most backup and file transfer tools allow you to configure the number of threads and the amount of data to be transferred per API call, whether that’s block size or part size. If you are writing your own application, you should allow for these parameters to be configured. When it comes to deployment, some experimentation may be required to achieve maximum throughput given available memory.

The big takeaway: When it comes to cloud performance, the metrics you need to care about and the performance you actually need are highly dependent on your use case, your own infrastructure, your workload, and all the network connections between your infrastructure and the cloud provider as well. So, when you’re deciding how to store and use your data, it’s worth taking some extra time to consider the above factors for optimum performance. 

The post Three Surprising Factors that Affect Cloud Performance appeared first on Backblaze Blog | Cloud Storage & Cloud Backup

Five Tips for Creating a Predictable Cloud Storage Budget

Post Syndicated from David Johnson original https://www.backblaze.com/blog/calculate-cost-cloud-storage/

A decorative image showing buildings, data, and icons indicating cost.

Editor’s Note

This post has been updated since it was originally published.

With spending on public cloud services expected to double by 2028, many businesses are looking for ways to cut cloud costs—or at least gain predictability in their spend. Forecasting cloud storage costs should be straightforward once you know what to look for.

Here are five tips you can use when doing your due diligence on the cloud storage vendors you are considering. The goal is to create a cloud storage forecast that you can rely on each and every month.

Tip 1: Navigate tiered pricing structures carefully

Many cloud providers still use tiered pricing structures, which can be misleading if not carefully understood. For example:

AWS S3 Storage Pricing Example

For this post, we’re comparing with hypothetical data stored in AWS S3’s U.S. East Region (N. Virginia) using pricing available at the time of publishing. Note that many factors may affect your final price, including selecting a different region, choosing a different storage tier, etc.

  • First 50 TB/month = $0.023 per GB
  • Next 450 TB/month = $0.022 per GB
  • Over 500 TB/month = $0.021 per GB

In order to receive lower pricing, you have to reach a specific amount of data stored. But, the lower rate only applies to data above the threshold for that tier. In other words, you don’t get a discount on the cumulative amount—each pricing tier is reflected in the data you’re storing. 

The mistake sometimes made is estimating your entire storage cost based on the level for the total data stored. For example, if you had 600TB of storage, you could wrongly calculate as follows:

600,000GB x $0.021 = $12,600/month

When, in fact, you should do the following:

(50,000GB x $0.023) + (450,000GB x $0.022) + (100,000GB x $0.021) = $13,150/month

That was just for storage. Make sure you consider the tiered pricing tables for data retrieval, and API transactions as well.

Tip 2: Don’t choose the wrong storage class

Many cloud providers, especially hyperscalers, now offer a wider array of storage classes than ever before. The idea is that you can trade service capabilities for lower costs. If you don’t need immediate access to your files or don’t want data replication or 11 nines of durability, you can choose to downgrade your service and gain cost savings. The biggest problem with this method is that you have to know what you are going to do with your data to pick the right service—as well as correctly anticipate future business needs—because mistakes can get very expensive. For example:

  • You choose a low cost, cold storage tier that takes hours or days to restore your data. What can go wrong? You need some files back immediately (if, for example, your backups are corrupted by ransomware) and you end up paying 10-20 times the cost to expedite your restore.
  • You choose one storage class and decide you want to upload some data to a compute-based application or to another region—features not part of your current service. The good news? You can usually move the data. The bad news? Even if you’re transferring within the same cloud storage company’s infrastructure, you’re often charged a transfer fee to move the data because you didn’t choose the right storage class when you started. These fees often eradicate any “savings” you had gotten from the lower priced tier.

Basically, if your needs change as they pertain to the data you have stored, you will pay more than you expect to get your data where you need it to be.

Tip 3: Don’t pay for deleted (or modified) files

Some cloud storage companies have a minimum amount of time you are charged for storage for each file uploaded. Typically this minimum period is between 30 and 90 days. You are charged even if you delete the file before the minimum period. For example (assuming a 90 day minimum period), if you upload a file today and delete the file tomorrow, you still have to pay for storing that deleted file for the next 88 days.

This “feature” often extends to files deleted due to versioning. If you set your system to keep three versions of each file, with older versions automatically deleted, you end up paying for those deleted versions for the full minimum duration.

In a typical backup workflow, let’s say you are using a cloud storage service to store your files and your backup program is set to a 30 day retention. That means you will be perpetually paying for an additional 60 days worth of storage (for files that were pruned at 30 days). In other words, you would be paying for a 90 day retention period even though you only have 30 days worth of backups.

Tip 4: Beware of hidden minimums

As the cloud storage market has matured, pricing models have become more complicated. To create an accurate budget, it’s crucial to understand all potential cost components, including some that might not be immediately obvious. Here are two key areas to examine:

  1. Minimum monthly charges: Some providers charge a set fee regardless of how little you store. For instance, you might pay for 1TB even if you only use 100GB.
  2. Minimum file sizes: Some services round up small files to a minimum billable size, often 128KB. While this might seem insignificant, it can add up quickly if you have millions of small files.

Tip 5: Be suspicious of the fine print

Misdirection is the art of getting you to focus on one thing so you don’t focus on other things going on. Practiced by magicians and some cloud storage companies, the idea is to get you to focus on certain features and capabilities without delving below the surface into the fine print. (And, sometimes the prices this technique generates feels like someone has pulled a rabbit out of a hat—to your company’s detriment.)

Read the fine print and as you scroll through the multi-page pricing tables and linked pages of all of the rules that shape how you can use a given cloud storage service. Stop and ask, “What are they trying to hide?” If you find phrases like: “We reserve the right to limit your egress traffic,” or “New users get free usage tier for 12 months,” or “Provisioned requests should be used when you need a guarantee that your retrieval capacity will be available when you need it,” take heed. 

And, even if it seems like you can turn the tables and use things like free credits in the short term, remember that you’ll want to have a plan for your long-term infrastructure when those credits run out as well. 

How to build a predictable cloud storage budget

As organizations increasingly rely on cloud storage for everything from day-to-day operations to long-term data archiving, the ability to accurately forecast and control these costs can significantly impact overall IT budgets and business planning.

The first place to start is data storage as it’s generally the easiest for a company to calculate. For a given month, you can calculate your data volume as follows:

Data stored = current data + new data – deleted data

Take that total and multiple by the monthly storage rate and you’ll get your monthly storage costs. 

Things can get more complicated if your business regularly uploads and downloads data. The data stored at the end of the month should get you at least in the ballpark. But, creating a predictable cloud storage budget requires a holistic understanding of your data needs, usage patterns, and the pricing structures of your chosen provider. It’s not just about estimating how much data you’ll store, but also how you’ll interact with that data over time. Will you be frequently accessing and modifying files, or primarily using the storage for long-term archiving? Are there seasonal fluctuations in your data storage or retrieval patterns? These factors can all influence your overall costs, and we’ll walk through a scenario to show that next.

Let’s do the math

To illustrate how to calculate your cloud storage costs, let’s work through an example using current Backblaze B2 pricing. We’ll focus on a single month for a growing business that is backing up business data to the cloud and verifying their backups have zero errors during recovery:

  • Initial storage at the beginning of the month: 100TB
  • New data added during the month: 10TB
  • Data deleted during the month: 5TB
  • Downloads during the month (egress): 75TB

Backblaze has built a cloud storage calculator that computes costs for all of the major cloud storage providers. Using this calculator, we find that Amazon S3 would cost $2,675 to store this data for a month, while Backblaze B2 would charge just $630.

Using those numbers for storage and assuming you download 75TB a month for backup validation testing, you get a total monthly cost of $8,725 for Amazon S3; Backblaze B2 would be $630 a month. 

The additional cost you see from AWS S3 is from download costs, also known as egress fees, and they can certainly take a toll on your budget. Backblaze offers free egress up to three times the amount you have stored so you can move data when and where you prefer.

The chart below provides the breakdown of the expected cost.

Backblaze B2 Amazon S3
Storage $630 $2,675
Egress Free* $6,050
Totals: $630 $8,725

*Up to 3x of average monthly data stored, then $0.01/GB for additional egress.

Of course each month you will add and delete storage, so you’ll have to account for that in your forecast. And, as we mentioned above, there may also be other fees like minimum storage duration fees or API transaction fees. Using the cloud storage calculator noted above, you can get a reasonable estimate of your total cost over the budget forecasting period.

Finally, you can use the Backblaze B2 storage calculator to address potential use cases that are outside of your normal operations, such as if you delete a large project from your storage or you need to download a large amount of data. Running the calculator for these types of actions lets you obtain a solid estimate for their effect on your budget before they happen and lets you plan accordingly.

Understanding cloud storage pricing gives you options

Creating a predictable cloud storage forecast is key to taking full advantage of all of the value in cloud storage. Organizations like Austin City Limits, Amplify, and Runbiz were able to move to the cloud because they could reliably predict their cloud storage cost with Backblaze B2. You don’t have to let pricing tiers, hidden costs, and fine print stop you. Backblaze makes predicting your cloud storage costs easy.

The post Five Tips for Creating a Predictable Cloud Storage Budget appeared first on Backblaze Blog | Cloud Storage & Cloud Backup

Backblaze Network Stats: Ingress Trends and What They Tell Us About Backup Behaviors

Post Syndicated from Brent Nowak original https://www.backblaze.com/blog/backblaze-network-stats-ingress-trends-and-what-they-tell-us-about-backup-behaviors/

An image with a background pattern of trend lines and the words "Network Stats Ingress rends and what they tell us"

Every day, thousands of Backblaze customers create and update files. These changes make their way into our system to be securely stored. Sometimes they are sent to us immediately, while other times the differentials are batched up into a job that runs at a scheduled time. 

In this post, I’m sampling three points in our network where we take in a lot of ingress traffic off of the internet, and we’re going to explore some of the trends that we see. 

Reading the ingress tea leaves

So, why do we care about ingress trends? In short, it helps us with capacity planning, and it also tells us a lot about how people use cloud storage. We often think of planning in longer terms—weeks, months, or years. Here I wanted to focus on some of the patterns that we see during a shorter period; for example, a single day or a significant date, like the end of the calendar month. There are some interesting patterns we see in our client behavior that keep us on our toes when we are performing capacity planning.

We currently have two product offerings that have different usage and traffic patterns:

  • Backblaze B2 Cloud Storage: Ingress and egress, high variance in traffic levels throughout the day, hour, and at the start of month. 
  • Backblaze Computer Backup: Heavy ingress, with a small variance in traffic levels during the business day or weekday vs. weekend.

Since humans are using our system, we see very human quirks in our traffic profiles. For example, we humans like round numbers! We notice that a lot of backup jobs kick off at midnight local or UTC, or fire off at the top of the hour, or trigger on the first of the month. This means we see spikes of network traffic during these periods. Additionally, a lot of new content gets created during the day and then queued up to be uploaded to us in an overnight backup job.

Scope and terms

Today we’re going to look at ingress traffic, which means we’re monitoring uploads from both Backblaze Computer Backup and Backblaze B2 into our environment. We’ll save downloads, traffic coming out of Backblaze, for analysis in future posts.

One common term that you’ll see on our graphs in the 95th percentile. The 95th percentile number is a point where 95% of all measurements are under and only 5% are over. This is a very typical method to use for monitoring, billing, and trend analysis in the telecom industry. It maps to a standard bell curve, and tells you that you’re capturing the vast majority of usage for planning purposes.

A chart displaying a bell curve and percentiles
A standard bell curve. Source.

In one of our monitoring systems, we are sampling and recording the utilization on our network links and computing a 95th percentile over a five minute period.

With these items defined, let’s get into the data with some charts!

Sample 1: One-month trend

In this first sample, we see that the majority of our daily traffic falls within a nice range. What stands out here is the clock tick over from February to March, where we see a spike of ingress traffic that is outside the expected daily range.

A chart displaying a sample of ingress trends over one month.

Taking that same dataset, let’s take a closer look at the end of the month and zoom in on the calendar change into March.

Adding a vertical red line on 00:00 UTC where the month changes over, we see that there must be a lot of automated jobs that kick in right at the clock changeover into the new month.

A chart showing ingress trends over 7 days.

Sample 2: Top of the hour

Taking a look at another traffic sample from another point in our network, we see very distinct traffic patterns on the top of almost every hour.

A chart showing ingress trends over 24 hours

Sample 3: Pacific Time Zone working hours

Here’s a sample of traffic in our US-West region. During the business day on the West Coast, we see a lull in traffic, with a pickup after the business day is done. This makes sense to us as there are jobs that backup daily content that start to send traffic to us overnight.

A chart showing ingress trends over three days.

What does this mean for you?

It’s very interesting to see the impact of humans in our network traffic and the patterns that emerge. Generally we humans create and modify things during the day, and we like to back them up over night for safekeeping. And we also like round numbers—people tend to send data at the top of the hour, midnight, or end of the month. 

All of these elements are very important in how we, at Backblaze, capacity plan and balance traffic over transit links. We do a lot of work to make sure that no matter what time of day or day of the month, you can reliably get your data into Backblaze.

But, you might also look at this data and take away a meaningful conclusion: Much like choosing to go to the grocery store at 10:30 a.m. on a Tuesday versus fighting the after-work rush at 6:00 p.m., scheduling jobs on the 15, 30, or 45 minute mark or mid-month instead of at the end of the month would mean you’re up against less traffic, which is never a bad thing (and it also smooths out our ingress, which we wouldn’t be mad about either).

At the end of the day, however you choose to schedule your jobs works for us. We’re just glad we’re able to store and protect our customers’ data reliably and affordably, and we’re happy to pass along any tips and trips for a better, less congested, backup experience as well.   

Thanks for reading, and stay tuned for more graphs and commentary on how we strive to build a reliable, scalable, and forward looking network to serve our customer’s needs.

The post Backblaze Network Stats: Ingress Trends and What They Tell Us About Backup Behaviors appeared first on Backblaze Blog | Cloud Storage & Cloud Backup

How to Build Your Own LLM with Backblaze B2 + Jupyter Notebook

Post Syndicated from Pat Patterson original https://www.backblaze.com/blog/how-to-build-your-own-llm-with-backblaze-b2-jupyter-notebook/

A decorative image showing a computer, a cloud, and a building.

Last month, Backblaze Principal Storage Cloud Storyteller, Andy Klein, and I presented a webinar, Leveraging your Cloud Storage Data in AI/ML Apps and Services, in which we explored the various ways AI/ML applications use and store data. In addition to sharing insights from our customers who leverage Backblaze B2 Cloud Object Storage for their AI/ML needs, we also demonstrated a simple AI use case: a retrieval-augmented generation (RAG) chatbot answering questions based on custom context downloaded from a private Backblaze B2 Bucket. After the webinar, I posted the demo source code to a GitHub repository: https://github.com/backblaze-b2-samples/ai-rag-examples

In this blog post, I’ll recap a little of the webinar, and explain how you can use the demo source code as a basis for your own experiments with RAG and large language models (LLMs).

But why, Pat?

You might be asking yourself, why build a chatbot when multiple online services, such as ChatGPT, are just a click away? It’s a good question. The main motivation is privacy. Suppose you want your chatbot to use confidential data in generating its responses. By running an LLM on your own machine, whether on-premises or on a virtual machine (VM) under your control in a public cloud provider’s infrastructure, you eliminate the risks of that data surfacing in response to a question from a user outside your organization.

In the webinar, I showed two Python apps running on a GPU-equipped VM at Vultr, one of Backblaze’s compute partners. The first app used the GPT4All Python SDK to create a very simple conversational chatbot running a local instance of a large language model (LLM), which it used in answering general questions. Here’s an example from the webinar:

Ask me a question: What were the causes of the First World War?

The causes of the First World War are complex and varied, but some key factors include nationalism, imperialism, militarism, alliances between nations, and the assassination of Archduke Franz Ferdinand. Nationalism led to tensions between ethnic groups and their respective governments, while imperialism saw countries competing for territories and resources around the world. Militarism also played a role as many European powers built up large armies and navies in preparation for potential conflicts. The complex web of alliances between nations meant that any conflict could quickly escalate into a latIer war, and the assassination of Archduke Franz Ferdinand by a Serbian nationalist was the spark that ignited the powder keg of tensions already present in Europe at the time.

Now, I’m not a history scholar, but that looks like a pretty good answer to me! (History scholars, you are welcome to correct me.)

The second app used the Langchain framework to implement a more elaborate chatbot, again running on my own machine at Vultr, that used PDF data downloaded from a private bucket in Backblaze B2 as context for answering questions. As much as I love our webinar attendees, I didn’t want to share genuinely confidential data with them, so I used our Backblaze B2 Cloud Storage documentation as context. The chatbot was configured to use that context, and only that context, in answering questions. From the webinar:

Ask me a question about Backblaze 82: What's the difference between the master application key and a standard application key?

The master application key provides complete access to your account with all capabilities, access to all buckets, and has no file prefix restrictions or expiration. On the other hand, a standard application key is limited to the level of access that a user needs and can be specific to a bucket.

Ask me a question about Backblaze B2: What were the causes of the First World War?

The exact cause of the First World War is not mentioned in these documents.

The chatbot provides a comprehensive, accurate answer to the question on Backblaze application keys, but doesn’t answer the question on the causes of the First World War, since it was configured to use only the supplied context in generating its response.

During the webinar’s question-and-answer session, an attendee posed an excellent question: “Can you ask [the chatbot] follow-up questions where it can use previous discussions to build a proper answer based on content?” I responded, “Yes, absolutely; I’ll extend the demo to do exactly that before I post it to GitHub.” What follows are instructions for building a simple RAG chatbot, and then extending it to include message history.

Building a simple RAG chatbot

After the webinar, I rewrote both demo apps as Jupyter notebooks, which allowed me to add commentary to the code. I’ll provide you with edited highlights here, but you can find all of the details in the RAG demo notebook.

The first section of the notebook focuses on downloading PDF data from the private Backblaze B2 Bucket into a vector database, a storage mechanism particularly well suited for use with RAG. This process involves retrieving each PDF, splitting it into uniformly sized segments, and loading the segments into the database. The database stores each segment as a vector with many dimensions—we’re talking hundreds, or even thousands. The vector database can then vectorize a new piece of text—say a question from a user—and very quickly retrieve a list of matching segments.

Since this process can take significant time—about four minutes on my MacBook Pro M1 for the 225 PDF files I used, totaling 58MB of data—the notebook also shows you how to archive the resulting vector data to Backblaze B2 for safekeeping and retrieve it when running the chatbot later.

The vector database provides a “retriever” interface that takes a string as input, performs a similarity search on the vectors in the database, and outputs a list of matching documents. Given the vector database, it’s easy to obtain its retriever:

retriever = vectorstore.as_retriever()

The prompt template I used in the webinar provides the basic instructions for the LLM: use this context to answer the user’s question, and don’t go making things up!

prompt_template = """Use the following pieces of context to answer the question at the end. 
    If you don't know the answer, just say that you don't know, don't try to make up an answer.
    
    {context}
    
    Question: {question}
    Helpful Answer:"""

prompt = PromptTemplate(
    template=prompt_template, input_variables=["context", "question"]
)

The RAG demo app creates a local instance of an LLM, using GPT4All with Nous Hermes 2 Mistral DPO, a fast chat-based model. Here’s an abbreviated version of the code:

model = GPT4All(
    model='Nous-Hermes-2-Mistral-7B-DPO.Q4_0.gguf',
    max_tokens=4096,
    device='gpu'
)

LangChain, as its name suggests, allows you to combine these components into a chain that can accept the user’s question and generate a response.

chain = (
        {"context": retriever, "question": RunnablePassthrough()}
        | prompt
        | model
        | StrOutputParser()
)

As mentioned above, the retriever takes the user’s question as input and returns a list of matching documents. The user’s question is also passed through the first step, and, in the second step, the prompt template combines the context with the user’s question to form the input to the LLM. If we were to peek inside the chain as it was processing the question about application keys, the prompt’s output would look something like this:

Use the following pieces of context to answer the question at the end. If you don't know the answer, just say that you don't know, don't try to make up an answer.

<Text of first matching document>

<Text of second matching document>

Question: What's the difference between the master application key and a standard application key?

Helpful Answer:

This is the basis of RAG: building an LLM prompt that contains the information required to generate an answer, then using the LLM to distill that prompt into an answer. The final step of the chain transforms the data structure emitted by the LLM into a simple string for display.

Now that we have a chain, we can ask it a question. Again, abbreviated from the sample code:

question = 'What is the difference between the master application key and a standard application key?'
answer = chain.invoke(question)

Adding message history to the simple RAG chatbot

The first step of extending the chatbot is to give the LLM new instructions, similar to its previous prompt template, but including the message history:

prompt_template = """Use the following pieces of context and the message history to answer the question at the end. If you don't know the answer, just say that you don't know, don't try to make up an answer.
    
Context: {context}
    
History: {history}
    
Question: {question}

Helpful Answer:"""

prompt = PromptTemplate(
    template=prompt_template, input_variables=["context", "question", "history"]
)

The chain must be modified slightly to accommodate the message history:

chain = (
    {
        "context": (
                itemgetter("question")
                | retriever
        ),
        "question": itemgetter("question"),
        "history": itemgetter("history")
    }
    | prompt
    | model
    | StrOutputParser()
)

Now, we define a very simple in-memory message store that uses a session_id parameter to manage multiple simultaneous conversations:

store = {}

def get_session_history(session_id: str) -> BaseChatMessageHistory:
    if session_id not in store:
        store[session_id] = InMemoryChatMessageHistory()
    return store[session_id]

LangChain provides a wrapper, RunnableWithMessageHistory, that combines the message store with the above chain to create a new chain with message history capability:

with_message_history = RunnableWithMessageHistory(
    chain,
    get_session_history,
    input_messages_key="question",
    history_messages_key="history",
)

Now we can feed a series of related questions into the new chain:

questions = [
    'What is the difference between the master application key and a standard application key?',
    'Which one would I use to work with a single bucket?',
    'Can you tell me anything more about this topic?'
]

for question in questions:
    print(f'\n{question}\n')
    answer = with_message_history.invoke(
        {"question": question},
        config={"configurable": {"session_id": "abc123"}},
    )
    print(f'{answer}\n')

I have to admit, I was pleasantly surprised by the results:

What is the difference between the master application key and a standard application key?

A master application key grants broad access privileges, while a standard application key is limited to the level of access that a user needs.

Which one would I use to work with a single bucket?

You would use a standard application key to work with a single bucket as it has limited access and only grants permissions needed for specific tasks, unlike the master application key which provides broad access privileges.

Can you tell me anything more about this topic?

Sure! The master application key is typically used by developers during development or testing phases to grant full access to all resources in a Backblaze B2 account, while the standard application key provides limited permissions and should be used for production environments where security is paramount.

Processing this series of questions on my MacBook Pro M1 with no GPU-acceleration took three minutes and 25 seconds, and just 52 seconds with its 16-core GPU. For comparison, I spun up a VM at Ori, another Backblaze partner offering GPU VM instances, with an Nvidia L4 Tensor Core GPU and 24GB of VRAM. The only code change required was to set the LLM device to ‘cuda’ to select the Nvidia GPU. The Ori VM answered those same questions in just 18 seconds.

An image of an Nvidia L4 Tensor Core GPU
The Nvidia L4 Tensor Core GPU: not much to look at, but crazy-fast AI inference!

Go forth and experiment

One of the reasons I refactored the demo apps was that notebooks allow an interactive, experimental approach. You can run the code in a cell, make a change, then re-run it to see the outcome. The RAG demo repository includes instructions for running the notebooks, and both the GPT4All and LangChain SDKs can run LLMs on machines with or without a GPU. Use the code as a starting point for your own exploration of AI, and let us know how you get on in the comments!

The post How to Build Your Own LLM with Backblaze B2 + Jupyter Notebook appeared first on Backblaze Blog | Cloud Storage & Cloud Backup

Backblaze Drive Stats for Q2 2024

Post Syndicated from Andy Klein original https://www.backblaze.com/blog/backblaze-drive-stats-for-q2-2024/

A decorative image with the headline Q2 2024 Drive Stats.

As of the end of Q2 2024, Backblaze was monitoring 288,665 hard drives (HDDs) and solid state drives (SSDs) in our cloud storage servers located in our data centers around the world. We removed from this analysis 3,789 boot drives, consisting of 2,923 SSDs and 866 hard drives. This leaves us with 284,876 hard drives under management to review for this report. We’ll review the annualized failure rates (AFRs) for Q2 2024 and the lifetime AFRs of the qualifying drive models, and we’ll also check out drive age versus failure rates over time. Along the way, we’ll share our observations and insights on the data presented and, as always, we look forward to you doing the same in the comments section at the end of the post.

Hard drive failure rates for Q2 2024

For our Q2 2024 quarterly analysis, we remove from consideration: drive models which did have at least 100 drives in service at the end of the quarter, drive models which did not accumulate 10,000 or more drive days during the quarter, and individual drives which exceeded their manufacturer’s temperature specification during their lifetime. The removed pool totalled 490 drives, leaving us with 284,386 drives grouped into 29 drive models for our Q2 2024 analysis. 

The table below lists the AFRs and related data for these drive models. The table is sorted large to small by drive size then by AFR within drive size.

Notes and observations on the Q2 2024 Drive Stats

  • Upward AFR: The AFR for Q2 2024 was 1.71%. That’s up from Q1 2024 at 1.41%, but down from one year ago (Q2 2023) at 2.28%. While the quarter over quarter increase was a bit surprising, quarterly fluctuations in AFR are expected. Sixteen drive models had an AFR of 1.71% or below while 13 drive models had an AFR above.
  • Two good zeroes: In Q2 2024, two drive models had zero failures, a 14TB Seagate (model: ST14000NM000J) and a 16TB Seagate (model: ST16000NM002J). Both have a relatively small number of drives and drive days for the quarter, so their success is somewhat muted, but the 16TB Seagate drive model has a very respectable 0.57% lifetime failure rate.
  • Another GOAT is gone: In Q1, we migrated the last of our 4TB Toshiba drives. In Q2, we migrated the last of our 6TB drives, including all of the Seagate 6TB drives which had reached an average age of nine years (108 months). This Seagate drive model closed out its career at Backblaze with an impressive 0.86% lifetime AFR.

    Currently the 4TB Seagate (model: ST4000DM000) is our oldest data drive model in production at an average age of 99.5 months. The data on these drives is scheduled to be migrated over the next quarter or two using CVT, our in-house drive migration system. They’ll never reach nine years of service. 

  • The 10-Year Club: With the 6TB Seagate drives being migrated as they hit 10 years of service, we wondered: What is the oldest data drive in service? The answer, a 4TB HGST drive (model: HMS5C4040ALE640) with 9 years, 11 months and 23 days service as of the end of Q2. Alas, the Backblaze Vault in which this drive resides is now being migrated as are many other drives with over nine years of service. We’ll see next quarter to see if any of them made it to the 10-Year Club before they are retired.

    While there are no data drives with 10 years of service, there are 11 HDD boot drives that exceed the mark. In fact one, a 500GB WD drive (model: WD5000BPKT) has over 11 years of service. (Psst, don’t tell the CVT team.)

  • An HGST surprise: Over the years, the HGST drive models we have used performed very well. So, when the 12TB HGST (model: HUH721212ALN604) drive showed up with a 7.17% AFR for Q2, it’s news. Such uncharacteristic quarterly failure rates for this model actually go back about a year, although the 7.17% AFR is the largest quarterly value to date. As a result, the lifetime AFR has risen from 0.99% to 1.57% over the last year. While the lifetime AFR is not alarming, we are paying attention to this trend.

Lifetime hard drive failure rates

As of the end of Q2 2024, we were tracking 284,876 operational hard drives. To be considered for the lifetime review, a drive model was required to have 500 or more drives as of the end of Q2 2024 and have over 100,000 accumulated drive days during their lifetime. When we removed those drive models which did not meet the lifetime criteria, we had 283,065 drives grouped into 25 models remaining for analysis as shown in the table below.

Age, AFR, and snakes

One of the truisms in our business is that different drive models fail at different rates. Our goal is to develop a failure profile for a given drive model over time. Such a profile can help optimize our drive replacement and migration strategies, and ultimately maintains the durability of our cloud storage service.

For our cohort of data drives, we’ll look at the changes in the lifetime AFR over time for drive models with at least one million drive days as of the end of Q2 2024. This gives us 23 drive models to review. We’ll divide the drive models into two groups: those whose average age is five years (60 months) or less, and those whose average age is above 60 months. Why that cutoff? That’s the typical warranty period for enterprise class hard drives. 

Let’s start by plotting the current lifetime AFR for the 14 drives models that have an average age of 60 months or less as shown in the chart below.

Let’s review the drive models by characterizing the four quadrants as follows:

  • Quadrant I: Drive models in this quadrant are performing well, and have a respectable AFR of less than 1.5%. Drive models to the right in this quadrant might require a little more attention over the coming months than those to the left.
  • Quadrant II: These drive models have failure rates above 1.5%, but are still reasonable at around 2% lifetime AFR. What is important is that AFR does not increase significantly over time.
  • Quadrant III: There are no drives currently in this quadrant, but if there were it would not be a cause for alarm. Why? Some drive models experience higher rates of failure early on, and then following the bathtub curve, their AFR drops as they get older. 
  • Quadrant IV: These drive models are just starting out and are just beginning to establish their failure profile, which at the moment is good.

At a glance, the chart tells us that everything seems fine. The drives in Quadrant I are performing well, the two drives in Quadrant II could be better, but are still acceptable, and there are no surprises in the newer drive models to this point. Let’s see how things fair for the drive models which have an average age of over 60 months as in the chart below.

There are nine drive models which fit the average age criteria, including the Seagate 6TB drive (in yellow) whose drives were removed from service in Q2. As you can see the drive models are spread out across all four quadrants. As before, Quadrant I contains good drives, Quadrants II and III are drives we need to worry about, and Quadrant IV models look good so far. 

If we were to stop here we could decide for example that the 4TB Seagate drives are first in line for the CVT migration process, but not so fast. All of these drive models have been around for at least five years and we have their failure rates over time. So, rather than rely on just a point in time, let’s look at their change in failure rates over time in the chart below.

The snake chart, as we’re calling it, shows the lifetime failure rate of each drive model over time. We started at 24 months to make the chart less messy. Regardless, the drive models sort themselves out into either Quadrant I or II once their average age passes 60 months. Let’s take a look at the drives in each of those quadrants.

  • Quadrant I: Five of the nine drive models are in Quadrant I as of Q2 2024. The two 4TB HGST drives (brown and purple lines) as well as the 6TB Seagate (red line) have nearly vertical lines indicating their failure rates have been consistent over time, especially after 60 months of service. Such demonstrated consistency over time is a failure profile we like to see. 

    The failure profile of the 8TB Seagate (blue line) and the 8TB HGST (gray line) are less consistent, with each increasing their failure rates as they have aged. In the case of the HGST drive, the lifetime AFR rose from about 0.5% to 1.0% over an 18 month period starting at 48 months before leveling out. The Seagate drive took about two years starting at 60 months to go from 1.0% to nearly 1.5% before leveling out.

  • Quadrant II: The remaining 4 drive models ended in this quadrant. Three of the models, the 8TB Seagate (yellow line), the 10TB Seagate (green line), and the 12TB HGST (teal line) have similar failure profiles. All three got to some point in their lifetime and their curve began bending to the right. In other words, their failure rates over time accelerated. While the 8TB Seagate (yellow) shows some signs of leveling off, all three models will be closely watched and replaced if this trend continues.

    Also in Quadrant II is the 4TB Seagate drive (black line). This drive model is aggressively being migrated and is being replaced by 16TB and larger drives via the CVT process. As such, it is hard to tell if the nearly vertical failure profile is a function of the replacement process or the drive model failure rate leveling out over time. Either way, the migration of this drive model is expected to be complete in the next quarter or two.

A normal failure profile

If we had to pick one of the drive models to represent a normal failure profile, it would be the 8TB Seagate (blue line, model: ST800DM002). Why? The failure rate for the first 60 months was consistently around 1.0%, Seagate’s predicted AFR. After 60 months, the AFR increased as the drive aged as one would expect. You might have thought we’d choose the failure profile of one of the two 4TB HGST drive models (brown and purple lines). The “trouble” is their failure rates are well below any published AFR by any drive manufacturer. While that’s great for us, their annualized failure rates over time are sadly not normal.

Can AI help?

The idea of using AI/ML techniques to predict drive failure has been around for several years, but as a first step let’s see if predicting drive failure is even an AI-worthy problem. We recently conducted a webinar “Leveraging Your Cloud Storage Data in AL/ML Apps and Services” in which we outlined general criteria to be used in evaluating if AI/ML is needed to solve a given problem, in this case predicting drive failure. The most salient criteria which applies here is that AI is best used for a problem for which you can not consistently apply a set of rules to solve the problem. 

A model is trained by taking the source data and applying an algorithm to iteratively combine and weigh multiple factors. The output is a model which can be used to answer questions about the model’s subject matter, in this case drive failure. For example, we train a model using the Drive Stats data for a given drive model for the last year. Then, we ask the model a question using drive Z’s daily SMART stats and related information. We use this data as input to the model, and while there is no exact match, the model will use inference to develop a response of the probability of drive failure for drive Z over time. As such, it would seem that drive failure prediction would be a good candidate for using AI.

What’s not clear is whether what is learned about one drive model can be applied to another drive model. One look at the snake chart above visualizes the issue as the failure profile for each drive model is different, sometimes radically different. For example, do you think you could train a model on the 4TB Seagate drives (black line) and use it to predict drive failures for either of the 4TB HGST drive models (purple and brown lines)? The answer may be yes, but it certainly doesn’t seem likely. 

All that said, several research papers and studies have been published over the years attempting to determine whether or not AI/ML can be used to make drive failure predictions. We’ll be doing a review of these publications in the next couple of months and hopefully shed some light on the ability to use AI to accurately make drive failure predictions in a timely manner.

The Hard Drive Stats data

It has now been over 11 years since we began recording, storing, and reporting the operational statistics of the hard drives and SSDs we use to store data in the Backblaze data storage cloud. We look at the telemetry data of the drives, including their SMART stats and other health related attributes. We do not read or otherwise examine the actual customer data stored. 

Over the years, we have analyzed the data we have gathered and published our findings and insights from our analyses. For transparency, we also publish the data itself, known as the Drive Stats dataset. This dataset is open source and can be downloaded from our Drive Stats webpage.

The post Backblaze Drive Stats for Q2 2024 appeared first on Backblaze Blog | Cloud Storage & Cloud Backup

Proper Address: IPv4 vs. IPv6

Post Syndicated from Stephanie Doyle original https://www.backblaze.com/blog/proper-address-ipv4-vs-ipv6/

A decorative image showing a cloud over performance graphs and charts.

Ah, the 1980s. It brought us such classics as Ghostbusters, The Princess Bride, Tina Turner’s triumphant comeback, Pac-Man, and the original Apple Macintosh. Also, it gave us the birth of the internet, in which we figured out how to make all our computers one giant, powerful network held together initially by internet protocols (IPs) and, eventually, by a mutual love of cat videos

Now, each of our devices that connect to the internet require a way to find and send information back and forth, which means they need an IP address. Most folks don’t type IP addresses into their search bar though—we use domain names (for example, www.backblaze.com). Which IP addresses correspond to which domain names is stored in a hierarchical and distributed database system known as the domain name system (DNS), which is also an internet protocol. 

Today, let’s talk about IP addresses: What are IPv4 and IPv6, why is IPv6 necessary, and what impact will it have on networking?

Let’s set the scene

Any time you’re sending and receiving data, be it a letter in the mail, dialing a phone number, or loading a website, you’ve got to have an identifiable address reach the proper person and/or device. What all of these types of addresses have in common is that as our population has exploded, we’ve had to re-work how addresses work in order to include more possible data locations. U.S. zip codes were established in 1963. Area codes were established in 1947, and a great expansion was necessary only three(ish) decades later, and that plan was implemented starting in the late 1980s and ending in the mid ’90s.

IP addresses, meanwhile, have been operating on the first and only protocol we introduced in the 1980s, called IPv4. Not only has the world population almost doubled since then, but there has also been a nonlinear explosion in internet-connected devices per person. When IP addresses were first invented, it was unfathomable that most folks would be walking around with a computer in their pocket, remotely checking who’s ringing their doorbells while adjusting their thermostat in anticipation of returning home. All of those internet-connected devices use an IP address, in one way or another. 

So, it’s no surprise that we’re now seeing an adoption of a new IP address standard. In keeping with tradition, the versions aren’t sequential: Right now we’re jumping from IPv4 to IPv6. (What happened to IPv5? It was skipped, sort of.)

What is IPv4?

IPv4 is an internet protocol that assigns addresses to devices. It uses a 32-bit address, represented by four numbers (octets), each between 0 and 255, separated by dots (e.g., 192.168.1.100), and uses decimal notation. 

Remember that each bit represents one of two possible values, a 0 or a 1. So, for a 32-bit value, there are 2^32 possible addresses, or 4,294,967,296 IP addresses total. Several IPv4 address blocks were also reserved for private networks and multicast addresses, about 286 million total. Between the two reserved blocks of addresses, that’s about 7% of the total addresses in existence.

What is IPv6?

IPv6 uses a 128-bit address, represented by a longer string of numbers and letters (e.g., 2001:0db8:85a3:0000:0000:8a2e:0370:7334) in hexadecimal code, aka hex code. If you’ve ever designed a MySpace page (hi, Tom!) or a webpage, you’re likely familiar with the hex codes used to identify precise colors.

Doing the math as we did above, there are 2^128 possible IPv6 addresses, which is 340 undecillion. (That’s the 11th order of magnitude if you’re going, million, billion, trillion, and so on.) And, just like IPv4, there are some reserved addresses, but they represent such a comparatively smaller number of total available addresses that it’s not even worth calculating a percentage. 

Woah, how have we been surviving in the meantime?

We mentioned above that we’ve known we’re running out of IP addresses for a while. But, important detail: There was evidence of the problem as early as 1981, and mitigation efforts were enacted by 1992. Before we get into what mitigation strategies have been used over the years, a bit of a refinement of the above information—IP addresses consist of two main parts, one that identifies the network (or, sometimes, the subnet) and the host, or the destination on that network. (That’s true of both IPv4 and IPv6.)

Classful networking

In the original iteration of IPv4, the bits that identified the subnet were fixed, and that meant a lot of wasted space. In 1981, we implemented classful networking. Instead of keeping a fixed number of bits to identify a network, the three most significant bits identified the size of the network prefix, and that sent you to different classes. That meant that existing addresses didn’t have to change. Here’s a handy table:

Class Most significant bits Network prefix size (bits) Host identifier size (bits) Address range Maximum number of networks Maximum number of hosts per network
A 0 8 24 0.0.0.0–127.255.255.255 128 networks 16,777,216 hosts per network
B 10 16 16 128.0.0.0–191.255.255.255 16,384 networks 65,386 hosts per network
C 110 24 8 192.0.0.0–223.255.255.255 2,097,152 networks 256 hosts per network
D (multicast)
E (reserved)
1110
1111
224.0.0.0–255.255.255.255

All that sounds a bit like gobbley-gook. An analogy: You live in a city that wants to improve mail delivery, so it’s introduced the option to choose from a small, medium, or large mailbox. The sizes are actually pretty disproportionate—the small is about the size of a toaster, whereas the medium is the size of a kitchen trash can. (And large is the size of your car. Who gets that much mail?) No matter which size mailbox you (or your neighbor) chooses, your physical address didn’t change when this system was implemented. You usually get more mail than the toaster would accommodate, but never even come close to filling your trash can-sized mailbox. So, that extra space just sits empty and unused, never fulfilling its mail volume potential.  

Note that classful networking is now largely defunct, replaced by…  

Classless inter-domain routing (CIDR)

The biggest issue of the above system was its inflexibility. Adding classes gave us more flexibility than the original design, but you were still restricted to 8, 16, or 24 bits to identify the network. That means you can end up with a lot of unused IP addresses, as indicated by our above analogy. Here’s the math behind why: 

The number of addresses available on a network is the inverse of how many bits you use to define it. So, in a 32-bit address, if you use 16 bits to define the network, you have 8 bits leftover to define the host. That’s our Class C network, which contained 2^8 (256) IP addresses—not enough for most use cases. And, the next smallest subset, Class B, represented 2^16 IP addresses (65,536 total), which most organizations could not use efficiently. After DNS became the norm, it became clear that classful networking wasn’t scalable, and thus CIDR rose to prominence.  

CIDR is based on variable-length subnet masking (VLSM), which lets each network be divided into subnetworks of various power-of-two sizes. This method optimizes the allocation of IPv4 addresses by allowing for more flexible address blocks. 

Using our analogy, instead of assigning mailbox size based on household size, you might just have a system in which folks walk up to the post office and find their name on a list associated with a mailbox. If someone has more or less mail that month, then they can be assigned the properly sized mailbox. 

Network address translation (NAT)

NAT allows multiple devices to share a single public IPv4 address by modifying the IP header when it’s in transit. This is super useful when you’re talking about private networks—you can assign a single IP address to multiple devices. For example, if you have several internet of thing (IoT) devices in your home, they can all appear to the public network as one IP address, and your local network can figure out what traffic goes where. It also makes it so that if a network moves, the host doesn’t necessarily have to be assigned a new IP address, such as if an internet provider like Cox decides to stop doing business in your region, and Spectrum takes over their IP address allocation—though likely they’d just change your public IP address in that specific scenario.

In our mail analogy, NAT is like those group mailboxes you see in rural areas, apartment buildings, or in neighborhoods. Everyone in the same location gets their mail delivered to the same physical address, and your box number is used to further identify your house within the group mailbox. 

The secondary market of IP addresses

If we can learn anything from the above workarounds, flexibility and possibility is key. So, it’s unsurprising to know that a secondary market has cropped up, introducing things like address recycling, address trading, and address leasing. IPv6 will solve the scarcity issue—but what else can it do?

What are the benefits of IPv6?

So far we’ve talked about the primary benefit of IPv6—more IP addresses that we clearly need. But, there are other benefits as well. Here’s a summary: 

Improved Efficiency

  • Simpler header: The IPv6 header is simpler than IPv4’s, leading to faster packet processing and reduced overhead.
  • Efficient routing: IPv6’s design allows for more efficient routing, potentially reducing latency and improving network performance. Arguably, most folks won’t see a huge performance improvement unless they reconfigure their own network architecture, but the possibility is there. 
  • Autoconfiguration: IPv6 supports automatic configuration of network interfaces, simplifying setup and reducing administrative overhead.

Enhanced Security

  • Built-in security features: IPv6 offers built-in security mechanisms like IPsec, potentially providing better protection against attacks. In practice, it’s not typically implemented as most encryption is typically handled at the transport layer security (TLS) IP layer. 

Quality of Service (QoS)

  • Improved QoS: IPv6 provides better support for QoS, allowing for prioritization of different types of traffic, ensuring a better user experience for applications like video conferencing and online gaming.

Other Benefits

  • Reduced reliance on NAT: IPv6 reduces the need for NAT, simplifying network configurations and improving end-to-end connectivity.
  • Support for new services: IPv6 is better suited for emerging technologies and applications that require a large number of addresses and advanced features.

What’s next? Will we run out again?

Given the amount of addresses for IPv4 vs. IPv6 (4.2 billion vs. 340 undecillion, respectively), you can understand how we might have needed to shore up our IPv4 addresses. Honestly, if you assume one device per person, we already outnumber IPv4 addresses—in fact, we outnumbered IP addresses in the 1970s, before IPv4 was even invented! You shouldn’t assume one device per person, by the way. While many countries with widespread broadband access have several devices per person—in the U.S., Consumer Affairs was reporting 21 per U.S. household in 2023, and the average U.S. household for that same year was 2.51 people. Globally, that same source reports 3.6 internet-connected devices per person.   

Changes like this can certainly be disruptive, but the good news on that front is that most devices will be dual-stacked for quite a while. That means that you’ll have both versions of an IP address, and this change can roll out organically (so to speak). In the end, we’ll have a better-performing internet, ready to grow with us for the foreseeable future.

The post Proper Address: IPv4 vs. IPv6 appeared first on Backblaze Blog | Cloud Storage & Cloud Backup

How to Future-Proof Your Archives: File Formats That Stand the Test of Time

Post Syndicated from Stephanie Doyle original https://www.backblaze.com/blog/how-to-future-proof-your-archives-file-formats-that-stand-the-test-of-time/

A decorative image showing a vault door with a series of 0s and 1s behind it.

You may have heard us talk about backup a time or two, and hopefully our love has been clear. So, when Wired gave us a shoutout in their recent, astute article about archiving, allow us to say we were flattered. 

As both a tribute and a collaboration, we’re happy to build on their article’s premise about choosing the correct file type for archiving purposes, and we’ll highlight a few tools to help you protect your files in the long term. 

Wired reports: Archived files are especially vulnerable to changing file types

Archives are distinct from backups and have their own demands. Backups are intended to give you the ability to restore files or your whole environment—they need to be both in step with your current environment and flexible enough to respond to both a point in time restore of your whole system or a single file, depending on what you need. Archiving, on the other hand, is about preservation when you can’t depend on the continuity of devices or digital tools—those tools might look quite different (or not exist at all!) down the line. That said, backups are also an essential building block of digital archives. 

Making something last long-term takes more work than you’d think. And, interestingly, digital archiving suffers from the opposite problem of “traditional” archiving. Whereas with books, magazines, and other paper-based media, you want to touch them as little as possible, with digital archives, you actually need to do some active maintenance to make sure you’re converting files to accessible formats that you can open well into the future. 

Here’s an expert from the Wired report telling us about just one part of the practical concerns of digital archiving: 

“Twenty years, in the digital realm, is ancient,” says Lance Stuchell, director of digital preservation services at the University of Michigan. His team is frequently tasked with recovering digital files from old computers and storage mediums. “We have a lab that can deal with old media—floppy drives, CDs, older computers. We can get that off of those types of media and move it into our preservation system while ensuring we don’t mess it up while we’re doing it.”

Wired goes on to report that the problem isn’t just having the correct device, but actually having the correct file type. Their biggest takeaways for making sure your files hold up over time? 

  1. Use open source file types. 
  2. If you’re storing media, store files uncompressed. 
  3. Back up absolutely everything. 

Check out the rest of the article for details—it’s worth a read. And, thanks for the shoutout as a good option for folks looking to back up, Wired. 

Some tools for converting files

So, now that you’re all geared up to get your archive in order, here are some free, open source tools that will help you convert your files. One note when you’re using open source (and we’re big fans) is to make sure you’re using a tool you trust. And, some tools, especially web-based tools, may collect user data or can expose sensitive information. 

With that in mind, here are a few to get you started: 

  • LibreOffice: The successor to OpenOffice, LibreOffice is a well-respected open source alternative to Microsoft Office and supports several open source and older document file formats.
  • Pandoc: Pandoc calls itself the Swiss army knife of file converters for markup formats, which includes documents, HTML formats, spreadsheets, and more. It’s got a very helpful list of file formats and indicates whether they can convert from/to each of them. 
  • ImageMagick: ImageMagick can certainly convert your files, and it’s also beloved because it can edit files, including support for scripting and automation. But, for our purposes, it converts image formats and has continuous support from the open source community. 
  • FFmpeg: FFmpeg is a community supported audio and video tool. 
  • VLC media player: Another audio and video tool that supports conversion.

Keep in mind that while we’re recommending many of these for conversion purposes, many are actually fully-fledged programs with some very cool features—and, some can even replace traditional paid tool options, if you’re the budget-conscious type.  

Archiving hardware of the future

Standard tech right now for storing archived files is on hard disk drives (HDDs) or solid state drives (SSDs), and you’ll even find DVDs that can keep your data stored for 1,000 years or more. All storage media types are known to degrade over time—when you’re storing long-term, you can’t just leave your drive disconnected from power forever, for instance. 

That said, developing storage media types, while not as common, offer some interesting (if not yet widely practical) options. If you’re willing to drop some cash, DNA (yes, the biological kind) or ceramic might be for you. And, if you want to get super sci-fi with it, PhysicsWorld has reported on the “Superman memory crystal” that could keep data intact for millions of years. 

Build your archive for alien circumstances

When we ambitiously sent out messages to the (potential) sentient life in the universe almost 50 years ago, on golden records no less, we apparently thought it was enough to also include a phonograph needle and some symbolic instructions on how to play the record. In practice, we sent a message with no guarantees that someone could decode and play it. 

That may be fine for our space-age time capsule, but for our everyday archives, we do want to do our best to make sure we’re able to open them in the future. While we can’t anticipate where technology will be in 20, 40, or 100 years, we can follow digital archiving best practices to give future generations the best chance of opening files. At least they’ll likely share a language with us, as opposed to our alien friends.

The post How to Future-Proof Your Archives: File Formats That Stand the Test of Time appeared first on Backblaze Blog | Cloud Storage & Cloud Backup

What Do Teachers, Parents, and Students Have in Common? The Need to Back Up

Post Syndicated from Yev original https://www.backblaze.com/blog/what-do-teachers-parents-and-students-have-in-common-the-need-to-back-up/

Our world has moved more online, and blackboards have taken a backseat to laptops in classrooms and lecture halls alike. From homework to lesson planning and grading, to communicating with students and parents, educators and students rely heavily on their computers and sync drives like Google Drive, Dropbox, or OneDrive. And, when it comes to digital resources, there’s always a risk of data loss, which, when it strikes, can wipe out hours or days of work. 

This is where backup solutions come into play. In this blog post, we will explore the benefits of computer backup for both students and educators, highlight the importance of choosing an affordable and reliable backup solution, and give you some talking points to help others in your educational community understand the importance of backing up.

Risks of data loss

Data loss can happen for a variety of reasons, including hardware failure, accidental deletion, theft, or cyber attacks. 

Imagine this scenario: You’ve spent hours building a detailed lesson plan, preparing engaging multimedia presentations, and grading student assignments. Suddenly, your computer crashes, and you can’t get it to turn back on. Or, you lose your USB drive that has years of work, including lesson plans. Both situations are not great and the result is that all of your hard work is gone in an instant. 

Data loss is an issue for anyone, but for educators, the consequences can affect not only your work but also your students’ learning experience. And the same scenario is true for students—working on a research project last minute only to have a blue screen of death five minutes before the deadline can be a frustrating turn of events—and one that affects your grade long-term. 

The 3-2-1 backup rule

The good news about avoiding data loss is that there are some established best practices that can give you a great place to start. The most fundamental of these, the 3-2-1 backup rule, says you should have three copies of your data on two types of storage media with one copy stored off-site. 

Sync is not backup

Sync services like Google Drive, OneDrive, and Dropbox are great, but they are not the same thing as a true backup. Sync drives are designed to keep all versions consistent with each other, which makes them vulnerable to things like accidental deletion and ransomware attacks. While some may have limited version history or “backup,” those features are typically for a limited amount of time (i.e., 30 days), or are lacking in some of the key areas that schools need to maintain compliance with data protection standards. 

Cloud backup services are using a different tool for a different job—you want your synced files to change, whereas you want your backup to be a fixed point in time you can restore if you need to. That’s not to say that you won’t have your backup files constantly up-to-date, like you do with an automatic backup solution, just that you’ll be able to restore a file, or all of your files, to whatever time you choose. 

And, if you think the difference is just splitting hairs, studies show that 58% of organizations that experienced data loss last year had some amount of unrecovered data. And, in that same pool of survey takers, 84% of organizations were relying on cloud sync services. 

Benefits of backing up

  1. Protection against data loss: The primary benefit of a backup solution is the protection it offers against data loss. By regularly backing up your files, you can ensure that your important documents are safe and can be restored quickly in case of any mishap, or even if you forget your laptop at home.
  2. Enhanced productivity: With a reliable backup system in place, you can focus on what you’re working on without worrying about it getting lost. This peace of mind allows you to work more efficiently and creatively, knowing that your files are secure.
  3. Compliance and accountability: While not at the top of many student’s minds, many educators know that educational institutions have policies and regulations regarding data storage and protection. Having a robust backup solution helps teachers, professors, and the organizations they work for stay compliant with these regulations.
  4. Cost savings: Investing in a backup solution can save you money in the long run. Data recovery services can be expensive after the fact, and the time lost in trying to recreate lost work can be even more costly. An affordable backup solution provides a safety net that prevents these potential expenses.

Students: Back up your data regularly

Often, students are given space on cloud drives or required to submit assignments through learning management systems like Blackboard. But, even with cloud drives, many tools don’t account for adequate backups. When it comes down to it, students are responsible for turning in their work on time. 

Getting a backup in place protects you and all the effort you’re putting into your coursework, and you can try it for free to see if it’s right for you. 

Educators and faculty members often drive change

Collaboration is one of the hallmarks of an educational environment, and educators and students are often just as responsible for driving change as administrators are. Whatever role you take in your educational community, there are many ways you can make to help others understand why backup is so crucial, and how to choose the tool that’s right for you. 

Choosing an affordable and reliable backup solution

When selecting a backup solution, affordability and reliability are key factors to consider. Here are some decision criteria you can share with others to help in choosing a backup solution:

  • Assess your needs. Determine the amount of data you need to back up and how frequently it changes. This will help you choose a solution that meets your specific requirements without overpaying for unnecessary features.
  • Cloud vs. local backup. Cloud-based backups offer the advantage of remote access and easy storage to a geographically separate location, while local backups (such as external hard drives) can provide faster recovery times. Both methods have a place in a solid 3-2-1 backup strategy
  • Ease of use. Look for a backup solution that is user-friendly and doesn’t require extensive technical knowledge. The easier it is to use, the more likely you are to maintain regular backups.
  • Security features. Ensure that the backup solution you choose has robust security features, such as encryption, to protect your data from unauthorized access and cyber threats.
  • Cost-effective plans. Many backup service providers offer tiered pricing plans based on storage needs and features, or are based on the number of devices you need protected.  Backblaze Computer Backup, for example, starts at $9 per computer per month for unlimited backup, with discounts for one year or two year plans. 

Share resources to facilitate discussion

If you don’t have a robust backup strategy in place through your IT department or district, send them this article or this Texas A&M case study and recommend that they get started with a backup strategy.

Save your data (and yourself!): Think about backups ahead of time

Remember, regardless of how you’re creating data, the question isn’t if you will experience data loss, but when. Be prepared and make backup a priority—if not in your organization, then definitely in your personal tech choices.

The post What Do Teachers, Parents, and Students Have in Common? The Need to Back Up appeared first on Backblaze Blog | Cloud Storage & Cloud Backup