Tag Archives: PII

Detect Stripe keys in S3 buckets with Amazon Macie

Post Syndicated from Koulick Ghosh original https://aws.amazon.com/blogs/security/detect-stripe-keys-in-s3-buckets-with-amazon-macie/

Many customers building applications on Amazon Web Services (AWS) use Stripe global payment services to help get their product out faster and grow revenue, especially in the internet economy. It’s critical for customers to securely and properly handle the credentials used to authenticate with Stripe services. Much like your AWS API keys, which enable access to your AWS resources, Stripe API keys grant access to the Stripe account, which allows for the movement of real money. Therefore, you must keep Stripe’s API keys secret and well-controlled. And, much like AWS keys, it’s important to invalidate and re-issue Stripe API keys that have been inadvertently committed to GitHub, emitted in logs, or uploaded to Amazon Simple Storage Service (Amazon S3).

Customers have asked us for ways to reduce the risk of unintentionally exposing Stripe API keys, especially when code files and repositories are stored in Amazon S3. To help meet this need, we collaborated with Stripe to develop a new managed data identifier that you can use to help discover and protect Stripe API keys.

“I’m really glad we could collaborate with AWS to introduce a new managed data identifier in Amazon Macie. Mutual customers of AWS and Stripe can now scan S3 buckets to detect exposed Stripe API keys.”
Martin Pool, Staff Engineer in Cloud Security at Stripe

In this post, we will show you how to use the new managed data identifier in Amazon Macie to discover and protect copies of your Stripe API keys.

About Stripe API keys

Stripe provides payment processing software and services for businesses. Using Stripe’s technology, businesses can accept online payments from customers around the globe.

Stripe authenticates API requests by using API keys, which are included in the request. Stripe takes various measures to help customers keep their secret keys safe and secure. Stripe users can generate test-mode keys, which can only access simulated test data, and which doesn’t move real money. Stripe encourages its customers to use only test API keys for testing and development purposes to reduce the risk of inadvertent disclosure of live keys or of accidentally generating real charges.

Stripe also supports publishable keys, which you can make publicly accessible in your web or mobile app’s client-side code to collect payment information.

In this blog post, we focus on live-mode keys, which are the primary security concern because they can access your real data and cause money movement. These keys should be closely held within the production services that need to use them. Stripe allows keys to be restricted to read or write specific API resources, or used only from certain IP ranges, but even with these restrictions, you should still handle live mode keys with caution.

Stripe keys have distinctive prefixes to help you detect them such as sk_live_ for secret keys, and rk_live_ for restricted keys (which are also secret).

Amazon Macie

Amazon Macie is a fully managed service that uses machine learning (ML) and pattern matching to discover and help protect your sensitive data, such as personally identifiable information. Macie can also provide detailed visibility into your data and help you align with compliance requirements by identifying data that needs to be protected under various regulations, such as the General Data Protection Regulation (GDPR) and the Health Insurance Portability and Accountability Act (HIPAA).

Macie supports a suite of managed data identifiers to make it simpler for you to configure and adopt. Managed data identifiers are prebuilt, customizable patterns that help automatically identify sensitive data, such as credit card numbers, social security numbers, and email addresses.

Now, Macie has a new managed data identifier STRIPE_CREDENTIALS that you can use to identify Stripe API secret keys.

Configure Amazon Macie to detect Stripe credentials

In this section, we show you how to use the managed data identifier STRIPE_CREDENTIALS to detect Stripe API secret keys. We recommend that you carry out these tutorial steps in an AWS account dedicated to experimentation and exploration before you move forward with detection in a production environment.

Prerequisites

To follow along with this walkthrough, complete the following prerequisites.

Create example data

The first step is to create some example objects in an S3 bucket in the AWS account. The objects contain strings that resemble Stripe secret keys. You will use the example data later to demonstrate how Macie can detect Stripe secret keys.

To create the example data

  1. Open the S3 console and create an S3 bucket.
  2. Create four files locally, paste the following mock sensitive data into those files, and upload them to the bucket.
    file1
     stripe publishable key sk_live_cpegcLxKILlrXYNIuqYhGXoy
    
    file2
     sk_live_cpegcLxKILlrXYNIuqYhGXoy
     sk_live_abcdcLxKILlrXYNIuqYhGXoy
     sk_live_efghcLxKILlrXYNIuqYhGXoy
     stripe payment sk_live_ijklcLxKILlrXYNIuqYhGXoy
    
     file3
     sk_live_cpegcLxKILlrXYNIuqYhGXoy
     stripe api key sk_live_abcdcLxKILlrXYNIuqYhGXoy
    
     file4
     stripe secret key sk_live_cpegcLxKILlrXYNIuqYhGXoy

Note: The keys mentioned in the preceding files are mock data and aren’t related to actual live Stripe keys.

Create a Macie job with the STRIPE_CREDENTIALS managed data identifier

Using Macie, you can scan your S3 buckets for sensitive data and security risks. In this step, you run a one-time Macie job to scan an S3 bucket and review the findings.

To create a Macie job with STRIPE_CREDENTIALS

  1. Open the Amazon Macie console, and in the left navigation pane, choose Jobs. On the top right, choose Create job.
    Figure 1: Create Macie Job

    Figure 1: Create Macie Job

  2. Select the bucket that you want Macie to scan or specify bucket criteria, and then choose Next.
    Figure 2: Select S3 bucket

    Figure 2: Select S3 bucket

  3. Review the details of the S3 bucket, such as estimated cost, and then choose Next.
    Figure 3: Review S3 bucket

    Figure 3: Review S3 bucket

  4. On the Refine the scope page, choose One-time job, and then choose Next.

    Note: After you successfully test, you can schedule the job to scan S3 buckets at the frequency that you choose.

    Figure 4: Select one-time job

    Figure 4: Select one-time job

  5. For Managed data identifier options, select Custom and then select Use specific managed data identifiers. For Select managed data identifiers, search for STRIPE_CREDENTIALS and then select it. Choose Next.
    Figure 5: Select managed data identifier

    Figure 5: Select managed data identifier

  6. Enter a name and an optional description for the job, and then choose Next.
    Figure 6: Enter job name

    Figure 6: Enter job name

  7. Review the job details and choose Submit. Macie will create and start the job immediately, and the job will run one time.
  8. When the Status of the job shows Complete, select the job, and from the Show results dropdown, select Show findings.
    Figure 7: Select the job and then select Show findings

    Figure 7: Select the job and then select Show findings

  9. You can now review the findings for sensitive data in your S3 bucket. As shown in Figure 8, Macie detected Stripe keys in each of the four files, and categorized the findings as High severity. You can review and manage the findings in the Macie console, retrieve them through the Macie API for further analysis, send them to Amazon EventBridge for automated processing, or publish them to AWS Security Hub for a comprehensive view of your security state.
    Figure 8: Review the findings

    Figure 8: Review the findings

Respond to unintended disclosure of Stripe API keys

If you discover Stripe live-mode keys (or other sensitive data) in an S3 bucket, then through the Stripe dashboard, you can roll your API keys to revoke access to the compromised key and generate a new one. This helps ensure that the key can’t be used to make malicious API requests. Make sure that you install the replacement key into the production services that need it. In the longer term, you can take steps to understand the path by which the key was disclosed and help prevent a recurrence.

Conclusion

In this post, you learned about the importance of safeguarding Stripe API keys on AWS. By using Amazon Macie with managed data identifiers, setting up regular reviews and restricted access to S3 buckets, training developers in security best practices, and monitoring logs and repositories, you can help mitigate the risk of key exposure and potential security breaches. By adhering to these practices, you can help ensure a robust security posture for your sensitive data on AWS.

If you have feedback about this post, submit comments in the Comments section below. If you have questions about this post, start a new thread on Amazon Macie re:Post.

Koulick Ghosh

Koulick Ghosh

Koulick is a Senior Product Manager in AWS Security based in Seattle, WA. He loves speaking with customers about how AWS Security services can help improve their security. In his free time, he enjoys playing the guitar, reading, and exploring the Pacific Northwest.

Sagar Gandha

Sagar Gandha

Sagar is an experienced Senior Technical Account Manager at AWS adept at assisting large customers in enterprise support. He offers expert guidance on best practices, facilitates access to subject matter experts, and delivers actionable insights on optimizing AWS spend, workloads, and events. Outside of work, Sagar loves spending time with his kids.

Mohan Musti

Mohan Musti

Mohan is a Senior Technical Account Manager at AWS based in Dallas. Mohan helps customers architect and optimize applications on AWS. In his spare time, he enjoys spending time with his family and camping.

Transforming transactions: Streamlining PCI compliance using AWS serverless architecture

Post Syndicated from Abdul Javid original https://aws.amazon.com/blogs/security/transforming-transactions-streamlining-pci-compliance-using-aws-serverless-architecture/

Compliance with the Payment Card Industry Data Security Standard (PCI DSS) is critical for organizations that handle cardholder data. Achieving and maintaining PCI DSS compliance can be a complex and challenging endeavor. Serverless technology has transformed application development, offering agility, performance, cost, and security.

In this blog post, we examine the benefits of using AWS serverless services and highlight how you can use them to help align with your PCI DSS compliance responsibilities. You can remove additional undifferentiated compliance heavy lifting by building modern applications with abstracted AWS services. We review an example payment application and workflow that uses AWS serverless services and showcases the potential reduction in effort and responsibility that a serverless architecture could provide to help align with your compliance requirements. We present the review through the lens of a merchant that has an ecommerce website and include key topics such as access control, data encryption, monitoring, and auditing—all within the context of the example payment application. We don’t discuss additional service provider requirements from the PCI DSS in this post.

This example will help you navigate the intricate landscape of PCI DSS compliance. This can help you focus on building robust and secure payment solutions without getting lost in the complexities of compliance. This can also help reduce your compliance burden and empower you to develop your own secure, scalable applications. Join us in this journey as we explore how AWS serverless services can help you meet your PCI DSS compliance objectives.

Disclaimer

This document is provided for the purposes of information only; it is not legal advice, and should not be relied on as legal advice. Customers are responsible for making their own independent assessment of the information in this document. This document: (a) is for informational purposes only, (b) represents current AWS product offerings and practices, which are subject to change without notice, and (c) does not create any commitments or assurances from AWS and its affiliates, suppliers or licensors. AWS products or services are provided “as is” without warranties, representations, or conditions of any kind, whether express or implied. The responsibilities and liabilities of AWS to its customers are controlled by AWS agreements, and this document is not part of, nor does it modify, any agreement between AWS and its customers.

AWS encourages its customers to obtain appropriate advice on their implementation of privacy and data protection environments, and more generally, applicable laws and other obligations relevant to their business.

PCI DSS v4.0 and serverless

In April 2022, the Payment Card Industry Security Standards Council (PCI SSC) updated the security payment standard to “address emerging threats and technologies and enable innovative methods to combat new threats.” Two of the high-level goals of these updates are enhancing validation methods and procedures and promoting security as a continuous process. Adopting serverless architectures can help meet some of the new and updated requirements in version 4.0, such as enhanced software and encryption inventories. If a customer has access to change a configuration, it’s the customer’s responsibility to verify that the configuration meets PCI DSS requirements. There are more than 20 PCI DSS requirements applicable to Amazon Elastic Compute Cloud (Amazon EC2). To fulfill these requirements, customer organizations must implement controls such as file integrity monitoring, operating system level access management, system logging, and asset inventories. Using AWS abstracted services in this scenario can remove undifferentiated heavy lifting from your environment. With abstracted AWS services, because there is no operating system to manage, AWS becomes responsible for maintaining consistent time settings for an abstracted service to meet Requirement 10.6. This will also shift your compliance focus more towards your application code and data.

This makes more of your PCI DSS responsibility addressable through the AWS PCI DSS Attestation of Compliance (AOC) and Responsibility Summary. This attestation package is available to AWS customers through AWS Artifact.

Reduction in compliance burden

You can use three common architectural patterns within AWS to design payment applications and meet PCI DSS requirements: infrastructure, containerized, and abstracted. We look into EC2 instance-based architecture (infrastructure or containerized patterns) and modernized architectures using serverless services (abstracted patterns). While both approaches can help align with PCI DSS requirements, there are notable differences in how they handle certain elements. EC2 instances provide more control and flexibility over the underlying infrastructure and operating system, assisting you in customizing security measures based on your organization’s operational and security requirements. However, this also means that you bear more responsibility for configuring and maintaining security controls applicable to the operating systems, such as network security controls, patching, file integrity monitoring, and vulnerability scanning.

On the other hand, serverless architectures similar to the preceding example can reduce much of the infrastructure management requirements. This can relieve you, the application owner or cloud service consumer, of the burden of configuring and securing those underlying virtual servers. This can streamline meeting certain PCI requirements, such as file integrity monitoring, patch management, and vulnerability management, because AWS handles these responsibilities.

Using serverless architecture on AWS can significantly reduce the PCI compliance burden. Approximately 43 percent of the overall PCI compliance requirements, encompassing both technical and non-technical tests, are addressed by the AWS PCI DSS Attestation of Compliance.

Customer responsible
52%
AWS responsible
43%
N/A
5%

The following table provides an analysis of each PCI DSS requirement against the serverless architecture in Figure 1, which shows a sample payment application workflow. You must evaluate your own use and secure configuration of AWS workload and architectures for a successful audit.

PCI DSS 4.0 requirements Test cases Customer responsible AWS responsible N/A
Requirement 1: Install and maintain network security controls 35 13 22 0
Requirement 2: Apply secure configurations to all system components 27 16 11 0
Requirement 3: Protect stored account data 55 24 29 2
Requirement 4: Protect cardholder data with strong cryptography during transmission over open, public networks 12 7 5 0
Requirement 5: Protect all systems and networks from malicious software 25 4 21 0
Requirement 6: Develop and maintain secure systems and software 35 31 4 0
Requirement 7: Restrict access to system components and cardholder data by business need-to-know 22 19 3 0
Requirement 8: Identify users and authenticate access to system components 52 43 6 3
Requirement 9: Restrict physical access to cardholder data 56 3 53 0
Requirement 10: Log and monitor all access to system components and cardholder data 38 17 19 2
Requirement 11: Test security of systems and networks regularly 51 22 23 6
Requirement 12: Support information security with organizational policies 56 44 2 10
Total 464 243 198 23
Percentage 52% 43% 5%

Note: The preceding table is based on the example reference architecture that follows. The actual extent of PCI DSS requirements reduction can vary significantly depending on your cardholder data environment (CDE) scope, implementation, and configurations.

Sample payment application and workflow

This example serverless payment application and workflow in Figure 1 consists of several interconnected steps, each using different AWS services. The steps are listed in the following text and include brief descriptions. They cover two use cases within this example application — consumers making a payment and a business analyst generating a report.

The example outlines a basic serverless payment application workflow using AWS serverless services. However, it’s important to note that the actual implementation and behavior of the workflow may vary based on specific configurations, dependencies, and external factors. The example serves as a general guide and may require adjustments to suit the unique requirements of your application or infrastructure.

Several factors, including but not limited to, AWS service configurations, network settings, security policies, and third-party integrations, can influence the behavior of the system. Before deploying a similar solution in a production environment, we recommend thoroughly reviewing and adapting the example to align with your specific use case and requirements.

Keep in mind that AWS services and features may evolve over time, and new updates or changes may impact the behavior of the components described in this example. Regularly consult the AWS documentation and ensure that your configurations adhere to best practices and compliance standards.

This example is intended to provide a starting point and should be considered as a reference rather than an exhaustive solution. Always conduct thorough testing and validation in your specific environment to ensure the desired functionality and security.

Figure 1: Serverless payment architecture and workflow

Figure 1: Serverless payment architecture and workflow

  • Use case 1: Consumers make a payment
    1. Consumers visit the e-commerce payment page to make a payment.
    2. The request is routed to the payment application’s domain using Amazon Route 53, which acts as a DNS service.
    3. The payment page is protected by AWS WAF to inspect the initial incoming request for any malicious patterns, web-based attacks (such as cross-site scripting (XSS) attacks), and unwanted bots.
    4. An HTTPS GET request (over TLS) is sent to the public target IP. Amazon CloudFront, a content delivery network (CDN), acts as a front-end proxy and caches and fetches static content from an Amazon Simple Storage Service (Amazon S3) bucket.
    5. AWS WAF inspects the incoming request for any malicious patterns, if the request is blocked, the request doesn’t return static content from the S3 bucket.
    6. User authentication and authorization are handled by Amazon Cognito, providing a secure login and scalable customer identity and access management system (CIAM)
    7. AWS WAF processes the request to protect against web exploits, then Amazon API Gateway forwards it to the payment application API endpoint.
    8. API Gateway launches AWS Lambda functions to handle payment requests. AWS Step Functions state machine oversees the entire process, directing the running of multiple Lambda functions to communicate with the payment processor, initiate the payment transaction, and process the response.
    9. The cardholder data (CHD) is temporarily cached in Amazon DynamoDB for troubleshooting and retry attempts in the event of transaction failures.
    10. A Lambda function validates the transaction details and performs necessary checks against the data stored in DynamoDB. A web notification is sent to the consumer for any invalid data.
    11. A Lambda function calculates the transaction fees.
    12. A Lambda function authenticates the transaction and initiates the payment transaction with the third-party payment provider.
    13. A Lambda function is initiated when a payment transaction with the third-party payment provider is completed. It receives the transaction status from the provider and performs multiple actions.
    14. Consumers receive real-time notifications through a web browser and email. The notifications are initiated by a step function, such as order confirmations or payment receipts, and can be integrated with external payment processors through an Amazon Simple Notification Service (Amazon SNS) Amazon Simple Email Service (Amazon SES) web hook.
    15. A separate Lambda function clears the DynamoDB cache.
    16. The Lambda function makes entries into the Amazon Simple Queue Service (Amazon SQS) dead-letter queue for failed transactions to retry at a later time.
  • Use case 2: An admin or analyst generates the report for non-PCI data
    1. An admin accesses the web-based reporting dashboard using their browser to generate a report.
    2. The request is routed to AWS WAF to verify the source that initiated the request.
    3. An HTTPS GET request (over TLS) is sent to the public target IP. CloudFront fetches static content from an S3 bucket.
    4. AWS WAF inspects incoming requests for any malicious patterns, if the request is blocked, the request doesn’t return static content from the S3 bucket. The validated traffic is sent to Amazon S3 to retrieve the reporting page.
    5. The backend requests of the reporting page pass through AWS WAF again to provide protection against common web exploits before being forwarded to the reporting API endpoint through API Gateway.
    6. API Gateway launches a Lambda function for report generation. The Lambda function retrieves data from DynamoDB storage for the reporting mechanism.
    7. The AWS Security Token Service (AWS STS) issues temporary credentials to the Lambda service in the non-PCI serverless account, allowing it to launch the Lambda function in the PCI serverless account. The Lambda function retrieves non-PCI data and writes it into DynamoDB.
    8. The Lambda function fetches the non-PCI data based on the report criteria from the DynamoDB table from the same account.

Additional AWS security and governance services that would be implemented throughout the architecture are shown in Figure 1, Label-25. For example, Amazon CloudWatch monitors and alerts on all the Lambda functions within the environment.

Label-26 demonstrates frameworks that can be used to build the serverless applications.

Scoping and requirements

Now that we’ve established the reference architecture and workflow, lets delve into how it aligns with PCI DSS scope and requirements.

PCI scoping

Serverless services are inherently segmented by AWS, but they can be used within the context of an AWS account hierarchy to provide various levels of isolation as described in the reference architecture example.

Segregating PCI data and non-PCI data into separate AWS accounts can help in de-scoping non-PCI environments and reducing the complexity and audit requirements for components that don’t handle cardholder data.

PCI serverless production account

  • This AWS account is dedicated to handling PCI data and applications that directly process, transmit, or store cardholder data.
  • Services such as Amazon Cognito, DynamoDB, API Gateway, CloudFront, Amazon SNS, Amazon SES, Amazon SQS, and Step Functions are provisioned in this account to support the PCI data workflow.
  • Security controls, logging, monitoring, and access controls in this account are specifically designed to meet PCI DSS requirements.

Non-PCI serverless production account

  • This separate AWS account is used to host applications that don’t handle PCI data.
  • Since this account doesn’t handle cardholder data, the scope of PCI DSS compliance is reduced, simplifying the compliance process.

Note: You can use AWS Organizations to centrally manage multiple AWS accounts.

AWS IAM Identity Center (successor to AWS Single Sign-On) is used to manage user access to each account and is integrated with your existing identify provider. This helps to ensure you’re meeting PCI requirements on identity, access control of card holder data, and environment.

Now, let’s look at the PCI DSS requirements that this architectural pattern can help address.

Requirement 1: Install and maintain network security controls

  • Network security controls are limited to AWS Identity and Access Management (IAM) and application permissions because there is no customer controlled or defined network. VPC-centric requirements aren’t applicable because there is no VPC. The configuration settings for serverless services can be covered under Requirement 6 to for secure configuration standards. This supports compliance with Requirements 1.2 and 1.3.

Requirement 2: Apply secure configurations to all system components

  • AWS services are single function by default and exist with only the necessary functionality enabled for the functioning of that service. This supports compliance with much of Requirement 2.2.
  • Access to AWS services is considered non-console and only accessible through HTTPS through the service API. This supports compliance with Requirement 2.2.7.
  • The wireless requirements under Requirement 2.3 are not applicable, because wireless environments don’t exist in AWS environments.

Requirement 3: Protect stored account data

  • AWS is responsible for destruction of account data configured for deletion based on DynamoDB Time to Live (TTL) values. This supports compliance with Requirement 3.2.
  • DynamoDB and Amazon S3 offer secure storage of account data, encryption by default in transit and at rest, and integration with AWS Key Management Service (AWS KMS). This supports compliance with Requirements 3.5 and 4.2.
  • AWS is responsible for the generation, distribution, storage, rotation, destruction, and overall protection of encryption keys within AWS KMS. This supports compliance with Requirements 3.6 and 3.7.
  • Manual cleartext cryptographic keys aren’t available in this solution, Requirement 3.7.6 is not applicable.

Requirement 4: Protect cardholder data with strong cryptography during transmission over open, public networks

  • AWS Certificate Manager (ACM) integrates with API Gateway and enables the use of trusted certificates and HTTPS (TLS) for secure communication between clients and the API. This supports compliance with Requirement 4.2.
  • Requirement 4.2.1.2 is not applicable because there are no wireless technologies in use in this solution. Customers are responsible for ensuring strong cryptography exists for authentication and transmission over other wireless networks they manage outside of AWS.
  • Requirement 4.2.2 is not applicable because no end-user technologies exist in this solution. Customers are responsible for ensuring the use of strong cryptography if primary account numbers (PAN) are sent through end-user messaging technologies in other environments.

Requirement 5: Protect a ll systems and networks from malicious software

  • There are no customer-managed compute resources in this example payment environment, Requirements 5.2 and 5.3 are the responsibility of AWS.

Requirement 6: Develop and maintain secure systems and software

  • Amazon Inspector now supports Lambda functions, adding continual, automated vulnerability assessments for serverless compute. This supports compliance with Requirement 6.2.
  • Amazon Inspector helps identify vulnerabilities and security weaknesses in the payment application’s code, dependencies, and configuration. This supports compliance with Requirement 6.3.
  • AWS WAF is designed to protect applications from common attacks, such as SQL injections, cross-site scripting, and other web exploits. AWS WAF can filter and block malicious traffic before it reaches the application. This supports compliance with Requirement 6.4.2.

Requirement 7: Restrict access to system components and cardholder data by business need to know

  • IAM and Amazon Cognito allow for fine-grained role- and job-based permissions and access control. Customers can use these capabilities to configure access following the principles of least privilege and need-to-know. IAM and Cognito support the use of strong identification, authentication, authorization, and multi-factor authentication (MFA). This supports compliance with much of Requirement 7.

Requirement 8: Identify users and authenticate access to system components

  • IAM and Amazon Cognito also support compliance with much of Requirement 8.
  • Some of the controls in this requirement are usually met by the identity provider for internal access to the cardholder data environment (CDE).

Requirement 9: Restrict physical access to cardholder data

  • AWS is responsible for the destruction of data in DynamoDB based on the customer configuration of content TTL values for Requirement 9.4.7. Customers are responsible for ensuring their database instance is configured for appropriate removal of data by enabling TTL on DDB attributes.
  • Requirement 9 is otherwise not applicable for this serverless example environment because there are no physical media, electronic media not already addressed under Requirement 3.2, or hard-copy materials with cardholder data. AWS is responsible for the physical infrastructure under the Shared Responsibility Model.

Requirement 10: Log and monitor all access to system components and cardholder data

  • AWS CloudTrail provides detailed logs of API activity for auditing and monitoring purposes. This supports compliance with Requirement 10.2 and contains all of the events and data elements listed.
  • CloudWatch can be used for monitoring and alerting on system events and performance metrics. This supports compliance with Requirement 10.4.
  • AWS Security Hub provides a comprehensive view of security alerts and compliance status, consolidating findings from various security services, which helps in ongoing security monitoring and testing. Customers must enable PCI DSS security standard, which supports compliance with Requirement 10.4.2.
  • AWS is responsible for maintaining accurate system time for AWS services. In this example, there are no compute resources for which customers can configure time. Requirement 10.6 is addressable through the AWS Attestation of Compliance and Responsibility Summary available in AWS Artifact.

Requirement 11: Regularly test security systems and processes

  • Testing for rogue wireless activity within the AWS-based CDE is the responsibility of AWS. AWS is responsible for the management of the physical infrastructure under Requirement 11.2. Customers are still responsible for wireless testing for their environments outside of AWS, such as where administrative workstations exist.
  • AWS is responsible for internal vulnerability testing of AWS services, and supports compliance with Requirement 11.3.1.
  • Amazon GuardDuty, a threat detection service that continuously monitors for malicious activity and unauthorized access, providing continuous security monitoring. This supports the IDS requirements under Requirement 11.5.1, and covers the entire AWS-based CDE.
  • AWS Config allows customers to catalog, monitor and manage configuration changes for their AWS resources. This supports compliance with Requirement 11.5.2.
  • Customers can use AWS Config to monitor the configuration of the S3 bucket hosting the static website. This supports compliance with Requirement 11.6.1.

Requirement 12: Support information security with organizational policies and programs

  • Customers can download the AWS AOC and Responsibility Summary package from Artifact to support Requirement 12.8.5 and the identification of which PCI DSS requirements are managed by the third-party service provider (TSPS) and which by the customer.

Conclusion

Using AWS serverless services when developing your payment application can significantly help reduce the number of PCI DSS requirements you need to meet by yourself. By offloading infrastructure management to AWS and using serverless services such as Lambda, API Gateway, DynamoDB, Amazon S3, and others, you can benefit from built-in security features and help align with your PCI DSS compliance requirements.

Contact us to help design an architecture that works for your organization. AWS Security Assurance Services is a Payment Card Industry-Qualified Security Assessor company (PCI-QSAC) and HITRUST External Assessor firm. We are a team of industry-certified assessors who help you to achieve, maintain, and automate compliance in the cloud by tying together applicable audit standards to AWS service-specific features and functionality. We help you build on frameworks such as PCI DSS, HITRUST CSF, NIST, SOC 2, HIPAA, ISO 27001, GDPR, and CCPA.

More information on how to build applications using AWS serverless technologies can be found at Serverless on AWS.

Want more AWS Security news? Follow us on Twitter.

If you have feedback about this post, submit comments in the Comments section below. If you have questions about this post, start a new thread on the Serverless re:Post, Security, Identity, & Compliance re:Post or contact AWS Support.

Abdul Javid

Abdul Javid

Abdul is a Senior Security Assurance Consultant and PCI DSS Qualified Security Assessor with AWS Security Assurance Services, and has more than 25 years of IT governance, operations, security, risk, and compliance experience. Abdul leverages his experience and knowledge to advise AWS customers with guidance and advice on their compliance journey. Abdul earned an M.S. in Computer Science from IIT, Chicago and holds various industry recognized sought after certifications in security and program and risk management from prominent organizations like AWS, HITRUST, ISACA, PMI, PCI DSS, and ISC2.

Ted Tanner

Ted Tanner

Ted is a Principal Assurance Consultant and PCI DSS Qualified Security Assessor with AWS Security Assurance Services, and has more than 25 years of IT and security experience. He uses this experience to provide AWS customers with guidance on compliance and security, and on building and optimizing their cloud compliance programs. He is co-author of the Payment Card Industry Data Security Standard (PCI DSS) v3.2.1 on AWS Compliance Guide and the soon-to-be-released v4.0 edition.

Tristan Watty

Tristan Watty

Dr. Watty is a Senior Security Consultant within the Professional Services team of Amazon Web Services based in Queens, New York. He is a passionate Tech Enthusiast, Influencer, and Amazonian with 15+ years of professional and educational experience with a specialization in Security, Risk, and Compliance. His zeal lies in empowering customers to develop and put into action secure mechanisms that steer them towards achieving their security goals. Dr. Watty also created and hosts an AWS Security Show named “Security SideQuest!” that airs on the AWS Twitch Channel.

Padmakar Bhosale

Padmakar Bhosale

Padmakar is a Sr. Technical Account Manager with over 25 years of experience in the Financial, Banking, and Cloud Services. He provides AWS customers with guidance and advice on Payment Services, Core Banking Ecosystem, Credit Union Banking Technologies, Resiliency on AWS Cloud, AWS Accounts & Network levels PCI Segmentations, and Optimization of the Customer’s Cloud Journey experience on AWS Cloud.

Updated whitepaper available: Architecting for PCI DSS Segmentation and Scoping on AWS

Post Syndicated from Ted Tanner original https://aws.amazon.com/blogs/security/updated-whitepaper-available-architecting-for-pci-dss-segmentation-and-scoping-on-aws/

Amazon Web Services (AWS) has re-published the whitepaper Architecting for PCI DSS Scoping and Segmentation on AWS to provide guidance on how to properly define the scope of your Payment Card Industry (PCI) Data Security Standard (DSS) workloads that are running in the AWS Cloud. The whitepaper has been refreshed to include updated AWS best practices and technologies, and updates that are applicable to the new PCI DSS v4.0 requirements. The whitepaper looks at how to define segmentation boundaries between your in-scope and out-of-scope resources by using cloud-based AWS services.

The whitepaper is intended for engineers and solution builders, but it also serves as a guide for Qualified Security Assessors (QSAs) and internal security assessors (ISAs) to better understand the different segmentation controls that are available within AWS products and services, along with associated scoping considerations.

Compared to on-premises environments, software-defined networking on AWS transforms the scoping process for applications by providing additional segmentation controls beyond network segmentation. Thoughtful design of your applications and selection of security-impacting services for implementing your required controls can reduce the number of systems and services in your cardholder data environment (CDE).

The whitepaper is based on the PCI Council’s Information Supplement: Guidance for PCI DSS Scoping and Network Segmentation.

 
If you have questions or want to learn more, contact your account representative, or leave a comment below.

Want more AWS Security how-to content, news, and feature announcements? Follow us on Twitter.

Ted Tanner

Ted Tanner

Ted is a Principal Assurance Consultant and PCI DSS Qualified Security Assessor with AWS Security Assurance Services, and has more than 25 years of IT and security experience. He uses this experience to provide AWS customers with guidance on compliance and security, and on building and optimizing their cloud compliance programs. He is co-author of the Payment Card Industry Data Security Standard (PCI DSS) v3.2.1 on AWS Compliance Guide and the soon-to-be-released v4.0 edition.

Author

Avik Mukherjee

Avik is a Senior Security Consultant with more than 15 years of experience in IT governance, security, risk, and compliance. He has background of being a QSA for PCI DSS and point-to-point encryption (P2PE) and has deep knowledge of security advisory and assessment work in various industries, including retail, financial, and technology.

Joseph Okonkwo

Joseph Okonkwo

Joseph is a Senior Security Architect and PCI DSS Professional (PCIP), and has more than a decade of experience in application security, security architecture, and as an Internal Security Assessor (ISA). He works closely with AWS clients to enable digital transformation and migration in the Professional Services team. Joseph earned an MBA from Imperial College, Business School, and a M.S. in Data Telecommunications & Networks from The University of Salford in Manchester.

How to use Amazon Macie to reduce the cost of discovering sensitive data

Post Syndicated from Nicholas Doropoulos original https://aws.amazon.com/blogs/security/how-to-use-amazon-macie-to-reduce-the-cost-of-discovering-sensitive-data/

Amazon Macie is a fully managed data security service that uses machine learning and pattern matching to discover and help protect your sensitive data, such as personally identifiable information (PII), payment card data, and Amazon Web Services (AWS) credentials. Analyzing large volumes of data for the presence of sensitive information can be expensive, due to the nature of compute-intensive operations involved in the process.

Macie offers several capabilities to help customers reduce the cost of discovering sensitive data, including automated data discovery, which can reduce your spend with new data sampling techniques that are custom-built for Amazon Simple Storage Service (Amazon S3). In this post, we will walk through such Macie capabilities and best practices so that you can cost-efficiently discover sensitive data with Macie.

Overview of the Macie pricing plan

Let’s do a quick recap of how customers pay for the Macie service. With Macie, you are charged based on three dimensions: the number of S3 buckets evaluated for bucket inventory and monitoring, the number of S3 objects monitored for automated data discovery, and the quantity of data inspected for sensitive data discovery. You can read more about these dimensions on the Macie pricing page.

The majority of the cost incurred by customers is driven by the quantity of data inspected for sensitive data discovery. For this reason, we will limit the scope of this post to techniques that you can use to optimize the quantity of data that you scan with Macie.

Not all security use cases require the same quantity of data for scanning

Broadly speaking, you can choose to scan your data in two ways—run full scans on your data or sample a portion of it. When to use which method depends on your use cases and business objectives. Full scans are useful when customers have identified what they want to scan. A few examples of such use cases are: scanning buckets that are open to the internet, monitoring a bucket for unintentionally added sensitive data by scanning every new object, or performing analysis on a bucket after a security incident.

The other option is to use sampling techniques for sensitive data discovery. This method is useful when security teams want to reduce data security risks. For example, just knowing that an S3 bucket contains credit card numbers is enough information to prioritize it for remediation activities.

Macie offers both options, and you can discover sensitive data either by creating and running sensitive data discovery jobs that perform full scans on targeted locations, or by configuring Macie to perform automated sensitive data discovery for your account or organization. You can also use both options simultaneously in Macie.

Use automated data discovery as a best practice

Automated data discovery in Macie minimizes the quantity of data scanning that is needed to a fraction of your S3 estate.

When you enable Macie for the first time, automated data discovery is enabled by default. When you already use Macie in your organization, you can enable automatic data discovery in the management console of the Amazon Macie administrator account. This Macie capability automatically starts discovering sensitive data in your S3 buckets and builds a sensitive data profile for each bucket. The profiles are organized in a visual, interactive data map, and you can use the data map to identify data security risks that need immediate attention.

Automated data discovery in Macie starts to evaluate the level of sensitivity of each of your buckets by using intelligent and fully managed data sampling techniques to minimize the quantity of data scanning needed. During evaluation, objects are organized with similar S3 metadata, such as bucket names, object-key prefixes, file-type extensions, and storage class, into groups that are likely to have similar content. Macie then selects small, but representative, samples from each identified group of objects and scans them to detect the presence of sensitive data. Macie has a feedback loop that uses the results of previously scanned samples to prioritize the next set of samples to inspect.

The automated sensitive data discovery feature is designed to detect sensitive data at scale across hundreds of buckets and accounts, which makes it easier to identify the S3 buckets that need to be prioritized for more focused scanning. Because the amount of data that needs to be scanned is reduced, this task can be done at fraction of the cost of running a full data inspection across all your S3 buckets. The Macie console displays the scanning results as a heat map (Figure 1), which shows the consolidated information grouped by account, and whether a bucket is sensitive, not sensitive, or not analyzed yet.

Figure 1: A heat map showing the results of automated sensitive data discovery

Figure 1: A heat map showing the results of automated sensitive data discovery

There is a 30-day free trial period when you enable automatic data discovery on your AWS account. During the trial period, in the Macie console, you can see the estimated cost of running automated sensitive data discovery after the trial period ends. After the evaluation period, we charge based on the total quantity of S3 objects in your account, as well as the bytes that are scanned for sensitive content. Charges are prorated per day. You can disable this capability at any time.

Tune your monthly spend on automated sensitive data discovery

To further reduce your monthly spend on automated sensitive data, Macie allows you to exclude buckets from automated discovery. For example, you might consider excluding buckets that are used for storing operational logs, if you’re sure they don’t contain any sensitive information. Your monthly spend is reduced roughly by the percentage of data in those excluded buckets compared to your total S3 estate.

Figure 2 shows the setting in the heatmap area of the Macie console that you can use to exclude a bucket from automated discovery.

Figure 2: Excluding buckets from automated sensitive data discovery from the heatmap

Figure 2: Excluding buckets from automated sensitive data discovery from the heatmap

You can also use the automated data discovery settings page to specify multiple buckets to be excluded, as shown in Figure 3.

Figure 3: Excluding buckets from the automated sensitive data discovery settings page

Figure 3: Excluding buckets from the automated sensitive data discovery settings page

How to run targeted, cost-efficient sensitive data discovery jobs

Making your sensitive data discovery jobs more targeted make them more cost-efficient, because it reduces the quantity of data scanned. Consider using the following strategies:

  1. Make your sensitive data discovery jobs as targeted and specific as possible in their scope by using the Object criteria settings on the Refine the scope page, shown in Figure 4.
    Figure 4: Adjusting the scope of a sensitive data discovery job

    Figure 4: Adjusting the scope of a sensitive data discovery job

    Options to make discovery jobs more targeted include:

    • Include objects by using the “last modified” criterion — If you are aware of the frequency at which your classifiable S3-hosted objects get modified, and you want to scan the resources that changed at a particular point in time, include in your scope the objects that were modified at a certain date or time by using the “last modified” criterion.
    • Don’t scan CloudTrail logs — Identify the S3 bucket prefixes that contain AWS CloudTrail logs and exclude them from scanning.
    • Consider using random object sampling — With this option, you specify the percentage of eligible S3 objects that you want Macie to analyze when a sensitive data discovery job runs. If this value is less than 100%, Macie selects eligible objects to analyze at random, up to the specified percentage, and analyzes the data in those objects. If your data is highly consistent and you want to determine whether a specific S3 bucket, rather than each object, contains sensitive information, adjust the sampling depth accordingly.
    • Include objects with specific extensions, tags, or storage size — To fine tune the scope of a sensitive data discovery job, you can also define custom criteria that determine which S3 objects Macie includes or excludes from a job’s analysis. These criteria consist of one or more conditions that derive from properties of S3 objects. You can exclude objects with specific file name extensions, exclude objects by using tags as the criterion, and exclude objects on the basis of their storage size. For example, you can use a criteria-based job to scan the buckets associated with specific tag key/value pairs such as Environment: Production.
  2. Specify S3 bucket criteria in your job — Use a criteria-based job to scan only buckets that have public read/write access. For example, if you have 100 buckets with 10 TB of data, but only two of those buckets containing 100 GB are public, you could reduce your overall Macie cost by 99% by using a criteria-based job to classify only the public buckets.
  3. Consider scheduling jobs based on how long objects live in your S3 buckets. Running jobs at a higher frequency than needed can result in unnecessary costs in cases where objects are added and deleted frequently. For example, if you’ve determined that the S3 objects involved contain high velocity data that is expected to reside in your S3 bucket for a few days, and you’re concerned that sensitive data might remain, scheduling your jobs to run at a lower frequency will help in driving down costs. In addition, you can deselect the Include existing objects checkbox to scan only new objects.
    Figure 5: Specifying the frequency of a sensitive data discovery job

    Figure 5: Specifying the frequency of a sensitive data discovery job

  4. As a best practice, review your scheduled jobs periodically to verify that they are still meaningful to your organization. If you aren’t sure whether one of your periodic jobs continues to be fit for purpose, you can pause it so that you can investigate whether it is still needed, without incurring potentially unnecessary costs in the meantime. If you determine that a periodic job is no longer required, you can cancel it completely.
    Figure 6: Pausing a scheduled sensitive data discovery job

    Figure 6: Pausing a scheduled sensitive data discovery job

  5. If you don’t know where to start to make your jobs more targeted, use the results of Macie automated data discovery to plan your scanning strategy. Start with small buckets and the ones that have policy findings associated with them.
  6. In multi-account environments, you can monitor Macie’s usage across your organization in AWS Organizations through the usage page of the delegated administrator account. This will enable you to identify member accounts that are incurring higher costs than expected, and you can then investigate and take appropriate actions to keep expenditure low.
  7. Take advantage of the Macie pricing calculator so that you get an estimate of your Macie fees in advance.

Conclusion

In this post, we highlighted the best practices to keep in mind and configuration options to use when you discover sensitive data with Amazon Macie. We hope that you will walk away with a better understanding of when to use the automated data discovery capability and when to run targeted sensitive data discovery jobs. You can use the pointers in this post to tune the quantity of data you want to scan with Macie, so that you can continuously optimize your Macie spend.

If you have feedback about this post, submit comments in the Comments section below. If you have questions about this post, start a new thread on Amazon Macie re:Post.

Want more AWS Security news? Follow us on Twitter.

Nicholas Doropoulos

Nicholas Doropoulos

Nicholas is an AWS Cloud Security Engineer, a Bestselling Udemy Instructor, and a subject matter expert in AWS Shield, GuardDuty and Certificate Manager. Outside work, he enjoys spending his time with his wife and their beautiful baby son.

Koulick Ghosh

Koulick Ghosh

Koulick is a Senior Product Manager in AWS Security based in Seattle, WA. He loves speaking with customers on how AWS Security services can help make them more secure. In his free-time, he enjoys playing the guitar, reading, and exploring the Pacific Northwest.

How to query and visualize Macie sensitive data discovery results with Athena and QuickSight

Post Syndicated from Keith Rozario original https://aws.amazon.com/blogs/security/how-to-query-and-visualize-macie-sensitive-data-discovery-results-with-athena-and-quicksight/

Amazon Macie is a fully managed data security service that uses machine learning and pattern matching to help you discover and protect sensitive data in Amazon Simple Storage Service (Amazon S3). With Macie, you can analyze objects in your S3 buckets to detect occurrences of sensitive data, such as personally identifiable information (PII), financial information, personal health information, and access credentials.

In this post, we walk you through a solution to gain comprehensive and organization-wide visibility into which types of sensitive data are present in your S3 storage, where the data is located, and how much is present. Once enabled, Macie automatically starts discovering sensitive data in your S3 storage and builds a sensitive data profile for each bucket. The profiles are organized in a visual, interactive data map, and you can use the data map to run targeted sensitive data discovery jobs. Both automated data discovery and targeted jobs produce rich, detailed sensitive data discovery results. This solution uses Amazon Athena and Amazon QuickSight to deep-dive on the Macie results, and to help you analyze, visualize, and report on sensitive data discovered by Macie, even when the data is distributed across millions of objects, thousands of S3 buckets, and thousands of AWS accounts. Athena is an interactive query service that makes it simpler to analyze data directly in Amazon S3 using standard SQL. QuickSight is a cloud-scale business intelligence tool that connects to multiple data sources, including Athena databases and tables.

This solution is relevant to data security, data governance, and security operations engineering teams.

The challenge: how to summarize sensitive data discovered in your growing S3 storage

Macie issues findings when an object is found to contain sensitive data. In addition to findings, Macie keeps a record of each S3 object analyzed in a bucket of your choice for long-term storage. These records are known as sensitive data discovery results, and they include additional context about your data in Amazon S3. Due to the large size of the results file, Macie exports the sensitive data discovery results to an S3 bucket, so you need to take additional steps to query and visualize the results. We discuss the differences between findings and results in more detail later in this post.

With the increasing number of data privacy guidelines and compliance mandates, customers need to scale their monitoring to encompass thousands of S3 buckets across their organization. The growing volume of data to assess, and the growing list of findings from discovery jobs, can make it difficult to review and remediate issues in a timely manner. In addition to viewing individual findings for specific objects, customers need a way to comprehensively view, summarize, and monitor sensitive data discovered across their S3 buckets.

To illustrate this point, we ran a Macie sensitive data discovery job on a dataset created by AWS. The dataset contains about 7,500 files that have sensitive information, and Macie generated a finding for each sensitive file analyzed, as shown in Figure 1.

Figure 1: Macie findings from the dataset

Figure 1: Macie findings from the dataset

Your security team could spend days, if not months, analyzing these individual findings manually. Instead, we outline how you can use Athena and QuickSight to query and visualize the Macie sensitive data discovery results to understand your data security posture.

The additional information in the sensitive data discovery results will help you gain comprehensive visibility into your data security posture. With this visibility, you can answer questions such as the following:

  • What are the top 5 most commonly occurring sensitive data types?
  • Which AWS accounts have the most findings?
  • How many S3 buckets are affected by each of the sensitive data types?

Your security team can write their own customized queries to answer questions such as the following:

  • Is there sensitive data in AWS accounts that are used for development purposes?
  • Is sensitive data present in S3 buckets that previously did not contain sensitive information?
  • Was there a change in configuration for S3 buckets containing the greatest amount of sensitive data?

How are findings different from results?

As a Macie job progresses, it produces two key types of output: sensitive data findings (or findings for short), and sensitive data discovery results (or results).

Findings provide a report of potential policy violations with an S3 bucket, or the presence of sensitive data in a specific S3 object. Each finding provides a severity rating, information about the affected resource, and additional details, such as when Macie found the issue. Findings are published to the Macie console, AWS Security Hub, and Amazon EventBridge.

In contrast, results are a collection of records for each S3 object that a Macie job analyzed. These records contain information about objects that do and do not contain sensitive data, including up to 1,000 occurrences of each sensitive data type that Macie found in a given object, and whether Macie was unable to analyze an object because of issues such as permissions settings or use of an unsupported format. If an object contains sensitive data, the results record includes detailed information that isn’t available in the finding for the object.

One of the key benefits of querying results is to uncover gaps in your data protection initiatives—these gaps can occur when data in certain buckets can’t be analyzed because Macie was denied access to those buckets, or was unable to decrypt specific objects. The following table maps some of the key differences between findings and results.

Findings Results
Enabled by default Yes No
Location of published results Macie console, Security Hub, and EventBridge S3 bucket
Details of S3 objects that couldn’t be scanned No Yes
Details of S3 objects in which no sensitive data was found No Yes
Identification of files inside compressed archives that contain sensitive data No Yes
Number of occurrences reported per object Up to 15 Up to 1,000
Retention period 90 days in Macie console Defined by customer

Architecture

As shown in Figure 2, you can build out the solution in three steps:

  1. Enable the results and publish them to an S3 bucket
  2. Build out the Athena table to query the results by using SQL
  3. Visualize the results with QuickSight
Figure 2: Architecture diagram showing the flow of the solution

Figure 2: Architecture diagram showing the flow of the solution

Prerequisites

To implement the solution in this blog post, you must first complete the following prerequisites:

Figure 3: Sample data loaded into three different AWS accounts

Figure 3: Sample data loaded into three different AWS accounts

Note: All data in this blog post has been artificially created by AWS for demonstration purposes and has not been collected from any individual person. Similarly, such data does not, nor is it intended, to relate back to any individual person.

Step 1: Enable the results and publish them to an S3 bucket

Publication of the discovery results to Amazon S3 is not enabled by default. The setup requires that you specify an S3 bucket to store the results (we also refer to this as the discovery results bucket), and use an AWS Key Management Service (AWS KMS) key to encrypt the bucket.

If you are analyzing data across multiple accounts in your organization, then you need to enable the results in your delegated Macie administrator account. You do not need to enable results in individual member accounts. However, if you’re running Macie jobs in a standalone account, then you should enable the Macie results directly in that account.

To enable the results

  1. Open the Macie console.
  2. Select the AWS Region from the upper right of the page.
  3. From the left navigation pane, select Discovery results.
  4. Select Configure now.
  5. Select Create Bucket, and enter a unique bucket name. This will be the discovery results bucket name. Make note of this name because you will use it when you configure the Athena tables later in this post.
  6. Under Encryption settings, select Create new key. This takes you to the AWS KMS console in a new browser tab.
  7. In the AWS KMS console, do the following:
    1. For Key type, choose symmetric, and for Key usage, choose Encrypt and Decrypt.
    2. Enter a meaningful key alias (for example, macie-results-key) and description.
    3. (Optional) For simplicity, set your current user or role as the Key Administrator.
    4. Set your current user/role as a user of this key in the key usage permissions step. This will give you the right permissions to run the Athena queries later.
    5. Review the settings and choose Finish.
  8. Navigate to the browser tab with the Macie console.
  9. From the AWS KMS Key dropdown, select the new key.
  10. To view KMS key policy statements that were automatically generated for your specific key, account, and Region, select View Policy. Copy these statements in their entirety to your clipboard.
  11. Navigate back to the browser tab with the AWS KMS console and then do the following:
    1. Select Customer managed keys.
    2. Choose the KMS key that you created, choose Switch to policy view, and under Key policy, select Edit.
    3. In the key policy, paste the statements that you copied. When you add the statements, do not delete any existing statements and make sure that the syntax is valid. Policies are in JSON format.
  12. Navigate back to the Macie console browser tab.
  13. Review the inputs in the Settings page for Discovery results and then choose Save. Macie will perform a check to make sure that it has the right access to the KMS key, and then it will create a new S3 bucket with the required permissions.
  14. If you haven’t run a Macie discovery job in the last 90 days, you will need to run a new discovery job to publish the results to the bucket.

In this step, you created a new S3 bucket and KMS key that you are using only for Macie. For instructions on how to enable and configure the results using existing resources, see Storing and retaining sensitive data discovery results with Amazon Macie. Make sure to review Macie pricing details before creating and running a sensitive data discovery job.

Step 2: Build out the Athena table to query the results using SQL

Now that you have enabled the discovery results, Macie will begin publishing them into your discovery results bucket in the form of jsonl.gz files. Depending on the amount of data, there could be thousands of individual files, with each file containing multiple records. To identify the top five most commonly occurring sensitive data types in your organization, you would need to query all of these files together.

In this step, you will configure Athena so that it can query the results using SQL syntax. Before you can run an Athena query, you must specify a query result bucket location in Amazon S3. This is different from the Macie discovery results bucket that you created in the previous step.

If you haven’t set up Athena previously, we recommend that you create a separate S3 bucket, and specify a query result location using the Athena console. After you’ve set up the query result location, you can configure Athena.

To create a new Athena database and table for the Macie results

  1. Open the Athena console, and in the query editor, enter the following data definition language (DDL) statement. In the context of SQL, a DDL statement is a syntax for creating and modifying database objects, such as tables. For this example, we named our database macie_results.
    CREATE DATABASE macie_results;
    

    After running this step, you’ll see a new database in the Database dropdown. Make sure that the new macie_results database is selected for the next queries.

    Figure 4: Create database in the Athena console

    Figure 4: Create database in the Athena console

  2. Create a table in the database by using the following DDL statement. Make sure to replace <RESULTS-BUCKET-NAME> with the name of the discovery results bucket that you created previously.
    CREATE EXTERNAL TABLE maciedetail_all_jobs(
    	accountid string,
    	category string,
    	classificationdetails struct<jobArn:string,result:struct<status:struct<code:string,reason:string>,sizeClassified:string,mimeType:string,sensitiveData:array<struct<category:string,totalCount:string,detections:array<struct<type:string,count:string,occurrences:struct<lineRanges:array<struct<start:string,`end`:string,`startColumn`:string>>,pages:array<struct<pageNumber:string>>,records:array<struct<recordIndex:string,jsonPath:string>>,cells:array<struct<row:string,`column`:string,`columnName`:string,cellReference:string>>>>>>>,customDataIdentifiers:struct<totalCount:string,detections:array<struct<arn:string,name:string,count:string,occurrences:struct<lineRanges:array<struct<start:string,`end`:string,`startColumn`:string>>,pages:array<string>,records:array<string>,cells:array<string>>>>>>,detailedResultsLocation:string,jobId:string>,
    	createdat string,
    	description string,
    	id string,
    	partition string,
    	region string,
    	resourcesaffected struct<s3Bucket:struct<arn:string,name:string,createdAt:string,owner:struct<displayName:string,id:string>,tags:array<string>,defaultServerSideEncryption:struct<encryptionType:string,kmsMasterKeyId:string>,publicAccess:struct<permissionConfiguration:struct<bucketLevelPermissions:struct<accessControlList:struct<allowsPublicReadAccess:boolean,allowsPublicWriteAccess:boolean>,bucketPolicy:struct<allowsPublicReadAccess:boolean,allowsPublicWriteAccess:boolean>,blockPublicAccess:struct<ignorePublicAcls:boolean,restrictPublicBuckets:boolean,blockPublicAcls:boolean,blockPublicPolicy:boolean>>,accountLevelPermissions:struct<blockPublicAccess:struct<ignorePublicAcls:boolean,restrictPublicBuckets:boolean,blockPublicAcls:boolean,blockPublicPolicy:boolean>>>,effectivePermission:string>>,s3Object:struct<bucketArn:string,key:string,path:string,extension:string,lastModified:string,eTag:string,serverSideEncryption:struct<encryptionType:string,kmsMasterKeyId:string>,size:string,storageClass:string,tags:array<string>,embeddedFileDetails:struct<filePath:string,fileExtension:string,fileSize:string,fileLastModified:string>,publicAccess:boolean>>,
    	schemaversion string,
    	severity struct<description:string,score:int>,
    	title string,
    	type string,
    	updatedat string)
    ROW FORMAT SERDE
    	'org.openx.data.jsonserde.JsonSerDe'
    WITH SERDEPROPERTIES (
    	'paths'='accountId,category,classificationDetails,createdAt,description,id,partition,region,resourcesAffected,schemaVersion,severity,title,type,updatedAt')
    STORED AS INPUTFORMAT
    	'org.apache.hadoop.mapred.TextInputFormat'
    OUTPUTFORMAT
    	'org.apache.hadoop.hive.ql.io.HiveIgnoreKeyTextOutputFormat'
    LOCATION
    	's3://<RESULTS-BUCKET-NAME>/AWSLogs/'
    

    After you complete this step, you will see a new table named maciedetail_all_jobs in the Tables section of the query editor.

  3. Query the results to start gaining insights. For example, to identify the top five most common sensitive data types, run the following query:
    select sensitive_data.category,
    	detections_data.type,
    	sum(cast(detections_data.count as INT)) total_detections
    from maciedetail_all_jobs,
    	unnest(classificationdetails.result.sensitiveData) as t(sensitive_data),
    	unnest(sensitive_data.detections) as t(detections_data)
    where classificationdetails.result.sensitiveData is not null
    and resourcesaffected.s3object.embeddedfiledetails is null
    group by sensitive_data.category, detections_data.type
    order by total_detections desc
    LIMIT 5
    

    Running this query on the sample dataset gives the following output.

    Results of a query showing the five most common sensitive data types in the dataset

    Figure 5: Results of a query showing the five most common sensitive data types in the dataset

  4. (Optional) The previous query ran on all of the results available for Macie. You can further query which accounts have the greatest amount of sensitive data detected.
    select accountid,
    	sum(cast(detections_data.count as INT)) total_detections
    from maciedetail_all_jobs,
    	unnest(classificationdetails.result.sensitiveData) as t(sensitive_data),
    	unnest(sensitive_data.detections) as t(detections_data)
    where classificationdetails.result.sensitiveData is not null
    and resourcesaffected.s3object.embeddedfiledetails is null
    group by accountid
    order by total_detections desc
    

    To test this query, we distributed the synthetic dataset across three member accounts in our organization, ran the query, and received the following output. If you enable Macie in just a single account, then you will only receive results for that one account.

    Figure 6: Query results for total number of sensitive data detections across all accounts in an organization

    Figure 6: Query results for total number of sensitive data detections across all accounts in an organization

For a list of more example queries, see the amazon-macie-results-analytics GitHub repository.

Step 3: Visualize the results with QuickSight

In the previous step, you used Athena to query your Macie discovery results. Although the queries were powerful, they only produced tabular data as their output. In this step, you will use QuickSight to visualize the results of your Macie jobs.

Before creating the visualizations, you first need to grant QuickSight the right permissions to access Athena, the results bucket, and the KMS key that you used to encrypt the results.

To allow QuickSight access to the KMS key

  1. Open the AWS Identity and Access Management (IAM) console, and then do the following:
    1. In the navigation pane, choose Roles.
    2. In the search pane for roles, search for aws-quicksight-s3-consumers-role-v0. If this role does not exist, search for aws-quicksight-service-role-v0.
    3. Select the role and copy the role ARN. You will need this role ARN to modify the KMS key policy to grant permissions for this role.
  2. Open the AWS KMS console and then do the following:
    1. Select Customer managed keys.
    2. Choose the KMS key that you created.
    3. Paste the following statement in the key policy. When you add the statement, do not delete any existing statements, and make sure that the syntax is valid. Replace <QUICKSIGHT_SERVICE_ROLE_ARN> and <KMS_KEY_ARN> with your own information. Policies are in JSON format.
	{ "Sid": "Allow Quicksight Service Role to use the key",
		"Effect": "Allow",
		"Principal": {
			"AWS": <QUICKSIGHT_SERVICE_ROLE_ARN>
		},
		"Action": "kms:Decrypt",
		"Resource": <KMS_KEY_ARN>
	}

To allow QuickSight access to Athena and the discovery results S3 bucket

  1. In QuickSight, in the upper right, choose your user icon to open the profile menu, and choose US East (N.Virginia). You can only modify permissions in this Region.
  2. In the upper right, open the profile menu again, and select Manage QuickSight.
  3. Select Security & permissions.
  4. Under QuickSight access to AWS services, choose Manage.
  5. Make sure that the S3 checkbox is selected, click on Select S3 buckets, and then do the following:
    1. Choose the discovery results bucket.
    2. You do not need to check the box under Write permissions for Athena workgroup. The write permissions are not required for this post.
    3. Select Finish.
  6. Make sure that the Amazon Athena checkbox is selected.
  7. Review the selections and be careful that you don’t inadvertently disable AWS services and resources that other users might be using.
  8. Select Save.
  9. In QuickSight, in the upper right, open the profile menu, and choose the Region where your results bucket is located.

Now that you’ve granted QuickSight the right permissions, you can begin creating visualizations.

To create a new dataset referencing the Athena table

  1. On the QuickSight start page, choose Datasets.
  2. On the Datasets page, choose New dataset.
  3. From the list of data sources, select Athena.
  4. Enter a meaningful name for the data source (for example, macie_datasource) and choose Create data source.
  5. Select the database that you created in Athena (for example, macie_results).
  6. Select the table that you created in Athena (for example, maciedetail_all_jobs), and choose Select.
  7. You can either import the data into SPICE or query the data directly. We recommend that you use SPICE for improved performance, but the visualizations will still work if you query the data directly.
  8. To create an analysis using the data as-is, choose Visualize.

You can then visualize the Macie results in the QuickSight console. The following example shows a delegated Macie administrator account that is running a visualization, with account IDs on the y axis and the count of affected resources on the x axis.

Figure 7: Visualize query results to identify total number of sensitive data detections across accounts in an organization

Figure 7: Visualize query results to identify total number of sensitive data detections across accounts in an organization

You can also visualize the aggregated data in QuickSight. For example, you can view the number of findings for each sensitive data category in each S3 bucket. The Athena table doesn’t provide aggregated data necessary for visualization. Instead, you need to query the table and then visualize the output of the query.

To query the table and visualize the output in QuickSight

  1. On the Amazon QuickSight start page, choose Datasets.
  2. On the Datasets page, choose New dataset.
  3. Select the data source that you created in Athena (for example, macie_datasource) and then choose Create Dataset.
  4. Select the database that you created in Athena (for example, macie_results).
  5. Choose Use Custom SQL, enter the following query below, and choose Confirm Query.
    	select resourcesaffected.s3bucket.name as bucket_name,
    		sensitive_data.category,
    		detections_data.type,
    		sum(cast(detections_data.count as INT)) total_detections
    	from macie_results.maciedetail_all_jobs,
    		unnest(classificationdetails.result.sensitiveData) as t(sensitive_data),unnest(sensitive_data.detections) as t(detections_data)
    where classificationdetails.result.sensitiveData is not null
    and resourcesaffected.s3object.embeddedfiledetails is null
    group by resourcesaffected.s3bucket.name, sensitive_data.category, detections_data.type
    order by total_detections desc
    	

  6. You can either import the data into SPICE or query the data directly.
  7. To create an analysis using the data as-is, choose Visualize.

Now you can visualize the output of the query that aggregates data across your S3 buckets. For example, we used the name of the S3 bucket to group the results, and then we created a donut chart of the output, as shown in Figure 6.

Figure 8: Visualize query results for total number of sensitive data detections across each S3 bucket in an organization

Figure 8: Visualize query results for total number of sensitive data detections across each S3 bucket in an organization

From the visualizations, we can identify which buckets or accounts in our organizations contain the most sensitive data, for further action. Visualizations can also act as a dashboard to track remediation.

If you encounter permissions issues, see Insufficient permissions when using Athena with Amazon QuickSight and Troubleshooting key access for troubleshooting steps.

You can replicate the preceding steps by using the sample queries from the amazon-macie-results-analytics GitHub repo to view data that is aggregated across S3 buckets, AWS accounts, or individual Macie jobs. Using these queries with the results of your Macie results will help you get started with tracking the security posture of your data in Amazon S3.

Conclusion

In this post, you learned how to enable sensitive data discovery results for Macie, query those results with Athena, and visualize the results in QuickSight.

Because Macie sensitive data discovery results provide more granular data than the findings, you can pursue a more comprehensive incident response when sensitive data is discovered. The sample queries in this post provide answers to some generic questions that you might have. After you become familiar with the structure, you can run other interesting queries on the data.

We hope that you can use this solution to write your own queries to gain further insights into sensitive data discovered in S3 buckets, according to the business needs and regulatory requirements of your organization. You can consider using this solution to better understand and identify data security risks that need immediate attention. For example, you can use this solution to answer questions such as the following:

  • Is financial information present in an AWS account where it shouldn’t be?
  • Are S3 buckets that contain PII properly hardened with access controls and encryption?

You can also use this solution to understand gaps in your data security initiatives by tracking files that Macie couldn’t analyze due to encryption or permission issues. To further expand your knowledge of Macie capabilities and features, see the following resources:

If you have feedback about this post, submit comments in the Comments section below. If you have questions about this post, start a new thread on Amazon Macie re:Post.

Want more AWS Security news? Follow us on Twitter.

Author

Keith Rozario

Keith is a Sr. Solution Architect at Amazon Web Services based in Singapore, where he helps customers develop solutions for their most complex business problems. He loves road cycling, reading comics from DC, and enjoying the sweet sound of music from AC/DC.

Author

Scott Ward

Scott is a Principal Solutions Architect with AWS External Security Services (ESS) and has been with Amazon for over 20 years. Scott provides technical guidance to the ESS services, such as GuardDuty, Security Hub, Macie, Inspector and Detective, and helps customers make their applications secure. Scott has a deep background in supporting, enhancing, and building global financial solutions to meet the needs of large companies, including many years of supporting the global financial systems for Amazon.com.

Author

Koulick Ghosh

Koulick is a Senior Product Manager in AWS Security based in Seattle, WA. He loves speaking with customers on how AWS Security services can help make them more secure. In his free-time, he enjoys playing the guitar, reading, and exploring the Pacific Northwest.

Best practices: Securing your Amazon Location Service resources

Post Syndicated from Dave Bailey original https://aws.amazon.com/blogs/security/best-practices-securing-your-amazon-location-service-resources/

Location data is subjected to heavy scrutiny by security experts. Knowing the current position of a person, vehicle, or asset can provide industries with many benefits, whether to understand where a current delivery is, how many people are inside a venue, or to optimize routing for a fleet of vehicles. This blog post explains how Amazon Web Services (AWS) helps keep location data secured in transit and at rest, and how you can leverage additional security features to help keep information safe and compliant.

The General Data Protection Regulation (GDPR) defines personal data as “any information relating to an identified or identifiable natural person (…) such as a name, an identification number, location data, an online identifier or to one or more factors specific to the physical, physiological, genetic, mental, economic, cultural or social identity of that natural person.” Also, many companies wish to improve transparency to users, making it explicit when a particular application wants to not only track their position and data, but also to share that information with other apps and websites. Your organization needs to adapt to these changes quickly to maintain a secure stance in a competitive environment.

On June 1, 2021, AWS made Amazon Location Service generally available to customers. With Amazon Location, you can build applications that provide maps and points of interest, convert street addresses into geographic coordinates, calculate routes, track resources, and invoke actions based on location. The service enables you to access location data with developer tools and to move your applications to production faster with monitoring and management capabilities.

In this blog post, we will show you the features that Amazon Location provides out of the box to keep your data safe, along with best practices that you can follow to reach the level of security that your organization strives to accomplish.

Data control and data rights

Amazon Location relies on global trusted providers Esri and HERE Technologies to provide high-quality location data to customers. Features like maps, places, and routes are provided by these AWS Partners so solutions can have data that is not only accurate but constantly updated.

AWS anonymizes and encrypts location data at rest and during its transmission to partner systems. In parallel, third parties cannot sell your data or use it for advertising purposes, following our service terms. This helps you shield sensitive information, protect user privacy, and reduce organizational compliance risks. To learn more, see the Amazon Location Data Security and Control documentation.

Integrations

Operationalizing location-based solutions can be daunting. It’s not just necessary to build the solution, but also to integrate it with the rest of your applications that are built in AWS. Amazon Location facilitates this process from a security perspective by integrating with services that expedite the development process, enhancing the security aspects of the solution.

Encryption

Amazon Location uses AWS owned keys by default to automatically encrypt personally identifiable data. AWS owned keys are a collection of AWS Key Management Service (AWS KMS) keys that an AWS service owns and manages for use in multiple AWS accounts. Although AWS owned keys are not in your AWS account, Amazon Location can use the associated AWS owned keys to protect the resources in your account.

If customers choose to use their own keys, they can benefit from AWS KMS to store their own encryption keys and use them to add a second layer of encryption to geofencing and tracking data.

Authentication and authorization

Amazon Location also integrates with AWS Identity and Access Management (IAM), so that you can use its identity-based policies to specify allowed or denied actions and resources, as well as the conditions under which actions are allowed or denied on Amazon Location. Also, for actions that require unauthenticated access, you can use unauthenticated IAM roles.

As an extension to IAM, Amazon Cognito can be an option if you need to integrate your solution with a front-end client that authenticates users with its own process. In this case, you can use Cognito to handle the authentication, authorization, and user management for you. You can use Cognito unauthenticated identity pools with Amazon Location as a way for applications to retrieve temporary, scoped-down AWS credentials. To learn more about setting up Cognito with Amazon Location, see the blog post Add a map to your webpage with Amazon Location Service.

Limit the scope of your unauthenticated roles to a domain

When you are building an application that allows users to perform actions such as retrieving map tiles, searching for points of interest, updating device positions, and calculating routes without needing them to be authenticated, you can make use of unauthenticated roles.

When using unauthenticated roles to access Amazon Location resources, you can add an extra condition to limit resource access to an HTTP referer that you specify in the policy. The aws:referer request context value is provided by the caller in an HTTP header, and it is included in a web browser request.

The following is an example of a policy that allows access to a Map resource by using the aws:referer condition, but only if the request comes from the domain example.com.

{
  "Version": "2012-10-17",
  "Statement": [
    {
      "Sid": "MapsReadOnly",
      "Effect": "Allow",
      "Action": [
        "geo:GetMapStyleDescriptor",
        "geo:GetMapGlyphs",
        "geo:GetMapSprites",
        "geo:GetMapTile"
      ],
      "Resource": "arn:aws:geo:us-west-2:111122223333:map/MyMap",
      "Condition": {
        "StringLike": {
          "aws:Referer": "https://www.example.com/*"
        }
      }
    }
  ]
}

To learn more about aws:referer and other global conditions, see AWS global condition context keys.

Encrypt tracker and geofence information using customer managed keys with AWS KMS

When you create your tracker and geofence collection resources, you have the option to use a symmetric customer managed key to add a second layer of encryption to geofencing and tracking data. Because you have full control of this key, you can establish and maintain your own IAM policies, manage key rotation, and schedule keys for deletion.

After you create your resources with customer managed keys, the geometry of your geofences and all positions associated to a tracked device will have two layers of encryption. In the next sections, you will see how to create a key and use it to encrypt your own data.

Create an AWS KMS symmetric key

First, you need to create a key policy that will limit the AWS KMS key to allow access to principals authorized to use Amazon Location and to principals authorized to manage the key. For more information about specifying permissions in a policy, see the AWS KMS Developer Guide.

To create the key policy

Create a JSON policy file by using the following policy as a reference. This key policy allows Amazon Location to grant access to your KMS key only when it is called from your AWS account. This works by combining the kms:ViaService and kms:CallerAccount conditions. In the following policy, replace us-west-2 with your AWS Region of choice, and the kms:CallerAccount value with your AWS account ID. Adjust the KMS Key Administrators statement to reflect your actual key administrators’ principals, including yourself. For details on how to use the Principal element, see the AWS JSON policy elements documentation.

{
  "Version": "2012-10-17",
  "Statement": [
    {
      "Sid": "Amazon Location",
      "Effect": "Allow",
      "Principal": {
        "AWS": "*"
      },
      "Action": [
        "kms:DescribeKey",
        "kms:CreateGrant"
      ],
      "Resource": "*",
      "Condition": {
        "StringEquals": {
          "kms:ViaService": "geo.us-west-2.amazonaws.com",
          "kms:CallerAccount": "111122223333"
        }
      }
    },
    {
      "Sid": "Allow access for Key Administrators",
      "Effect": "Allow",
      "Principal": {
        "AWS": "arn:aws:iam::111122223333:user/KMSKeyAdmin"
      },
      "Action": [
        "kms:Create*",
        "kms:Describe*",
        "kms:Enable*",
        "kms:List*",
        "kms:Put*",
        "kms:Update*",
        "kms:Revoke*",
        "kms:Disable*",
        "kms:Get*",
        "kms:Delete*",
        "kms:TagResource",
        "kms:UntagResource",
        "kms:ScheduleKeyDeletion",
        "kms:CancelKeyDeletion"
      ],
      "Resource": "*"
    }
  ]
}

For the next steps, you will use the AWS Command Line Interface (AWS CLI). Make sure to have the latest version installed by following the AWS CLI documentation.

Tip: AWS CLI will consider the Region you defined as the default during the configuration steps, but you can override this configuration by adding –region <your region> at the end of each command line in the following command. Also, make sure that your user has the appropriate permissions to perform those actions.

To create the symmetric key

Now, create a symmetric key on AWS KMS by running the create-key command and passing the policy file that you created in the previous step.

aws kms create-key –policy file://<your JSON policy file>

Alternatively, you can create the symmetric key using the AWS KMS console with the preceding key policy.

After running the command, you should see the following output. Take note of the KeyId value.

{
  "KeyMetadata": {
    "Origin": "AWS_KMS",
    "KeyId": "1234abcd-12ab-34cd-56ef-1234567890ab",
    "Description": "",
    "KeyManager": "CUSTOMER",
    "Enabled": true,
    "CustomerMasterKeySpec": "SYMMETRIC_DEFAULT",
    "KeyUsage": "ENCRYPT_DECRYPT",
    "KeyState": "Enabled",
    "CreationDate": 1502910355.475,
    "Arn": "arn:aws:kms:us-west-2:111122223333:key/1234abcd-12ab-34cd-56ef-1234567890ab",
    "AWSAccountId": "111122223333",
    "MultiRegion": false
    "EncryptionAlgorithms": [
      "SYMMETRIC_DEFAULT"
    ],
  }
}

Create an Amazon Location tracker and geofence collection resources

To create an Amazon Location tracker resource that uses AWS KMS for a second layer of encryption, run the following command, passing the key ID from the previous step.

aws location \
	create-tracker \
	--tracker-name "MySecureTracker" \
	--kms-key-id "1234abcd-12ab-34cd-56ef-1234567890ab"

Here is the output from this command.

{
    "CreateTime": "2021-07-15T04:54:12.913000+00:00",
    "TrackerArn": "arn:aws:geo:us-west-2:111122223333:tracker/MySecureTracker",
    "TrackerName": "MySecureTracker"
}

Similarly, to create a geofence collection by using your own KMS symmetric keys, run the following command, also modifying the key ID.

aws location \
	create-geofence-collection \
	--collection-name "MySecureGeofenceCollection" \
	--kms-key-id "1234abcd-12ab-34cd-56ef-1234567890ab"

Here is the output from this command.

{
    "CreateTime": "2021-07-15T04:54:12.913000+00:00",
    "TrackerArn": "arn:aws:geo:us-west-2:111122223333:geofence-collection/MySecureGeoCollection",
    "TrackerName": "MySecureGeoCollection"
}

By following these steps, you have added a second layer of encryption to your geofence collection and tracker.

Data retention best practices

Trackers and geofence collections are stored and never leave your AWS account without your permission, but they have different lifecycles on Amazon Location.

Trackers store the positions of devices and assets that are tracked in a longitude/latitude format. These positions are stored for 30 days by the service before being automatically deleted. If needed for historical purposes, you can transfer this data to another data storage layer and apply the proper security measures based on the shared responsibility model.

Geofence collections store the geometries you provide until you explicitly choose to delete them, so you can use encryption with AWS managed keys or your own keys to keep them for as long as needed.

Asset tracking and location storage best practices

After a tracker is created, you can start sending location updates by using the Amazon Location front-end SDKs or by calling the BatchUpdateDevicePosition API. In both cases, at a minimum, you need to provide the latitude and longitude, the time when the device was in that position, and a device-unique identifier that represents the asset being tracked.

Protecting device IDs

This device ID can be any string of your choice, so you should apply measures to prevent certain IDs from being used. Some examples of what to avoid include:

  • First and last names
  • Facility names
  • Documents, such as driver’s licenses or social security numbers
  • Emails
  • Addresses
  • Telephone numbers

Latitude and longitude precision

Latitude and longitude coordinates convey precision in degrees, presented as decimals, with each decimal place representing a different measure of distance (when measured at the equator).

Amazon Location supports up to six decimal places of precision (0.000001), which is equal to approximately 11 cm or 4.4 inches at the equator. You can limit the number of decimal places in the latitude and longitude pair that is sent to the tracker based on the precision required, increasing the location range and providing extra privacy to users.

Figure 1 shows a latitude and longitude pair, with the level of detail associated to decimals places.

Figure 1: Geolocation decimal precision details

Figure 1: Geolocation decimal precision details

Position filtering

Amazon Location introduced position filtering as an option to trackers that enables cost reduction and reduces jitter from inaccurate device location updates.

  • DistanceBased filtering ignores location updates wherein devices have moved less than 30 meters (98.4 ft).
  • TimeBased filtering evaluates every location update against linked geofence collections, but not every location update is stored. If your update frequency is more often than 30 seconds, then only one update per 30 seconds is stored for each unique device ID.
  • AccuracyBased filtering ignores location updates if the distance moved was less than the measured accuracy provided by the device.

By using filtering options, you can reduce the number of location updates that are sent and stored, thus reducing the level of location detail provided and increasing the level of privacy.

Logging and monitoring

Amazon Location integrates with AWS services that provide the observability needed to help you comply with your organization’s security standards.

To record all actions that were taken by users, roles, or AWS services that access Amazon Location, consider using AWS CloudTrail. CloudTrail provides information on who is accessing your resources, detailing the account ID, principal ID, source IP address, timestamp, and more. Moreover, Amazon CloudWatch helps you collect and analyze metrics related to your Amazon Location resources. CloudWatch also allows you to create alarms based on pre-defined thresholds of call counts. These alarms can create notifications through Amazon Simple Notification Service (Amazon SNS) to automatically alert teams responsible for investigating abnormalities.

Conclusion

At AWS, security is our top priority. Here, security and compliance is a shared responsibility between AWS and the customer, where AWS is responsible for protecting the infrastructure that runs all of the services offered in the AWS Cloud. The customer assumes the responsibility to perform all of the necessary security configurations to the solutions they are building on top of our infrastructure.

In this blog post, you’ve learned the controls and guardrails that Amazon Location provides out of the box to help provide data privacy and data protection to our customers. You also learned about the other mechanisms you can use to enhance your security posture.

Start building your own secure geolocation solutions by following the Amazon Location Developer Guide and learn more about how the service handles security by reading the security topics in the guide.

 
If you have feedback about this post, submit comments in the Comments section below. If you have questions about this blog post, start a new thread on Amazon Location Service forum or contact AWS Support.

Want more AWS Security news? Follow us on Twitter.

Rafael Leandro Junior

Rafael Leandro, Junior

Rafael Leandro, Junior, is a senior global solutions architect who currently focuses on the consumer packaged goods and transportation industries. He helps large global customers on their journeys with AWS.

David Bailey

David Bailey

David Bailey is a senior security consultant who helps AWS customers achieve their cloud security goals. He has a passion for building new technologies and providing mentorship for others.

How to use tokenization to improve data security and reduce audit scope

Post Syndicated from Tim Winston original https://aws.amazon.com/blogs/security/how-to-use-tokenization-to-improve-data-security-and-reduce-audit-scope/

Tokenization of sensitive data elements is a hot topic, but you may not know what to tokenize, or even how to determine if tokenization is right for your organization’s business needs. Industries subject to financial, data security, regulatory, or privacy compliance standards are increasingly looking for tokenization solutions to minimize distribution of sensitive data, reduce risk of exposure, improve security posture, and alleviate compliance obligations. This post provides guidance to determine your requirements for tokenization, with an emphasis on the compliance lens given our experience as PCI Qualified Security Assessors (PCI QSA).

What is tokenization?

Tokenization is the process of replacing actual sensitive data elements with non-sensitive data elements that have no exploitable value for data security purposes. Security-sensitive applications use tokenization to replace sensitive data, such as personally identifiable information (PII) or protected health information (PHI), with tokens to reduce security risks.

De-tokenization returns the original data element for a provided token. Applications may require access to the original data, or an element of the original data, for decisions, analysis, or personalized messaging. To minimize the need to de-tokenize data and to reduce security exposure, tokens can retain attributes of the original data to enable processing and analysis using token values instead of the original data. Common characteristics tokens may retain from the original data are:

Format attributes

Length for compatibility with storage and reports of applications written for the original data
Character set for compatibility with display and data validation of existing applications
Preserved character positions such as first 6 and last 4 for credit card PAN

Analytics attributes

Mapping consistency where the same data always results in the same token
Sort order

Retaining functional attributes in tokens must be implemented in ways that do not defeat the security of the tokenization process. Using attribute preservation functions can possibly reduce the security of a specific tokenization implementation. Limiting the scope and access to tokens addresses limitations introduced when using attribute retention.

Why tokenize? Common use cases

I need to reduce my compliance scope

Tokens are generally not subject to compliance requirements if there is sufficient separation of the tokenization implementation and the applications using the tokens. Encrypted sensitive data may not reduce compliance obligations or scope. Such industry regulatory standards as PCI DSS 3.2.1 still consider systems that store, process, or transmit encrypted cardholder data as in-scope for assessment; whereas tokenized data may remove those systems from assessment scope. A common use case for PCI DSS compliance is replacing PAN with tokens in data sent to a service provider, which keeps the service provider from being subject to PCI DSS.

I need to restrict sensitive data to only those with a “need-to-know”

Tokenization can be used to add a layer of explicit access controls to de-tokenization of individual data items, which can be used to implement and demonstrate least-privileged access to sensitive data. For instances where data may be co-mingled in a common repository such as a data lake, tokenization can help ensure that only those with the appropriate access can perform the de-tokenization process and reveal sensitive data.

I need to avoid sharing sensitive data with my service providers

Replacing sensitive data with tokens before providing it to service providers who have no access to de-tokenize data can eliminate the risk of having sensitive data within service providers’ control, and avoid having compliance requirements apply to their environments. This is common for customers involved in the payment process, which provides tokenization services to merchants that tokenize the card holder data, and return back to their customers a token they can use to complete card purchase transactions.

I need to simplify data lake security and compliance

A data lake centralized repository allows you to store all your structured and unstructured data at any scale, to be used later for not-yet-determined analysis. Having multiple sources and data stored in multiple structured and unstructured formats creates complications for demonstrating data protection controls for regulatory compliance. Ideally, sensitive data should not be ingested at all; however, that is not always feasible. Where ingestion of such data is necessary, tokenization at each data source can keep compliance-subject data out of data lakes, and help avoid compliance implications. Using tokens that retain data attributes, such as data-to-token consistency (idempotence) can support many of the analytical capabilities that make it useful to store data in the data lake.

I want to allow sensitive data to be used for other purposes, such as analytics

Your organization may want to perform analytics on the sensitive data for other business purposes, such as marketing metrics, and reporting. By tokenizing the data, you can minimize the locations where sensitive data is allowed, and provide tokens to users and applications needing to conduct data analysis. This allows numerous applications and processes to access the token data and maintain security of the original sensitive data.

I want to use tokenization for threat mitigation

Using tokenization can help you mitigate threats identified in your workload threat model, depending on where and how tokenization is implemented. At the point where the sensitive data is tokenized, the sensitive data element is replaced with a non-sensitive equivalent throughout the data lifecycle, and across the data flow. Some important questions to ask are:

  • What are the in-scope compliance, regulatory, privacy, or security requirements for the data that will be tokenized?
  • When does the sensitive data need to be tokenized in order to meet security and scope reduction objectives?
  • What attack vector is being addressed for the sensitive data by tokenizing it?
  • Where is the tokenized data being hosted? Is it in a trusted environment or an untrusted environment?

For additional information on threat modeling, see the AWS security blog post How to approach threat modeling.

Tokenization or encryption consideration

Tokens can provide the ability to retain processing value of the data while still managing the data exposure risk and compliance scope. Encryption is the foundational mechanism for providing data confidentiality.

Encryption rarely results in cipher text with a similar format to the original data, and may prevent data analysis, or require consuming applications to adapt.

Your decision to use tokenization instead of encryption should be based on the following:

Reduction of compliance scope As discussed above, by properly utilizing tokenization to obfuscate sensitive data you may be able to reduce the scope of certain framework assessments such as PCI DSS 3.2.1.
Format attributes Used for compatibility with existing software and processes.
Analytics attributes Used to support planned data analysis and reporting.
Elimination of encryption key management A tokenization solution has one essential API—create token—and one optional API—retrieve value from token. Managing access controls can be simpler than some non-AWS native general purpose cryptographic key use policies. In addition, the compromise of the encryption key compromises all data encrypted by that key, both past and future. The compromise of the token database compromises only existing tokens.

Where encryption may make more sense

Although scope reduction, data analytics, threat mitigation, and data masking for the protection of sensitive data make very powerful arguments for tokenization, we acknowledge there may be instances where encryption is the more appropriate solution. Ask yourself these questions to gain better clarity on which solution is right for your company’s use case.

Scalability If you require a solution that scales to large data volumes, and have the availability to leverage encryption solutions that require minimal key management overhead, such as AWS Key Management Services (AWS KMS), then encryption may be right for you.
Data format If you need to secure data that is unstructured, then encryption may be the better option given the flexibility of encryption at various layers and formats.
Data sharing with 3rd parties If you need to share sensitive data in its original format and value with a 3rd party, then encryption may be the appropriate solution to minimize external access to your token vault for de-tokenization processes.

What type of tokenization solution is right for your business?

When trying to decide which tokenization solution to use, your organization should first define your business requirements and use cases.

  1. What are your own specific use cases for tokenized data, and what is your business goal? Identifying which use cases apply to your business and what the end state should be is important when determining the correct solution for your needs.
  2. What type of data does your organization want to tokenize? Understanding what data elements you want to tokenize, and what that tokenized data will be used for may impact your decision about which type of solution to use.
  3. Do the tokens need to be deterministic, the same data always producing the same token? Knowing how the data will be ingested or used by other applications and processes may rule out certain tokenization solutions.
  4. Will tokens be used internally only, or will the tokens be shared across other business units and applications? Identifying a need for shared tokens may increase the risk of token exposure and, therefore, impact your decisions about which tokenization solution to use.
  5. How long does a token need to be valid? You will need to identify a solution that can meet your use cases, internal security policies, and regulatory framework requirements.

Choosing between self-managed tokenization or tokenization as a service

Do you want to manage the tokenization within your organization, or use Tokenization as a Service (TaaS) offered by a third-party service provider? Some advantages to managing the tokenization solution with your company employees and resources are the ability to direct and prioritize the work needed to implement and maintain the solution, customizing the solution to the application’s exact needs, and building the subject matter expertise to remove a dependency on a third party. The primary advantages of a TaaS solution are that it is already complete, and the security of both tokenization and access controls are well tested. Additionally, TaaS inherently demonstrates separation of duties, because privileged access to the tokenization environment is owned by the tokenization provider.

Choosing a reversible tokenization solution

Do you have a business need to retrieve the original data from the token value? Reversible tokens can be valuable to avoid sharing sensitive data with internal or third-party service providers in payments and other financial services. Because the service providers are passed only tokens, they can avoid accepting additional security risk and compliance scope. If your company implements or allows de-tokenization, you will need to be able to demonstrate strict controls on the management and use of de-tokenization privilege. Eliminating the implementation of de-tokenization is the clearest way to demonstrate that downstream applications cannot have sensitive data. Given the security and compliance risks of converting tokenized data back into its original data format, this process should be highly monitored, and you should have appropriate alerting in place to detect each time this activity is performed.

Operational considerations when deciding on a tokenization solution

While operational considerations are outside the scope of this post, they are important factors for choosing a solution. Throughput, latency, deployment architecture, resiliency, batch capability, and multi-regional support can impact the tokenization solution of choice. Integration mechanisms with identity and access control and logging architectures, for example, are important for compliance controls and evidence creation.

No matter which deployment model you choose, the tokenization solution needs to meet security standards, similar to encryption standards, and must prevent determining what the original data is from the token values.

Conclusion

Using tokenization solutions to replace sensitive data offers many security and compliance benefits. These benefits include lowered security risk and smaller audit scope, resulting in lower compliance costs and a reduction in regulatory data handling requirements.

Your company may want to use sensitive data in new and innovative ways, such as developing personalized offerings that use predictive analysis and consumer usage trends and patterns, fraud monitoring and minimizing financial risk based on suspicious activity analysis, or developing business intelligence to improve strategic planning and business performance. If you implement a tokenization solution, your organization can alleviate some of the regulatory burden of protecting sensitive data while implementing solutions that use obfuscated data for analytics.

On the other hand, tokenization may also add complexity to your systems and applications, as well as adding additional costs to maintain those systems and applications. If you use a third-party tokenization solution, there is a possibility of being locked into that service provider due to the specific token schema they may use, and switching between providers may be costly. It can also be challenging to integrate tokenization into all applications that use the subject data.

In this post, we have described some considerations to help you determine if tokenization is right for you, what to consider when deciding which type of tokenization solution to use, and the benefits. disadvantages, and comparison of tokenization and encryption. When choosing a tokenization solution, it’s important for you to identify and understand all of your organizational requirements. This post is intended to generate questions your organization should answer to make the right decisions concerning tokenization.

You have many options available to tokenize your AWS workloads. After your organization has determined the type of tokenization solution to implement based on your own business requirements, explore the tokenization solution options available in AWS Marketplace. You can also build your own solution using AWS guides and blog posts. For further reading, see this blog post: Building a serverless tokenization solution to mask sensitive data.

If you have feedback about this post, submit comments in the Comments section below. If you have questions about this post, start a new thread on the Amazon Security Assurance Services or contact AWS Support.

Want more AWS Security news? Follow us on Twitter.

Author

Tim Winston

Tim is a Senior Assurance Consultant with AWS Security Assurance Services. He leverages more than 20 years’ experience as a security consultant and assessor to provide AWS customers with guidance on payment security and compliance. He is a co-author of the “Payment Card Industry Data Security Standard (PCI DSS) 3.2.1 on AWS”.

Author

Kristine Harper

Kristine is a Senior Assurance Consultant and PCI DSS Qualified Security Assessor (QSA) with AWS Security Assurance Services. Her professional background includes security and compliance consulting with large fintech enterprises and government entities. In her free time, Kristine enjoys traveling, outdoor activities, spending time with family, and spoiling her pets.

Author

Michael Guzman

Michael is an Assurance Consultant with AWS Security Assurance Services. Michael is a PCI QSA and HITRUST CCSFP, along with holding several AWS certifications. His background is in Financial Services IT Operations and Administrations, with over 20 years experience within that industry. In his spare time Michael enjoy’s spending time with his family, continuing to improve his golf skills and perfecting his Tri-Tip recipe.

Using Amazon Macie to Validate S3 Bucket Data Classification

Post Syndicated from Bill Magee original https://aws.amazon.com/blogs/architecture/using-amazon-macie-to-validate-s3-bucket-data-classification/

Securing sensitive information is a high priority for organizations for many reasons. At the same time, organizations are looking for ways to empower development teams to stay agile and innovative. Centralized security teams strive to create systems that align to the needs of the development teams, rather than mandating how those teams must operate.

Security teams who create automation for the discovery of sensitive data have some issues to consider. If development teams are able to self-provision data storage, how does the security team protect that data? If teams have a business need to store sensitive data, they must consider how, where, and with what safeguards that data is stored.

Let’s look at how we can set up Amazon Macie to validate data classifications provided by decentralized software development teams. Macie is a fully managed service that uses machine learning (ML) to discover sensitive data in AWS. If you are not familiar with Macie, read New – Enhanced Amazon Macie Now Available with Substantially Reduced Pricing.

Data classification is part of the security pillar of a Well-Architected application. Following the guidelines provided in the AWS Well-Architected Framework, we can develop a resource-tagging scheme that fits our needs.

Overview of decentralized data validation system

In our example, we have multiple levels of data classification that represent different levels of risk associated with each classification. When a software development team creates a new Amazon Simple Storage Service (S3) bucket, they are responsible for labeling that bucket with a tag. This tag represents the classification of data stored in that bucket. The security team must maintain a system to validate that the data in those buckets meets the classification specified by the development teams.

This separation of roles and responsibilities for development and security teams who work independently requires a validation system that’s decoupled from S3 bucket creation. It should automatically detect new buckets or data in the existing buckets, and validate the data against the assigned classification tags. It should also notify the appropriate development teams of misclassified or unclassified buckets in a timely manner. These notifications can be through standard notification channels, such as email or Slack channel notifications.

Validation and alerts with AWS services

Figure 1. Validation system for Data Classification

Figure 1. Validation system for data classification

We assume that teams are permitted to create S3 buckets and we will use AWS Config to enforce the following required tags: DataClassification and SupportSNSTopic. The DataClassification tag indicates what type of data is allowed in the bucket. The SupportSNSTopic tag indicates an Amazon Simple Notification Service (SNS) topic. If there are issues found with the data in the bucket, a message is published to the topic, and Amazon SNS will deliver an alert. For example, if there is personally identifiable information (PII) data in a bucket that is classified as non-sensitive, the system will alert the owners of the bucket.

Macie is configured to scan all S3 buckets on a scheduled basis. This configuration ensures that any new bucket and data placed in the buckets is analyzed the next time the Macie job runs.

Macie provides several managed data identifiers for discovering and classifying the data. These include bank account numbers, credit card information, authentication credentials, PII, and more. You can also create custom identifiers (or rules) to gather information not covered by the managed identifiers.

Macie integrates with Amazon EventBridge to allow us to capture data classification events and route them to one or more destinations for reporting and alerting needs. In our configuration, the event initiates an AWS Lambda. The Lambda function is used to validate the data classification inferred by Macie against the classification specified in the DataClassification tag using custom business logic. If a data classification violation is found, the Lambda then sends a message to the Amazon SNS topic specified in the SupportSNSTopic tag.

The Lambda function also creates custom metrics and sends those to Amazon CloudWatch. The metrics are organized by engineering team and severity. This allows the security team to create a dashboard of metrics based on the Macie findings. The findings can also be filtered per engineering team and severity to determine which teams need to be contacted to ensure remediation.

Conclusion

This solution provides a centralized security team with the tools it needs. The team can validate the data classification of an Amazon S3 bucket that is self-provisioned by a development team. New Amazon S3 buckets are automatically included in the Macie jobs and alerts. These are only sent out if the data in the bucket does not conform to the classification specified by the development team. The data auditing process is loosely coupled with the Amazon S3 Bucket creation process, enabling self-service capabilities for development teams, while ensuring proper data classification. Your teams can stay agile and innovative, while maintaining a strong security posture.

Learn more about Amazon Macie and Data Classification.

How to protect sensitive data for its entire lifecycle in AWS

Post Syndicated from Raj Jain original https://aws.amazon.com/blogs/security/how-to-protect-sensitive-data-for-its-entire-lifecycle-in-aws/

Many Amazon Web Services (AWS) customer workflows require ingesting sensitive and regulated data such as Payments Card Industry (PCI) data, personally identifiable information (PII), and protected health information (PHI). In this post, I’ll show you a method designed to protect sensitive data for its entire lifecycle in AWS. This method can help enhance your data security posture and be useful for fulfilling the data privacy regulatory requirements applicable to your organization for data protection at-rest, in-transit, and in-use.

An existing method for sensitive data protection in AWS is to use the field-level encryption feature offered by Amazon CloudFront. This CloudFront feature protects sensitive data fields in requests at the AWS network edge. The chosen fields are protected upon ingestion and remain protected throughout the entire application stack. The notion of protecting sensitive data early in its lifecycle in AWS is a highly desirable security architecture. However, CloudFront can protect a maximum of 10 fields and only within HTTP(S) POST requests that carry HTML form encoded payloads.

If your requirements exceed CloudFront’s native field-level encryption feature, such as a need to handle diverse application payload formats, different HTTP methods, and more than 10 sensitive fields, you can implement field-level encryption yourself using the Lambda@Edge feature in CloudFront. In terms of choosing an appropriate encryption scheme, this problem calls for an asymmetric cryptographic system that will allow public keys to be openly distributed to the CloudFront network edges while keeping the corresponding private keys stored securely within the network core. One such popular asymmetric cryptographic system is RSA. Accordingly, we’ll implement a Lambda@Edge function that uses asymmetric encryption using the RSA cryptosystem to protect an arbitrary number of fields in any HTTP(S) request. We will discuss the solution using an example JSON payload, although this approach can be applied to any payload format.

A complex part of any encryption solution is key management. To address that, I use AWS Key Management Service (AWS KMS). AWS KMS simplifies the solution and offers improved security posture and operational benefits, detailed later.

Solution overview

You can protect data in-transit over individual communications channels using transport layer security (TLS), and at-rest in individual storage silos using volume encryption, object encryption or database table encryption. However, if you have sensitive workloads, you might need additional protection that can follow the data as it moves through the application stack. Fine-grained data protection techniques such as field-level encryption allow for the protection of sensitive data fields in larger application payloads while leaving non-sensitive fields in plaintext. This approach lets an application perform business functions on non-sensitive fields without the overhead of encryption, and allows fine-grained control over what fields can be accessed by what parts of the application.

A best practice for protecting sensitive data is to reduce its exposure in the clear throughout its lifecycle. This means protecting data as early as possible on ingestion and ensuring that only authorized users and applications can access the data only when and as needed. CloudFront, when combined with the flexibility provided by Lambda@Edge, provides an appropriate environment at the edge of the AWS network to protect sensitive data upon ingestion in AWS.

Since the downstream systems don’t have access to sensitive data, data exposure is reduced, which helps to minimize your compliance footprint for auditing purposes.

The number of sensitive data elements that may need field-level encryption depends on your requirements. For example:

  • For healthcare applications, HIPAA regulates 18 personal data elements.
  • In California, the California Consumer Privacy Act (CCPA) regulates at least 11 categories of personal information—each with its own set of data elements.

The idea behind field-level encryption is to protect sensitive data fields individually, while retaining the structure of the application payload. The alternative is full payload encryption, where the entire application payload is encrypted as a binary blob, which makes it unusable until the entirety of it is decrypted. With field-level encryption, the non-sensitive data left in plaintext remains usable for ordinary business functions. When retrofitting data protection in existing applications, this approach can reduce the risk of application malfunction since the data format is maintained.

The following figure shows how PII data fields in a JSON construction that are deemed sensitive by an application can be transformed from plaintext to ciphertext with a field-level encryption mechanism.

Figure 1: Example of field-level encryption

Figure 1: Example of field-level encryption

You can change plaintext to ciphertext as depicted in Figure 1 by using a Lambda@Edge function to perform field-level encryption. I discuss the encryption and decryption processes separately in the following sections.

Field-level encryption process

Let’s discuss the individual steps involved in the encryption process as shown in Figure 2.

Figure 2: Field-level encryption process

Figure 2: Field-level encryption process

Figure 2 shows CloudFront invoking a Lambda@Edge function while processing a client request. CloudFront offers multiple integration points for invoking Lambda@Edge functions. Since you are processing a client request and your encryption behavior is related to requests being forwarded to an origin server, you want your function to run upon the origin request event in CloudFront. The origin request event represents an internal state transition in CloudFront that happens immediately before CloudFront forwards a request to the downstream origin server.

You can associate your Lambda@Edge with CloudFront as described in Adding Triggers by Using the CloudFront Console. A screenshot of the CloudFront console is shown in Figure 3. The selected event type is Origin Request and the Include Body check box is selected so that the request body is conveyed to Lambda@Edge.

Figure 3: Configuration of Lambda@Edge in CloudFront

Figure 3: Configuration of Lambda@Edge in CloudFront

The Lambda@Edge function acts as a programmable hook in the CloudFront request processing flow. You can use the function to replace the incoming request body with a request body with the sensitive data fields encrypted.

The process includes the following steps:

Step 1 – RSA key generation and inclusion in Lambda@Edge

You can generate an RSA customer managed key (CMK) in AWS KMS as described in Creating asymmetric CMKs. This is done at system configuration time.

Note: You can use your existing RSA key pairs or generate new ones externally by using OpenSSL commands, especially if you need to perform RSA decryption and key management independently of AWS KMS. Your choice won’t affect the fundamental encryption design pattern presented here.

The RSA key creation in AWS KMS requires two inputs: key length and type of usage. In this example, I created a 2048-bit key and assigned its use for encryption and decryption. The cryptographic configuration of an RSA CMK created in AWS KMS is shown in Figure 4.

Figure 4: Cryptographic properties of an RSA key managed by AWS KMS

Figure 4: Cryptographic properties of an RSA key managed by AWS KMS

Of the two encryption algorithms shown in Figure 4— RSAES_OAEP_SHA_256 and RSAES_OAEP_SHA_1, this example uses RSAES_OAEP_SHA_256. The combination of a 2048-bit key and the RSAES_OAEP_SHA_256 algorithm lets you encrypt a maximum of 190 bytes of data, which is enough for most PII fields. You can choose a different key length and encryption algorithm depending on your security and performance requirements. How to choose your CMK configuration includes information about RSA key specs for encryption and decryption.

Using AWS KMS for RSA key management versus managing the keys yourself eliminates that complexity and can help you:

  • Enforce IAM and key policies that describe administrative and usage permissions for keys.
  • Manage cross-account access for keys.
  • Monitor and alarm on key operations through Amazon CloudWatch.
  • Audit AWS KMS API invocations through AWS CloudTrail.
  • Record configuration changes to keys and enforce key specification compliance through AWS Config.
  • Generate high-entropy keys in an AWS KMS hardware security module (HSM) as required by NIST.
  • Store RSA private keys securely, without the ability to export.
  • Perform RSA decryption within AWS KMS without exposing private keys to application code.
  • Categorize and report on keys with key tags for cost allocation.
  • Disable keys and schedule their deletion.

You need to extract the RSA public key from AWS KMS so you can include it in the AWS Lambda deployment package. You can do this from the AWS Management Console, through the AWS KMS SDK, or by using the get-public-key command in the AWS Command Line Interface (AWS CLI). Figure 5 shows Copy and Download options for a public key in the Public key tab of the AWS KMS console.

Figure 5: RSA public key available for copy or download in the console

Figure 5: RSA public key available for copy or download in the console

Note: As we will see in the sample code in step 3, we embed the public key in the Lambda@Edge deployment package. This is a permissible practice because public keys in asymmetric cryptography systems aren’t a secret and can be freely distributed to entities that need to perform encryption. Alternatively, you can use Lambda@Edge to query AWS KMS for the public key at runtime. However, this introduces latency, increases the load against your KMS account quota, and increases your AWS costs. General patterns for using external data in Lambda@Edge are described in Leveraging external data in Lambda@Edge.

Step 2 – HTTP API request handling by CloudFront

CloudFront receives an HTTP(S) request from a client. CloudFront then invokes Lambda@Edge during origin-request processing and includes the HTTP request body in the invocation.

Step 3 – Lambda@Edge processing

The Lambda@Edge function processes the HTTP request body. The function extracts sensitive data fields and performs RSA encryption over their values.

The following code is sample source code for the Lambda@Edge function implemented in Python 3.7:

import Crypto
import base64
import json
from Crypto.Cipher import PKCS1_OAEP
from Crypto.PublicKey import RSA

# PEM-formatted RSA public key copied over from AWS KMS or your own public key.
RSA_PUBLIC_KEY = "-----BEGIN PUBLIC KEY-----<your key>-----END PUBLIC KEY-----"
RSA_PUBLIC_KEY_OBJ = RSA.importKey(RSA_PUBLIC_KEY)
RSA_CIPHER_OBJ = PKCS1_OAEP.new(RSA_PUBLIC_KEY_OBJ, Crypto.Hash.SHA256)

# Example sensitive data field names in a JSON object. 
PII_SENSITIVE_FIELD_NAMES = ["fname", "lname", "email", "ssn", "dob", "phone"]

CIPHERTEXT_PREFIX = "#01#"
CIPHERTEXT_SUFFIX = "#10#"

def lambda_handler(event, context):
    # Extract HTTP request and its body as per documentation:
    # https://docs.aws.amazon.com/AmazonCloudFront/latest/DeveloperGuide/lambda-event-structure.html
    http_request = event['Records'][0]['cf']['request']
    body = http_request['body']
    org_body = base64.b64decode(body['data'])
    mod_body = protect_sensitive_fields_json(org_body)
    body['action'] = 'replace'
    body['encoding'] = 'text'
    body['data'] = mod_body
    return http_request


def protect_sensitive_fields_json(body):
    # Encrypts sensitive fields in sample JSON payload shown earlier in this post.
    # [{"fname": "Alejandro", "lname": "Rosalez", … }]
    person_list = json.loads(body.decode("utf-8"))
    for person_data in person_list:
        for field_name in PII_SENSITIVE_FIELD_NAMES:
            if field_name not in person_data:
                continue
            plaintext = person_data[field_name]
            ciphertext = RSA_CIPHER_OBJ.encrypt(bytes(plaintext, 'utf-8'))
            ciphertext_b64 = base64.b64encode(ciphertext).decode()
            # Optionally, add unique prefix/suffix patterns to ciphertext
            person_data[field_name] = CIPHERTEXT_PREFIX + ciphertext_b64 + CIPHERTEXT_SUFFIX 
    return json.dumps(person_list)

The event structure passed into the Lambda@Edge function is described in Lambda@Edge Event Structure. Following the event structure, you can extract the HTTP request body. In this example, the assumption is that the HTTP payload carries a JSON document based on a particular schema defined as part of the API contract. The input JSON document is parsed by the function, converting it into a Python dictionary. The Python native dictionary operators are then used to extract the sensitive field values.

Note: If you don’t know your API payload structure ahead of time or you’re dealing with unstructured payloads, you can use techniques such as regular expression pattern searches and checksums to look for patterns of sensitive data and target them accordingly. For example, credit card primary account numbers include a Luhn checksum that can be programmatically detected. Additionally, services such as Amazon Comprehend and Amazon Macie can be leveraged for detecting sensitive data such as PII in application payloads.

While iterating over the sensitive fields, individual field values are encrypted using the standard RSA encryption implementation available in the Python Cryptography Toolkit (PyCrypto). The PyCrypto module is included within the Lambda@Edge zip archive as described in Lambda@Edge deployment package.

The example uses the standard optimal asymmetric encryption padding (OAEP) and SHA-256 encryption algorithm properties. These properties are supported by AWS KMS and will allow RSA ciphertext produced here to be decrypted by AWS KMS later.

Note: You may have noticed in the code above that we’re bracketing the ciphertexts with predefined prefix and suffix strings:

person_data[field_name] = CIPHERTEXT_PREFIX + ciphertext_b64 + CIPHERTEXT_SUFFIX

This is an optional measure and is being implemented to simplify the decryption process.

The prefix and suffix strings help demarcate ciphertext embedded in unstructured data in downstream processing and also act as embedded metadata. Unique prefix and suffix strings allow you to extract ciphertext through string or regular expression (regex) searches during the decryption process without having to know the data body format or schema, or the field names that were encrypted.

Distinct strings can also serve as indirect identifiers of RSA key pair identifiers. This can enable key rotation and allow separate keys to be used for separate fields depending on the data security requirements for individual fields.

You can ensure that the prefix and suffix strings can’t collide with the ciphertext by bracketing them with characters that don’t appear in cyphertext. For example, a hash (#) character cannot be part of a base64 encoded ciphertext string.

Deploying a Lambda function as a Lambda@Edge function requires specific IAM permissions and an IAM execution role. Follow the Lambda@Edge deployment instructions in Setting IAM Permissions and Roles for Lambda@Edge.

Step 4 – Lambda@Edge response

The Lambda@Edge function returns the modified HTTP body back to CloudFront and instructs it to replace the original HTTP body with the modified one by setting the following flag:

http_request['body']['action'] = 'replace'

Step 5 – Forward the request to the origin server

CloudFront forwards the modified request body provided by Lambda@Edge to the origin server. In this example, the origin server writes the data body to persistent storage for later processing.

Field-level decryption process

An application that’s authorized to access sensitive data for a business function can decrypt that data. An example decryption process is shown in Figure 6. The figure shows a Lambda function as an example compute environment for invoking AWS KMS for decryption. This functionality isn’t dependent on Lambda and can be performed in any compute environment that has access to AWS KMS.

Figure 6: Field-level decryption process

Figure 6: Field-level decryption process

The steps of the process shown in Figure 6 are described below.

Step 1 – Application retrieves the field-level encrypted data

The example application retrieves the field-level encrypted data from persistent storage that had been previously written during the data ingestion process.

Step 2 – Application invokes the decryption Lambda function

The application invokes a Lambda function responsible for performing field-level decryption, sending the retrieved data to Lambda.

Step 3 – Lambda calls the AWS KMS decryption API

The Lambda function uses AWS KMS for RSA decryption. The example calls the KMS decryption API that inputs ciphertext and returns plaintext. The actual decryption happens in KMS; the RSA private key is never exposed to the application, which is a highly desirable characteristic for building secure applications.

Note: If you choose to use an external key pair, then you can securely store the RSA private key in AWS services like AWS Systems Manager Parameter Store or AWS Secrets Manager and control access to the key through IAM and resource policies. You can fetch the key from relevant vault using the vault’s API, then decrypt using the standard RSA implementation available in your programming language. For example, the cryptography toolkit in Python or javax.crypto in Java.

The Lambda function Python code for decryption is shown below.

import base64
import boto3
import re

kms_client = boto3.client('kms')
CIPHERTEXT_PREFIX = "#01#"
CIPHERTEXT_SUFFIX = "#10#"

# This lambda function extracts event body, searches for and decrypts ciphertext 
# fields surrounded by provided prefix and suffix strings in arbitrary text bodies 
# and substitutes plaintext fields in-place.  
def lambda_handler(event, context):    
    org_data = event["body"]
    mod_data = unprotect_fields(org_data, CIPHERTEXT_PREFIX, CIPHERTEXT_SUFFIX)
    return mod_data

# Helper function that performs non-greedy regex search for ciphertext strings on
# input data and performs RSA decryption of them using AWS KMS 
def unprotect_fields(org_data, prefix, suffix):
    regex_pattern = prefix + "(.*?)" + suffix
    mod_data_parts = []
    cursor = 0

    # Search ciphertexts iteratively using python regular expression module
    for match in re.finditer(regex_pattern, org_data):
        mod_data_parts.append(org_data[cursor: match.start()])
        try:
            # Ciphertext was stored as Base64 encoded in our example. Decode it.
            ciphertext = base64.b64decode(match.group(1))

            # Decrypt ciphertext using AWS KMS  
            decrypt_rsp = kms_client.decrypt(
                EncryptionAlgorithm="RSAES_OAEP_SHA_256",
                KeyId="<Your-Key-ID>",
                CiphertextBlob=ciphertext)
            decrypted_val = decrypt_rsp["Plaintext"].decode("utf-8")
            mod_data_parts.append(decrypted_val)
        except Exception as e:
            print ("Exception: " + str(e))
            return None
        cursor = match.end()

    mod_data_parts.append(org_data[cursor:])
    return "".join(mod_data_parts)

The function performs a regular expression search in the input data body looking for ciphertext strings bracketed in predefined prefix and suffix strings that were added during encryption.

While iterating over ciphertext strings one-by-one, the function calls the AWS KMS decrypt() API. The example function uses the same RSA encryption algorithm properties—OAEP and SHA-256—and the Key ID of the public key that was used during encryption in Lambda@Edge.

Note that the Key ID itself is not a secret. Any application can be configured with it, but that doesn’t mean any application will be able to perform decryption. The security control here is that the AWS KMS key policy must allow the caller to use the Key ID to perform the decryption. An additional security control is provided by Lambda execution role that should allow calling the KMS decrypt() API.

Step 4 – AWS KMS decrypts ciphertext and returns plaintext

To ensure that only authorized users can perform decrypt operation, the KMS is configured as described in Using key policies in AWS KMS. In addition, the Lambda IAM execution role is configured as described in AWS Lambda execution role to allow it to access KMS. If both the key policy and IAM policy conditions are met, KMS returns the decrypted plaintext. Lambda substitutes the plaintext in place of ciphertext in the encapsulating data body.

Steps three and four are repeated for each ciphertext string.

Step 5 – Lambda returns decrypted data body

Once all the ciphertext has been converted to plaintext and substituted in the larger data body, the Lambda function returns the modified data body to the client application.

Conclusion

In this post, I demonstrated how you can implement field-level encryption integrated with AWS KMS to help protect sensitive data workloads for their entire lifecycle in AWS. Since your Lambda@Edge is designed to protect data at the network edge, data remains protected throughout the application execution stack. In addition to improving your data security posture, this protection can help you comply with data privacy regulations applicable to your organization.

Since you author your own Lambda@Edge function to perform standard RSA encryption, you have flexibility in terms of payload formats and the number of fields that you consider to be sensitive. The integration with AWS KMS for RSA key management and decryption provides significant simplicity, higher key security, and rich integration with other AWS security services enabling an overall strong security solution.

By using encrypted fields with identifiers as described in this post, you can create fine-grained controls for data accessibility to meet the security principle of least privilege. Instead of granting either complete access or no access to data fields, you can ensure least privileges where a given part of an application can only access the fields that it needs, when it needs to, all the way down to controlling access field by field. Field by field access can be enabled by using different keys for different fields and controlling their respective policies.

In addition to protecting sensitive data workloads to meet regulatory and security best practices, this solution can be used to build de-identified data lakes in AWS. Sensitive data fields remain protected throughout their lifecycle, while non-sensitive data fields remain in the clear. This approach can allow analytics or other business functions to operate on data without exposing sensitive data.

If you have feedback about this post, submit comments in the Comments section below.

Want more AWS Security how-to content, news, and feature announcements? Follow us on Twitter.

Author

Raj Jain

Raj is a Senior Cloud Architect at AWS. He is passionate about helping customers build well-architected applications in AWS. Raj is a published author in Bell Labs Technical Journal, has authored 3 IETF standards, and holds 12 patents in internet telephony and applied cryptography. In his spare time, Raj enjoys outdoors, cooking, reading, and travel.

Use Macie to discover sensitive data as part of automated data pipelines

Post Syndicated from Brandon Wu original https://aws.amazon.com/blogs/security/use-macie-to-discover-sensitive-data-as-part-of-automated-data-pipelines/

Data is a crucial part of every business and is used for strategic decision making at all levels of an organization. To extract value from their data more quickly, Amazon Web Services (AWS) customers are building automated data pipelines—from data ingestion to transformation and analytics. As part of this process, my customers often ask how to prevent sensitive data, such as personally identifiable information, from being ingested into data lakes when it’s not needed. They highlight that this challenge is compounded when ingesting unstructured data—such as files from process reporting, text files from chat transcripts, and emails. They also mention that identifying sensitive data inadvertently stored in structured data fields—such as in a comment field stored in a database—is also a challenge.

In this post, I show you how to integrate Amazon Macie as part of the data ingestion step in your data pipeline. This solution provides an additional checkpoint that sensitive data has been appropriately redacted or tokenized prior to ingestion. Macie is a fully managed data security and privacy service that uses machine learning and pattern matching to discover sensitive data in AWS.

When Macie discovers sensitive data, the solution notifies an administrator to review the data and decide whether to allow the data pipeline to continue ingesting the objects. If allowed, the objects will be tagged with an Amazon Simple Storage Service (Amazon S3) object tag to identify that sensitive data was found in the object before progressing to the next stage of the pipeline.

This combination of automation and manual review helps reduce the risk that sensitive data—such as personally identifiable information—will be ingested into a data lake. This solution can be extended to fit your use case and workflows. For example, you can define custom data identifiers as part of your scans, add additional validation steps, create Macie suppression rules to archive findings automatically, or only request manual approvals for findings that meet certain criteria (such as high severity findings).

Solution overview

Many of my customers are building serverless data lakes with Amazon S3 as the primary data store. Their data pipelines commonly use different S3 buckets at each stage of the pipeline. I refer to the S3 bucket for the first stage of ingestion as the raw data bucket. A typical pipeline might have separate buckets for raw, curated, and processed data representing different stages as part of their data analytics pipeline.

Typically, customers will perform validation and clean their data before moving it to a raw data zone. This solution adds validation steps to that pipeline after preliminary quality checks and data cleaning is performed, noted in blue (in layer 3) of Figure 1. The layers outlined in the pipeline are:

  1. Ingestion – Brings data into the data lake.
  2. Storage – Provides durable, scalable, and secure components to store the data—typically using S3 buckets.
  3. Processing – Transforms data into a consumable state through data validation, cleanup, normalization, transformation, and enrichment. This processing layer is where the additional validation steps are added to identify instances of sensitive data that haven’t been appropriately redacted or tokenized prior to consumption.
  4. Consumption – Provides tools to gain insights from the data in the data lake.


Figure 1: Data pipeline with sensitive data scan

Figure 1: Data pipeline with sensitive data scan

The application runs on a scheduled basis (four times a day, every 6 hours by default) to process data that is added to the raw data S3 bucket. You can customize the application to perform a sensitive data discovery scan during any stage of the pipeline. Because most customers do their extract, transform, and load (ETL) daily, the application scans for sensitive data on a scheduled basis before any crawler jobs run to catalog the data and after typical validation and data redaction or tokenization processes complete.

You can expect that this additional validation will add 5–10 minutes to your pipeline execution at a minimum. The validation processing time will scale linearly based on object size, but there is a start-up time per job that is constant.

If sensitive data is found in the objects, an email is sent to the designated administrator requesting an approval decision, which they indicate by selecting the link corresponding to their decision to approve or deny the next step. In most cases, the reviewer will choose to adjust the sensitive data cleanup processes to remove the sensitive data, deny the progression of the files, and re-ingest the files in the pipeline.

Additional considerations for deploying this application for regular use are discussed at the end of the blog post.
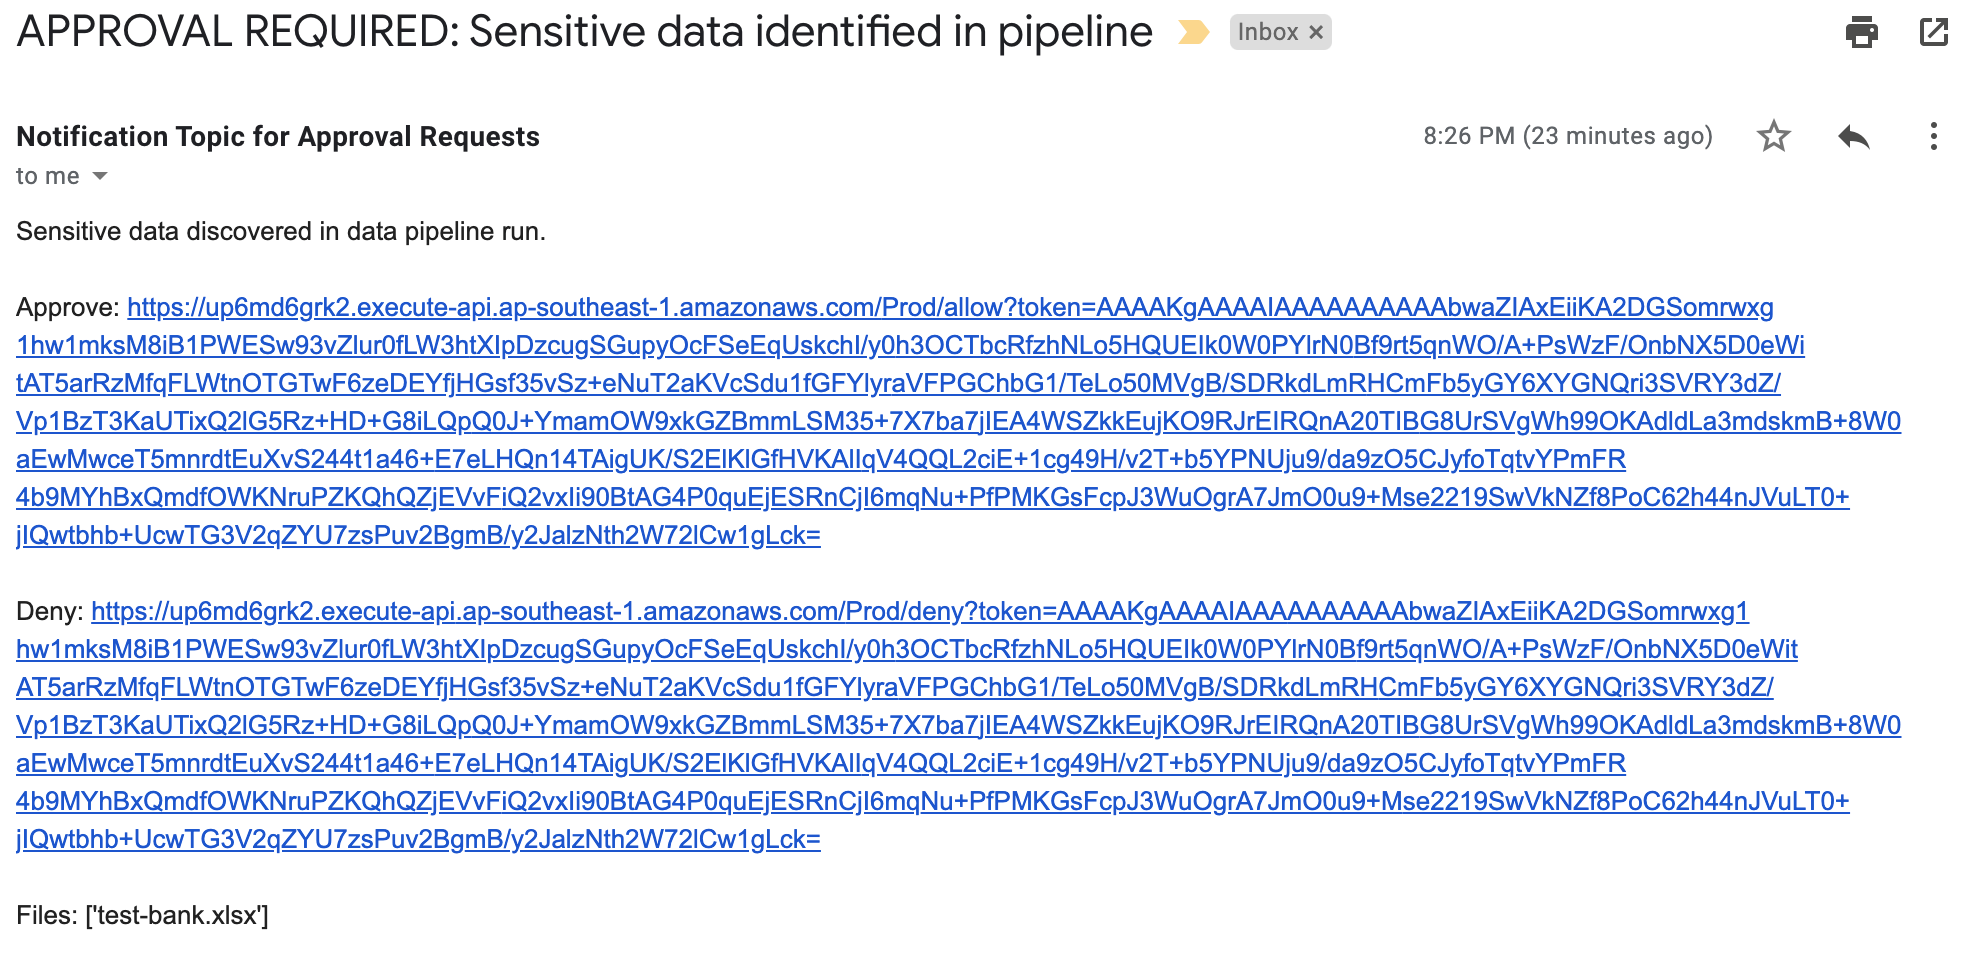
Application components

The following resources are created as part of the application:

Note: the application uses various AWS services, and there are costs associated with these resources after the Free Tier usage. See AWS Pricing for details. The primary drivers of the solution cost will be the amount of data ingested through the pipeline, both for Amazon S3 storage and data processed for sensitive data discovery with Macie.

The architecture of the application is shown in Figure 2 and described in the text that follows.
 

Figure 2: Application architecture and logic

Figure 2: Application architecture and logic

Application logic

  1. Objects are uploaded to the raw data S3 bucket as part of the data ingestion process.
  2. A scheduled EventBridge rule runs the sensitive data scan Step Functions workflow.
  3. triggerMacieScan Lambda function moves objects from the raw data S3 bucket to the scan stage S3 bucket.
  4. triggerMacieScan Lambda function creates a Macie sensitive data discovery job on the scan stage S3 bucket.
  5. checkMacieStatus Lambda function checks the status of the Macie sensitive data discovery job.
  6. isMacieStatusCompleteChoice Step Functions Choice state checks whether the Macie sensitive data discovery job is complete.
    1. If yes, the getMacieFindingsCount Lambda function runs.
    2. If no, the Step Functions Wait state waits 60 seconds and then restarts Step 5.
  7. getMacieFindingsCount Lambda function counts all of the findings from the Macie sensitive data discovery job.
  8. isSensitiveDataFound Step Functions Choice state checks whether sensitive data was found in the Macie sensitive data discovery job.
    1. If there was sensitive data discovered, run the triggerManualApproval Lambda function.
    2. If there was no sensitive data discovered, run the moveAllScanStageS3Files Lambda function.
  9. moveAllScanStageS3Files Lambda function moves all of the objects from the scan stage S3 bucket to the scanned data S3 bucket.
  10. triggerManualApproval Lambda function tags and moves objects with sensitive data discovered to the manual review S3 bucket, and moves objects with no sensitive data discovered to the scanned data S3 bucket. The function then sends a notification to the ApprovalRequestNotification Amazon SNS topic as a notification that manual review is required.
  11. Email is sent to the email address that’s subscribed to the ApprovalRequestNotification Amazon SNS topic (from the application deployment template) for the manual review user with the option to Approve or Deny pipeline ingestion for these objects.
  12. Manual review user assesses the objects with sensitive data in the manual review S3 bucket and selects the Approve or Deny links in the email.
  13. The decision request is sent from the Amazon API Gateway to the receiveApprovalDecision Lambda function.
  14. manualApprovalChoice Step Functions Choice state checks the decision from the manual review user.
    1. If denied, run the deleteManualReviewS3Files Lambda function.
    2. If approved, run the moveToScannedDataS3Files Lambda function.
  15. deleteManualReviewS3Files Lambda function deletes the objects from the manual review S3 bucket.
  16. moveToScannedDataS3Files Lambda function moves the objects from the manual review S3 bucket to the scanned data S3 bucket.
  17. The next step of the automated data pipeline will begin with the objects in the scanned data S3 bucket.

Prerequisites

For this application, you need the following prerequisites:

You can use AWS Cloud9 to deploy the application. AWS Cloud9 includes the AWS CLI and AWS SAM CLI to simplify setting up your development environment.

Deploy the application with AWS SAM CLI

You can deploy this application using the AWS SAM CLI. AWS SAM uses AWS CloudFormation as the underlying deployment mechanism. AWS SAM is an open-source framework that you can use to build serverless applications on AWS.

To deploy the application

  1. Initialize the serverless application using the AWS SAM CLI from the GitHub project in the aws-samples repository. This will clone the project locally which includes the source code for the Lambda functions, Step Functions state machine definition file, and the AWS SAM template. On the command line, run the following:
    sam init --location gh: aws-samples/amazonmacie-datapipeline-scan
    

    Alternatively, you can clone the Github project directly.

  2. Deploy your application to your AWS account. On the command line, run the following:
    sam deploy --guided
    

    Complete the prompts during the guided interactive deployment. The first deployment prompt is shown in the following example.

    Configuring SAM deploy
    ======================
    
            Looking for config file [samconfig.toml] :  Found
            Reading default arguments  :  Success
    
            Setting default arguments for 'sam deploy'
            =========================================
            Stack Name [maciepipelinescan]:
    

  3. Settings:
    • Stack Name – Name of the CloudFormation stack to be created.
    • AWS RegionRegion—for example, us-west-2, eu-west-1, ap-southeast-1—to deploy the application to. This application was tested in the us-west-2 and ap-southeast-1 Regions. Before selecting a Region, verify that the services you need are available in those Regions (for example, Macie and Step Functions).
    • Parameter StepFunctionName – Name of the Step Functions state machine to be created—for example, maciepipelinescanstatemachine).
    • Parameter BucketNamePrefix – Prefix to apply to the S3 buckets to be created (S3 bucket names are globally unique, so choosing a random prefix helps ensure uniqueness).
    • Parameter ApprovalEmailDestination – Email address to receive the manual review notification.
    • Parameter EnableMacie – Whether you need Macie enabled in your account or Region. You can select yes or no; select yes if you need Macie to be enabled for you as part of this template, select no, if you already have Macie enabled.
  4. Confirm changes and provide approval for AWS SAM CLI to deploy the resources to your AWS account by responding y to prompts, as shown in the following example. You can accept the defaults for the SAM configuration file and SAM configuration environment prompts.
    #Shows you resources changes to be deployed and require a 'Y' to initiate deploy
    Confirm changes before deploy [y/N]: y
    #SAM needs permission to be able to create roles to connect to the resources in your template
    Allow SAM CLI IAM role creation [Y/n]: y
    ReceiveApprovalDecisionAPI may not have authorization defined, Is this okay? [y/N]: y
    ReceiveApprovalDecisionAPI may not have authorization defined, Is this okay? [y/N]: y
    Save arguments to configuration file [Y/n]: y
    SAM configuration file [samconfig.toml]: 
    SAM configuration environment [default]:
    

    Note: This application deploys an Amazon API Gateway with two REST API resources without authorization defined to receive the decision from the manual review step. You will be prompted to accept each resource without authorization. A token (Step Functions taskToken) is used to authenticate the requests.

  5. This creates an AWS CloudFormation changeset. Once the changeset creation is complete, you must provide a final confirmation of y to Deploy the changeset? [y/N] when prompted as shown in the following example.
    Changeset created successfully. arn:aws:cloudformation:ap-southeast-1:XXXXXXXXXXXX:changeSet/samcli-deploy1605213119/db681961-3635-4305-b1c7-dcc754c7XXXX
    
    
    Previewing CloudFormation changeset before deployment
    ======================================================
    Deploy this changeset? [y/N]:
    

Your application is deployed to your account using AWS CloudFormation. You can track the deployment events in the command prompt or via the AWS CloudFormation console.

After the application deployment is complete, you must confirm the subscription to the Amazon SNS topic. An email will be sent to the email address entered in Step 3 with a link that you need to select to confirm the subscription. This confirmation provides opt-in consent for AWS to send emails to you via the specified Amazon SNS topic. The emails will be notifications of potentially sensitive data that need to be approved. If you don’t see the verification email, be sure to check your spam folder.

Test the application

The application uses an EventBridge scheduled rule to start the sensitive data scan workflow, which runs every 6 hours. You can manually start an execution of the workflow to verify that it’s working. To test the function, you will need a file that contains data that matches your rules for sensitive data. For example, it is easy to create a spreadsheet, document, or text file that contains names, addresses, and numbers formatted like credit card numbers. You can also use this generated sample data to test Macie.

We will test by uploading a file to our S3 bucket via the AWS web console. If you know how to copy objects from the command line, that also works.

Upload test objects to the S3 bucket

  1. Navigate to the Amazon S3 console and upload one or more test objects to the <BucketNamePrefix>-data-pipeline-raw bucket. <BucketNamePrefix> is the prefix you entered when deploying the application in the AWS SAM CLI prompts. You can use any objects as long as they’re a supported file type for Amazon Macie. I suggest uploading multiple objects, some with and some without sensitive data, in order to see how the workflow processes each.

Start the Scan State Machine

  1. Navigate to the Step Functions state machines console. If you don’t see your state machine, make sure you’re connected to the same region that you deployed your application to.
  2. Choose the state machine you created using the AWS SAM CLI as seen in Figure 3. The example state machine is maciepipelinescanstatemachine, but you might have used a different name in your deployment.
     
    Figure 3: AWS Step Functions state machines console

    Figure 3: AWS Step Functions state machines console

  3. Select the Start execution button and copy the value from the Enter an execution name – optional box. Change the Input – optional value replacing <execution id> with the value just copied as follows:
    {
        “id”: “<execution id>”
    }
    

    In my example, the <execution id> is fa985a4f-866b-b58b-d91b-8a47d068aa0c from the Enter an execution name – optional box as shown in Figure 4. You can choose a different ID value if you prefer. This ID is used by the workflow to tag the objects being processed to ensure that only objects that are scanned continue through the pipeline. When the EventBridge scheduled event starts the workflow as scheduled, an ID is included in the input to the Step Functions workflow. Then select Start execution again.
     

    Figure 4: New execution dialog box

    Figure 4: New execution dialog box

  4. You can see the status of your workflow execution in the Graph inspector as shown in Figure 5. In the figure, the workflow is at the pollForCompletionWait step.
     
    Figure 5: AWS Step Functions graph inspector

    Figure 5: AWS Step Functions graph inspector

The sensitive discovery job should run for about five to ten minutes. The jobs scale linearly based on object size, but there is a start-up time per job that is constant. If sensitive data is found in the objects uploaded to the <BucketNamePrefix>-data-pipeline-upload S3 bucket, an email is sent to the address provided during the AWS SAM deployment step, notifying the recipient requesting of the need for an approval decision, which they indicate by selecting the link corresponding to their decision to approve or deny the next step as shown in Figure 6.
 

Figure 6: Sensitive data identified email

Figure 6: Sensitive data identified email

When you receive this notification, you can investigate the findings by reviewing the objects in the <BucketNamePrefix>-data-pipeline-manual-review S3 bucket. Based on your review, you can either apply remediation steps to remove any sensitive data or allow the data to proceed to the next step of the data ingestion pipeline. You should define a standard response process to address discovery of sensitive data in the data pipeline. Common remediation steps include review of the files for sensitive data, deleting the files that you do not want to progress, and updating the ETL process to redact or tokenize sensitive data when re-ingesting into the pipeline. When you re-ingest the files into the pipeline without sensitive data, the files will not be flagged by Macie.

The workflow performs the following:

  • If you select Approve, the files are moved to the <BucketNamePrefix>-data-pipeline-scanned-data S3 bucket with an Amazon S3 SensitiveDataFound object tag with a value of true.
  • If you select Deny, the files are deleted from the <BucketNamePrefix>-data-pipeline-manual-review S3 bucket.
  • If no action is taken, the Step Functions workflow execution times out after five days and the file will automatically be deleted from the <BucketNamePrefix>-data-pipeline-manual-review S3 bucket after 10 days.

Clean up the application

You’ve successfully deployed and tested the sensitive data pipeline scan workflow. To avoid ongoing charges for resources you created, you should delete all associated resources by deleting the CloudFormation stack. In order to delete the CloudFormation stack, you must first delete all objects that are stored in the S3 buckets that you created for the application.

To delete the application

  1. Empty the S3 buckets created in this application (<BucketNamePrefix>-data-pipeline-raw S3 bucket, <BucketNamePrefix>-data-pipeline-scan-stage, <BucketNamePrefix>-data-pipeline-manual-review, and <BucketNamePrefix>-data-pipeline-scanned-data).
  2. Delete the CloudFormation stack used to deploy the application.

Considerations for regular use

Before using this application in a production data pipeline, you will need to stop and consider some practical matters. First, the notification mechanism used when sensitive data is identified in the objects is email. Email doesn’t scale: you should expand this solution to integrate with your ticketing or workflow management system. If you choose to use email, subscribe a mailing list so that the work of reviewing and responding to alerts is shared across a team.

Second, the application is run on a scheduled basis (every 6 hours by default). You should consider starting the application when your preliminary validations have completed and are ready to perform a sensitive data scan on the data as part of your pipeline. You can modify the EventBridge Event Rule to run in response to an Amazon EventBridge event instead of a scheduled basis.

Third, the application currently uses a 60 second Step Functions Wait state when polling for the Macie discovery job completion. In real world scenarios, the discovery scan will take 10 minutes at a minimum, likely several orders of magnitude longer. You should evaluate the typical execution times for your application execution and tune the polling period accordingly. This will help reduce costs related to running Lambda functions and log storage within CloudWatch Logs. The polling period is defined in the Step Functions state machine definition file (macie_pipeline_scan.asl.json) under the pollForCompletionWait state.

Fourth, the application currently doesn’t account for false positives in the sensitive data discovery job results. Also, the application will progress or delete all objects identified based on the decision by the reviewer. You should consider expanding the application to handle false positives through automation rather than manual review / intervention (such as deleting the files from the manual review bucket or removing the sensitive data tags applied).

Last, the solution will stop the ingestion of a subset of objects into your pipeline. This behavior is similar to other validation and data quality checks that most customers perform as part of the data pipeline. However, you should test to ensure that this will not cause unexpected outcomes and address them in your downstream application logic accordingly.

Conclusion

In this post, I showed you how to integrate sensitive data discovery using Macie as an additional validation step in an automated data pipeline. You’ve reviewed the components of the application, deployed it using the AWS SAM CLI, tested to validate that the application functions as expected, and cleaned up by removing deployed resources.

You now know how to integrate sensitive data scanning into your ETL pipeline. You can use automation and—where required—manual review to help reduce the risk of sensitive data, such as personally identifiable information, being inadvertently ingested into a data lake. You can take this application and customize it to fit your use case and workflows, such as using custom data identifiers as part of your scans, adding additional validation steps, creating Macie suppression rules to define cases to archive findings automatically, or only request manual approvals for findings that meet certain criteria (such as high severity findings).

If you have feedback about this post, submit comments in the Comments section below. If you have questions about this post, start a new thread on the Amazon Macie forum.

Want more AWS Security how-to content, news, and feature announcements? Follow us on Twitter.

Author

Brandon Wu

Brandon is a security solutions architect helping financial services organizations secure their critical workloads on AWS. In his spare time, he enjoys exploring outdoors and experimenting in the kitchen.