Tag Archives: Security Blog

Prevent account creation fraud with AWS WAF Fraud Control – Account Creation Fraud Prevention

Post Syndicated from David MacDonald original https://aws.amazon.com/blogs/security/prevent-account-creation-fraud-with-aws-waf-fraud-control-account-creation-fraud-prevention/

Threat actors use sign-up pages and login pages to carry out account fraud, including taking unfair advantage of promotional and sign-up bonuses, publishing fake reviews, and spreading malware.

In 2022, AWS released AWS WAF Fraud Control – Account Takeover Prevention (ATP) to help protect your application’s login page against credential stuffing attacks, brute force attempts, and other anomalous login activities.

Today, we introduce AWS WAF Fraud Control – Account Creation Fraud Prevention (ACFP) to help protect your application’s sign-up pages against fake account creation by detecting and blocking fake account creation requests.

You can now get comprehensive account fraud prevention by combining AWS WAF Account Creation Fraud Prevention and Account Takeover Prevention in your AWS WAF web access control list (web ACL). In this post, we will show you how to set up AWS WAF with ACFP for your application sign-up pages.

Overview of Account Creation Fraud Prevention for AWS WAF

ACFP helps protect your account sign-up pages by continuously monitoring requests for anomalous digital activity and automatically blocking suspicious requests based on request identifiers, behavioral analysis, and machine learning.

ACFP uses multiple capabilities to help detect and block fake account creation requests at the network edge before they reach your application. An automated vetting process for account creation requests uses rules based on reputation and risk to protect your registration pages against use of stolen credentials and disposable email domains. ACFP uses silent challenges and CAPTCHA challenges to identify and respond to sophisticated bots that are designed to actively evade detection.

ACFP is an AWS Managed Rules rule group. If you already use AWS WAF, you can configure ACFP without making architectural changes. On a single configuration page, you specify the registration page request inspection parameters that ACFP uses to detect fake account creation requests, including user identity, address, and phone number.

ACFP uses session tokens to separate legitimate client sessions from those that are not. These tokens allow ACFP to verify that the client applications that sign up for an account are legitimate. The AWS WAF Javascript SDK automatically generates these tokens during the frontend application load. We recommend that you integrate the AWS WAF Javascript SDK into your application, particularly for single-page applications where you don’t want page refreshes.

Walkthrough

In this walkthrough, we will show you how to set up ACFP for AWS WAF to help protect your account sign-up pages against account creation fraud. This walkthrough has two main steps:

  1. Set up an AWS managed rule group for ACFP in the AWS WAF console.
  2. Add the AWS WAF JavaScript SDK to your application pages.

Set up Account Creation Fraud Prevention

The first step is to set up ACFP by creating a web ACL or editing an existing one. You will add the ACFP rule group to this web ACL.

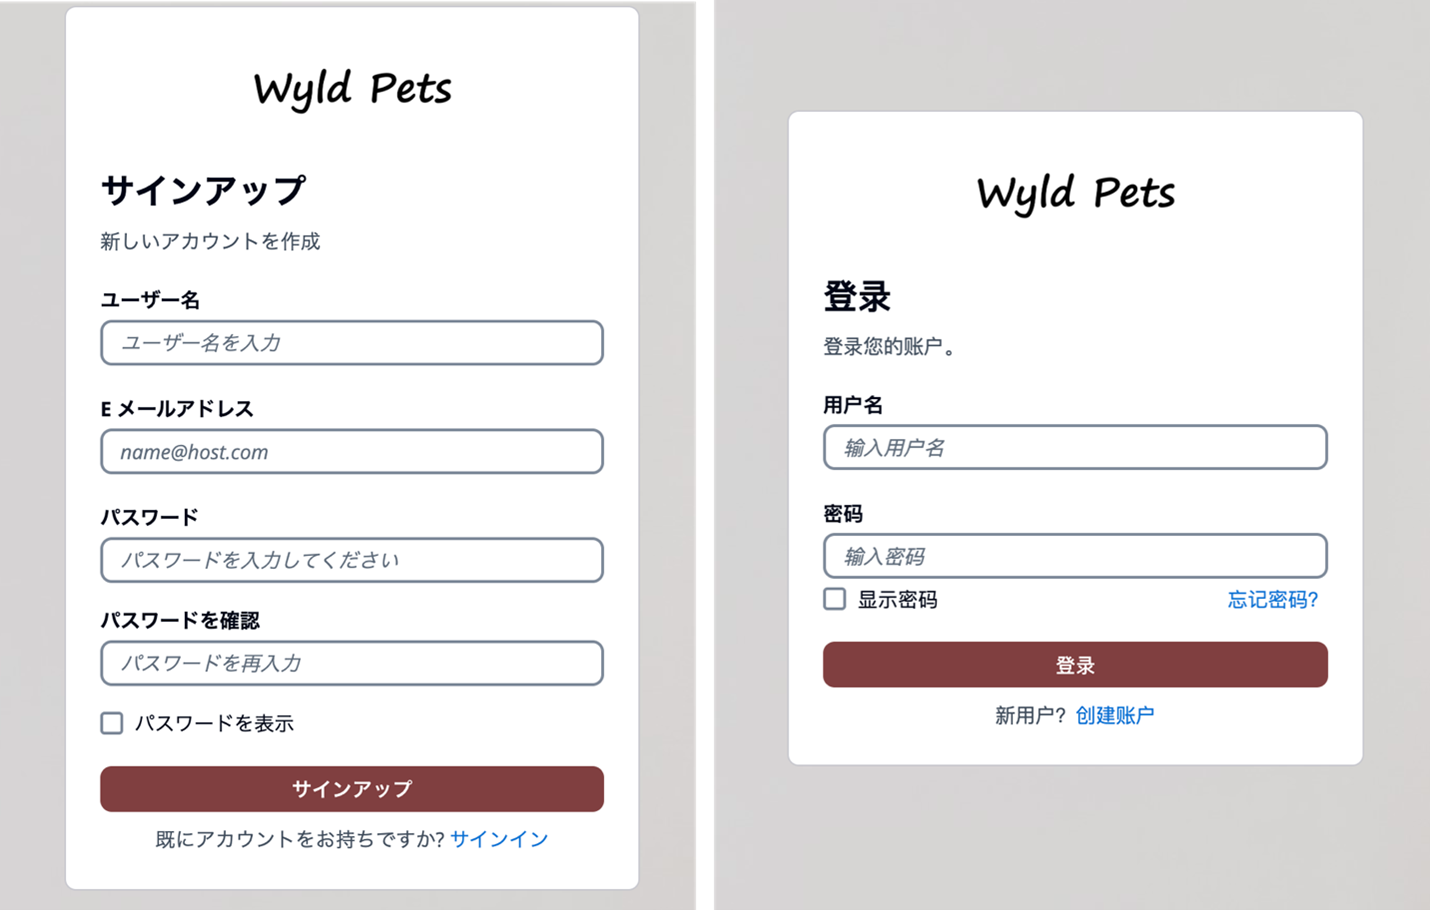
The ACFP rule group requires that you provide your registration page path, account creation path, and optionally the sign-up request fields that map to user identity, address, and phone number. ACFP uses this configuration to detect fraudulent sign-up requests and then decide an appropriate action, including blocking, challenging interstitial during the frontend application load, or requiring a CAPTCHA.

To set up ACFP

  1. Open the AWS WAF console, and then do one of the following:
    • To create a new web ACL, choose Create web ACL.
    • To edit an existing web ACL, choose the name of the ACL.
  2. On the Rules tab, for the Add Rules dropdown, select Add managed rule groups.
  3. Add the Account creation fraud prevention rule set to the web ACL. Then, choose Edit to edit the rule configuration.
  4. For Rule group configuration, provide the following information that the ACFP rule group requires to inspect account creation requests, as shown in Figure 1.
    • For Registration page path, enter the path for the registration page website for your application.
    • For Account creation path, enter the path of the endpoint that accepts the completed registration form.
    • For Request inspection, select whether the endpoint that you specified in Account creation path accepts JSON or FORM_ENCODED payload types.
    Figure 1: Account creation fraud prevention - Add account creation paths

    Figure 1: Account creation fraud prevention – Add account creation paths

  5. (Optional): Provide Field names used in submitted registration forms, as shown in Figure 2. This helps ACFP more accurately identify requests that contain information that is considered stolen, or with a bad reputation. For each field, provide the relevant information that was included in your account creation request. For this walkthrough, we use JSON pointer syntax.
     
    Figure 2: Account creation fraud prevention - Add optional field names

    Figure 2: Account creation fraud prevention – Add optional field names

  6. For Account creation fraud prevention rules, review the actions taken on each category of account creation fraud, and optionally customize them for your web applications. For this walkthrough, we leave the default rule action for each category set to the default action, as shown in Figure 3. If you want to customize the rules, you can select different actions for each category based on your application security needs:
    • Allow — Allows the request to be sent to the protected resource.
    • Block — Blocks the request, returning an HTTP 403 (Forbidden) response.
    • Count — Allows the request to be sent to the protected resource while counting detections. The count shows you bot activity that is occurring without blocking or challenging. When you turn on rules for the first time, this information can help you see what the detections are, before you change the actions.
    • CAPTCHA and Challenge — use CAPTCHA puzzles and silent challenges with tokens to track successful client responses.
    Figure 3: Account creation fraud prevention - Select actions for each category

    Figure 3: Account creation fraud prevention – Select actions for each category

  7. To save the configuration, choose Save.
  8. To add the ACFP rule group to your web ACL, choose Add rules.
  9. (Optional) Include additional rules in your web ACL, as described in the Best practices section that follows.
  10. To create or edit your web ACL, proceed through the remaining configuration pages.

Add the AWS WAF JavaScript SDK to your application pages

The next step is to find the AWS WAF JavaScript SDK and add it to your application pages.

The SDK injects a token in the requests that you send to your protected resources. You must use the SDK integration to fully enable ACFP detections.

To add the SDK to your application pages

  1. In the AWS WAF console, in the left navigation pane, choose Application integration.
  2. Under Web ACLs that are enabled for application integration, choose the name of the web ACL that you created previously.
  3. Under JavaScript SDK, copy the provided code snippet. This code snippet allows for creation of the cryptographic token in the background when the application loads for the first time. Figure 4 shows the SDK link.
    Figure 4: Application integration – Add JavaScript SDK link to application pages

    Figure 4: Application integration – Add JavaScript SDK link to application pages

  4. Add the code snippet to your pages. For example, paste the provided script code within the <head> section of the HTML. For ACFP, you only need to add the code snippet to the registration page, but if you are using other AWS WAF managed rules such as Account Takeover Protection or Targeted Bots on other pages, you will also need to add the code snippet to those pages.
  5. To validate that your application obtains tokens correctly, load your application in a browser and verify that a cookie named aws-waf-token has been set during page load.

Review metrics

Now that you’ve set up the web ACL and integrated the SDK with the application, you can use the bot visualization dashboard in AWS WAF to review fraudulent account creation traffic patterns. ACFP rules emit metrics that correspond to their labels, helping you identify which rule within the ACFP rule group initiated an action. You can also use labels and rule actions to filter AWS WAF logs so that you can further examine a request.

To view AWS WAF metrics for the distribution

  1. In the AWS WAF console, in the left navigation pane, select Web ACLs.
  2. Select the web ACL for which ACFP is enabled, and then choose the Bot Control tab to view the metrics.
  3. In the Filter metrics by dropdown, select Account creation fraud prevention to see the ACFP metrics for your web ACL.
Figure 5: Account creation fraud prevention – Review web ACL metrics

Figure 5: Account creation fraud prevention – Review web ACL metrics

Best practices

In this section, we share best practices for your ACFP rule group setup.

Limit the requests that ACFP evaluates to help lower costs

ACFP evaluates web ACL rules in priority order and takes the action associated with the first rule that a request matches. Requests that match and are blocked by a rule will not be evaluated against lower priority rules. ACFP only evaluates an ACFP rule group if a request matches the registration and account creation URI paths that are specified in the configuration.

You will incur additional fees for requests that ACFP evaluates. To help reduce ACFP costs, use higher priority rules to block requests before the ACFP rule group evaluates them. For example, you can add a higher priority AWS Managed Rules IP reputation rule group to block account creation requests from bots and other threats before ACFP evaluates them. Rate-based rules with a higher priority than the ACFP rule group can help mitigate volumetric account creation attempts by limiting the number of requests that a single IP can make in a five-minute period. For further guidance on rate-based rules, see The three most important AWS WAF rate-based rules.

If you are using the AWS WAF Bot Control rule group, give it a higher priority than the ACFP rule group because it’s less expensive to evaluate.

Use SDK integration

ACFP requires the tokens that the SDK generates. The SDK can generate these tokens silently rather than requiring a redirect or CAPTCHA. Both AWS WAF Bot Control and AWS WAF Fraud Control use the same SDK if both rule groups are in the same web ACL.

These tokens have a default immunity time (otherwise knowns as a timeout) of 5 minutes, after which AWS WAF requires the client to be challenged again. You can use the AWS WAF integration fetch wrapper in your single-pane application to help ensure that the token retrieval completes before the client sends requests to your account creation API without requiring a page refresh. Alternatively, you can use the getToken operation if you are not using fetch.

You can continue to use the CAPTCHA JavaScript API instead if you’ve already integrated this into your application.

Use both ACFP and ATP for comprehensive account fraud prevention

You can help prevent account fraud for both sign-up and login pages by enabling the ATP rule group in the same web ACL as ACFP.

Test ACFP before you deploy it to production

Test and tune your ACFP implementation in a staging or testing environment to help avoid negatively impacting legitimate users. We recommend that you start by deploying your rules in count mode in production to understand potential impact to your traffic before switching them back to the default rule actions. Use the default ACFP rule group actions when you deploy the web ACL to production. For further guidance, see Testing and Deploying ACFP.

Pricing and availability

ACFP is available today on Amazon CloudFront and in 22 AWS Regions. For information on availability and pricing, see AWS WAF Pricing.

Conclusion

In this post, we showed you how to use ACFP to protect your application’s sign-up pages against fake account creation. You can now combine ACFP with ATP managed rules in a single web ACL for comprehensive account fraud prevention. For more information and to get started today, see the AWS WAF Developer Guide.

If you have feedback about this post, submit comments in the Comments section below. If you have questions about this post, start a new thread on the AWS Security, Identity, & Compliance re:Post or contact AWS Support.

Want more AWS Security news? Follow us on Twitter.

David MacDonald

David MacDonald

David is a Senior Solutions Architect focused on helping New Zealand startups build secure and scalable solutions. He has spent most of his career building and operating SaaS products that serve a variety of industries. Outside of work, David is an amateur farmer, and tends to a small herd of alpacas and goats.

Geary Scherer

Geary Scherer

Geary is a Solutions Architect focused on Travel and Hospitality customers in the Southeast US. He holds all 12 current AWS certifications and loves to dive into complex Edge Services use cases to help AWS customers, especially around Bot Mitigation. Outside of work, Geary enjoys playing soccer and cheering his daughters on at dance and softball competitions.

AWS Security Hub launches a new capability for automating actions to update findings

Post Syndicated from Stuart Gregg original https://aws.amazon.com/blogs/security/aws-security-hub-launches-a-new-capability-for-automating-actions-to-update-findings/

If you’ve had discussions with a security organization recently, there’s a high probability that the word automation has come up. As organizations scale and consume the benefits the cloud has to offer, it’s important to factor in and understand how the additional cloud footprint will affect operations. Automation is a key enabler for efficient operations and can help drive down the number of repetitive tasks that the operational teams have to perform.

Alert fatigue is caused when humans work on the same repetitive tasks day in and day out and also have a large volume of alerts that need to be addressed. The repetitive nature of these tasks can cause analysts to become numb to the importance of the task or make errors due to manual processing. This can lead to misclassification of security alerts or higher-severity alerts being overlooked due to investigation times. Automation is key here to reduce the number of repetitive tasks and give analysts time to focus on other areas of importance.

In this blog post, we’ll walk you through new capabilities within AWS Security Hub that you can use to take automated actions to update findings. We’ll show you some example scenarios that use this capability and set you up with the knowledge you need to get started with creating automation rules.

Automation rules in Security Hub

AWS Security Hub is available globally and is designed to give you a comprehensive view of your security posture across your AWS accounts. With Security Hub, you have a single place that aggregates, organizes, and prioritizes your security alerts, or findings, from multiple AWS services, including Amazon GuardDuty, Amazon Inspector, Amazon Macie, AWS Firewall Manager, AWS Systems Manager Patch Manager, AWS Config, AWS Health, and AWS Identity and Access Management (IAM) Access Analyzer, as well as from over 65 AWS Partner Network (APN) solutions.

Previously, Security Hub could take automated actions on findings, but this involved going to the Amazon EventBridge console or API, creating an EventBridge rule, and then building an AWS Lambda function, an AWS Systems Manager Automation runbook, or an AWS Step Functions step as the target of that rule. If you wanted to set up these automated actions in the administrator account and home AWS Region and run them in member accounts and in linked Regions, you would also need to deploy the correct IAM permissions to enable the actions to run across accounts and Regions. After setting up the automation flow, you would need to maintain the EventBridge rule, Lambda function, and IAM roles. Such maintenance could include upgrading the Lambda versions, verifying operational efficiency, and checking that everything is running as expected.

With Security Hub, you can now use rules to automatically update various fields in findings that match defined criteria. This allows you to automatically suppress findings, update findings’ severities according to organizational policies, change findings’ workflow status, and add notes. As findings are ingested, automation rules look for findings that meet defined criteria and update the specified fields in findings that meet the criteria. For example, a user can create a rule that automatically sets the finding’s severity to “Critical” if the finding account ID is of a known business-critical account. A user could also automatically suppress findings for a specific control in an account where the finding represents an accepted risk.

With automation rules, Security Hub provides you a simplified way to build automations directly from the Security Hub console and API. This reduces repetitive work for cloud security and DevOps engineers and can reduce the mean time to response.

Use cases

In this section, we’ve put together some examples of how Security Hub automation rules can help you. There’s a lot of flexibility in how you can use the rules, and we expect there will be many variations that your organization will use when contextual information about security risk has been added.

Scenario 1: Elevate finding severity for specific controls based on account IDs

Security Hub offers protection by using hundreds of security controls that create findings that have a severity associated with them. Sometimes, you might want to elevate that severity according to your organizational policies or according to the context of the finding, such as the account it relates to. With automation rules, you can now automatically elevate the severity for specific controls when they are in a specific account.

For example, the AWS Foundational Security Best Practices control GuardDuty.1 has a “High” severity by default. But you might consider such a finding to have “Critical” severity if it occurs in one of your top production accounts. To change the severity automatically, you can choose GeneratorId as a criteria and check that it’s equal to aws-foundational-security-best-practices/v/1.0.0/GuardDuty.1, and also add AwsAccountId as a criteria and check that it’s equal to YOUR_ACCOUNT_IDs. Then, add an action to update the severity to “Critical,” and add a note to the person who will look at the finding that reads “Urgent — look into these production accounts.”

You can set up this automation rule through the AWS CLI, the console, the Security Hub API, or the AWS SDK for Python (Boto3), as follows.

To set up the automation rule for Scenario 1 (AWS CLI)

  • In the AWS CLI, run the following command to create a new automation rule with a specific Amazon Resource Name (ARN). Note the different modifiable parameters:
    • Rule-name — The name of the rule that will be created.
    • Rule-status — An optional parameter. Specify whether you want Security Hub to activate and start applying the rule to findings after creation. If no value is specified, the default value is ENABLED. A value of DISABLED means that the rule will be paused after creation.
    • Rule-order — Provide the processing order for the rule. Security Hub applies rules with a lower numerical value for this parameter first.
    • Criteria — Provide the criteria that you want Security Hub to use to filter your findings. The rule action will be applied to findings that match the criteria. For a list of supported criteria, see Criteria and actions for automation rules. In this example, the criteria are placeholders and should be replaced.
    • Actions — Provide the actions that you want Security Hub to take when there’s a match between a finding and your defined criteria. For a list of supported actions, see Criteria and actions for automation rules. In this example, the actions are placeholders and should be replaced.
    aws securityhub create-automation-rule \—rule-name "Elevate severity for findings in production accounts - GuardDuty.1" \—rule-status "ENABLED"" \—rule-order 1 \—description "Elevate severity for findings in production accounts - GuardDuty.1" \—criteria '{"GeneratorId": [{"Value": "aws-foundational-security-best-practices/v/1.0.0/GuardDuty.1","Comparison": "EQUALS"}, "AwsAccountId": [{"Value": "<111122223333>","Comparison": "EQUALS"},]}' \—actions '[{"Type": "FINDING_FIELDS_UPDATE","FindingFieldsUpdate": {"Severity": {"Label": "CRITICAL"},"Note": {"Text": "Urgent – look into these production accounts","UpdatedBy": "sechub-automation"}}}]' \—region us-east-1

To set up the automation rule for Scenario 1 (console)

  1. Open the Security Hub console, and in the left navigation pane, choose Automations.
    Figure 1: Automation rules in the Security Hub console

    Figure 1: Automation rules in the Security Hub console

  2. Choose Create rule, and then choose Create a custom rule to get started with creating a rule of your choice. Add a rule name and description.
    Figure 2: Create a new custom rule

    Figure 2: Create a new custom rule

  3. Under Criteria, add the following information.
    • Key 1
      • Key = GeneratorID
      • Operator = EQUALS
      • Value = aws-foundational-security-best-practices/v/1.0.0/GuardDuty.1
    • Key 2
      • Key = AwsAccountId
      • Operator = EQUALS
      • Value = Your AWS account ID
    Figure 3: Information added for the rule criteria

    Figure 3: Information added for the rule criteria

  4. You can preview which findings will match the criteria by looking in the preview section.
    Figure 4: Preview section

    Figure 4: Preview section

  5. Next, under Automated action, specify which finding value to update automatically when findings match your criteria.
    Figure 5: Automated action to be taken against the findings that match the criteria

    Figure 5: Automated action to be taken against the findings that match the criteria

  6. For Rule status, choose Enabled, and then choose Create rule.
    Figure 6: Set the rule status to Enabled

    Figure 6: Set the rule status to Enabled

  7. After you choose Create rule, you will see the newly created rule within the Automations portal.
    Figure 7: Newly created rule within the Security Hub Automations page

    Figure 7: Newly created rule within the Security Hub Automations page

    Note: In figure 7, you can see multiple automation rules. When you create automation rules, you assign each rule an order number. This determines the order in which Security Hub applies your automation rules. This becomes important when multiple rules apply to the same finding or finding field. When multiple rule actions apply to the same finding field, the rule with the highest numerical value for rule order is applied last and has the ultimate effect on that field.

Additionally, if your preferred deployment method is to use the API or AWS SDK for Python (Boto3), we have information on how you can use these means of deployment in our public documentation.

Scenario 2: Change the finding severity to high if a resource is important, based on resource tags

Imagine a situation where you have findings associated to a wide range of resources. Typically, organizations will attempt to prioritize which findings to remediate first. You can achieve this prioritization through Security Hub and the contextual fields that are available for you to use — for example, by using the severity of the finding or the account ID the resource is sitting in. You might also have your own prioritization based on other factors. You could add this additional context to findings by using a tagging strategy. With automation rules, you can now automatically elevate the severity for specific findings based on the tag value associated to the resource.

For example, if a finding comes into Security Hub with the severity rating “Medium,” but the resource in question is critical to the business and has the tag production associated to it, you could automatically raise the severity rating to “High.”

Note: This will work only for findings where there is a resource tag associated with the finding.

Scenario 3: Suppress GuardDuty findings with a severity of “Informational”

GuardDuty provides an overarching view of the state of threats to deployed resources in your organization’s cloud environment. After evaluation, GuardDuty produces findings related to these threats. The findings produced by GuardDuty have different severities, to help organizations with prioritization. Some of these findings will be given an “Informational” severity. “Informational” indicates that no issue was found and the content of the finding is purely to give information. After you have evaluated the context of the finding, you might want to suppress any additional findings that match the same criteria.

For example, you might want to set up a rule so that new findings with the generator ID that produced “Informational” findings are suppressed, keeping only the findings that need action.

Templates

When you create a new rule, you can also choose to create a rule from a template. These templates are regularly updated with use cases that are applicable for many customers.

To set up an automation rule by using a template from the console

  1. In the Security Hub console, choose Automations, and then choose Create rule.
  2. Choose Create a rule from a template to get started with creating a rule of your choice.
  3. Select a rule template from the drop-down menu.
    Figure 8: Select an automation rule template

    Figure 8: Select an automation rule template

  4. (Optional) If necessary, modify the Rule, Criteria, and Automated action sections.
  5. For Rule status, choose whether you want the rule to be enabled or disabled after it’s created.
  6. (Optional) Expand the Additional settings section. Choose Ignore subsequent rules for findings that match these criteria if you want this rule to be the last rule applied to findings that match the rule criteria.
  7. (Optional) For Tags, add tags as key-value pairs to help you identify the rule.
  8. Choose Create rule.

Multi-Region deployment

For organizations that operate in multiple AWS Regions, we’ve provided a solution that you can use to replicate rules created in your central Security Hub admin account into these additional Regions. You can find the sample code for this solution in our GitHub repo.

Conclusion

In this blog post, we’ve discussed the importance of automation and its ability to help organizations scale operations within the cloud. We’ve introduced a new capability in AWS Security Hub, automation rules, that can help reduce the repetitive tasks your operational teams may be facing, and we’ve showcased some example use cases to get you started. Start using automation rules in your environment today. We’re excited to see what use cases you will solve with this feature and as always, are happy to receive any feedback.

If you have feedback about this post, submit comments in the Comments section below. If you have questions about this post, start a new thread on the AWS Security, Identity, & Compliance re:Post or contact AWS Support.

Stuart Gregg

Stuart Gregg

Stuart enjoys providing thought leadership and being a trusted advisor to customers. In his spare time Stuart can be seen either training for an Ironman or snacking.

Shachar Hirshberg

Shachar Hirshberg

Shachar is a Senior Product Manager at AWS Security Hub with over a decade of experience in building, designing, launching, and scaling enterprise software. He is passionate about further improving how customers harness AWS services to enable innovation and enhance the security of their cloud environments. Outside of work, Shachar is an avid traveler and a skiing enthusiast.

Post-quantum hybrid SFTP file transfers using AWS Transfer Family

Post Syndicated from Panos Kampanakis original https://aws.amazon.com/blogs/security/post-quantum-hybrid-sftp-file-transfers-using-aws-transfer-family/

Amazon Web Services (AWS) prioritizes security, privacy, and performance. Encryption is a vital part of privacy. To help provide long-term protection of encrypted data, AWS has been introducing quantum-resistant key exchange in common transport protocols used by AWS customers. In this blog post, we introduce post-quantum hybrid key exchange with Kyber, the National Institute of Standards and Technology’s chosen quantum-resistant key encapsulation algorithm, in the Secure Shell (SSH) protocol. We explain why it’s important and show you how to use it with Secure File Transfer Protocol (SFTP) file transfers in AWS Transfer Family, the AWS file transfer service.

Why use PQ-hybrid key establishment in SSH

Although not available today, a cryptanalytically relevant quantum computer (CRQC) could theoretically break the standard public key algorithms currently in use. Today’s network traffic could be recorded now and then decrypted in the future with a CRQC. This is known as harvest-now-decrypt-later.

With such concerns in mind, the U.S. Congress recently signed the Quantum Computing Cybersecurity Preparedness Act, and the White House issued National Security Memoranda (NSM-8, NSM-10) to prepare for a timely and equitable transition to quantum-resistant cryptography. The National Security Agency (NSA) also announced its quantum-resistant algorithm requirements and timelines in its CNSA 2.0 release. Many other governments like Canada, Germany, and France and organizations like ISO/IEC and IEEE have also been prioritizing preparations and experiments with quantum-resistant cryptography technologies.

AWS is migrating to post-quantum cryptography. AWS Key Management Service (AWS KMS)AWS Certificate Manager (ACM), and AWS Secrets Manager TLS endpoints already include support for post-quantum hybrid (PQ-hybrid) key establishment with Elliptic Curve Diffie-Hellman (ECDH) and Kyber, NIST’s Post-Quantum Cryptography (PQC) project’s chosen key encapsulation mechanism (KEM). Although PQ-hybrid TLS 1.3 key exchange has received a lot of attention, there has been limited work on SSH.

SSH is a protocol widely used by AWS customers for various tasks ranging from moving files between machines to managing Amazon Elastic Compute Cloud (Amazon EC2) instances. Considering the importance of the SSH protocol, its ubiquitous use, and the data it transfers, we introduced PQ-hybrid key exchange with Kyber in it.

How PQ-hybrid key exchange works in Transfer Family SFTP

AWS just announced support for post-quantum key exchange in SFTP file transfers in AWS Transfer Family. Transfer Family securely scales business-to-business file transfers to AWS Storage services using SFTP and other protocols. SFTP is a secure version of the File Transfer Protocol (FTP) that runs over SSH. The post-quantum key exchange support of Transfer Family raises the security bar for data transfers over SFTP.

PQ-hybrid key establishment in SSH introduces post-quantum KEMs used in conjunction with classical key exchange. The client and server still do an ECDH key exchange. Additionally, the server encapsulates a post-quantum shared secret to the client’s post-quantum KEM public key, which is advertised in the client’s SSH key exchange message. This strategy combines the high assurance of a classical key exchange with the security of the proposed post-quantum key exchanges, to help ensure that the handshakes are protected as long as the ECDH or the post-quantum shared secret cannot be broken.

More specifically, the PQ-hybrid key exchange SFTP support in Transfer Family includes combining post-quantum Kyber-512, Kyber-768, and Kyber-1024, with ECDH over P256, P384, P521, or Curve25519 curves. The corresponding SSH key exchange methods — [email protected], [email protected], [email protected], and [email protected] — are specified in the PQ-hybrid SSH key exchange draft.

Why Kyber?

AWS is committed to supporting standardized interoperable algorithms, so we wanted to introduce Kyber to SSH. Kyber was chosen for standardization by NIST’s Post-Quantum Cryptography (PQC) project. Some standards bodies are already integrating Kyber in various protocols.

We also wanted to encourage interoperability by adopting, making available, and submitting for standardization, a draft that combines Kyber with NIST-approved curves like P256 for SSH. To help enhance security for our customers, the AWS implementation of the PQ key exchange in SFTP and SSH follows that draft.

Interoperability

The new key exchange methods — [email protected], [email protected], [email protected], and [email protected] — are supported in two new security policies in Transfer Family. These might change as the draft evolves towards standardization or when NIST ratifies the Kyber algorithm.

Is PQ-hybrid SSH key exchange aligned with cryptographic requirements like FIPS 140?

For customers that require FIPS compliance, Transfer Family provides FIPS cryptography in SSH by using the AWS-LC, open-source cryptographic library. The PQ-hybrid key exchange methods supported in the TransferSecurityPolicy-PQ-SSH-FIPS-Experimental-2023-04 policy in Transfer Family continue to meet FIPS requirements as described in SP 800-56Cr2 (section 2). BSI Germany and ANSSI France also recommend such PQ-hybrid key exchange methods.

How to test PQ SFTP with Transfer Family

To enable PQ-hybrid SFTP in Transfer Family, you need to enable one of the two security policies that support PQ-hybrid key exchange in your SFTP-enabled endpoint. You can choose the security policy when you create a new SFTP server endpoint in Transfer Family, as explained in the documentation; or by editing the Cryptographic algorithm options in an existing SFTP endpoint. The following figure shows an example of the AWS Management Console where you update the security policy.

Figure 1: Use the console to set the PQ-hybrid security policy in the Transfer Family endpoint

Figure 1: Use the console to set the PQ-hybrid security policy in the Transfer Family endpoint

The security policy names that support PQ key exchange in Transfer Family are TransferSecurityPolicy-PQ-SSH-Experimental-2023-04 and TransferSecurityPolicy-PQ-SSH-FIPS-Experimental-2023-04. For more details on Transfer Family policies, see Security policies for AWS Transfer Family.

After you choose the right PQ security policy in your SFTP Transfer Family endpoint, you can experiment with post-quantum SFTP in Transfer Family with an SFTP client that supports PQ-hybrid key exchange by following the guidance in the aforementioned draft specification. AWS tested and confirmed interoperability between the Transfer Family PQ-hybrid key exchange in SFTP and the SSH implementations of our collaborators on the NIST NCCOE Post-Quantum Migration project, namely OQS OpenSSH and wolfSSH.

OQS OpenSSH client

OQS OpenSSH is an open-source fork of OpenSSH that adds quantum-resistant cryptography to SSH by using liboqs. liboqs is an open-source C library that implements quantum-resistant cryptographic algorithms. OQS OpenSSH and liboqs are part of the Open Quantum Safe (OQS) project.

To test PQ-hybrid key exchange in Transfer Family SFTP with OQS OpenSSH, you first need to build OQS OpenSSH, as explained in the project’s README. Then you can run the example SFTP client to connect to your AWS SFTP endpoint (for example, s-9999999999999999999.server.transfer.us-west-2.amazonaws.com) by using the PQ-hybrid key exchange methods, as shown in the following command. Make sure to replace <user_priv_key_PEM_file> with the SFTP user private key PEM-encoded file used for user authentication, and <username> with the username, and update the SFTP-enabled endpoint with the one that you created in Transfer Family.

./sftp -S ./ssh -v -o \
   KexAlgorithms=ecdh-nistp384-kyber-768r3-sha384-d00@openquantumsafe.org \
   -i <user_priv_key_PEM_file> \
   <username>@s-9999999999999999999.server.transfer.us-west-2.amazonaws.com

wolfSSH client

wolfSSH is an SSHv2 client and server library that uses wolfCrypt for its cryptography. For more details and a link to download, see wolfSSL’s product licensing information

To test PQ-hybrid key exchange in Transfer Family SFTP with wolfSSH, you first need to build wolfSSH. When built with liboqs, the open-source library that implements post-quantum algorithms, wolfSSH automatically negotiates [email protected]. Run the example SFTP client to connect to your AWS SFTP server endpoint, as shown in the following command. Make sure to replace <user_priv_key_DER_file> with the SFTP user private key DER-encoded file used for user authentication, <user_public_key_PEM_file> with the corresponding SSH user public key PEM-formatted file, and <username> with the username. Also replace the s-9999999999999999999.server.transfer.us-west-2.amazonaws.com SFTP endpoint with the one that you created in Transfer Family.

./examples/sftpclient/wolfsftp -p 22 -u <username> \
      -i <user_priv_key_DER_file> -j <user_public_key_PEM_file> -h \
      s-9999999999999999999.server.transfer.us-west-2.amazonaws.com

As we migrate to a quantum-resistant future, we expect that more SFTP and SSH clients will add support for PQ-hybrid key exchanges that are standardized for SSH.

How to confirm PQ-hybrid key exchange in SFTP

To confirm that PQ-hybrid key exchange was used in an SSH connection for SFTP to Transfer Family, check the client output and optionally use packet captures.

OQS OpenSSH client

The client output (omitting irrelevant information for brevity) should look similar to the following:

$./sftp -S ./ssh -v -o KexAlgorithms=ecdh-nistp384-kyber-768r3-sha384-d00@openquantumsafe.org -i panos_priv_key_PEM_file panos@s-9999999999999999999.server.transfer.us-west-2.amazonaws.com
OpenSSH_8.9-2022-01_p1, Open Quantum Safe 2022-08, OpenSSL 3.0.2 15 Mar 2022
debug1: Reading configuration data /home/lab/openssh/oqs-test/tmp/ssh_config
debug1: Authenticator provider $SSH_SK_PROVIDER did not resolve; disabling
debug1: Connecting to s-9999999999999999999.server.transfer.us-west-2.amazonaws.com [xx.yy.zz..12] port 22.
debug1: Connection established.
[...]
debug1: Local version string SSH-2.0-OpenSSH_8.9-2022-01_
debug1: Remote protocol version 2.0, remote software version AWS_SFTP_1.1
debug1: compat_banner: no match: AWS_SFTP_1.1
debug1: Authenticating to s-9999999999999999999.server.transfer.us-west-2.amazonaws.com:22 as 'panos'
debug1: load_hostkeys: fopen /home/lab/.ssh/known_hosts2: No such file or directory
[...]
debug1: SSH2_MSG_KEXINIT sent
debug1: SSH2_MSG_KEXINIT received
debug1: kex: algorithm: [email protected]
debug1: kex: host key algorithm: ssh-ed25519
debug1: kex: server->client cipher: aes192-ctr MAC: [email protected] compression: none
debug1: kex: client->server cipher: aes192-ctr MAC: [email protected] compression: none
debug1: expecting SSH2_MSG_KEX_ECDH_REPLY
debug1: SSH2_MSG_KEX_ECDH_REPLY received
debug1: Server host key: ssh-ed25519 SHA256:BY3gNMHwTfjd4n2VuT4pTyLOk82zWZj4KEYEu7y4r/0
[...]
debug1: rekey out after 4294967296 blocks
debug1: SSH2_MSG_NEWKEYS sent
debug1: expecting SSH2_MSG_NEWKEYS
debug1: SSH2_MSG_NEWKEYS received
debug1: rekey in after 4294967296 blocks
[...]
Authenticated to AWS.Tranfer.PQ.SFTP.test-endpoint.aws.com ([xx.yy.zz..12]:22) using "publickey".s
debug1: channel 0: new [client-session]
[...]
Connected to s-9999999999999999999.server.transfer.us-west-2.amazonaws.com. sftp>

The output shows that client negotiation occurred using the PQ-hybrid [email protected] method and successfully established an SFTP session.

To view the negotiated PQ-hybrid key, you can use a packet capture in Wireshark or a similar network traffic analyzer. The key exchange method negotiation offered by the client should look similar to the following:

Figure 2: View the client proposed PQ-hybrid key exchange method in Wireshark

Figure 2: View the client proposed PQ-hybrid key exchange method in Wireshark

Figure 2 shows that the client is offering the PQ-hybrid key exchange method [email protected]. The Transfer Family SFTP server negotiates the same method, and the client offers a PQ-hybrid public key.

Figure 3: View the client P384 ECDH and Kyber-768 public keys

Figure 3: View the client P384 ECDH and Kyber-768 public keys

As shown in Figure 3, the client sent 1281 bytes for the PQ-hybrid public key. These are the ECDH P384 92-byte public key, the 1184-byte Kyber-768 public key, and 5 bytes of padding. The server response is of similar size and includes the 92-byte P384 public key and the 1088 Kyber-768 ciphertext.

wolfSSH client

The client output (omitting irrelevant information for brevity) should look similar to the following:

$ ./examples/sftpclient/wolfsftp -p 22 -u panos -i panos_priv_key_DER_file -j panos_public_key_PEM_file -h s-9999999999999999999.server.transfer.us-west-2.amazonaws.com
[...]
2023-05-25 17:37:24 [DEBUG] SSH-2.0-wolfSSHv1.4.12
[...]
2023-05-25 17:37:24 [DEBUG] DNL: name ID = unknown
2023-05-25 17:37:24 [DEBUG] DNL: name ID = [email protected]
2023-05-25 17:37:24 [DEBUG] DNL: name ID = unknown
2023-05-25 17:37:24 [DEBUG] DNL: name ID = diffie-hellman-group-exchange-sha256
[...]
2023-05-25 17:37:24 [DEBUG] connect state: SERVER_KEXINIT_DONE
[...]
2023-05-25 17:37:24 [DEBUG] connect state: CLIENT_KEXDH_INIT_SENT
[...]
2023-05-25 17:37:24 [DEBUG] Decoding MSGID_KEXDH_REPLY
2023-05-25 17:37:24 [DEBUG] Entering DoKexDhReply()
2023-05-25 17:37:24 [DEBUG] DKDR: Calling the public key check callback
Sample public key check callback
  public key = 0x24d011a
  public key size = 104
  ctx = s-9999999999999999999.server.transfer.us-west-2.amazonaws.com
2023-05-25 17:37:24 [DEBUG] DKDR: public key accepted
[...]
2023-05-25 17:37:26 [DEBUG] Entering wolfSSH_get_error()
wolfSSH sftp>

The output shows that the client negotiated the PQ-hybrid [email protected] method and successfully established a quantum- resistant SFTP session. A packet capture of this session would be very similar to the previous one.

Conclusion

In this blog post, we introduced the importance of both migrating to post-quantum cryptography and adopting standardized algorithms and protocols. We also shared our approach for bringing PQ-hybrid key exchanges to SSH, and how to use this today using SFTP with Transfer Family. Additionally, AWS employees are collaborating with other cryptography experts on a draft for PQ-hybrid SSH key exchange, which is the draft specification that Transfer Family follows.

If you have questions about how to use Transfer Family PQ key exchange, start a new thread in the Transfer Family for SFTP forum. If you want to learn more about post-quantum cryptography with AWS, contact the post-quantum cryptography team.

If you have feedback about this post, submit comments in the Comments section below. If you have questions about this post, start a new thread on the AWS Security, Identity, & Compliance re:Post or contact AWS Support.

Want more AWS Security news? Follow us on Twitter.

Panos Kampanakis

Panos Kampanakis

Panos is a Principal Security Engineer in AWS Cryptography organization. He has extensive experience in cybersecurity, applied cryptography, security automation, and vulnerability management. He has co-authored cybersecurity publications, and participated in various security standards bodies to provide common interoperable protocols and languages for security information sharing, cryptography, and PKI. Currently, he works with engineers and industry standards partners to provide cryptographic implementations, protocols, and standards.

Torben Hansen

Torben Hansen

Torben is a cryptographer on the AWS Cryptography team. He is focused on developing and deploying cryptographic libraries. He also contributes to the design and analysis of cryptographic solutions across AWS.

Alex Volanis

Alex Volanis

Alex is a Software Development Engineer at AWS with a background in distributed systems, cryptography, authentication and build tools. Currently working with the AWS Transfer Family team to provide scalable, secure, and high performing data transfer solutions for internal and external customers. Passionate coder and problem solver, and occasionally a pretty good skier.

Gerardo Ravago

Gerardo Ravago

Gerardo is a Senior Software Development Engineer in the AWS Cryptography organization, where he contributes to post-quantum cryptography and the Amazon Corretto Crypto Provider. In prior AWS roles, he’s worked on Storage Gateway and DataSync. Though a software developer by day, he enjoys diving deep into food, art, culture, and history through travel on his off days.

Should I use managed login or create a custom UI in Amazon Cognito?

Post Syndicated from Joshua Du Lac original https://aws.amazon.com/blogs/security/use-the-hosted-ui-or-create-a-custom-ui-in-amazon-cognito/

October 8, 2025: This blog post has been updated to include the Amazon Cognito managed login experience. The managed login experience has an updated look, additional features, and enhanced customization options.

September 8, 2023: It’s important to know that if you activate user sign-up in your user pool, anyone on the internet can sign up for an account and sign in to your apps. Don’t enable self-registration in your user pool unless you want to open your app to allow users to sign up.

June 9, 2023: Original publication date.


Amazon Cognito is an authentication, authorization, and user management service for your web and mobile applications. Your users can sign in directly through many different authentication methods, such as user accounts within Amazon Cognito or through social providers such as Facebook, Amazon, Apple, or Google. You can also configure federation through a third-party OpenID Connect (OIDC) or SAML 2.0 identity provider (IdP).

Amazon Cognito user pools are user directories that provide sign-up and sign-in functions for your application users, including federated authentication capabilities. A Cognito user pool has two primary UI options:

  • Managed login: AWS hosts, preconfigures, maintains, and scales the UI—including managed login branding and classic Hosted UI branding—with a set of options that you can customize or configure for sign-up and sign-in for app users.
  • Custom UI: You can configure an Amazon Cognito user pool with a completely custom UI by using the SDK. You’re accountable for hosting, configuring, maintaining, and scaling your custom UI as a part of your responsibility in the AWS Shared Responsibility Model.

In this blog post, we review the benefits of using the managed login or creating a custom UI with the SDK and things to consider in determining which to choose for your application.

Managed login

Managed login provides web interfaces for sign-up, sign-in, multi-factor authentication (MFA), password management, and passwordless and passkey sign-in capabilities in your user pool. The managed login provides an authorization server based on the OAuth 2.0 specification, and has a default implementation of user flows for sign-up and sign-in. Your application can redirect to the managed login, which will handle the user flows through the authorization code grant flow. The managed login also supports sign-in through social providers and federation from OIDC-compliant and SAML 2.0 providers. Amazon Cognito offers two visual modes and branding and customization experiences: managed login branding with branding editor and hosted UI (classic) branding.

Managed login branding with branding editor
Managed login branding provides an improved user experience with the most up-to-date authentication options for the user pool UI experience. Figure 1 shows managed login using the default branding settings.

Figure 1: Managed login default branding settings

Figure 1: Managed login default branding settings

The branding editor is a no-code visual editor that you can use to customize the look and feel of the entire user journey. You can customize each user pool application client individually, and preview screens in real-time with different screen sizes, as shown in Figure 2.

Figure 2: Customization in the Amazon Cognito branding editor (Image credits)

Figure 2: Customization in the Amazon Cognito branding editor (Image credits)

As shown in Figure 3, You can customize various components using the branding editor, including background, header and footer, buttons, focus state, icons, and more.

Figure 3: Various components customization options

Figure 3: Various components customization options

Additionally, managed login branding adds support for passwordless sign-in with passkeys, email one-time-passwords (OTP) and SMS OTPs, as shown in Figure 4. After you enable passwordless login in your user pool, managed login branding adapts to curated user flows with users’ preferred authentication methods.

Figure 4: Sign in with passkey flow (left) and user-selected sign-in method flow (right)

Figure 4: Sign in with passkey flow (left) and user-selected sign-in method flow (right)

Managed login branding also offers localization options in several languages (two are shown in Figure 5). You can add a lang query parameter in the link you distribute to users, and Amazon Cognito will set a cookie in users’ browsers with their language preference after the initial request.

Figure 5: Cognito user sign up page in Japanese (left) and user sign in page in Simplified Chinese (right)

Figure 5: Cognito user sign up page in Japanese (left) and user sign in page in Simplified Chinese (right)

Hosted UI (classic) branding
For customers who prefer a traditional approach, Amazon Cognito continues to support the Hosted UI (classic) branding (shown in Figure 6) with basic customization where you can upload a CSS file to design the UI styling and upload a brand-specific logo. Hosted UI (classic) supports standard authentication flows with MFA and self-service sign up.

Figure 6: Hosted UI (classic) branding

Figure 6: Hosted UI (classic) branding

The managed login branding with branding editor is available to Amazon Cognito user pools with Essentials and Plus feature tiers, and Hosted UI (classic) branding is available to most Cognito user pools including Lite tier. To learn more about Cognito feature tiers, visit Amazon Cognito pricing.

Security and compliance capabilities

Both managed login branding and Hosted UI (classic) branding are designed to help you meet your compliance and security requirements and your users’ needs. Managed login supports custom OAuth scopes and OAuth 2.0 flows. If you want single sign-on (SSO), you can use managed login to support a single login across many application clients, with browser session cookies for the same domain. Actions are logged in AWS CloudTrail, and you can use the logs for audit and reactionary automation. The managed login experience also supports the full suite of threat protection features for Amazon Cognito. For additional protection, managed login has support for AWS WAF web ACLs and for AWS WAF CAPTCHA, which can help protect your Cognito user pools from web-based exploits and unwanted bots.

Figure 7: Example default managed login with several login providers enabled

Figure 7: Example default managed login with several login providers enabled

For federation, managed login supports federation with third-party IdPs that support OIDC and SAML 2.0, as well as social IdPs, as shown in Figure 7. Identity providers are connected to your Amazon Cognito user pool. In managed login, users use a button to select the federation source, and redirection is automatic. With SAML and OIDC IdPs, you can also configure mapping by using the domain in the user’s email address. In this case, a single text field is visible to your application users to enter an email address, as shown in Figure 8, and the lookup and redirect to the appropriate SAML IdP is automatic, as described in Choosing SAML identity provider names.

Figure 8: Managed login that links to corporate IdP through an email domain

Figure 8: Managed login that links to corporate IdP through an email domain

Managed login integrates with Application Load Balancer (ALB) for web applications and works with AWS Amplify to enable social identity provider and enterprise federation (SAML and OIDC) capabilities. Beyond these integrations, Amazon Cognito user pools integrate with various AWS services (such as AWS AppSync), that require user authentication and authorization, and Amazon API Gateway through Cognito authorizers to secure your REST and HTTP endpoints.

You might choose to use managed login for many reasons. AWS fully manages the hosting, maintenance, and scaling of the managed login, which can contribute to the speed of go-to-market for customers. If your app requires OAuth 2.0 custom scopes, federation, social login, or native users with basic but customized branding and potentially numerous Amazon Cognito user pools, you might benefit from using managed login.

For more information about how to configure and use the hosted UI, see Using the Amazon Cognito hosted UI for sign-up and sign-in.

Create a custom UI

Creating a custom UI using the SDK for Amazon Cognito provides a host of benefits and features that can help you completely customize the UI for your application users. With a custom UI, you have complete control over the look and feel of the UI that your application users will land on, including designing your app to support multiple languages, and you can build and design custom authentication flows.

There are numerous features that are supported when you build a custom UI. As with the managed login, the APIs invoked from a custom UI using the SDK will create log entries in CloudTrail, and you can use the logs for audit and automation. You can also create a custom authentication flow for your users with a fully custom authentication experience beyond the those available in managed login.

In a custom UI, you can build custom session management and integrate with AWS WAF. A custom UI also works with the threat protection features of Amazon Cognito.

Figure 9: Example of a custom user interface

Figure 9: Example of a custom user interface

With a custom UI, such as the one shown in Figure 10, you can orchestrate a suite of sign-in options and sign-in flows for your users. For example, you can collect a user or tenant identifier at the beginning of the authentication flow and apply your own logic for user authentication flow, such as redirecting federated users to external IdPs, displaying a password prompt for local users, or directing users to create a new account if they don’t exist. You can also build flows to let a user choose alternative MFA methods if their preferred choices aren’t available.

Figure 10: Custom UI example

Figure 10: Custom UI example

When you build a custom UI, there is support for custom endpoints and proxies so that you have a wider range of options for management and consistency across application development as it relates to authentication. Custom authentication flows are only available in applications with a custom UI, which gives you the ability to make customized challenge prompts and answers to help you meet custom security requirements by using AWS Lambda triggers. For example, you could use it to implement OAuth 2.0 device grant flows. Lastly, a custom UI supports a remember device feature where you can add low-effort sign-in from trusted devices.

You might choose to build a custom UI with an SDK when full customization is a requirement or where you want to incorporate customized authentication flows using the custom authentication challenge Lambda triggers. A custom UI is a great choice if you aren’t required to use OAuth 2.0 flows and you have the resources to develop and implement a unique UI for your application users.

For more information about how to configure and use a custom UI, see Using the Amazon Cognito managed login for sign-up and sign-in. You can also visit the documentation on Building custom UIs with Amplify.

Decision criteria matrix

When deciding between Amazon Cognito managed login branding options and a custom UI, there are some unique differences that can help you determine which UI is best for your application needs. Managed login offers a modern, customizable authentication experience with advanced features like no-code visual customization, dark mode themes, and support for passwordless options. It supports OAuth 2.0 flows, custom OAuth scopes, the ability to sign in one time and access many Cognito application clients (using SSO), and full use of the Cognito threat protection features. For applications requiring complete control over the authentication experience and UX—including custom authentication flows, device fingerprinting, and reduced token expiration—a custom UI is the better choice. This option allows for full UI customization, implementation of custom authentication flows, and integration with specific frameworks or libraries not supported by managed login.

When making your decision, consider factors such as the level of customization required, specific authentication features needed, development resources available, integration requirements with other AWS services, security and compliance needs, and user experience priorities. Remember that your application authentication requirements and customer experience should take precedence over other considerations. You can use the following table to help select the best UI for your requirements.

Requirements

Managed login

Hosted UI (classic)

Custom UI (SDK)

OAuth 2.0 flows

Supported

Supported

Not available

Custom OAuth scopes

Supported

Supported

Supported

Customization of UI

No-code branding designer

Limited CSS customization

Full custom control

Custom user input forms

Not available

Not available

Supported

Custom authentication flow

Not available

Not available

Supported

Passwordless authentication flow

Supported

Not available

Custom implementation available

Localization with multiple languages

Supported

Not available

Supported

Login once across many app clients

Supported

Supported

Not available

Session expiration configurable under 1 hour

Not available

Not available

Supported

Trusted-device authentication

Not available

Not available

Supported

AWS WAF integration

Supported

Supported

Supported

Support for AWS WAF CAPTCHA

Supported

Supported

Not available

Ability to use a custom endpoint or proxy

Not available

Not available

Supported

AWS Application Load Balancer integration

Supported

Supported

Not available

Figure 11: Decision criteria matrix

Conclusion

In this post, you learned about using managed login, including its two branding options and creating a custom UI in Amazon Cognito and the many supported features and benefits of each. Each UI option targets a specific need. Choose from available options based on your list of requirements for authentication and the user sign-up and sign-in experience. You can use the information in this post as a reference as you add Amazon Cognito to your mobile and web applications for authentication.

Have a question? Contact us for general support services.

Author photo

Joshua Du Lac

Josh is a Senior Manager of Security Solutions Architects at AWS. He has advised hundreds of enterprise, global, and financial services customers to accelerate their journey to the cloud while improving their security along the way. Outside of work, Josh enjoys searching for the best tacos in Texas and practicing his handstands.

Jeremy Wave

Jeremy Ware

Jeremy is a Security Specialist Solutions Architect focused on Identity and Access Management. Jeremy and his team enable AWS customers to implement sophisticated, scalable, and secure IAM architecture and Authentication workflows to solve business challenges. With a background in Security Engineering, Jeremy has spent many years working to raise the Security Maturity gap at numerous global enterprises. Outside of work, Jeremy loves to explore the mountainous outdoors, and participate in sports such as snowboarding, wakeboarding, and dirt bike riding.

Edward Sun

Edward Sun

Edward is a Security Specialist Solutions Architect focused on identity and access management. He loves helping customers throughout their cloud transformation journey with architecture design, security best practices, migration, and cost optimizations. Outside of work, Edward enjoys hiking, golfing, and cheering for his alma mater, the Georgia Bulldogs.

Kiran Dongara

Kiran Dongara

Kiran Dongara is a Solutions Architect at Amazon Web Services (AWS) in the Worldwide Public Sector, primarily supporting US state and local government (SLG) customers and partners. His expertise lies in designing scalable and efficient architectures that adhere to well-architected framework practices, maximizing value and return on investment for his customers. When not working, Kiran prioritizes family time, nature walks, and cycling.

Temporary elevated access management with IAM Identity Center

Post Syndicated from Taiwo Awoyinfa original https://aws.amazon.com/blogs/security/temporary-elevated-access-management-with-iam-identity-center/

AWS recommends using automation where possible to keep people away from systems—yet not every action can be automated in practice, and some operations might require access by human users. Depending on their scope and potential impact, some human operations might require special treatment.

One such treatment is temporary elevated access, also known as just-in-time access. This is a way to request access for a specified time period, validate whether there is a legitimate need, and grant time-bound access. It also allows you to monitor activities performed, and revoke access if conditions change. Temporary elevated access can help you to reduce risks associated with human access without hindering operational capabilities.

In this post, we introduce a temporary elevated access management solution (TEAM) that integrates with AWS IAM Identity Center (successor to AWS Single Sign-On) and allows you to manage temporary elevated access to your multi-account AWS environment. You can download the TEAM solution from AWS Samples, deploy it to your AWS environment, and customize it to meet your needs.

The TEAM solution provides the following features:

  • Workflow and approval — TEAM provides a workflow that allows authorized users to request, review, and approve or reject temporary access. If a request is approved, TEAM activates access for the requester with the scope and duration specified in the request.
  • Invoke access using IAM Identity Center — When temporary elevated access is active, a requester can use the IAM Identity Center AWS access portal to access the AWS Management Console or retrieve temporary credentials. A requester can also invoke access directly from the command line by configuring AWS Command Line Interface (AWS CLI) to integrate with IAM Identity Center.
  • View request details and session activity — Authorized users can view request details and session activity related to current and historical requests from within the application’s web interface.
  • Ability to use managed identities and group memberships — You can either sync your existing managed identities and group memberships from an external identity provider into IAM Identity Center, or manage them directly in IAM Identity Center, in order to control user authorization in TEAM. Similarly, users can authenticate directly in IAM Identity Center, or they can federate from an external identity provider into IAM Identity Center, to access TEAM.
  • A rich authorization model — TEAM uses group memberships to manage eligibility (authorization to request temporary elevated access with a given scope) and approval (authorization to approve temporary elevated access with a given scope). It also uses group memberships to determine whether users can view historical and current requests and session activity, and whether they can administer the solution. You can manage both eligibility and approval policies at different levels of granularity within your organization in AWS Organizations.

TEAM overview

You can download the TEAM solution and deploy it into the same organization where you enable IAM Identity Center. TEAM consists of a web interface that you access from the IAM Identity Center access portal, a workflow component that manages requests and approvals, an orchestration component that activates temporary elevated access, and additional components involved in security and monitoring.

Figure 1 shows an organization with TEAM deployed alongside IAM Identity Center.

Figure 1: An organization using TEAM alongside IAM Identity Center

Figure 1: An organization using TEAM alongside IAM Identity Center

Figure 1 shows three main components:

  • TEAM — a self-hosted solution that allows users to create, approve, monitor and manage temporary elevated access with a few clicks in a web interface.
  • IAM Identity Center — an AWS service which helps you to securely connect your workforce identities and manage their access centrally across accounts.
  • AWS target environment — the accounts where you run your workloads, and for which you want to securely manage both persistent access and temporary elevated access.

There are four personas who can use TEAM:

  • Requesters — users who request temporary elevated access to perform operational tasks within your AWS target environment.
  • Approvers — users who review and approve or reject requests for temporary elevated access.
  • Auditors — users with read-only access who can view request details and session activity relating to current and historical requests.
  • Admins — users who can manage global settings and define policies for eligibility and approval.

TEAM determines a user’s persona from their group memberships, which can either be managed directly in IAM Identity Center or synced from an external identity provider into IAM Identity Center. This allows you to use your existing access governance processes and tools to manage the groups and thereby control which actions users can perform within TEAM.

The following steps describe how you use TEAM during normal operations to request, approve, and invoke temporary elevated access. The steps correspond to the numbered items in Figure 1:

  1. Access the AWS access portal in IAM Identity Center (all personas)
  2. Access the TEAM application (all personas)
  3. Request elevated access (requester persona)
  4. Approve elevated access (approver persona)
  5. Activate elevated access (automatic)
  6. Invoke elevated access (requester persona)
  7. Log session activity (automatic)
  8. End elevated access (automatic; or requester or approver persona)
  9. View request details and session activity (requester, approver, or auditor persona)

In the TEAM walkthrough section later in this post, we provide details on each of these steps.

Deploy and set up TEAM

Before you can use TEAM, you need to deploy and set up the solution.

Prerequisites

To use TEAM, you first need to have an organization set up in AWS Organizations with IAM Identity Center enabled. If you haven’t done so already, create an organization, and then follow the Getting started steps in the IAM Identity Center User Guide.

Before you deploy TEAM, you need to nominate a member account for delegated administration in IAM Identity Center. This has the additional benefit of reducing the need to use your organization’s management account. We strongly recommend that you use this account only for IAM Identity Center delegated administration, TEAM, and associated services; that you do not deploy any other workloads into this account, and that you carefully manage access to this account using the principle of least privilege.

We recommend that you enforce multi-factor authentication (MFA) for users, either in IAM Identity Center or in your external identity provider. If you want to statically assign access to users or groups (persistent access), you can do that in IAM Identity Center, independently of TEAM, as described in Multi-account permissions.

Deploy TEAM

To deploy TEAM, follow the solution deployment steps in the TEAM documentation. You need to deploy TEAM in the same account that you nominate for IAM Identity Center delegated administration.

Access TEAM

After you deploy TEAM, you can access it through the IAM Identity Center web interface, known as the AWS access portal. You do this using the AWS access portal URL, which is configured when you enable IAM Identity Center. Depending on how you set up IAM Identity Center, you are either prompted to authenticate directly in IAM Identity Center, or you are redirected to an external identity provider to authenticate. After you authenticate, the AWS access portal appears, as shown in Figure 2.

Figure 2: TEAM application icon in the AWS access portal of IAM Identity Center

Figure 2: TEAM application icon in the AWS access portal of IAM Identity Center

You configure TEAM as an IAM Identity Center Custom SAML 2.0 application, which means it appears as an icon in the AWS access portal. To access TEAM, choose TEAM IDC APP.

When you first access TEAM, it automatically retrieves your identity and group membership information from IAM Identity Center. It uses this information to determine what actions you can perform and which navigation links are visible.

Set up TEAM

Before users can request temporary elevated access in TEAM, a user with the admin persona needs to set up the application. This includes defining policies for eligibility and approval. A user takes on the admin persona if they are a member of a named IAM Identity Center group that is specified during TEAM deployment.

Manage eligibility policies

Eligibility policies determine who can request temporary elevated access with a given scope. You can define eligibility policies to ensure that people in specific teams can only request the access that you anticipate they’ll need as part of their job function.

  • To manage eligibility policies, in the left navigation pane, under Administration, select Eligibility policy. Figure 3 shows this view with three eligibility policies already defined.
     
Figure 3: Manage eligibility policies

Figure 3: Manage eligibility policies

An eligibility policy has four main parts:

  • Name and Type — An IAM Identity Center user or group
  • Accounts or OUs — One or more accounts, organizational units (OUs), or both, which belong to your organization
  • Permissions — One or more IAM Identity Center permission sets (representing IAM roles)
  • Approval required — whether requests for temporary elevated access require approval.

Each eligibility policy allows the specified IAM Identity Center user, or a member of the specified group, to log in to TEAM and request temporary elevated access using the specified permission sets in the specified accounts. When you choose a permission set, you can either use a predefined permission set provided by IAM Identity Center, or you can create your own permission set using custom permissions to provide least-privilege access for particular tasks.

Note: If you specify an OU in an eligibility or approval policy, TEAM includes the accounts directly under that OU, but not those under its child OUs.

Manage approval policies

Approval policies work in a similar way as eligibility policies, except that they authorize users to approve temporary elevated access requests, rather than create them. If a specific account is referenced in an eligibility policy that is configured to require approval, then you need to create a corresponding approval policy for the same account. If there is no corresponding approval policy—or if one exists but its groups have no members — then TEAM won’t allow users to create temporary elevated access requests for that account, because no one would be able to approve them.

  • To manage approval policies, in the left navigation pane, under Administration, select Approval policy. Figure 4 shows this view with three approval policies already defined.
     
Figure 4: Manage approval policies

Figure 4: Manage approval policies

An approval policy has two main parts:

  • Id, Name, and Type — Identifiers for an account or organizational unit (OU)
  • Approver groups — One or more IAM Identity Center groups

Each approval policy allows a member of a specified group to log in to TEAM and approve temporary elevated access requests for the specified account, or all accounts under the specified OU, regardless of permission set.

Note: If you specify the same group for both eligibility and approval in the same account, this means approvers can be in the same team as requesters for that account. This is a valid approach, sometimes known as peer approval. Nevertheless, TEAM does not allow an individual to approve their own request. If you prefer requesters and approvers to be in different teams, specify different groups for eligibility and approval.

TEAM walkthrough

Now that the admin persona has defined eligibility and approval policies, you are ready to use TEAM.

To begin this walkthrough, imagine that you are a requester, and you need to perform an operational task that requires temporary elevated access to your AWS target environment. For example, you might need to fix a broken deployment pipeline or make some changes as part of a deployment. As a requester, you must belong to a group specified in at least one eligibility policy that was defined by the admin persona.

Step 1: Access the AWS access portal in IAM Identity Center

To access the AWS access portal in IAM Identity Center, use the AWS access portal URL, as described in the Access TEAM section earlier in this post.

Step 2: Access the TEAM application

To access the TEAM application, select the TEAM IDC APP icon, as described in the Access TEAM section earlier.

Step 3: Request elevated access

The next step is to create a new elevated access request as follows:

  1. Under Requests, in the left navigation pane, choose Create request.
  2. In the Elevated access request section, do the following, as shown in Figure 5:
    1. Select the account where you need to perform your task.
    2. For Role, select a permission set that will give you sufficient permissions to perform the task.
    3. Enter a start date and time, duration, ticket ID (typically representing a change ticket or incident ticket related to your task), and business justification.
    4. Choose Submit.
Figure 5: Create a new request

Figure 5: Create a new request

When creating a request, consider the following:

  • In each request, you can specify exactly one account and one permission set.
  • You can only select an account and permission set combination for which you are eligible based on the eligibility policies defined by the admin persona.
  • As a requester, you should apply the principle of least privilege by selecting a permission set with the least privilege, and a time window with the least duration, that will allow you to complete your task safely.
  • TEAM captures a ticket identifier for audit purposes only; it does not try to validate it.
  • The duration specified in a request determines the time window for which elevated access is active, if your request is approved. During this time window, you can invoke sessions to access the AWS target environment. It doesn’t affect the duration of each session.
  • Session duration is configured independently for each permission set by an IAM Identity Center administrator, and determines the time period for which IAM temporary credentials are valid for sessions using that permission set.
  • Sessions invoked just before elevated access ends might remain valid beyond the end of the approved elevated access period. If this is a concern, consider minimizing the session duration configured in your permission sets, for example by setting them to 1 hour.

Step 4: Approve elevated access

After you submit your request, approvers are notified by email. Approvers are notified when there are new requests that fall within the scope of what they are authorized to approve, based on the approval policies defined earlier.

For this walkthrough, imagine that you are now the approver. You will perform the following steps to approve the request. As an approver, you must belong to a group specified in an approval policy that the admin persona configured.

  1. Access the TEAM application in exactly the same way as for the other personas.
  2. In the left navigation pane, under Approvals, choose Approve requests. TEAM displays requests awaiting your review, as shown in Figure 6.
    • To view the information provided by the requester, select a request and then choose View details.
    Figure 6: Requests awaiting review

    Figure 6: Requests awaiting review

  3. Select a pending request, and then do one of the following:
    • To approve the request, select Actions and then choose Approve.
    • To reject the request, select Actions and then choose Reject.

    Figure 7 shows what TEAM displays when you approve a request.

    Figure 7: Approve a request

    Figure 7: Approve a request

  4. After you approve or reject a request, the original requester is notified by email.

A requester can view the status of their requests in the TEAM application.

  • To see the status of your open requests in the TEAM application, in the left navigation pane, under Requests, select My requests. Figure 8 shows this view with one approved request.
     
Figure 8: Approved request

Figure 8: Approved request

Step 5: Automatic activation of elevated access

After a request is approved, the TEAM application waits until the start date and time specified in the request and then automatically activates elevated access. To activate access, a TEAM orchestration workflow creates a temporary account assignment, which links the requester’s user identity in IAM Identity Center with the permission set and account in their request. Then TEAM notifies the requester by email that their request is active.

A requester can now view their active request in the TEAM application.

  1. To see active requests, in the left navigation pane under Elevated access, choose Active access. Figure 9 shows this view with one active request.
     
    Figure 9: Active request

    Figure 9: Active request

  2. To see further details for an active request, select a request and then choose View details. Figure 10 shows an example of these details.
    Figure 10: Details of an active request

    Figure 10: Details of an active request

Step 6: Invoke elevated access

During the time period in which elevated access is active, the requester can invoke sessions to access the AWS target environment to complete their task. Each session has the scope (permission set and account) approved in their request. There are three ways to invoke access.

The first two methods involve accessing IAM Identity Center using the AWS access portal URL. Figure 11 shows the AWS access portal while a request is active.

Figure 11: Invoke access from the AWS access portal

Figure 11: Invoke access from the AWS access portal

From the AWS access portal, you can select an account and permission set that is currently active. You’ll also see the accounts and permission sets that have been statically assigned to you using IAM Identity Center, independently of TEAM. From here, you can do one of the following:

  • Choose Management console to federate to the AWS Management Console.
  • Choose Command line or programmatic access to copy and paste temporary credentials.

The third method is to initiate access directly from the command line using AWS CLI. To use this method, you first need to configure AWS CLI to integrate with IAM Identity Center. This method provides a smooth user experience for AWS CLI users, since you don’t need to copy and paste temporary credentials to your command line.

Regardless of how you invoke access, IAM Identity Center provides temporary credentials for the IAM role and account specified in your request, which allow you to assume that role in that account. The temporary credentials are valid for the duration specified in the role’s permission set, defined by an IAM Identity Center administrator.

When you invoke access, you can now complete the operational tasks that you need to perform in the AWS target environment. During the period in which your elevated access is active, you can invoke multiple sessions if necessary.

Step 7: Log session activity

When you access the AWS target environment, your activity is logged to AWS CloudTrail. Actions you perform in the AWS control plane are recorded as CloudTrail events.

Note: Each CloudTrail event contains the unique identifier of the user who performed the action, which gives you traceability back to the human individual who requested and invoked temporary elevated access.

Step 8: End elevated access

Elevated access ends when either the requested duration elapses or it is explicitly revoked in the TEAM application. The requester or an approver can revoke elevated access whenever they choose.

When elevated access ends, or is revoked, the TEAM orchestration workflow automatically deletes the temporary account assignment for this request. This unlinks the permission set, the account, and the user in IAM Identity Center. The requester is then notified by email that their elevated access has ended.

Step 9: View request details and session activity

You can view request details and session activity for current and historical requests from within the TEAM application. Each persona can see the following information:

  • Requesters can inspect elevated access requested by them.
  • Approvers can inspect elevated access that falls within the scope of what they are authorized to approve.
  • Auditors can inspect elevated access for all TEAM requests.

Session activity is recorded based on the log delivery times provided by AWS CloudTrail, and you can view session activity while elevated access is in progress or after it has ended. Figure 12 shows activity logs for a session displayed in the TEAM application.

Figure 12: Session activity logs

Figure 12: Session activity logs

Security and resiliency considerations

The TEAM application controls access to your AWS environment, and you must manage it with great care to prevent unauthorized access. This solution is built using AWS Amplify to ease the reference deployment. Before operationalizing this solution, consider how to align it with your existing development and security practices.

Further security and resiliency considerations including setting up emergency break-glass access are available in the TEAM documentation.

Additional resources

AWS Security Partners provide temporary elevated access solutions that integrate with IAM Identity Center, and AWS has validated the integration of these partner offerings and assessed their capabilities against a common set of customer requirements. For further information, see temporary elevated access in the IAM Identity Center User Guide.

The blog post Managing temporary elevated access to your AWS environment describes an alternative self-hosted solution for temporary elevated access which integrates directly with an external identity provider using OpenID Connect, and federates users directly into AWS Identity and Access Management (IAM) roles in your accounts. The TEAM solution described in this blog post, on the other hand, integrates with IAM Identity Center, which provides a way to centrally manage user access to accounts across your organization and optionally integrates with an external identity provider.

Conclusion

In this blog post, you learned that your first priority should be to use automation to avoid the need to give human users persistent access to your accounts. You also learned that in the rare cases in which people need access to your accounts, not all access is equal; there are times when you need a process to verify that access is needed, and to provide temporary elevated access.

We introduced you to a temporary elevated access management solution (TEAM) that you can download from AWS Samples and use alongside IAM Identity Center to give your users temporary elevated access. We showed you the TEAM workflow, described the TEAM architecture, and provided links where you can get started by downloading and deploying TEAM.

 
If you have feedback about this post, submit comments in the Comments section below. If you have questions about this post, start a new thread on AWS IAM Identity Center re:Post or contact AWS Support.

Want more AWS Security news? Follow us on Twitter.

Taiwo Awoyinfa

Taiwo Awoyinfa

Taiwo is a senior cloud architect with AWS Professional Services. At AWS, he helps global customers with cloud transformation, migration and security initiatives. Taiwo has expertise in cloud architecture, networking, security and application development. He is passionate about identifying and solving problems that delivers value.

Author

James Greenwood

James is a principal security solutions architect who helps AWS Financial Services customers meet their security and compliance objectives in the AWS cloud. James has a background in identity and access management, authentication, credential management, and data protection with more than 20 years experience in the financial services industry.

Varvara Semenova

Varvara Semenova

Varvara is a cloud infrastructure architect with AWS Professional Services. She specialises in building microservices-based serverless applications to address the needs of AWS enterprise customers. Varvara uses her background in DevOps to help the customer innovate faster when developing cost-effective, secure, and reliable solutions.

AWS Security Profile: Matthew Campagna, Senior Principal, Security Engineering, AWS Cryptography

Post Syndicated from Roger Park original https://aws.amazon.com/blogs/security/security-profile-matthew-campagna-aws-cryptography/

In the AWS Security Profile series, we interview Amazon Web Services (AWS) thought leaders who help keep our customers safe and secure. This interview features Matt Campagna, Senior Principal, Security Engineering, AWS Cryptography, and re:Inforce 2023 session speaker, who shares thoughts on data protection, cloud security, post-quantum cryptography, and more. Matthew was first profiled on the AWS Security Blog in 2019. This is part 1 of 3 in a series of interviews with our AWS Cryptography team.


What do you do in your current role and how long have you been at AWS?

I started at Amazon in 2013 as the first cryptographer at AWS. Today, my focus is on the cryptographic security of our customers’ data. I work across AWS to make sure that our cryptographic engineering meets our most sensitive customer needs. I lead our migration to quantum-resistant cryptography, and help make privacy-preserving cryptography techniques part of our security model.

How did you get started in the data protection and cryptography space? What about it piqued your interest?

I first learned about public-key cryptography (for example, RSA) during a math lesson about group theory. I found the mathematics intriguing and the idea of sending secret messages using only a public value astounding. My undergraduate and graduate education focused on group theory, and I started my career at the National Security Agency (NSA) designing and analyzing cryptologics. But what interests me most about cryptography is its ability to enable business by reducing risks. I look at cryptography as a financial instrument that affords new business cases, like e-commerce, digital currency, and secure collaboration. What enables Amazon to deliver for our customers is rooted in cryptography; our business exists because cryptography enables trust and confidentiality across the internet. I find this the most intriguing aspect of cryptography.

AWS has invested in the migration to post-quantum cryptography by contributing to post-quantum key agreement and post-quantum signature schemes to protect the confidentiality, integrity, and authenticity of customer data. What should customers do to prepare for post-quantum cryptography?

Our focus at AWS is to help ensure that customers can migrate to post-quantum cryptography as fast as prudently possible. This work started with inventorying our dependencies on algorithms that aren’t known to be quantum-resistant, like integer-factorization-based cryptography, and discrete-log-based cryptography, like ECC. Customers can rely on AWS to assist with transitioning to post-quantum cryptography for their cloud computing needs.

We recommend customers begin inventorying their dependencies on algorithms that aren’t quantum-resistant, and consider developing a migration plan, to understand if they can migrate directly to new post-quantum algorithms or if they should re-architect them. For the systems that are provided by a technology provider, customers should ask what their strategy is for post-quantum cryptography migration.

AWS offers post-quantum TLS endpoints in some security services. Can you tell us about these endpoints and how customers can use them?

Our open source TLS implementation, s2n-TLS, includes post-quantum hybrid key exchange (PQHKEX) in its mainline. It’s deployed everywhere that s2n is deployed. AWS Key Management Service, AWS Secrets Manager, and AWS Certificate Manager have enabled PQHKEX cipher suites in our commercial AWS Regions. Today customers can use the AWS SDK for Java 2.0 to enable PQHKEX on their connection to AWS, and on the services that also have it enabled, they will negotiate a post-quantum key exchange method. As we enable these cipher suites on additional services, customers will also be able to connect to these services using PQHKEX.

You are a frequent contributor to the Amazon Science Blog. What were some of your recent posts about?

In 2022, we published a post on preparing for post-quantum cryptography, which provides general information on the broader industry development and deployment of post-quantum cryptography. The post links to a number of additional resources to help customers understand post-quantum cryptography. The AWS Post-Quantum Cryptography page and the Science Blog are great places to start learning about post-quantum cryptography.

We also published a post highlighting the security of post-quantum hybrid key exchange. Amazon believes in evidencing the cryptographic security of the solutions that we vend. We are actively participating in cryptographic research to validate the security that we provide in our services and tools.

What’s been the most dramatic change you’ve seen in the data protection and post-quantum cryptography landscape since we talked to you in 2019?

Since 2019, there have been two significant advances in the development of post-quantum cryptography.

First, the National Institute of Standards and Technology (NIST) announced their selection of PQC algorithms for standardization. NIST expects to finish the standardization of a post-quantum key encapsulation mechanism (Kyber) and digital signature scheme (Dilithium) by 2024 as part of the Federal Information Processing Standard (FIPS). NIST will also work on standardization of two additional signature standards (FALCON and SPHINCS+), and continue to consider future standardization of the key encapsulation mechanisms BIKE, HQC, and Classical McEliece.

Second, the NSA announced their Commercial National Security Algorithm (CNSA) Suite 2.0, which includes their timelines for National Security Systems (NSS) to migrate to post-quantum algorithms. The NSA will begin preferring post-quantum solutions in 2025 and expect that systems will have completed migration by 2033. Although this timeline might seem far away, it’s an aggressive strategy. Experience shows that it can take 20 years to develop and deploy new high-assurance cryptographic algorithms. If technology providers are not already planning to migrate their systems and services, they will be challenged to meet this timeline.

What makes cryptography exciting to you?

Cryptography is a dynamic area of research. In addition to the business applications, I enjoy the mathematics of cryptography. The state-of-the-art is constantly progressing in terms of new capabilities that cryptography can enable, and the potential risks to existing cryptographic primitives. This plays out in the public sphere of cryptographic research across the globe. These advancements are made public and are accessible for companies like AWS to innovate on behalf of our customers, and protect our systems in advance of the development of new challenges to our existing crypto algorithms. This is happening now as we monitor the advancements of quantum computing against our ability to define and deploy new high-assurance quantum-resistant algorithms. For me, it doesn’t get more exciting than this.

Where do you see the cryptography and post-quantum cryptography space heading to in the future?

While NIST transitions from their selection process to standardization, the broader cryptographic community will be more focused on validating the cryptographic assurances of these proposed schemes for standardization. This is a critical part of the process. I’m optimistic that we will enter 2025 with new cryptographic standards to deploy.

There is a lot of additional cryptographic research and engineering ahead of us. Applying these new primitives to the cryptographic applications that use classical asymmetric schemes still needs to be done. Some of this work is happening in parallel, like in the IETF TLS working group, and in the ETSI Quantum-Safe Cryptography Technical Committee. The next five years should see the adoption of PQHKEX in protocols like TLS, SSH, and IKEv2 and certification of new FIPS hardware security modules (HSMs) for establishing new post-quantum, long-lived roots of trust for code-signing and entity authentication.

I expect that the selected primitives for standardization will also be used to develop novel uses in fields like secure multi-party communication, privacy preserving machine learning, and cryptographic computing.

With AWS re:Inforce 2023 around the corner, what will your session focus on? What do you hope attendees will take away from your session?

Session DAP302 – “Post-quantum cryptography migration strategy for cloud services” is about the challenge quantum computers pose to currently used public-key cryptographic algorithms and how the industry is responding. Post-quantum cryptography (PQC) offers a solution to this challenge, providing security to help protect against quantum computer cybersecurity events. We outline current efforts in PQC standardization and migration strategies. We want our customers to leave with a better understanding of the importance of PQC and the steps required to migrate to it in a cloud environment.

Is there something you wish customers would ask you about more often?

The question I am most interested in hearing from our customers is, “when will you have a solution to my problem?” If customers have a need for a novel cryptographic solution, I’m eager to try to solve that with them.

How about outside of work, any hobbies?

My main hobbies outside of work are biking and running. I wish I was as consistent attending to my hobbies as I am to my work desk. I am happier being able to run every day for a constant speed and distance as opposed to running faster or further tomorrow or next week. Last year I was fortunate enough to do the Cycle Oregon ride. I had registered for it twice before without being able to find the time to do it.

If you have feedback about this post, submit comments in the Comments section below. If you have questions about this post, contact AWS Support.

Want more AWS Security news? Follow us on Twitter.

Roger Park

Roger Park

Roger is a Senior Security Content Specialist at AWS Security focusing on data protection. He has worked in cybersecurity for almost ten years as a writer and content producer. In his spare time, he enjoys trying new cuisines, gardening, and collecting records.

Campagna bio photo

Matthew Campagna

Matthew is a Sr. Principal Engineer for Amazon Web Services’s Cryptography Group. He manages the design and review of cryptographic solutions across AWS. He is an affiliate of Institute for Quantum Computing at the University of Waterloo, a member of the ETSI Security Algorithms Group Experts (SAGE), and ETSI TC CYBER’s Quantum Safe Cryptography group. Previously, Matthew led the Certicom Research group at BlackBerry managing cryptographic research, standards, and IP, and participated in various standards organizations, including ANSI, ZigBee, SECG, ETSI’s SAGE, and the 3GPP-SA3 working group. He holds a Ph.D. in mathematics from Wesleyan University in group theory, and a bachelor’s degree in mathematics from Fordham University.

2023 ISO and CSA STAR certificates now available with 8 new services and 1 new Region

Post Syndicated from Atul Patil original https://aws.amazon.com/blogs/security/2023-iso-and-csa-star-certificates-now-available-with-8-new-services-and-1-new-region/

Amazon Web Services (AWS) successfully completed a special onboarding audit with no findings for ISO 9001, 27001, 27017, 27018, 27701, and 22301, and Cloud Security Alliance (CSA) STAR CCM v4.0. Ernst and Young Certify Point auditors conducted the audit and reissued the certificates on May 23, 2023. The objective of the audit was to assess the level of compliance with the requirements of the applicable international standards.

We added eight additional AWS services and one additional AWS Region to the scope of this special onboarding audit. The following are the eight additional services:

The additional Region is Asia Pacific (Melbourne).

For a full list of AWS services that are certified under ISO and CSA Star, see the AWS ISO and CSA STAR Certified page. Customers can also access the certifications in the console through AWS Artifact.

If you have feedback about this post, submit comments in the Comments section below.

Want more AWS Security how-to content, news, and feature announcements? Follow us on Twitter.

Atul Patil

Atul Patil

Atul is a Compliance Program Manager at AWS. He has 27 years of consulting experience in information technology and information security management. Atul holds a Master’s degree in electronics, and professional certifications such as CCSP, CISSP, CISM, ISO 27001 Lead Auditor, HITRUST CSF, Archer Certified Consultant, and AWS CCP certifications.

Mary Roberts

Mary Roberts

Mary is a Compliance Program Manager at AWS. She is a cybersecurity leader, and an adjunct professor with several years of experience leading and teaching cybersecurity, security governance, risk management, and compliance. Mary holds a Master’s degree in cybersecurity and information assurance, and industry certifications such as CISSP, CHFI, CEH, ISO 27001 Lead Auditor, and AWS Solutions Architect.

Nimesh Ravas

Nimesh Ravasa

Nimesh is a Compliance Program Manager at AWS. He leads multiple security and privacy initiatives within AWS. Nimesh has 15 years of experience in information security and holds CISSP, CISA, PMP, CSX, AWS Solutions Architect – Associate, and AWS Security Specialty certifications.

AWS Security Profile – Cryptography Edition: Valerie Lambert, Senior Software Development Engineer

Post Syndicated from Roger Park original https://aws.amazon.com/blogs/security/aws-security-profile-cryptography-edition-valerie-lambert-senior-software-development-engineer/

In the AWS Security Profile series, we interview Amazon Web Services (AWS) experts who help keep our customers safe and secure. This interview features Valerie Lambert, Senior Software Development Engineer, Crypto Tools, and upcoming AWS re:Inforce 2023 speaker, who shares thoughts on data protection, cloud security, cryptography tools, and more.


What do you do in your current role and how long have you been at AWS?
I’m a Senior Software Development Engineer on the AWS Crypto Tools team in AWS Cryptography. My team focuses on building open source, client-side encryption solutions, such as the AWS Encryption SDK. I’ve been working in this space for the past four years.

How did you get started in cryptography? What about it piqued your interest?
When I started on this team back in 2019, I knew very little about the specifics of cryptography. I only knew its importance for securing our customers’ data and that security was our top priority at AWS. As a developer, I’ve always taken security and data protection very seriously, so when I learned about this particular team from one of my colleagues, I was immediately interested and wanted to learn more. It also helped that I’m a very math-oriented person. I find this domain endlessly interesting, and love that I have the opportunity to work with some truly amazing cryptography experts.

Why do cryptography tools matter today?
Customers need their data to be secured, and builders need to have tools they can rely on to help provide that security. It’s well known that no one should cobble together their own encryption scheme. However, even if you use well-vetted, industry-standard cryptographic primitives, there are still many considerations when applying those primitives correctly. By using tools that are simple to use and hard to misuse, builders can be confident in protecting their customers’ most sensitive data, without cryptographic expertise required.

What’s been the most dramatic change you’ve seen in the data protection and cryptography space?
In the past few years, I’ve seen more and more formal verification used to help prove various properties about complex systems, as well as build confidence in the correctness of our libraries. In particular, the AWS Crypto Tools team is using Dafny, a formal verification-aware programming language, to implement the business logic for some of our libraries. Given the high bar for correctness of cryptographic libraries, having formal verification as an additional tool in the toolbox has been invaluable. I look forward to how these tools mature in the next couple years.

You are speaking in Anaheim June 13-14 at AWS re:Inforce 2023 — what will your session focus on?
Our team has put together a workshop (DAP373) that will focus on strategies to use client-side encryption with Amazon DynamoDB, specifically focusing on solutions for effectively searching on data that has been encrypted on the client side. I hope that attendees will see that, with a bit of forethought put into their data access patterns, they can still protect their data on the client side.

Where do you see the cryptography tools space heading in the future?
More and more customers have been coming to us with use cases that involve client-side encryption with different database technologies. Although my team currently vends an out-of-the-box solution for DynamoDB, customers working with other database technologies have to build their own solutions to help keep their data safe. There are many, many considerations that come with encrypting data on the client side for use in a database, and it’s very expensive for customers to design, build, and maintain these solutions. The AWS Crypto Tools team is actively investigating this space—both how we can expand the usability of client-side encrypted data in DynamoDB, and how to bring our tools to more database technologies.

Is there something you wish customers would ask you about more often?
Customers shouldn’t need to understand the cryptographic details that underpin the security properties that our tools provide to protect their end users’ data. However, I love when our customers are curious and ask questions and are themselves interested in the nitty-gritty details of our solutions.

How about outside of work, any hobbies?
A couple years ago, I picked up aerial circus arts as a hobby. I’m still not very good, but it’s a lot of fun to play around on silks and trapeze. And it’s great exercise!

 
If you have feedback about this post, submit comments in the Comments section below. If you have questions about this post, contact AWS Support.

Want more AWS Security news? Follow us on Twitter.

Roger Park

Roger Park

Roger is a Senior Security Content Specialist at AWS Security focusing on data protection. He has worked in cybersecurity for almost ten years as a writer and content producer. In his spare time, he enjoys trying new cuisines, gardening, and collecting records.

Valerie Lambert

Valerie Lambert

Valerie is a Senior Software Development Engineer at Amazon Web Services on the Crypto Tools team. She focuses on the security and usability of high-level cryptographic libraries. Outside of work, she enjoys drawing, hiking, and finding new indie video games to play.

Our commitment to shared cybersecurity goals

Post Syndicated from Mark Ryland original https://aws.amazon.com/blogs/security/our-commitment-to-shared-cybersecurity-goals/

The United States Government recently launched its National Cybersecurity Strategy. The Strategy outlines the administration’s ambitious vision for building a more resilient future, both in the United States and around the world, and it affirms the key role cloud computing plays in realizing this vision.

Amazon Web Services (AWS) is broadly committed to working with customers, partners, and governments such as the United States to improve cybersecurity. That longstanding commitment aligns with the goals of the National Cybersecurity Strategy. In this blog post, we will summarize the Strategy and explain how AWS will help to realize its vision.

The Strategy identifies two fundamental shifts in how the United States allocates cybersecurity roles, responsibilities, and resources. First, the Strategy calls for a shift in cybersecurity responsibility away from individuals and organizations with fewer resources, toward larger technology providers that are the most capable and best-positioned to be successful. At AWS, we recognize that our success and scale bring broad responsibility. We are committed to improving cybersecurity outcomes for our customers, our partners, and the world at large.

Second, the Strategy calls for realigning incentives to favor long-term investments in a resilient future. As part of our culture of ownership, we are long-term thinkers, and we don’t sacrifice long-term value for short-term results. For more than fifteen years, AWS has delivered security, identity, and compliance services for millions of active customers around the world. We recognize that we operate in a complicated global landscape and dynamic threat environment that necessitates a dynamic approach to security. Innovation and long-term investments have been and will continue to be at the core of our approach, and we continue to innovate to build and improve on our security and the services we offer customers.

AWS is working to enhance cybersecurity outcomes in ways that align with each of the Strategy’s five pillars:

  1. Defend Critical Infrastructure — Customers, partners, and governments need confidence that they are migrating to and building on a secure cloud foundation. AWS is architected to have the most flexible and secure cloud infrastructure available today, and our customers benefit from the data centers, networks, custom hardware, and secure software layers that we have built to satisfy the requirements of the most security-sensitive organizations. Our cloud infrastructure is secure by design and secure by default, and our infrastructure and services meet the high bar that the United States Government and other customers set for security.
  2. Disrupt and Dismantle Threat Actors — At AWS, our paramount focus on security leads us to implement important measures to prevent abuse of our services and products. Some of the measures we undertake to deter, detect, mitigate, and prevent abuse of AWS products include examining new registrations for potential fraud or identity falsification, employing service-level containment strategies when we detect unusual behavior, and helping protect critical systems and sensitive data against ransomware. Amazon is also working with government to address these threats, including by serving as one of the first members of the Joint Cyber Defense Collaborative (JCDC). Amazon is also co-leading a study with the President’s National Security Telecommunications Advisory Committee on addressing the abuse of domestic infrastructure by foreign malicious actors.
  3. Shape Market Forces to Drive Security and Resilience — At AWS, security is our top priority. We continuously innovate based on customer feedback, which helps customer organizations to accelerate their pace of innovation while integrating top-tier security architecture into the core of their business and operations. For example, AWS co-founded the Open Cybersecurity Schema Framework (OCSF) project, which facilitates interoperability and data normalization between security products. We are contributing to the quality and safety of open-source software both by direct contributions to open-source projects and also by an initial commitment of $10 million in a variety of open-source security improvement projects in and through the Open Source Security Foundation (OpenSSF).
  4. Invest in a Resilient Future — Cybersecurity skills training, workforce development, and education on next-generation technologies are essential to addressing cybersecurity challenges. That’s why we are making significant investments to help make it simpler for people to gain the skills they need to grow their careers, including in cybersecurity. Amazon is committing more than $1.2 billion to provide no-cost education and skills training opportunities to more than 300,000 of our own employees in the United States, to help them secure new, high-growth jobs. Amazon is also investing hundreds of millions of dollars to provide no-cost cloud computing skills training to 29 million people around the world. We will continue to partner with the Cybersecurity and Infrastructure Security Agency (CISA) and others in government to develop the cybersecurity workforce.
  5. Forge International Partnerships to Pursue Shared Goals — AWS is working with governments around the world to provide innovative solutions that advance shared goals such as bolstering cyberdefenses and combating security risks. For example, we are supporting international forums such as the Organization of American States to build security capacity across the hemisphere. We encourage the administration to look toward internationally recognized, risk-based cybersecurity frameworks and standards to strengthen consistency and continuity of security among interconnected sectors and throughout global supply chains. Increased adoption of these standards and frameworks, both domestically and internationally, will mitigate cyber risk while facilitating economic growth.

AWS shares the Biden administration’s cybersecurity goals and is committed to partnering with regulators and customers to achieve them. Collaboration between the public sector and industry has been central to US cybersecurity efforts, fueled by the recognition that the owners and operators of technology must play a key role. As the United States Government moves forward with implementation of the National Cybersecurity Strategy, we look forward to redoubling our efforts and welcome continued engagement with all stakeholders—including the United States Government, our international partners, and industry collaborators. Together, we can address the most difficult cybersecurity challenges, enhance security outcomes, and build toward a more secure and resilient future.

 
If you have feedback about this post, submit comments in the Comments section below. If you have questions about this post, contact AWS Support.

Want more AWS Security news? Follow us on Twitter.

Mark Ryland

Mark Ryland

Mark is the director of the Office of the CISO for AWS. He has over 30 years of experience in the technology industry, and has served in leadership roles in cybersecurity, software engineering, distributed systems, technology standardization, and public policy. Previously, he served as the Director of Solution Architecture and Professional Services for the AWS World Public Sector team.

Updated AWS Ramp-Up Guide available for security, identity, and compliance

Post Syndicated from Anna McAbee original https://aws.amazon.com/blogs/security/updated-aws-ramp-up-guide-available-for-security-identity-and-compliance/

To support our customers in securing their Amazon Web Services (AWS) environment, AWS offers digital training, whitepapers, blog posts, videos, workshops, and documentation to learn about security in the cloud.

The AWS Ramp-Up Guide: Security is designed to help you quickly learn what is most important to you when it comes to security, identity, and compliance. The Ramp-Up Guide helps you get started with learning cloud foundations and then provides you with options for building skills in various security domains.

Recently, we have updated the AWS Ramp-Up Guide: Security. In this post, we will highlight some of the changes and discuss how to use the new guide.

Update highlights

Based on customer feedback, new service and feature releases, and our experience helping customers, we’ve updated the majority of the guide with new content. Some highlights of the new version include:

  • Focus on AWS security digital trainings — The new Ramp-Up Guide for security focuses on digital trainings provided by AWS Skill Builder. AWS Skill Builder is a learning center for AWS customers and partners to build cloud skills through digital trainings, self-paced labs, and other course types. AWS Skill Builder has a variety of AWS security content to help customers understand concepts and gain hands-on experience with AWS security.
  • Security focus areas — Because there are different roles and focuses within cybersecurity, we created sections for different focus areas of AWS security, including threat detection and incident response (TD/IR), compliance, data protection, and more. A Security Operations Center (SOC) analyst, for example, can choose to focus on TD/IR training, which is most relevant for that role.
  • Extensive additional resources — For each focus area, we added new resources, including whitepapers, blogs, re:Invent videos, and workshops. Customers can use these additional resources to supplement the AWS Skill Builder courses and labs.

How to use the new guide

The AWS Ramp-Up Guide: Security is designed to take you all the way from cloud foundations to the AWS Certified Security – Specialty certification. The guide takes the latest in digital training available from AWS Skill Builder and augments that with the latest resources aligned to foundational concepts and specialized areas within cloud security. Although you are free to use the learnings in any order, if you are new to the cloud, we recommend the following steps:

  1. Sign up for your free AWS Skill Builder account, which provides you with more than 600 digital courses.

    Note: You can optionally buy an AWS Skill Builder subscription if you’d like to complete the self-paced labs. See Pricing options for AWS Skill Builder for more details.

  2. Review the “Learn the fundamentals of the AWS Cloud” section of the Ramp-Up Guide, choose a course name under Learning Resource, and search for that course in Skill Builder. If you are unsure of which course to start with, we recommend that you begin with “AWS Cloud Practitioner Essentials.”
  3. After you’ve completed the “Learn the fundamentals of the AWS Cloud” section, proceed to the “AWS Cloud Security Fundamentals” section begin your security training.
  4. After you complete the Security Fundamentals section, review the specialized security focus areas in the Ramp-Up Guide, choose a focus area, and complete the training items within that focus area.
  5. After you’ve completed the training specific to your focus area, explore other focus areas beyond the scope of your immediate role. Security often requires knowledge across domains and focus areas, so we encourage you to explore the security focus areas beyond the immediate scope of your role.
  6. Review the “Putting it all together” section to prepare for the AWS Certified Security – Specialization certification.
  7. Go build, securely!

More information

For more information and to get started, see the updated AWS Ramp-Up Guide: Security.

We greatly value feedback and contributions from our community. To share your thoughts and insights about the AWS Ramp-Up Guide: Security and your experience using it, and what you want to see in future versions, please contact [email protected].

 
If you have feedback about this post, submit comments in the Comments section below. If you have questions about this post, contact AWS Support.

Want more AWS Security news? Follow us on Twitter.

Author

Anna McAbee

Anna is a Security Specialist Solutions Architect focused on threat detection and incident response at AWS. Before AWS, she worked as an AWS customer in financial services on both the offensive and defensive sides of security. Outside of work, Anna enjoys cheering on the Florida Gators football team, wine tasting, and traveling the world.

Conor Colgan

Conor Colgan

Conor is a Sr. Solutions Architect on the AWS Healthcare and Life Sciences (HCLS) Startup team. He focuses on helping organizations of all sizes adopt AWS to help meet their business objectives and accelerate their velocity. Prior to AWS, Conor built automated compliance solutions for healthcare customers in the cloud ranging from startups to enterprise, helping them build and demonstrate a culture of compliance.

New eBook: 5 Keys to Secure Enterprise Messaging

Post Syndicated from Anne Grahn original https://aws.amazon.com/blogs/security/new-ebook-5-keys-to-secure-enterprise-messaging/

AWS is excited to announce a new eBook, 5 Keys to Secure Enterprise Messaging. The new eBook includes best practices for addressing the security and compliance risks associated with messaging apps.

An estimated 3.09 billion mobile phone users access messaging apps to communicate, and this figure is projected to grow to 3.51 billion users in 2025.

Legal and regulatory requirements for data protection, privacy, and data retention have made protecting business communications a priority for organizations across the globe. Although consumer messaging apps are convenient and support real-time communication with colleagues, customers, and partners, they often lack the robust security and administrative controls many businesses require.

The eBook details five keys to secure enterprise messaging that balance people, process, and technology.

We encourage you to read the eBook, and learn about:

  • Establishing messaging policies and guidelines that are effective for your workforce
  • Training employees to use messaging apps in a way that doesn’t increase organizational risk
  • Building a security-first culture
  • Using true end-to-end encryption (E2EE) to secure communications
  • Retaining data to help meet requirements, without exposing it to outside parties

Download 5 Keys to Secure Enterprise Messaging.

 
If you have feedback about this post, submit comments in the Comments section below.

Want more AWS Security news? Follow us on Twitter.

Anne Grahn

Anne Grahn

Anne is a Senior Worldwide Security GTM Specialist at AWS based in Chicago. She has more than a decade of experience in the security industry, and focuses on effectively communicating cybersecurity risk. She maintains a Certified Information Systems Security Professional (CISSP) certification.

Announcing the AWS Blueprint for Ransomware Defense

Post Syndicated from Jeremy Ware original https://aws.amazon.com/blogs/security/announcing-the-aws-blueprint-for-ransomware-defense/

In this post, Amazon Web Services (AWS) introduces the AWS Blueprint for Ransomware Defense, a new resource that both enterprise and public sector organizations can use to implement preventative measures to protect data from ransomware events. The AWS Blueprint for Ransomware Defense provides a mapping of AWS services and features as they align to aspects of the Center for Internet Security (CIS) Critical Security Controls (CIS Controls). This information can be used to help customers assess and protect their data from ransomware events.

The following is background on ransomware, CIS, and the initiatives that led to the publication of this new blueprint.

The Ransomware Task Force

In April of 2021, the U.S. government launched the Ransomware Task Force (RTF), which has the mission of uniting key stakeholders across industry, government, and civil society to create new solutions, break down silos, and find effective new methods of countering the ransomware threat. The RTF has since launched several progress reports with specific recommendations, including the development of the RTF Blueprint for Ransomware Defense, which provides a framework with practical steps to mitigate, respond to, and recover from ransomware. AWS is a member of the RTF, and we have taken action to create our own AWS Blueprint for Ransomware Defense that maps actionable and foundational security controls to AWS services and features that customers can use to implement those controls. The AWS Blueprint for Ransomware Defense is based on the CIS Controls framework.

Center for Internet Security

The Center for Internet Security (CIS) is a community-driven nonprofit, globally recognized for establishing best practices for securing IT systems and data. To help establish foundational defense mechanisms, a subset of the CIS Critical Security Controls (CIS Controls) have been identified as important first steps in the implementation of a robust program to prevent, respond to, and recover from ransomware events. This list of controls was established to provide safeguards against the most impactful and well-known internet security issues. The controls have been further prioritized into three implementation groups (IGs), to help guide their implementation. IG1, considered “essential cyber hygiene,” provides foundational safeguards. IG2 builds on IG1 by including the controls in IG1 plus a number of additional considerations. Finally, IG3 includes the controls in IG1 and IG2, with an additional layer of controls that protect against more sophisticated security issues.

CIS recommends that organizations use the CIS IG1 controls as basic preventative steps against ransomware events. We’ve produced a mapping of AWS services that can help you implement aspects of these controls in your AWS environment. Ransomware is a complex event, and the best course of action to mitigate risk is to apply a thoughtful strategy of defense in depth. The mitigations and controls outlined in this mapping document are general security best practices, but are a non-exhaustive list.

Because data is often vital to the operation of mission-critical services, ransomware can severely disrupt business processes and applications that depend on this data. For this reason, many organizations are looking for effective security controls that will improve their security posture against these types of events. We hope you find the information in the AWS Blueprint for Ransomware Defense helpful and incorporate it as a tool to provide additional layers of security to help keep your data safe.

Let us know if you have any feedback through the AWS Security Contact Us page. Please reach out if there is anything we can do to add to the usefulness of the blueprint or if you have any additional questions on security and compliance. You can find more information from the IST (Institute for Security and Technology) describing ransomware and how to protect yourself on the IST website.

If you have feedback about this post, submit comments in the Comments section below. If you have questions about this post, contact AWS Support.

Want more AWS Security news? Follow us on Twitter.

Jeremy Wave

Jeremy Ware

Jeremy is a Security Specialist Solutions Architect focused on Identity and Access Management. Jeremy and his team enable AWS customers to implement sophisticated, scalable, and secure IAM architecture and Authentication workflows to solve business challenges. With a background in Security Engineering, Jeremy has spent many years working to raise the Security Maturity gap at numerous global enterprises. Outside of work, Jeremy loves to explore the mountainous outdoors, and participate in sports such as snowboarding, wakeboarding, and dirt bike riding.

Author

Megan O’Neil

Megan is a Principal Security Specialist Solutions Architect focused on Threat Detection and Incident Response. Megan and her team enable AWS customers to implement sophisticated, scalable, and secure solutions that solve their business challenges. Outside of work, Megan loves to explore Colorado, including mountain biking, skiing, and hiking.

Luis Pastor

Luis Pastor

Luis is a Senior Security Solutions Architect focused on infrastructure security at AWS. Before AWS, he worked with both large and boutique system integrators, helping clients in an array of industries to improve their security posture and reach and maintain compliance in hybrid environments. Luis enjoys keeping active, cooking, and eating spicy food—especially Mexican cuisine.

Updated whitepaper available: Architecting for PCI DSS Segmentation and Scoping on AWS

Post Syndicated from Ted Tanner original https://aws.amazon.com/blogs/security/updated-whitepaper-available-architecting-for-pci-dss-segmentation-and-scoping-on-aws/

Amazon Web Services (AWS) has re-published the whitepaper Architecting for PCI DSS Scoping and Segmentation on AWS to provide guidance on how to properly define the scope of your Payment Card Industry (PCI) Data Security Standard (DSS) workloads that are running in the AWS Cloud. The whitepaper has been refreshed to include updated AWS best practices and technologies, and updates that are applicable to the new PCI DSS v4.0 requirements. The whitepaper looks at how to define segmentation boundaries between your in-scope and out-of-scope resources by using cloud-based AWS services.

The whitepaper is intended for engineers and solution builders, but it also serves as a guide for Qualified Security Assessors (QSAs) and internal security assessors (ISAs) to better understand the different segmentation controls that are available within AWS products and services, along with associated scoping considerations.

Compared to on-premises environments, software-defined networking on AWS transforms the scoping process for applications by providing additional segmentation controls beyond network segmentation. Thoughtful design of your applications and selection of security-impacting services for implementing your required controls can reduce the number of systems and services in your cardholder data environment (CDE).

The whitepaper is based on the PCI Council’s Information Supplement: Guidance for PCI DSS Scoping and Network Segmentation.

 
If you have questions or want to learn more, contact your account representative, or leave a comment below.

Want more AWS Security how-to content, news, and feature announcements? Follow us on Twitter.

Ted Tanner

Ted Tanner

Ted is a Principal Assurance Consultant and PCI DSS Qualified Security Assessor with AWS Security Assurance Services, and has more than 25 years of IT and security experience. He uses this experience to provide AWS customers with guidance on compliance and security, and on building and optimizing their cloud compliance programs. He is co-author of the Payment Card Industry Data Security Standard (PCI DSS) v3.2.1 on AWS Compliance Guide and the soon-to-be-released v4.0 edition.

Author

Avik Mukherjee

Avik is a Senior Security Consultant with more than 15 years of experience in IT governance, security, risk, and compliance. He has background of being a QSA for PCI DSS and point-to-point encryption (P2PE) and has deep knowledge of security advisory and assessment work in various industries, including retail, financial, and technology.

Joseph Okonkwo

Joseph Okonkwo

Joseph is a Senior Security Architect and PCI DSS Professional (PCIP), and has more than a decade of experience in application security, security architecture, and as an Internal Security Assessor (ISA). He works closely with AWS clients to enable digital transformation and migration in the Professional Services team. Joseph earned an MBA from Imperial College, Business School, and a M.S. in Data Telecommunications & Networks from The University of Salford in Manchester.

AWS Security Profile: Ritesh Desai, GM, AWS Secrets Manager

Post Syndicated from Roger Park original https://aws.amazon.com/blogs/security/aws-security-profile-ritesh-desai-gm-aws-secrets-manager/

AWS Security Profile: Ritesh Desai, GM, AWS Secrets Manager

In the AWS Security Profile series, we interview Amazon Web Services (AWS) thought leaders who help keep our customers safe and secure. This interview features Ritesh Desai, General Manager, AWS Secrets Manager, and re:Inforce 2023 session speaker, who shares thoughts on data protection, cloud security, secrets management, and more.


What do you do in your current role and how long have you been at AWS?

I’ve been in the tech industry for more than 20 years and joined AWS about three years ago. Currently, I lead our Secrets Management organization, which includes the AWS Secrets Manager service.

How did you get started in the data protection and secrets management space? What about it piqued your interest?

I’ve always been excited at the prospect of solving complex customer problems with simple technical solutions. Working across multiple small to large organizations in the past, I’ve seen similar challenges with secret sprawl and lack of auditing and monitoring tools. Centralized secrets management is a challenge for customers. As organizations evolve from start-up to enterprise level, they can end up with multiple solutions across organizational units to manage their secrets.

Being part of the Secrets Manager team gives me the opportunity to learn about our customers’ unique needs and help them protect access to their most sensitive digital assets in the cloud, at scale.

Why does secrets management matter to customers today?

Customers use secrets like database passwords and API keys to protect their most sensitive data, so it’s extremely important for them to invest in a centralized secrets management solution. Through secrets management, customers can securely store, retrieve, rotate, and audit secrets.

What’s been the most dramatic change you’ve seen in the data protection and secrets management space?

Secrets management is becoming increasingly important for customers, but customers now have to deal with complex environments that include single cloud providers like AWS, multi-cloud setups, hybrid (cloud and on-premises) environments, and only on-premises instances.

Customers tell us that they want centralized secrets management solutions that meet their expectations across these environments. They have two distinct goals here. First, they want a central secrets management tool or service to manage their secrets. Second, they want their secrets to be available closer to the applications where they’re run. IAM Roles Anywhere provides a secure way for on-premises servers to obtain temporary AWS credentials and removes the need to create and manage long-term AWS credentials. Now, customers can use IAM Roles Anywhere to access their Secrets Manager secrets from workloads running outside of AWS. Secrets Manager also launched a program in which customers can manage secrets in third-party secrets management solutions to replicate secrets to Secrets Manager for their AWS workloads. We’re continuing to invest in these areas to make it simpler for customers to manage their secrets in their tools of choice, while providing access to their secrets closer to where their applications are run.

With AWS re:Inforce 2023 around the corner, what will your session focus on? What do you hope attendees will take away from your session?

I’m speaking in a session called “Using AWS data protection services for innovation and automation” (DAP305) alongside one of our senior security specialist solutions architects on the topic of secrets management at scale. In the session, we’ll walk through a sample customer use case that highlights how to use data protection services like AWS Key Management Service (AWS KMS), AWS Private Certificate Authority (AWS Private CA), and Secrets Manager to help build securely and help meet organizational security and compliance expectations. Attendees will walk away with a clear picture of the services that AWS offers to protect sensitive data, and how they can use these services together to protect secrets at scale.

I also encourage folks to check out the other sessions in the data protection track.

Where do you see the secrets management space heading in the future?

Traditionally, secrets management was addressed after development, rather than being part of the design and development process. This placement created an inherent clash between development teams who wanted to put the application in the hands of end users, and the security admins who wanted to verify that the application met security expectations. This resulted in longer timelines to get to market. Involving security in the mix only after development is complete, is simply too late. Security should enable business, not restrict it.

Organizations are slowly adopting the culture that “Security is everyone’s responsibility.” I expect more and more organizations will take the step to “shift-left” and embed security early in the development lifecycle. In the near future, I expect to see organizations prioritize the automation of security capabilities in the development process to help detect, remediate, and eliminate potential risks by taking security out of human hands.

Is there something you wish customers would ask you about more often?

I’m always happy to talk to customers to help them think through how to incorporate secure-by-design in their planning process. There are many situations where decisions could end up being expensive to reverse. AWS has a lot of experience working across a multitude of use cases for customers as they adopt secrets management solutions. I’d love to talk more to customers early in their cloud adoption journey, about the best practices that they should adopt and potential pitfalls to avoid, when they make decisions about secrets management and data protection.

How about outside of work—any hobbies?

I’m an avid outdoors person, and living in Seattle has given me and my family the opportunity to trek and hike through the beautiful landscapes of the Pacific Northwest. I’ve also been a consistent Tough Mudder-er for the last 5 years. The other thing that I spend my time on is working as an amateur actor for a friend’s nonprofit theater production, helping in any way I can.

 
If you have feedback about this post, submit comments in the Comments section below. If you have questions about this post, contact AWS Support.

Want more AWS Security news? Follow us on Twitter.

Roger Park

Roger Park

Roger is a Senior Security Content Specialist at AWS Security focusing on data protection. He has worked in cybersecurity for almost ten years as a writer and content producer. In his spare time, he enjoys trying new cuisines, gardening, and collecting records.

Ritesh Desai

Ritesh Desai

Ritesh is GM of AWS Secrets Manager. His background includes driving product vision and technology innovation for multiple organizations. He focuses on leading security services that provide innovative solutions to enable customers to securely move their workloads to AWS.

Get custom data into Amazon Security Lake through ingesting Azure activity logs

Post Syndicated from Adam Plotzker original https://aws.amazon.com/blogs/security/get-custom-data-into-amazon-security-lake-through-ingesting-azure-activity-logs/

Amazon Security Lake automatically centralizes security data from both cloud and on-premises sources into a purpose-built data lake stored on a particular AWS delegated administrator account for Amazon Security Lake.

In this blog post, I will show you how to configure your Amazon Security Lake solution with cloud activity data from Microsoft Azure Monitor activity log, which you can query alongside your existing AWS CloudTrail data. I will walk you through the required steps — from configuring the required AWS Identity and Access Management (IAM) permissions, AWS Glue jobs, and Amazon Kinesis Data Streams required on the AWS side to forwarding that data from within Azure.

When you turn on Amazon Security Lake, it begins to collect actionable security data from various AWS sources. However, many enterprises today have complex environments that include a mix of different cloud resources in addition to on-premises data centers.

Although the AWS data sources in Amazon Security Lake encompass a large amount of the necessary security data needed for analysis, you may miss the full picture if your infrastructure operates across multiple cloud venders (for example, AWS, Azure, and Google Cloud Platform) and on-premises at the same time. By querying data from across your entire infrastructure, you can increase the number of indicators of compromise (IOC) that you identify, and thus increase the likelihood that those indicators will lead to actionable outputs.

Solution architecture

Figure 1 shows how to configure data to travel from an Azure event hub to Amazon Security Lake.

Figure 1: Solution architecture

Figure 1: Solution architecture

As shown in Figure 1, the solution involves the following steps:

  1. An AWS user instantiates the required AWS services and features that enable the process to function, including AWS Identity and Access Management (IAM) permissions, Kinesis data streams, AWS Glue jobs, and Amazon Simple Storage Service (Amazon S3) buckets, either manually or through an AWS CloudFormation template, such as the one we will use in this post.
  2. In response to the custom source created from the CloudFormation template, a Security Lake table is generated in AWS Glue.
  3. From this point on, Azure activity logs in their native format are stored within an Azure cloud event hub within an Azure account. An Azure function is deployed to respond to new events within the Azure event hub and forward these logs over the internet to the Kinesis data stream that was created in the preceding step.
  4. The Kinesis data stream forwards the data to an AWS Glue streaming job fronted by the Kinesis data.
  5. The AWS Glue job then performs the extract, transfer, and load (ETL) mapping to the appropriate Open Cybersecurity Schema Framework (OCSF) (specified for API Activity events at OCSF API Activity Mappings).
  6. The Azure events are partitioned with respect to the required partitioning requirements in Amazon Security Lake tables and stored in S3.
  7. The user can query these tables by using Amazon Athena alongside the rest of their data inside Amazon Security Lake.

Prerequisites

Before you implement the solution, complete the following prerequisites:

  • Verify that you have enabled Amazon Security Lake in the AWS Regions that correspond to the Azure Activity logs that you will forward. For more information, see What is Amazon Security Lake?
  • Preconfigure the custom source logging for the source AZURE_ACTIVITY in your Region. To configure this custom source in Amazon Security Lake, open the Amazon Security Lake console, navigate to Create custom data source, and do the following, as shown in Figure 2:
    • For Data source name, enter AZURE_ACTIVITY.
    • For Event class, select API_ACTIVITY.
    • For Account Id, enter the ID of the account which is authorized to write data to your data lake.
    • For External Id, enter “AZURE_ACTIVITY-<YYYYMMDD>
    Figure 2:  Configure custom data source

    Figure 2: Configure custom data source

For more information on how to configure custom sources for Amazon Security Lake, see Collecting data from custom sources.

Step 1: Configure AWS services for Azure activity logging

The first step is to configure the AWS services for Azure activity logging.

  1. To configure Azure activity logging in Amazon Security Lake, first prepare the assets required in the target AWS account. You can automate this process by using the provided CloudFormation template — Security Lake CloudFormation — which will do the heavy lifting for this portion of the setup.

    Note: I have predefined these scripts to create the AWS assets required to ingest Azure activity logs, but you can generalize this process for other external log sources, as well.

    The CloudFormation template has the following components:

    • securitylakeGlueStreamingRole — includes the following managed policies:
      • AWSLambdaKinesisExecutionRole
      • AWSGlueServiceRole
    • securitylakeGlueStreamingPolicy — includes the following attributes:
      • “s3:GetObject”
      • “s3:PutObject”
    • securitylakeAzureActivityStream — This Kinesis data stream is the endpoint that acts as the connection point between Azure and AWS and the frontend of the AWS Glue stream that feeds Azure activity logs to Amazon Security Lake.
    • securitylakeAzureActivityJob — This is an AWS Glue streaming job that is used to take in feeds from the Kinesis data stream and map the Azure activity logs within that stream to OCSF.
    • securitylake-glue-assets S3 bucket — This is the S3 bucket that is used to store the ETL scripts used in the AWS Glue job to map Azure activity logs.

    Running the CloudFormation template will instantiate the aforementioned assets in your AWS delegated administrator account for Amazon Security Lake.

  2. The CloudFormation template creates a new S3 bucket with the following syntax: securityLake-glue-assets-<ACCOUNT-ID><REGION>. After the CloudFormation run is complete, navigate to this bucket within the S3 console.
  3. Within the S3 bucket, create a scripts and temporary folder in the S3 bucket, as shown in Figure 4.
    Figure 4: Glue assets bucket

    Figure 4: Glue assets bucket

  4. Update the Azure AWS Glue Pyspark script by replacing the following values in the file. You will attach this script to your AWS Glue job and use it to generate the AWS assets required for the implementation.
    • Replace <AWS_REGION_NAME> with the Region that you are operating in — for example, us-east-2.
    • Replace <AWS_ACCOUNT_ID> with the account ID of your delegated administrator account for Amazon Security Lake — for example, 111122223333.
    • Replace <SECURITYLAKE-AZURE-STREAM-ARN> with the Kinesis stream name created through the CloudFormation template. To find the stream name, open the Kinesis console, navigate to the Kinesis stream with the name securityLakeAzureActivityStream<STREAM-UID>, and copy the Amazon Resource Name (ARN), as shown in the following figure.

      Figure 5: Kinesis stream ARN

      Figure 5: Kinesis stream ARN

    • Replace <SECURITYLAKE-BUCKET-NAME> with the name of your data lake S3 bucket root name — for example, s3://aws-security-data-lake-DOC-EXAMPLE-BUCKET.

    After you replace these values, navigate within the scripts folder and upload the AWS Glue PySpark Python script named azure-activity-pyspark.py, as shown in Figure 6.

    Figure 6: AWS Glue script

    Figure 6: AWS Glue script

  5. Within your AWS Glue job, choose Job details and configure the job as follows:
    • For Type, select Spark Streaming.
    • For Language, select Python 3.
    • For Script path, select the S3 path that you created in the preceding step.
    • For Temporary path, select the S3 path that you created in the preceding step.
  6. Save the changes, and run the AWS Glue job by selecting Save and then Run.
  7. Choose the Runs tab, and make sure that the Run status of the job is Running.
    igure 7: AWS Glue job status

    Figure 7: AWS Glue job status

At this point, you have finished the configurations from AWS.

Step 2: Configure Azure services for Azure activity log forwarding

You will complete the next steps in the Azure Cloud console. You need to configure Azure to export activity logs to an Azure cloud event hub within your desired Azure account or organization. Additionally, you need to create an Azure function to respond to new events within the Azure event hub and forward those logs over the internet to the Kinesis data stream that the CloudFormation template created in the initial steps of this post.

For information about how to set up and configure Azure Functions to respond to event hubs, see Azure Event Hubs Trigger for Azure Functions in the Azure documentation.

Configure the following Python script — Azure Event Hub Function — in an Azure function app. This function is designed to respond to event hub events, create a connection to AWS, and forward those events to Kinesis as deserialized JSON blobs.

In the script, replace the following variables with your own information:

  • For <SECURITYLAKE-AZURE-STREAM-ARN>, enter the Kinesis data stream ARN.
  • For <SECURITYLAKE-AZURE-STREAM-NAME>, enter the Kinesis data stream name.
  • For <SECURITYLAKE-AZURE-STREAM-KEYID>, enter the AWS Key Management Service (AWS KMS) key ID created through the CloudFormation template.

The <SECURITYLAKE-AZURE-STREAM-ARN> and securityLakeAzureActivityStream<STREAM-UID> are the same variables that you obtained earlier in this post (see Figure 5).

You can find the AWS KMS key ID within the AWS KMS managed key policy associated with securityLakeAzureActivityStream. For example, in the key policy shown in Figure 8, the <SECURITYLAKE-AZURE-STREAM-KEYID> is shown in line 3.

Figure 8: Kinesis data stream inputs

Figure 8: Kinesis data stream inputs

Important: When you are working with KMS keys retrieved from the AWS console or AWS API keys within Azure, you should be extremely mindful of how you approach key management. Improper or poor handling of keys could result in the interception of data from the Kinesis stream or Azure function.

It’s a best security practice to use a trusted key management architecture that uses sufficient encryption and security protocols when working with keys that safeguard sensitive security information. Within Azure, consider using services such as the AWS Azure AD integration for seamless and ephemeral credential usage inside of the azure function. See – Azure AD Integration – for more information on how the Azure AD Integration works to safeguard and manage stored security keys and help make sure that no keys are accessible to unauthorized parties or stored as unencrypted text outside the AWS console.

Step 3: Validate the workflow and query Athena

After you complete the preceding steps, your logs should be flowing. To make sure that the process is working correctly, complete the following steps.

  1. In the Kinesis Data Streams console, verify that the logs are flowing to your data stream. Open the Kinesis stream that you created previously, choose the Data viewer tab, and then choose Get records, as shown in Figure 9.
    Figure 9: Kinesis data stream inputs

    Figure 9: Kinesis data stream inputs

  2. Verify that the logs are partitioned and stored within the correct Security Lake bucket associated with the configured Region. The log partitions within the Security Lake bucket should have the following syntax — “region=<region>/account_id=<account_id>/eventDay=<YYYYMMDD>/”, and they should be stored with the expected parquet compression.
     Figure 10: S3 bucket with object

    Figure 10: S3 bucket with object

  3. Assuming that CloudTrail logs exist within your Amazon Security Lake instance as well, you can now create a query in Athena that pulls data from the newly created Azure activity table and examine it alongside your existing CloudTrail logs by running queries such as the following:
    SELECT 
        api.operation,
        actor.user.uid,
        actor.user.name,
        src_endpoint.ip,
        time,
        severity,
        metadata.version,
        metadata.product.name,
        metadata.product.vendor_name,
        category_name,
        activity_name,
        type_uid,
    FROM {SECURITY-LAKE-DB}.{SECURITY-LAKE-AZURE-TABLE}
    UNION ALL
    SELECT 
        api.operation,
        actor.user.uid,
        actor.user.name,
        src_endpoint.ip,
        time,
        severity,
        metadata.version,
        metadata.product.name,
        metadata.product.vendor_name,
        category_name,
        activity_name,
        type_uid,
    FROM {SECURITY-LAKE-DB}.{SECURITY-LAKE-CLOUDTRAIL-TABLE}

    Figure 11:  Query Azure activity and CloudTrail together in Athena

    Figure 11: Query Azure activity and CloudTrail together in Athena

For additional guidance on how to configure access and query Amazon Security Lake in Athena, see the following resources:

Conclusion

In this blog post, you learned how to create and deploy the AWS and Microsoft Azure assets needed to bring your own data to Amazon Security Lake. By creating an AWS Glue streaming job that can transform Azure activity data streams and by fronting that AWS Glue job with a Kinesis stream, you can open Amazon Security Lake to intake from external Azure activity data streams.

You also learned how to configure Azure assets so that your Azure activity logs can stream to your Kinesis endpoint. The combination of these two creates a working, custom source solution for Azure activity logging.

To get started with Amazon Security Lake, see the Getting Started page, or if you already use Amazon Security Lake and want to read additional blog posts and articles about this service, see Blog posts and articles.

If you have feedback about this blog post, submit comments in the Comments section below. If you have questions about this blog post, start a new thread on Amazon Security Lake re:Post or contact AWS Support.

Want more AWS Security news? Follow us on Twitter.

Adam Plotzker

Adam Plotzker

Adam is currently a Security Engineer at AWS, working primarily on the Amazon Security Lake solution. One of the things he enjoys most about his work at AWS is his ability to be creative when exploring customer needs and coming up with unique solutions that meet those needs.

Amazon Security Lake is now generally available

Post Syndicated from Ross Warren original https://aws.amazon.com/blogs/security/amazon-security-lake-is-now-generally-available/

Today we are thrilled to announce the general availability of Amazon Security Lake, first announced in a preview release at 2022 re:Invent. Security Lake centralizes security data from Amazon Web Services (AWS) environments, software as a service (SaaS) providers, on-premises, and cloud sources into a purpose-built data lake that is stored in your AWS account. With Open Cybersecurity Schema Framework (OCSF) support, the service normalizes and combines security data from AWS and a broad range of security data sources. This helps provide your team of analysts and security engineers with broad visibility to investigate and respond to security events, which can facilitate timely responses and helps to improve your security across multicloud and hybrid environments.

Figure 1 shows how Security Lake works, step by step. In this post, we discuss these steps, highlight some of the most popular use cases for Security Lake, and share the latest enhancements and updates that we have made since the preview launch.

Figure 1: How Security Lake works

Figure 1: How Security Lake works

Target use cases

In this section, we showcase some of the use cases that customers have found to be most valuable while the service was in preview.

Facilitate your security investigations with elevated visibility

Amazon Security Lake helps to streamline security investigations by aggregating, normalizing, and optimizing data storage in a single security data lake. Security Lake automatically normalizes AWS logs and security findings to the OCSF schema. This includes AWS CloudTrail management events, Amazon Virtual Private Cloud (Amazon VPC) Flow Logs, Amazon Route 53 Resolver query logs, and AWS Security Hub security findings from Amazon security services, including Amazon GuardDuty, Amazon Inspector, and AWS IAM Access Analyzer, as well as security findings from over 50 partner solutions. By having security-related logs and findings in a centralized location, and in the same format, Security Operations teams can streamline their process and devote more time to investigating security issues. This centralization reduces the need to spend valuable time collecting and normalizing logs into a specific format.

Figure 2 shows the Security Lake activation page, which presents users with options to enable log sources, AWS Regions, and accounts.

Figure 2: Security Lake activation page with options to enable log sources, Regions, and accounts

Figure 2: Security Lake activation page with options to enable log sources, Regions, and accounts

Figure 3 shows another section of the Security Lake activation page, which presents users with options to set rollup Regions and storage classes.

Figure 3: Security Lake activation page with options to select a rollup Region and set storage classes

Figure 3: Security Lake activation page with options to select a rollup Region and set storage classes

Simplify your compliance monitoring and reporting

With Security Lake, customers can centralize security data into one or more rollup Regions, which can help teams to simplify their regional compliance and reporting obligations. Teams often face challenges when monitoring for compliance across multiple log sources, Regions, and accounts. By using Security Lake to collect and centralize this evidence, security teams can significantly reduce the time spent on log discovery and allocate more time towards compliance monitoring and reporting.

Analyze multiple years of security data quickly

Security Lake offers integration with third-party security services such as security information and event management (SIEM) and extended detection and response (XDR) tools, as well as popular data analytics services like Amazon Athena and Amazon OpenSearch Service to quickly analyze petabytes of data. This enables security teams to gain deep insights into their security data and take nimble measures to help protect their organization. Security Lake helps enforce least-privilege controls for teams across organizations by centralizing data and implementing robust access controls, automatically applying policies that are scoped to the required subscribers and sources. Data custodians can use the built-in features to create and enforce granular access controls, such as to restrict access to the data in the security lake to only those who require it.

Figure 4 depicts the process of creating a data access subscriber within Security Lake.

Figure 4: Creating a data access subscriber in Security Lake

Figure 4: Creating a data access subscriber in Security Lake

Unify security data management across hybrid environments

The centralized data repository in Security Lake provides a comprehensive view of security data across hybrid and multicloud environments, helping security teams to better understand and respond to threats. You can use Security Lake to store security-related logs and data from various sources, including cloud-based and on-premises systems, making it simpler to collect and analyze security data. Additionally, by using automation and machine learning solutions, security teams can help identify anomalies and potential security risks more efficiently. This can ultimately lead to better risk management and enhance the overall security posture for the organization. Figure 5 illustrates the process of querying AWS CloudTrail and Microsoft Azure audit logs simultaneously by using Amazon Athena.

Figure 5: Querying AWS CloudTrail and Microsoft Azure audit logs together in Amazon Athena

Figure 5: Querying AWS CloudTrail and Microsoft Azure audit logs together in Amazon Athena

Updates since preview launch

Security Lake automatically normalizes logs and events from natively supported AWS services to the OCSF schema. With the general availability release, Security Lake now supports the latest version of OCSF, which is version 1 rc2. CloudTrail management events are now normalized into three distinct OCSF event classes: Authentication, Account Change, and API Activity.

We made various improvements to resource names and schema mapping to enhance the usability of logs. Onboarding is made simpler with automated AWS Identity and Access Management (IAM) role creation from the console. Additionally, you have the flexibility to collect CloudTrail sources independently including management events, Amazon Simple Storage Service (Amazon S3) data events, and AWS Lambda events.

To enhance query performance, we made a transition from hourly to daily time partitioning in Amazon S3, resulting in faster and more efficient data retrieval. Also, we added Amazon CloudWatch metrics to enable proactive monitoring of your log ingestion process to facilitate the identification of collection gaps or surges.

New Security Lake account holders are eligible for a 15-day free trial in supported Regions. Security Lake is now generally available in the following AWS Regions: US East (Ohio), US East (N. Virginia), US West (Oregon), Asia Pacific (Singapore), Asia Pacific (Sydney), Asia Pacific (Tokyo), Europe (Frankfurt), Europe (Ireland), Europe (London), and South America (São Paolo).

Ecosystem integrations

We have expanded our support for third-party integrations and have added 23 new partners. This includes 10 source partners — Aqua Security, Claroty, Confluent, Darktrace, ExtraHop, Gigamon, Sentra, Torq, Trellix, and Uptycs — enabling them to send data directly to Security Lake. Additionally, we have integrated with nine new subscribing partners — ChaosSearch, New Relic, Ripjar, SOC Prime, Stellar Cyber, Swimlane, Tines, Torq, and Wazuh. We have also established six new services partners, including Booz Allen Hamilton, CMD Solutions, part of Mantel Group, Infosys, Insbuilt, Leidos, and Tata Consultancy Services.

In addition, Security Lake supports third-party sources that provide OCSF security data. Notable partners include Barracuda Networks, Cisco, Cribl, CrowdStrike, CyberArk, Lacework, Laminar, NETSCOUT, Netskope, Okta, Orca, Palo Alto Networks, Ping Identity, Tanium, The Falco Project, Trend Micro, Vectra AI, VMware, Wiz, and Zscaler. We have integrated with various third-party security, automation, and analytics tools. This includes Datadog, IBM, Rapid7, SentinelOne, Splunk, Sumo Logic, and Trellix. Lastly, we have partnered with service partners such as Accenture, Eviden , Deloitte, DXC Technology, Kyndryl, PwC, and Wipro, that can work with you and Security Lake to deliver comprehensive solutions.

Get help from AWS Professional Services

The AWS Professional Services organization is a global team of experts that can help customers realize their desired business outcomes when using AWS. Our teams of data architects and security engineers engage with customer Security, IT, and business leaders to develop enterprise solutions. We follow current recommendations to support customers in their journey to integrate data into Security Lake. We integrate ready-built data transformations, visualizations, and AI/machine learning (ML) workflows that help Security Operations teams rapidly realize value. If you are interested in learning more, reach out to your AWS Professional Services account representative.

Summary

We invite you to explore the benefits of using Amazon Security Lake by taking advantage of our 15-day free trial and providing your feedback on your experiences, use cases, and solutions. We have several resources to help you get started and build your first data lake, including comprehensive documentation, demo videos, and webinars. By giving Security Lake a try, you can experience firsthand how it helps you centralize, normalize, and optimize your security data, and ultimately streamline your organization’s security incident detection and response across multicloud and hybrid environments.

 
If you have feedback about this post, submit comments in the Comments section below. If you have questions about this post, contact AWS Support.

Want more AWS Security news? Follow us on Twitter.

Author

Ross Warren

Ross is a Senior Product SA at AWS for Amazon Security Lake based in Northern Virginia. Prior to his work at AWS, Ross’ areas of focus included cyber threat hunting and security operations. Outside of work, he likes to spend time with his family, bake bread, make sawdust and enjoy time outside.

Nisha Amthul

Nisha Amthul

Nisha is a Senior Product Marketing Manager at AWS Security, specializing in detection and response solutions. She has a strong foundation in product management and product marketing within the domains of information security and data protection. When not at work, you’ll find her cake decorating, strength training, and chasing after her two energetic kiddos, embracing the joys of motherhood.

Jonathan Garzon

Jonathan Garzon

Jonathan is a Senior Product Management leader at AWS with a passion for building products with delightful customer experiences and solving complex problems. He has launched and managed products in various domains, including networking, cybersecurity, and data analytics. Outside of work, Jonathan enjoys spending time with friends and family, playing soccer, mountain biking, hiking, and playing the guitar.

Exclude cipher suites at the API gateway using a Network Load Balancer security policy

Post Syndicated from Sid Singh original https://aws.amazon.com/blogs/security/exclude-cipher-suites-at-the-api-gateway-using-a-network-load-balancer-security-policy/

In this blog post, we will show you how to use Amazon Elastic Load Balancing (ELB)—specifically a Network Load Balancer—to apply a more granular control on the cipher suites that are used between clients and servers when establishing an SSL/TLS connection with Amazon API Gateway. The solution uses virtual private cloud (VPC) endpoints (powered by AWS PrivateLink) and ELB policies. By using this solution, highly regulated industries like financial services and healthcare and life sciences can exercise more control over cipher suite selection for TLS negotiation.

Configure the minimum TLS version on API Gateway

The TLS protocol is a mechanism to encrypt data in transit — data that is moving from one location to another such as across the internet or through a network. TLS requires that the client and server agree on the family of encryption algorithms — otherwise known as the cipher suite — to use to protect the communication between the client and server. The two parties agree on the cipher suite during the phase known as the TLS handshake, in which the client first provides a lists of preferred cipher suites, and the server then selects the one that it deems most appropriate.

API Gateway supports a wide range of protocols and ciphers and allows you to choose a minimum TLS version to be enforced by selecting a specific security policy. A security policy is a predefined combination of the minimum TLS version and cipher suite offered by API Gateway. Currently, you can choose either a TLS version 1.2 or TLS version 1.0 security policy. Although the usage of TLS v1.0 or TLSv1.2 covers a wide range of network security use cases, it doesn’t address the situation where you need to exclude specific ciphers that don’t meet your security requirements.

Options for granular control on TLS cipher suites

If you want to exclude specific ciphers, you can use the following solutions to offload and control the TLS connection termination with a customized cipher suite:

  • Amazon CloudFront distributionAmazon CloudFront provides the TLS version and cipher suite in the CloudFront-Viewer-TLS-header, and you can configure it by using a CloudFront function on the Viewer request to then forward the appropriate traffic to an API Gateway. CloudFront is a global service that transfers customer data as an essential function of the service, so you should carefully consider its usage according to your specific use case.
  • Self-managed reverse proxy — Using a containerized reverse proxy (for example, an NGINX Docker image) that manages the TLS sessions and forwards traffic to an API Gateway is another approach for more granular control on the cipher suites. You can deploy and manage this solution with Amazon Elastic Container Service (Amazon ECS). You can also run Amazon ECS on AWS Fargate so that you don’t have to manage servers or clusters of Amazon Elastic Compute Cloud (Amazon EC2) instances. The self-managed reverse proxy approach entails an operational overhead associated with the configuration and management of the reverse proxy application.
  • Network Load Balancer — By placing a Network Load Balancer in front of an API Gateway, you can use the load balancer to terminate the TLS session on the client side, and reinitiate a new TLS session with the backend API gateway. This approach, in conjunction with the use of ELB policies, provides you with much more granular control on the cipher suite used for the communication. Network Load Balancer is a fully-managed service, meaning that it handles scalability and elasticity automatically. This represents the main advantage in comparison to a self-managed reverse proxy solution that would add operational overhead due to the need to manage the reverse proxy application and the ECS cluster.

Network Load Balancer is the solution with the most suitable set of trade-offs: it minimizes operational overhead while providing the necessary flexibility to control and secure the connection between client and server. Therefore, we focus on using Network Load Balancer in this post.

Prerequisites

To show how a Network Load Balancer can front-end an API gateway in practice, we will walk you through a real-world example. To follow along, make sure that you have the following prerequisites in place:

Figure 1: Sample architecture of API Gateway with Lambda backend

Figure 1: Sample architecture of API Gateway with Lambda backend

Use Network Load Balancer for cipher suite selection

We start with a scenario where a client interacts with the API gateway domain (for example, api.example.com) over a set of TLS/cipher combinations that are not acceptable for security reasons. In the subsequent steps, we will introduce a Network Load Balancer layer to frontend the API gateway domain without impacting the end-user interaction with the API gateway domain. In this section, we will walk you through how to make the application accessible through a Network Load Balancer and use ELB policies to exclude the TLS_ECDHE_RSA_WITH_AES_256_CBC_SHA384 cipher suite. In doing so, we will limit the operational overhead as much as possible, while keeping the application scalable, elastic, and highly available.

Figure 2 shows the solution that you will build.

Figure 2: Target architecture, with a load balancer for cipher suite selection

Figure 2: Target architecture, with a load balancer for cipher suite selection

The preceding diagram shows a workflow of the user interaction with the API gateway domain abstracted by the Network Load Balancer layer. For the first interaction, the user retrieves the API gateway domain from the Route 53 hosted zone. This API gateway domain aliases to the Network Load Balancer endpoint. In the next interaction, the user makes an HTTPS request to the domain endpoint with a TLS/cipher combination from the client side. The TLS connection is accepted or denied based on the security policy configured at the Network Load Balancer. In the rest of this post, we will walk you through how to set up this architecture.

Step 1: Create a VPC endpoint

The first step is to create a private VPC endpoint for API Gateway.

To create a VPC endpoint

  1. Open the Amazon VPC console.
  2. In the left navigation pane, choose Endpoints, and select Create endpoint.
  3. For Name tag, enter a name for your endpoint. For this walkthrough, we will enter MyEndPoint as the name for the endpoint.
  4. For Services, search for execute-api and select the service name, which will look similar to the following: com.amazonaws.<region-name>.execute-api.
  5. For VPC, select the VPC where you want to deploy the endpoint. For this walkthrough, we will use MyVPC as the VPC.
  6. For Subnets, select the private subnets where you want the private endpoint to be accessible. To help ensure high availability and resiliency, make sure that you select at least two subnets.
  7. (Optional) Specify the VPC endpoint policy to allow access to the VPC endpoint only for the desired users or services. Make sure that you apply the principle of least privilege.
  8. For Security Groups, select (or create) a security group for the API Gateway VPC endpoint. This security group will allow or deny traffic to the VPC endpoint. You can choose the ports and protocols along with the source and destination IP address range to allow for inbound and outbound traffic. In this example, you want the VPC endpoint to be accessed only from the Network Load Balancer, so make sure that you allow incoming traffic from the VPC’s Classless Inter-Domain Routing (CIDR) on port 443.
  9. Leave the other configuration options as they are, and then choose Create Endpoint. Wait until the VPC endpoint is deployed.
  10. When the VPC endpoint completes provisioning, take note of the endpoint ID and the IP addresses associated with it because you will need this information in the following steps. You will find one address for each subnet where you chose to deploy the VPC endpoint. After you select the newly created endpoint, you can find the assigned IP addresses in the Subnets tab.

Step 2: Associate API Gateway with the VPC endpoint and custom domain

The next step is to instruct the API Gateway to only accept invocations coming from the VPC endpoint, and then map your APIs with the custom domain name.

To associate API Gateway with the VPC endpoint and custom domain

  1. Open the Amazon API Gateway console and take note of the ID of your API.
  2. Choose your existing API in the console. For this walkthrough, we will use an API called MyAPI.
  3. In the left navigation pane, under API: <MyAPI>, choose Resource Policy.
  4. Paste the following policy, and replace <region-id>, <account-id>, <api-id>, and <endpoint-id> with your own information:
    {
        "Version": "2012-10-17",
        "Statement": [
            {
                "Effect": "Allow",
                "Principal": "*",
                "Action": "execute-api:Invoke",
                "Resource": "arn:aws:execute-api:<region-id>:<account-id>:<api-id>/*/*/*",
                "Condition": {
                    "StringEquals": {
                        "aws:SourceVpce": "<endpoint-id>"
                    }
                }
            }
        ]
    }

  5. In the left navigation pane, under API: <MyAPI>, choose Settings.
  6. In the Endpoint Configuration section, for VPC Endpoint IDs, enter your VPC endpoint ID.
  7. Leave the other configuration options as they are and choose Save Changes.
  8. In the left navigation pane, under API: <MyAPI>, choose Resources.
  9. Choose Actions and select Deploy API.
  10. Select an existing stage, or if you haven’t created one yet, select [New Stage] and enter a name for the stage (for example, prod). Then choose Deploy.
  11. Navigate back to the Amazon API Gateway console, and in the left navigation pane, choose Custom domain names.
  12. Choose Create.
  13. For Domain name, enter the full domain name that you plan to associate with your API Gateway (for example, api.example.com).
  14. For ACM certificate, select the certificate for the domain that you own (for example, *.example.com).
  15. Leave the rest as it is and choose Create domain name.
  16. Select the domain name that you just associated with API Gateway and select API mappings.
  17. Choose Configure API Mapping.
  18. For API, select your API, and for Stage, select your preferred stage.
  19. Leave the other configuration options as they are, and choose Save.

Step 3: Create a new target group for Network Load Balancer

Before creating a Network Load Balancer, you need to create a target group that it will redirect the requests to. You will configure the target group to redirect requests to the VPC endpoint.

To create a new target group for Network Load Balancer

  1. Open the Amazon EC2 console.
  2. In the left navigation pane, choose Target groups, and then choose Create target group.
  3. For Choose a target type, select IP addresses.
  4. For Target group name, enter your desired target group name. For this walkthrough, we will enter MyGroup as the target group name.
  5. For Protocol, select TLS.
  6. For Port, enter 443.
  7. Select MyVPC.
  8. Under Heath check protocol, select HTTPS, and under Health check path, enter /ping.
  9. Leave the rest as it is and choose Next.
  10. For Network, select MyVPC.
  11. Choose Add IPv4 address and add the IP addresses associated with the VPC endpoint one by one (these are the IP address associated with the VPC endpoint and detailed in step 10 of the section Step 1: Create a VPC endpoint).
  12. For Ports, enter 443, and then choose Include as pending below.
  13. Choose Create target group, and then wait for the target group to complete creation.

Step 4: Create a Network Load Balancer

Now you can create the Network Load Balancer. You will configure it to redirect traffic to the target group that you defined in Step 3.

To create the Network Load Balancer

  1. Open the Amazon EC2 console.
  2. In the left navigation pane, choose Load Balancers, and then choose Create load balancer.
  3. In the Network Load Balancer section, choose Create.
  4. For Load balancer name, enter a name for your load balancer. For this walkthrough, we will use the name MyNLB.
  5. For Scheme, select Internal.
  6. For VPC, select MyVPC.
  7. For Mappings, select the same subnets that you selected when you created the VPC endpoint in Step 1: Create a VPC endpoint.
  8. In the Listeners and routing section, for Port, enter 443.
  9. Forward the traffic to MyGroup.
  10. Select a security policy that excludes the cipher suites that you don’t want to allow. To learn more about the available policies, see Security policies. In this example, we will select ELBSecurityPolicy-TLS13-1-2-Res-2021-06, which excludes the TLS_ECDHE_RSA_WITH_AES_256_CBC_SHA384 cipher.
  11. For Default SSL cert, choose Select a certificate and then select your certificate (for example, *.example.com).
  12. Leave the rest as it is and choose Create load balancer. Wait for the load balancer to complete deployment.

Step 5: Set up DNS forwarding

The final step is to configure the Domain Name System (DNS) to associate the custom domain name with our APIs.

To set up DNS forwarding

  1. Open the Route53 console.
  2. In the left navigation pane, choose Hosted zones.
  3. Select the private hosted zone that manages your domain.
  4. Choose Create record.
  5. For Record name, enter the domain name that you plan to associate with your API (for example, api.example.com — the same name as in Step 2: Associate API Gateway with the VPC endpoint and custom domain).
  6. For Record type, leave the default A – Routes traffic to an IPV4 address and some AWS resources.
  7. Turn on Alias.
  8. For Route traffic to, select Alias to Network Load Balancer. Select the AWS Region where you deployed your resources and then select your load balancer.
  9. Choose Create records.

Step 6: Validate your solution

At this point, you have deployed the resources that you need to implement the solution. You now need to validate that it works as expected.

Your resources are deployed in private subnets, so you need to test them by sending requests from within the private subnet itself. For example, you can do that by connecting to a Linux instance that you have running inside the private subnet.

After you have logged in to your private EC2 instance, you can validate your solution by sending requests to your endpoint.

From your terminal of choice, run the following commands. Replace <endpoint> with your chosen domain name—for example, api.example.com/<your-path>.

curl https://<endpoint> ‐‐cipher ECDHE-RSA-AES128-GCM-SHA256

This command sends a GET request to API Gateway by selecting a cipher suite that’s allowed by the ELB policy. As a result, the Network Load Balancer allows the connection and returns success.

curl https://<endpoint> ‐‐cipher ECDHE-RSA-AES128-SHA256

This command sends a GET request to the API Gateway by selecting a cipher suite that is excluded by the ELB policy. As a result, the Network Load Balancer denies the connection and returns an error response.

Figure 3 shows the expected behavior.

Figure 3: Target behavior: accept only connections with selected cipher suites

Figure 3: Target behavior: accept only connections with selected cipher suites

Conclusion

In this blog post, you learned how to use a Network Load Balancer as a reverse proxy for your private APIs managed by Amazon API Gateway. With this solution, the Network Load Balancer allows you to exclude specific cipher suites by selecting the ELB policy that’s most appropriate for your use case.

 
If you have feedback about this post, submit comments in the Comments section below. If you have questions about this post, contact AWS Support.

Want more AWS Security news? Follow us on Twitter.

Sid Singh

Sid is a Solutions Architect with Amazon Web Services. He works with global financial services customers and has more than 10 years of industry experience covering a wide range of technologies. Outside of work, he loves traveling, is an avid foodie, and Bavarian beer enthusiast.

Francesco Vergona

Francesco Vergona

Francesco is a Solutions Architect for AWS Financial Services. He has been with Amazon since November 2019, first in the retail space and then in the cloud business. He assists financial services customers throughout their cloud journey, helping them craft scalable, flexible and resilient architectures. Francesco has an interest in all things serverless and enjoys helping customers understand how serverless technologies can change the way they think about building and running applications at scale with minimal operational overhead.

Faster AWS cloud connections with TLS 1.3

Post Syndicated from Kate Rodgers original https://aws.amazon.com/blogs/security/faster-aws-cloud-connections-with-tls-1-3/

At Amazon Web Services (AWS), we strive to continuously improve customer experience by delivering a cloud computing environment that supports the most modern security technologies. To improve the overall performance of your connections, we have already started to enable TLS version 1.3 globally across our AWS service API endpoints, and will complete this process by December 31, 2023. By using TLS 1.3, you can decrease your connection time by removing one network round trip for every connection request, and can benefit from some of the most modern and secure cryptographic cipher suites available today.

If you are using current software tools (2014 or later) including our AWS SDKs or AWS Command Line Interface (AWS CLI), you will automatically receive the benefits of TLS 1.3 with no action required on your part. This is because AWS services will negotiate the highest TLS protocol version that your client software supports. If you want to continue using TLS 1.2, you will still have full control through your client configurations. AWS will retain support for TLS 1.2, in addition to TLS 1.3, into the foreseeable future. Meanwhile, here’s the latest information on the on-going deprecation of TLS 1.0/1.1.

If you have any questions, start a new thread on AWS re:Post, or contact AWS Support or your technical account manager. If you have feedback about this post, submit comments in the Comments section below.

Want more AWS Security how-to content, news, and feature announcements? Follow us on Twitter.

Kate Rodgers

Kate Rodgers

Kate is a Senior Technical Program Manager in AWS Security with over 10 years of experience in industry as an engineer and program manager. Today she works with AWS services, infrastructure, and administrative teams to drive innovative solutions that improve the AWS security posture.

James McDuffie

James McDuffie

James is a Senior Technical Account Manager. He has over 20 years of experience in software development, with previous roles in Software and Hardware Security Architecture in Industrial IoT. He is an active member of the AWS Security community, and he works closely with our customers to help them solve complex security challenges at scale.

Stronger together: Highlights from RSA Conference 2023

Post Syndicated from Anne Grahn original https://aws.amazon.com/blogs/security/stronger-together-highlights-from-rsa-conference-2023/

Golden Gate bridge

RSA Conference 2023 brought thousands of cybersecurity professionals to the Moscone Center in San Francisco, California from April 24 through 27.

The keynote lineup was eclectic, with more than 30 presentations across two stages featuring speakers ranging from renowned theoretical physicist and futurist Dr. Michio Kaku to Grammy-winning musician Chris Stapleton. Topics aligned with this year’s conference theme, “Stronger Together,” and focused on actions that can be taken by everyone, from the C-suite to those of us on the front lines of security, to strengthen collaboration, establish new best practices, and make our defenses more diverse and effective.

With over 400 sessions and 500 exhibitors discussing the latest trends and technologies, it’s impossible to recap every highlight. Now that the dust has settled and we’ve had time to reflect, here’s a glimpse of what caught our attention.

Noteworthy announcements

Hundreds of companies — including Amazon Web Services (AWS) — made new product and service announcements during the conference.

We announced three new capabilities for our Amazon GuardDuty threat detection service to help customers secure container, database, and serverless workloads. These include GuardDuty Elastic Kubernetes Service (EKS) Runtime Monitoring, GuardDuty RDS Protection for data stored in Amazon Aurora, and GuardDuty Lambda Protection for serverless applications. The new capabilities are designed to provide actionable, contextual, and timely security findings with resource-specific details.

Artificial intelligence

It was hard to find a single keynote, session, or conversation that didn’t touch on the impact of artificial intelligence (AI).

In “AI: Law, Policy and Common Sense Suggestions on How to Stay Out of Trouble,” privacy and gaming attorney Behnam Dayanim highlighted ambiguity around the definition of AI. Referencing a quote from University of Washington School of Law’s Ryan Calo, Dayanim pointed out that AI may be best described as “…a set of techniques aimed at approximating some aspect of cognition,” and should therefore be thought of differently than a discrete “thing” or industry sector.

Dayanim noted examples of skepticism around the benefits of AI. A recent Monmouth University poll, for example, found that 73% of Americans believe AI will make jobs less available and harm the economy, and a surprising 55% believe AI may one day threaten humanity’s existence.

Equally skeptical, he noted, is a joint statement made by the Federal Trade Commission (FTC) and three other federal agencies during the conference reminding the public that enforcement authority applies to AI. The statement takes a pessimistic view, saying that AI is “…often advertised as providing insights and breakthroughs, increasing efficiencies and cost-savings, and modernizing existing practices,” but has the potential to produce negative outcomes.

Dayanim covered existing and upcoming legal frameworks around the world that are aimed at addressing AI-related risks related to intellectual property (IP), misinformation, and bias, and how organizations can design AI governance mechanisms to promote fairness, competence, transparency, and accountability.

Many other discussions focused on the immense potential of AI to automate and improve security practices. RSA Security CEO Rohit Ghai explored the intersection of progress in AI with human identity in his keynote. “Access management and identity management are now table stakes features”, he said. In the AI era, we need an identity security solution that will secure the entire identity lifecycle—not just access. To be successful, he believes, the next generation of identity technology needs to be powered by AI, open and integrated at the data layer, and pursue a security-first approach. “Without good AI,” he said, “zero trust has zero chance.”

Mark Ryland, director at the Office of the CISO at AWS, spoke with Infosecurity about improving threat detection with generative AI.

“We’re very focused on meaningful data and minimizing false positives. And the only way to do that effectively is with machine learning (ML), so that’s been a core part of our security services,” he noted.

We recently announced several new innovations—including Amazon Bedrock, the Amazon Titan foundation model, the general availability of Amazon Elastic Compute Cloud (Amazon EC2) Trn1n instances powered by AWS Trainium, Amazon EC2 Inf2 instances powered by AWS Inferentia2, and the general availability of Amazon CodeWhisperer—that will make it practical for customers to use generative AI in their businesses.

“Machine learning and artificial intelligence will add a critical layer of automation to cloud security. AI/ML will help augment developers’ workstreams, helping them create more reliable code and drive continuous security improvement. — CJ Moses, CISO and VP of security engineering at AWS

The human element

Dozens of sessions focused on the human element of security, with topics ranging from the psychology of DevSecOps to the NIST Phish Scale. In “How to Create a Breach-Deterrent Culture of Cybersecurity, from Board Down,” Andrzej Cetnarski, founder, chairman, and CEO of Cyber Nation Central and Marcus Sachs, deputy director for research at Auburn University, made a data-driven case for CEOs, boards, and business leaders to set a tone of security in their organizations, so they can address “cyber insecure behaviors that lead to social engineering” and keep up with the pace of cybercrime.

Lisa Plaggemier, executive director of the National Cybersecurity Alliance, and Jenny Brinkley, director of Amazon Security, stressed the importance of compelling security awareness training in “Engagement Through Entertainment: How To Make Security Behaviors Stick.” Education is critical to building a strong security posture, but as Plaggemier and Brinkley pointed out, we’re “living through an epidemic of boringness” in cybersecurity training.

According to a recent report, just 28% of employees say security awareness training is engaging, and only 36% say they pay full attention during such training.

Citing a United Airlines preflight safety video and Amazon’s Protect and Connect public service announcement (PSA) as examples, they emphasized the need to make emotional connections with users through humor and unexpected elements in order to create memorable training that drives behavioral change.

Plaggemeier and Brinkley detailed five actionable steps for security teams to improve their awareness training:

  • Brainstorm with staff throughout the company (not just the security people)
  • Find ideas and inspiration from everywhere else (TV episodes, movies… anywhere but existing security training)
  • Be relatable, and include insights that are relevant to your company and teams
  • Start small; you don’t need a large budget to add interest to your training
  • Don’t let naysayers deter you — change often prompts resistance
“You’ve got to make people care. And so you’ve got to find out what their personal motivators are, and how to develop the type of content that can make them care to click through the training and…remember things as they’re walking through an office.” — Jenny Brinkley, director of Amazon Security

Cloud security

Cloud security was another popular topic. In “Architecting Security for Regulated Workloads in Hybrid Cloud,” Mark Buckwell, cloud security architect at IBM, discussed the architectural thinking practices—including zero trust—required to integrate security and compliance into regulated workloads in a hybrid cloud environment.

Mitiga co-founder and CTO Ofer Maor told real-world stories of SaaS attacks and incident response in “It’s Getting Real & Hitting the Fan 2023 Edition.”

Maor highlighted common tactics focused on identity theft, including MFA push fatigue, phishing, business email compromise, and adversary-in-the middle attacks. After detailing techniques that are used to establish persistence in SaaS environments and deliver ransomware, Maor emphasized the importance of forensic investigation and threat hunting to gaining the knowledge needed to reduce the impact of SaaS security incidents.

Sarah Currey, security practice manager, and Anna McAbee, senior solutions architect at AWS, provided complementary guidance in “Top 10 Ways to Evolve Cloud Native Incident Response Maturity.” Currey and McAbee highlighted best practices for addressing incident response (IR) challenges in the cloud — no matter who your provider is:

  1. Define roles and responsibilities in your IR plan
  2. Train staff on AWS (or your provider)
  3. Develop cloud incident response playbooks
  4. Develop account structure and tagging strategy
  5. Run simulations (red team, purple team, tabletop)
  6. Prepare access
  7. Select and set up logs
  8. Enable managed detection services in all available AWS Regions
  9. Determine containment strategy for resource types
  10. Develop cloud forensics capabilities

Speaking to BizTech, Clarke Rodgers, director of enterprise strategy at AWS, noted that tools and services such as Amazon GuardDuty and AWS Key Management Service (AWS KMS) are available to help advance security in the cloud. When organizations take advantage of these services and use partners to augment security programs, they can gain the confidence they need to take more risks, and accelerate digital transformation and product development.

Security takes a village

There are more highlights than we can mention on a variety of other topics, including post-quantum cryptography, data privacy, and diversity, equity, and inclusion. We’ve barely scratched the surface of RSA Conference 2023. If there is one key takeaway, it is that no single organization or individual can address cybersecurity challenges alone. By working together and sharing best practices as an industry, we can develop more effective security solutions and stay ahead of emerging threats.

 
If you have feedback about this post, submit comments in the Comments section below. If you have questions about this post, contact AWS Support.

Want more AWS Security news? Follow us on Twitter.

Anne Grahn

Anne Grahn

Anne is a Senior Worldwide Security GTM Specialist at AWS based in Chicago. She has more than a decade of experience in the security industry, and focuses on effectively communicating cybersecurity risk. She maintains a Certified Information Systems Security Professional (CISSP) certification.

Danielle Ruderman

Danielle Ruderman

Danielle is a Senior Manager for the AWS Worldwide Security Specialist Organization, where she leads a team that enables global CISOs and security leaders to better secure their cloud environments. Danielle is passionate about improving security by building company security culture that starts with employee engagement.

Your guide to the threat detection and incident response track at re:Inforce 2023

Post Syndicated from Celeste Bishop original https://aws.amazon.com/blogs/security/your-guide-to-the-threat-detection-and-incident-response-track-at-reinforce-2023/

reInforce 2023

A full conference pass is $1,099. Register today with the code secure150off to receive a limited time $150 discount, while supplies last.


AWS re:Inforce is back, and we can’t wait to welcome security builders to Anaheim, CA, on June 13 and 14. AWS re:Inforce is a security learning conference where you can gain skills and confidence in cloud security, compliance, identity, and privacy. As an attendee, you will have access to hundreds of technical and non-technical sessions, an Expo featuring AWS experts and security partners with AWS Security Competencies, and keynote and leadership sessions featuring Security leadership. re:Inforce 2023 features content across the following six areas:

  • Data protection
  • Governance, risk, and compliance
  • Identity and access management
  • Network and infrastructure security
  • Threat detection and incident response
  • Application security

The threat detection and incident response track is designed to showcase how AWS, customers, and partners can intelligently detect potential security risks, centralize and streamline security management at scale, investigate and respond quickly to security incidents across their environment, and unlock security innovation across hybrid cloud environments.

Breakout sessions, chalk talks, and lightning talks

TDR201 | Breakout session | How Citi advanced their containment capabilities through automation
Incident response is critical for maintaining the reliability and security of AWS environments. To support the 28 AWS services in their cloud environment, Citi implemented a highly scalable cloud incident response framework specifically designed for their workloads on AWS. Using AWS Step Functions and AWS Lambda, Citi’s automated and orchestrated incident response plan follows NIST guidelines and has significantly improved its response time to security events. In this session, learn from real-world scenarios and examples on how to use AWS Step Functions and other core AWS services to effectively build and design scalable incident response solutions.

TDR202 | Breakout session | Wix’s layered security strategy to discover and protect sensitive data
Wix is a leading cloud-based development platform that empowers users to get online with a personalized, professional web presence. In this session, learn how the Wix security team layers AWS security services including Amazon Macie, AWS Security Hub, and AWS Identity and Access Management Access Analyzer to maintain continuous visibility into proper handling and usage of sensitive data. Using AWS security services, Wix can discover, classify, and protect sensitive information across terabytes of data stored on AWS and in public clouds as well as SaaS applications, while empowering hundreds of internal developers to drive innovation on the Wix platform.

TDR203 | Breakout session | Vulnerability management at scale drives enterprise transformation
Automating vulnerability management at scale can help speed up mean time to remediation and identify potential business-impacting issues sooner. In this session, explore key challenges that organizations face when approaching vulnerability management across large and complex environments, and consider the innovative solutions that AWS provides to help overcome them. Learn how customers use AWS services such as Amazon Inspector to automate vulnerability detection, streamline remediation efforts, and improve compliance posture. Whether you’re just getting started with vulnerability management or looking to optimize your existing approach, gain valuable insights and inspiration to help you drive innovation and enhance your security posture with AWS.

TDR204 | Breakout session | Continuous innovation in AWS detection and response services
Join this session to learn about the latest advancements and most recent AWS launches in detection and response. This session focuses on use cases such as automated threat detection, continual vulnerability management, continuous cloud security posture management, and unified security data management. Through these examples, gain a deeper understanding of how you can seamlessly integrate AWS services into your existing security framework to gain greater control and insight, quickly address security risks, and maintain the security of your AWS environment.

TDR205 | Breakout session | Build your security data lake with Amazon Security Lake, featuring Interpublic Group
Security teams want greater visibility into security activity across their entire organizations to proactively identify potential threats and vulnerabilities. Amazon Security Lake automatically centralizes security data from cloud, on-premises, and custom sources into a purpose-built data lake stored in your account and allows you to use industry-leading AWS and third-party analytics and ML tools to gain insights from your data and identify security risks that require immediate attention. Discover how Security Lake can help you consolidate and streamline security logging at scale and speed, and hear from an AWS customer, Interpublic Group (IPG), on their experience.

TDR209 | Breakout session | Centralizing security at scale with Security Hub & Intuit’s experience
As organizations move their workloads to the cloud, it becomes increasingly important to have a centralized view of security across their cloud resources. AWS Security Hub is a powerful tool that allows organizations to gain visibility into their security posture and compliance status across their AWS accounts and Regions. In this session, learn about Security Hub’s new capabilities that help simplify centralizing and operationalizing security. Then, hear from Intuit, a leading financial software company, as they share their experience and best practices for setting up and using Security Hub to centralize security management.

TDR210 | Breakout session | Streamline security analysis with Amazon Detective
Join us to discover how to streamline security investigations and perform root-cause analysis with Amazon Detective. Learn how to leverage the graph analysis techniques in Detective to identify related findings and resources and investigate them together to accelerate incident analysis. Also hear a customer story about their experience using Detective to analyze findings automatically ingested from Amazon GuardDuty, and walk through a sample security investigation.

TDR310 | Breakout session | Developing new findings using machine learning in Amazon GuardDuty
Amazon GuardDuty provides threat detection at scale, helping you quickly identify and remediate security issues with actionable insights and context. In this session, learn how GuardDuty continuously enhances its intelligent threat detection capabilities using purpose-built machine learning models. Discover how new findings are developed for new data sources using novel machine learning techniques and how they are rigorously evaluated. Get a behind-the-scenes look at GuardDuty findings from ideation to production, and learn how this service can help you strengthen your security posture.

TDR311 | Breakout session | Securing data and democratizing the alert landscape with an event-driven architecture
Security event monitoring is a unique challenge for businesses operating at scale and seeking to integrate detections into their existing security monitoring systems while using multiple detection tools. Learn how organizations can triage and raise relevant cloud security findings across a breadth of detection tools and provide results to downstream security teams in a serverless manner at scale. We discuss how to apply a layered security approach to evaluate the security posture of your data, protect your data from potential threats, and automate response and remediation to help with compliance requirements.

TDR231 | Chalk talk | Operationalizing security findings at scale
You enabled AWS Security Hub standards and checks across your AWS organization and in all AWS Regions. What should you do next? Should you expect zero critical and high findings? What is your ideal state? Is achieving zero findings possible? In this chalk talk, learn about a framework you can implement to triage Security Hub findings. Explore how this framework can be applied to several common critical and high findings, and take away mechanisms to prioritize and respond to security findings at scale.

TDR232 | Chalk talk | Act on security findings using Security Hub’s automation capabilities
Alert fatigue, a shortage of skilled staff, and keeping up with dynamic cloud resources are all challenges that exist when it comes to customers successfully achieving their security goals in AWS. In order to achieve their goals, customers need to act on security findings associated with cloud-based resources. In this session, learn how to automatically, or semi-automatically, act on security findings aggregated in AWS Security Hub to help you secure your organization’s cloud assets across a diverse set of accounts and Regions.

TDR233 | Chalk talk | How LLA reduces incident response time with AWS Systems Manager
Liberty Latin America (LLA) is a leading telecommunications company operating in over 20 countries across Latin America and the Caribbean. LLA offers communications and entertainment services, including video, broadband internet, telephony, and mobile services. In this chalk talk, discover how LLA implemented a security framework to detect security issues and automate incident response in more than 180 AWS accounts accessed by internal stakeholders and third-party partners using AWS Systems Manager Incident Manager, AWS Organizations, Amazon GuardDuty, and AWS Security Hub.

TDR432 | Chalk talk | Deep dive into exposed credentials and how to investigate them
In this chalk talk, sharpen your detection and investigation skills to spot and explore common security events like unauthorized access with exposed credentials. Learn how to recognize the indicators of such events, as well as logs and techniques that unauthorized users use to evade detection. The talk provides knowledge and resources to help you immediately prepare for your own security investigations.

TDR332 | Chalk talk | Speed up zero-day vulnerability response
In this chalk talk, learn how to scale vulnerability management for Amazon EC2 across multiple accounts and AWS Regions. Explore how to use Amazon Inspector, AWS Systems Manager, and AWS Security Hub to respond to zero-day vulnerabilities, and leave knowing how to plan, perform, and report on proactive and reactive remediations.

TDR333 | Chalk talk | Gaining insights from Amazon Security Lake
You’ve created a security data lake, and you’re ingesting data. Now what? How do you use that data to gain insights into what is happening within your organization or assist with investigations and incident response? Join this chalk talk to learn how analytics services and security information and event management (SIEM) solutions can connect to and use data stored within Amazon Security Lake to investigate security events and identify trends across your organization. Leave with a better understanding of how you can integrate Amazon Security Lake with other business intelligence and analytics tools to gain valuable insights from your security data and respond more effectively to security events.

TDR431 | Chalk talk | The anatomy of a ransomware event
Ransomware events can cost governments, nonprofits, and businesses billions of dollars and interrupt operations. Early detection and automated responses are important steps that can limit your organization’s exposure. In this chalk talk, examine the anatomy of a ransomware event that targets data residing in Amazon RDS and get detailed best practices for detection, response, recovery, and protection.

TDR221 | Lightning talk | Streamline security operations and improve threat detection with OCSF
Security operations centers (SOCs) face significant challenges in monitoring and analyzing security telemetry data from a diverse set of sources. This can result in a fragmented and siloed approach to security operations that makes it difficult to identify and investigate incidents. In this lightning talk, get an introduction to the Open Cybersecurity Schema Framework (OCSF) and its taxonomy constructs, and see a quick demo on how this normalized framework can help SOCs improve the efficiency and effectiveness of their security operations.

TDR222 | Lightning talk | Security monitoring for connected devices across OT, IoT, edge & cloud
With the responsibility to stay ahead of cybersecurity threats, CIOs and CISOs are increasingly tasked with managing cybersecurity risks for their connected devices including devices on the operational technology (OT) side of the company. In this lightning talk, learn how AWS makes it simpler to monitor, detect, and respond to threats across the entire threat surface, which includes OT, IoT, edge, and cloud, while protecting your security investments in existing third-party security tools.

TDR223 | Lightning talk | Bolstering incident response with AWS Wickr enterprise integrations
Every second counts during a security event. AWS Wickr provides end-to-end encrypted communications to help incident responders collaborate safely during a security event, even on a compromised network. Join this lightning talk to learn how to integrate AWS Wickr with AWS security services such as Amazon GuardDuty and AWS WAF. Learn how you can strengthen your incident response capabilities by creating an integrated workflow that incorporates GuardDuty findings into a secure, out-of-band communication channel for dedicated teams.

TDR224 | Lightning talk | Securing the future of mobility: Automotive threat modeling
Many existing automotive industry cybersecurity threat intelligence offerings lack the connected mobility insights required for today’s automotive cybersecurity threat landscape. Join this lightning talk to learn about AWS’s approach to developing an automotive industry in-vehicle, domain-specific threat intelligence solution using AWS AI/ML services that proactively collect, analyze, and deduce threat intelligence insights for use and adoption across automotive value chains.

Hands-on sessions (builders’ sessions and workshops)

TDR251 | Builders’ session | Streamline and centralize security operations with AWS Security Hub
AWS Security Hub provides you with a comprehensive view of the security state of your AWS resources by collecting security data from across AWS accounts, Regions, and services. In this builders’ session, explore best practices for using Security Hub to manage security posture, prioritize security alerts, generate insights, automate response, and enrich findings. Come away with a better understanding of how to use Security Hub features and practical tips for getting the most out of this powerful service.

TDR351 | Builders’ session | Broaden your scope: Analyze and investigate potential security issues
In this builders’ session, learn how you can more efficiently triage potential security issues with a dynamic visual representation of the relationship between security findings and associated entities such as accounts, IAM principals, IP addresses, Amazon S3 buckets, and Amazon EC2 instances. With Amazon Detective finding groups, you can group related Amazon GuardDuty findings to help reduce time spent in security investigations and in understanding the scope of a potential issue. Leave this hands-on session knowing how to quickly investigate and discover the root cause of an incident.

TDR352 | Builders’ session | How to automate containment and forensics for Amazon EC2
In this builders’ session, learn how to deploy and scale the self-service Automated Forensics Orchestrator for Amazon EC2 solution, which gives you a standardized and automated forensics orchestration workflow capability to help you respond to Amazon EC2 security events. Explore the prerequisites and ways to customize the solution to your environment.

TDR353 | Builders’ session | Detecting suspicious activity in Amazon S3
Have you ever wondered how to uncover evidence of unauthorized activity in your AWS account? In this builders’ session, join the AWS Customer Incident Response Team (CIRT) for a guided simulation of suspicious activity within an AWS account involving unauthorized data exfiltration and Amazon S3 bucket and object data deletion. Learn how to detect and respond to this malicious activity using AWS services like AWS CloudTrail, Amazon Athena, Amazon GuardDuty, Amazon CloudWatch, and nontraditional threat detection services like AWS Billing to uncover evidence of unauthorized use.

TDR354 | Builders’ session | Simulate and detect unwanted IMDS access due to SSRF
Using appropriate security controls can greatly reduce the risk of unauthorized use of web applications. In this builders’ session, find out how the server-side request forgery (SSRF) vulnerability works, how unauthorized users may try to use it, and most importantly, how to detect it and prevent it from being used to access the instance metadata service (IMDS). Also, learn some of the detection activities that the AWS Customer Incident Response Team (CIRT) performs when responding to security events of this nature.

TDR341 | Code talk | Investigating incidents with Amazon Security Lake & Jupyter notebooks
In this code talk, watch as experts live code and build an incident response playbook for your AWS environment using Jupyter notebooks, Amazon Security Lake, and Python code. Leave with a better understanding of how to investigate and respond to a security event and how to use these technologies to more effectively and quickly respond to disruptions.

TDR441 | Code talk | How to run security incident response in your Amazon EKS environment
Join this Code Talk to get both an adversary’s and a defender’s point of view as AWS experts perform live exploitation of an application running on multiple Amazon EKS clusters, invoking an alert in Amazon GuardDuty. Experts then walk through incident response procedures to detect, contain, and recover from the incident in near real-time. Gain an understanding of how to respond and recover to Amazon EKS-specific incidents as you watch the events unfold.

TDR271-R | Workshop | Chaos Kitty: Gamifying incident response with chaos engineering
When was the last time you simulated an incident? In this workshop, learn to build a sandbox environment to gamify incident response with chaos engineering. You can use this sandbox to test out detection capabilities, play with incident response runbooks, and illustrate how to integrate AWS resources with physical devices. Walk away understanding how to get started with incident response and how you can use chaos engineering principles to create mechanisms that can improve your incident response processes.

TDR371-R | Workshop | Threat detection and response on AWS
Join AWS experts for a hands-on threat detection and response workshop using Amazon GuardDuty, AWS Security Hub, and Amazon Detective. This workshop simulates security events for different types of resources and behaviors and illustrates both manual and automated responses with AWS Lambda. Dive in and learn how to improve your security posture by operationalizing threat detection and response on AWS.

TDR372-R | Workshop | Container threat detection with AWS security services
Join AWS experts for a hands-on container security workshop using AWS threat detection and response services. This workshop simulates scenarios and security events while using Amazon EKS and demonstrates how to use different AWS security services to detect and respond to events and improve your security practices. Dive in and learn how to improve your security posture when running workloads on Amazon EKS.

Browse the full re:Inforce catalog to get details on additional sessions and content at the event, including gamified learning, leadership sessions, partner sessions, and labs.

If you want to learn the latest threat detection and incident response best practices and updates, join us in California by registering for re:Inforce 2023. We look forward to seeing you there!

 
If you have feedback about this post, submit comments in the Comments section below. If you have questions about this post, contact AWS Support.

Want more AWS Security news? Follow us on Twitter.

Celeste Bishop

Celeste Bishop

Celeste is a Product Marketing Manager in AWS Security, focusing on threat detection and incident response solutions. Her background is in experience marketing and also includes event strategy at Fortune 100 companies. Passionate about soccer, you can find her on any given weekend cheering on Liverpool FC, and her local home club, Austin FC.

Author

Himanshu Verma

Himanshu is a Worldwide Specialist for AWS Security Services. In this role, he leads the go-to-market creation and execution for AWS Security Services, field enablement, and strategic customer advisement. Prior to AWS, he held several leadership roles in Product Management, engineering and development, working on various identity, information security and data protection technologies. He obsesses brainstorming disruptive ideas, venturing outdoors, photography and trying various “hole in the wall” food and drinking establishments around the globe.