Post Syndicated from Mahmoud Matouk original https://aws.amazon.com/blogs/architecture/enriching-amazon-cognito-features-with-an-amazon-api-gateway-proxy/
This post was co-written with Geoff Baskwill, member of the Architecture Enabling Team at Trend Micro. At Trend Micro, we use AWS technologies to build secure solutions to help our customers improve their security posture.
This post builds on the architecture originally published in Protect public clients for Amazon Cognito with an Amazon CloudFront proxy. Read that post to learn more about public clients and why it is helpful to implement a proxy layer.
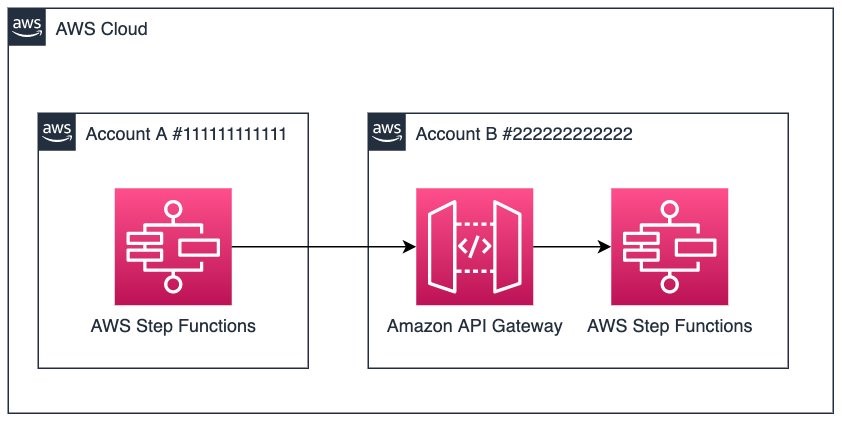
We’ll build on the idea of passing calls to Amazon Cognito through a lightweight proxy. This pattern allows you to augment identity flows in your system with additional processing without having to change the client or the backend. For example, you can use the proxy layer to protect public clients as explained in the original post. You can also use this layer to apply additional fraud detection logic to prevent fraudulent sign up, propagate events to downstream systems for monitoring or enhanced logging, and replicate certain events to another AWS Region (for example, to build high availability and multi-Region capabilities).
The solution in the original post used Amazon CloudFront, Lambda@Edge, and AWS WAF to implement protection of public clients, and hinted that there are multiple ways to do it. In this post, we explore one of these alternatives by using Amazon API Gateway and a proxy AWS Lambda function to implement the proxy to Amazon Cognito. This alternative offers improved performance and full access to request and response elements.
Solution overview
The focus of this solution is to protect public clients of the Amazon Cognito user pool.
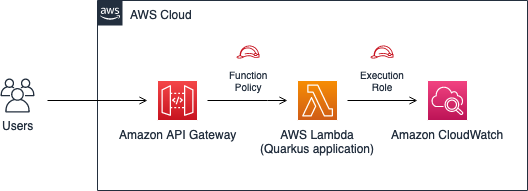
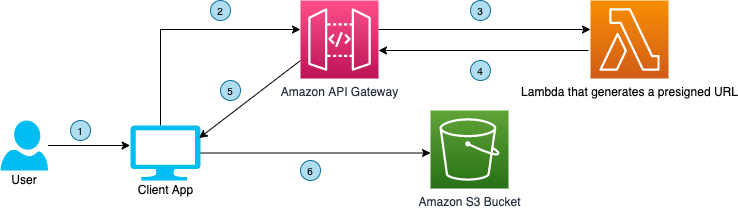
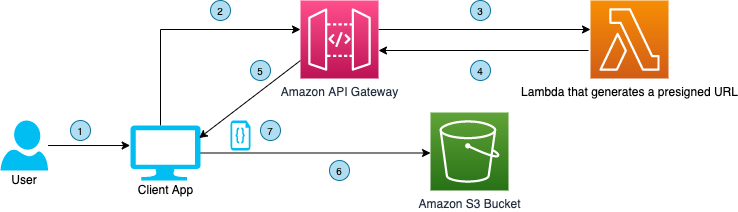
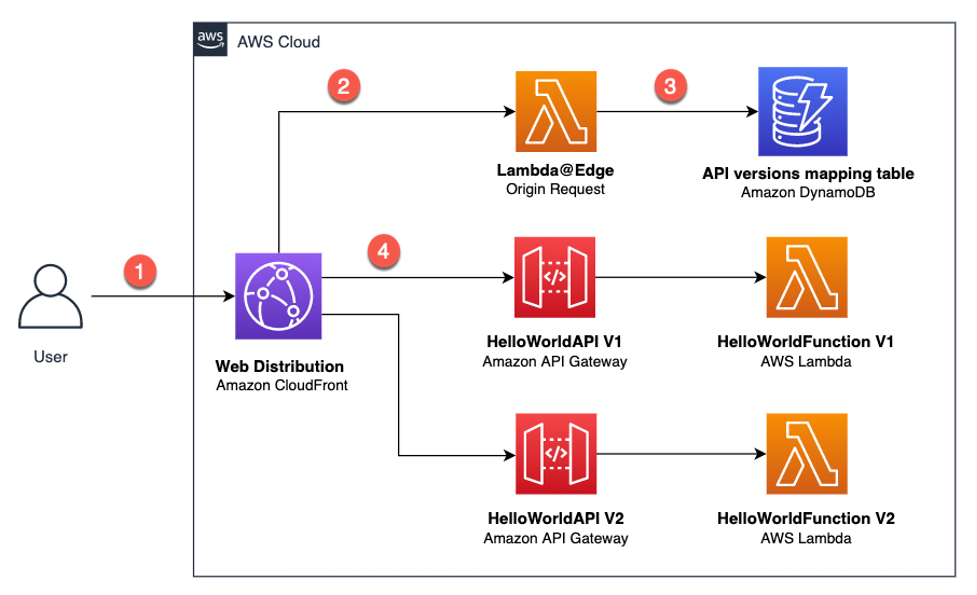
The workflow is shown in Figure 1 and works as follows:
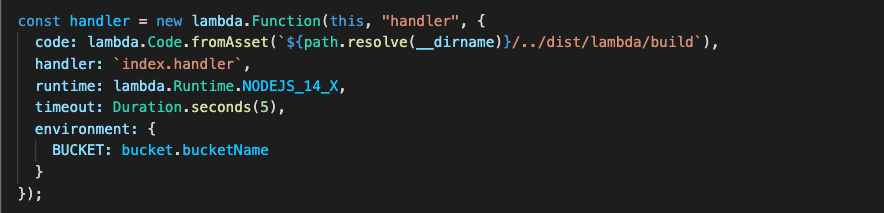
- Configure the client application (mobile or web client) to use the API Gateway endpoint as a proxy to an Amazon Cognito regional endpoint. You also create an application client in Amazon Cognito with a secret. This means that any unauthenticated API call must have the secret hash.
- Use a Lambda function to add a secret hash to the relevant incoming requests before passing them on to the Amazon Cognito endpoint. This function can also be used for other purposes like logging, propagation of events, or additional validation.
- In the Lambda function, you must have the app client secret to be able to calculate the secret hash and add it to the request. We recommend that you keep the secret in AWS Secrets Manager and cache it for the lifetime of the function.
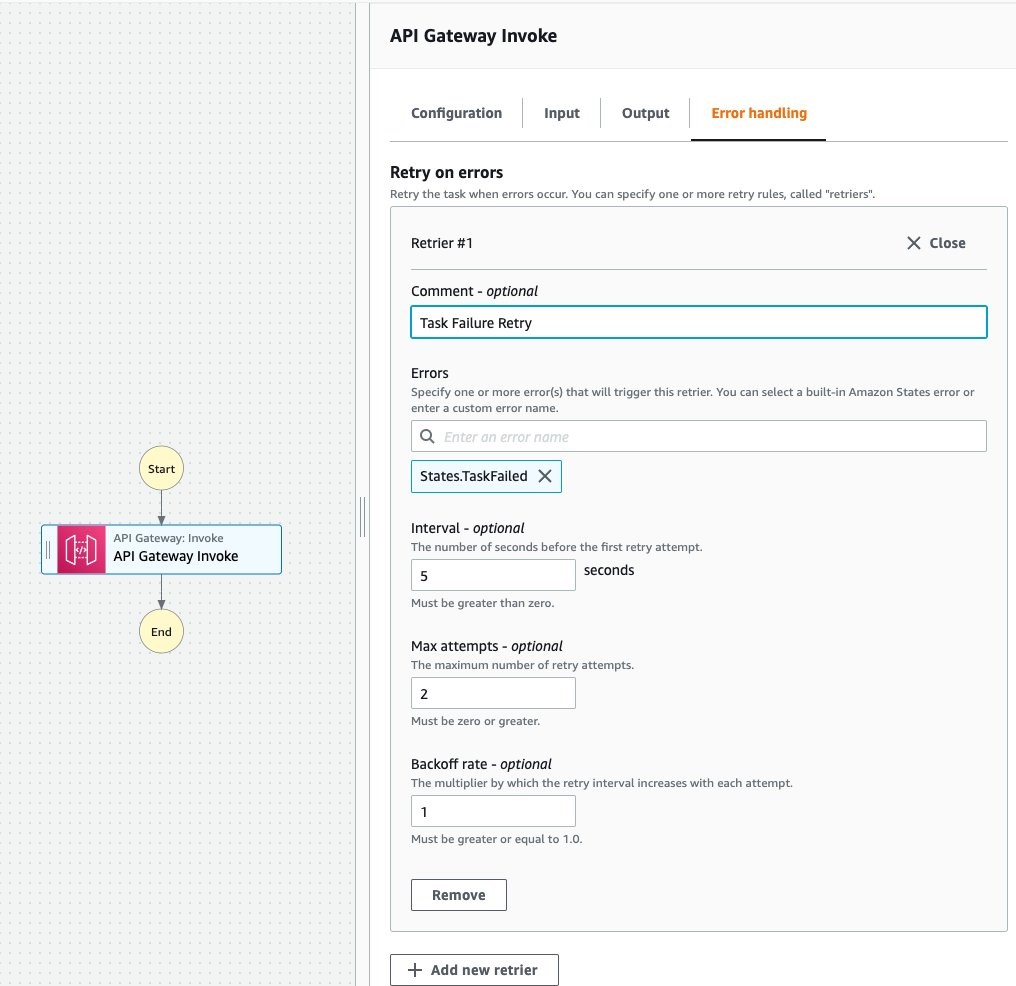
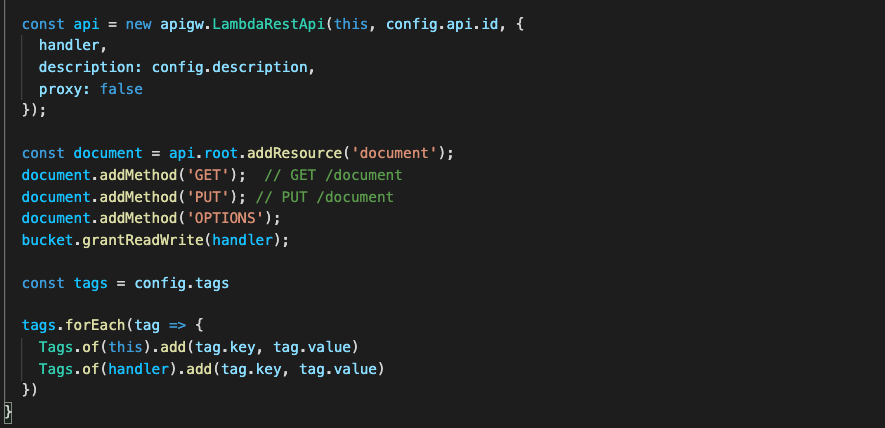
- Use AWS WAF with API Gateway to enforce rate limiting, implement allow and deny lists, and apply other rules according to your security requirements.
- Clients that send unauthenticated API calls to the Amazon Cognito endpoint directly are blocked and dropped because of the missing secret.
Not shown: You may want to set up a custom domain and certificate for your API Gateway endpoint.

Figure 1. A proxy solution to the Amazon Cognito regional endpoint
Deployment steps
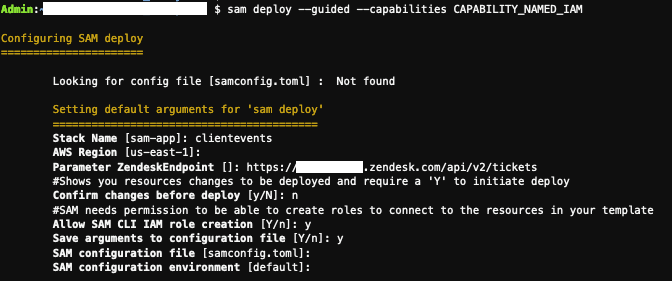
You can use the following AWS CloudFormation template to deploy this proxy pattern for your existing Amazon Cognito user pool.
Note: This template references a Lambda code package from a bucket in the us-east-1 Region. For that reason, the template can be only created in us-east-1. If you need to create the proxy solution in another Region, download the template and Lambda code package, update the template to reference another Amazon Simple Storage Service (Amazon S3) bucket that you own in the desired Region, and upload the code package to that S3 bucket. Then you can deploy your modified template in the desired Region.
![]()
This template requires the user pool ID as input and will create several resources in your AWS account to support the following proxy pattern:
- A new application client with a secret will be added to your Amazon Cognito user pool
- The secret will be stored in Secrets Manager and will be read from the proxy Lambda function
- The proxy Lambda function will be used to intercept Amazon Cognito API calls and attach client-secret to applicable requests
- The API Gateway project provides the custom proxy endpoint that is used as the Amazon Cognito endpoint in your client applications
- An AWS WAF WebACL provides firewall protection to the API Gateway endpoint. The WebACL includes placeholder rules for Allow and Deny lists of IPs. It also includes a rate limiting rule that will block requests from IP addresses that exceed the number of allowed requests within a five-minute period (rate limit value is provided as input to the template)
- Several helper resources will also be created like Lambda functions, necessary AWS IAM policies, and roles to allow the solution to function properly
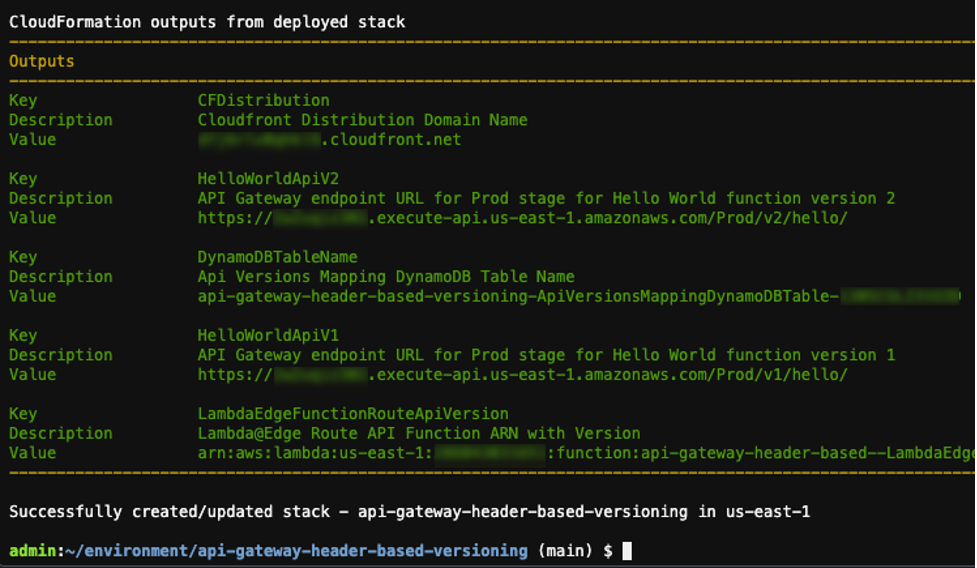
After you create a successful stack, you can find the endpoint URL in the outputs section of your CloudFormation stack. This is the URL we use in the next section with client applications.
Note: The template and code has been simplified for demonstration purposes. If you plan to deploy this solution in production, make sure to review these resources for compliance with your security and performance requirements. For example, you might need to enable certain logs or log encryption or use a customer managed key for encryption.
Integrating your client with proxy solution
Integrate the client application with the proxy by changing the endpoint in your client application to use the endpoint URL for the proxy API Gateway. The endpoint URL and application client ID are located in the Outputs section of the CloudFormation stack.
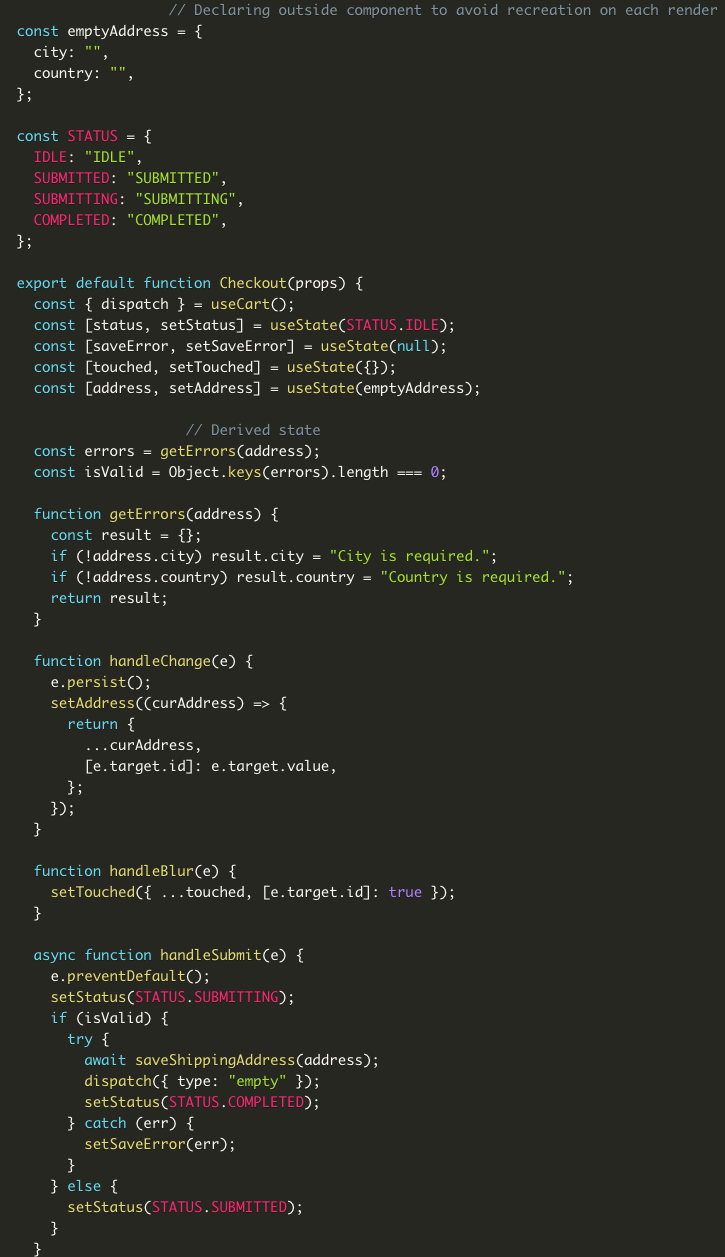
Next, edit your client-side code to forward calls to Amazon Cognito through the proxy endpoint and use the new application client ID. For example, if you’re using the Identity SDK, you should change this property as follows.
var poolData = {
UserPoolId: '<USER-POOL-ID>',
ClientId: '<APP-CLIENT-ID>',
endpoint: 'https://<APIGATEWAY-URL>'
};
If you’re using AWS Amplify, change the endpoint in the aws-exports.js file by overriding the property aws_cognito_endpoint. Or, if you configure Amplify Auth in your code, you can provide the endpoint as follows.
Amplify.Auth.configure({
userPoolId: '<USER-POOL-ID>',
userPoolWebClientId: '<APP-CLIENT-ID>',
endpoint: 'https://<APIGATEWAY-URL>'
});
If you have a mobile application that uses the Amplify mobile SDK, override the endpoint in your configuration as follows (don’t include AppClientSecret parameter in your configuration).
Note that the Endpoint value contains the domain name only, not the full URL. This feature is available in the latest releases of the iOS and Android SDKs.
"CognitoUserPool": {
"Default": {
"AppClientId": "<APP-CLIENT-ID>",
"Endpoint": "<APIGATEWAY-DOMAIN-NAME>",
"PoolId": "<USER-POOL-ID>",
"Region": "<REGION>"
}
}
WARNING: If you do an amplify push or amplify pull operation, the Amplify CLI overwrites customizations to the awsconfiguration.json and amplifyconfiguration.json files. You must manually re-apply the Endpoint customization and remove the AppClientSecret if you use the CLI to modify your cloud backend.
When to use this pattern
The same guidance for using this pattern applies as in the original post.
You may prefer this solution if you are familiar with API Gateway or if you want to take advantage of the following:
- Use CloudWatch metrics from API Gateway to monitor the behavior and health of your Amazon Cognito user pool.
- Find and examine logs from your Lambda proxy function in the Region where you have deployed this solution.
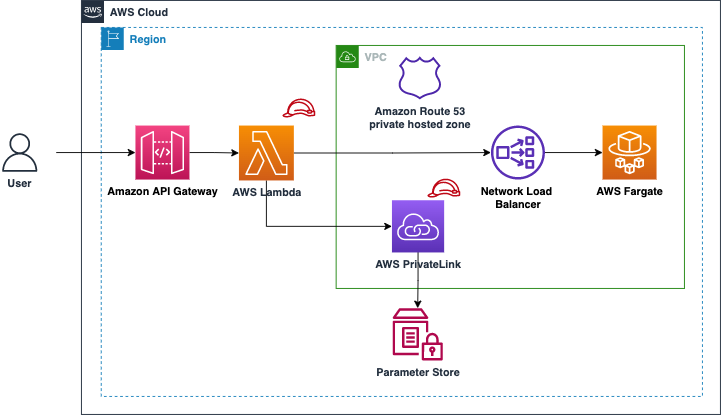
- Deploy your proxy function into an Amazon Virtual Private Cloud (Amazon VPC) and access sensitive data or services in the Amazon VPC or through Amazon VPC endpoints.
- Have full access to request and response in the proxy Lambda function
Extend the proxy features
Now that you are intercepting all of the API requests to Amazon Cognito, add features to your identity layer:
- Emit events using Amazon EventBridge when user data changes. You can do this when the proxy function receives mutating actions like
UpdateUserAttribute(among others) and Amazon Cognito processes the request successfully. - Implement more complex rate limiting than what AWS WAF supports, like per-user rate limits regardless of where IP address requests are coming from. This can also be extended to include fraud detection, request input validation, and integration with third-party security tools.
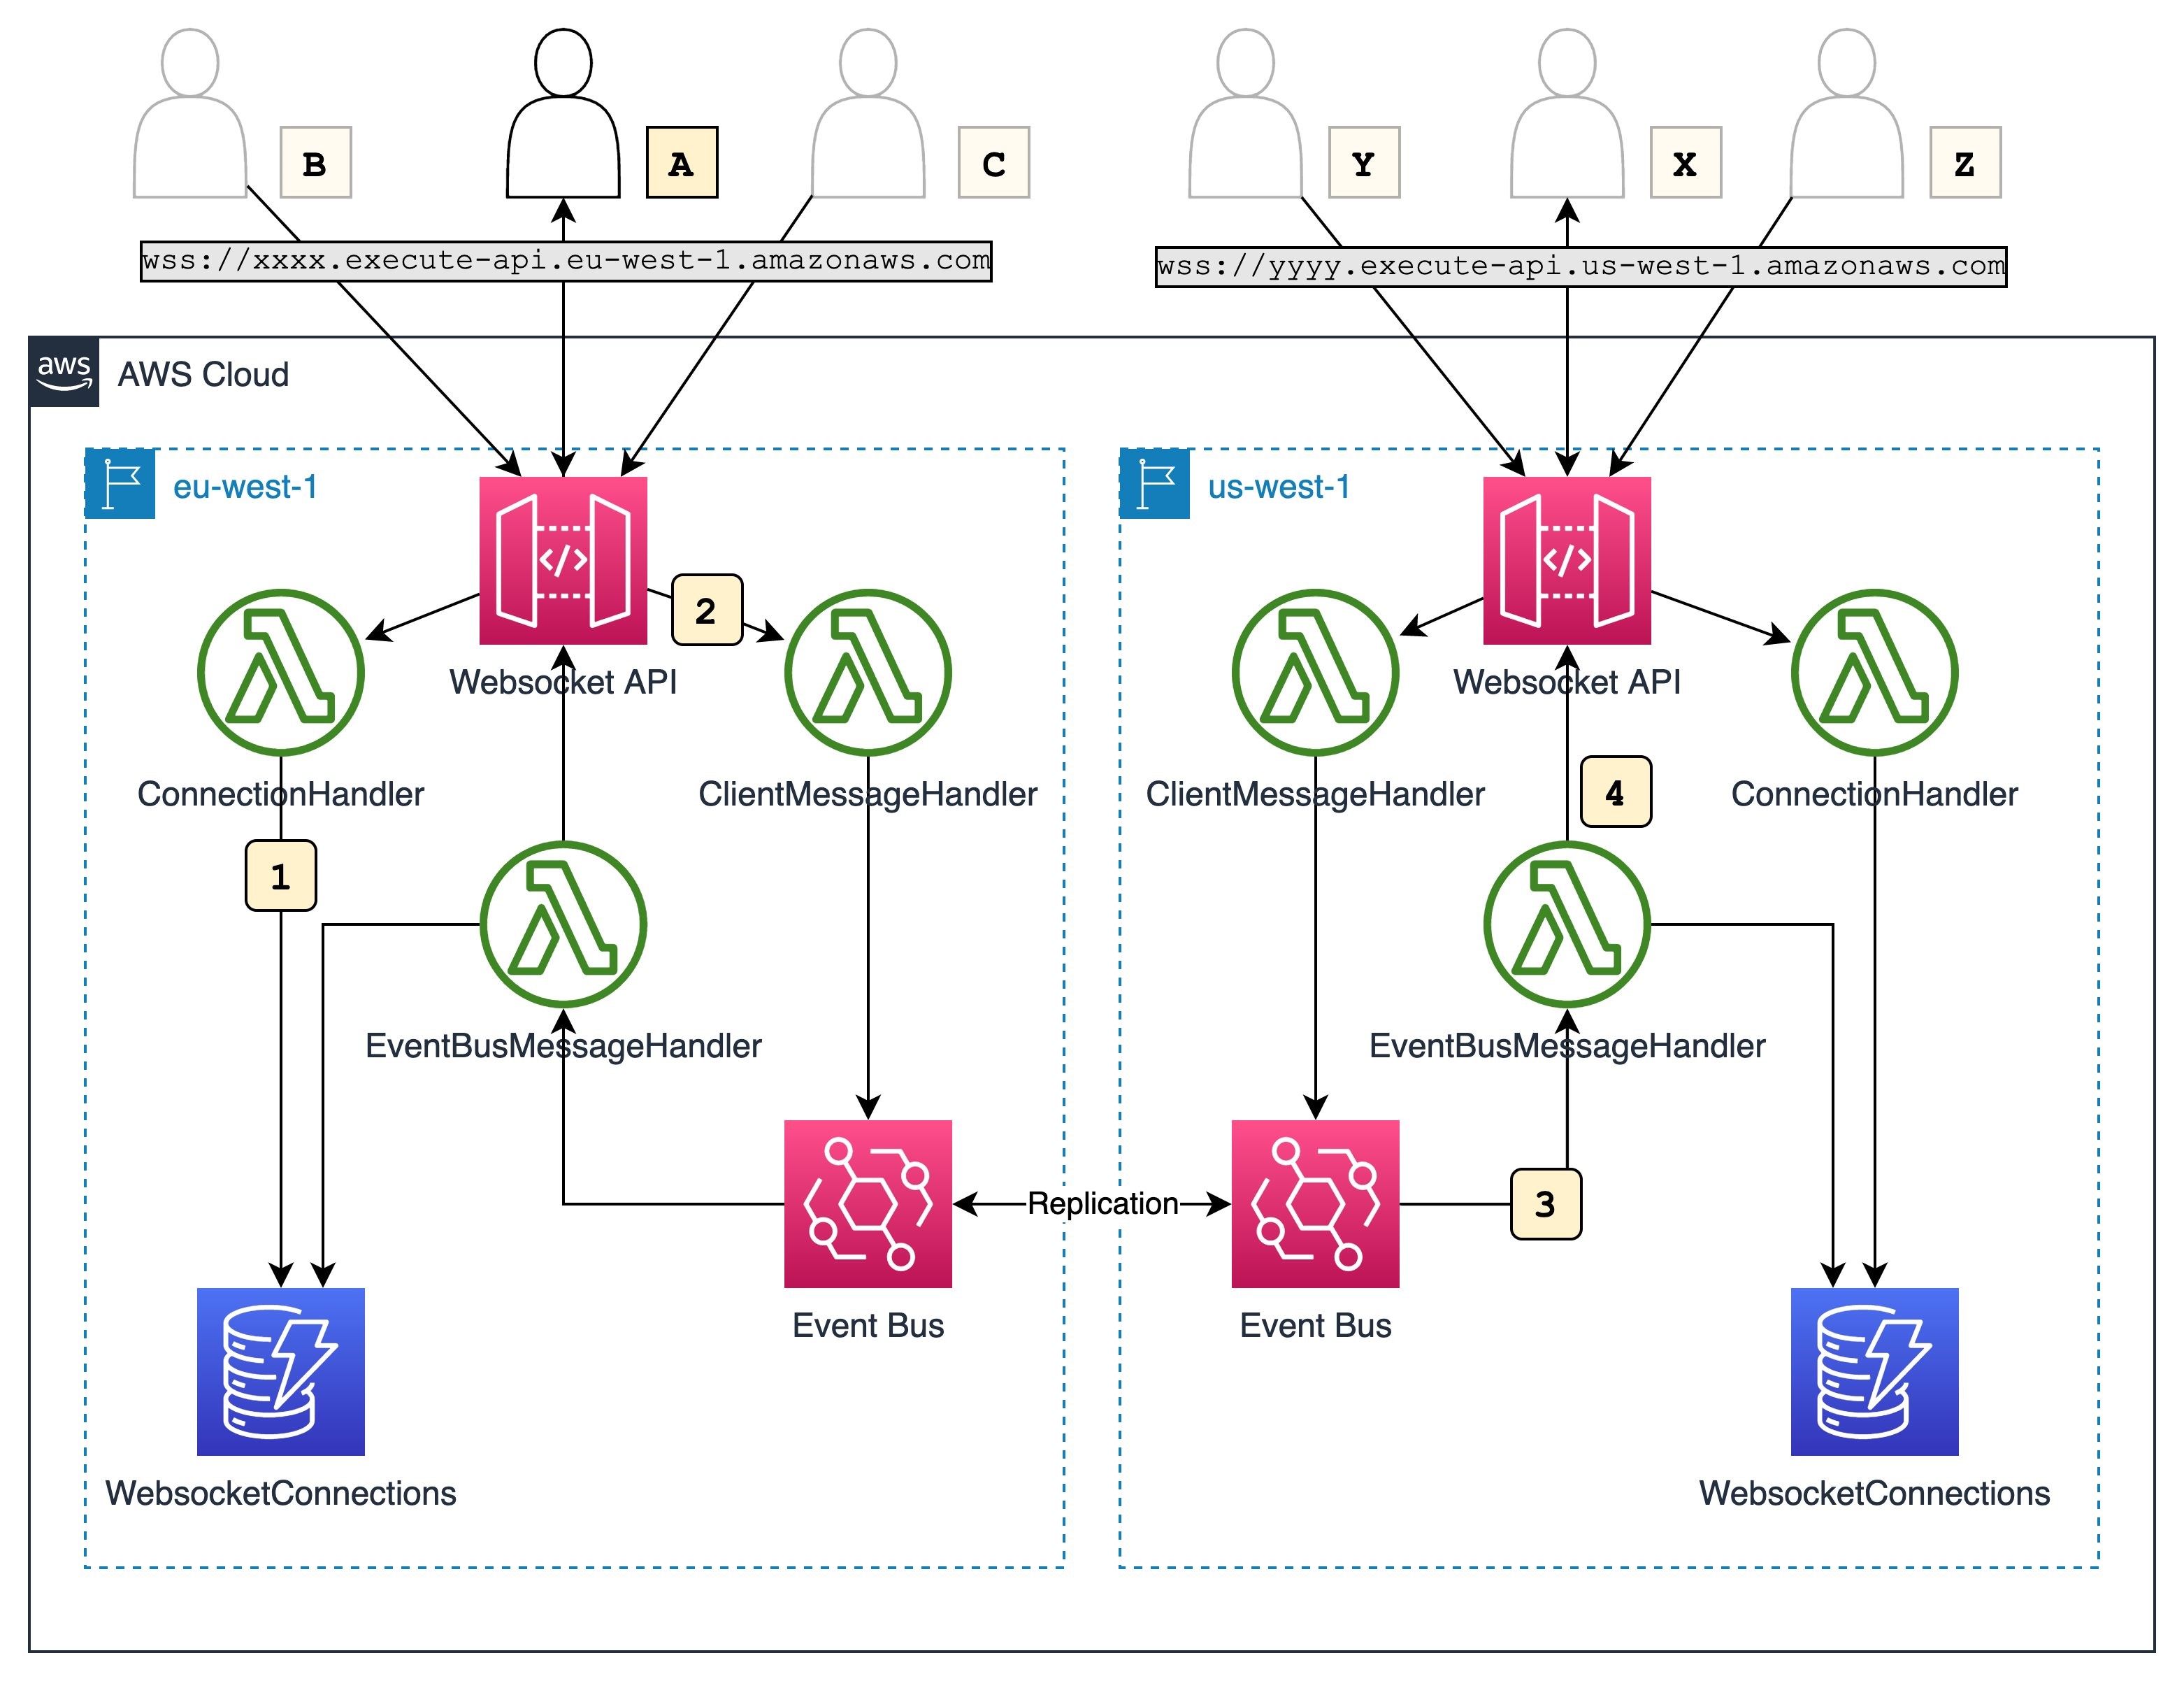
- Build a geo-redundant user pool that transparently mitigates regional failures by replicating mutating actions to an Amazon Cognito user pool in another Region.
Limitations
This solution has the same limitations highlighted in the original post. Keep in mind that resourceful authenticated users can still make requests to the Amazon Cognito API directly using the access token they obtained from authentication. If you want to prevent this from happening, adjust the proxy to avoid returning the access token to clients or return an encrypted version of the token.
Conclusion
In this post, we explored an alternative solution that implements a thin proxy to Amazon Cognito endpoint. This allows you to protect your application against unwanted requests and enrich your identity flows with additional logging, event propagation, validations, and more.
Ready to get started? If you have questions about this post, start a new thread on the Amazon Cognito forum or contact AWS Support.