Post Syndicated from Eric Johnson original https://aws.amazon.com/blogs/compute/speeding-up-incremental-changes-with-aws-sam-accelerate-and-nested-stacks/
This blog written by Jeff Marcinko, Sr. Technical Account Manager, Health Care & Life Sciencesand Brian Zambrano, Sr. Specialist Solutions Architect, Serverless.
Developers and operators have been using the AWS Serverless Application Model (AWS SAM) to author, build, test, and deploy serverless applications in AWS for over three years. Since its inception, the AWS SAM team has focused on developer productivity, simplicity, and best practices.
As good as AWS SAM is at making your serverless development experience easier and faster, building non-trivial cloud applications remains a challenge. Developers and operators want a development experience that provides high-fidelity and fast feedback on incremental changes. With serverless development, local emulation of an application composed of many AWS resources and managed services can be incomplete and inaccurate. We recommend developing serverless applications in the AWS Cloud against live AWS services to increase developer confidence. However, the latency of deploying an entire AWS CloudFormation stack for every code change is a challenge that developers face with this approach.
In this blog post, I show how to increase development velocity by using AWS SAM Accelerate with AWS CloudFormation nested stacks. Nested stacks are an application lifecycle management best practice at AWS. We recommend nested stacks for deploying complex serverless applications, which aligns to the Serverless Application Lens of the AWS Well-Architected Framework. AWS SAM Accelerate speeds up deployment from your local system by bypassing AWS CloudFormation to deploy code and resource updates when possible.
AWS CloudFormation nested stacks and AWS SAM
A nested stack is a CloudFormation resource that is part of another stack, referred to as the parent, or root stack.

Nested stack architecture
The best practice for modeling complex applications is to author a root stack template and declare related resources in their own nested stack templates. This partitioning improves maintainability and encourages reuse of common template patterns. It is easier to reason about the configuration of the AWS resources in the example application because they are described in nested templates for each application component.
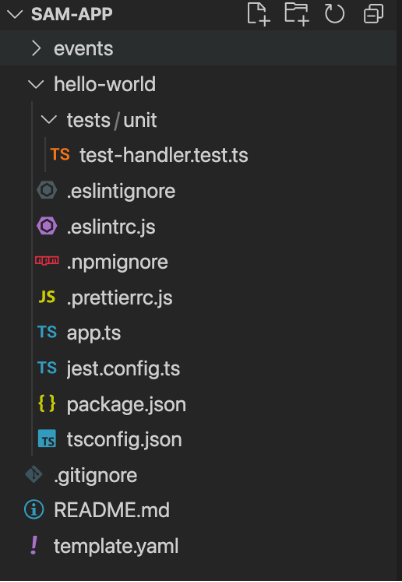
With AWS SAM, developers create nested stacks using the AWS::Serverless::Application resource type. The following example shows a snippet from a template.yaml file, which is the root stack for an AWS SAM application.
AWSTemplateFormatVersion: '2010-09-09'
Transform: AWS::Serverless-2016-10-31

Resources:
  DynamoDB:
    Type: AWS::Serverless::Application
    Properties:
      Location: db/template.yaml

  OrderWorkflow:
    Type: AWS::Serverless::Application
    Properties:
      Location: workflow/template.yaml

  ApiIntegrations:
    Type: AWS::Serverless::Application
    Properties:
      Location: api-integrations/template.yaml

  Api:
    Type: AWS::Serverless::Application
    Properties:
      Location: api/template.yaml
Each AWS::Serverless::Application resource type references a child stack, which is an independent AWS SAM template. The Location property tells AWS SAM where to find the stack definition.
Solution overview
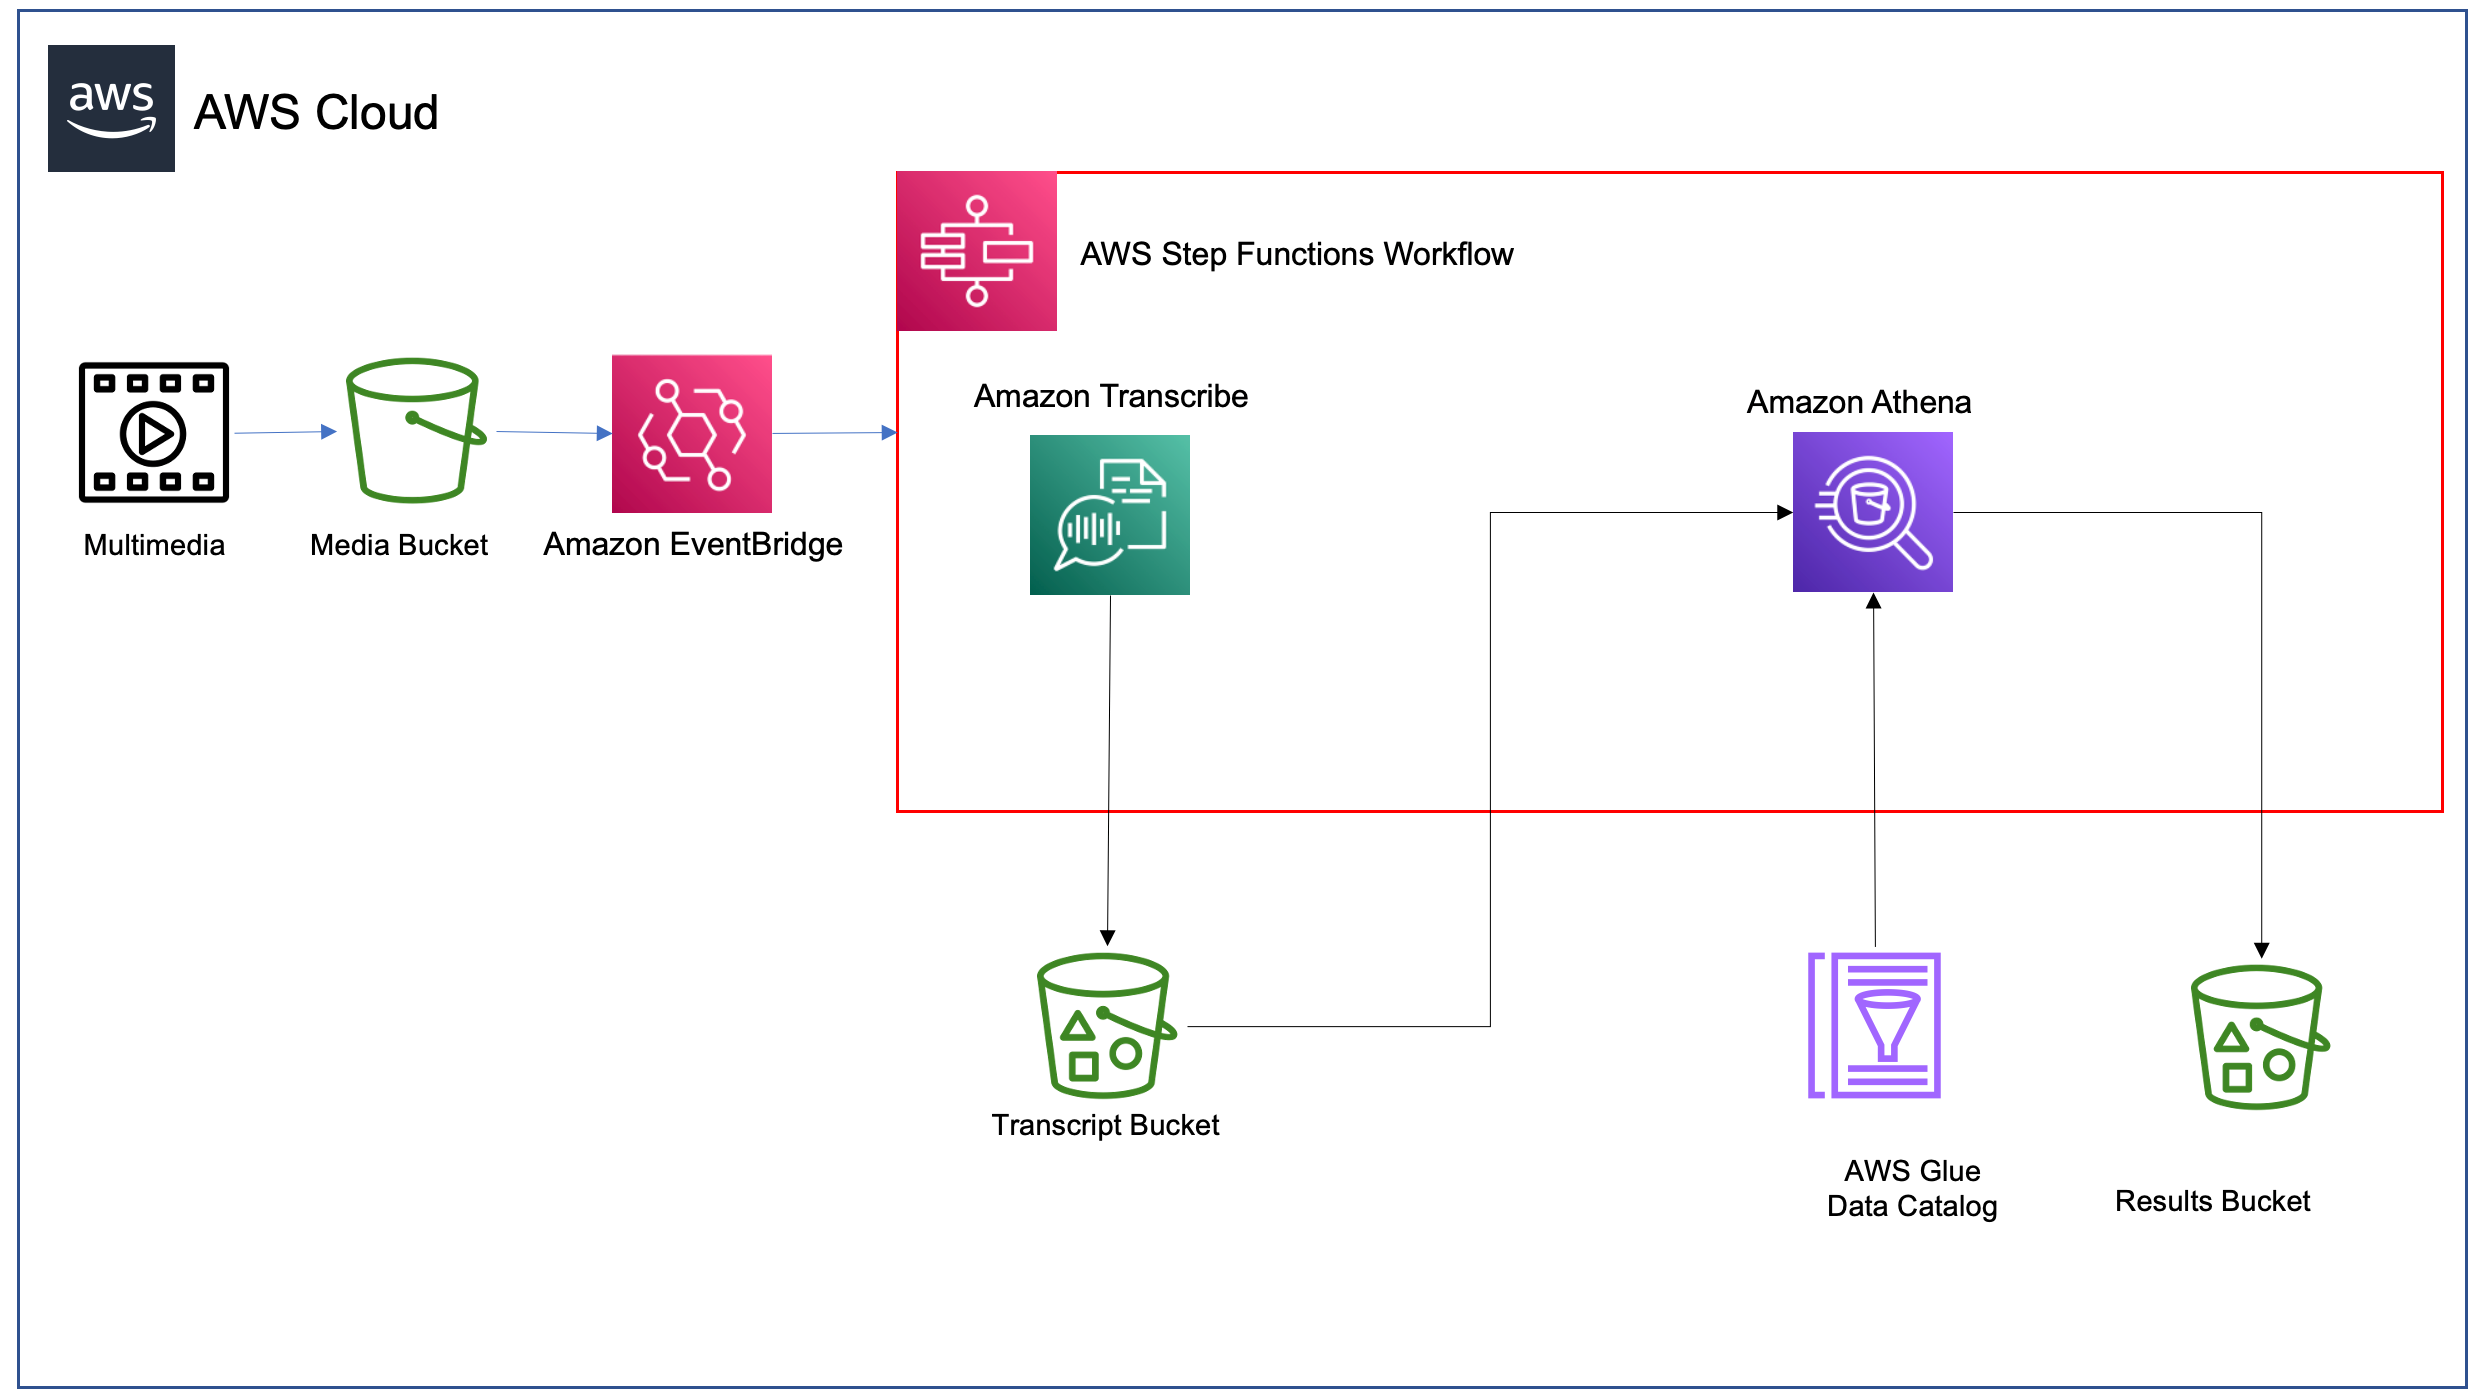
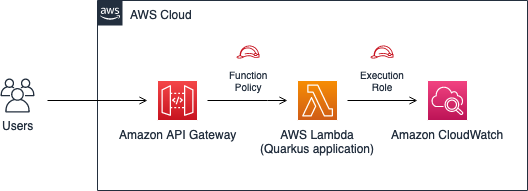
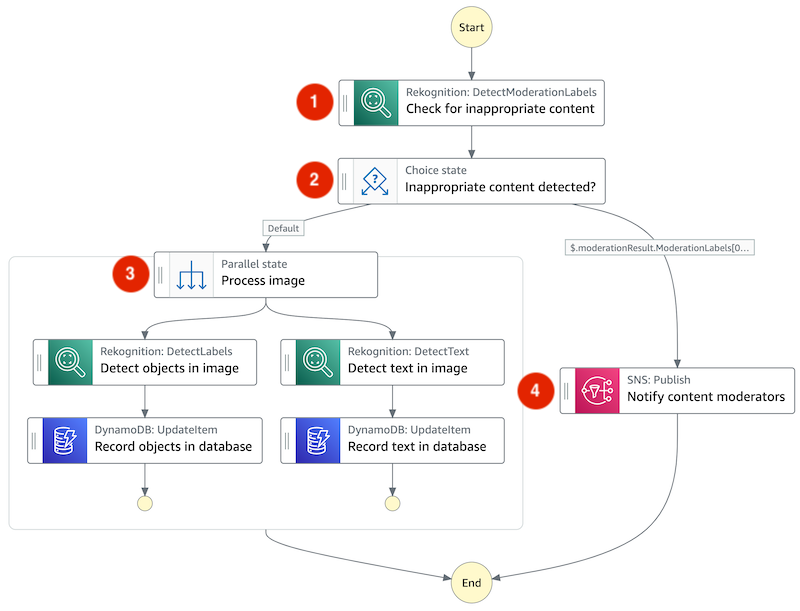
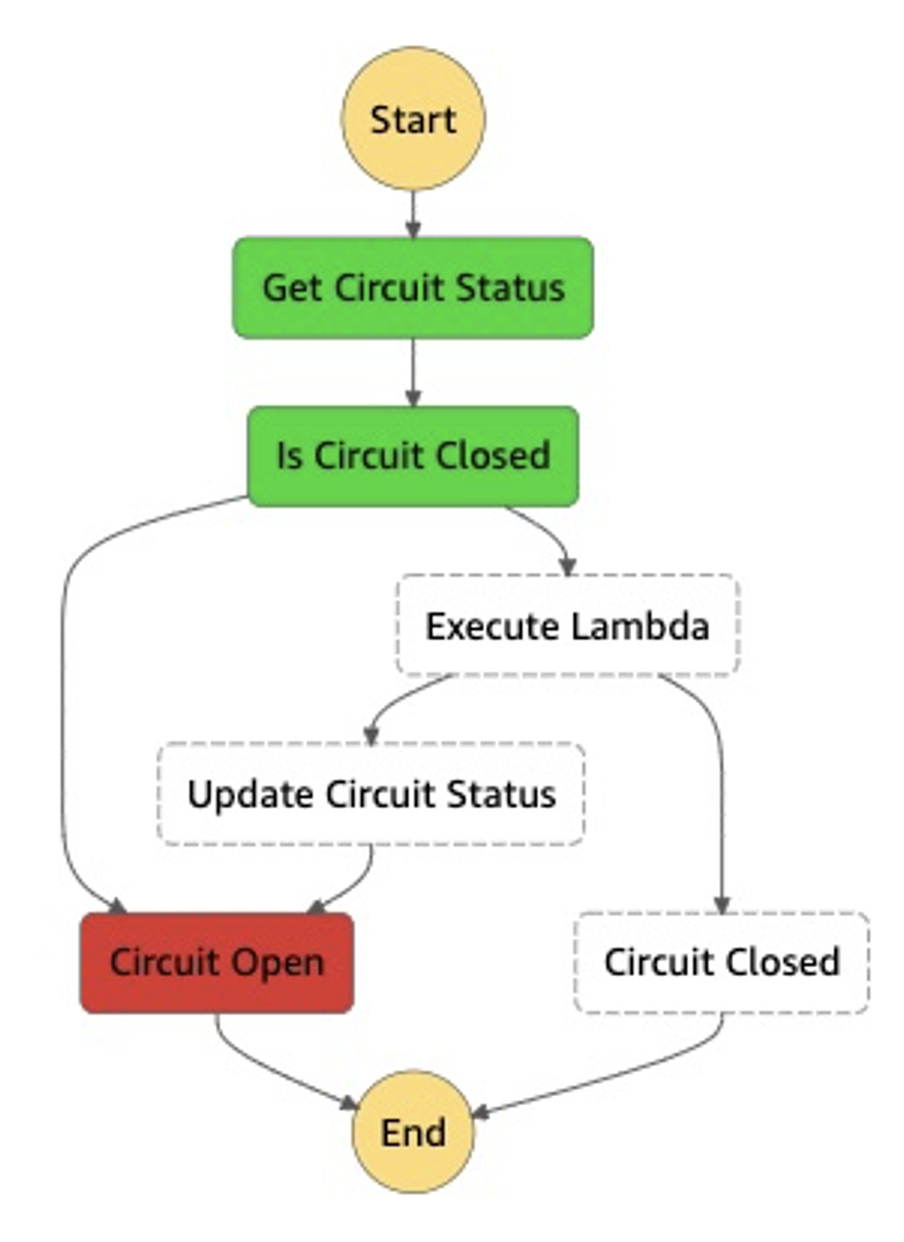
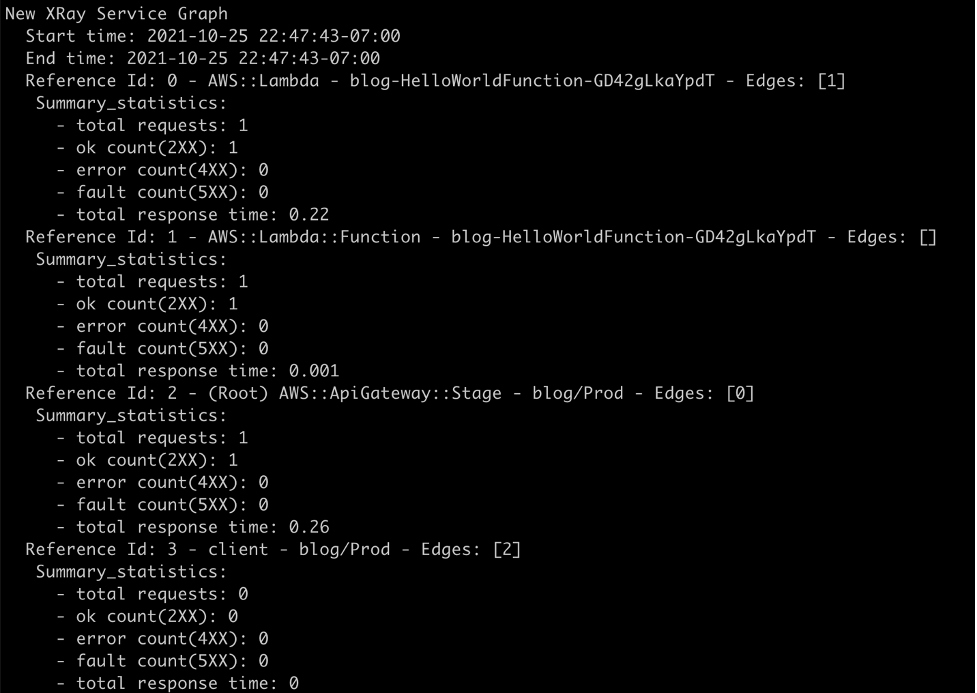
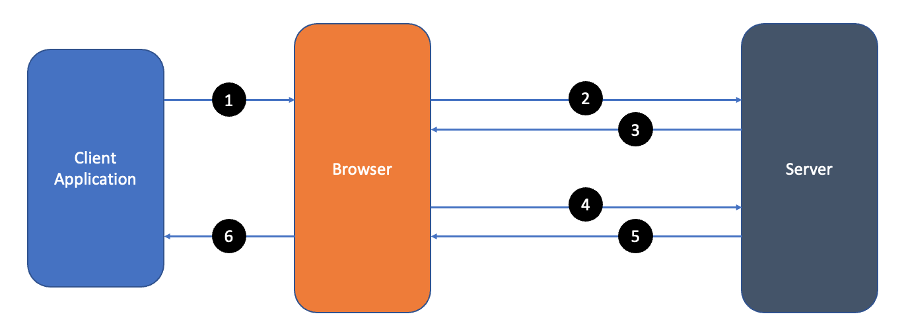
The sample application exposes an API via Amazon API Gateway. One API endpoint (#2) forwards POST requests to Amazon SQS, an AWS Lambda function polls (#3) the SQS Queue and starts an Amazon Step Function workflow execution (#4) for each message.
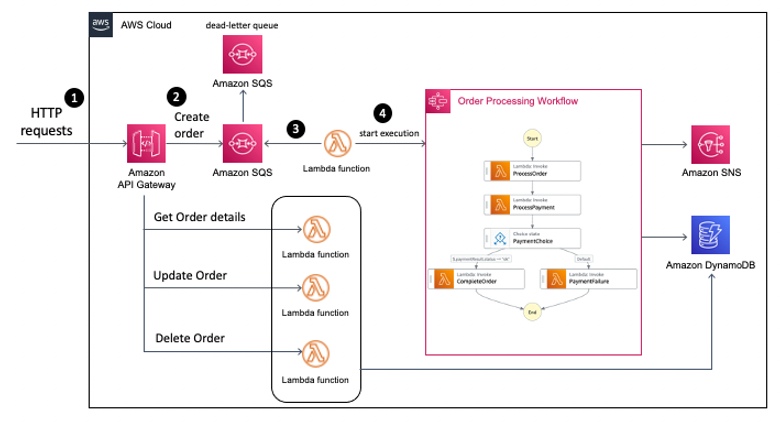
Sample application architecture
Prerequisites
- AWS SAM CLI, version 1.53.0 or higher
- Python 3.9
Deploy the application
To deploy the application:
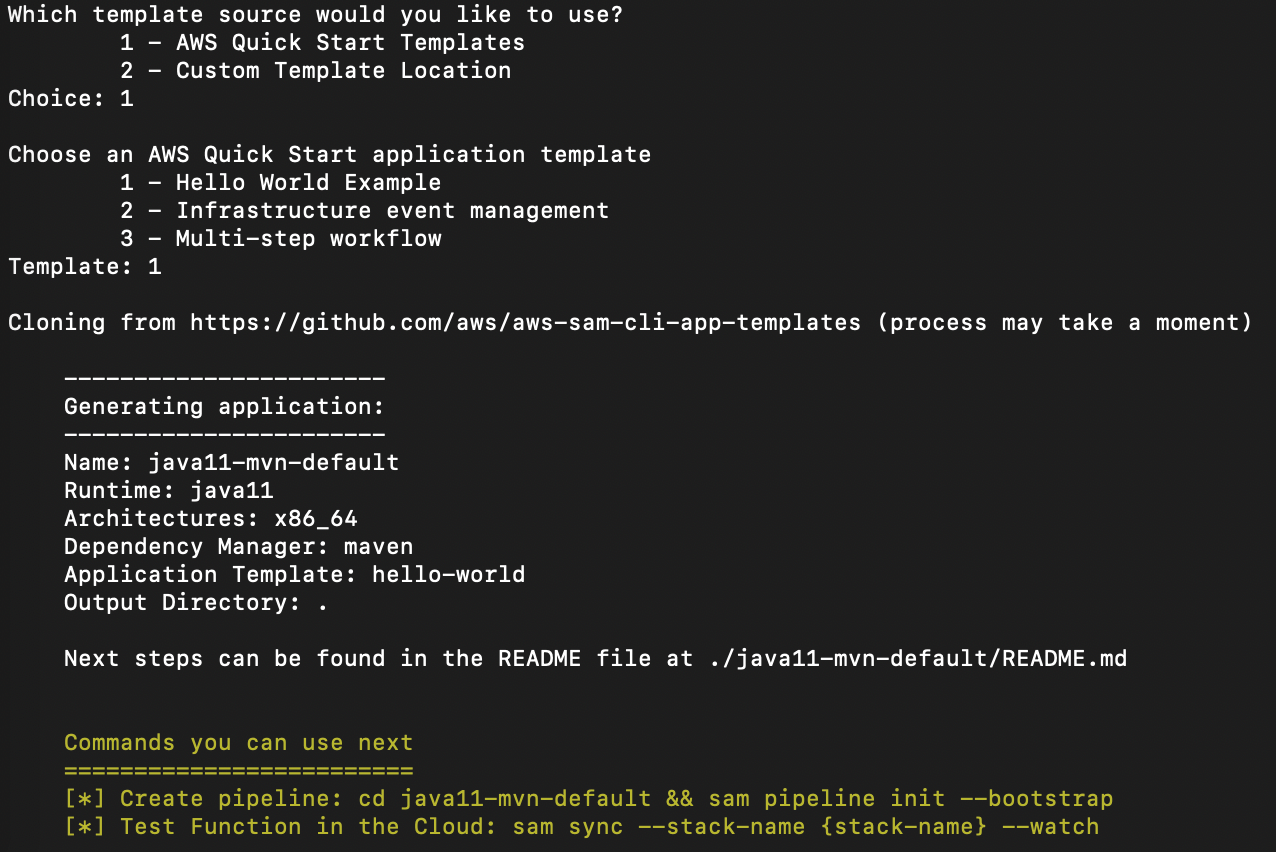
- Clone the repository:
git clone <a href="https://github.com/aws-samples/sam-accelerate-nested-stacks-demo.git" target="_blank" rel="noopener">https://github.com/aws-samples/sam-accelerate-nested-stacks-demo.git</a> - Change to the root directory of the project and run the following AWS SAM CLI commands:
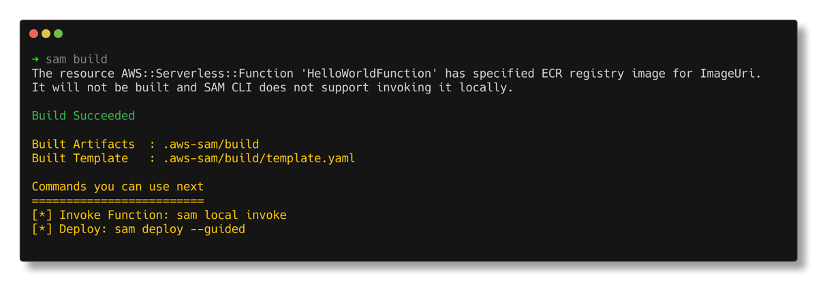
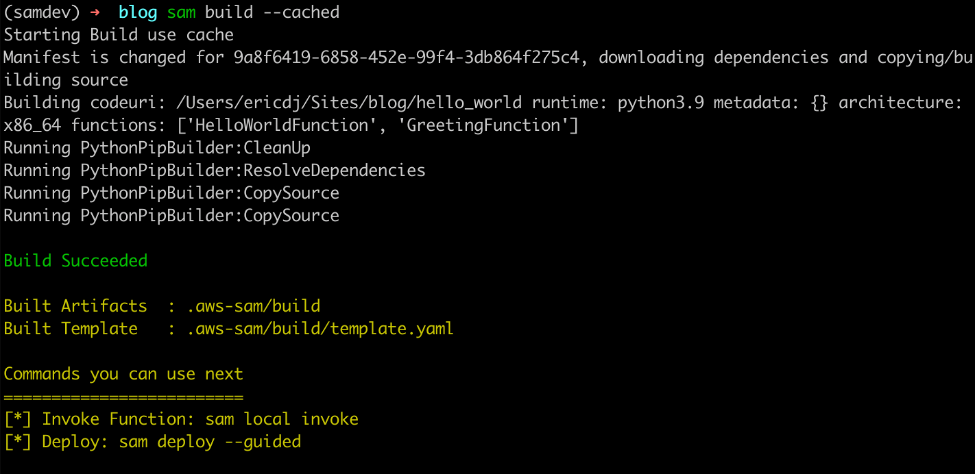
cd sam-accelerate-nested-stacks-demo
sam build
sam deploy --guided --capabilities CAPABILITY_IAM CAPABILITY_AUTO_EXPAND
You must include the CAPABILITY_IAM and CAPABILITY_AUTO_EXPAND capabilities to support nested stacks and the creation of permissions.
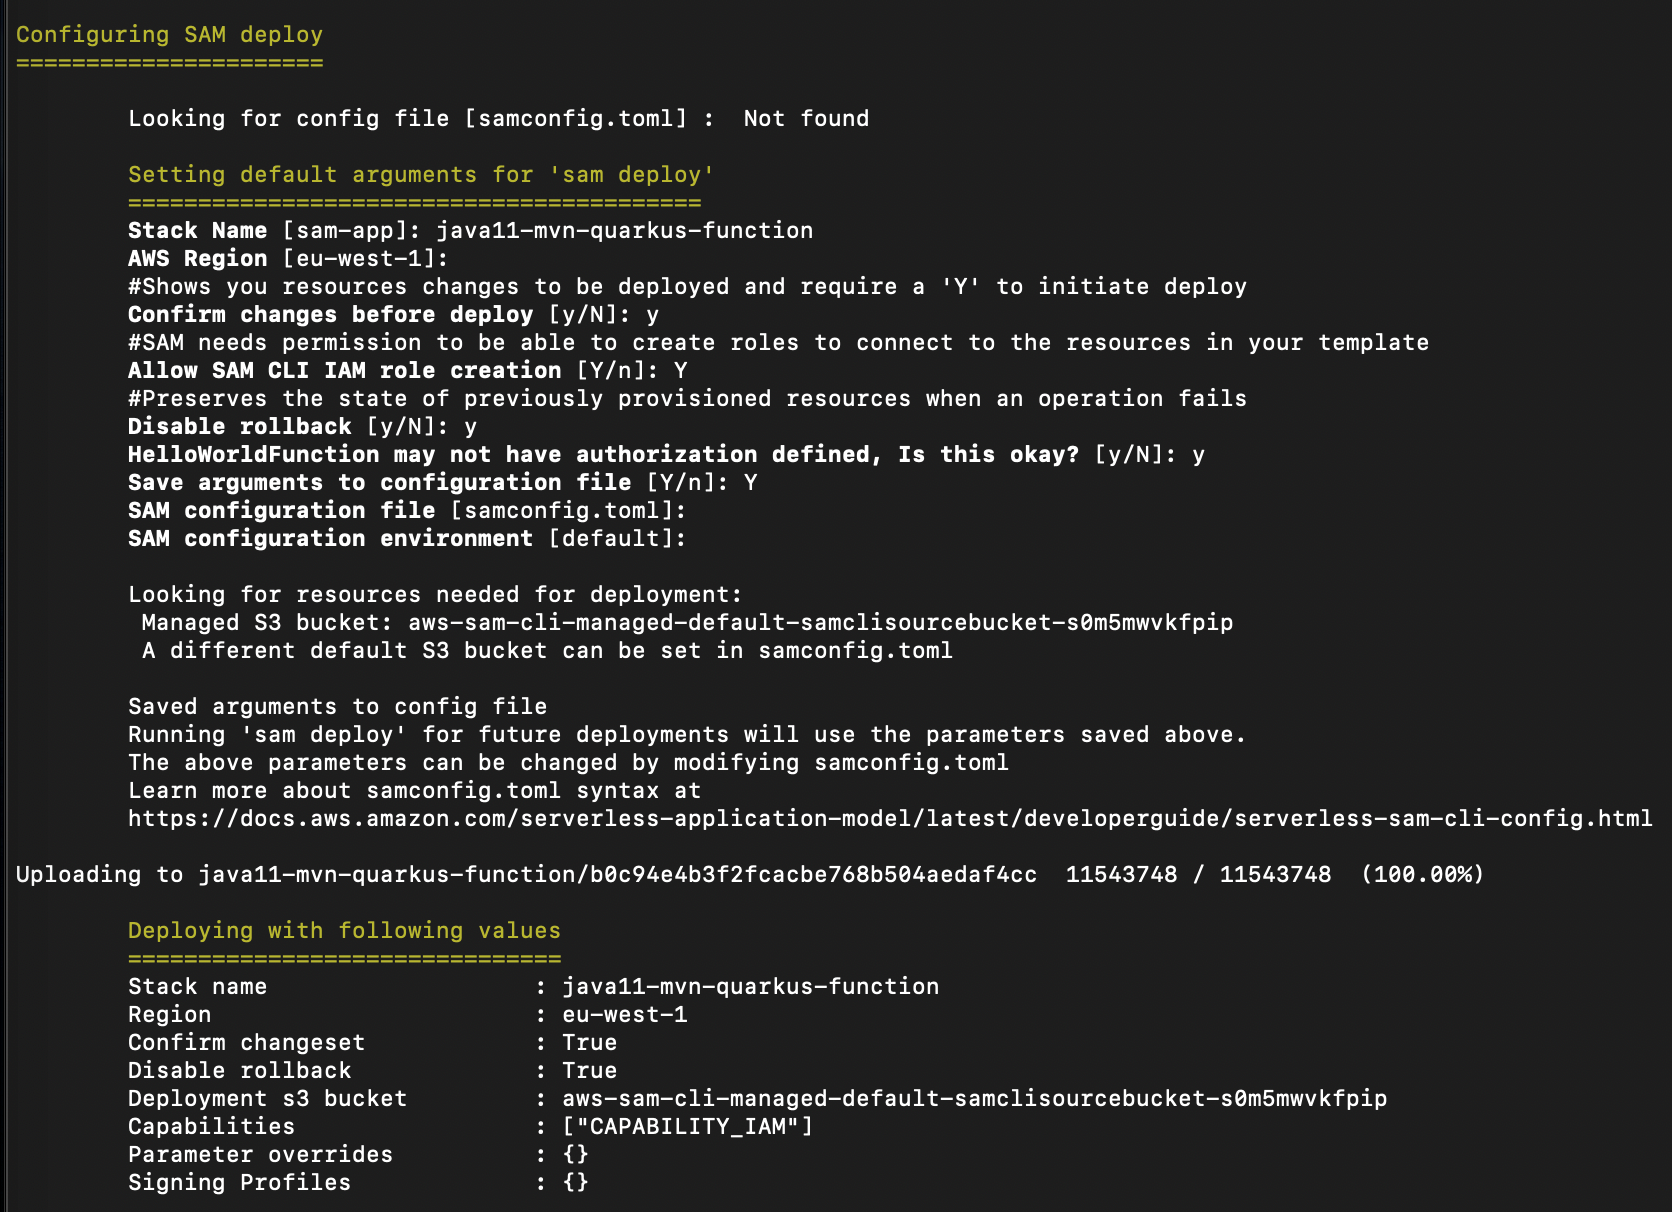
- Use orders-app as the stack name during guided deployment. During the deploy process, enter your email for the SubscriptionEmail value. This requires confirmation later. Accept the defaults for the rest of the values.

SAM deploy example
- After the CloudFormation deployment completes, save the API endpoint URL from the outputs.


Confirming the notifications subscription
After the deployment finishes, you receive an Amazon SNS subscription confirmation email at the email address provided during the deployment. Choose the Confirm Subscription link to receive notifications.
You have chosen to subscribe to the topic:
arn:aws:sns:us-east-1:123456789012:order-topic-xxxxxxxxxxxxxxxxxx

To confirm this subscription, click or visit the link below (If this was in error no action is necessary):
Confirm subscription
Testing the orders application
To test the application, use the curl command to create a new Order request with the following JSON payload:
{
    "quantity": 1,
    "name": "Pizza",
    "restaurantId": "House of Pizza"
}
curl -s --header "Content-Type: application/json" \
--request POST \
--data '"quantity":1,"name":"Pizza","quantity":1,"restaurantId":"House of Pizza"}' \
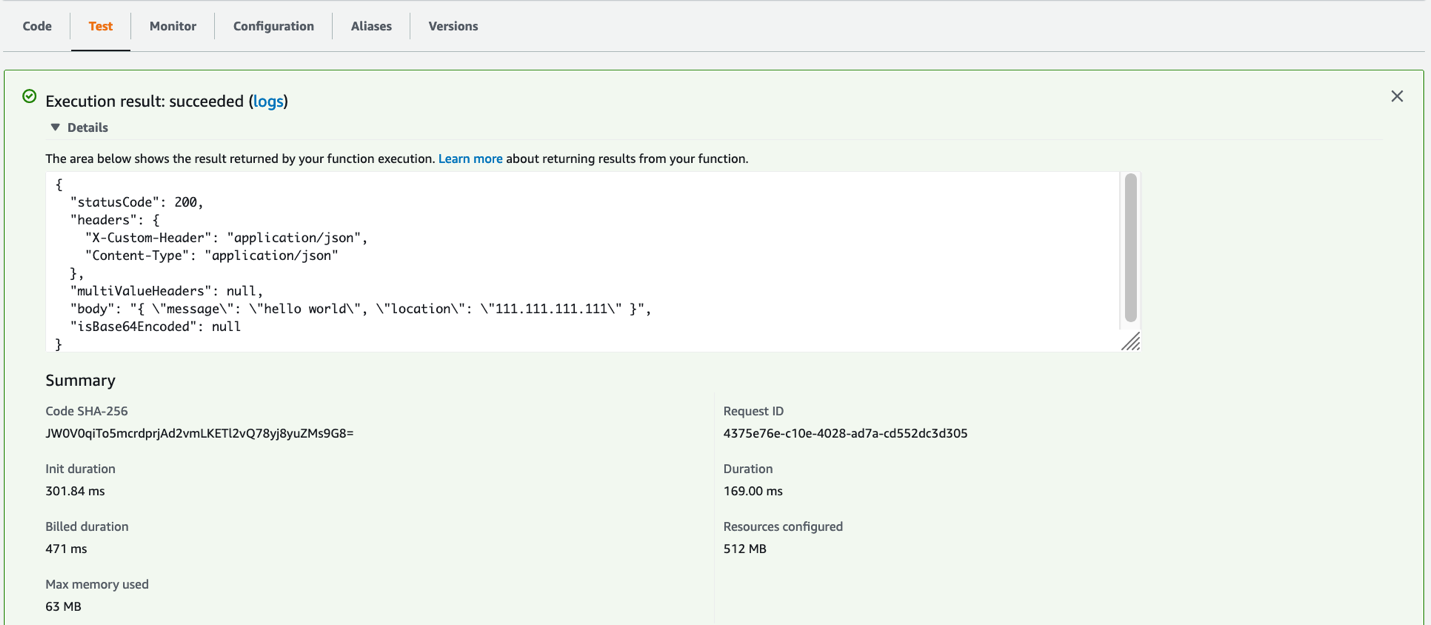
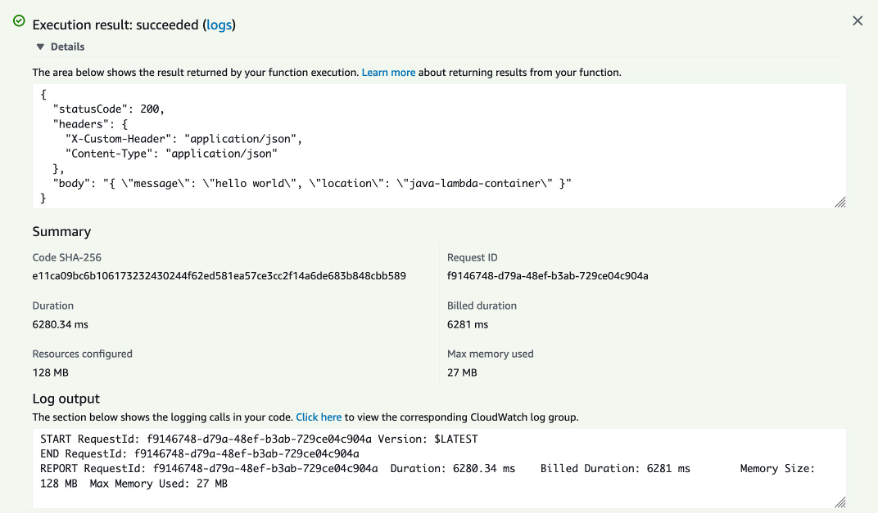
https://xxxxxxxxxx.execute-api.us-east-1.amazonaws.com/Dev/orders | python -m json.toolAPI Gateway responds with the following message, showing it successfully sent the request to the SQS queue:

API Gateway response
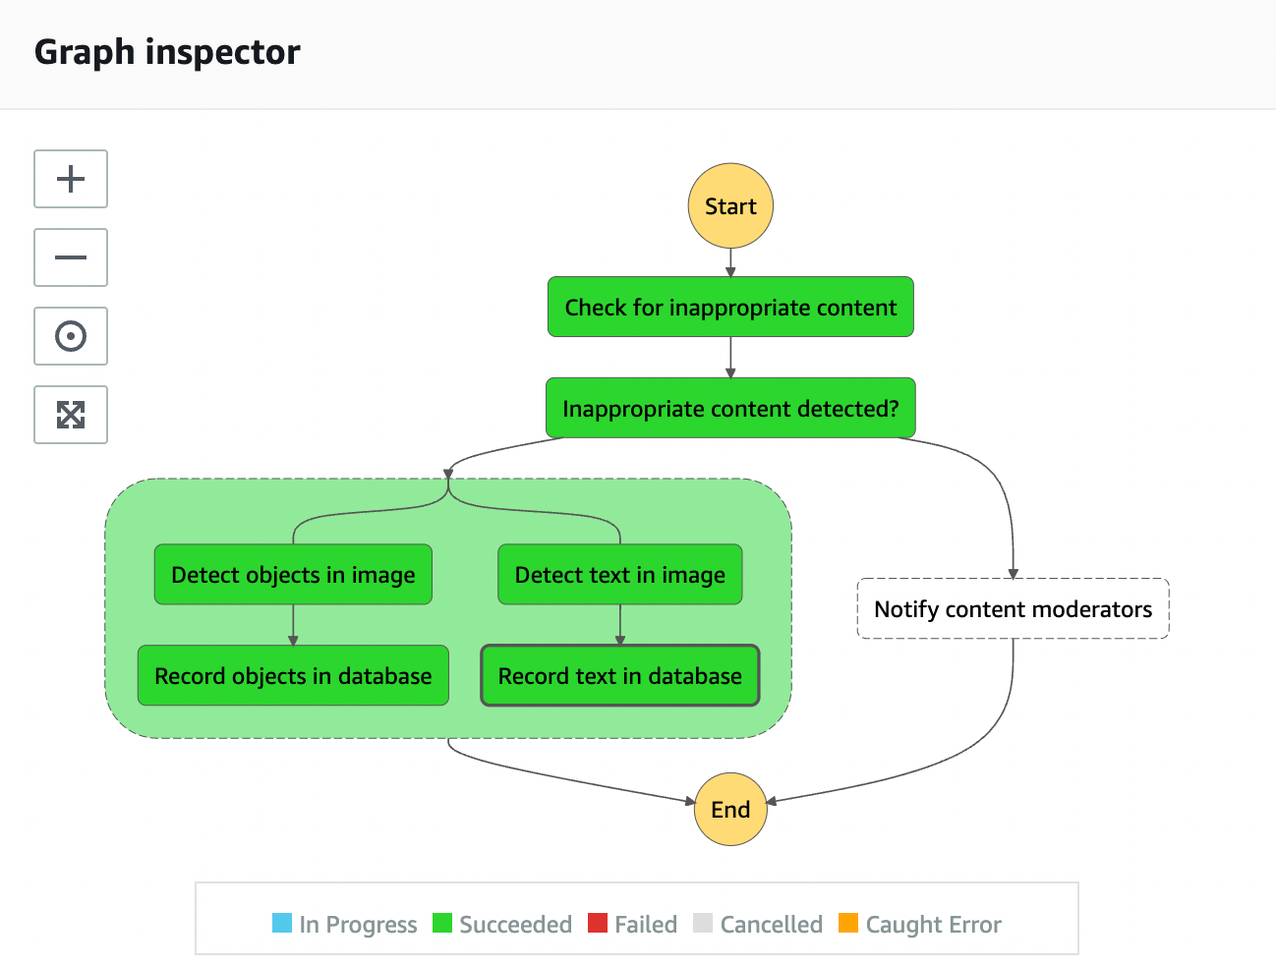
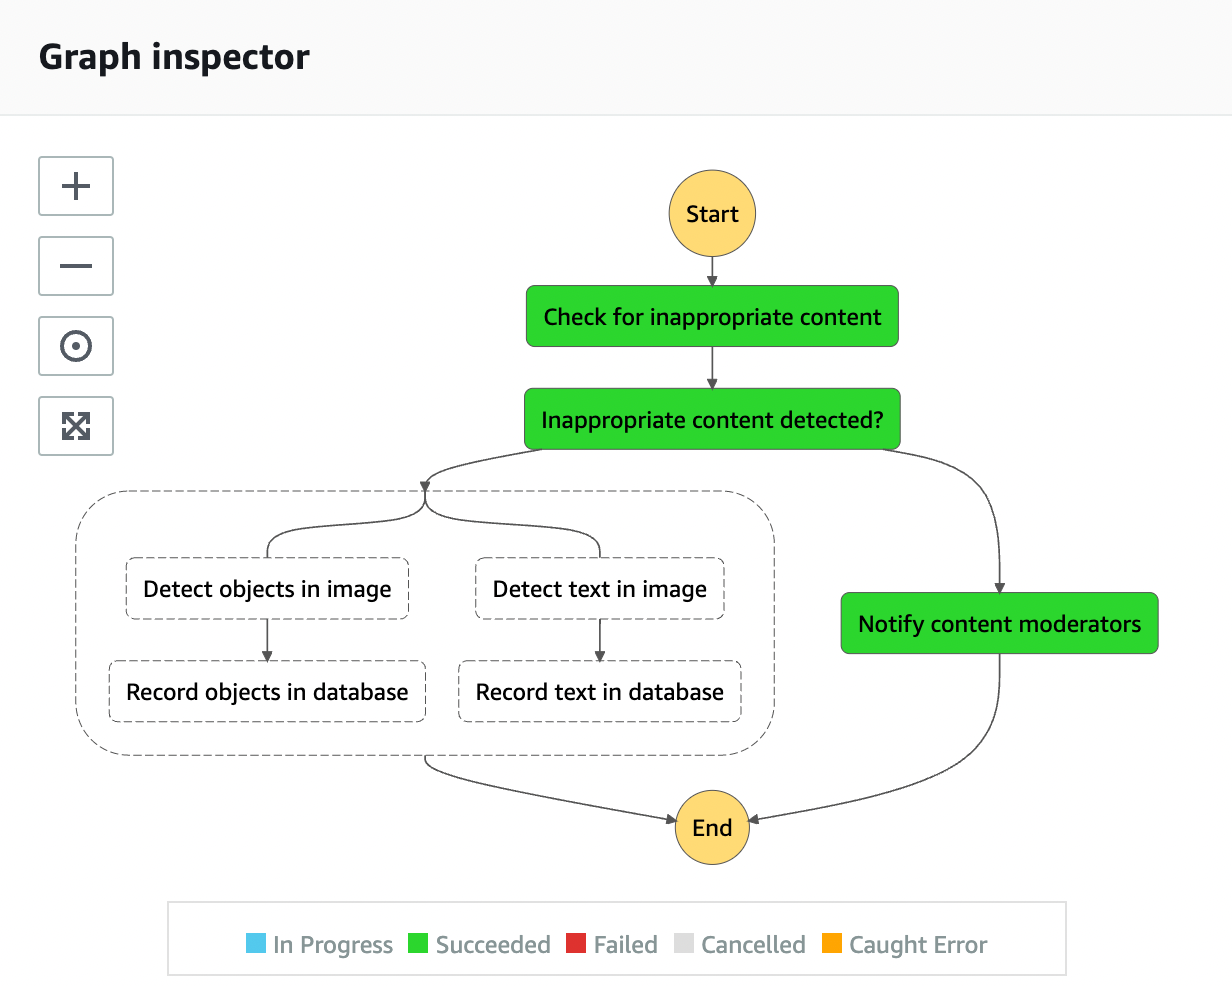
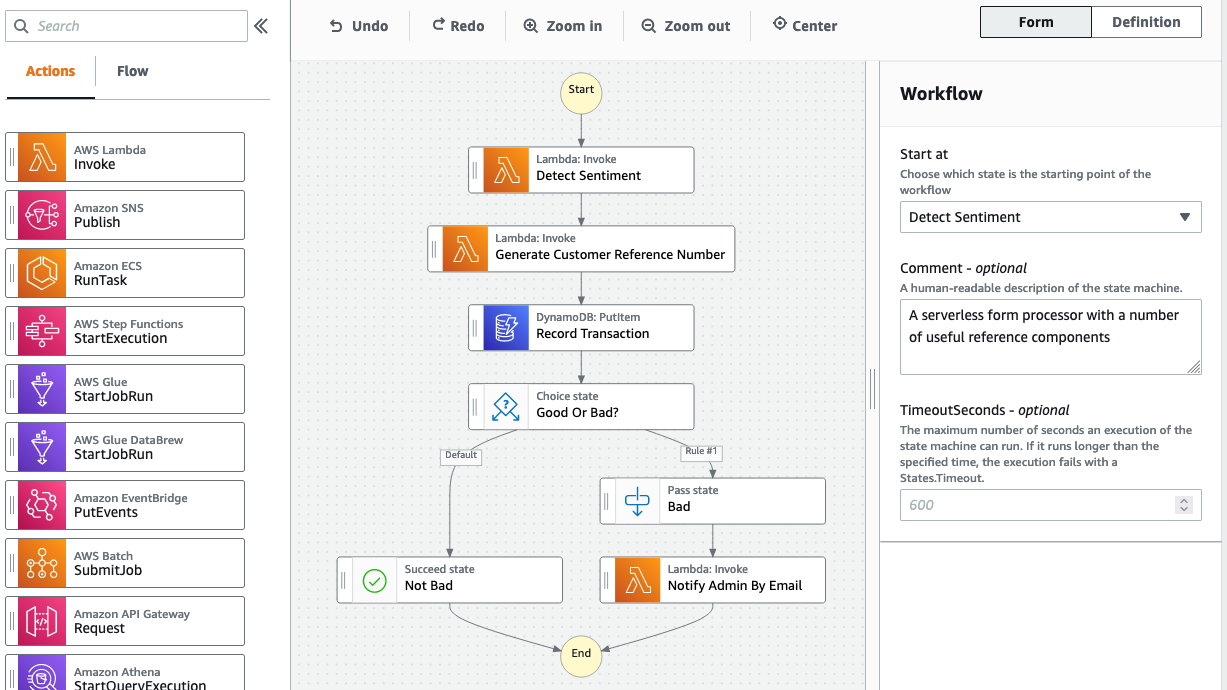
The application sends an order notification once the Step Functions workflow completes processing. The workflow intentionally randomizes the SUCCESS or FAILURE status message.
Accelerating development with AWS SAM sync
AWS SAM Accelerate enhances the development experience. It automatically observes local code changes and synchronizes them to AWS without building and deploying every function in my project.
However, when you synchronize code changes directly into the AWS Cloud, it can introduce drift between your CloudFormation stacks and its deployed resources. For this reason, you should only use AWS SAM Accelerate to publish changes in a development stack.
In your terminal, change to the root directory of the project folder and run the sam sync command. This runs in the foreground while you make code changes:
cd sam-accelerate-nested-stacks-demo
sam sync --watch --stack-name orders-appThe –watch option causes AWS SAM to perform an initial CloudFormation deployment. After the deployment is complete, AWS SAM watches for local changes and synchronizes them to AWS. This feature allows you to make rapid iterative code changes and sync to the Cloud automatically in seconds.
Making a code change
In the editor, update the Subject argument in the send_order_notification function in workflow/src/complete_order/app.py.
def send_order_notification(message):
topic_arn = TOPIC_ARN
response = sns.publish(
TopicArn=topic_arn,
Message=json.dumps(message),
Subject=f'Orders-App: Update for order {message["order_id"]}'
#Subject='Orders-App: SAM Accelerate for the win!'
)
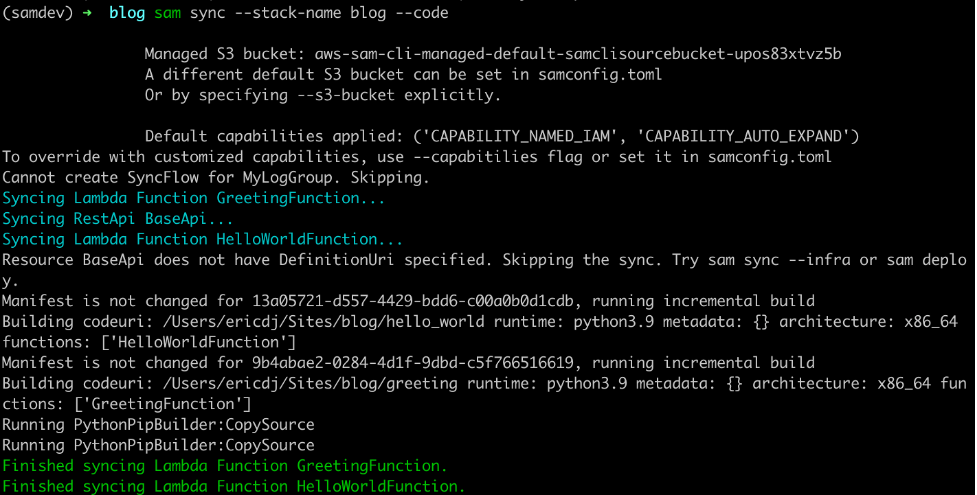
On save, AWS SAM notices the local code change, and updates the CompleteOrder Lambda function. AWS SAM does not trigger updates to other AWS resources across the different stacks, since they are unchanged. This can result in increased development velocity.

SAM sync output
Validate the change by sending a new order request and review the notification email subject.
curl -s --header "Content-Type: application/json" \
  --request POST \
  --data '"quantity":1,"name":"Pizza","quantity":1,"restaurantId":"House of Pizza"}' \
  https://xxxxxxxxxx.execute-api.us-east-1.amazonaws.com/Dev/orders  | python -m json.tool

In this example, AWS SAM Accelerate is 10–15 times faster than the CloudFormation deployment workflow (sam deploy) for single function code changes.

Deployment speed comparison between SAM accelerate and CloudFormation
Deployment times vary based on the size and complexity of your Lambda functions and the number of resources in your project.
Making a configuration change
Next, make an infrastructure change to show how sync –watch handles configuration updates.
Update ReadCapacityUnits and WriteCapacityUnits in the DynamoDB table definition by changing the values from five to six in db/template.yaml.
Resources:
  OrderTable:
    Type: AWS::DynamoDB::Table
    Properties:
      TableName: order-table-test
      AttributeDefinitions:
        - AttributeName: user_id
          AttributeType: S
        - AttributeName: id
          AttributeType: S
      KeySchema:
        - AttributeName: user_id
          KeyType: HASH
        - AttributeName: id
          KeyType: RANGE
      ProvisionedThroughput:
        ReadCapacityUnits: 5
        WriteCapacityUnits: 5
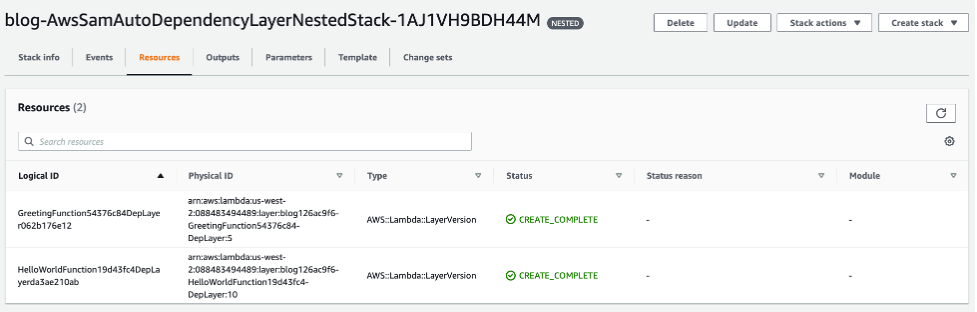
The sam sync –watch command recognizes the configuration change requires a CloudFormation deployment to update the db nested stack. Nested stacks reflect an UPDATE_COMPLETE status because CloudFormation starts an update to every nested stack to determine if changes must be applied.

SAM sync infrastructure update
Cleaning up
Delete the nested stack resources to make sure that you don’t continue to incur charges. After stopping the sam sync –watch command, run the following command to delete your resources:
sam delete orders-appYou can also delete the CloudFormation root stack from the console by following these steps.
Conclusion
Local emulation of complex serverless applications, built with nested stacks, can be challenging. AWS SAM Accelerate helps builders achieve a high-fidelity development experience by rapidly synchronizing code changes into the AWS Cloud.
This post shows AWS SAM Accelerate features that push code changes in near real time to a development environment in the Cloud. I use a non-trivial sample application to show how developers can push code changes to a live environment in seconds while using CloudFormation nested stacks to achieve the isolation and maintenance benefits.
For more serverless learning resources, visit Serverless Land.