Tag Archives: Developers

Cloudflare Integrations Marketplace introduces three new partners: Sentry, Momento and Turso

Post Syndicated from Tanushree Sharma original http://blog.cloudflare.com/cloudflare-integrations-marketplace-new-partners-sentry-momento-turso/

Cloudflare Integrations Marketplace introduces three new partners: Sentry, Momento and Turso

Cloudflare Integrations Marketplace introduces three new partners: Sentry, Momento and Turso

Building modern full-stack applications requires connecting to many hosted third party services, from observability platforms to databases and more. All too often, this means spending time doing busywork, managing credentials and writing glue code just to get started. This is why we’re building out the Cloudflare Integrations Marketplace to allow developers to easily discover, configure and deploy products to use with Workers.

Earlier this year, we introduced integrations with Supabase, PlanetScale, Neon and Upstash. Today, we are thrilled to introduce our newest additions to Cloudflare’s Integrations Marketplace – Sentry, Turso and Momento.

Let's take a closer look at some of the exciting integration providers that are now part of the Workers Integration Marketplace.

Improve performance and reliability by connecting Workers to Sentry

When your Worker encounters an error you want to know what happened and exactly what line of code triggered it. Sentry is an application monitoring platform that helps developers identify and resolve issues in real-time.

The Workers and Sentry integration automatically sends errors, exceptions and console.log() messages from your Worker to Sentry with no code changes required. Here’s how it works:

  1. You enable the integration from the Cloudflare Dashboard.
  2. The credentials from the Sentry project of your choice are automatically added to your Worker.
  3. You can configure sampling to control the volume of events you want sent to Sentry. This includes selecting the sample rate for different status codes and exceptions.
  4. Cloudflare deploys a Tail Worker behind the scenes that contains all the logic needed to capture and send data to Sentry.
  5. Like magic, errors, exceptions, and log messages are automatically sent to your Sentry project.

In the future, we’ll be improving this integration by adding support for uploading source maps and stack traces so that you can pinpoint exactly which line of your code caused the issue. We’ll also be tying in Workers deployments with Sentry releases to correlate new versions of your Worker with events in Sentry that help pinpoint problematic deployments. Check out our developer documentation for more information.

Develop at the Data Edge with Turso + Workers

Turso is an edge-hosted, distributed database based on libSQL, an open-source fork of SQLite. Turso focuses on providing a global service that minimizes query latency (and thus, application latency!). It’s perfect for use with Cloudflare Workers – both compute and data are served close to users.

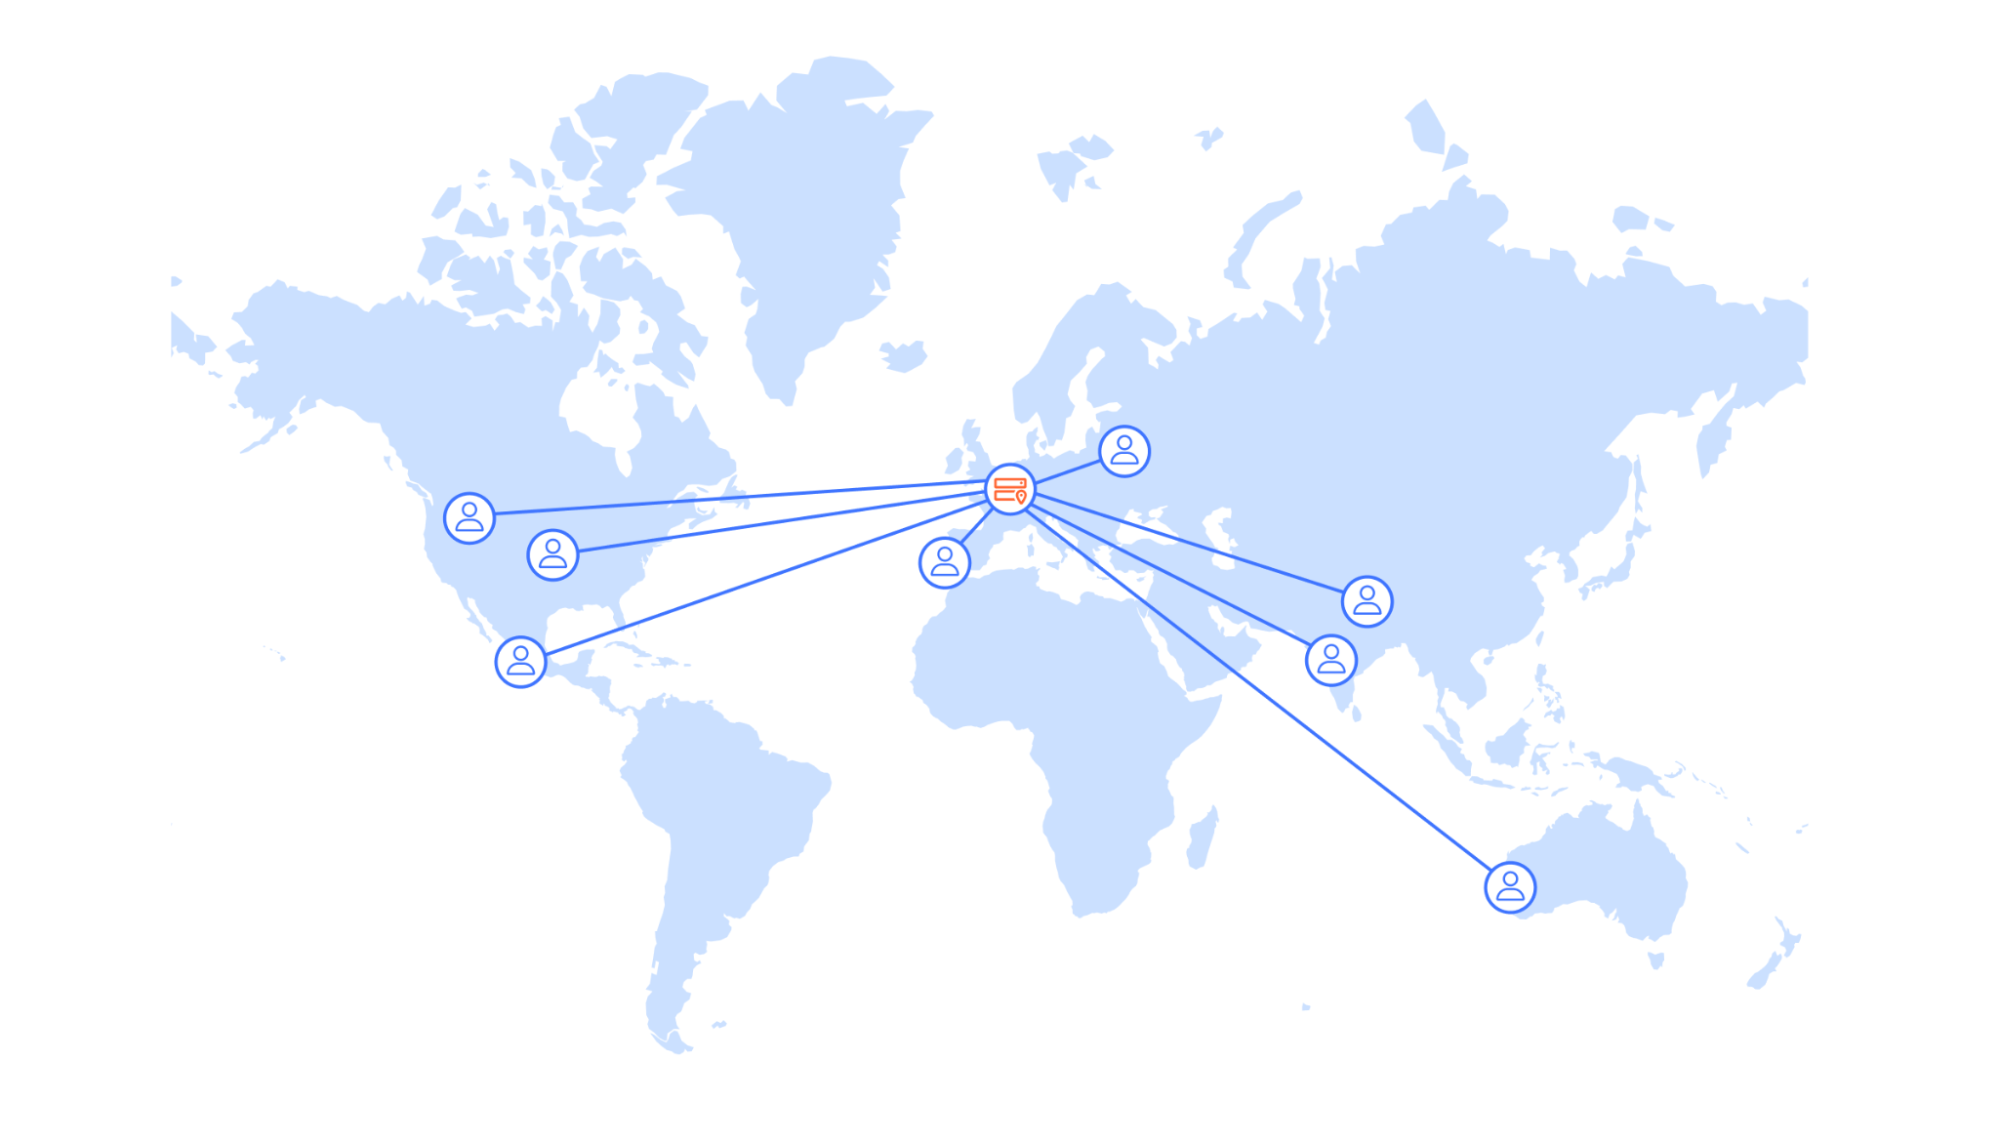
Turso follows the model of having one primary database with replicas that are located globally, close to users. Turso automatically routes requests to a replica closest to where the Worker was invoked. This model works very efficiently for read heavy applications since read requests can be served globally. If you’re running an application that has heavy write workloads, or want to cut down on replication costs, you can run Turso with just the primary instance and use Smart Placement to speed up queries.

The Turso and Workers integration automatically pulls in Turso API credentials and adds them as secrets to your Worker, so that you can start using Turso by simply establishing a connection using the libsql SDK. Get started with the Turso and Workers Integration today by heading to our developer documentation.

Cache responses from data stores with Momento

Momento Cache is a low latency serverless caching solution that can be used on top of relational databases, key-value databases or object stores to get faster load times and better performance. Momento abstracts details like scaling, warming and replication so that users can deploy cache in a matter of minutes.

The Momento and Workers integration automatically pulls in your Momento API key using an OAuth2 flow. The Momento API key is added as a secret in Workers and, from there, you can start using the Momento SDK in Workers. Head to our developer documentation to learn more and use the Momento and Workers integration!

Try integrations out today

We want to give you back time, so that you can focus less on configuring and connecting third party tools to Workers and spend more time building. We’re excited to see what you build with integrations. Share your projects with us on Twitter (@CloudflareDev) and stay tuned for more exciting updates as we continue to grow our Integrations Marketplace!

If you would like to build an integration with Cloudflare Workers, fill out the integration request form and we’ll be in touch.

New Workers pricing — never pay to wait on I/O again

Post Syndicated from Rita Kozlov original http://blog.cloudflare.com/workers-pricing-scale-to-zero/

New Workers pricing — never pay to wait on I/O again

New Workers pricing — never pay to wait on I/O again

Today we are announcing new pricing for Cloudflare Workers and Pages Functions, where you are billed based on CPU time, and never for the idle time that your Worker spends waiting on network requests and other I/O. Unlike other platforms, when you build applications on Workers, you only pay for the compute resources you actually use.

Why is this exciting? To date, all large serverless compute platforms have billed based on how long your function runs — its duration or “wall time”. This is a reflection of a new paradigm built on a leaky abstraction — your code may be neatly packaged up into a “function”, but under the hood there’s a virtual machine (VM). A VM can’t be paused and resumed quickly enough to execute another piece of code while it waits on I/O. So while a typical function might take 100ms to run, it might typically spend only 10ms doing CPU work, like crunching numbers or parsing JSON, with the rest of time spent waiting on I/O.

This status quo has meant that you are billed for this idle time, while nothing is happening.

With this announcement, Cloudflare is the first and only global serverless platform to offer standard pricing based on CPU time, rather than duration. We think you should only pay for the compute time you actually use, and that’s how we’re going to bill you going forward.

Old pricing — two pricing models, each with tradeoffs

New Workers pricing — never pay to wait on I/O again

New pricing — one simple and predictable pricing model

New Workers pricing — never pay to wait on I/O again

With the same generous Free plan

New Workers pricing — never pay to wait on I/O again

Unlike wall time (duration, or GB-s), CPU time is more predictable and under your control. When you make a request to a third party API, you can’t control how long that API takes to return a response. This time can be quite long, and vary dramatically — particularly when building AI applications that make inference requests to LLMs. If a request takes twice as long to complete, duration-based billing means you pay double. By contrast, CPU time is consistent and unaffected by time spent waiting on I/O — purely a function of the logic and processing of inputs on outputs to your Worker. It is entirely under your control.

Starting October 31, 2023, you will have the option to opt in individual Workers and Pages Functions projects on your account to new pricing, and newly created projects will default to new pricing. You’ll be able to estimate how much new pricing will cost in the Cloudflare dashboard. For the majority of current applications, new pricing is the same or less expensive than the previous Bundled and Unbound pricing plans.

If you’re on our Workers Paid plan, you will have until March 1, 2024 to switch to the new pricing on your own, after which all of your projects will be automatically migrated to new pricing. If you’re an Enterprise customer, any contract renewals after March 1, 2024, will use the new pricing. You’ll receive plenty of advance notice via email and dashboard notifications before any changes go into effect. And since CPU time is fully in your control, the more you optimize your Worker’s compute time, the less you’ll pay. Your incentives are aligned with ours, to make efficient use of compute resources on Region: Earth.

The challenge of truly scaling to zero

The beauty of serverless is that it allows teams to focus on what matters most — delivering value to their customers, rather than managing infrastructure. It saves you money by effortlessly scaling up and down all over the world based on your traffic, whether you’re an early stage startup or Shopify during Black Friday.

One of the promises of serverless is the idea of scaling to zero — once those big days subside, you no longer have to pay for virtual machines to sit idle before your autoscaling kicks in, or be charged by the hour for instances that you barely ended up using. No compute = no bills for usage. Or so, at least, is the promise of serverless.

Yet, there’s one hidden cost, where even in the serverless world you will find yourself paying for idle resources — what happens when your function is sitting around waiting on I/O? With pricing based on the duration that a function runs, you’re still billed for time that your service is doing zero work, and just waiting on network requests.

New Workers pricing — never pay to wait on I/O again

Most applications spend far more time waiting on this I/O than they do using the CPU, often ten times more.

Imagine a similar scenario in your own life — you grab a cab to go to the airport. On the way, the driver decides to stop to refuel and grab a snack, but leaves the meter running. This is not time spent bringing you closer to your destination, but it’s time that you’re paying for. Now imagine for the time the driver was refueling the car, the meter was paused. That’s the difference between CPU time and duration, or wall clock time.

New Workers pricing — never pay to wait on I/O again

But rather than waiting on the driver to refuel or grab a Snickers bar, what is it that you’re actually paying for when it comes to serverless compute?

Time spent waiting on services you don’t control

Most applications depend on one or many external service providers. Providers of hosted large language models (LLMs) like GPT-4 or Stable Diffusion. Databases as a service. Payment processors. Or simply an API request to a system outside your control. This is where software development is headed — rather than reinventing the wheel and slowly building everything themselves, both fast-moving startups and the Fortune 500 increasingly build using other services to avoid undifferentiated heavy lifting.

Every time an application interacts with one of these external services, it has to send data over the network and wait until it receives a response. And while some services are lightning fast, others can take considerable time, like waiting for a payment processor or for a large media file to be uploaded or converted. Your own application sits idle for most of the request, waiting on services outside your control.

Until today, you’ve had to pay while your application waits. You’ve had to pay more when a service you depend on has an operational issue and slows down, or times out in responding to your request. This has been a disincentive to incrementally move parts of your application to serverless.

Cloudflare’s new pricing: the first serverless platform to truly scale down to zero

The idea of “scale to zero” is that you never have to keep instances of your application sitting idle, waiting for something to happen. Serverless is more than just not having to manage servers or virtual machines — you shouldn’t have to provision and manage the number of compute resources that are available or warm.

Our new pricing takes the “scale to zero” concept even further, and extends it to whether your application is actually performing work. If you’re still paying while nothing is happening, we don’t think that’s truly scale to zero. Your application is idle. The CPU can be used for other tasks. Whether your application is “running” is an old concept lifted from an era before multi-tenant cloud platforms. What matters is if you are actually using compute resources.

Pay less, deploy everywhere, without hidden costs

Let’s compare what you’d pay on new Workers pricing to AWS Lambda, for the following Worker:

  • One billion requests per month
  • Seven CPU milliseconds per request
  • 200ms duration per request
New Workers pricing — never pay to wait on I/O again

The above table is for informational purposes only. Prices are limited to the public fees as of September 20, 2023, and do not include taxes and any other fees. AWS Lambda and Lambda @ Edge prices are based on publicly available pricing in US-East (Ohio) region as published on https://aws.amazon.com/lambda/pricing/

Workers are the most cost-effective option, and are globally distributed, automatically optimized with Smart Placement, and integrated with Durable Objects, R2, KV, Cache, Queues, D1 and more. And with Workers, you never have to pay extra for provisioned concurrency, pay a penalty for streaming responses, or incur egregious egress fees.

New Workers pricing makes building AI applications dramatically cheaper

Yesterday we announced a new suite of products to let you build AI applications on Cloudflare — Workers AI, AI Gateway, and our new vector database, Vectorize.

Nearly everyone is building new products and features using AI models right now. Large language models and generative AI models are incredibly powerful. But they aren’t always fast — asking a model to create an image, transcribe a segment of audio, or write a story often takes multiple seconds — far longer than a typical API response or database query that we expect to return in tens of milliseconds. There is significant compute work going on behind the scenes, and that means longer duration per request to a Worker.

New Workers pricing makes this much less expensive than it was previously on the Unbound usage model.

Let’s take the same example as above, but instead assume the duration of the request is two seconds (2000ms), because the Worker makes an inference request to a large AI model. With new Workers pricing, you pay the exact same amount, no matter how long this request takes.

New Workers pricing — never pay to wait on I/O again

No surprise bills — set a maximum limit on CPU time for each Worker

Surprise bills from cloud providers are an unfortunately common horror story. In the old way of provisioning compute resources, forgetting to shut down an instance of a database or virtual machine can cost hundreds of dollars. And accidentally autoscaling up too high can be even worse.

We’re building new safeguards to prevent these kinds of scenarios on Workers. As part of new pricing, you will be able to cap CPU usage on a per-Worker basis.

For example, if you have a Worker with a p99 CPU time of 15ms, you might use this to set a max CPU limit of 40ms — enough headroom to ensure that your worker will run successfully, while ensuring that even if you ship a bug that causes a CPU time to ratchet up dramatically, or have an edge case that causes infinite recursion, you can’t suddenly rack up a giant unexpected bill, or be vulnerable to a denial of wallet attack. This can be particularly helpful if your worker handles variable or user-generated input, to guard against edge cases that you haven’t accounted for.

Alternatively, if you’re running a production service, but want to make sure you stay on top of your costs, we will also be adding the option to configure notifications that can automatically email you, page you, or send a webhook if your worker exceeds a particular amount of CPU time per request. You will be able to choose at what threshold you want to be notified, and how.

New ways to “hibernate” Durable Objects while keeping connections alive

While Workers are stateless functions, Durable Objects are stateful and long-lived, commonly used to coordinate and persist real-time state in chat, multiplayer games, or collaborative apps. And unlike Workers, duration-based pricing fits Durable Objects well. As long as one or more clients are connected to a Durable Object, it keeps state available in memory. Durable Objects pricing will remain duration-based, and is not changing as part of this announcement.

What about when a client is connected to a Durable Object, but no work has happened for a long time? Consider a collaborative whiteboard app built using Durable Objects. A user of the app opens the app in a browser tab, but then forgets about it, and leaves it running for days, with an open WebSocket connection. Just like with Workers, we don’t think you should have to pay for this idle time. But until recently, there hasn’t been an API to signal to us that a Durable Object can be safely “hibernated”.

The recently introduced Hibernation API, currently in beta, allows you to set an automatic response to be used while hibernated and serialize state such that it survives hibernation. This gives Cloudflare the inputs we need in order to maintain open WebSocket connections from clients, while “hibernating” the Durable Object such that it is not actively running, and you are not billed for idle time. The result is that your state is always available in-memory when actually need it, but isn’t unnecessarily kept around when it’s not. As long as your Durable Object is hibernating, even if there are active clients still connected over a WebSocket, you won’t be billed for duration.

Snippets make Cloudflare’s CDN programmable — for free

What if you just want to modify a header, do a country code redirect, or cache a custom query? Developers have relied on Workers to program Cloudflare’s CDN like this for many years. With the announcement of Cloudflare Snippets last year, now in alpha, we’re making it free.

If you use Workers today for these smaller use cases, to customize any of Cloudflare’s application services, Snippets will be the optimal, zero cost option.

A serverless platform without limits

Developers are building ever larger and more complex full-stack applications on Workers each month. Our promise to you is to help you scale in any direction, without worrying about paying for idle time or having to manage and provision compute resources across regions.

This also means not having to worry about limits. Workers already serves many millions of requests per second, and scales and performs so well that we are rebuilding our own CDN on top of Workers. Individual Workers can now be up to 10MB, with a max startup time of 400ms, and can be easily composed together using Service Bindings. Entire platforms are built on top of Workers, with a growing number of companies allowing their own customers to write and deploy custom code and applications via Workers for Platforms. Some of the biggest platforms in the world rely on Cloudflare and the Workers platform during the most critical moments.

New pricing removes limits on the types of applications that could be built cost effectively with duration-based pricing. It removes the ceiling on CPU time from our original request-based pricing. We’re excited to see what you build, and are committed to being the development platform where you’re not constrained by limits on scale, regions, instances, concurrency or whatever else you need to handle to grow and operate globally.

When will new pricing be available?

Starting October 31, 2023, you will have the option to opt in individual Workers and Pages Functions projects on your account to new pricing, and newly created projects will default to new pricing. You will have until March 1, 2024, or the end of your Enterprise contract, whichever comes later, to switch to new pricing on your own, after which all of your projects will be automatically migrated to new pricing. You’ll receive plenty of advance notice via email and dashboard notifications before any changes go into effect.

Between now and then, we want to hear from you. We’ve based new pricing off feedback we’ve heard from developers building serverless applications, and companies estimating and projecting their costs. Tell us what you think of new pricing by sharing your feedback in this survey. We read every response.

Sippy helps you avoid egress fees while incrementally migrating data from S3 to R2

Post Syndicated from Phillip Jones original http://blog.cloudflare.com/sippy-incremental-migration-s3-r2/

Sippy helps you avoid egress fees while incrementally migrating data from S3 to R2

Sippy helps you avoid egress fees while incrementally migrating data from S3 to R2

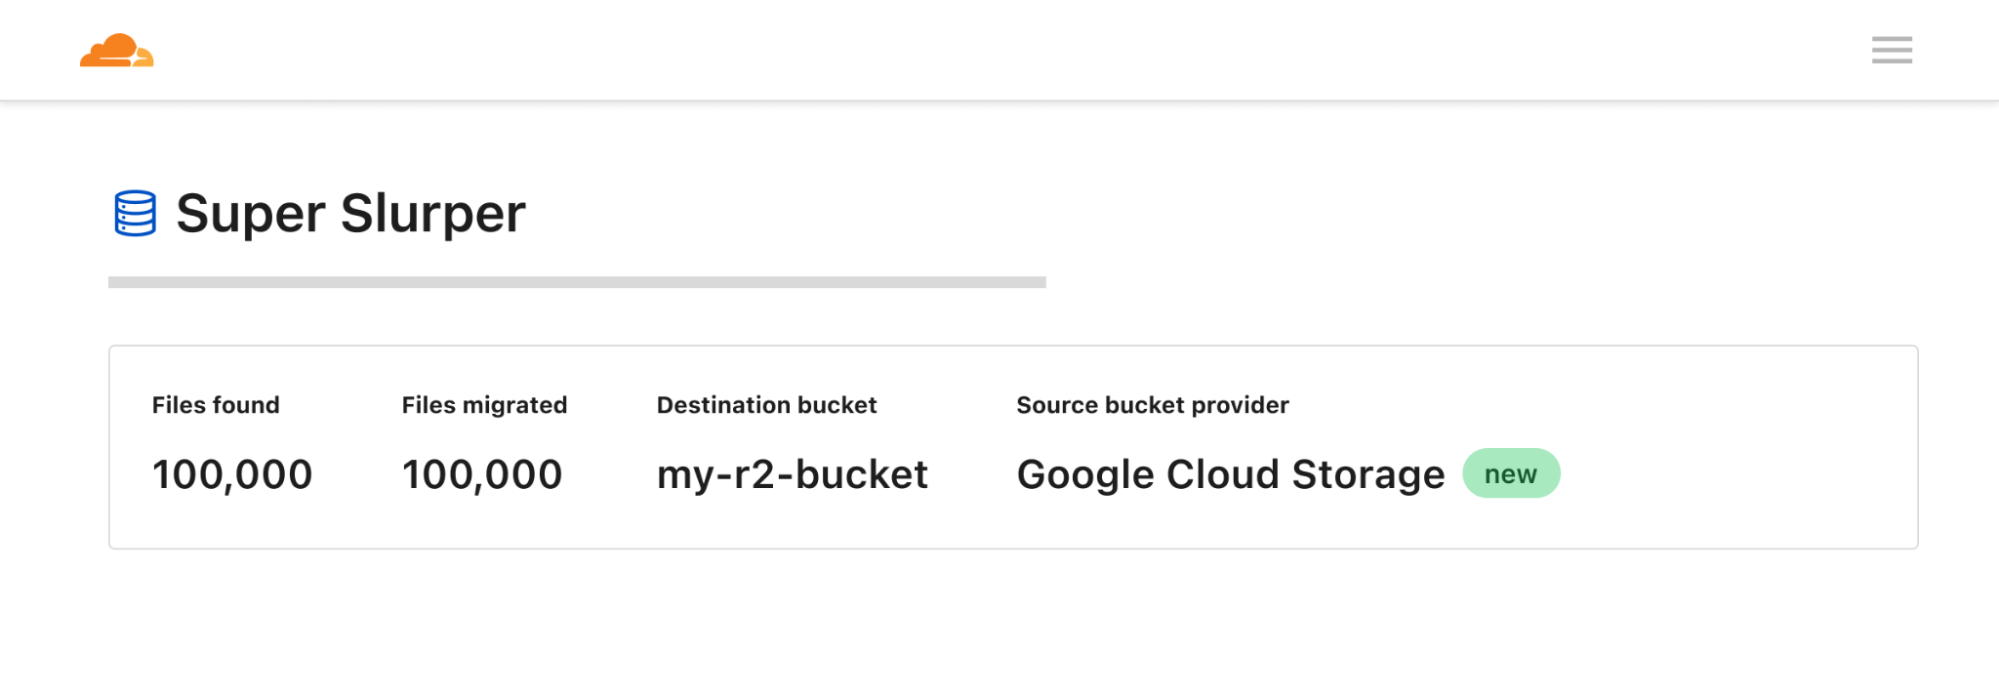
Earlier in 2023, we announced Super Slurper, a data migration tool that makes it easy to copy large amounts of data to R2 from other cloud object storage providers. Since the announcement, developers have used Super Slurper to run thousands of successful migrations to R2!

While Super Slurper is perfect for cases where you want to move all of your data to R2 at once, there are scenarios where you may want to migrate your data incrementally over time. Maybe you want to avoid the one time upfront AWS data transfer bill? Or perhaps you have legacy data that may never be accessed, and you only want to migrate what’s required?

Today, we’re announcing the open beta of Sippy, an incremental migration service that copies data from S3 (other cloud providers coming soon!) to R2 as it’s requested, without paying unnecessary cloud egress fees typically associated with moving large amounts of data. On top of addressing vendor lock-in, Sippy makes stressful, time-consuming migrations a thing of the past. All you need to do is replace the S3 endpoint in your application or attach your domain to your new R2 bucket and data will start getting copied over.

How does it work?

Sippy is an incremental migration service built directly into your R2 bucket. Migration-specific egress fees are reduced by leveraging requests within the flow of your application where you’d already be paying egress fees to simultaneously copy objects to R2. Here is how it works:

When an object is requested from Workers, S3 API, or public bucket, it is served from your R2 bucket if it is found.

Sippy helps you avoid egress fees while incrementally migrating data from S3 to R2

If the object is not found in R2, it will simultaneously be returned from your S3 bucket and copied to R2.

Note: Some large objects may take multiple requests to copy.

Sippy helps you avoid egress fees while incrementally migrating data from S3 to R2

That means after objects are copied, subsequent requests will be served from R2, and you’ll begin saving on egress fees immediately.

Start incrementally migrating data from S3 to R2

Create an R2 bucket

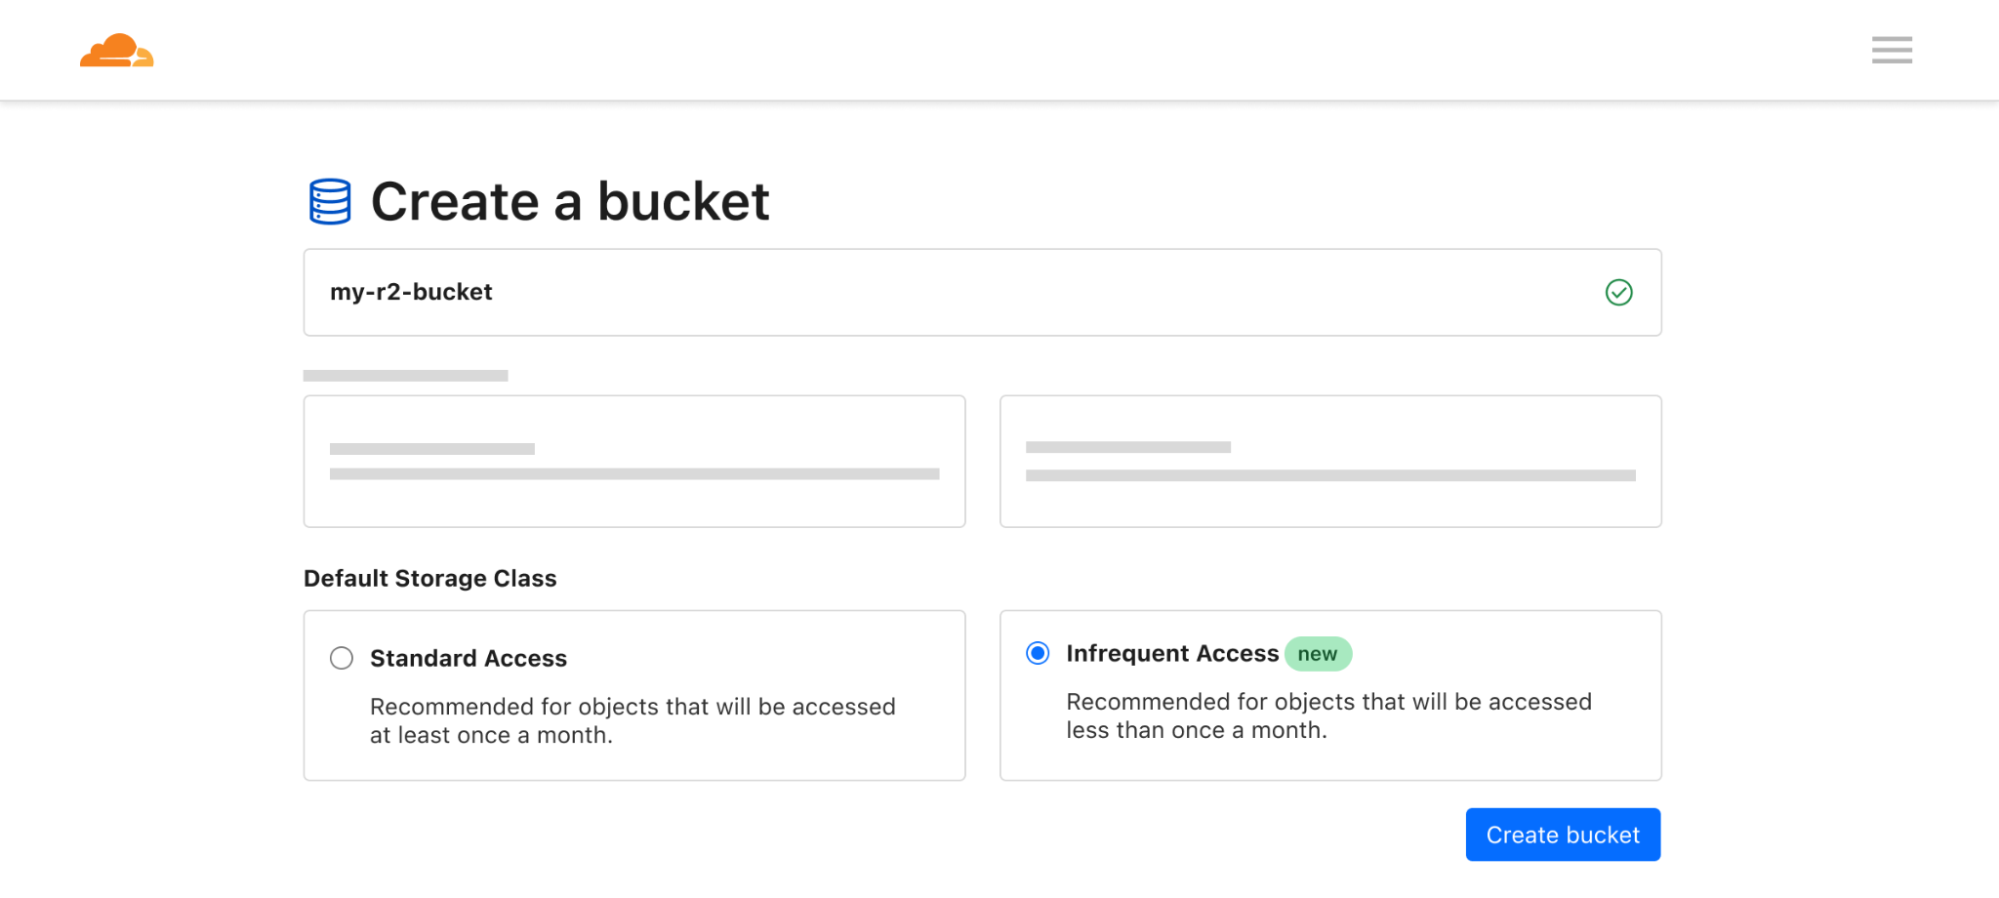
To get started with incremental migration, you’ll first need to create an R2 bucket if you don’t already have one. To create a new R2 bucket from the Cloudflare dashboard:

  1. Log in to the Cloudflare dashboard and select R2.
  2. Select Create bucket.
  3. Give your bucket a name and select Create bucket.

​​To learn more about other ways to create R2 buckets refer to the documentation on creating buckets.

Enable Sippy on your R2 bucket

Next, you’ll enable Sippy for the R2 bucket you created. During the beta, you can do this by using the API. Here’s an example of how to enable Sippy for an R2 bucket with cURL:

curl -X PUT https://api.cloudflare.com/client/v4/accounts/{account_id}/r2/buckets/{bucket_name}/sippy \
--header "Authorization: Bearer <API_TOKEN>" \
--data '{"provider": "AWS", "bucket": "<AWS_BUCKET_NAME>", "zone": "<AWS_REGION>","key_id": "<AWS_ACCESS_KEY_ID>", "access_key":"<AWS_SECRET_ACCESS_KEY>", "r2_key_id": "<R2_ACCESS_KEY_ID>", "r2_access_key": "<R2_SECRET_ACCESS_KEY>"}'

For more information on getting started, please refer to the documentation. Once enabled, requests to your bucket will now start copying data over from S3 if it’s not already present in your R2 bucket.

Finish your migration with Super Slurper

You can run your incremental migration for as long as you want, but eventually you may want to complete the migration to R2. To do this, you can pair Sippy with Super Slurper to easily migrate your remaining data that hasn’t been accessed to R2.

What’s next?

We’re excited about open beta, but it’s only the starting point. Next, we plan on making incremental migration configurable from the Cloudflare dashboard, complete with analytics that show you the progress of your migration and how much you are saving by not paying egress fees for objects that have been copied over so far.

If you are looking to start incrementally migrating your data to R2 and have any questions or feedback on what we should build next, we encourage you to join our Discord community to share!

Sippy helps you avoid egress fees while incrementally migrating data from S3 to R2

Improving Worker Tail scalability

Post Syndicated from Joshua Johnson original http://blog.cloudflare.com/improving-worker-tail-scalability/

Improving Worker Tail scalability

Improving Worker Tail scalability

Being able to get real-time information from applications in production is extremely important. Many times software passes local testing and automation, but then users report that something isn’t working correctly. Being able to quickly see what is happening, and how often, is critical to debugging.

This is why we originally developed the Workers Tail feature – to allow developers the ability to view requests, exceptions, and information for their Workers and to provide a window into what’s happening in real time. When we developed it, we also took the opportunity to build it on top of our own Workers technology using products like Trace Workers and Durable Objects. Over the last couple of years, we’ve continued to iterate on this feature – allowing users to quickly access logs from the Dashboard and via Wrangler CLI.

Today, we’re excited to announce that tail can now be enabled for Workers at any size and scale! In addition to telling you about the new and improved scalability, we wanted to share how we built it, and the changes we made to enable it to scale better.

Why Tail was limited

Tail leverages Durable Objects to handle coordination between the Worker producing messages and consumers like wrangler and the Cloudflare dashboard, and Durable Objects are a great choice for handling real-time communication like this. However, when a single Durable Object instance starts to receive a very high volume of traffic – like the kind that can come with tailing live Workers – it can see some performance issues.

As a result, Workers with a high volume of traffic could not be supported by the original Tail infrastructure. Tail had to be limited to Workers receiving 100 requests/second (RPS) or less. This was a significant limitation that resulted in many users with large, high-traffic Workers having to turn to their own tooling to get proper observability in production.

Believing that every feature we provide should scale with users during their development journey, we set out to improve Tail's performance at high loads.

Updating the way filters work

The first improvement was to the existing filtering feature. When starting a Tail with wrangler tail (and now with the Cloudflare dashboard) users have the ability to filter out messages based on information in the requests or logs.
Previously, this filtering was handled within the Durable Object, which meant that even if a user was filtering out the majority of their traffic, the Durable Object would still have to handle every message. Often users with high traffic Tails were using many filters to better interpret their logs, but wouldn’t be able to start a Tail due to the 100 RPS limit.

We moved filtering out of the Durable Object and into the Tail message producer, preventing any filtered messages from reaching the Tail Durable Object, and thereby reducing the load on the Tail Durable Object. Moving the filtering out of the Durable Object was the first step in improving Tail’s performance at scale.

Sampling logs to keep Tails within Durable Object limits

After moving log filtering outside of the Durable Object, there was still the issue of determining when Tails could be started since there was no way to determine to what degree filters would reduce traffic for a given Tail, and simply starting a Durable Object back up would mean that it more than likely hit the 100 RPS limit immediately.

The solution for this was to add a safety mechanism for the Durable Object while the Tail was running.

We created a simple controller to track the RPS hitting a Durable Object and sample messages until the desired volume of 100 RPS is reached. As shown below, sampling keeps the Tail Durable Object RPS below the target of 100.

Improving Worker Tail scalability

When messages are sampled, the following message appears every five seconds to let the user know that they are in sampling mode:

Improving Worker Tail scalability

This message goes away once the Tail is stopped or filters are applied that drop the RPS below 100.

A final failsafe

Finally as a last resort a failsafe mechanism was added in the case the Durable Object gets fully overloaded. Since RPS tracking is done within the Durable Object, if the Durable Object is overloaded due to an extremely large amount of traffic, the sampling mechanism will fail.

In the case that an overload is detected, all messages forwarded to the Durable Object are stopped periodically to prevent any issues with Workers infrastructure.

Improving Worker Tail scalability

Here we can see a user who had a large amount of traffic that started to become sampled. As the traffic increased, the number of sampled messages grew. Since the traffic was too fast for the sampling mechanism to handle, the Durable Object got overloaded. However, soon excess messages were blocked and the overload stopped.

Try it out

These new improvements are in place currently and available to all users 🎉

To Tail Workers via the Dashboard, log in, navigate to your Worker, and click on the Logs tab. You can then start a log stream via the default view.

Improving Worker Tail scalability

If you’re using the Wrangler CLI, you can start a new Tail by running wrangler tail.

Beyond Worker tail

While we're excited for tail to be able to reach new limits and scale, we also recognize users may want to go beyond the live logs provided by Tail.

For example, if you’d like to push log events to additional destinations for a historical view of your application’s performance, we offer Logpush. If you’d like more insight into and control over log messages and events themselves, we offer Tail Workers.

These products, and others, can be read about in our Logs documentation. All of them are available for use today.

Wasm core dumps and debugging Rust in Cloudflare Workers

Post Syndicated from Sven Sauleau original http://blog.cloudflare.com/wasm-coredumps/

Wasm core dumps and debugging Rust in Cloudflare Workers

Wasm core dumps and debugging Rust in Cloudflare Workers

A clear sign of maturing for any new programming language or environment is how easy and efficient debugging them is. Programming, like any other complex task, involves various challenges and potential pitfalls. Logic errors, off-by-ones, null pointer dereferences, and memory leaks are some examples of things that can make software developers desperate if they can't pinpoint and fix these issues quickly as part of their workflows and tools.

WebAssembly (Wasm) is a binary instruction format designed to be a portable and efficient target for the compilation of high-level languages like Rust, C, C++, and others. In recent years, it has gained significant traction for building high-performance applications in web and serverless environments.

Cloudflare Workers has had first-party support for Rust and Wasm for quite some time. We've been using this powerful combination to bootstrap and build some of our most recent services, like D1, Constellation, and Signed Exchanges, to name a few.

Using tools like Wrangler, our command-line tool for building with Cloudflare developer products, makes streaming real-time logs from our applications running remotely easy. Still, to be honest, debugging Rust and Wasm with Cloudflare Workers involves a lot of the good old time-consuming and nerve-wracking printf'ing strategy.

What if there’s a better way? This blog is about enabling and using Wasm core dumps and how you can easily debug Rust in Cloudflare Workers.

What are core dumps?

In computing, a core dump consists of the recorded state of the working memory of a computer program at a specific time, generally when the program has crashed or otherwise terminated abnormally. They also add things like the processor registers, stack pointer, program counter, and other information that may be relevant to fully understanding why the program crashed.

In most cases, depending on the system’s configuration, core dumps are usually initiated by the operating system in response to a program crash. You can then use a debugger like gdb to examine what happened and hopefully determine the cause of a crash. gdb allows you to run the executable to try to replicate the crash in a more controlled environment, inspecting the variables, and much more. The Windows' equivalent of a core dump is a minidump. Other mature languages that are interpreted, like Python, or languages that run inside a virtual machine, like Java, also have their ways of generating core dumps for post-mortem analysis.

Core dumps are particularly useful for post-mortem debugging, determining the conditions that lead to a failure after it has occurred.

WebAssembly core dumps

WebAssembly has had a proposal for implementing core dumps in discussion for a while. It's a work-in-progress experimental specification, but it provides basic support for the main ideas of post-mortem debugging, including using the DWARF (debugging with attributed record formats) debug format, the same that Linux and gdb use. Some of the most popular Wasm runtimes, like Wasmtime and Wasmer, have experimental flags that you can enable and start playing with Wasm core dumps today.

If you run Wasmtime or Wasmer with the flag:

--coredump-on-trap=/path/to/coredump/file

The core dump file will be emitted at that location path if a crash happens. You can then use tools like wasmgdb to inspect the file and debug the crash.

But let's dig into how the core dumps are generated in WebAssembly, and what’s inside them.

How are Wasm core dumps generated

(and what’s inside them)

When WebAssembly terminates execution due to abnormal behavior, we say that it entered a trap. With Rust, examples of operations that can trap are accessing out-of-bounds addresses or a division by zero arithmetic call. You can read about the security model of WebAssembly to learn more about traps.

The core dump specification plugs into the trap workflow. When WebAssembly crashes and enters a trap, core dumping support kicks in and starts unwinding the call stack gathering debugging information. For each frame in the stack, it collects the function parameters and the values stored in locals and in the stack, along with binary offsets that help us map to exact locations in the source code. Finally, it snapshots the memory and captures information like the tables and the global variables.

DWARF is used by many mature languages like C, C++, Rust, Java, or Go. By emitting DWARF information into the binary at compile time a debugger can provide information such as the source name and the line number where the exception occurred, function and argument names, and more. Without DWARF, the core dumps would be just pure assembly code without any contextual information or metadata related to the source code that generated it before compilation, and they would be much harder to debug.

WebAssembly uses a (lighter) version of DWARF that maps functions, or a module and local variables, to their names in the source code (you can read about the WebAssembly name section for more information), and naturally core dumps use this information.

All this information for debugging is then bundled together and saved to the file, the core dump file.

The core dump structure has multiple sections, but the most important are:

  • General information about the process;
  • The threads and their stack frames (note that WebAssembly is single threaded in Cloudflare Workers);
  • A snapshot of the WebAssembly linear memory or only the relevant regions;
  • Optionally, other sections like globals, data, or table.

Here’s the thread definition from the core dump specification:

corestack   ::= customsec(thread-info vec(frame))
thread-info ::= 0x0 thread-name:name ...
frame       ::= 0x0 ... funcidx:u32 codeoffset:u32 locals:vec(value)
                stack:vec(value)

A thread is a custom section called corestack. A corestack section contains the thread name and a vector (or array) of frames. Each frame contains the function index in the WebAssembly module (funcidx), the code offset relative to the function's start (codeoffset), the list of locals, and the list of values in the stack.

Values are defined as follows:

value ::= 0x01       => ∅
        | 0x7F n:i32 => n
        | 0x7E n:i64 => n
        | 0x7D n:f32 => n
        | 0x7C n:f64 => n

At the time of this writing these are the possible numbers types in a value. Again, we wanted to describe the basics; you should track the full specification to get more detail or find information about future changes. WebAssembly core dump support is in its early stages of specification and implementation, things will get better, things might change.

This is all great news. Unfortunately, however, the Cloudflare Workers runtime doesn’t support WebAssembly core dumps yet. There is no technical impediment to adding this feature to workerd; after all, it's based on V8, but since it powers a critical part of our production infrastructure and products, we tend to be conservative when it comes to adding specifications or standards that are still considered experimental and still going through the definitions phase.

So, how do we get core Wasm dumps in Cloudflare Workers today?

Polyfilling

Polyfilling means using userland code to provide modern functionality in older environments that do not natively support it. Polyfills are widely popular in the JavaScript community and the browser environment; they've been used extensively to address issues where browser vendors still didn't catch up with the latest standards, or when they implement the same features in different ways, or address cases where old browsers can never support a new standard.

Meet wasm-coredump-rewriter, a tool that you can use to rewrite a Wasm module and inject the core dump runtime functionality in the binary. This runtime code will catch most traps (exceptions in host functions are not yet catched and memory violation not by default) and generate a standard core dump file. To some degree, this is similar to how Binaryen's Asyncify works.

Let’s look at code and see how this works. He’s some simple pseudo code:

export function entry(v1, v2) {
    return addTwo(v1, v2)
}

function addTwo(v1, v2) {
  res = v1 + v2;
  throw "something went wrong";

  return res
}

An imaginary compiler could take that source and generate the following Wasm binary code:

  (func $entry (param i32 i32) (result i32)
    (local.get 0)
    (local.get 1)
    (call $addTwo)
  )

  (func $addTwo (param i32 i32) (result i32)
    (local.get 0)
    (local.get 1)
    (i32.add)
    (unreachable) ;; something went wrong
  )

  (export "entry" (func $entry))

“;;” is used to denote a comment.

entry() is the Wasm function exported to the host. In an environment like the browser, JavaScript (being the host) can call entry().

Irrelevant parts of the code have been snipped for brevity, but this is what the Wasm code will look like after wasm-coredump-rewriter rewrites it:

  (func $entry (type 0) (param i32 i32) (result i32)
    ...
    local.get 0
    local.get 1
    call $addTwo ;; see the addTwo function bellow
    global.get 2 ;; is unwinding?
    if  ;; label = @1
      i32.const x ;; code offset
      i32.const 0 ;; function index
      i32.const 2 ;; local_count
      call $coredump/start_frame
      local.get 0
      call $coredump/add_i32_local
      local.get 1
      call $coredump/add_i32_local
      ...
      call $coredump/write_coredump
      unreachable
    end)

  (func $addTwo (type 0) (param i32 i32) (result i32)
    local.get 0
    local.get 1
    i32.add
    ;; the unreachable instruction was here before
    call $coredump/unreachable_shim
    i32.const 1 ;; funcidx
    i32.const 2 ;; local_count
    call $coredump/start_frame
    local.get 0
    call $coredump/add_i32_local
    local.get 1
    call $coredump/add_i32_local
    ...
    return)

  (export "entry" (func $entry))

As you can see, a few things changed:

  1. The (unreachable) instruction in addTwo() was replaced by a call to $coredump/unreachable_shim which starts the unwinding process. Then, the location and debugging data is captured, and the function returns normally to the entry() caller.
  2. Code has been added after the addTwo() call instruction in entry() that detects if we have an unwinding process in progress or not. If we do, then it also captures the local debugging data, writes the core dump file and then, finally, moves to the unconditional trap unreachable.

In short, we unwind until the host function entry() gets destroyed by calling unreachable.

Let’s go over the runtime functions that we inject for more clarity, stay with us:

  • $coredump/start_frame(funcidx, local_count) starts a new frame in the coredump.
  • $coredump/add_*_local(value) captures the values of function arguments and in locals (currently capturing values from the stack isn’t implemented.)
  • $coredump/write_coredump is used at the end and writes the core dump in memory. We take advantage of the first 1 KiB of the Wasm linear memory, which is unused, to store our core dump.

A diagram is worth a thousand words:

Wasm core dumps and debugging Rust in Cloudflare Workers

Wait, what’s this about the first 1 KiB of the memory being unused, you ask? Well, it turns out that most WebAssembly linters and tools, including Emscripten and WebAssembly’s LLVM don’t use the first 1 KiB of memory. Rust and Zig also use LLVM, but they changed the default. This isn’t pretty, but the hugely popular Asyncify polyfill relies on the same trick, so there’s reasonable support until we find a better way.

But we digress, let’s continue. After the crash, the host, typically JavaScript in the browser, can now catch the exception and extract the core dump from the Wasm instance’s memory:

try {
    wasmInstance.exports.someExportedFunction();
} catch(err) {
    const image = new Uint8Array(wasmInstance.exports.memory.buffer);
    writeFile("coredump." + Date.now(), image);
}

If you're curious about the actual details of the core dump implementation, you can find the source code here. It was written in AssemblyScript, a TypeScript-like language for WebAssembly.

This is how we use the polyfilling technique to implement Wasm core dumps when the runtime doesn’t support them yet. Interestingly, some Wasm runtimes, being optimizing compilers, are likely to make debugging more difficult because function arguments, locals, or functions themselves can be optimized away. Polyfilling or rewriting the binary could actually preserve more source-level information for debugging.

You might be asking what about performance? We did some testing and found that the impact is negligible; the cost-benefit of being able to debug our crashes is positive. Also, you can easily turn wasm core dumps on or off for specific builds or environments; deciding when you need them is up to you.

Debugging from a core dump

We now know how to generate a core dump, but how do we use it to diagnose and debug a software crash?

Similarly to gdb (GNU Project Debugger) on Linux, wasmgdb is the tool you can use to parse and make sense of core dumps in WebAssembly; it understands the file structure, uses DWARF to provide naming and contextual information, and offers interactive commands to navigate the data. To exemplify how it works, wasmgdb has a demo of a Rust application that deliberately crashes; we will use it.

Let's imagine that our Wasm program crashed, wrote a core dump file, and we want to debug it.

$ wasmgdb source-program.wasm /path/to/coredump
wasmgdb>

When you fire wasmgdb, you enter a REPL (Read-Eval-Print Loop) interface, and you can start typing commands. The tool tries to mimic the gdb command syntax; you can find the list here.

Let's examine the backtrace using the bt command:

wasmgdb> bt
#18     000137 as __rust_start_panic () at library/panic_abort/src/lib.rs
#17     000129 as rust_panic () at library/std/src/panicking.rs
#16     000128 as rust_panic_with_hook () at library/std/src/panicking.rs
#15     000117 as {closure#0} () at library/std/src/panicking.rs
#14     000116 as __rust_end_short_backtrace<std::panicking::begin_panic_handler::{closure_env#0}, !> () at library/std/src/sys_common/backtrace.rs
#13     000123 as begin_panic_handler () at library/std/src/panicking.rs
#12     000194 as panic_fmt () at library/core/src/panicking.rs
#11     000198 as panic () at library/core/src/panicking.rs
#10     000012 as calculate (value=0x03000000) at src/main.rs
#9      000011 as process_thing (thing=0x2cff0f00) at src/main.rs
#8      000010 as main () at src/main.rs
#7      000008 as call_once<fn(), ()> (???=0x01000000, ???=0x00000000) at /rustc/b833ad56f46a0bbe0e8729512812a161e7dae28a/library/core/src/ops/function.rs
#6      000020 as __rust_begin_short_backtrace<fn(), ()> (f=0x01000000) at /rustc/b833ad56f46a0bbe0e8729512812a161e7dae28a/library/std/src/sys_common/backtrace.rs
#5      000016 as {closure#0}<()> () at /rustc/b833ad56f46a0bbe0e8729512812a161e7dae28a/library/std/src/rt.rs
#4      000077 as lang_start_internal () at library/std/src/rt.rs
#3      000015 as lang_start<()> (main=0x01000000, argc=0x00000000, argv=0x00000000, sigpipe=0x00620000) at /rustc/b833ad56f46a0bbe0e8729512812a161e7dae28a/library/std/src/rt.rs
#2      000013 as __original_main () at <directory not found>/<file not found>
#1      000005 as _start () at <directory not found>/<file not found>
#0      000264 as _start.command_export at <no location>

Each line represents a frame from the program's call stack; see frame #3:

#3      000015 as lang_start<()> (main=0x01000000, argc=0x00000000, argv=0x00000000, sigpipe=0x00620000) at /rustc/b833ad56f46a0bbe0e8729512812a161e7dae28a/library/std/src/rt.rs

You can read the funcidx, function name, arguments names and values and source location are all present. Let's select frame #9 now and inspect the locals, which include the function arguments:

wasmgdb> f 9
000011 as process_thing (thing=0x2cff0f00) at src/main.rs
wasmgdb> info locals
thing: *MyThing = 0xfff1c

Let’s use the p command to inspect the content of the thing argument:

wasmgdb> p (*thing)
thing (0xfff2c): MyThing = {
    value (0xfff2c): usize = 0x00000003
}

You can also use the p command to inspect the value of the variable, which can be useful for nested structures:

wasmgdb> p (*thing)->value
value (0xfff2c): usize = 0x00000003

And you can use p to inspect memory addresses. Let’s point at 0xfff2c, the start of the MyThing structure, and inspect:

wasmgdb> p (MyThing) 0xfff2c
0xfff2c (0xfff2c): MyThing = {
    value (0xfff2c): usize = 0x00000003
}

All this information in every step of the stack is very helpful to determine the cause of a crash. In our test case, if you look at frame #10, we triggered an integer overflow. Once you get comfortable walking through wasmgdb and using its commands to inspect the data, debugging core dumps will be another powerful skill under your belt.

Tidying up everything in Cloudflare Workers

We learned about core dumps and how they work, and we know how to make Cloudflare Workers generate them using the wasm-coredump-rewriter polyfill, but how does all this work in practice end to end?

We've been dogfooding the technique described in this blog at Cloudflare for a while now. Wasm core dumps have been invaluable in helping us debug Rust-based services running on top of Cloudflare Workers like D1, Privacy Edge, AMP, or Constellation.

Today we're open-sourcing the Wasm Coredump Service and enabling anyone to deploy it. This service collects the Wasm core dumps originating from your projects and applications when they crash, parses them, prints an exception with the stack information in the logs, and can optionally store the full core dump in a file in an R2 bucket (which you can then use with wasmgdb) or send the exception to Sentry.

We use a service binding to facilitate the communication between your application Worker and the Coredump service Worker. A Service binding allows you to send HTTP requests to another Worker without those requests going over the Internet, thus avoiding network latency or having to deal with authentication. Here’s a diagram of how it works:

Wasm core dumps and debugging Rust in Cloudflare Workers

Using it is as simple as npm/yarn installing @cloudflare/wasm-coredump, configuring a few options, and then adding a few lines of code to your other applications running in Cloudflare Workers, in the exception handling logic:

import shim, { getMemory, wasmModule } from "../build/worker/shim.mjs"

const timeoutSecs = 20;

async function fetch(request, env, ctx) {
    try {
        // see https://github.com/rustwasm/wasm-bindgen/issues/2724.
        return await Promise.race([
            shim.fetch(request, env, ctx),
            new Promise((r, e) => setTimeout(() => e("timeout"), timeoutSecs * 1000))
        ]);
    } catch (err) {
      const memory = getMemory();
      const coredumpService = env.COREDUMP_SERVICE;
      await recordCoredump({ memory, wasmModule, request, coredumpService });
      throw err;
    }
}

The ../build/worker/shim.mjs import comes from the worker-build tool, from the workers-rs packages and is automatically generated when wrangler builds your Rust-based Cloudflare Workers project. If the Wasm throws an exception, we catch it, extract the core dump from memory, and send it to our Core dump service.

You might have noticed that we race the workers-rs shim.fetch() entry point with another Promise to generate a timeout exception if the Rust code doesn't respond earlier. This is because currently, wasm-bindgen, which generates the glue between the JavaScript and Rust land, used by workers-rs, has an issue where a Promise might not be rejected if Rust panics asynchronously (leading to the Worker runtime killing the worker with “Error: The script will never generate a response”.). This can block the wasm-coredump code and make the core dump generation flaky.

We are working to improve this, but in the meantime, make sure to adjust timeoutSecs to something slightly bigger than the typical response time of your application.

Here’s an example of a Wasm core dump exception in Sentry:

Wasm core dumps and debugging Rust in Cloudflare Workers

You can find a working example, the Sentry and R2 configuration options, and more details in the @cloudflare/wasm-coredump GitHub repository.

Too big to fail

It's worth mentioning one corner case of this debugging technique and the solution: sometimes your codebase is so big that adding core dump and DWARF debugging information might result in a Wasm binary that is too big to fit in a Cloudflare Worker. Well, worry not; we have a solution for that too.

Fortunately the DWARF for WebAssembly specification also supports external DWARF files. To make this work, we have a tool called debuginfo-split that you can add to the build command in the wrangler.toml configuration:

command = "... && debuginfo-split ./build/worker/index.wasm"

What this does is it strips the debugging information from the Wasm binary, and writes it to a new separate file called debug-{UUID}.wasm. You then need to upload this file to the same R2 bucket used by the Wasm Coredump Service (you can automate this as part of your CI or build scripts). The same UUID is also injected into the main Wasm binary; this allows us to correlate the Wasm binary with its corresponding DWARF debugging information. Problem solved.

Binaries without DWARF information can be significantly smaller. Here’s our example:

4.5 MiB debug-63372dbe-41e6-447d-9c2e-e37b98e4c656.wasm
313 KiB build/worker/index.wasm

Final words

We hope you enjoyed reading this blog as much as we did writing it and that it can help you take your Wasm debugging journeys, using Cloudflare Workers or not, to another level.

Note that while the examples used here were around using Rust and WebAssembly because that's a common pattern, you can use the same techniques if you're compiling WebAssembly from other languages like C or C++.

Also, note that the WebAssembly core dump standard is a hot topic, and its implementations and adoption are evolving quickly. We will continue improving the wasm-coredump-rewriter, debuginfo-split, and wasmgdb tools and the wasm-coredump service. More and more runtimes, including V8, will eventually support core dumps natively, thus eliminating the need to use polyfills, and the tooling, in general, will get better; that's a certainty. For now, we present you with a solution that works today, and we have strong incentives to keep supporting it.

As usual, you can talk to us on our Developers Discord or the Community forum or open issues or PRs in our GitHub repositories; the team will be listening.

Debug Queues from the dash: send, list, and ack messages

Post Syndicated from Emilie Ma original http://blog.cloudflare.com/debug-queues-from-dash/

Debug Queues from the dash: send, list, and ack messages

Debug Queues from the dash: send, list, and ack messages

Today, August 11, 2023, we are excited to announce a new debugging workflow for Cloudflare Queues. Customers using Cloudflare Queues can now send, list, and acknowledge messages directly from the Cloudflare dashboard, enabling a more user-friendly way to interact with Queues. Though it can be difficult to debug asynchronous systems, it’s now easy to examine a queue’s state and test the full flow of information through a queue.

With guaranteed delivery, message batching, consumer concurrency, and more, Cloudflare Queues is a powerful tool to connect services reliably and efficiently. Queues integrate deeply with the existing Cloudflare Workers ecosystem, so developers can also leverage our many other products and services. Queues can be bound to producer Workers, which allow Workers to send messages to a queue, and to consumer Workers, which pull messages from the queue.

We’ve received feedback that while Queues are effective and performant, customers find it hard to debug them. After a message is sent to a queue from a producer worker, there’s no way to inspect the queue’s contents without a consumer worker. The limited transparency was frustrating, and the need to write a skeleton worker just to debug a queue was high-friction.

Debug Queues from the dash: send, list, and ack messages

Now, with the addition of new features to send, list, and acknowledge messages in the Cloudflare dashboard, we’ve unlocked a much simpler debugging workflow. You can send messages from the Cloudflare dashboard to check if their consumer worker is processing messages as expected, and verify their producer worker’s output by previewing messages from the Cloudflare dashboard.

The pipeline of messages through a queue is now more open and easily examined. Users just getting started with Cloudflare Queues also no longer have to write code to send their first message: it’s as easy as clicking a button in the Cloudflare dashboard.

Debug Queues from the dash: send, list, and ack messages

Sending messages

Both features are located in a new Messages tab on any queue’s page. Scroll to Send message to open the message editor.

Debug Queues from the dash: send, list, and ack messages

From here, you can write a message and click Send message to send it to your queue. You can also choose to send JSON, which opens a JSON editor with syntax highlighting and formatting. If you’ve saved your message as a file locally, you can drag-and-drop the file over the textbox or click Upload a file to send it as well.

This feature makes testing changes in a queue’s consumer worker much easier. Instead of modifying an existing producer worker or creating a new one, you can send one-off messages. You can also easily verify if your queue consumer settings are behaving as expected: send a few messages from the Cloudflare dashboard to check that messages are batched as desired.

Behind the scenes, this feature leverages the same pipeline that Cloudflare Workers uses to send messages, so you can be confident that your message will be processed as if sent via a Worker.

Listing messages

On the same page, you can also inspect the messages you just sent from the Cloudflare dashboard. On any queue’s page, open the Messages tab and scroll to Queued messages.

If you have a consumer attached to your queue, you’ll fetch a batch of messages of the same size as configured in your queue consumer settings by default, to provide a realistic view of what would be sent to your consumer worker. You can change this value to preview messages one-at-a-time or even in much larger batches than would be normally sent to your consumer.

After fetching a batch of messages, you can preview the message’s body, even if you’ve sent raw bytes or a JavaScript object supported by the structured clone algorithm. You can also check the message’s timestamp; number of retries; producer source, such as a Worker or the Cloudflare dashboard; and type, such as text or JSON. This information can help you debug the queue’s current state and inspect where and when messages originated from.

Debug Queues from the dash: send, list, and ack messages

The batch of messages that’s returned is the same batch that would be sent to your consumer Worker on its next run. Messages are even guaranteed to be in the same order on the UI as sent to your consumer. This feature grants you a looking glass view into your queue, matching the exact behavior of a consumer worker. This works especially well for debugging messages sent by producer workers and verifying queue consumer settings.

Listing messages from the Cloudflare dashboard also doesn’t interfere with an existing connected consumer. Messages that are previewed from the Cloudflare dashboard stay in the queue and do not have their number of retries affected.

This ‘peek’ functionality is unique to Cloudflare Queues: Amazon SQS bumps the number of retries when a message is viewed, and RabbitMQ retries the message, forcing it to the back of the queue. Cloudflare Queues’ approach means that previewing messages does not have any unintended side effects on your queue and your consumer. If you ever need to debug queues used in production, don’t worry – listing messages is entirely safe.

As well, you can now remove messages from your queue from the Cloudflare dashboard. If you’d like to remove a message or clear the full batch from the queue, you can select messages to acknowledge. This is useful for preventing buggy messages from being repeatedly retried without having to write a dummy consumer.

Debug Queues from the dash: send, list, and ack messages

You might have noticed that this message preview feature operates similarly to another popular feature request for an HTTP API to pull batches of messages from a queue. Customers will be able to make a request to the API endpoint to receive a batch of messages, then acknowledge the batch to remove the messages from the queue. Under the hood, both listing messages from the Cloudflare dashboard and HTTP Pull/Ack use a common infrastructure, and HTTP Pull/Ack is coming very soon!

These debugging features have already been invaluable for testing example applications we’ve built on Cloudflare Queues. At an internal hack week event, we built a web crawler with Queues as an example use-case (check out the tutorial here!). During development, we took advantage of this user-friendly way to send messages to quickly iterate on a consumer worker before we built a producer worker. As well, when we encountered bugs in our consumer worker, the message previews were handy to realize we were sending malformed messages, and the message acknowledgement feature gave us an easy way to remove them from the queue.

New Queues debugging features — available today!

The Cloudflare dashboard features announced today provide more transparency into your application and enable more user-friendly debugging.

All Cloudflare Queues customers now have access to these new debugging tools. And if you’re not already using Queues, you can join the Queues Open Beta by enabling Cloudflare Queues here.
Get started on Cloudflare Queues with our guide and create your next app with us today! Your first message is a single click away.

Introducing scheduled deletion for Cloudflare Stream

Post Syndicated from Austin Christiansen original http://blog.cloudflare.com/introducing-scheduled-deletion-for-cloudflare-stream/

Introducing scheduled deletion for Cloudflare Stream

Introducing scheduled deletion for Cloudflare Stream

Designed with developers in mind, Cloudflare Stream provides a seamless, integrated workflow that simplifies video streaming for creators and platforms alike. With features like Stream Live and creator management, customers have been looking for ways to streamline storage management.

Today, August 11, 2023, Cloudflare Stream is introducing scheduled deletion to easily manage video lifecycles from the Stream dashboard or our API, saving time and reducing storage-related costs. Whether you need to retain recordings from a live stream for only a limited time, or preserve direct creator videos for a set duration, scheduled deletion will simplify storage management and reduce costs.

Stream scheduled deletion

Scheduled deletion allows developers to automatically remove on-demand videos and live recordings from their library at a specified time. Live inputs can be set up with a deletion rule, ensuring that all recordings from the input will have a scheduled deletion date upon completion of the stream.

Let’s see how it works in those two configurations.

Getting started with scheduled deletion for on-demand videos

Whether you run a learning platform where students can upload videos for review, a platform that allows gamers to share clips of their gameplay, or anything in between, scheduled deletion can help manage storage and ensure you only keep the videos that you need. Scheduled deletion can be applied to both new and existing on-demand videos, as well as recordings from completed live streams. This feature lets you specify a specific date and time at which the video will be deleted. These dates can be applied in the Cloudflare dashboard or via the Cloudflare API.

Cloudflare dashboard

Introducing scheduled deletion for Cloudflare Stream
  1. From the Cloudflare dashboard, select Videos under Stream
  2. Select a video
  3. Select Automatically Delete Video
  4. Specify a desired date and time to delete the video
  5. Click Submit to save the changes

Cloudflare API

The Stream API can also be used to set the scheduled deletion property on new or existing videos. In this example, we’ll create a direct creator upload that will be deleted on December 31, 2023:

curl -X POST \
-H 'Authorization: Bearer <BEARER_TOKEN>' \
-d '{ "maxDurationSeconds": 10, "scheduledDeletion": "2023-12-31T12:34:56Z" }' \
https://api.cloudflare.com/client/v4/accounts/<ACCOUNT_ID>/stream/direct_upload 

For more information on live inputs and how to configure deletion policies in our API, refer to the documentation.

Getting started with automated deletion for Live Input recordings

We love how recordings from live streams allow those who may have missed the stream to catch up, but these recordings aren’t always needed forever. Scheduled recording deletion is a policy that can be configured for new or existing live inputs. Once configured, the recordings of all future streams on that input will have a scheduled deletion date calculated when the recording is available. Setting this retention policy can be done from the Cloudflare dashboard or via API operations to create or edit Live Inputs:

Cloudflare Dashboard

Introducing scheduled deletion for Cloudflare Stream
  1. From the Cloudflare dashboard, select Live Inputs under Stream
  2. Select Create Live Input or an existing live input
  3. Select Automatically Delete Recordings
  4. Specify a number of days after which new recordings should be deleted
  5. Click Submit to save the rule or create the new live input

Cloudflare API

The Stream API makes it easy to add a deletion policy to new or existing inputs. Here is an example API request to create a live input with recordings that will expire after 30 days:

curl -X POST \
-H 'Authorization: Bearer <BEARER_TOKEN>' \
-H 'Content-Type: application/json' \
-d '{ "recording": {"mode": "automatic"}, "deleteRecordingAfterDays": 30 }' \
https://api.staging.cloudflare.com/client/v4/accounts/<ACCOUNT_ID>/stream/live_inputs/

For more information on live inputs and how to configure deletion policies in our API, refer to the documentation.

Try out scheduled deletion today

Scheduled deletion is now available to all Cloudflare Stream customers. Try it out now and join our Discord community to let us know what you think! To learn more, check out our developer docs. Stay tuned for more exciting Cloudflare Stream updates in the future.

Cloudflare Workers database integration with Upstash

Post Syndicated from Joaquin Gimenez original http://blog.cloudflare.com/cloudflare-workers-database-integration-with-upstash/

Cloudflare Workers database integration with Upstash

Cloudflare Workers database integration with Upstash

During Developer Week we announced Database Integrations on Workers  a new and seamless way to connect with some of the most popular databases. You select the provider, authorize through an OAuth2 flow and automatically get the right configuration stored as encrypted environment variables to your Worker.

Today we are thrilled to announce that we have been working with Upstash to expand our integrations catalog. We are now offering three new integrations: Upstash Redis, Upstash Kafka and Upstash QStash. These integrations allow our customers to unlock new capabilities on Workers. Providing them with a broader range of options to meet their specific requirements.

Add the integration

We are going to show the setup process using the Upstash Redis integration.

Select your Worker, go to the Settings tab, select the Integrations tab to see all the available integrations.

Cloudflare Workers database integration with Upstash

After selecting the Upstash Redis integration we will get the following page.

Cloudflare Workers database integration with Upstash

First, you need to review and grant permissions, so the Integration can add secrets to your Worker. Second, we need to connect to Upstash using the OAuth2 flow. Third, select the Redis database we want to use. Then, the Integration will fetch the right information to generate the credentials. Finally, click “Add Integration” and it's done! We can now use the credentials as environment variables on our Worker.

Implementation example

On this occasion we are going to use the CF-IPCountry  header to conditionally return a custom greeting message to visitors from Paraguay, United States, Great Britain and Netherlands. While returning a generic message to visitors from other countries.

To begin we are going to load the custom greeting messages using Upstash’s online CLI tool.

➜ set PY "Mba'ẽichapa 🇵🇾"
OK
➜ set US "How are you? 🇺🇸"
OK
➜ set GB "How do you do? 🇬🇧"
OK
➜ set NL "Hoe gaat het met u? 🇳🇱"
OK

We also need to install @upstash/redis package on our Worker before we upload the following code.

import { Redis } from '@upstash/redis/cloudflare'
 
export default {
  async fetch(request, env, ctx) {
    const country = request.headers.get("cf-ipcountry");
    const redis = Redis.fromEnv(env);
    if (country) {
      const localizedMessage = await redis.get(country);
      if (localizedMessage) {
        return new Response(localizedMessage);
      }
    }
    return new Response("👋👋 Hello there! 👋👋");
  },
};

Just like that we are returning a localized message from the Redis instance depending on the country which the request originated from. Furthermore, we have a couple ways to improve performance, for write heavy use cases we can use Smart Placement with no replicas, so the Worker code will be executed near the Redis instance provided by Upstash. Otherwise, creating a Global Database on Upstash to have multiple read replicas across regions will help.

Try it now

Upstash Redis, Kafka and QStash are now available for all users! Stay tuned for more updates as we continue to expand our Database Integrations catalog.

Cloudflare Zaraz steps up: general availability and new pricing

Post Syndicated from Yair Dovrat original http://blog.cloudflare.com/cloudflare-zaraz-steps-up-general-availability-and-new-pricing/

Cloudflare Zaraz steps up: general availability and new pricing

This post is also available in Deutsch, Français.

Cloudflare Zaraz has transitioned out of beta and is now generally available to all customers. It is included under the free, paid, and enterprise plans of the Cloudflare Developer Platform. Visit our docs to learn more on our different plans.

Cloudflare Zaraz steps up: general availability and new pricing

Zaraz Is part of Cloudflare Developer Platform

Cloudflare Zaraz is a solution that developers and marketers use to load third-party tools like Google Analytics 4, Facebook CAPI, TikTok, and others. With Zaraz, Cloudflare customers can easily transition to server-side data collection with just a few clicks, without the need to set up and maintain their own cloud environment or make additional changes to their website for installation. Server-side data collection, as facilitated by Zaraz, simplifies analytics reporting from the server rather than loading numerous JavaScript files on the user's browser. It's a rapidly growing trend due to browser limitations on using third-party solutions and cookies. The result is significantly faster websites, plus enhanced security and privacy on the web.

We've had Zaraz in beta mode for a year and a half now. Throughout this time, we've dedicated our efforts to meeting as many customers as we could, gathering feedback, and getting a deep understanding of our users' needs before addressing them. We've been shipping features at a high rate and have now reached a stage where our product is robust, flexible, and competitive. It also offers unique features not found elsewhere, thanks to being built on Cloudflare’s global network, such as Zaraz’s Worker Variables. We have cultivated a strong and vibrant discord community, and we have certified Zaraz developers ready to help anyone with implementation and configuration.

With more than 25,000 websites running Zaraz today – from personal sites to those of some of the world's biggest companies – we feel confident it's time to go out of beta, and introduce our new pricing system. We believe this pricing is not only generous to our customers, but also competitive and sustainable. We view this as the next logical step in our ongoing commitment to our customers, for whom we're building the future.

If you're building a web application, there's a good chance you've spent at least some time implementing third-party tools for analytics, marketing performance, conversion optimization, A/B testing, customer experience and more. Indeed, according to the Web Almanac report, 94% percent of mobile pages used at least one third-party solution in 2022, and third-party requests accounted for 45% of all requests made by websites. It's clear that third-party solutions are everywhere. They have become an integral part of how the web has evolved. Third-party tools are here to stay, and they require effective developer solutions. We are building Zaraz to help developers manage the third-party layer of their website properly.

Starting today, Cloudflare Zaraz is available to everyone for free under their Cloudflare dashboard, and the paid version of Zaraz is included in the Workers Paid plan. The Free plan is designed to meet the needs of most developers who want to use Zaraz for personal use cases. For a price starting at $5/month, customers of the Workers Paid plan can enjoy the extensive list of features that makes Zaraz powerful, deploy Zaraz on their professional projects, and utilize the pay-as-you-go system. This is in addition to everything else included in the Workers Paid plan. The Enterprise plan, on the other hand, addresses the needs of larger businesses looking to leverage our platform to its fullest potential.

How is Zaraz priced

Zaraz pricing is based on two components: Zaraz Loads and the set of features. A Zaraz Load is counted each time a web page loads the Zaraz script within it, and/or the Pageview trigger is being activated. For Single Page Applications, each URL navigation is counted as a new Zaraz Load. Under the Zaraz Monitoring dashboard, you can find a report showing how many Zaraz Loads your website has generated during a specific time period. Zaraz Loads and features are factored into our billing as follows:

Cloudflare Zaraz steps up: general availability and new pricing

Free plan

The Free Plan has a limit of 100,000 Zaraz Loads per month per account. This should allow almost everyone wanting to use Zaraz for personal use cases, like personal websites or side projects, to do so for free. After 100,000 Zaraz Loads, Zaraz will simply stop functioning.

Following the same logic, the free plan includes everything you need in order to use Zaraz for personal use cases. That includes Auto-injection, Zaraz Debugger, Zaraz Track and Zaraz Set from our Web API, Consent Management Platform (CMP), Data Layer compatibility mode, and many more.

If your websites generate more than 100,000 Zaraz loads combined, you will need to upgrade to the Workers Paid plan to avoid service interruption. If you desire some of the more advanced features, you can upgrade to Workers Paid and get access for only $5/month.

The Workers Paid Plan includes the first 200,000 Zaraz Loads per month per account, free of charge.

If you exceed the free Zaraz Loads allocations, you'll be charged $0.50 for every additional 1,000 Zaraz Loads, but the service will continue to function. (You can set notifications to get notified when you exceed a certain threshold of Zaraz Loads, to keep track of your usage.)

Workers Paid customers can enjoy most of Zaraz robust and existing features, amongst other things, this includes: Zaraz E-commerce from our Web API, Custom Endpoints, Workers Variables, Preview/Publish Workflow, Privacy Features, and more.

If your websites generate Zaraz Loads in the millions, you might want to consider the Workers Enterprise plan. Beyond the free 200,000 Zaraz Loads per month for your account, it offers additional volume discounts based on your Zaraz Loads usage as well as Cloudflare’s professional services.

Enterprise plan

The Workers Enterprise Plan includes the first 200,000 Zaraz Loads per month per account free of charge. Based on your usage volume, Cloudflare’s sales representatives can offer compelling discounts. Get in touch with us here. Workers Enterprise customers enjoy all paid enterprise features.

I already use Zaraz, what should I do?

If you were using Zaraz under the free beta, you have a period of two months to adjust and decide how you want to go about this change. Nothing will change until September 20, 2023. In the meantime we advise you to:

  1. Get more clarity of your Zaraz Loads usage. Visit Monitoring to check how many Zaraz Loads you had in the previous couple of months. If you are worried about generating more than 100,000 Zaraz Loads per month, you might want to consider upgrading to Workers Paid via the plans page, to avoid service interruption. If you generate a big amount of Zaraz Loads, you’d probably want to reach out to your sales representative and get volume discounts. You can leave your details here, and we’ll get back to you.
  2. Check if you are using one of the paid features as listed in the plans page. If you are, then you would need to purchase a Workers Paid subscription, starting at $5/month via the plans page. On September 20, these features will cease to work unless you upgrade.

* Please note, as of now, free plan users won't have access to any paid features. However, if you're already using a paid feature without a Workers Paid subscription, you can continue to use it risk-free until September 20. After this date, you'll need to upgrade to keep using any paid features.

We are here for you

As we make this important transition, we want to extend our sincere gratitude to all our beta users who have provided invaluable feedback and have helped us shape Zaraz into what it is today. We are excited to see Zaraz move beyond its beta stage and look forward to continuing to serve your needs and helping you build better, faster, and more secure web experiences. We know this change comes with adjustments, and we are committed to making the transition as smooth as possible. In the next couple of days, you can expect an email from us, with clear next steps and a way to get advice in case of need. You can always get in touch directly with the Cloudflare Zaraz team on Discord, or the community forum.

Thank you for joining us on this journey and for your ongoing support and trust in Cloudflare Zaraz. Let's continue to build the future of the web together!

Recapping Developer Week

Post Syndicated from Ricky Robinett original http://blog.cloudflare.com/developer-week-2023-wrap-up/

Recapping Developer Week

Recapping Developer Week

Developer Week 2023 is officially a wrap. Last week, we shipped 34 posts highlighting what has been going on with our developer platform and where we’re headed in the future – including new products & features, in-depth tutorials to help you get started, and customer stories to inspire you.
We’ve loved already hearing feedback from you all about what we’ve shipped:


We hope you’re able to spend the coming weeks slinging some code and experimenting with some of the new tools we shipped last week. As you’re building, join us in our developers discord and let us know what you think.

In case you missed any of our announcements here’s a handy recap:

AI announcements

Announcement Summary
Batteries included: how AI will transform the who and how of programming The emergence of large language models (LLMs) is going to change the way developers write, debug, and modify code. Developer Platforms need to evolve to integrate AI capabilities to assist developers in their journeys.
Introducing Constellation, bringing AI to the Cloudflare stack Run pre-trained machine learning models and inference tasks on Cloudflare’s global network with Constellation AI. We’ll maintain a catalog of verified and ready-to-use models, or you can upload and train your own.
Introducing Cursor: the Cloudflare AI Assistant When getting started with a new technology comes a lot of questions on how to get started. Finding answers quickly is a time-saver. To help developers build in the fastest way possible we’ve introduced Cursor, an experimental AI assistant, to answer questions you may have about the Developer Platform. The assistant responds with both text and relevant links to our documentation to help you go further.
Query Cloudflare Radar and our docs using ChatGPT plugins ChatGPT, recently allowed the ability for developers to create custom extensions to make ChatGPT even more powerful. It’s now possible to provide guidance to the conversational workflows within ChatGPT such as up-to-date statistics and product information. We’ve published plugins for Radar and our Developer Documentation and a tutorial showing how you can build your own plugin using Workers.
A complete suite of Zero Trust security tools to help get the most from AI With any new technology comes concerns about risk and AI is no different. If you want to build with AI and maintain a Zero Trust security posture, Cloudflare One offers a collection of features to build with AI without increased risk. We’ve also compiled some best practices around securing your LLM.
Cloudflare R2 and MosaicML enable training LLMs on any compute, anywhere in the world, with zero switching costs Training large language models requires massive amount of compute which has led AI companies to look at multi-cloud architectures, with R2 and MosaicML companies can build these infrastructures at a fraction of the cost.
The S3 to R2 Super Slurper is now Generally Available After partnering with hundreds of early adopters to migrate objects to R2 during the beta, the Super Slurper is now generally available.
A raft of Cloudflare services for AI startups AI startups no longer need affiliation with an accelerator or an employee referral to gain access to the Startup Program. Bootstrapped AI startups can apply today to get free access to Cloudflare services including R2, Workers, Pages, and a host of other security and developer services.
How to secure Generative AI applications 11 tips for securing your generative AI application.
Using LangChain JS and Cloudflare Workers together A tutorial on building your first LangChainJS and Workers application to build more sophisticated applications by switching between LLMs or chaining prompts together.

Data announcements

Announcement Summary
Announcing database integrations: a few clicks to connect to Neon, PlanetScale, and Supabase on Workers We’ve partnered with other database providers, including Neon, PlanetScale, and Supabase, to make authenticating and connecting back to your databases there just work, without having to copy-paste credentials and connection strings back and forth.
Announcing connect() – a new API for creating TCP sockets from Cloudflare Workers Connect back to existing PostgreSQL and MySQL databases directly from Workers with outbound TCP sockets allowing you to connect to any database when building with Workers.
D1: We turned it up to 11 D1 is now not only significantly faster, but has a raft of new features, including the ability to time travel: restore your database to any minute within the last 30 days, without having to make a manual backup.
Smart Placement speed up applications by moving code close to your backend – no config needed Bringing compute closer to the end user isn’t always the right answer to improve performance. Smart Placement for Workers and Pages Functions moves compute to the optimal location whether that is closer to the end user or closer to backend services and data.
Use Snowflake with R2 to extend your global data lake Get valuable insights from your data when you use Snowflake to query data stored in your R2 data lake and load data from R2 into Snowflake’s Data Cloud.
Developer Week Performance Update: Spotlight on R2 Retrieving objects from storage needs to be fast. R2 is 20-40% faster than Amazon S3 when serving media content via public access.

Developer experience announcements

Announcement Summary
Making Cloudflare the best place for your web applications Create Cloudflare CLI (C3) is a companion CLI to Wrangler giving you a single entry-point to configure Cloudflare via CLI. Pick your framework, all npm dependencies are installed, and you’ll receive a URL for where your application was deployed.
A whole new Quick Edit in Cloudflare Workers QuickEdit for Workers powered by VSCode giving you a familiar environment to edit Workers directly in the dash.
Bringing a unified developer experience to Cloudflare Workers and Pages Manage all your Workers scripts and Pages projects from a single place in the Cloudflare dashboard. Over the next year we’ll be working to converge these two separate experiences into one eliminating friction when building.
Modernizing the toolbox for Cloudflare Pages builds Now in beta, the build system for Pages includes the latest versions of Node.js, Python, Hugo, and more. You can opt in to use this for existing projects or stay on the existing system, so your builds won’t break.
Improved local development with Wrangler and workerd Having a local development environment that mimics production as closely as possible helps to ensure everything runs as expected in production. You can test every aspect prior to deployment. Wrangler 3 now leverages Miniflare3 based on workerd with local-by-default development.
Goodbye, section 2.8 and hello to Cloudflare’s new terms of service Our terms of service were not clear about serving content hosted on the Developer Platform via our CDN. We’ve made it clearer that customers can use the CDN to serve video and other large files stored on the Developer Platform including Images, Pages, R2, and Stream.
More Node.js APIs in Cloudflare Workers-Streams, Pat, StringDecoder We’ve expanded support Node.js APIs to increase compatibility with the existing ecosystem of open source npm packages.

But wait, there’s more

Announcement Summary
How Cloudflare is powering the next generation of platforms with Workers A retrospective on the first year of Workers for Platform, what’s coming next, and featuring how customers like Shopify and Grafbase are building with it.
Building Cloudflare on Cloudflare A technical deep dive into how we are rearchitecting internal services to use Workers.
Announcing Cloudflare Secrets Store A centralized repository to store sensitive data for use across all of Cloudflare’s products.
Cloudflare Queues: messages at your speed with consumer concurrency and explicit acknowledgement Announcing new features for Queues to ensure queues don’t fall behind, and processing time doesn’t slow down.
Workers Browser Rendering API enters open beta Deploy a Worker script that requires Browser Rendering capabilities through Wrangler.

Watch on Cloudflare TV

If you missed any of the announcements or want to also view the associated Cloudflare TV segments, where blog authors went through each announcement, you can now watch all the Developer Week videos on Cloudflare TV.

Launching our new Open Source Software Sponsorships Program

Post Syndicated from Veronica Marin original http://blog.cloudflare.com/cloudflare-new-oss-sponsorships-program/

Launching our new Open Source Software Sponsorships Program

Launching our new Open Source Software Sponsorships Program

In 2018, we first launched our Open Source Software Sponsorships program, and since then, we've been listening to your feedback, and realized that it's time to introduce a fresh and enhanced version of the program that's more inclusive and better addresses the needs of the OSS community.

Launching our new Open Source Software Sponsorships Program
A subset of open source projects on Cloudflare. See more >>

Previously, our sponsorship focused on engineering tools, but we're excited to announce that we've now opened it to include any non-profit and open source projects.

Program criteria and eligibility

To qualify for our Open Source Sponsorship Program, projects must be open source and meet the following criteria:

  1. Operate on a non-profit basis.
  2. Include a link back to our home page.

Please keep in mind that this program isn't intended for event sponsorships, but rather for project-based support.

Sponsorship benefits

As part of our sponsorship program, we offer the following benefits to projects:

Can Cloudflare help your open source project be successful and sustainable? Fill out the application form to submit your project for review, and please share this so that more open source projects can be supported by Cloudflare.

Announcing Cohort #2 of the Workers Launchpad

Post Syndicated from Mia Wang original http://blog.cloudflare.com/launchpad-cohort2/

Announcing Cohort #2 of the Workers Launchpad

Announcing Cohort #2 of the Workers Launchpad

We launched the $2B Workers Launchpad Funding Program in late 2022 to help support the over one million developers building on Cloudflare’s Developer Platform, many of which are startups leveraging Cloudflare to ship faster, scale more efficiently, and accelerate their growth.

Cohort #1 wrap-up

Since announcing the program just a few months ago, we have welcomed 25 startups from all around the world into our inaugural cohort and recently wrapped up the program with the Demo Day. Cohort #1 gathered weekly for Office Hours with our Solutions Architects for technical advice and the Founders Bootcamp, where they spent time with Cloudflare leadership, preview upcoming products with our Developer Platform Product Managers, and receive advice on a wide range of topics such as how to build Sales teams and think about the right pricing model for your product.

Learn more about what these companies are building and what they’ve been up to below:

Authdog

Identity and Access Management streamlined.

Demo Day pitch

Why they chose Cloudflare
“Cloudflare is the de facto Infrastructure for building resilient serverless products, it was a no-brainer to migrate to Cloudflare Workers to build the most frictionless experience for our customers.”

Recent updates
Learn more about how Authdog is using Cloudflare’s Developer Platform in their Built With Workers case study.

Drivly

Automotive Commerce APIs to Buy & Sell Cars Online.

Demo Day pitch

Why they chose Cloudflare
“We believe that Cloudflare is the next-generation of cloud computing platforms, and Drivly is completely built on Cloudflare, from Workers, Queues, PubSub, and especially Durable Objects.”

Recent updates
Drivly made their public launch at Demo Day!

Flethy

Integrate APIs, the easy way.

Demo Day pitch

Why they chose Cloudflare
“Simplicity and Performance. Using Pages and KV is extremely easy, but what really impresses are Workers with a nearly instant cold start!”

Recent updates
Check out how Cloudflare is helping Flethy improve and accelerate API service integrations for developers here.

GPUX

Serverless GPU.

Demo Day pitch

Why they chose Cloudflare
“Cloudflare is core to the internet; R2, Transit, Workers with no egress charge.”

Recent updates
GPUX launched v2 of their platform on Demo Day!

Grafbase

The easiest way to build and deploy GraphQL backends.

Demo Day pitch

Why they chose Cloudflare
“The Grafbase platform is built from the ground up to be highly performant and deployed to the edge using Rust and WebAssembly. Services like Cloudflare Workers, KV, Durable Objects, Edge Caching were a natural choice as it fits perfectly into our vision architecturally.”

Recent updates
Grafbase, which is building on Workers for Platforms among other Cloudflare products, celebrated their public launch and 7 new features in their April 2023 Launch Week.

JEMPass

Simple, seamless, and secure way to eliminate passwords.

Demo Day pitch

Why they chose Cloudflare
“We found it to be the best fit for our needs: performant, and easy to develop on, easy to scale.”

Recent updates
Learn more about how JEMPass works here.

Karambit.ai

The last line of defense for the software supply chain.

Demo Day pitch

Why they chose Cloudflare
“Cloudflare's developer products offer effortlessly powerful building blocks essential to scaling up product to meet strenuous customer demand while enabling our developers to deliver faster than ever.”

Recent updates
Karambit recently received a grant from the Virginia Innovation Partnership Corporation to help scale their commercial growth.

Narrative BI

A no-code analytics platform for growth teams that automatically turns raw data into actionable narratives.

Demo Day pitch

Why they chose Cloudflare
“Our customers benefit as we improve the quality of insights for them by running advanced algorithms for finding unqualified data points and quickly solving them with the unlimited power of Cloudflare Workers.”

Recent updates
Learn more about how Cloudflare is helping Narrative BI improve the quality of insights they generate for customers here.

Ninetailed

API-first personalization and experimentation solution to give your customers blazing-fast experiences.

Demo Day pitch

Why they chose Cloudflare
“Cloudflare’s developers platform allows us to fully deploy our everything-on-the-edge approach to both data and delivery means personalized experience cause zero loading lag and zero interruptions for the customer.”

Recent updates
Ninetailed recently launched integrations with Contentstack, Zapier, and other tools to improve and personalize digital customer experiences. Learn more on the Ninetailed blog and their Built with Workers case study.

Patr

Scalable, secure and cost-effective digital infrastructure, without the complexities of it.

Demo Day pitch

Why they chose Cloudflare
“Workers provides us with a global network of edge compute that we can use to route data internally to our user's deployments, providing our users with infinite scale.”

Recent updates
Patr was recently highlighted as a Product of the Day on Product Hunt!

QRYN

Polyglot monitoring and edge observability.

Demo Day pitch

Why they chose Cloudflare
“Polyglot, Secure, Cost-Effective Edge Observability – all powered by Cloudflare Workers and R2 Storage.”

Recent updates
QRYN recently launched integrations with Cloudflare Log Push, Grafana, and others.

Quest.ai

Quest is a code-generation tool that automatically generates frontend code for business applications.

Demo Day pitch

Why they chose Cloudflare
“We chose Cloudflare's Workers and Pages product to augment our frontend code-gen to include backend and hosting capabilities.”

Recent updates
Quest has been hard at work expanding their platform and recently added animations, CSS grid, MUI & Chakra UI support, NextJS support, breakpoints, nested components, and more.

Rollup ID

Simple & Secure ‍User Access. Rollup is all your authentication and authorization needs bundled into one great package.

Demo Day pitch

Why they chose Cloudflare
“We chose Cloudflare’s developer platform because it provides us all the tools to build a logical user graph at the edge. We can utilize everything from Durable Objects, D1, R2, and more to build a fast and distributed auth platform.”

Recent updates
Rollup ID recently made their public debut and has rolled out lots of new features since. Learn more here.

Targum

Translating videos at the speed of social media using AI.

Demo Day pitch

Why they chose Cloudflare
“Cloudflare Stream allows us to compete with YouTube's scale while being a 1-person startup, and Cloudflare Workers handles millions of unique views on Targum without waking us up at night.”

Recent updates
Targum launched its platform to customers and hit $100K MRR in just a few days! Check out their Built With Workers case study to learn more.

Touchless

Fixing website platforms without code.

Demo Day pitch

Why they chose Cloudflare
“Workers and the Cloudflare developer platform have been pivotal in enabling us to modernize and enhance existing website platforms and grow their conversions by 5X with little to no code.”

Recent updates
Touchless has been growing their ecosystem and recently joined the RudderStack Solutions Partner Program.

Introducing Cohort #2 of the Workers Launchpad!

We have received hundreds of applications from startups from nearly 50 different countries. There were many AI or AI-related companies helping everyone from developers, to security teams and sales organizations. We also heard from many startups looking to improve developer tooling and collaboration, new social and gaming platforms, and companies solving a wide range of problems that ecommerce, consumer, real estate, and other businesses face today.

While these applicants are tackling a diverse set of real-world problems, the common thread is that they chose to leverage Cloudflare’s developer platform to build more secure, scalable, and feature-rich products faster than they otherwise could.

Without further ado, we are thrilled to announce the 25 incredible startups selected for Cohort #2 of the Workers Launchpad:

Announcing Cohort #2 of the Workers Launchpad

Here’s what they’re building, in their own words:

42able.ai Making AI available and accessible to all.
ai.moda Automate delegating tasks to both your bots and human workers with an MTurk compatible API.
Arrive GG Real-time CDN for gamers.
Astro All-in-one web framework designed for speed. Pull your content from anywhere and deploy everywhere, all powered by your favorite UI components and libraries.
Azule Azule delivers AI agents that interact with your customers.
Brevity Build better software, visually.
Buildless Buildless is a global build cache, like Cloudflare for compiled code; we cache artifacts and make them available over the internet to exponentially accelerate developer velocity.
ChainFuse no-code platform to build multi-model AI for your business.
ChatORG Collaborative ChatGPT for your team.
Clerk Clerk, the drop-in authentication and user management solution for React.
contribute.design OpenSource Software & Design collaboration made easy.
Drifting in Space Drifting in Space builds software that enables developers to use WebSockets to create real-time applications.
Eclipse AI Prevent churn with generative AI.
Embley Marketplace automation platform enabling businesses to scale better and faster.
Fudge Fudge makes websites faster.
Mixer Real world social on a generative AI stack.
Monosnap Monosnap is a secure productivity SaaS with B2B PLG strategy, complementing existing workflows.
Nefeli Networks Unified and declarative cloud network management.
Smplrspace The digital floor plan platform.
Speech Labs AI assistant helping with everyday tasks.
TestApp.io Mobile app testing made easy.
Tigris Data Serverless NoSQL database and search platform to help developers quickly and easily build any application.
tldraw tldraw is building an infinite canvas for developers.
Vantyr The programmatic authorization layer for SaaS.
WunderGraph WunderGraph: The Backend for Frontend framework.

We are looking forward to working with each of these companies over the next few months and sharing what they’re building with you.

If you’re building on Cloudflare’s Developer Platform, head over to @CloudflareDev or join the Cloudflare Developer Discord community to stay in the loop on Launchpad updates. In the early fall, we’ll be selecting Cohort #3 — apply early here!

Cloudflare is not providing any funding or making any funding decisions, and there is no guarantee that any particular company will receive funding through the program. All funding decisions will be made by the venture capital firms that participate in the program. Cloudflare is not a registered broker-dealer, investment adviser, or other similar intermediary.

More Node.js APIs in Cloudflare Workers — Streams, Path, StringDecoder

Post Syndicated from James M Snell original http://blog.cloudflare.com/workers-node-js-apis-stream-path/

More Node.js APIs in Cloudflare Workers — Streams, Path, StringDecoder

More Node.js APIs in Cloudflare Workers — Streams, Path, StringDecoder

Today we are announcing support for three additional APIs from Node.js in Cloudflare Workers. This increases compatibility with the existing ecosystem of open source npm packages, allowing you to use your preferred libraries in Workers, even if they depend on APIs from Node.js.

We recently added support for AsyncLocalStorage, EventEmitter, Buffer, assert and parts of util. Today, we are adding support for:

We are also sharing a preview of a new module type, available in the open-source Workers runtime, that mirrors a Node.js environment more closely by making some APIs available as globals, and allowing imports without the node: specifier prefix.

You can start using these APIs today, in the open-source runtime that powers Cloudflare Workers, in local development, and when you deploy your Worker. Get started by enabling the nodejs_compat compatibility flag for your Worker.

Stream

The Node.js streams API is the original API for working with streaming data in JavaScript that predates the WHATWG ReadableStream standard. Now, a full implementation of Node.js streams (based directly on the official implementation provided by the Node.js project) is available within the Workers runtime.

Let's start with a quick example:

import {
  Readable,
  Transform,
} from 'node:stream';

import {
  text,
} from 'node:stream/consumers';

import {
  pipeline,
} from 'node:stream/promises';

// A Node.js-style Transform that converts data to uppercase
// and appends a newline to the end of the output.
class MyTransform extends Transform {
  constructor() {
    super({ encoding: 'utf8' });
  }
  _transform(chunk, _, cb) {
    this.push(chunk.toString().toUpperCase());
    cb();
  }
  _flush(cb) {
    this.push('\n');
    cb();
  }
}

export default {
  async fetch() {
    const chunks = [
      "hello ",
      "from ",
      "the ",
      "wonderful ",
      "world ",
      "of ",
      "node.js ",
      "streams!"
    ];

    function nextChunk(readable) {
      readable.push(chunks.shift());
      if (chunks.length === 0) readable.push(null);
      else queueMicrotask(() => nextChunk(readable));
    }

    // A Node.js-style Readable that emits chunks from the
    // array...
    const readable = new Readable({
      encoding: 'utf8',
      read() { nextChunk(readable); }
    });

    const transform = new MyTransform();
    await pipeline(readable, transform);
    return new Response(await text(transform));
  }
};

In this example we create two Node.js stream objects: one stream.Readable and one stream.Transform. The stream.Readable simply emits a sequence of individual strings, piped through the stream.Transform which converts those to uppercase and appends a new-line as a final chunk.

The example is straightforward and illustrates the basic operation of the Node.js API. For anyone already familiar with using standard WHATWG streams in Workers the pattern here should be recognizable.

The Node.js streams API is used by countless numbers of modules published on npm. Now that the Node.js streams API is available in Workers, many packages that depend on it can be used in your Workers. For example, the split2 module is a simple utility that can break a stream of data up and reassemble it so that every line is a distinct chunk. While simple, the module is downloaded over 13 million times each week and has over a thousand direct dependents on npm (and many more indirect dependents). Previously it was not possible to use split2 within Workers without also pulling in a large and complicated polyfill implementation of streams along with it. Now split2 can be used directly within Workers with no modifications and no additional polyfills. This reduces the size and complexity of your Worker by thousands of lines.

import {
  PassThrough,
} from 'node:stream';

import { default as split2 } from 'split2';

const enc = new TextEncoder();

export default {
  async fetch() {
    const pt = new PassThrough();
    const readable = pt.pipe(split2());

    pt.end('hello\nfrom\nthe\nwonderful\nworld\nof\nnode.js\nstreams!');
    for await (const chunk of readable) {
      console.log(chunk);
    }

    return new Response("ok");
  }
};

Path

The Node.js Path API provides utilities for working with file and directory paths. For example:

import path from "node:path"
path.join('/foo', 'bar', 'baz/asdf', 'quux', '..');

// Returns: '/foo/bar/baz/asdf'

Note that in the Workers implementation of path, the path.win32 variants of the path API are not implemented, and will throw an exception.

StringDecoder

The Node.js StringDecoder API is a simple legacy utility that predates the WHATWG standard TextEncoder/TextDecoder API and serves roughly the same purpose. It is used by Node.js' stream API implementation as well as a number of popular npm modules for the purpose of decoding UTF-8, UTF-16, Latin1, Base64, and Hex encoded data.

import { StringDecoder } from 'node:string_decoder';
const decoder = new StringDecoder('utf8');

const cent = Buffer.from([0xC2, 0xA2]);
console.log(decoder.write(cent));

const euro = Buffer.from([0xE2, 0x82, 0xAC]);
console.log(decoder.write(euro)); 

In the vast majority of cases, your Worker should just keep on using the standard TextEncoder/TextDecoder APIs, but the StringDecoder is available directly for workers to use now without relying on polyfills.

Node.js Compat Modules

One Worker can already be a bundle of multiple assets. This allows a single Worker to be made up of multiple individual ESM modules, CommonJS modules, JSON, text, and binary data files.

Soon there will be a new type of module that can be included in a Worker bundles: the NodeJsCompatModule.

A NodeJsCompatModule is designed to emulate the Node.js environment as much as possible. Within these modules, common Node.js global variables such as process, Buffer, and even __filename will be available. More importantly, it is possible to require() our Node.js core API implementations without using the node: specifier prefix. This maximizes compatibility with existing NPM packages that depend on globals from Node.js being present, or don’t import Node.js APIs using the node: specifier prefix.

Support for this new module type has landed in the open source workerd runtime, with deeper integration with Wrangler coming soon.

What’s next

We’re adding support for more Node.js APIs each month, and as we introduce new APIs, they will be added under the nodejs_compat compatibility flag — no need to take any action or update your compatibility date.

Have an NPM package that you wish worked on Workers, or an API you’d like to be able to use? Join the Cloudflare Developers Discord and tell us what you’re building, and what you’d like to see next.

Cloudflare Queues: messages at your speed with consumer concurrency and explicit acknowledgement

Post Syndicated from Charles Burnett original http://blog.cloudflare.com/messages-at-your-speed-with-concurrency-and-explicit-acknowledgement/

Cloudflare Queues: messages at your speed with consumer concurrency and explicit acknowledgement

Cloudflare Queues: messages at your speed with consumer concurrency and explicit acknowledgement

Communicating between systems can be a balancing act that has a major impact on your business. APIs have limits, billing frequently depends on usage, and end-users are always looking for more speed in the services they use. With so many conflicting considerations, it can feel like a challenge to get it just right. Cloudflare Queues is a tool to make this balancing act simple. With our latest features like consumer concurrency and explicit acknowledgment, it’s easier than ever for developers to focus on writing great code, rather than worrying about the fees and rate limits of the systems they work with.

Queues is a messaging service, enabling developers to send and receive messages across systems asynchronously with guaranteed delivery. It integrates directly with Cloudflare Workers, making for easy message production and consumption working with the many products and services we offer.

What’s new in Queues?

Consumer concurrency

Oftentimes, the systems we pull data from can produce information faster than other systems can consume them. This can occur when consumption involves processing information, storing it, or sending and receiving information to a third party system. The result of which is that sometimes, a queue can fall behind where it should be. At Cloudflare, a queue shouldn't be a quagmire. That’s why we’ve introduced Consumer Concurrency.

With Concurrency, we automatically scale up the amount of consumers needed to match the speed of information coming into any given queue. In this way, customers no longer have to worry about an ever-growing backlog of information bogging down their system.

How it works

When setting up a queue, developers can set a Cloudflare Workers script as a target to send messages to. With concurrency enabled, Cloudflare will invoke multiple instances of the selected Worker script to keep the messages in the queue moving effectively. This feature is enabled by default for every queue and set to automatically scale.

Autoscaling considers the following factors when spinning up consumers:  the number of messages in a queue, the rate of new messages, and successful vs. unsuccessful consumption attempts.

If a queue has enough messages in it, concurrency will increase each time a message batch is successfully processed. Concurrency is decreased when message batches encounter errors. Customers can set a max_concurrency value in the Dashboard or via Wrangler, which caps out how many consumers can be automatically created to perform processing for a given queue.

Setting the max_concurrency value manually can be helpful in the following situations where producer data is provided in bursts, the datasource API is rate limited, and datasource API has higher costs with more usage.

Setting a max concurrency value manually allows customers to optimize their workflows for other factors beyond speed.

// in your wrangler.toml file


[[queues.consumers]]
  queue = "my-queue"

//max concurrency can be set to a number between 1 and 10
//this defines the total amount of consumers running simultaneously

max_concurrency = 7

To learn more about concurrency you can check out our developer documentation here.

Concurrency in practice

It’s baseball season in the US, and for many of us that means fantasy baseball is back! This year is the year we finally write a program that uses data and statistics to pick a winning team, as opposed to picking players based on “feelings” and “vibes”. We’re engineers after all, and baseball is a game of rules. If the Oakland A’s can do it, so can we!

So how do we put this together? We’ll need a few things:

  1. A list of potential players
  2. An API to pull historical game statistics from
  3. A queue to send this data to its consumer
  4. A Worker script to crunch the numbers and generate a score

A developer can pull from a baseball reference API into a Workers script, and from that worker pass this information to a queue. Historical data is… historical, so we can pull data into our queue as fast as the baseball API will allow us. For our list of potential players, we pull statistics for each game they’ve played. This includes everything from batting averages, to balls caught, to game day weather. Score!

//get data from a third party API and pass it along to a queue


const response = await fetch("http://example.com/baseball-stats.json");
const gamesPlayedJSON = await response.json();

for (game in gamesPlayedJSON){
//send JSON to your queue defined in your workers environment
env.baseballqueue.send(jsonData)
}

Our producer Workers script then passes these statistics onto the queue. As each game contains quite a bit of data, this results in hundreds of thousands of “game data” messages waiting to be processed in our queue. Without concurrency, we would have to wait for each batch of messages to be processed one at a time, taking minutes if not longer. But, with Consumer Concurrency enabled, we watch as multiple instances of our worker script invoked to process this information in no time!

Our Worker script would then take these statistics, apply a heuristic, and store the player name and a corresponding quality score into a database like a Workers KV store for easy access by your application presenting the data.

Explicit Acknowledgment

In Queues previously, a failure of a single message in a batch would result in the whole batch being resent to the consumer to be reprocessed. This resulted in extra cycles being spent on messages that were processed successfully, in addition to the failed message attempt. This hurts both customers and developers, slowing processing time, increasing complexity, and increasing costs.

With Explicit Acknowledgment, we give developers the precision and flexibility to handle each message individually in their consumer, negating the need to reprocess entire batches of messages. Developers can now tell their queue whether their consumer has properly processed each message, or alternatively if a specific message has failed and needs to be retried.

An acknowledgment of a message means that that message will not be retried if the batch fails. Only messages that were not acknowledged will be retried. Inversely, a message that is explicitly retried, will be sent again from the queue to be reprocessed without impacting the processing of the rest of the messages currently being processed.

How it works

In your consumer, there are 4 new methods you can call to explicitly acknowledge a given message: .ack(), .retry(), .ackAll(), .retryAll().

Both ack() and retry() can be called on individual messages. ack() tells a queue that the message has been processed successfully and that it can be deleted from the queue, whereas retry() tells the queue that this message should be put back on the queue and delivered in another batch.

async queue(batch, env, ctx) {
    for (const msg of batch.messages) {
	try {
//send our data to a 3rd party for processing
await fetch('https://thirdpartyAPI.example.com/stats', {
	method: 'POST',
	body: msg, 
	headers: {
		'Content-type': 'application/json'
}
});
//acknowledge if successful
msg.ack();
// We don't have to re-process this if subsequent messages fail!
}
catch (error) {
	//send message back to queue for a retry if there's an error
      msg.retry();
		console.log("Error processing", msg, error);
}
    }
  }

ackAll() and retryAll() work similarly, but act on the entire batch of messages instead of individual messages.

For more details check out our developer documentation here.

Explicit Acknowledgment in practice

In the course of making our Fantasy Baseball team picker, we notice that data isn’t always sent correctly from the baseball reference API. This results in data not being correctly parsed and rejected from our player heuristics.

Without Explicit Acknowledgment, the entire batch of baseball statistics would need to be retried. Thankfully, we can use Explicit Acknowledgment to avoid that, and tell our queue which messages were parsed successfully and which were not.

import heuristic from "baseball-heuristic";
export default {
  async queue(batch: MessageBatch, env: Env, ctx: ExecutionContext) {
    for (const msg of batch.messages) {
      try {
        // Calculate the score based on the game stats
        heuristic.generateScore(msg)
        // Explicitly acknowledge results 
        msg.ack()
      } catch (err) {
        console.log(err)
        // Retry just this message
        msg.retry()
      } 
    }
  },
};

Higher throughput

Under the hood, we’ve been working on improvements to further increase the amount of messages per second each queue can handle. In the last few months, that number has quadrupled, improving from 100 to over 400 messages per second.

Scalability can be an essential factor when deciding which services to use to power your application. You want a service that can grow with your business. We are always aiming to improve our message throughput and hope to see this number quadruple again over the next year. We want to grow with you.
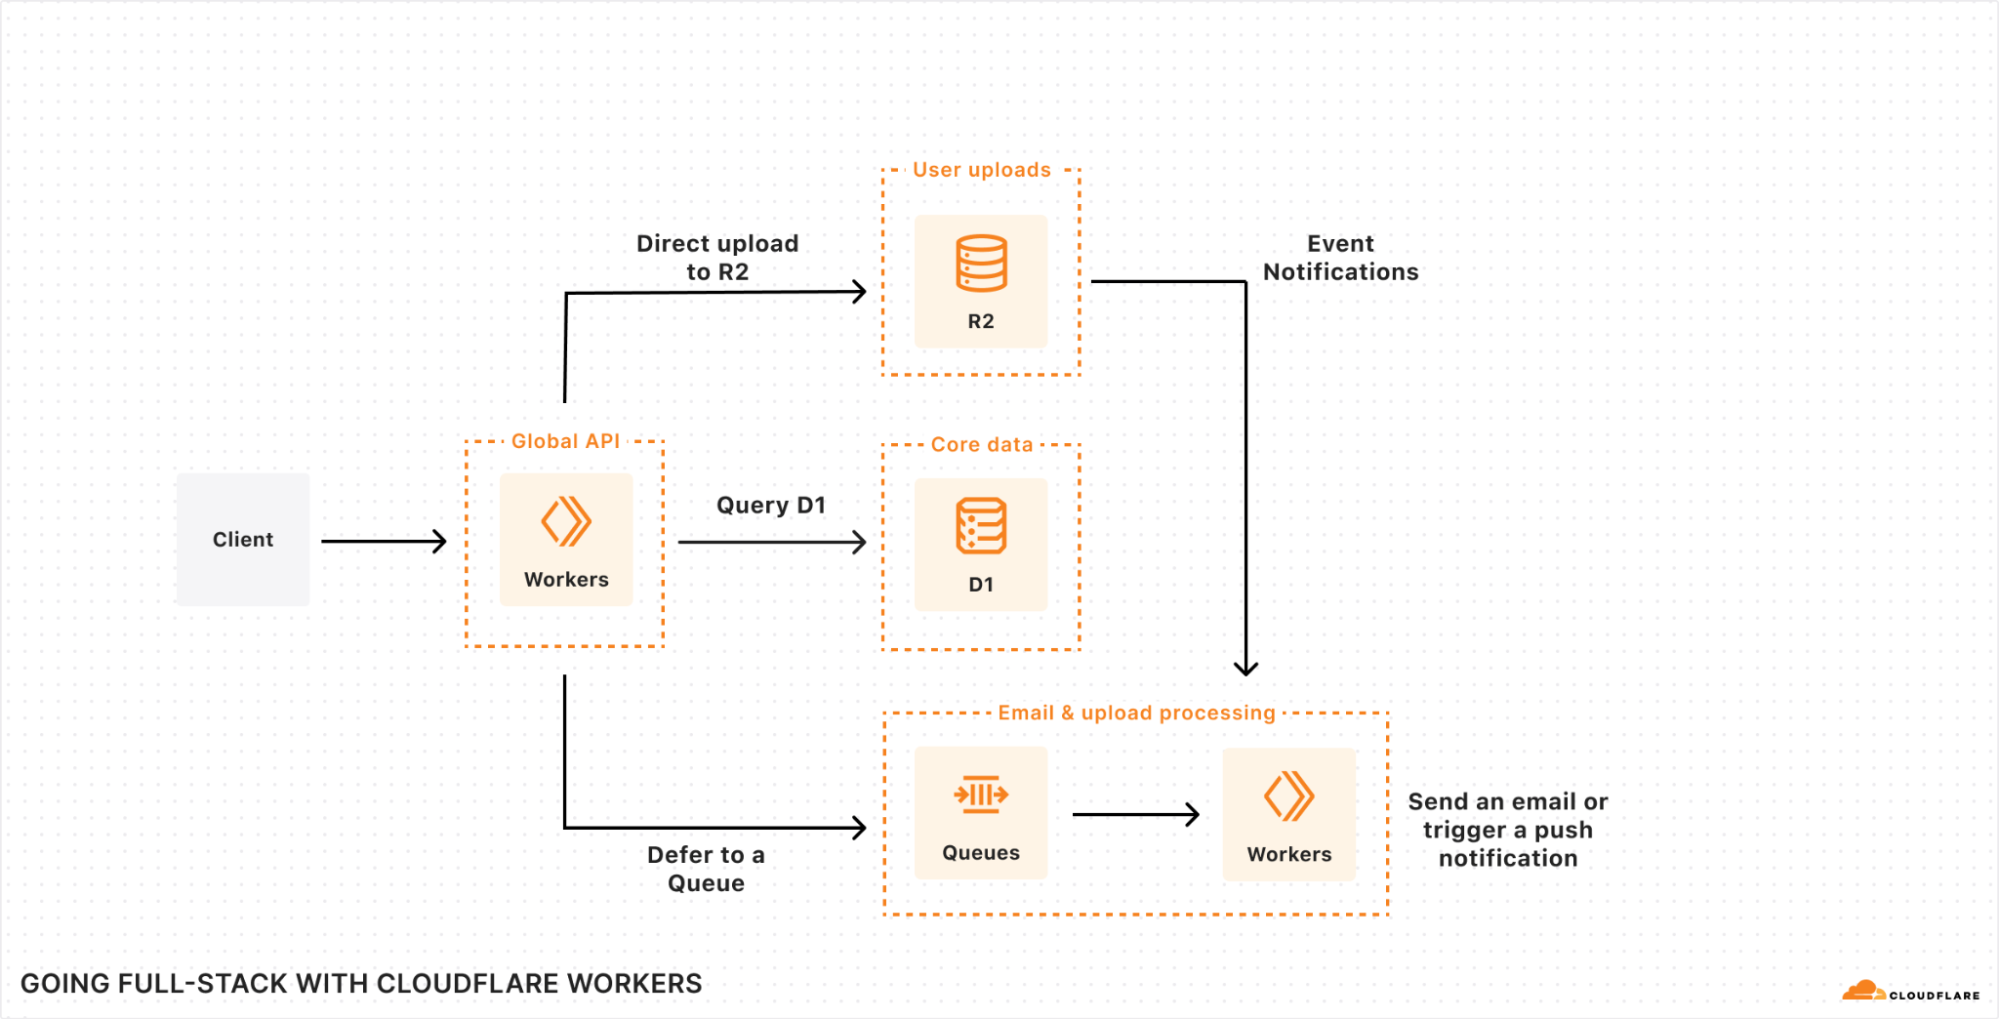
What’s next?

As our service grows, we want to provide our customers with more ways to interact with our service beyond the traditional Cloudflare Workers workflow. We know our customers’ infrastructure is often complex, spanning across multiple services. With that in mind, our focus will be on enabling easy connection to services both within the Cloudflare ecosystem and beyond.

R2 as a consumer

Today, the only type of consumer you can configure for a queue is a Workers script. While Workers are incredibly powerful, we want to take it a step further and give customers a chance to write directly to other services, starting with R2. Coming soon, customers will be able to select an R2 bucket in the Cloudflare Dashboard for a Queue to write to directly, no code required. This will save valuable developer time by avoiding the initial setup in a Workers script, and any maintenance that is required as services evolve. With R2 as a first party consumer in Queues, customers can simply select their bucket, and let Cloudflare handle the rest.

HTTP pull

We're also working to allow you to consume messages from existing infrastructure you might have outside of Cloudflare. Cloudflare Queues will provide an HTTP API for each queue from which any consumer can pull batches of messages for processing. Customers simply make a request to the API endpoint for their queue, receive data they requested, then send an acknowledgment that they have received the data, so the queue can continue working on the next batch.

Always working to be faster

For the Queues team, speed is always our focus, as we understand our customers don't want bottlenecks in the performance of their applications. With this in mind the team will be continuing to look for ways to increase the velocity through which developers can build best in class applications on our developer platform. Whether it's reducing message processing time, the amount of code you need to manage, or giving developers control over their application pipeline, we will continue to implement solutions to allow you to focus on just the important things, while we handle the rest.

Cloudflare Queues is currently in Open Beta and ready to power your most complex applications.

Check out our getting started guide and build your service with us today!

Workers Browser Rendering API enters open beta

Post Syndicated from Celso Martinho original http://blog.cloudflare.com/browser-rendering-open-beta/

Workers Browser Rendering API enters open beta

Workers Browser Rendering API enters open beta

The Workers Browser Rendering API allows developers to programmatically control and interact with a headless browser instance and create automation flows for their applications and products.

Since the private beta announcement, based on the feedback we've been receiving and our own roadmap, the team has been working on the developer experience and improving the platform architecture for the best possible performance and reliability. Today we enter the open beta and will start onboarding the customers on the wait list.

Developer experience

Starting today, Wrangler, our command-line tool for configuring, building, and deploying applications with Cloudflare developer products, has support for the Browser Rendering API bindings.

You can install Wrangler Beta using npm:

npm install wrangler --save-dev

Bindings allow your Workers to interact with resources on the Cloudflare developer platform. In this case, they will provide your Worker script with an authenticated endpoint to interact with a dedicated Chromium browser instance.

This is all you need in your wrangler.toml once this service is enabled for your account:

browser = { binding = "MYBROWSER", type = "browser" }

Now you can deploy any Worker script that requires Browser Rendering capabilities. You can spawn Chromium instances and interact with them programmatically in any way you typically do manually behind your browser.

Under the hood, the Browser Rendering API gives you access to a WebSocket endpoint that speaks the DevTools Protocol. DevTools is what allows us to instrument a Chromium instance running in our global network, and it's the same protocol that Chrome uses on your computer when you inspect a page.

Workers Browser Rendering API enters open beta

With enough dedication, you can, in fact, implement your own DevTools client and talk the protocol directly. But that'd be crazy; almost no one does that.

So…

Puppeteer

Puppeteer is one of the most popular libraries that abstract the lower-level DevTools protocol from developers and provides a high-level API that you can use to easily instrument Chrome/Chromium and automate browsing sessions. It's widely used for things like creating screenshots, crawling pages, and testing web applications.

Puppeteer typically connects to a local Chrome or Chromium browser using the DevTools port.

We forked a version of Puppeteer and patched it to connect to the Workers Browser Rendering API instead. The changes are minimal; after connecting the developers can then use the full Puppeteer API as they would on a standard setup.

Our version is open sourced here, and the npm can be installed from npmjs as @cloudflare/puppeteer. Using it from a Worker is as easy as:

import puppeteer from "@cloudflare/puppeteer";

And then all it takes to launch a browser from your script is:

const browser = await puppeteer.launch(env.MYBROWSER);

In the long term, we will update Puppeteer to keep matching the version of our Chromium instances infrastructure running in our network.

Developer documentation

Following the tradition with other Developer products, we created a dedicated section for the Browser Rendering APIs in our Developer's Documentation site.

You can access this page to learn more about how the service works, Wrangler support, APIs, and limits, and find examples of starter templates for common applications.

Workers Browser Rendering API enters open beta

An example application: taking screenshots

Taking screenshots from web pages is one of the typical cases for browser automation.

Let's create a Worker that uses the Browser Rendering API to do just that. This is a perfect example of how to set up everything and get an application running in minutes, it will give you a good overview of the steps involved and the basics of the Puppeteer API, and then you can move from here to other more sophisticated use-cases.

Step one, start a project, install Wrangler and Cloudflare’s fork of Puppeteer:

npm init -f
npm install wrangler -save-dev
npm install @cloudflare/puppeteer -save-dev

Step two, let’s create the simplest possible wrangler.toml configuration file with the Browser Rendering API binding:

name = "browser-worker"
main = "src/index.ts"
compatibility_date = "2023-03-14"
node_compat = true
workers_dev = true

browser = { binding = "MYBROWSER", type = "browser" }

Step three, create src/index.ts with your Worker code:

import puppeteer from "@cloudflare/puppeteer";

export default {
    async fetch(request: Request, env: Env): Promise<Response> {
        const { searchParams } = new URL(request.url);
        let url = searchParams.get("url");
        let img: Buffer;
        if (url) {
            const browser = await puppeteer.launch(env.MYBROWSER);
            const page = await browser.newPage();
            await page.goto(url);
            img = (await page.screenshot()) as Buffer;
            await browser.close();
            return new Response(img, {
                headers: {
                    "content-type": "image/jpeg",
                },
            });
        } else {
            return new Response(
                "Please add the ?url=https://example.com/ parameter"
            );
        }
    },
};

That's it, no more steps. This Worker instantiates a browser using Puppeteer, opens a new page, navigates to whatever you put in the "url" parameter, takes a screenshot of the page, closes the browser, and responds with the JPEG image of the screenshot. It can't get any easier to get started with the Browser Rendering API.

Run npx wrangler dev –remote to test it and npx wrangler publish when you’re done.

Workers Browser Rendering API enters open beta

You can explore the entire Puppeteer API and implement other functionality and logic from here. And, because it's Workers, you can add other developer products to your code. You might need a relational database, or a KV store to cache your screenshots, or an R2 bucket to archive your crawled pages and assets, or maybe use a Durable Object to keep your browser instance alive and share it with multiple requests, or queues to handle your jobs asynchronous, we have all of this and more.

You can also find this and other examples of how to use Browser Rendering in the Developer Documentation.

How do we use Browser Rendering

Dogfooding our products is one of the best ways to test and improve them, and in some cases, our internal needs dictate or influence our roadmap. Workers Browser Rendering is a good example of that; it was born out of our necessities before we realized it could be a product. We've been using it extensively for things like taking screenshots of pages for social sharing or dashboards, testing web software in CI, or gathering page load performance metrics of our applications.

But there's one product we've been using to stress test and push the limits of the Browser Rendering API and drive the engineering sprints that brought us to open the beta to our customers today: The Cloudflare Radar URL Scanner.

Workers Browser Rendering API enters open beta

The URL Scanner scans any URL and compiles a full report containing technical, performance, privacy, and security details about that page. It's processing thousands of scans per day currently. It was built on top of Workers and uses a combination of the Browser Rendering APIs with Puppeteer to create enriched HAR archives and page screenshots, Durable Objects to reuse browser instances, Queues to handle customers' load and execute jobs asynchronously, and R2 to store the final reports.

This tool will soon have its own "how we built it" blog. Still, we wanted to let you know about it now because it is a good example of how you can build sophisticated applications using Browser Rendering APIs at scale starting today.

Future plans

The team will keep improving the Browser Rendering API, but a few things are worth mentioning today.

First, we are looking into upstreaming the changes in our Puppeteer fork to the main project so that using the official library with the Cloudflare Workers Browser Rendering API becomes as easy as a configuration option.

Second, one of the reasons why we decided to expose the DevTools protocol bare naked in the Worker binding is so that it can support other browser instrumentalization libraries in the future. Playwright is a good example of another popular library that developers want to use.

And last, we are also keeping an eye on and testing WebDriver BiDi, a "new standard browser automation protocol that bridges the gap between the WebDriver Classic and CDP (DevTools) protocols." Click here to know more about the status of WebDriver BiDi.

Final words

The Workers Browser Rendering API enters open beta today. We will gradually be enabling the customers in the wait list in batches and sending them emails. We look forward to seeing what you will be building with it and want to hear from you.

As usual, you can talk to us on our Developers Discord or the Community forum; the team will be listening.

Developer Week Performance Update: Spotlight on R2

Post Syndicated from David Tuber original http://blog.cloudflare.com/r2-is-faster-than-s3/

Developer Week Performance Update: Spotlight on R2

Developer Week Performance Update: Spotlight on R2

For developers, performance is everything. If your app is slow, it will get outclassed and no one will use it. In order for your application to be fast, every underlying component and system needs to be as performant as possible. In the past, we’ve shown how our network helps make your apps faster, even in remote places. We’ve focused on how Workers provides the fastest compute, even in regions that are really far away from traditional cloud datacenters.

For Developer Week 2023, we’re going to be looking at one of the newest Cloudflare developer offerings and how it compares to an alternative when retrieving assets from buckets: R2 versus Amazon Simple Storage Service (S3). Spoiler alert: we’re faster than S3 when serving media content via public access. Our test showed that on average, Cloudflare R2 was 20-40% faster than Amazon S3. For this test, we used 95th percentile Response tests, which measures the time it takes for a user to make a request to the bucket, and get the entirety of the response. This test was designed with the goal of measuring end-user performance when accessing content in public buckets.

In this blog we’re going to talk about why your object store needs to be fast, how much faster R2 is, why that is, and how we measured it.

Storage performance is user-facing

Storage performance is critical to a snappy user experience. Storage services are used for many scenarios that directly impact the end-user experience, particularly in the case where the data stored doesn’t end up in a cache (uncacheable or dynamic content). Compute and database services can rely on storage services, so if they’re not fast, the services using them won’t be either. Even the basic content fetching scenarios that use a CDN require storage services to be fast if the asset is either uncacheable or was not cached on the request: if the storage service is slow or far away, users will be impacted by that performance. And as every developer knows, nobody remembers the nine fast API calls if the last call was slow. Users don’t care about API calls, they care about overall experience. One slow API call, one slow image, one slow anything can muck up the works and provide users with a bad experience.

Because there are lots of different ways to use storage services, we’re going to focus on a relatively simple scenario: fetching static images from these services. Let’s talk about R2 and how it compares to one of the alternatives in this scenario: Amazon S3.

Benchmarking storage performance

When looking at uncached raw file delivery for users in North America retrieving content from a bucket in Ashburn, Virginia (US-East) and examining 95th percentile Response, R2 is 38% faster than S3:

Developer Week Performance Update: Spotlight on R2

Storage Performance: Response in North America (US-East)
95th percentile (ms)
Cloudflare R2 1,262
Amazon S3 2,055

For content hosted in US-East (Ashburn, VA) and only looking at North America-based eyeballs, R2 beats S3 by 30% in response time. When we look at why this is the case, the answer lies in our closeness to users and highly optimized HTTP stacks. Let’s take a look at the TCP connect and SSL times for these tests, which are the times it takes to reach the storage bucket (TCP connect) and the time to complete TLS handshake (SSL time):

Developer Week Performance Update: Spotlight on R2

Storage Performance: Connect and SSL in North America (US-East)
95th percentile connect (ms) 95th percentile SSL (ms)
Cloudflare R2 32 59
Amazon S3 78 180

Cloudflare’s cumulative connect + SSL time is almost 1/2 of Amazon’s SSL time alone. Being able to be fast on connection establishment gives us an edge right off the bat, especially in North America where cloud and storage providers tend to optimize for performance, and connect times tend to be low because ISPs have good peering with cloud and storage providers. But this isn’t just true in North America. Let’s take a look at Europe (EMEA) and Asia (APAC), where Cloudflare also beats out AWS in 95th percentile response time when we look at eyeballs in region for both regions:

Developer Week Performance Update: Spotlight on R2

Storage Performance: Response in EMEA (EU-East)
95th percentile (ms)
Cloudflare R2 1,303
Amazon S3 1,729

Cloudflare beats Amazon by 20% in EMEA. And when you look at the SSL times, you’ll see the same trends that were present in North America: faster Connect and SSL times:

Storage Performance: Connect and SSL in EMEA (EU-East)
95th percentile connect (ms) 95th percentile SSL (ms)
Cloudflare R2 57 94
Amazon S3 80 178

Again, the separator is how optimized Cloudflare is at setting up connections to deliver content. This is also true in APAC, where objects stored in Tokyo are served about 1.5 times faster on Cloudflare than for AWS:

Developer Week Performance Update: Spotlight on R2

Storage Performance: Response in APAC (Tokyo)
95th percentile (ms)
Cloudflare R2 4,057
Amazon S3 6,850

Focus on cross-region

Up until this point, we’ve been looking at scenarios where users are accessing data that is stored in the same region as they are. But what if that isn’t the case? What if a user in Germany is accessing content in Ashburn? In those cases, Cloudflare also pulls ahead. This is a chart showing 95th percentile response times for cases where users outside the United States are accessing content hosted in Ashburn, VA, or US-East:

Developer Week Performance Update: Spotlight on R2

Storage Performance: Response for users outside of US connecting to US-East
95th percentile (ms)
Cloudflare R2 3,224
Amazon S3 6,387

Cloudflare wins again, at almost 2x faster than S3 at P95. This data shows that not only do our in-region calls win out, but we win across the world. Even if you don’t have the money to buy storage everywhere in the world, R2 can still give you world-class performance because not only is R2 faster cross-region, R2’s default no-region setup ensures your data will be close to your users as often as possible.

Testing methodology

To measure these tests, we set up over 400 Catchpoint backbone nodes embedded in last mile ISPs around the world to retrieve a 1 MB file from R2 and S3 in specific locations: Ashburn, Tokyo, and Frankfurt. We recognize that many users will store larger files than the one we tested with, and we plan to test with larger files next showing that we’re faster delivering larger files as well.

We had these 400 nodes retrieve the file uncached from each storage service every 30 minutes for four days. We configured R2 to disable caching. This allows us to make sure that we aren’t reaping any benefits from our CDN pipeline and are only retrieving uncached files from the storage services.

Finally, we had to fix where the public buckets were stored in R2 to get an equivalent test compared to S3. You may notice that when configuring R2, you aren’t able to select specific datacenter locations like you can in AWS. Instead, you can provide a location hint to a general region. Cloudflare will store data anywhere in that region.

Developer Week Performance Update: Spotlight on R2

This feature is designed to make it easier for developers to deploy storage that benefits larger ranges of users as opposed to needing to know where specific datacenters are. However, that makes performance comparisons difficult, so for this test we configured R2 to store data in those specific locations (consistent with the S3 placement) on the backend as opposed to in any location in that region to ensure we would get better apples-to-apples results.

Putting the pieces together

Storage services like R2 are only part of the equation. Developers will often use storage services in conjunction with other compute services for a complete end-to-end application experience. Previously, we performed comparisons of Workers and other compute products such as Fastly’s Compute@Edge and AWS’s Lambda@Edge. We’ve rerun the numbers, and for compute times, Workers is still the fastest compute around, beating AWS Lambda@Edge and Fastly’s Compute@Edge for end-to-end performance for Rust hard tests:

Developer Week Performance Update: Spotlight on R2

Cloudflare is faster than Fastly for both JavaScript and Rust tests, while also being faster than AWS at JavaScript, which is the only test Lambda@Edge supports

To run these tests, we perform two tests against each provider: a complex JavaScript function, and a complex Rust function. These tests run as part of our network benchmarking tests that run from real user browsers around the world. For a more in-depth look at how we collect this data for Workers scenarios, check our previous Developer Week posts.

Here are the functions for both complex functions in JavaScript and Rust:

JavaScript complex function:

function testHardBusyLoop() {
  let value = 0;
  let offset = Date.now();

  for (let n = 0; n < 15000; n++) {
    value += Math.floor(Math.abs(Math.sin(offset + n)) * 10);
  }

  return value;
}

Rust complex function:

fn test_hard_busy_loop() -> i32 {
  let mut value = 0;
  let offset = Date::now().as_millis();

  for n in 0..15000 {
    value += (((offset + n) as f64).sin().abs() * 10.0) as i32;
  }

  value
}

By combining Workers and R2, you get a much simpler developer experience and a much faster user experience than you would get with any of the competition.

Storage, sped up and simplified

R2 is a unique storage service that doesn’t require the knowledge of specific locations, has a more global footprint, and integrates easily with existing Cloudflare Developer Platform products for a simple, performant experience for both users and developers. However, because it’s built on top of Cloudflare, it comes with performance baked in, and that’s evidenced by R2 being faster than its primary alternatives.

At Cloudflare, we believe that developers shouldn’t have to think about performance, you have so many other things to think about. By choosing Cloudflare, you should be able to rest easy knowing that your application will be faster because it’s built on Cloudflare, not because you’re manipulating Cloudflare to be faster for you. And by using R2 and the rest of our developer platform, we’re happy to say that we’re delivering on our vision to make performance easy for you.

D1: We turned it up to 11

Post Syndicated from Matt Silverlock original http://blog.cloudflare.com/d1-turning-it-up-to-11/

D1: We turned it up to 11

This post is also available in 简体中文, 日本語, Español.

D1: We turned it up to 11

We’re not going to bury the lede: we’re excited to launch a major update to our D1 database, with dramatic improvements to performance and scalability. Alpha users (which includes any Workers user) can create new databases using the new storage backend right now with the following command:

$ wrangler d1 create your-database --experimental-backend

In the coming weeks, it’ll be the default experience for everyone, but we want to invite developers to start experimenting with the new version of D1 immediately. We’ll also be sharing more about how we built D1’s new storage subsystem, and how it benefits from Cloudflare’s distributed network, very soon.

Remind me: What’s D1?

D1 is Cloudflare’s native serverless database, which we launched into alpha in November last year. Developers have been building complex applications with Workers, KV, Durable Objects, and more recently, Queues & R2, but they’ve also been consistently asking us for one thing: a database they can query.

We also heard consistent feedback that it should be SQL-based, scale-to-zero, and (just like Workers itself), take a Region: Earth approach to replication. And so we took that feedback and set out to build D1, with SQLite giving us a familiar SQL dialect, robust query engine and one of the most battle tested code-bases to build on.

We shipped the first version of D1 as a “real” alpha: a way for us to develop in the open, gather feedback directly from developers, and better prioritize what matters. And living up to the alpha moniker, there were bugs, performance issues and a fairly narrow “happy path”.

Despite that, we’ve seen developers spin up thousands of databases, make billions of queries, popular ORMs like Drizzle and Kysely add support for D1 (already!), and Remix and Nuxt templates build directly around it, as well.

Turning it up to 11

If you’ve used D1 in its alpha state to date: forget everything you know. D1 is now substantially faster: up to 20x faster on the well-known Northwind Traders Demo, which we’ve just migrated to use our new storage backend:

D1: We turned it up to 11

Our new architecture also increases write performance: a simple benchmark inserting 1,000 rows (each row about 200 bytes wide) is approximately 6.8x faster than the previous version of D1.

Larger batches (10,000 rows at ~200 bytes wide) see an even larger improvement: between 10-11x, with the new storage backend’s latency also being significantly more consistent. We’ve also not yet started to optimize our overall write throughput, and so expect D1 to only get faster here.

With our new storage backend, we also want to make clear that D1 is not a toy, and we’re constantly benchmarking our performance against other serverless databases. A query against a 500,000 row key-value table (recognizing that benchmarks are inherently synthetic) sees D1 perform about 3.2x faster than a popular serverless Postgres provider:

D1: We turned it up to 11

We ran the Postgres queries several times to prime the page cache and then took the median query time, as measured by the server. We’ll continue to sharpen our performance edge as we go forward.

Developers with existing databases can import data into a new database backed by the storage engine by following the steps to export their database and then import it in our docs.

What did I miss?

We’ve also been working on a number of improvements to D1’s developer experience:

  • A new console interface that allows you to issue queries directly from the dashboard, making it easier to get started and/or issue one-shot queries.
  • Formal support for JSON functions that query over JSON directly in your database.
  • Location Hints, allowing you to influence where your leader (which is responsible for writes) is located globally.

Although D1 is designed to work natively within Cloudflare Workers, we realize that there’s often a need to quickly issue one-shot queries via CLI or a web editor when prototyping or just exploring a database. On top of the support in wrangler for executing queries (and files), we’ve also introduced a console editor that allows you to issue queries, inspect tables, and even edit data on the fly:

D1: We turned it up to 11

JSON functions allow you to query JSON stored in TEXT columns in D1: allowing you to be flexible about what data is associated strictly with your relational database schema and what isn’t, whilst still being able to query all of it via SQL (before it reaches your app).

For example, suppose you store the last login timestamps as a JSON array in a login_history TEXT column: I can query (and extract) sub-objects or array items directly by providing a path to their key:

SELECT user_id, json_extract(login_history, '$.[0]') as latest_login FROM users

D1’s support for JSON functions is extremely flexible, and leverages the SQLite core that D1 builds on.

When you create a database for the first time with D1, we automatically infer the location based on where you’re currently connecting from. There are some cases, however, where you might want to influence that — maybe you’re traveling, or you have a distributed team that’s distinct from the region you expect the majority of your writes to come from.

D1’s support for Location Hints makes that easy:

# Automatically inferred based your location
$ wrangler d1 create user-prod-db --experimental-backend

# Indicate a preferred location to create your database
$ wrangler d1 create eu-users-db --location=weur --experimental-backend

Location Hints are also now available in the Cloudflare dashboard:

D1: We turned it up to 11

We’ve also published more documentation to help developers not only get started, but make use of D1’s advanced features. Expect D1’s documentation to continue to grow substantially over the coming months.

Not going to burn a hole in your wallet

We’ve had many, many developers ask us about how we’ll be pricing D1 since we announced the alpha, and we’re ready to share what it’s going to look like. We know it’s important to understand what something might cost before you start building on it, so you’re not surprised six months later.

In a nutshell:

  • We’re announcing pricing so that you can start to model how much D1 will cost for your use-case ahead of time. Final pricing may be subject to change, although we expect changes to be relatively minor.
  • We won’t be enabling billing until later this year, and we’ll notify existing D1 users via email ahead of that change. Until then, D1 will remain free to use.
  • D1 will include an always-free tier, included usage as part of our $5/mo Workers subscription, and charge based on reads, writes and storage.

If you’re already subscribed to Workers, then you don’t have to lift a finger: your existing subscription will have D1 usage included when we enable billing in the future.

Here’s a summary (we’re keeping it intentionally simple):

D1: We turned it up to 11

Importantly, when we enable global read replication, you won’t have to pay extra for it, nor will replication multiply your storage consumption. We think built-in, automatic replication is important, and we don’t think developers should have to pay multiplicative costs (replicas x storage fees) in order to make their database fast everywhere.

Beyond that, we wanted to ensure D1 took the best parts of serverless pricing — scale-to-zero and pay-for-what-you-use — so that you’re not trying to figure out how many CPUs and/or how much memory you need for your workload or writing scripts to scale down your infrastructure during quieter hours.

D1’s read pricing is based on the familiar concept of a read unit (per 4KB read), and a write unit (per 1KB written). A query that reads (scans) ~10,000 rows of 64 bytes each would consume 160 read units. Write a big 3KB row in a “blog_posts” table that has a lot of Markdown, and that’s three write units. And if you create indexes for your most popular queries to improve performance and reduce how much data those queries need to scan, you’ll also reduce how much we bill you. We think making the fast path more cost-efficient by default is the right approach.

Importantly: we’ll continue to take feedback on our pricing before we flip the switch.

Time Travel

We’re also introducing new backup functionality: point-in-time-recovery, and we’re calling this Time Travel, because it feels just like it. Time Travel allows you to restore your D1 database to any minute within the last 30 days, and will be built into D1 databases using our new storage system. We expect to turn on Time Travel for new D1 databases in the very near future.

What makes Time Travel really powerful is that you no longer need to panic and wonder “oh wait, did I take a backup before I made this major change?!” — because we do it for you. We retain a stream of all changes to your database (the Write-Ahead Log), allowing us to restore your database to a point in time by replaying those changes in sequence up until that point.

Here’s an example (subject to some minor API changes):

# Using a precise Unix timestamp (in UTC):
$ wrangler d1 time-travel my-database --before-timestamp=1683570504

# Alternatively, restore prior to a specific transaction ID:
$ wrangler d1 time-travel my-database --before-tx-id=01H0FM2XHKACETEFQK2P5T6BWD

And although the idea of point-in-time recovery is not new, it’s often a paid add-on, if it is even available at all. Realizing you should have had it turned on after you’ve deleted or otherwise made a mistake means it’s often too late.

For example, imagine if I made the classic mistake of forgetting a WHERE on an UPDATE statement:

-- Don't do this at home
UPDATE users SET email = '[email protected]' -- missing: WHERE id = "abc123"

Without Time Travel, I’d have to hope that either a scheduled backup ran recently, or that I remembered to make a manual backup just prior. With Time Travel, I can restore to a point a minute or so before that mistake (and hopefully learn a lesson for next time).

We’re also exploring features that can surface larger changes to your database state, including making it easier to identify schema changes, the number of tables, large deltas in data stored and even specific queries (via transaction IDs) — to help you better understand exactly what point in time to restore your database to.

On the roadmap

So what’s next for D1?

  • Open beta: we’re ensuring we’ve observed our new storage subsystem under load (and real-world usage) prior to making it the default for all `d1 create` commands. We hold a high bar for durability and availability, even for a “beta”, and we also recognize that access to backups (Time Travel) is important for folks to trust a new database. Keep an eye on the Cloudflare blog in the coming weeks for more news here!
  • Bigger databases: we know this is a big ask from many, and we’re extremely close. Developers on the Workers Paid plan will get access to 1GB databases in the very near future, and we’ll be continuing to ramp up the maximum per-database size over time.
  • Metrics & observability: you’ll be able to inspect overall query volume by database, failing queries, storage consumed and read/write units via both the D1 dashboard and our GraphQL API, so that it’s easier to debug issues and track spend.
  • Automatic read replication: our new storage subsystem is built with replication in mind, and we’re working on ensuring our replication layer is both fast & reliable before we roll it out to developers. Read replication is not only designed to improve query latency by storing copies — replicas — of your data in multiple locations, close to your users, but will also allow us to scale out D1 databases horizontally for those with larger workloads.

In the meantime, you can start prototyping and experimenting with D1 right now, explore our D1 + Drizzle + Remix example project, or join the #d1 channel on the Cloudflare Developers Discord server to engage directly with the D1 team and others building on D1.

Announcing Cloudflare Secrets Store

Post Syndicated from Dina Kozlov original http://blog.cloudflare.com/secrets-store/

Announcing Cloudflare Secrets Store

Announcing Cloudflare Secrets Store

We’re excited to announce Secrets Store – Cloudflare’s new secrets management offering!

A secrets store does exactly what the name implies – it stores secrets. Secrets are variables that are used by developers that contain sensitive information – information that only authorized users and systems should have access to.

If you’re building an application, there are various types of secrets that you need to manage. Every system should be designed to have identity & authentication data that verifies some form of identity in order to grant access to a system or application. One example of this is API tokens for making read and write requests to a database. Failure to store these tokens securely could lead to unauthorized access of information – intentional or accidental.

The stakes with secret’s management are high. Every gap in the storage of these values has potential to lead to a data leak or compromise. A security administrator’s worst nightmare.

Developers are primarily focused on creating applications, they want to build quickly, they want their system to be performant, and they want it to scale. For them, secrets management is about ease of use, performance, and reliability. On the other hand, security administrators are tasked with ensuring that these secrets remain secure. It’s their responsibility to safeguard sensitive information, ensure that security best practices are met, and to manage any fallout of an incident such as a data leak or breach. It’s their job to verify that developers at their company are building in a secure and foolproof manner.

In order for developers to build at high velocity and for security administrators to feel at ease, companies need to adopt a highly reliable and secure secrets manager. This should be a system that ensures that sensitive information is stored with the highest security measures, while maintaining ease of use that will allow engineering teams to efficiently build.

Why Cloudflare is building a secrets store

Cloudflare’s mission is to help build a better Internet – that means a more secure Internet. We recognize our customers’ need for a secure, centralized repository for storing sensitive data. Within the Cloudflare ecosystem, are various places where customers need to store and access API and authorization tokens, shared secrets, and sensitive information. It’s our job to make it easy for customers to manage these values securely.

The need for secrets management goes beyond Cloudflare. Customers have sensitive data that they manage everywhere – at their cloud provider, on their own infrastructure, across machines. Our plan is to make our Secrets Store a one-stop shop for all of our customer’s secrets.

The evolution of secrets at Cloudflare

In 2020, we launched environment variables and secrets for Cloudflare Workers, allowing customers to create and encrypt variables across their Worker scripts. By doing this, developers can obfuscate the value of a variable so that it’s no longer available in plaintext and can only be accessed by the Worker.

Announcing Cloudflare Secrets Store

Adoption and use of these secrets is quickly growing. We now have more than three million Workers scripts that reference variables and secrets managed through Cloudflare. One piece of feedback that we continue to hear from customers is that these secrets are scoped too narrowly.

Today, customers can only use a variable or secret within the Worker that it’s associated with. Instead, customers have secrets that they share across Workers. They don’t want to re-create those secrets and focus their time on keeping them in sync. They want account level secrets that are managed in one place but are referenced across multiple Workers scripts and functions.

Outside of Workers, there are many use cases for secrets across Cloudflare services.

Inside our Web Application Firewall (WAF), customers can make rules that look for authorization headers in order to grant or deny access to requests. Today, when customers create these rules, they put the authorization header value in plaintext, so that anyone with WAF access in the Cloudflare account can see its value. What we’ve heard from our customers is that even internally, engineers should not have access to this type of information. Instead, what our customers want is one place to manage the value of this header or token, so that only authorized users can see, create, and rotate this value. Then when creating a WAF rule, engineers can just reference the associated secret e.g.“account.mysecretauth”. By doing this, we help our customers secure their system by reducing the access scope and enhance management of this value by keeping it updated in one place.

Announcing Cloudflare Secrets Store

With new Cloudflare products and features quickly developing, we’re hearing more and more use cases for a centralized secrets manager. One that can be used to store Access Service tokens or shared secrets for Webhooks.

With the new account level Secrets Store, we’re excited to give customers the tools they need to manage secrets across Cloudflare services.

Securing the Secret Store

To have a secrets store, there are a number of measures that need to be in place, and we’re committing to providing these for our customers.

First, we’re going to give the tools that our customers need to restrict access to secrets. We will have scope permissions that will allow admins to choose which users can view, create, edit, or remove secrets. We also plan to add the same level of granularity to our services – giving customers the ability to say “only allow this Worker to access this secret and only allow this set of Firewall rules to access that secret”.

Announcing Cloudflare Secrets Store

Next, we’re going to give our customers extensive audits that will allow them to track the access and use of their secrets. Audit logs are crucial for security administrators. They can be used to alert team members that a secret was used by an unauthorized service or that a compromised secret is being accessed when it shouldn’t be. We will give customers audit logs for every secret-related event, so that customers can see exactly who is making changes to secrets and which services are accessing and when.

In addition to the built-in security of the Secrets Store, we’re going to give customers the tools to rotate their encryption keys on-demand or at a cadence that fits the right security posture for them.

Sign up for the beta

We’re excited to get the Secrets Store in our customer’s hands. If you’re interested in using this, please fill out this form, and we’ll reach out to you when it’s ready to use.

Using LangChainJS and Cloudflare Workers together

Post Syndicated from Ricky Robinett original http://blog.cloudflare.com/langchain-and-cloudflare/

Using LangChainJS and Cloudflare Workers together

Using LangChainJS and Cloudflare Workers together

We are incredibly stoked that our friends at LangChain have announced LangChainJS Support for Multiple JavaScript Environments (including Cloudflare Workers). During Developer Week 2023 we wanted to celebrate this launch and our future collaborations with LangChain.

“Our goal for LangChain is to empower developers around the world to build with AI. We want LangChain to work wherever developers are building, and to spark their creativity to build new and innovative applications. With this new launch, we can't wait to see what developers build with LangChainJS and Cloudflare Workers. And we're excited to put more of Cloudflare's developer tools in the hands of our community in the coming months.” – Harrison Chase, Co-Founder and CEO, LangChain

In this post, we’ll share why we’re so excited about LangChain and walk you through how to build your first LangChainJS + Cloudflare Workers application.

For the uninitiated, LangChain is a framework for building applications powered by large language models (LLMs). It not only lets you fairly seamlessly switch between different LLMs, but also gives you the ability to chain prompts together. This allows you to build more sophisticated applications across multiple LLMs, something that would be way more complicated without the help of LangChain.

Building your first LangChainJS + Cloudflare Workers application

There are a few prerequisites you have to set up in order to build this application:

  1. An OpenAI account: If you don’t already have one, you can sign up for free.
  2. A paid Cloudflare Workers account: If you don’t already have an account, you can sign up here and upgrade your Workers for $5 per month.
  3. Wrangler: Wrangler is a command line tool for building with Cloudflare Workers. You can find installation instructions for it here.
  4. Node & npm: If this is your first time working with node, you can get it here.

Next create a new folder called langchain-workers, navigate into that folder and then within that folder run wrangler init.

When you run wrangler init you’ll select the following options:

  • ✔Would you like to use git to manage this Worker? … yes
  • ✔ No package.json found. Would you like to create one? … yes
  • ✔ Would you like to use TypeScript? … no
  • ✔ Would you like to create a Worker at src/index.js? › Fetch handler
  • ✔ Would you like us to write your first test? … no

With our Worker created, we’ll need to set up the environment variable for our OpenAI API Key. You can create an API key in your OpenAI dashboard. Save your new API key someplace safe, then open your wrangler.toml file and add the following lines at the bottom (making sure to insert you actual API key):

[vars]
OPENAI_API_KEY = "sk…"

Then we’ll install LangChainjs using npm:

npm install langchain

Before we start writing code we can make sure everything is working properly by running wrangler dev. With wrangler dev running you can press b to open a browser. When you do, you'll see “Hello World!” in your browser.

A sample application

One common way you may want to use a language model is to combine it with your own text. LangChain is a great tool to accomplish this goal and that’s what we’ll be doing today in our sample application. We’re going to build an application that lets us use the OpenAI language model to ask a question about an article on Wikipedia. Because I live in (and love) Brooklyn, we’ll be using the Wikipedia article about Brooklyn. But you can use this code for any Wikipedia article, or website, you’d like.

Because language models only know about the data that they were trained on, if we want to use a language model with new or specific information we need a way to pass a model that information. In LangChain we can accomplish this using a ”document”. If you’re like me, when you hear “document” you often think of a specific file format but in LangChain a document is an object that consists of some text and optionally some metadata. The text in a document object is what will be used when interacting with a language model and the metadata is a way that you can track information about your document.

Most often you’ll want to create documents from a source of pre-existing text. LangChain helpfully provides us with different document loaders to make loading text from many different sources easy. There are document loaders for different types of text formats (for example: CSV, PDFs, HTML, unstructured text) and that content can be loaded locally or from the web. A document loader will both retrieve the text for you and load that text into a document object. For our application, we’ll be using the webpages with Cheerio document loader. Cheerio is a lightweight library that will let us read the content of a webpage. We can install it using npm install cheerio.

After we’ve installed cheerio we’ll import the CheerioWebBaseLoader at the top of our src/index.js file:

import { CheerioWebBaseLoader } from "langchain/document_loaders/web/cheerio";

With CheerioWebBaseLoader imported, we can start using it within our fetch function:.

    async fetch(request, env, ctx) {
        const loader = new CheerioWebBaseLoader(
          “https://en.wikipedia.org/wiki/Brooklyn"
        );
        const docs = await loader.load();
        console.log(docs);

        return new Response("Hello World!");
  },

In this code, we’re configuring our loader with the Wikipedia URL for the article about Brooklyn, run the load() function and log the result to the console. Like I mentioned earlier, if you want to try this with a different Wikipedia article or website, LangChain makes it very easy. All we have to do is change the URL we’re passing to our CheerioWebBaseLoader.

Let’s run wrangler dev, load up our page locally and watch the output in our console. You should see:

Loaded page
Array(1) [ Document ]

Our document loader retrieved the content of the webpage, put that content in a document object and loaded it into an array.

Using LangChainJS and Cloudflare Workers together

This is great, but there’s one more improvement we can make to this code before we move on – splitting our text into multiple documents.

Many language models have limits on the amount of text you can pass to them. As well, some LLM APIs charge based on the amount of text you send in your request. For both of these reasons, it’s helpful to only pass the text you need in a request to a language model.

Currently, we’ve loaded the entire content of the Wikipedia page about Brooklyn into one document object and would send the entirety of that text with every request to our language model. It would be more efficient if we could only send the relevant text to our language model when we have a question. The first step in doing this is to split our text into smaller chunks that are stored in multiple document objects. To assist with this LangChain gives us the very aptly named Text Splitters.

We can use a text splitter by updating our loader to use the loadAndSplit() function instead of load(). Update the line where we assign docs to this:

const docs = await loader.loadAndSplit();

Now start the application again with wrangler dev and load our page. This time in our console you’ll see something like this:

Loaded page
Array(227) [ Document, Document, Document, Document, Document, Document, Document, Document, Document, Document, Document, Document, Document, Document, Document, Document, Document, Document, Document, Document, Document, Document, Document, Document, Document, Document, Document, Document, Document, Document, Document, Document, Document, Document, Document, Document, Document, Document, Document, Document, Document, Document, Document, Document, Document, Document, Document, Document, Document, Document, Document, Document, Document, Document, Document, Document, Document, Document, Document, Document, Document, Document, Document, Document, Document, Document, Document, Document, Document, Document, Document, Document, Document, Document, Document, Document, Document, Document, Document, Document, Document, Document, Document, Document, Document, Document, Document, Document, Document, Document, Document, Document, Document, Document, Document, Document, Document, Document, Document, Document... ]

Instead of an array with one document object, our document loader has now split the text it retrieved into multiple document objects. It’s still a single Wikipedia article, LangChain just split that text into chunks that would be more appropriately sized for working with a language model.

Using LangChainJS and Cloudflare Workers together

Even though our text is split into multiple documents, we still need to be able to understand what text is relevant to our question and should be sent to our language model. To do this, we’re going to introduce two new concepts – embeddings and vector stores.

Embeddings are a way of representing text with numerical data. For our application we’ll be using OpenAI Embeddings to generate our embeddings based on the document objects we just created. When you generate embeddings the result is a vector of floating point numbers. This makes it easier for computers to understand the relatedness of the strings of text to each other. For each document object we pass the embedding API, a vector will be created.

Using LangChainJS and Cloudflare Workers together

When we compare vectors, the closer numbers are to each other the more related the strings are. Inversely, the further apart the numbers are then the less related the strings are. It can be helpful to visualize how these numbers would allow us to place each document in a virtual space:

Using LangChainJS and Cloudflare Workers together

In this illustration, you could imagine how the text in the document objects that are bunched together would be more similar than the document object further off. The grouped documents could be text pulled from the article’s section on the history of Brooklyn. It’s a longer section that would have been split into multiple documents by our text splitter. But even though the text was split the embeddings would allow us to know this content is closely related to each other. Meanwhile, the document further away could be the text on the climate of Brooklyn. This section was smaller, not split into multiple documents, and the current climate is not as related to the history of Brooklyn, so it’s placed further away.

Embeddings are a pretty fascinating and complicated topic. If you’re interested in understanding more, here's a great explainer video that takes an in-depth look at the embeddings.

Once you’ve generated your documents and embeddings, you need to store them someplace for future querying. Vector stores are a kind of database optimized for storing & querying documents and their embeddings. For our vector store, we’ll be using MemoryVectorStore which is an ephemeral in-memory vector store. LangChain also has support for many of your favorite vector databases like Chroma and Pinecone.

We’ll start by adding imports for OpenAIEmbeddings and MemoryVectorStore at the top of our file:

import { OpenAIEmbeddings } from "langchain/embeddings/openai";
import { MemoryVectorStore } from "langchain/vectorstores/memory";

Then we can remove the console.log() function we had in place to show how our loader worked and replace them with the code to create our Embeddings and Vector store:

const store = await MemoryVectorStore.fromDocuments(docs, new OpenAIEmbeddings({ openAIApiKey: env.OPENAI_API_KEY}));

With our text loaded into documents, our embeddings created and both stored in a vector store we can now query our text with our language model. To do that we’re going to introduce the last two concepts that are core to building this application – models and chains.

When you see models in LangChain, it’s not about generating or creating models. Instead, LangChain provides a standard interface that lets you access many different language models. In this app, we’ll be using the OpenAI model.

Chains enable you to combine a language model with other sources of information, APIs, or even other language models. In our case, we’ll be using the RetreivalQAChain. This chain retrieves the documents from our vector store related to a question and then uses our model to answer the question using that information.

Using LangChainJS and Cloudflare Workers together

To start, we’ll add these two imports to the top of our file:

import { OpenAI } from "langchain/llms/openai";
import { RetrievalQAChain } from "langchain/chains";

Then we can put this all into action by adding the following code after we create our vector store:

        const model = new OpenAI({ openAIApiKey: env.OPENAI_API_KEY});
        const chain = RetrievalQAChain.fromLLM(model, store.asRetriever());

        const question = "What is this article about? Can you give me 3 facts about it?";

        const res = await chain.call({
            query: question,
        });

        return new Response(res.text); 

In this code the first line is where we instantiate our model interface and pass it our API key. Next we create a chain passing it our model and our vector store. As mentioned earlier, we’re using a RetrievalQAChain which will look in our vector store for documents related to our query and then use those documents to get an answer for our query from our model.

With our chain created, we can call the chain by passing in the query we want to ask. Finally, we send the response text we got from our chain as the response to the request our Worker received. This will allow us to see the response in our browser.

With all our code in place, let’s test it again by running wrangler dev. This time when you open your browser you will see a few facts about Brooklyn:

Using LangChainJS and Cloudflare Workers together

Right now, the question we’re asking is hard coded. Our goal was to be able to use LangChain to ask any question we want about this article. Let’s update our code to allow us to pass the question we want to ask in our request. In this case, we’ll pass a question as an argument in the query string (e.g. ?question=When was Brooklyn founded). To do this we’ll replace the line we’re currently assigning our question with the code needed to pull a question from our query string:

        const { searchParams } = new URL(request.url);
        const question = searchParams.get('question') ?? "What is this article about? Can you give me 3 facts about it?";

This code pulls all the query parameters from our URL using a JavaScript URL’s native searchParams property, and gets the value passed in for the “question” parameter. If a value isn’t present for the “question” parameter, we’ll use the default question text we were using previously thanks to JavaScripts’s nullish coalescing operator.

With this update, run wrangler dev and this time visit your local url with a question query string added. Now instead of giving us a few fun facts about Brooklyn, we get the answer of when Brooklyn was founded. You can try this with any question you may have about Brooklyn. Or you can switch out the URL in our document loader and try asking similar questions about different Wikipedia articles.

With our code working locally, we can deploy it with wrangler publish. After this command completes you’ll receive a Workers URL that runs your code.

You + LangChain + Cloudflare Workers

You can find our full LangChain example application on GitHub. We can’t wait to see what you all build with LangChain and Cloudflare Workers. Join us on Discord or tag us on Twitter as you’re building. And if you’re ever having any trouble or questions, you can ask on community.cloudflare.com.

How to secure Generative AI applications

Post Syndicated from Reid Tatoris original http://blog.cloudflare.com/secure-generative-ai-applications/

How to secure Generative AI applications

How to secure Generative AI applications

I remember when the first iPhone was announced in 2007. This was NOT an iPhone as we think of one today. It had warts. A lot of warts. It couldn’t do MMS for example. But I remember the possibility it brought to mind. No product before had seemed like anything more than a product. The iPhone, or more the potential that the iPhone hinted at, had an actual impact on me. It changed my thinking about what could be.

In the years since no other product came close to matching that level of awe and wonder. That changed in March of this year. The release of GPT-4 had the same impact I remember from the iPhone launch. It’s still early, but it's opened the imagination, and fears, of millions of developers in a way I haven’t seen since that iPhone announcement.

That excitement has led to an explosion of development and hundreds of new tools broadly grouped into a category we call generative AI. Generative AI systems create content mimicking a particular style. New images that look like Banksy or lyrics that sound like Taylor Swift. All of these Generative AI tools, whether built on top of GPT-4 or something else, use the same basic model technique: a transformer.

Attention is all you need

GPT-4 (Generative Pretrained Transformer) is the most advanced version of a transformer model. Transformer models all emerged from a seminal paper written in 2017 by researchers at the University of Toronto and the team at Google Brain, titled Attention is all you need. The key insight from the paper is the self-attention mechanism. This mechanism replaced recurrent and convolutional layers, allowing for faster training and better performance.

The secret power of transformer models is their ability to efficiently process large amounts of data in parallel. It's the transformers' gargantuan scale and extensive training that makes them so appealing and versatile, turning them into the Swiss Army knife of natural language processing. At a high level, Large Language Models (LLMs) are just transformer models that use an incredibly large number of parameters (billions), and are trained on incredibly large amounts of unsupervised text (the Internet). Hence large, and language.

Groundbreaking technology brings groundbreaking challenges

Unleashing the potential of LLMs in consumer-facing AI tools has opened a world of possibilities. But possibility also means new risk: developers must now navigate the unique security challenges that arise from making powerful new tools widely available to the masses.

First and foremost, consumer-facing applications inherently expose the underlying AI systems to millions of users, vastly increasing the potential attack surface. Since developers are targeting a consumer audience, they can't rely on trusted customers or limit access based on geographic location. Any security measure that makes it too difficult for consumers to use defeats the purpose of the application. Consequently, developers must strike a delicate balance between security and usability, which can be challenging.

The current popularity of AI tools makes explosive takeoff more likely than in the past. This is great! Explosive takeoff is what you want! But, that explosion can also lead to exponential growth in costs, as the computational requirements for serving a rapidly growing user base can become overwhelming.

In addition to being popular, Generative AI apps are unique in that calls to them are incredibly resource intensive, and therefore expensive for the owner. In comparison, think about a more traditional API that Cloudflare has protected for years. A product API. Sites don’t want competitors calling their product API and scraping data. This has an obvious negative business impact. However, it doesn’t have a direct infrastructure cost. A product list API returns a small amount of text. An attacker calling it 4 million times will have a negligible cost to an infrastructure bill. But generative models can cost cents, or in the case of image generation even tens of cents per call. An attacker gaining access and generating millions of calls has a real cost impact to the developers providing those APIs.

Not only are the costs for generating content high, but the value that end users are willing to pay is high as well. Customers tell us that they have seen multiple instances of bad actors accessing an API without paying, then reselling the content they generate for 50 cents or more per call. The huge monetary opportunity of exploitation means attackers are highly motivated to come back again and again, refactoring their approach each time.

Last, consumer-facing LLM applications are generally designed as a single entry point for customers, almost always accepting query text as input. The open-text nature of these calls makes it difficult to predict the potential impact of a single request. For example, a complex query might consume significant resources or trigger unexpected behavior. While these APIs are not GraphQL based, the challenges are similar. When you accept unstructured submissions, it's harder to create any type of rule to prevent abuse.

Tips for protecting your Generative AI application

So you've built the latest generative AI sensation, and the world is about to be taken by storm. But that success is also about to make you a target. What's the trick to stopping all those attacks you’re about to see? Well, unfortunately there isn’t one. For all the reasons above, this is a hard, persistent problem with no simple solution. But, we’ve been fortunate to work with many customers who have had that target on their back for months, and we’ve learned a lot from that experience. Here are some recommendations that will give you a good foundation for making sure that you, and only you, reap the rewards of your hard work.

1. Enforce tokens for each user. Enforcing usage based on a specific user or user session is straightforward. But sometimes you want to allow anonymous usage. While anonymous usage is great for demos and testing, it can lead to abuse. If you must allow anonymous usage, create a “stickier” identification scheme that persists browser restarts and incognito mode. Your goal isn’t to track specific users, but instead to understand how much an anonymous user has already used your service so far in demo / free mode.

2. Manage quotas carefully. Your service likely incurs costs and charges users per API call, so it likely makes sense to set a limit on the number of times any user can call your API. You may not ever intend for the average user to hit this limit, but having limits in place will protect against that user’s API key becoming compromised and shared amongst many users. It also protects against programming errors that could result in 100x or 1000x expected usage, and a large unexpected bill to the end user.

3. Block certain ASNs (autonomous system numbers) wholesale. Blocking ASNs, or even IPs wholesale is an incredibly blunt tool. In general Cloudflare rarely recommends this approach to customers. However, when tools are as popular as some generative AI applications, attackers are highly motivated to send as much traffic as possible to those applications. The fastest and cheapest way to accomplish this is through data centers that usually share a common ASN. Some ASNs belong to ISPs, and source traffic from people browsing the Internet. But other ASNs belong to cloud compute providers, and mainly source outbound traffic from virtual servers. Traffic from these servers can be overwhelmingly malicious. For example, several of our customers have found ASNs where 88-90% of the traffic turns out to be automated, while this number is usually only 30% for average traffic. In cases this extreme, blocking entire ASNs can make sense.

4. Implement smart rate limits. Counting not only requests per minute and requests per session, but also IPs per token and tokens per IP can guard against abuse. Tracking how many different IPs are using a particular token at any one time can alert you to a user's token being leaked. Similarly, if one IP is rotating through tokens, looking at each token’s session traffic would not alert you to the abuse. You’d need to look at how many tokens that single IP is generating in order to pinpoint that specific abusive behavior.

How to secure Generative AI applications

5. Rate limit on something other than the user. Similar to enforcing tokens on each user, your real time rate limits should also be set on your sticky identifier.

How to secure Generative AI applications

6. Have an option to slow down attackers. Customers often think about stopping abuse in terms of blocking traffic from abusers. But blocking isn’t the only option. Attacks not only need to be successful, they also need to be economically feasible. If you can make requests more difficult or time-consuming for abusers, you can ruin their economics. You can do this by implementing a waiting room, or by challenging users. We recommend a challenge option that doesn’t give real users an awful experience. Challenging users can also be quickly enabled or disabled as you see abuse spike or recede.

7. Map and analyze sequences. By sampling user sessions that you suspect of abuse, you can inspect their requests path-by-path in your SIEM. Are they using your app as expected? Or are they circumventing intended usage? You might benefit from enforcing a user flow between endpoints.

How to secure Generative AI applications

8. Build and validate an API schema. Many API breaches happen due to permissive schemas. Users are allowed to send in extra fields in requests that grant them too many privileges or allow access to other users’ data. Make sure you build a verbose schema that outlines what intended usage is by identifying and cataloging all API endpoints, then making sure all specific parameters are listed as required and have type limits to them.

We recently went through the transition to an OpenAPI schema ourselves for api.cloudflare.com. You can read more about how we did it here. Our schema looks like this:

/zones:
    get:
      description: List, search, sort, and filter your zones.
      operationId: zone-list-zones
      responses:
        4xx:
          content:
            application/json:
              schema:
                allOf:
                - $ref: '#/components/schemas/components-schemas-response_collection'
                - $ref: '#/components/schemas/api-response-common-failure'
          description: List Zones response failure
        "200":
          content:
            application/json:
              schema:
                $ref: '#/components/schemas/components-schemas-response_collection'
          description: List Zones response
      security:
      - api_email: []
        api_key: []
      summary: List Zones
      tags:
      - Zone
      x-cfPermissionsRequired:
        enum:
        - '#zone:read'
      x-cfPlanAvailability:
        business: true
        enterprise: true
        free: true
        pro: true

9. Analyze the depth and complexity of queries. Are your APIs driven by GraphQL? GraphQL queries can be a source of abuse since they allow such free-form requests. Large, complex queries can grow to overwhelm origins if limits aren’t in place. Limits help guard against outright DoS attacks as well as developer error, keeping your origin healthy and serving requests to your users as expected.

For example, if you have statistics about your GraphQL queries by depth and query size, you could execute this TypeScript function to analyze them by quantile:

import * as ss from 'simple-statistics';

function calculateQuantiles(data: number[], quantiles: number[]): {[key: number]: string} {
    let result: {[key: number]: string} = {};
    for (let q of quantiles) {
        // Calculate quantile, convert to fixed-point notation with 2 decimal places
        result[q] = ss.quantile(data, q).toFixed(2);
    }
    return result;
}

// Example usage:
let queryDepths = [2, 2, 2, 2, 2, 2, 2, 4, 4, 4, 4, 4, 1, 1, 1, 1, 1, 1, 1, 1];
let querySizes = [11, 11, 11, 11, 11, 11, 11, 11, 11, 11, 2, 2, 2, 2, 2, 2, 2, 2, 2, 2];

console.log(calculateQuantiles(queryDepths, [0.5, 0.75, 0.95, 0.99]));
console.log(calculateQuantiles(querySizes, [0.5, 0.75, 0.95, 0.99]));

The results give you a sense for the depth of the average query hitting your endpoint, grouped by quantile:

{ '0.5': 2, '0.75': 3, '0.95': 4, '0.99': 4 }
{ '0.5': 6.5, '0.75': 2, '0.95': 2, '0.99': 2 }

Actual data from your production environment would provide a threshold to start an investigation into which queries to further log or limit. A simpler option is to use a query analysis tool, like Cloudflare’s, to make the process automatic.

10. Use short-lived access tokens and long-lived refresh tokens upon successful authentication of your users. Implement token validation in a middleware layer or API Gateway, and be sure to have a dedicated token renewal endpoint in your API. JSON Web Tokens (JWTs) are popular choices for these short-lived tokens. When access tokens expire, allow users to obtain new ones using their refresh tokens. Revoke refresh tokens when necessary to maintain system security. Adopting this approach enhances your API's security and user experience by effectively managing access and mitigating the risks associated with compromised tokens.

11. Communicate directly with your users. All of the above recommendations are going to make it a bit more cumbersome for some of your customers to use your product. You are going to get complaints. You can reduce these by first, giving clear communication to your users explaining why you put these measures in place. Write a blog about what security measures you did and did not decide to implement and have dev docs explaining troubleshooting steps to resolve. Second, give your users concrete steps they can take if they are having trouble, and a clear way to contact you directly. Feeling inconvenienced can be frustrating, but feeling stuck can lose you a customer.

Conclusion: this is the beginning

Generative AI, like the first iPhone, has sparked a surge of excitement and innovation. But that excitement also brings risk, and innovation brings new security holes and attack vectors. The broadness and uniqueness of generative AI applications in particular make securing them particularly challenging. But as every scout knows, being prepared ahead of time means less stress and worry during the journey. Implementing the tips we've shared can establish a solid foundation that will let you sit back and enjoy the thrill of building something special, rather than worrying what might be lurking around the corner.

To learn more about how you can put some of these recommendations into practice, check out our developer platform, API Security, and Rate Limiting products.