Post Syndicated from John Graham-Cumming original https://blog.cloudflare.com/ga-week-2022-recap/

Back in 2019, we worked on a chart for Cloudflare’s IPO S-1 document that showed major releases since Cloudflare was launched in 2010. Here’s that chart:
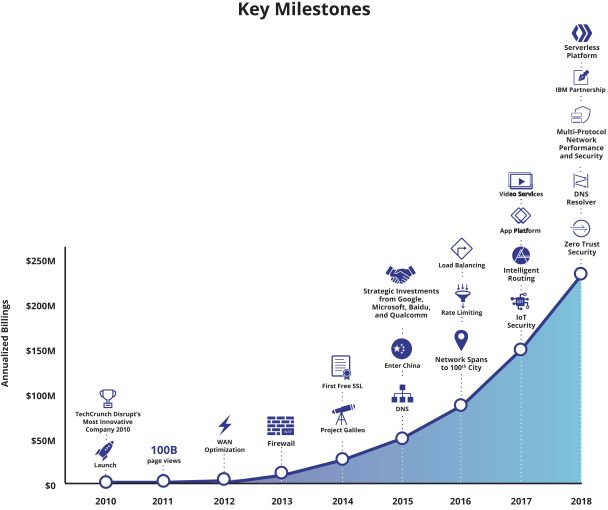
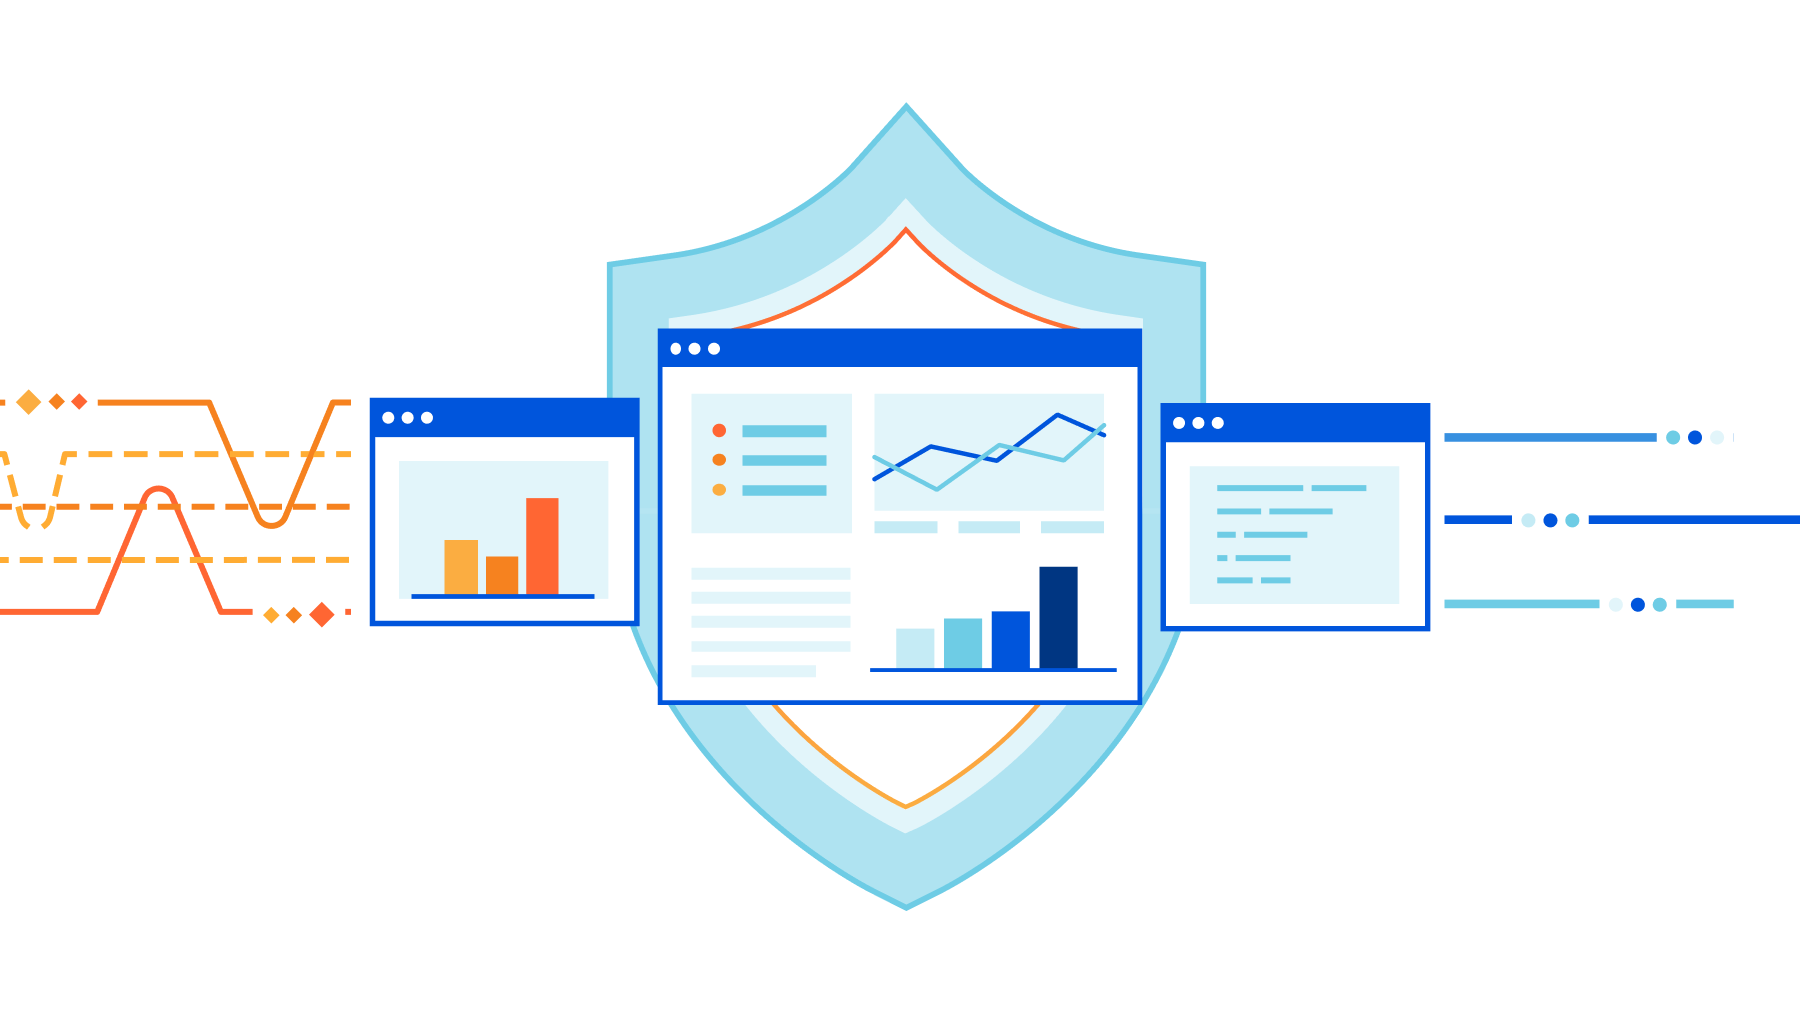
Of course, that chart doesn’t show everything we’ve shipped, but the curve demonstrates a truth about a growing company: we keep shipping more and more products and services. Some of those things start with a beta, sometimes open and sometimes private. But all of them become generally available after the beta period.
Back in, say, 2014, we only had a few major releases per year. But as the years have progressed and the company has grown we have constant updates, releases and changes. This year a confluence of products becoming generally available in September meant it made sense to wrap them all up into GA Week.
GA Week has now finished, and the team is working to put the finishing touches on Birthday Week (coming this Sunday!), but here’s a recap of everything that we launched this week.
| What launched | Summary | Available for? |
|---|---|---|
| Monday (September 19) | ||
| Cloudforce One | Our threat operations and research team, Cloudforce One, is now open for business and has begun conducting threat briefings. | Enterprise |
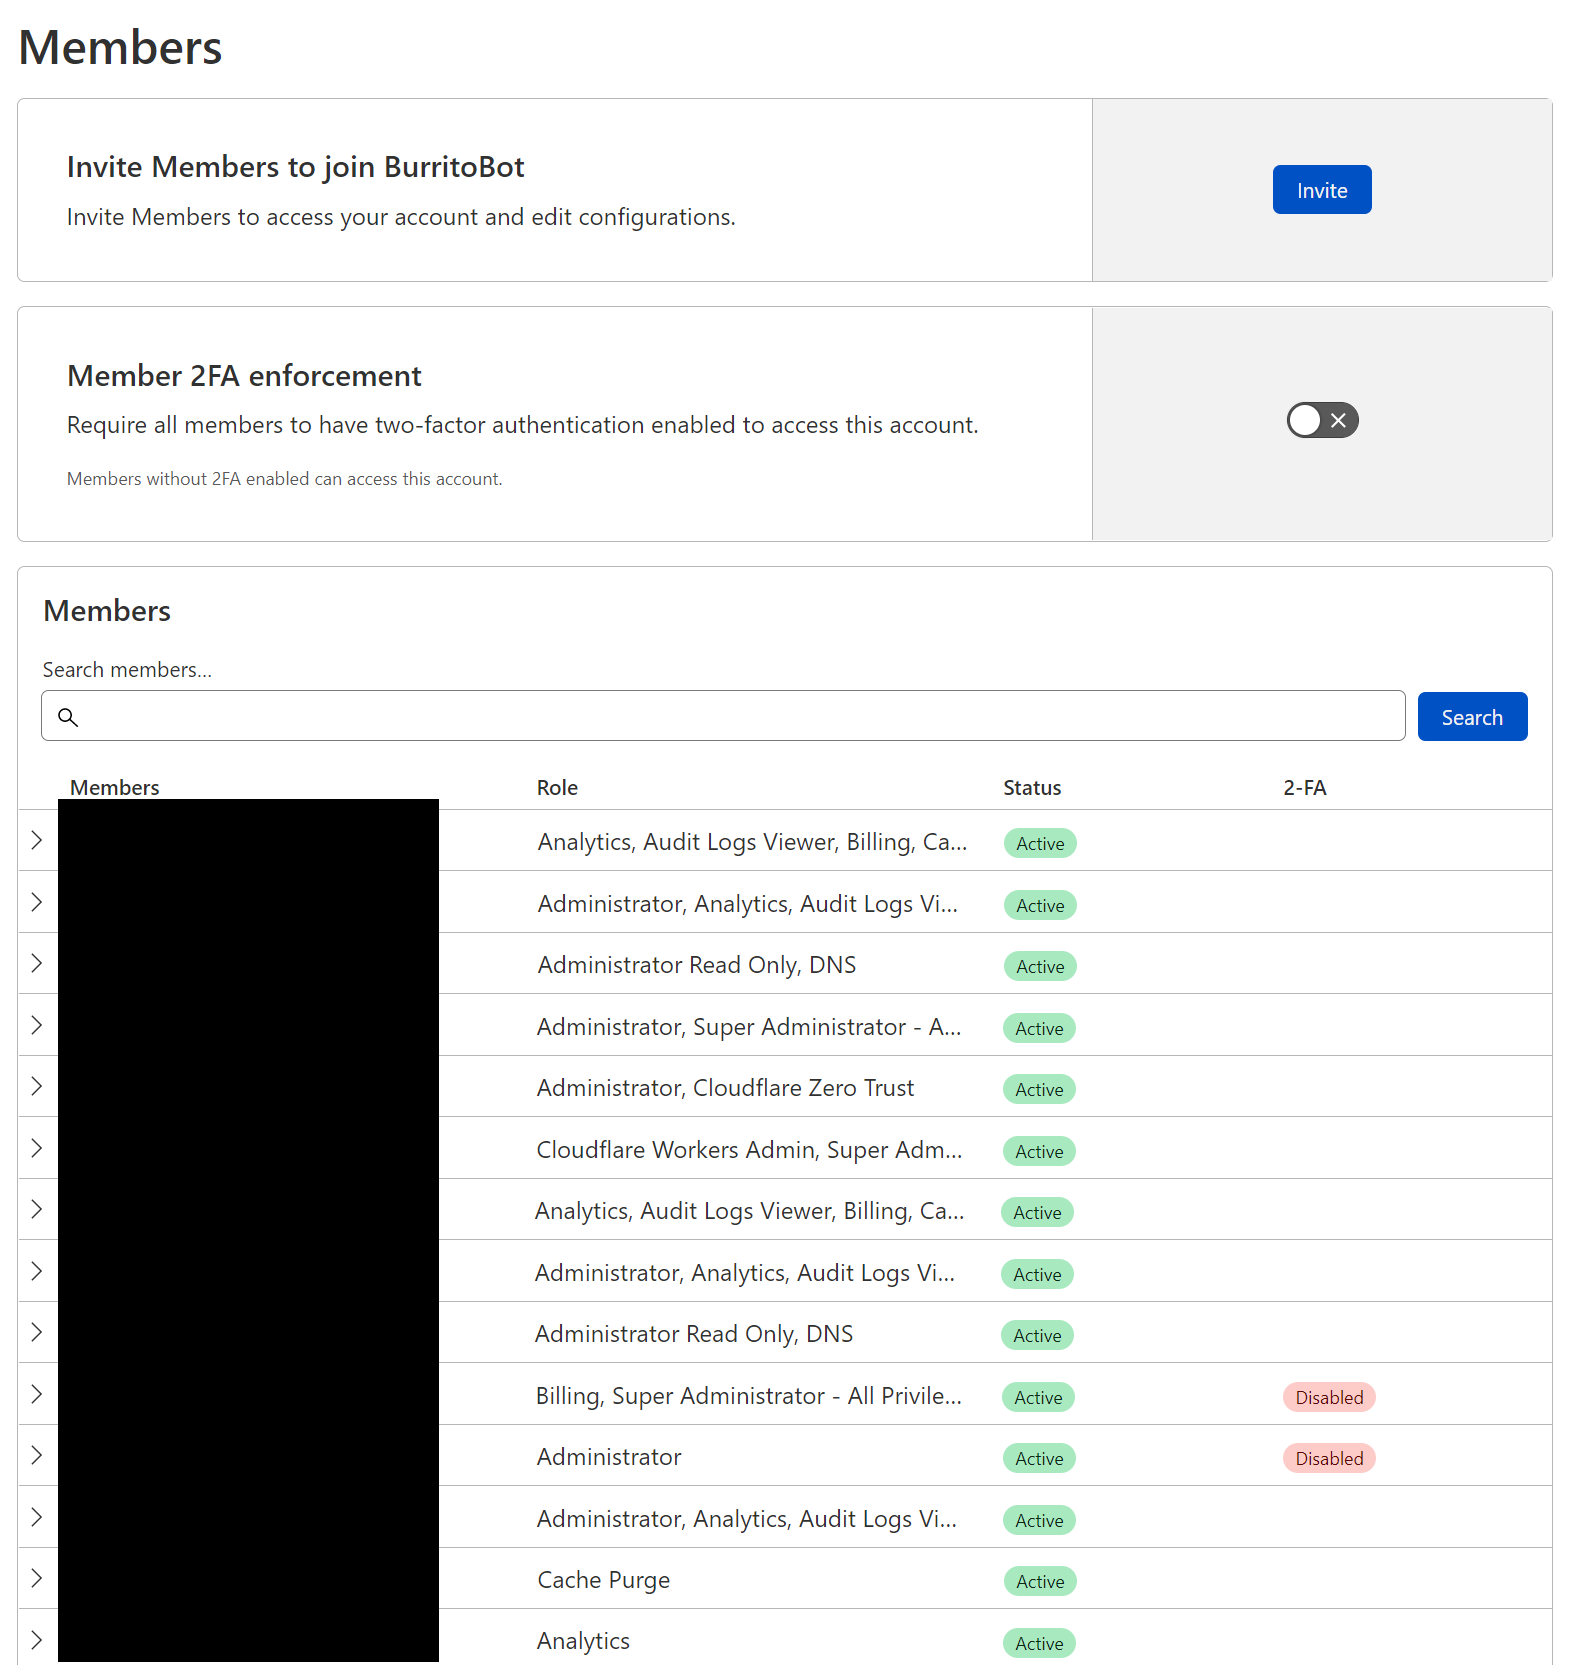
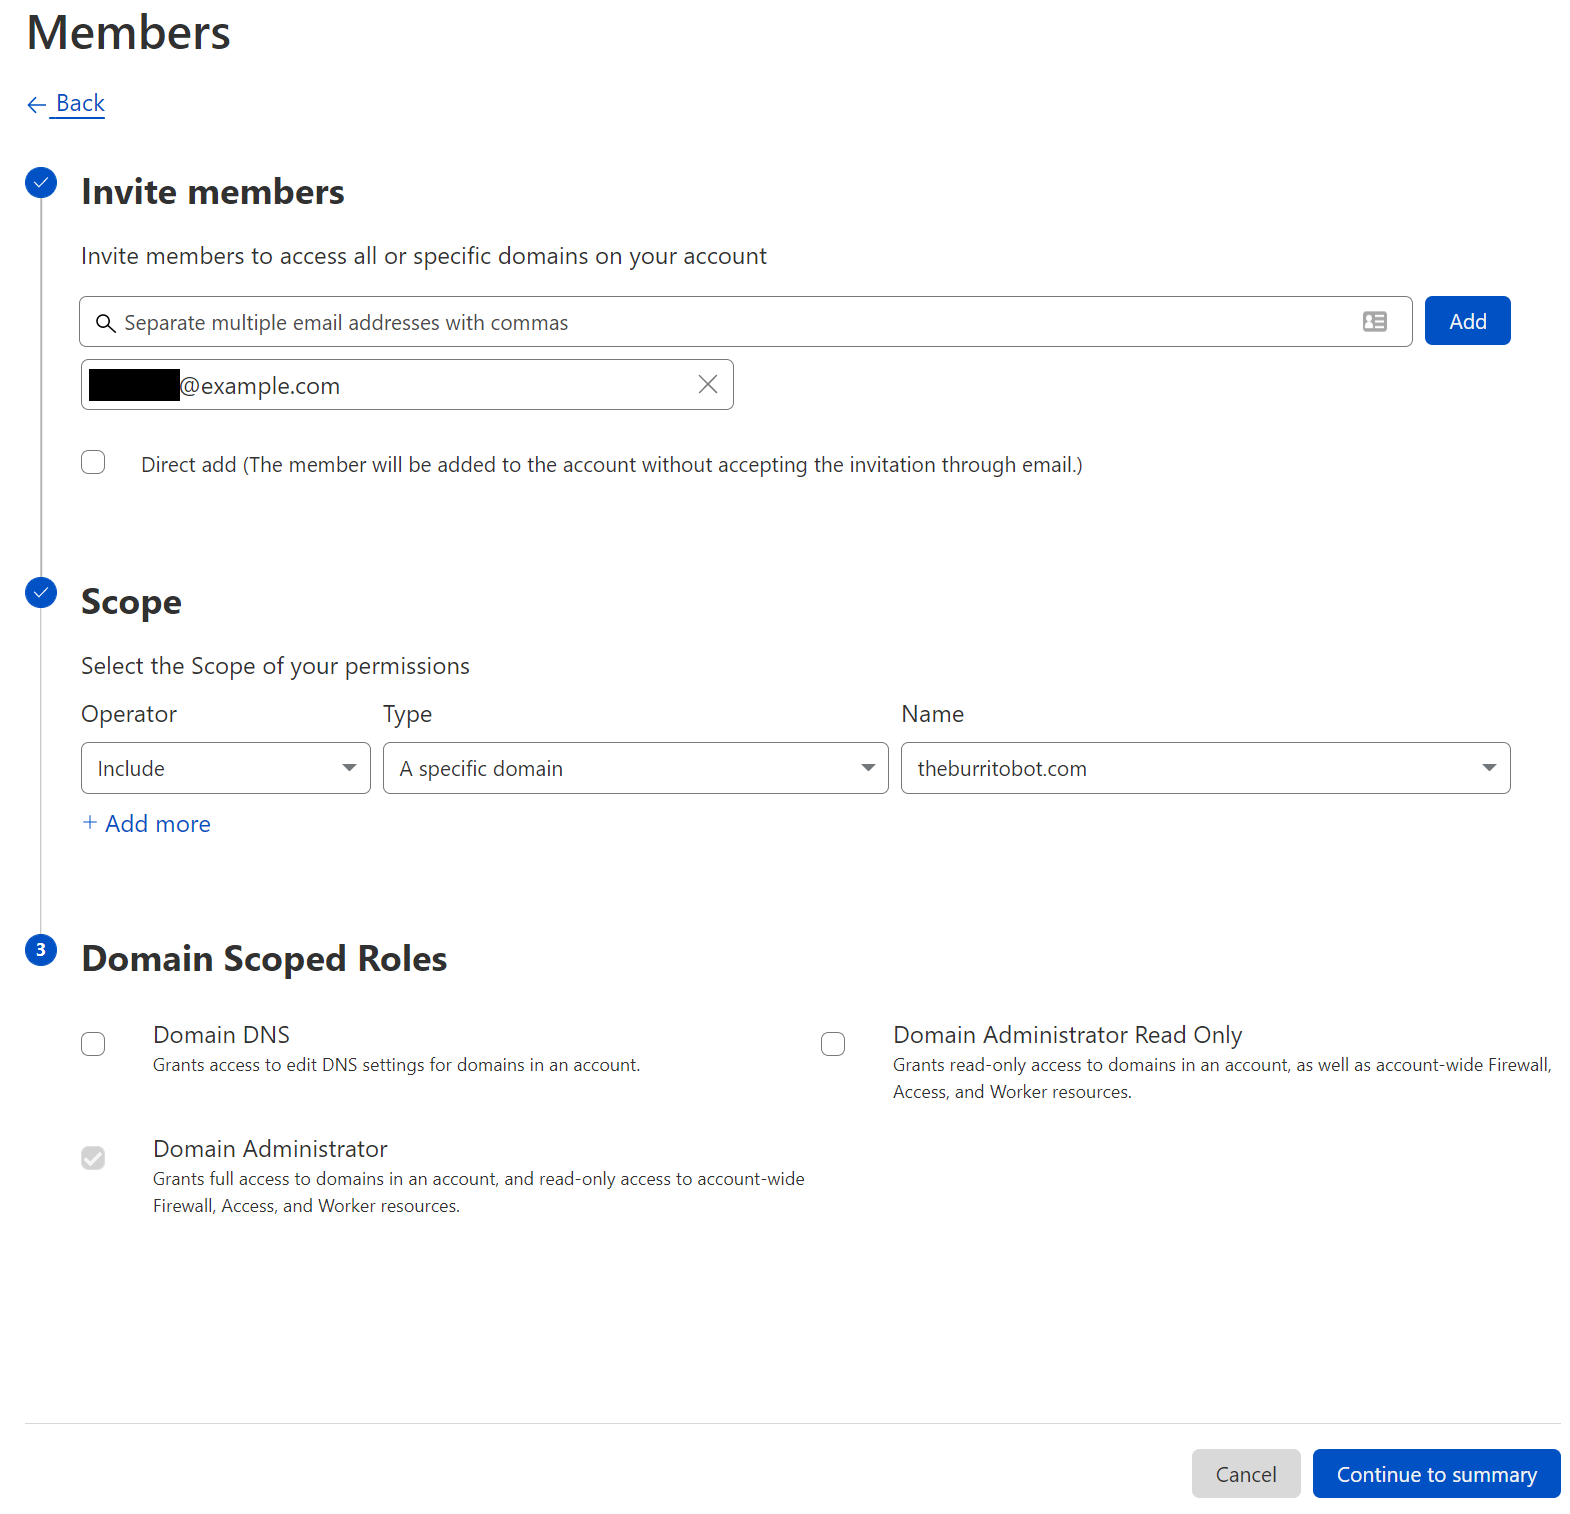
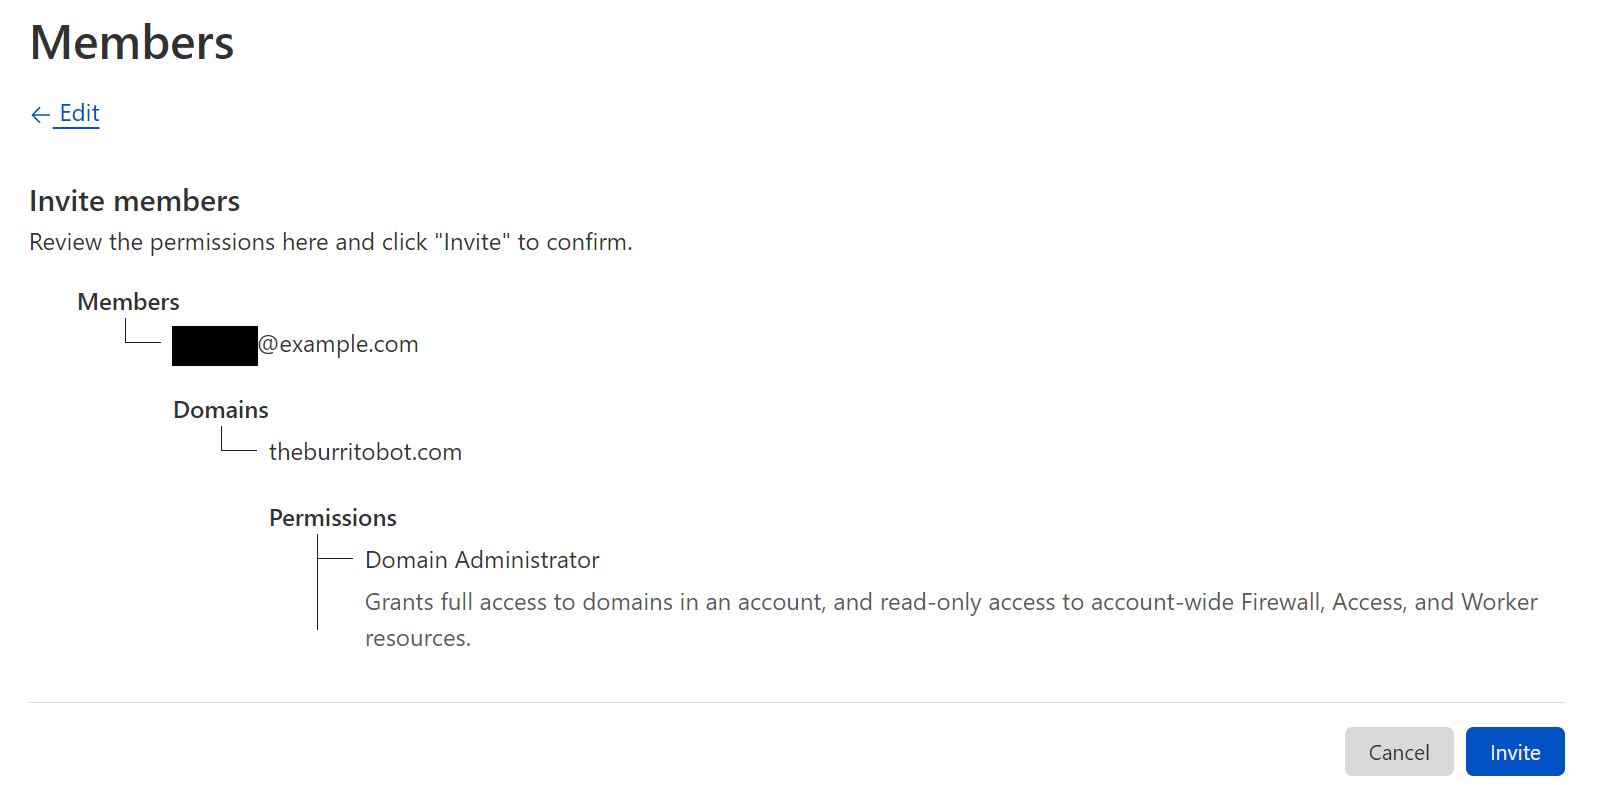
| Improved Access Control: Domain Scoped Roles are now generally available | It is possible to scope your users’ access to specific domains with Domain Scoped Roles. This will allow all users access to roles, and the ability to access within zones. | Currently available to all Free plans, and coming to Enterprise shortly. |
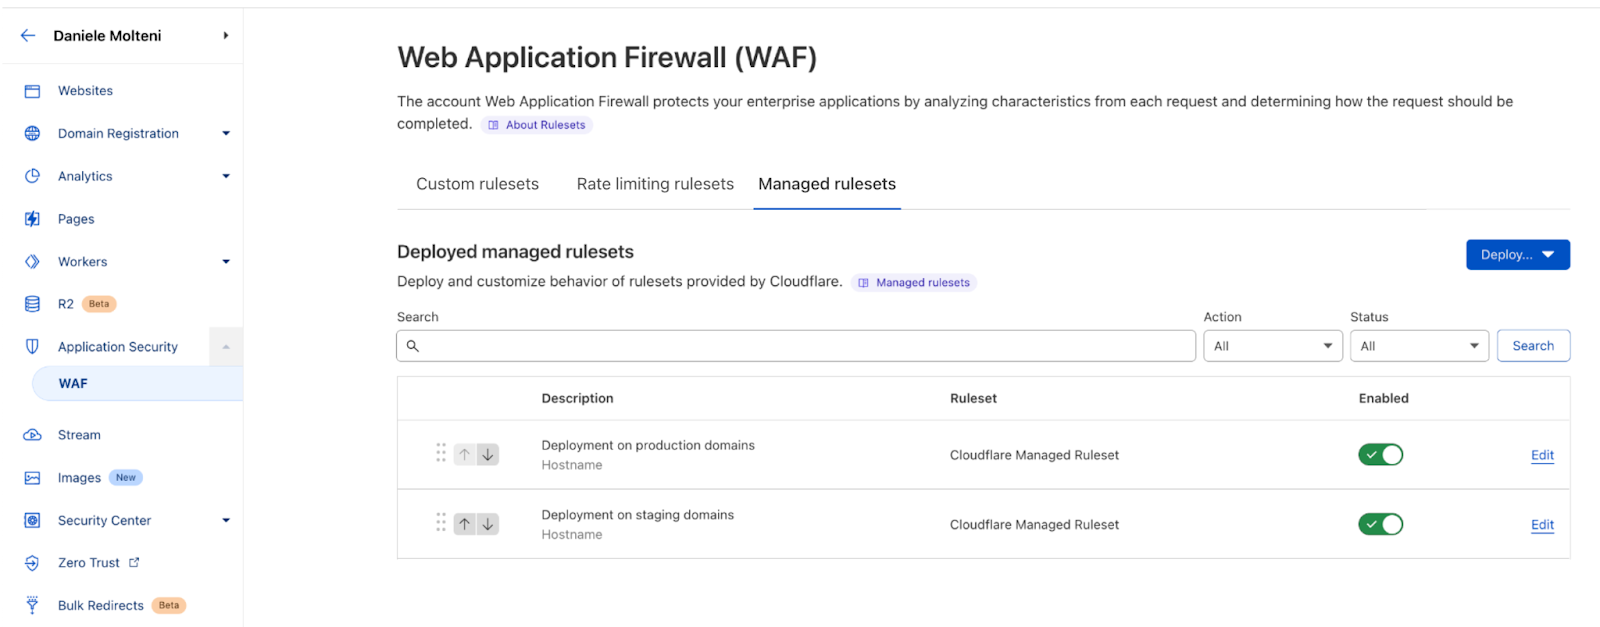
| Account WAF now available to Enterprise customers | Users can manage and configure the WAF for all of their zones from a single pane of glass. This includes custom rulesets and managed rulesets (Core/OWASP and Managed). | Enterprise |
| Introducing Cloudflare Adaptive DDoS Protection – our new traffic profiling system for mitigating DDoS attacks | Cloudflare’s new Adaptive DDoS Protection system learns your unique traffic patterns and constantly adapts to protect you against sophisticated DDoS attacks. | Built into our Advanced DDoS product |
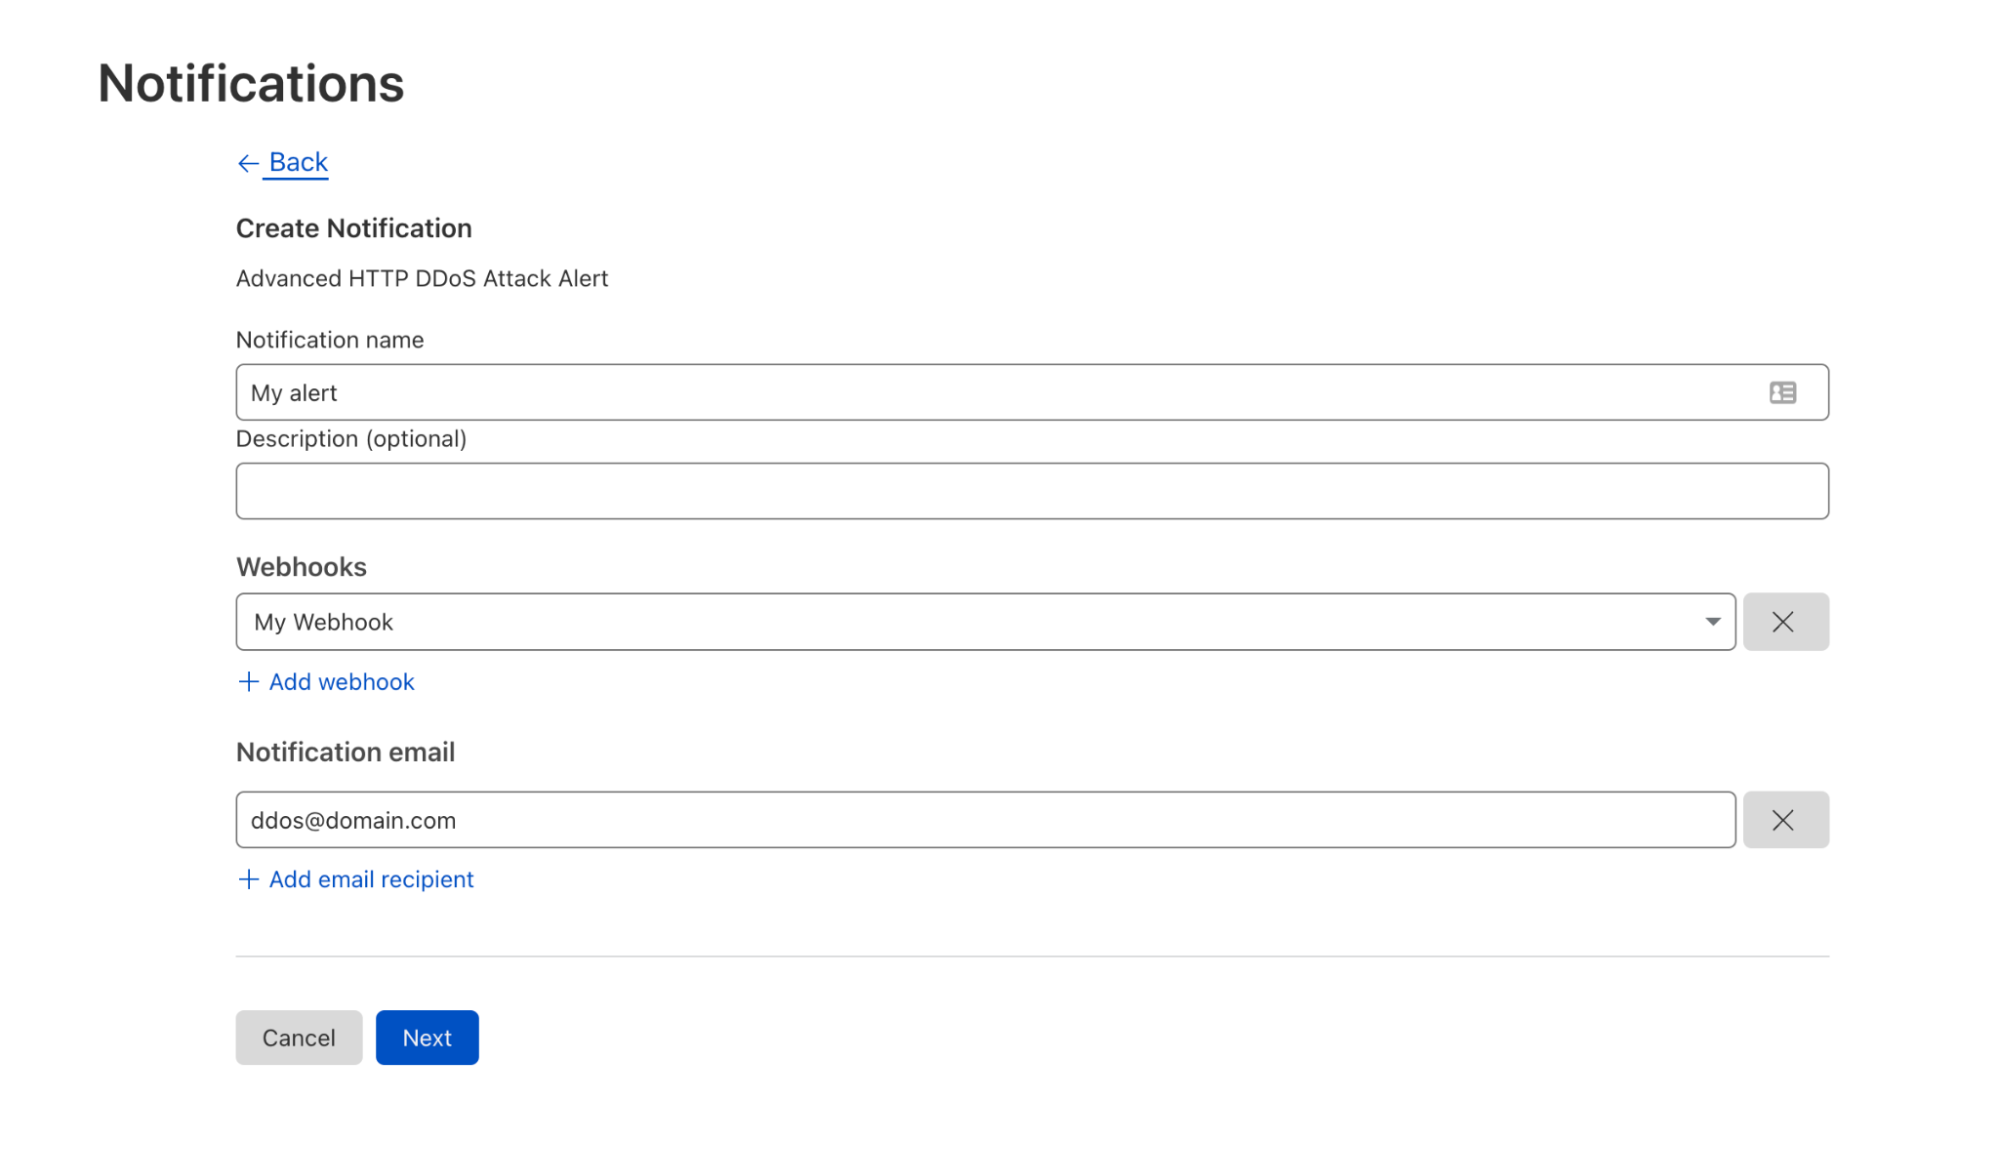
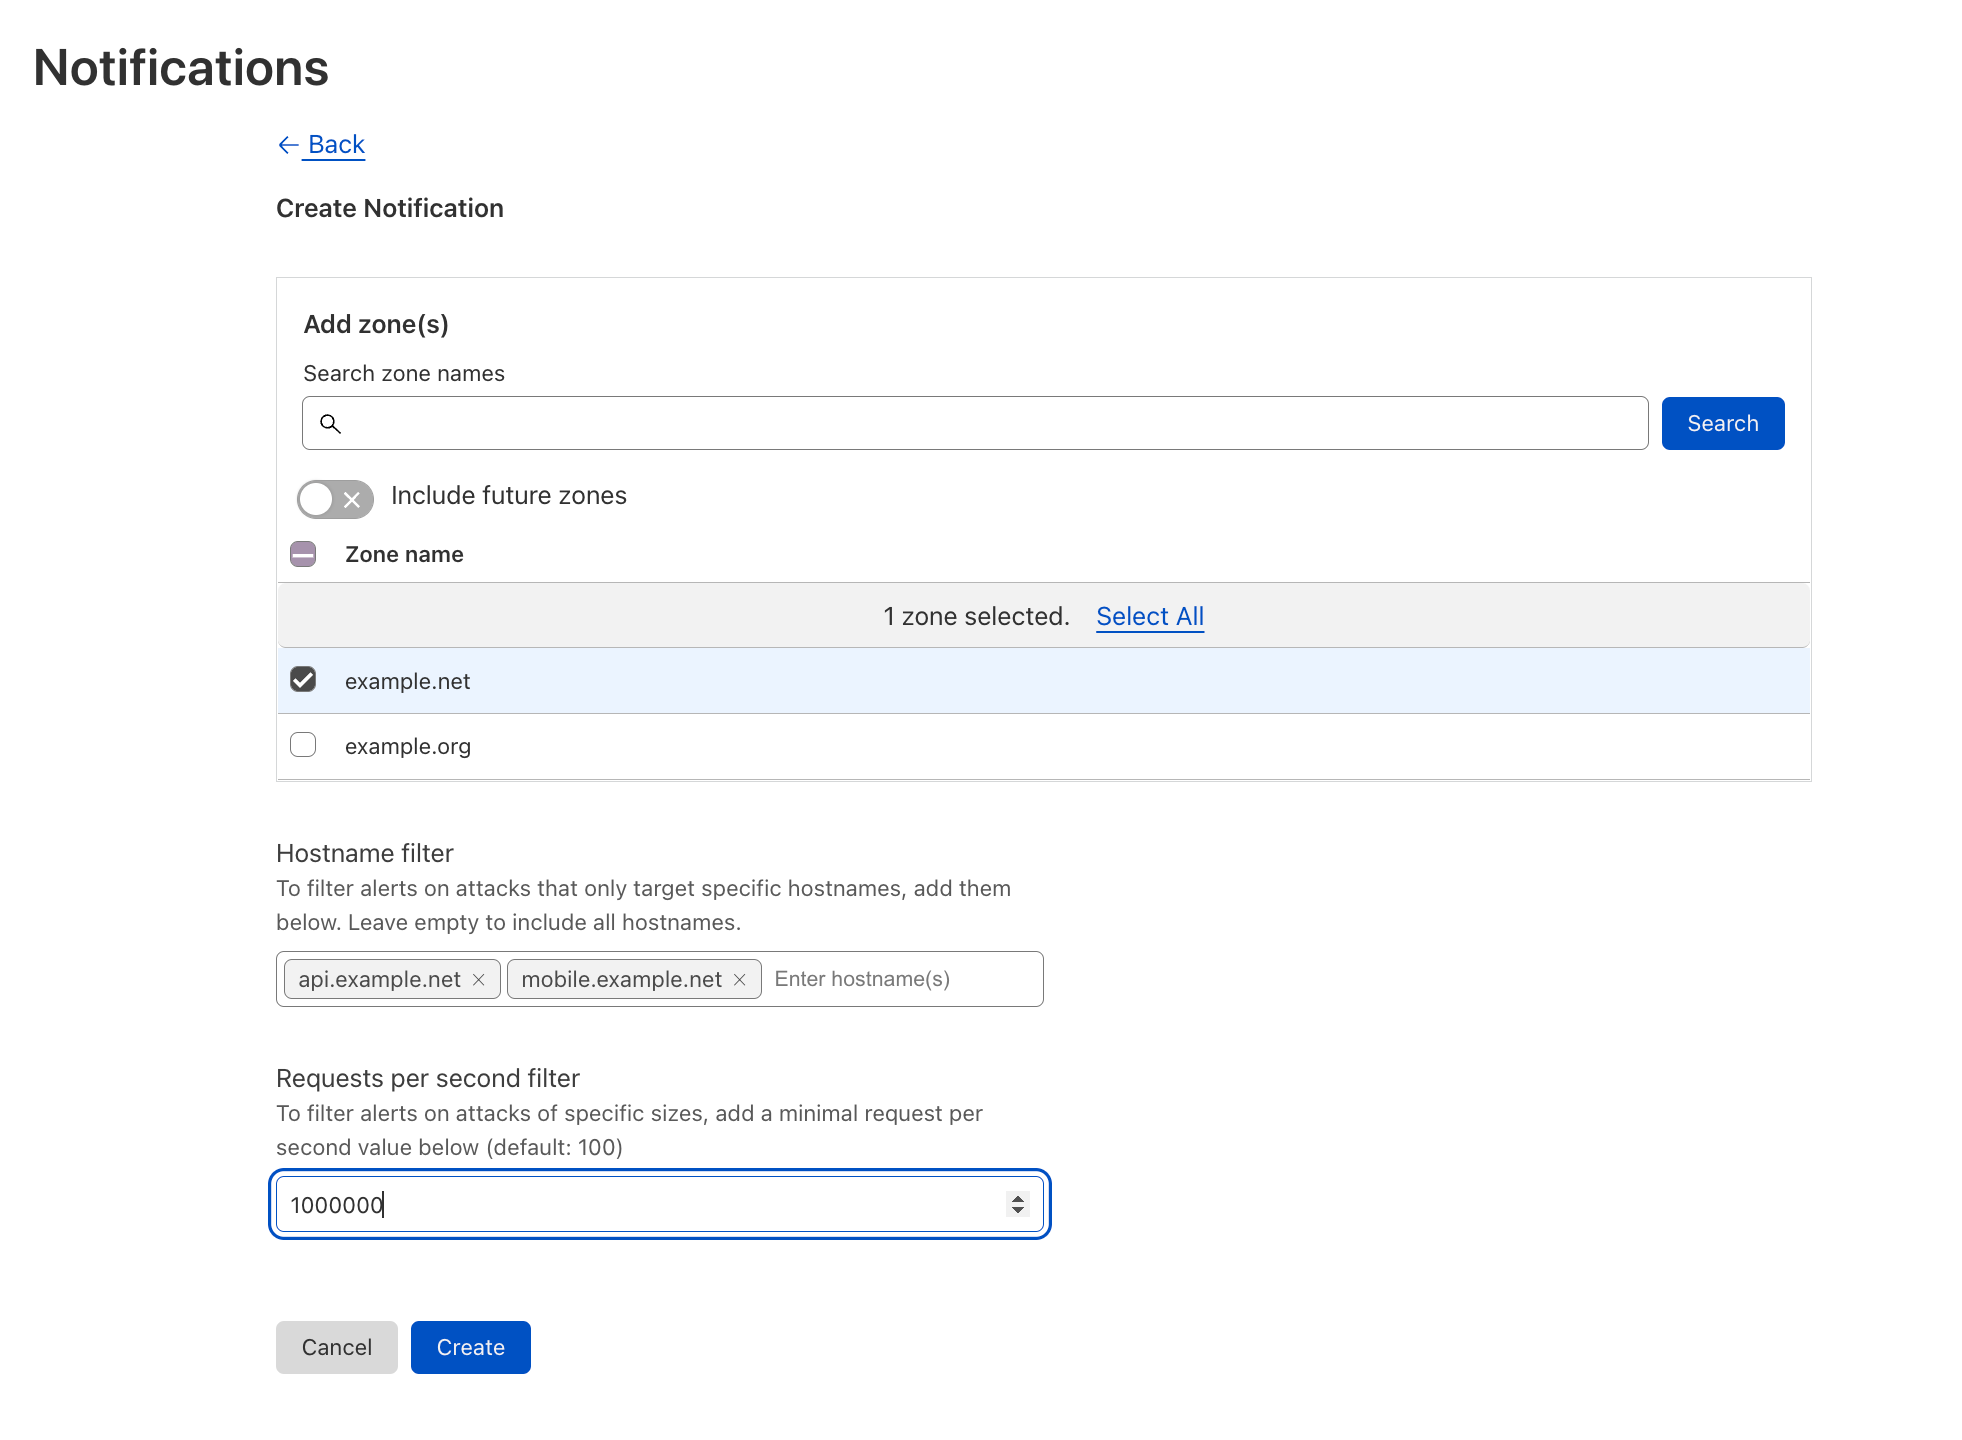
| Introducing Advanced DDoS Alerts | Cloudflare’s Advanced DDoS Alerts provide tailored and actionable notifications in real-time. | Built into our Advanced DDoS product |
| Tuesday (September 20) | ||
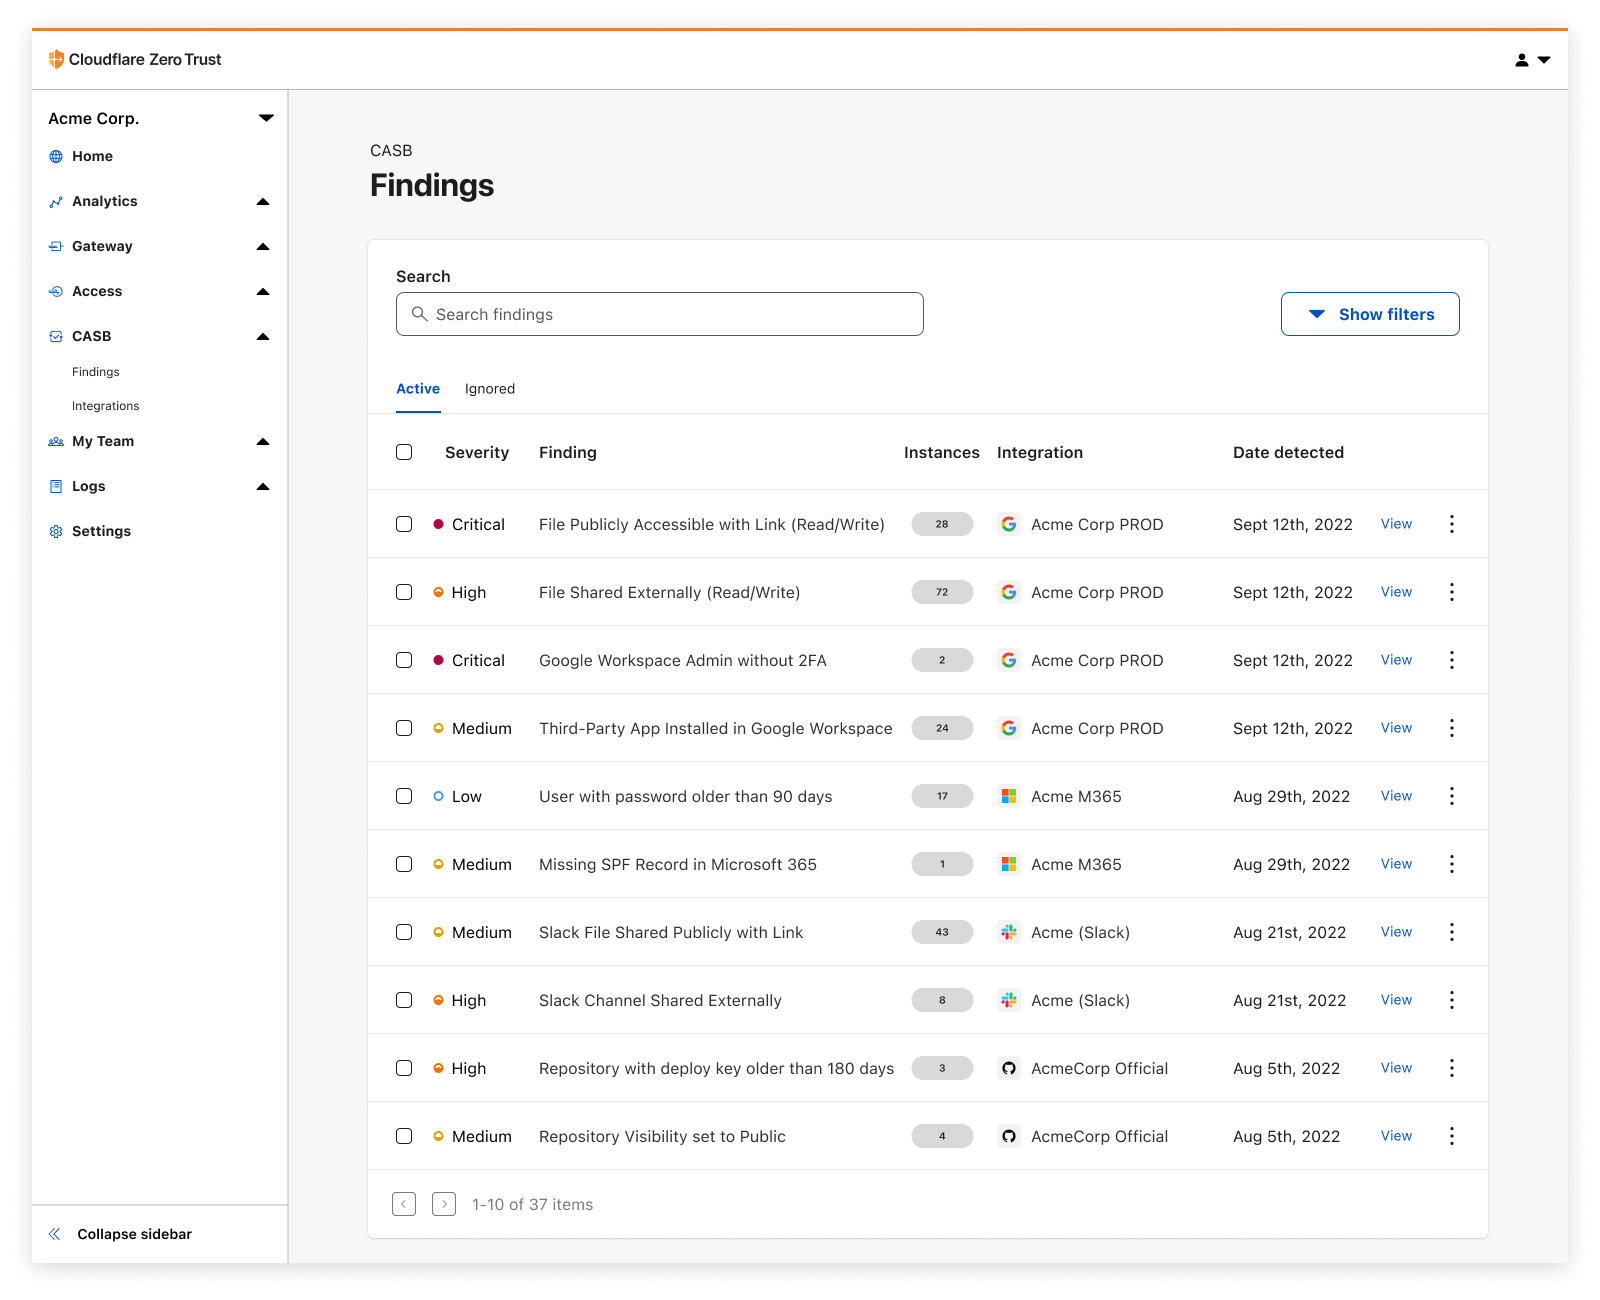
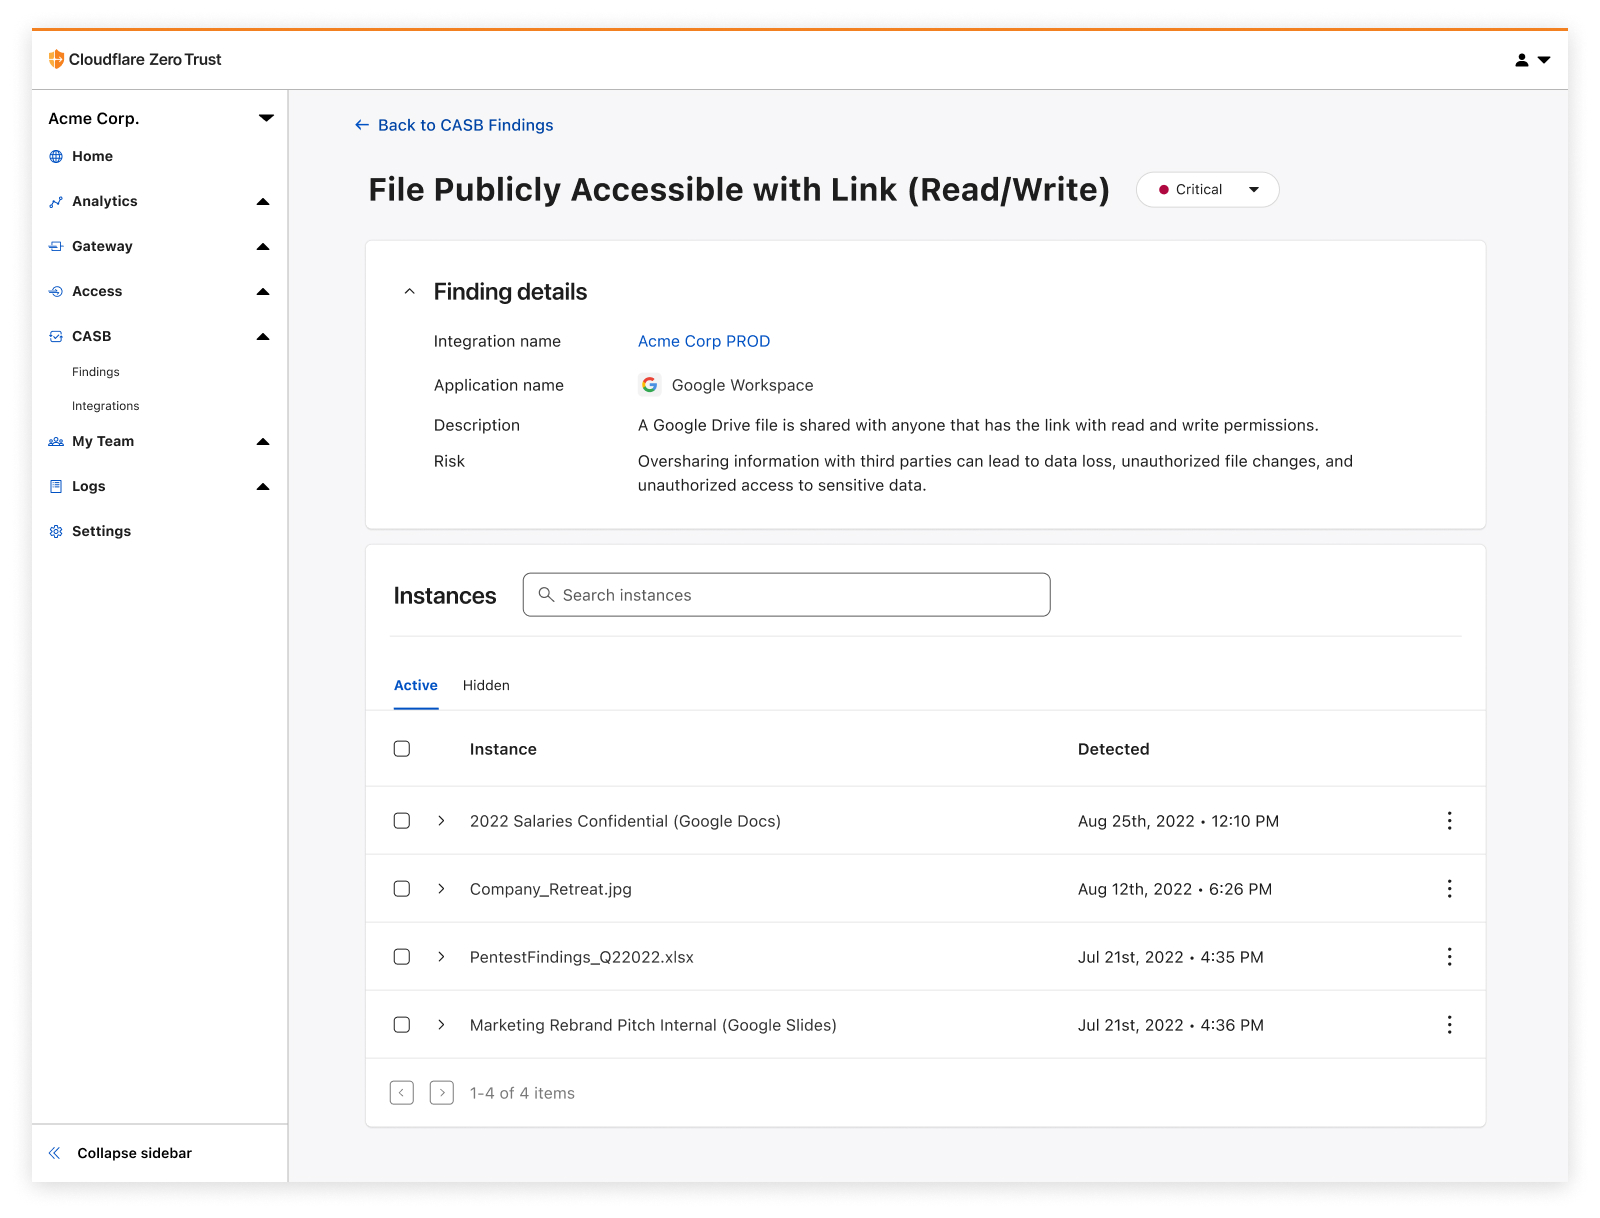
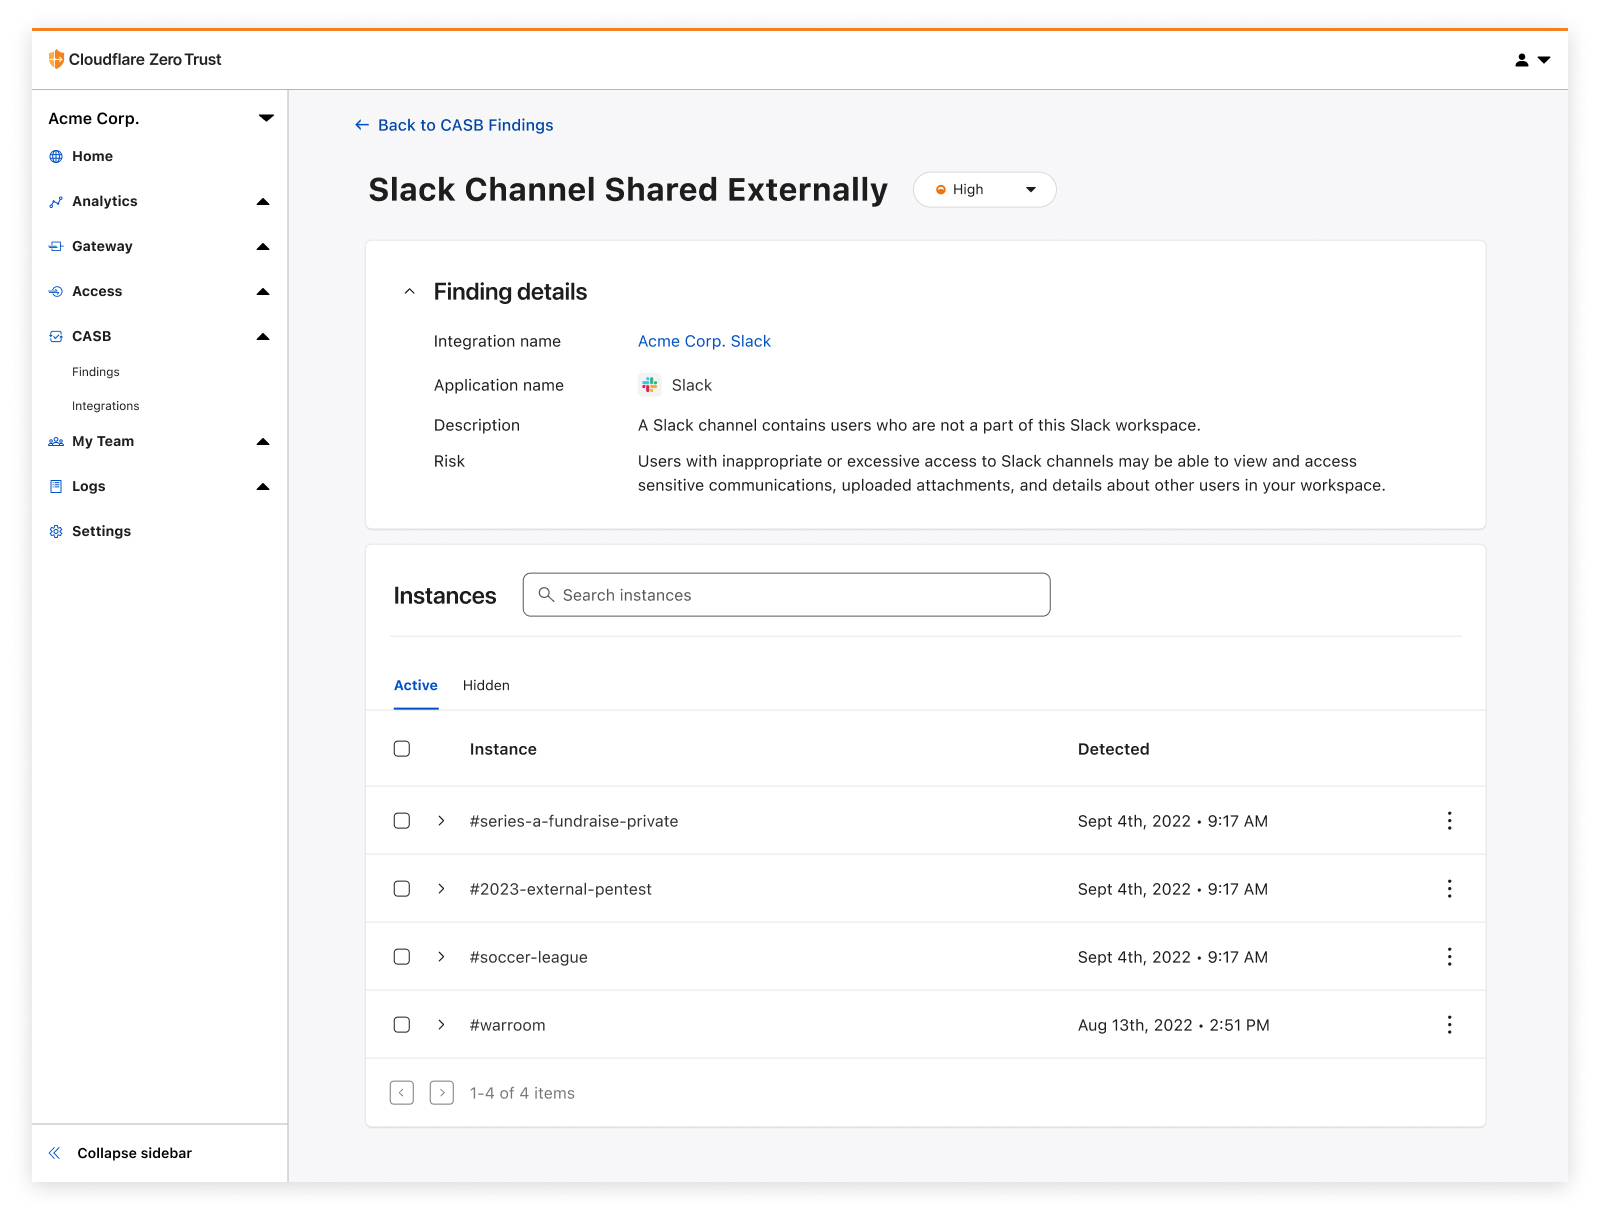
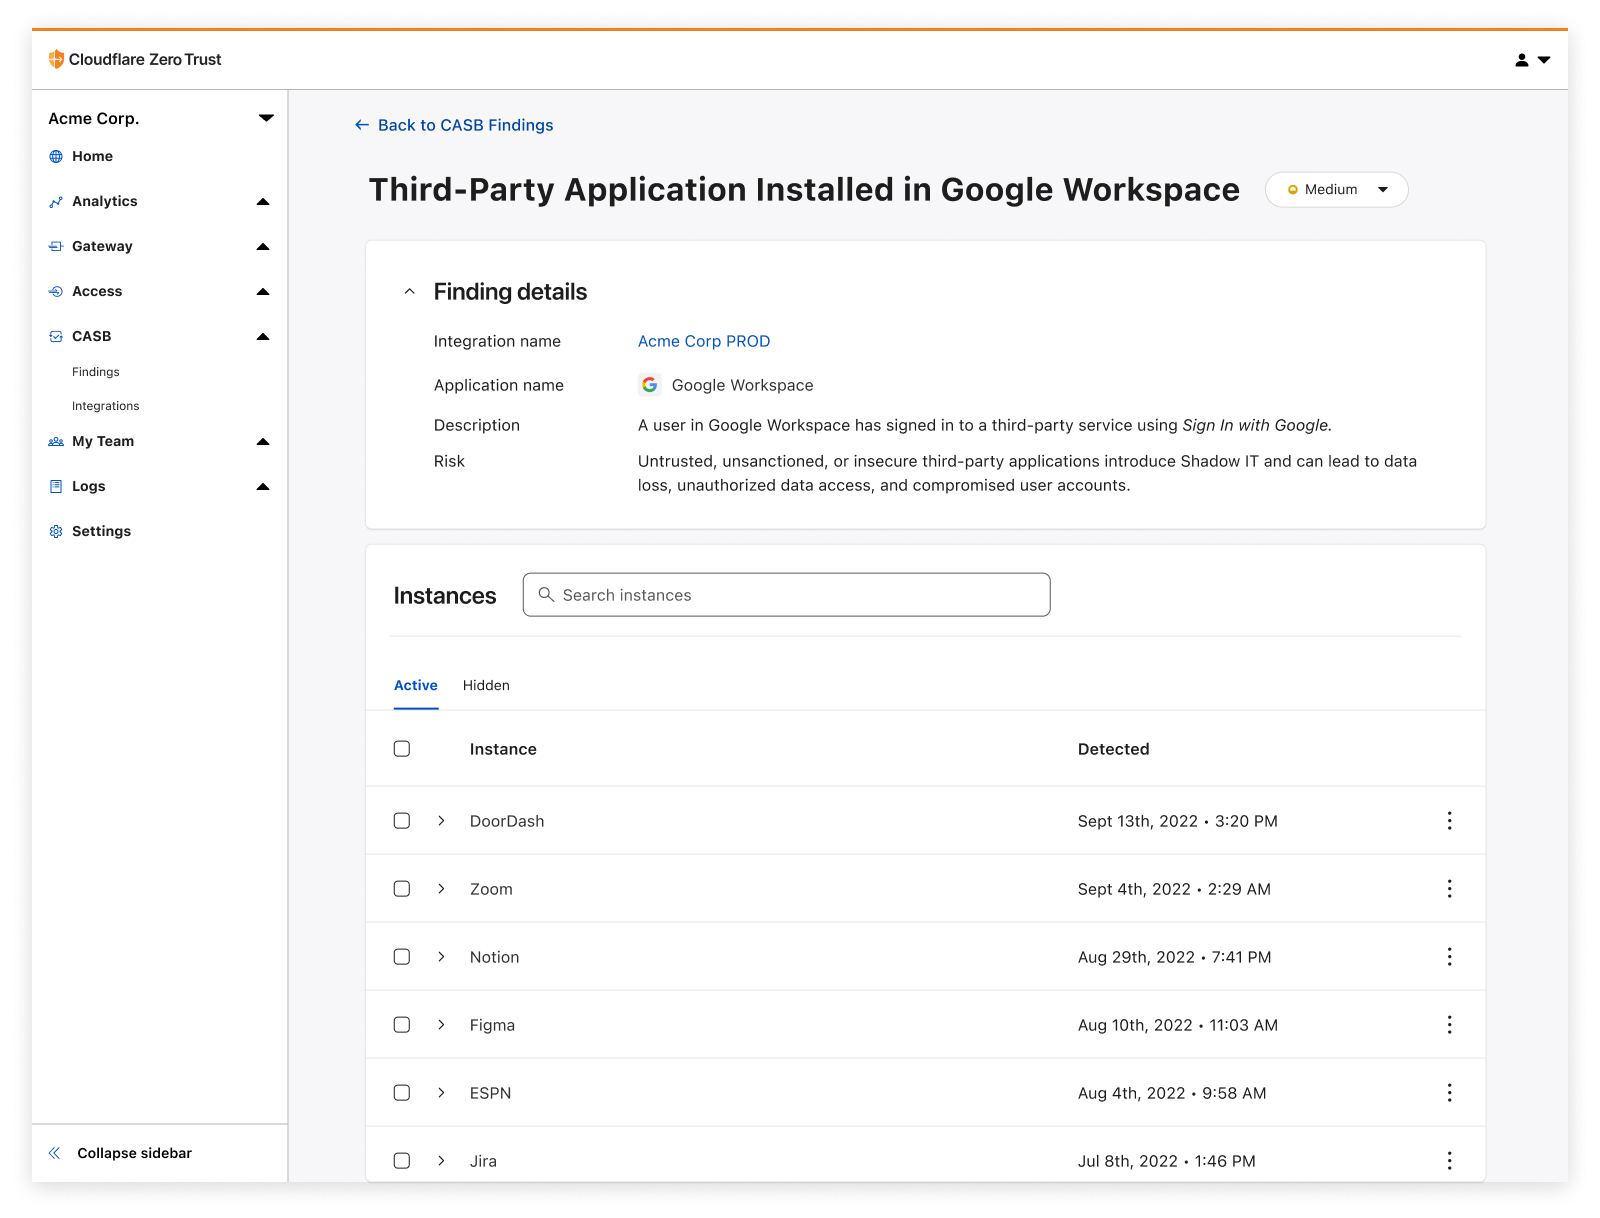
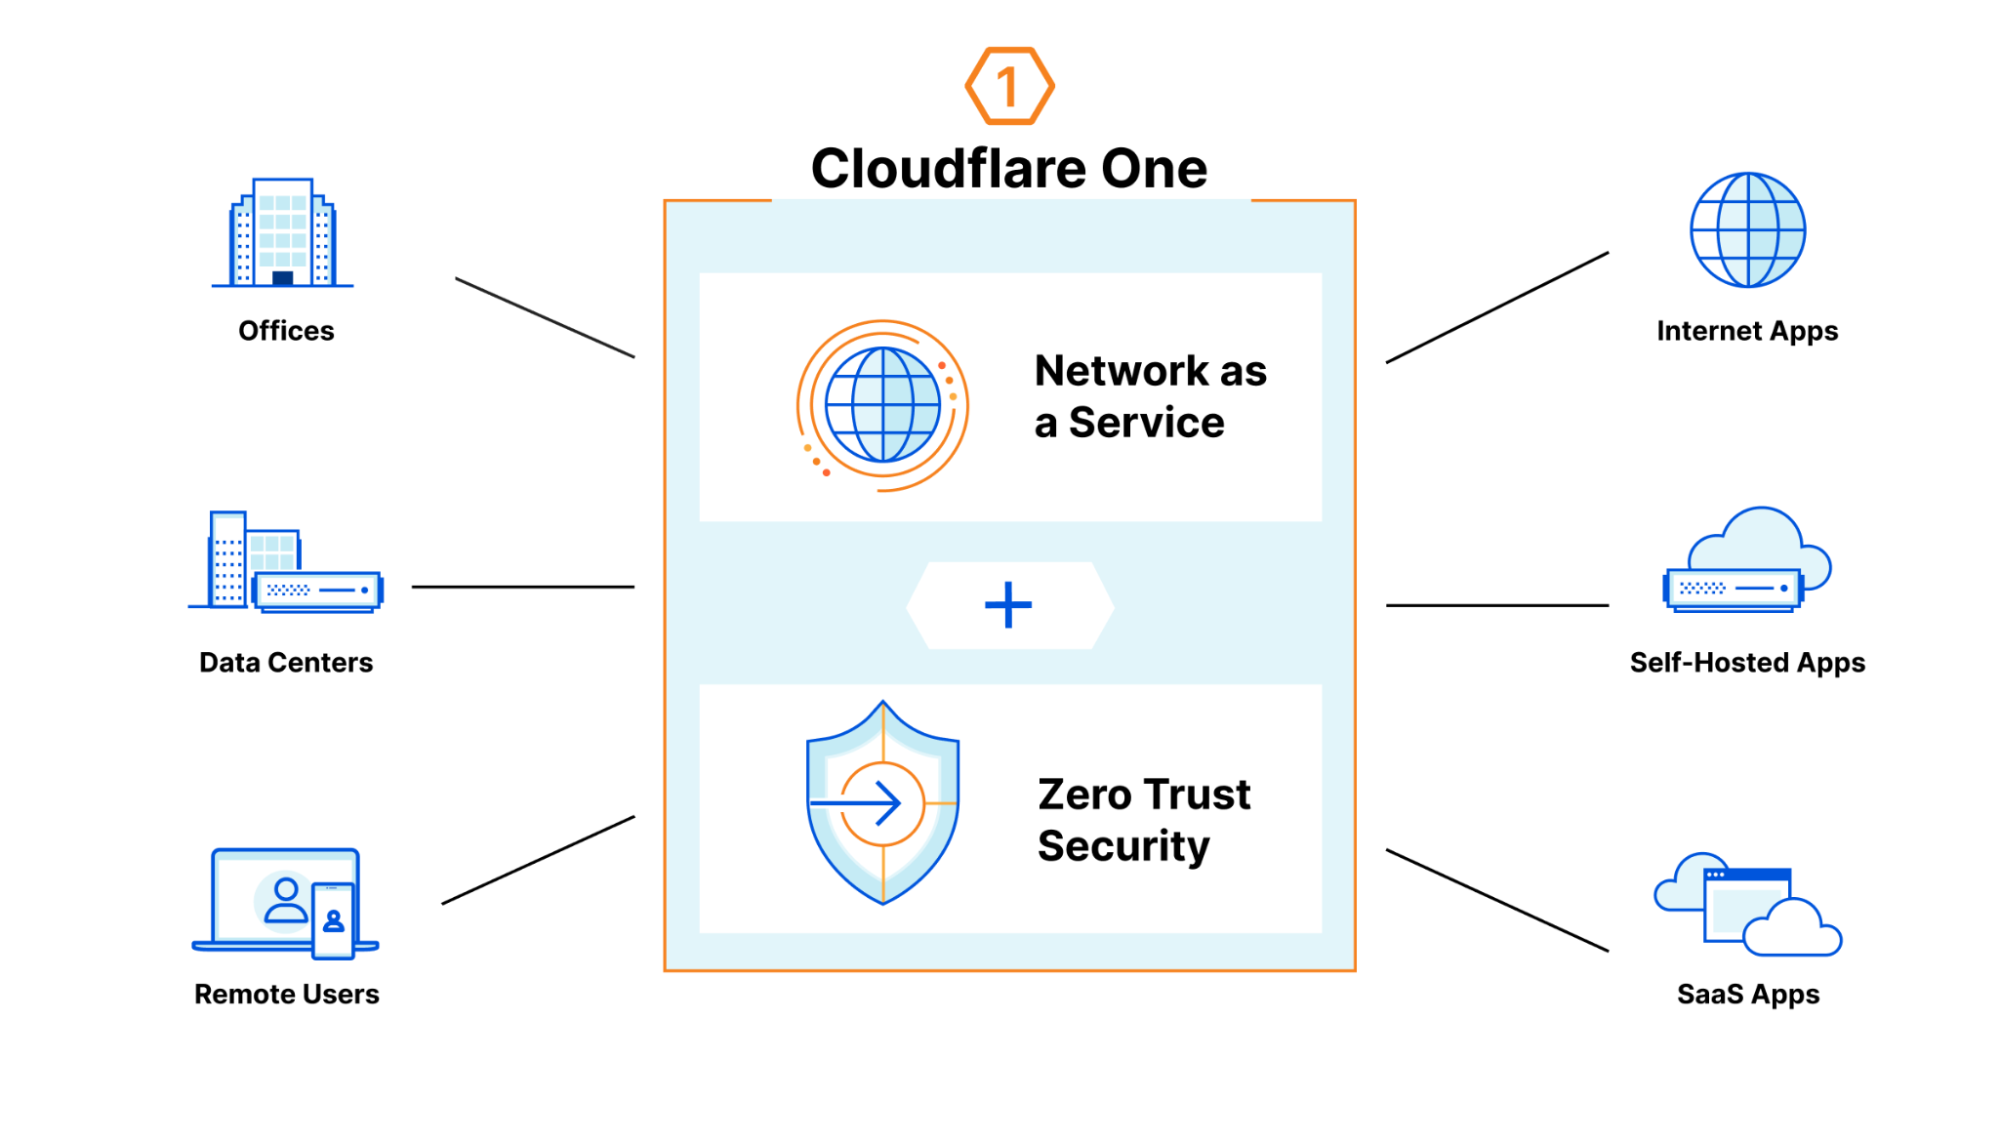
| Detect security issues in your SaaS apps with Cloudflare CASB | By leveraging API-driven integrations, receive comprehensive visibility and control over SaaS apps to prevent data leaks, detect Shadow IT, block insider threats, and avoid compliance violations. | Enterprise Zero Trust |
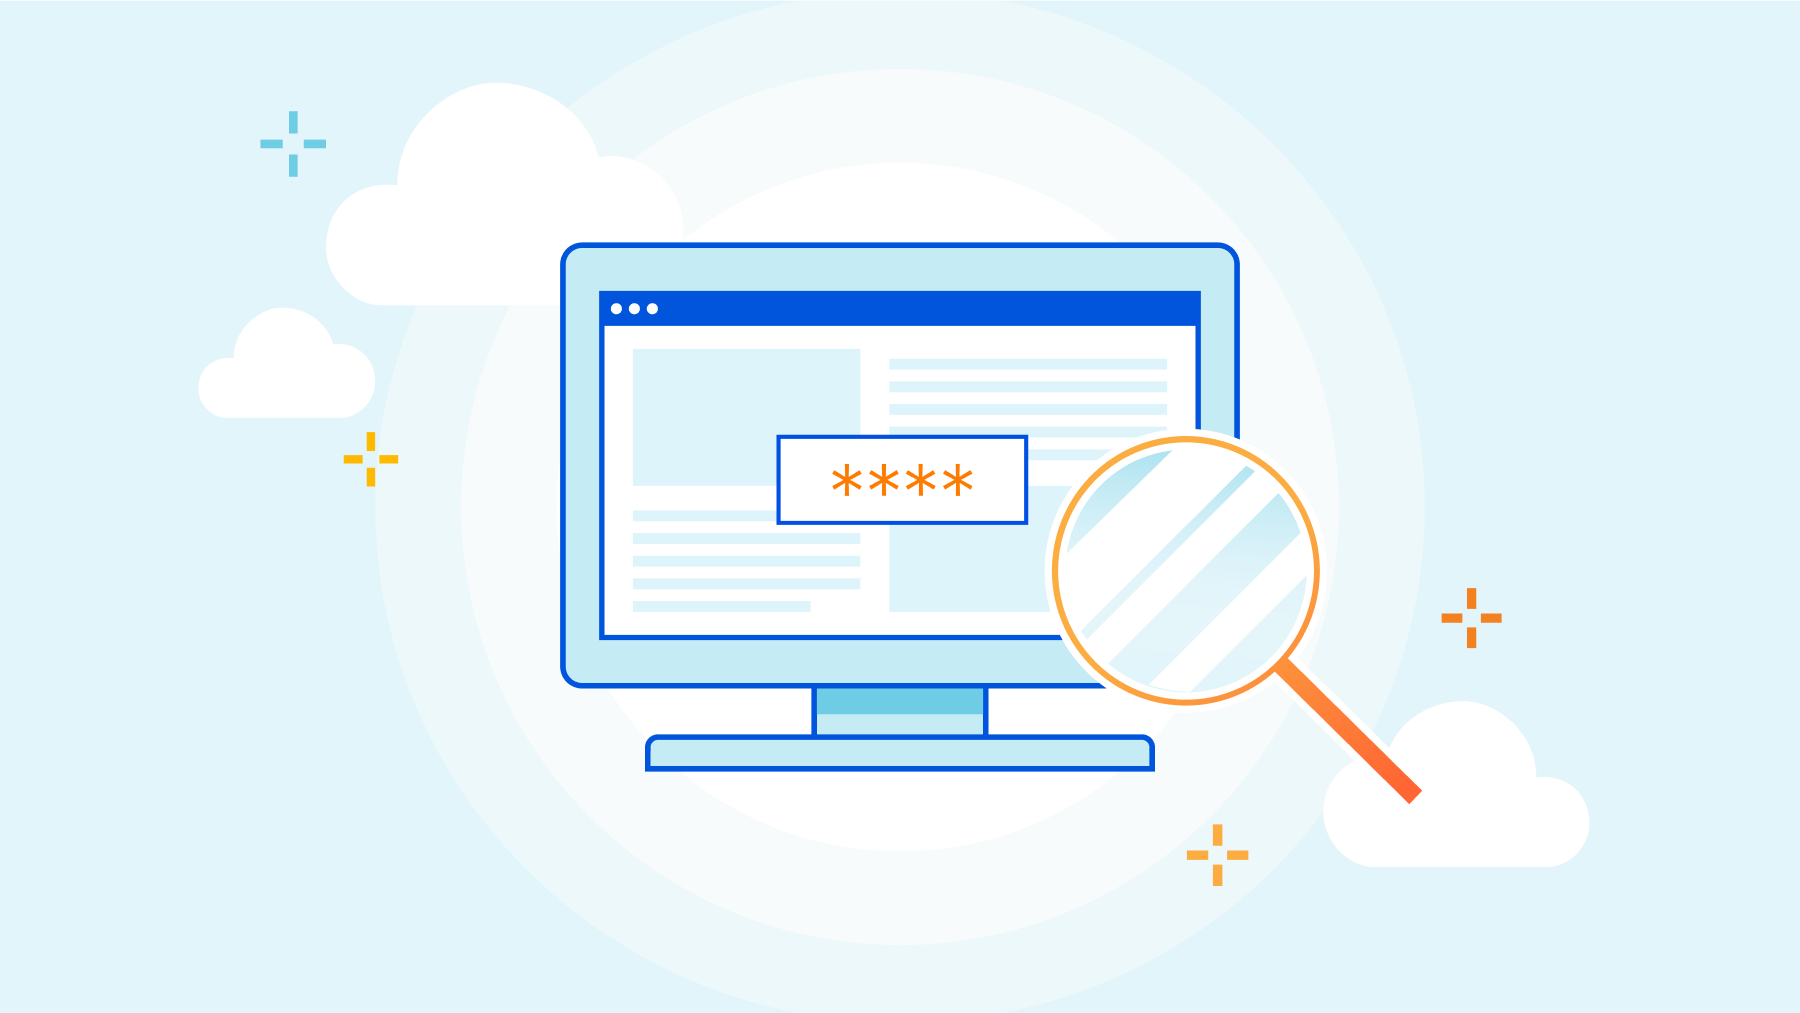
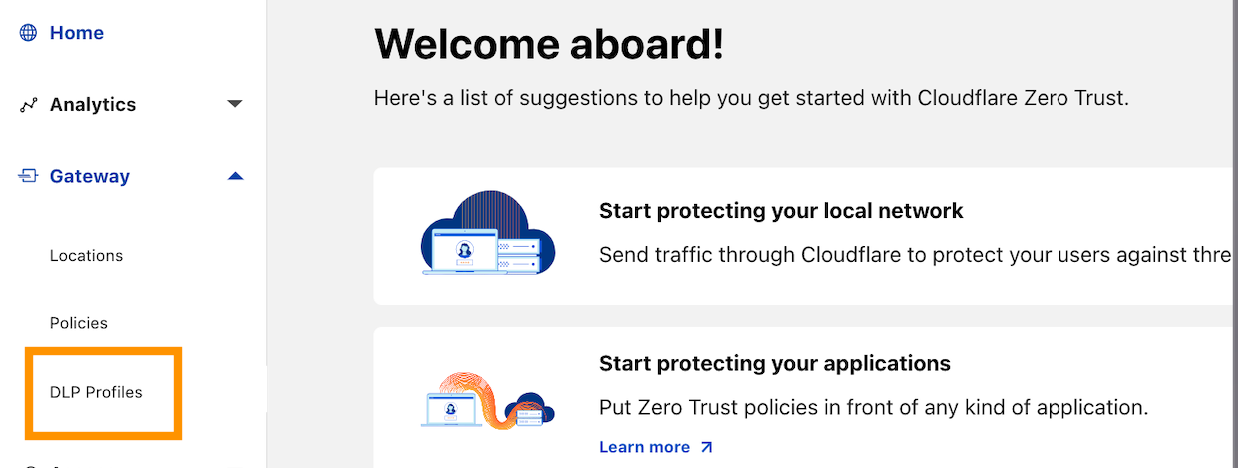
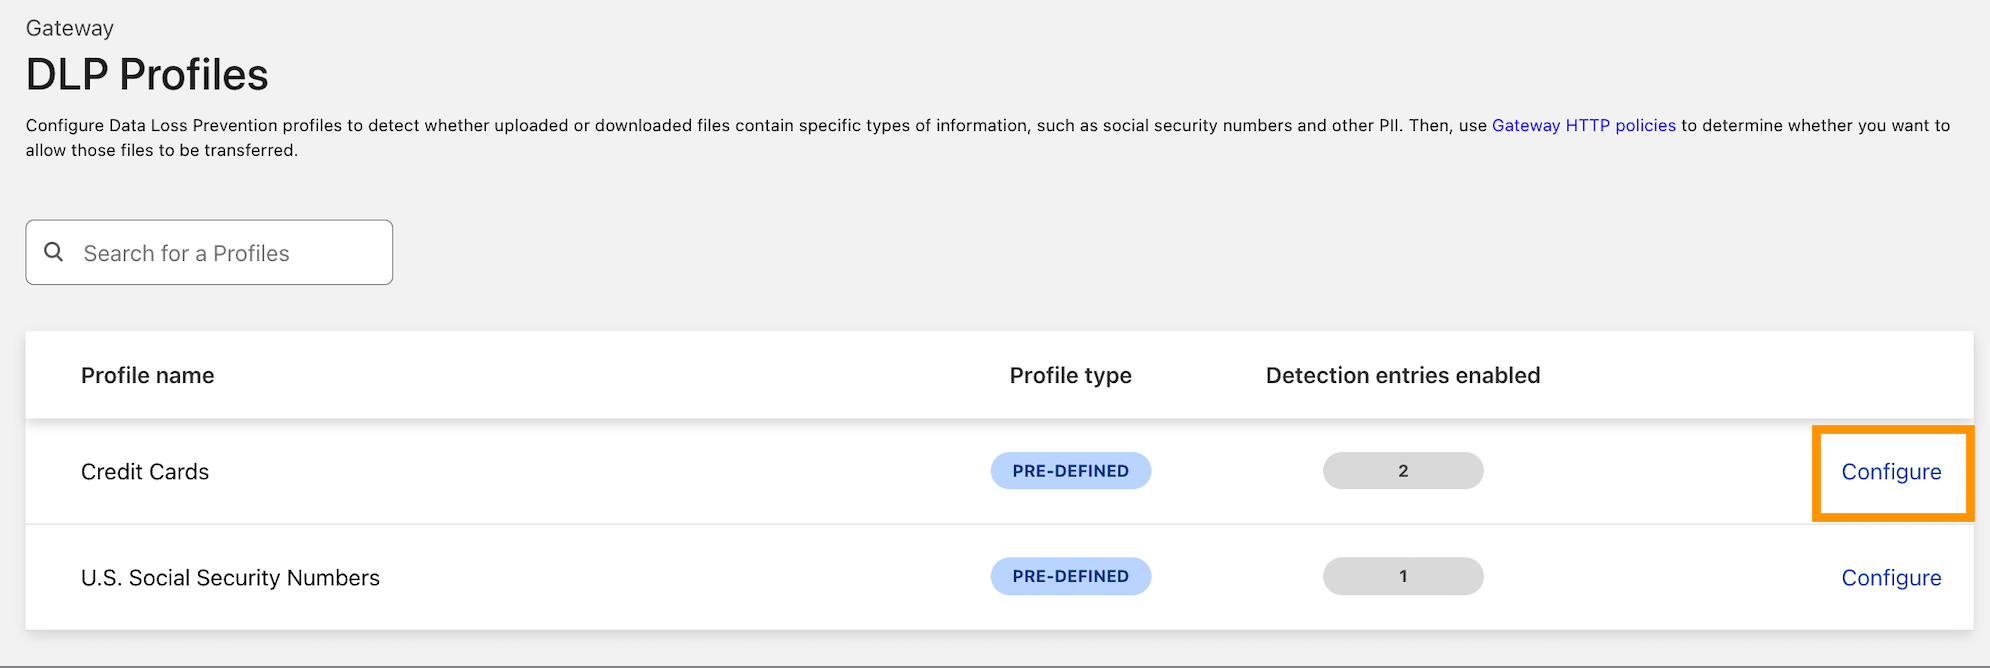
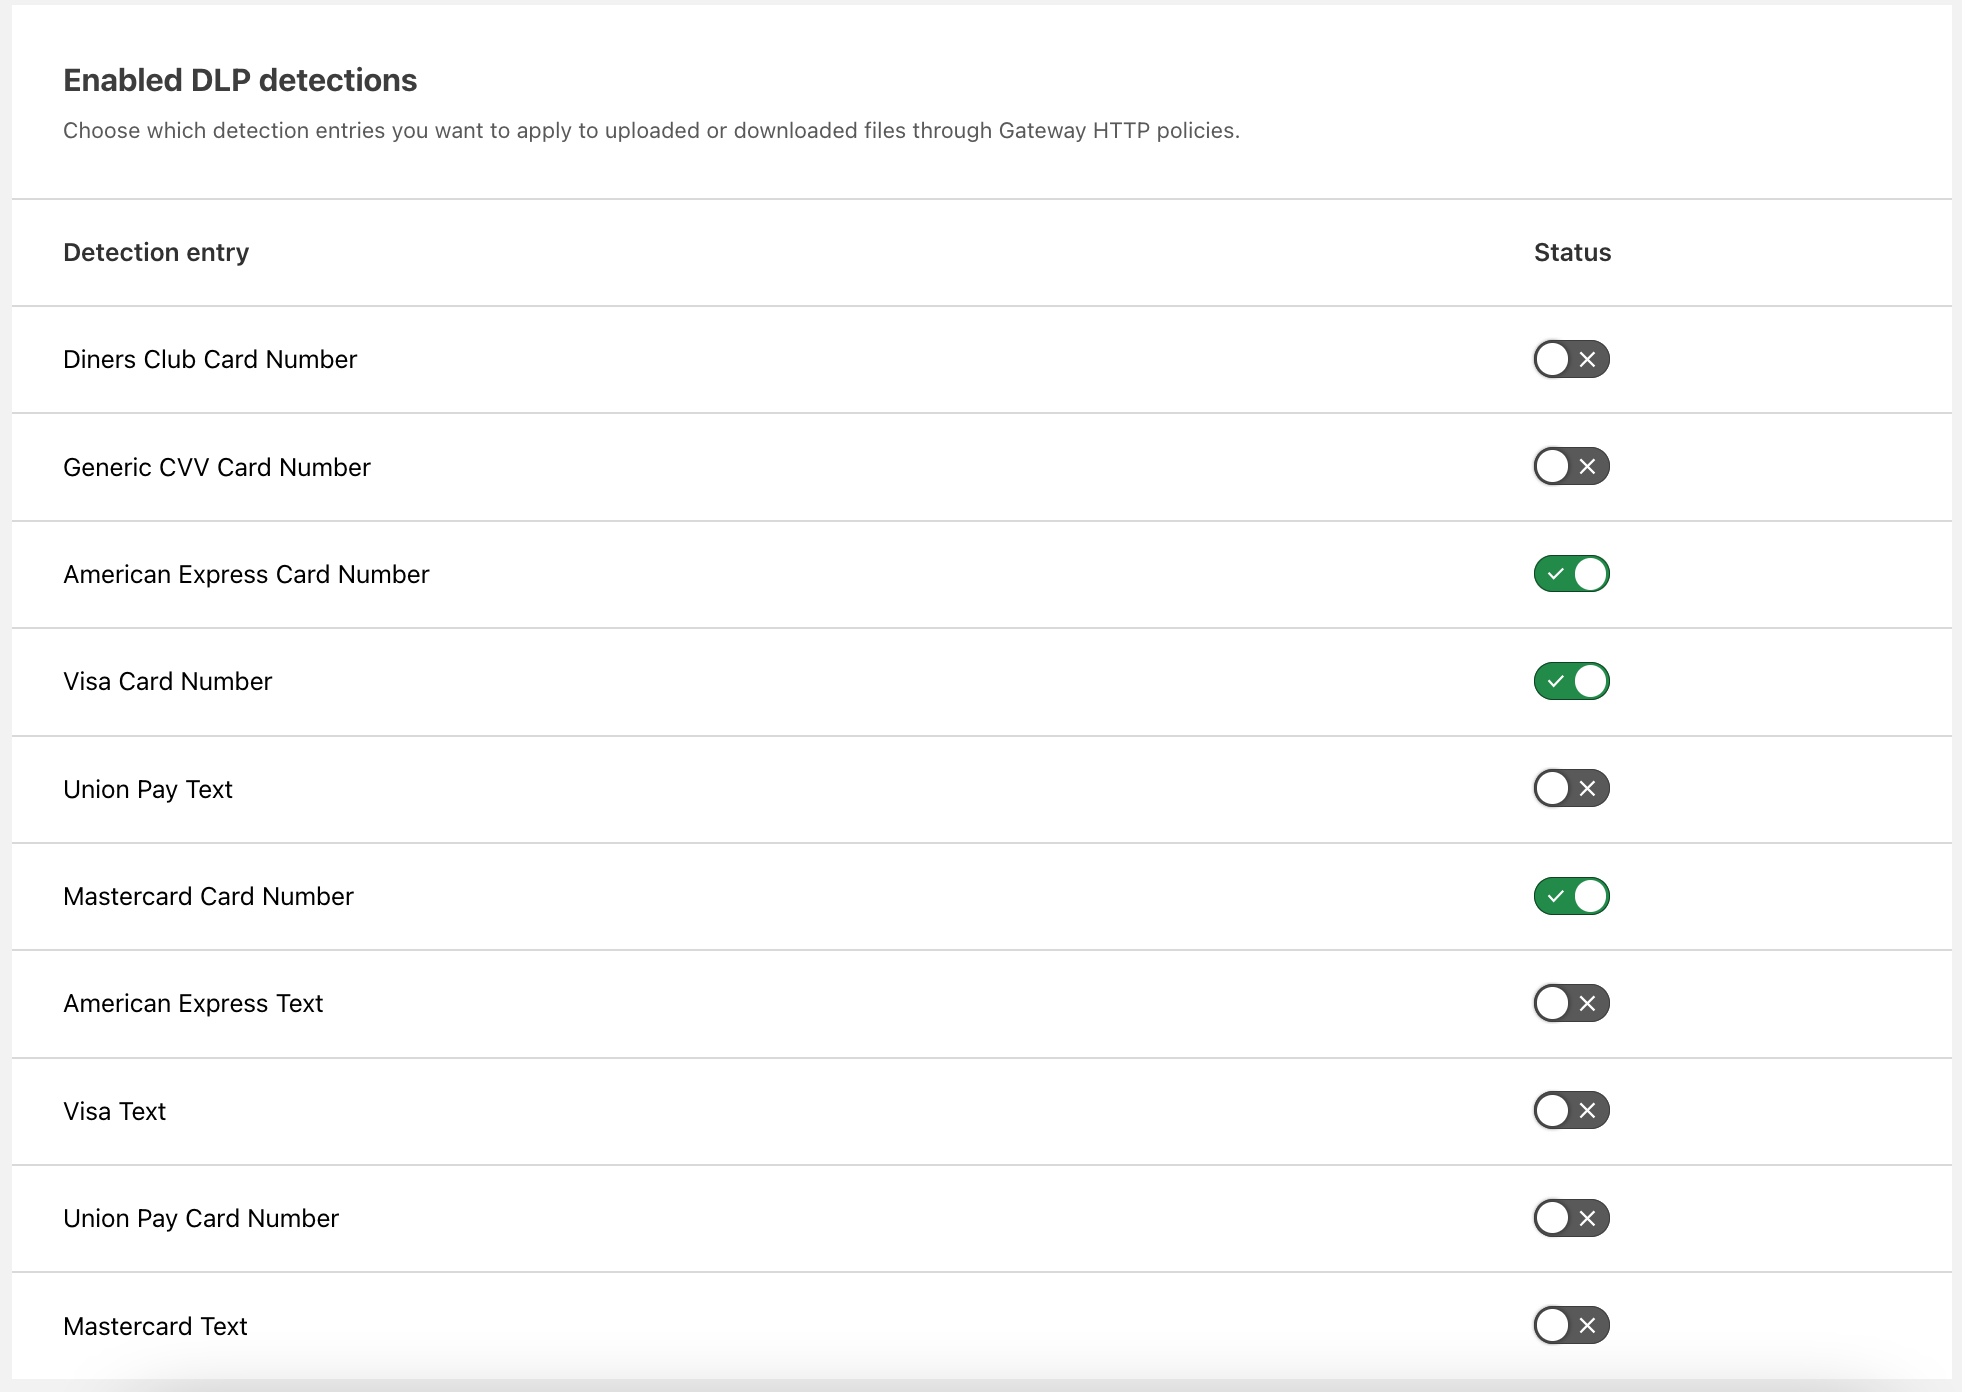
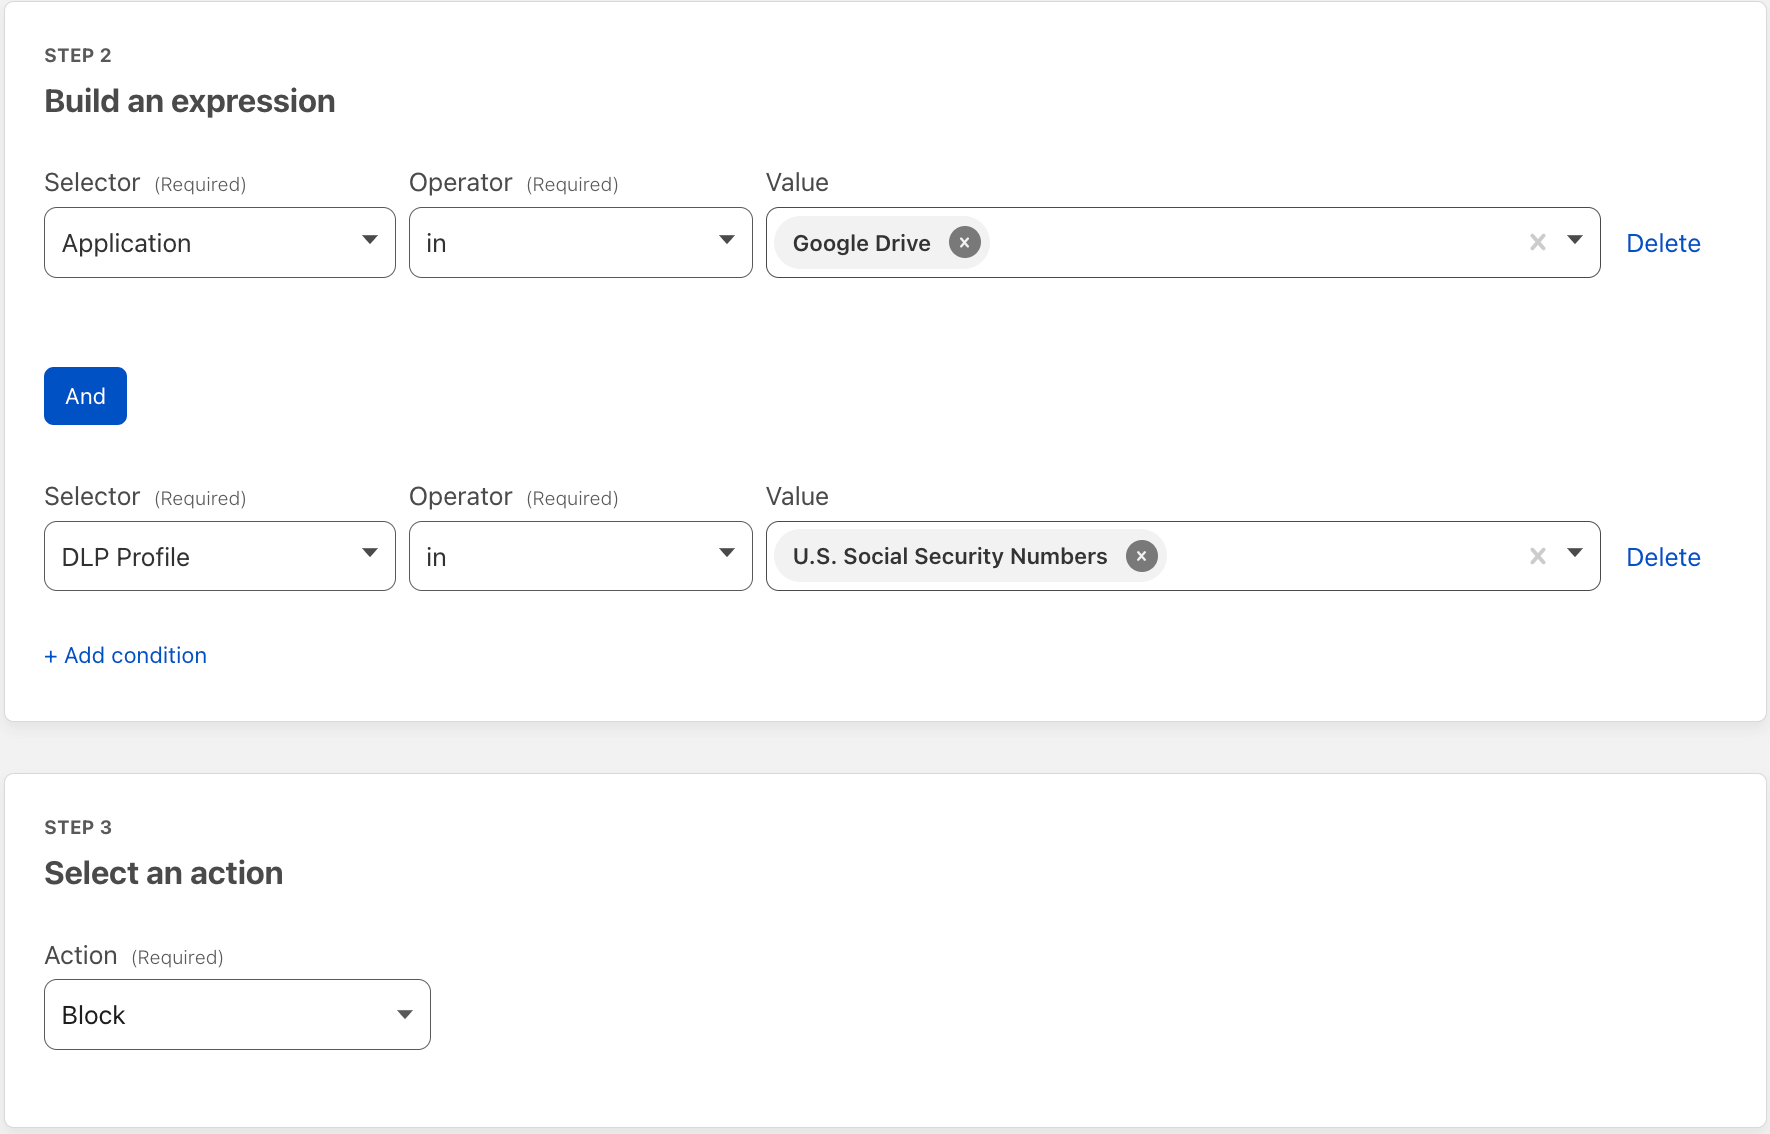
| Cloudflare Data Loss Prevention now Generally Available | Data Loss Prevention is now available for Cloudflare customers, giving customers more options to protect their sensitive data. | Enterprise Zero Trust |
| Cloudflare One Partner Program acceleration | The Cloudflare One Partner Program gains traction with existing and prospective partners. | Enterprise Zero Trust |
| Isolate browser-borne threats on any network with WAN-as-a-Service | Defend any network from browser-borne threats with Cloudflare Browser Isolation by connecting legacy firewalls over IPsec / GRE | Zero Trust |
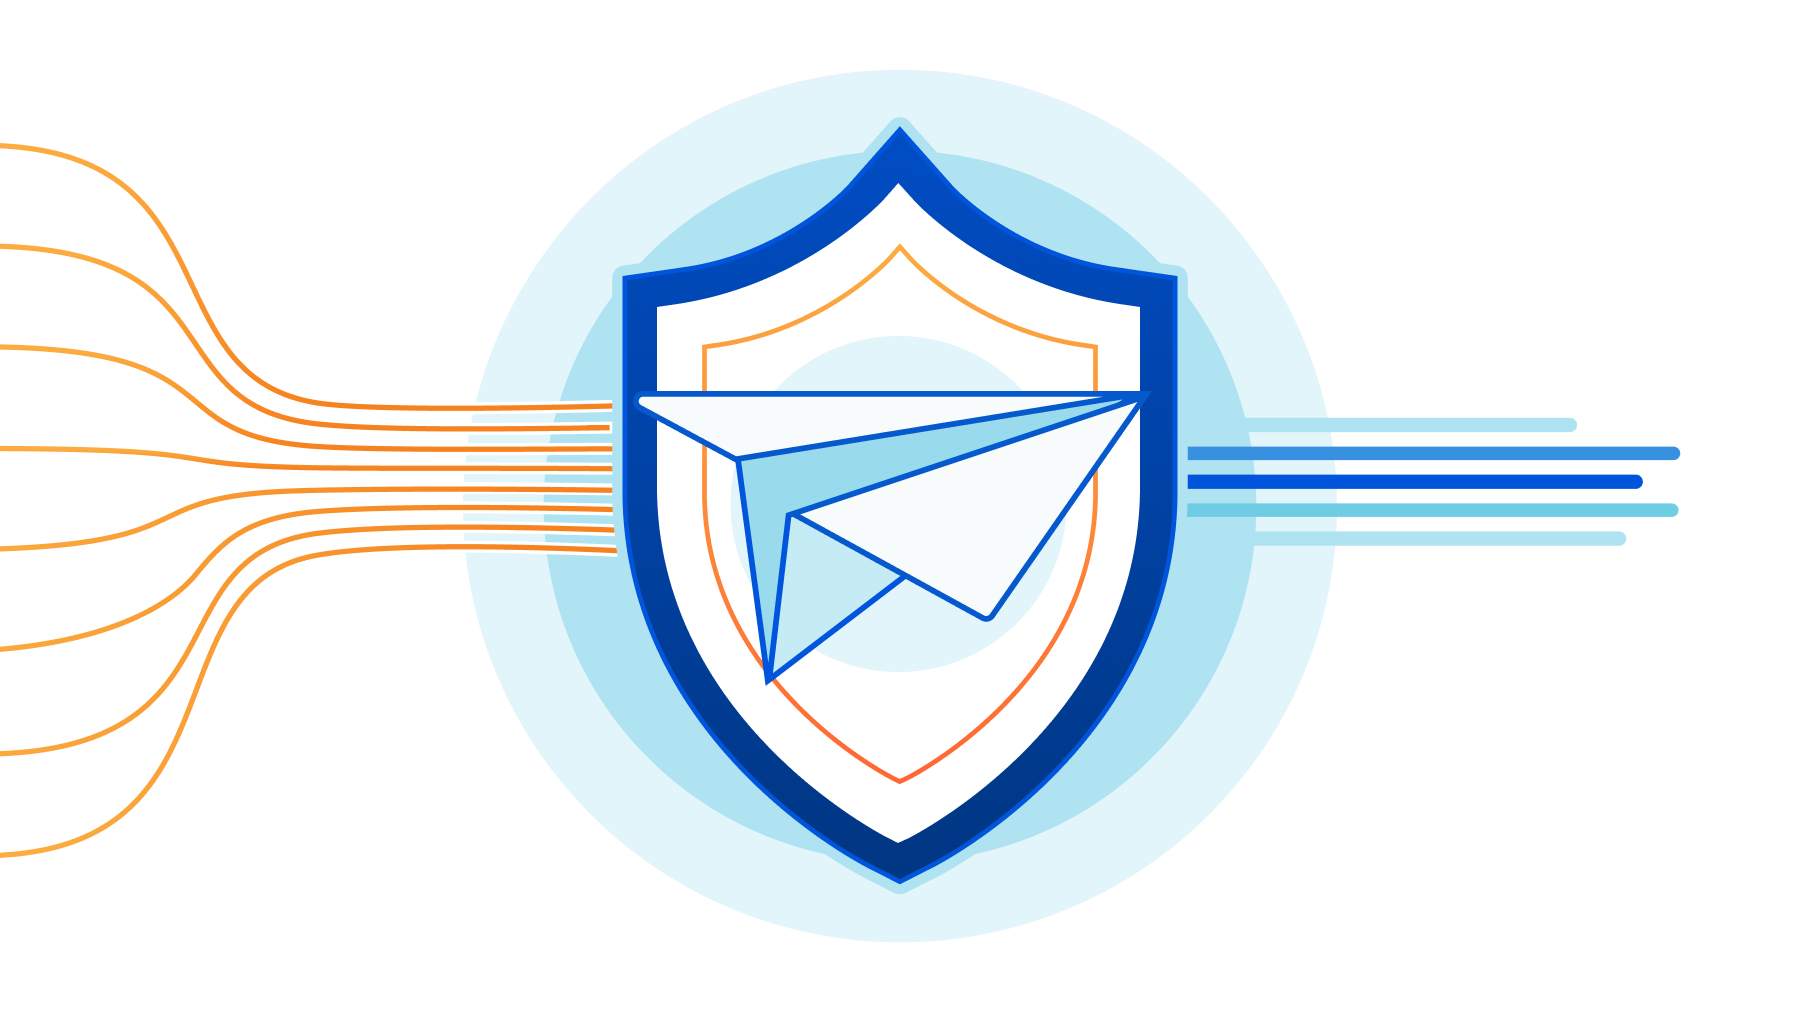
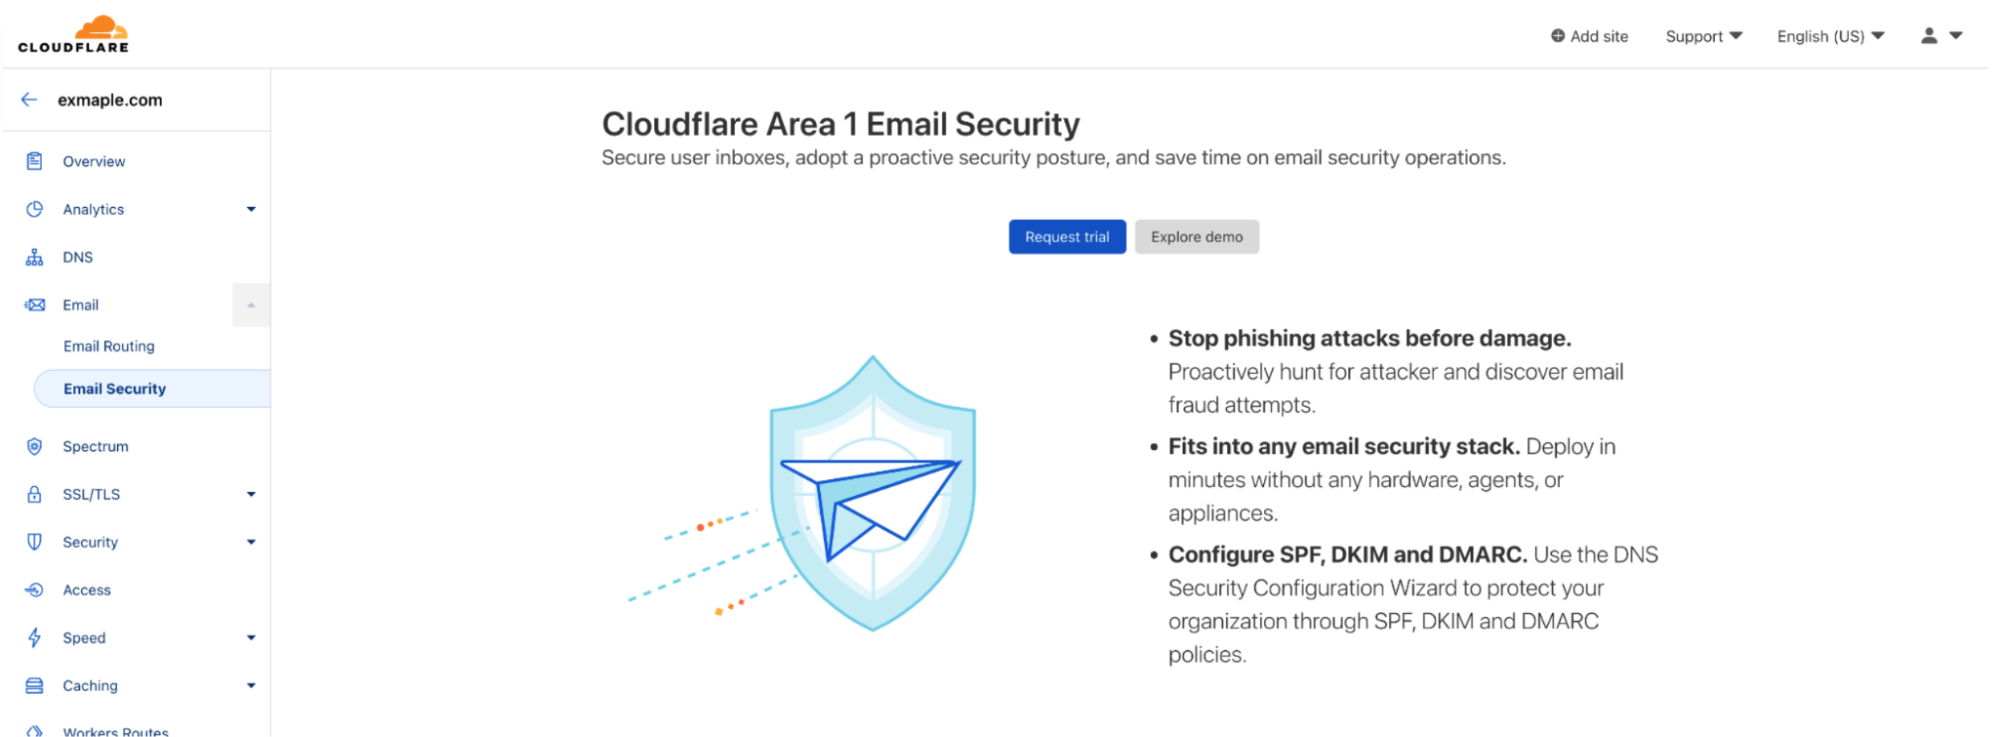
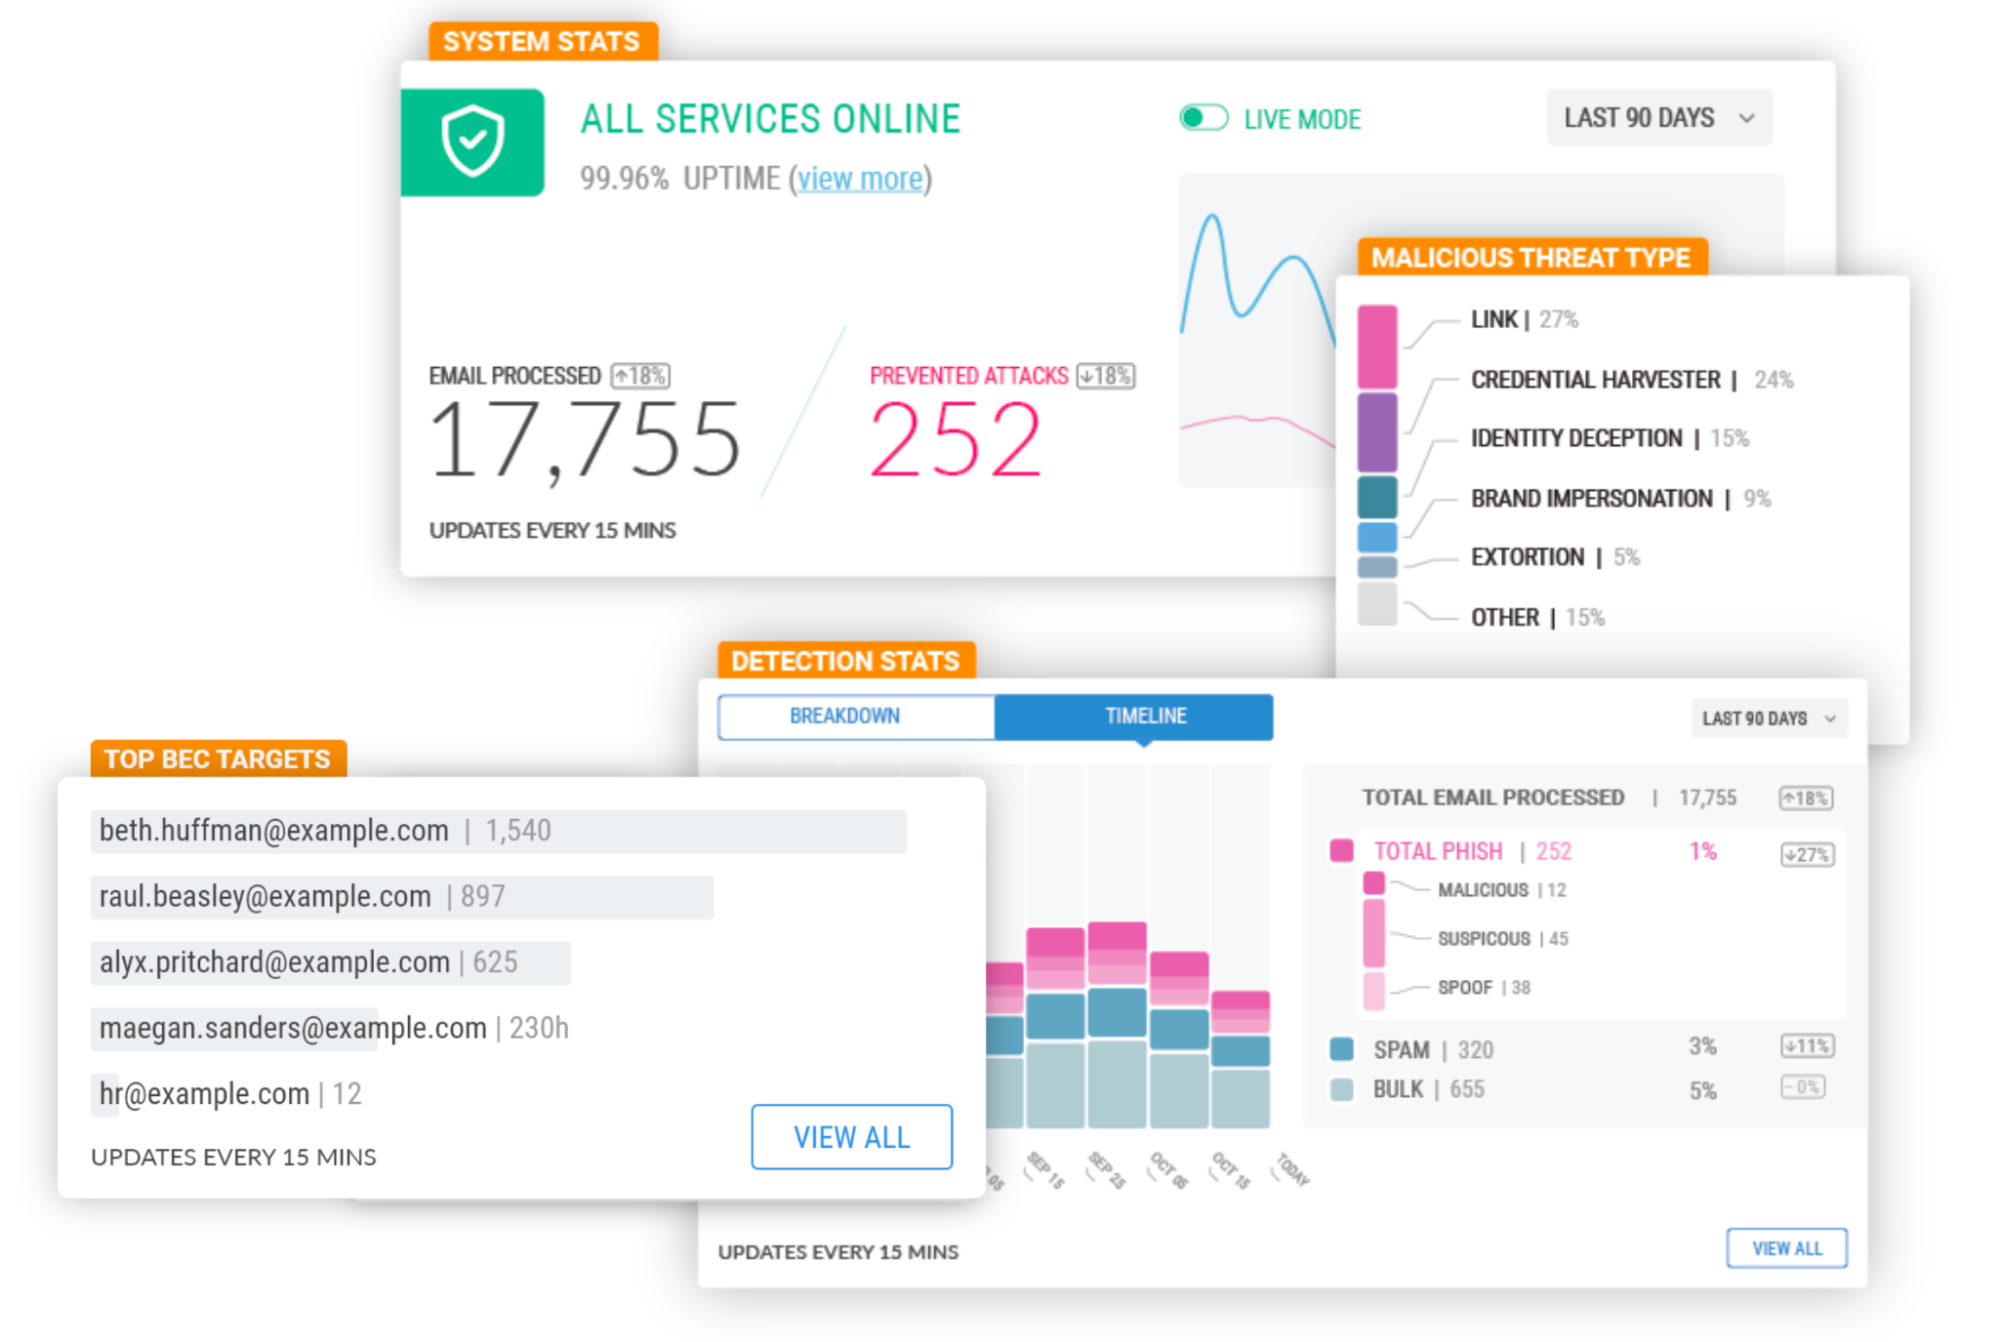
| Cloudflare Area 1 – how the best Email Security keeps getting better | Cloudflare started using Area 1 in 2020 and later acquired the company in 2022. We were most impressed how phishing, responsible for 90+% of cyberattacks, basically became a non-issue overnight when we deployed Area 1. But our vision is much bigger than preventing phishing attacks. | Enterprise Zero Trust |
| Wednesday (September 21) | ||
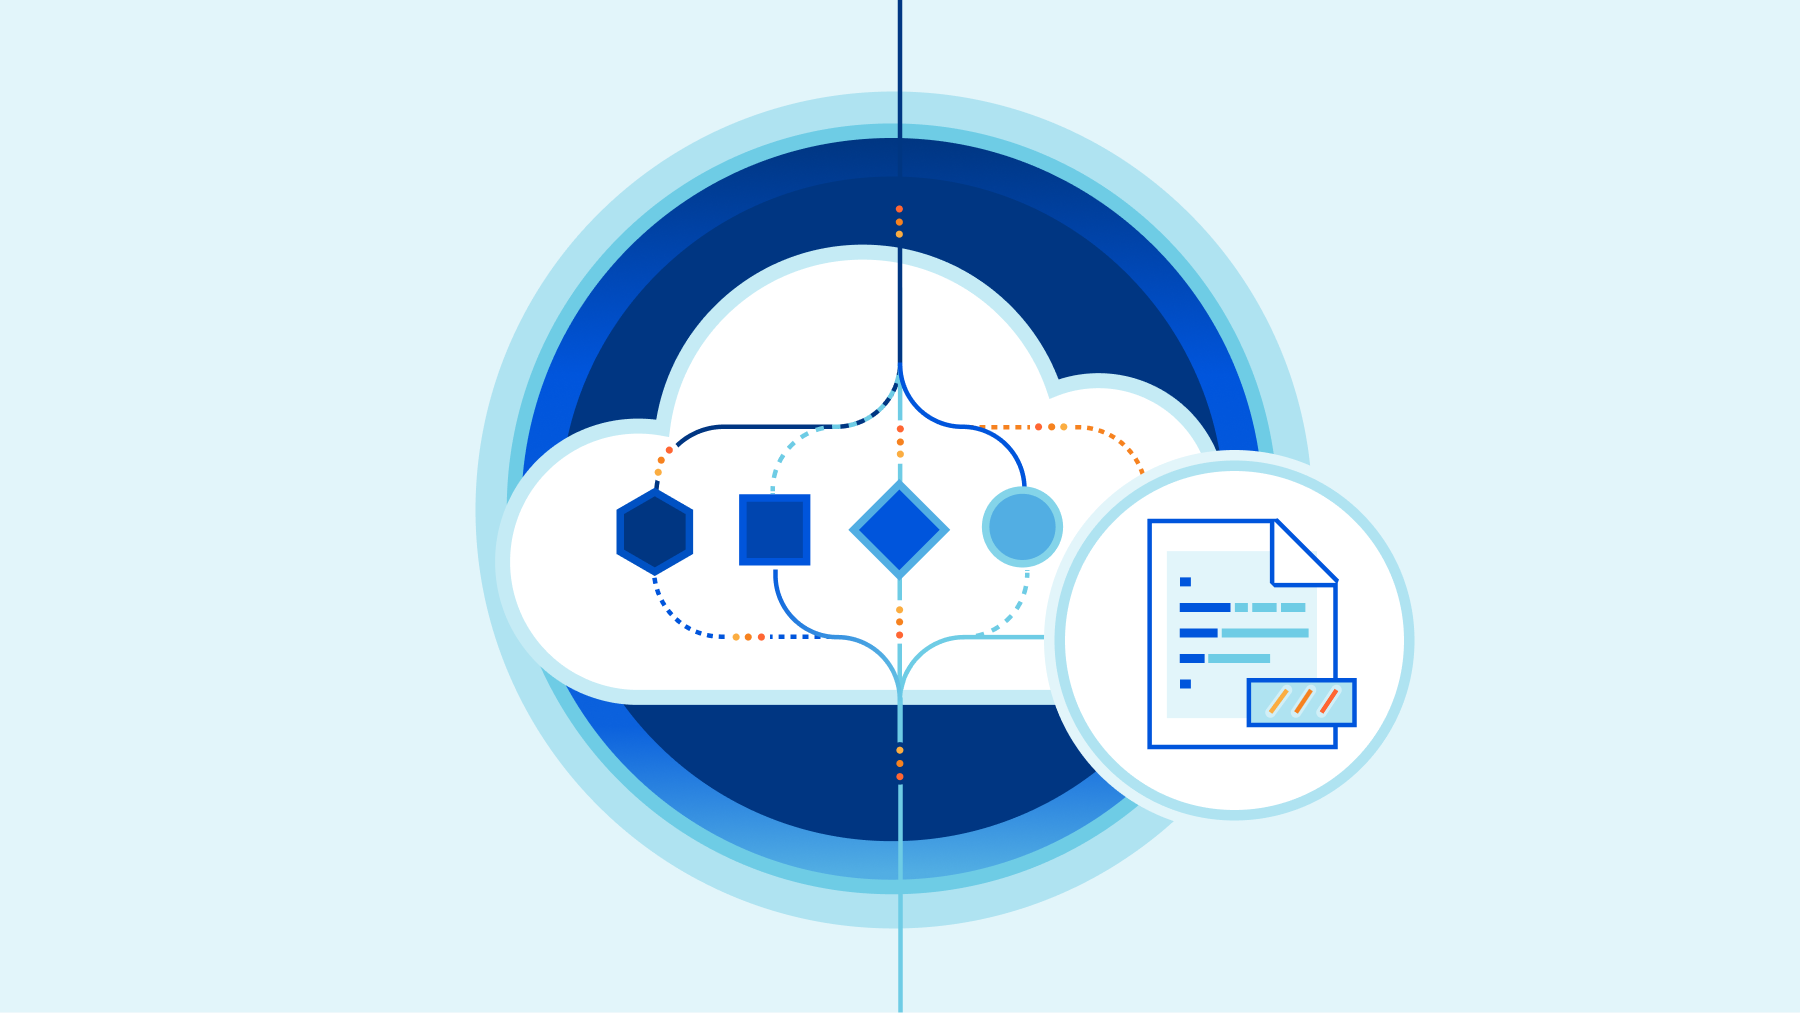
| R2 is now Generally Available | R2 gives developers object storage minus the egress fees. With the GA of R2, developers will be free to focus on innovation instead of worrying about the costs of storing their data. | All plans |
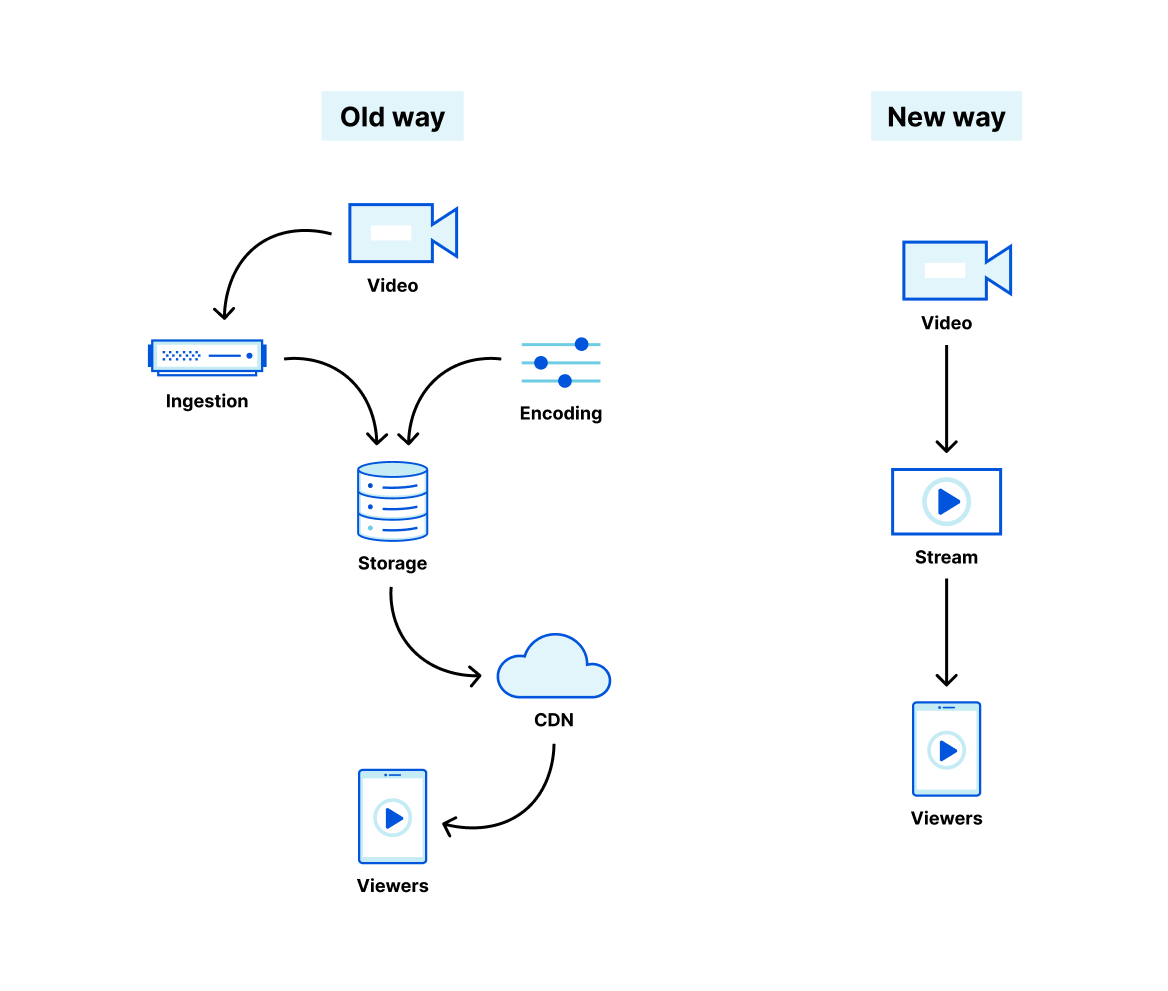
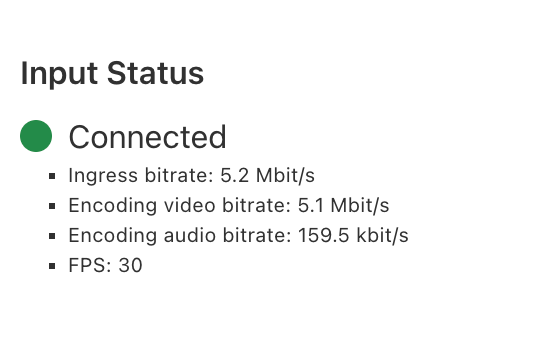
| Stream Live is now Generally Available | Stream live video to viewers at a global scale. | All plans |
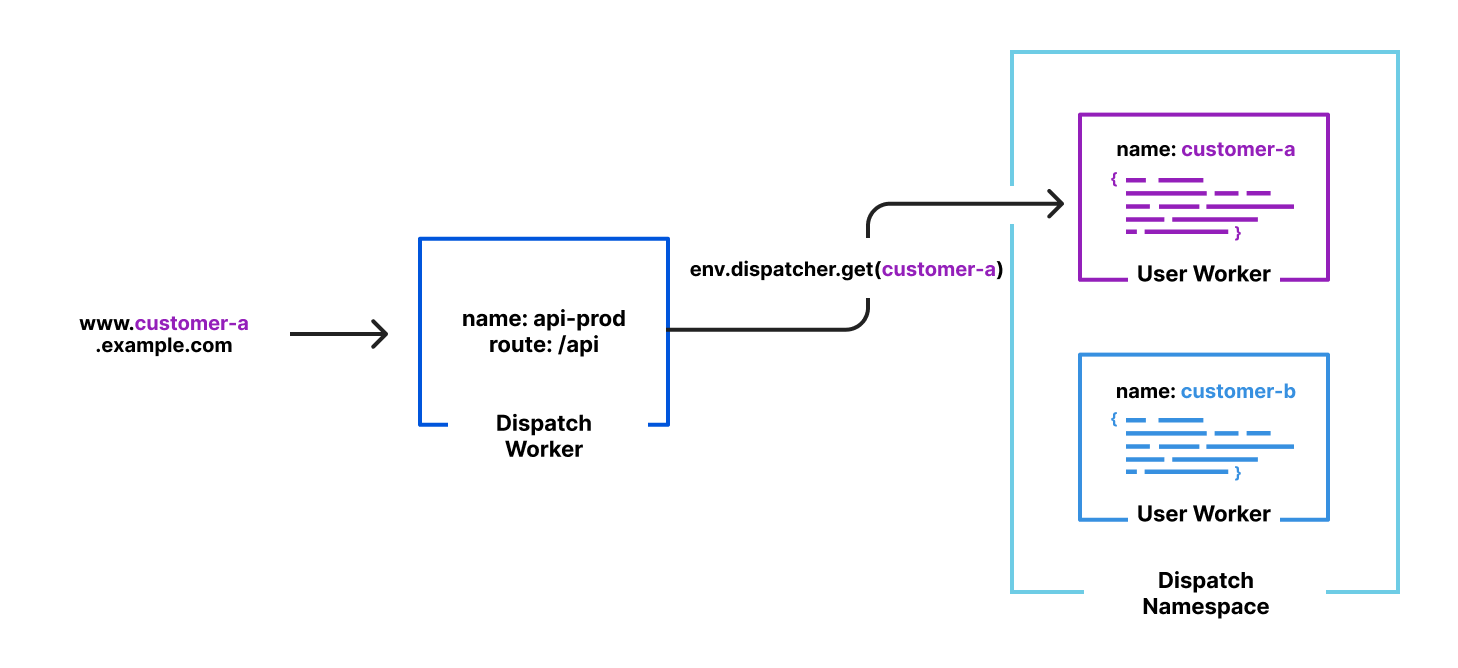
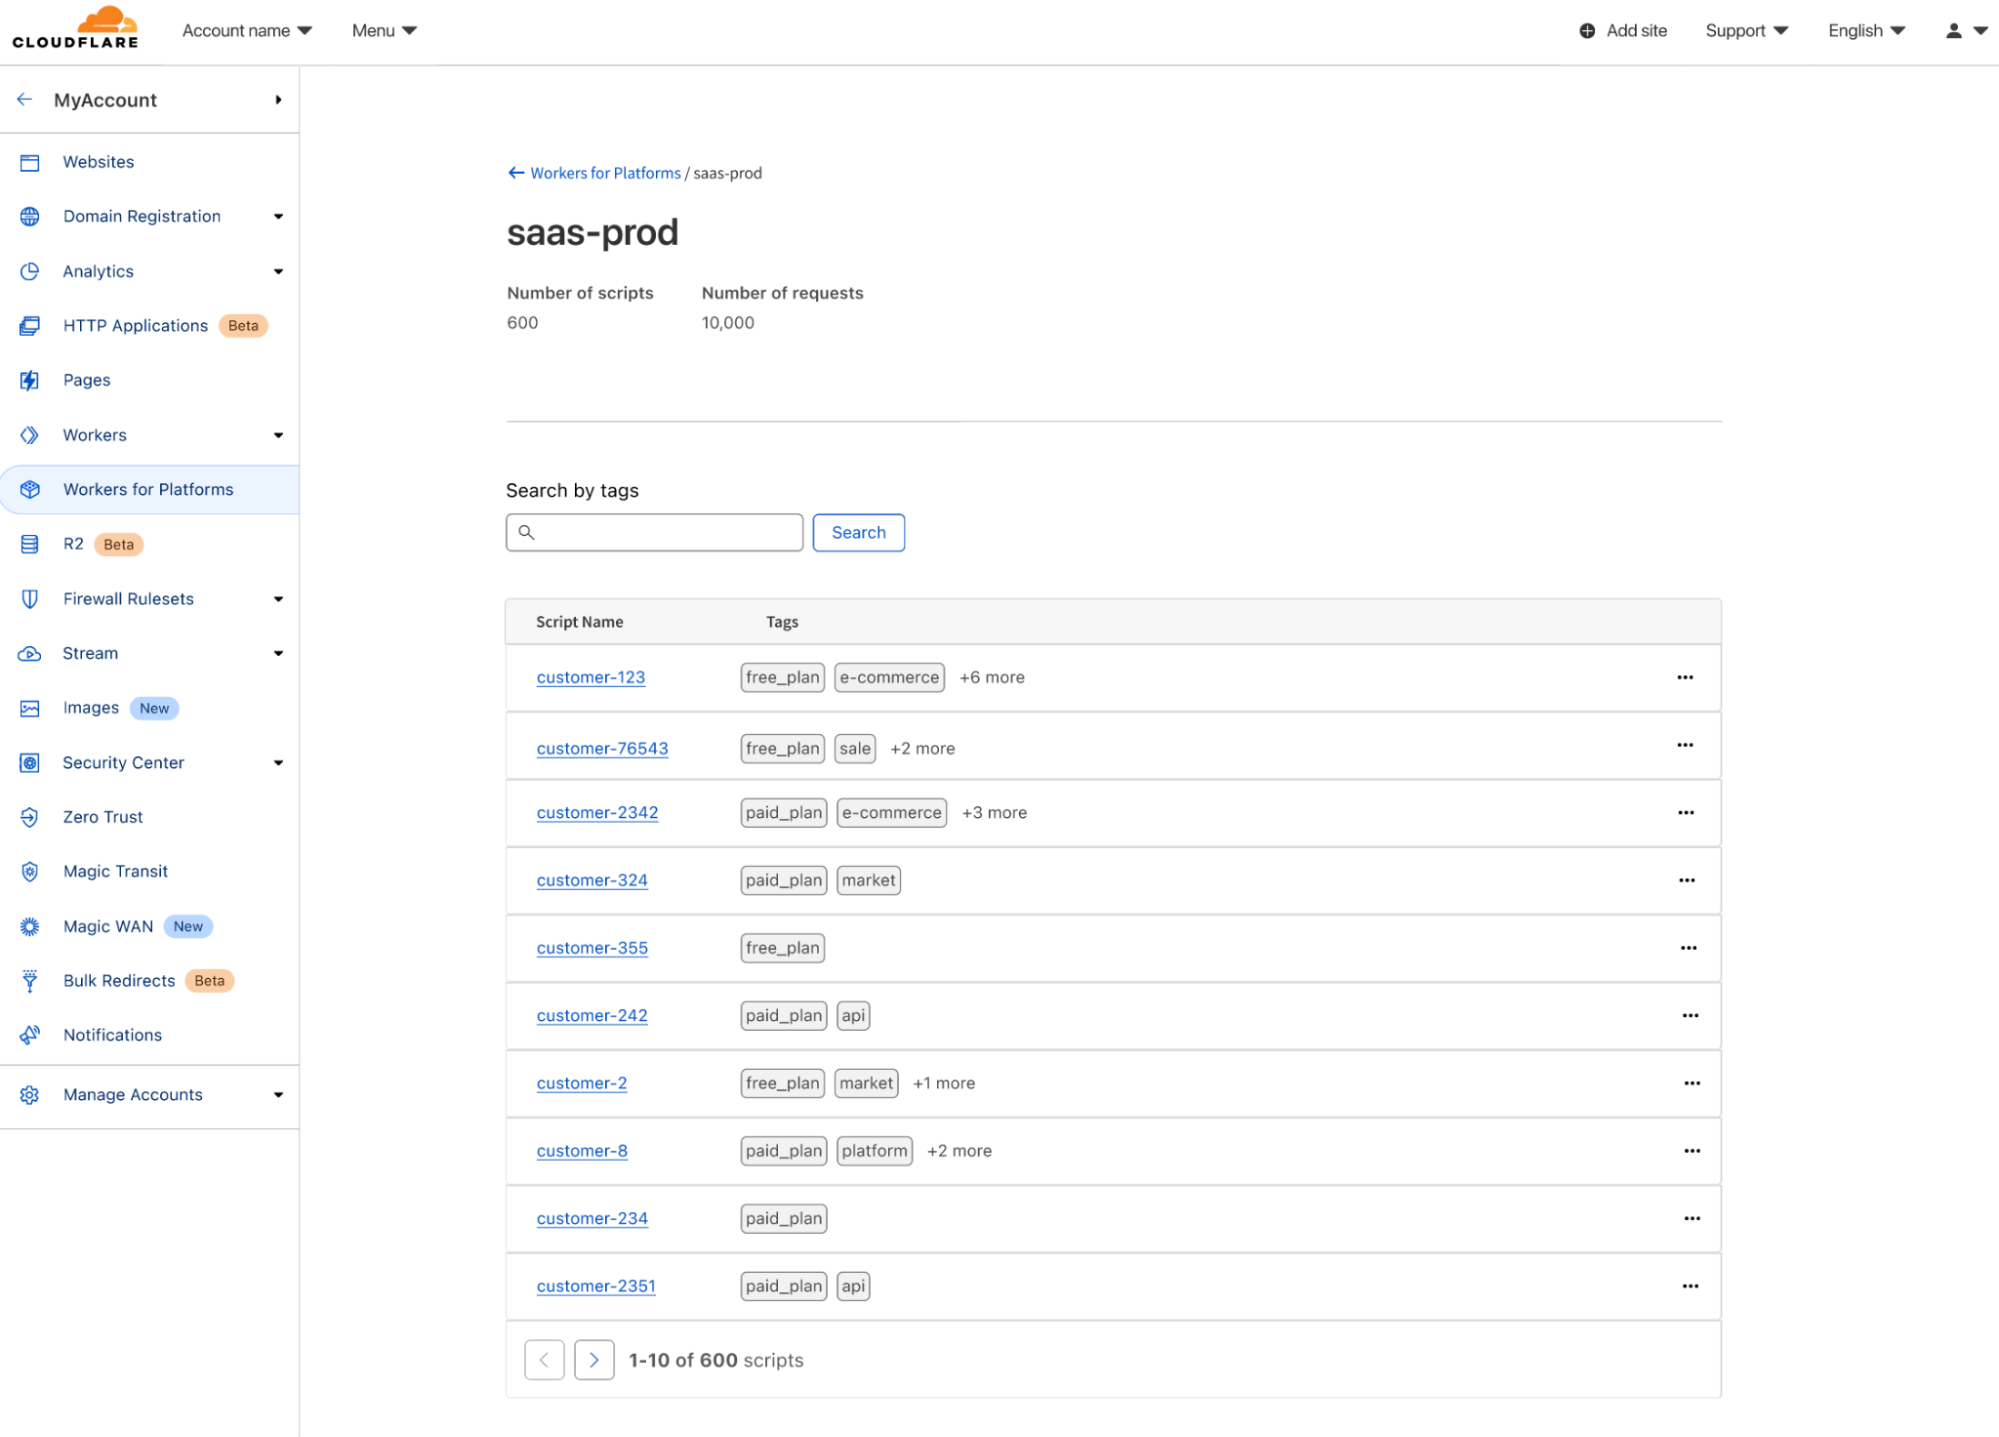
| The easiest way to build a modern SaaS application | With Workers for Platforms, your customers can build custom logic to meet their needs right into your application. | Enterprise |
| Going originless with Cloudflare Workers – Building a Todo app – Part 1: The API | Today we go through Part 1 in a series on building completely serverless applications on Cloudflare’s Developer Platform. | Free for all Workers users |
| Store and Retrieve your logs on R2 | Log Storage on R2: a cost-effective solution to store event logs for any of our products! | Enterprise (as part of Logpush) |
| SVG support in Cloudflare Images | Cloudflare Images now supports storing and delivering SVG files. | Part of Cloudflare Images |
| Thursday (September 22) | ||
| Regional Services Expansion | Cloudflare is launching the Data Localization Suite for Japan, India and Australia. | Enterprise |
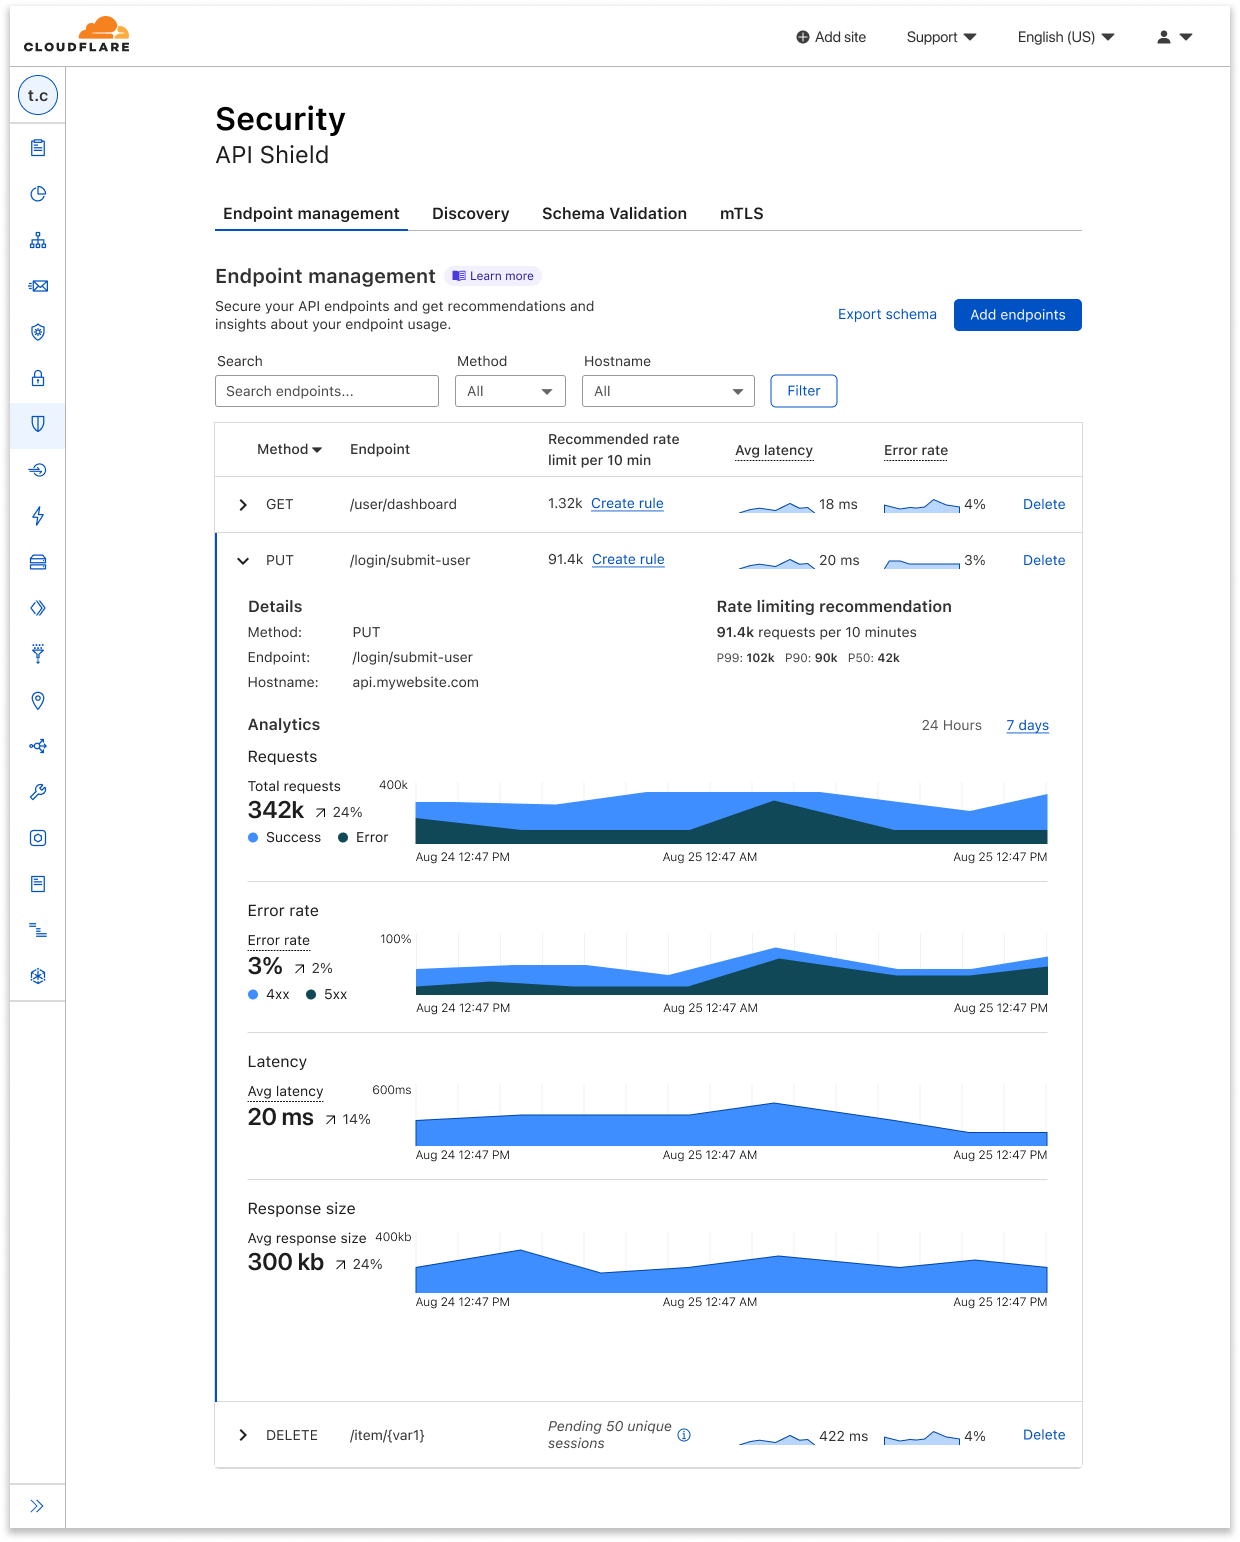
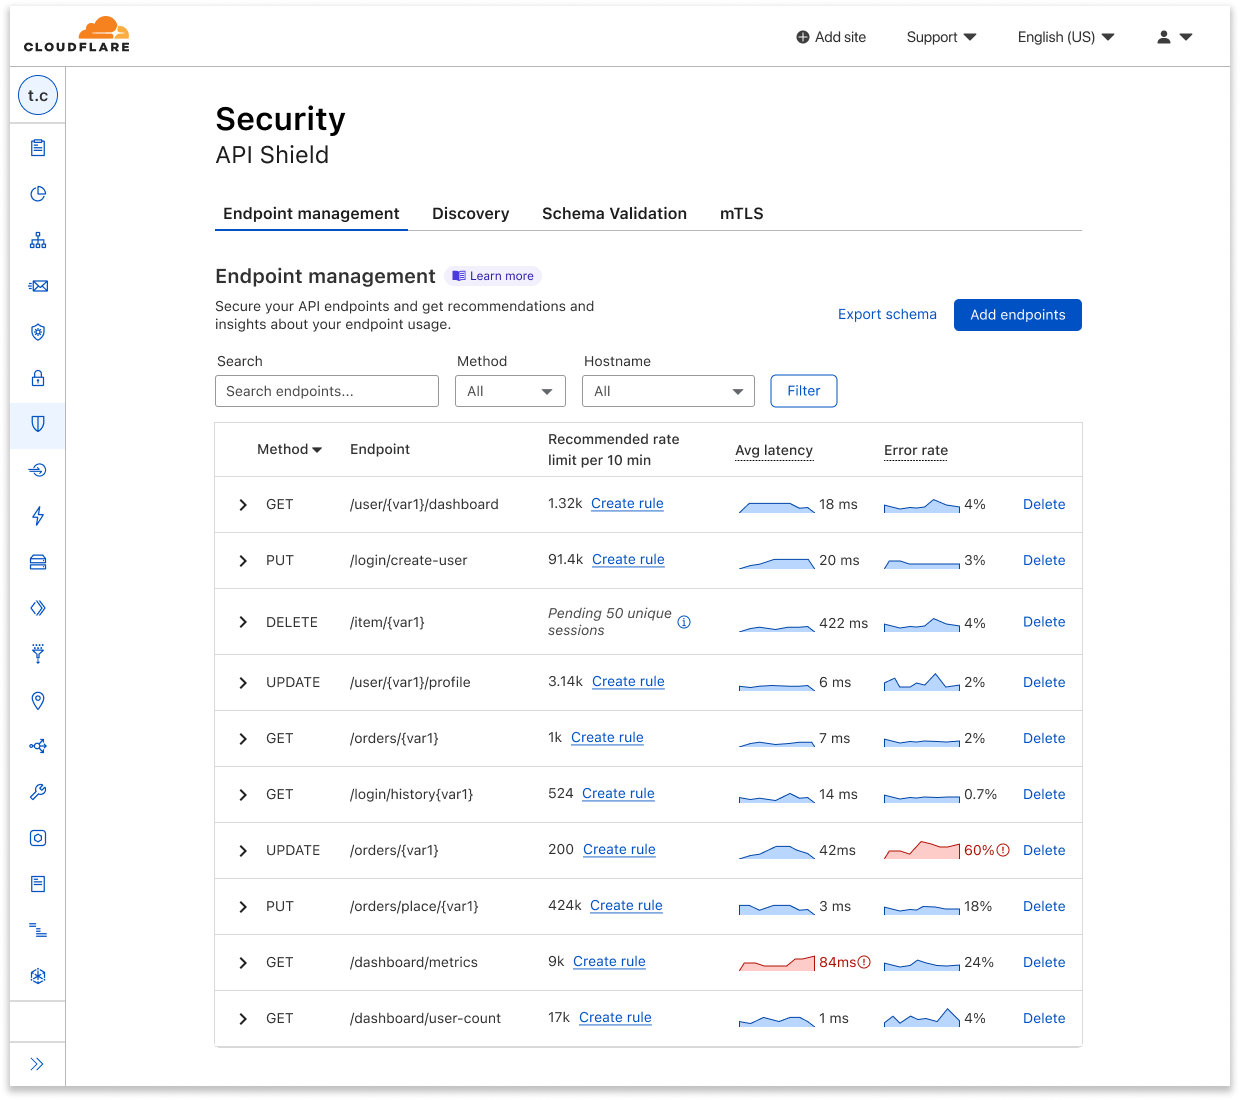
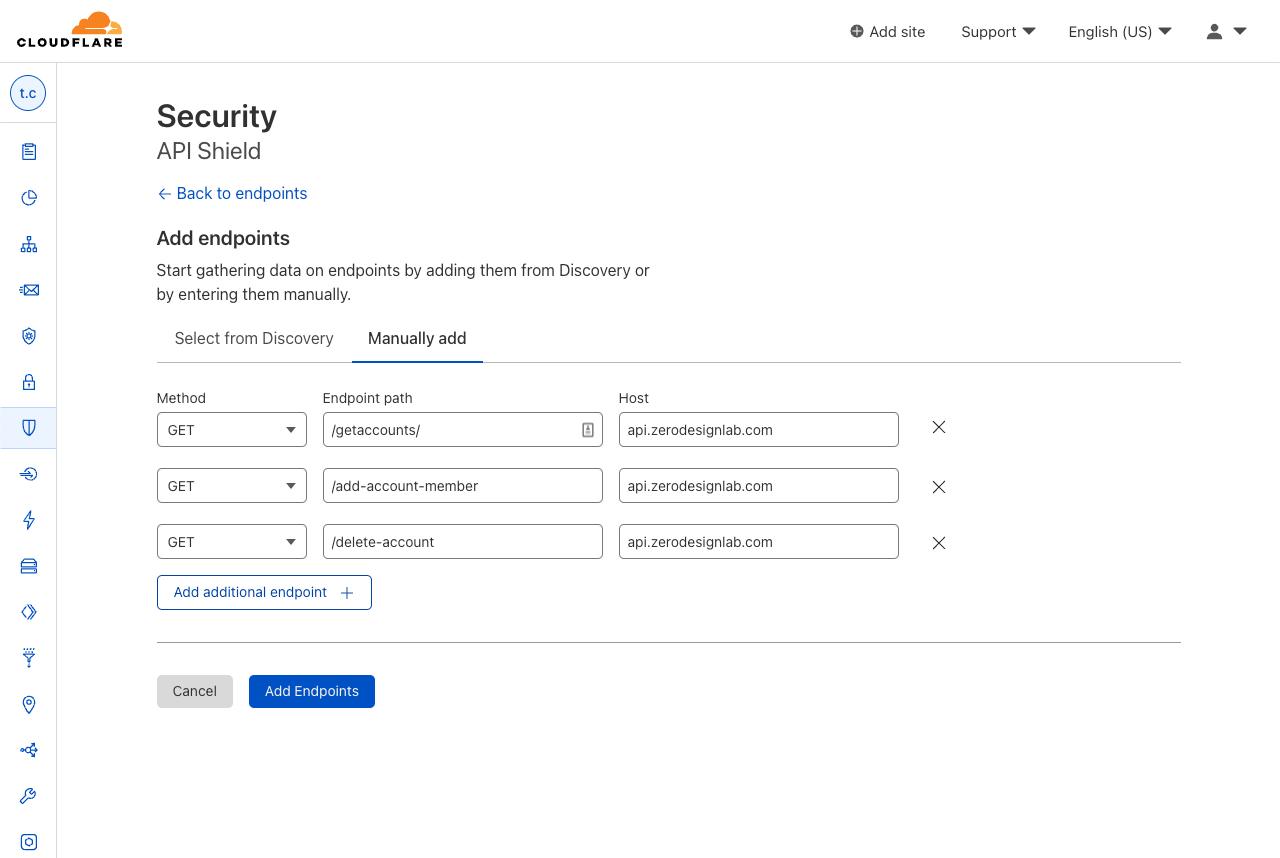
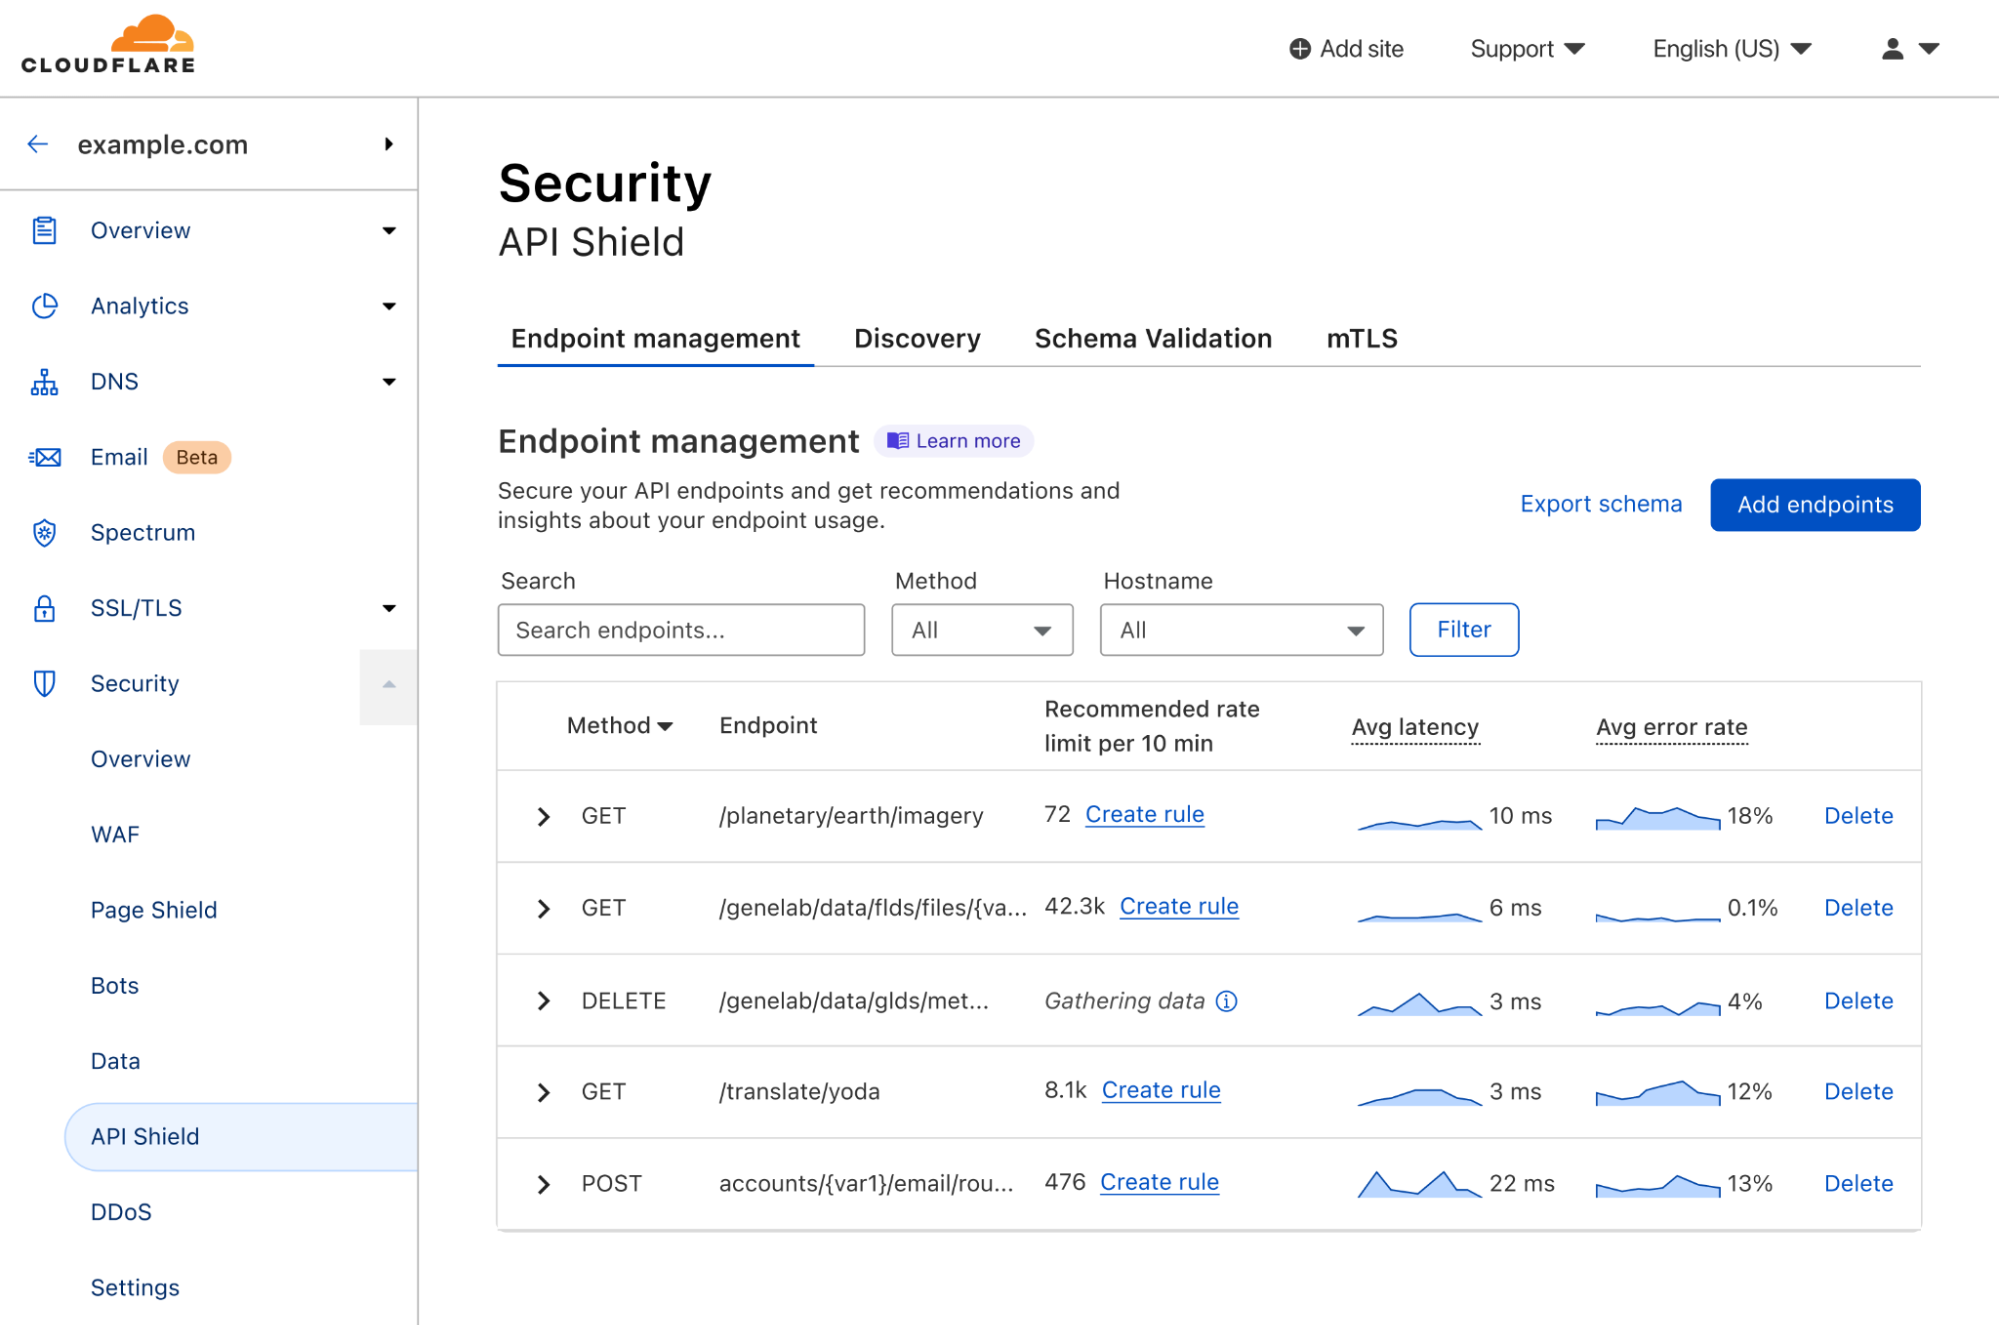
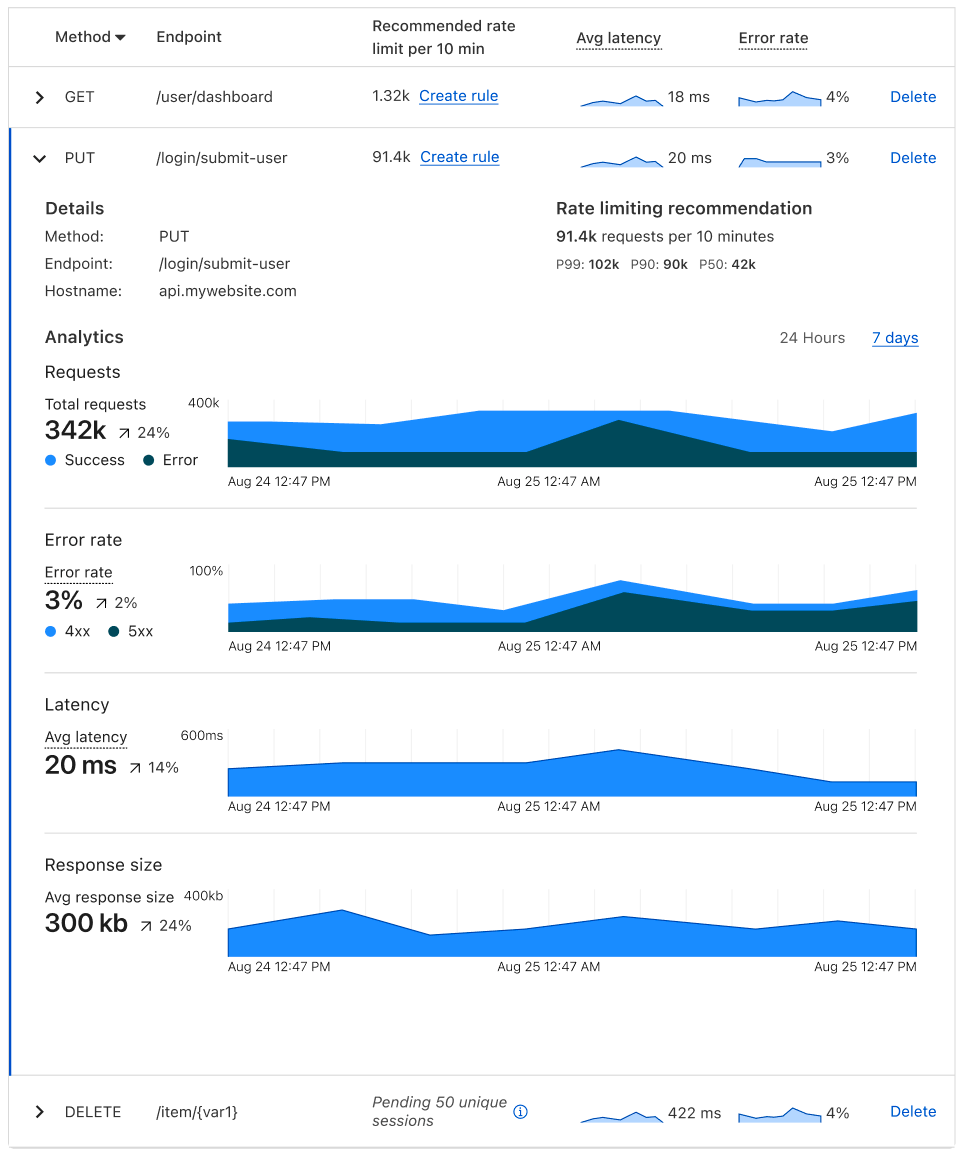
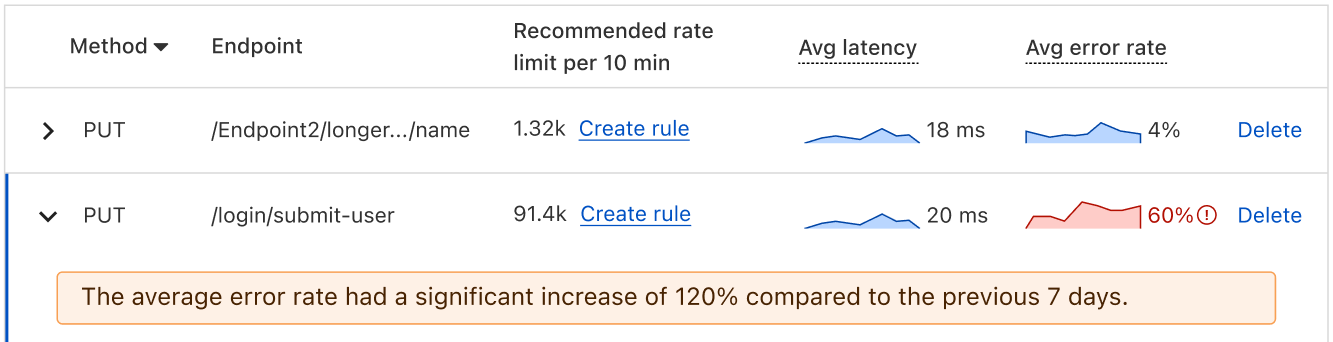
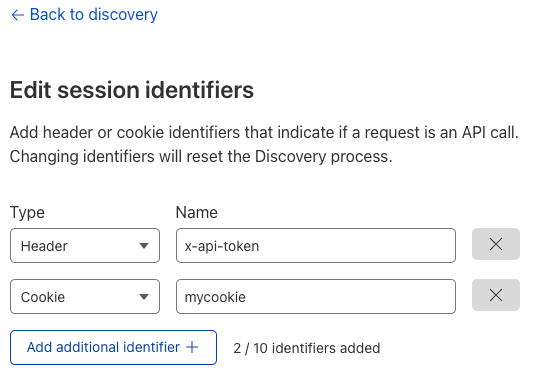
| API Endpoint Management and Metrics are now GA | API Shield customers can save, update, and monitor the performance of API endpoints. | Enterprise |
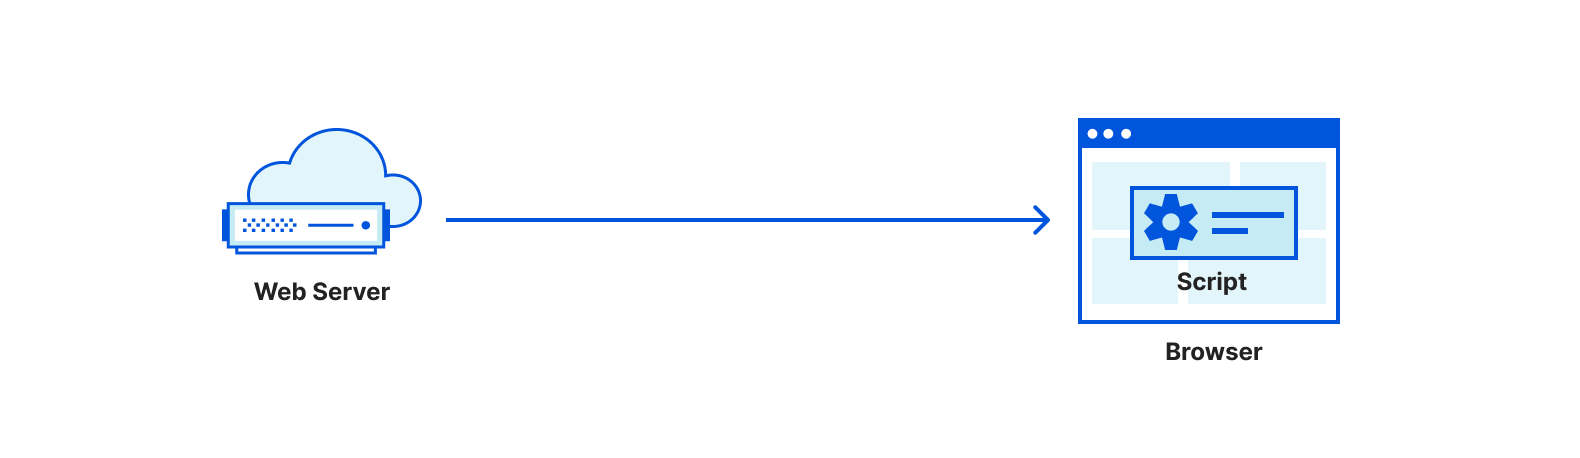
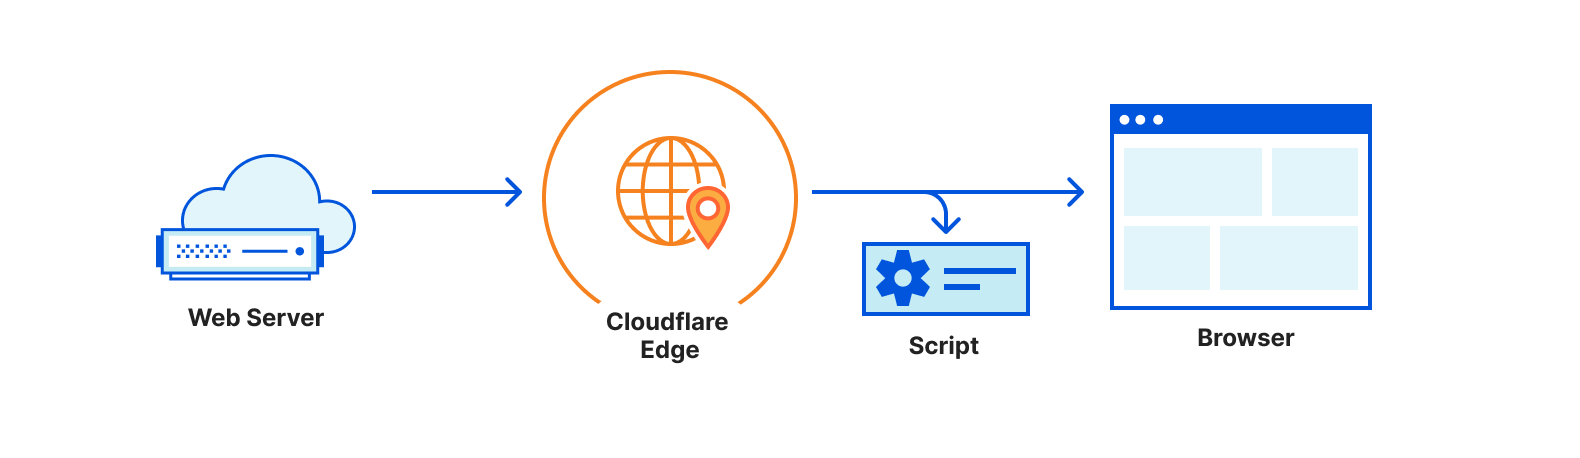
| Cloudflare Zaraz supports Managed Components and DLP to make third-party tools private | Third party tools are the only thing you can’t control on your website, unless you use Managed Components with Cloudflare Zaraz. | Available on all plans |
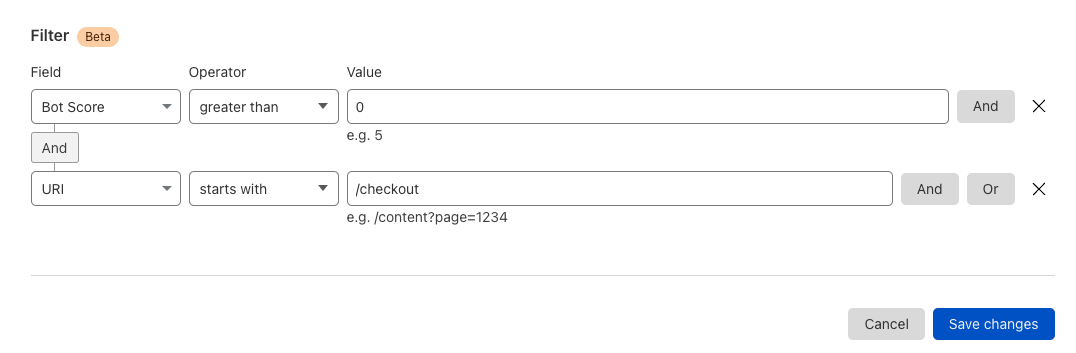
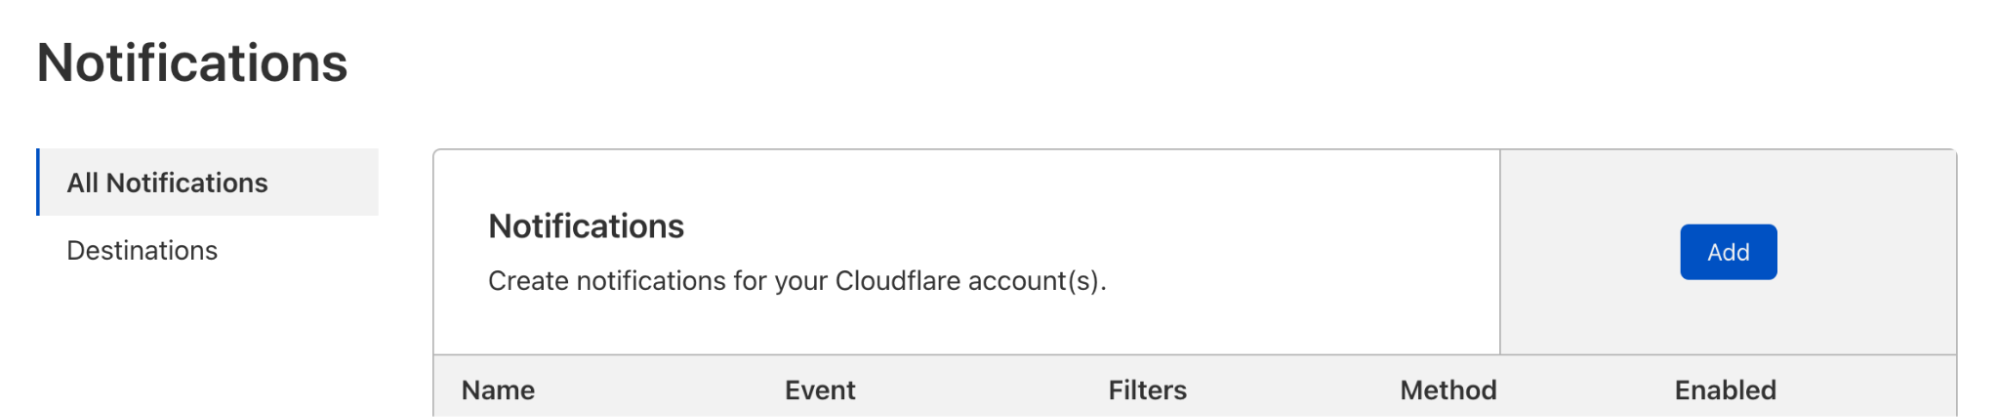
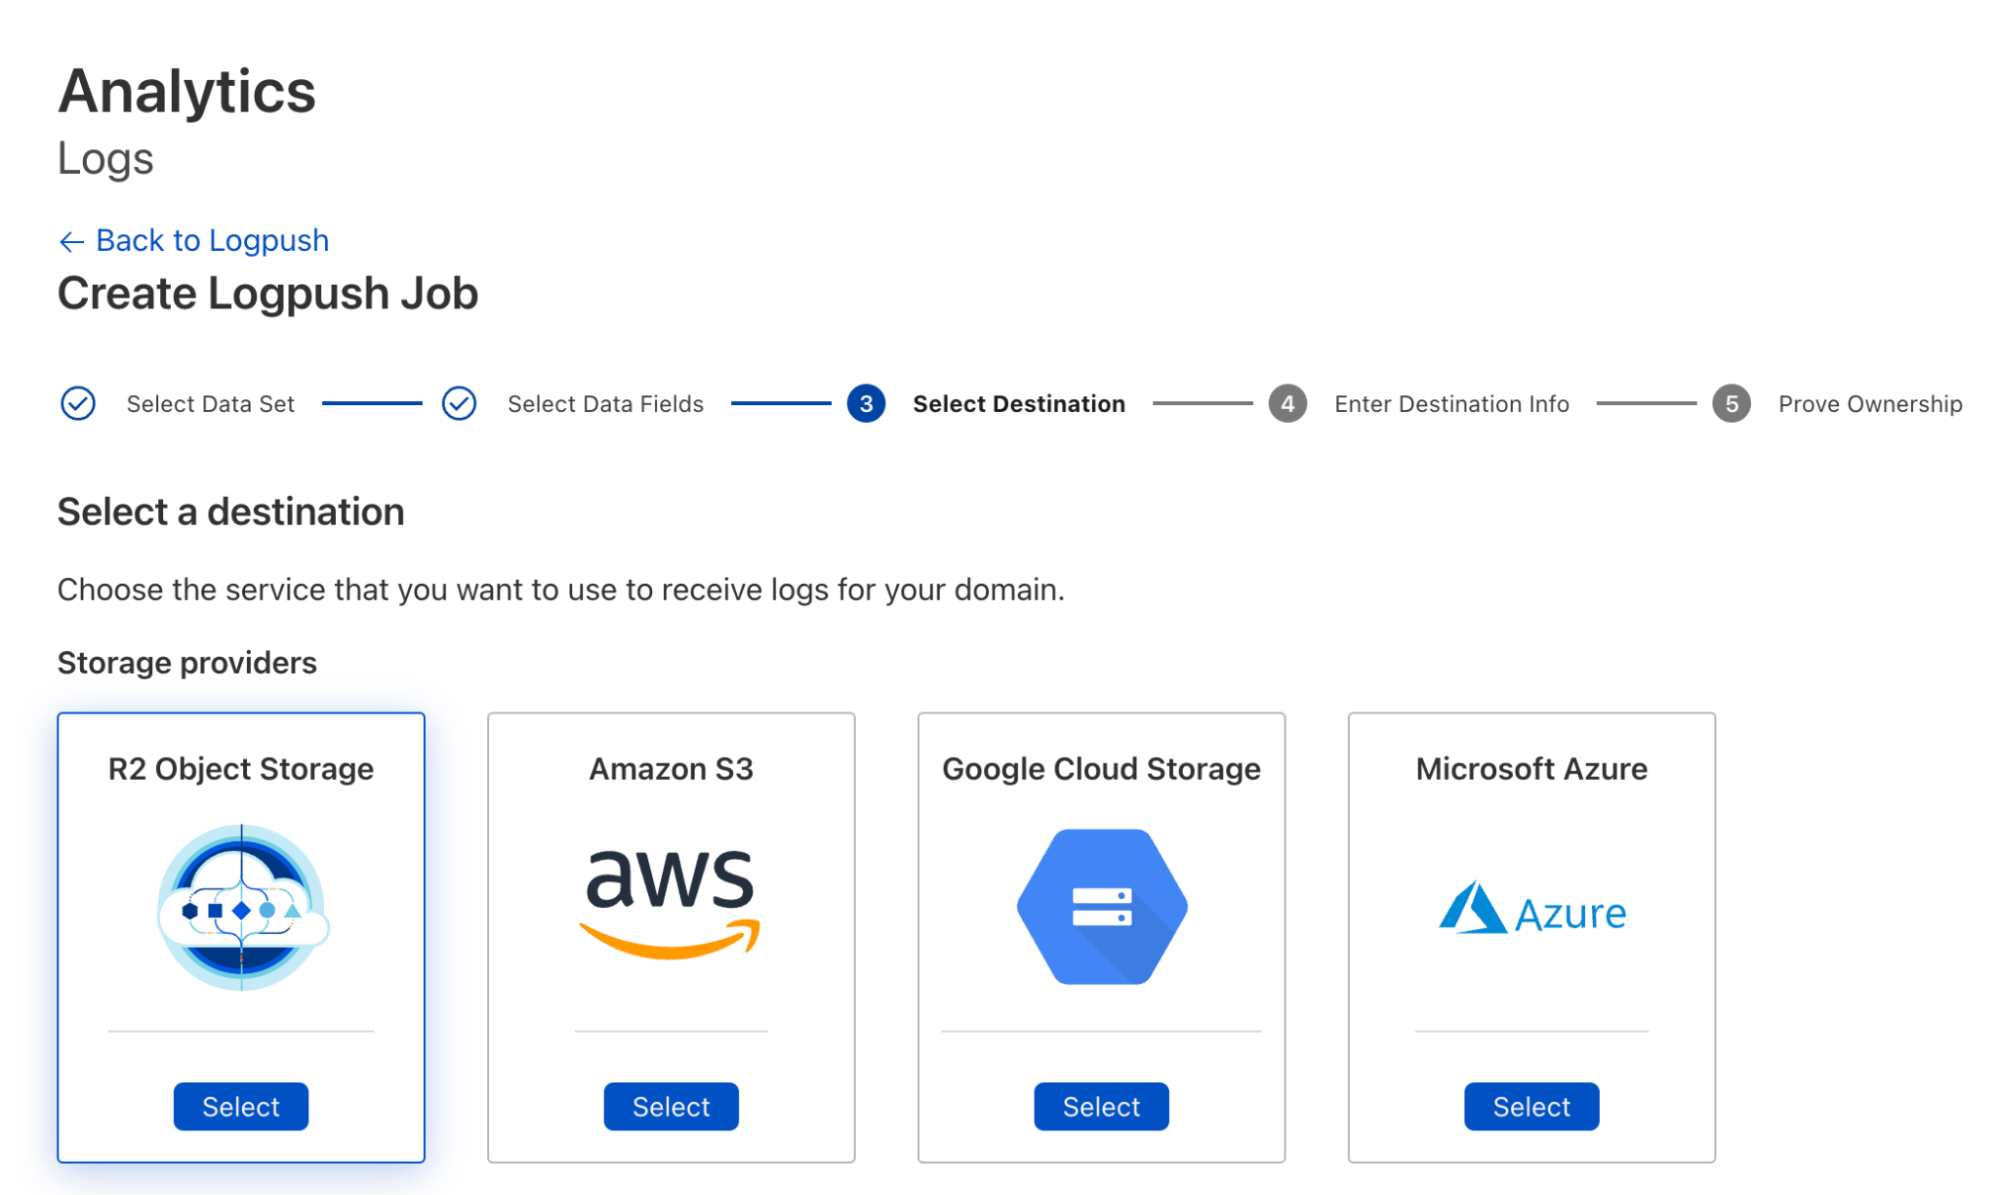
| Logpush: now lower cost and with more visibility | Logpush jobs can now be filtered to contain only logs of interest. Also, you can receive alerts when jobs are failing, as well as get statistics on the health of your jobs. | Enterprise |
Of course, you won’t have to wait a year for more products to become GA. We’ll be shipping betas and making products generally available throughout the year. And we’ll continue iterating on our products so that all of them become leaders.
As we said at the start of GA Week:
“But it’s not just about making products work and be available, it’s about making the best-of-breed. We ship early and iterate rapidly. We’ve done this over the years for WAF, DDoS mitigation, bot management, API protection, CDN and our developer platform. Today, analyst firms such as Gartner, Forrester and IDC recognize us as leaders in all those areas.”
Now, onwards to Birthday Week!