Today, we’re announcing Amazon ECS Managed Instances, a new compute option for Amazon Elastic Container Service (Amazon ECS) that enables developers to use the full range of Amazon Elastic Compute Cloud (Amazon EC2) capabilities while offloading infrastructure management responsibilities to Amazon Web Service (AWS). This new offering combines the operational simplicity of offloading infrastructure with the flexibility and control of Amazon EC2, which means customers can focus on building applications that drive innovation, while reducing total cost of ownership (TCO) and maintaining AWS best practices.
Customers running containerized workloads told us they want to combine the simplicity of serverless with the flexibility of self-managed EC2 instances. Although serverless options provide an excellent general-purpose solution, some applications require specific compute capabilities, such as GPU acceleration, particular CPU architectures, or enhanced networking performance. Additionally, customers with existing Amazon EC2 capacity investments through EC2 pricing options couldn’t fully use these commitments with serverless offerings.
Amazon ECS Managed Instances provides a fully managed container compute environment that supports a broad range of EC2 instance types and deep integration with AWS services. By default, it automatically selects the most cost-optimized EC2 instances for your workloads, but you can specify particular instance attributes or types when needed. AWS handles all aspects of infrastructure management, including provisioning, scaling, security patching, and cost optimization, enabling you to concentrate on building and running your applications.
Let’s try it out
Looking at the AWS Management Console experience for creating a new Amazon ECS cluster, I can see the new option for using ECS Managed Instances. Let’s take a quick tour of all the new options.
After I’ve selected Fargate and Managed Instances, I’m presented with two options. If I select Use ECS default, Amazon ECS will choose general purpose instance types based on grouping together pending Tasks, and picking the optimum instance type based on cost and resilience metrics. This is the most straightforward and recommended way to get started. Selecting Use custom – advanced opens up additional configuration parameters, where I can fine-tune the attributes of instances Amazon ECS will use.
By default, I see CPU and Memory as attributes, but I can select from 20 additional attributes to continue to filter the list of available instance types Amazon ECS can access.
After I’ve made my attribute selections, I see a list of all the instance types that match my choices.
From here, I can create my ECS cluster as usual and Amazon ECS will provision instances for me on my behalf based on the attributes and criteria I’ve defined in the previous steps.
Key features of Amazon ECS Managed Instances
With Amazon ECS Managed Instances, AWS takes full responsibility for infrastructure management, handling all aspects of instance provisioning, scaling, and maintenance. This includes implementing regular security patches initiated every 14 days (due to instance connection draining, the actual lifetime of the instance may be longer), with the ability to schedule maintenance windows using Amazon EC2 event windows to minimize disruption to your applications.
The service provides exceptional flexibility in instance type selection. Although it automatically selects cost-optimized instance types by default, you maintain the power to specify desired instance attributes when your workloads require specific capabilities. This includes options for GPU acceleration, CPU architecture, and network performance requirements, giving you precise control over your compute environment.
To help optimize costs, Amazon ECS Managed Instances intelligently manages resource utilization by automatically placing multiple tasks on larger instances when appropriate. The service continually monitors and optimizes task placement, consolidating workloads onto fewer instances to dry up, utilize and terminate idle (empty) instances, providing both high availability and cost efficiency for your containerized applications.
Integration with existing AWS services is seamless, particularly with Amazon EC2 features such as EC2 pricing options. This deep integration means that you can maximize existing capacity investments while maintaining the operational simplicity of a fully managed service.
Security remains a top priority with Amazon ECS Managed Instances. The service runs on Bottlerocket, a purpose-built container operating system, and maintains your security posture through automated security patches and updates. You can see all the updates and patches applied to the Bottlerocket OS image on the Bottlerocket website. This comprehensive approach to security keeps your containerized applications running in a secure, maintained environment.
Available now
Amazon ECS Managed Instances is available today in US East (North Virginia), US West (Oregon), Europe (Dublin), Africa (Cape Town), Asia Pacific (Singapore), and Asia Pacific (Tokyo) AWS Regions. You can start using Managed Instances through the AWS Management Console, AWS Command Line Interface (AWS CLI), or infrastructure as code (IaC) tools such as AWS Cloud Development Kit (AWS CDK) and AWS CloudFormation. You pay for the EC2 instances you use plus a management fee for the service.
To learn more about Amazon ECS Managed Instances, visit the documentation and get started simplifying your container infrastructure today.
Since announcing second-generation AWS Outposts racks in April with breakthrough performance and scalability, we’ve continued to innovate on behalf of our customers at the edge of the cloud. Today, we’re expanding AWS Outposts third-party storage integration program to include Dell PowerStore and HPE Alletra Storage MP B10000 systems, joining our list of existing integrations with NetApp on-premises enterprise storage arrays and Pure Storage FlashArray. This program makes it easy for customers to use AWS Outposts with third-party storage arrays through AWS native tooling. The solution integration is particularly important for organizations migrating VMware workloads to AWS who need to maintain their existing storage infrastructure during the transition, and for those who must meet strict data residency requirements by keeping their data on-premises while using AWS services.
This announcement builds upon two significant storage integration milestones we achieved in the past year. In December 2024, we introduced the ability to attach block data volumes from third-party storage arrays to Amazon EC2 instances on Outposts directly through the AWS Management Console. Then in July 2025, we enabled booting Amazon EC2 instances directly from these external storage arrays. Now, with the addition of Dell and HPE, customers have even more choice in how they integrate their on-premises storage investments with AWS Outposts.
Enhanced storage integration capabilities
Our third-party storage integration supports both data and boot volumes, offering two boot methods: iSCSI SANboot and Localboot. The iSCSI SANboot option enables both read-only and read-write boot volumes, while Localboot supports read-only boot volumes using either iSCSI or NVMe-over-TCP protocols. With this comprehensive approach, customers can centrally manage their storage resources while maintaining the consistent hybrid experience that Outposts provides.
Through the Amazon EC2 Launch Instance Wizard in the AWS Management Console, customers can configure their instances to use external storage from any of our supported partners. For boot volumes, we provide AWS-verified AMIs for Windows Server 2022 and Red Hat Enterprise Linux 9, with automation scripts available through AWS Samples to simplify the setup process.
Support for various Outposts configurations
All third-party storage integration features are supported on Outposts 2U servers and both generations of Outposts racks. Support for second-generation Outposts racks means customers can combine the enhanced performance of our latest EC2 instances on Outposts—including twice the vCPU, memory, and network bandwidth—with their preferred storage solutions. The integration works seamlessly with both our new simplified network scaling capabilities and specialized Amazon EC2 instances designed for ultra-low latency and high throughput workloads.
Things to know
Customers can begin using these capabilities today with their existing Outposts deployments or when ordering new Outposts through the AWS Management Console. If you are using third-party storage integration with Outposts servers, you can have either your onsite personnel or a third-party IT provider install the servers for you. After the Outposts servers are connected to your network, AWS will remotely provision compute and storage resources so you can start launching applications. For Outposts rack deployments, the process involves a setup where AWS technicians verify site conditions and network connectivity before the rack installation and activation. Storage partners assist with the implementation of the third-party storage components.
Third-party storage integration for Outposts with all compatible storage vendors is available at no additional charge in all AWS Regions where Outposts is supported. See the FAQs for Outposts servers and Outposts racks for the latest list of supported Regions.
Today, we’re excited to announce that Claude Sonnet 4.5, powered by Anthropic, is now available in Amazon Bedrock, a fully managed service that offers a choice of high- performing foundation models from leading AI companies. This new model builds upon Claude 4’s foundation to achieve state-of-the-art performance in coding and complex agentic applications.
Claude Sonnet 4.5 demonstrates advancements in agent capabilities, with enhanced performance in tool handling, memory management, and context processing. The model shows marked improvements in code generation and analysis, from identifying optimal improvements to exercising stronger judgment in refactoring decisions. It particularly excels at autonomous long-horizon coding tasks, where it can effectively plan and execute complex software projects spanning hours or days while maintaining consistent performance and reliability throughout the development cycle.
By using Claude Sonnet 4.5 in Amazon Bedrock, developers gain access to a fully managed service that not only provides a unified API for foundation models but ensures their data stays under complete control with enterprise-grade tools for security, and optimization.
Claude Sonnet 4.5 also seamlessly integrates with Amazon Bedrock AgentCore, enabling developers to maximize the model’s capabilities for building complex agents. AgentCore’s purpose-built infrastructure complements the model’s enhanced abilities in tool handling, memory management, and context understanding. Developers can leverage complete session isolation, 8-hour long-running support, and comprehensive observability features to deploy and monitor production-ready agents from autonomous security operations to complex enterprise workflows.
Business applications and use cases Beyond its technical capabilities, Sonnet 4.5 delivers practical business value through consistent performance and advanced problem-solving abilities. The model excels at producing and editing business documents while maintaining reliable performance across complex workflows.
The model demonstrates strength in several key industries:
Cybersecurity – Claude Sonnet 4.5 can be used to deploy agents that autonomously patch vulnerabilities before exploitation, shifting from reactive detection to proactive defense.
Finance – Sonnet 4.5 handles everything from entry-level financial analysis to advanced predictive analysis, helping transform manual audit preparation into intelligent risk management.
Research – Sonnet 4.5 can better handle tools, context, and deliver ready-to-go office files to drive expert analysis into final deliverables and actionable insights.
Sonnet 4.5 features in the Amazon Bedrock API Here are some highlights of Sonnet 4.5 in the Amazon Bedrock API:
Smart Context Window Management – The new API introduces intelligent handling when AI models reach their maximum capacity. Instead of returning errors when conversations get too long, Claude Sonnet 4.5 will now generate responses up to the available limit and clearly indicate why it stopped. This eliminates frustrating interruptions and allows users to maximize their available context window.
Tool Use Clearing for Efficiency – Claude Sonnet 4.5 enables automatic cleanup of tool interaction history during long conversations. When conversations involve multiple tool calls, the system can automatically remove older tool results while preserving recent ones. This keeps conversations efficient and prevents unnecessary token consumption, reducing costs while maintaining conversation quality.
Cross-Conversation Memory – A new memory capability enables Sonnet 4.5 to remember information across different conversations through the use of a local memory file. Users can explicitly ask the model to remember preferences, context, or important information that persists beyond a single chat session. This creates more personalized and contextually aware interactions while keeping the information safe within the local file.
With these new capabilities for managing context, developers can build AI agents capable of handling long-running tasks at higher intelligence without hitting context limits or losing critical information as frequently.
Getting started To begin working with Claude Sonnet 4.5, you can access it through Amazon Bedrock using the correct model ID. A good practice is to use the Amazon Bedrock Converse API to write code once and seamlessly switch between different models, making it easier to experiment with Sonnet 4.5 or any of the other models available in Amazon Bedrock.
Let’s see this in action with a simple example. I’m going to use the Amazon Bedrock Converse API to send a prompt to Sonnet 4.5. I start by importing the modules I’m going to use. For this short example, I only need AWS SDK for Python (Boto3) so I can create a BedrockRuntimeClient. I’m also importing the rich package so I can format my output nicely later on.
Following best practices, I create a boto3 session and create an Amazon Bedrock client from it instead of creating one directly. This gives you explicit control over configuration, improves thread safety, and makes your code more predictable and testable compared to relying on the default session.
I want to give the model something with a bit of complexity instead of asking a simple question to demonstrate the power of Sonnet 4.5. So I’m going to give the model the current state of an imaginary legacy monolithic application written in Java with a single database and ask for a digital transformation plan which includes a migration strategy, risk assessment, estimated timeline and key milestones and specific AWS services recommendations.
Because the prompt is quite long I put it in a text file locally and just load it up in code. I then set up the Amazon Bedrock converse payload setting the role to “user” to indicate that this is a message by the user of the application and add the prompt to the content.
This is where the magic happens! We put it all together and call Claude Sonnet 4.5 using its model ID. Well, kind of. You can only access Sonnet 4.5 through an inference profile. This defines which AWS Regions will process your model requests and helps manage throughput and performance.
For this demo, I’ll be using one of Amazon Bedrock’s system-defined cross-Region inference profiles, which automatically routes requests across multiple Regions for optimal performance.
Now I just need to print to the screen to see the results. This is where I use the rich package I imported earlier just so we may have a nicely formatted output as I’m expecting a long response for this one. I also save the output to a file so I can have it handy as something to share with my teams.
Ok, let’s check the results! As expected, Sonnet 4.5 worked through my requirements and provided extensive and deep guidance for my digital transformation plan that I could start putting into practice. It included an executive summary, a step-by-step migration strategy split into phases with time estimates, and even some code samples to seed the development process and start breaking things down into microservices. It also provided the business cases for introducing technology and recommended the correct AWS services for each scenario. Here are some highlights from the report.
Claude Sonnet 4.5 is able to maintain consistency while delivering creative solutions making it an ideal choice for businesses seeking to use AI for complex problem-solving and development tasks. Its enhanced capabilities in following directions and using tools effectively translate into more reliable and innovative solutions across various business contexts.
Things to know Claude Sonnet 4.5 represents a significant step forward in agent capabilities, particularly excelling in areas where consistent performance and creative problem-solving are essential. Its enhanced abilities in tool handling, memory management, and context processing make it particularly valuable across key industries such as finance, research, and cybersecurity. Whether handling complex development lifecycles, executing long-running tasks, or tackling business-critical workflows, Claude Sonnet 4.5 combines technical excellence with practical business value.
To learn more about Amazon Bedrock explore our self-paced Amazon Bedrock Workshop and discover how to use available models and their capabilities in your applications.
Today, I’m excited to announce the Nova Act extension — a tool that streamlines the path to build browser automation agents without leaving your IDE. The Nova Act extension integrates directly into IDEs like Visual Studio Code (VS Code), Kiro, and Cursor, helping you to create web-based automation agents using natural language with the Nova Act model.
Here’s a quick look at the Nova Act extension in Visual Studio Code:
The Nova Act extension is built on top of the Amazon Nova Act SDK (preview), our browser automation agents SDK (Software Development Kit). The Nova Act extension transforms traditional workflow development by eliminating context switching between coding and testing environments. You can now build, customize, and test production-grade agent scripts—all within your IDE—using features like natural language based generation, atomic cell-style editing, and integrated browser testing. This unified experience accelerates development velocity for tasks like form filling, QA automation, search, and complex multi-step workflows.
You can start with the Nova Act extension by describing your workflow in natural language to quickly generate an initial agent script. Customize it using the notebook-style builder mode to integrate APIs, data sources, and authentication, then validate it with local testing tools that simulate real-world conditions, including live step-by-step debugging of lengthy multi-step workflows.
Getting started with the Nova Act extension First, I need to install the Nova Act extension from the extension manager in my IDE.
I’m using Visual Studio Code, and after choosing Extensions, I enter Nova Act. Then, I select the extension and choose Install.
To get started, I need to obtain an API key. To do this, I navigate to the Nova Act page and follow the instructions to get the API key. I select Set API Key by opening the Command Palette with Cmd+Shift+P / Ctrl+Shift+P.
After I’ve entered my API key, I can try Builder Mode. This is a notebook-style builder mode that breaks complex automation scripts into modular cells, allowing me to test and debug each step individually before moving to the next.
Here, I can use the Nova Act SDK to build my agent. On the right side, I have a Live view panel to preview my agent’s actions in the browser and an Output panel to monitor execution logs, including the model’s thinking and actions.
To test the Nova Act extension, I choose Run all cells. This will start a new browser instance and act based on the given prompt.
I choose Fullscreen to see how browser automation works.
Another useful feature in Builder Mode is that I can navigate to the Output panel and select the cell to see its logs. This helps me debug or review logs specific to the cell I’m working on.
I can also select a template to get started.
Besides using Builder Mode, I can also chat with Nova Act to create a script for me. To do that, I select the extension and choose Generate Nova Act Script. The Nova Act extension opens a chat dialog in the right panel and automatically creates a script for me.
After I finish creating the script, I can choose Start Builder Mode, and the Nova Act extension will help me create a Python file in Builder Mode. This creates a seamless integration because I can switch between chat capability and Builder Mode.
In the chat interface, I see three workflow modes available:
Ask: Describe tasks in natural language to generate automation scripts
Edit: Refine or customize generated scripts before execution
Agent: Run, monitor, and interact with the AI agent performing the workflow
I can also add Context to provide relevant information about my active documents, instructions, problems, or additional Model Context Protocol (MCP) resources the agent can use, plus a screenshot of the current window. Providing this information helps the agent understand any specific requirements for the automation task.
The Nova Act extension also provides a set of predefined templates that I can access by entering / in the chat. These templates are predefined automation scenarios designed to help quickly generate scripts for common web tasks.
I can use these templates (for example, @novaAct /shopping [my requirements]) to get tailored Python scripts for my workflow. At launch, Nova Act extension provides the following templates:
/search: Performs search and information gathering
/qa: Automates quality assurance and testing workflows
/formfilling: Completes forms and data entry tasks
This extension transforms my agent development workflow by positioning Nova Act extension as a full-stack agent builder tool—a complete agent IDE for the entire development lifecycle. I can prototype with natural language, customize with modular scripting, and validate with local testing—all without leaving my IDE—ensuring production-grade scripts.
Things to know Here are key points to note:
Supported IDEs: At launch, the Nova Act extension is available for Visual Studio Code, Cursor, and Kiro, with additional IDE support planned
Open source: The Nova Act extension is available under the Apache 2.0 license, allowing for community contributions and customization
Pricing: The Nova Act extension is available at no charge.
Get started with Nova Act extension by installing it from your IDE’s extension marketplace or visiting the GitHub repository for documentation and examples.
Today we are adding Qwen models from Alibaba in Amazon Bedrock. With this launch, Amazon Bedrock continues to expand model choice by adding access to Qwen3 open weight foundation models (FMs) in a full managed, serverless way. This release includes four models: Qwen3-Coder-480B-A35B-Instruct, Qwen3-Coder-30B-A3B-Instruct, Qwen3-235B-A22B-Instruct-2507, and Qwen3-32B (Dense). Together, these models feature both mixture-of-experts (MoE) and dense architectures, providing flexible options for different application requirements.
Amazon Bedrock provides access to industry-leading FMs through a unified API without requiring infrastructure management. You can access models from multiple model providers, integrate models into your applications, and scale usage based on workload requirements. With Amazon Bedrock, customer data is never used to train the underlying models. With the addition of Qwen3 models, Amazon Bedrock offers even more options for use cases like:
Code generation and repository analysis with extended context understanding
Building agentic workflows that orchestrate multiple tools and APIs for business automation
Balancing AI costs and performance using hybrid thinking modes for adaptive reasoning
Qwen3 models in Amazon Bedrock These four Qwen3 models are now available in Amazon Bedrock, each optimized for different performance and cost requirements:
Qwen3-Coder-480B-A35B-Instruct – This is a mixture-of-experts (MoE) model with 480B total parameters and 35B active parameters. It’s optimized for coding and agentic tasks and achieves strong results in benchmarks such as agentic coding, browser use, and tool use. These capabilities make it suitable for repository-scale code analysis and multistep workflow automation.
Qwen3-Coder-30B-A3B-Instruct – This is a MoE model with 30B total parameters and 3B active parameters. Specifically optimized for coding tasks and instruction-following scenarios, this model demonstrates strong performance in code generation, analysis, and debugging across multiple programming languages.
Qwen3-235B-A22B-Instruct-2507 – This is an instruction-tuned MoE model with 235B total parameters and 22B active parameters. It delivers competitive performance across coding, math, and general reasoning tasks, balancing capability with efficiency.
Qwen3-32B (Dense) – This is a dense model with 32B parameters. It is suitable for real-time or resource-constrained environments such as mobile devices and edge computing deployments where consistent performance is critical.
Architectural and functional features in Qwen3 The Qwen3 models introduce several architectural and functional features:
MoE compared with dense architectures – MoE models such as Qwen3-Coder-480B-A35B, Qwen3-Coder-30B-A3B-Instruct, and Qwen3-235B-A22B-Instruct-2507, activate only part of the parameters for each request, providing high performance with efficient inference. The dense Qwen3-32B activates all parameters, offering more consistent and predictable performance.
Agentic capabilities – Qwen3 models can handle multi-step reasoning and structured planning in one model invocation. They can generate outputs that call external tools or APIs when integrated into an agent framework. The models also maintain extended context across long sessions. In addition, they support tool calling to allow standardized communication with external environments.
Hybrid thinking modes – Qwen3 introduces a hybrid approach to problem-solving, which supports two modes: thinking and non-thinking. The thinking mode applies step-by-step reasoning before delivering the final answer. This is ideal for complex problems that require deeper thought. Whereas the non-thinking mode provides fast and near-instant responses for less complex tasks where speed is more important than depth. This helps developers manage performance and cost trade-offs more effectively.
Long-context handling – The Qwen3-Coder models support extended context windows, with up to 256K tokens natively and up to 1 million tokens with extrapolation methods. This allows the model to process entire repositories, large technical documents, or long conversational histories within a single task.
When to use each model The four Qwen3 models serve distinct use cases. Qwen3-Coder-480B-A35B-Instruct is designed for complex software engineering scenarios. It’s suited for advanced code generation, long-context processing such as repository-level analysis, and integration with external tools. Qwen3-Coder-30B-A3B-Instruct is particularly effective for tasks such as code completion, refactoring, and answering programming-related queries. If you need versatile performance across multiple domains, Qwen3-235B-A22B-Instruct-2507 offers a balance, delivering strong general-purpose reasoning and instruction-following capabilities while leveraging the efficiency advantages of its MoE architecture. Qwen3-32B (Dense) is appropriate for scenarios where consistent performance, low latency, and cost optimization are important.
Getting started with Qwen models in Amazon Bedrock To begin using Qwen models, in the Amazon Bedrock console, I choose Model Access from the Configure and learn section of the navigation pane. I then navigate to the Qwen models to request access. In the Chat/Text Playground section of the navigation pane, I can quickly test the new Qwen models with my prompts.
To integrate Qwen3 models into my applications, I can use any AWS SDKs. The AWS SDKs include access to the Amazon Bedrock InvokeModel and Converse API. I can also use these model with any agentic framework that supports Amazon Bedrock and deploy the agents using Amazon Bedrock AgentCore. For example, here’s the Python code of a simple agent with tool access built using Strands Agents:
from strands import Agent
from strands_tools import calculator

agent = Agent(
    model="qwen.qwen3-coder-480b-instruct-v1:0",
    tools=[calculator]
)

agent("Tell me the square root of 42 ^ 9")

with open("function.py", 'r') as f:
    my_function_code = f.read()

agent(f"Help me optimize this Python function for better performance:\n\n{my_function_code}")
Now available Qwen models are available today in the following AWS Regions:
Qwen3-Coder-480B-A35B-Instruct is available in the US West (Oregon), Asia Pacific (Mumbai, Tokyo), and Europe (London, Stockholm) Regions.
Qwen3-Coder-30B-A3B-Instruct, Qwen3-235B-A22B-Instruct-2507, and Qwen3-32B are available in the US East (N. Virginia), US West (Oregon), Asia Pacific (Mumbai, Tokyo), Europe (Ireland, London, Milan, Stockholm), and South America (São Paulo) Regions.
In March, Amazon Web Services (AWS) became the first cloud service provider to deliver DeepSeek-R1 in a serverless way by launching it as a fully managed, generally available model in Amazon Bedrock. Since then, customers have used DeepSeek-R1’s capabilities through Amazon Bedrock to build generative AI applications, benefiting from the Bedrock’s robust guardrails and comprehensive tooling for safe AI deployment.
Today, I am excited to announce DeepSeek-V3.1 is now available as a fully managed foundation model in Amazon Bedrock. DeepSeek-V3.1 is a hybrid open weight model that switches between thinking mode (chain-of-thought reasoning) for detailed step-by-step analysis and non-thinking mode (direct answers) for faster responses.
According to DeepSeek, the thinking mode of DeepSeek-V3.1 achieves comparable answer quality with better results, stronger multi-step reasoning for complex search tasks, and big gains in thinking efficiency compared with DeepSeek-R1-0528.
DeepSeek-V3.1 model performance in tool usage and agent tasks has significantly improved through post-training optimization compared to previous DeepSeek models. DeepSeek-V3.1 also supports over 100 languages with near-native proficiency, including significantly improved capability in low-resource languages lacking large monolingual or parallel corpora. You can build global applications to deliver enhanced accuracy and reduced hallucinations compared to previous DeepSeek models, while maintaining visibility into its decision-making process.
Here are your key use cases using this model:
Code generation – DeepSeek-V3.1 excels in coding tasks with improvements in software engineering benchmarks and code agent capabilities, making it ideal for automated code generation, debugging, and software engineering workflows. It performs well on coding benchmarks while delivering high-quality results efficiently.
Agentic AI tools – The model features enhanced tool calling through post-training optimization, making it strong in tool usage and agentic workflows. It supports structured tool calling, code agents, and search agents, positioning it as a solid choice for building autonomous AI systems.
Enterprise applications – DeepSeek models are integrated into various chat platforms and productivity tools, enhancing user interactions and supporting customer service workflows. The model’s multilingual capabilities and cultural sensitivity make it suitable for global enterprise applications.
As I mentioned in my previous post, when implementing publicly available models, give careful consideration to data privacy requirements when implementing in your production environments, check for bias in output, and monitor your results in terms of data security, responsible AI, and model evaluation.
Get started with the DeepSeek-V3.1 model in Amazon Bedrock If you’re new to using the DeepSeek-V3.1 model, go to the Amazon Bedrock console, choose Model access under Bedrock configurations in the left navigation pane. To access the fully managed DeepSeek-V3.1 model, request access for DeepSeek-V3.1 in the DeepSeek section. You’ll then be granted access to the model in Amazon Bedrock.
Next, to test the DeepSeek-V3.1 model in Amazon Bedrock, choose Chat/Text under Playgrounds in the left menu pane. Then choose Select model in the upper left, and select DeepSeek as the category and DeepSeek-V3.1 as the model. Then choose Apply.
Using the selected DeepSeek-V3.1 model, I run the following prompt example about technical architecture decision.
Outline the high-level architecture for a scalable URL shortener service like bit.ly. Discuss key components like API design, database choice (SQL vs. NoSQL), how the redirect mechanism works, and how you would generate unique short codes.
You can turn the thinking on and off by toggling Model reasoning mode to generate a response’s chain of thought prior to the final conclusion.
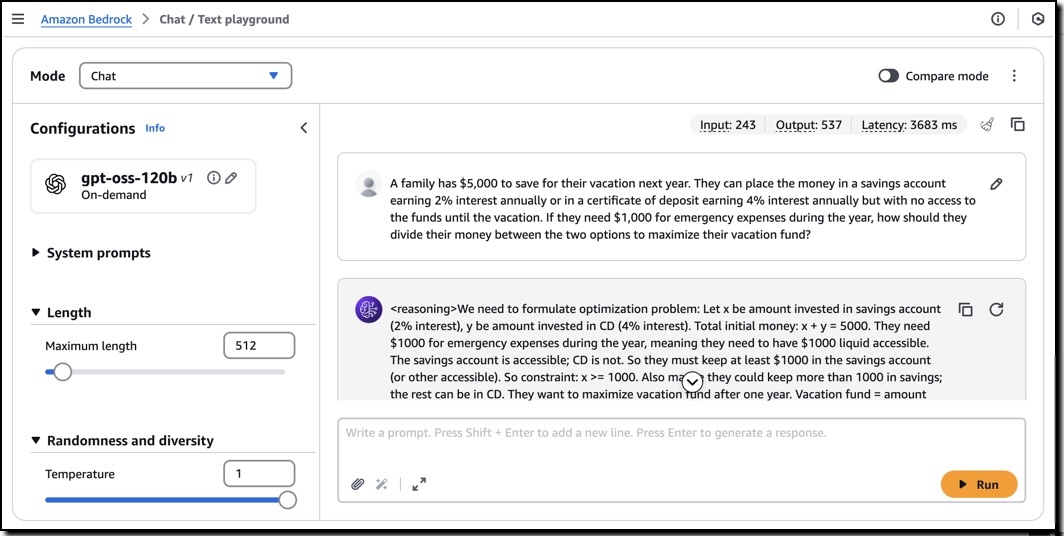
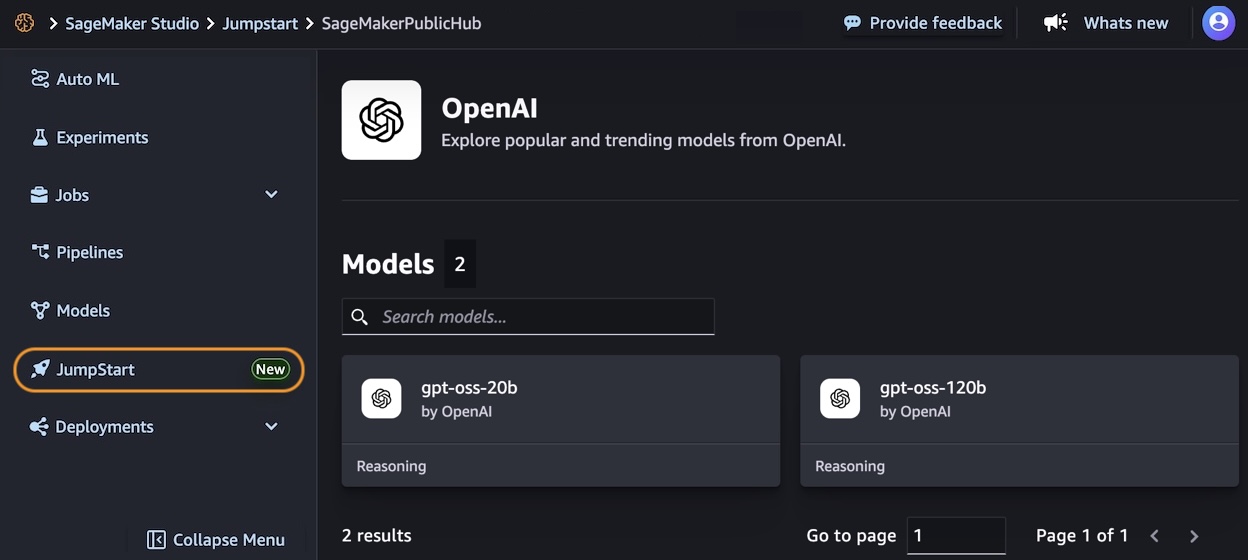
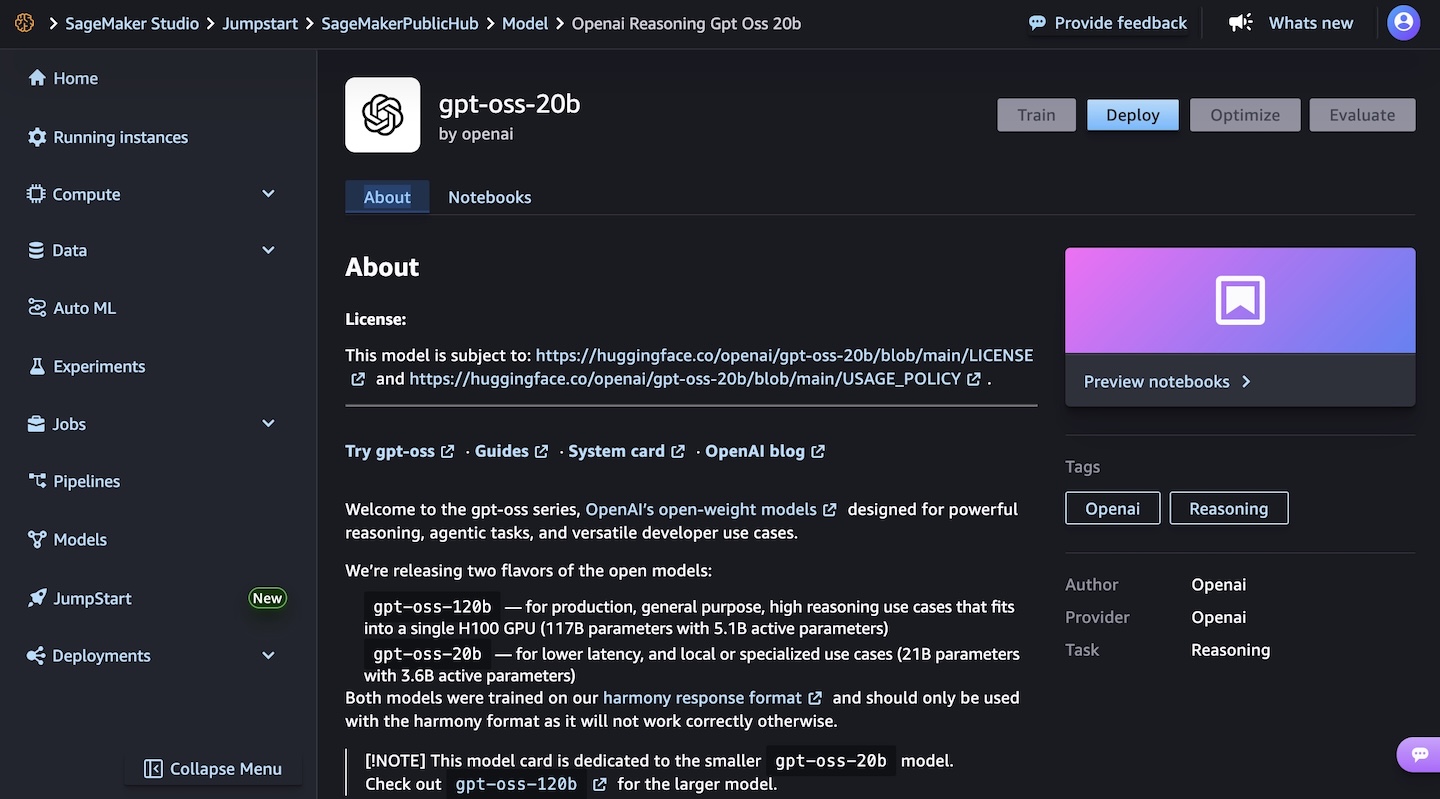
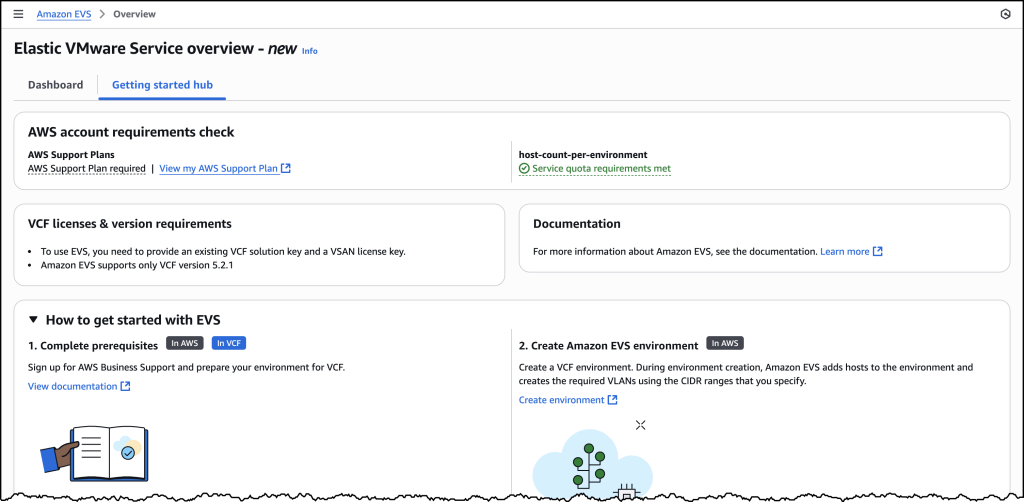
As someone who has been using macOS since 2001 and Amazon EC2 Mac instances since their launch 4 years ago, I’ve helped numerous customers scale their continuous integration and delivery (CI/CD) pipelines on AWS. Today, I’m excited to share that Amazon EC2 M4 and M4 Pro Mac instances are now generally available.
Development teams building applications for Apple platforms need powerful computing resources to handle complex build processes and run multiple iOS simulators simultaneously. As development projects grow larger and more sophisticated, teams require increased performance and memory capacity to maintain rapid development cycles.
Apple M4 Mac mini at the core EC2 M4 Mac instances (known as mac-m4.metal in the API) are built on Apple M4 Mac mini computers and are built on the AWS Nitro System. They feature Apple silicon M4 chips with 10-core CPU (four performance and six efficiency cores), 10-core GPU, 16-core Neural Engine, and 24 GB unified memory, delivering enhanced performance for iOS and macOS application build workloads. When building and testing applications, M4 Mac instances deliver up to 20 percent better application build performance compared to EC2 M2 Mac instances.
EC2 M4 Pro Mac (mac-m4pro.metal in the API) instances are powered by Apple silicon M4 Pro chips with 14-core CPU, 20-core GPU, 16-core Neural Engine, and 48 GB unified memory. These instances offer up to 15 percent better application build performance compared to EC2 M2 Pro Mac instances. The increased memory and computing power make it possible to run more tests in parallel using multiple device simulators.
Each M4 and M4 Pro Mac instance now comes with 2 TB of local storage, providing low-latency storage for improved caching and build and test performance.
For this demo, let’s start an M4 Pro instance from the console. I first allocate a dedicated host to run my instances. On the AWS Management Console, I navigate to EC2, then Dedicated Hosts, and I select Allocate Dedicated Host.
Then, I enter a Name tag and I select the Instance family (mac-m4pro) and an Instance type (mac-m4pro.metal). I choose one Availability Zone and I clear Host maintenance.
Alternatively, I can use the command line interface:
After the dedicated host is allocated to my account, I select the host I just allocated, then I select the Actions menu and choose Launch instance(s) onto host.
Notice the console gives you, among other information, the Latest supported macOS versions for this type of host. In this case, it’s macOS 15.6.
On the Launch an instance page, I enter a Name. I select a macOS Sequoia Amazon Machine Image (AMI). I make sure the Architecture is 64-bit Arm and the Instance type is mac-m4pro.metal.
The rest of the parameters arn’t specific to Amazon EC2 Mac: the network and storage configuration. When starting an instance for development use, make sure you select a volume with minimum 200 Gb or more. The default 100 Gb volume size isn’t sufficient to download and install Xcode.
When ready, I select the Launch instance orange button on the bottom of the page. The instance will rapidly appear as Running in the console. However, it might take up to 15 minutes to allow you to connect over SSH.
Alternatively, I can use this command:
aws ec2 run-instances \
    --image-id "ami-000420887c24e4ac8"  \ # AMI ID depends on the region !
    --instance-type "mac-m4pro.metal"   \
    --key-name "my-ssh-key-name"        \
    --network-interfaces '{"AssociatePublicIpAddress":true,"DeviceIndex":0,"Groups":["sg-0c2f1a3e01b84f3a3"]}' \ # Security Group ID depends on your config
    --tag-specifications '{"ResourceType":"instance","Tags":[{"Key":"Name","Value":"My Dev Server"}]}' \
    --placement '{"HostId":"h-0e984064522b4b60b","Tenancy":"host"}' \ # Host ID depends on your config
    --private-dns-name-options '{"HostnameType":"ip-name","EnableResourceNameDnsARecord":true,"EnableResourceNameDnsAAAARecord":false}' \
    --count "1"
Install Xcode from the Terminal After the instance is reachable, I can connect using SSH to it and install my development tools. I use xcodeinstall to download and install Xcode 16.4.
From my laptop, I open a session with my Apple developer credentials:
# on my laptop, with permissions to access AWS Secret Manager
» xcodeinstall authenticate -s eu-central-1

Retrieving Apple Developer Portal credentials...
Authenticating...
🔐 Two factors authentication is enabled, enter your 2FA code: 067785
✅ Authenticated with MFA.
I connect to the EC2 Mac instance I just launched. Then, I download and install Xcode:
» ssh [email protected]

Warning: Permanently added '44.234.115.119' (ED25519) to the list of known hosts.
Last login: Sat Aug 23 13:49:55 2025 from 81.49.207.77

    ┌───┬──┐   __|  __|_  )
    │ ╷╭╯╷ │   _|  (     /
    │  └╮  │  ___|\___|___|
    │ ╰─┼╯ │  Amazon EC2
    └───┴──┘  macOS Sequoia 15.6

ec2-user@ip-172-31-54-74 ~ % brew tap sebsto/macos
==> Tapping sebsto/macos
Cloning into '/opt/homebrew/Library/Taps/sebsto/homebrew-macos'...
remote: Enumerating objects: 227, done.
remote: Counting objects: 100% (71/71), done.
remote: Compressing objects: 100% (57/57), done.
remote: Total 227 (delta 22), reused 63 (delta 14), pack-reused 156 (from 1)
Receiving objects: 100% (227/227), 37.93 KiB | 7.59 MiB/s, done.
Resolving deltas: 100% (72/72), done.
Tapped 1 formula (13 files, 61KB).

ec2-user@ip-172-31-54-74 ~ % brew install xcodeinstall
==> Fetching downloads for: xcodeinstall
==> Fetching sebsto/macos/xcodeinstall
==> Downloading https://github.com/sebsto/xcodeinstall/releases/download/v0.12.0/xcodeinstall-0.12.0.arm64_sequoia.bottle.tar.gz
Already downloaded: /Users/ec2-user/Library/Caches/Homebrew/downloads/9f68a7a50ccfdc479c33074716fd654b8528be0ec2430c87bc2b2fa0c36abb2d--xcodeinstall-0.12.0.arm64_sequoia.bottle.tar.gz
==> Installing xcodeinstall from sebsto/macos
==> Pouring xcodeinstall-0.12.0.arm64_sequoia.bottle.tar.gz
🍺  /opt/homebrew/Cellar/xcodeinstall/0.12.0: 8 files, 55.2MB
==> Running `brew cleanup xcodeinstall`...
Disable this behaviour by setting `HOMEBREW_NO_INSTALL_CLEANUP=1`.
Hide these hints with `HOMEBREW_NO_ENV_HINTS=1` (see `man brew`).
==> No outdated dependents to upgrade!

ec2-user@ip-172-31-54-74 ~ % xcodeinstall download -s eu-central-1 -f -n "Xcode 16.4.xip"
                        Downloading Xcode 16.4
100% [============================================================] 2895 MB / 180.59 MBs
[ OK ]
✅ Xcode 16.4.xip downloaded

ec2-user@ip-172-31-54-74 ~ % xcodeinstall install -n "Xcode 16.4.xip"
Installing...
[1/6] Expanding Xcode xip (this might take a while)
[2/6] Moving Xcode to /Applications
[3/6] Installing additional packages... XcodeSystemResources.pkg
[4/6] Installing additional packages... CoreTypes.pkg
[5/6] Installing additional packages... MobileDevice.pkg
[6/6] Installing additional packages... MobileDeviceDevelopment.pkg
[ OK ]
✅ file:///Users/ec2-user/.xcodeinstall/download/Xcode%2016.4.xip installed

ec2-user@ip-172-31-54-74 ~ % sudo xcodebuild -license accept

ec2-user@ip-172-31-54-74 ~ %
Things to know Select an EBS volume with minimum 200 Gb for development purposes. The 100 Gb default volume size is not sufficient to install Xcode. I usually select 500 Gb. When you increase the EBS volume size after the launch of the instance, remember to resize the APFS filesystem.
Alternatively, you can choose to install your development tools and framework on the low-latency local 2 Tb SSD drive available in the Mac mini. Pay attention that the content of that volume is bound to the instance lifecycle, not the dedicated host. This means that everything will be deleted from the internal SSD storage when you stop and restart the instance.
Themac-m4.metal and mac-m4pro.metal instances support macOS Sequoia 15.6 and later.
You can migrate your existing EC2 Mac instances when the migrated instance runs macOS 15 (Sequoia). Create a custom AMI from your existing instance and start an M4 or M4 Pro instance from this AMI.
Finally, I suggest checking the tutorials I wrote to help you to get started with Amazon EC2 Mac:
Pricing and availability EC2 M4 and M4 Pro Mac instances are currently available in US East (N. Virginia) and US West (Oregon), with additional Regions planned for the future.
Amazon EC2 Mac instances are available for purchase as Dedicated Hosts through the On-Demand and Savings Plans pricing models. Billing for EC2 Mac instances is per second with a 24-hour minimum allocation period to comply with the Apple macOS Software License Agreement. At the end of the 24-hour minimum allocation period, the host can be released at any time with no further commitment
As someone who works closely with Apple developers, I’m curious to see how you’ll use these new instances to accelerate your development cycles. The combination of increased performance, enhanced memory capacity, and integration with AWS services opens new possibilities for teams building applications for iOS, macOS, iPadOS, tvOS, watchOS, and visionOS platforms. Beyond application development, Apple silicon’s Neural Engine makes these instances cost-effective candidates for running machine learning (ML) inference workloads. I’ll be discussing this topic in detail at AWS re:Invent 2025, where I’ll share benchmarks and best practices for optimizing ML workloads on EC2 Mac instances.
To learn more about EC2 M4 and M4 Pro Mac instances, visit the Amazon EC2 Mac Instances page or refer to the EC2 Mac documentation. You can start using these instances today to modernize your Apple development workflows on AWS.
When building serverless applications, developers typically focus on three key areas to streamline their testing experience: unit testing, integration testing, and debugging resources running in the cloud. Although AWS Serverless Application Model Command Line Interface (AWS SAM CLI) provides excellent local unit testing capabilities for individual Lambda functions, developers working with event-driven architectures that involve multiple AWS services, such as Amazon Simple Queue Service (Amazon SQS), Amazon EventBridge, and Amazon DynamoDB, need a comprehensive solution for local integration testing. Although LocalStack provided local emulation of AWS services, developers had to previously manage it as a standalone tool, requiring complex configuration and frequent context switching between multiple interfaces, which slowed down the development cycle.
LocalStack integration in AWS Toolkit for VS Code To address these challenges, we’re introducing LocalStack integration so developers can connect AWS Toolkit for VS Code directly to LocalStack endpoints. With this integration, developers can test and debug serverless applications without switching between tools or managing complex LocalStack setups. Developers can now emulate end-to-end event-driven workflows involving services such as Lambda, Amazon SQS, and EventBridge locally, without needing to manage multiple tools, perform complex endpoint configurations, or deal with service boundary issues that previously required connecting to cloud resources.
The key benefit of this integration is that AWS Toolkit for VS Code can now connect to custom endpoints such as LocalStack, something that wasn’t possible before. Previously, to point AWS Toolkit for VS Code to their LocalStack environment, developers had to perform manual configuration and context switching between tools.
Getting started with LocalStack in VS Code is straightforward. Developers can begin with the LocalStack Free version, which provides local emulation for core AWS services ideal for early-stage development and testing. Using the guided application walkthrough in VS Code, developers can install LocalStack directly from the toolkit interface, which automatically installs the LocalStack extension and guides them through the setup process. When it’s configured, developers can deploy serverless applications directly to the emulated environment and test their functions locally, all without leaving their IDE.
Let’s try it out First, I’ll update my copy of the AWS Toolkit for VS Code to the latest version. Once, I’ve done this, I can see a new option when I go to Application Builder and click on Walkthrough of Application Builder. This allows me to install LocalStack with a single click.
Once I’ve completed the setup for LocalStack, I can start it up from the status bar and then I’ll be able to select LocalStack from the list of my configured AWS profiles. In this illustration, I am using Application Composer to build a simple serverless architecture using Amazon API Gateway, Lambda, and DynamoDB. Normally, I’d deploy this to AWS using AWS SAM. In this case, I’m going to use the same AWS SAM command to deploy my stack locally.
I just do `sam deploy –guided –profile localstack` from the command line and follow the usual prompts. Deploying to LocalStack using AWS SAM CLI provides the exact same experience I’m used to when deploying to AWS. In the screenshot below, I can see the standard output from AWS SAM, as well as my new LocalStack resources listed in the AWS Toolkit Explorer.
I can even go in to a Lambda function and edit the function code I’ve deployed locally!
Over on the LocalStack website, I can login and take a look at all the resources I have running locally. In the screenshot below, you can see the local DynamoDB table I just deployed.
Enhanced development workflow These new capabilities complement our recently launched console-to-IDE integration and remote debugging features, creating a comprehensive development experience that addresses different testing needs throughout the development lifecycle. AWS SAM CLI provides excellent local testing for individual Lambda functions, handling unit testing scenarios effectively. For integration testing, the LocalStack integration enables testing of multiservice workflows locally without the complexity of AWS Identity and Access Management (IAM) permissions, Amazon Virtual Private Cloud (Amazon VPC) configurations, or service boundary issues that can slow down development velocity.
When developers need to test using AWS services in development environments, they can use our remote debugging capabilities, which provide full access to Amazon VPC resources and IAM roles. This tiered approach frees up developers to focus on business logic during early development phases using LocalStack, then seamlessly transition to cloud-based testing when they need to validate against AWS service behaviors and configurations. The integration eliminates the need to switch between multiple tools and environments, so developers can identify and fix issues faster while maintaining the flexibility to choose the right testing approach for their specific needs.
Now available You can start using these new features through the AWS Toolkit for VS Code by updating to v3.74.0. The LocalStack integration is available in all commercial AWS Regions except AWS GovCloud (US) Regions. To learn more, visit the AWS Toolkit for VS Code and Lambda documentation.
For developers who need broader service coverage or advanced capabilities, LocalStack offers additional tiers with expanded features. There are no additional costs from AWS for using this integration.
These enhancements represent another significant step forward in our ongoing commitment to simplifying the serverless development experience. Over the past year, we’ve focused on making VS Code the tool of choice for serverless developers, and this LocalStack integration continues that journey by providing tools for developers to build and test serverless applications more efficiently than ever before.
Summer has drawn to a close here in Utrecht, where I live in the Netherlands. In two weeks, I’ll be attending AWS Community Day 2025, hosted at the Kinepolis Jaarbeurs Utrecht on September 24. The single-day event will bring together over 500 cloud practitioners from across the Netherlands, featuring 25 breakout sessions across five technical tracks. The day will begin with virtual keynotes at 9:00 AM, followed by parallel breakout sessions focused on practical implementations of serverless architectures and container optimization strategies, providing valuable insights regardless of experience level.
Last year’s AWS Community Day Netherlands 2024 brought together a diverse group of cloud practitioners, speakers, and AWS enthusiasts who contributed to making the community-led conference a valuable knowledge-sharing platform. If you’re planning to attend, feel free to find me there to discuss AWS services or share your cloud implementation experiences!
Let’s look at last week’s new announcements.
Last week’s launches
AWS Transform assessments now includes detached storage analysis – AWS Transform has expanded its assessment capabilities to analyze on-premises detached storage infrastructure, helping customers determine migration total cost of ownership (TCO). The assessment now evaluates Storage Area Network (SAN), Network Attached Storage (NAS), file servers, object storage, and virtual environments, providing migration recommendations to appropriate AWS services including Amazon S3, Amazon EBS, and Amazon FSx. The tool delivers a comprehensive TCO comparison between current and AWS environments, along with performance and cost optimization recommendations. With storage accounting for up to 45% of total migration opportunities, this enhancement helps customers visualize various AWS migration options. AWS Transform assessment is available in US East (N. Virginia) and Europe (Frankfurt) Regions.
Amazon Bedrock introduces Global Cross-Region inference for Anthropic Claude Sonnet 4 – Anthropic’s Claude Sonnet 4 model in Amazon Bedrock now supports Global cross-Region inference, allowing inference requests to route to any supported commercial AWS Region for processing. This enhancement optimizes available resources and enables higher model throughput by distributing traffic across multiple Regions. Previously, you could select cross-Region inference profiles tied to specific geographies (US, EU, or APAC). The new Global cross-Region inference profile provides additional flexibility for generative AI use cases that don’t require geography-specific processing, helping manage unplanned traffic bursts and increase model throughput. For detailed implementation guidance, visit the Amazon Bedrock documentation.
Amazon Neptune Database adds Public Endpoints support – Amazon Neptune now supports Public Endpoints, enabling direct connections to Neptune databases from outside the VPC without complex networking configurations. This feature helps developers securely access their graph databases from development desktops without requiring VPN connections or bastion hosts, while maintaining security through IAM authentication, VPC security groups, and encryption in transit. Public Endpoints can be enabled for Neptune clusters running engine version 1.4.6 or above through the AWS Management Console, AWS CLI, or AWS SDK. The feature is available at no additional cost beyond standard Neptune pricing in all AWS Regions where Neptune Database is offered. Implementation details are available in the Amazon Neptune documentation.
ECS Exec now available in AWS Management Console – Amazon ECS now supports ECS Exec directly in the AWS Management Console, enabling secure, interactive shell access to running containers without requiring inbound ports or SSH key management. Previously available only through API, CLI, or SDKs, this feature streamlines troubleshooting by allowing container access directly from the console interface. You can enable ECS Exec when creating or updating services and standalone tasks, then connect to containers by selecting “Connect” on the task details page, which opens an interactive session through CloudShell. The console also displays the underlying AWS CLI command for use in local terminals. This feature is available in all AWS commercial Regions and documented in the ECS developer guide.
Organizational Notification Configurations for AWS User Notifications now generally available – AWS User Notifications now supports Organizational Notification Configurations, helping AWS Organizations users centrally configure and view notifications across their organization. Management accounts or delegated administrators can configure notifications for specific organizational units or all accounts in an organization. The service supports configuring notifications for any supported Amazon EventBridge event, such as console sign-ins without MFA, with notifications appearing in the admin’s Console Notifications Center and AWS Console Mobile Application. User Notifications supports up to five delegated administrators and is available in all AWS Regions where AWS User Notifications is offered. For implementation details, visit the AWS User Notifications user guide.
Upcoming AWS events Check your calendar and sign up for upcoming AWS events.
AWS Summits – Join free online and in-person events that bring the cloud computing community together to connect, collaborate, and learn about AWS. Register in your nearest city: Zurich (September 11), Los Angeles (September 17), and Bogotá (October 9).
AWS re:Invent 2025 – Join us in Las Vegas between December 1–5 as cloud pioneers gather from across the globe for the latest AWS innovations, peer-to-peer learning, expert-led discussions, and invaluable networking opportunities. Don’t forget to explore the event catalog.
AWS Community Days – Join community-led conferences that feature technical discussions, workshops, and hands-on labs led by expert AWS users and industry leaders from around the world: Baltic (September 10), Aotearoa (September 18), South Africa (September 20), Bolivia (September 20), Portugal (September 27).
Today, we’re announcing the general availability of Amazon Elastic Compute Cloud (Amazon EC2) general-purpose M8i and M8i-Flex instances powered by custom Intel Xeon 6 processors available only on AWS with sustained all-core 3.9 GHz turbo frequency. These instances deliver the highest performance and fastest memory bandwidth among comparable Intel processors in the cloud. They also deliver up to 15 percent better price performance, up to 20 percent higher performance, and 2.5 times more memory bandwidth compared to previous generation M7i and M7i-Flex instances.
M8i and M8i-flex instances are ideal for running general purpose workloads such as general web application servers, virtual desktops, batch processing, microservices, databases, and enterprise applications. In terms of performance, these instances are specifically up to 60 percent faster for NGINX web applications, up to 30 percent faster for PostgreSQL database workloads, and up to 40 percent faster for AI deep learning recommendation models compared to M7i and M7i-Flex instances.
As like R8i and R8i-Flex instances, these instances use the new sixth generation AWS Nitro Cards, delivering up to two times more network and Amazon Elastic Block Storage (Amazon EBS) bandwidth compared to the previous generation instances. It greatly improves network throughput for workloads handling small packets such as web, application, and gaming servers. They also support bandwidth configuration with 25 percent allocation adjustments between network and Amazon EBS bandwidth, enabling better database performance, query processing, and logging speeds.
M8i instances M8i instances provide up to 384 vCPUs and 1.5 TB memory including bare metal instances that provide dedicated access to the underlying physical hardware. These SAP-certified instances help you to run large application servers and databases, gaming servers, CPU-based inference, and video streaming that need the largest instance sizes or high CPU continuously.
Here are the specs for M8i instances:
Instance size
vCPUs
Memory (GiB)
Network bandwidth (Gbps)
EBS bandwidth (Gbps)
m8i.large
2
8
Up to 12.5
Up to 10
m8i.xlarge
4
16
Up to 12.5
Up to 10
m8i.2xlarge
8
32
Up to 15
Up to 10
m8i.4xlarge
16
64
Up to 15
Up to 10
m8i.8xlarge
32
128
15
10
m8i.12xlarge
48
192
22.5
15
m8i.16xlarge
64
256
30
20
m8i.24xlarge
96
384
40
30
m8i.32xlarge
128
512
50
40
m8i.48xlarge
192
768
75
60
m8i.96xlarge
384
1536
100
80
m8i.metal-48xl
192
768
75
60
m8i.metal-96xl
384
1536
100
80
M8i-Flex instances M8i-Flex instances are a lower-cost variant of the M8i instances, with 5 percent better price performance at 5 percent lower prices. They’re designed for workloads that benefit from the latest generation performance but don’t fully utilize all compute resources. These instances can reach up to the full CPU performance 95 percent of the time.
Here are the specs for the M8i-Flex instances:
Instance size
vCPUs
Memory (GiB)
Network bandwidth (Gbps)
EBS bandwidth (Gbps)
m8i-flex.large
2
8
Up to 12.5
Up to 10
m8i-flex.xlarge
4
16
Up to 12.5
Up to 10
m8i-flex.2xlarge
8
32
Up to 15
Up to 10
m8i-flex.4xlarge
16
64
Up to 15
Up to 10
m8i-flex.8xlarge
32
128
Up to 15
Up to 10
m8i-flex.12xlarge
48
192
Up to 22.5
Up to 15
m8i-flex.16xlarge
64
256
Up to 30
Up to 20
If you’re currently using earlier generations of general-purpose instances, you can adopt M8i-Flex instances without having to make changes to your application or your workload.
As I was preparing for this week’s roundup, I couldn’t help but reflect on how database technology has evolved over the past decade. It’s fascinating to see how architectural decisions made years ago continue to shape the way we build modern applications. This week brings a special milestone that perfectly captures this evolution in cloud database innovation as Amazon Aurora celebrated 10 years of database innovation.
Amazon Web Services (AWS) Vice President Swami Sivasubramanian reflected on LinkedIn about his journey with Amazon Aurora, calling it “one of the most interesting products” he’s worked on. When Aurora launched in 2015, it shifted the database landscape by separating compute and storage. Now trusted by hundreds of thousands of customers across industries, Aurora has grown from a MySQL-compatible database to a comprehensive platform featuring innovations such as Aurora DSQL, serverless capabilities, I/O-Optimized pricing, zero-ETL integrations, and generative AI support. Last week’s celebration on August 21 highlighted this decade-long transformation that continues to simplify database scaling for customers.
Last week’s launches
In addition to the inspiring celebrations, here are some AWS launches that caught my attention:
AWS Billing and Cost Management introduces customizable Dashboards — This new feature consolidates cost data into visual dashboards with multiple widget types and visualization options, combining information from Cost Explorer, Savings Plans, and Reserved Instance reports to help organizations track spending patterns and share standardized cost reporting across accounts.
Amazon Bedrock simplifies access to OpenAI open weight models — AWS has streamlined access to OpenAI’s open weight models (gpt-oss-120b and gpt-oss-20b), making them automatically available to all users without manual activation while maintaining administrator control through IAM policies and service control policies.
Amazon Bedrock adds batch inference support for Claude Sonnet 4 and GPT-OSS models —This feature provides asynchronous processing of multiple inference requests with 50 percent lower pricing compared to on-demand inference, optimizing high-volume AI tasks such as document analysis, content generation, and data extraction with Amazon CloudWatch metrics for tracking batch workload progress
AWS launching Amazon EC2 R8i and R8i-flex memory-optimized instances — Powered by custom Intel Xeon 6 processors, these new instances deliver up to 20 percent better performance and 2.5 times higher memory throughput than R7i instances, making them ideal for memory-intensive workloads like databases and big data analytics, with R8i-flex offering additional cost savings for applications that don’t fully utilize compute resources.
Amazon S3 introduces batch data verification feature — A new capability in S3 Batch Operations that offers efficient verification of billions of objects using multiple checksum algorithms without downloading or restoring data, generating detailed integrity reports for compliance and audit purposes regardless of storage class or object size.
Other AWS news
Here are some additional projects and blog posts that you might find interesting:
Amazon introduces DeepFleet foundation models for multirobot coordination — Trained on millions of hours of data from Amazon fulfillment and sortation centers, these pioneering models predict future traffic patterns for robot fleets, representing the first foundation models specifically designed for coordinating multiple robots in complex environments.
Building Strands Agents with a few lines of code — A new blog demonstrates how to build multi-agent AI systems with a few lines of code, enabling specialized agents to collaborate seamlessly, handle complex workflows, and share information through standardized protocols for creating distributed AI systems beyond individual agent capabilities.
AWS Security Incident Response introduces ITSM integrations — New integrations with Jira and ServiceNow provide bidirectional synchronization of security incidents, comments, and attachments, streamlining response while maintaining existing processes, with open source code available on GitHub for customization and extension to additional IT service management (ITSM) platforms.
Finding root-causes using a network digital twin graph and agentic AI — A detailed blog post shows how AWS collaborated with NTT DOCOMO to build a network digital twin using graph databases and autonomous AI agents, helping telecom operators to move beyond correlation to identify true root causes of complex network issues, predict future problems, and improve overall service reliability.
Upcoming AWS events Check your calendars and sign up for these upcoming AWS events:
AWS Summits — Join free online and in-person events that bring the cloud computing community together to connect, collaborate, and learn about AWS. Register in your nearest city: Toronto (September 4), Los Angeles (September 17), and Bogotá (October 9).
AWS re:Invent 2025 — This flagship annual conference is coming to Las Vegas from December 1–5. The event catalog is now available. Mark your calendars for this not to be missed gathering of the AWS community.
AWS Community Days — Join community-led conferences that feature technical discussions, workshops, and hands-on labs led by expert AWS users and industry leaders from around the world: Adria (September 5), Baltic (September 10), Aotearoa (September 18), South Africa (September 20), Bolivia (September 20), Portugal (September 27).
Today, we’re announcing general availability of the new eighth generation, memory optimized Amazon Elastic Compute Cloud (Amazon EC2) R8i and R8i-flex instances powered by custom Intel Xeon 6 processors, available only on AWS. They deliver the highest performance and fastest memory bandwidth among comparable Intel processors in the cloud. These instances deliver up to 15 percent better price performance, 20 percent higher performance, and 2.5 times more memory throughput compared to previous generation instances.
With these improvements, R8i and R8i-flex instances are ideal for a variety of memory intensive workloads such as SQL and NoSQL databases, distributed web scale in-memory caches (Memcached and Redis), in-memory databases such as SAP HANA, and real-time big data analytics (Apache Hadoop and Apache Spark clusters). For a majority of the workloads that don’t fully utilize the compute resources, the R8i-flex instances are a great first choice to achieve an additional 5 percent better price performance and 5 percent lower prices.
Improvements made to both instances compared to their predecessors In terms of performance, R8i and R8i-flex instances offer 20 percent better performance than R7i instances, with even higher gains for specific workloads. These instances are up to 30 percent faster for PostgreSQL databases, up to 60 percent faster for NGINX web applications, and up to 40 percent faster for AI deep learning recommendation models compared to previous generation R7i instances, with sustained all-core turbo frequency now reaching 3.9 GHz (compared to 3.2 GHz in the previous generation). They also feature a 4.6x larger L3 cache and significantly better memory throughput, offering 2.5 times higher memory bandwidth than the seventh generation. With this higher performance across all the vectors, you can run a greater number of workloads while keeping costs down.
R8i instances now scale up to 96xlarge with up to 384 vCPUs and 3TB memory (versus 48xlarge sizes in the seventh generation), helping you to scale up database applications. R8i instances are SAP certified to deliver 142,100 aSAPS, which is highest among all comparable machines in on premises and cloud environments, delivering exceptional performance for your mission-critical SAP workloads. R8i-flex instances offer the most common sizes, from large to 16xlarge, and are a great first choice for applications that don’t fully utilize all compute resources. Both R8i and R8i-flex instances use the latest sixth generation AWS Nitro Cards, delivering up to two times more network and Amazon Elastic Block Storage (Amazon EBS) bandwidth compared to the previous generation, which greatly improves network throughput for workloads handling small packets, such as web, application, and gaming servers.
R8i and R8i-flex instances also support bandwidth configuration with 25 percent allocation adjustments between network and Amazon EBS bandwidth, enabling better database performance, query processing, and logging speeds. Additional enhancements include FP16 datatype support for Intel AMX to support workloads such as deep learning training and inference and other artificial intelligence and machine learning (AI/ML) applications.
The specs for the R8i instances are as follows.
Instance size
vCPUs
Memory (GiB)
Network bandwidth (Gbps)
EBS bandwidth (Gbps)
r8i.large
2
16
Up to 12.5
Up to 10
r8i.xlarge
4
32
Up to 12.5
Up to 10
r8i.2xlarge
8
64
Up to 15
Up to 10
r8i.4xlarge
16
128
Up to 15
Up to 10
r8i.8xlarge
32
256
15
10
r8i.12xlarge
48
384
22.5
15
r8i.16xlarge
64
512
30
20
r8i.24xlarge
96
768
40
30
r8i.32xlarge
128
1024
50
40
r8i.48xlarge
192
1536
75
60
r8i.96xlarge
384
3072
100
80
r8i.metal-48xl
192
1536
75
60
r8i.metal-96xl
384
3072
100
80
The specs for the R8i-flex instances are as follows.
Instance size
vCPUs
Memory (GiB)
Network bandwidth (Gbps)
EBS bandwidth (Gbps)
r8i-flex.large
2
16
Up to 12.5
Up to 10
r8i-flex.xlarge
4
32
Up to 12.5
Up to 10
r8i-flex.2xlarge
8
64
Up to 15
Up to 10
r8i-flex.4xlarge
16
128
Up to 15
Up to 10
r8i-flex.8xlarge
32
256
Up to 15
Up to 10
r8i-flex.12xlarge
48
384
Up to 22.5
Up to 15
r8i-flex.16xlarge
64
512
Up to 30
Up to 20
When to use the R8i-flex instances As stated earlier, R8i-flex instances are more affordable versions of the R8i instances, offering up to 5 percent better price performance at 5 percent lower prices. They’re designed for workloads that benefit from the latest generation performance but don’t fully use all compute resources. These instances can reach up to the full CPU performance 95 percent of the time and work well for in-memory databases, distributed web scale cache stores, mid-size in-memory analytics, real-time big data analytics, and other enterprise applications. R8i instances are recommended for more demanding workloads that need sustained high CPU, network, or EBS performance such as analytics, databases, enterprise applications, and web scale in-memory caches.
Available now R8i and R8i-flex instances are available today in the US East (N. Virginia), US East (Ohio), US West (Oregon), and Europe (Spain) AWS Regions. As usual with Amazon EC2, you pay only for what you use. For more information, refer to Amazon EC2 Pricing. Check out the full collection of memory optimized instances to help you start migrating your applications.
Let me start this week’s update with something I’m especially excited about – the upcoming BeSA (Become a Solutions Architect) cohort. BeSA is a free mentoring program that I host along with a few other AWS employees on a volunteer basis to help people excel in their cloud careers. Last week, the instructors’ lineup was finalized for the 6-week cohort starting September 6. The cohort will focus on migration and modernization on AWS. Visit the BeSA website to learn more.
Another highlight for me last week was the announcement of six new AWS Heroes for their technical leadership and exceptional contributions to the AWS community. Read the full announcement to learn more about these community leaders.
Last week’s launches Here are some launches from last week that got my attention:
Amazon EC2 Single GPU P5 instances are now generally available — You can right-size your machine learning (ML) and high performance computing (HPC) resources cost-effectively with the new Amazon Elastic Compute Cloud (Amazon EC2) P5 instance size with one NVIDIA H100 GPU.
AWS Advanced Go Driver is generally available — You can now use the AWS Advanced Go Driver with Amazon Relational Database Service (Amazon RDS) and Amazon Aurora PostgreSQL-Compatible and MySQL-Compatible database clusters for faster switchover and failover times, Federated Authentication, and authentication with AWS Secrets Manager or AWS Identity and Access Management (IAM). You can install the PostgreSQL and MySQL packages for Windows, Mac, or Linux, by following the installation guides in GitHub.
Expanded support for Cilium with Amazon EKS Hybrid Nodes — Cilium is a Cloud Native Computing Foundation (CNCF) graduated project that provides core networking capabilities for Kubernetes workloads. Now, you can receive support from AWS for a broader set of Cilium features when using Cilium with Amazon EKS Hybrid Nodes including application ingress, in-cluster load balancing, Kubernetes network policies, and kube-proxy replacement mode.
Amazon SageMaker AI now supports P6e-GB200 UltraServers — You can accelerate training and deployment of foundational models (FMs) at trillion-parameter scale by using up to 72 NVIDIA Blackwell GPUs under one NVLink domain with the new P6e-GB200 UltraServer support in Amazon SageMaker HyperPod and Model Training.
Amazon SageMaker HyperPod now supports fine-grained quota allocation of compute resources, topology-aware-scheduling of LLM tasks and custom Amazon Machine Images (AMIs) — You can allocate fine-grained compute quota for GPU, Trainium accelerator, vCPU, and vCPU memory within an instance to optimize compute resource distribution. With topology-aware scheduling, you can schedule your large language model (LLM) tasks on an optimal network topology to minimize network communication and enhance training efficiency. Using custom AMIs, you can deploy clusters with pre-configured, security-hardened environments that meet your specific organizational requirements.
Additional updates Here are some additional news items and blog posts that I found interesting:
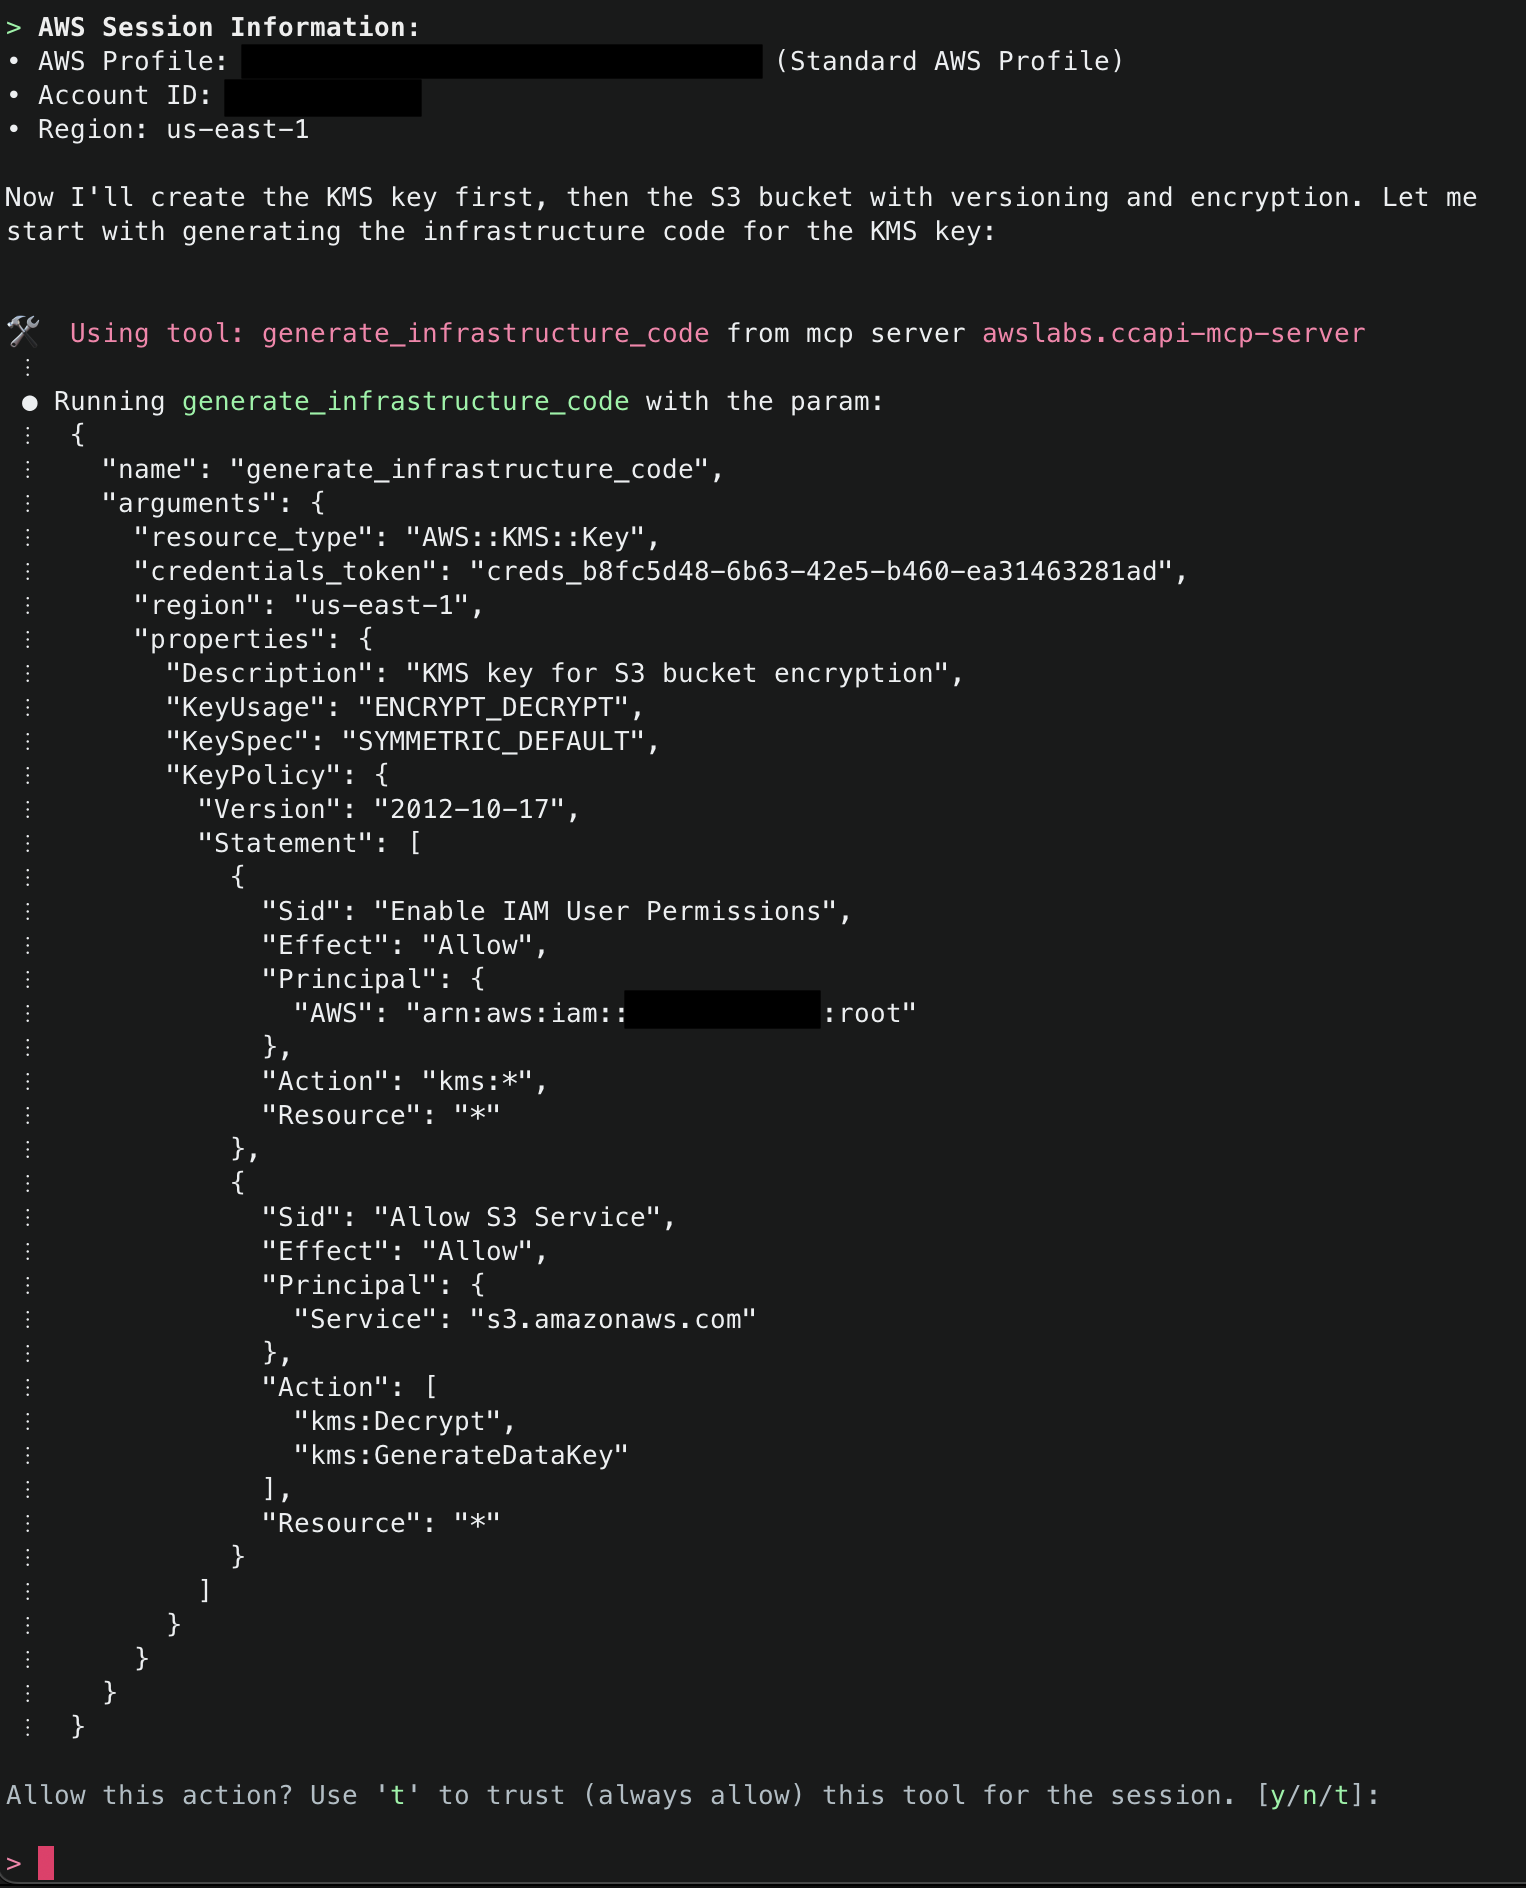
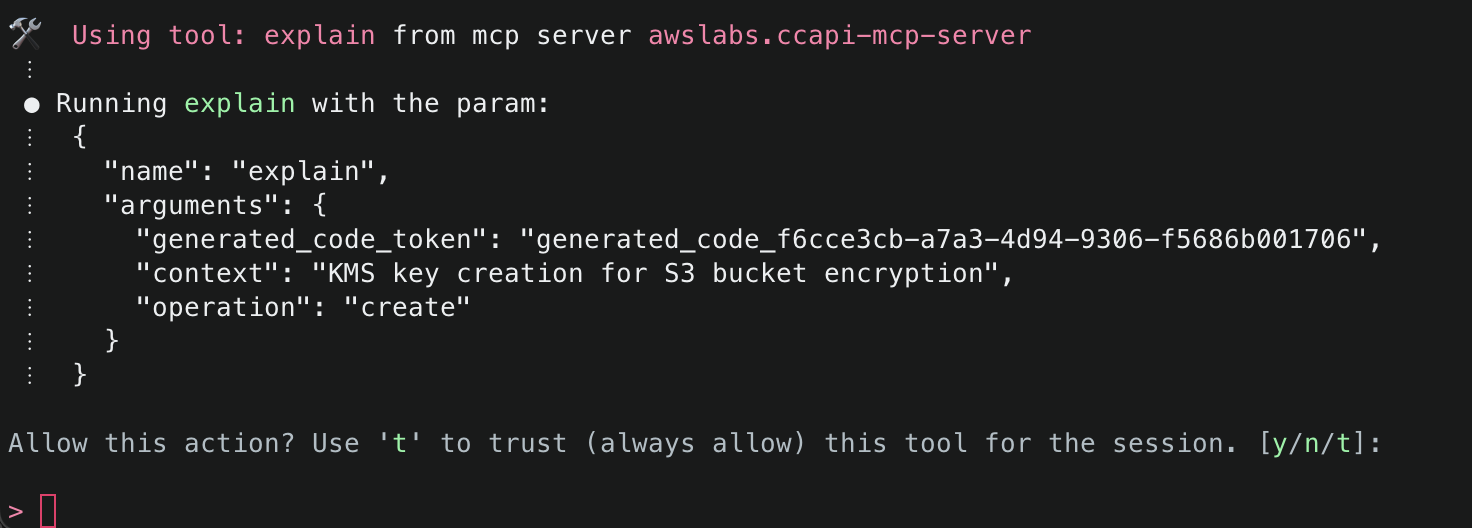
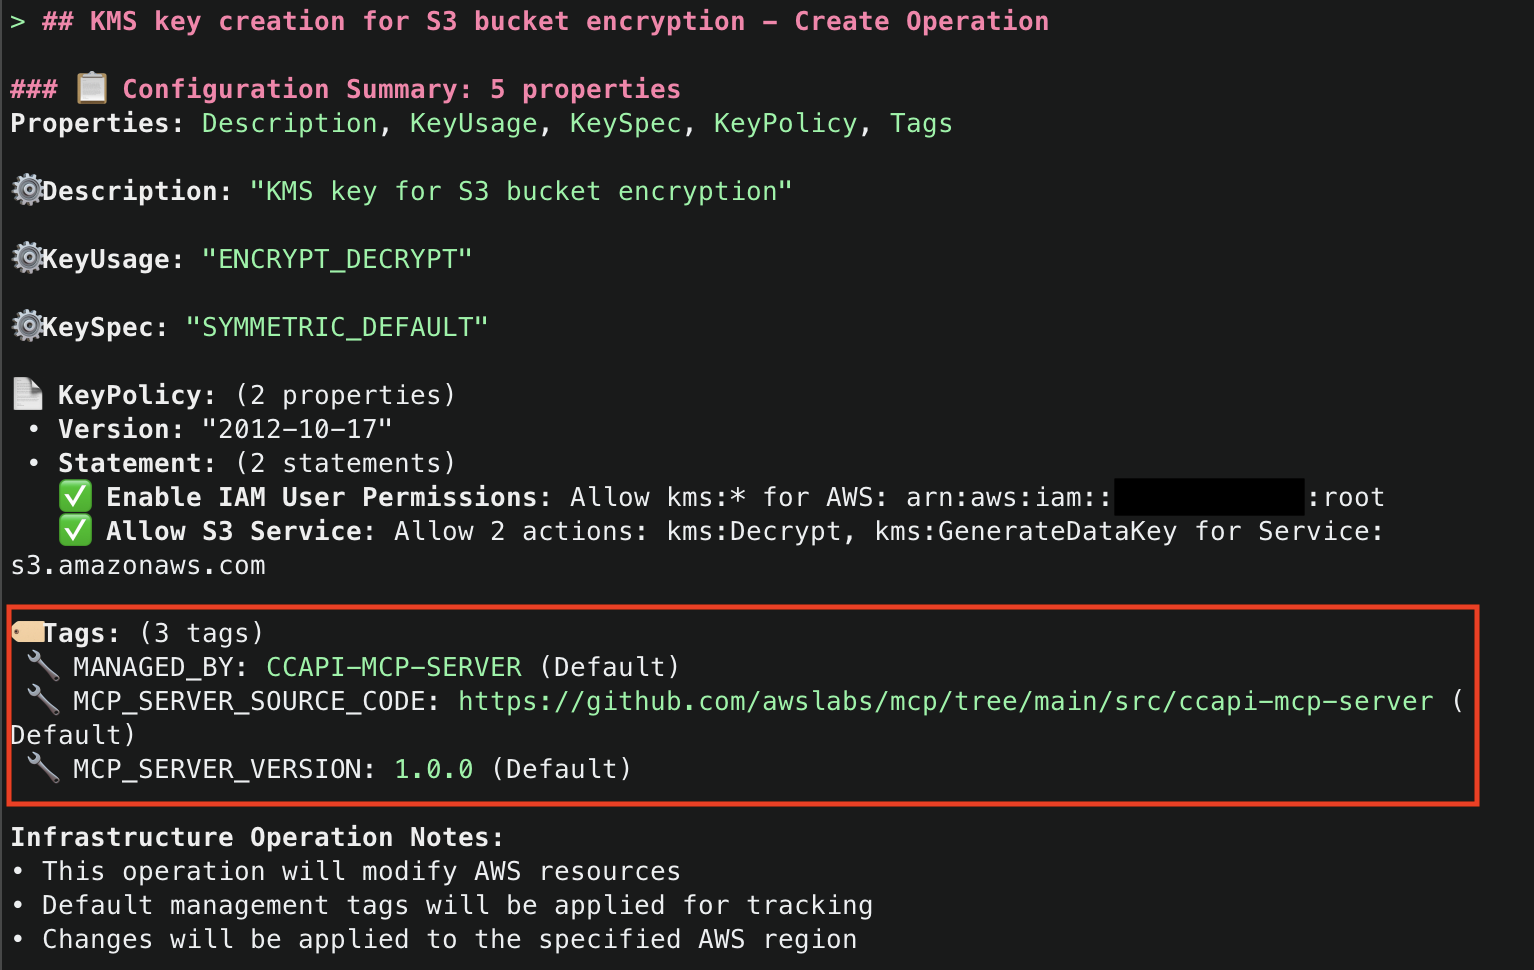
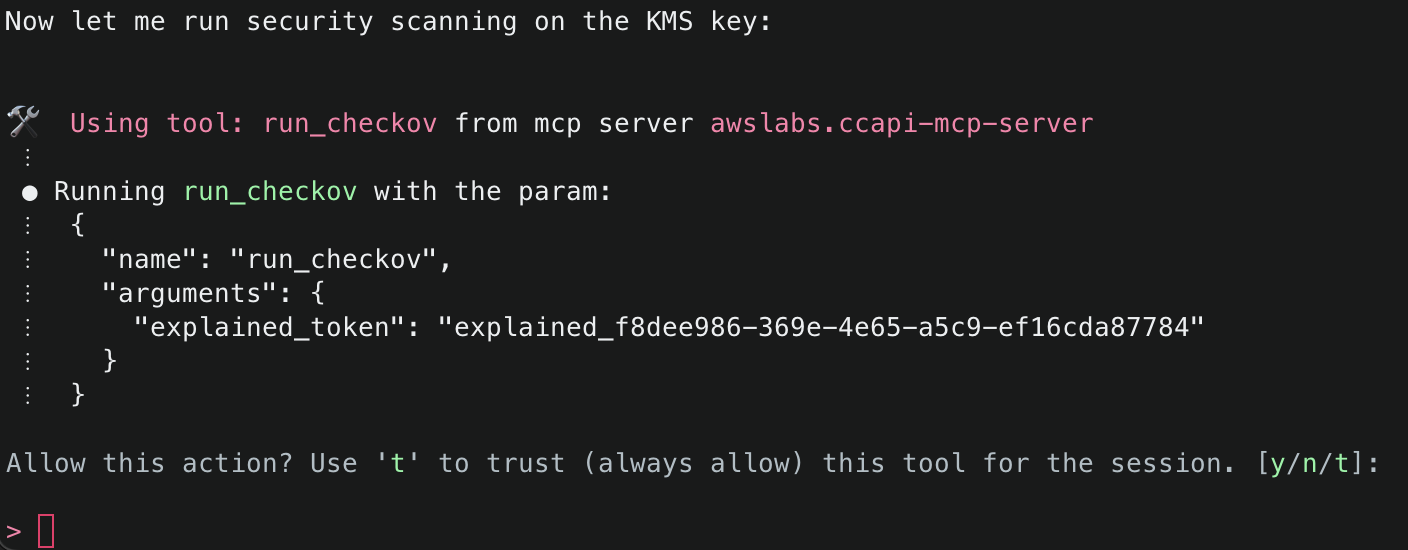
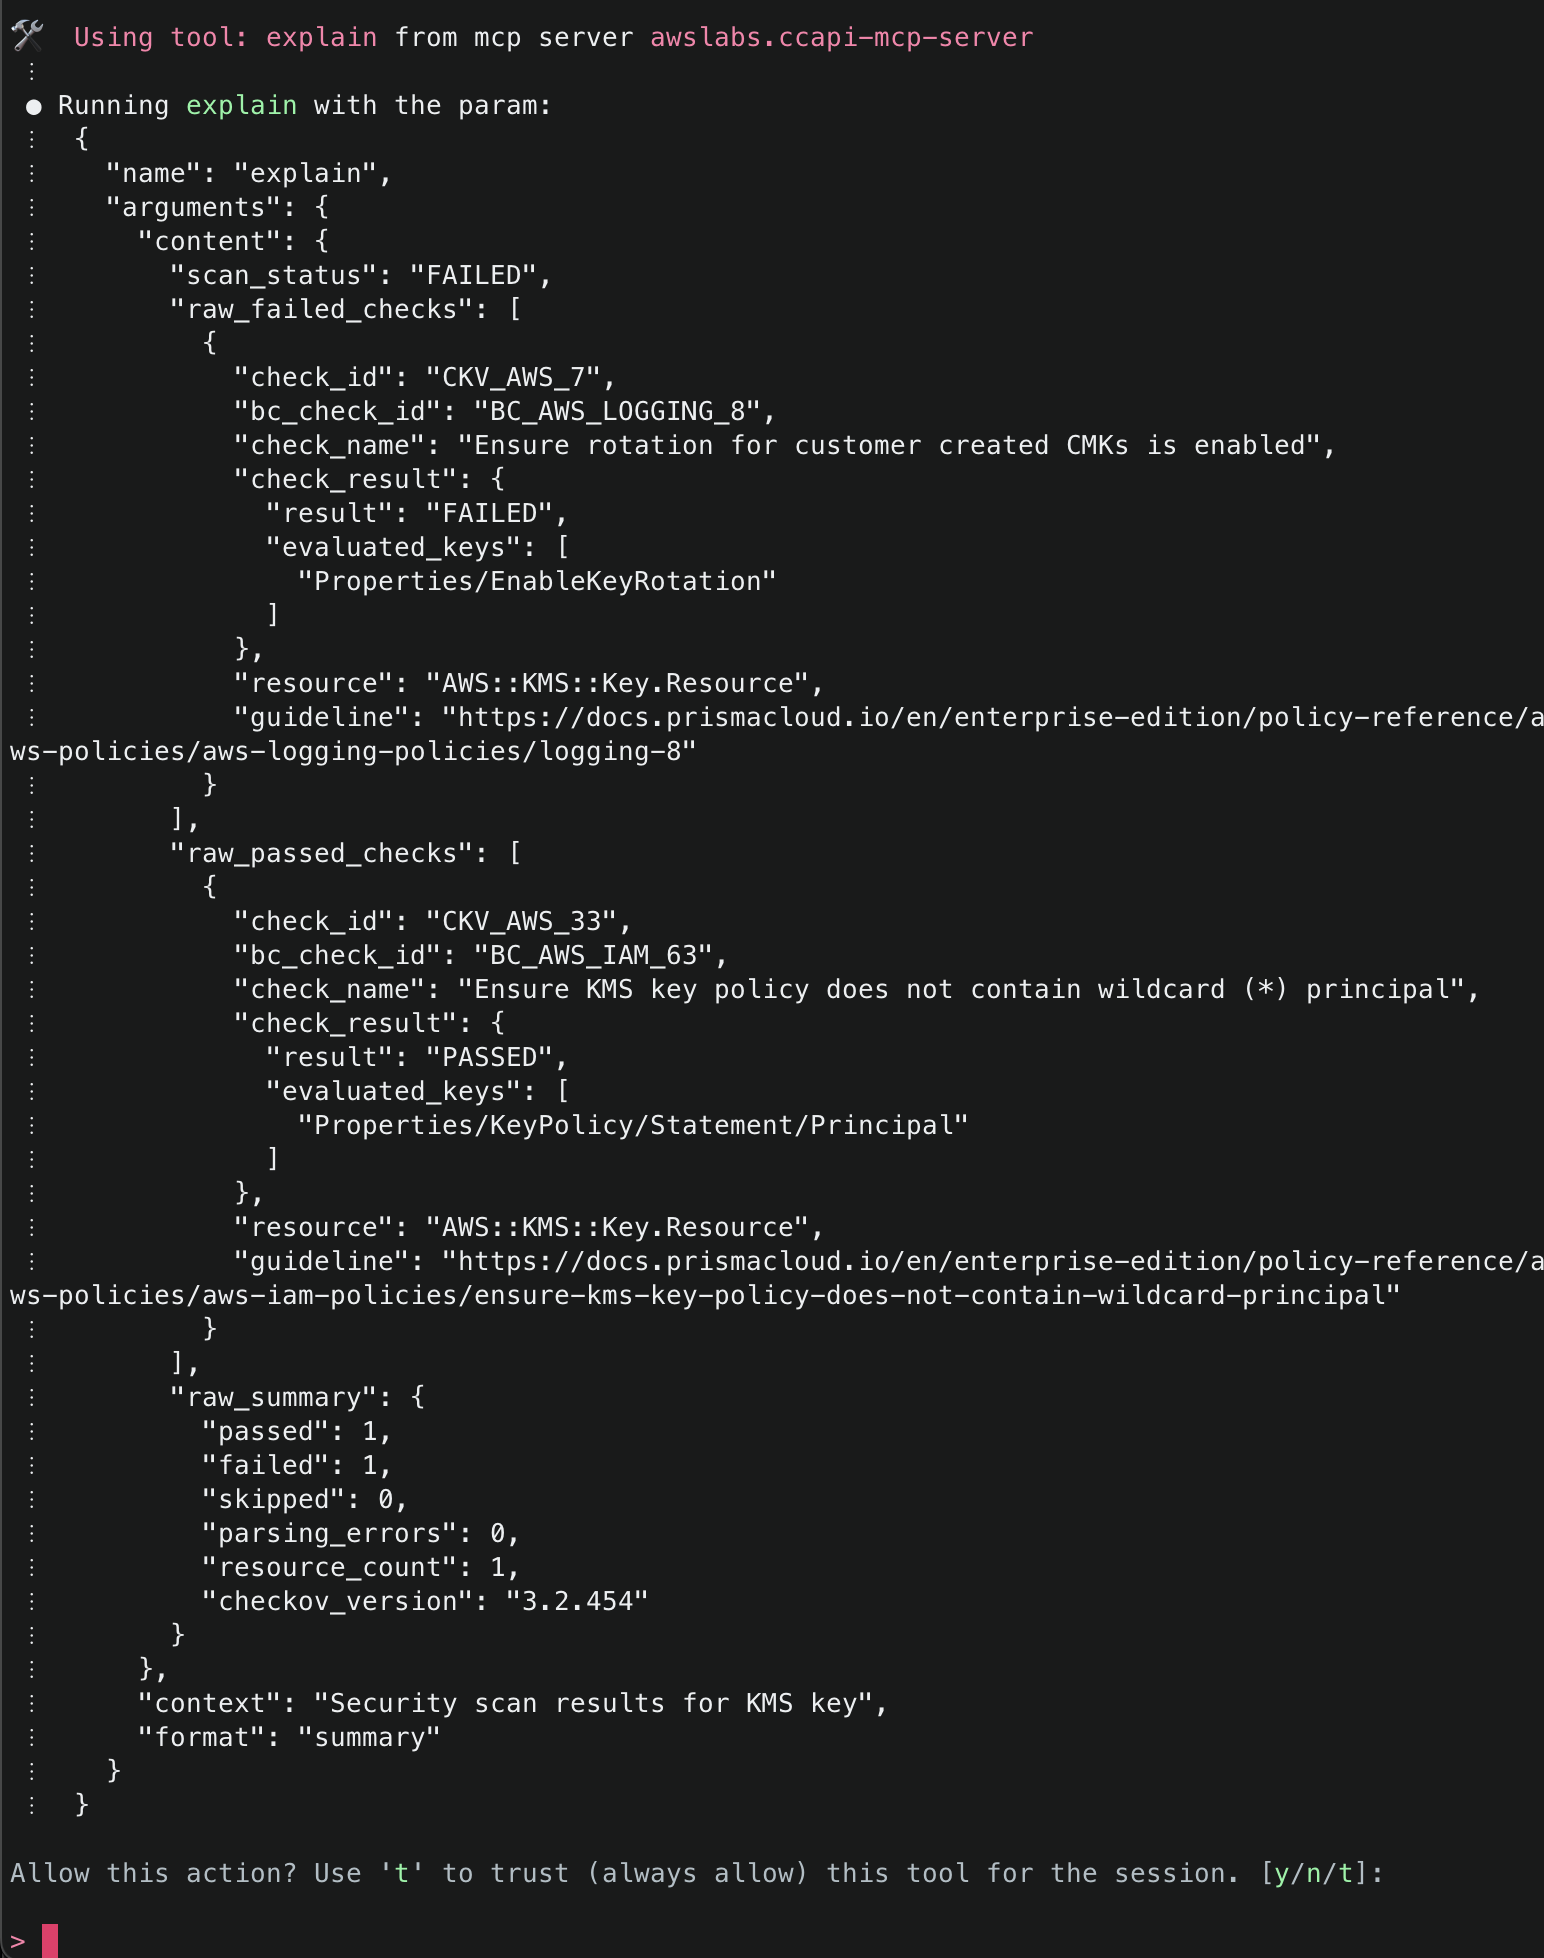
Introducing AWS Cloud Control API (CCAPI) MCP Server — You can now use natural language to managing cloud infrastructure using CCAPI MCP Server. You can create, read, update, delete, and list resources using natural language.
Introducing Amazon Bedrock AgentCore Identity — AgentCore Identity provides a centralized capability to manage agent identities, securing credentials, and supporting seamless integration with AWS and third-party services through Sigv4, standardized OAuth 2.0 flows, and API key.
Introducing Amazon Bedrock AgentCore Gateway — A fully managed service to connect AI agents with tools and services. It serves as a centralized tool server, providing a unified interface where agents can discover, access, and invoke tools.
Upcoming AWS events Check your calendars and sign up for upcoming AWS and AWS Community events:
AWS re:Invent 2025 (December 1-5, 2025, Las Vegas) — The AWS flagship annual conference offering collaborative innovation through peer-to-peer learning, expert-led discussions, and invaluable networking opportunities.
AWS Summits — Join free online and in-person events that bring the cloud computing community together to connect, collaborate, and learn about AWS. Coming up soon are summits in Johannesburg (August 20) and Toronto (September 4).
AWS Community Days — Join community-led conferences that feature technical discussions, workshops, and hands-on labs led by expert AWS users and industry leaders from around the world: Adria (September 5), Baltic (September 10), Aotearoa (September 18), and South Africa (September 20).
We are excited to announce the latest cohort of AWS Heroes, recognized for their exceptional contributions and technical leadership. These passionate individuals represent diverse regions and technical specialties, demonstrating notable expertise and dedication to knowledge sharing within the AWS community. From AI and machine learning to serverless architectures and security, our new Heroes showcase the breadth of cloud innovation while fostering inclusive and engaging technical communities. Join us in welcoming these community leaders who are helping to shape the future of cloud computing and inspiring the next generation of AWS builders.
Kristine Armiyants – Masis, Armenia
Community Hero Kristine Armiyants is a software engineer and cloud support engineer who transitioned into technology from a background in finance, having earned an MBA before becoming self-taught in software development. As the founder and leader of AWS User Group Armenia for over 2.5 years, she has transformed the local tech landscape by organizing Armenia’s first AWS Community Day, scaling it from 320 to 440+ attendees, and leading a team that brings international-scale events to her country. Through her technical articles in Armenian, hands-on workshops, and “no-filter” blog series, she makes cloud knowledge more accessible while mentoring new user group organizers and early-career engineers. Her dedication to community building has resulted in five new AWS Community Builders from Armenia, demonstrating her commitment to creating inclusive spaces for learning and growth in the AWS community.
Nadia Reyhani – Perth, Australia
Machine Learning Hero Nadia Reyhani is an AI Product Engineer who integrates DevOps best practices with machine learning systems. She is a former AWS Community Builder and regularly presents at AWS events on building scalable AI solutions using Amazon SageMaker and Bedrock. As a Women in Digital Ambassador, she combines technical expertise with advocacy, creating inclusive spaces for underrepresented groups in cloud and AI technologies.
Raphael Manke – Karlsruhe, Germany
DevTools Hero Raphael Manke is a Senior Product Engineer at Dash0 and the creator of the unofficial AWS re:Invent planner, which is used to help build a schedule for the event. With a decade of AWS experience, he specializes in serverless technologies and DevTools that streamline cloud development. As the organizer of the AWS User Group in Karlsruhe and a former AWS Community Builder, he actively contributes to product enhancement through public speaking and direct collaboration with AWS service teams. His commitment to the AWS community spans from local user group leadership to providing valuable feedback to service teams.
Rowan Udell – Brisbane, Australia
Security Hero Rowan Udell is an independent AWS security consultant specializing in AWS Identity and Access Management (IAM). He has been sharing AWS security expertise for over a decade through books, blog posts, meet-ups, workshops, and conference presentations. Rowan has taken part in many AWS community programs, was an AWS Community Builder for four years, and is part of the AWS Community Day Australia Organizing Committee. A frequent speaker at AWS events including Sydney Summit and other community meetups, Rowan is known for transforming complex security concepts into simple, practical, and workable solutions for businesses securing their AWS environments.
Sangwoon (Chris) Park – Seoul, Korea
Serverless Hero Sangwoon (Chris) Park leads development at RECON Labs, an AI startup specializing in AI-driven 3D content generation. He is a former AWS Community Builder and the creator of “AWS Classroom” YouTube channel, and he shares practical serverless architecture knowledge with the AWS community. Chris hosts monthly AWS Classroom Meetups and the AWS KRUG Serverless Small Group, actively promoting serverless technologies through community events and educational content.
Toshal Khawale – Pune, India
Community Hero Toshal Khawale is an experienced technology leader with over 22 years of expertise in engineering and AWS cloud technology, holding 12 AWS certifications that demonstrate his cloud knowledge. As a Managing Director at PwC, Toshal guides organizations through cloud transformation, digital innovation, and application modernization initiatives, having led numerous large-scale AWS migrations and generative AI implementations. He was an AWS Community Builder for six years and continues to serve as the AWS User Group Pune Leader, actively fostering community engagement and knowledge sharing. Through his roles as a mentor, frequent speaker, and advocate, Toshal helps organizations maximize their AWS investments while staying at the forefront of cloud technology trends.
Learn More
Visit the AWS Heroes webpage if you’d like to learn more about the AWS Heroes program, or to connect with a Hero near you.
Today, we’re officially announcing the AWS Cloud Control API (CCAPI) MCP Server. This MCP server transforms AWS infrastructure management by allowing developers to create, read, update, delete, and list resources using natural language. As part of the awslabs/mcp project, this new and innovative tool serves as a bridge between natural language commands and AWS infrastructure deployment and management. This MCP server is powered by the AWS Cloud Control API – a standardized API that allows CRUDL (Create/Read/Update/Delete/List) operations to be performed against AWS and third party resources using a single endpoint.
Key Features:
Leverages AWS Cloud Control API for CRUDL operations for more than 1,200 AWS resources
Enables LLM-powered agents and developers to manage infrastructure with natural language prompts
Provides the option to output Infrastructure as Code (IaC) templates for infrastructure it will create, allowing to still be used with existing CI/CD pipelines
Integrates with AWS Pricing API to provide cost estimates for the infrastructure it will create
Applies security best practices automatically using Checkov
Why Use CCAPI MCP Server?
Simplified Infrastructure Management: No more wrestling with complex templates or documentation
Increased Developer Productivity: Focus on what you need, not how to configure it
Reduced Learning Curve: Onboard new team members faster with natural language commands
LLM Integration: Perfect companion for AI-assisted development workflows
The CCAPI MCP Server transforms infrastructure management by enabling natural language interactions for AWS resource operations. Bridging natural language commands with AWS infrastructure deployment and management, this MCP Server allows developers to manage cloud infrastructure through conversational inputs such as:
Can you create a new s3 bucket for me?or
Find all of my EC2 instances and tell me which one have an instance type that is not t2.large
This significantly reduces configuration overhead and accelerates onboarding for new team members, directly translates developer intent into cloud infrastructure.
Let’s see it in action.
Creating and Managing Cloud Infrastructure
Prerequisites
uv package manager installed
Python 3.x.x installed
AWS credentials with appropriate permissions. The MCP server supports multiple ways to define these credentials. See the MCP documentation for more information. Using dynamic credentials such as one provided via SSO is recommended. For more information on configuring AWS credentials, see the AWS CLI documentation.
An MCP Host application installed that supports MCP Clients and MCP Servers (e.g. Amazon Q Developer, Claude Desktop, Cursor, etc.). To follow this blog install Amazon Q Developer for CLI (CLI) as described in the installation instructions
Integration with Developer Tools
To start using the CCAPI MCP server, you will need to set up your server configuration which is typically in a file named mcp.json. For this blog we will focus on using the CCAPI MCP server with Amazon Q Developer. Note that for other MCP Host applications the path to the mcp configuration file may differ. You will need to create the file if it does not already exist in the directory.
1. Global Configuration: ~/.aws/amazon/mcp.json – Applies to all workspaces
2. Workspace Configuration: .amazonq/mcp.json – Specific to the current workspace
Ensure you correctly set your AWS credentials in the MCP server config. It is essential that you properly configure these credentials, as the MCP server uses their associated permissions when invoking the AWS Cloud Control API for CRUDL operations in your AWS account. The server supports multiple methods of consuming these credentials such as AWS profiles, Environment Variables, SSO tokens, etc. You can see some of this in the aws_client.py file. See these docs on using named profiles for more information.
Read Only Mode
If you would like to prevent the MCP server from performing mutating actions (e.g. Create/Update/Delete Resource), you can specify the --readonly flag as demonstrated below:
More information on the configuration and tools the CCAPI MCP server provides can be found in the AWS CloudFormation MCP Server documentation.
Security Considerations
Ensure the IAM credentials include permissions for Cloud Control API actions (List, Get, Create, Update, Delete). See the AWS CCAPI API documentation for more info
Consider running in read-only mode with --readonly flag for safer operations
Example Use Case: Creating an S3 Bucket with KMS Encryption
IMPORTANT: Ensure you have satisfied all prerequisites before attempting these commands.
1. With the mcp.json file correctly set, try to run a sample prompt. In your terminal, run q chat to start using Amazon Q in the CLI.
2. This will start initializing the MCP servers in the background, allowing you to immediately start using Q Chat even if they are still loading. As a note, if these have not finished loading, your prompts will be handled without using any MCP servers. To check the status of the servers, run /mcp
3. Once that you have validated that the MCP server was loaded successfully, try a sample command. Simply tell Amazon Q : Create an S3 bucket with versioning and encrypt it using a new KMS key
Amazon Q will use the server to automatically:
Fetch your current environment variables
Use those to fetch your current AWS session info
Create code that defines what is in your prompt
Explain the code that was generated
Run security analysis against the code that was generated (if enabled)
Explain the results of the security analysis
Validate the configuration against AWS Cloud Control API schemas (which use CloudFormation Resource Provider Schemas as their foundation) and IAM policies. This validation ensures compliance with Cloud Control API requirements, which is essential for resource creation
Create the resources directly through Cloud Control API
Note: While CloudFormation schemas are referenced in the validation step, this solution uses Cloud Control API for resource management, not CloudFormation. The schemas are used because they define the standardized resource properties that Cloud Control API expects.
4. First, Amazon Q will mention that it needs to check the environment variables to find information related to the AWS session information. It will inform you about the specific tool it aims to use and will ask for permission. Select y to accept and allow actions.
5. Next, Amazon Q will ask to use get_aws_session_info() to fetch information about the AWS session it should use for subsequent actions. It will use the relevant values from the environment variables defined in the MCP configuration file (e.g. ~/.aws/amazon/mcp.json)
6.Amazon Q will then display the AWS account ID and region it will use to deploy resources. To start, it will use generate_infrastructure_code() to generate the resource properties for a KMS key that will be sent to Cloud Control API. These properties mirror the structure defined in AWS CloudFormation Resource Provider Schemas (which Cloud Control API uses as its foundation), allowing for security validation through Checkov before deployment. The key will be configured following security best practices, with a key policy scoped to only allow usage within the AWS account.
7. Once that Amazon Q has generated the code for the resource, it will run then use the explain() tool to explain the infrastructure code that was generated. Note that default tags MANAGED_BY, MCP_SERVER_SOURCE_CODE, and MCP_SERVER_VERSION are added for all resources managed by the CCAPI MCP server. These tags provide for ease of identification of infrastructure that is being managed by the MCP server. They are configurable and you optionally can disable them, but we highly recommend adding tags to ensure you have visibility into infrastructure that is being managed by the CCAPI MCP server.
8. It will then attempt to use the run_checkov() tool to inspect the security of the code. This tool is triggered because SECURITY_SCANNING was set to enabled in your server configuration file.
9. After Checkov has run, it will then attempt to use the explain() tool again to explain the security findings from the Checkov run. If there were no security issues, it will attempt to proceed. If there were security issues, you will be asked how you’d like to proceed, and Amazon Q will recommend necessary fixes. By default, the checks that passed will only give a minimal summary. If you’d like to get more information, just ask for more details.
10. The next tool that Amazon Q will use is the create_resource() tool. This tool will attempt to create the resource using the AWS Cloud Control API, and then use the get_resource_request_status() tool to check the status of the creation. This tool uses the request token to identify the request that was submitted to the Cloud Control API and uses this to fetch its status information.
11. Amazon Q will continue using the CCAPI MCP server tools as needed until it finishes creation of both the S3 Bucket and KMS Key and will output a summary.
12. Now, ask Amazon Q to make a change potentially negatively affecting security, for example by allowing the S3 bucket to be publicly accessible. While this configuration is generally advised against, sometimes it is necessary – such as when you want to use the S3 bucket for public website hosting. Amazon Q will respond letting you know that what you are asking for is not the best practice, and explain why. However, since this could be a valid request depending on your use case, it will prompt you to confirm.
13. The CCAPI MCP server also has integrations with the AWS Pricing API, so you can even ask for the estimated cost of what it has deployed.
14. Lastly, ask Amazon Q to create a CloudFormation template of what it has created so far so you can either have a backup, or if you want to redeploy something similar, you will have a template to work off. It will use the create_template() tool to accomplish this task.
Note: The create_template() tool comes with predefined settings:
Outputs YAML format by default (can be JSON)
Sets DeletionPolicy to RETAIN
Sets UpdateReplacePolicy to RETAIN
Allows optional parameters for template ID, file saving location, and region specification
15. Try one more dangerous operation, attempting to delete all resources within an AWS account. The security checks block this attempt and suggest other alternatives.
16. Finally, ask Amazon Q to just delete what it has created. This time it will use the get_resource() tool to get information about the existing resources it created, the explain() tool to explain the changes that will be made, and finally the delete_resource() tool to delete the resources.
After successfully deleting the resources, it will provide a final summary.
Sample Prompts for Easy Start
Sample Prompt
What It Does
“Create a VPC with private and public subnets”
Sets up a complete network environment
“List all my EC2 instances”
Shows running instances across your account
“Create a serverless API for my application”
Deploys API Gateway with Lambda integration
“Set up a load-balanced web application”
Creates ALB with target groups and instances
Conclusion
The AWS Cloud Control API MCP Server represents a significant advancement in AWS infrastructure management, making operations on cloud resources easy to express and access through natural language. Whether you’re streamlining operations, experimenting with LLM-based development, or onboarding new team members, whether you are using Amazon Q Developer in CLI or any other MCP Host application (such as Claude Desktop or Cursor), the CCAPI MCP servet and its tools offer a truly intuitive way to interact with AWS.
AWS Summits in the northern hemisphere have mostly concluded but the fun and learning hasn’t yet stopped for those of us in other parts of the globe. The community, customers, partners, and colleagues enjoyed a day of learning and networking last week at the AWS Summit Mexico City and the AWS Summit Jakarta.
Last week’s launches These are the launches from last week that caught my attention:
Automated Reasoning checks — Automated Reasoning checks, a new Amazon Bedrock Guardrails policy that was previewed during AWS re:Invent, is now generally available. Automated Reasoning checks helps you validate the accuracy of content generated by foundation models (FMs) against a domain knowledge. Read more in Danilo’s post on how this can help prevent factual errors that can be caused by AI hallucinations.
Multi-Region application recovery service — In this post, Sébastien writes about the announcement of Amazon Application Recovery Controller (ARC) Region switch, a fully managed, highly available capability that enables organizations to plan, practice, and orchestrate Region switches with confidence, eliminating the uncertainty around cross-Region recovery operations.
Additional updates I thought these projects, blog posts, and news items were also interesting:
AWS Lambda now supports GitHub Actions — AWS Lambda now enables you to use GitHub Actions to automatically deploy Lambda functions when you push code or configuration changes to your GitHub repository, streamlining your continuous integration and continuous deployment (CI/CD) pipeline for serverless applications.
Console-to-Code on Amazon DynamoDB — Amazon DynamoDB announced the support of Console-to-Code, powered by Amazon Q Developer. Console-to-Code to make it simple, fast, and cost-effective to create DynamoDB resources at scale by getting you started with your automation code.
Upcoming AWS events Keep a look out and be sure to sign up for these upcoming events:
AWS re:Invent 2025 (December 1-5, 2025, Las Vegas) — AWS’s flagship annual conference offering collaborative innovation through peer-to-peer learning, expert-led discussions, and invaluable networking opportunities.
AWS Summits — Join free online and in-person events that bring the cloud computing community together to connect, collaborate, and learn about AWS. Coming up soon are the summits at São Paulo (August 13) and Johannesburg (August 20).
AWS Community Days — Join community-led conferences that feature technical discussions, workshops, and hands-on labs led by expert AWS users and industry leaders from around the world: Australia (August 15), Adria (September 5), Baltic (September 10), Aotearoa (September 18), and South Africa (September 20).
Today, I’m happy to share that Automated Reasoning checks, a new Amazon Bedrock Guardrails policy that we previewed during AWS re:Invent, is now generally available. Automated Reasoning checks helps you validate the accuracy of content generated by foundation models (FMs) against a domain knowledge. This can help prevent factual errors due to AI hallucinations. The policy uses mathematical logic and formal verification techniques to validate accuracy, providing definitive rules and parameters against which AI responses are checked for accuracy.
This approach is fundamentally different from probabilistic reasoning methods which deal with uncertainty by assigning probabilities to outcomes. In fact, Automated Reasoning checks delivers up to 99% verification accuracy, providing provable assurance in detecting AI hallucinations while also assisting with ambiguity detection when the output of a model is open to more than one interpretation.
With general availability, you get the following new features:
Support for large documents in a single build, up to 80K tokens – Process extensive documentation; we found this can add up to 100 pages of content
Simplified policy validation – Save your validation tests and run them repeatedly, making it easier to maintain and verify your policies over time
Automated scenario generation – Create test scenarios automatically from your definitions, saving time and effort while helping make coverage more comprehensive
Enhanced policy feedback – Provide natural language suggestions for policy changes, simplifying the way you can improve your policies
Customizable validation settings – Adjust confidence score thresholds to match your specific needs, giving you more control over validation strictness
Let’s see how this works in practice.
Creating Automated Reasoning checks in Amazon Bedrock Guardrails To use Automated Reasoning checks, you first encode rules from your knowledge domain into an Automated Reasoning policy, then use the policy to validate generated content. For this scenario, I’m going to create a mortgage approval policy to safeguard an AI assistant evaluating who can qualify for a mortgage. It is important that the predictions of the AI system do not deviate from the rules and guidelines established for mortgage approval. These rules and guidelines are captured in a policy document written in natural language.
In the Amazon Bedrock console, I choose Automated Reasoning from the navigation pane to create a policy.
I enter name and description of the policy and upload the PDF of the policy document. The name and description are just metadata and do not contribute in building the Automated Reasoning policy. I describe the source content to add context on how it should be translated into formal logic. For example, I explain how I plan to use the policy in my application, including sample Q&A from the AI assistant.
When the policy is ready, I land on the overview page, showing the policy details and a summary of the tests and definitions. I choose Definitions from the dropdown to examine the Automated Reasoning policy, made of rules, variables, and types that have been created to translate the natural language policy into formal logic.
The Rules describe how variables in the policy are related and are used when evaluating the generated content. For example, in this case, which are the thresholds to apply and how some of the decisions are taken. For traceability, each rule has its own unique ID.
The Variables represent the main concepts at play in the original natural language documents. Each variable is involved in one or more rules. Variables allow complex structures to be easier to understand. For this scenario, some of the rules need to look at the down payment or at the credit score.
Custom Types are created for variables that are neither boolean nor numeric. For example, for variables that can only assume a limited number of values. In this case, there are two type of mortgage described in the policy, insured and conventional.
Now we can assess the quality of the initial Automated Reasoning policy through testing. I choose Tests from the dropdown. Here I can manually enter a test, consisting of input (optional) and output, such as a question and its possible answer from the interaction of a customer with the AI assistant. I then set the expected result from the Automated Reasoning check. The expected result can be valid (the answer is correct), invalid (the answer is not correct), or satisfiable (the answer could be true or false depending on specific assumptions). I can also assign a confidence threshold for the translation of the query/content pair from natural language to logic.
Before I enter tests manually, I use the option to automatically generate a scenario from the definitions. This is the easiest way to validate a policy and (unless you’re an expert in logic) should be the first step after the creation of the policy.
For each generated scenario, I provide an expected validation to say if it is something that can happen (satisfiable) or not (invalid). If not, I can add an annotation that can then be used to update the definitions. For a more advanced understanding of the generated scenario, I can show the formal logic representation of a test using SMT-LIB syntax.
After using the generate scenario option, I enter a few tests manually. For these tests, I set different expected results: some are valid, because they follow the policy, some are invalid, because they flout the policy, and some are satisfiable, because their result depends on specific assumptions.
Then, I choose Validate all tests to see the results. All tests passed in this case. Now, when I update the policy, I can use these tests to validate that the changes didn’t introduce errors.
For each test, I can look at the findings. If a test doesn’t pass, I can look at the rules that created the contradiction that made the test fail and go against the expected result. Using this information, I can understand if I should add an annotation, to improve the policy, or correct the test.
Now that I’m satisfied with the tests, I can create a new Amazon Bedrock guardrail (or update an existing one) to use up to two Automated Reasoning policies to check the validity of the responses of the AI assistant. All six policies offered by Guardrails are modular, and can be used together or separately. For example, Automated Reasoning checks can be used with other safeguards such as content filtering and contextual grounding checks. The guardrail can be applied to models served by Amazon Bedrock or with any third-party model (such as OpenAI and Google Gemini) via the ApplyGuardrail API. I can also use the guardrail with an agent framework such as Strands Agents, including agents deployed using Amazon Bedrock AgentCore.
Now that we saw how to set up a policy, let’s look at how Automated Reasoning checks are used in practice.
Customer case study – Utility outage management systems When the lights go out, every minute counts. That’s why utility companies are turning to AI solutions to improve their outage management systems. We collaborated on a solution in this space together with PwC. Using Automated Reasoning checks, utilities can streamline operations through:
Real-time plan validation – Ensures response plans comply with established policies
Structured workflow creation – Develops severity-based workflows with defined response targets
At its core, this solution combines intelligent policy management with optimized response protocols. Automated Reasoning checks are used to assess AI-generated responses. When a response is found to be invalid or satisfiable, the result of the Automated Reasoning check is used to rewrite or enhance the answer.
This approach demonstrates how AI can transform traditional utility operations, making them more efficient, reliable, and responsive to customer needs. By combining mathematical precision with practical requirements, this solution sets a new standard for outage management in the utility sector. The result is faster response times, improved accuracy, and better outcomes for both utilities and their customers.
In the words of Matt Wood, PwC’s Global and US Commercial Technology and Innovation Officer:
“At PwC, we’re helping clients move from AI pilot to production with confidence—especially in highly regulated industries where the cost of a misstep is measured in more than dollars. Our collaboration with AWS on Automated Reasoning checks is a breakthrough in responsible AI: mathematically assessed safeguards, now embedded directly into Amazon Bedrock Guardrails. We’re proud to be AWS’s launch collaborator, bringing this innovation to life across sectors like pharma, utilities, and cloud compliance—where trust isn’t a feature, it’s a requirement.”
Things to know Automated Reasoning checks in Amazon Bedrock Guardrails is generally available today in the following AWS Regions: US East (Ohio, N. Virginia), US West (Oregon), and Europe (Frankfurt, Ireland, Paris).
With Automated Reasoning checks, you pay based on the amount of text processed. For more information, see Amazon Bedrock pricing.
The videos in this playlist include an introduction to Automated Reasoning checks, a deep dive presentation, and hands-on tutorials to create, test, and refine a policy.
AWS is committed to bringing you the most advanced foundation models (FMs) in the industry, continuously expanding our selection to include groundbreaking models from leading AI innovators so that you always have access to the latest advancements to drive your business forward.
These open weight models excel at coding, scientific analysis, and mathematical reasoning, with performance comparable to leading alternatives. Both models support a 128K context window and provide adjustable reasoning levels (low/medium/high) to match your specific use case requirements. The models support external tools to enhance their capabilities and can be used in an agentic workflow, for example, using a framework like Strands Agents.
With Amazon Bedrock and Amazon SageMaker JumpStart, AWS gives you the freedom to innovate with access to hundreds of FMs from leading AI companies, including OpenAI open weight models. With our comprehensive selection of models, you can match your AI workloads to the perfect model every time.
Through Amazon Bedrock, you can seamlessly experiment with different models, mix and match capabilities, and switch between providers without rewriting code—turning model choice into a strategic advantage that helps you continuously evolve your AI strategy as new innovations emerge. At launch, these new models are available in Bedrock via an OpenAI compatible endpoint. You can point the OpenAI SDK to this endpoint or use the Bedrock InvokeModel and Converse API.
With SageMaker JumpStart, you can quickly evaluate, compare, and customize models for your use case. You can then deploy the original or the customized model in production with the SageMaker AI console or using the SageMaker Python SDK.
Let’s see how these work in practice.
Getting started with OpenAI open weight models in Amazon Bedrock In the Amazon Bedrock console, I choose Model access from the Configure and learn section of the navigation pane. Then, I navigate to the two listed OpenAI models on this page and request access.
Now that I have access, I use the Chat/Test playground to test and evaluate the models. I select OpenAI as the category and then the gpt-oss-120b model.
Using this model, I run the following sample prompt:
A family has $5,000 to save for their vacation next year. They can place the money in a savings account earning 2% interest annually or in a certificate of deposit earning 4% interest annually but with no access to the funds until the vacation. If they need $1,000 for emergency expenses during the year, how should they divide their money between the two options to maximize their vacation fund?
This prompt generates an output that includes the chain of thought used to produce the result.
I can use these models with the OpenAI SDK by configuring the API endpoint (base URL) and using an Amazon Bedrock API key for authentication. For example, I set this environment variables to use the US West (Oregon) AWS Region endpoint (us-west-2) and my Amazon Bedrock API key:
Now I invoke the model using the OpenAI Python SDK.
client = OpenAI()

response = client.chat.completion.create(
    messages=[{
        "role": "user",
        "content": "Hello, how are you?"
    }],
    model="openai.gpt-oss-120b-1:0",
    stream=True
)

for item in response:
    print(item)
To build an AI agent, I can choose any framework that supports the Amazon Bedrock API or the OpenAI API. For example, here’s the starting code for Strands Agents using the Amazon Bedrock API:
from strands import Agent
from strands.models import BedrockModel
from strands_tools import calculator

model = BedrockModel(
    model_id="openai.gpt-oss-120b-1:0"
)
agent = Agent(
    model=model,
    tools=[calculator]
)

agent("Tell me the square root of 42 ^ 3")
I save the code (app.py file), install the dependencies, and run the agent locally:
When I am satisfied with the agent, I can deploy in production using the capabilities offered by Amazon Bedrock AgentCore, including a fully managed serverless runtime and memory and identity management.
Getting started with OpenAI open weight models in Amazon SageMaker JumpStart In the Amazon SageMaker AI console, you can use OpenAI open weight models in the SageMaker Studio. The first time I do this, I need to set up a SageMaker domain. There are options to set it up for a single user (simpler) or an organization. For these tests, I use a single user setup.
In the SageMaker JumpStart model view, I have access to a detailed description of the gpt-oss-120b or gpt-oss-20b model.
I choose the gpt-oss-20b model and then deploy the model. In the next steps, I select the instance type and the initial instance count. After a few minutes, the deployment creates an endpoint that I can then invoke in SageMaker Studio and using any AWS SDKs.
Each model comes equipped with full chain-of-thought output capabilities, providing you with detailed visibility into the model’s reasoning process. This transparency is particularly valuable for applications requiring high levels of interpretability and validation. These models give you the freedom to modify, adapt, and customize them to your specific needs. This flexibility allows you to fine-tune the models for your unique use cases, integrate them into your existing workflows, and even build upon them to create new, specialized models tailored to your industry or application.
Security and safety are built into the core of these models, with comprehensive evaluation processes and safety measures in place. The models maintain compatibility with the standard GPT-4 tokenizer.
Both models can be used in your preferred environment, whether that’s through the serverless experience of Amazon Bedrock or the extensive machine learning (ML) development capabilities of SageMaker JumpStart. For information about the costs associated with using these models and services, visit the Amazon Bedrock pricing and Amazon SageMaker AI pricing pages.
Many organizations running VMware workloads on premises want to move to the cloud to benefit from improved scalability, reliability, and access to cloud services, but migrating these workloads often requires substantial changes to applications and infrastructure configurations. Amazon EVS lets customers continue using their existing VMware expertise and tools without having to re-architect applications or change established practices, thereby simplifying the migration process while providing access to AWS’s scale, reliability, and broad set of services.
With Amazon EVS, you can run VMware workloads directly in your Amazon VPC. This gives you full control over your environments while being on AWS infrastructure. You can extend your on-premises networks and migrate workloads without changing IP addresses or operational runbooks, reducing complexity and risk.
Key capabilities and features
Amazon EVS delivers a comprehensive set of capabilities designed to streamline your VMware workload migration and management experience. The service enables seamless workload migration without the need for replatforming or changing hypervisors, which means you can maintain your existing infrastructure investments while moving to AWS. Through an intuitive, guided workflow on the AWS Management Console, you can efficiently provision and configure your EVS environments, significantly reducing the complexity to migrate your workloads to AWS.
With Amazon EVS, you can deploy a fully functional VCF environment running on AWS in a few hours. This process eliminates many of the manual steps and potential configuration errors that often occur during traditional deployments. Furthermore, with Amazon EVS you can optimize your virtualization stack on AWS. Given the VCF environment runs inside your VPC, you have full full administrative access to the environment and the associated management appliances. You also have the ability to integrate third-party solutions, from external storage such as Amazon FSx for NetApp ONTAP or Pure Cloud Block Store or backup solutions such as Veeam Backup and Replication.
The service also gives you the ability to self-manage or work with AWS Partners to build, manage, and operate your environments. This provides you with flexibility to match your approach with your overall goals.
Setting up a new VCF environment
Organizations can streamline their setup process by ensuring they have all the necessary pre-requisites in place ahead of creating a new VCF environment. These prerequisites include having an active AWS account, configuring the appropriate AWS Identity and Access Management (IAM) permissions, and setting up a Amazon VPC with sufficient CIDR space and two Route Server endpoints, with each endpoint having its own peer. Additionally, customers will need to have their VMware Cloud Foundation license keys ready, secure Amazon EC2 capacity reservations specifically for i4i.metal instances, and prepare their VLAN subnet information planning.
To help ensure a smooth deployment process, we’ve provided a Getting started hub, which you can access from the EVS homepage as well as a comprehensive guide in our documentation. By following these preparation steps, you can avoid potential setup delays and ensure a successful environment creation.
Let’s walk through the process of setting up a new VCF environment using Amazon EVS.
You will need to provide your Site ID, which is allocated by Broadcom when purchasing VCF licenses, along with your license keys. To ensure a successful initial deployment, you should verify you have sufficient licensing coverage for a minimum of 256 cores. This translates to at least four i4i.metal instances, with each instance providing 64 physical cores.
This licensing requirement helps you maintain optimal performance and ensures your environment meets the necessary infrastructure specifications. By confirming these requirements upfront, you can avoid potential deployment delays and ensure a smooth setup process.
Once you have provided all the required details, you will be prompted to specify your host details. These are the underlying Amazon EC2 instances that your VCF environment will get deployed in.
Once you have filled out details for each of your host instances, you will need to configure your networking and management appliance DNS details. For further information on how to create a new VCF environment on Amazon EVS, follow the documentation here.
After you have created your VCF environment, you will be able to look over all of the host and configuration details through the AWS Console.
Additional things to know
Amazon EVS currently supports VCF version 5.2.1 and runs on i4i.metal instances. Future releases will expand VCF versions, licensing options, and more instance type support to provide even more flexibility for your deployments.
Amazon EVS provides flexible storage options. Your Amazon EVS local Instance storage is powered by VMware’s vSAN solution, which pools local disks across multiple ESXi hosts into a single distributed datastore. To scale your storage, you can leverage external Network File System (NFS) or iSCSI-based storage solutions. For example, Amazon FSx for NetApp ONTAP is particularly well-suited for use as an NFS datastore or shared block storage over iSCSI.
Additionally, Amazon EVS makes connecting your on-premises environments to AWS simple. You can connect from on-premises vSphere environment into Amazon EVS using a Direct Connect connection or a VPN that terminates into a transit gateway. Amazon EVS also manages the underlying connectivity from your VLAN subnets into your VMs.
AWS provides comprehensive support for all AWS services deployed by Amazon EVS, handling direct customer support while engaging with Broadcom for advanced support needs. Customers must maintain AWS Business Support on accounts running the service.
Availability and pricing
Amazon EVS is now generally available in US East (N. Virginia), US East (Ohio), US West (Oregon), Europe (Frankfurt), Europe (Ireland), and Asia Pacific (Tokyo) AWS Regions, with additional Regions coming soon. Pricing is based on the Amazon EC2 instances and AWS resources you use, with no minimum fees or upfront commitments.
This week brings an array of innovations spanning from generative AI capabilities to enhancements of foundational services. Whether you’re building AI-powered applications, managing databases, or optimizing your cloud infrastructure, these updates help build more advanced, robust, and flexible applications.
Last week’s launches Here are the launches that got my attention this week:
Amazon Q Developer CLI – You can now create custom agents to help you customize the CLI agent to be more effective when performing specialized tasks such as code reviews and troubleshooting. More info in this blog.
AWS Lambda – Response streaming now supports a default maximum response payload size of 200 MB, 10 times higher than before. Lambda response streaming helps you build applications that progressively stream response payloads back to clients, improving performance for latency sensitive workloads by reducing time to first byte (TTFB) performance.
Powertools for AWS – Introducing v2 of Powertools for AWS Lambda (Java), a developer toolkit that helps you implement serverless best practices and directly translates AWS Well-Architected recommendations.
Amazon SNS – Now supports three additional message filtering operators: wildcard matching, anything-but wildcard matching, and anything-but prefix matching. SNS now also supports message group IDs in standard topics, enabling fair queue functionality for subscribed Amazon SQS standard queues.
Amazon CloudFront – Now offers two capabilities to enhance origin timeout controls: a response completion timeout and support for custom response timeout values for Amazon S3 origins. These capabilities give you more control over how to handle slow or unresponsive origins.
Amazon EC2 Auto Scaling – You can now use AWS Lambda functions as notification targets for EC2 Auto Scaling lifecycle hooks. For example, you can use this to trigger custom actions when an instance enters a wait state.
AWS Clean Rooms – Now publishes events to Amazon EventBridge for status changes in a Clean Rooms collaboration, further simplifying how companies and their partners analyze and collaborate on their collective datasets without revealing or copying one another’s underlying data.
Upcoming AWS events Check your calendars so that you can sign up for these upcoming events:
AWS re:Invent 2025 (December 1-5, 2025, Las Vegas) — AWS’s flagship annual conference offering collaborative innovation through peer-to-peer learning, expert-led discussions, and invaluable networking opportunities.
AWS Summits — Join free online and in-person events that bring the cloud computing community together to connect, collaborate, and learn about AWS. Register in your nearest city: Mexico City (August 6) and Jakarta (August 7).
AWS Community Days — Join community-led conferences that feature technical discussions, workshops, and hands-on labs led by expert AWS users and industry leaders from around the world: Australia (August 15), Adria (September 5), Baltic (September 10), and Aotearoa (September 18).
To provide the best experiences, we use technologies like cookies to store and/or access device information. Consenting to these technologies will allow us to process data such as browsing behavior or unique IDs on this site. Not consenting or withdrawing consent, may adversely affect certain features and functions.
Functional
Always active
The technical storage or access is strictly necessary for the legitimate purpose of enabling the use of a specific service explicitly requested by the subscriber or user, or for the sole purpose of carrying out the transmission of a communication over an electronic communications network.
Preferences
The technical storage or access is necessary for the legitimate purpose of storing preferences that are not requested by the subscriber or user.
Statistics
The technical storage or access that is used exclusively for statistical purposes.The technical storage or access that is used exclusively for anonymous statistical purposes. Without a subpoena, voluntary compliance on the part of your Internet Service Provider, or additional records from a third party, information stored or retrieved for this purpose alone cannot usually be used to identify you.
Marketing
The technical storage or access is required to create user profiles to send advertising, or to track the user on a website or across several websites for similar marketing purposes.
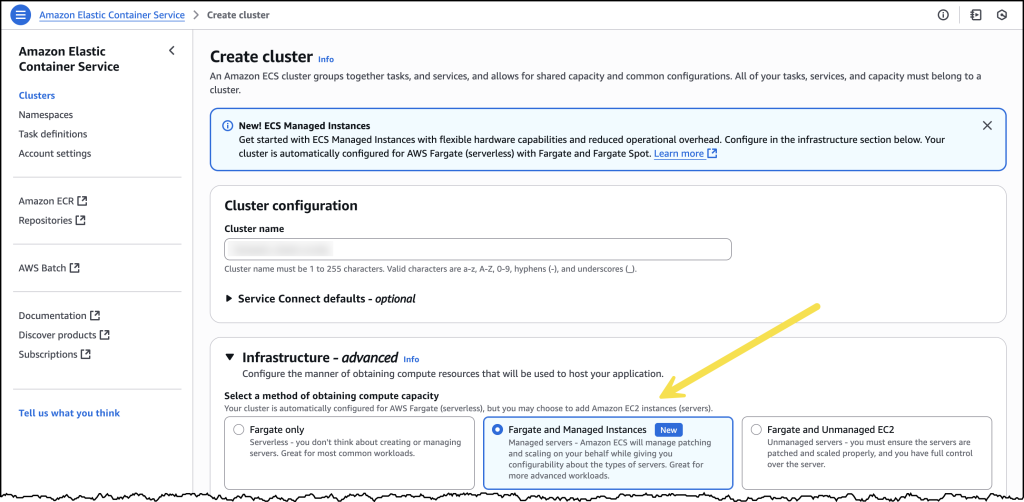
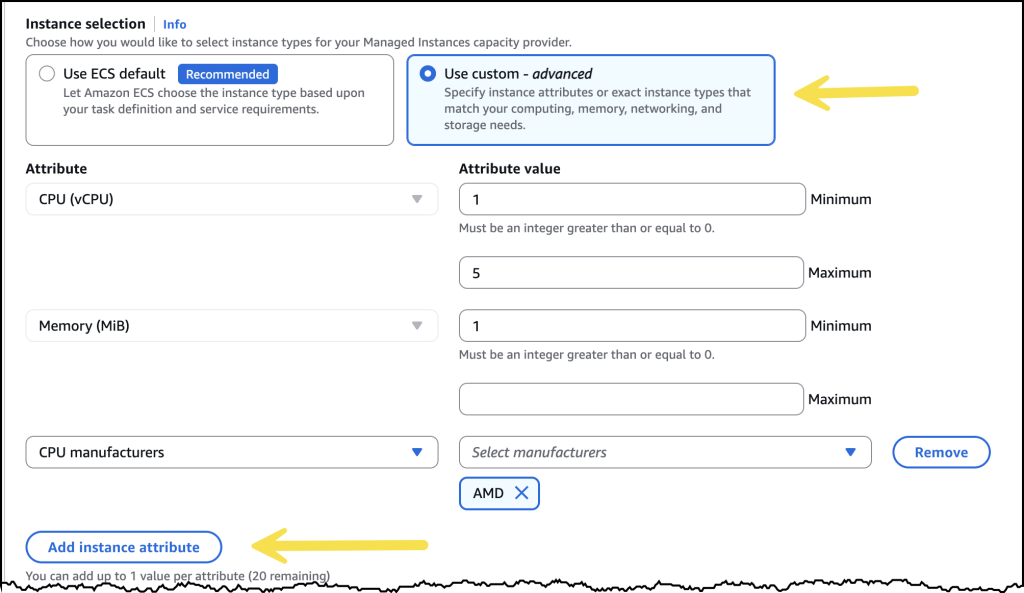
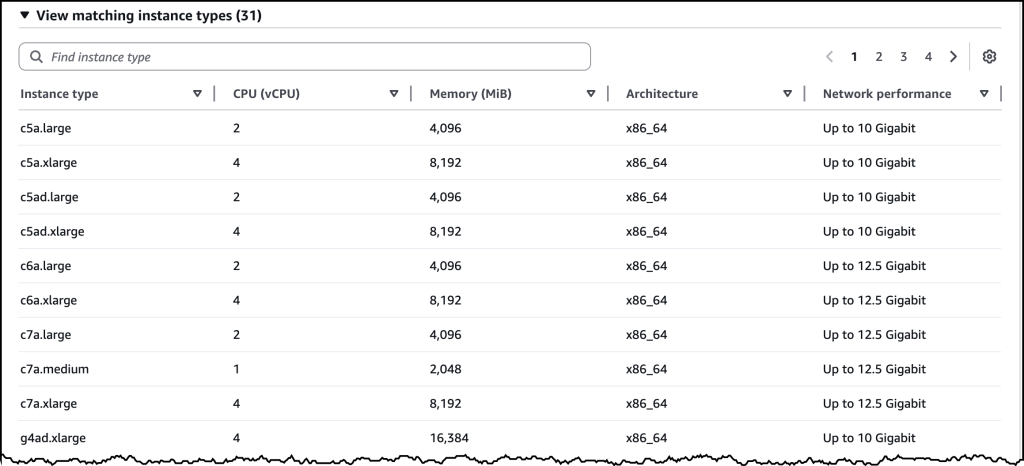
 This announcement builds upon two significant storage integration milestones we achieved in the past year. In December 2024, we introduced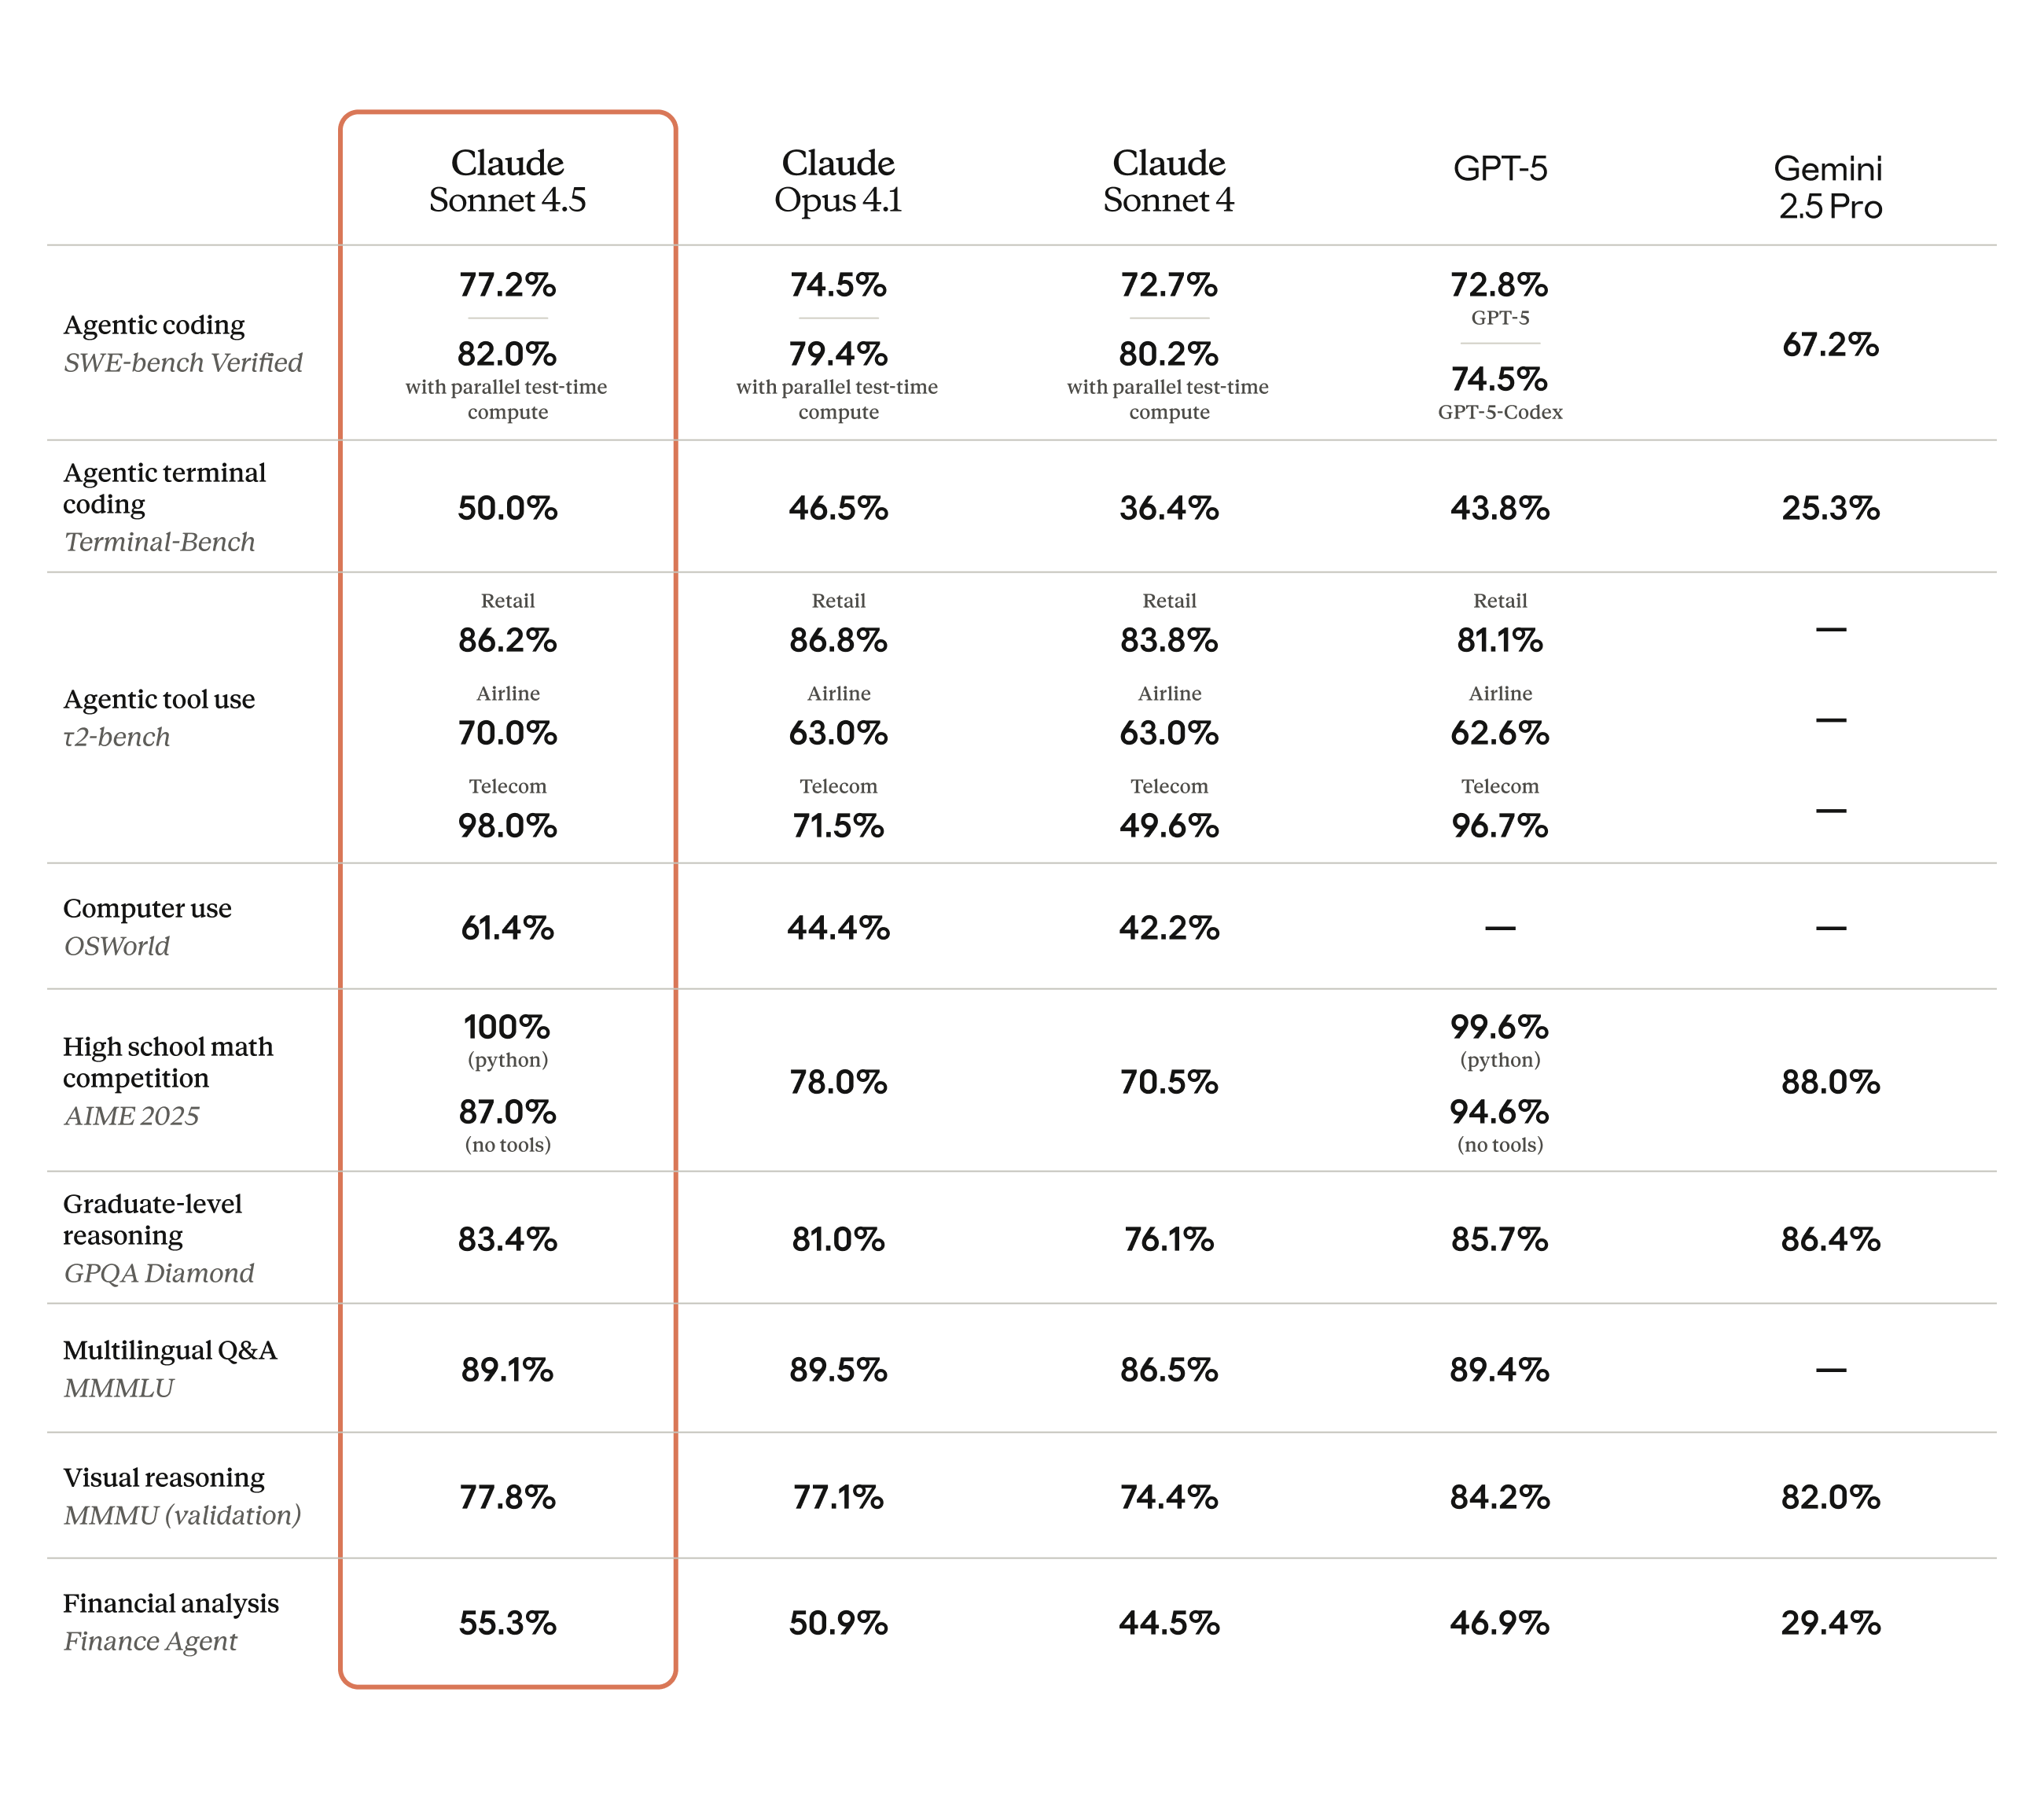
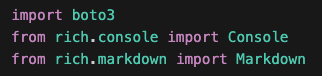

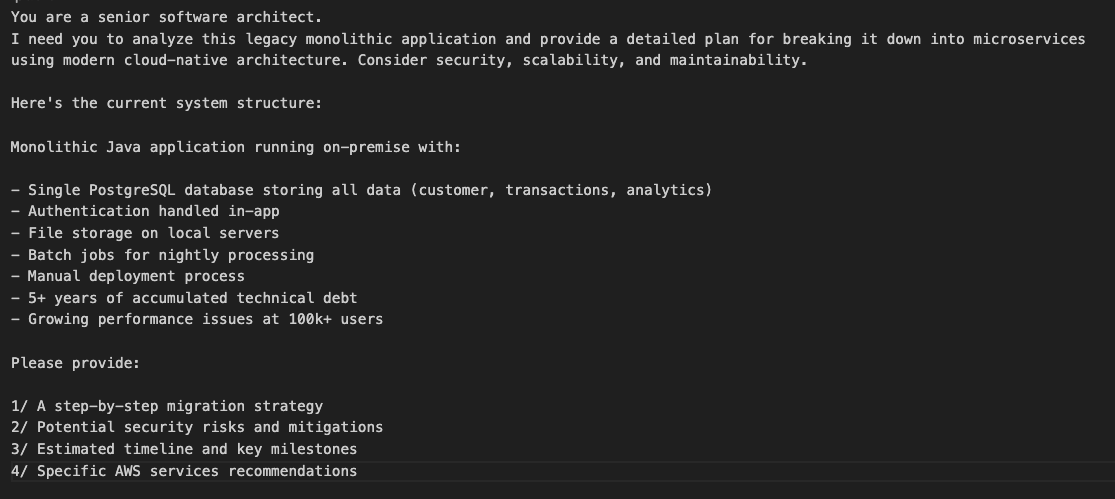
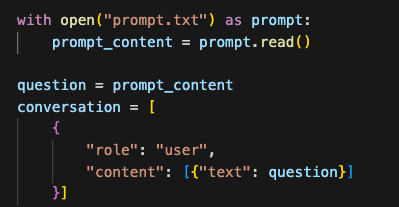
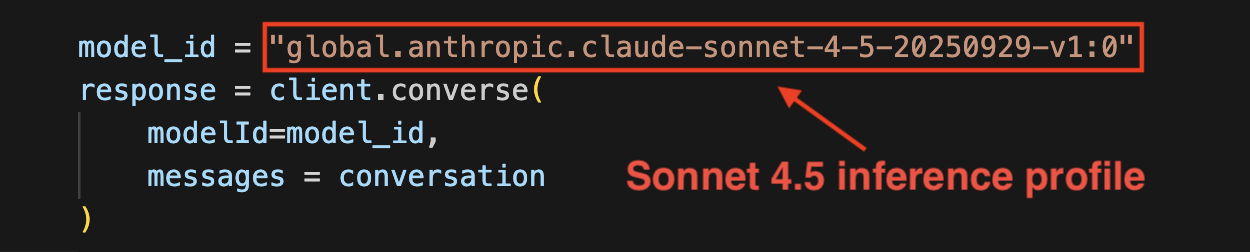
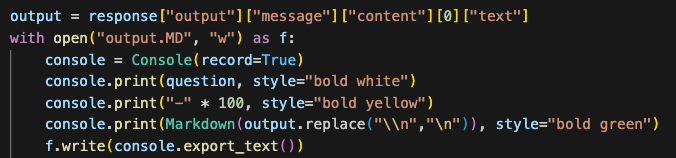
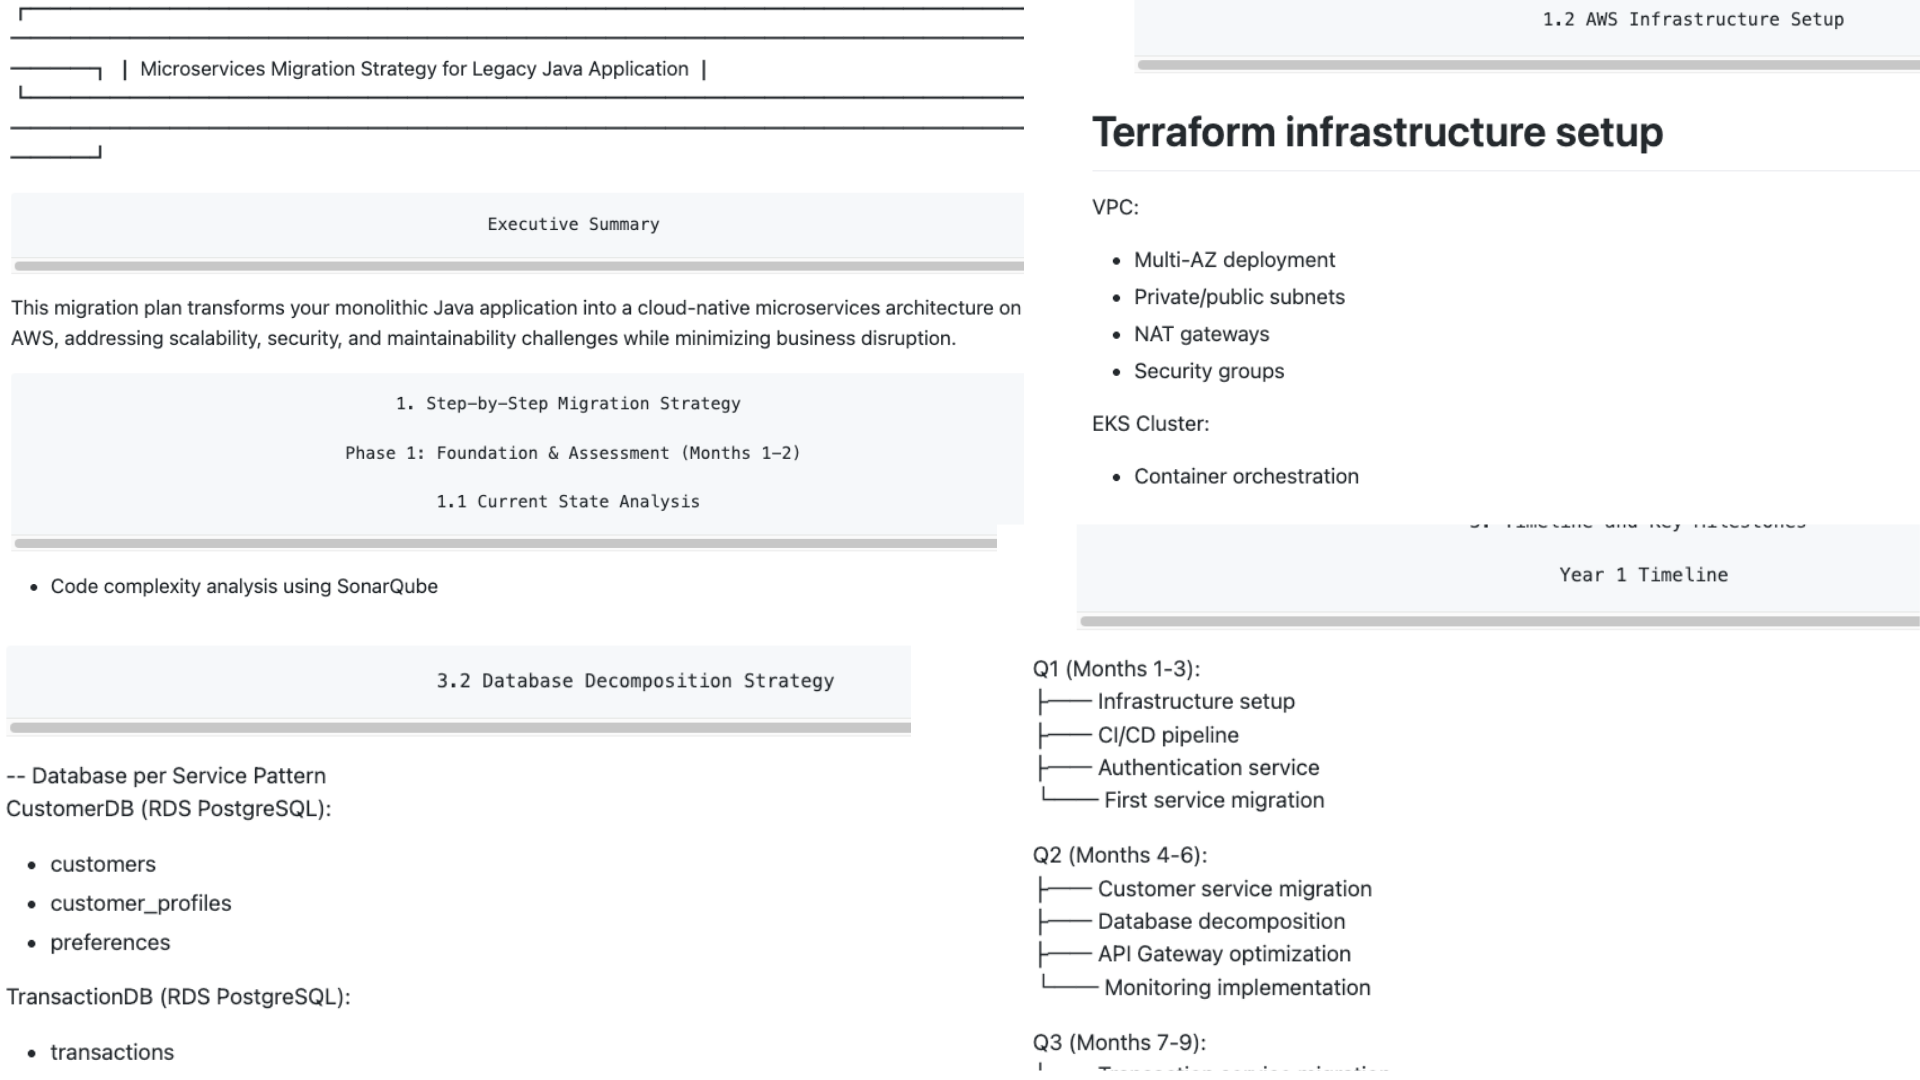
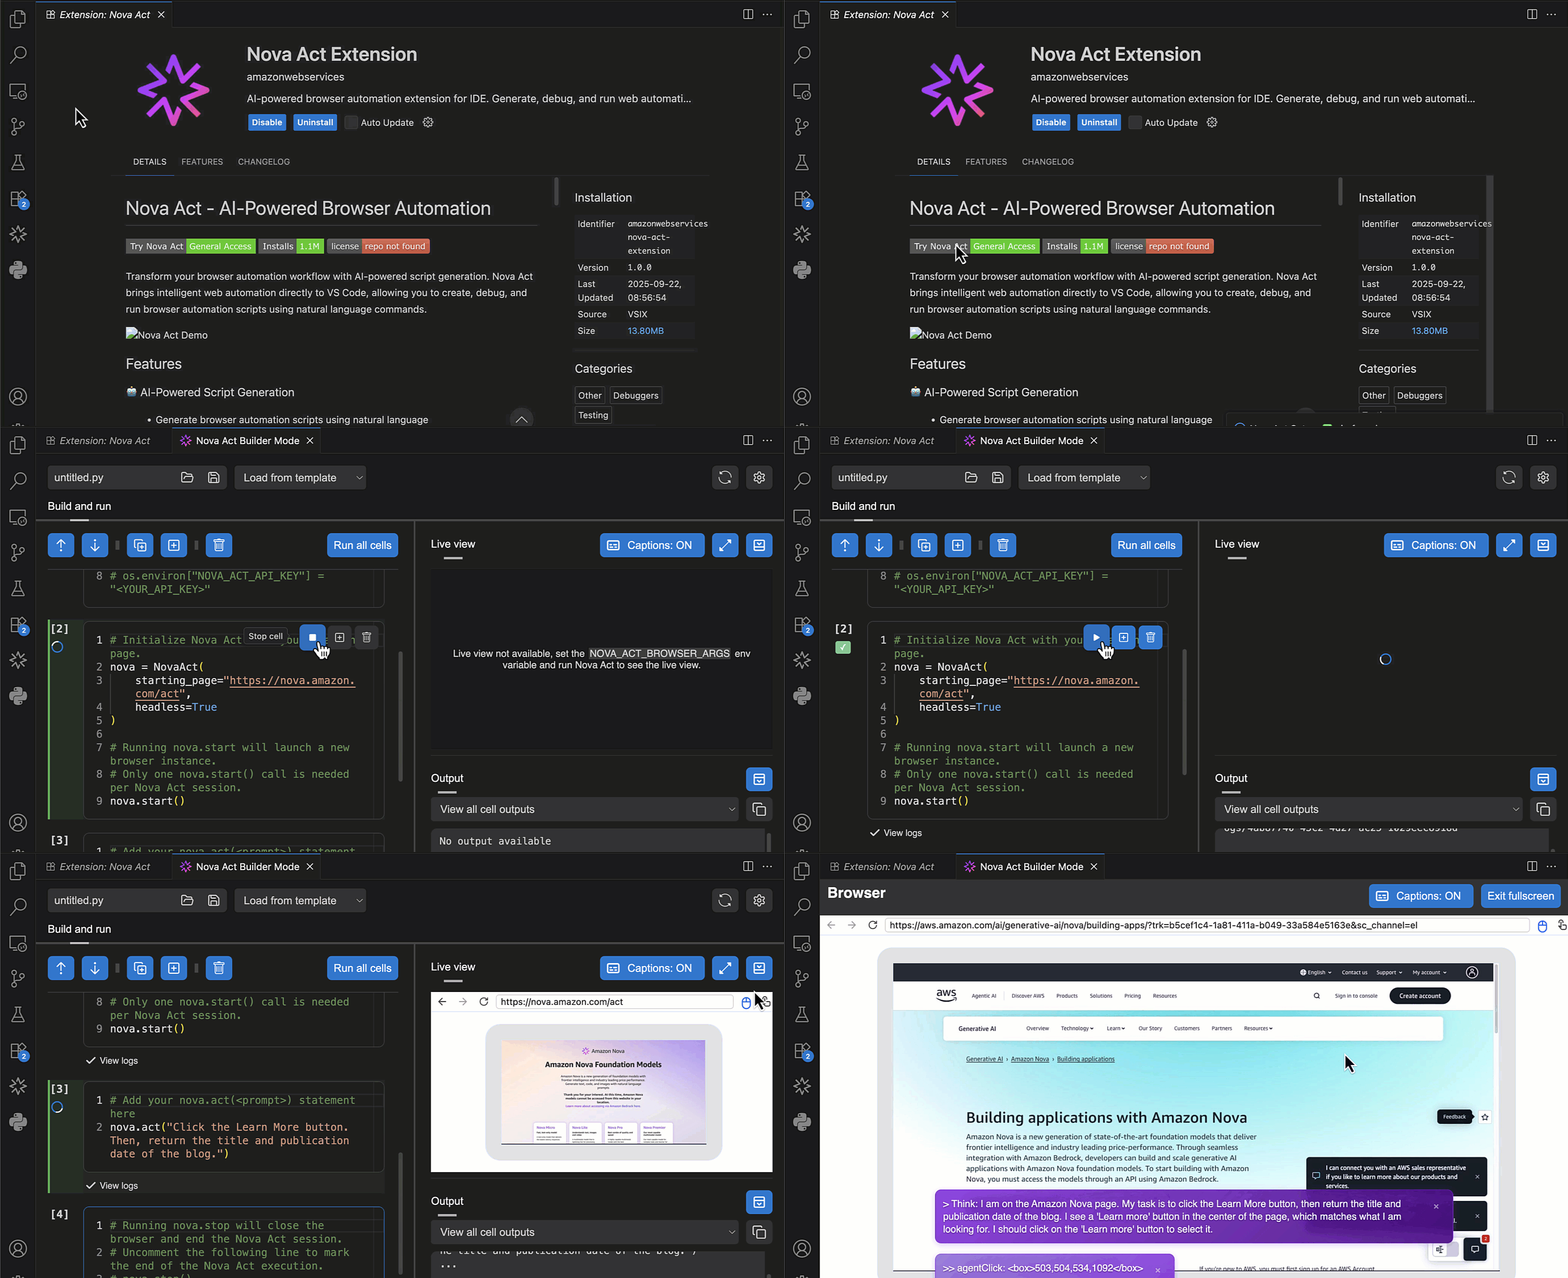
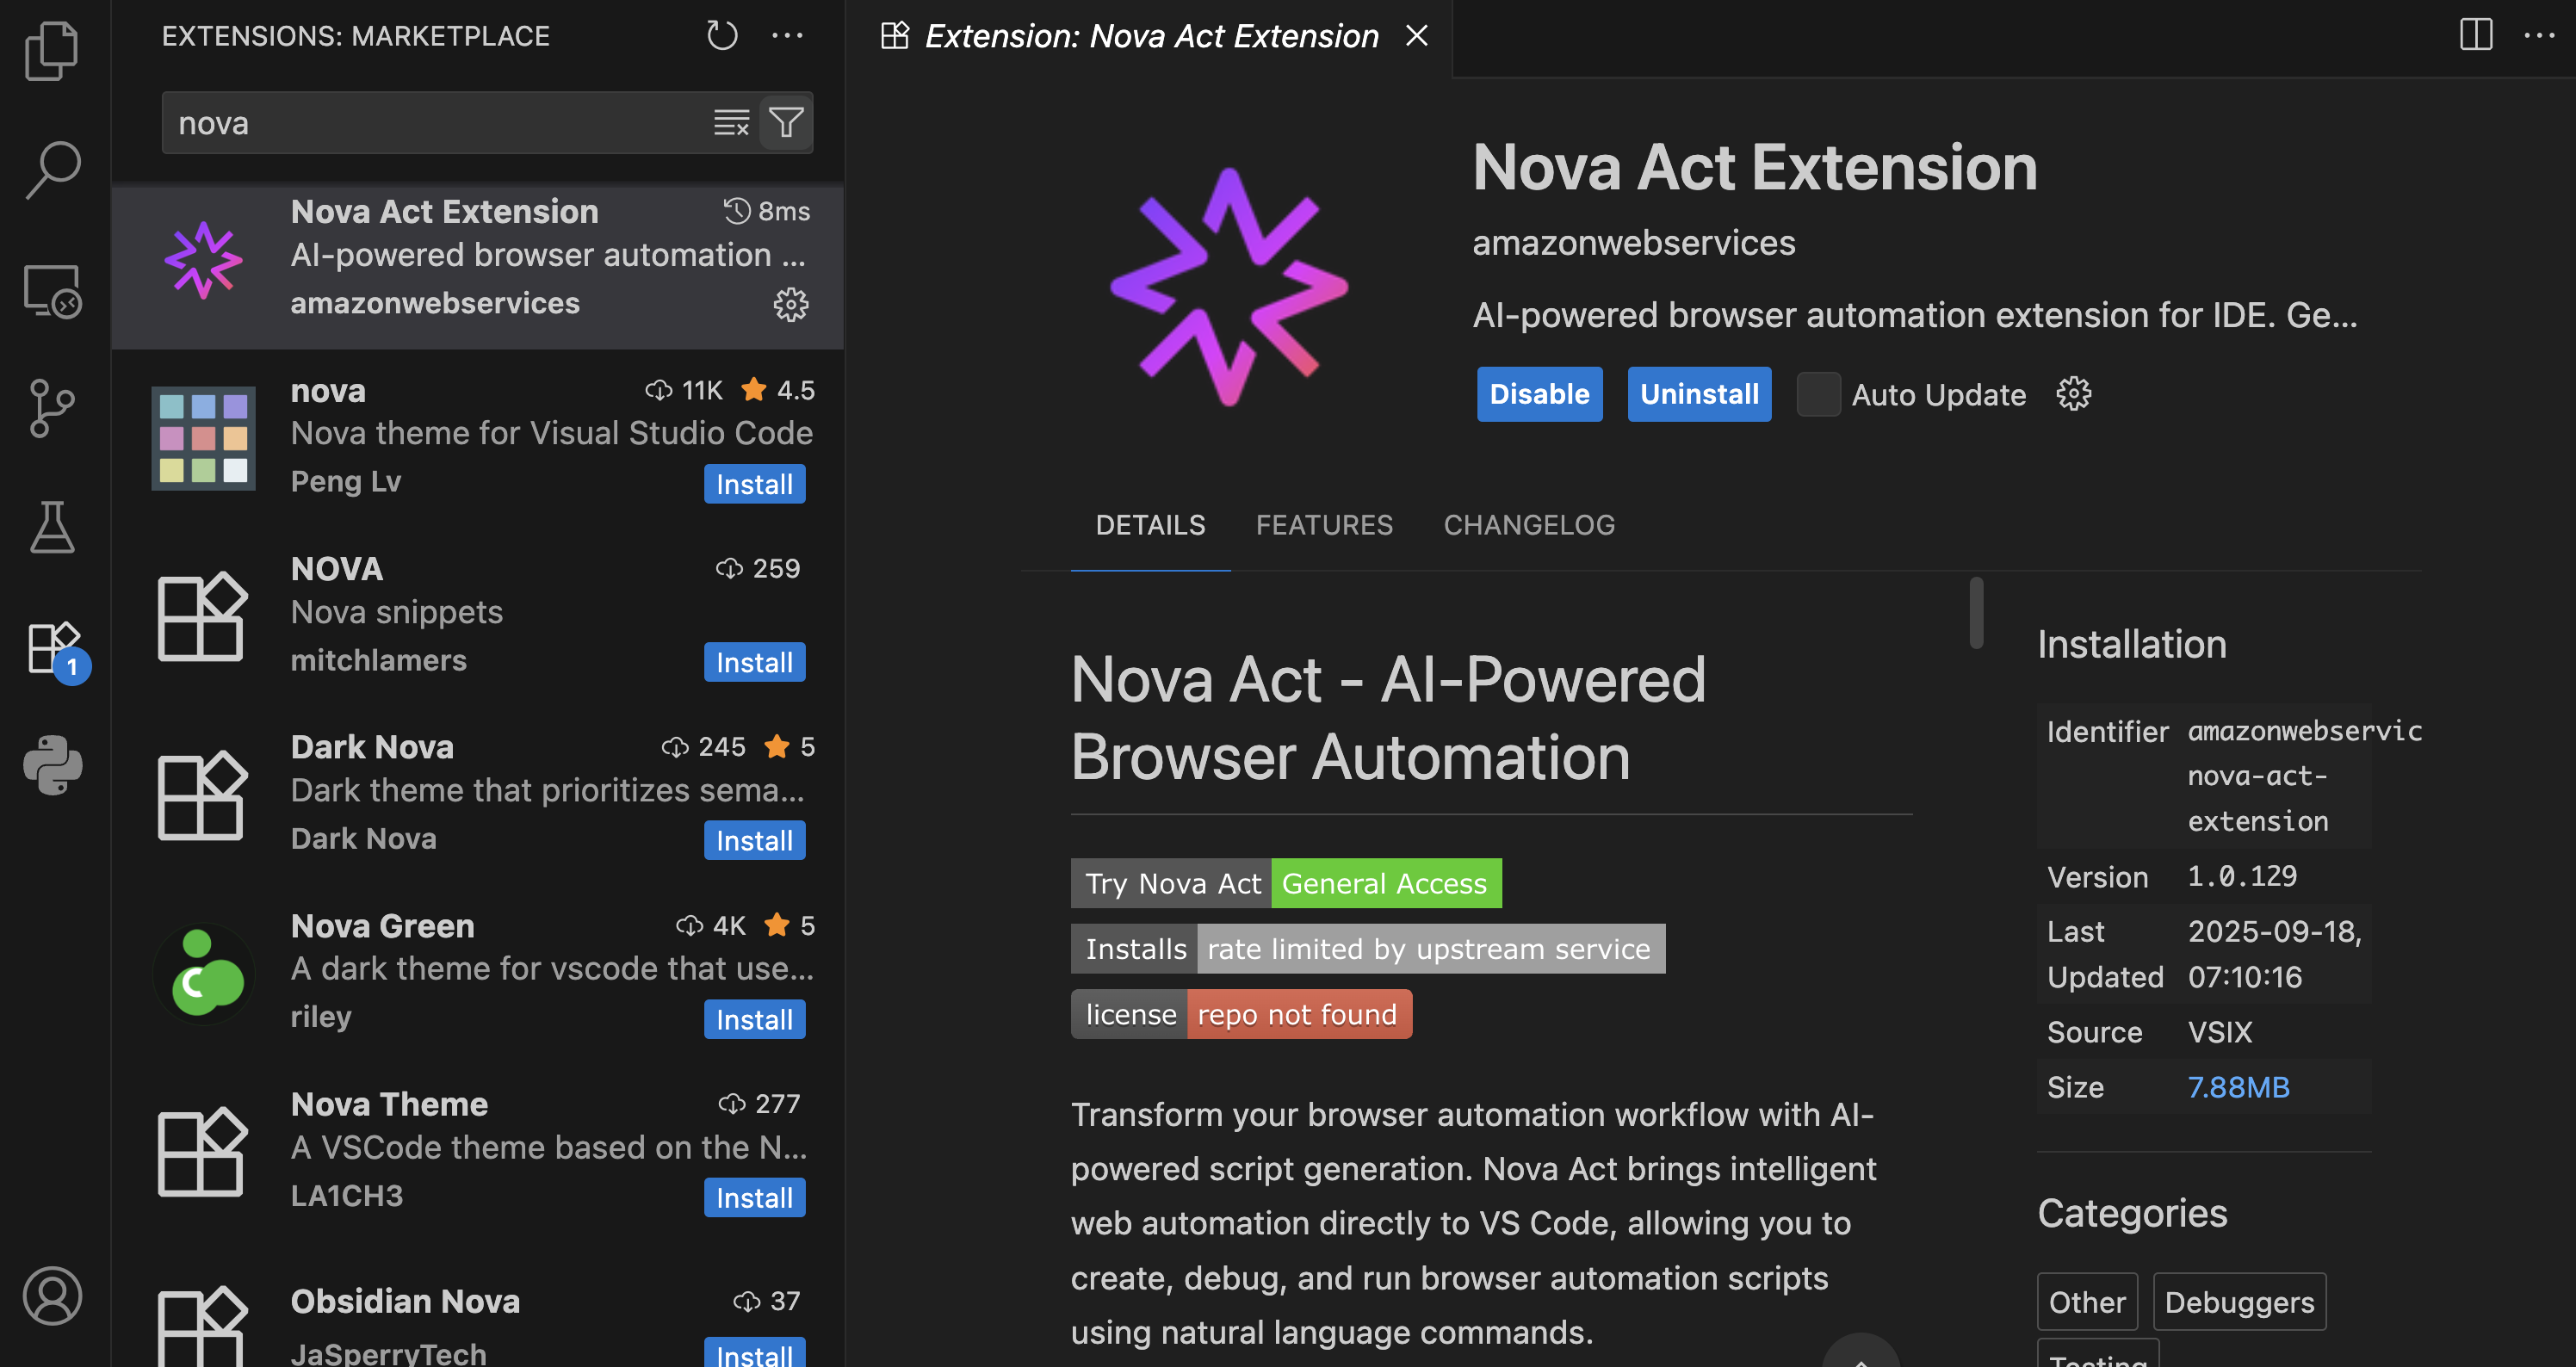
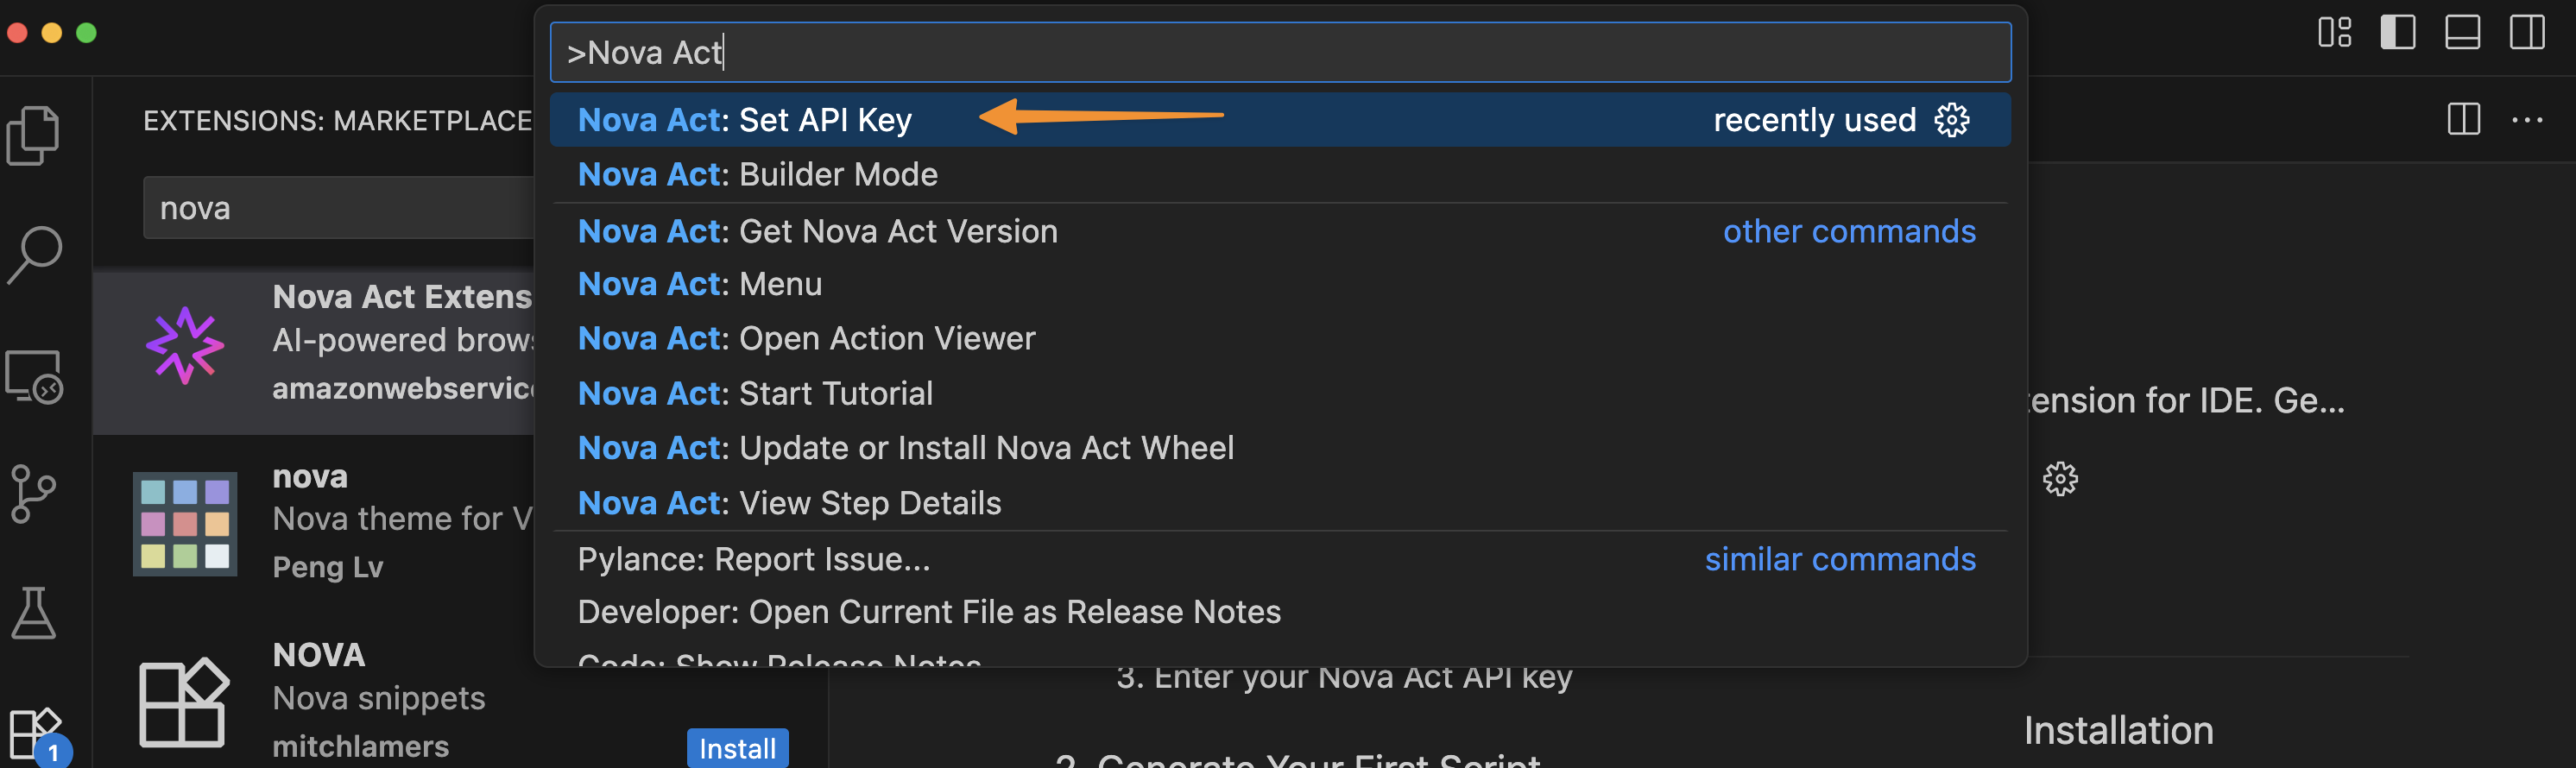
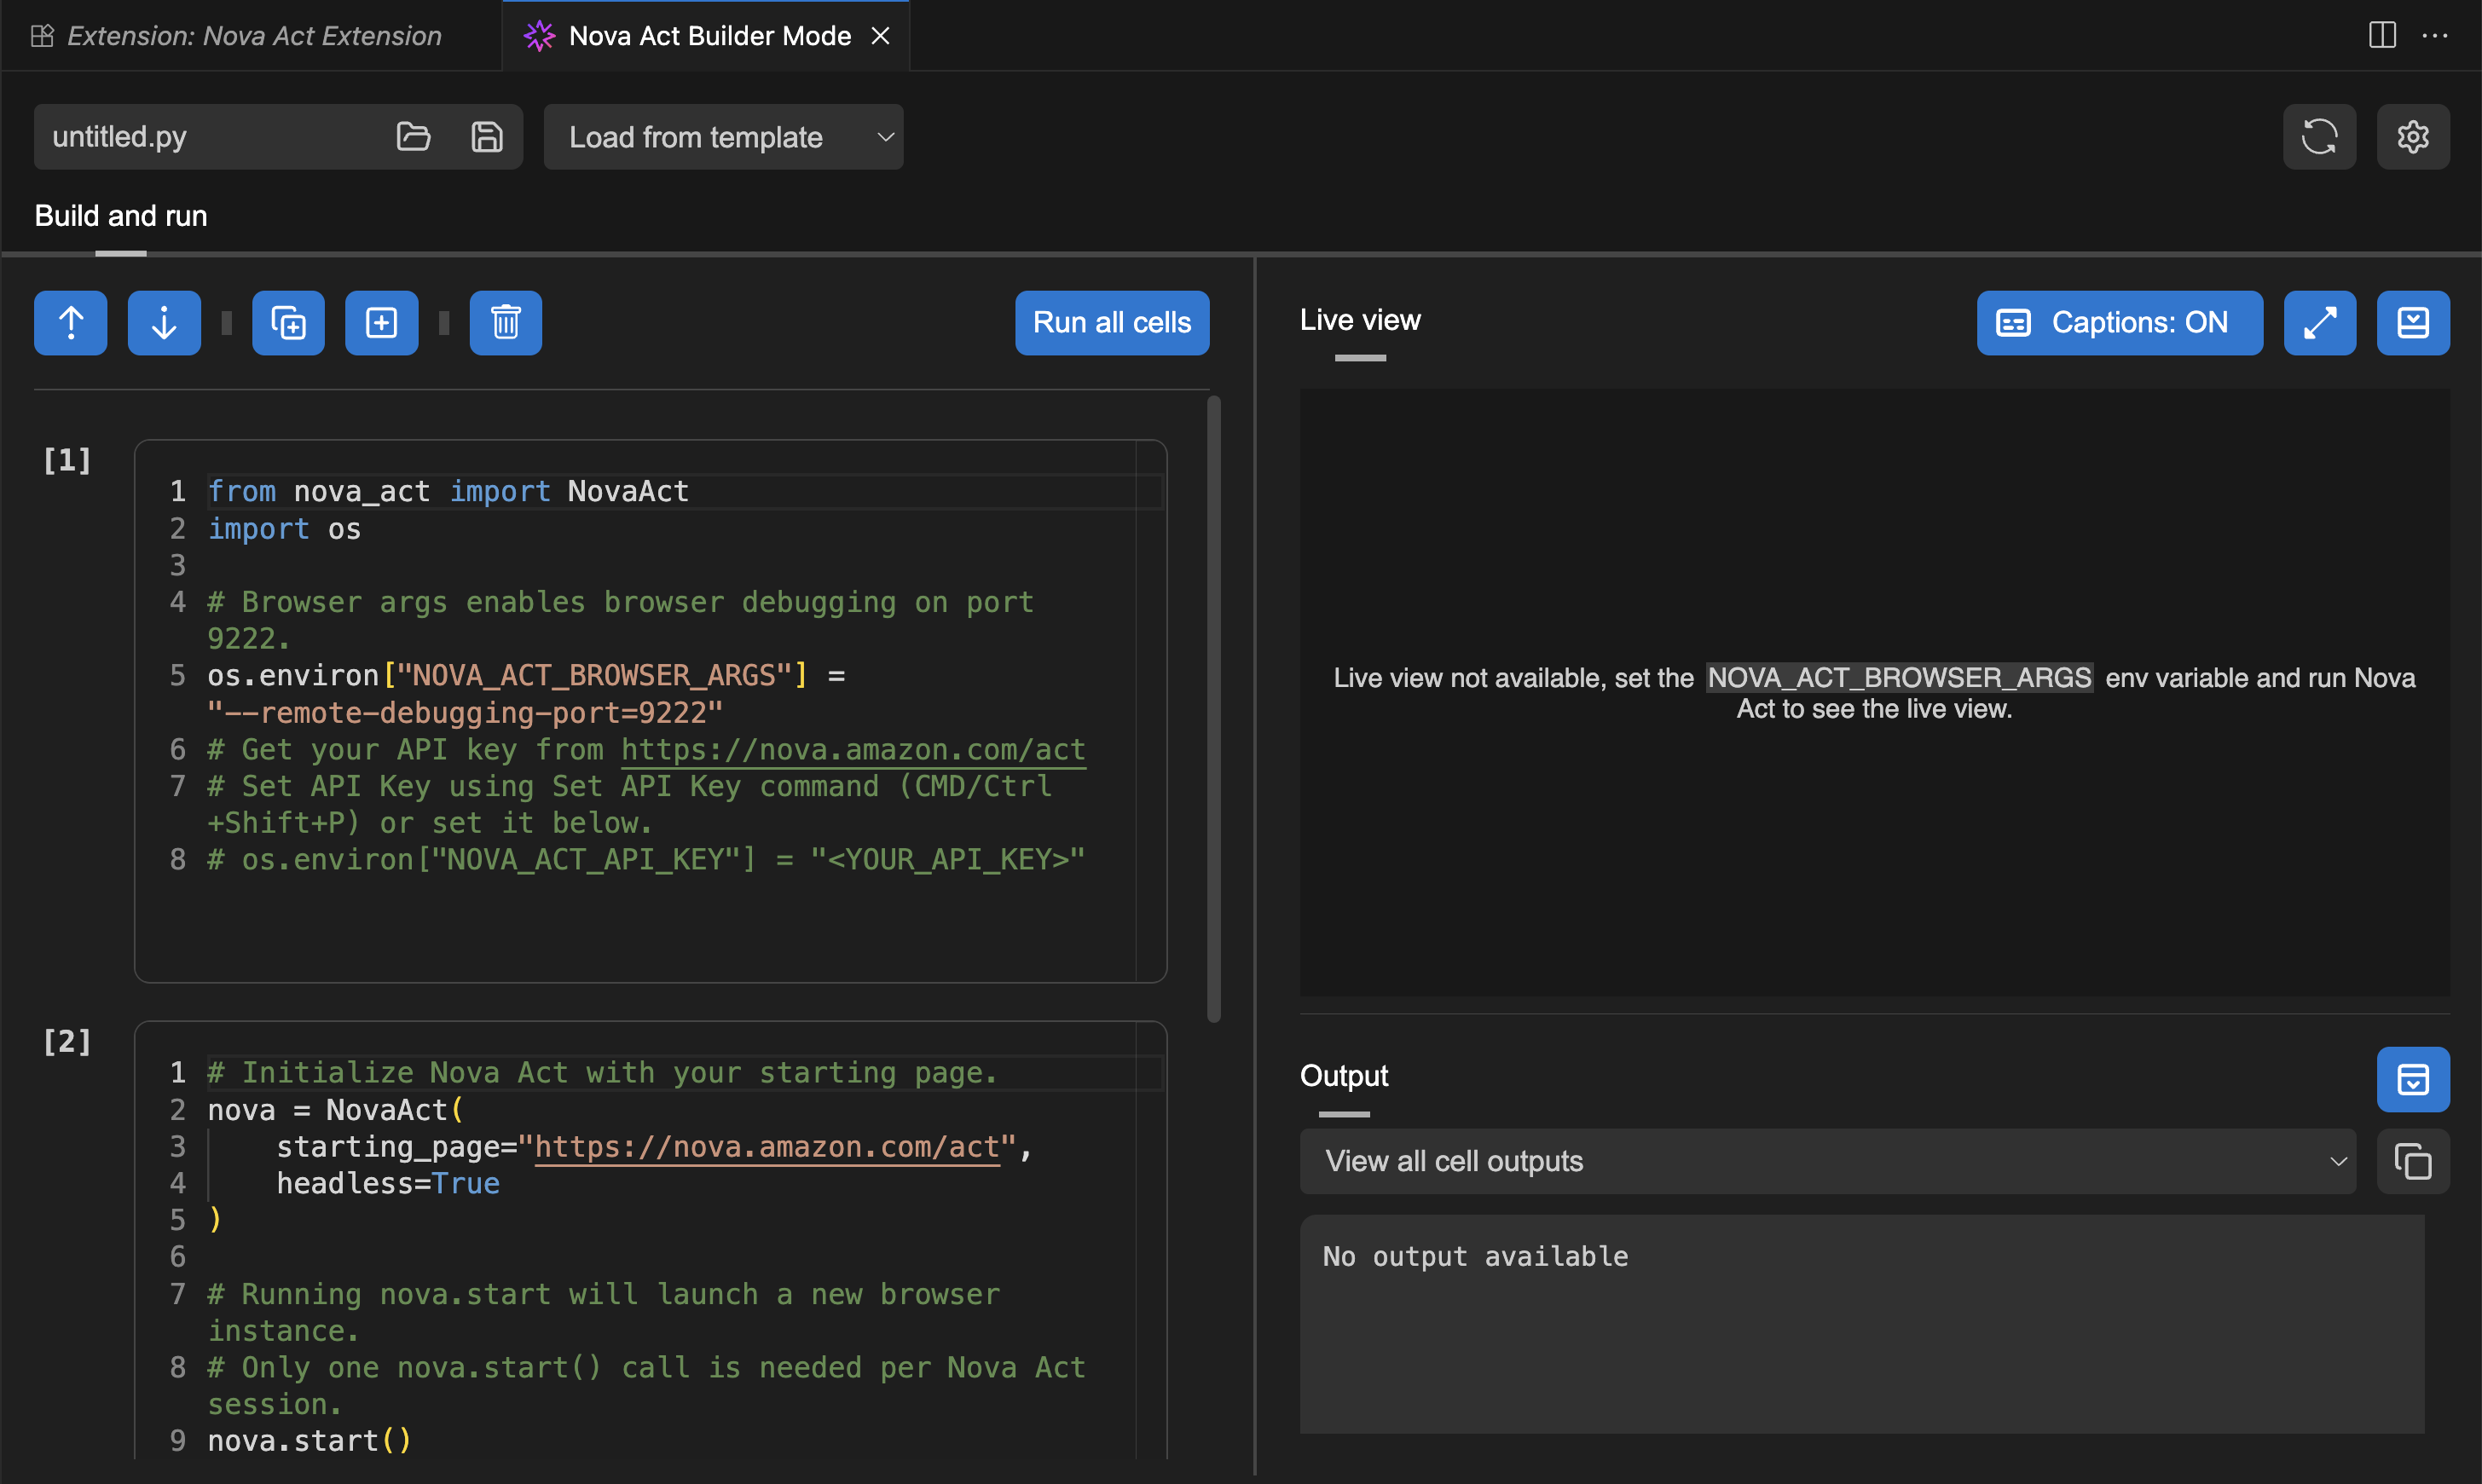
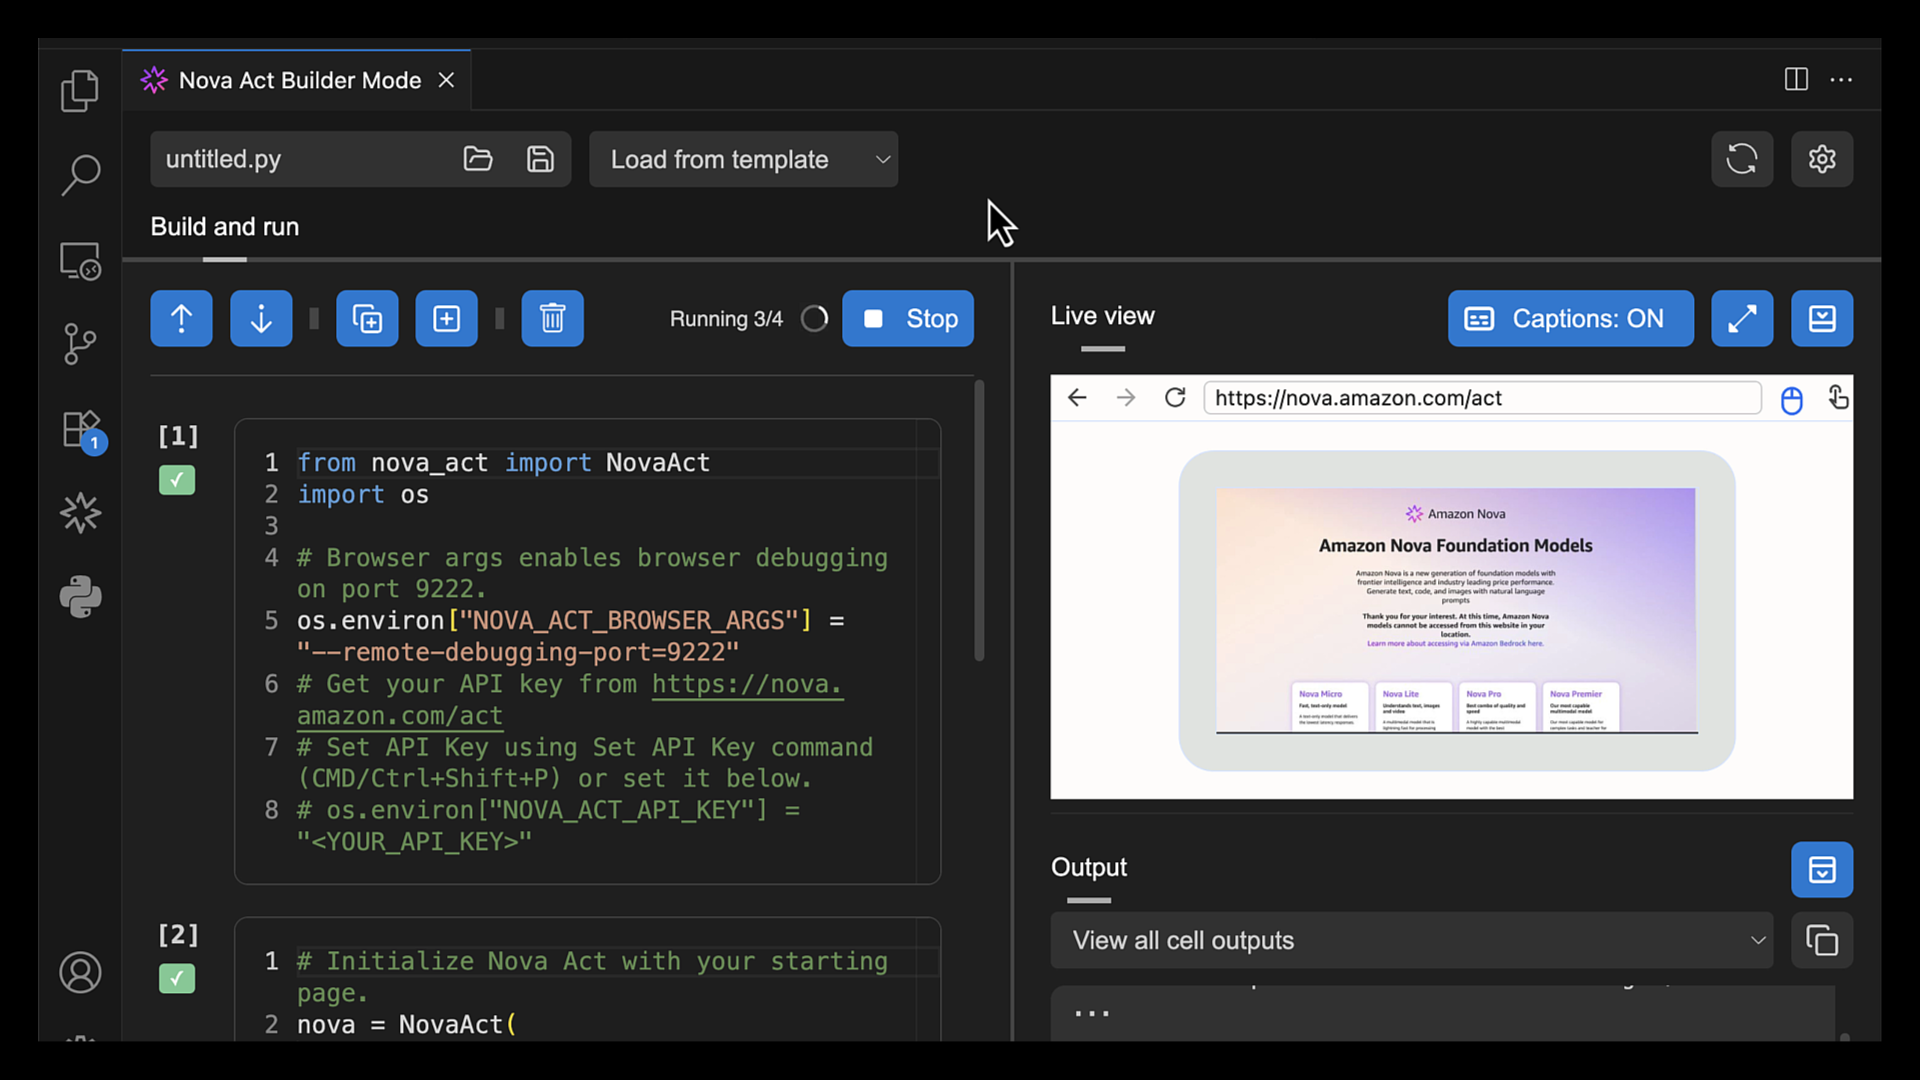
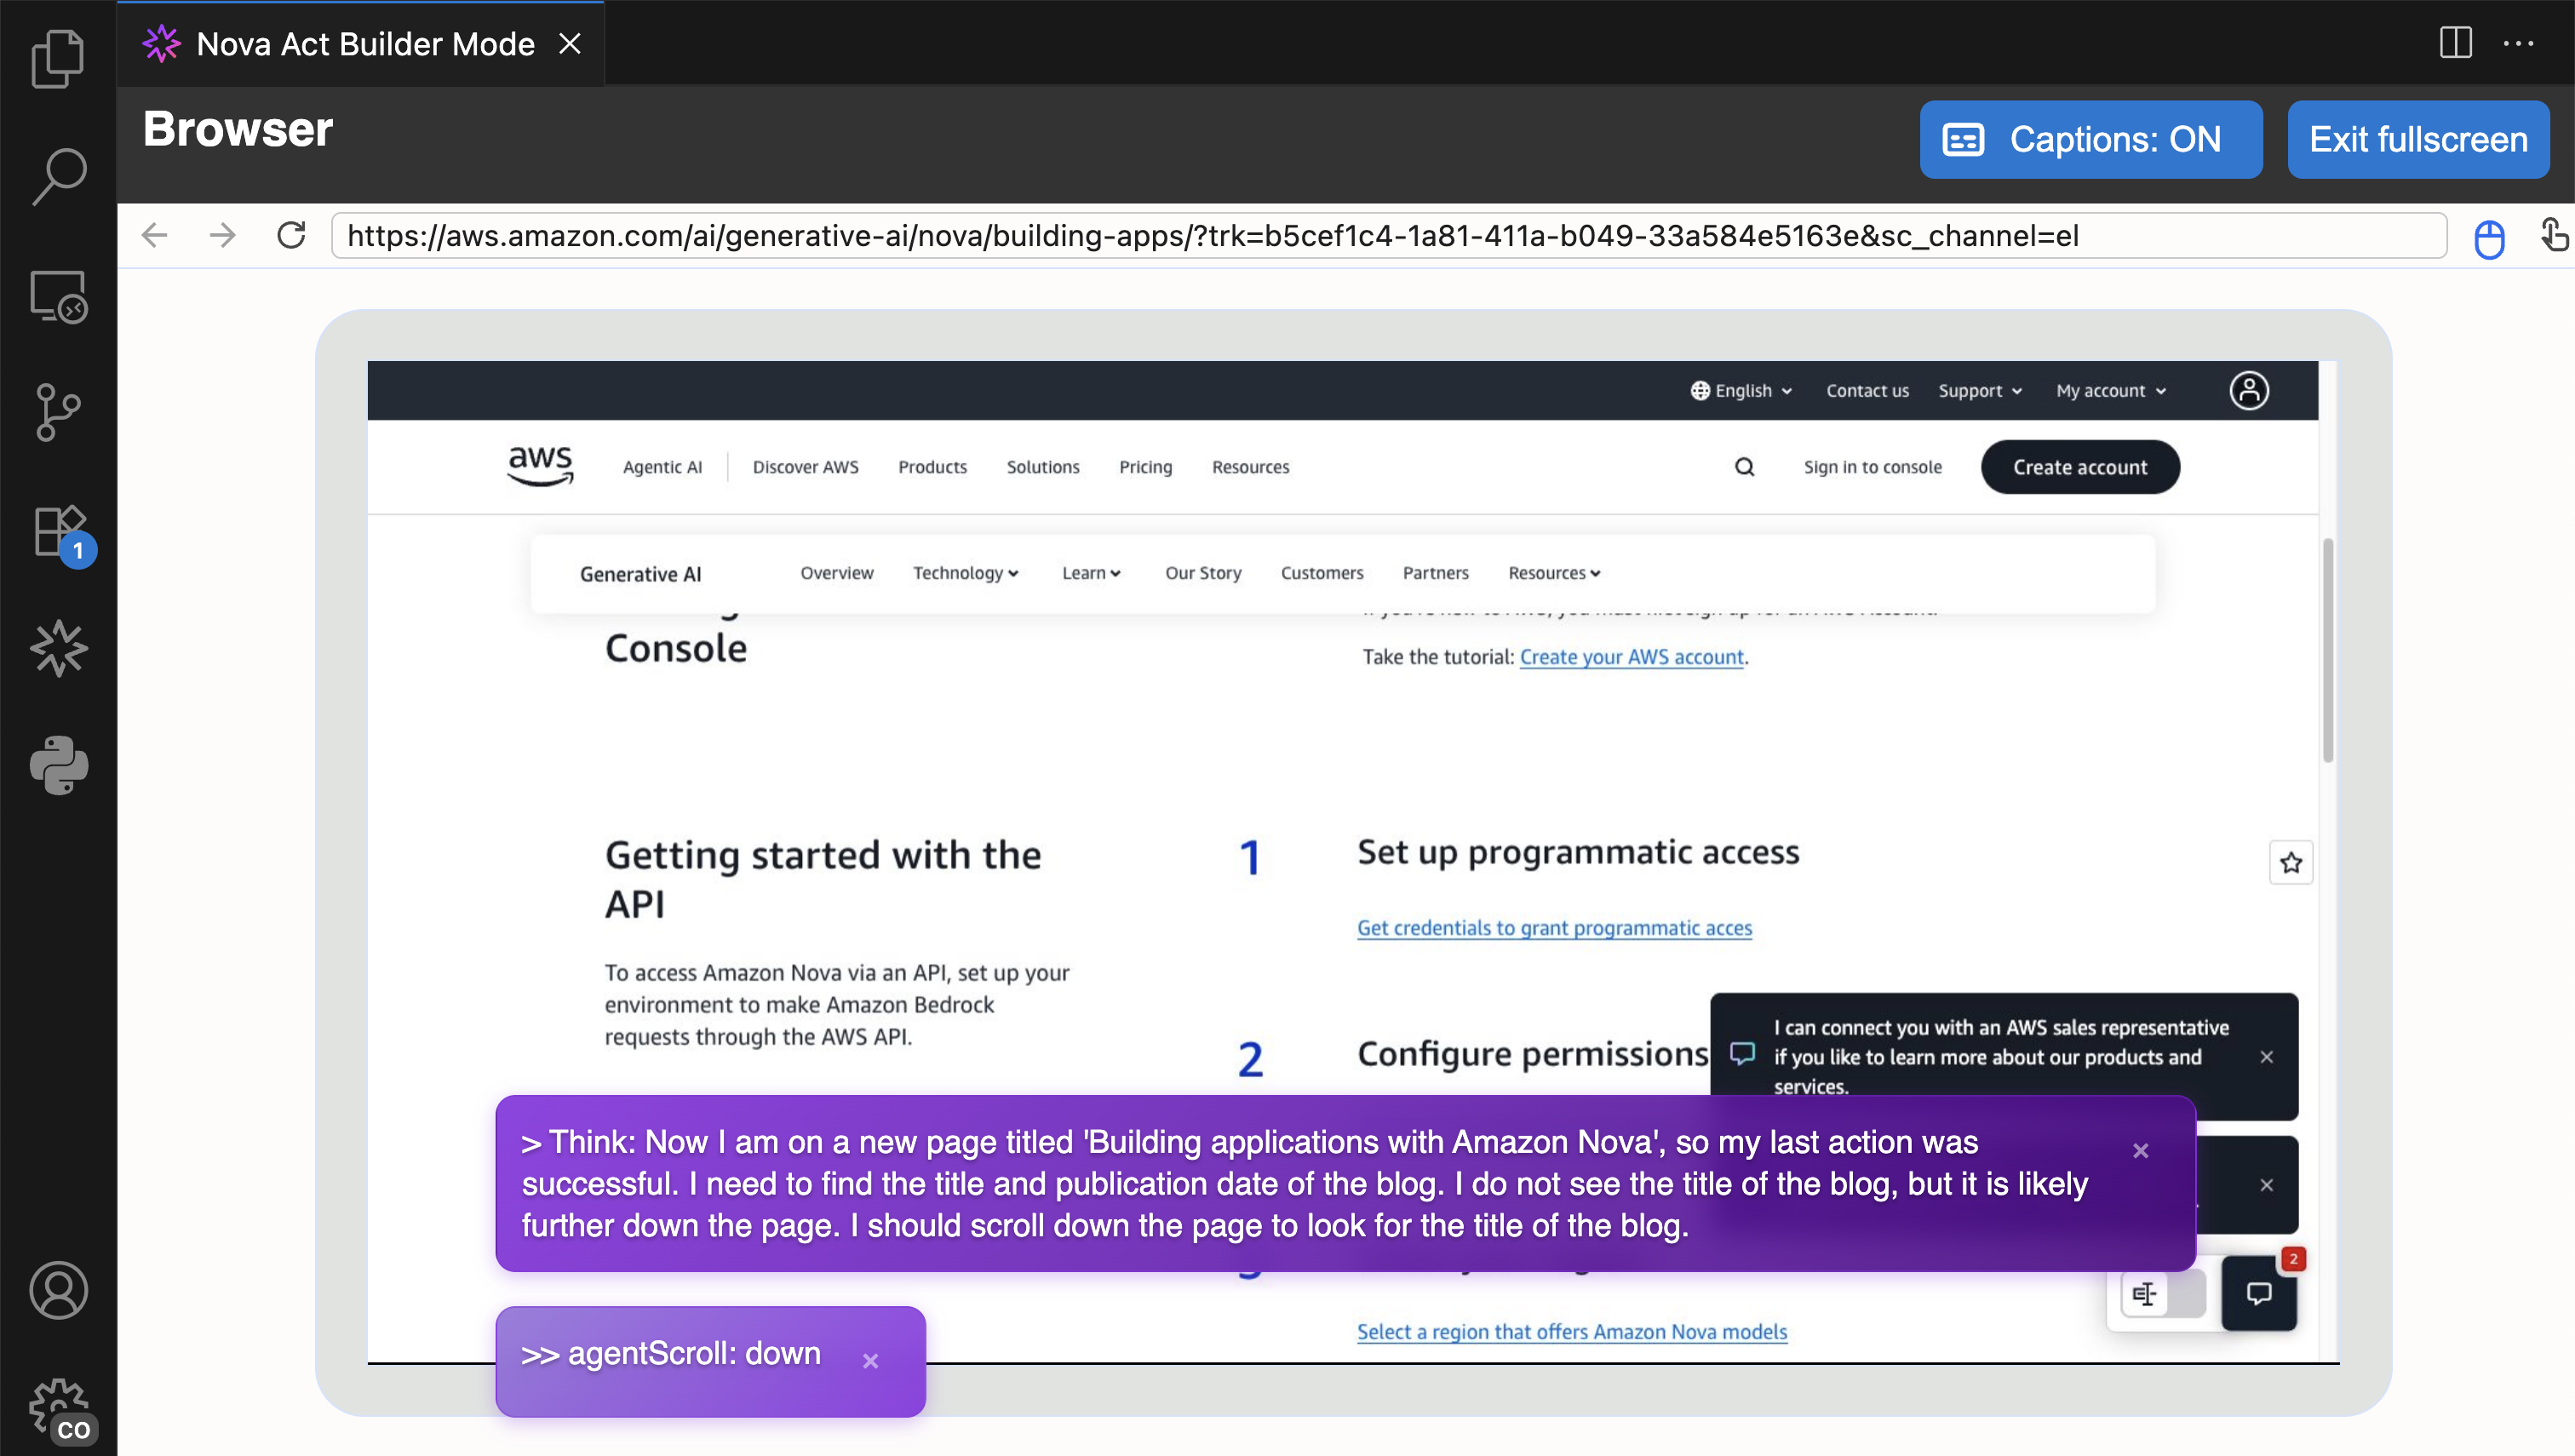
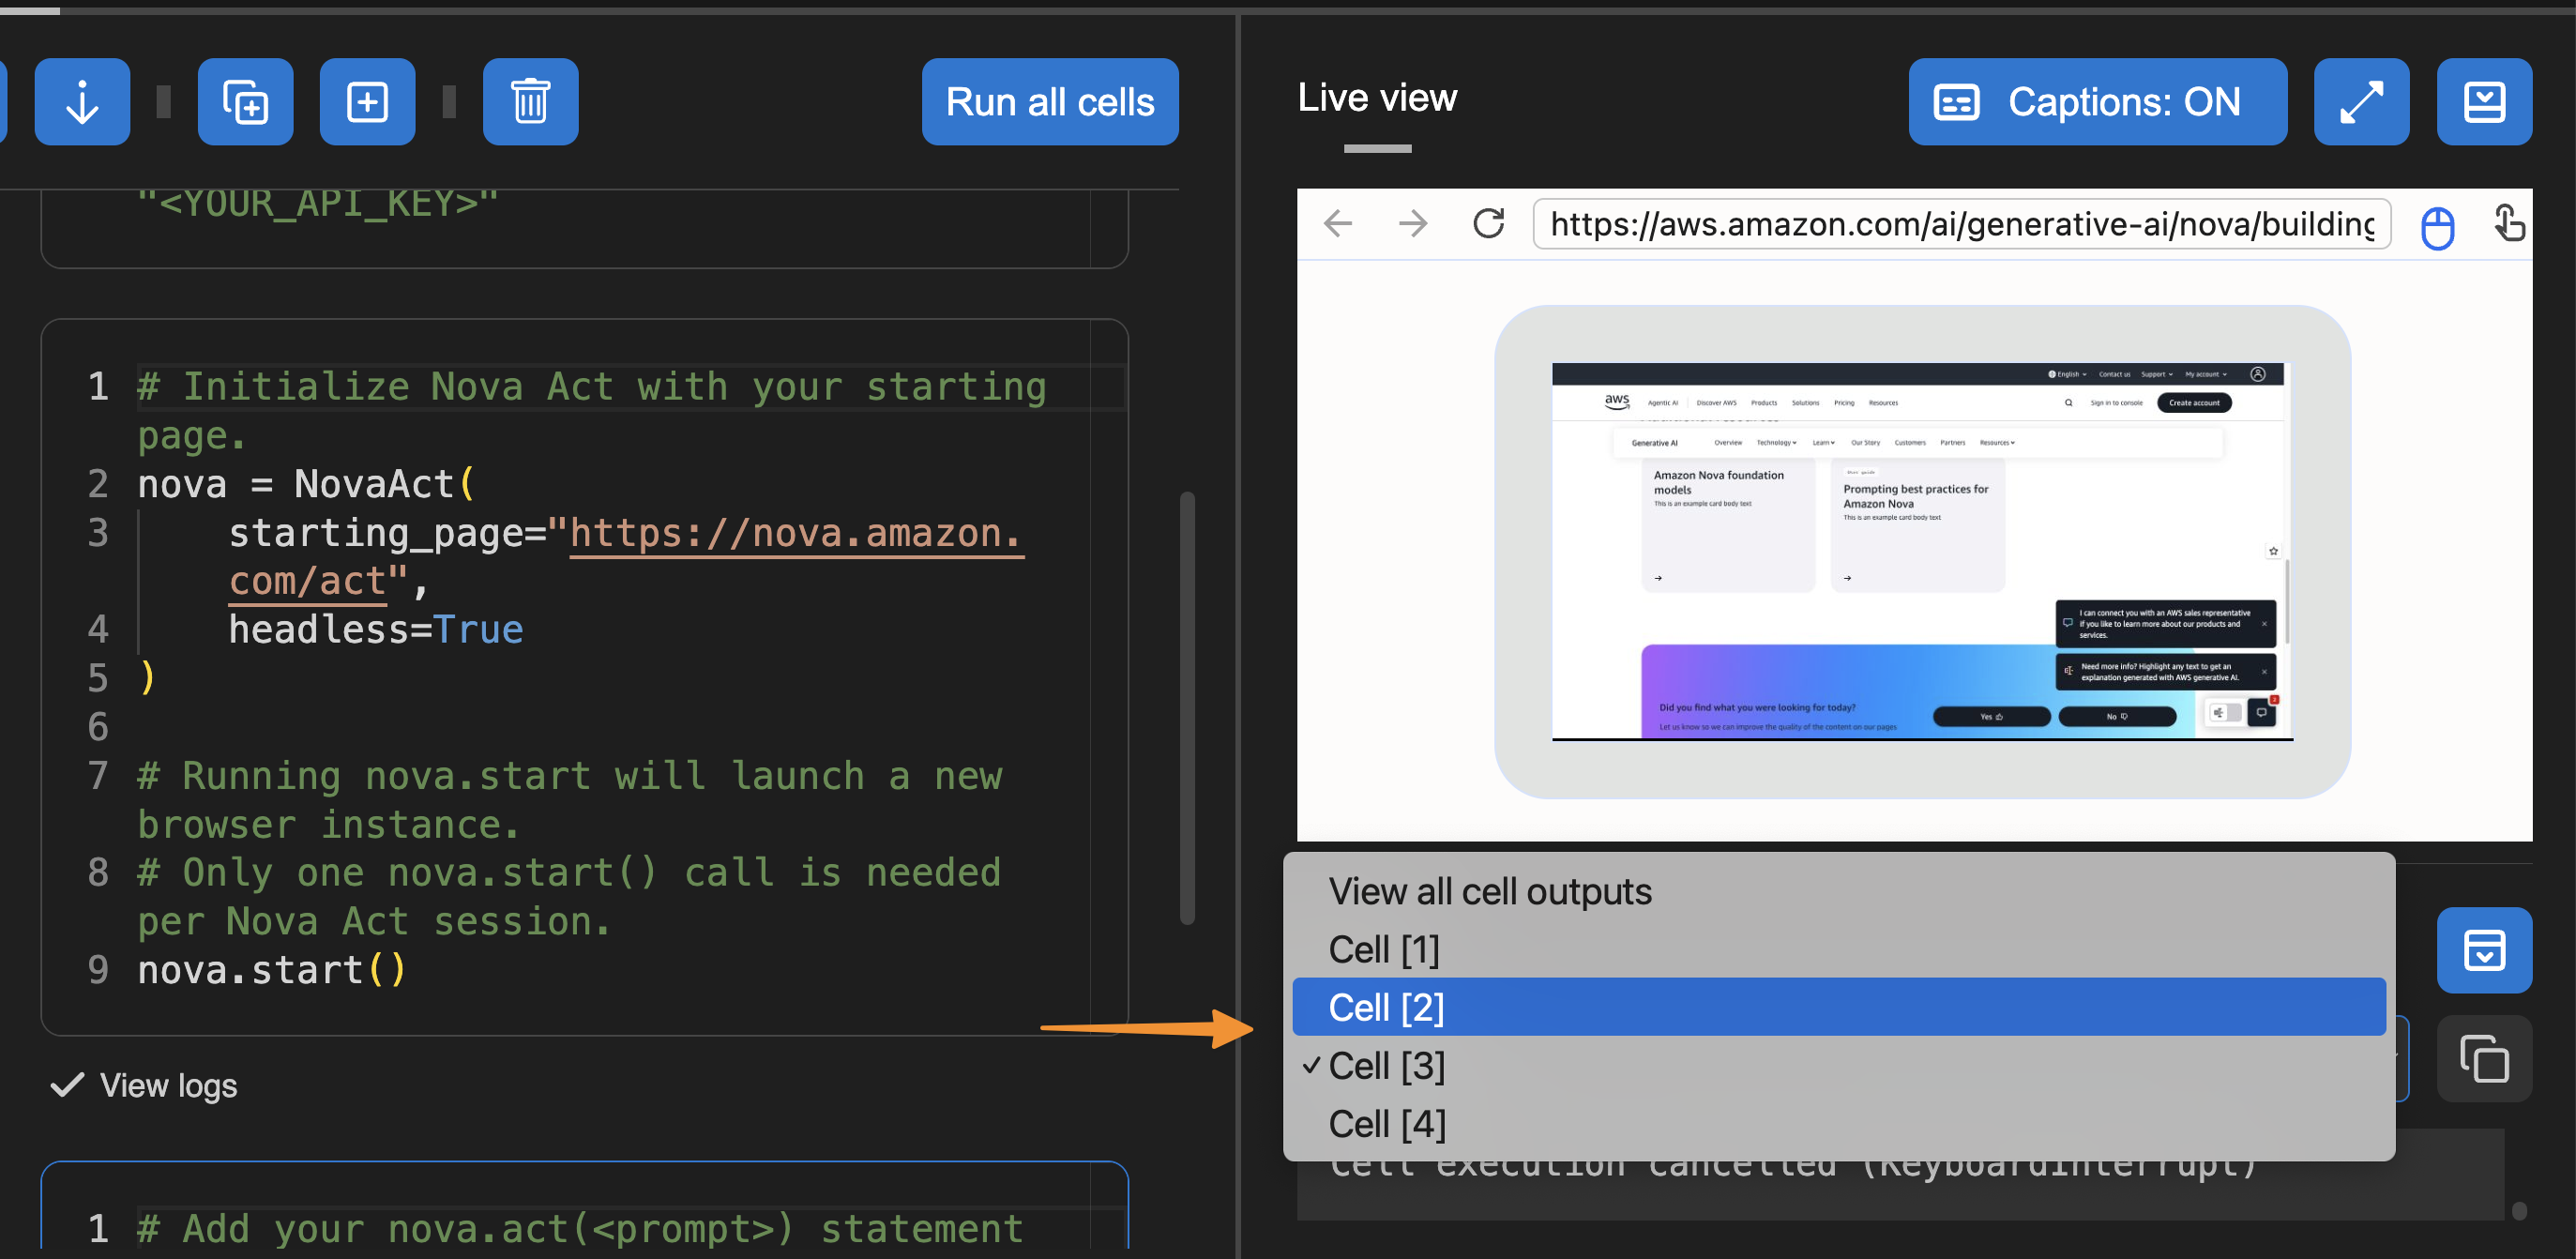
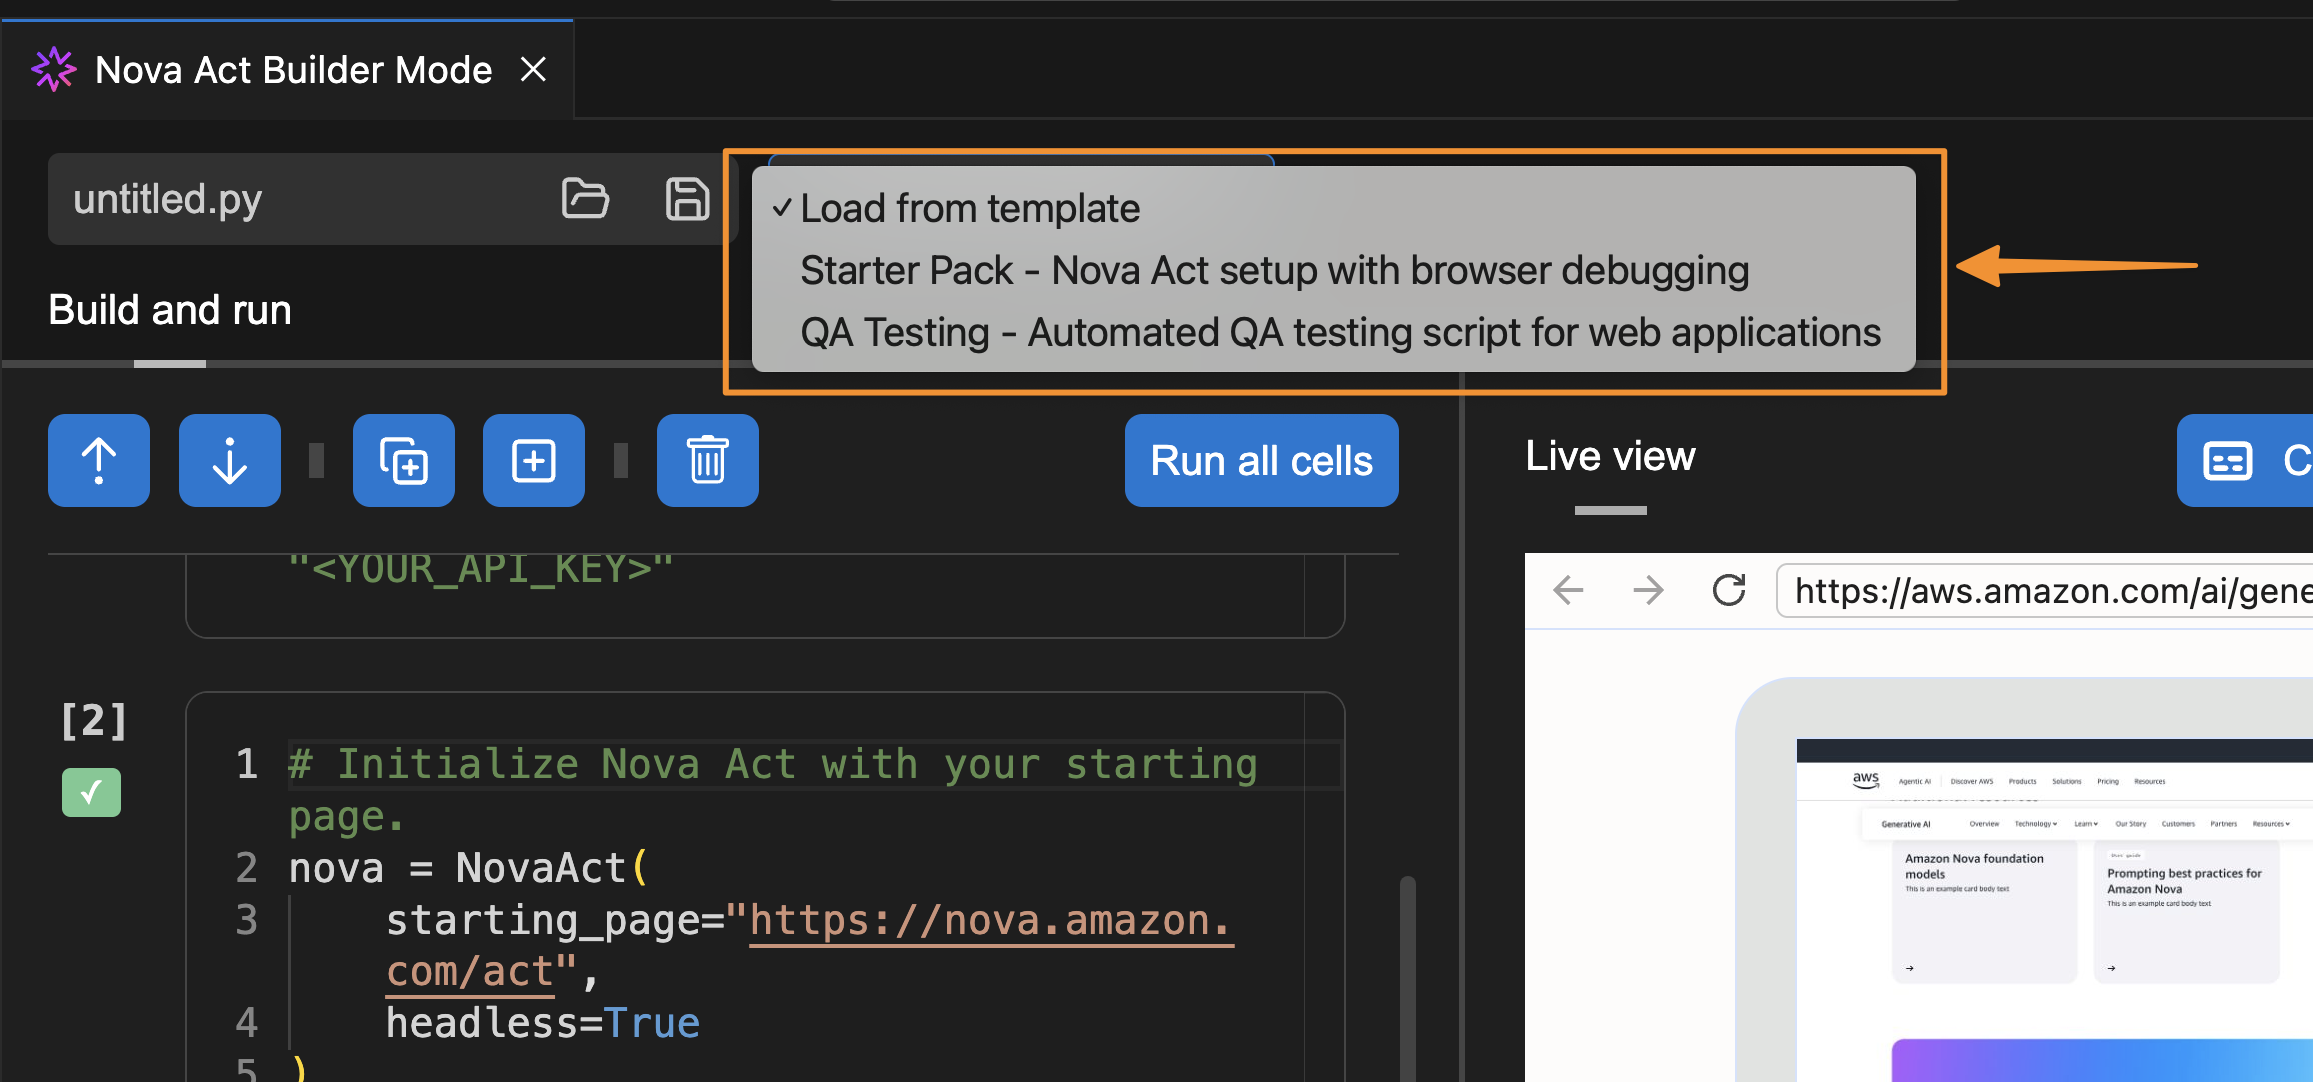
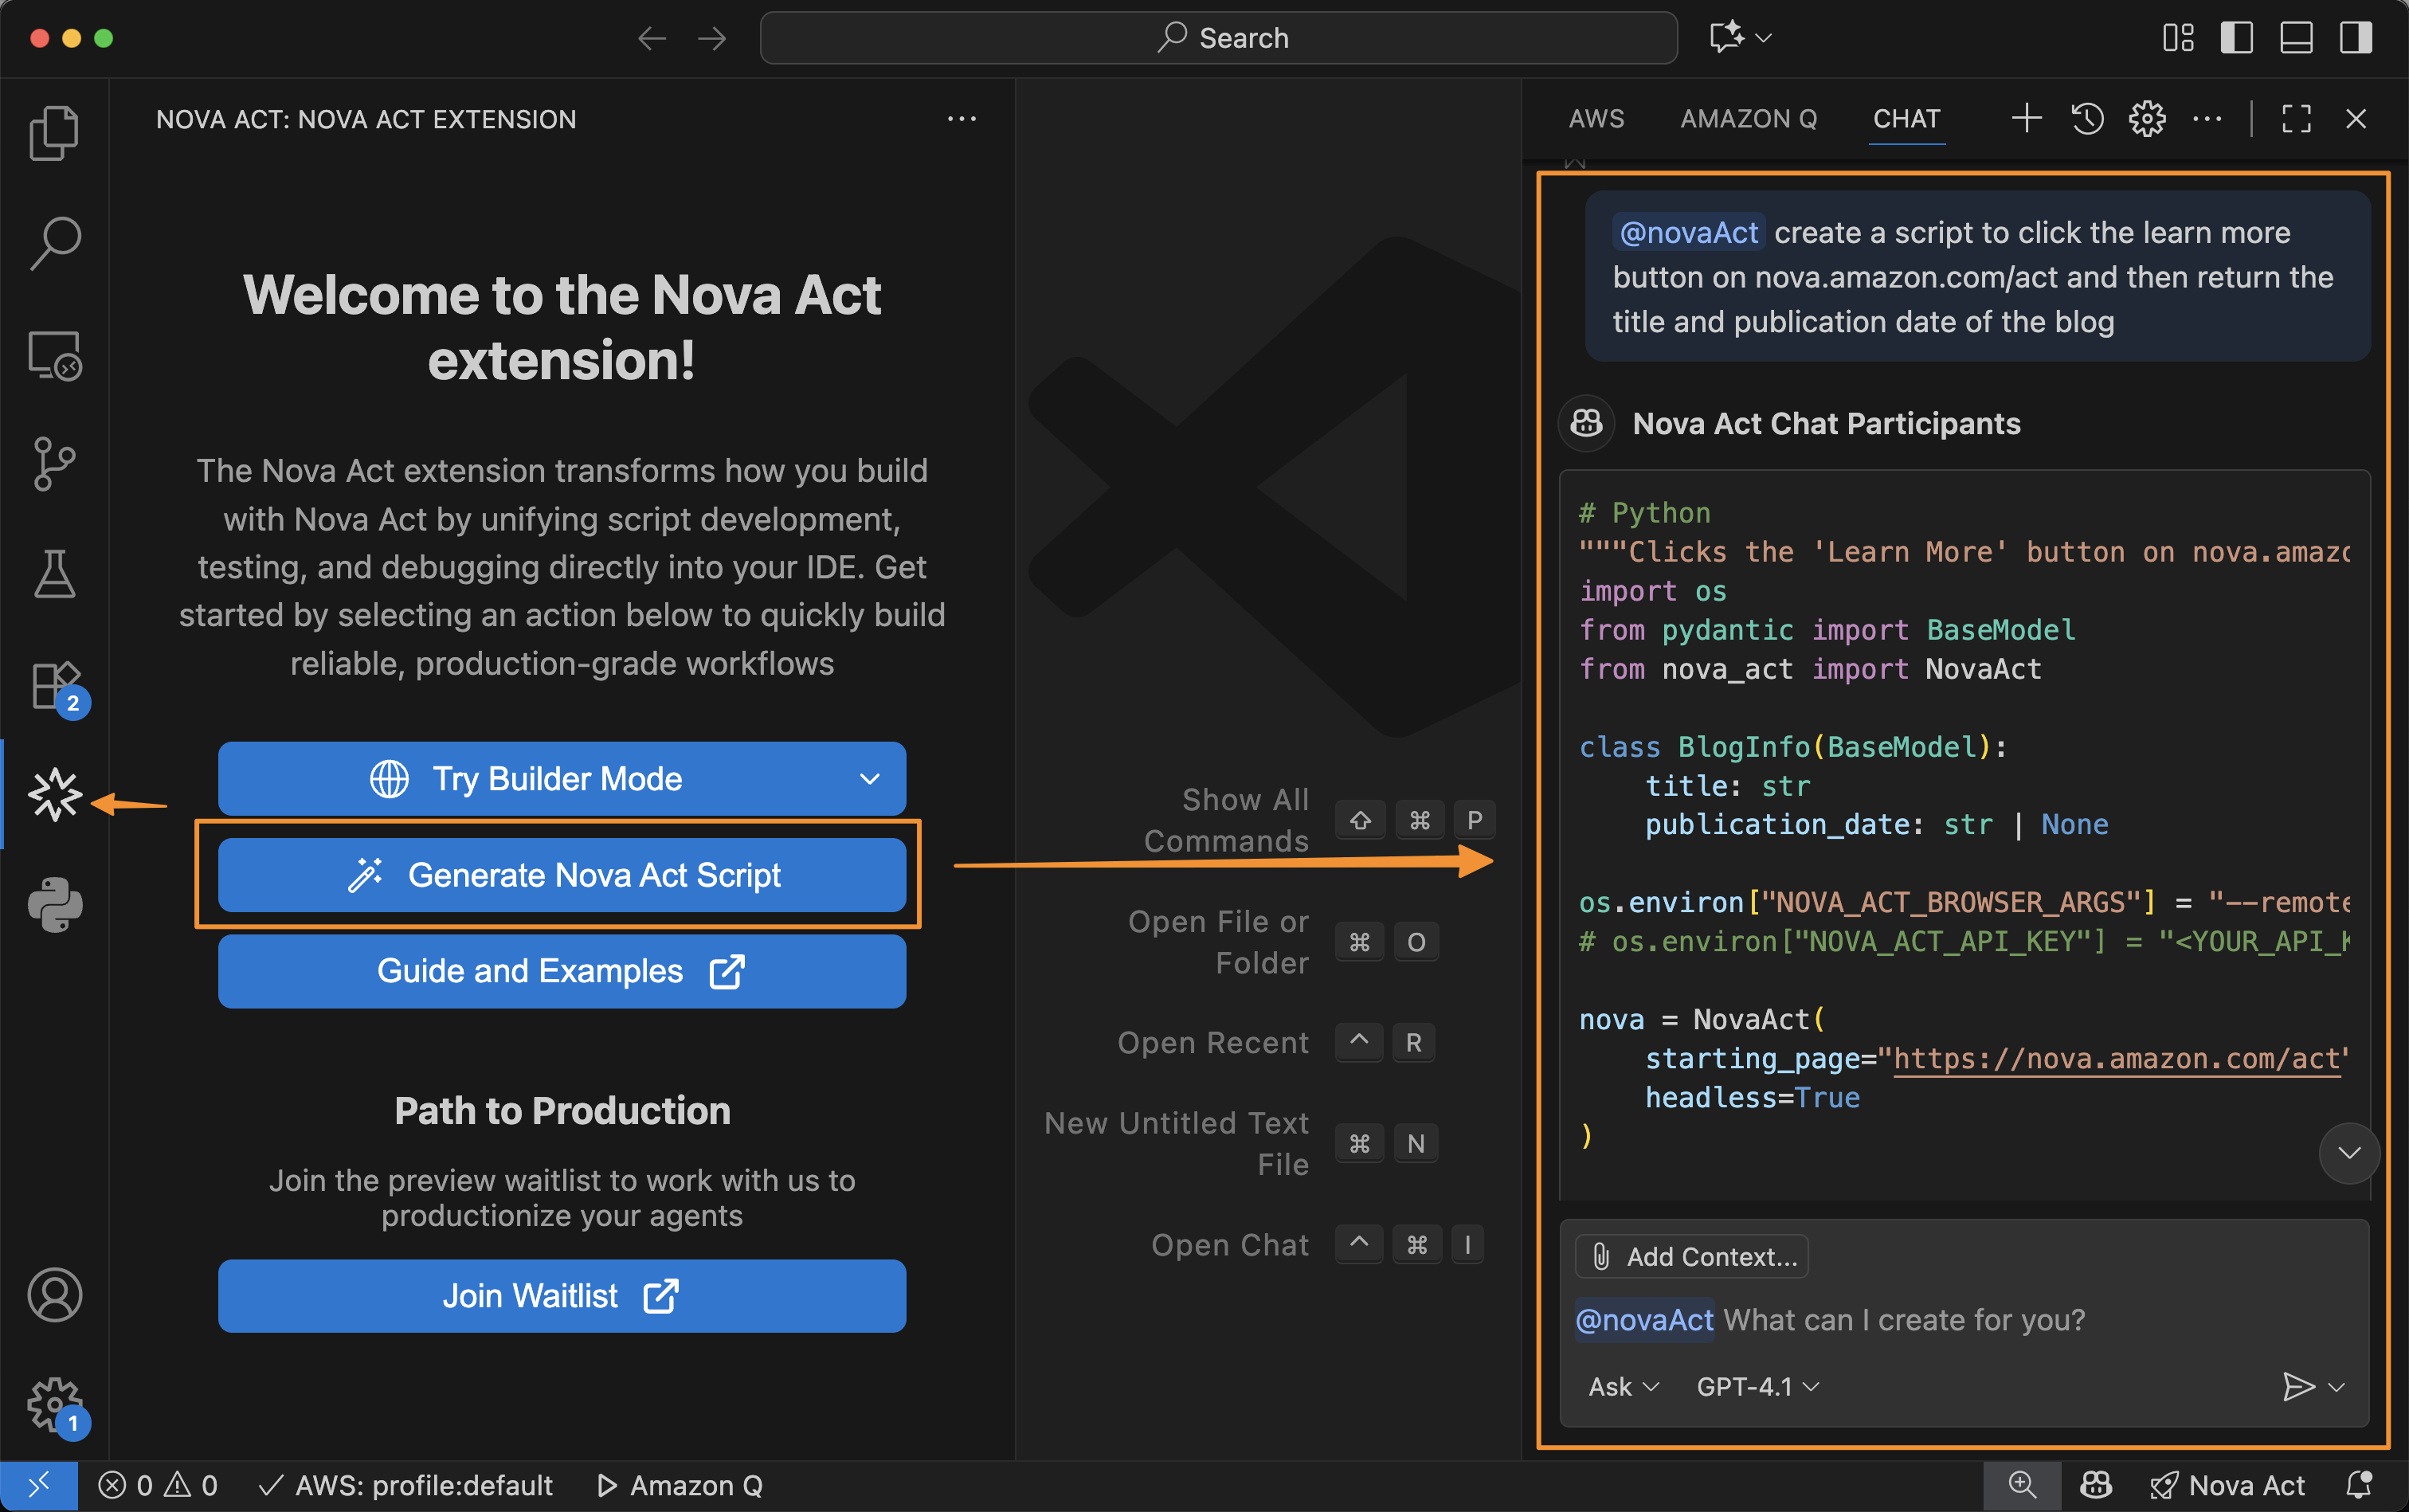
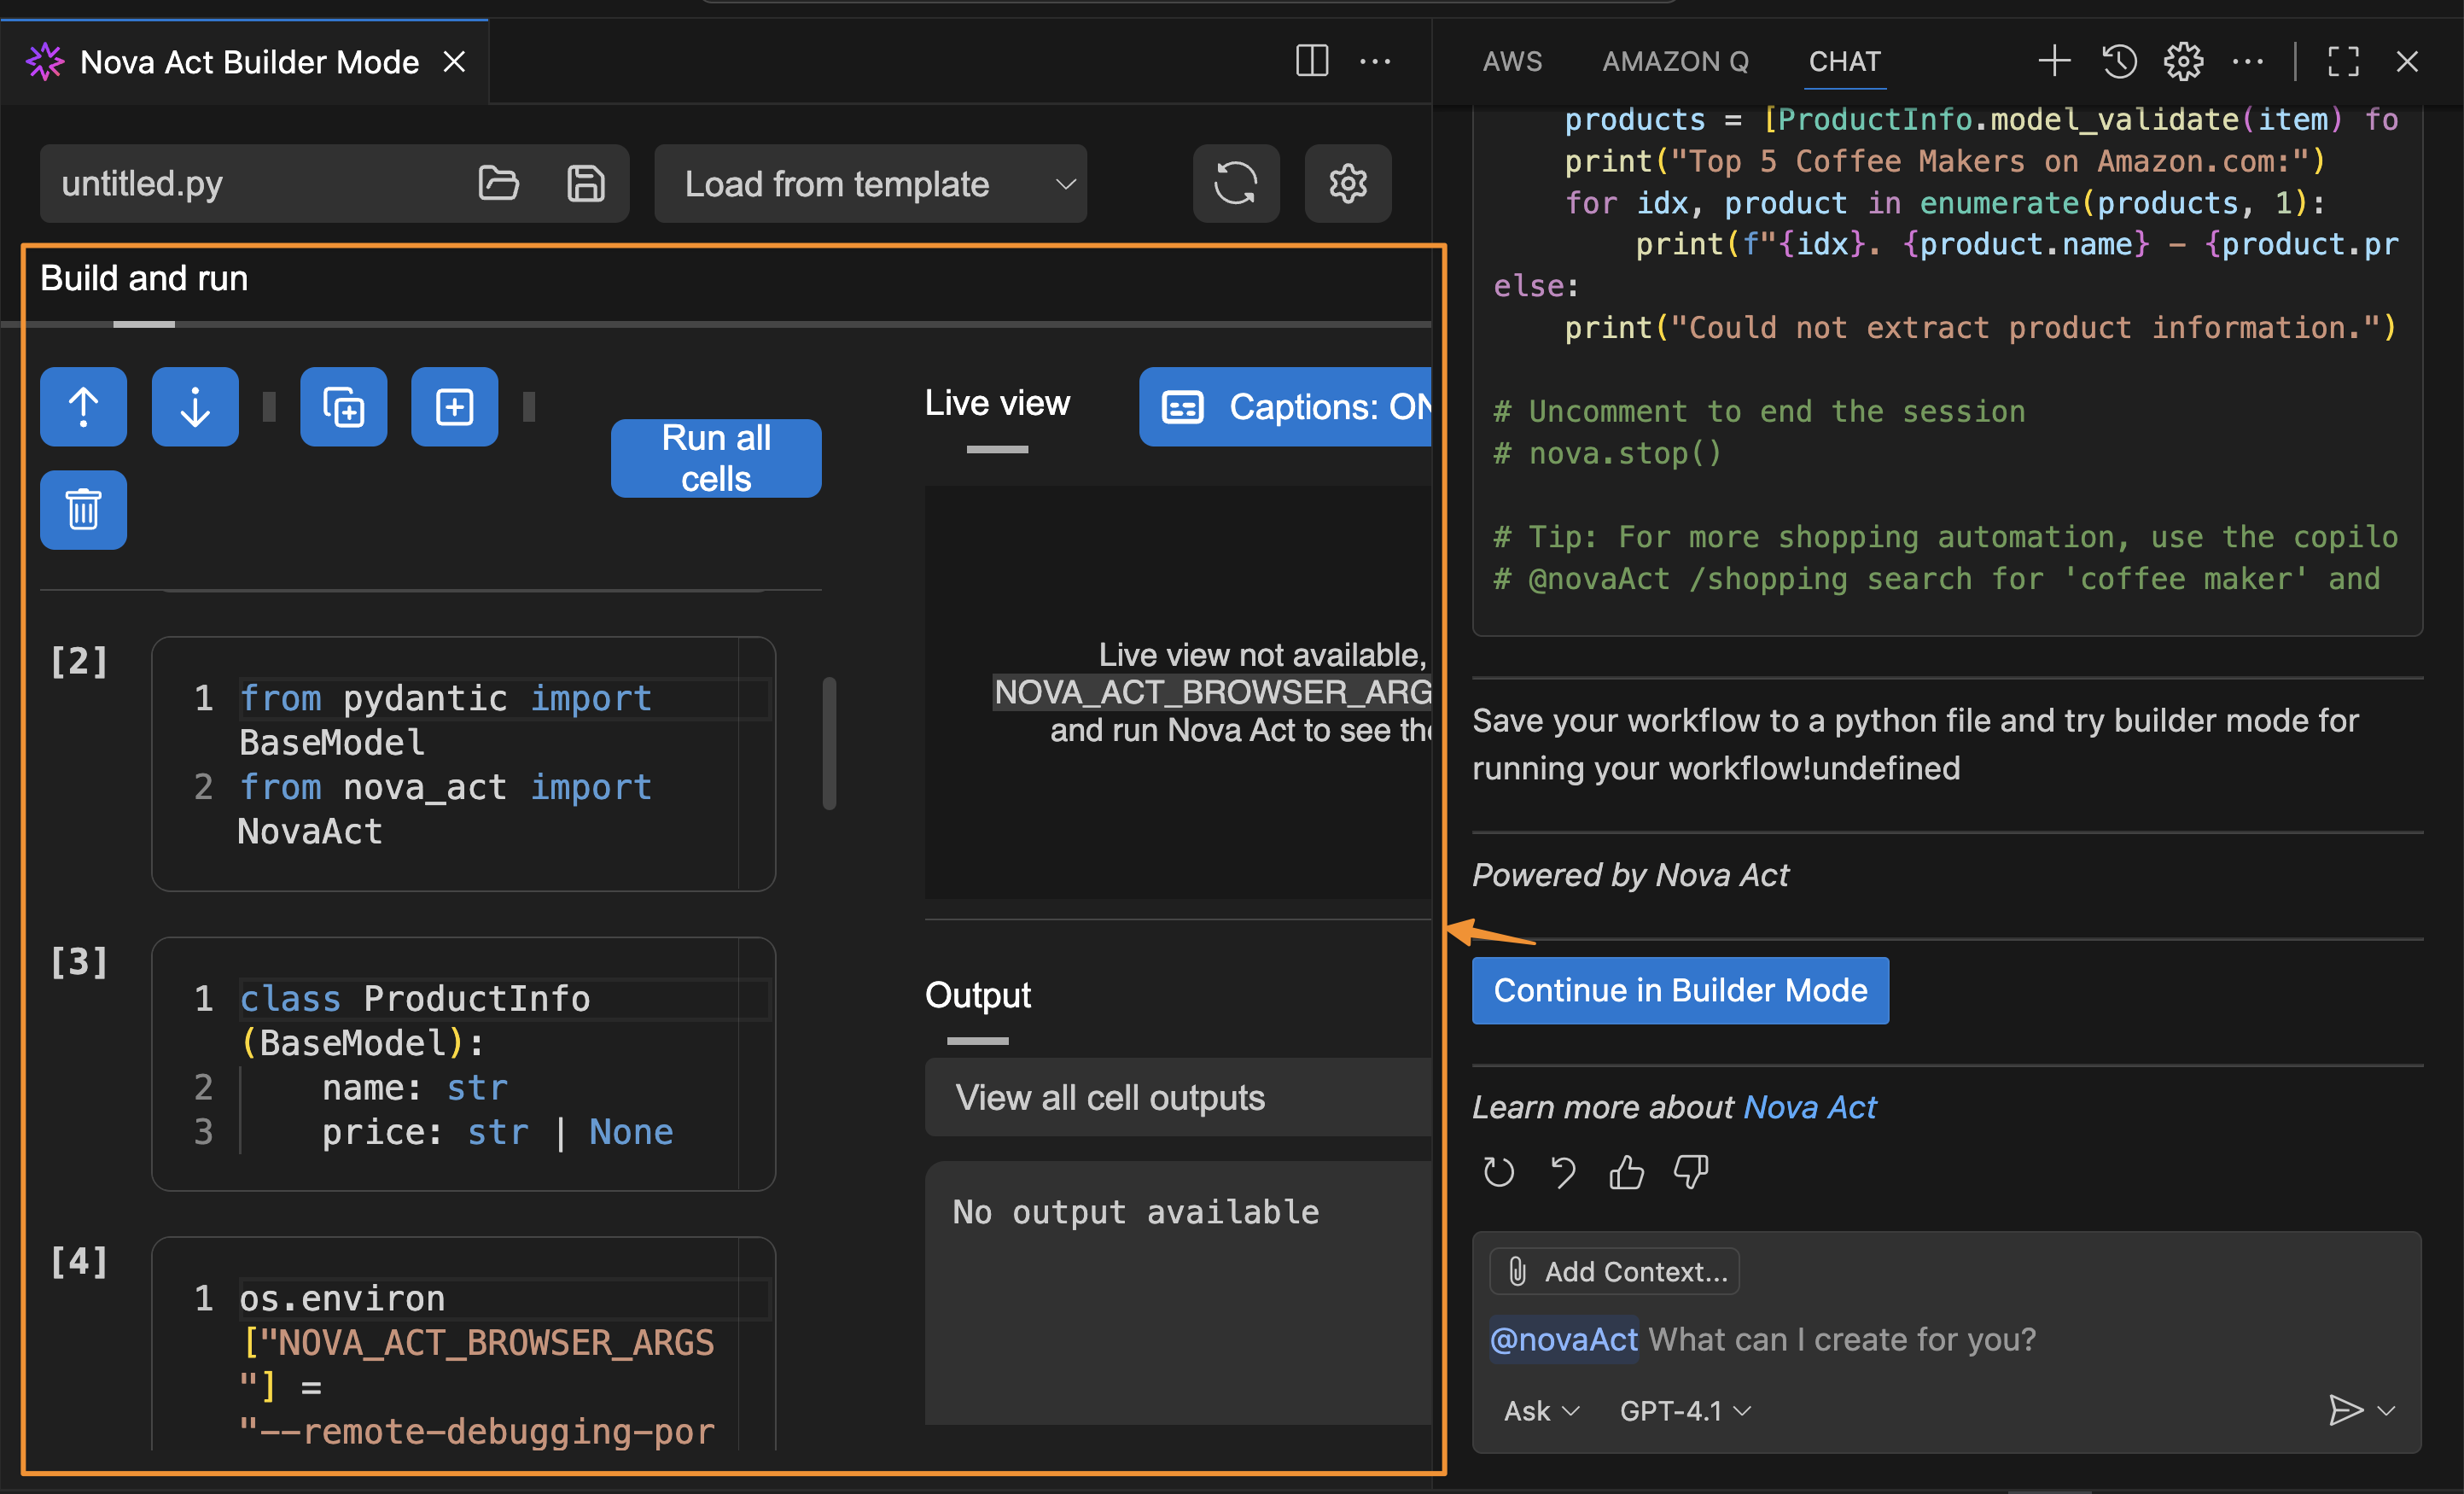
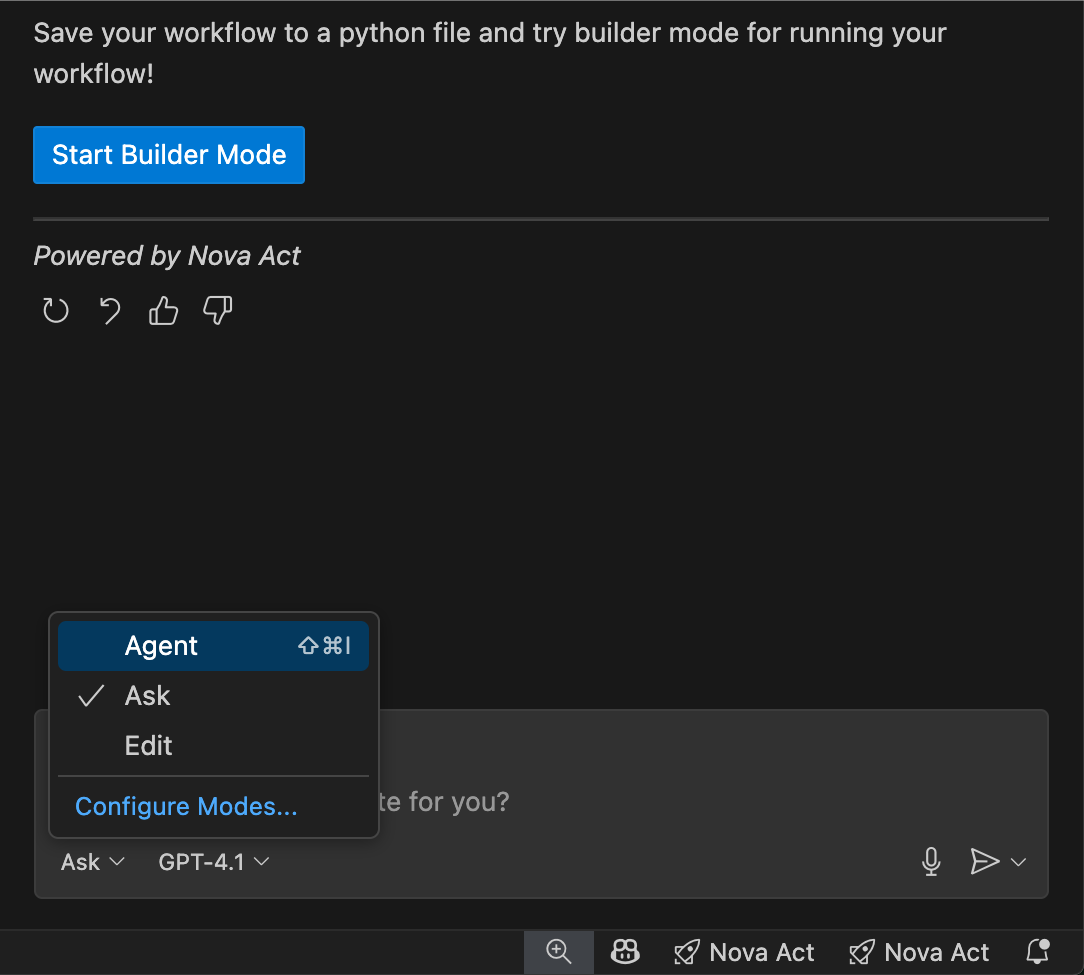
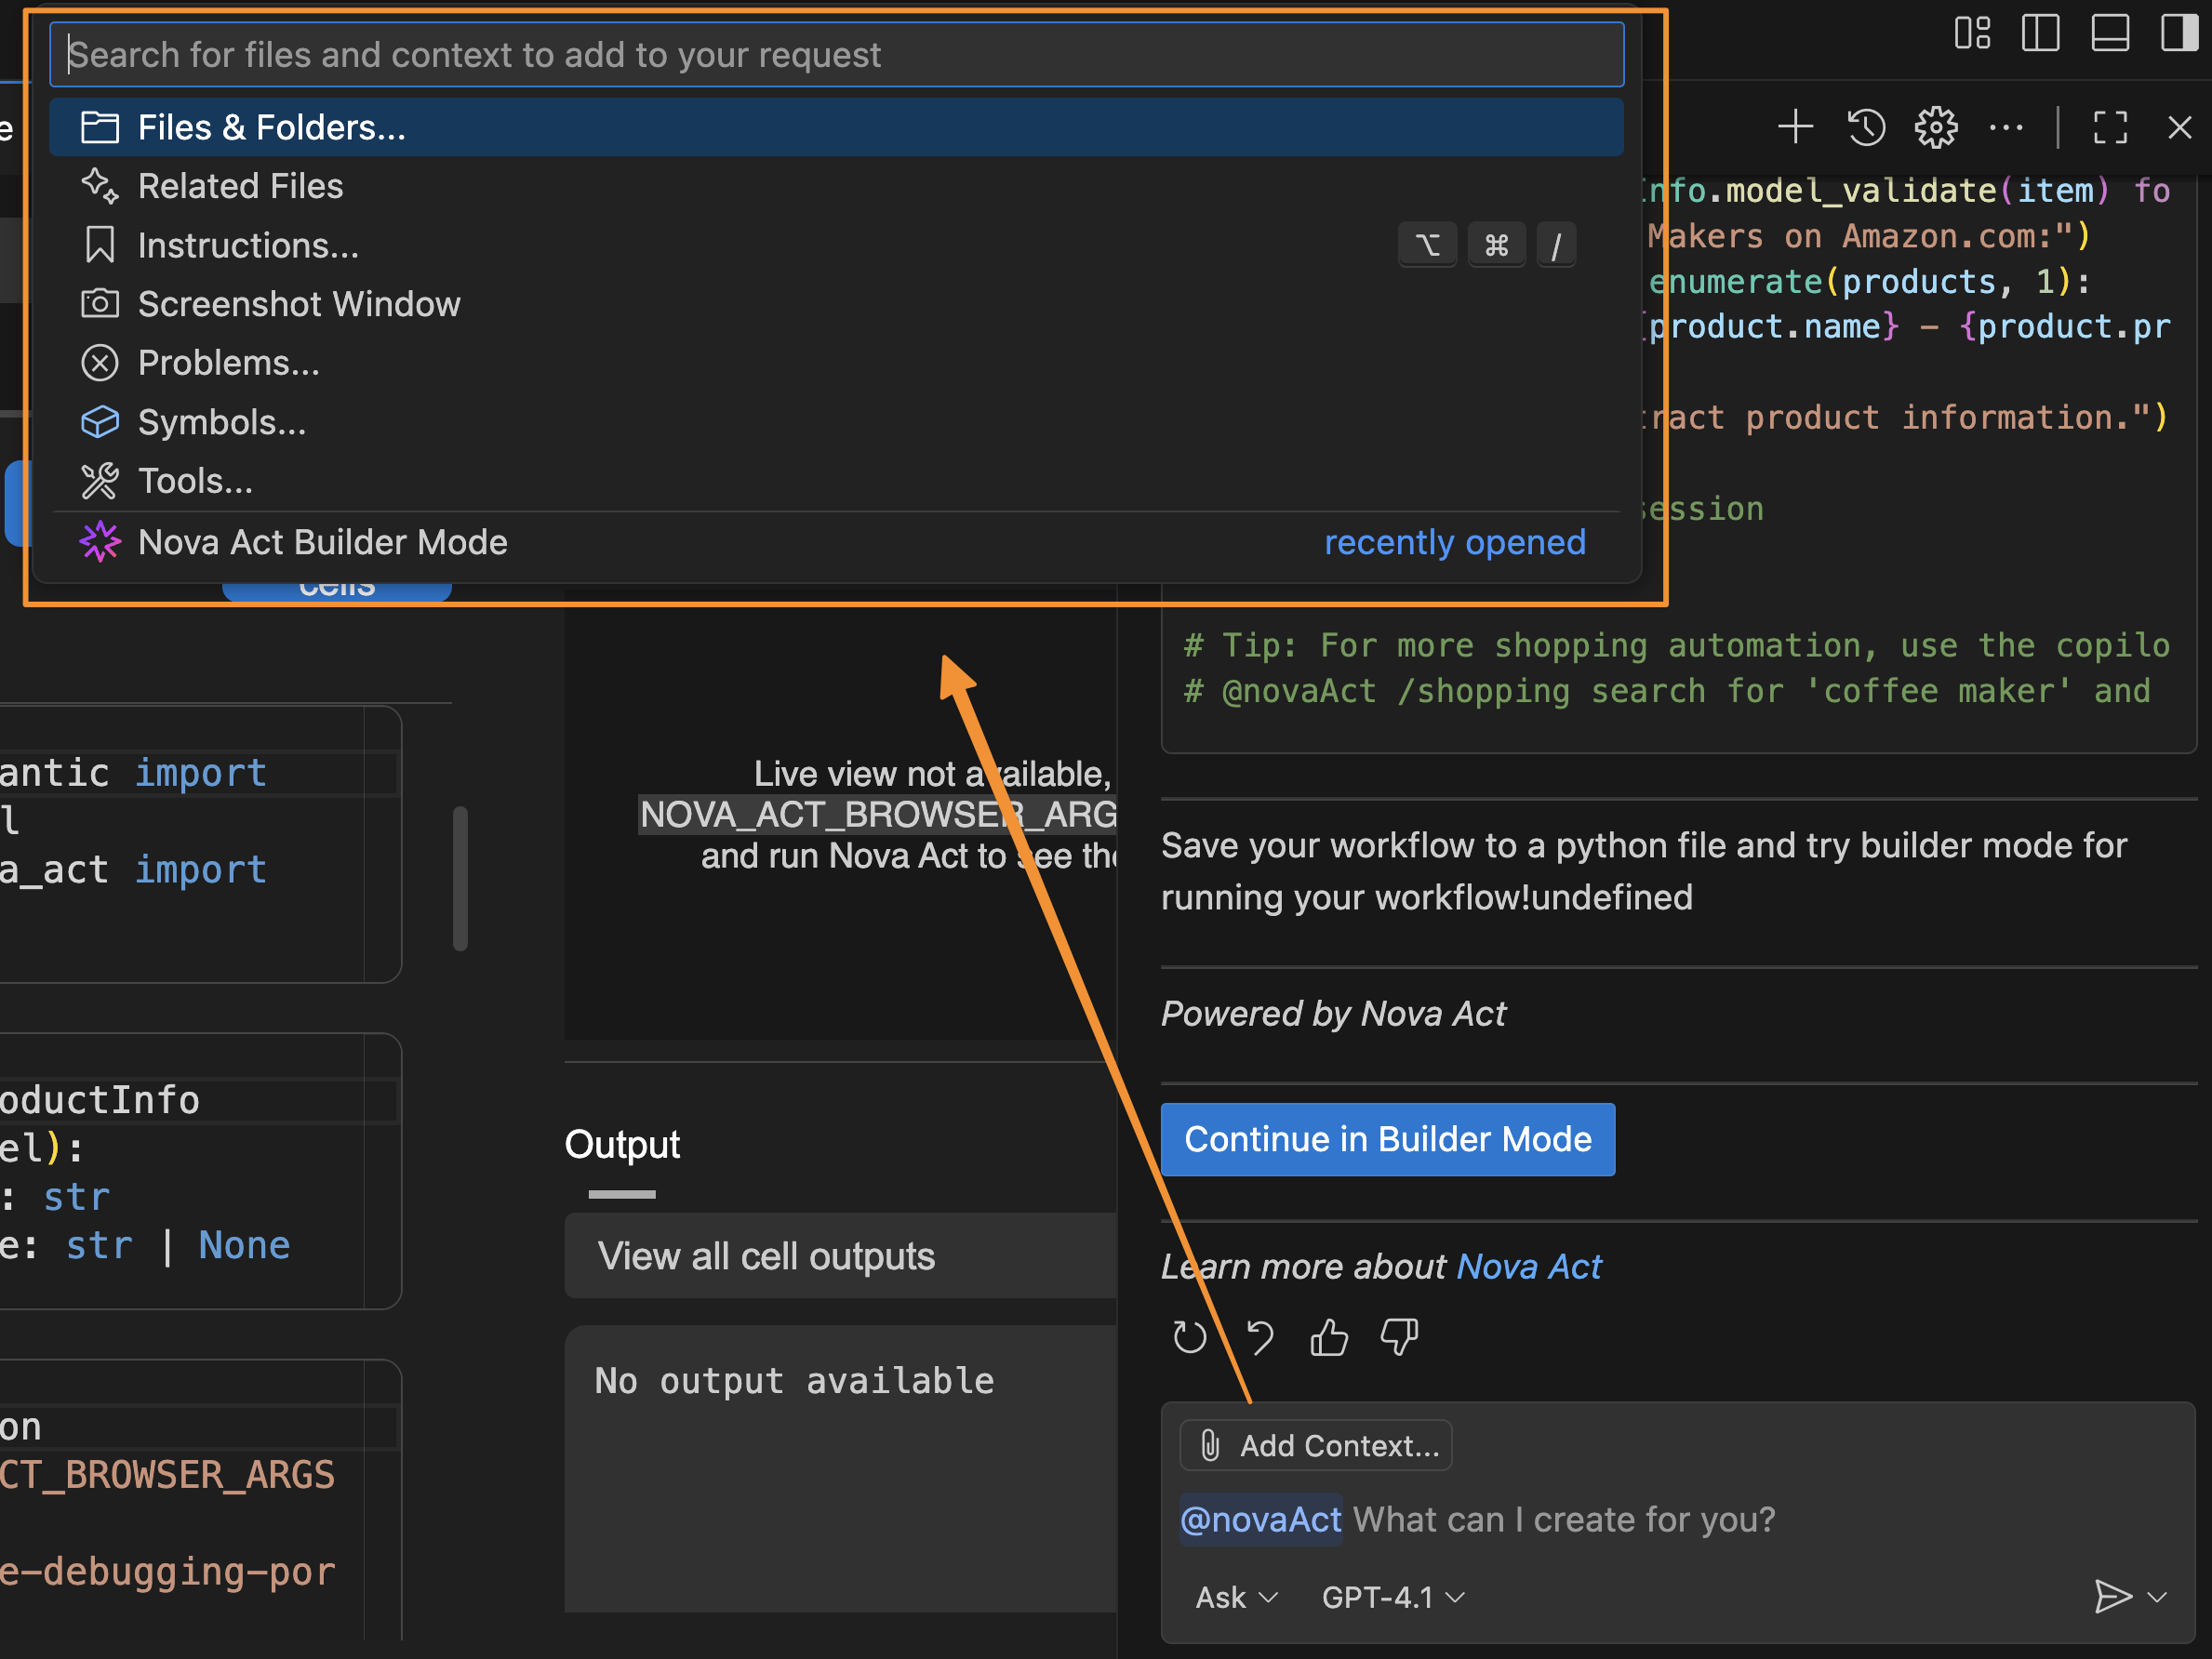
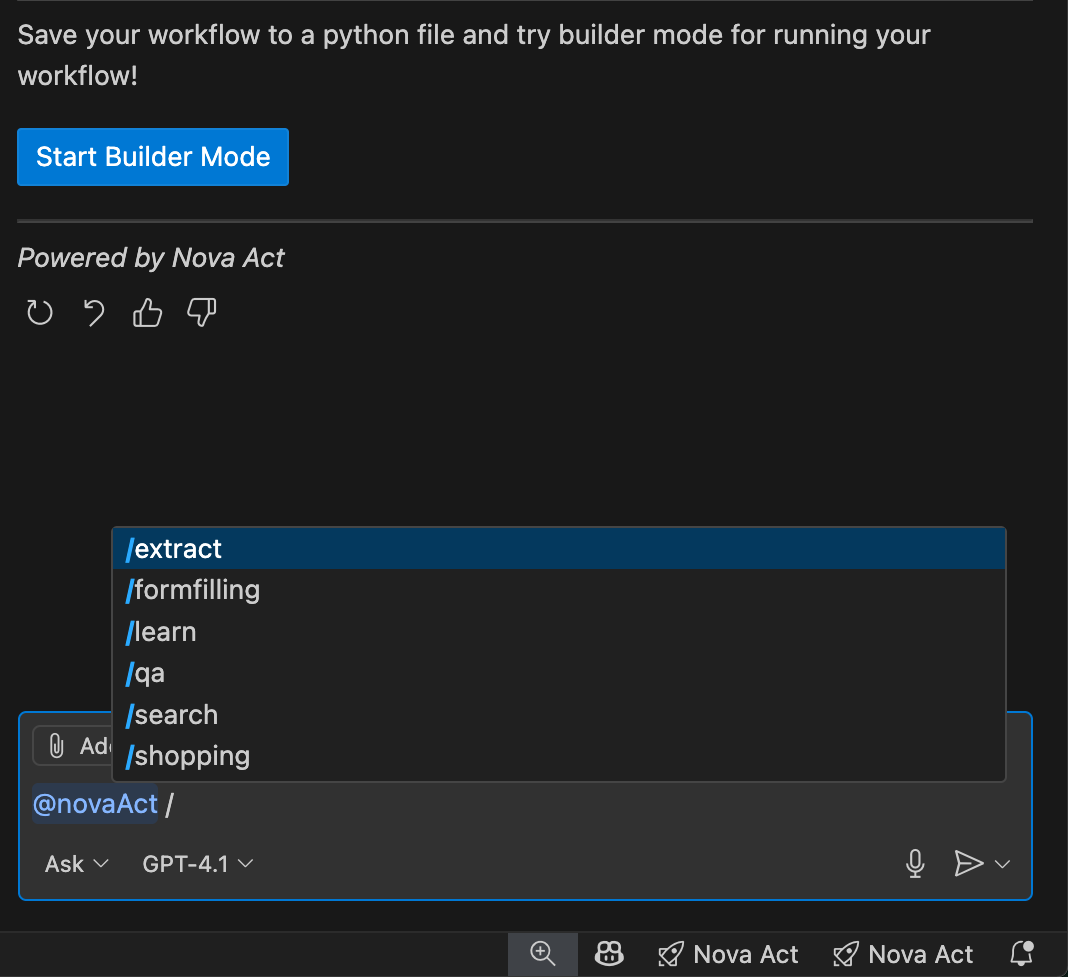

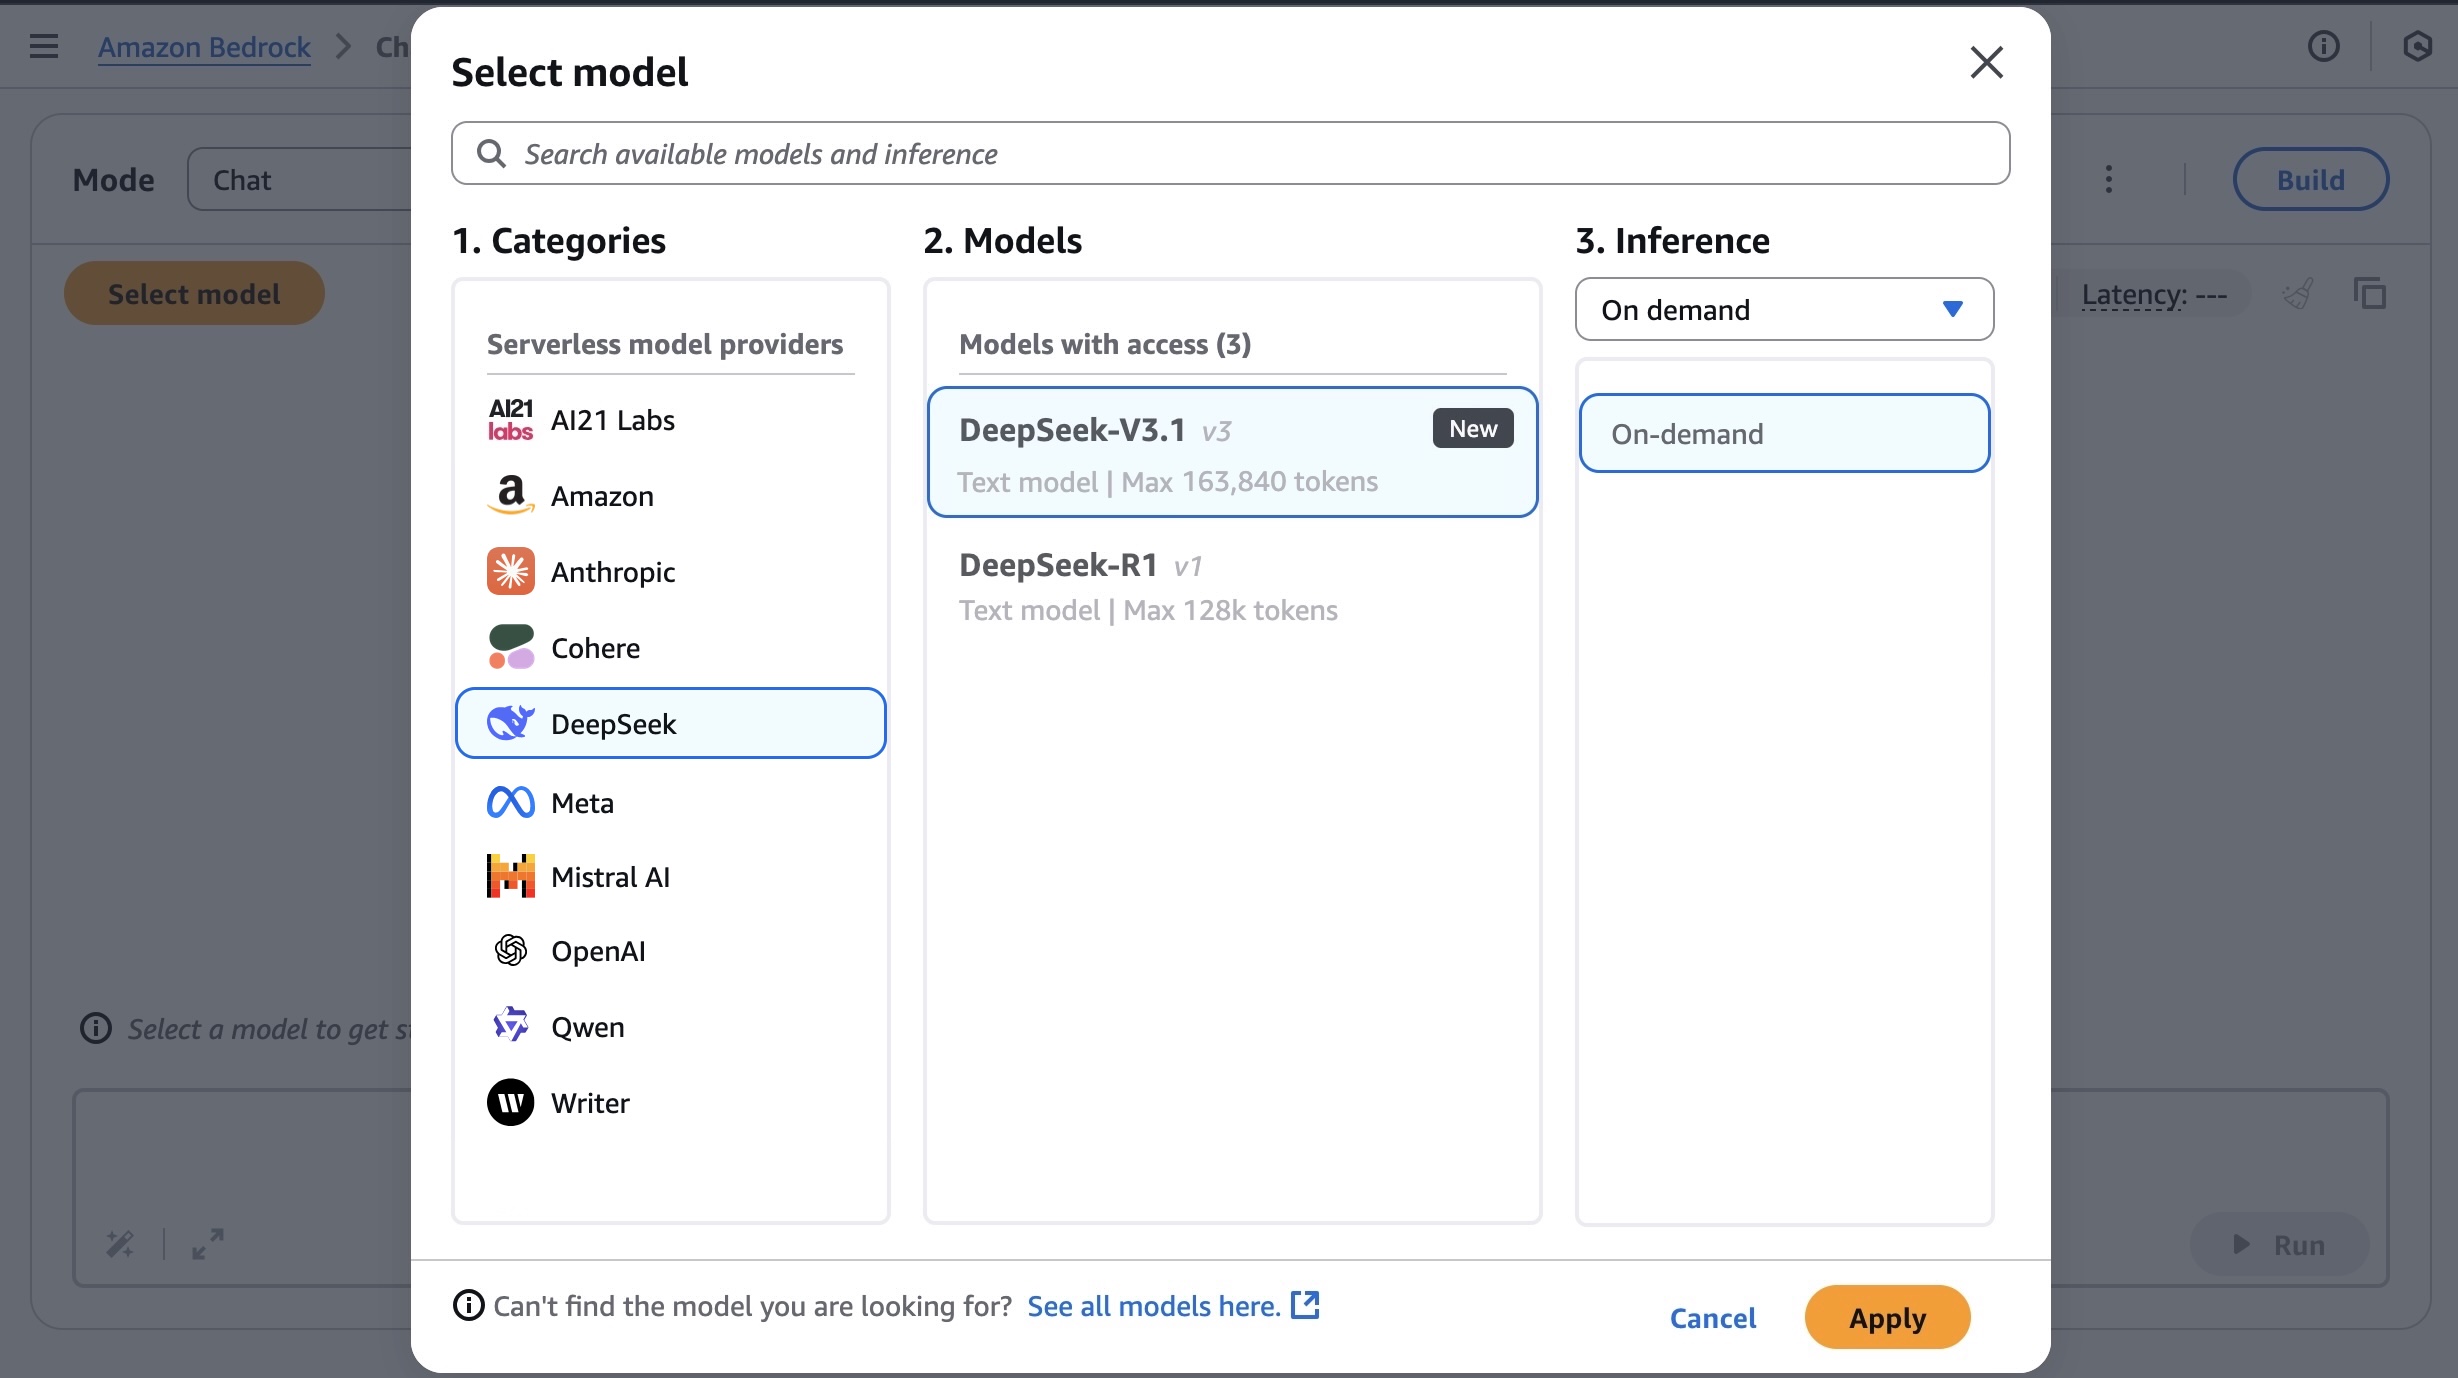
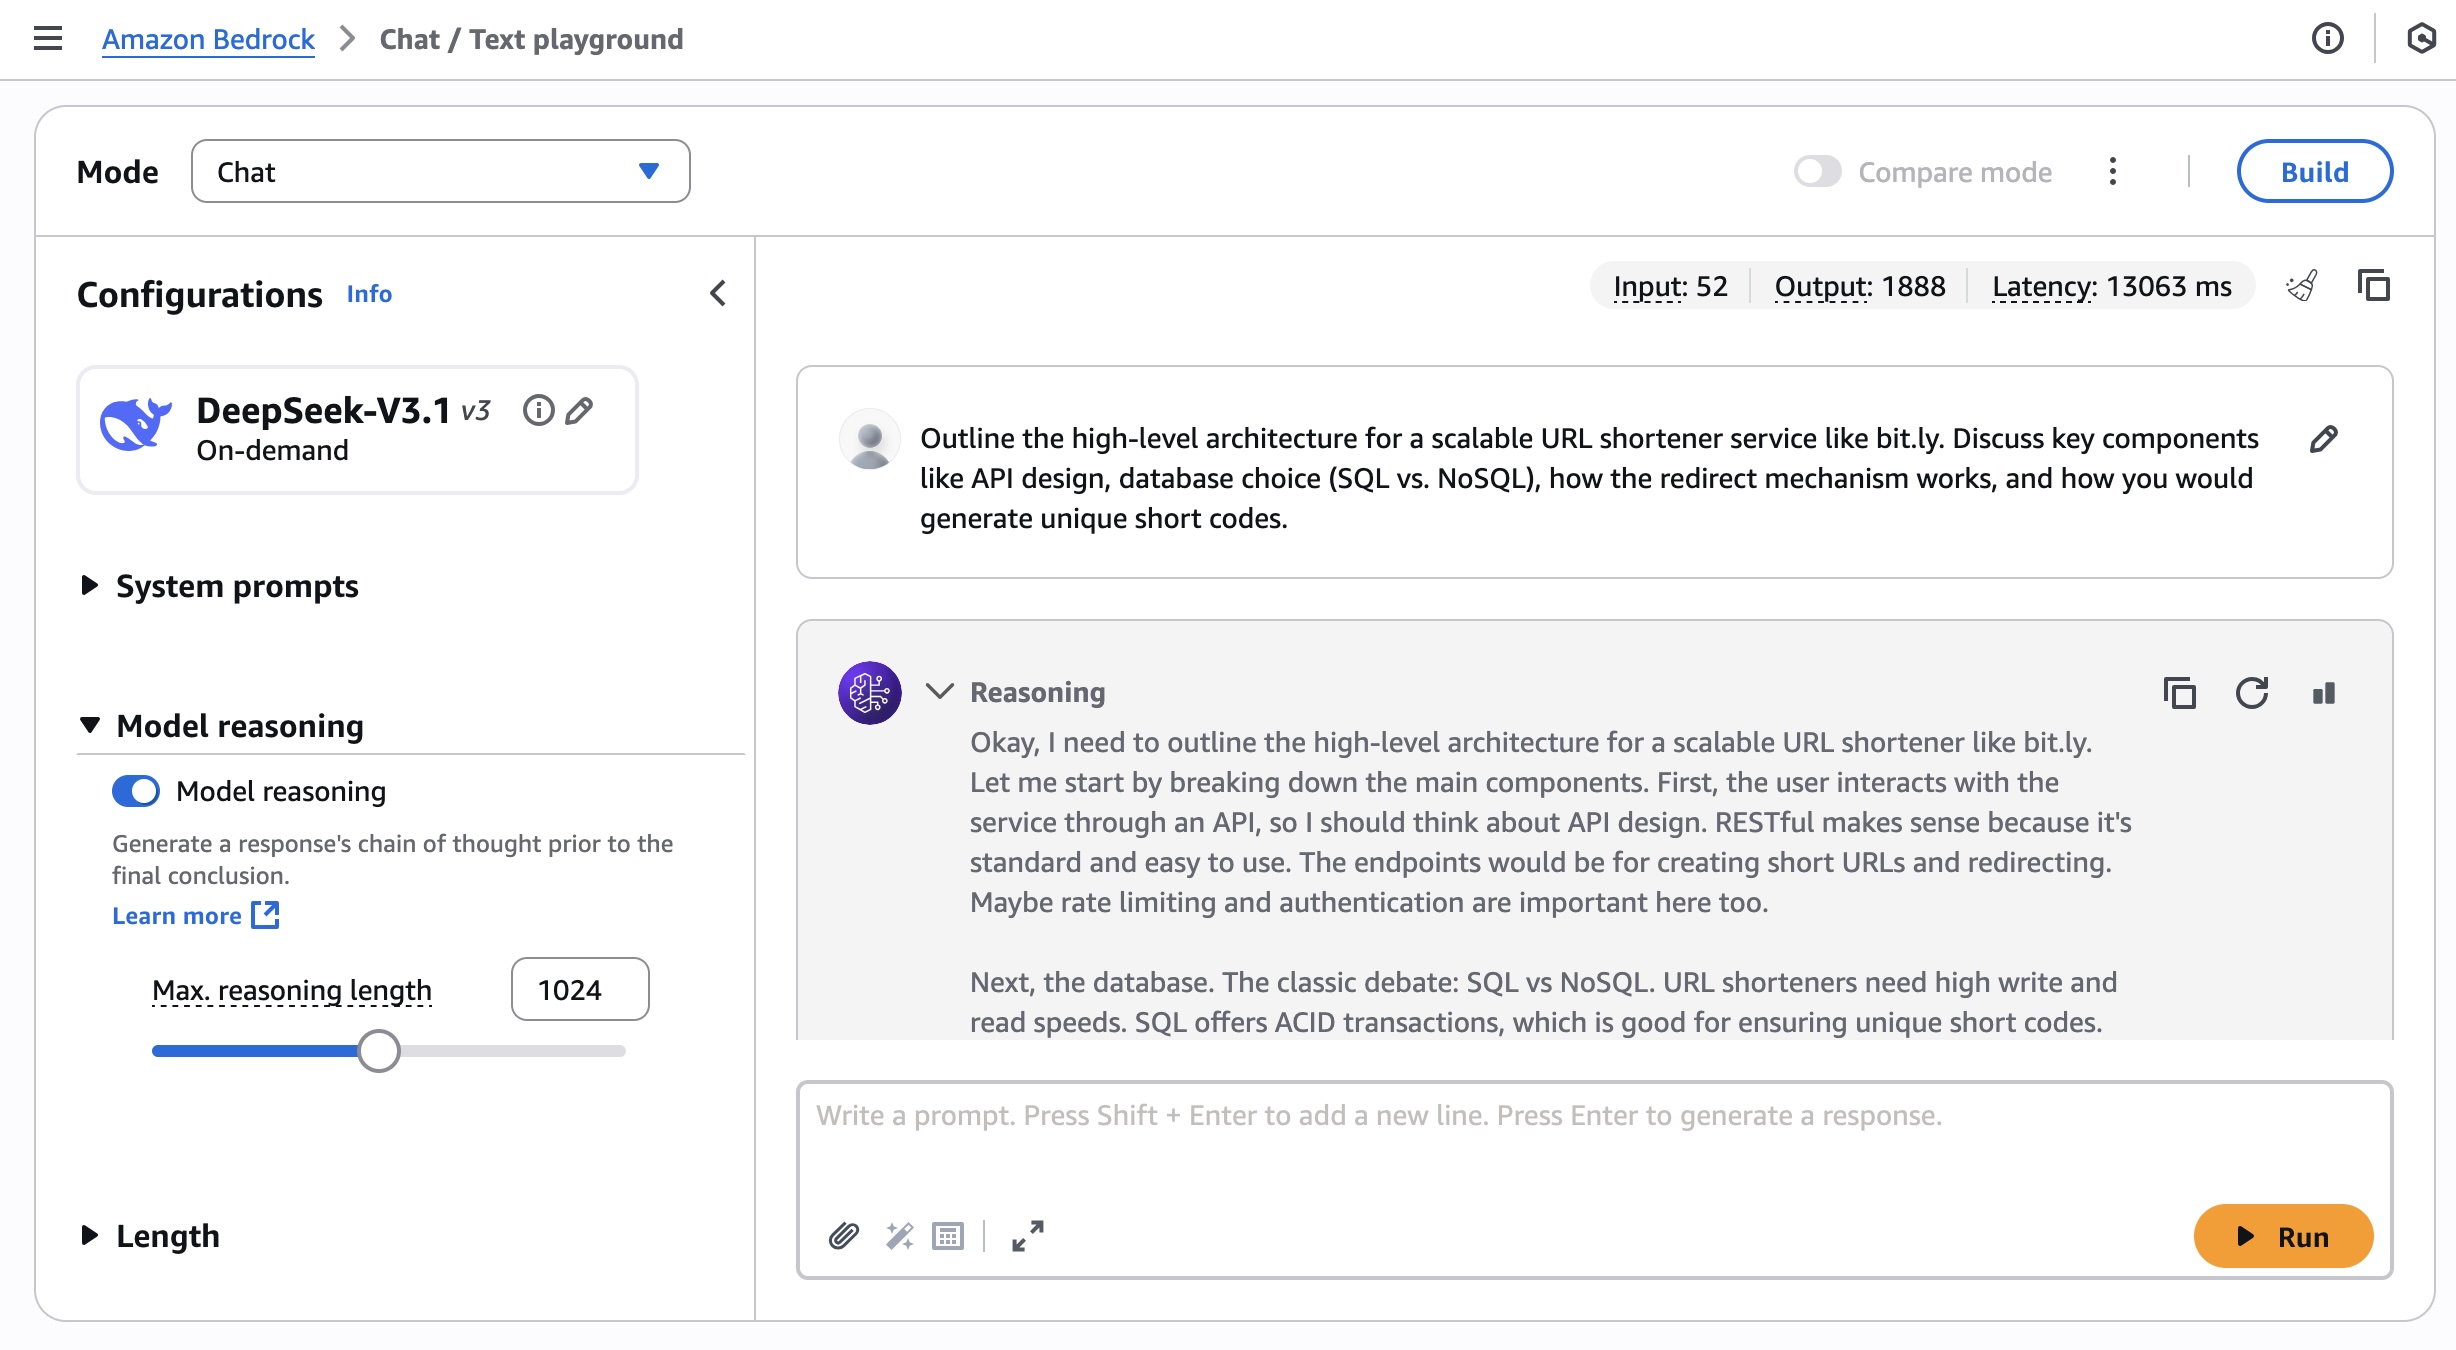
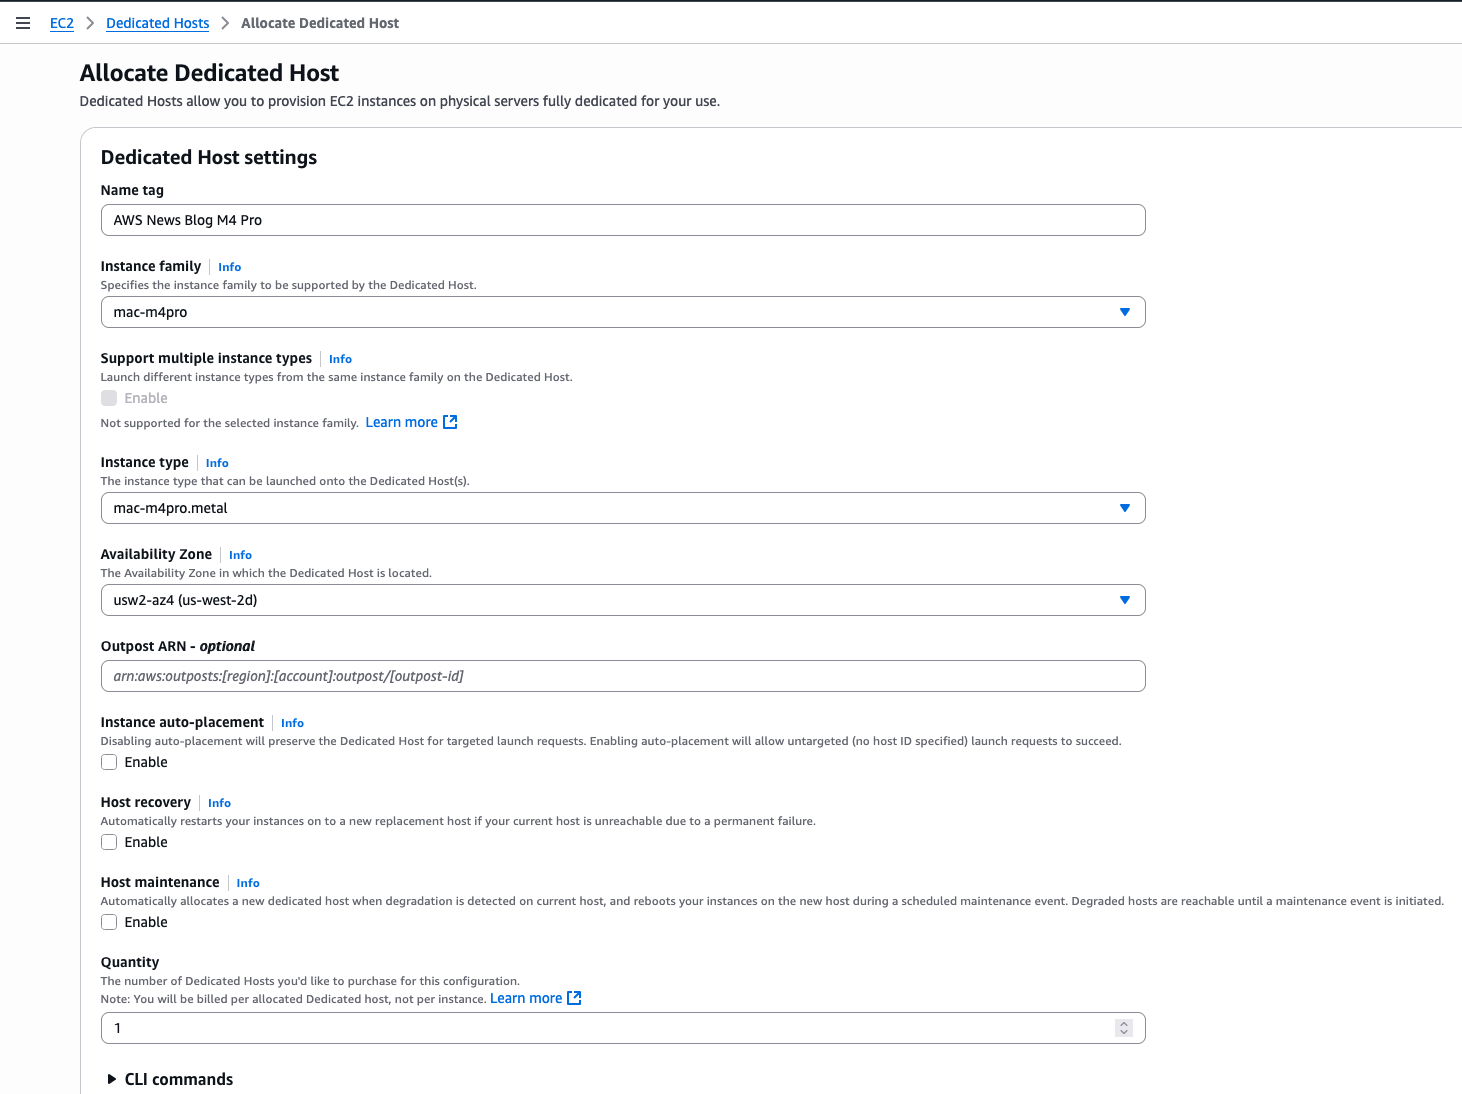
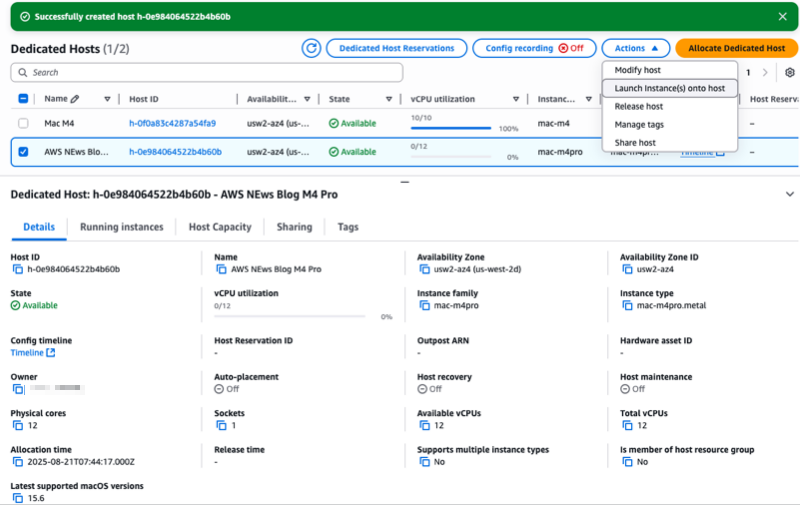
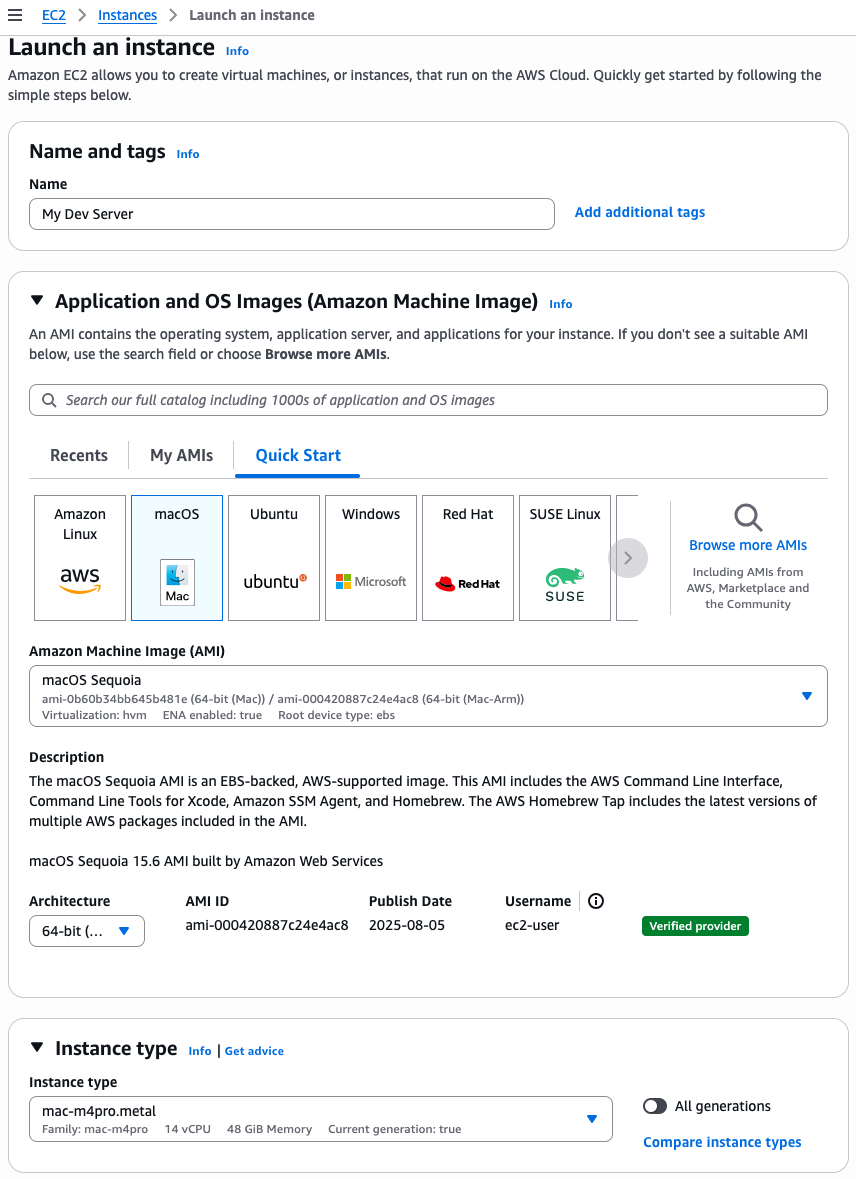
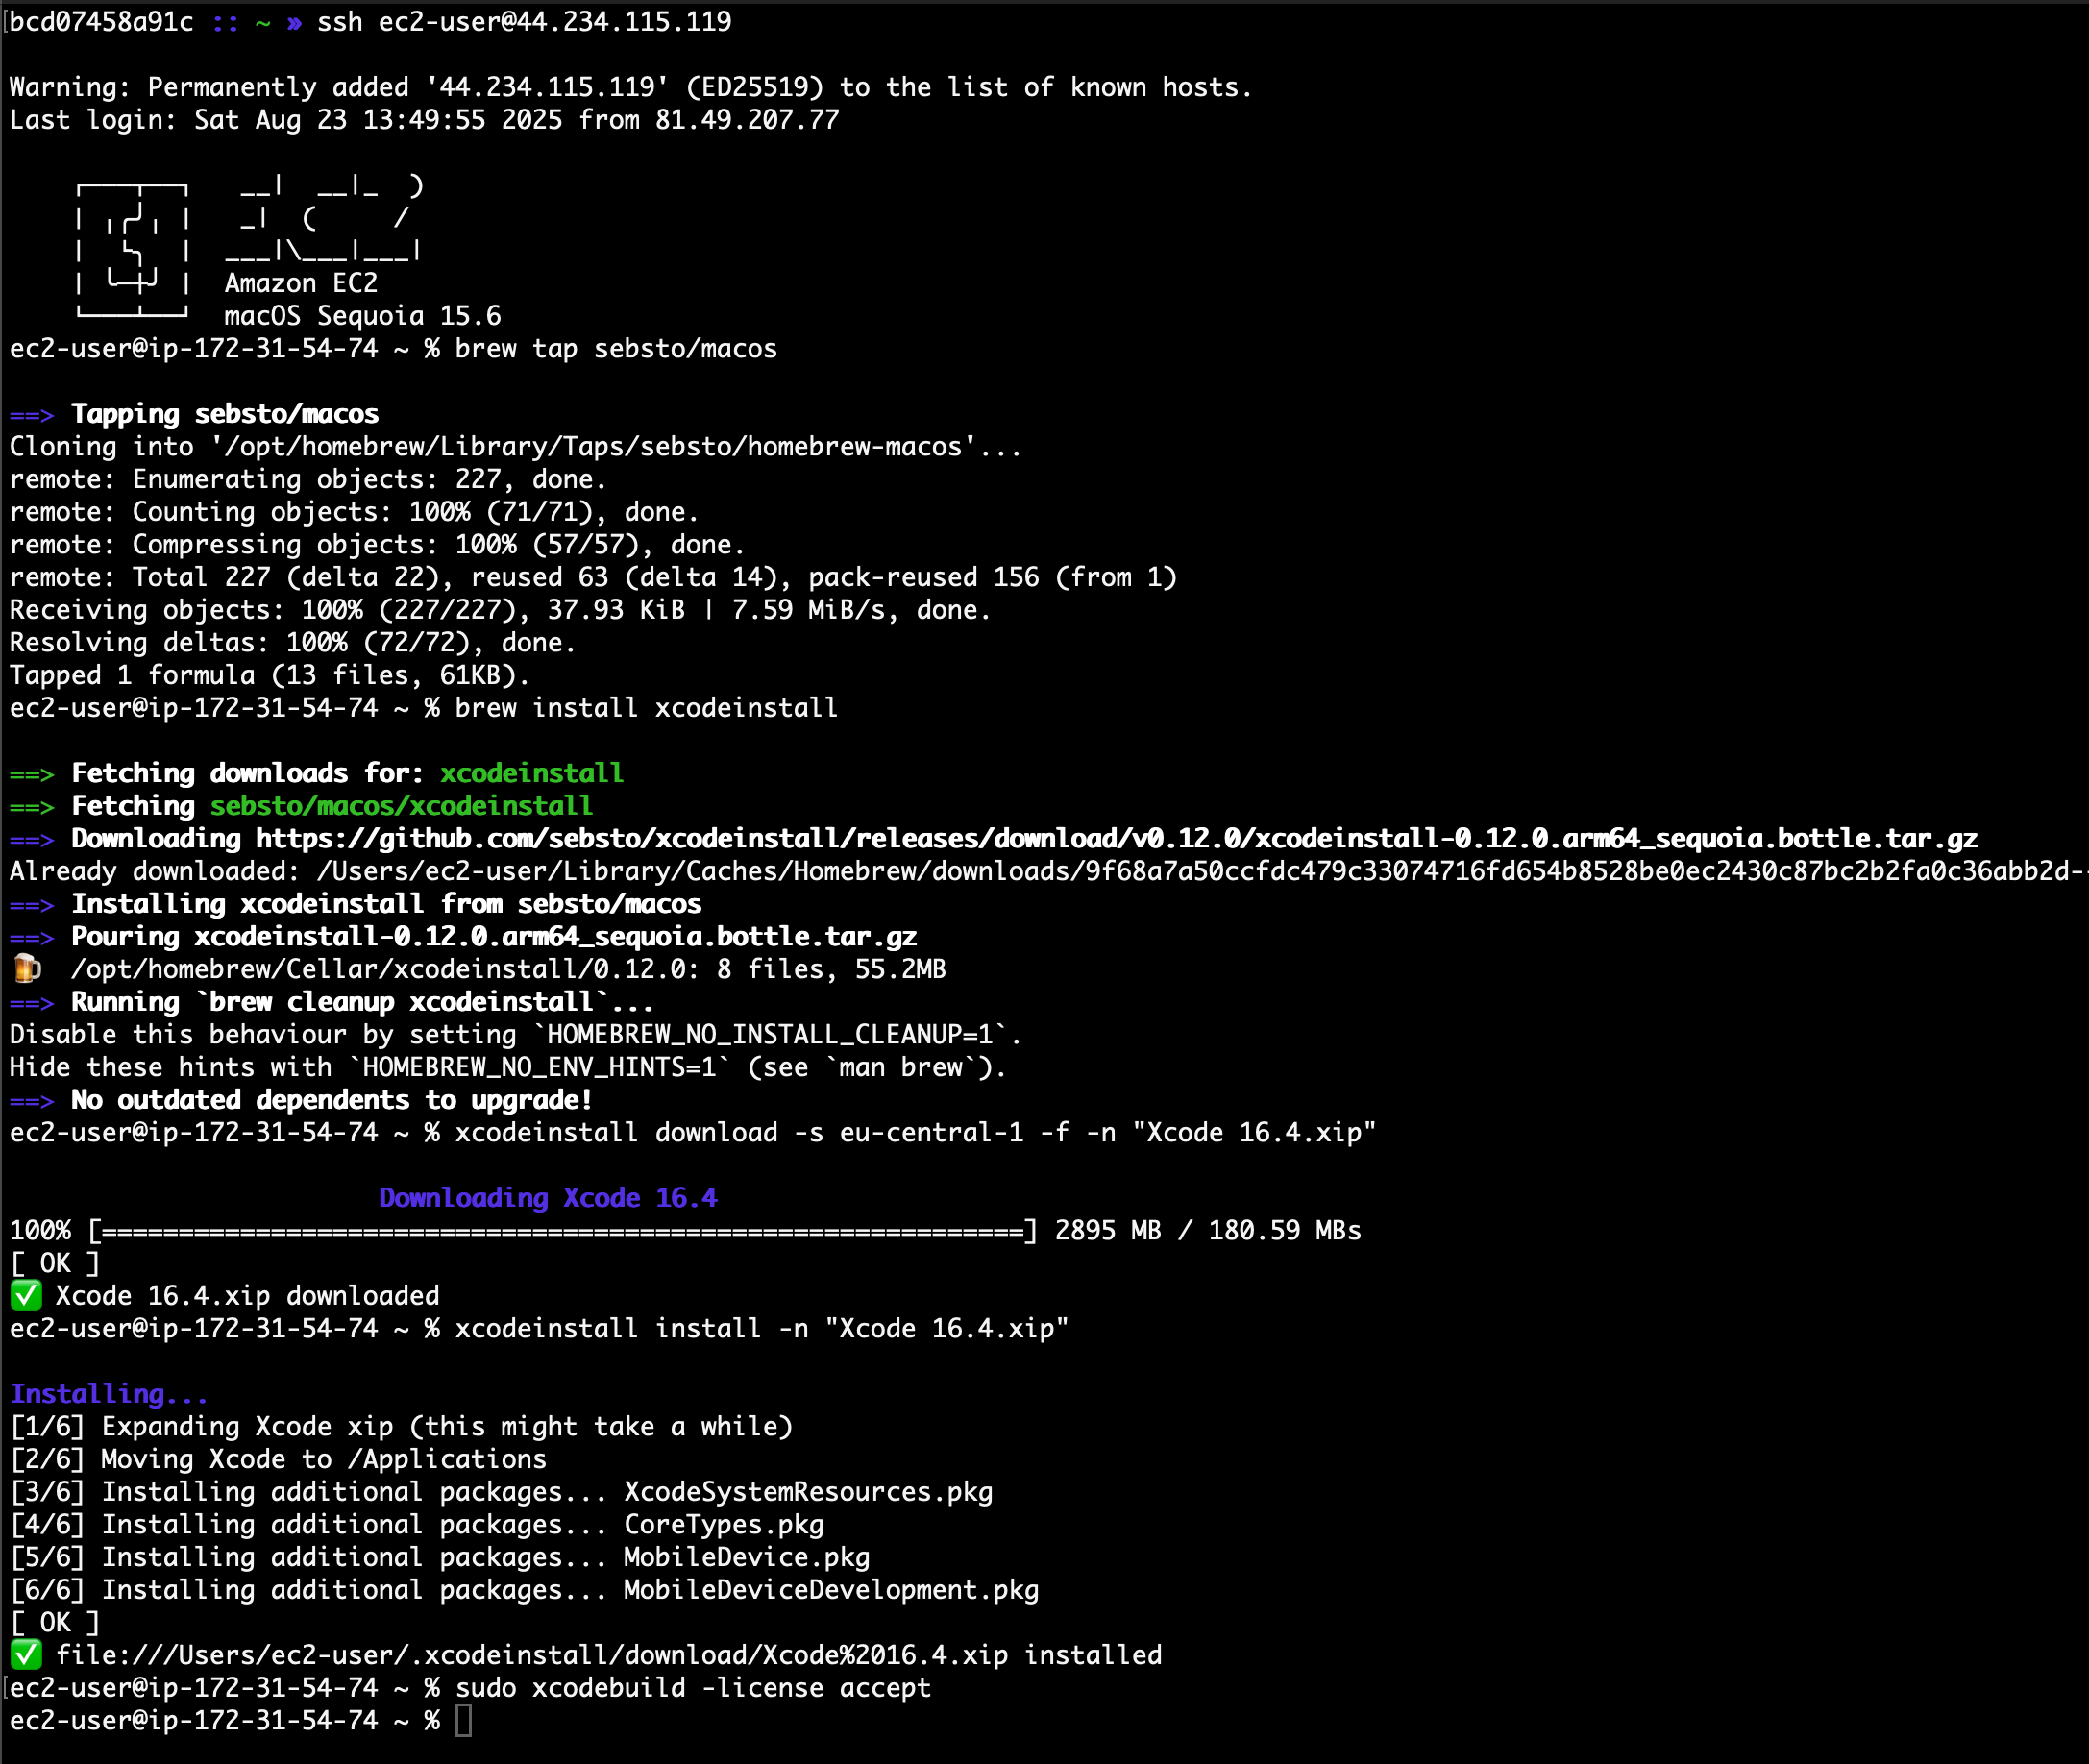
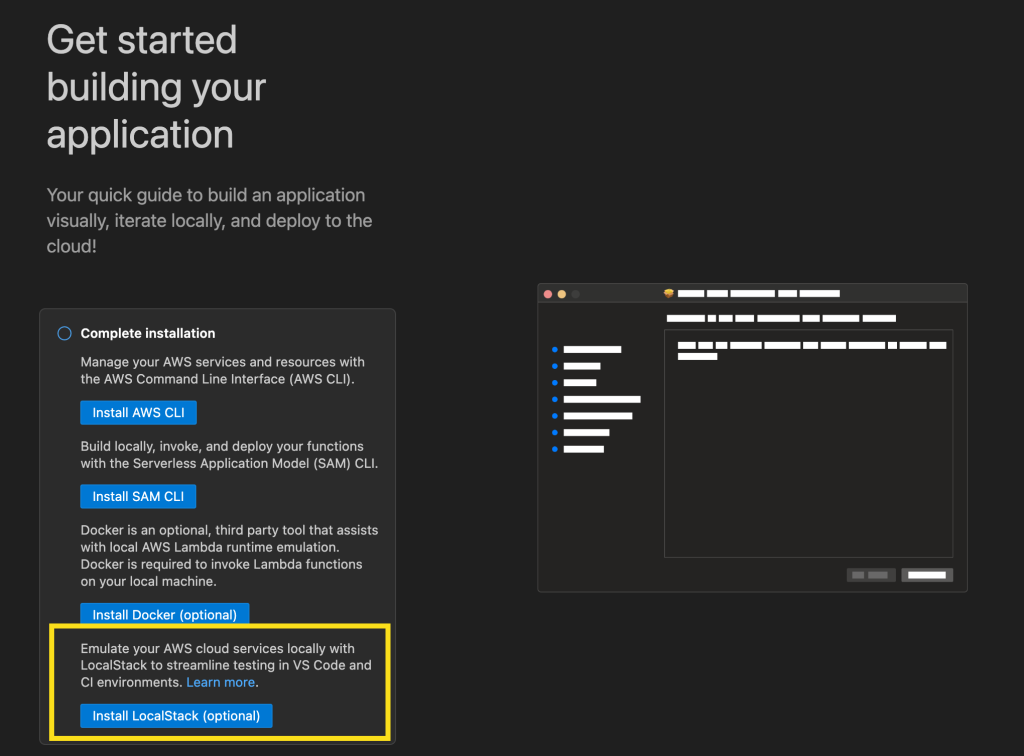
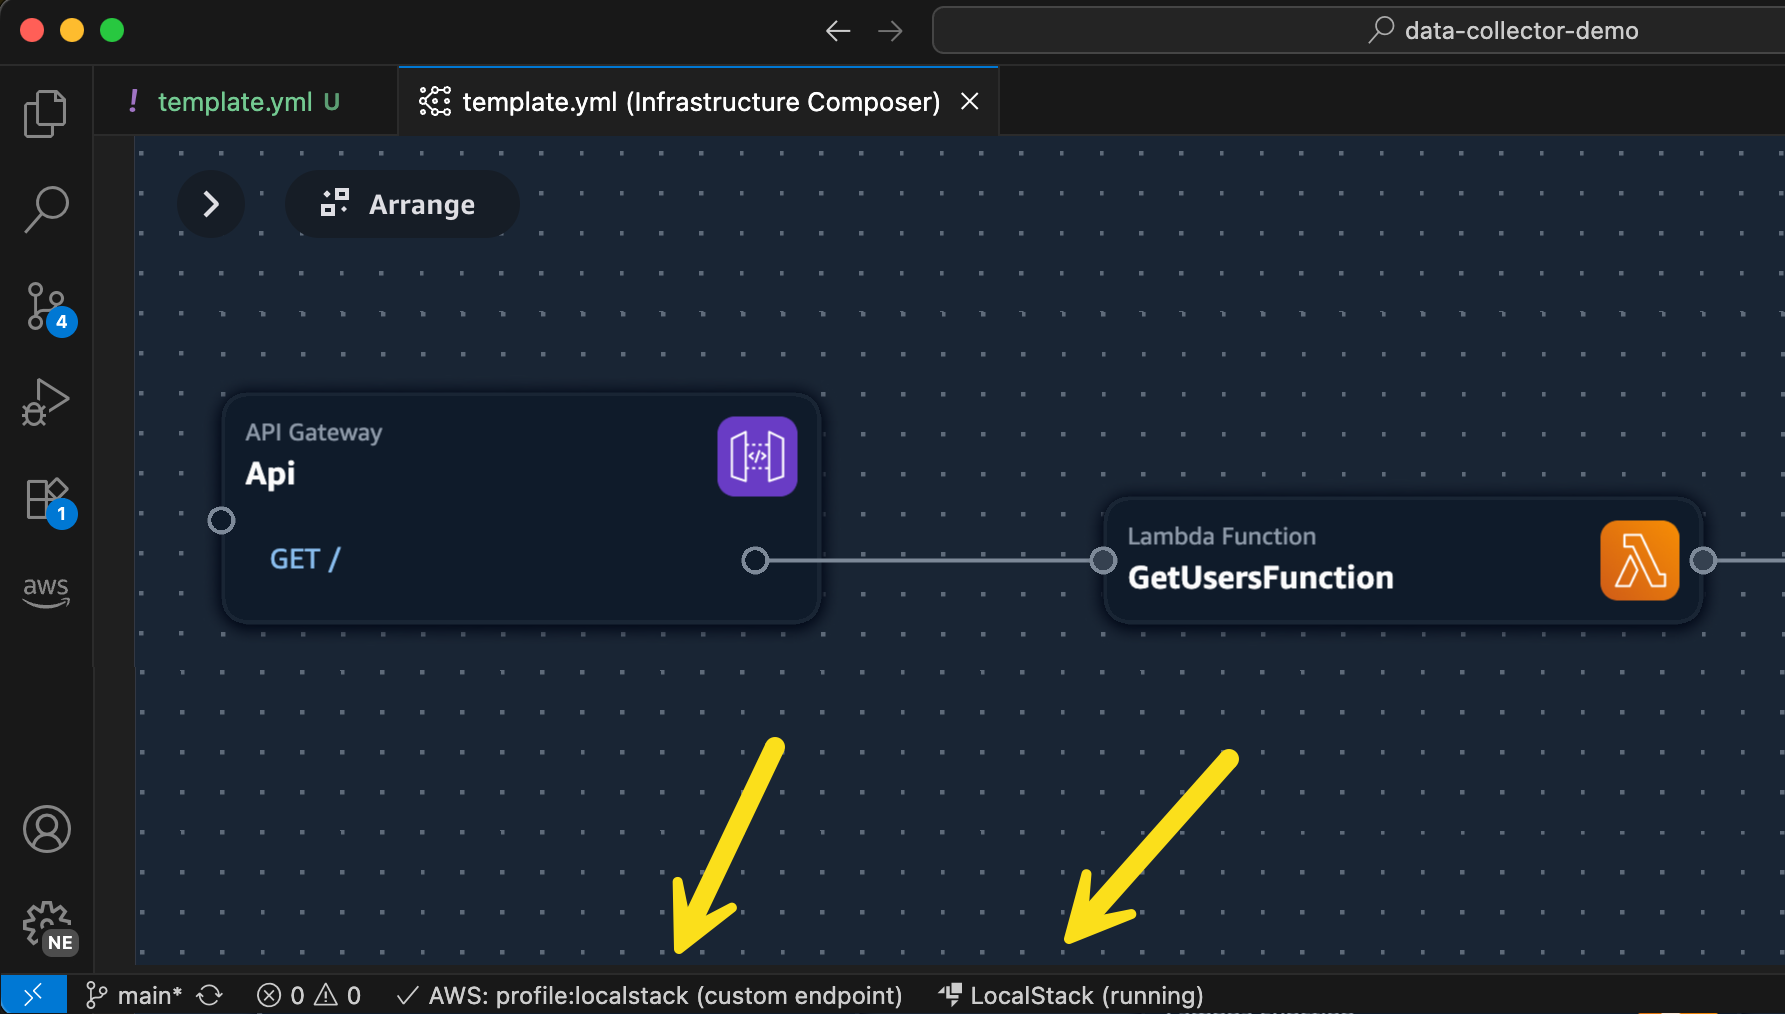
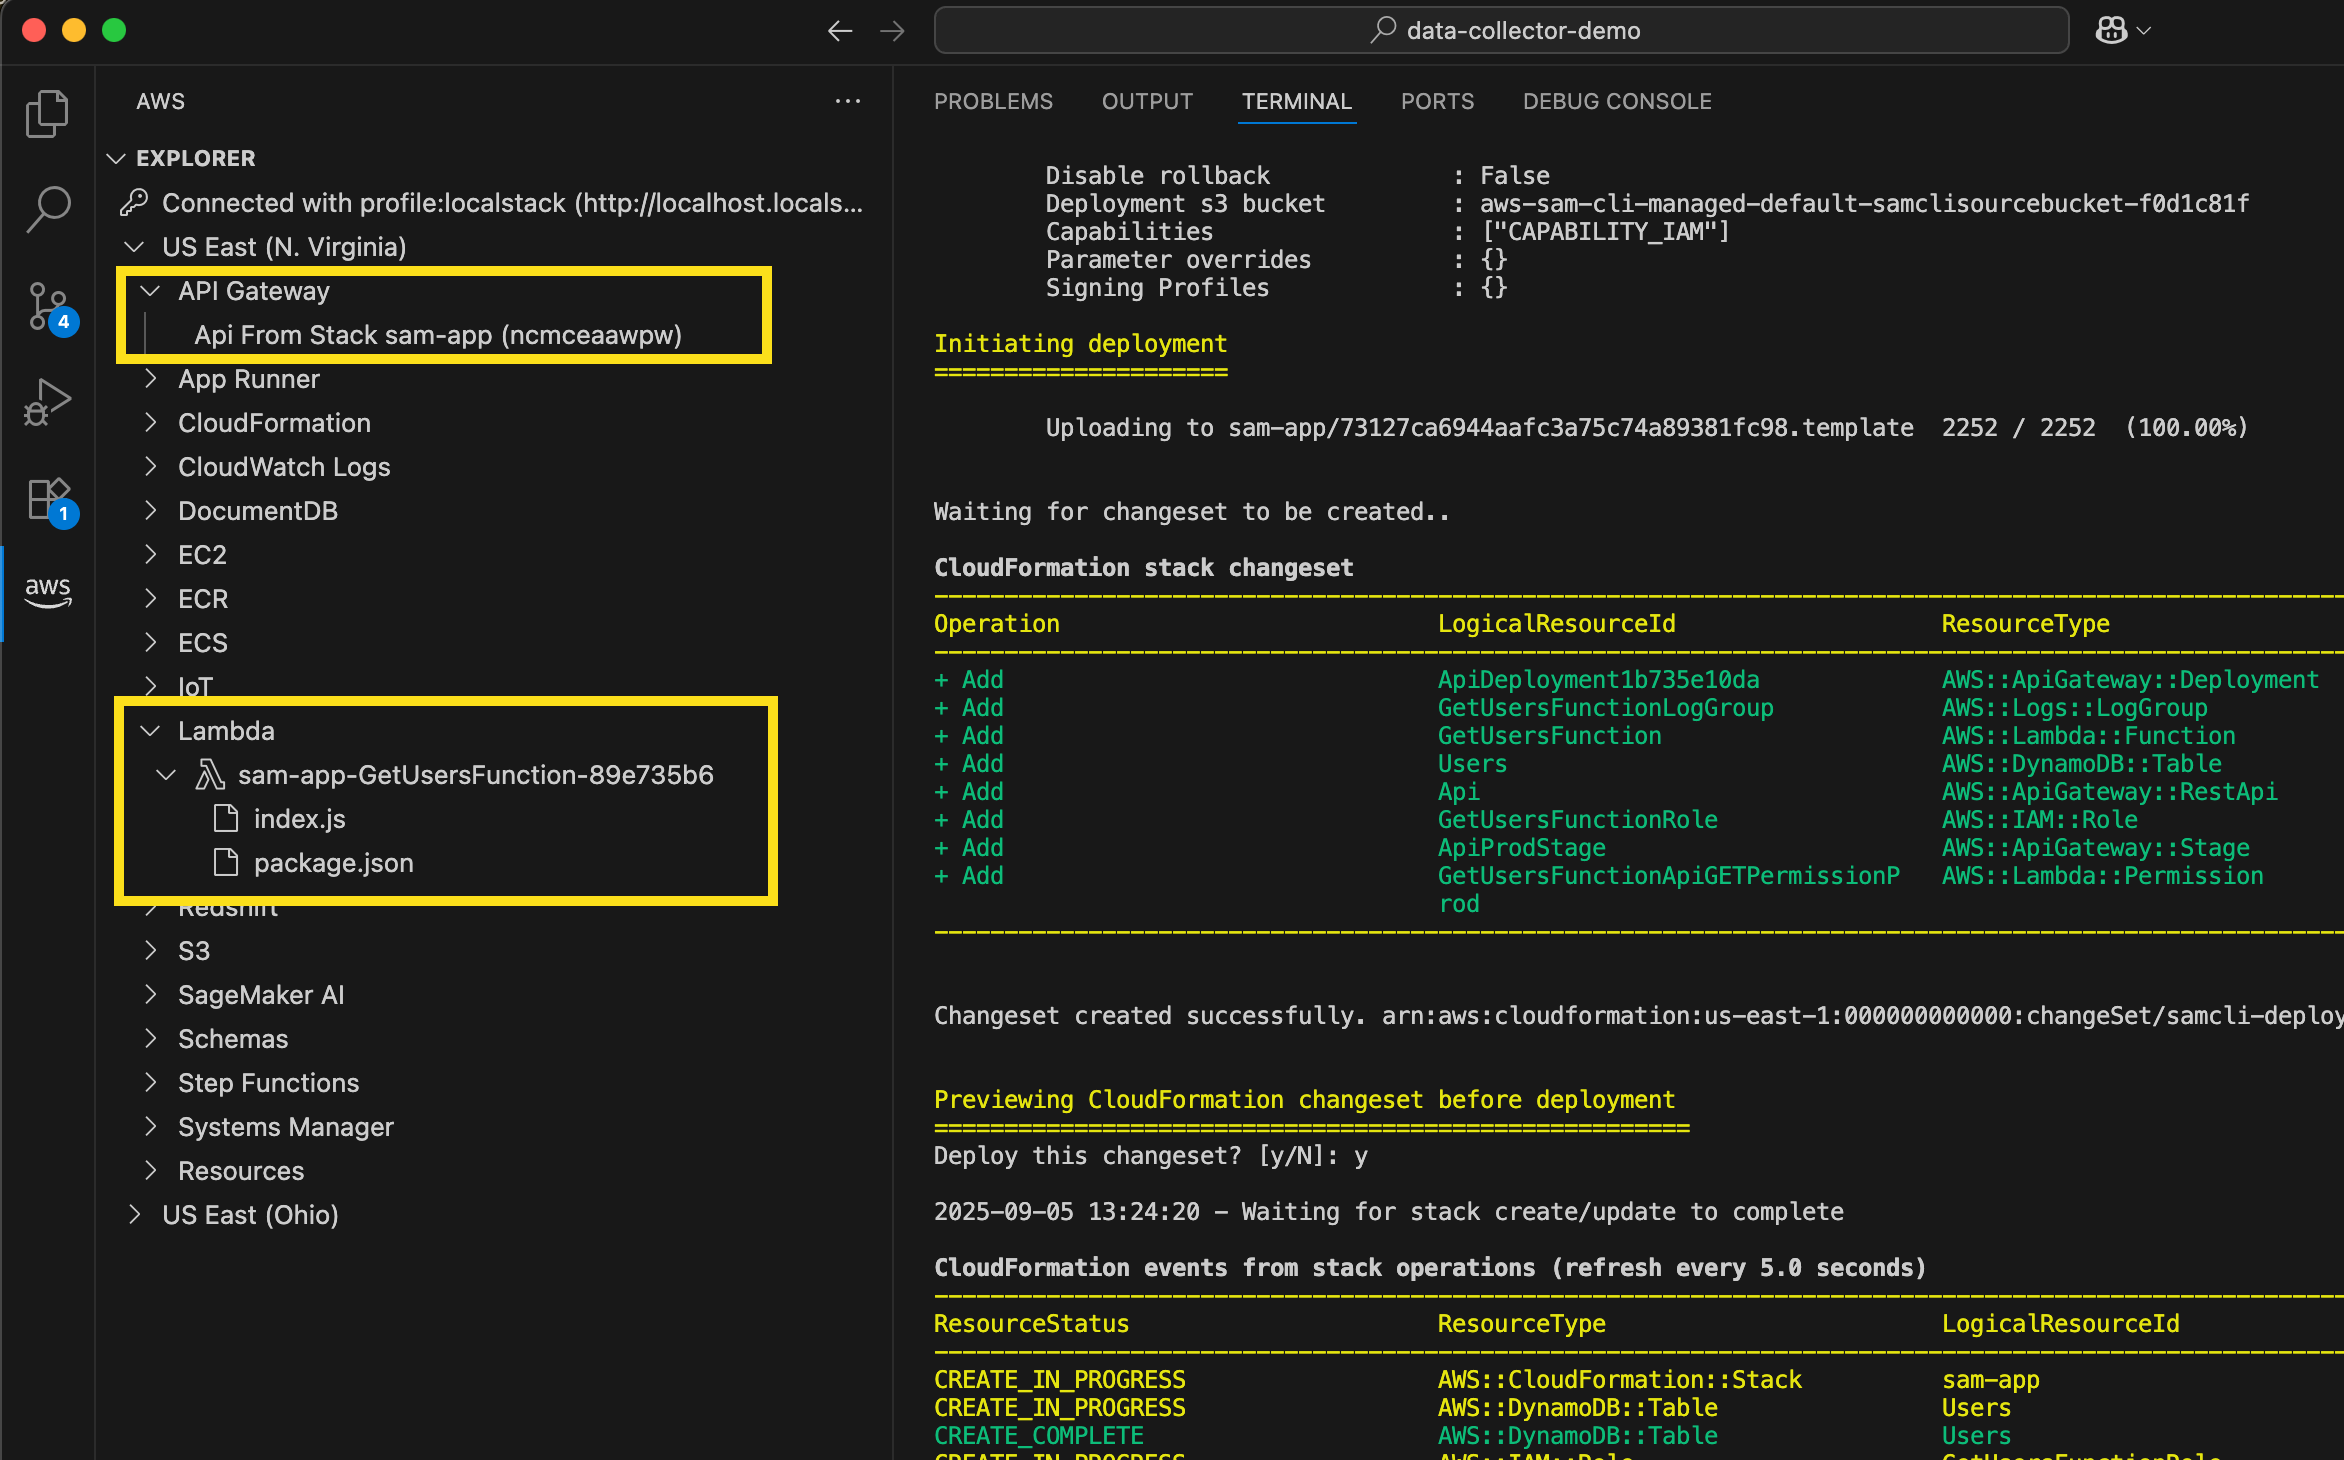
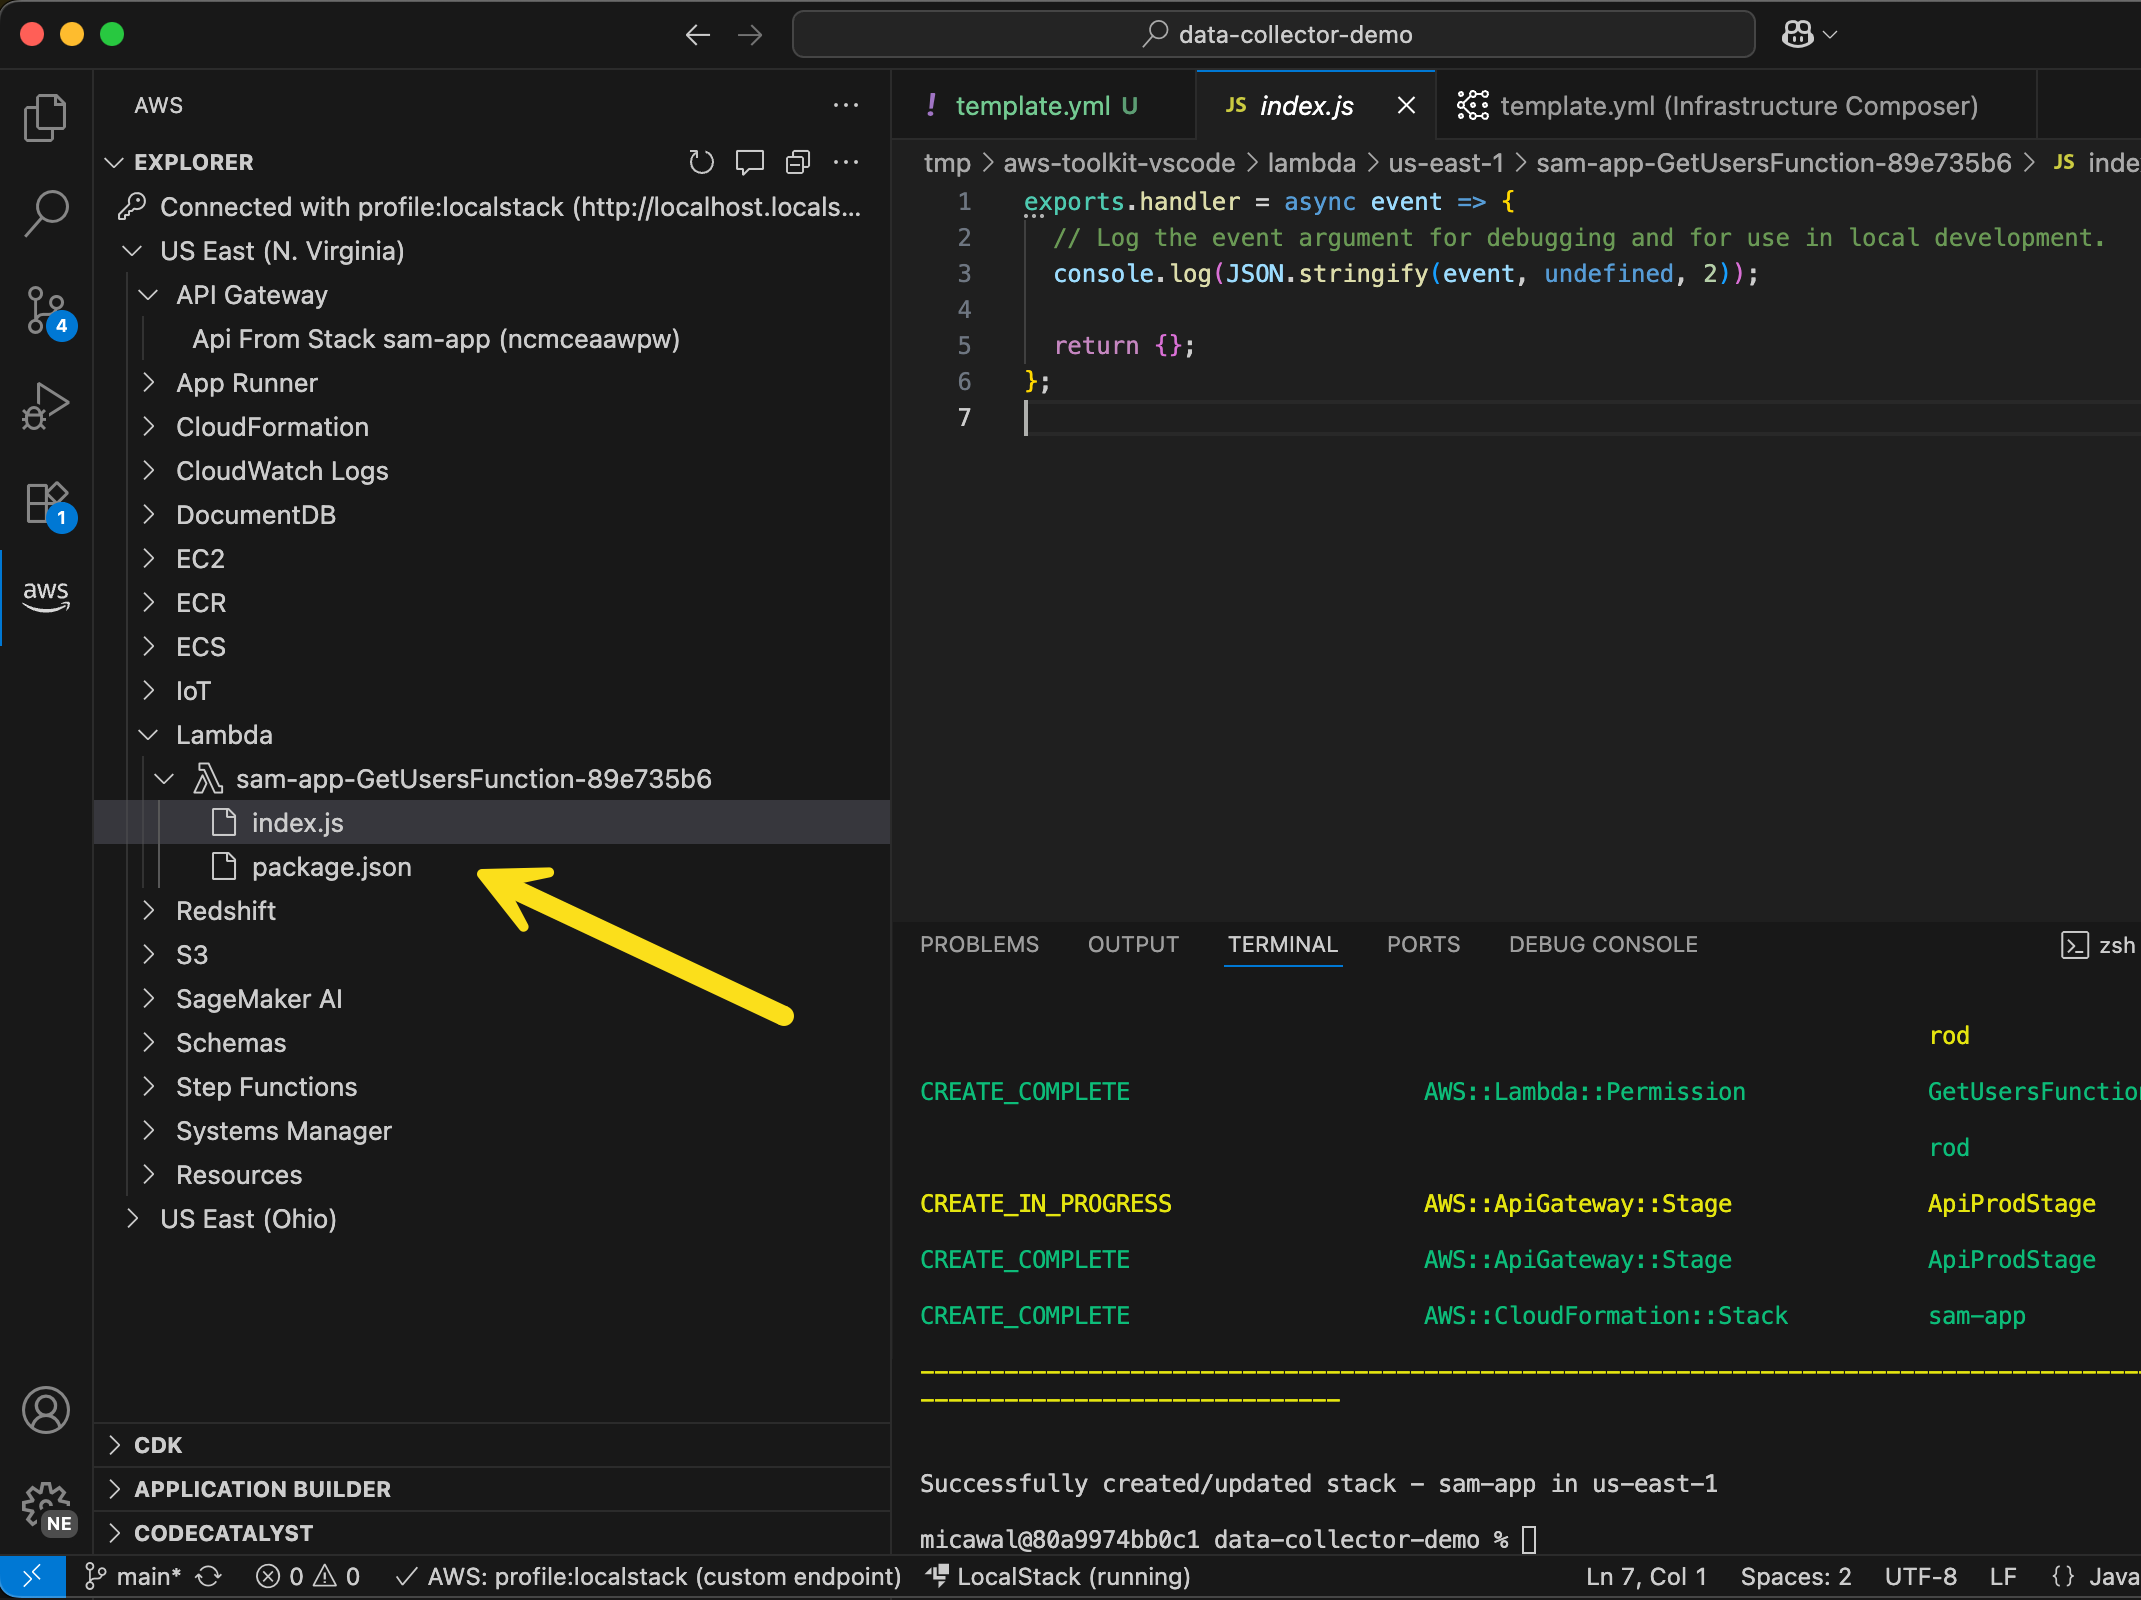
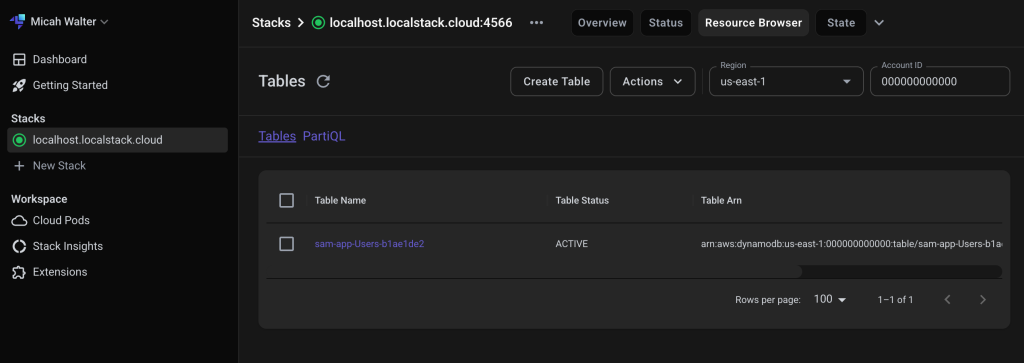
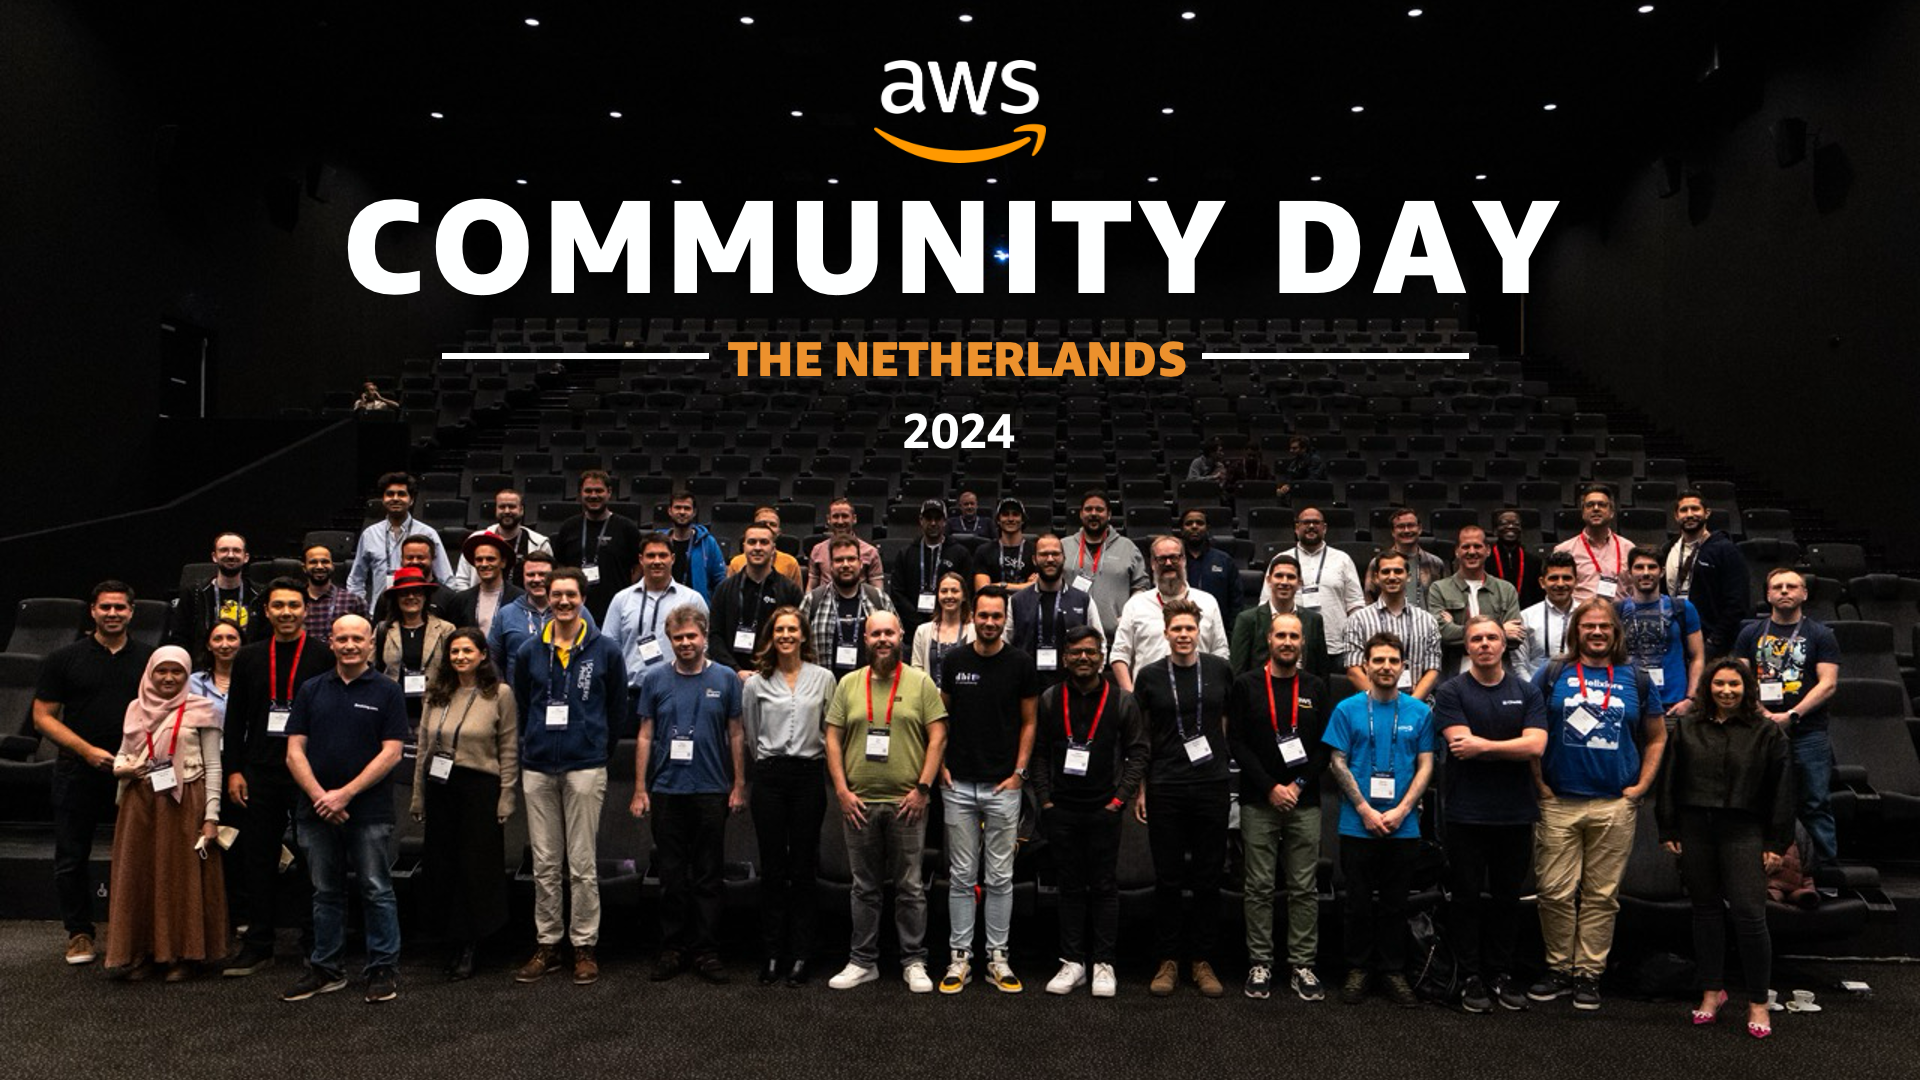








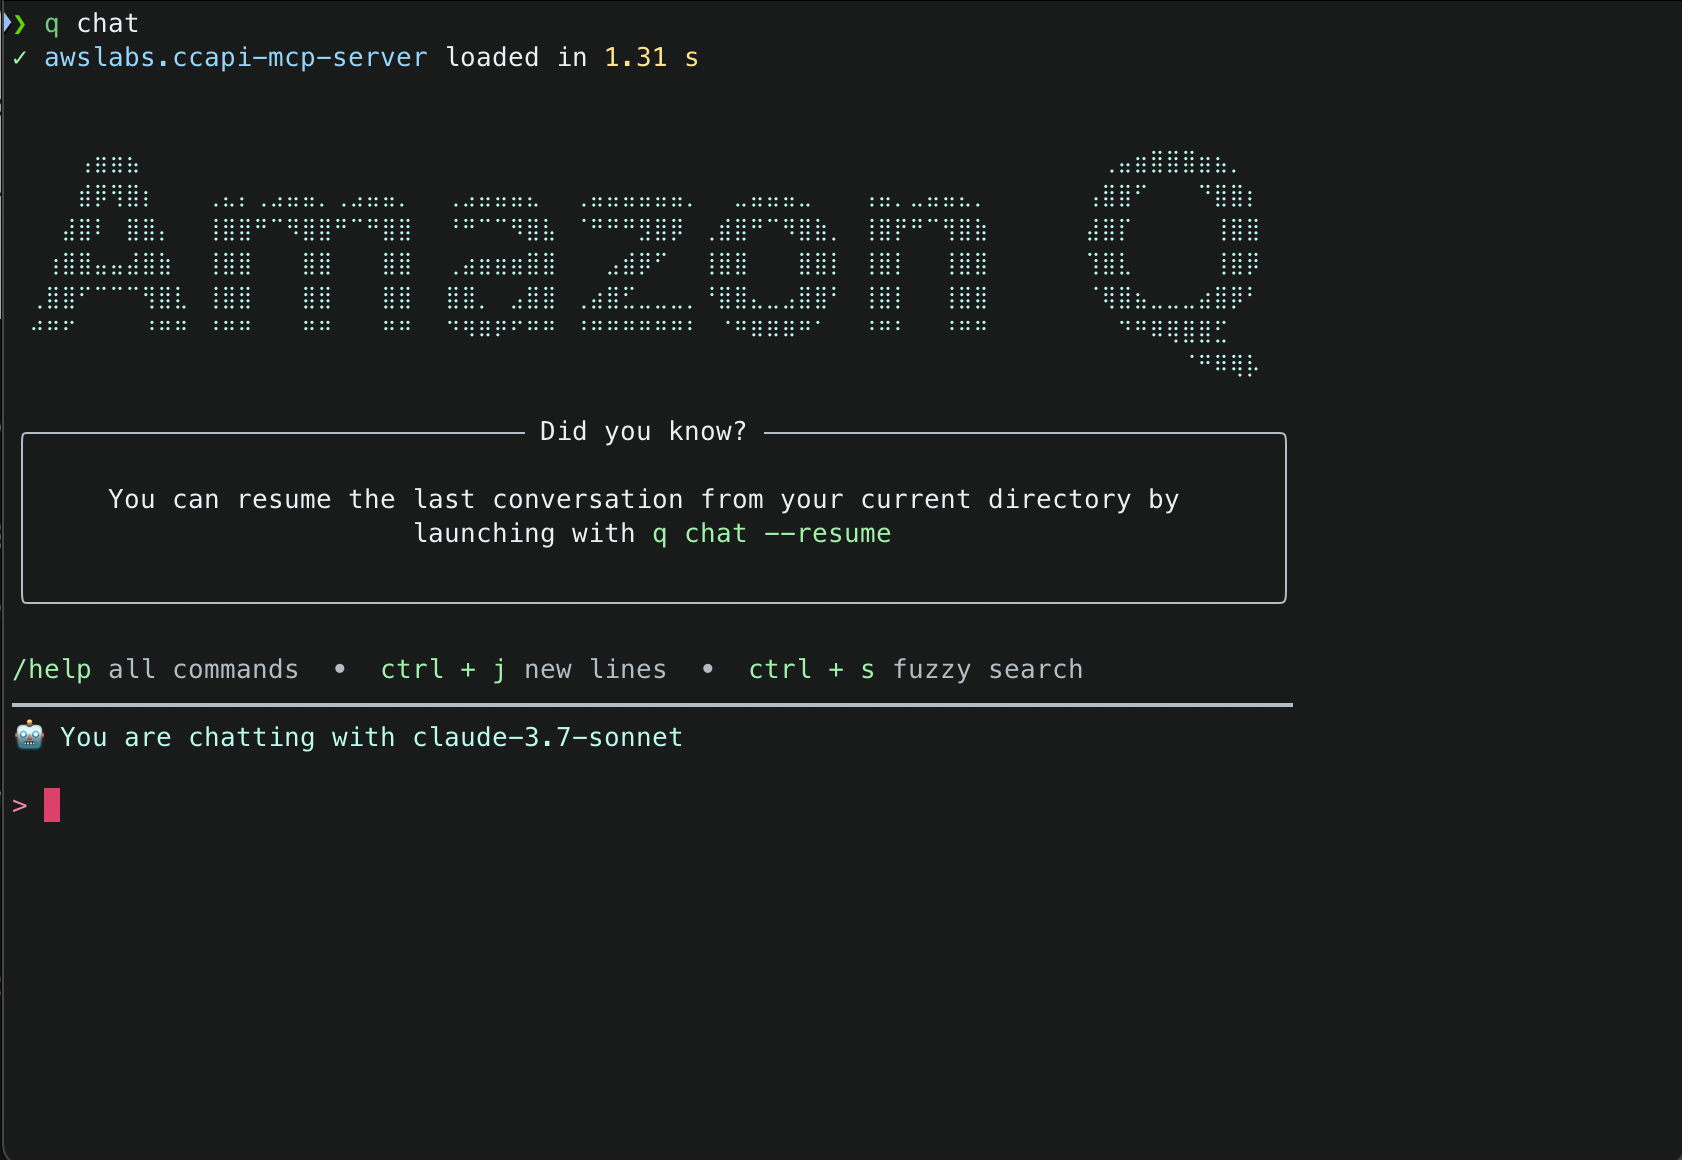 2. This will start initializing the MCP servers in the background, allowing you to immediately start using Q Chat even if they are still loading. As a note, if these have not finished loading, your prompts will be handled without using any MCP servers. To check the status of the servers, run