Post Syndicated from Julian Wood original https://aws.amazon.com/blogs/compute/detecting-and-stopping-recursive-loops-in-aws-lambda-functions/
This post is written by Pawan Puthran, Principal Serverless Specialist TAM, Aneel Murari, Senior Serverless Specialist Solution Architect, and Shree Shrikhande, Senior AWS Lambda Product Manager.
AWS Lambda is announcing a recursion control to detect and stop Lambda functions running in a recursive or infinite loop.
At launch, this feature is available for Lambda integrations with Amazon Simple Queue Service (Amazon SQS), Amazon SNS, or when invoking functions directly using the Lambda invoke API. Lambda now detects functions that appear to be running in a recursive loop and drops requests after exceeding 16 invocations.
This can help reduce costs from unexpected Lambda function invocations because of recursion. You receive notifications about this action through the AWS Health Dashboard, email, or by configuring Amazon CloudWatch Alarms.
Overview
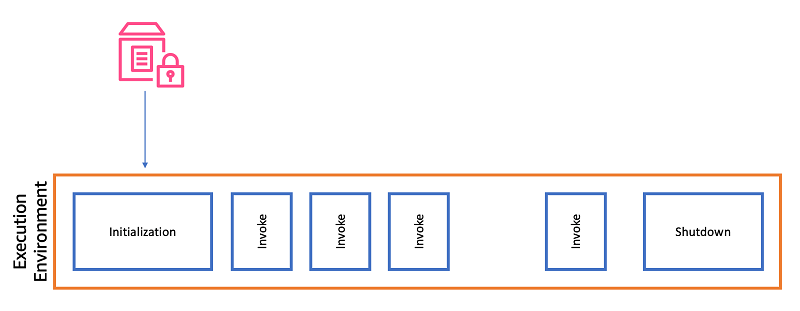
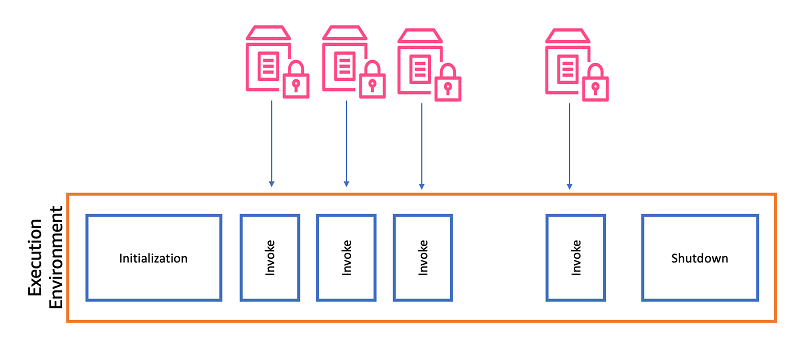
You can invoke Lambda functions in multiple ways. AWS services generate events that invoke Lambda functions, and Lambda functions can send messages to other AWS services. In most architectures, the service or resource that invokes a Lambda function should be different from the service or resource that the function outputs to. Because of misconfiguration or coding bugs, a function can send a processed event to the same service or resource that invokes the Lambda function, causing a recursive loop.
Lambda now detects the function running in a recursive loop between supported services, after exceeding 16 invocations. It returns a RecursiveInvocationException to the caller. There is no additional charge for this feature. For asynchronous invokes, Lambda sends the event to a dead-letter queue or on-failure destination, if one is configured.
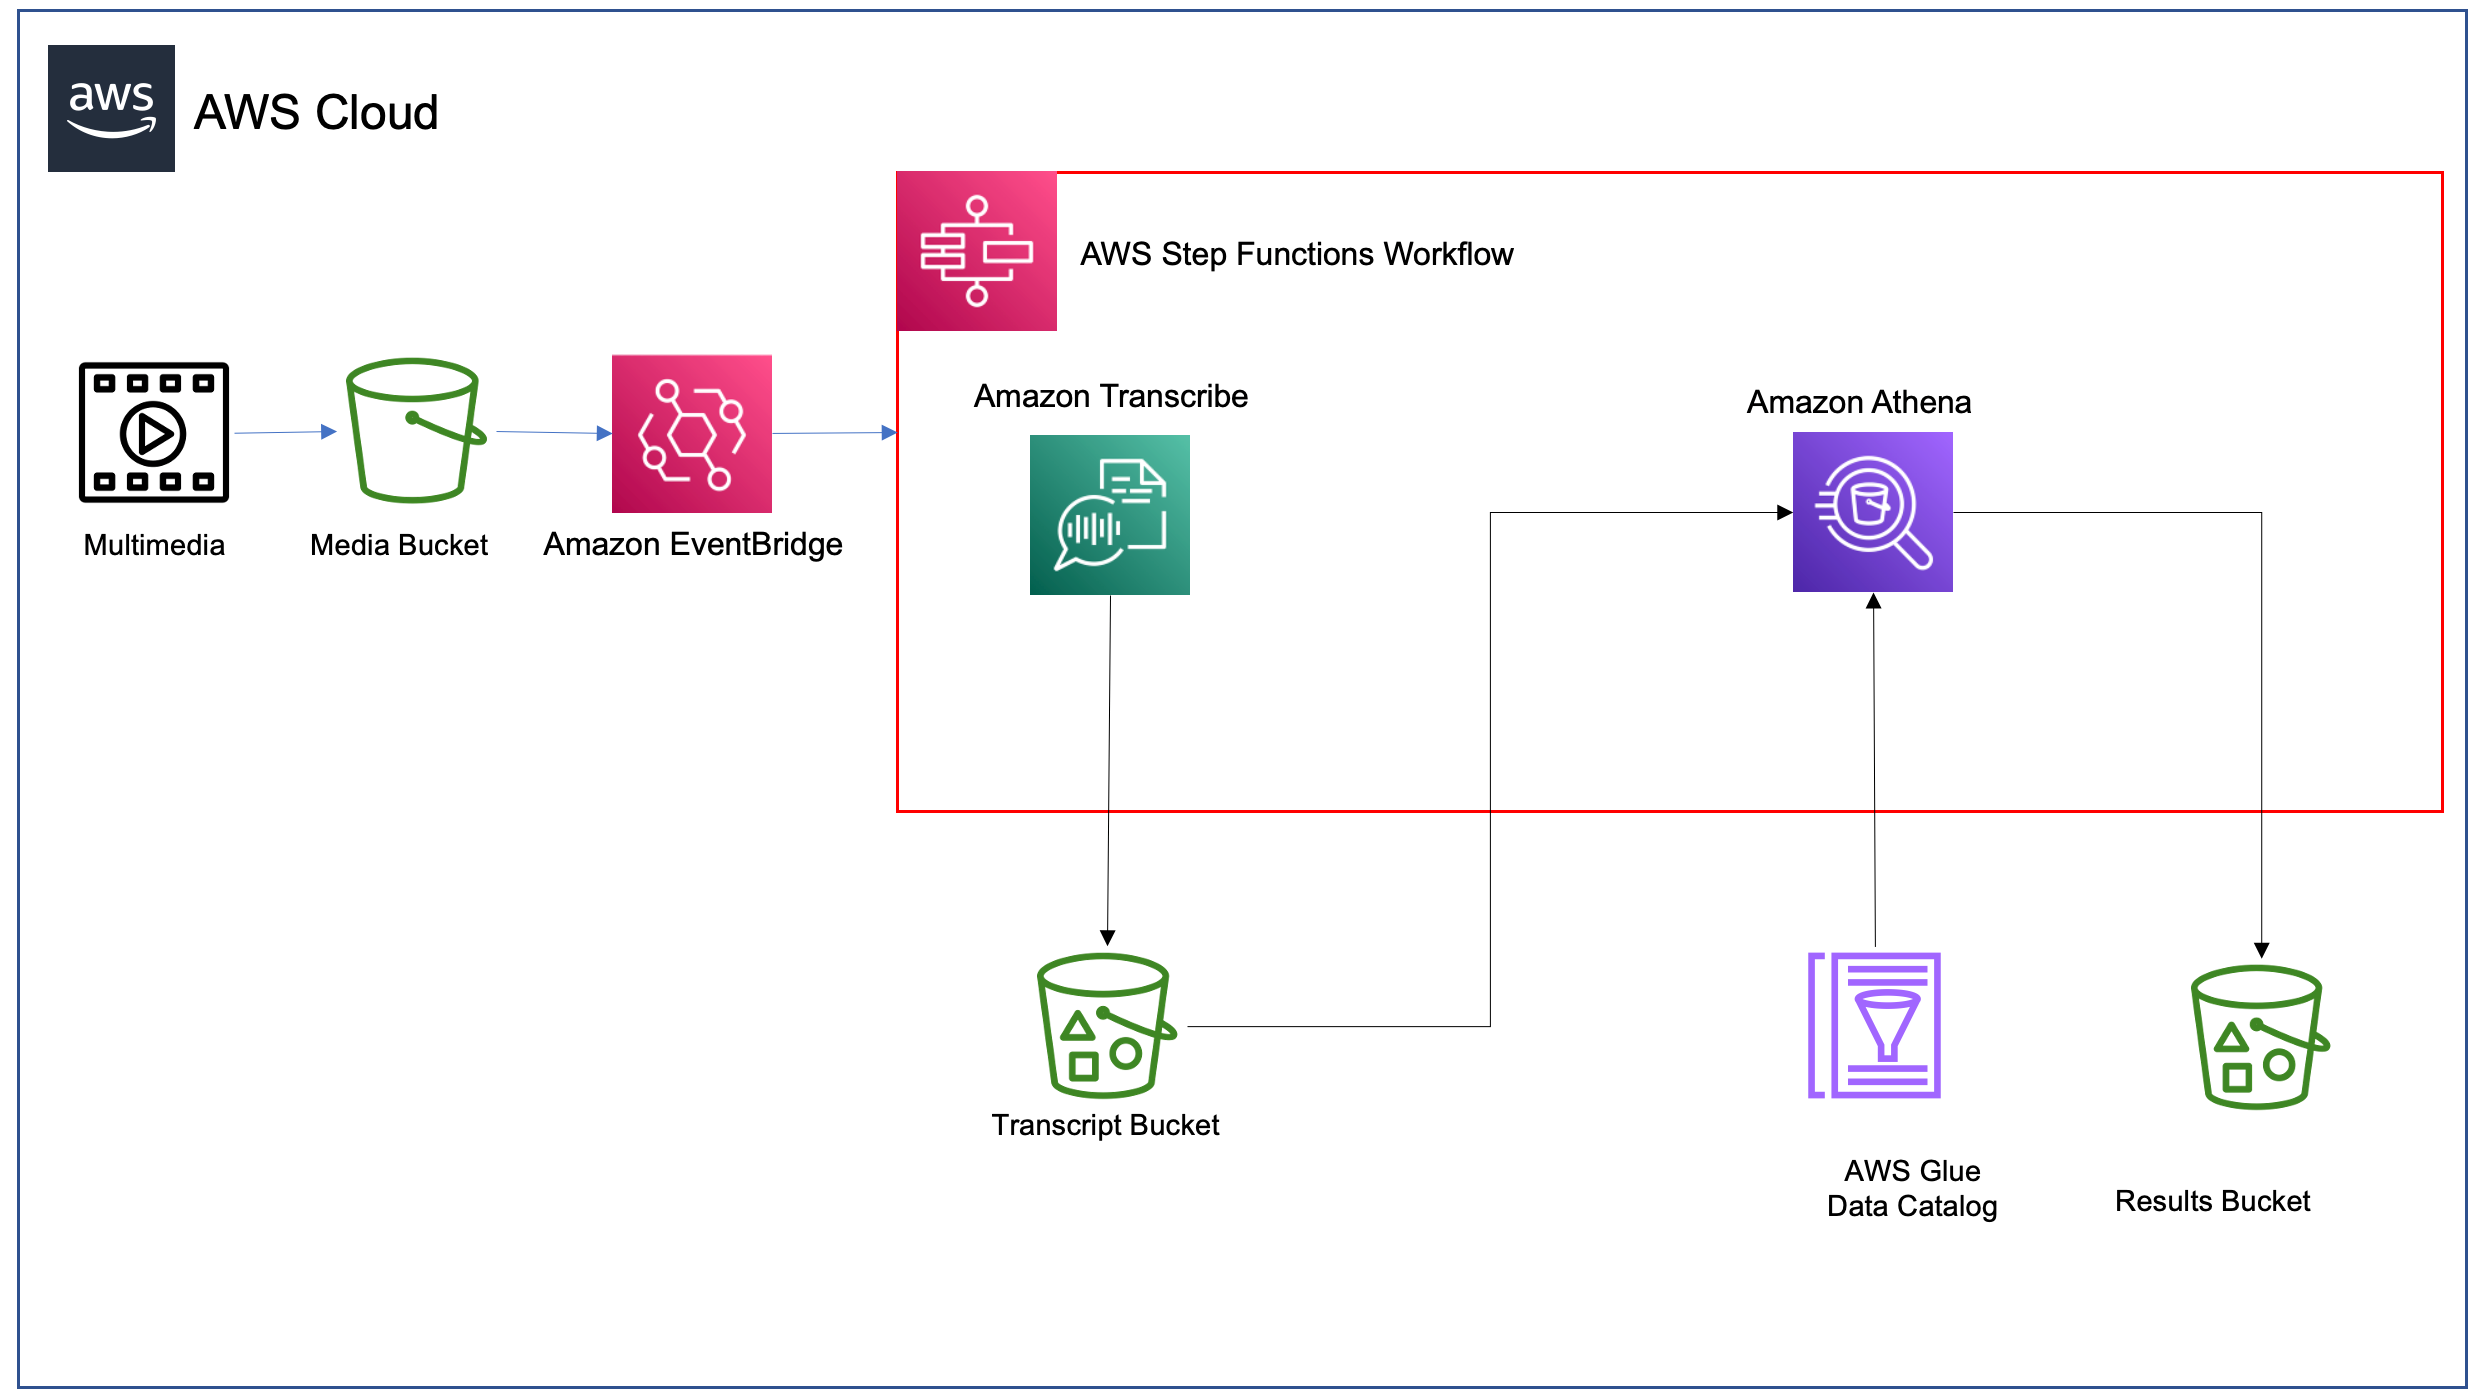
The following is an example of an order processing system.

Order processing system
- A new order information message is sent to the source SQS queue.
- Lambda consumes the message from the source queue using an ESM.
- The Lambda function processes the message and sends the updated orders message to a destination SQS queue using the SQS SendMessage API.
- The source queue has a dead-letter queue(DLQ) configured for handling any failed or unprocessed messages.
- Because of a misconfiguration, the Lambda function sends the message to the source SQS queue instead of the destination queue. This causes a recursive loop of Lambda function invocations.
To explore sample code for this example, see the GitHub repo.
In the preceding example, after 16 invocations, Lambda throws a RecursiveInvocationException to the ESM. The ESM stops invoking the Lambda function and, once the maxReceiveCount is exceeded, SQS moves the message to the source queues configured DLQ.
You receive an AWS Health Dashboard notification with steps to troubleshoot the function.

AWS Health Dashboard notification
You also receive an email notification to the registered email address on the account.

Email notification
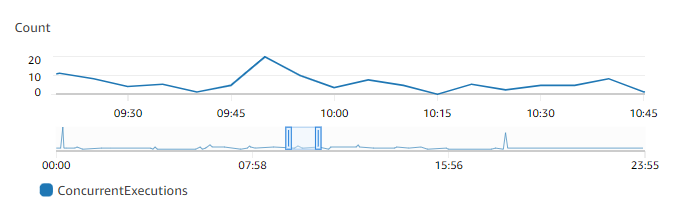
Lambda emits a RecursiveInvocationsDropped CloudWatch metric, which you can view in the CloudWatch console.

RecursiveInvocationsDropped CloudWatch metric
How does Lambda detect recursion?
For Lambda to detect recursive loops, your function must use one of the supported AWS SDK versions or higher.
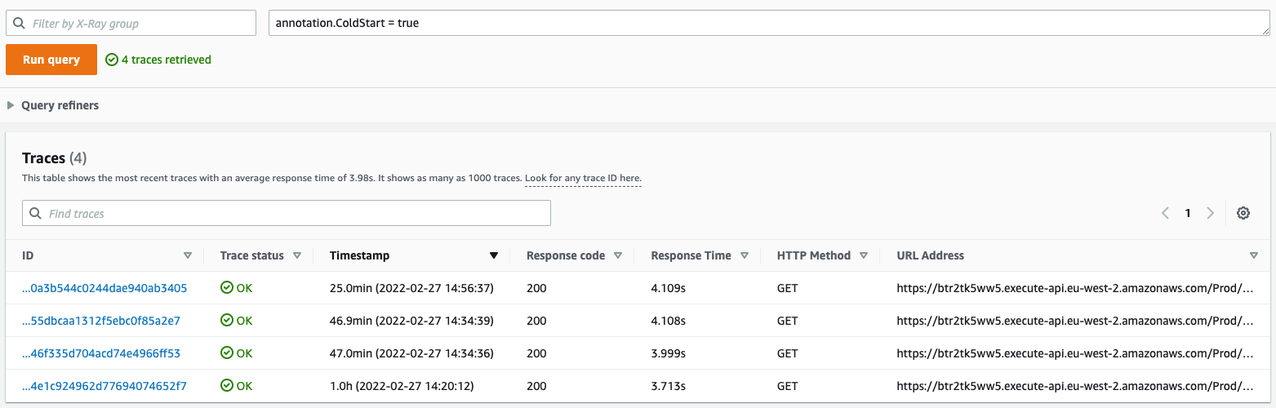
Lambda uses an AWS X-Ray trace header primitive called “Lineage” to track the number of times a function has been invoked with an event. When your function code sends an event using a supported AWS SDK version, Lambda increments the counter in the lineage header. If your function is then invoked with the same triggering event more than 16 times, Lambda stops the next invocation for that event. You do not need to configure active X-Ray tracing for this feature to work.
An example lineage header looks like:
X-Amzn-Trace-Id:Root=1-645f7998-4b1e232810b0bb733dba2eab;Parent=5be88d12eefc1fc0;Sampled=1;Lineage=43e12f0f:5
43e12f0f is the hash of a resource, in this case a Lambda function. 5 is the number of times this function has been invoked with the same event. The logic of hash generation, encoding, and size of the lineage header may change in the future. You should not design any application functionality based on this.
When using an ESM to consume messages from SQS, after the maxReceiveCount value is exceeded, the message is sent to the source queue’s configured DLQ. When Lambda detects a recursive loop and drops subsequent invocations, it returns a RecursiveInvocationException to the ESM. This increments the maxReceiveCount value. When the ESM auto retries to process events, based on the error handling configuration, these retries are not considered recursive invocations.
When using SQS, you can also batch multiple messages into one Lambda event. Where the message batch size is greater than 1, Lambda uses the maximum lineage value within the batch of messages. It drops the entire batch if the value exceeds 16.
Recursion detection in action
You can deploy a sample application example in the GitHub repo to test Lambda recursive loop detection. The application includes a Lambda function that reads from an SQS queue and writes messages back to the same SQS queue.
As prerequisites, you must install:
- AWS Command Line Interface (AWS CLI)
- AWS Serverless Application Model (AWS SAM) (version 1.81.1 or above)
- Docker
To deploy the application:
-
- Set your AWS Region:
export REGION=<your AWS region>-
- Clone the GitHub repository
git clone https://github.com/aws-samples/aws-lambda-recursion-detection-sample.git
cd aws-lambda-recursion-detection-sample-
- Use AWS SAM to build and deploy the resources to your AWS account. Enter a stack name, such as
lambda-recursion, when prompted. Accept the remaining default values.
- Use AWS SAM to build and deploy the resources to your AWS account. Enter a stack name, such as
sam build –-use-container
sam deploy --guided --region $REGION
To test the application:
-
- Save the name of the SQS queue in a local environment variable:
SOURCE_SQS_URL=$(aws cloudformation describe-stacks \ --region $REGION \ --stack-name lambda-recursion \ --query 'Stacks[0].Outputs[?OutputKey==`SourceSQSqueueURL`].OutputValue' --output text)- Publish a message to the source SQS queue:
aws sqs send-message --queue-url $SOURCE_SQS_URL --message-body '{"orderId":"111","productName":"Bolt","orderStatus":"Submitted"}' --region $REGIONThis invokes the Lambda function, which writes the message back to the queue.
To verify that Lambda has detected the recursion:
- Navigate to the CloudWatch console. Choose All Metrics under Metrics in the left-hand panel and search for RecursiveInvocationsDropped.

Find RecursiveInvocationsDropped.
- Choose Lambda > By Function Name and choose RecursiveInvocationsDropped for the function you created. Under Graphed metrics, change the statistic to sum and Period to 1 minute. You see one record. Refresh if you don’t see the metric after a few seconds.


Metrics sum view
Actions to take when Lambda stops a recursive loop
When you receive a notification regarding recursion in your account, the following steps can help address the issue.
- To stop further invoke attempts while you fix the underlying configuration issue, set the function concurrency to 0. This acts as an off switch for the Lambda function. You can choose the “Throttle” button in the Lambda console or use the PutFunctionConcurrency API to set the function concurrency to 0.
- You can also disable or delete the event source mapping or trigger for the Lambda function.
- Check your Lambda function code and configuration for any code defects that create loops. For example, check your environment variables to ensure you are not using the same SQS queue or SNS topic as source and target.
- If an SQS Queue is the event source for your Lambda function, configure a DLQ on the source queue.
- If an SNS topic is the event source, configure an On-Failure Destination for the Lambda function.
Disabling recursion detection
You may have valid use-cases where Lambda recursion is intentional as part of your design. In this case, use caution and implement suitable guardrails to prevent unexpected charges to your account. To learn more about best practices for using recursive invocation patterns, see Recursive patterns that cause run-away Lambda functions in the AWS Lambda Operator Guide.
This feature is turned on by default to stop recursive loops. To request turning it off for your account, reach out to AWS Support.
Conclusion
Lambda recursion control for SQS and SNS automatically detects and stops functions running in a recursive or infinite loop. This can be due to misconfiguration or coding errors. Recursion control helps reduce unexpected usage with Lambda and downstream services. The post also explains how Lambda detects and stops recursive loops and notifies you through AWS Health Dashboard to troubleshoot the function.
To learn more about the feature, visit the AWS Lambda Developer Guide.
For more serverless learning resources, visit Serverless Land