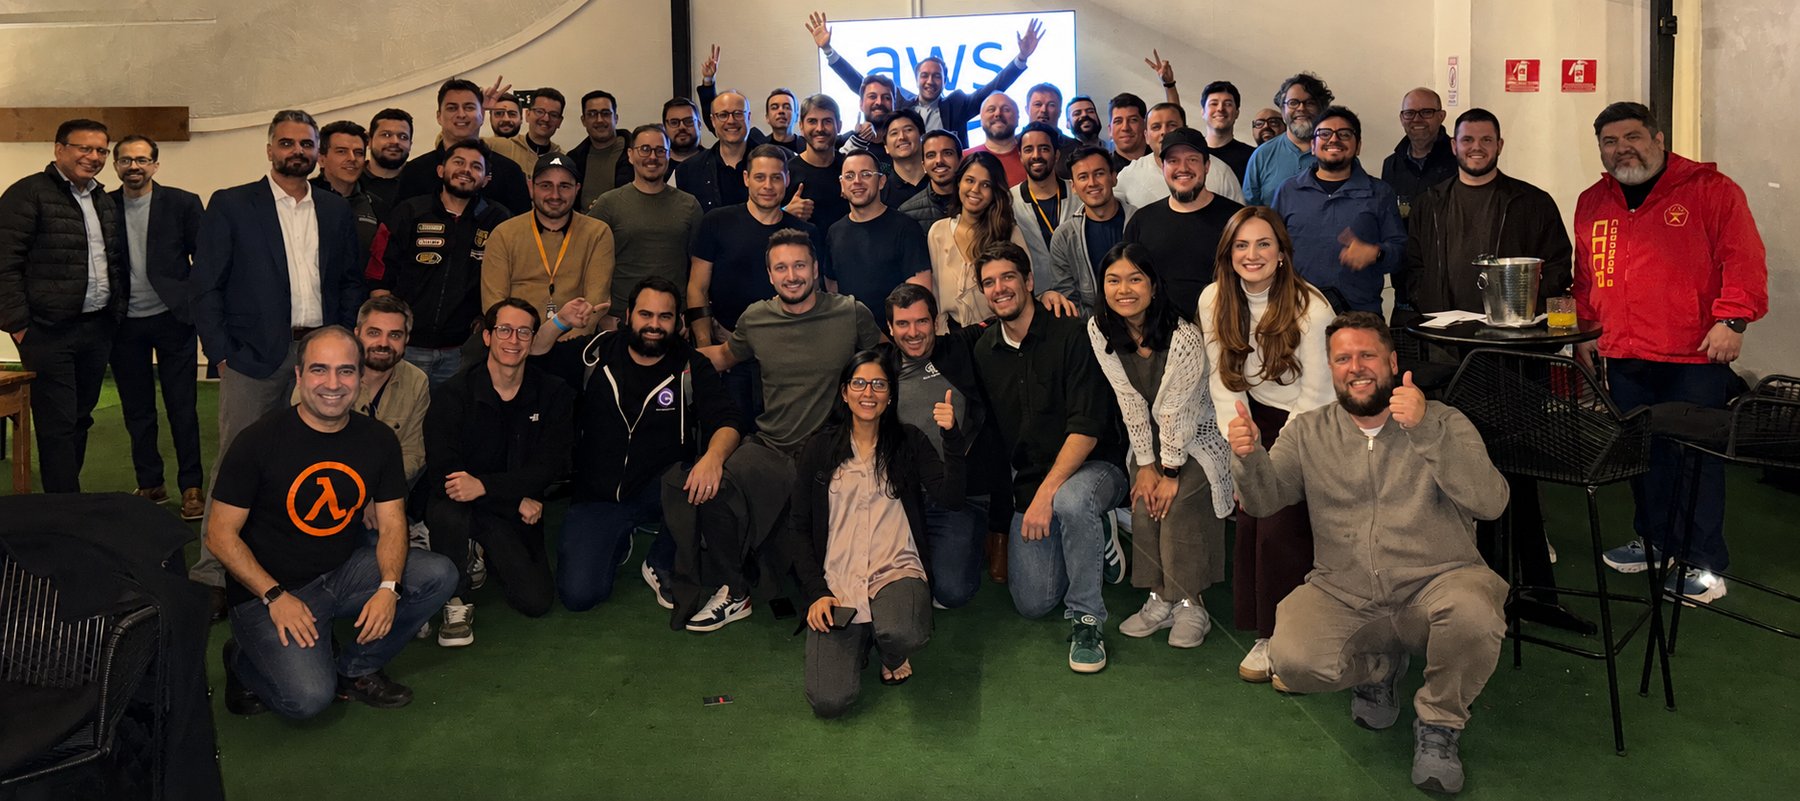
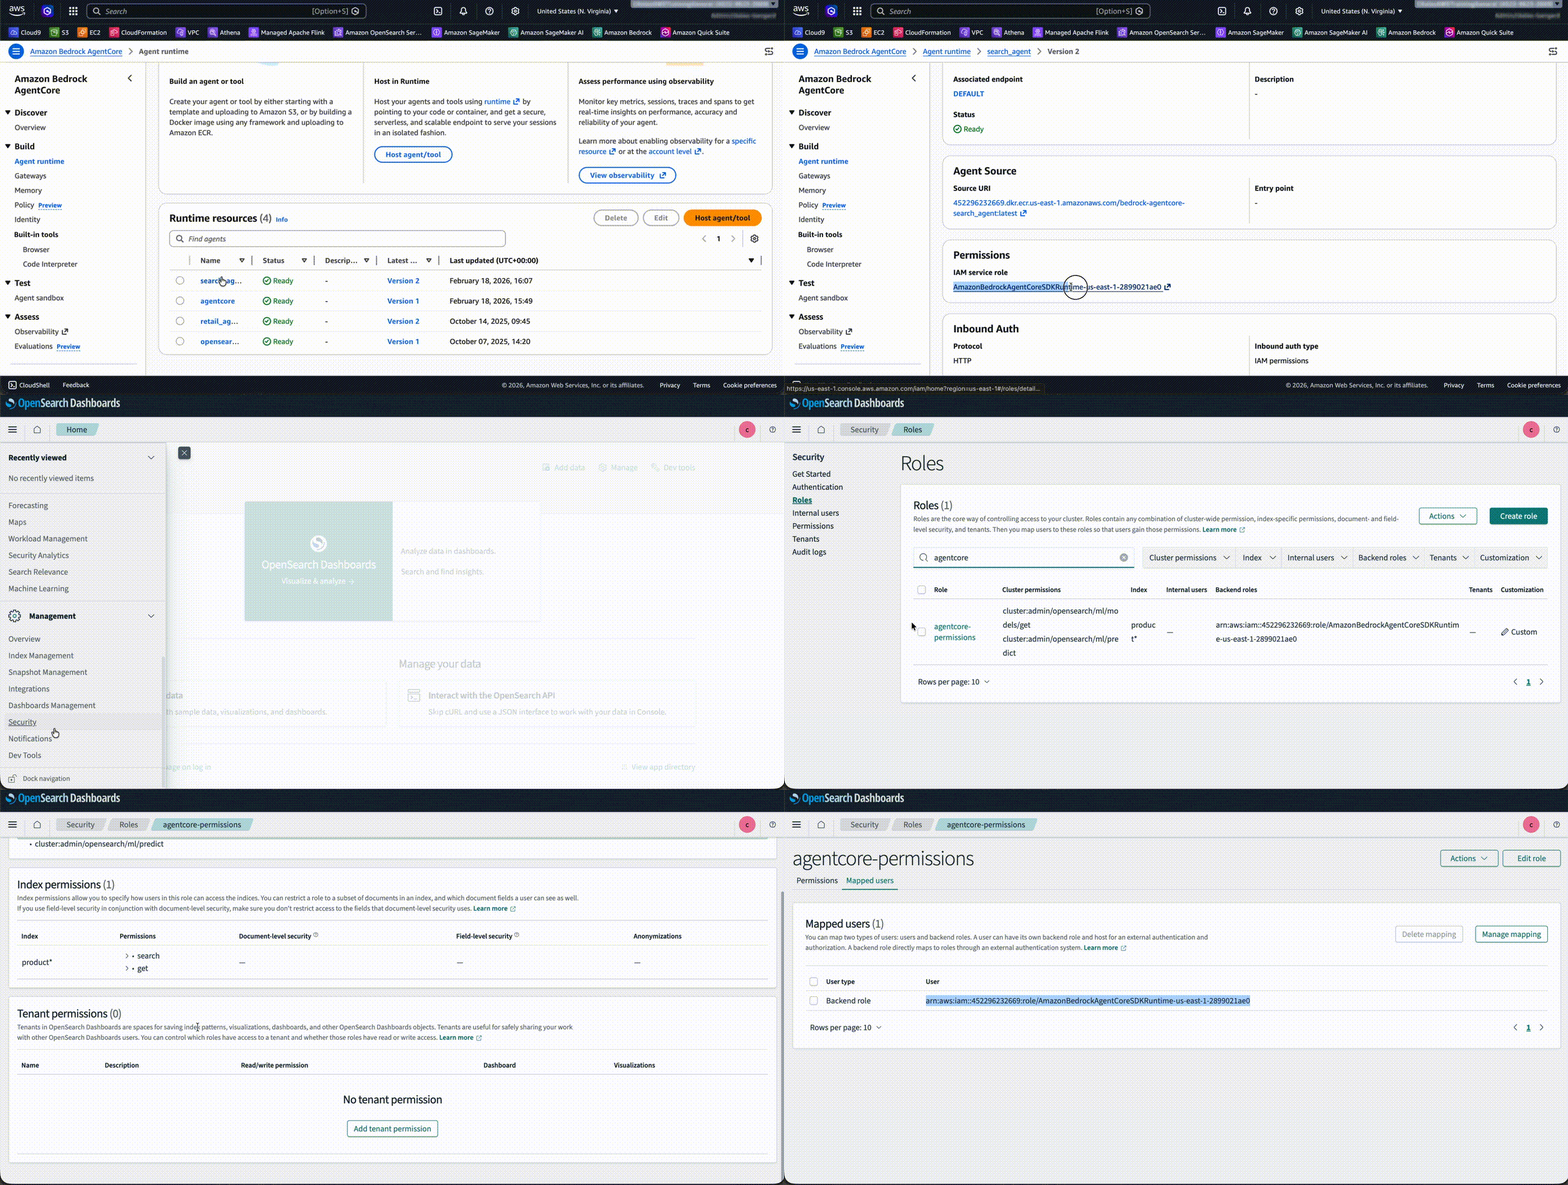
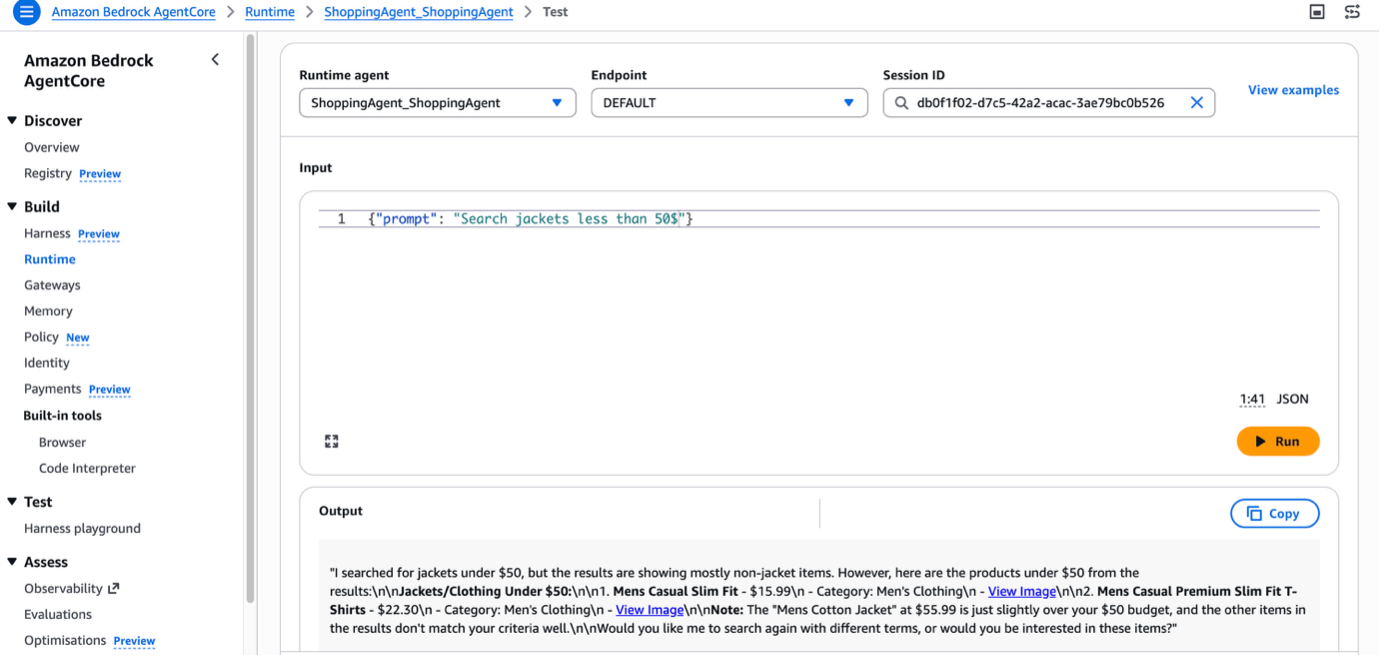
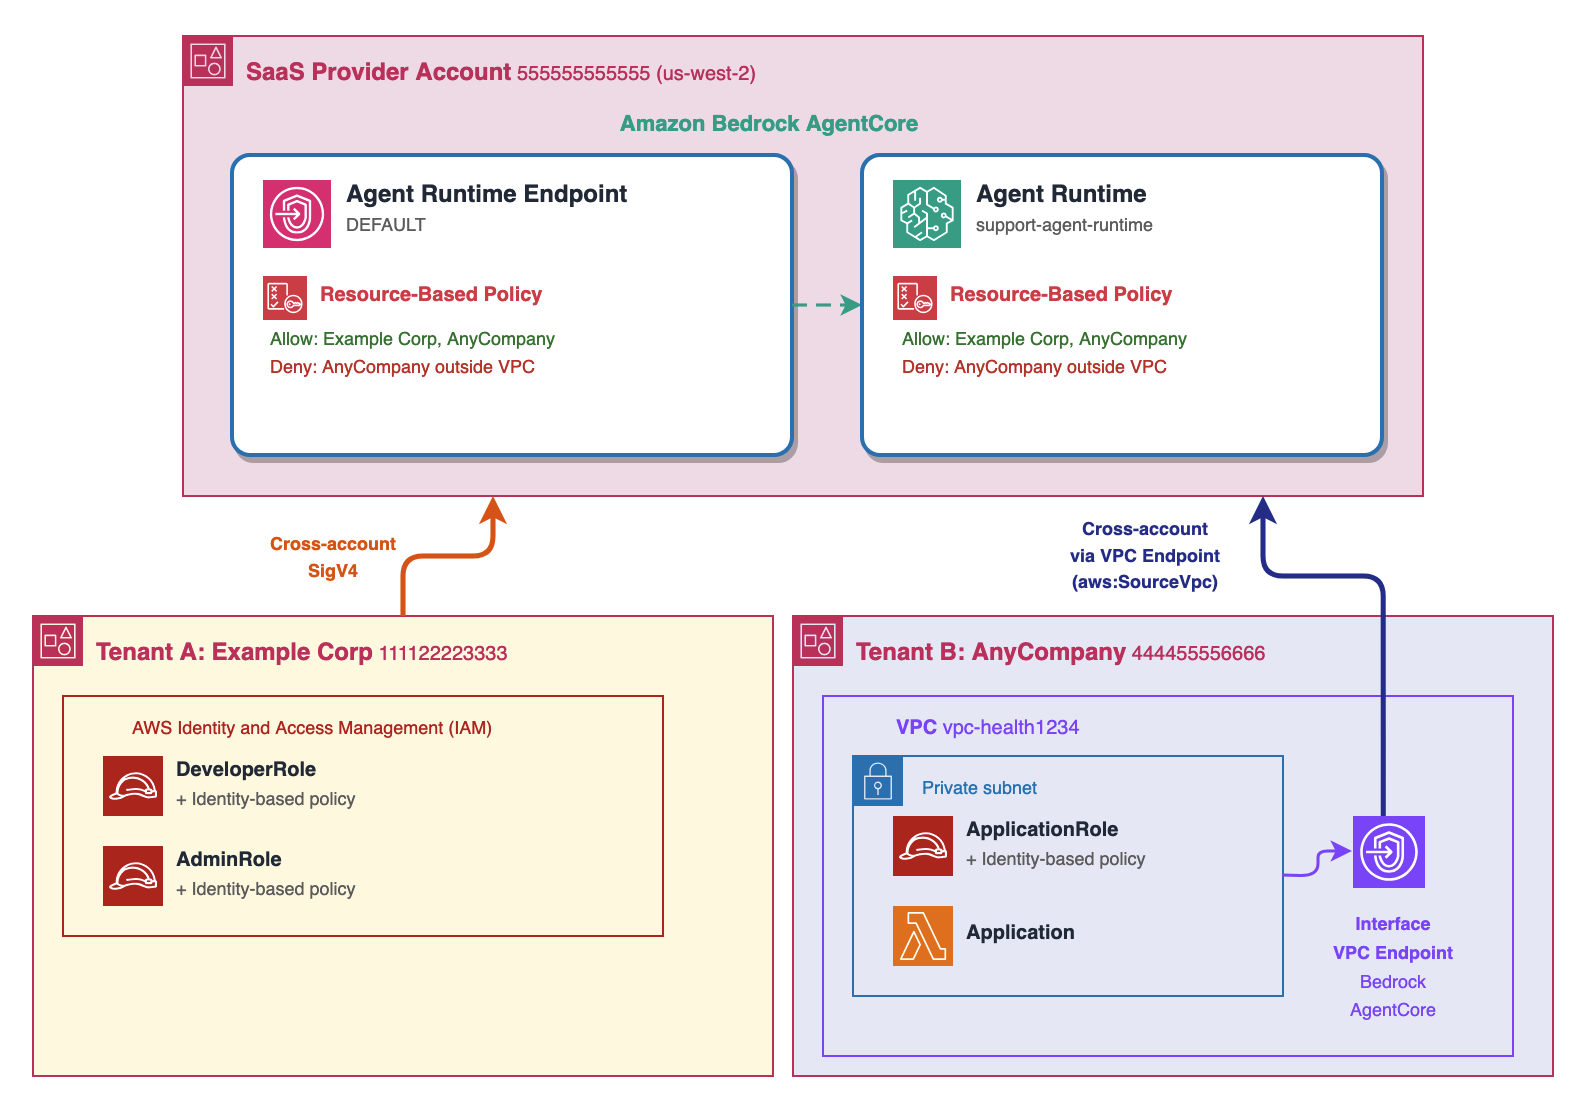
Living in the Netherlands, I spend a fair amount of time on trains, and that is usually where I catch up on what the builder community is writing. Until now, that meant opening a laptop or squinting at a browser tab on my phone. This week I found myself scrolling through trending articles and checking a workshop from the AWS Builder Center mobile app while waiting for a delayed train, and it made those spare twenty minutes very useful. That is why I am glad to open this week with the Builder Center mobile app.
AWS Builder Center is now available as a mobile app on iOS and Android, extending the experience beyond desktop and web. Using your AWS Builder ID, you stay signed in across sessions and can browse trending articles, access 600+ AWS Skill Builder courses, and manage hands-on workshops with free sandbox environments from your mobile device. You can follow AWS Heroes, Community Builders, and User Group Leaders, check Builder Loft event calendars on the go, and receive push notifications for subscribed topics and communities. The app also supports the Wishlist feature for submitting product feedback directly to AWS teams. It is available worldwide on the Apple App Store and Google Play Store.
Builder Center also added two features this week. Polls give you a way to ask the community a question from the Home feed: write a question, add 2 to 5 answer options, set a deadline, and people vote, with results updating live and discussion happening in the comments. Votes are anonymous, and creators see aggregate counts and percentages only. Separately, the Zero to Shipped hackathon is open from September 18 to October 2. You connect your coding agent to AWS, build a real application, and ship it live on AWS for a chance to win a share of a $28,000 prize pool. Five winning projects each receive $5,000 in AWS credits and an AWS Builder swag bundle.
Last week’s launches
Here is what else happened this week.
Amazon Connect Talent is now generally available – Amazon Connect Talent is an AI-powered hiring solution for talent acquisition teams managing hiring at scale. Informed by decades of Amazon hiring science, it uses AI agents to conduct structured voice interviews, administer evidence-based assessments, and score candidates consistently, so recruiters can focus on final decisions. Candidates interview 24/7 from any device, and recruiters review scores, transcripts, and detailed evaluations the next morning. All candidate data is anonymized during AI evaluation, each competency is scored against a rubric with every score tied to specific evidence from the interview, and recruiters keep final decision authority over every hire. General availability includes competency-based assessments, AI-led voice interviews with adaptive questioning, a brand-customizable mobile-first candidate portal, and admin onboarding tools.
Amazon Corretto 27 is now generally available – Amazon Corretto 27, a Feature Release version of the no-cost, multi-platform distribution of OpenJDK, is now available for download on Linux, Windows, and macOS, with support through April 2027. Notable features include G1 as the default garbage collector across all environments (JEP 523), post-quantum hybrid key exchange for TLS 1.3 (JEP 527), compact object headers by default for a smaller memory footprint (JEP 534), and JFR in-process data redaction to remove sensitive data from Java Flight Recorder recordings before they leave the JVM (JEP 536). It also continues previews of enhanced pattern matching, structured concurrency, and lazy constants, along with the Vector API incubator.
Kimi K3 by Moonshot AI is now generally available on Amazon Bedrock – Kimi K3 is now available on Amazon Bedrock for coding and knowledge work. According to Moonshot AI, Kimi K3 is its most capable model and the first open model to reach 2.8 trillion parameters. It combines native vision capabilities with a 1-million-token context window, making it well suited to long-running coding sessions across large repositories, multi-document analysis, and extended agent workflows. Moonshot AI reports an approximate 2.5x improvement in scaling efficiency over Kimi K2. Kimi K3 is the first open-weight model on Amazon Bedrock to support explicit prompt caching, which helps reduce latency and input costs when reusing context across model calls.
AWS reimagines the getting started experience – We announced a new simplified experience for builders starting a new project. Instead of completing configuration tasks first, you start with sensible defaults: sign up using an existing identity from providers including Google, GitHub, and Apple, and for most new customers no credit card is required, with $100 in free credits as part of the AWS Free Tier. AWS organizes your work in a project, which contains an AWS account and sharing settings, and applies security controls for you. You can invite collaborators by email without setting up IAM users, set a monthly spend limit starting at $20, and activate advanced AWS features later at no additional cost with no migration. The experience is gradually rolling out to new customers.
New low-cost burstable Amazon EC2 T8i instances are generally available – Amazon EC2 T8i instances, powered by custom sixth-generation Intel Xeon Scalable processors (Granite Rapids), are among the lowest-cost EC2 instances and deliver up to 30% better price performance over previous-generation T3 instances. They are designed for low-to-moderate CPU utilization workloads such as microservices, low-traffic websites, development and testing environments, and small databases. T8i instances deliver up to 70% higher compute performance, up to 1.25x higher network bandwidth, and up to 2.4x higher Amazon EBS bandwidth compared to T3, and they use the same CPU credit system, so upgrading from T3 is straightforward.
AWS Elastic Beanstalk introduces Cluster Mode – AWS Elastic Beanstalk Cluster Mode is a new fully managed option for teams running a portfolio of applications on shared infrastructure powered by Amazon EKS. Instead of operating each application in isolation, you run multiple applications through one experience with a single operational baseline, so per-application cost decreases as your portfolio grows. You can upload source code in Java, .NET, Python, Node.js, PHP, Ruby, or Go, and Elastic Beanstalk handles containerization automatically through Cloud Native Buildpacks when needed. Cluster Mode includes production-grade deployment strategies with automatic rollback, event-driven autoscaling, AWS Secrets Manager integration, native OpenTelemetry observability, and AI-powered troubleshooting. Standard and Cluster Mode environments run side by side within the same application, so teams can migrate one environment at a time.
For a full list of AWS announcements, be sure to keep an eye on the What’s New with AWS page.
Other AWS news
Here are some additional posts you may find useful:
Building in the AWS European Sovereign Cloud – Two new posts cover building on the AWS European Sovereign Cloud, an independent cloud for Europe that runs as a distinct partition with its own control plane, IAM, billing, console, and service endpoints, and its first Region in Brandenburg, Germany. The first post walks through architecting a secure landing zone, covering account structure and governance, identity as infrastructure as code, centralized logging, data protection, and partition-aware ARN construction that works across AWS partitions. The second announces the general availability of Gemma 4 open-weight models on the Amazon Bedrock next-generation inference engine in the AWS European Sovereign Cloud, with inference staying entirely within eusc-de-east-1 under a zero data retention and zero operator access model.
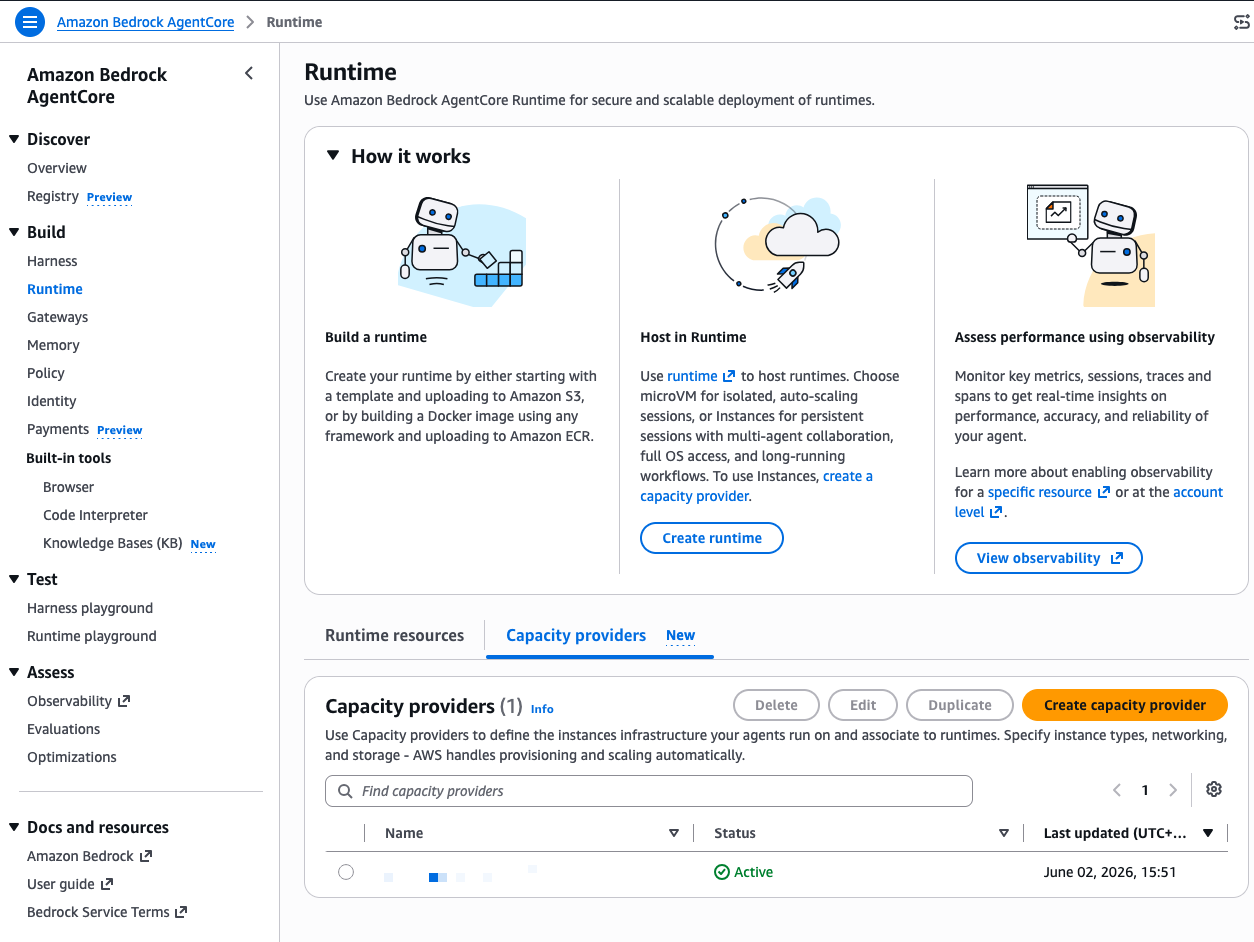
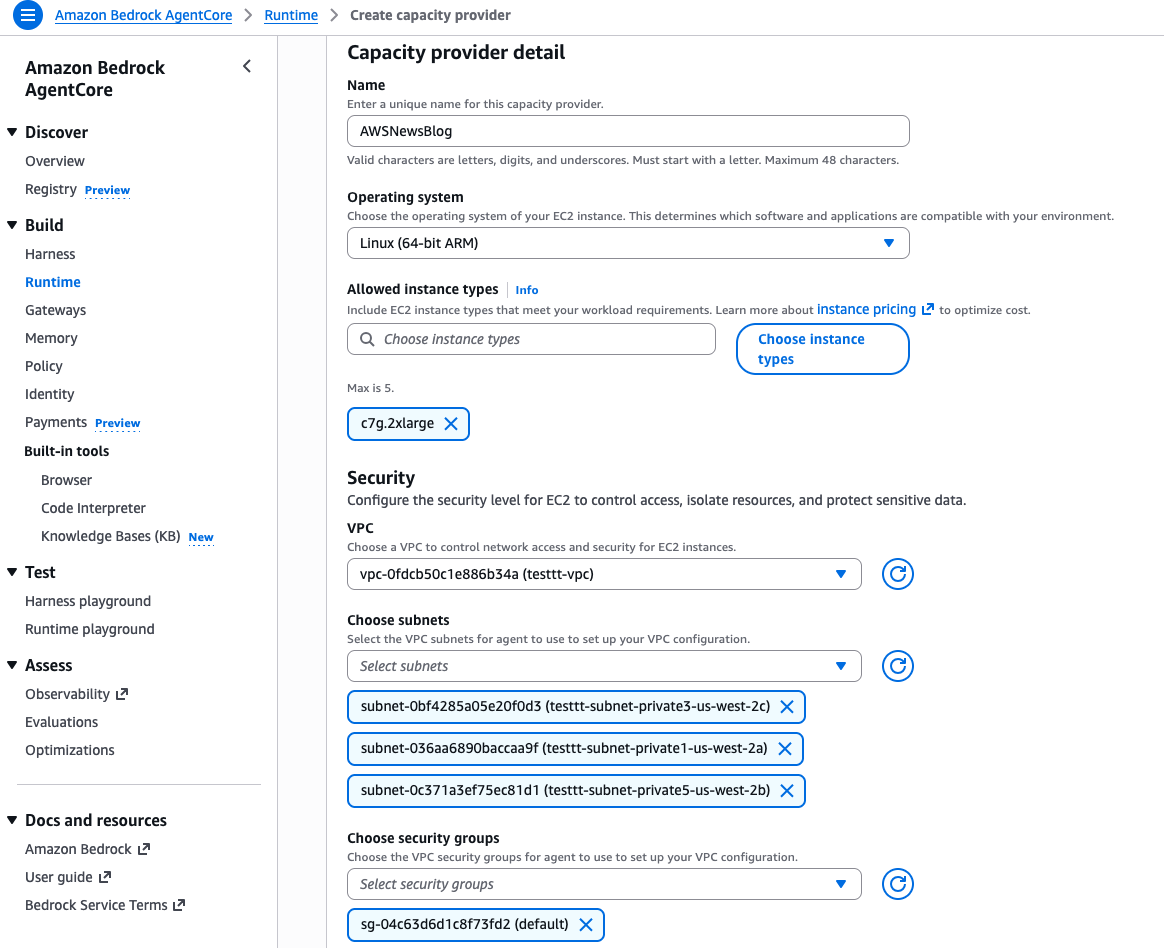
The new AgentCore runtime: elastic, optimized, and consistently fast starts – We announced a new version of the Amazon Bedrock AgentCore runtime, the managed compute layer for running agents. The new runtime reclaims memory as a session releases it rather than holding it at the peak, so the bill tracks real usage over the life of a session. It also delivers consistent cold start times regardless of container image size or concurrency by preparing the environment once, snapshotting it, and restoring that snapshot for each new instance. In testing with an empty echo agent, the new runtime delivered a P75 cold start of about 2 seconds from a 200 MB image up to 2 GB, compared to roughly 5.4 to nearly 30 seconds for the original runtime.
Introducing the updated AWS Well-Architected Streaming Media Lens – We published a revised Streaming Media Lens, which provides architectural best practices for video streaming workloads. The revision expands from the original 2021 version to cover five streaming scenarios, including interactive live streaming with Amazon IVS Real-Time Streaming for up to 25,000 concurrent viewers, low-latency live streaming, and ad-supported content monetization, alongside enhanced video-on-demand and live streaming guidance. It also adds new sustainability best practices focused on reducing carbon footprint, expanded observability and incident-response frameworks, and advanced content protection with multi-layered DRM and forensic watermarking. The lens whitepaper and custom lens are available now.
For a full list of AWS blog posts, be sure to keep an eye on the AWS Blogs page.
Upcoming AWS events
Check your calendar and sign up for upcoming AWS events:
AWS re:Invent – AWS re:Invent returns to Las Vegas from November 30 to December 4. 2, 200+ session times, locations, and speakers are live. Reserved seating for AWS re:Invent opens October 6. Register now and be ready to claim your spot in chalk talks, workshops, and builders’ sessions when reserved seating opens.
AWS Summits – AWS Summits are free in-person events covering cloud and AI. With re:Invent on the horizon, the Summits are coming to an end for the year. The last Summit is Dubai (September 30) at the Dubai World Trade Center, with 60+ sessions, an AWS Village, and hands-on workshops.
Summer has officially given way to September, but the weather where I am has not quite caught up. The days are still unusually warm, and I suspect these are the last mild afternoons before autumn settles in for good. I am making the most of them while they last. Come back next week for more!
For an airline operations team, a single flight cancellation sets off a chain reaction. Hundreds of passengers need new itineraries within minutes, and no two cases are alike. They have different loyalty tiers, sit on different fare rules, and have downstream connections that may not wait. Passengers have varying cabin and seat preferences and might fall under different regulatory entitlements depending on where they booked and where they are flying.
Most airlines handle this with a layered system: rule-based automation covers the simple, one-hop rebooks, and everything else flows to a manual queue staffed by service agents. That works when disruptions are isolated. When they are not, the queue overwhelms, waiting times spike, and passengers booked alternatives themselves that create downstream knock-on disruptions.
This is exactly where AI agents become compelling. An agent can reason across seat availability, fare rules, loyalty entitlements, and connection timing the way an experienced desk agent would, but at machine speed and across hundreds of cases in parallel. Multi-agent collaboration typically lets a supervisor agent route work to collaborator sub-agents, with the model itself deciding which sub-agent runs and in what order. But an unconstrained agent might optimize for the passenger’s preference while ignoring a codeshare restriction, rebook onto a flight that meets minimum connection time on paper but not at that specific airport, or calculate compensation under the wrong regulatory regime because it misread the ticket’s point of sale.
Orchestrating specialized Amazon Bedrock AgentCore agents with AWS Step Functions gives you the reasoning power of generative AI with the guardrails of deterministic validation. Step Functions adds native fan-out across thousands of passengers, a callback pattern that pauses a case for human review at zero compute cost, and a durable execution history that serves as your audit trail. The principle is that agents propose, and deterministic code validates. The pattern is demonstrated here for airline rebooking, but it applies anywhere automated decisions can have real financial or regulatory consequences.
Solution overview
The design is a Step Functions state machine where deterministic steps that map to the business processes wrap each agent’s non-deterministic behavior. The following diagram shows the end-to-end flow. At a high level, the workflow proceeds through these stages:
The workflow starts when a flight-cancellation event arrives, for example through an Amazon EventBridge integration.
An enrichment step pulls additional data such as the passenger manifest, current bookings, loyalty status, and stored preferences.
The workflow fans out to run agents in parallel for each affected passenger.
Two agents then run for each passenger: a find-alternatives agent proposes the top three rebooking options, and a compensation agent determines entitlement based on route, delay duration, and cause.
A deterministic validation step runs after each agent, confirming flights are actually bookable and entitlement rules are followed before either result is used.
The workflow checks whether the case can be auto-confirmed, or needs human review.
Bookings are confirmed, compensation issues, and confirmations are sent. Unresolved cases go to human agents.
The key principle: no agent Task state writes to the reservation system or issues a payment. Only deterministic Task states do that, and only after a deterministic validation step has passed.
Integrating AgentCore harness with Step Functions
AgentCore harness is a managed agent loop. You specify a model, system prompt, and tools, and the harness runs the reasoning cycle (model calls, tool execution, memory management, and response generation) end-to-end in a single API call. It handles the intra-agent orchestration so that Step Functions can focus on inter-agent orchestration: fan-out, sequencing, validation gates, and exception routing. Step Functions provides a native optimized integration for AgentCore harness, which calls InvokeHarness against a target HarnessArn. The optimized integration gives you an extended per-Task timeout of 15 minutes (900 seconds), so agents have enough time to reason through complex proposals. The trade-off is that the agent call is request-response only. There is no .sync and no .waitForTaskToken on the agent step, and only the final assistant message is returned to the state machine.
The following Amazon States Language snippet shows the optimized harness invocation inside a Distributed Map. For the full definition, see the sample on Serverless Land.
Note: the service name is spelled bedrockagentcore (no hyphen) in the Step Functions resource string, but bedrock-agentcore (with a hyphen) in the AgentCore ARN.
MaxConcurrency is set to 1000 to bound fan-out and protect downstream booking and inventory systems. If you omit it or set it to 0, you get the default behavior, which runs up to 10,000 parallel child executions. The agent Task flows directly into a deterministic validation Task.
How it differs from managed multi-agent collaboration
Multi-agent collaboration typically means that a supervisor agent decides which sub-agent runs and which tools it calls. Step Functions moves those decisions out of the agent layer entirely.
This design puts orchestration, fan-out, validation, routing, retries, and the audit trail into Step Functions instead. Routing is a deterministic state you define and can test in isolation, not a model classification you hope will be consistent. You get a per-state execution history (every transition recorded with input and output), whereas agent-layer traces require opt-in and provide reasoning rationale rather than a durable, always-on event log.
Design walkthrough of the reference app
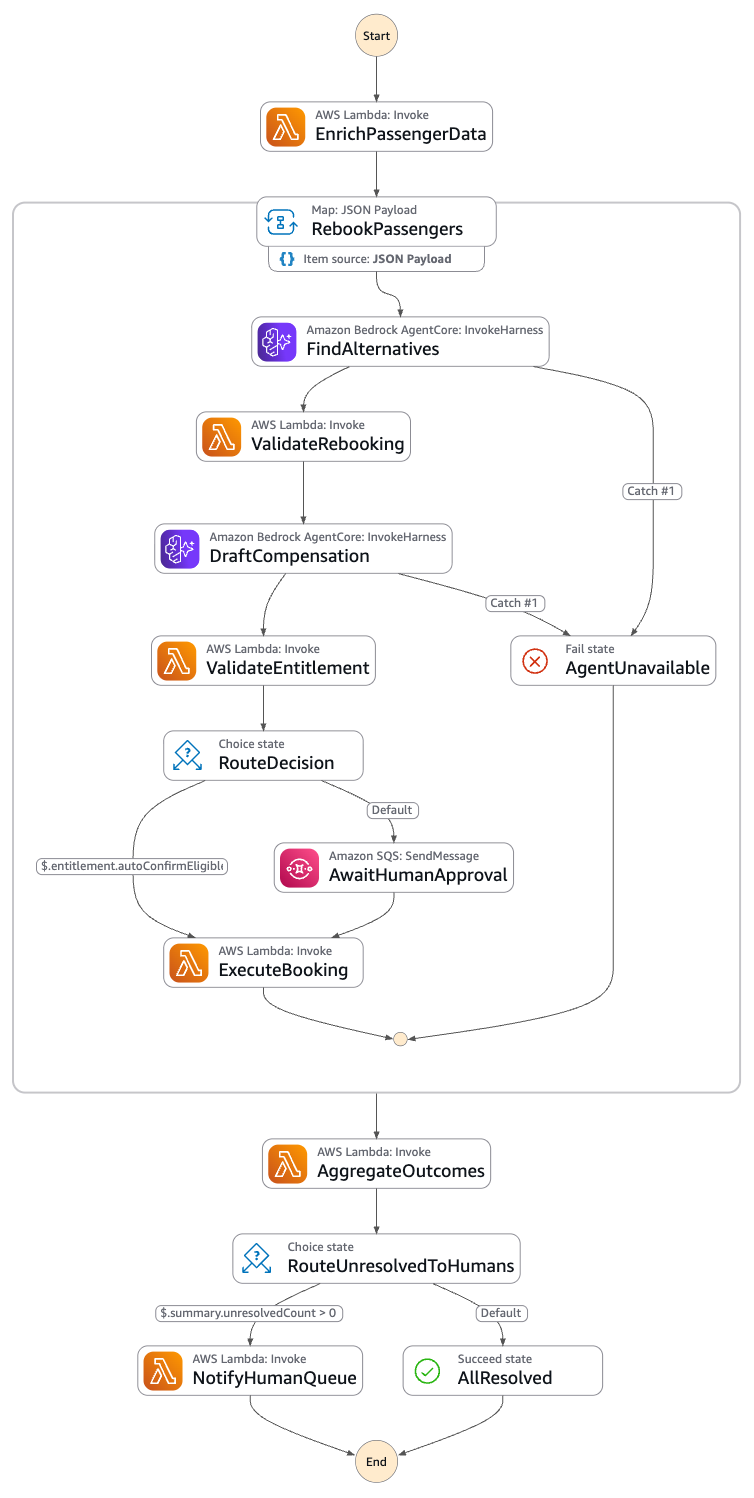
The following image shows the Step Functions state machine implemented by the sample application.
Figure 1: The Step Functions state machine for the airline rebooking workflow
Stage 1, Trigger. An Amazon EventBridge rule starts the workflow on a flight-cancellation event.
Stage 2, Enrich. A deterministic Task pulls the passenger manifest, bookings, loyalty status, and preferences into the execution state.
Stage 3, Map fan-out. A Distributed Map iterates affected passengers in parallel. The choice of Map type matters at scale. An inline Map runs up to 40 concurrent iterations, which is the documented threshold for choosing Distributed mode. A Distributed Map runs up to 10,000 parallel child executions by default, the right tool when a hub event affects thousands of passengers.
Stage 4, Agent 1 find alternatives. An AgentCore Task proposes the top three options, reasoning over the passenger’s preferences and constraints.
Stage 5, Deterministic validation of the rebooking proposal. An AWS Lambda Task confirms each proposed flight is bookable by checking live availability, fare rules, and route validity, and it rejects hallucinated options. An agent might confidently propose a flight that does not exist. This stage is where that proposal is caught before it can become a ticket.
Stage 6a, Agent 2 draft compensation. A second AgentCore Task drafts personalized, customer-facing notification text only. It does not compute entitlement and it does not move money.
Stage 6b, Deterministic entitlement check. A Lambda Task computes and validates the entitlement against rule tables before any compensation issues. Consumer-protection frameworks such as EU Regulation 261/2004 (EU261) and US Department of Transportation refund rules are referenced here illustratively, to show why deterministic, auditable computation matters. The specific bands, triggers, and amounts are configuration you own and validate against current legal guidance, not something an agent should infer.
Stage 7, Choice routing and human-in-the-loop. A Choice state auto-confirms rebookings for some passengers and routes the rest to a human. For the cases that need review, the workflow waits on a separate .waitForTaskToken Task, backed by Lambda, Amazon Simple Notification Service (Amazon SNS), or Amazon Simple Queue Service (Amazon SQS), with a 4-hour timeout. The wait happens on this separate callback Task, never on the agent step.
{
  "Comment": "Illustrative - route and wait on a human, not on the agent",
  "RouteDecision": {
    "Type": "Choice",
    "Choices": [
      {
        "Variable": "$.passenger.autoConfirmEligible",
        "BooleanEquals": true,
        "Next": "ExecuteBooking"
      }
    ],
    "Default": "AwaitHumanApproval"
  },
  "AwaitHumanApproval": {
    "Type": "Task",
    "Resource": "arn:aws:states:::sqs:sendMessage.waitForTaskToken",
    "Parameters": {
      "QueueUrl": "https://sqs.us-east-1.amazonaws.com/123456789012/approvals",
      "MessageBody": {
        "taskToken.$": "$$.Task.Token",
        "passengerId.$": "$.passenger.id",
        "options.$": "$.proposal.validatedOptions"
      }
    },
    "TimeoutSeconds": 14400,
    "Next": "ExecuteBooking"
  }
}
Stage 8, Execute. Deterministic Task states confirm the booking, issue compensation, and send confirmation. Each execution Task derives an idempotency token from the passenger ID combined with the decision ID (the child execution name, or a hash of the validated option set) and passes it to the booking and payment APIs, so a retry or redrive is a no-op instead of a duplicate booking or a second payment.
Stage 9, Aggregate and exception routing. The workflow summarizes outcomes and routes any unresolved cases to human agents.
The validation step itself is ordinary deterministic code. A simplified rebooking validator in Python looks like the following.
# Illustrative - reject any option the agent proposed that is not bookable
def handler(event, context):
    passenger = event["passenger"]
    proposed = event["proposal"]["options"]

    validated = []
    for option in proposed:
        flight = lookup_flight(option["flightId"])
        if flight is None:
            continue  # hallucinated or stale flight, reject
        if flight["seatsAvailable"] < 1:
            continue  # no inventory, reject
        if not fare_rules_allow(passenger["fareClass"], flight):
            continue  # fare rule violation, reject
        if not route_is_valid(passenger["origin"], passenger["destination"], flight):
            continue  # invalid route, reject
        validated.append(option)

    return {
        "passengerId": passenger["id"],
        "validatedOptions": validated,
        "autoConfirmEligible": passenger["loyaltyTier"] == "top" and len(validated) > 0,
    }
Best practices and guardrails
Reject hallucinations through validations. No agent proposal is applied without a deterministic validation step passing first. This minimizes the impact of hallucinations, prompt injections, or bugs on your workflow.
Keep a complete audit trail. Step Functions execution history records every state transition, input, and output, and pairing that with durable persistence gives you a per-decision record. You can show exactly which proposal was made, which validation passed or failed, and who approved the exception.
Surface only true exceptions to humans. Humans handle only what validation or the agent cannot resolve. Auto-confirmation handles the clear cases, and people spend their attention on the genuinely ambiguous ones.
Hold executions open cheaply. The .waitForTaskToken callback holds the execution open with no compute charges while the execution is paused. For example, you can cost-efficiently park thousands of pending approvals overnight. Refer to the AWS Step Functions pricing page for current details.
Make execution idempotent. Guard reservation execution and compensation issuance against retries and double-sends, as shown in Stage 8. Derive the idempotency token from the passenger ID and decision ID, and pass it to your booking and payment APIs so that a replay is a no-op.
Respect cost and timeouts. Keep each per-agent Task timeout within the 15-minute quota, bound your Map concurrency to protect downstream systems, and track the token usage returned in the agent response so you can attribute and forecast cost.
Handle errors deliberately. Apply Retry and Catch on the agent Tasks for conditions such as BedrockAgentCore.ThrottlingException and BedrockAgentCore.ResourceNotFoundException, and on the Lambda validation Tasks for their own failure modes. A Catch on an agent Task can route a stuck passenger straight to the human queue rather than failing the whole child execution.
Confirm availability and Region support. Check the current availability status and supported AWS Regions for AgentCore and the Step Functions integration at the AWS Capabilities by Region on Builder Center.
Conclusion
A flight-cancellation event is a challenging test of automated decision-making, because the output can have immediate financial impact. The way to use AI agents safely in that setting is to let them do what they are good at, proposing options and drafting language, while never letting a proposal become an action until deterministic code has approved it. In this design, orchestration, fan-out, validation, routing, and retries are implemented in Step Functions rather than inside an agent’s reasoning. Agents do not make changes directly, and their output is only applied after deterministic validation. You get a per-decision record for review, and you hold exceptions open on a callback that adds no compute or storage cost while it waits.
Authors: Hyunsoo Kim, Chloe Kwak Learning level: 300 – Advanced Post type: Best Practices
Every inventory manager faces the same question each morning: How much should I order today? The answer depends on dozens of variables (sales history, upcoming promotions, pricing changes, day-of-week seasonality, supplier lead times) and the cost of getting it wrong is asymmetric. Over-order and you carry capital in slow-moving stock. Under-order and you lose revenue, damage customer trust, and scramble for emergency replenishment.
The case for zero-shot forecasting
Classical time-series methods (ARIMA, Holt-Winters, seasonal decomposition) require per-SKU model fitting. A retailer with 10,000 SKUs must train, validate, and maintain 10,000 separate models. Each requires its own hyperparameter tuning, retraining schedule, and cold-start problem for new products. The operational burden scales linearly with catalog size, and the engineering team spends more time managing infrastructure than improving forecast quality.
Gradient boosting and deep learning approaches (LightGBM, DeepAR, Temporal Fusion Transformer) improve accuracy but compound the operational complexity: feature engineering pipelines, training jobs, model registries, A/B testing infrastructure. For many organizations, the time from “we want better forecasts” to “forecasts are running in production” often takes a full quarter or more.
From manual rules to automated decisions
Even with a reliable forecast, converting a demand signal into a purchase order requires applying business rules: safety stock buffers, minimum order quantities, budget constraints, promotional lift adjustments. These rules are typically encoded in spreadsheets or institutional knowledge, applied inconsistently across buyers, and nearly impossible to audit or explain at scale.
The architecture this post builds
This post describes how to combine two complementary capabilities to address both problems simultaneously:
Amazon Chronos2: A time-series foundation model that performs zero-shot forecasting, returning probabilistic demand predictions without per-product training.
Multi-agent orchestration with the Strands Agents SDK and Amazon Bedrock AgentCore: A system of four LLM agents that coordinate deterministic tools, converting raw forecasts into validated purchase orders with full auditability.
The result is an end-to-end inventory automation pipeline where adding a new product requires zero ML model training, adding a new business rule requires changing one tool, and each decision is auditable, observable, and recoverable from failure. In internal testing across 50 SKUs over a 4-week horizon, this architecture achieved a median weighted absolute percentage error (WAPE) of 12.3% (P50 forecast compared to actuals), reduced per-SKU onboarding time from 2–3 weeks of model training to under 5 minutes of CSV upload, and cut monthly inference cost from ~$1,091 (always-on GPU) to ~$15 (Serverless) — a 98% reduction. End-to-end pipeline latency averaged 8 seconds per SKU excluding cold start.
Solution overview
This section describes the end-to-end system architecture, explains why Chronos2 is well suited for inventory forecasting, and outlines the benefits of a multi-agent design over a monolithic approach.
End-to-end architecture
The system is organized into three logical layers:
Figure 1. Solution architecture — Amazon Bedrock AgentCore orchestrates four LLM agents (Strands Agents SDK) that invoke deterministic tools against Amazon S3 and Amazon SageMaker Serverless Inference.
Data layer. Amazon Simple Storage Service (Amazon S3) serves as the single source of truth. A single CSV per product encodes both historical sales and future covariate values. Business rules (lead times, safety stock, warehouse capacity, minimum order quantities) live in a separate JSON config. Adding a new product requires only uploading these two files, with no changes to code.
Inference layer. Amazon SageMaker Serverless Inference hosts the Chronos2 endpoint for zero-shot time-series forecasting. This is the only external model inference call in the pipeline — the LLM reasoning runs through Amazon Bedrock within the orchestration layer.
Orchestration layer. Four LLM agents — Supervisor, Preprocessing, Forecasting, and Reporting — are built with the Strands Agents SDK and deployed on Amazon Bedrock AgentCore. Each agent uses Claude on Amazon Bedrock for reasoning and calls deterministic tools to execute the computational work.
Amazon Bedrock AgentCore is a fully managed platform to build, deploy, and optimize agents at scale, with any framework or model. The orchestration layer runs on AgentCore, which provides six sub-services: Runtime, Gateway, Policy, Memory, Observability, and Evaluations. This system uses each of the six, but each for a specific, single purpose. The architecture deep dive section maps each service to the production concern it addresses in this design — including why the Gateway surface is deliberately small (one tool out of eight).
Why Chronos2: zero-shot, covariates, what-if
Chronos2 is an encoder-only transformer that closely follows the T5 encoder design, pre-trained on a large and diverse corpus of real-world time series. The model generates multi-step probabilistic forecasts using in-context learning and a group attention mechanism — no fine-tuning on your data required.
Three properties make it the right choice for inventory forecasting at scale:
Zero-shot generalization: A new SKU requires no training job. Historical sales window in, probabilistic forecast out — including for products with sparse or short histories.
Covariate support: Chronos2 accepts past-only covariates (historical features known only for past periods) and known covariates (features whose future values are given for the forecast horizon, such as a scheduled promotion or price change). In the Python API these are passed via the context_df and future_df dataframes to pipeline.predict_df(). Covariates transform the model from a univariate forecaster into a conditional one.
What-if scenario analysis: Because covariates are explicit inputs, you can generate multiple forecasts — with a promotion and without one, at the current price and at a discounted price — and compare them before committing to an order.
Chronos2 is well-suited for this workload because it satisfies all three requirements simultaneously: zero-shot inference (no per-SKU training), explicit support for both past-only and future covariates via the predict_df() API, and a one-click deployment path to Amazon SageMaker Serverless Inference. This combination means that onboarding a new product requires only data — no pipeline changes, no model registry entries, no retraining schedule. The evaluator framework introduced in the architecture deep dive makes it straightforward to benchmark any alternative forecasting model on the same traces without rebuilding the pipeline.
Why multi-agent over monolithic
A single LLM prompt that performs all reasoning steps — data loading, covariate selection, forecast interpretation, order calculation, validation, and result saving — would exceed practical context window limits for large catalogs, be impossible to unit test at the component level, and fail catastrophically when any single step encounters an error.
An agent-per-reasoning-responsibility architecture solves each of these problems directly. Critically, this architecture makes a firm distinction: LLM agents handle judgment. Deterministic tools handle computation. Bedrock inference happens in exactly four places: the four agents. The operations they coordinate (loading files, running the replenishment formula, generating charts, writing to S3) run as plain Python functions that the agents call as @tools. The agent determines when to call each tool and with what arguments: the tool itself contains no LLM inference. This separation keeps per-run LLM cost bounded and reasoning quality high by ensuring each agent’s context window carries only what it needs to reason about, not the raw byproducts of every tool call.
Prerequisites
Four things need to be in place before deploying this architecture. Other components (the S3 bucket, IAM roles, folder layout, and the agent runtime package) are provisioned by the CDK stack and deploy scripts described in the following sections.
AWS account with Amazon Bedrock, Amazon SageMaker, and Amazon S3 access in the same AWS Region (the following examples assume us-east-1).
Amazon Bedrock model access for Claude Sonnet 4.5 (Anthropic), enabled in the Bedrock console under Model access → Manage model access. For model availability by Region, refer to Supported models by AWS Region in Amazon Bedrock .
Chronos2 endpoint deployed on Amazon SageMaker Serverless Inference. The deployment procedure uses a single SageMaker Serverless endpoint configuration with the Chronos2 model package.
Python 3.10+ and Node.js 20+ on the local machine. Install the SDKs and CLIs:
Rows where sales are null define the forecast horizon. Covariates are fully populated for both historical and future periods. This design makes the distinction between past and future a data concern, not a code concern — the Preprocessing Agent reads the same schema regardless of forecast horizon length. When the operations team knows a promotion is planned next week, they fill in the promotion column for those future rows and re-upload the file.
Product-level business rules live in a separate JSON config:
By treating business rules as data rather than code, adjusting a supplier’s lead time or safety stock threshold requires only a config update in S3 — no deployment.
The four LLM agents and their tools
The central design principle: use an LLM agent where the output depends on interpretation or context. Use a deterministic tool where the output is fully determined by the input.
Supervisor agent
The Supervisor is the entry point for every user request. Its responsibility is pure orchestration: parse the user’s intent in natural language, construct the execution plan, route work to the three specialist agents in sequence, and handle conditional branching based on their outputs.
When a user sends “Run the weekly replenishment forecast for wireless earbuds — there’s a promotion this weekend,” the Supervisor:
Identifies the product scope and resolves “wireless earbuds” to its SKU.
Notes the promotional context and passes it explicitly to the Preprocessing Agent.
Constructs the sequential execution plan.
Monitors agent outputs and triggers the conditional retry loop if validation fails.
This requires genuine LLM reasoning. The Supervisor is not a router with a hardcoded lookup table — it interprets ambiguous instructions, surfaces missing parameters as clarifying questions, and makes branching decisions based on downstream agent outputs.
The Supervisor does not call data or computation tools directly. Its only job is to reason about the workflow.
In production, Amazon Bedrock Guardrails protects each agent’s LLM reasoning steps as a mandatory control, not an optional add-on. The Supervisor agent — which interprets natural-language requests and makes branching decisions that ultimately determine order quantities — runs behind a Guardrails configuration that enforces content filtering, denied topic policies, and grounding validation against the structured tool outputs. This prevents the Supervisor from hallucinating constraint overrides or generating purchase decisions outside its authorized scope. For implementation details, refer to Amazon Bedrock Guardrails.
Preprocessing agent
The Preprocessing Agent loads raw data via deterministic tools and then applies LLM reasoning to decide how to prepare it for Chronos2.
import json
import boto3
from strands import Agent, tool
from strands.models import BedrockModel

@tool
def load_sales_from_s3(product_id: str) -> dict:
    """Load sales time-series CSV from S3 for the given product ID."""
    response = s3.get_object(Bucket=BUCKET, Key=f"sales/{product_id}.csv")
    return parse_csv(response["Body"].read())

@tool
def load_inventory_from_s3() -> dict:
    """Load current inventory levels for all products from S3."""
    response = s3.get_object(Bucket=BUCKET, Key="inventory/current_stock.json")
    return json.loads(response["Body"].read())

@tool
def load_product_config_from_s3(product_id: str) -> dict:
    """Load business rules (lead time, safety stock, capacity) for a product."""
    response = s3.get_object(Bucket=BUCKET, Key="config/product_config.json")
    return json.loads(response["Body"].read())[product_id]

preprocessing_agent = Agent(
    model=BedrockModel(model_id="us.anthropic.claude-sonnet-4-5-20250929-v1:0"),
    tools=[load_sales_from_s3, load_inventory_from_s3, load_product_config_from_s3],
    system_prompt=(
        "You are a data preprocessing specialist. Load the required data, "
        "then decide which covariates to include in the Chronos2 input based on "
        "data quality and the business context provided by the Supervisor. "
        "Return a structured Chronos2 payload as JSON."
    )
)
The three load_* functions are plain Python — without LLM inference. The Preprocessing Agent’s LLM reasoning kicks in after the data is loaded, when it must decide which covariates to include. The Supervisor passes the user’s natural-language request (for example, “there’s a promotion this weekend”) down to the Preprocessing Agent as part of the task description, which signals that the promotion column must be included. But the agent also evaluates data quality: if promotion is sparsely populated or shows near-zero variance across the training period, the agent may exclude it and note the decision. A deterministic function does not make this call — it requires reading both the numbers and the business context together.
Forecasting agent
The Forecasting Agent calls the Chronos2 endpoint via a deterministic tool and then applies LLM reasoning to interpret the results.
@tool
def call_chronos2(payload: str) -> dict:
    """
    Invoke the Chronos2 SageMaker endpoint.
    Retries up to 3 times with 30-second backoff for cold starts.
    """
    for attempt in range(3):
        try:
            response = sagemaker_runtime.invoke_endpoint(
                EndpointName=CHRONOS2_ENDPOINT,
                ContentType="application/json",
                Body=payload
            )
            return json.loads(response["Body"].read())
        except ClientError as e:
            if e.response["Error"]["Code"] == "ModelNotReadyException":
                time.sleep(30)
                continue
            raise
    raise TimeoutError(f"Chronos2 endpoint not ready after 3 attempts")

@tool
def calculate_order_quantity(
    forecast_p50: list,
    current_stock: int,
    safety_stock: int,
    lead_time_days: int,
    min_order_quantity: int
) -> dict:
    """Deterministic replenishment formula."""
    lead_time_demand = sum(forecast_p50[:lead_time_days])
    order_qty = max(0, lead_time_demand + safety_stock - current_stock)
    if 0 < order_qty < min_order_quantity:
        order_qty = min_order_quantity
    return {"order_quantity": int(order_qty), "lead_time_demand": int(lead_time_demand)}

@tool
def validate_constraints(
    order_quantity: int,
    current_stock: int,
    warehouse_capacity: int,
    budget_cap: float,
    unit_cost: float,
) -> dict:
    """Deterministic constraint check against warehouse capacity and budget."""
    new_stock = current_stock + order_quantity
    within_capacity = new_stock <= warehouse_capacity
    total_cost = order_quantity * unit_cost
    within_budget = total_cost <= budget_cap
    return {
        "approved": within_capacity and within_budget,
        "capacity_used": round(new_stock / warehouse_capacity, 2),
        "budget_used": round(total_cost, 2),
        "budget_remaining": round(budget_cap - total_cost, 2),
        "violations": [v for v in [
            None if within_capacity
                else f"Exceeds warehouse capacity ({new_stock}/{warehouse_capacity})",
            None if within_budget
                else f"Exceeds budget (${total_cost:.2f}/${budget_cap:.2f})",
        ] if v],
    }

forecasting_agent = Agent(
    model=BedrockModel(model_id="us.anthropic.claude-sonnet-4-5-20250929-v1:0"),
    tools=[call_chronos2, calculate_order_quantity, validate_constraints],
    system_prompt=(
        "You are a forecasting and order planning specialist. "
        "Invoke Chronos2 with the provided payload, interpret the probabilistic "
        "forecast results, calculate the recommended order quantity, and validate "
        "it against business constraints. Flag any anomalies with a brief explanation."
    )
)
call_chronos2, calculate_order_quantity, and validate_constraints are each deterministic functions. The Forecasting Agent’s LLM reasoning provides two things these tools cannot: anomaly contextualization (“day 7 P90/P50 ratio is 1.36 — above the 1.3 anomaly threshold, consistent with the promotional covariate for that day”) and a natural language rationale for the order recommendation (for example, “753 units covers a 5-day lead-time demand of 648 plus a 150-unit safety stock buffer, net of 45 current inventory”). The numbers in this rationale are drawn from data/product_config.json — the same values used in the Running the agent walkthrough later in this post.
The probabilistic output — P10, P50, and P90 quantiles — is central to inventory planning, not incidental. Ordering to the P50 (median) without any buffer would mean running out of stock roughly half the time, which is why safety stock exists as a separate parameter. calculate_order_quantity uses the P50 forecast for expected lead-time demand, and the safety_stock parameter in the product config absorbs the uncertainty between P50 and P90 (teams typically tune safety stock toward a target service level such as P90 or P95). For products with high P90/P50 ratios — indicating volatile or promotion-driven demand — the Forecasting Agent flags the anomaly explicitly so the Reporting Agent can surface elevated uncertainty to the buyer rather than hiding it behind a single order number.
The violations array returned by validate_constraints is what makes the conditional retry loop actionable. When the constraint check fails, the array contains a human-readable string per violated constraint (for example, "Exceeds budget ($9412.50/$500.00)"), which the Forecasting Agent passes up to the Supervisor. The Supervisor uses this specific message, not a generic “validation failed” signal. Based on the violation details, it decides whether to re-invoke the Forecasting Agent with adjusted constraints or escalate to the user.
Reporting agent
The Reporting Agent consumes the structured output from the Forecasting Agent and produces the final deliverables: a visualization and a persisted decision record. The tools are deterministic. The agent provides the natural language summary that makes the output actionable for a business user.
import io
import json
import boto3
import matplotlib
matplotlib.use("Agg")
import matplotlib.pyplot as plt
from strands import Agent, tool
from strands.models import BedrockModel

BUCKET = os.environ["INVENTORY_BUCKET"]

@tool
def generate_forecast_chart(forecast_data: str, output_path: str) -> str:
    """Generate forecast quantile chart and upload to S3.

    Args:
        forecast_data: JSON string (Strands serializes tool arguments as strings)
        output_path: S3 key for the output PNG
    """
    data = json.loads(forecast_data)
    forecast = data["forecast"]
    days = list(range(1, len(forecast["p50"]) + 1))

    fig, ax = plt.subplots(figsize=(10, 5))
    ax.fill_between(days, forecast["p10"], forecast["p90"],
                    alpha=0.2, color="#147EBA", label="P10-P90 range")
    ax.plot(days, forecast["p50"], color="#147EBA", linewidth=2, label="P50 median")
    ax.set_xlabel("Forecast day")
    ax.set_ylabel("Predicted demand (units)")
    ax.set_title(f"Demand forecast - {data.get('product_id', '')}")
    ax.legend()
    plt.tight_layout()

    buf = io.BytesIO()
    fig.savefig(buf, format="png", dpi=150, bbox_inches="tight")
    buf.seek(0)
    plt.close(fig)

    s3 = boto3.client("s3")
    s3.put_object(Bucket=BUCKET, Key=output_path,
                  Body=buf.read(), ContentType="image/png")
    return json.dumps({"chart_s3_path": f"s3://{BUCKET}/{output_path}", "status": "uploaded"})

@tool
def save_decision_record(decision_data: str, output_path: str) -> str:
    """Persist the complete decision record as JSON to S3."""
    s3 = boto3.client("s3")
    s3.put_object(
        Bucket=BUCKET,
        Key=output_path,
        Body=decision_data.encode("utf-8"),
        ContentType="application/json",
    )
    return json.dumps({"record_s3_path": f"s3://{BUCKET}/{output_path}", "status": "saved"})

reporting_agent = Agent(
    model=BedrockModel(model_id="us.anthropic.claude-sonnet-4-5-20250929-v1:0"),
    tools=[generate_forecast_chart, save_decision_record],
    system_prompt=(
        "You are a reporting specialist. Generate the forecast visualization, "
        "persist the decision record, and produce a concise natural language "
        "summary of the recommendation and its business rationale."
    )
)
User Request
     │
     ▼
Supervisor Agent
     │
     ▼
Preprocessing Agent ──── tools: load_sales_from_s3,
     │                          load_inventory_from_s3,
     │                          load_product_config_from_s3
     ▼
Forecasting Agent ──────── tools: call_chronos2,
     │                            calculate_order_quantity,
     │                            validate_constraints
     ├── validated ──────► Reporting Agent ── tools: generate_forecast_chart,
     │                                               save_decision_record
     │                          │
     │                          ▼
     │                    Final Response
     │
     └── constraint violated
               │
               ▼
         back to Forecasting Agent
         (with adjusted constraints from Supervisor)
               │
               └── max 3 iterations, then escalate to user
Pattern: agents-as-tools
The preceding coordinator diagram is a behavioral view. Structurally, this implementation follows the Agents-as-Tools pattern: the Supervisor is a single Strands agent whose tool list contains the three specialist agents, each wrapped as a @tool. There is no explicit multi-node graph in the Strands SDK’s orchestration layer — the graph is a single Supervisor node with max_node_executions=10 (enough headroom for the base preprocessing → forecasting → reporting sequence plus up to three retry iterations, then a safety stop). Orchestration happens inside the Supervisor’s tool-use loop.
This matters for context isolation. Each specialist @tool invocation spawns a fresh Strands agent with its own context window, own system prompt, and its own tool subset. Results return to the Supervisor as a compressed labeled-output block (a CLUES_FORMAT envelope defined by the Strands SDK) that carries the specialist’s labeled output instead of its full reasoning transcript — so the Supervisor sees labeled deltas and its context stays bounded as the workflow grows.
Deploying to Amazon Bedrock AgentCore
The preceding Strands agent definitions run as local Python processes with Amazon Bedrock as the LLM backbone. To move them to managed execution, package the Supervisor entry point as an AgentCore application:
from bedrock_agentcore.runtime import BedrockAgentCoreApp
from memory.session import get_session_manager
from observability.tracing import set_session_context
from src.graph.nodes import supervisor_node

app = BedrockAgentCoreApp()

@app.entrypoint
async def handler(payload: dict, context=None):
    user_request = payload.get("prompt", payload.get("user_request", ""))
    session_id = getattr(context, "session_id", None) or payload.get("session_id", "default-session")
    actor_id = getattr(context, "user_id", None) or payload.get("actor_id", "system")

    # Attach telemetry context for this session
    set_session_context(session_id, product_id=payload.get("product_id"))

    # Create memory session manager (returns None if MEMORY_ID not configured)
    session_manager = get_session_manager(session_id, actor_id)
    result = await supervisor_node(task={"request": user_request}, session_manager=session_manager)
    return result.get("text", "No response generated.")
Deploy with the AgentCore CLI: agentcore deploy. AgentCore wraps each invocation in an isolated microVM, injects session context for short-term memory reads and writes, and streams agent traces automatically to Amazon CloudWatch — no additional instrumentation required. Full end-to-end deployment is a sequence of steps — CDK infrastructure, Gateway with save_decision registered, Cedar policies, Memory resource, Runtime package, and post-deploy Evaluations setup — orchestrated by a single deployment script.
The sequential chain is enforced by data dependency: the Forecasting Agent cannot run without the preprocessed payload. The Reporting Agent cannot run without a validated order decision.
The conditional retry loop handles constraint violations as a first-class workflow state rather than an error condition. When validate_constraints returns approved: false, the Forecasting Agent surfaces the violation explanation. The Supervisor interprets it, adjusts the constraint parameters (for example, reducing the order to fit within the budget cap), and re-invokes the Forecasting Agent. The Supervisor tracks iteration count in the short-term session memory of AgentCore and escalates to the user if three iterations do not converge — avoiding silent infinite loops.
Cost optimization: scale to zero
The most significant cost decision is the SageMaker deployment mode for the Chronos2 endpoint.
Configuration
Monthly Cost
Cold Start
Recommendation
Always-on ml.g5.2xlarge
~$1,091
None
High-frequency real-time use
Serverless Inference
~$15
30–60 seconds
Batch / scheduled forecasting
For batch inventory forecasting — a nightly or weekly job — a 30–60 second cold start is fully acceptable. Serverless Inference reduces inference costs by over 98% compared to an always-on GPU endpoint.
The AgentCore Runtime follows the same scale-to-zero cost model: microVM isolation per session, up to 8-hour session duration, and no idle cost between workflow runs. Both the agent runtime and the inference endpoint scale to zero when not in use.
How the numbers break down. The $15/month Serverless estimate assumes approximately 500 invocations averaging eight seconds of compute each, priced against the ml.g5.xlarge Serverless rate, with storage and inter-service data transfer excluded (the forecast payload and response each sit well under a megabyte). The $1,091/month always-on estimate is a ml.g5.2xlarge endpoint running 24×7, which pays for idle GPU memory every hour the agent is not forecasting. For nightly or weekly batch jobs, the duty cycle makes Serverless the correct default. For latency-sensitive real-time forecasting with a high invocation rate, the break-even point is roughly a few thousand invocations per month and tips toward the always-on endpoint.
Architecture deep dive: design patterns and trade-offs
This section examines the key design decisions behind the system: how to decompose work into agents versus tools, how agents communicate through data contracts, and how to handle failures and control costs.
The agent versus tool decision framework
The most consequential design decision in a multi-agent system is not which framework to use or how many agents to create — it is deciding, for each unit of work, whether it requires an LLM or a deterministic function.
The practical test:
“If I fix the input, will the output always be the same?”
Yes → Implement as a @tool. The LLM calls it. The function does the work.
No → The agent’s LLM reasoning IS the logic. The variability is intentional.
Applying this test to every component in this system:
Component
Output deterministic?
Implementation
Parse user’s natural-language request
No
Supervisor Agent reasoning
Load file from S3
Yes
@tool
Select covariates based on data quality + user context
No
Preprocessing Agent reasoning
Invoke Chronos2 endpoint
Yes
@tool
Interpret forecast anomalies in business context
No
Forecasting Agent reasoning
Calculate order quantity from formula
Yes
@tool
Check order against warehouse/budget constraints
Yes
@tool
Generate rationale for order recommendation
No
Forecasting Agent reasoning
Generate matplotlib chart
Yes
@tool
Write JSON to S3
Yes
@tool
Decide whether to retry with adjusted constraints or escalate to the user
The pattern: deterministic computation belongs in tools. Judgment, interpretation, and context-dependent recommendation belong in agent reasoning. Wrapping a deterministic formula in an LLM agent adds cost, latency, and non-determinism with no benefit. Asking a deterministic function to interpret “there’s a promotion next week” will fail.
This framework also prevents scope creep. When a new requirement arrives — “add a second validation check for seasonal buffer stock” — the answer is clear: add a @tool, not a new agent.
Data contract design: structured JSON between agents
Each agent in the sequential chain outputs a typed JSON structure that the next agent consumes. A representative contract between the Forecasting Agent and the Reporting Agent:
{
  "product_id": "SKU-00142",
  "forecast_horizon_days": 14,
  "covariates_used": ["promotion", "price", "day_of_week"],
  "forecast": {
    "p10": [95, 98, 118, 128, 105, 112, 135, 92, 96, 100, 105, 112, 140, 148],
    "p50": [110, 115, 145, 158, 120, 128, 158, 106, 110, 115, 119, 127, 154, 166],
    "p90": [132, 138, 183, 206, 150, 160, 215, 130, 138, 150, 155, 165, 195, 210]
  },
  "order_decision": {
    "order_quantity": 753,
    "lead_time_demand": 648,
    "safety_stock": 150,
    "current_stock": 45,
    "supplier": "Supplier-A",
    "approved": true,
    "warehouse_utilization": 0.40
  },
  "anomaly_flags": [
    {
      "day": 7,
      "note": "P90/P50 ratio of 1.36 on day 7 exceeds the 1.3 anomaly threshold; elevated uncertainty consistent with the promotional covariate on that day"
    }
  ],
  "rationale": "Recommended order of 753 units covers a 5-day lead-time demand of 648 units plus a 150-unit safety stock buffer, net of 45 units current stock. Warehouse utilization after delivery: 40%.",
  "model": "chronos2",
  "inference_latency_ms": 1840
}
The contract is explicit about which covariates were actually used (the Preprocessing Agent’s decision is visible and auditable), includes the order rationale as a first-class field, and carries anomaly flags in structured form rather than buried in prose. This makes the contract machine-readable for downstream tools and human-readable for debugging.
Implicit coupling through unstructured text — where one agent returns a paragraph and the next tries to extract numbers from it — is the most common failure mode in multi-agent systems. Explicit JSON contracts prevent it.
Failure handling: retry, degradation, and isolation
Three failure strategies, matched to component criticality:
Per-agent retry with backoff: Applied to load_* tools (S3 transient errors) and call_chronos2 (SageMaker Serverless cold starts). The Forecasting Agent’s tool handles cold starts with up to 3 retries at 30-second intervals, catching ModelNotReadyException transparently before surfacing an error to the agent.
Graceful degradation: If the Preprocessing Agent determines that a covariate column is too sparse to be reliable, it proceeds without that covariate and notes the degradation in the output contract. The Forecasting Agent receives a valid — if potentially less accurate — input and continues. The Reporting Agent surfaces the degradation flag in its summary.
Failure isolation for non-critical paths: generate_forecast_chart and save_decision_record run within the Reporting Agent. If chart generation fails (rendering error, S3 write timeout), the Reporting Agent can still complete its primary output: the natural language summary and the decision record. The order recommendation is never blocked by a visualization failure.
In-process versus gateway: a second boundary
The agent versus tool framework draws one line: is the output determined by the input? A second line sits underneath it, and it matters just as much for a production system: does this tool cross a trust, durability, or cost-of-mistake boundary?
The practical test:
“If the agent hallucinates and calls this tool wrongly, does the mistake propagate to external systems or stop at the agent’s memory?”
Stops at the agent → In-process Strands @tool. The agent’s IAM role and Strands type system already bound it. Adding Gateway adds latency and cost with no safety gain.
Propagates externally → Gateway. This is where Cedar authorization, JWT identity, and the audit trail of “who asked for this write, and what was persisted” need to live.
Applying this to every tool in the system:
Tool
Side effect at failure?
Placement
load_sales
None (read only)
In-process @tool
load_inventory
None (read only)
In-process @tool
load_product_config
None (read only)
In-process @tool
invoke_chronos2
External SageMaker call, no state mutation
In-process @tool
calculate_order
None (pure function)
In-process @tool
validate_constraints
None (pure function)
In-process @tool
generate_forecast_chart
S3 write, retryable, not authoritative
In-process @tool (Failure Handling § covers this isolation)
save_decision
S3 write that becomes the authoritative order record
Gateway + Cedar policies
Of the eight tools in this system, exactly one needs Gateway. That proportion is the norm, not the exception: most “tools” in an agent system are reads and pure functions where Gateway adds cost without adding safety. The services AgentCore provides are opt-in for a reason — pick the one sub-service that guards each distinct boundary, not all six for every tool.
A natural follow-up: generate_forecast_chart also writes to S3 — why is it in-process rather than behind the Gateway? Because the chart is a visualization, not a decision of record. If it fails or is silently wrong, the order recommendation still stands and the write can simply be retried. save_decision is the opposite: once the decision record is persisted, downstream systems treat the order as real. The Gateway earns its place where a faulty write would create downstream inconsistency, not where it would at worst inconvenience a buyer.
The Gateway Lambda (mcp/lambda/handler.py) exposes save_decision as an MCP-compatible tool endpoint. Infrastructure complexity stays proportional to the actual policy surface, not to the number of tools the agent calls.
Cost-aware architecture: token budget per agent
Beyond infrastructure cost, the four-agent design enables explicit token budget allocation. Each agent’s context window is bounded by its single responsibility:
Agent
Context window contains
Does NOT contain
Supervisor
User request, execution plan, and compressed CLUES_FORMAT blocks returned by specialists
Raw CSV, Chronos2 forecast arrays
Preprocessing
Raw CSV rows, product config
Conversation history
Forecasting
Formatted Chronos2 payload, model output
Raw CSV, full history
Reporting
Validated order decision, rationale
Raw data, Chronos2 payload
This partitioning keeps per-run LLM inference cost flat as catalog size scales. A monolithic agent carrying all data, all conversation history, and all intermediate results through every step would accumulate a context window that grows with catalog size and conversation length — and incur that cost on every invocation.
One boundary per AgentCore service
The two decision frameworks discussed earlier (agent versus tool, in-process versus gateway) leave us with a clear map of where each AgentCore sub-service earns its place in this system. The following table maps each service to a single production concern. The paragraphs that follow explain why that service is the right answer to that concern — not only what the service does.
Production concern
AgentCore service
What it replaces
Where does the agent run?
Runtime
Always-on container hosting
What writes are allowed to reach external systems?
Gateway + Policy
API Gateway + custom authz middleware
What does the agent carry across sessions?
Memory
Redis + bespoke retrieval code
Can we reconstruct why a decision was made?
Observability
Custom OTEL setup + CloudWatch wiring
How do we know the agent is still behaving after deployment?
Evaluations
Offline eval scripts + manual QA
Runtime guards where agents execute. AgentCore Runtime hosts the Supervisor inside a per-session microVM with up to 8-hour session duration and zero idle cost between runs. For batch inventory forecasting — weekly or nightly jobs — paying for an always-on container is waste. Runtime provides session isolation and scale-to-zero-between-sessions as the default behavior, so the team does not have to engineer either separately.
Gateway and Policy guard what writes are allowed to reach external systems. Gateway is designed to be paired with Policy: Gateway validates who is calling (JWT from Cognito), Policy decides whether this specific call is allowed (Cedar evaluates principal, action, resource, and the full tool-call payload via context.input). Without Policy, Gateway would grant each authenticated caller access to each registered tool.
Because only save_decision is registered on the Gateway, the authorization surface is scoped to the single point where an order becomes a persisted record — the last gate before downstream systems (dashboards, ERP integration) treat the decision as real. Two Cedar policies apply:
allow_write_reporting_only — save_decision may only be invoked by the Reporting workflow’s identity.
deny_high_value_orders — any save_decision call where context.input.budget_used > 50000 is denied, regardless of principal:
forbid(
  principal is AgentCore::OAuthUser,
  action == AgentCore::Action::"InventoryTools___save_decision",
  resource is AgentCore::Gateway
) when {
  context.input has budget_used &&
  context.input.budget_used > 50000
};
Putting the high-value deny anywhere upstream — say, on calculate_order — would be ineffective: the agent could re-run the calculation until it passed, and the denial wouldn’t map to any durable effect. The policy is meaningful only at the write boundary.
Memory guards what the agent carries across sessions. AgentCore Memory supports three long-term strategies. This system uses two of them: semanticMemoryStrategy for SKU-level forecast accuracy history and userPreferenceMemoryStrategy for constraint overrides such as “this buyer always sets a 20% higher safety stock for electronics.” summaryMemoryStrategy is not used here because session-level summarization adds little for a structured forecast workflow. The Strands AgentCoreMemorySessionManager wires these into the Supervisor with no bespoke retrieval code.
Observability guards whether we can reconstruct why a decision was made. Each agent invocation — inputs, outputs, tool calls, retry attempts, latency — is traced automatically and streamed to Amazon CloudWatch. For an inventory pipeline, each order decision acquires a complete, auditable trail: which agent ran, which tools were called, what Chronos2 returned, and why the Forecasting Agent recommended a specific quantity. CloudWatch Logs Insights queries surface operational patterns like “which SKUs trigger the most constraint violations” or “which products show the highest P90/P50 forecast uncertainty” — directly informing improvements to business rules and covariate selection without re-running the pipeline.
Evaluations guards whether the agent is still behaving after deployment. AgentCore Evaluations runs online quality monitoring against a sampled portion of production traffic (configurable. This system samples 100% during initial rollout). Two built-in evaluators — Builtin.GoalSuccessRate and Builtin.Helpfulness — provide generic quality signal, and a custom LLM-as-a-Judge evaluator scores constraint compliance on a 3-point scale:
1.0 — Silent violation: order violates constraints and the agent did not flag it.
2.0 — Flagged violation: order violates constraints but the agent explicitly surfaced the flag.
3.0 — Compliant: order respects all constraints.
The scale deliberately rewards agents that flag violations rather than hide them. This is the failure mode the retry loop is designed to prevent, and the evaluator is designed to detect. Without this rubric, an agent that quietly truncates orders to fit the budget scores the same as one that escalates to the user — even though only the second is safe for production. The 3-point rubric catches the failure mode where an agent hides a constraint violation. The next subsection adds a second evaluator for the complementary question — was the forecast itself accurate?
The throughline: AgentCore is not a monolithic “agent platform” you either adopt or refuse. It is a set of services, each addressing one specific concern that production agent systems face. Picking the right service for each concern — and not stretching one service to cover two — is the architecture work. The preceding map is the output of that work for this system. The map for a different domain (customer support, code generation, research) will look different, but the exercise of drawing one is the same.
Two layers of evaluation: behavior and accuracy
The Evaluations described earlier answer one question: did the agent behave safely? That is necessary but not sufficient. For an inventory system, a second question is equally important: was the forecast the agent produced actually accurate? An agent that flags each constraint violation correctly is still useless if its P50 forecast is systematically off by 30%.
These two questions map to the two evaluator types that AgentCore Evaluations supports. The choice between them follows the same logic as the agent versus tool framework from the architecture deep dive, one layer up: if the correct output is fully determined by the inputs, use a deterministic function, not an LLM. A forecast accuracy score is a calculation, not a judgment call.
The pattern: agent behavior needs subjective scoring. Forecast accuracy needs arithmetic. Use the evaluator type that matches the question, not the one that feels more sophisticated.
LLM-as-a-Judge evaluators score subjective dimensions — did the agent flag the violation, was the rationale coherent, was the response helpful. Good for behavior, wrong tool for arithmetic.
Code-based evaluators invoke a Lambda function against the session trace with optional ground truth injected via evaluationReferenceInputs. Good for deterministic metrics — WAPE, signed bias, pinball loss, coverage — that have a correct numeric answer.
Forecast accuracy evaluator (code-based)
The evaluator is a Lambda function that reads the Chronos2 forecast from the session trace, pairs each horizon day with the actual sales value supplied as ground truth, and returns WAPE as the primary numeric score alongside signed bias, pinball loss at P90, and P10–P90 coverage.
# lambda/forecast_accuracy_evaluator/handler.py
import numpy as np

def handler(event, context):
    """Code-based evaluator for forecast accuracy.
    Runs after actual sales are known (horizon + lead time later)."""
    spans = event["evaluationInput"]["sessionSpans"]
    ground_truth = event.get("evaluationReferenceInputs", [])

    forecast = extract_forecast_from_spans(spans)  # Forecasting Agent span
    actual = np.array([g["actual_sales"] for g in ground_truth])
    p10 = np.array(forecast["p10"])
    p50 = np.array(forecast["p50"])
    p90 = np.array(forecast["p90"])

    if len(actual) != len(p50):
        return {
            "errorCode": "HORIZON_MISMATCH",
            "errorMessage": f"forecast={len(p50)}, actual={len(actual)}",
        }

    # Primary metric: WAPE (weighted absolute percentage error).
    # Preferred over MAPE because it weights errors by volume, avoiding
    # MAPE's well-known blow-up on low-volume days.
    wape = float(np.abs(actual - p50).sum() / actual.sum())

    # Signed bias (SCM convention: bias = forecast - actual, normalised).
    # Positive => chronic over-forecast => excess inventory risk.
    # Negative => chronic under-forecast => stock-out risk.
    bias = float((p50 - actual).sum() / actual.sum())

    # Pinball loss at P90:
    #   L_q(y, ŷ) = max(q·(y-ŷ), (q-1)·(y-ŷ))
    # At q=0.9, under-coverage (y > ŷ_p90) is penalised 9x more than
    # over-coverage — matches the operational cost of stock-outs.
    q = 0.9
    diff = actual - p90
    pinball_p90 = float(np.mean(np.maximum(q * diff, (q - 1) * diff)))

    # Coverage of the P10–P90 band (nominal target: 0.80).
    coverage = float(((actual >= p10) & (actual <= p90)).mean())

    # Composite label. Thresholds are retail-demand defaults; tune per
    # catalog. WAPE < 15% aligns with M5 competition 'strong' baseline.
    if wape < 0.15 and abs(bias) < 0.05 and 0.75 <= coverage <= 0.85:
        label = "ACCURATE"
    elif wape < 0.25:
        label = "ACCEPTABLE"
    else:
        label = "POOR"

    return {
        "label": label,
        "value": wape,  # primary score surfaced in CloudWatch
        "explanation": (
            f"WAPE={wape:.3f}, bias={bias:+.3f}, "
            f"pinball@P90={pinball_p90:.2f}, coverage={coverage:.2%}"
        ),
    }
A note on thresholds. WAPE < 15 percent is a common ‘strong baseline’ reference for retail demand at SKU-week granularity, anchored by the M5 forecasting competition. Treat the cut-offs as starting values and tune per catalog. The coverage target (0.75–0.85 for a P10–P90 band) and the pinball loss together tell you whether the quantiles are calibrated: if coverage drifts below the band year-over-year while point WAPE stays flat, the model has grown over-confident and the safety stock multiplier, not the point forecast, is the thing to revisit.
Two implementation notes worth flagging for readers reusing the evaluator. First, the signed-bias convention here is the SCM standard (positive = over-forecast), which matches Tracking Signal conventions used in most inventory-planning systems. Second, the pinball loss at P90 is asymmetric by design: under-coverage of the upper quantile is penalised 9× more than over-coverage, mirroring the asymmetric cost of stock-outs compared to carrying cost.
Register the evaluator once through the AgentCore control plane, then reference it by ARN in every session-level evaluation:
The 3-point behavior rubric runs online — every session, in real time — because its inputs (agent trace, tool outputs) exist at the moment the session ends. The accuracy evaluator is different. On the day the order decision is made, the “correct” demand for the next 14 days does not yet exist. It materialises one horizon later, as each forecast day passes and actual sales are recorded in the data warehouse.
The code-based evaluator handles this naturally. A nightly job collects sessions whose forecast horizon has fully elapsed, pulls actual sales from the data warehouse, and invokes the evaluator on-demand with evaluationReferenceInputs populated:
import boto3

agentcore = boto3.client("bedrock-agentcore")

EVALUATOR_ID = "forecast-accuracy-evaluator-id"  # from create_evaluator

for session_id, session_spans, actuals in sessions_ready_for_scoring():
    response = agentcore.evaluate(
        evaluatorId=EVALUATOR_ID,
        evaluationInput={"sessionSpans": session_spans},
        evaluationTarget={"traceIds": session_trace_ids(session_spans)},
        evaluationReferenceInputs=[
            {"day": i + 1, "actual_sales": y}
            for i, y in enumerate(actuals)
        ],
    )
    for result in response["evaluationResults"]:
        # EvaluationResultContent schema: label, value, explanation,
        # evaluatorId, evaluatorName (see AWS SDK docs)
        if "errorCode" in result:
            emit_alarm(session_id, result["errorCode"], result["errorMessage"])
            continue
        emit_dashboard_metric(
            session_id=session_id,
            wape=result["value"],
            label=result["label"],
            explanation=result["explanation"],
        )
Scores stream into the same CloudWatch Evaluations namespace as the online evaluators, so the team queries behavior and accuracy through the same dashboards and alarms. A P50 forecast with four consecutive weeks of negative bias triggers the same operational response as a run of silent-violation sessions: investigate, fix, redeploy.
The preceding snippet is the on-demand path — one evaluator call per session, invoked explicitly after ground truth arrives. When you want the evaluator to run automatically against every session’s trace as it lands in CloudWatch, register it in an Online Evaluation Config:
Note what is not in the online list: the ForecastAccuracyEvaluator. Ground truth is not available at trace-emit time, so registering it online would produce HORIZON_MISMATCH errors on every invocation. The two cadences — online for behavior, on-demand for accuracy — are a consequence of the data arriving at different times, not a configuration preference.
ForecastAccuracyEvaluator (WAPE, signed bias, pinball@P90, P10–P90 coverage)
Custom Code-Based (Lambda)
Session
On-demand, once horizon + lead time elapse
The first three evaluators guard how the agent acted. The fourth guards what the model was right about. Together they close the gap that either alone would leave open: an agent that behaves perfectly while quietly under-forecasting, or a model with excellent WAPE whose recommendations are silently truncated by an agent. Both failure modes are invisible to a single-layer evaluation. Both become visible when the two layers run side by side.
Production targets and throughput
These evaluators only matter if they feed operational targets. For this system the targets are explicit: P95 end-to-end latency under 90 seconds for a batch-scheduled session, constraint-compliance rubric score of at least 2.0 on 95 percent of sessions (flagged violations count. Silent violations do not), and rolling 4-week WAPE under 20 percent across the top-20 SKUs by revenue. Each target has a CloudWatch alarm routed to oncall. The error budget — 5 percent of sessions scoring below 2.0 — gives the team room to iterate on prompts and constraints without treating every regression as a page.
Throughput at catalog scale. A full session for one SKU completes in roughly eight seconds end to end (Chronos2 Serverless cold path excluded, which amortises after the first call in a run). A 10,000-SKU nightly run finishes in under thirty minutes at roughly 100-way parallelism, bounded by the SageMaker Serverless concurrency quota. Per-run cost at that scale is on the order of a few dollars in Bedrock reasoning plus a few dollars in SageMaker inference — small enough that the daily-run cadence is a pricing choice, not a constraint.
Running the agent: a constraint-violation walkthrough
After deploying all components, invoke the agent with a scenario that deliberately forces the conditional retry loop to fire. The following test case overrides the product’s default budget cap to $500 — well under what a full lead-time order would cost — so that the system’s response to constraint violation is observable end-to-end.
agentcore invoke "Forecast replenishment for SKU-00142 this weekend \
  (promotion active). My budget for this order is $500." \
  --session-id test-session-chronos2-inventory-001
The agent executes the full pipeline and returns a structured recommendation. The following numbers derive from data/product_config.json (safety_stock = 150, lead_time_days = 5, min_order_quantity = 50, unit_cost = $12.50) and the Chronos2 P50 forecast with the promotion covariate active:
Product: SKU-00142 (Wireless Earbuds Pro)
Current stock: 45 units.
Forecast P50 (5-day lead time, with promotion): ~648 units.
Optimal order: 753 units = $9,412.50.
User budget cap: $500 → violation detected.
Adjusted order (bounded by min_order_quantity): 50 units = $625.00 — still over budget.
Projected shortfall: ~553 units over the 5-day lead-time window.
The behaviour at this point is the whole point of the design. Rather than silently truncating the order to whatever number fits the budget and creating a large stock-out, the Supervisor surfaces the three actionable options — raise the budget, accept the shortfall and pre-position expedited delivery, or delay the promotion — and asks the user to choose. This is the conditional retry loop doing its job: a constraint violation is treated as a workflow state requiring input, not as a silent failure.
Observability and Evaluations both capture this event for inspection afterwards. The CloudWatch trace shows each tool call in the retry loop, and the Evaluations custom evaluator scores this session at 2.0 (flagged violation), confirming the agent behaved as designed rather than silently failing.
Cleaning up
To avoid incurring future charges, delete the resources you created during this walkthrough in the following order:
Tear down AgentCore resources (Runtime, Gateway, Policy engine, Memory, Evaluations):
agentcore destroy
Destroy the CDK stack (S3 bucket, Gateway Lambda, Cognito user pool, IAM roles):
cd cdk && npx cdk destroy
Delete the SageMaker Serverless endpoint to stop Chronos2 inference charges:
Revoke Amazon Bedrock model access under Model access in the Bedrock console if it is no longer needed for other workloads.
Conclusion
This architecture demonstrates that zero-shot forecasting and multi-agent automation are complementary abstractions that remove different categories of operational burden.
Chronos2 removes the ML pipeline. Adding a new SKU to the forecast requires no training job, no feature engineering, no model validation. The only inputs required are historical sales data and covariate values for the forecast horizon — both of which are standard operational data.
Multi-agent orchestration removes the manual workflow. Converting a demand forecast into a purchase order with business rule compliance, natural language rationale, and an audit trail requires coordinating judgment and computation across multiple steps. Four LLM agents handle the judgment. A set of deterministic tools handle the computation.
What you gain:
Dimension
Traditional Approach
This Architecture
New product onboarding
Train new model (days–weeks)
Zero — Chronos2 zero-shot
Business rule change
Edit spreadsheet or monolith
Change one @tool
Failure recovery
Restart entire pipeline
Retry at the failed agent
Audit trail
Manual documentation
Every agent output is a structured JSON contract
LLM cost at scale
Unbounded (monolith carries all context)
Bounded per agent by single-responsibility context
Forecast explanation
Raw numbers
Natural language rationale with anomaly flags
Forecast quality signal
Manual backtest scripts, ad-hoc
Code-based evaluator scores every session
The patterns described here — the agent versus tool, in-process versus gateway, and subjective versus deterministic evaluation decision frameworks, structured JSON contracts between agents, conditional retry as a first-class workflow state, and mapping each AgentCore service to one production concern — apply beyond inventory management to any domain where deterministic computation and contextual judgment must work together.
To get started, deploy the CDK stack in your AWS account using the infrastructure patterns described in the technical implementation section, then run the constraint-violation walkthrough with your own product data to see the full agent coordination in action.
Cost figures for SageMaker Serverless Inference are estimates based on us-east-1 pricing and assume approximately 500 inference calls per month. Actual costs vary by Region and usage pattern.
How much to trust an AI agent is now a daily operational question. Agents read customer data, open tickets, process refunds, and delete accounts, yet most teams pick up a binary: full access or read-only. Full access is risky because agents fail unpredictably. Read-only leaves most of the agent’s value unused. The distance between what an agent could do and what an operator trusts it to do is the agent’s trust gap.
In this post, we describe graduated autonomy, an architectural pattern that closes the gap. Agents earn expanded permissions through sustained reliability and lose them when performance degrades. Amazon Bedrock AgentCore, a platform to build, connect, and optimize agents at scale with any framework or model, provides the runtime, gateway, policy, and evaluation capabilities. Amazon DynamoDB stores trust state. AWS CodePipeline gates delivery on evaluation results. We cover each layer’s responsibility and the key design decision behind it.
The agent trust gap
Identity and access management answers “who can do what?” once, at provisioning. That model assumes that the principal behaves consistently. A large language model agent breaks it: the same agent can be accurate Monday and hallucinated Tuesday after a prompt change or model update.
Closing the gap requires three capabilities raw API logs rarely provide:
Visibility. API logs tell engineers what happened but tell a compliance officer nothing about whether an action was safe.
Decision provenance. Tracing an action back to the signal that triggered it, the alternatives considered, and the confidence held.
Reversibility. Pre-action state capture, so operators can recover from incorrect actions.
The framework that implements this pattern delivers all three through six architectural layers.
Solution overview
The six layers:
Scoring engine computes trust from configurable dimensions.
Tier system translates sustained scores into autonomy levels.
Pre-execution layer blocks dangerous actions before they run.
Enforcement layer applies tiers through Cedar policies at the infrastructure level.
Post-execution layer evaluates outcomes, records of provenance, and feeds signals back to scoring.
Delivery gate keeps degraded agent versions out of production.
Figure 1: The trust framework’s closed loop.
Each layer is replaceable: the scoring model, tier thresholds, pre-execution signals, and evaluation criteria are configuration, not code. Each layer also embodies one deliberate design decision, developed in the following sections:
Layer
Key design decision
Scoring engine
Safety is an independent floor, never averaged away by strong metrics
Tier system
Start every agent at T1. Promote slowly, demote immediately
Pre-execution layer
Fast in-process filters are backstopped, never solely trusted
Enforcement layer
Deny by default, enforced outside the agent’s process
Post-execution layer
Audit records capture pre-action state, making recovery possible
Delivery gate
One unauthorized tool call in adversarial tests blocks release
The scoring engine
The scoring engine computes a weighted score from 0 to 100 per agent over a rolling window of 50 actions, from five dimensions:
Dimension
Weight
What it measures
Accuracy
25%
Task completion correctness against expected outcomes
Behavioral predictability, inverse of tool-use pattern drift
Compliance
20%
Reasoning quality before acting, guardrail adherence
Efficiency
15%
Execution without unnecessary retries or resource waste
The composite drives dashboards and tier assignment, but safety acts as an independent floor, so a dangerous individual metric never hides strength elsewhere.
The tier system
Every new agent starts at T1, regardless of test performance:
Tier
Score range
Permissions
T1: Probation
0 to 40
Read and list only. Two tools visible.
T2: Supervised
41 to 70
Add write operations. Human approves high-risk.
T3: Trusted
71 to 90
Execute and modify. Anomalies flagged for review.
T4: Autonomous
91 to 100
Full access. Post-hoc audit only.
Three rules govern transitions:
Promotion requires sustained performance. The score must stay above the promotion threshold for the entire rolling window.
Demotion is immediate. When safety drops below its floor or injection is detected, the agent moves down.
Hysteresis prevents oscillation. Promotion into a tier requires a score 5 points above that tier range floor. Demotion happens at the range floor itself. An agent at a boundary cannot flap between tiers.
Trust state lives in Amazon DynamoDB as a current state record plus a time-series history per agent. Enforcement components read the current tier on every invocation, a lookup DynamoDB typically serves in single-digit milliseconds.
The pre-execution layer
Post-execution evaluation cannot undo damage, so the pre-execution layer evaluates every tool’s call and can block it before execution. It scores six signals independently:
Adversarial injection detection. Pattern matching against known injection phrases. One match triggers an instant block and a trust penalty.
Sensitive target detection. Regex matching credentials, tokens, and private keys in tool arguments.
Dangerous tool detection. Flagging tools that match destructive operation patterns.
Behavioral consistency. Comparing the current tool call against the agent’s historical tool-use distribution.
Confidence calibration. Comparing stated confidence against historical accuracy. Overconfident failures are penalized at twice the normal rate.
Reasoning quality. Checking whether the agent provided reasoning before acting.
These checks are fast first-pass filters, not a complete defense. The enforcement layer’s deny-by-default policies backstop anything they miss.
The enforcement layer
The pre-execution layer is application code inside the agent’s process. The enforcement layer operates outside the agent, at the infrastructure level.
AgentCore Gateway, a capability of Amazon Bedrock AgentCore, sits between the agent and its tools. It routes every MCP tool invocation through Policy in Amazon Bedrock AgentCore, which evaluates Cedar policies with forbid-wins semantics. One satisfied forbid overrides any number of permits. Tier maps to policy state:
Probation: A forbid policy blocks write, execute, and delete tool actions.
Promotion: The forbid policy is removed, and broader permits take effect.
Demotion: The forbid policy is re-applied.
With the policy engine in enforce mode, the Gateway lists only tools that policy could permit, so the tier’s unconditional forbids keep blocked tools out of the listing. The agent is unlikely to call a tool it has never seen. Listing is a meta-action: each invocation is still evaluated separately with full request context, including input parameters. Cedar denies by default. Enforcement never depends on the agent’s choosing to behave. For model-level content safety, Amazon Bedrock Guardrails complements Policy in AgentCore, filtering harmful content and masking sensitive information independent of tier.
The post-execution layer
After every tool call, the system scores the outcome across eight signals, from confidence calibration and behavioral drift to human overrides and retry detection. Every action generates an audit record following the Think, Plan, Act, Observe, Score chain:
The Plan and Act records capture pre-action state, which is what makes recovery from an incorrect action possible. Operators ask questions in plain English, and a provenance query endpoint returns a human-readable explanation of any decision. Audit entries persist to DynamoDB.
The delivery gate
Each change to the agent’s prompt, configuration, or tool definitions triggers an AWS CodePipeline run. The run deploys the candidate to staging and runs it against ground-truth fixtures with Amazon Bedrock AgentCore Evaluations, a capability of Amazon Bedrock AgentCore. The fixtures include adversarial cases such as prompt injection and data-exfiltration requests. A single unauthorized tool call in any adversarial case fails the gate. The version that passes becomes the last known stable version.
Production monitoring and recovery
The framework injects synthetic honeypot cases with known expected behavior into a small share of traffic. Validation checks the tool-call trajectory (expected tools, expected order, no forbidden tools) rather than nondeterministic natural-language output, so a mismatch signals a real anomaly. Honeypot results stay out of production metrics. When safety drops below the floor, demotion narrows the agent’s permissions, and the framework redeploys the last known stable version. Together they restore known-good code alongside a tighter permission set. The framework also alerts operators.
Operator judgment feeds directly: the rolling rate at which operators reject proposed actions caps the effective safety metric, so 30 percent rejections cap safety at 70. An emergency stop pushes a single Cedar deny-all policy. Once the policy is active, typically within seconds, the Gateway denies all tool invocations without a redeployment. In multi-agent systems, a delegated action’s effective tier is the minimum across the delegation chain, closing the delegation privilege-escalation path.
Conclusion
In this post, we described graduated autonomy, an architectural pattern for closing the agent trust gap. With this pattern in place, your agents hold the autonomy their track record supports.
If you’re building AI agents for commerce at scale, you face two critical challenges: handling unpredictable traffic spikes and ensuring your agents can be trusted with real customer transactions.
This post shows how AgentFlo solved these challenges using Amazon Bedrock AgentCore and AWS serverless architecture. You learn the architectural patterns behind their reliability and trust frameworks, see the measurable business results (including +12% net revenue uplift based on early deployment data), and explore their roadmap for voice agents and server-side tool execution.
This is Part 2 of a two-part series. Part 1 covers velocity, standardization, and scalability.
Pillar 4: Trust: guardrails for autonomous commercial action and real-time visibility into agent operations
AgentFlo enforces trust at every layer of the stack, from pre-request filtering to post-response privacy controls, so merchants can deploy autonomous agents with confidence.
The challenge
Enterprise customers won’t deploy autonomous agents unless they can trust them. An agent in production can’t expose sensitive data, offer unauthorized discounts, or access another customer’s information. The system also prevents price hallucination, unauthorized tool calls, opt-out violations, and credential exposure.
Merchants also need fine-grained control over who can interact with their AI agents and what data each segment can access. Enterprise customers require restricted access; B2C businesses need open access for broader reach. Without identity-based controls, deploying customer-facing AI is a non-starter.
Defense in depth
In AgentFlo, trust isn’t only about safe responses. It’s about safe action. Agents can create carts, place orders, apply discounts, access customer data, and interact with backend systems, so policy enforcement must sit outside the model’s reasoning loop. The model proposes. Deterministic policy decides.
AgentFlo applies trust controls across the full agent lifecycle: before the model sees the request, during tool execution, and after the model generates a response.
Three-layer guardrails
When users deploy an agent from the AgentFlo Portal, security enforcement happens at three stages.
First, the AWS Fargate layer detects prompt injection and handles opt-outs before requests reach the agent. WhatsApp messages are authenticated using phone numbers as unique identifiers. Enterprise customers like EBM restrict access to authorized users, while restaurant deployments stay open for broader reach.
Next, the AgentCore layer verifies identity and enforces order locks during tool execution. AgentCore Gateway, a capability of Amazon Bedrock AgentCore, enforces policies that prevent sales agents from accessing customer support tools. Cedar policies enforce business rules like maximum discount percentages independently of the model’s reasoning. Cedar is an open-source policy language developed by AWS for fine-grained, verifiable authorization decisions. Additionally, Policy in Amazon Bedrock AgentCore integrates with Amazon Bedrock Guardrails, so Cedar policies can invoke configurable safeguards for prompt attack detection, content filtering, and sensitive information blocking directly at the gateway boundary.
Finally, post-turn privacy filters screen outputs to block inadvertent token disclosure and unverified price claims before customers see responses. Secrets are managed through AWS Secrets Manager with OIDC (OpenID Connect)-authenticated continuous integration and continuous delivery (CI/CD) pipelines. No credentials are stored in agent code.
Infrastructure security
Trust at the application layer requires sound underlying infrastructure. AgentFlo combines the built-in isolation of AgentCore with application-level controls:
Session isolation: Session isolation through AgentCore runtime, a capability of Amazon Bedrock AgentCore, which provides complete separation between merchants’ agent sessions through dedicated microVMs.
AgentCore Gateway policies: Fine-grained Cedar policies control which agents can access which tools and data, enforced deterministically regardless of model reasoning.
Amazon Virtual Private Cloud (Amazon VPC) integration: Agent sessions operate within AgentFlo’s VPC with domain-level network restrictions, so agents only communicate with approved endpoints.
Compliance: Data residency controls and audit trails for regulatory requirements across multiple jurisdictions.
Observability
Trust requires visibility. Merchants need to see what their agents are doing in real time, not only after something goes wrong. AgentFlo uses AgentCore Observability, a capability of Amazon Bedrock AgentCore, to provide end-to-end tracing of every agent interaction, from initial request through tool execution to final response.
AgentCore Observability captures structured traces for each agent turn, including model latency, tool invocation sequences, token usage, and error rates. These traces flow into Amazon CloudWatch, where AgentFlo builds dashboards showing active sessions, response times, and tool call patterns. Full request-to-response traces enable trace-level debugging. The system tracks P50/P95 latencies and throughput across agent types, alerting merchants when behavior deviates from baselines. Cost attribution provides per-merchant, per-agent breakdowns tied to specific conversations.
Results
Together, observability and trust give enterprises confidence to deploy autonomous agents at scale. Merchants benefit from safer execution, stronger compliance across jurisdictions, and controlled access to tools and data at the session level.
Pillar 5: Reliability: a data foundation that keeps agents grounded in reliable data
Reliable agents need reliable data. AgentFlo grounds every agent action in verified, current information through stateful sessions, merchant knowledge bases, and semantic product discovery.
The challenge
Enterprise customers won’t trust AI agents that forget context, hallucinate product details, or operate on stale data. An agent that quotes the wrong price, forgets a customer’s earlier request, or recommends discontinued products destroys confidence instantly. The system must make sure every agent action is grounded in verified, current information, from product catalogs and pricing to conversation history and business rules.
Merchants also need their agents to maintain continuity across long customer journeys, access up-to-date business-specific knowledge, and surface products through natural language, all without manual intervention or prompt engineering.
Data architecture overview
In AgentFlo, reliability isn’t only about accurate responses. It’s about accurate action grounded in verified data. Agents retrieve product information, manage carts, and complete transactions, so every data source must be authoritative and current. The model reasons. Structured data decides.
AgentFlo applies data reliability controls across three layers: stateful conversation management through Amazon DynamoDB, merchant-specific knowledge through Amazon Bedrock Knowledge Bases, and semantic product discovery through vector embeddings in Amazon S3 Vector.
State management architecture
A real sales journey can span 8 hours or 3 days. A customer might ask about a product in the morning, compare options at lunch, and complete the purchase that evening. The agent must remember context across all turns and maintain state, so customers don’t need to start over.
AgentCore runtime and Amazon DynamoDB manage this context storage. The agent replays relevant history, loads context based on intent, and continues transactions safely.
Each agent needs to be stateful (remembering earlier interactions), autonomous (deciding next steps without human intervention), and safe (operating within business rules without exposing sensitive data).
The two-table DynamoDB design covers all three requirements: session continuity through conversation replay, autonomous context loading based on detected intent, and data integrity through structured ground-truth storage that the model can’t hallucinate over.
Figure 1: Per-message conversation flow. AgentCore runtime loads the last 15 messages from the DynamoDB Session Table at the start of each turn. The Cart Table is loaded on demand only when intent detection flags the request as cart-related, preventing the model from generating incorrect prices and quantities.
Knowledge base system
Merchants upload business-specific data (restaurant menus, clinic policies, product specifications, promotion calendars) into Amazon Bedrock Knowledge Bases backed by Amazon Simple Storage Service (Amazon S3). Agents automatically retrieve and reason over this merchant-specific content. Responses stay grounded in accurate, up-to-date business information without merchants writing a single prompt.
Semantic search and vector retrieval
AgentFlo improves product discovery by giving every product in its Amazon Aurora database a lightweight vector embedding. Customers can find products by name or description.
AgentFlo also generates extra searchable tags for each product automatically, and merchants can add their own. The result: phrases like “the pink one,” “the smallest one,” “the new one,” or “the chocolate with the golden wrapper” all map to the right product. Customers ask for things naturally, and the platform finds what they’re looking for.
Observability and billing
The system captures all message interactions through Amazon Data Firehose to Amazon S3, so merchants can track cost per conversation and compare those costs against sales revenue. This pipeline shows merchants the return on investment (ROI) of their agent deployments and provides the data foundation for continuous agent improvement.
Results
The data architecture helps minimize context loss in conversations across multi-day customer journeys, with grounded responses that eliminate price and product hallucination. Merchants benefit from natural language product discovery without keyword dependency and merchant-specific knowledge retrieval without prompt engineering. Full cost visibility and ROI attribution per agent deployment give merchants clear measurement of platform value.
Business impact: measurable results across the customer lifecycle
Salesflo’s solution, powered by Strands Agents SDK and Amazon Bedrock AgentCore, delivered measurable improvements across the customer lifecycle:
Metric
Improvement
Net revenue uplift
+12%
Customer engagement
+40%
Conversion rate
+15%
Average order value
+8%
Customer reactivation
+20%
AgentFlo generated these results by comparing agent-assisted customer journeys against a control group over a 90-day early deployment period.
Note: The foundation models referenced in this post are available in select AWS Regions. For the latest information on model availability, see Supported Regions and models for Amazon Bedrock.
The compounding effect at scale
At AgentFlo’s scale, the impact is significant. With $300 billion in annual transacted value flowing through the Salesflo solution (based on platform transaction data), even single-digit percentage improvements translate to billions in incremental revenue for merchants.
Operational improvements
Beyond the metrics, merchants see operational improvements:
24/7 coverage — AI agents engage customers at any hour, in any time zone, across any channel.
Consistent quality — Every customer interaction follows best-practice selling methodologies without the variability of human agents.
Scalable personalization — Thousands of concurrent agent sessions, each maintaining unique context per customer.
Rapid merchant onboarding — New merchants go live with customized AI agents in days, not months, through the self-service configuration platform.
What’s next: voice, server-side execution, and integration expansion
AgentFlo is actively extending the platform along three directions, each at a different stage of maturity.
Real-time voice agents (in pilot)
AgentFlo already supports voice within WhatsApp. Incoming voice notes go through a two-pass transcription process: a raw initial pass, followed by domain-aware correction that fuzzy-matches text against the live product catalog. The second pass catches brand names and SKUs even when partially misheard, across more than 90 supported languages. For outbound audio, merchants pick from multiple Text-to-Speech (TTS) providers per deployment.
Because Speech-to-Text (STT), reasoning on AgentCore runtime, and TTS are fully independent components, any one can be swapped without disrupting the rest of the pipeline.
The next step: BidiAgent. The next evolution is real-time voice agents built on the Strands SDK BidiAgent and Amazon Bedrock AgentCore WebRTC support. BidiAgent supports bidirectional audio streaming, natural interruptions, and concurrent tool execution. The agent can check inventory or apply a discount while continuing to listen and respond to the customer in the same call.
The AgentCore WebRTC protocol and Amazon Kinesis Video Streams handle peer-to-peer transport for mobile and browser interactions without requiring relay infrastructure. This pushes AgentFlo beyond text messaging into proactive outbound calls and high-value B2B sales, where real-time conversation is essential for building trust.
AgentFlo is experimenting with server-side tool execution in Amazon Bedrock, which removes client-side orchestration entirely.
Traditional orchestration loops between model and tools repeatedly (model → execute → send result → repeat). With server-side execution, the agent makes a single API call to the Amazon Bedrock Responses API with an AgentCore Gateway Amazon Resource Name (ARN). The model then autonomously discovers, invokes, and processes tools through the Gateway Model Context Protocol (MCP) interface, all inside AWS infrastructure with no roundtrips back to the client.
Note: Model availability varies by AWS Region. The model and endpoint shown in this example may not be available in all Regions. See Supported Regions and models for Amazon Bedrock for current availability.
One request handles the whole loop. The Gateway ARN goes in as an MCP connector, and Bedrock takes it from there; pulling the tool list, picking the right one, invoking it, and feeding the result back to the model without anything leaving AWS. The client never sees credentials, tool schemas, or the intermediate turns. See ShopAssist: E-Commerce Agent Demo for more details.
Early results: For specialist agents with short, focused tool loops, early measurements show approximately 30% lower latency. A sales agent calling three tools in sequence (check inventory, apply discount, update cart) collapses 50+ lines of orchestration into a single API call. All credentials stay server-side, and the simplified architecture makes onboarding new agent developers faster.
Integration ecosystem expansion (ongoing)
AgentFlo adds integrations based on merchant demand. Each new platform (payment processors, shipping providers, loyalty systems, or vertical-specific ERPs) becomes another MCP server connector in AgentCore Gateway. This pattern keeps expansion modular and quick.
Key takeaways
Pick your pillars first. The right AWS stack follows. AgentFlo first defined what velocity, standardization, scalability, and trust meant for the production system. With clear requirements, the AWS stack choices became obvious: Strands for the agent layer, AgentCore runtime for stateful sessions, AgentCore Gateway for tool routing and policy, and AWS Fargate for message ingestion.
Specialized agent recipes beat multi-agent complexity. Deploying a single, well-configured agent with domain-specific tools and knowledge outperforms multi-agent orchestration for most customer interactions. Multi-agent handoffs are reserved for cross-domain transitions where context boundaries are clearly defined.
Commerce is stateful. Plan for that on day one. A real sales journey can span 8 hours or 3 days. Stateless chatbots can’t maintain context that long. AgentCore runtime stateful sessions and DynamoDB-backed context were chosen on day one for exactly this reason. Retrofitting state onto a stateless agent later is much more painful than designing for it up front.
Three-layer security builds trust. Pre-turn guards on Fargate, per-tool guards through AgentCore Gateway policies with Cedar, and post-turn output filters work together to support safe deployment of autonomous agents handling commercial transactions.
System design supports scale. By building agent customization as a software as a service (SaaS) layer on top of AgentCore infrastructure, AgentFlo serves hundreds of merchants on shared infrastructure while still delivering personalized agent behavior for each one.
Serverless + AgentCore = elastic commerce. The combination of Fargate for message handling and AgentCore for agent execution means AgentFlo scales from normal traffic to 50x flash-sale spikes without pre-provisioning or capacity planning.
The feedback loop is the product. Real customer conversations teach the agents how to close. Where customers hesitate, what language converts, when they want a human handoff — all of it feeds back into recipes, prompts, and tool definitions. A new merchant deployment benefits from every conversation that ran on the platform before it. That compounding loop is harder to copy than any single piece of the architecture.
Conclusion
Building production-scale AI agents for commerce requires scalability and trust from day one. By combining Amazon Bedrock AgentCore stateful sessions and microVM isolation with AWS serverless infrastructure, AgentFlo delivers autonomous agents that handle unpredictable traffic while maintaining the security controls enterprises require.
In this post, you learn how AgentFlo built intelligent sales agents that convert conversations into completed purchases. We show you how AgentFlo improved revenue performance in early deployments using Amazon Bedrock AgentCore and the Strands Agents SDK.
AgentFlo, the agentic commerce service by Salesflo, helps merchants deploy always-on AI sales, support, and ordering agents across channels like WhatsApp. These agents understand intent, connect to commerce systems, recommend products, create carts, and convert conversations into completed transactions. Today, AgentFlo serves eCommerce merchants managing over $300 billion in annual transacted value, according to Salesflo, across services including Shopify, WooCommerce, Magento, and SAP.
This is Part 1 of a two-part series covering the five pillars of production-grade AI agents. Part 1 covers Velocity, Standardization, and Scalability. Part 2 covers Trust, Reliability, and Business results.
The challenge: customer intent without assistance
Cart abandonment hovers around 70% industry-wide, representing trillions in unrealized revenue annually. For merchants operating on messaging platforms like WhatsApp, the gap widens further:
Cart abandonment: Customers abandon carts because a single question goes unanswered.
Generic product discovery: Ranked listings replace recommendations tailored to each customer.
Missed messaging conversations: Inbound chat volume exceeds staffing capacity across time zones and languages.
No personalized guidance: Most merchants can’t afford 1:1 assistance for every interaction.
Limited outbound engagement: Teams lack bandwidth for proactive sales motions.
Peak traffic spikes: Flash sales and seasonal campaigns can spike traffic 10–50x beyond normal capacity.
Rule-based chatbots can’t handle nuanced sales conversations. Human agents can’t scale across geographies, languages, and time zones. Merchants need specialized AI sales agents that understand customer context, run complex workflows, and operate autonomously 24/7.
What makes an agent?
At its simplest, an agent combines a model, instructions, tools, context, and memory. The model reasons over a user’s request. The instructions define the agent’s role and the limits of what it should do. Tools let the agent take action in the real world. Context grounds it in business-specific data. Memory keeps the conversation coherent across turns.
In AgentFlo, those abstract components map to concrete pieces of the platform:
Component
What it does in AgentFlo
Model
Understands user intent and decides what to do next
System prompt / persona
Defines whether the agent behaves like a sales agent, restaurant agent, support agent, or receptionist
Tools
Allow the agent to search products, check inventory, create carts, place orders, raise tickets, or trigger follow-ups
Knowledge
Grounds responses in merchant-specific data such as product catalogs, menus, policies, promotions, and FAQs
Memory / state
Maintains conversation history, cart state, customer preferences, and previous actions
Channels
Connects the agent to WhatsApp, SMS, RCS, web chat, and voice
Guardrails / Policy
Prevents unsafe, unauthorized, or incorrect actions
Observability
Tracks cost, performance, conversions, and conversation quality
Building a demo agent is straightforward. Building one that runs a business safely, repeatably, and at scale requires a different approach. AgentFlo organizes this approach around five pillars.
Figure 1: AgentFlo’s production architecture on AWS.
Customer messages arrive through WhatsApp Graph API or web/mobile channels and pass through an Application Load Balancer into the AWS Fargate messaging layer. It handles authentication, image optical character recognition (OCR), speech-to-text/text-to-speech, pre-turn guardrails, and prompt injection detection. Validated requests flow into AgentCore runtime, a capability of Amazon Bedrock AgentCore, where the Strands Agents SDK orchestrates an agent that streams model inference to an external large language model (LLM). AgentCore Gateway, a capability of Amazon Bedrock AgentCore, brokers tool calls, with IAM-based authorization, to an API layer of AWS Lambda functions (Cart, Product, and Knowledge Base). It persists state across a data layer comprising Amazon DynamoDB session and cart tables, Amazon Aurora order tables, and an Amazon Bedrock Knowledge Base backed by Amazon S3. Policy in Amazon Bedrock AgentCore enforces deterministic access control independently of model reasoning. Amazon Bedrock Guardrails can also be embedded in Policy to filter prompt attacks, harmful content, and sensitive information on both requests and responses. On the observability side, logs and traces feed into AgentCore Observability, a capability of Amazon Bedrock AgentCore, while Amazon Data Firehose captures every interaction into Amazon S3 for cost and revenue analytics.
AgentFlo evaluated several hosting options before selecting Amazon Bedrock AgentCore. Three capabilities made the difference:
Stateful sessions for long-running commerce conversations.
Agent runtime: each agent session runs in its own lightweight virtual machine, providing hardware-level security boundaries between tenants.
Native MCP integration: Model Context Protocol (MCP) is an open standard that allows AI agents to connect securely to external data sources and tools through a unified interface. AgentCore Gateway supports MCP natively for standardized tool connectivity.
Pillar 1: Velocity: from merchant idea to live agent in minutes
Speed to market determines whether merchants can capture emerging opportunities. AgentFlo addresses this with a streamlined deployment model.
The challenge
Merchants want to launch agents quickly, but each has unique workflows, tone, tools, languages, products, and business rules. Generic chatbot templates are too shallow. Custom-building each agent doesn’t scale.
Recipe-based deployment
AgentFlo uses a recipe-based agent deployment model. Merchants select from pre-configured recipes, each shipping with persona, language, tone, tool sets, prompt templates, knowledge sources, response packs, and business rules. Available recipes include:
Sales agent.
Restaurant ordering agent.
Clinic receptionist.
Support agent.
B2B reorder agent.
Cart recovery agent.
Merchants fine-tune a few choices in the AgentFlo Portal. The rest is automated.
How it works
AgentFlo chose Strands Agents SDK as its agent framework. Strands Agents SDK uses a model-driven architecture: you define tools as Python functions, write a system prompt, and let the model handle orchestration. No rigid workflow graphs or hand-coded state machines.
From the merchant’s perspective, agent creation is entirely no-code. Here’s an example of the agent customization flow:
Figure 2: Agent customization workflow
This approach makes the recipe model work. Adding a new capability (like loyalty program enrollment) means writing a new tool function and updating the system prompt. No orchestration layer rewiring is needed.
Behind the scenes, one selection triggers an automated pipeline:
The portal generates a Strands agent configuration from the recipe template.
GitHub Actions packages the agent (tools, prompts, context) into a container.
The container deploys to AgentCore runtime with appropriate Gateway policies.
The agent goes live on WhatsApp within minutes.
Figure 3: How to build a customized agent under hook workflow
Each agent is a Strands Agent instance with tool definitions mapped to AgentCore Gateway endpoints. Extending an agent’s capabilities is a code change, not an architectural one.
Results
This recipe-based approach delivers faster merchant onboarding, rapid experimentation with new agent behaviors, and quick addition of new capabilities platform-wide. It also means lower engineering effort per deployment and a tighter feedback loop between customer conversations and product iteration.
Pillar 2: Standardization: reusable recipes, tools, and commerce workflows
Consistency across deployments speeds iteration and reduces maintenance burden. AgentFlo achieves this through shared building blocks.
The challenge
As AgentFlo expanded across industries, fragmentation threatened to slow the team down. Every merchant has unique catalog structures, ERP setups, system configurations (Shopify, WooCommerce, Magento), pricing rules, languages, promotions, and support processes. Without standardization, every deployment becomes a custom project, and custom projects don’t scale to hundreds of merchants.
Repeatable building blocks
AgentFlo standardizes around several core components: agent recipes (domain-specific templates), a tool marketplace (reusable capabilities), MCP-based connectors (standardized integrations), integration contracts (consistent interfaces). Additional components include prompt and context packs (reusable templates), conversation review loops (continuous improvement), and a shared semantic layer (unified product understanding). Merchant-specific complexity is pushed to the system edges. The core remains consistent.
Single-agent architecture with domain expertise
We learned early on that a single agent with domain-specific knowledge and a curated tool set outperforms multi-agent architectures for most customer interactions. Each AgentFlo deployment configures a distinct persona, voice, language, and specialized tool set tailored to the business domain (sales agent, restaurant agent, clinic receptionist). It ships with curated contexts, prompt templates, and response packs. Merchants deploy these domain-specific agents through the self-service portal.
A single focused agent maintaining unified context converts better than multiple generalists coordinating with each other. Multi-agent capabilities remain available where valuable. For example, when conversations transition from sales to support, context hands off cleanly to the specialist agent.
Tool routing through AgentCore Gateway
Centralized tool management routes agent requests to dedicated AWS Lambda functions. When a customer asks about product availability, the agent queries the product catalog. When they’re ready to buy, it handles cart operations. For personalized recommendations, it retrieves data from Amazon Bedrock Knowledge Bases, the fully managed Retrieval Augmented Generation (RAG) capability, backed by merchant data stored in Amazon S3. Sales intelligence APIs provide additional context for each interaction.
OAuth tokens and platform credentials live in the Gateway, not in agent sessions. Policy in AgentCore sits alongside the Gateway, enforcing fine-grained, Cedar-based access control rules that operate independently of model reasoning. Cedar is an open-source policy language developed by AWS that allows fine-grained, verifiable authorization decisions.
Policies define which agent sessions can invoke which tools. For example, a sales agent can’t call customer-support-only APIs.
For standardization, this means every new tool added to the platform (payment integration, shipping provider, loyalty system) becomes available to every applicable recipe through the same mechanism. Tools aren’t re-implemented per merchant.
AgentCore Gateway as the integration backbone
AgentFlo integrates with dozens of eCommerce services: Shopify, WooCommerce, Magento, SAP, payment processors, shipping providers, and loyalty systems. Each integration is defined as an MCP server connector, with Gateway handling discovery, authentication, and routing. Furthermore, AgentFlo has many different agent recipes, each with their own specialized tool packs to provide that functionality. To make these connections modular and efficient, AgentFlo uses AgentCore Gateway.
From the agent’s perspective, the full Gateway tool surface is reachable in a few lines:
from strands import Agent
from strands.models import BedrockModel
from strands.tools.mcp.mcp_client import MCPClient
from mcp.client.streamable_http import streamablehttp_client

def create_transport():
    return streamablehttp_client(
        GATEWAY_URL,
        headers={"Authorization": f"Bearer {access_token}"},
    )

mcp_client = MCPClient(create_transport)

with mcp_client:
    # Discover every tool registered on the Gateway in one call.
    # cart, product catalog, knowledge base, shipping, loyalty, etc.
    tools = mcp_client.list_tools_sync()

    agent = Agent(
        model=BedrockModel(model_id="us.anthropic.claude-sonnet-5-20260630"),
        tools=tools,
        system_prompt=SALES_AGENT_PROMPT,
    )

    response = agent("Do you have the red leather wallet in stock?")
Connecting a Strands agent to AgentCore Gateway. A single list_tools_sync() call gives the agent every integration registered on the Gateway: cart, product catalog, knowledge base, shipping, loyalty. Onboarding a new service for a merchant is a Gateway change, not an agent change.
Key capabilities:
MCP-native tool connectivity: Each platform or tool set integration is a standard MCP server connector.
OAuth and credential management: Platform API keys and OAuth tokens are managed centrally in Gateway, never exposed to individual agent sessions.
Code simplicity: The code is cleaner, shorter, and more modular, which simplifies configuration for scale. The alternative is extensive local code for each connection or tool set.
Because each new service integration and recipe-specific tool set is defined as an MCP server connector in AgentCore Gateway, expansion is modular and quick. Adding a new service or tool set requires a connector definition, not a re-architecture.
Conversation reviews as a standardization loop
Standardization also comes from learning. AgentFlo continuously reviews real conversations to understand how customers ask for products, where they drop off, which recommendations convert, when handoff is needed, and how local language affects buying behavior.
These reviews feed back into recipes, prompts, and tool definitions. Standardization is something the platform earns over time, not something declared at launch.
Results
Every deployment improves future deployments, and new integrations become reusable across the merchant base. Agent behavior stays consistent across recipes and merchants, and workflows become repeatable across industries. The service becomes harder to replicate because it learns from real commerce behavior, not generic templates.
Commerce conversations are unpredictable in volume and duration. AgentFlo’s architecture handles both dimensions without manual intervention.
The challenge
During flash sales, product launches, or restaurant rush hours, customer conversations can spike 10–50x. Human teams can’t scale that fast. AgentFlo must also support many merchants and concurrent customer sessions simultaneously. One merchant’s surge can’t affect another’s experience.
AgentFlo’s serverless architecture
AgentFlo uses a serverless architecture. Message ingestion, agent execution, tool execution, state, analytics, and billing each scale independently. Each layer absorbs its own spikes without requiring the rest of the system to over-provision.
AgentCore runtime properties for scale
Several AgentCore runtime properties specifically support scale:
Isolated microVM execution: Each agent session runs in its own environment with dedicated CPU, memory, and filesystem. The environment is sanitized on termination. One merchant’s sessions never interfere with another’s.
Stateful sessions up to eight hours: Long-running conversations don’t lose context. A customer browsing in the morning can continue the same assisted session that evening.
Framework-agnostic: AgentCore runs Strands Agents natively but also supports any containerized agent framework, giving AgentFlo flexibility to evolve the agent architecture over time.
How it works
The architecture is built end-to-end on AWS:
Messaging layer (AWS Fargate): An Application Load Balancer routes incoming WhatsApp messages to a Fargate application that handles authentication, voice message conversion (Opus OGG to MP3 transcription with fuzzy matching for product name recognition). The application also runs pre-turn security guards. AWS End User Messaging provides an alternative channel option for broader reach.
Agent orchestration (Amazon Bedrock AgentCore runtime): Each customer session spawns an isolated agent instance running the Strands Agents SDK. Sessions are stateful for up to eight hours and isolated through microVM architecture, where each session runs in its own lightweight virtual machine. They are persistent, with filesystem access for intermediate results and cached product catalogs. microVM isolation keeps merchants completely separated.
This is the entire bridge between Strands SDK agent code and a production-ready endpoint on AWS:
from strands import Agent
from bedrock_agentcore.runtime import BedrockAgentCoreApp

app = BedrockAgentCoreApp()

agent = Agent(
    tools=tools,  # from the Gateway, per snippet above
    system_prompt=SALES_AGENT_PROMPT,
)

@app.entrypoint
def invoke(payload, context):
    """One AgentCore session per customer conversation."""
    user_message = payload.get("prompt")
    session_id = getattr(context, "session_id", None)  # stable for up to 8 hours
    result = agent(user_message)
    return {"result": result.message}

if __name__ == "__main__":
    app.run()
This is all the glue between a Strands agent and AgentCore Runtime. BedrockAgentCoreApp wraps the agent in the standard /invocations contract, and AgentCore handles microVM provisioning, session isolation, scaling, and stateful sessions up to eight hours. Two CLI commands take it from a local file to a live endpoint on AWS. No Dockerfile, no API routing, no web framework to maintain.
Tool execution (Amazon Bedrock AgentCore Gateway): Tool calls scale separately from agent reasoning, so a sudden burst of cart operations doesn’t slow down the agent loop itself.
Results
The architecture handles peak traffic without pre-provisioning capacity and supports long-running conversations that survive across visits. It provides strong multi-merchant isolation with lower operational overhead than traditional always-on infrastructure, resulting in a better customer experience during high-intent moments like product launches or flash sales.
What’s next
In Part 2 of this series, we explore:
Pillar 4: Trust. Guardrails for autonomous commercial action and real-time visibility into agent operations.
Pillar 5: Reliable. Data foundation that ensures agents act on reliable, up-to-date information to complete tasks with precision.
Business results: Measurable impact across the customer lifecycle.
Future roadmap: Voice agents, server-side tool execution, and integration expansion.
Summary
In this post, we explored three of the five pillars for building production-grade AI agents:
Velocity: How recipe-based deployment allows merchants to launch AI sales agents in minutes using the model-driven architecture of the Strands Agents SDK.
Standardization: How reusable building blocks and centralized tool management through Amazon Bedrock AgentCore create consistency across hundreds of deployments.
Scalability: How AgentFlo handles elastic, stateful commerce conversations at scale through Amazon Bedrock AgentCore and AWS Fargate.
Many teams now deploy AI agents that pull from Amazon DynamoDB tables, document repositories, software as a service (SaaS) platforms, and internal knowledge bases to answer questions and automate workflows. A key risk in these deployments is that the agent has no awareness of who’s asking, so it might return data the user shouldn’t see.
If you’re using Amazon Bedrock AgentCore to build AI agents that access multiple data sources, you need each user to see only the data they’re authorized to access. In this post, you learn patterns for propagating user authorization context through your agents so access control is enforced by infrastructure and downstream services, not by agent code. In this post, we show you how to deploy agents that enforce least privilege access without writing authorization logic in the agent itself. This approach follows AGENTSEC03 best practice in the AWS Well-Architected Agentic AI Lens.
Use case
Consider an example of a customer relationship management (CRM) chat application where employees from Sales and Finance departments interact with an AI agent to access customer information. Employees use the same chat interface and the same agent, but each department needs isolated access to their respective data:
Sales needs access to customer contracts, pricing strategies, and sales pipeline data
Finance needs access to customer invoices, payment records, and financial reports
The AI agent accesses three types of data sources on behalf of users:
Customer records in Amazon DynamoDB, partitioned by department
When a Sales employee asks, “Show me customer contracts,” the agent must retrieve only Sales department contracts, not Finance invoices. This enforcement must happen outside the agent so that even if the agent is compromised through prompt injection or application bugs, it can’t access unauthorized data.
Note: Although we use department-based scoping in this example, the pattern generalizes to any custom claim you define, whether it represents a role, business unit, geographic region, or project assignment.
Architecture overview
The following diagram shows the architecture used in this demonstration.
Figure 1: Target architecture
The data flow shown in Figure 1 includes:
A user opens the chat application and authenticates with Amazon Cognito user pool , which acts as the identity provider (IdP).
A pre token generation Lambda trigger (V2) enriches the JSON Web Tokens (JWTs) with a custom claim and AWS session tag metadata before returning them to the user.
The web app routes the user’s request along with the access token to the agent deployed on Amazon Bedrock AgentCore Runtime.
Bedrock AgentCore Runtime validates the inbound JWT and, through Bedrock AgentCore Identity, issues a workload access token that binds the user and agent identities, and then invokes the agent.
For queries requiring internal documents, the agent uses its AWS Identity and Access Management (IAM) role to query Amazon Bedrock Knowledge Bases (backed by an Amazon S3 vector store) with metadata filtering, and DynamoDB with user-scoped session-tagged credentials.
The agent calls the Salesforce REST API using the user-scoped token. Salesforce applies sharing rules and returns only records the user is authorized to access.
This architecture follows two key principles.
The agent acts as an orchestrator, not a gatekeeper; it coordinates tool calls and reasoning but doesn’t control access to data. Authorization is enforced by downstream services.
The agent doesn’t store credentials to data stores; instead, each request gets temporary, user-bound access tokens.
In the following sections, we dive deep into each data source to show how these principles are achieved in practice.
Initial user authentication with IdP
When an employee opens the chat application, they authenticate using their corporate credentials. For this example, you use Amazon Cognito user pools as the IdP. You can also achieve this with other IdPs such as Entra ID or Okta.
The pre token generation Lambda trigger (V2) captures the user’s custom department context and adds it to the tokens to both the identity (ID) token and access token that Bedrock AgentCore Runtime uses for authorization decisions each serving a distinct purpose. The access token is used by the Bedrock AgentCore Runtime custom JWT authorizer for inbound authorization. The ID token also receive the https://aws.amazon.com/tags claim (used by AWS Security Token Service (AWS STS)) for session tags). The https://aws.amazon.com/tags claim is the specific format required by AWS STS to extract session tags during AssumeRoleWithWebIdentity. For more information and step-by-step guidance see How to customize access tokens in Amazon Cognito user pools.
The following example shows the key logic within a pre token generation Lambda handler function configured as a trigger on your Amazon Cognito user pool. This code runs automatically when a user authenticates, extracting their department attribute and adding it as a custom claim to both ID Token and access token.
When the user request reaches AgentCore Runtime, the Inbound JWT authorizer performs two checks as shown in Figure 2. It validates the JWT token with Amazon Cognito (the configured IdP) by cryptographically verifying the token’s signature, confirming it is non-expired, and checking it was issued by the trusted IdP. It then extracts the department claim from the validated token and compares it against the expected value configured in the authorizer, any token without a matching claim is rejected before the agent code is invoked.
Figure 2: Inbound JWT authorization
The following example shows the inbound JWT authorizer configuration that you pass when deploying your agent to AgentCore Runtime. This configuration tells AgentCore which IdP to validate against and which custom claim value to enforce for this agent. In this example, inboundTokenClaimName is department, inboundTokenClaimValueType declares the claim type as STRING_ARRAY, and authorizingClaimMatchValue specifies the allowed values ([“Sales”, “Finance”]) with the CONTAINS_ANY operator. The authorizer validates that the department claim is present in the token and matches one of these values, ensuring only authenticated users from the Sales or Finance department can invoke the agent.
Note: AgentCore Runtime automatically creates a workload identity for each deployed agent. A workload identity represents the digital identity of your agents within the AWS environment. It allows agents to maintain consistent identity whether they’re using IAM roles for AWS resource access, OAuth 2.0 tokens for external service integration, or API keys for third-party tool access.
Passing the user context for agent outbound authorization
After the inbound JWT token is validated and the user’s authorization context is confirmed, the agent must propagate this context to downstream resources. The fundamental security challenge here is how to design a system so that an agent acting on behalf of a user can only access data that user is authorized to see, even if the agent itself is compromised.
The traditional approach of granting the agent broad credentials and relying on application-level filtering (such as adding WHERE clauses to queries) creates a single point of failure. If an attacker manipulates the agent through prompt injection or exploits a bug in the filtering logic, the full dataset becomes accessible. A more resilient design moves authorization enforcement out of the agent’s application code and into the infrastructure layer wherever possible. Instead of trusting the agent to filter results correctly, you configure the underlying services—IAM policies, database access controls, SaaS sharing rules—to reject unauthorized requests regardless of what the agent asks for. This way, the agent’s credentials are inherently limited to the requesting user’s permissions, and no amount of prompt manipulation can bypass those boundaries. Where infrastructure-level enforcement isn’t yet available, such as metadata filtering in Amazon Bedrock Knowledge Bases, the agent applies application-layer controls as a complementary measure. The following sections demonstrate how this principle applies to each data source in our architecture.
Pattern 1: Scoping DynamoDB access to the requesting user
For DynamoDB access, you can use AssumeRoleWithWebIdentity with session tags to create per-request, user-scoped credentials rather than granting the agent a static IAM role with direct table access. The agent passes the user’s signed ID token to AWS STS, which extracts the department tag from the token’s https://aws.amazon.com/tags claim and returns temporary credentials constrained to that department’s data partition. This moves access control from agent code to IAM policy evaluation. STS additionally validates the token’s audience (aud) claim against the IAM OIDC provider configuration, preventing tokens issued for other app clients from being used to assume the role. The following diagram shows this flow (Figure 3).
Before this runtime flow can execute, complete the following configuration:
Register Amazon Cognito as an IAM OIDC provider. Although the user authenticates using the Cognito API (USER_PASSWORD_AUTH), STS requires Cognito to be registered as an OIDC provider so it can discover and validate ID tokens. Configure the allowed client IDs (audiences) on the provider to match your application’s app client ID.
Configure the UserScopedDynamoDBRole trust policy to include both sts:AssumeRoleWithWebIdentity and sts:TagSession permissions, with the Amazon Cognito OIDC provider as the federated principal.
By default, AgentCore Runtime drops custom headers as a security measure. To allow the X-Id-Token header through to the agent container, configure it in the agent runtime’s requestHeaderAllowlist so the ID token is forwarded to agent code. The following configuration tells AgentCore Runtime to forward only the X-Id-Token header to agent code, dropping other non-standard headers:
The user authenticates with Amazon Cognito using USER_PASSWORD_AUTH.
The JWT is issued with a custom department claim and the https://aws.amazon.com/tags claim for STS session tagging (covered in the preceding Initial user authentication with IdP section).
Amazon Cognito returns the enriched tokens to the frontend. The access token carries the department claim for inbound authorization. The ID token carries both the department claim and the https://aws.amazon.com/tags claim for downstream STS calls.
The user asks the agent a question (for example, “Show Q4 sales pipeline”).
The frontend calls AgentCore Runtime, passing two tokens: the Amazon Cognito access token in the Authorization header (for inbound authorization), and the user’s ID token as a custom X-Id-Token header (for downstream STS calls).
AgentCore Runtime validates the JWT and verifies the department claim matches the allowed values configured in the inbound authorizer. If validation fails, the request is rejected with HTTP 401 before agent code executes. After validation, AgentCore forwards the request to the agent container along with the allowed X-Id-Token header.
The agent calls sts:AssumeRoleWithWebIdentity with the ID token. This call targets a single shared UserScopedDynamoDBRole. The following is the agent code for this step:
AWS STS validates the token against the Amazon Cognito OIDC provider registered in IAM. STS verifies the token’s cryptographic signature, expiration, issuer, and audience (aud). The aud claim in the ID token must match one of the client IDs configured on the IAM OIDC provider resource. This prevents a valid token issued by the same Cognito user pool but for a different app client from being accepted. Note that the agent’s own execution role has no DynamoDB access and only permits sts:AssumeRoleWithWebIdentity, so even a compromised agent can’t bypass this flow.
Note: Amazon Cognito user pools expose a standard OpenID Connect discovery endpoint, which is what you register as the trusted OIDC provider in IAM, even though the user signs in through the Cognito authentication APIs. When STS validates the token, it checks that the aud claim matches the client ID configured in the IAM OIDC provider. Tokens whose audience doesn’t match are rejected, adding a second control alongside signature and issuer validation.
AWS STS extracts the https://aws.amazon.com/tags claim and creates a session with aws:PrincipalTag/department set. The trust policy’s sts:TagSession permission (configured in the prerequisites) enables this. Without it, STS silently drops the session tags and subsequent access is denied.
AWS STS returns temporary credentials. These credentials are user-scoped and tamper-proof because the session tags are derived from the cryptographically signed JWT, not from agent code.
The agent queries DynamoDB using these credentials.
IAM evaluates the dynamodb:LeadingKeys condition against ${aws:PrincipalTag/department}. Only the user’s department partition is accessible. Because IAM evaluates this condition at the policy level, even if agent code is manipulated using prompt injection, cross-department access is denied. The following is an example of the permission policy on the role:
DynamoDB returns only the records from the user’s authorized department partition. Cross-department data is never returned because the IAM policy blocks the API call itself. It doesn’t rely on post-query filtering.
The agent receives the authorized results and passes them to the LLM for natural language response composition.
The composed response is returned to the frontend application and displayed to the user.
Pattern 2: User-scoped authorization to Amazon Bedrock Knowledge Bases
For documents stored in Amazon Bedrock Knowledge Bases, the agent applies metadata filtering at query time. Each document is tagged with a Department metadata attribute during ingestion. Amazon Bedrock Knowledge Bases using metadata filtering to implement the data authorization. You need to provide metadata files alongside the source data files with the same name as the source data file and .metadata.json suffix while uploading data in Amazon S3. Amazon Bedrock Knowledge Bases ingests these documents along with corresponding metadata file. The metadata attributes are stored alongside the vectors as filterable fields in the index.
Each metadata file contains a simple JSON structure with the department attribute. The following example shows the complete content of a metadata file for Sales department documents:
{"metadataAttributes": {"Department": “Sales"}}
When the agent queries Amazon Bedrock Knowledge Bases, it calls the bedrock:Retrieve action and appends the retrievalConfiguration filter scoped to the user’s department. The department value is extracted from the JWT access token that the agent received during inbound authorization.
Note: Metadata filtering is application-layer enforcement. The bedrock:Retrieve API doesn’t expose metadata filter content as an IAM condition key. For stricter isolation, consider separate knowledge bases per department with IAM resource-level policies.
Pattern 3: User-scoped access to external services using on-behalf-of token exchange
We use Salesforce as an example of an external service integration. The same on-behalf-of (OBO) token exchange pattern applies to external service that supports RFC 8693 or a compatible token exchange mechanism. External services like Salesforce don’t support IAM-based access control, so you need a different mechanism to propagate user identity. The AgentCore Identity OBO token exchange (RFC 8693) provides this by exchanging the user’s authenticated identity for a user-scoped token that the external service will recognize and enforce natively.
AgentCore Identity supports three OAuth patterns for external service access. With client credentials—Two-Legged OAuth (2LO) or machine-to-machine (M2M)—the agent authenticates as a service account and receives a token with broad access. The agent is then responsible for filtering data in queries, which makes this pattern suitable when accessing organization-wide data that isn’t scoped to an individual user. A variation of this pattern embeds user context as custom claims within the agent’s M2M token itself, see Empower AI agents with user context using Amazon Cognito. With Authorization Code (3LO), the user explicitly consents through a browser redirect and the external service enforces per-user access. This works when per-service consent is required, but it demands user interaction during the flow, making it impractical for background agent operations. Learn more about this in Secure AI agents with Amazon Bedrock AgentCore Identity on Amazon ECS. With OBO token exchange, the user’s already-authenticated identity is exchanged for a service-scoped token without any additional user interaction, and the external service enforces access.
For this use case, OBO is the most appropriate pattern. The user has already authenticated at the entry point (through the IdP), and the agent needs to act on their behalf across multiple services without prompting for additional consent. OBO propagates user identity end-to-end without the agent holding credentials, scales automatically with no per-user token storage, and allows downstream services to enforce their own authorization (sharing rules, role-based access control (RBAC)). Because no browser redirect is needed, OBO works seamlessly for background tool calls where the user isn’t present in a browser session. Figure 4 demonstrates the complete flow when using OBO token exchange.
The user authenticates with Amazon Cognito using USER_PASSWORD_AUTH.
A pre token generation Lambda function injects the custom department claim into the token (covered in the preceding Initial user authentication with IdP section).
Amazon Cognito returns the tokens to the frontend. The access token is issued with the department claim.
The user asks the agent a question (for example, “Show me Sales opportunities”).
The frontend calls AgentCore Runtime with a single agent Amazon Resource Name (ARN), passing the Amazon Cognito access token: POST /invocations, Authorization: Bearer {access_token}.
AgentCore Runtime validates the inbound JWT (signature, expiration, issuer, and custom claims including the department claim). After successful validation, AgentCore Runtime extracts the user identity from the JWT and calls the GetWorkloadAccessTokenForJWT API to exchange it for a workload access token. The agent code receives the workload access token through the invocation payload header. Workload access tokens are exclusively for accessing Amazon Bedrock AgentCore services and can’t be used directly for external services.
The agent calls AgentCore Identity (GetResourceOauth2Token) with the workload access token, requesting a Salesforce token through the configured OBO (on-behalf-of) credential provider. AgentCore Identity validates the caller identity and agent identity, then accesses the stored client credentials from Secrets Manager. If a previously stored OAuth access token has expired, AgentCore Identity automatically obtains a new one using the client credentials, reducing the need for manual token lifecycle management in agent code. The agent code uses the @requires_access_token decorator to invoke this flow:
On the AWS side, this requires an AgentCore Identity OAuth Client configured with Grant type: Token Exchange, Actor token: None, pointing to the Salesforce token endpoint. The Salesforce Connected App consumer secret is stored in Secrets Manager (the agent doesn’t access it directly).
AgentCore Identity performs RFC 8693 token exchange with the Salesforce token endpoint, sending the user identity as the subject_token. AgentCore Identity performs this secure token exchange for user-delegated access based on the configured OAuth 2.0 credential provider. The agent can’t request tokens for arbitrary users because the workload access token cryptographically binds the request to the authenticated user.
Salesforce validates the token against the registered Amazon Cognito auth provider configured in Salesforce Setup.
Salesforce resolves the user using FederationIdentifier. On the Salesforce side, this requires:
Amazon Cognito registered as an OpenID Connect auth provider
A token exchange handler (Apex class extending Auth.Oauth2TokenExchangeHandler) that resolves users by FederationIdentifier
Token exchange flow enabled on the connect app or external client app
Each user’s FederationIdentifier set to their Amazon Cognito subject’s (sub) unique user identifier (UUID).
Sharing rules configured to enforce department-scoped record access
The federation ID (sub) is immutable and can’t be spoofed by the agent, because it originates from the cryptographically signed identity token.
Salesforce returns a user-scoped access token to AgentCore Identity, which passes it back to the agent.
Agent calls the Salesforce REST API using the user-scoped token. No department filtering is needed in the Salesforce Object Query Language (SOQL) query because Salesforce enforces access through sharing rules:
@tool
def query_salesforce_opportunities(query_text: str) -> str:
    access_token = _get_salesforce_token_sync()

    # No department filter needed. Salesforce sharing rules enforce access.
    soql = "SELECT Id, Name, Amount, StageName, CloseDate FROM Opportunity ORDER BY CloseDate DESC LIMIT 10"

    response = requests.get(
        f"{SALESFORCE_URL}/services/data/v59.0/query?q={urllib.parse.quote(soql)}",
        headers={"Authorization": f"Bearer {access_token}"},
        timeout=30,
    )
    return json.dumps(response.json().get("records", []))
Salesforce applies sharing rules and returns only records the user is authorized to access. The agent doesn’t hold Salesforce credentials (refresh tokens, client secrets), these remain with AgentCore Identity.
The agent’s LLM composes a response from the returned records.
The frontend displays the results to the user.
Conclusion
In this post, you learned how to enforce consistent, end-to-end authorization in agentic AI applications by propagating user context from Amazon Cognito through Amazon Bedrock AgentCore to downstream resources. We showed you three patterns:
Per-request user-scoped credentials using AssumeRoleWithWebIdentity with session tags, evaluated by IAM attribute-based access control (ABAC) policies to access Amazon DynamoDB
Department-scoped metadata filtering at the application layer to access Amazon Bedrock Knowledge Bases.
On-behalf-of token exchange (RFC 8693) using AgentCore Identity, with Salesforce-native sharing rules governing access to external CRM data.
The key takeaway is that the agent coordinates work but doesn’t decide who can access what. Access decisions are made by infrastructure-level controls and the downstream service’s authorization model. This layered approach means that even if the agent behaves unexpectedly, unauthorized data access is still blocked.
You can use this as a reference implementation and adapt it to your requirements by choosing authorization attributes relevant to your organization (such as department, role, business unit, or region), integrating additional data sources, or extending the token exchange patterns to other external services.
AI agents built on Amazon Bedrock AgentCore let clinical trial teams make fast, accurate enrollment decisions while keeping clinicians in control through human-in-the-loop oversight. According to the Tufts Center for the Study of Drug Development, 80 percent of clinical trials miss their enrollment timelines, and each day of delay costs an estimated $500,000.
Today, eligibility decisions rely on manual chart review across fragmented sources — EHR notes, lab results, imaging reports, and medication histories. Study teams spend hours reconstructing each candidate’s history and mapping it to protocol criteria. As protocols grow more complex, this doesn’t scale: screen failure rates stay high and enrollment targets slip.
We show how to architect a Clinical Trial Eligibility and Safety Agent on AWS that assembles patient evidence, evaluates it against protocol criteria, and presents screening recommendations with citations, while clinicians retain final authority and full audit trails. It combines AWS HealthLake for FHIR-native data access, Amazon Bedrock AgentCore for multi-step reasoning, and Amazon Bedrock AgentCore Evaluations for scoring each decision via LLM-as-a-judge and human-in-the-loop. This post is for solution architects, engineering teams, and technology leaders applying AI to clinical trial operations on AWS.
AI agents for clinical trial screening
AI agents with Human-in-the-Loop (HIL) are well-suited for clinical trial eligibility and safety decisions because they address information fragmentation while preserving human clinical judgment. The core problem isn’t a lack of data, but that eligibility and safety signals are scattered across EHR notes, lab portals, imaging reports, and medication histories, forcing study teams to reconstruct each participant’s clinical picture. A knowledge graph addresses this by storing clinical data as entities and the relationships between them, representing each patient, molecule, endpoint, and market as a node with relationships stored as edges. To answer an eligibility or safety question, the agent traverses these edges, going from a diagnosis to its associated labs or a medication to its known interactions, rather than re-querying and joining disconnected sources each time. This structure supports the agent’s preparatory work:
Organizing evidence from fragmented sources into a knowledge graph, linking patients, molecules, endpoints, and markets as interconnected nodes.
Mapping patient information against protocol criteria.
Surfacing relevant passages with citations for clinician review.
Highlighting uncertainties that require human judgment.
Critically, the clinician remains the decision-maker. The agent organizes the supporting information. These systems augment rather than replace clinical reasoning — proposing preliminary assessments, flagging edge cases, providing confidence scores, and learning from feedback.
As protocols grow more complex with precision oncology and biomarker-driven eligibility, agents manage multi-step logic and maintain consistency across sites, while deferring final judgment to clinical staff.
Architecture overview
This proposed architecture illustrates how core AWS services can be combined to create an end-to-end clinical trial screening pipeline. AWS HealthLake serves as the FHIR-native clinical data foundation, ingesting and normalizing patient records from disparate EHR systems, lab portals, and imaging archives into a unified, queryable data store. Amazon Bedrock AgentCore orchestrates the multi-step workflow assembling patient profiles, matching them against trial protocols, detecting safety signals, and generating evidence-backed screening recommendations. An Amazon Bedrock Knowledge Bases stores trial protocols, inclusion/exclusion criteria, and safety guidelines. The entire pipeline feeds into a clinician review dashboard where investigators examine agent reasoning, verify citations, and render final decisions. Actions are captured in an immutable audit trail for regulatory compliance.
Architecture diagram showing the clinical trial screening pipeline with AWS HealthLake, Amazon Bedrock AgentCore, and Amazon CloudWatch
Architecture workflow
The screening pipeline operates in the following steps. Each step maps to a distinct phase of the eligibility and safety assessment, from data ingestion through clinician review and continuous monitoring.
Step 1: Clinical data ingestion
AWS HealthLake ingests patient records from EHR systems, lab portals, imaging reports, and medication histories, then normalizes them into FHIR R4 resources for standardized, queryable access.
Step 2: Agent orchestration
Amazon Bedrock AgentCore orchestrates three specialized agents, each scoped to a distinct phase of the screening pipeline. They operate within the Amazon Bedrock AgentCore Runtime, which connects to tools through MCP Gateway, maintains session memory so agents reference earlier findings without re-querying, and enforces identity-based access control for least-privilege data access. A built-in code interpreter handles dynamic calculations such as eGFR or BMI derivation.
Pre-screening agent: The first gate. It resolves three threshold questions: Is the patient’s informed consent valid and current? Does their high-level profile (age, diagnosis category, geography) align with basic enrollment parameters? Have they completed any required washout period? Patients who clear all three advance. Those who don’t receive a documented rejection citing the failing criterion.
Detailed screening agent: The core clinical reasoning engine. It walks through all inclusion and exclusion criteria, retrieving the relevant FHIR resources — Observation for labs, Condition for diagnoses, MedicationStatement for medications — and evaluating each against the protocol threshold. It also reviews organ function, adverse drug reactions, and contraindicated conditions, cross-references medications against the investigational product for interactions, and assesses the overall comorbidity profile for risk combinations no single criterion would catch. The output is a structured determination (Eligible, Ineligible, or Requires Review) with a per-criterion evidence matrix, confidence scores, and a reasoning summary citing source records.
Site & enrollment agent: Once a patient clears screening, it handles operational logistics — matching the patient to the most appropriate site by proximity, capabilities, and investigator availability, then confirming open enrollment capacity. If the preferred site is full, it identifies alternatives and flags the study coordinator.
All three agents operate behind Amazon Bedrock Guardrails, which enforce:
PII/PHI filtering to protect patient health information.
Content safety controls to help prevent clinically inappropriate outputs.
Grounding checks to keep responses anchored in retrieved evidence rather than model parametric knowledge.
Denied topic boundaries to keep agents within their screening scope.
Step 3: LLM-as-judge evaluation
Amazon Bedrock AgentCore Evaluations scores every screening decision using a combination of built-in and custom evaluators across three dimensions:
Clinical accuracy: Correctness of the eligibility determination against patient data, faithfulness to source evidence (not hallucinated justifications), logical coherence across reasoning steps, and context relevance confirming the right protocol and patient records were retrieved.
Operational effectiveness: Response completeness and clarity for coordinators reviewing dozens of patients daily, appropriate use of FHIR queries and knowledge base tools, and end-to-end goal success (did the agent complete the full screening workflow?).
Safety compliance: Custom evaluators verify that safety-critical criteria (lab thresholds, restricted medications, contraindicated conditions) were never skipped, that uncertainties are explicitly acknowledged rather than resolved with false confidence, and that all safety flags route to the appropriate review tier.
Decisions that pass evaluation with high confidence proceed to the clinician dashboard. The system flags those that fall below quality thresholds and routes them to human review with the specific evaluation concern highlighted.
Step 4: Human-in-the-loop review and enrollment
Flagged cases and agent recommendations flow into a tiered clinical review structure:
PI review queue: Principal Investigators review flagged decisions from the LLM Judge, examining the agent’s reasoning chain, verifying citations against source records, and rendering a final determination.
Study coordinator dashboard: Coordinators manage trial logistics, scheduling, and the day-to-day enrollment pipeline, using the agent’s structured outputs to accelerate their workflow.
Patient communication: Outreach and consent updates are coordinated through the dashboard, keeping patients informed of their screening status.
Escalation to medical director: Complex or high-risk cases that exceed the PI’s comfort level are escalated to the Medical Director for final adjudication.
Clinicians retain complete override capability at every stage. When a clinician overrides an agent recommendation, approving a patient the agent flagged or rejecting one it cleared, the system captures the corrected decision and the clinician’s reasoning. These corrections expand the ground truth dataset used by Amazon Bedrock AgentCore Evaluations and surface patterns that inform prompt and retrieval tuning, creating a continuous learning loop where human judgment directly improves agent performance over time.
Step 5: Observability and continuous monitoring
Amazon CloudWatch provides end-to-end observability across all agents, surfacing agent traces (step-by-step execution logs), latency metrics, error rates (failed tool calls, guardrail blocks), judge scores (pass/flag rates per agent), HITL metrics (override rates, review latency), and alarm-based escalation when safety thresholds are breached.
Although the current implementation focuses on screening and enrollment, the same agent orchestration framework, evaluation pipeline, and compliance infrastructure support future post-enrollment monitoring agents such as adverse event detection from lab results and clinical notes, protocol deviation tracking, retention risk prediction, and re-screening triggers when clinical changes affect ongoing eligibility. Each inherits the existing scoring, logging, and auditability without requiring a separate governance framework.
Evaluating agent performance in clinical trial screening with human oversight
The screening pipeline’s credibility rests on two layers: an automated evaluation layer that scores every decision, and a human-in-the-loop (HITL) layer that gives clinicians final authority. LLM-as-Judge (Step 3) decides which cases clinicians see and how they’re prioritized. The HITL workflow (Step 4) decides how clinicians act. Together they form a continuous loop where human judgment both safeguards and improves agent performance. Using Amazon Bedrock AgentCore Evaluations, you build a framework spanning three dimensions: clinical accuracy, operational effectiveness, and safety compliance with built-in and custom evaluators that run continuously.
Clinical accuracy and reasoning
Built-in evaluators check whether the agent gets the determination right and whether its reasoning holds up: Correctness (accurate against the patient’s labs, diagnoses, and medications), Faithfulness (reasoning stays grounded in patient data and protocol, not plausible-sounding invention), Coherence (no logical contradictions across steps), Context relevance (the right protocol and records were retrieved), and Goal success rate (the full workflow ran end to end). Custom LLM-as-Judge evaluators add clinical specifics: Eligibility accuracy (each inclusion/exclusion criterion evaluated correctly) and Criteria coverage (no criteria skipped, especially safety-critical lab thresholds and restricted medications).
Operational effectiveness
Accuracy alone is insufficient, output must fit workflows where coordinators review dozens of patients daily. Helpfulness, conciseness, and relevance confirm a clear, scannable, on-topic determination. Instruction following verifies the expected structured format (patient summary, criteria checklist, determination, justification, safety flags, next steps). Tool selection and parameter accuracy check the agent invoked the right tools with correct inputs.
Safety and responsible behavior
Safety carries the strictest thresholds. Harmfulness detection flags clinically dangerous content; Stereotyping detection makes sure decisions aren’t influenced by demographics beyond protocol requirements. Both trigger immediate review. Custom evaluators target the highest-risk failures: Safety flag detection confirms every significant concern surfaced (contraindicated medications, out-of-range labs, disqualifying conditions, drug interactions), with a single miss treated as critical; Uncertainty acknowledgment makes sure the agent recommends human review on missing or ambiguous data rather than making an overconfident call.
The human-in-the-loop safeguard
When a wrong eligibility call can affect patient safety, human judgment is the final safeguard. A score below threshold routes the case to the HITL workflow.
The three agents together produce an eligibility determination with a confidence score. At trial onset, the clinician sets a confidence threshold. Cases below it or flagged by evaluation reach the clinician dashboard with the specific concern highlighted. Clinicians review the full reasoning and approve, reject, or request more information from the same interface. Their corrections are stored alongside machine-approved records, feeding back into future determinations and continuously improving accuracy.
Review and approval workflow
Review is tiered by complexity: automated pre-screening filters clearly ineligible candidates. Low-complexity cases get expedited review, medium-complexity follow standard protocols, and high-complexity edge cases escalate to senior clinicians. Cases unreviewed beyond set timeframes escalate automatically. Final enrollment decisions, low-confidence cases, experimental therapies, and complex histories require human approval. Routine high-confidence checks proceed automatically.
Audit trails
The system generates immutable audit records in Amazon DynamoDB for every decision, capturing clinician ID, timestamp, patient and trial IDs, outcomes, AI recommendations, and complete workflow execution history. These records are designed to support FDA 21 CFR Part 11 requirements for electronic records and signatures, providing documentation for regulatory inspections and quality assurance. Readers should consult their compliance team and conduct their own assessment. See the AWS compliance resources for further guidance.
Security and compliance
Clinical trial data is among the most sensitive in healthcare. HIPAA, FDA 21 CFR Part 11, GxP, and GDPR require strict controls over how patient data is stored, accessed, and processed, and AI agents reasoning over that data introduce new security considerations. This solution protects data at every layer while maintaining the audit trails and privacy standards regulators require.
AWS HealthLake is HIPAA-eligible with encryption at rest and in transit, access controls, and SMART on FHIR authorization. Amazon Bedrock is HIPAA-eligible, SOC 2 attested, ISO and CSA STAR Level 2 certified, and never shares customer data with model providers. AWS PrivateLink keeps traffic off the public internet.
Amazon Bedrock AgentCore enforces agent boundaries at runtime through declarative authorization policies — readable, deterministic rules, outside application code, defining what the agent can access, invoke, and retrieve. AgentCore runs within your Amazon Virtual Private Cloud (Amazon VPC) for network isolation, and AWS CloudTrail records API calls for an immutable audit trail that can support FDA compliance requirements.
Amazon Bedrock AgentCore Evaluations scores each decision using built-in and custom evaluators with an LLM-as-a-Judge approach. Continuous sampling detects drift, and Amazon CloudWatch alerts teams when quality drops below thresholds — ongoing evidence the agent performs within validated parameters, supporting GxP with minimal manual testing.
Conclusion
In this post, we showed how combining the FHIR-native data foundation of AWS HealthLake with the multi-step reasoning capabilities of Amazon Bedrock AgentCore turns manual, fragmented clinical trial screening into an AI-assisted workflow that reduces patient matching time from days to minutes. Clinical trial enrollment remains one of drug development’s most resource-intensive bottlenecks, and delayed starts carry heavy financial consequences from lost patent-protected sell time and operational burn. Clinicians receive organized evidence, transparent reasoning, and actionable recommendations while retaining full decision authority and audit traceability.
The impact extends beyond speed: more consistent criteria interpretation across sites, earlier detection of safety contraindications, and lower screen failure rates. As oncology trial eligibility criteria grow in complexity — with fewer than 5% of cancer patients enrolling under strict requirements — this human-in-the-loop approach offers a scalable, compliance-aligned path to faster, higher-quality recruitment.
Call to action
Ready to accelerate your clinical trial operations? Take the next step:
Schedule a 30-minute architecture review with our Healthcare and Life Sciences Applied AI specialists to see how Amazon Bedrock AgentCore fits your trial portfolio.
Join other life sciences organizations already transforming enrollment workflows with AWS. Contact us today to begin your journey toward faster, safer, and more efficient clinical trials.
To dive deeper and start building your own solution, explore the following resources:
When deploying AI agents with Amazon Bedrock AgentCore, organizations benefit from built-in modern support for OAuth 2.0, AWS Identity and Access Management (IAM), and API key authentication through Amazon Bedrock AgentCore Gateway. However, some enterprise environments still use legacy authentication mechanisms such as HTTP Basic Authentication (Basic Auth) (RFC 7617). The extensible architecture of AgentCore Gateway enables support for these authentication mechanisms through a request Lambda interceptor—custom code that runs each time an agent calls a tool.
In this post, we show you how to use a request Lambda interceptor to authenticate to a downstream tool API using system credentials, retrieving a service account credential from AWS Secrets Manager and constructing a Basic Auth header. This design keeps credentials isolated from the agent, designed to mitigate exposure through model-driven behavior such as prompt injection.
Important: Basic Auth is an antiquated technology that transmits credentials as Base64-encoded text and should not be used as a long-term authentication strategy. AWS recommends modernizing to OAuth 2.0, SAML, OpenID Connect, or IAM where possible. However, some organizations with legacy workloads choose to decouple authentication modernization from their agentic AI adoption, addressing each on independent timelines. If your environment requires Basic Auth integration as an interim measure, consult your AWS Solutions Architect to evaluate the security trade-offs before proceeding. We’re providing this post as a reusable implementation, but it shouldn’t be construed as an endorsement of Basic Auth, or considered suitable as a long-term solution.
Solution overview
The solution uses a request Lambda interceptor in AgentCore Gateway to retrieve system credentials and construct a Basic Auth header for the downstream tool API. Figure 1 shows the end-to-end flow.
Figure 1: Solution workflow
The AI agent initiates a tool call over Model Context Protocol (MCP) to the gateway with an inbound JSON Web Token (JWT) issued by a configured identity provider (IdP). The MCP request body contains the tool name and any required parameters. The gateway’s inbound authentication layer validates the token against the IdP specified in the inbound authorizer configuration.
After inbound authentication succeeds, the gateway invokes the request Lambda interceptor, passing the original request payload and headers, including the validated JWT and its embedded claims.
The request Lambda interceptor re-validates the inbound JWT issued by the configured IdP as a defense-in-depth measure, then retrieves the system service account credential from Secrets Manager. The credential is a service account that authenticates the AI agent to the downstream tool.
The interceptor then constructs a compliant Basic Auth header using the system credential and adds it to the outbound request. Because Basic Auth transmits credentials as Base64-encoded text (not encrypted), you must implement relevant compensating controls (e.g., ensure that all communication with the downstream tool API is over TLS, conduct two-person review of Lambda code changes, and so on).
Note: The system credential stored in Secrets Manager corresponds to a service account in Active Directory (AD). The credential lifecycle requires a one-time manual seed: a system administrator creates the service account in AD and stores the same initial credential in Secrets Manager (necessary because Secrets Manager can’t read a password back from AD). As a security best practice, trigger an immediate rotation after seeding to retire the human-known password using the built-in capabilities of Secrets Manager. From that point forward, Secrets Manager automates the rotation process, periodically generates a new password, and updates both Secrets Manager and AD simultaneously. This eliminates manual credential management in either system. At runtime, the request Lambda interceptor retrieves the current credential from Secrets Manager and presents it to the downstream tool, which validates it against AD. For implementation details on keeping both stores synchronized, seeRotate Active Directory credentials stored in AWS Secrets Manager.
The AgentCore gateway forwards the adjusted request now carrying the custom authentication header to the downstream target tool.
The downstream target tool authenticates the request, processes it, and returns the response to the gateway.
The gateway relays the response back to the AI agent.
Step 1: Attach a request Lambda interceptor to your AgentCore Gateway
Configure the AgentCore gateway to invoke a request Lambda interceptor for authentication transformation before forwarding the request to the downstream tool.
Important: You must enable passRequestHeaders configuration. Without it, the request Lambda interceptor can’t receive the request header containing the inbound JWT, and the authentication pattern described in this post will not work.
The following example shows the gateway configuration:
The interceptor independently validates the JWT signature as a defense-in-depth measure, protecting against scenarios where the request Lambda interceptor could be invoked through a path that bypasses gateway validation. It fetches the identity provider’s JSON Web Key Set (JWKS) (cached across warm Lambda invocations to avoid repeated network calls), verifies the token’s signature, expiration, and issuer, then returns the decoded claims.
Step 3: Retrieve system credentials from Secrets Manager
The interceptor retrieves the system service account credential from Secrets Manager. This credential authenticates the AI agent to the downstream tool. The secret is encrypted with a customer-managed AWS Key Management Service (AWS KMS) key and cached in memory for the configured time-to-live (TTL) to minimize API calls while ensuring rotated credentials are picked up promptly.
The following code retrieves the credential from Secrets Manager:
  import boto3
  secrets_client = boto3.client('secretsmanager')

  def get_system_credentials():
      """Retrieve the system service account credential from Secrets Manager."""
      response = secrets_client.get_secret_value(
          SecretId=os.environ['SYSTEM_CREDS_SECRET_NAME']
      )
      return json.loads(response['SecretString'])
IAM permissions: The interceptor’s execution role requires secretsmanager:GetSecretValue scoped to the specific secret Amazon Resource Name (ARN), and kms:Decrypt scoped to the KMS key used to encrypt it. Follow the principle of least privilege by restricting the resource ARN rather than using wildcards.
Note: The agent doesn’t have access to Secrets Manager. Only the request Lambda interceptor—a deterministic function not influenced by model behavior—retrieves credentials. This isolation is designed to mitigate the risk of adversarial prompts instructing the model to access or exfiltrate authentication credentials, even if the agent is compromised.
Step 4: Construct the Basic Auth header
The request Lambda interceptor constructs the Basic Auth header using the system credential retrieved for the downstream tool.
The following code shows the core transformation logic.
  def build_system_auth_header(headers):
      """Validate JWT and construct Basic Auth header with system credential."""
      auth_header = headers.get('Authorization', '')
      if not auth_header.startswith('Bearer '):
          return _error_response(401, "No Bearer token found in request.")

      # Validate JWT (defense-in-depth)
      claims = validate_jwt(auth_header[7:])
      if not claims:
          return _error_response(401, "JWT validation failed.")

      # Retrieve system credential from Secrets Manager
      creds = get_system_credentials()

      # Construct Basic Auth header (RFC 7617)
      basic_auth_encoded = base64.b64encode(
          f"{creds['username']}:{creds['password']}".encode()

      ).decode()
      headers['Authorization'] = f"Basic {basic_auth_encoded}"
      return headers
Conclusion
A request Lambda interceptor in Amazon Bedrock AgentCore Gateway can bridge the gap between the authentication patterns supported by the gateway and the authentication requirements of legacy tool APIs that haven’t yet migrated to modern authentication standards. As demonstrated in this post, the interceptor validates the inbound JWT, retrieves system credentials from Secrets Manager, and constructs the downstream tool’s Basic Auth header without modifying tool schemas or agent implementation.
This approach is an interim integration pattern, not a target architecture. It introduces a credential that must be synchronized between Secrets Manager and the tool’s identity store (such as Active Directory), adding operational overhead for rotation, drift detection, and lifecycle management. The recommended path is to modernize the downstream tool to accept OAuth 2.0, SAML, or OpenID Connect, eliminating stored credentials entirely. Until that modernization is complete, the interceptor isolates credential handling from the agent runtime, designed to help ensure that the agent—a non-deterministic system influenced by user prompts—does not have access to authentication secrets.
If you have feedback about this post, submit comments in the Comments section below.
Last week, we brought together AWS Heroes from around the world to connect, collaborate, and celebrate the builders who go above and beyond for the AWS community.
The AWS Heroes Summit, an invite-only annual gathering, brings global experts specializing in fields like AI, serverless, and containers together for direct collaboration, technical deep-dives, and feedback sessions with internal AWS product and service teams.
Day 1 started with an inspiring fireside chat from AWS CEO Matt Garman. From an insightful AMA with James Hamilton on Day 2 to breakout sessions from various product teams that sparked new ideas, our AWS Heroes excelled at sharing knowledge, lifting each other up, and turning conversations into collaborations. To learn more, read the attendee feedback on LinkedIn.
Last week’s launches Here are some launches that got my attention:
Web Search on Amazon Bedrock: Amazon Bedrock now enables OpenAI models (GPT-5.4, GPT-5.5, and GPT-5.6 Sol/Terra/Luna) to browse and retrieve information from the internet, allowing AI applications to access up-to-date information beyond their training data. This capability opens new possibilities for building AI agents and applications that can answer questions using real-time web content while maintaining data residency within your secured AWS environment with zero data egress. To get started, visit the AI blog post and the Amazon Bedrock User Guide.
Vector search for Amazon DynamoDB: You can store and query vector embeddings alongside your existing data in DynamoDB without managing a separate vector database. DynamoDB already supports storing memory for AI agents, and with vector search you can now add semantic retrieval over that memory for agentic grounding, with predictable performance. To learn more, visit Esra’s blog post and Amazon DynamoDB Developer Guide.
Up to 3,000 Mbps for AWS Lambda function bandwidth: AWS Lambda functions now support increased network bandwidth, enabling data-intensive workloads and faster communication between Lambda functions and other AWS services. This feature enables functions outside a VPC that are configured with 2 GB of memory or more to access network bandwidth that scales proportionally, from 625 Mbps at 2 GB up to 3,000 Mbps at 10 GB.
For a full list of AWS announcements, be sure to keep an eye on the What’s New with AWS page.
Other AWS news Here are some additional projects and news items that you may find interesting:
Introducing Dogwood: Runtime Verification for AI Agents: AWS open-sourced Dogwood, a purpose-built governance language for AI agents to support Cedar policies and add temporal conditions. Powering Dogwood, Amazon Bedrock AgentCore introduced temporal policies whose decisions depend on the history of an agent’s actions within a session, not on the current request alone.
AWS supports Agent Plugins: An Open Standard for Portable Agent Extensions: AWS announced support for Agent Plugins, an open source, vendor-neutral specification that gives AI agent extensions a common packaging format so you can package an extension once and ship it to any client, including Kiro, VS Code, Cursor, or any tool that implements the spec.
Introducing Kiro Crew: Kiro Crew is a persistent, self-evolving workspace that keeps work moving, online or off, enabling collaborative multi-agent development workflows within the Kiro IDE. It’s built for engineering work that goes beyond a single chat session, and spans repos, tools, and days. You can run several efforts in parallel or hand work to subagents that report back, so nothing waits in line.
For a full list of AWS blog posts, be sure to keep an eye on the AWS Blogs page.
When you move AI agents from prototype to production, the infrastructure challenges multiply. Your agents need to persist state across multi-step workflows that run for hours or days. They need to coordinate with other agents, share context, and sometimes access GPUs for specialized tasks. Amazon Bedrock AgentCore runtime microVMs provide a fully managed environment for invocations that can run for up to 8 hours and support stateful workflows through managed session storage. Some workloads also benefit from dedicated, larger-capacity environments — for example, when agents need to run continuously for multiple days, access GPUs or the underlying OS, or run multiple collaborating agents on the same host.
Today, I’m happy to announce runtime instances, a new complementary compute option in Amazon Bedrock AgentCore Runtime that gives your agents persistent, managed infrastructure purpose-built for complex agent workloads.
What you get Runtime instances provides AWS-managed EC2 infrastructure where you deploy multiple agents in a single runtime, each with their own dependencies and artifact types. Your agents can collaborate on the same host within shared sessions that persist for up to 14 days. The service supports GPU acceleration for compute-intensive tasks, session stop/restart to save costs during idle periods, and containerized deployments for teams that want to ship independently. For knowledge that needs to survive beyond a session, runtime instances pairs naturally with Amazon Elastic Block Store (Amazon EBS) and AgentCore Memory, which gives your agents long-term recall across sessions and environments.
Before today, if you wanted to keep your agents running for days or they needed GPU access, or multi-agent coordination, you had to build and manage that infrastructure yourself. You provisioned EC2 instances, configured networking, set up session management, handled scaling, and stitched together monitoring. Runtime instances handles all of that for you while integrating with the same AgentCore APIs, identity controls, and observability you already use with AgentCore Runtime microVMs.
A few things that should make agent developers smile: your agents can call each other as tools within a shared session, iterating autonomously until the job is done. You bring any framework (CrewAI, LangGraph, LlamaIndex, Strands) and any model. Packaging is minimal, a @app.entrypoint decorator and a zip file or container image. And if your workflow spans days, hibernate Monday night and resume Wednesday morning with everything intact.
Runtime microVMs and runtime instances are complementary compute options that you can use independently or together through the same AgentCore runtime APIs. A lightweight orchestrator agent on runtime microVM can coordinate and dispatch work to specialized worker agents running on instances. The orchestrator handles API calls, task routing, and result aggregation using runtime microVM’s fast scaling, while workers on Instances perform compute-intensive tasks like code compilation, security scanning, or GUI automation that require persistent state and direct OS access.
Let me show you how it works I built two agents for this demo: a code writer agent that generates Python code from natural language descriptions, and a code reviewer agent that analyzes the generated code for bugs, security issues, and style improvements. Both agents share the same file system, so the reviewer can read whatever the writer produces without any data transfer or API calls between them.
Here is the code writer (simplified, no error handling):
writer = Agent(
    model="us.anthropic.claude-sonnet-4-5-20250929-v1:0",
    system_prompt=(
        "You are a senior Python engineer. "
        "Given a task, return ONLY a single Python code block — no prose."
    ),
)

@app.entrypoint
def handler(event, context):
    task = event.get("task") or event.get("prompt")
    session_id = getattr(context, "session_id", None) or event.get("session_id")
    session_dir = SHARED_DIR / session_id
    session_dir.mkdir(parents=True, exist_ok=True)

    code = str(writer(task))
    (session_dir / "code.py").write_text(code)

    return {"agent": "writer", "wrote": str(session_dir / "code.py"), "code": code}
Here is the code reviewer agent (simplified, no error handling):
A capacity provider defines the EC2 infrastructure your agents run on. In the AgentCore console, I select Runtime in the left navigation, then select the Capacity providers tab and Create capacity provider.
I give it a Name, select Linux (64-bit ARM) as the Operating system, and choose c7g.2xlarge as the Allowed instance types. This gives me 8 vCPUs and 16 GiB of memory, enough for both agents to run comfortably side by side.
Further down, I configure the VPC, subnets, and security groups for network access. Under Storage configuration, I keep the default gp3 volume. Under Service access, I select Create a new service role and let the console create the infrastructure role that manages EC2 instances on my behalf.
I select Create capacity provider and wait a few seconds. The status moves to Active.
Note the capacity provider configuration summary: operating system, instance type, subnets, security group, instance profile, and infrastructure role. Once created, only the description can be edited, so verify your settings before you proceed.
Step 2: Create a runtime and deploy the first agent.
Back on the Runtime page, I select Create runtime. I give it a Name, select Instances as the Compute type, and choose the Capacity provider I created in the previous step.
Under Agent source, I select S3 Source, then Upload to S3. I choose my agent zip file (ACIDemoWriter.zip), set the Language runtime to Python 3.13, and specify agent.py as the Agent entry point. This is the file that contains my @app.entrypoint decorated function. Under Permissions, I select Create default role to let the console provision the IAM role my agent needs.
I select Create runtime and wait for the status to become Ready.
I repeat the same process for my code reviewer agent. I create a second runtime, select the same capacity provider, upload my reviewer agent zip file, and wait for it to become Ready. Both agents now share the same underlying EC2 infrastructure.
The console shows me a View invocation code section with ready-to-use Python, TypeScript, and JavaScript snippets to invoke my agent programmatically. But for this demo, I use the built-in test feature. I select Test on the writer agent’s page.
Step 3: Invoke agents and observe collaboration.
The Runtime playground opens. At the top, I see three fields: Runtime agent, Endpoint, and Session ID. The console generates a session ID automatically. I take note of it because I will reuse it with the reviewer agent.
In the Input field, I type a JSON payload asking the writer agent to generate code:
{"prompt": "write a fibonacci suite"}
I select Run. After a few seconds, the Output panel shows the agent’s response. The writer agent generated a Python module with two implementations of a Fibonacci sequence (a list-based function and a generator) and wrote it to /tmp/agentcore-session/ca5ec24d-07f5-4eeb-add1-5ba416bf9eb2/code.py. Notice the session ID in the file path. That directory is the shared file system for this session.
Step 4: Invoke the reviewer agent in the same session.
Now I switch the Runtime agent dropdown to ACIDemoReviewer. The important part: I paste the same session ID (ca5ec24d-07f5-4eeb-add1-5ba416bf9eb2) in the Session ID field. This is what connects the two agents.
I type a simple prompt:
{"prompt": "review the code"}
I select Run. The reviewer agent reads the file the writer produced from the shared session directory and returns a detailed code review. It finds no critical bugs but suggests adding type hints, input validation, and simplifying the edge case handling.
The two agents never exchanged messages or called each other’s APIs. They collaborated through the shared file system that runtime instances provide within a session. You can extend this pattern to any number of agents: a test agent that runs the code, a documentation agent that generates README files, a security agent that scans for vulnerabilities, all sharing the same working directory.
Key details Here are a few things to know as you get started:
Supported OS: Linux (ARM64 and x86_64) at launch.
Session persistence: Sessions persist for up to 14 days.
Runtimes: Python 3.11-14 with native code support. Container images also supported.
GPU: Support for GPU-accelerated instance types.
Integration: Uses the same AgentCore APIs, identity, observability, and policy controls as AgentCore Runtime.
Pricing: Standard EC2 pricing plus a management fee for AgentCore orchestration.
Regions: US East (Ohio, N. Virginia), US West (Oregon), Asia Pacific (Mumbai, Singapore, Sydney, Tokyo), and Europe (Frankfurt, Ireland)
Last week I had the privilege of spending three days in São Paulo with technical builders from across Latin America, brought together for a regional tech event full of deep-dive sessions, hands-on workshops, and conversations with customers and partners. What struck me most wasn’t any single session, it was the energy of a technical community that so rarely gets to be in the same room. People traded architecture ideas over coffee, sketched out solutions on whiteboards, and left with a longer list of things to try than they arrived with. It’s a good reminder that, for all the tooling we build, the community around it is what makes the technology stick.
That community spirit connects nicely to the week’s biggest infrastructure news, which is all about bringing AWS closer to where builders actually are.
Now, let’s get into this week’s AWS news…
Headlines AWS Local Zone in Athens, Greece: AWS has opened a new Local Zone in Athens, Greece, the second Local Zone in EMEA with support for Amazon S3 and Amazon EBS Local Snapshots, so you can store and process data within Greece to help meet local data residency requirements. The Athens Local Zone supports Amazon EC2 (C7i, M7i, and R7i instances), Amazon S3 with the One Zone-Infrequent Access storage class, Amazon EBS, and Amazon ECS.
AWS Local Zones place AWS infrastructure much closer to large population and industry hubs, enabling applications that require single-digit millisecond latency, such as real-time gaming, media production, and financial services, to run where end users actually are. For builders in Greece, you can now run latency-sensitive workloads locally while connecting seamlessly to the nearest AWS Region for services that don’t require low latency, giving you the flexibility to architect hybrid, latency-optimized applications without managing your own data center infrastructure. To learn more, visit AWS Global Infrastructure and Sustainability Blog post.
Last week’s launches Here are some launches and updates from this past week that caught my attention:
Claude Opus 5 on AWS: You can use Anthropic’s Claude Opus 5, the most advanced Opus model yet, matching Claude Fable 5’s top-tier intelligence in many domains at Opus-tier pricing. Amazon Bedrock offers Claude Opus 5 with zero data retention (ZDR) enabled by default, giving you Opus’ top-tier intelligence while meeting your data governance requirements unlike Claude Fable 5. You have two ways to access Claude Opus 5: Amazon Bedrock and Claude Platform on AWS. To learn more, visit the deep dive blog post.
AWS Lambda durable execution SDK for .NET is now generally available: You can now build resilient, long-running workflows in C# using Lambda durable functions, without implementing custom progress tracking or integrating an external orchestration service. The SDK is a natural fit for multi-step applications like payment processing pipelines, AI agent orchestration, and human-in-the-loop approvals, it checkpoints progress automatically and can pause execution for up to a year. If you’re a .NET developer building serverless workflows, this removes a lot of the plumbing you used to write by hand.
Amazon Bedrock AgentCore now delivers unified observability with traces and logs in a single log group: Amazon Bedrock AgentCore now delivers agent traces and prompts to the same Amazon CloudWatch log group as your agent’s logs. Previously, telemetry was split across destinations, trace spans went to a shared log group while prompts, inputs, and outputs went to a separate one, so debugging a single agent invocation meant searching in multiple places. You can now debug an invocation in one place, and apply fine-grained access control and customer-managed key (CMK) encryption at the individual agent level.
Amazon Connect delivers more natural agentic voice experiences: Amazon Connect now supports more natural, human-sounding agentic voice experiences across 50+ languages, including Portuguese, Spanish, French, Italian, Japanese, Korean, and Thai, with over 100 new voice options and conversational improvements that make AI interactions sound more fluid. Connect’s agentic self-service lets AI agents understand, reason, and take action across voice and digital channels, adapting to a customer’s tone and sentiment. You can now build contact center experiences that feel natural to callers in far more of the languages your customers actually speak.
Amazon SageMaker Unified Studio now supports Amazon OpenSearch: You can now query and analyze your search and log analytics data from Amazon OpenSearch directly alongside other data assets in Amazon SageMaker Unified Studio. With this connection, you can combine operational search data in OpenSearch with data from sources like Amazon Redshift, Amazon S3, and relational databases, all within a single, governed environment. It’s especially useful when you need to correlate analytical and operational workloads, such as joining application logs with transactional data to uncover insights.
Amazon CloudWatch announces coding agent insights: Amazon CloudWatch now gives engineering leaders visibility into how AI coding tools are driving value across their organization. Coding agent insights integrates with the Claude apps gateway for AWS to collect telemetry from Claude Code without additional instrumentation, and also supports agents like Codex and GitHub Copilot. As teams scale AI coding adoption, you can now measure the return on that investment with metrics built on OpenTelemetry, no custom instrumentation required.
For a full list of AWS announcements, be sure to keep an eye on the What’s New with AWS page.
Other AWS news Here are some additional posts and resources that you might find interesting:
Evaluating AI Agents: A production blueprint with Strands and AgentCore: A practical guide to evaluating AI agents before and after they reach production, using Strands Agents and Amazon Bedrock AgentCore. If you’re moving agents from prototype to production, this post is a great companion to the AgentCore observability update above, it walks through how to measure agent quality systematically rather than by gut feel.
Upcoming AWS events Check your calendar and sign up for upcoming AWS events:
AWS Summits: AWS Summits are free events that bring the cloud and AI community together to connect, learn, and explore the latest technologies. Browse the full calendar to find a Summit near you in the second half of 2026.
AWS Community Days: Community-led conferences where content is planned, sourced, and delivered by community leaders. If you’re in Latin America, don’t miss AWS Community Day Belo Horizonte on August 22, registration is open at awscommunityday.com.br.
Join the AWS Builder Center to connect with builders, share solutions, and access content that supports your development. Browse here for upcoming AWS-led in-person and virtual events and developer-focused events.
That’s all for this week. Check back next Monday for another Weekly Roundup!
This post is part of our Weekly Roundup series. Check back each week for a quick roundup of interesting news and announcements from AWS!
Enterprise data architectures have become fundamentally distributed. Over the past decade, organizations have made deliberate investments across multiple platforms such as relational databases for transactional workloads, cloud data warehouses for analytics, object stores for unstructured data, and SaaS applications for domain-specific functions. Each was chosen to solve a specific problem, serve a specific team, or meet a specific performance requirement. The result is not accidental sprawl. It is a deeply heterogeneous data landscape shaped by intentional, workload-driven decisions. The challenge now is not consolidation, but interoperability: enabling these systems to function as a unified foundation for the next generation of AI-driven applications.
Agentic AI systems that autonomously reason, plan, and take action on behalf of users are moving rapidly from experimentation to enterprise production. These systems do not just retrieve information. They synthesize it, act on it, and learn from it. And unlike traditional analytics tools that can work with a well-scoped dataset, AI agents require something more demanding: unified, governed, and real-time access to all relevant enterprise data, regardless of where it lives.
This is the gap that matters most right now. Enterprises that have invested in building strong data capabilities across multiple providers are well-positioned, but only if those platforms can be accessed together, consistently, and with the governance controls that enterprise AI requires. Without a unified data foundation, AI agents operate with incomplete context, governance becomes inconsistent, and the promise of autonomous AI remains out of reach.
Solution approach
The following high-level architecture explains how you can onboard metadata catalogs and MCP servers to your context layer, which becomes the primary input for your AI agents.
Assuming your data products have a well-defined metadata catalog, you can take a unified-catalog-first approach, then build the context layer on top of it to let your AI agents discover all the context from one place. This helps bring in centralized governance and audit control, because every request gets routed through the centralized metadata catalog and context layer to simplify implementation of unified governance. In addition, this brings simplicity to enable business semantics, define attribute priorities, and define authoritative sources for the consumer use cases.
If any of the data sources does not have a well-defined metadata catalog, you can define Model Context Protocol (MCP) servers on them, and then directly onboard them to the context layer. For example, if you have semi-structured or unstructured datasets for which you do not have a well-defined metadata catalog, or you want to onboard third-party data sources through REST APIs, then you can add their respective MCP server to the context layer directly. The following architecture explains the extended flow for it.
In this series of posts, we demonstrate how you can unify the metadata catalog access across multiple providers, how you can enable AI agents to query the unified catalog, and how the context layer can be integrated to unify metadata from catalogs and MCP servers. We have divided the series into the following parts.
Part 1: Architecture approach with tradeoffs to unify a multi-cloud lakehouse architecture that can power Agentic AI (this post).
Part 2: Implementing an example solution to unify catalogs from multiple providers and deploy AI agents to query the unified data access layer.
Part 3: Integrate a context layer on top of the unified catalog for AI agents.
Part 4: Onboard additional data sources to the context layer through MCP servers and demonstrate the full solution.
This post focuses on explaining the architecture approach to build the open lakehouse architecture on AWS, unifying the metadata catalog across providers for the AI agents to access. In addition, it highlights the architecture trade-offs and best practices.
Use case
Every AI initiative launched on a fragmented data foundation is an initiative that will need to be rebuilt. Organizations that establish unified data access today are the ones that will scale Agentic AI with confidence tomorrow. Consider a large enterprise managing petabytes of data across a diverse set of environments:
On-premises: Network device telemetry, customer records, and operational databases.
Multiple cloud platforms: Marketing analytics, HR systems, and enterprise applications distributed across cloud providers.
Data platforms: Data science workloads, feature engineering pipelines, and finance and supply chain analytics running on specialized platforms.
SaaS applications: Salesforce, SAP, Zendesk, ITSM, and other business tools that each hold a critical piece of the enterprise data picture.
The business objective is to build a unified analytics and AI platform that can:
Query and analyze data across all environments without requiring full data migration.
Enforce consistent data governance and access control regardless of data location.
Power AI agents that can autonomously discover, query, and act on enterprise data.
Reduce total cost of ownership by eliminating redundant pipelines and storage.
This architecture directly addresses these needs by combining flexible data integration patterns, an open-table-format-based lakehouse architecture (with an example of Apache Iceberg), AI agent deployment to access unified metadata, and centralized governance.
Reference architecture
Before going deeper into a specific architecture, let’s revisit at a high level how the AWS open lakehouse architecture enables data ingestion and query or catalog federation to power analytics, machine learning development, and generative AI application development.
The following architecture diagram represents an end-to-end flow that includes:
Data ingestion to the data lake or data warehouse through Zero-ETL and batch or stream processing using AWS native services, or accessing data from Google Cloud Platform using AWS Interconnect – multicloud.
A centralized metadata catalog layer that includes data on AWS and metadata representation of non-AWS data sources using query or catalog federation.
A context layer that you can integrate to create a knowledge graph with ontology and business semantics that can enrich context for AI agents.
The consumption layer, which can include analytics, machine learning model development with Amazon SageMaker AI, and generative AI application development with Amazon Bedrock AgentCore, Amazon Quick, or other AWS and non-AWS AI applications.
Let’s look at an expanded version of this architecture that details the data ingestion and data consumption patterns to build a unified data access layer on AWS that spans multiple cloud and ISV providers.
Expanded technical architecture walkthrough
The following architecture demonstrates the comprehensive AWS approach for metadata catalog consolidation through flexible integration patterns, and it also highlights patterns for building a lakehouse on AWS. Built on the open standards of Apache Iceberg for storage and governance through AWS Lake Formation, it creates a unified data foundation that connects existing investments without requiring wholesale migration, and it makes enterprise data AI-ready from day one. This architecture delivers value at every layer: business teams query across platforms without data movement, IT teams manage governance through a single federated layer with the flexibility to federate or ingest per use case, and compliance teams enforce policies once across all sources with full lineage and audit coverage.
The following are the key components of the architecture.
Data access methods
This section provides options to access data that is not available in AWS Glue Data Catalog and not available on AWS.
AWS Glue Data Catalog implements the Iceberg REST Catalog API specification, which enables seamless federation with Databricks, Snowflake, or other Iceberg-compatible catalogs set up with Amazon Simple Storage Service (Amazon S3) as the storage layer.
With the growing adoption of Apache Iceberg, catalog federation will become a common standard in the future and simplify metadata unification.
2. Query federation (Reference point 1.1)
Direct cross-cloud querying over the public internet to Google BigQuery, Azure SQL, Salesforce, and other platforms.
Real-time access to external data sources without replication, and seamless access with AWS analytics services.
Provides flexibility, because the catalog federation capability of the Iceberg REST catalog is limited to Iceberg tables only.
2.1. Secured private connectivity to Google Cloud Platform using AWS Interconnect for multi-cloud (Reference points 3.1, 3.2)
The default query federation approach makes the connection and transfers data over the public internet, which has its own latency implications depending on the target platform and the data volume transferred over the internet. During re:Invent 2025, AWS announced the public preview of AWS Interconnect – multicloud, which recently became generally available.
AWS Interconnect – multicloud is a managed service that provides private, high-speed, and secure network connections between Amazon Web Services (AWS) and other cloud providers, starting with Google Cloud Platform (GCP), with Microsoft Azure and Oracle Cloud Infrastructure (OCI) coming later in 2026. You can enable the integration with three steps: 1) specify the target cloud service provider, 2) select the destination Region on the other side, and 3) pick the required bandwidth.
The following architecture represents AWS and GCP integration with AWS Interconnect – multicloud.
On the AWS side, you need an AWS Direct Connect gateway (a global construct that acts as a route reflector), which you can attach to your Amazon Virtual Private Cloud (Amazon VPC) through a virtual private gateway or AWS Transit Gateway, or AWS Cloud WAN. On the GCP side, you need a Google Cloud Router that you attach to your customer VPC. Interconnect – multicloud offers pre-cabled capacity pools at shared Interconnect points of presence (PoPs) in selected Regions, where both AWS and GCP routers are co-located and pre-wired.
Because Interconnect – multicloud primarily routes traffic within the VPC through a private network, to benefit from it you need to keep your query engine or jobs within a customer VPC.
2.2. High network bandwidth with on-premises systems (Reference point 4)
AWS Direct Connect for high-bandwidth, low-latency on-premises connectivity.
Data ingestion methods
This section focuses on ways you can use to onboard datasets (complete or subset) to a lakehouse on AWS.
1. Zero-ETL: Data movement to AWS with Zero-ETL ingestion (Reference points 5.1, 5.2)
AWS Zero-ETL capabilities for seamless data loading from AWS and non-AWS sources.
2. Extract, transform, load (ETL): Extract data from JDBC or SaaS sources and transform through a batch or stream pipeline (Reference points 3.1, 3.2)
Option to design batch and stream ingestion pipelines using AWS managed services with open source data processing engines such as Apache Spark and Apache Flink.
Hundreds of connectors available as part of AWS Glue to extract data from JDBC and SaaS sources, and the flexibility to design custom connectors that can run on serverless Glue clusters.
The following architecture expands the flow 1.1 to 1.2 ingestion method that integrates AWS services to onboard data to the Amazon S3 raw layer and then takes it through an ETL pipeline for data cleansing and transformations. It also includes steps to onboard unstructured data to Amazon S3 using Amazon Bedrock Data Automation, and taking the lakehouse data for machine learning development with Amazon SageMaker AI.
You can also use AWS Interconnect – multicloud to run Spark jobs (Spark with Amazon EMR on EKS or open source Spark on any compute within a customer VPC) to ingest and transform data from Google Cloud with private connectivity.
3. Accessing data from Google Cloud over a private network
Refer to the preceding data access methods (3.1 and 3.2).
4. Onboarding data from AWS Outposts (S3 on Outposts) (Reference points 9.1 to 9.5)
Option to onboard S3 on AWS Outposts data to regional Amazon S3 through AWS DataSync (reference 9.1 to 9.3), which might be a better fit to sync files as-is through a scheduled batch or an event-driven approach.
Flexibility to transform the S3 on Outposts data using an Amazon EMR clusters on Outposts job, and then directly write the transformed output to a regional Amazon S3 bucket in the formats you want (including open table formats such as Apache Hudi, Apache Iceberg, and Delta Lake).
Lakehouse foundation with Apache Iceberg
By standardizing on Apache Iceberg, you’re not choosing AWS over your other platforms. You’re choosing interoperability and future flexibility. Your data becomes truly portable across any Iceberg-compatible engine.
Open table format: Industry-standard format supported across AWS, Databricks, Snowflake, and other platforms, which eliminates vendor lock-in.
ACID transactions: Reliability with full transactional consistency.
Time travel and schema evolution: Built-in versioning and flexible schema management.
Performance optimization: Advanced features such as hidden partitioning, partition evolution, and metadata management.
Note that lakehouse storage is not limited to the Apache Iceberg format, and you have the flexibility to include other open table formats (for example, Apache Hudi and Delta Lake) or file formats (for example, Apache Parquet and Apache Avro).
Unified governance and access control
AWS governance capabilities transform the lakehouse from a storage layer into a fully governed data platform. This delivers security, compliance, and data quality out of the box, applied consistently across all data sources including federated catalogs. A unified catalog consolidates metadata from AWS and non-AWS sources with generative AI-powered business glossary generation, while automated ML-powered classification identifies sensitive data (for example, PII, PHI, and financial data) across structured and unstructured datasets. AWS Identity and Access Management (AWS IAM) and AWS Lake Formation enforce fine-grained access control at the row, column, cell, and tag level, applied consistently across Amazon Athena, Amazon Redshift Spectrum, Amazon EMR, and federated sources. End-to-end data lineage tracking provides visual data flow graphs, impact analysis, and compliance audit trails. When AI agents explore metadata from the unified catalog and submit a query to Amazon Athena for execution, the Lake Formation fine-grained access control filters data based on the user interacting with the AI agent.
For the foundation model integrated into your AI agents, you can use Amazon Bedrock Guardrails, which implements customized safeguards to block harmful content and minimize hallucinations. Amazon Bedrock AgentCore provides fine-grained policy control over agent actions with real-time enforcement and managed authentication for agents accessing AWS and third-party services.
A comprehensive audit and compliance stack spans Amazon CloudWatch, AWS CloudTrail, AWS IAM, AWS Key Management Service (AWS KMS), AWS Audit Manager, and AWS PrivateLink. This stack makes sure every agent invocation is traceable, every key is managed, and every configuration is automatically mapped to frameworks including ISO, SOC, GDPR, and HIPAA.
When an end user interacts with the AI chat assistant, the layers of security and governance should go through the following.
Layer 1: Who can access?
Enable Active Directory and single sign-on integration for user authentication, and a combination of AWS IAM roles for AWS API-level authorization.
Layer 2: What can they see?
Integrate an agent profile to define what datasets each agent can access, because not all agents should have access to all datasets.
Enable fine-grained access control on the metadata layer using AWS Lake Formation that can filter rows and columns.
Enable data masking as applicable while the query responses are served through the query engine.
Layer 3: What can the agent do?
Control agent actions by restricting them to read-only, and apply restrictions to INSERT, UPDATE, and DELETE if the agents are supposed to query only.
Apply a limit on the number of rows that can be returned from the query, and apply a query scan limit to reduce cost.
Layer 4: What does the agent reveal?
Enable output filtering to make sure no PII is included.
Apply Amazon Bedrock Guardrails on large language model (LLM) responses to make sure the model does not produce anything inappropriate.
In addition, enable audit logging of all queries to make sure future audit and compliance needs can be met.
AWS offers a complete analytics ecosystem that includes the following.
Amazon Athena: Serverless SQL queries with Iceberg v2 support, including provisioned capacity for consistent performance and workgroups for resource and cost management.
Amazon Redshift Spectrum: Federated queries across the data warehouse and Iceberg data lake.
Amazon Quick Sight: Enterprise visualization with governed access to all data.
AWS Glue and Amazon EMR: Distributed data processing capability for enterprise transformations.
AI-ready architecture (Reference points 8.1 to 8.4)
A consolidated lakehouse architecture helps you make data ready for AI agents that can access the data through readily available MCP servers or through the AWS SDK for Python (Boto3) for Amazon Athena or Amazon Redshift Spectrum. AI agents can integrate the AWS MCP Server to interact with AWS analytics services such as AWS Glue, Amazon Athena, and Amazon S3 Tables, a capability of Amazon S3, to query both data and metadata.
AI agents need context to understand how the catalog tables and their attributes are linked to each other, how users have queried them in the past, or what priorities are defined to understand which one is an authoritative source for a particular natural language question. To enable the AI agent with additional context, we can integrate the AWS Context service that was pre-announced recently at the AWS New York Summit 2026.
Governance integration: AI agents automatically inherit Lake Formation permissions, because the agent can submit the SQL query to be run through Amazon Athena or Amazon Redshift Spectrum. This makes sure they only access data that users are authorized to see. Amazon SageMaker Unified Studio data lineage tracks AI agent queries for full auditability.
The following diagram represents how the AI agent request flow looks.
This architecture delivers value across every layer of the organization. Business teams gain faster time-to-insight by querying data across all platforms without waiting for data movement, while eliminating duplicate storage and reducing transfer costs through federation. The Apache Iceberg open table format ensures data portability and freedom from vendor lock-in. For IT and data teams, a single governance layer across all sources, including federated catalogs, reduces operational complexity, while the flexibility to choose between federation and ingestion for each use case, combined with the elastic AWS infrastructure and the petabyte-scale metadata architecture of Iceberg, delivers both agility and scalability. Data governance and compliance teams benefit from a single point of policy enforcement across all data regardless of location, complete lineage and access logs for audit and compliance reporting, automated sensitive data classification, and policies that are defined once and enforced everywhere, including across federated sources.
Architecture tradeoffs and best practices
The following are a few key trade-offs you need to consider while designing the solution.
Data ingestion and access methods
Use catalog federation (Iceberg REST) when:
The source platform supports the Iceberg REST API (Databricks, Snowflake Polaris).
Data is already in Iceberg format with Amazon S3 backed storage.
You want bidirectional discovery (AWS tables visible in Databricks or Snowflake too).
Use query federation (Amazon SageMaker Lakehouse architecture or AWS Glue connectors) when:
The source is BigQuery, SQL Server, or another non-Iceberg platform.
Data must stay in the source cloud (sovereignty, contractual, or latency reasons).
Real-time access is required without replication lag.
Use ingestion (Zero-ETL, AWS Glue, or Amazon EMR) when:
Data is accessed frequently with a low-latency requirement by AI agents or high-concurrency analytics.
The business decides to build a data lake and warehouse on AWS.
You need full governance, time travel, and performance optimization.
Use AWS Interconnect – multicloud when:
You need real-time or near-real-time query federation to GCP data sources (BigQuery, AlloyDB, Cloud Spanner) and latency or security requirements prohibit public internet routing.
You have high-volume, recurring data transfers between AWS and GCP where public internet egress costs or bandwidth variability are unacceptable.
Your organization has compliance or regulatory requirements mandating that data never traverse the public internet (HIPAA, PCI-DSS, or financial services regulations).
You need bidirectional connectivity, such as GCP workloads calling AWS APIs, or AWS workloads calling GCP APIs, both over private paths.
Choosing between federation and ingestion based on use case
Dimension
Federation (Query in Place)
Ingestion (Move to AWS)
Data freshness
Real-time or near-real-time
Dependent on ingestion frequency
Query performance
Subject to source system latency and network
Subject to data volume and operation, avoids cross-cloud network latency
Cost
Lower storage cost. Higher per-query cost for cross-cloud egress
Integrating Amazon Bedrock AgentCore Gateway and Amazon Bedrock AgentCore Runtime based on use case
The following are key differences between AgentCore Gateway and AgentCore Runtime that are relevant for our use case.
Dimension
Amazon Bedrock AgentCore Gateway
Amazon Bedrock AgentCore Runtime
Timeout
5 minutes (hard limit)
15 min sync / 8 hours async
Statefulness
Stateless (per-request)
Stateful (session-based)
Best for
Lightweight API proxying
Long-running data processing
Your lakehouse queries
Will time out frequently
Handles multi-hour jobs
Because AgentCore Gateway has a 5-minute hard timeout limit, use AgentCore Runtime for data processing jobs.
AWS Glue ETL jobs can run for minutes to hours.
Amazon Redshift queries on large datasets routinely exceed 5 minutes.
Athena federated queries (especially cross-cloud through Interconnect) can be slow.
Iceberg table scans on multi-TB datasets take time.
You can use AgentCore Gateway if the scope is limited to Glue Data Catalog interactions to fetch metadata schema, because that won’t run for more than 5 minutes.
Design considerations for production implementation
In practice, there are multiple aspects to consider when deploying the solution for production. The following summarizes a few of the key issues you might encounter and approaches to address them.
Catalog federation: The metadata drift problem
One of the first surprises in production is metadata drift, the state where your federated catalog no longer reflects the actual schema of the source system, because the source system’s metadata changes are not reflected in the unified catalog. The agent continues to generate SQL against the stale schema, producing silent failures that are hard to trace.
The following are a few ways you can address the metadata drift issue.
Implement a catalog refresh schedule. Even a daily Glue crawler run against federated sources catches most drift before it causes agent failures.
Add schema validation as a pre-query step in your agent tool. Before running SQL, verify that the referenced columns exist in the current catalog metadata.
Instead of pulling metadata changes from the source in a scheduled manner, you can design an event-driven system, where the source system triggers a push event to run the schema change in the federated catalog.
Query federation: Latency is non-deterministic
Query federation works well for moderate data volumes, but latency becomes non-deterministic at scale. A query that returns in 3 seconds during testing can take more than 10 seconds in production when the source system is under load, the network path is congested, or the federated connector is cold-starting.
The following are a few approaches you can consider to improve the performance.
Set explicit query timeouts in your Athena execution context. Without them, a slow federated query will block your agent indefinitely.
Implement query result caching for frequently asked questions. Most business users ask the same questions repeatedly, and caching at the agent layer improves perceived performance.
For time-sensitive use cases, consider caching aggregated data in an AWS lakehouse on a schedule rather than querying live. This trades freshness for reliability.
AgentCore memory: Statefulness cost
AgentCore Memory enables stateful conversations, but in production, unbounded memory accumulation creates its own problems. An agent that remembers every conversation eventually starts surfacing stale context. For example, a user who asked about Q3 revenue six months ago gets that context injected into a Q1 query today.
The following are a few ways you can optimize cost and improve relevance.
Set explicit memory expiry (we use 30 days as shown in the implementation) and enforce it consistently.
Use session-scoped memory for transactional queries and long-term memory only for user preferences and recurring patterns.
Implement a memory review step in your LangGraph workflow. Before invoking the model, filter retrieved memories by recency and relevance score rather than injecting all of them.
LangGraph orchestration: When tool calls loop
The conditional routing of LangGraph is powerful, but in production we observed a failure mode where the agent enters a tool call loop. The model repeatedly calls the same tool with slightly different parameters, never reaching a satisfactory answer. This typically happens when the tool returns partial or ambiguous results and the model keeps trying to refine.
What we learned:
Add a maximum tool call counter in your LangGraph state. If the agent has called tools more than N times in a single session, force a graceful exit with a summary of what was found.
Return structured, unambiguous responses from your tools. Include row counts, column names, and explicit null indicators so the model can reason clearly about completeness.
Log every tool invocation with its input and output. This is the single most valuable debugging artifact when diagnosing agent misbehavior in production.
Handling hallucination risks in federated agent architectures
This is the most important section for teams moving from prototype to production. Hallucination in agentic AI systems that query real data is qualitatively different from hallucination in general-purpose LLMs, and it is more dangerous because the outputs look authoritative.
There are three distinct hallucination risk zones in a lakehouse AI agent:
SQL generation: The model generates SQL that is syntactically valid but semantically wrong. For example, when asked “What is our revenue growth this quarter?”, the model might generate a query that compares the wrong date ranges, uses the wrong aggregation function, or joins tables on incorrect keys, and then returns a confident, formatted answer with the wrong numbers.
Cross-source synthesis: When the agent queries multiple federated sources and synthesizes results, the risk compounds. The model may correctly retrieve customer counts from Amazon S3 and revenue figures from Snowflake, but incorrectly draw conclusions that aren’t supported by either dataset individually.
Memory-augmented reasoning: When long-term memory is active, the model may blend historical context with current query results in ways that are factually incorrect. For example, it might apply a business rule that was true six months ago but has since changed.
To improve, before any agent output informs a business decision, apply the following three-step validation framework:
Step 1: Source verification. Can you trace the answer back to a specific table, column, and row count? If the agent can’t show you the SQL and the row count, the answer is unverified.
Step 2: Reasonableness check. Does the answer fall within expected ranges? A sudden 10x spike in customer count is a signal to investigate.
Step 3: Cross-validation. For critical decisions, run the equivalent query directly in Athena or your BI tool and compare. Discrepancies reveal either a model reasoning error or a data quality issue. Resolve both before the answer is trusted.
These lessons don’t diminish the value of the architecture. They make it production-ready. The teams that move fastest with agentic AI are not the ones who skip these guardrails. They’re the ones who build them in from the start and spend less time firefighting in production.
Alternative to the unified catalog approach
In case you face technical and process challenges to unify catalogs across providers, you can let each data producer expose the metadata and data through MCP servers, as represented in the following diagram. In this approach, each producer takes the responsibility of maintaining the MCP servers and exposing them to the context layer. While this approach provides autonomy to data owners to operate independently and with flexibility, it also creates operational overhead to synchronize all metadata in a consistent way.
What’s next
In Part 2 of this series, we walk through the full implementation step by step, including hands-on scripts to:
Load example sales datasets into Databricks and marketing data to Snowflake as Iceberg tables, and federate them into AWS Glue Data Catalog through the Iceberg REST API.
Register Google BigQuery as a native federated data source in Amazon SageMaker, instead of a traditional AWS Lambda connector integration.
Create a customer master table as a native Iceberg table in Amazon S3.
Run a single SQL query in Amazon Athena that joins all four sources across two federation patterns, with no data movement.
Deploy an AI agent on Amazon Bedrock AgentCore that can autonomously query the same unified catalog using Amazon Athena and answer complex business questions in natural language queries. In addition, integrate AgentCore Memory to persist user context.
Conclusion
In this post, we summarized how you can unify data access across multiple cloud and ISV providers on AWS with the combination of catalog federation, query federation, and data movement to AWS. We then explained how AWS Glue Data Catalog and Lake Formation help provide unified catalog and access governance, and how AI agents hosted in Amazon Bedrock AgentCore can access it using MCP servers to explore the metadata context, convert user natural language queries to SQL, and use Amazon Athena to run the query across data sources to get the response to the end user. In addition, we provided an overview of different data ingestion methods to build a lakehouse architecture on AWS, including AWS Interconnect – multicloud and where it adds value.
We also provided architecture trade-offs and best practices to integrate the service capabilities. In the next post (Part 2), we will take a specific use case and provide a step-by-step implementation guide to unify the catalog and deploy the agent to Amazon Bedrock AgentCore.
In this post, we walk through Claw Boutique, an open-source reference architecture that connects a web storefront, WhatsApp, email, and Telegram into a single OpenClaw-driven ecommerce experience on AWS. Buyers interact through WhatsApp and a web store. The shop owner manages everything from Telegram, where an artificial intelligence (AI) agent processes restock, refund, and order commands.
The architecture separates concerns into three channels that share a common Store API and database.
Figure 1 – Claw Boutique architecture on AWS
Buyer channel (WhatsApp): Inbound WhatsApp messages arrive through AWS End User Messaging Social, which provides a managed WhatsApp Business API integration. Messages publish to an Amazon Simple Notification Service (Amazon SNS) topic, which triggers a Dispatcher AWS Lambda function. The dispatcher invokes a Strands Agent hosted on Amazon Bedrock AgentCore Runtime, running Amazon Nova Lite for real-time, tool-calling conversations. AgentCore Memory provides session continuity across messages. The agent can look up products, check order status, escalate issues, and send replies back through WhatsApp.
Seller channel (Telegram): The store owner receives stock alerts, review escalations, and order notifications on Telegram. An AI agent runs on Amazon EKS via the OpenClaw gateway. The owner replies with natural language commands such as “restock hoodies” or “apologize to the buyer,” and the agent runs the appropriate Store API calls.
All three channels converge on a single Store API Lambda function (Python/Flask) backed by Amazon Relational Database Service (Amazon RDS) for MySQL. Amazon Simple Email Service (Amazon SES) sends transactional email messages for order confirmations, shipping updates, and refund notices.
How it works: The order lifecycle
A single order touches the web storefront, WhatsApp, email, Telegram, and the admin dashboard. Here is the full flow.
1. Place an order
You visit the storefront, add items to the cart, and check out. The Store API creates the order in Amazon RDS and returns an order number.
Figure 2 – The Claw Boutique storefront
2. Order confirmation on WhatsApp and email
Two things happen right after checkout. The buyer receives a WhatsApp message with the order number, items, and total, followed by a feedback survey asking them to rate their experience from 1 to 5. At the same time, Amazon SES sends a confirmation email with the same order details.
Figure 3 – WhatsApp order confirmation and feedback survey
Figure 4 – Order confirmation email via Amazon SES
3. Stock alert on Telegram
Every purchase triggers a stock check. If any item is out of stock, running low (fewer than 5 units), or projected to sell out within 7 days, the seller gets a Telegram alert with current stock levels and sell-through rates. The seller can reply with a command such as “restock hoodies 20” and the AI agent runs it.
Figure 5 – Telegram stock alert with restock command
4. Negative feedback triggers an escalation
The buyer replies “1” to the WhatsApp survey. The Store API creates an escalation record and sends the seller a Telegram alert with the buyer’s name, phone number, rating, and review text.
Figure 6 – Telegram review escalation alert
5. Seller resolves the issue from Telegram
The seller replies “apologize” on Telegram. The AI agent looks up the unresolved escalation and takes four actions: sends a WhatsApp apology to the buyer, sends a refund confirmation email via Amazon SES, marks the order as “refunded” in the database, and resolves the escalation. If there are multiple open escalations, the agent lists them and asks which one to resolve.
6. Admin dashboard
The seller can also open the admin dashboard to view orders (now showing “refunded” status), escalation history, stock levels, and AI-generated business insights based on order patterns and buyer feedback.
Figure 7 – Admin dashboard with orders and insights
Ordering directly through WhatsApp
Buyers can also browse and order by texting the WhatsApp business number directly. The Strands Agent on AgentCore manages the full conversation: showing available products, checking order status, answering product questions, and escalating issues to the store owner.
Figure 8 – Ordering through WhatsApp via Amazon Bedrock AgentCore
Why two AI models?
Claw Boutique uses two AI models for different purposes, each chosen for the characteristics that matter most in its channel.
Amazon Nova Lite (via Amazon Bedrock AgentCore) for the buyer channel: Buyer-facing WhatsApp interactions need to be fast and cost-effective. Amazon Nova Lite provides sub-second responses with reliable tool calling at a fraction of the cost of larger models. AgentCore Runtime hosts the agent container, while AgentCore Memory manages conversation history per buyer phone number. The Strands Agents SDK handles tool definitions, orchestration, and model interaction with minimal boilerplate.
AI agent (via OpenClaw on Amazon EKS) for the seller channel: The seller channel involves more complex tasks: interpreting ambiguous commands, managing multi-step workflows (such as resolving escalations that span WhatsApp, email, and the database), and generating business insights. The model’s reasoning capabilities are well suited for these. OpenClaw provides the gateway, tool execution, and memory management layer.
This approach keeps buyer-facing latency low and costs predictable, while giving the seller access to deeper reasoning when managing the business.
Prerequisites
Before you deploy, make sure you have the following:
AWS Command Line Interface (AWS CLI) configured with credentials.
The entire stack deploys with AWS CDK. A single cdk deploy command provisions the Amazon Virtual Private Cloud (Amazon VPC), Amazon EKS cluster, Amazon RDS database, Lambda functions, Amazon API Gateway, Amazon CloudFront distribution, Amazon S3 bucket, Amazon SNS topic, and all AWS Identity and Access Management (IAM) roles and security groups. AWS CDK also runs database initialization (schema and seed data), Docker image build, Amazon Elastic Container Registry (Amazon ECR) push, and Amazon EKS deployment.
Configuration values (Telegram token, WhatsApp IDs, Amazon SES email) go into a CDK context file. Cold deploy takes about 25-30 minutes.
You can find the full source code and deployment instructions in the GitHub repository.
Cleaning up
To avoid ongoing charges, delete the resources created in this walkthrough when you’re done experimenting. Run the following command from the cdk/ directory:
cd cdk && npx cdk destroy
This removes the Amazon EKS cluster, Amazon RDS database, Lambda functions, and all other resources created by the stack. No context values are needed for destroy.
Conclusion
In this post, we showed how to build an ecommerce bot using OpenClaw and Amazon Bedrock AgentCore. By combining AWS End User Messaging Social for WhatsApp, Amazon Bedrock AgentCore Runtime for real-time buyer conversations, and Amazon EKS for a seller-side AI agent, you can create a system where buyers order through the channels they already use, and store owners manage their business from a single Telegram chat.
The project is open source and deploys with a single AWS CDK command. You can use it as a starting point and adapt it to your own product catalog, messaging channels, and business logic.
Today at the AWS Summit in New York City, Swami Sivasubramanian, AWS VP of Agentic AI, provided the day’s keynote. Here’s our roundup of the biggest announcements from the event:
New in Amazon Bedrock AgentCore We’re introducing new capabilities on Amazon Bedrock AgentCore: connecting AI agents to organizational, web, and paid knowledge, helping teams find and fix what’s going wrong in production, and enforcing controls that scale as agents grow more capable.
Together, these capabilities help you build more capable agents faster, govern those agents with controls that scale, and improve them continuously. To learn more, read our blog post covering all the new features.
Introducing Amazon Bedrock Managed Knowledge Base for faster, more accurate enterprise AI applications — You can build enterprise RAG pipelines with the managed Knowledge Base on Bedrock. It provides native data connectors, Smart Parsing for automatic multi-format data preparation, and an Agentic Retriever for complex multi-step queries—all integrated with AgentCore Gateway so developers can focus on business outcomes rather than infrastructure management.
AWS WAF adds AI traffic monetization capability to help content owners charge AI bots for content access — You can use a new Bot Control capability that enables content providers and publishers price, meter, and collect payment from AI bots and agents accessing their content and APIs. AWS WAF now lets you set a price for that access, accept payment through third-party providers, and grant scoped access directly at the edge.
Amazon Bedrock AgentCore harness in now generally available — You can do building and running production-grade AI agents in minutes—without coding orchestration loops—by defining your agent’s model, tools, skills, and instructions in configuration, with Bedrock AgentCore harness.
New in AI-based security tools
Introducing AWS Continuum: Security at machine speed — AWS Continuum for code vulnerabilities, available in a gated preview, takes findings from across your environment, prioritizes by business impact, proves which are exploitable, and drives a fix through your own process.
AWS Security Agent (now part of AWS Continuum) adds threat modeling, Kiro power and Claude Code plugin, and more — You can generate the new threat modeling (preview) to understand the full context of your application and identify threats with recommended mitigations using the STRIDE framework. You can also use pull request code scanning with remediation across major Git platforms, and IDE integrations via Kiro power, Claude Code plugin, and MCP — letting developers run security reviews and fix issues without context switching.
New in building AI-based applications
Introducing Kiro for iOS — Kiro introduces a native iOS app, available in a gated preview, built for real engineering work that gives developers a new surface to kick off, monitor, steer, and interact with their Kiro sessions directly from their phone. That means you can now start sessions, check back when they’re done, review diffs, and approve changes all while staying connected to your work with no laptop running.
Proactively reduce tech debt autonomously with AWS Transform – continuous modernization — You can use continuous analysis (preview) to automatically scan your code repositories against configurable baselines and generates findings in hours, not weeks. Once you’ve identified and prioritized findings, you can configure autonomous remediations that generate pull requests for affected repositories automatically.
In addition to the keynote announcements, we have other important launches this week:
Amazon S3 annotations: attach rich, queryable context directly to your objects — Amazon S3 now lets you attach up to 1 GB of rich, mutable, and queryable context directly to your objects using annotations, purpose-built for AI agents and autonomous workflows that need to discover, understand, and act on data at scale without maintaining separate metadata systems.
Today, we’re announcing Amazon Bedrock Managed Knowledge Base, a new set of capabilities that enables developers to build enterprise-grade generative AI applications with their proprietary data in minutes. Organizations building agentic AI applications need secure, reliable, and up-to-date access to enterprise-wide data to deliver accurate, fast, and trusted outcomes. Managed Knowledge Base abstracts away the complexity of building and managing retrieval-augmented generation (RAG) pipelines, allowing developers to focus on business outcomes rather than infrastructure management.
Developers building knowledge bases for their agents face three key challenges today:
Connecting to enterprise data – Enterprise knowledge lives across disparate systems with different content types, access control lists, and document formats. Building and maintaining custom connectors for each source adds complexity that slows down development.
Optimizing RAG accuracy – Best practices for retrieval-augmented generation keep evolving. Developers need to experiment with different parsing strategies, chunking approaches, embedding models, and agentic retrieval behaviors to get accurate answers from their data.
Managing infrastructure at scale – Organizations need to serve large knowledge bases with millions of documents, or manage thousands of smaller knowledge bases across teams. Both patterns require reliable infrastructure, security enforcement, and cost control.
These challenges require developers to repeatedly perform undifferentiated work instead of focusing on their applications.
Amazon Bedrock Managed Knowledge Base addresses these challenges by abstracting away the multiple infrastructure components developers traditionally have to assemble and maintain themselves (storage, retrieval, embeddings, re-ranking, and foundation model selection) into a single managed primitive. By default, the service automatically selects and manages a default embeddings model, re-ranker model, and foundational model on your behalf, so you can get up to speed quickly without needing to pick or maintain one yourself. On top of this managed foundation, three core innovations further improve ease of use and accuracy:
Native data connectors – Six pre-built ingestion connectors that natively pull enterprise data and permissions from SaaS applications, eliminating the overhead developers face in managing application-specific requirements. At launch, we support Amazon S3, SharePoint, Confluence, Web Crawler, Google Drive, and OneDrive.
Smart Parsing – Different content types and sources require different approaches to achieve accurate retrieval. Smart Parsing handles this complexity automatically, selecting the right parsing strategy for each data type and connector to provide the highest accuracy for your agents.
Agentic Retriever – Optimized for complex queries that require multiturn, multihop retrieval within a single knowledge base or across multiple knowledge bases. Agentic Retriever automatically infers end-user intent and draws relevant context from institutional knowledge spread across data sources and modalities.
With just a few lines of code, Amazon Bedrock Managed Knowledge Base automatically manages and scales the end-to-end RAG pipeline that powers your enterprise knowledge agents. For agent builders, it’s available as a pre-built target type in Amazon Bedrock AgentCore Gateway, reducing integration to a few lines of code, auto-generating role-based permissions, and providing observability and evaluation metrics in the AgentCore Observability dashboard.
Getting started with Amazon Bedrock Managed Knowledge Base Creating a Managed Knowledge Base is straightforward. Navigate to the Amazon Bedrock AgentCore console or the Amazon Bedrock console, open the Knowledge Bases page, and choose Create Managed KB. The experience is the same in both consoles. You will see that Unstructured Vector Store KB is now available as the recommended option, alongside the other knowledge base types you may already be familiar with:
Picture 1 – Knowledge Bases list page in the Amazon Bedrock AgentCore console showing the Type column with different KB types and the Create Managed KB button
When creating a new Knowledge Bases, you can connect to your enterprise data sources by choosing from the list of supported connectors directly from a dropdown. AWS Identity and Access Management (IAM) roles are automatically created, and you can choose to edit these permissions if needed:
Picture 2 – Create Knowledge Base page showing the Data source dropdown expanded with all supported connectors: Amazon S3, Confluence, Custom, Google Drive, One Drive, SharePoint, and Web Crawler
An optimized set of defaults will be presented, allowing you to create your knowledge base in just a few clicks. Once the data is synced, you can integrate the knowledge base with your agent or provide it as a tool for your foundation model and start querying.
Smart Parsing for accurate data ingestion One of the key challenges in building knowledge bases is preparing diverse data types for accurate retrieval. Once you point Managed Knowledge Base at your data sources, Smart Parsing automatically determines the optimal parsing strategy for each data type and connector, no extra configuration is required.
Smart Parsing combines multiple techniques:
Connector-specific data models – Optimized handling for each data source. For example, the Web Crawler connector preserves HTML structure including embedded images and tables, ensuring rich content is not dropped during ingestion. SharePoint connectors maintain document hierarchy and relationships between files.
Multimodal processing – Automatic detection and processing of different content types within documents. The system identifies bounding boxes in documents, then sends them to foundation models for data extraction, captioning, and scene description in video files.
Optimized chunking – Smart Parsing leverages foundation models to understand document structure and extract meaningful content, ensuring that complex documents with mixed formats are properly indexed. Intelligent defaults balance retrieval accuracy with performance based on document type and content structure, while advanced users can customize chunking strategies when needed.
This automated approach eliminates weeks of experimentation typically required to achieve production-quality retrieval accuracy, while still preserving the flexibility to customize when needed.
Using Agentic Retriever for complex queries After your data is ingested, you can start querying your knowledge base. Generative AI applications often struggle with complex user queries that require reasoning, recursive multi-step retrieval, and intermediate evaluations of results. Consider a user asking two related questions: “What is the cloud infrastructure budget for the ML platform team?” and “Does our expense policy allow prepaying annual commitments?” A single retrieval step might surface documents about the ML platform team but fail to connect the budget information with the expense policy needed to fully answer the question.
Picture 3 – Agentic Retriever decomposes complex user queries into a step-by-step plan, performing multi-hop retrieval across multiple knowledge bases and combining results to deliver accurate, grounded responses
Agentic Retriever solves this by creating a step-by-step query plan: 1. Which team owns the ML platform, and what is their cloud infrastructure budget? 2. What does the expense policy say about prepaying annual commitments? 3. Does the policy allow the ML platform team to prepay against this budget?
The system performs multi-hop retrieval and reasoning at each step, and once it has gathered sufficient relevant passages, it stops the search process and returns the top results. By abstracting away the complexity of building a separate multi-hop reasoning pipeline, this approach dramatically improves accuracy for complex queries while letting developers focus on their agentic search applications instead of orchestration logic.
You can try Agentic Retriever directly from the test panel of your knowledge base in the Amazon Bedrock AgentCore console. Select Agentic retrieval only as the retrieval type to let the system automatically plan and execute multi-step queries across your knowledge bases:
Picture 4 – Test Knowledge Base panel showing Agentic retrieval with answer generation selected as the retrieval type, with model selection and maximum agentic iterations options
Enabling MCP with Bedrock AgentCore Amazon Bedrock Managed Knowledge Base seamlessly integrates with AgentCore Gateway as a native target type. This integration eliminates the need for manual integration and provides built-in observability, policy enforcement, and automatic permission management.
You can navigate to the Amazon Bedrock AgentCore console or SDK and create an AgentCore Gateway or select an existing one. When adding targets to your gateway, you will find Knowledge Base as a new pre-built target type alongside other options such as MCP server, Lambda ARN, REST API, and other integrations. Simply select your knowledge base ID to expose it through the gateway:
Picture 5 – Add targets page in AgentCore Gateway showing Knowledge Base as a new pre-built target type, with the knowledge base ID selector and runtime retrieval mode options
Add targets page in AgentCore Gateway showing Knowledge Base as a new pre-built target type, with the knowledge base ID selector and runtime retrieval mode options
Gateway exposes the standard Model Context Protocol (MCP), so the knowledge base tools are automatically discovered by clients from any MCP-compatible framework, including Strands Agents, LangChain, CrewAI, LlamaIndex, and LangGraph. No custom integration code is required.
Model choice and flexibility Amazon Bedrock Managed Knowledge Base preserves the flexibility developers expect from Amazon Bedrock. Every foundation model available on Bedrock can power the generation step, and developers can select from different embedding and re-ranking models to optimize retrieval for their specific use case, enabling teams to fine-tune accuracy and cost-performance without changing infrastructure.
Unlike managed solutions that lock you into specific model providers, Amazon Bedrock Managed Knowledge Base separates the infrastructure management (connectors, parsing, storage, retrieval orchestration) from model selection. This means you can:
Take advantage of the latest models – Adopt the latest embedding, re-ranking, and foundation models as they become available to improve accuracy, latency, and cost for your application without rebuilding your RAG pipeline.
Optimize for price-performance – Choose smaller, faster models for simple queries and more capable models for complex reasoning tasks, all using the same knowledge base infrastructure.
Use Bedrock embedding models – While Smart Parsing provides optimized defaults, you can configure Bedrock embedding models when your domain requires specialized semantic understanding.
Maintain consistency with existing applications – If you’re already using Bedrock Knowledge Bases APIs (Retrieve, StartIngest, StopIngest, IngestKnowledgeBaseDocuments), Managed Knowledge Base uses the same APIs, so migration requires no code changes, just point to the new knowledge base ID.
This approach ensures you can spend time on your generative AI application without losing the ability to change models based on evolving requirements or new model capabilities.
Get started today Amazon Bedrock Managed Knowledge Base is available today in the US East (N. Virginia), US West (Oregon), Asia Pacific (Sydney, Tokyo), Europe (Dublin, Frankfurt, London), and AWS GovCloud (US-West) Regions. For Regional availability and future roadmap, visit AWS Capabilities by Region.
With Bedrock Managed Knowledge Base, you pay for what you use with no upfront commitments. Pricing is based on two dimensions: the size of indexed data stored and the number of retrievals performed (on-demand). For detailed pricing information, visit the Amazon Bedrock pricing page. Bedrock is also a part of the AWS Free Tier that new AWS customers can use to get started at no cost and explore key AWS services.
These capabilities work with any open source framework such as CrewAI, LangGraph, LlamaIndex, and Strands Agents, and with any foundation model. Bedrock services can be used together or independently, and you can get started using your favorite AI-assisted development environment with the AgentCore open source MCP server.
Today, we’re announcing the general availability of Web Search on Amazon Bedrock AgentCore, a fully managed tool that enables agents to ground responses in current, cited web knowledge with zero data egress from customer’s secured AWS environment.
Web Search uses a built-in connector target on Bedrock AgentCore Gateway using the Model Context Protocol (MCP). Your agent sends a natural-language query, and Web Search returns most relevant snippets, source URLs, titles, and publication dates that the model can reason over to produce a grounded response.
It is built on Amazon’s search infrastructure, informed by years of experience powering agentic search experiences across Alexa+, Amazon Quick, and Kiro. It uses a multi-source grounding approach that combines Amazon’s web index with structured knowledge graph data. Beyond standard web results, this gives agents access to Amazon Knowledge Graph with verified facts, helping them retrieve more relevant and accurate responses than traditional web search alone.
With this launch, you can focus on building agents instead of manually adding web search to agents on Bedrock AgentCore and managing its infrastructure. Your AI agent looks at user question, retrieves the latest facts, and then takes any necessary action grounded in current developments beyond a model’s training data. You can also meet enterprise governance policies without sending user prompts and retrieval queries to external search API providers outside of AWS.
Web Search on Bedrock AgentCore in action To get started, create the Bedrock AgentCore Gateway with Web Search tool target in the Bedrock AgentCore console. When the Gateway URL is created, you can interact with API call, Command Line Interface (CLI), or MCP Inspector.
To add Web Search tool target when creating the Gateway, choose MCP target as a target protocol and Connectors as a target type. You can select the Web Search tool as a preconfigured target to retrieve most relevant web search results including links, snippets, and metadata.
After creating your gateway, you can find the Web Search tool target on the detail page of your gateway. You can also add a new Web Search tool target to an existing gateway.
To interact with Web Search tool, use the sample invocation code in the View invocation code section. You can use code snippets through Python codes with API requests, MCP Python SDK, Strands MCP Client, and MCP Inspector.
For example, you can interact with the MCP Inspector, an interactive developer tool for testing and debugging MCP servers. When you connect to the MCP server through the Gateway resource URL, you will find a Web Search tool for each connector target on the Gateway. Enter input the web search query and choose Run Tool to get the results.
Customer voices Some of our customers had early access to this new feature. This is what they shared with us:
Benchling helps scientists accelerate R&D, making it easy to centralize scientific data, collaborate across teams, and access insights. Nicholas Larus-Stone, Head of AI Agents at Benchling shared “Scientists using Benchling AI can now ask about a target they’re actively working on and get answers grounded in both their institutional data in Benchling and published literature. The result is more complete science, and hypothesis generation done right. Because we’re using the Web Search tool on Amazon Bedrock AgentCore, customers have a secure, governed environment to bring that high quality published data into their workflows without compromising how they manage their data.”
Gen Digital leads consumer and small business cyber safety, offering antivirus, antimalware, identity and privacy protection, virtual private networks, and cloud backup. Iskander Sanchez-Rola, Senior Director of AI & Innovation, Gen Digital shared “With the Web Search tool on Amazon Bedrock AgentCore, Norton Revamp helps professionals build their online reputation with current, grounded content ideas shaped by what’s actually happening in the world today. What we value most is that AWS uses its own search index and keep queries within our trusted AWS environment.”
Now available Web Search on Amazon Bedrock AgentCore is generally available today in the US East (N. Virginia) Region. For Regional availability and a future roadmap, visit the AWS Capabilities by Region.
You can get started with Web Search on Bedrock AgentCore at no additional cost. You pay only for the data transfer charges you use for the Gateway. New AWS customers also receive up to $200 in Free Tier credits. To learn more, visit the Amazon Bedrock AgentCore pricing page.
In this post, we explore how to build an online shopping AI agent. We focus on its architecture and implementation with Amazon OpenSearch Service, Amazon Bedrock AgentCore, and Strands Agents. Amazon Bedrock AgentCore is an agentic platform for deploying and operating those agents and tools securely at scale without managing infrastructure. AgentCore Runtime is the secure, serverless runtime that hosts your Strands Agents and tools as containerized applications. Strands Agents is an open source SDK for building AI agents. In this SDK, an agent is defined by a model, tools, and a prompt. Tools are callable functions that allow agents to perform actions beyond text generation, such as API calls, database queries, and file operations. The framework lets the model autonomously plan steps and invoke tools to complete tasks.
Today’s AI shopping assistants understand natural language, context, and shopping intent, creating a more human-like interaction. These assistants handle complex shopping requirements, such as “Find me a formal dress under $200 that’s appropriate for a summer wedding.” They maintain conversation history, process follow-up questions naturally, and provide personalized recommendations based on user preferences and past interactions. Customers can use visual search to upload images of items that they want, and the AI finds similar products across multiple retailers, matching styles and patterns. The goal is to provide instant, relevant, and personalized assistance at scale, creating a more efficient shopping journey for consumers worldwide.
AI agents combined with Retrieval Augmented Generation (RAG) on Amazon OpenSearch Service represent an evolution in conversational search. This integration builds AI agents on enriched catalogs, supporting context-aware and autonomous search experiences while maintaining accuracy and relevance through grounded responses.
Solution overview
The following diagram illustrates the solution architecture of an AI-powered online shopping agent built using Strands Agents, Amazon Bedrock AgentCore Runtime, and Amazon OpenSearch Service. For simplicity, the diagram doesn’t show authentication and authorization. In a production setup, secure access to the backend by using mechanisms such as Amazon API Gateway, AWS Identity and Access Management (IAM) roles, or OAuth-based authentication.
The following is a walkthrough of the reference architecture:
The user submits a question through the front-end application. AgentCore Runtime receives the request and routes it to the Strands Retail Agent.
The Strands Agent processes the task and invokes the search_product_catalog tool.
OpenSearch Service performs semantic search and returns relevant product results.
The Strands Agent invokes Amazon Bedrock large language models (LLMs) to generate a natural language response.
The agent response is returned to the user through the front end.
Walkthrough
The following section walks you through how to build an online shopping AI agent.
Prerequisites
To implement this solution, you need an AWS account. You also need an OpenSearch Service domain with OpenSearch version 2.13 or later. You can use an existing domain or create a new domain.
To use the vector search capabilities of OpenSearch Service with Strands Agents on AgentCore, you use ingest pipelines. These ingestion pipelines apply built-in processors to pre-process your documents before you index them in OpenSearch Service.
You use the text_embedding processor, which relies on the ML Commons plugin and a registered embedding model—Amazon Nova Multimodal Embeddings on Amazon Bedrock. OpenSearch Service uses the ML Commons plugin to generate vector embedding for your data and uses the same model to convert incoming queries into vectors. This supports semantic search across your indexed content.
You extend your semantic search backend by adding an agent built with Strands Agents and deployed on Amazon Bedrock AgentCore.
Code samples provided in this post are tested in Python 3.11. You only need to install Python 3.11 in your environment to execute the python scripts. You also need Node.js 18 or later installed to use the AgentCore CLI. The provided code scripts will deploy into your AWS account so make sure your terminal has access to necessary AWS credentials.
Install AgentCore CLI
Install the AgentCore CLI globally using npm:
npm install -g @aws/agentcore
Python Dependencies
You also need to create a requirements.txt file with following dependencies in your workspace to deploy the agents.
Run pip install -r requirements.txt in your terminal to install the required dependencies. To avoid conflicts with other dependencies in your system, you can use a virtual environment.
Now, walk through each step.
Step 1: Configure IAM permissions
Complete the following steps to register the Nova Multimodal Embeddings model with OpenSearch Service and verify that your OpenSearch Service domain has permission to invoke the Amazon Bedrock API.
Go to the IAM console and create a new role with a custom trust policy. Add the following trust policy.
Give your role a name and create it. For this post, we use OpenSearchBedrockEmbeddingRole as the role name. OpenSearch Service uses this role to invoke the Nova Multimodal Embeddings model on Amazon Bedrock.
On the Permissions tab, attach an inline policy with the following permissions. For this post, we name this policy OpenSearchBedrockEmbeddingPolicy.
Create a passRole policy with the following JSON document and assign it to the IAM role that creates the ML connector. This lets the principal running the Python code pass the OpenSearchBedrockEmbeddingRole to OpenSearch. Replace <your-aws-account-id> with your own AWS account ID.
By using fine-grained access control (FGAC), map the IAM role as a backend role for the ml_full_access role in the OpenSearch Dashboards Security plugin. This mapping lets the user create ML connectors:
Log in to OpenSearch Dashboards and open the Security page from the navigation menu.
Choose Roles and select ml_full_access.
Choose Mapped Users and Manage Mapping.
Under Backend roles, add the ARN of the IAM role that you created in the previous steps.
Step 2: Connect to the model by using OpenSearch ML Connectors
In this section, you create an ML connector to link OpenSearch Service with the Bedrock Nova Multimodal Embeddings model. You then register and deploy the model so you can use it for neural search queries.
Create a file named create-connector.py with the following code. Replace <your hostname>, <your region>, and <your account id> placeholders within the code.
Run python create-connector.py in your terminal by using the IAM role with ml_full_access and passRole permissions created in the previous step. This script creates a connector between OpenSearch Service and the Bedrock Nova Multimodal Embeddings model.
The program responds with connector_id. Take a note of it. Then, navigate to OpenSearch Dashboards and open Dev Tools. Create a model group against which to register this model in the OpenSearch Service domain.
POST /_plugins/_ml/model_groups/_register
{
  "name": "agent-conversational-search-model-group",
  "description": "A model group for bedrock Nova embedding models used for conversational search"
}
Register a model by using connector_id and model_group_id.
Run the following API call to deploy the model. Use the registered model ID from the previous step.
POST /_plugins/_ml/models/<registered-model-id>/_deploy
Step 3: Create an ingest pipeline for data indexing
Use the following code to create an ingest pipeline for data indexing. The pipeline establishes a connection to the embedding model, retrieves the embedding for the title field, and stores it in the OpenSearch index.
PUT /_ingest/pipeline/nova_multimodal_embedding
{
  "description": "Text embedding pipeline using nova_multimodal_embedding",
  "processors": [
    {
      "text_embedding": {
        "model_id": "<deployed model id>",
        "field_map": {
          "title": "title_vector"
        }
      }
    }
  ]
}
Step 4: Create an index for storing data
Create an index named product for storing data by using Dev Tools. This index stores raw text and 1024-dimensional embeddings of the title field, and uses the ingest pipeline you created in the previous step.
Use the following code to ingest the sample product data in Dev Tools.
POST /_bulk
{"index": {"_index": "product", "_id": "2"}}
{"id":2,"title":"Mens Casual Premium Slim Fit T-Shirts","price":22.3,"description":"Slim-fitting style, contrast raglan long sleeve, three-button henley placket, light weight & soft fabric for breathable and comfortable wearing.","category":"men's clothing","image":"https://fakestoreapi.com/img/71-3HjGNDUL._AC_SY879._SX._UX._SY._UY_.jpg","rating":{"rate":4.1,"count":259}}
{"index": {"_index": "product", "_id": "3"}}
{"id":3,"title":"Mens Cotton Jacket","price":55.99,"description":"great outerwear jackets for Spring/Autumn/Winter, suitable for many occasions, such as working, hiking, camping, mountain/rock climbing, cycling, traveling or other outdoors.","category":"men's clothing","image":"https://fakestoreapi.com/img/71li-ujtlUL._AC_UX679_.jpg","rating":{"rate":4.7,"count":500}}
{"index": {"_index": "product", "_id": "4"}}
{"id":4,"title":"Mens Casual Slim Fit","price":15.99,"description":"The color could be slightly different between on the screen and in practice.","category":"men's clothing","image":"https://fakestoreapi.com/img/71YXzeOuslL._AC_UY879_.jpg","rating":{"rate":2.1,"count":430}}
{"index": {"_index": "product", "_id": "5"}}
{"id":5,"title":"John Hardy Women's Legends Naga Gold & Silver Dragon Station Chain Bracelet","price":695,"description":"From our Legends Collection, the Naga was inspired by the mythical water dragon that protects the ocean's pearl.","category":"jewelery","image":"https://fakestoreapi.com/img/71pWzhdJNwL._AC_UL640_QL65_ML3_.jpg","rating":{"rate":4.6,"count":400}}
Step 6: Query the index
Run the following API call to test semantic search by using the Nova Multimodal Embeddings model.
Import the Runtime app with from bedrock_agentcore.runtime import BedrockAgentCoreApp.
Initialize the app in your code with app = BedrockAgentCoreApp().
Create the OpenSearch Service connection and search query with the @tool decorator.
Decorate the invocation function with the @app.entrypoint decorator.
Let AgentCore Runtime control the running of the agent with app.run().
Now, complete the following steps:
Make sure that you have installed the necessary dependencies from the Prerequisites section of this post.
Create and save a file named search_agent.py with the following code. Replace <your hostname>, <your region>, and <your account id> placeholders within the code.
from strands import Agent, tool
import argparse
import json
from bedrock_agentcore.runtime import BedrockAgentCoreApp
from strands.models import BedrockModel
import boto3
from opensearchpy import OpenSearch, RequestsHttpConnection
from requests_aws4auth import AWS4Auth
app = BedrockAgentCoreApp()
@tool
def search_products(query: str, size: int = 5):
try:
# OpenSearch configuration
host = '' ## CHANGE THIS, DOMAIN ENDPOINT WITHOUT HTTPS!
region = '' ##CHANGE THIS
model_id= '' ##CHANGE THIS with your deployed model id in OpenSearch
service = 'es'
credentials = boto3.Session().get_credentials()
awsauth = AWS4Auth(credentials.access_key, credentials.secret_key, region, service, session_token=credentials.token)
# Create OpenSearch client
client = OpenSearch(
hosts=[{'host': host, 'port': 443}],
http_auth=awsauth,
use_ssl=True,
verify_certs=True,
connection_class=RequestsHttpConnection
)
"""Search products in OpenSearch using neural search"""
search_body = {
"_source": False,
"fields": ["title", "price", "category", "image"],
"size": size,
"query": {
"neural": {
"title_vector": {
"query_text": query,
"model_id": model_id,
"k": 3
}
}
}
}
response = client.search(
body=search_body,
index="product"
)
products = []
for hit in response['hits']['hits']:
fields = hit.get('fields', {})
product = {
'title': fields.get('title', [''])[0] if fields.get('title') else '',
'price': fields.get('price', [''])[0] if fields.get('price') else '',
'category': fields.get('category', [''])[0] if fields.get('category') else '',
'image': fields.get('image', [''])[0] if fields.get('image') else ''
}
products.append(product)
return f"Found {len(products)} products: {json.dumps(products, indent=2)}"
except Exception as e:
return f"Search error: {str(e)}"
model_id = "global.anthropic.claude-haiku-4-5-20251001-v1:0"
model = BedrockModel(
model_id=model_id,
)
agent = Agent(
model=model,
tools=[search_products],
system_prompt="You're a helpful assistant. You can do product search, and tell the product details."
)
@app.entrypoint
def strands_agent_bedrock(payload):
"""
Invoke the agent with a payload
"""
user_input = payload.get("prompt")
print("User input:", user_input)
response = agent(user_input)
return response.message['content'][0]['text']
if __name__ == "__main__":
#strands_agent_bedrock({"prompt": "Search jacket"}) ##UNCOMMENT THIS FOR TESTING
#app.run() ##UNCOMMENT THIS FOR DEPLOYMENT, MAKE SURE THE ABOVE LINE IS COMMENTED WHEN YOU ARE DEPLOYING TO AGENTCORE
This deploys your agent locally for testing purposes.
Navigate to the IAM console and add the AmazonBedrockLimitedAccess permission policy to the principal running the code.
Navigate to OpenSearch Dashboards and, from the left menu, choose Security plugin, then choose Roles.
Choose Create Role.
Name the role agentcore-permissions.
Under cluster permissions, add cluster:admin/opensearch/ml/models/get and cluster:admin/opensearch/ml/predict.
Under index permissions, enter product* as the index pattern. Add search and get permissions.
Create the role.
Choose the role you created, switch to the Mapped Users tab, choose Manage mapping, and add the role that you use for running the Python code as a backend role.
Uncomment the line strands_agent_bedrock({"prompt": "Search jacket"}) and make sure the app.run() line is commented in the code.
Run python search_agent.py in your terminal to start the shopping agent. The output should look similar to the following.
"Here are the jacket search results:\n\n1. **Mens Cotton Jacket** - $55.99\n2. **Mens Casual Slim Fit** - $15.99\n3. **Mens Casual Premium Slim Fit T-Shirts** - $22.30\n4. **John Hardy Women's Legends Naga Gold & Silver Dragon Station Chain Bracelet** - $695.00\n\nThe most relevant jacket option is the **Mens Cotton Jacket** at $55.99. Would you like to know more about any of these products?
Comment strands_agent_bedrock({"prompt": "Search jacket"}) and uncomment the app.run() line in the code before going into the next step.
Step 8: Configure and launch your agent to Bedrock AgentCore Runtime
The AgentCore CLI is a command-line tool provided by AWS that simplifies deployment of agents to Amazon Bedrock AgentCore Runtime. When you run the CLI deployment command, it automates the entire deployment workflow: it creates the necessary IAM execution role with proper permissions, packages your Python application code along with its dependencies, uses AWS CodeBuild to build an optimized Docker container image, pushes that container image to Amazon Elastic Container Registry (ECR), and finally provisions the AgentCore Runtime environment that hosts your containerized agent. This eliminates the need for manual Dockerfile creation, container builds, or infrastructure management.
Before you start this step, make sure you have gone through section 7 and installed the AgentCore CLI and Python dependencies listed in the Prerequisites section.
Create a policy named AgentCoreAccessPolicy with the following permissions and attach it to the role running the code. Replace <ACCOUNT_ID> and <REGION> placeholders.
Create a file named agentcore.yaml in your project directory with the following configuration. Replace <REGION>, <ACCOUNT_ID>, and <OPENSEARCH_DOMAIN_NAME> placeholders:
Map your AgentCore execution role to an OpenSearch backend role so the agent can access your data.
Navigate to OpenSearch Dashboards. From the left menu, choose the Security plugin, then choose Roles.
Search for agentcore-permissions and choose the role. Then, navigate to the Mapped Users tab, choose Manage mapping, and add arn:aws:iam::<ACCOUNT_ID>:role/AmazonBedrockAgentCoreSDKRuntime-us-east-1-custom as a backend role. Replace the <ACCOUNT_ID> placeholder with your account ID.
Step 10: Invoke the Bedrock AgentCore Runtime
You can test the agent in Agent Sandbox. Enter the prompt Search jacket less than 50$, and the agent returns the relevant result from the OpenSearch Service index with a summary.
In real-world scenarios, you can design a search application with a Strands Agent deployed in AgentCore Runtime. You can add AgentCore Memory, which gives your AI agents the ability to remember past interactions and provide more context-aware, personalized conversations.
Cleanup
To avoid incurring future charges, delete the resources created while building this solution:
In this post, you saw how to create a conversational search with Amazon OpenSearch Service and Strands Agents. You also learned how to deploy the agent on Amazon Bedrock AgentCore Runtime. You can further enhance this shopping agent by using other AgentCore capabilities. For example, AgentCore Memory retains user preferences and past interactions across sessions, AgentCore Identity manages shopper authentication and access control, and AgentCore Observability helps you monitor and debug agent behavior in production. Together, these services help you build shopping experiences that deliver instant, relevant assistance at scale.
Now it’s your turn. Build your own conversational search experience by integrating OpenSearch Service and Strands Agents with your product catalog. To learn more, see the Amazon OpenSearch Service and Amazon Bedrock AgentCore detail pages.
This week, the AWS IoT Device SDK for Swift reached general availability. As a member of the Swift Server Workgroup (SSWG), this one caught my attention. The SDK brings production-ready MQTT 5 connectivity, Device Shadow, Jobs, and fleet provisioning to Swift developers on macOS, iOS, tvOS, and Linux.
I’m curious to see what you will build with it. Swift on the server has matured over the past few years, and now it reaches IoT devices too. This connects to a broader trend of running Swift at the edge. WendyOS, for example, is an open-source operating system for physical AI that offers first-class Swift support for deploying apps to NVIDIA Jetson and Raspberry Pi hardware. Between server-side Swift, IoT, and edge computing, the language is showing up in places that would have surprised most people a few years ago.
Now, let’s get into this week’s AWS news.
Headlines Amazon RDS for SQL Server supports Bring Your Own Media — Customers who migrate SQL Server applications from on-premises environments can now reuse their existing Microsoft SQL Server licenses, including Software Assurance, through Microsoft’s License Mobility program on Amazon RDS. BYOM is integrated with AWS License Manager for tracking license usage and compliance. Read more.
Amazon Cognito now supports multi-Region replication — You can now synchronize user and machine identity data, including credentials, user pool configurations, and federation setups, to a secondary user pool in a standby Region in near real-time. In the event of a disruption in the primary Region, signed-in users continue accessing their applications without re-authenticating, and registered users can sign in with their existing credentials. Multi-Region replication is available as an add-on for user pools in Essentials or Plus feature tiers across 16 Regions. Read more.
GPT-5.5, GPT-5.4, and Codex from OpenAI are now generally available on Amazon Bedrock — You can now use GPT-5.5 and GPT-5.4 in production workloads on Amazon Bedrock and build with Codex for AI-powered software development, with the same security, governance, and operational controls you already use across AWS. GPT-5.5 is the most capable model from OpenAI, excelling at agentic coding, data analysis, and multi-step autonomous tasks. Codex is available through the Codex App, the Codex CLI, and IDE integrations with Visual Studio Code, JetBrains, and Xcode. Pricing matches OpenAI first-party rates, and usage counts toward existing AWS commitments. Read more.
Last week’s launches Here are some launches and updates from this past week that caught my attention:
Amazon Bedrock adds CloudWatch metrics for OpenAI- and Anthropic-compatible APIs — You can now monitor inference traffic to the bedrock-mantle endpoint with CloudWatch metrics, including inference counts, input and output token totals, and client error counts at account, project, model, and project-and-model granularity.
AWS Step Functions adds AgentCore-powered agentic reasoning step — You can now add AI agent reasoning steps to your Step Functions workflows through an integration with the managed harness in Amazon Bedrock AgentCore. Run multiple agents in parallel or sequence, add human approval, and trace every agent decision.
Amazon EKS and Amazon EKS Distro now support Kubernetes version 1.36 — Kubernetes 1.36 promotes User Namespaces to GA, introduces Mutating Admission Policies, In-Place Pod-Level Resources Vertical Scaling, and Resource Health Status reporting. Available in all Regions where EKS is available.
Amazon Quick now supports VPC connectivity for MCP connections — Enterprise customers can now connect privately hosted Model Context Protocol (MCP) servers to Amazon Quick through VPC, enabling secure access to proprietary applications and internal tools without exposing them to the internet.
Software as a service (SaaS) providers building AI-powered applications on Amazon Bedrock AgentCore often need to serve multiple tenants with distinct security requirements from a shared infrastructure. Some tenants require cross-account access from their own Amazon Web Services (AWS) accounts, while others mandate that traffic stay within a private virtual private cloud (VPC) for regulatory compliance. Without centralized resource-level control, managing these diverse requirements can be complex.
AgentCore supports resource-based policies, giving you centralized, resource-level control over who can access your AgentCore Runtime and AgentCore Runtime endpoint resources and under what conditions.
In this post, you walk through a multi-tenant AI customer service platform where two tenants need different levels of access to the same agent. You learn how to use resource-based policies on AgentCore to grant cross-account access for one tenant while restricting another to VPC-only traffic—all while sharing the same underlying AgentCore Runtime and AgentCore Runtime endpoint.
The multi-tenant scenario
Imagine you’re an SaaS provider who builds and operates an AI-powered customer service platform. You use AgentCore to deploy intelligent agents that handle customer inquiries, answering product questions, processing returns, and escalating complex issues to human agents.
You serve multiple enterprise clients (tenants), each with their own AWS account and unique security requirements:
Tenant A: Example Corp is a large retailer operating in AWS account 111122223333. Their development teamis building a customer-facing chat agent that calls your AI agent to answer product questions in real time, and their admin team needs access to test agent behavior and monitor responses. Both roles must invoke the agent directly from Example Corp’s own AWS account without you having to share credentials or create AWS Identity and Access Management (IAM) users on their behalf. Example Corp has no network restriction requirements—their teams can invoke the agent from any network path as long as they have valid AWS credentials.
Tenant B: AnyCompany is a healthcare company operating in AWS account 444455556666. Because of regulatory (HIPAA) requirements, AI agent traffic must originate only from their private VPC (vpc-health1234). Their internal support staff uses the AI agent to assist with patient billing inquiries, which might involve protected health information (PHI). Their compliance team mandates that no API call to the agent can be made from developer laptops, public endpoints, or any network outside the controlled VPC boundary.
Your platform (SaaS provider) runs in account 555555555555 in the us-west-2 AWS Region. You operate an AgentCore Runtime (support-agent-runtime) that handles the core customer service logic, and an AgentCore Runtime endpoint (DEFAULT) that routes requests to the latest version of the support agent. Both tenants share this same agent infrastructure.
You can use resource-based policies to define who can access your AgentCore Runtime and AgentCore Runtime endpoint directly on the resources themselves—centralizing access control on the resource side. For cross-account scenarios like Example Corp, both a resource-based policy on your resources and an identity-based policy in the tenant’s account are required. For VPC-restricted scenarios like AnyCompany, you can use specific IAM conditions to enforce that requests originate only from an approved VPC, adding a network-level security boundary on top of identity-based controls.
Solution architecture
The following diagram shows the architecture for the multi-tenant AI customer service platform with both access patterns.
Figure 1: Architecture for the multi-tenant AI customer service platform with both access patterns
Your account (555555555555) with AgentCore Runtime and AgentCore Runtime endpoint
Example Corp’s account (111122223333) with DeveloperRole and AdminRole
AnyCompany’s account (444455556666) with VPC boundary and ApplicationRole
Policy enforcement points on both resources
VPC endpoint in AnyCompany’s VPC connecting to AgentCore
The SaaS provider account (555555555555) hosts the AgentCore Runtime and AgentCore Runtime endpoint that both tenants share. Example Corp (111122223333) accesses the agent cross-account using IAM roles—DeveloperRole and AdminRole—authenticated with Signature Version 4 (SigV4), the standard AWS request signing protocol. AWS evaluates both the resource-based policy on your resources and the identity-based policy in Example Corp’s account before granting access.
AnyCompany (444455556666) also accesses the agent cross-account, but with an additional constraint: all requests must originate from within their private VPC (vpc-health1234) through a VPC endpoint for AgentCore. The resource-based policy on your resources includes an explicit Deny statement that blocks any request from AnyCompany’s ApplicationRole when it doesn’t originate from the approved VPC.
In both cases, resource-based policies must be applied to both the AgentCore Runtime and AgentCore Runtime endpoint. AWS evaluates policies on both resources for InvokeAgentRuntime operations—if either resource denies access or lacks an explicit Allow, the request is denied.
Prerequisites
Before you begin, ensure you have the following:
An AWS account with AgentCore access and permissions to call PutResourcePolicy, GetResourcePolicy, and DeleteResourcePolicy on AgentCore resources
An AgentCore Runtime with SigV4 authentication and a DEFAULT AgentCore Runtime endpoint pointing to the latest runtime version
For the VPC-restricted scenario, the tenant must have a VPC endpoint for AgentCore configured in their VPC. An interface VPC endpoint creates a private connection between the tenant’s VPC and the AgentCore service without requiring traffic to traverse the public internet. For more information, see Interface VPC endpoints for Amazon Bedrock AgentCore.
Implementation
Both Example Corp and AnyCompanyoperate in separate AWS accounts from your platform. For cross-account access to AgentCore Runtime, AWS requires that both of the following allow the action:
A resource-based policyin your platform account applied to both the AgentCore Runtime and its AgentCore Runtime endpoint. InvokeAgentRuntime operations require an explicit Allow on both resources—if either lacks one, the request is denied.
An identity-based policy attached to the caller’s IAM role in the tenant’s account.
If either side is missing or denies the action, the request is denied.
Step 1: Configure cross-account access for Example Corp (Tenant A)
Example Corp’s DeveloperRole and AdminRole in account 111122223333 need to invoke your AI customer service agent. Without resource-based policies, enabling this cross-account access would typically require Example Corp’s roles to assume a role in your platform account through IAM role chaining—adding operational complexity, introducing temporary credential management, and creating additional IAM roles that must be maintained in your account for each tenant. With resource-based policies, you grant Example Corp’s roles direct access to your AgentCore Runtime and AgentCore Runtime endpoint without role chaining. Example Corp’s roles can invoke the agent directly from their own account using their own credentials, while you maintain centralized control over access on the resource side.
AgentCore Runtime resource-based policy
The following policy grants Example Corp’s DeveloperRole and AdminRole permission to invoke the agent runtime. This is the first of two resource-based policies required—it controls access to the runtime resource itself. Save this as runtime-policy.json:
The following policy grants the same roles permission to invoke the AgentCore Runtime endpoint. Without this second policy, requests are allowed at the runtime level but denied at the endpoint level, and the invocation fails. Save this as endpoint-policy.json:
Configure an identity-based policy (Example Corp’s account)
Resource-based policies alone aren’t sufficient for cross-account access. Example Corp must also attach an identity-based policy to DeveloperRole and AdminRole in their account (111122223333) that allows the same action on your resources. Without this policy on the tenant side, IAM denies the cross-account request even though your resource-based policies allow it.
Example Corp attaches the following policy to both DeveloperRole and AdminRole:
Attach this policy to both DeveloperRole and AdminRole in Example Corp’s account.
Step 2: Configure cross-account with VPC-restricted access for AnyCompany (Tenant B)
AnyCompany operates under HIPAA compliance requirements and mandates that all traffic to your agent stays within a private network path. Like Example Corp, AnyCompany needs cross-account access from account 444455556666—but with an additional constraint, requests must originate from their VPC vpc-health1234 through an interface VPC endpoint. Any request from outside this VPC is denied, even if it comes from AnyCompany’s ApplicationRole.
Resource-based policies (your platform account): To enforce this, you update the resource-based policies on both the AgentCore Runtime and AgentCore Runtime endpoint. Each policy includes an Allow statement that grants ApplicationRole permission to invoke the agent, paired with a Deny statement that blocks any request not originating from vpc-health1234. In the following policy, the Deny statement uses StringNotEquals on aws:SourceVpc . When a request arrives through an interface VPC endpoint, AWS populates this key with the VPC ID. If it doesn’t match vpc-health1234, or if the key is absent because no VPC endpoint was used, the Deny takes effect. Because an explicit Deny overrides any Allow from any policy, this pattern helps ensure that no other identity-based or resource-based policy can inadvertently grant AnyCompany access from outside the VPC. Add the following statements to runtime-policy-v2.json alongside the Example Corp statement from Step 1:
Because put-resource-policy replaces the entire policy on a resource, your updated policy files must include both the preceding AnyCompany statments and the Example Corp statements from Step 1.
AnyCompany must attach an identity-based policy to ApplicationRole in their account 444455556666 that allows the same InvokeAgentRuntime on your resources in account 555555555555. Without this policy on the tenant side, IAM denies the cross-account request even though your resource-based policies allow it.
AnyCompany attaches the following policy to ApplicationRole:
The VPC restriction is enforced entirely on resource account through the resource-based policy condition, AnyCompany’s identity-based policy doesn’t need VPC conditions. This keeps the tenant-side configuration straightforward while you maintain centralized network-level control.
OAuth authentication considerations
The policies in this post use SigV4 authentication with specific IAM role principals. If your AgentCore Runtime or AgentCore Gateway is configured with OAuth authentication instead, the principal structure changes. OAuth-authenticated resources require a wildcard principal (“Principal": "*") because the caller identity comes from a JSON Web Token (JWT) validated before policy evaluation. Anonymous or unauthenticated requests are rejected before the policy is evaluated, so the wildcard principal doesn’t grant open access. To restrict OAuth-authenticated requests to a specific VPC, combine the wildcard principal with a VPC condition in the resource-based policy. IAM principal-based condition keys such as aws:PrincipalAccount and aws:PrincipalOrgID aren’t populated in the OAuth authentication context—only supported network-level condition keys (such as aws:SourceVpc, aws:SourceVpce, aws:SourceIp) are available for use in resource-based policies with OAuth. For more details, see Resource-based policies for Amazon Bedrock AgentCore.
Understanding policy evaluation
To understand how AWS evaluates these policies when a request arrives, consider the following scenarios:
Caller or principal
Network
Identity-based policy (tenant side)
Runtime resource-based policy
Runtime endpoint resource-based policy
Final policy evaluation result
Example Corp
Any network
Allows
Allows
Allows
Allowed
Example Corp
Any network
Allows
Allows
Allows
Allowed
AnyCompany
From
Allows
Allows ( does not match)
Allows ( does not match)
Allowed
AnyCompany
Outside VPC
Allows
matches
matches
Denied
Any other cross-account role
Any network
Allows
No matching
No matching
Denied
Any other cross-account role
Any network
No policy
Allows
Allows
Denied
Conclusion and next steps
In this post, you learned how to use resource-based policies on AgentCore to secure a multi-tenant AI platform with distinct access patterns for each tenant:
Example Corp gets seamless cross-account integration, their development and admin teams can invoke your AI agent directly from their own AWS account without credential management.
AnyCompany gets the strict network-level isolation their compliance team requires, the AI agent is accessible only from within their private VPC, ensuring that interactions involving potential PHI — stay within the controlled network boundary
Both tenants share the same underlying AgentCore Runtime and AgentCore Runtime endpoint, yet each has tailored security controls enforced at the resource level. his approach avoids per-tenant infrastructure duplication while satisfying each tenant’s security posture, a challenge you likely face when onboarding tenants with different compliance postures. Resource-based policies complement identity-based IAM policies, giving you layered control over which principals can invoke which agents, and from which network paths.
If you have feedback about this post, submit comments in the Comments section below.
The collective thoughts of the interwebz
Manage Consent
To provide the best experiences, we use technologies like cookies to store and/or access device information. Consenting to these technologies will allow us to process data such as browsing behavior or unique IDs on this site. Not consenting or withdrawing consent, may adversely affect certain features and functions.
Functional
Always active
The technical storage or access is strictly necessary for the legitimate purpose of enabling the use of a specific service explicitly requested by the subscriber or user, or for the sole purpose of carrying out the transmission of a communication over an electronic communications network.
Preferences
The technical storage or access is necessary for the legitimate purpose of storing preferences that are not requested by the subscriber or user.
Statistics
The technical storage or access that is used exclusively for statistical purposes.The technical storage or access that is used exclusively for anonymous statistical purposes. Without a subpoena, voluntary compliance on the part of your Internet Service Provider, or additional records from a third party, information stored or retrieved for this purpose alone cannot usually be used to identify you.
Marketing
The technical storage or access is required to create user profiles to send advertising, or to track the user on a website or across several websites for similar marketing purposes.