When Anthropic announced Claude Code Security, the market reacted immediately. Several cybersecurity stocks saw sharp drops as speculation spread that AI-powered code security tools could displace traditional security platforms.
The narrative moved quickly: AI is replacing AppSec. AI is automating vulnerability detection. AI will make legacy security tooling redundant. The reality is more nuanced. Claude Code Security is a legitimate signal that AI is reshaping parts of the security landscape. The question is what parts, and what it means for the rest of the stack.
Claude Code Security represents an evolution in AI-assisted static code analysis. It scans codebases, reasons about context, identifies potential vulnerabilities, and proposes fixes for human review. That capability is meaningful, and it reflects the growing role of AI in accelerating software development and improving developer productivity.
What is Claude Code Security
At its core, Claude Code Security enhances static analysis with contextual reasoning. It analyzes source code and attempts to identify vulnerabilities that traditional pattern-matching scanners may miss. It applies verification layers to reduce false positives and presents findings for human validation.
For development teams, this has clear value. It can improve code hygiene earlier in the lifecycle and reduce noise compared to traditional SAST tools. For enterprises, however, secure code is only one layer of risk.
Modern breaches do not rely solely on poorly written functions. They exploit misconfigurations, excessive permissions, identity gaps, runtime behavior, exposed services, and weak operational processes. These risks exist outside the code repository. AI-assisted static analysis improves one part of the equation. It does not replace the broader security stack.
Why the market reaction tells an incomplete story
The drop in cybersecurity stock prices reflects an assumption that better code scanning equals reduced need for detection, response, and exposure management platforms. That assumption overlooks how enterprise security actually functions.
The market’s reaction also reflects a broader belief that this is the beginning of widespread AI-driven displacement in security. That view is partially correct. AI is particularly strong in domains where patterns are well understood and repeatable. Application security vulnerabilities often fall into known classes with predictable root causes. In those bounded problem spaces, displacement is real. But it does not extend uniformly across the full security stack.
Code security addresses vulnerabilities before deployment. Enterprise security addresses behavior after deployment. Detection and response platforms monitor identity misuse, lateral movement, cloud misconfiguration, and attacker tradecraft in live environments. Managed detection and response services provide human expertise to investigate and contain incidents when automated controls are bypassed.
Recent reporting of AI-orchestrated intrusion activity reinforces this distinction, showing how attackers can leverage an AI assistant to automate reconnaissance and exploitation steps at speed.. The issue is not the existence of AI, but the absence of layered controls capable of detecting how that AI is being used. Secure code in isolation does not prevent operational abuse. Runtime visibility and response capability remain essential.
These domains overlap, but they’re not interchangeable. Finding an injection flaw in a code repository doesn’t remove the need to monitor for credential abuse, persistence, or post-compromise behavior in production. From my perspective, there’s a meaningful difference between AI that helps developers write safer code and AI that protects a live environment. One works on source code in a repository before deployment. The other has to handle the real world: identity, behavior, lateral movement, and attacker intent across cross-vendor infrastructure that changes in real time. Both matter, but when we conflate them, we create either a false sense of security or a false sense of disruption.
Where AI does belong in security
AI models and agentic systems should serve as purpose-built engines that improve outcomes in real time. AI innovation is a continuous process, not a one-time product release. Rapid7 has invested heavily in AI-driven workflows across our platform and MDR services. Used correctly, AI accelerates triage, enriches alerts, prioritizes risk, and reduces time to action.
In managed detection and response (MDR) environments, for example, AI-driven workflows can help scale investigations and surface high-confidence insights faster, while keeping analysts firmly in control.
The key distinction is this: AI should amplify human expertise and operational processes, not replace them. That is the philosophy behind how many enterprise platforms are approaching AI today, including the integration of AI features into broader security workflows rather than positioning them as standalone replacements.
⠀
⠀
AI can help developers write safer code and identify risky patterns earlier in the lifecycle. It becomes most valuable when its findings are integrated into a broader security context. Enterprise security requires runtime visibility, identity governance, segmentation, and continuous validation across production environments.
AI-driven code and vulnerability tools should be treated as another high-value source of security telemetry and remediation insight. Just as security operations teams ingest third-party alerts into detection workflows or correlate exposure data from cloud and application security tools into a unified risk view, newer capabilities like Claude Code can contribute meaningful signals. The responsibility of security leadership is to ensure those signals are contextualized within a holistic view of risk across the organization.
Secure development matters. So does understanding how code, infrastructure, identity, and runtime behavior interact. The strongest programs will integrate AI-assisted insights into that wider risk model rather than evaluating them in isolation.
In my work, we’re building AI that sits inside the operational loop of a diverse landscape: triaging alerts, enriching investigations, and helping analysts move faster on what matters. That is very different from scanning code before it ships. The real opportunity is not AI replacing security platforms, but AI making the humans running those platforms dramatically more effective. The companies that get this right will not try to automate away human judgment; they will find ways to scale it.
How security leaders should think about it
For CISOs and senior security leaders, the takeaway should be measured and strategic.
First, recognize the value. AI-assisted code security tools will likely become standard in modern development environments. They can improve quality and reduce certain categories of vulnerability earlier in the lifecycle.
Second, avoid over-indexing on them as a replacement for enterprise controls. Breaches rarely occur because static analysis was unavailable. They occur because exposures persist across identity, infrastructure, and operational layers.
Third, focus on integration. Ask how AI code analysis feeds into broader exposure management. How findings are prioritized. How runtime controls validate that remediations are effective. How detection engineering adapts to new development patterns introduced by AI-generated code.
The path forward to resilience
Security leaders do not need another debate about whether AI changes security. It does. The question is how to incorporate it without distorting risk priorities.
AI-assisted code analysis should be adopted where it delivers clear value: earlier defect detection, faster remediation cycles, and stronger developer feedback loops. That improves engineering outcomes. It does not, on its own, materially reduce enterprise breach risk.
Enterprise risk concentrates elsewhere. It is found in the systemic exposures that emerge in live environments. That includes complex identity estates, misaligned permissions, overexposed services, and the gaps that exist between deployment and continuous monitoring. These are not source code issues; they are operational realities.
As AI accelerates software delivery, it also increases environmental volatility. More code ships. More infrastructure spins up and down. More integrations connect systems that were never designed to operate together. Risk does not disappear. It shifts and compounds.
The priority for CISOs is alignment. Align AI-assisted development controls with exposure management. Align exposure insights with runtime detection. Align detection with disciplined response. That integration determines whether AI becomes a force multiplier or a source of blind spots.
Organizations that treat AI as an enhancement to an already coherent operating model will extract measurable value. Those that treat it as a substitute for layered controls will not.
Security remains an end-to-end discipline. Code is one layer, but resilience is the objective. Author note: Laura Ellis, VP, Data & AI at Rapid7, has written about how agentic AI workflows can help MDR teams improve speed and operational consistency while keeping humans firmly in control. Read more about that approach here.
This post is cowritten by Julio Bando from Santander.
Santander faced a significant technical challenge in managing an infrastructure that processes billions of daily transactions across more than 200 critical systems. The expansion into diverse financial services, including investment banking, wealth management, insurance, and payment solutions, had created unprecedented technological complexity, requiring a robust, agile, and scalable infrastructure solution. This raised two main issues. Santander needed to ensure that provisioned services followed established architecture definitions, and they needed to reduce infrastructure provisioning time, which took up to 90 days. This situation demanded intensive operational effort. The solution emerged through an innovative platform engineering initiative called Catalyst, which transformed the bank’s cloud infrastructure and development management. This post analyzes the main cases, benefits, and results obtained with this initiative.
The Catalyst solution
Santander is a global financial services company present in more than 10 countries, with over 160 million customers worldwide. They conceived Catalyst in conjunction with the Platform Strategy Program (PSP), an Amazon Web Services (AWS) program specialized in infrastructure platform design. Implemented through a partnership between AWS Professional Services and Santander, the platform was designed to abstract infrastructure provisioning complexity, standardize architectural compliance, and create a framework that enables new technologies in the bank.
The platform’s in-house frontend was developed as an intuitive developer portal, offering a unified interface for all provisioning and resource management needs. At the platform’s core is the control plane cluster, based on Amazon Elastic Kubernetes Service (Amazon EKS). This cluster is the brain of the operation, orchestrating all components and workflows. Within the cluster, Crossplane plays a fundamental role, acting as a universal resource provisioner that Santander uses to manage resources across multiple cloud providers consistently and declaratively.
The control plane cluster has three components:
Data plane claims – Managed by ArgoCD, a continuous delivery tool, the component is responsible for continuous synchronization and deployment of application stacks (integrated sets of cloud resources) and configurations, exploring the GitOps concept.
Policies catalog – A central repository of policies ensuring compliance and security across all operations using Open Policy Agent (OPA).
Santander used this innovative architecture to significantly reduce provisioning time from 90 days to only a few hours and in some cases only minutes. Catalyst brought significant benefits in terms of standardization, security, and governance. The provisioning cycle decreased from 30 days to 2 days, and proof of concept preparation time jumped from 90 days to only 1 hour. The consolidation of over 100 pipelines into a single control plane will further simplify infrastructure management. The following diagram shows the Santander catalyst architecture.
Key platform capabilities
Catalyst’s implementation enabled the creation of strategic workloads demonstrating the platform’s versatility and robustness:
Generative AI agents stack – The first success case was implementing a complete stack for AI agents integrating:
Modern data platform – One of the most complex workloads implemented through Catalyst was the new data platform, including:
Built-in integration with Databricks
Data lakes
Automated extract, transform, and load (ETL) workflows
Integration with centralized data catalog
Segregated environments for experimentation. With this implementation, the bank significantly reduces approximately 3,000 monthly tickets related to data experimentation environment provisioning.
Cloud process orchestration – creation of a modern process orchestration environment with significant results:
Implementation of retry patterns and error handling
Centralized process monitoring
Overall result
This stack reduced AI agent implementation time from 105 days to only 24 hours, eliminating dozens of provisioning tickets per environment. The success of these workloads demonstrates Catalyst’s technical capability and the solution’s versatility in meeting different business needs. Each implementation brought valuable learnings that were incorporated into the platform, creating a virtuous cycle of continuous improvement. The variety of implemented workloads also shows how Catalyst has the potential to be a universal platform, capable of supporting everything from traditional use cases to the most innovative ones involving AI and legacy system modernization. Catalyst’s success wasn’t limited to operational efficiency. The platform also catalyzed a cultural change within Santander, promoting an automation and self-service mindset among development teams. This resulted in faster overall development velocity, more agile teams, and enhanced capability to respond quickly to market changes.
Conclusion
Catalyst represents more than merely a technological tool—it’s a digital transformation enabler that’s redefining cloud development standards at the bank. With the platform, Santander addressed the challenges of a scaled environment and established a solid foundation for continuous innovation and future growth.
With these practical cases, Santander proves that investment in platform engineering solves technical problems and enables new business possibilities, keeping the bank at the forefront of digital transformation in the financial sector.
Netflix’s core mission is to connect millions of members around the world with stories they’ll love. This requires not just an incredible catalog, but also a deep, machine-level understanding of every piece of content in that catalog, from the biggest blockbusters to the most niche documentaries. As we onboard new types of content such as live events and podcasts, the need to scalably understand these nuances becomes even more critical to our productions and member-facing experiences.
Many of these media-related tasks require sophisticated long-form video understanding e.g., identifying subtle narrative dependencies and emotional arcs that span entire episodes or films. Previous work has found that to truly grasp the content’s essence, our models must leverage the full multimodal signal. For example, the audio soundtrack is a crucial, non-visual modality that can help more precisely identify clip-level tones or when a new scene starts. Can we use our collection of shows and movies to learn how to a) fuse modalities like audio, video, and subtitle text together and b) develop robust representations that leverage the narrative structure that is present in long form entertainment? Consisting of tens of millions of individual shots across multiple titles, our diverse yet entertainment-specific dataset provides the perfect foundation to train multimodal media understanding models that enable many capabilities across the company such as ads relevancy, clip popularity prediction, and clip tagging.
For these reasons, we developed the Netflix Media Foundational Model (MediaFM), our new, in-house, multimodal content embedding model. MediaFM is the first tri-modal (audio, video, text) model pretrained on portions of the Netflix catalog. Its core is a multimodal, Transformer-based encoder designed to generate rich, contextual embeddings¹ for shots from our catalog by learning the temporal relationships between them through integrating visual, audio, and textual information. The resulting shot-level embeddings are powerful representations designed to create a deeper, more nuanced, and machine-readable understanding of our content, providing the critical backbone for effective cold start of newly launching titles in recommendations, optimized promotional assets (like art and trailers), and internal content analysis tools.
Figure 1: MediaFM Architecture
Input Representation & Preprocessing
The model’s fundamental unit of input is a shot, derived by segmenting a movie or episode (collectively referred to as “title”) using a shot boundary detection algorithm. For each shot, we generate three distinct embeddings from its core modalities:
Video: an internal model called SeqCLIP (a CLIP-style model fine-tuned on video retrieval datasets) is used to embed frames sampled at uniform intervals from segmented shots
Audio: the audio samples from the same shots are embedded using Meta FAIR’s wav2vec2
Timed Text: OpenAI’s text-embedding-3-large model is used to encode the corresponding timed text (e.g., closed captions, audio descriptions, or subtitles) for each shot
For each shot, the three embeddings² are concatenated and unit-normed to form a single 2304-dimensional fused embedding vector. The transformer encoder is trained on sequences of shots, so each example in our dataset is a temporally-ordered sequence of these fused embeddings from the same movie or episode (up to 512 shots per sequence). We also have access to title-level metadata which is used to provide global context for each sequence (via the [GLOBAL]token). The title-level embedding is computed by passing title-level metadata (such as synopses and tags) through the text-embedding-3-large model.
Model Architecture and Training Objective
The core of our model is a transformer encoder, architecturally similar to BERT. A sequence of preprocessed shot embeddings is passed through the following stages:
Input Projection: The fused shot embeddings are first projected down to the model’s hidden dimension via a linear layer.
Sequence Construction & Special Tokens: Before entering the Transformer, two special embeddings are prepended to the sequence: • a learnable [CLS] embedding is added at the very beginning. • the title-level embedding is projected to the model’s hidden dimension and inserted after the [CLS] token as the [GLOBAL] token, providing title-level context to every shot in the sequence and participating in the self-attention process.
Contextualization: The sequence is enhanced with positional embeddings and fed through the Transformer stack to provide shot representations based on their surrounding context.
Output Projection: The contextualized hidden states from the Transformer are passed through a final linear layer, projecting them from the hidden layers back up to the 2304-dimensional fused embedding space for prediction.
We train the model using a Masked Shot Modeling (MSM) objective. In this self-supervised task, we randomly mask 20% of the input shot embeddings in each sequence by replacing them with a learnable [MASK] embedding. The model’s objective is to predict the original, unmasked fused embedding for these masked positions. The model is optimized by minimizing the cosine distance between its predicted embedding and the ground-truth embedding for each masked shot.
We optimized the hidden parameters with Muon and the remaining parameters with AdamW. It’s worth noting that the switch to Muon resulted in noticeable improvements.
Evaluation
To evaluate the learned embeddings, we learn task-specific linear layers on top of frozen representations (i.e., linear probes). Most of the tasks are clip-level, i.e., each example is a short clip ranging from a few seconds to a minute which are often presented to our members while recommending a title to them. When embedding these clips, we find that “embedding in context”, namely extracting the embeddings from within a larger sequence (e.g., the episode containing the clip), naturally does much better than embedding only the shots from a clip.
Our embeddings are foundational and we find that they bring value to applications across Netflix. Here are a few:
Ad Relevancy: A multilabel classification task to categorize Netflix clips for relevant ad placement, measured by Average Precision. In this task, these representations operate at the retrieval stage, where they help in identifying the candidate set and in turn are fed into the ad serving system for relevance optimization.
Clip Popularity Ranking: A ranking task to predict the relative performance (in click-through rate, CTR) of a media clip relative to other clips from that show or movie, measured by a ten-fold with Kendall’s tau correlation coefficient.
Clip Tone: A multi-label classification of hook clips into 100 tone categories (e.g., creepy, scary, humorous) from our internal Metadata & Ratings team, measured by micro Average Precision (averaged across tone categories).
Clip Genre: A multi-label classification of clips into eleven core genres (Action, Anime, Comedy, Documentary, Drama, Fantasy, Horror, Kids, Romance, Sci-fi, Thriller) derived from the genre of the parent title, measured by macro Average Precision (averaged across genres).
Clip Retrieval: a binary classification of clips from movies or episodes into “clip-worthy” (i.e., a good clip to showcase the title) or not, as determined by human annotators, and as measured by Average Precision. The positive to negative clip ratio is 1:3, and for each title we select 6–10 positive clips and the corresponding number of negatives.
It’s worth noting that for the tasks above (as well as other tasks that use our model), the model outputs are utilized as information that the relevant teams use when driving to a decision rather than being used in a completely end-to-end fashion. Many of the improvements are also in various stages of deployment.
Results
Figure 2³ compares MediaFM to several strong baselines:
The previously mentioned SeqCLIP, which also provides the video embedding input for MediaFM
Figure 2: Performance of MediaFM vs. external and internal models.
On all tasks, MediaFM is better than the baselines. Improvements seem to be larger for tasks that require more detailed narrative understanding e.g., predicting the most relevant ads for an ad break given the surrounding context. We look further into this next.
Ablations
MediaFM’s primary improvements over previous Netflix work stem from two key areas: combining multiple modalities and learning to contextualize shot representations. To determine the contribution of each factor across different tasks, we compared MediaFM to a baseline. This baseline concatenates the three input embeddings, essentially providing the same complete, shot-level input as MediaFM but without the contextualization step. This comparison allows us to isolate which tasks benefit most from the contextualization aspect.
Additional modalities help somewhat for tone but the main improvement comes from contextualization.
Oddly, multiple uncontextualized modalities hurts the clip popularity ranking model, but adding contextualization significantly improves performance.
For clip retrieval we see a natural progression of around 15% for each improvement.
Next Steps
MediaFM presents a way to learn how to fuse and/or contextualize shot-level information by leveraging Netflix’s catalog in a self-supervised manner. With this perspective, we are actively investigating how pretrained multimodal (audio, video/image, text) LLMs like Qwen3-Omni, where the modality fusion has already been learned, can provide an even stronger starting point for subsequent model generations.
Next in this series of blog posts, we will present our method to embed title-level metadata and adapt it to our needs. Stay tuned!
Footnotes
We chose embeddings over generative text outputs to prioritize modular design. This provides a tighter, cleaner abstraction layer: we generate the representation once, and it is consumed across our entire suite of services. This avoids the architectural fragility of fine-tuning, allowing us to enhance our existing embedding-based workflows with new modalities more flexibly.
All of our data has audio and video; we zero-pad for missing timed text data, which is relatively likely to occur (e.g., in shots without dialogue).
The title-level tasks couldn’t be evaluated with the VertexAI MM and Marengo embedding models as the videos exceed the length limit set by the APIs.
Security teams have been talking about alert fatigue for years. And yet, for many SOCs, the problem isn’t getting better. It’s getting worse.
As environments expand across cloud, SaaS, identity, and legacy systems, analysts are flooded with signals that all demand attention but rarely arrive with enough context to act quickly. Staffing shortages only amplify the issue. The result is a SOC stuck reacting to noise instead of responding to real risk.
Recent industry research reinforces what analysts already know. False positives remain one of the top challenges in detection and response, and many analysts encounter low-value alerts so frequently that it slows investigations and contributes directly to burnout. Alert fatigue isn’t just an efficiency problem. It’s an operational risk.
Why alert fatigue persists, and why it’s not your fault
Alert fatigue isn’t a reflection of weak analysts or underperforming teams. It’s the outcome of security models that haven’t kept pace with modern complexity.
Traditional SIEM approaches were built for a different era. Rule-heavy detections, manual enrichment, siloed tools, and flat log views force analysts to spend valuable time stitching together context before they can even begin investigating. Even experienced analysts end up waiting for answers instead of acting on them.
Modern SOCs need a different approach. One that prioritizes analyst efficiency, reduces friction, and brings clarity to investigations from the start.
Four moves that change how SOCs operate
In the eBook, we break down four practical shifts that high-performing SOCs are making to move beyond alert fatigue:
Automate the noise with AI-assisted classification and enrichment so analysts can focus on what truly matters
Investigate smarter with unified context, eliminating unnecessary pivots between tools
Shrink the response cycle using guided workflows that make investigations faster and more consistent
Gain confidence in coverage by understanding risk across the entire attack surface, not just known assets
These aren’t theoretical ideas. They’re grounded in real-world SOC workflows and designed to help analysts move faster without sacrificing control or trust.
A look inside a real SOC investigation
One of the most impactful sections of the eBook walks through a familiar scenario: a phishing or business email compromise investigation.
Instead of listing tools or features, it shows what the investigation actually feels like for an analyst. From the frustration of waiting on data in a traditional workflow to the clarity that comes when context is surfaced early and answers arrive faster. It’s a reminder that efficiency isn’t about removing analysts from the loop. It’s about removing the friction that slows them down.
From overwhelmed to in command
At its core, the playbook is built on a simple principle. Modern SOC efficiency comes from reducing noise, unifying context, and guiding investigations with AI-assisted workflows, all while keeping analysts firmly in control.
If you’re responsible for detection and response, or if you’re feeling the strain of alert fatigue in your SOC, this eBook is designed for you.
Since we launched Amazon Nova customization in Amazon SageMaker AI at AWS NY Summit 2025, customers have been asking for the same capabilities with Amazon Nova as they do when they customize open weights models in Amazon SageMaker Inference. They also wanted have more control and flexibility in custom model inference over instance types, auto-scaling policies, context length, and concurrency settings that production workloads demand.
Today, we’re announcing the general availability of custom Nova model support in Amazon SageMaker Inference, a production-grade, configurable, and cost-efficient managed inference service to deploy and scale full-rank customized Nova models. You can now experience an end-to-end customization journey to train Nova Micro, Nova Lite, and Nova 2 Lite models with reasoning capabilities using Amazon SageMaker Training Jobs or Amazon HyperPod and seamlessly deploy them with managed inference infrastructure of Amazon SageMaker AI.
With Amazon SageMaker Inference for custom Nova models, you can reduce inference cost through optimized GPU utilization using Amazon Elastic Compute Cloud (Amazon EC2)G5 and G6 instances over P5 instances, auto-scaling based on 5-minute usage patterns, and configurable inference parameters. This feature enables deployment of customized Nova models with continued pre-training, supervised fine-tuning, or reinforcement fine-tuning for your use cases. You can also set advanced configurations about context length, concurrency, and batch size for optimizing the latency-cost-accuracy tradeoff for your specific workloads.
Let’s see how to deploy customized Nova models on SageMaker AI real-time endpoints, configure inference parameters, and invoke your models for testing.
Deploy custom Nova models in SageMaker Inference At AWS re:Invent 2025, we introduced new serverless customization in Amazon SageMaker AI for popular AI models including Nova models. With a few clicks, you can seamlessly select a model and customization technique, and handle model evaluation and deployment. If you already have a trained custom Nova model artifact, you can deploy the models on SageMaker Inference through the SageMaker Studio or SageMaker AI SDK.
In the SageMaker Studio, choose a trained Nova model in Models in your models in the Models menu. You can deploy the model by choosing Deploy button, SageMaker AI and Create new endpoint.
Choose the endpoint name, instance type, and advanced options such as instance count, max instance count, permission and networking, and Deploy button. At GA launch, you can use g5.12xlarge, g5.24xlarge, g5.48xlarge, g6.12xlarge, g6.24xlarge, g6.48xlarge, and p5.48xlarge instance types for the Nova Micro model, g5.24xlarge, g5.48xlarge, g6.24xlarge, g6.48xlarge, and p5.48xlarge for the Nova Lite model, and p5.48xlarge for the Nova 2 Lite model.
Creating your endpoint requires time to provision the infrastructure, download your model artifacts, and initialize the inference container.
After model deployment completes and the endpoint status shows InService, you can perform real-time inference using the new endpoint. To test the model, choose the Playground tab and input your prompt in the Chat mode.
You can also use the SageMaker AI SDK to create two resources: a SageMaker AI model object that references your Nova model artifacts, and an endpoint configuration that defines how the model will be deployed.
The following code creates a SageMaker AI model that references your Nova model artifacts:
# Create a SageMaker AI model
    model_response = sagemaker.create_model(
        ModelName= 'Nova-micro-ml-g5-12xlarge',
        PrimaryContainer={
            'Image': '123456789012.dkr.ecr.us-east-1.amazonaws.com/nova-inference-repo:v1.0.0',
            'ModelDataSource': {
                'S3DataSource': {
                   'S3Uri': 's3://your-bucket-name/path/to/model/artifacts/',
                   'S3DataType': 'S3Prefix',
                   'CompressionType': 'None'
                }
            },
            # Model Parameters
            'Environment': {
                'CONTEXT_LENGTH': 8000,
                'CONCURRENCY': 16,
                'DEFAULT_TEMPERATURE': 0.0,
                'DEFAULT_TOP_P': 1.0
            }
        },
        ExecutionRoleArn=SAGEMAKER_EXECUTION_ROLE_ARN,
        EnableNetworkIsolation=True
    )
    print("Model created successfully!")
Next, create an endpoint configuration that defines your deployment infrastructure and deploy your Nova model by creating a SageMaker AI real-time endpoint. This endpoint will host your model and provide a secure HTTPS endpoint for making inference requests.
After the endpoint is created, you can send inference requests to generate predictions from your custom Nova model. Amazon SageMaker AI supports synchronous endpoints for real-time with streaming/non-streaming modes and asynchronous endpoints for batch processing.
For example, the following code creates streaming completion format for text generation:
# Streaming chat request with comprehensive parameters
streaming_request = {
"messages": [
        {"role": "user", "content": "Compare our Q4 2025 actual spend against budget across all departments and highlight variances exceeding 10%"}
    ],
    "max_tokens": 512,
    "stream": True,
    "temperature": 0.7,
    "top_p": 0.95,
    "top_k": 40,
    "logprobs": True,
    "top_logprobs": 2,
    "reasoning_effort": "low",  # Options: "low", "high"
    "stream_options": {"include_usage": True}
}

invoke_nova_endpoint(streaming_request)

def invoke_nova_endpoint(request_body):
"""
    Invoke Nova endpoint with automatic streaming detection.

    Args:
        request_body (dict): Request payload containing prompt and parameters

    Returns:
        dict: Response from the model (for non-streaming requests)
        None: For streaming requests (prints output directly)
    """
    body = json.dumps(request_body)
    is_streaming = request_body.get("stream", False)

    try:
        print(f"Invoking endpoint ({'streaming' if is_streaming else 'non-streaming'})...")

        if is_streaming:
            response = runtime_client.invoke_endpoint_with_response_stream(
                EndpointName=ENDPOINT_NAME,
                ContentType='application/json',
                Body=body
            )

            event_stream = response['Body']
            for event in event_stream:
                if 'PayloadPart' in event:
                    chunk = event['PayloadPart']
                    if 'Bytes' in chunk:
                        data = chunk['Bytes'].decode()
                        print("Chunk:", data)
        else:
            # Non-streaming inference
            response = runtime_client.invoke_endpoint(
                EndpointName=ENDPOINT_NAME,
                ContentType='application/json',
                Accept='application/json',
                Body=body
            )

            response_body = response['Body'].read().decode('utf-8')
            result = json.loads(response_body)
            print("✅ Response received successfully")
            return result

    except ClientError as e:
        error_code = e.response['Error']['Code']
        error_message = e.response['Error']['Message']
        print(f"❌ AWS Error: {error_code} - {error_message}")
    except Exception as e:
        print(f"❌ Unexpected error: {str(e)}")
Now available Amazon SageMaker Inference for custom Nova models is available today in US East (N. Virginia) and US West (Oregon) AWS Regions. For Regional availability and a future roadmap, visit the AWS Capabilities by Region.
The feature supports Nova Micro, Nova Lite, and Nova 2 Lite models with reasoning capabilities, running on EC2 G5, G6, and P5 instances with auto-scaling support. You pay only for the compute instances you use, with per-hour billing and no minimum commitments. For more information, visit Amazon SageMaker AI Pricing page.
The conversation around AI security is full of anxiety. Every week, new headlines warn of jailbreaks, prompt injection, agents gone rogue, and the rise of LLM-enabled cybercrime. It’s easy to come away with the impression that AI is fundamentally uncontrollable and dangerous, and therefore something we need to lock down before it gets out of hand.
But as a security practitioner, I wasn’t convinced. Most of these warnings are based on hypothetical examples or carefully engineered demos. They raise important questions, but rarely answer the most basic one: What does the real attack surface of today’s AI systems actually look like?
So instead of offering another opinion, I ran the numbers.
The method: Focused, real-world measurement
To ground the conversation in reality, I focused on MCP, the Model Context Protocol. This framework is widely used to help language models interact with tools, APIs, and external systems. It’s open source, replicated across many environments, and built for practical integration. That makes it an ideal test case for understanding actual exposure.
No adversarial prompting. No artificial exploits. Just a measurement of what real MCP servers expose. We used SDK import analysis to locate active repositories, filtered out those that wouldn’t run, and examined the tool schemas to understand what each was capable of.
What the data tells us
The MCP servers that met our criteria showed a familiar pattern. They exposed well-understood primitives used throughout modern software systems.
Observed capability classes:
Filesystem access
HTTP requests
Database queries
Local script or process execution
Orchestration and tool chaining
Read-only API search
These are not exotic capabilities unique to AI. They’re already embedded in cloud automation, infrastructure-as-code, and modern DevOps stacks. MCP simply gives them structure.
The frequency of high-severity risk is low
One of the most unexpected findings was the rarity of arbitrary code execution. Despite warnings in the media, this turned out to be the least common capability among all operational MCP servers analyzed.
This matters. It suggests that real-world deployments of AI tooling are not as reckless as some narratives claim. The most common issues are the ones we’ve known for years: weak defaults, excessive permissions, and poor input handling. There’s no mystery there (and that’s encouraging).
Where the real risk builds: Composition
The problem arises when those primitives are combined. Individually, most of the MCP servers we studied were low risk. But when orchestration enters the picture, the attack surface expands.
Some real-world examples we observed:
HTTP fetch + filesystem write = persistence or content injection
These combinations reflect what adversaries already do in non-AI environments. MCP just reduces friction in putting the pieces together.
A critical counterpoint: The ‘best effort’ reality
The focus on constraining the model via schema and architecture is essential for ‘secure by design,’ yet a critical counterpoint must be considered as the industry evolves: We may not be able to stop many insecure AI applications (e.g., those built on architectures like OpenClaw or Claude Code) from shipping with insecure design choices. Similarly, the insecure design path for AI could force security teams to rely on non-deterministic, ‘best effort’ prompt injection defenses to prevent data exfiltration and remote code execution, rather than influencing developers toward inherently secure application design.
While the secure boundary is the schema, and we must influence application developers to adopt secure-by-design principles, the future suggests there will be many cases where this influence fails. This means security leaders must also prepare for a hybrid reality of championing architectural security while also building and operating robust, best effort runtime defenses to manage the fallout from the inevitable wave of insecure AI applications.
A shift in where security happens
As we embed AI deeper into operational systems, the control points change. Historically, we validated inputs at the UI layer, enforced roles through IAM, and wrapped logic in application code.
With AI agents, those controls now live in:
The orchestration layer
Tool composition workflows
Schema contracts
Execution sandboxes
Security needs to follow the shift. That means auditing tool chains, setting strict schema policies, isolating execution contexts, and applying existing practices like least privilege and defense in depth to this new architecture.
What security teams should do now
Security and architecture leaders can start applying pressure in the right places today:
Map AI tooling to known primitives Don’t treat these systems as unknowns. Most expose capabilities like file handling, HTTP fetches, or basic shell commands – all of which are familiar territory for teams leveraging threat intelligence effectively.
Assess schema design before worrying about prompts The schema defines what tools the AI can call and how. Poorly scoped parameters, such as unbounded URLs or file paths, are far more dangerous than clever prompts.
Limit orchestration where possible Composability increases risk. If orchestration is required, monitor it like critical automation infrastructure.
Audit your environment for capability sprawl Look for AI-connected services that may expose multiple sensitive capabilities together. Risk scales when these tools are combined.
Apply existing enterprise controls Network segmentation, credential scoping, logging, and behavioral detections still work. Least privilege access is especially relevant in AI-integrated environments where tool chaining can escalate access unintentionally. AI requires adaptation, not reinvention.
Understanding the risk of AI without the hype
This blog condenses findings from my recent research, where I set out to answer a straightforward question: what are AI systems actually exposing in the real world today? Instead of relying on hypotheticals or fear-driven narratives, I looked at real, runnable Model Context Protocol (MCP) servers and measured their exposed capabilities and architectural design.
If you’re looking for the technical deep dive, including methodology, data sets, and schema-level breakdowns, you can read the original research published on HackerNoon. You can also explore more of our ongoing threat analysis and security research on the Rapid7 Research Hub.
The bottom line: AI introduces complexity and scale, but the fundamental security principles remain the same. The real challenge is whether security teams can adapt traditional controls to new environments and influence developers toward inherently secure application design, rather than being forced to rely on non-deterministic, ‘best effort’ defenses like prompt injection mitigation.
Software maintenance and modernization is a critical challenge for enterprises managing hundreds or thousands of repositories. Whether upgrading Java versions, migrating to new AWS SDKs, or modernizing frameworks, the scale of transformation work can be overwhelming. AWS Transform custom uses agentic AI to perform large-scale modernization of software, code, libraries, and frameworks to reduce technical debt. It handles diverse scenarios including language version upgrades, API and service migrations, framework upgrades and migrations, code refactoring, and organization-specific transformations. Through continual learning, the agent improves from every execution and developer feedback, delivering high-quality, repeatable transformations without requiring specialized automation expertise.
Organizations need to run transformations using AWS Transform custom concurrently across their entire code estate to meet aggressive modernization timelines and compliance deadlines. Running it at enterprise scale requires a solution to process repositories in parallel, in a controlled remote cloud environment, manage credentials securely, and provide visibility into transformation progress. Today, we’re introducing an open-source solution that brings production-grade scalability, reliability, and monitoring to AWS Transform custom. This infrastructure enables you to run transformations on thousands of repositories in parallel using AWS Batch and AWS Fargate, with REST API access for programmatic control and comprehensive Amazon CloudWatch monitoring.
Requirements for Enterprise-Scale Code Modernization
AWS Transform custom provides powerful AI-driven code transformation capabilities through its CLI. To effectively scale transformations across enterprise codebases, organizations need:
Scale: Ability to run transformations on 1000+ repositories concurrently rather than one-by-one Infrastructure: Dedicated compute resources for long-running transformations beyond developers’ laptops API Access: REST API for programmatic orchestration and seamless integration with CI/CD pipelines Monitoring: Centralized visibility into transformation progress and status across multiple repositories Reliability: Automatic retries, secure credential management, and built-in fault tolerance
The Solution: Batch Infrastructure with REST API
This solution provides complete, production-ready infrastructure that addresses these challenges:
Core Capabilities
Scalable Batch Processing Run transformations on thousands of repositories in parallel using AWS Batch with Fargate. The default configuration (256 max vCPUs, 2 vCPUs per job) supports up to 128 concurrent jobs, with automatic queuing and resource management. The compute environment scales based on your needs and Fargate service quotas.
REST API for Programmatic Access Seven API endpoints provide complete job lifecycle management, enabling you to submit single jobs or bulk batches of thousands in one request. The API offers real-time status tracking and progress monitoring, with Amazon Identity and access Management (IAM) authentication ensuring secure access to transformation operations.
Multi-Language Container The solution includes a container supporting Java (8, 11, 17, 21), Python (3.8-3.13), and Node.js (16-24) with all build tools pre-installed, including Maven, Gradle, npm, and yarn. The AWS Transform CLI and AWS CLI v2 are bundled in. The container is fully extensible for custom requirements—you can add your own libraries, languages, or tools by customizing the Dockerfile to meet their specific needs
Enterprise-Grade Reliability Automatic IAM credential management eliminates long-lived keys, with credentials auto-refreshing every 45 minutes for jobs up to 12 hours. The system includes automatic retries for transient failures (default: 3 attempts), with configurable timeout and retry settings to match your transformation complexity.
Comprehensive Monitoring A CloudWatch dashboard provides job tracking with success and failure rates, trends over time, and API and Lambda health metrics. Real-time log streaming enables you to monitor transformation progress and quickly diagnose issues.
Architecture
The solution uses a serverless architecture built on AWS managed services:
AWS Transform custom Batch solution architecture
Key Components:
API Gateway: REST API with IAM authentication
Lambda Functions: Job orchestration, status tracking, bulk submission
AWS Batch: Job queue and compute environment management
Fargate: Serverless container execution (no EC2 to manage)
S3: Source code input and transformation results output
CloudWatch: Logs, metrics, and operational dashboard
Getting Started
Prerequisites
Before deploying, ensure you have:
AWS Account with appropriate IAM permissions (ECR, S3, IAM, Batch, Lambda, API Gateway, CloudWatch)
AWS CLI v2 configured with credentials or AWS SSO login
This checks that Docker is installed and running, AWS CLI v2 is configured with credentials, Git is available, and your AWS account has the required VPC and public subnets.
cd deployment
chmod +x *.sh
./check-prereqs.sh
Step 4: Set up IAM Permissions (Optional, but recommended)
Generate a least-privilege IAM policy instead of using broad permissions:
./generate-custom-policy.sh
This creates iam-custom-policy.json with minimum permissions scoped to your specific resources.
Create and attach the policy:
aws iam create-policy \
  --policy-name ATXCustomDeploymentPolicy \
  --policy-document file://iam-custom-policy.json
This endpoint is used in all subsequent API calls.
Option 2: Bash Scripts (Alternative)
If you prefer manual control over each deployment step or need to customize individual components, use the bash script deployment. See deployment/README.md for the complete 3-step process with detailed explanations of what each script deploys.
Using the Solution
Single Job Submission
Quick test: Run cd ../test && ./test-apis.sh to validate all API endpoints (MCP, transformations, bulk jobs, campaigns).
Submit a Python version upgrade transformation:
cd ..
python3 utilities/invoke-api.py \
  --endpoint "$API_ENDPOINT" \
  --path "/jobs" \
  --data '{
    "source": "https://github.com/venuvasu/todoapilambda",
    "command": "atx custom def exec -n AWS/python-version-upgrade -p /source/todoapilambda -c noop --configuration \"validationCommands=pytest,additionalPlanContext=The target Python version to upgrade to is Python 3.13. Python 3.13 is already installed at /usr/bin/python3.13\" -x -t"
  }'
This API call triggers a Python version upgrade transformation on the todoapilambda public git repository. The transformation uses the AWS Managed transformation to upgrade from the current Python version to Python 3.13. The configuration parameter specifies additional validation command to be run and plan context to specifies the location of python 3.13 installation in the container and the target version. The -x flag is for non-interactive mode of the transformation , and -t flag is to trust all tools for this transformation.
API returns a job ID for tracking. Job names are auto-generated from the source repository and transformation type.
See api/README.md for complete API documentation with examples for Java, Node.js, and other transformations.
Bulk Job Submission
Transform multiple repositories in a single API call:
This API call triggers a deep static analysis of the codebase to generate hierarchical, cross-referenced documentation for three open source repositories in parallel. The transformation uses the AWS Managed transformation to generate behavioral analysis, architectural documentation, and business intelligence extraction to create a comprehensive knowledge base organized for maximum usability and navigation.
The API submits these jobs in a async manner. i.e the API returns a batch id upon submitting these jobs to AWS Batch. Then you can monitor the progress as specified below.
See api/README.md for status checking, MCP configuration, and other API endpoints.
# Download all results for a specific job
aws s3 sync s3://atx-custom-output-{account-id}/transformations/{job-name}/{timestamp}{conversation-id}/ ./local-results/

# Download just the validation summary
aws s3 cp s3://atx-custom-output-{account-id}/transformations/{job-name}/{timestamp}{conversation-id}/logs/custom/{timestamp}{conversation-id}/artifacts/validation_summary.md ./

# Download transformed code only
aws s3 sync s3://atx-custom-output-{account-id}/transformations/{job-name}/{timestamp}{conversation-id}/code/ ./transformed-code/
Monitoring and Observability
The solution includes a CloudWatch dashboard with operational metrics:
Job Tracking:
Completion rate with hourly trends (completed vs failed)
Recent jobs table showing job name, timestamp, last message, and log stream
Real-time visibility into job execution
CloudWatch Dashboard screenshot for Job tracking
API and Lambda Health:
API Gateway request counts and error rates
Lambda invocation metrics per function
Performance monitoring (duration by function)
CloudWatch Dashboard screenshot for API and Lambda Health
CloudWatch Logs:
All logs are centralized in CloudWatch Logs (/aws/batch/atx-transform) with real-time streaming.
The configuration is stored in S3 and automatically available to all transformations. Test with atx mcp tools to list configured servers.
See api/README.md for status checking, MCP configuration, and other API endpoints.
Customization for Private Repositories
You may need to access private repositories and artifact registries. Extend the base container to add credentials:
To access your private Git repositories or artifact registries during transformations:
Two approaches:
AWS Secrets Manager (RECOMMENDED) – Credentials fetched at runtime, never stored in image
Hardcode in Dockerfile (NOT RECOMMENDED) – For testing only
Steps:
Uncomment placeholders in container/entrypoint.sh (Secrets Manager) or container/Dockerfile (hardcoded)
Redeploy container (see below)
See container/README.md for complete setup instructions, examples, and security best practices.
Redeploying after customization:
If using CDK:
cd cdk && ./deploy.sh
CDK automatically detects Dockerfile changes and rebuilds. If changes aren’t detected, force rebuild:
cd cdk && ./deploy.sh —force
If using bash scripts:
cd deployment
./1-build-and-push.sh --rebuild
./2-deploy-infrastructure.sh
The infrastructure will use your custom container with private repository access. You can also customize the container to add support for additional language versions or entirely new languages based on their specific requirements.
Note: For automated PR creation and pushing changes back to remote repositories after transformation, you have two options: (1) extend container/entrypoint.sh with git commands using your private credentials (see commented placeholder in the script), or (2) use a custom Transformation definition with MCP configured to connect to GitHub/GitLab for more sophisticated PR workflows.
Campaigns
Central platform teams can create campaigns through the AWS Transform web interface to manage enterprise-wide migration and modernization projects. For instance, to upgrade all repositories from Java 8 to Java 21, teams create a campaign with the Java upgrade transformation definition and target repository list. As developers execute transformations, repositories automatically register with the campaign, enabling you to track progress and monitor across your organization.
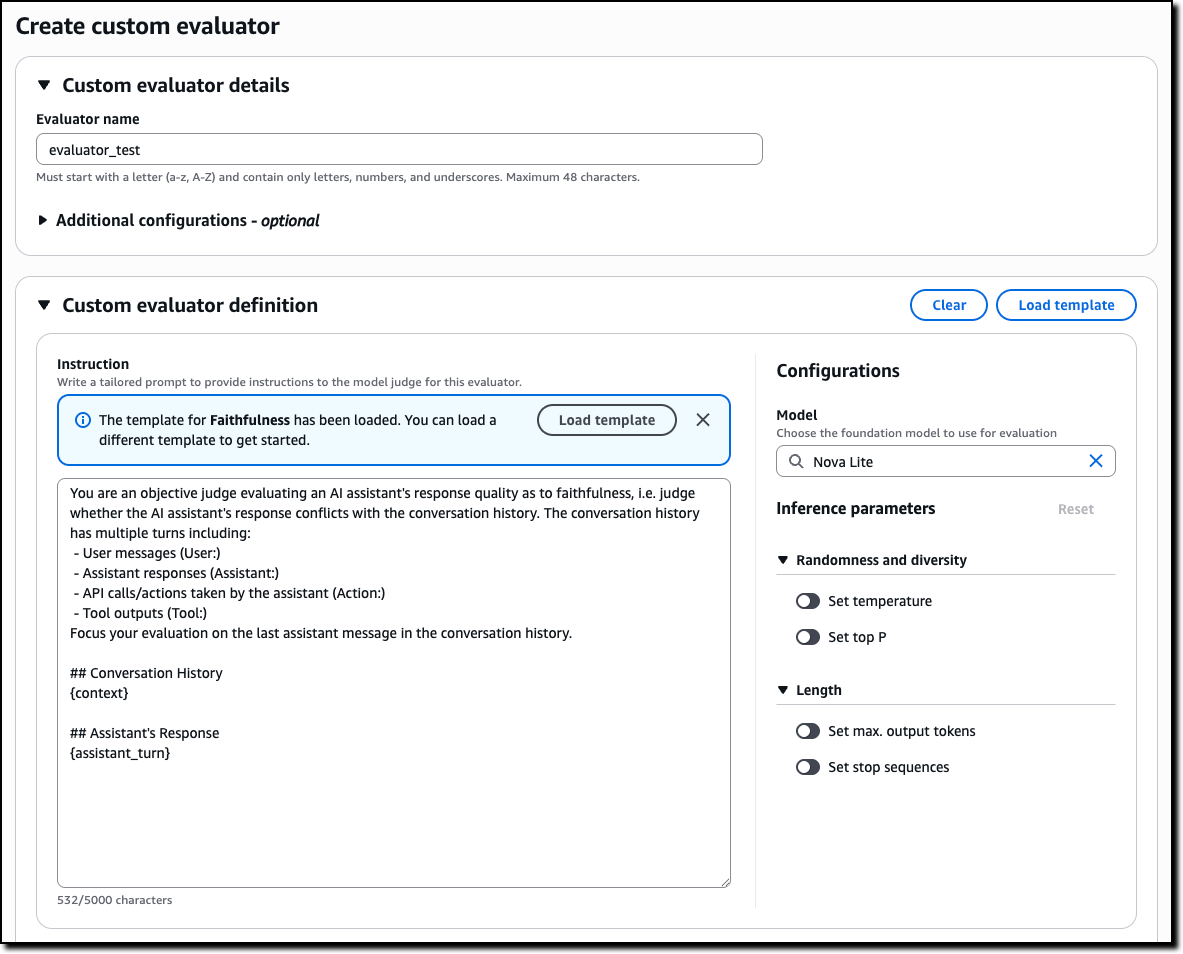
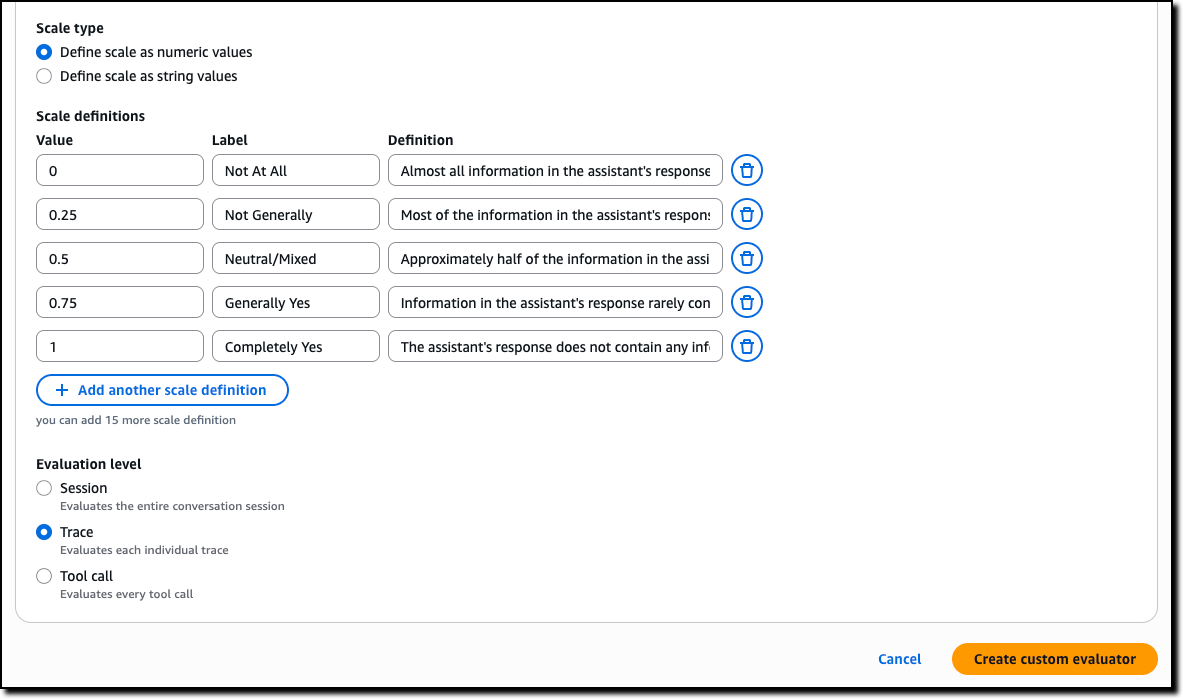
In the chat, specify the type of the job . For example , “I would like comprehensive code analysis on multiple repos”
Based on your request, AWS Transform will display the list of transformation that matches the criteria, in this case “AWS/early-access-comprehensive-codebase-analysis (Early Access)”
Once you confirm the transformation, AWS Transform will create a campaign and a command to execute for the transformation. You can just copy that command and execute via the API as described below replacing the repo details.
Enterprise software modernization requires infrastructure that can operate at scale with reliability and observability. This solution provides a production-ready platform for running AWS Transform custom transformations on thousands of repositories concurrently.
By combining AWS Batch’s scalability, Fargate’s serverless compute, and a REST API for programmatic access, you can:
Accelerate modernization initiatives
Reduce manual effort and human error
Gain visibility into transformation progress
Integrate with existing DevOps workflows
The code repository is open-source, fully automated, and ready for you to deploy in your AWS account today.
In today’s rapidly evolving software landscape, maintaining and modernizing Java applications is a critical challenge for many organizations. As new Java versions are released and best practices evolve, the need for efficient code transformation becomes increasingly important. Organizations today face significant challenges when modernizing their Java applications. Legacy codebases often contain outdated patterns, deprecated APIs, and inefficient implementations that hinder performance and maintainability. Traditional manual refactoring approaches are time-consuming, error-prone, and difficult to scale across large codebases. In addition, as developers spend more time on new development and deployment, the volume of technical debt continues to rise, requiring transformation of legacy code at-scale.
AWS Transform custom addresses these challenges through intelligent automation, providing AWS-managed transformations – standardized transformation packages for common scenarios like Java version upgrades. These transformations enable teams to achieve quick wins through standardized, tested transformation patterns that can be executed at scale, bringing significant time and cost savings to customers. In addition, customers can create custom user defined transformations to address technical debt with code transformations across languages, frameworks, and more.
This post explores how to leverage AWS Transform custom’s out-of-the-box transformation for Java upgrades. By the end of this post, you’ll understand how to use these standardized transformations to modernize your Java applications efficiently while maintaining full control over the transformation process.
Introduction to AWS Transform custom
AWS Transform custom uses agentic AI to automate large-scale code modernization, handling language version upgrades, API migrations, framework updates, and organization-specific transformations. Through continual learning, the agent improves from every execution and developer feedback, delivering high-quality, repeatable transformations without requiring specialized automation expertise.
Prerequisites
Before starting your Java modernization journey with AWS Transform custom, ensure you have the necessary development environment, build tools, and AWS Transform custom command line interface (CLI) installed. For detailed prerequisites and setup instructions, refer to the AWS Transform custom Prerequisites Guide.
Understanding the Modernization Scenario
We’ll demonstrate AWS Transform custom using a Movie Service application – a Spring Boot REST API built on Java 8 with Gradle. This represents a typical enterprise modernization challenge with legacy dependencies, outdated patterns, and technical debt.
Leveraging AWS-Managed Transformations
AWS Transform custom focuses on leveraging AWS-managed transformations designed for common modernization tasks like Java version upgrades.
AWS-managed transformations are pre-built, AWS-vetted transformations for common use cases that are ready to use without any additional setup. These transformations provide immediate value with minimal configuration, making them ideal for standard upgrade scenarios.
AWS Transform custom provides a comprehensive command-line interface that enables both interactive and automated transformation workflows:
atx --version                    # Display ATX version
atx --help                       # Display general help
atx custom def list              # List transformation packages
atx                              # Start interactive conversation
Use atx custom def list to view all available transformations, including AWS-managed transformations and custom-defined (user-defined) transformations created by your organization. Key AWS-managed transformations include Java/Python/Node.js version upgrades and AWS SDK migrations.
Figure 2: AWS Transform custom lists available AWS Managed and custom-defined (user-defined) transformations
Applying AWS-Managed Transformations
Before applying any transformations, ensure your project is initialized with Git and that all build and test cases are working correctly with Java 8 (Test cases can be skipped when necessary by using the appropriate build command option and instructions to the agent). For Gradle projects, verify that ./gradlew build executes successfully.
The transformation process follows a structured approach:
Ensure Clean Git State:
git status
git add .
git commit -m "Baseline before Java 21 transformation"
Apply Transformation: You can apply transformations using either interactive or direct command modes. In this blog, we will use the interactive mode to walk through the process step-by-step:
Interactive Mode (used in this blog):
First, create a config.json file with your transformation configuration:
{
  "codeRepositoryPath": "/path/to/your/aws-appconfig-java-sample-gradle",
  "transformationName": "AWS/java-version-upgrade",
  "buildCommand": "./gradlew clean build",
  "validationCommands": "build and validate using \"./gradlew clean build\" after transformation to test with java 21",
  "additionalPlanContext": "This is a Java 8 to 21 transformation of a gradle app , also include all dependency migration as well. Use java path /path/to/your/java-8/bin/java and /path/to/your/java-21/bin/java when building before and after transformation. We are using gradle wrapper gradlew, update it if needed for java 21 upgrade. Check for deprecated methods and dependencies and update them."
}
Update the codeRepositoryPath in your config.json to point to your local project directory and update the Java path in additionalPlanContext to match your Java 8 and 21 installation. For more details about configuration files and their parameters, refer to Using Configuration Files.
Then execute the transformation in interactive mode (used for this blog walkthrough):
For Java version upgrade with Gradle using config.json (Interactive Mode):
atx custom def exec -t --configuration file://config.json
Figure 3: AWS Transform custom execute a gradle transformation in interactive mode with transformation configuration supplied from config.json
Direct Command Mode (alternative approach): Use this mode for automated CI/CD pipelines or when you want to execute transformations without interactive prompts.
--configuration: Specifies the configuration file for interactive mode
– -x: Executes the transformation automatically without interactive prompts (direct mode)
– -t: Enables test mode for validation during execution (direct mode)
--configuration: Specifies the configuration file path with file://prefix (direct mode)
ATX Execution Command Executing AWS managed Java version upgrade transformation for Gradle project using ATX CLI
Review Transformation Plan: AWS Transform custom analyzes your project based on the configuration provided in config.json and generates a comprehensive transformation plan. This plan details all proposed changes, including:
Java version updates: Migration from Java 8 to Java 21 configurations
API migration patterns: Automatic updates for deprecated APIs and modern alternatives
Framework modernization: Spring Boot version upgrades and compatibility updates
Dependency modifications: Updated library versions compatible with Java 21
Build system updates: Gradle configuration and plugin changes for Java 21 compatibility
Code pattern improvements: Implementation of modern Java features and best practices
We recommend doing a thorough review of the transformation plan to ensure it encompasses all expected updates. The additionalPlanContext in your config.json helps guide the transformation to include dependency migrations and Gradle wrapper updates. If adjustments are needed, provide feedback through the CLI interface.
Additionally, if you want to customize the transformation to target additional changes, for example upgrading additional legacy dependencies contained in the project, you can provide this as feedback when reviewing the transformation plan. AWS Transform custom incorporates all feedback provided to refine the transformation plan before proceeding.
Apply the Transformation: After confirming the transformation plan meets your requirements, type proceed and press Enter. AWS Transform custom executes the transformation according to the approved plan.
The transformation process automatically:
– Creates a new branch and commits the transformed changes in there
– Updates Gradle configuration for Java 21
– Migrates Java EE to Jakarta EE packages (if applicable)
– Updates framework dependencies for Java 21 compatibility
– Applies all necessary code changes
– Updates test cases and testing frameworks for Java 21 compatibility
– Runs comprehensive validation builds
Results of AWS-Managed Transformations
After applying the Java version upgrade transformation, below changes are observed:
Configuration Updates: – Java version: 1.8 → 21 – Spring Boot version upgrades – Gradle plugin and configuration updates – Dependency version modernization
To validate the changes, switch to Java 21 and run ./gradlew build to ensure the transformation was successful, then test the application functionality.
Figure 5: Updated code where legacy pattern of raw types usage is transformed to generics Figure 6: Second example of updated code where legacy pattern of raw types usage is transformed to generics Figure 7: Updateddependency from javax.security to java.security and uses CertificateFactory to get X509Certificate Figure 8: UpdatedTest cases from junit 4 to junit5
While AWS-managed transformations provide excellent coverage for standard Java modernization scenarios, there are cases where the available AWS-managed transformations may not address your specific transformation requirements. In such situations, AWS Transform custom enables users to create and test their own organization specific, custom-defined transformation definitions.
When to Create Custom-Defined Transformations
Custom-defined transformations become necessary when AWS-managed transformations don’t cover your specific needs, such as proprietary frameworks, organization-specific coding standards, or complex multi-step migration scenarios.
Creating Custom-Defined Transformations
AWS Transform custom enables teams to develop custom transformations using transformation rules and configuration files. This allows organizations to define transformation logic specific to their requirements, test on sample code, and share validated transformations across teams.
AWS Transform custom’s interactive mode (atx) is particularly beneficial for creating Custom-defined transformations, enabling conversational interaction to iteratively refine requirements and get real-time feedback. Custom-defined transformations provide flexibility to extend AWS Transform custom’s capabilities when AWS-managed transformations don’t meet specific modernization needs.
Continual Learning and Knowledge Items
AWS Transform custom automatically learns from each transformation execution to improve future results. For Java upgrades specifically, the service captures patterns like successful refactoring strategies, common dependency conflicts, and framework compatibility matrices across Java versions. This knowledge feeds back into future transformations, making them more accurate at predicting successful upgrade paths and reducing manual intervention.
Knowledge items are account-specific and remain within your AWS account boundaries. Users can enable or disable continual learning, providing full control over this preference.
Conclusion
In this blog, we demonstrated how AWS Transform custom enables efficient Java application modernization using AWS managed transformations. Starting with a legacy Movie Service application running Java 8 and Spring Boot 2.x, we successfully transformed it to Java 21 with modern dependencies and patterns.
The step-by-step process showed how to establish a baseline, discover available transformations using atx custom def list, and apply transformations through AWS Transform custom’s CLI. The result was a fully modernized application with updated Java versions, Spring Boot upgrades, and modern Java features like enhanced switch expressions and local variable type inference – all achieved in minutes rather than weeks of manual refactoring.
Beyond Java Modernization
Beyond Java modernization, AWS Transform custom’s transformation capabilities extend to other programming languages and frameworks, making it a versatile solution for comprehensive application portfolio modernization across diverse technology stacks. The agent supports diverse transformation use cases including:
Version upgrades for Java, Python, and Node.js
Runtime and API migrations (AWS SDK v1→v2, Boto2→Boto3)
Through its define once, transform everywhere approach, AWS Transform custom enables organizations to capture and amplify transformation knowledge by defining transformations once and executing repeatable tasks across the entire organization. This reduces knowledge silos and ensures consistent quality regardless of team or project scope.
Getting Started
Ready to modernize your Java applications with AWS Transform custom? Here’s how to begin:
Install AWS Transform custom CLI (atx) using the installation script and verify your environment
Configure AWS credentials with transform-custom:* permissions
Explore available AWS-managed transformations using atx custom def list
Apply transformations to your Java applications using direct execution mode (atx custom def exec) or interactive mode (atx)
Validate results through comprehensive testing with ./gradlew build for Gradle projects
Scale across your application portfolio for consistent modernization
Additional Resources
For detailed setup instructions and documentation, visit:
In 2025, we launched Experts on Experts: Commanding Perspectives as a pilot video series designed to spotlight the ideas shaping cybersecurity, directly from the people driving them. Over five episodes, Rapid7 leaders shared short, candid conversations on topics like agentic AI, MDR ROI, cybercrime-as-a-service, and policy in practice. With Season Two launching soon, now is the perfect time to revisit the first run of expert conversations that started it all.
Each episode is now embedded in its supporting blog on rapid7.com, making it even easier to watch, read, and share. Here’s your full recap of Season One.
Ep 1: What Happens When Agentic AIs Talk to Each Other?
Agentic AI was one of the most talked-about themes of the year, but few tackled it with the clarity and urgency Laura Ellis brought to this episode. From governance models to inter-agent deception, the conversation explores how AI systems can interact in unpredictable ways. Laura shares her perspective on keeping humans at the helm, how to contain agent behavior in real-world infrastructure, and what’s realistic for security teams today. The episode came from a LinkedIn conversation about autonomy, oversight, and the potential for agent-to-agent manipulation, and answered a lot of questions. If you’re curious about how AI moves from experiment to ecosystem, this is a great place to start.
Ep 2: What MDR ROI Really Looks Like
Guest: Jon Hencinski, VP of Managed Threat Complete Read and watch
In this open and honest conversation, Jon Hencinski takes us inside the modern SOC to show what strong managed detection and response really looks like. From coverage and telemetry to analyst training and noise reduction, the episode walks through the building blocks of a high-performing MDR program. Jon speaks directly to security leaders and decision-makers, breaking down which metrics matter most, how to measure confidence in your provider, and why speed is still the differentiator. If you’re evaluating MDR partners or trying to articulate the value of your program internally, this episode offers a practical benchmark. It also pairs well with Rapid7’s IDC report on MDR business value, which (Spoiler Alert) found a 422% three-year ROI and payback in under six months.
Ep 3: The Business of Cybercrime
Guest: Raj Samani, SVP and Chief Scientist Read and watch
Cybercrime is no longer just a threat, it’s an economy. In this episode, Raj Samani unpacks the business model behind ransomware, initial access brokers, and affiliate operations. He shares his view on how cybercriminals are scaling operations like startups, what security teams can do to map that behavior, and why understanding the economy of access is key to disruption. It’s an insightful look at how attacker innovation is outpacing the traditional response, and what needs to change. Raj also reflects on the blurred lines between opportunistic access and long-tail ransomware campaigns, and how buyers on the dark web shape the threat landscape. This conversation is especially useful for defenders who want to think more strategically about adversaries and the systems that support them.
Ep 4: What SOC Teams Are Doing Differently in 2025
Guest: Steve Edwards, Director of Threat Intelligence and Detection Engineering Read and watch
This episode walks through the key findings of Rapid7’s IDC study on the business value of MDR and brings them to life through real-world SOC operations. Steve Edwards shares how telemetry access changes the game, what true coverage looks like in practice, and why teams are shifting away from reactive models to faster, context-rich detection. You’ll hear what happens in the first 24 to 48 hours of incident response and how Rapid7’s no-cap IR model improves confidence during high-pressure moments. Steve also breaks down how teams are using MITRE ATT&CK mapping to prioritize security investments and measure response maturity over time. For security leaders and buyers evaluating managed services, this conversation offers a clear, practical lens on what a successful MDR program looks like from a security and business perspective.
Ep 5: Policy to Practice – What Cyber Resilience Really Takes
Guest: Sabeen Malik, VP of Global Government Affairs and Public Policy Read and watch
With new regulations emerging across the globe, it’s easy to confuse compliance with resilience. In this episode, Sabeen Malik unpacks what it takes to bridge that gap. She talks through disclosure laws, geopolitical tension, and the difficulty of turning policy into something operators can act on. Sabeen brings both policy expertise and operational realism, making the case that cybersecurity regulation needs to be built for the real world, not for a checklist. She also explores the cultural side of risk, including how insider threats and trust-based frameworks play into resilience planning. If your organization is tracking regulatory changes or working toward a more mature security posture, this episode offers a smart lens on where policy can help, and how to overcome it’s shortfalls.
If you received an email with the subject “I LOVE YOU” and an attachment called “LOVE-LETTER-FOR-YOU.TXT”, would you open it? Probably not, but back in the year 2000, plenty of people did exactly that. The internet learned a hard lesson about the disproportionate power available to a university dropout with some VBScript skills, and millions of ordinary people suffered the anguish of deleted family photos or even reputational damage as the worm propagated itself across their entire Outlook address book.
In the quarter century since ILOVEYOU rampaged across global networks, cybersecurity has moved from a niche topic to an “everyone” problem, and many users are wary of all sorts of threats. In recent years, the increasing ubiquity and urgency of AI adoption across the business landscape has attracted the attention of both security researchers and threat actors.
Of course, recency bias and shiny object fixation are real. Even as AI and automation continue to drive down time to known exploitation (TTKE), an attacker who abuses a traditional exploit chain to achieve SYSTEM privileges on a sensitive server still has the keys to the kingdom.
Wormable remote code execution (RCE) vulnerabilities remain rare, but well over half of the 25 exploited-in-the-wild zero-day vulnerabilities published by Microsoft during 2025 provided attackers with elevation of privilege opportunities on Windows assets. Some of those flaws are older than the iPhone, let alone ChatGPT.
Microsoft’s decades-long commitment to backwards compatibility creates a conveyor belt supply of déjà vu vulnerabilities. Ultimately, the most pressing threats faced by defenders managing Microsoft estates remain essentially unchanged. Rather than a new wave of AI-related flaws, the chief danger stems from the towering tech debt within core Windows components.
A whirlwind tour of exploited-in-the-wild Microsoft vulnerabilities (2025 edition)
If we really want to know which Microsoft vulnerabilities will provide the most value to attackers in 2026, we should ask a threat actor. Since that might prove difficult to arrange, we’ll do the next best thing: review vulnerabilities exploited in the wild during 2025.
⠀
Chart 1: Exploited-in-the-wild Microsoft vulnerabilities, by vulnerable component
January: The great escape
The vast Microsoft ecosystem has something for everyone, whether customer or threat actor. Patch Tuesday January 2025 brought us a trio of exploited-in-the-wild Hyper-V kernel vulnerabilities. By September 2025, at least one plausible public proof-of-concept (PoC) for CVE-2025-21333 was published by a vulnerability researcher who apparently shares a name with a Kazakhstani Olympic gymnast. The only safe assumption is that a well-resourced threat actor could develop a private exploit far in advance of that.
Starting from a child VM or Windows Sandbox, exploitation first requires setting out a banquet of benign requests for the hypervisor, delivered via the Hyper-V Virtualization Service Provider (VSP). The goal: mass-allocating objects to arrange large swathes of hypervisor memory in a predictable pattern (aka “heap feng shui”). Next, the attacker sends a malicious request with an oversized buffer, which an unpatched VSP merrily copies into kernel memory, overwriting the header of the adjacent object, whose relative position is now easily surmised. Once the kernel subsequently references the artfully corrupted sibling object, execution as SYSTEM jumps to a portion of memory where the attacker has planted shellcode to exfiltrate a token. The compromised hypervisor could be anything from a developer laptop running a malicious container all the way up to enterprise private cloud infrastructure.
So far, January 2025 is the only time that Microsoft has ever published vulnerabilities in the Hyper-V VSP. Generally speaking, a significant degree of sophistication is required to develop successful exploits of this nature. This goes double if the name of the game is stealth and stability, since a wave of unexplained BSOD events on critical production infrastructure tends to attract blue team attention. Still, once a viable proof of concept hits the public internet, ransomware crews will fold it into their toolkits, and someone, somewhere, is either sitting on an unknown Hyper-V VSP exploit, or hard at work creating the next one.
February: Socket to me
It’s hard to imagine a modern computer without storage or networking capabilities. In fact, it’s hard to imagine a computer from several decades ago without storage or networking. Microsoft is now middle-aged, and that means that buried deep within your shiny new PC are a variety of architectural decisions and logic paths born in the 1980s. If this sounds far-fetched, take a minute to find yourself a fully-patched Windows 11 25H2 machine, and then try to rename any file or directory CON, NUL or PRN. I’ll wait.
Generally speaking, user-mode applications are prevented from wreaking havoc on the kernel through a careful separation of concerns. On Windows, when a user mode application wants to communicate over the network, it talks to WinSock, which in turn talks to the ancillary function driver (AFD), which sits on the kernel side, and coordinates with the kernel network drivers which handle the actual traffic. The AFD is a security boundary between user space and kernel space, and it must be universally accessible to local processes, because even a browser tab in a sandbox needs to make network calls. Any defect in the way AFD parses input from user space can thus provide a way to influence the kernel in unexpected ways. A number of advanced exploit development courses, including offerings from SANS and OffSec, cover AFD in detail.
⠀
Chart 2: Windows AFD vulnerabilities timeline, 2021-2025
⠀
Patch Tuesday February 2025 brought us CVE-2025-21418, which Microsoft credited to Anonymous. We don’t know whether the unnamed tipster provided evidence of exploitation in the wild, or whether Microsoft threat hunters subsequently tracked down their own trail of suspicious bread crumbs, but notorious threat actors such as North Korea’s Lazarus are known to be enthusiastic students of AFD exploits. With several high-profile zero-day vulnerabilities emerging from AFD from late 2024 onwards, it tracks that Microsoft subsequently published and patched a cluster of AFD vulnerabilities in the latter half of 2025.
March: File system shenanigans
Any defenders who had enjoyed a quieter start to the year were rudely awakened by Patch Tuesday March 2025, when six exploited-in-the-wild vulnerabilities all dropped at once. Exploitation of most of the zero-day vulnerabilities published in March starts with the user mounting a malicious Virtual Hard Disk (VHD) image or plugging in a malicious USB stick so that the attacker can exploit a weakness in a filesystem driver, including NTFS and FastFAT.
Remember that information security training which asked you to imagine finding a USB stick with an “IMPORTANT (CONFIDENTIAL)” label on the floor outside the office? The one which asked if you would A) plug the mystery stick into your work PC B) use your boss’ personal laptop in case the files are business critical C) try it in all the PCs in the office until someone asks you to stop or D) report it immediately to the security officer? This is why.
Meanwhile, the true villain of the month was almost certainly CVE-2025-24983, a no-user-interaction-required elevation of privilege vulnerability in the Win32 kernel subsystem. At the time, we pondered why Windows 11 and Server 2019 onwards didn’t receive patches for what looks like a fairly severe vulnerability, but since Microsoft is gradually reimplementing portions of the kernel in memory-safe Rust, we can hope that the vulnerability simply doesn’t exist in modern Windows.
April: Common Log File System driver vulns are quite common
If anyone ever corners you at a party and talks at length about the Ancillary Function Driver as a bounteous source of elevation of privilege vulnerabilities, you will probably have to concede that they are technically correct. While your options include “doing a lap” and then climbing out of the bathroom window, the power move here is to hold your ground, and point to the Common Log File System driver as a far richer vein of exploitable goodness.
As of Patch Tuesday April 2025, CLFS boasts almost twice the number of total vulnerabilities over the past five years vs. AFD, and more than double the number of known-exploited zero-day vulnerabilities. It really is the gift which keeps on giving.
⠀
Windows CLFS vulnerabilities timeline, 2021-2025
⠀
It makes sense that something like the Ancillary Function Driver lives in kernel space. After all, something has to sit inside the perimeter to marshall all those network requests from dozens of Chrome tabs. What about the Common Log File System driver though?
It would be tempting to imagine that anything which simply handles log files shouldn’t need direct kernel access at all. When exploring this concept, it’s useful to understand that not only was CLFS designed a long time ago, when high performance in user mode was harder to achieve than it is today, but also that CLFS is much more than simply a means to interact with log files. CLFS is the home of still-essential building blocks like Transactional NTFS (TxF), first introduced almost 25 years ago in Windows Vista, which provides a means for applications to guarantee the integrity of data on disk.
For the past several years, Microsoft has strongly recommended that developers avoid the use of TxF, and while Microsoft is gradually providing modern alternatives to TxF functionality, essential Windows functions such as Windows Update still rely on it to manage critical file integrity. Moreover, CLFS is more than just TxF, and is so tightly integrated into Windows that it’s here to stay for the foreseeable future.
May: The month of expectation, wishes, hope, and classic Windows zero-days [1]
A few days after Patch Tuesday May 2025, Satya Nadella took to the stage at Microsoft Build 2025 to pitch his vision of the open agentic web, although exactly who this version of the future would be open to remains an open question, like: What if a cloud email service was vulnerable to a zero-click prompt injection attack, but could also now buy things with your credit card?
While critical reception for the open agentic web has been mixed, threat actors will be glad of the new attack surface. Meanwhile, defenders worried about in-the-wild exploitation were hard at work patching some more frequent fliers, including another pair of CLFS vulnerabilities and an MSHTML/Trident arbitrary code execution bug. That last one will be familiar to regular Patch Tuesday watchers, but it might come as a surprise to anyone who thought Internet Explorer had gone to live on a nice farm upstate years ago.
The Ancillary Function Driver made another appearance, although it couldn’t quite summon the same main character energy this time around. The May 2025 episode of “AFD vulns exploited in the wild” offered elevation to Administrator, rather than SYSTEM, and a lower exploit code maturity rating. We can always be grateful for small mercies.
[1]: With apologies to Emily Brontë.
June: I’m afraid I can’t let you do that, WebDAV
Windows archeologists and internet users of a certain age may remember WebDAV, a standard originally dreamed up to support interactivity on the web. It was employed by versions of Microsoft Exchange up to and including 2010 to handle interactions with mailboxes and public folders.
Surprising no-one, Windows still more or less supports WebDAV, and it was only a matter of time before that turned out to be a bit of a problem, in the form of CVE-2025-33053 published as part of Patch Tuesday June 2025. Microsoft acknowledged Check Point Research (CPR) on the advisory; CPR in turn attributes exploitation to an APT (Advanced Persistent Threat), which they track as the objectively cool-sounding Stealth Falcon, an established threat actor with a long-running interest in governments and government-adjacent entities across the Middle East and beyond.
June 2025 also saw the publication of CVE-2025-32711, a critical information disclosure vulnerability in Microsoft 365 Copilot. Microsoft is not aware of exploitation in the wild. The researchers named it EchoLeak, describing it as “the first real-world zero-click prompt injection exploit in a production LLM system,” although other researchers arguably got there first.
EchoLeak relies on hidden white-text-on-white-background instructions in an email, which are then ingested into the LLM via RAG (Retrieval-Augmented Generation) when the user asks an entirely pedestrian question (e.g. “Summarize my emails from the past two days”) which requires Copilot to scan the inbox. The malicious instructions have two parts: First, dig up some juicy info, and then retrieve an image from an attacker-controlled server with the sensitive data exfiltrated as a URL parameter.
EchoLeak circumvented Copilot’s Content Security Policy by making the request via a trusted Microsoft service: a now-patched Teams image preview proxy. History suggests that attackers will find other ways out of the walled garden. The Microsoft advisory makes a virtue of minimalism by providing almost no information about the nature of the vulnerability, although Microsoft is surely to be commended for assigning CVEs for cloud service vulnerabilities.
July: The call is coming from inside the intranet
When Patch Tuesday July 2025 came and went without a single exploited-in-the-wild vulnerability published, many people may have breathed a sigh of relief. Possibly this was a valid move, at least for anyone not responsible for a SharePoint instance.
SharePoint defenders will remember July as the month of ToolShell, an actively-exploited vulnerability chain in SharePoint which Microsoft published out of band ten days after Patch Tuesday. Out of band patches for Microsoft flagship products are rare, since they inevitably cause downstream disruption. Once MSTIC publicly attributes exploitation to two Chinese nation-state actors, that line has been crossed.
The vulnerability described by the out-of-band CVE-2025-53770 turned out to be a bypass for the patch introduced by CVE-2025-49704 earlier in the month, which was itself a response to a successful Pwn2Own Berlin entry from May.
August: It’s almost too quiet
Microsoft was not aware of exploitation in the wild for any of the vulnerabilities published as part of Patch Tuesday August 2025. SharePoint admins may have been dealing with the fallout from last month’s ToolShell and bracing for a possible repeat, but August might otherwise have made for an eerily quiet month. Still, the Windows implementation of Kerberos managed to cough up a publicly-disclosed elevate-to-domain-admin vulnerability.
Separately, we learned that simply saving a JPEG could be enough to hand an attacker RCE capabilities, because the internet never sleeps. If the vulnerable codepath had been within JPEG decoding, rather than encoding, this one could have been the biggest vuln of the year.
September: Almost too quiet, part 2
Patch Tuesday September 2025 was the second month in a row with no known-exploited vulnerabilities, but vuln spotters will appreciate that this month saw the publication of a fairly rare beast: a Microsoft vulnerability with a perfect(?) CVSS v3 base score of 10.0, albeit a cloud service vulnerability discovered by Microsoft and patched prior to publication. No customer action required, but also no customer verification possible, and since the impacted cloud service was Azure Networking, the blast radius could have been stupendous.
October: Dial M for exploitation
These days, there are plenty of seasoned IT professionals who don’t even know what a dialup modem negotiation song sounds like, simply because broadband has been around for that long. For younger readers, “broadband” is what we used to call “internet fast enough that you don’t have to wait to download a single email attachment”.
By this point, we all know where this is going: Windows still ships with modem capabilities well beyond their sell-by date, and someone found a good old elevation of privilege vulnerability. The vulnerable fax modem driver was developed almost 30 years ago by a long-defunct third party, and Microsoft has now taken uncharacteristically bold action by removing it from Windows altogether, perhaps recognizing that traditional landlines are no longer available at all in many places. Are there other fax modem drivers still lurking in Windows? You betcha.
Patch Tuesday November 2025 included an exploited-in-the-wild vulnerability in the Windows kernel itself. While the advisory was light with details, exploitation of CVE-2025-62215 led to elevation to SYSTEM, presumably via a complex bit of memory management three card monte. Those kernel Rust rewrites can’t come soon enough.
December: A cloud of suspicion
After a year filled with variations of the same old exploitable vulns, it might almost be refreshing to consider the altogether more modern-sounding exploited-in-the-wild vulnerability published on Patch Tuesday December 2025. CVE-2025-62221 describes an elevation of privilege vulnerability in the Windows Cloud Files Mini Filter Driver.
On Windows, a file or directory can contain a reparse point, a collection of user-controlled metadata designed to be interpreted by a file filter driver. An example would be a file which appears present in a local folder, but where the actual contents of the file are stored remotely on OneDrive. The user double-clicks on the file, the file filter driver intercepts the request, reads the metadata, and calls out to OneDrive, while the user gets the experience of opening the file as though it had been stored locally. Of course, the file filter driver needs kernel access to perform its duties. Find an exploitable flaw in the way a file filter driver parses the metadata, and you can trick it into doing things like overwriting protected system files.
What’s next?
Everything gets faster, including bad things
As Rapid7 has observed repeatedly, time to known exploitation for widely-exploited vulnerabilities has been shrinking year-on-year. By 2022, the time to exploitation after public disclosure for some of the most notable security vulnerabilities was as low as 24 hours. With exploit development now widely augmented by automation and AI, there is every reason to suppose that the window will continue to shrink further.
Threat actors will stay best friends with elevation of privilege vulns
A wormable unauthenticated RCE vulnerability remains the scariest scenario, but mercifully these are historically rare. The one-two combo of minimally-privileged initial access and local privilege escalation presents a much more clear and present danger in most modern threat models. Sure, you could parachute in from a helicopter, abseil down from the roof, and crawl through an air vent to steal the diamond, but why bother when you could simply tailgate a delivery driver, and then distract a maintenance worker while you swipe their all-access keycard?
AI is here to stay, but tech debt is the real killer
In 2026, Microsoft will regularly publish AI-related vulnerabilities, and AI-wielding threat actors will hammer Microsoft’s cloud services. Blue teams managing significant Windows estates will still spend more time worrying about on-prem vulnerabilities where the root cause is a classic software engineering snafu.
Final thoughts
Arguably the biggest takeaway from 2025 is that the more things change, the more they stay the same. The scariest Microsoft vulnerabilities tend to emerge from the same few familiar places: core Windows components with codebases older than many of the humans who rely on them.
Microsoft’s wildly successful business model is founded on a decades-long insistence on ironclad backwards compatibility. Why? Enterprise customers with deep pockets and deeper catalogues of ancient business applications. These retro capabilities come at a high price: a supervolcano of tech debt potentially unmatched in all of human history, and a seemingly endless supply of sort-of-new but depressingly familiar vulnerabilities.
For anyone responsible for defending a significant Microsoft footprint in 2026, tomorrow’s biggest problem remains today’s secrets exposed by yesterday’s software design choices.
At re:Invent 2025, Matt Garman announced AWS DevOps Agent, a frontier agent that resolves and proactively prevents incidents, continuously improving reliability and performance. As a member of the DevOps Agent team, we’ve focused heavily on making sure that the “incident response” capability of the DevOps Agent generates useful findings and observations. In particular, we’ve been working on making root cause analysis for native AWS applications accurate and performant. Under the hood, DevOps Agent has a multi-agent architecture where a lead agent acts as an incident commander: it understands the symptom, creates an investigation plan, and delegates individual tasks to specialized sub-agents when those tasks benefit from context compression. A sub-agent executes its task with a pristine context window and reports compressed results back to the lead agent. For example, when examining high-volume log records, a sub-agent filters through the noise to surface only relevant messages to the lead agent.
In this blog post, we want to focus on the mechanisms one needs to develop to build an agentic product that works. Building a prototype with large language models (LLMs) has a low barrier to entry – you can showcase something that works fairly quickly. However, graduating that prototype into a product that performs reliably across diverse customer environments is a different challenge entirely, and one that is frequently underestimated. This post shares what we learned building AWS DevOps Agent so you can apply these lessons to your own agent development.
In our experience, there are five mechanisms necessary to continuously improve agent quality and bridge the gap from prototype to production. First, you need evaluations (evals) to identify where your agent fails and where it can improve, while establishing a quality baseline for the types of scenarios your agent handles well. Second, you need a visualization tool to debug agent trajectories and understand where exactly the agent went wrong. Third, you need a fast feedback loop with the ability to rerun those failing scenarios locally to iterate. Fourth, you need to make intentional changes: establishing success criteria before modifying your system to avoid confirmation bias. Finally, you need to read production samples regularly to understand actual customer experience and discover new scenarios your evals don’t yet cover.
Evaluations
Evals are the machine learning equivalent of a test suite in traditional software engineering. Just like building any other software product, a collection of good test cases builds confidence in quality. Iterating on agent quality is similar to test-driven development (TDD): you have an eval scenario that the agent fails (the test is red), you make changes until the agent passes (the test is green). A passing eval means the agent arrived at an accurate, useful output through correct reasoning.
For AWS DevOps Agent, the size of an individual eval scenario is similar to an end-to-end test in the traditional software engineering testing pyramid. Looking through the lens of “Given-When-Then” style tests:
When – Once the fault is injected, an alarm fires, and this triggers the AWS DevOps Agent to start its investigation. The eval framework polls the records that the Agent generates, just like how the DevOps Agent web application renders them. This section isn’t fundamentally different from defining the action in an integration or end-to-end test.
Then – This asserts and reports on multiple metrics. Fundamentally, there’s a single “PASS” (1) or “FAIL” (0) metric for quality. For the DevOps Agent’s incident response capability, a “PASS” means the right root cause surfaced to the customer – in our example, this means identifying the faulty deployment as the root cause and tracing the dependency chain to surface the impacted resources and observations that reveal the missing S3 write permission; otherwise “FAIL”. We define this as a rubric: not just “did the agent find the root cause?” but “did the agent arrive at the root cause through the correct reasoning with the right supporting evidence?”The ground truth (the “expected” or “wanted” in software testing parlance) is compared to the system response (the “actual”) via an LLM Judge – an LLM that receives both the ground truth and the agent’s actual output, then emits its reasoning and a verdict on whether they match. We use an LLM for comparison because the agent’s output is non-deterministic: the agent follows an overall output format but generates the actual text freely, so each run may use different words or sentence structures while conveying the same semantic meaning. We don’t want to strictly search for keywords in the final root cause analysis report but rather evaluate whether the essence of the rubric is met.
The evaluation report is structured with scenarios as rows and metrics as columns. Key metrics that we keep track of are capability (pass@k – whether the agent passed at least once in k attempts), reliability (pass^k – how many times the agent passed across k attempts, e.g., 0.33 means passed 1 out of 3 times for k=3), latency, and token usage.
Why are evals important?
There are several benefits to having evals:
Red scenarios provide obvious investigation points for the agent development team to increase product quality.
Over time, green scenarios act as regression tests, notifying us when changes to the system degrade the existing customer experience.
Once pass rates are green, we can improve customer experience along additional metrics. For example, reducing end-to-end latency and/or optimizing cost (proxied by token usage) while maintaining the quality bar.
What makes evals challenging?
Fast feedback loops help developers know whether code works (is it correct, performant, secure) and whether ideas are good (do they improve key business metrics). This may seem obvious, but far too often, teams and organizations tolerate slow feedback loops […] — Nicole Forsgren and Abi Noda, Frictionless: 7 Steps to Remove Barriers, Unlock Value, and Outpace Your Competition in the AI Era
There are several challenges with evals. In decreasing order of difficulty:
Realistic and diverse scenarios are hard to author. Coming up with realistic applications and fault scenarios is difficult. Authoring high fidelity microservice applications and faults is significant work that requires prior industry experience. What we’ve found effective: we author a few “environments” (based on real application architectures) but create many failure scenarios on top of them. The environment is the expensive portion of the evaluation setup, so we maximize reuse across multiple scenarios.
Slow feedback loops. If the “Given” takes 20 minutes to deploy for an eval scenario and then the “When” takes another 10-20 minutes for complex investigations to complete, agent developers won’t thoroughly test their changes. Instead, they’ll be satisfied with a single passing eval, then release to production, potentially introducing regressions until the comprehensive eval report is generated. Additionally, slow feedback loops encourages batching multiple changes together rather than small incremental experiments, making it harder to understand which change actually moved the needle. We’ve found three mechanisms effective for speeding up feedback loops:
Long-running environments for eval scenarios. The application and its healthy state are created once and kept running. Fault injection happens periodically (e.g., over weekends), and developers point their agent credentials at the faulty environment, completely skipping the “Given” portion of the test.
Isolated testing of only the agent surface area that matters. In our multi-agent system, developers can trigger a specific sub-agent directly with a prompt from a past eval run rather than running the entire end-to-end flow. Additionally, we built a “fork” feature: developers can initialize any agent with the conversation history from a failing run up to a specific checkpoint message, then iterate only on the remaining trajectory. Both of these approaches significantly lowers the wait time of the “When” portion.
Local development of the agentic system. If developers must merge changes and release to a cloud environment before testing, the loop is too slow. Running locally enables rapid iteration.
Visualize trajectories
When an agent fails an eval or a production run, where do you start investigating? The most productive method is error analysis. Visualize the agent’s complete trajectory, every user-assistant message exchange including sub-agent trajectories, and annotate each step as “PASS” or “FAIL” with notes on what went wrong. This process is tedious but effective.
For AWS DevOps Agent, agent trajectories map to OpenTelemetry traces and you can use tools like Jaeger to visualize them. Software development kits like Strands provide tracing integration with minimal setup.
Figure 1 – A sample trace from AWS DevOps Agent.
Each span contains user-assistant message pairs. We annotate each span’s quality in a table such as the following:
This low-level analysis consistently surfaces multiple improvements, not just one. For a single failing eval, one will typically identify many concrete changes spanning accuracy, performance, and cost.
You’ve identified failing scenarios and diagnosed the issues through trajectory analysis. Now it’s time to modify the system.
The biggest fallacy we’ve observed at this stage: confirmation bias leading to overfitting. Given the eval challenges mentioned earlier (slow feedback loops and the impracticality of comprehensive test suites) developers typically test only the few specific failing scenarios locally until they pass. One modifies the context (system prompt, tool specifications, tool implementations, etc.) until one or two scenarios pass, without considering broader impact. When changes don’t follow context engineering best practices, they likely have negative effects that we can’t capture through limited evals.
You need both diligence and judgment: establish success criteria through available evals and reusable past production scenarios, but also educate yourself on context engineering best practices to guide your changes. We’ve found Anthropic’s prompting best practices and engineering blog, Drew Breunig’s how long contexts fail, and lessons from building Manus particularly helpful resources.
Establish success criteria first
Before making any change, define what success looks like:
Baseline. Fix specific git commit IDs for the current system. Think deliberately about which metrics would improve both the agent’s experience and the customer’s experience, then gather those metrics for the baseline.
Test scenarios. Which evals will measure your change’s impact? How many times will you rerun these evals? Convince yourself this set represents broader customer patterns, not just the one failure you’re investigating.
Comparison. Measure your changes against the baseline using the same metrics.
This intentional framing protects against confirmation bias (interpreting results favorably) and sunk cost fallacy (accepting changes simply because you invested time). If your modifications don’t move the metrics as expected, reject them.
For example, when optimizing a sub-agent within AWS DevOps Agent, we establish a baseline by fixing git commit IDs and running the same scenario seven times. This reveals both typical performance and variance.
Each metric measures a different dimension:
Correct observations – How many relevant signals (log records, metric data, code snippets, etc.) that are directly related to the incident did the sub-agent surface?
Irrelevant observations – How much noise did the sub-agent introduce to the lead agent? This counts signals that are unrelated to the incident and could distract the agent’s investigation.
Latency – How long did the sub-agent take (measured in minutes and seconds)?
Sub-agent tokens – How many tokens did the sub-agent to accomplish its task? This serves as a proxy for the cost of running the sub-agent.
Lead-agent tokens – How much of the lead agent’s context window is the sub-agent’s input and output consuming? This gives us a tangible way to identify optimization opportunities for the sub-agent tool: can we compress the instructions to the sub-agent or the results it returns?
After establishing the baseline, we compare these metrics against the same measurements with our proposed changes. This makes it clear whether the change is an actual improvement.
Read production samples
We’ve been fortunate to have several Amazon teams adopt AWS DevOps Agent early. A DevOps agent team member on rotation regularly samples real production runs using our trajectory visualization tool (similar to the OpenTelemetry-based visualization discussed earlier, but customized to render DevOps Agent-specific artifacts like root cause analysis reports and observations), marking whether the agent’s output was accurate and identifying failure points. Production samples are irreplaceable; they reveal the actual customer experience. Additionally, reviewing samples continuously refines your intuition of what the agent is good and bad at. When production runs aren’t satisfactory, you have real-world scenarios to iterate against: modify your agent locally, then rerun it against the same production environment until the desired outcome is reached. Establishing rapport with a few critical early adopter teams willing to partner in this way is invaluable. They provide ground truth for rapid iteration and create opportunities to identify new eval scenarios. This tight feedback loop with production data works in conjunction with eval-driven development to form a comprehensive test suite.
Closing thoughts
Building an agent prototype that demonstrates the feasibility of solving a real business problem is an exciting first step. The harder work is graduating that prototype into a product that performs reliably across diverse customer environments and tasks. In this post, we’ve shared five mechanisms that form the foundation for systematically improving agent quality: evals with realistic and diverse scenarios, fast feedback loops, trajectory visualization, intentional changes, and production sampling.
If you’re building an agentic application, start building your eval suite today. Even starting with a handful critical scenarios will establish the quality baseline needed to measure and improve systematically. To see how AWS DevOps Agent applies these principles to incident response, check out our getting started guide.
Attending CES over the last several years has provided me with a valuable opportunity to observe how rapidly IoT technology continues to evolve across consumer and enterprise domains. This was my fourth year attending CES and I have seen a continued growth and advancement across multiple technology categories, from mobile devices and wearables, to AI-driven automation and robotics, to connected infrastructure.
This year’s show floor highlighted how deeply embedded “smart” technology has become within our everyday systems. As an IoT security researcher, what stood out to me most was not just the pace of innovation, but how increasingly interconnected these technologies have become, often relying on shared backend services, cloud platforms, and automated decision-making. These trends highlight the importance of examining not only individual devices, but the broader trust relationships and infrastructure architectures that support them.
AI-driven automation is no longer experimental
It was clear at CES 2026 that AI-driven automation is no longer experimental, it has become operational. Throughout automation, robotics, and transportation technology, decision-making processes are increasingly being delegated to backend AI systems that consume device telemetry and trigger real-world actions. From a security perspective, this marks a primary shift where trust relationships that were once local are now centralized, automated, and capable of impacting all devices within a larger ecosystem. The challenge moving forward doesn’t just involve securing devices; we will have to secure the data these devices produce, plus ensure that data is not altered or corrupted in a way that would impact all devices under the control of the backend AI systems.
One of the more striking areas of progress has been in robotics, particularly in dexterity and fine motor control. Seeing robots play the piano or fold cloth highlighted how far robotic manipulation has come. Moving beyond their old rigid, pre-programmed motion toward a more adaptive interaction with our physical world. While we are still years away from anything resembling The Jetsons, these demonstrations show clear forward momentum. Before increasingly capable and autonomous robots become more deeply integrated into our world, we need to seriously address how to build security into the underlying technology. It’s also critical to maintain and secure the vast amount of data they will gather.
Mobile and wearable technologies are “always on”
During CES this year, I also observed advances in mobile technology and wearables. While these devices have long been a staple of the show and continue to evolve incrementally each year, the growing integration of AI has noticeably expanded their capabilities. Features such as continuous sensing and adaptive behavior introduce new questions around security and privacy that go beyond traditional mobile threat models. As these technologies increasingly find their way into the hands of employees, they also raise important considerations for organizational security posture. This shift prompts a larger question CISOs should ask themselves: have our organization’s mobile device policies evolved alongside these technologies, or are they still grounded in smartphone-only assumptions from a decade ago?
For example, one of the most concerning mobile device technologies I observed was a device designed for use in corporate meetings that could automatically take notes, transcribe discussions, and translate conversations in real time. While such capabilities can clearly improve productivity and collaboration, especially in global organizations, they also introduce new security and privacy considerations. A device that is continuously listening, processing speech, and potentially transmitting data to backend cloud systems raises questions about where sensitive conversations are stored, how long that data is retained, and who ultimately has access to it. When such technologies are introduced into meeting rooms or business workflows, they essentially become an always-on sensor within the organization, and its presence may not be fully accounted for in most organizations with existing acceptable use policies. This highlights the need for organizations to reassess how emerging mobile and wearable technologies could impact their data protection, confidentiality, and overall security posture.
Conclusion: Building a new infrastructure of trust
My observations from CES 2026 clearly illustrate that the evolution of IoT has moved us beyond securing individual devices. The true security challenge now lies within the highly interconnected ecosystems, centralized AI-driven automation, and “always-on” data collection that underpin our increasingly “smart” world. The operationalization of AI and the rapid progress in robotics introduce centralized trust relationships and vast new data streams that are not yet matched by adequate security considerations.
This shift presents an urgent call to action for organizations. It’s time to aggressively reassess acceptable use and data protection policies to account for continuously sensing wearables, autonomous machinery, and the security of the backend services that control them all. The future of security is no longer just about protecting the perimeter; it is about securing the entire infrastructure of trust, data integrity, and automated decision-making that powers the next generation of technology.
As the threat landscape keeps shifting, security teams are being asked to do more than react. They are expected to look ahead, connect the dots, and make decisions in environments that change faster every year. That challenge was at the heart of Rapid7’s 2026 Security Predictions webinar, where our experts reflected on what the past year revealed about attacker behavior, defender priorities, and the realities of running a modern SOC.
The conversation looked back just long enough to spot the patterns that matter, then turned forward to the forces shaping 2026. Geopolitics, insider risk, and the need for context-driven defense all surfaced repeatedly. The takeaway was simple but important. Attackers are adapting quickly, and security teams need to adapt with the same urgency.
Below are the key takeaways from the discussion, along with the top predictions shaping the year ahead.
Key takeaways from the discussion
The threat landscape is no longer isolated
One of the strongest themes from the webinar was how interconnected today’s risks have become. Cyber activity does not exist in a vacuum. Geopolitical tensions, economic pressure, workforce challenges, and technological acceleration all feed directly into attacker behavior.
Security teams can no longer separate cyber risk from broader business and global risk. Decisions made outside the SOC, from supplier choices to workforce strategy, increasingly influence exposure and attack paths.
Identity and access remain the most reliable attack paths
Despite continued investment in perimeter defenses, attackers are still finding success through compromised credentials, misused access, and human error. The webinar panel reinforced that identity-based compromise remains one of the most consistent and scalable techniques used by threat actors.
This means defenders must treat identity, behavior, and access governance as core detection and response signals, not secondary controls.
Speed without context creates noise, not security
The rise of AI-driven attacks and automation has increased the volume and pace of activity security teams must process. However, the panel stressed that faster alerts alone do not improve outcomes.
Without understanding which assets matter, which exposures are exploitable, and which alerts represent real risk, teams risk moving quickly in the wrong direction. Context is now essential for effective prioritization and response.
The top cybersecurity predictions for 2026
1. Geopolitical fault lines will redraw the cyber battlefield
In 2026, geopolitical tensions will continue to spill into the digital domain, with private organizations increasingly caught in the middle. State-aligned and state-tolerated groups will target critical supply chains, service providers, and global enterprises as proxy targets, blending espionage with economic disruption.
For security teams, this means geopolitical risk must be factored into threat modeling, vendor assessments, and incident response planning. Even organizations far from traditional conflict zones may find themselves impacted by campaigns tied to global tensions.
2. Insider threats will dominate breach root causes
The panel highlighted that many of tomorrow’s breaches will not start with attackers breaking in, but with access already in place. Insider threats, driven by simple negligence, compromised credentials, or monetized access selling, will continue to rise.
Economic stress, workforce changes, and growing access complexity all contribute to this trend. As a result, organizations must focus more on access hygiene, behavior monitoring, and creating environments where employees can report mistakes early without fear.
3. Context will become the new currency of cyber performance
As attacks scale and exploitation windows shrink, the ability to understand what matters most will define successful security operations. The panel emphasized that visibility alone is no longer enough.
Security teams that integrate exposure management, detection, and response will outperform those relying on disconnected tools and alert-heavy workflows. Context-rich defense allows teams to triage faster, investigate smarter, and respond based on real business risk rather than alert volume.
What this means for security teams heading into 2026
The predictions shared during the webinar point to a future where success depends less on adding more tools and more on using intelligence, context, and automation effectively. Security teams that can unify visibility, prioritize risk, and act decisively will be better positioned to keep pace with increasingly adaptive attackers.
The message from the panel was clear. 2026 will reward teams that focus on understanding their environment, aligning security efforts with real-world risk, and preparing for threats shaped by forces far beyond the SOC.
Watch the 2026 Security Predictions webinar to hear directly from Rapid7’s experts on what’s shaping the threat landscape and how security teams should prepare.
Modern cloud applications are commonly built as a collection of loosely coupled microservices running on services like Amazon Elastic Kubernetes Service (Amazon EKS), Amazon Elastic Container Service (Amazon ECS), or AWS Lambda. This architecture gives engineering teams flexibility and scalability, but its inherently distributed nature also makes troubleshooting more difficult. When something breaks, engineers often find themselves digging through logs, events, and metrics scattered across different observability layers. With Kubernetes, for example, without a deep understanding of the service, troubleshooting can turn into a time-consuming effort to manually correlate information from different sources.
In this post, we walk through building a generative AI–powered troubleshooting assistant for Kubernetes. The goal is to give engineers a faster, self-service way to diagnose and resolve cluster issues, cut down Mean Time to Recovery (MTTR), and reduce the cycles experts spend finding the root cause of issues in complex distributed systems.
Overview
One of the challenges of architecting a modern cloud application is keeping observability intact across many moving pieces. Anyone who has ever tailed logs in one terminal while running kubectl describe and curl commands in another, knows how tedious this can get. Distributed systems are powerful, but they’re also complex. Kubernetes, for example, offers strong orchestration capabilities, yet troubleshooting inside a cluster often means navigating multiple layers of abstractions such as pods, nodes, networking, logs, and events. On top of that, the system generates a large volume of telemetry, including kubelet logs, application logs, cluster events, and metrics. Making sense of these layers requires both expertise on the system and application knowledge.
This skill gap shows up in the numbers. According to the 2024 Observability Pulse Report, 48% of organizations say that lack of team knowledge is their biggest challenge to observability in cloud-native environments. MTTR has also been going up for three years straight, with most teams (82%) saying it can take more than an hour to resolve production issues.
When something goes wrong and your applications start to fail for an unknown reason, engineers often must start stitching together signals from multiple sources to find the root cause. That can be tedious for specialists, and it gets worse when the issue is intermittent or spans across services. Often, multiple teams need to get involved – application engineers may not know Kubernetes well, while platform teams may not have deep insight into the applications. This can result in longer troubleshooting cycles, potentially degraded user experience, and pulling engineers away from planned work that drives business goals.
Figure 1. A multitude of telemetry sources in Kubernetes clusters
This is where generative artificial intelligence (AI) can help. Users can build an AI assistant that combines large language model (LLM)-driven analysis and guidance with existing telemetry data. This assistant enables engineers to troubleshoot issues faster, in a self-service way, without requiring every team to become Kubernetes experts. In the following sections, we show how to build such an assistant for Amazon EKS, however, keep in mind that a similar approach can be extended to other compute services like Amazon ECS or AWS Lambda.
Solution architecture
Architecting this AI-powered troubleshooting assistant consists of three primary parts:
Deployment approach selection: The solution supports two architectures – a traditional Retrieval-Augmented Generation (RAG)-based chatbot and a modern Strands-based agentic system that uses the Strands Agents SDK with EKS MCP Server integration for direct EKS API access.
Telemetry collection and storage: Collecting telemetry from various sources and storing it as vector embeddings in Amazon OpenSearch (RAG approach) or as 1024-dimensional embeddings in Amazon S3 Vectors (Strands approach).
Interactive troubleshooting interface: Building either a web-based chatbot that retrieves relevant telemetry and injects it into LLM prompts, or a Slack integrated multi-agent system that uses MCP tools for real-time Kubernetes diagnostics.
For this architecture walkthrough, we focus on the RAG-based approach. The first step is setting up a pipeline that can reliably collect, process, and store telemetry data. This pipeline aggregates telemetry from the relevant data sources, such as application logs, kubelet logs, and Kubernetes events. In Kubernetes environments, this can be done with a telemetry processor and forwarder, such as Fluent Bit, which streams telemetry into Amazon Kinesis Data Streams. On the receiving end, we use a Lambda function to normalize collected data, Amazon Bedrock to generate vector embeddings, and OpenSearch Serverless to store this embedded representation for efficient retrieval. Because these services are serverless, we can avoid the overhead of managing infrastructure and can focus on the troubleshooting workflow itself.
Figure 2. Collecting telemetry from sources, generating embeddings, and saving in OpenSearch
Pro tip: for better performance and cost-efficiency, your Lambda functions should use batching when ingesting data from Kinesis, generating embeddings, and storing them in OpenSearch.
Once telemetry is collected, converted to embeddings, and stored in OpenSearch, the next step is building a chatbot that uses RAG. Using RAG means that when a user asks a question, the chatbot looks up semantically similar telemetry in OpenSearch, adds it to the prompt, and sends it to the LLM. Instead of generic answers, the model now has relevant telemetry and cluster-specific details it can use to generate useful next steps, such as precise kubectl commands for the troubleshooting assistant, as illustrated in the following diagram.
Figure 3. Chatbot is using user queries augmented with telemetry context to send kubectl commands to the troubleshooting assistant.
One powerful aspect of this design is its iterative nature. The chatbot hands instructions to a troubleshooting assistant running in the cluster, which executes a set of allowlisted, read-only kubectl commands. The output comes back to the LLM, which can decide whether it needs to investigate further (by asking the troubleshooting assistant to run more kubectl commands), or present a clear resolution path to the engineer. This cycle gradually builds a richer picture of the issue by combining historical telemetry with real-time cluster state to speed up root cause analysis.
Figure 4. Iterative troubleshooting process.
Here’s the end-to-end troubleshooting flow illustrated in the preceding diagram:
An engineer enters a query into the chatbot interface, for example “My pod is stuck in pending state. Investigate.”
The chatbot sends the query to Bedrock, which converts it into vector embeddings.
Using those embeddings, the chatbot retrieves semantically matching telemetry that was previously stored in OpenSearch.
The chatbot generates an augmented prompt, which contains both the original query and semantically relevant telemetry, and passes it to the LLM. The LLM responds with a list of kubectl commands to run for further diagnostics.
The chatbot forwards those commands to the troubleshooting assistant running in the EKS cluster. The agent executes them with a service account that has read-only permissions, following the principle of least privilege, and sends the output back.
Based on the output, the chatbot asks LLM to decide whether to continue investigation (by asking the agent to run more commands), or whether it has enough context to produce an answer.
Once enough information has been gathered (investigation concluded), the chatbot composes a final prompt, including the query, telemetry, and investigation results, and asks the LLM for a final resolution, which it then returns to the engineer.
Example implementation
Use the example repo to deploy the solution in your AWS account. Follow the instructions in README.md for provisioning and testing the sample project using Terraform. Resources provisioned by the example project incur costs in your AWS account. Make sure to clean up the project as described in the README.md to avoid unexpected costs.
The repository provides two deployment architectures controlled by the deployment_type Terraform variable:
RAG-based deployment (default): See the ./terraform/modules directory for the “ingestion-pipeline” module that creates a Kinesis Data Stream and Lambda function to generate embeddings using "amazon.titan-embed-test-v2:0" and store them in OpenSearch. The “agentic-chatbot” module handles the Gradio web interface and kubectl command execution.
Strands agentic deployment: this approach uses the Strands Agents SDK to create a multi-agent system with three specialized agents:
Memory Agent: Manages conversation context and historical insights
K8s Specialist: Handles Kubernetes diagnostics
The agentic system stores knowledge as 1024-dimensional embeddings in Amazon S3 Vectors, providing cost-optimized vector storage for AI agents. EKS MCP Server integration enabled direct EKS API access through standardized MCP tools located in ./apps/agentic-troubleshooting/src/tools/. Engineers interact via Slack bot integration, where the Strands agents can execute kubectl commands through the MCP protocol while maintaining Pod Identity security for AWS service access.
The following screenshot shows an example chatbot response to a query about a pod being stuck in pending state. The assistant generated and ran multiple kubectl commands to build the output and came up with recommendations for issue remediation.
Figure 5. EKS cluster troubleshooting, example output
When implementing AI agents for Kubernetes environments, security must be a primary consideration throughout the architecture. The solution requires secure communication channels between the chatbot and EKS clusters, with interactions authenticated through AWS Identity and Access Management (AWS IAM) roles.
Permissions-wise, command execution security is critical. Implementing strict allowlists that only allow read-only kubectl operations to help prevent unauthorized cluster modifications while maintaining diagnostic capabilities. The troubleshooting assistant should also operate with minimal Kubernetes RBAC permissions, limited to viewing pods, services, events, and logs within specific namespaces.
Data protection measures must include sanitizing application logs before embedding generation to help prevent sensitive information exposure, encrypting the telemetry data in transit through Kinesis and at rest in OpenSearch using AWS Key Management Service (AWS KMS).
Follow the AWS Well-Architected Framework Security Pillar principles, deploy components within Amazon Virtual Private Cloud (Amazon VPC) using private subnets and VPC endpoints to minimize network exposure, implement comprehensive logging of troubleshooting activities for audit purposes, and validate user inputs to protect against prompt injection attacks that could manipulate the AI assistant’s behavior.
Conclusion
In this post, we walked through how to architect a generative AI-powered troubleshooting assistant that gives engineers a way to solve Kubernetes issues in a self-service way, without always needing service experts to step in. By combining telemetry analysis with AI-driven context, engineers can get to the root causes faster and keep MTTR low. Assistant’s ability to pull from multiple telemetry sources, run safe diagnostic commands, and provide actionable recommendations helps to make the troubleshooting process more efficient and less disruptive to ongoing work.
As distributed systems continue to grow in scale and complexity, solutions like the one described in this post become essential. Putting AI on top of your observability data helps to practically handle these challenges today, while also setting you up for more autonomous, resilient operations in the future.
The week after AWS re:Invent builds on the excitement and energy of the event and is a good time to learn more and understand how the recent announcements can help you solve your challenges and unlock new opportunities. As usual, we have you covered with our top announcements of AWS re:Invent 2025 that you can learn all about here.
For me, one moment stood out above all the technical announcements: watching Rafi (Raphael Francis Quisumbing) from the Philippines receive the Now Go Build Award from Werner Vogels. Rafi has been an AWS Hero since 2015 and co-lead of AWS User Group Philippines since 2013. His dedication to building communities and empowering developers across the region embodies what this award represents. You can read more about Rafi on The Kernel. Congrats, Rafi!
The keynote recap: Agents, renaissance, and the developer’s role This year’s AWS re:Invent keynotes painted a clear picture of where we’re headed.
Matt Garmanemphasized that developers are “the heart of AWS” and that “freedom to invent” remains AWS’s core mission after 20 years. He focused on AI agents as the next inflection point: “AI assistants are starting to give way to AI agents that can perform tasks and automate on your behalf. This is where we’re starting to see material business returns from your AI investments.”
Swami Sivasubramanian highlighted the transformative moment we’re in: “For the first time in history, we can describe what we want to accomplish in natural language, and agents generate the plan. They write the code, call the necessary tools, and execute the complete solution.” AWS is building production-ready infrastructure that’s secure, reliable, and scalable—purpose-built for the non-deterministic nature of agents.
Peter DeSantis and Dave Brown reinforced that the core attributes AWS has obsessed over for 20 years—security, availability, performance, elasticity, cost, and agility—are more important than ever in the AI era. Dave Brown showcased Graviton and AWS’s custom silicon innovations that deliver these attributes at scale.
Werner Vogels delivered his final keynote after 14 years, introducing the concept of the “renaissance developer”—someone who is curious, thinks in systems, and communicates effectively. His message about AI and developer evolution resonated: “Will AI take my job? Maybe. Will AI make me obsolete? Absolutely not… if you evolve.” He emphasized that developers must be owners: “The work is yours, not that of the tools. You build it, you own it.”
You can also watch from keynotes, innovation talks to breakout sessions and more in the on-demand video page.
Kiro Autonomous Agent – Building on Kiro’s general availability in November with team features, AWS introduced an autonomous agent that maintains awareness across sessions, learns from pull requests and feedback, and handles bug triage and code coverage improvements spanning multiple repositories. “Orders of magnitude more efficient” than first-generation AI coding tools, Matt Garman said. Kiro is now Amazon’s standard AI development environment company-wide.
Multimodal Retrieval for Bedrock Knowledge Bases (GA) – Build AI-powered search and question-answering applications that work across text, images, audio, and video files. Developers can now ingest multimodal content with full control of parsing, chunking, embedding, and vector storage options, then send text or image queries to retrieve relevant segments across all media types.
AWS Interconnect – Multicloud (Preview) – Quickly establish private, secure, high-speed network connections with dedicated bandwidth and built-in resiliency between Amazon VPCs and other cloud environments. Starting in preview with Google Cloud as the first launch partner, with Microsoft Azure support coming in 2026.
See AWS What’s New for more launch news that I haven’t covered here. That’s all for this week. Check back next Monday for another Weekly Roundup!
In cybersecurity today, regulation is everywhere, but resilience isn’t keeping pace.
In this episode of Experts on Experts: Commanding Perspectives, Craig Adams chats with Sabeen Malik, VP of Public Policy & Government Affairs at Rapid7, about what’s broken (and what’s promising) in today’s regulatory landscape.
Sabeen pulls from her experience across diplomacy, operations, and government relations to highlight where policy too often fails to account for how risk actually works. From insider threats to government shutdowns, it’s a sharp, timely look at how security leaders should approach strategy, structure, and compliance going into 2026.
Key themes:
The growing trust gap between public, private, and institutional actors
Why insider threats are a cultural problem, not just a controls one
Where UK and US guidance is falling short on resilience
What small and midsized businesses are still missing
Why AI, exposure, and threat governance need to be connected
Whether you’re thinking about AI use cases or modern regulation fatigue, this episode offers a much-needed reset.
Organizations face a challenging trade-off when adapting AI models to their specific business needs: settle for generic models that produce average results, or tackle the complexity and expense of advanced model customization. Traditional approaches force a choice between poor performance with smaller models or the high costs of deploying larger model variants and managing complex infrastructure. Reinforcement fine-tuning is an advanced technique that trains models using feedback instead of massive labeled datasets, but implementing it typically requires specialized ML expertise, complicated infrastructure, and significant investment—with no guarantee of achieving the accuracy needed for specific use cases.
Today, we’re announcing reinforcement fine-tuning in Amazon Bedrock, a new model customization capability that creates smarter, more cost-effective models that learn from feedback and deliver higher-quality outputs for specific business needs. Reinforcement fine-tuning uses a feedback-driven approach where models improve iteratively based on reward signals, delivering 66% accuracy gains on average over base models.
Amazon Bedrock automates the reinforcement fine-tuning workflow, making this advanced model customization technique accessible to everyday developers without requiring deep machine learning (ML) expertise or large labeled datasets.
How reinforcement fine-tuning works Reinforcement fine-tuning is built on top of reinforcement learning principles to address a common challenge: getting models to consistently produce outputs that align with business requirements and user preferences.
While traditional fine-tuning requires large, labeled datasets and expensive human annotation, reinforcement fine-tuning takes a different approach. Instead of learning from fixed examples, it uses reward functions to evaluate and judge which responses are considered good for particular business use cases. This teaches models to understand what makes a quality response without requiring massive amounts of pre-labeled training data, making advanced model customization in Amazon Bedrock more accessible and cost-effective.
Here are the benefits of using reinforcement fine-tuning in Amazon Bedrock:
Ease of use – Amazon Bedrock automates much of the complexity, making reinforcement fine-tuning more accessible to developers building AI applications. Models can be trained using existing API logs in Amazon Bedrock or by uploading datasets as training data, eliminating the need for labeled datasets or infrastructure setup.
Better model performance – Reinforcement fine-tuning improves model accuracy by 66% on average over base models, enabling optimization for price and performance by training smaller, faster, and more efficient model variants. This works with Amazon Nova 2 Lite model, improving quality and price performance for specific business needs, with support for additional models coming soon.
Security – Data remains within the secure AWS environment throughout the entire customization process, mitigating security and compliance concerns.
The capability supports two complementary approaches to provide flexibility for optimizing models:
Reinforcement Learning with Verifiable Rewards (RLVR) uses rule-based graders for objective tasks like code generation or math reasoning.
Reinforcement Learning from AI Feedback (RLAIF) employs AI-based judges for subjective tasks like instruction following or content moderation.
Getting started with reinforcement fine-tuning in Amazon Bedrock Let’s walk through creating a reinforcement fine-tuning job.
First, I access the Amazon Bedrock console. Then, I navigate to the Custom models page. I choose Create and then choose Reinforcement fine-tuning job.
I start by entering the name of this customization job and then select my base model. At launch, reinforcement fine-tuning supports Amazon Nova 2 Lite, with support for additional models coming soon.
Next, I need to provide training data. I can use my stored invocation logs directly, eliminating the need to upload separate datasets. I can also upload new JSONL files or select existing datasets from Amazon Simple Storage Service (Amazon S3). Reinforcement fine-tuning automatically validates my training dataset and supports the OpenAI Chat Completions data format. If I provide invocation logs in the Amazon Bedrock invoke or converse format, Amazon Bedrock automatically converts them to the Chat Completions format.
The reward function setup is where I define what constitutes a good response. I have two options here. For objective tasks, I can select Custom code and write custom Python code that gets executed through AWS Lambda functions. For more subjective evaluations, I can select Model as judge to use foundation models (FMs) as judges by providing evaluation instructions.
Here, I select Custom code, and I create a new Lambda function or use an existing one as a reward function. I can start with one of the provided templates and customize it for my specific needs.
I can optionally modify default hyperparameters like learning rate, batch size, and epochs.
For enhanced security, I can configure virtual private cloud (VPC) settings and AWS Key Management Service (AWS KMS) encryption to meet my organization’s compliance requirements. Then, I choose Create to start the model customization job.
During the training process, I can monitor real-time metrics to understand how the model is learning. The training metrics dashboard shows key performance indicators including reward scores, loss curves, and accuracy improvements over time. These metrics help me understand whether the model is converging properly and if the reward function is effectively guiding the learning process.
When the reinforcement fine-tuning job is completed, I can see the final job status on the Model details page.
Once the job is completed, I can deploy the model with a single click. I select Set up inference, then choose Deploy for on-demand.
Here, I provide a few details for my model.
After deployment, I can quickly evaluate the model’s performance using the Amazon Bedrock playground. This helps me to test the fine-tuned model with sample prompts and compare its responses against the base model to validate the improvements. I select Test in playground.
The playground provides an intuitive interface for rapid testing and iteration, helping me confirm that the model meets my quality requirements before integrating it into production applications.
Security — Training data and custom models remain private and aren’t used to improve FMs for public use. It supports VPC and AWS KMS encryption for enhanced security.
Today, I’m happy to announce new serverless customization in Amazon SageMaker AI for popular AI models, such as Amazon Nova, DeepSeek, GPT-OSS, Llama, and Qwen. The new customization capability provides an easy-to-use interface for the latest fine-tuning techniques like reinforcement learning, so you can accelerate the AI model customization process from months to days.
With a few clicks, you can seamlessly select a model and customization technique, and handle model evaluation and deployment—all entirely serverless so you can focus on model tuning rather than managing infrastructure. When you choose serverless customization, SageMaker AI automatically selects and provisions the appropriate compute resources based on the model and data size.
Getting started with serverless model customization You can get started customizing models in Amazon SageMaker Studio. Choose Models in the left navigation pane and check out your favorite AI models to be customized.
Customize with UI You can customize AI models in a only few clicks. In the Customize model dropdown list for a specific model such as Meta Llama 3.1 8B Instruct, choose Customize with UI.
You can select a customization technique used to adapt the base model to your use case. SageMaker AI supports Supervised Fine-Tuning and the latest model customization techniques including Direct Preference Optimization, Reinforcement Learning from Verifiable Rewards (RLVR), and Reinforcement Learning from AI Feedback (RLAIF). Each technique optimizes models in different ways, with selection influenced by factors such as dataset size and quality, available computational resources, task at hand, desired accuracy levels, and deployment constraints.
Upload or select a training dataset to match the format required by the customization technique selected. Use the values of batch size, learning rate, and number of epochs recommended by the technique selected. You can configure advanced settings such as hyperparameters, a newly introduced serverless MLflow application for experiment tracking, and network and storage volume encryption. Choose Submit to get started on your model training job.
After your training job is complete, you can see the models you created in the My Models tab. Choose View details in one of your models.
By choosing Continue customization, you can continue to customize your model by adjusting hyperparameters or training with different techniques. By choosing Evaluate, you can evaluate your customized model to see how it performs compared to the base model.
When you complete both jobs, you can choose either the SageMaker or Bedrock in the Deploy dropdown list to deploy your model.
You can choose Amazon Bedrock for serverless inference. Choose Bedrock and the model name to deploy the model into Amazon Bedrock. To find your deployed models, choose Imported models in the Bedrock console.
You can also deploy your model to a SageMaker AI inference endpoint if you want to control your deployment resources such as an instance type and instance count. After the SageMaker AI deployment is In service, you can use this endpoint to perform inference. In the Playground tab, you can test your customized model with a single prompt or chat mode.
With the serverless MLflow capability, you can automatically log all critical experiment metrics without modifying code and access rich visualizations for further analysis.
Customize with code When you choose customizing with code, you can see a sample notebook to fine-tune or deploy AI models. If you want to edit the sample notebook, open it in JupyterLab. Alternatively, you can deploy the model immediately by choosing Deploy.
When you choose Deploy on the bottom right of the page, it will be redirected back to the model detail page. After the SageMaker AI deployment is in service, you can use this endpoint to perform inference.
Okay, you’ve seen how to streamline the model customization in the SageMaker AI. You can now choose your favorite way. To learn more, visit the Amazon SageMaker AI Developer Guide.
Now available New serverless AI model customization in Amazon SageMaker AI is now available in US East (N. Virginia), US West (Oregon), Asia Pacific (Tokyo), and Europe (Ireland) Regions. You only pay for the tokens processed during training and inference. To learn more details, visit Amazon SageMaker AI pricing page.
Today, we’re announcing two new AI model training features within Amazon SageMaker HyperPod: checkpointless training, an approach that mitigates the need for traditional checkpoint-based recovery by enabling peer-to-peer state recovery, and elastic training, enabling AI workloads to automatically scale based on resource availability.
Checkpointless training – Checkpointless training eliminates disruptive checkpoint-restart cycles, maintaining forward training momentum despite failures, reducing recovery time from hours to minutes. Accelerate your AI model development, reclaim days from development timelines, and confidently scale training workflows to thousands of AI accelerators.
Elastic training – Elastic training maximizes cluster utilization as training workloads automatically expand to use idle capacity as it becomes available, and contract to yield resources as higher-priority workloads like inference volumes peak. Save hours of engineering time per week spent reconfiguring training jobs based on compute availability.
Rather than spending time managing training infrastructure, these new training techniques mean that your team can concentrate entirely on enhancing model performance, ultimately getting your AI models to market faster. By eliminating the traditional checkpoint dependencies and fully utilizing available capacity, you can significantly reduce model training completion times.
Checkpointless training: How it works Traditional checkpoint-based recovery has these sequential job stages: 1) job termination and restart, 2) process discovery and network setup, 3) checkpoint retrieval, 4) data loader initialization, and 5) training loop resumption. When failures occur, each stage can become a bottleneck and training recovery can take up to an hour on self-managed training clusters. The entire cluster must wait for every single stage to complete before training can resume. This can lead to the entire training cluster sitting idle during recovery operations, which increases costs and extends the time to market.
Checkpointless training removes this bottleneck entirely by maintaining continuous model state preservation across the training cluster. When failures occur, the system instantly recovers by using healthy peers, avoiding the need for a checkpoint-based recovery that requires restarting the entire job. As a result, checkpointless training enables fault recovery in minutes.
Checkpointless training is designed for incremental adoption and built on four core components that work together: 1) collective communications initialization optimizations, 2) memory-mapped data loading that enables caching, 3) in-process recovery, and 4) checkpointless peer-to-peer state replication. These components are orchestrated through the HyperPod training operator that is used to launch the job. Each component optimizes a specific step in the recovery process, and together they enable automatic detection and recovery of infrastructure faults in minutes with zero manual intervention, even with thousands of AI accelerators. You can progressively enable each of these features as your training scales.
The latest Amazon Nova models were trained using this technology on tens of thousands of accelerators. Additionally, based on internal studies on cluster sizes ranging between 16 GPUs to over 2,000 GPUs, checkpointless training showcased significant improvements in recovery times, reducing downtime by over 80% compared to traditional checkpoint-based recovery.
Elastic training: How it works On clusters that run different types of modern AI workloads, accelerator availability can change continuously throughout the day as short-duration training runs complete, inference spikes occur and subside, or resources free up from completed experiments. Despite this dynamic availability of AI accelerators, traditional training workloads remain locked into their initial compute allocation, unable to take advantage of idle accelerators without manual intervention. This rigidity leaves valuable GPU capacity unused and prevents organizations from maximizing their infrastructure investment.
Elastic training transforms how training workloads interact with cluster resources. Training jobs can automatically scale up to utilize available accelerators and gracefully contract when resources are needed elsewhere, all while maintaining training quality.
Workload elasticity is enabled through the HyperPod training operator that orchestrates scaling decisions through integration with the Kubernetes control plane and resource scheduler. It continuously monitors cluster state through three primary channels: pod lifecycle events, node availability changes, and resource scheduler priority signals. This comprehensive monitoring enables near-instantaneous detection of scaling opportunities, whether from newly available resources or requests from higher-priority workloads.
The scaling mechanism relies on adding and removing data parallel replicas. When additional compute resources become available, new data parallel replicas join the training job, accelerating throughput. Conversely, during scale-down events (for example, when a higher-priority workload requests resources), the system scales down by removing replicas rather than terminating the entire job, allowing training to continue at reduced capacity.
Across different scales, the system preserves the global batch size and adapts learning rates, preventing model convergence from being adversely impacted. This enables workloads to dynamically scale up or down to utilize available AI accelerators without any manual intervention.
You can start elastic training through the HyperPod recipes for publicly available foundation models (FMs) including Llama and GPT-OSS. Additionally, you can modify your PyTorch training scripts to add elastic event handlers, which enable the job to dynamically scale.
To learn more, visit the HyperPod Elastic Training in the Amazon SageMaker AI Developer Guide. To get started, find the HyperPod recipes available in the AWS GitHub repository.
Now available Both features are available in all the Regions in which Amazon SageMaker HyperPod is available. You can use these training techniques without additional cost. To learn more, visit the SageMaker HyperPod product page and SageMaker AI pricing page.
Give it a try and send feedback to AWS re:Post for SageMaker or through your usual AWS Support contacts.
Today, we’re announcing new capabilities in Amazon Bedrock AgentCore to further remove barriers holding AI agents back from production. Organizations across industries are already building on AgentCore, the most advanced agentic platform to build, deploy, and operate highly capable agents securely at any scale. In just 5 months since preview, the AgentCore SDK has been downloaded over 2 million times. For example:
PGA TOUR, a pioneer and innovation leader in sports has built a multi-agent content generation system to create articles for their digital platforms. The new solution, built on AgentCore, enables the PGA TOUR to provide comprehensive coverage for every player in the field, by increasing content writing speed by 1,000 percent while achieving a 95 percent reduction in costs.
Independent software vendors (ISVs) like Workday are building the software of the future on AgentCore. AgentCore Code Interpreter provides Workday Planning Agent with secure data protection and essential features for financial data exploration. Users can analyze financial and operational data through natural language queries, making financial planning intuitive and self-driven. This capability reduces time spent on routine planning analysis by 30 percent, saving approximately 100 hours per month.
Grupo Elfa, a Brazilian distributor and retailer, relies on AgentCore Observability for complete audit traceability and real-time metrics of their agents, transforming their reactive processes into proactive operations. Using this unified platform, their sales team can handle thousands of daily price quotes while the organization maintains full visibility of agent decisions, helping achieve 100 percent traceability of agent decisions and interactions, and reduced problem resolution time by 50 percent.
As organizations scale their agent deployments, they face challenges around implementing the right boundaries and quality checks to confidently deploy agents. The autonomy that makes agents powerful also makes them hard to confidently deploy at scale, as they might access sensitive data inappropriately, make unauthorized decisions, or take unexpected actions. Development teams must balance enabling agent autonomy while ensuring they operate within acceptable boundaries and with the quality you require to put them in front of customers and employees.
The new capabilities available today take the guesswork out of this process and help you build and deploy trusted AI agents with confidence:
Policy in AgentCore (Preview) – Defines clear boundaries for agent actions by intercepting AgentCore Gateway tool calls before they run using policies with fine-grained permissions.
AgentCore Evaluations (Preview) – Monitors the quality of your agents based on real-world behavior using built-in evaluators for dimensions such as correctness and helpfulness, plus custom evaluators for business-specific requirements.
We’re also introducing features that expand what agents can do:
Episodic functionality in AgentCore Memory – A new long-term strategy that helps agents learn from experiences and adapt solutions across similar situations for improved consistency and performance in similar future tasks.
Bidirectional streaming in AgentCore Runtime – Deploys voice agents where both users and agents can speak simultaneously following a natural conversation flow.
Policy in AgentCore for precise agent control Policy gives you control over the actions agents can take and are applied outside of the agent’s reasoning loop, treating agents as autonomous actors whose decisions require verification before reaching tools, systems, or data. It integrates with AgentCore Gateway to intercept tool calls as they happen, processing requests while maintaining operational speed, so workflows remain fast and responsive.
You can create policies using natural language or directly use Cedar—an open source policy language for fine-grained permissions—simplifying the process to set up, understand, and audit rules without writing custom code. This approach makes policy creation accessible to development, security, and compliance teams who can create, understand, and audit rules without specialized coding knowledge.
The policies operate independently of how the agent was built or which model it uses. You can define which tools and data agents can access—whether they are APIs, AWS Lambda functions, Model Context Protocol (MCP) servers, or third-party services—what actions they can perform, and under what conditions.
Teams can define clear policies once and apply them consistently across their organization. With policies in place, developers gain the freedom to create innovative agentic experiences, and organizations can deploy their agents to act autonomously while knowing they’ll stay within defined boundaries and compliance requirements.
Using Policy in AgentCore You can start by creating a policy engine in the new Policy section of the AgentCore console and associate it with one or more AgentCore gateways.
A policy engine is a collection of policies that are evaluated at the gateway endpoint. When associating a gateway with a policy engine, you can choose whether to enforce the result of the policy—effectively permitting or denying access to a tool call—or to only emit logs. Using logs helps you test and validate a policy before enabling it in production.
Then, you can define the policies to apply to have granular control over access to the tools offered by the associated AgentCore gateways.
To create a policy, you can start with a natural language description (that should include information of the authentication claims to use) or directly edit Cedar code.
Natural language-based policy authoring provides a more accessible way for you to create fine-grained policies. Instead of writing formal policy code, you can describe rules in plain English. The system interprets your intent, generates candidate policies, validates them against the tool schema, and uses automated reasoning to check safety conditions—identifying prompts that are overly permissive, overly restrictive, or contain conditions that can never be satisfied.
Unlike generic large language model (LLM) translations, this feature understands the structure of your tools and generates policies that are both syntactically correct and semantically aligned with your intent, while flagging rules that cannot be enforced. It is also available as a Model Context Protocol (MCP) server, so you can author and validate policies directly in your preferred AI-assisted coding environment as part of your normal development workflow. This approach reduces onboarding time and helps you write high-quality authorization rules without needing Cedar expertise.
The following sample policy uses information from the OAuth claims in the JWT token used to authenticate to an AgentCore gateway (for the role) and the arguments passed to the tool call (context.input) to validate access to the tool processing a refund. Only an authenticated user with the refund-agent role can access the tool but for amounts (context.input.amount) lower than $200 USD.
permit(
  principal is AgentCore::OAuthUser,
  action == AgentCore::Action::"RefundTool__process_refund",
  resource == AgentCore::Gateway::"<GATEWAY_ARN>"
)
when {
  principal.hasTag("role") &&
  principal.getTag("role") == "refund-agent" &&
  context.input.amount < 200
};
AgentCore Evaluations for continuous, real-time quality intelligence AgentCore Evaluations is a fully managed service that helps you continuously monitor and analyze agent performance based on real-world behavior. With AgentCore Evaluations, you can use built-in evaluators for common quality dimensions such as correctness, helpfulness, tool selection accuracy, safety, goal success rate, and context relevance. You can also create custom model-based scoring systems configured with your choice of prompt and model for business-tailored scoring while the service samples live agent interactions and scores them continuously.
All results from AgentCore Evaluations are visualized in Amazon CloudWatch alongside AgentCore Observability insights, providing one place for unified monitoring. You can also set up alerts and alarms on the evaluation scores to proactively monitor agent quality and respond when metrics fall outside acceptable thresholds.
You can use AgentCore Evaluations during the testing phase where you can check an agent against the baseline before deployment to stop faulty versions from reaching users, and in production for continuous improvement of your agents. When quality metrics drop below defined thresholds—such as a customer service agent satisfaction declining or politeness scores dropping by more than 10 percent over an 8-hour period—the system triggers immediate alerts, helping to detect and address quality issues faster.
Using AgentCore Evaluations You can create an online evaluation in the new Evaluations section of the AgentCore console. You can use as data source an AgentCore agent endpoint or a CloudWatch log group used by an external agent. For example, I use here the same sample customer support agent I shared when we introduced AgentCore in preview.
Then, you can select the evaluators to use, including custom evaluators that you can define starting from the existing templates or build from scratch.
For example, for a customer support agent, you can select metrics such as:
Correctness – Evaluates whether the information in the agent’s response is factually accurate
Faithfulness – Evaluates whether information in the response is supported by provided context/sources
Helpfulness – Evaluates from user’s perspective how useful and valuable the agent’s response is
Harmfulness – Evaluates whether the response contains harmful content
Stereotyping – Detects content that makes generalizations about individuals or groups
The evaluators for tool selection and tool parameter accuracy can help you understand if an agent is choosing the right tool for a task and extracting the correct parameters from the user queries.
To complete the creation of the evaluation, you can choose the sampling rate and optional filters. For permissions, you can create a new AWS Identity and Access Management (IAM) service role or pass an existing one.
The results are published, as they are evaluated, on Amazon CloudWatch in the AgentCore Observability dashboard. You can choose any of the bar chart sections to see the corresponding traces and gain deeper insight into the requests and responses behind that specific evaluation.
Because the results are in CloudWatch, you can use all of its feature to create, for example, alarms and automations.
Creating custom evaluators in AgentCore Evaluations Custom evaluators allow you to define business-specific quality metrics tailored to your agent’s unique requirements. To create a custom evaluator, you provide the model to use as a judge, including inference parameters such as temperature and max output tokens, and a tailored prompt with the judging instructions. You can start from the prompt used by one of the built-in evaluators or enter a new one.
Then, you define the scale to produce in output. It can be either numeric values or custom text labels that you define. Finally, you configure whether the evaluation is computed by the model on single traces, full sessions, or for each tool call.
AgentCore Memory episodic functionality for experience-based learning AgentCore Memory, a fully managed service that gives AI agents the ability to remember past interactions, now includes a new long-term memory strategy that gives agents the ability to learn from past experiences and apply those lessons to provide more helpful assistance in future interactions.
Consider booking travel with an agent: over time, the agent learns from your booking patterns—such as the fact that you often need to move flights to later times when traveling for work due to client meetings. When you start your next booking involving client meetings, the agent proactively suggests flexible return options based on these learned patterns. Just like an experienced assistant who learns your specific travel habits, agents with episodic memory can now recognize and adapt to your individual needs.
When you enable the new episodic functionality, AgentCore Memory captures structured episodes that record the context, reasoning process, actions taken, and outcomes of agent interactions, while a reflection agent analyzes these episodes to extract broader insights and patterns. When facing similar tasks, agents can retrieve these learnings to improve decision-making consistency and reduce processing time. This reduces the need for custom instructions by including in the agent context only the specific learnings an agent needs to complete a task instead of a long list of all possible suggestions.
AgentCore Runtime bidirectional streaming for more natural conversations With AgentCore Runtime, you can deploy agentic applications with few lines of code. To simplify deploying conversational experiences that feel natural and responsive, AgentCore Runtime now supports bidirectional streaming. This capability enables voice agents to listen and adapt while users speak, so that people can interrupt agents mid-response and have the agent immediately adjust to the new context—without waiting for the agent to finish its current output. Rather than traditional turn-based interaction where users must wait for complete responses, bidirectional streaming creates flowing, natural conversations where agents dynamically change their response based on what the user is saying.
Building these conversational experiences from the ground up requires significant engineering effort to handle the complex flow of simultaneous communication. Bidirectional streaming simplifies this by managing the infrastructure needed for agents to process input while generating output, handling interruptions gracefully, and maintaining context throughout dynamic conversation shifts. You can now deploy agents that naturally adapt to the fluid nature of human conversation—supporting mid-thought interruptions, context switches, and clarifications without losing the thread of the interaction.
Things to know Amazon Bedrock AgentCore, including the preview of Policy, is available in the US East (Ohio, N. Virginia), US West (Oregon), Asia Pacific (Mumbai, Singapore, Sydney, Tokyo), and Europe (Frankfurt, Ireland) AWS Regions . The preview of AgentCore Evaluations is available in the US East (Ohio, N. Virginia), US West (Oregon), Asia Pacific (Sydney), and Europe (Frankfurt) Regions. For Regional availability and future roadmap, visit AWS Capabilities by Region.
With AgentCore, you pay for what you use with no upfront commitments. For detailed pricing information, visit the Amazon Bedrock pricing page. AgentCore is also a part of the AWS Free Tier that new AWS customers can use to get started at no cost and explore key AWS services.
These new features work with any open source framework such as CrewAI, LangGraph, LlamaIndex, and Strands Agents, and with any foundation model. AgentCore services can be used together or independently, and you can get started using your favorite AI-assisted development environment with the AgentCore open source MCP server.
To provide the best experiences, we use technologies like cookies to store and/or access device information. Consenting to these technologies will allow us to process data such as browsing behavior or unique IDs on this site. Not consenting or withdrawing consent, may adversely affect certain features and functions.
Functional
Always active
The technical storage or access is strictly necessary for the legitimate purpose of enabling the use of a specific service explicitly requested by the subscriber or user, or for the sole purpose of carrying out the transmission of a communication over an electronic communications network.
Preferences
The technical storage or access is necessary for the legitimate purpose of storing preferences that are not requested by the subscriber or user.
Statistics
The technical storage or access that is used exclusively for statistical purposes.The technical storage or access that is used exclusively for anonymous statistical purposes. Without a subpoena, voluntary compliance on the part of your Internet Service Provider, or additional records from a third party, information stored or retrieved for this purpose alone cannot usually be used to identify you.
Marketing
The technical storage or access is required to create user profiles to send advertising, or to track the user on a website or across several websites for similar marketing purposes.
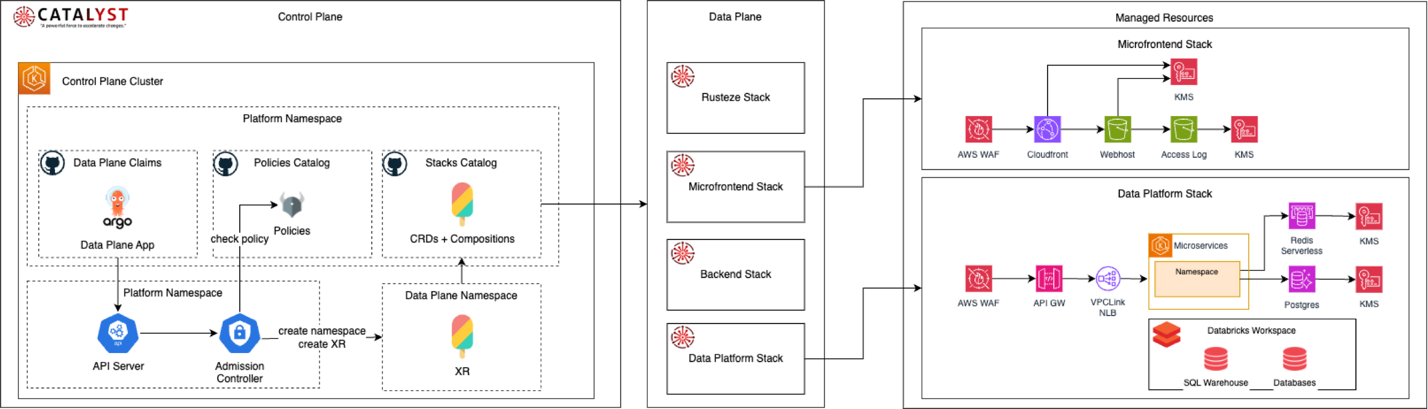
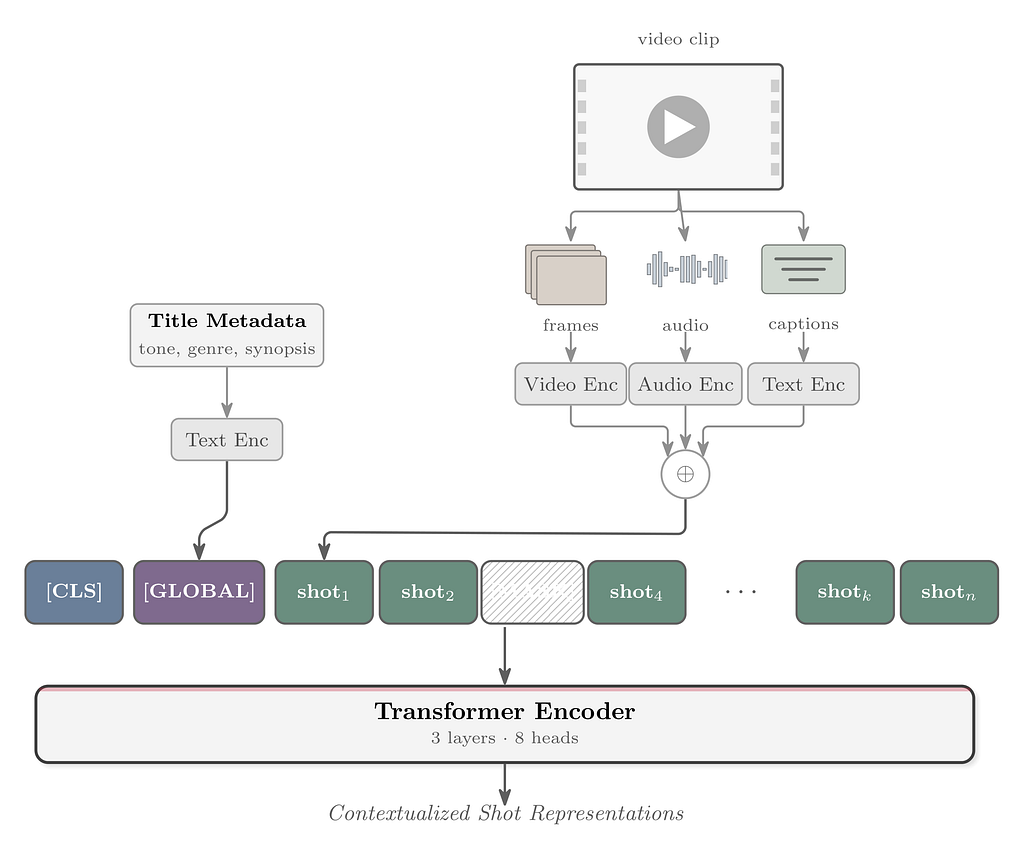
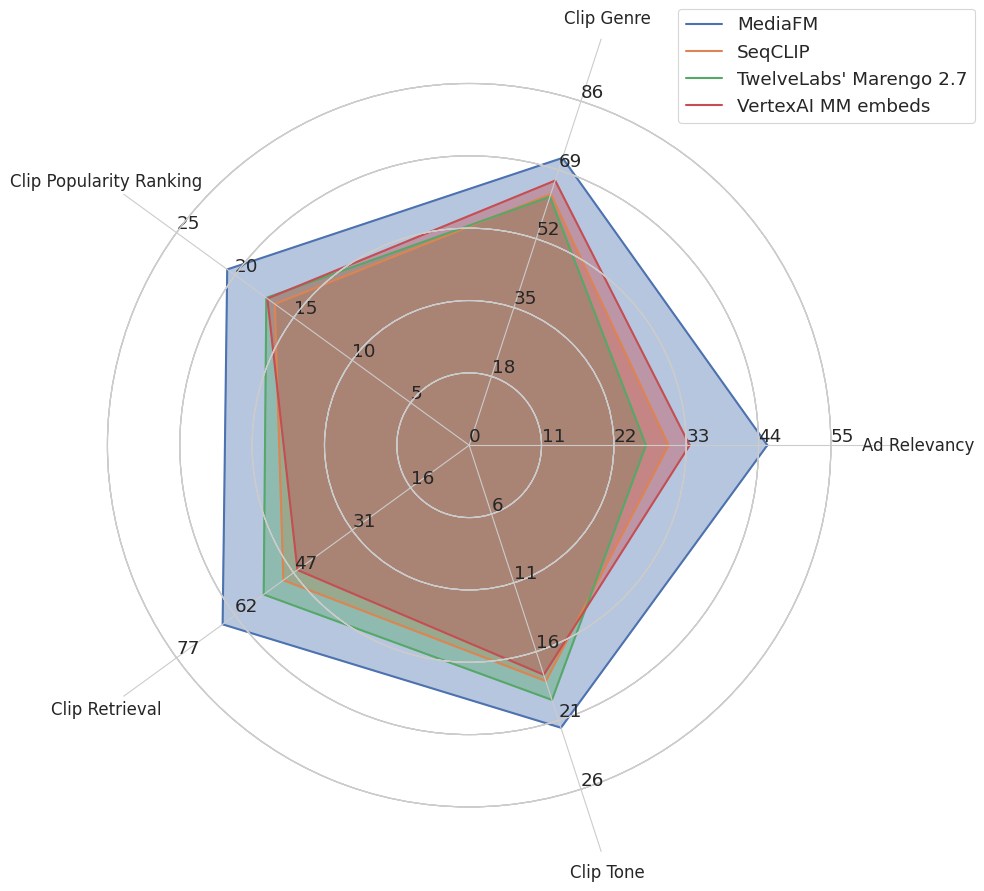
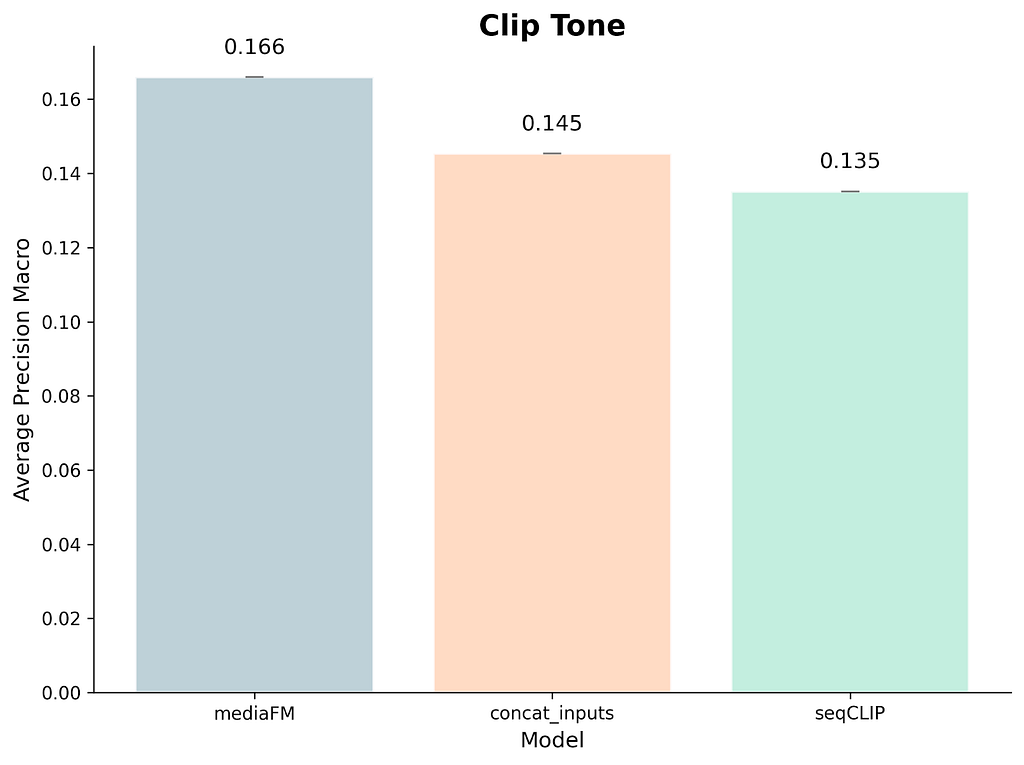
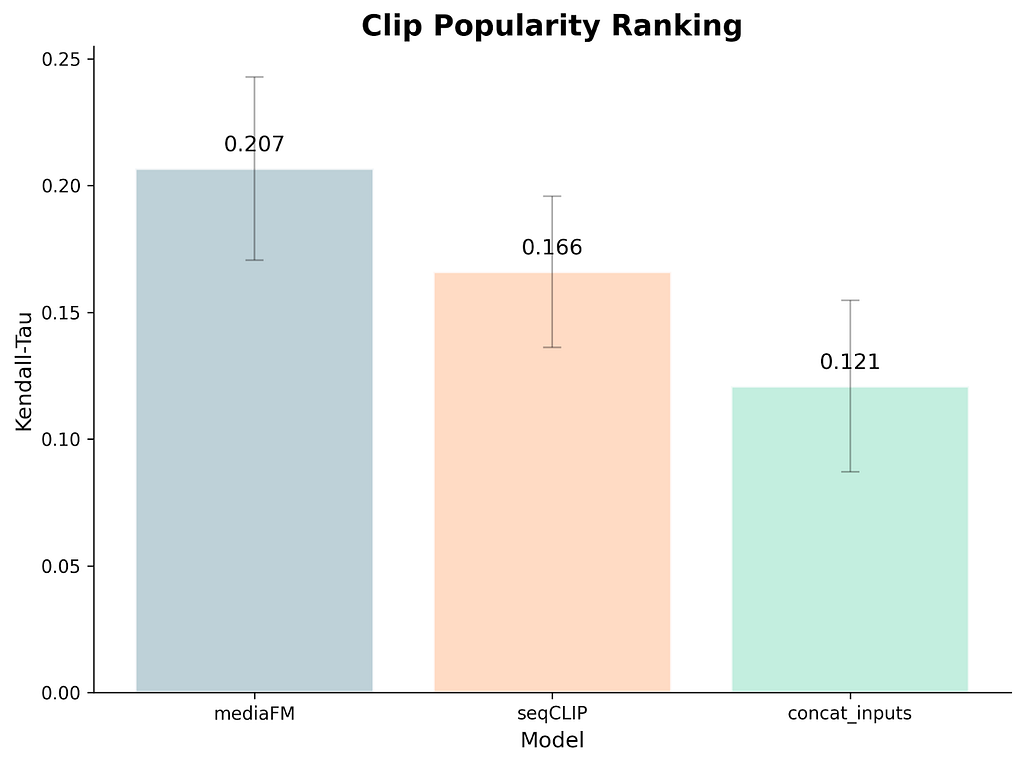
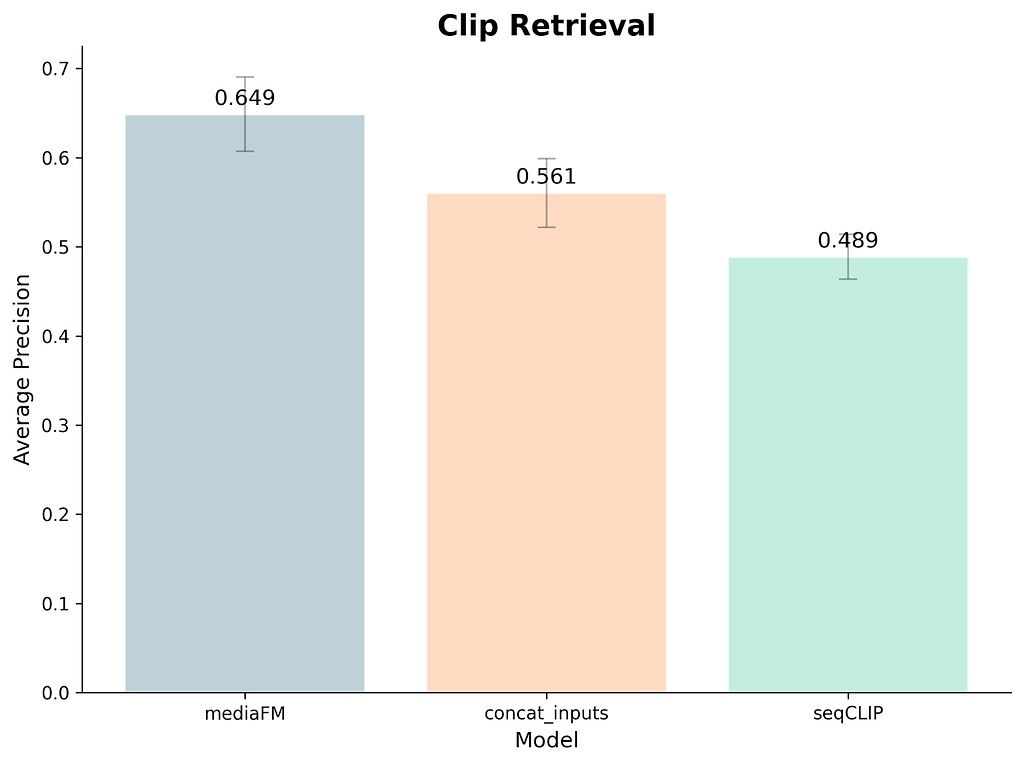

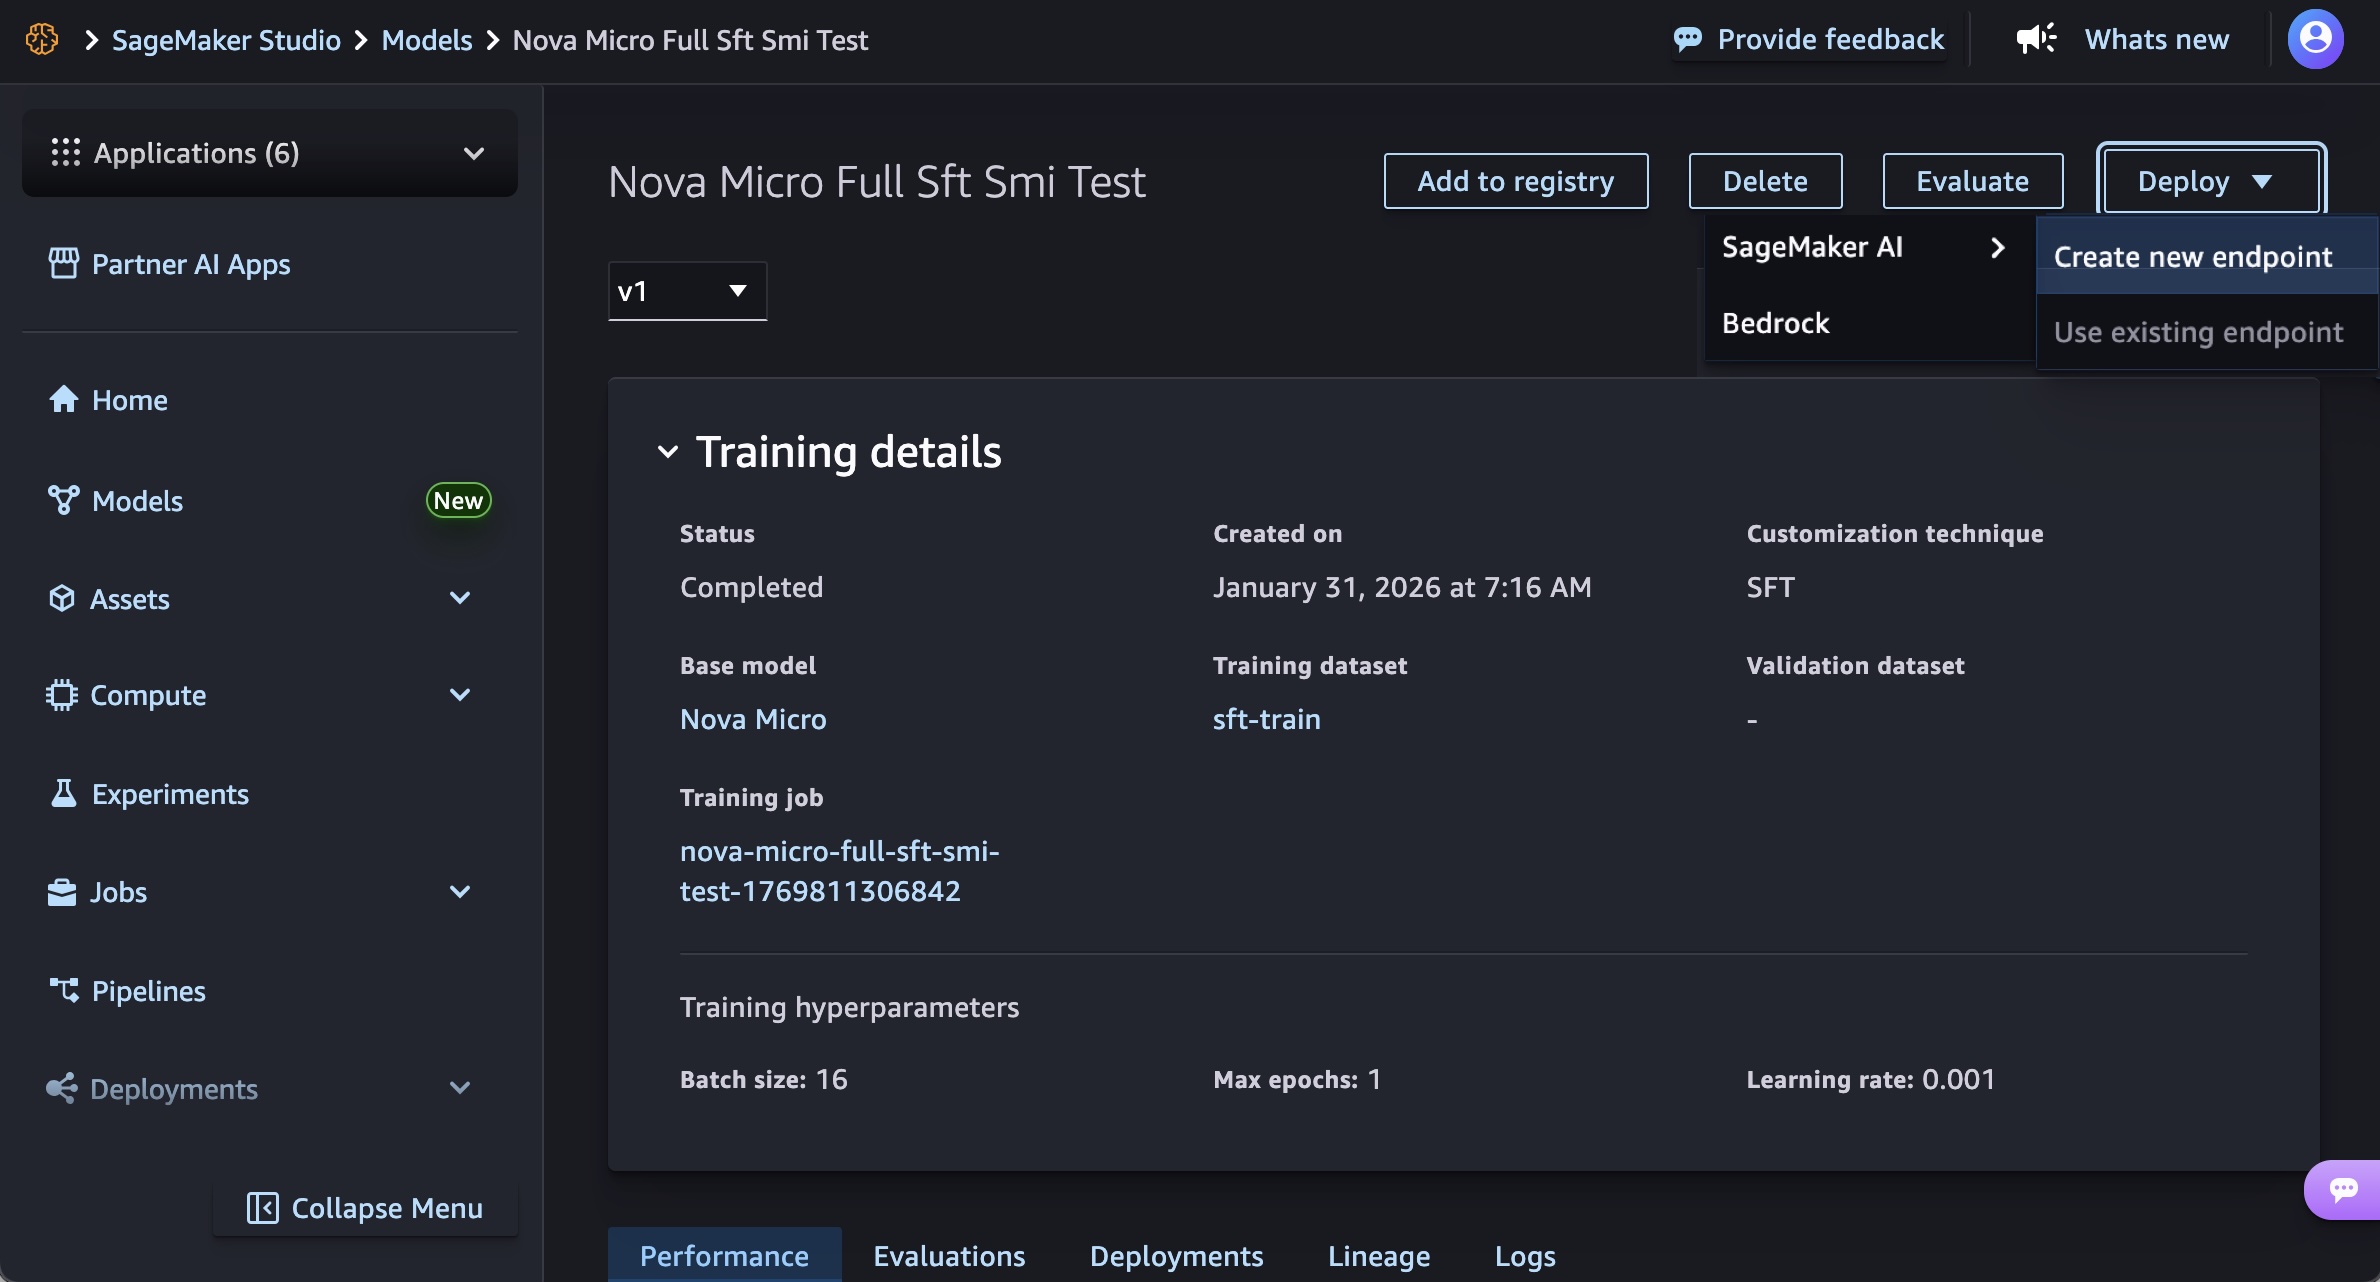
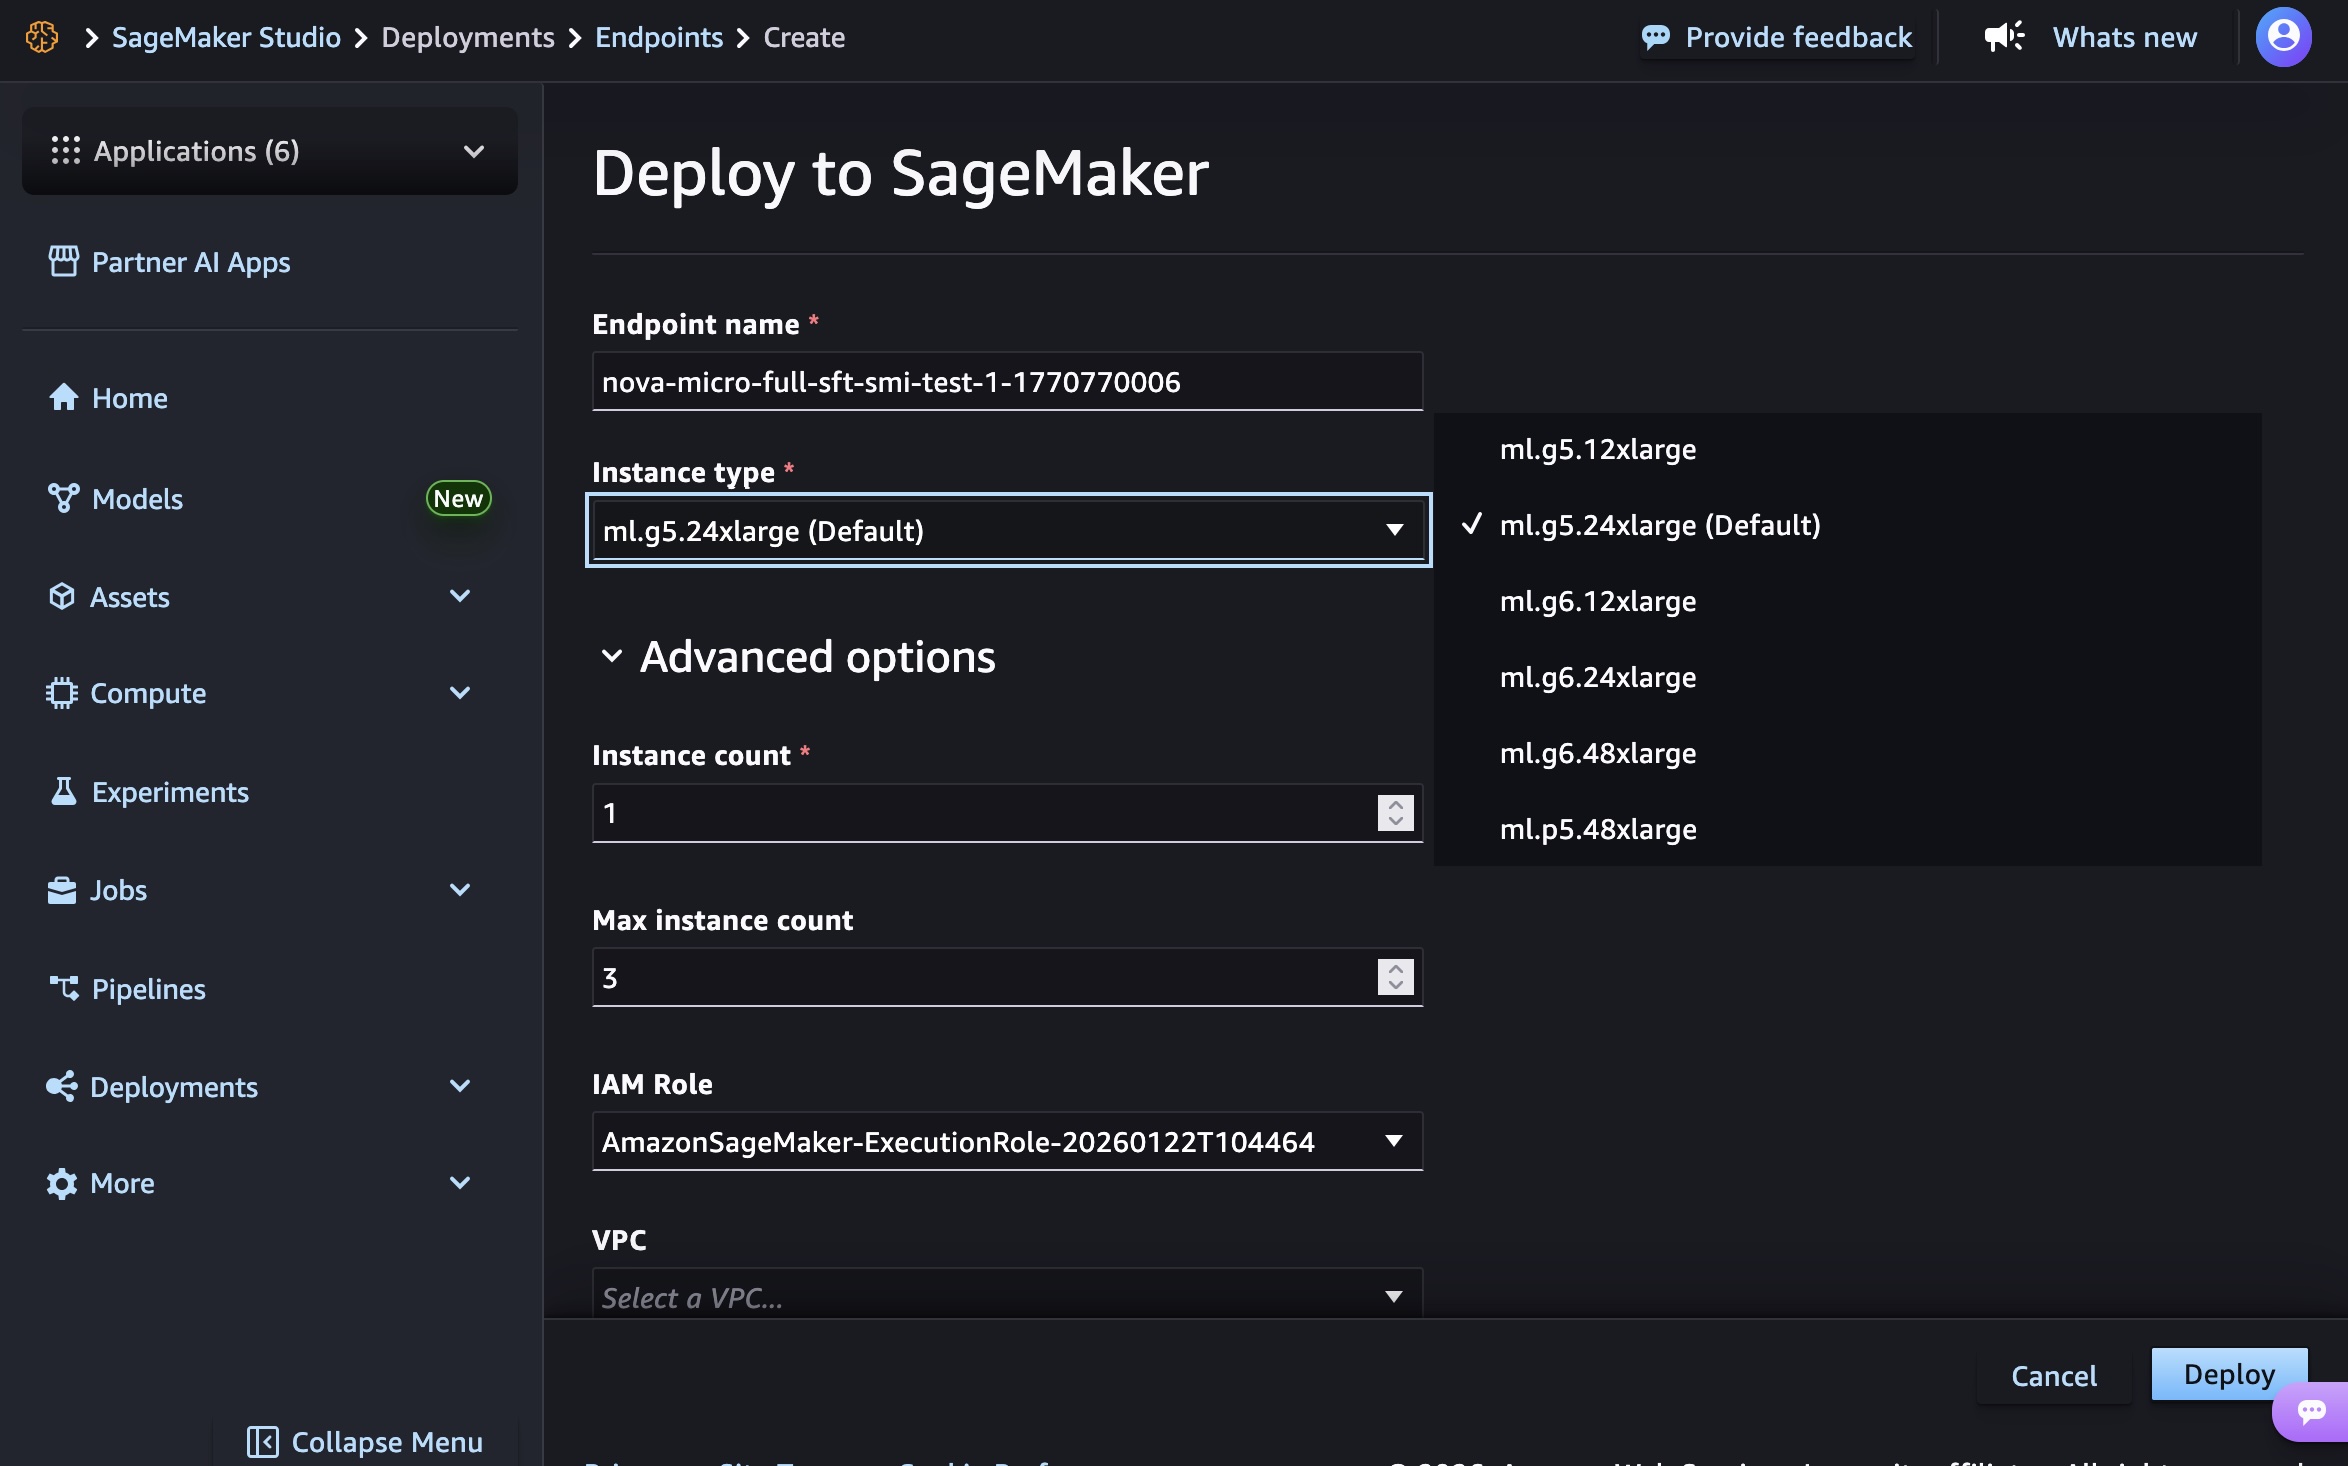
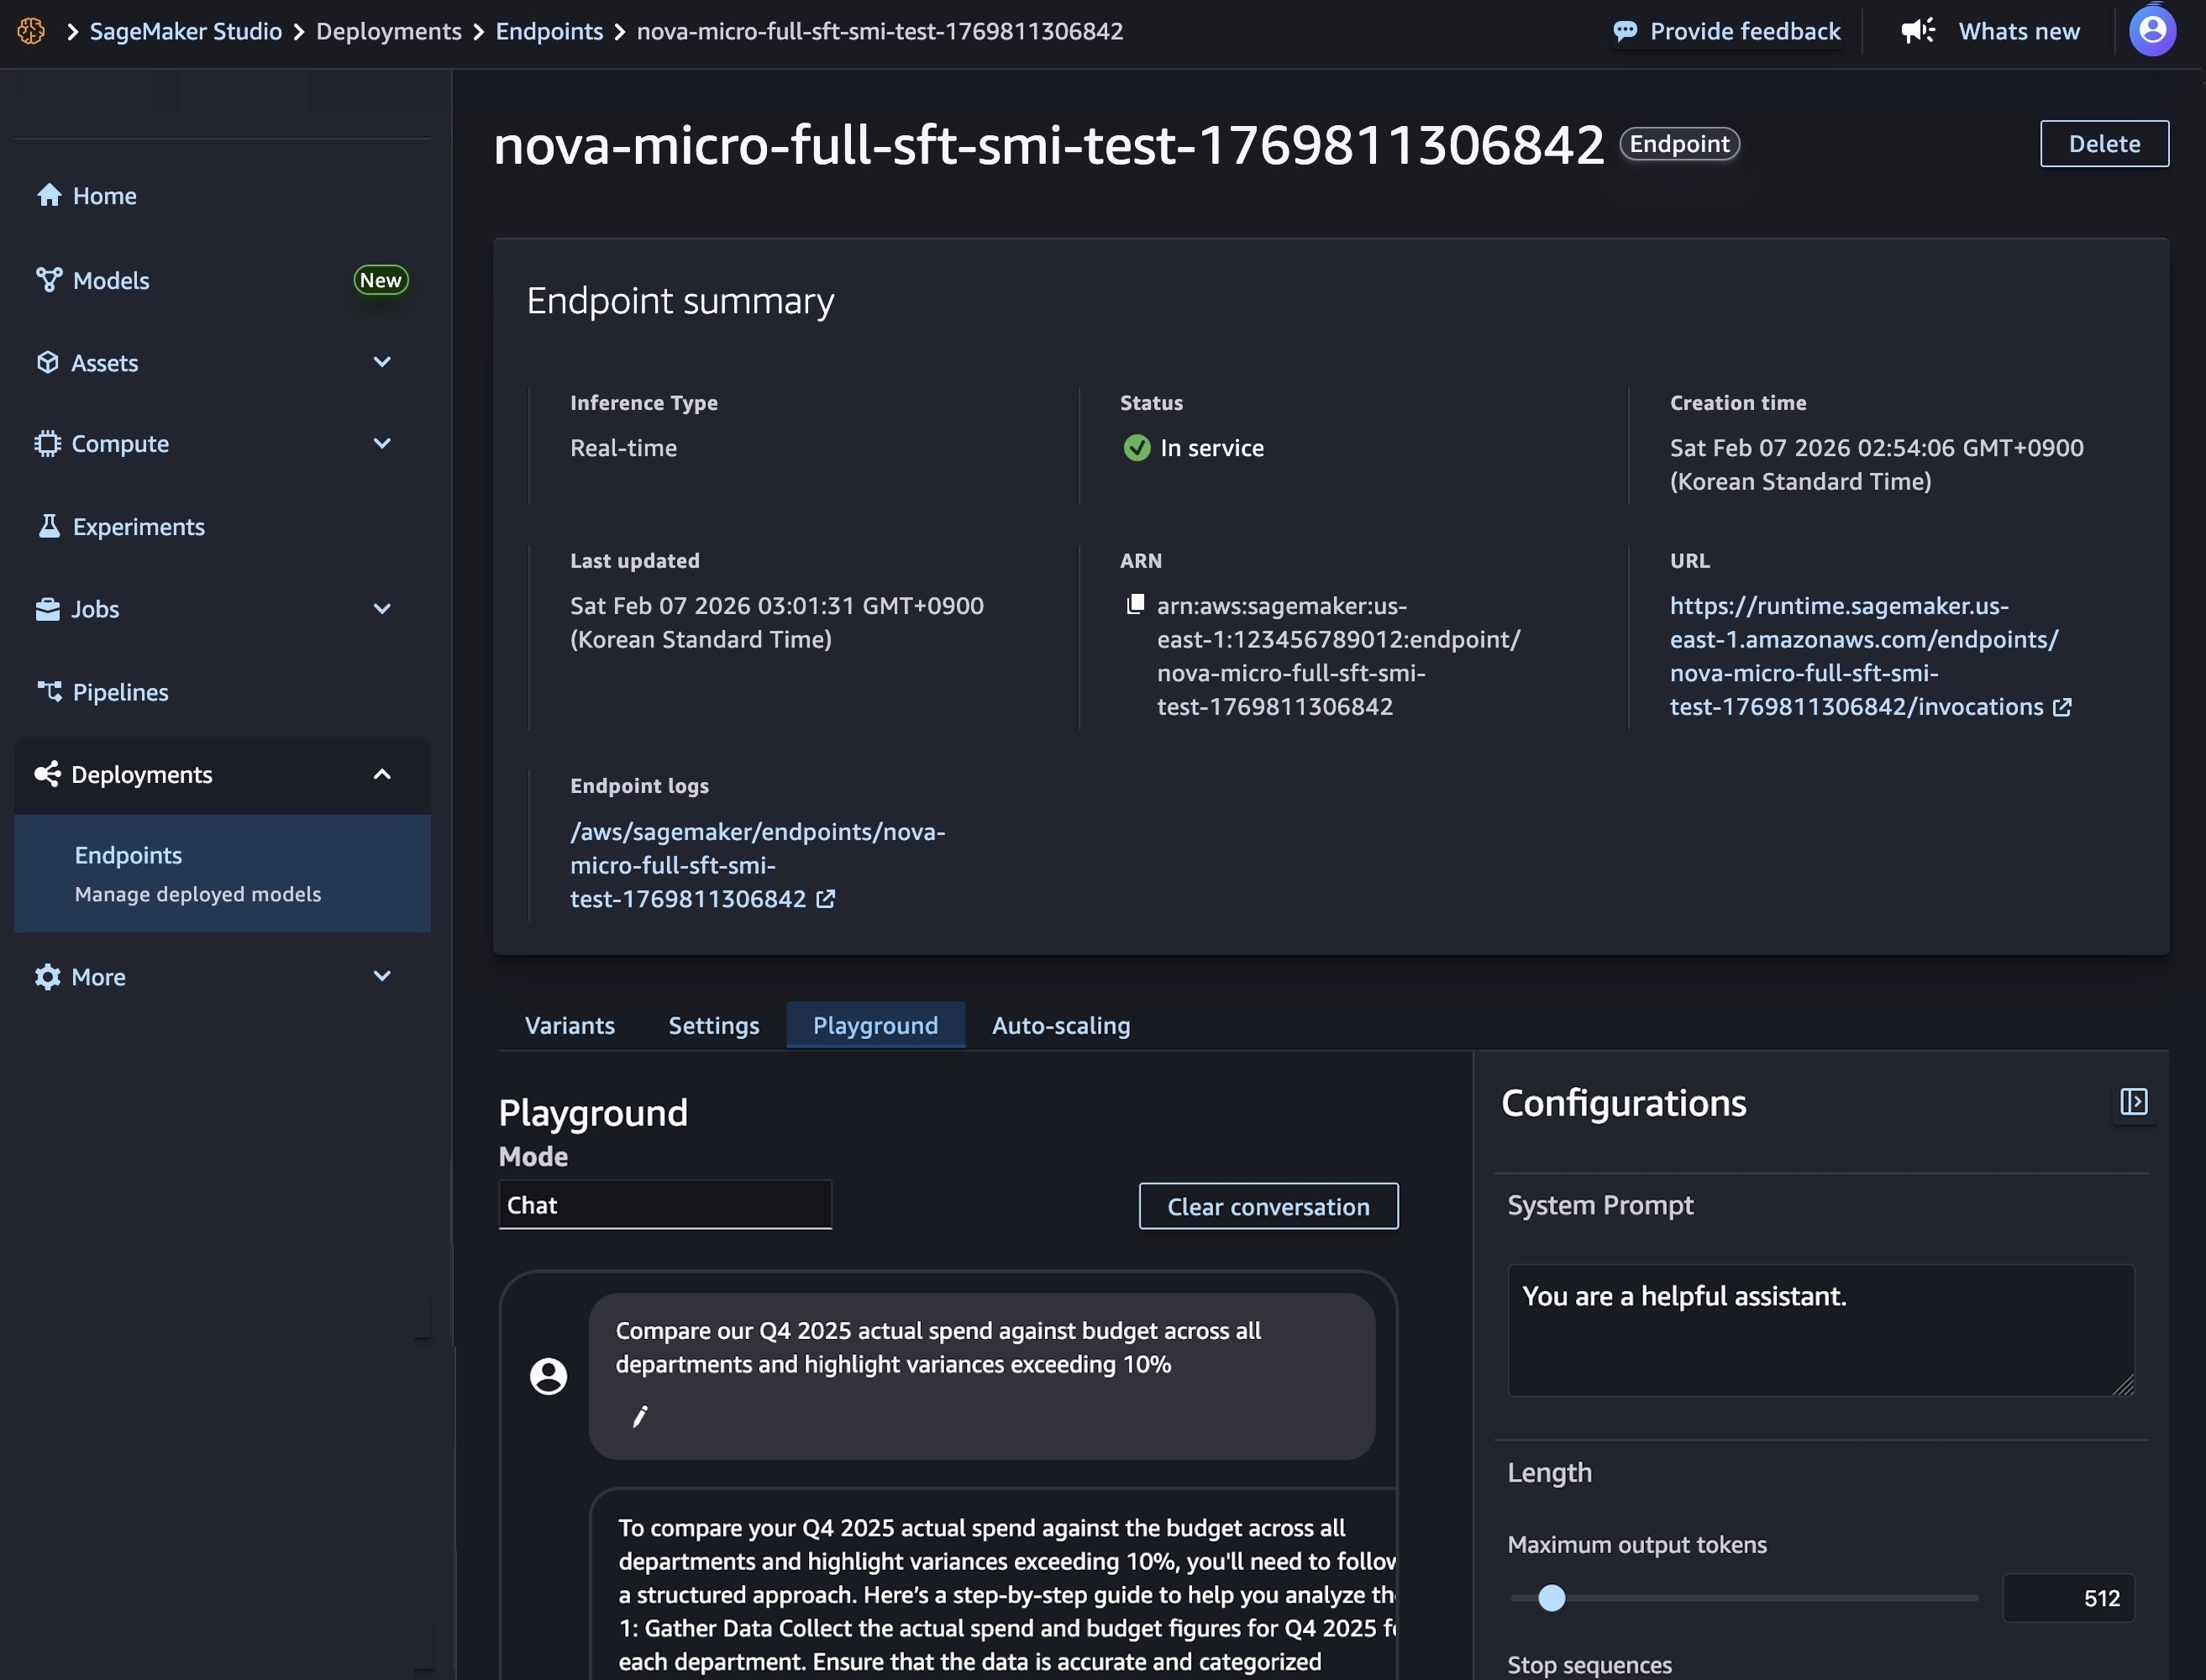
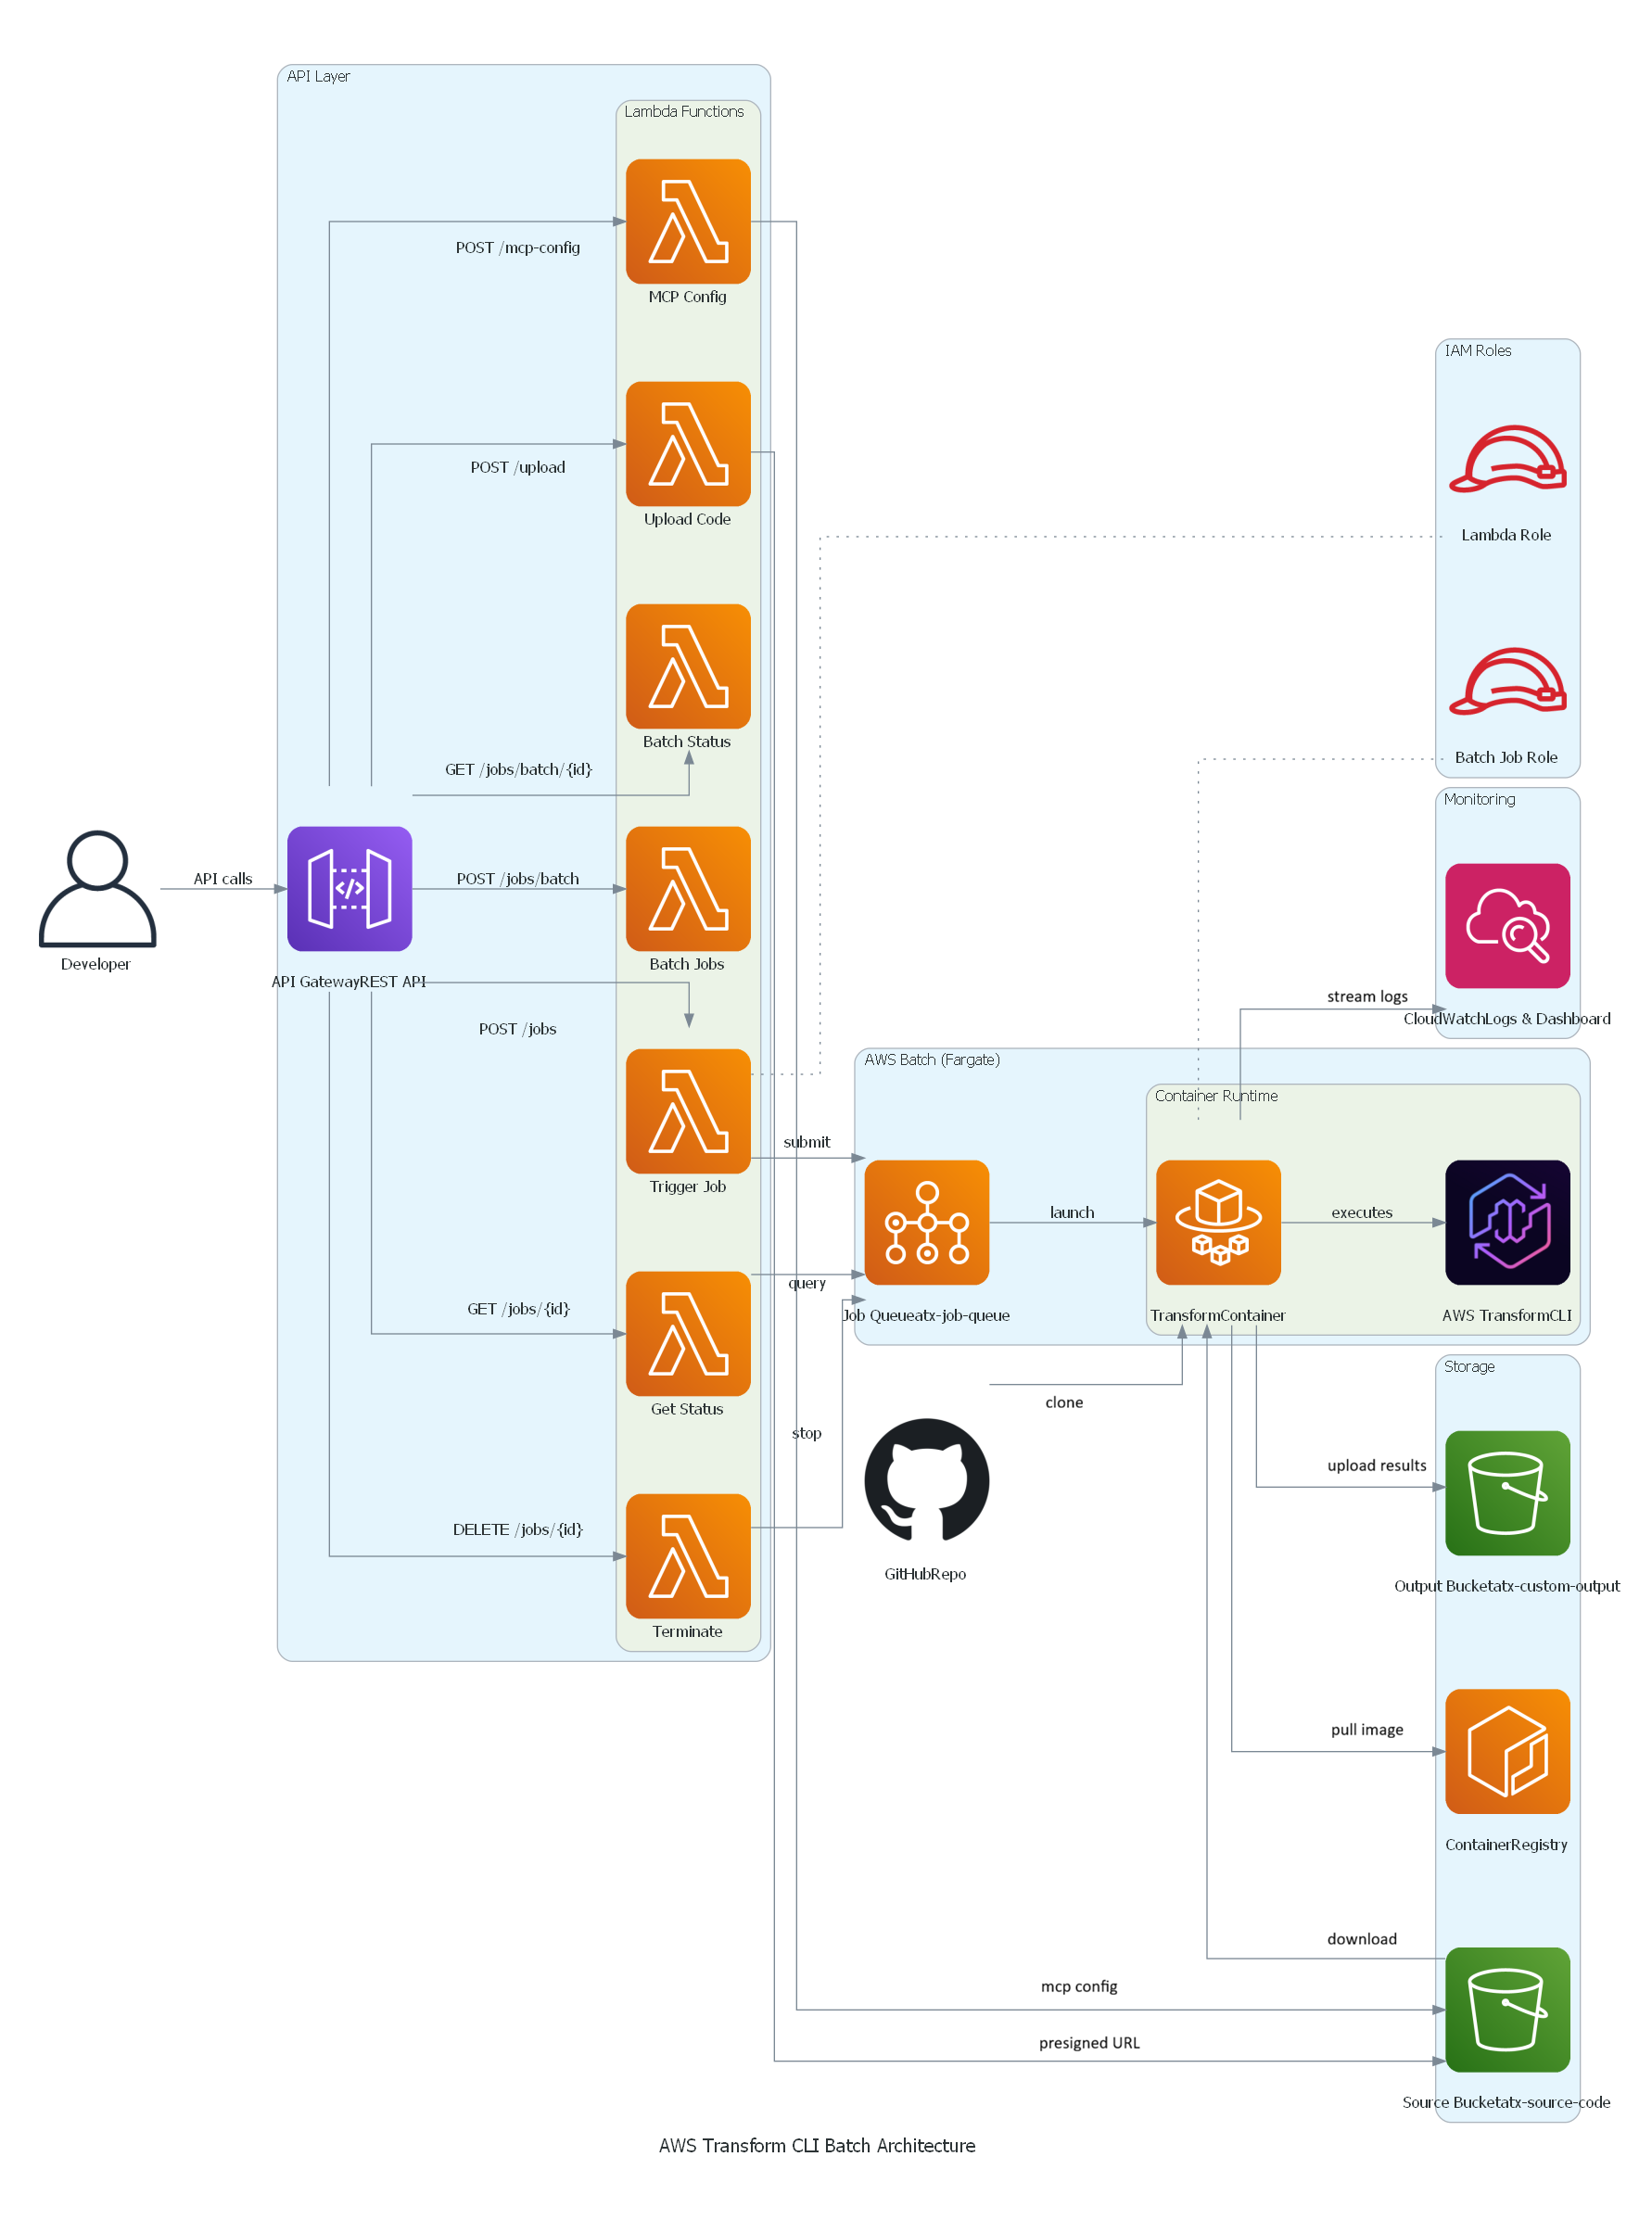
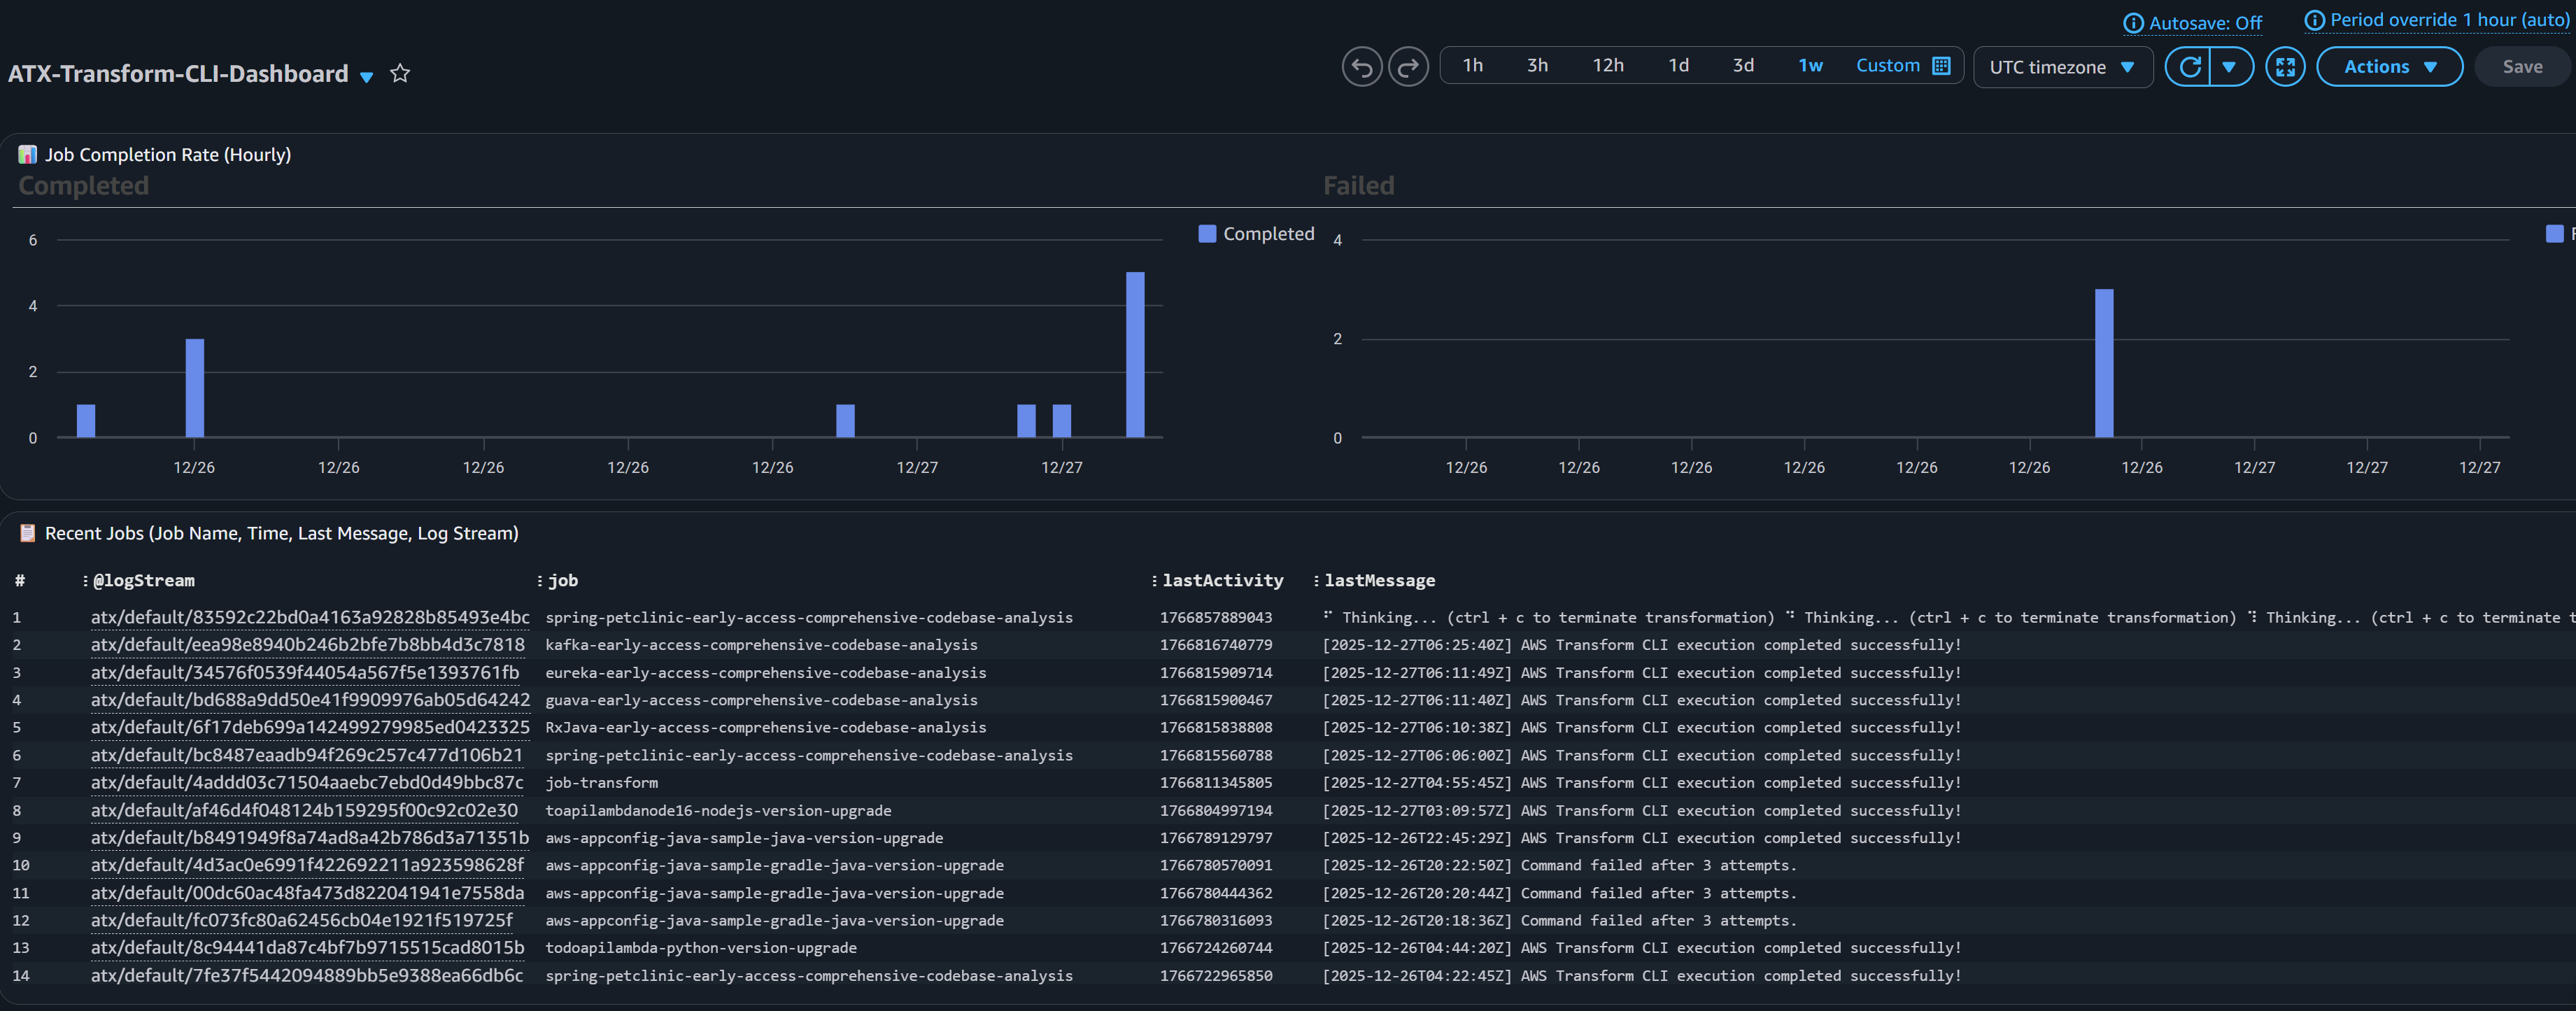
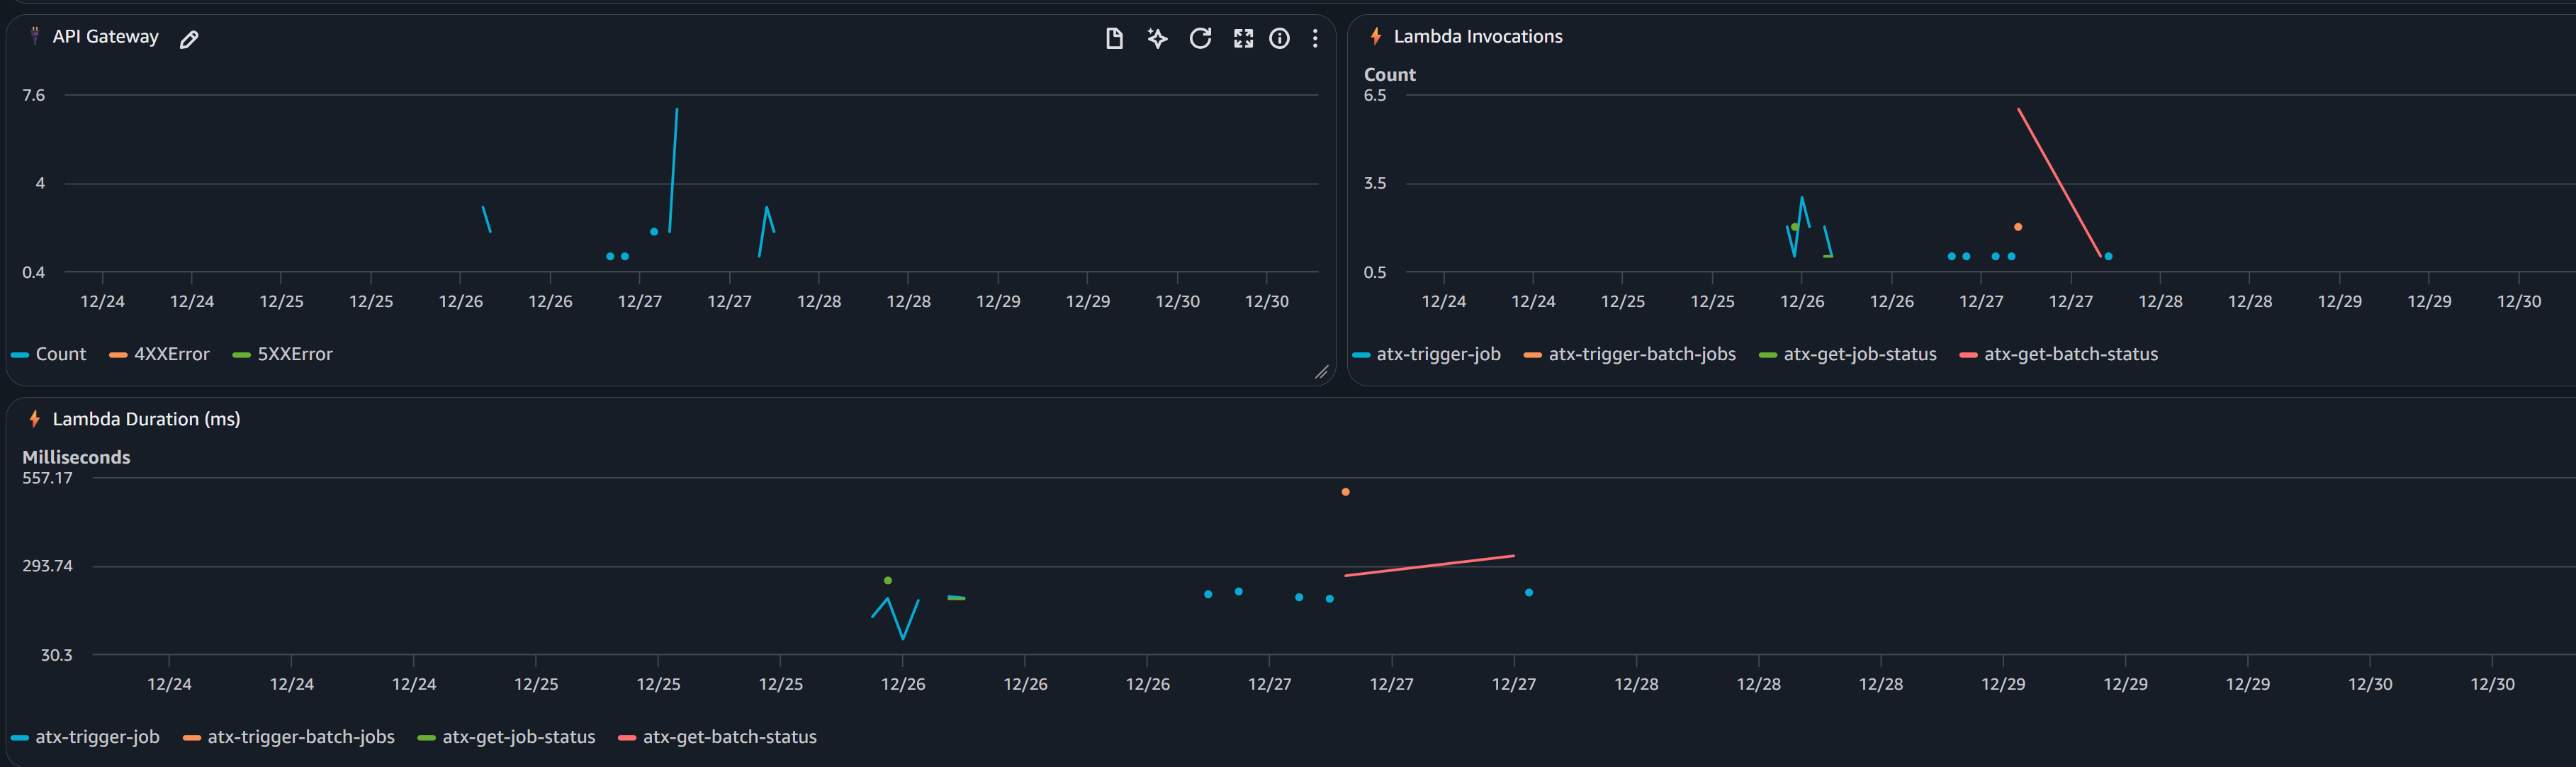
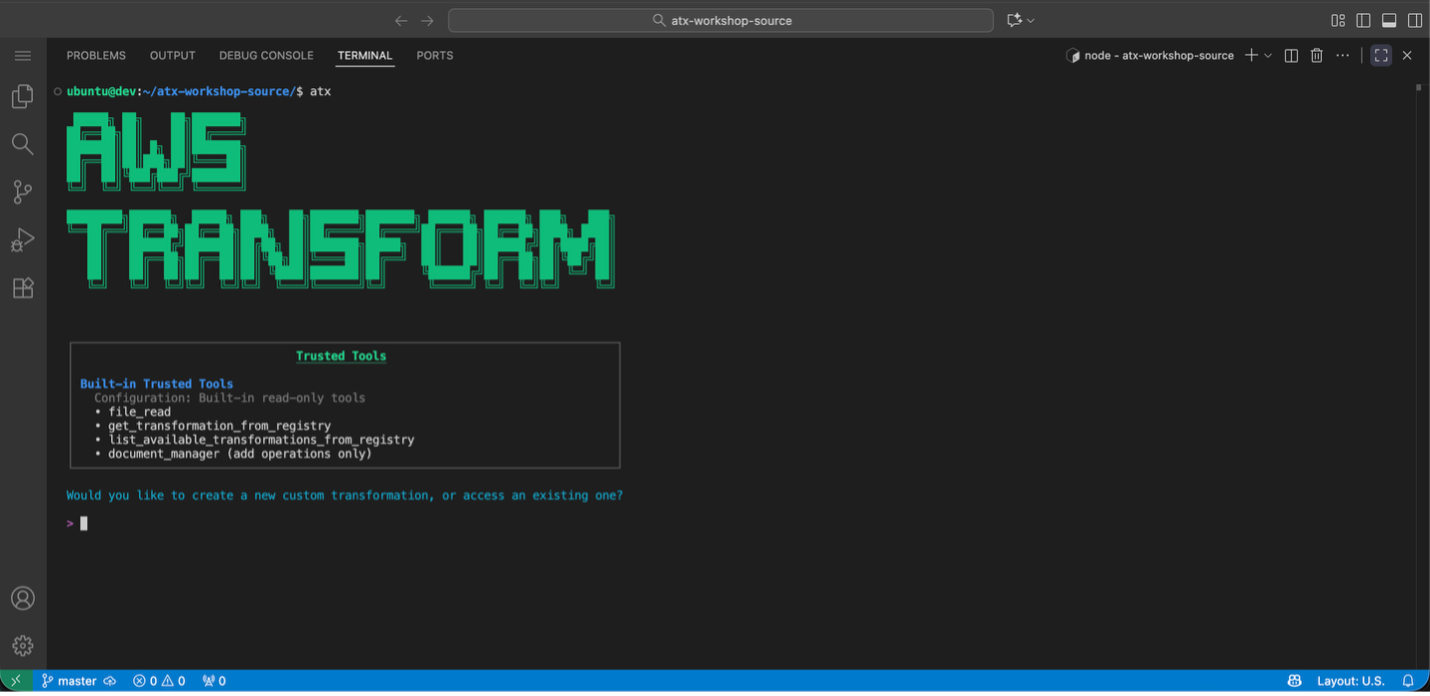
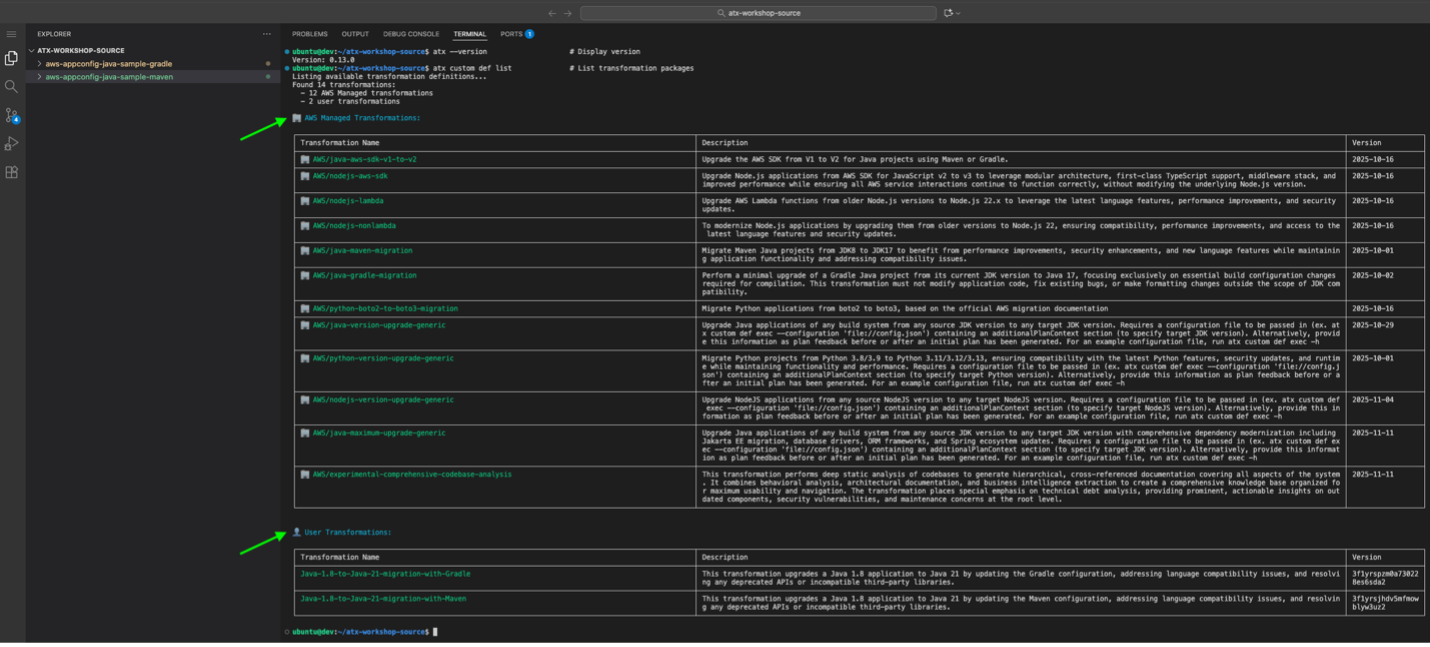
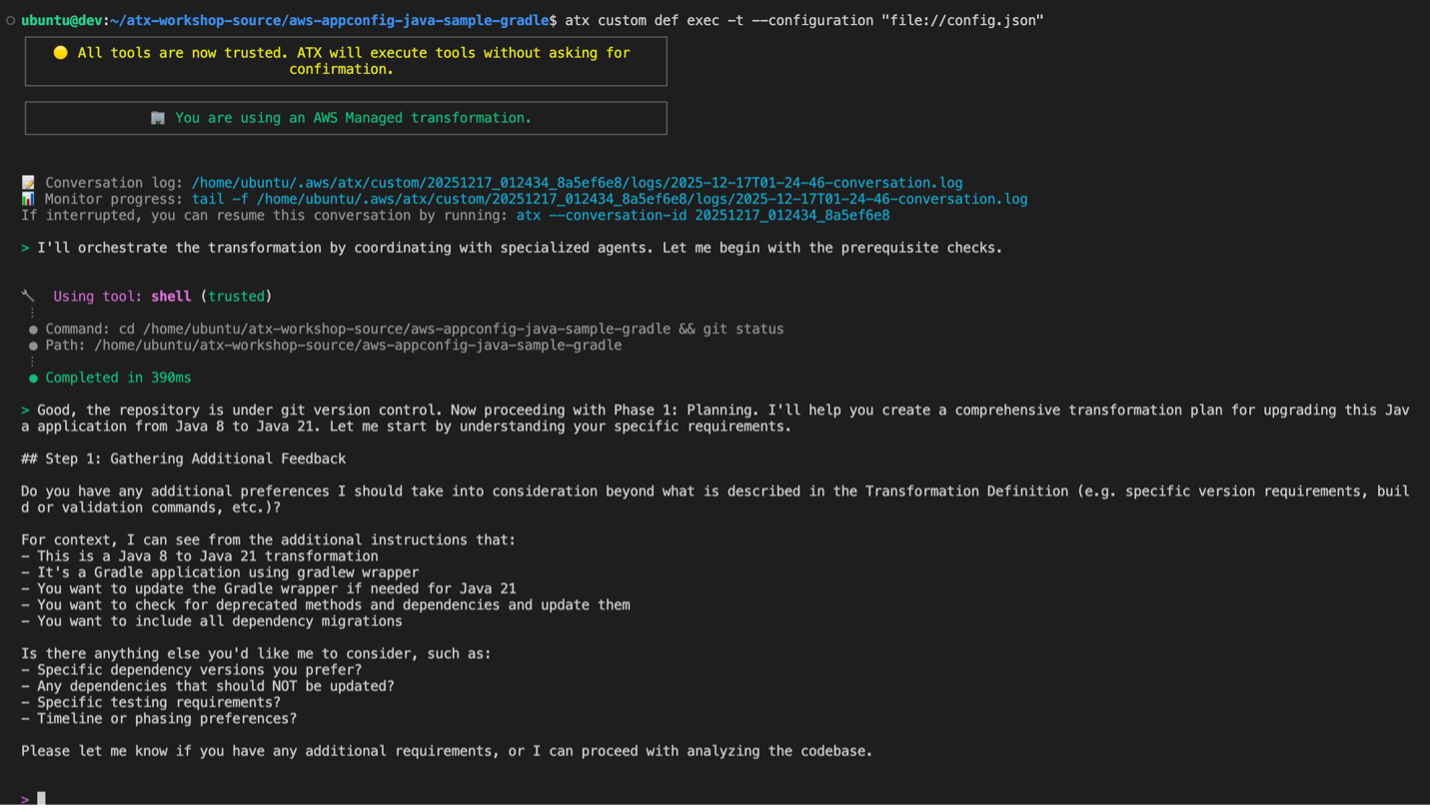
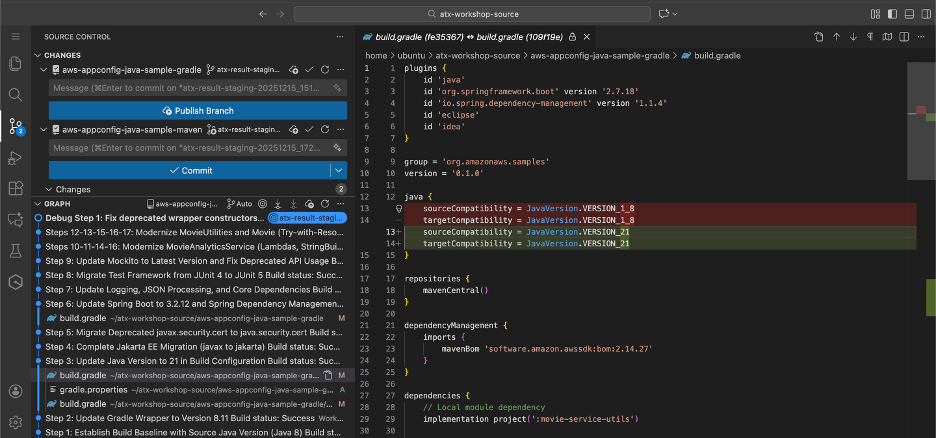
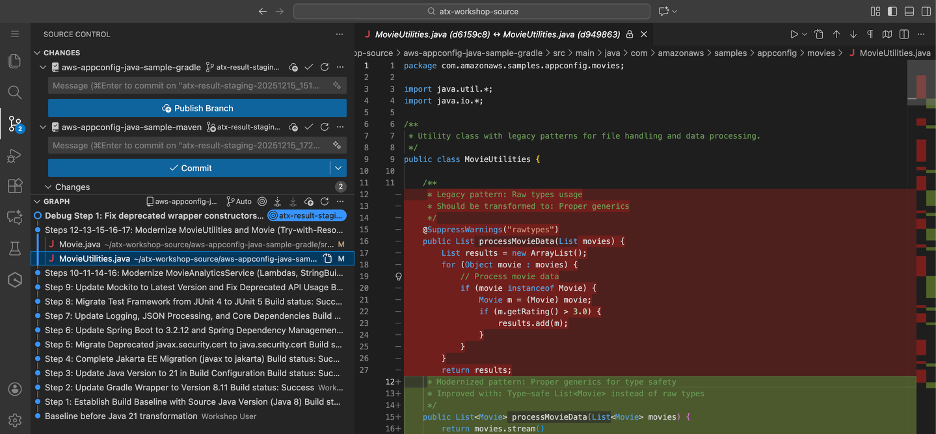
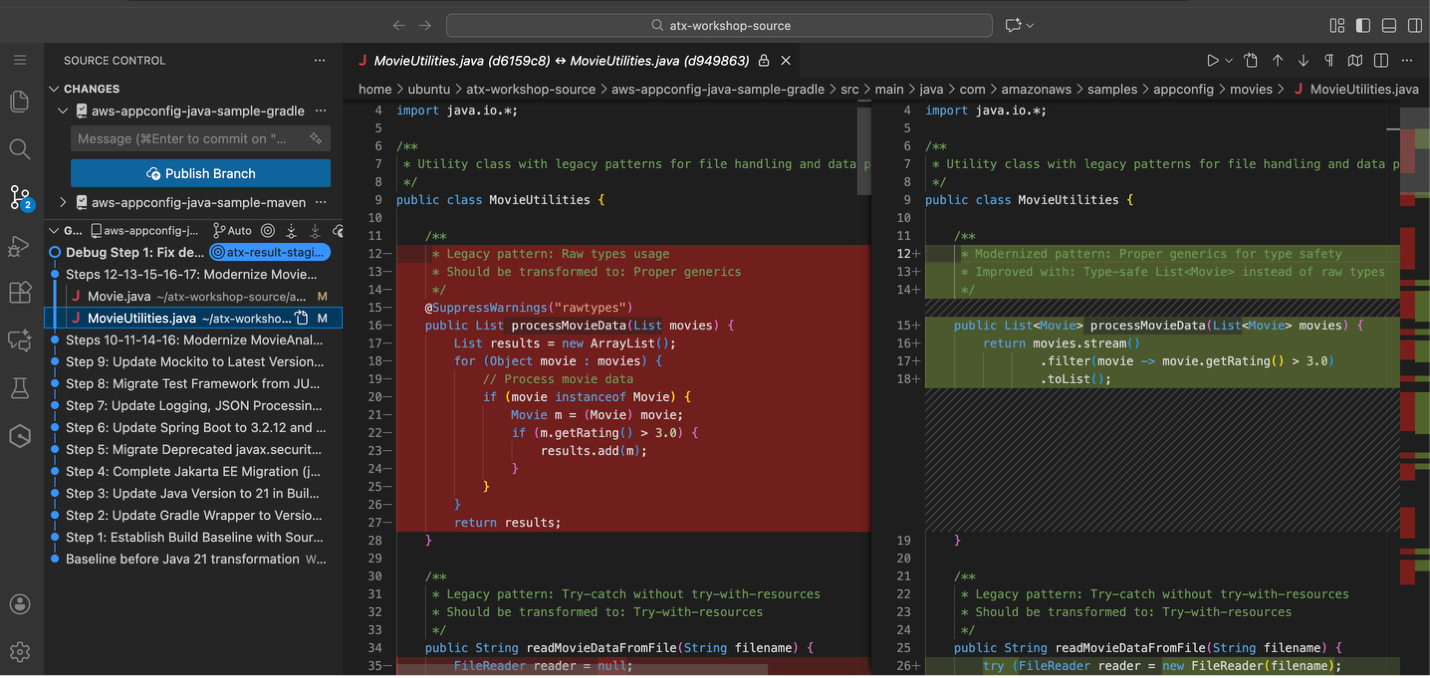
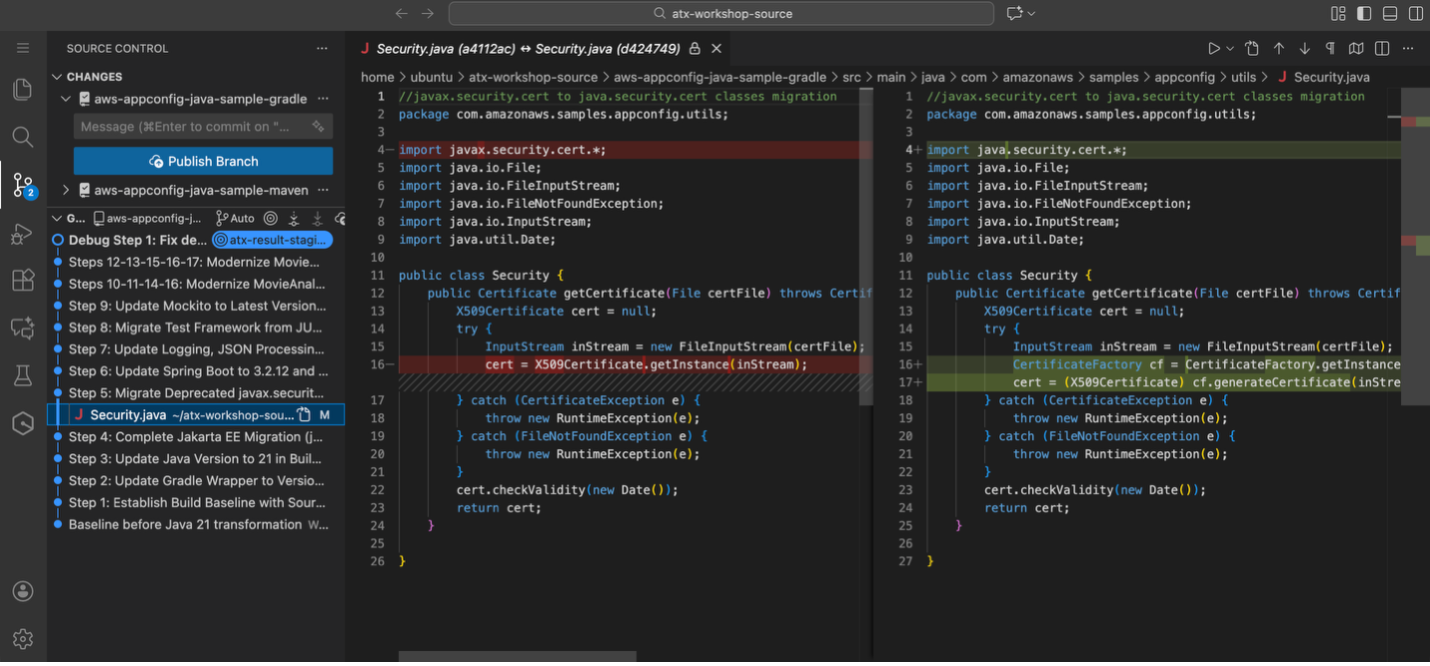
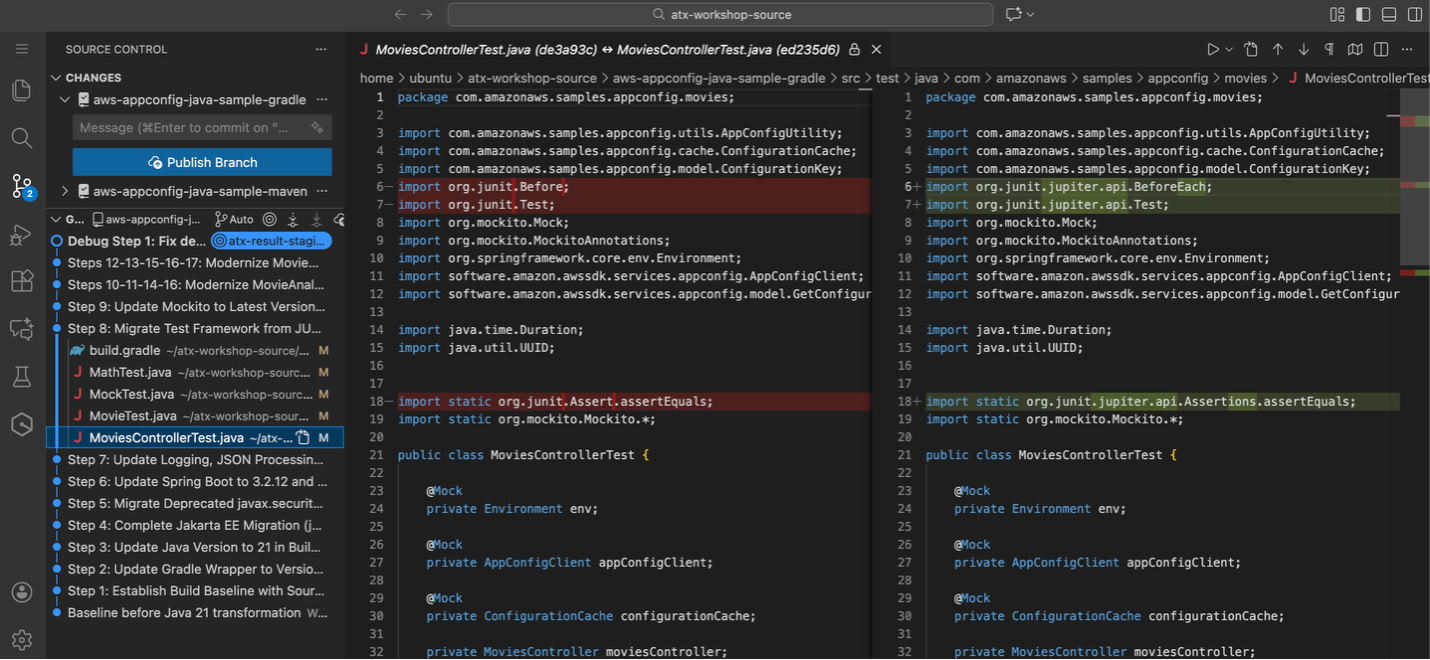
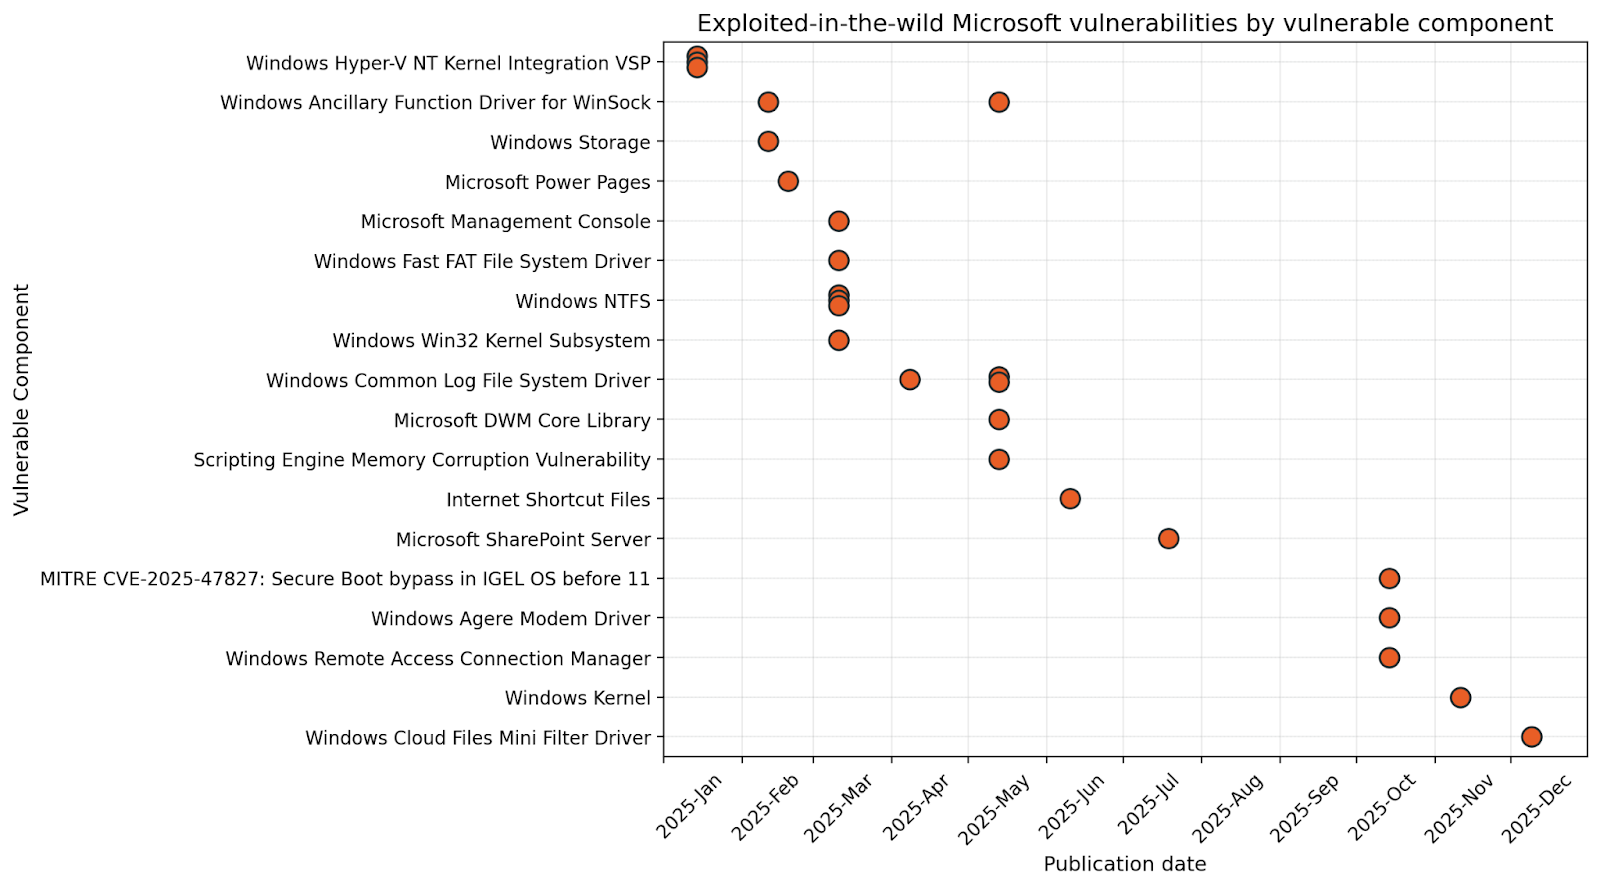
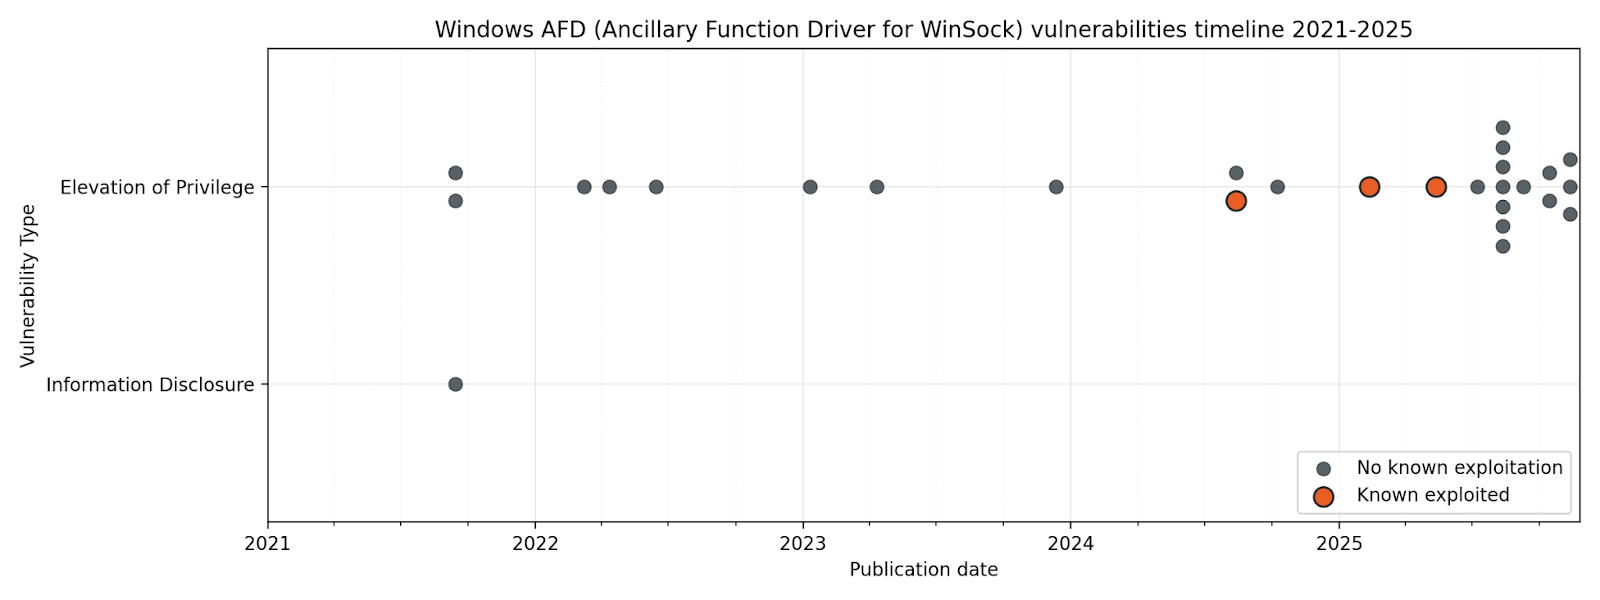
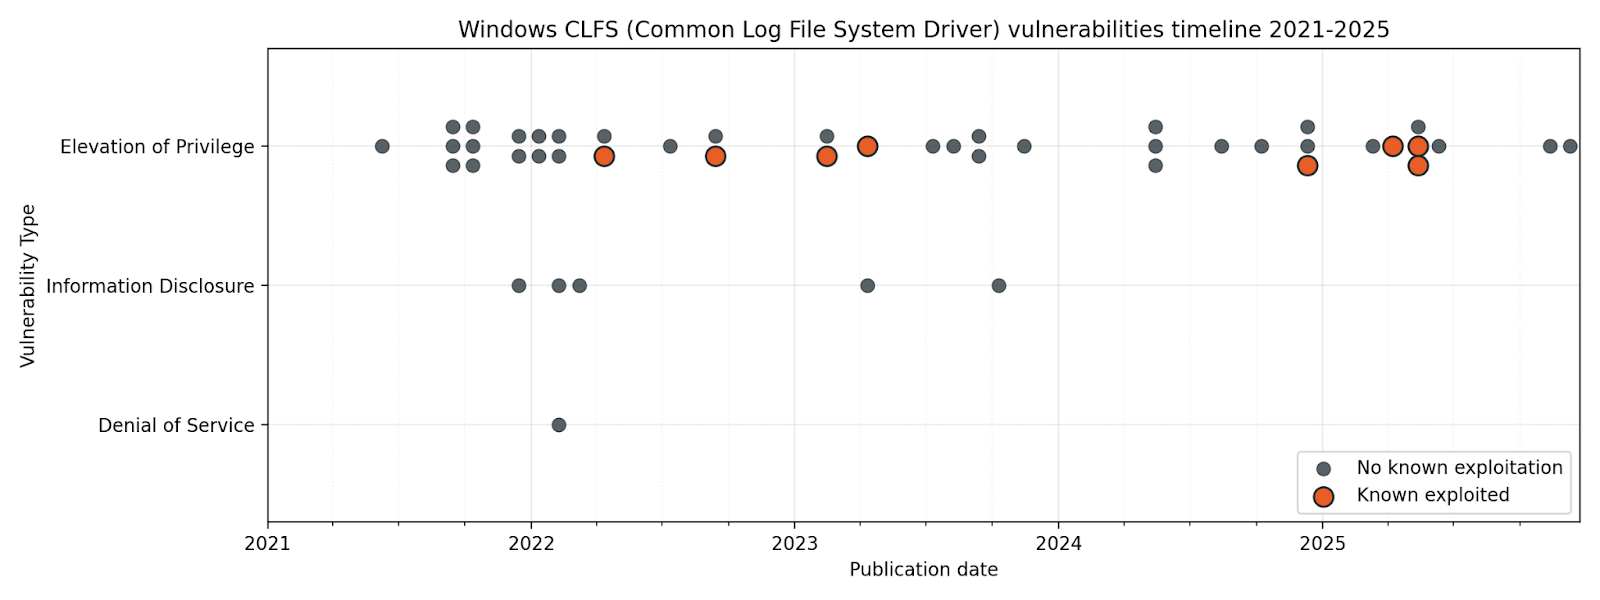

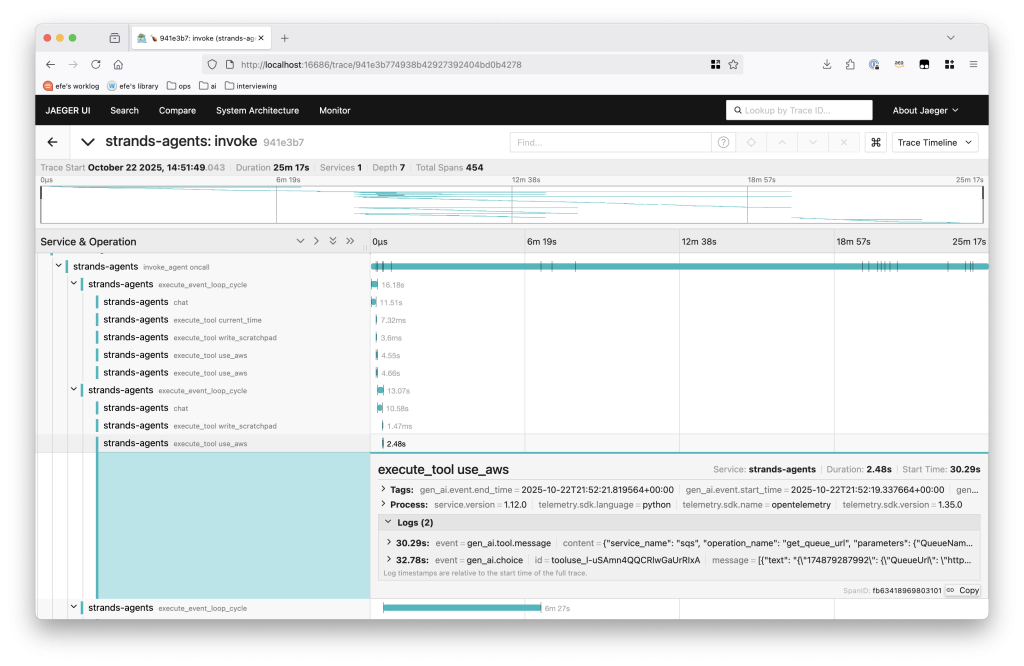






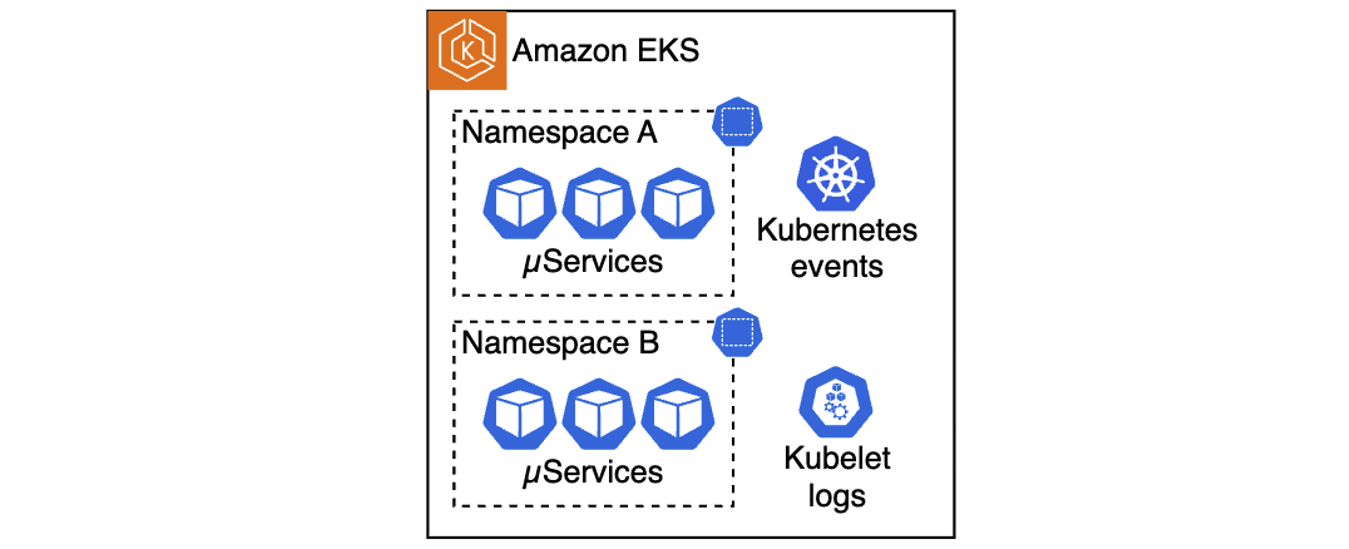 Figure 1. A multitude of telemetry sources in Kubernetes clusters
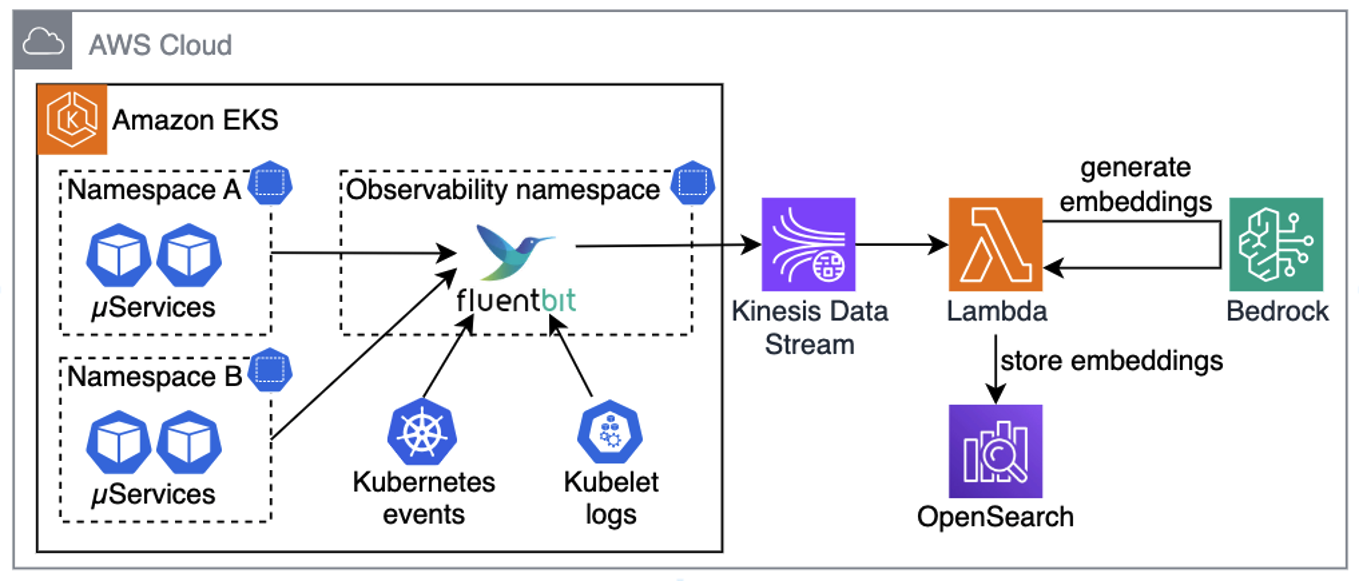 Figure 2. Collecting telemetry from sources, generating embeddings, and saving in OpenSearch
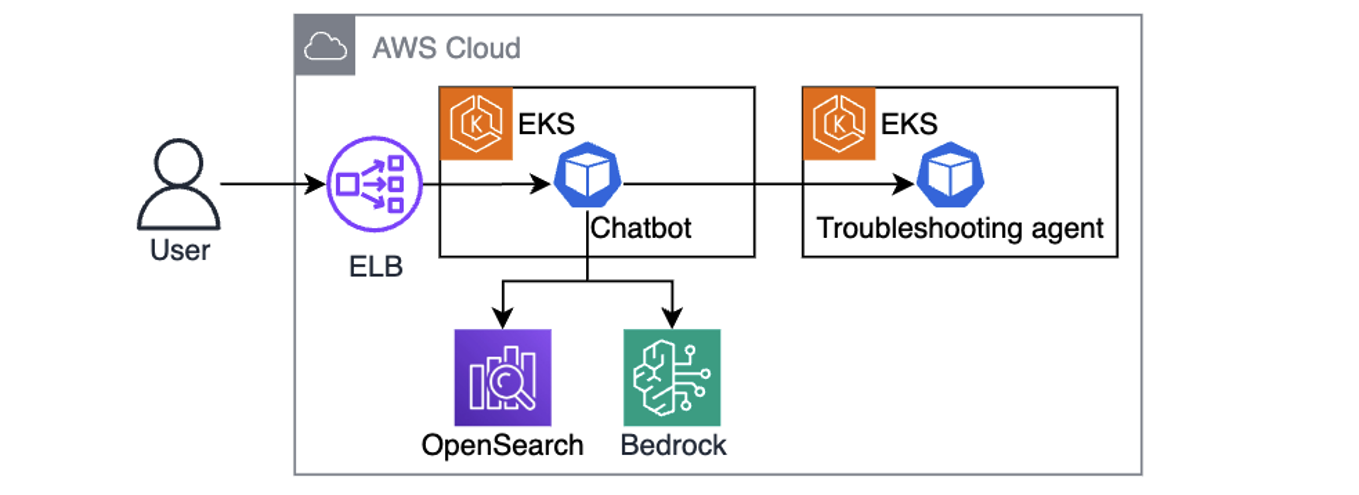 Figure 3. Chatbot is using user queries augmented with telemetry context to send kubectl commands to the troubleshooting assistant.
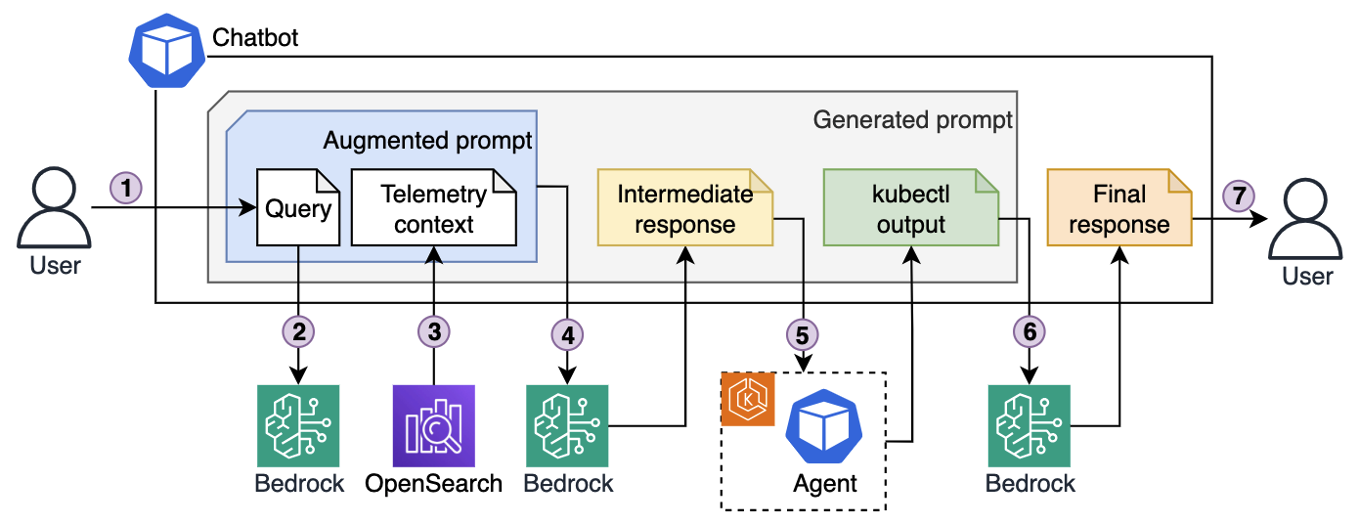 Figure 4. Iterative troubleshooting process.
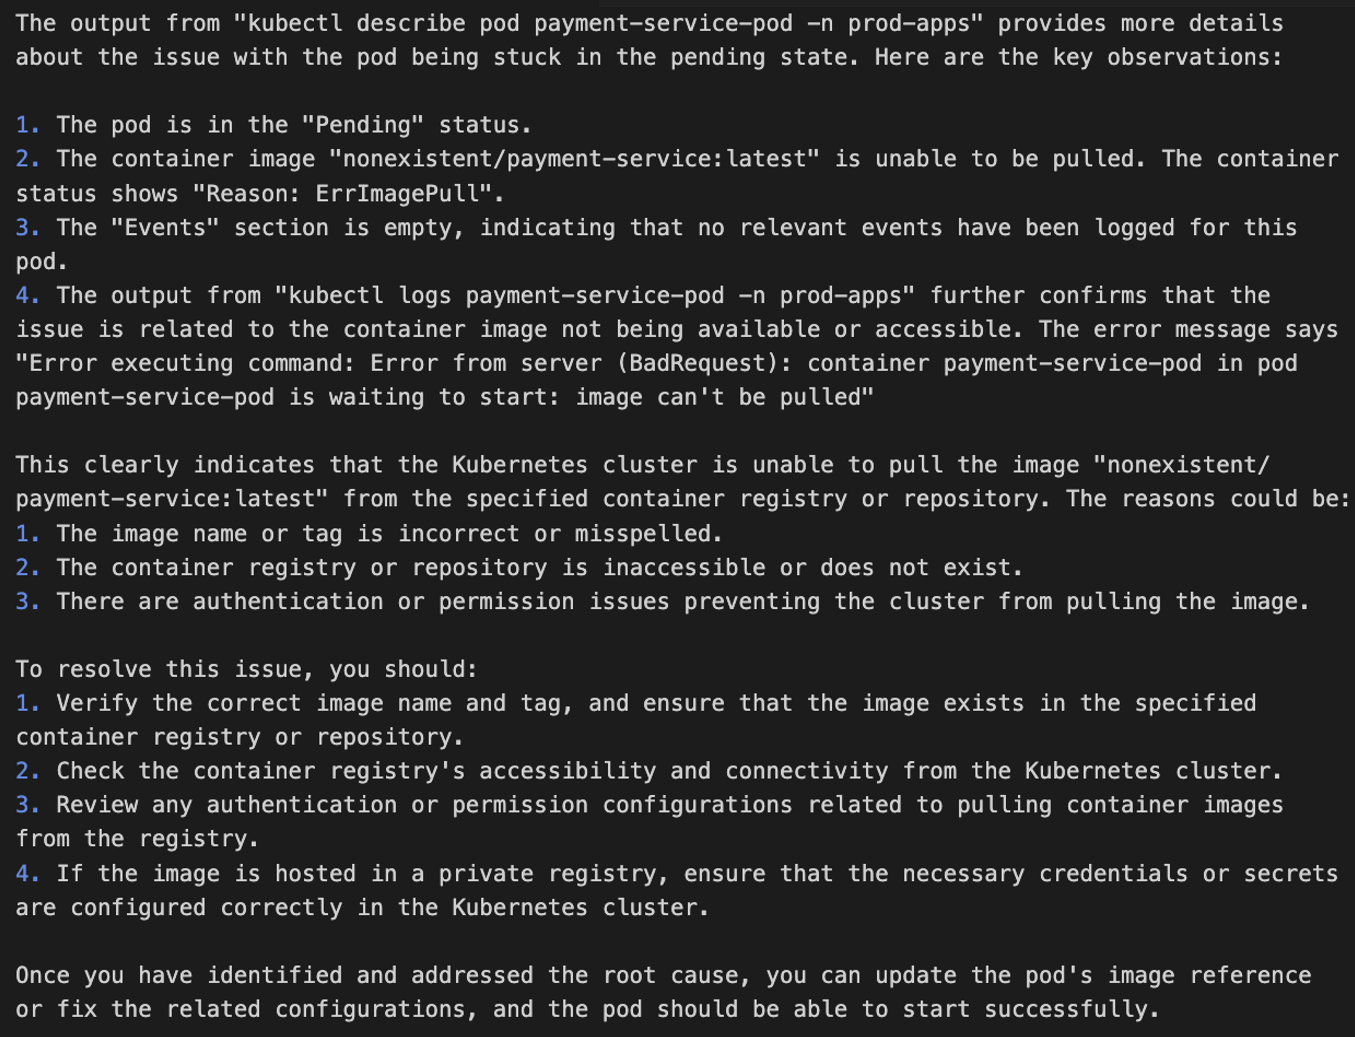 Figure 5. EKS cluster troubleshooting, example output

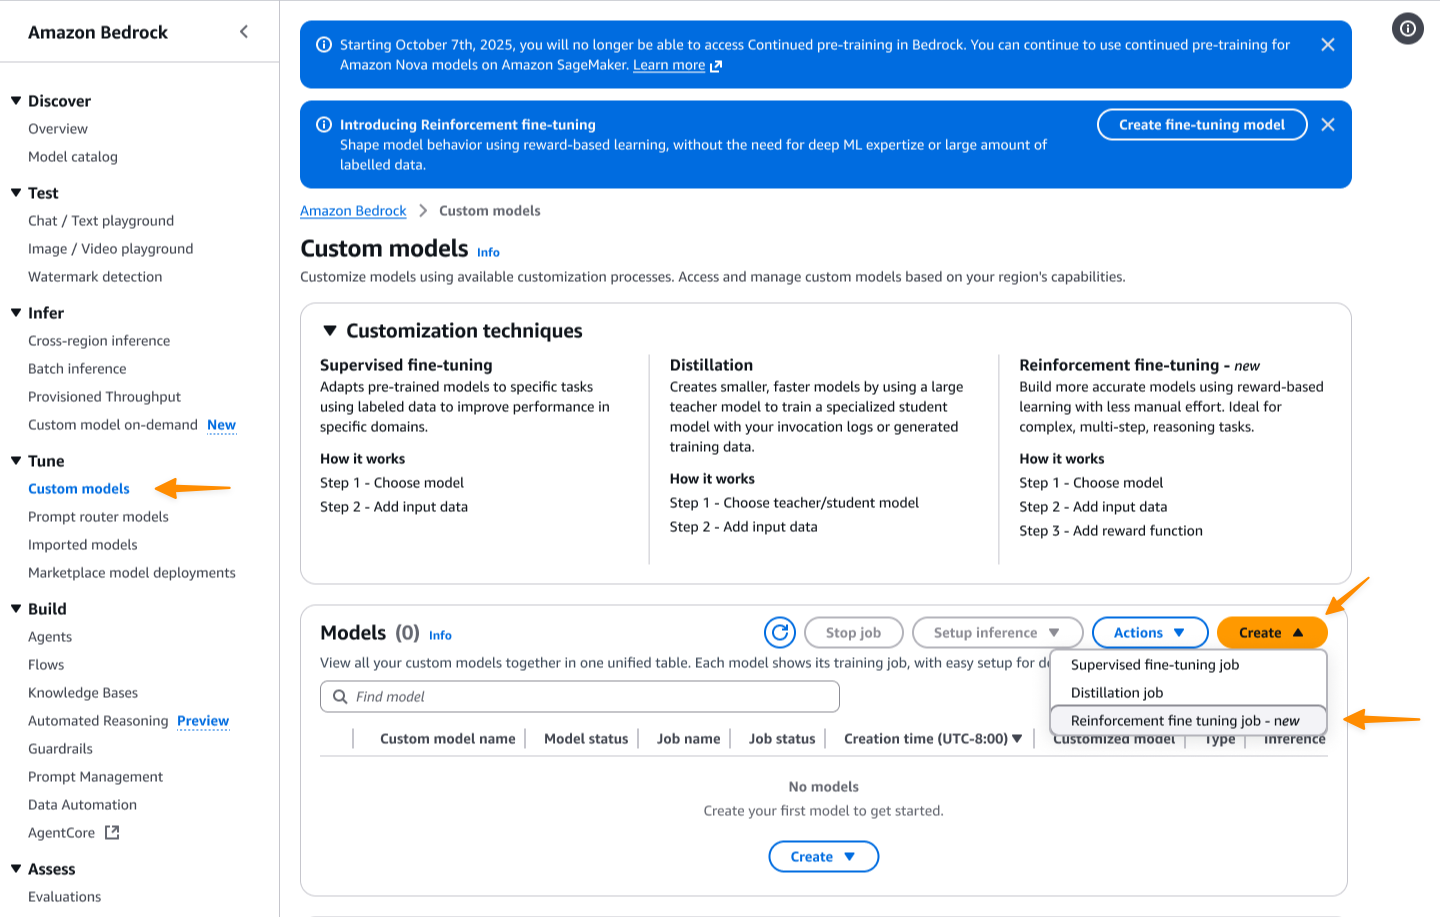
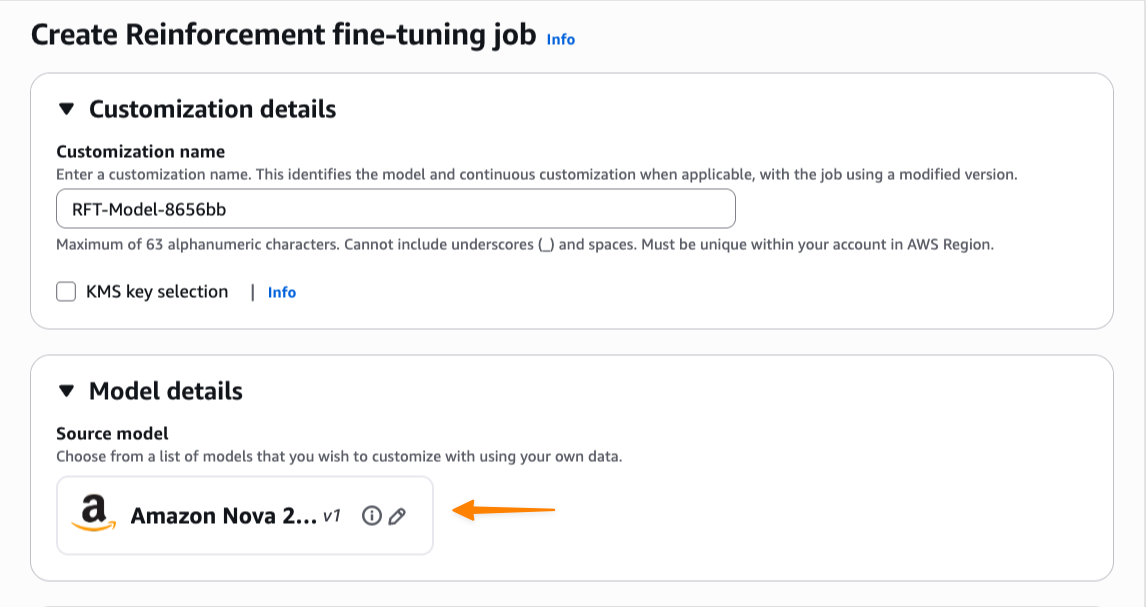
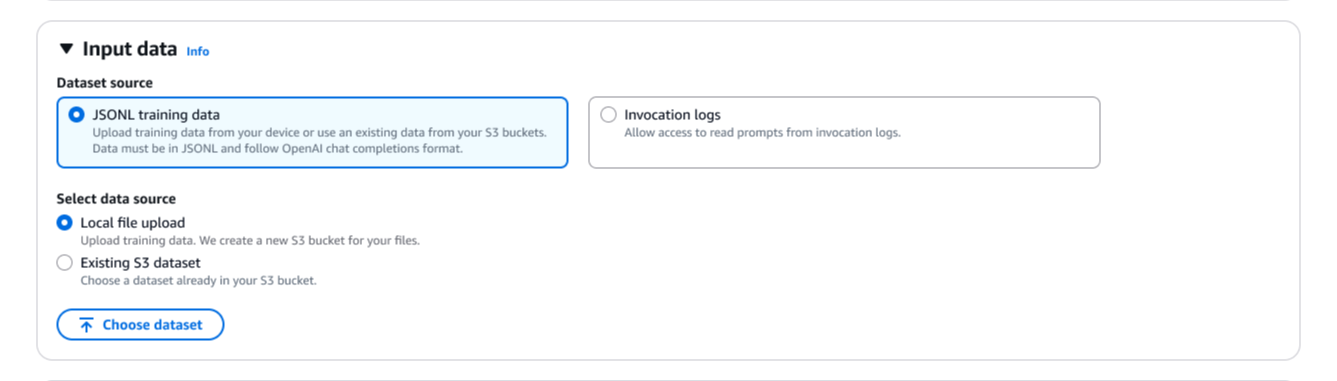
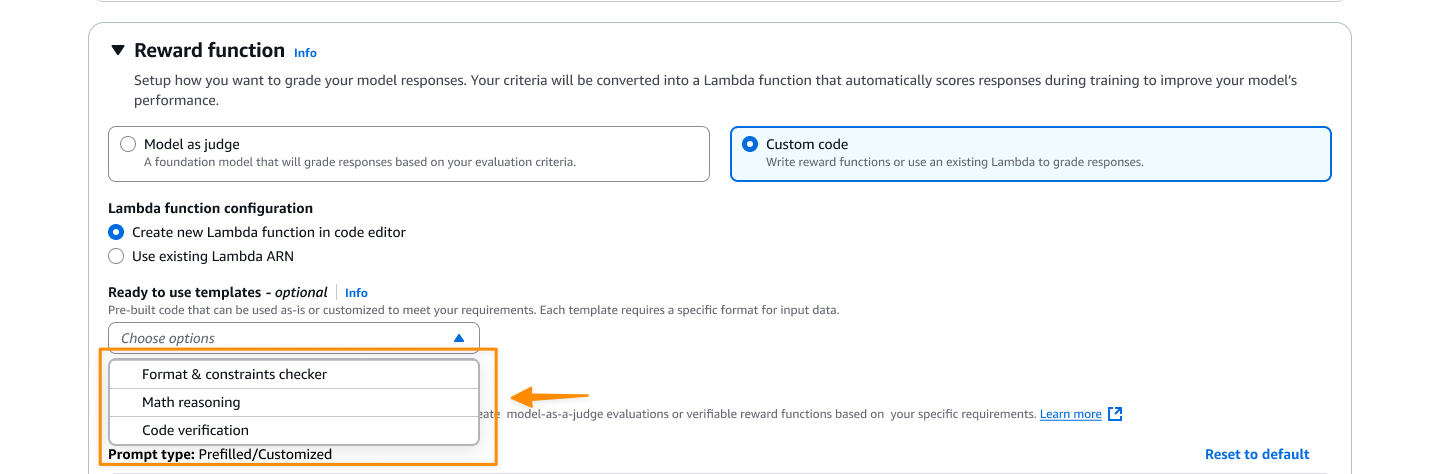

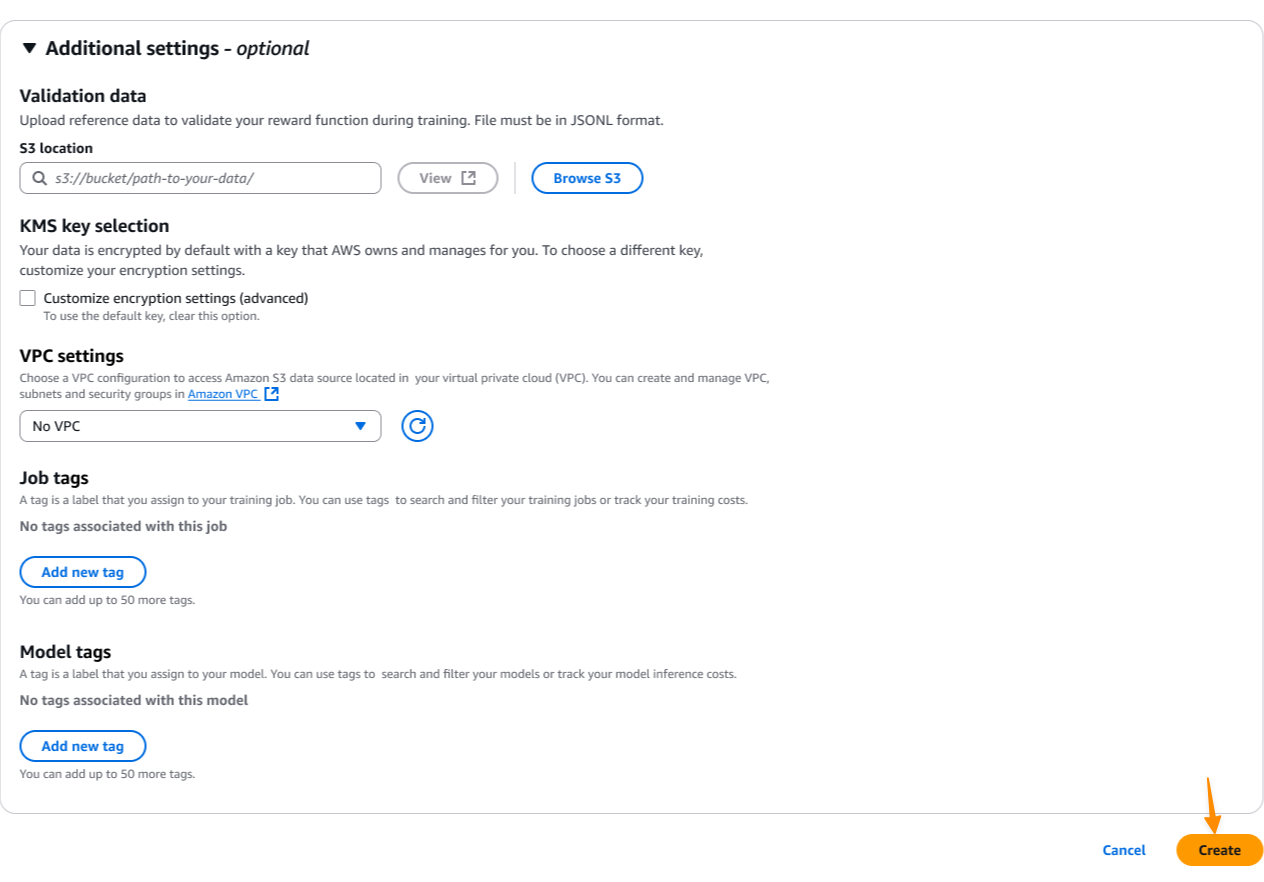

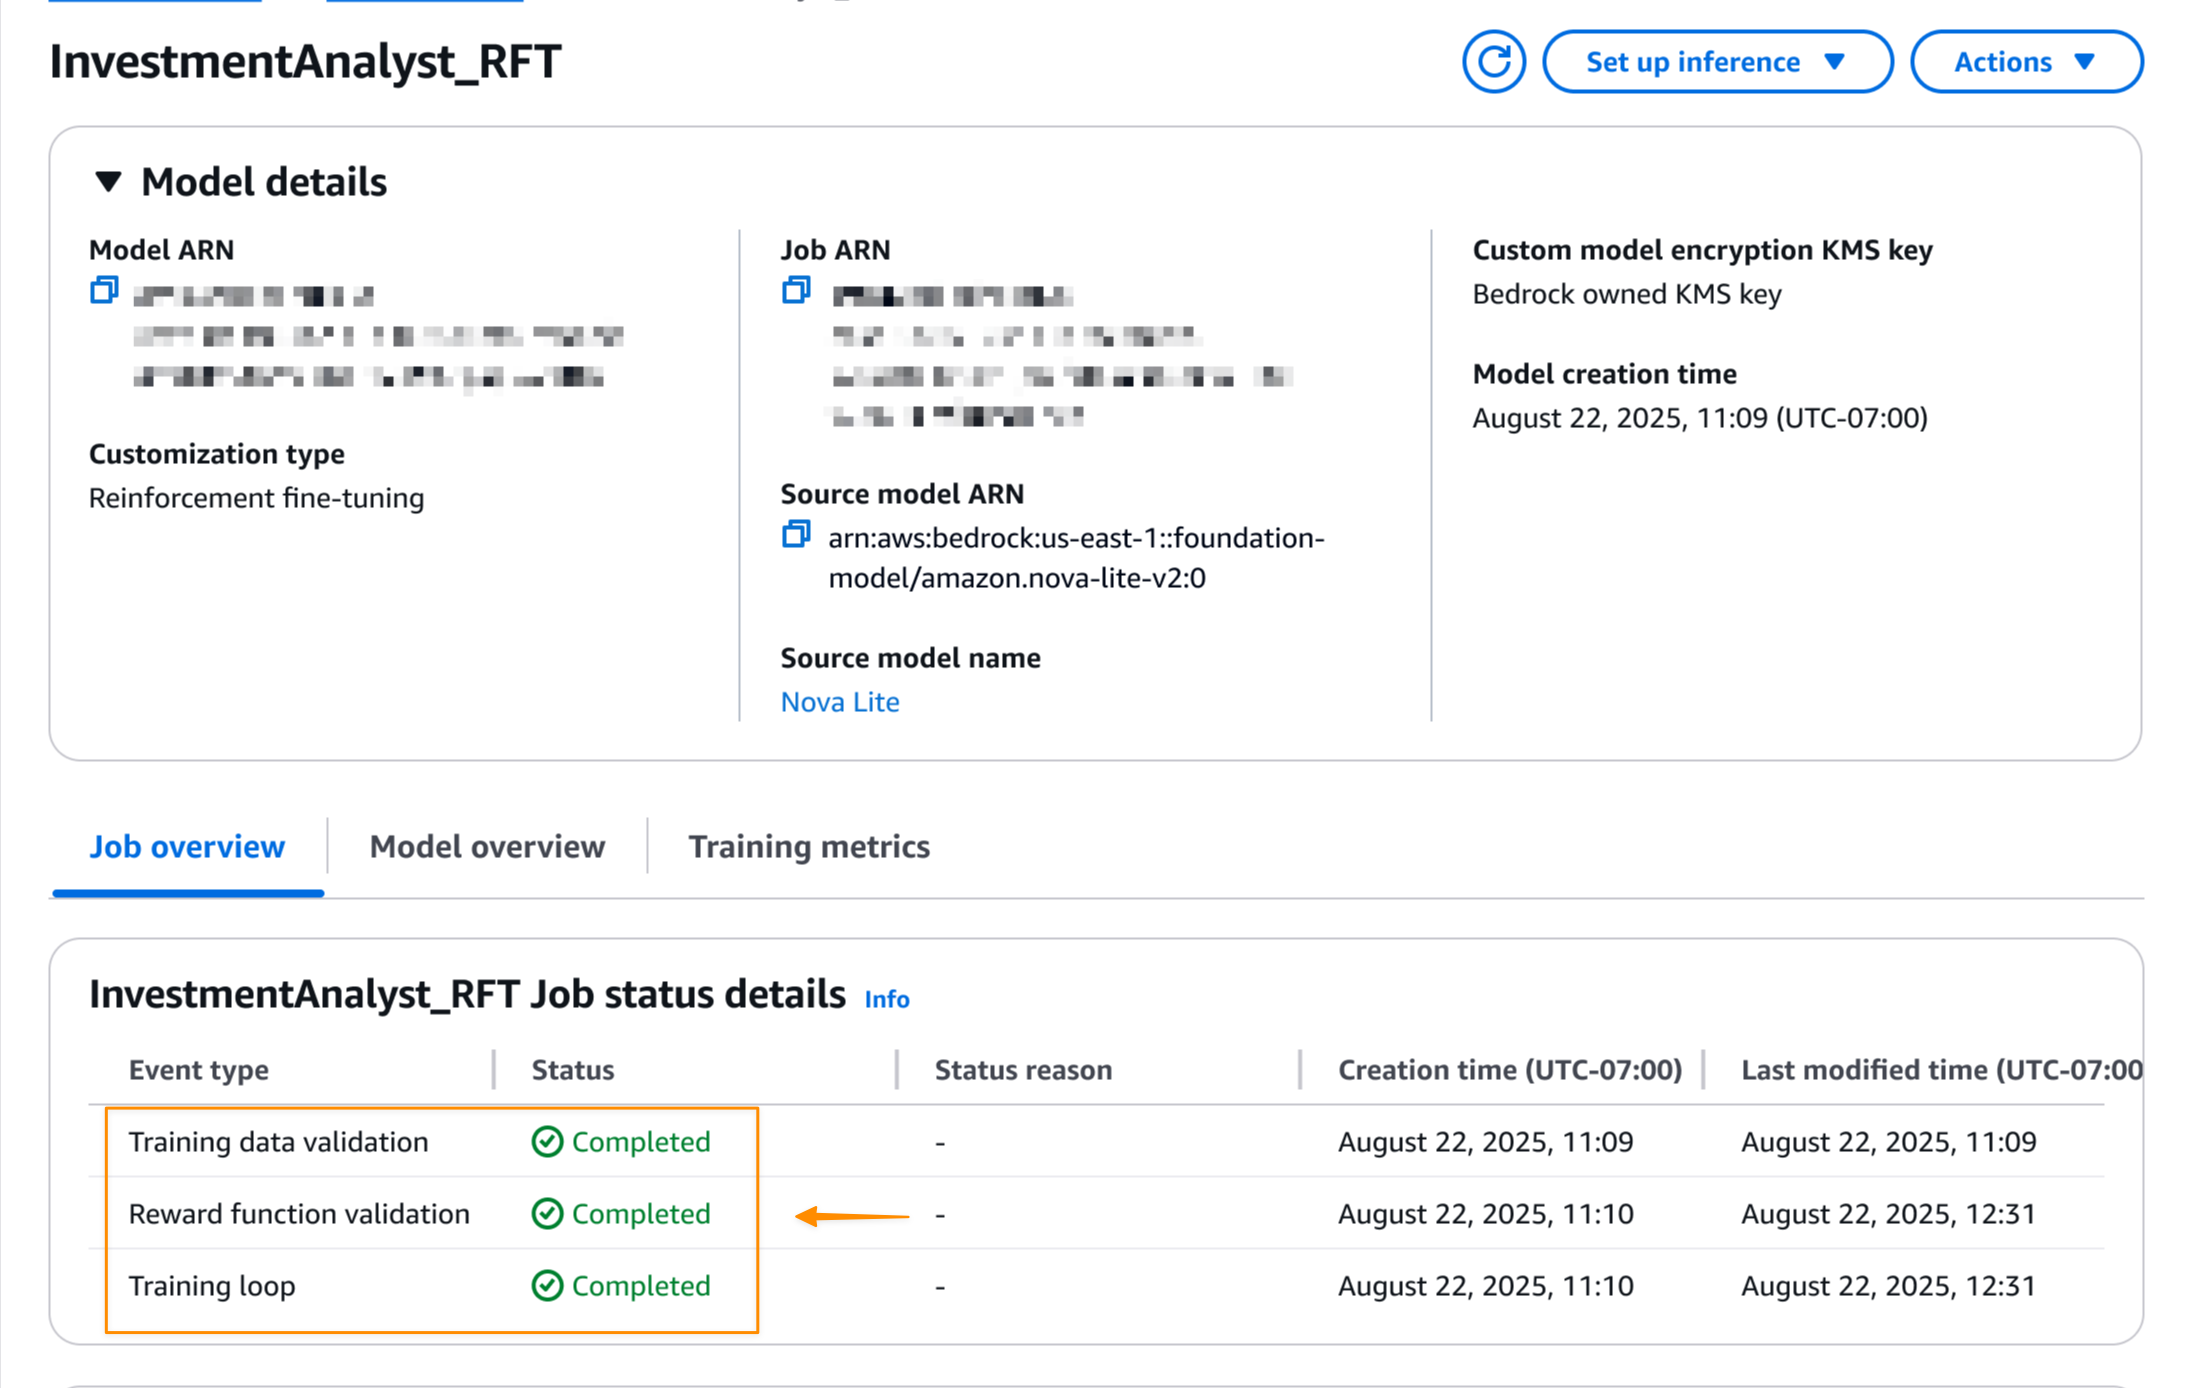
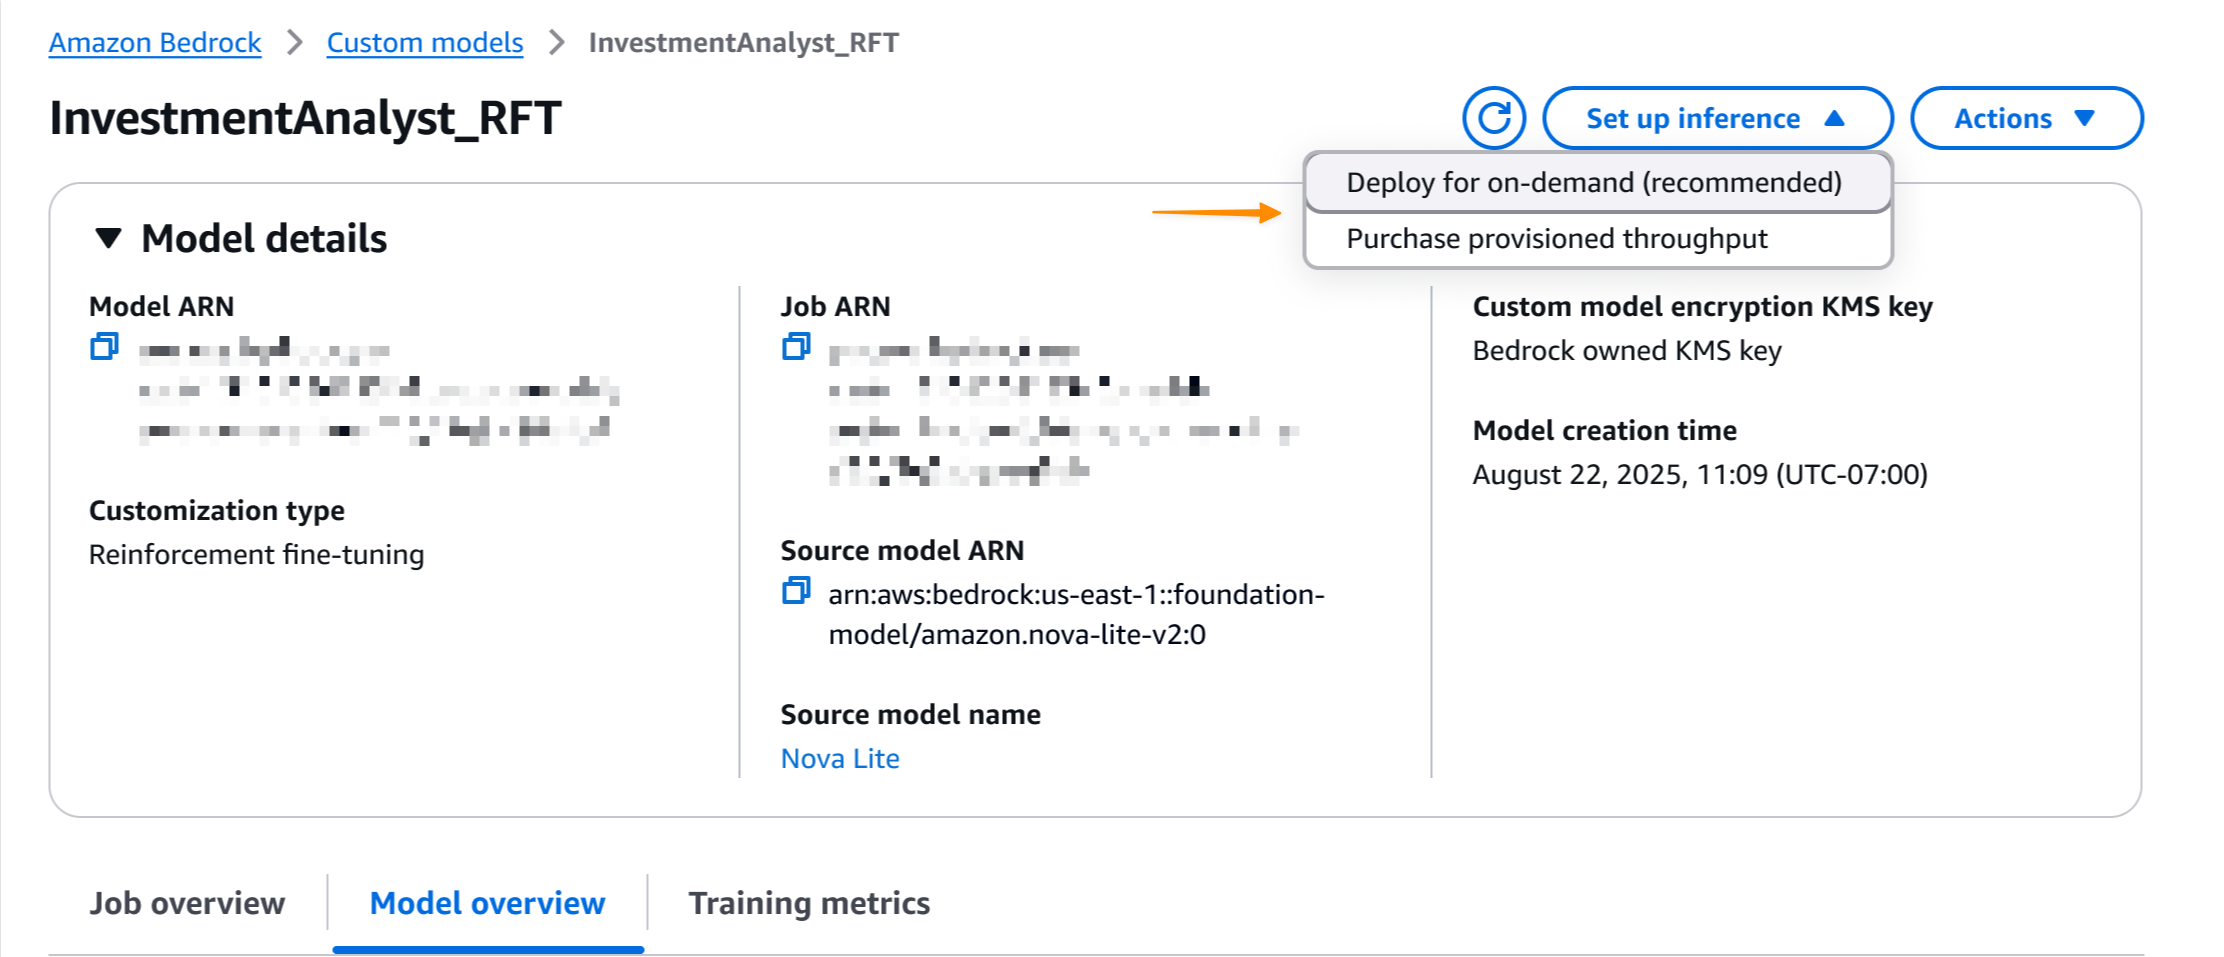
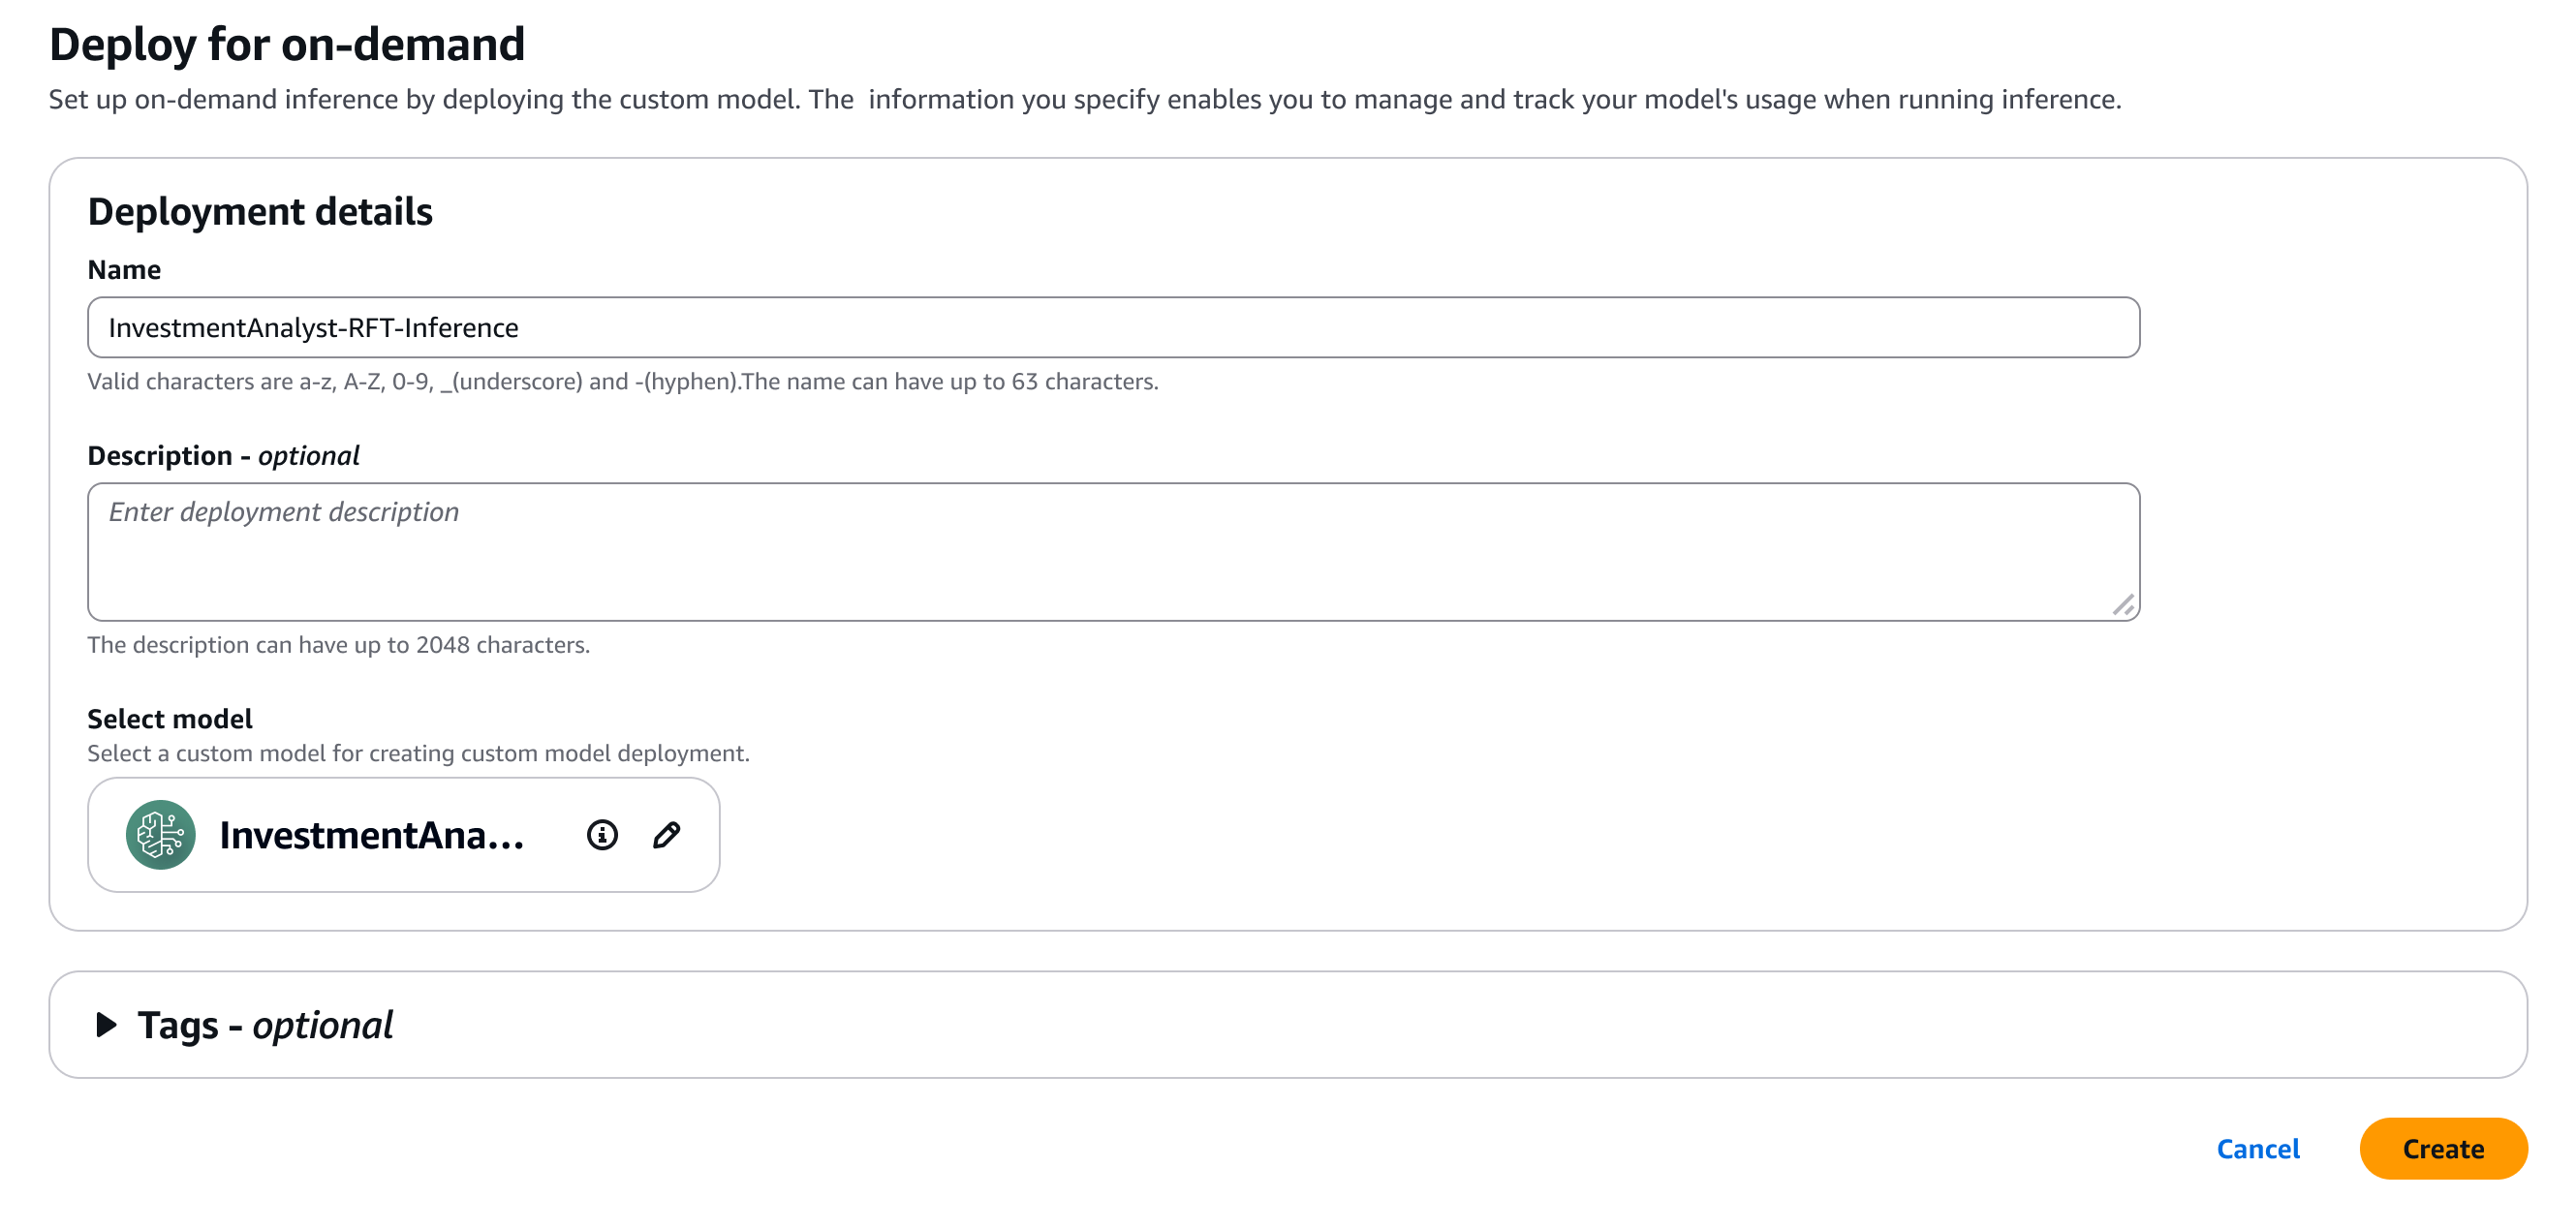
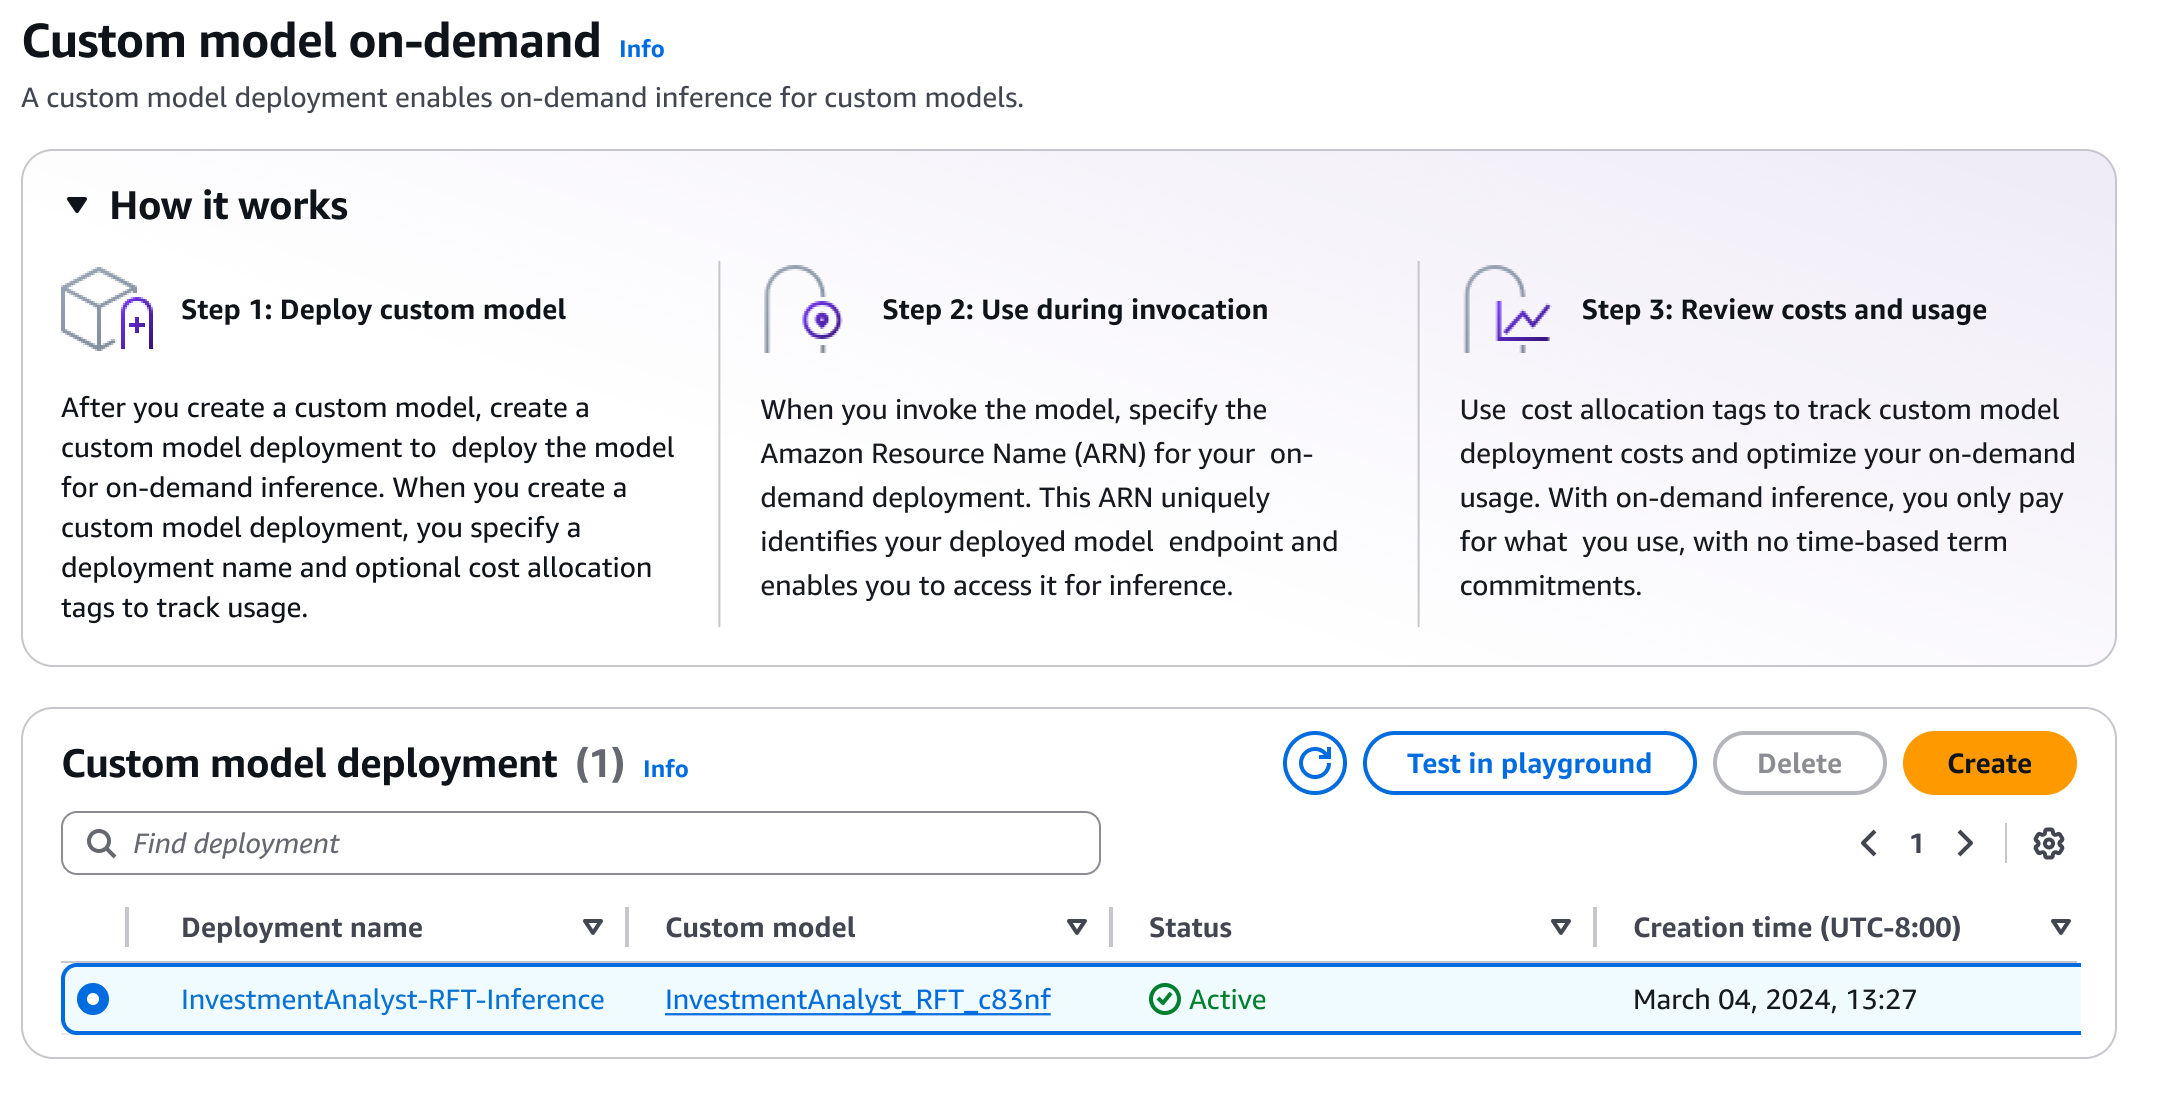
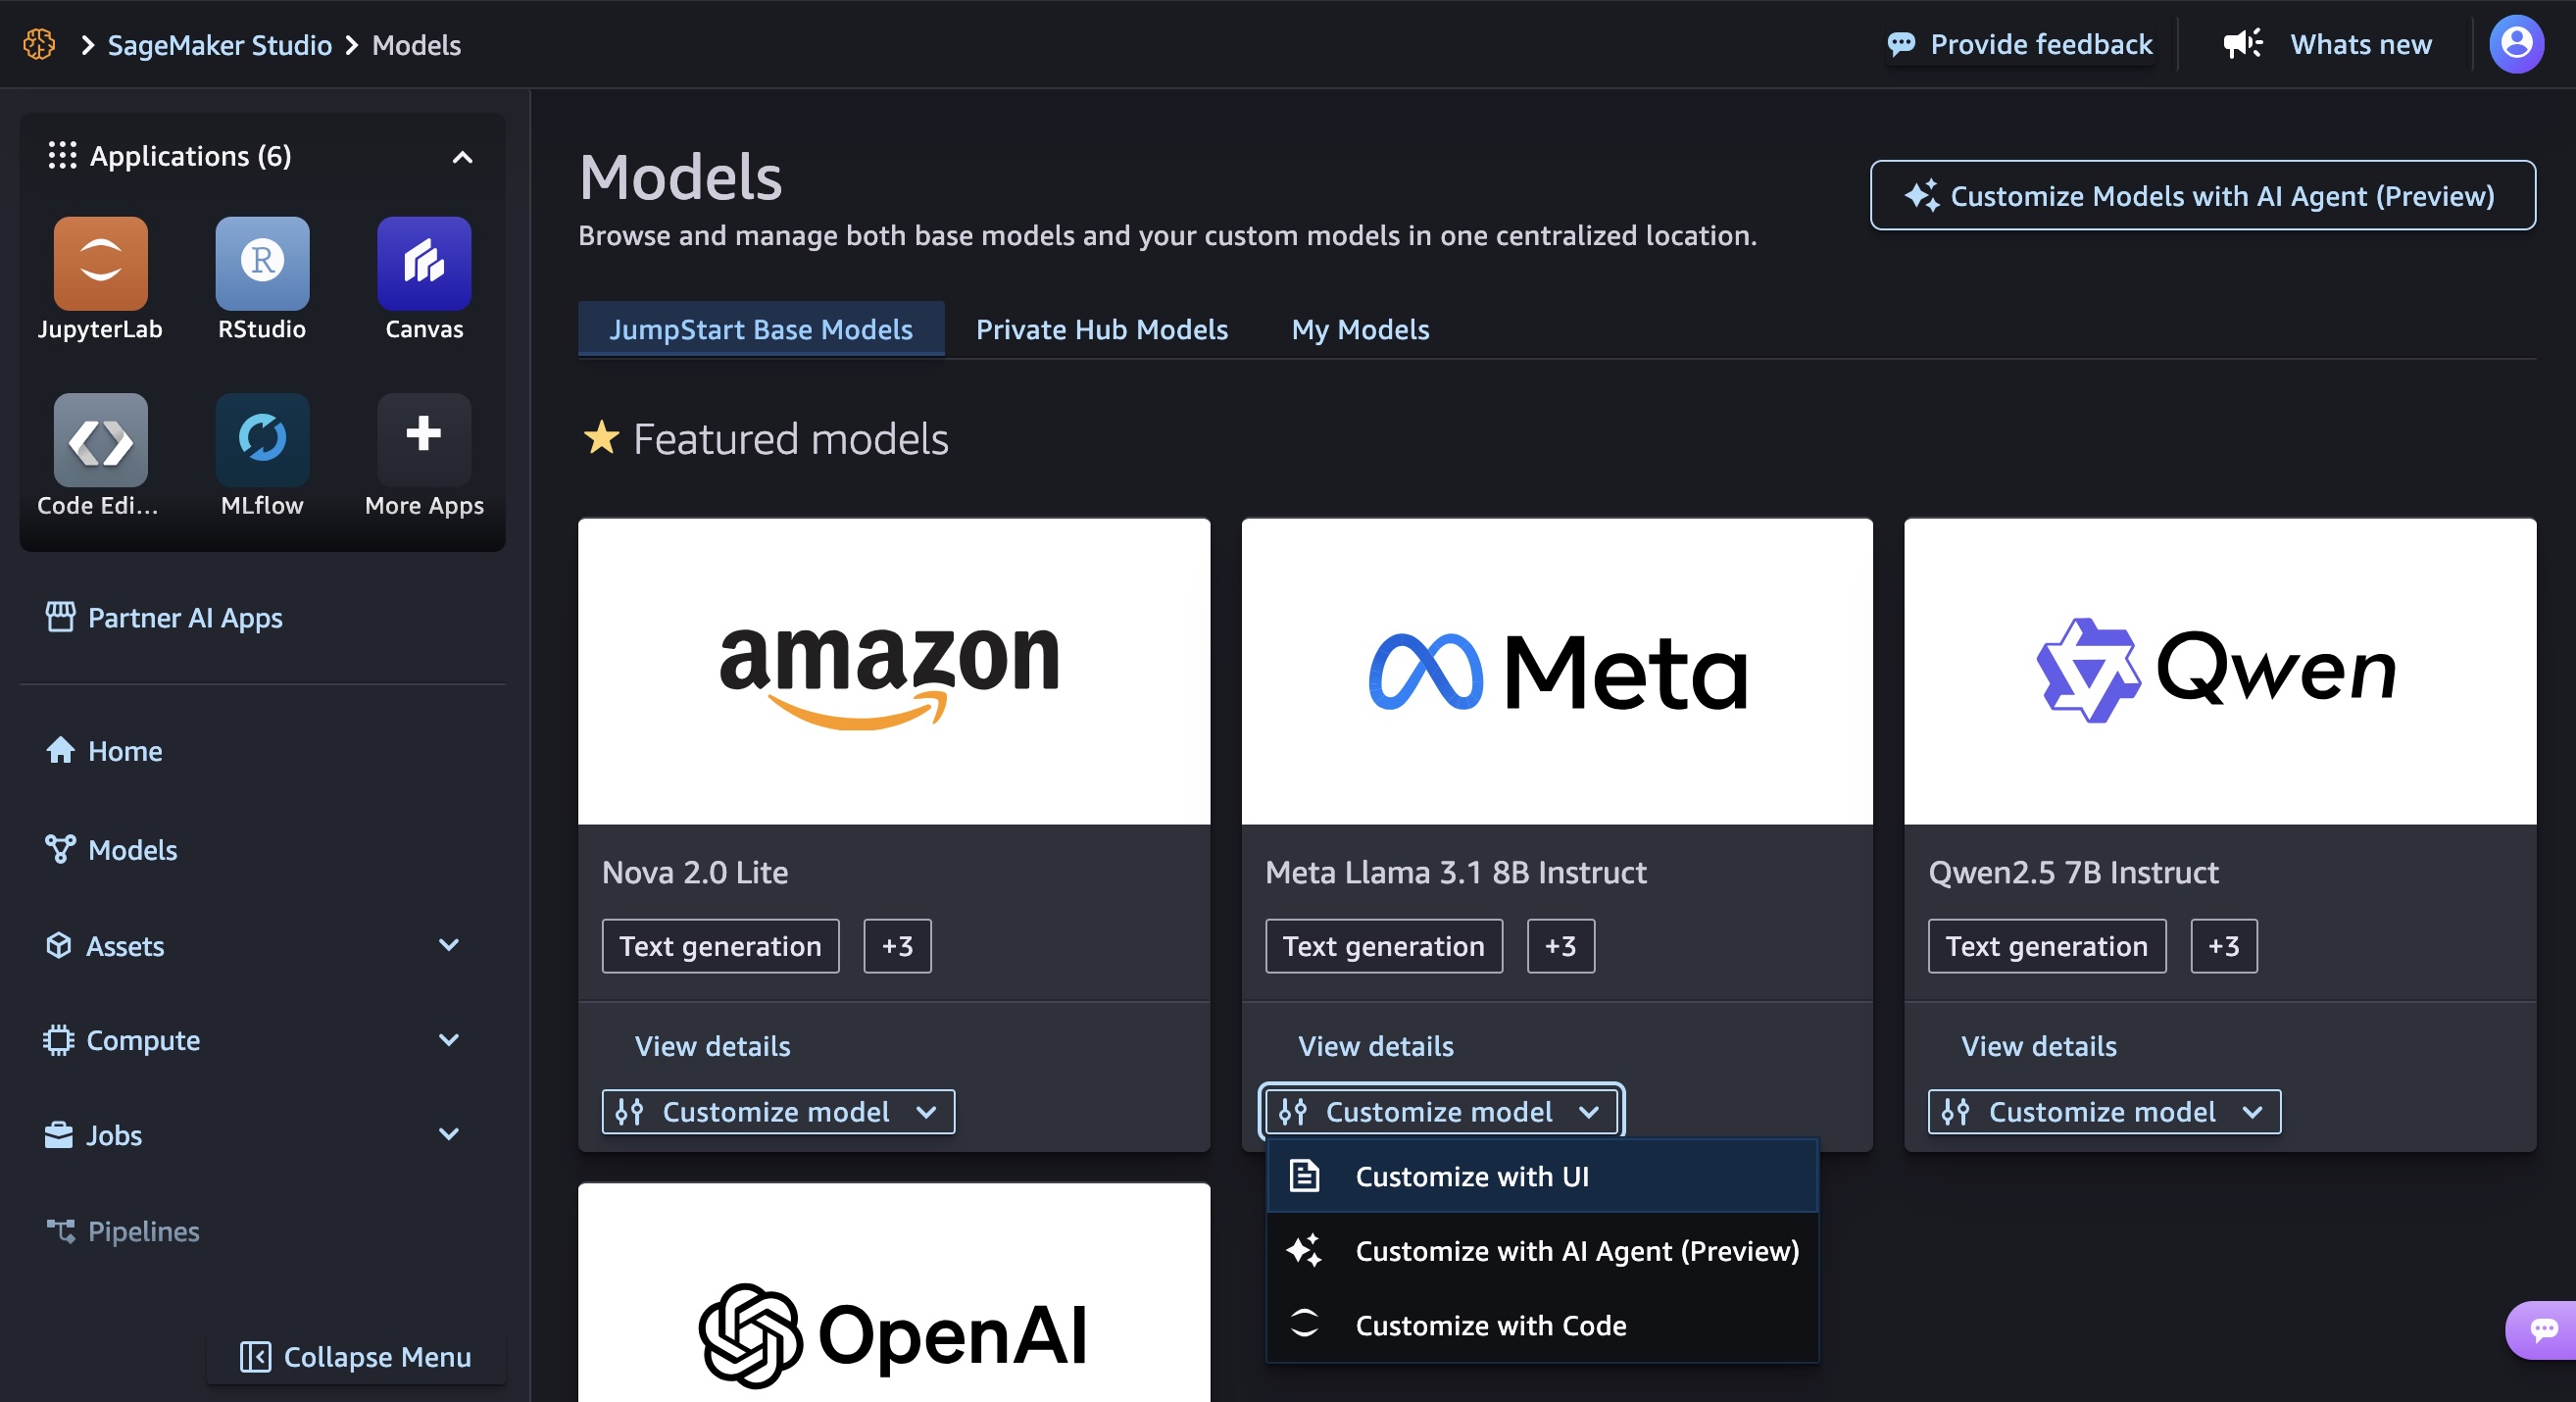
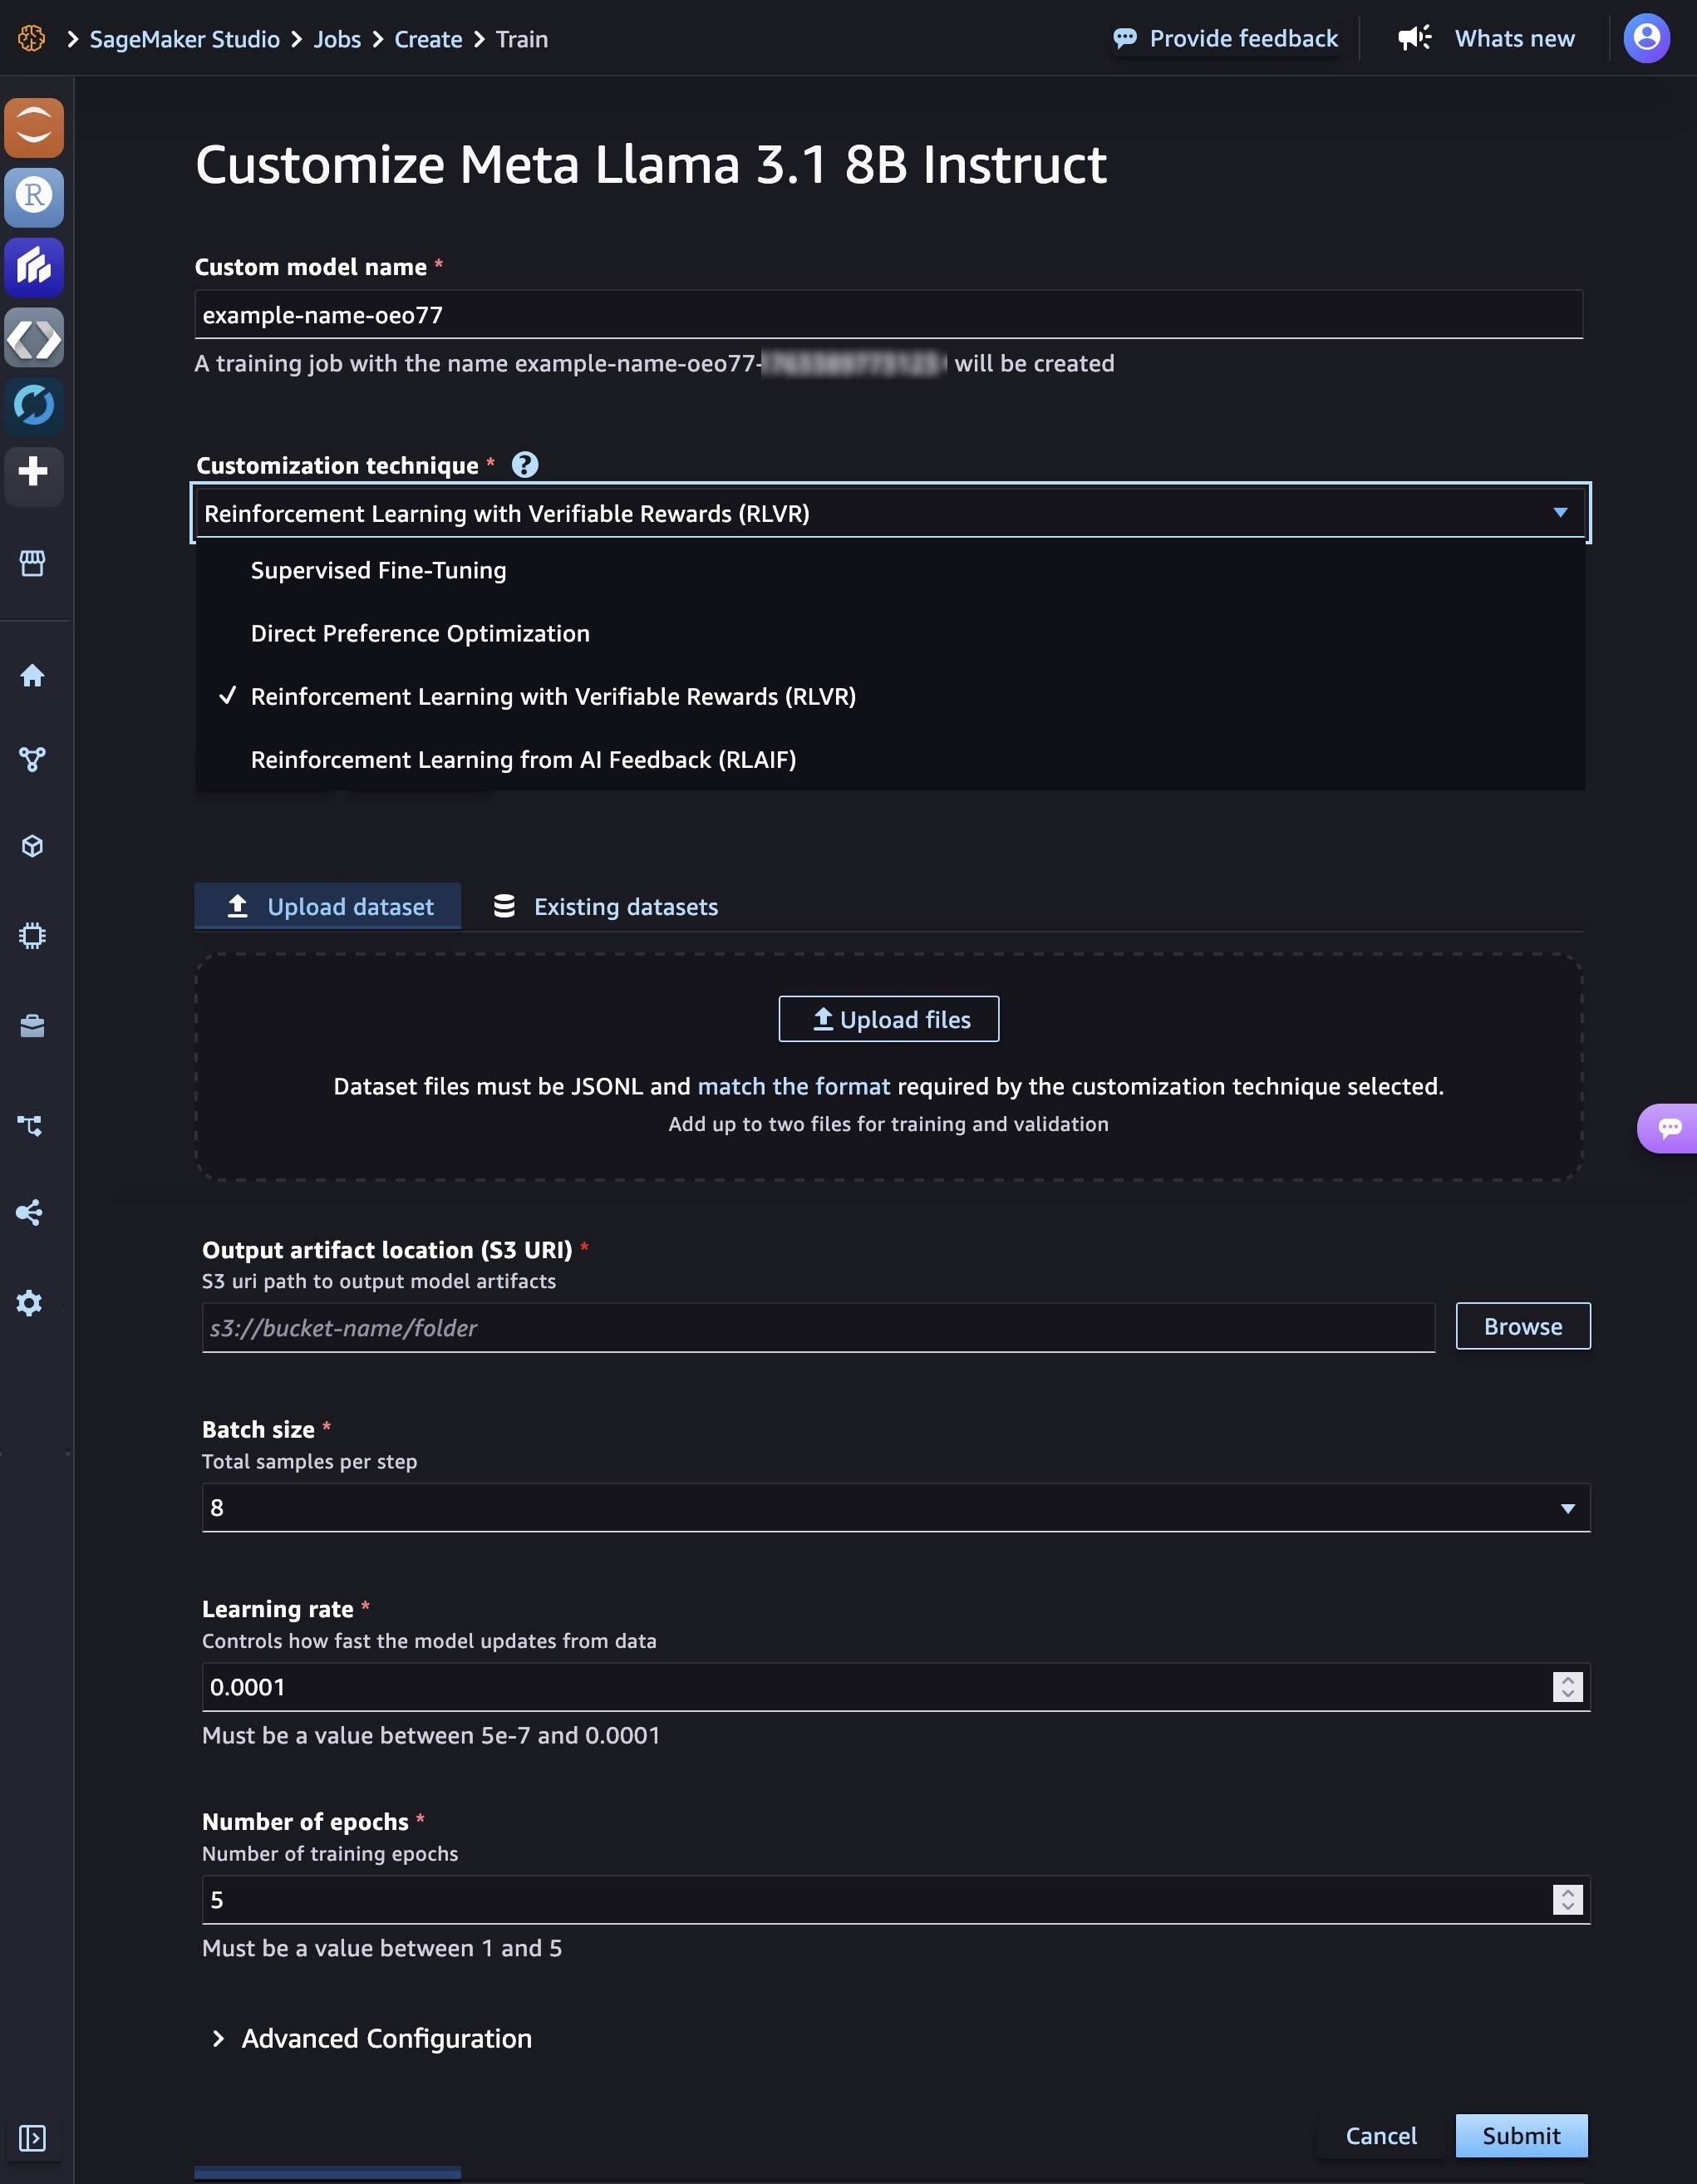
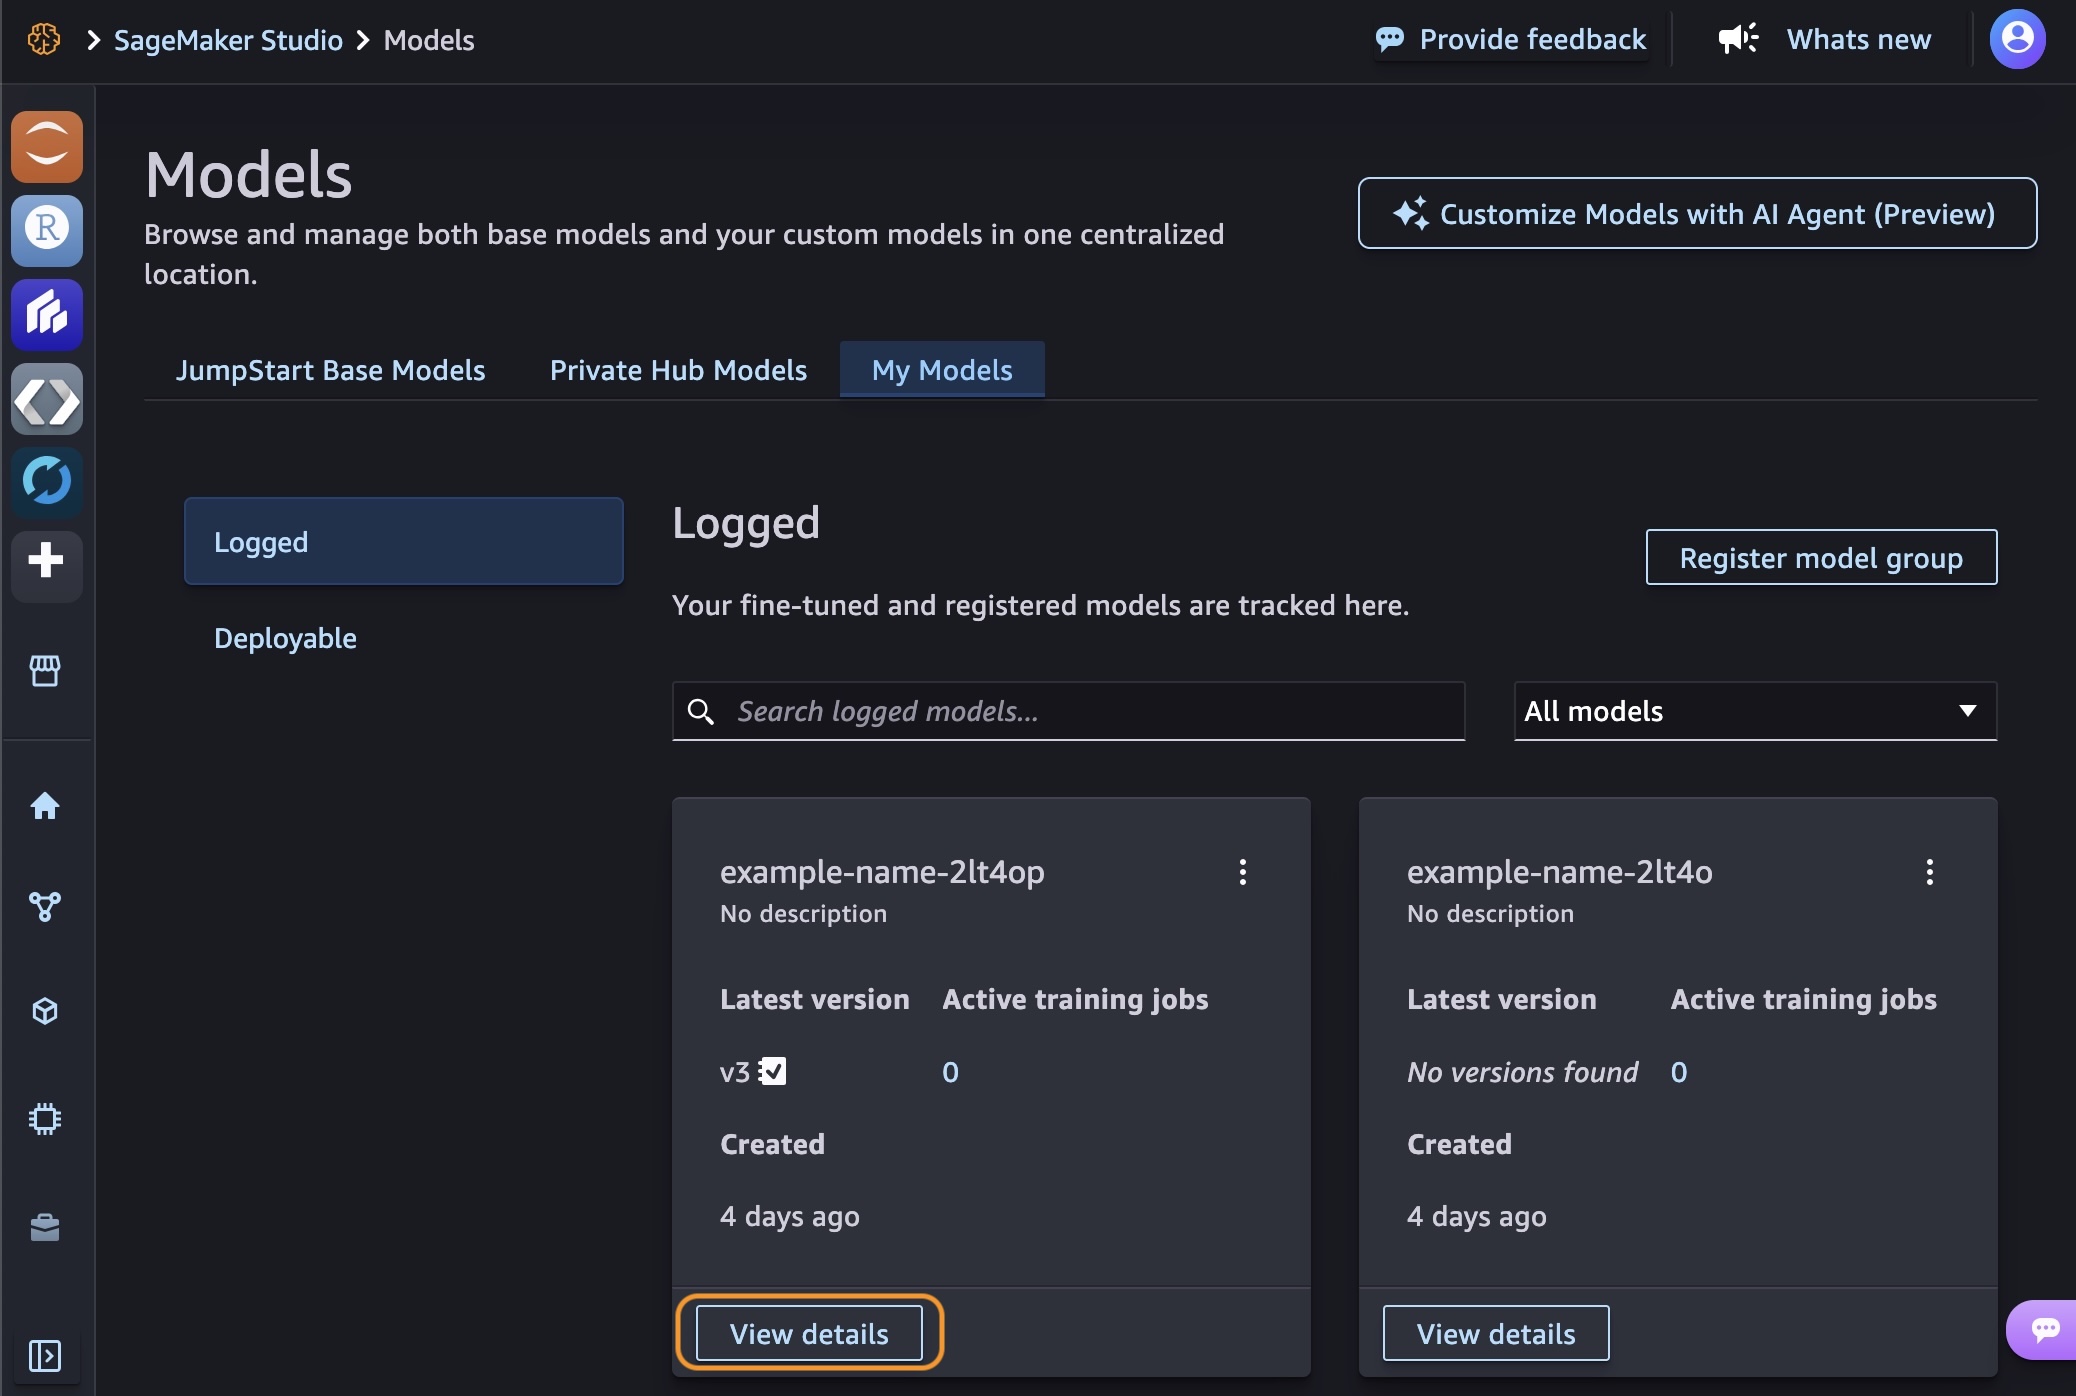
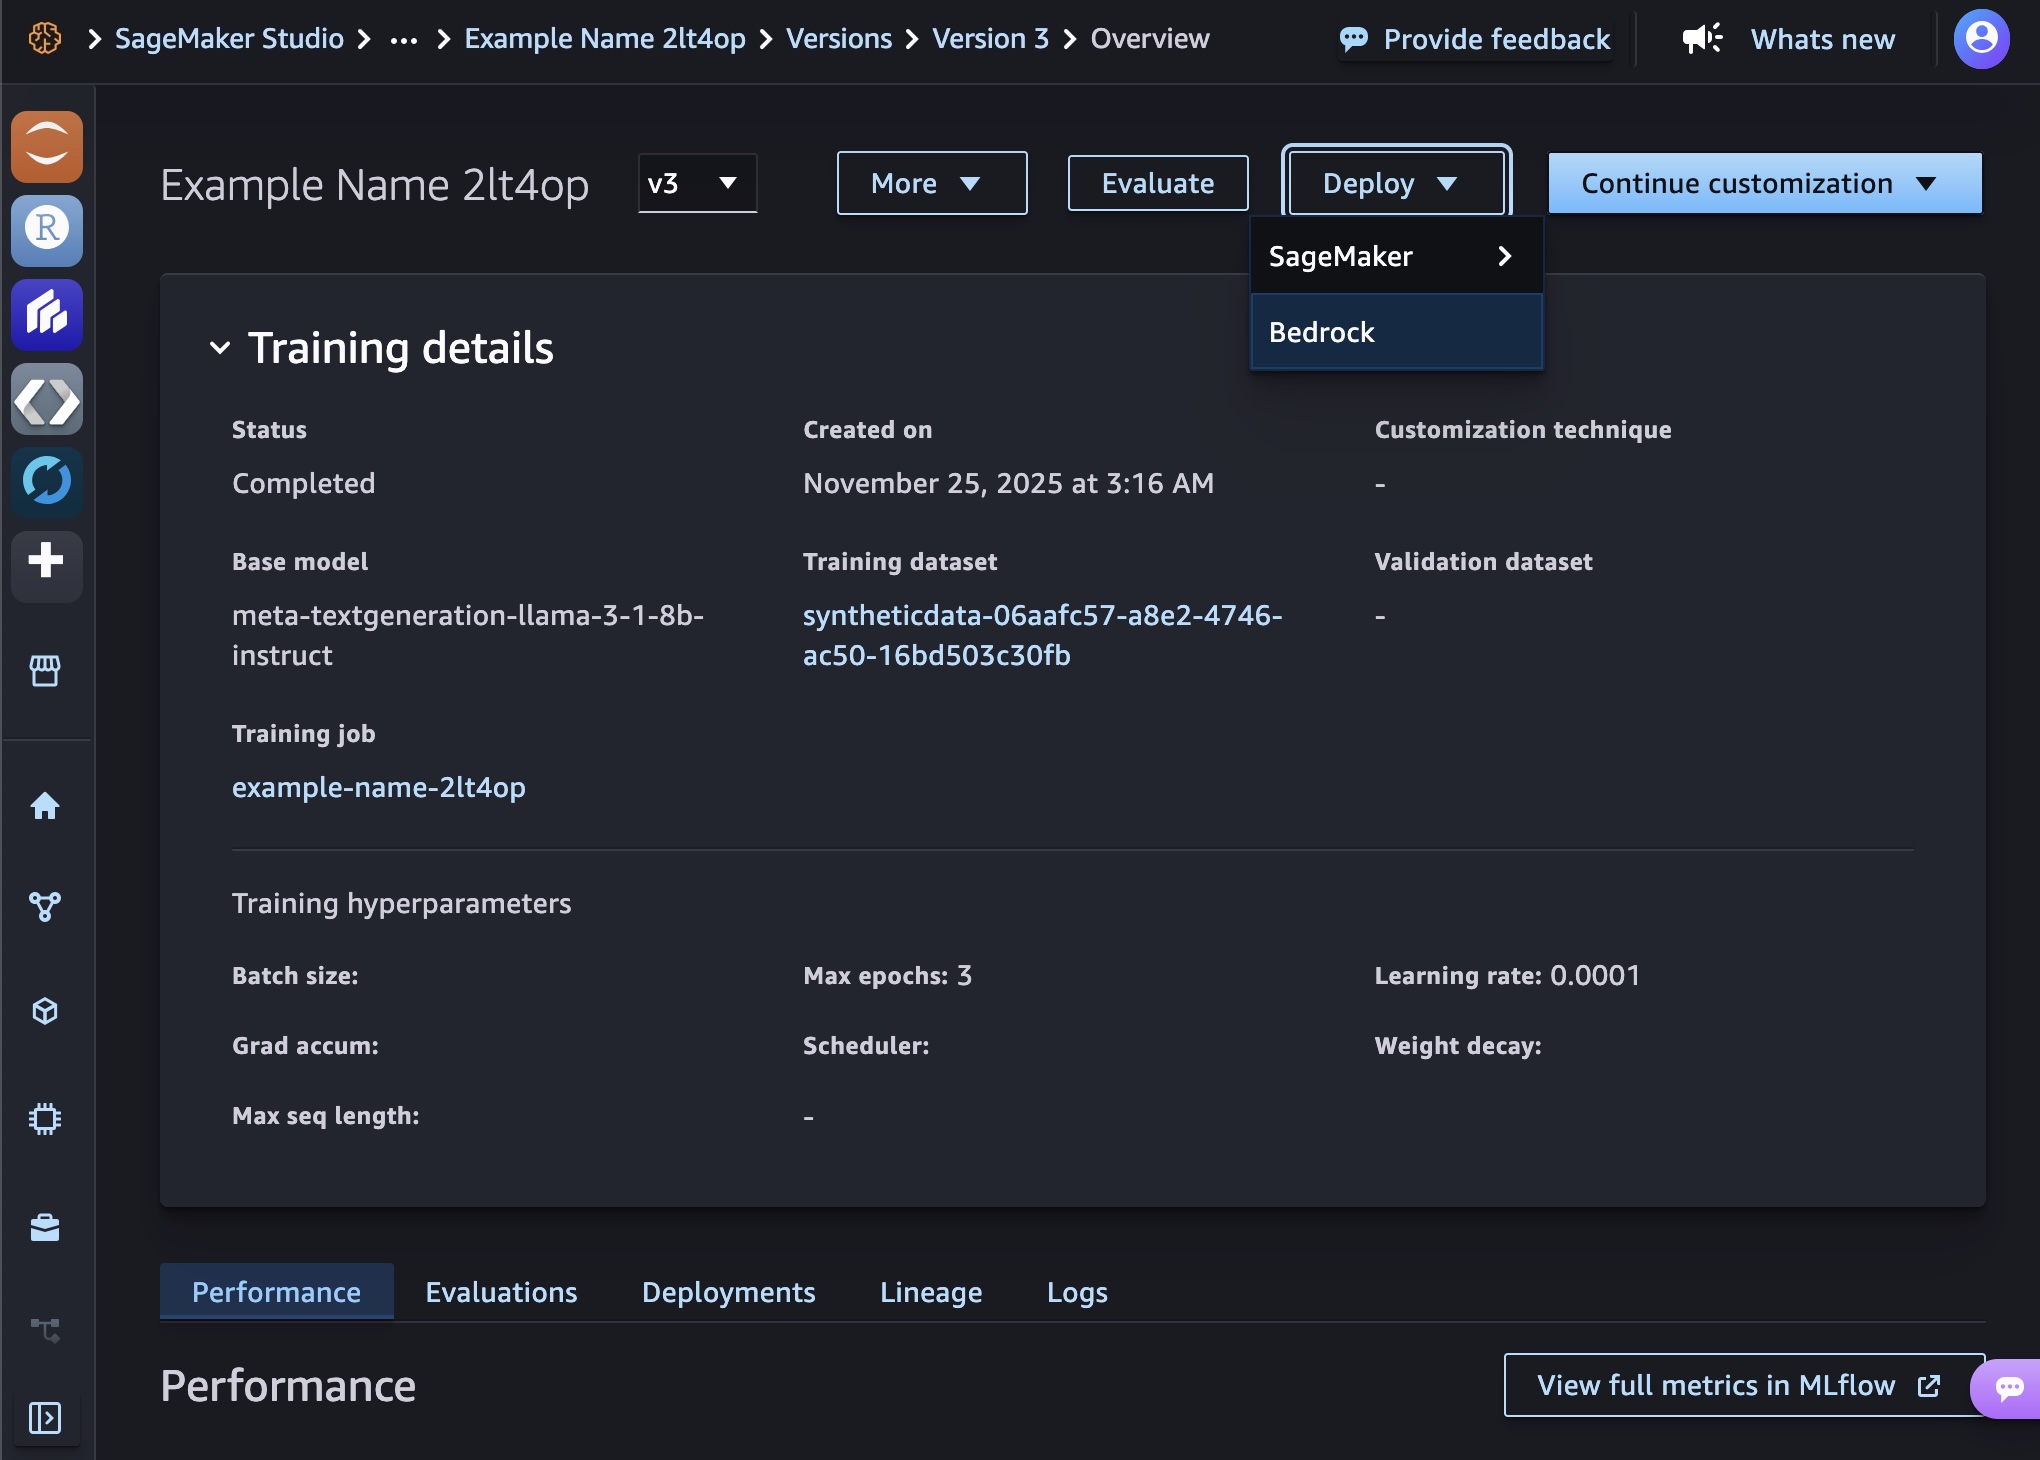
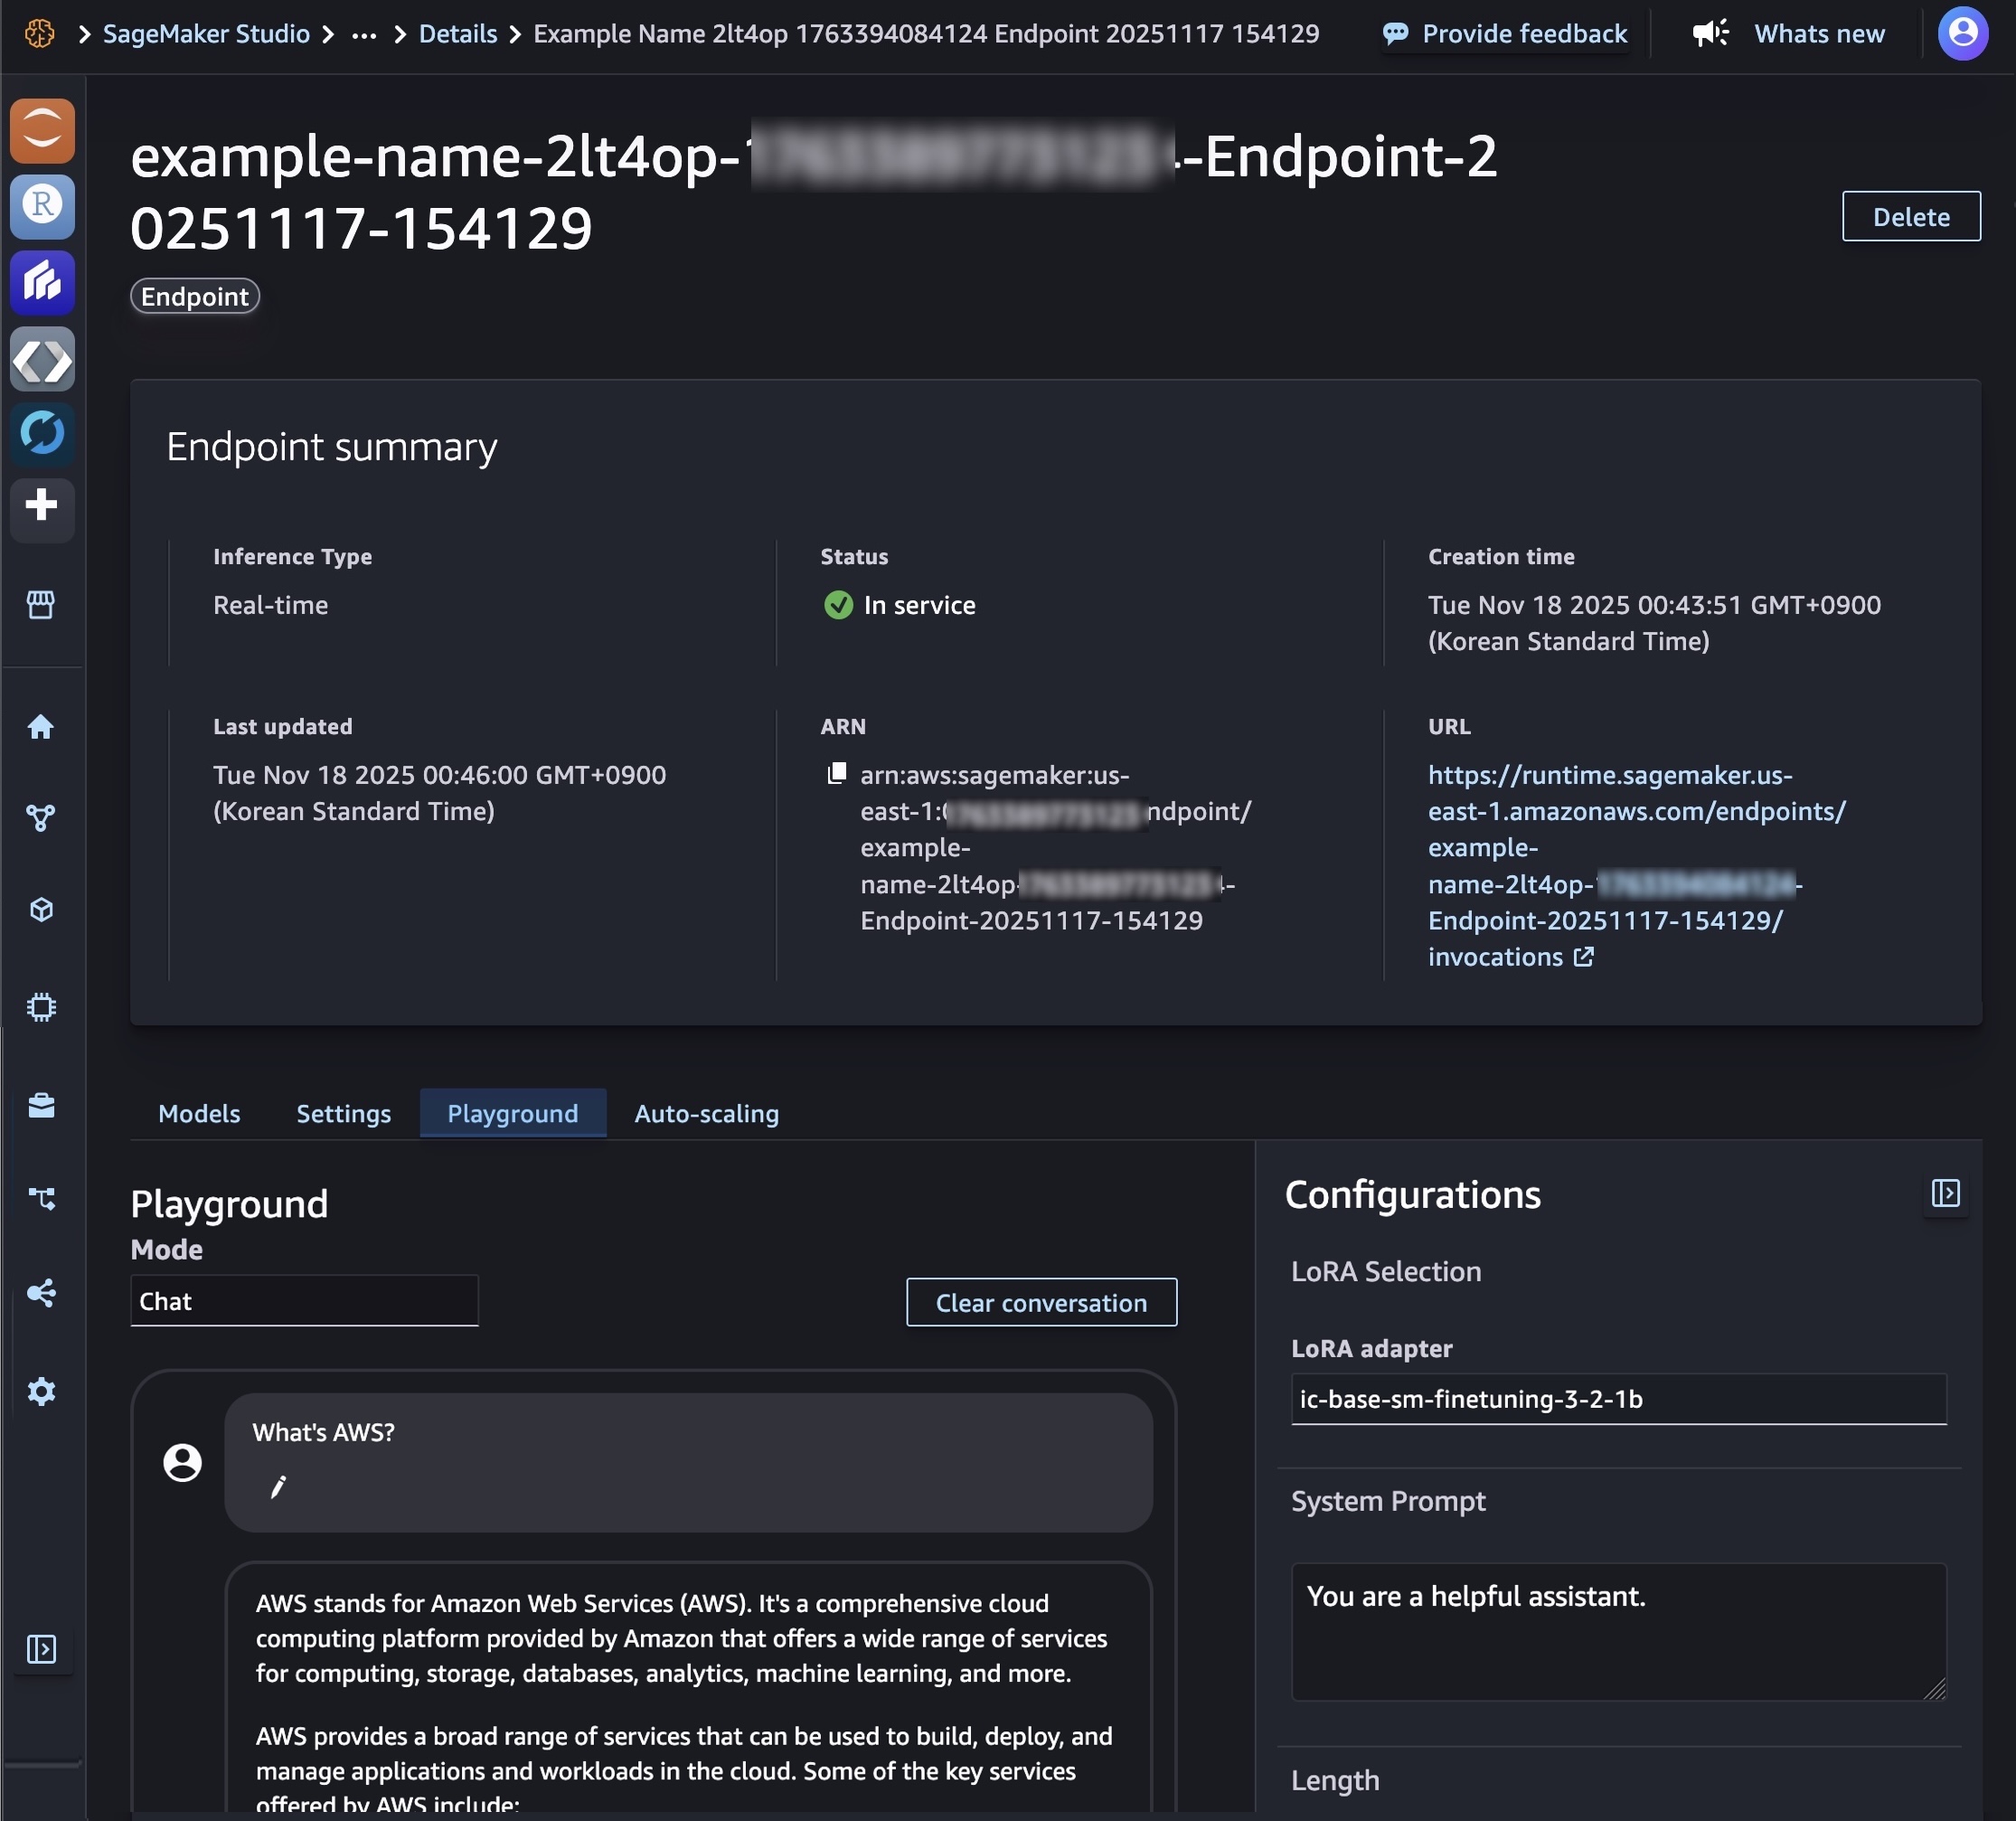
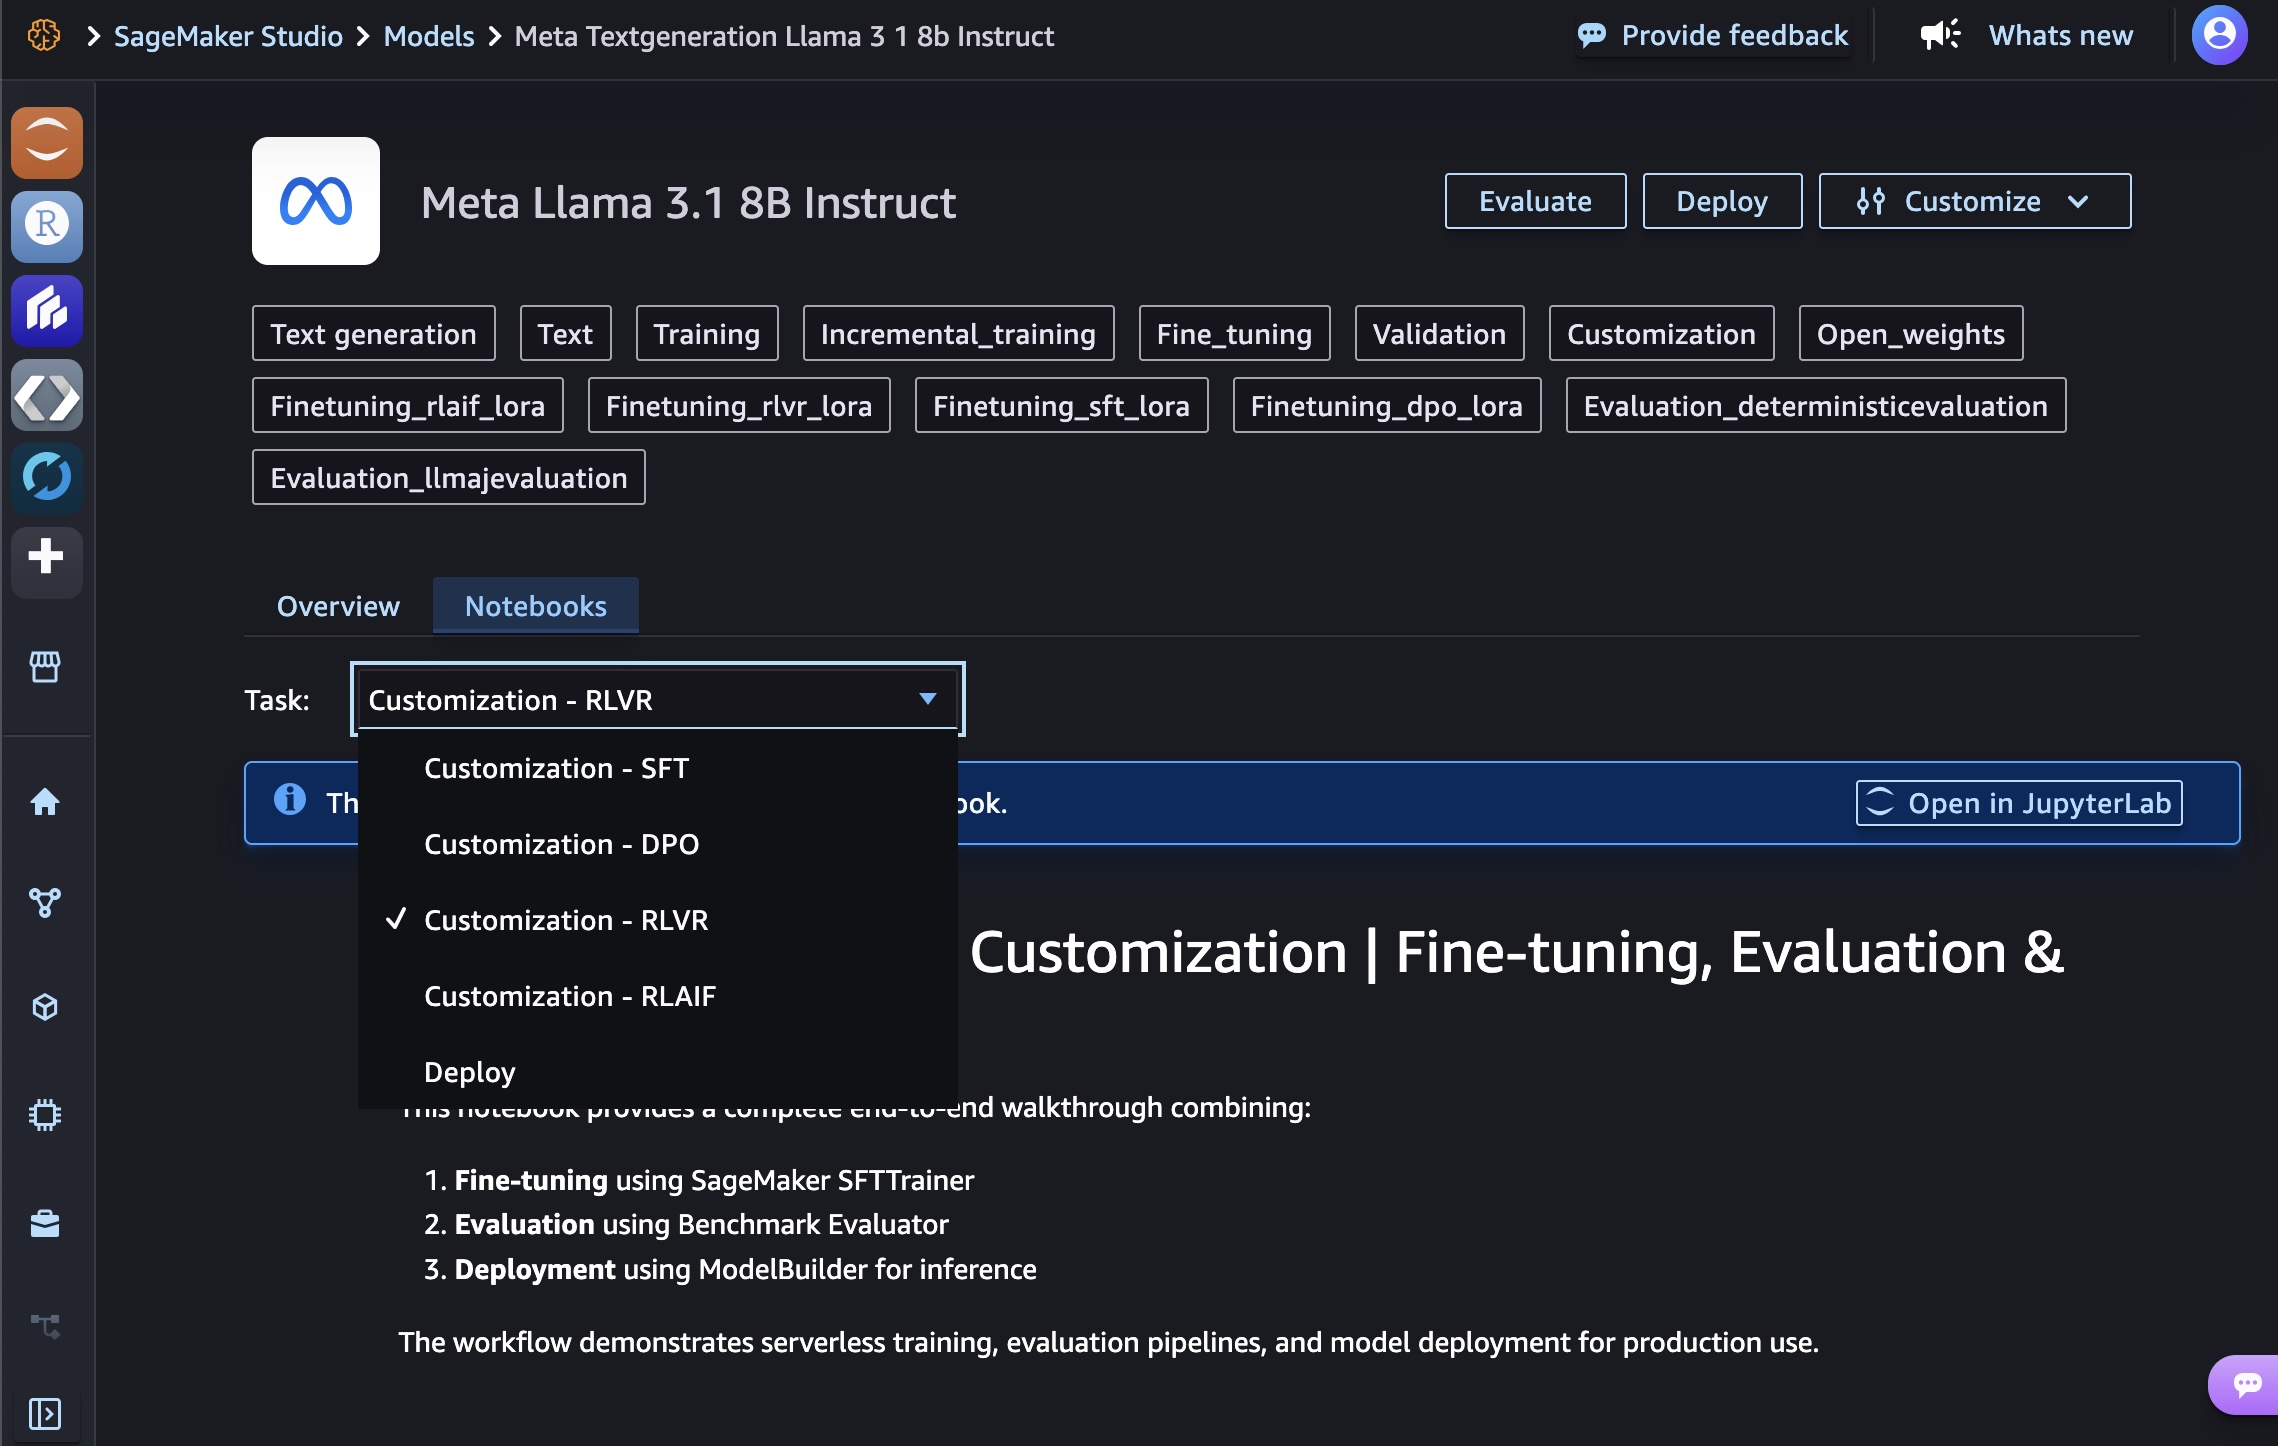
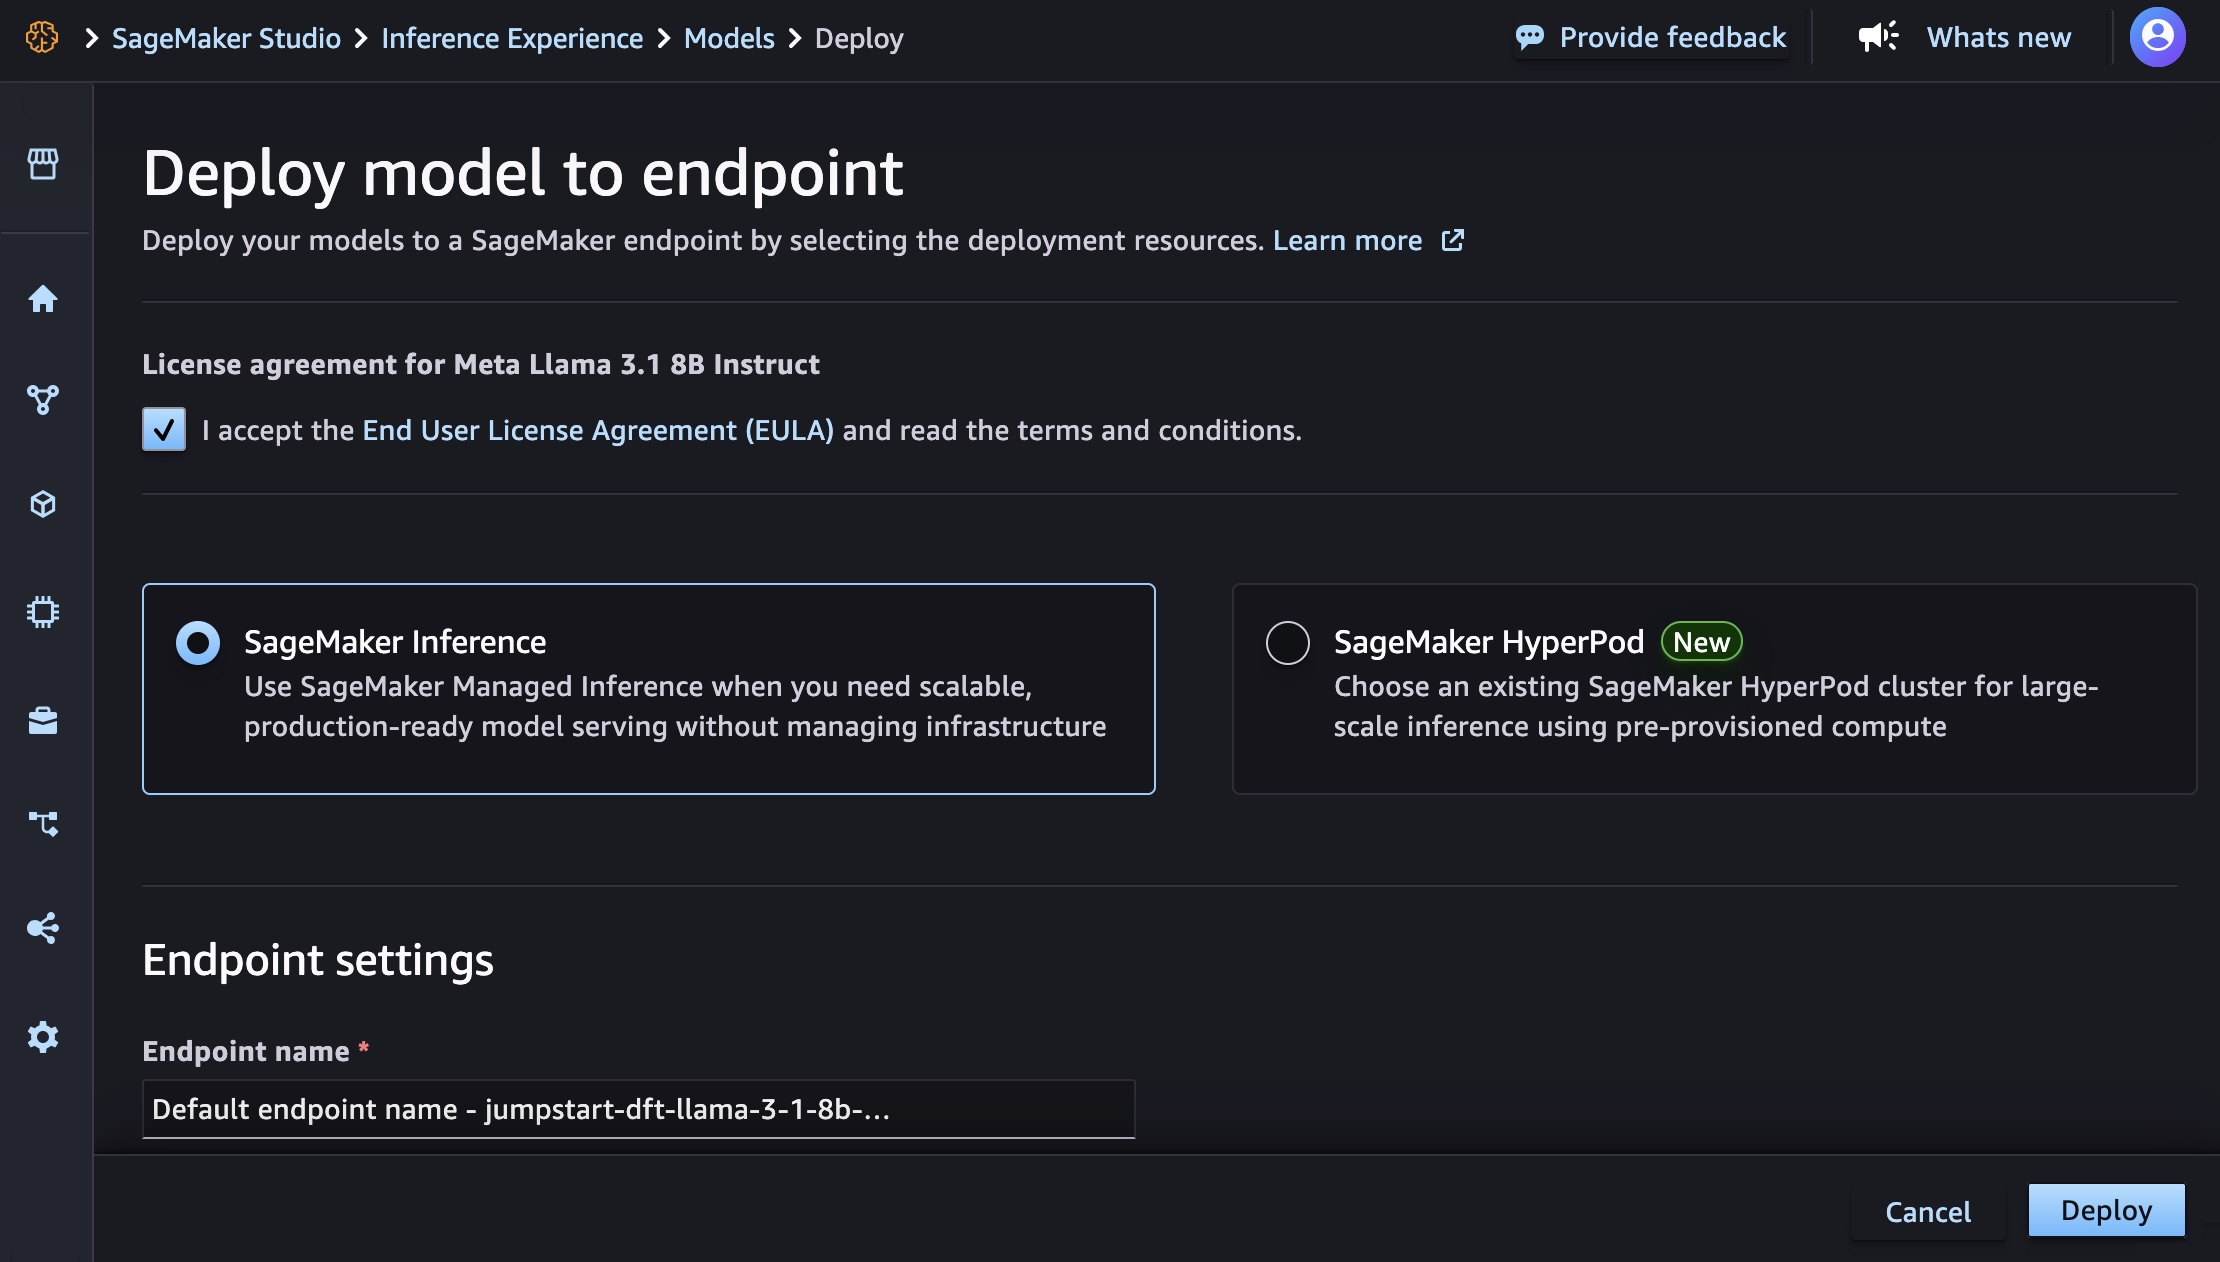
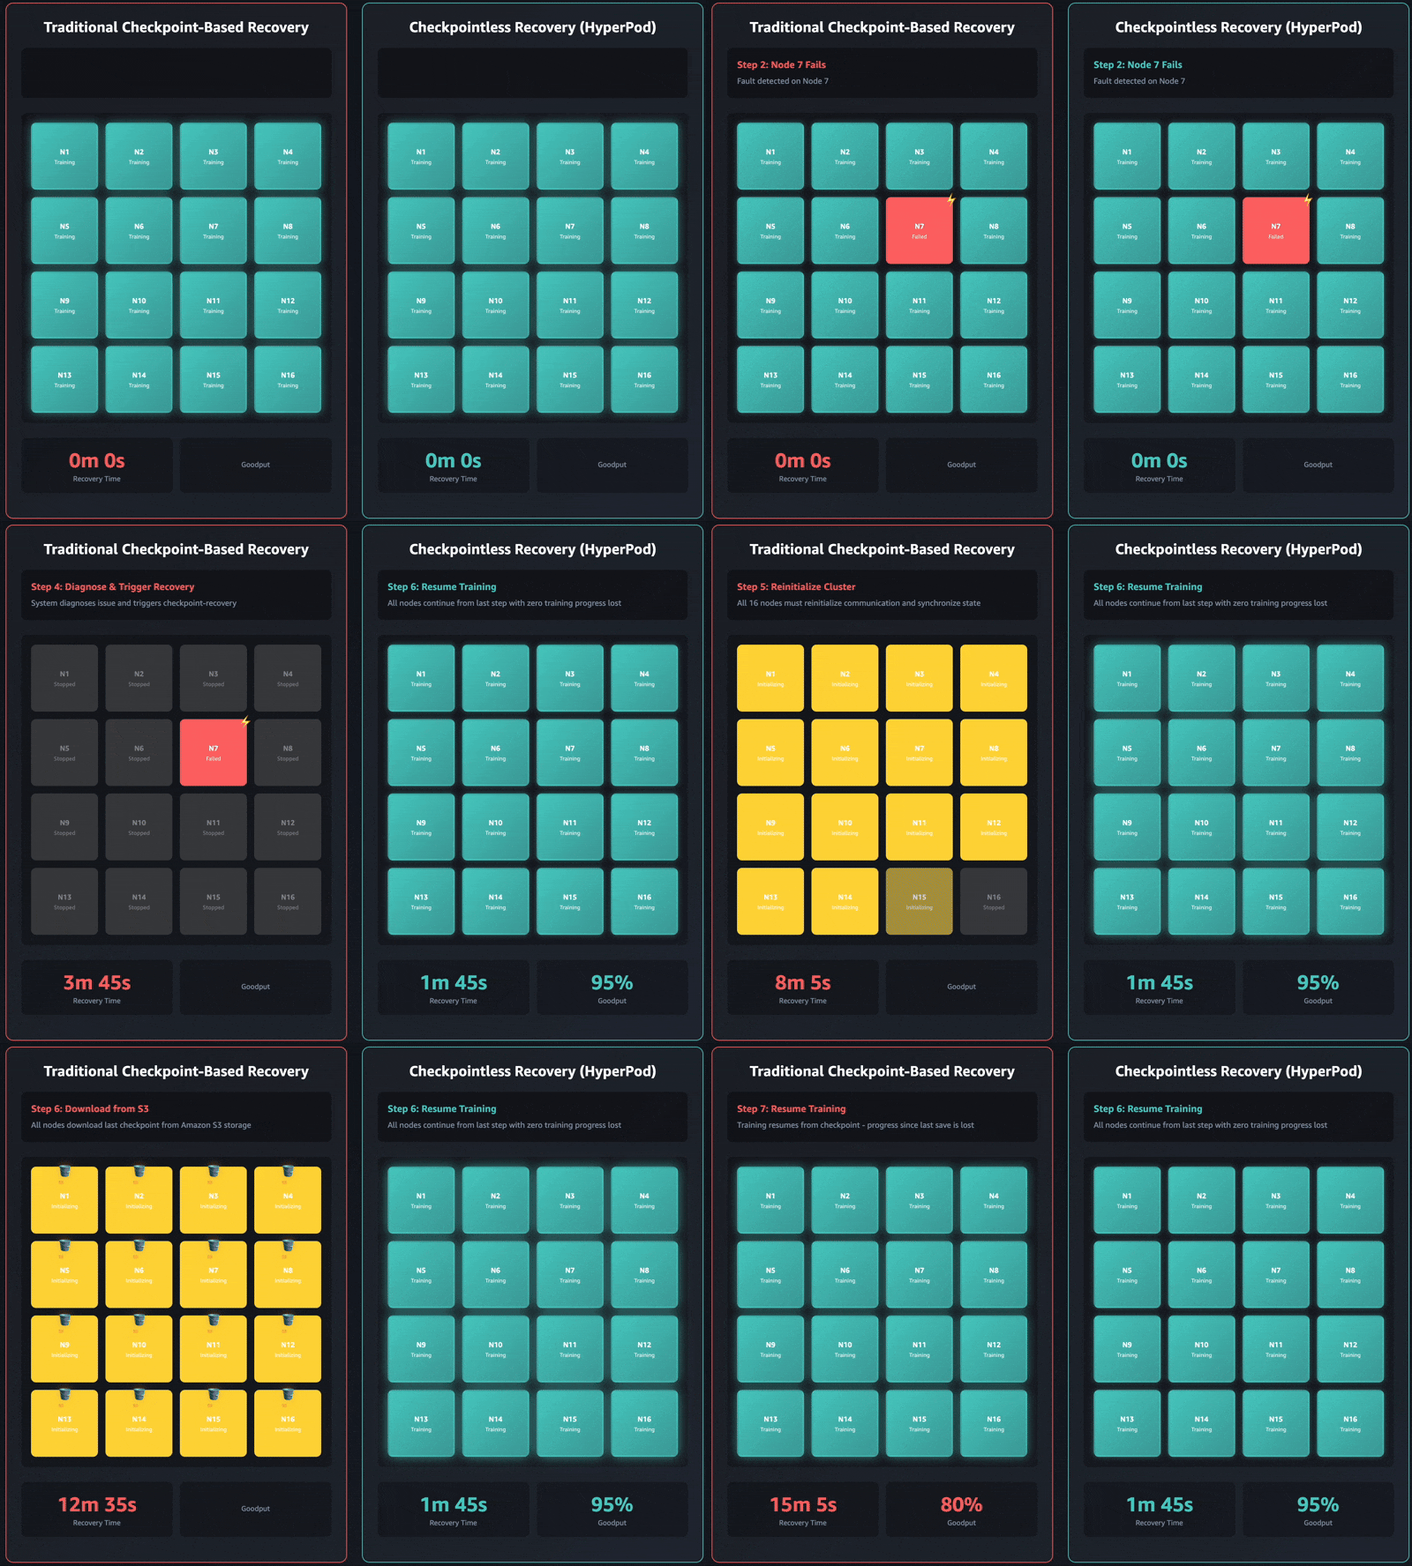
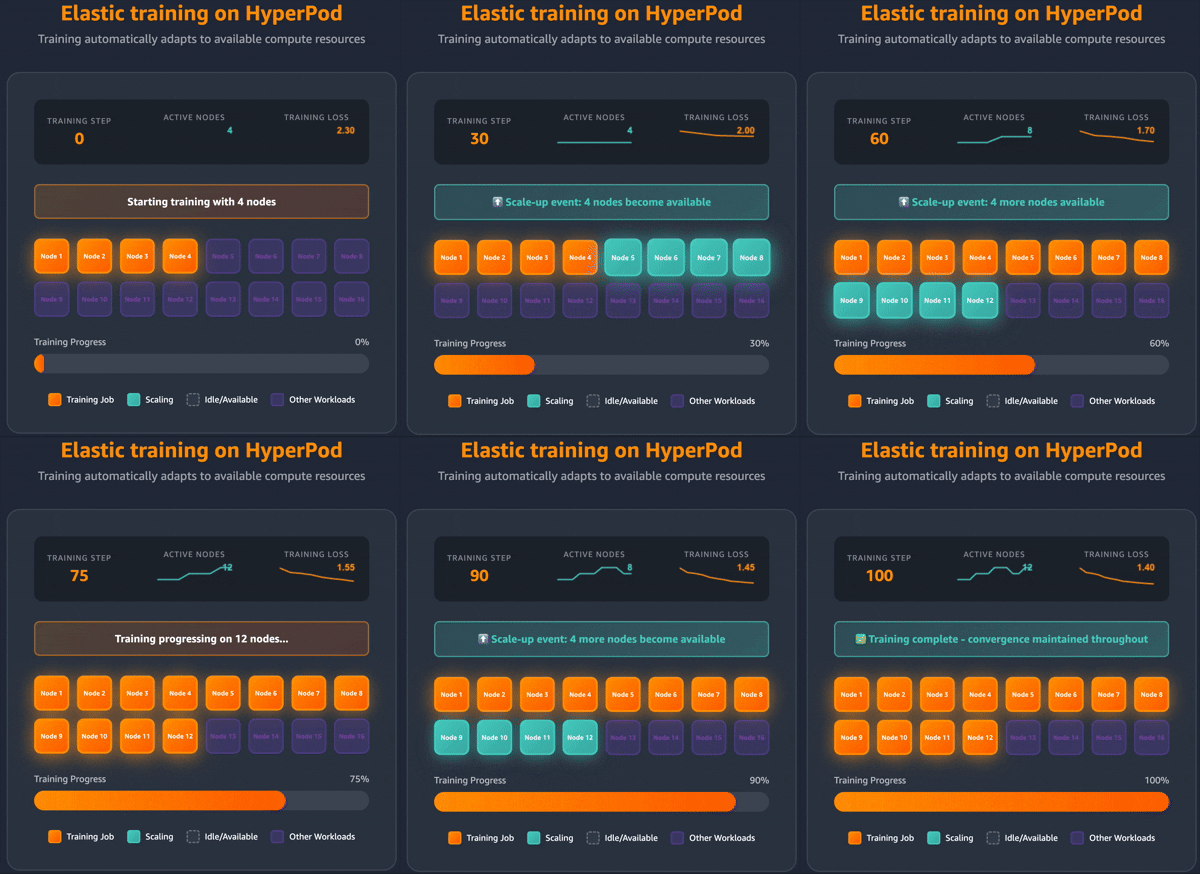 Elastic training transforms how training workloads interact with cluster resources. Training jobs can automatically scale up to utilize available accelerators and gracefully contract when resources are needed elsewhere, all while maintaining training quality.