Tag Archives: Security, Identity & Compliance

Privacy video: Innovating securely

Post Syndicated from Chad Woolf original https://aws.amazon.com/blogs/security/privacy-video-innovating-securely/

I’m pleased to share a video of a conversation about privacy I had with my colleague Laura Dawson, the North American Lead at the AWS Institute. Privacy is becoming more of a strategic issue for our customers, similar to how security is today. We discussed how, while the two topics are similar in some ways, they also have important differences. We also talked about the importance of building a strong privacy program, and how AWS helps customers safeguard privacy while still taking advantage of digital modernization opportunities.

The differences between security and privacy aren’t fully understood in some industries. Security principles are better known in the industry – security involves considering the confidentiality, integrity, and availability of information. It’s about keeping unauthorized parties away from your data, and about making sure access to your systems and data is appropriate. Similarly, privacy is about control of data through its entire lifecycle, specifically personal identifiable information (PII). That includes the collection, use, transmission, and deletion of that data. Properly managing the privacy of PII is like security when you consider the “access control” aspect, but privacy is about making sure you always have granular control of what is happening to that PII from formation/gathering through to deletion.

Unlike security, which is now commonly recognized as a core business function, privacy practices and principles are still in the early stages of being widely accepted. This is why AWS advocates for organizations to follow the principles of Privacy by Design, to ensure that privacy processes and controls are baked into everything you do.

I also discussed with Laura some of the privacy trends I see happening in the tech industry right now, such as homomorphic encryption, anonymization, and PII discovery tools. The privacy challenges organizations face today, however, aren’t just technology challenges; they’re also business challenges, of how to get value from the data you control, in a way that meets privacy best practices and accounts for your customers’ interests.

For more about these and other privacy topics, check out the video of my conversation with Laura. To learn more about privacy at AWS, check out the Data Privacy Center and Data Protection at AWS.

Author

Chad Woolf

Chad joined Amazon in 2010 and built the AWS compliance functions from the ground up, including audit and certifications, privacy, contract compliance, control automation engineering and security process monitoring. Chad’s work also includes enabling public sector and regulated industry adoption of the AWS cloud and leads the AWS trade and product compliance team.

Using CloudTrail to identify unexpected behaviors in individual workloads

Post Syndicated from Volker Rath original https://aws.amazon.com/blogs/security/using-cloudtrail-to-identify-unexpected-behaviors-in-individual-workloads/

In this post, we describe a practical approach that you can use to detect anomalous behaviors within Amazon Web Services (AWS) cloud workloads by using behavioral analysis techniques that can be used to augment existing threat detection solutions. Anomaly detection is an advanced threat detection technique that should be considered when a mature security baseline as described in the security pillar of the AWS Well-Architected framework is in place.

Why you should consider behavior-based detection in the cloud

Traditionally, threat detection solutions focus on the endpoint and the network and analyze log events for known indicators of attack and indicators of compromise Other forms of threat detection focus on the user and data using products such as data loss prevention and user and endpoint behavior analytics to detect suspicious user behavior at the data layer. Both solution types analyze operating system, application level, and network logs and focus on the detection of known tactics, techniques, and procedures, but the cloud control plane and other cloud native log sources are outside the use case of traditional threat detection solutions

Being able to detect malicious behavior in your environment is necessary to stay secure in the cloud. This includes the detection of events when cloud services might have been misused. The challenge is that related activities are logged on a control plane level and don’t leave any traces in log sources that are traditionally analyzed for threat detection. For example, unwanted data movements between cloud services or cloud accounts use the cloud backplane for data transfers and don’t necessarily touch any endpoint or network gateway. Therefore, related events only appear within cloud native logs such as AWS CloudTrail or AWS Config and not in network or operating system logs.
 

Figure 1: Solution architecture example

Figure 1: Solution architecture example

In the simplified example shown in Figure 1, only data streams that pass from the cloud to the firewall and then to AWS services are visible to the endpoint (an Amazon EC2 instance) or the gateway security solution.

Data streams that pass through serverless solutions and activities of cloud native services are only visible in cloud native logs.

Amazon GuardDuty is a threat detection service that continuously monitors for malicious activity and unauthorized behavior to protect AWS accounts, and analyzes not only the network flow logs but also the cloud control plane. GuardDuty uses threat intelligence coupled with machine learning and behavior models to detect threats such as account compromise and unusual data access or communications, and should be activated in each cloud account.

But not all unwanted behavior follows known attack patterns. Unwanted behaviors can also include normal activity inside a cloud environment that is different from the intended behavior of a particular workload. Each activity or log entry by itself might not look malicious, but a series of events can reveal possible malicious intent when compared to the individual context of the application. Because there are no bad events as such in CloudTrail like in a firewall or antivirus log, the challenge is to detect threats based on noncompliant behaviors in the context of the application use case and not on known threat vectors.

Anomaly detection is playing an increasingly important role in defense strategies because of the constantly evolving attack and obfuscation techniques that make it hard to detect threats based on known tactics, techniques, and procedures.

What does unwanted behavior look like?

One approach to identifying key events that are related to unwanted behaviors is to identify a set of anomaly-related questions around common cloud activities that consider the workload context. Depending on the workload type, unwanted cloud API events and related questions could look like the following:

Event: An EC2 instance was launched. 
Question: Was an unexpected user or role used or was the EC2 instance launched outside the pipeline?

Event: A user or role performs many API list and describe events within a short timeframe. 
Questions: Does the application normally generate list and describe API calls in production? If not, this could be reconnaissance activity performed by an intruder.

Event: A user or role creates and shares an Amazon Elastic Block Store (Amazon EBS) snapshot with another account. 
Question: Is the snapshot sharing event expected? If not, it could be an attempt to exfiltrate data.

Event: Many failed API calls are detected in CloudTrail. 
Question: Are these failed calls around sensitive services or information? If yes, an unauthorized user could be exploring the environment.

Event: Many ListBucket events are detected for a sensitive Amazon Simple Storage Service (Amazon S3) bucket. 
Question: Are these events unexpected and performed by an unexpected identity? If yes, an unauthorized user performing an S3 bucket enumeration might indicate a reconnaissance activity.

After a set of questions has been identified, they can be converted into application specific threat detection use cases, which can be applied to sensitive production environments. This is a useful strategy because these environments typically have a predictable usage pattern. The predictable patterns reduce the chance of false positives, making it worth the effort of developing use cases for monitoring anomalies. Threat detection use cases can be identified within CloudTrail logs using security information and event management (SIEM) tools or Amazon CloudWatch rules.

Detecting anomalies in CloudTrail with CloudWatch

Activities within your AWS account can be recorded with CloudTrail, which makes it the ideal service not only for deeper investigations into past cloud activities but also to detect unwanted behaviors in near real time. CloudTrail sends logs to an S3 bucket and can forward events to CloudWatch. Using CloudWatch, you can perform searches across all CloudTrail events and define CloudWatch alarms for automatic notifications.

You can create alerts for individual CloudTrail events that you consider an anomaly by creating CloudWatch filters and alarms. A filter defines the events that you want to monitor and an alarm defines the threshold when you want to be notified.

To create a filter for the preceding S3 bucket enumeration example, you would select the CloudTrail log group, and then select Metric Filters and create a new metric filter, as shown in Figure 2.
 

Figure 2: Create CloudWatch metric filter

Figure 2: Create CloudWatch metric filter

Excluding the userAgent AWS Internal excludes S3 access activities performed by other AWS services such as AWS Access Analyzer or Amazon Macie which can be considered normal behavior.

Save this metric filter in a new name space that you use for all of your anomaly detection monitoring. After you have created the filter, create a new CloudWatch alarm based on your filter. Depending on your filter and alarm thresholds, you will receive CloudWatch alarm notifications through a Amazon Simple Notification Service (Amazon SNS) topic and have the opportunity to automatically launch other actions that can perform incident response activities.

After an alert is raised, you can use the same filter pattern to search for the relevant events in CloudWatch. The CloudTrail events will provide more information about who performed the S3 ListBucket events such as IP address (sourceIPAddress), who performed the action (userIdentity), or if the action was performed through the AWS Management Console or AWS Command Line Interface (AWS CLI) (userAgent = aws-internal or aws-cli).   Figure 3 that follows is an example of a CloudTrail log.
 

Figure 3: CloudTrail example log

Figure 3: CloudTrail example log

Detecting anomalies using traps

Another simple, but effective technique to detect intruders based on unwanted behaviors is to use decoy services such as canaries or honey pots. Honey pots are designed to provide information about the behavior of attackers by providing them fake production environments that they can explore—such as hosts within a subnet or data stores such as databases or storage services with dummy data. Canaries are identities or access tokens within honey pot environments that look like privileged identities. Honey pots and canaries both appear attractive to attackers due to the names that are used for users, databases, or host names, but don’t expose the organization to risk if compromised.

Using CloudWatch alarms, you can monitor CloudTrail for events that indicate that attackers have started to explore the honey pot or tried to laterally move using the canary access token. By acting like an attacker yourself, you can generate test events within CloudTrail that will help you to identify the event details—such as event sources, event names, and parameters—that you want to monitor. Here are some examples of CloudTrail events you can monitor for different kinds of traps.

Trap Event source Event name Example instance or user name
Login attempt using a canary identity signin.amazonaws.com ConsoleLogin Backup_Admin
Assume role attempt using a canary role sts.amazonaws.com AssumeRole DevOps_role
Exploration of a honey pot database dynamodb.amazonaws.com ListTable CustomerAccounts
Exploration of a honey pot storage service s3.amazonaws.com GetObject PasswordBackup

Traps are typically deployed in production environments where access and use patterns are predictable and strictly controlled.  They’re a cost effective and easy to implement solution that can provide alarms with a high degree of certainty. Traps also offer a good chance to catch even the most sophisticated threat actors; especially when they use highly automated attacks.

Detecting statistical anomalies

AWS CloudTrail Insights is a feature of CloudTrail that can be used to identify unusual operational activity in your AWS accounts such as spikes in resource provisioning, bursts of AWS Identity and Access Management (IAM) activity, or gaps in periodic maintenance activity.

CloudTrail Insights can provide primary indicators for noncompliant behaviors by establishing a baseline for normal behavior and then generating Insights events when it detects unusual patterns. Primary indicators are events that initiate an investigation.

But even when statistical changes haven’t reached alert thresholds and no issue is raised, statistical insights can be used as a supporting secondary indicator during investigations to better understand the context of an incident. Even minor changes of specific API calls around sensitive data can provide valuable information after an alert from another solution such as GuardDuty, or when the previously described anomaly detection techniques have been raised.

Figure 4 that follows is an example of an Insights chart showing API calls over time.
 

Figure 4: CloudTrail Insights example chart

Figure 4: CloudTrail Insights example chart

Conclusion

In this post I described the importance of monitoring sensitive workloads for noncompliant or unwanted behaviors to complement existing security solutions. Anomaly detection in the cloud monitors cloud service activities on the control plane and checks to see if the behavior is expected in the context of each workload. The effort to set up and support the tools described in this blog post leads to an affordable, practical, and powerful mechanism for the detection of sophisticated threat actors in the cloud. To learn more about how you can analyze API activities in the cloud, see Analyzing AWS CloudTrail in Amazon CloudWatch in the AWS Management & Governance Blog.

If you have feedback about this post, submit comments in the Comments section below. If you have questions about this post, start a new thread on the Amazon ADD FORUM NAME AND LINK or contact AWS Support.

Want more AWS Security how-to content, news, and feature announcements? Follow us on Twitter.

Author

Volker Rath

Volker is a security, risk, and compliance (SRC) principal within AWS Professional Services. During his 20 years of experience in IT security, he developed many solutions that helped organizations improve their security management capabilities. He currently focuses on cloud native threat management strategies as well as SRC strategies for enterprise cloud platforms in the FSI industry. Adventure motorbike travels and basketball are his preferred hobbies in the analog world.

AWS attained MTCS Level 3 certification under the new SS584:2020 standard

Post Syndicated from Clara Lim original https://aws.amazon.com/blogs/security/aws-attained-mtcs-level-3-certification-under-the-new-ss5842020-standard/

We’re excited to announce the completion of the Multi-Tier Cloud Security (MTCS) Level 3 certification under the new SS584:2020 standard in November 2021 for three Amazon Web Services (AWS) Regions: Singapore, Korea, and United States, excluding AWS GovCloud (US) Regions. The new standard, released in October 2020, includes more stringent controls for greater assurance as compared to the prior version SS584:2015, and a new CSP Self-Disclosure Form to provide to cloud service customers (CSC) for transparency. With the MTCS Level 3 certification, customers can be assured AWS security processes meet the stringent security controls set forth by the new MTCS SS 584:2020 standard for hosting their sensitive workloads.

AWS was the first cloud service provider (CSP) to attain the MTCS Level 3 certification for Singapore, in 2014, and is now one of the first few CSPs certified under the new SS584:2020 Level 3 standard. The services in scope have increased from 130 to 145, about a 10% increase since the last audit (September 2020).

The following services are newly added as in scope:

  1. Amazon Augmented AI (Amazon A2I)
  2. Amazon CloudWatch SDK Metrics for Enterprise Support
  3. Amazon Detective
  4. Amazon Finspace
  5. Amazon Kendra
  6. Amazon Keyspaces (for Apache Cassandra)
  7. Amazon Timestream
  8. AWS App Mesh
  9. AWS Audit Manager
  10. AWS Cloud Map
  11. AWS Device Farm
  12. AWS Glue DataBrew
  13. AWS Ground Station
  14. AWS Personal Health Dashboard

MTCS was the world’s first cloud security standard to specify a management system for cloud security that covers multiple tiers, and it can be applied by CSPs to meet differing cloud user needs for data sensitivity and business criticality. An intent of MTCS is for certified CSPs to be able to better specify the levels of security they can offer their users. AWS achieved this through third-party certification and fulfillment of the self-disclosure requirement for CSPs that covers service-oriented information normally captured in service level agreements. The MTCS framework establishes that the different levels of security help local businesses to pick the right CSP, and use of MTCS is mandated by the Singapore government as a requirement for public sector agencies and regulated organizations.

MTCS has three levels of security, Level 1 being the base and Level 3 the most stringent:

  • Level 1 was designed for non–business critical data and systems with basic security controls, to counter certain risks and threats targeting low-impact information systems (for example, a website that hosts public information).
  • Level 2 addresses the needs of organizations that run their business-critical data and systems in public or third-party cloud systems (for example, confidential business data and email).
  • Level 3 was designed for regulated organizations with specific and more stringent security requirements. Industry-specific regulations can be applied in addition to the baseline controls, to help supplement and address security risks and threats in high-impact information systems (for example, highly confidential business data, financial records, and medical records).

Benefits of MTCS Level 3 certification

AWS’s certification enables Singapore customers in regulated industries with the strictest security requirements to securely host applications and systems with highly sensitive information, ranging from confidential business data to financial and medical records, in a level-3-compliant MTCS environment. With the scope extended beyond Singapore to AWS Regions in Korea and the United States, it provides an alternative for Singapore government agencies to leverage AWS services which haven’t yet launched locally, and also provides resiliency and recovery use cases.

Financial Services Industry (FSI) customers in Korea are able to accelerate cloud adoption with MTCS controls that cover relevant regulations (the Financial Security Institute’s Guideline on Use of Cloud Computing Services in the Financial Industry, and the Regulation on Supervision on Electronic Financial Transactions (RSEFT)).

With increasing cloud adoption across different industries, MTCS certification has the potential to provide assurance to customers globally. Please reach out to your AWS representative if you have any services or Regions you would like to see in scope for the next MTCS audit.

You can now download the latest MTCS certificates and the MTCS Self-Disclosure Form in AWS Artifact.

If you have feedback about this post, submit comments in the Comments section below.

Want more AWS Security how-to content, news, and feature announcements? Follow us on Twitter.

Author

Clara Lim

Clara is the APJ-Lead Strategist supporting the compliance programs for the Asia Pacific Region, leading multiple security certification programs. Clara is passionate about leveraging her decade-long experience to deliver compliance programs that provide assurance and build trust with customers.

AWS Shield Advanced Update – Automatic Application Layer DDoS Mitigation

Post Syndicated from Channy Yun original https://aws.amazon.com/blogs/aws/aws-shield-advanced-update-automatic-application-layer-ddos-mitigation/

In 2016, we launched AWS Shield, a managed Distributed Denial of Service (DDoS) protection service that safeguards applications running on AWS. AWS Shield provides always-on detection and automatic inline mitigations that minimize application downtime and latency without needing to contact AWS Support.

There are two tiers of AWS Shield: Standard and Advanced. All AWS customers benefit from the automatic network layer protections of AWS Shield Standard and at no cost. AWS Shield Standard defends against the most common, frequently occurring network and transport layer (Layer 3 and 4) DDoS attacks to maximize the availability of AWS services.

For customized protection against sophisticated (Layer 3 to 7) threats targeting your applications, you can subscribe to AWS Shield Advanced. AWS Shield Advanced provides more sensitive detection and tailored mitigations against large and complex DDoS attacks, near real-time visibility into attacks, and integration with AWS WAF, a web application firewall for defense against Layer 7 attacks. AWS Shield Advanced also gives you 24-7 access to the AWS Shield Response Team (SRT) and cost protection against scaling costs stemming from DDoS attacks.

AWS Shield Advanced establishes a traffic baseline for each protected resource. Significant deviations from this baseline are flagged as DDoS events and trigger alerts through Amazon CloudWatch. However, mitigating these events still requires manually crafting an AWS WAF rule that isolates the malicious traffic, deploying it through the AWS WAF console or API, and evaluating the rule’s effectiveness. AWS Shield Advanced customers can utilize the SRT to create such AWS WAF rules or rely on their own expertise, but the process is time-consuming, which increases the time it takes to mitigate a DDoS attack and prevent availability impact to applications.

Today, we are announcing Automatic Application Layer DDoS Mitigation for AWS Shield Advanced. This is a new set of capabilities included for all Shield Advanced customers that automatically mitigate malicious web traffic that threatens to impact application availability. This feature automatically creates, tests, and deploys AWS WAF rules to mitigate layer 7 DDoS events on behalf of customers.

Enabling Automatic Application Layer DDoS Mitigation
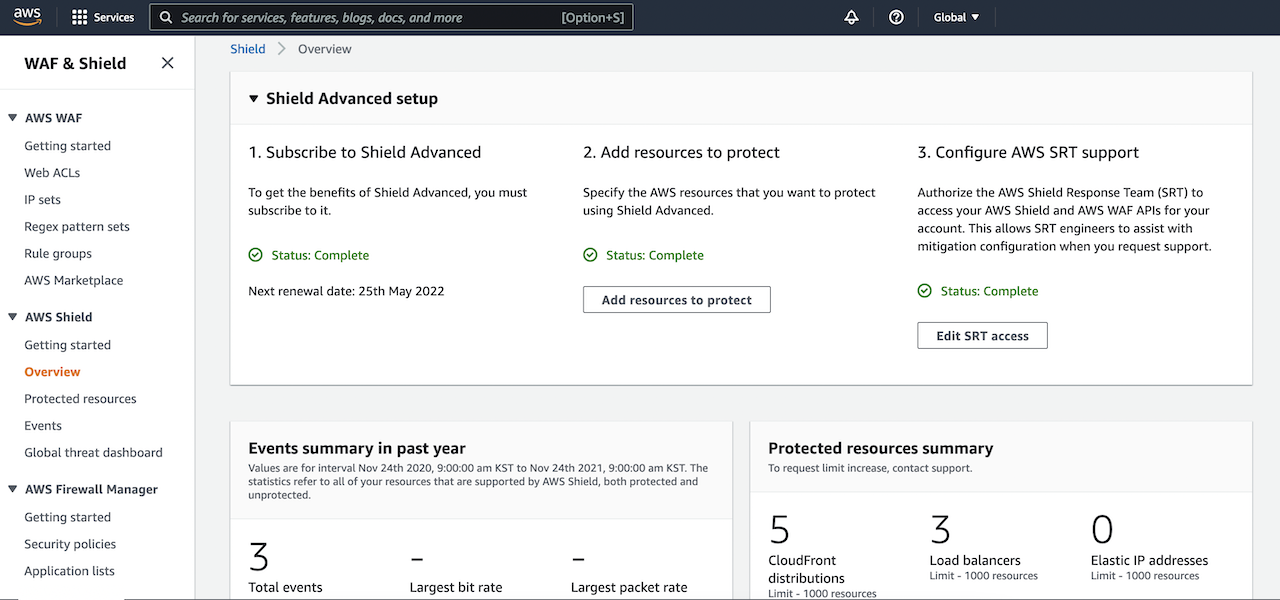
Visit the AWS Shield console to get started with automatic application layer DDoS mitigation. To get the benefits of Shield Advanced, you must subscribe to an annual subscription.

After you subscribe to AWS Shield Advanced, you specify the resources that you want to protect, configure a layer 7 DDoS mitigation, AWS SRT supports, and a dashboard in CloudWatch to monitor DDoS events. To learn more, see Getting started with AWS Shield Advanced in the AWS documentation.

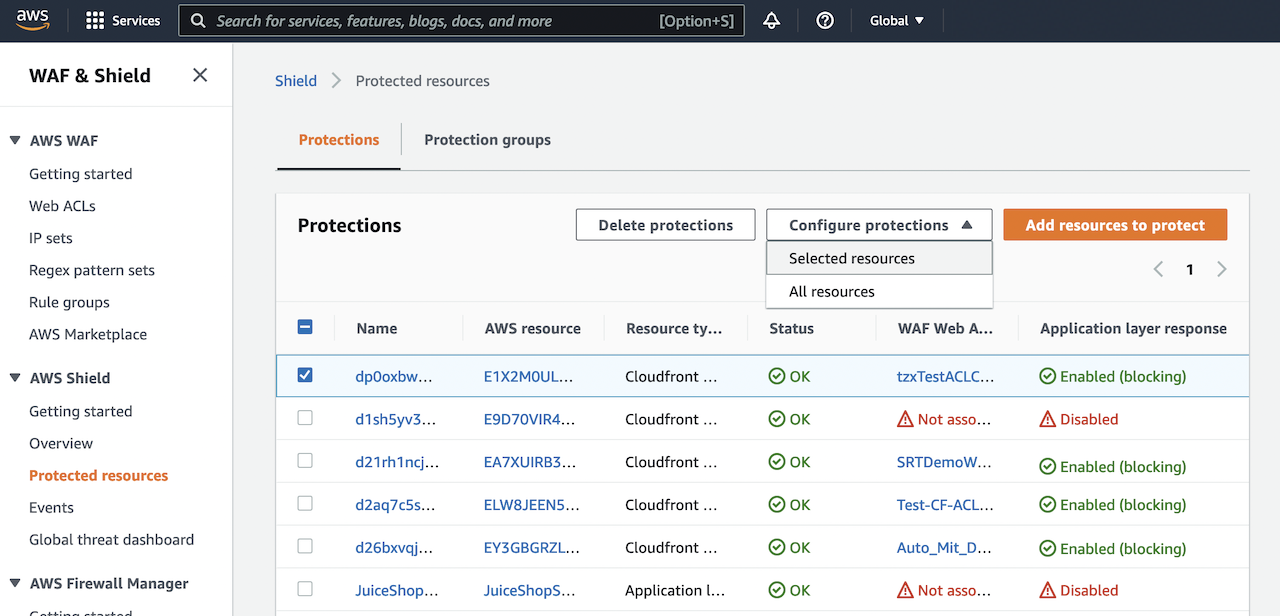
To enable Shield Advanced automatic application layer DDoS mitigation, select your layer 7 AWS resources (e.g. CloudFront), and choose Configure protections from the drop down list.

Next, in Edit protection, choose if you would like to enable automatic mitigation of layer 7 events and select if whether WAF rules should be created in Count or Block mode in Automatic response. Placing WAF rules in Count mode allows you to observe how resource traffic would be affected before deploying them in Block mode. Please note that a WebACL must be associated with a Shield protected resource in order to enable automatic layer 7 mitigation.

Mitigation actions can be changed to count or block mode at any time. Navigate to the Events tab of the console to view detected DDoS events, and select a detected event to see detection, mitigation, and top contributor metrics.

How to Mitigate Application Layer DDoS Automatically
When you want to protect layer 7 resources, such as CloudFront distributions, AWS Shield Advanced will establish a 30-day traffic baseline into each protected resource.

When automatic mitigation is enabled, only then will we create a Shield managed rule group in which AWS Shield Advanced will create AWS WAF rules in response to DDoS events.

Traffic that significantly deviates from the established baseline will be flagged as a potential DDoS event. After an event is detected, Shield Advanced will attempt to identify a signature based on offending request patterns. If a signature is identified, WAF rules will be created to mitigate traffic with that signature.

Once rules are confirmed to be safe, they will be added to the Shield-managed rule group, and customers can choose whether the rules are deployed in count or block mode. Customers can also create CloudWatch alerts based on when requests are being blocked or counted.

Customers can change the action that automatic mitigation takes (count or block) or disable it entirely at any time. Shield Advanced will automatically remove AWS WAF rules after it has determined that an event has fully subsided. To learn more, see Shield Advanced automatic application layer DDoS mitigation in the AWS Shield Developer Guide.

Available Now
Automatic Application Layer DDoS Mitigation is now available in all AWS regions where AWS Shield Advanced is available, and it can be enabled at no additional cost.

You can send feedback to the AWS forum for AWS Shield or through your usual AWS Support contacts.

— Channy

New for AWS Control Tower – Region Deny and Guardrails to Help You Meet Data Residency Requirements

Post Syndicated from Danilo Poccia original https://aws.amazon.com/blogs/aws/new-for-aws-control-tower-region-deny-and-guardrails-to-help-you-meet-data-residency-requirements/

Many customers, such as those in highly regulated industries and the public sector, want to have control over where their data is stored and processed. AWS already offers many tools and features to comply with local laws and regulations, but we want to provide a simplified way to translate data residency requirements into controls that can be applied to single- and multi-account environments.

Starting today, you can use AWS Control Tower to deploy data residency preventive and detective controls, referred to as guardrails. These guardrails will prevent provisioning resources in unwanted AWS Regions by restricting access to AWS APIs through service control policies (SCPs) built and managed by AWS Control Tower. In this way, content cannot be created or transferred outside of your selected Regions at the infrastructure level. In this context, content can be software (including machine images), data, text, audio, video, or images hosted on AWS for processing or storage. For example, AWS customers in Germany can deny access to AWS services in Regions outside of Frankfurt with the exception of global services such as AWS Identity and Access Management (IAM) and AWS Organizations.

AWS Control Tower also offers guardrails to further control data residency in underlying AWS service options, for example, blocking Amazon Simple Storage Service (Amazon S3) cross-region replication or blocking the creation of internet gateways.

The AWS account used for managing AWS Control Tower is not restricted by the new Region deny settings. That account can be used for remediation if you have data in an unwanted Region before enabling Region deny.

Detective guardrails are implemented via AWS Config rules and can further detect unexpected configuration changes that should not be allowed.

You still retain a shared responsibility model for data residency at the application level, but these controls can help you restrict what infrastructure and application teams can do on AWS.

Using Data Residency Guardrails in AWS Control Tower
To use the new data residency guardrails, you need to have created a landing zone using AWS Control Tower. See Plan your AWS Control Tower landing zone for more information.

To see all the new controls that are available, I select Guardrails on the left pane of the AWS Control Tower console and then find those in the Data Residency category. I sort results by Behavior. Guardrails that have a Prevention behavior are implemented as SCPs. Those that have a Detection behavior are implemented as AWS Config rules.

Console screenshot.

The most interesting guardrail is probably the one denying access to AWS based on the requested AWS Region. I choose it from the list and find that it is different from the other guardrails because it affects all Organizational Units (OUs) and cannot be activated here but must be activated in the landing zone settings.

Console screenshot.

Below the Overview, in the Guardrail components, there is a link to the full SCP for this guardrail, and I can see the list of the AWS APIs that, when this setting is enabled, are still going to be allowed towards non-governed Regions. Depending on your requirements, some of those services, such as Amazon CloudFront or AWS Global Accelerator, can be further limited by a custom SCP.

In the Landing zone settings, the Region deny guardrail is currently not enabled. I choose Modify settings and then enable the Region deny settings.

Console screenshot.

Below the Region deny settings, there is the list of AWS Regions governed by the landing zone. Those will be the regions allowed when I enable Region deny.

Console screenshot.

In my case, I have four governed Regions, two in the US and two in Europe:

  • US East (N. Virginia), which is also the home Region for the landing zone
  • US West (Oregon)
  • Europe (Ireland)
  • Europe (Frankfurt)

I choose Update landing zone at the bottom. The update of the landing zone takes a few minutes to complete. Now, the vast majority of the AWS APIs are blocked if they are not directed to one of those governed Regions. Let’s do a few tests.

Testing Region Deny in a Sandbox Account
Using AWS Single Sign-On, I copy the AWS credentials to use the sandbox account with AWSAdministratorAccess permissions. In a terminal, I paste the commands setting the environment variables to use those credentials.

Console screenshot.

Now, I try to start a new Amazon Elastic Compute Cloud (Amazon EC2) instance in US East (Ohio), one of the non-governed Regions. In a landing zone, the default VPC is replaced by a VPC managed by AWS Control Tower. To start the instance, I need to specify a VPC subnet. Let’s find a subnet ID that I can use.

aws ec2 describe-subnets --query 'Subnets[0].SubnetId' --region us-east-2

An error occurred (UnauthorizedOperation) when calling the DescribeSubnets operation:
You are not authorized to perform this operation.

As expected, I am not authorized to perform this operation in US East (Ohio). Let’s try to start an EC2 instance without passing the subnet ID.

aws ec2 run-instances --image-id ami-0dd0ccab7e2801812 --region us-east-2 \
    --instance-type t3.small                                     

An error occurred (UnauthorizedOperation) when calling the RunInstances operation:
You are not authorized to perform this operation.
Encoded authorization failure message: <ENCODED MESSAGE>

Again, I am not authorized. More information is included in the encoded authorization failure message that I can decode as described in this article:

aws sts decode-authorization-message --encoded-message <ENCODED MESSAGE>

The decoded message (that I have omitted for brevity) tells me that there was an explicit deny to my request and includes the full SCP that caused the deny. This information is really useful for debugging these kind of errors.

Now, let’s try in US East (N. Virginia), one of the four governed regions.

aws ec2 describe-subnets --query 'Subnets[0].SubnetId' --region us-east-1
"subnet-0f3580c0c5e56c210"

This time, the command returns the subnet ID of the first subnet returned by the request. Let’s start an instance in US East (N. Virginia) using this subnet.

aws ec2 run-instances --image-id  ami-04ad2567c9e3d7893 --region us-east-1 \
    --instance-type t3.small --subnet-id subnet-0f3580c0c5e56c210

As expected, it works, and I can see the EC2 instance running in the console.

Console screenshot.

Similarly, APIs for other AWS services are limited by the Region deny settings. For example, I can’t create an S3 bucket in a non-governed Region.

Console screenshot.

When I try to create the bucket, I get an access denied error.

Console screenshot.

As expected, the creation of an S3 bucket works in a governed Region.

Even if someone gives this account access to a bucket in a non-governed Region, I would not be able to copy any data into that bucket.

Other preventive guardrails can enforce data residency, for example:

  • Disallow cross-region networking for Amazon EC2, Amazon CloudFront, and AWS Global Accelerator
  • Disallow internet access for an Amazon VPC instance managed by a customer
  • Disallow Amazon Virtual Private Network (VPN) connections

Now, let’s see how detective guardrails work.

Testing Detective Guardrails in a Sandbox Account
I enable the following guardrails for all accounts in the sandbox OU:

  • Detect whether Amazon EBS snapshots are restorable by all AWS accounts
  • Detect whether public routes exist in the route table for an internet gateway

Now, I want to see what happens if I go against these guardrails. In the EC2 console, I create an EBS snapshot for the volume of the EC2 instance I started before. Then, I modify permissions to share it with all AWS accounts.

Console screenshot.

Then, in the VPC console, I create an internet gateway, attach it to the AWS Control Tower managed VPC, and update the route table of one of the private subnets to use the internet gateway.

Console screenshot.

After a few minutes, the noncompliant resources in the sandbox account are found by the detective guardrails.

Console screenshot.

I look at the information provided by the guardrails and update my configuration to fix the issues. In a multi-account setup I’d contact the account owner and ask for remediation.

Availability and Pricing
You can use data-residency guardrails to control resources in any AWS Region. To create a landing zone, you should start from one of the Regions where AWS Control Tower is offered. For more information, see the AWS Regional Services List. There is no additional cost for this feature. You pay the costs of other services used, such as AWS Config.

This feature provides you with a framework of controls and guidance for setting up a multi-account environment that addresses data residency requirements. Depending on your use case, you may use any subset of the new data residency guardrails.

Set up guardrails based on your data residency requirements with AWS Control Tower.

— Danilo

AWS Security Profiles: Jenny Brinkley, Director, AWS Security

Post Syndicated from Maddie Bacon original https://aws.amazon.com/blogs/security/aws-security-profiles-jenny-brinkley-director-aws-security/

AWS Security Profiles: Jenny Brinkley, Director, AWS Security
In the week leading up to AWS re:Invent 2021, we’ll share conversations we’ve had with people at AWS who will be presenting, and get a sneak peek at their work.


How long have you been at AWS, and what do you do in your current role?

I’ve been at AWS for 5½ years. I get to focus on the future of security and compliance. It gives me a lot of space to experiment and try new things, which is how I like to operate.

How did you get started in AWS Security?

I joined AWS through a startup acquisition, and I actually didn’t think I was going to go with the acquisition. I thought AWS would be way too big and move way too slow. I love being in environments where I get to move fast and be entrepreneurial. I started on the product side. I was able to learn what it takes to build and ship products at the scale of AWS – which is on another level and mind-blowing.

Then, like others at AWS, I was able to reinvent myself, find different passions, and experiment with new things. One of those areas for me was compliance. I started to get perspective on how that space was being defined by regulatory activity for the cloud, and it started opening my mind in different ways.

I started thinking, how do you make compliance easier for customers? How do you work with regulated entities to understand how to audit, and to understand the function of how the cloud operates? From there, my career has been about changing how to think about product, about how to make security easier. Layering in this compliance aspect, too, means I get to play in all these different worlds, work with internal and external customers, and work to simplify security, while also understanding where and how compliance fits in, without slowing down innovation.

How do you explain your job to non-tech friends?

I explain my work as removing the fear around security. You go see images of people in hoodies, with darkened faces, and binary code running behind them, and my job is to break that perception and walk in the light – yes, that’s my nod to Olivia Pope in Scandal. I love the idea of that gladiator mentality. You’re going in and solving the big problems, but you’re also creating more visibility and transparency around how security operates. And you’re doing this without making anyone afraid that they’re being watched or monitored, and without holding back innovation. My job is to provide that transparency and clarity, and give people prescriptive guidance on how to operate securely on AWS.

What are you currently working on that you’re excited about?

So much! That’s what I really love about my job – I get to play in a lot of spaces, and the context switching is something that really fuels me. One of the top projects I’m working on is something we just released in response to an ask from the White House, which I feel really privileged to work on. We released a new Cybersecurity Awareness training which is now available to everyone in the world. You can access this training right now, and you can share it with your grandparents or implement it in your corporation or small business. We were able to take a training product we built for all Amazon employees–and then externalize it. The size and the scope is something I’m really excited about. Making security easier for everybody is a big mission for us.

Another big area is up-skilling. You hear a lot about security jobs being the future, so we’re building everything from apprenticeships to new learning paths for anyone interested in security. We’re thinking about how we can build quick learning modules for people to listen to on the go. That’s something I get really excited about in this job – creating opportunities for people to understand that security jobs and opportunities are vast. If you’re curious and want to learn new things, AWS is endless.

You’re presenting at re:Invent this year – can you give readers a sneak peek at what you’re covering?

I am partnering with Eric Brandwine, AWS VP/Distinguished Engineer for a session called Introverts and extroverts collide: Build an inclusive workforce (SEC204). Eric and I are night and day in terms of how we work. In our talk we’ll touch on some of the challenges we had when we first started working together, but how we found value in our different approaches.

We’ll be discussing how he solves problems with technology and how I solve problems regarding people, and thinking about how that empathetic layer resonates between the two perspectives. Not every problem needs technology, and not every problem needs a people-focused solution. But, humans are behind any of those aspects of impact.

We’ll give prescriptive guidance to customers on how they should think about their security culture as it relates to people and as it relates to technology. We’ll talk about how those two worlds can blend together in a way that empowers an entire organization to prioritize security, and that they shouldn’t be afraid of it. We want to help bridge the gaps between the technologists and the empathetic individuals who think about how the technology lands in use cases across a business.

From your perspective, what’s the most important thing leaders can do to create an inclusive work environment?

Listening. Sitting back, getting the feedback, being vulnerable, asking the questions. So much of what we need to do now is practice that listening skill, really understand the motivations of our teams, and then try to create these safe working environments where people feel comfortable sharing their perspectives. It’s not that you’re going to act on everything everyone’s talking about, but at least you get diverse perspectives and points of view to help create an inclusive work environment that makes everyone want to show up, support each other, and do the best work possible.

What’s your favorite Leadership Principle at Amazon and why?

I have two. One is Learn and Be Curious because that is how I like to operate. I think, “what if…” or “why can’t we…”. Then Think Big pairs with “why can’t we…” The culture within AWS really supports that. On a daily basis, we can flip the script on how we think about our jobs and how we position the business.

If you’re entrepreneurial and like to create, this place is like a magic playground. Some people look at my job and they’re so confused with all the different things I get to do – but it goes back to that context switching. I believe that Learn and Be Curious and Think Big fit in that realm for me–I feel like I can be anything, I can do anything. I also had parents who told me as a kid that I could do anything and be anything, so I think that’s just who I am. Those two leadership principles help me to produce and do my best work.

What’s the thing you’re most proud of in your career?

That’s hard. It’s a couple of things. I’ve had a lot of incredible opportunities. One of which was being involved in a startup. We raised the money quickly, we worked with incredible customers, we solved really challenging business issues. The fact that I was able to bring that here to AWS, in a way that now hundreds of thousands of people get to see the kind of work we’re able to produce, is pretty cool.

But honestly, working with some of our new hires who are just getting into the workforce–especially with our diverse candidates–I’m at a place in my career where I want to create opportunities for others. I’m working to create safe spaces for people to operate and do their best work and really break down barriers for people who might not otherwise get those opportunities. That’s what I’m most excited about for the future, and also the most proud about–giving people opportunities to work in careers they never thought were available to them. I love that, and I get to do it daily.

If you had to pick any other job, what would you want to do?

Sports agent. I think I’d be so good at it. I would love to go work with young athletes, especially with the new NCAA ruling that college athletes can get paid for the use of their likeness. I would love to help them develop really interesting business plans.

If you have feedback about this post, submit comments in the Comments section below.

Want more AWS Security news? Follow us on Twitter.
Jenny Brinkley, Director, AWS Security

Jenny Brinkley

Jenny leads efforts for AWS Security to understand where compliance and security is headed. In her role as a Director, she helps teams understand how to consider security when building their services and deliverables. Prior to joining AWS, Jenny co-founded a security start-up, harvest.ai, that was acquired by AWS in April 2016.

Author

Maddie Bacon

Maddie (she/her) is a technical writer for AWS Security with a passion for creating meaningful content. She previously worked as a security reporter and editor at TechTarget and has a BA in Mathematics. In her spare time, she enjoys reading, traveling, and all things Harry Potter.

Top Announcements of AWS re:Invent 2021

Post Syndicated from AWS News Blog Team original https://aws.amazon.com/blogs/aws/top-announcements-of-aws-reinvent-2021/

Welcome to AWS re:Invent! From Nov. 29-Dec. 3, 2021, we’ll update this page daily with the most noteworthy launches from our biggest event of the year. AWS Chief Evangelist Jeff Barr and our team of AWS developer advocates from around the globe share the news and offer helpful tips for getting started with all the latest AWS releases.

More ways to learn:

(This post was last updated: 12:42 a.m., PST, Nov. 29, 2021.)


Quick category links:
Internet of Things |
Security

Internet of Things

Preview – AWS IoT RoboRunner for Building Robot Fleet Management Applications

AWS IoT RoboRunner is a new robotics service that makes it easier for enterprises to build and deploy applications that help fleets of robots work seamlessly together.

Security

Amazon CodeGuru Reviewer Introduces Secrets Detector to Identify Hardcoded Secrets and Secure Them with AWS Secrets Manager
The new Amazon CodeGuru Reviewer Secrets Detector is an automated tool that helps developers detect secrets in source code or configuration files, such as passwords, API keys, SSH keys, and access tokens.

Back to Top

AWS Security Profiles: Megan O’Neil, Sr. Security Solutions Architect

Post Syndicated from Maddie Bacon original https://aws.amazon.com/blogs/security/aws-security-profiles-megan-oneil-sr-security-solutions-architect/

AWS Security Profiles: Megan O’Neil, Sr. Security Solutions Architect
In the week leading up to AWS re:Invent 2021, we’ll share conversations we’ve had with people at AWS who will be presenting, and get a sneak peek at their work.


How long have you been at Amazon Web Services (AWS), and what do you do in your current role?

I’ve been at AWS nearly 4 years, and in IT security over 15 years. I’m a solutions architect with a specialty in security. I work with commercial customers in North America, helping them solve security problems and build out secure foundations for their AWS workloads.

How did you get started in security?

I took part in a Boeing internship for three summers starting my junior year of high school. This internship gave me the opportunity to work with mechanical engineers at Boeing. The specific team I worked with were engineers responsible for building digital tools and robots for the 767-400 line at the Everett plant in Washington state. The purpose of these custom tools and robots was to help build the planes more efficiently and accurately. I had a lot of fun and learned a lot from my time working with them. I asked the group for career advice during lunch one day, and they all pointed me towards computer science (CS) instead of mechanical engineering. Because of their strong support for CS, I took the first course, Intro to Computer Science, and was excited that something that I previously thought was intimidating was actually approachable and a subject I really enjoyed.

During my sophomore year there was a new elective class offered called Digital Security, which piqued my interest and influenced my senior project. I built (coded) an intrusion detection program that identified nefarious network traffic. I also worked on campus during college in the sound services department and participated in the Dance Ensemble Program, where I met the IT manager for a local hospital in Washington state, Good Samaritan Hospital in Puyallup. He was helping mix music at the studio I worked in. After showing him my senior project, he told me about a job opening for a network security specialist at the hospital. No one else had applied for the role. I then interviewed with the team, which was made up of only three engineers including the manager. They were responsible for the all-backend systems including the hospital information system, patient telemetry and clinic systems, the hospital network, etc. The group of people I worked with at the hospital is still very special to me, we are all still friends.

How do you explain your job to non-tech friends?

I’m in tech, and I help companies protect their websites and their customers’ data.

What are you currently working on that you’re excited about?

I’m very excited about re:Invent. It’s the 10th anniversary, we’re back in person, and I’ve got quite a few sessions I’m delivering.

Speaking of AWS re:Invent 2021 – can you give readers a sneak peek at what you’re covering?

The first is a session I’m delivering is called Use AWS to improve your security posture against ransomware (SEC308) with Merritt Baer, Principal in the Office of the CISO. We’re discussing what AWS services and features you can use to help you protect your systems from ransomware.

The second is a chalk talk, Automating and evidencing key compliance security controls (STP211-R1 and STP211-R2), I’m delivering with Kristin Haught, Principal Security TPM, and we’re discussing strategies for automating, monitoring, and evidencing common controls required for multiple compliance standards.

The third session is a builder session called Grant least privilege temporary access securely at scale (WPS304). We’ll use AWS Secrets Manager, AWS Identity and Access Management (IAM), and the isolated compute functionality provided by AWS Nitro Enclaves to allow system administrators to request and retrieve narrowly scoped and limited-time access.

The fourth session is another builder session called Detecting security threats with Amazon GuardDuty (SEC213-R1 and SEC213-R2). It includes several simulated scenarios, representing just a small sample of the threats that GuardDuty can detect. We will review how to view and analyze GuardDuty findings, how to send alerts based on the findings, and, finally, how to remediate findings.

From your perspective, what’s the most important thing to know about ransomware?

Whenever we see a security event continue to make news, it’s a call to action and an opportunity for customers to analyze their security programs including operations and controls. There’s no silver bullet when it comes to protection from ransomware, but it’s time to level up your security operations and controls. This means minimize human access, translate security policies into code, build mechanism and measure them, streamline the use of environment and infrastructure, and use advanced data/database service features.

For example, we still see customers with large amounts of long-lived credentials; it’s time to take inventory and minimize or eliminate them. While there is a small subset of use cases where they may be required, such as on-premises to AWS access, I recommend the following:

  1. Inventory your long-lived credentials.
  2. Ensure the access is least privilege, absolutely no wildcard actions and/or resources.
  3. If the access is interactive, apply multi-factor authentication (MFA).
  4. Ask if you can architect a better option that doesn’t rely on static access keys.
  5. Rotate access keys on a regular, frequent basis.
  6. Enable alerts on login events.

For more information, check out Ransomware mitigation: Top 5 protections and recovery preparation actions and Ransomware Risk Management on AWS Using the NIST Cyber Security Framework (CSF).

What’s your favorite Leadership Principle at Amazon and why?

Learn and Be Curious! I am the most happy in my job and personal life when I’m learning new things. I also believe that this principle is a way of life for us technology folks. Learning new technology and finding better ways of implementing technology is our job. My favorite quote/laptop sticker is:

“I hate programming”

“I hate programming”

“I hate programming”

“IT WORKS! ”

“I love programming.”

It just makes me laugh because it’s so true. Of course we are only that frustrated when something is very new. It’s like solving a puzzle. When a project comes together, it’s absolutely worth it – the puzzle pieces now fit.

What’s the best career advice you’ve ever gotten?

Work with a mentor. This can be casual by finding projects where you can collaborate with folks who have more experience than you. Or it can be more formal by asking someone to be your mentor and setting up a regular cadence of meetings with them. I’ve done both, a simple example is by collaborating with Merritt and Kristen on upcoming re:Invent presentations, I’ve already learned a lot from both of them just through the preparation process and developing the content. Having a mentor by your side can be especially helpful when setting new goals. Sometimes we need someone to push us out of our comfort zone and believe that we can achieve bigger things than we would have thought and then can help devise a plan to help you achieve those goals. All it takes is someone else believing in us.

If you had to pick any other job, what would you want to do?

I’ve always been interested in naturopathic medicine and getting to the root cause of an issue. It’s somewhat similar to my job in that I’m solving puzzles and complex problems, but in technology, instead of the body.
 

If you have feedback about this post, submit comments in the Comments section below.

Want more AWS Security news? Follow us on Twitter.
Author

Megan O’Neil

Megan is a Senior Specialist Solutions Architect focused on threat detection and incident response. Megan and her team enable AWS customers to implement sophisticated, scalable, and secure solutions that solve their business challenges.

Author

Maddie Bacon

Maddie (she/her) is a technical writer for AWS Security with a passion for creating meaningful content. She previously worked as a security reporter and editor at TechTarget and has a BA in Mathematics. In her spare time, she enjoys reading, traveling, and all things Harry Potter.

How to enable secure seamless single sign-on to Amazon EC2 Windows instances with AWS SSO

Post Syndicated from Todd Rowe original https://aws.amazon.com/blogs/security/how-to-enable-secure-seamless-single-sign-on-to-amazon-ec2-windows-instances-with-aws-sso/

Today, we’re launching new functionality that simplifies the experience to securely access your AWS compute instances running Microsoft Windows. We took on this update to respond to customer feedback around creating a more streamlined experience for administrators and users to more securely access their EC2 Windows instances. The new experience utilizes your existing identity solutions to run and manage your Microsoft Windows workloads on AWS. You can create and administer users in AWS Single Sign-On (AWS SSO) or an AWS SSO supported identity provider (such as Okta, Ping, and OneLogin), and provide a one-click single sign-on to your EC2 Windows instances from the AWS Fleet Manager console. You can also use your existing corporate usernames, passwords, and multi-factor authentication devices to securely access your EC2 windows instances, without having to enter your credentials multiple times.

Using AWS SSO eliminates the use of shared administrator credentials and the need to configure remote access client software. You can centrally grant and revoke access to your EC2 Windows instances at scale across multiple AWS accounts. For example, if you remove an employee from your AWS SSO integrated identity system, their access to all AWS resources (including EC2 Windows instances) is automatically revoked. Individual user actions can now be viewed in the Amazon EC2 Windows instances event log, making it easier to meet audit and compliance requirements.

AWS SSO background

AWS SSO simplifies managing SSO access to AWS accounts and business applications, and it is the central location where you can create or connect your workforce identities in AWS. You can control SSO access and user permissions across all your AWS accounts in AWS Organizations. You can choose to manage access to your AWS accounts, to cloud applications, or both.

When managing access to AWS accounts, AWS SSO enables you to define and assign roles centrally across your AWS Organizations account using permission sets. Permission sets are role definitions (templates) that AWS SSO uses to create and maintain roles in your AWS Organizations accounts. The permission set defines the session duration and policies for the role. When you assign a permission set to a user or group in a selected AWS account, AWS SSO creates a corresponding role in the target account, and AWS SSO controls access to the role through the AWS SSO user portal.

This post uses a permission set that manages access to AWS Fleet Manager to deliver one-click access into EC2 instances.

You will accomplish this in three steps:

  1. Create an AWS SSO permission set (for example, demoFMPermissionSet)
  2. Assign the permission set to an existing AWS SSO group (for example, demoFMGroup)
  3. Login to the AWS SSO User Portal and connect to your EC2 Windows instance via the AWS Fleet Manager console

Prerequisites

The prerequisites for this example are that you have:

  1. Configured AWS SSO in your account with provisioned users and groups
  2. An EC2 Windows instance managed by AWS Systems Manager Fleet Manager

Solution architecture

The following diagram shows the steps you will follow to configure and use an AWS SSO user identity to login to an EC2 Windows instance. 

Figure 1: Architecture diagram showing steps implemented in this solution

Figure 1: Architecture diagram showing steps implemented in this solution

How it works

The AWS SSO permission set creates a role in a target account that gives an authorized user permissions to use AWS Fleet Manager to sign into EC2 Windows instances. When a user chooses the role in the account, the user signs onto the AWS Fleet Manager console and selects the EC2 instance where they want to sign in.

AWS Fleet Manager creates a local Windows user account and a credential for that user, and then automates their sign-in to the instance.

To create an AWS SSO permission set

This procedure creates a permission set that grants assigned users and groups permissions to use AWS Fleet Manager for single sign-on to EC2 instances.

  1. From the AWS SSO console, go to AWS Accounts, select the Permission sets tab, select Create permission set and choose Create a custom permission set.
  2. Name your permission set, and fill out the required fields, making sure to select Create a custom permissions policy at the bottom of the page. See Sample custom permissions policy below for details on the policy.
  3. After creating the custom permissions policy, you can also apply optional tagging. When you are done, review and choose Create to complete creating your custom permission set, as shown in Figure 2.


Figure 2: Reviewing the custom permission set

Figure 2: Reviewing the custom permission set

Sample custom permissions policy

This is the sample policy you’ll use; you can download it here.
Code sample

This permission policy contains a separate statement ID (Sid) for each service, with the required actions for each.

On line 84, notice the reference to an AWSSSO-CreateSSOUser document resource. This document is responsible for creating a local Windows account based on the AWS SSO logged in user, as well as setting/resetting the user’s password for automatic log in to the Windows instance.

On lines 96-98, you will see a new ssm-guiconnect action. This is used to make the secure connection to your EC2 Windows instance, and render the GUI desktop in the Fleet Manager console.

To assign your AWS SSO group

Assign your AWS SSO group to the AWS Fleet Manager permission set in your selected accounts

In this procedure, we will select two AWS accounts in our AWS organization, and grant our AWS SSO group access to the previously-created permission set that enables sign-in via Fleet manager.

  1. From the AWS SSO console, navigate to AWS accounts and select an account (for example, demoAccount1 and demoAccount2), as shown in Figure 3.
  2. Choose the Assign users button. If you wish, you may also assign access to multiple groups or to users individually.
  3.  

    Figure 3: Selecting AWS Account to assign users or groups

    Figure 3: Selecting AWS Account to assign users or groups

  4. To enable multiple AWS SSO users to access this feature, choose an AWS SSO group from the Groups tab and then choose the Next button, as shown in Figure 4
  5.  

    Figure 4: Assigning group to AWS accounts

    Figure 4: Assigning group to AWS accounts

  6. Select the permission set you created previously and choose the Next button.
  7.  

    Figure 5: Selecting permission set to AWS accounts

    Figure 5: Selecting permission set to AWS accounts

  8. Review your choices, and press Submit to submit your assignments, as shown in Figure 6.
  9.  

    Figure 6: Reviewing submit assignments to AWS accounts

    Figure 6: Reviewing submit assignments to AWS accounts

AWS SSO will now use the permission set definition to create a role in each selected account, which grants users access to sign in via Fleet Manager. Users gain access to that role by signing into the AWS SSO user portal.

To access Fleet Managed EC2 instances

  1. From the console, navigate to your AWS SSO user portal URL and login as any AWS SSO user who is a member of the group (e.g., demoFMGroup) you selected in step 3 above.
  2. From the AWS SSO user portal page, choose Management console and navigate to the Fleet Manager console where you have your EC2 Windows managed instance, as shown in Figure 7
  3.  

    Figure 7: Navigating to the Management console from the user portal

    Figure 7: Navigating to the Management console from the user portal

  4. Select a managed Windows instance and select Instance actions and then Connect with Remote Desktop as shown in Figure 8.
  5.  

    Figure 8: Connecting with Remote Desktop

    Figure 8: Connecting with Remote Desktop

  6. Select Single Sign-On and then select Connect, as shown in Figure 9.
  7. This automatically logs you in using your AWS SSO credential. If this is the first time connecting to the instance, a new local user will be created. 

    Figure 9: Selecting Single Sign-On

    Figure 9: Selecting Single Sign-On

    Once connected, you will see your EC2 Windows instance in the All sessions tab, enabling you to have up to four concurrent sessions in a single view, as shown in Figure 10. For a single session view, select the Instance ID tab. 

    Figure 10: Selecting expanded desktop view

    Figure 10: Selecting expanded desktop view

  8. From the single session tab, we can see that AWS Fleet Manager created a local Windows Server user for the AWS SSO user (demoUser1).

After creating the local user, AWS Fleet Manager used the credentials it created to sign into the EC2 Windows server as sso-demoUser1 from the Windows Event Viewer, giving you individual user logging on your EC2 Windows servers. These logs are also available from within the Fleet Manager console. 

Figure 11: Showing AWS SSO username in Amazon EC2 Windows instance event log

Figure 11: Showing AWS SSO username in Amazon EC2 Windows instance event log

Conclusion

This post described how to provide a single sign-in experience to Windows EC2 instances using AWS Fleet Manager with AWS Single Sign-On. Doing this allows you to create users in AWS SSO, or to connect any supported identity provider to AWS SSO, and to give users one-click access to their EC2 instances through AWS Fleet Manager.

This is done by creating an AWS SSO permission set that grants users access to AWS Fleet Manager, then assigning a group from AWS SSO to the permission set in the selected AWS accounts. Users can sign into the AWS SSO user portal, navigate to the AWS Fleet Manager, select their Windows EC2 instance, and land in the Windows user experience without having to enter Windows credentials separately.

To learn more about AWS SSO, visit the AWS Single Sign-On Documentation. To learn more about Fleet Manager, visit the AWS Systems Manager Fleet Manager Documentation.

If you have feedback about this blog post, submit comments in the Comments section below. If you have questions about this post, start a new thread on the AWS Single Sign-On forum.

Want more AWS Security news? Follow us on Twitter.

Author

Todd Rowe

Todd is a Principal Product Manager focused on AWS workforce identity products. He enjoys tackling complex customer problems through intuitive connected solutions. Outside of work, Todd enjoys all water sports, mountain biking, and live music.

2021 PCI 3DS report now available

Post Syndicated from Michael Oyeniya original https://aws.amazon.com/blogs/security/2021-pci-3ds-report-now-available/

We are excited to announce that Amazon Web Services (AWS) has released the latest 2021 PCI 3-D Secure (3DS) attestation to support our customers implementing EMV® 3-D Secure services on AWS. Although AWS doesn’t directly perform the functions of 3DS Server (3DSS), 3DS Directory Server (DS), or 3DS Access Control Server (ACS), AWS customers can host their 3DS environments on AWS, using services such as Amazon Elastic Compute Cloud (Amazon EC2), Amazon Elastic Container Service (Amazon ECS) and Amazon Virtual Private Cloud (Amazon VPC).

The new AWS PCI 3DS attestation of compliance means customers can now attain their own PCI 3DS compliance for services running on AWS. All AWS Regions in scope for PCI DSS are included in the 3DS attestation. AWS was assessed by Coalfire, an independent Qualified Security Assessor (QSA). AWS compliance reports, including this latest PCI 3DS attestation, are available on demand through AWS Artifact. The 3DS package available in AWS Artifact includes the 3DS Attestation of Compliance (AOC) and a Shared Responsibility Guide.

To learn more about our PCI program and other compliance and security programs, please visit AWS Compliance Programs.

We value your feedback and questions—feel free to reach out to our team or give feedback about this post through our Contact Us page.

 
If you have feedback about this post, submit comments in the Comments section below.

Want more AWS Security news? Follow us on Twitter.

Author

Michael Oyeniya

Michael is a Compliance Program Manager at AWS on the Global Audits team, managing the PCI compliance program. He holds a Master’s degree in management and has over 18 years of experience in information technology security risk and control.

AWS Security Profiles: Merritt Baer, Principal in OCISO

Post Syndicated from Maddie Bacon original https://aws.amazon.com/blogs/security/aws-security-profiles-merritt-baer-principal-in-ociso/

AWS Security Profiles: Merritt Baer, Principal in OCISO
In the week leading up AWS re:Invent 2021, we’ll share conversations we’ve had with people at AWS who will be presenting, and get a sneak peek at their work.


How long have you been at Amazon Web Services (AWS), and what do you do in your current role?

I’m a Principal in the Office of the Chief Information Security Officer (OCISO), and I’ve been at AWS about four years. In the past, I’ve worked in all three branches of the U.S. Government, doing security on behalf of the American people.

My current role involves both internal- and external- facing security.

I love having C-level conversations around hard but simple questions about how to prioritize the team’s resources and attention. A lot of my conversations revolve around organizational change, and how to motivate the move to the cloud from a security perspective. Within that, there’s a technical “how”—we might talk about the move to an intelligent multi-account governance structure using AWS Organizations, or the use of appropriate security controls, including remediations like AWS Config Rules and Amazon EventBridge. We might also talk about the ability to do forensics, which in the cloud looks like logging and monitoring with AWS CloudTrail, Amazon CloudWatch, Amazon GuardDuty, and others aggregated in AWS Security Hub.

I also handle strategic initiatives for our security shop, from operational considerations like how we share threat intelligence internally, to the ways we can better streamline our policy and contract vehicles, to the ways that we can incorporate customer feedback into our products and services. The work I do for AWS’ security gives me the empathy and credibility to talk with our customers—after all, we’re a security organization, running on AWS.

What drew you to security?

(Sidebar: it’s a little bit of who I am— I mean, doesn’t everyone rely on polaroid photos? just kidding— kind of :))
 
Merritt Baer polaroid photo

I always wanted to matter.

I was in school post-9/11, and security was an imperative. Meanwhile, I was in Mark Zuckerberg’s undergrad class at Harvard. A lot of the technologies that feel so intimate and foundational—cloud, AI/ML, IoT, and the use of mobile apps, for example—were just gaining traction back then. I loved both emerging tech and security, and I was convinced that they needed to speak to and with one another. I wanted our approach to include considerations around how our systems impact vulnerable people and communities. I became an expert in child pornography law, which continues to be an important area of security definition.

I am someone who wonders what we’re all doing here, and I got into security because I wanted to help change the world. In the words of Poet Laureate Joy Harjo, “There is no world like the one surfacing.”

How do you explain your job to non-tech friends?

I often frame my work relative to what they do, or where we are when we’re chatting. Today, nearly everyone interacts with cloud infrastructure in our everyday lives. If I’m talking to a person who works in finance, I might point to AWS’ role providing IT infrastructure to the global financial system; if we’re walking through a pharmacy I might describe how research and development cycles have accelerated because of high-performance computing (HPC) on AWS.

What are you currently working on that you’re excited about?

Right now, I’m helping customer executives who’ve had a tumultuous (different, not necessarily all bad) couple of years. I help them adjust to a new reality in their employee behavior and access needs, like the move to fully remote work. I listen to their challenges in the ability to democratize security knowledge through their organizations, including embedding security in dev teams. And I help them restructure their consumption of AWS, which has been changing in light of the events of the last two years.

On a strategic level, I have a lot going on … here’s a good sampling: I’ve been championing new work based on customers asking our experts to be more proactive by “snapshotting” metadata about their resources and evaluating that metadata against our well-architected security framework. I work closely with our Trust and Safety team on new projects that both increase automation for high volume issues but also provide more “high touch” and prioritized responses to trusted reporters. I’m also building the business case for security service teams to make their capabilities even more broadly available by extended free tiers and timelines. I’m providing expertise to our private equity folks on a framework for evaluating the maturity of security capabilities of target acquisitions. Finally, I’ve helped lead our efforts to add tighter security controls when AWS teams provide prototyping and co-development work. I live in Miami, Florida, USA, and I also work on building out the local tech ecosystem here!

I’m also working on some of the ways we can address ransomware. During our interview process, Amazon requests that folks do an hour-long presentation on a topic of your choice. I did mine on ransomware in the cloud, and when I came on board I pointed to that area of need for security solutions. Now we have a ransomware working group I help lead, with efforts underway to help out customers doing both education and architectural guidance, as well as curated solutions with industries and partners, including healthcare.

You’re presenting at AWS re:Invent this year—can you give readers a sneak peek at what you’re covering?

One talk is on cloud-native approaches to ransomware defense, encouraging folks to think innovatively as they mature their IT infrastructure. And a second talk highlights partner solutions that can help meet customers where they are, and improve their anti-ransomware posture using vendors—from MSSPs and systems integrators, to endpoint security, DNS filtering, and custom backup solutions.

What are you hoping the audience will take away from the sessions?

These days, security doesn’t just take the form of security services (like GuardDuty and AWS WAF), but will also manifest in the ways you design a cloud-aware architecture. For example, our managed database service Aurora can be cloned; that clone might act as a canary when you see data drift (a canary is security concept for testing your expectations). You can use this to get back to a known good state.

Security is a bottom line proposition. What I mean by that is:

  1. It’s a business criticality to avoid a bad day
  2. Embracing mature security will enable your entity’s development innovation
  3. The security of your products is a meaningful part of what you deliver on to your customers.

From your perspective, what’s the most important thing to know about ransomware?

Ransomware is a big headline-maker right now, but it’s not new. Most ransomware attacks are not based on zero days; they’re knowable but opportunistic. So, without victim-blaming, I mean to equip us with the confidence to confront the security issue. There’s no need to be ransomed.

I try not to get wrapped around particular issues, and instead emphasize building the foundation right. So sure, we can call it ransomware defense, but we can also point to these security maturity measures as best practices in general.

I think it’s fair to say that you’re passionate about women in tech and in security specifically. You recently presented at the Day of Shecurity conference and the Women in Business Summit, and did an Instagram takeover for Women in CyberSecurity (WiCyS). Why do you feel passionately about this?

I see security as an inherently creative field. As security professionals, we’re capable of freeing the business to get stuff done, and to get it done securely. That sounds simple, and it’s hard!

Any time you’re working in a creative field, you rely on human ingenuity and pragmatism to ensure you’re doing it imaginatively instead of simply accepting old realities. When we want to be creative, we need more of the stuff life is made of: human experience. We know that people who move through the world with different identities and experiences think differently. They approach problems differently. They code differently.

So, I think having women in security is important, both for the women who choose to work in security, and for the security field as a whole.

What advice would you give a woman just starting out in the security industry?

No one is born with a brain full of security knowledge. Technology is human-made and imperfect, and we all had to learn it at some point. Start somewhere. No one is going to tap you on the shoulder and invite you to your life 🙂

Operationally, I recommend:

  • Curate your “elevator pitch” about who you are and what you’re looking for, and be explicit when asking for folks for a career conversation or a referral (you can find me on Twitter @MerrittBaer, feel free to send a note).
  • Don’t accept a first job offer—ask for more.
  • Beware of false choices. For example, sometimes there’s a job that’s not in the description—consider writing your own value proposition and pitching it to the organization. This is a field that’s developing all the time, and you may be seeing a need they hadn’t yet solidified.

What’s your favorite Leadership Principle at Amazon and why?

I think Bias for Action takes precedence for me— there’s a business decision here to move fast. We know that comes with some costs and risks, but we’ve made that calculated decision to pursue high velocity.

I have a law degree, and I see the Leadership Principles sort of like the Bill of Rights: they are frequently in tension and sometimes even at odds with one another (for example, Bias for Action and Are Right, A Lot might demand different modes). That is what makes them timeless—yet even more contingent on our interpretation—as we derive value from them. As a security person, I want us to pursue the good, and also to transcend the particular fears of the day.

If you had to pick any other industry, what would you want to do?

Probably public health. I think if I wasn’t doing security, I would want to do something else landscape-level.

Even before I had a daughter, but certainly now that I have a one-year-old, I would calculate the ROI of my life’s existence and my investment in my working life.

That being said, there are days I just need to come home to some unconditional love from my rescue pug, Peanut Butter.
 
Peanut Butter the dog


If you have feedback about this post, submit comments in the Comments section below.

Want more AWS Security news? Follow us on Twitter.

 Merritt Baer

Merritt Baer

Merritt is a Principal in the Office of the CISO. She can be found on Twitter at @merrittbaer and looks forward to meeting you at re:Invent, or in your next executive conversation.

Author

Maddie Bacon

Maddie (she/her) is a technical writer for AWS Security with a passion for creating meaningful content. She previously worked as a security reporter and editor at TechTarget and has a BA in Mathematics. In her spare time, she enjoys reading, traveling, and all things Harry Potter.

How to set up Amazon Cognito for federated authentication using Azure AD

Post Syndicated from Ratan Kumar original https://aws.amazon.com/blogs/security/how-to-set-up-amazon-cognito-for-federated-authentication-using-azure-ad/

In this blog post, I’ll walk you through the steps to integrate Azure AD as a federated identity provider in Amazon Cognito user pool. A user pool is a user directory in Amazon Cognito that provides sign-up and sign-in options for your app users.

Identity management and authentication flow can be challenging when you need to support requirements such as OAuth, social authentication, and login using a Security Assertion Markup Language (SAML) 2.0 based identity provider (IdP) to meet your enterprise identity management requirements. Amazon Cognito provides you a managed, scalable user directory, user sign-up and sign-in, and federation through third-party identity providers. An added benefit for developers is that it provides you a standardized set of tokens (Identity, Access and Refresh Token). So, in situations when you have to support authentication with multiple identity providers (e.g. Social authentication, SAML IdP, etc.), you don’t have to write code for handling different tokens issued by different identity providers. Instead, you can just work with a consistent set of tokens issued by Amazon Cognito user pool.
 

Figure 1: High-level architecture for federated authentication in a web or mobile app

Figure 1: High-level architecture for federated authentication in a web or mobile app

As shown in Figure 1, the high-level application architecture of a serverless app with federated authentication typically involves following steps:

  1. User selects their preferred IdP to authenticate.
  2. User gets re-directed to the federated IdP for login. On successful authentication, the IdP posts back a SAML assertion or token containing user’s identity details to an Amazon Cognito user pool.
  3. Amazon Cognito user pool issues a set of tokens to the application
  4. Application can use the token issued by the Amazon Cognito user pool for authorized access to APIs protected by Amazon API Gateway.

To learn more about the authentication flow with SAML federation, see the blog post Building ADFS Federation for your Web App using Amazon Cognito User Pools.

Step-by-step instructions for enabling Azure AD as federated identity provider in an Amazon Cognito user pool

This post will walk you through the following steps:

  1. Create an Amazon Cognito user pool
  2. Add Amazon Cognito as an enterprise application in Azure AD
  3. Add Azure AD as SAML identity provider (IDP) in Amazon Cognito
  4. Create an app client and use the newly created SAML IDP for Azure AD

Prerequisites

You’ll need to have administrative access to Azure AD, an AWS account and the AWS Command Line Interface (AWS CLI) installed on your machine. Follow the instructions for installing, updating, and uninstalling the AWS CLI version 2; and then to configure your installation, follow the instructions for configuring the AWS CLI. If you don’t want to install AWS CLI, you can also run these commands from AWS CloudShell which provides a browser-based shell to securely manage, explore, and interact with your AWS resources.

Step 1: Create an Amazon Cognito user pool

The procedures in this post use the AWS CLI, but you can also follow the instructions to use the AWS Management Console to create a new user pool.

To create a user pool in the AWS CLI

  1. Use the following command to create a user pool with default settings. Be sure to replace <yourUserPoolName> with the name you want to use for your user pool.
    aws cognito-idp create-user-pool \
    --pool-name <yourUserPoolName>
    

    You should see an output containing number of details about the newly created user pool.

  2. Copy the value of user pool ID, in this example, ap-southeast-2_xx0xXxXXX. You will need this value for the next steps.
    "UserPool": {
            "Id": "ap-southeast-2_xx0xXxXXX",
            "Name": "example-corp-prd-userpool"
           "Policies": { …
    

Add a domain name to user pool

One of the many useful features of Amazon Cognito is hosted UI which provides a configurable web interface for user sign in. Hosted UI is accessible from a domain name that needs to be added to the user pool. There are two options for adding a domain name to a user pool. You can either use an Amazon Cognito domain, or a domain name that you own. This solution uses an Amazon Cognito domain, which will look like the following:

https://<yourDomainPrefix>.auth.<aws-region>.amazoncognito.com

To add a domain name to user pool

  1. Use following CLI command to add an Amazon Cognito domain to the user pool. Replace <yourDomainPrefix> with a unique domain name prefix (for example example-corp-prd). Note that you cannot use keywords aws, amazon, or cognito for domain prefix.
    aws cognito-idp create-user-pool-domain \
    --domain <yourDomainPrefix> \
    --user-pool-id <yourUserPoolID>
    

Prepare information for Azure AD setup

Next, you prepare Identifier (Entity ID) and Reply URL, which are required to add Amazon Cognito as an enterprise application in Azure AD (done in Step 2 below). Azure AD expects these values in a very specific format. In a text editor, note down your values for Identifier (Entity ID) and Reply URL according to the following formats:

  • For Identifier (Entity ID) the format is:
    urn:amazon:cognito:sp:<yourUserPoolID>
    

    For example:

    urn:amazon:cognito:sp:ap-southeast-2_nYYYyyYyYy
    

  • For Reply URL the format is:
    https://<yourDomainPrefix>.auth.<aws-region>.amazoncognito.com/saml2/idpresponse
    

    For example:

    https://example-corp-prd.auth.ap-southeast-2.amazoncognito.com/saml2/idpresponse
    

    Note: The Reply URL is the endpoint where Azure AD will send SAML assertion to Amazon Cognito during the process of user authentication.

Update the placeholders above with your values (without < >), and then note the values of Identifier (Entity ID) and Reply URL in a text editor for future reference.

For more information, see Adding SAML Identity Providers to a User Pool in the Amazon Cognito Developer Guide.

Step 2: Add Amazon Cognito as an enterprise application in Azure AD

In this step, you add an Amazon Cognito user pool as an application in Azure AD, to establish a trust relationship between them.

To add new application in Azure AD

  1. Log in to the Azure Portal.
  2. In the Azure Services section, choose Azure Active Directory.
  3. In the left sidebar, choose Enterprise applications.
  4. Choose New application.
  5. On the Browse Azure AD Gallery page, choose Create your own application.
  6. Under What’s the name of your app?, enter a name for your application and select Integrate any other application you don’t find in the gallery (Non-gallery), as shown in Figure 2. Choose Create.
     
    Figure 2: Add an enterprise app in Azure AD

    Figure 2: Add an enterprise app in Azure AD

It will take few seconds for the application to be created in Azure AD, then you should be redirected to the Overview page for the newly added application.

Note: Occasionally, this step can result in a Not Found error, even though Azure AD has successfully created a new application. If that happens, in Azure AD navigate back to Enterprise applications and search for your application by name.

To set up Single Sign-on using SAML

  1. On the Getting started page, in the Set up single sign on tile, choose Get started, as shown in Figure 3.
     
    Figure 3: Application configuration page in Azure AD

    Figure 3: Application configuration page in Azure AD

  2. On the next screen, select SAML.
  3. In the middle pane under Set up Single Sign-On with SAML, in the Basic SAML Configuration section, choose the edit icon ().
  4. In the right pane under Basic SAML Configuration, replace the default Identifier ID (Entity ID) with the Identifier (Entity ID) you copied previously. In the Reply URL (Assertion Consumer Service URL) field, enter the Reply URL you copied previously, as shown in Figure 4. Choose Save.
     
    Figure 4: Azure AD SAML-based Sign-on setup

    Figure 4: Azure AD SAML-based Sign-on setup

  5. In the middle pane under Set up Single Sign-On with SAML, in the User Attributes & Claims section, choose Edit.
  6. Choose Add a group claim.
  7. On the User Attributes & Claims page, in the right pane under Group Claims, select Groups assigned to the application, leave Source attribute as Group ID, as shown in Figure 5. Choose Save.
     
    Figure 5: Option to select group claims to release to Amazon Cognito

    Figure 5: Option to select group claims to release to Amazon Cognito

    This adds the group claim so that Amazon Cognito can receive the group membership detail of the authenticated user as part of the SAML assertion.

  8. In a text editor, note down the Claim names under Additional claims, as shown in Figure 5. You’ll need these when creating attribute mapping in Amazon Cognito.
  9. Close the User Attributes & Claims screen by choosing the X in the top right corner. You’ll be redirected to the Set up Single Sign-on with SAML page.
  10. Scroll down to the SAML Signing Certificate section, and copy the App Federation Metadata Url by choosing the copy into clipboard icon (highlighted with red arrow in Figure 6). Keep this URL in a text editor, as you’ll need it in the next step.
     
    Figure 6: Copy SAML metadata URL from Azure AD

    Figure 6: Copy SAML metadata URL from Azure AD

Step 3: Add Azure AD as SAML IDP in Amazon Cognito

Next, you need an attribute in the Amazon Cognito user pool where group membership details from Azure AD can be received, and add Azure AD as an identity provider.

To add custom attribute to user pool and add Azure AD as an identity provider

  1. Use the following CLI command to add a custom attribute to the user pool. Replace <yourUserPoolID> and <customAttributeName> with your own values.
    aws cognito-idp add-custom-attributes \
    --user-pool-id <yourUserPoolID> \
    --custom-attributes Name=<customAttributeName>,AttributeDataType="String"
    

    If the command succeeds, you’ll not see any output.

  2. Use the following CLI command to add Azure AD as an identity provider. Be sure to replace the following with your own values:
    • Replace <yourUserPoolID> with Amazon Cognito user pool ID copied previously.
    • Replace <IDProviderName> with a name for your identity provider (for example, Example-Corp-IDP).
    • Replace <MetadataURLCopiedFromAzureAD> with the Metadata URL copied from Azure AD.
    • Replace <customAttributeName> with custom attribute name created previously.
    aws cognito-idp create-identity-provider \
    --user-pool-id <yourUserPoolID> \
    --provider-name=<IDProviderName> \
    --provider-type SAML \
    --provider-details MetadataURL=<MetadataURLCopiedFromAzureAD> \
    --attribute-mapping email=http://schemas.xmlsoap.org/ws/2005/05/identity/claims/emailaddress,<customAttributeName>=http://schemas.microsoft.com/ws/2008/06/identity/claims/groups
    

    Successful running of this command adds Azure AD as a SAML IDP to your Amazon Cognito user pool.

Step 4: Create an app client and use the newly created SAML IDP for Azure AD

Before you can use Amazon Cognito in your web application, you need to register your app with Amazon Cognito as an app client. An app client is an entity within an Amazon Cognito user pool that has permission to call unauthenticated API operations (operations that do not require an authenticated user), for example to register, sign in, and handle forgotten passwords.

To create an app client

  1. Use following command to create an app client. Be sure to replace the following with your own values:
    • Replace <yourUserPoolID> with the Amazon Cognito user pool ID created previously.
    • Replace <yourAppClientName> with a name for your app client.
    • Replace <callbackURL> with the URL of your web application that will receive the authorization code. It must be an HTTPS endpoint, except for in a local development environment where you can use http://localhost:PORT_NUMBER.
    • Use parameter –allowed-o-auth-flows for allowed OAuth flows that you want to enable. In this example, we use code for Authorization code grant.
    • Use parameter –allowed-o-auth-scopes to specify which OAuth scopes (such as phone, email, openid) Amazon Cognito will include in the tokens. In this example, we use openid.
    • Replace <IDProviderName> with the same name you used for ID provider previously.
    aws cognito-idp create-user-pool-client \
    --user-pool-id <yourUserPoolID> \
    --client-name <yourAppClientName> \
    --no-generate-secret \
    --callback-urls <callbackURL> \
    --allowed-o-auth-flows code \
    --allowed-o-auth-scopes openid email\
    --supported-identity-providers <IDProviderName> \
    --allowed-o-auth-flows-user-pool-client
    

Successful running of this command will provide an output in following format. In a text editor, note down the ClientId for referencing in the web application. In this following example, the ClientId is 7xyxyxyxyxyxyxyxyxyxy.

{
    "UserPoolClient": {
        "UserPoolId": "ap-southeast-2_xYYYYYYY",
        "ClientName": "my-client-name",
        "ClientId": "7xyxyxyxyxyxyxyxyxyxy",
        "LastModifiedDate": "2021-05-04T17:33:32.936000+12:00",
        "CreationDate": "2021-05-04T17:33:32.936000+12:00",
        "RefreshTokenValidity": 30,
        "SupportedIdentityProviders": [
            "Azure-AD"
        ],
        "CallbackURLs": [
            "http://localhost:3030"
        ],
        "AllowedOAuthFlows": [
            "code"
        ],
        "AllowedOAuthScopes": [
            "openid", "email"
        ],
        "AllowedOAuthFlowsUserPoolClient": true
    }
}

Test the setup

Next, do a quick test to check if everything is configured properly.

  1. Open the Amazon Cognito console.
  2. Choose Manage User Pools, then choose the user pool you created in Step 1: Create an Amazon Cognito user pool.
  3. In the left sidebar, choose App client settings, then look for the app client you created in Step 4: Create an app client and use the newly created SAML IDP for Azure AD. Scroll to the Hosted UI section and choose Launch Hosted UI, as shown in Figure 7.
     
    Figure 7: App client settings showing link to access Hosted UI

    Figure 7: App client settings showing link to access Hosted UI

  4. On the sign-in page as shown in Figure 8, you should see all the IdPs that you enabled on the app client. Choose the Azure-AD button, which redirects you to the sign-in page hosted on https://login.microsoftonline.com/.
     
    Figure 8: Amazon Cognito hosted UI

    Figure 8: Amazon Cognito hosted UI

  5. Sign in using your corporate ID. If everything is working properly, you should be redirected back to the callback URL after successful authentication.

(Optional) Add authentication to a single page application

One way to add secure authentication using Amazon Cognito into a single page application (SPA) is to use the Auth.federatedSignIn() method of Auth class from AWS Amplify. AWS Amplify provides SDKs to integrate your web or mobile app with a growing list of AWS services, including integration with Amazon Cognito user pool. The federatedSign() method will render the hosted UI that gives users the option to sign in with the identity providers that you enabled on the app client (in Step 4), as shown in Figure 8. One advantage of hosted UI is that you don’t have to write any code for rendering it. Additionally, it will transparently implement the Authorization code grant with PKCE and securely provide your client-side application with the tokens (ID, Access and Refresh) that are required to access the backend APIs.

For a sample web application and instructions to connect it with Amazon Cognito authentication, see the aws-amplify-oidc-federation GitHub repository.

Conclusion

In this blog post, you learned how to integrate an Amazon Cognito user pool with Azure AD as an external SAML identity provider, to allow your users to use their corporate ID to sign in to web or mobile applications.

For more information about this solution, see our video Integrating Amazon Cognito with Azure Active Directory (from timestamp 25:26) on the official AWS twitch channel. In the video, you’ll find an end-to-end demo of how to integrate Amazon Cognito with Azure AD, and then how to use AWS Amplify SDK to add authentication to a simple React app (using the example of a pet store). The video also includes how you can access group membership details from Azure AD for authorization and fine-grained access control.

If you have feedback about this post, submit comments in the Comments section below. If you have questions about this post, start a new thread on the Amazon Cognito forum or contact AWS Support.

Want more AWS Security how-to content, news, and feature announcements? Follow us on Twitter.

Author

Ratan Kumar

Ratan is a solutions architect based out of Auckland, New Zealand. He works with large enterprise customers helping them design and build secure, cost-effective, and reliable internet scale applications using the AWS cloud. He is passionate about technology and likes sharing knowledge through blog posts and twitch sessions.

Author

Vishwanatha Nayak

Vish is a solutions architect at AWS. He engages with customers to create innovative solutions that are secure, reliable, and cost optimised to address business problems and accelerate the adoption of AWS services. He has over 15 years of experience in various software development, consulting, and architecture roles.

Hands-on walkthrough of the AWS Network Firewall flexible rules engine – Part 2

Post Syndicated from Shiva Vaidyanathan original https://aws.amazon.com/blogs/security/hands-on-walkthrough-of-the-aws-network-firewall-flexible-rules-engine-part-2/

This blog post is Part 2 of Hands-on walkthrough of the AWS Network Firewall flexible rules engine – Part 1. To recap, AWS Network Firewall is a managed service that offers a flexible rules engine that gives you the ability to write firewall rules for granular policy enforcement. In Part 1, we shared how to write a rule and how the rule engine processes rules differently depending on whether you are performing stateless or stateful inspection using the action order method.

In this blog, we focus on how stateful rules are evaluated using a recently added feature—the strict rule order method. This feature gives you the ability to set one or more default actions. We demonstrate how you can use this feature to create or update your rule groups and share scenarios where this feature can be useful.

In addition, after reading this post, you’ll be able to deploy an automated serverless solution that retrieves the latest Suricata-specific rules from the community, such as from Proofpoint’s Emerging Threats OPEN ruleset. By deploying such solutions into your Amazon Web Services (AWS) environment, you can seamlessly enhance your overall security posture as the solutions fetch the latest set of intrusion detection system (IDS) rules from Proofpoint (formerly Emerging Threats) and optionally using them as intrusion prevention system (IPS) thereby keeping the rule groups updated on your Network Firewall. You can select the refresh interval to update these rulesets—the default refresh interval is 6 hours. You can also convert the set of rule groups to intrusion prevention system (IPS) mode. Finally, you have granular visibility of the various categories of rules for your Network Firewall on the AWS Management Console.

How does Network Firewall evaluate your stateful rule group?

There are two ways that Network Firewall can evaluate your stateful rule groups: the action ordering method or the strict ordering method. The settings of your rule groups must match the settings of the firewall policy that they belong to.

With the action order evaluation method for stateless inspection, all individual packets in a flow are evaluated against each rule in the policy. The rules are processed in order based on the priority assigned to them with lowest numbered rules evaluated first. For stateful inspection using the action order evaluation method, the rule engine evaluates based on the order of their action setting with pass rules processed first, then drop, then alert. The engine stops processing rules when it finds a match. The firewall also takes into consideration the order that the rules appear in the rule group, and the priority assigned to the rule, if any. Part 1 provides more details on action order evaluation.

If your firewall policy is set up to use strict ordering, Network Firewall now allows you the option to manually set a strict rule group order for stateful rule groups. Using this optional setting, the rule groups are evaluated in order of priority, starting from the lowest numbered rule, and the rules in each rule group are processed in the order in which they’re defined. You can also select which of the default actions—drop all, drop established, alert all, or alert established—Network Firewall will take when following strict rule ordering.

A customer scenario where strict rule order is beneficial

Configuring rule groups by action order is appropriate for IDS use cases, but can be an obstacle for use cases where you deploy firewalls that follow security best practice, which is to allow only what’s required and deny everything else (default deny). You can’t achieve this best practice by using the default action order behavior. However, with strict order functionality, you can create a firewall policy that allows prioritization of stateful rules, or that can run 5-tuple and Suricata rules simultaneously. Strict rule order allows you to have a block of fine-grain rules with specific actions at the beginning followed by a coarse set of rules with specific actions and finally a default drop action. An example is shown in Figure 1 that follows.

Figure 1: An example snippet of a Network Firewall firewall policy with strict rule order

Figure 1: An example snippet of a Network Firewall firewall policy with strict rule order

Figure 1 shows that there are two different default drop actions that you can choose:
drop established and
drop all. If you choose
drop established, Network Firewall drops only the packets that are in established connections. This allows the layer 3 and 4 connection establishment packets that are needed for the upper-layer connections to be established, while dropping the packets for connections that are already established. This allows application-layer
pass rules to be written in a default-deny setup without the need to write additional rules to allow the lower-layer handshaking parts of the underlying protocols.

The drop all action drops all packets. In this scenario, you need additional rules to explicitly allow lower-level handshakes for protocols to succeed. Evaluation order for stateful rule groups provides details of how Network Firewall evaluates the different actions. In order to set the additional environment variables that are shown in the snippet, follow the instructions outlined in Examples of stateful rules for Network Firewall and the Suricata rule variables.

An example walkthrough to set up a Network Firewall policy with a stateful rule group with strict rule order and default drop action

In this section, you’ll start by creating a firewall policy with strict rule order. From there, you’ll build on it by adding a stateful rule group with strict rule order and modifying the priority order of the rules within a stateful rule group.

Step 1: Create a firewall policy with strict rule order

You can configure the default actions on policies using strict rule order, which is a property that can only be set at creation time as described below.

  1. Log in to the console and select the AWS Region where you have Network Firewall.
  2. Select VPC service on the search bar.
  3. On the left pane, under the Network Firewall section, select Firewall policies.
  4. Choose Create Firewall policy. In Describe firewall policy, enter an appropriate name and (optional) description. Choose Next.
  5. In the Add rule groups section.
    1. Select the Stateless default actions:
      1. Under Choose how to treat fragmented packets choose one of the options.
      2. Choose one of the actions for stateless default actions.
    2. Under Stateful rule order and default action
      1. Under Rule order choose Strict.
      2. Under Default actions choose the default actions for strict rule order. You can select one drop action and one or both of the alert actions from the list.
  6. Next, add an optional tag (for example, for Key enter Name, and for Value enter Firewall-Policy-Non-Production). Review and choose Create to create the firewall policy.

Step 2: Create a stateful rule group with strict rule order

  1. Log in to the console and select the AWS Region where you have Network Firewall.
  2. Select VPC service on the search bar.
  3. On the left pane, under the Network Firewall section, select Network Firewall rule groups.
  4. In the center pane, select Create Network Firewall rule group on the top right.
    1. In the rule group type, select Stateful rule group.
    2. Enter a name, description, and capacity.
    3. In the stateful rule group options select either 5-tuple or Suricata compatible IPS rules. These allow rule order to be strict.
    4. In the Stateful rule order, choose Strict.
    5. In the Add rule section, add the stateful rules that you require. Detailed instructions on creating a rule can be found at Creating a stateful rule group.
    6. Finally, Select Create stateful rule group.

Step 3: Add the stateful rule group with strict rule order to a Network Firewall policy

  1. Log in to the console and select the AWS Region where you have Network Firewall.
  2. Select VPC service on the search bar.
  3. On the left pane, under the Network Firewall section, select Firewall policies.
  4. Chose the network firewall policy you created in step 1.
  5. In the center pane, in the Stateful rule groups section, select Add rule group.
  6. Select the stateful rule group you created in step 2. Next, choose Add stateful rule group. This is explained in detail in Updating a firewall policy.

Step 4: Modify the priority of existing rules in a stateful rule group

  1. Log in to the console and select the AWS Region where you have Network Firewall.
  2. Select VPC service on the search bar.
  3. On the left pane, under the Network Firewall section, choose Network Firewall rule groups.
  4. Select the rule group that you want to edit the priority of the rules.
  5. Select the Edit rules tab. Select the rule you want to change the priority of and select the Move up and Move down buttons to reorder the rule. This is shown in Figure 2.


Figure 2: Modify the order of the rules within a stateful rule groups

Figure 2: Modify the order of the rules within a stateful rule groups

Note:

  • Rule order can be set to strict order only when network firewall policies or rule groups are created. The rule order can’t be changed to strict order evaluation on existing objects.
  • You can only associate strict-order rule groups with strict-order policies, and default-order rule groups with default-order policies. If you try to associate an incompatible rule group, you will get a validation exception.
  • Today, creating domain list-type rule groups using strict order isn’t supported. So, you won’t be able to associate domain lists with strict order policies. However, 5-tuple and Suricata compatible rules are supported.

Automated serverless solution to retrieve Suricata rules

To help simplify and maintain your more advanced Network Firewall rules, let’s look at an automated serverless solution. This solution uses an Amazon CloudWatch Events rule that’s run on a schedule. The rule invokes an AWS Lambda function that fetches the latest Suricata rules from Proofpoint’s Emerging Threats OPEN ruleset and extracts them to an Amazon Simple Storage Service (Amazon S3) bucket. Once the files lands in the S3 bucket another Lambda function is invoked that parses the Suricata rules and creates rule groups that are compatible with Network Firewall. This is shown in Figure 3 that follows. This solution was developed as an AWS Serverless Application Model (AWS SAM) package to make it less complicated to deploy. AWS SAM is an open-source framework that you can use to build serverless applications on AWS. The deployment instructions for this solution can be found in this code repository on GitHub. 

Figure 3: Network Firewall Suricata rule ingestion workflow

Figure 3: Network Firewall Suricata rule ingestion workflow

Multiple rule groups are created based on the Suricata IDS categories. This solution enables you to selectively change certain rule groups to IPS mode as required by your use case. It achieves this by modifying the default action from alert to drop in the ruleset. The modified stateful rule group can be associated to the active Network Firewall firewall policy. The quota for rule groups might need to be increased to incorporate all categories from Proofpoint’s Emerging Threats OPEN ruleset to meet your security requirements. An example screenshot of various IPS categories of rule groups created by the solution is shown in Figure 4. Setting up rule groups by categories is the preferred way to define an IPS rule, because the underlying signatures have already been grouped and maintained by Proofpoint.   

Figure 4: Rule groups created by the solution based on Suricata IPS categories

Figure 4: Rule groups created by the solution based on Suricata IPS categories

The solution provides a way to use logs in CloudWatch to troubleshoot the Suricata rulesets that weren’t successfully transformed into Network Firewall rule groups.
The final rulesets and discarded rules are stored in an S3 bucket for further analysis. This is shown in Figure 5. 

Figure 5: Amazon S3 folder structure for storing final applied and discarded rulesets

Figure 5: Amazon S3 folder structure for storing final applied and discarded rulesets

Conclusion

AWS Network Firewall lets you inspect traffic at scale in a variety of use cases. AWS handles the heavy lifting of deploying the resources, patch management, and ensuring performance at scale so that your security teams can focus less on operational burdens and more on strategic initiatives. In this post, we covered a sample Network Firewall configuration with strict rule order and default drop. We showed you how the rule engine evaluates stateful rule groups with strict rule order and default drop. We then provided an automated serverless solution from Proofpoint’s Emerging Threats OPEN ruleset that can aid you in establishing a baseline for your rule groups. We hope this post is helpful and we look forward to hearing about how you use these latest features that are being added to Network Firewall.

Author

Shiva Vaidyanathan

Shiva is a senior cloud infrastructure architect at AWS. He provides technical guidance, and designs and leads implementation projects for customers to ensure their success on AWS. He works towards making cloud networking simpler for everyone. Prior to joining AWS, he worked on several NSF-funded research initiatives on how to perform secure computing in public cloud infrastructures. He holds a MS in Computer Science from Rutgers University and a MS in Electrical Engineering from New York University.

Author

Lakshmikanth Pandre

Lakshmikanth is a senior technical consultant with an AWS Professional Services team based out of Dallas, Texas. With more than 20 years of industry experience, he works as a trusted advisor with a broad range of customers across different industries and segments, helping the customers on their cloud journey. He focuses on design and implementation, and he consults on devops strategies, infrastructure automation, and security for AWS customers.

Author

Brian Lazear

Brian is head of product management for AWS Network Firewall and Firewall Manager services. He has over 15 years of experience helping enterprise customers build secure applications in the cloud. In AWS, his focus is on network security, firewalls, NDR/EDR, monitoring, and traffic-mirroring services.

Everything you wanted to know about trusts with AWS Managed Microsoft AD

Post Syndicated from Jeremy Girven original https://aws.amazon.com/blogs/security/everything-you-wanted-to-know-about-trusts-with-aws-managed-microsoft-ad/

Many Amazon Web Services (AWS) customers use Active Directory to centralize user authentication and authorization for a variety of applications and services. For these customers, Active Directory is a critical piece of their IT infrastructure. AWS offers AWS Directory Service for Microsoft Active Directory, also known as AWS Managed Microsoft AD, to provide a highly available and resilient Active Directory service.

One of the most common AWS Managed Microsoft AD use cases is for customers who need to integrate their on-premises Active Directory domain or forest with AWS services like Amazon Relational Database Service (Amazon RDS), Amazon FSx, Amazon WorkSpaces, and other AWS applications and services. This type of integration can require a trust relationship. When it comes to trusts, there are some common misconceptions about what happens and doesn’t happen when a trust is created.

In this post, I’m going to dive deep into various aspects of Active Directory trusts and debunk some common myths along the way. This post will cover the following areas:

Starting with Kerberos

The first part of understanding how trusts work is to understand how authentication flows across a trust, particularly with Kerberos. Kerberos is a subject that, on the surface, is simple enough, but can quickly become much more complex. This post isn’t going to go into detail about Kerberos in Microsoft Windows. If you wish to look further into the topic, see the Microsoft Kerberos documentation. In this post, I’m just going to give you an overview of how Kerberos authentication works across trusts.
 

Figure 1: Kerberos authentication across trusts

Figure 1: Kerberos authentication across trusts

If you only remember one thing about Kerberos and trust, it should be referrals. Let’s look at the workflow in Figure 1, which shows a user from Domain A who is logged into a computer in Domain A and wants to access an Amazon FSx file share in Domain B. For simplicity’s sake, I’ll say there is a two-way trust between Domains A and B.

Note: When a trust is integrated with AWS Managed Microsoft AD, you need to enable Kerberos preauthentication for accounts that traverse the trusts. Disabling Kerberos preauthentication isn’t recommended, because a malicious user can directly send dummy requests for authentication. The key distribution center (KDC) will return an encrypted Ticket-Granting Ticket (TGT), which the malicious user can brute force offline. See Kerberos Pre-Authentication: Why It Should Not Be Disabled for more details.

The steps of the Kerberos authentication process over trusts are as follows:

1. Kerberos authentication service request (KRB_AS_REQ): The client contacts the authentication service (AS) of the KDC (which is running on a domain controller) for Domain A, which the client is a member of, for a short-lived ticket called a Ticket-Granting Ticket (TGT). The default lifetime of the TGT is 10 hours. For Windows clients this happens at logon, but Linux clients might need to run a kinit command.

2. Kerberos authentication service response (KRB_AS_REP): The AS constructs the TGT and creates a session key that the client can use to encrypt communication with the ticket-granting service (TGS). At the time that the client receives the TGT, the client has not been granted access to any resources, even to resources on the local computer.

3. Kerberos ticket-granting service request (KRB_TGS_REQ): The user’s Kerberos client sends a KRB_TGS_REQ message to a local KDC in Domain A, specifying fsx@domainb as the target. The Kerberos client compares the location with its own workstation’s domain. Because these values are different, the client sets a flag in the KDC Options field of the KRB_TGS_REQ message for NAME_CANONICALIZE, which indicates to the KDC that the server might be in another realm (domain).

4. Kerberos ticket-granting service response (KRB_TGS_REP): The user’s local KDC (for Domain A) receives the KRB_TGS_REQ and sends back a TGT referral ticket for Domain B. The TGT is issued for the next intervening domain along the shortest path to Domain B. The TGT also has a referral flag set, so that the KDC will be informed that the KRB_TGS_REQ is coming from another realm. This flag also tells the KDC to fill in the Transited Realms field. The referral ticket is encrypted with the interdomain key that is decrypted by Domain B’s TGS.

Note: When a trust is established between domains or forests, an interdomain key based on the trust password becomes available for authenticating KDC functions and is used to encrypt and decrypt Kerberos tickets.

5. Kerberos ticket-granting service request (KRB_TGS_REQ): The user’s Kerberos client sends a KRB_TGS_REQ along with the TGT it received from the Domain A KDC to a KDC in Domain B.

6. Kerberos ticket-granting service response (KRB_TGS_REP): The TGS in Domain B examines the TGT and the authenticator. If these are acceptable, the TGS creates a service ticket. The client’s identity is taken from the TGT and copied to the service ticket. Then the ticket is sent to the client.

For more details on the authenticator, see How the Kerberos Version 5 Authentication Protocol Works.

7. Application server service request (KRB_TGS_REQ): After the client has the service ticket, the client sends the ticket and a new authenticator to the target server, requesting access. The server will decrypt the ticket, validate the authenticator, and (for Windows services), create an access token for the user based on the SIDs in the ticket.

8. Application server service response (KRB_TGS_REP): Optionally, the client might request that the target server verify its own identity. This is called mutual authentication. If mutual authentication is requested, the target server takes the client computer’s timestamp from the authenticator, encrypts it with the session key the TGS provided for client-target server messages, and sends it to the client.

The basics of trust transitivity, direction, and types

Let’s start off by defining a trust. Active Directory trusts are a relationship between domains, which makes it possible for users in one domain to be authenticated by a domain controller in the other domain. Authenticated users, if given proper permissions, can access resources in the other domain.

Active Directory Domain Services supports four types of trusts: External (Domain), Forest, Realm, and Shortcut. Out of those four types of trusts, AWS Managed Microsoft AD supports the External (Domain) and Forest trust types. I’ll focus on External (Domain) and Forest trust types for this post.

Transitivity: What is it?

Before I dive into the types of trusts, it’s important to understand the concept of transitivity in trusts. A trust that is transitive allows authentication to flow through other domains (Child and Trees) in the trusted forests or domains. In contrast, a non-transitive trust is a point-to-point trust that allows authentication to flow exclusively between the trusted domains.
 

Figure 2: Forest trusts between the Example.local and Example.com forests

Figure 2: Forest trusts between the Example.local and Example.com forests

Don’t worry about the trust types at this point, because I’ll cover those shortly. The example in Figure 2 shows a Forest trust between Example.com and Example.local. The Example.local forest has a child domain named Child. With a transitive trust, users from the Example.local and Child.Example.local domain can be authenticated to resources in the Example.com domain.

If Figure 2 has an External trust, only users from Example.local can be authenticated to resources in the Example.com domain. Users from Child.Example.local cannot traverse the trust to access resources in the Example.com domain.

Trust direction

Two-way trusts are bidirectional trusts that allow authentication referrals from either side of the trust to give users access resources in either domain or forest. If you look in the Active Directory Domains and Trusts area of the Microsoft Management Console (MMC), which provides consoles to manage the hardware, software, and network components of Microsoft Windows operating system, you can see both an incoming and an outgoing trust for the trusted domain.

One-way trusts are a single-direction trust that allows authentication referrals from one side of the trust only. A one-way trust is either outgoing or incoming, but not both (that would be a two-way trust).

  • An outgoing trust allows users from the trusted domain (Example.com) to authenticate in this domain (Example.local).
  • An incoming trust allows users from this domain (Example.local) to authenticate in the trusted domain (Example.com).


Figure 3: One-way trust direction

Figure 3: One-way trust direction

Let’s use a diagram to further explain this concept. Figure 3 shows a one-way trust between Example.com and Example.local. This an outgoing trust from Example.com and an incoming trust on Example.local. Users from Example.local can authenticate and, if given proper permissions, access resources in Example.com. Users from Example.com cannot access or authenticate to resources in Example.local.

Trust types

In this section of the post, I’ll examine the various types of Active Directory trusts and their capabilities.

External trusts

This trust type is used to share resources between two domains. These can be individual domains within or external to a forest. Think of this as a point-to-point trust between two domains. See Understanding When to Create an External Trust for more details on this trust type.

  • Transitivity: Non-transitive
  • Direction: One-way or two-way
  • Authentication types: NTLM Only* (Kerberos is possible with caveats; see the Microsoft Windows Server documentation for details)
  • AWS Managed Microsoft AD support: Yes

Forest trusts

This trust type is used to share resources between two forests. This is the preferred trust model, because it works fully with Kerberos without any caveats. See Understanding When to Create a Forest Trust for more details.

  • Transitivity: Transitive
  • Direction: One-way or two-way
  • Authentication types: Kerberos and NTLM
  • AWS Managed Microsoft AD support: Yes

Realm trusts

This trust type is used to form a trust relationship between a non-Windows Kerberos realm and an Active Directory domain. See Understanding When to Create a Realm Trust for more details.

  • Transitivity: Non-transitive or transitive
  • Direction: One-way or two-way
  • Authentication types: Kerberos Only
  • AWS Managed Microsoft AD support: No

Shortcut trusts

This trust type is used to shorten the authentication path between domains within complex forests. See Understanding When to Create a Shortcut Trust for more details.

  • Transitivity: Transitive
  • Direction: One-way or two-way
  • Authentication types: Kerberos and NTLM
  • AWS Managed Microsoft AD support: No

User Principal Name suffixes

The default User Principal Name (UPN) suffix for a user account is the Domain Name System (DNS) domain name of the domain where the user account resides. In AWS Managed Microsoft AD and self-managed AD, alternative UPN suffixes are added to simplify administration and user logon processes by providing a single UPN suffix for all users. The UPN suffix is used within the Active Directory forest, and is not required to be a valid DNS domain name. See Adding User Principal Name Suffixes for the process to add UPN suffixes to a forest.

For example, if your domain is Example.local but you want your users to sign in with what appears to be another domain name (such as ExampleSuffix.local), you would need to add a new UPN suffix to the domain. Figure 4 shows a user being created with an alternate UPN suffix.
 

Figure 4: UPN selection on object creation

Figure 4: UPN selection on object creation

If you’re logged into a Windows system, you can use the whoami /upn command to see the UPN of the current user.

Forest trusts and name suffix routing

Name suffix routing manages how authentication requests are routed across forest trusts. A unique name suffix is a name suffix within a forest, such as a UPN suffix or DNS forest or domain tree name, that isn’t subordinate to any other name suffix. For example, the DNS forest name Example.com is a unique name suffix within the example.com forest.

All names that are subordinate to unique name suffixes are routed implicitly. For example, if your forest root is named Example.local, authentication requests for all child domains of Example.local (Child.Example.local) will be routed because the child domains are subordinate to the Example.local name suffix. If you want to exclude members of a child domain from authenticating in the specified forest, you can disable name suffix routing for that name. You can also disable routing for the forest name itself, if necessary. With domain trees and additional UPN suffixes, name suffix routing by default is disabled and must be enabled if those suffixes are to be able to traverse the trust.

Note: In AWS Managed Microsoft AD, customers don’t have the ability to create or modify trusts by using the native Microsoft tools. If you need a name suffix route enabled for your trust, open a support case with Premium Support.

A couple of diagrams will make it easier to digest this information. Figure 5 shows the trust configuration. There is a one-way outgoing forest trust from Example.com to Example.local. Example.local has a UPN suffix named ExampleSuffix.local added to it. Example.local also has a child domain named Child and a tree domain named ExampleTree.local. By default, users in Example.local and Child.Example.local will be able to authenticate to resources in Example.com. Users in the ExampleTree.local domain will not be able to authenticate to resources in Example.com, unless the name suffix route for ExampleTree.local is enabled on the trust object in Example.com.
 

Figure 5: Multi-domain and suffix forest with a trust

Figure 5: Multi-domain and suffix forest with a trust

Figure 6 is from the trust properties dialog from the Example.com forest of a trust between Example.com and Example.local. As you can see, *.example.local is enabled. But the custom UPN suffix ExampleSuffix.local and the tree domain ExampleTree.local are disabled by default.
 

Figure 6: Example.local trusts details

Figure 6: Example.local trusts details

Selective authentication

With AWS Managed Microsoft AD and self-managed AD, you have the option of configuring Selective Authentication. This option restricts authentication access over a trust to only the users in a trusted domain or forest who have been explicitly given authentication permissions to computer objects that reside in the trusting domain or forest.

When you use domain or forest-wide authentication, depending on the trust direction, users can authenticate across the trust. Authentication by itself doesn’t provide access—users have to be delegated permissions to access resources. When Selective Authentication is enabled, you must set the Allowed to Authenticate permission on each computer object the trusted user will be accessing, in addition to any other permissions that are required to access the computer object.

While Selective Authentication is a way to provide additional hardening of trusts, it requires a significant amount of planning and delegation, because you have to set the Allowed to Authenticate permission on all computer objects that are being accessed. It can also make troubleshooting permissions and trust issues more difficult.

For more details on Selective Authentication, see Selective Authentication and Configuring Selective Authentication Settings in the Microsoft documentation.

SID filtering

I won’t spend a lot of time on the subject of SID filtering, since this feature is enabled in AWS Managed Microsoft AD and can’t be disabled. SID filtering prevents malicious users who have domain or enterprise administrator level access in a trusted forest from granting elevated user rights to a trusting forest. It does this by preventing misuse of the attributes containing SIDs on security principals in the trusted forest. For example, a malicious user with administrative credentials located in a trusted forest could, through various means, obtain the SID information of a domain or enterprise admin in the trusting forest. After obtaining the SID of an administrator from the trusting forest, a malicious user with administrative credentials can add that SID to the SID history attribute of a security principal in the trusted forest and attempt to gain full access to the trusting forest and the resources within it.

Keeping SID filtering disabled on your on-premises domain can open your domain up to risks from malicious users. We understand that during a domain migration, you may need to disable it to allow an object’s SID from the original domain to be used during the migration. But in AWS Managed Microsoft AD, this filtering cannot be disabled. See SID Filtering for more details.

Network ports that are required to create trusts

The following network ports are required to be open between domain controllers on both domains or forests prior to attempting to create a trust. Note, the Security Group used by your AWS Managed Microsoft AD directory already has these inbound ports open. You will need to adjust the outbound rules of the Security Group to let it communicate with the to be trusted domains or forests. The following table is based on Microsoft’s recommendations. Depending on your use case, some of these ports might not need to be opened. For example, if LDAP over SSL isn’t configured, then TCP 636 isn’t needed.

Port Protocol Service
53 TCP and UDP DNS
88 TCP and UDP Kerberos
123 UDP Windows Time
135 TCP Remote Procedure Call (RPC)
389 TCP and UDP Lightweight Directory Access Protocol (LDAP)
445 TCP Server Message Block (SMB)
464 TCP and UDP Kerberos Password Change
636 TCP LDAP over SSL
3268 TCP LDAP Global Catalog (GC)
3269 TCP LDAP GC over SSL
49152–65535 TCP and UDP RPC

Trust creation process overview

AWS Managed Microsoft AD is based on Windows Server Active Directory Domain Services, which means that Active Directory trusts function the same way they do with self-managed Active Directory. The only difference is how the trust is created. You use the AWS Management Console or APIs to create the trust for the AWS Managed Microsoft AD side. This process has been documented thoroughly in the AWS Directory Service Administration Guide, so I won’t go into detail on the steps.

The high-level overview of the process is:

  1. Ensure that network and DNS name resolution is available and functional between the domains.
  2. Create the trust on the on-premises Active Directory.
  3. Complete the trust on the AWS Managed Microsoft AD in the AWS Directory Service console.

Common trust scenarios with AWS Managed Microsoft AD

When you create trust between an on-premises domain and AWS Managed Microsoft AD, there are some items to take into consideration that will help you decide what direction of trust you need to deploy. In this post, I’ll cover a couple of the most common scenarios.

All scenarios: Selecting a trust type

Let’s start with the choice between a Forest or External trust. We generally recommend using a Forest trust type. The reason for that is that Forest trusts fully support Kerberos without any caveats. With that said, if you have a specific requirement to implement an External trust, you can do so—just be aware of these caveats.

Scenario 1: Use AWS Managed Microsoft AD as a resource forest for Amazon RDS, Amazon FSx for Windows File Server, or Amazon EC2 instances

In this scenario, you might want to use AWS Managed Microsoft AD as a resource forest for Amazon RDS, Amazon FSx for Windows File Server, or Amazon Elastic Compute Cloud (Amazon EC2). AWS Managed Microsoft AD is going to be a resource domain, and user accounts will reside on the on-premises side of the trust and need to be able to access the resources in the AWS Managed Microsoft AD side of the trust.

In this scenario, the AWS applications (Amazon RDS, Amazon FSx for Windows File Server, or Amazon EC2) don’t require a two-way trust to function, because they are natively integrated with Active Directory. This tells you that you only need authentication to flow one way. This scenario requires a one-way incoming trust on the on-premises domain and one-way outgoing trusts on the AWS Managed Microsoft AD domain. Figure 7 demonstrates this.
 

Figure 7: A one-way trust

Figure 7: A one-way trust

Scenario 2: Use AWS Managed Microsoft AD as a resource forest for all other supported AWS applications

In this scenario, you want to use AWS Managed Microsoft AD as a resource domain for all other supported AWS applications that aren’t included in Scenario 1. As the previous scenario stated, AWS Managed Microsoft AD will be a resource domain, and the user accounts will reside on the on-premises side of the trust and need to be able to access the resources in the AWS Managed Microsoft AD.

In this scenario, AWS applications (Amazon Chime, Amazon Connect, Amazon QuickSight, AWS Single Sign-On, Amazon WorkDocs, Amazon WorkMail, Amazon WorkSpaces, AWS Client VPN, AWS Management Console, and AWS Transfer Family) need to be able to look up objects from the on-premises domain in order for them to function. This tells you that authentication needs to flow both ways. This scenario requires a two-way trust between the on-premises and AWS Managed Microsoft AD domains. Figure 8 demonstrates this.
 

Figure 8: A two-way trust

Figure 8: A two-way trust

Common trust myths and misconceptions

I have had many conversations with customers concerning trusts between their on-premises domain and their AWS Managed Microsoft AD domain. These are some of the common myths and misconceptions we’ve come across in our conversations.

Trusts synchronize objects between each domain.

This is false. A trust between domains or forests acts as a bridge that allows validated authentication requests, in the form of Kerberos or NTLM traffic, to travel between domains or forests. Objects are not synchronized between the domains or forests. Only the trust password is synchronized, which is used for Kerberos.

My password is passed over the trust when authenticating.

This is false. As I showed earlier in the Starting with Kerberos section, when authenticating across trusts, the user’s password is not passed between domains. The only things passed between domains are the Ticket Granting Service (TGS) requests and responses, which are generated in real time, are single use, and expire within hours.

A one-way trust allows bidirectional authentication.

This is false. One-way trusts allow authentications to traverse in one direction only. Users or objects from the trusted domain are able to authenticate and, if they are delegated, to access resources in the trusting domain. Users in the trusting domain can’t authenticate into the trusted domain, and aren’t granted permissions to access resources. Let’s say there is an Amazon FSx file system in Example.local and a one-way trust between Example.com (outgoing trust direction) and Example.local (incoming trust direction). A user in Example.com can’t be delegated permission to the Amazon FSx file system Example.local with the current trust configuration. That’s the nature of a one-way trust.

Trusts are inherently insecure by default.

This is false, although an improperly configured trust can increase your risk and exposure. Trusts by themselves do very little to increase an Active Directory’s attack surface. You should always use best practices when creating a trust to minimize risk. For example, a trust without a purpose should be removed. You should disable the SID History unless you’re in the process of migrating domains. See Security Considerations for Trusts for more guidance on securing trusts.

Users in the trusted domain are granted permissions to my domain when a trust is created.

This is false. By default, with two-way trusts, objects have read-only permission to Active Directory in both directions. Objects are not delegated permissions or access to resources or servers by default. For example, if you want a user to log into a computer in another domain, you first must delegate the user access to the resource in the other domain. Without that delegation, the user won’t be able to access the resource.

Troubleshooting trusts

Based on our experience working with many customers, the vast majority of trust configuration issues are either DNS resolution or networking connectivity errors. These are some troubleshooting steps to help you resolve any of these common issues:

  • Check whether you allowed outbound networking traffic on the AWS Managed Microsoft AD. See Step 1: Set up your environment for trusts to learn how to find your directory’s security group and how to modify it.
  • If the DNS server or the network for your on-premises domain uses a public (non-RFC 1918) IP address space, follow these steps:
    1. In the AWS Directory Service console, go to the IP routing section for your directory, choose Actions, and then choose Add route.
    2. Enter the IP address block of your DNS server or on-premises network using CIDR format, for example 203.0.113.0/24.

      This step isn’t necessary if both your DNS server and your on-premises network are using RFC 1918 private IP address spaces.

  • After you verify the security group and check whether any applicable routes are required, launch a Windows Server instance and join it to the AWS Managed Microsoft AD directory. See Step 3: Deploy an EC2 instance to manage your AWS Managed Microsoft AD to learn how to do this. Once the instance is launched, do the following:
    • Run the following PowerShell command to test DNS connectivity:
      Resolve-DnsName -Name 'example.local' -DnsOnly
  • You should also look through the message explanations in the Trust creation status reasons guide in the AWS Directory Service documentation.

Summary of AWS Managed Microsoft AD trust considerations

In this blog post, I covered Kerberos authentication over Active Directory trusts and provided details on what Active Directory trusts are and how they function. Here’s a quick list of items that you should consider when you plan trust creation with AWS Managed Microsoft AD:

  • Ensure that you have a network connection and the appropriate network ports opened between both domains. Note, it is recommended all Active Directory traffic occur over private network connection like a VPN or Direct Connect.
  • Ensure that DNS resolution is working on both sides of the trust.
  • Decide whether you will implement selective authentication. If it will be used, plan your Active Directory access control list (ACL) delegation strategy before implementation.
  • As of this blog’s publication, keep in mind that AWS Managed Microsoft AD currently supports Forest trusts and External trusts only.
  • Ensure that Kerberos preauthentication is enabled for all objects that traverse trusts with AWS Managed Microsoft AD.
  • If you find that you need a name suffix route enabled for your trust, open a support case with AWS Support, requesting that the name suffix route be enabled.
  • Finally, review Security Considerations for Trusts: Domain and Forest Trusts for additional considerations for trust configuration.

If you have feedback about this post, submit comments in the Comments section below. If you have questions about this post, start a new thread on the AWS Directory Service forum.

Want more AWS Security how-to content, news, and feature announcements? Follow us on Twitter.

Author

Jeremy Girven

Jeremy is a solutions architect specializing in Microsoft workloads on AWS. He has over 15 years’ experience with Microsoft Active Directory and over 23 years of industry experience. One of his fun projects is using SSM to automate the Active Directory build processes in AWS. To see more, check out the Active Directory AWS QuickStart.

Fall 2021 SOC reports now available with 141 services in scope

Post Syndicated from Ninad Naik original https://aws.amazon.com/blogs/security/fall-2021-soc-reports-now-available-with-141-services-in-scope/

At Amazon Web Services (AWS), we’re committed to providing our customers with continued assurance over the security, availability and confidentiality of the AWS control environment. We’re proud to deliver the System and Organizational (SOC) 1, 2, and 3 reports to enable our AWS customers to maintain confidence in AWS services.

For the Fall 2021 SOC reports, covering April 1, 2021, to September 30, 2021, we are excited to announce eight new services in scope, for a total of 141 total services in scope. You can see the full list on Services in Scope by Compliance Program. The associated infrastructure supporting our in-scope products and services is updated to reflect new regions, edge locations, Wavelength, and Local Zones.

Here are the eight new services in scope for Fall 2021 SOC reports:

The Fall 2021 SOC reports are now available through Artifact in the AWS Management Console. The SOC 3 report can also be downloaded here as PDF.

AWS strives to bring services into scope of its compliance programs to help you meet your architectural and regulatory needs. If there are additional AWS services you would like to see added to the scope of our SOC reports (or other compliance programs), reach out to your AWS representatives.

As always, we value your feedback and questions. Feel free to reach out to the team through the Contact Us page. If you have feedback about this post, submit comments in the Comments section below.

Want more AWS Security how-to-content, news, and feature announcements? Follow us on Twitter.


Author

Ninad Naik

Ninad is a Security Assurance Manager at Amazon Web Services. He leads multiple security and privacy initiatives within AWS. Ninad holds a Master’s degree in Information Systems from Syracuse University, NY and a Bachelor’s of Engineering degree in Information Technology from Mumbai University, India. Ninad has 11 years of experience in security assurance and ITIL, CISA, CGEIT, and CISM certifications.

Author

Lu Yu

Lu is a Compliance Program Manager at Amazon Web Services. She leads multiple security and privacy initiatives within AWS. Lu holds a Master’s degree in Accounting and dual Bachelor’s degrees in Accounting and Management Information System from University of Minnesota, Twin Cities. Lu has AWS Cloud Practitioner and CPA certifications and 8 years of experience in security assurance.

Author

Nimesh Ravasa

Nimesh is a Compliance Program Manager at Amazon Web Services. He leads multiple security and privacy initiatives within AWS. Nimesh has 14 years of experience in information security and holds CISSP, CISA, PMP, CSX, AWS Solution Architect – Associate, and AWS Security Specialty certifications.

Fall 2021 SOC 2 Type I Privacy report now available

Post Syndicated from Ninad Naik original https://aws.amazon.com/blogs/security/fall-2021-soc-2-type-i-privacy-report-now-available/

 Your privacy considerations are at the core of our compliance work, and at Amazon Web Services (AWS), we are focused on the protection of your content while using AWS services. Our Fall 2021 SOC 2 Type I Privacy report is now available, demonstrating the privacy compliance commitments we made to you.

The Fall 2021 SOC 2 Type I Privacy report provides you with a third-party attestation of our system and the suitability of the design of our privacy controls. The SOC 2 Privacy Trust Service Criteria (TSC), developed by the American Institute of CPAs (AICPA) establishes the criteria for evaluating controls relating to how personal information is collected, used, retained, disclosed and disposed of to meet AWS’ objectives. You can find additional information related to privacy commitments supporting our SOC 2 Type 1 report in the AWS Customer Agreement documentation.

The scope of the privacy report includes information about how we handle the content that you upload to AWS and how it is protected in all of the services and locations that are in scope for the latest AWS SOC reports. You can find our SOC 2 Type I Privacy report through Artifact in the AWS Management Console.

As always, we value your feedback and questions. Feel free to reach out to the compliance team through the Contact Us page. If you have feedback about this post, submit comments in the Comments section below.

Want more AWS Security how-to-content, news, and feature announcements? Follow us on Twitter.

Author

Ninad Naik

Ninad is a Security Assurance Manager at Amazon Web Services. He leads multiple security and privacy initiatives within AWS. Ninad holds a Master’s degree in Information Systems from Syracuse University, NY and a Bachelor’s of Engineering degree in Information Technology from Mumbai University, India. Ninad has 11 years of experience in security assurance and ITIL, CISA, CGEIT, and CISM certifications.

Author

Lu Yu

Lu is a Compliance Program Manager at Amazon Web Services. She leads multiple security and privacy initiatives within AWS. Lu holds a Master’s degree in Accounting and dual Bachelor’s degrees in Accounting and Management Information System from University of Minnesota, Twin Cities. Lu has AWS Cloud Practitioner and CPA certifications and 8 years of experience in security assurance.

Author

Nimesh Ravasa

Nimesh is a Compliance Program Manager at Amazon Web Services. He leads multiple security and privacy initiatives within AWS. Nimesh has 14 years of experience in information security and holds CISSP, CISA, PMP, CSX, AWS Solution Architect – Associate, and AWS Security Specialty certifications.

Managing temporary elevated access to your AWS environment

Post Syndicated from James Greenwood original https://aws.amazon.com/blogs/security/managing-temporary-elevated-access-to-your-aws-environment/

In this post you’ll learn about temporary elevated access and how it can mitigate risks relating to human access to your AWS environment. You’ll also be able to download a minimal reference implementation and use it as a starting point to build a temporary elevated access solution tailored for your organization.

Introduction

While many modern cloud architectures aim to eliminate the need for human access, there often remain at least some cases where it is required. For example, unexpected issues might require human intervention to diagnose or fix, or you might deploy legacy technologies into your AWS environment that someone needs to configure manually.

AWS provides a rich set of tools and capabilities for managing access. Users can authenticate with multi-factor authentication (MFA), federate using an external identity provider, and obtain temporary credentials with limited permissions. AWS Identity and Access Management (IAM) provides fine-grained access control, and AWS Single Sign-On (AWS SSO) makes it easy to manage access across your entire organization using AWS Organizations.

For higher-risk human access scenarios, your organization can supplement your baseline access controls by implementing temporary elevated access.

What is temporary elevated access?

The goal of temporary elevated access is to ensure that each time a user invokes access, there is an appropriate business reason for doing so. For example, an appropriate business reason might be to fix a specific issue or deploy a planned change.

Traditional access control systems require users to be authenticated and authorized before they can access a protected resource. Becoming authorized is typically a one-time event, and a user’s authorization status is reviewed periodically—for example as part of an access recertification process.

With persistent access, also known as standing access, a user who is authenticated and authorized can invoke access at any time just by navigating to a protected resource. The process of invoking access does not consider the reason why they are invoking it on each occurrence. Today, persistent access is the model that AWS Single Sign-On supports, and is the most common model used for IAM users and federated users.

With temporary elevated access, also known as just-in-time access, users must be authenticated and authorized as before—but furthermore, each time a user invokes access an additional process takes place, whose purpose is to identify and record the business reason for invoking access on this specific occasion. The process might involve additional human actors or it might use automation. When the process completes, the user is only granted access if the business reason is appropriate, and the scope and duration of their access is aligned to the business reason.

Why use temporary elevated access?

You can use temporary elevated access to mitigate risks related to human access scenarios that your organization considers high risk. Access generally incurs risk when two elements come together: high levels of privilege, such as ability to change configuration, modify permissions, read data, or update data; and high-value resources, such as production environments, critical services, or sensitive data. You can use these factors to define a risk threshold, above which you enforce temporary elevated access, and below which you continue to allow persistent access.

Your motivation for implementing temporary elevated access might be internal, based on your organization’s risk appetite; or external, such as regulatory requirements applicable to your industry. If your organization has regulatory requirements, you are responsible for interpreting those requirements and determining whether a temporary elevated access solution is required, and how it should operate.

Regardless of the source of requirement, the overall goal is to reduce risk.

Important: While temporary elevated access can reduce risk, the preferred approach is always to automate your way out of needing human access in the first place. Aim to use temporary elevated access only for infrequent activities that cannot yet be automated. From a risk perspective, the best kind of human access is the kind that doesn’t happen at all.

The AWS Well-Architected Framework provides guidance on using automation to reduce the need for human user access:

How can temporary elevated access help reduce risk?

In scenarios that require human intervention, temporary elevated access can help manage the risks involved. It’s important to understand that temporary elevated access does not replace your standard access control and other security processes, such as access governance, strong authentication, session logging and monitoring, and anomaly detection and response. Temporary elevated access supplements the controls you already have in place.

The following are some of the ways that using temporary elevated access can help reduce risk:

1. Ensuring users only invoke elevated access when there is a valid business reason. Users are discouraged from invoking elevated access habitually, and service owners can avoid potentially disruptive operations during critical time periods.

2. Visibility of access to other people. With persistent access, user activity is logged—but no one is routinely informed when a user invokes access, unless their activity causes an incident or security alert. With temporary elevated access, every access invocation is typically visible to at least one other person. This can arise from their participation in approvals, notifications, or change and incident management processes which are multi-party by nature. With greater visibility to more people, inappropriate access by users is more likely to be noticed and acted upon.

3. A reminder to be vigilant. Temporary elevated access provides an overt reminder for users to be vigilant when they invoke high-risk access. This is analogous to the kind security measures you see in a physical security setting. Imagine entering a secure facility. You see barriers, fences, barbed wire, CCTV, lighting, guards, and signs saying “You are entering a restricted area.” Temporary elevated access has a similar effect. It reminds users there is a heightened level of control, their activity is being monitored, and they will be held accountable for any actions they perform.

4. Reporting, analytics, and continuous improvement. A temporary elevated access process records the reasons why users invoke access. This provides a rich source of data to analyze and derive insights. Management can see why users are invoking access, which systems need the most human access, and what kind of tasks they are performing. Your organization can use this data to decide where to invest in automation. You can measure the amount of human access and set targets to reduce it. The presence of temporary elevated access might also incentivize users to automate common tasks, or ask their engineering teams to do so.

Implementing temporary elevated access

Before you examine the reference implementation, first take a look at a logical architecture for temporary elevated access, so you can understand the process flow at a high level.

A typical temporary elevated access solution involves placing an additional component between your identity provider and the AWS environment that your users need to access. This is referred to as a temporary elevated access broker, shown in Figure 1.
 

Figure 1: A logical architecture for temporary elevated access

Figure 1: A logical architecture for temporary elevated access

When a user needs to perform a task requiring temporary elevated access to your AWS environment, they will use the broker to invoke access. The broker performs the following steps:

1. Authenticate the user and determine eligibility. The broker integrates with your organization’s existing identity provider to authenticate the user with multi-factor authentication (MFA), and determine whether they are eligible for temporary elevated access.

Note: Eligibility is a key concept in temporary elevated access. You can think of it as pre-authorization to invoke access that is contingent upon additional conditions being met, described in step 3. A user typically becomes eligible by becoming a trusted member of a team of admins or operators, and the scope of their eligibility is based on the tasks they’re expected to perform as part of their job function. Granting and revoking eligibility is generally based on your organization’s standard access governance processes. Eligibility can be expressed as group memberships (if using role-based access control, or RBAC) or user attributes (if using attribute-based access control, or ABAC). Unlike regular authorization, eligibility is not sufficient to grant access on its own.

2. Initiate the process for temporary elevated access. The broker provides a way to start the process for gaining temporary elevated access. In most cases a user will submit a request on their own behalf—but some broker designs allow access to be initiated in other ways, such as an operations user inviting an engineer to assist them. The scope of a user’s requested access must be a subset of their eligibility. The broker might capture additional information about the context of the request in order to perform the next step.

3. Establish a business reason for invoking access. The broker tries to establish whether there is a valid business reason for invoking access with a given scope on this specific occasion. Why does this user need this access right now? The process of establishing a valid business reason varies widely between organizations. It might be a simple approval workflow, a quorum-based authorization, or a fully automated process. It might integrate with existing change and incident management systems to infer the business reason for access. A broker will often provide a way to expedite access in a time-critical emergency, which is a form of break-glass access. A typical broker implementation allows you to customize this step.

4. Grant time-bound access. If the business reason is valid, the broker grants time-bound access to the AWS target environment. The scope of access that is granted to the user must be a subset of their eligibility. Further, the scope and duration of access granted should be necessary and sufficient to fulfill the business reason identified in the previous step, based on the principle of least privilege.

A minimal reference implementation for temporary elevated access

To get started with temporary elevated access, you can deploy a minimal reference implementation accompanying this blog post. Information about deploying, running and extending the reference implementation is available in the Git repo README page.

Note: You can use this reference implementation to complement the persistent access that you manage for IAM users, federated users, or manage through AWS Single Sign-On. For example, you can use the multi-account access model of AWS SSO for persistent access management, and create separate roles for temporary elevated access using this reference implementation.

To establish a valid business reason for invoking access, the reference implementation uses a single-step approval workflow. You can adapt the reference implementation and replace this with a workflow or business logic of your choice.

To grant time-bound access, the reference implementation uses the identity broker pattern. In this pattern, the broker itself acts as an intermediate identity provider which conditionally federates the user into the AWS target environment granting a time-bound session with limited scope.

Figure 2 shows the architecture of the reference implementation.
 

Figure 2: Architecture of the reference implementation

Figure 2: Architecture of the reference implementation

To illustrate how the reference implementation works, the following steps walk you through a user’s experience end-to-end, using the numbers highlighted in the architecture diagram.

Starting the process

Consider a scenario where a user needs to perform a task that requires privileged access to a critical service running in your AWS environment, for which your security team has configured temporary elevated access.

Loading the application

The user first needs to access the temporary elevated access broker so that they can request the AWS access they need to perform their task.

  1. The user navigates to the temporary elevated access broker in their browser.
  2. The user’s browser loads a web application using web static content from an Amazon CloudFront distribution whose target is an Amazon S3 bucket.

The broker uses a web application that runs in the browser, known as a Single Page Application (SPA).

Note: CloudFront and S3 are only used for serving web static content. If you prefer, you can modify the solution to serve static content from a web server in your private network.

Authenticating users

  1. The user is redirected to your organization’s identity provider to authenticate. The reference implementation uses the OpenID Connect Authorization Code flow with Proof Key for Code Exchange (PKCE).
  2. The user returns to the application as an authenticated user with an access token and ID token signed by the identity provider.

The access token grants delegated authority to the browser-based application to call server-side APIs on the user’s behalf. The ID token contains the user’s attributes and group memberships, and is used for authorization.

Calling protected APIs

  1. The application calls APIs hosted by Amazon API Gateway and passes the access token and ID token with each request.
  2. For each incoming request, API Gateway invokes a Lambda authorizer using AWS Lambda.

The Lambda authorizer checks whether the user’s access token and ID token are valid. It then uses the ID token to determine the user’s identity and their authorization based on their group memberships.

Displaying information

  1. The application calls one of the /get… API endpoints to fetch data about previous temporary elevated access requests.
  2. The /get… API endpoints invoke Lambda functions which fetch data from a table in Amazon DynamoDB.

The application displays information about previously-submitted temporary elevated access requests in a request dashboard, as shown in Figure 3.
 

Figure 3: The request dashboard

Figure 3: The request dashboard

Submitting requests

A user who is eligible for temporary elevated access can submit a new request in the request dashboard by choosing Create request. As shown in Figure 4, the application then displays a form with input fields for the IAM role name and AWS account ID the user wants to access, a justification for invoking access, and the duration of access required.
 

Figure 4: Submitting requests

Figure 4: Submitting requests

The user can only request an IAM role and AWS account combination for which they are eligible, based on their group memberships.

Note: The duration specified here determines a time window during which the user can invoke sessions to access the AWS target environment if their request is approved. It does not affect the duration of each session. Session duration can be configured independently.

  1. When a user submits a new request for temporary elevated access, the application calls the /create… API endpoint, which writes information about the new request to the DynamoDB table.

The user can submit multiple concurrent requests for different role and account combinations, as long as they are eligible.

Generating notifications

The broker generates notifications when temporary elevated access requests are created, approved, or rejected.

  1. When a request is created, approved, or rejected, a DynamoDB stream record is created for notifications.
  2. The stream record then invokes a Lambda function to handle notifications.
  3. The Lambda function reads data from the stream record, and generates a notification using Amazon Simple Notification Service (Amazon SNS).

By default, when a user submits a new request for temporary elevated access, an email notification is sent to all authorized reviewers. When a reviewer approves or rejects a request, an email notification is sent to the original requester.

Reviewing requests

A user who is authorized to review requests can approve or reject requests submitted by other users in a review dashboard, as shown in Figure 5. For each request awaiting their review, the application displays information about the request, including the business justification provided by the requester.
 

Figure 5: The review dashboard

Figure 5: The review dashboard

The reviewer can select a request, determine whether the request is appropriate, and choose either Approve or Reject.

  1. When a reviewer approves or rejects a request, the application calls the /approve… or /reject… API endpoint, which updates the status of the request in the DynamoDB table and initiates a notification.

Invoking sessions

After a requester is notified that their request has been approved, they can log back into the application and see their approved requests, as shown in Figure 6. For each approved request, they can invoke sessions. There are two ways they can invoke a session, by choosing either Access console or CLI.

Figure 6: Invoking sessions

Figure 6: Invoking sessions

Both options grant the user a session in which they assume the IAM role in the AWS account specified in their request.

When a user invokes a session, the broker performs the following steps.

  1. When the user chooses Access console or CLI, the application calls one of the /federate… API endpoints.
  2. The /federate… API endpoint invokes a Lambda function, which performs the following three checks before proceeding:
    1. Is the user authenticated? The Lambda function checks that the access and ID tokens are valid and uses the ID token to determine their identity.
    2. Is the user eligible? The Lambda function inspects the user’s group memberships in their ID token to confirm they are eligible for the AWS role and account combination they are seeking to invoke.
    3. Is the user elevated? The Lambda function confirms the user is in an elevated state by querying the DynamoDB table, and verifying whether there is an approved request for this user whose duration has not yet ended for the role and account combination they are seeking to invoke.
  3. If all three checks succeed, the Lambda function calls sts:AssumeRole to fetch temporary credentials on behalf of the user for the IAM role and AWS account specified in the request.
  4. The application returns the temporary credentials to the user.
  5. The user obtains a session with temporary credentials for the IAM role in the AWS account specified in their request, either in the AWS Management Console or AWS CLI.

Once the user obtains a session, they can complete the task they need to perform in the AWS target environment using either the AWS Management Console or AWS CLI.

The IAM roles that users assume when they invoke temporary elevated access should be dedicated for this purpose. They must have a trust policy that allows the broker to assume them. The trusted principal is the Lambda execution role used by the broker’s /federate… API endpoints. This ensures that the only way to assume those roles is through the broker.

In this way, when the necessary conditions are met, the broker assumes the requested role in your AWS target environment on behalf of the user, and passes the resulting temporary credentials back to them. By default, the temporary credentials last for one hour. For the duration of a user’s elevated access they can invoke multiple sessions through the broker, if required.

Session expiry

When a user’s session expires in the AWS Management Console or AWS CLI, they can return to the broker and invoke new sessions, as long as their elevated status is still active.

Ending elevated access

A user’s elevated access ends when the requested duration elapses following the time when the request was approved.
 

Figure 7: Ending elevated access

Figure 7: Ending elevated access

Once elevated access has ended for a particular request, the user can no longer invoke sessions for that request, as shown in Figure 7. If they need further access, they need to submit a new request.

Viewing historical activity

An audit dashboard, as shown in Figure 8, provides a read-only view of historical activity to authorized users.
 

Figure 8: The audit dashboard

Figure 8: The audit dashboard

Logging session activity

When a user invokes temporary elevated access, their session activity in the AWS control plane is logged to AWS CloudTrail. Each time they perform actions in the AWS control plane, the corresponding CloudTrail events contain the unique identifier of the user, which provides traceability back to the identity of the human user who performed the actions.

The following example shows the userIdentity element of a CloudTrail event for an action performed by user [email protected] using temporary elevated access.

"userIdentity": {
    "type": "AssumedRole",
    "principalId": "AROACKCEVSQ6C2EXAMPLE:[email protected]-TempAccessRoleS3Admin",
    "arn": "arn:aws:sts::111122223333:assumed-role/TempAccessRoleS3Admin/[email protected]-TempAccessRoleS3Admin",
    "accountId": "111122223333",
    "sessionContext": {
        "sessionIssuer": {
            "type": "Role",
            "principalId": "AROACKCEVSQ6C2EXAMPLE",
            "arn": "arn:aws:iam::111122223333:role/TempAccessRoleS3Admin",
            "accountId": "111122223333",
            "userName": "TempAccessRoleS3Admin"
        },
        "webIdFederationData": {},
        "attributes": {
            "mfaAuthenticated": "true",
            "creationDate": "2021-07-02T13:24:06Z"
        }
    }
}

Security considerations

The temporary elevated access broker controls access to your AWS environment, and must be treated with extreme care in order to prevent unauthorized access. It is also an inline dependency for accessing your AWS environment and must operate with sufficient resiliency.

The broker should be deployed in a dedicated AWS account with a minimum of dependencies on the AWS target environment for which you’ll manage access. It should use its own access control configuration following the principle of least privilege. Ideally the broker should be managed by a specialized team and use its own deployment pipeline, with a two-person rule for making changes—for example by requiring different users to check in code and approve deployments. Special care should be taken to protect the integrity of the broker’s code and configuration and the confidentiality of the temporary credentials it handles.

See the reference implementation README for further security considerations.

Extending the solution

You can extend the reference implementation to fit the requirements of your organization. Here are some ways you can extend the solution:

  • Customize the UI, for example to use your organization’s branding.
  • Keep network traffic within your private network, for example to comply with network security policies.
  • Change the process for initiating and evaluating temporary elevated access, for example to integrate with a change or incident management system.
  • Change the authorization model, for example to use groups with different scope, granularity, or meaning.
  • Use SAML 2.0, for example if your identity provider does not support OpenID Connect.

See the reference implementation README for further details on extending the solution.

Conclusion

In this blog post you learned about temporary elevated access and how it can help reduce risk relating to human user access. You learned that you should aim to eliminate the need to use high-risk human access through the use of automation, and only use temporary elevated access for infrequent activities that cannot yet be automated. Finally, you studied a minimal reference implementation for temporary elevated access which you can download and customize to fit your organization’s needs.

If you have feedback about this post, submit comments in the Comments section below. If you have questions about this post, start a new thread on the AWS IAM forum or contact AWS Support.

Want more AWS Security how-to content, news, and feature announcements? Follow us on Twitter.
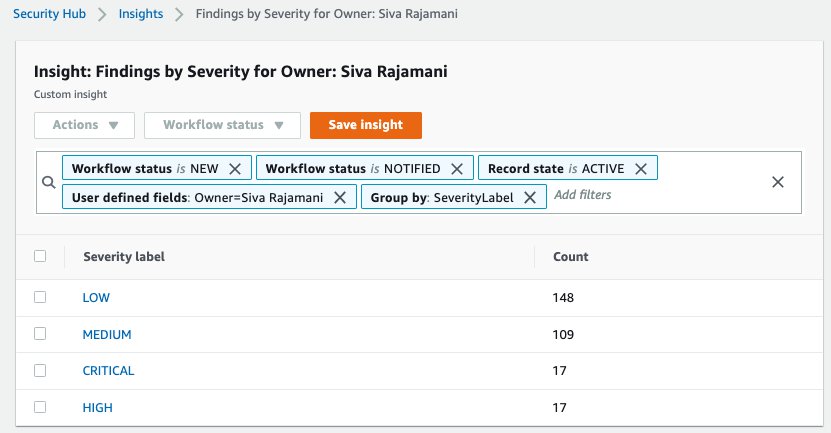
Author

James Greenwood

James is a principal security solutions architect who helps helps AWS Financial Services customers meet their security and compliance objectives in the AWS cloud. James has a background in identity and access management, authentication, credential management, and data protection with more than 20 years experience in the financial services industry.

Author

Bikash Behera

Bikash is a principal solutions architect who provides transformation guidance to AWS Financial Services customers and develops solutions for high priority customer objectives. Bikash has been delivering transformation guidance and technology solutions to the financial services industry for the last 25 years.

Author

Kevin Higgins

Kevin is a principal cloud architect with AWS Professional Services. He helps customers with the architecture, design, and development of cloud-optimized infrastructure solutions. As a member of the Microsoft Global Specialty Practice, he collaborates with AWS field sales, training, support, and consultants to help drive AWS product feature roadmap and go-to-market strategies.

AWS achieves GSMA Security Certification for Europe (Paris) Region

Post Syndicated from Janice Leung original https://aws.amazon.com/blogs/security/aws-achieves-gsma-security-certification-for-europe-paris-region/

We continue to expand the scope of our assurance programs at Amazon Web Services (AWS) and are pleased to announce that our Europe (Paris) Region is now certified by the GSM Association (GSMA) under its Security Accreditation Scheme Subscription Management (SAS-SM) with scope Data Center Operations and Management (DCOM). This is an addition to our US East (Ohio) Region, which received certification in September 2021. This alignment with GSMA requirements demonstrates our continuous commitment to adhere to the heightened expectations for cloud service providers. AWS customers who provide embedded Universal Integrated Circuit Card (eUICC) for mobile devices can run their remote provisioning applications with confidence in the AWS Cloud in the GSMA-certified Regions.

As of this writing, 72 services offered in the Europe (Paris) Region and 128 services offered in the US East (Ohio) Region are in scope of this certification. For up-to-date information, including when additional services are added, see the AWS Services in Scope by Compliance Program and choose GSMA.

AWS was evaluated by independent third-party auditors chosen by GSMA. The Certificate of Compliance that shows that AWS achieved GSMA compliance status is available on the GSMA Website and through AWS Artifact. AWS Artifact is a self-service portal for on-demand access to AWS compliance reports. Sign in to AWS Artifact in the AWS Management Console, or learn more at Getting Started with AWS Artifact.

To learn more about our compliance and security programs, see AWS Compliance Programs. As always, we value your feedback and questions; reach out to the AWS Compliance team through the Contact Us page. Or if you have feedback about this post, submit comments in the Comments section below.

Want more AWS Security how-to content, news, and feature announcements? Follow us on Twitter.
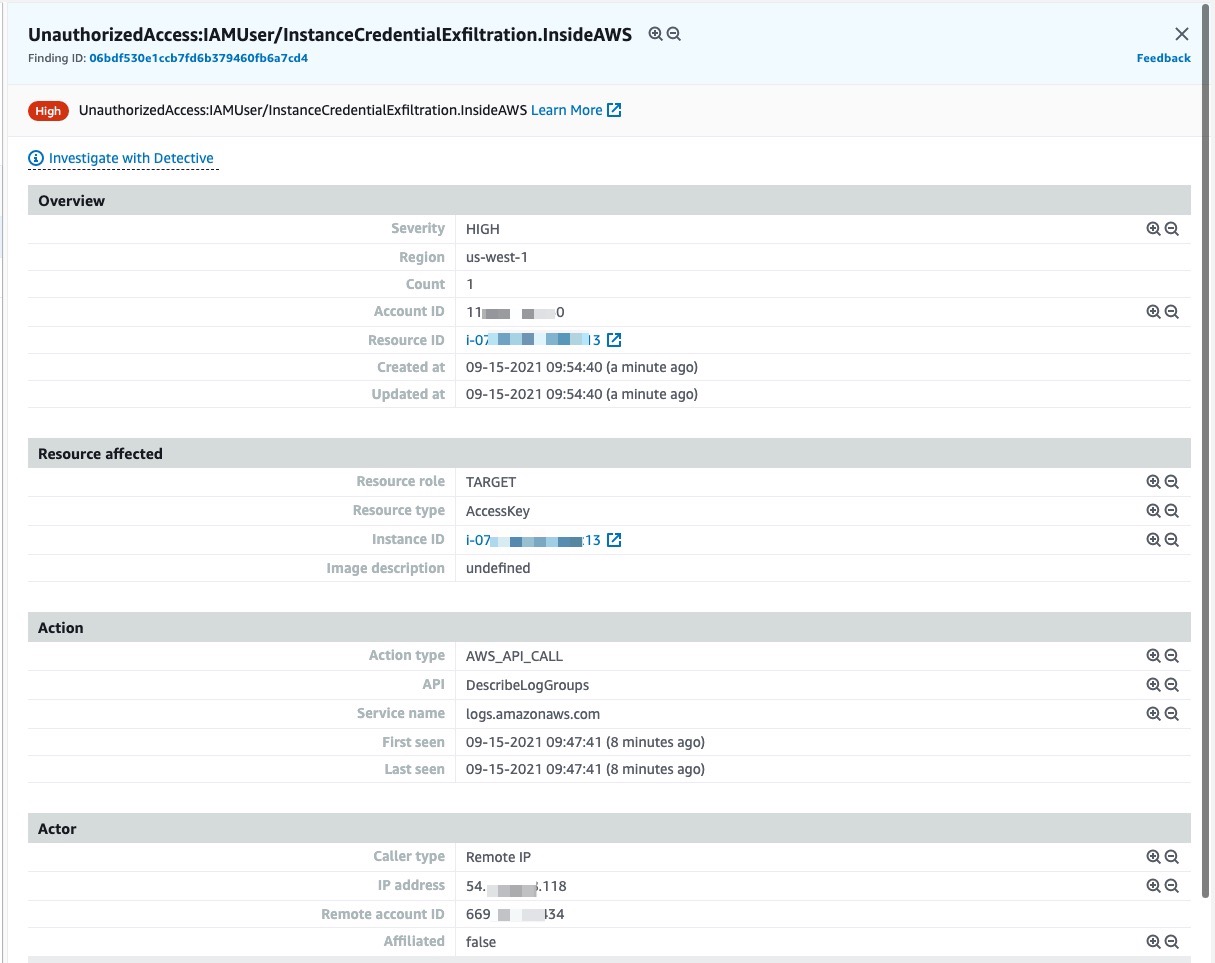
Author

Janice Leung

Janice is a security audit program manager at AWS, based in New York. She leads security audits across Europe and has previously worked in security assurance and technology risk management in the financial industry for 10 years.

Author

Karthik Amrutesh

Karthik is a senior manager, security assurance at AWS based in New York, U.S. His team is responsible for audits, attestations, certifications, and assessments across the European Union. Karthik has previously worked in risk management, security assurance, and technology audits for the past 18 years.

Managing permissions with grants in AWS Key Management Service

Post Syndicated from Rick Yin original https://aws.amazon.com/blogs/security/managing-permissions-with-grants-in-aws-key-management-service/

AWS Key Management Service (AWS KMS) helps customers to use encryption to secure their data. When creating a new encrypted Amazon Web Services (AWS) resource, such as an Amazon Relational Database Service (Amazon RDS) database or an Amazon Simple Storage Service (Amazon S3) bucket, all you have to do is provide an AWS KMS key ID that you control and the data will be encrypted and the complexity of protecting and making encryption keys highly available is reduced.

If you’re considering delegating encryption to an AWS service to use a key under your control when it encrypts your data in that service, you might wonder how to ensure the AWS service can only use your key when you want it to and not have full access to decrypt any of your resources at any time. The answer is to use scoped-down dynamic permissions in AWS KMS. Specifically, a combination of permissions that you define in the KMS key policy document along with additional permissions that are created dynamically using KMS grants define the conditions under which one or more AWS services can use your KMS keys to encrypt and decrypt your data.

In this blog post, I discuss:

  • An example of how an AWS service uses your KMS key policy and grants to securely manage access to your encryption keys. The example uses Amazon RDS and demonstrates how the block storage volume behind your database instance is encrypted.
  • Best practices for using grants from AWS KMS in your own workloads.
  • Recent performance improvements when using grants in AWS KMS.

Case study: How RDS uses grants from AWS KMS to encrypt your database volume

Many Amazon RDS instance types are hosted on an Amazon Elastic Compute Cloud (Amazon EC2) instance where the underlying storage layer is an Amazon Elastic Block Store (Amazon EBS) volume. The blocks of the EBS volume that stores the database content are encrypted under a randomly generated 256-bit symmetric data key that is itself encrypted under a KMS key that you configure RDS to use when you create your database instance. Let’s look at how RDS interacts with EBS, EC2, and AWS KMS to securely create an RDS instance using an KMS key.

When you send a request to RDS to create your database, there are several asynchronous requests being made among the RDS, EC2, EBS, and KMS services to:

  1. Create the underlying storage volume with a unique encryption key.
  2. Create the compute instance in EC2.
  3. Load the database engine into the EC2 instance.
  4. Give the EC2 instance permissions to use the encryption key to read and write data to the database storage volume.

The initial authenticated request that you make to RDS to create a new database is made by an AWS Identity and Access Management (IAM) principal in your account (e.g. a user or role). Once the request is received, a series of things has to happen:

  1. RDS needs to request EBS to create an encrypted volume to store your future data.
  2. EBS needs to request AWS KMS generate a unique 256-bit data key for the volume and encrypt it under the KMS key you told RDS to use.
  3. RDS then needs to request that EC2 launch an instance, attach that encrypted volume, and make the data key available to EC2 for use in reads and writes to the volume.

From your perspective, the IAM principal used to create the database also must have permissions in the KMS key policy for the GenerateDataKeyWithoutPlaintext and Decrypt actions. This enables the unique 256-bit data key to be created and encrypted under the desired KMS key as well as allowing the user or role to have the data key decrypted and provisioned to the Nitro card managing your EC2 instance so that reads/writes can happen from/to the database. Given the asynchronous nature of the process of creating the database vs. launching the database volume in the future, how do the RDS, EBS, and EC2 services all get the necessary least privileged permissions to create and provision the data key for use with your database? The answer starts with your IAM principal having permission for the AWS KMS CreateGrant action in the key policy.

RDS uses the identity from your IAM principal to create a grant in AWS KMS that allows it to create other grants for EC2 and EBS with very limited permissions that are further scoped down compared to the original permissions your IAM principal has on the AWS KMS key. A total of three grants are created:

  • The initial RDS grant.
  • A subsequent EBS grant that allows EBS to call AWS KMS and generate a 256-bit data key that is encrypted under the KMS key you defined when creating your database.
  • The attachment grant, which allows the specific EC2 instance hosting your database volume to decrypt the encrypted data key for and provision it for use during I/O between the instance and the EBS volume.

RDS grant

In this example, let’s say you’ve created an RDS instance with an ID of db-1234 and specified a KMS key for encryption. The following grant is created on the KMS key, allowing RDS to create more grants for EC2 and EBS to use in the asynchronous processes required to launch your database instance. The RDS grant is as follows:

{Grantee Principal: '<Regional RDS Service Account>', Encryption Context: '"aws:rds:db-id": "db-1234"', Operations: ['CreateGrant', 'Decrypt', 'GenerateDataKeyWithoutPlaintext']}

In plain English, this grant gives RDS permissions to use the KMS key for three specific operations (API actions) only when the call specifies the RDS instance ID db-1234 in the Encryption Context parameter. The grant provides access for the the grantee principal, which in this case is the value shown for the <Regional RDS service account>. This grant is created in AWS KMS and associated with your KMS key. Because the EC2 instance hasn’t yet been created and launched, the grantee principal cannot include the EC2 instance ID and must instead be the regional RDS service account.

EBS grant

With the RDS instance and initial AWS KMS grant created, RDS requests EC2 to launch an instance for the RDS database. EC2 creates an instance with a unique ID (e.g. i-1234567890abcdefg) using EC2 permissions you gave to the original IAM principal. In addition to the EC2 instance being created, RDS requests that Amazon EBS create an encrypted volume dedicated to the database. As a part of volume creation, EBS needs permission to call AWS KMS to generate a unique 256-bit data key for the volume and encrypt that data key under the KMS key you defined.

The EC2 instance ID is used as the name of the identity for future calls to AWS KMS, so RDS inserts it as the grantee principal in the EBS grant it creates. The EBS grant is as follows:

{Grantee Principal: '<RDS-Host-Role>:i-1234567890abcdefg', Encryption Context: '"aws:rds:db-id": "db-1234"', Operations: ['CreateGrant', 'Decrypt', 'GenerateDataKeyWithoutPlaintext']}}

You’ll notice that this grant uses the same encryption context as the initial RDS grant. However, now that we have the EC2 instance ID associated with the database ID, the permissions that EBS gets to use your key as the grantee principal can be scoped down to require both values. Once this grant is created, EBS can create the EBS volume (e.g. vol-0987654321gfedcba) and call AWS KMS to generate and encrypt a 256-bit data key that can only be used for that volume. This encrypted data key is stored by EBS in preparation for the volume attachment process.

Attachment grant

The final step in creating the RDS instance is to attach the EBS volume to the EC2 instance hosting your database. EC2 now uses the previously created EBS grant to create the attachment grant with the i-1234567890abcdefg instance identity. This grant allows EC2 to decrypt the encrypted data key, provision it to the Nitro card that manages the instance, and begin encrypting I/O to the EBS volume of the RDS database. The attachment grant in this example will be as follows:

{Grantee Principal: 'EC2 Instance Role:i-1234567890abcdefg', Encryption Context: '"aws:rds:db-id": "db-1234", "aws:ebs:id":"vol-0987654321gfedcba"', Operations: ['Decrypt']}

The attachment grant is the most restrictive of the three grants. It requires the caller to know the IDs of all the AWS entities involved: EC2 instance ID, EBS volume ID, and RDS database ID. This design ensures that your KMS key can only be used for decryption by these AWS services in order to launch the specific RDS database you want.

The encrypted EBS volume is now active and attached to the EC2 instance. Should you terminate the RDS instance, the services retire all the relevant KMS grants so they no longer have any permission to use your KMS key to decrypt the 256-bit data key required to decrypt data in your database. If you need to launch your encrypted database again, a similar set of three grants will be dynamically created with the RDS database, EC2 instance, and EBS volume IDs used to scope down permissions on the AWS KMS key.

The process described in the previous paragraphs is graphically shown in Figure 1:
 
Figure 1: How Amazon RDS uses Amazon EC2, Amazon EBS, and AWS KMS to create an encrypted RDS instance

Considering all the AWS KMS key permissions that are added and removed as a part of launching a database, you might ask why not just use the key policy document to make these changes? A KMS key allows only one key policy with a maximum document size of 32 KB. Because one key could be used to encrypt any number of AWS resources, trying to dynamically add and remove scoped-down permissions related to each resource to the key policy document creates two risks. First, the maximum allowable size of the key policy document (32KB) might be exceeded. Second, depending on how many resources are being accessed concurrently, you may exceed the request rate quota for the PutKeyPolicy API action in AWS KMS.

In contrast, there can be any number of grants on a given AWS KMS key, each grant specifying a scoped-down permission for the use of a KMS key with any AWS service that integrated with AWS KMS. Grant creation and deletion is also designed for much higher-volume request rates than modifications to the key policy document. Finally, permission to call PutKeyPolicy is a highly privileged permission, as it lets the caller make unrestricted changes to the permissions on the key, including changes to administrative permissions to disable or schedule the key for deletion. Grants on a key can only allow permissions to use the key, not administer the key. Also, grants that allow the creation of other grants by other IAM principals prohibit the escalation of privilege. In the RDS example above, the permissions RDS receives from the IAM principal in your account during the first CreateGrant request cannot be more permissive than what you defined for the IAM principal in the KMS key policy. The permissions RDS gives to EC2 and EBS during the database creation process cannot be more permissive than the original permission RDS has from the initial grant. This design ensures that AWS services cannot escalate their privileges and use your KMS key for purposes different than what you intend.

Best practices for using AWS KMS grants

AWS KMS grants are a powerful tool to dynamically define permissions to use keys. They are automatically created when you use server-side encryption features in various AWS services. You can also use grants to control permission in your own applications that perform client-side encryption. Here are some best practices to consider:

  • Design the permissions to be as scoped down as possible. Use a specific grantee principal, such as an IAM role, and give the principal access only to the AWS KMS API actions that are needed. You can further limit the scope of grants with the Encryption Context parameter by using any element you want to ensure callers are using the AWS KMS key only for the intended purpose. Below is a specific example that grants AWS account 123456789012 permission to call the GenerateDataKey or Decrypt APIs, but only if the supplied encryption context for customerID is 5678.
    {Actions: 'GenerateDataKey, Decrypt', Grantee Principal: '123456789012', Encryption Context: '"customerID": "5678"'}
    

    This grant could prevent your application from decrypting data belonging to customer “5678” without explicitly passing the expected customerID in the request to AWS KMS. This may be a useful defense-in-depth mechanism to prevent unauthorized access to your customers’ data if your application’s AWS credentials were compromised and used from a different caller who doesn’t know that encryption context is a required parameter for all reads and writes in order to encrypt and decrypt data.

    For more information on how you can use encryption context in AWS KMS permissions, requests, and AWS CloudTrail logs, see How to Protect the Integrity of Your Encrypted Data by Using AWS Key Management Service and EncryptionContext.

  • Remember that grants don’t automatically expire. Your code needs to retire or revoke them once you know the permission is no longer needed on the KMS key. Grants that aren’t retired are leftover permissions that might create a security risk for encrypted resources. See retiring and revoking grants in the AWS KMS developer guide for more detail.
  • Avoid creating duplicate grants. A duplicate grant is a grant that shares the same AWS KMS key ID, API actions, grantee principal, encryption context, and name. If you retire the original grant after use and not the duplicates, then the leftover duplicate grants can lead to unintended access to encrypt or decrypt data.

Recent performance improvements to AWS KMS grants: Removing a resource quota

For customers who use AWS KMS to encrypt resources in AWS services that use grants, there used to be cases where AWS KMS had to enforce a quota on the number of concurrently active resources that could be encrypted under the same KMS key. For example, customers of Amazon RDS, Amazon WorkSpaces, or Amazon EBS would run into this quota at very large scale. This was the Grants for a given principal per key quota and was previously set to 500. You might have seen the error message “Keys only support 500 grants per grantee principal in this region” when trying to create a resource in one of these services.

We recently made a change to AWS KMS to remove this quota entirely and this error message no longer exists. With this quota removed, you can now attach unlimited grants to any KMS key when using any AWS service.

Summary

In this blog post, you’ve seen how services such as Amazon RDS use AWS KMS grants to pass scoped-down permissions through the Amazon EC2 and Amazon EBS instances. You also saw some best practices for using AWS KMS grants in your own applications. Finally, you learned about how AWS KMS has improved grants by removing one of the resource quotas.

Below are some additional resources for AWS KMS and grants.

If you have feedback about this post, submit comments in the Comments section below.

Want more AWS Security how-to content, news, and feature announcements? Follow us on Twitter.
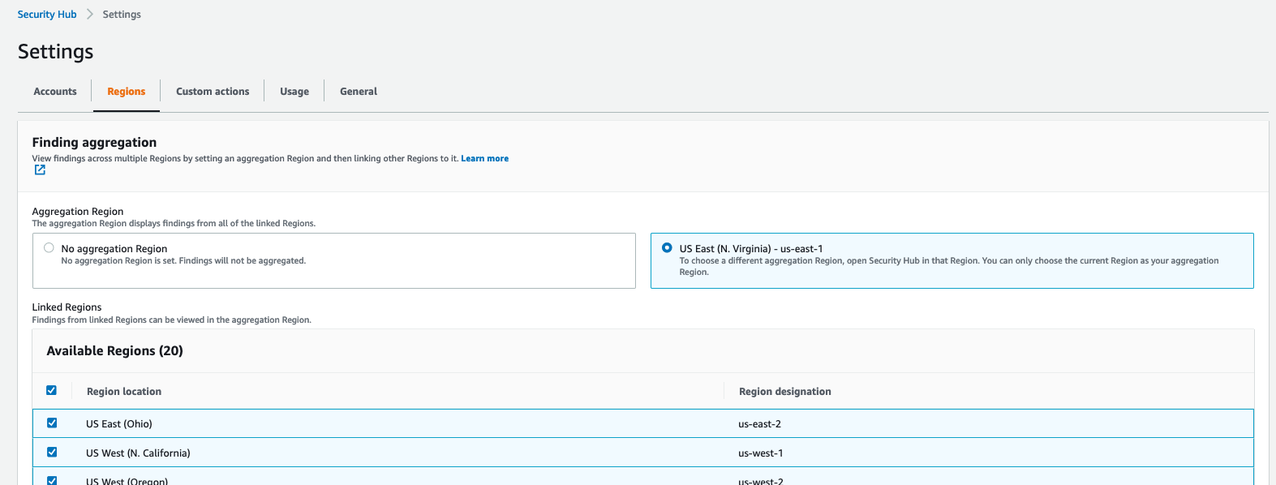
Author

Rick Yin

Rick is a software development engineer on the AWS KMS team. His current focus is helping to scale AWS KMS to meet increasing customer demand by making sure we can serve our requests at ultra-low latency and ultra-high availability. In his free time, Rick enjoys learning about history and trying to stay in shape. He has recently taken up rowing.

Implement OAuth 2.0 device grant flow by using Amazon Cognito and AWS Lambda

Post Syndicated from Jeff Lombardo original https://aws.amazon.com/blogs/security/implement-oauth-2-0-device-grant-flow-by-using-amazon-cognito-and-aws-lambda/

In this blog post, you’ll learn how to implement the OAuth 2.0 device authorization grant flow for Amazon Cognito by using AWS Lambda and Amazon DynamoDB.

When you implement the OAuth 2.0 authorization framework (RFC 6749) for internet-connected devices with limited input capabilities or that lack a user-friendly browser—such as wearables, smart assistants, video-streaming devices, smart-home automation, and health or medical devices—you should consider using the OAuth 2.0 device authorization grant (RFC 8628). This authorization flow makes it possible for the device user to review the authorization request on a secondary device, such as a smartphone, that has more advanced input and browser capabilities. By using this flow, you can work around the limits of the authorization code grant flow with Proof Key for Code Exchange (PKCE)-defined OpenID Connect Core specifications. This will help you to avoid scenarios such as:

  • Forcing end users to define a dedicated application password or use an on-screen keyboard with a remote control
  • Degrading the security posture of the end users by exposing their credentials to the client application or external observers

One common example of this type of scenario is a TV HDMI streaming device where, to be able to consume videos, the user must slowly select each letter of their user name and password with the remote control, which exposes these values to other people in the room during the operation.

Solution overview

The OAuth 2.0 device authorization grant (RFC 8628) is an IETF standard that enables Internet of Things (IoT) devices to initiate a unique transaction that authenticated end users can securely confirm through their native browsers. After the user authorizes the transaction, the solution will issue a delegated OAuth 2.0 access token that represents the end user to the requesting device through a back-channel call, as shown in Figure 1.
 

Figure 1: The device grant flow implemented in this solution

Figure 1: The device grant flow implemented in this solution

The workflow is as follows:

  1. An unauthenticated user requests service from the device.
  2. The device requests a pair of random codes (one for the device and one for the user) by authenticating with the client ID and client secret.
  3. The Lambda function creates an authorization request that stores the device code, user code, scope, and requestor’s client ID.
  4. The device provides the user code to the user.
  5. The user enters their user code on an authenticated web page to authorize the client application.
  6. The user is redirected to the Amazon Cognito user pool /authorize endpoint to request an authorization code.
  7. The user is returned to the Lambda function /callback endpoint with an authorization code.
  8. The Lambda function stores the authorization code in the authorization request.
  9. The device uses the device code to check the status of the authorization request regularly. And, after the authorization request is approved, the device uses the device code to retrieve a set of JSON web tokens from the Lambda function.
  10. In this case, the Lambda function impersonates the device to the Amazon Cognito user pool /token endpoint by using the authorization code that is stored in the authorization request, and returns the JSON web tokens to the device.

To achieve this flow, this blog post provides a solution that is composed of:

  • An AWS Lambda function with three additional endpoints:
    • The /token endpoint, which will handle client application requests such as generation of codes, the authorization request status check, and retrieval of the JSON web tokens.
    • The /device endpoint, which will handle user requests such as delivering the UI for approval or denial of the authorization request, or retrieving an authorization code.
    • The /callback endpoint, which will handle the reception of the authorization code associated with the user who is approving or denying the authorization request.
  • An Amazon Cognito user pool with:
  • Finally, an Amazon DynamoDB table to store the state of all the processed authorization requests.

Implement the solution

The implementation of this solution requires three steps:

  1. Define the public fully qualified domain name (FQDN) for the Application Load Balancer public endpoint and associate an X.509 certificate to the FQDN
  2. Deploy the provided AWS CloudFormation template
  3. Configure the DNS to point to the Application Load Balancer public endpoint for the public FQDN

Step 1: Choose a DNS name and create an SSL certificate

Your Lambda function endpoints must be publicly resolvable when they are exposed by the Application Load Balancer through an HTTPS/443 listener.

To configure the Application Load Balancer component

  1. Choose an FQDN in a DNS zone that you own.
  2. Associate an X.509 certificate and private key to the FQDN by doing one of the following:
  3. After you have the certificate in ACM, navigate to the Certificates page in the ACM console.
  4. Choose the right arrow (►) icon next to your certificate to show the certificate details.
     
    Figure 2: Locating the certificate in ACM

    Figure 2: Locating the certificate in ACM

  5. Copy the Amazon Resource Name (ARN) of the certificate and save it in a text file.
     
    Figure 3: Locating the certificate ARN in ACM

    Figure 3: Locating the certificate ARN in ACM

Step 2: Deploy the solution by using a CloudFormation template

To configure this solution, you’ll need to deploy the solution CloudFormation template.

Before you deploy the CloudFormation template, you can view it in its GitHub repository.

To deploy the CloudFormation template

  1. Choose the following Launch Stack button to launch a CloudFormation stack in your account.
    Select the Launch Stack button to launch the template

    Note: The stack will launch in the N. Virginia (us-east-1) Region. To deploy this solution into other AWS Regions, download the solution’s CloudFormation template, modify it, and deploy it to the selected Region.

  2. During the stack configuration, provide the following information:
    • A name for the stack.
    • The ARN of the certificate that you created or imported in AWS Certificate Manager.
    • A valid email address that you own. The initial password for the Amazon Cognito test user will be sent to this address.
    • The FQDN that you chose earlier, and that is associated to the certificate that you created or imported in AWS Certificate Manager.
    Figure 4: Configure the CloudFormation stack

    Figure 4: Configure the CloudFormation stack

  3. After the stack is configured, choose Next, and then choose Next again. On the Review page, select the check box that authorizes CloudFormation to create AWS Identity and Access Management (IAM) resources for the stack.
     
    Figure 5: Authorize CloudFormation to create IAM resources

    Figure 5: Authorize CloudFormation to create IAM resources

  4. Choose Create stack to deploy the stack. The deployment will take several minutes. When the status says CREATE_COMPLETE, the deployment is complete.

Step 3: Finalize the configuration

After the stack is set up, you must finalize the configuration by creating a DNS CNAME entry in the DNS zone you own that points to the Application Load Balancer DNS name.

To create the DNS CNAME entry

  1. In the CloudFormation console, on the Stacks page, locate your stack and choose it.
     
    Figure 6: Locating the stack in CloudFormation

    Figure 6: Locating the stack in CloudFormation

  2. Choose the Outputs tab.
  3. Copy the value for the key ALBCNAMEForDNSConfiguration.
     
    Figure 7: The ALB CNAME output in CloudFormation

    Figure 7: The ALB CNAME output in CloudFormation

  4. Configure a CNAME DNS entry into your DNS hosted zone based on this value. For more information on how to create a CNAME entry to the Application Load Balancer in a DNS zone, see Creating records by using the Amazon Route 53 console.
  5. Note the other values in the Output tab, which you will use in the next section of this post.

    Output key Output value and function
    DeviceCognitoClientClientID The app client ID, to be used by the simulated device to interact with the authorization server
    DeviceCognitoClientClientSecret The app client secret, to be used by the simulated device to interact with the authorization server
    TestEndPointForDevice The HTTPS endpoint that the simulated device will use to make its requests
    TestEndPointForUser The HTTPS endpoint that the user will use to make their requests
    UserPassword The password for the Amazon Cognito test user
    UserUserName The user name for the Amazon Cognito test user

Evaluate the solution

Now that you’ve deployed and configured the solution, you can initiate the OAuth 2.0 device code grant flow.

Until you implement your own device logic, you can perform all of the device calls by using the curl library, a Postman client, or any HTTP request library or SDK that is available in the client application coding language.

All of the following device HTTPS requests are made with the assumption that the device is a private OAuth 2.0 client. Therefore, an HTTP Authorization Basic header will be present and formed with a base64-encoded Client ID:Client Secret value.

You can retrieve the URI of the endpoints, the client ID, and the client secret from the CloudFormation Output table for the deployed stack, as described in the previous section.

Initialize the flow from the client application

The solution in this blog post lets you decide how the user will ask the device to start the authorization request and how the user will be presented with the user code and URI in order to verify the request. However, you can emulate the device behavior by generating the following HTTPS POST request to the Application Load Balancer–protected Lambda function /token endpoint with the appropriate HTTP Authorization header. The Authorization header is composed of:

  • The prefix Basic, describing the type of Authorization header
  • A space character as separator
  • The base64 encoding of the concatenation of:
    • The client ID
    • The colon character as a separator
    • The client secret
     POST /token?client_id=AIDACKCEVSQ6C2EXAMPLE HTTP/1.1
     User-Agent: Mozilla/4.0 (compatible; MSIE5.01; Windows NT)
     Host: <FQDN of the ALB protected Lambda function>
     Accept: */*
     Accept-Encoding: gzip, deflate
     Connection: Keep-Alive
     Authorization: Basic QUlEQUNLQ0VWUwJalrXUtnFEMI/K7MDENG/bPxRfiCYEXAMPLEKEY VORy9iUHhSZmlDWUVYQU1QTEVLRVkg
    

The following JSON message will be returned to the client application.

Server: awselb/2.0
Date: Tue, 06 Apr 2021 19:57:31 GMT
Content-Type: application/json
Content-Length: 33
Connection: keep-alive
cache-control: no-store
{
    "device_code": "APKAEIBAERJR2EXAMPLE",
    "user_code": "ANPAJ2UCCR6DPCEXAMPLE",
    "verification_uri": "https://<FQDN of the ALB protected Lambda function>/device",
    "verification_uri_complete":"https://<FQDN of the ALB protected Lambda function>/device?code=ANPAJ2UCCR6DPCEXAMPLE&authorize=true",
    "interval": <Echo of POLLING_INTERVAL environment variable>,
    "expires_in": <Echo of CODE_EXPIRATION environment variable>
}

Check the status of the authorization request from the client application

You can emulate the process where the client app regularly checks for the authorization request status by using the following HTTPS POST request to the Application Load Balancer–protected Lambda function /token endpoint. The request should have the same HTTP Authorization header that was defined in the previous section.

POST /token?client_id=AIDACKCEVSQ6C2EXAMPLE&device_code=APKAEIBAERJR2EXAMPLE&grant_type=urn:ietf:params:oauth:grant-type:device_code HTTP/1.1
 User-Agent: Mozilla/4.0 (compatible; MSIE5.01; Windows NT)
 Host: <FQDN of the ALB protected Lambda function>
 Accept: */*
 Accept-Encoding: gzip, deflate
 Connection: Keep-Alive
 Authorization: Basic QUlEQUNLQ0VWUwJalrXUtnFEMI/K7MDENG/bPxRfiCYEXAMPLEKEY VORy9iUHhSZmlDWUVYQU1QTEVLRVkg

Until the authorization request is approved, the client application will receive an error message that includes the reason for the error: authorization_pending if the request is not yet authorized, slow_down if the polling is too frequent, or expired if the maximum lifetime of the code has been reached. The following example shows the authorization_pending error message.

HTTP/1.1 400 Bad Request
Server: awselb/2.0
Date: Tue, 06 Apr 2021 20:57:31 GMT
Content-Type: application/json
Content-Length: 33
Connection: keep-alive
cache-control: no-store
{
"error":"authorization_pending"
}

Approve the authorization request with the user code

Next, you can approve the authorization request with the user code. To act as the user, you need to open a browser and navigate to the verification_uri that was provided by the client application.

If you don’t have a session with the Amazon Cognito user pool, you will be required to sign in.

Note: Remember that the initial password was sent to the email address you provided when you deployed the CloudFormation stack.

If you used the initial password, you’ll be asked to change it. Make sure to respect the password policy when you set a new password. After you’re authenticated, you’ll be presented with an authorization page, as shown in Figure 8.
 

Figure 8: The user UI for approving or denying the authorization request

Figure 8: The user UI for approving or denying the authorization request

Fill in the user code that was provided by the client application, as in the previous step, and then choose Authorize.

When the operation is successful, you’ll see a message similar to the one in Figure 9.
 

Figure 9: The “Success” message when the authorization request has been approved

Figure 9: The “Success” message when the authorization request has been approved

Finalize the flow from the client app

After the request has been approved, you can emulate the final client app check for the authorization request status by using the following HTTPS POST request to the Application Load Balancer–protected Lambda function /token endpoint. The request should have the same HTTP Authorization header that was defined in the previous section.

POST /token?client_id=AIDACKCEVSQ6C2EXAMPLE&device_code=APKAEIBAERJR2EXAMPLE&grant_type=urn:ietf:params:oauth:grant-type:device_code HTTP/1.1
 User-Agent: Mozilla/4.0 (compatible; MSIE5.01; Windows NT)
 Host: <FQDN of the ALB protected Lambda function>
 Accept: */*
 Accept-Encoding: gzip, deflate
 Connection: Keep-Alive
 Authorization: Basic QUlEQUNLQ0VWUwJalrXUtnFEMI/K7MDENG/bPxRfiCYEXAMPLEKEY VORy9iUHhSZmlDWUVYQU1QTEVLRVkg

The JSON web token set will then be returned to the client application, as follows.

HTTP/1.1 200 OK
Server: awselb/2.0
Date: Tue, 06 Apr 2021 21:41:50 GMT
Content-Type: application/json
Content-Length: 3501
Connection: keep-alive
cache-control: no-store
{
"access_token":"eyJrEXAMPLEHEADER2In0.eyJznvbEXAMPLEKEY6IjIcyJ9.eYEs-zaPdEXAMPLESIGCPltw",
"refresh_token":"eyJjdEXAMPLEHEADERifQ. AdBTvHIAPKAEIBAERJR2EXAMPLELq -co.pjEXAMPLESIGpw",
"expires_in":3600

The client application can now consume resources on behalf of the user, thanks to the access token, and can refresh the access token autonomously, thanks to the refresh token.

Going further with this solution

This project is delivered with a default configuration that can be extended to support additional security capabilities or to and adapted the experience to your end-users’ context.

Extending security capabilities

Through this solution, you can:

  • Use an AWS KMS key issued by AWS KMS to:
    • Encrypt the data in the database;
    • Protect the configuration in the Amazon Lambda function;
  • Use AWS Secret Manager to:
    • Securely store sensitive information like Cognito application client’s credentials;
    • Enforce Cognito application client’s credentials rotation;
  • Implement additional Amazon Lambda’s code to enforce data integrity on changes;
  • Activate AWS WAF WebACLs to protect your endpoints against attacks;

Customizing the end-user experience

The following table shows some of the variables you can work with.

Name Function Default value Type
CODE_EXPIRATION Represents the lifetime of the codes generated 1800 Seconds
DEVICE_CODE_FORMAT Represents the format for the device code #aA A string where:
# represents numbers
a lowercase letters
A uppercase letters
! special characters
DEVICE_CODE_LENGTH Represents the device code length 64 Number
POLLING_INTERVAL Represents the minimum time, in seconds, between two polling events from the client application 5 Seconds
USER_CODE_FORMAT Represents the format for the user code #B A string where:
# represents numbers
a lowercase letters
b lowercase letters that aren’t vowels
A uppercase letters
B uppercase letters that aren’t vowels
! special characters
USER_CODE_LENGTH Represents the user code length 8 Number
RESULT_TOKEN_SET Represents what should be returned in the token set to the client application ACCESS+REFRESH A string that includes only ID, ACCESS, and REFRESH values separated with a + symbol

To change the values of the Lambda function variables

  1. In the Lambda console, navigate to the Functions page.
  2. Select the DeviceGrant-token function.
     
    Figure 10: AWS Lambda console—Function selection

    Figure 10: AWS Lambda console—Function selection

  3. Choose the Configuration tab.
     
    Figure 11: AWS Lambda function—Configuration tab

    Figure 11: AWS Lambda function—Configuration tab

  4. Select the Environment variables tab, and then choose Edit to change the values for the variables.
     
    Figure 12: AWS Lambda Function—Environment variables tab

    Figure 12: AWS Lambda Function—Environment variables tab

  5. Generate new codes as the device and see how the experience changes based on how you’ve set the environment variables.

Conclusion

Although your business and security requirements can be more complex than the example shown in this post, this blog post will give you a good way to bootstrap your own implementation of the Device Grant Flow (RFC 8628) by using Amazon Cognito, AWS Lambda, and Amazon DynamoDB.

Your end users can now benefit from the same level of security and the same experience as they have when they enroll their identity in their mobile applications, including the following features:

  • Credentials will be provided through a full-featured application on the user’s mobile device or their computer
  • Credentials will be checked against the source of authority only
  • The authentication experience will match the typical authentication process chosen by the end user
  • Upon consent by the end user, IoT devices will be provided with end-user delegated dynamic credentials that are bound to the exact scope of tasks for that device

If you have feedback about this post, submit comments in the Comments section below. If you have questions about this post, start a new thread on the Amazon Cognito forum or reach out through the post’s GitHub repository.

Want more AWS Security how-to content, news, and feature announcements? Follow us on Twitter.
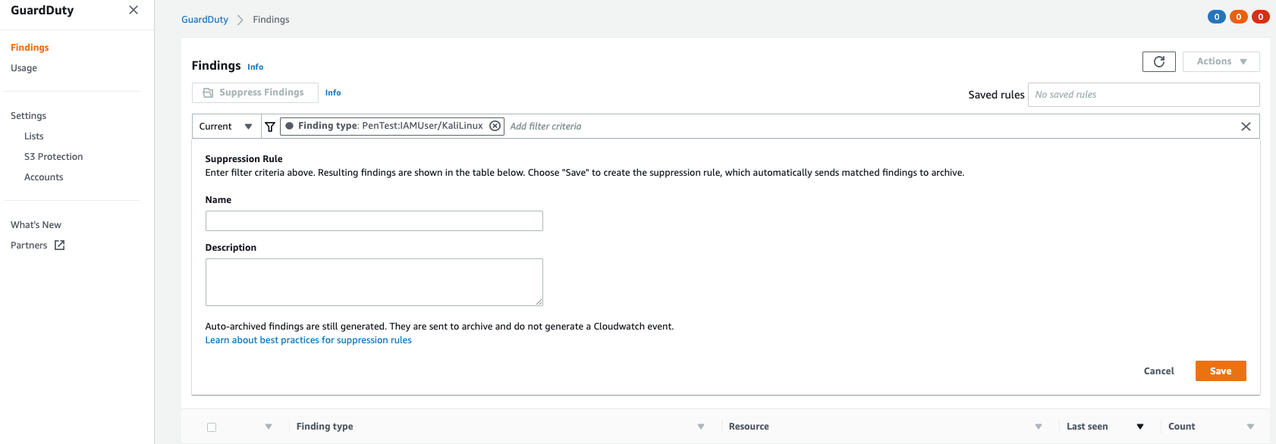
Author

Jeff Lombardo

Jeff is a solutions architect expert in IAM, Application Security, and Data Protection. Through 16 years as a security consultant for enterprises of all sizes and business verticals, he delivered innovative solutions with respect to standards and governance frameworks. Today at AWS, he helps organizations enforce best practices and defense in depth for secure cloud adoption.