Post Syndicated from Koushik Konjeti original https://aws.amazon.com/blogs/big-data/federate-to-amazon-redshift-query-editor-v2-with-microsoft-entra-id/
Amazon Redshift is a fast, petabyte-scale, cloud data warehouse that tens of thousands of customers rely on to power their analytics workloads. With its massively parallel processing (MPP) architecture and columnar data storage, Amazon Redshift delivers high price-performance for complex analytical queries against large datasets.
To interact with and analyze data stored in Amazon Redshift, AWS provides the Amazon Redshift Query Editor V2, a web-based tool that allows you to explore, analyze, and share data using SQL. The Query Editor V2 offers a user-friendly interface for connecting to your Redshift clusters, executing queries, and visualizing results.
As organizations increasingly adopt cloud-based solutions and centralized identity management, the need for seamless and secure access to data warehouses like Amazon Redshift becomes crucial. Many customers have already implemented identity providers (IdPs) like Microsoft Entra ID (formerly Azure Active Directory) for single sign-on (SSO) access across their applications and services. For more information about using Microsoft Entra ID for federation to Amazon Redshift with SQL clients, see Federate Amazon Redshift access with Microsoft Azure AD single sign-on. This post focuses on setting up federation for accessing the Redshift Query Editor.
Through this federated setup, users can connect to the Redshift Query Editor using their existing Microsoft Entra ID credentials, allowing you to control permissions for database objects based on business groups defined in your Active Directory. This approach provides a seamless user experience while centralizing the governance of authentication and permissions for end-users, eliminating the need to manage separate credentials for data warehousing. Additionally, you can restrict access to specific datasets based on the user’s business group, so users only have access to the data they are authorized to view and manage.
In the following sections, we explore the process of federating into AWS using Microsoft Entra ID and AWS Identity and Access Management (IAM), and how to restrict access to datasets based on permissions linked to AD groups. Although the integration with AWS IAM Identity Center is the recommended approach, this post focuses on setups where IAM Identity Center might not be applicable due to compliance constraints, such as organizations requiring FedRAMP Moderate compliance, which IAM Identity Center doesn’t yet meet. We cover the prerequisites, guide you through the setup process, and demonstrate how to seamlessly connect to the Redshift Query Editor while making sure data access permissions are accurately enforced based on your Microsoft Entra ID groups.
Solution overview
The following diagram illustrates the authentication flow of Microsoft Entra ID with a Redshift cluster using federated IAM roles.

The configuration of federation between Microsoft Entra ID and IAM to enable seamless access to Amazon Redshift through a SQL client such as the Redshift Query Editor V2 involves the following main components:
- Users start by authenticating with their Microsoft Entra ID credentials by accessing the enterprise application’s user access URL.
- Upon successful authentication, the custom claims provider triggers the custom authentication extension’s token issuance start event listener.
- The custom authentication extension calls an Azure function (your REST API endpoint) with information about the event, user profile, session data, and other context.
- The Azure function makes a call to the Microsoft Graph API to retrieve the authenticated user’s group membership information.
- The Microsoft Graph API responds with the user’s group membership details.
- The Azure function takes the group information and transforms it into a colon-separated list, such as
group1:group2:group3, and passes this colon-separated group information back to the custom authentication extension as a response payload.
- The custom authentication extension processes the response and augments the token with the user’s group information as SAML claims (principal tags). The token, now enriched with the group membership, is returned to the enterprise application.
- The enterprise application in Azure AD generates a SAML assertion with principal tags. It sends an HTTP POST to the user’s browser containing an HTML form. This form includes the SAML assertion and specifies the AWS sign-in SAML endpoint (
https://signin.aws.amazon.com/saml) as the destination where the SAML assertion should be submitted.
- The browser automatically submits this SAML assertion, sending an HTTP POST to the AWS SAML endpoint. This endpoint validates and processes the SAML assertion. If multiple IAM roles are available, the user selects one. The AWS SAML endpoint then uses AWS Security Token Service (AWS STS) to generate temporary credentials for that specific role, creates a console sign-in URL, and redirects the user to the AWS Management Console. From there, the user can access the Redshift Query Editor V2. To learn more about this process, refer to Enabling SAML 2.0 federated users to access the AWS Management Console.
- Inside Redshift Query Editor V2, the user selects the option to authenticate using their IAM identity. This triggers the Redshift Query Editor V2 to call the
GetClusterCredentialsWithIAM API, which checks the principal tags to determine the user’s database roles. If this is the user’s first login, the API automatically creates a database user and assigns the necessary database roles.
- The
GetClusterCredentialsWithIAM API issues a temporary user name and password to the user. Using these credentials, the user logs in to the Redshift database. This login authorizes the user based on the Redshift database roles assigned earlier and allows them to run queries on the datasets.
Prerequisites
On the Microsoft Entra ID side, you need the following prerequisites to set up this solution:
- A Microsoft Entra ID tenant – Required to set up and configure the Microsoft Entra ID service for managing and securing access to AWS resources through federation.
- An Azure Subscription – Needed to access and use Azure services like Azure Functions.
Users should be members of specific Azure AD groups based on their access needs:
- User A – Member of the
"redshift_sales" group for access to sales datasets in Amazon Redshift, and the "AWS-<acctno>_dev-bdt-team" group for access to AWS services in the development environment. <acctno> is the AWS account where you have your Redshift cluster.
- User B – Member of the
"redshift_product" group for access to product datasets in Amazon Redshift, and the "AWS-<acctno>_dev-bdt-team" group for access to AWS services.
- User C – Member of both
"redshift_sales" and "redshift_product" groups for access to both datasets, and the "AWS-<acctno>_dev-bdt-team" group for access to AWS services.
The "AWS-<acctno>_dev-bdt-team" group in Azure AD is configured to allow users to assume an IAM role in AWS, providing the necessary permissions to access the AWS account. For a multi-account setup, create multiple groups for different environments or accounts and add users based on their access needs. For example, "AWS-<acctno>_prd-bdt-team" could be used for access to the production environment, where <acctno> reflects the account number for the production account.
On the Amazon Redshift side, you need the following resources:
- Redshift cluster – A Redshift cluster should be available in the AWS account specified by
<acctno> in the AWS-<acctno>_dev-bdt-team group. If not, follow the instructions to create a sample Redshift cluster.
- Redshift database roles – Create database roles in Amazon Redshift that correspond to Microsoft Entra ID groups:
- redshift_sales – For users with access to sales datasets.
- redshift_product – For users with access to product datasets.
- Redshift schemas – You need a Redshift schema named
sales with the table sales_table, which can be accessed by users of the group redshift_sales. You also need a Redshift schema named product with the table product_table, which can be accessed by users of the group redshift_product in the dev database. You can use the following SQL statements on your Redshift cluster to create the groups and tables, inserting data into the created tables and granting access to the appropriate groups:
-- Create Redshift Roles
CREATE ROLE redshift_sales;
CREATE ROLE redshift_product;
-- Create sales schema and sales_table
CREATE SCHEMA sales;
CREATE TABLE sales.sales_table (
    id INT PRIMARY KEY,
    item VARCHAR(255),
    quantity INT,
    price DECIMAL(10,2)
);

-- Create product schema and product_table
CREATE SCHEMA product;
CREATE TABLE product.product_table (
    id INT PRIMARY KEY,
    name VARCHAR(255),
    category VARCHAR(255),
    price DECIMAL(10,2)
);
-- Insert data into sales_table
INSERT INTO sales.sales_table (id, item, quantity, price) VALUES
(1, 'Laptop', 10, 999.99),
(2, 'Smartphone', 20, 499.99),
(3, 'Headphones', 15, 199.99),
(4, 'Keyboard', 12, 89.99),
(5, 'Mouse', 30, 29.99);
-- Insert data into product_table
INSERT INTO product.product_table (id, name, category, price) VALUES
(1, 'Laptop', 'Electronics', 999.99),
(2, 'Smartphone', 'Electronics', 499.99),
(3, 'Blender', 'Home Appliances', 199.99),
(4, 'Mixer', 'Home Appliances', 89.99),
(5, 'Desk Lamp', 'Furniture', 29.99);
-- Grant usage on schema and select on all tables in the schema to redshift_sales
GRANT USAGE ON SCHEMA sales TO ROLE redshift_sales;
GRANT SELECT ON ALL TABLES IN SCHEMA sales TO ROLE redshift_sales;
-- Grant usage on schema and select on all tables in the schema to redshift_product
GRANT USAGE ON SCHEMA product TO ROLE redshift_product;
GRANT SELECT ON ALL TABLES IN SCHEMA product TO ROLE redshift_product;
Setup Azure Functions and custom authentication extensions
Complete the steps in this section to set up Azure Function and custom authentication extensions.
Create a new function app
Complete the following steps to create a new function app:
- Open your web browser and navigate to the Azure Portal (
portal.azure.com).
- Log in with your Azure account credentials.
- Choose Create a resource.
- Choose Create under Function App.

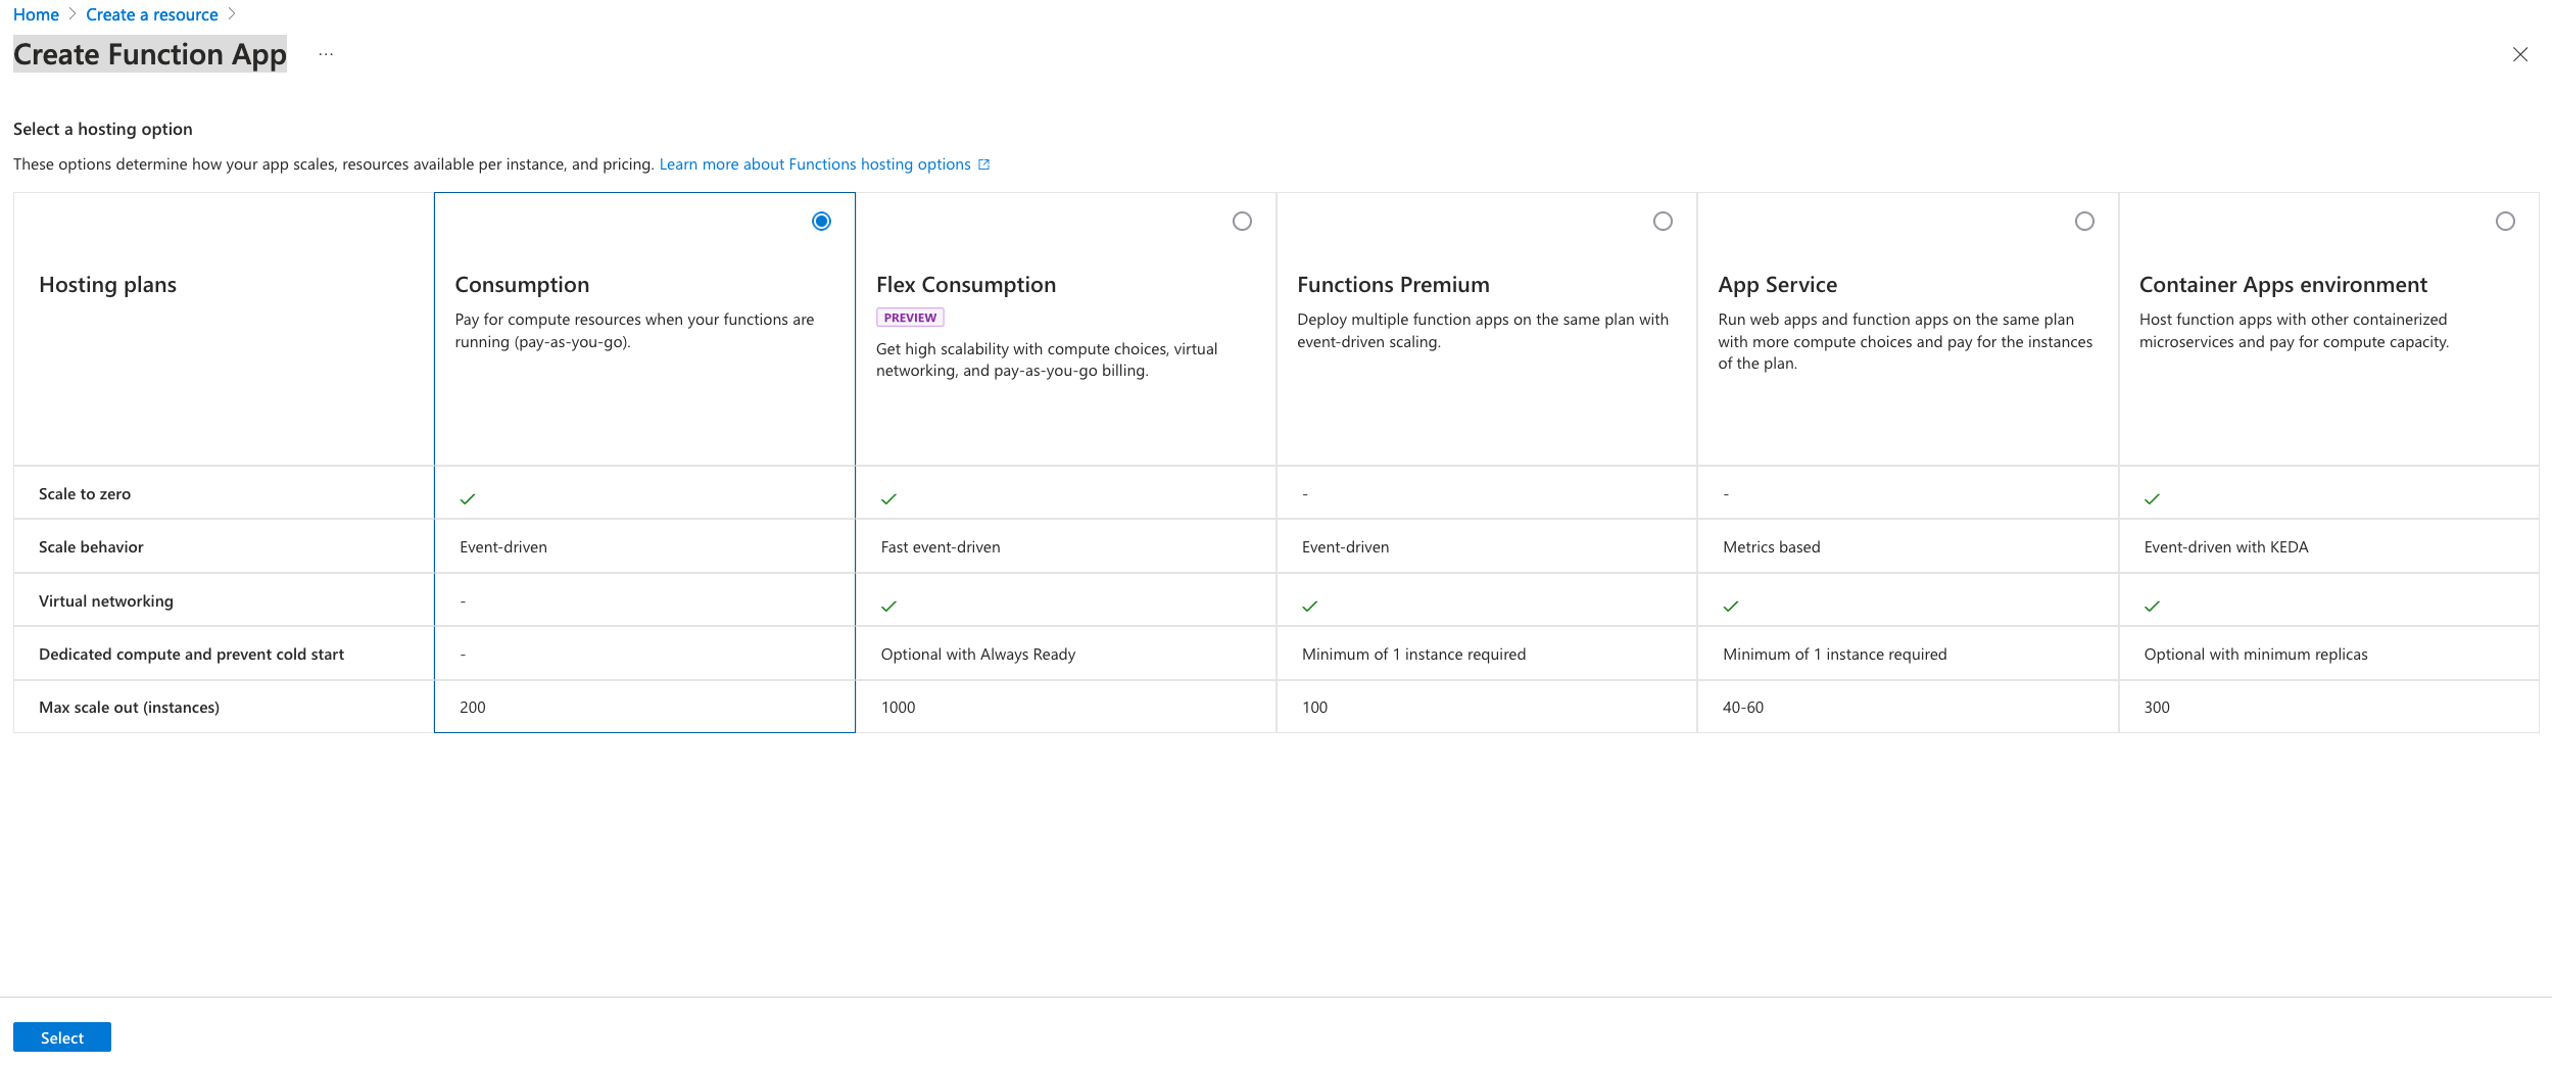
- Select the Consumption hosting plan and then choose Select.

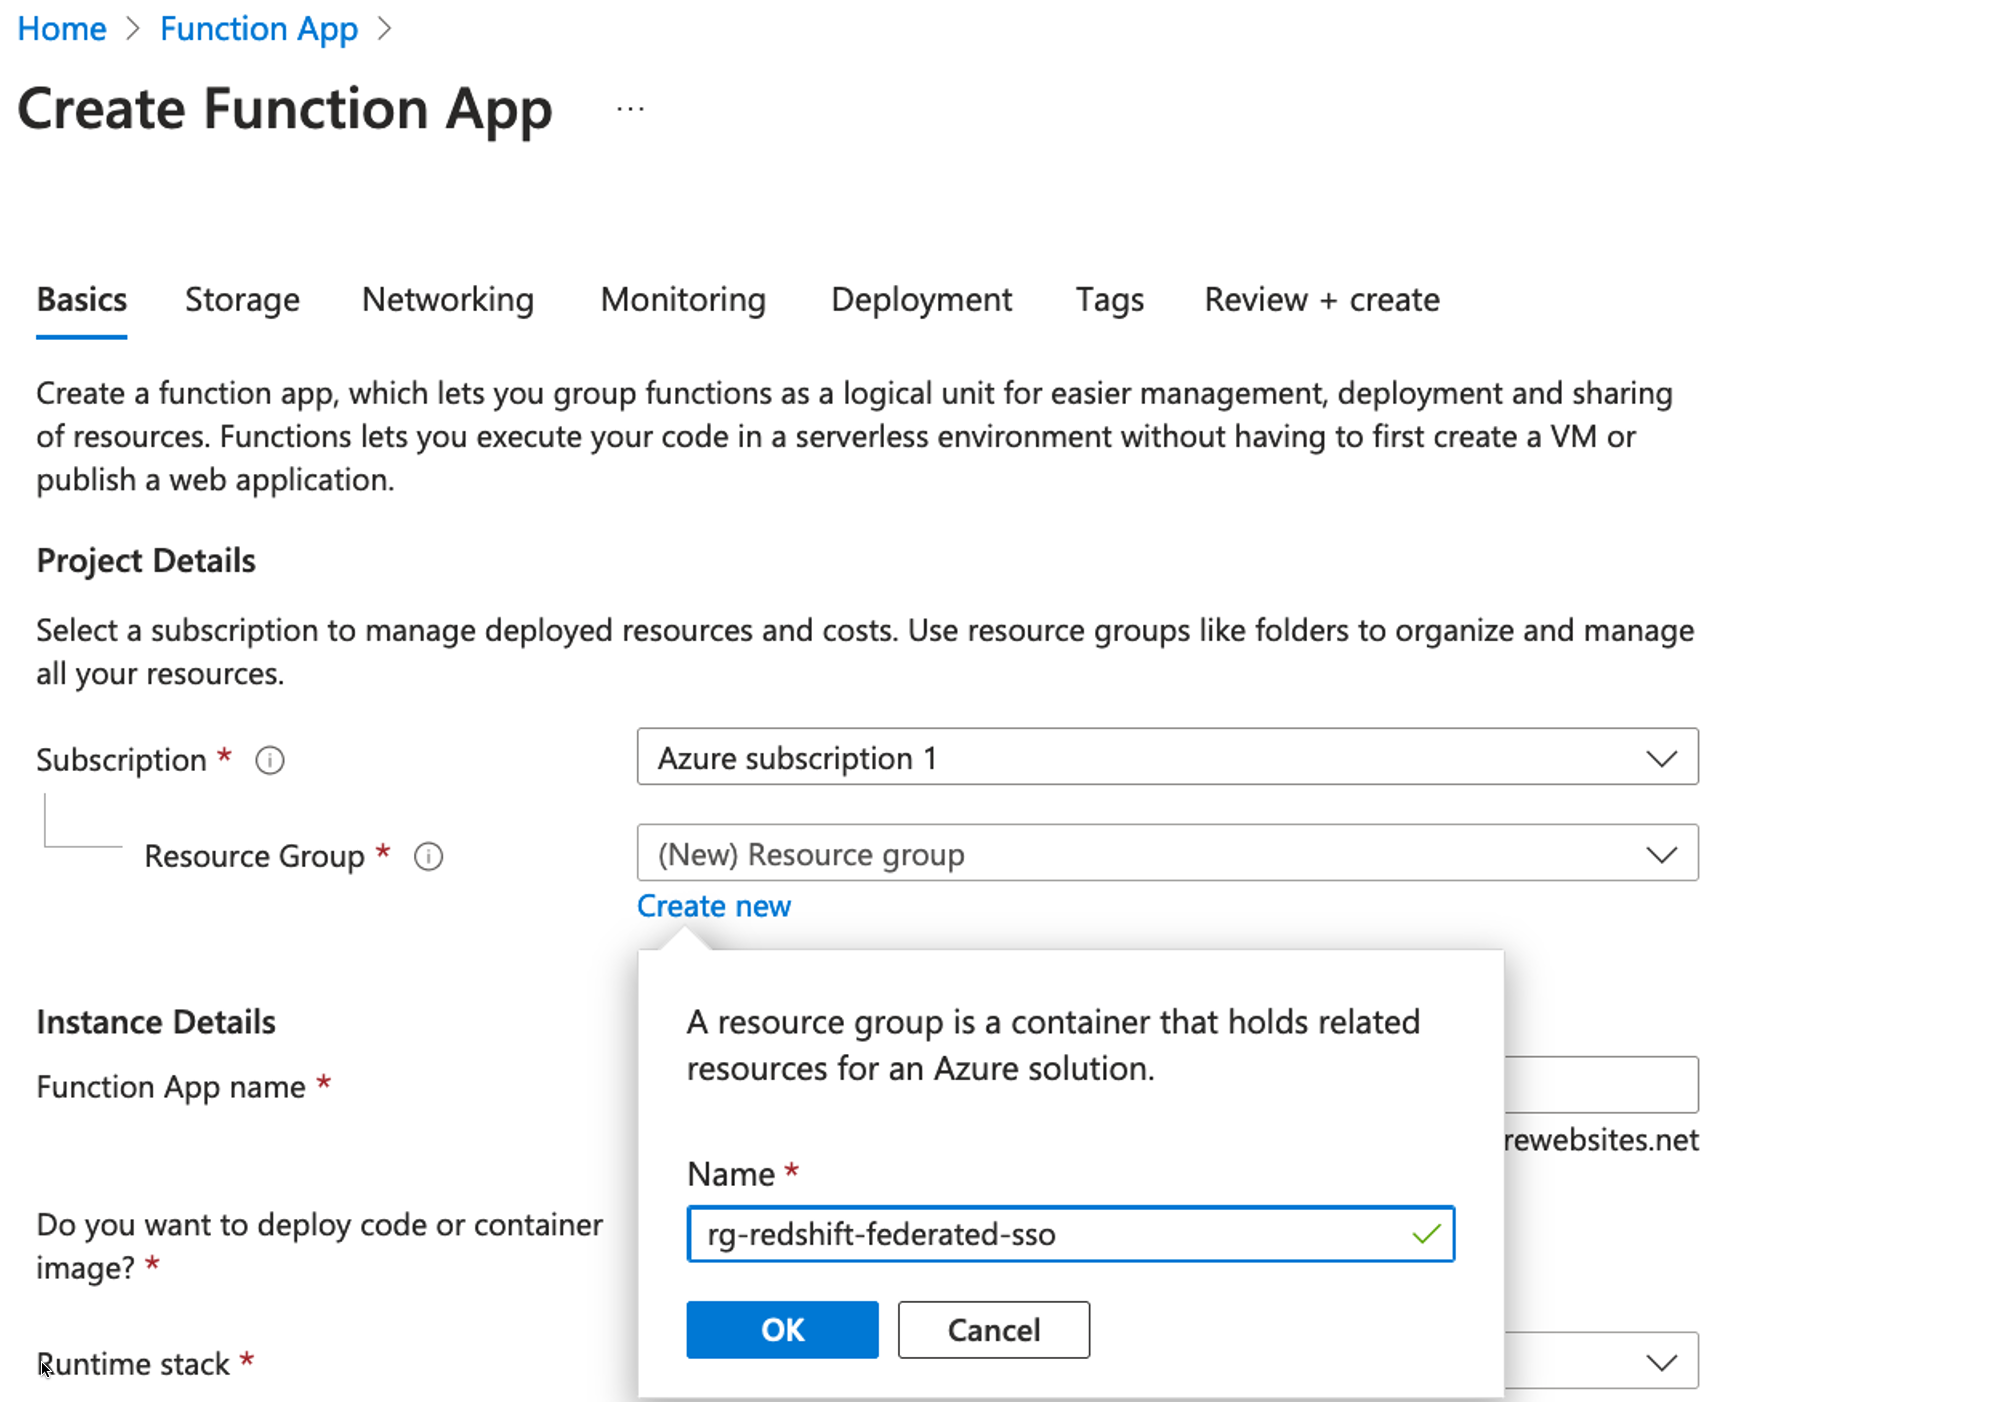
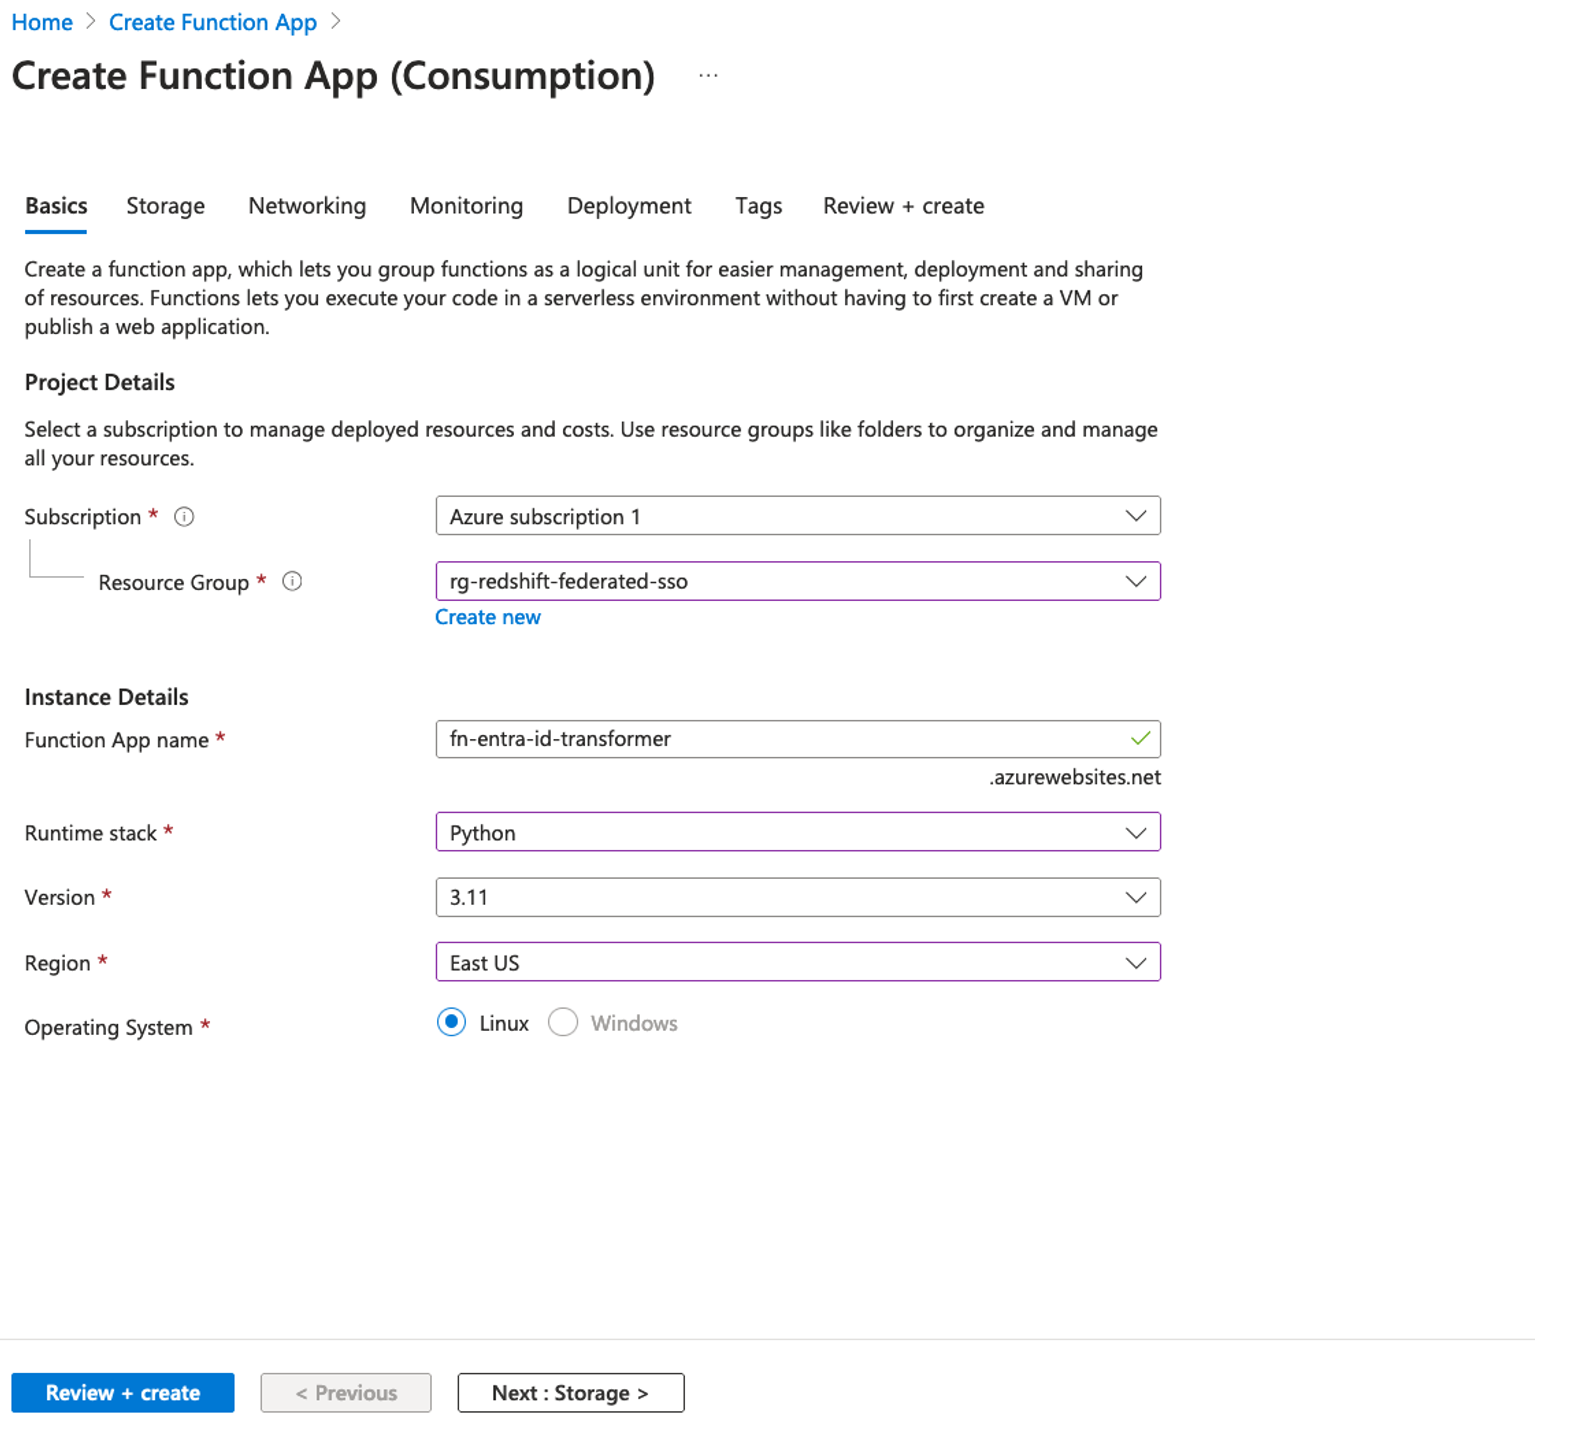
- On the Basics tab, for Subscription, provide the subscription you want to use. For this example, we use our default subscription, Azure subscription 1.
- Choose or create a new resource group to organize your Azure resources. We name our resource group
rg-redshift-federated-sso.

- Under Instance Details, enter a globally unique name. For this post, we use the name
fn-entra-id-transformer.
- For Runtime stack, choose as Python.
- For Version, choose 3.11.
- For Region, choose East Us.
- For Operating System, select Linux.
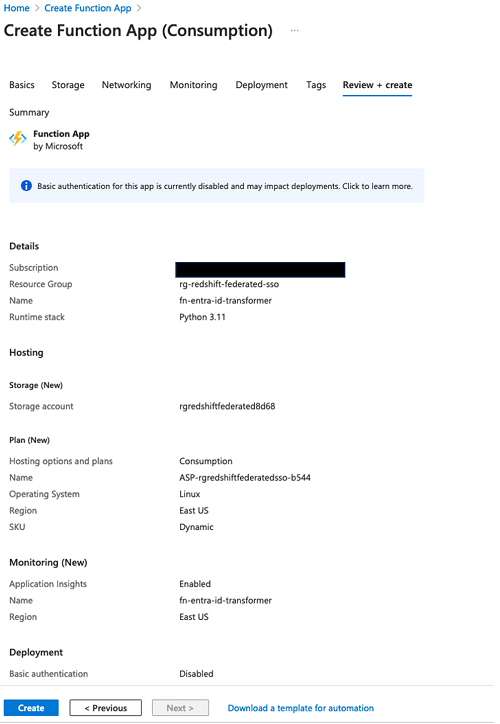
- Choose Review + create to review the app configuration.

- Choose Create to create the Azure Functions app.

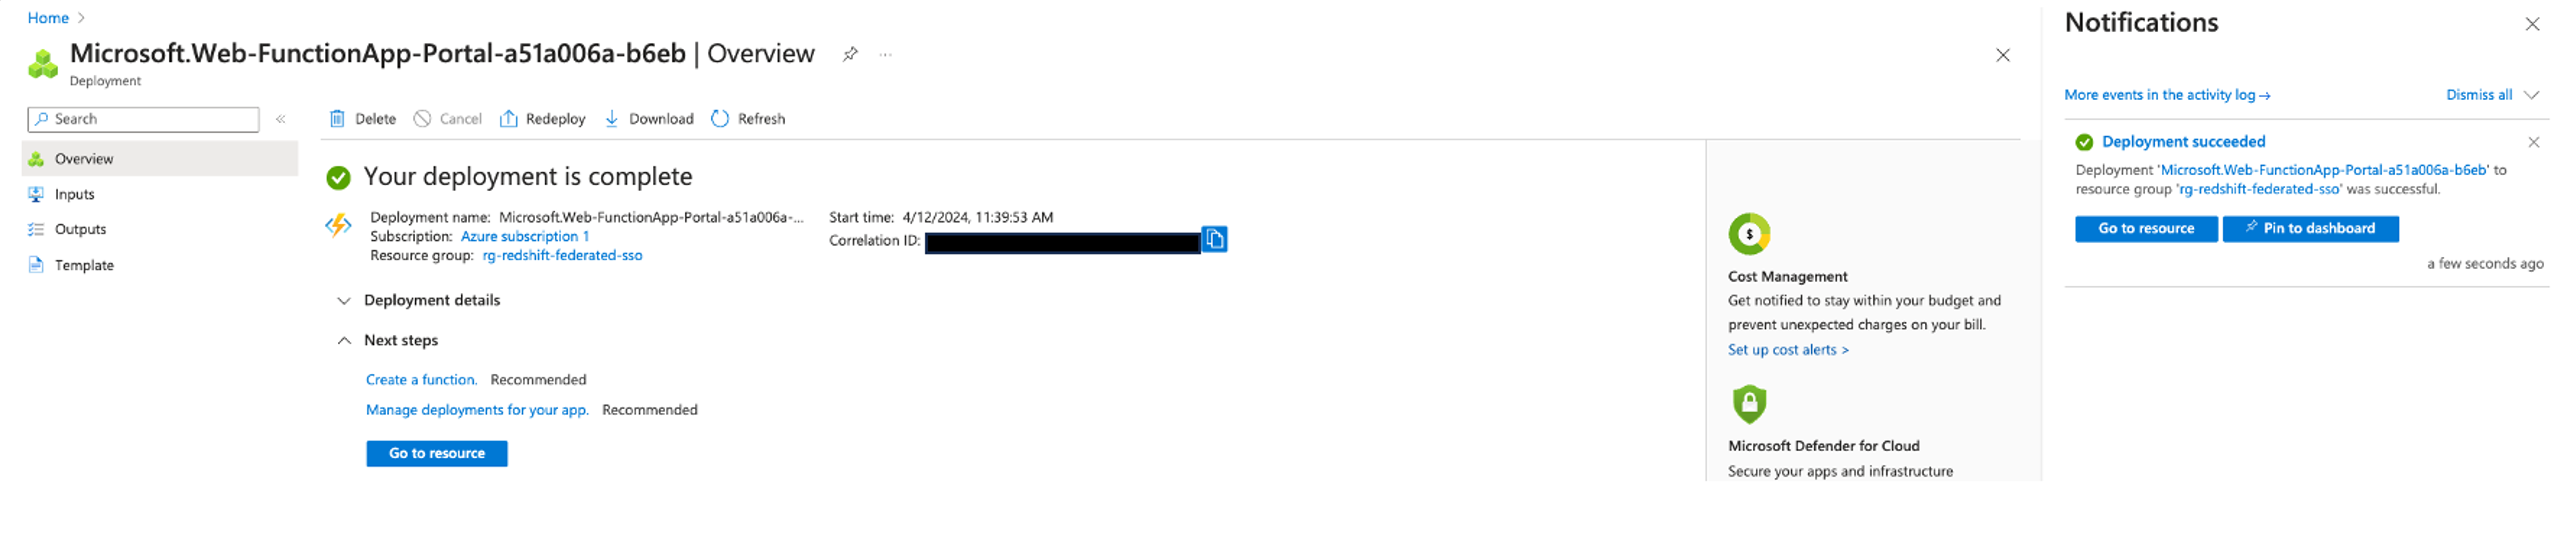
- Choose Go to resource in the notification message or deployment output window to navigate directly to your newly created app.

Create a function
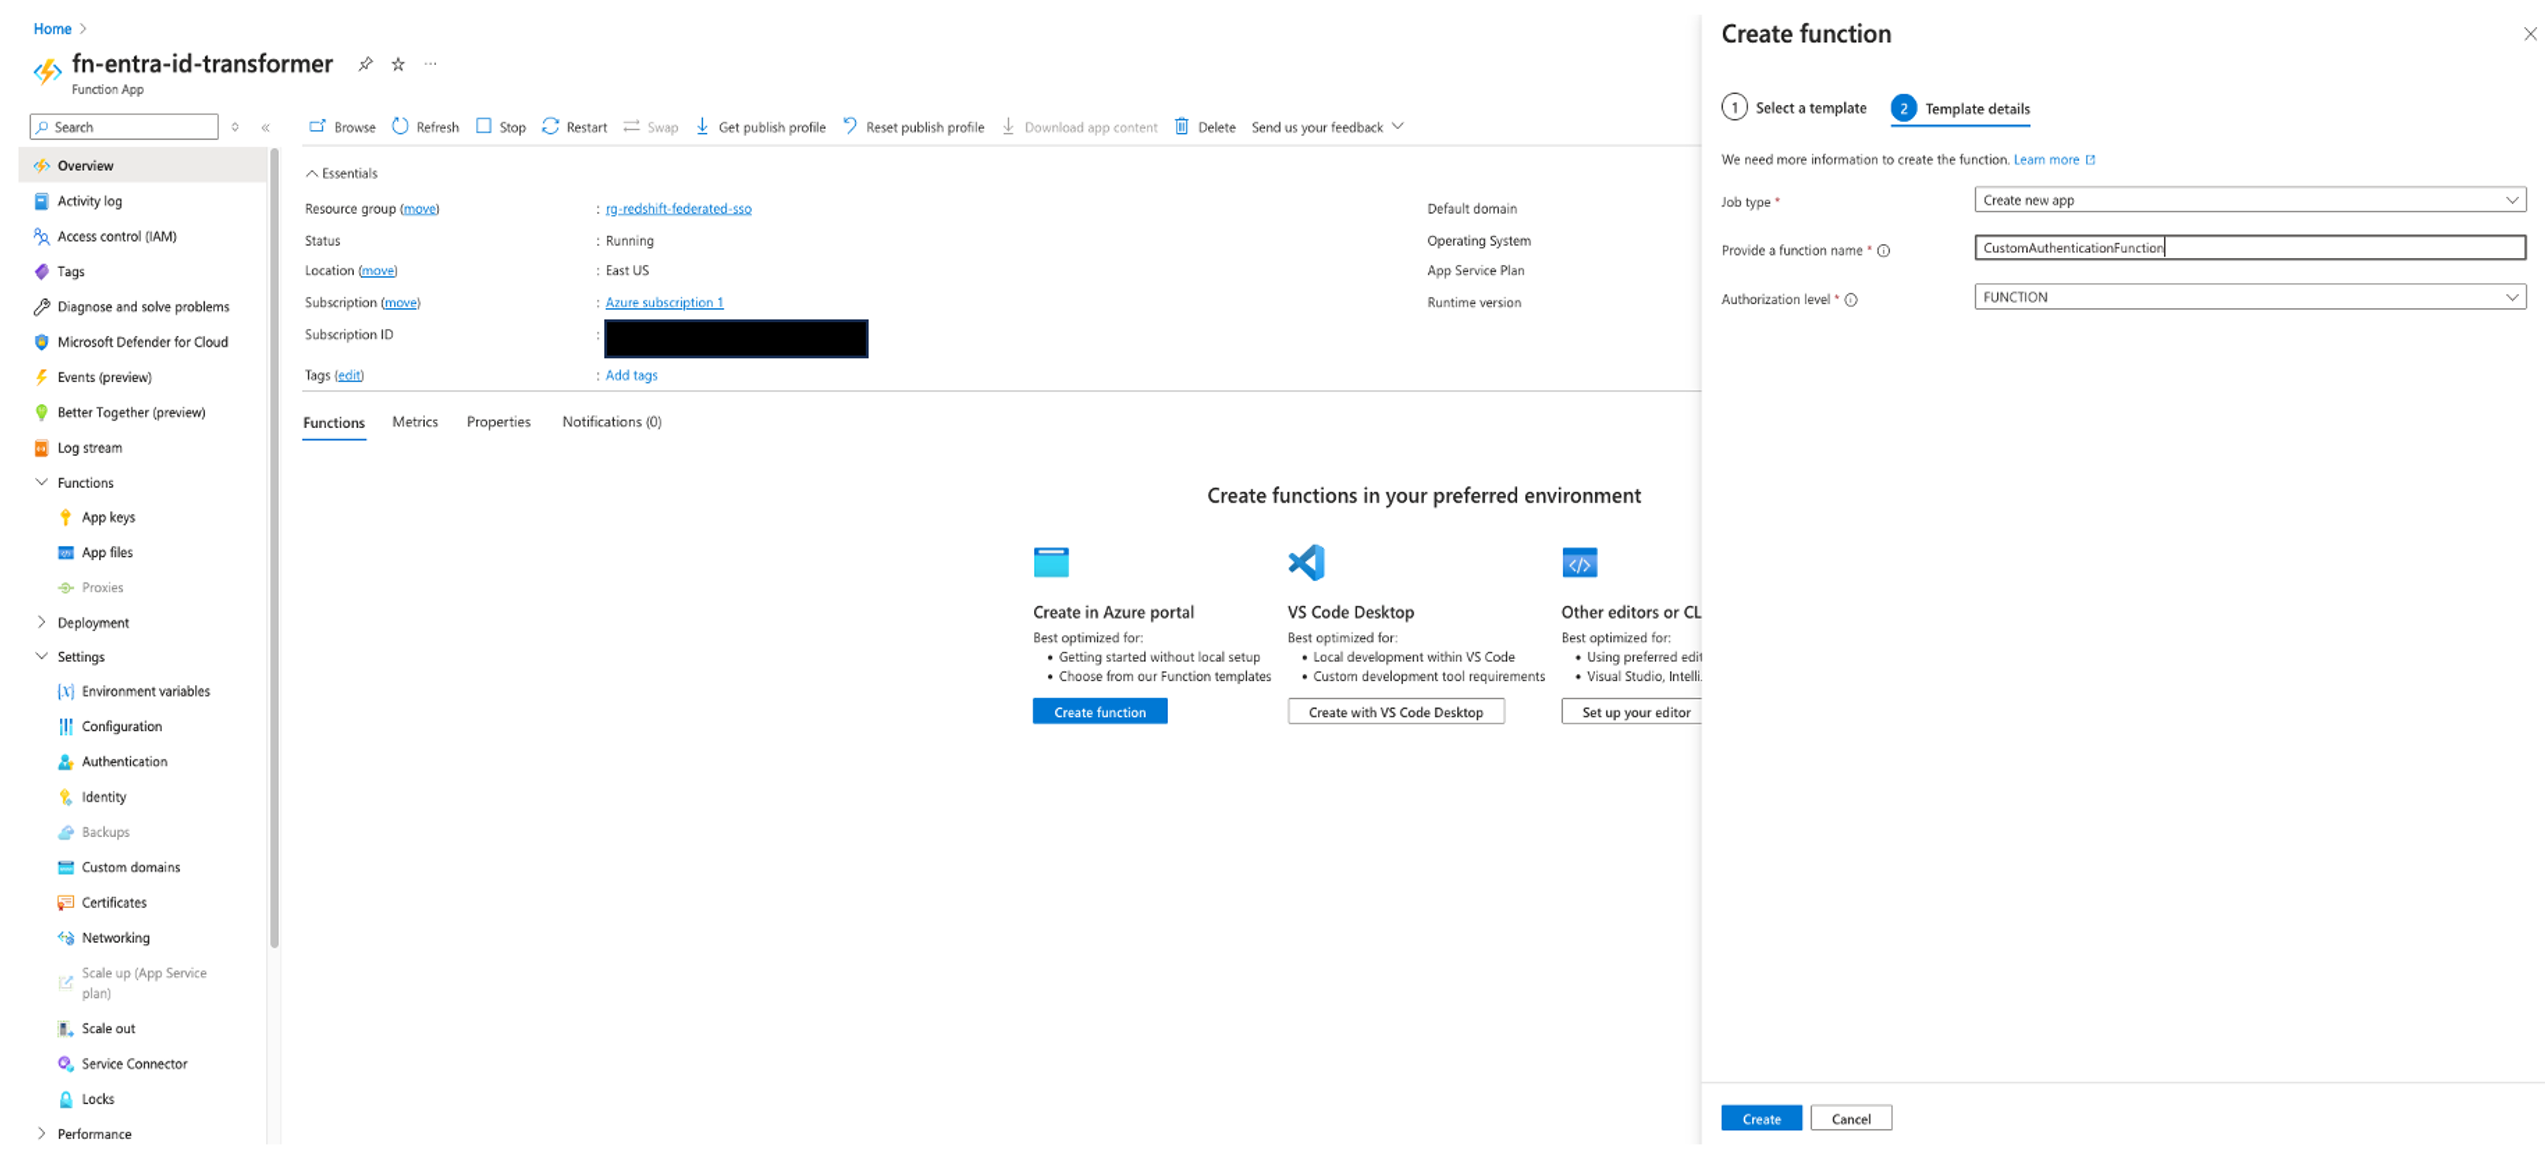
Next, we create a HTTP trigger function in the newly created function app, called fn-entra-id-transformer.
- In the function app, choose Overview, then choose Create function in the Functions section.

- In the Create function pane, provide the following information:
- For Select a template, choose v2 Programming Model.
- For Programming Model, choose the HTTP trigger template.
- choose Next.

- In the Template details section, provide the following information:
- For Job type, choose Create new app.
- For Provide a function name, enter
CustomAuthenticationFunction.
- Leave the Authorization level unchanged, which is set to Function by default.
- Choose Create.

- After the function is created, choose Get function URL and copy the value for default (Function key).

- Store the copied URL securely; you’ll need to use this URL later when setting up a custom authentication extension later in the section.
We will come back to this function later to update the code to retrieve group information.
Create a custom authentication extension
Next, we create a custom authentication extension. Complete the following steps:
- Navigate to Microsoft Entra ID, Enterprise applications, Custom authentication extensions.
- Choose Create a custom extension.

- In the Basics section, provide the following information:
- Leave Event type as
TokenIssuanceStart (which is the default option).
- Select it and choose Next.
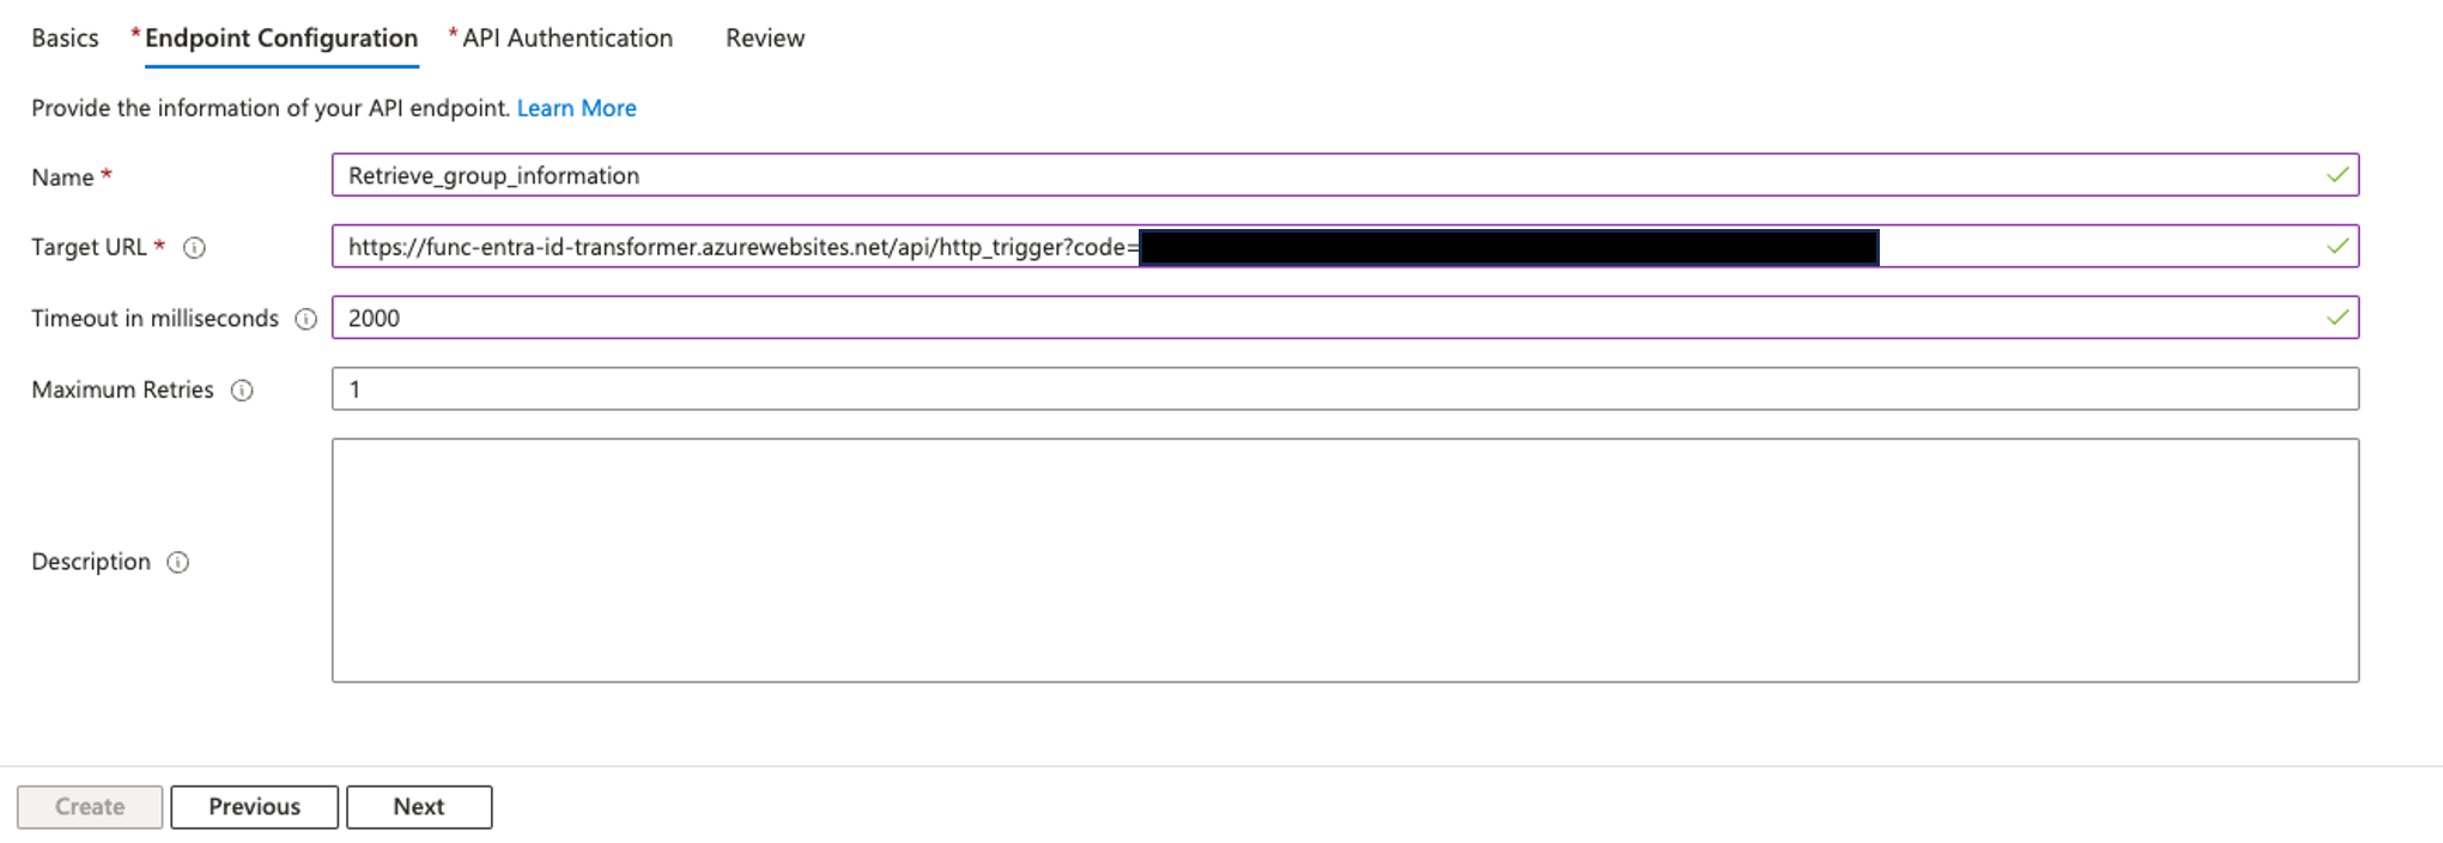
- In the Endpoint Configuration section, provide the following information:
- For Name, enter
Retrieve_user_group_information.
- For Target URL, enter the function URL you stored earlier.
- Leave Timeout in milliseconds and Maximum Retries as the default values.
- Choose Next.

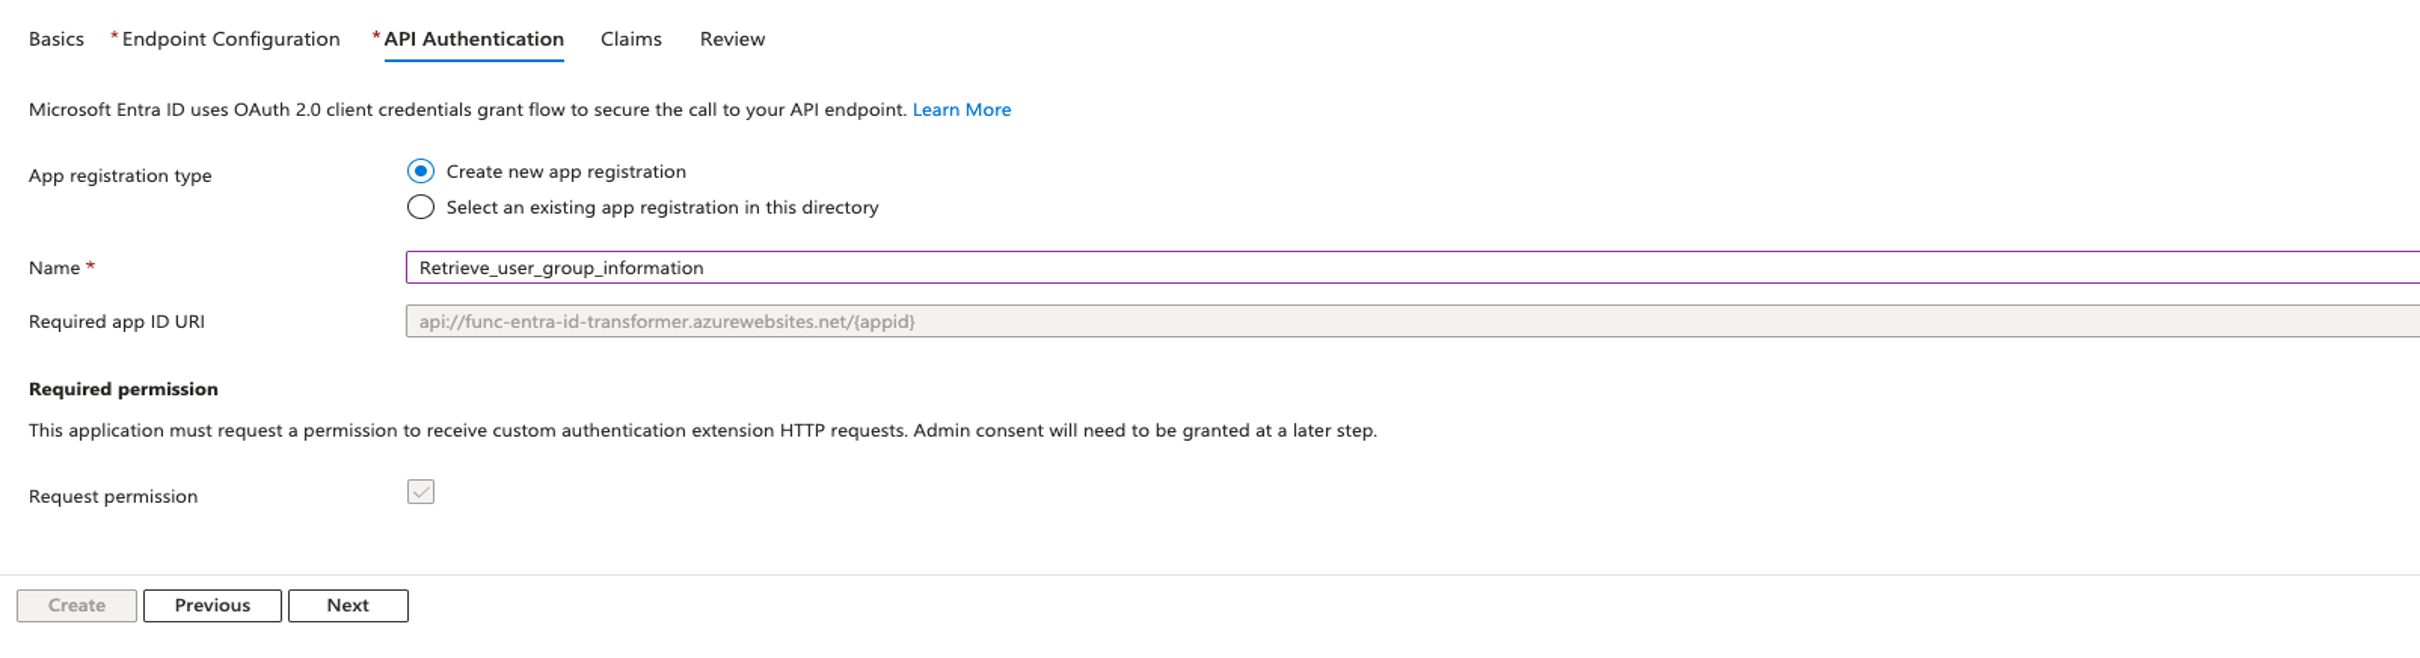
- In the Api Authentication section, provide the following information:
- Select Create new app registration for App registration type.
- For Name, enter
Retrieve_user_group_information.
- Choose Next.

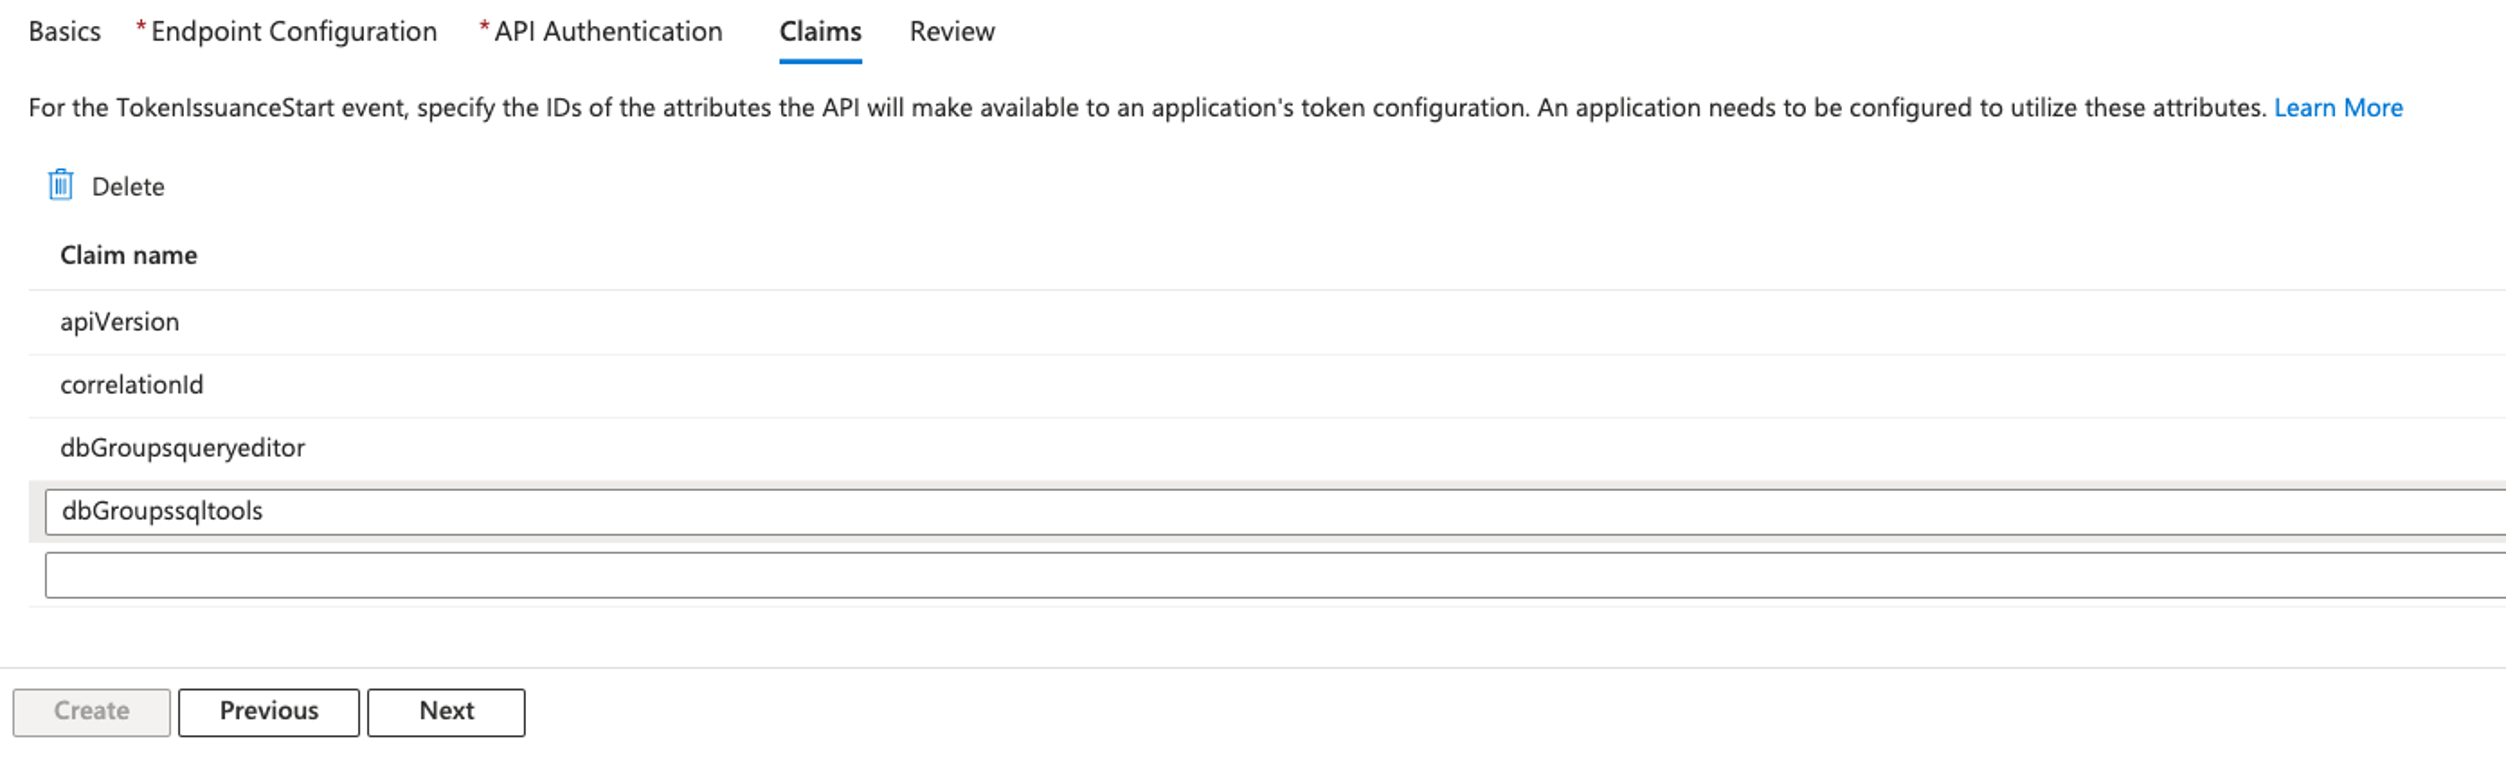
- In the Claims section, provide the following information:
- For Claim name, enter
dbGroupsqueryeditor and dbGroupssqltools.
- Choose Next.

- In the Review section, review the configuration details, and if everything looks correct, choose Create.After the creation is completed, you will be redirected to the overview page of the newly created custom authentication extension.On the overview page, in the API Authentication section, you will see a message indicating that admin consent is required.
- Choose Grant admin consent to grant the required permissions.

After the admin consent is granted successfully, the API Authentication section will show the status as Configured.
Now you can proceed to create the enterprise application.
Set up the Azure enterprise application
Complete the steps in this section to configure the Azure enterprise application.
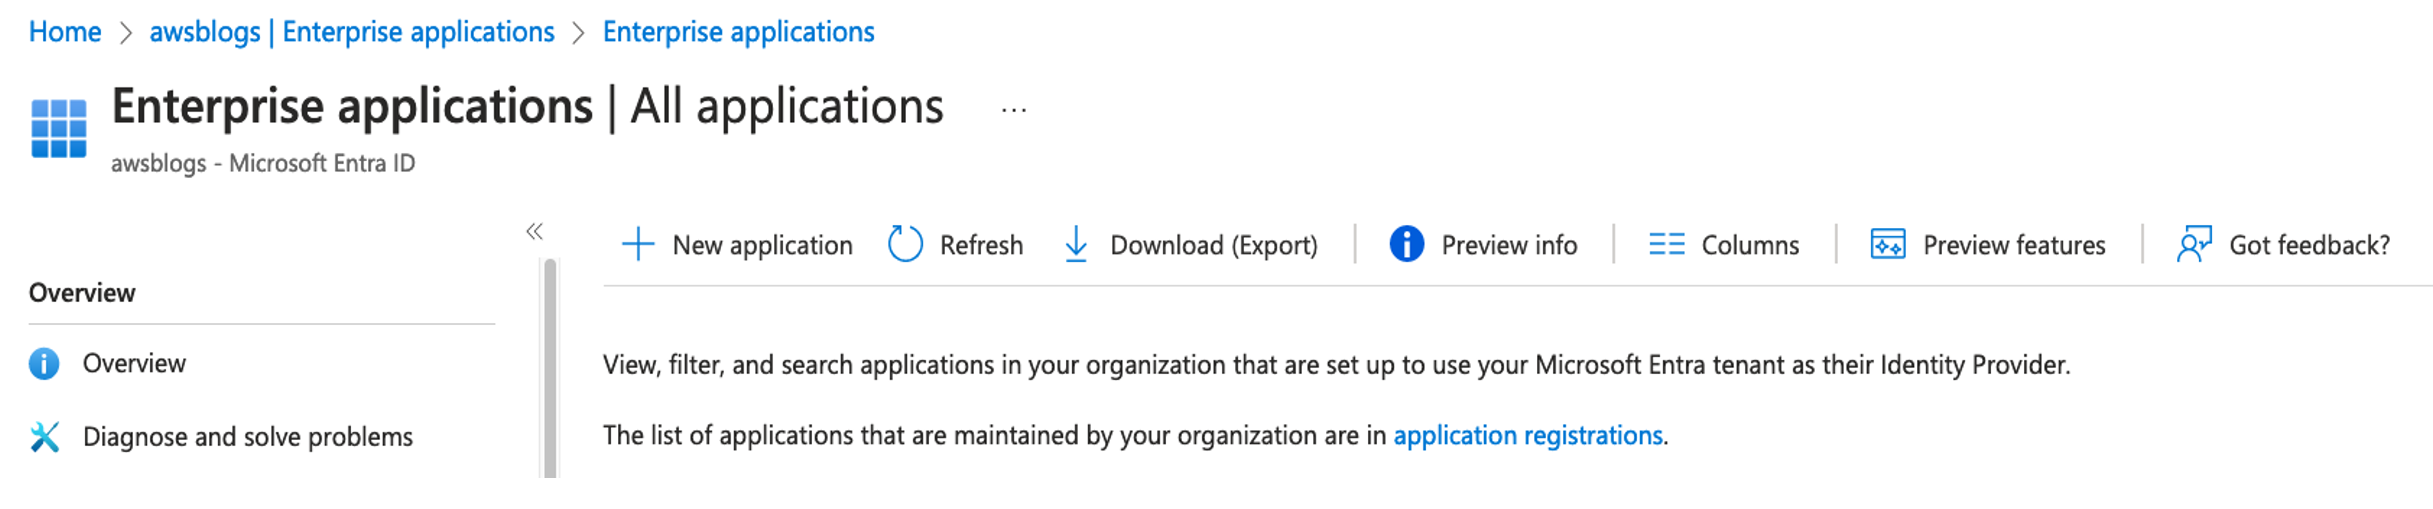
Create a new Azure enterprise application
Complete the following steps to create an Azure Enterprise application:
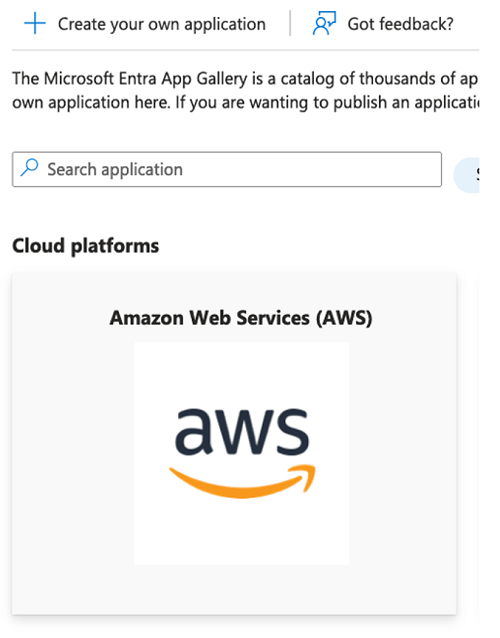
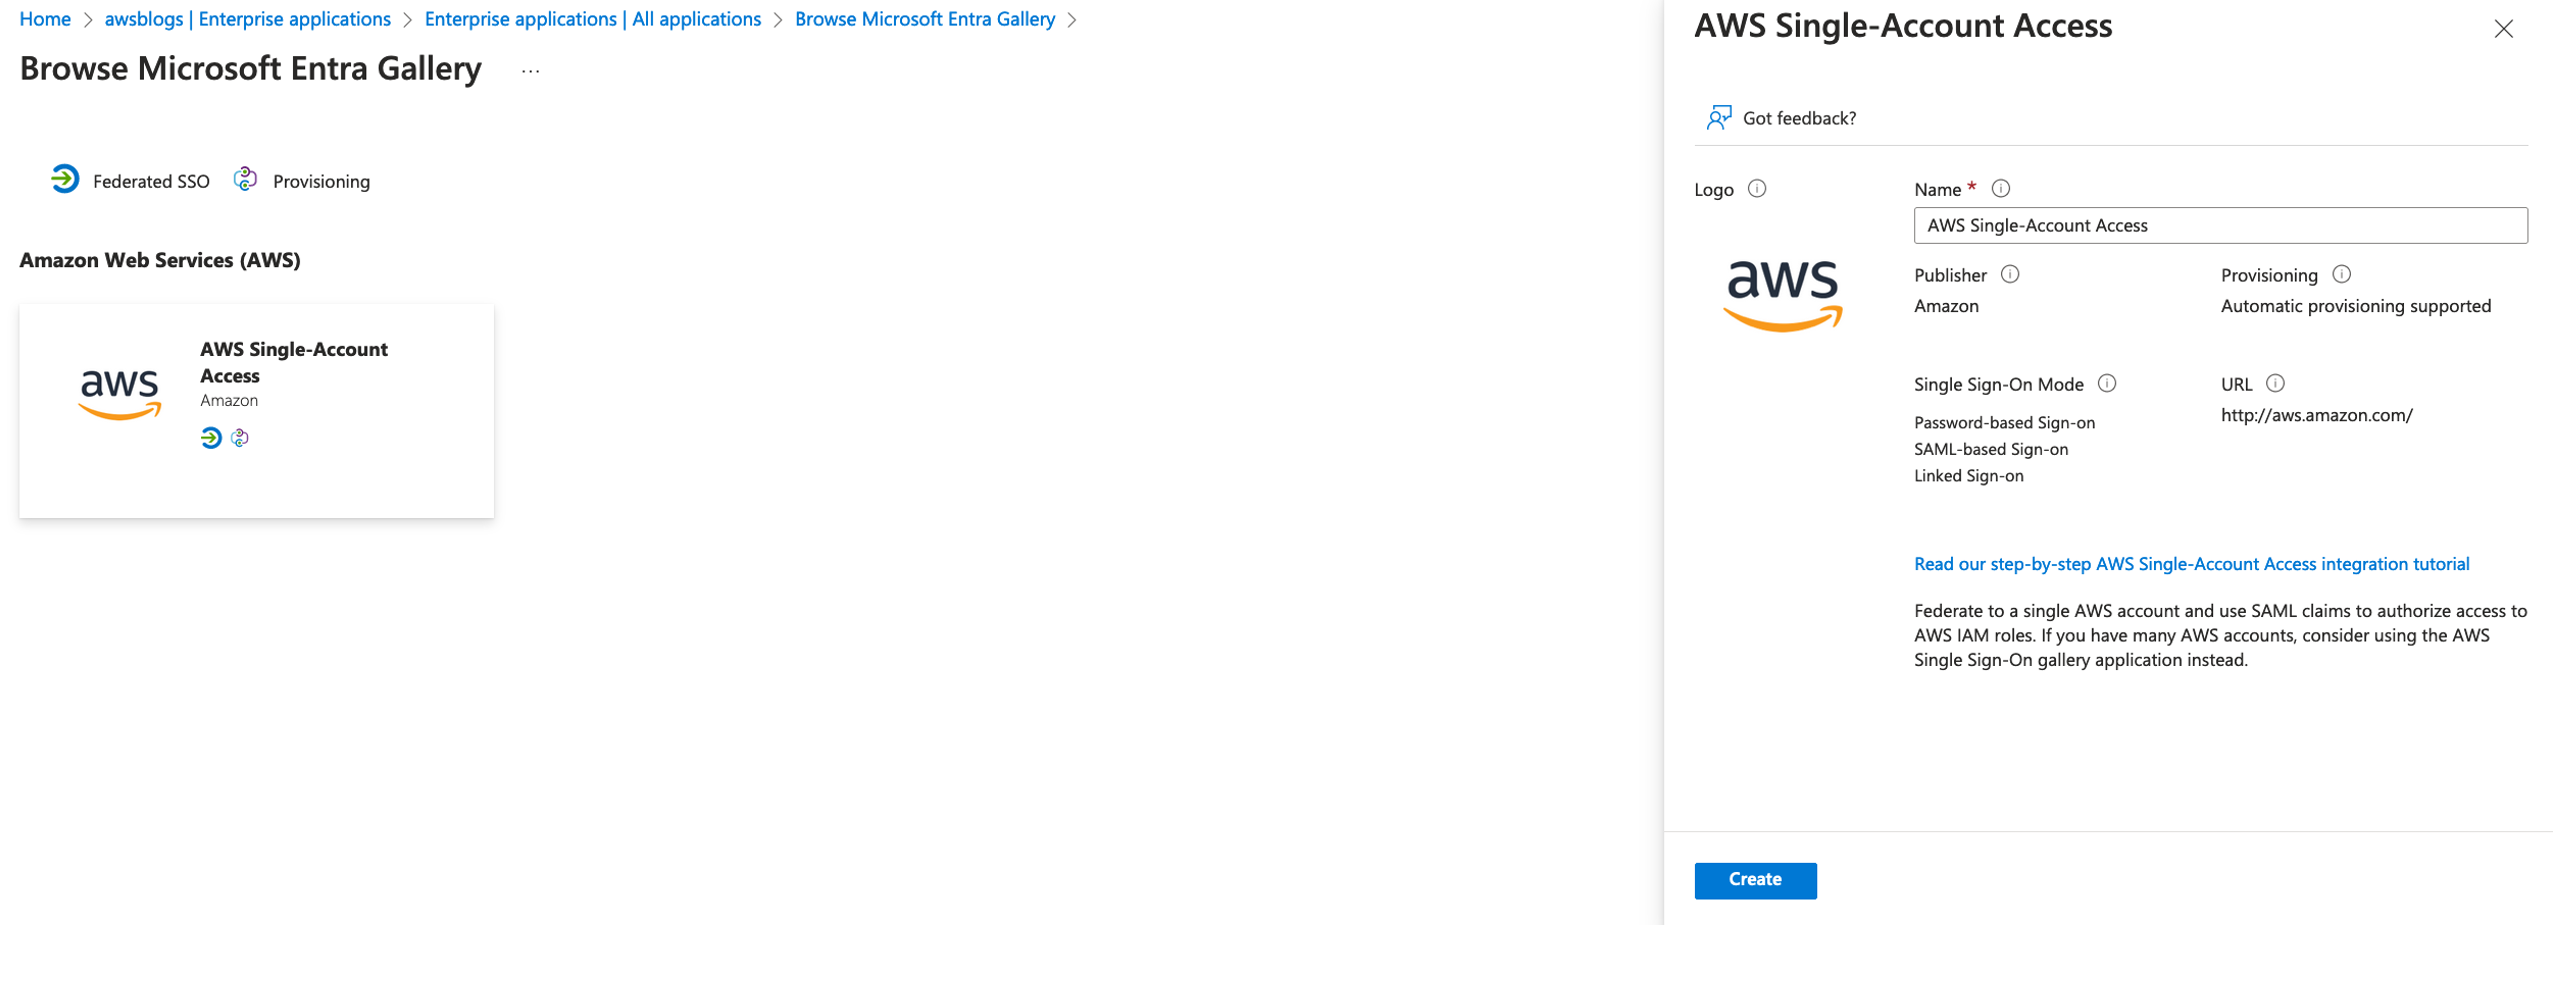
- Navigate to Microsoft Entra ID, Enterprise applications, New application.

- Under Cloud platforms, choose Amazon Web Services (AWS).

- For Name, enter
AWS Single-Account Access.
- Choose Create.

When the create process is complete, you will be redirected to the newly created enterprise application.
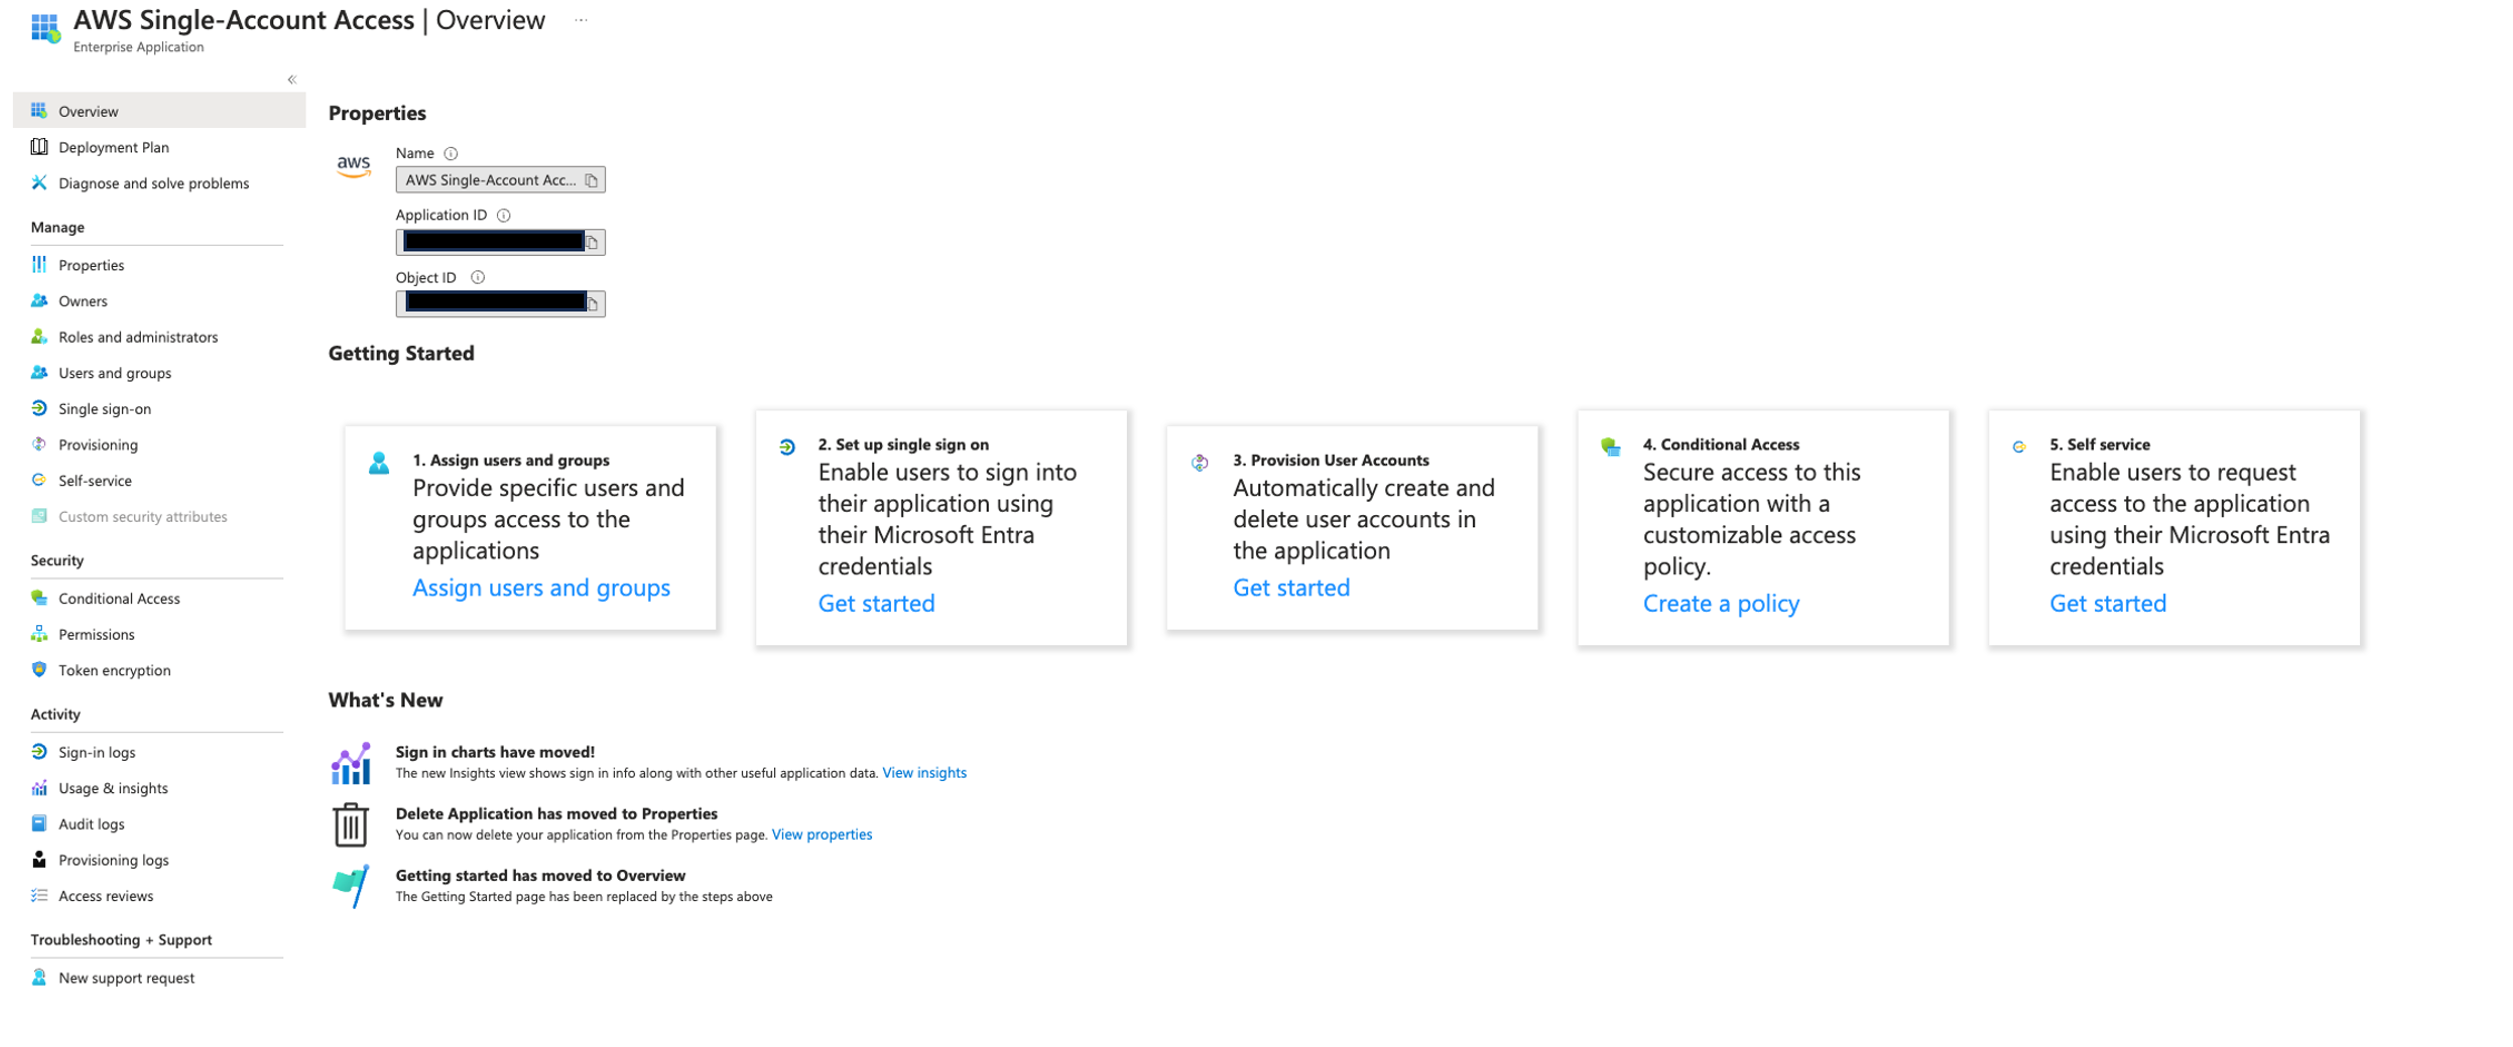
Configure SSO
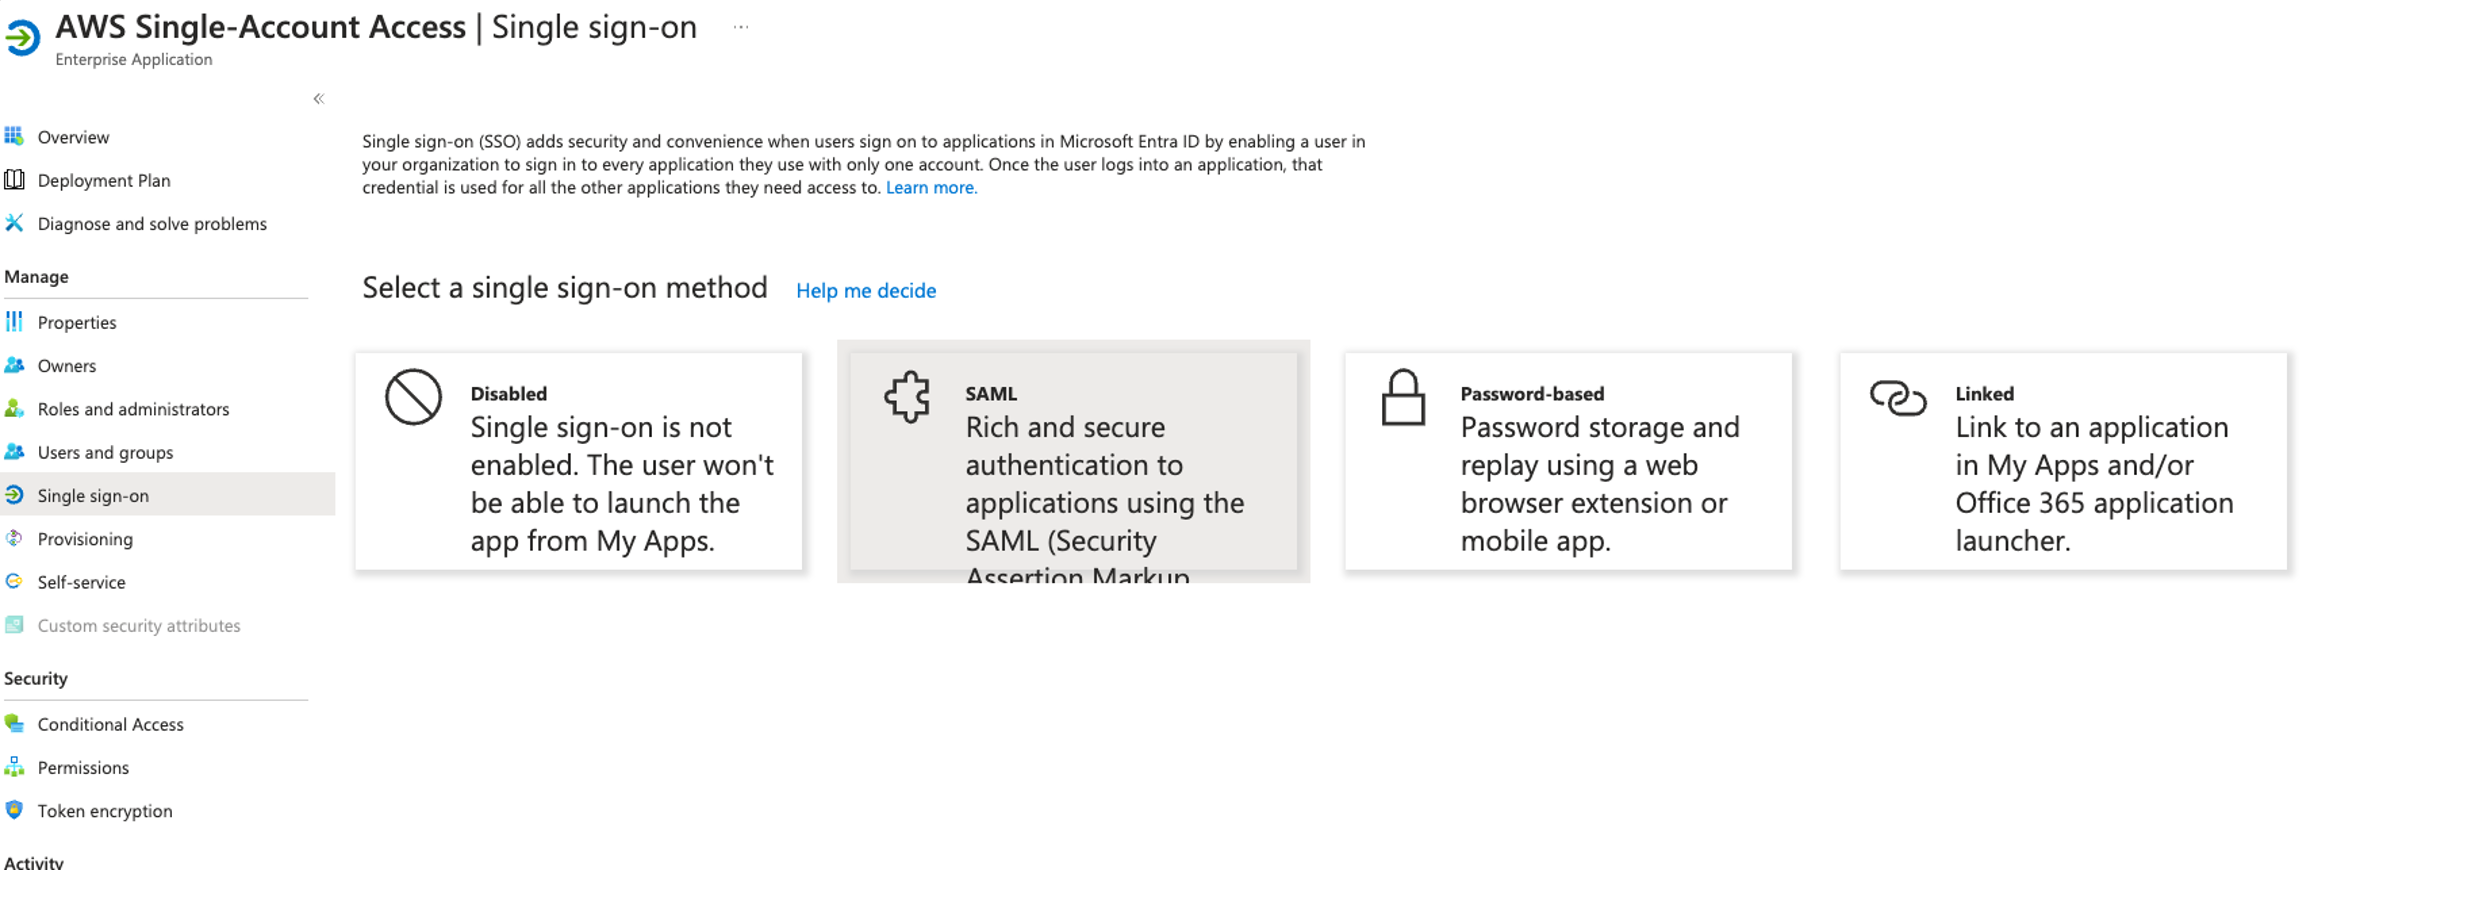
Complete the following steps to configure SSO for your application:
- On the enterprise application page, choose Get started under Set up single sign on.

- Choose SAML.

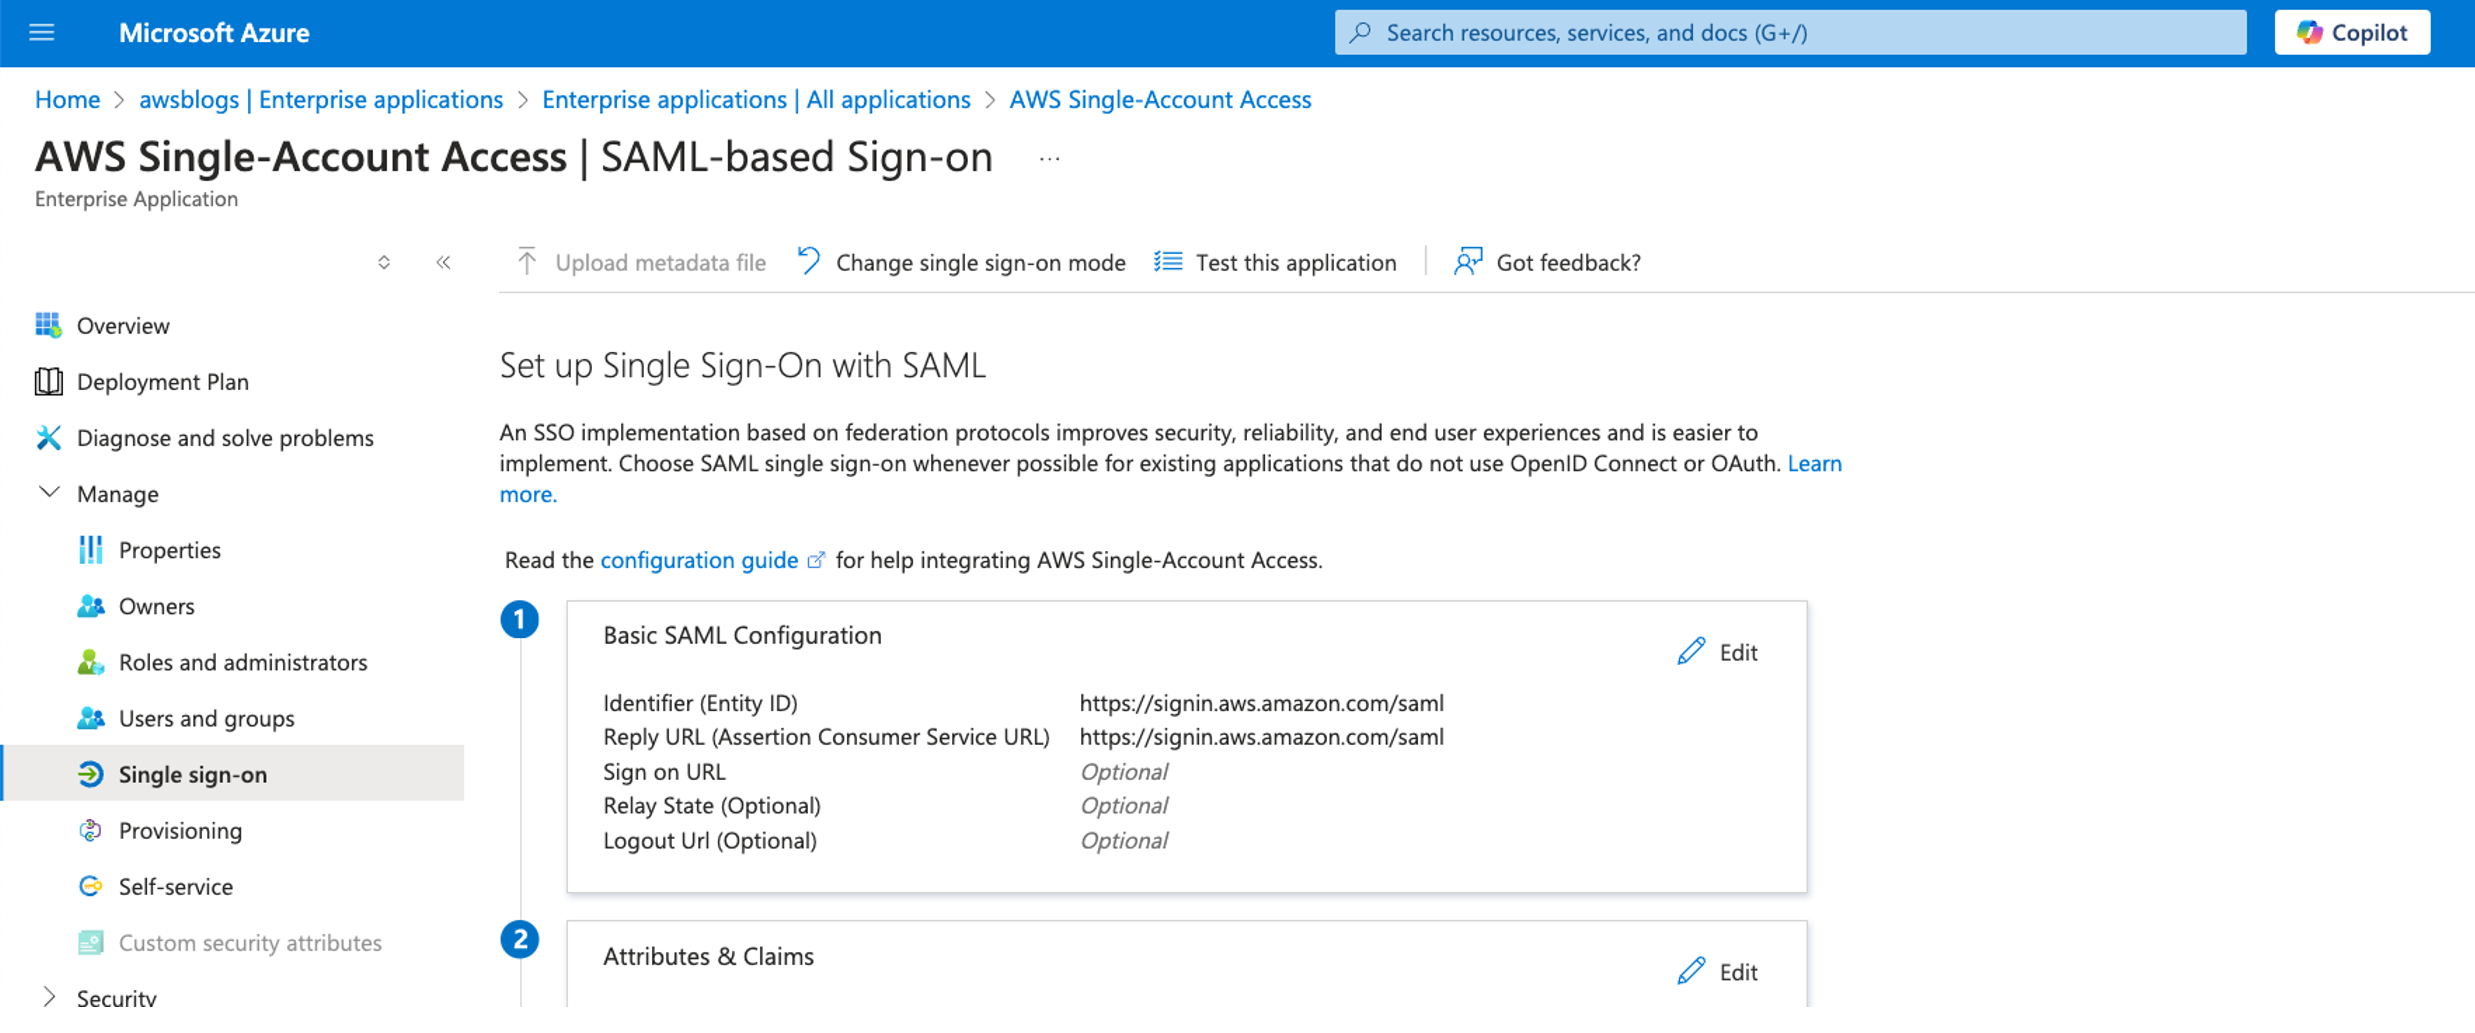
- In the Basic SAML Configuration section, choose Edit.
- For Identifier (Entity ID) and Reply URL, enter
https://signin.aws.amazon.com/saml.
- Choose Save.

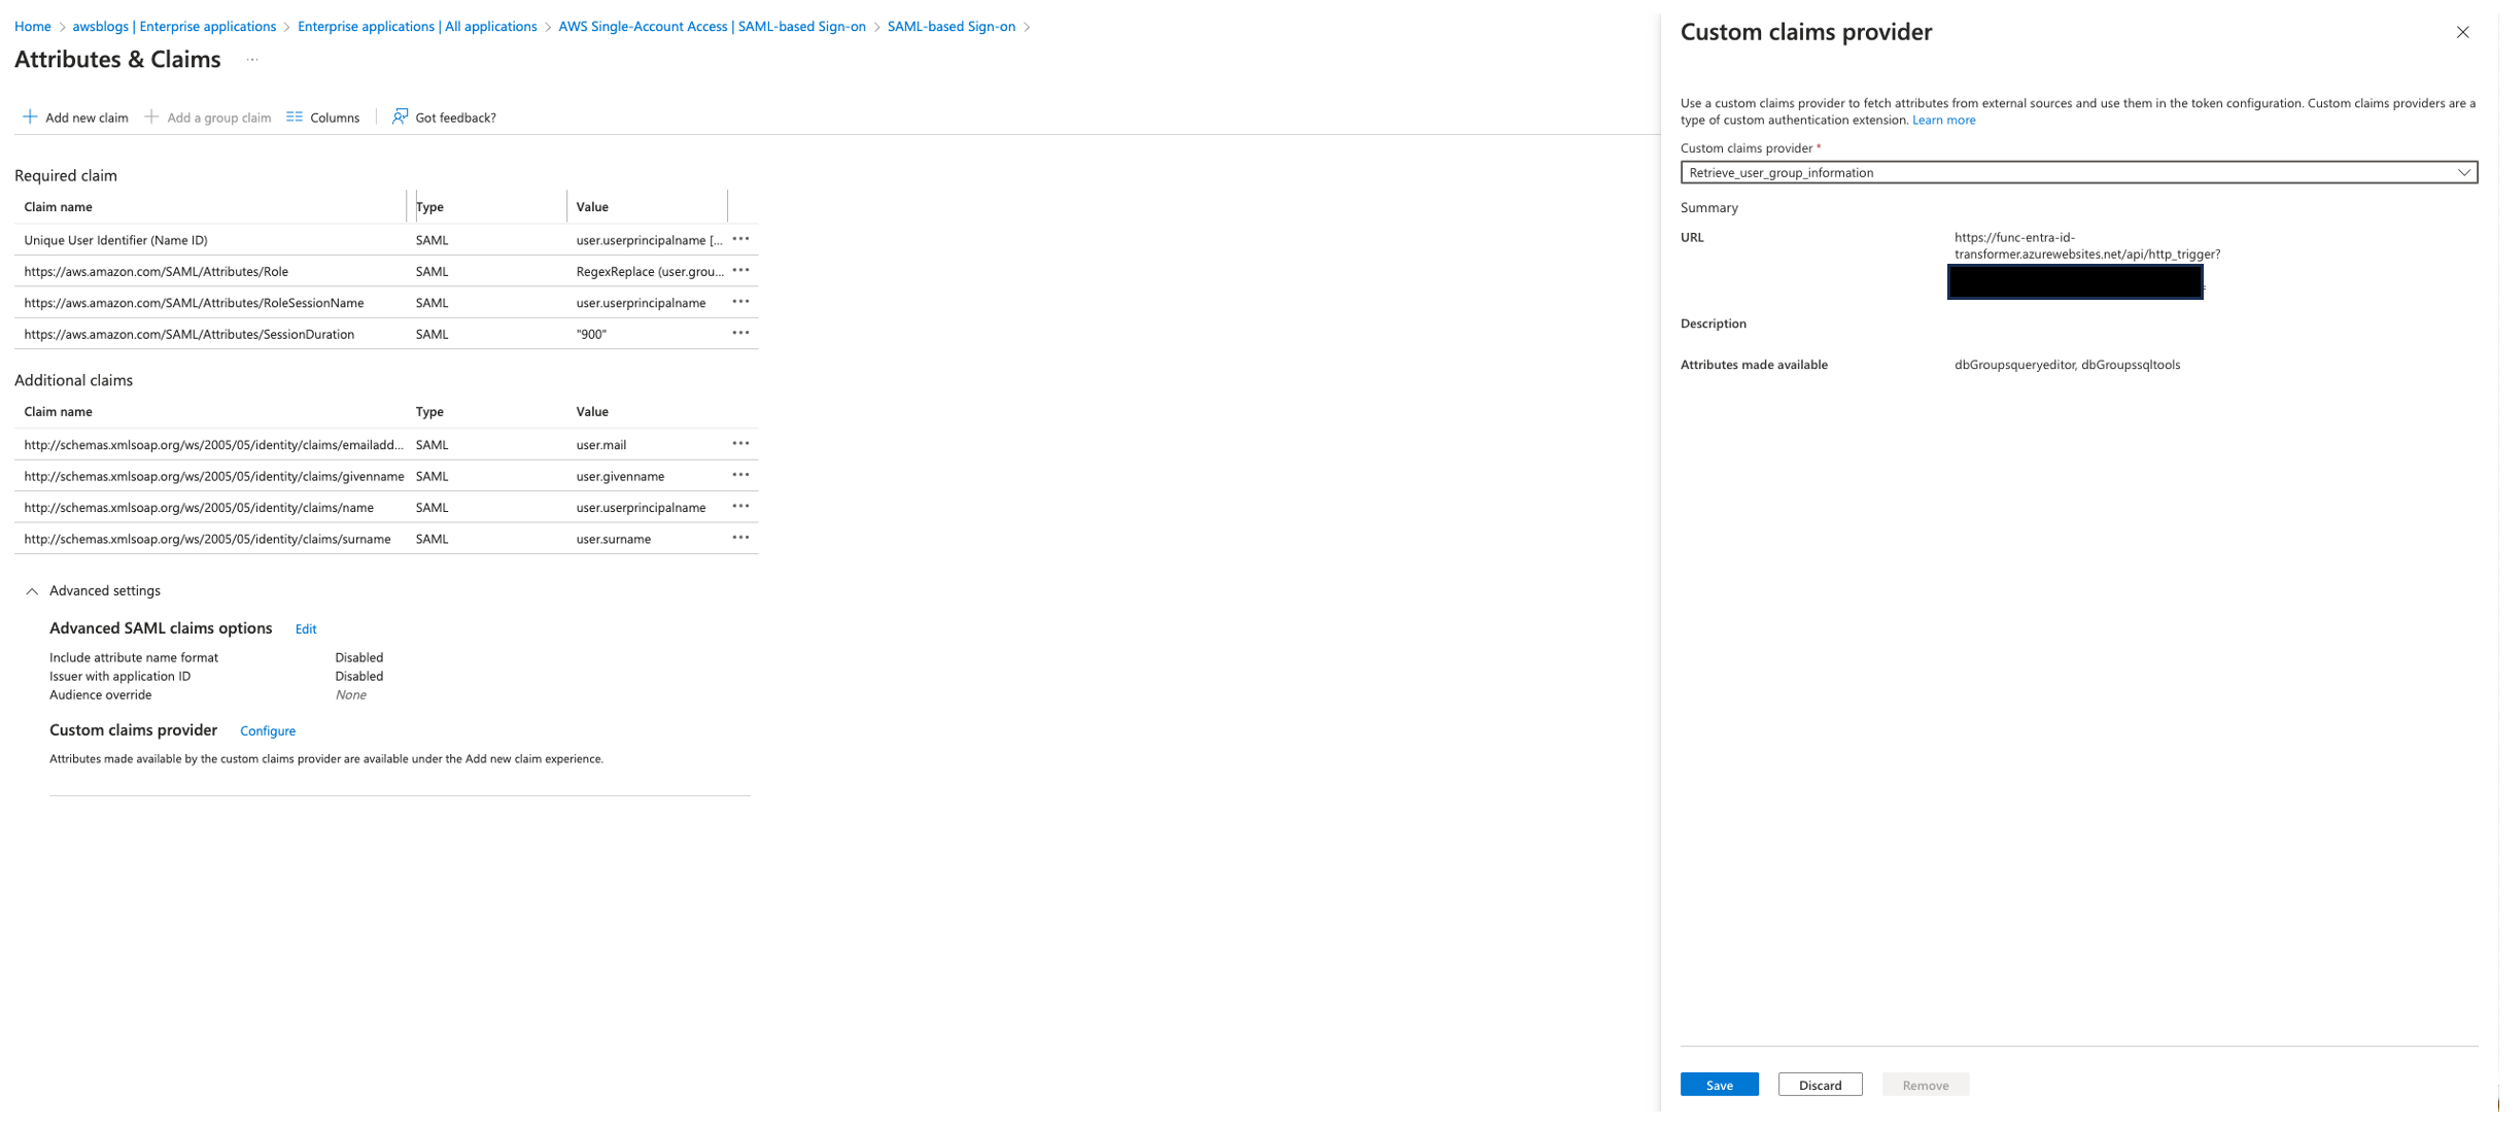
- In the Attributes & Claims section, choose Edit.
- In the Advanced settings section, choose Configure next to the custom claims provider setting.
- For Custom claims provider, choose
Retrieve_user_group_information.
- Choose Save.

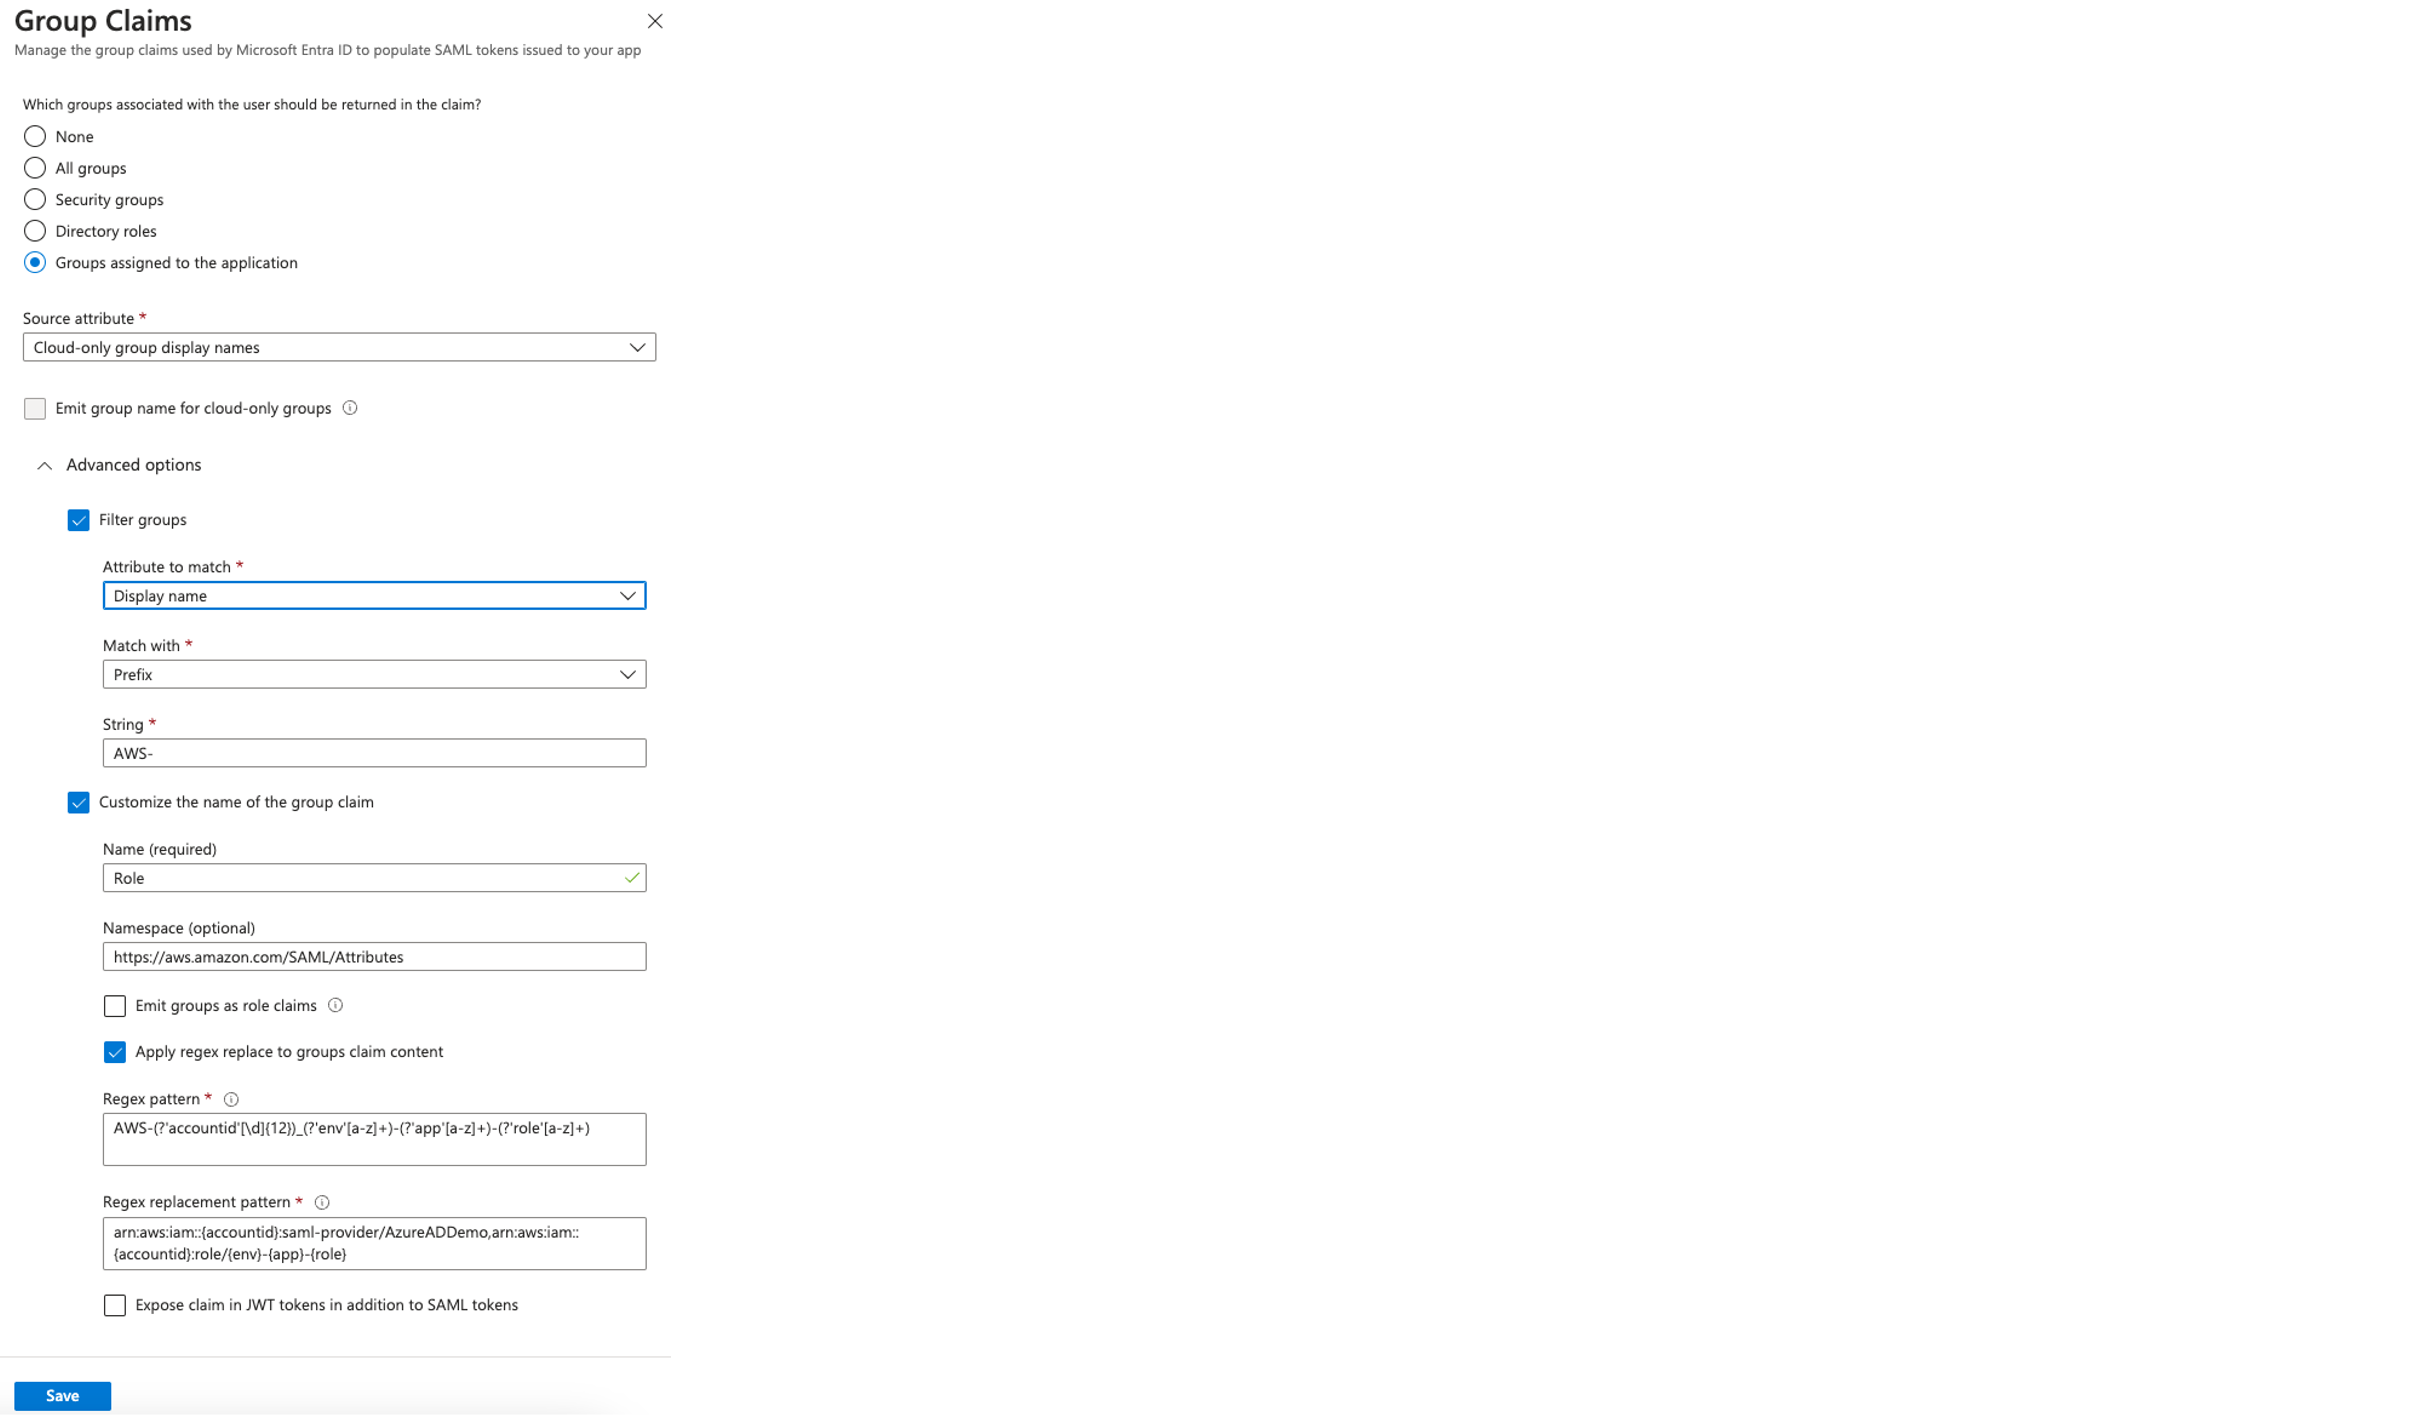
Configure a group claim
We use the group claim to transform the Azure AD group assignments into corresponding IAM roles. By applying a regular expression pattern, the group names are mapped to appropriate Amazon Resource Names (ARNs) for IAM roles and SAML providers. Complete the following steps to configure the group claim:
- On the Attributes & Claims page, delete claim name
https://aws.amazon.com/SAML/Attributes/Role.
- Choose Add a group claim.

- Select Groups assigned to the application for the associated groups.
- For Source attribute, choose Cloud-only group display names.
- Under Advanced options, select Filter groups and provide the following information:
- For Attribute to match, choose Display name.
- For Match with, choose Prefix.
- For String, enter AWS-.
- Select Customize the name of group claim and provide the following information:
- For Name, choose Role.
- For Namespace, enter
https://aws.amazon.com/SAML/Attributes.
- Select Apply regex replace to groups claim content.
- For Regex pattern, enter
AWS-(?'accountid'[\d]{12})_(?'env'[a-z]+)-(?'app'[a-z]+)-(?'role'[a-z]+).
- For Regex replacement pattern, enter
arn:aws:iam::{accountid}:saml-provider/AzureADDemo,arn:aws:iam::{accountid}:role/{env}-{app}-{role}
- Choose Save.

Add new claims
Complete the following steps to add new claims:
- On the Attributes & Claims page, choose Add new claim.

- Add claims with the following values:
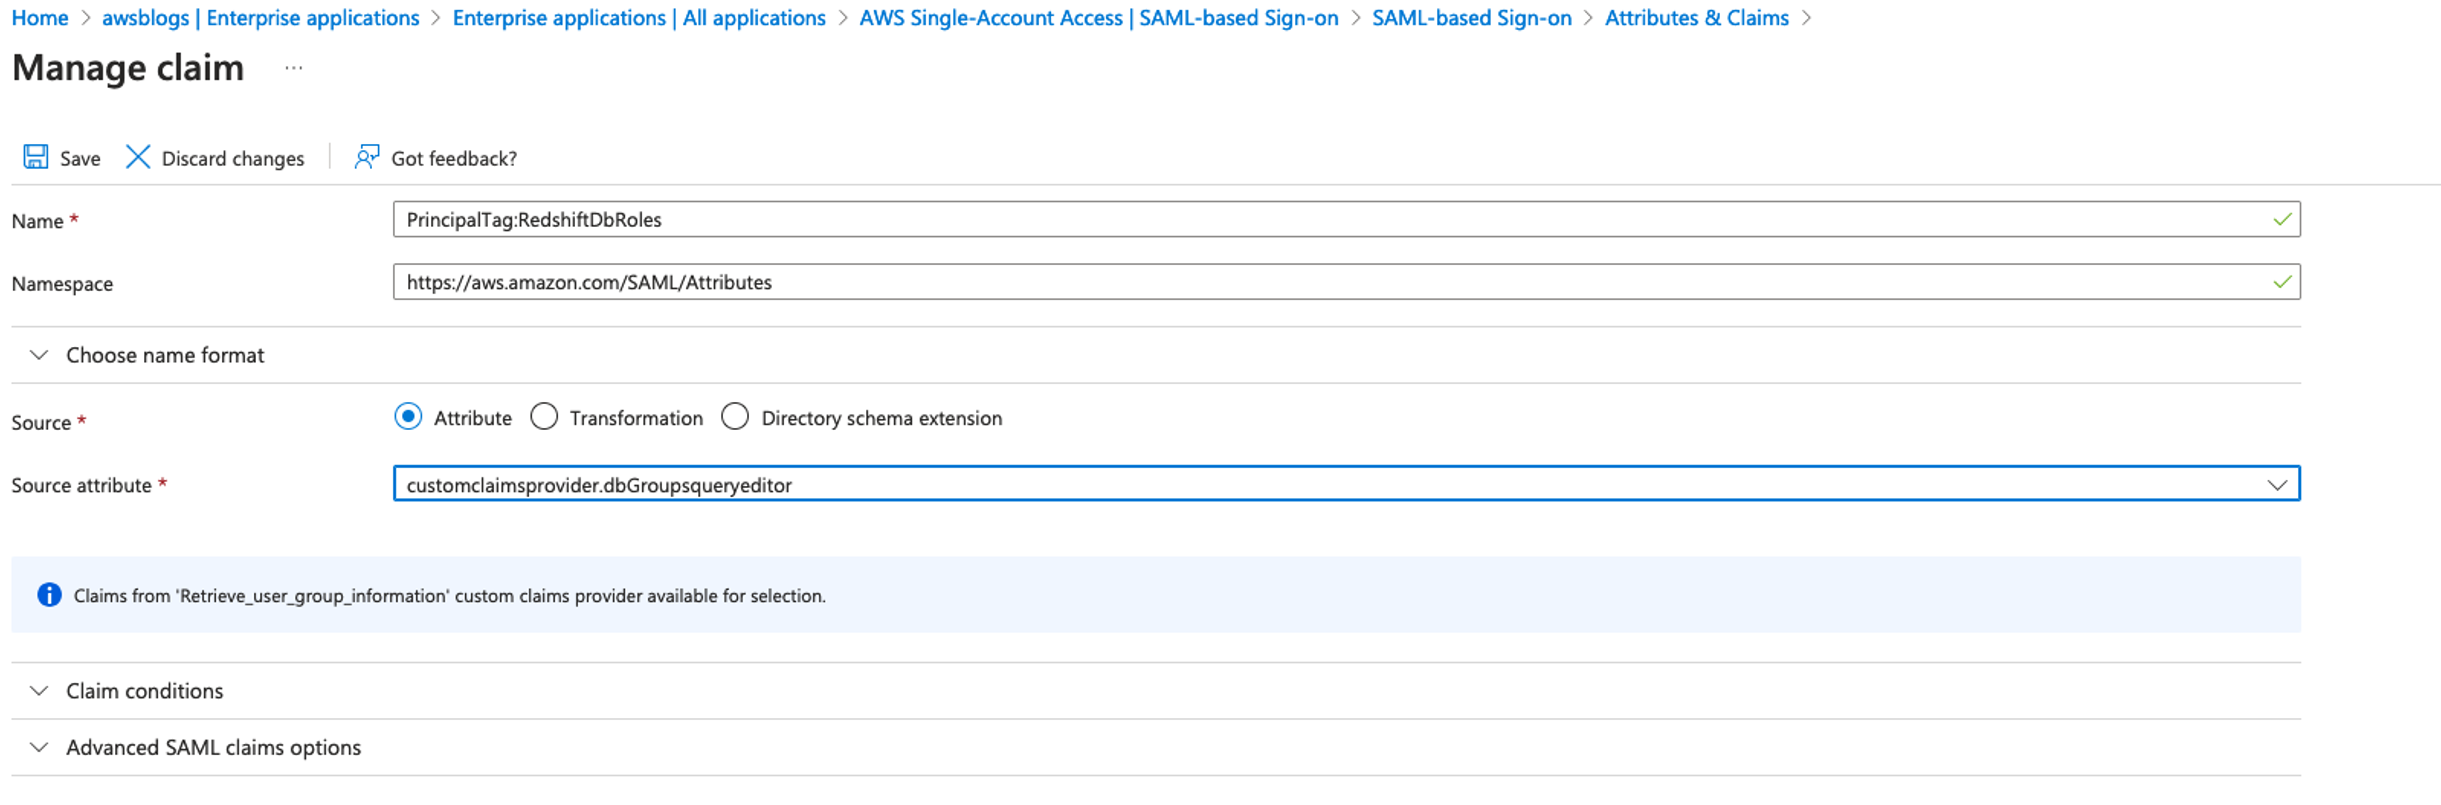
- Choose Add a new claim, name the new claim
https://aws.amazon.com/SAML/Attributes/PrincipalTag:RedshiftDbRoles, select Attribute for Source, enter customclaimsprovider.dbGroupsqueryeditor for Source attribute, and choose Save.

- Choose Add a new claim, name the new claim
https://aws.amazon.com/SAML/Attributes/PrincipalTag:RedshiftDbUser, select Attribute for Source, enter user.userprincipalname for Source attribute, and choose Save.
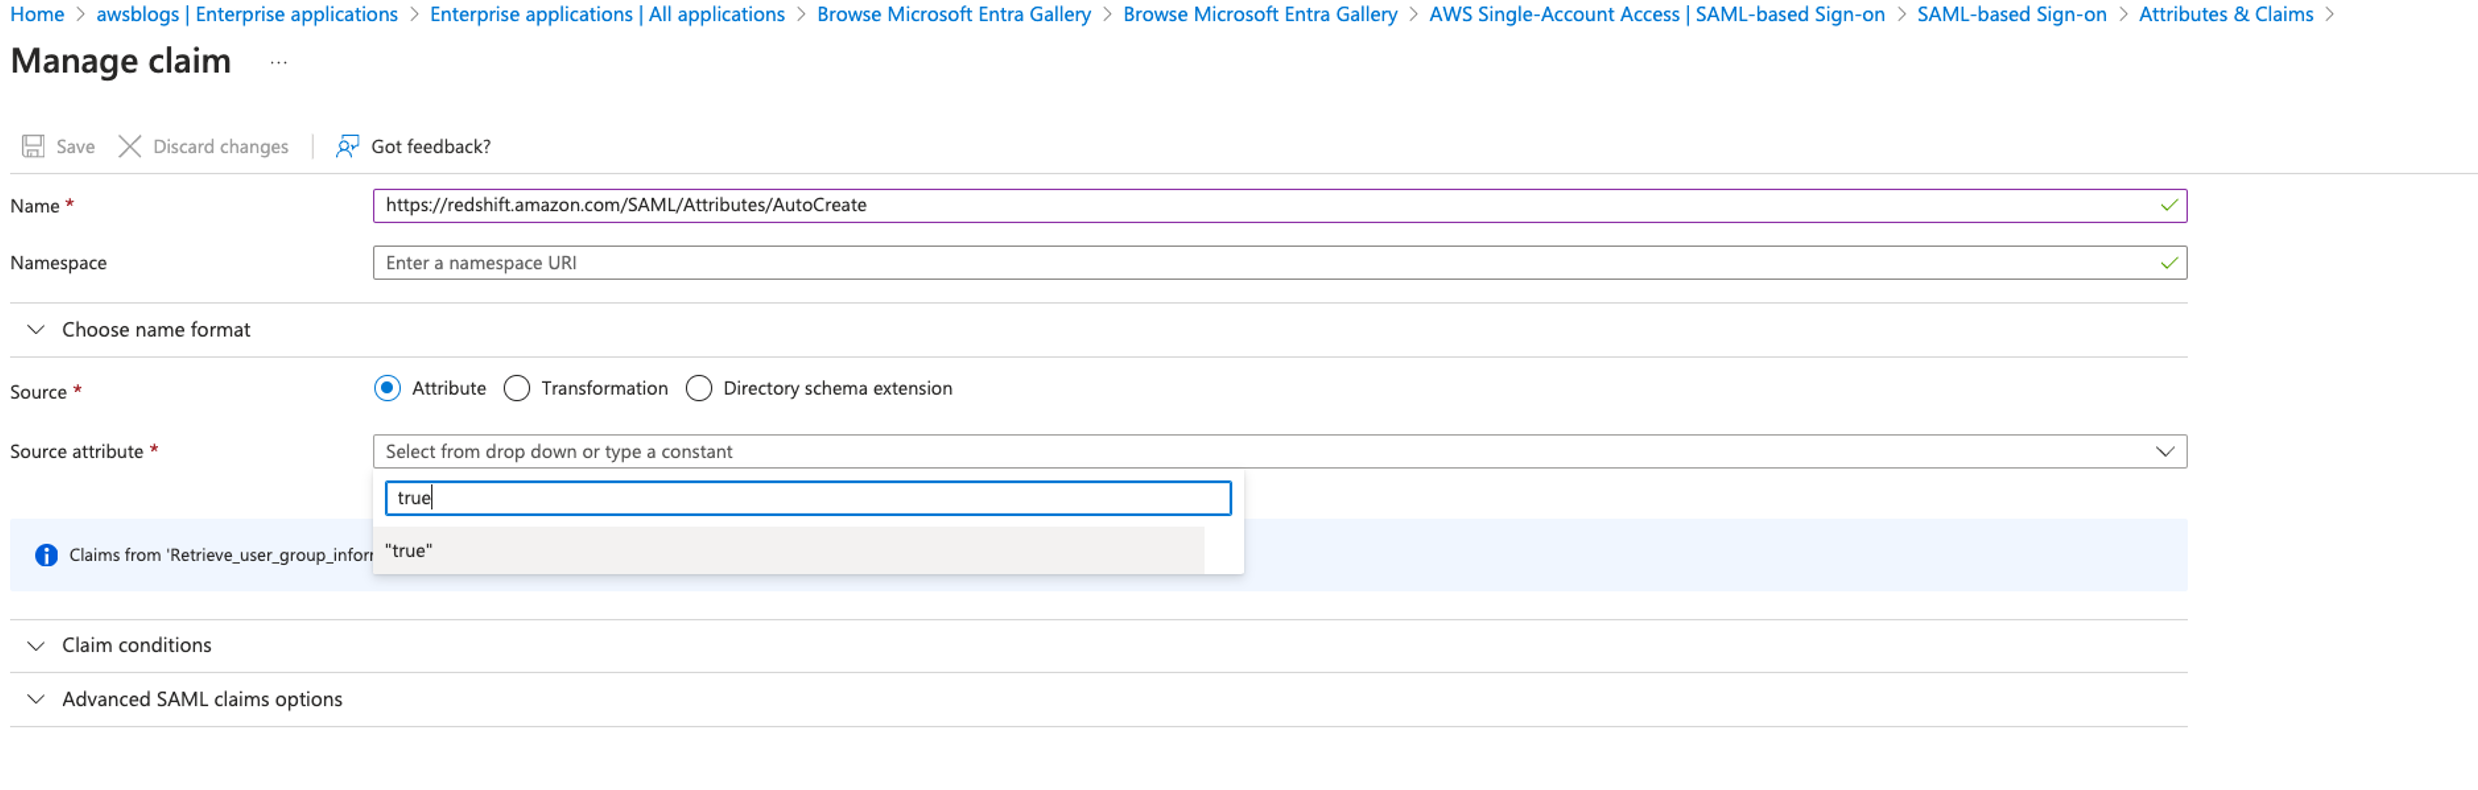
- Choose Add a new claim, name the new claim
https://redshift.amazon.com/SAML/Attributes/AutoCreate, select Attribute for Source, enter true for Source attribute, and choose Save.

The values of PrincipalTag:RedshiftDbUser and PrincipalTag:RedshiftDbGroups must be lowercase; begin with a letter; contain only alphanumeric characters, underscore (_), plus sign (+), dot (.), at (@), or hyphen (-); and be less than 128 characters.
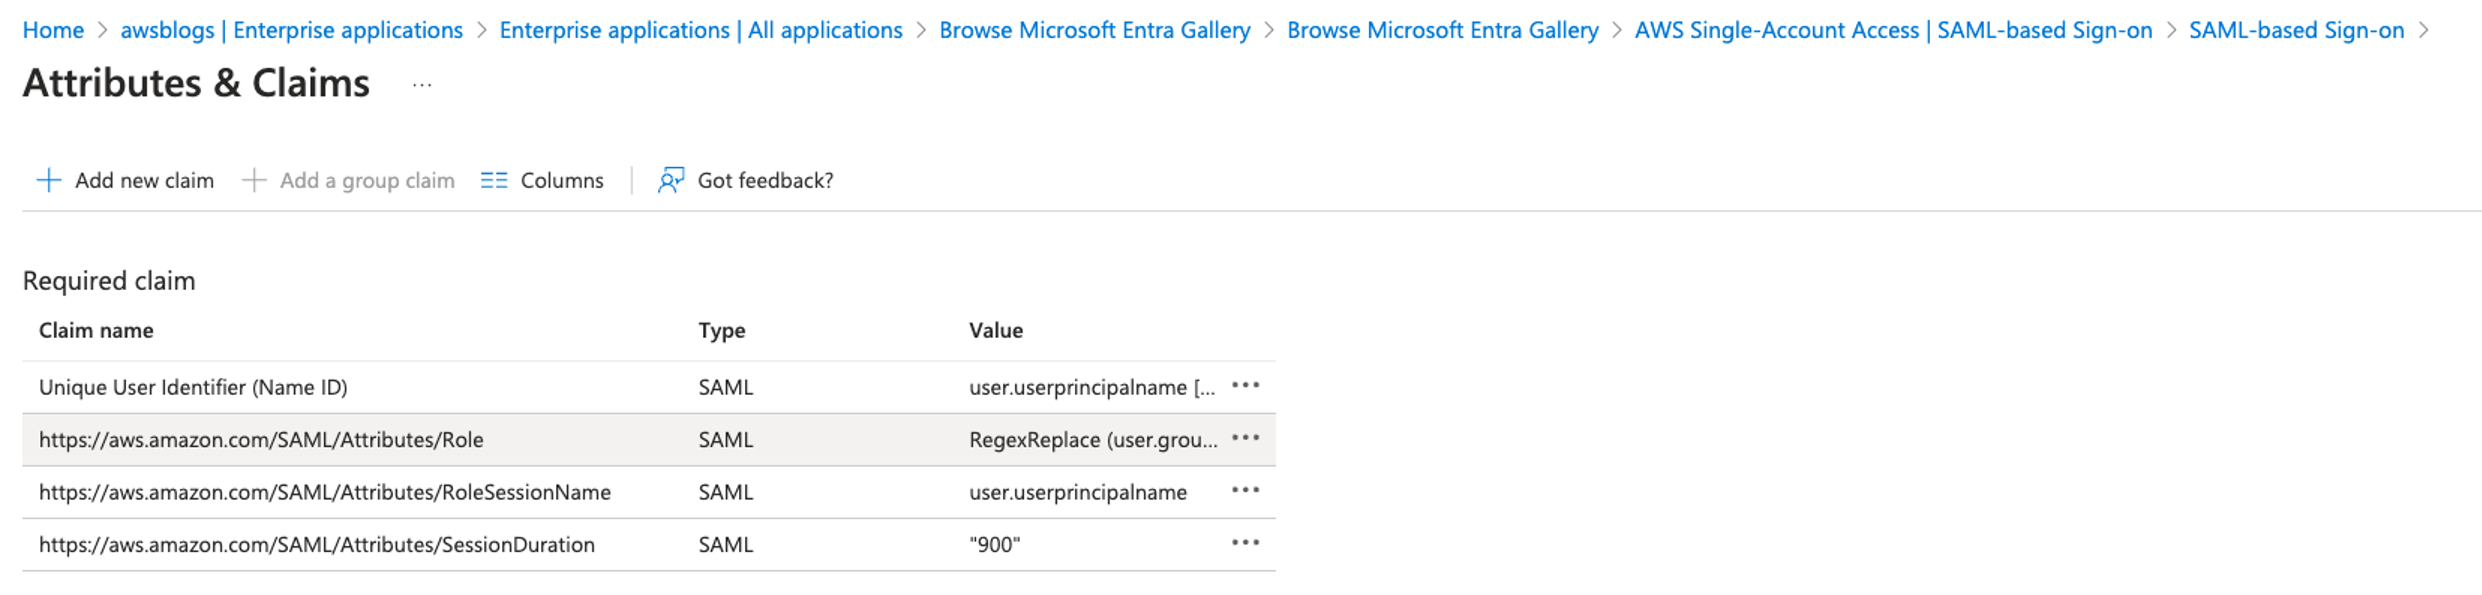
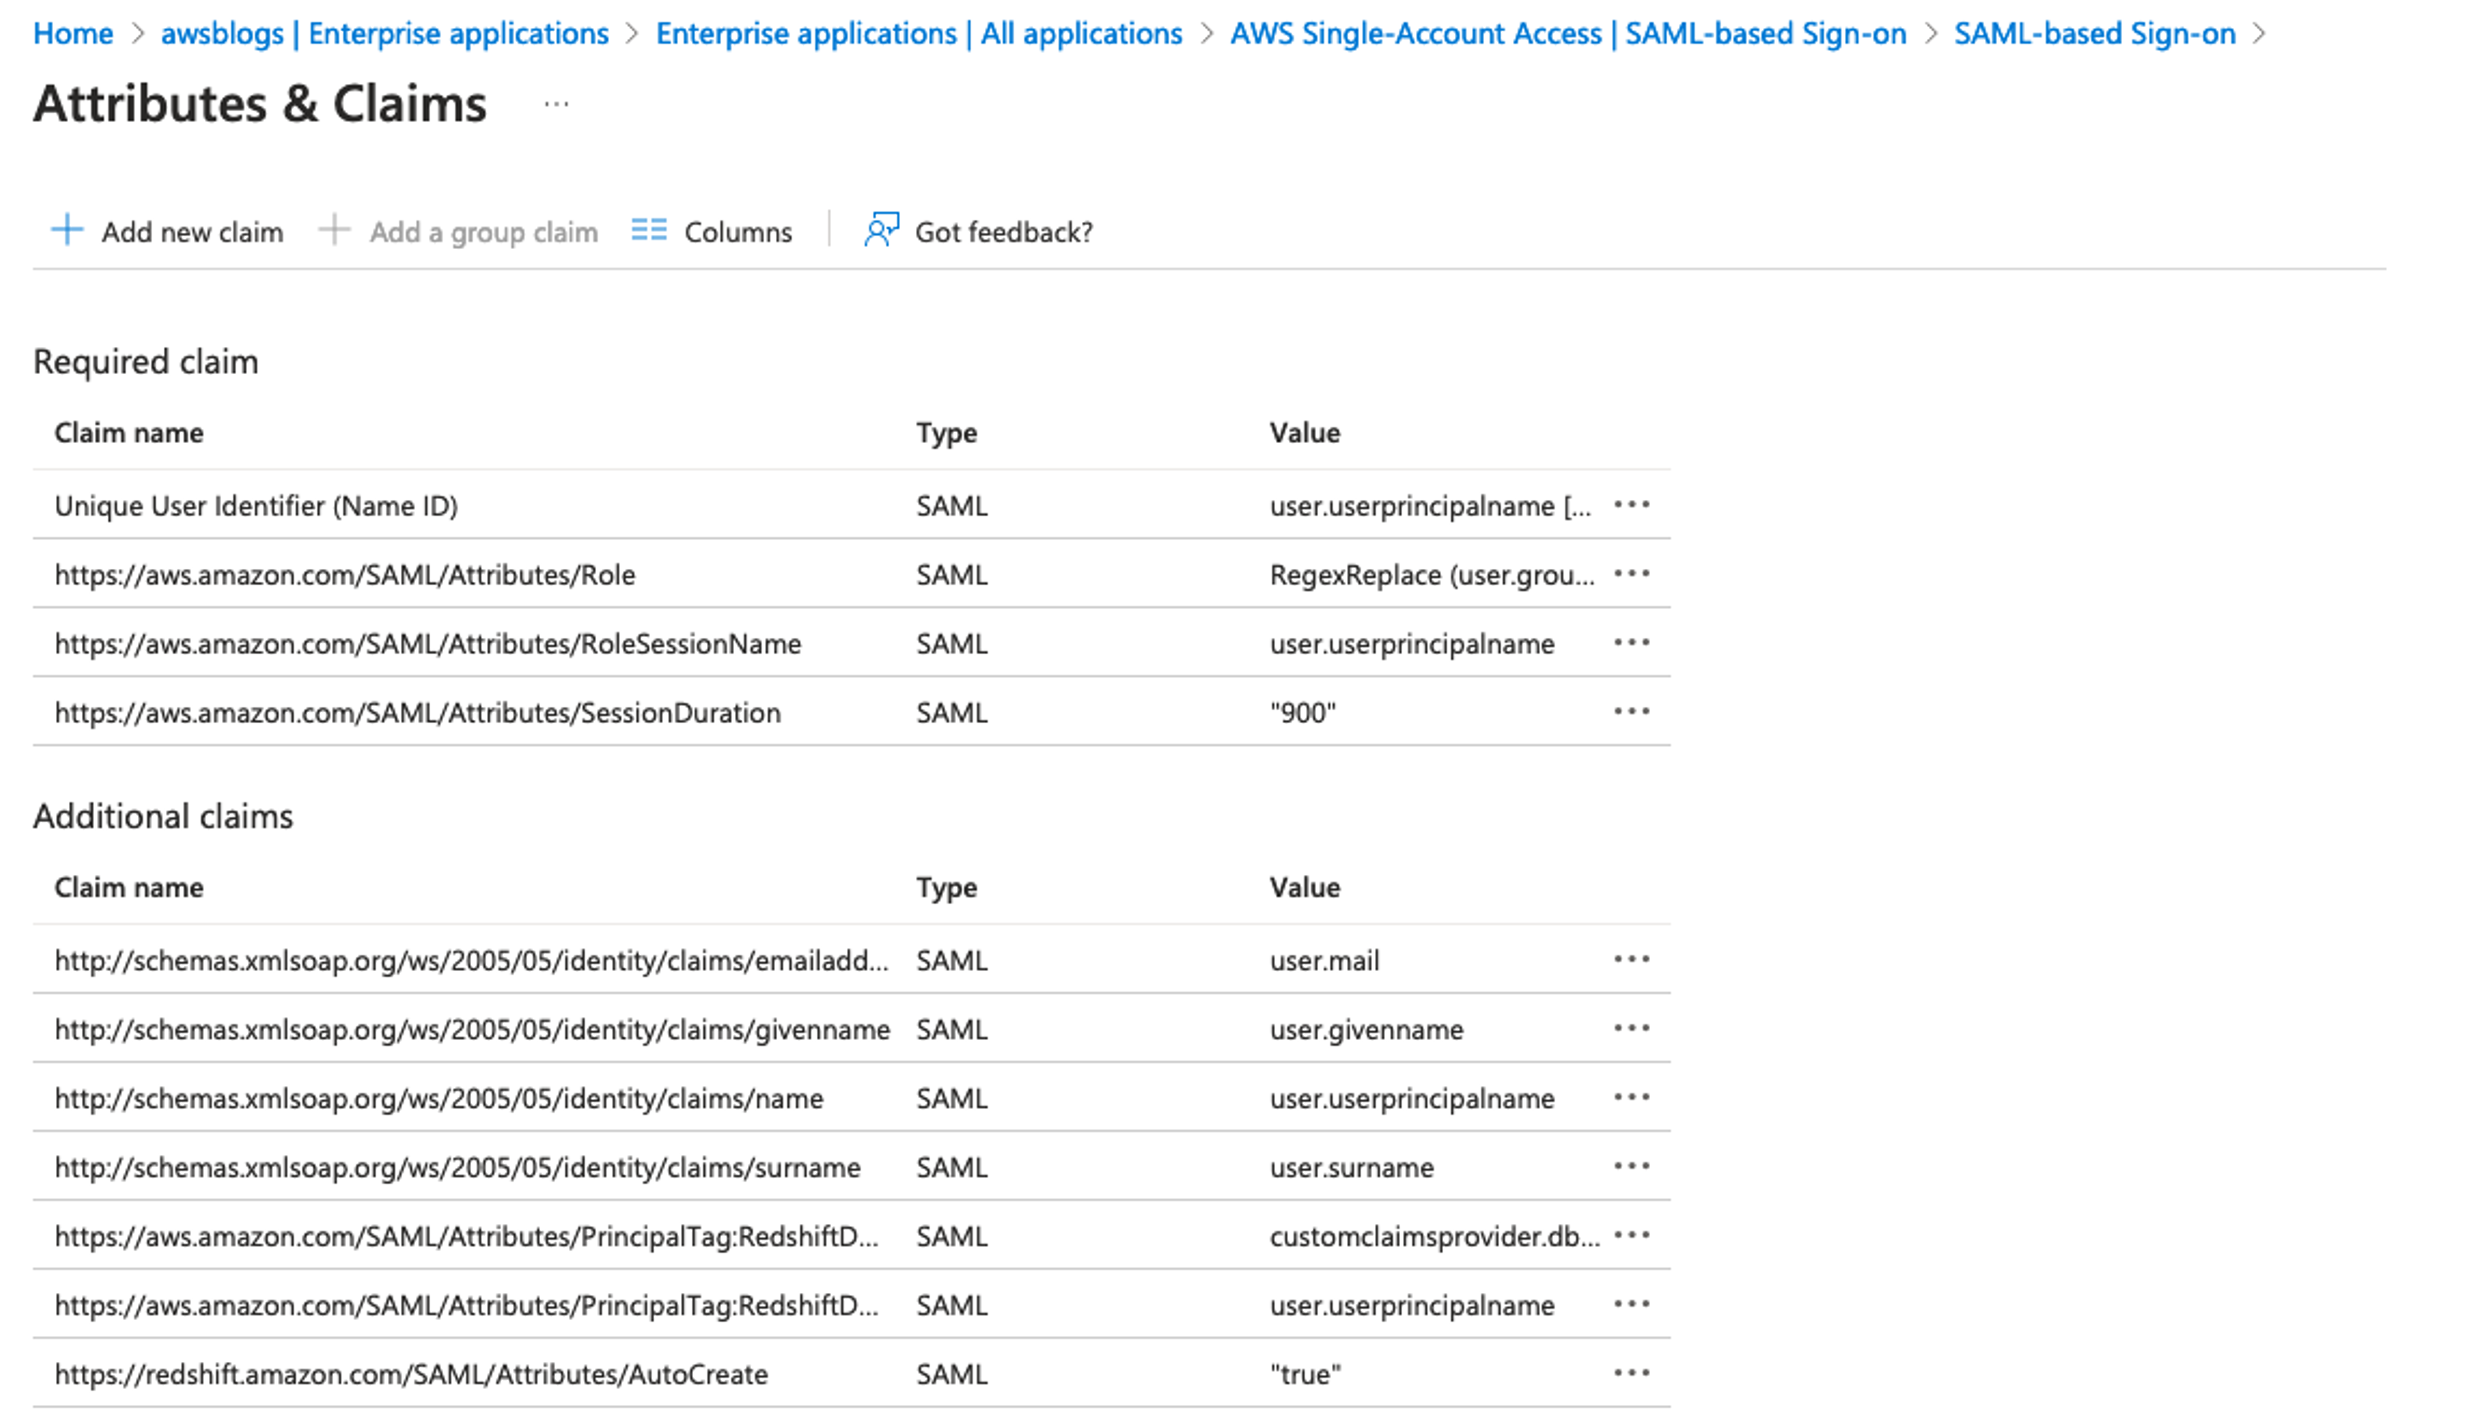
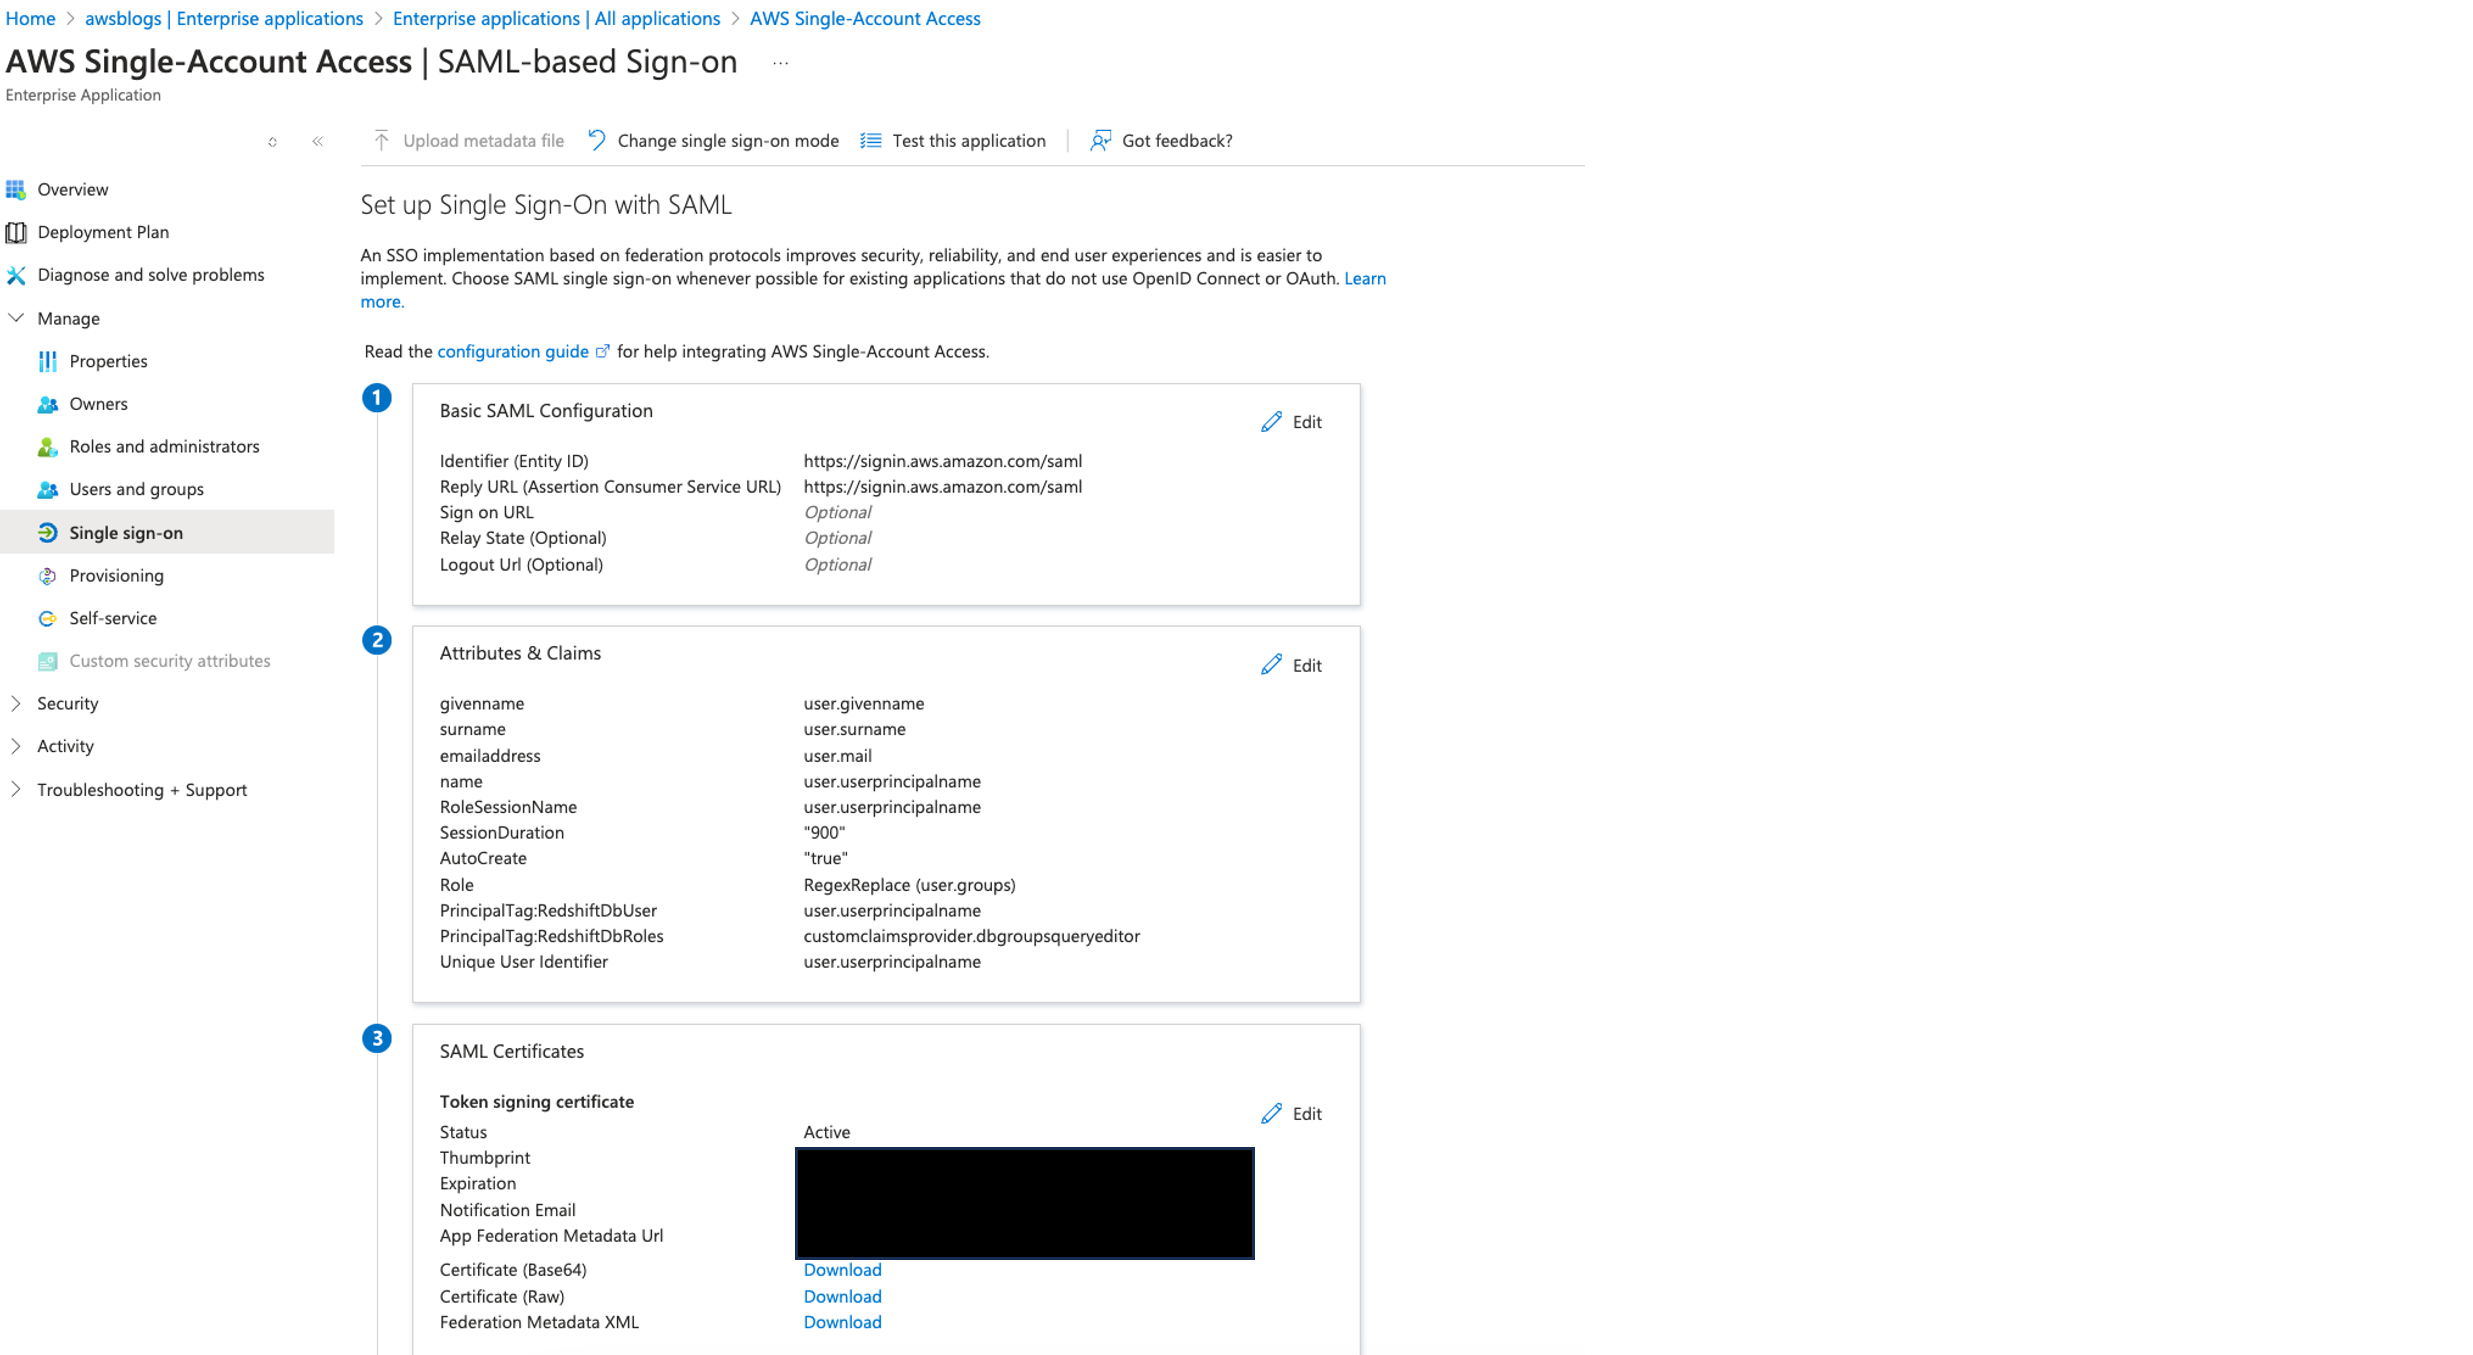
When you complete adding all the claims, your Attributes & Claims page should look like the following screenshot.

Save the federation metadata XML file
You use the federation metadata file to configure the IAM IdP in a later step. Complete the following steps to download the file:
- Navigate back to your SAML-based sign-in page.
- In the Single sign-on section, under SAML Certificates, choose Download for Federation Metadata XML.

- Save this file locally.
The name of the file is often the same as the application name; for example, AWS Single-Account Access.xml.
Create a new client secret
Complete the following steps to create a new client secret:
- Return to the Azure directory overview and navigate to App registrations.
- Choose the application
AWS Single-Account Access.
- If you don’t see your application in the list, choose the All applications tab and register it if it’s not registered.
- Record the values for Application (client) ID and Directory (tenant) ID.
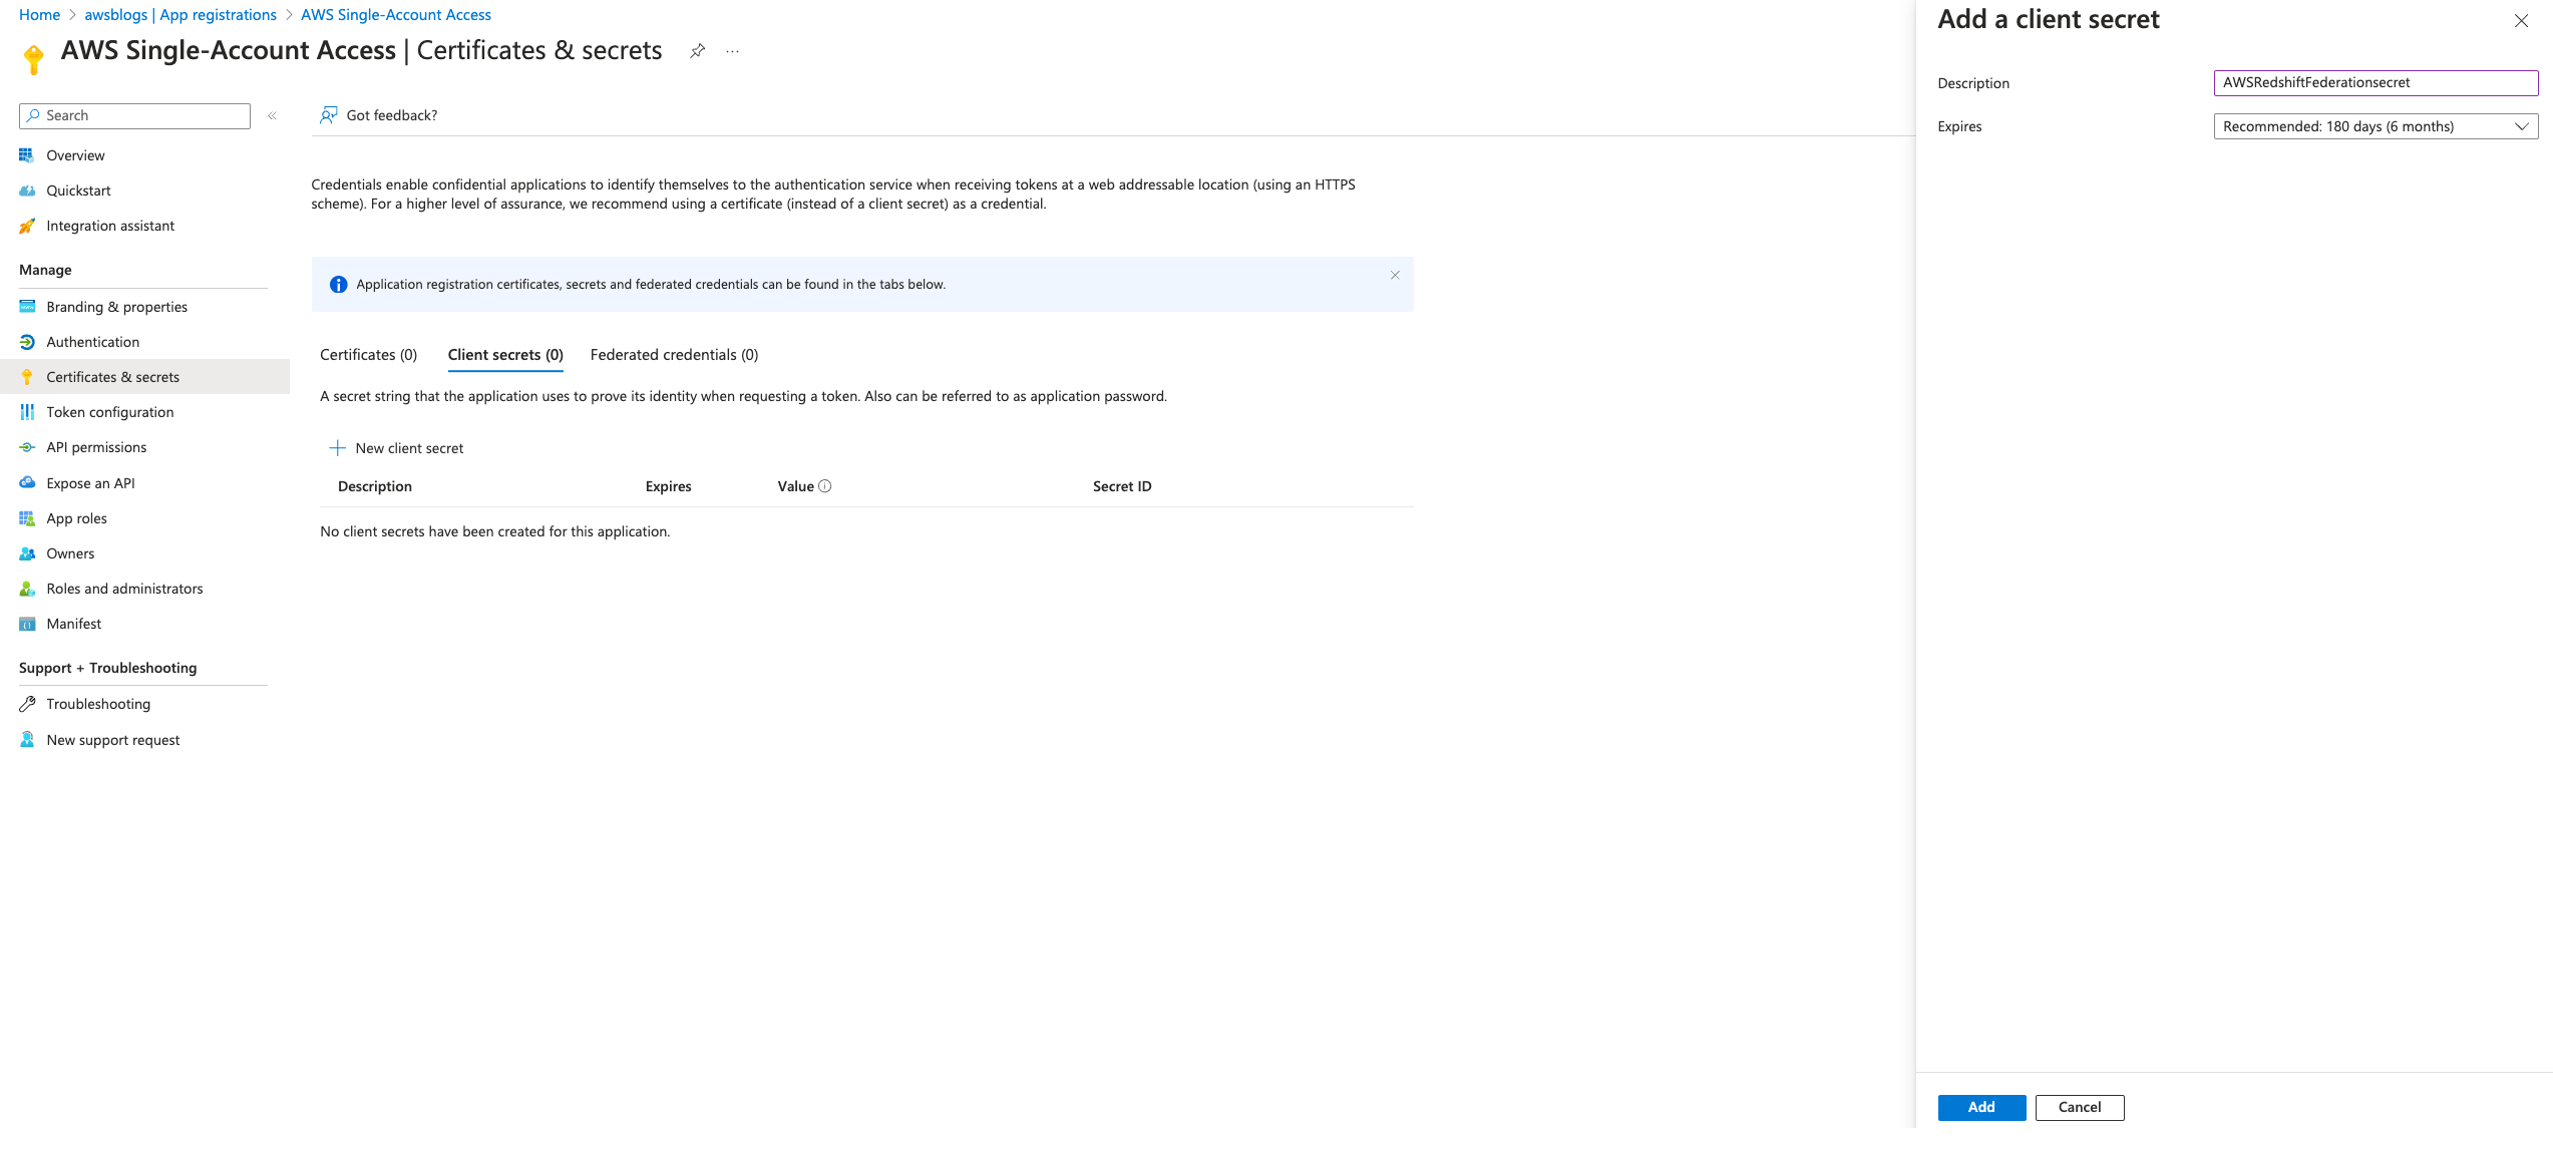
- Under Certificates & secrets, choose New client secret.
- In the Add a client secret pane, provide the following information:
- For Description, enter
AWSRedshiftFederationsecret.
- For Expires, choose select the Microsoft’s recommended value of 180 days.
- Choose Add.
- Copy the secret value and store it securely.
The secret expires after 180 days. Make sure there is a process in place to update with a new secret before the current secret expires in your environment.

Add permissions
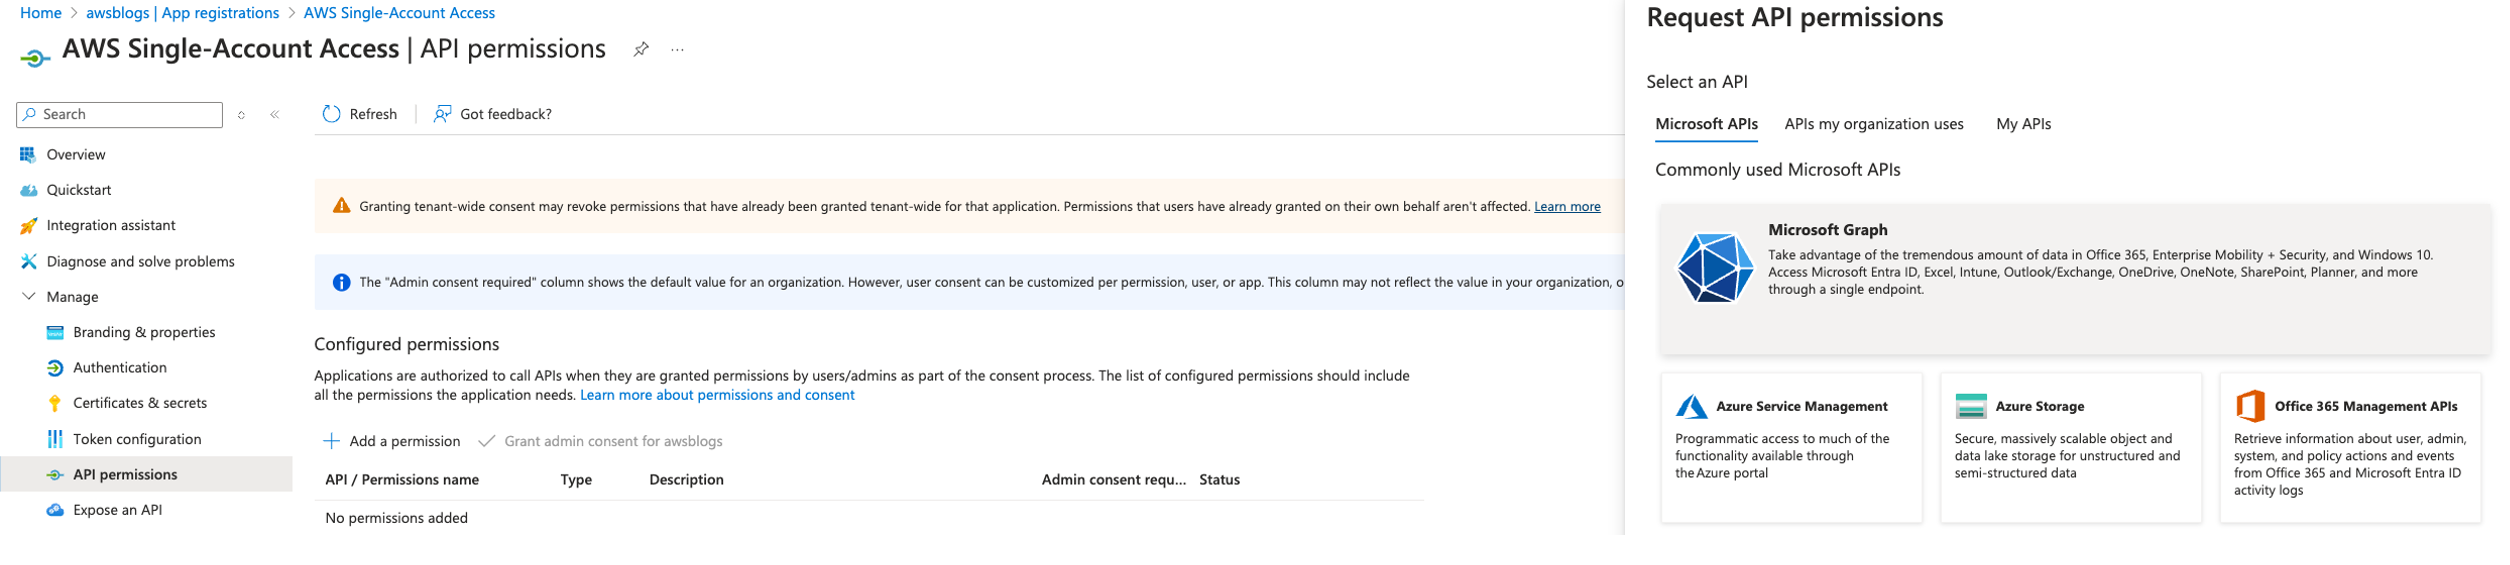
Complete the following steps to add permissions:
- Navigate to API permissions for application AWS Single-Account Access.
- Choose Add a permission and provide the following information:
- For Select an API, choose Microsoft Graph.

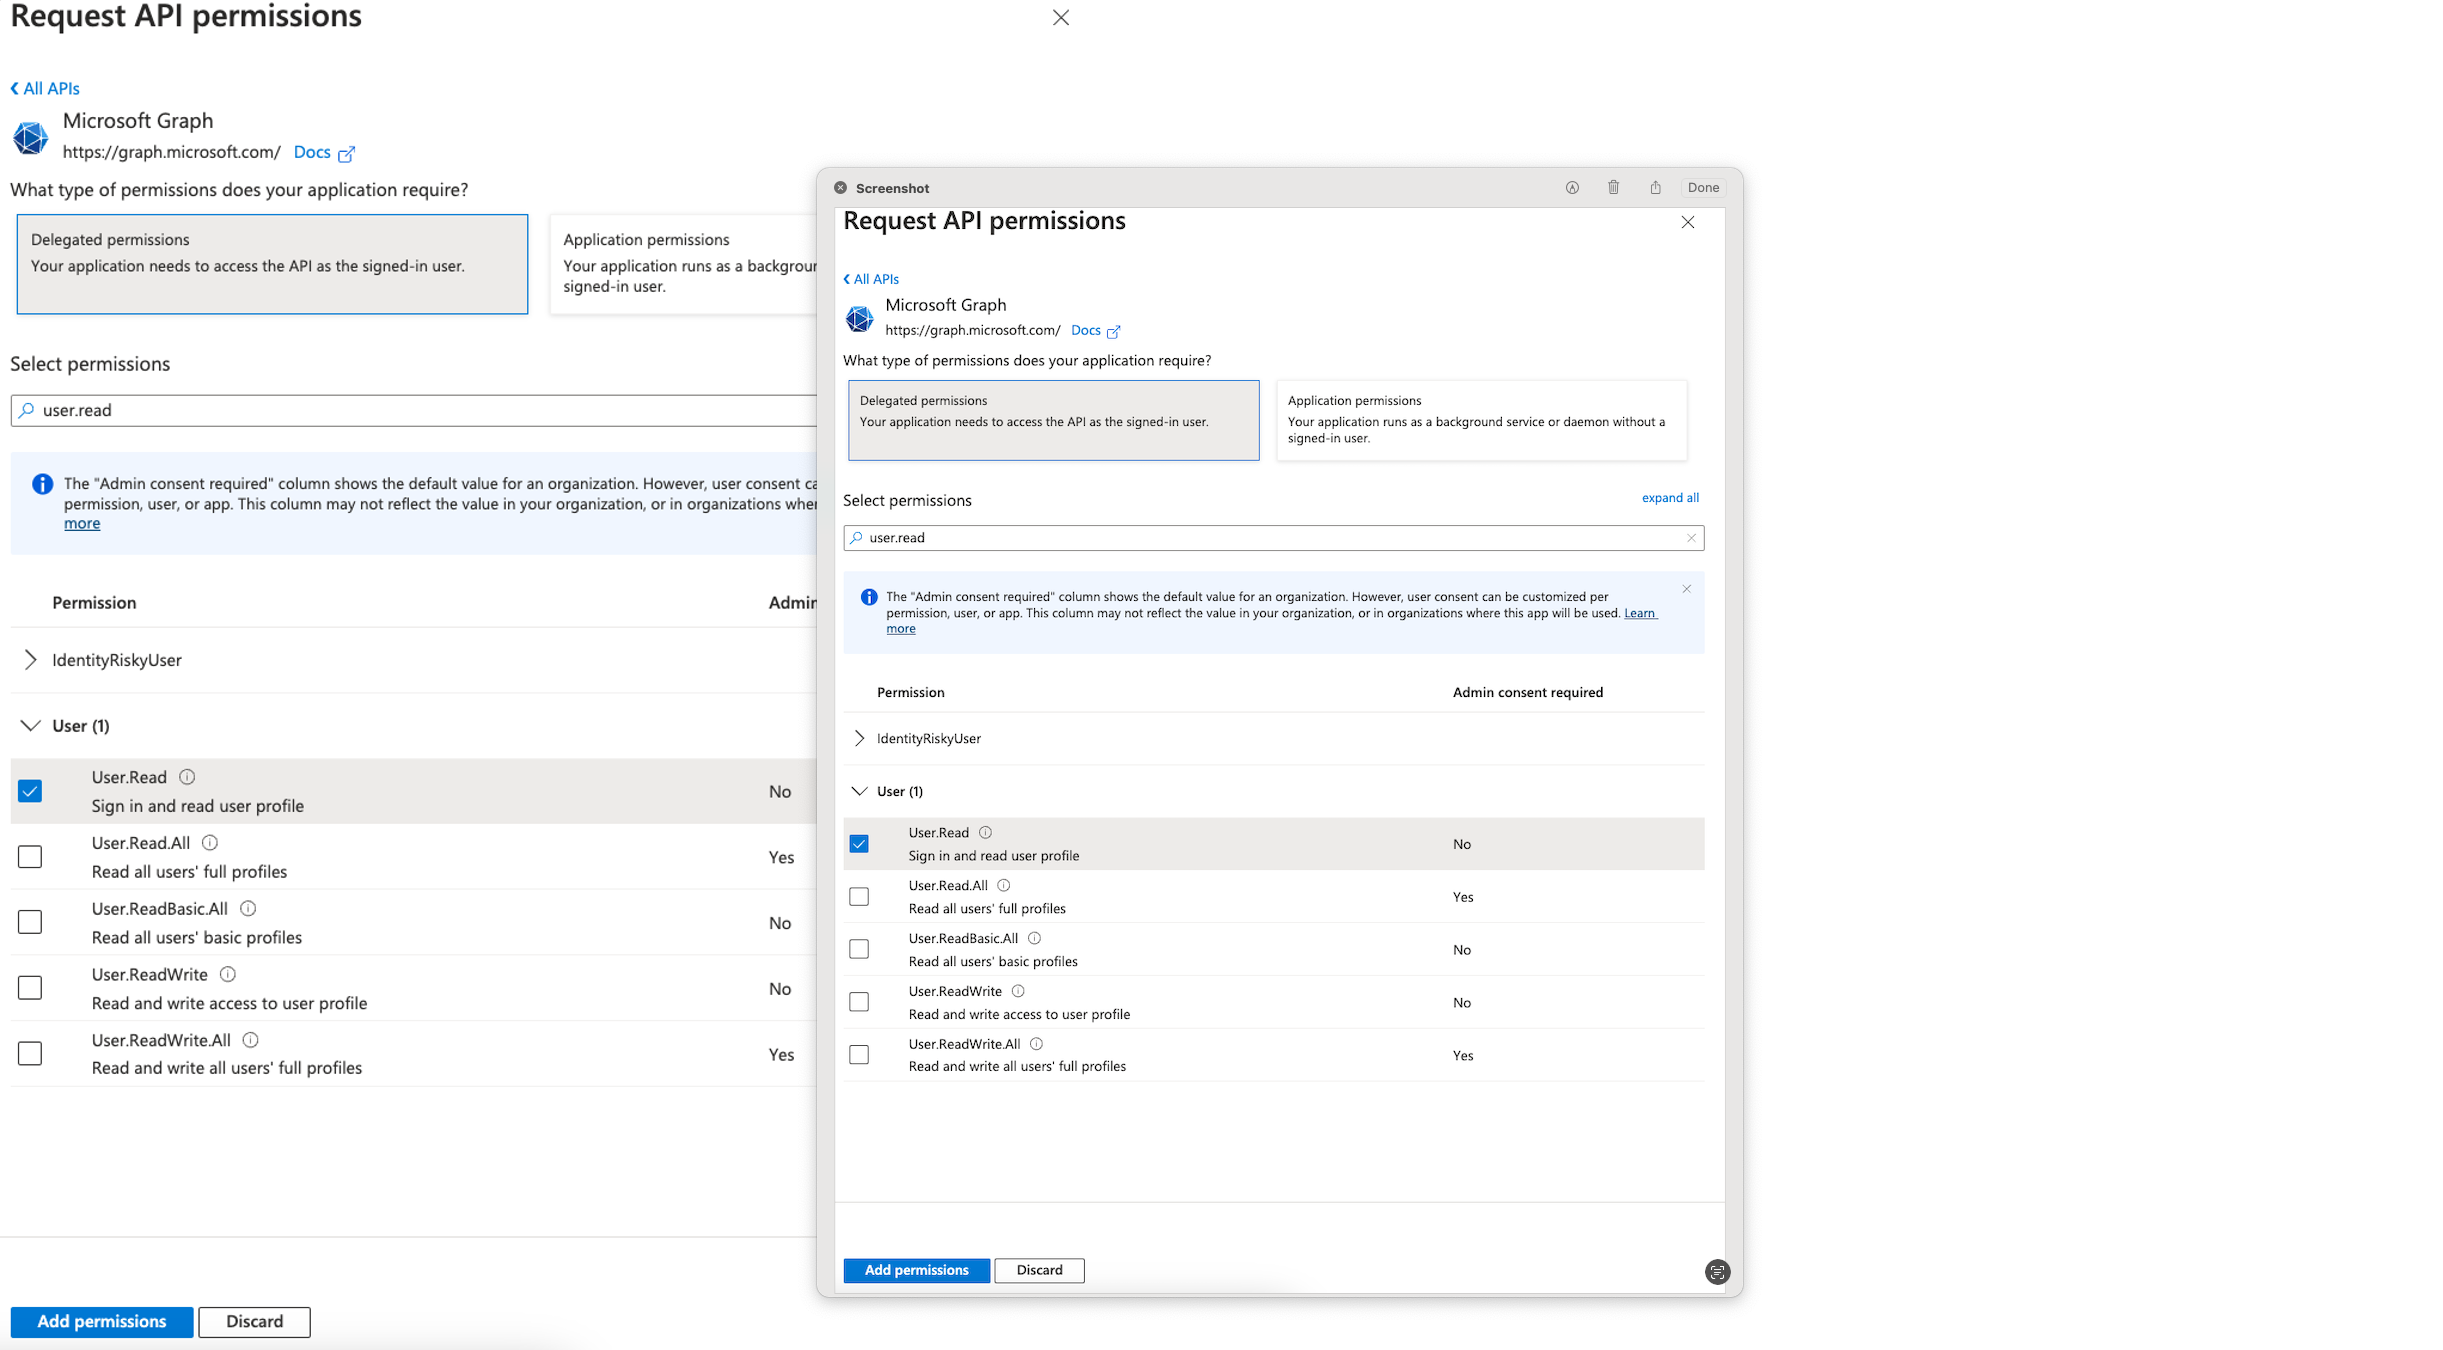
- Select Delegated permissions for the type of permission your application requires.
- In Select permissions, choose User and then User.Read.

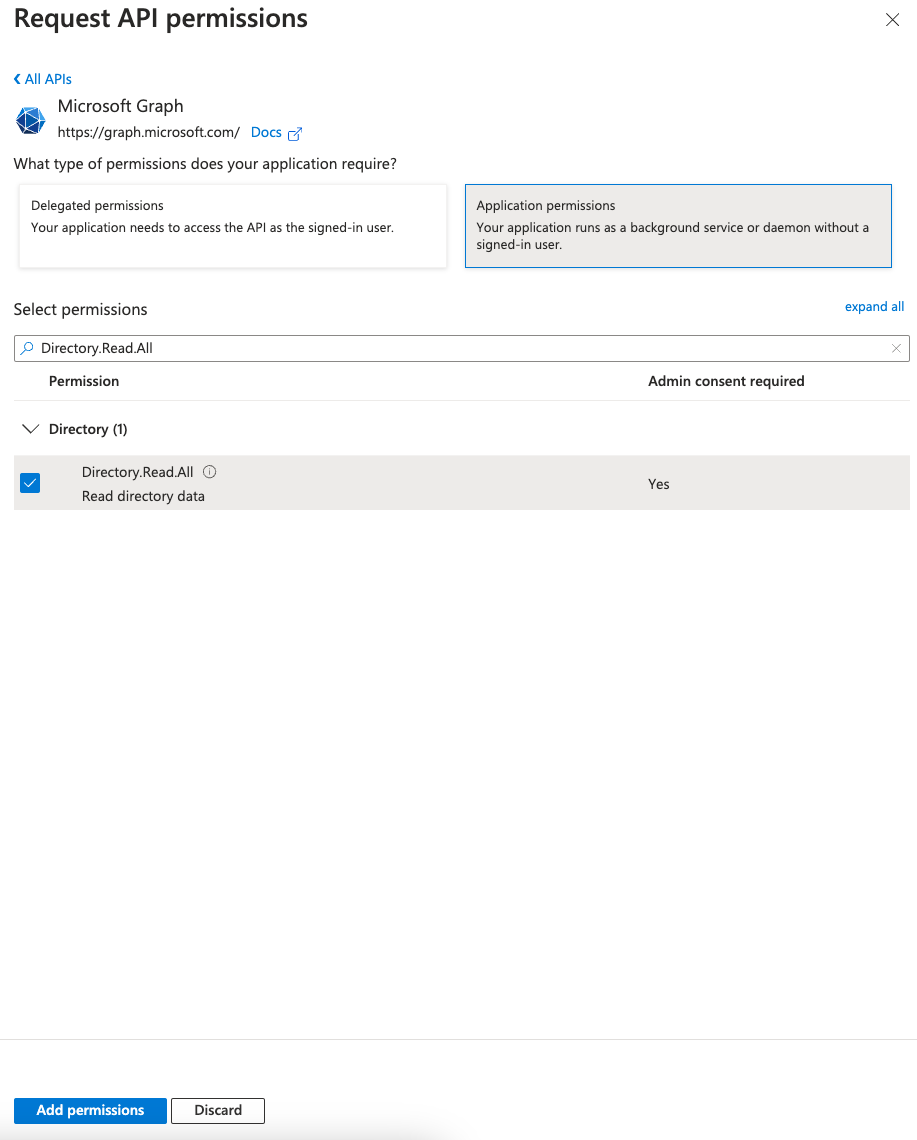
- Choose Application permissions for the type of permission your application requires.
- In Select permissions, choose Directory and then Directory.Read.All.

- Choose Add permissions.
This allows the Redshift enterprise application to grant admin consent to read the user profile and group data associated with the user and perform the login using SSO.
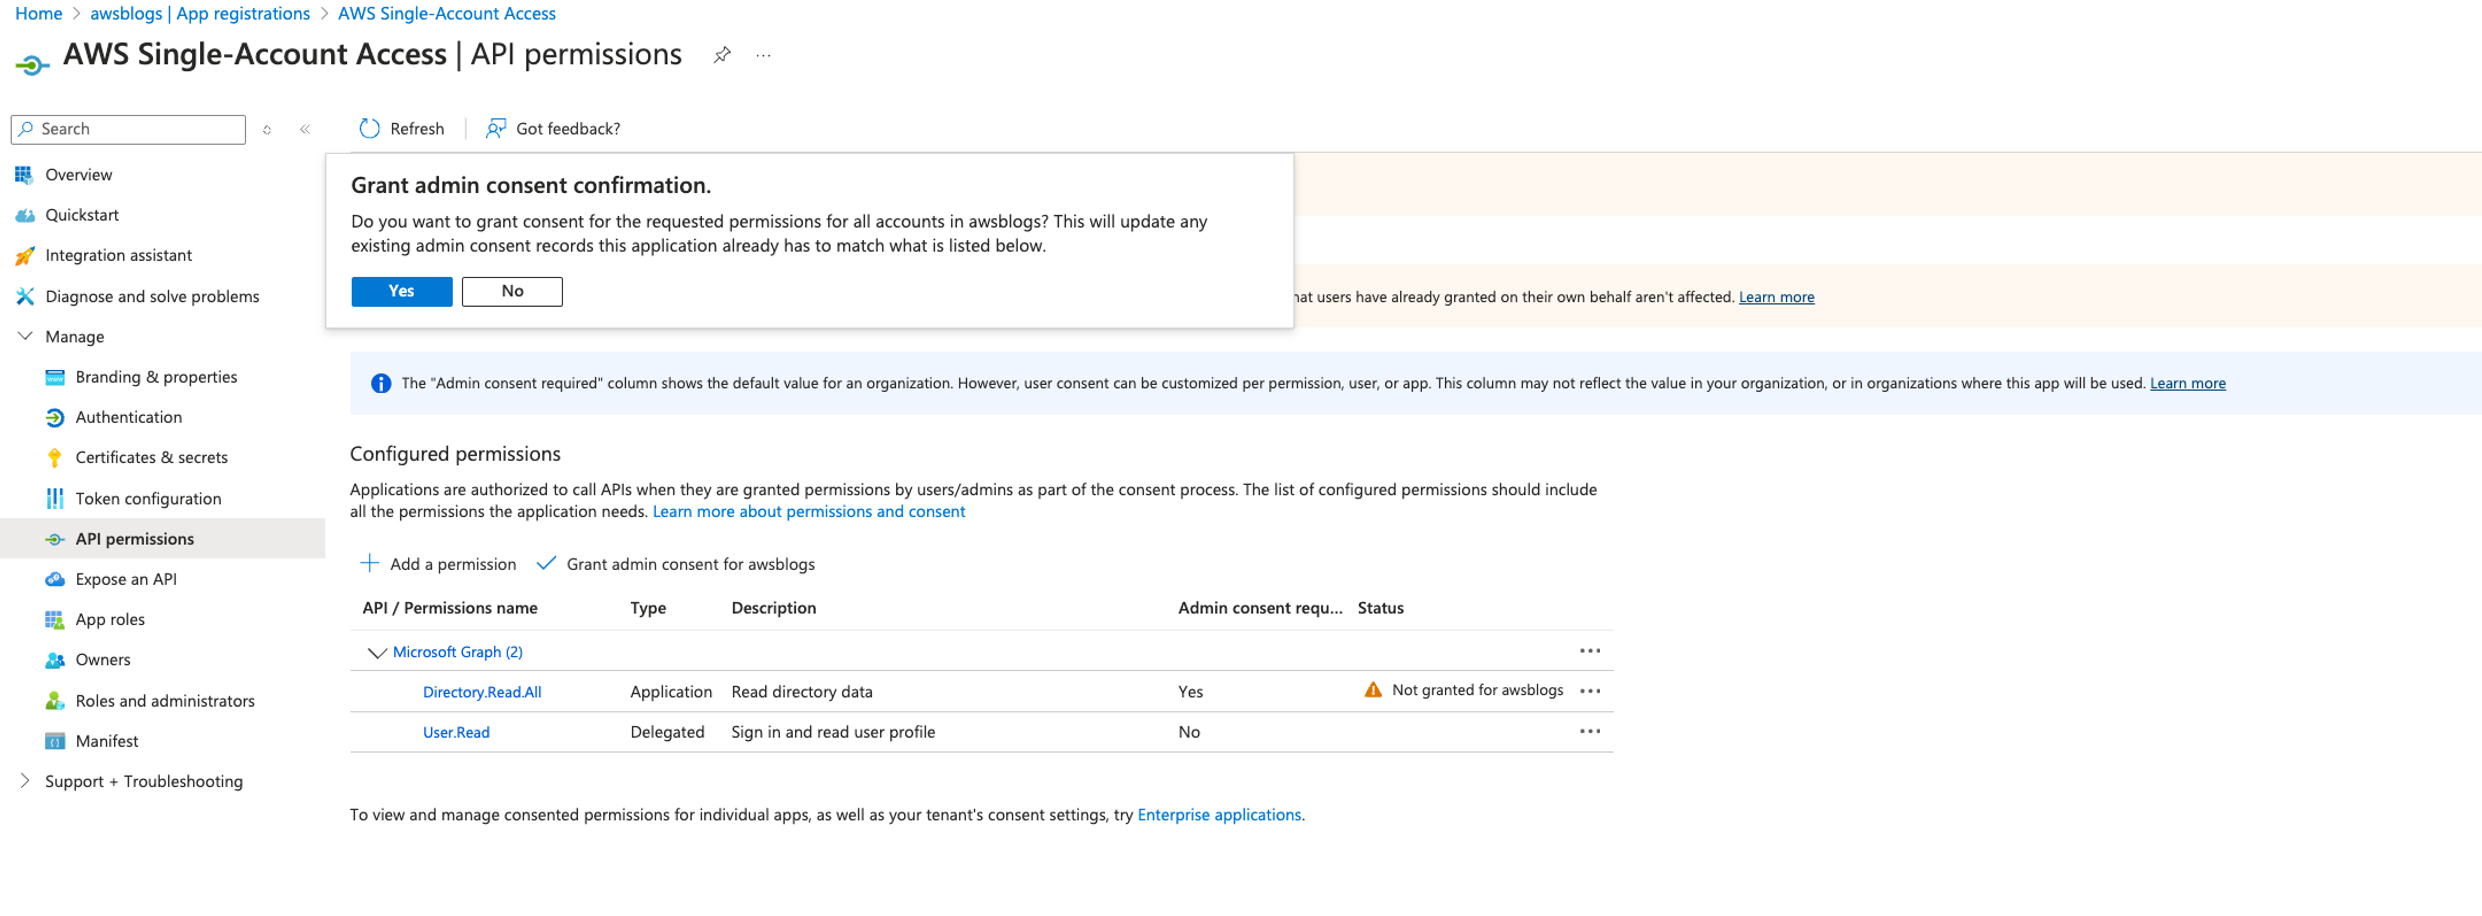
- Under Configured permissions, choose Grant admin consent for added permissions.
- In the confirmation pane, choose Yes to grant consent for the requested permissions for all accounts to the enterprise application.

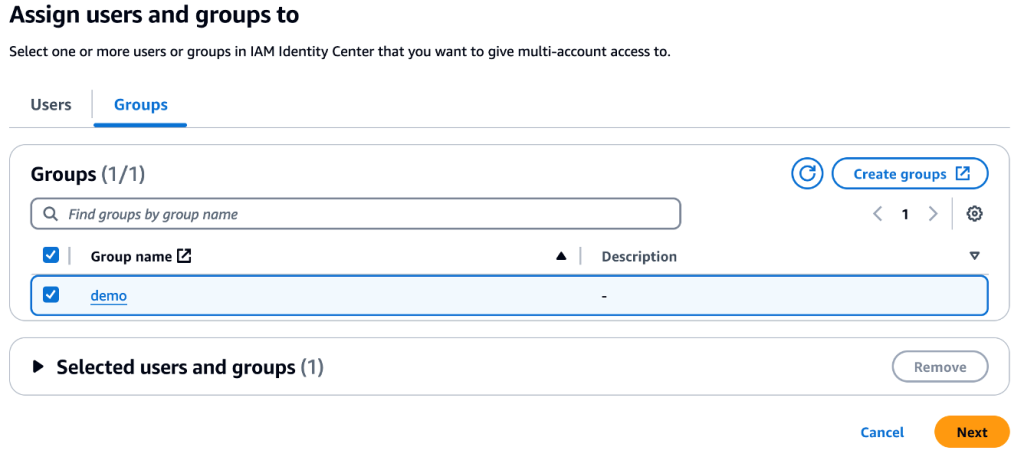
- Navigate to your enterprise applications and select
AWS Single-Account Access and choose Users and groups.
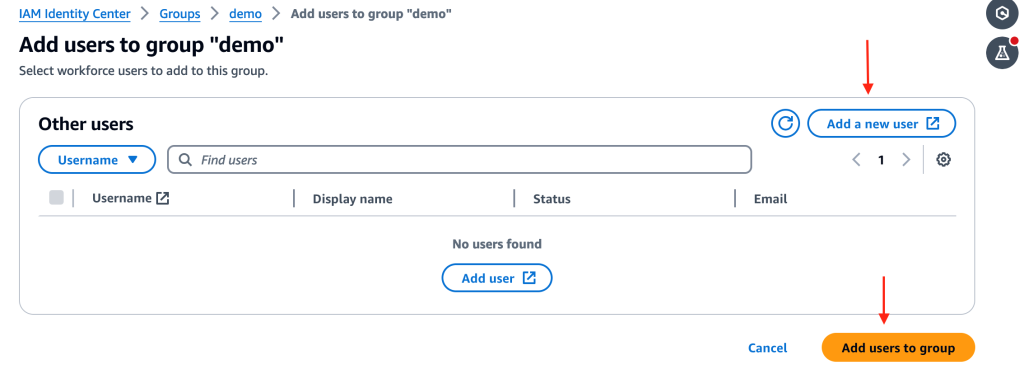
- Choose Add user/group.
- Under Users and groups select the groups
redshift_product, redshift_sales, and AWS-<acctno>_dev-bdt-team, which are created as part of the prerequisites, and choose Select.

- On the Add Assignment page, choose Assign.
Update Azure Function code
Complete the following steps to update the Azure Function code:
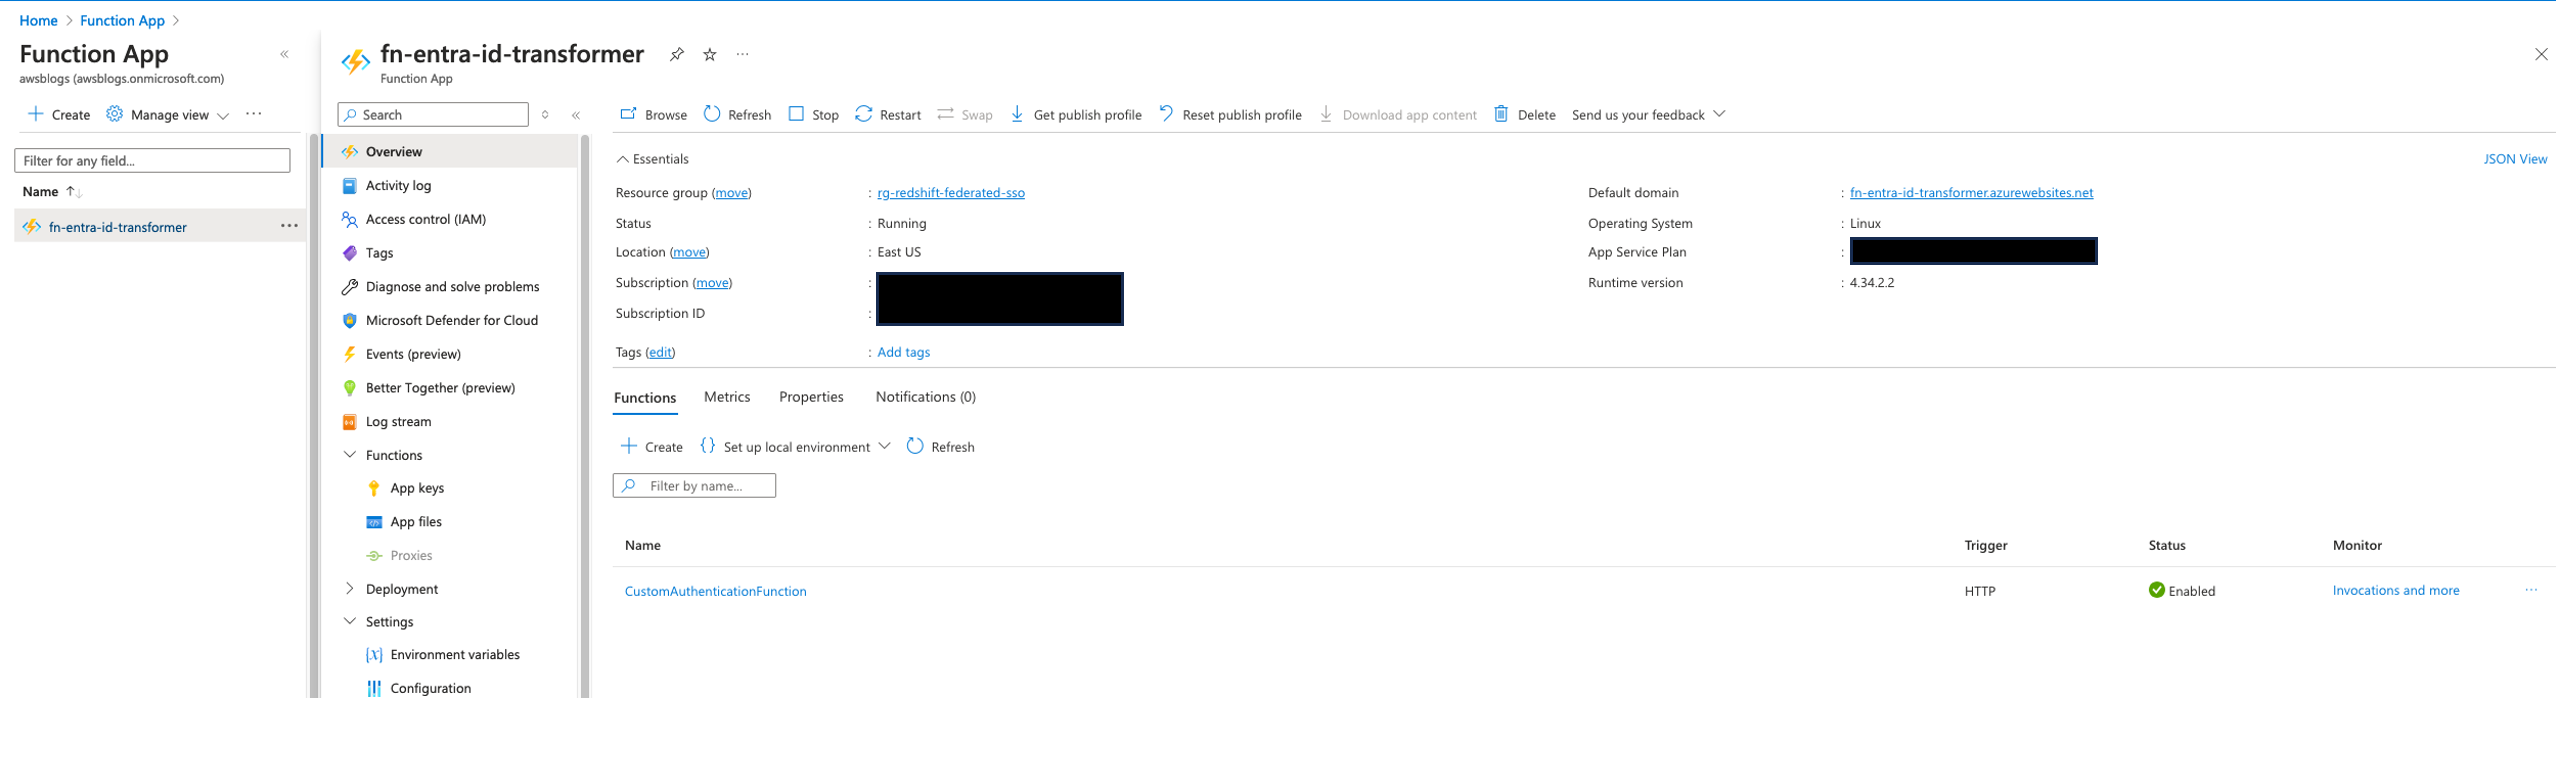
- Return to Home and navigate to
fn-entra-id-transformer under Function App.
- Choose
CustomAuthenticationFunction under Functions.

- On the Code + Test page, replace the sample code with the following code, which retrieves the user’s group membership, and choose Save.
In this code, replace the values of clientId, clientSecret, and tenantId with the values recorded previously. Also, in enterprise environments, use secret management service to store these secrets and use requirements file to install required packages such as requests.
import azure.functions as func
import logging
import json
import sys
import subprocess

def install(package):
    allowed_pattern = r'^[a-zA-Z0-9\-_\.]+$'
    if not re.match(allowed_pattern, package):
        raise ValueError("Invalid package name")

    subprocess.check_call([sys.executable, "-m", "pip", "install", package], shell=False)

# Ensure the requests package is installed
try:
    import requests
except ImportError:
    install("requests")
    import requests

app = func.FunctionApp(http_auth_level=func.AuthLevel.FUNCTION)

@app.route(route="custom-extension")
def custom_extension(req: func.HttpRequest) -> func.HttpResponse:
    logging.info("Azure AD Custom Extension function triggered")

    try:
        request_body = req.get_body().decode('utf-8')
        data = json.loads(request_body)
        user_id = data['data']['authenticationContext']['user']['id']

        # Fetch access token for Microsoft Graph API
        access_token = get_access_token()
        if not access_token:
            error_response = {"error": "Failed to obtain access token for Graph API"}
            return func.HttpResponse(body=json.dumps(error_response), status_code=200, headers={"Content-Type": "application/json"})

        # Fetch user groups
        user_groups = fetch_user_groups(user_id, access_token)
        if user_groups is None:
            error_response = {"error": "Failed to fetch user groups"}
            return func.HttpResponse(body=json.dumps(error_response), status_code=200, headers={"Content-Type": "application/json"})

        # Format groups as : seperated values as needed by redshift query editor
        groups_colon_separated = ":".join(user_groups)

        # Construct response as per the required JSON structure
        response_content = {
            "data": {
                "@odata.type": "microsoft.graph.onTokenIssuanceStartResponseData",
                "actions": [
                    {
                        "@odata.type": "microsoft.graph.tokenIssuanceStart.provideClaimsForToken",
                        "claims": {
                            "dbGroupsqueryeditor": groups_colon_separated,
                            "dbGroupssqltools": user_groups
                        }
                    }
                ]
            }
        }

        return func.HttpResponse(body=json.dumps(response_content), status_code=200, headers={"Content-Type": "application/json"})

    except Exception as e:
        logging.error(f"Error in function execution: {str(e)}")
        error_response = {"error": str(e)}
        return func.HttpResponse(body=json.dumps(error_response), status_code=200, headers={"Content-Type": "application/json"})

def get_access_token():
    # Hardcoded credentials for demonstration; replace with secure storage before production
    client_id = 'client_id'
    client_secret = 'client_secret'
    tenant_id = 'tenant_id'
    token_url = f"https://login.microsoftonline.com/{tenant_id}/oauth2/v2.0/token"

    body = {
        "client_id": client_id,
        "scope": "https://graph.microsoft.com/.default",
        "client_secret": client_secret,
        "grant_type": "client_credentials"
    }

    try:
        response = requests.post(token_url, data=body, timeout=10)
        response.raise_for_status()
        return response.json()['access_token']
    except requests.RequestException as e:
        logging.error(f"Failed to retrieve access token: {str(e)}")
        return None

def fetch_user_groups(user_id, access_token):
    graph_url = f"https://graph.microsoft.com/v1.0/users/{user_id}/memberOf?$select=displayName"

    headers = {
        "Authorization": f"Bearer {access_token}"
    }

    try:
        response = requests.get(graph_url, headers=headers, timeout=10)
        response.raise_for_status()
        return [group['displayName'] for group in response.json().get('value', []) if group["@odata.type"] == "#microsoft.graph.group"]
    except requests.RequestException as e:
        logging.error(f"Failed to fetch user groups: {str(e)}")
        return None
Now you can create an IAM IdP and role.
In IAM, an IdP represents a trusted external authentication service like Microsoft Entra ID that supports SAML 2.0, allowing AWS to recognize user identities authenticated by that service. It’s crucial to name this IdP AzureADDemo to match the previously configured SAML claims for role creation.
Create your IAM SAML IdP
Complete the following steps to create your IAM SAML IdP:
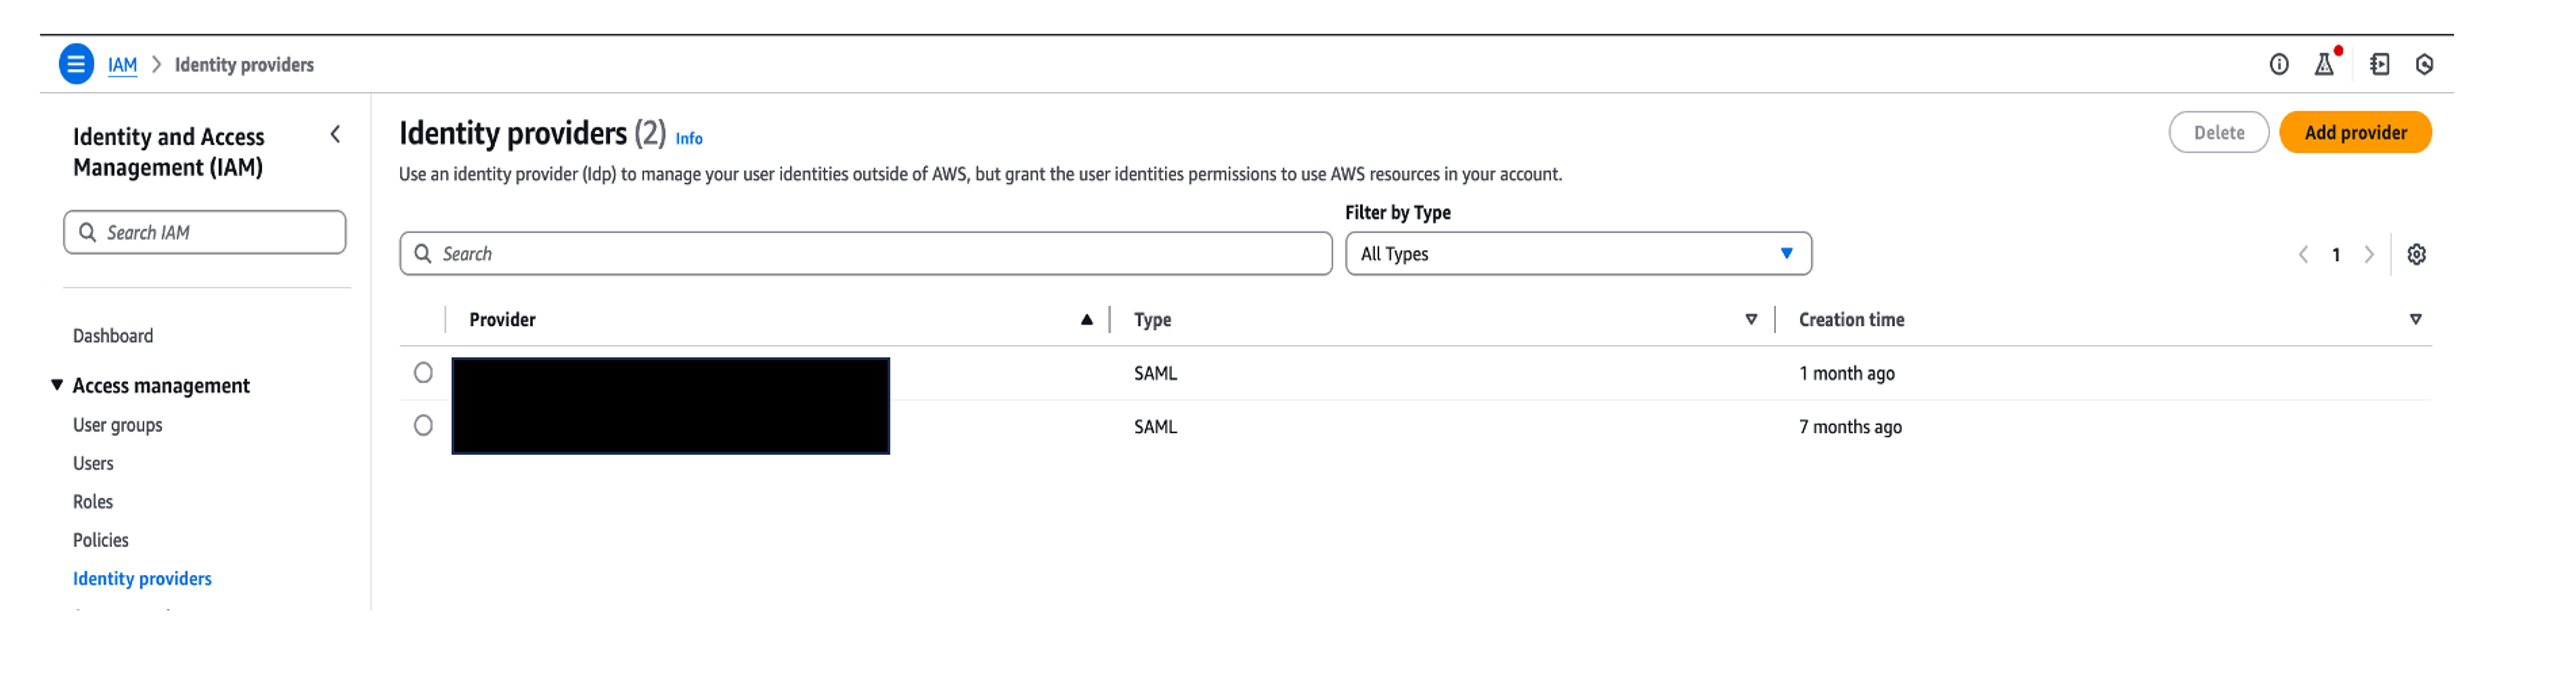
- On the IAM console, choose Identity providers in the navigation pane.
- Choose Add provider.

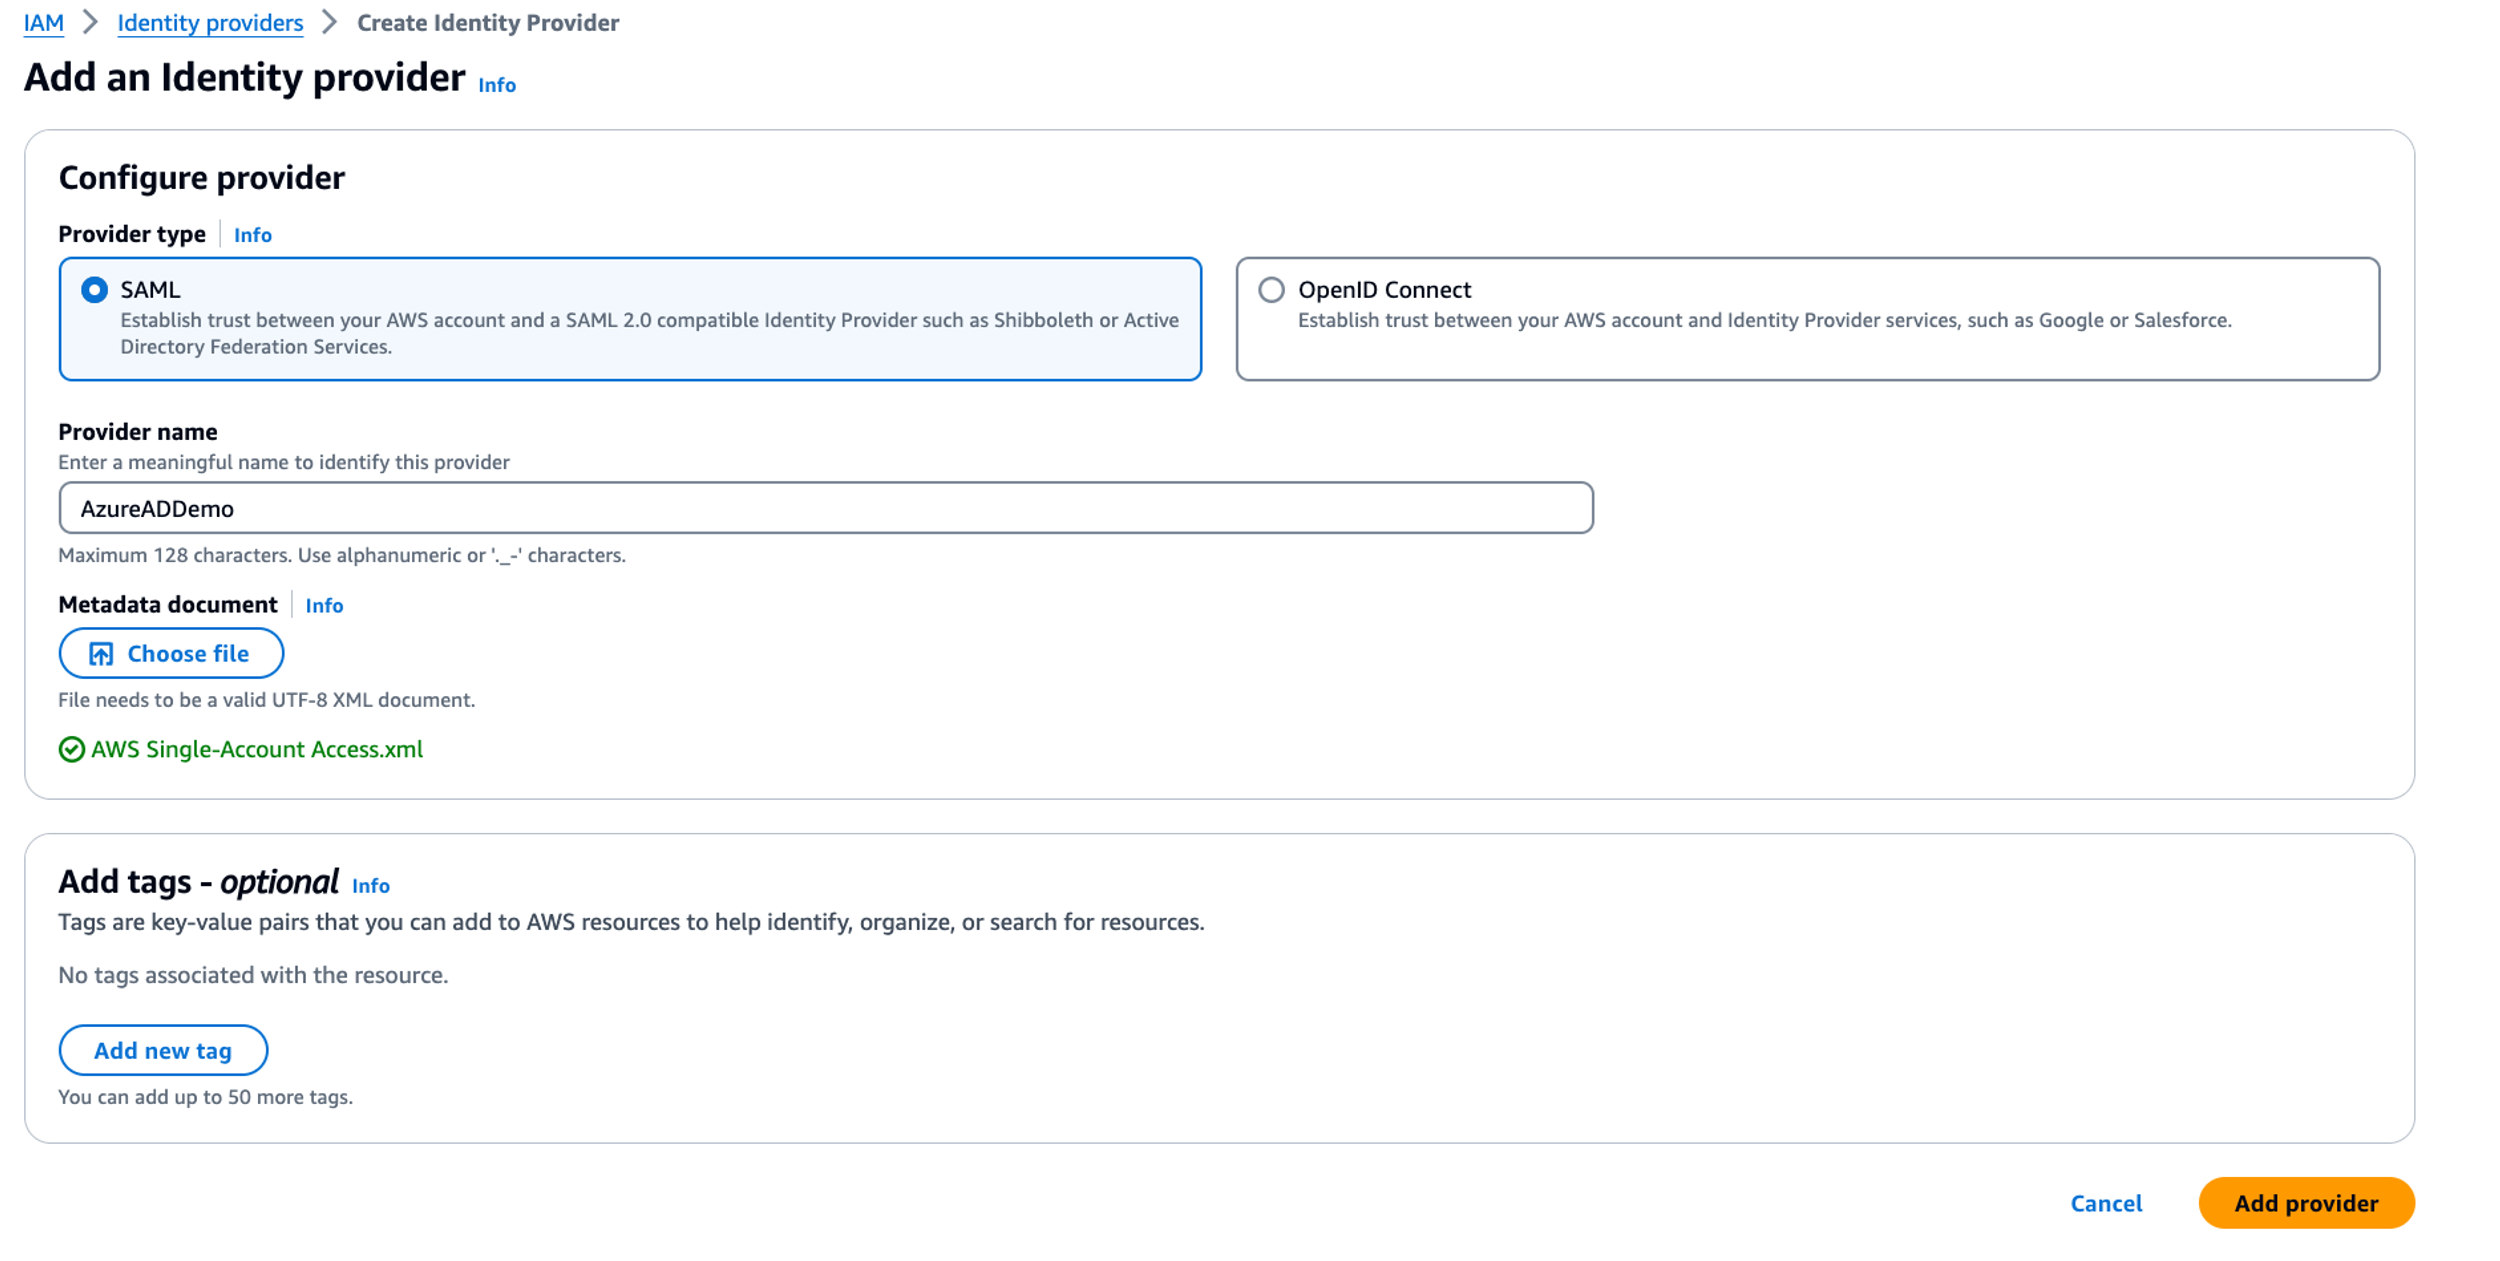
- For Provider type, select SAML.
- For Provider name, enter a descriptive name, such as
AzureADDemo.
- Upload the SAML metadata document, which you downloaded as
Federation Metadata.xml and stored as AWS Single-Account Access.xml.
- Choose Add provider.

Create an IAM role
Next, you create an IAM role for SAML-based federation, which will be used to grant access to the Redshift Query Editor and Redshift cluster. Complete the following steps:
- On the IAM console, choose Roles in the navigation pane.
- Choose Create role.
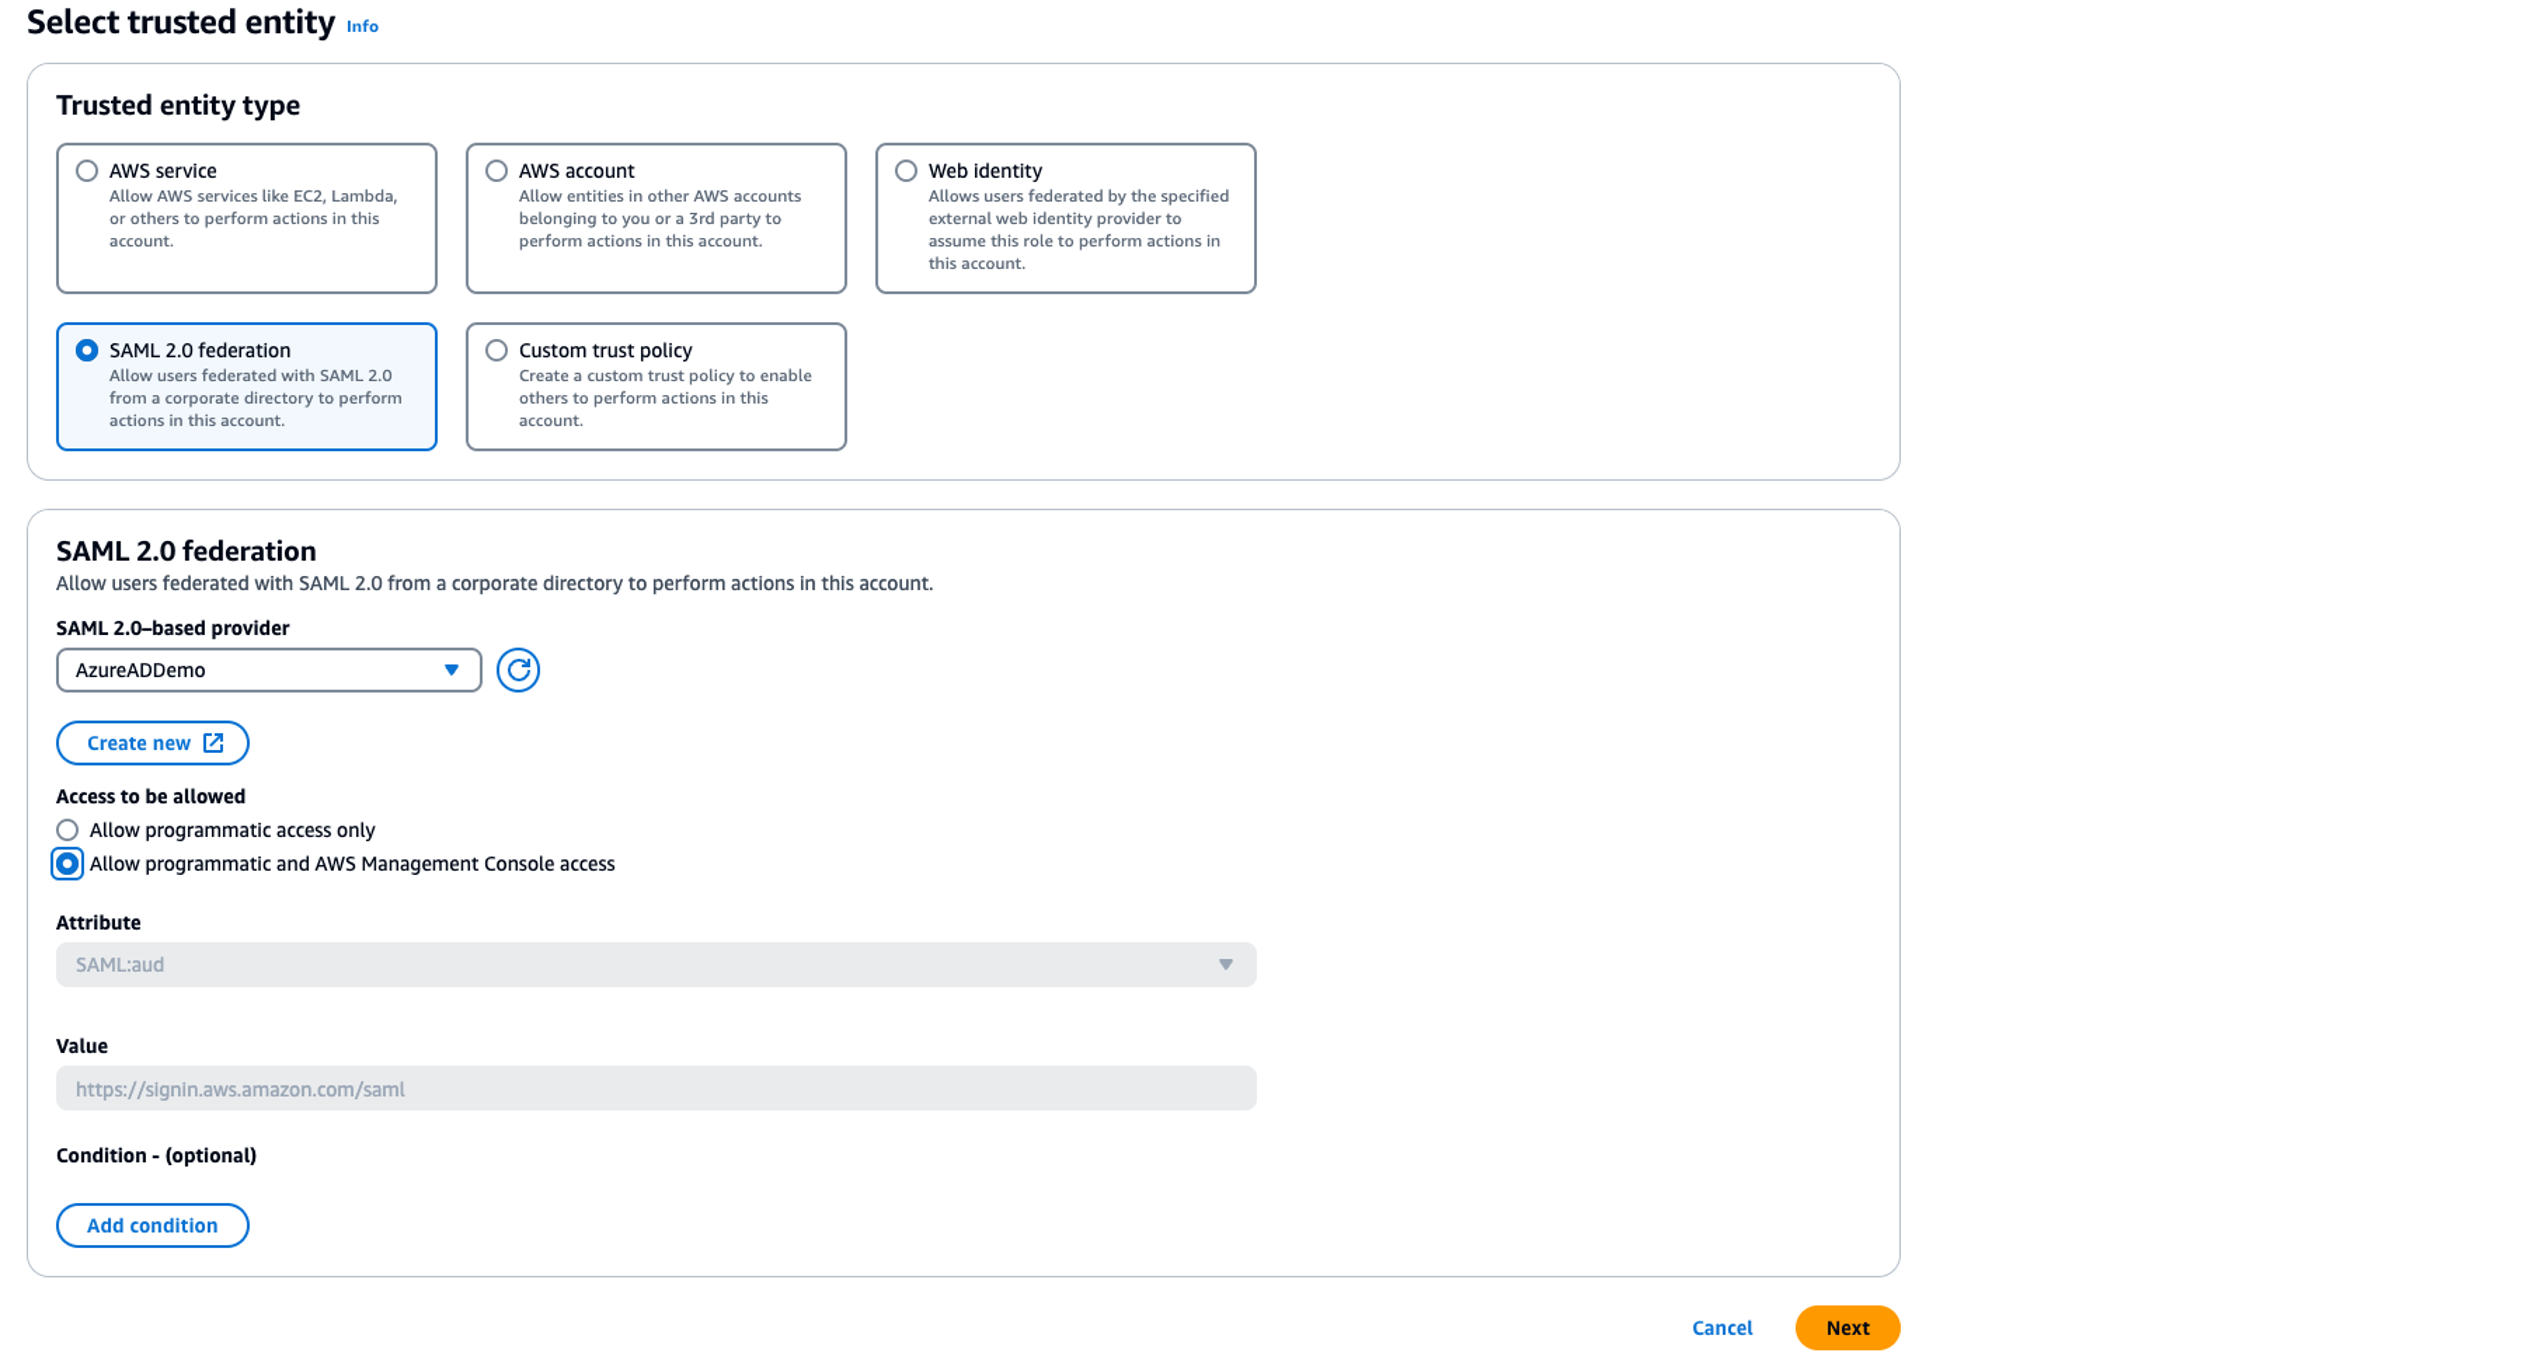
- For Trusted identity type, select SAML 2.0 federation.
- For SAML 2.0-based provider, choose
AzureADDemo.
- For Access to be allowed, select Allow programmatic and AWS Management Console access.
- Choose Next.

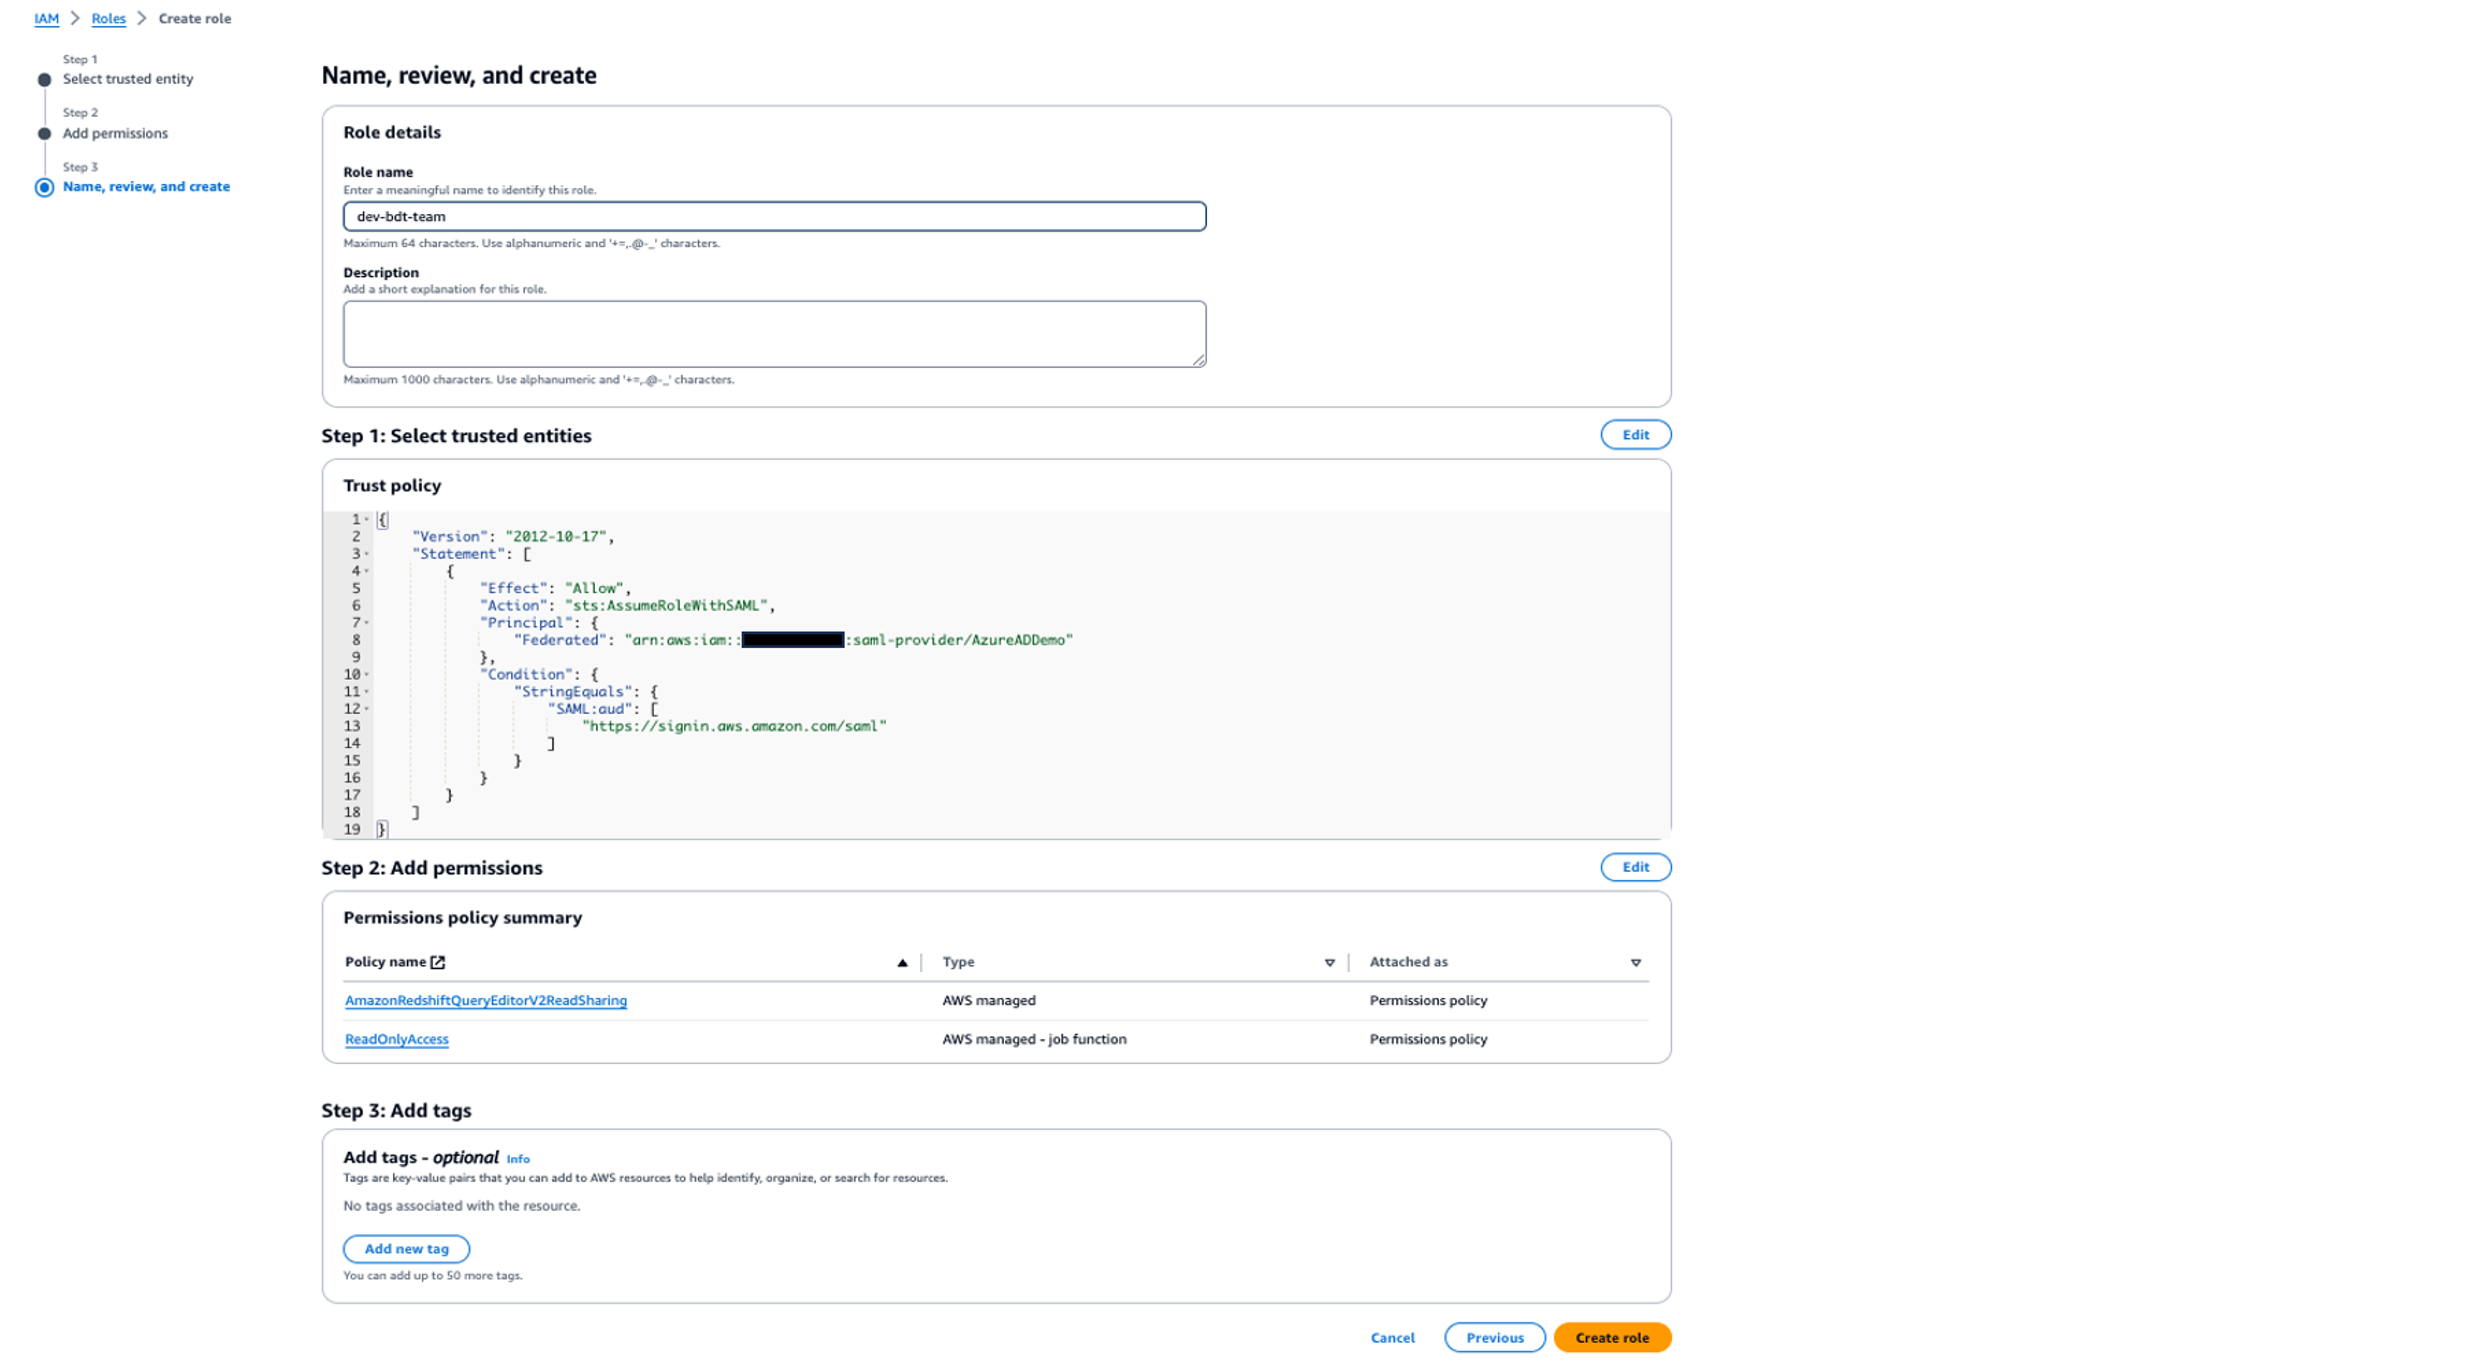
- Add the permissions
AmazonRedshiftQueryEditorV2ReadSharing and ReadOnlyAccess, and choose Next.
- For Role name, enter a descriptive name, such as
dev-bdt-team.
- Choose Create role.

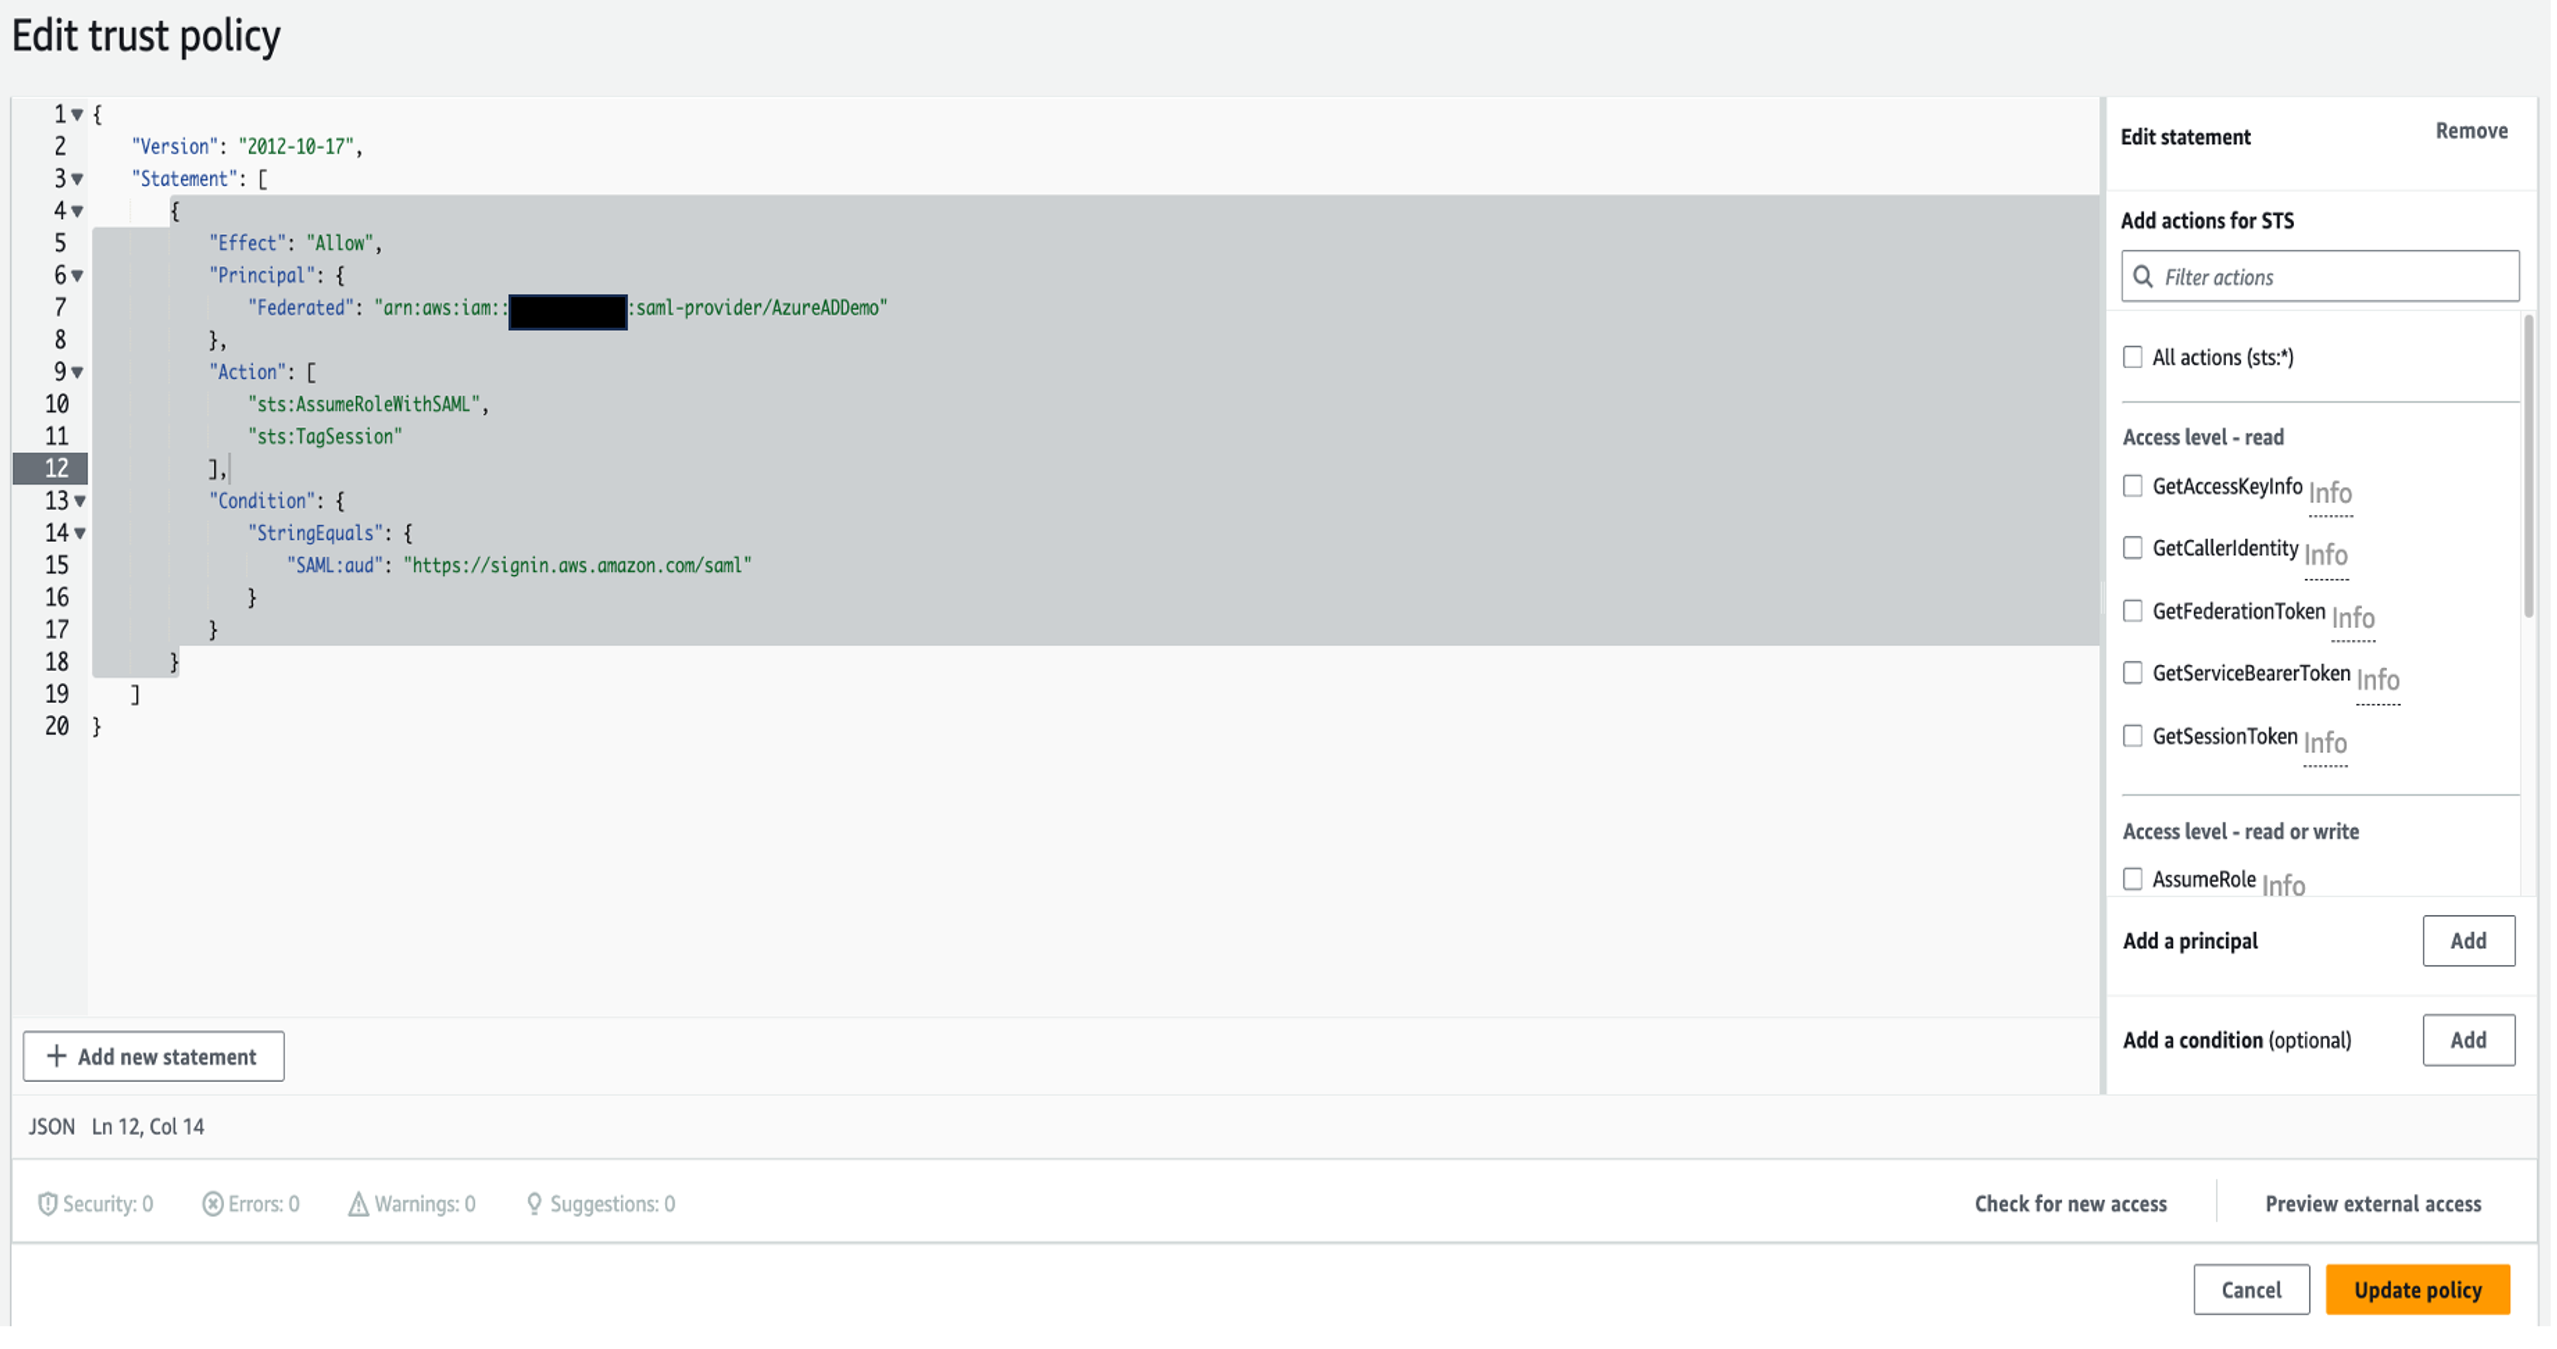
Update trust policy
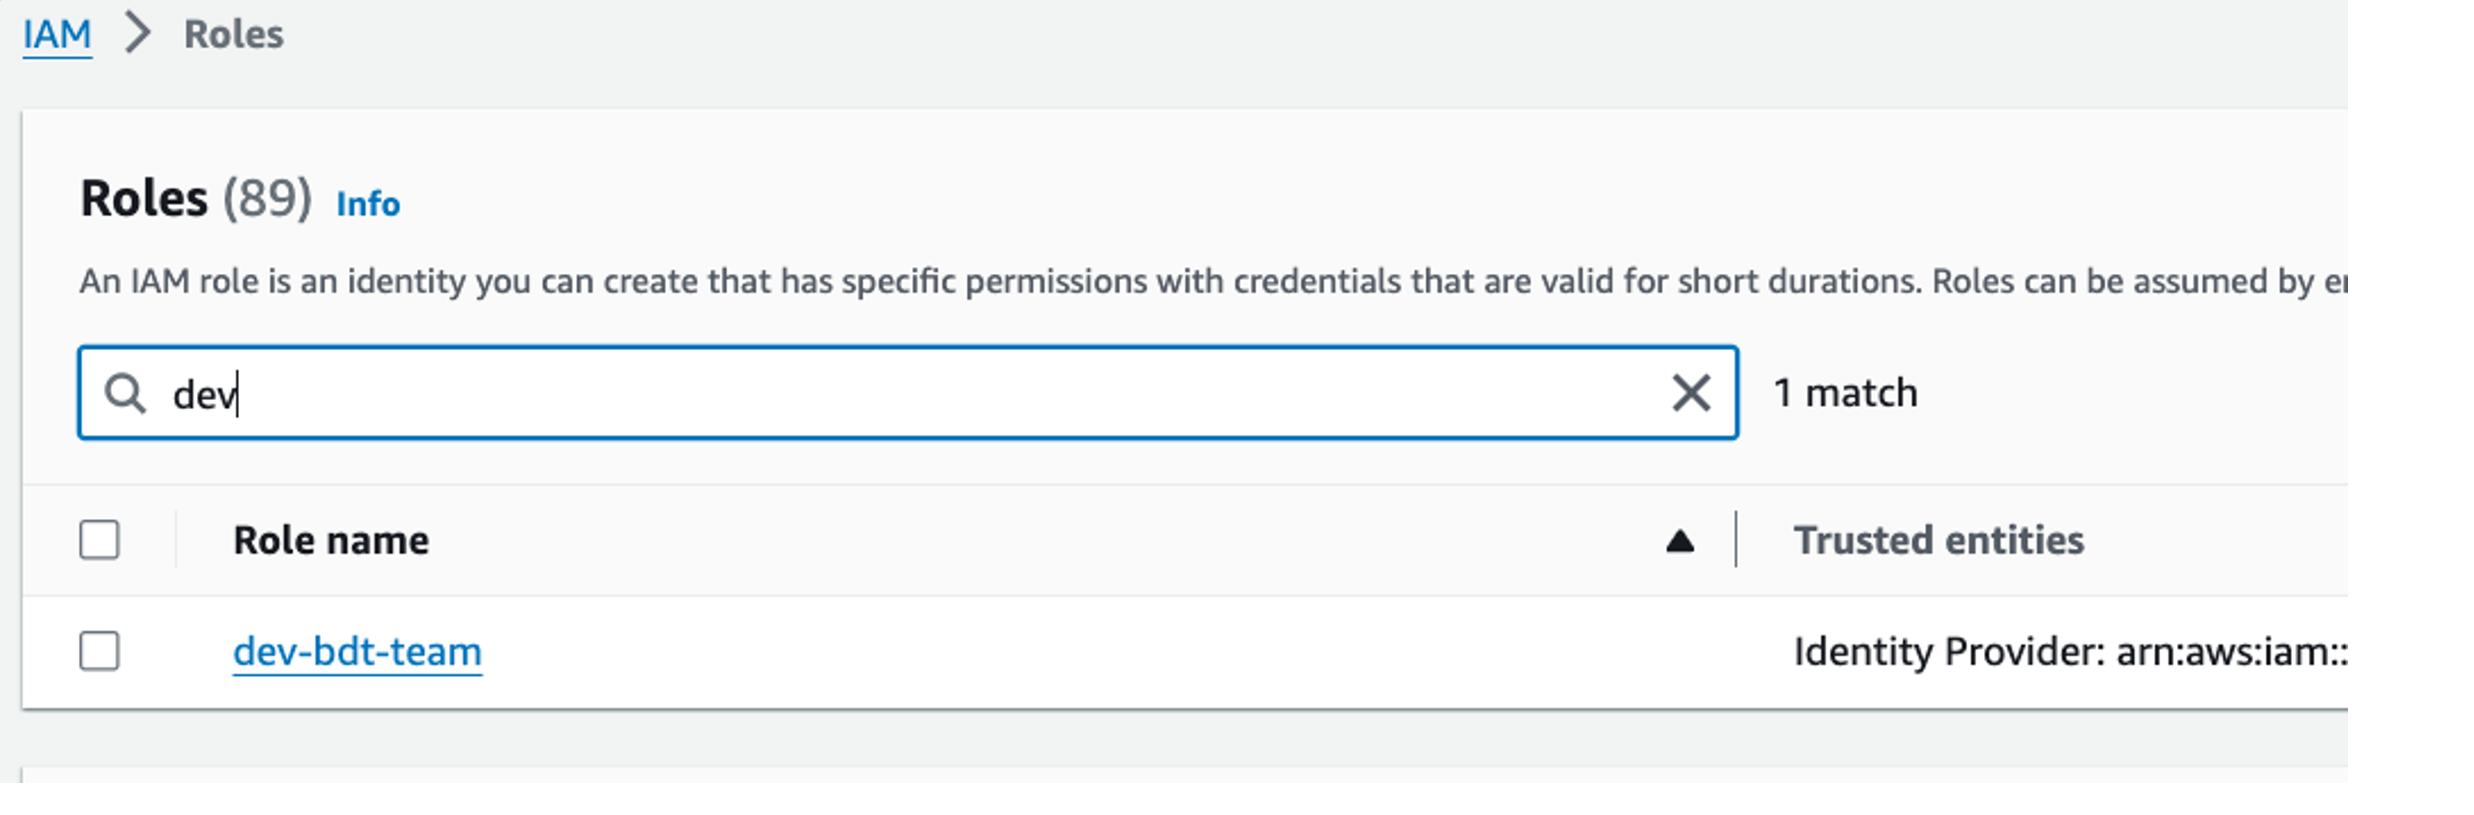
- On the IAM console, choose Roles in the navigation pane, and search for and choose the role
dev-bdt-team.

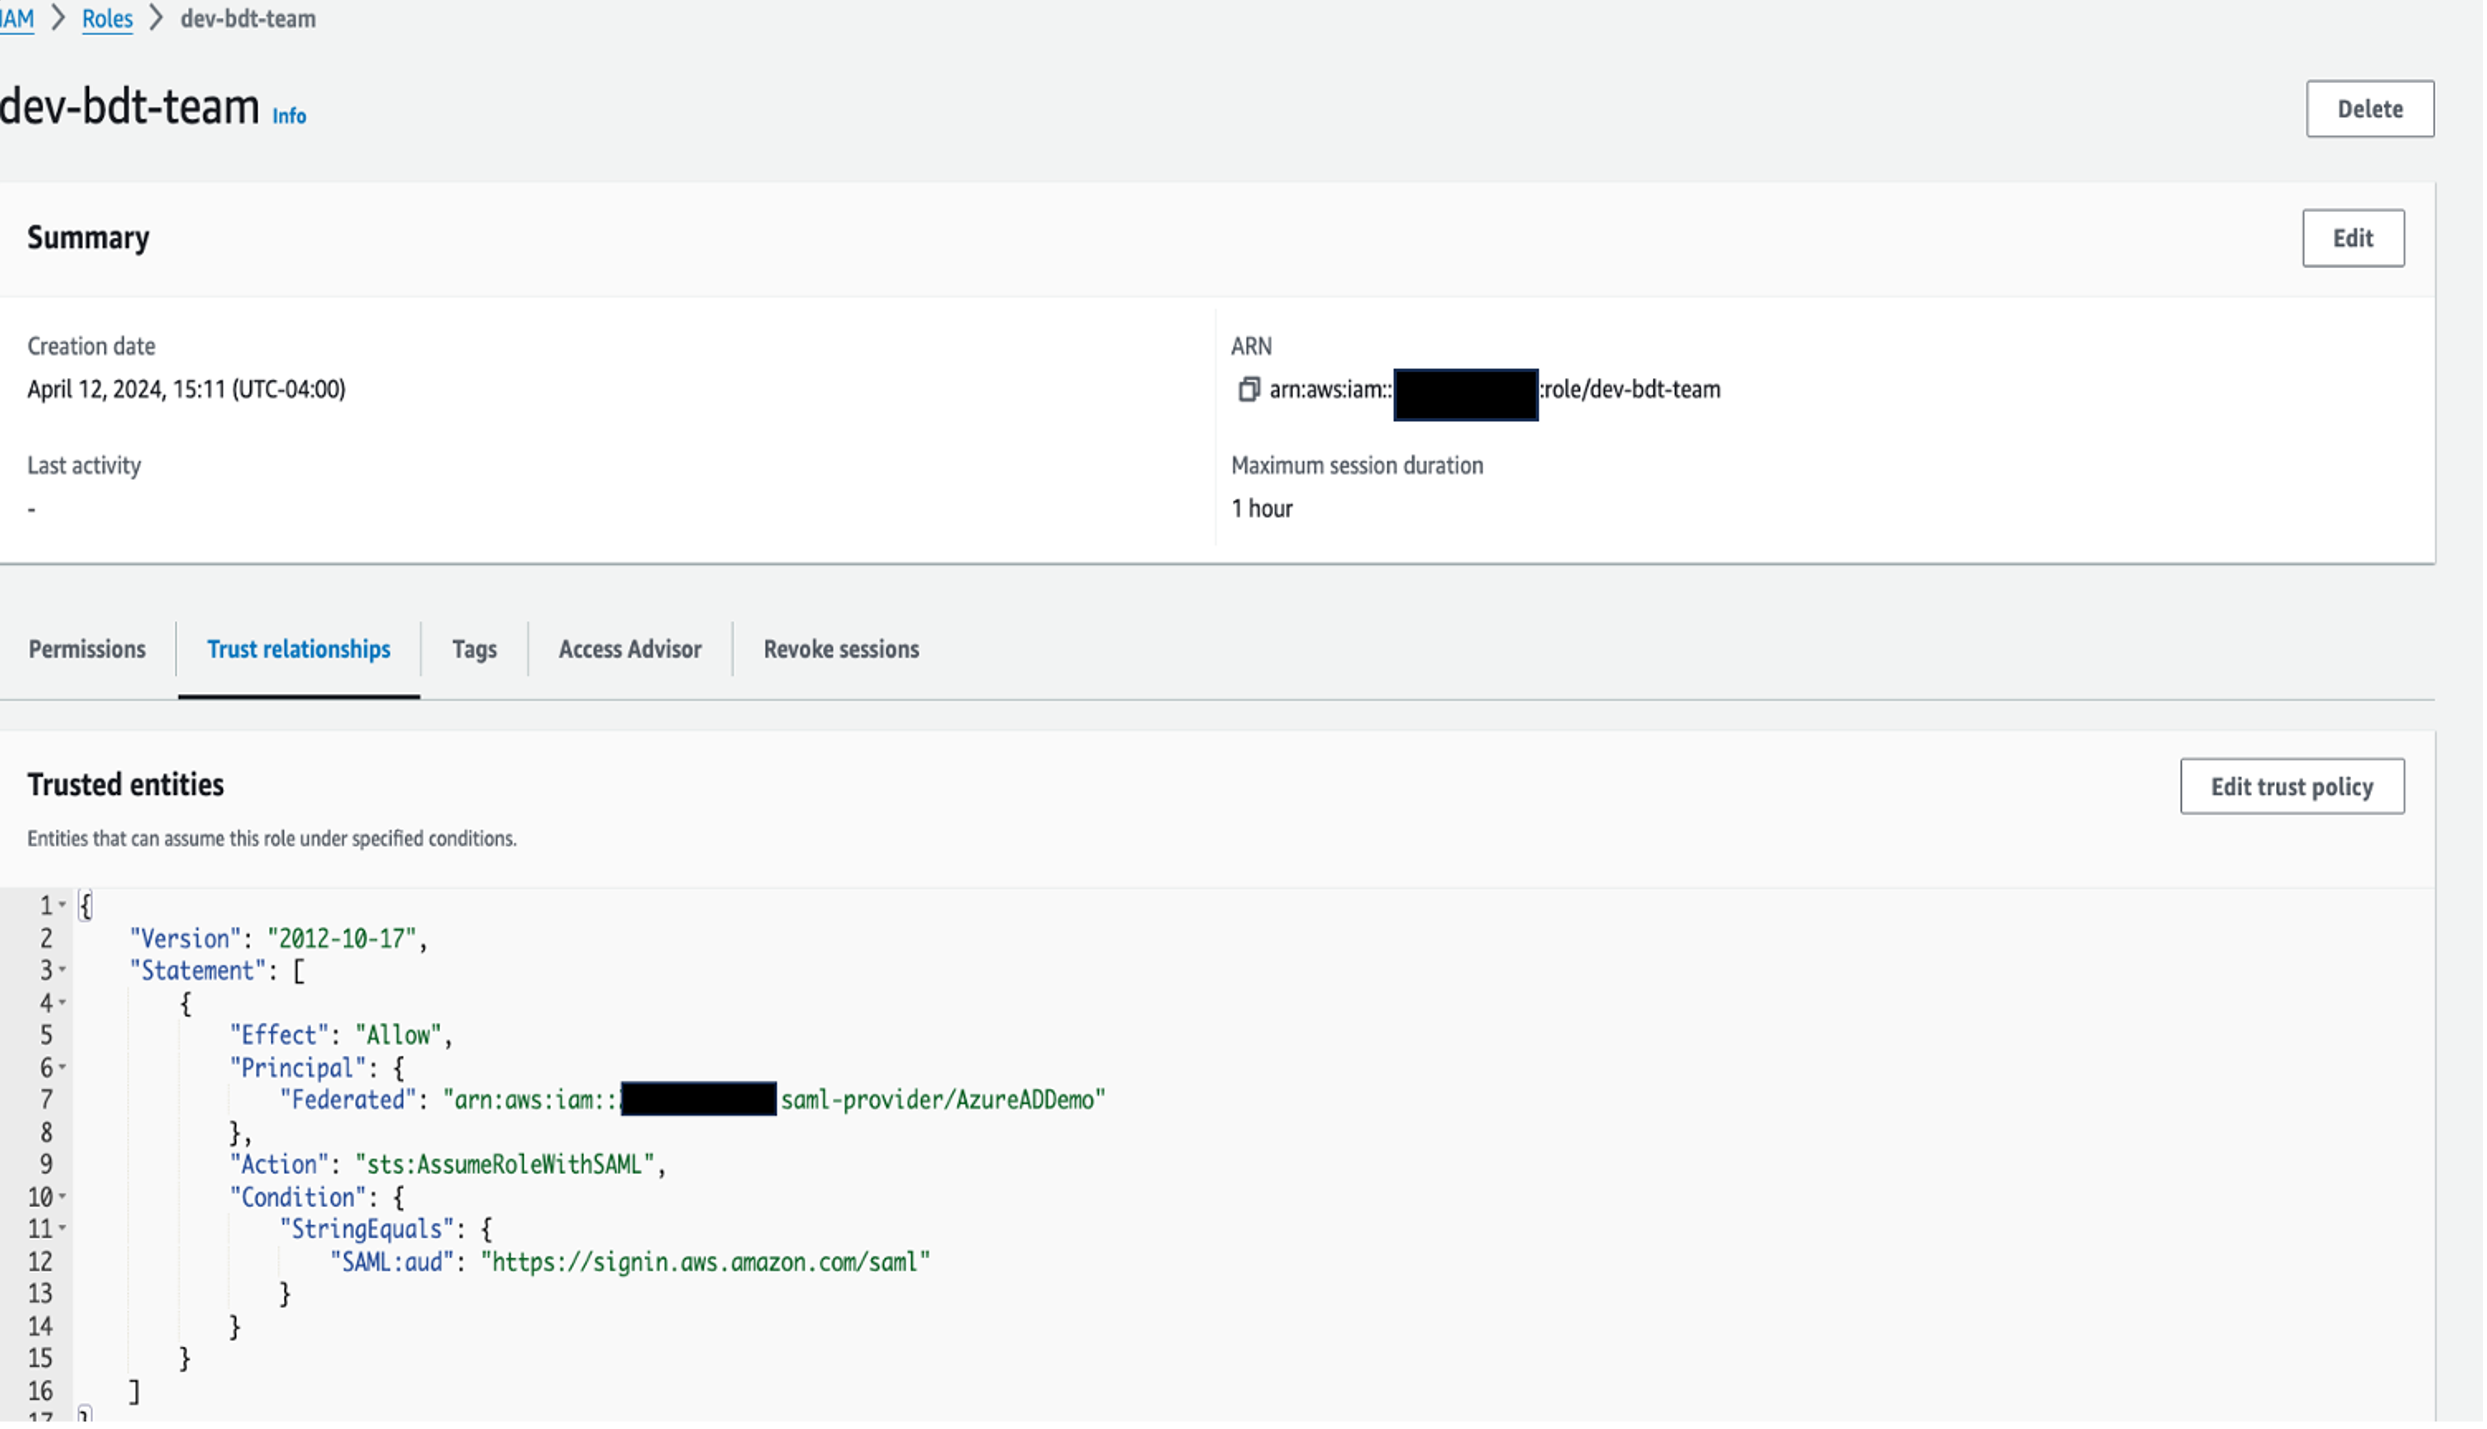
- In the Trusted entities section, choose Edit trust policy.

- Add the action
sts:TagSession by removing the Action line and adding the following code:"Action": [
"sts:AssumeRoleWithSAML",
"sts:TagSession"
],
- Choose Update policy.

Create an IAM policy
In the following steps, you create an IAM policy to allow the dev-bdt-team role to obtain temporary credentials for connecting to Amazon Redshift using IAM:
- On the IAM console, choose Policies in the navigation pane.
- Choose Create policy.
- On the JSON tab, enter the following policy document, replacing placeholders with appropriate values:
{
    "Version": "2012-10-17",
    "Statement": [
                    {
                        "Sid": "VisualEditor0",
                        "Effect": "Allow",
                        "Action": "redshift:GetClusterCredentialsWithIAM",
                        "Resource": "arn:aws:redshift:<YOUR-REGION>:<AWS-ACCOUNT-NUMBER>:dbname::<YOUR-REDSHIFT-CLUSTER-NAME>/*"
                    }
                ]
}
- Review the policy details and provide a descriptive name for your policy, such as
redshiftAccessPolicy.
- Review the policy summary and resolve any warnings or errors.
- Choose Create policy to finalize the policy creation process.
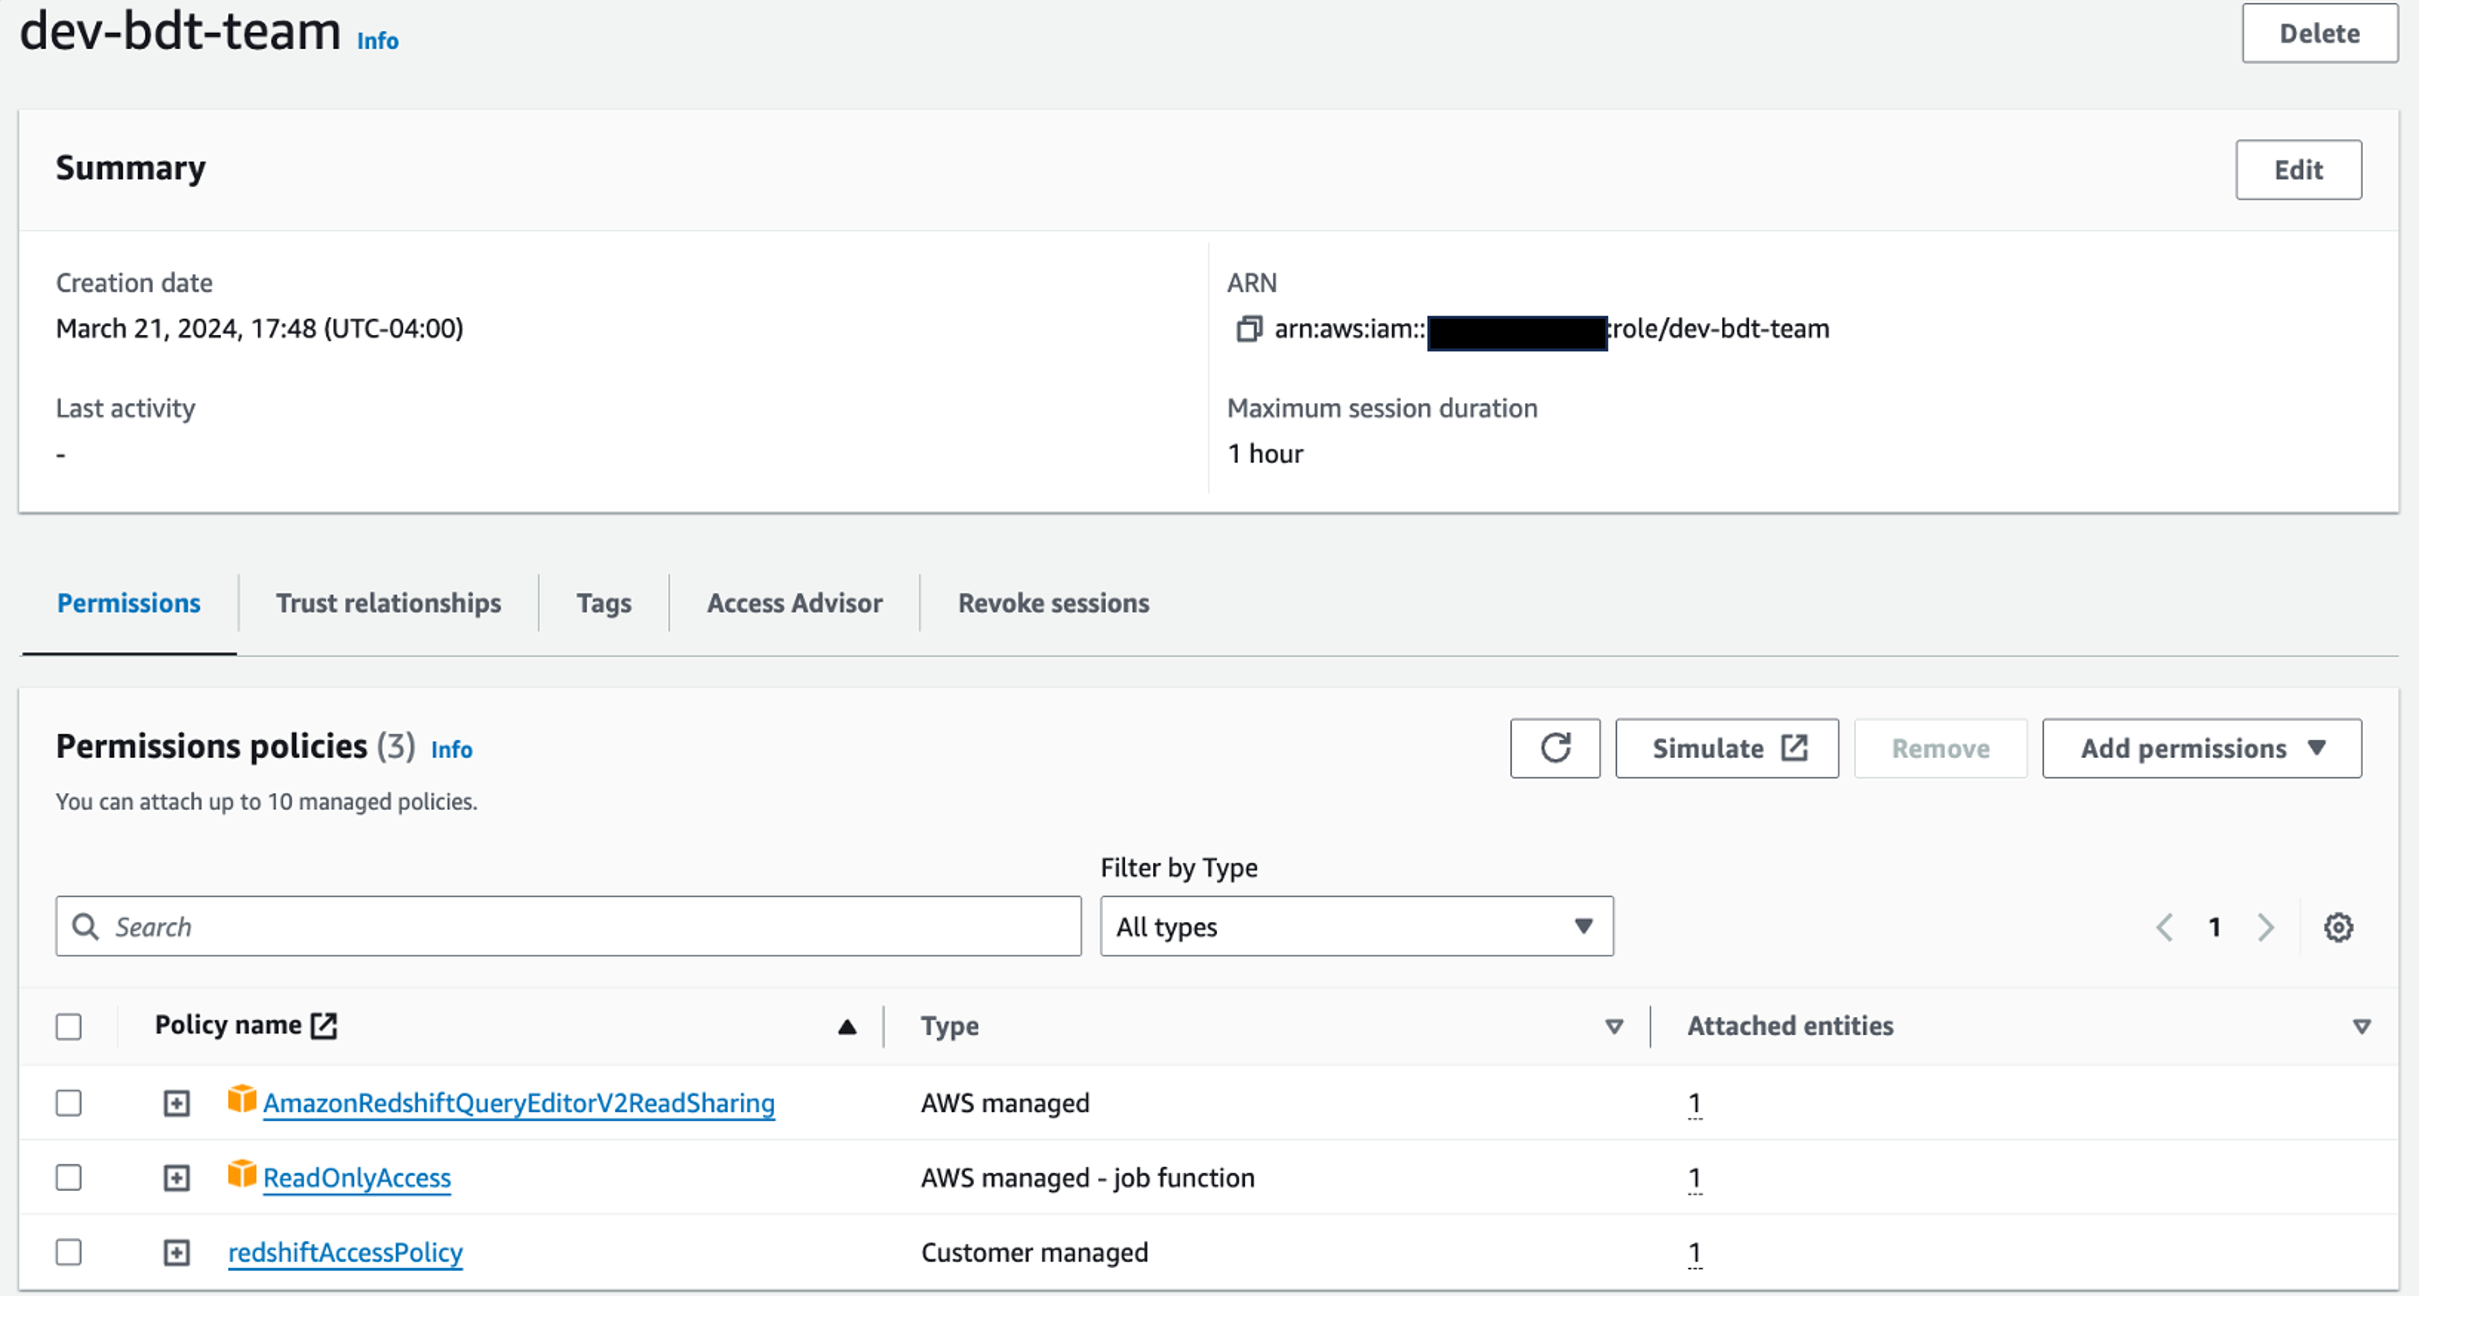
- On the Roles page, search for and open
dev-bdt-team role.
- On the Add permissions menu, choose Attach policies.
- Attach
redshiftAccessPolicy to the role.
Your permissions under the role dev-bdt-team should look like the following screenshot.

Test the SSO setup
You can now test the SSO setup. Complete the following steps:
- On the Azure Portal, for your
AWS Single-Account Access application, choose Single sign-on.
- Choose Test this application.
- Choose Sign in as current user.
If the setup is correct, you’re redirected to the AWS Management Console (which might be in a new tab for some browsers).
Test with Redshift Query Editor
Complete the following steps:
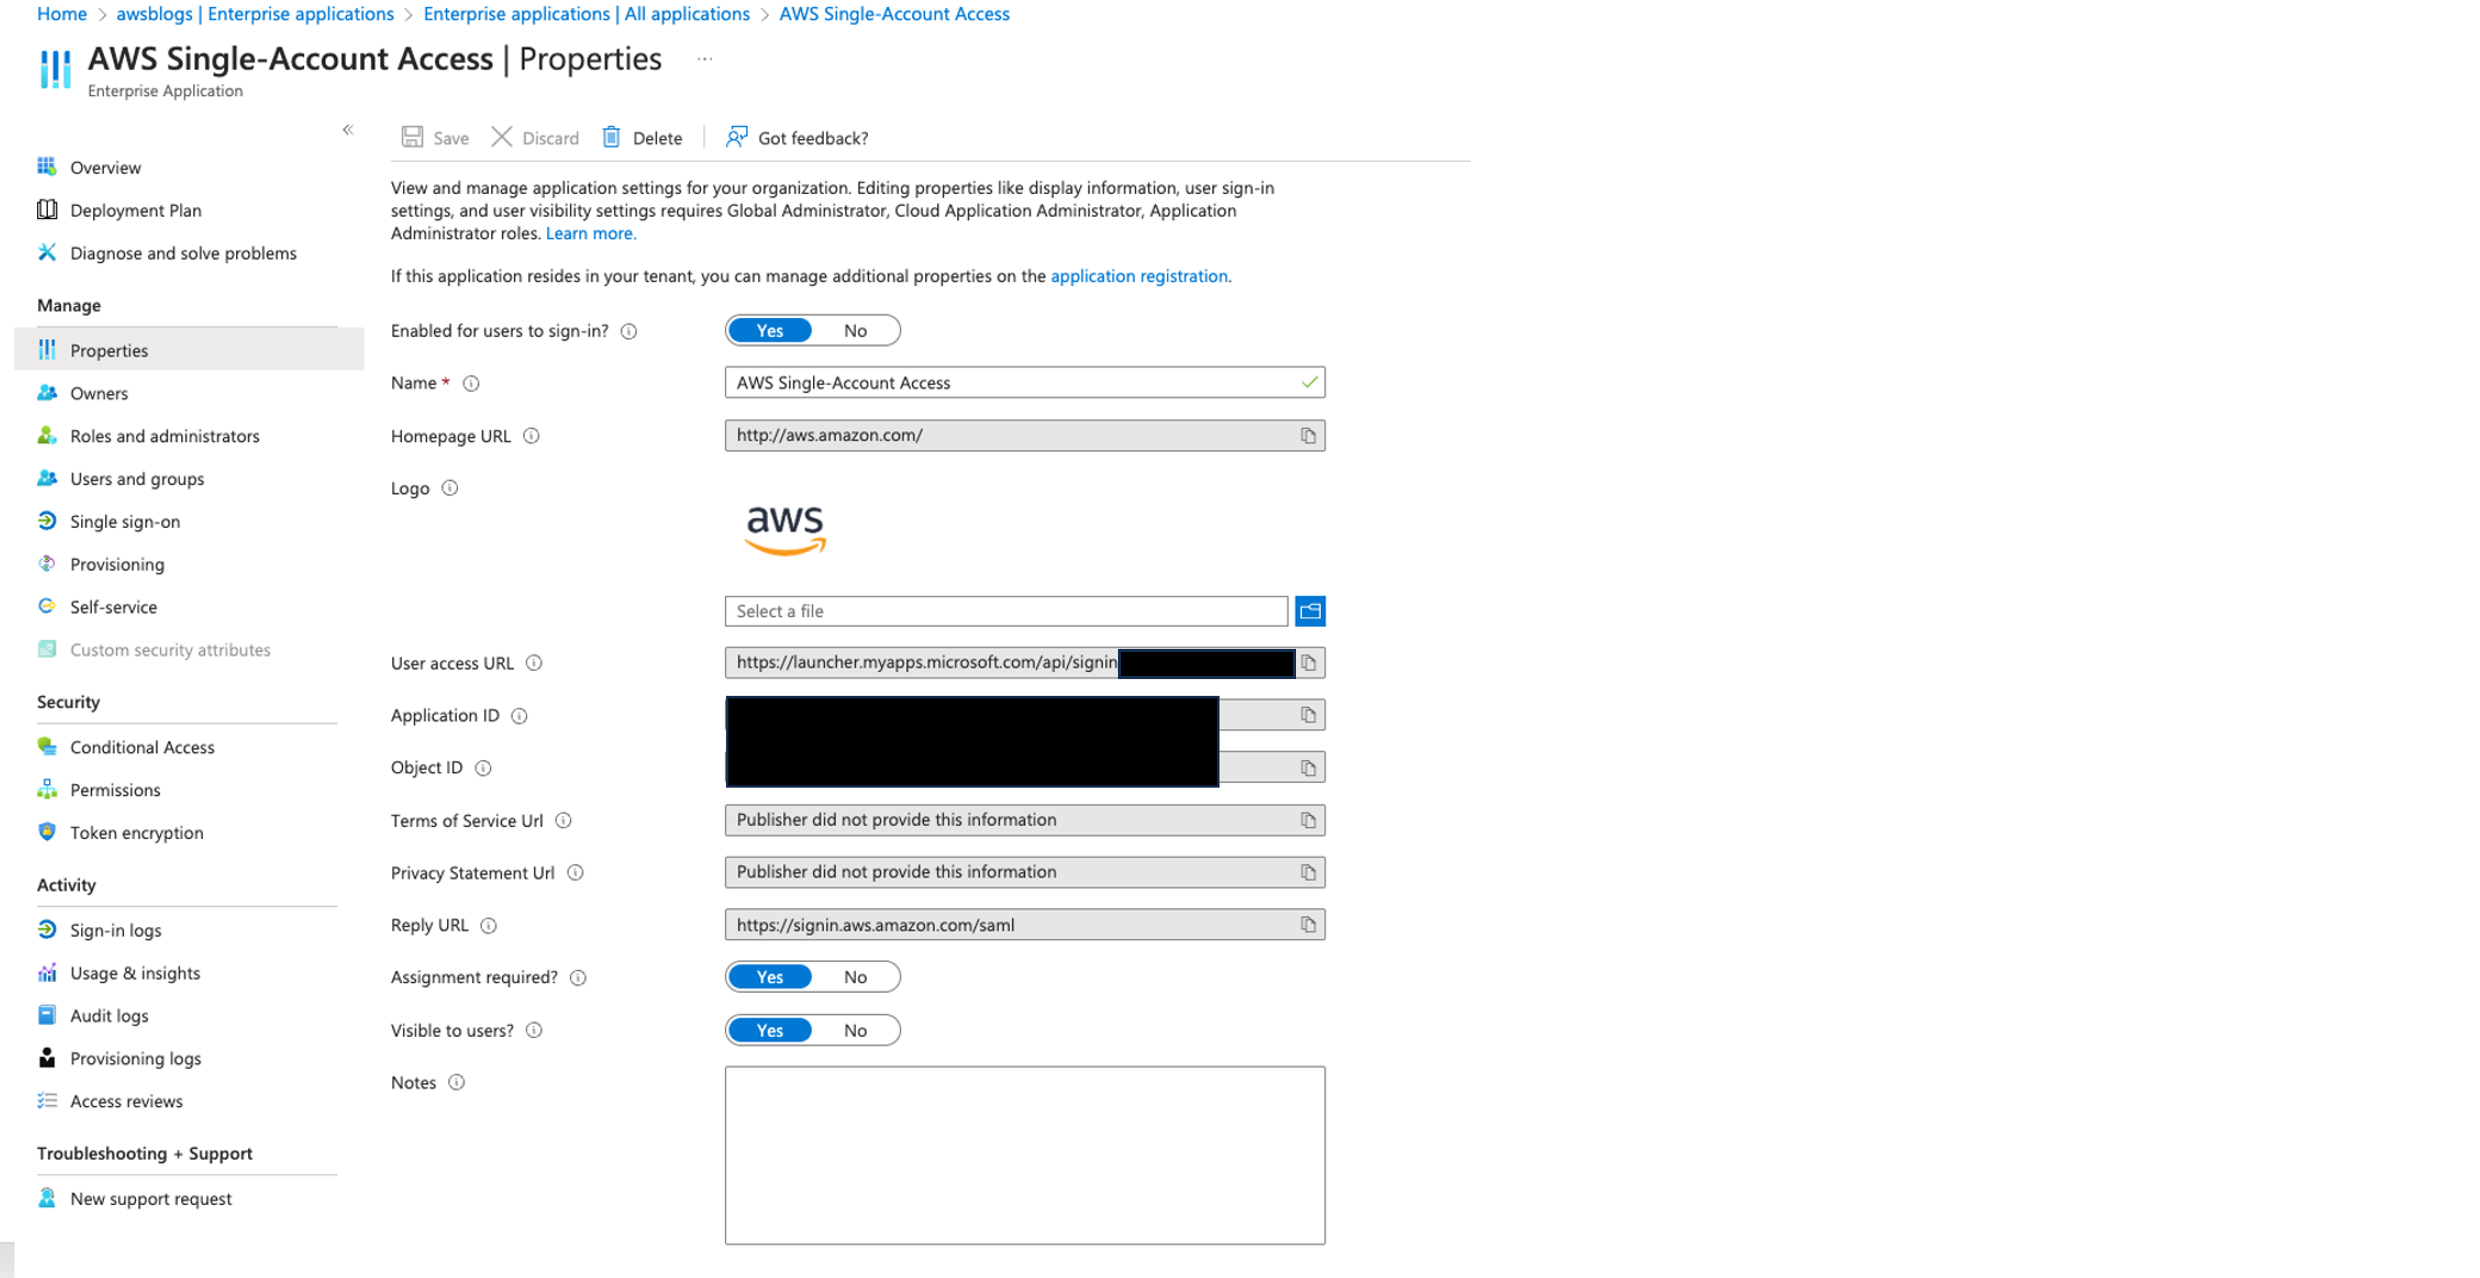
- Navigate to Microsoft Entra ID, Enterprise applications, AWS Single-Account Access.
- Go to Properties and copy the user access URL.

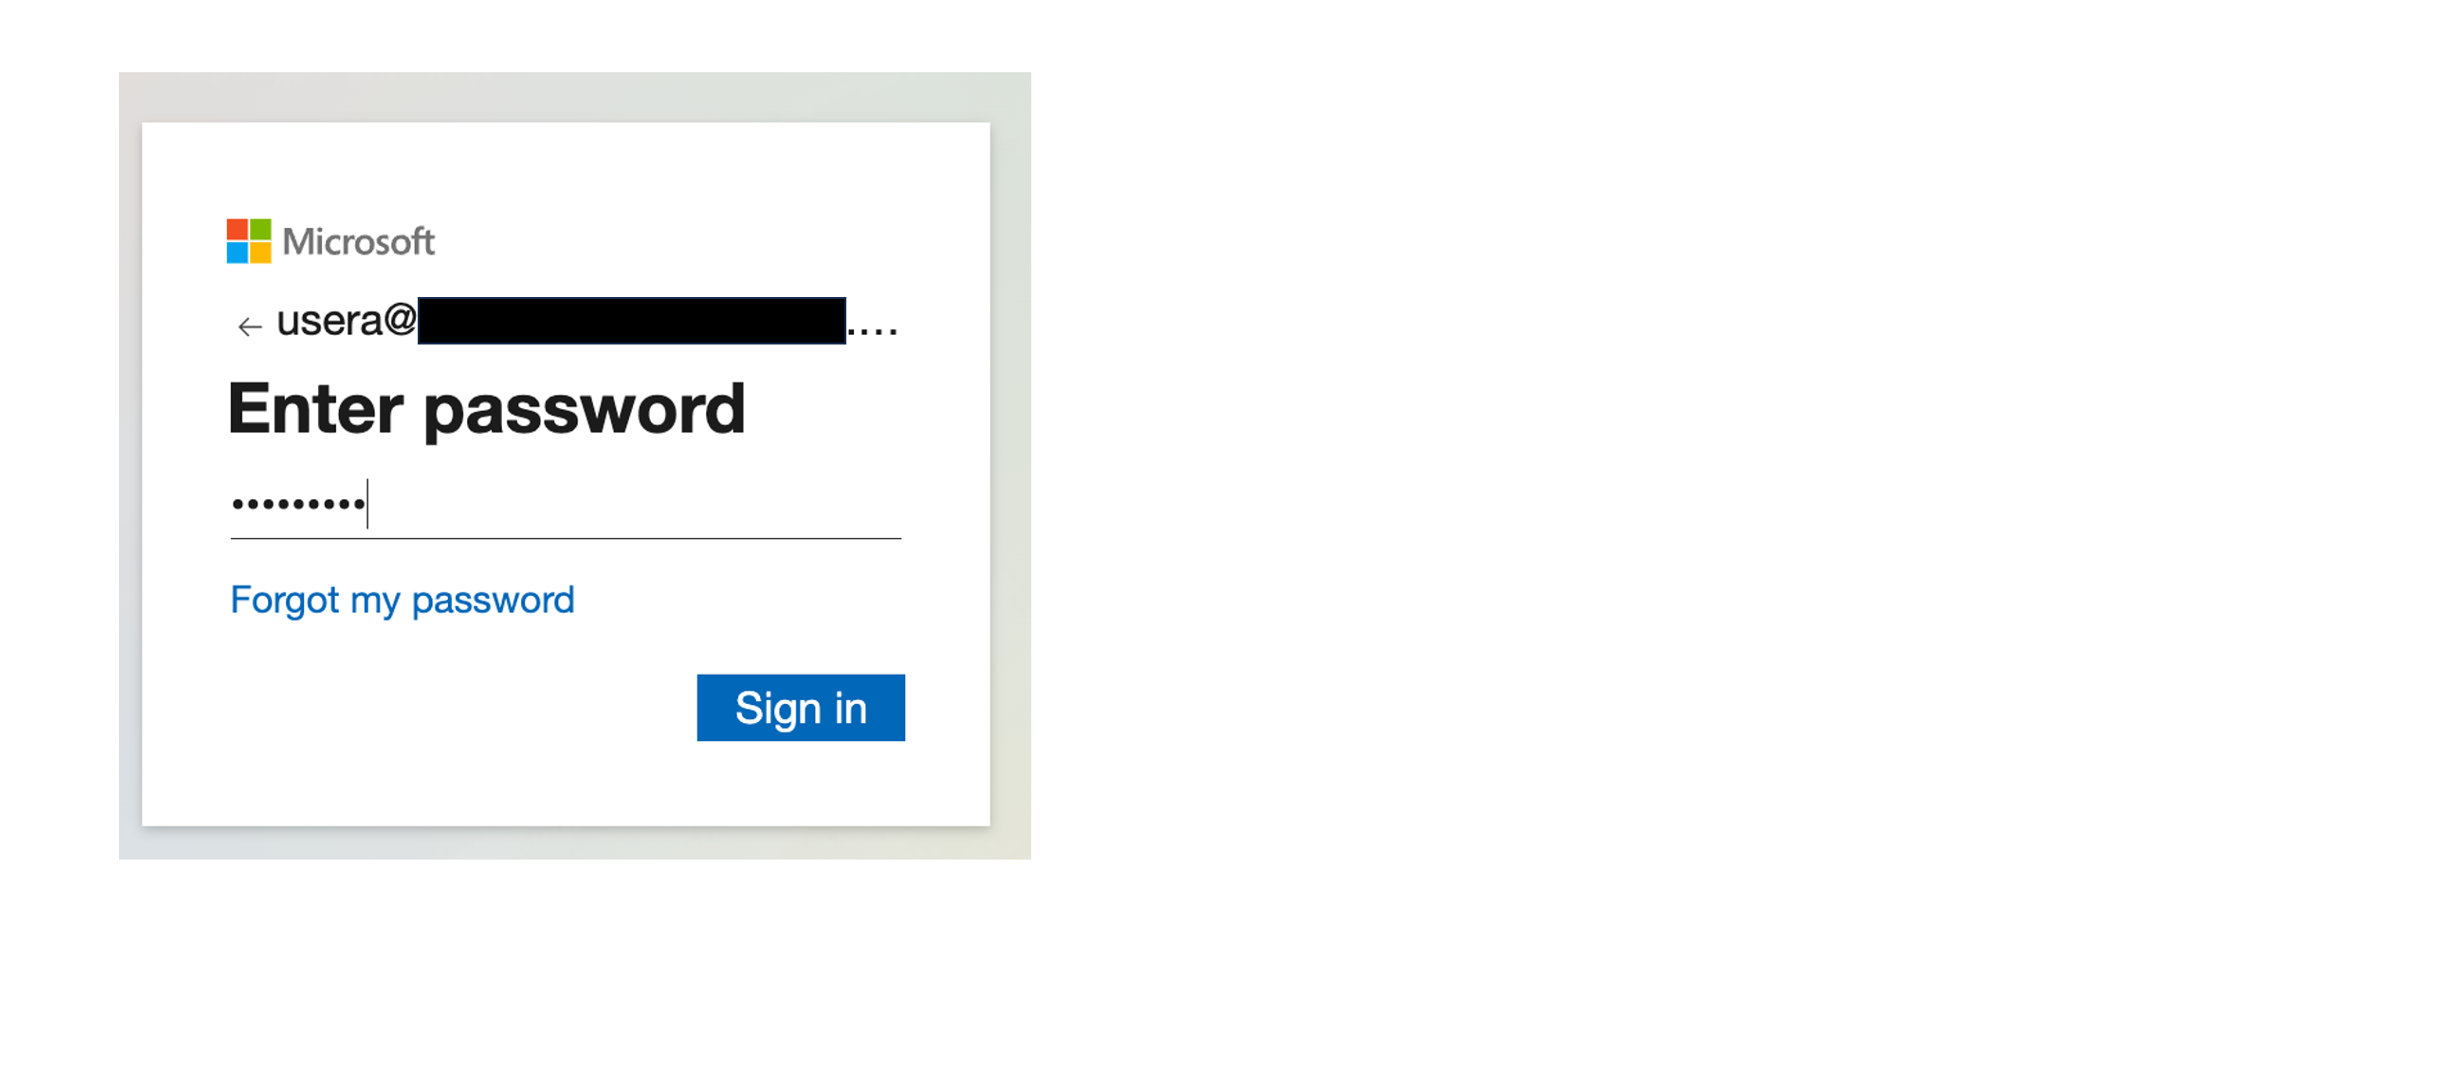
- Launch your preferred web browser and enter the user access URL to navigate to the Microsoft sign-in page.
- Log in with user A credentials.

- You will be directed to AWS console, and you will be logged in as
dev-bdt-role.

- Open the Amazon Redshift console and choose Provisioned clusters dashboard.
- Choose the cluster
examplecluster.

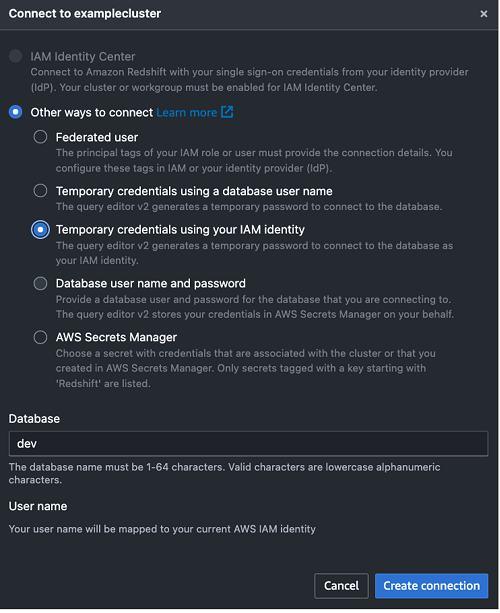
- On the Query data menu, choose Query in query editor v2.
- Select Temporary credentials using your IAM identity.
- For Database, enter dev.
- Choose Create connection.

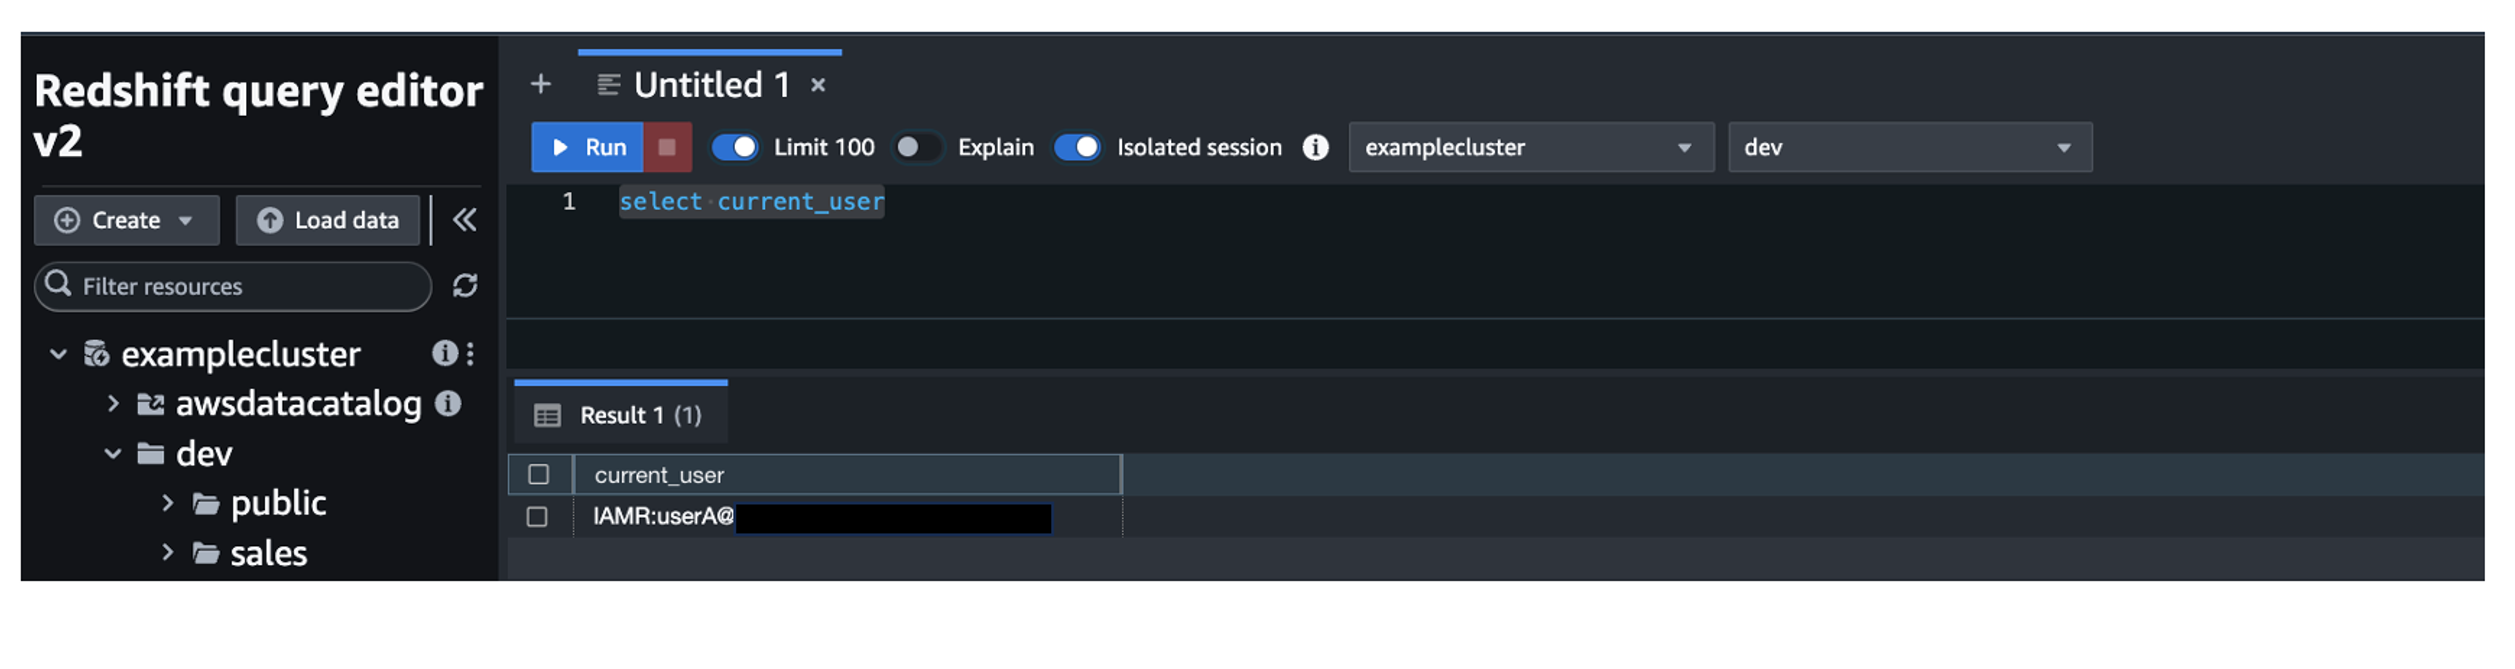
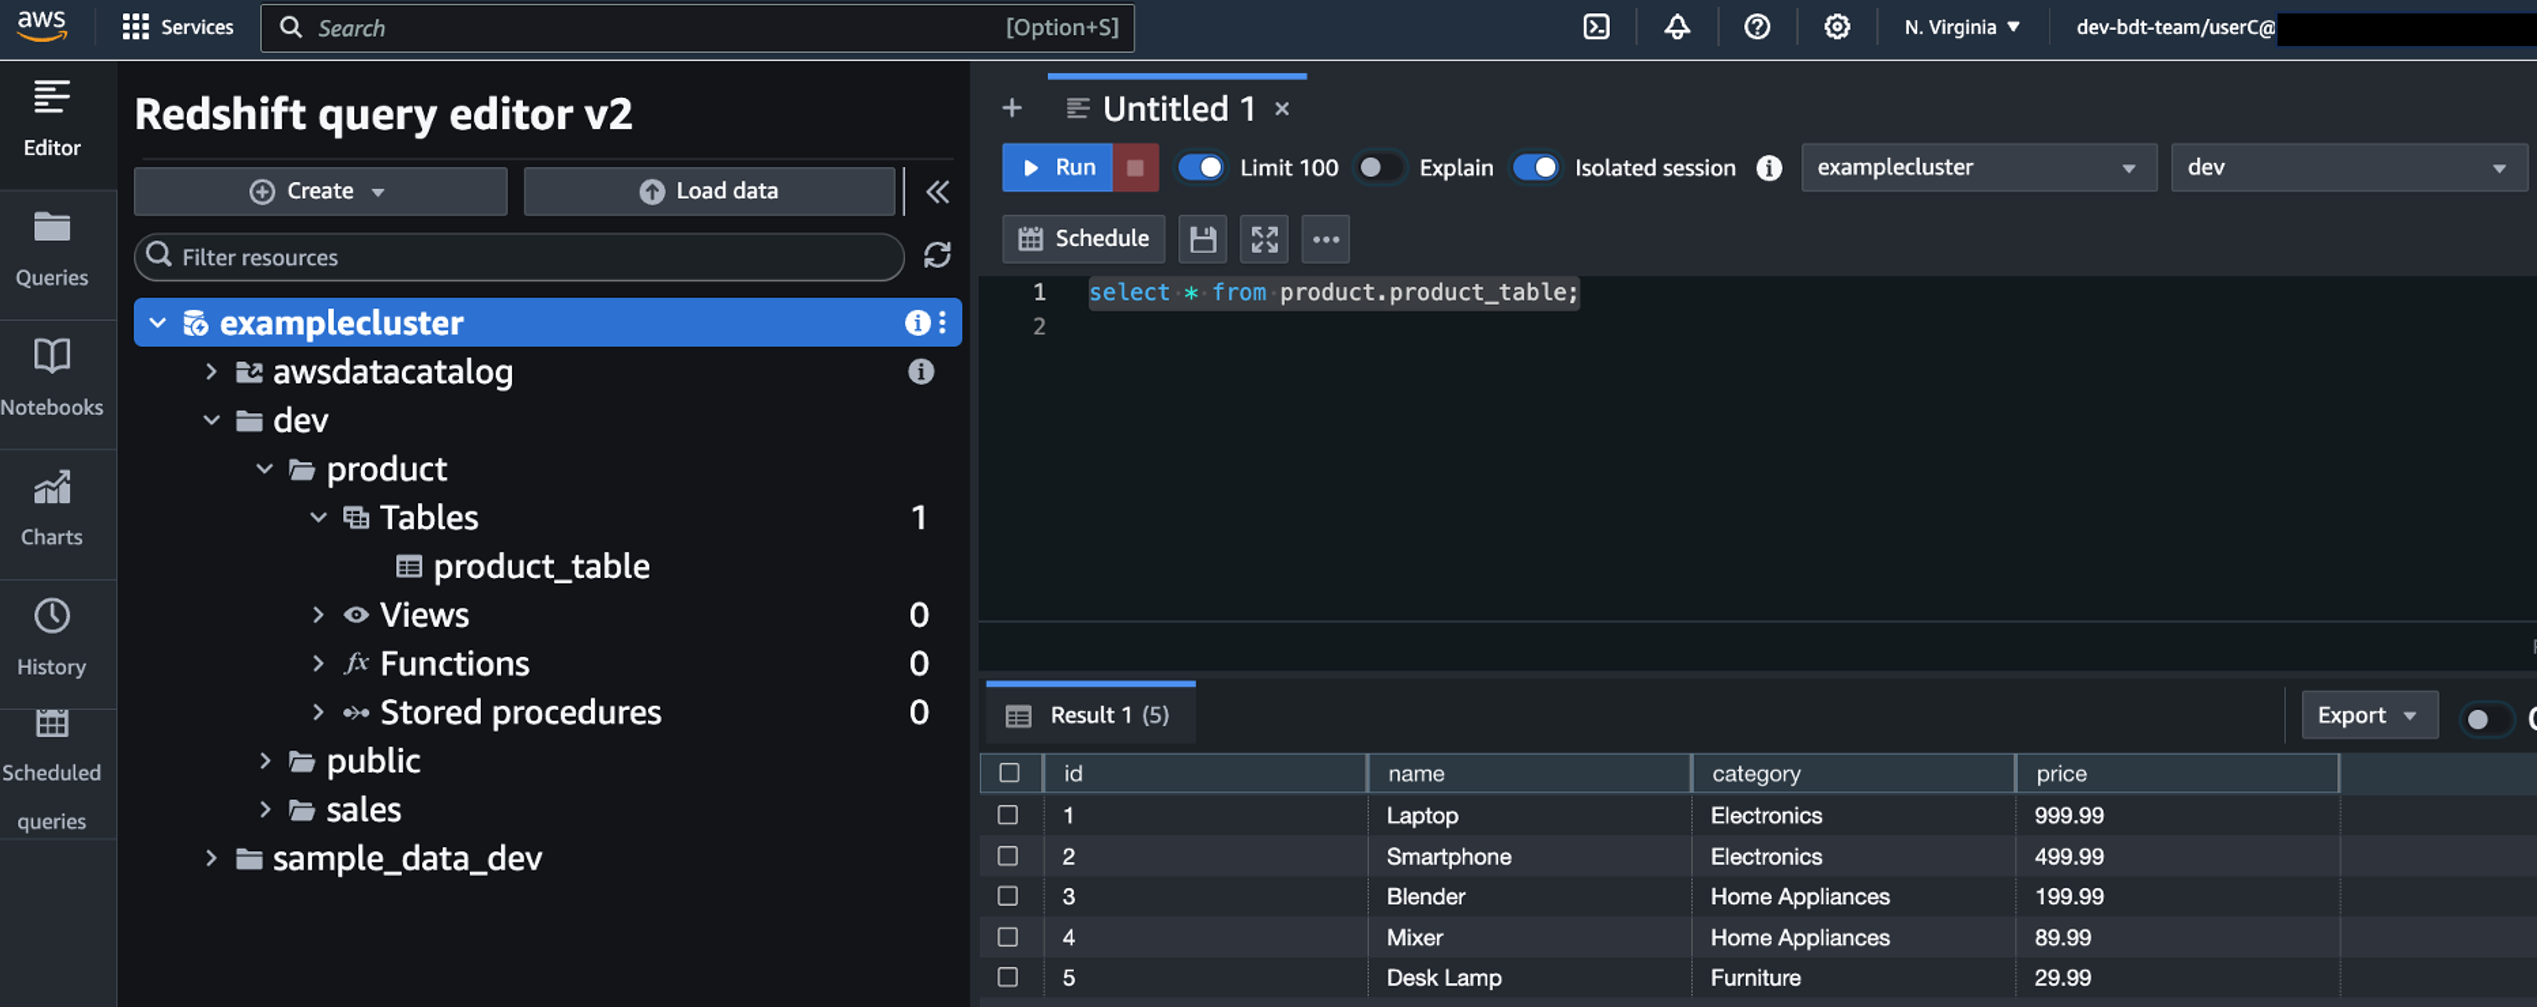
After the connection is established, you should be able to see your dev database and schemas under it, as shown in the following screenshot.

Because user A is only part of group redshift_sales, they will be able to see only the sales schema.
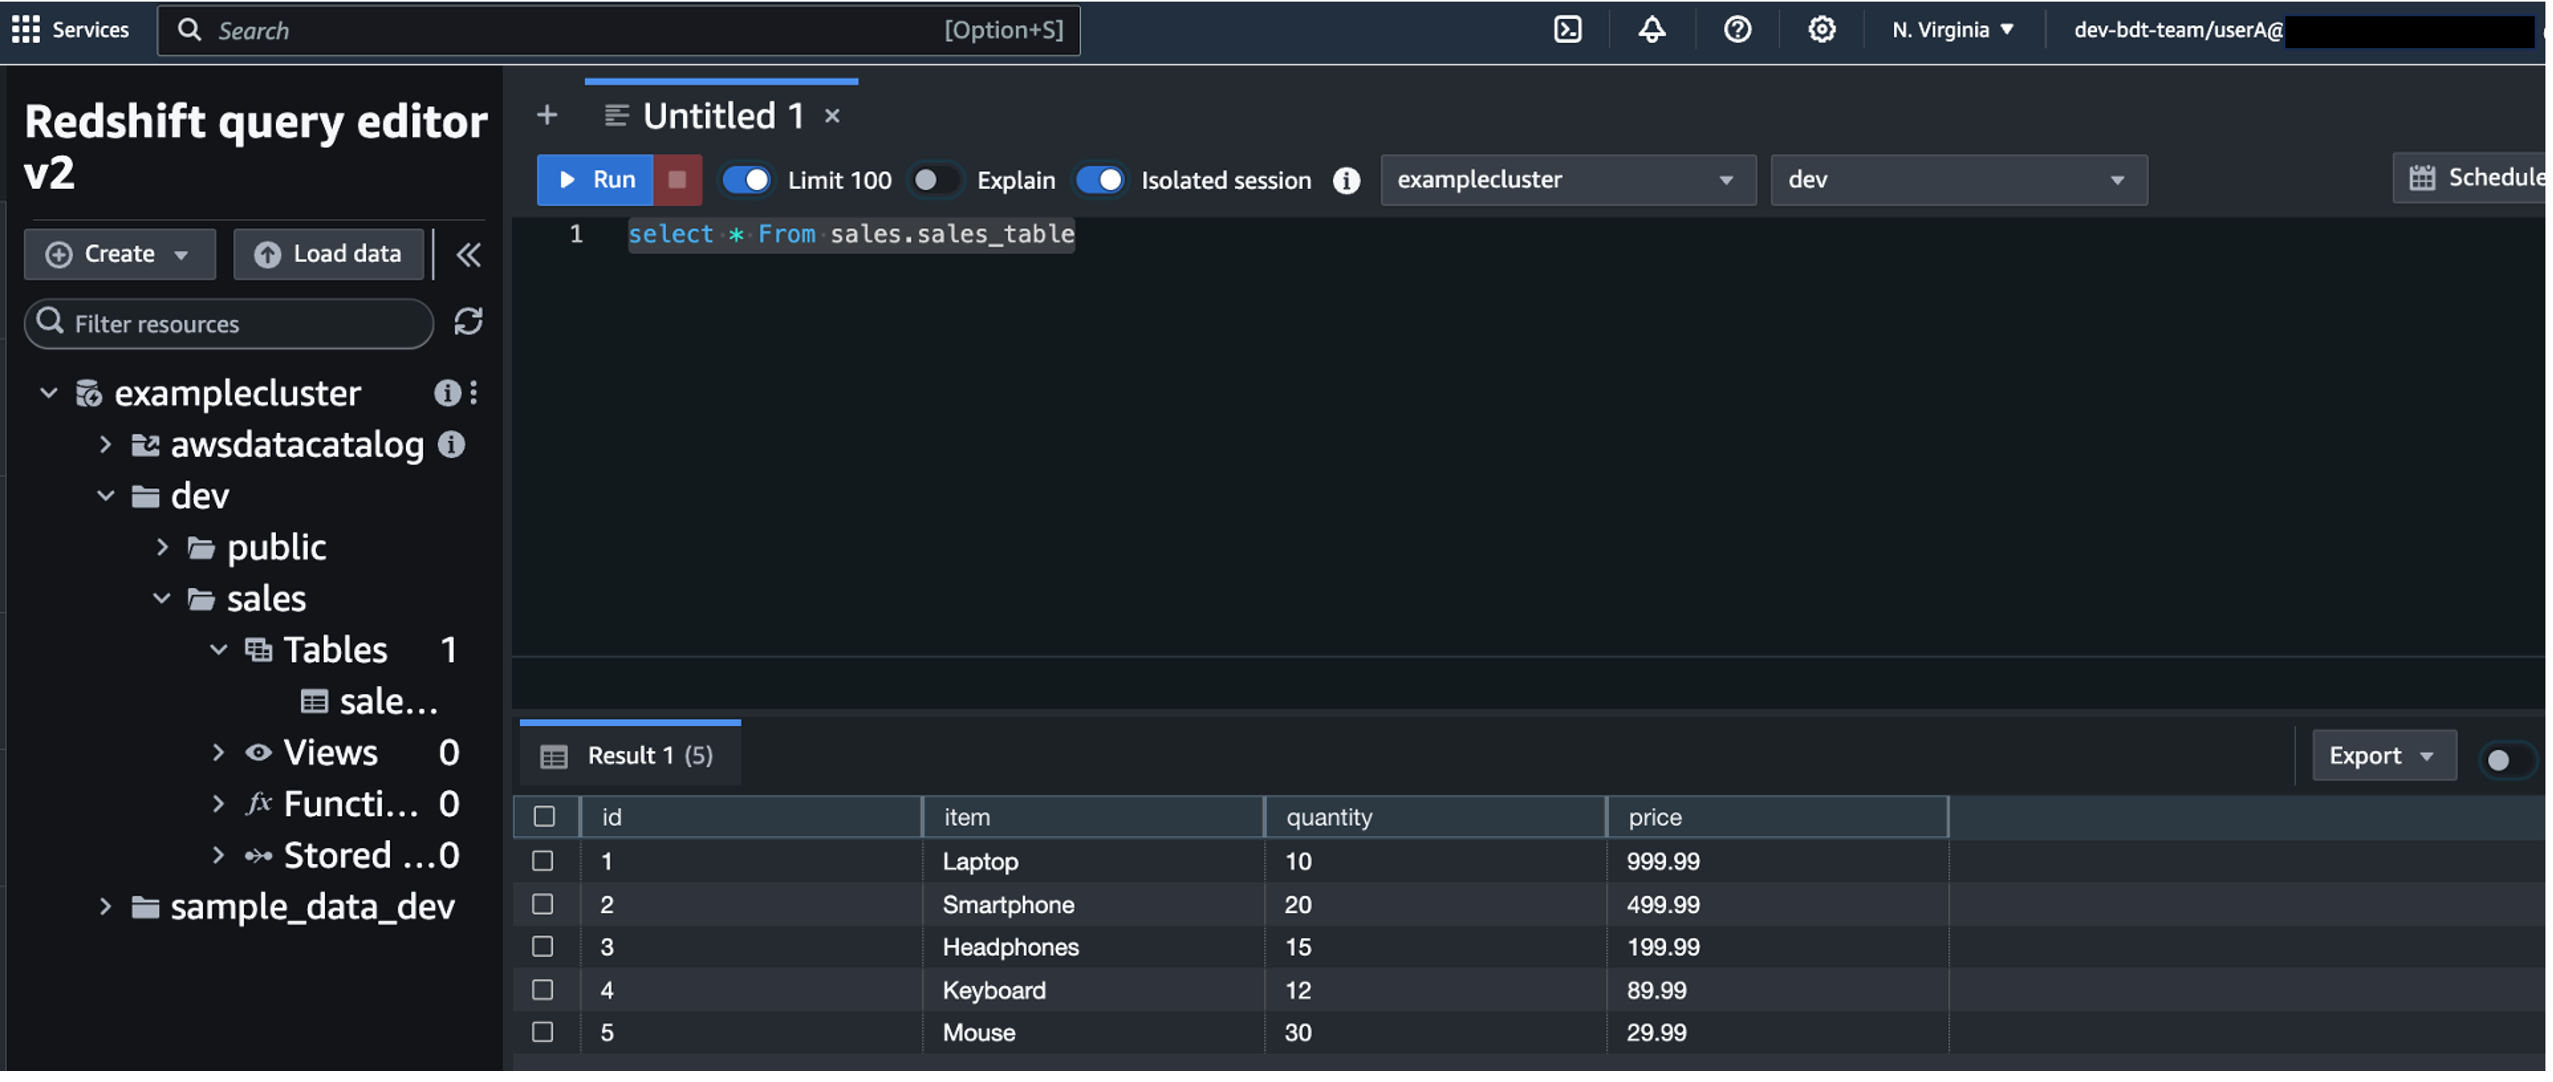
- Run a SQL statement to get data from
sales_table.
Because user A has access to the table, you can see output like the following screenshot.

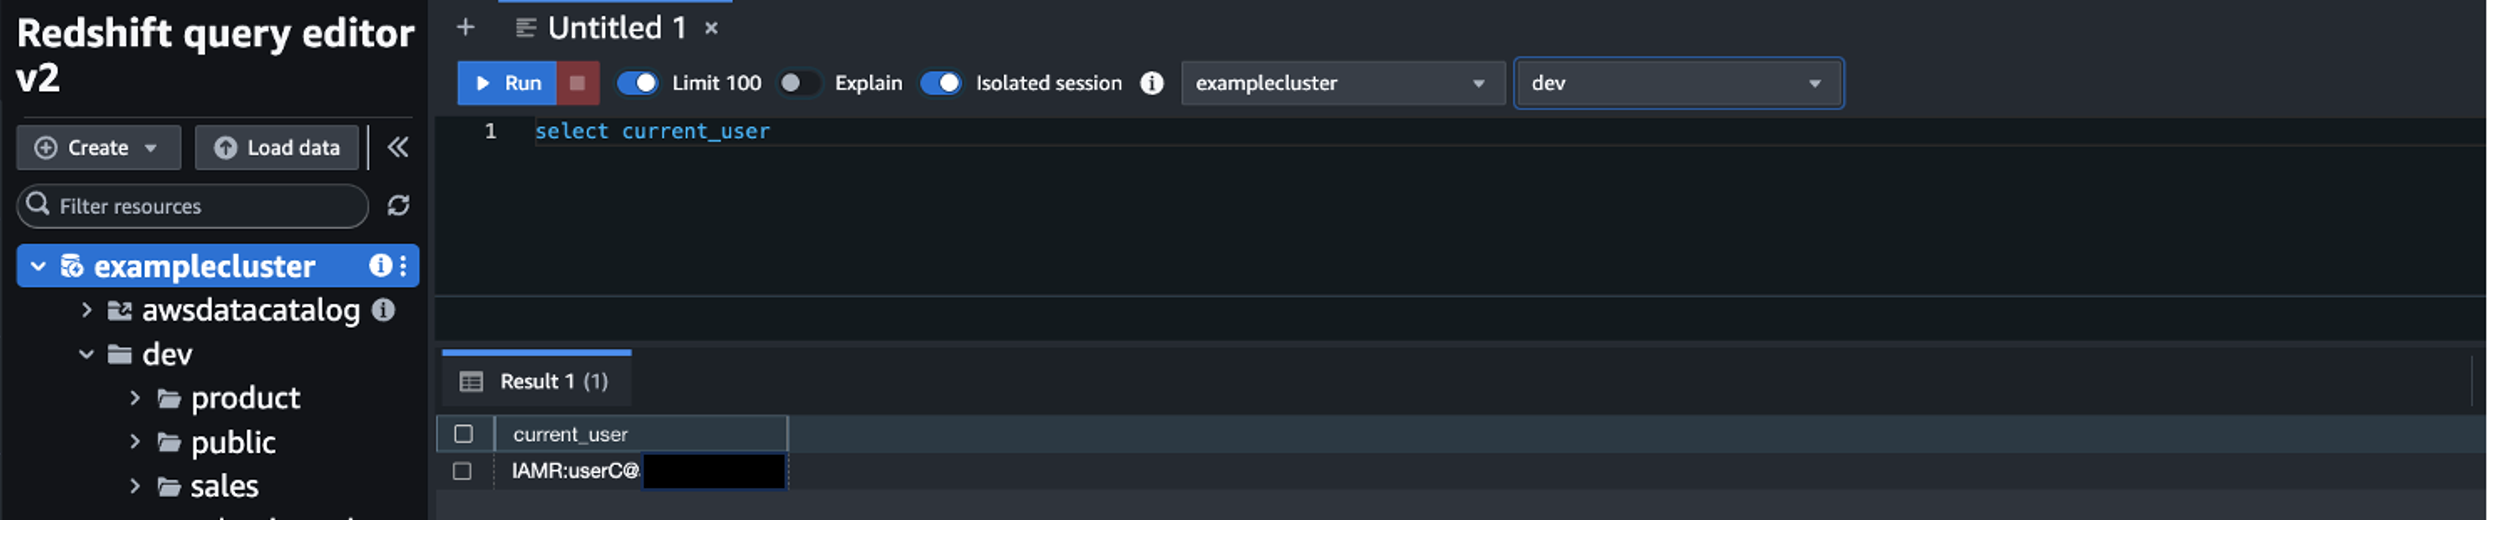
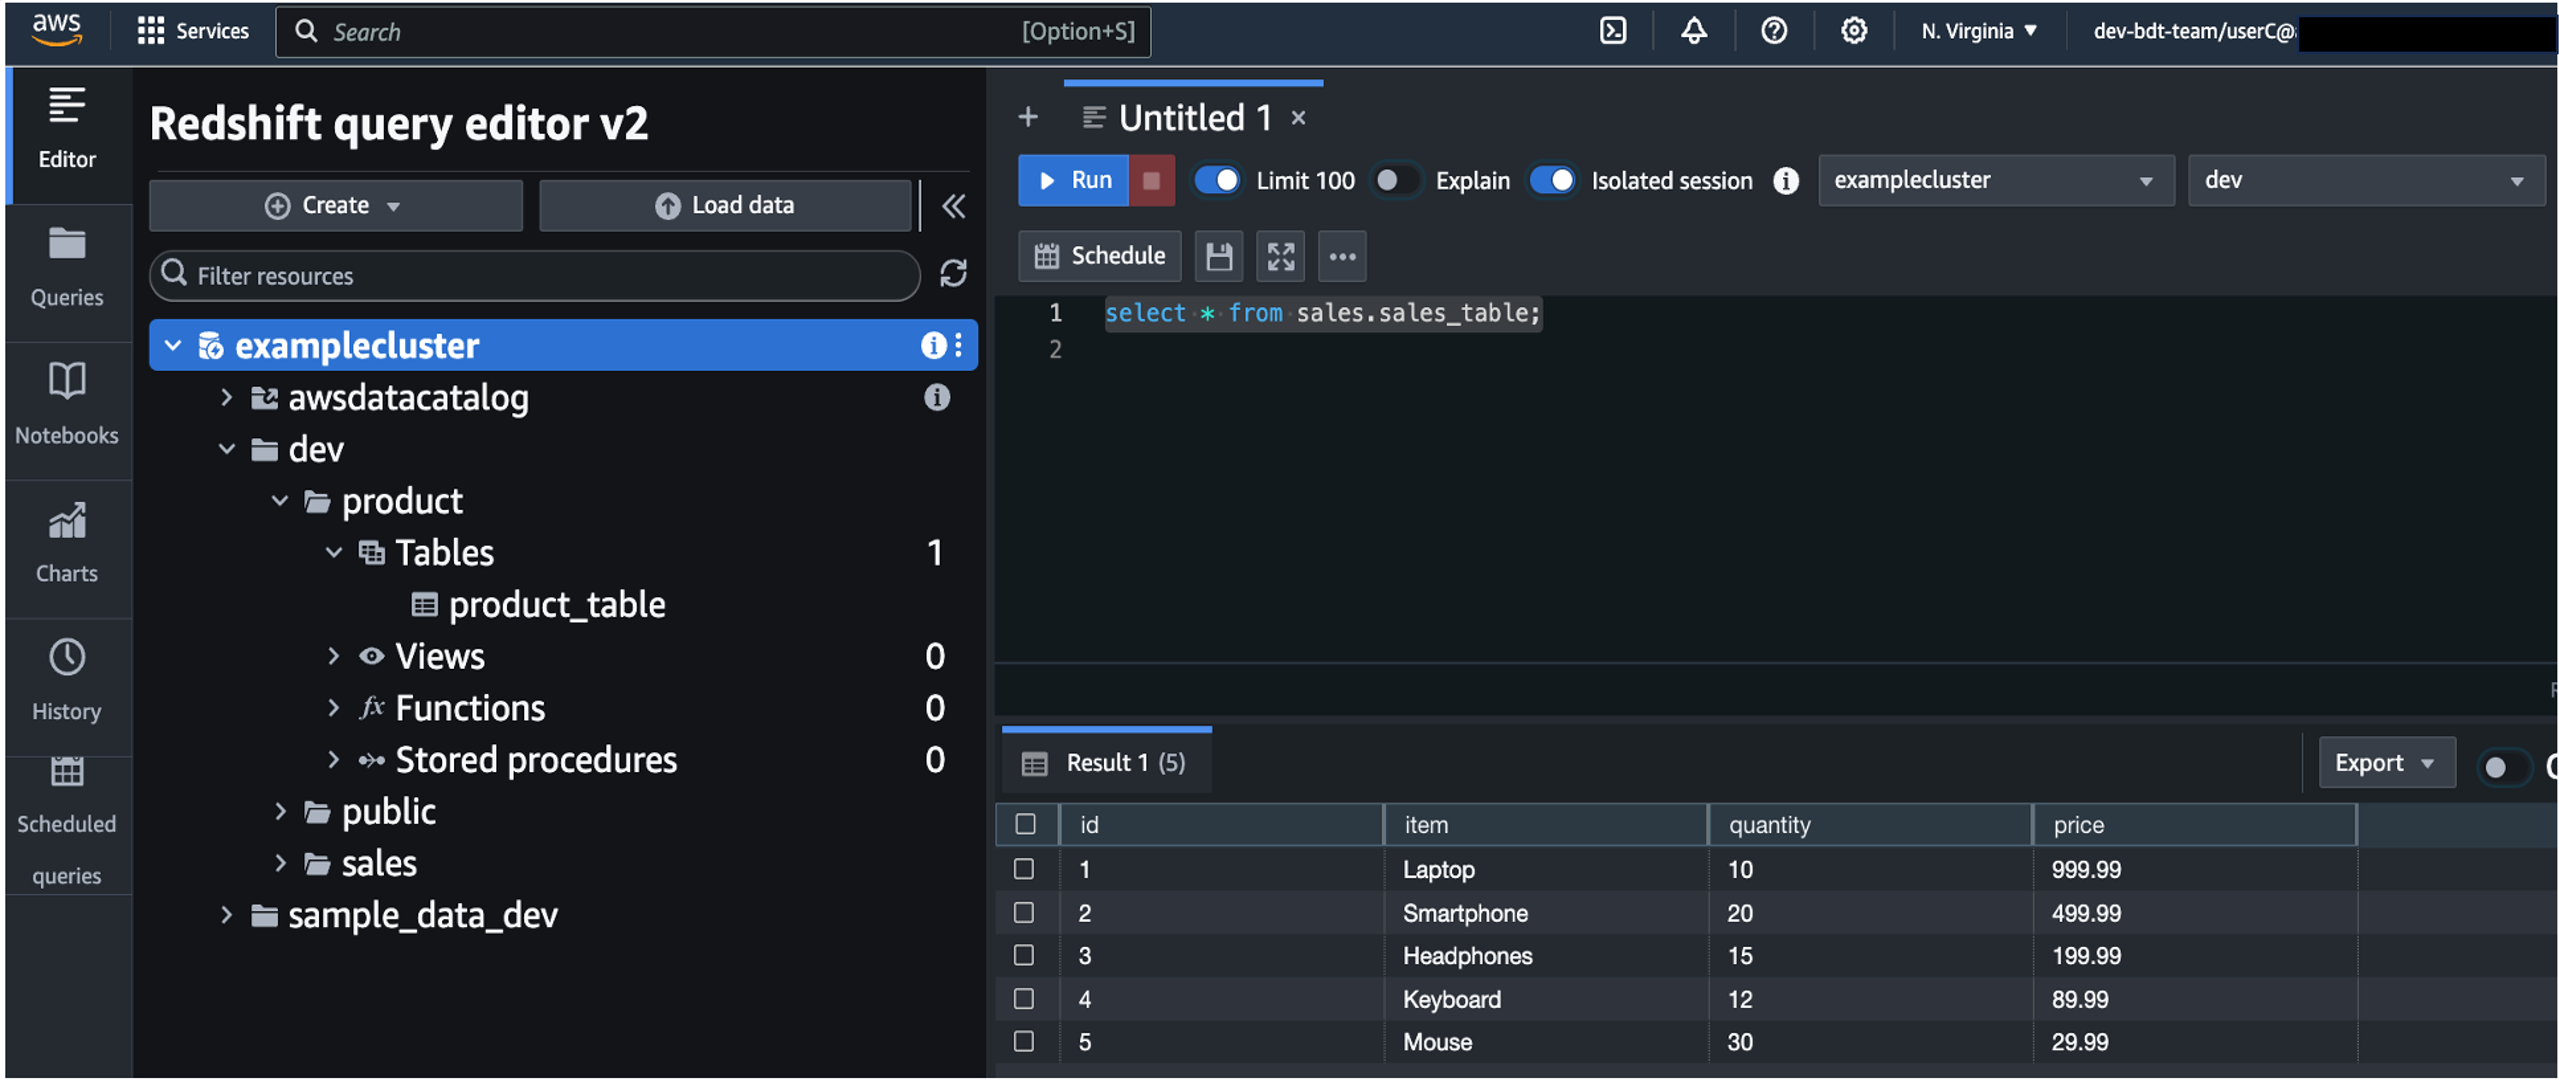
- Log in as user C to test access for user C.
User C is able to see both the product and sales schemas because they’re part of both the redshift_product and redshift_sales groups.

- Run a SQL statement to get data from both
sales_table and product_table.
User C has access to both tables, as you can see in the following screenshot.


Clean up
To avoid incurring future charges, delete the resources you created, including the Redshift cluster, IAM role, IAM policy, Microsoft Entra ID application, and Azure Functions app.
Conclusion
In this post, we demonstrated how to use Microsoft Entra ID to federate into your AWS account and use the Redshift Query Editor V2 to connect to a Redshift cluster and access the schemas based on the AD groups associated with the user.
About the author
 Koushik Konjeti is a Senior Solutions Architect at Amazon Web Services. He has a passion for aligning architectural guidance with customer goals, ensuring solutions are tailored to their unique requirements. Outside of work, he enjoys playing cricket and tennis.


 Koushik Konjeti is a Senior Solutions Architect at Amazon Web Services. He has a passion for aligning architectural guidance with customer goals, ensuring solutions are tailored to their unique requirements. Outside of work, he enjoys playing cricket and tennis.

 Madhan Kumar Baskaran works as a Search Engineer at AWS, specializing in Amazon OpenSearch Service. His primary focus involves assisting customers in constructing scalable search applications and analytics solutions. Based in Bellevue, Washington, Madhan has a keen interest in data engineering and DevOps.
 Priyanshi Omer is a Customer Success Engineer at AWS OpenSearch, based in Bengaluru. Her primary focus involves assisting customers in constructing scalable search applications and analytics solutions. She works closely with customers to help them migrate their workloads and aids existing customers in fine-tuning their clusters to achieve better performance and cost savings. Outside of work, she enjoys spending time with her cats and playing video games


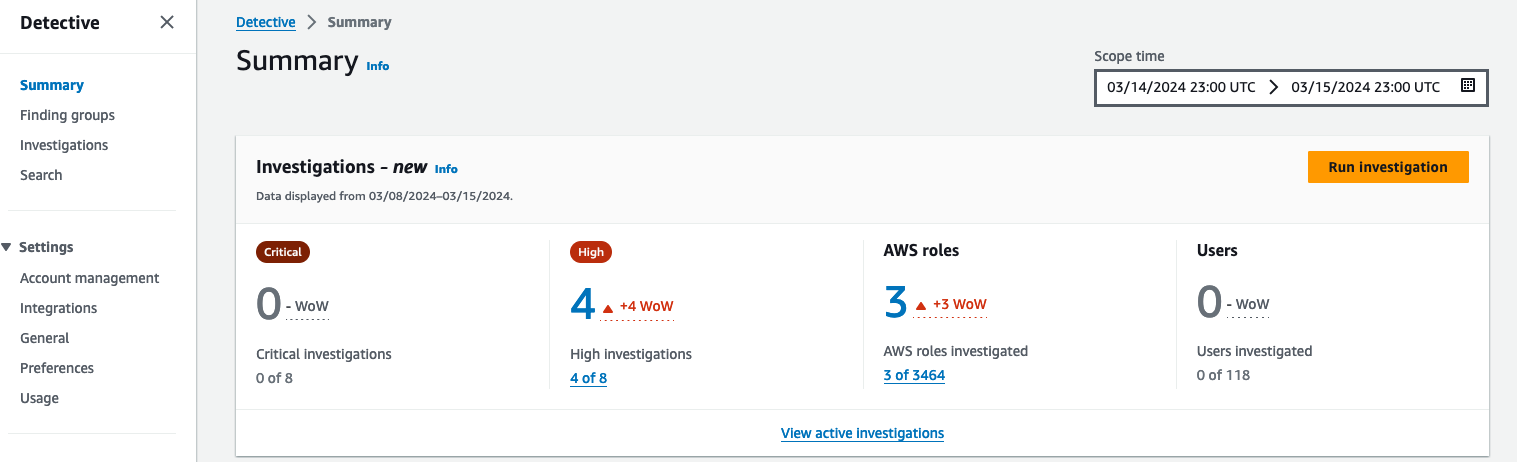
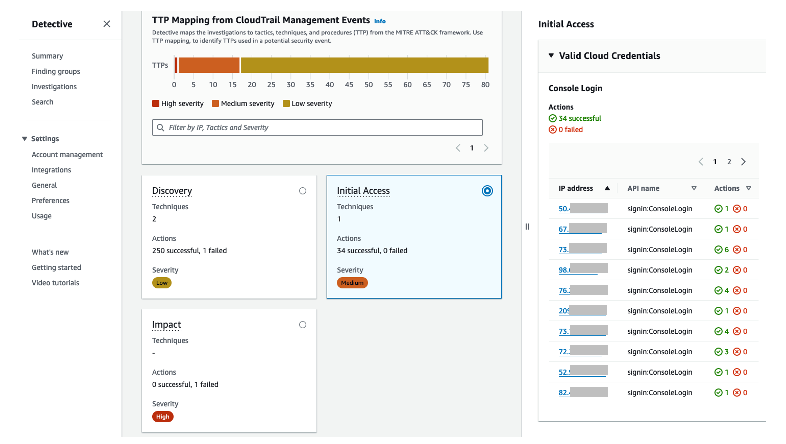
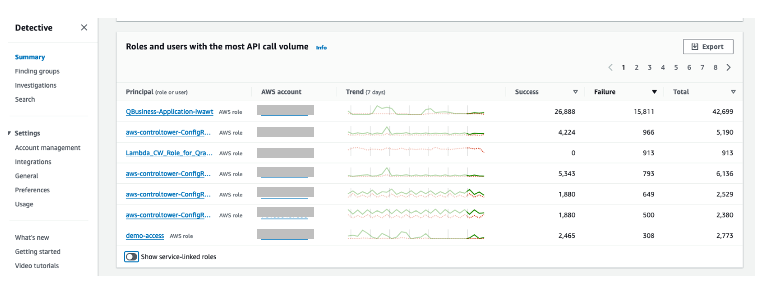
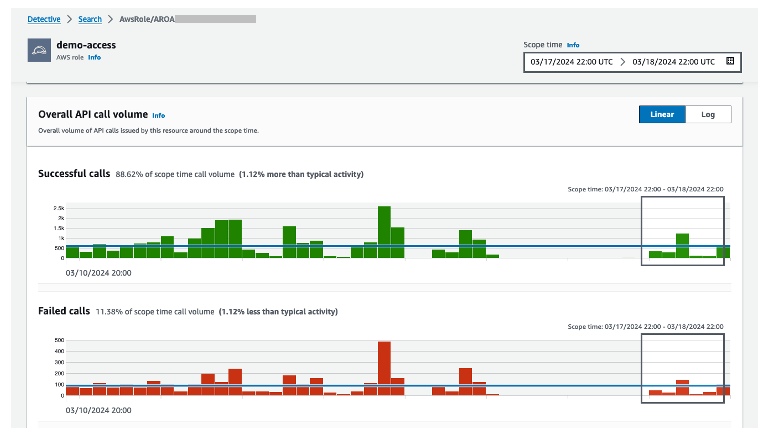
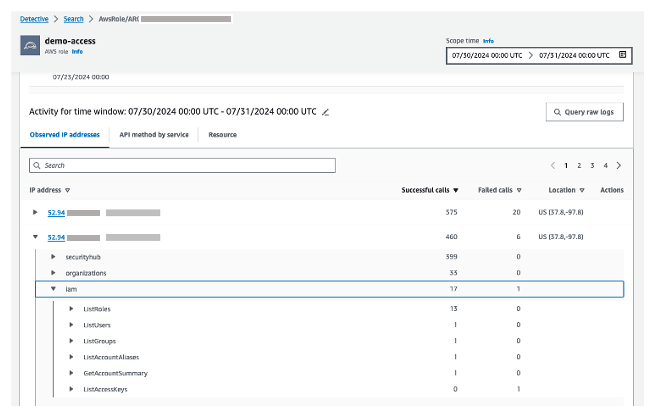
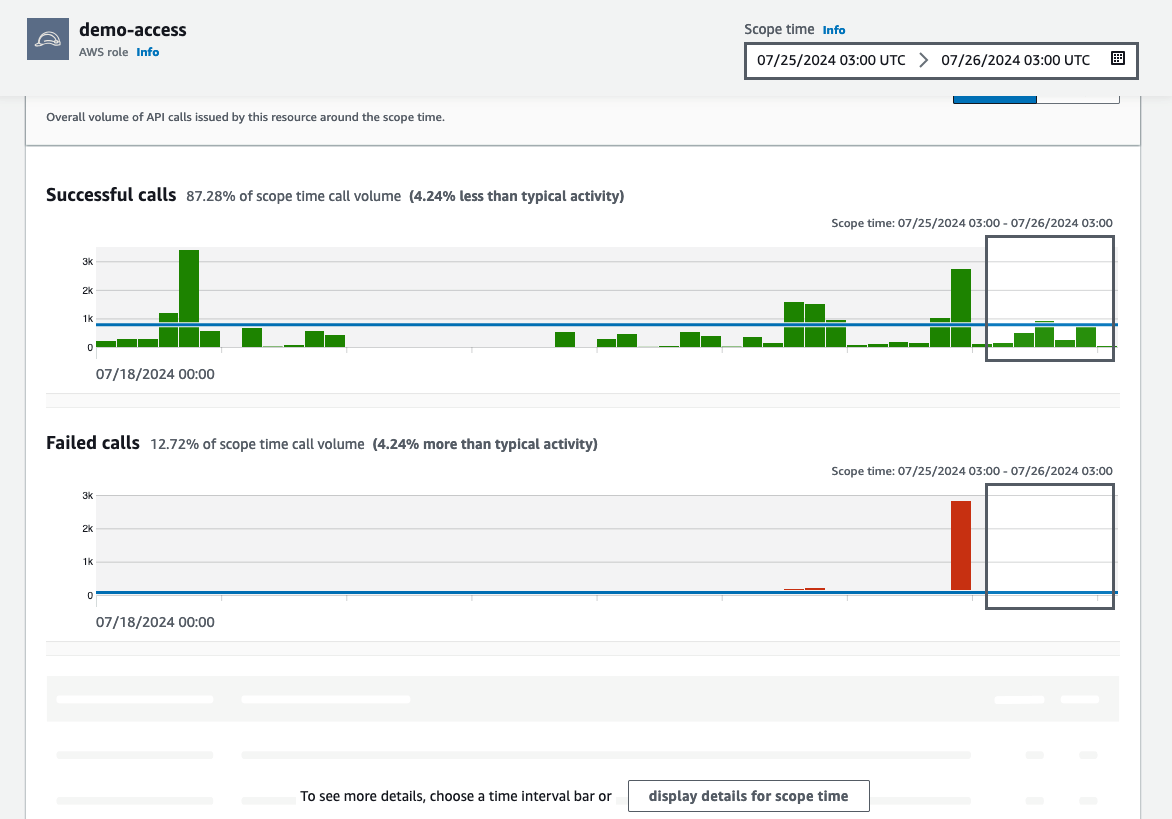 Figure 12: Overall API call volume during the specified scope time